Make a Punk Photocopy Gig Flyer with a Halftone Photo
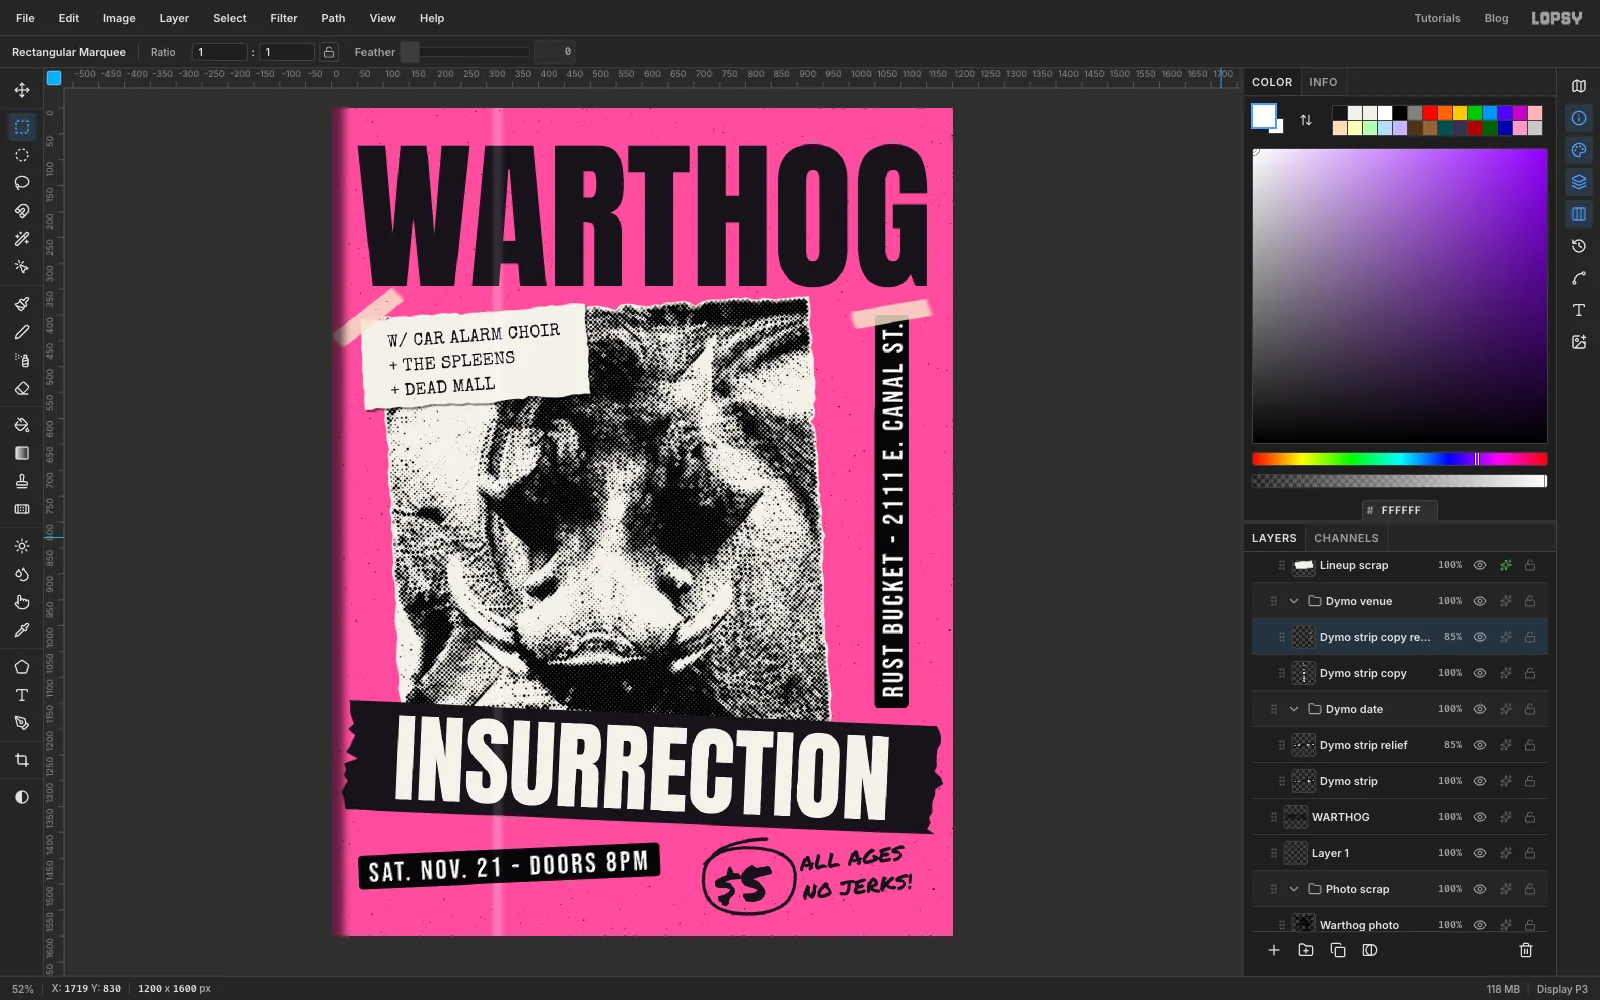
Build a cut-and-paste punk gig flyer in Lopsy, with a halftoned warthog on torn paper, gaffer-tape type, embossed label strips and copier toner.
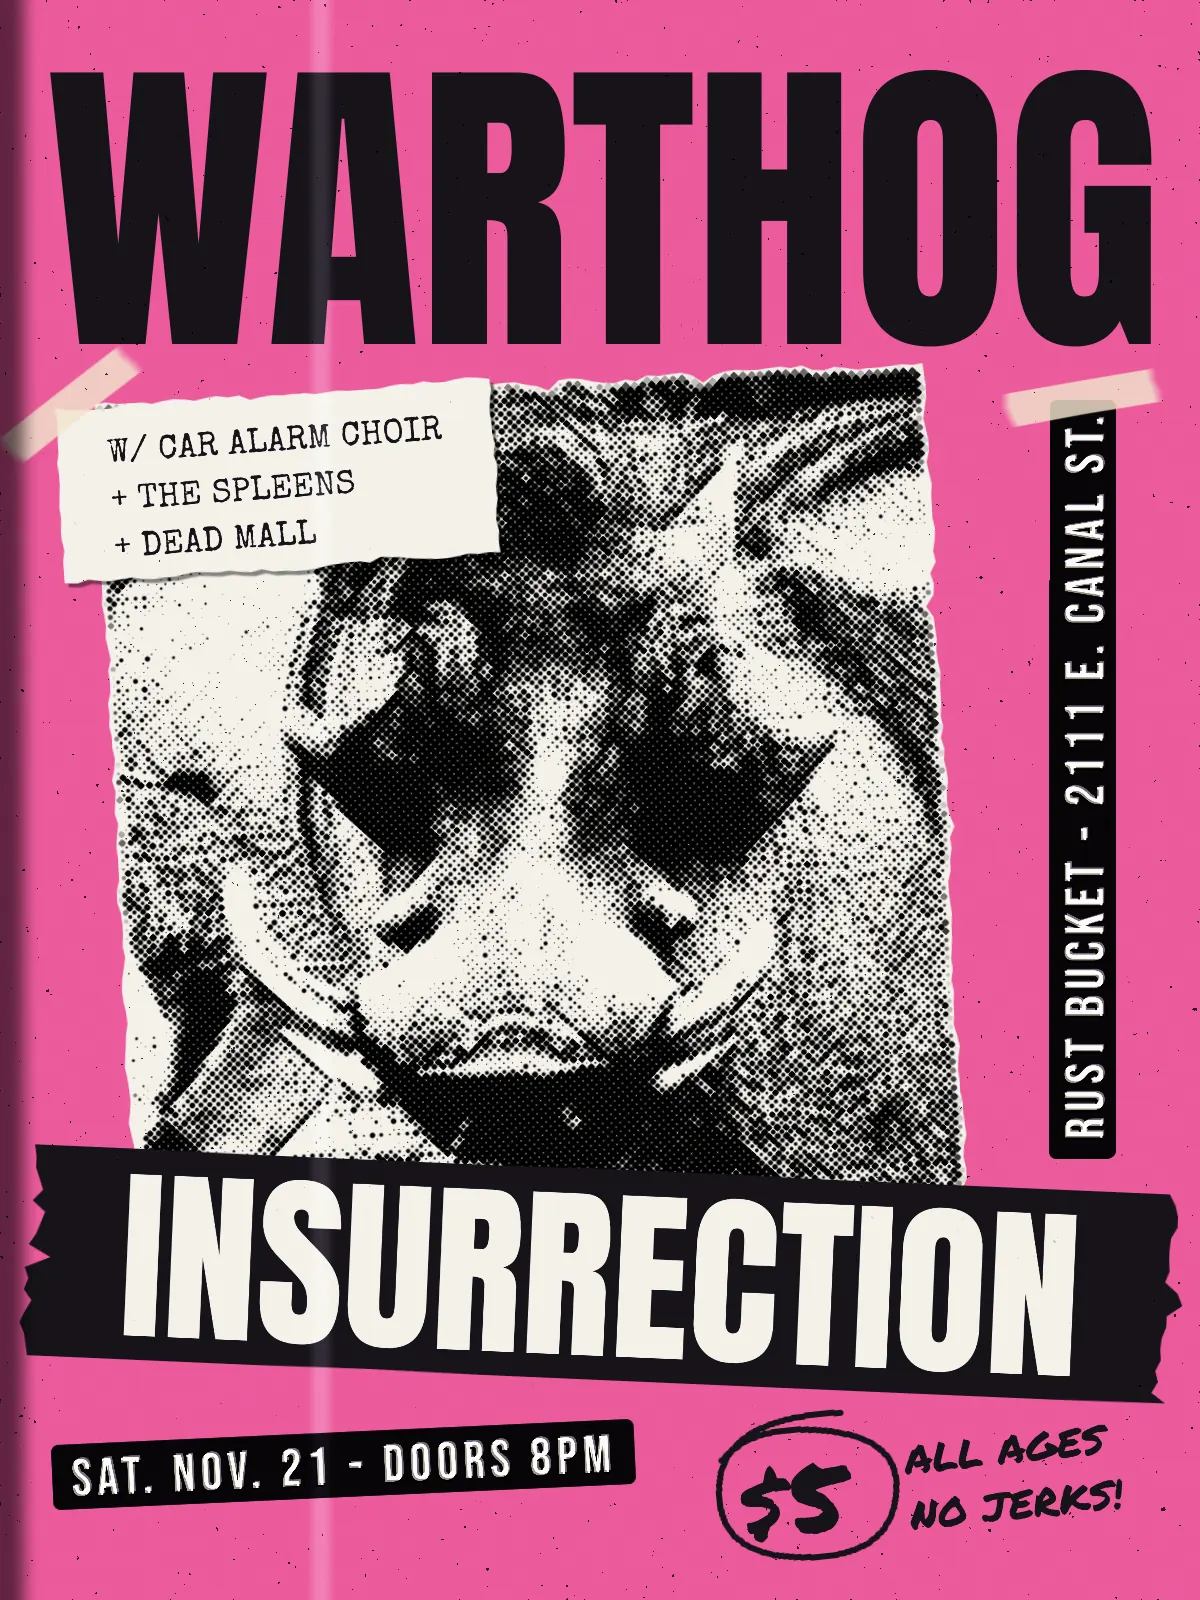
Before social media, a punk show got its crowd from a sheet of paper stapled to a telephone pole. The band cut pictures out of magazines, glued them to a page with typed or hand-lettered details, and ran a stack through the copier at the corner shop. Anything that went through that copier came out the same way:
- photos turned into coarse black dots or hard black and white
- type cut from different sources and stuck on at an angle
- label-maker strips, masking tape and marker scrawl
- toner specks and dark streaks along the edges of the sheet
This tutorial builds a flyer for an imaginary band, Warthog Insurrection, playing a basement venue called The Rust Bucket. The flyer is 1200 × 1600 px, a letter-size page. Every piece goes on its own layer, and most pieces are grouped and tilted a few degrees, so the whole page looks pasted up by hand.
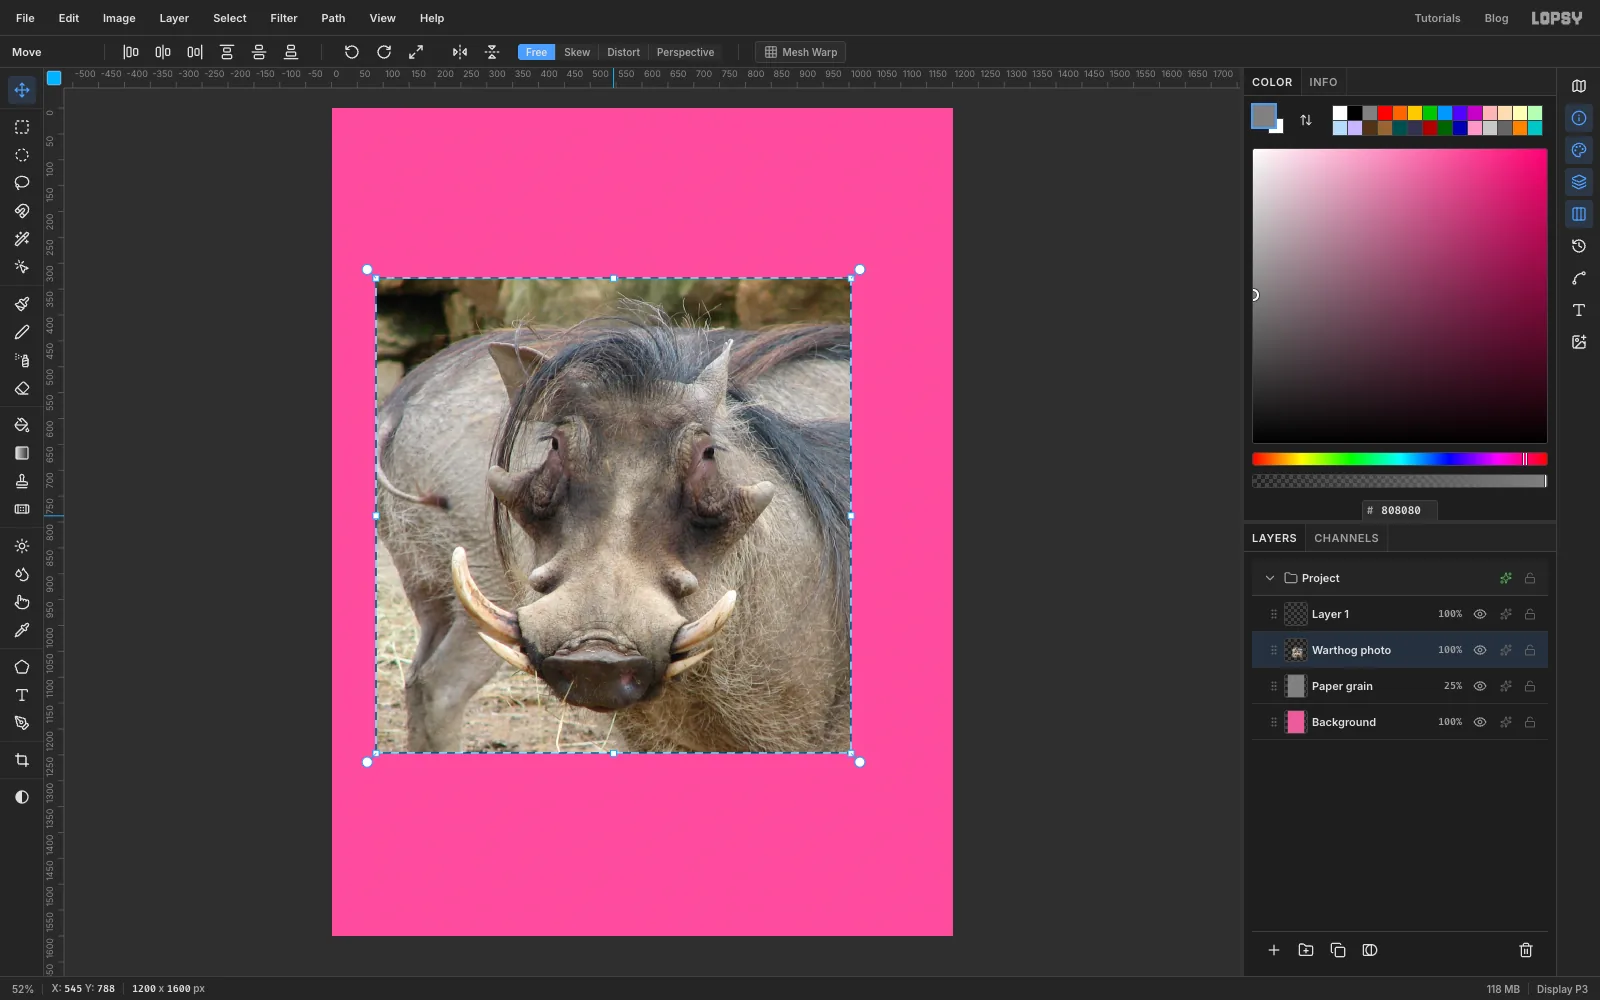
You'll need one photo from Wikimedia Commons: Warthog Face 001.jpg by Trisha M Shears. It's in the public domain, so you can use it freely. It shows a warthog looking straight at the camera. Download the full-size file (1710 × 1455 px), open it in Preview or any image viewer, and crop a square about 1080 px across around the head. Keep both pairs of tusks, the ears and the mane, with the head close to the middle of the square.
The tools you'll use:
- the Lasso, the Rectangular Marquee and its exact-size dialog, and the Magic Wand
- Select → Shrink / Grow / Feather / Inverse, and Cmd-click on a layer thumbnail to load its shape as a selection
- Paste, the Move tool's scale and rotate handles, its Rotate 90° CCW button, and arrow-key nudges
- Desaturate, Brightness/Contrast, Unsharp Mask, Gaussian Blur, Halftone, Threshold, Add Noise, Motion Blur and Emboss
- the Brush and the Eraser
- live text in four Google fonts (Anton, Special Elite, Bebas Neue and Permanent Marker), editing text in place, and Letter spacing
- groups, Duplicate Layer, Merge Down, and the Overlay, Multiply, Soft Light and Hard Light blend modes
- the Drop Shadow layer effect
The palette is one sheet of coloured copy paper, toner and paper scraps:
-
Fluorescent pink paper
-
Toner black
-
Scrap white
-
label ink
-
Masking tape
-
Grain grey
-
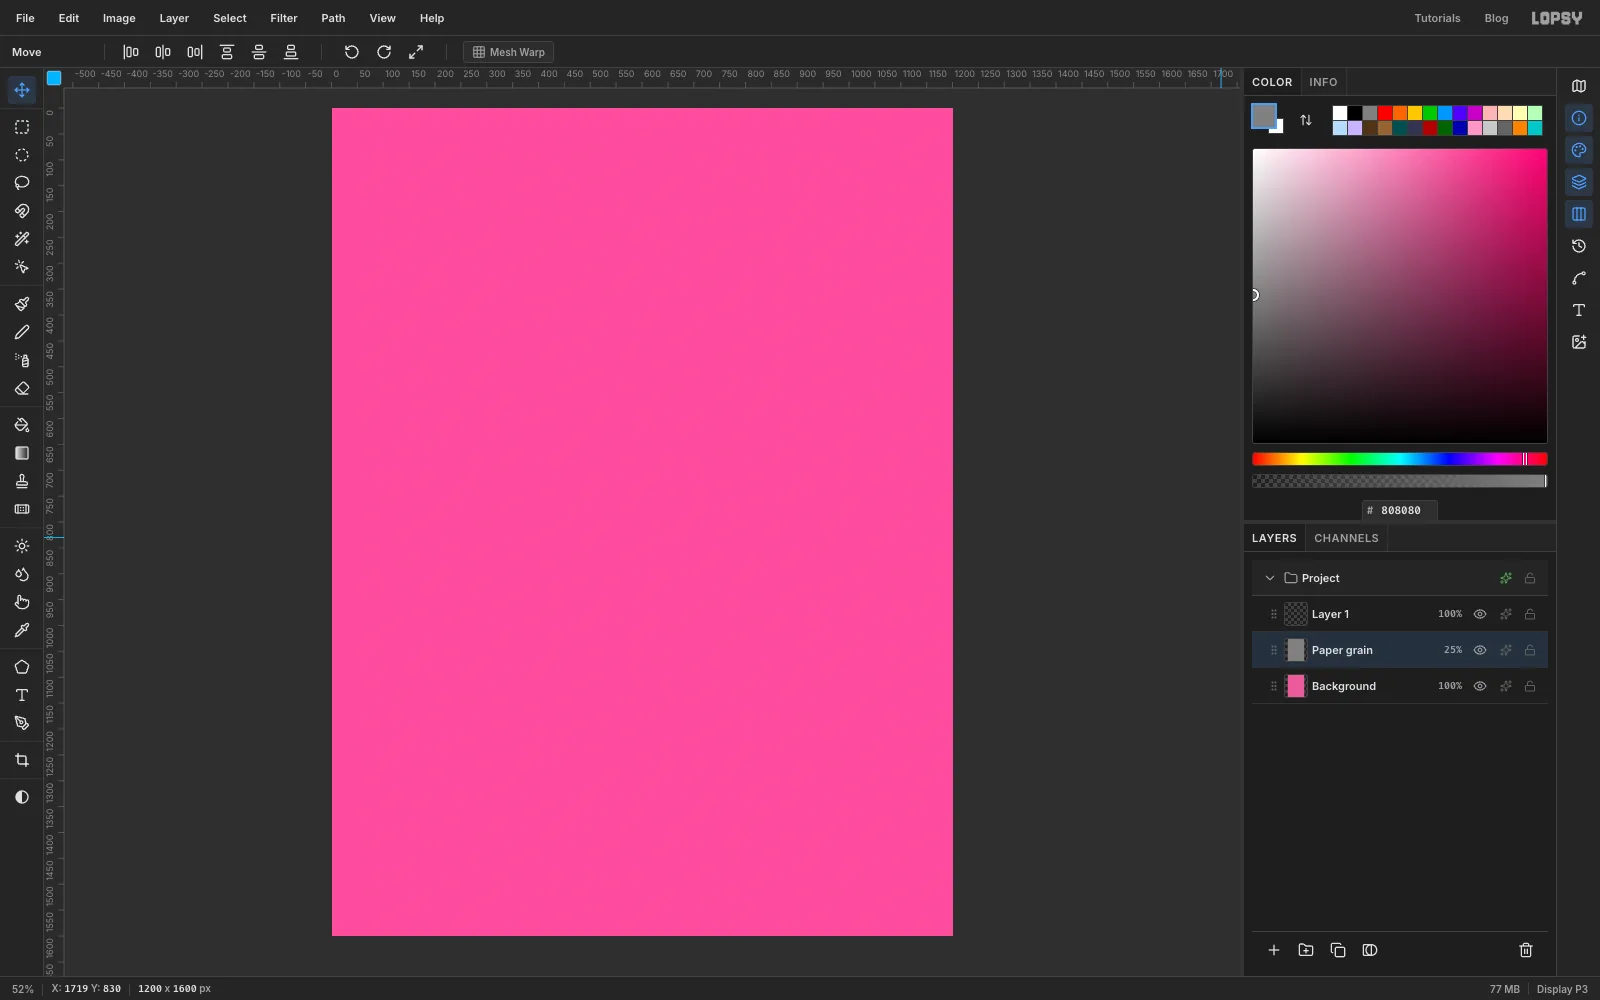
Lay down the pink copy paper
Choose File → New, keep the units on Pixels, and make the document 1200 wide and 1600 high. A new document comes with a Background layer and an empty Layer 1 above it. Leave Layer 1 where it is; you'll use it later as a safe place to start new type.
Click Background, type pink into the hex field of the Color panel, and choose Edit → Fill.
Real copy paper has a faint tooth, so add some grain:
- Click Add Layer and double-click the new layer's name to rename it Paper grain.
- Set the foreground to grain grey and choose Edit → Fill.
- Run Filter → Add Noise… at Amount 30 with Mono selected.
- Run Filter → Gaussian Blur… at Radius 1.
- Open the layer's effects with the sparkle button on its row, set the blend mode to Overlay, and close the drawer. Then click the layer's 100% and drag its opacity down to 25%.
The grey disappears into the pink and leaves only a fine mottle.
-
Paste the warthog photo
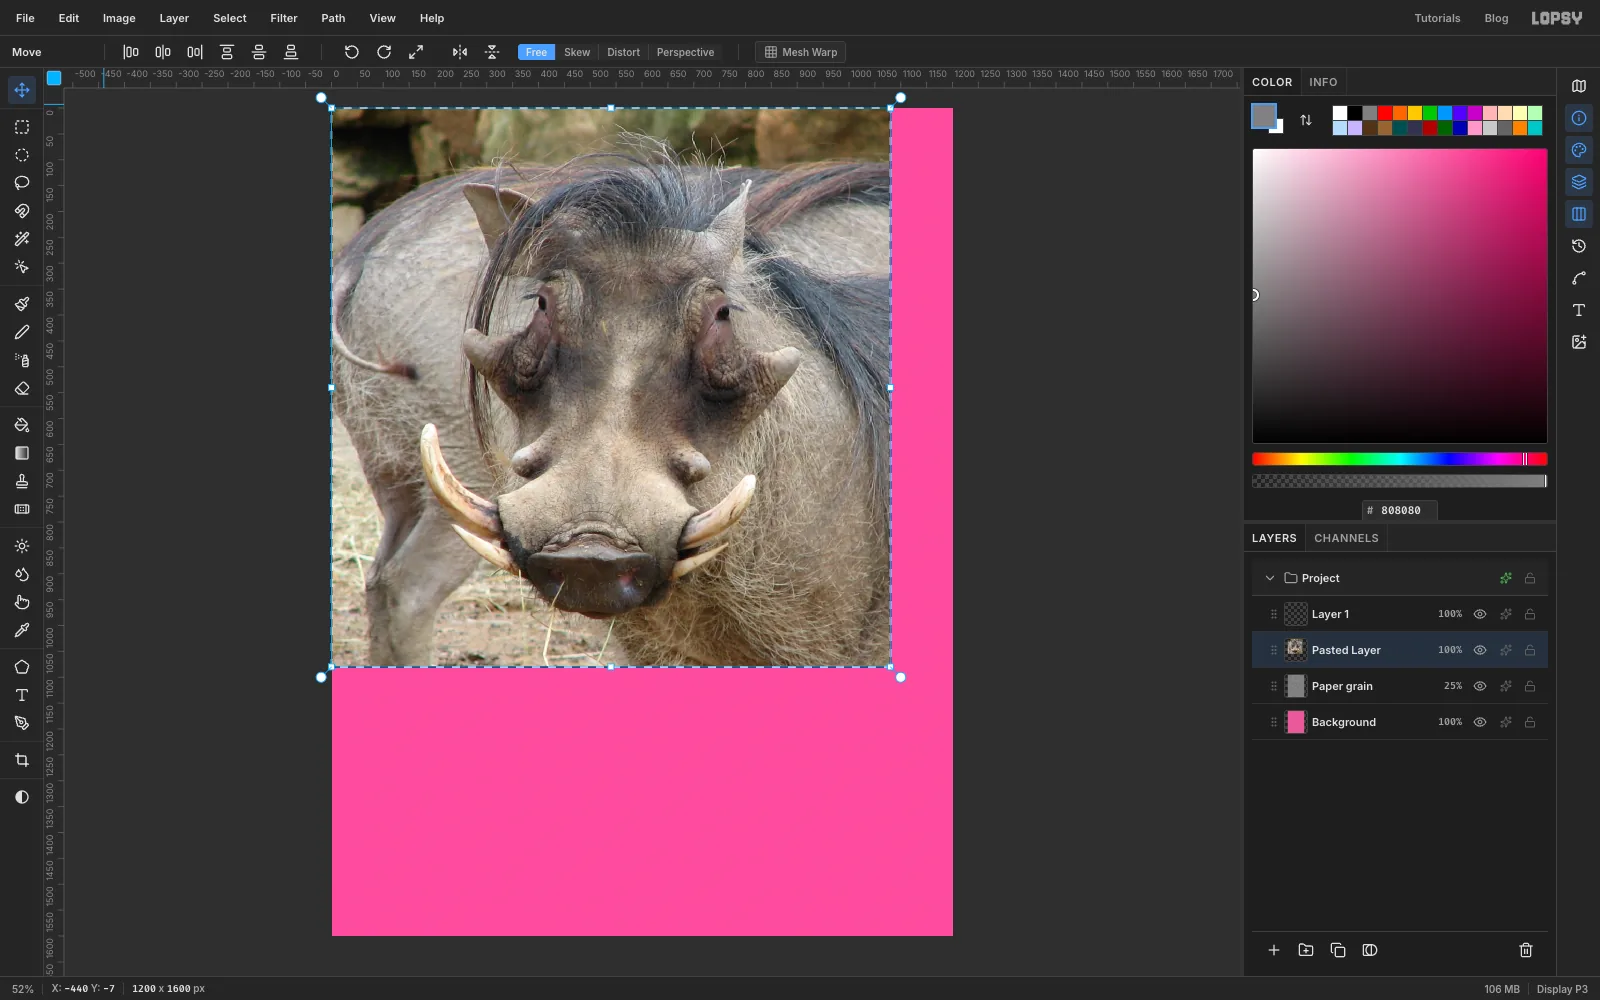
Copy your cropped square photo in Preview. Back in Lopsy, click Paper grain so the photo lands above it, and press Cmd+V.
A pasted image that fits on the canvas lands at the top-left corner at full size. Lopsy selects it and switches to the Move tool for you. Double-click the new layer's name and rename it Warthog photo.
-
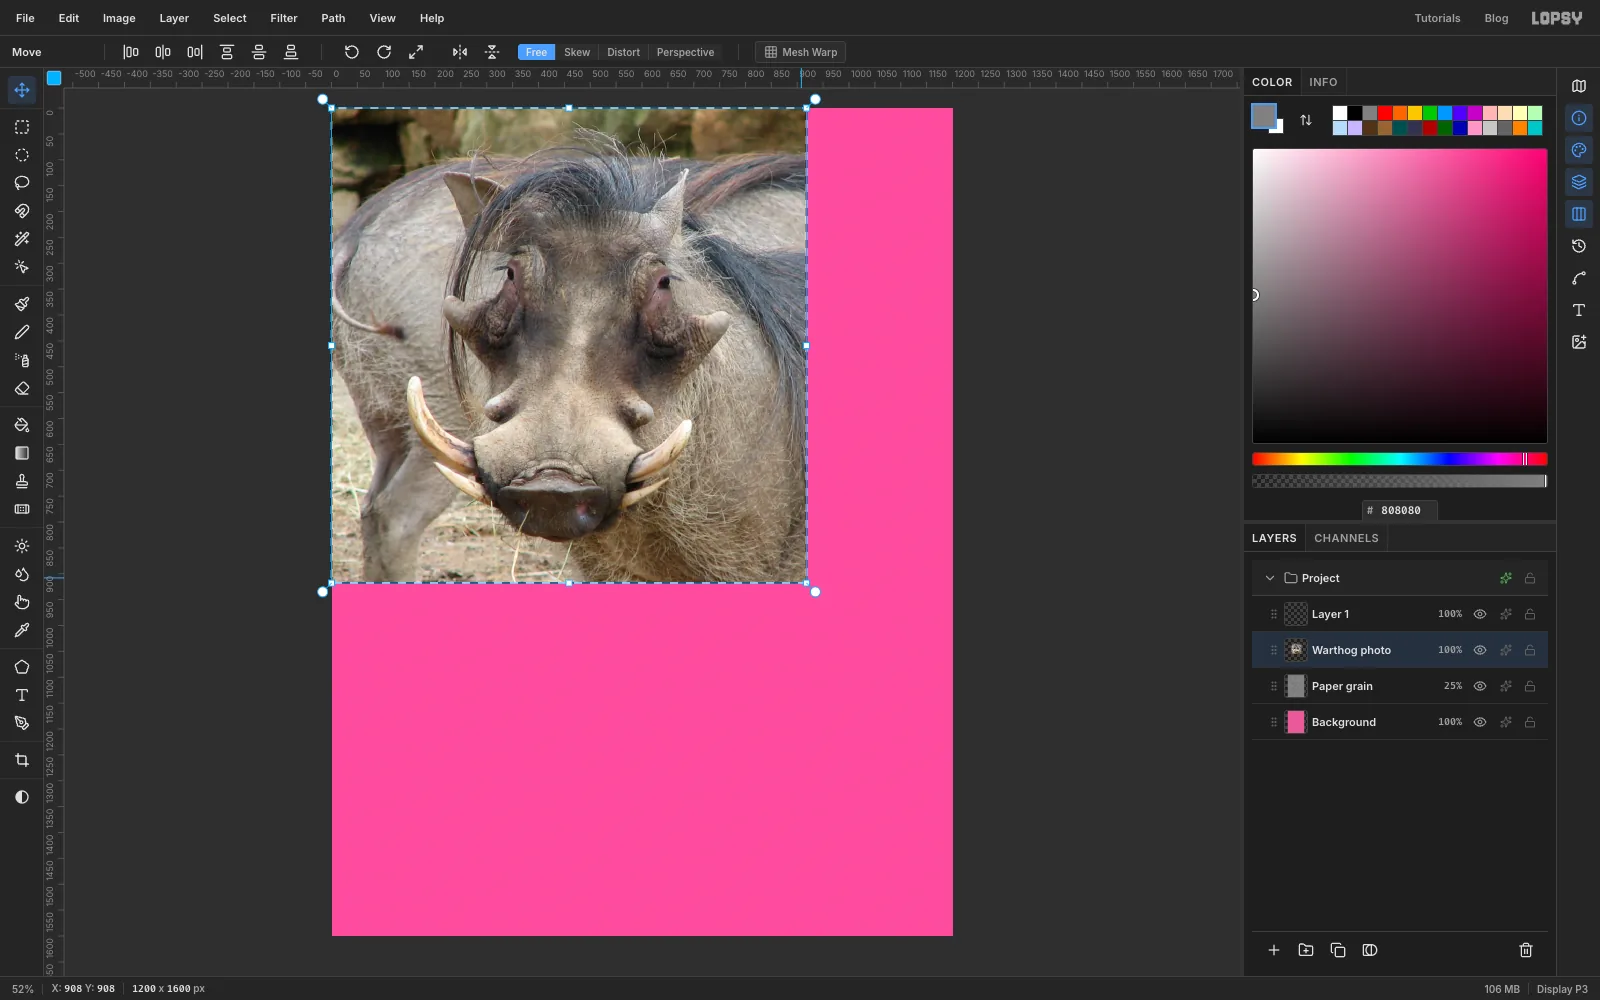
Scale the photo to 85%
Hold Cmd and drag the photo's bottom-right handle up and to the left until its right edge reaches about 920 on the top ruler, about 85% of its size. Cmd keeps the proportions.
Scale before you add the halftone dots, not after. Shrinking a finished halftone blurs the dots into grey mush.
-
Move the head to the middle of the page
With the Move tool, drag the photo down and a little to the right. Its left edge should sit just inside the page (about 90 on the top ruler) and its top about a fifth of the way down (about 330 on the left ruler). The head should end up a little left of the page centre, with the snout at about y 1150. Press Cmd+D to drop the selection.
-
Push the photo to hard black and white
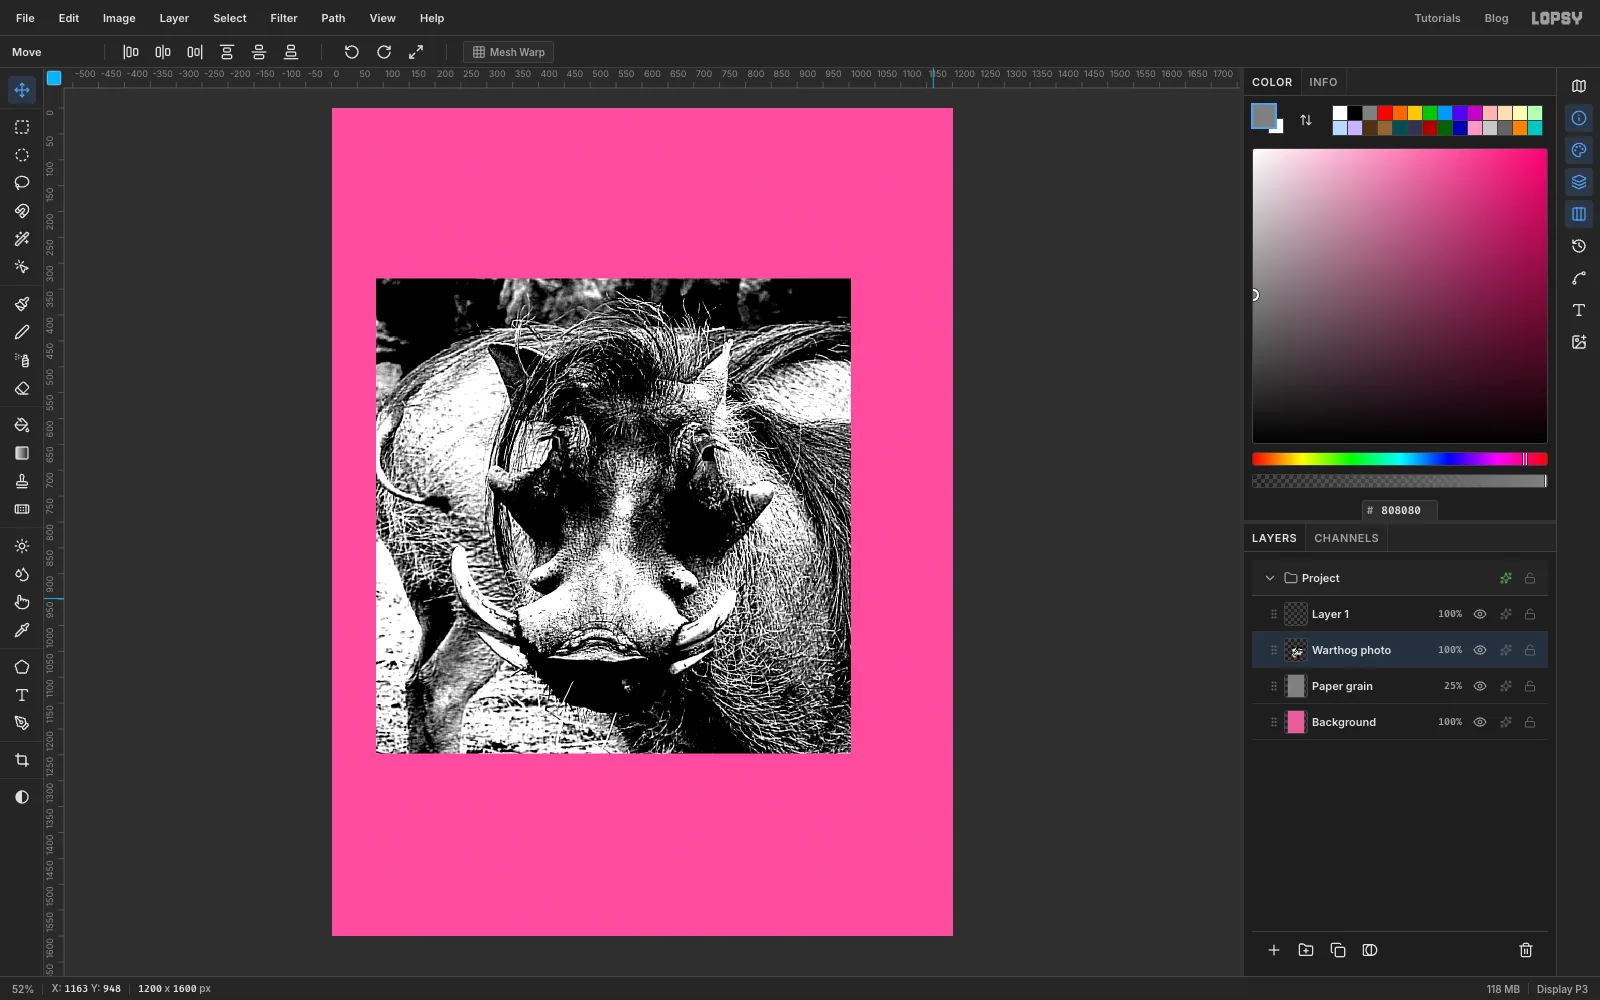
A copier only knows black and white, so throw away the colour and the soft middle tones:
- Filter → Desaturate.
- Filter → Brightness/Contrast… with Brightness 0 and Contrast 100.
- Filter → Brightness/Contrast… again, with Brightness −10 and Contrast 40. The fur goes darker, but the ivory tusks stay white, so they separate from the face.
- Filter → Unsharp Mask… with Radius 3 and Amount 2, to crisp up the warts and the snout.
-
Tear a paper scrap for the photo
In a real paste-up the picture is torn out of a magazine. Click Paper grain and add a layer called Scrap paper so it sits under the photo. Set the foreground to scrap white now, ready for the fill.
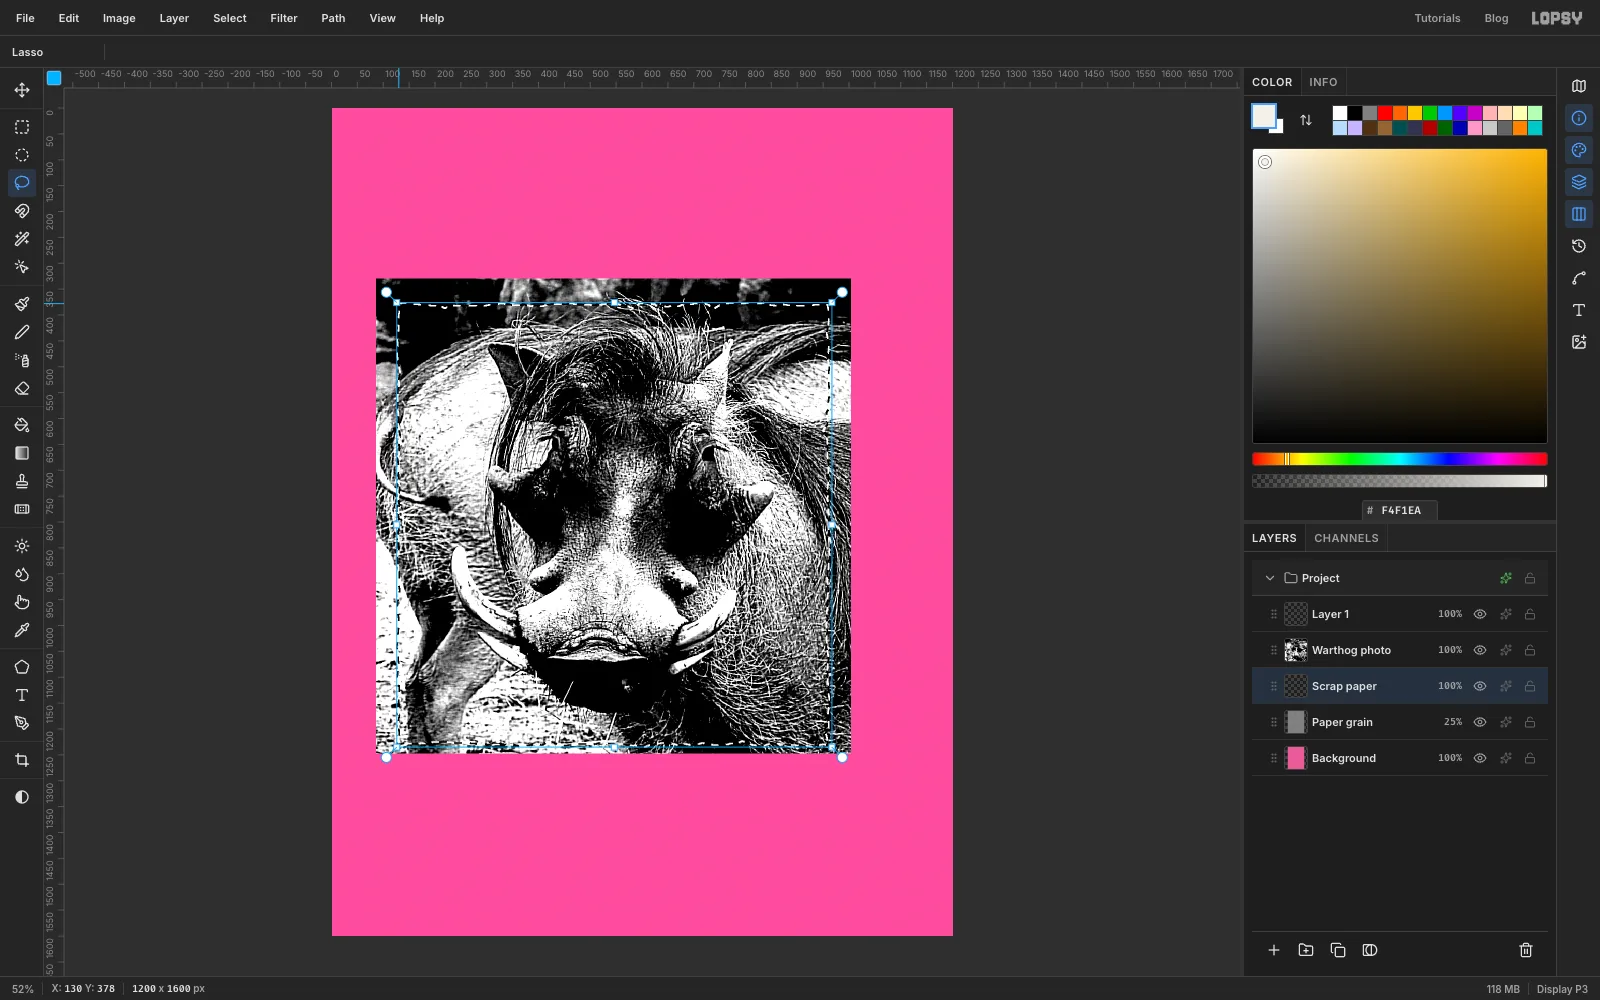
Pick the Lasso and draw a rough rectangle a little inside the photo: from about 130, 380 at the top left to about 960, 1230 at the bottom right. Keep each side roughly straight, but let your hand jitter a few pixels back and forth as you go, so every edge looks torn rather than cut. Finish where you started.
-
Fill the scrap and trim the photo to it
Choose Edit → Fill to fill the selection with scrap white. Keep the selection.
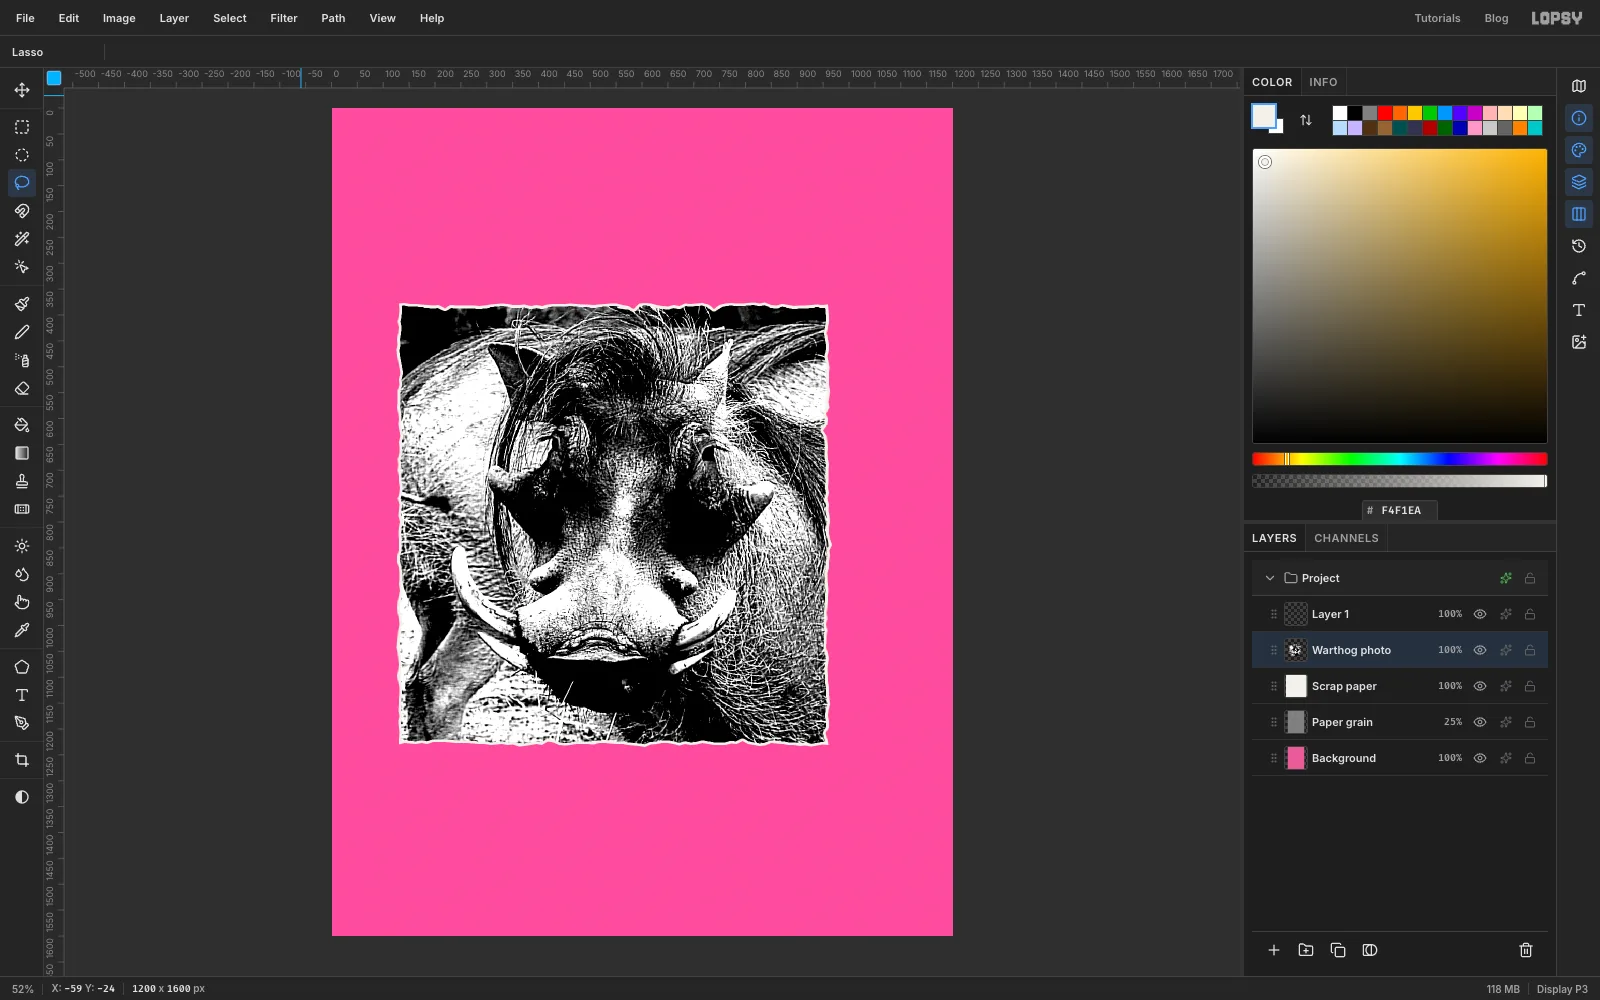
Choose Select → Shrink… and shrink it by 5 px. Then click Warthog photo, choose Select → Inverse and press Delete. Deselect with Cmd+D.
Shrinking first leaves a thin white rim of paper around the photo, as if it had been torn from a page with a margin.
-
Screen the photo with halftone dots
The Halftone filter reads one pixel at the centre of each dot cell. On fur, that pixel is random: light hair or dark gap. So soften the texture first:
- Filter → Gaussian Blur… at Radius 4.
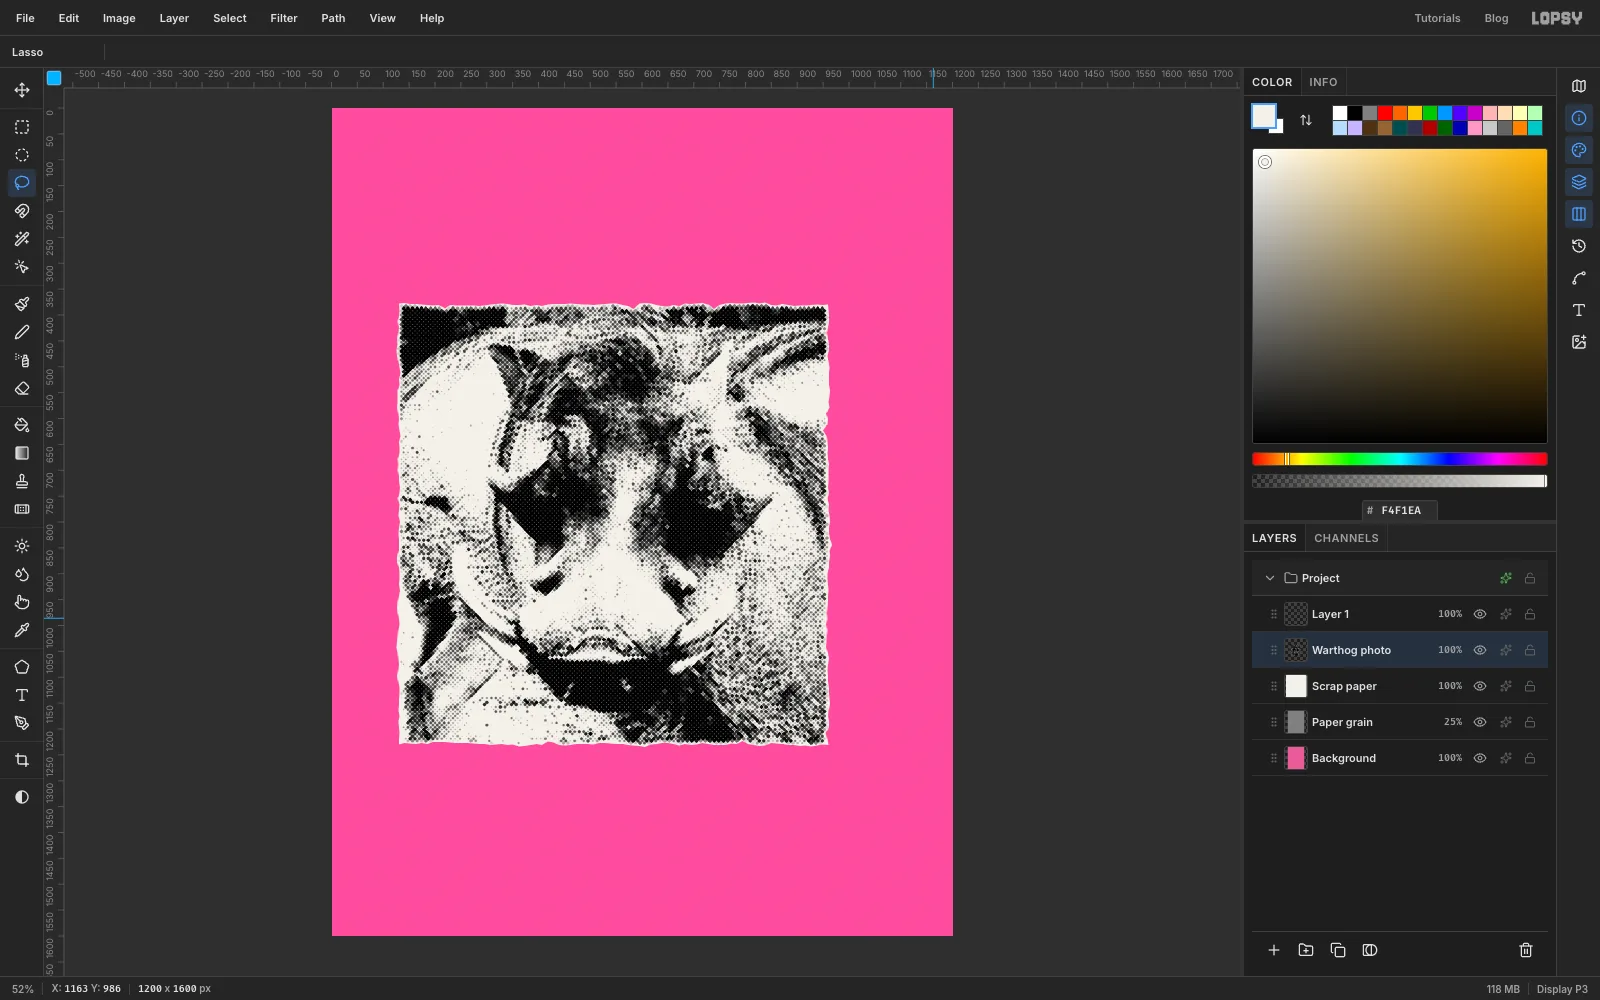
- Filter → Halftone… with Dot Size 8, Density 1.3, Angle 45 and Softness 1.
Dark areas turn into big dots and light areas into small ones. The dots keep the grey of the photo underneath.
-
Print every dot in solid black
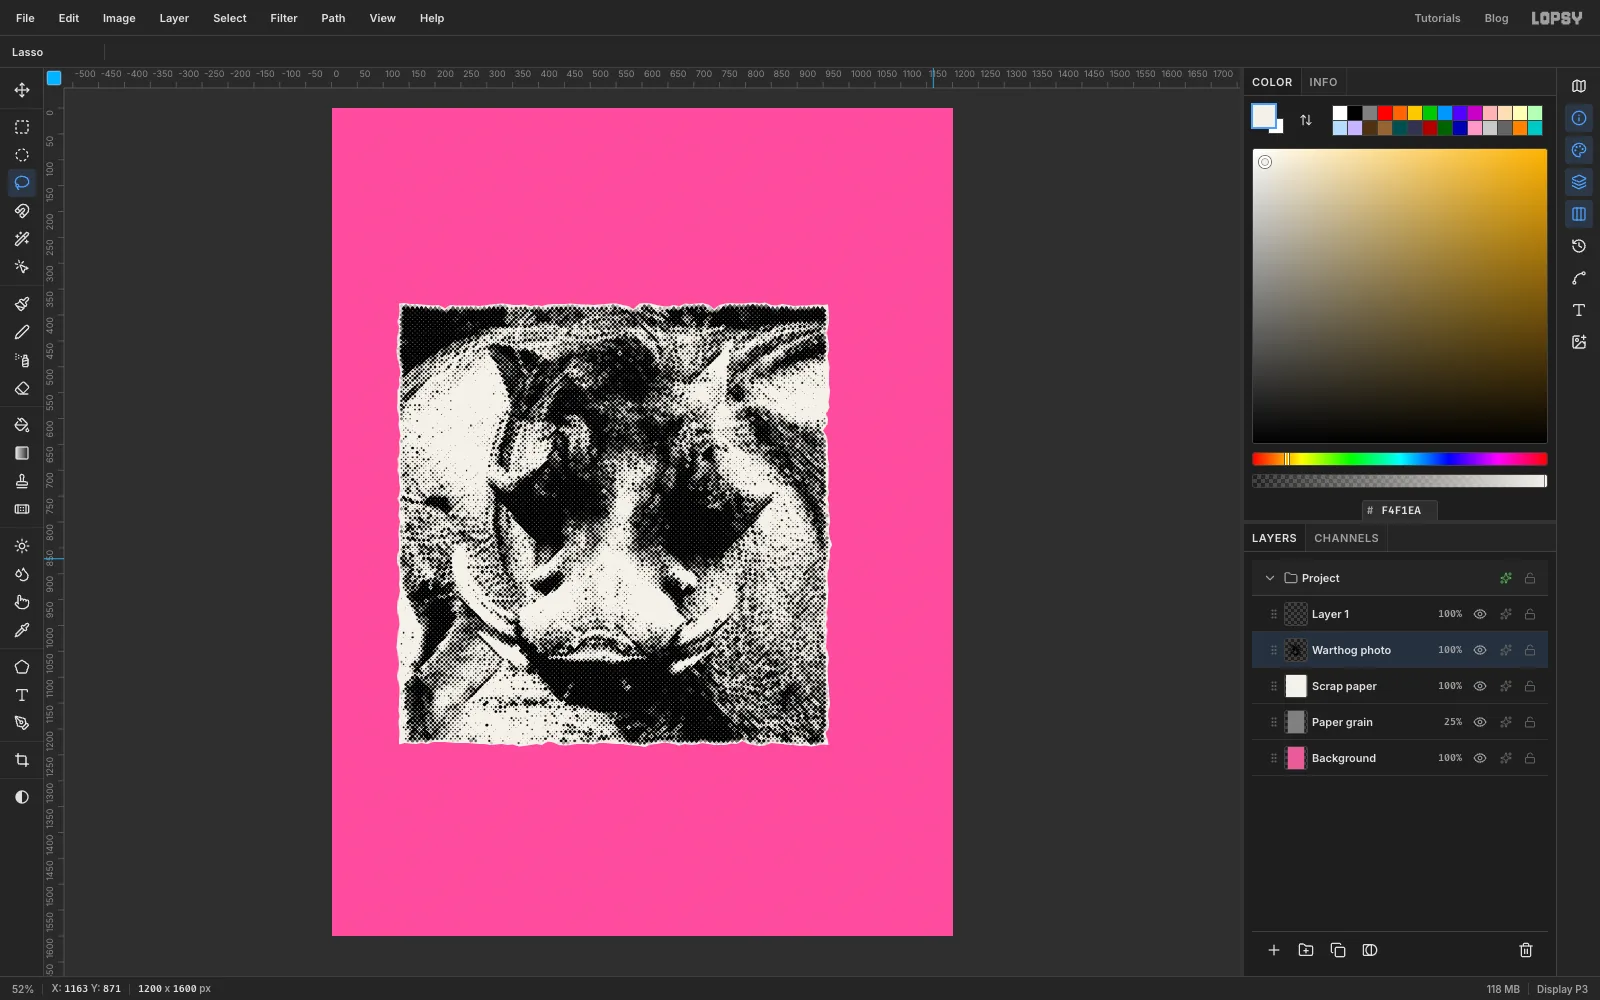
Run Filter → Threshold… at Level 250. Anything darker than near-white turns black, so every grey dot now prints solid. This is the photo the copier would give you: eye sockets and snout solid black, with the paler tusks showing as gaps in the dots beside the snout.
-
Group the photo and tilt it
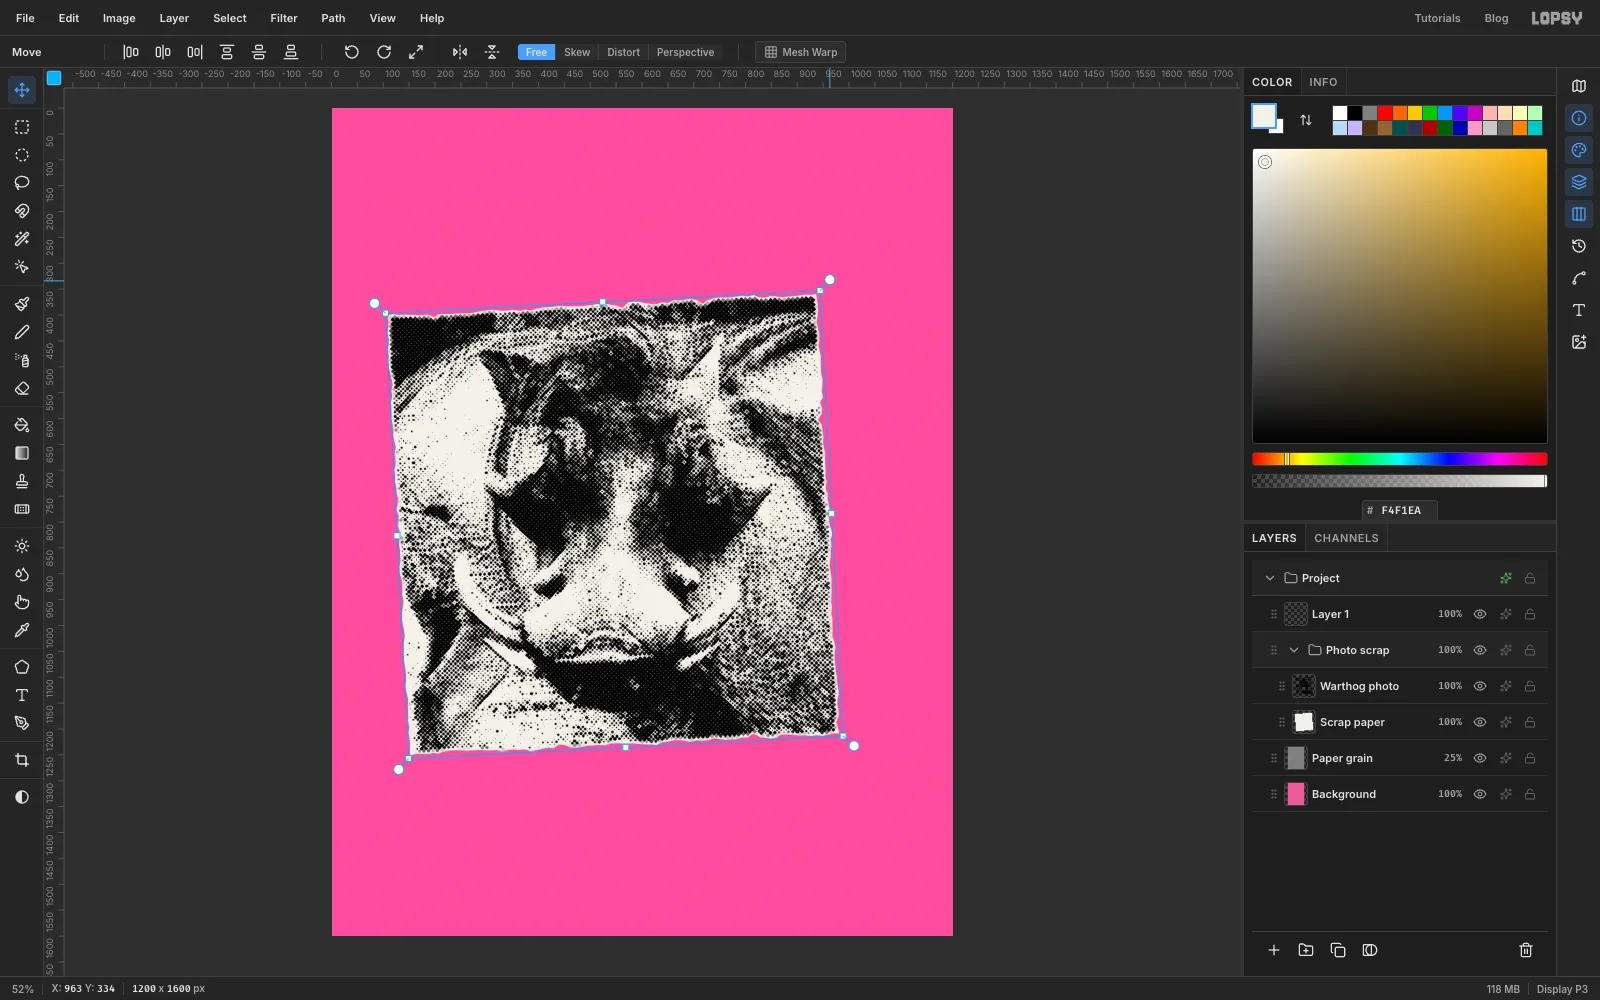
Click Scrap paper, Shift-click Warthog photo, and choose Layer → Group Layers. Rename the group Photo scrap.
With the group selected and the Move tool active, press Cmd+D to make sure nothing is selected. Hover just outside the top-right corner of the box until the cursor changes to the rotate cursor. Drag up and to the left a little to turn the group about 3° anticlockwise. Then drag the group a few pixels to the left, so its left edge sits about 100 px in from the page edge.
-
Set WARTHOG across the top
Click Layer 1, the empty layer at the top of the stack. Text options restyle whichever text layer is active, so always start new type from a plain layer.
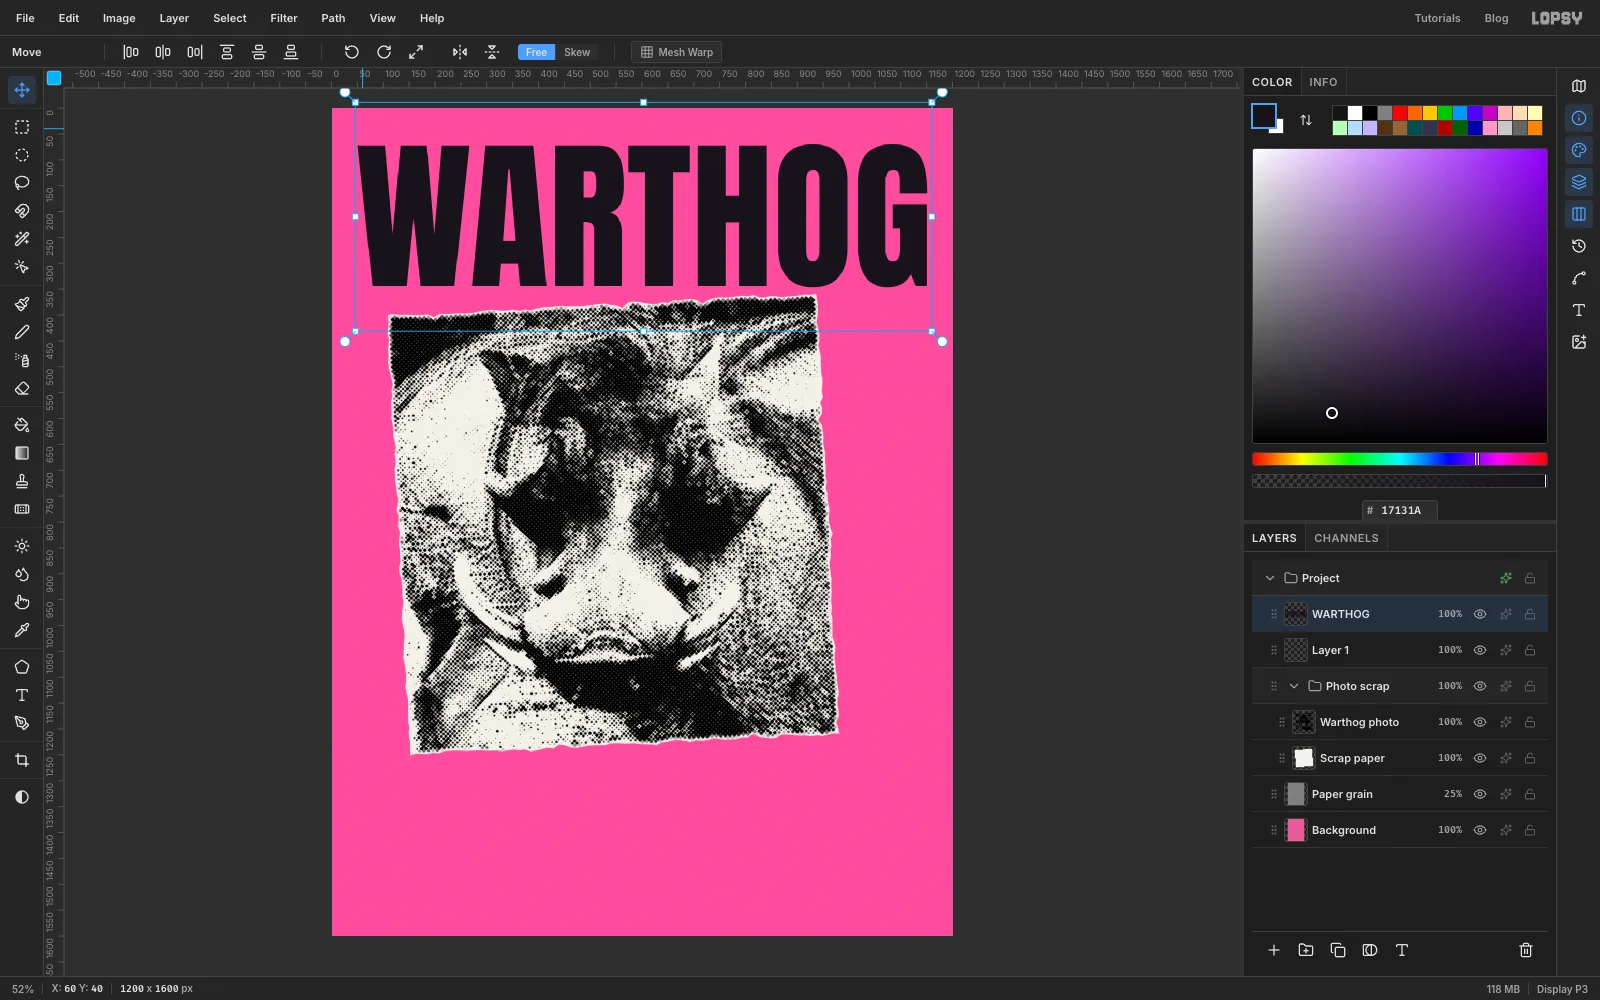
Pick the Text tool. Set the font to Anton, Size 316, and the colour to toner black . Click near the top-left corner of the page, type WARTHOG and press Tab to commit it. Double-click the new layer's name and rename it WARTHOG. Lopsy names text layers after their first few characters, so renaming keeps the panel readable.
Switch to the Move tool and drag the word until its letters start at about x 50 and their tops sit at about y 70. At size 316 the word spans almost the whole width, ending at about x 1150.
-
Tear a strip of black gaffer tape
Click WARTHOG and add a layer called Gaffer tape.
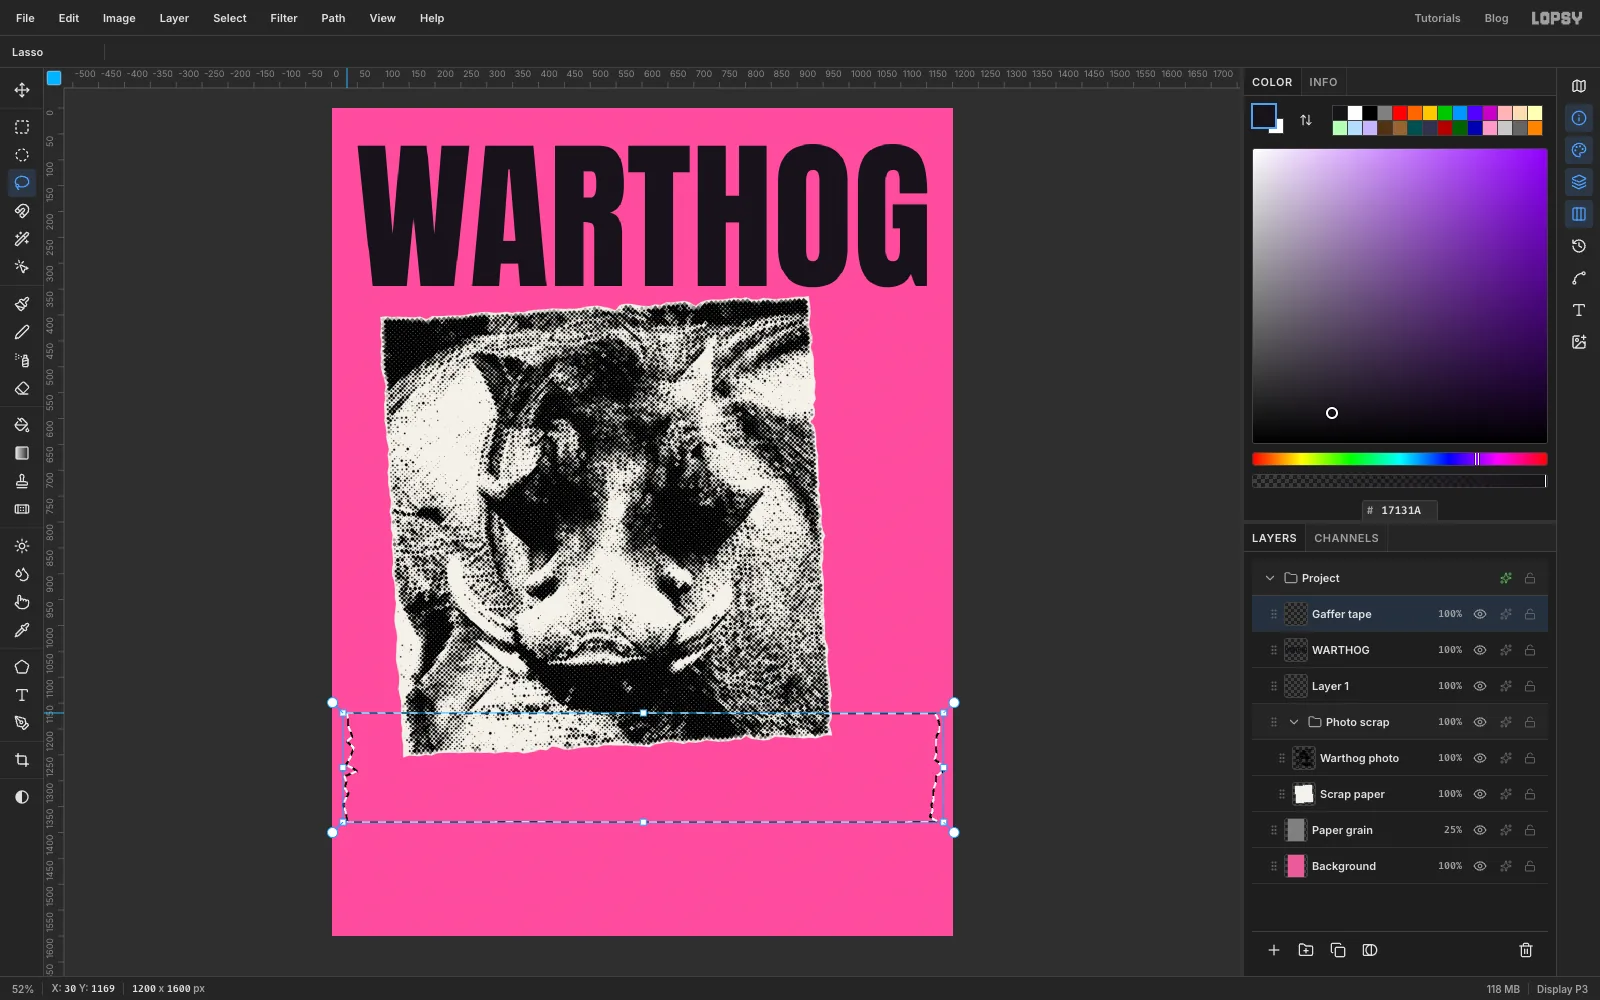
With the Lasso, draw a long band across the bottom of the photo, from near the left edge of the page (about x 30, y 1170) to near the right edge (about x 1170, y 1380). Keep the top and bottom as steady as you can; a slight wobble is fine, because tape edges aren't perfect either. Make both ends ragged, the way tape tears when you rip it by hand.
Set the foreground to toner black , choose Edit → Fill and deselect.
-
Print INSURRECTION on the tape
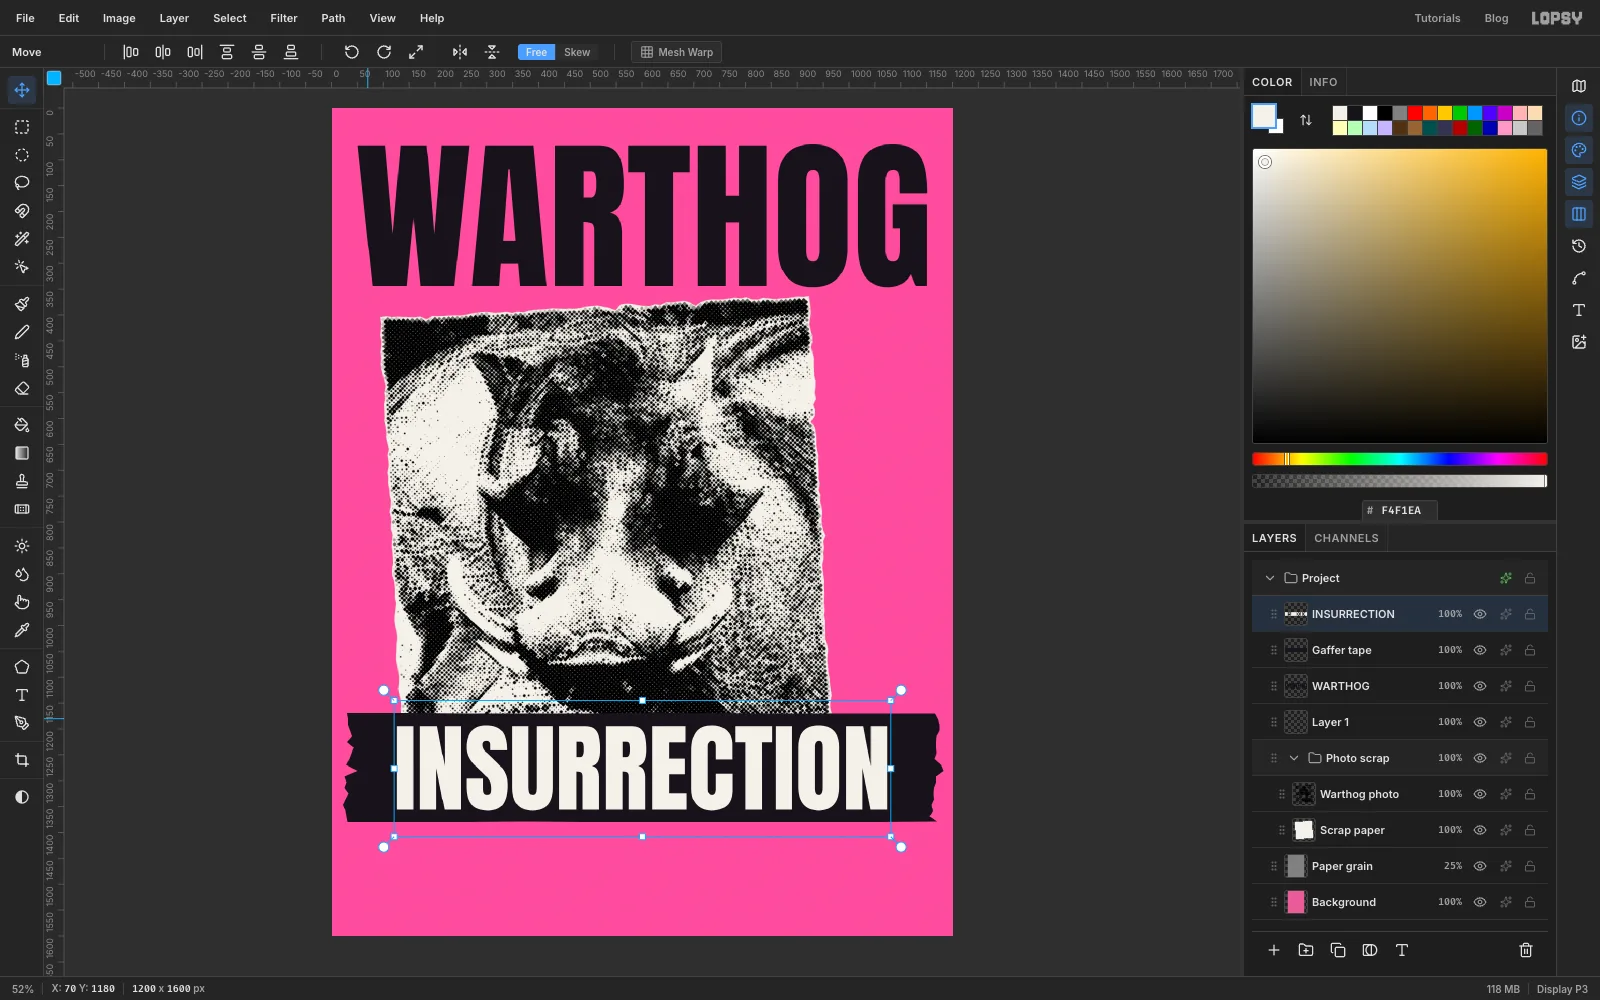
With Gaffer tape still active, pick the Text tool. Keep Anton, set Size 188 and the colour to scrap white .
Click in an empty bit of the page, away from WARTHOG. A click inside an existing text layer's box edits that layer instead of making a new one. Type INSURRECTION, press Tab, and rename the layer INSURRECTION.
Switch to the Move tool and drag the word onto the tape so it's centred both ways: about 75 px of black at each end, and roughly equal black above and below the letters.
-
Group the headline and tilt it the other way
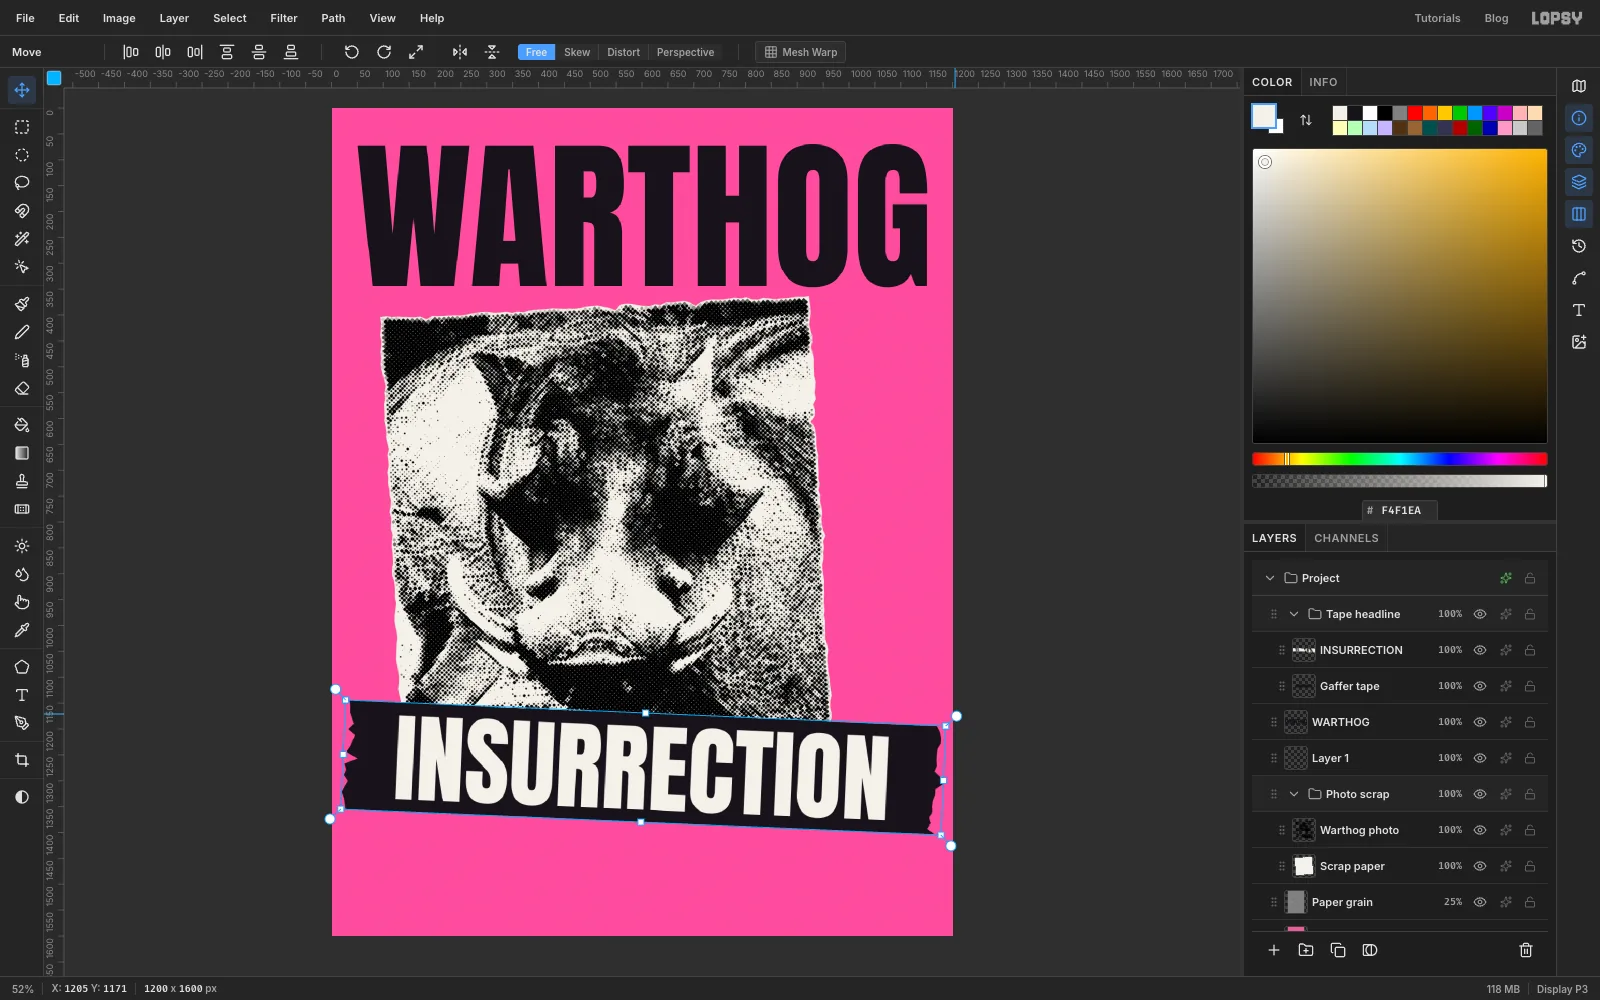
Click Gaffer tape, Shift-click INSURRECTION, and choose Layer → Group Layers. Rename the group Tape headline.
Press Cmd+D, then drag the group's top-right rotate handle down a little to turn it about 2.5° clockwise. The photo leans one way and the tape leans the other, so the pair looks stuck on by hand rather than laid out on a grid.
-
Type the lineup on a torn slip
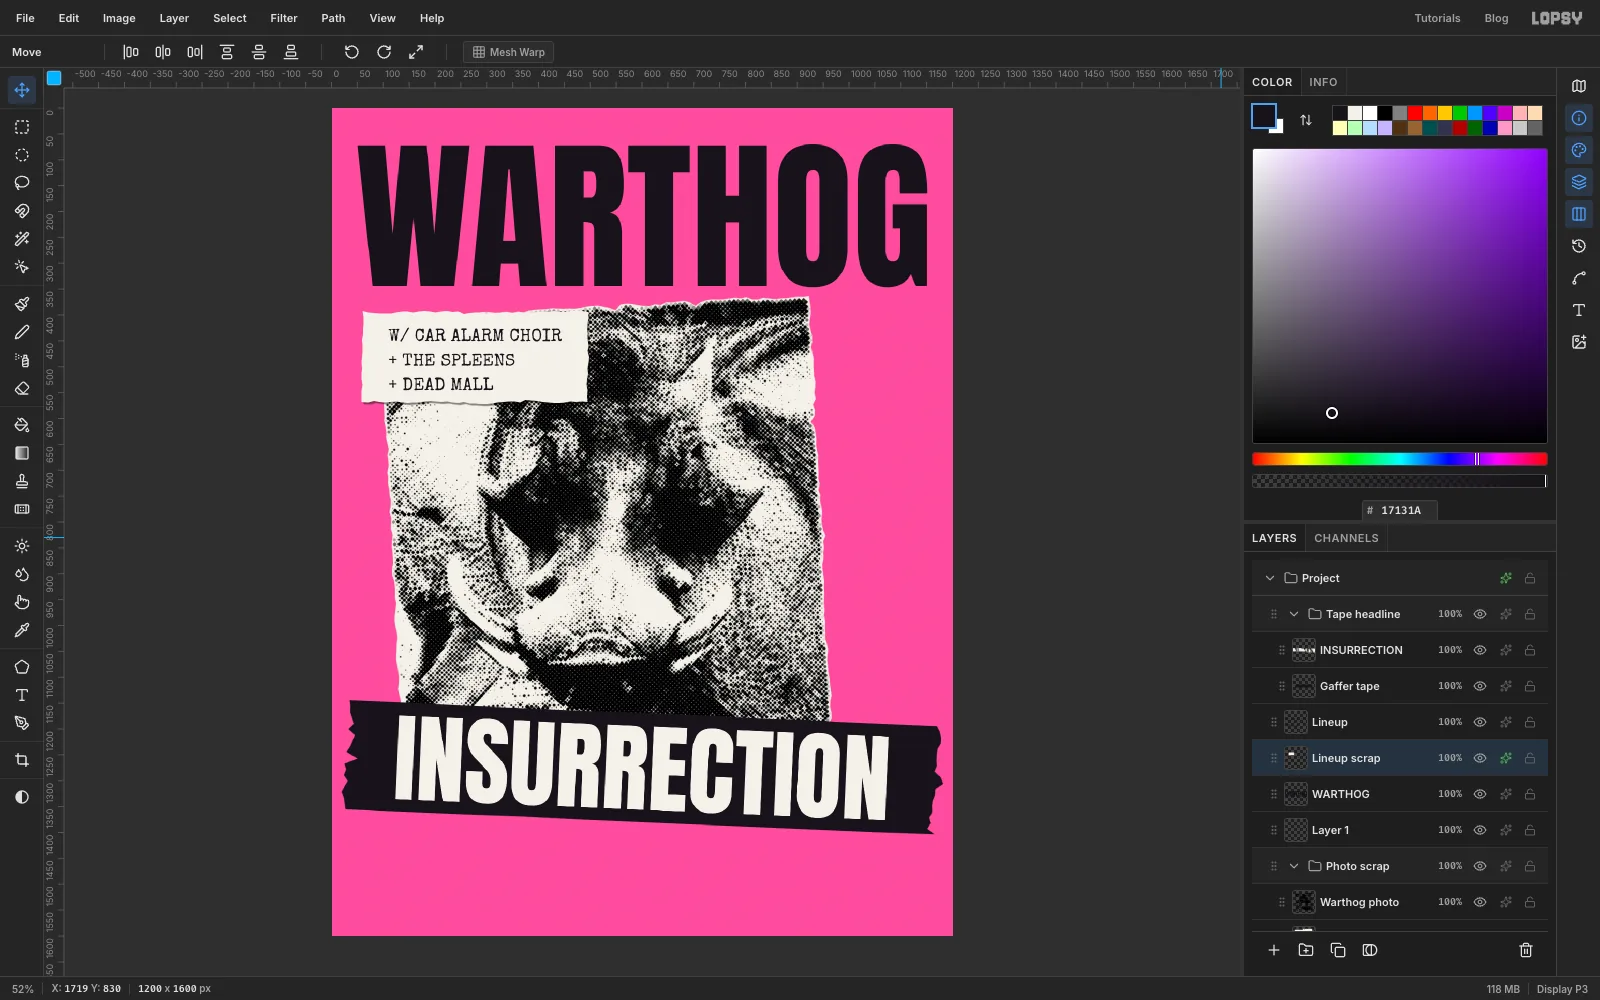
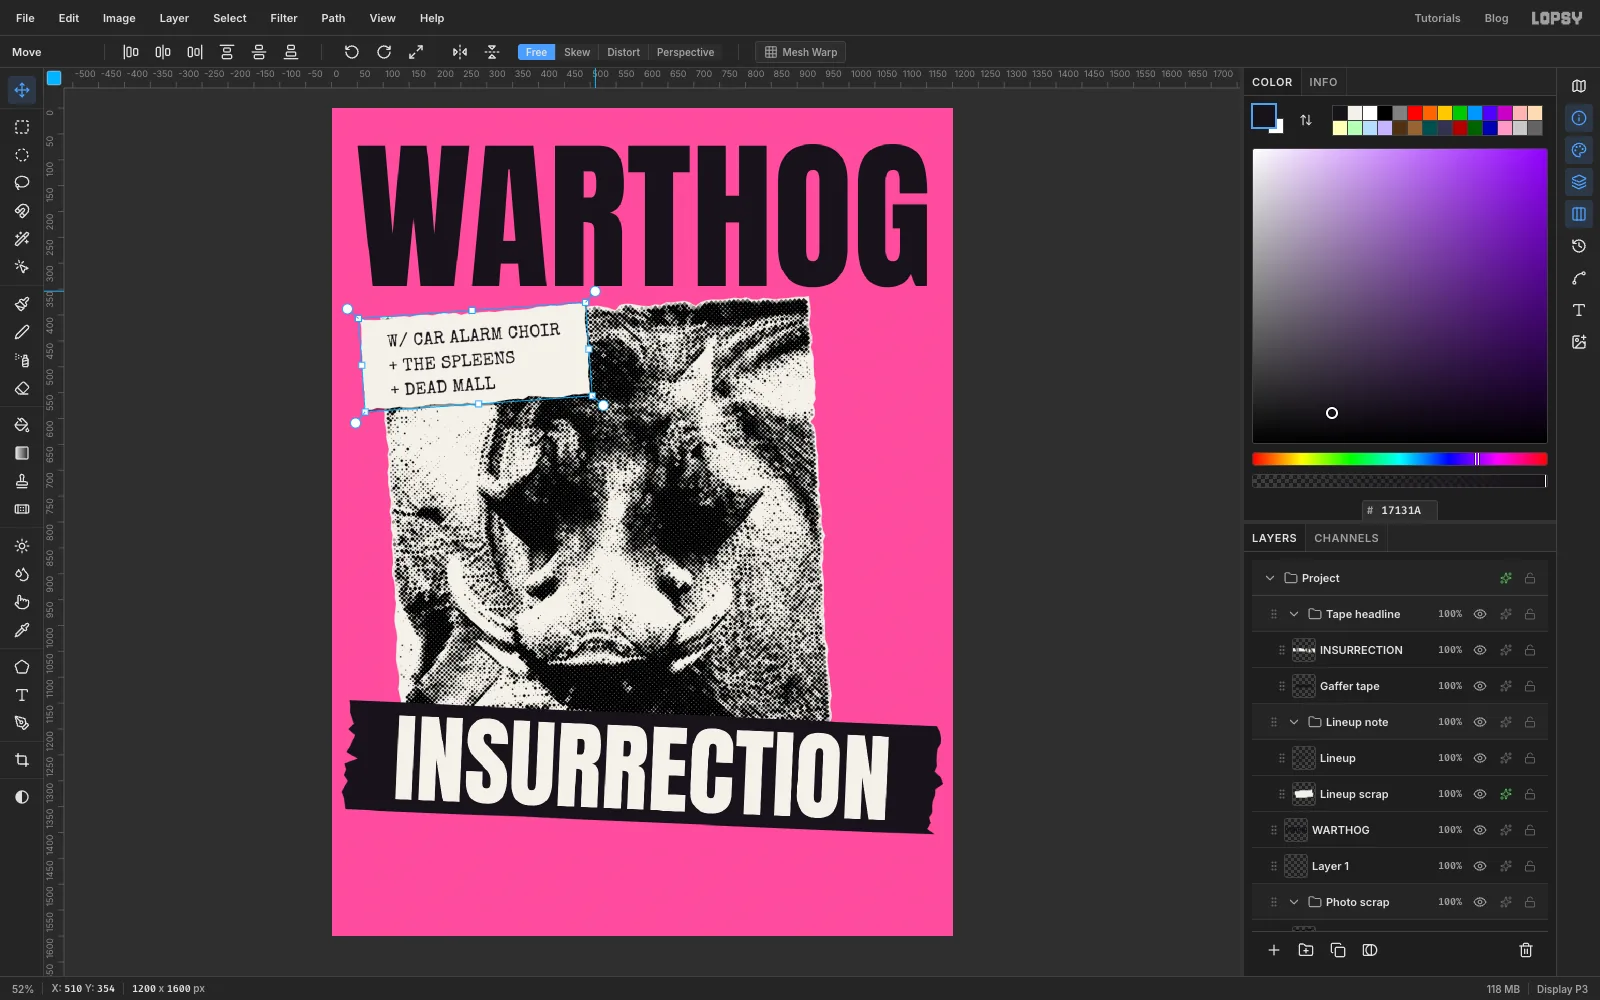
Click WARTHOG and add a layer called Lineup scrap. With the Lasso, draw a small torn rectangle, about 435 × 175 px, over the photo's top-left corner. Let it hang off the photo into the pink by about 70 px, and keep its top edge about 50 px below WARTHOG. Fill it with scrap white and deselect.
Pick the Text tool, set the font to Special Elite, Size 34, colour toner black . Click inside the slip and type three lines, pressing Return between them: W/ CAR ALARM CHOIR, then + THE SPLEENS, then + DEAD MALL. Press Tab and rename the layer Lineup. Then switch to the Move tool and drag the text so it's centred on the slip.
The slip and the photo's paper rim are the same white, so they merge. Click Lineup scrap, open its effects, and turn on Drop Shadow with Offset X 4, Offset Y 4, Blur 2 and Opacity 45. Close the drawer.
-
Tilt the lineup slip
Click Lineup scrap, Shift-click Lineup, choose Layer → Group Layers, and rename the group Lineup note. Press Cmd+D and rotate the group about 4° anticlockwise with its corner handle.
-
Make a Dymo label for the date
Punk flyers are full of label-maker tape: hard plastic strips with raised white letters.
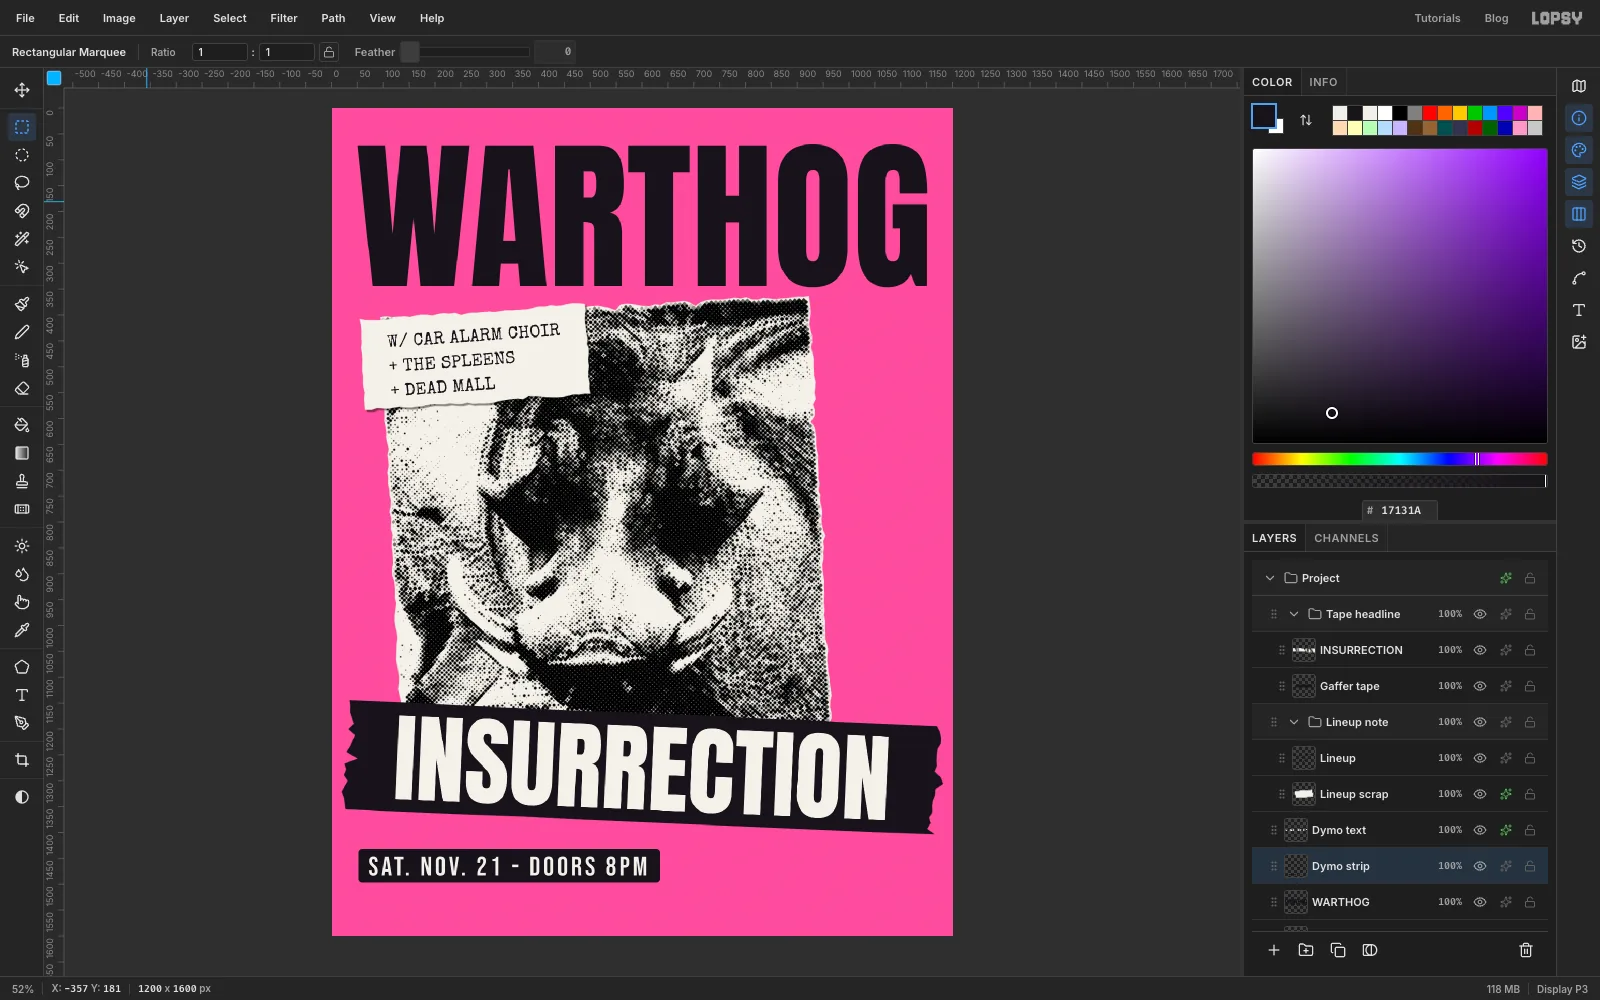
- Click WARTHOG and add a layer called Dymo strip.
- Pick the Text tool. Set Bebas Neue, Size 52, and colour label ink . Click in an empty spot, type SAT. NOV. 21 - DOORS 8PM, press Tab, and rename the layer Dymo text.
- Open the Text panel from the right-hand panel bar and set Letter spacing to 6. Label makers space their letters out.
- Open the text layer's effects and turn on Drop Shadow: Offset X 0, Offset Y 2, Blur 1, Opacity 70.
- Switch to the Move tool and drag the text to the bottom left, lined up with the W of WARTHOG (about x 72) and about 65 px below the gaffer tape (about y 1446).
- Click Dymo strip. Pick the Rectangular Marquee and drag a box around the text with about 20 px to spare on the left, top and bottom, and about 28 px on the right. Letter spacing adds a gap after the last letter, so the right end needs a bit more.
- Choose Select → Shrink… by 7, then Select → Grow… by 7. The corners come back rounded, like a die-cut label.
- Fill with toner black and deselect.
-
Duplicate the label for the venue
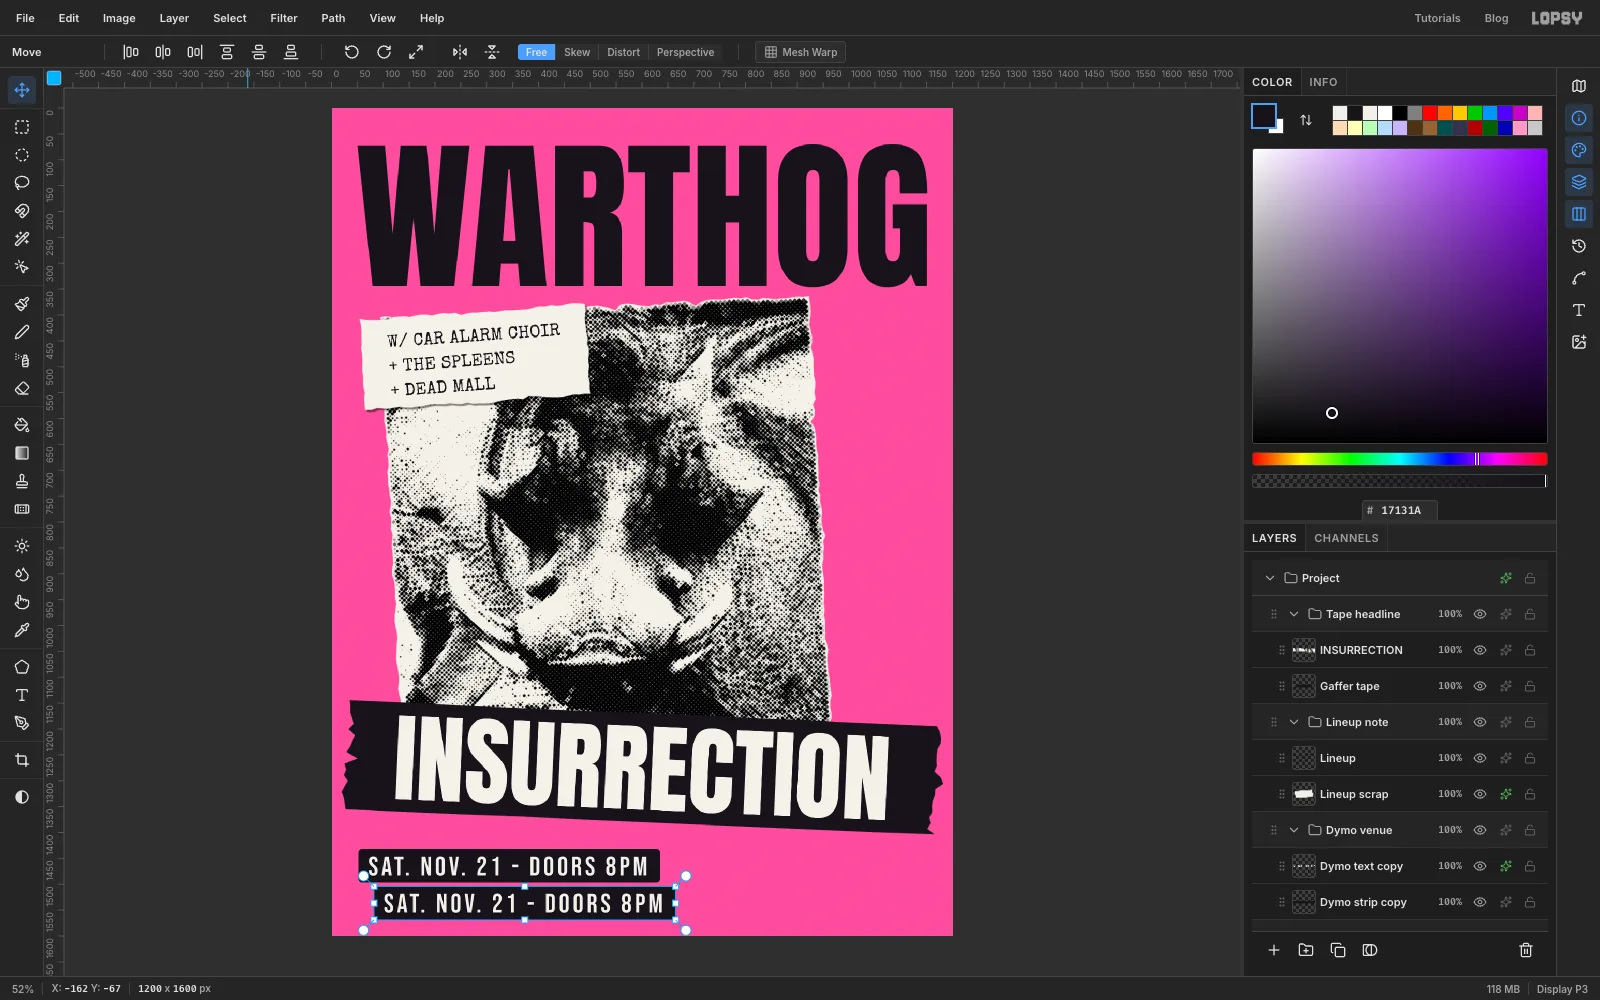
Click Dymo strip, Shift-click Dymo text, choose Layer → Group Layers, and rename the group Dymo date.
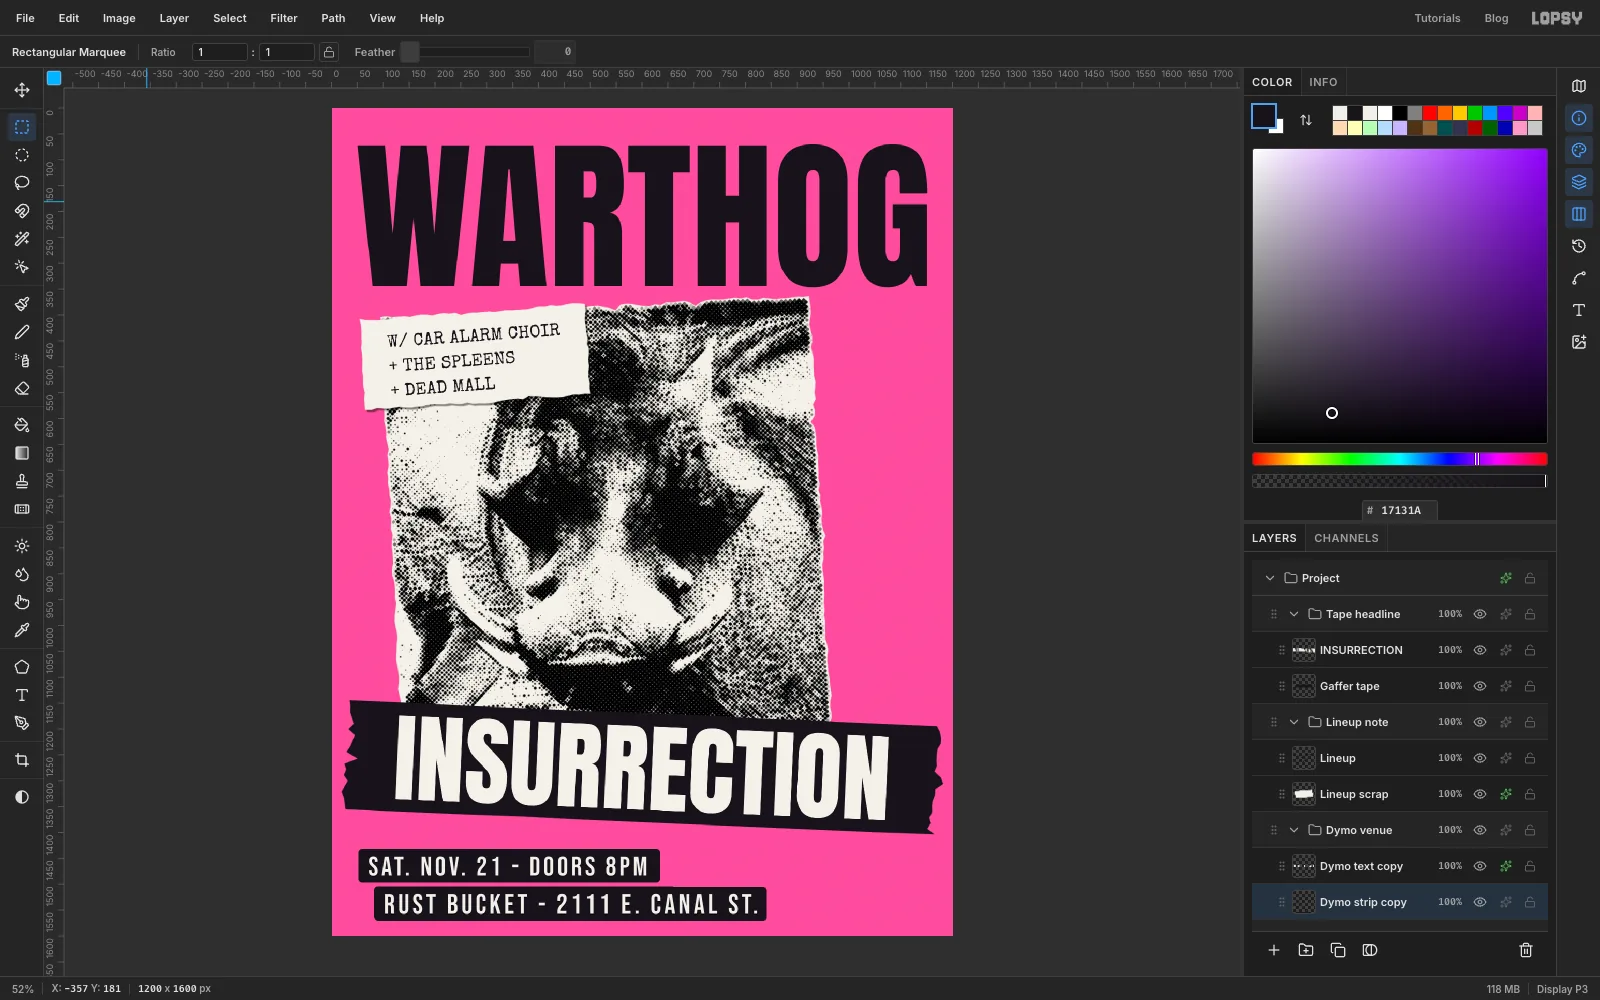
Choose Layer → Duplicate Layer to copy the whole group, and rename the copy Dymo venue. Its layers are called Dymo strip copy and Dymo text copy. With the Move tool, nudge it with the arrow keys about 30 px right and 72 px down so you can see both. Shift plus an arrow key moves 10 px at a time.
-
Retype the copied label
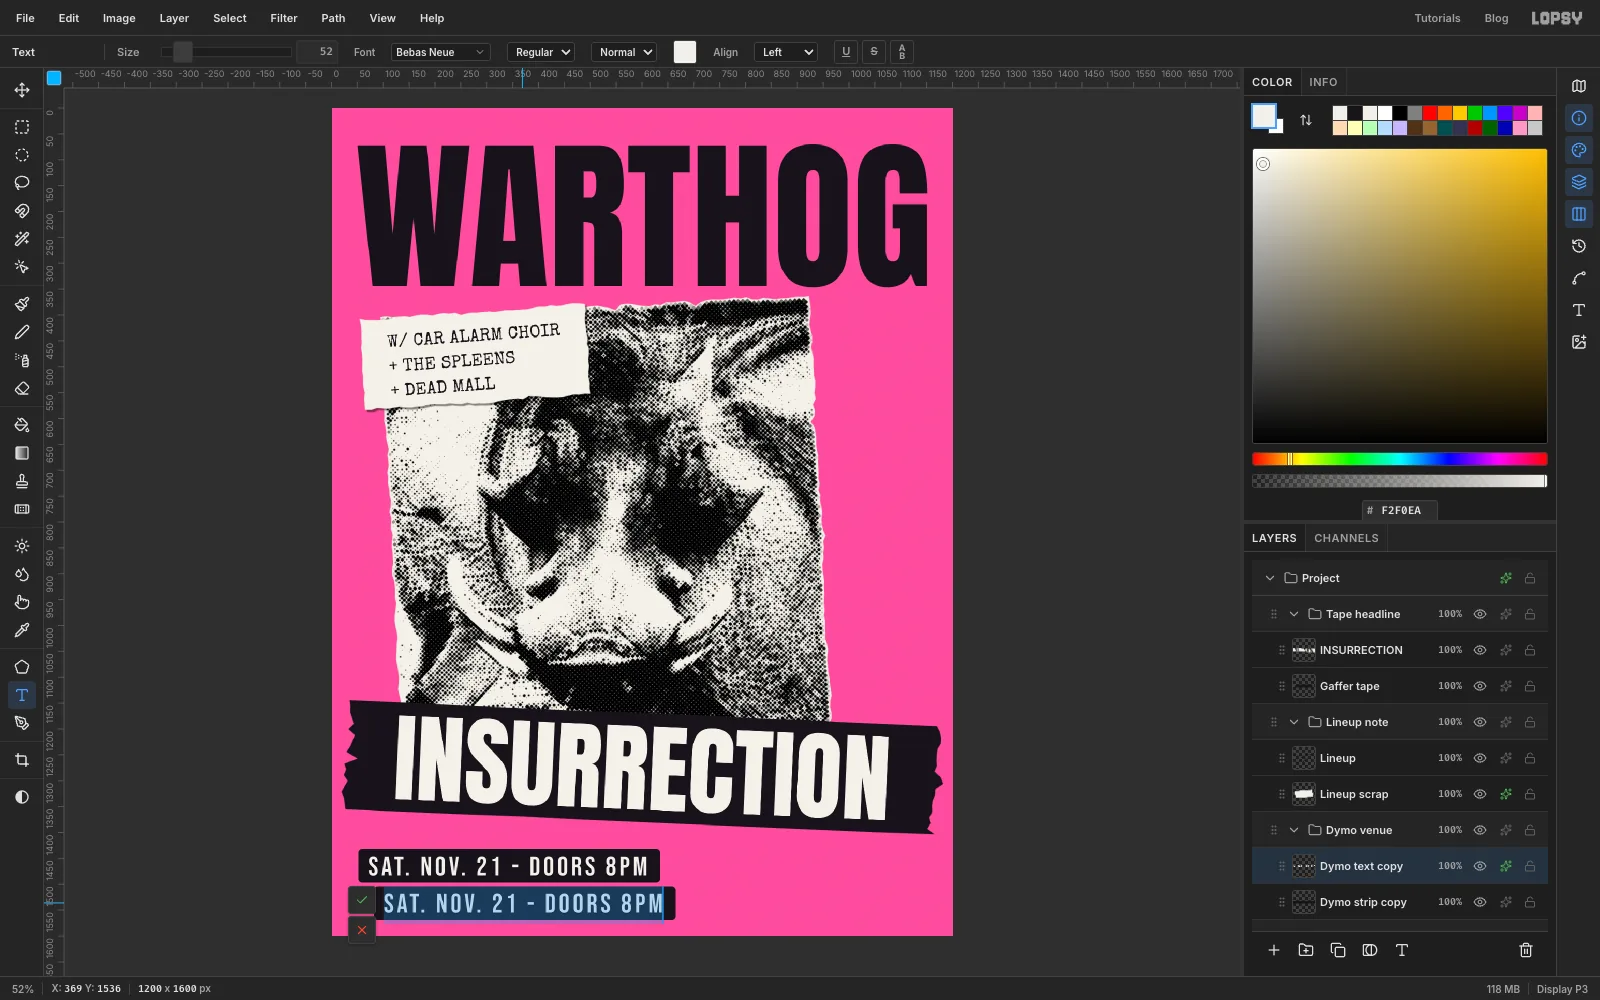
Pick the Text tool and click on the lower label's letters. The text opens for editing. Press Cmd+A to select all of its text and type RUST BUCKET - 2111 E. CANAL ST. over it. Press Tab.
Then, with the text layer still active, set Size to 54 in the options bar. The venue matters more than the date, so make it a little bigger.
-
Stretch the strip under the new text
The new text is longer than the old strip. Click Dymo strip copy, pick the Rectangular Marquee, and drag a box around the new text with the same padding as before. Choose Select → Shrink… 7 and Select → Grow… 7 again. Check the foreground is still toner black , fill, and deselect. The new strip covers the old one.
-
Tilt the date and stand the venue label on end
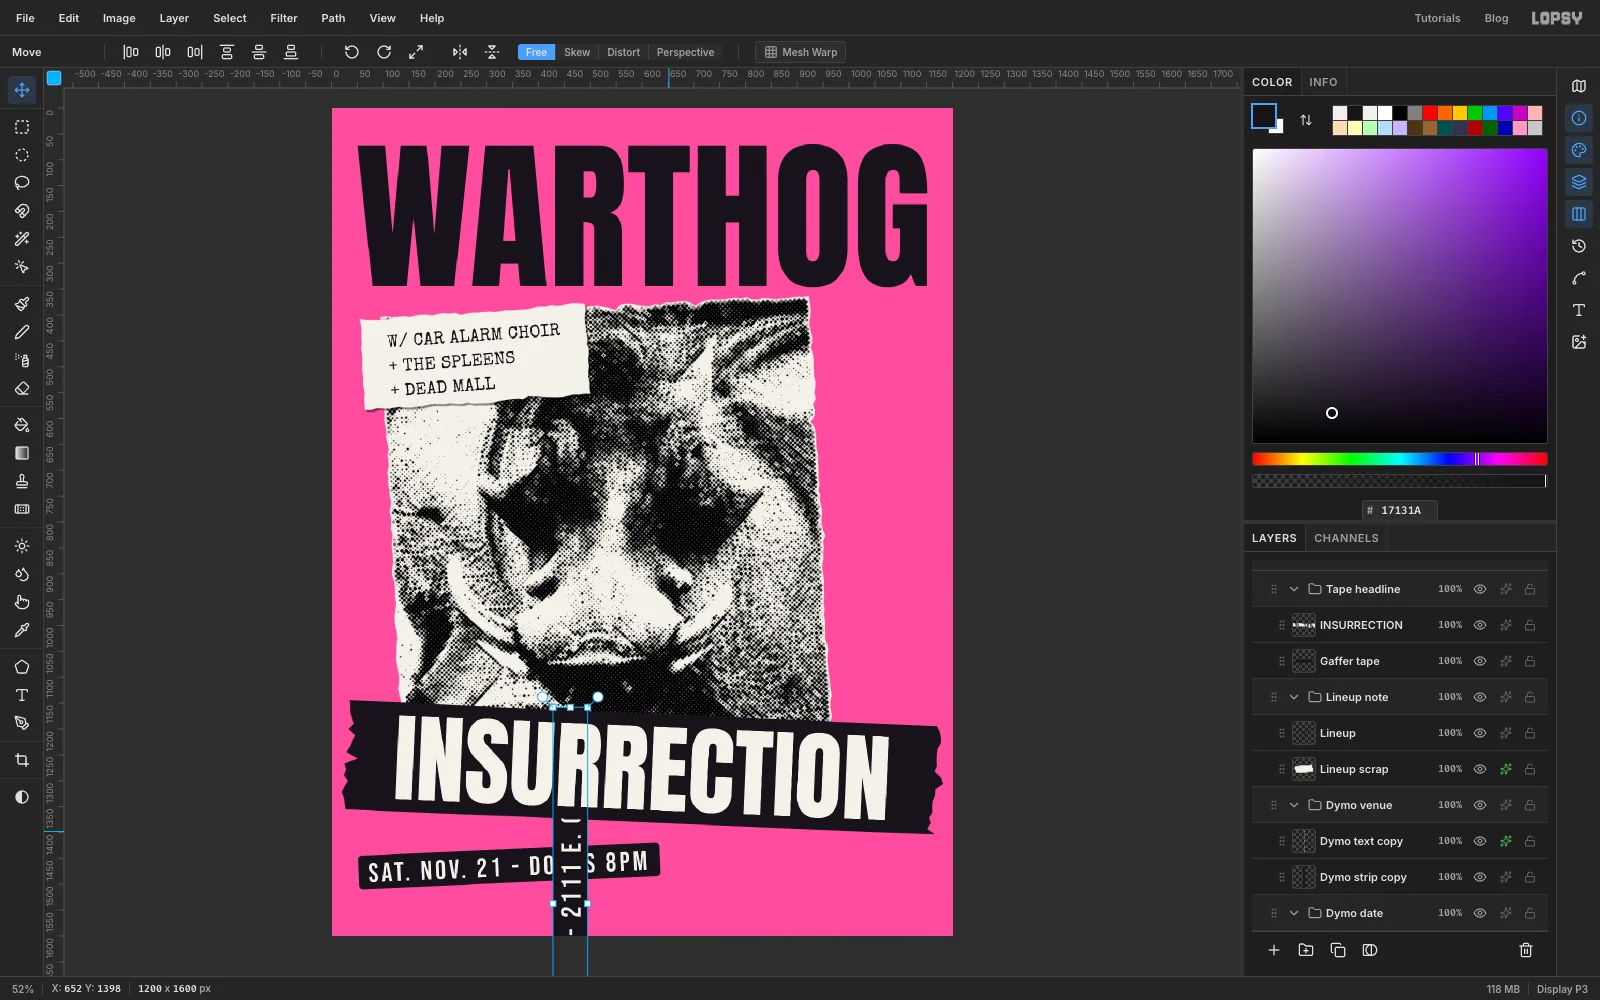
Pick the Move tool. Click Dymo date, press Cmd+D, and rotate it about 2.5° anticlockwise with a corner handle.
Click Dymo venue and press Cmd+D. In the Move tool's options bar, click Rotate 90° CCW. The whole group turns on end, live text and all, and now reads from bottom to top.
-
Move the venue label into the right margin
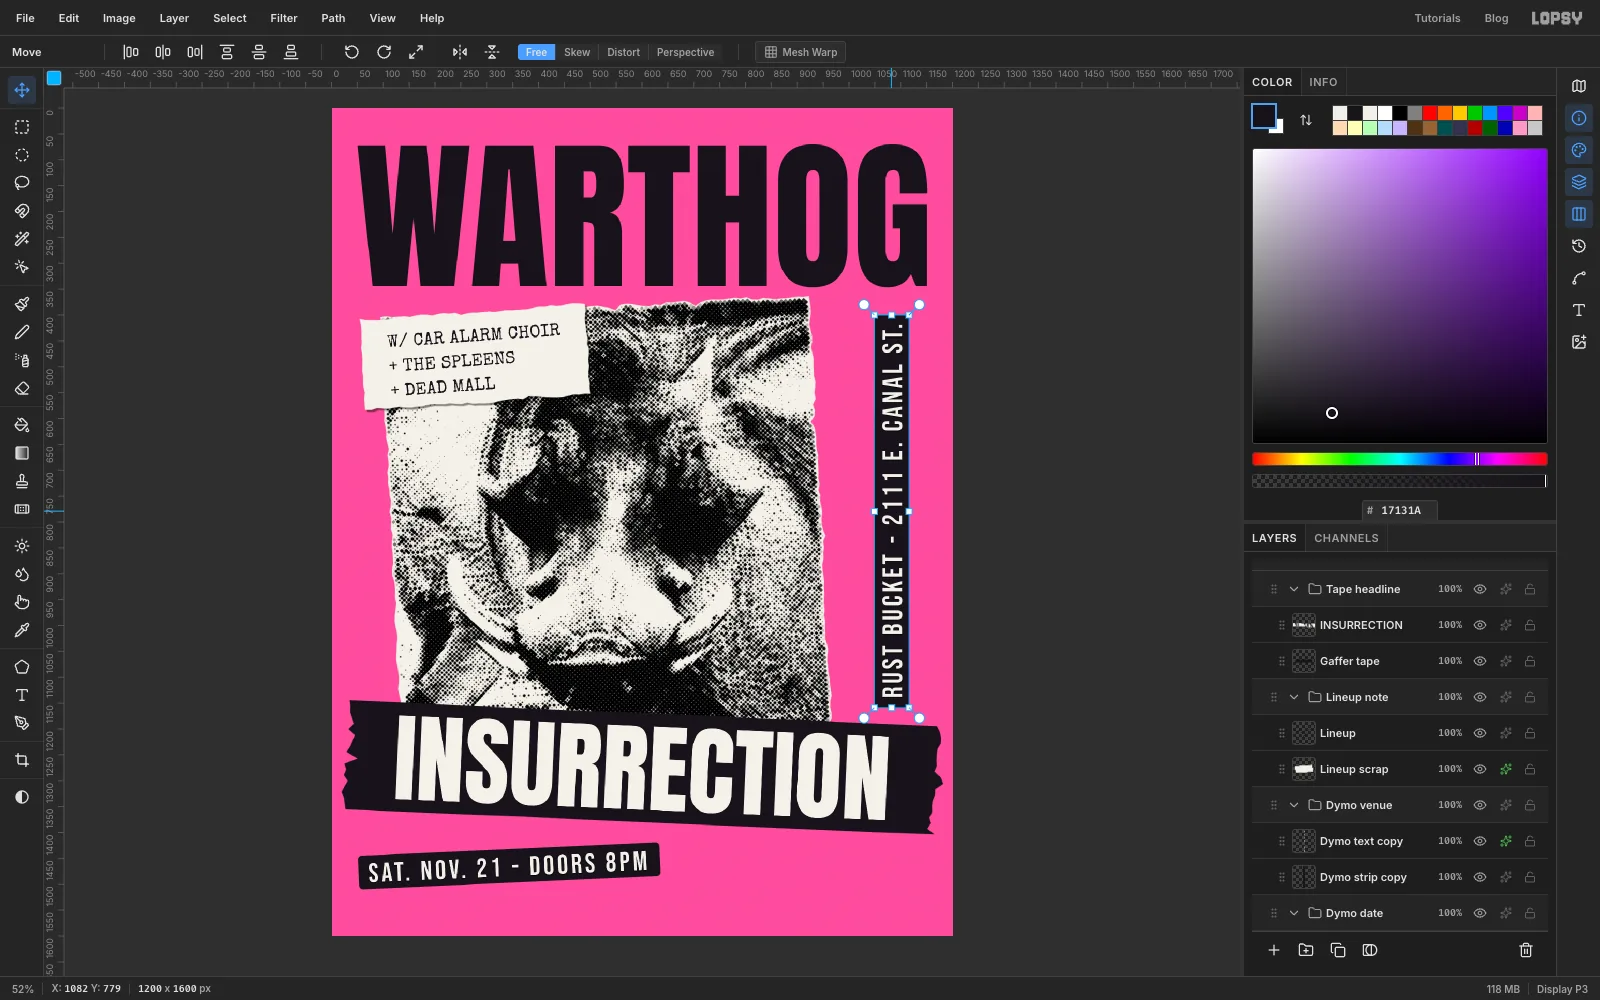
Drag the vertical label into the right margin, about halfway between the photo and the page edge (around x 1080). Put its top end about 50 px below WARTHOG (about y 400). Its bottom end should stop about 30 px above the INSURRECTION tape, with clear pink between them.
-
Hand-letter the price
Click the small arrow on the Tape headline row to collapse the group, then click the group. Add a layer called Marker circle. It lands above the group, not inside it.
Your last text used Letter spacing 6, and that setting carries over to new text. Open the Text panel and set Letter spacing back to 0.
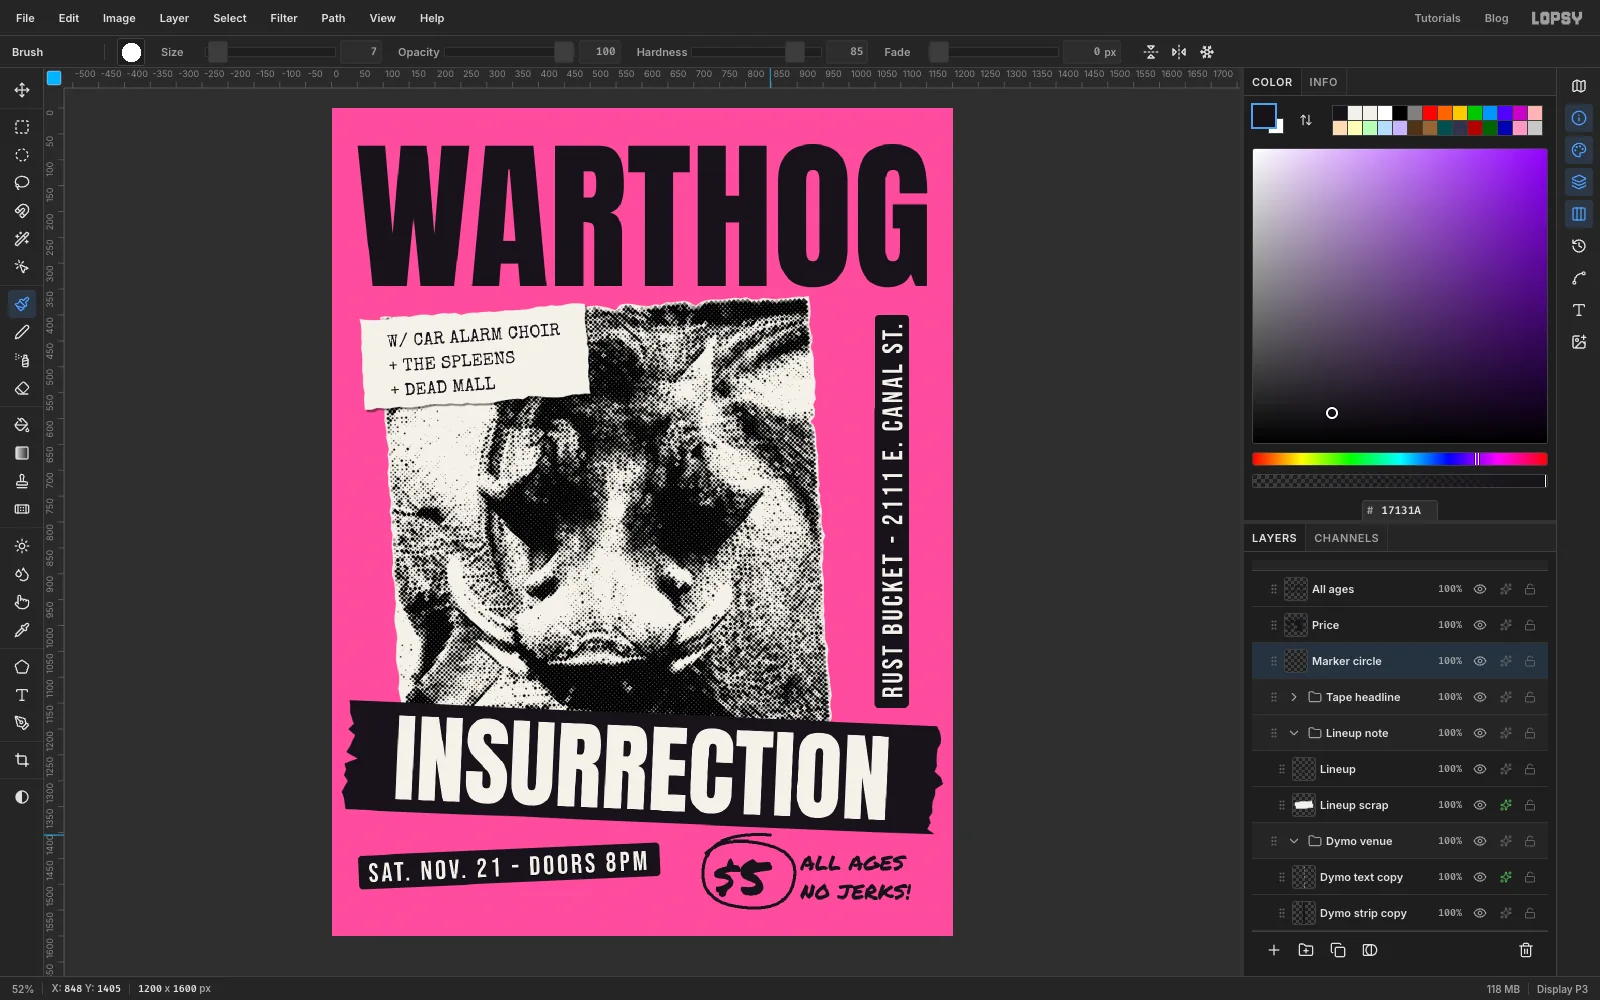
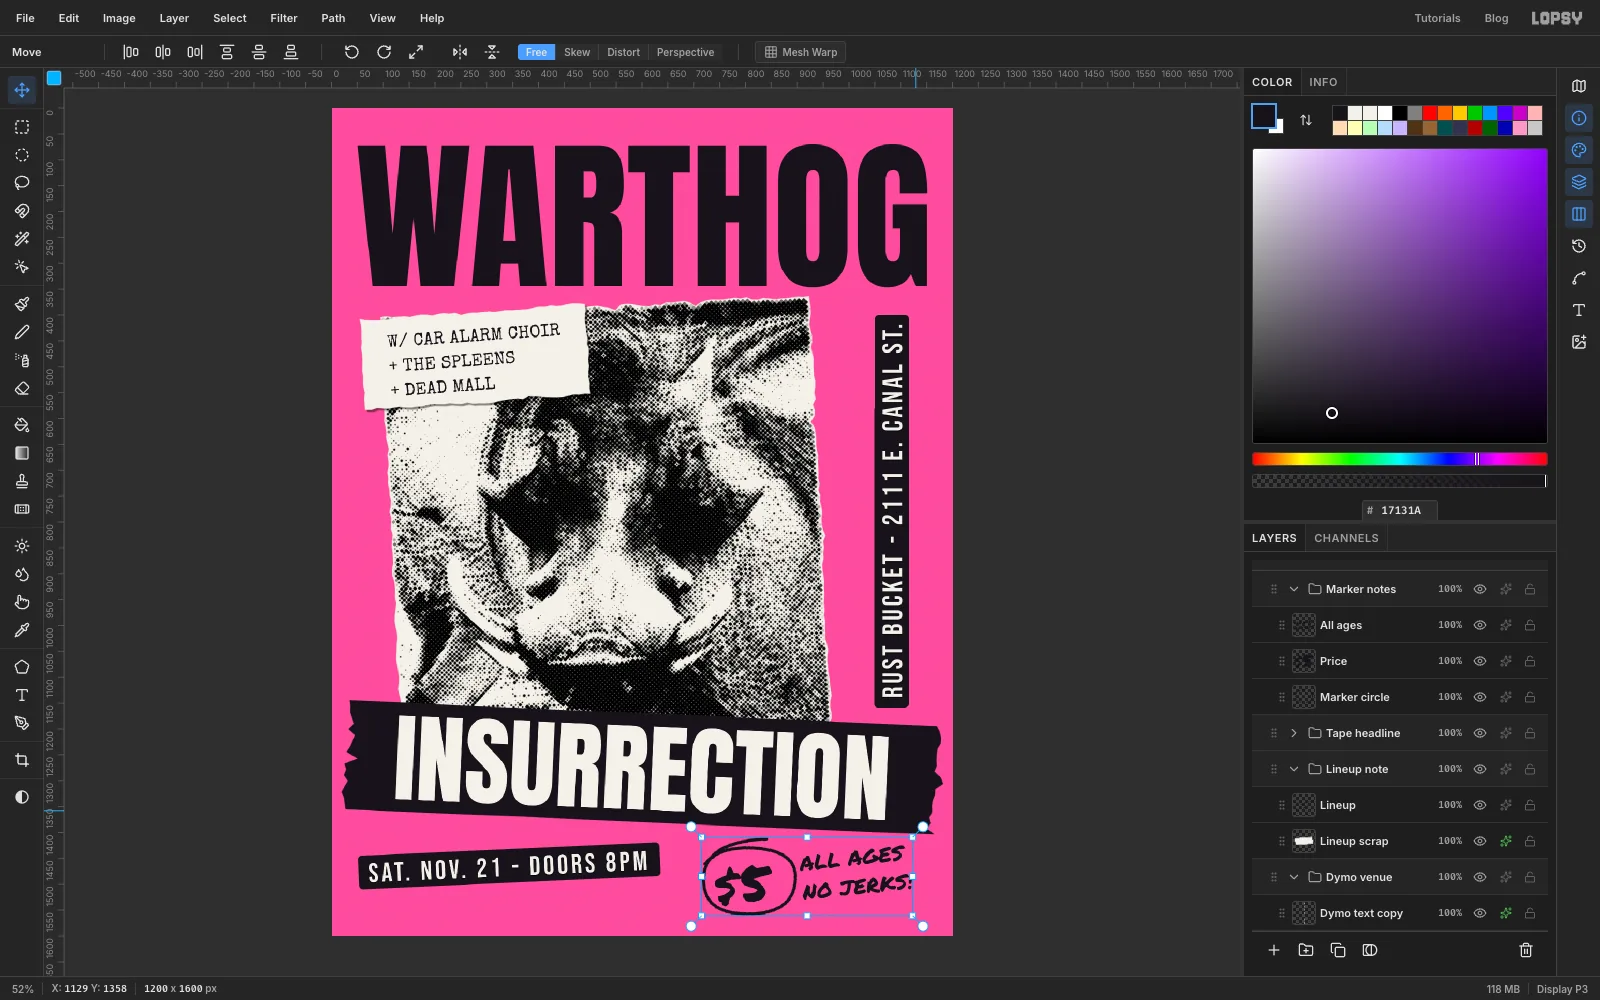
- Pick the Text tool, set Permanent Marker, Size 40, and toner black. Click on an empty part of the photo, away from the existing type. Type ALL AGES, press Return, type NO JERKS!, then press Tab and rename the layer All ages. Switch to the Move tool and drag it to the bottom right, about 80 px in from the right edge and level with the date label.
- Click Marker circle and pick the Text tool again. Set Size 100, click another empty spot on the photo and type $5. Press Tab and rename the layer Price. Switch to the Move tool and drag it to the left of ALL AGES, with about 55 px between them, centred on the two lines.
- Click Marker circle and pick the Brush. Open the brush settings and set Size 7, Hardness 85, Spacing 5. Check that Taper is 0, then close the panel. In one quick stroke, loop round the $5 one and a bit times. Start at the top left, keep the loop about 40 px clear of the letters, and let the end overshoot the start.
-
Group the marker notes and tilt them
Click Marker circle, Shift-click All ages, choose Layer → Group Layers, and rename the group Marker notes. Pick the Move tool, press Cmd+D and give it a slight anticlockwise turn with a corner handle, so the scrawl rises to the right like quick handwriting.
-
Tape down the venue label
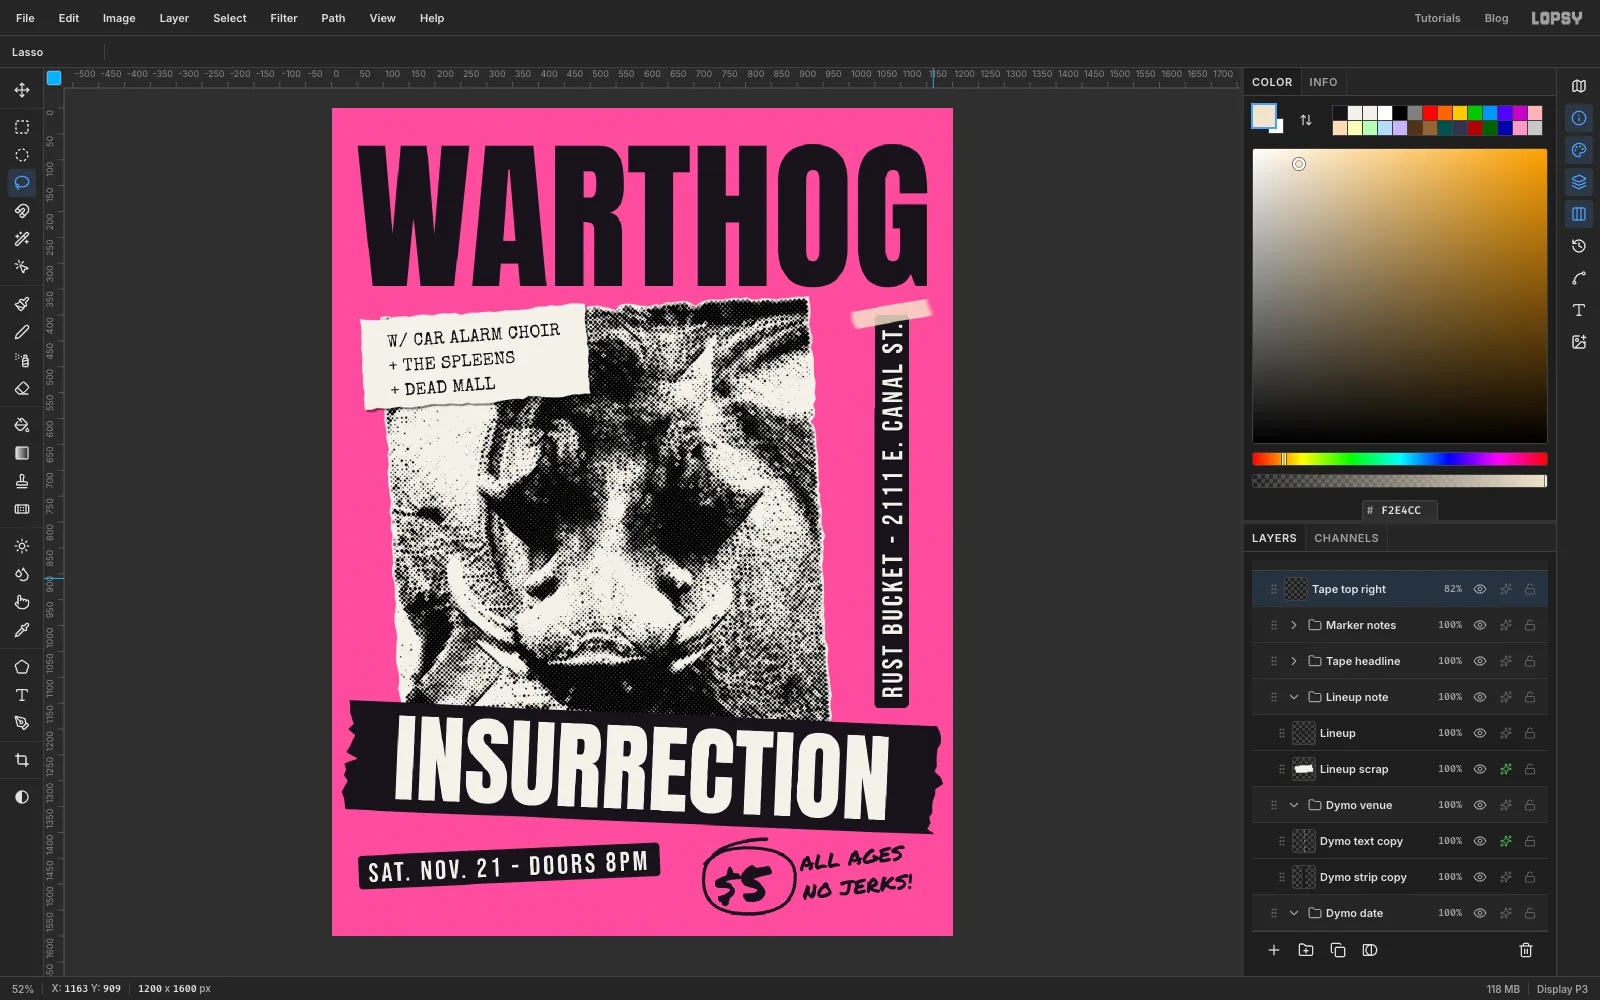
Collapse Marker notes, click it, and add a layer called Tape top right.
With the Lasso, draw a short strip about 150 × 34 px across the top end of the venue label. Tilt it about 10° so it rises to the right, and make both ends torn. The tape should cover only the label's black end, not the letters of "ST.".
Fill it with masking tape and deselect. Give it some paper fibre:
- Filter → Add Noise… at Amount 16, Mono.
- Filter → Motion Blur… with Angle 350 and Distance 10, so the noise streaks along the tape.
- Set the layer's opacity to 82% so the label shows through a little.
-
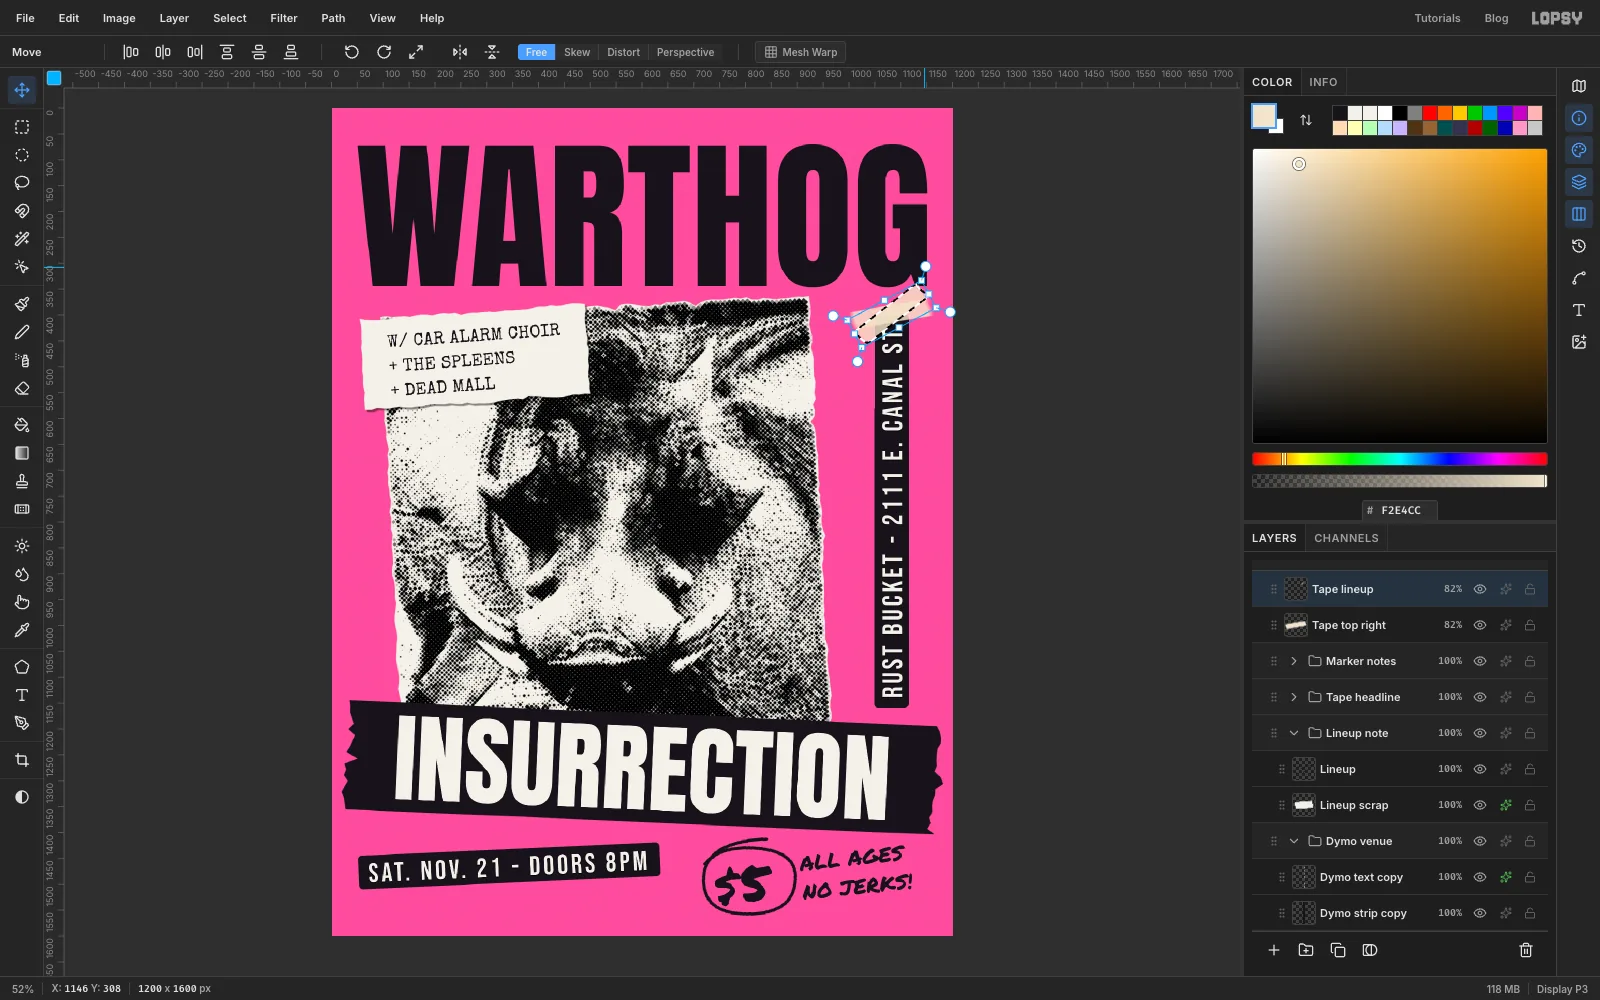
Copy the tape and turn the copy
Choose Layer → Duplicate Layer and rename the copy Tape lineup. Cmd-click its thumbnail to select its shape. With the Move tool, drag a rotate handle to turn it about 28° anticlockwise.
-
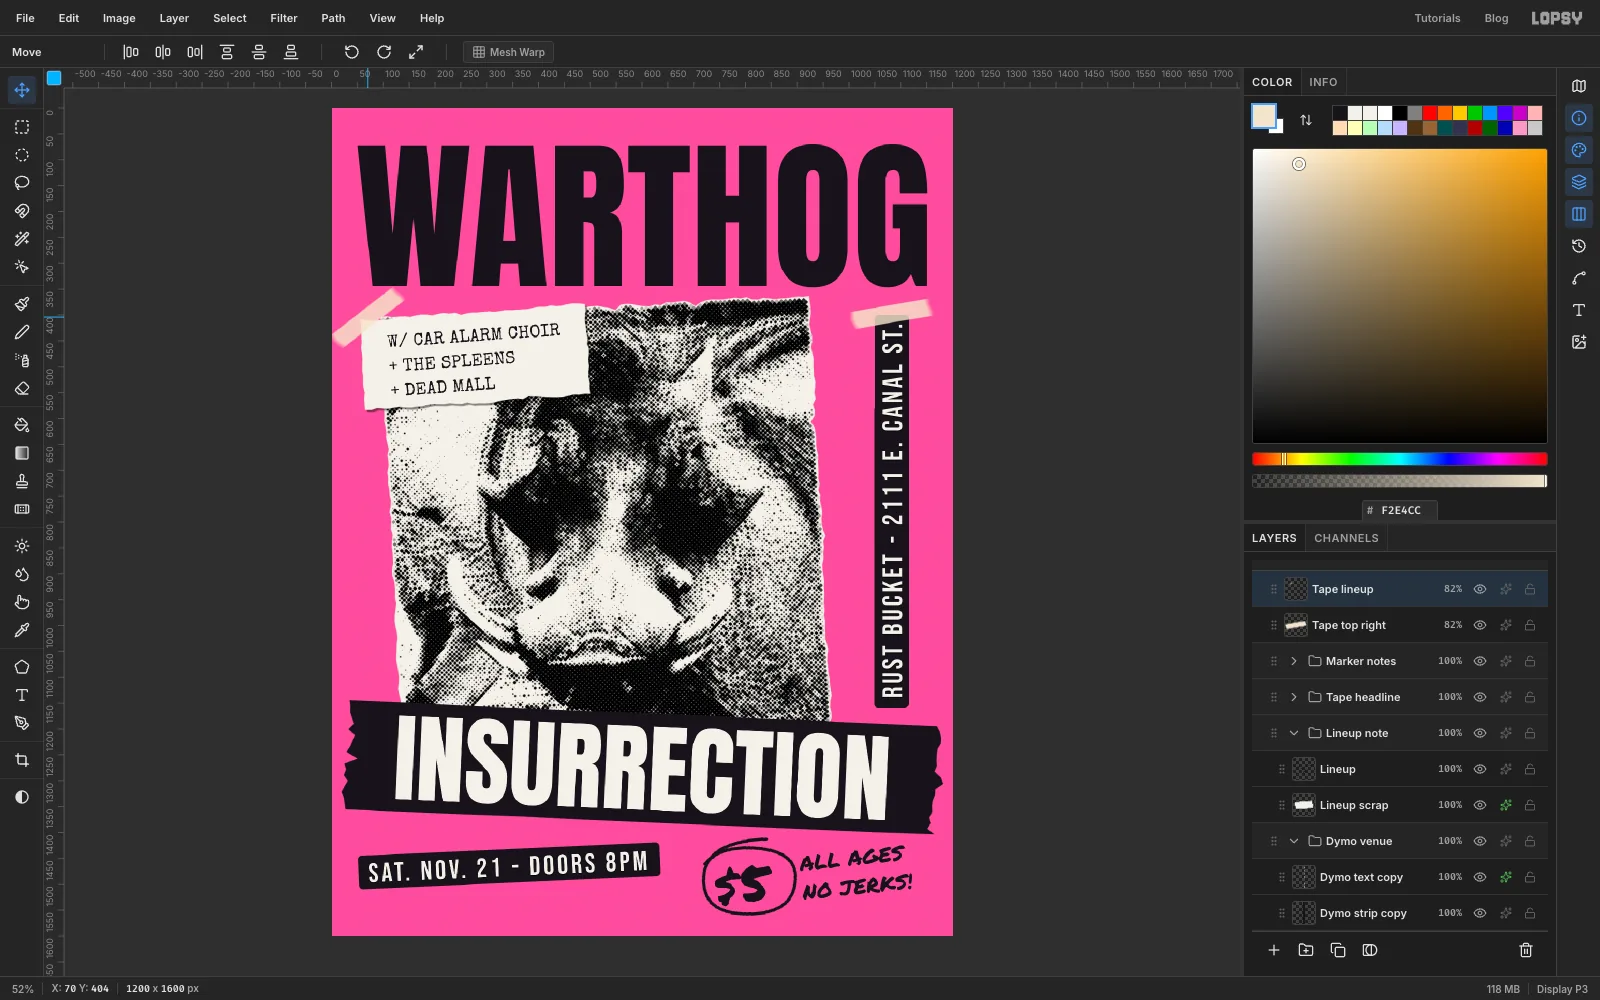
Stick the copy on the lineup slip
Drag the rotated tape over the top-left corner of the lineup slip. Centre it on the corner so it crosses from the pink onto the paper. Press Cmd+D.
-
Make toner specks
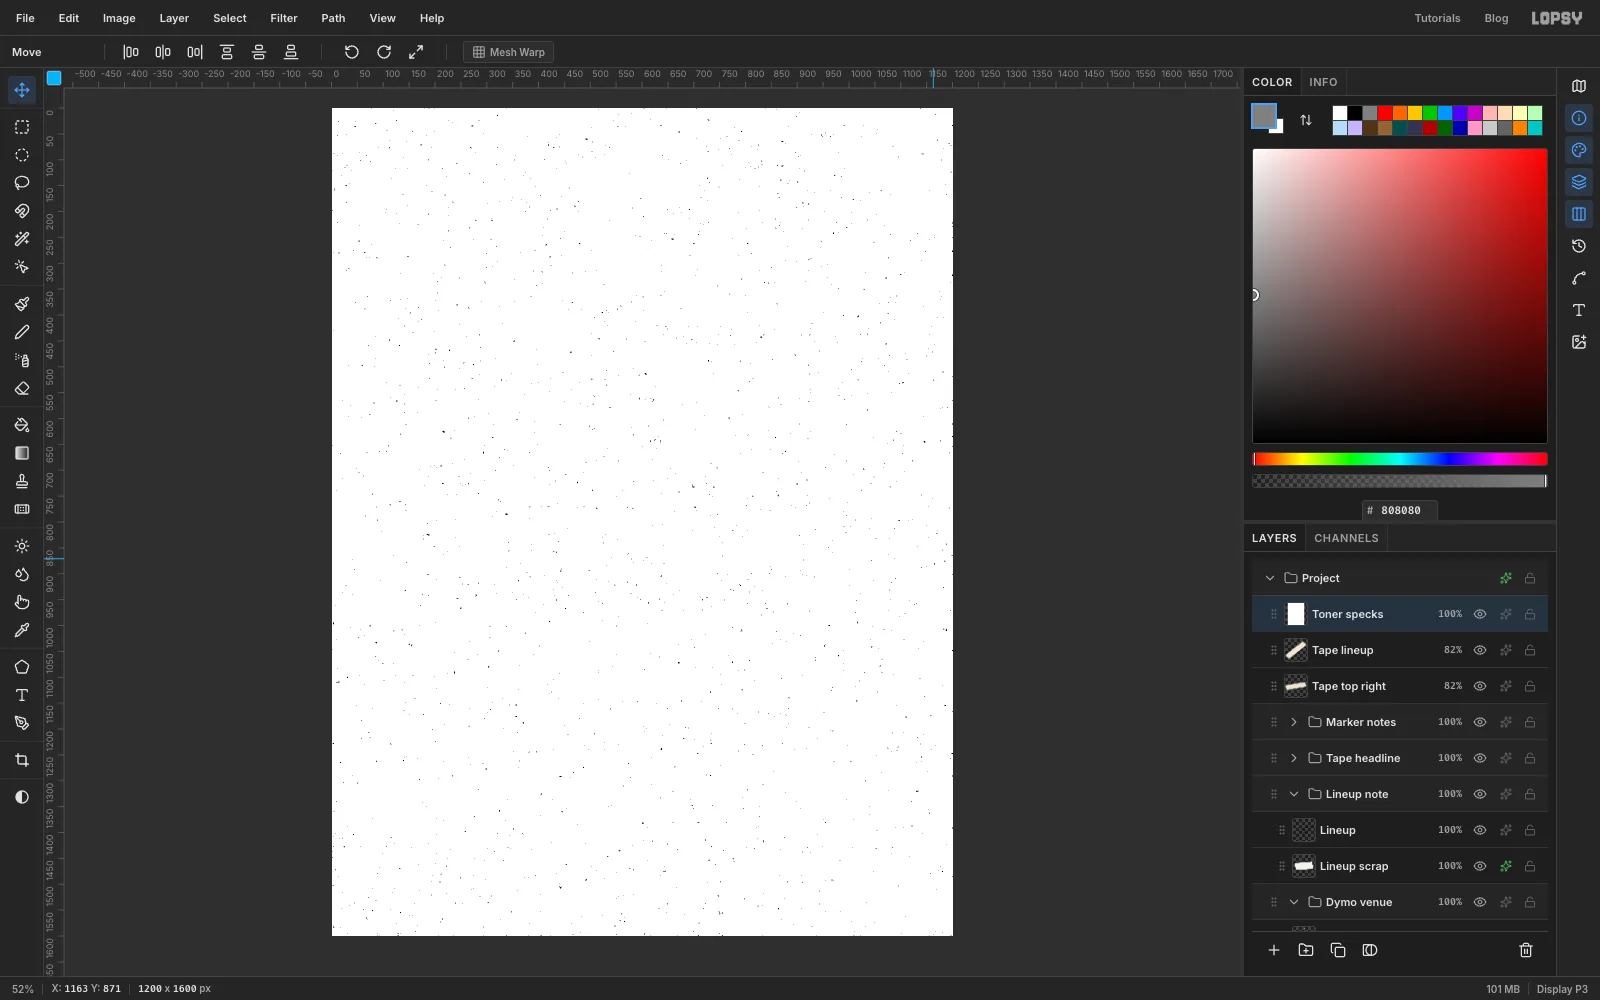
Click Tape lineup and add a layer called Toner specks. Fill it with grain grey , then run:
- Filter → Add Noise… at Amount 100, Mono.
- Filter → Gaussian Blur… at Radius 3. The blur clumps the noise together.
- Filter → Threshold… at Level 105. Only the darkest clumps survive, as small black specks on white.
Start from mid-grey, not white. Add Noise only moves each pixel about 50 levels up or down, so noise on white would never get dark enough to print.
-
Knock out the white and wear the specks away
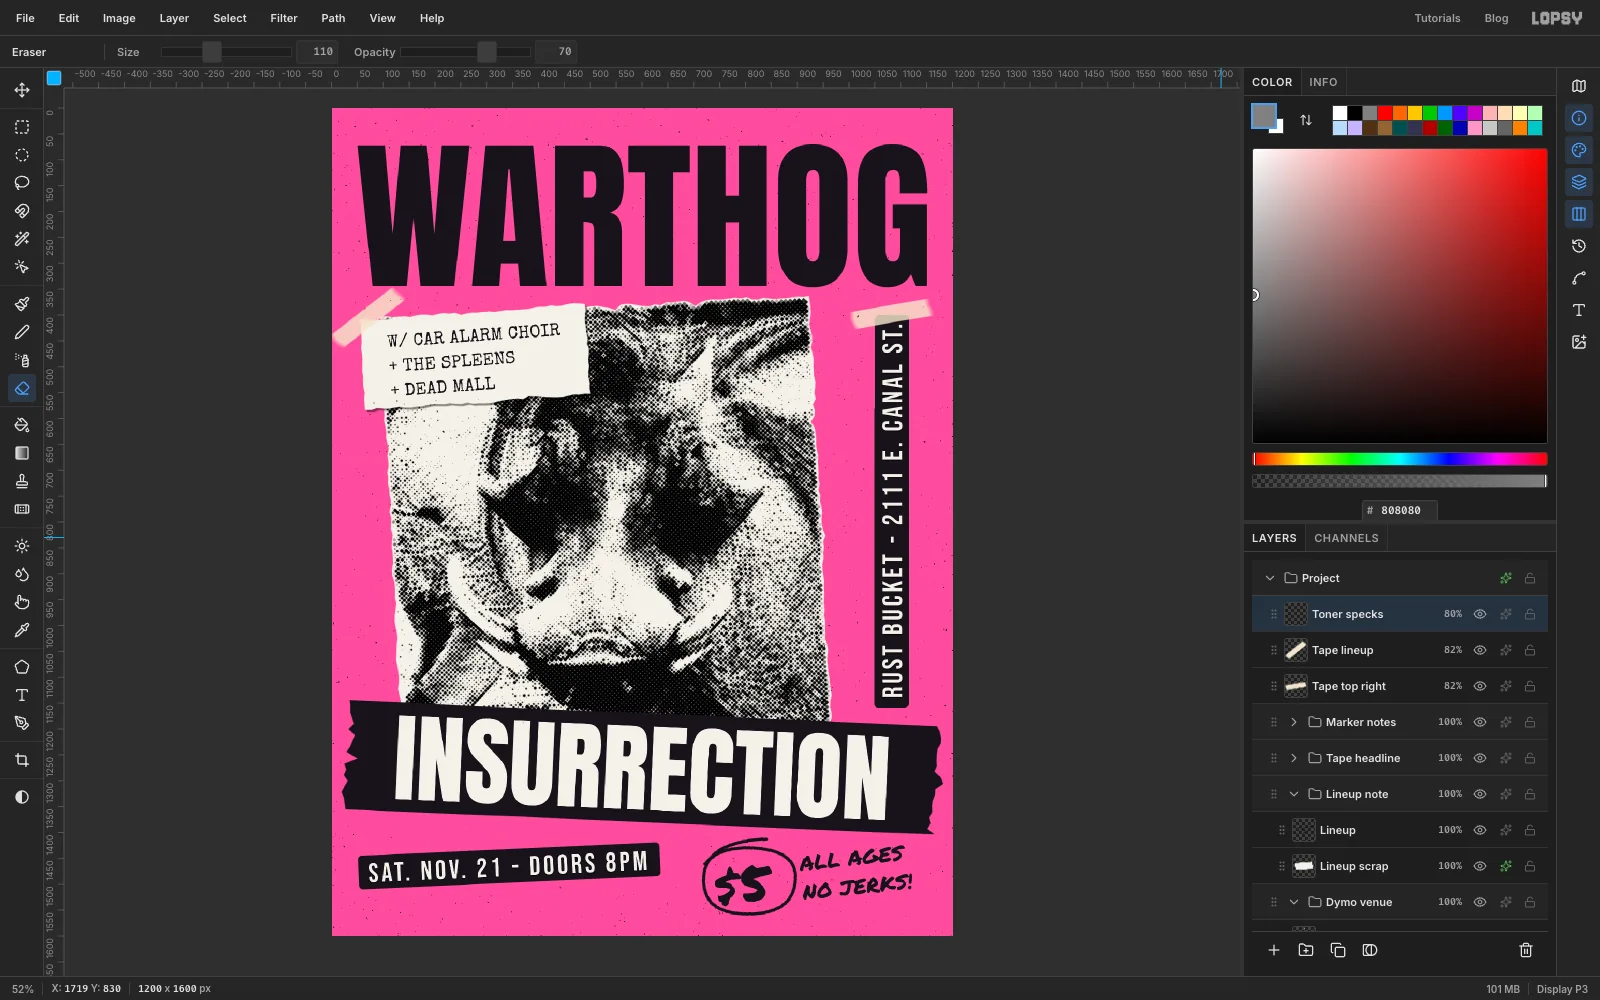
Pick the Magic Wand, set Tolerance 10 and untick Contiguous. Click a white pixel on Toner specks, press Delete, and deselect. Tick Contiguous again.
Specks everywhere look like a filter. A real copy is dirtier in some places than others, and the type should stay readable. Pick the Eraser at Opacity 70 and wipe some areas clean:
- at Size 420, one wavy stroke down the middle of the photo
- at Size 260, one stroke along the INSURRECTION tape
- at Size 180, a stroke across the lineup slip
- at Size 110, a stroke along the date label and one up the venue label
Set Toner specks to Multiply at 80%.
-
Add a copier-lid shadow and a fold
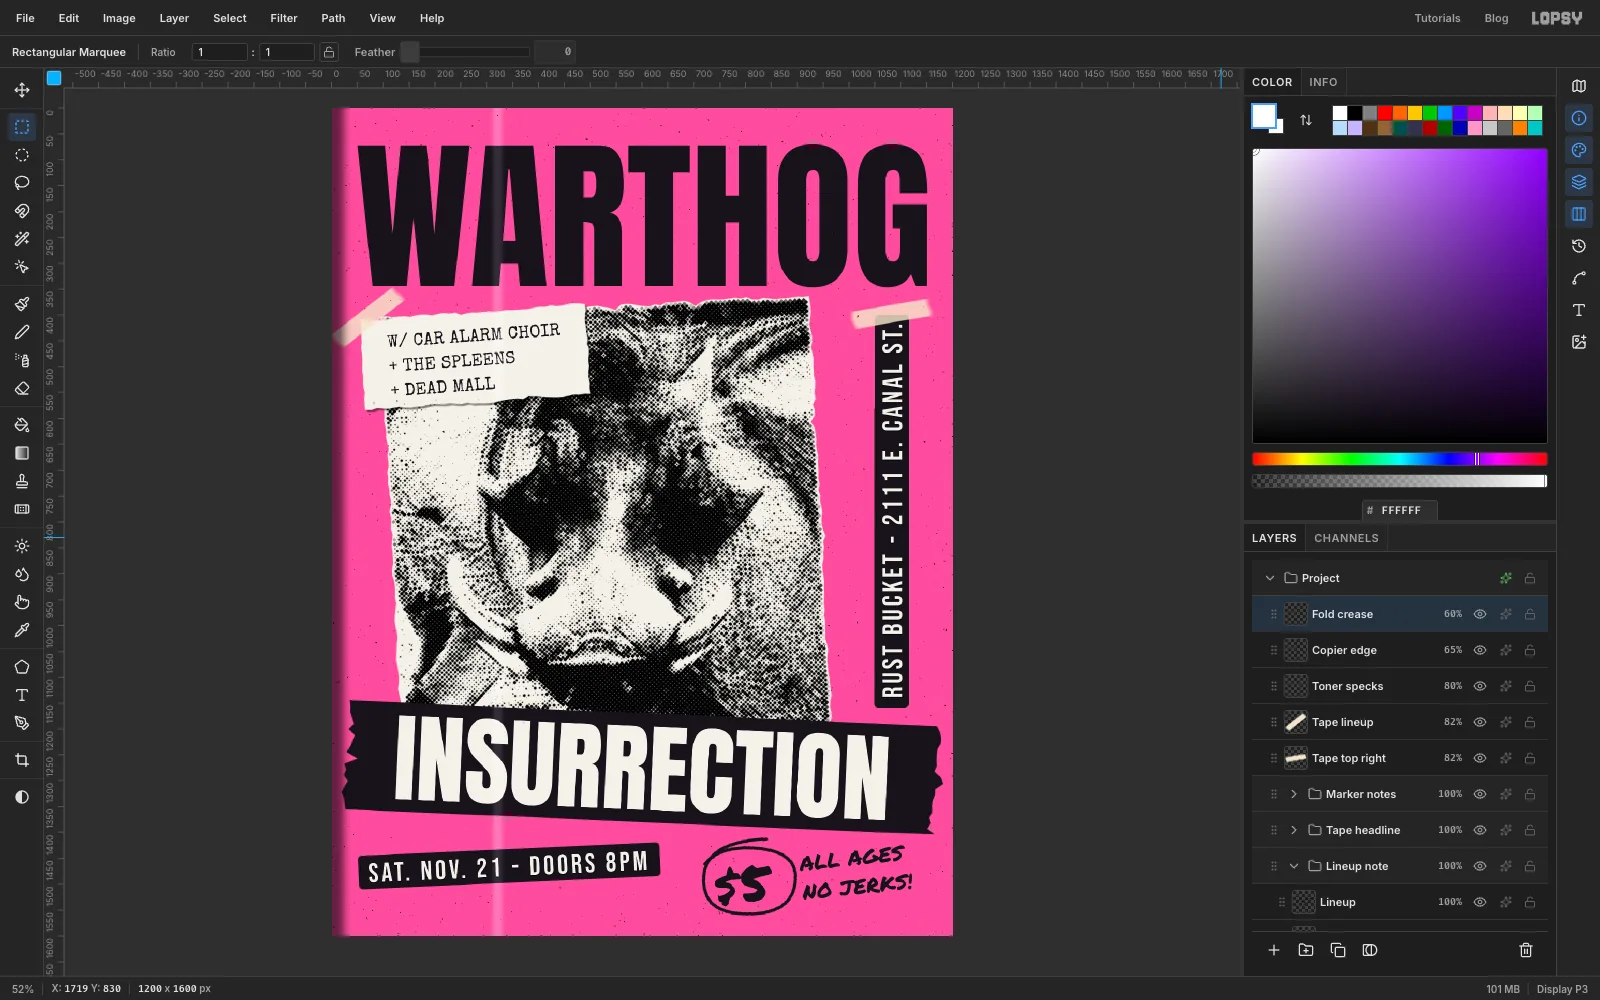
Copier edge. Add a layer called Copier edge. Pick the Rectangular Marquee and click once on the canvas without dragging to open its exact-size dialog. Set From to −40, −40 and To to 24, 1640, then press Enter. The strip starts off the canvas so its feathered edge only fades inwards. Choose Select → Feather… at 16. The foreground is still grain grey from the toner layer, so set it back to toner black , then fill and deselect. Set the layer to Multiply at 65%. This is the shadow you get when the copier lid doesn't quite close.
Fold. Flyers get folded into pockets. Add a layer called Fold crease. Use the exact-size dialog again for a strip from 312, −40 to 330, 1640. Feather it by 7, fill it with white , and deselect. Set it to Soft Light at 60%. It lightens the paper along the fold without leaving a hard line.
-
Emboss the label letters
Real label tape has raised letters. For each label:
- Click the label's text layer (Dymo text, then Dymo text copy) and choose Layer → Merge Down. The text and its shadow are flattened onto the strip.
- Click the strip and choose Layer → Duplicate Layer. Rename the copy with relief on the end, such as Dymo strip relief.
- Run Filter → Emboss… with Angle 135 and Strength 30. Higher strengths push the relief further out, and above about 40 it looks like a doubled image, not raised plastic.
- Set the copy to Hard Light at 85%.
Hard Light leaves flat areas alone and keeps only the light and dark edges, so each letter and the strip's rim catch the light.
Save with File → Save Project, then export with File → Quick Export PNG.