Make a Punk Ransom-Note Movie Poster
Cut out a public-domain portrait, xerox it into a halftone, give it a mohawk and build a ransom-note title, safety pin and stickers in Lopsy.
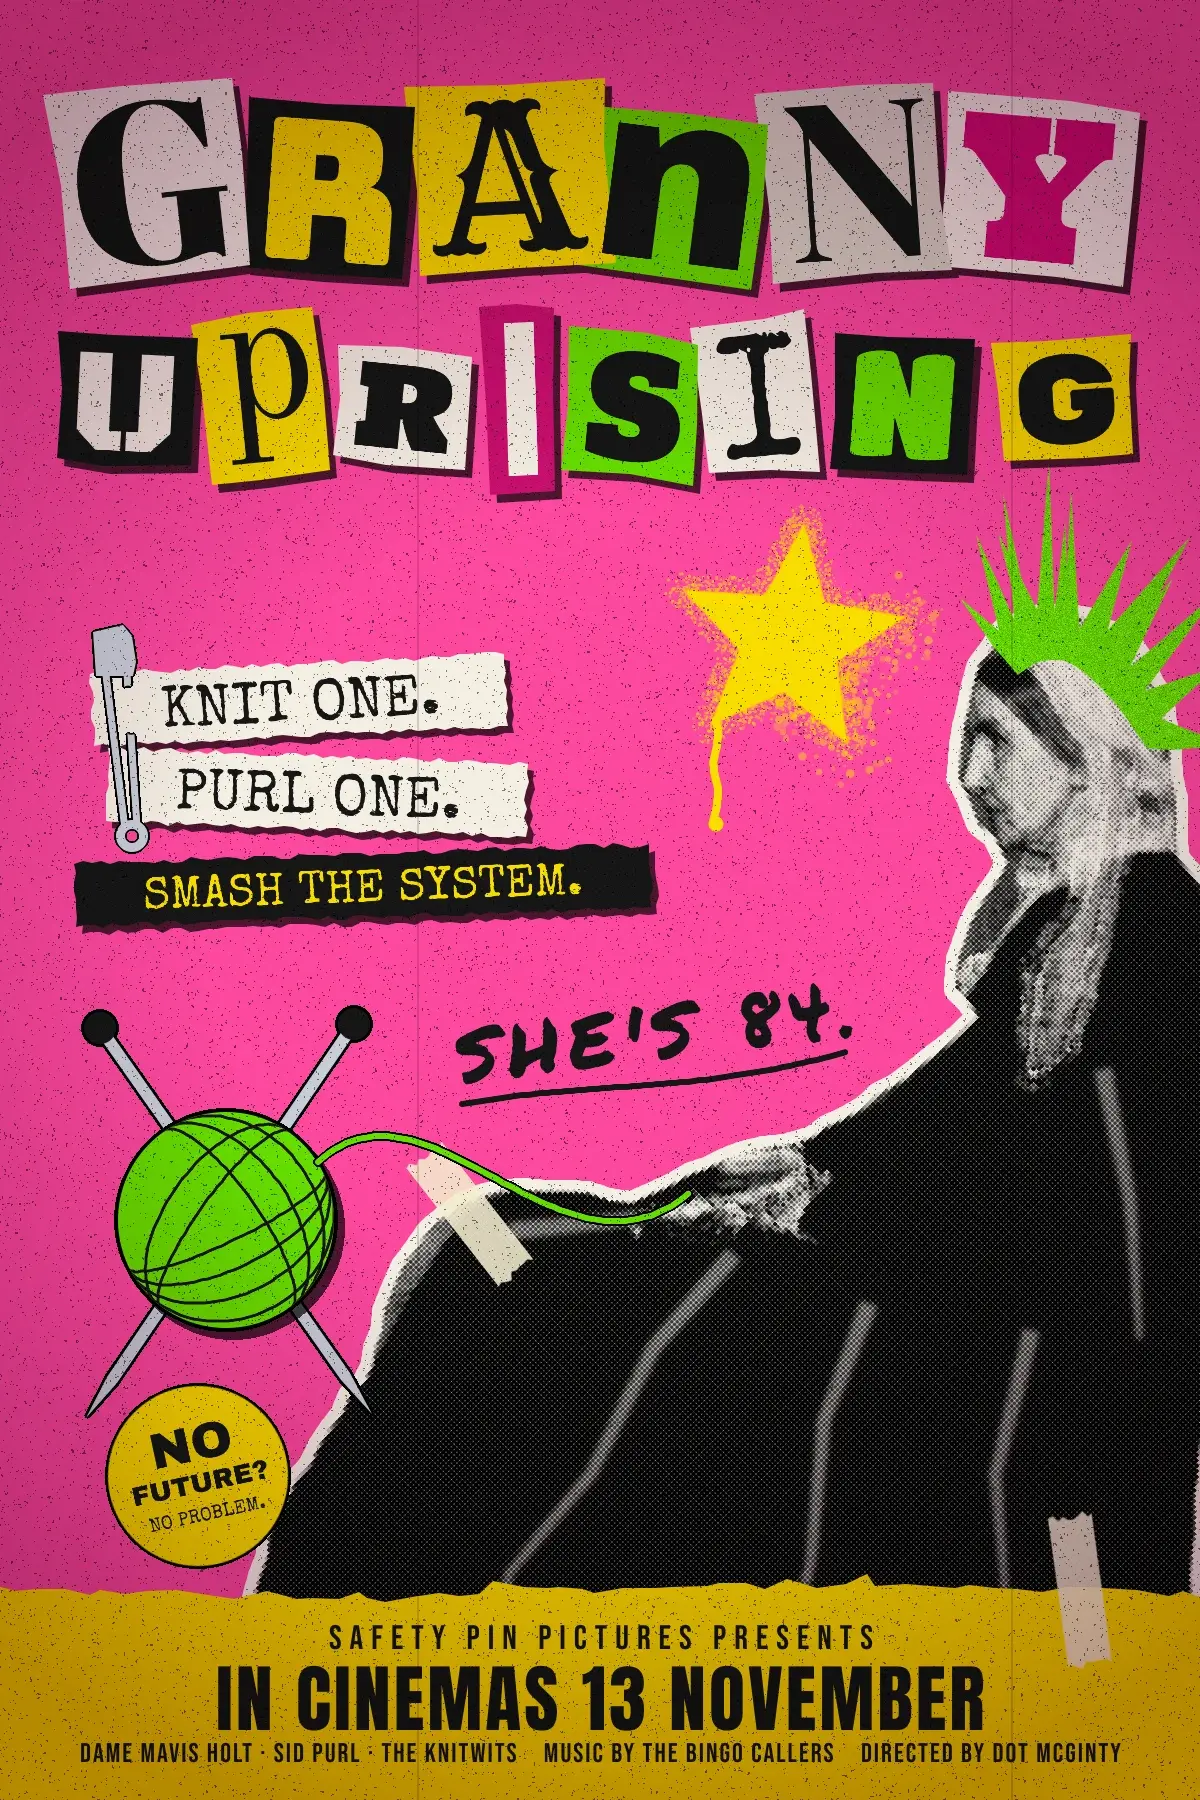
Late-1970s punk posters were made with whatever was lying around: a photocopier, a pair of scissors, a glue stick and a stack of magazines to cut letters out of. Jamie Reid's sleeves for the Sex Pistols are the famous ones. Hot pink and acid yellow, a cut-out photo pushed through the copier until it turned into dots, and a title spelled out in ransom-note letters, each from a different magazine.
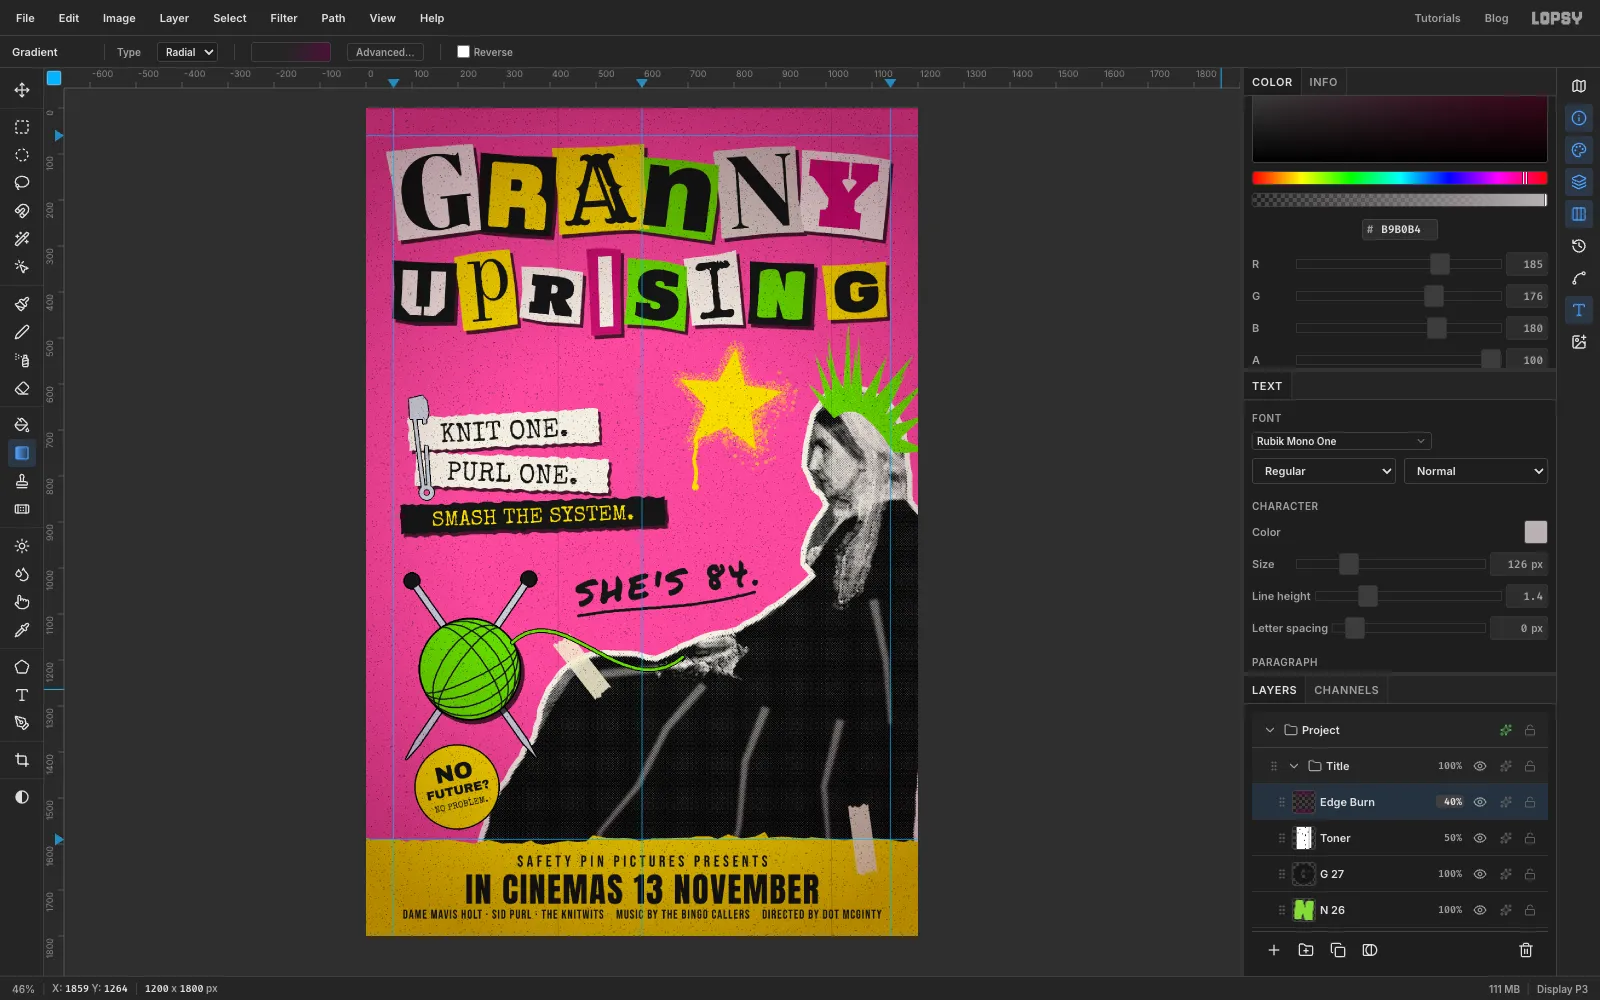
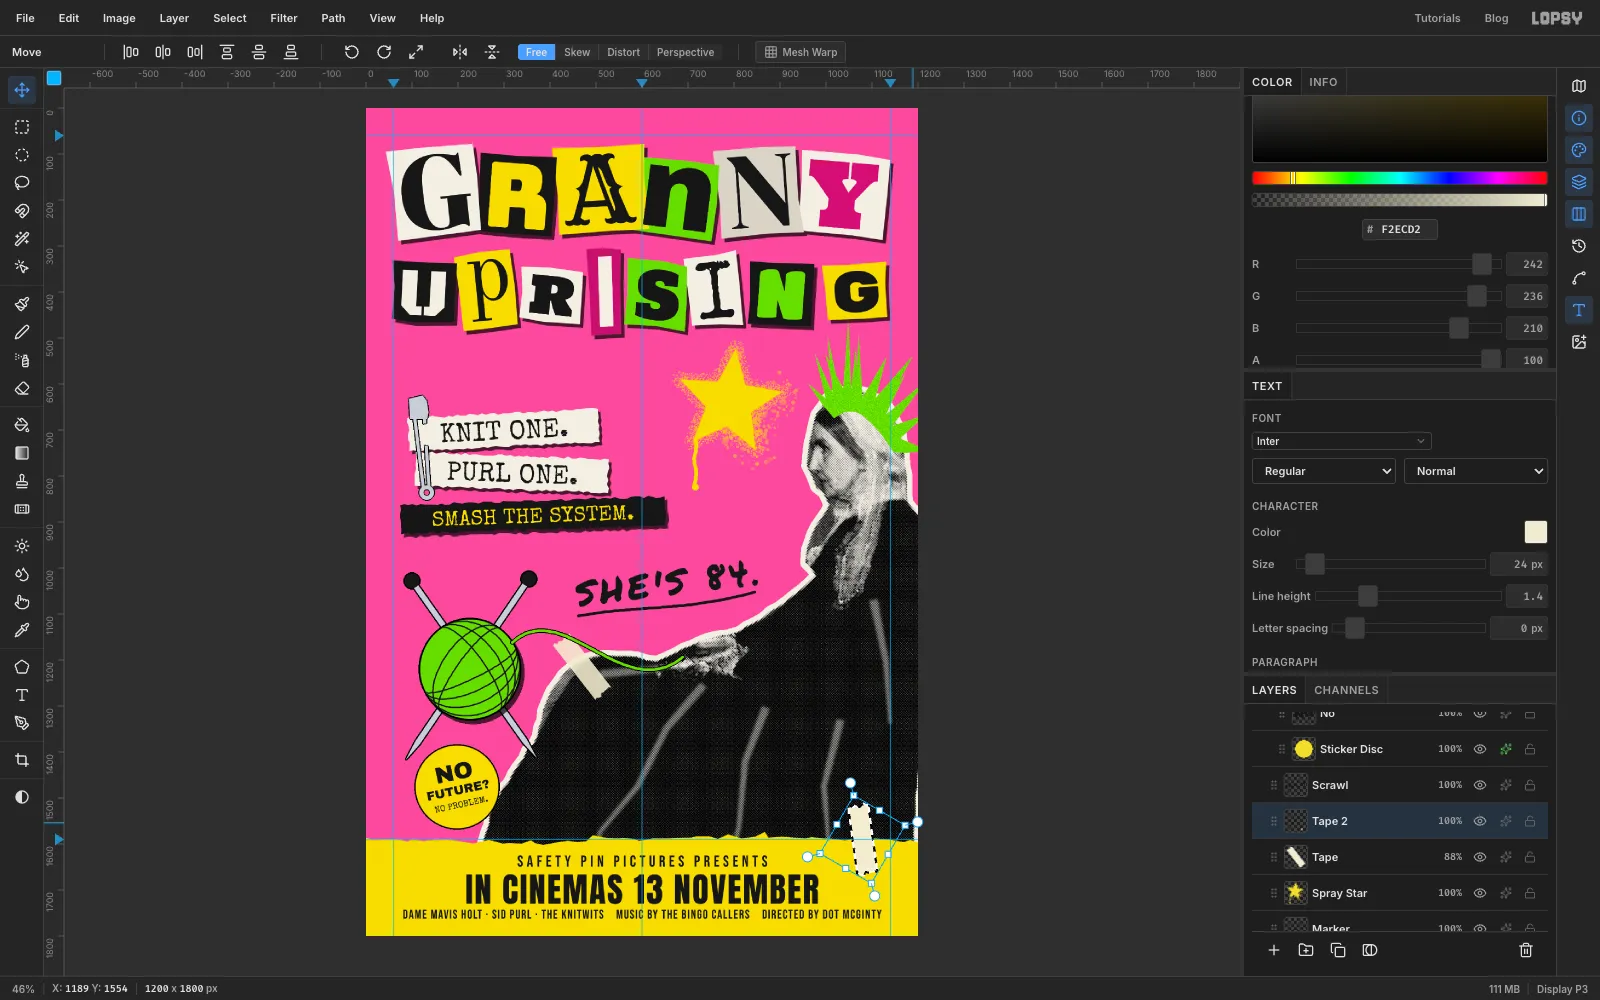
In this tutorial you'll make one for Granny Uprising, an imaginary comedy about a pensioner who has had enough. The star is the most famous mother in art: Whistler's 1871 Arrangement in Grey and Black No. 1. You'll photocopy her and give her a mohawk. The poster is 1200 × 1800 px and has:
- a cut-out of the portrait, turned into a black-and-white halftone with a white scissor margin
- a green liberty-spike mohawk
- a two-row ransom-note title made from fourteen tilted text layers on paper scraps
- typewriter tagline strips held by a safety pin that goes through the paper
- a yarn ball with crossed knitting needles, a round sticker, a sprayed star and a marker scrawl
- a billing block on a torn yellow band, masking tape, toner speckle and burnt edges
You'll need one image. On Wikimedia Commons, search for Whistlers Mother high res.jpg and download the 1920 px version. The painting is in the public domain, so you can use it freely.
Along the way you'll use the Lasso (with Shift to add), the marquees, Select → Grow and Feather, the Brush, Pencil, Eraser and Spray tools, the Gradient tool, live text that you rotate and re-edit, groups, copy and paste, and filters including Desaturate, Brightness/Contrast, Halftone, Add Noise, Gaussian Blur and Threshold.
The palette is the classic punk trio, plus photocopy black and white:
-
Hot pink
-
magenta scrap
-
magenta ink
-
Acid yellow
-
lime
-
Ink
-
copy paper
-
newsprint grey
-
Pin silver
-
masking tape
-
copier streak
-
edge burn
-
white
-
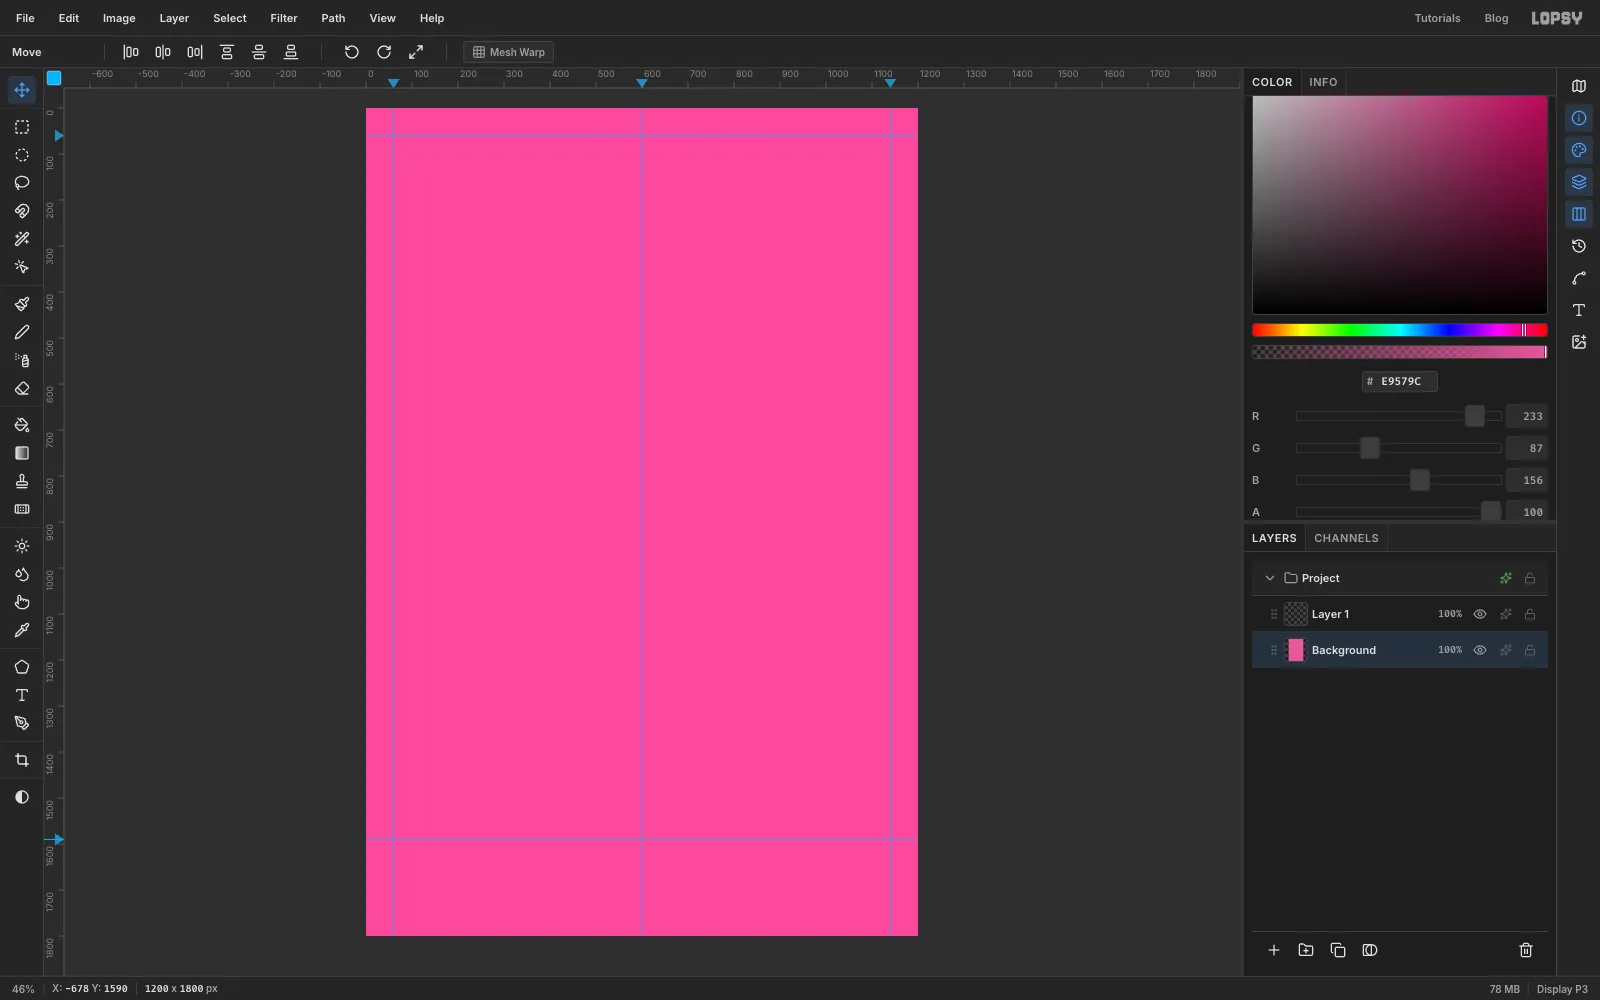
Set up a pink poster with guides
Choose File → New and make a 1200 × 1800 px document with a white background.
Select the Background layer, set the foreground colour to and choose Edit → Fill.
A new document also comes with an empty Layer 1 on top. Leave it there. You'll use it as a handle for adding groups at the top level of the stack, and later you'll paint a marker line on it.
Now add guides. Click the top ruler at 60, 600 and 1140 for the side margins and the centre line. Then click the left ruler at 60 for the top margin and at 1590, which is where the yellow billing band will start.
-
Tear a yellow band along the bottom
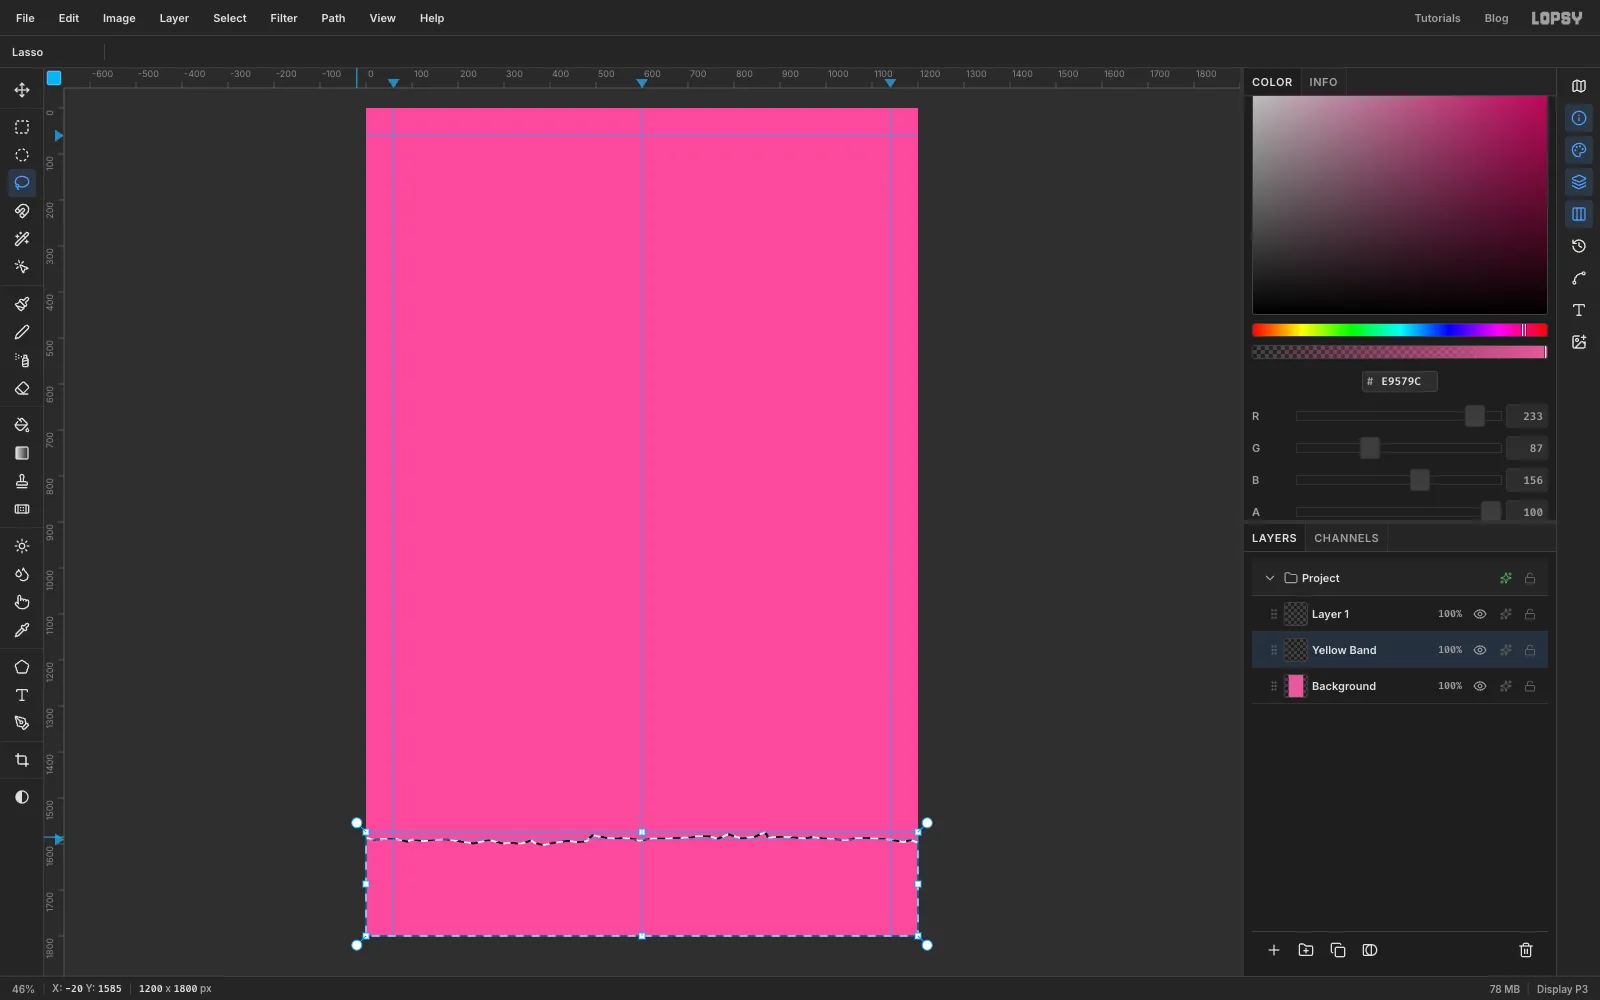
Click Add Layer and name the new layer Yellow Band. Pick the Lasso.
Start just off the left edge of the canvas, at about the height of the bottom guide. Drag across to the right edge in a wobbly line. Take uneven bites: mostly small ones a few pixels deep, plus the odd deeper tear. A torn sheet never has a regular zig-zag. Carry on down past the bottom of the canvas, back along underneath it, and up to where you started.
Set the foreground to , choose Edit → Fill and press Cmd+D.
-
Drop in the portrait
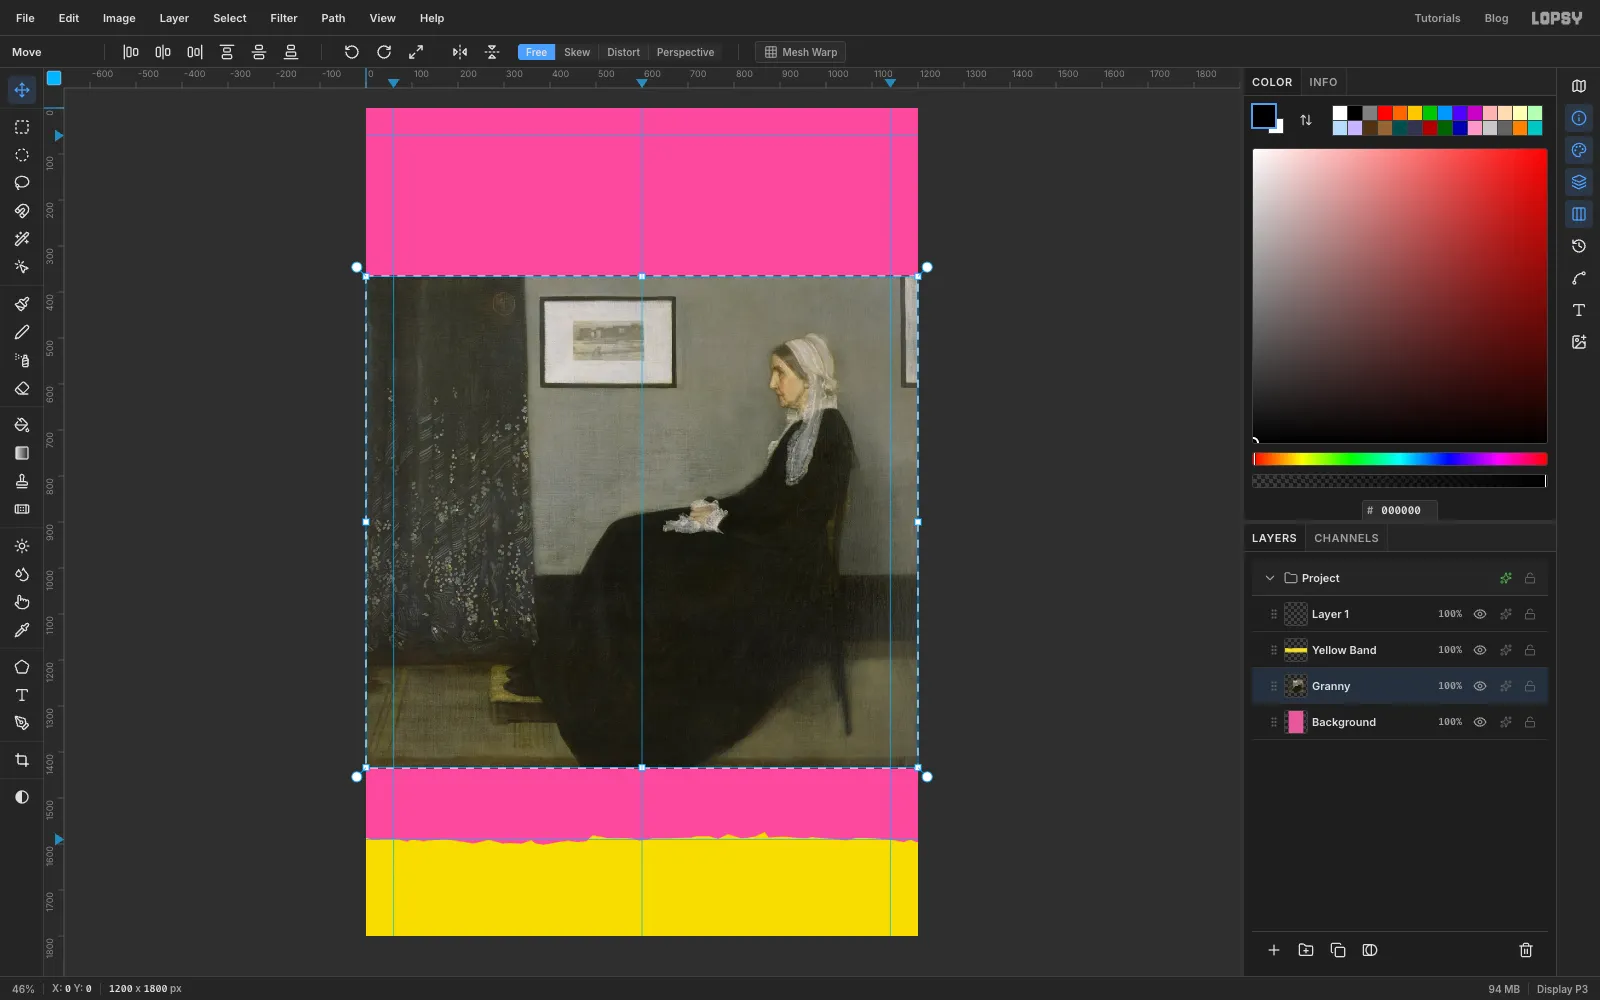
Click the Background layer so the photo lands directly above it, underneath the yellow band. Drag the JPG from your downloads folder onto the canvas.
Lopsy puts it on its own layer, scaled to fit the poster's width. Double-click the new layer's name and rename it Granny.
-
Cut her out with the Lasso
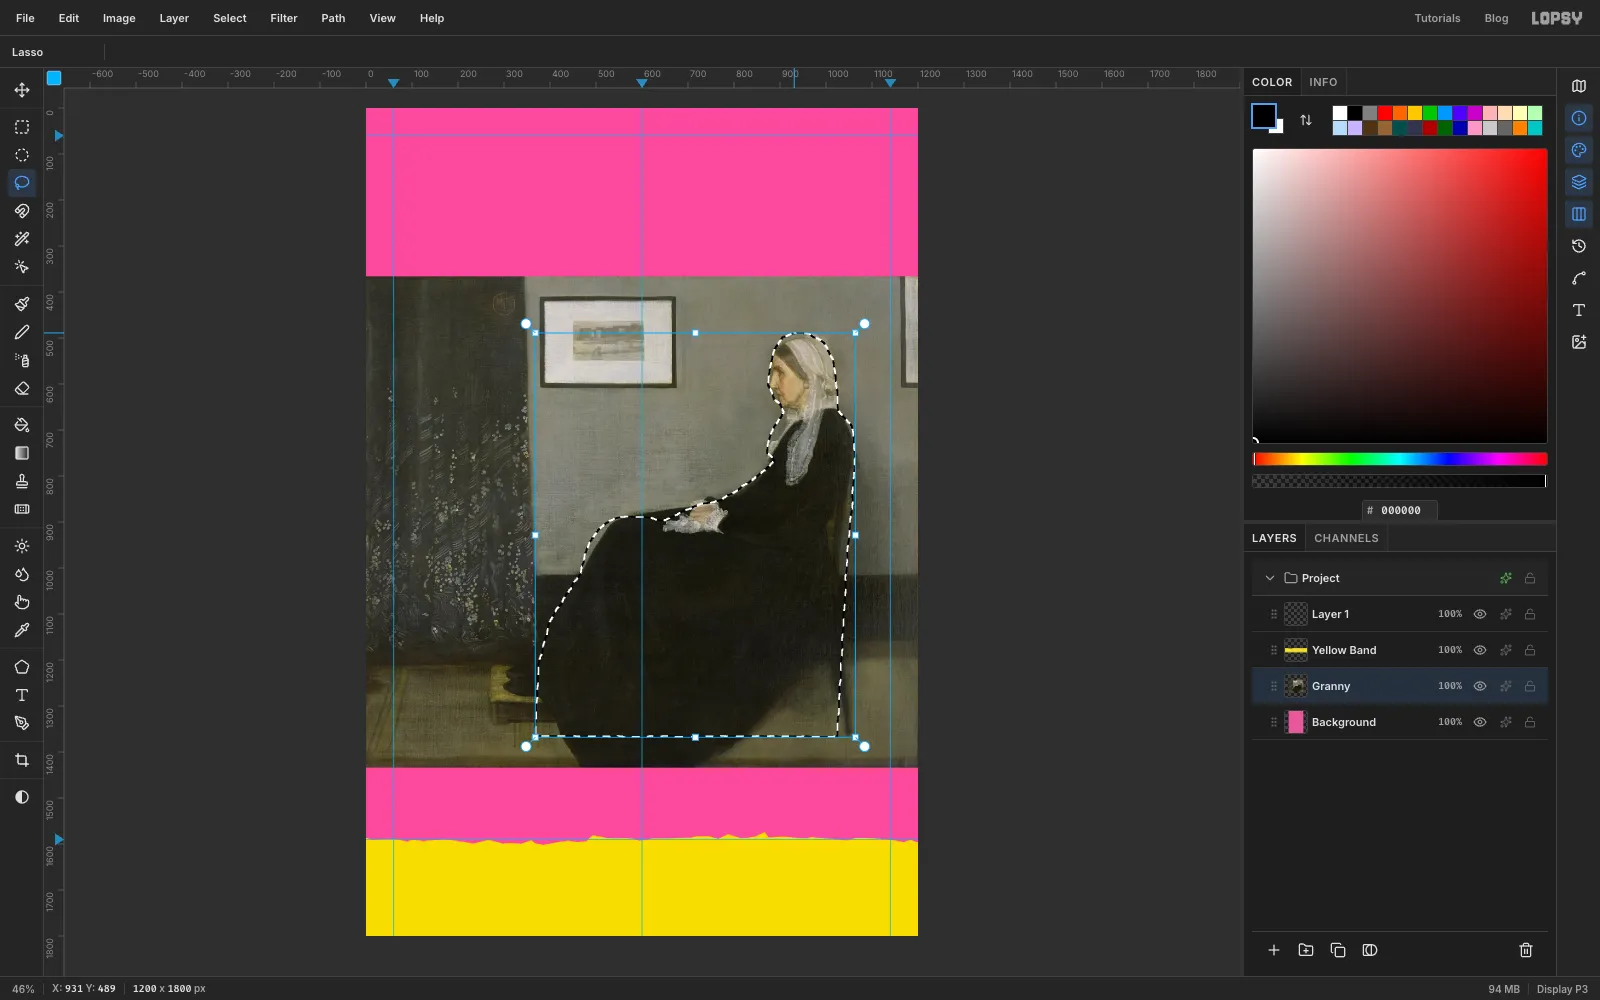
Punk collage is scissor work, so don't aim for a perfect mask. Pick the Lasso and trace around the sitter. Go over the top of her bonnet and down her back. Follow the chair down to the floor, then come back along the bottom of the painting. Run up the front of her skirt, along the top of her lap to her hands, and over the lace at her chest and chin. Finish round her face and back up to the bonnet.
A slightly shaky hand is fine. It reads as scissors.
-
Delete the wall and curtain
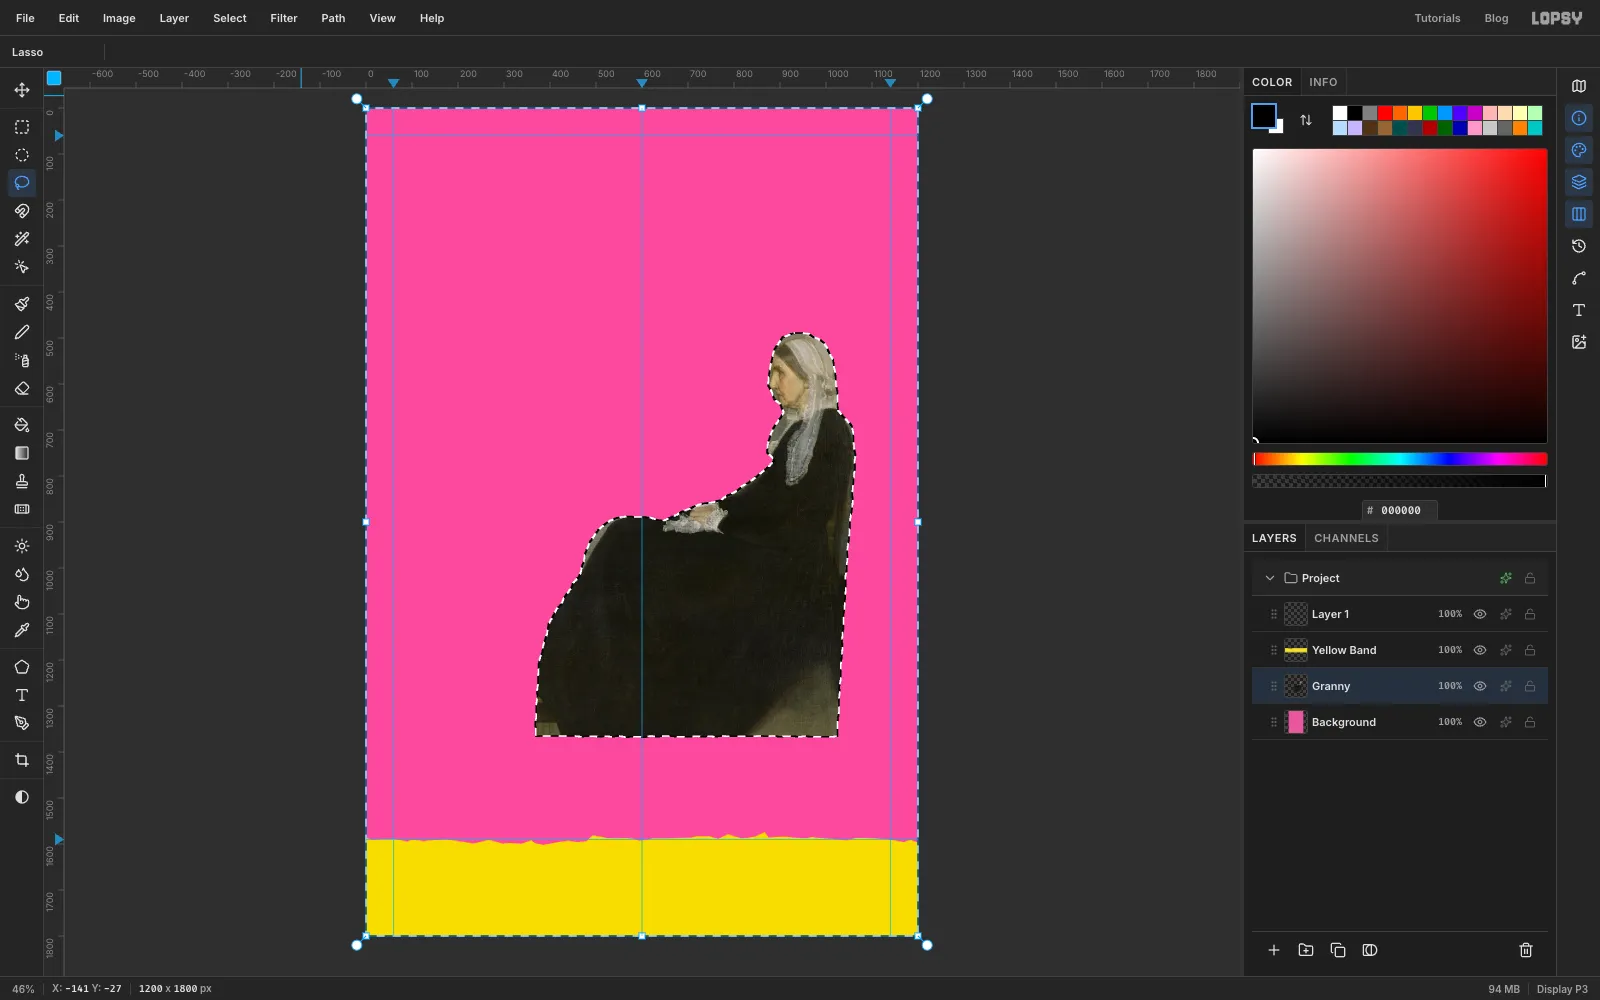
Choose Select → Inverse and press Delete. The wall, the framed print and the flowered curtain are deleted, and only the cut-out is left. Press Cmd+D.
-
Scale the cut-out up
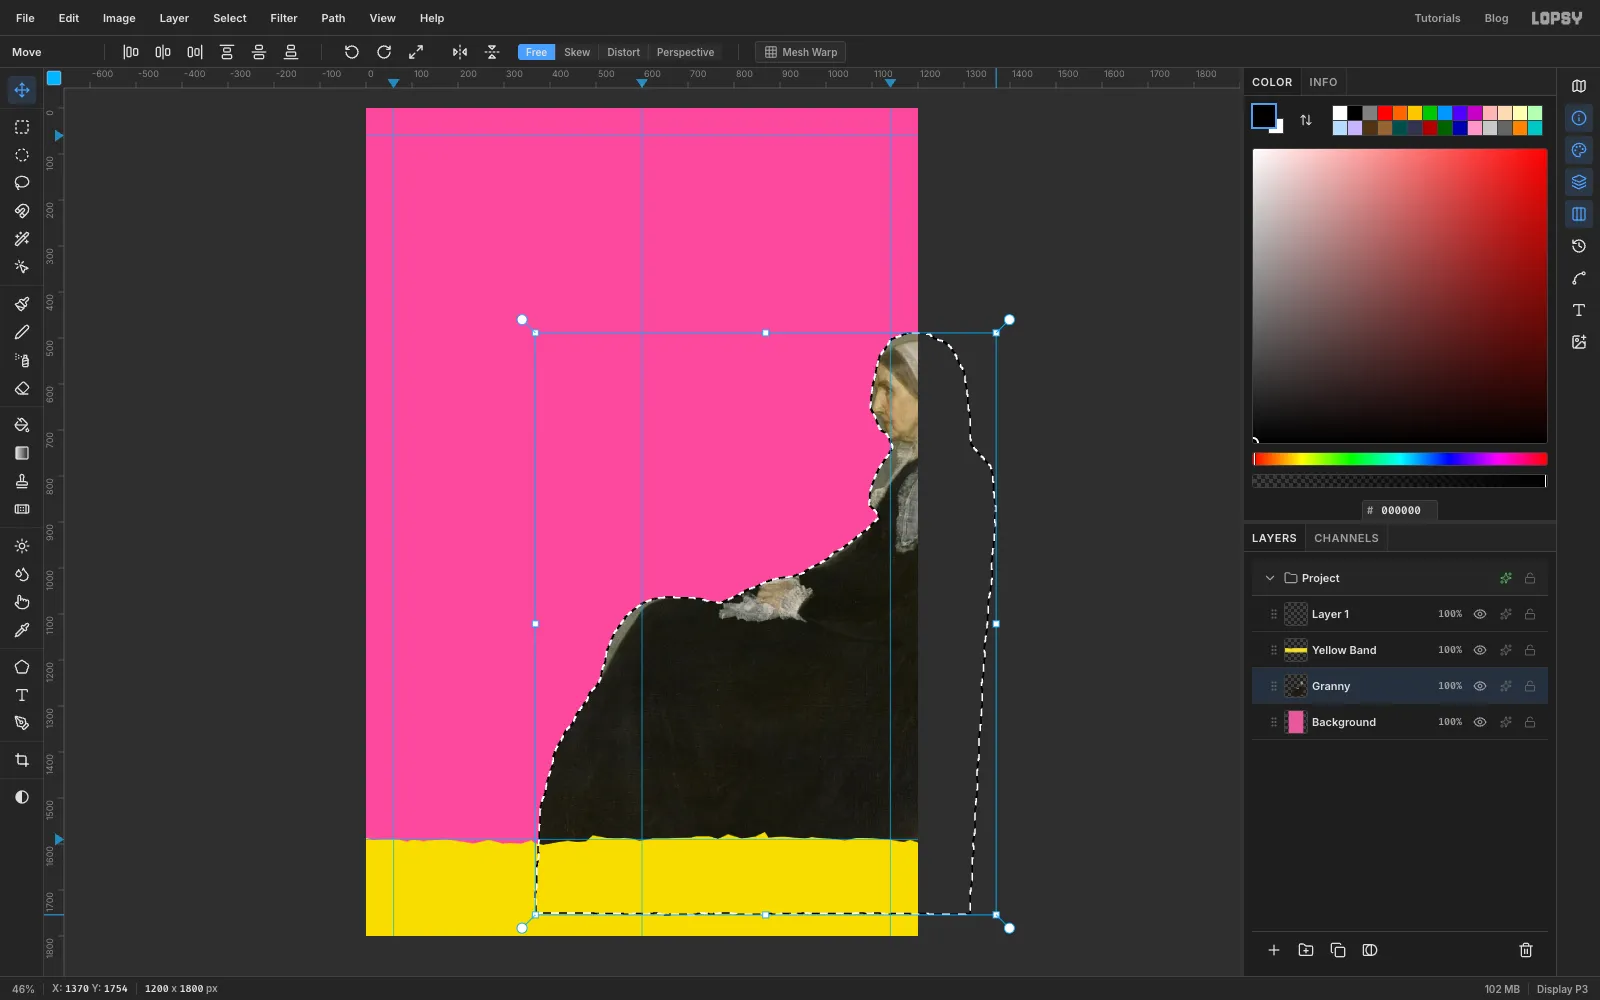
She needs to be much bigger. Cmd-click the Granny thumbnail in the Layers panel to select her outline. Transform handles appear around her.
Pick the Move tool. Zoom out a step with View → Zoom Out so the corner has somewhere to go. Then hold Cmd and drag the bottom-right corner handle out until she's about 1.45× her size, roughly 1000 px wide. Cmd keeps the proportions.
-
Slide her off the right edge
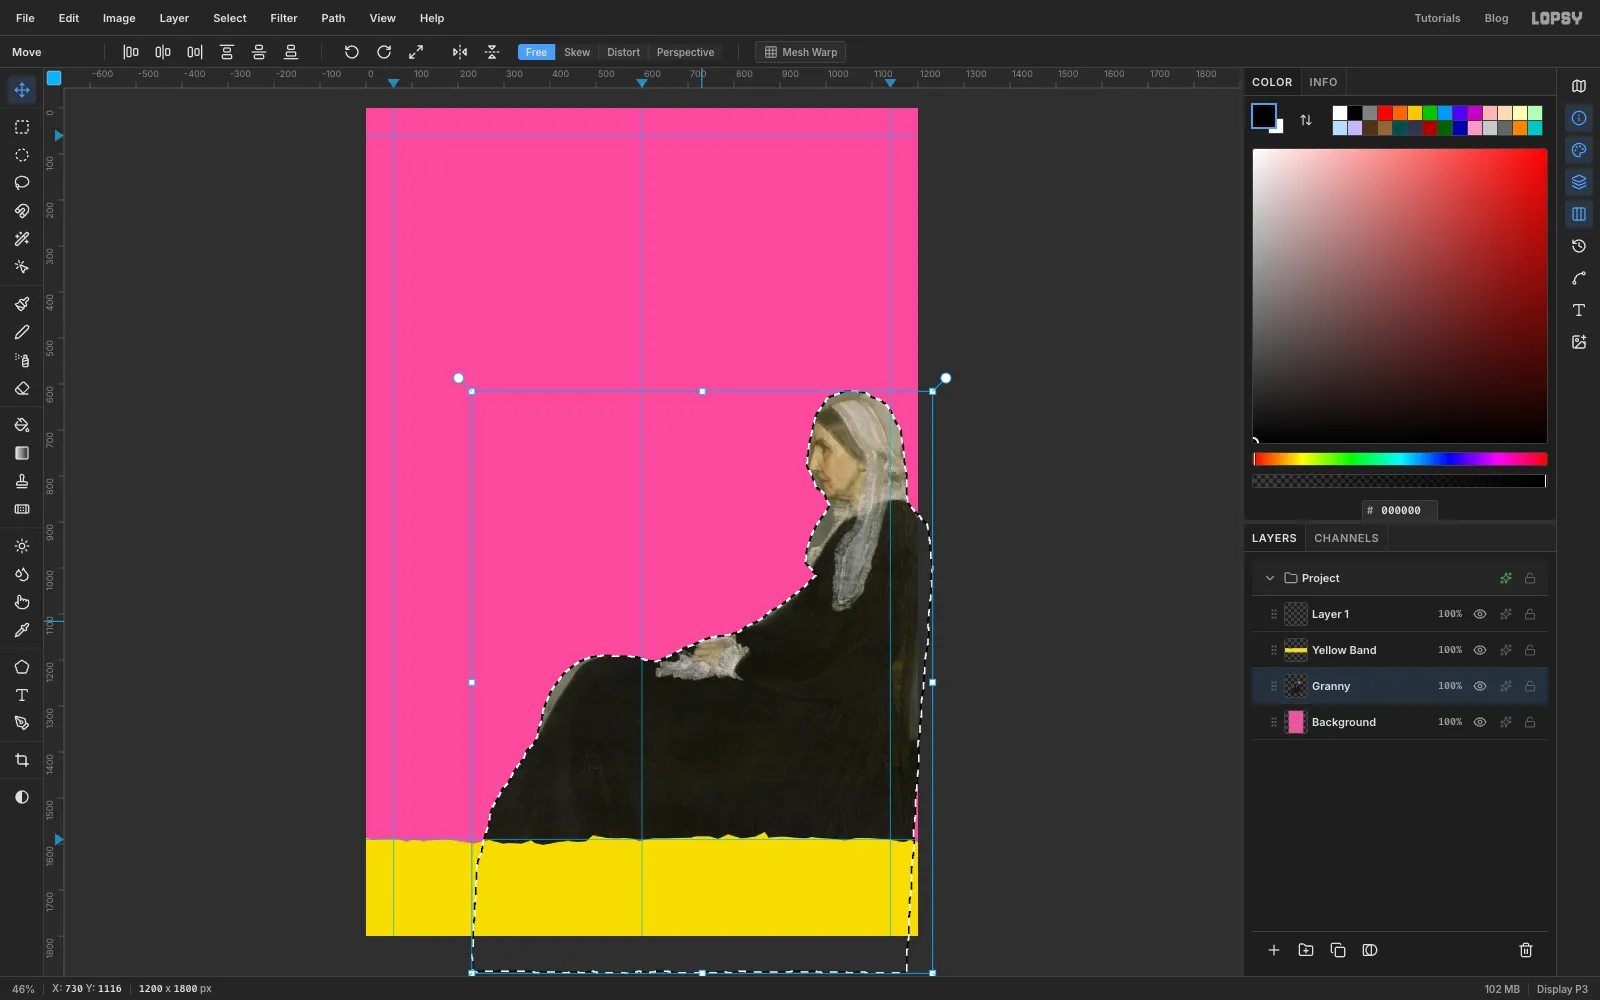
Drag from inside the selection to move her. The back of the chair should run about 30 px off the right edge of the poster, and the top of her bonnet should sit at about y 616, just over a third of the way down.
Letting her bleed off the edge makes the poster feel cropped from something bigger. Her skirt can go under the yellow band and off the bottom too.
Press Cmd+D to finish the move, then View → Fit to Screen.
-
Give her a white scissor margin
Cmd-click the Granny thumbnail again. Choose Select → Grow…, enter 12 and click Apply.
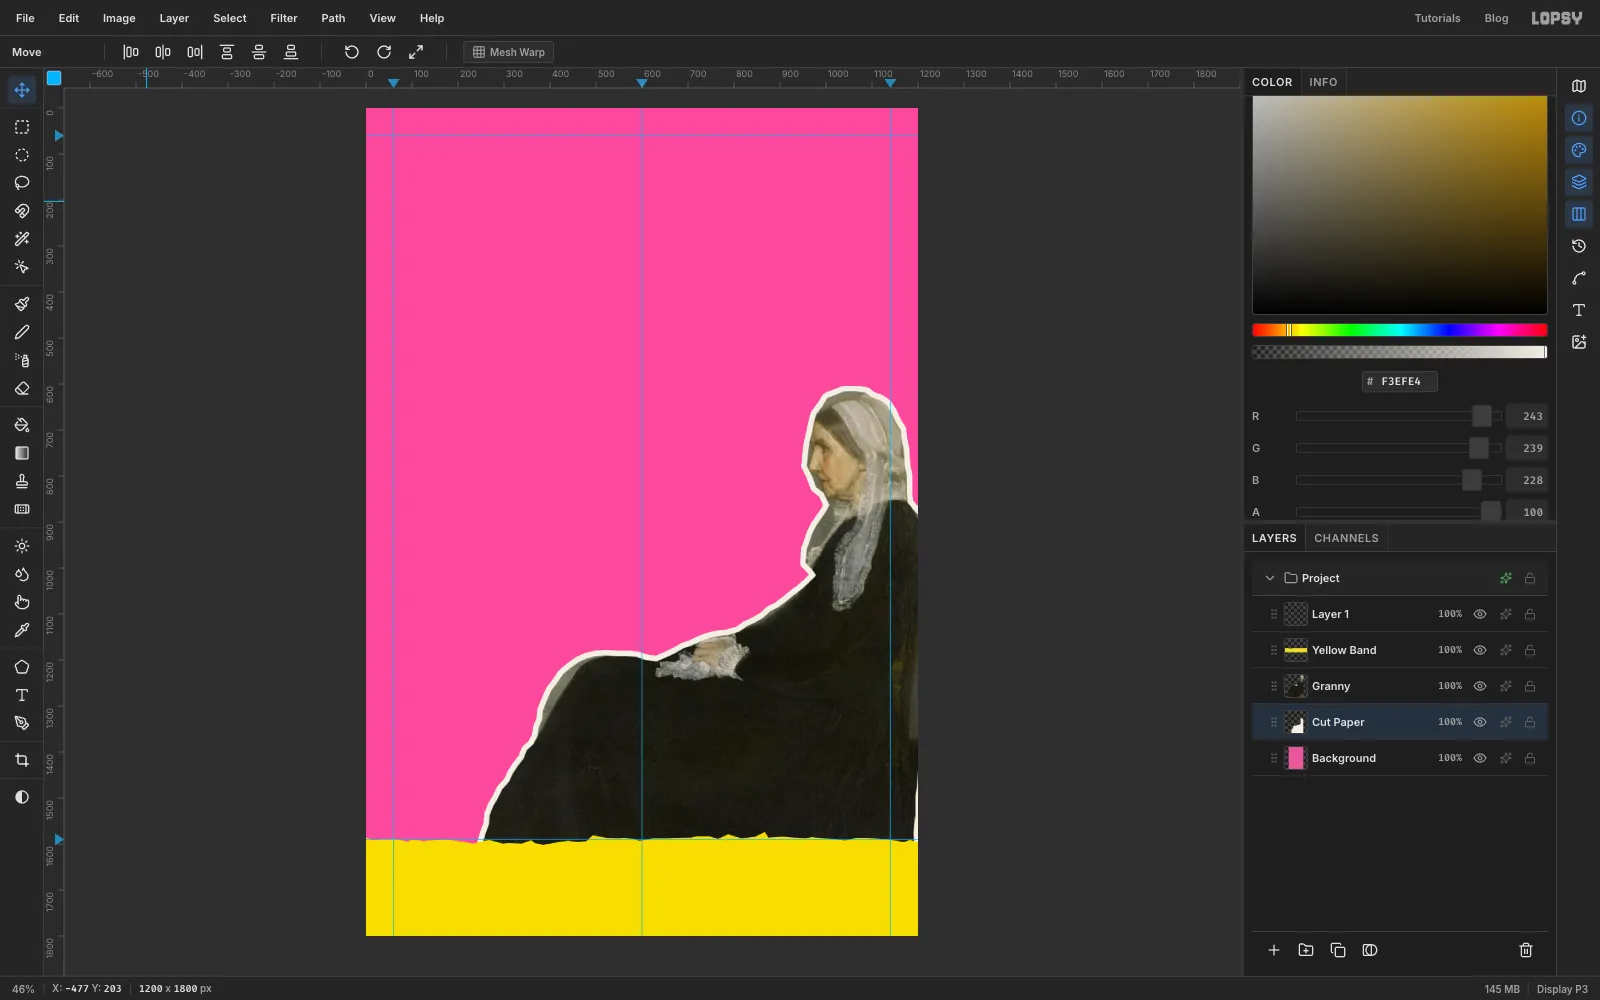
Click the Background layer, add a layer called Cut Paper (it lands between the background and the photo), set the foreground to and choose Edit → Fill. Press Cmd+D. She now looks like she was cut out of a photocopy with a margin left round her.
-
Push her through the photocopier
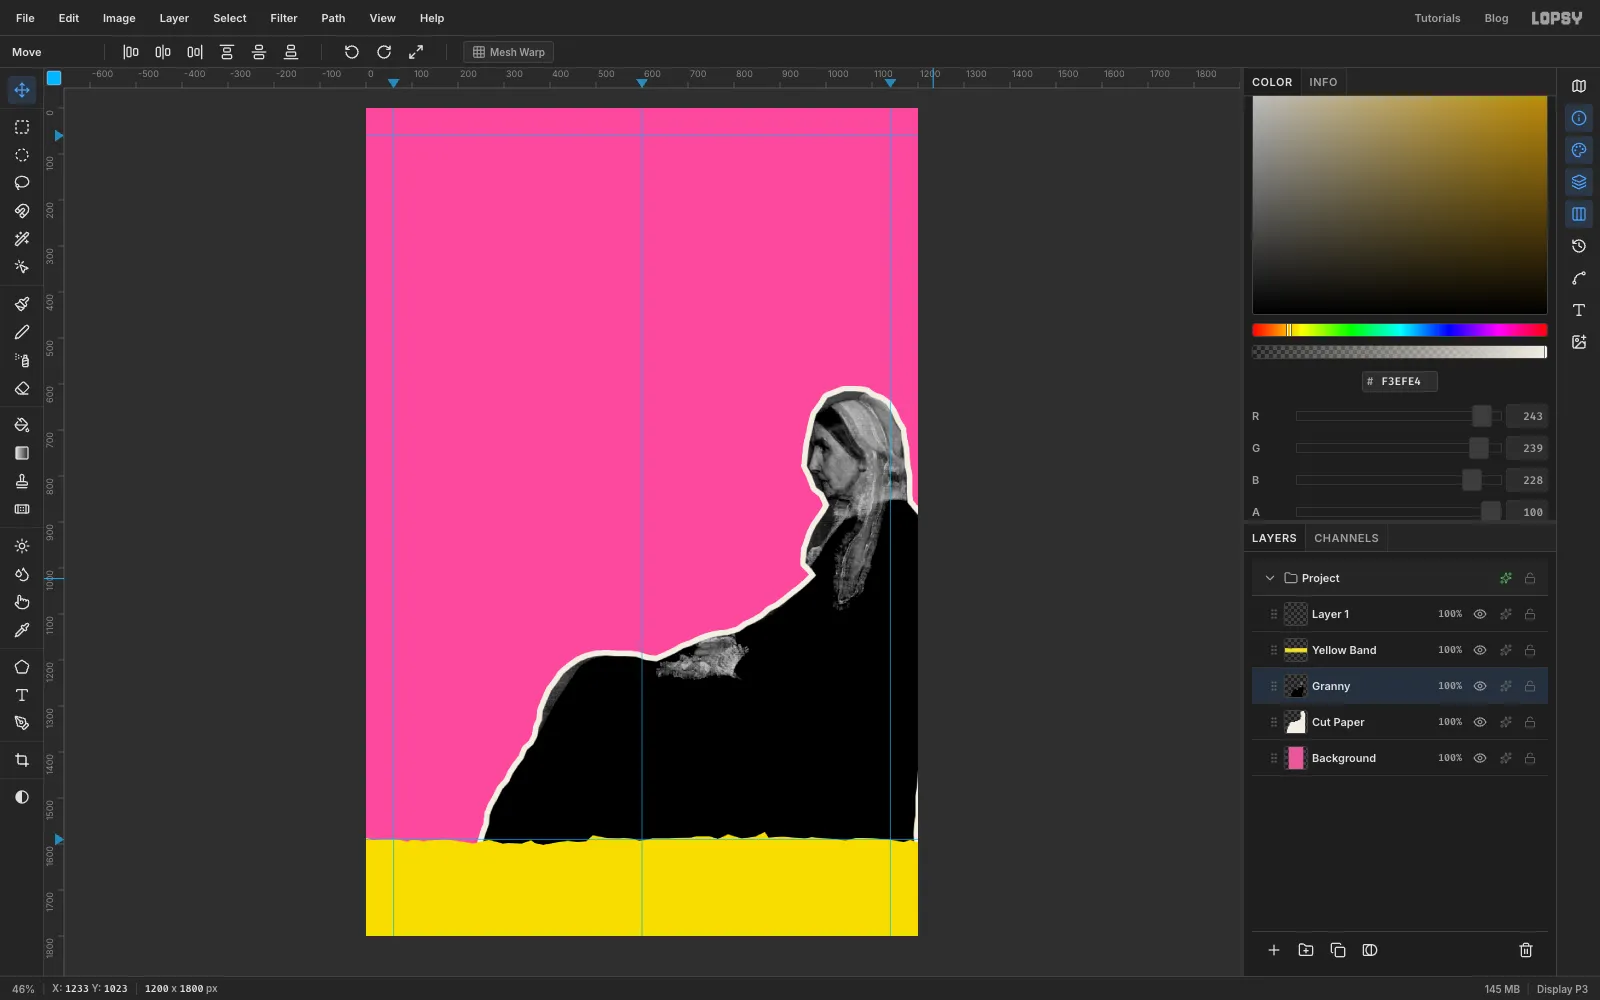
Click the Granny layer. Choose Filter → Desaturate, then Filter → Brightness/Contrast… with Brightness at −15 and Contrast at 60.
Her dress is now almost solid black. That's what a cheap copier does, but it would print as one flat slab. You'll fix that in the next step.
-
Pull folds out of the dress
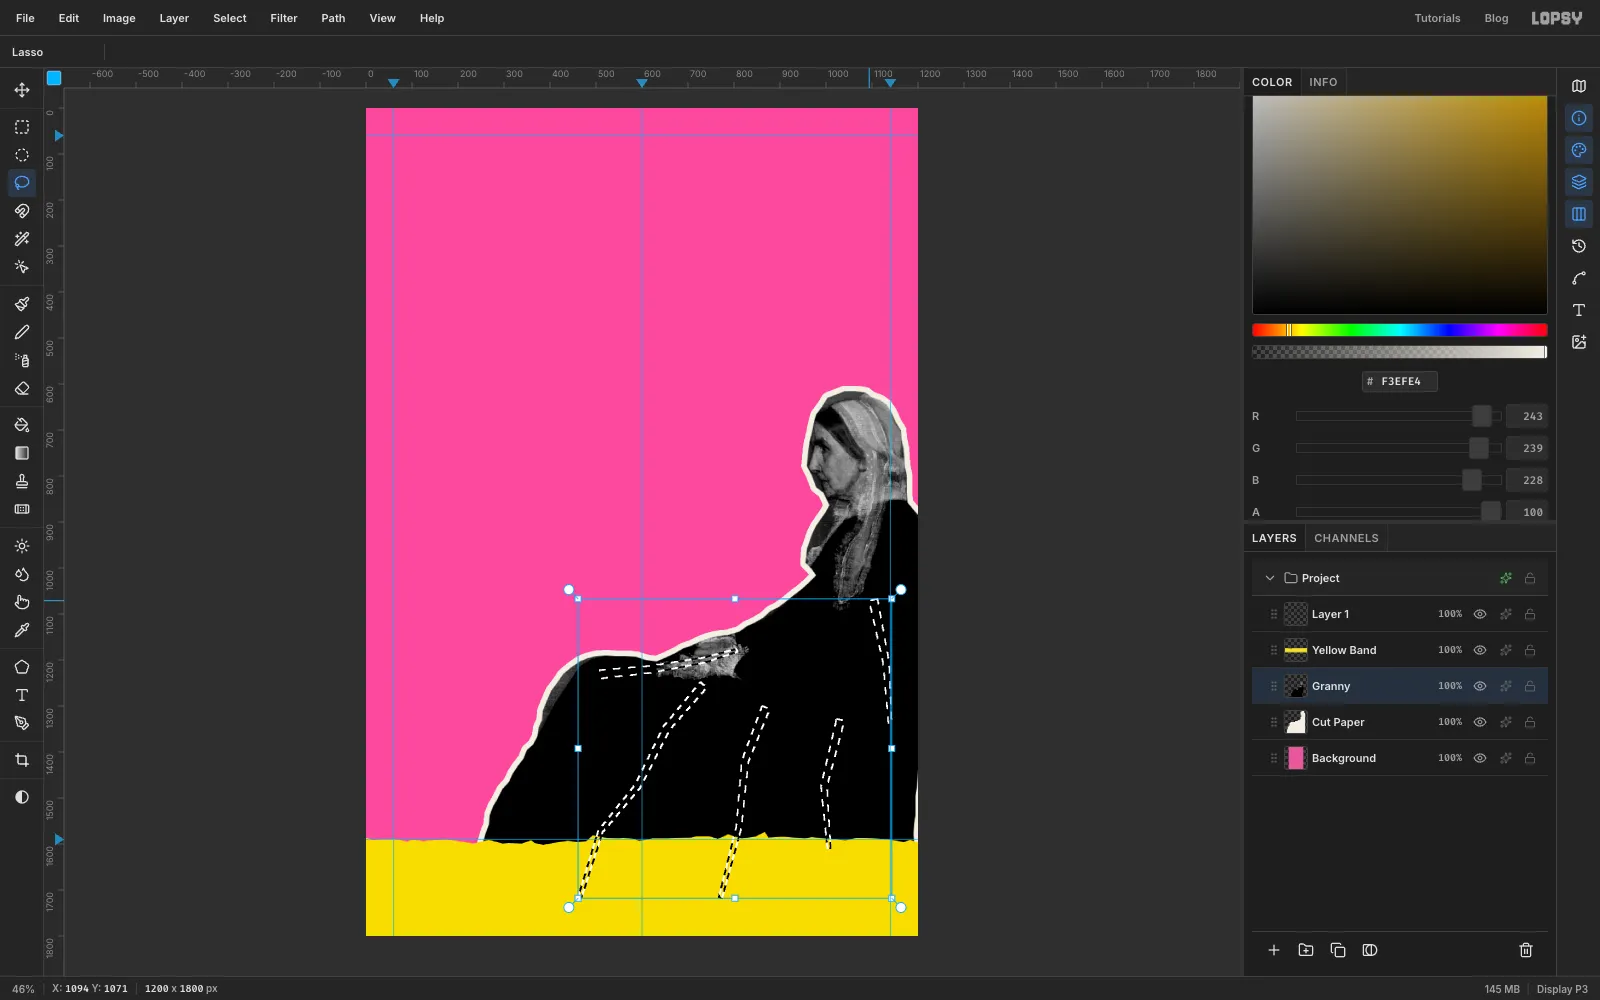
Pick the Lasso and draw a long, thin wedge, about 18 px wide and tapering to a point, along the top of her lap from her hands to her knee. Then hold Shift and draw three more wedges, which Shift adds to the selection:
- two running diagonally down the skirt from below the lap towards the hem, following the drape
- one short one down her back, where the light catches the shoulder
Make them slightly curved and unevenly spaced. Real folds are never parallel.
Choose Select → Feather… with 5, then Filter → Brightness/Contrast… with Brightness 24 and Contrast 0. Press Cmd+D.
Her hands come out of the copier as a pale smear, so darken them a little. Lasso loosely round the clasped hands and feather by 6. Run Filter → Brightness/Contrast… with Brightness −28 and Contrast 30, so they read as shapes. Press Cmd+D.
-
Screen her into halftone dots
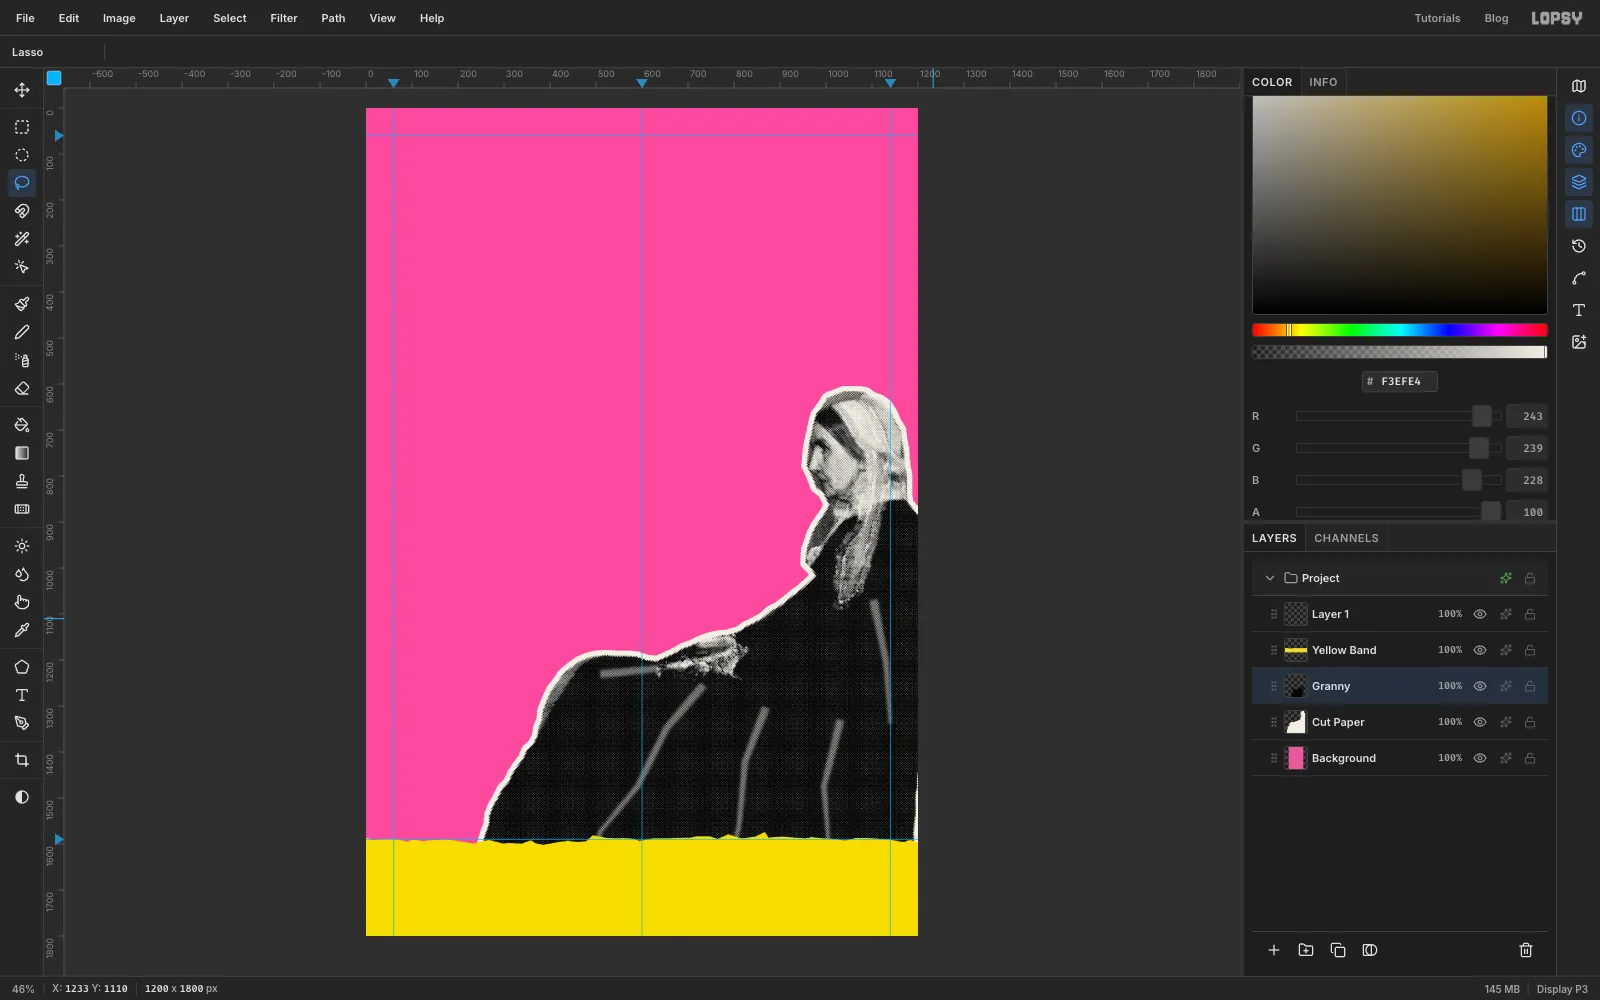
Choose Filter → Halftone… and set:
- Dot Size 5
- Density 1.3
- Angle 45
- Softness 1
Click Apply. Density above 1 packs the cells tighter than the dots, so the darkest areas print solid black while her face stays as light, readable dots. The white gaps go transparent, so the paper layer underneath shows through as the "paper".
-
Lasso the liberty spikes
With Granny selected, add a layer called Mohawk. It sits right above the photo.
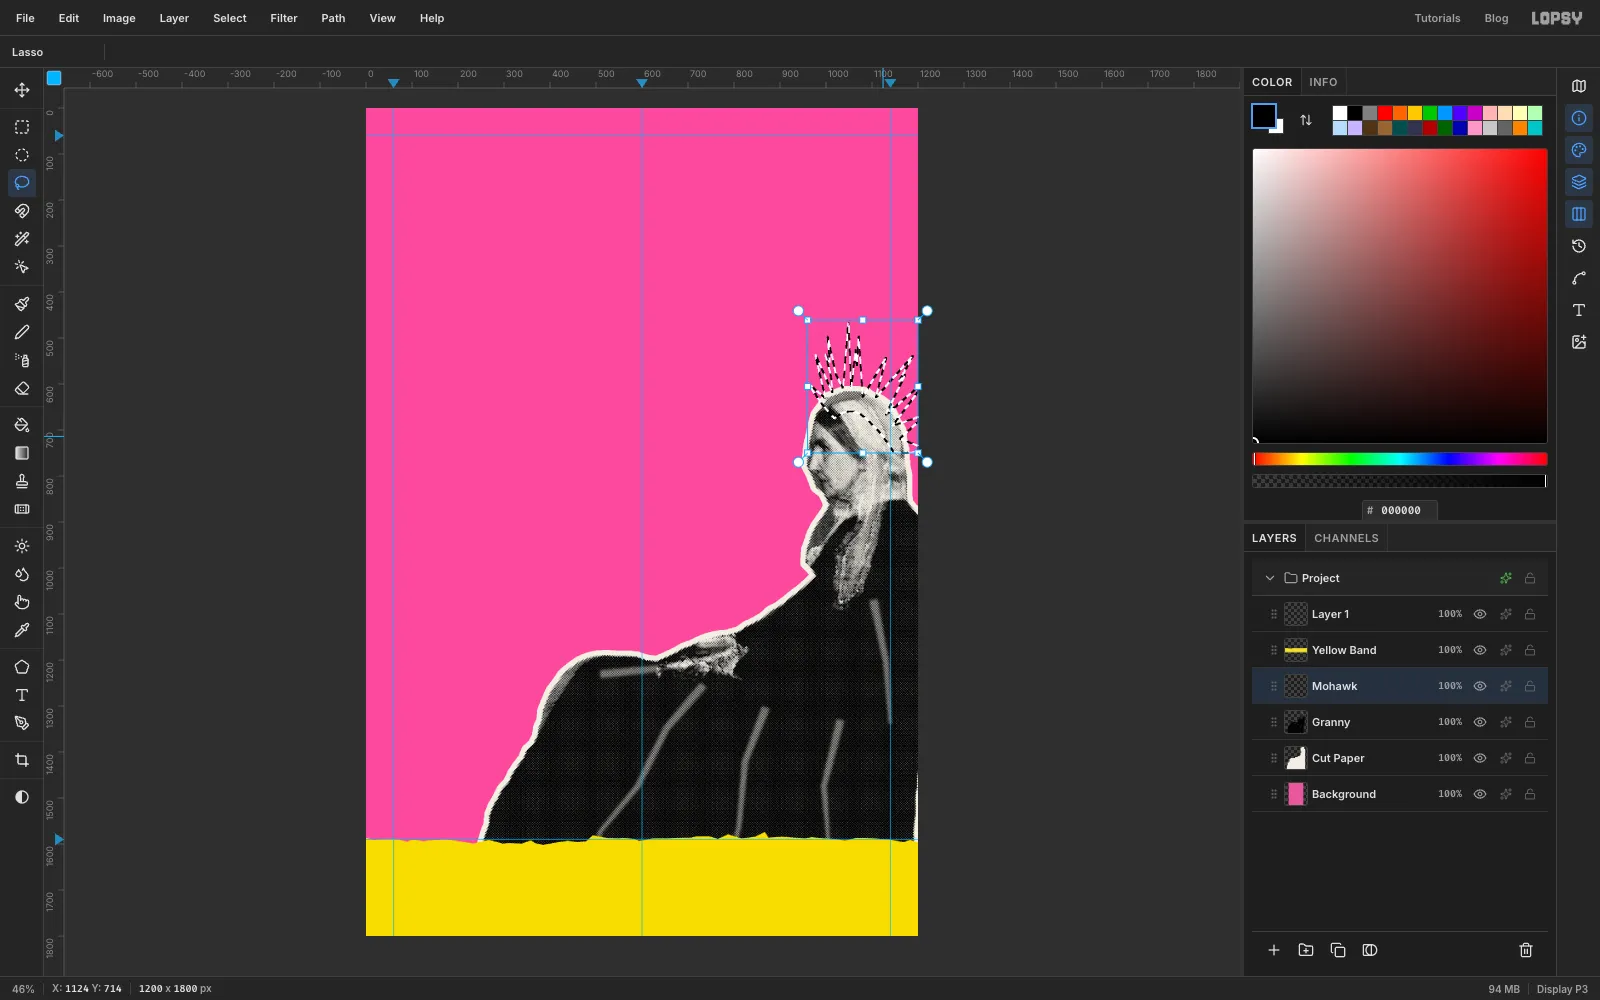
Each spike is its own skinny triangle. Its base starts inside the bonnet, so the hair grows out of her head rather than sitting on top of it. Its tip points away from the centre of her head, leaning back a little.
With the Lasso, draw the first spike at her forehead. Then hold Shift and draw twelve more, working back over the crown to the nape of her neck. Let neighbouring bases overlap, and vary them:
- Make the front and back spikes short, about 60–90 px.
- Make the crown spikes longer, up to about 190 px.
- Change the lean by a few degrees from one spike to the next.
-
Fill and grit the mohawk
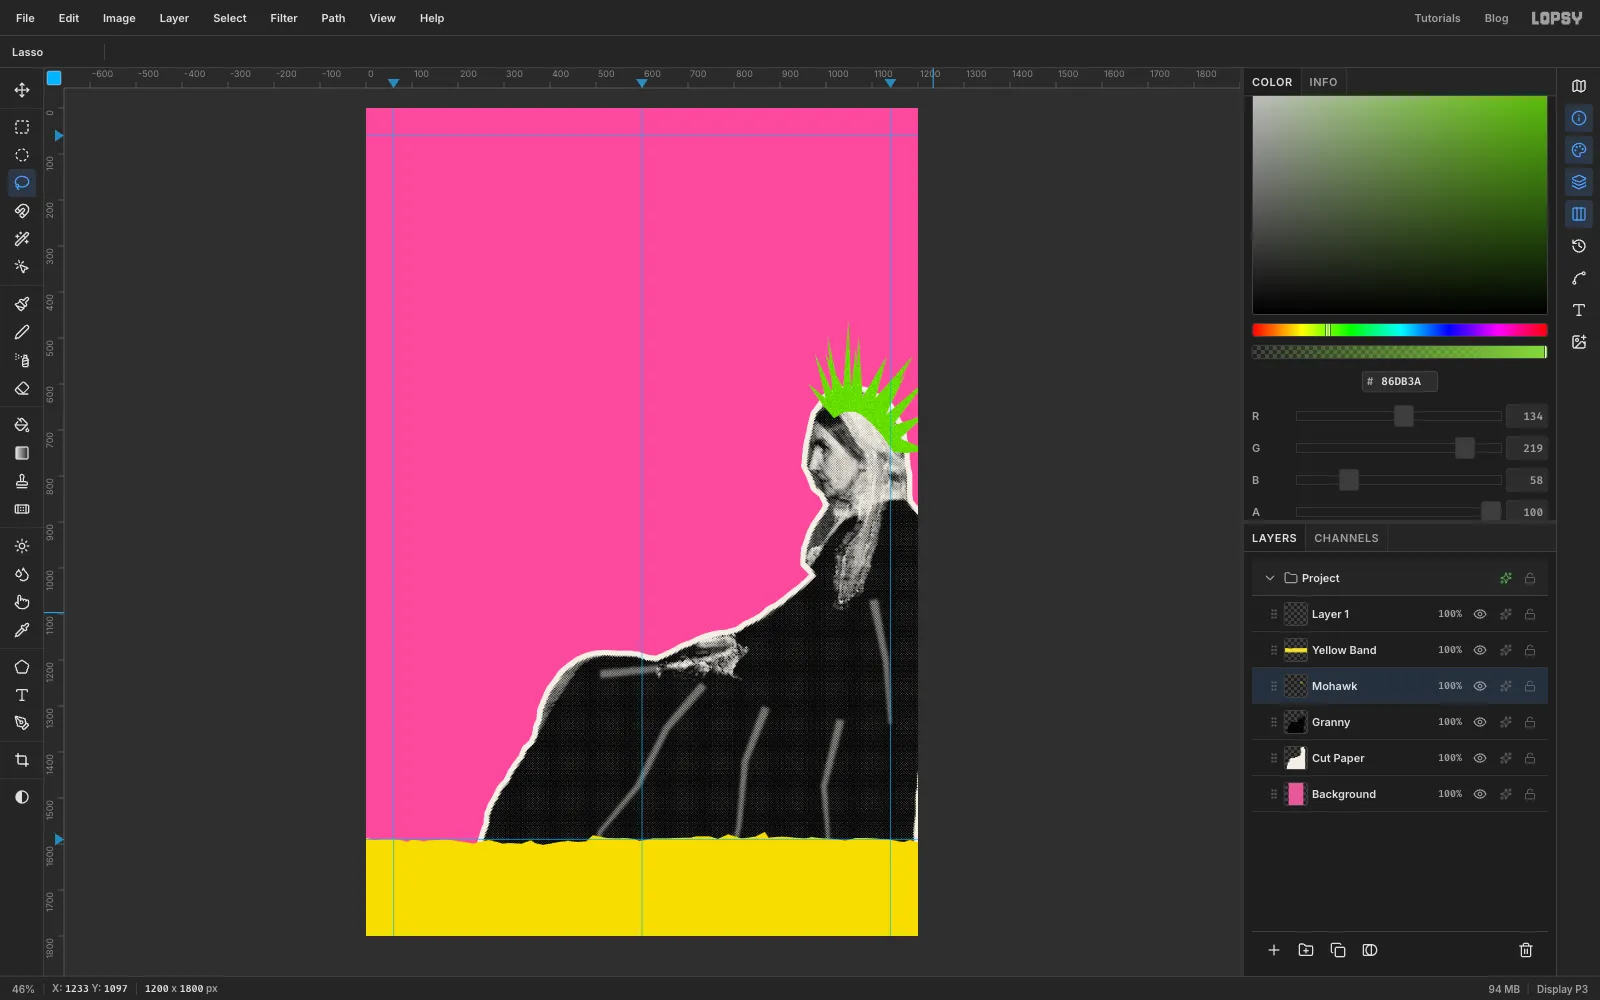
Set the foreground to , choose Edit → Fill and press Cmd+D.
A flat fill looks like vector clip art next to the photocopy, so rough it up. Run Filter → Gaussian Blur… at 1 to soften the edges. Then run Filter → Add Noise… with Mono selected and Amount at 45.
-
Start the ransom-note title
Every letter is a live text layer sitting on its own scrap of paper. All the scraps are painted on one layer underneath.
Click Layer 1 and click New Group at the bottom of the Layers panel. Name the group Title. With the group selected, click Add Layer: the layer goes inside the group. Name it Scraps.
The recipe for each letter:
- Click Scraps, so the new text goes just above it and so the Text options don't restyle a letter you've already made.
- Pick the Text tool and set the font, size and colour from the table below.
- Click where the letter goes, type it and press Tab to commit. The text box hangs down and to the right from your click, so click a little left of the letter's centre and about half the type size above the row's centre line. Then nudge it into place with the Move tool and the arrow keys.
- Pick the Move tool and drag the round rotate handle just off the text's top-right corner to tilt the letter.
- Click Scraps again. With the Lasso, draw a four-sided scrap around the letter, about 16 px clear of it on every side, tilted to match. Add a slight kink in one or two edges, as scissors do.
- Set the foreground to the scrap colour and choose Edit → Fill, then Cmd+D.
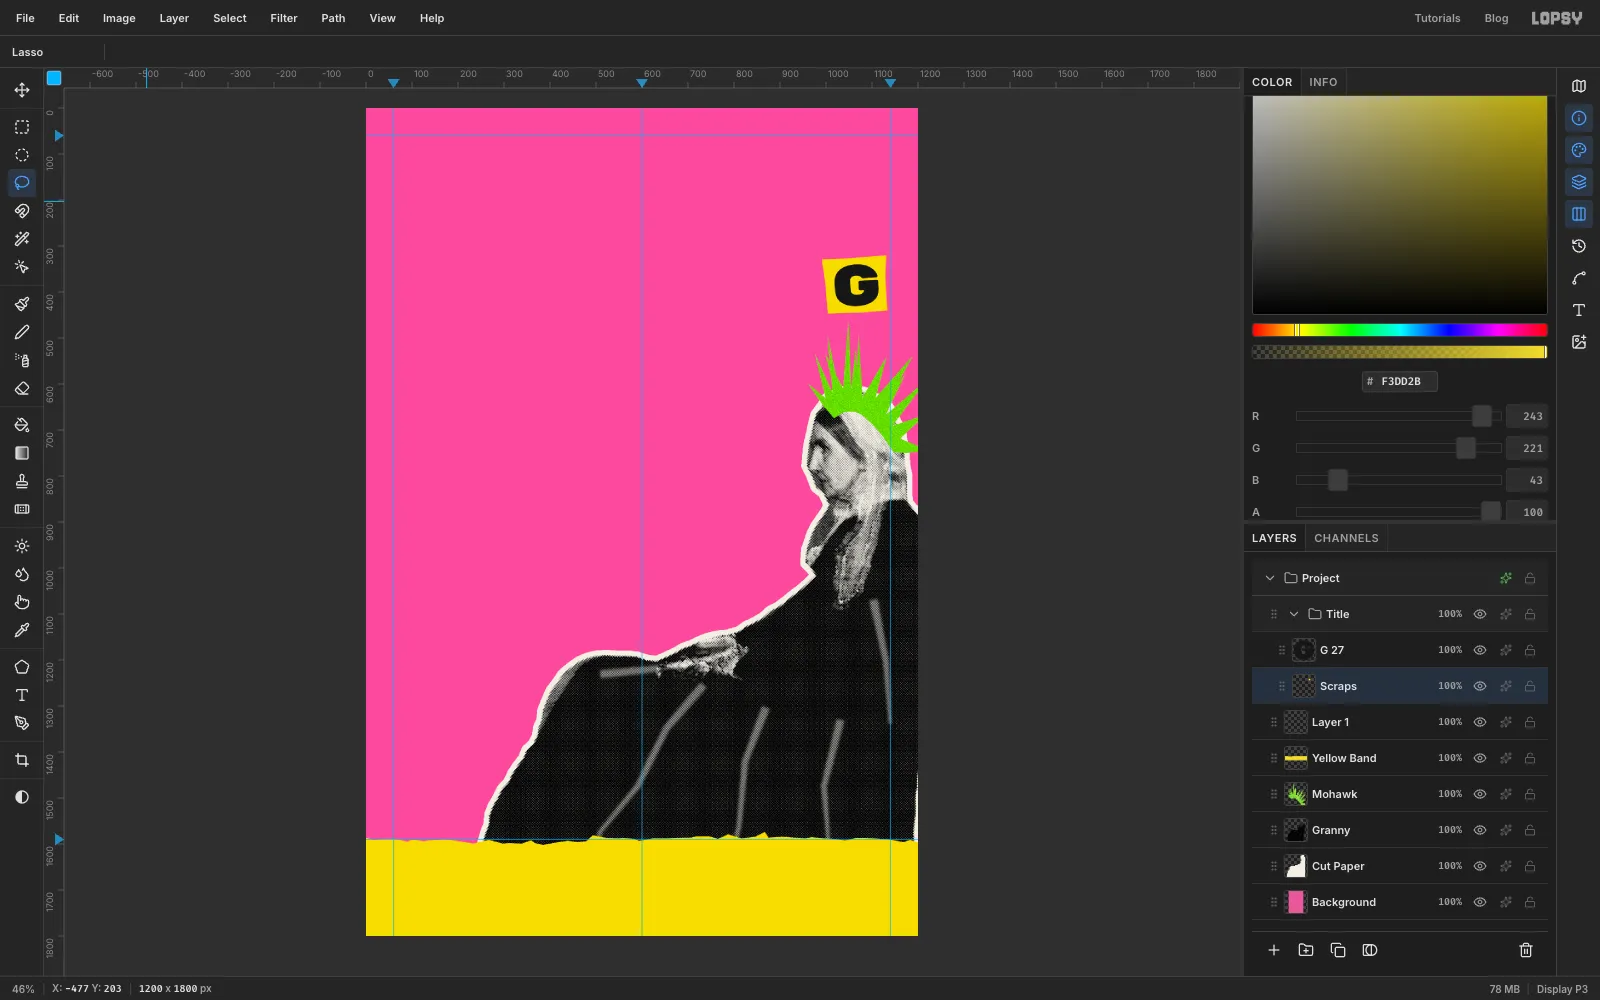
Start with the last letter, the G of UPRISING, with its scrap against the right margin guide. Work right to left, and do the whole bottom row before the top row. A click with the Text tool on top of an existing text box edits that box instead of starting a new one, and every box runs right and down from where you clicked. Building from the bottom right means you never click inside one.
-
Cut out the rest of the letters
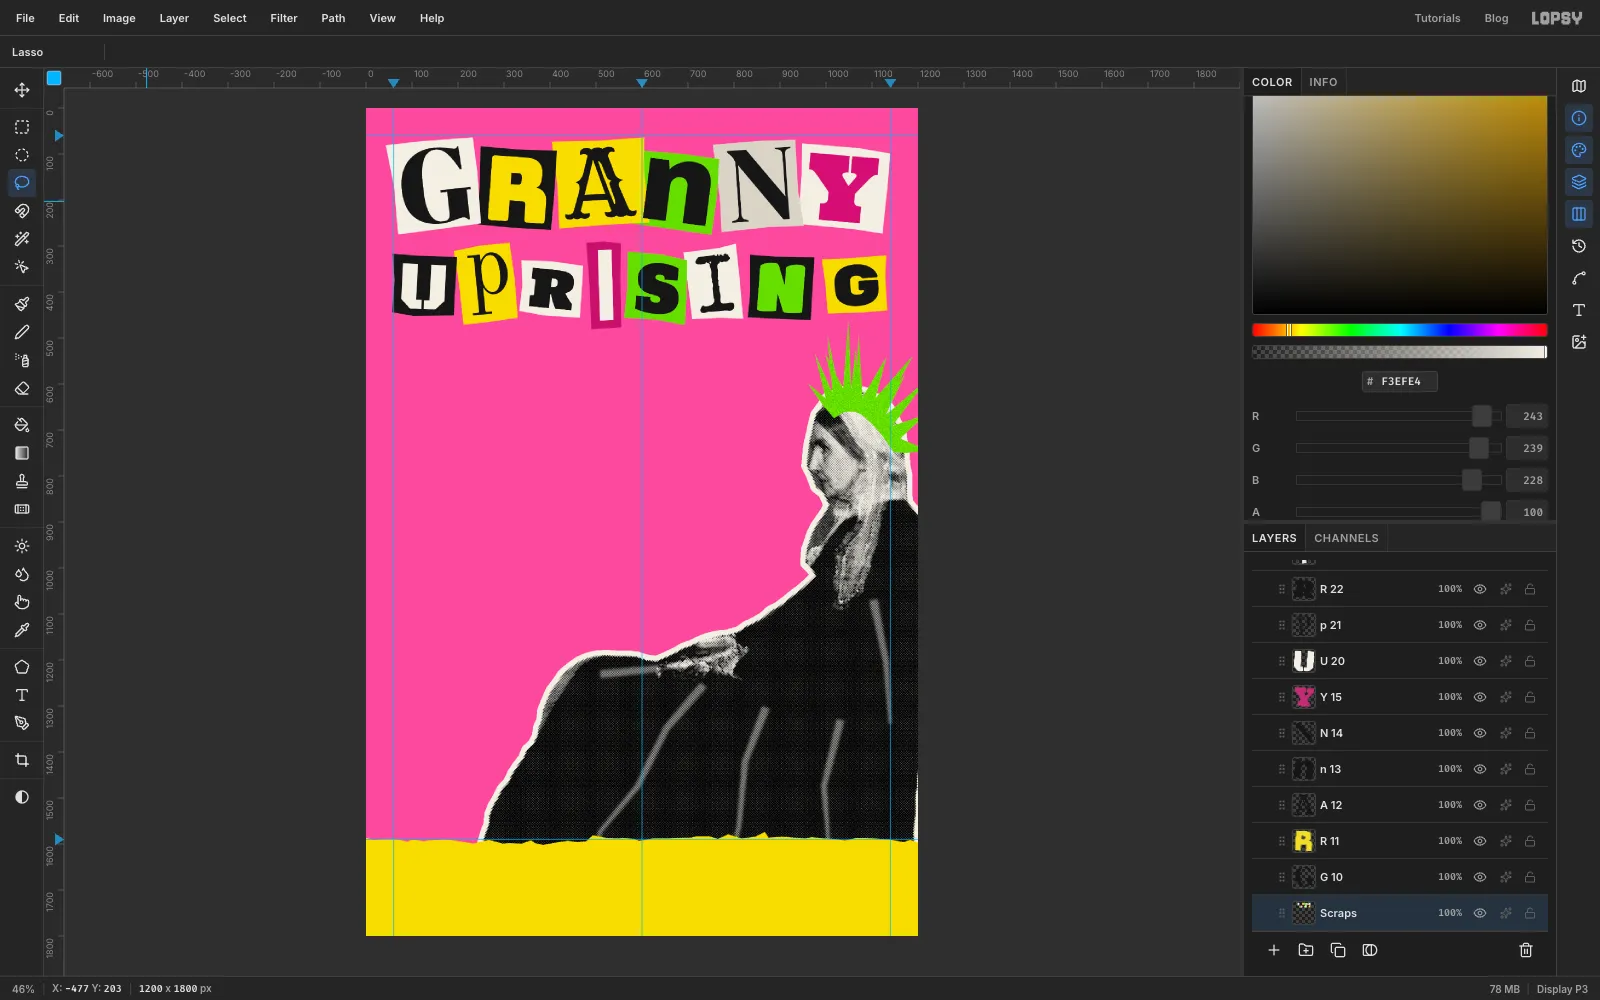
Build the other thirteen letters the same way. Row two, UPRISING, sits with its centre line at about y 388:
- G: Rubik Mono One 126, ink on , tilt −4°
- N: Titan One 150, ink on , tilt 4°
- I: Special Elite 170, ink on , tilt −7°
- s (lowercase): Alfa Slab One 190, ink on , tilt 5°
- I: Anton 178, ink on , tilt −2°
- R: Holtwood One SC 112, ink on , tilt 6°
- p (lowercase): Old Standard TT 190, ink on , tilt −5°
- U: Black Ops One 150, ink on , tilt 3°
Row one, GRANNY, sits at about y 170:
- Y: Ultra 200, ink on , tilt 5°
- N: DM Serif Display 236, ink on , tilt −4°
- n (lowercase): Archivo Black 250, ink on , tilt 7°
- A: Rye 200, ink on , tilt −3°
- R: Bungee 196, ink on , tilt 4°
- G: Abril Fatface 230, ink on , tilt −6°
Each letter takes roughly 110–180 px of row, so the U of UPRISING and the G of GRANNY end up against the left margin guide. Let neighbouring scraps touch or overlap a little. The lowercase letters and the mix of sizes are what make it look like a ransom note rather than a font.
-
Lift the scraps with a hard shadow
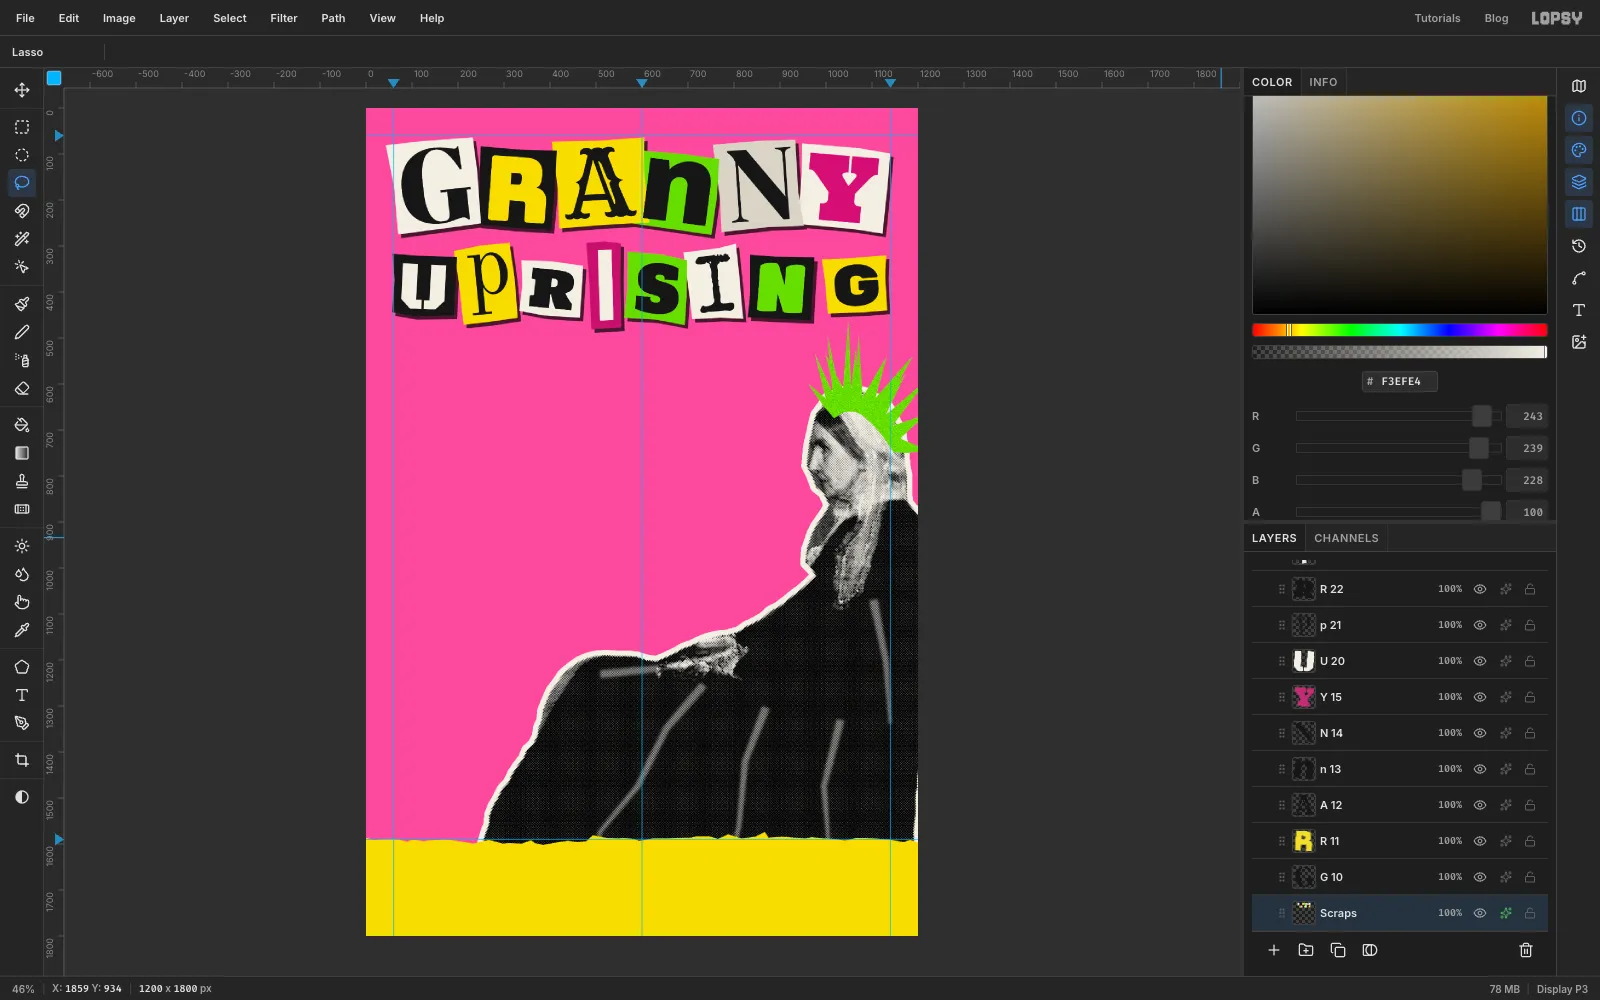
Click Scraps and open its effects with the sparkle button on the row. Turn on Drop Shadow and set Offset X 7, Offset Y 8, Blur 0, Spread 0 and Opacity 70. Close the drawer.
A blur of 0 gives the shadow a hard edge, like paper pasted down slightly off the board.
-
Nudge the whole title into place
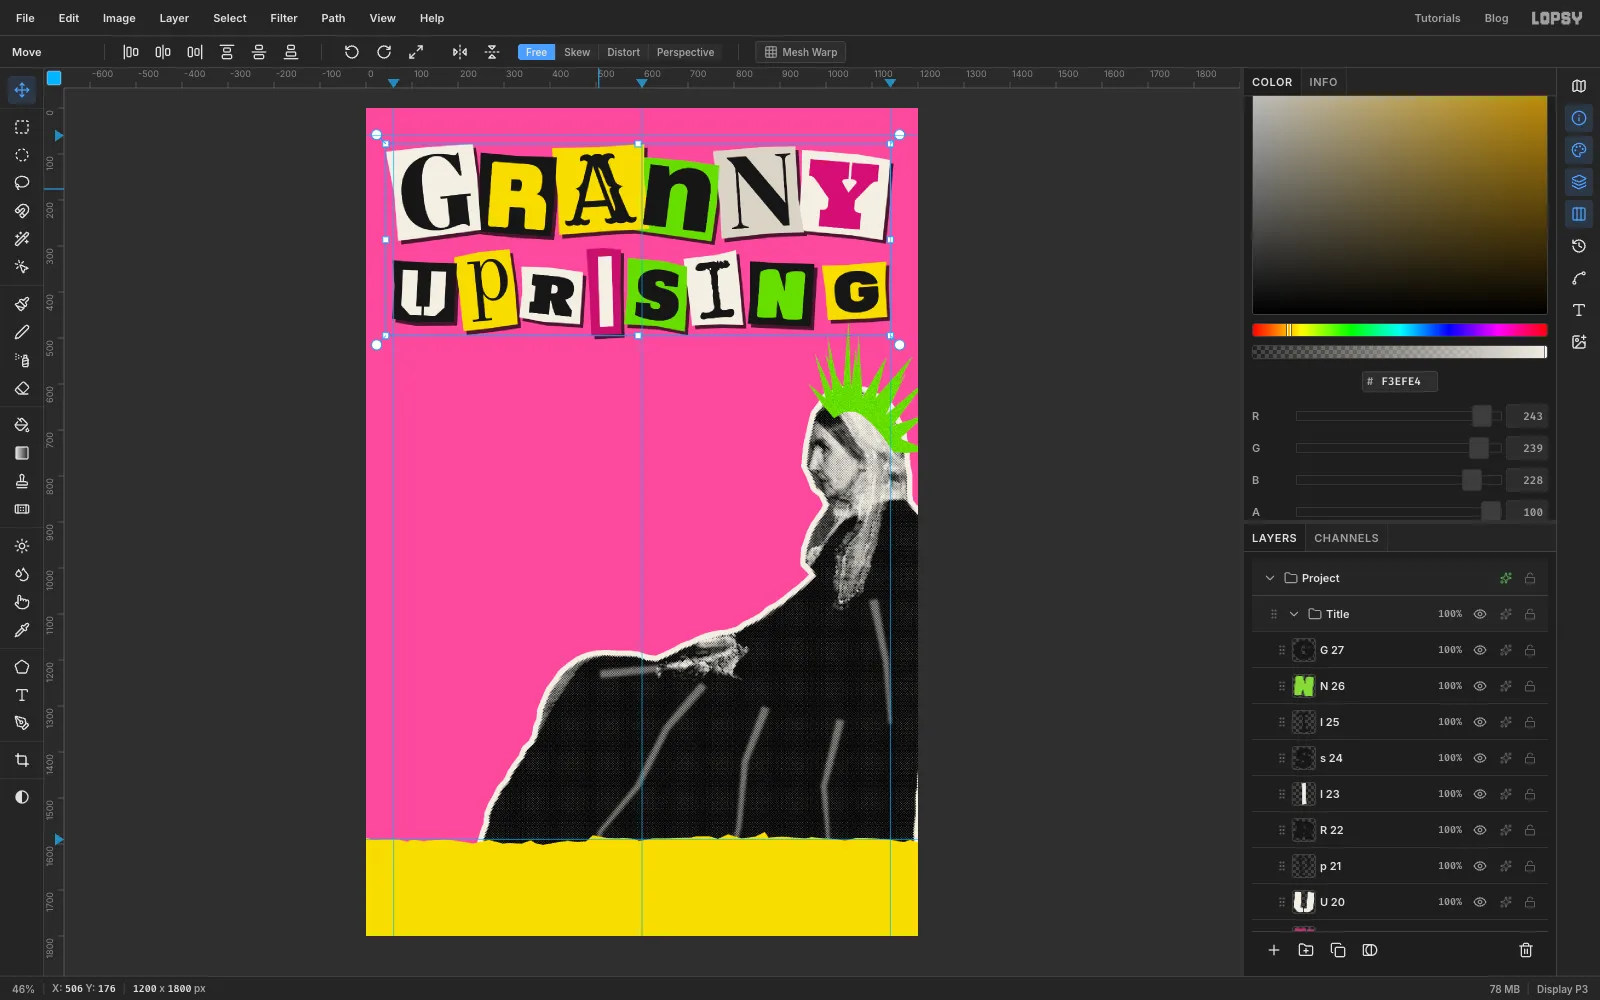
Look at the top margin. The title should sit just below the top guide with a little pink above it. If it doesn't, click the Title group's row, pick the Move tool and drag any letter. Here it went down about 14 px. All fourteen letters and their scraps move together, and the letters stay live and editable.
-
Type the tagline strips
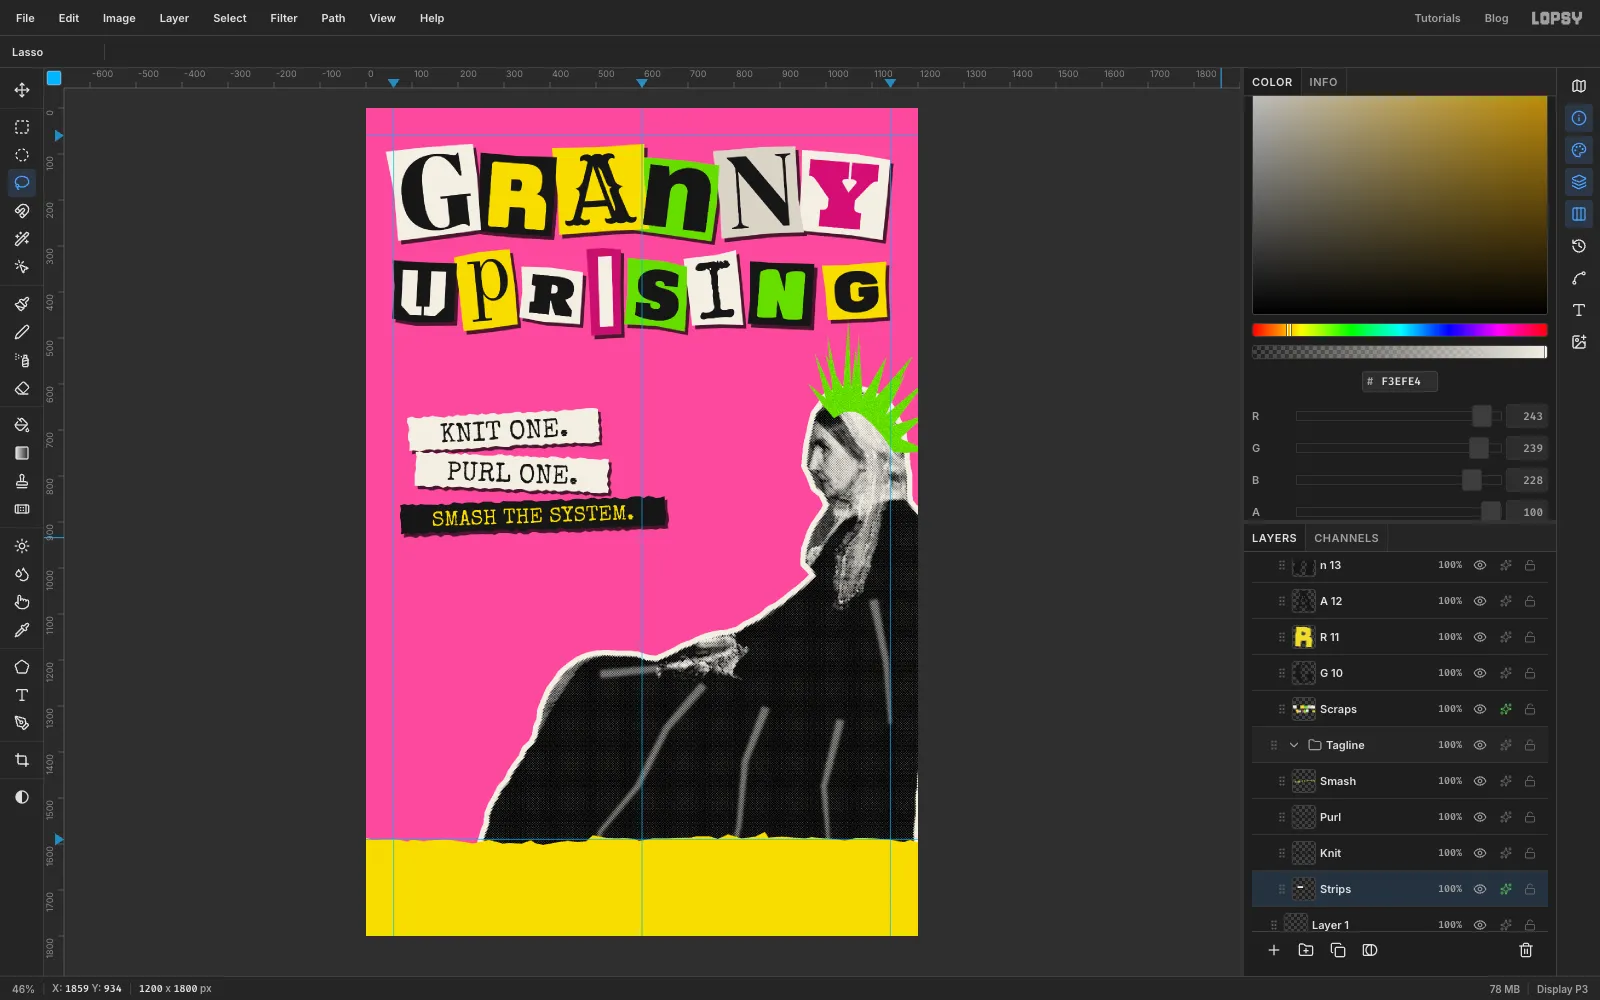
Click Layer 1 again, so the new group sits at the top level rather than inside Title. Click New Group and name it Tagline, then add a layer inside it called Strips.
Every line is set in Special Elite, a typewriter face. Work from the bottom up for the same reason as the title, clicking Strips before each one:
- SMASH THE SYSTEM. at size 46 in , the lowest line, tilted slightly anticlockwise. Name the layer Smash.
- PURL ONE. at size 58 in , about 90 px above it, tilted slightly clockwise. Name it Purl.
- KNIT ONE. at size 58 in , another 90 px up, tilted anticlockwise. Name it Knit.
The three lines stack down the left side of the poster, below the title, with their left ends about 140 px in from the edge. The bottom one sits at about y 884.
For each strip, click Strips and draw a long Lasso rectangle around the line, tilted to match. Leave about 70 px of paper either side of the words and about 15 px above and below. Give the short ends and the long edges a ragged, torn wobble. Fill the black strip with and the other two with , pressing Cmd+D after each.
Then give Strips the same Drop Shadow as the scraps, at 6 / 7.
-
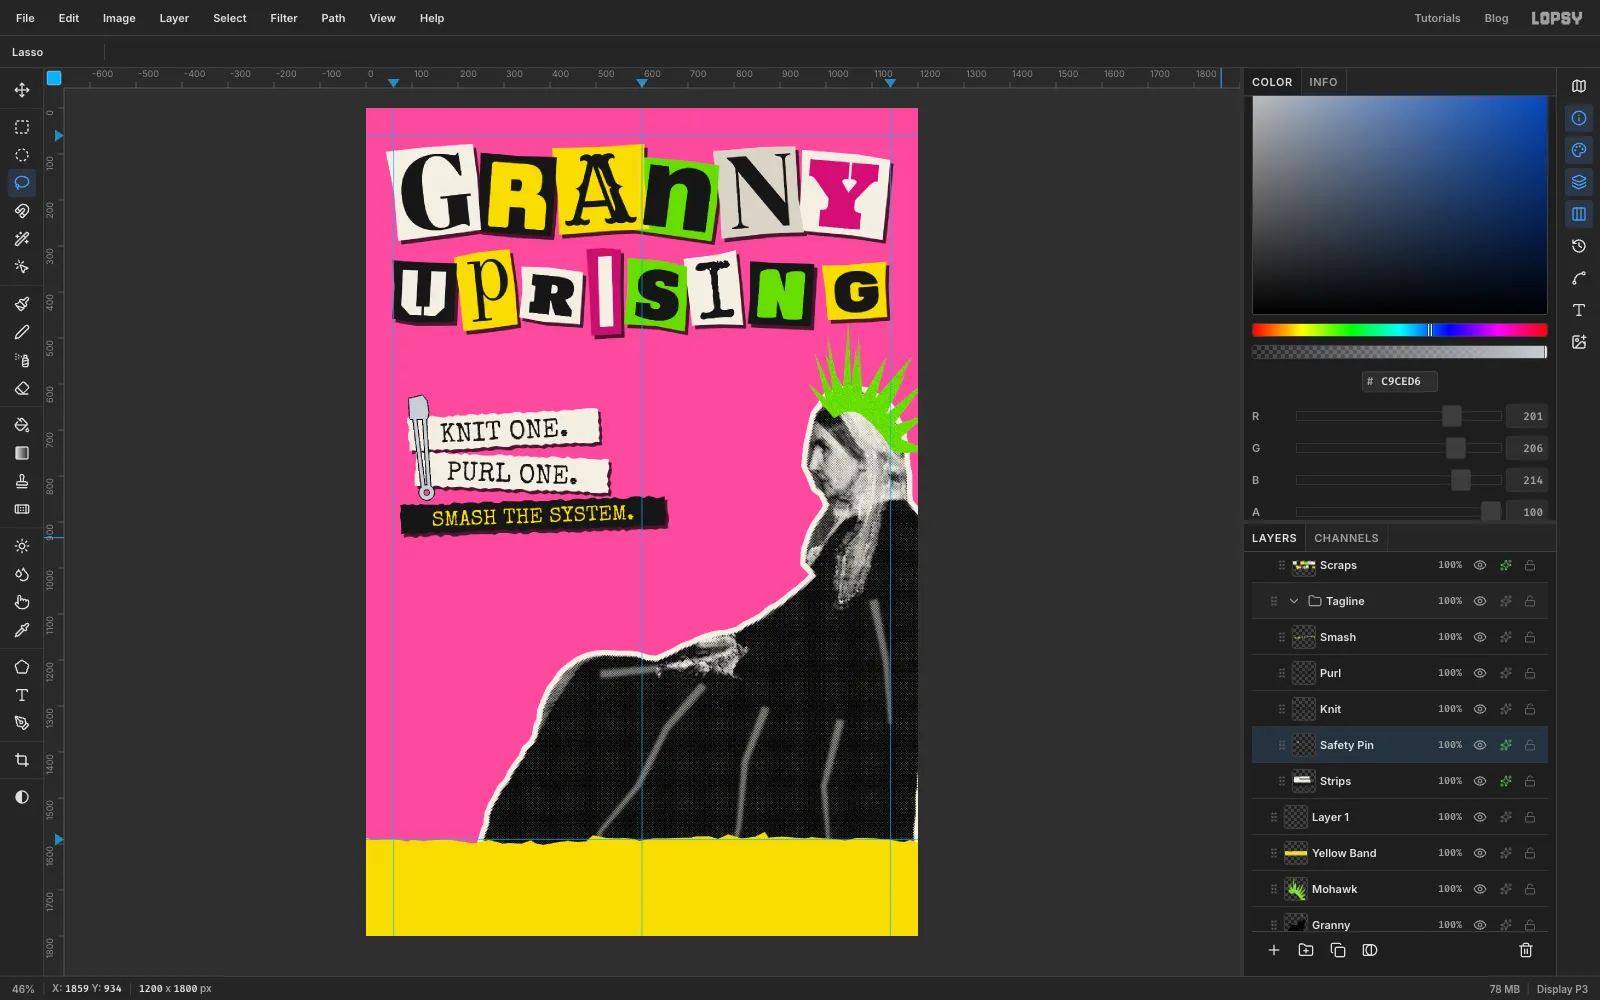
Draw the safety pin's legs
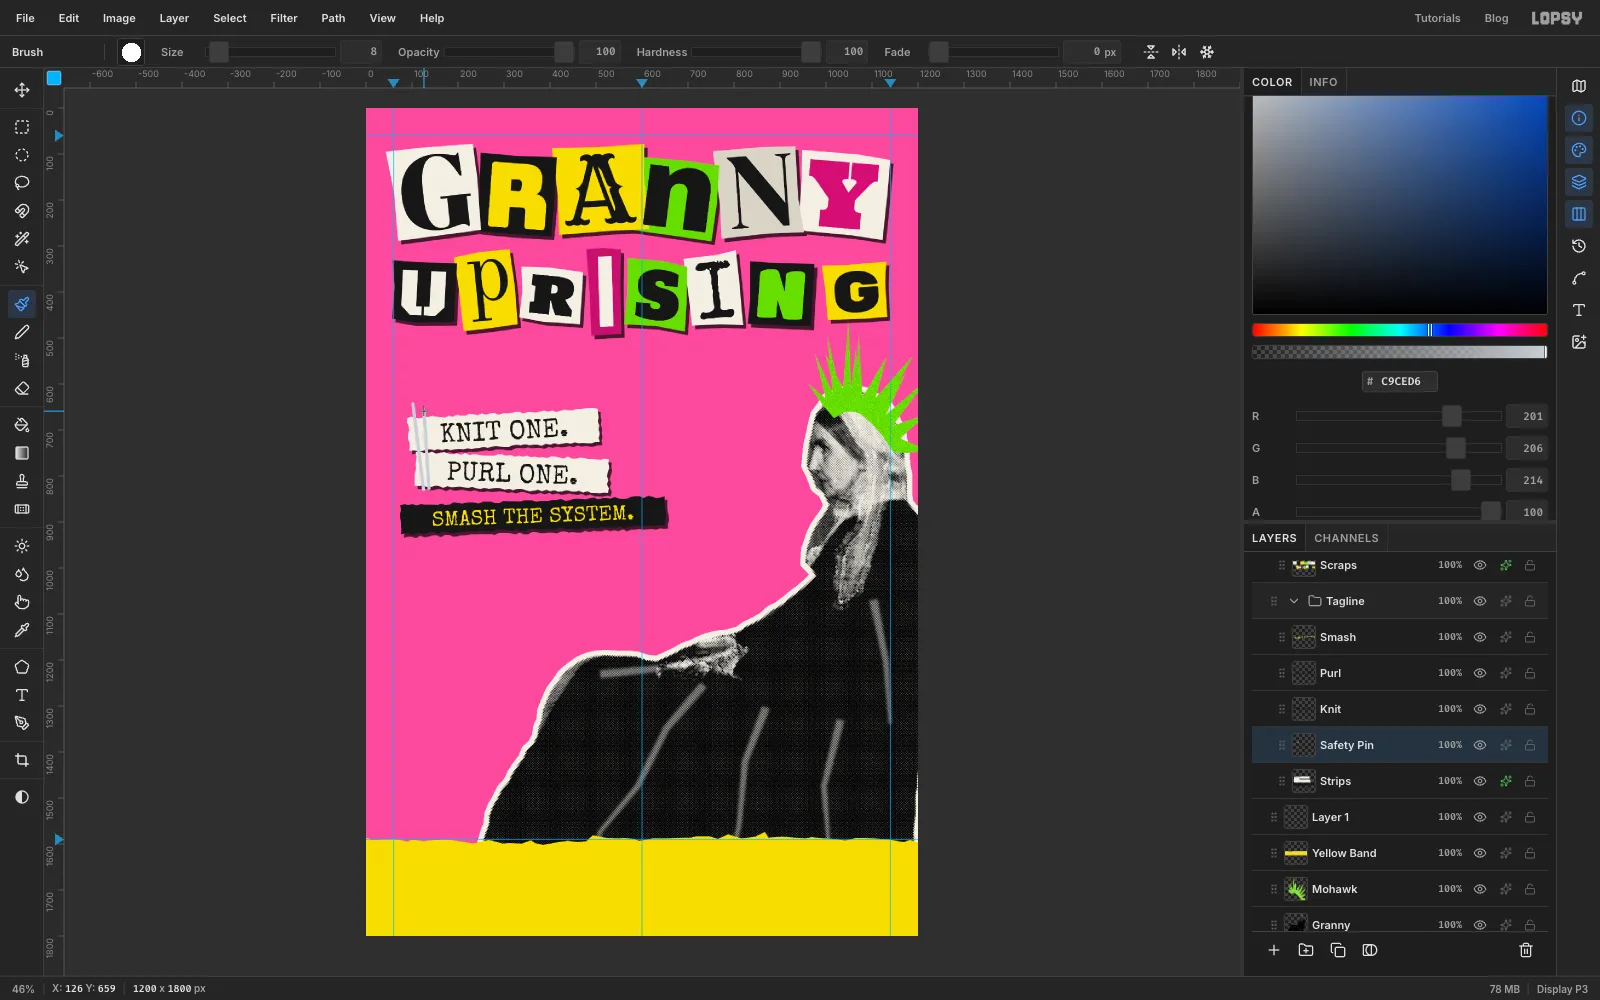
Click Strips and add a layer called Safety Pin. The pin lies almost upright across the left ends of the top two strips, in the spare paper you left there, leaning slightly to the right as it goes down.
Pick the Brush. In the brush settings set Size to 8, Hardness to 100 and Opacity to 100, and set the foreground to .
Draw the two legs as straight lines, about 200 px long:
- For the first leg, click just above the KNIT strip, then Shift-click a little below the bottom of the PURL strip.
- Draw the second leg about 12 px to the right of the first, from the bottom end up to a little short of the top. That one is the pointed leg that tucks under the clasp.
-
Add the coil and the clasp
For the coil spring, pick the Elliptical Marquee. Hold Cmd to keep it a perfect circle and drag a circle about 32 px across over the bottom ends of the legs. Choose Edit → Fill. Then draw a 14 px circle in its middle and press Delete, which leaves a ring.
For the clasp, use the Lasso to draw a rounded hood about 50 × 38 px over the top ends, and fill it. Press Cmd+D.
Open the layer's effects and add a Stroke of 2 in black. Close the drawer.
-
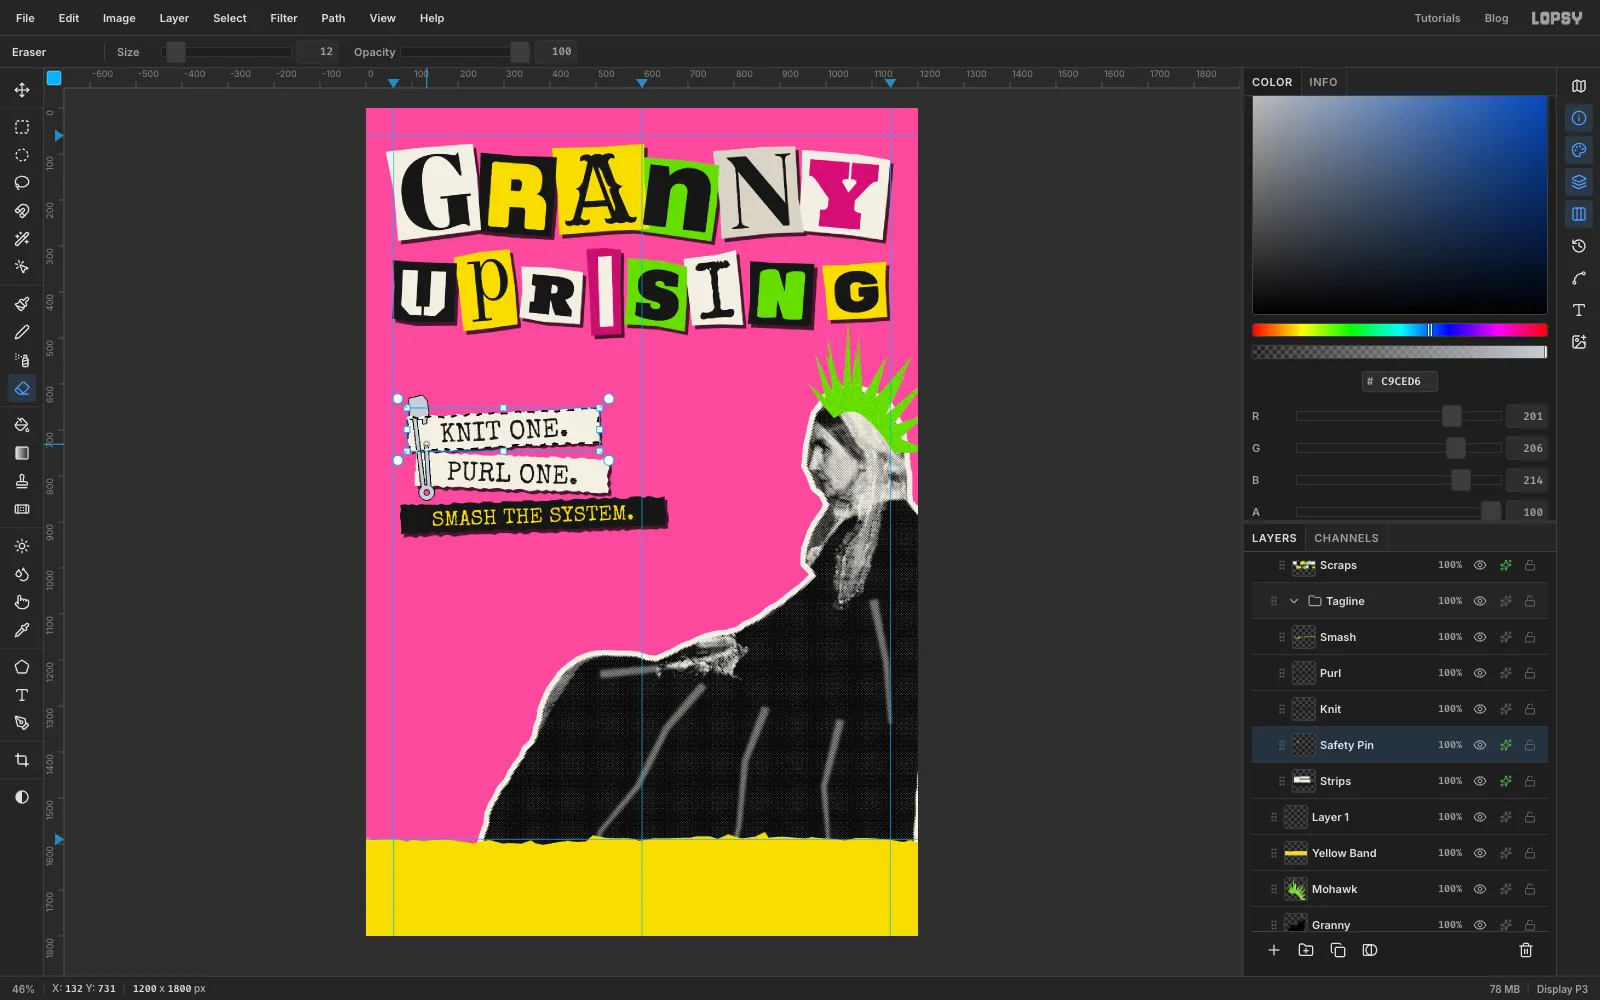
Push the pin through the paper
A pin that just lies on top isn't pinning anything. Lasso roughly round the KNIT ONE strip to select it. Then pick the Eraser, set Size to 12, and erase a stretch about 40 px long of the right-hand, pointed leg in the middle of the strip.
The eraser only works inside the selection, so the leg disappears exactly where it passes behind the paper. It looks like it goes in through one hole and comes out of the next. Press Cmd+D.
-
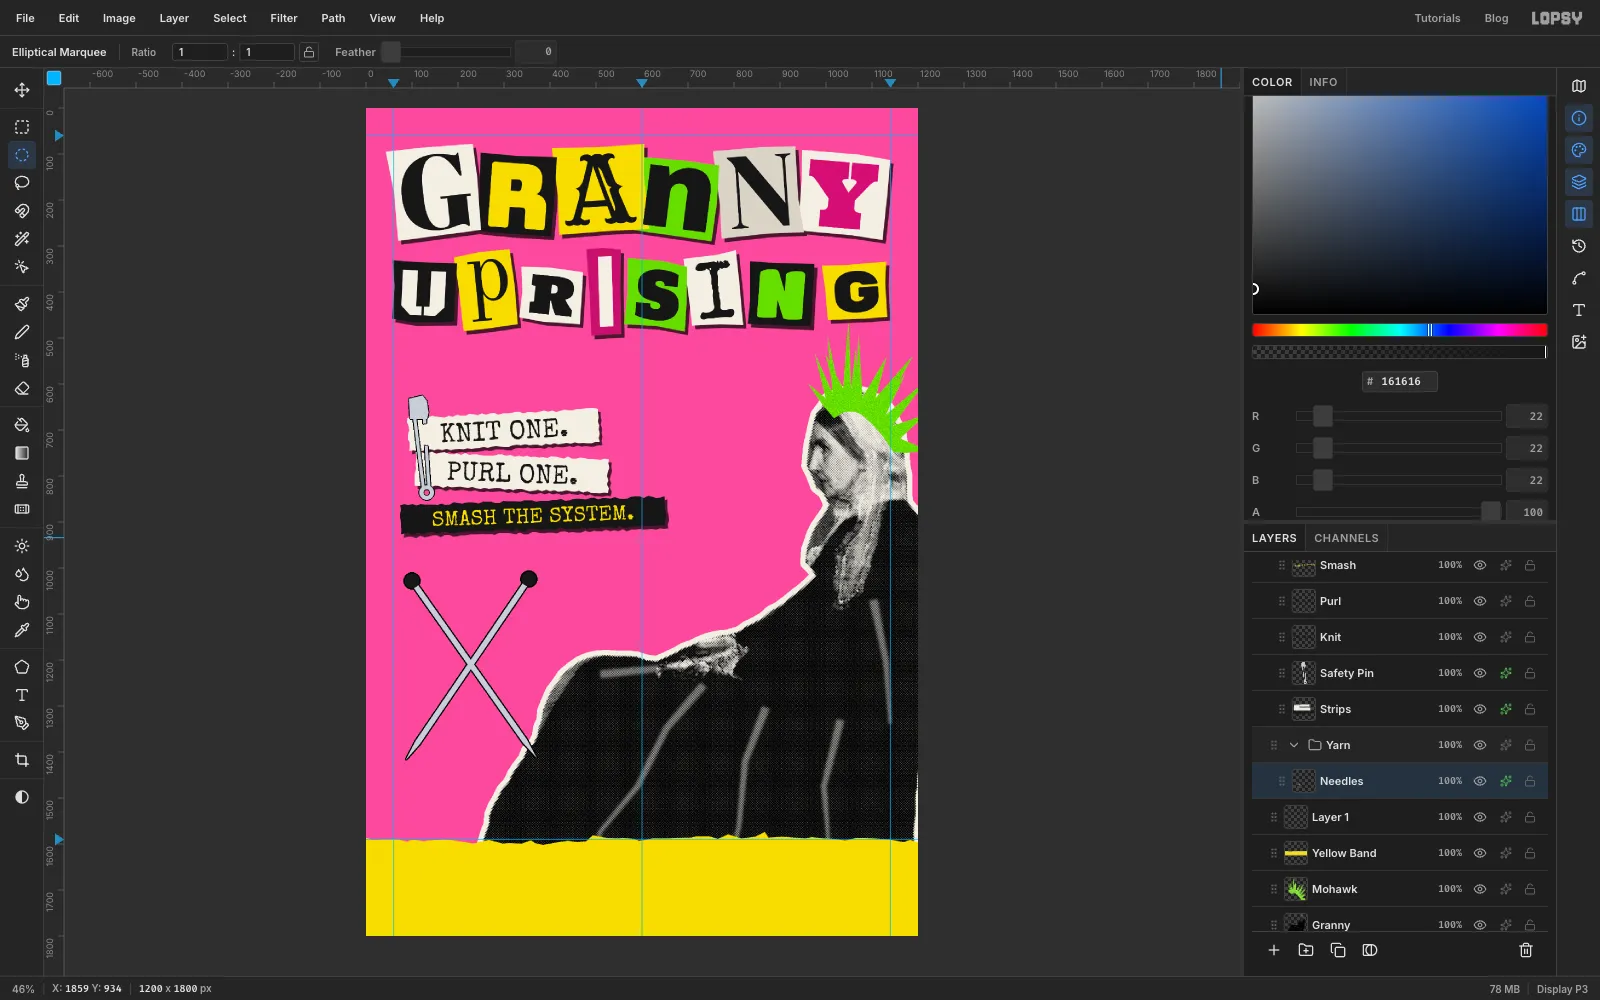
Cross two knitting needles
The needle knobs sit close to the left margin guide, so turn off View → Snap to Guides for now. Otherwise the knob circles snap to the guide and get a flat side.
Click Layer 1, click New Group and name it Yarn. Add a layer inside called Needles.
Each needle is a long, thin lasso shape about 12 px wide and 470 px long, coming to a point over its last 45 px. Draw the two so they cross in an X just inside the left margin, below the tagline. The knobs go at the top, about 250 px apart, and the points at the bottom, a little above the band. The crossing point, where the ball will go, is at about 226, 1220. Fill both with .
For the knobs, pick the Elliptical Marquee, hold Cmd for a perfect circle and drag a 32 px circle at the top end of each needle. Fill them with . Press Cmd+D and add a black Stroke of 3.
-
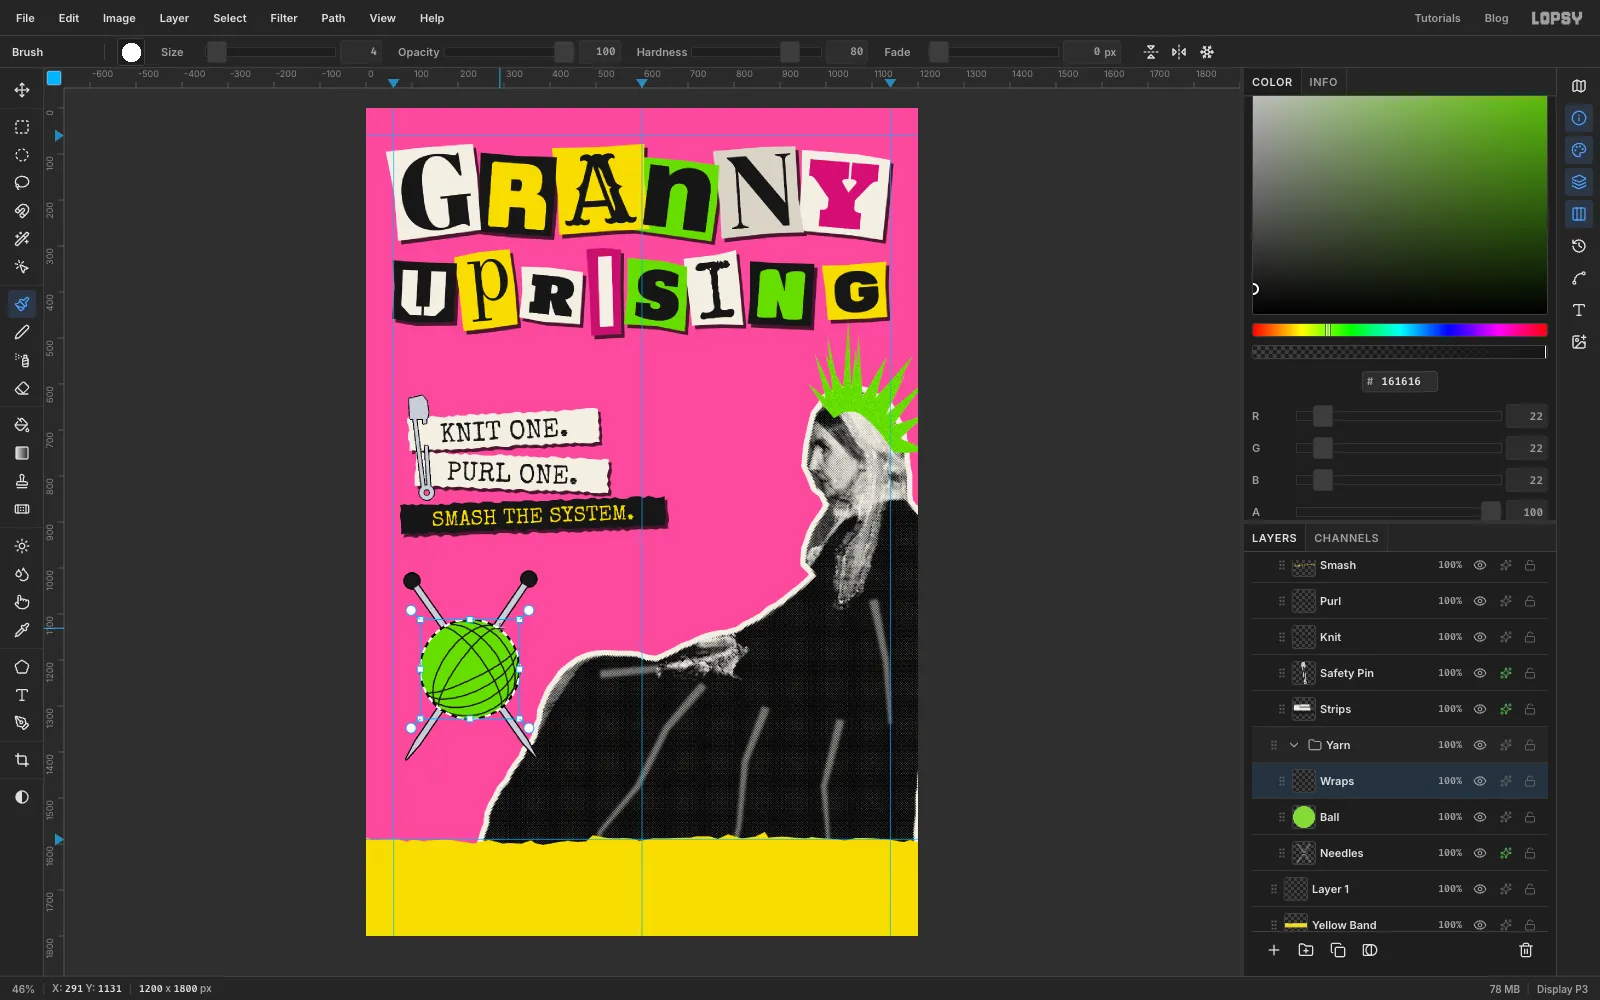
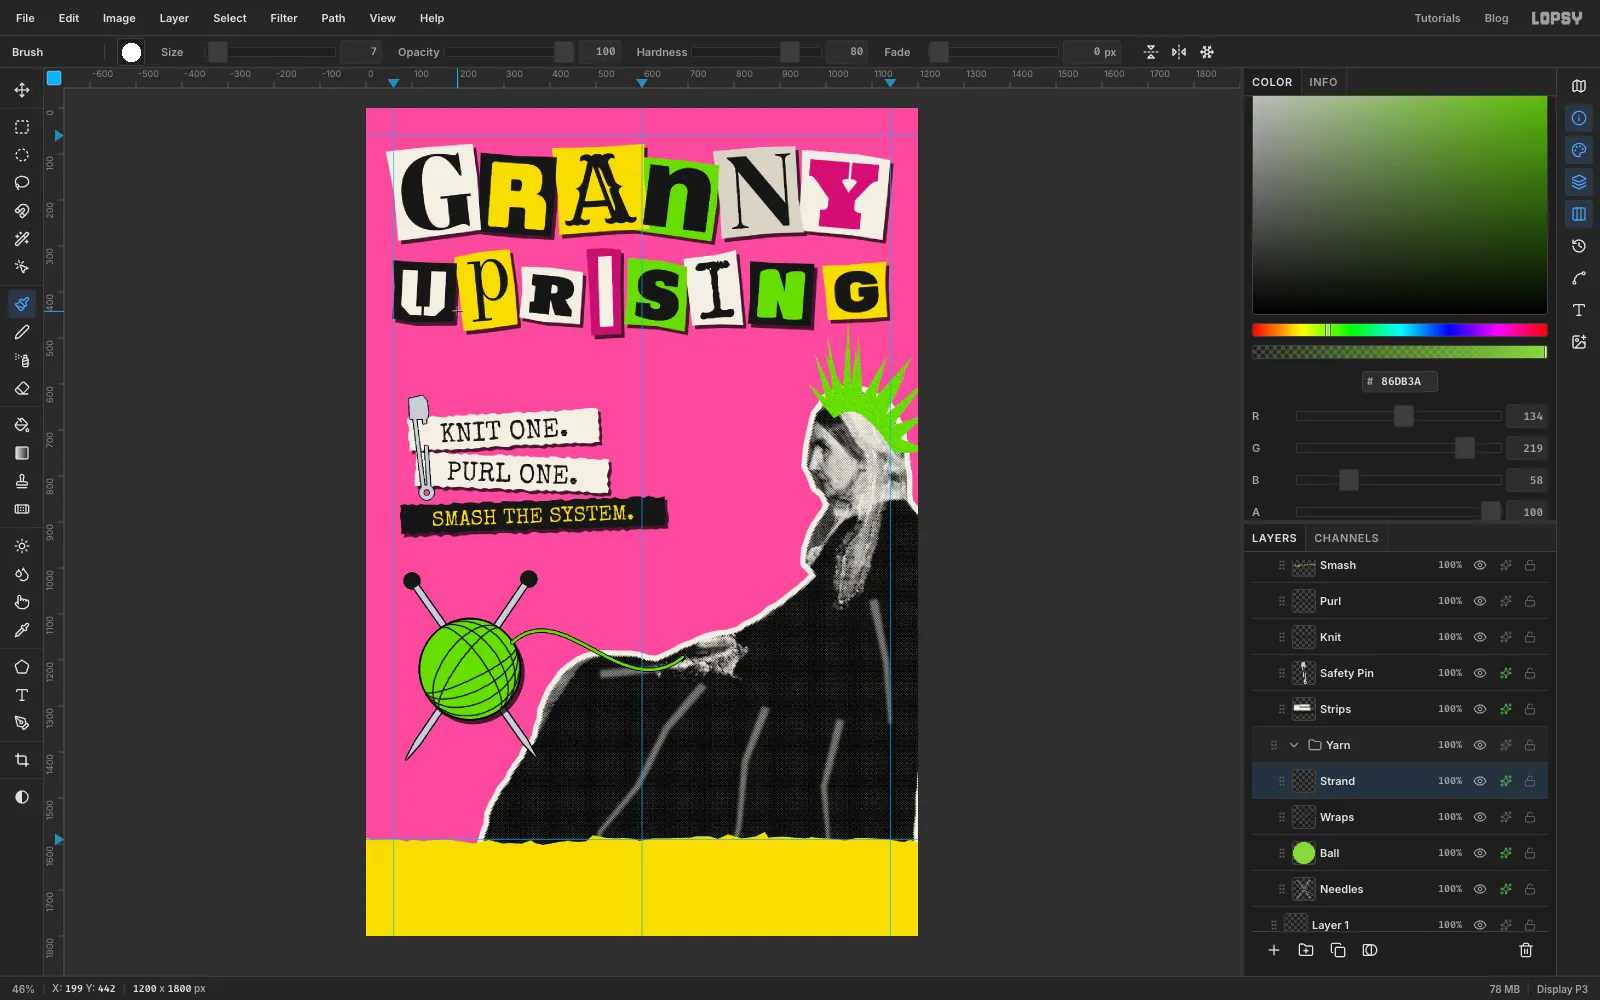
Wind a ball of wool
Add a layer called Ball. With the Elliptical Marquee, holding Cmd for a perfect circle, draw a circle 216 px across centred where the needles cross. Fill it with . The needles are on the layer below, so they now look as if they're stuck through the ball.
Add a layer called Wraps and Cmd-click the Ball thumbnail so you can only paint inside the ball. Pick the Brush at Size 4 with a foreground.
Wool wraps around a ball in bands that meet at two points, like lines of longitude meeting at the poles. Paint three sets of curves. In each set, the curves start and end at the same two points on the ball's edge. Some bow out wide, others stay nearly straight.
- Tilt the first set down to the right, with three or four curves.
- Tilt the second set the other way, with three curves.
- Make the third set steep, with two curves.
Press Cmd+D. Give Ball a black Stroke of 4 and the same hard Drop Shadow as the scraps.
-
Run a strand to her hands
Click Wraps and add a layer called Strand. Set the Brush to Size 7 with a foreground. Drag a loose S-curve from the top right of the ball, up over the pink, down across her lap and into her hands.
Give it a black Stroke of 2 so it stays visible against the black dress. Then turn View → Snap to Guides back on.
-
Make a round sticker
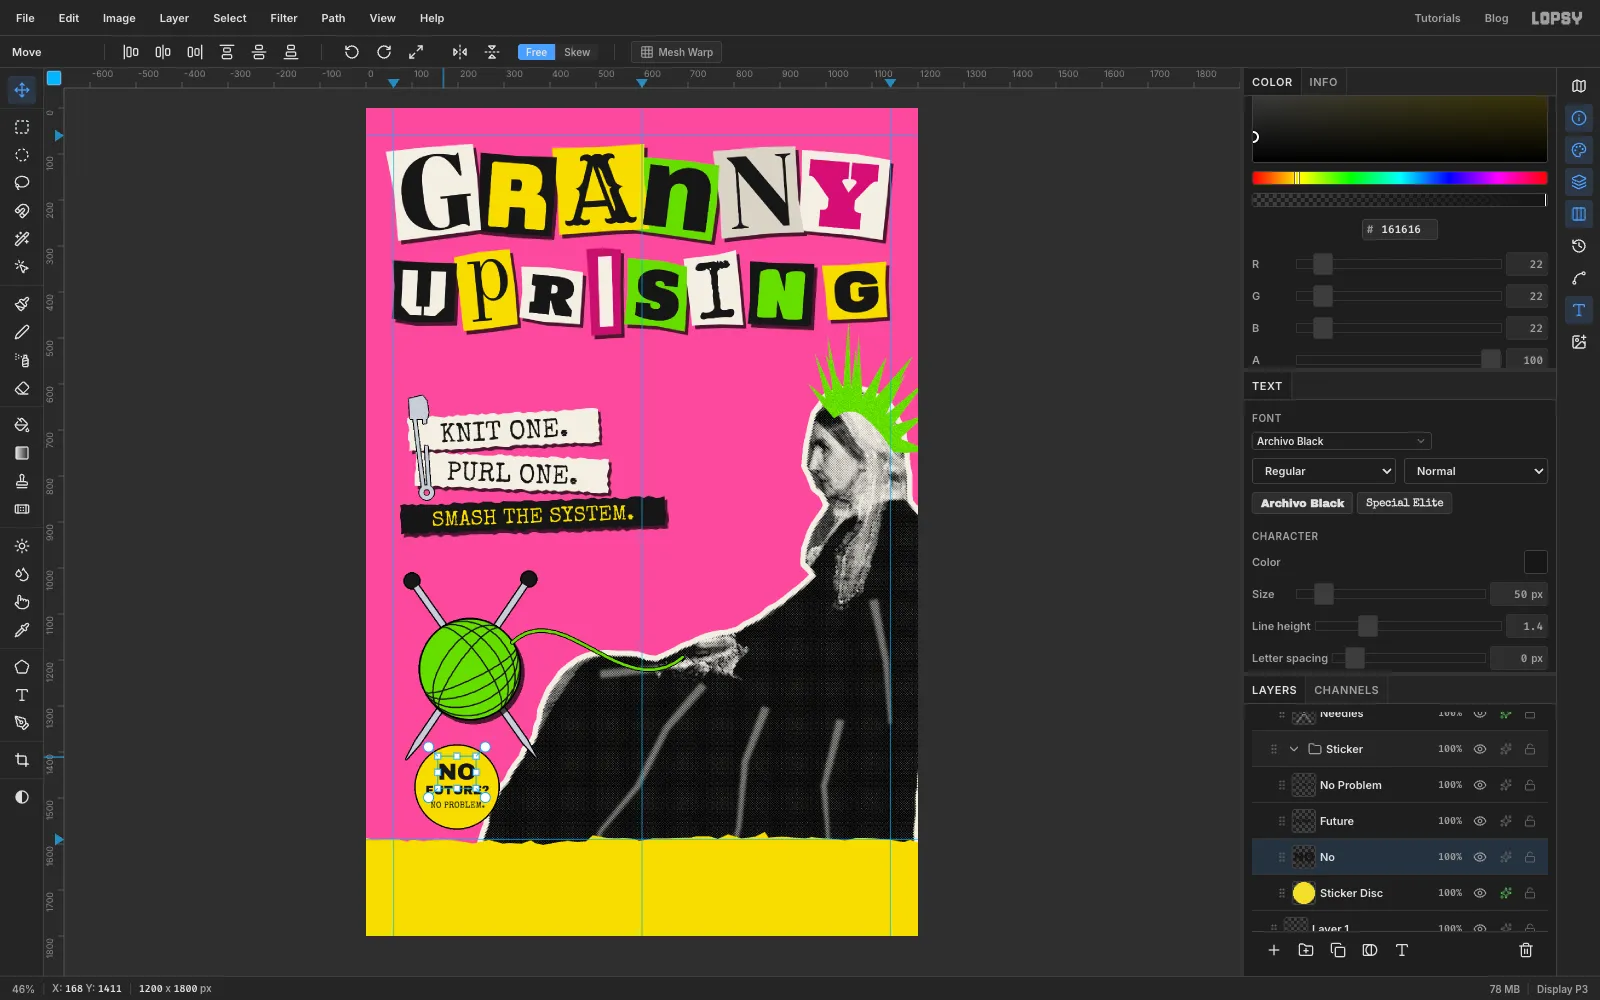
Click Layer 1, click New Group and name it Sticker. Add a layer inside called Sticker Disc. With the Elliptical Marquee, holding Cmd for a perfect circle, draw a 180 px circle under the needle points, centred at about 198, 1476, so its right edge laps over the hem of her skirt. Fill it with , press Cmd+D and give it a black Stroke of 3.
Add three lines of black text on the disc. Work bottom up, clicking Sticker Disc before each. Centre each line with the Move tool: drag until the middle of its text box sits over the disc's centre, then nudge with the arrow keys.
- NO PROBLEM. in Special Elite 19
- FUTURE? in Archivo Black 27
- NO in Archivo Black 50
Keep every line at least 12 px clear of the rim. The middle line is the widest, so check it first.
-
Slap the sticker on at an angle
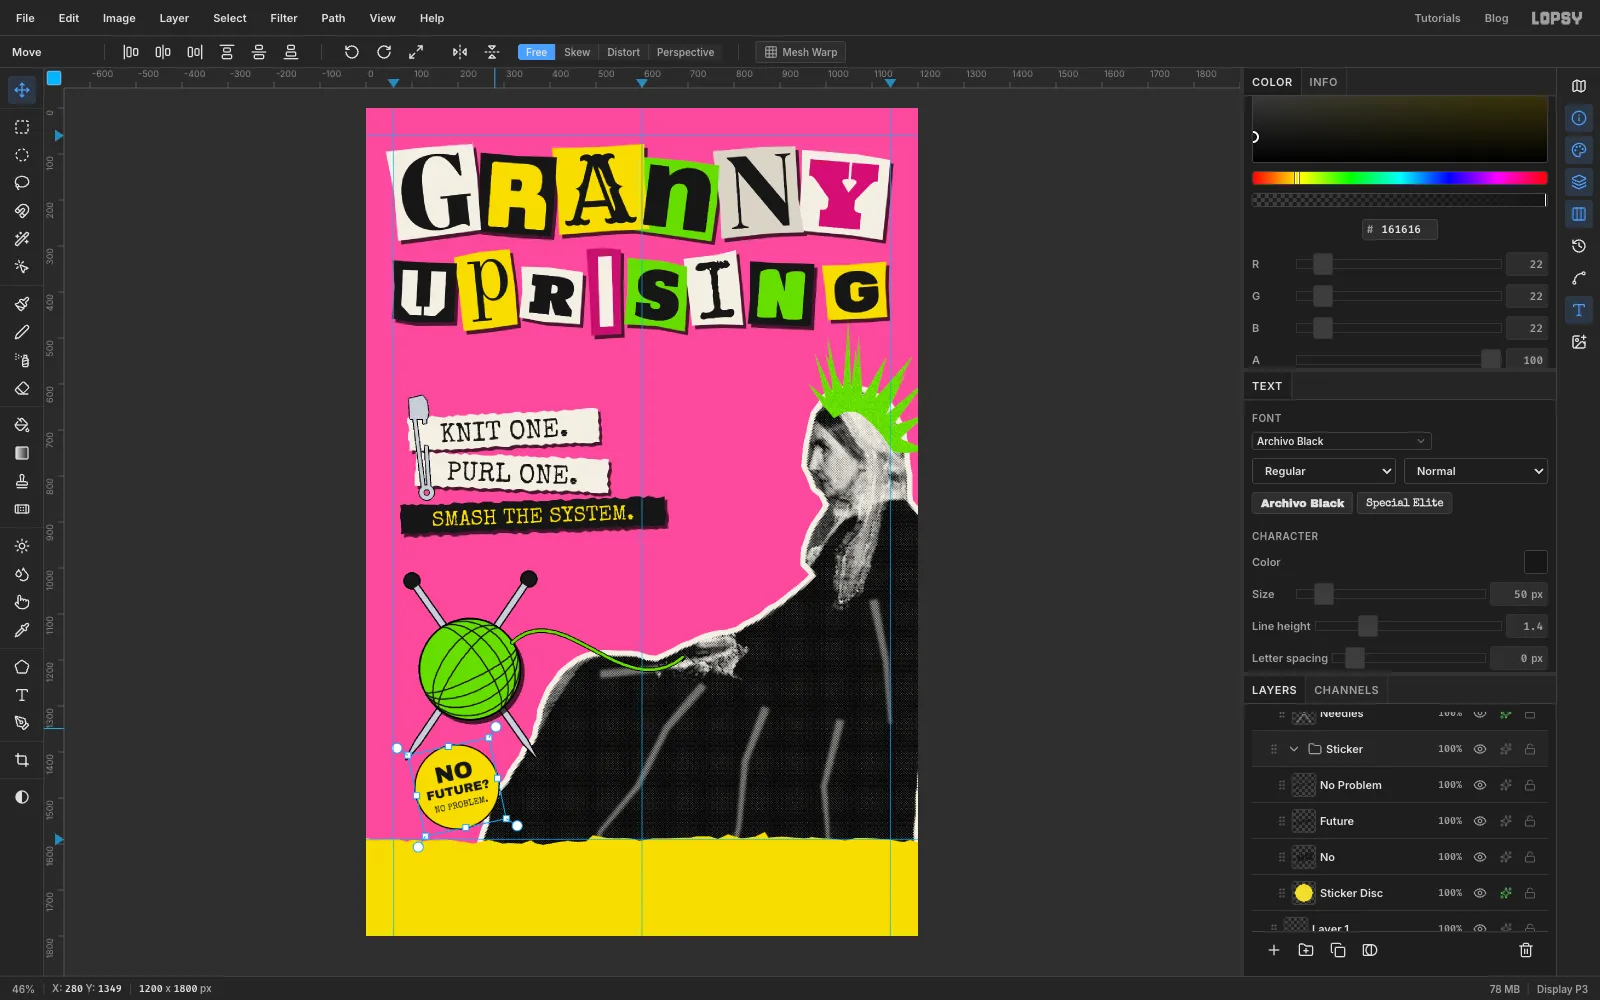
Click the Sticker group row and pick the Move tool. With no selection on the canvas, the handles frame everything in the group. Drag the top-right round rotate handle anticlockwise by about 12°.
The text layers turn with the disc and stay live, so you can still click into FUTURE? later and retype it.
-
Set the billing block
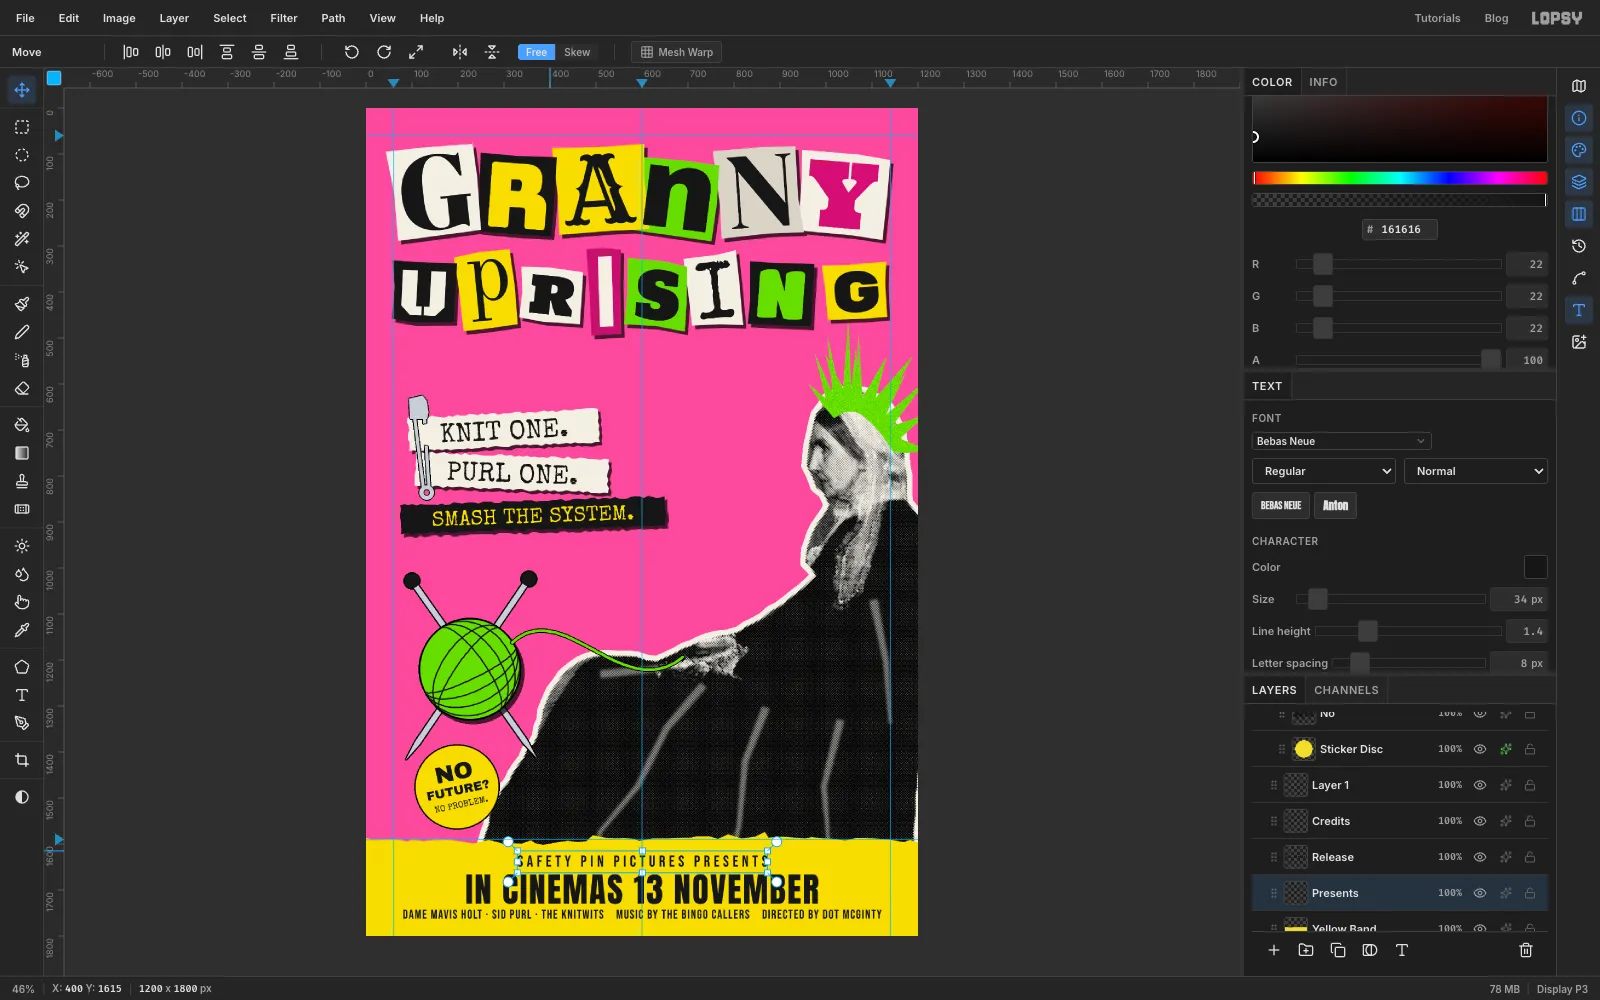
Click the Yellow Band layer, so the billing text lands just above it. Set three lines in black, again bottom first, and name them Credits, Release and Presents. Use the Text panel's Letter spacing for the tracking. Centre each line with the Move tool: drag it until the middle of its text box sits on the centre guide, then nudge with the arrow keys. The heights below are where the middle of each line's letters should sit.
- Credits in Bebas Neue 27, spacing 2, at y 1752. Type
DAME MAVIS HOLT · SID PURL · THE KNITWITS MUSIC BY THE BINGO CALLERS DIRECTED BY DOT McGINTY. Paste it if your keyboard can't type the middle dot. - IN CINEMAS 13 NOVEMBER in Anton 74, spacing 3, at y 1698.
- SAFETY PIN PICTURES PRESENTS in Bebas Neue 34, spacing 8, at y 1636.
Leave at least 30 px between the top line and the torn edge, and about 40 px under the credits.
- Credits in Bebas Neue 27, spacing 2, at y 1752. Type
-
Scrawl a note in marker
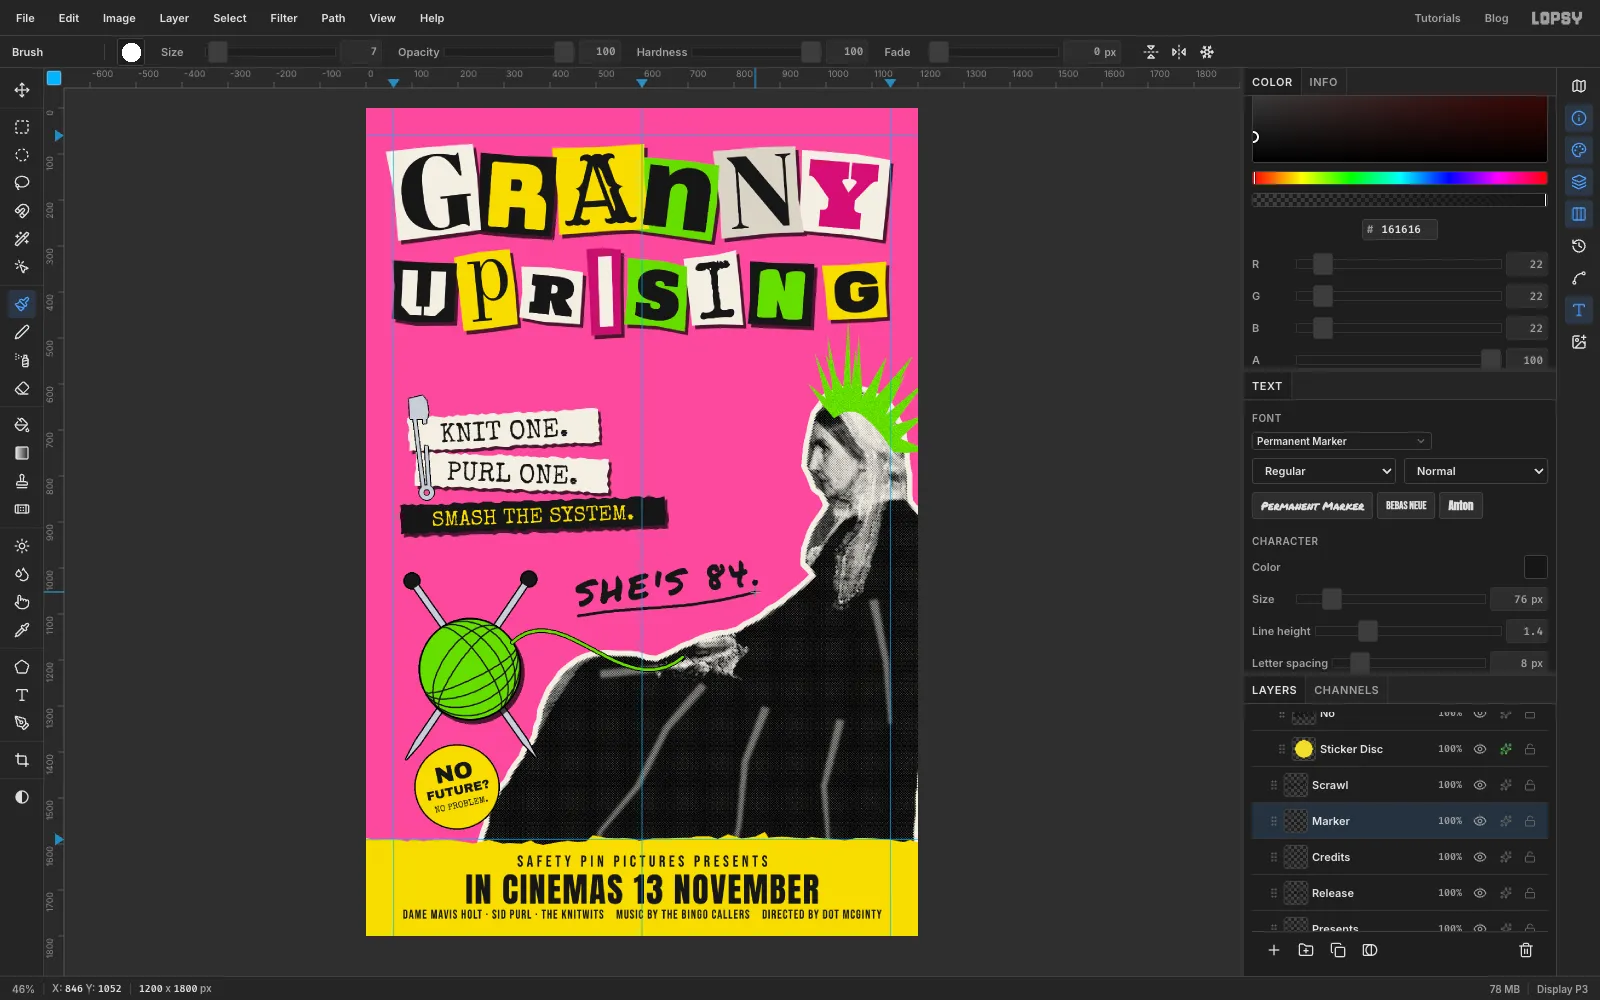
Click Layer 1. With the Text tool, set Permanent Marker at 76 in and type SHE'S 84. in the empty pink above her lap, centred at about 652, 1032. Name the layer Scrawl, and tilt it about 7° anticlockwise with the Move tool's rotate handle.
Now click Layer 1 again and rename it Marker. Check the foreground is still , pick the Brush at Size 7 and drag a slightly wavy underline beneath the words.
-
Spray a star on the wall
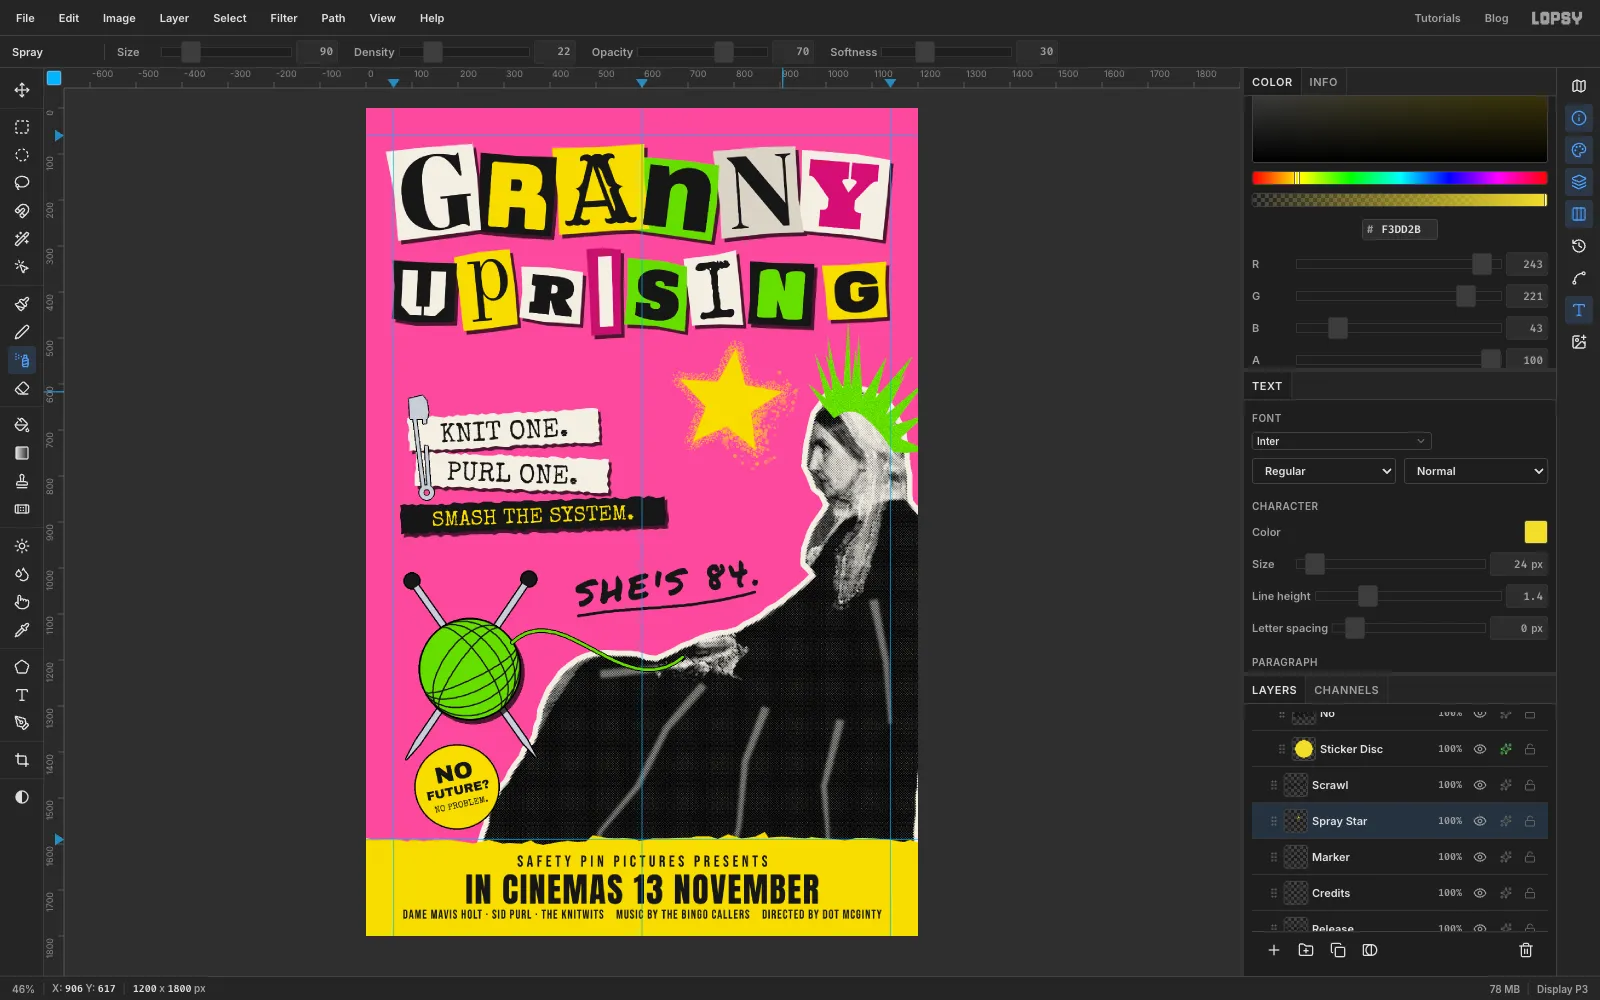
Click Marker and add a layer called Spray Star. With the Lasso, draw a five-pointed star about 236 px across, centred at about 790, 640 in the gap between the tagline and her face. Fill it with and press Cmd+D. Run Filter → Gaussian Blur… at 2 so the edge is soft, like spray through a loose stencil.
Pick the Spray tool and set Size 36, Density 60, Opacity 95 and Softness 30. Drag once around the star's outline.
Then set Size 90, Density 22 and Opacity 70 and drag a loose loop over just the lower-right points. Overspray always drifts one way.
-
Let it drip
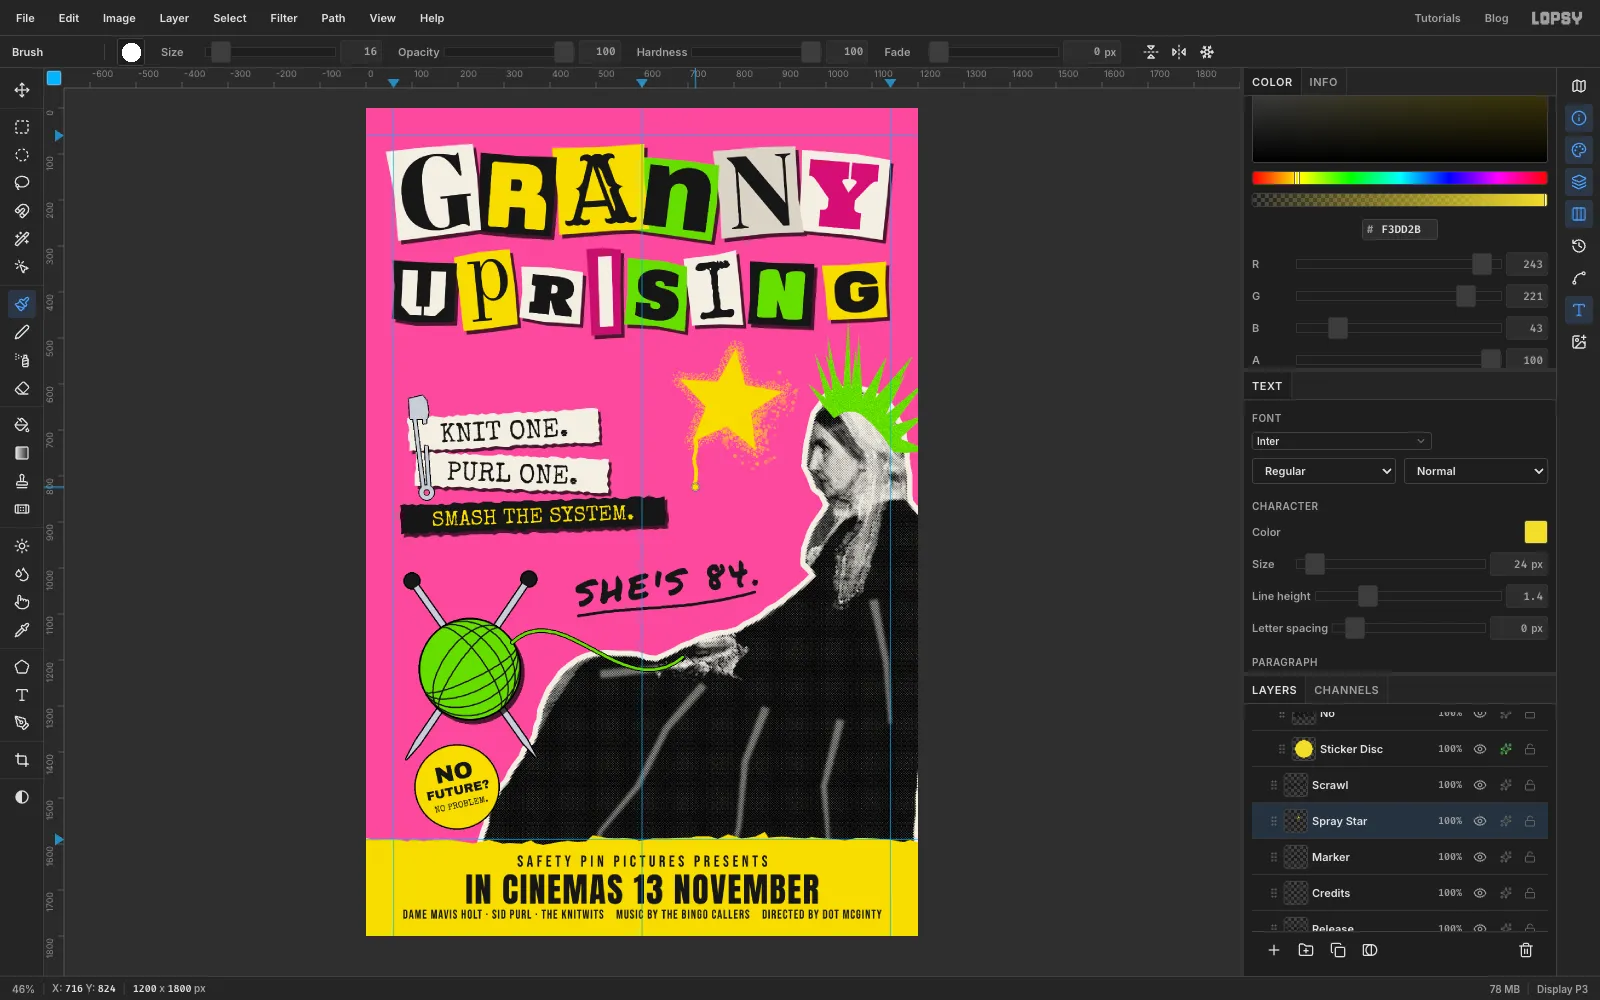
Pick the Brush at Size 9, Hardness 100. Drag a slightly wavering line straight down about 100 px from the star's lower-left point. Then set the size to 16 and click once at the bottom for the bead of paint.
-
Tape down the cut-out
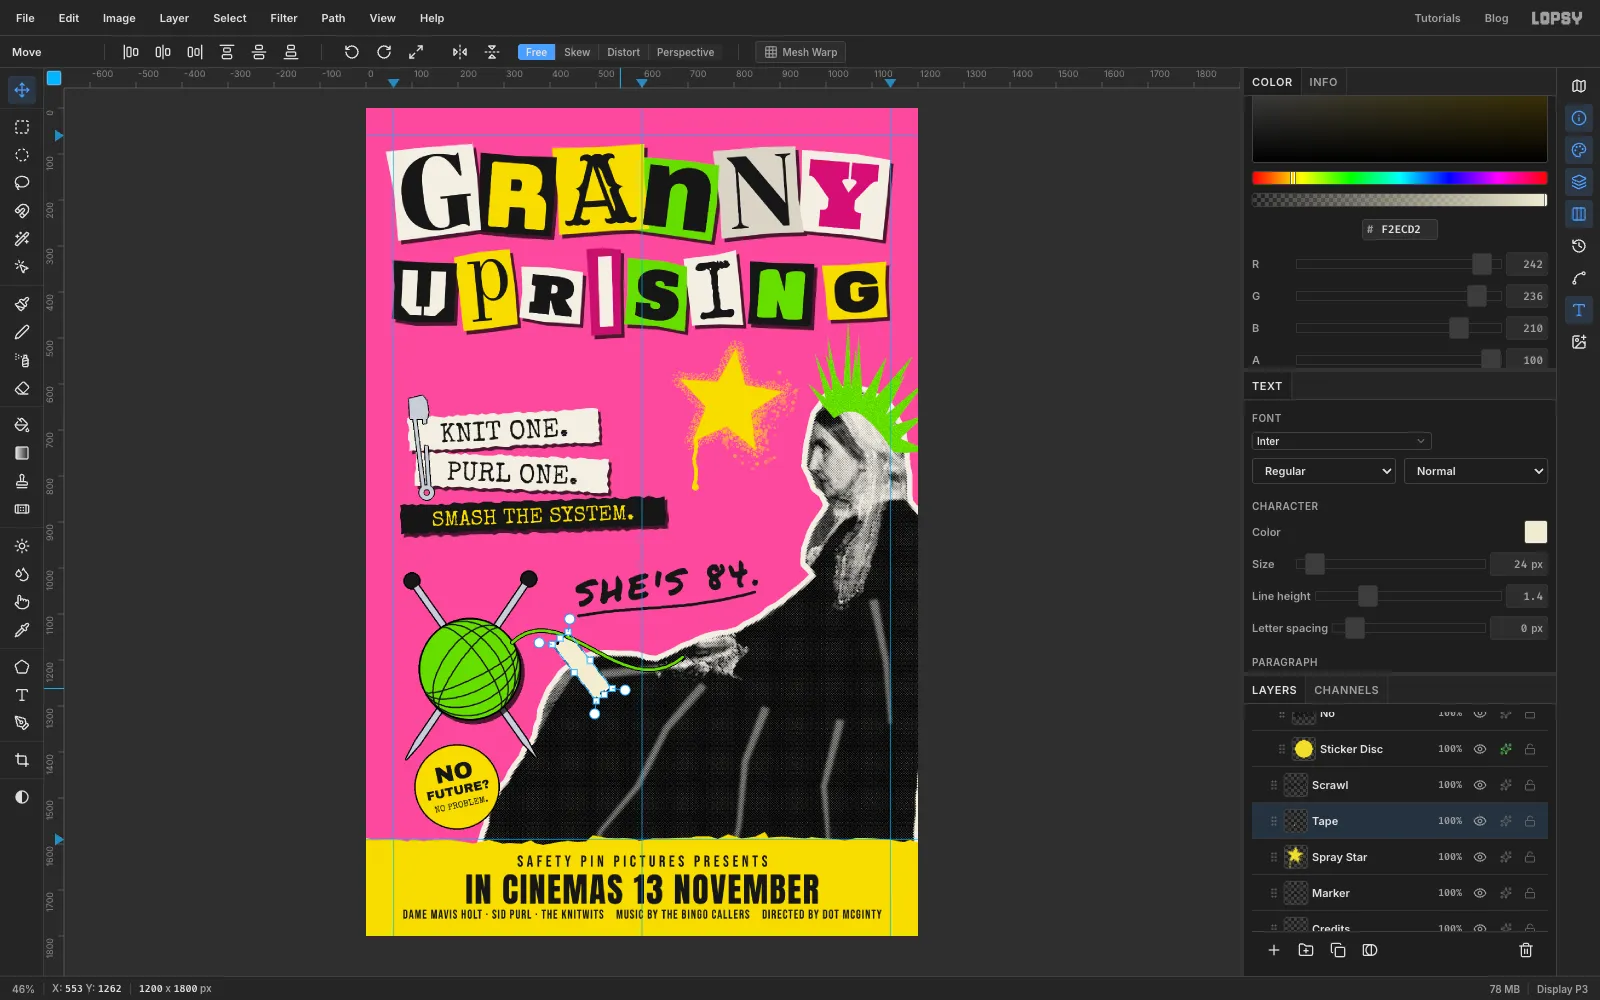
Click Spray Star and add a layer called Tape. With the Lasso, draw a strip about 150 × 44 px across the edge of her lap, near where the strand crosses. Make both short ends ragged zig-zags. Fill it with .
The fill leaves the selection active with handles on it. With the Move tool, drag the rotate handle until the tape crosses the edge at about 52°. Press Cmd+D and set the layer's opacity to about 88%, so the tape is just see-through.
-
Copy the tape for the band
Cmd-click the Tape thumbnail, press Cmd+C and then Cmd+V. The copy is pasted in place on its own layer. Rename it Tape 2.
Cmd-click its thumbnail to select it, and drag it down to the lower right, across the yellow band's torn edge at about 1080, 1590. Rotate it another 30° so it stands nearly upright, press Cmd+D and set its opacity to 88% too.
Now it looks like the band was taped on as well.
-
Add toner speckle and burnt edges
The Title group is at the top of the stack, so a layer at the top of it covers the whole poster. Click the top letter layer inside Title and add a layer called Toner.
- Choose Select → All, fill it with and press Cmd+D.
- Run Filter → Add Noise… with Mono and Gaussian selected and Amount at 100.
- Run Filter → Gaussian Blur… at 2.
- Run Filter → Threshold… at 238. That leaves only small clumps of black, about 3% of the layer.
- Pick the Pencil at Size 2 with a foreground. Click at the top of the canvas and Shift-click at the bottom to draw a faint vertical line. Draw a second one further across. These are the streaks a dirty copier drum leaves.
- Set the layer's blend mode to Multiply and its opacity to 50%.
Add one more layer called Edge Burn. Pick the Gradient tool, set Type to Radial and click Advanced…. Use three stops, all in :
- the left end at 0% opacity
- a second stop at 0% opacity about 40% along
- the right end at full opacity
Click a stop's marker under the bar to select it, then set its colour and its opacity in the picker below. Click the bar itself to add the middle stop, and drag its marker to about 40%. Click Done.
Drag from the centre of the poster straight up to just above the top edge. Set the layer to Multiply at 40%. The edges and corners darken, like a sheet that has been copied one time too many.
Both grit layers sit inside the Title group, so don't move that group from now on. If you do, the grit moves with it.
Choose File → Quick Export PNG to save the poster, and File → Save Project to keep the layers.