Design a Maximalist Retro Zine Cover
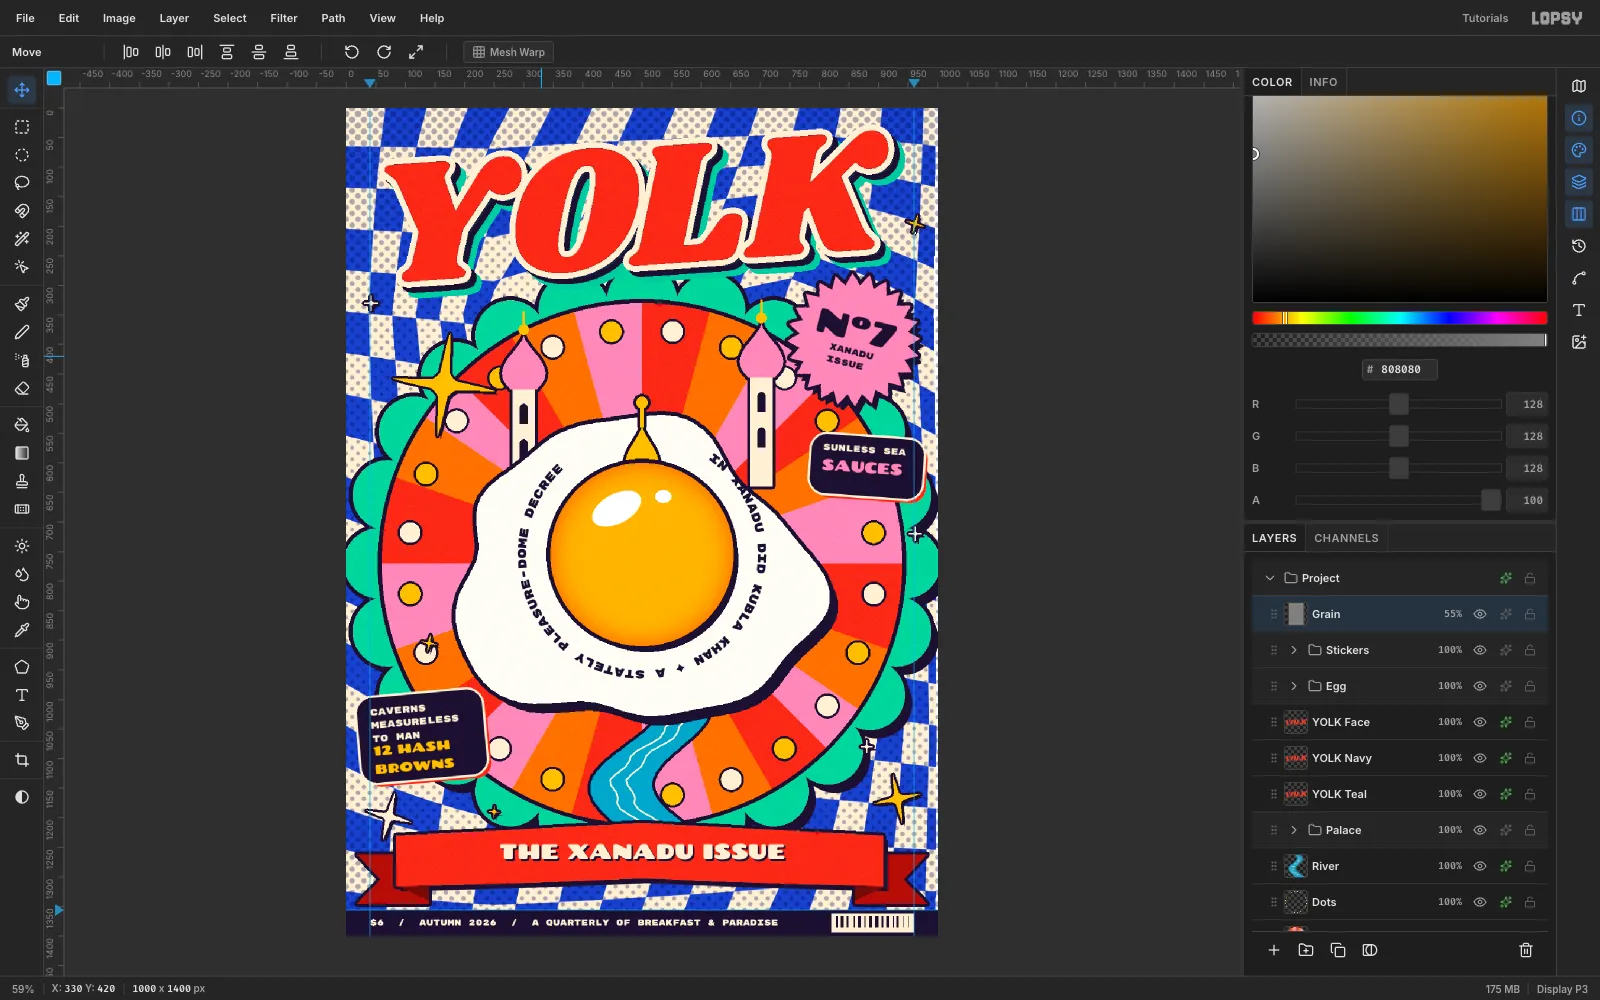
Build a loud, layered 70s-style zine cover in Lopsy with a mesh-warped checkerboard, a radial sunburst, a fried-egg pleasure dome and text on a path.
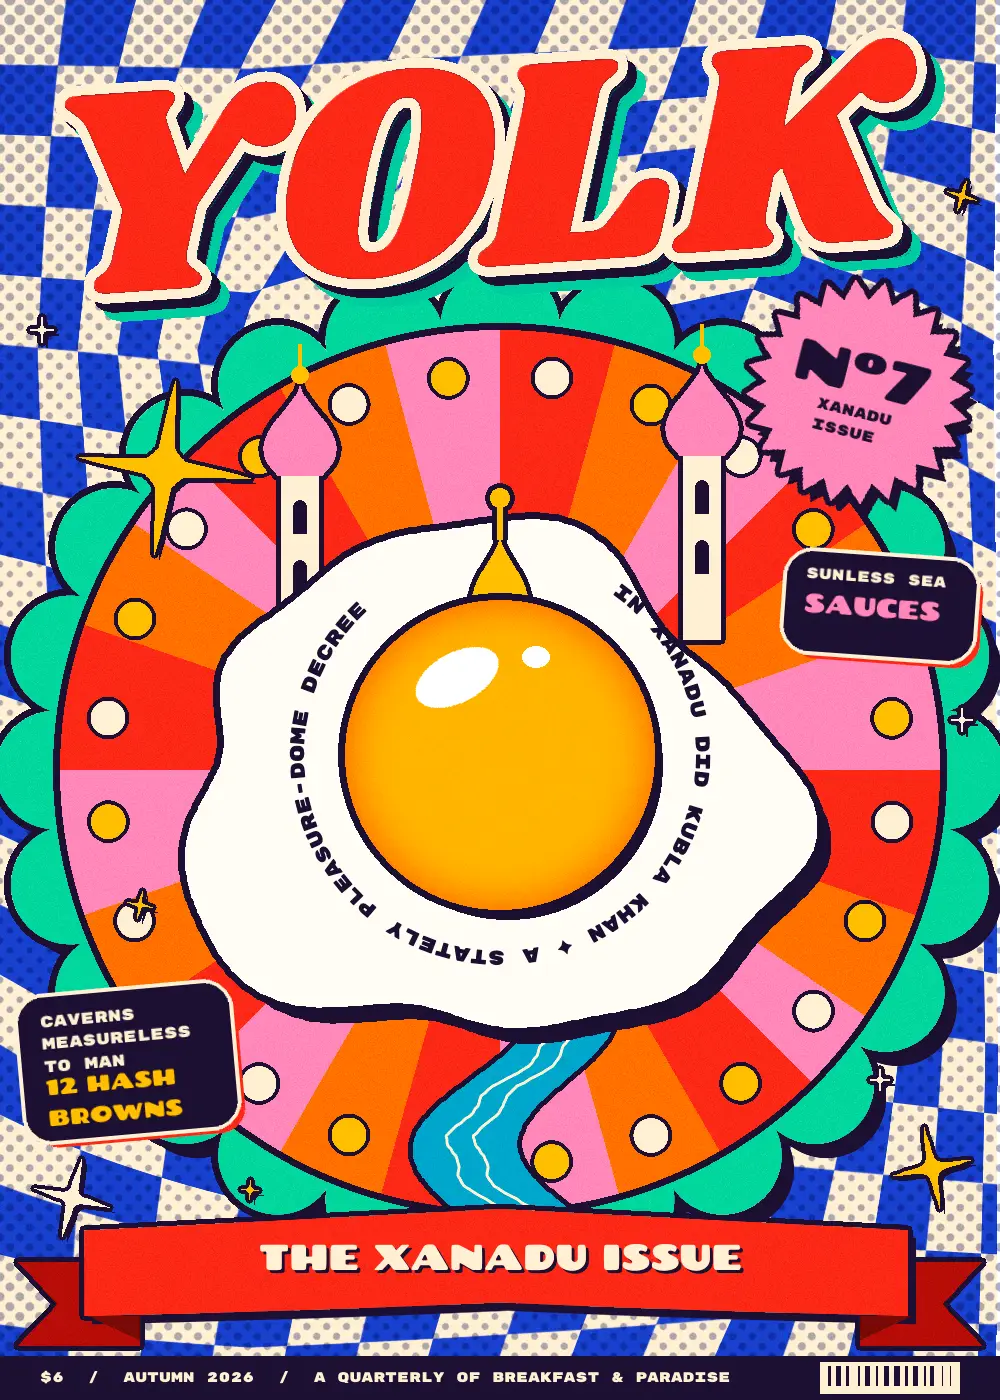
Maximalism isn't clutter. It's a lot of confident pieces, each with its own job, held together by a small palette, one outline colour and a clear hierarchy. In this tutorial you'll make a 1000 × 1400 cover for an imaginary breakfast zine, YOLK: The Xanadu Issue. The idea is that a fried egg becomes Kubla Khan's "stately pleasure-dome".
Along the way you'll use:
- pattern fills and Mesh Warp
- the radial-symmetry brush
- lasso and marquee fills
- Shape-tool paths with text on a path
- layer effects and blend modes
- the Halftone and Add Noise filters
- groups, transforms, and grid snapping
The palette:
- Cobalt
#2340C8and cream#FFF1D6for the background - Tomato
#E8412C, orange#FF7A1Aand bubblegum#FF8FB8for the sunburst - Mint
#5ED3A0and teal#19C9A0as accents - Yolk
#FFB81Cand gold#FFC21A - Ink navy
#1A1030for every outline and hard shadow
-
Create the zine document
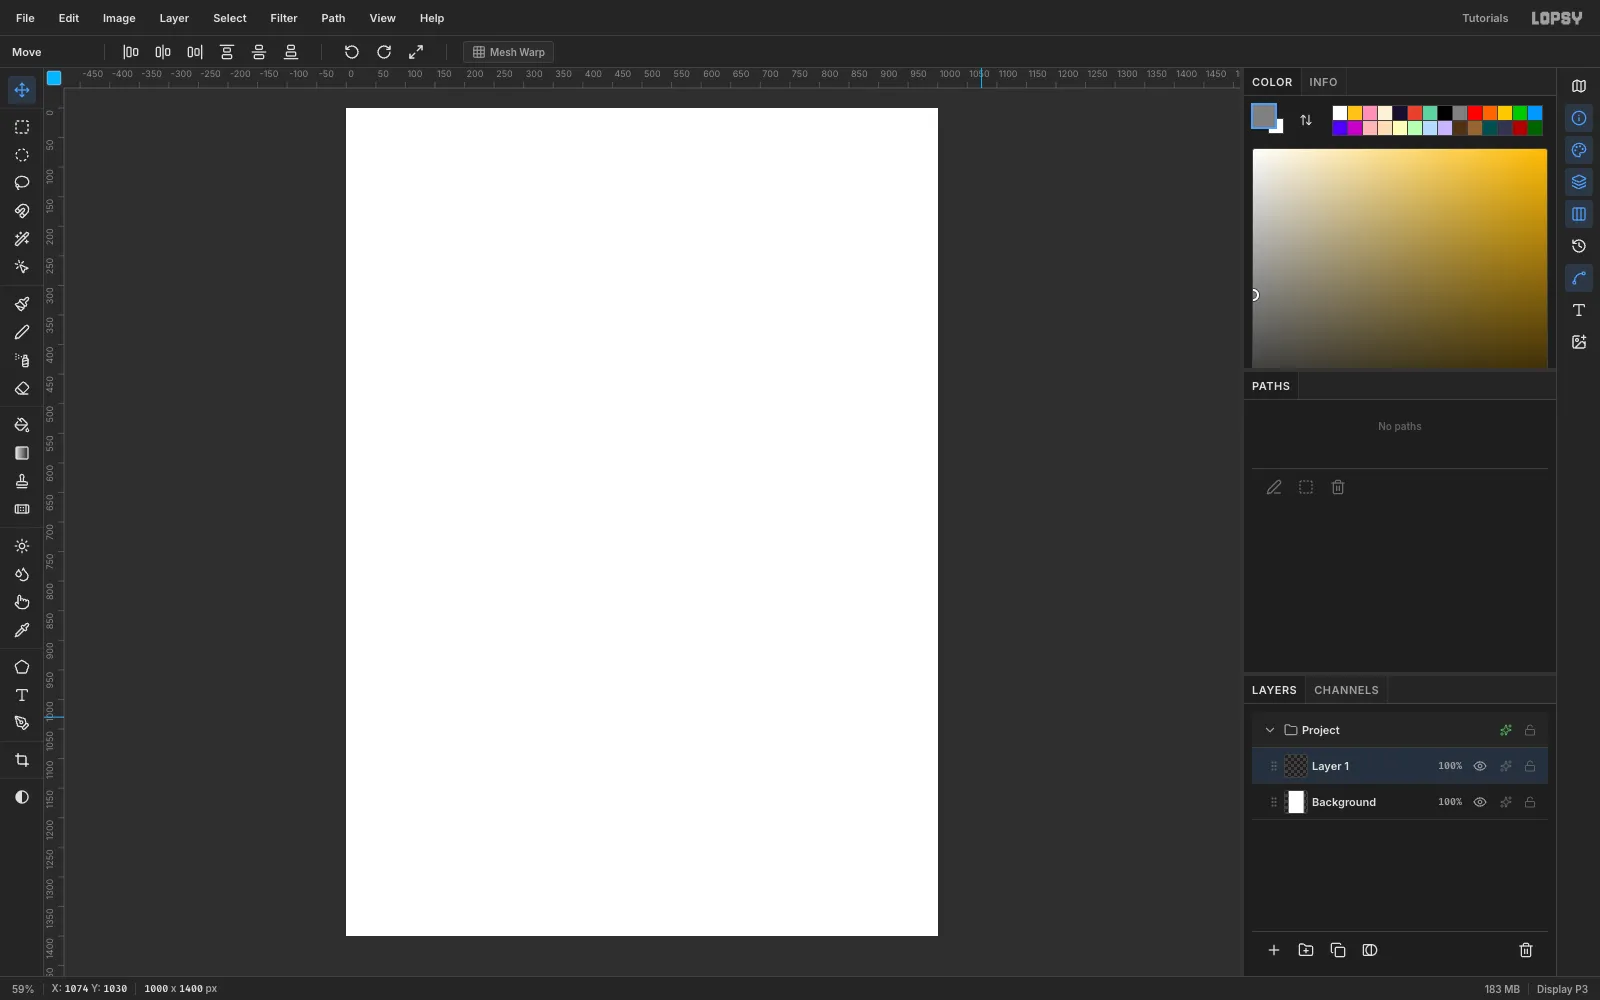
Choose File → New, type 1000 × 1400 px, and pick a White background. That's close to A5 proportions, which suits a zine. Double-click Layer 1 and rename it Tile.
-
Paint a checkerboard tile
You'll build the background from one small tile.
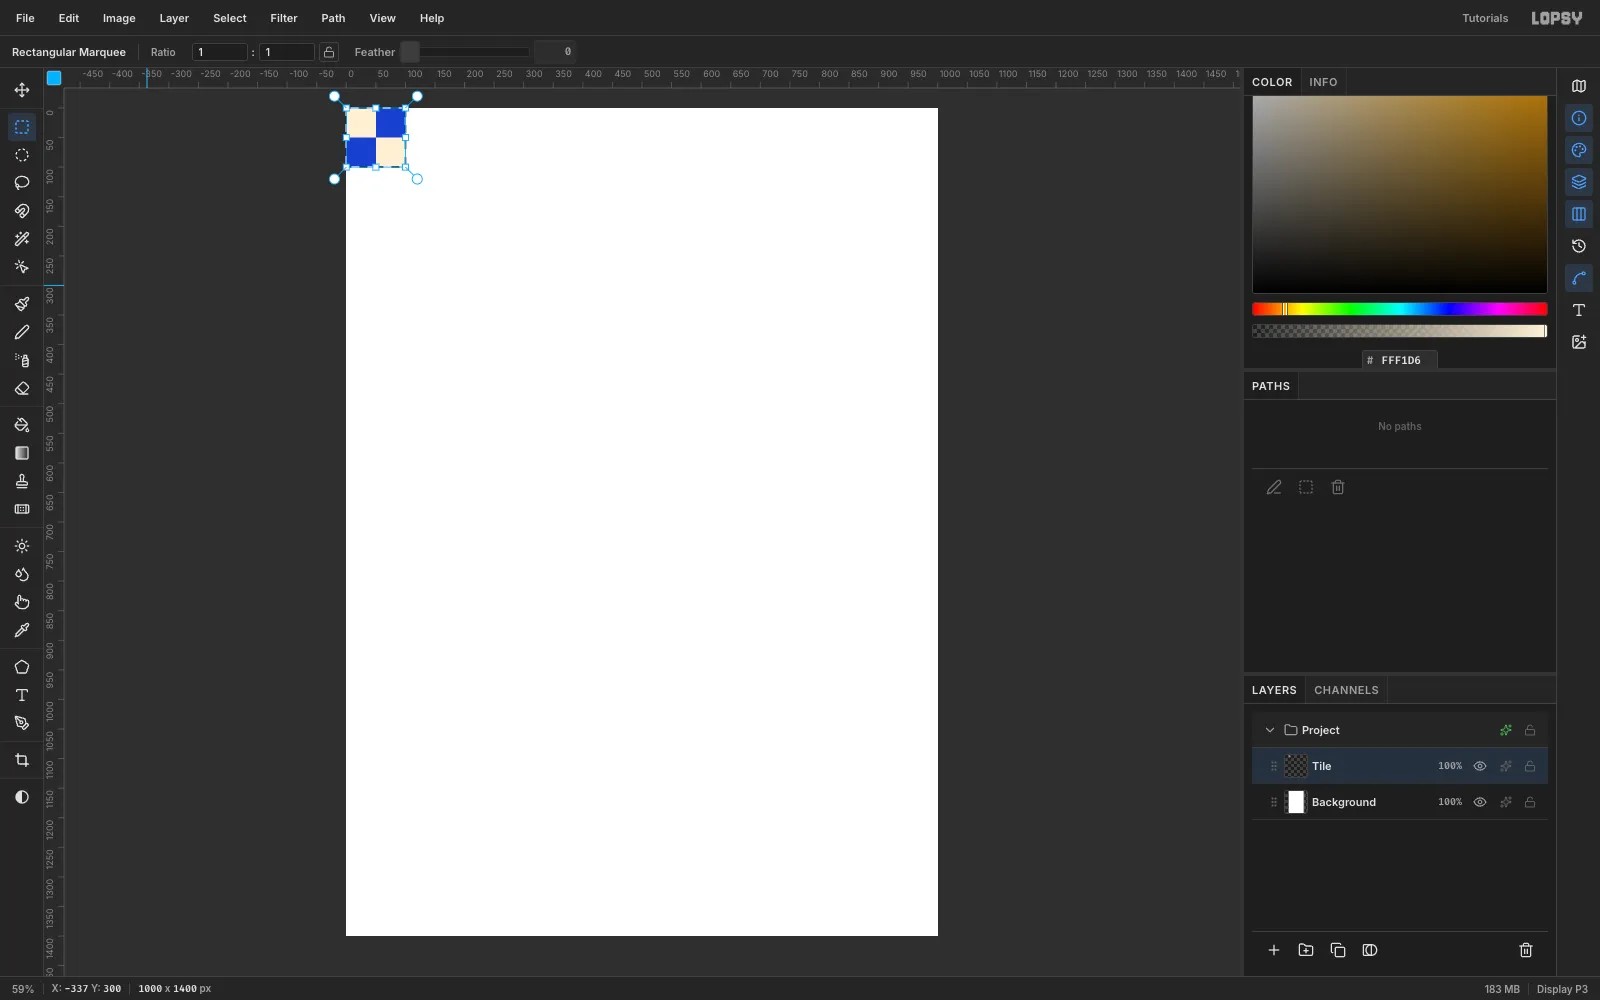
- With the Rectangular Marquee, drag a 100 × 100 selection at the top-left corner. Set the foreground to cobalt
#2340C8and choose Edit → Fill. - Marquee the top-left 50 × 50 quarter and fill it with cream
#FFF1D6. - Do the same for the bottom-right quarter.
- Re-select the whole 100 × 100 tile and choose Edit → Define Pattern.
- With the Rectangular Marquee, drag a 100 × 100 selection at the top-left corner. Set the foreground to cobalt
-
Fill a layer with the pattern
- Press Cmd+D to deselect.
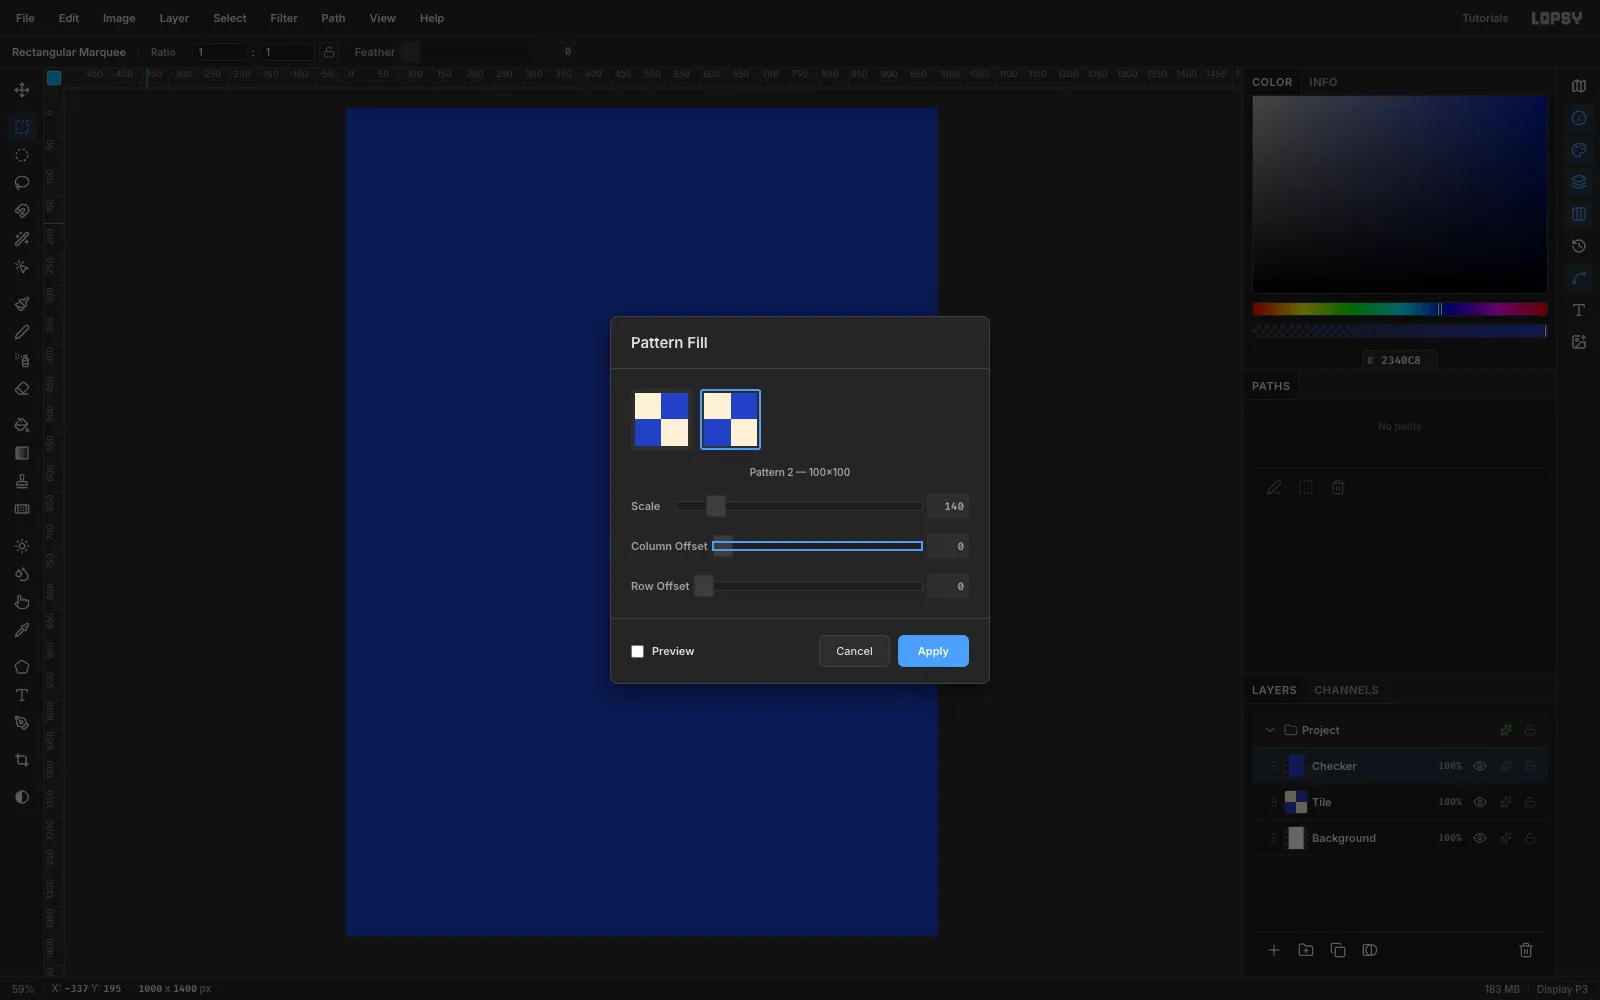
- Click Add Layer, name it Checker, and give it a solid Edit → Fill first. Pattern Fill needs existing pixels to tile over.
- Choose Edit → Fill with Pattern…, pick the checker, set Scale to 140, and click Apply. That gives you 70 px squares.
- Select the Tile layer and delete it.
-
Swirl the checkerboard with Mesh Warp
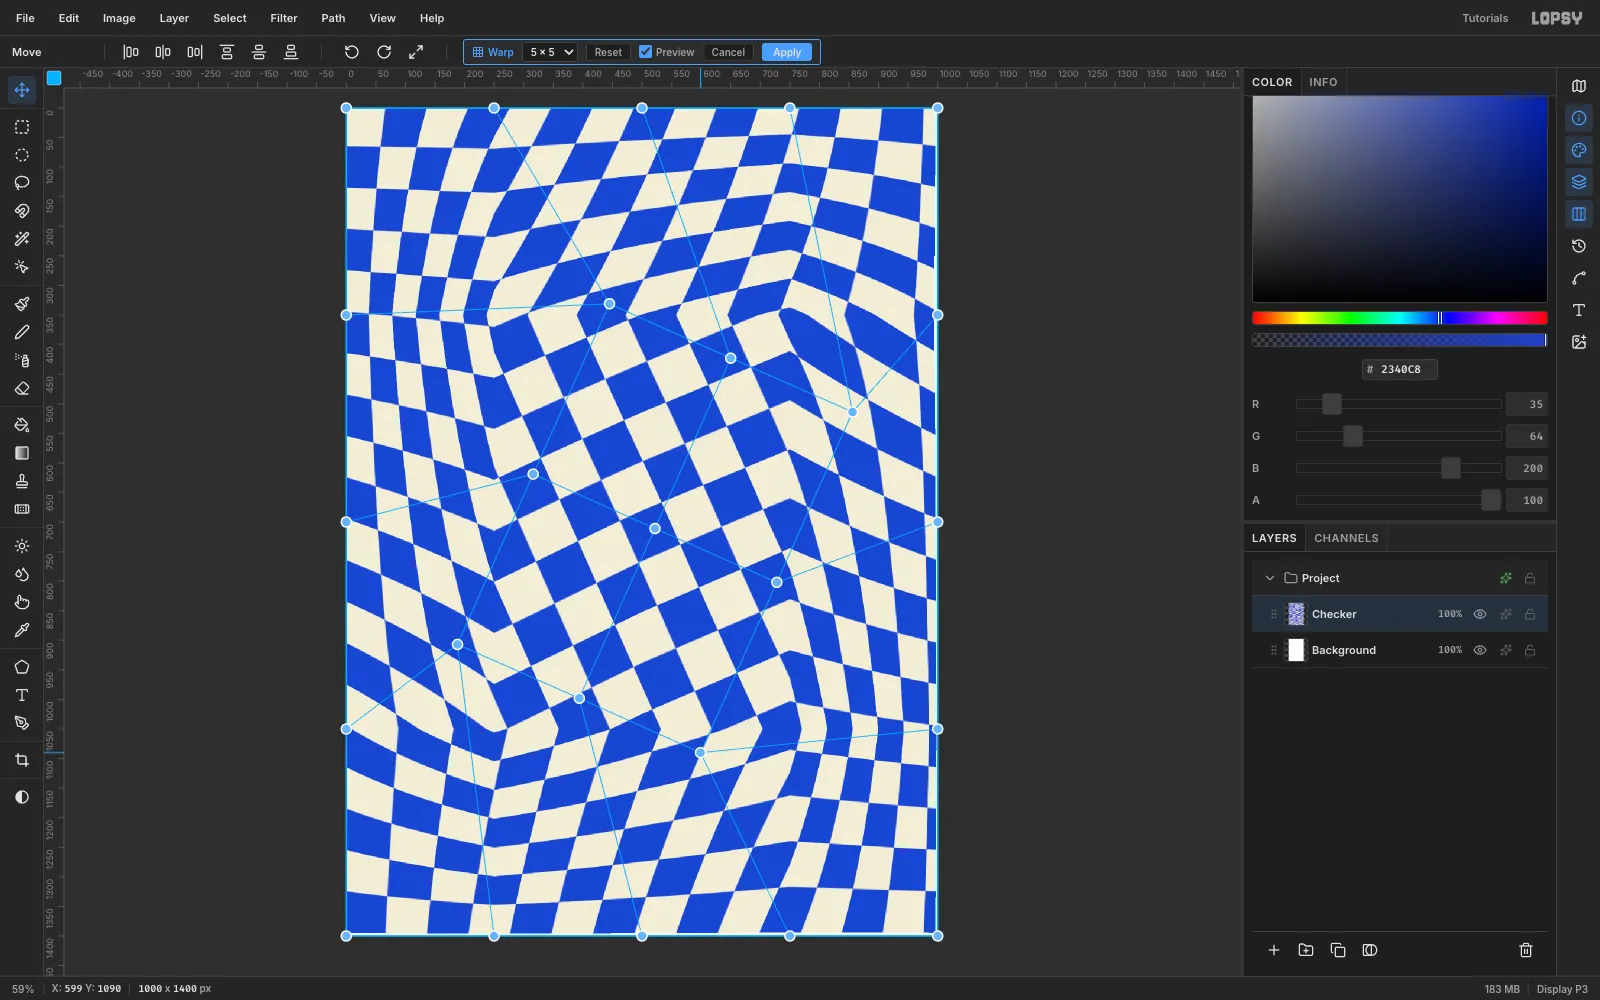
Select the Move tool and click Mesh Warp in the options bar. Set the grid to 5 × 5 and tick Preview.
Drag each of the nine interior handles about a quarter-turn around the point where the egg will sit (roughly x 500, y 760). Pull them slightly inward as you go. The checks spiral in like a vortex, which pulls the eye straight to the centre of the cover. Click Apply when you're happy.
-
Add a halftone print screen
This layer gives the background a printed look.
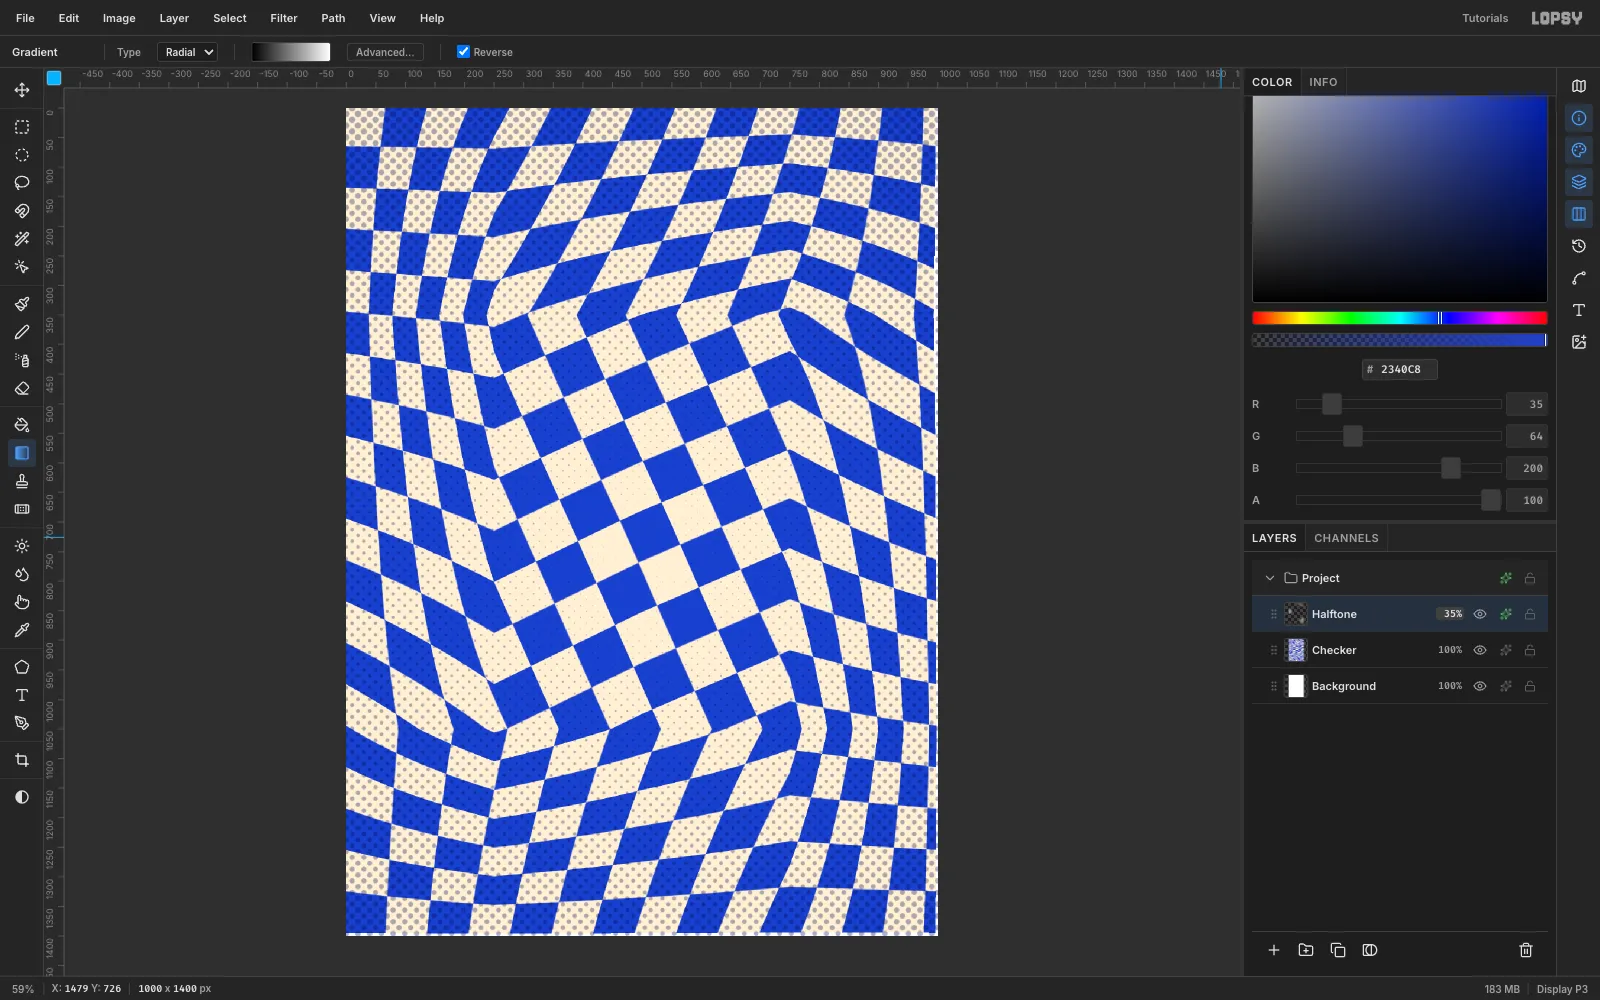
- Add a layer called Halftone.
- Choose the Gradient tool, set Type to Radial, and tick Reverse.
- Drag from the centre (500, 760) straight down past the bottom edge.
- Run Filter → Halftone… with Dot Size 14 and Softness 1.
- Open the layer's effects. Turn on Color Overlay in deep navy
#0E1A6B, set the blend mode to Multiply, and drop the layer opacity to 35%.
-
Stamp scallops with the radial-symmetry brush
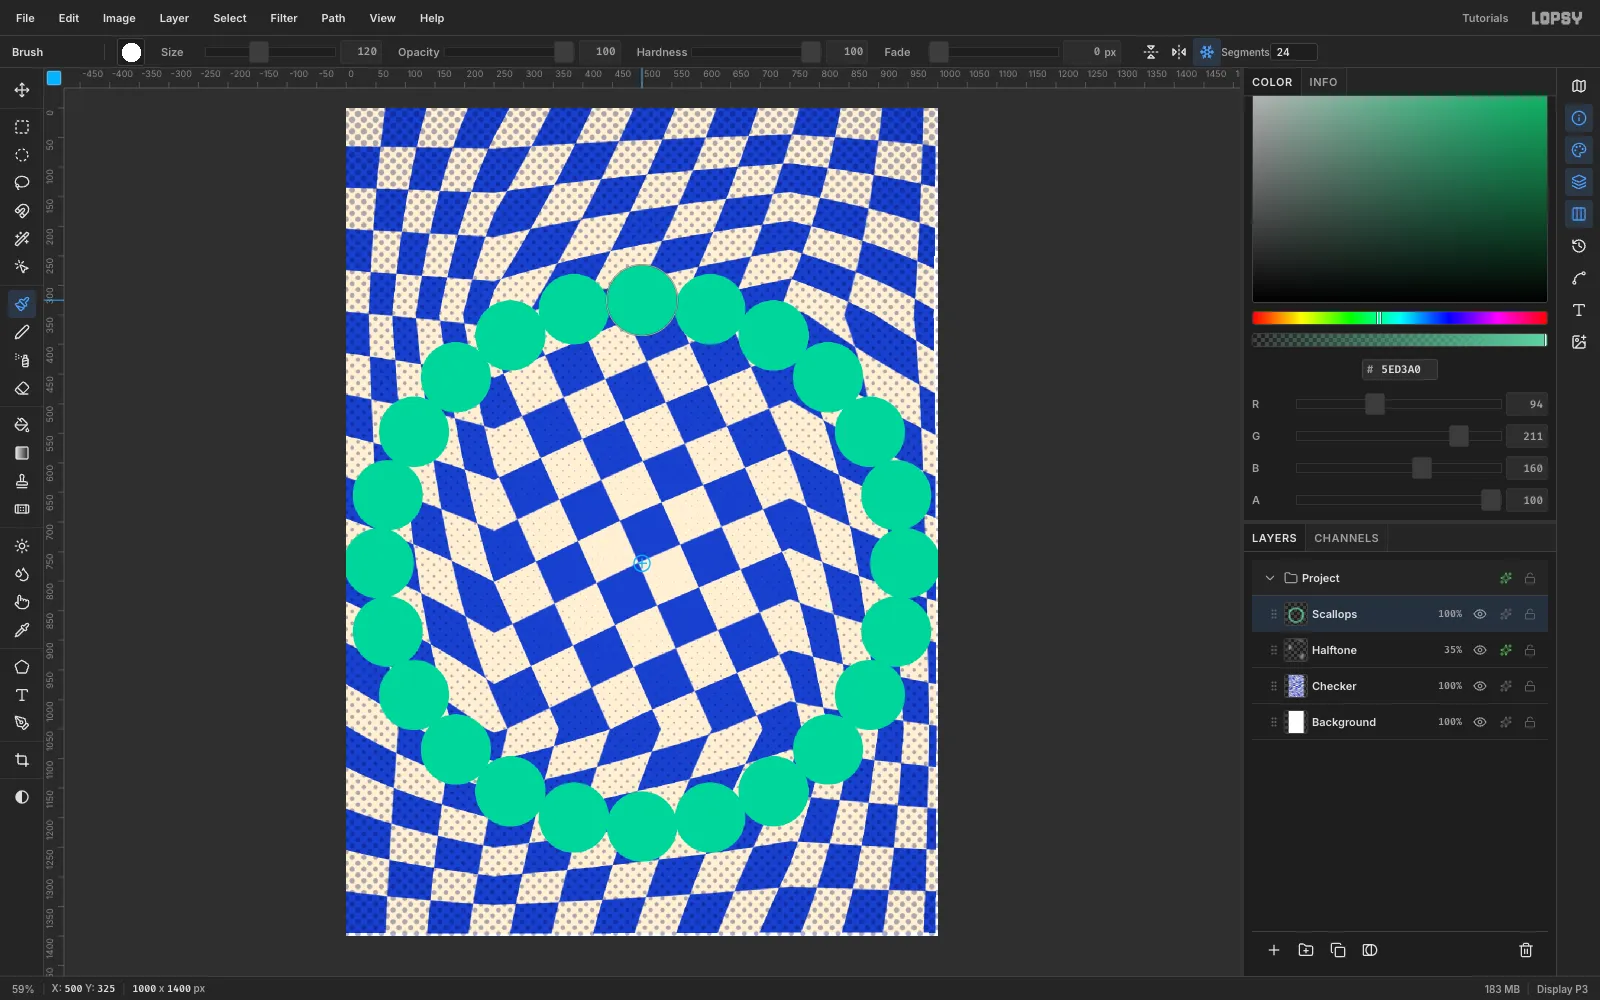
Add a layer called Scallops. Choose the Brush and set:
- Size 120, Hardness 100
- Radial Symmetry on, with 24 segments
Cmd-click at (500, 770) to set the symmetry centre, then click once 445 px above it in mint
#5ED3A0. One click stamps all 24 discs.Give the layer these effects:
- Stroke: 7 px, ink navy
- Drop Shadow: navy, offset 12 / 14, Blur 0, Opacity 100
-
Build a three-colour sunburst
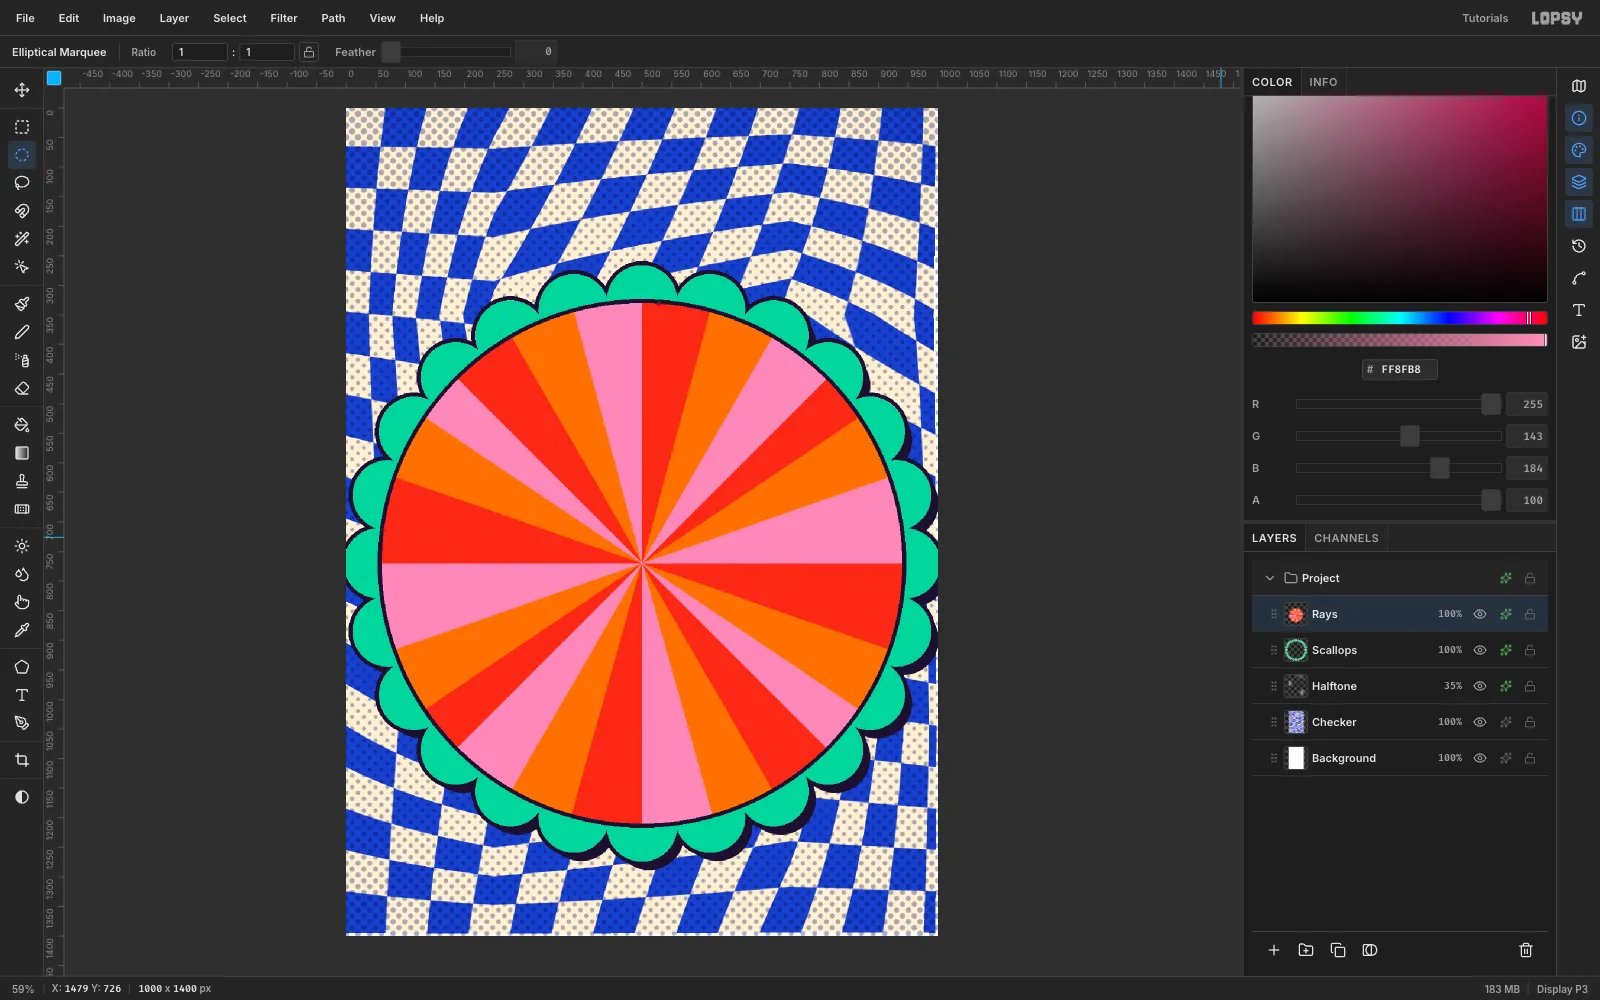
- Add a Rays layer.
- Ellipse-marquee a 880 px circle on the same centre and fill it orange
#FF7A1A. - With the Lasso, draw thin wedges from the centre out past the edge. Fill every third wedge tomato
#E8412C, and the next every-third bubblegum#FF8FB8. Three colours stop neighbouring wedges from blurring together. - Re-draw the 880 px circle marquee, choose Select → Inverse, and press Delete to clip the wedges.
- Add a 7 px navy Stroke effect.
-
Ring it with alternating dots
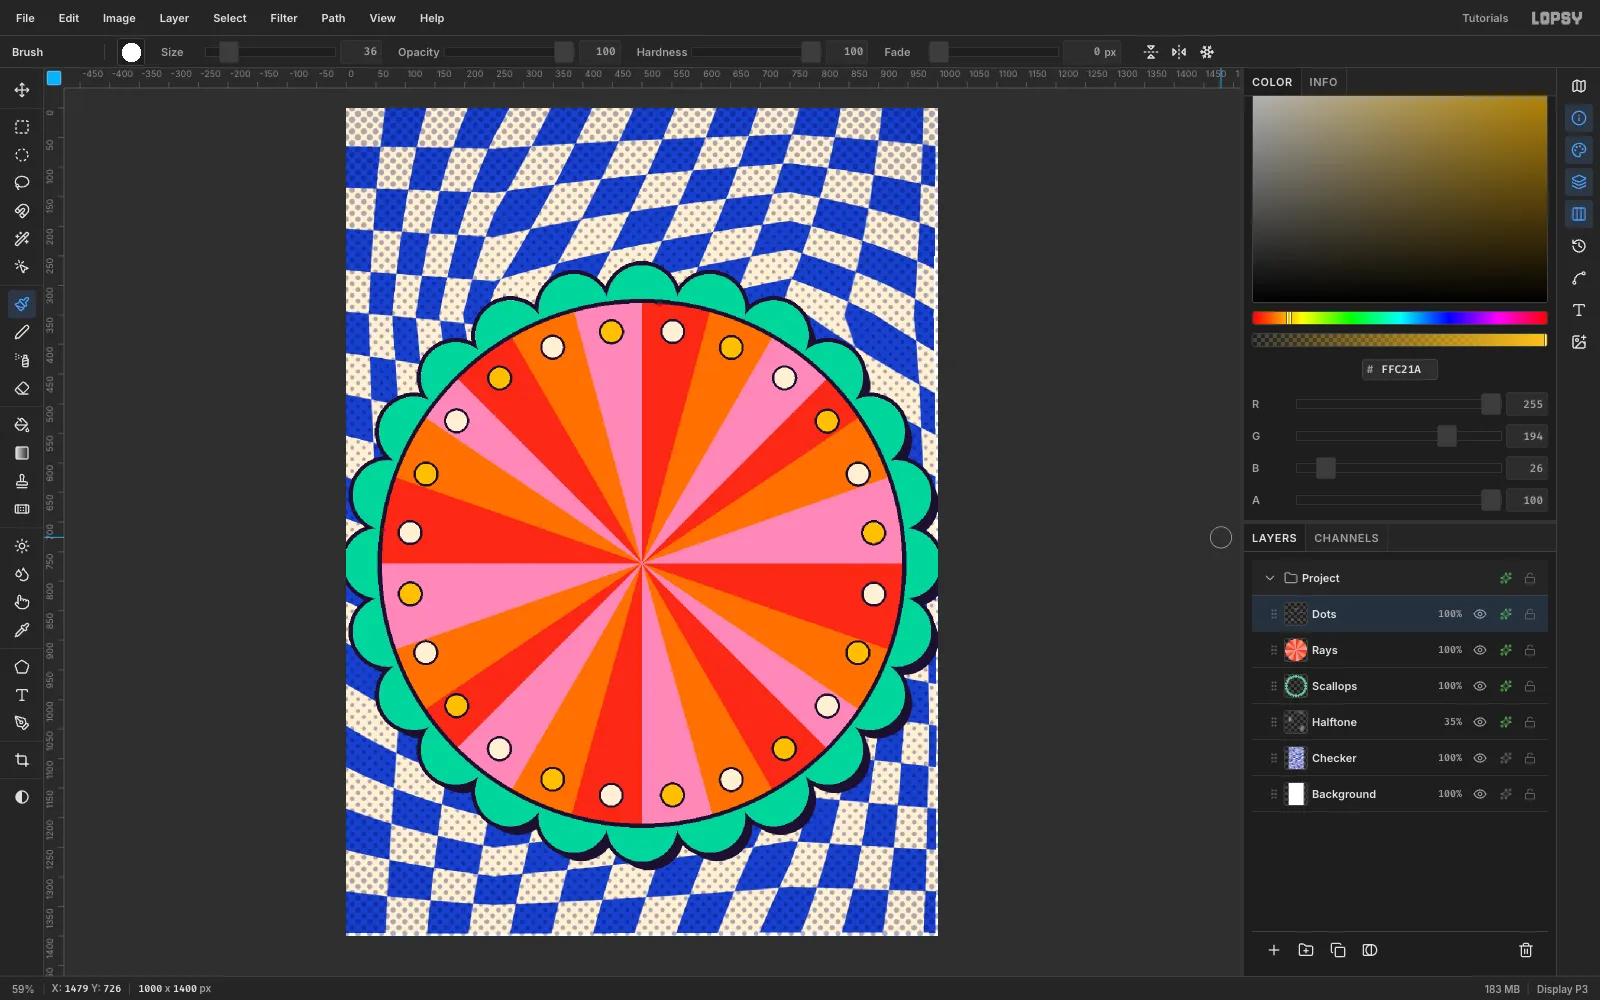
- On a new Dots layer, set the brush to Size 36 and Radial Symmetry to 12 segments, with the same centre.
- Click once in cream at 7.5° off vertical, 395 px out from the centre.
- Switch to gold
#FFC21Aand click once at 22.5°.
That gives 24 dots that alternate colours. Turn symmetry off and add a 4 px navy Stroke.
-
Draw the River Alph
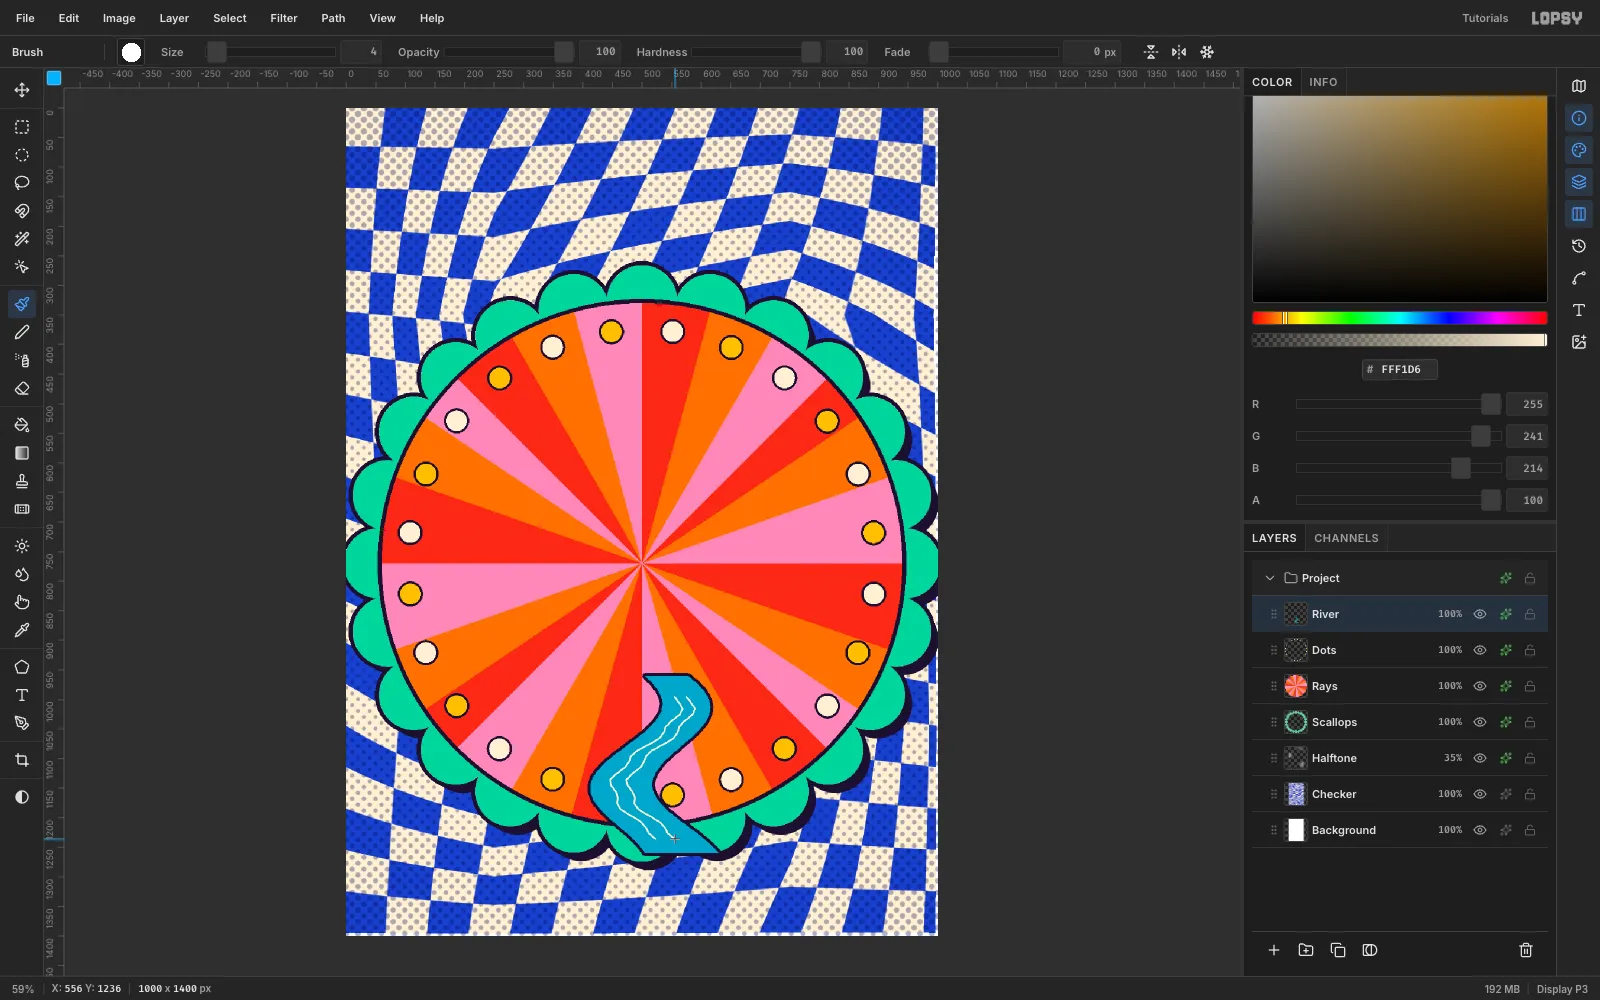
In Coleridge's poem, "Alph, the sacred river, ran" under the dome. On a River layer:
- Lasso a ribbon that snakes down from about y 960 to y 1260 and widens as it goes.
- Fill it with teal
#1FA3C8and add a 5 px navy Stroke. - Brush two 4 px cream wave lines along the current.
The top of the river will hide under the egg later.
-
Raise the palace minarets
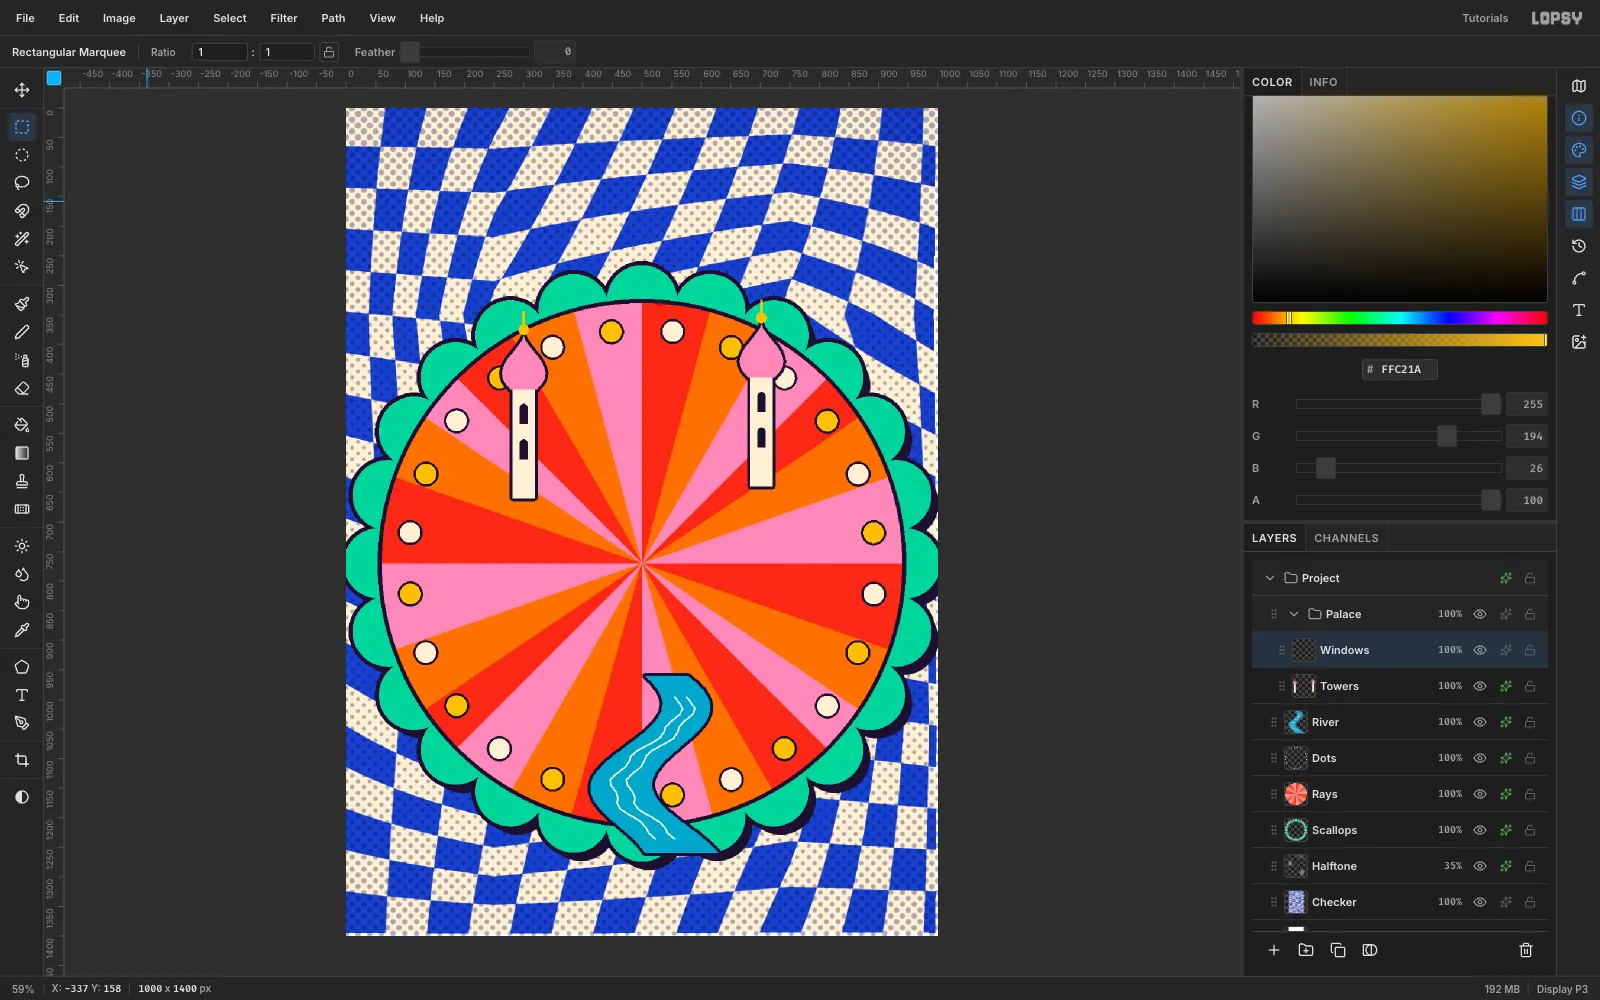
- Click New Group and name it Palace.
- On a Towers layer, marquee two 38 px-wide towers at x 300 and x 702 and fill them cream.
- Lasso an onion-dome outline on top of each tower and fill it pink.
- Add a 5 px navy Stroke.
- On a Windows layer above, fill small navy arches (a rectangle plus an ellipse) and gold ball-and-spire finials.
The egg will cover the bases of the towers.
-
Set and tilt the masthead
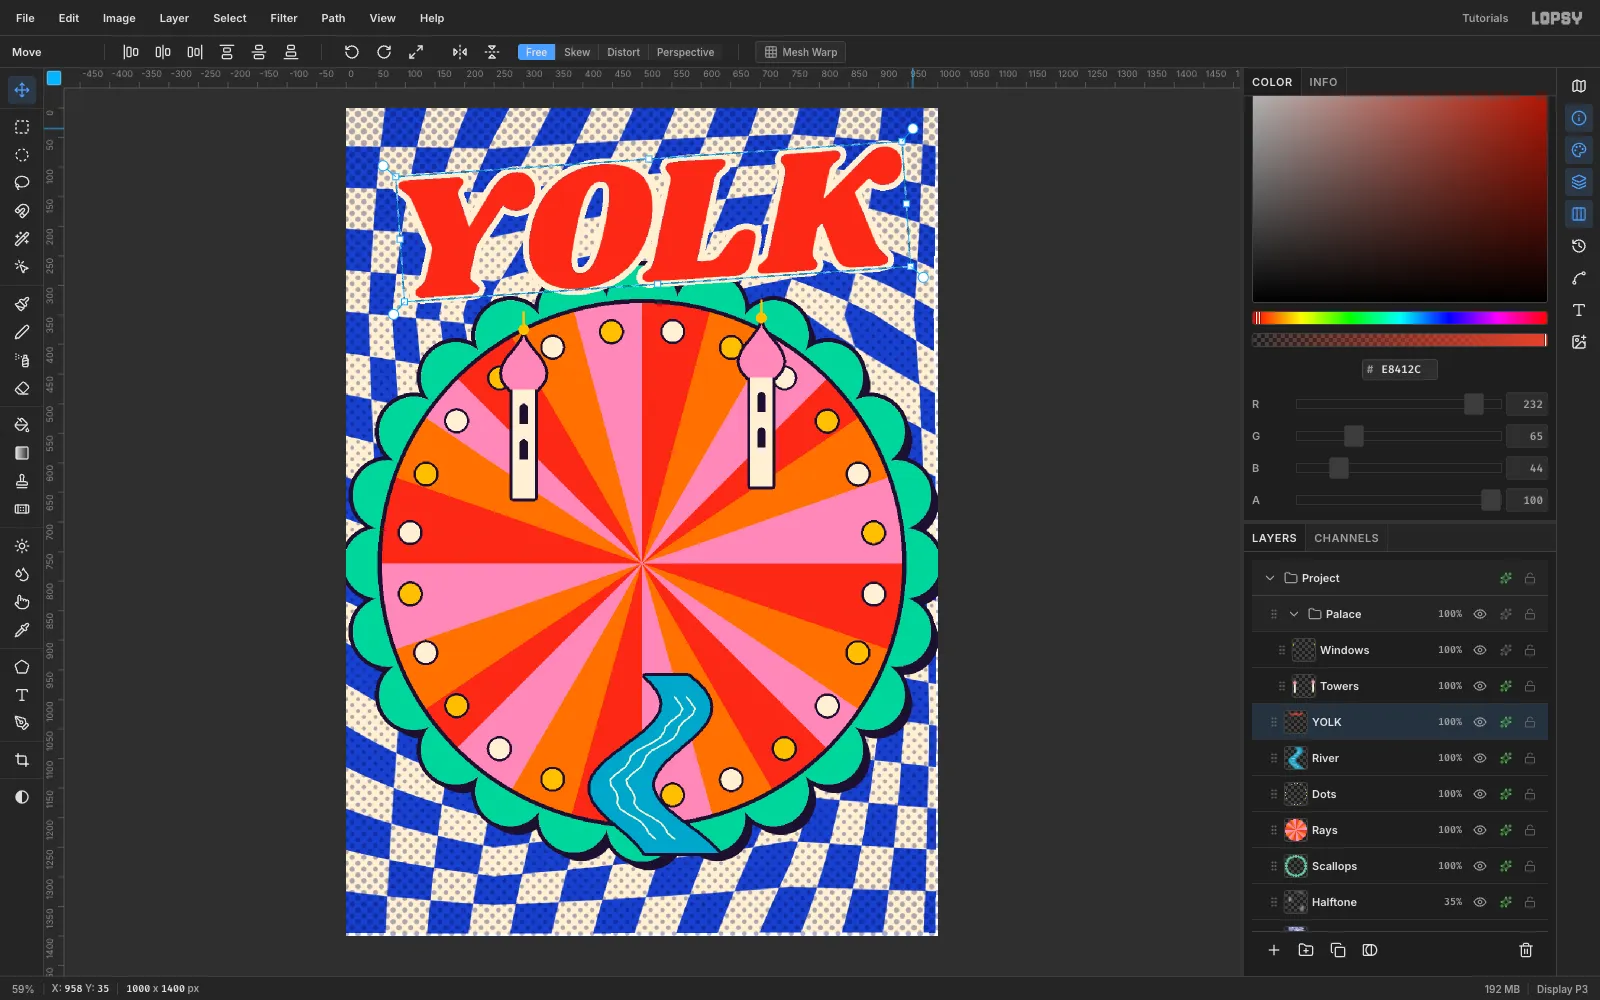
- Select the River layer, so the new type goes above it. Choose the Text tool, set Shrikhand at 250, and type YOLK in tomato.
- Add a 10 px cream Stroke, then click Rasterize Layer.
- Marquee the word and Cmd-drag a corner handle to scale it up by 20%. Press Cmd+D to commit.
- Marquee it again and drag the rotate handle to −4°. Press Cmd+D.
- Drag it so it's centred with its top about 36 px from the edge.
-
Give it a stepped extrusion
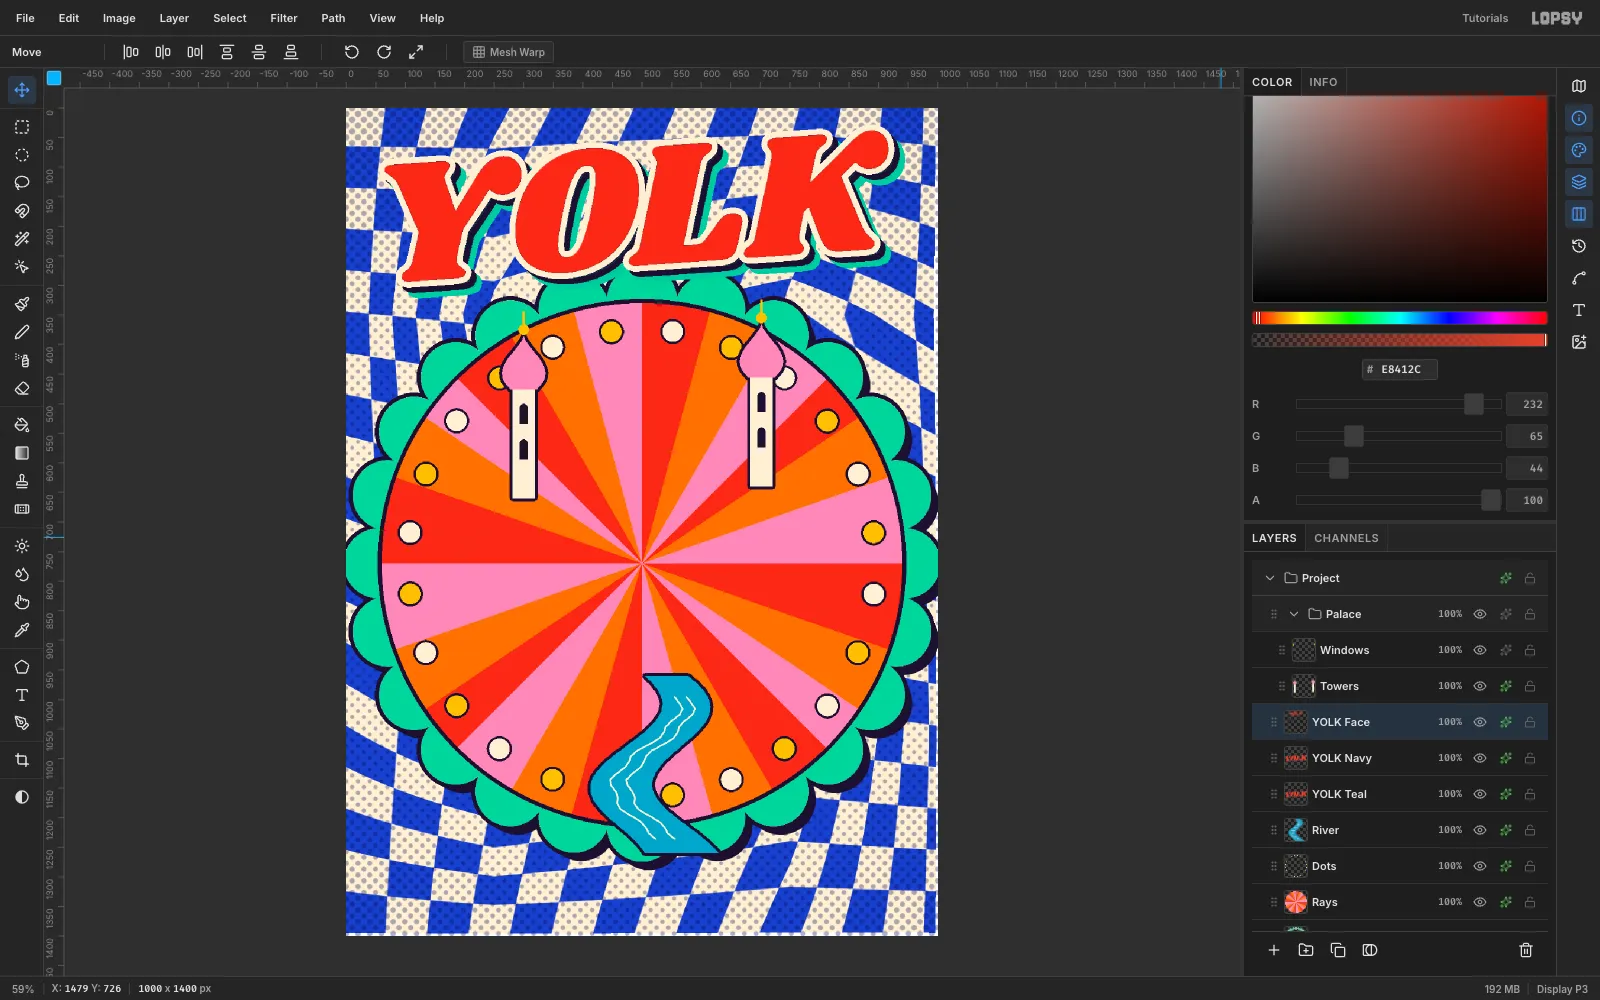
- With the Move tool active, click Duplicate Layer twice. Name the layers YOLK Teal (bottom), YOLK Navy and YOLK Face (top).
- Each copy lands 10 px down and right, so nudge them into place with the arrow keys (Shift + arrow moves 10 px):
- Face back to 0 / 0
- Navy to +9 / +9
- Teal to +18 / +18
- On Navy, add a navy Color Overlay and a 10 px navy Stroke.
- On Teal, do the same in teal and add a small navy drop shadow.
-
Bow a ribbon banner with Mesh Warp
- Select YOLK Face and create a Stickers group.
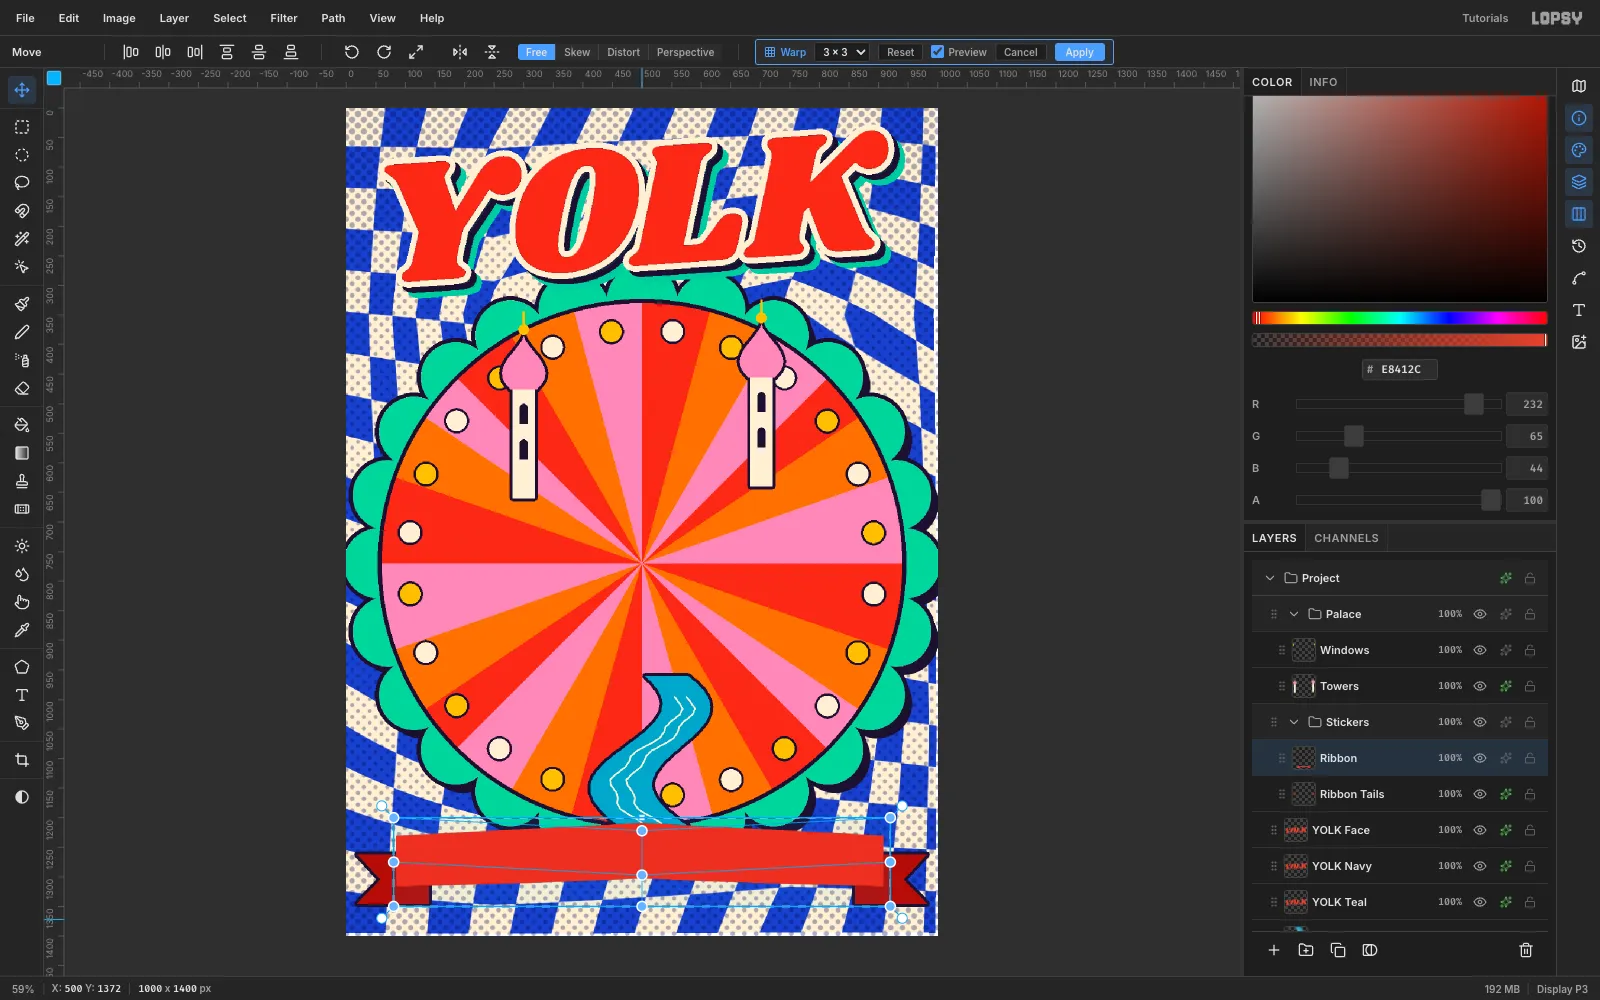
- Inside it, lasso two notched Ribbon Tails in dark red
#A8261A. - Above them, marquee and fill an 824 × 86 tomato Ribbon.
- Draw a marquee around the ribbon, open Mesh Warp at 3 × 3, and drag the three middle handles about 22 px vertically until the banner bows into an arch. Because of the marquee, the warp only affects the ribbon.
- Add a navy Stroke, a hard navy shadow, and small dark fold triangles where the tails tuck behind.
-
Fry the egg
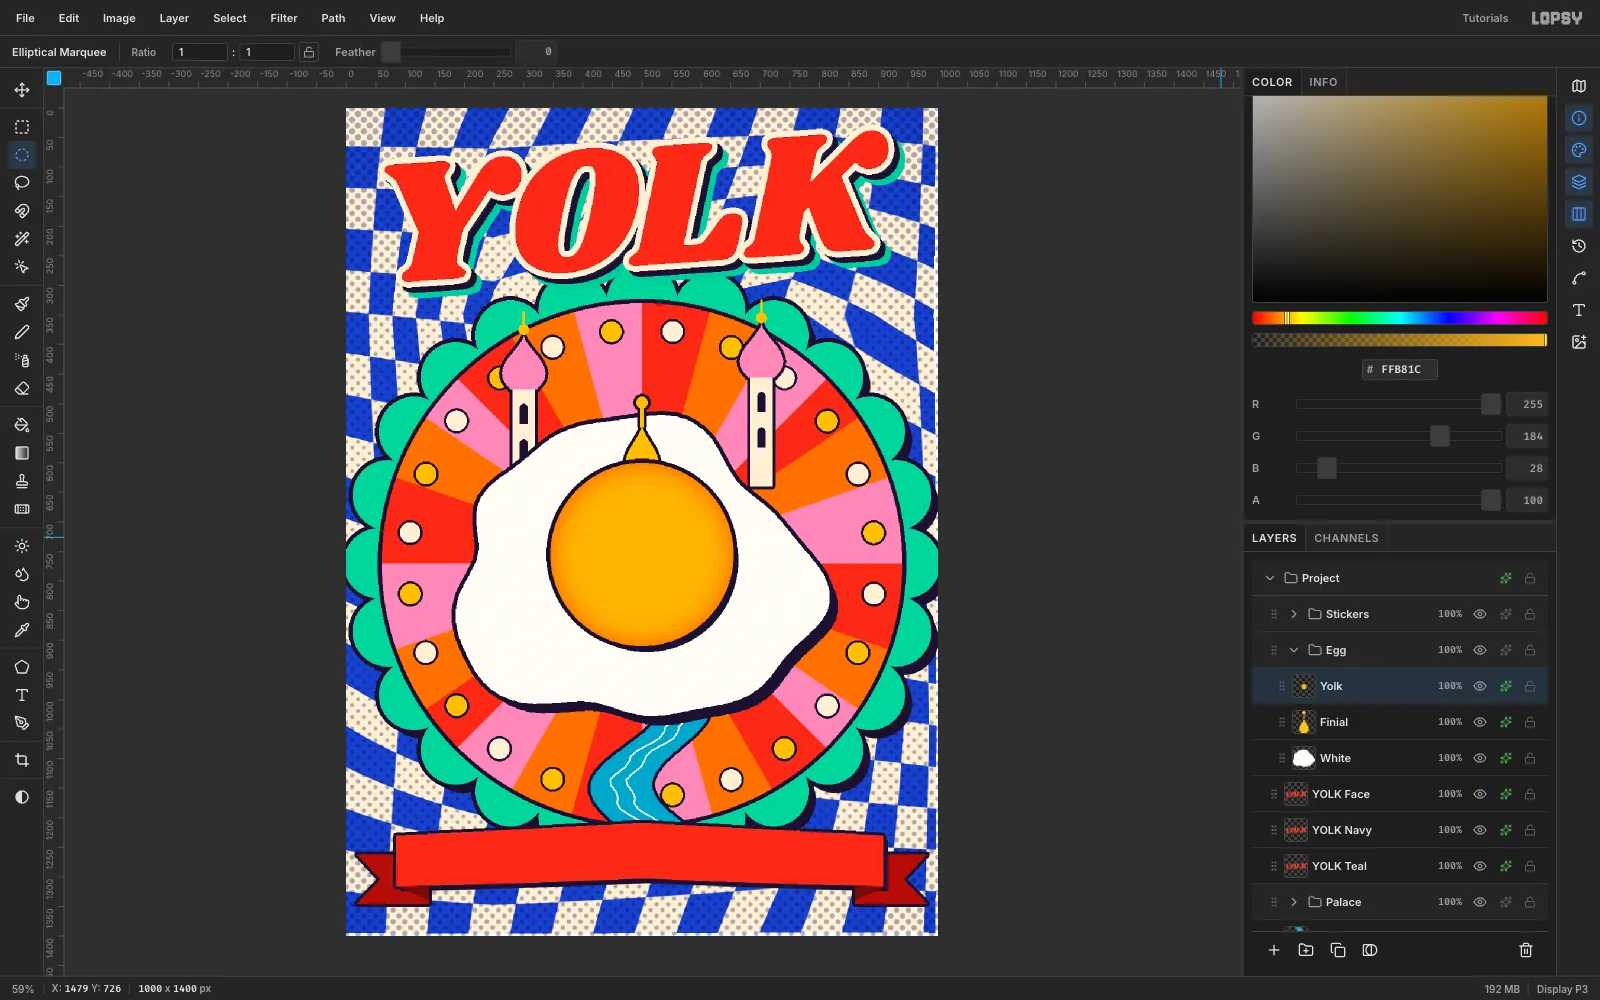
Select YOLK Face and create an Egg group. Build it from the bottom up:
- White: lasso a wobbly oval about 600 × 500, tilted 5° so the cover isn't perfectly symmetrical. Fill it
#FFFDF5and add a 7 px navy Stroke and a 14 / 16 hard shadow. - Finial: lasso a small gold onion dome with a spire and ball so it rises from behind the yolk.
- Yolk: fill a 310 px circle in
#FFB81C. Add an Inner Glow in orange#F25C05(Size 60, Spread 10, Opacity 90), a navy Stroke, and a small hard shadow.
- White: lasso a wobbly oval about 600 × 500, tilted 5° so the cover isn't perfectly symmetrical. Fill it
-
Rotate the highlight
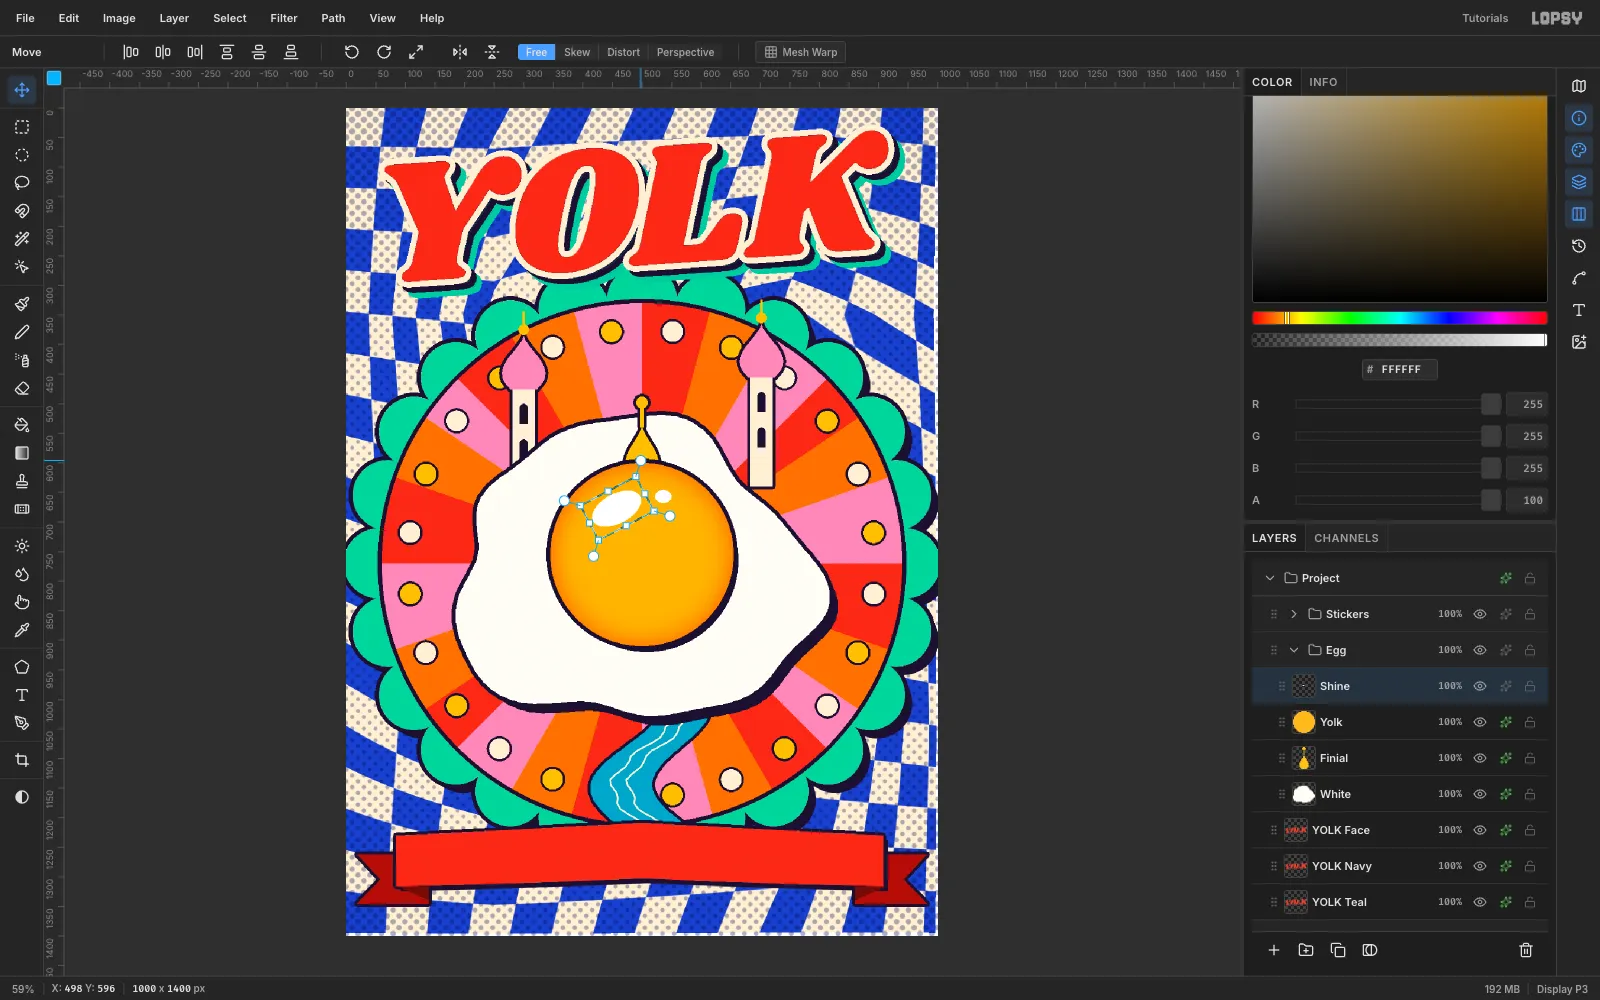
On a Shine layer, fill a white 90 × 50 ellipse and a small dot on the upper left of the yolk. Marquee them and drag the rotate handle to −28° so the highlight follows the curve of the yolk. Press Cmd+D to commit.
-
Wrap the poem around the yolk
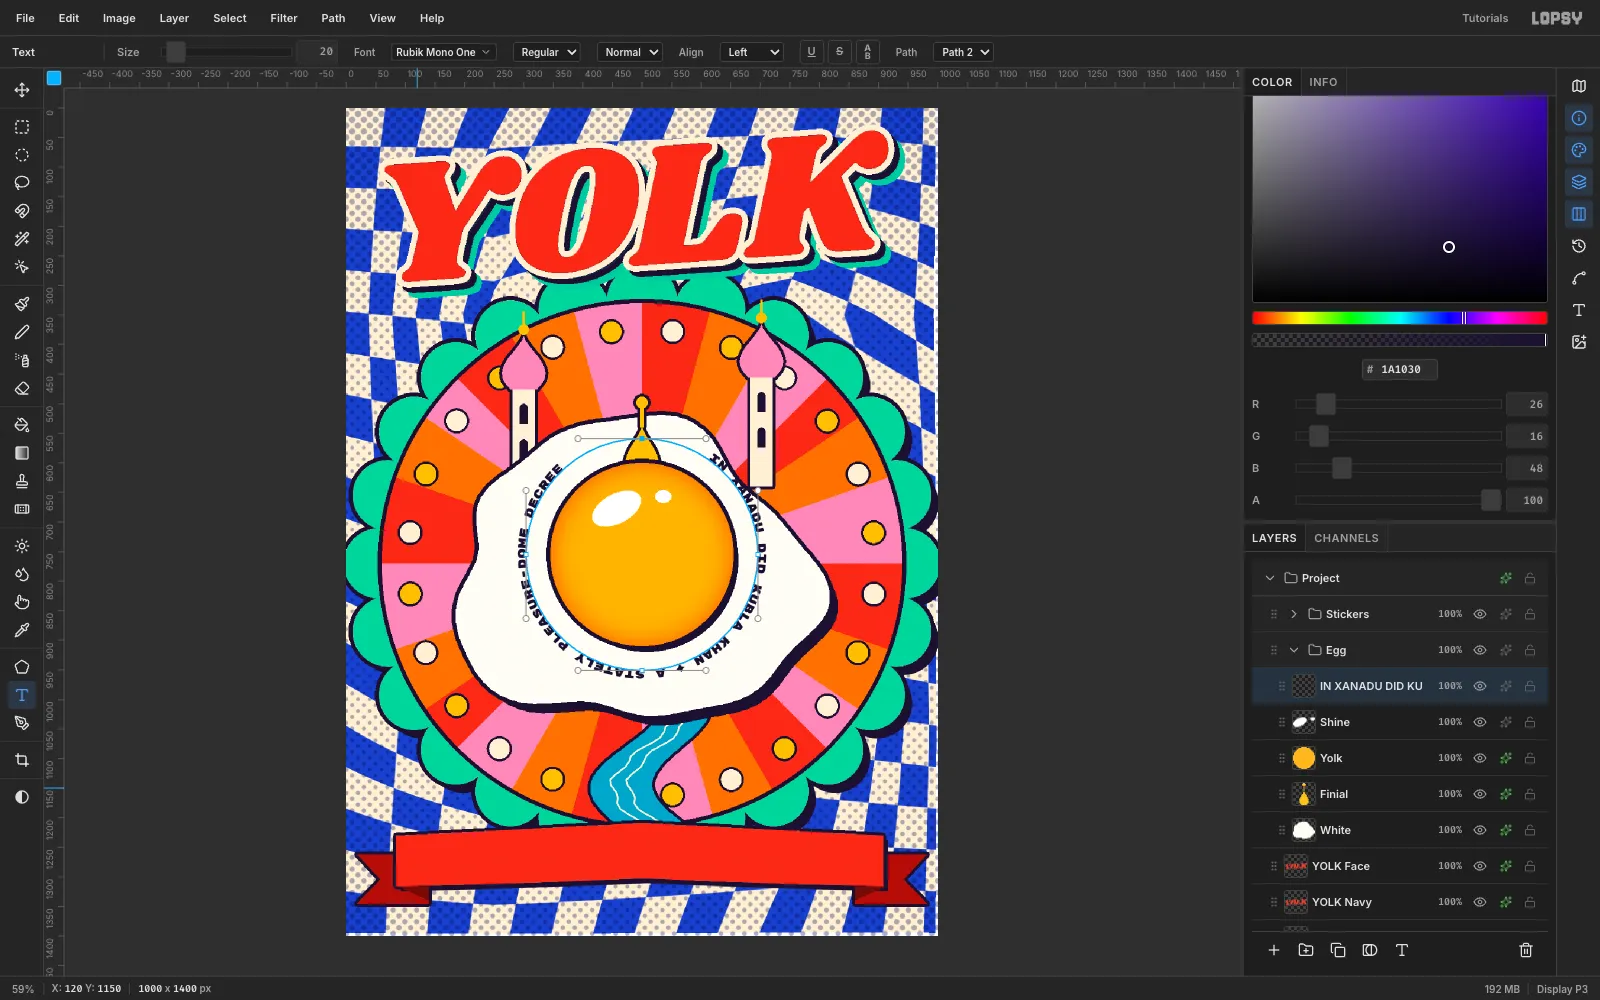
- Choose the Shape tool, set Shape Ellipse and Output Path. Cmd-drag a 196 px-radius circle from the yolk's centre.
- Select Shine, then choose the Text tool with Rubik Mono One at 20 in navy.
- Paste
IN XANADU DID KUBLA KHAN ✦ A STATELY PLEASURE-DOME DECREE. Start it with seven spaces so the text opens around the finial. - Press Tab and set Path in the options bar to your circle.
-
Stick on the issue badge
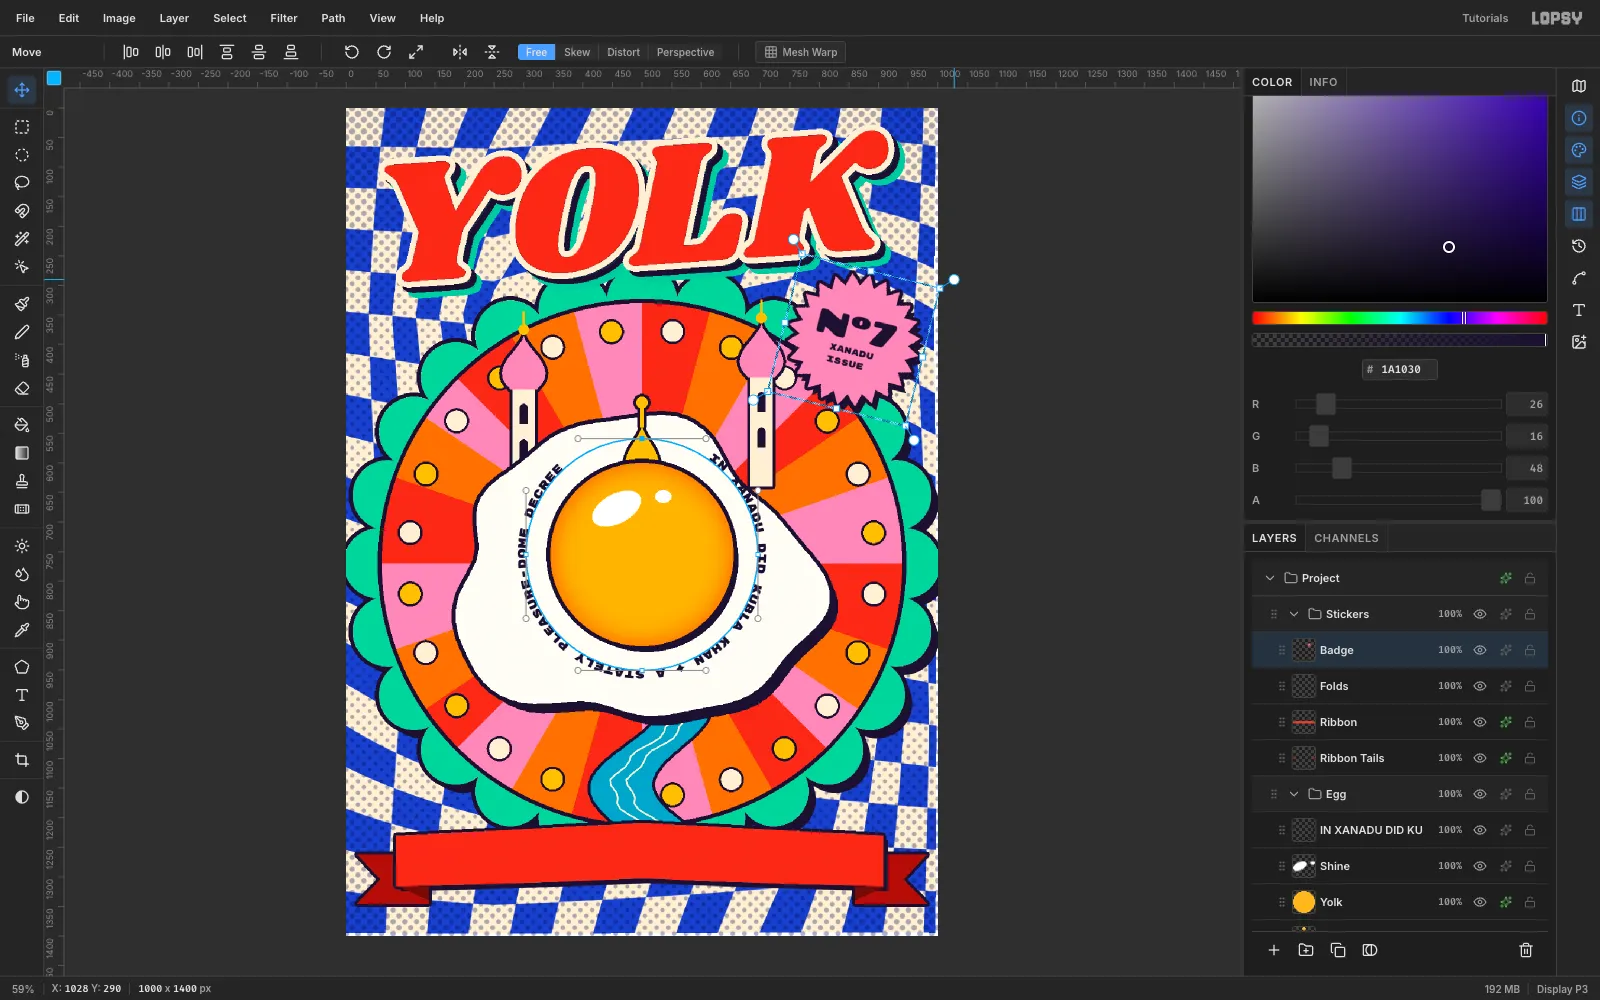
- In Stickers, lasso a 48-point starburst (alternating radius 112 / 92) at (858, 392).
- Fill it pink and add a navy Stroke and shadow.
- Set Nº7 in Chango 58 and XANADU / ISSUE in Rubik Mono One 15.
- Rasterize both, Merge Down each into the badge, then rotate the badge 14° so it overlaps the K.
-
Add editorial cover lines
Maximalism needs editorial density, not just decoration.
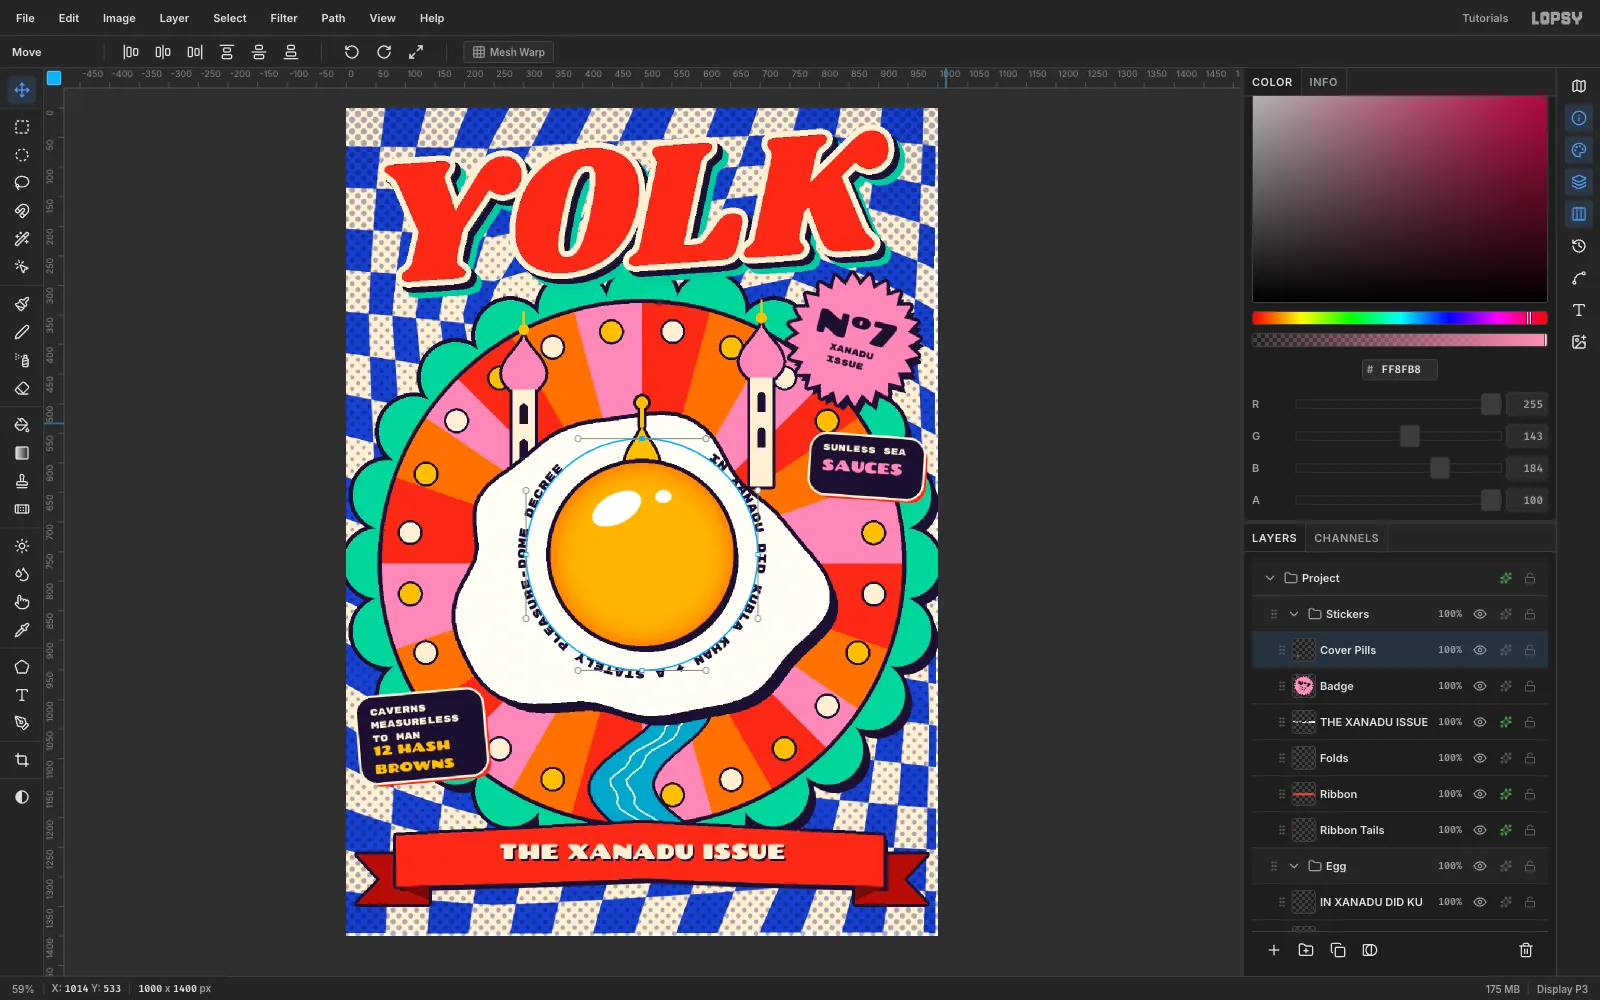
- On a Cover Pills layer, build two rounded navy rectangles. Fill two overlapping marquee rectangles, then fill four ellipse marquees for the corners.
- Add a 4 px cream Stroke and a tomato hard shadow.
- Set the cover lines in Rubik Mono One, with Chango for the punchlines in gold and pink.
- Rasterize the lines and merge them into the pills.
- Rotate the left pill −5° and the right one +4°.
-
Scatter sparkles with a hierarchy
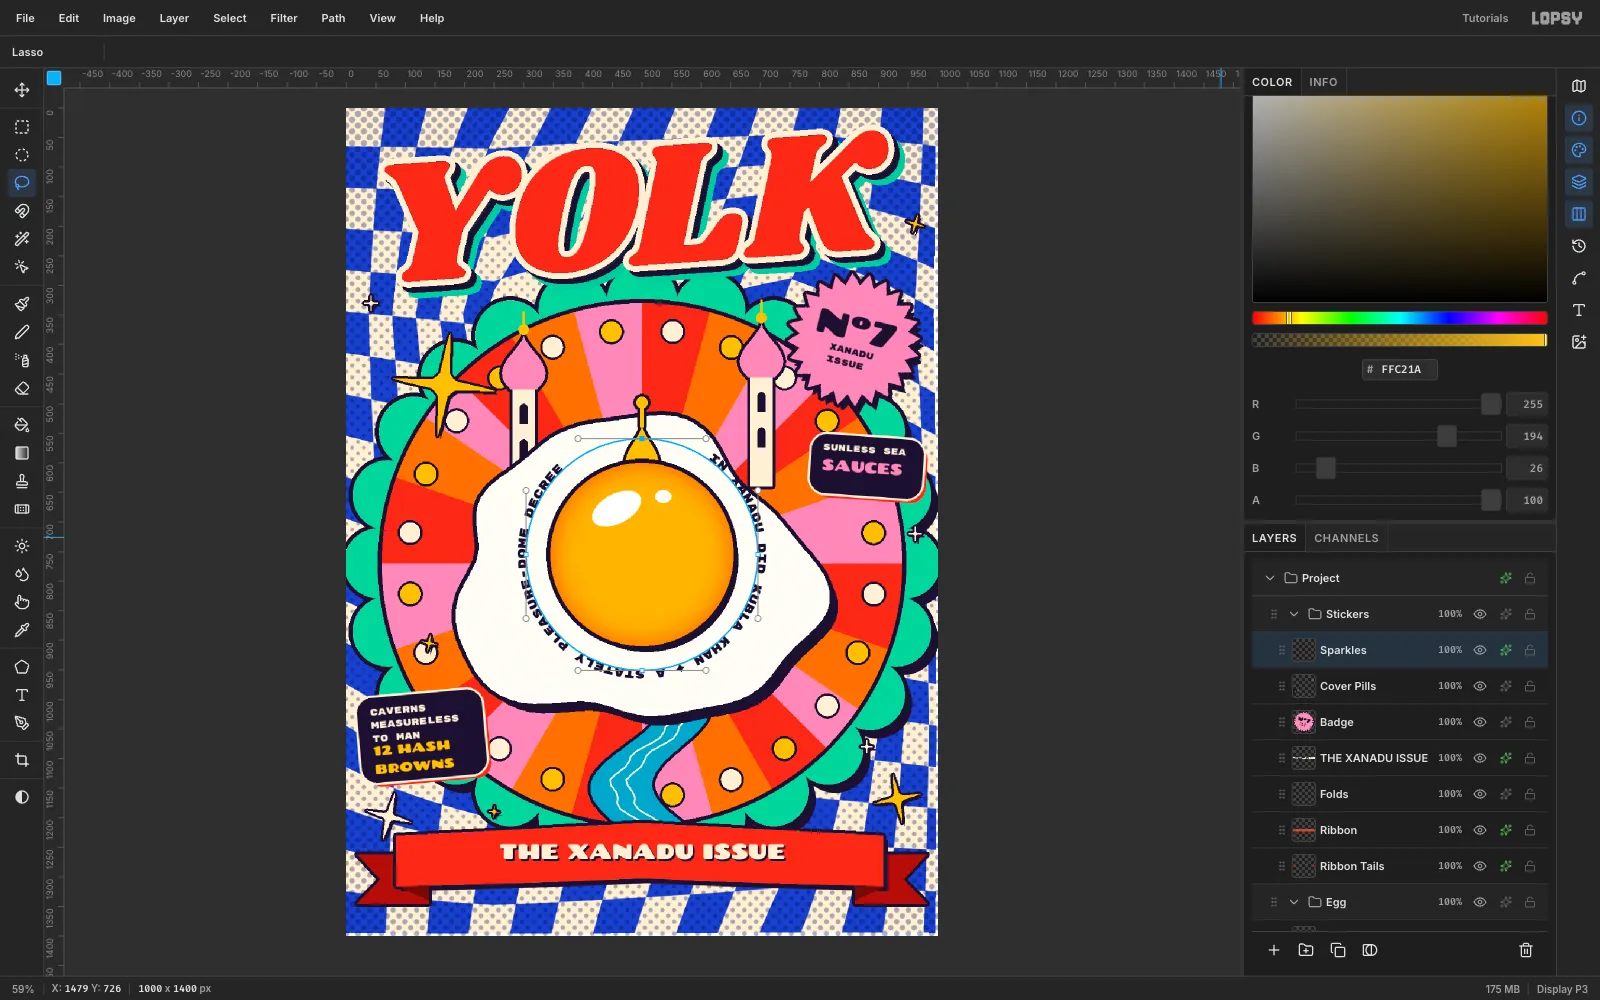
Evenly sized ornaments look like wallpaper, so vary the sizes. On a Sparkles layer, lasso one big four-point star (radius 88), two medium ones (radius about 40), and six tiny ones (radius about 15) in the checker gaps. Alternate gold and cream, then add a 4 px navy Stroke and a 5 px hard shadow.
-
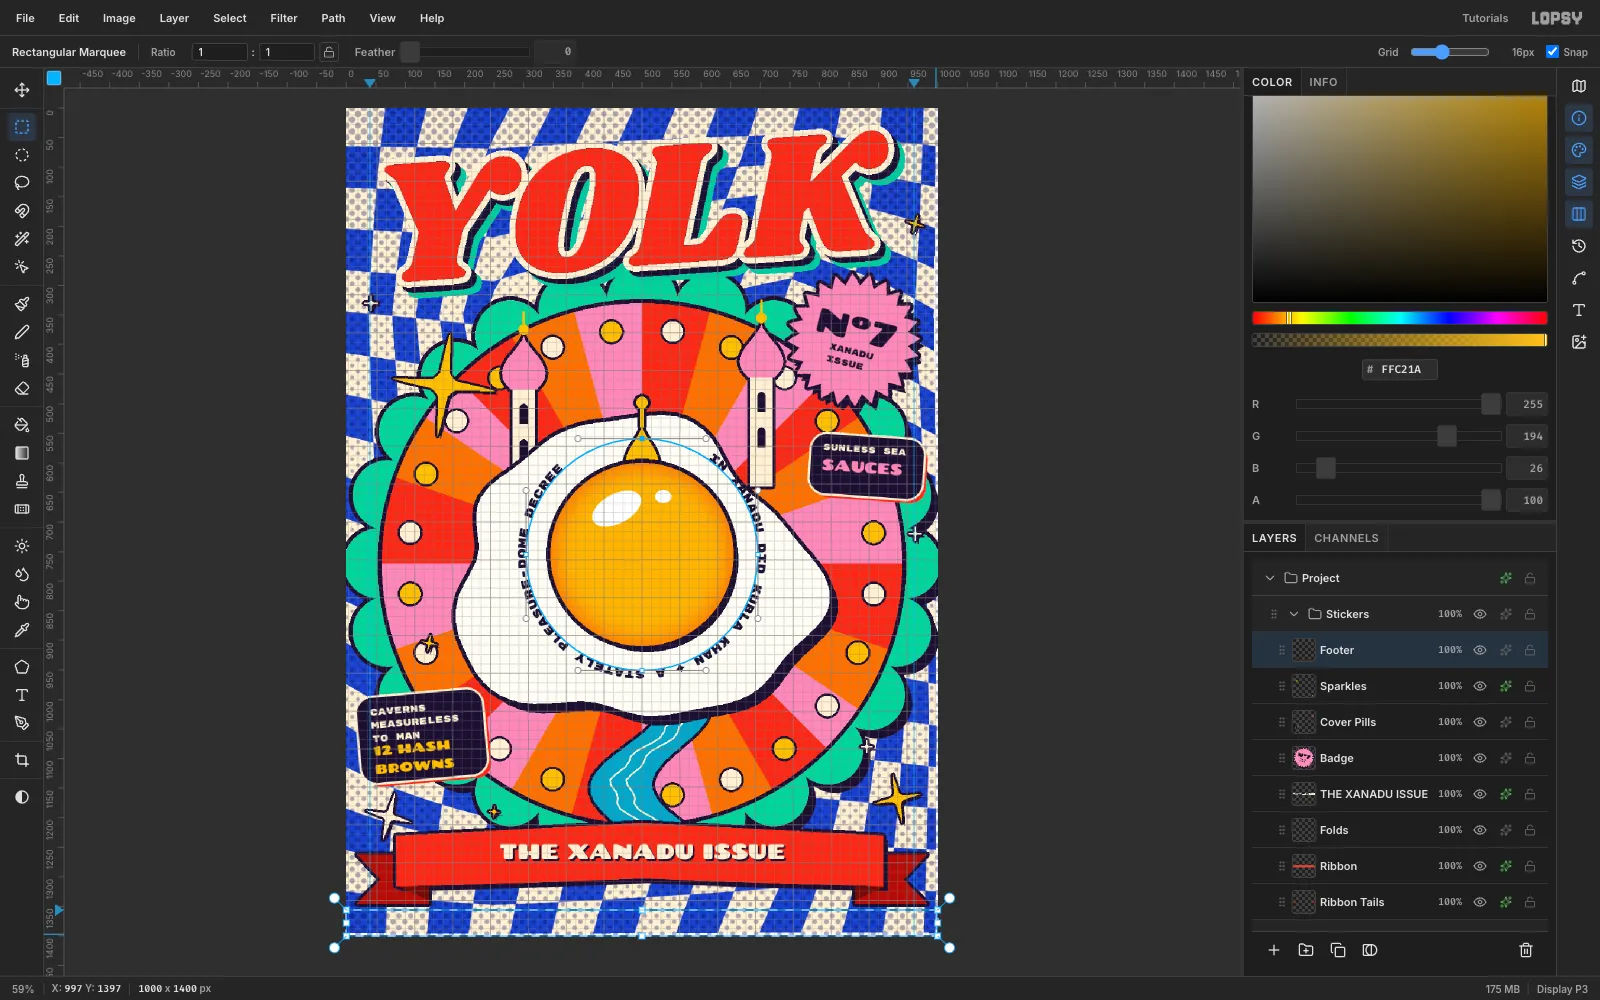
Snap the price bar to the grid
- Turn on View → Show Grid. Snap turns on with it.
- Click the top ruler at x 40 and x 960 to drop margin guides, and click the side ruler at y 1356.
- Drag a footer marquee along the bottom. It snaps to the grid. Fill it navy.
- Untick Snap and draw a small cream barcode with thin navy bars.
- Set
$6 / AUTUMN 2026 / A QUARTERLY OF BREAKFAST & PARADISEin cream Rubik Mono One 14 on the left guide.
-
Unify everything with grain
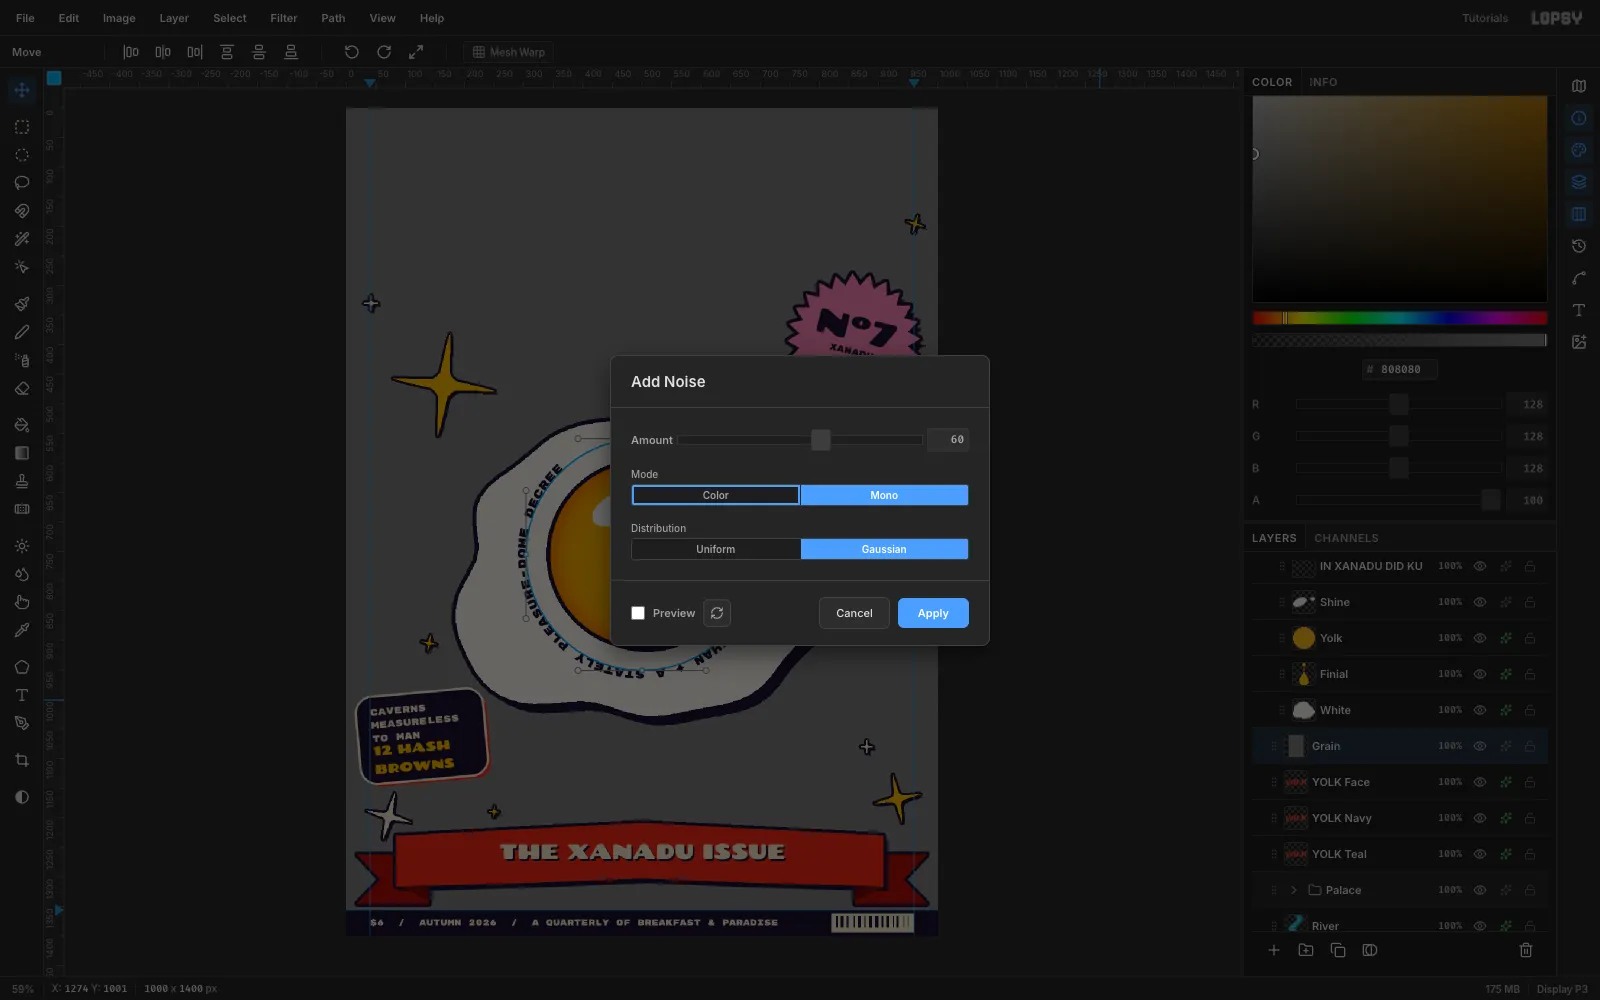
- Add a Grain layer and fill it with mid-grey
#808080. - Run Filter → Add Noise… with Mono, Gaussian, Amount 60.
- Set the layer to Overlay at 55%.
- Drag the layer to the very top of the Layers panel, above both groups.
The grain ties the flat vector-looking pieces to the printed halftone background.
- Add a Grain layer and fill it with mid-grey
-
Save and export
Before you export, open the Paths panel and click the circle path to deselect it, so its outline doesn't show.
Save the editable file with File → Save Project, then export the cover with File → Quick Export PNG. When you're ready for the next one, try a calmer grid in the Swiss-style exhibition poster.