Design a Folk Art Zine Cover
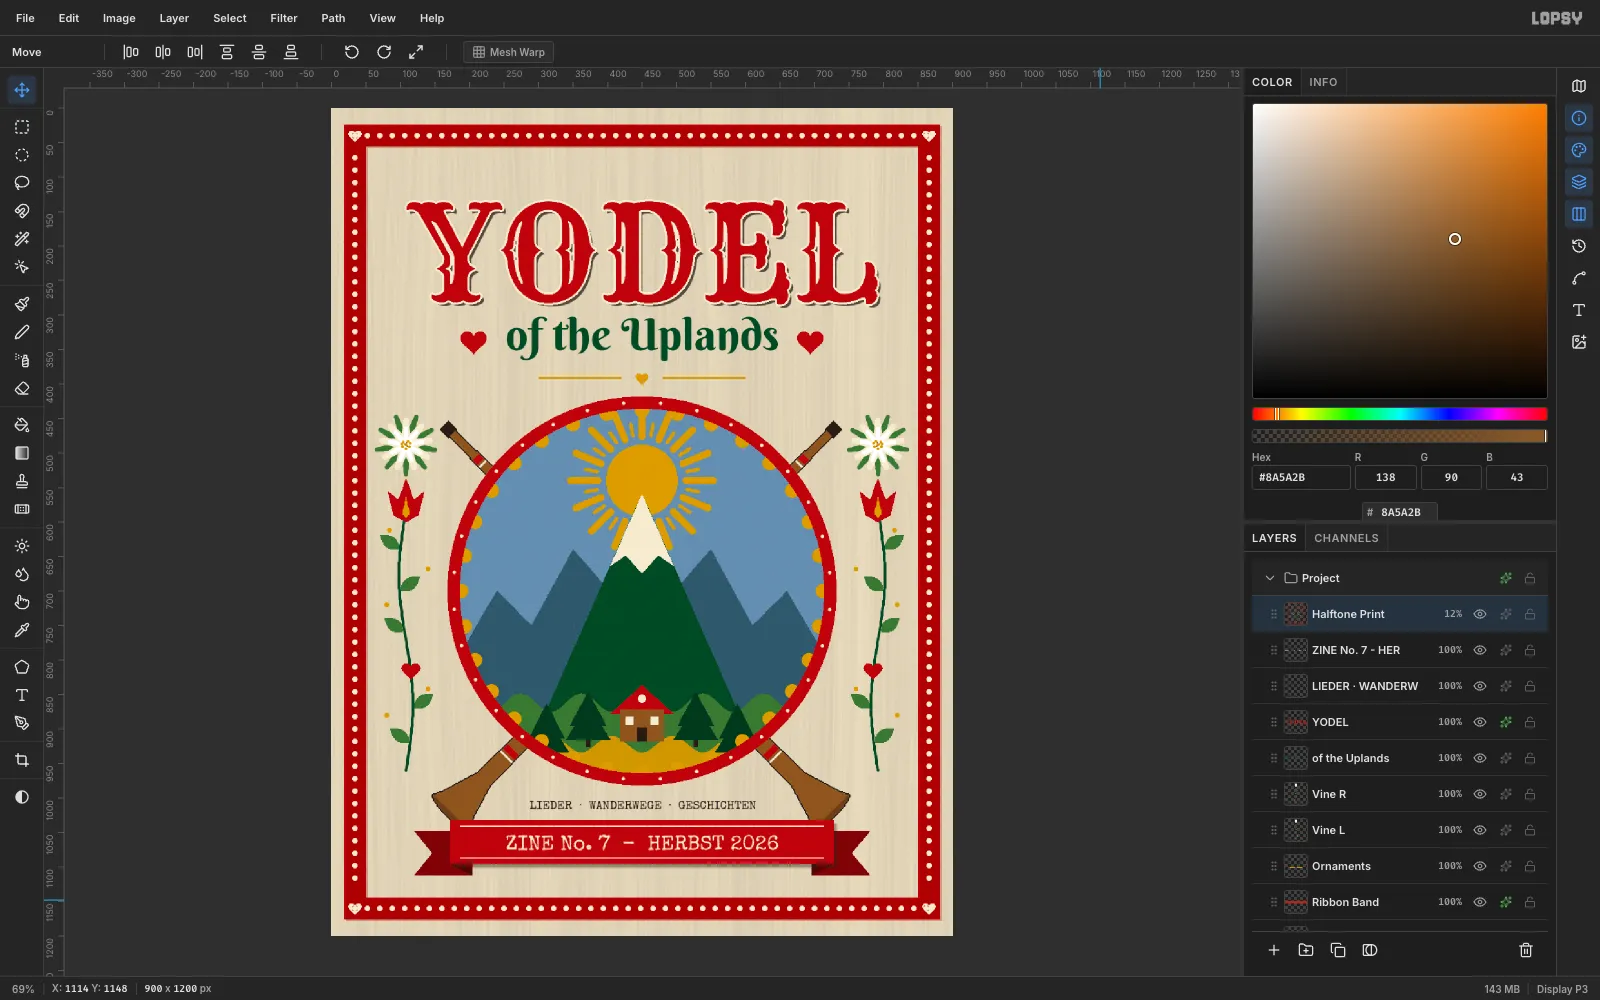
Make an alpine folk art zine cover in Lopsy with radial-symmetry sunbursts, crossed alphorns, a painted medallion, woodtype titles and halftone.
Alpine folk art, such as Swiss and Tyrolean Bauernmalerei painted furniture and cut-paper Scherenschnitte, runs on a few simple rules:
- a small set of flat, earthy colours
- shapes repeated with strict symmetry
- hearts, tulips and edelweiss wherever there's a gap
In this tutorial you'll use those rules for a zine cover called YODEL of the Uplands. It has a dotted red border, two crossed alphorns, and a painted mountain medallion with a sunburst and a scalloped ring. A woodtype title, a swallowtail ribbon and a halftone print texture finish it off.
Along the way you'll use:
- the Brush's Radial Symmetry, Spacing and Taper
- lasso and elliptical marquee fills
- Duplicate, Flip Horizontal and rotation handles
- groups, layer effects and Google fonts
- Copy Merged and the Halftone filter
The palette has six colours: red #B3261E, fir green #1E4D2B, ochre #D4A017, cream #F4EAD2, ink #2A1E17 and paper #EFE3C8. The sky is a slate blue, #6E8FB0.
-
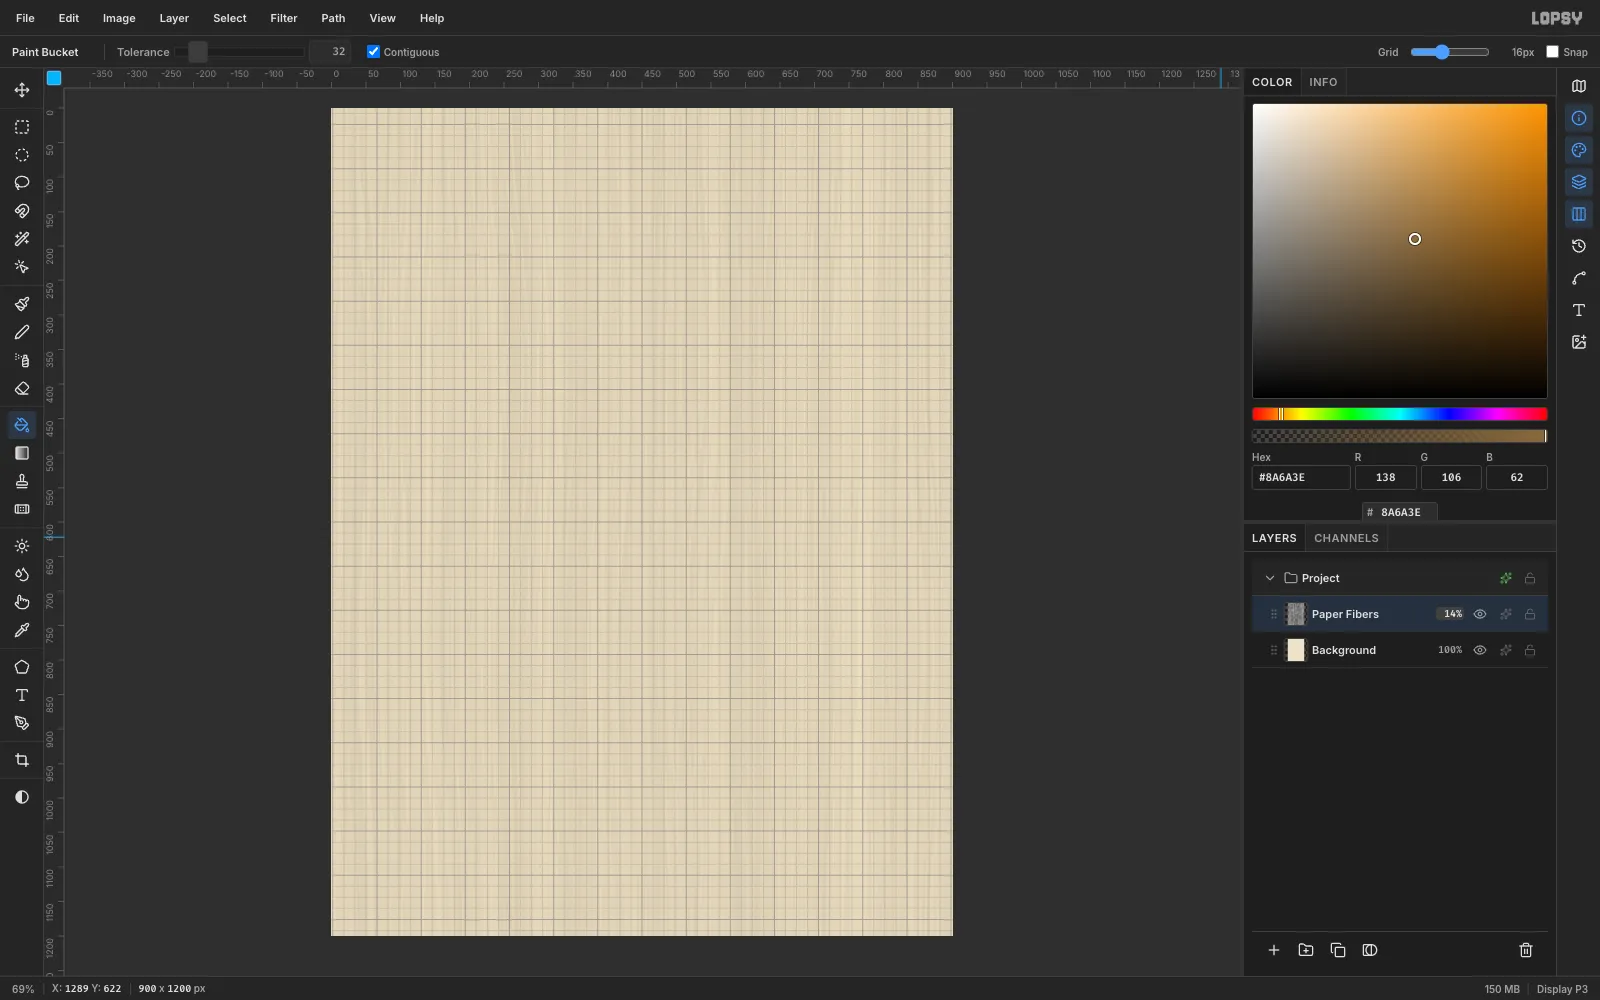
Make the paper
Open Lopsy. In the New Document dialog, set Width to
900, Height to1200and Background to White, then click Create.Select Background. In the Color panel's hex field, set the foreground to
#EFE3C8. Press G for the Paint Bucket and click the canvas. Then add a little tooth: choose Filter → Add Noise…, pick Mono and Gaussian, set Amount to4and click Apply.Double-click Layer 1 and rename it
Paper Fibers, then:- Set the foreground to
#8A6A3E. - Choose Filter → Fibers…, set Variance
20and Strength48, and click Apply. - Open the layer's effects (the ✦ button on its row) and set Blend to Multiply.
- Set the row's opacity to
14%.
- Set the foreground to
-
Cut the frame with the grid
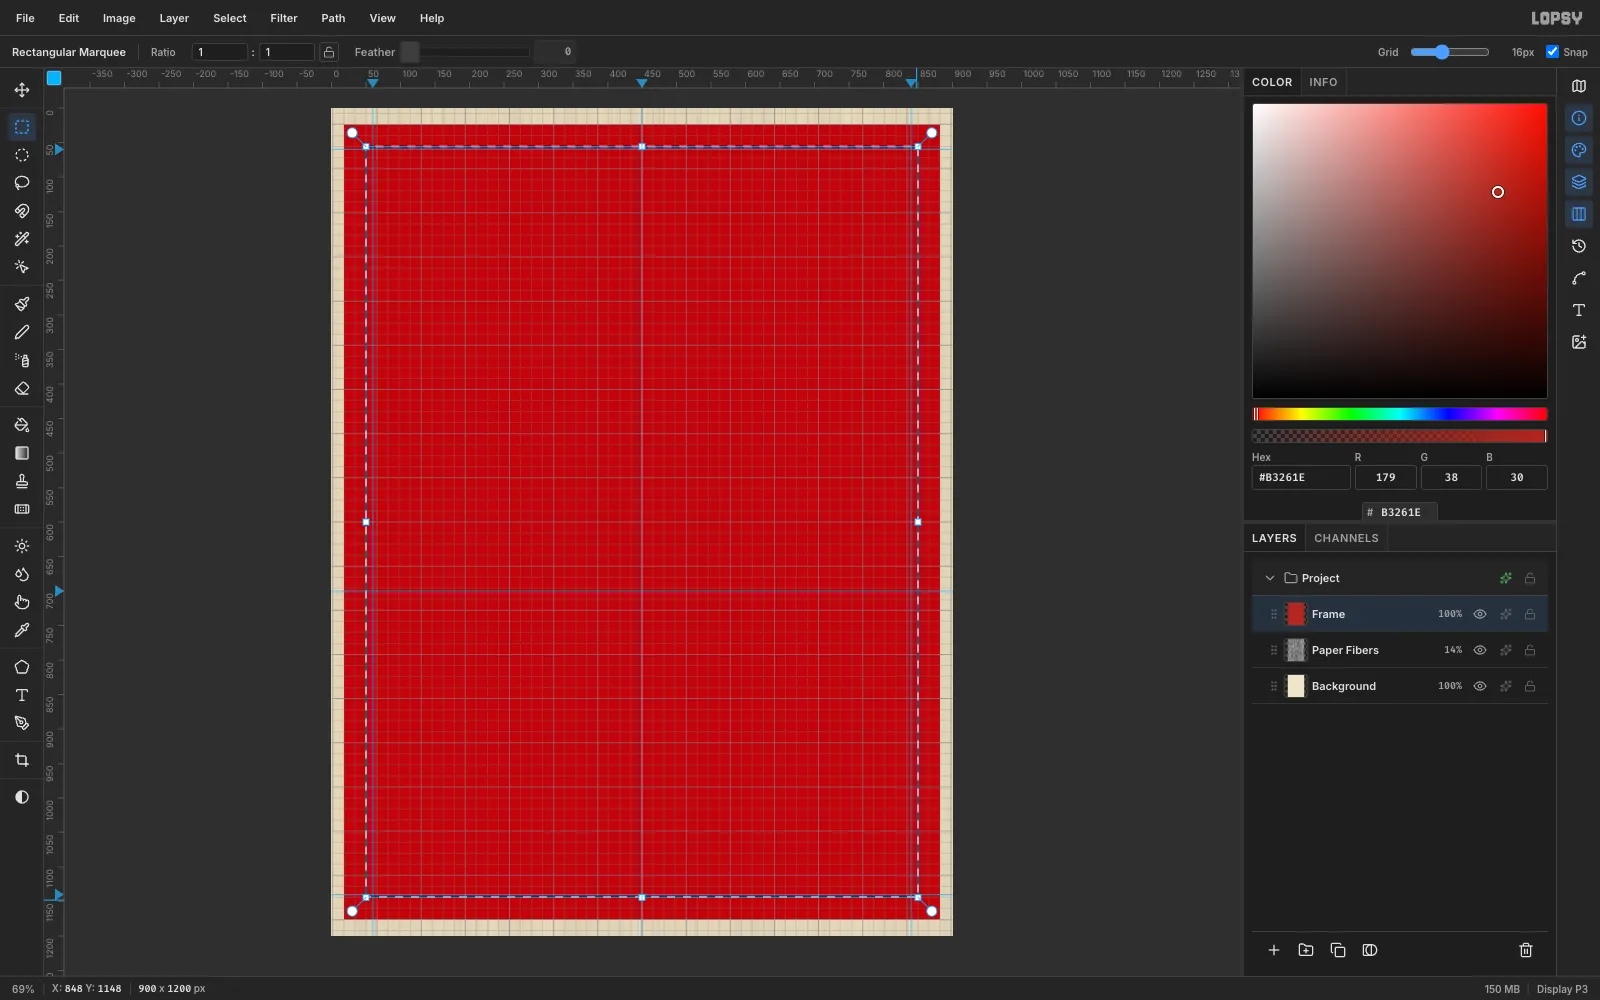
Choose View → Show Grid. Showing the grid switches Snap on in the options bar, and the grid is 16 px.
Click the top ruler at
60,450and840for vertical guides, and the left ruler at60,700and1140for horizontal ones. The450/700crossing is the centre of the medallion you'll paint later.- Click Add Layer and name the layer
Frame. Set the foreground to#B3261E. - With the Rectangular Marquee (M), drag from about (20, 20) to (880, 1180). Snap pulls the edges onto the grid.
- Fill it with the Paint Bucket.
- Marquee from (52, 52) to (848, 1148) and press Delete to hollow it out.
- Press Cmd+D to deselect, then untick Snap. The rest of the cover uses exact positions.
- Click Add Layer and name the layer
-
Add frame dots and heart corners
Add a layer named
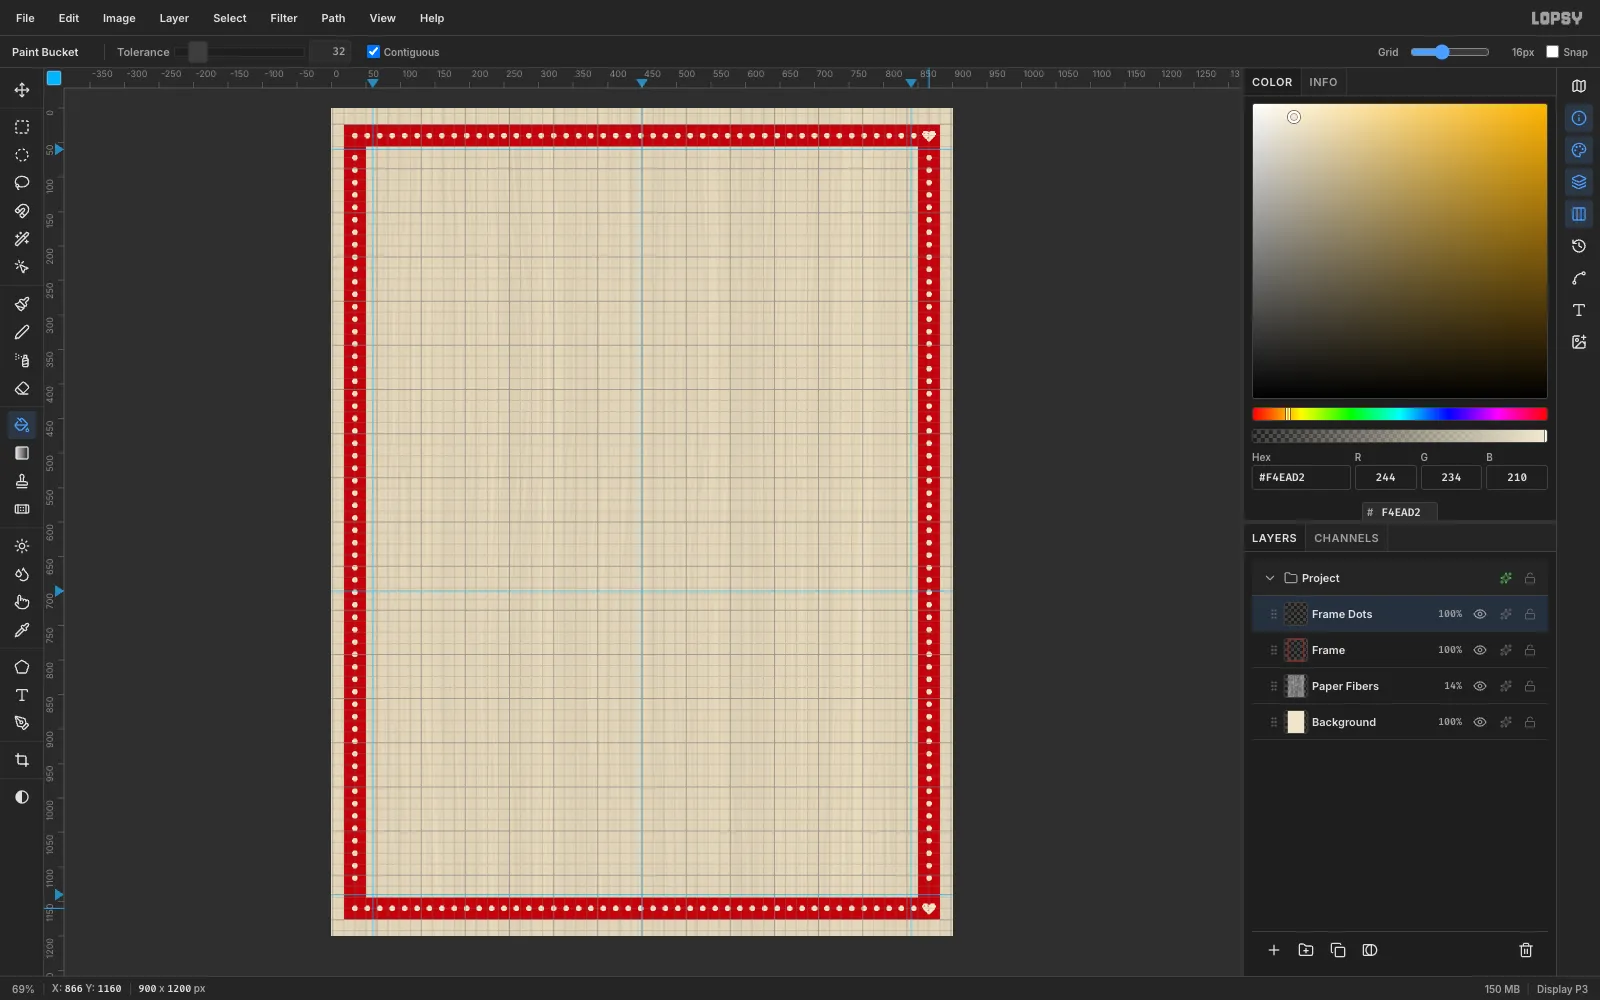
Frame Dotsand press B for the Brush. Open the brush presets. On the Shape tab, set Size9, Hardness100and Spacing355. With spacing that wide, a stroke lays down separate dots.Set the foreground to cream
#F4EAD2. Draw each side with a click and a Shift-click, which paints a straight dotted line:- top: (34, 40) to (866, 40)
- bottom: (34, 1160) to (866, 1160)
- left: (34, 72) to (34, 1128)
- right: (866, 72) to (866, 1128)
Finish the corners with small hearts. Draw a 20 px heart with the Lasso (L) on each corner square and fill it cream.
-
Draw an alphorn
Add a layer named
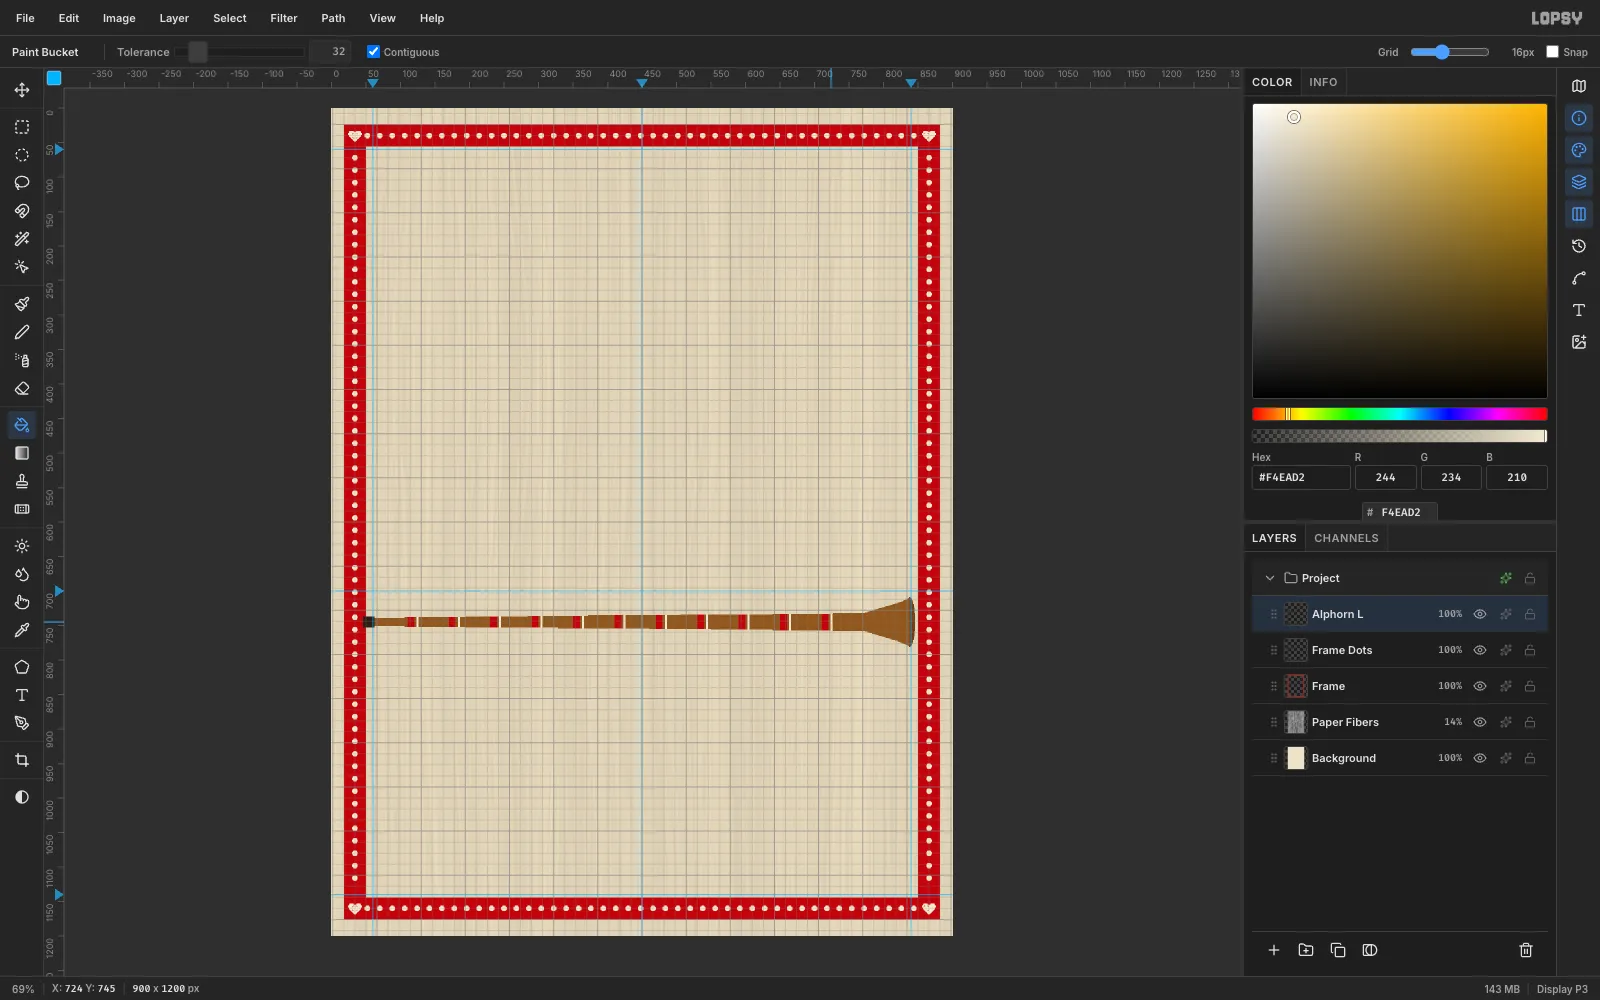
Alphorn L. Build the horn lying flat across the middle, and rotate it later.- Body: with the Lasso, trace a long taper. Start at (62, 739), go to (772, 732), flare out to (838, 711), come down to (838, 779), back to (772, 758) and (62, 751), then release. Fill it with
#8A5A2B. - Mouthpiece: marquee a 16 × 16 square at (46, 737) and fill it with ink
#2A1E17. - Bell rim: with the Elliptical Marquee, drag a 16 × 72 oval at (830, 709) and fill it with
#6B4320. - Bands: every 60 px from x
110to710, marquee a 10 px-wide strip from y700to790and bucket-click the horn inside it with red#B3261E. Then add a 3 px cream strip 13 px to the right of each red band.
Because the bucket only floods the horn's brown pixels, each band wraps the horn neatly without spilling onto the paper.
- Body: with the Lasso, trace a long taper. Start at (62, 739), go to (772, 732), flare out to (838, 711), come down to (838, 779), back to (772, 758) and (62, 751), then release. Fill it with
-
Duplicate and flip the second horn
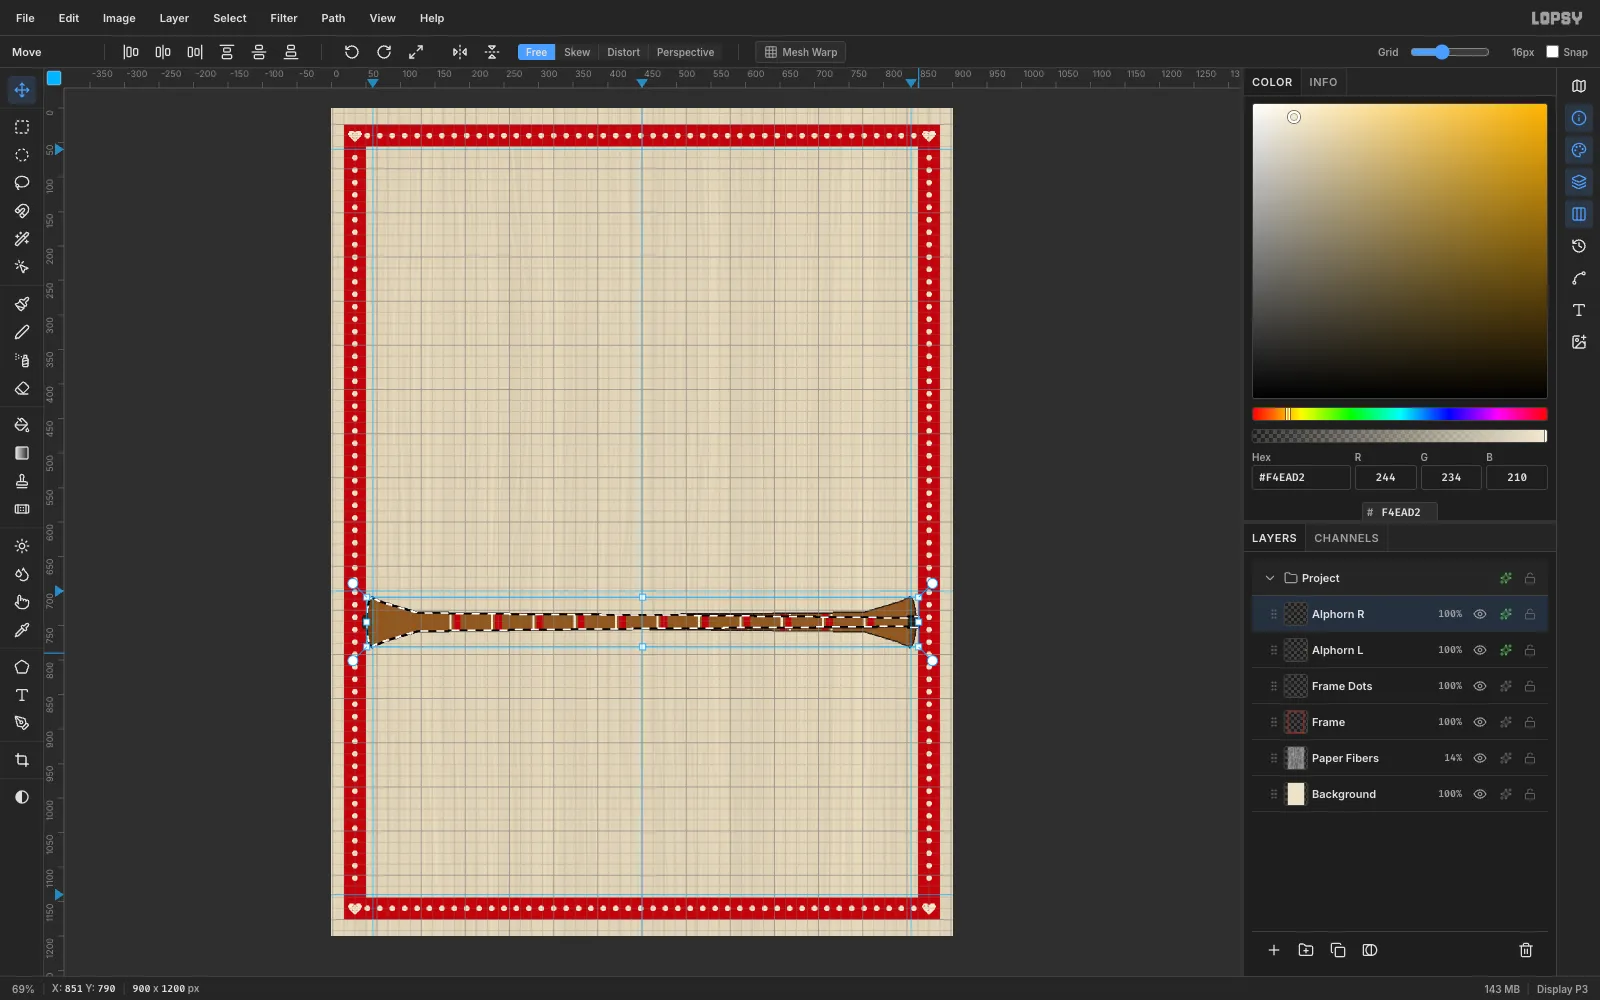
Give the horn an outline first so that both copies get it. Open Alphorn L's effects, tick Stroke, and set Width
2, position outside, colour ink.Click Duplicate Layer and rename the copy
Alphorn R. If the copy lands offset, use the Move tool (V) and the arrow keys to put it exactly on top of the original.Marquee from (46, 700) to (851, 790) around the horn. Press V and click Flip Horizontal in the options bar. The bell now points left.
Press Cmd+D.
-
Rotate the horns into an X
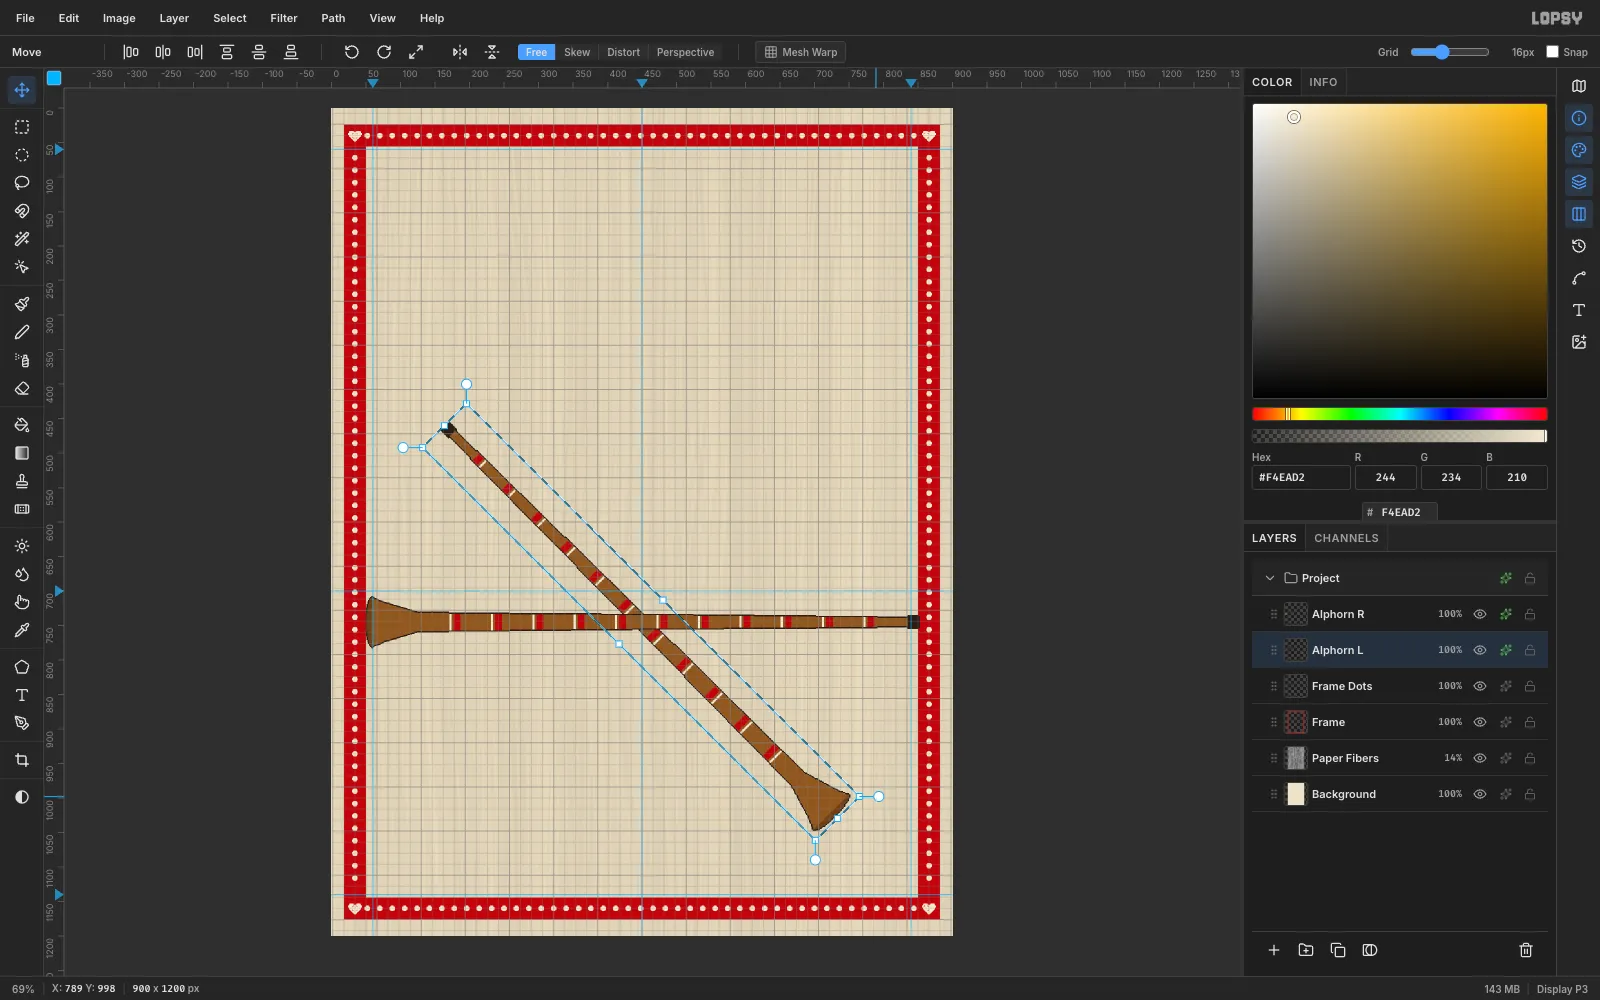
Select Alphorn L and marquee the same (46, 700) to (851, 790) box. With the Move tool, drag the top-right rotation handle (the circle just outside the corner) clockwise. Hold Cmd so it snaps in 15° steps, and stop at 45°, with the bell pointing to the lower right. Press Cmd+D to commit.
-
Cross the second horn
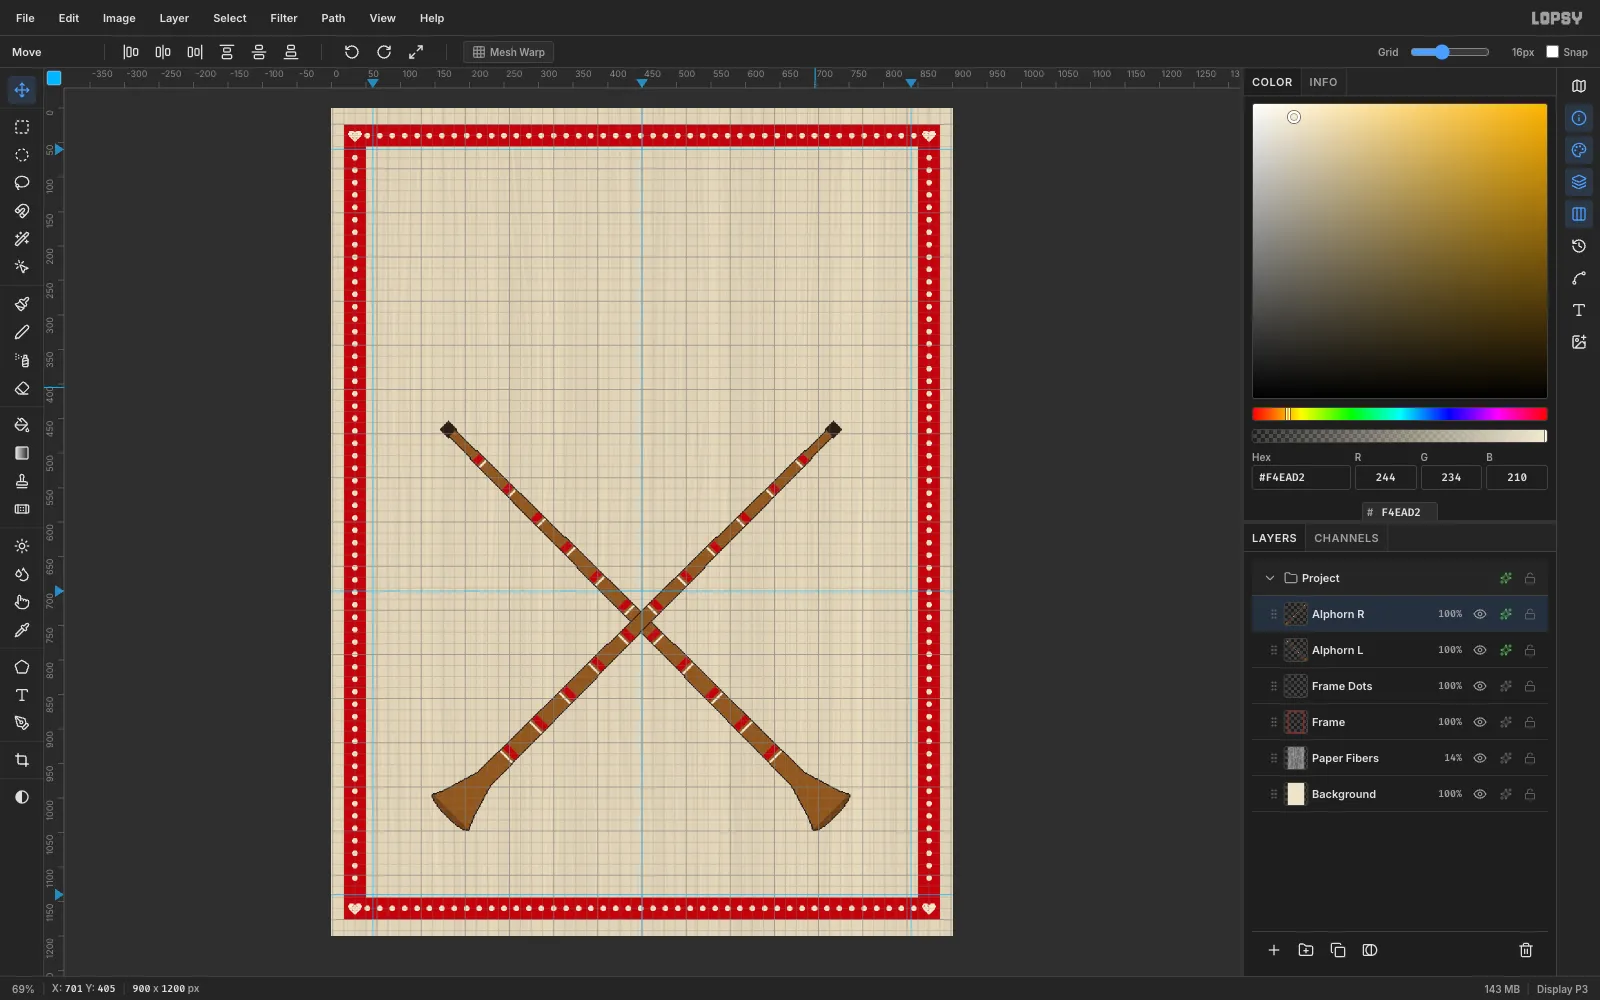
Select Alphorn R, marquee the same box, and rotate it 45° counter-clockwise so its bell points to the lower left. Press Cmd+D.
The two horns now cross at the centre guide. The medallion will cover the crossing, leaving the mouthpieces and bells showing like an emblem.
-
Paint the sky disc and sunburst
Select Alphorn R and add a layer named
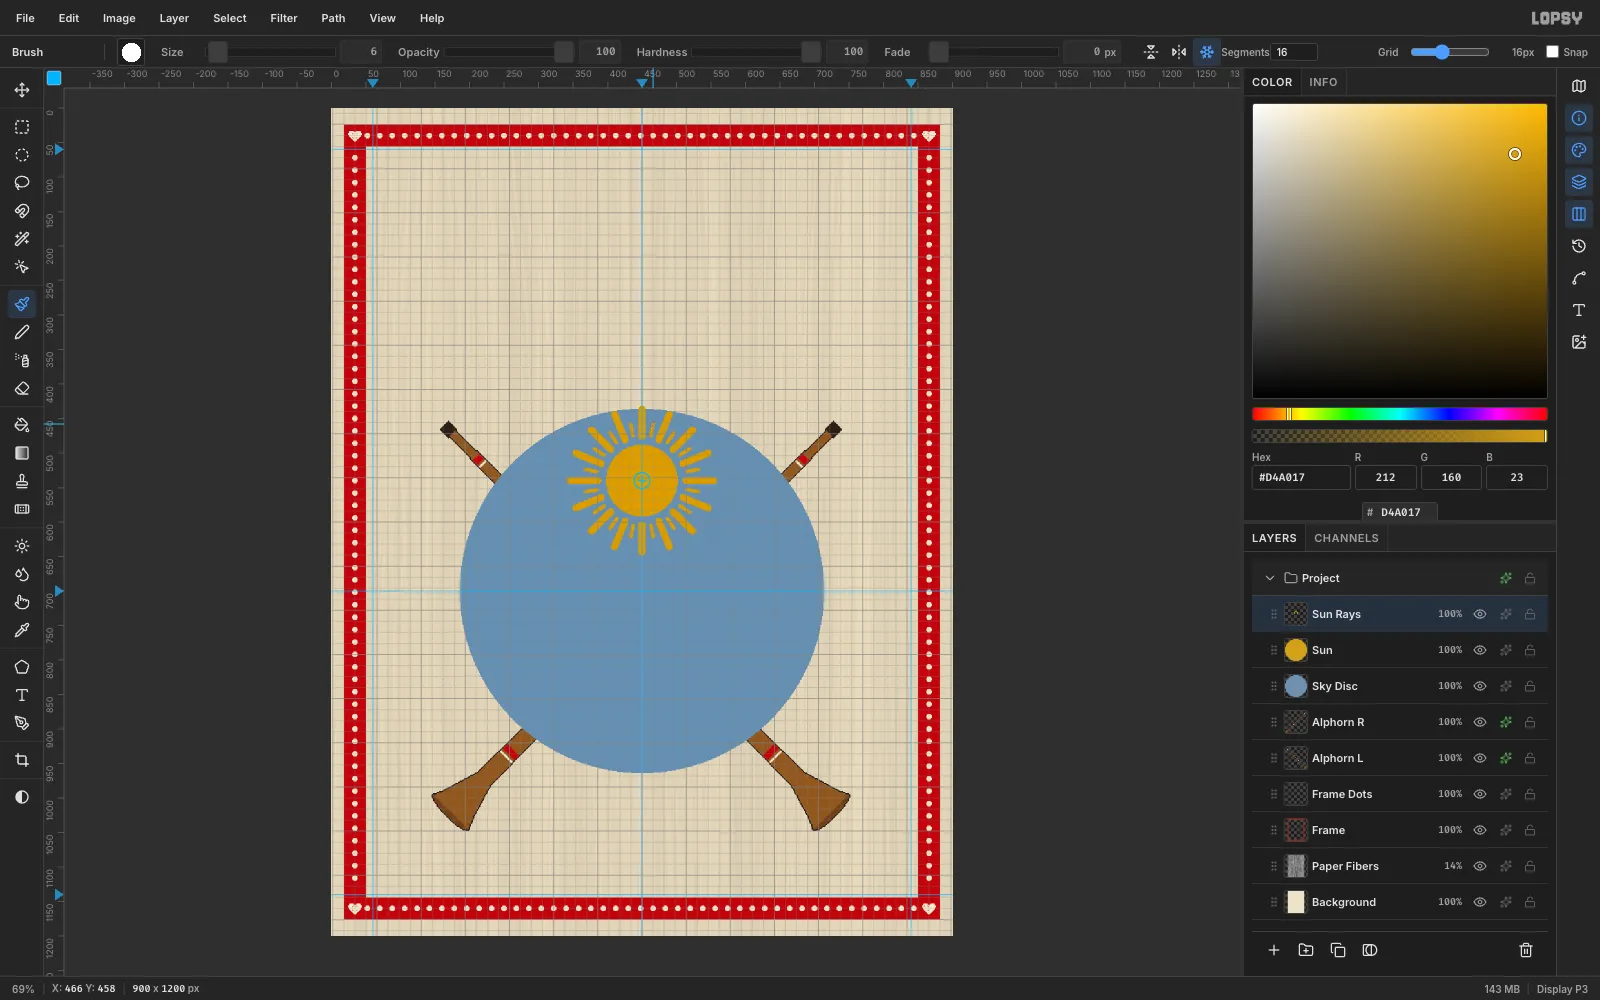
Sky Disc. Drag an Elliptical Marquee of 528 × 528 at (186, 436) and fill it with#6E8FB0.Add a layer named
Sun, marquee a 104 × 104 circle at (398, 488), and fill it with ochre#D4A017.Next, add a layer named
Sun Raysand select the Brush. In the brush presets, set Spacing back to10and Size to11. Then:- Click Radial Symmetry in the options bar and set Segments to
16. - Cmd-click the sun's centre at (450, 540) to move the symmetry centre there.
- Drag straight up from (450, 476) to (450, 436). Sixteen rays appear at once.
- For the short rays in between, set Size to
6and drag from (463, 475) to (466, 458). - Click Radial Symmetry again to turn it off.
- Click Radial Symmetry in the options bar and set Segments to
-
Build the mountains and hills
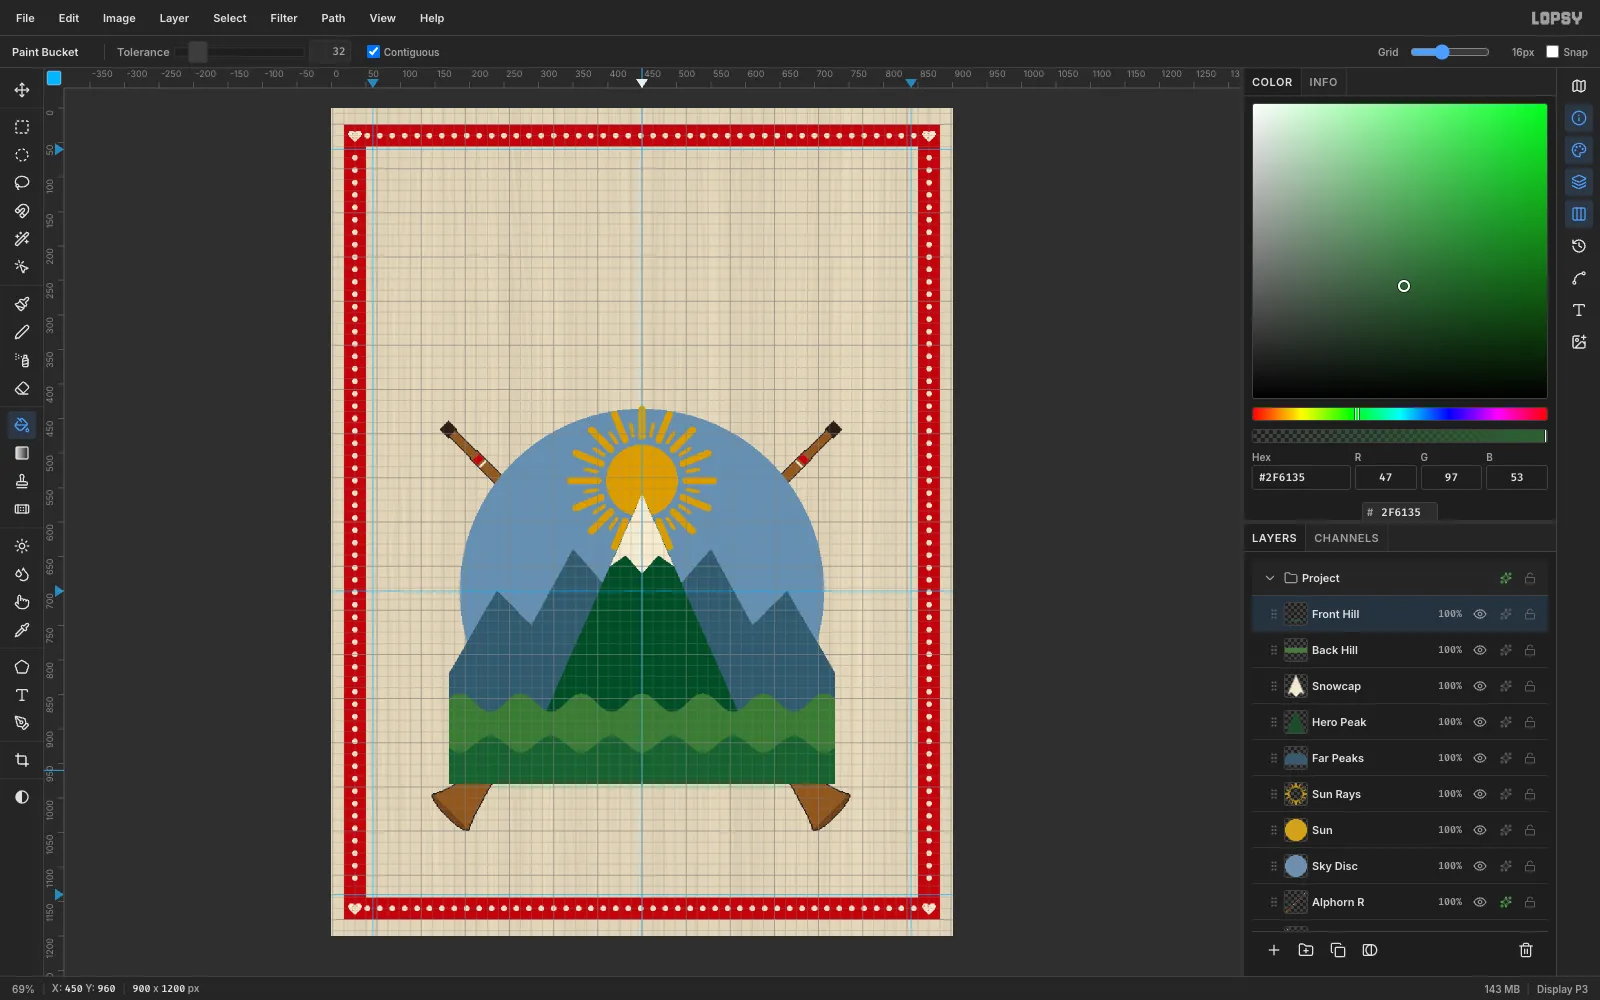
Folk painting likes mirror symmetry, so keep every shape balanced around the 450 guide. Add one layer per shape, lasso it, and fill it:
- Far Peaks
#3B5A6E: a zigzag through (170, 820), (240, 700), (290, 750), (350, 640), (420, 720), (450, 690), then the mirror image out to (730, 820). Close it along the bottom at y 980. - Hero Peak fir green
#1E4D2B: a triangle (296, 910), (450, 560), (604, 910). - Snowcap cream: (450, 560), (496, 664), (474, 648), (450, 674), (426, 648), (404, 664).
- Back Hill
#4B7A3C: a band with a wavy, scalloped top around y 862 (about 88 px per wave), closed at the bottom. - Front Hill
#2F6135: the same wave around y 922, offset by half a wave.
- Far Peaks
-
Add the chalet and fir trees
Select Front Hill and add a layer named
Chalet:- body: a 64 × 46 rectangle at (418, 872) in
#8A5A2B - roof: a red triangle (404, 878), (450, 836), (496, 878)
- windows: two cream 12 px squares at (426, 882) and (462, 882), and a round 12 px window at (444, 850)
- door: an ink 14 × 20 rectangle at (443, 898)
Add a
Fir Treeslayer. Each tree is two stacked lasso triangles in#163B21plus a short ink trunk. Put two trees at x372and528(base at y 916) and two smaller ones at x312and588(base at y 934).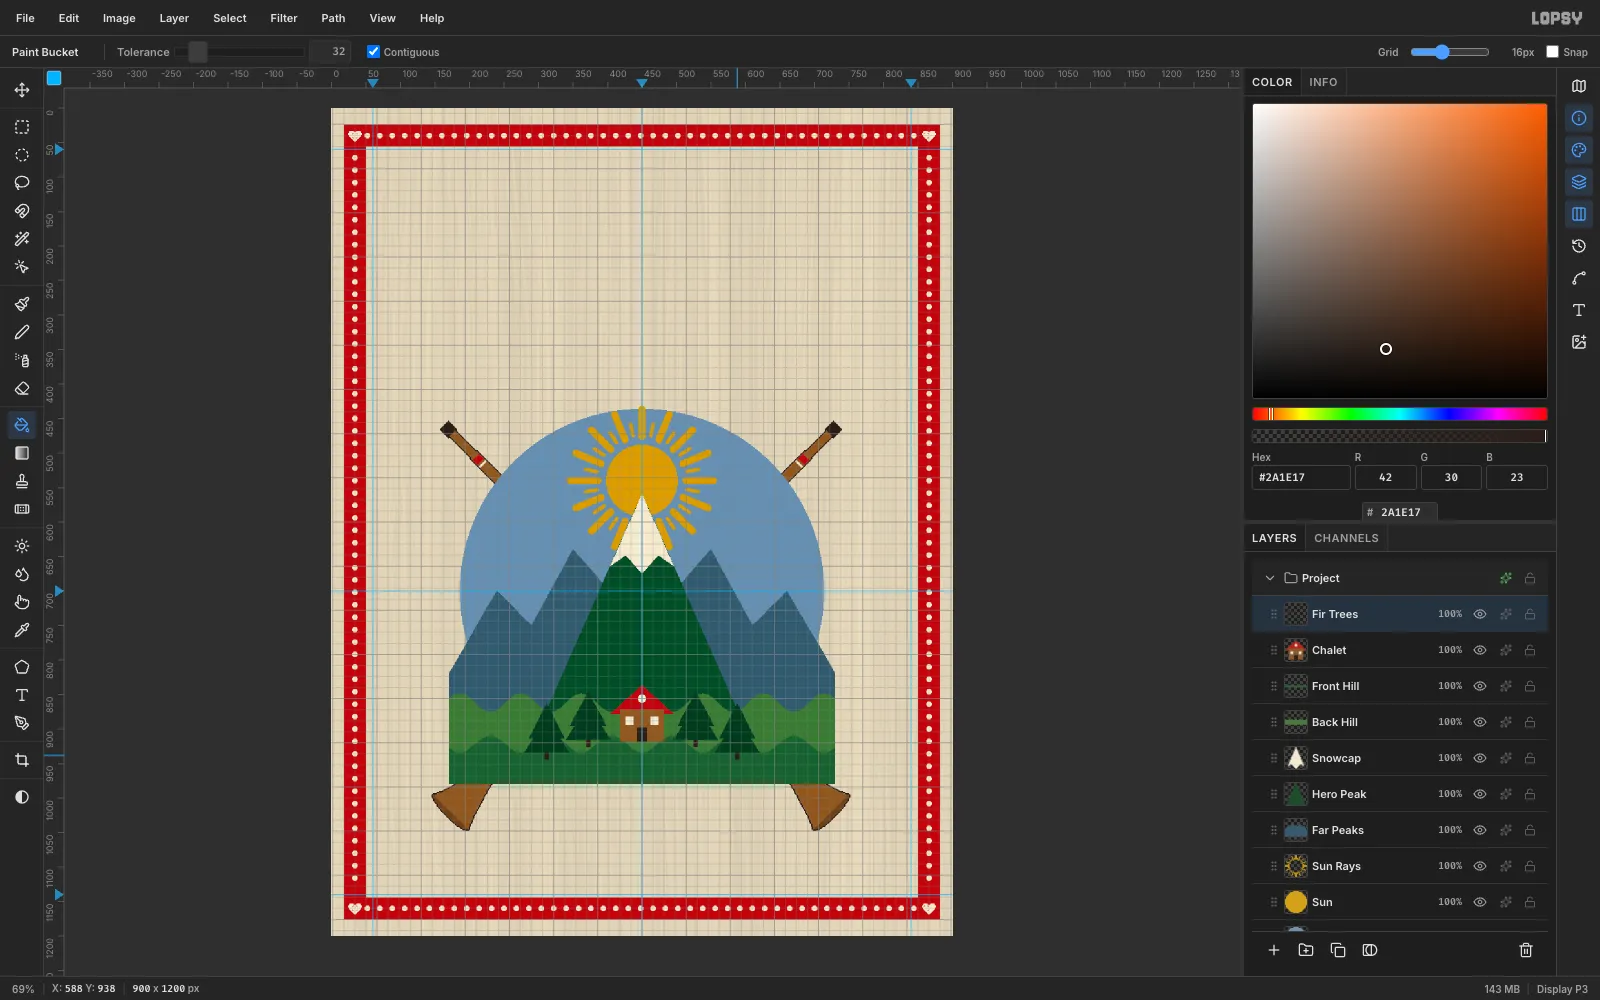
- body: a 64 × 46 rectangle at (418, 872) in
-
Clip the landscape to the disc
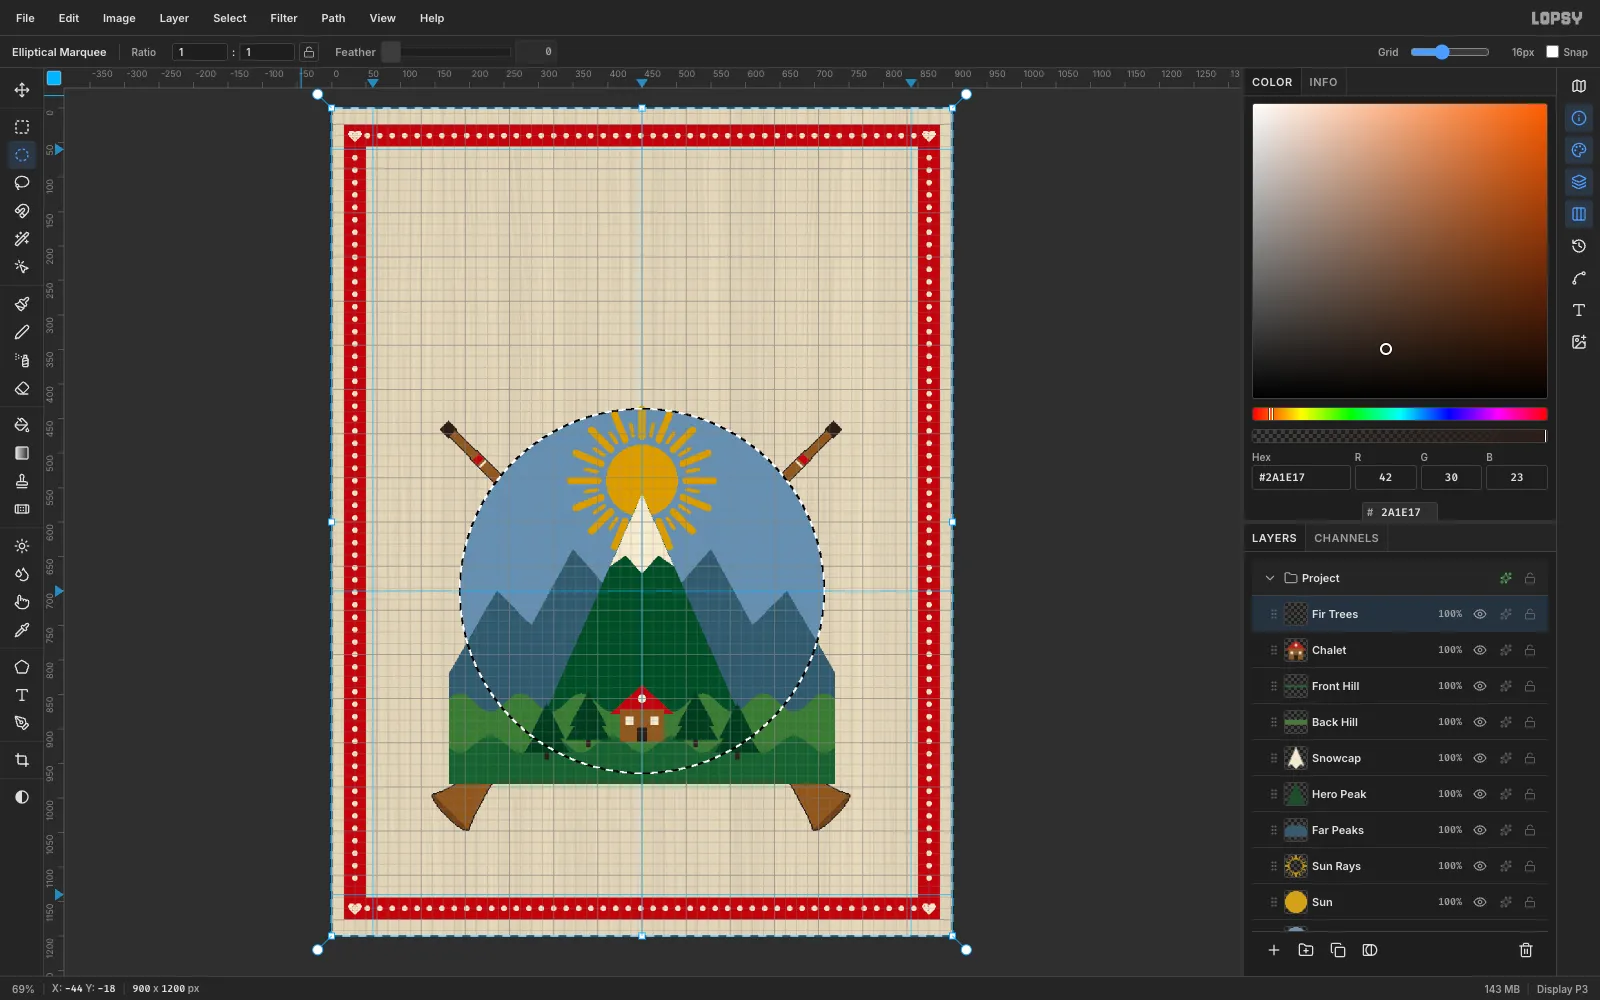
The peaks and hills overhang the disc. To trim them:
- Drag the 528 × 528 elliptical marquee at (186, 436) again.
- Choose Select → Inverse.
- Click each of Fir Trees, Chalet, Front Hill, Back Hill, Far Peaks and Sun Rays in turn, pressing Delete after each one. The selection stays put while you switch layers.
- Press Cmd+D.
-
Add scallops, ring and dots
Select Fir Trees and add a layer named
Scallops. With the Brush at Size22in ochre, turn on Radial Symmetry with32segments. Cmd-click the medallion centre (450, 700), then click once at (450, 438). Thirty-two half-hidden dabs make a scalloped inner edge.Add a
Ringlayer. Fill a 564 × 564 elliptical marquee at (168, 418) with red, then marquee the 528 disc at (186, 436) and press Delete. This leaves a clean 18 px ring.Add
Ring Dots, set the brush to Size6in cream, and keep 32 radial segments centred on (450, 700). Click once at (477, 429). That point is rotated half a step from the scallops, so the dots sit between them. Turn radial symmetry off.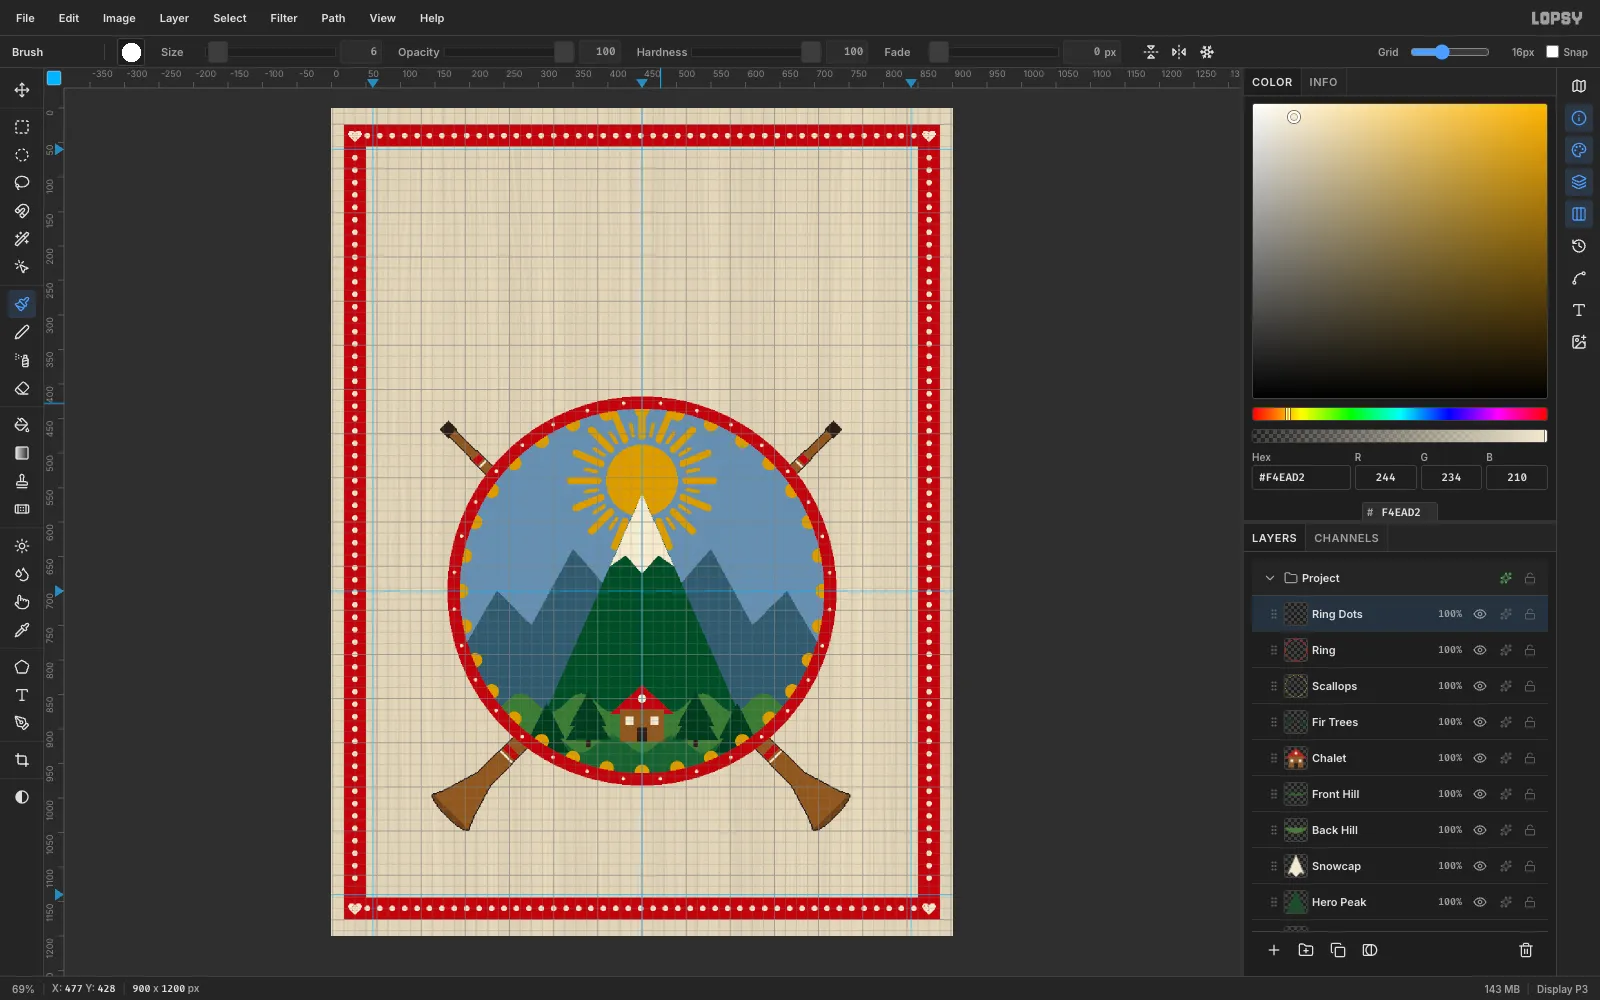
-
Turn the front hill into a golden field
The dark firs disappear against the dark front hill. Open Front Hill's effects, tick Color Overlay and set the colour to
#C99A2E. The hill turns into a harvest field. Because it's an effect rather than a repaint, you can still change the colour later.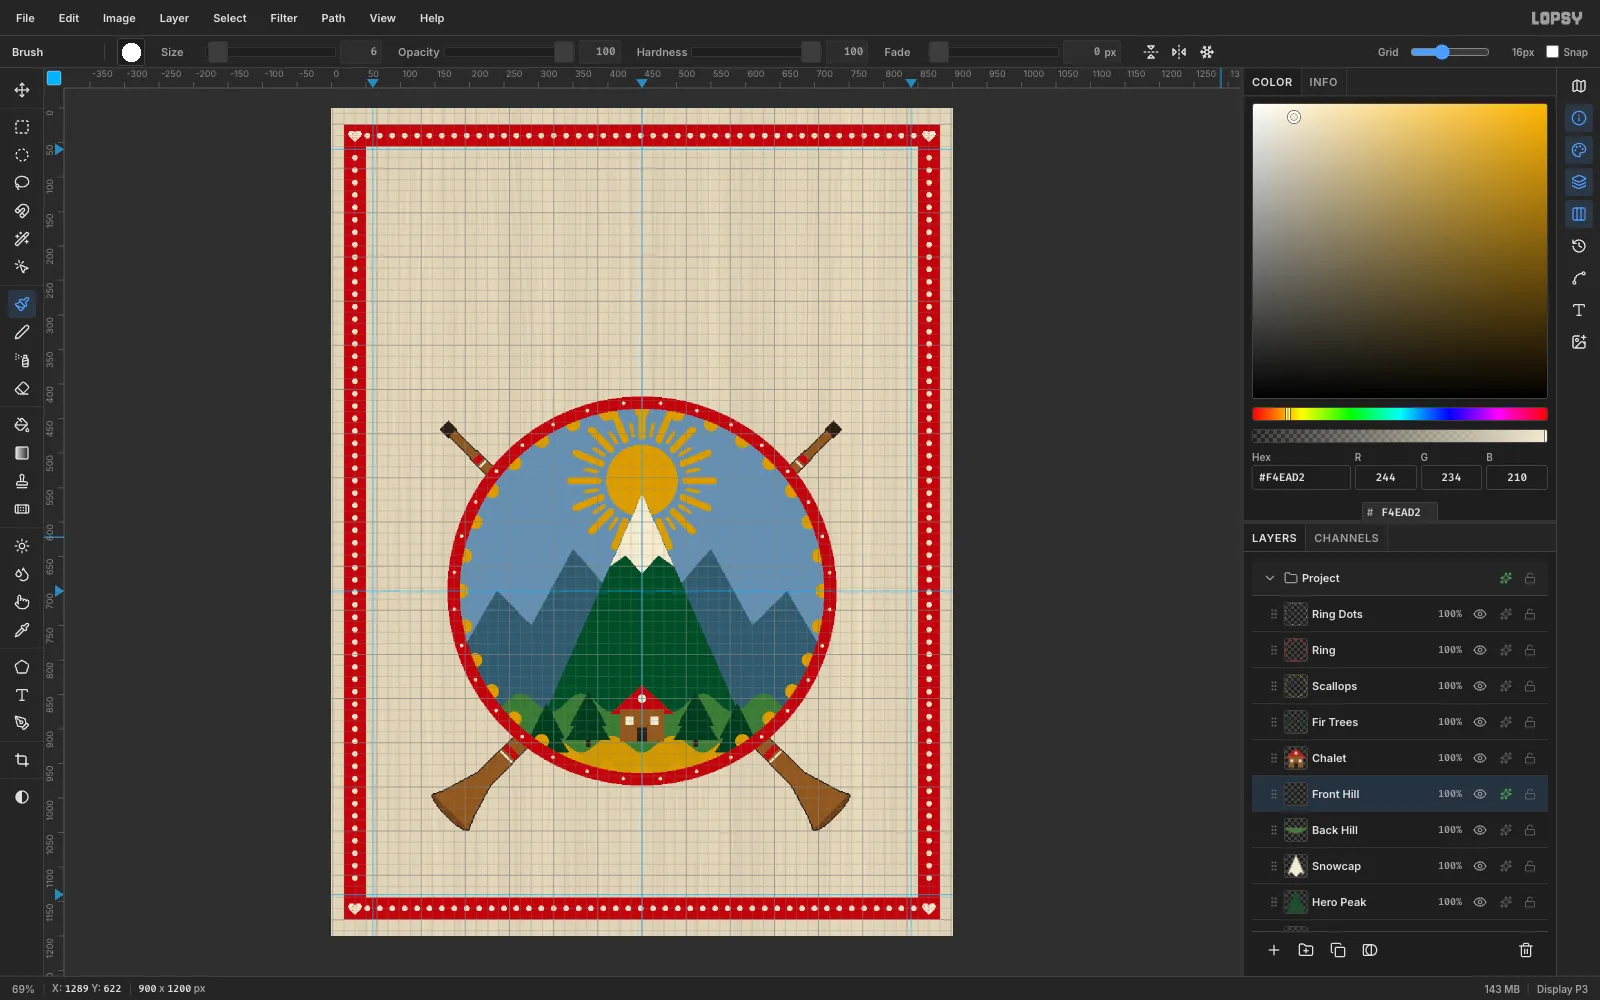
-
Group the horns and the medallion
Select Ring Dots and add a layer named
Ribbon Tails. It sits above everything you'll group, so new work lands on top.Click Ring Dots, Shift-click Sky Disc, and click Group Layers. Name the group
Medallion. Do the same with Alphorn R and Alphorn L and name that groupAlphorns. Collapse both groups to keep the panel short. You can now select a whole group and move it as one piece.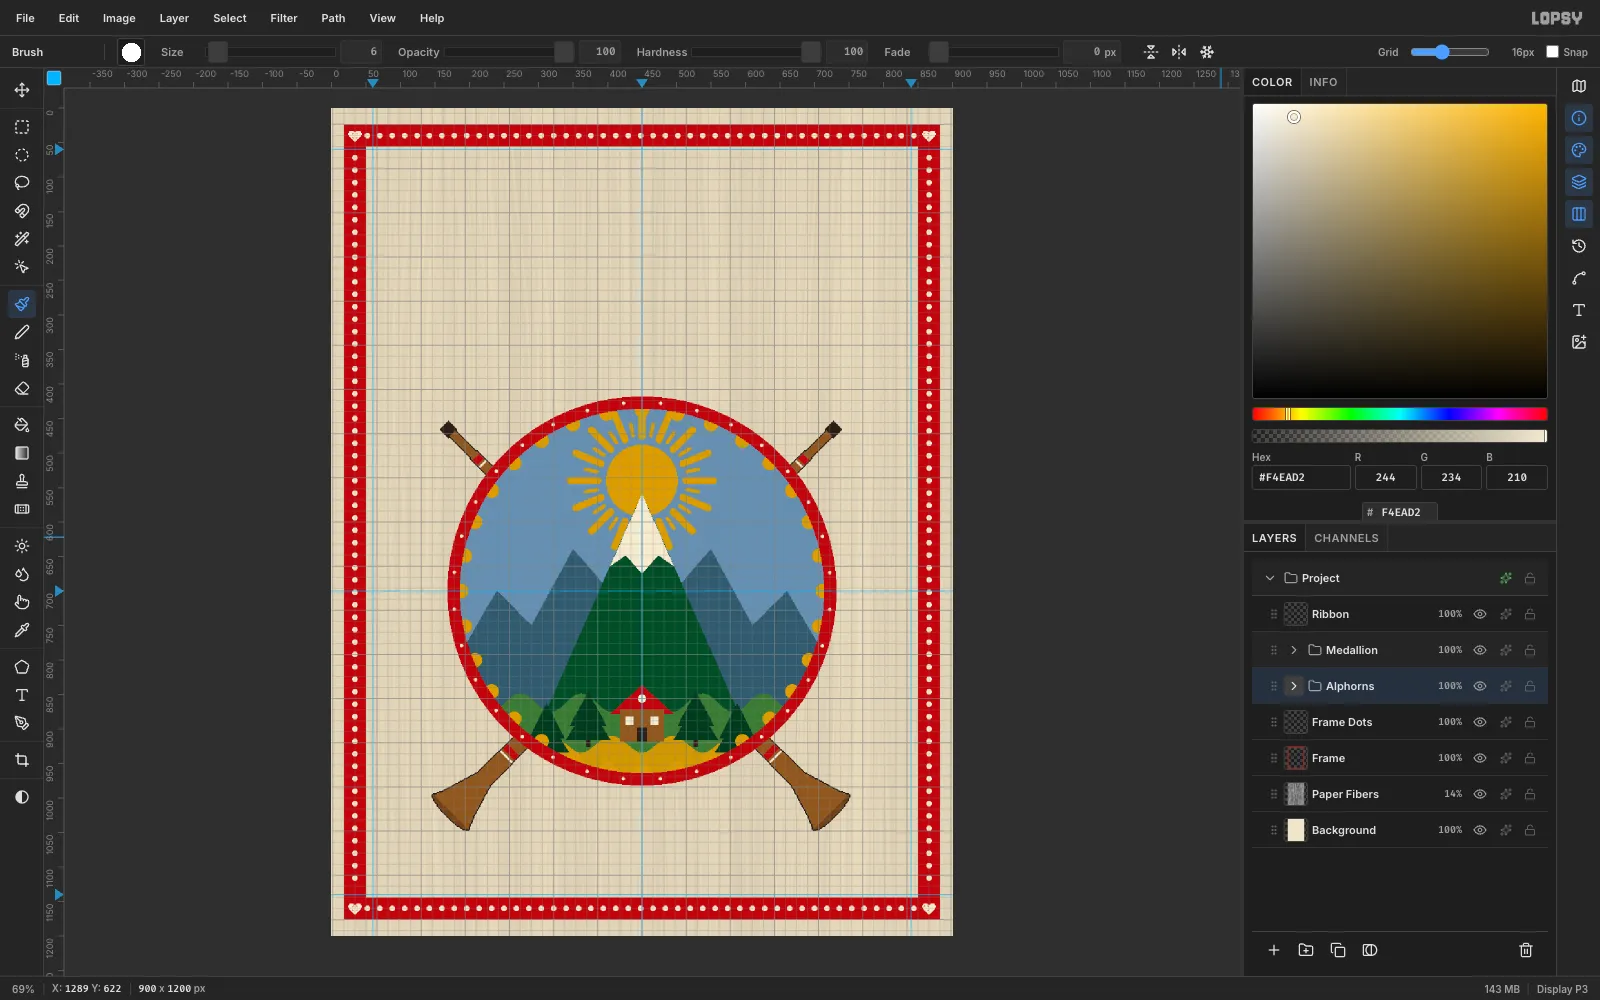
-
Draw the swallowtail ribbon
On Ribbon Tails, lasso the left tail with
#7A1712: (120, 1048), (204, 1048), (204, 1112), (120, 1112), with the notch point at (146, 1080). Draw its mirror image on the right, from x 780 to 696. Add two small fold triangles in#4A0E0Awhere the band meets the tails, at (172–204, 1096–1112) and (696–728, 1096–1112).Add a layer named
Ribbon Band. Fill a 556 × 64 rectangle at (172, 1032) with red, then add two 2 px cream rules at y1040and1086, from x 186 to 714.Finally, open the band's effects, tick Drop Shadow, and set Offset X
4, Offset Y5, Blur4, colour ink and Opacity about40.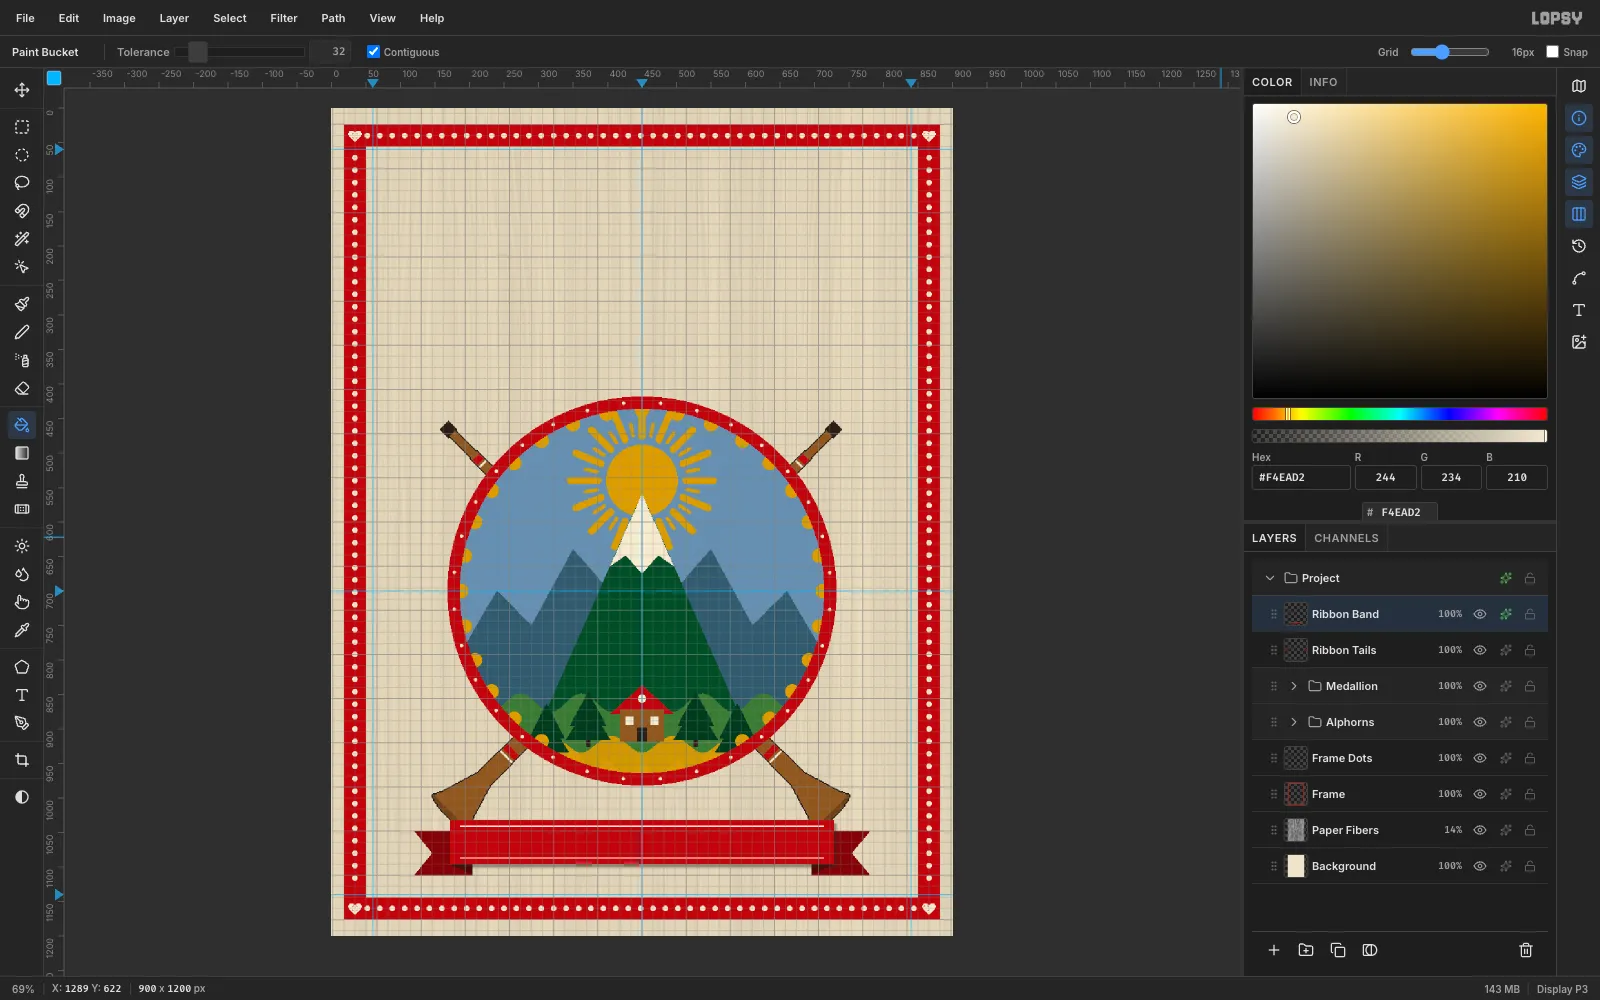
-
Set the issue line
With Ribbon Band still selected, press T for the Text tool:
- Open the Font browser, search
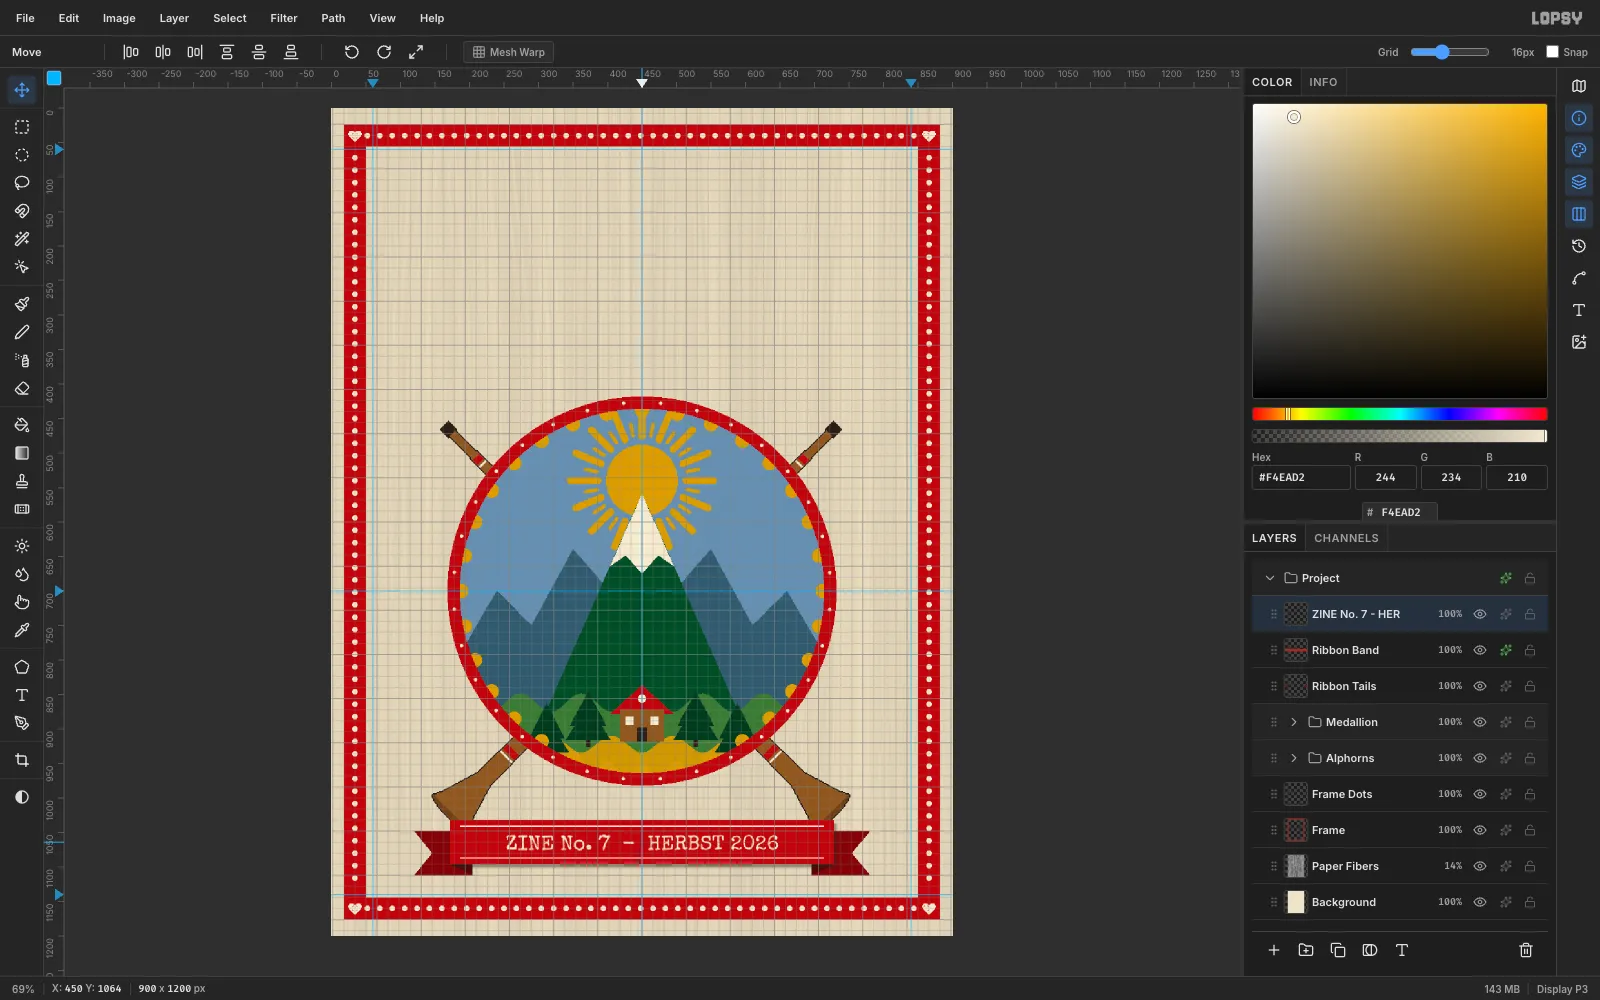
Special Eliteand click it. Set Size to30and the foreground to cream. - Click an empty spot near the bottom of the canvas, type
ZINE No. 7 - HERBST 2026, and press Tab to commit. - With the Move tool, drag the text onto the ribbon so it's centred at (450, 1064).
- Open the Font browser, search
-
Add the tagline
Click Ribbon Band again so the new type doesn't restyle the issue line. Keep Special Elite, but set Size to
17and the foreground to ink.Copy
LIEDER · WANDERWEGE · GESCHICHTENto your clipboard. Click an empty spot and paste it with Cmd+V. The middle dots are easiest to paste rather than type. Press Tab, then move the tagline to centre it at (450, 1009).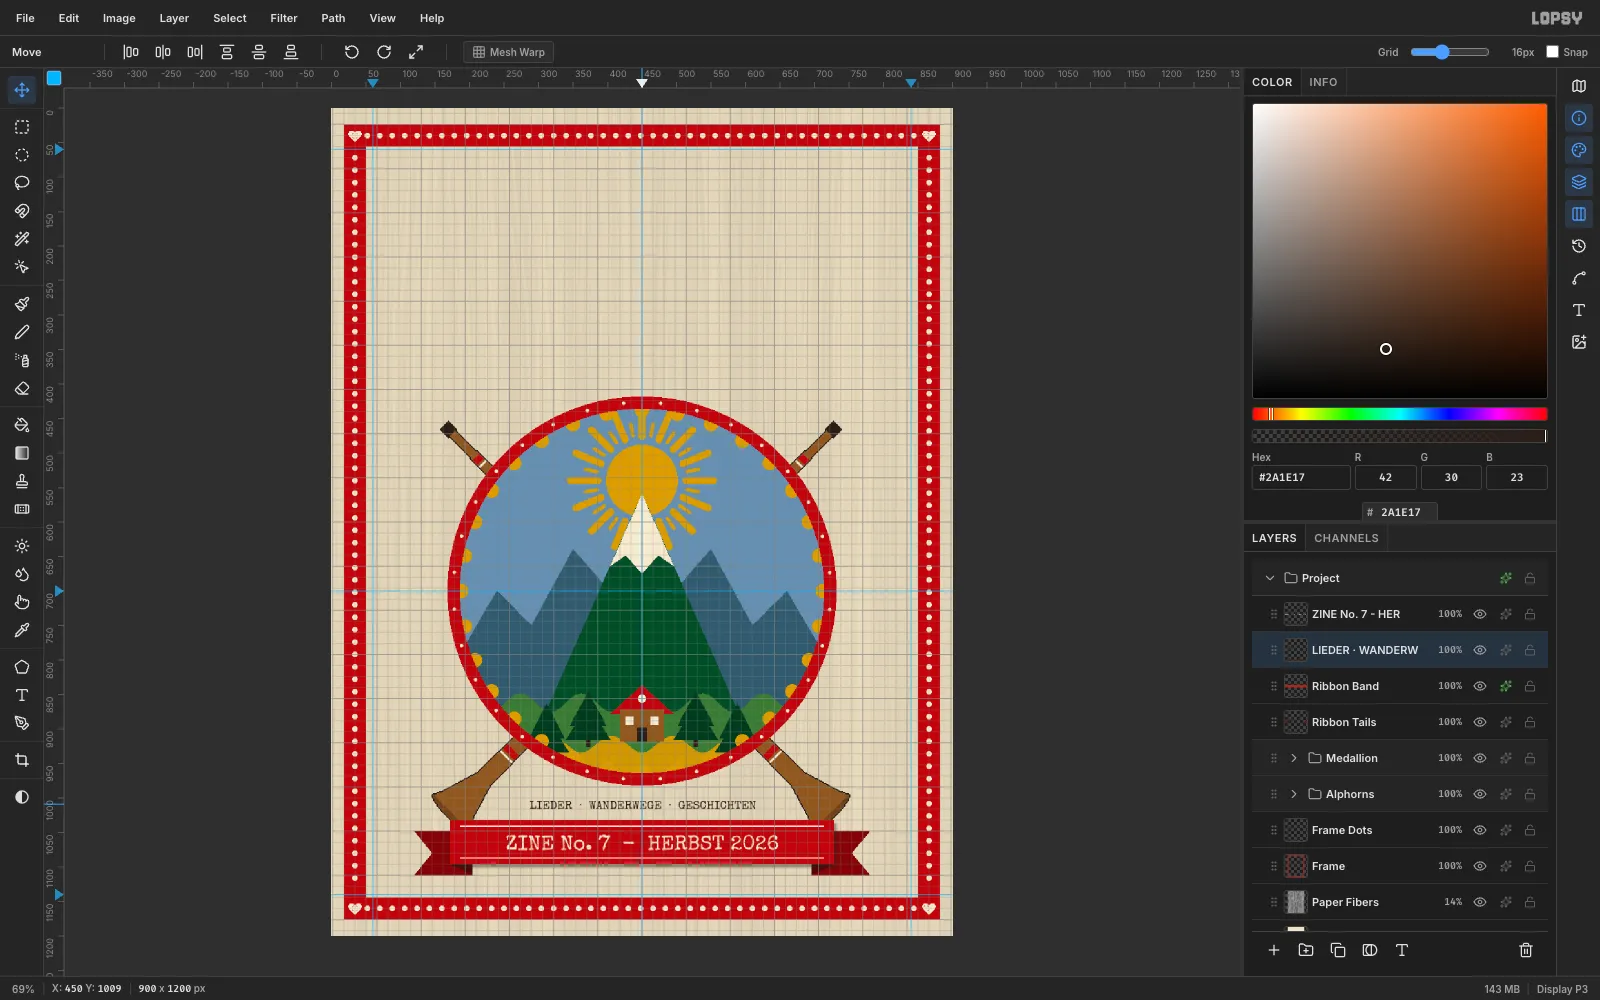
-
Set the woodtype title
Select Ribbon Band. In the Text tool, pick Rye, a Western woodtype face that suits folk posters. Set Size to
190and the foreground to red.Wait a moment for the font to download, then click at about (110, 80), type
YODELand press Tab. Nudge it with the Move tool until it's centred on the 450 guide.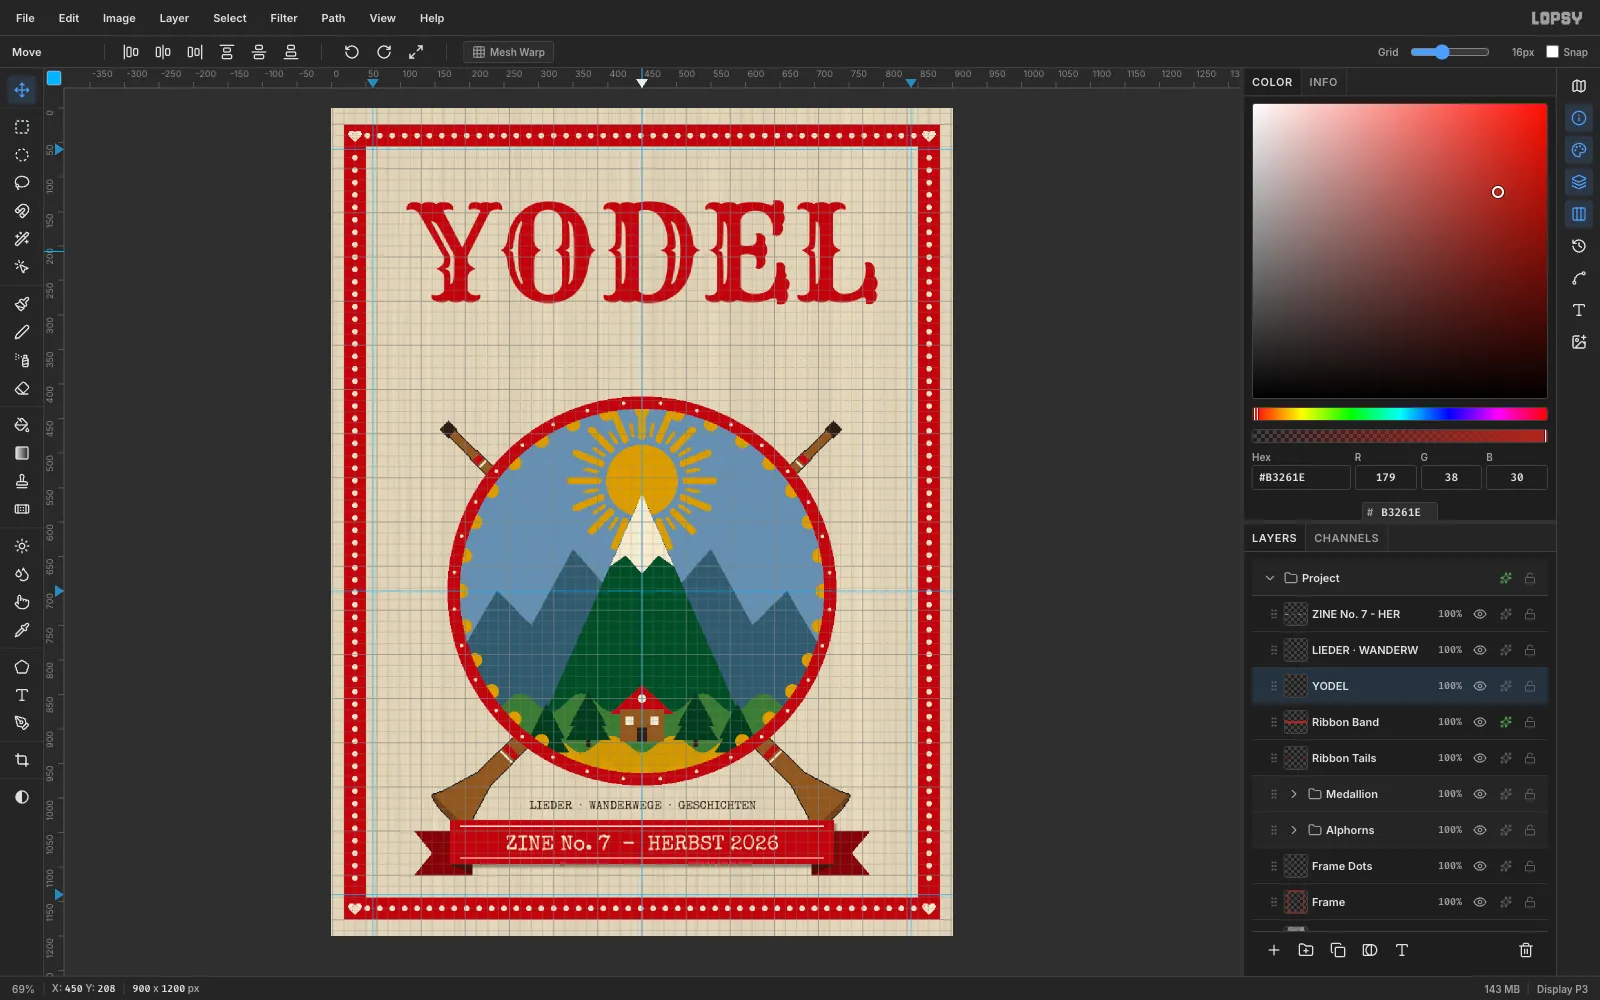
-
Give the title a cream outline and ink shadow
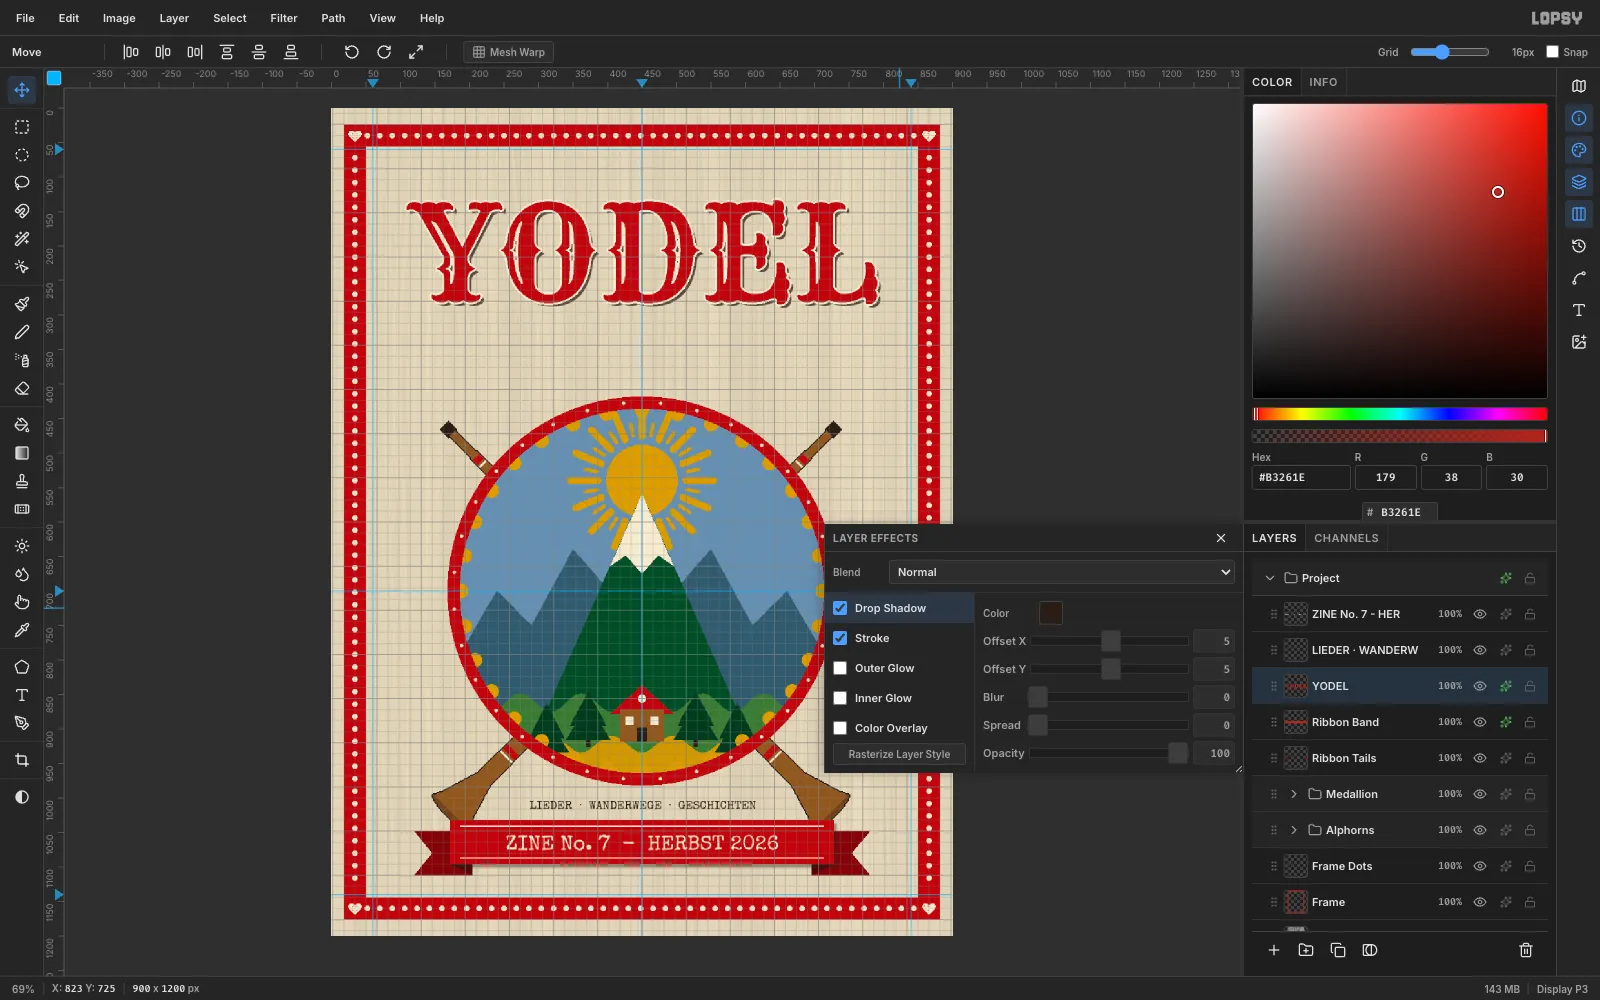
Open YODEL's effects:
- Stroke: Width
3, outside, cream. - Drop Shadow: Offset X and Offset Y
5, Blur0, colour ink, Opacity75.
The hard, unblurred shadow gives the title the slightly raised look of printed woodtype.
- Stroke: Width
-
Add the subtitle and ornaments
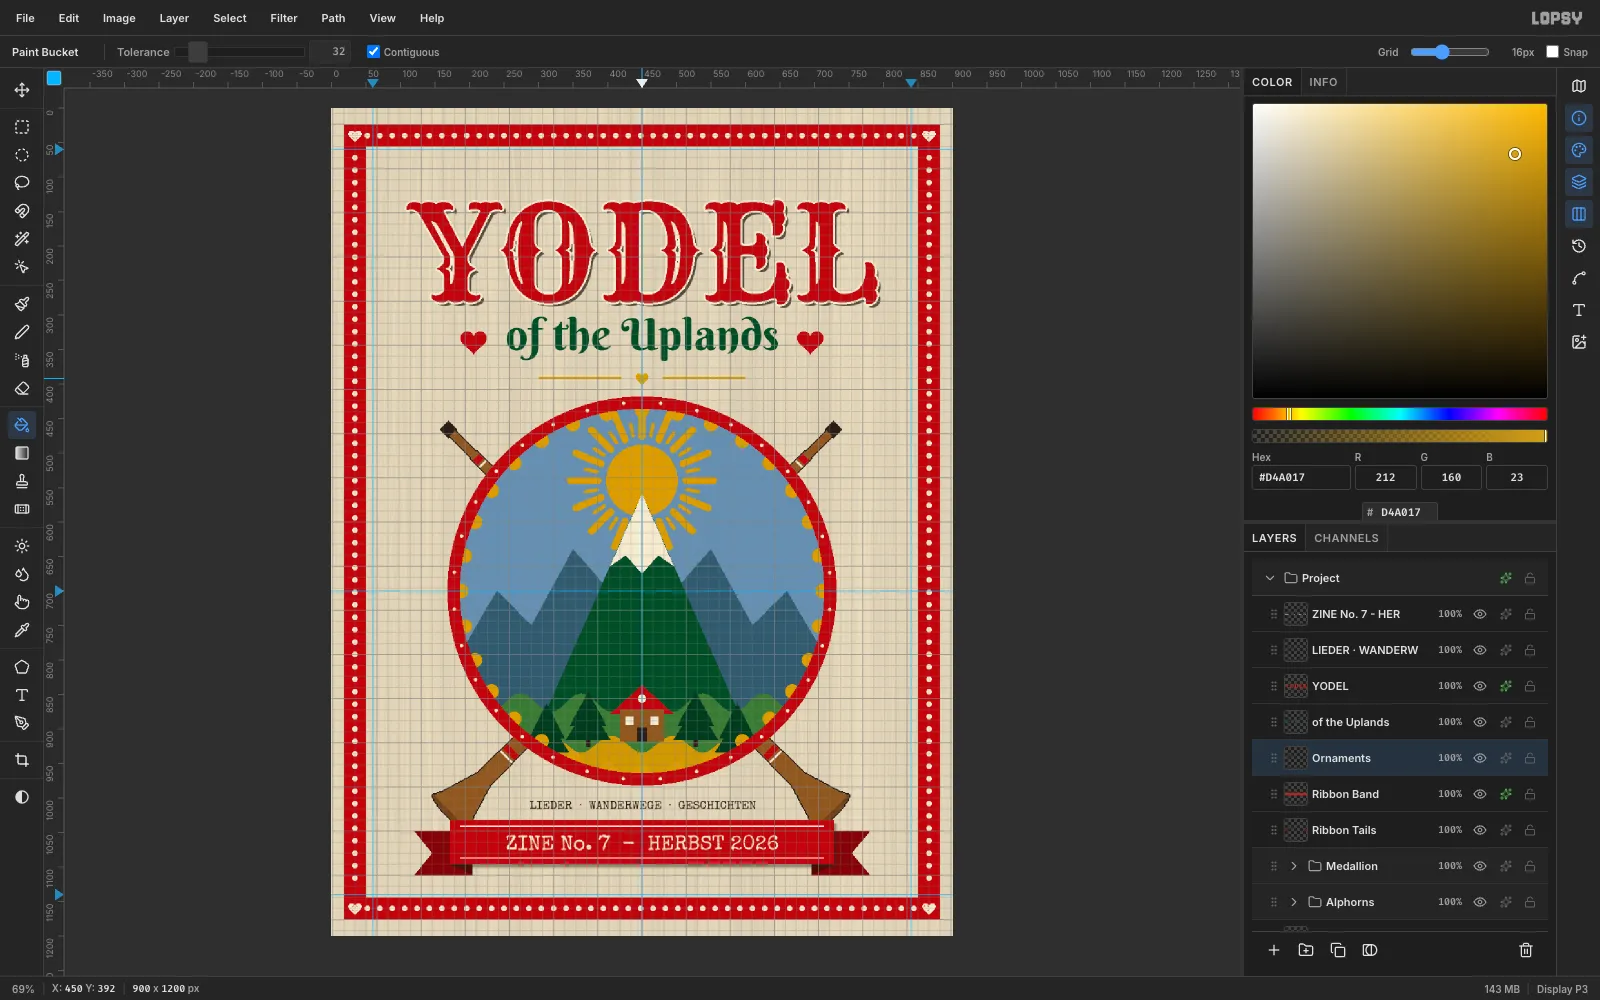
Select Ribbon Band and set type again: Berkshire Swash, Size
64, fir green. Typeof the Uplands, commit, and centre it at (450, 334).Add a layer named
Ornaments:- two red lasso hearts about 38 px wide at (206, 338) and (694, 338)
- two 3 px ochre rules, 120 px long, at (300, 390) and (480, 390)
- a tiny ochre heart between the rules at (450, 392)
-
Grow a vine in the margin
Add a layer named
Vine L. In the brush presets, set Size5, Spacing10and Taper0. Paint a gently wavy fir-green stem up the left margin, from (108, 960) to (108, 580).For the leaves, lasso small almond shapes, about 36 px long and tilted upwards, and fill them with
#4B7A3C. Alternate sides at y920,870,760,700and640.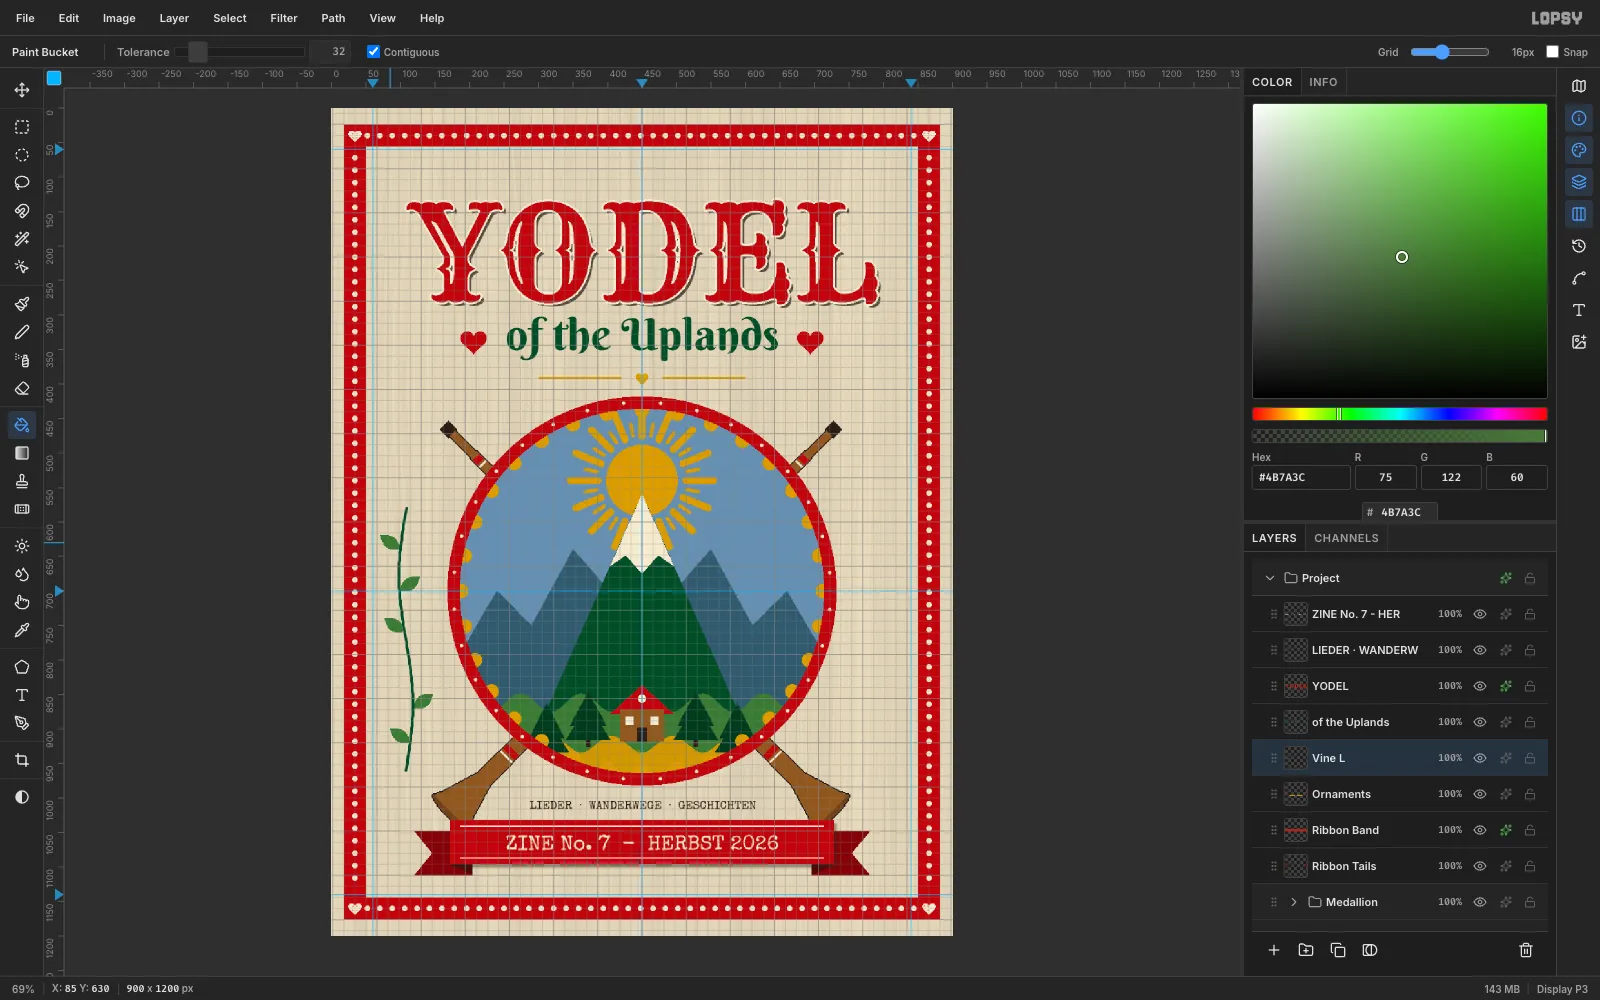
-
Add the tulip, heart and edelweiss
- Tulip: lasso a three-petal tulip on top of the stem, through (90, 590), (82, 556), (97, 568), (108, 538), (119, 568), (134, 556), (126, 590), (108, 600). Choose Edit → Fill with red. Add a small ochre flame in the middle the same way.
- Heart: lasso a small heart on the stem at (115, 815) and Edit → Fill it red.
- Berries: click a few ochre dots (Size
8) beside the leaves.
For the edelweiss, set the brush Taper to
80so each stroke ends in a point. Turn on Radial Symmetry with9segments and Cmd-click (108, 488) to centre it there. Then paint three layers of petals, each with a single short outward drag:- green
#4B7A3Cbracts at Size12 - cream petals at Size
14 - white highlights at Size
8
Turn radial symmetry off and set Taper back to
0. Finish with a cluster of tiny ochre and brown dots in the centre.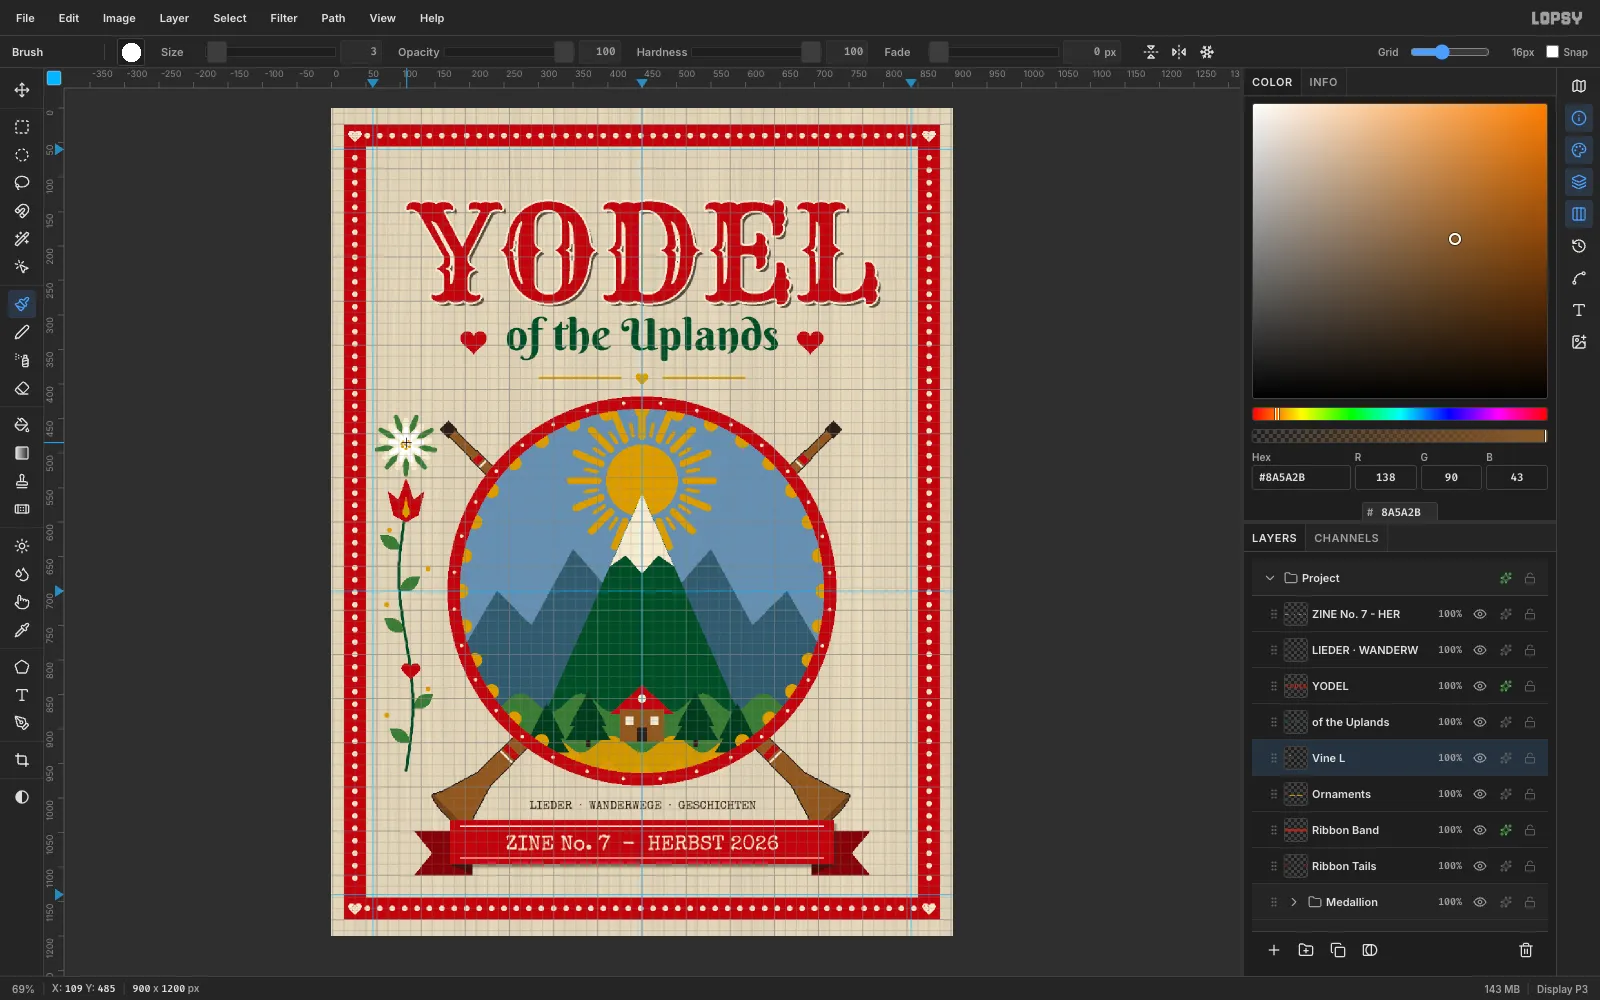
-
Mirror the vine
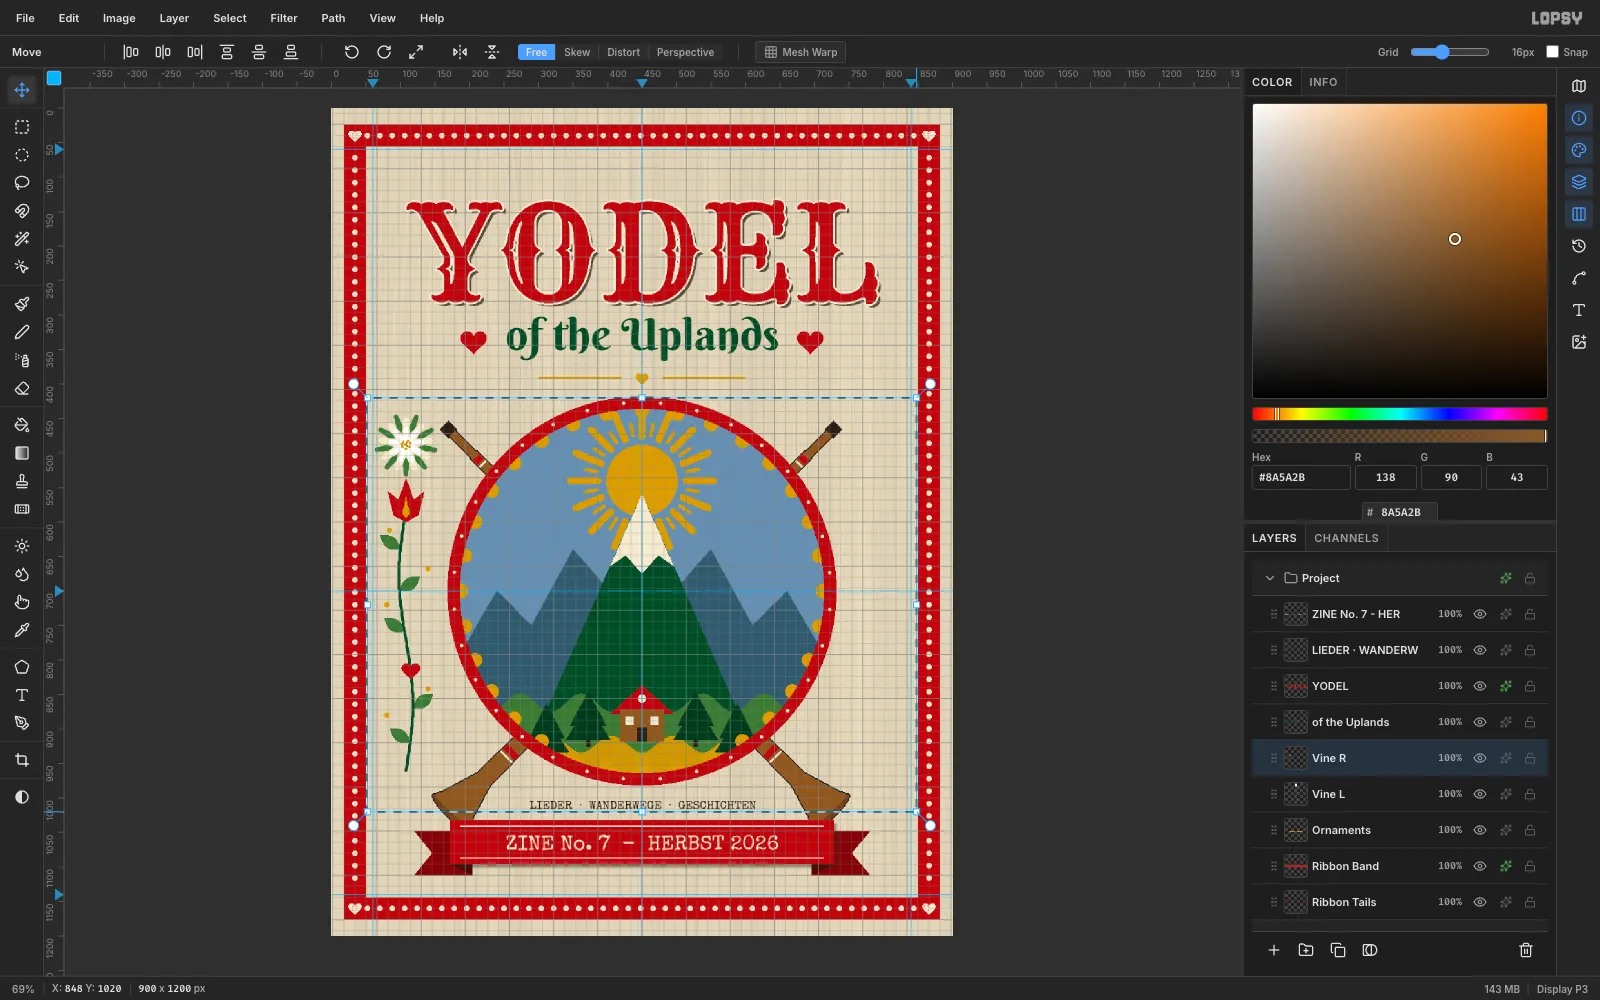
Duplicate Vine L and rename the copy
Vine R. Marquee from (52, 420) to (848, 1020). This box is centred on the 450 guide, so a flip mirrors the vine exactly into the right margin.Press V, click Flip Horizontal, click the status bar, and press Cmd+D.
-
Fake a slight misregistration
Screen prints and risographs never line up perfectly. To fake that:
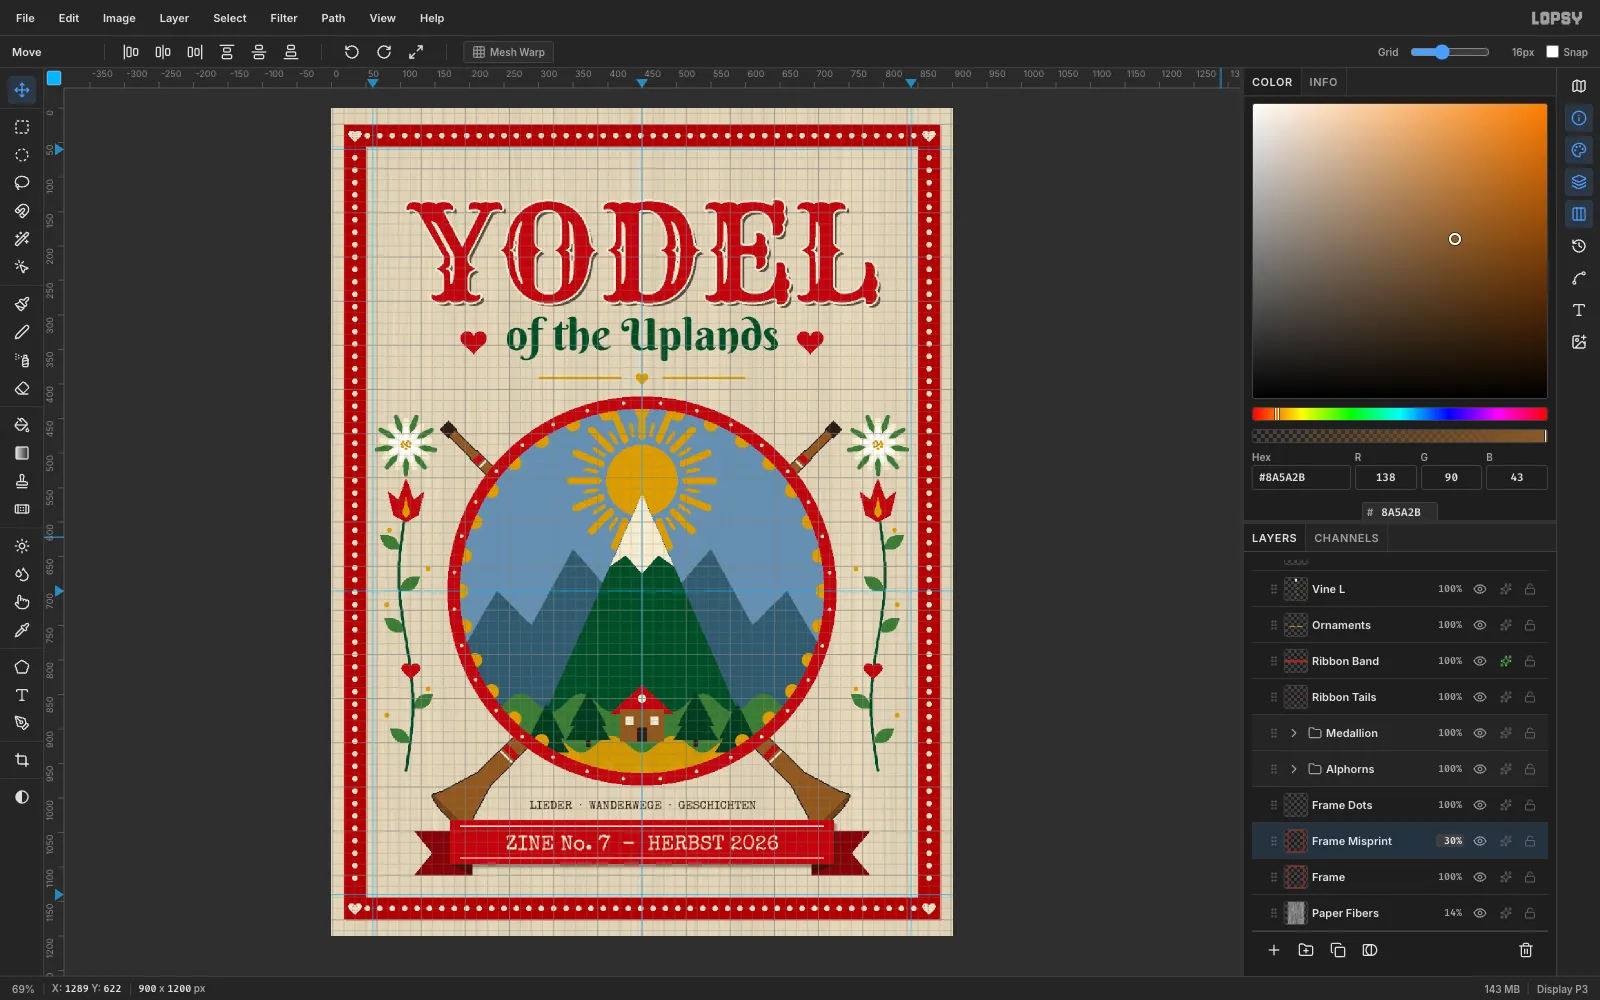
- Duplicate Frame and rename the copy
Frame Misprint. - With the Move tool (and Snap off), press the right arrow 3 times and the down arrow 2 times.
- Set the copy's blend mode to Multiply and its opacity to
30%.
You get a faint darker edge, like a second plate that slipped.
- Duplicate Frame and rename the copy
-
Add a halftone print texture
Select the top layer in the stack, then:
- Choose Select → All, then Edit → Copy Merged, then Edit → Paste. This puts a flattened copy of the whole cover on a new layer.
- Rename the layer
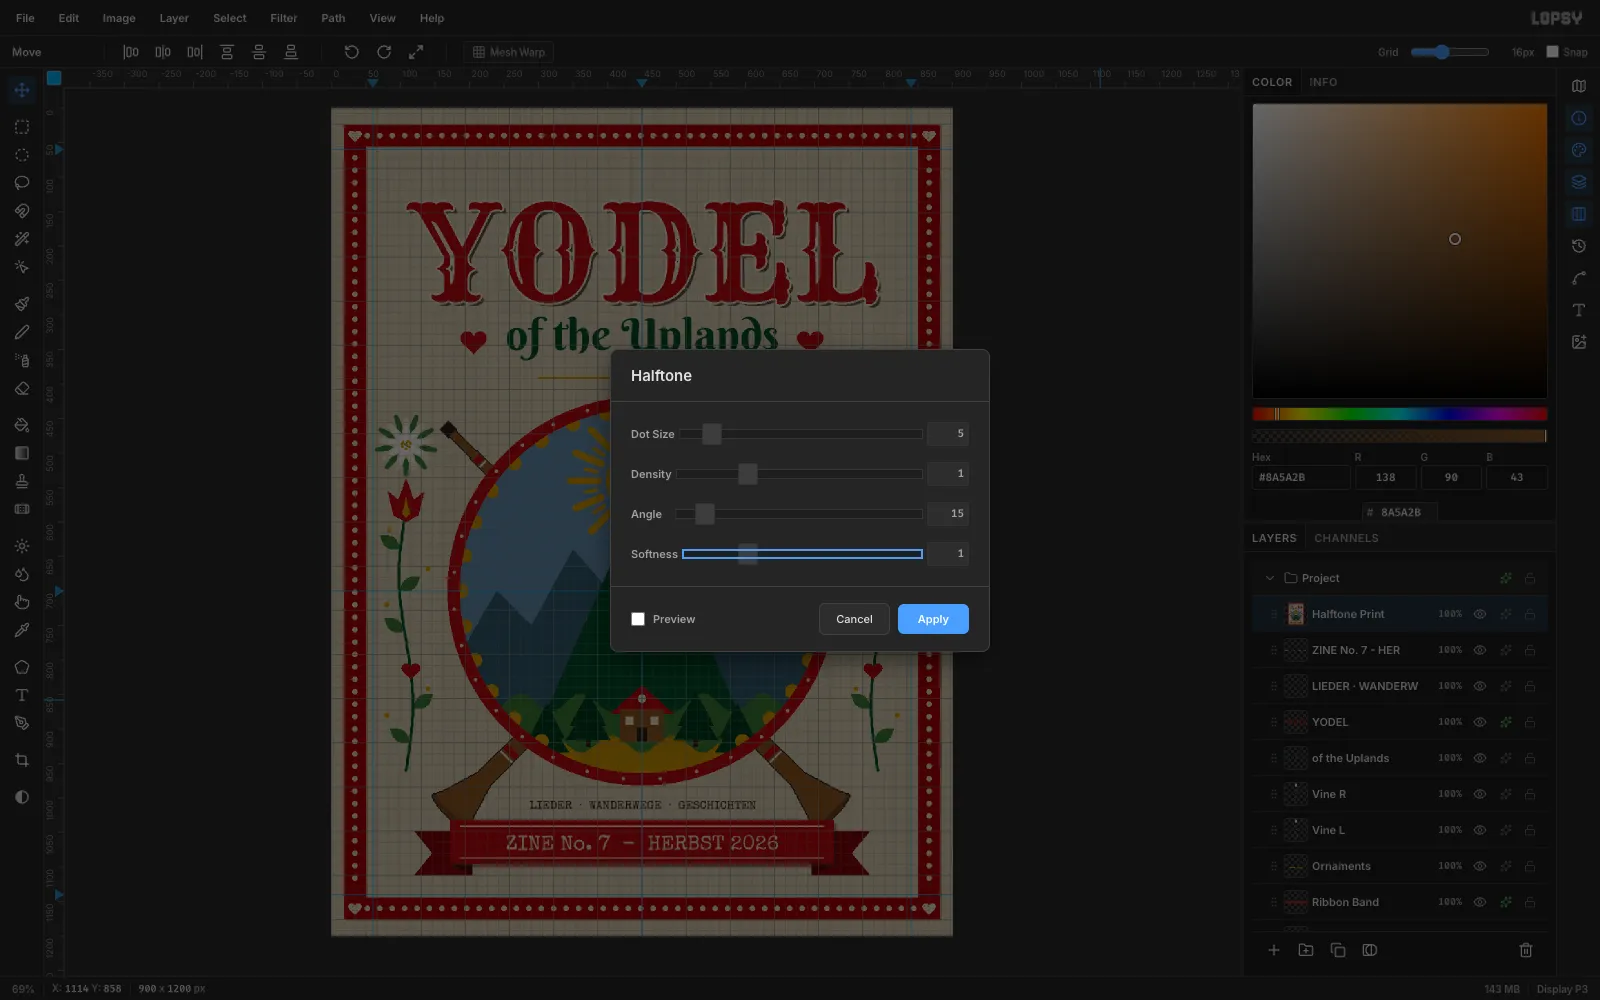
Halftone Printand press Cmd+D. - Choose Filter → Halftone…, set Dot Size
5, Density1, Angle15and Softness1, and click Apply. - Set the layer to Multiply at
12%.
The dots are only just visible, but they make every flat colour look printed on paper.
-
Export the cover
Turn off View → Show Grid and View → Show Guides to check the design without them. Then choose File → Quick Export PNG for the image, and File → Save Project to keep every layer, group and effect editable for the next issue.
To keep going, swap the subtitle for another region or season, change the ribbon text, or recolour the Front Hill overlay for a winter or spring cover.