Design a Propaganda Poster Style Party Invitation
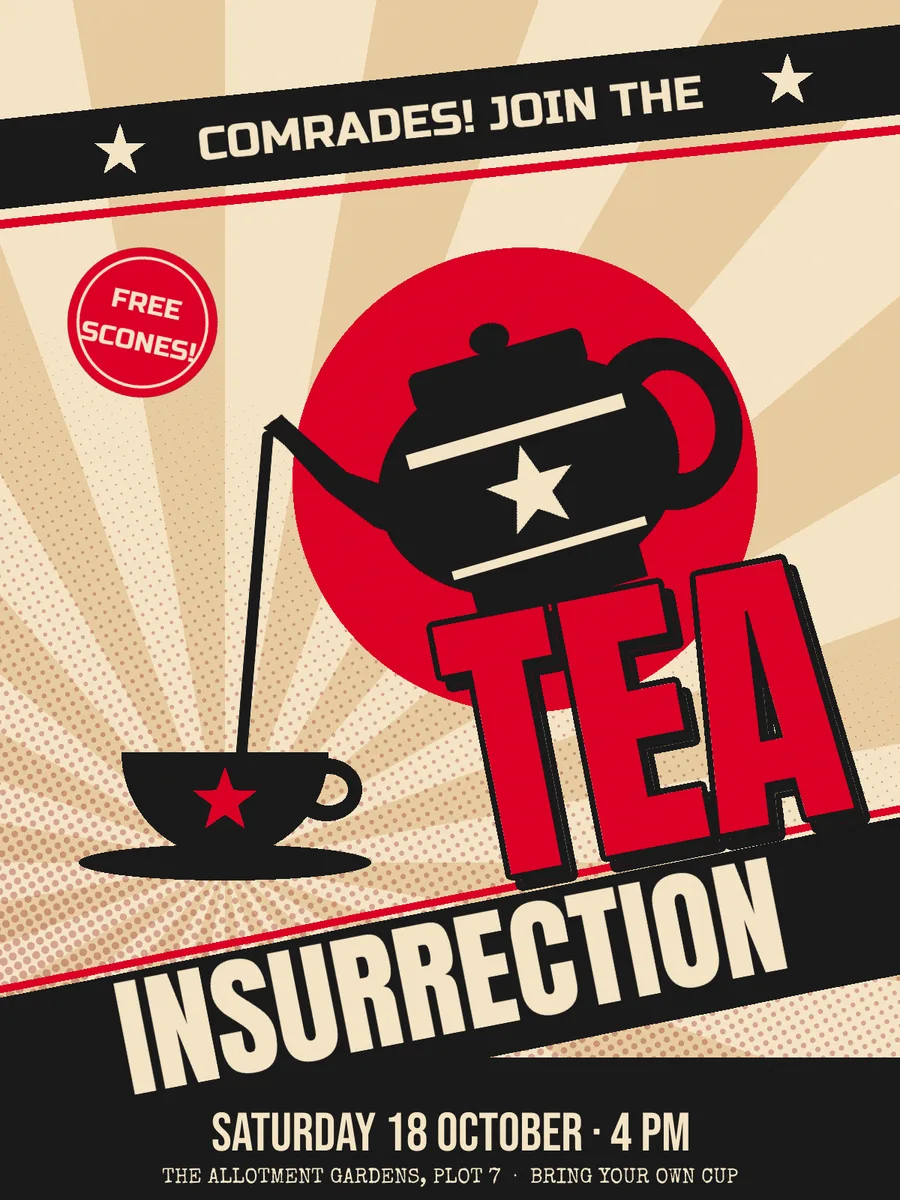
Build a constructivist propaganda-poster invitation in Lopsy with a sunburst, a pouring teapot, diagonal bands, hard-shadow type and halftone print texture.
Soviet constructivist posters by Rodchenko, Klutsis and the Stenberg brothers use very few ingredients. There's a radiating sunburst, one big red disc, black silhouettes, and slogans set in heavy condensed type on steep diagonals. There are only three inks: red, black and cream.
In this tutorial you'll use that vocabulary to make something much less serious: an invitation to a garden tea party called Tea Insurrection. You'll draw everything from lasso and marquee selections, rotate artwork and type with the transform handles, fake a hard offset shadow, and finish with halftone dots and paper grain.
The palette is: cream #F1E4C8, kraft #E2CCA4, red #C8102E and black #1A1A1A.
-
Create a portrait poster canvas
Open Lopsy. In the New Document dialog, type
1200for Width and1600for Height, choose a White background, and click Create. That's a 3:4 portrait sheet, a classic poster proportion.Select the Background layer, set the foreground colour to
#F1E4C8in the Color panel's hex field, press G for the Paint Bucket and click the canvas. Double-click Layer 1 and rename itRays.
-
Lasso the first sunburst ray
The sunburst radiates from the point where the teacup's saucer will sit, at about (300, 1150). Press L for the Lasso. Press the mouse down at that point, drag out to the canvas edge, follow the edge for a short way, and come back to the centre. The result is a thin wedge about 10° wide.
Set the foreground to
#E2CCA4, press G and click inside the wedge, then press Cmd+D to deselect.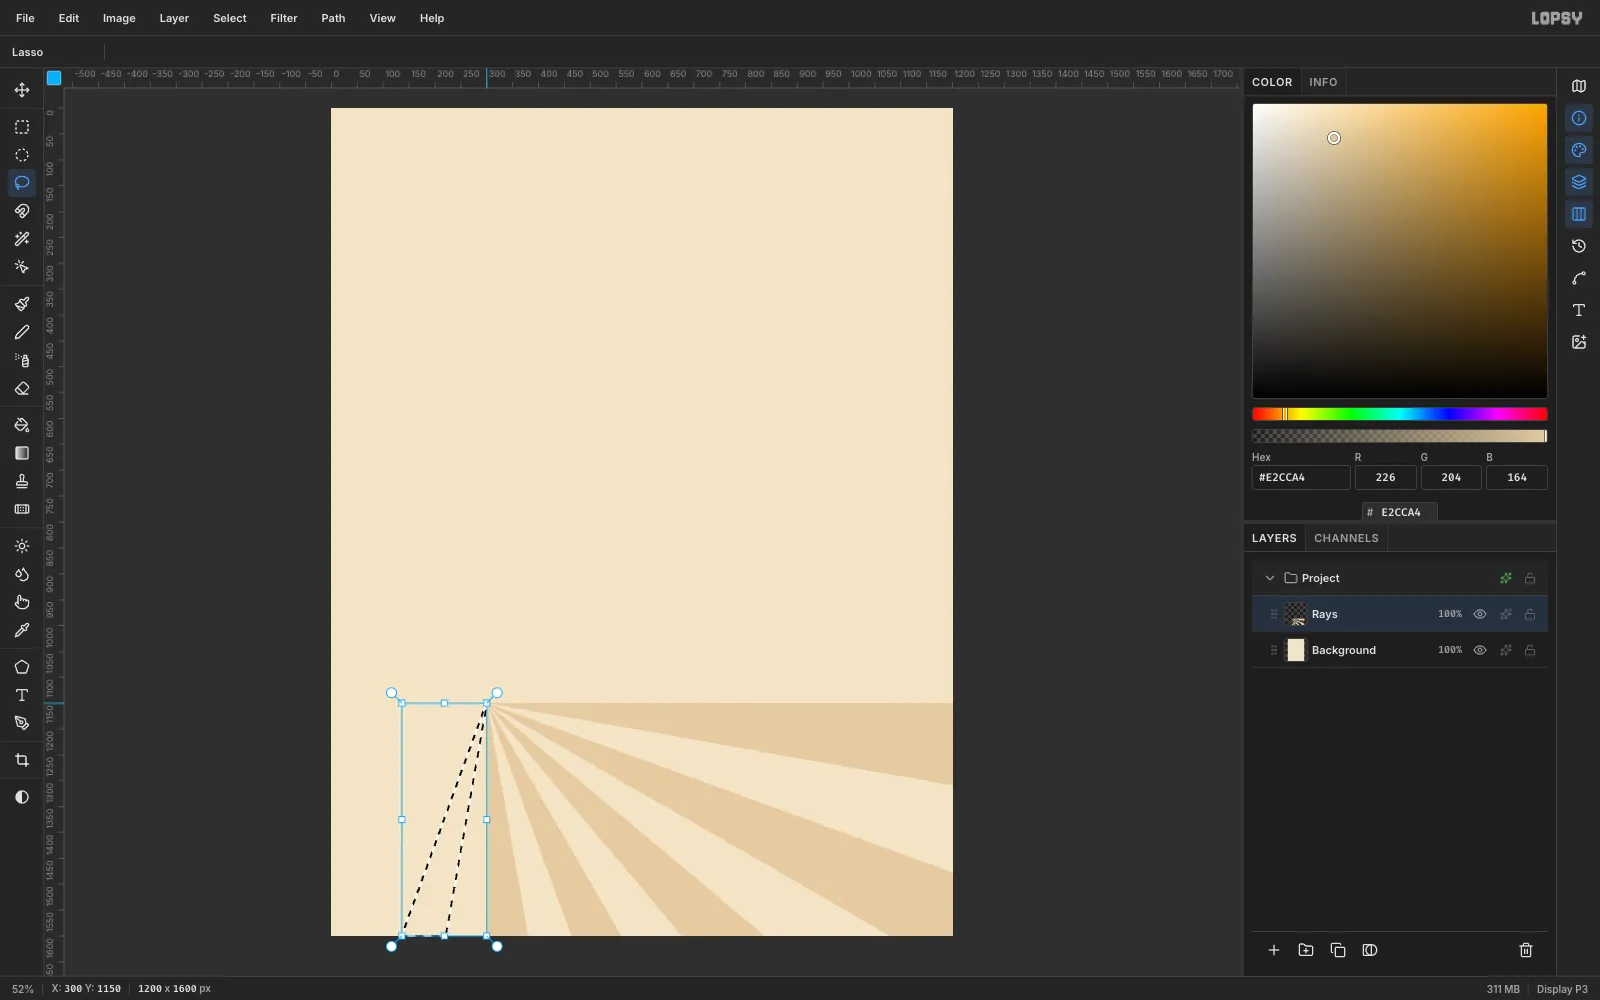
-
Complete the sunburst
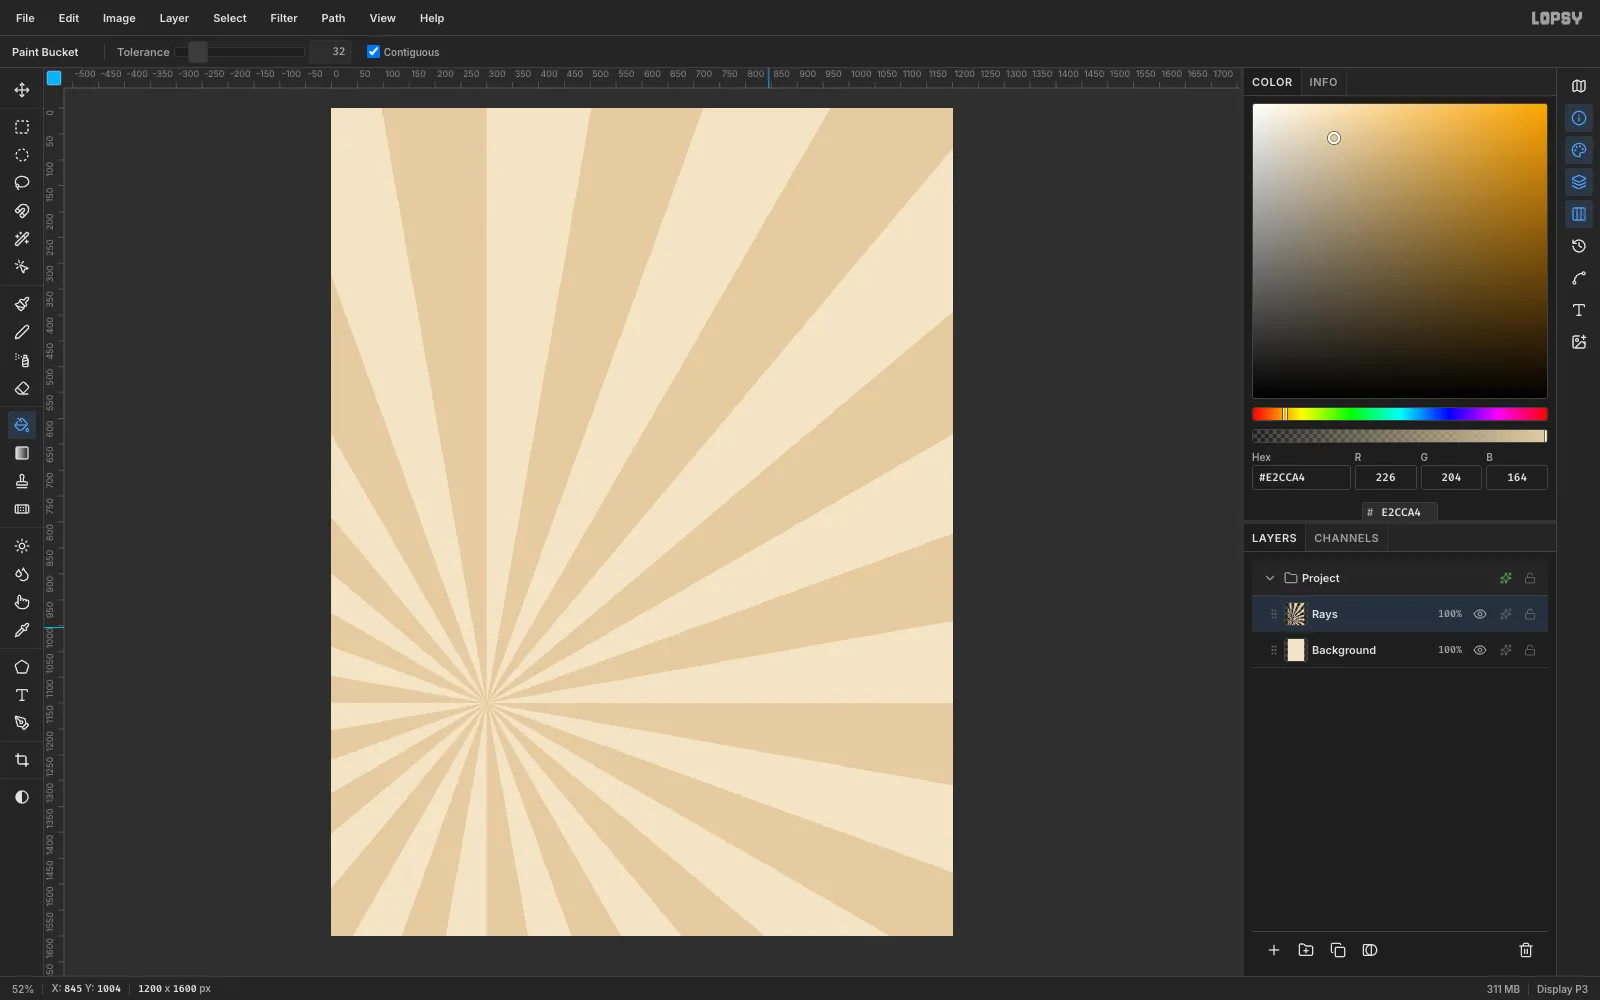
Repeat the wedge all the way round. Skip one 10° slice each time, so you get 18 kraft rays with cream gaps between them. Keep the rays low contrast. They're background texture, and the strong red is saved for the disc and the headline.
-
Add the red disc
Click Add Layer, name it
Sun, and pick the Elliptical Marquee. Hold Cmd while you drag to get a perfect circle 620 px across, centred at about (700, 640). Set the foreground to#C8102Eand fill it with the Paint Bucket.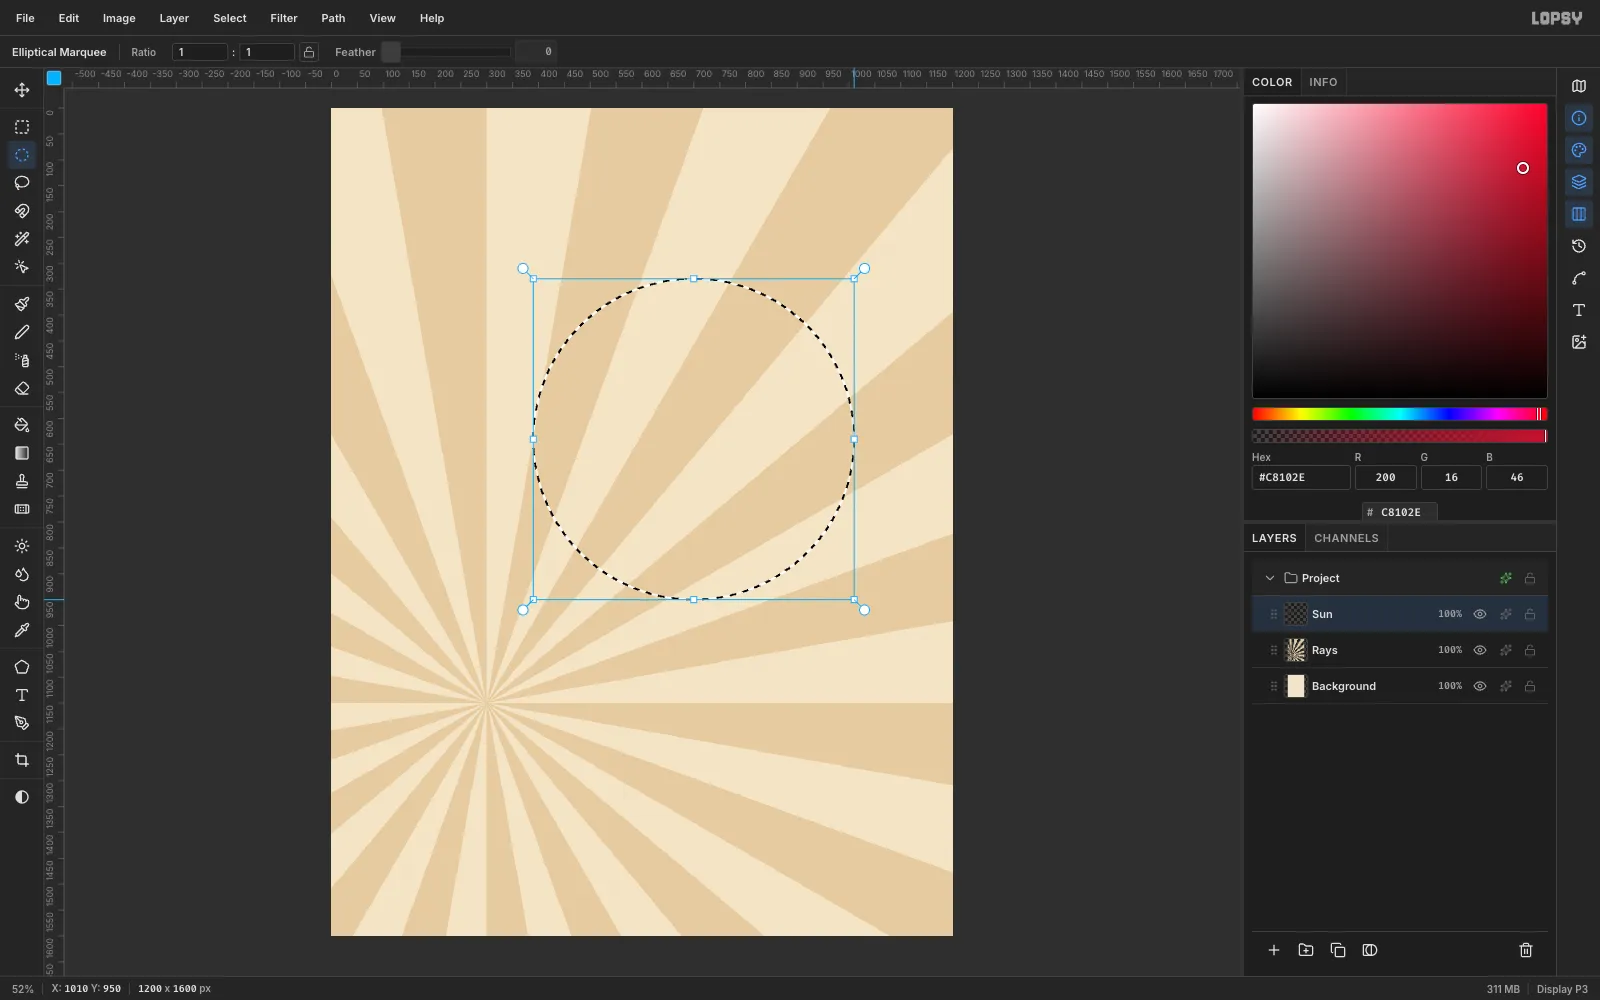
-
Build the teapot body and lid
Click New Group in the Layers panel and name it
Teapot. Add a layer calledHandle. Fill a black (#1A1A1A) ellipse on the right of the disc, then draw a smaller ellipse inside it and press Delete to punch out a ring.Add a layer called
Potabove it. Fill it with these black shapes:- a wide ellipse for the body, about 408 × 312 px, centred on the disc;
- a rectangle for the foot below it;
- a small ellipse for the knob on top.
For the lid, press U for the Shape tool. Set Shape to Polygon, Sides to
4and Corner Radius to14, then click the Fill swatch and enter1A1A1A. Shapes draw from the centre out, so start the drag in the middle of the lid.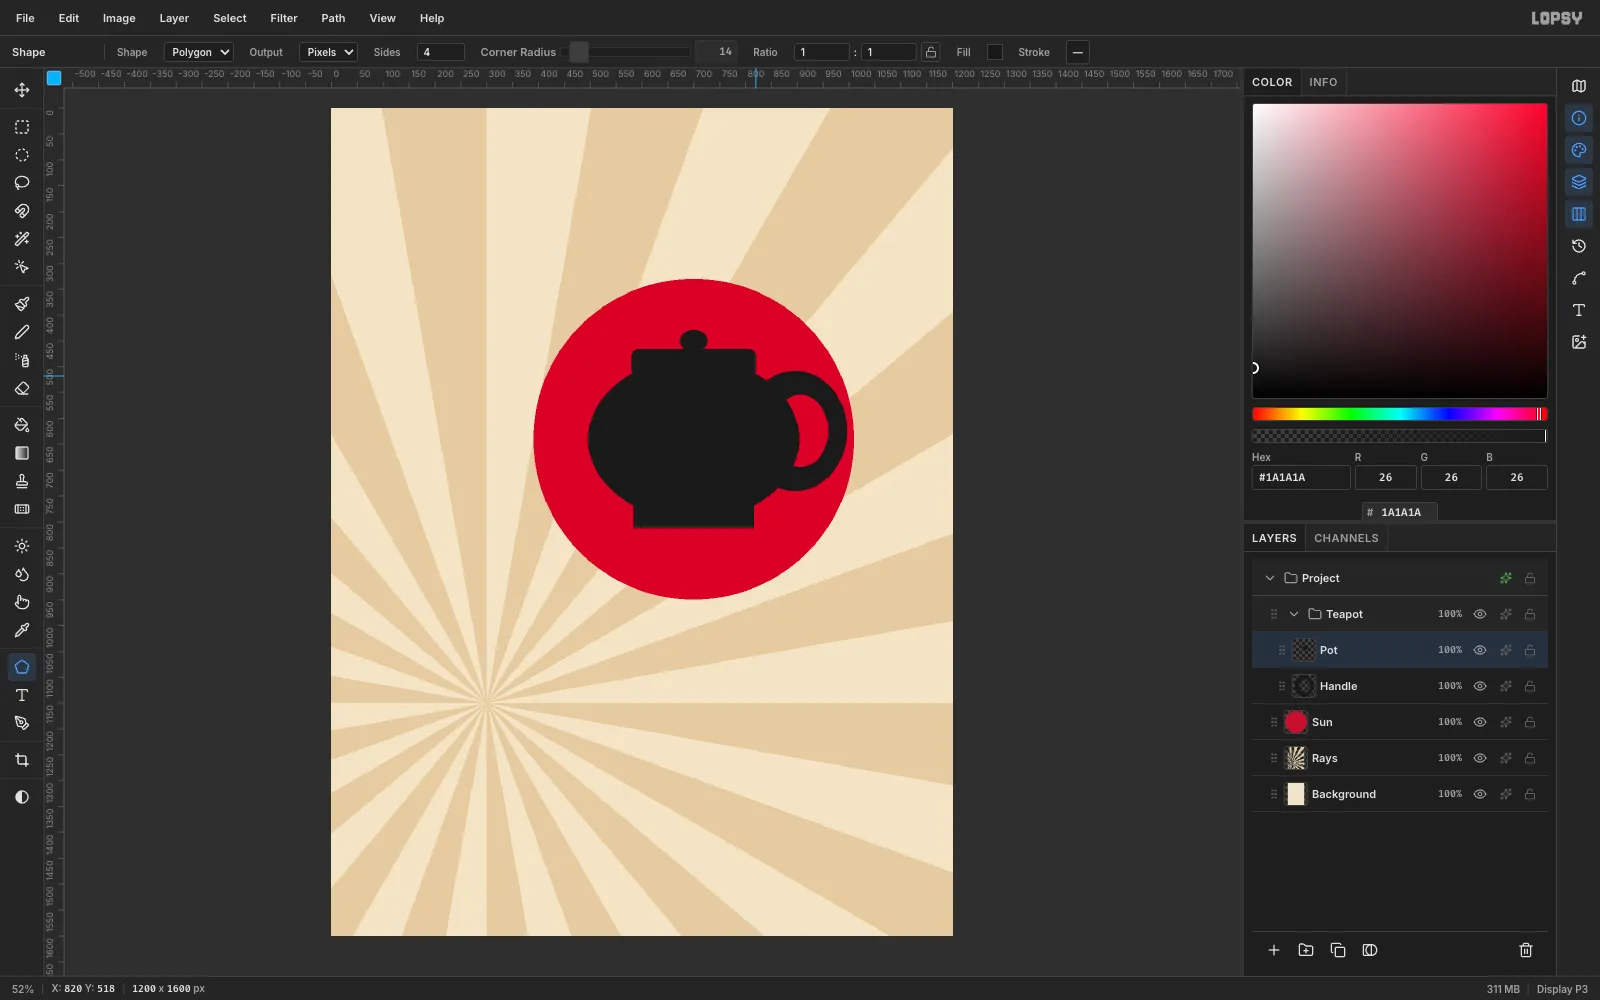
-
Draw the spout
On the same
Potlayer, use the Lasso to trace a spout. Start inside the body, run up and to the left, give it a flat cut tip, and come back down the other side. Fill it black.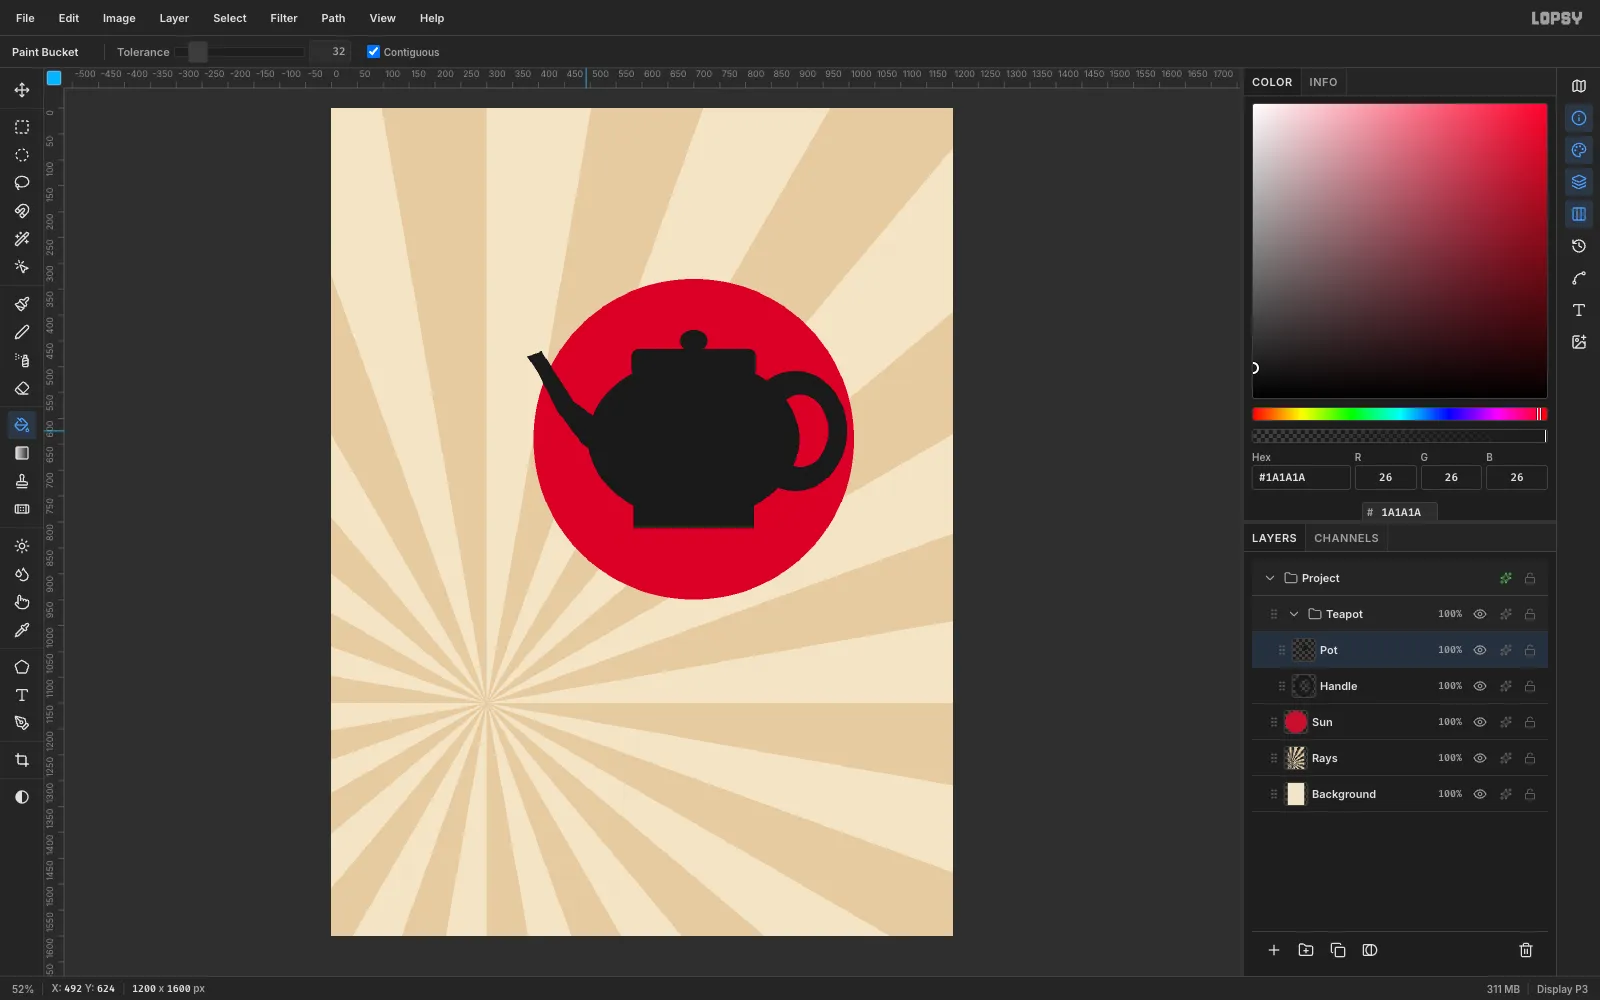
-
Decorate the pot with a star and bands
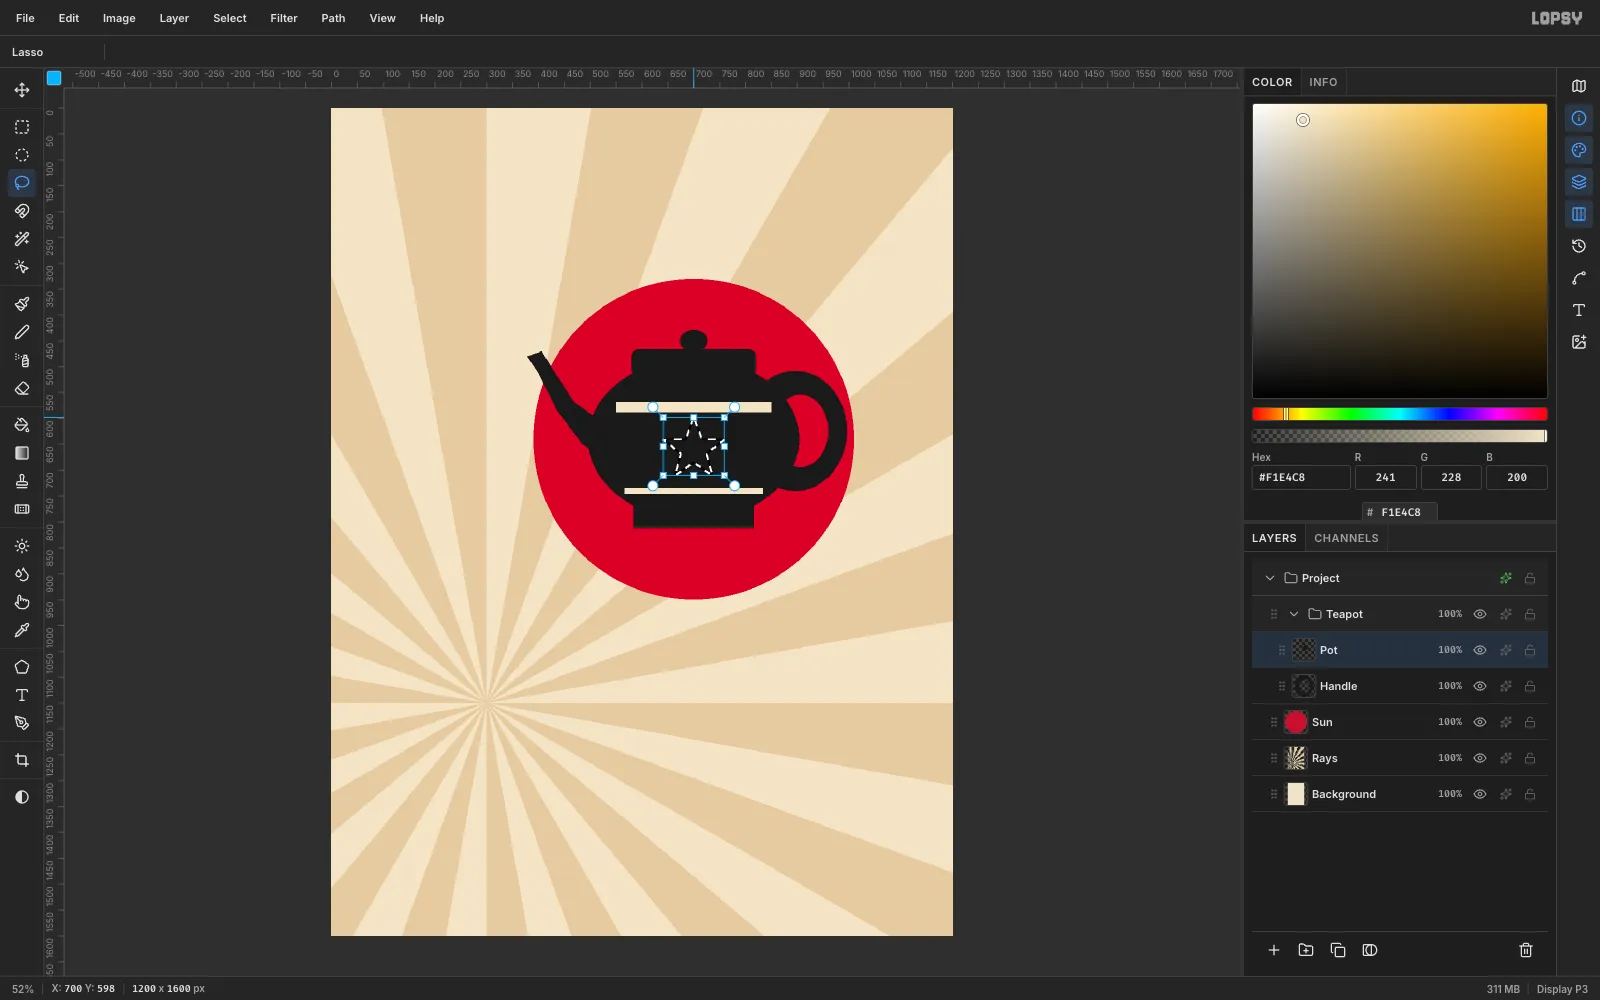
Switch the foreground to cream. With the Rectangular Marquee (M), make two thin horizontal bands across the body and bucket-fill each one. The bucket only fills the black pixels inside the selection, so the bands stop at the teapot's edge.
Then draw a five-pointed star with the Lasso by clicking through its ten points, and fill it cream. That's your first propaganda star.
-
Tilt the teapot into a pour
Select
Potand choose Layer → Merge Down to merge it intoHandle, then rename the resultTeapot Art. Draw a rectangular marquee around the whole teapot and press V for Move. Drag one of the round rotation handles outside a corner to turn the pot about −16°, so the spout tips down. Press Enter to commit and Cmd+D to deselect.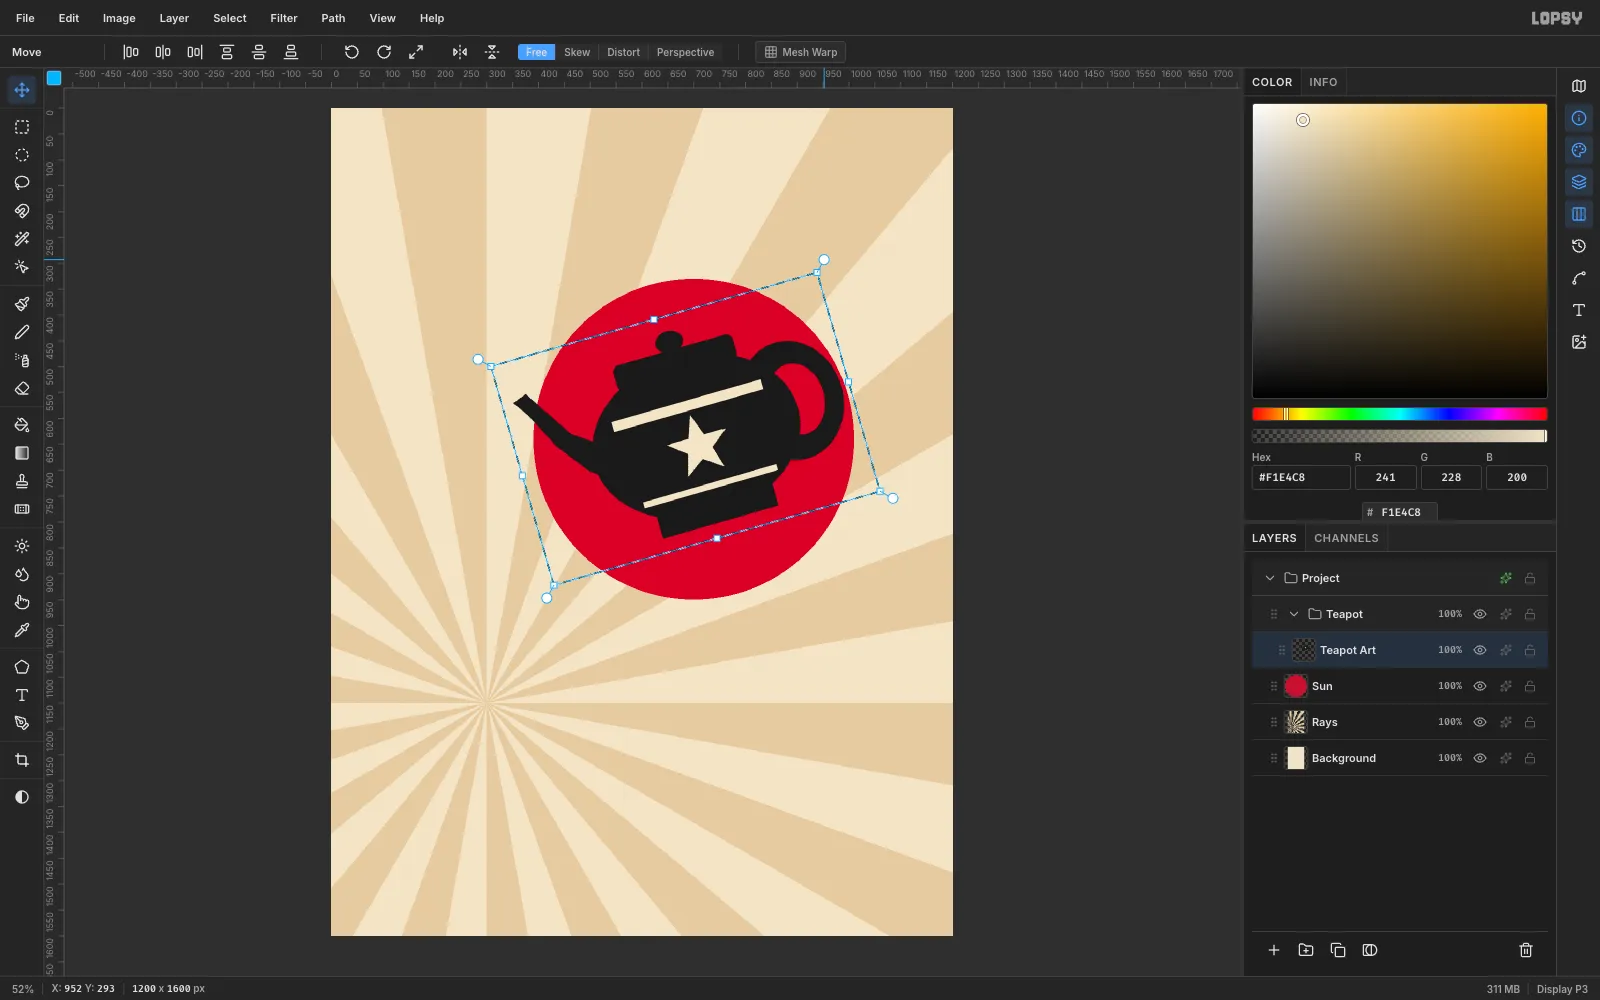
-
Cut the teacup from a circle
Select the
Sunlayer and create a New Group calledTeacup. In it, add aCup Handlelayer with a small black ring, made the same way as the teapot handle.Then add a
Cuplayer. Fill a black circle about 280 px across, drag a rectangular marquee over its top half and press Delete. What's left is a bowl. Add a wide, flat ellipse underneath it for the saucer, centred on the sunburst's focal point, and a red star on the front of the cup.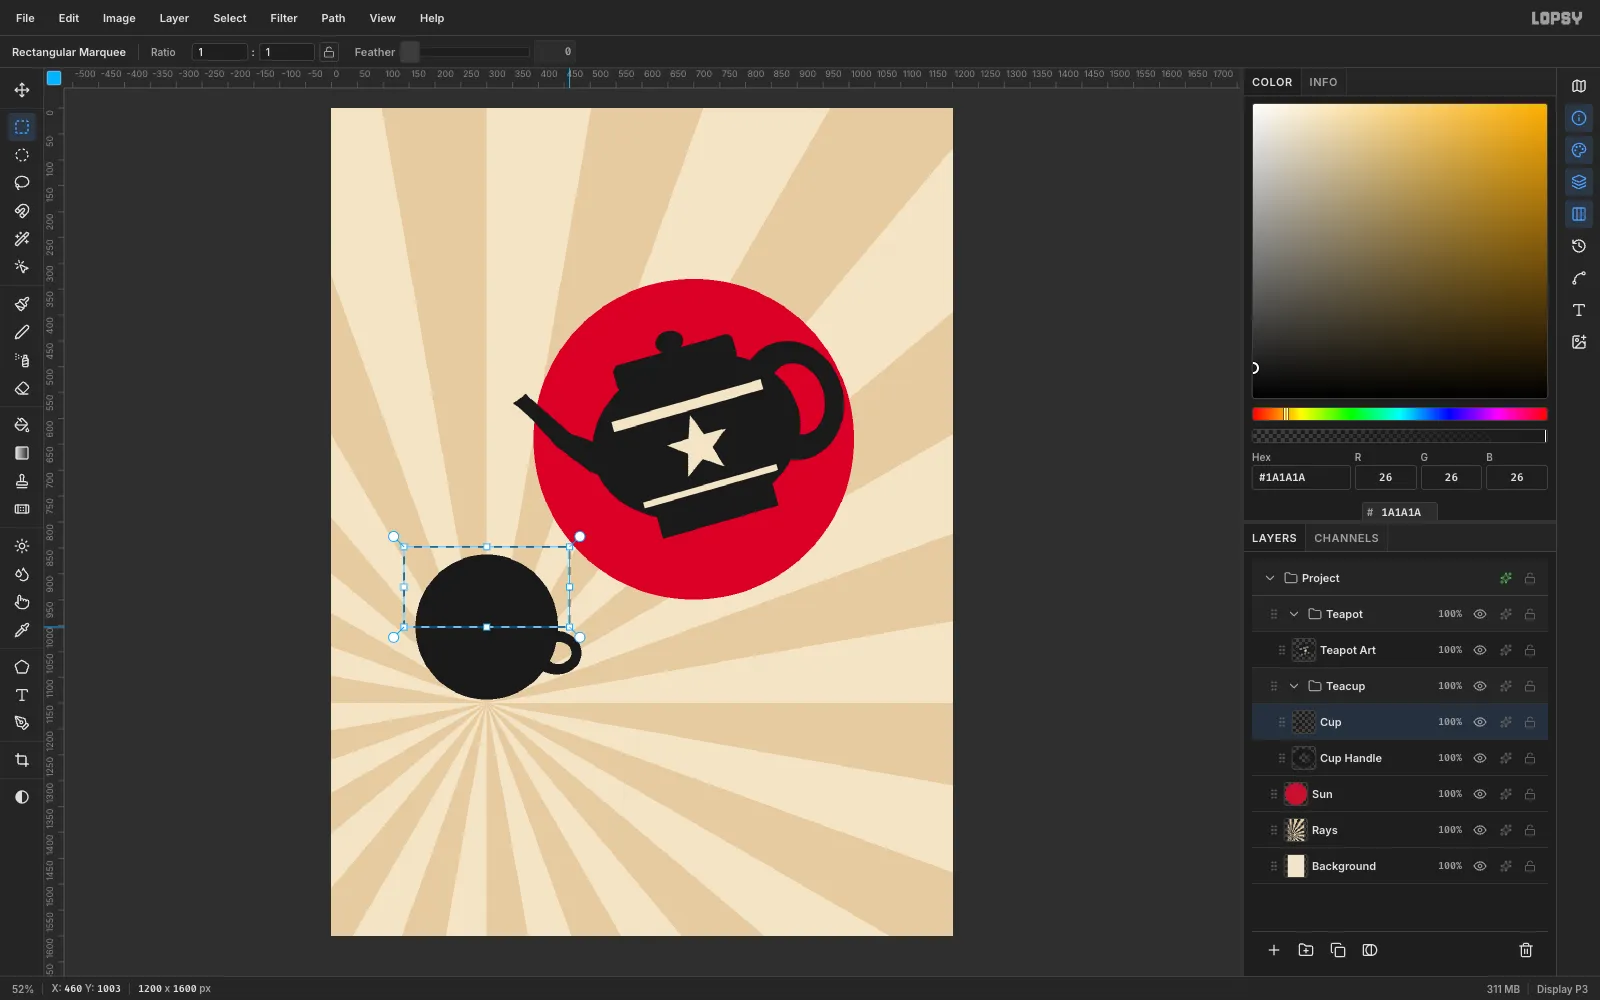
-
Pour the tea with a Shift-click line
Add a layer called
Stream, press B for the Brush, and set Size to16, Hardness to100and Opacity to100. Click once at the spout tip. Then hold Shift and click inside the cup to draw a perfectly straight stream. A straight, fairly thick pour reads as liquid. A thin wobbly one looks like wire.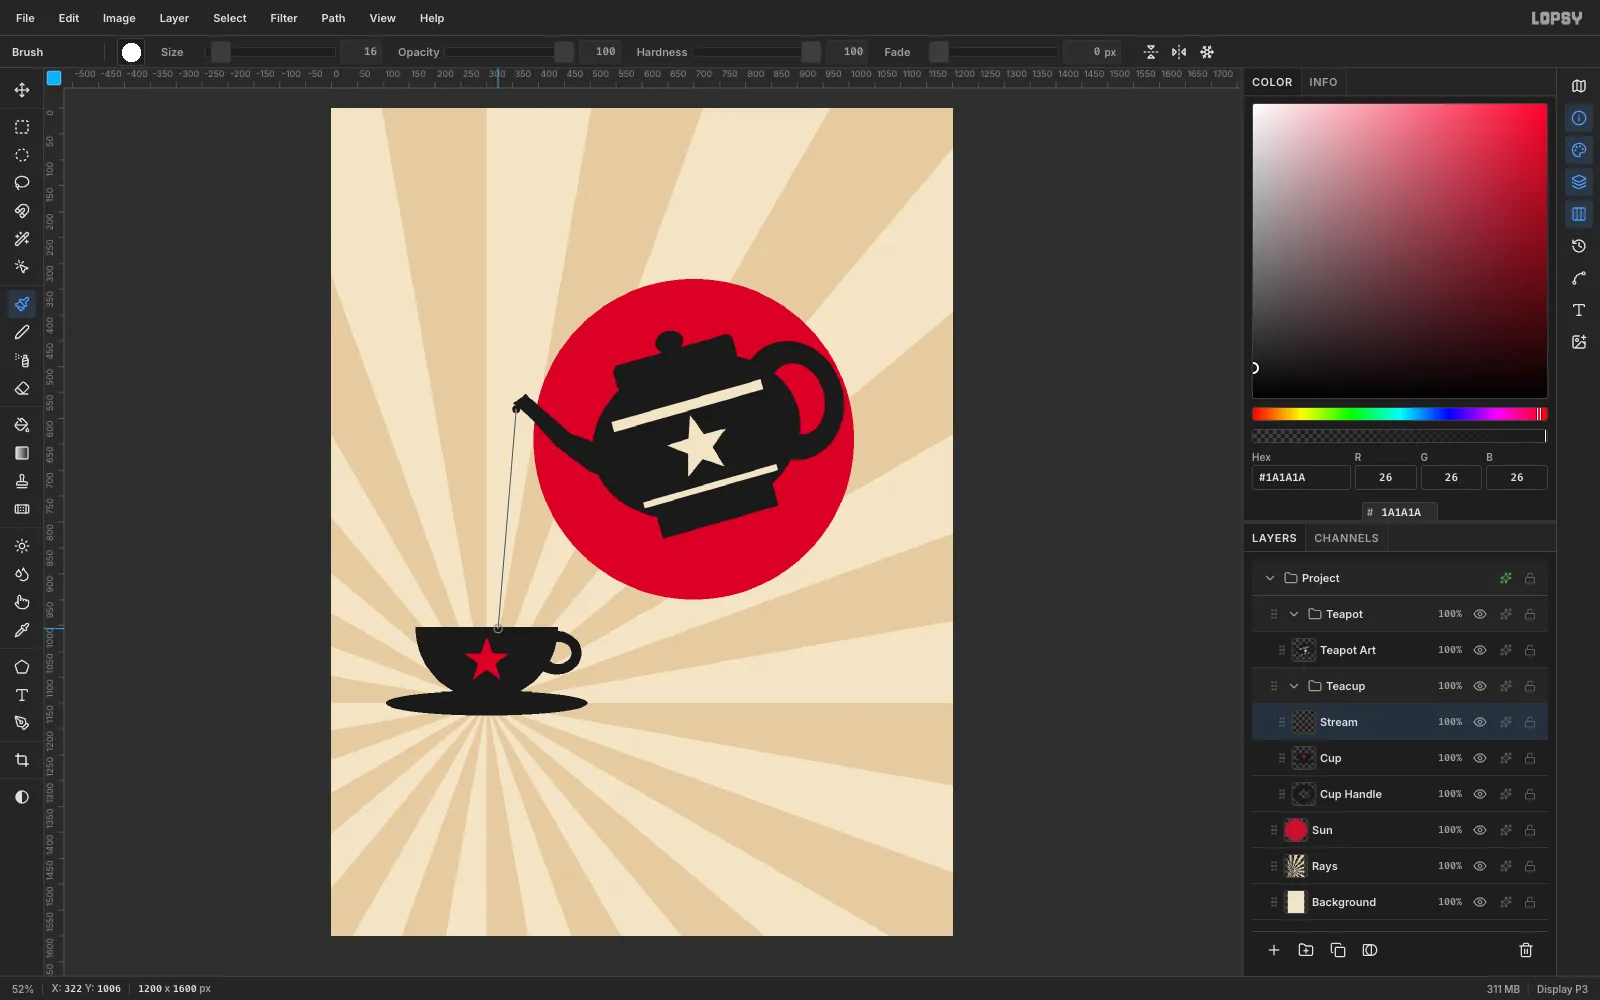
-
Add halftone print dots
Select
Raysand add a layer above it calledHalftone. With the Gradient tool, drag from the bottom-left corner up towards the middle of the canvas to fill it black to white. Then choose Filter → Halftone… and set Dot Size to14, Angle to30and Softness to0.5. Click Apply. You get dots that get bigger towards the bottom-left corner.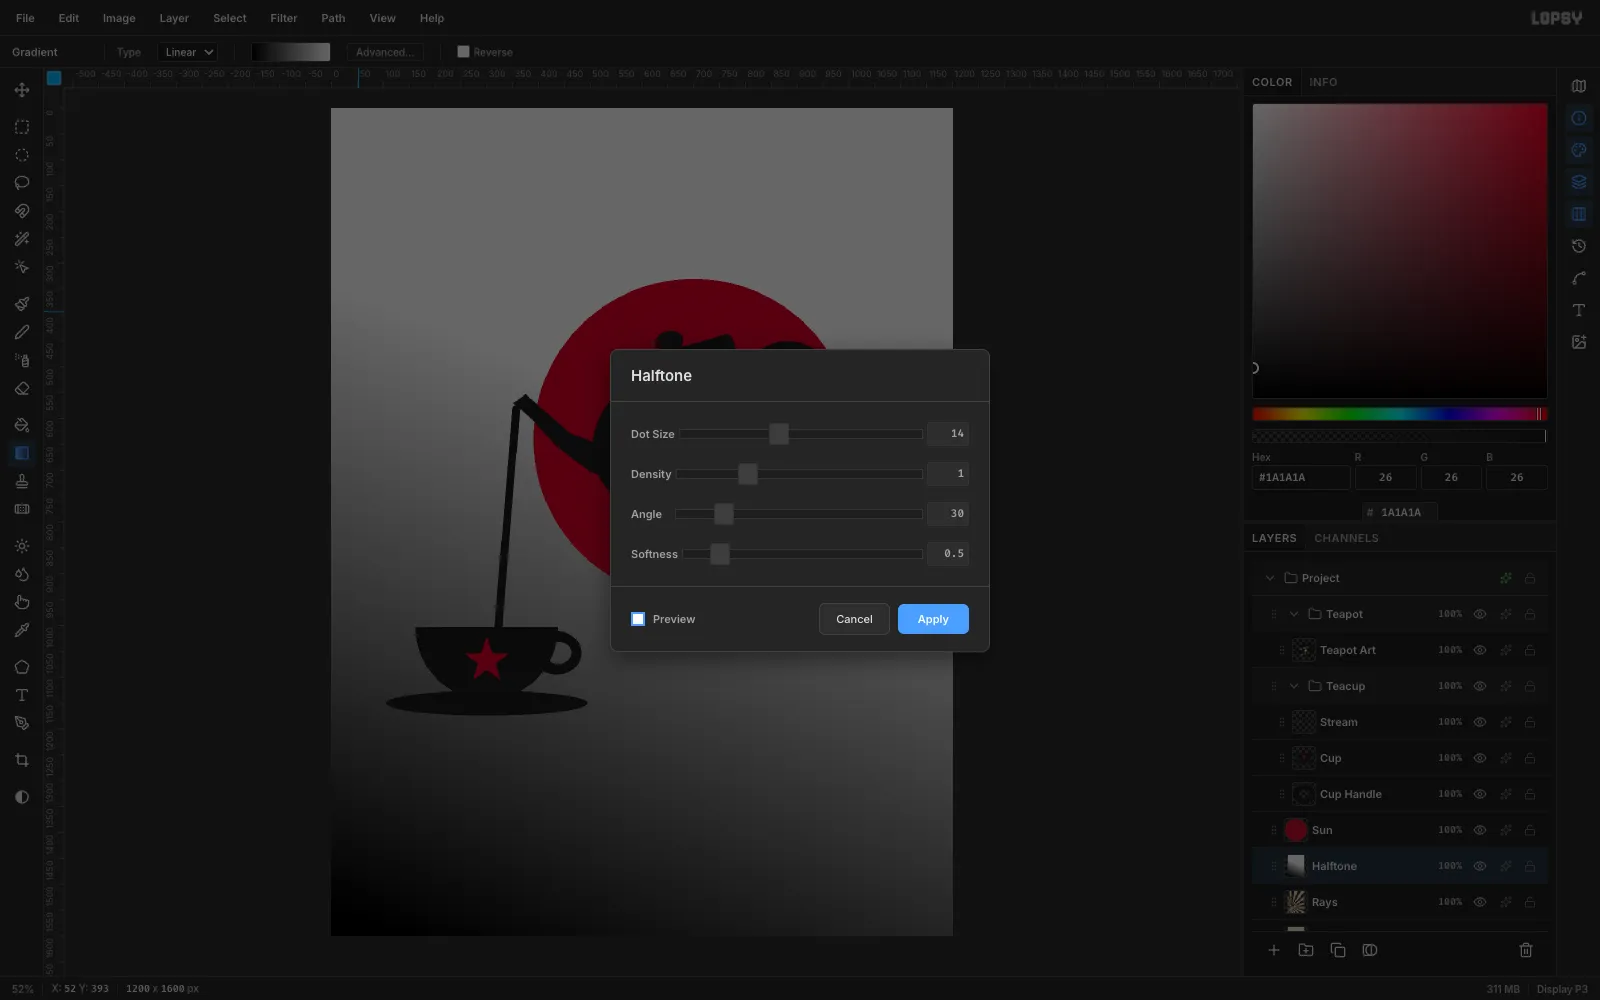
-
Tint the dots and multiply them in
Open the Halftone layer's Layer Effects (the sparkle icon on its row). Set the blend mode to Multiply and turn on Color Overlay in maroon
#7A0C1E. Close the panel and drop the layer opacity to about 30%. The dots now read as ink texture, not as a pattern on top.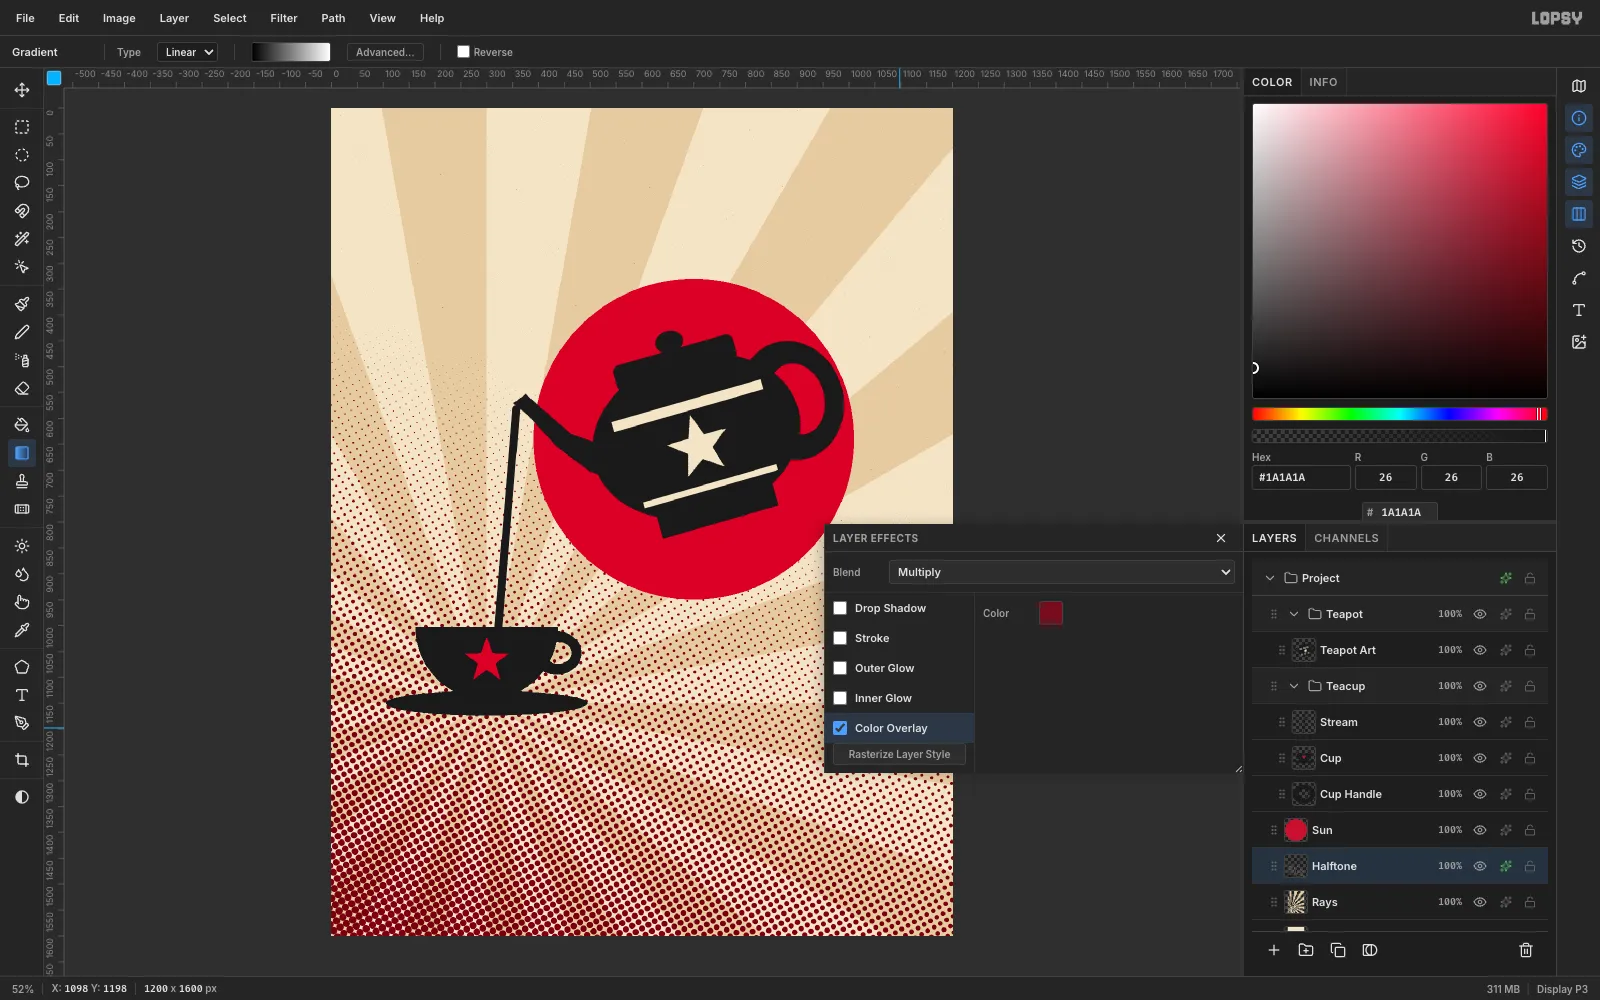
-
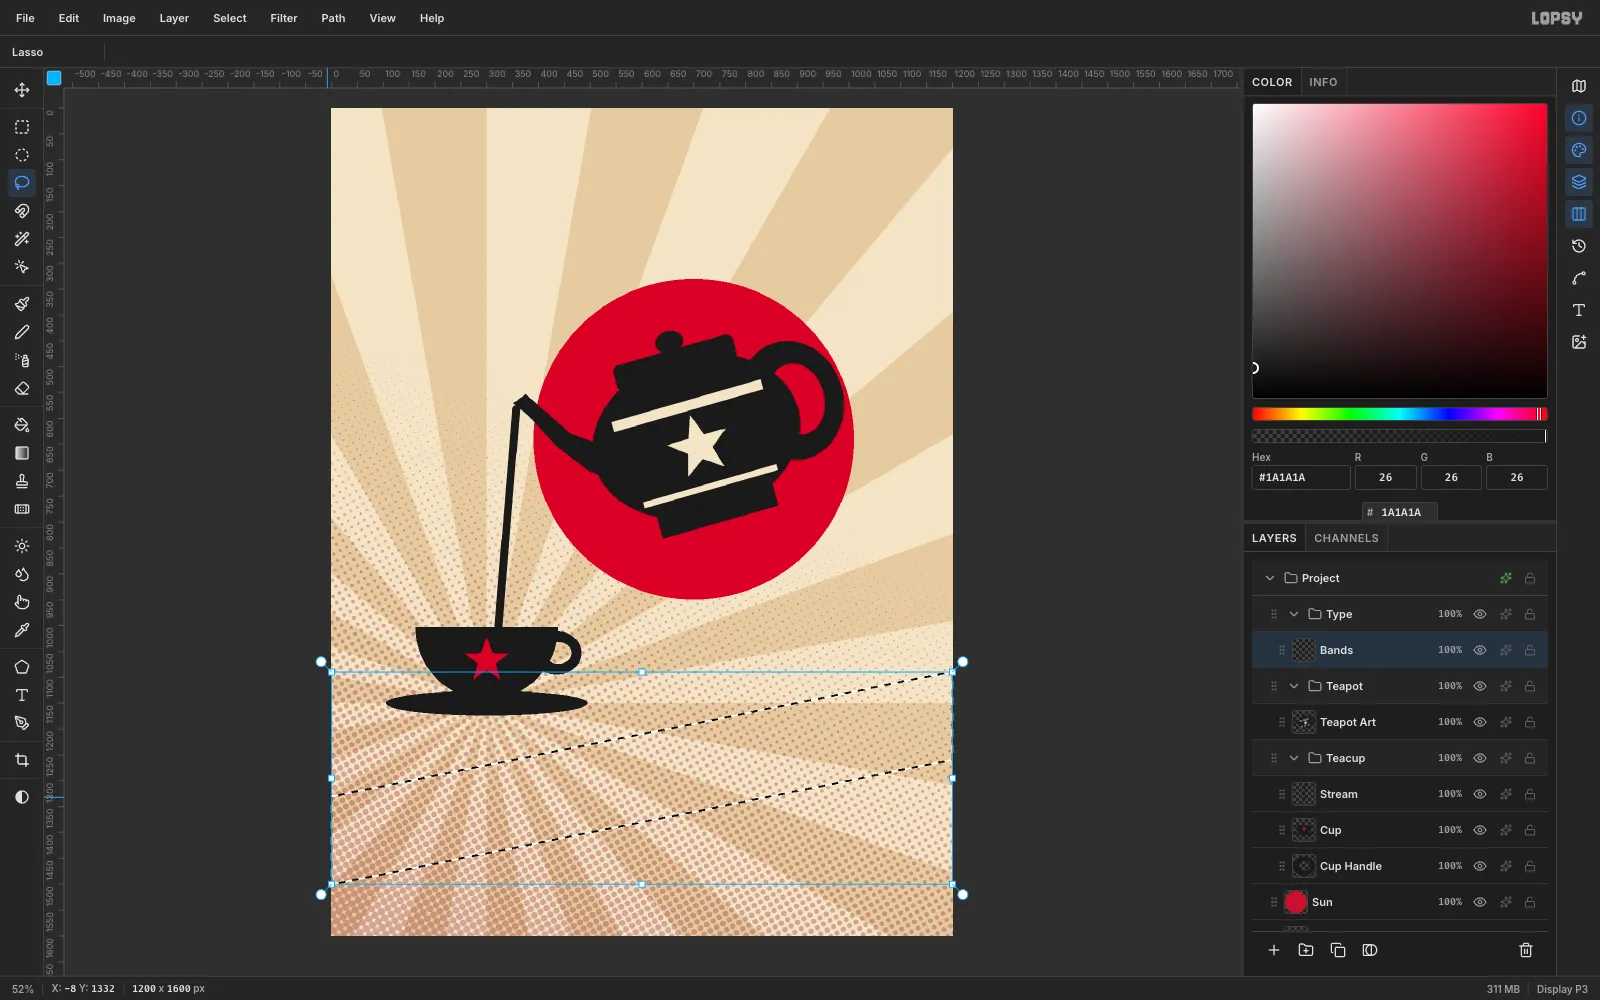
Lasso the diagonal band
Click the top-level Project group and create a New Group called
Type. Add aBandslayer inside it.Constructivism is built on the diagonal. Lasso a band that rises about 11° from left to right, with corners at (0, 1332), (1200, 1088), (1200, 1298) and (0, 1542). Fill it black. Then add these on the same layer:
- a black rectangle from y = 1410 to the bottom, for the event details;
- a black banner across the top that rises about 6°;
- thin red rules just above the diagonal band and just below the top banner.
-
Check the composition
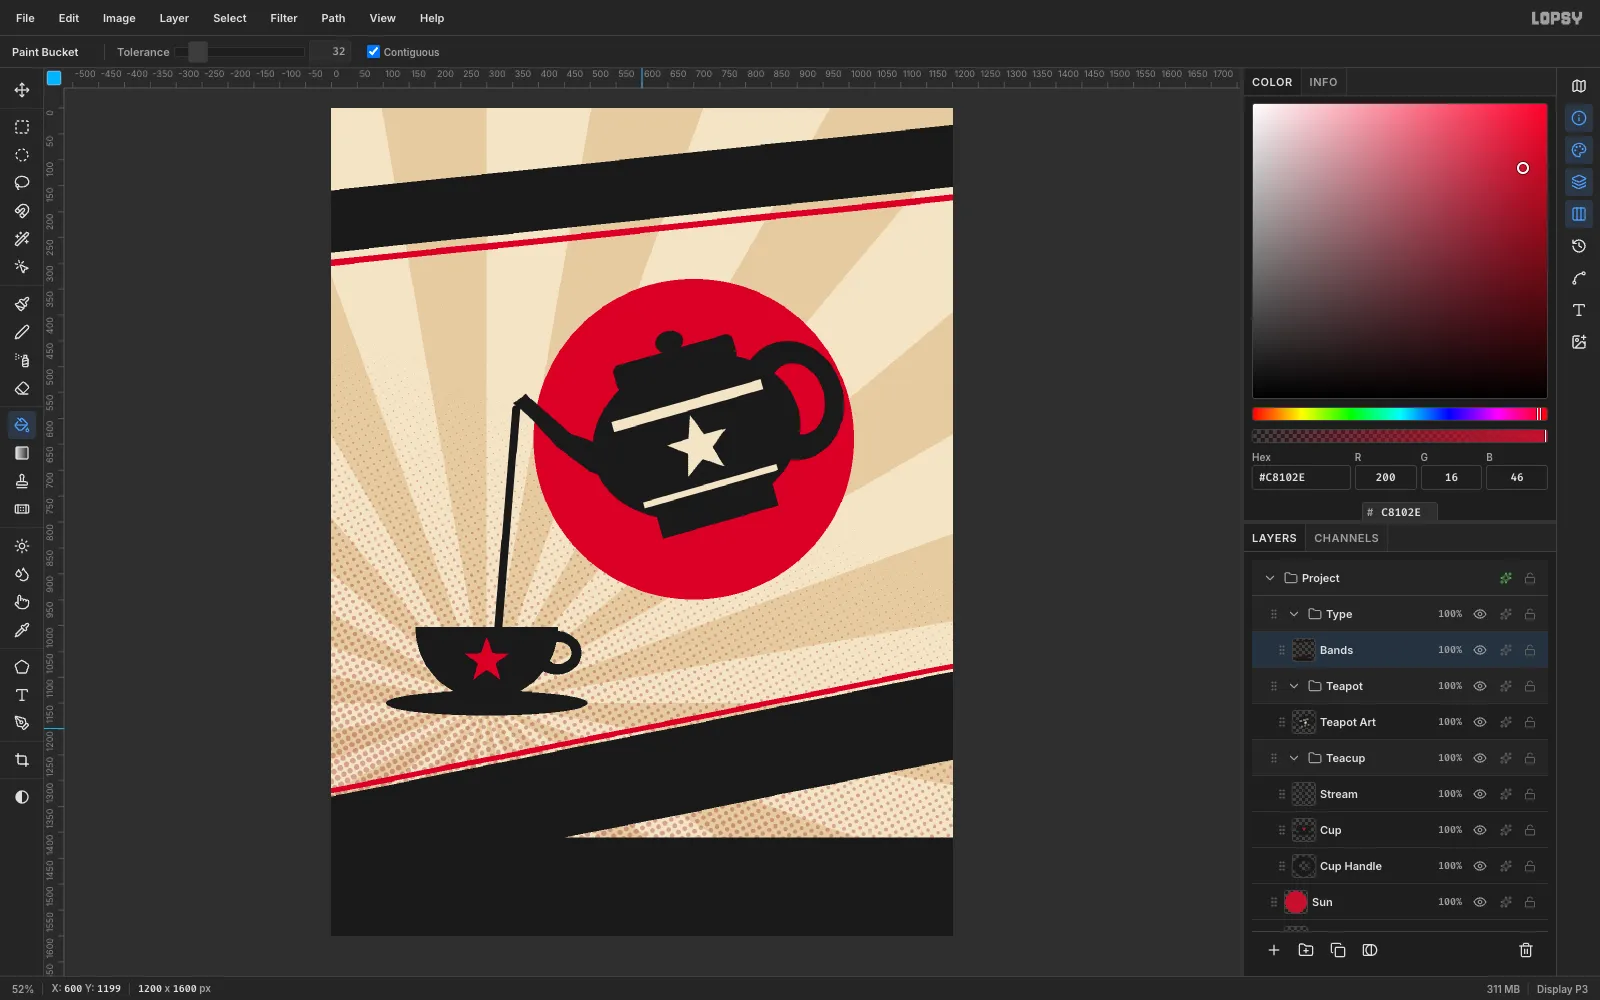
The page now has a strong zig-zag. The top banner and the big band slope the same way at different angles, which gives the layout its movement. The black footer gives the eye somewhere to land.
-
Set and rotate the banner type
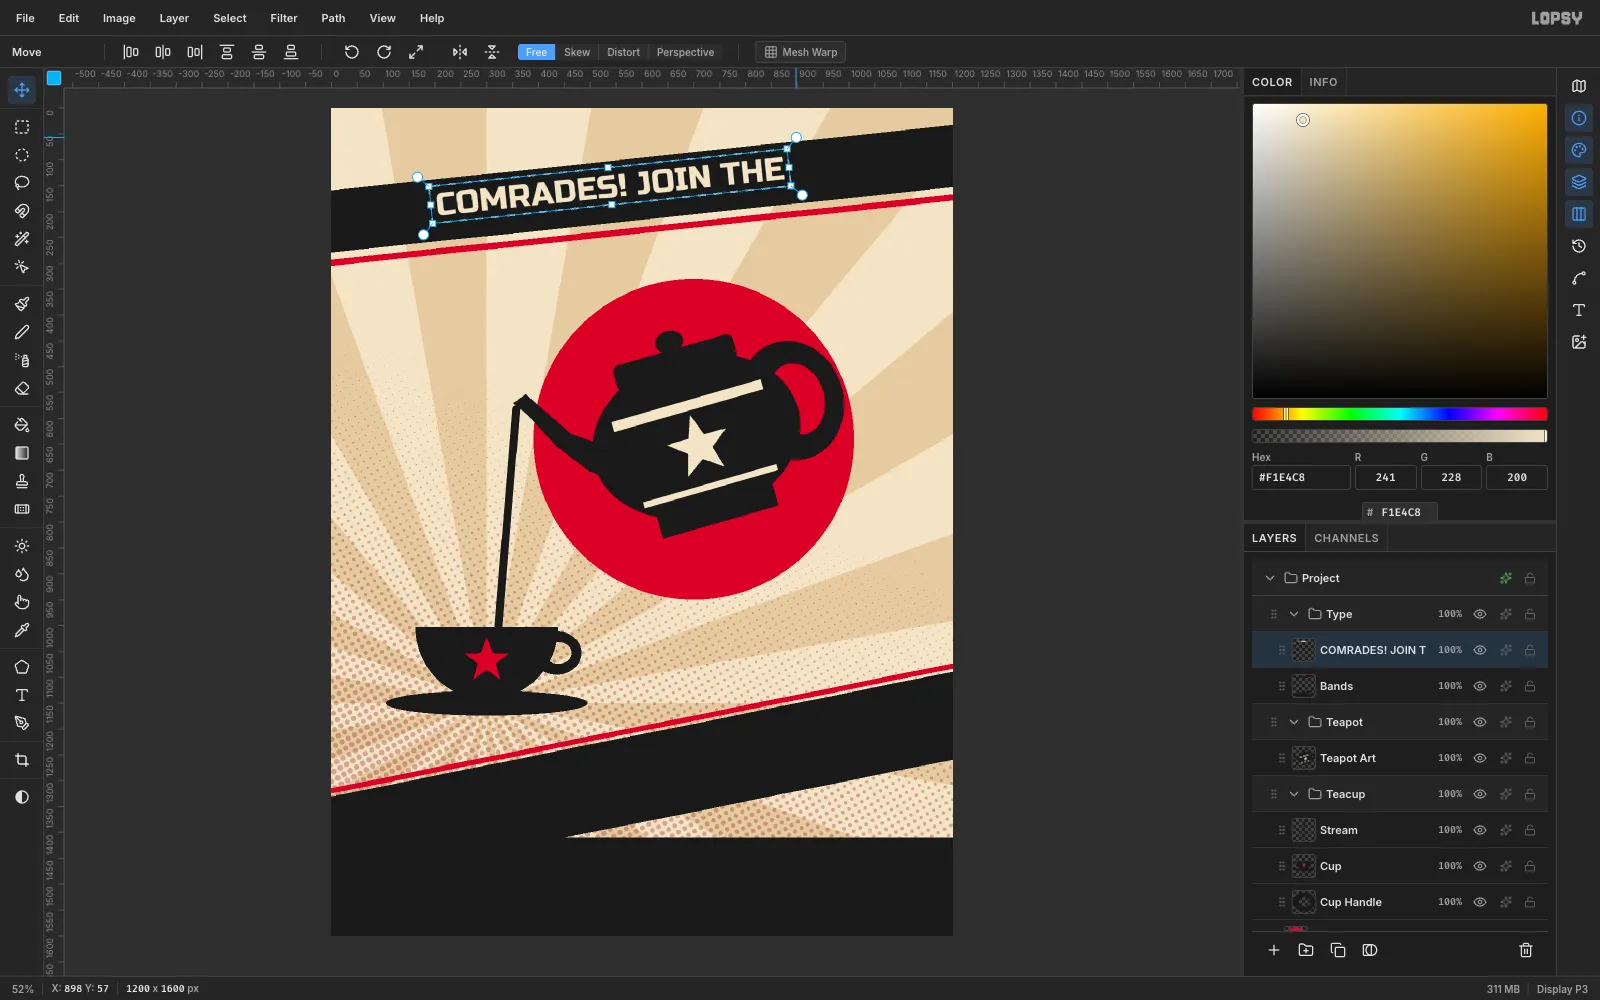
Set the foreground to cream. Press T, open the font picker, search for Russo One and set the Size to
62. Click near the top of the canvas and typeCOMRADES! JOIN THE. Press Tab to commit.Click the Rasterize Layer button at the bottom of the Layers panel. Marquee the words, drag a rotation handle to −6°, press Enter, and move the line so it sits centred in the banner.
-
Add stars with copy and paste
Add a
Starslayer and lasso-fill a cream star at the left end of the banner. Marquee it, press Cmd+C then Cmd+V, and drag the pasted copy with Move to the right end of the banner. Choose Layer → Merge Down to put both stars on one layer.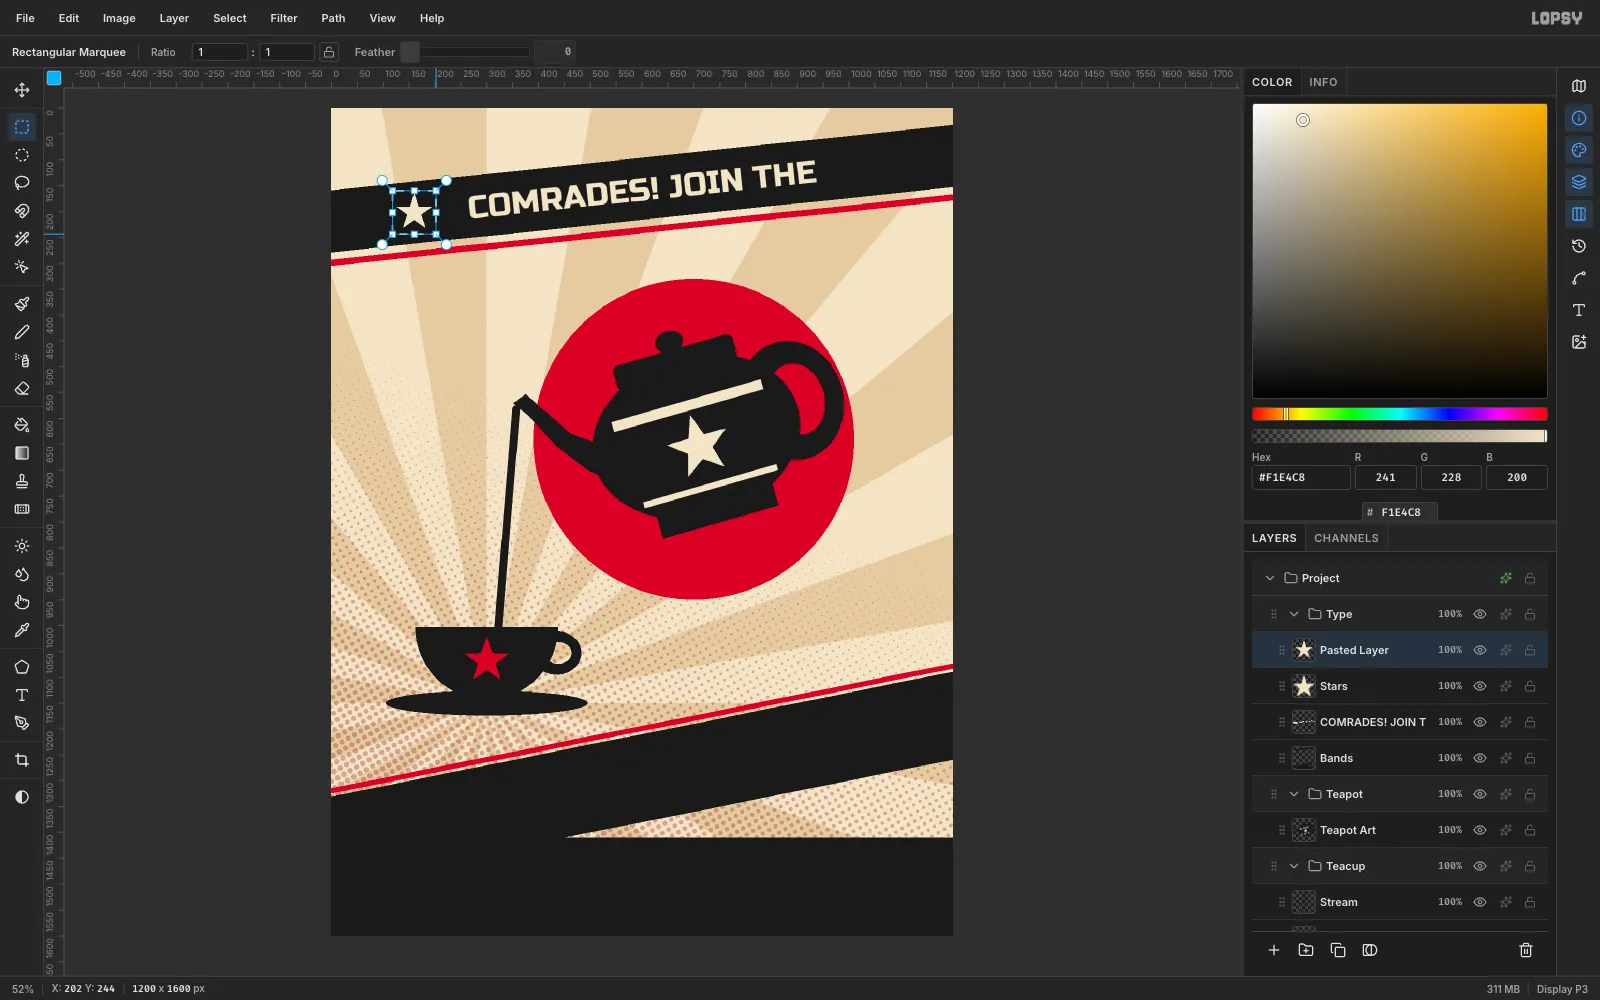
-
Rotate the TEA headline
Set the foreground to red, switch the font to Anton and set the Size to
400. TypeTEAon the right-hand side and commit with Tab. Rasterize it, marquee it, and rotate it −11° so it matches the diagonal band. Press Enter, then move it up until its baseline sits on the red rule above the band.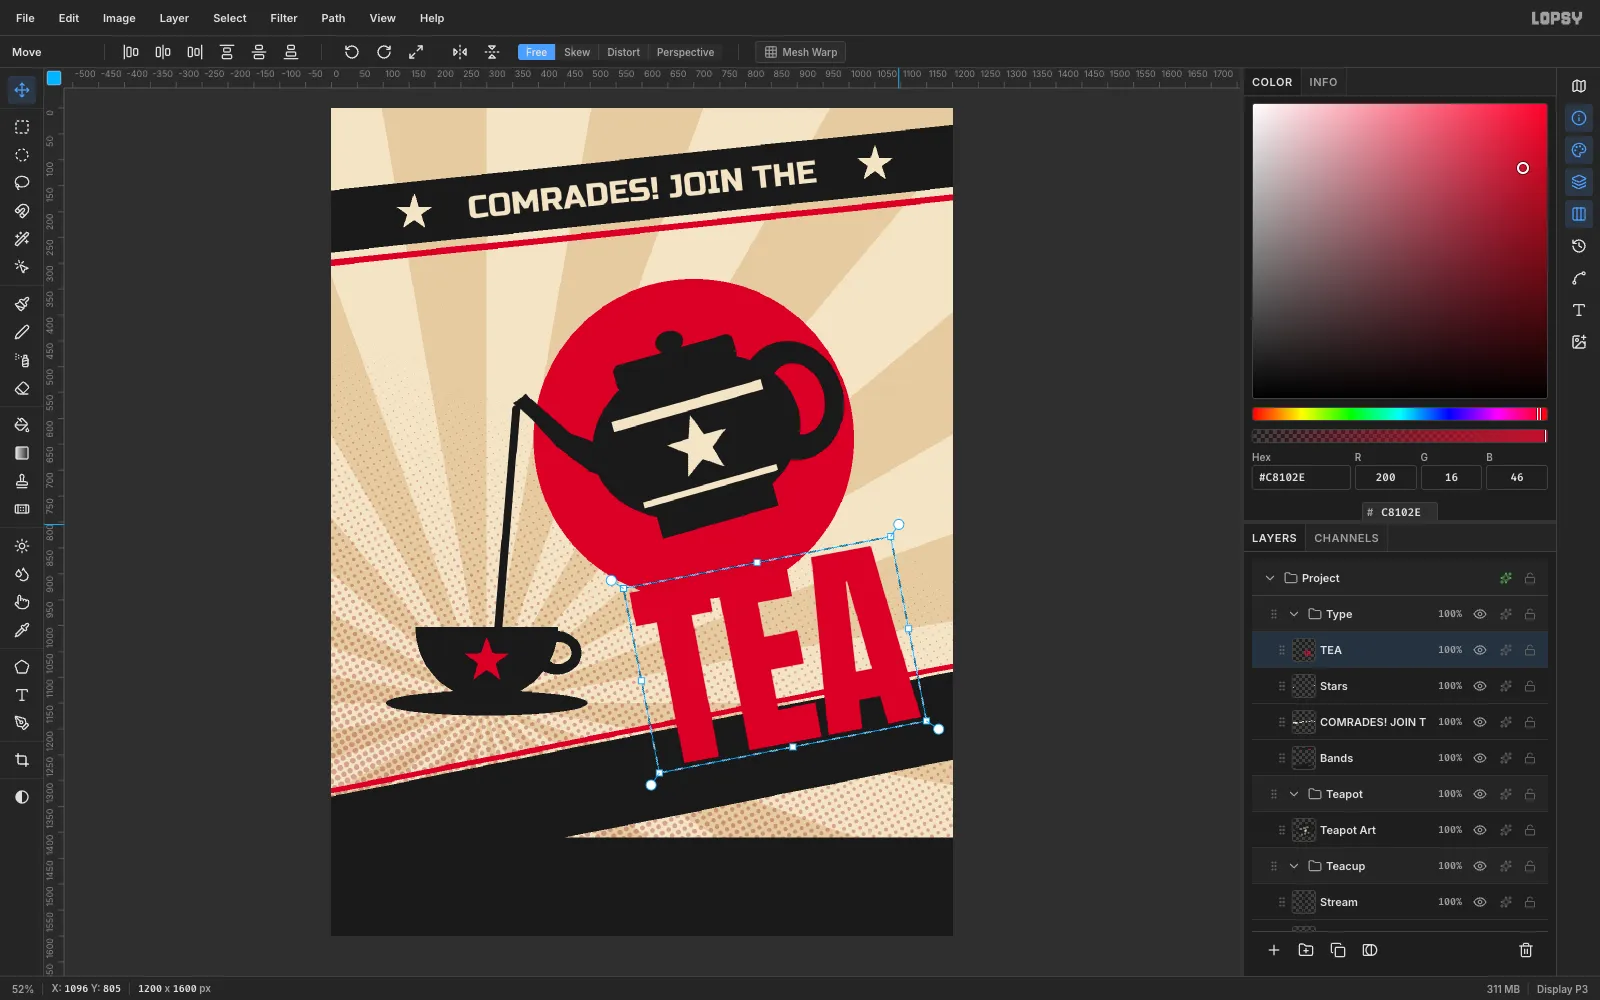
-
Outline the headline in black
The red letters overlap the red disc, so they need an edge. Open the TEA layer's Layer Effects, turn on Stroke, set Width to
8and set the colour to#1A1A1A.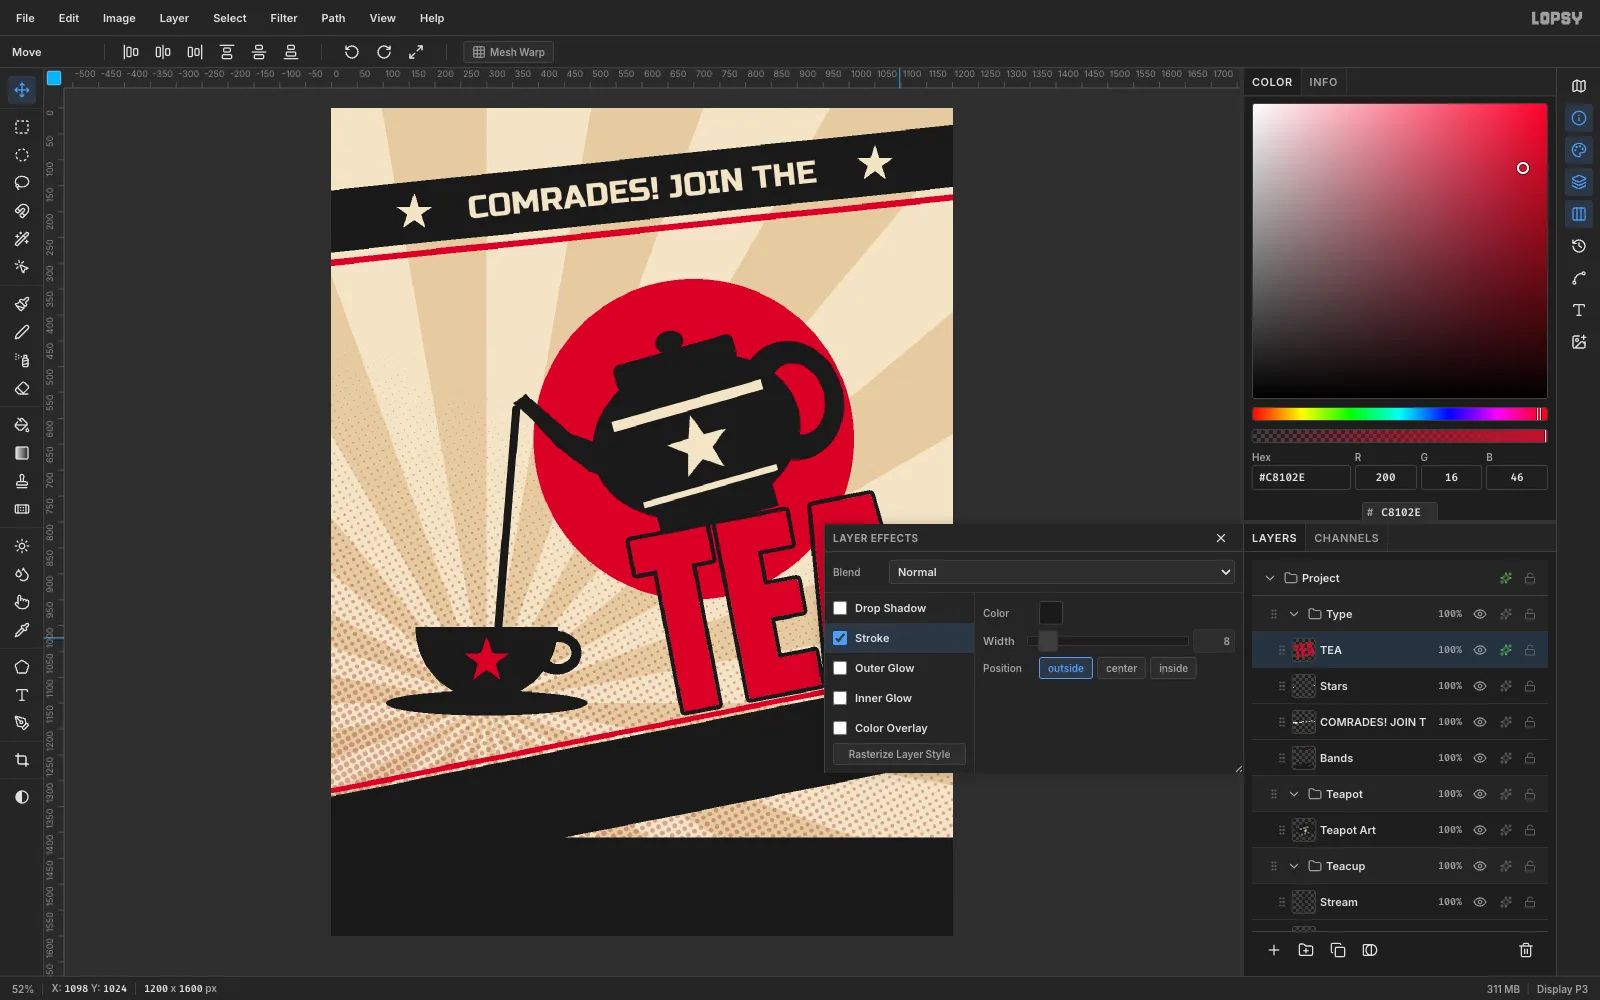
-
Build a hard offset shadow
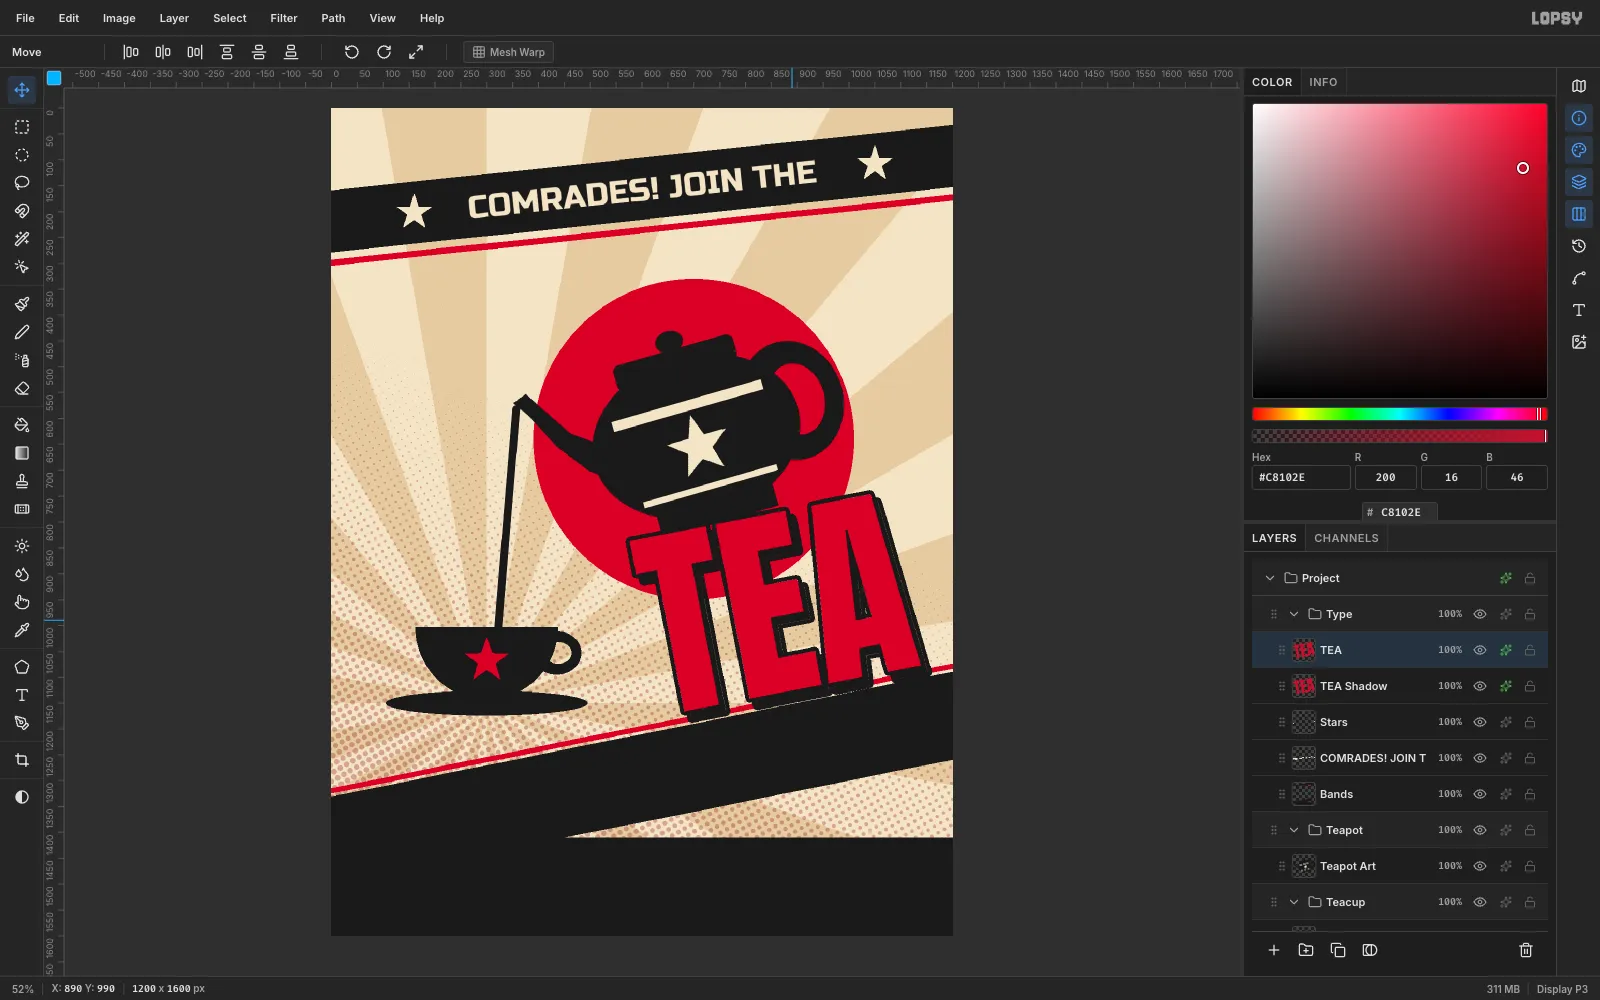
Click Duplicate Layer. Duplicate puts the copy 10 px right and 10 px down, so move the copy back by (−10, −10). Rename the original, which is underneath,
TEA Shadow. OnTEA Shadow, turn on Color Overlay in#1A1A1Aand move it 14 px right and 14 px down.This gives a crisp, fully opaque print shadow. The Drop Shadow effect tops out at 75% opacity, which looks grey instead of black.
-
Set and rotate INSURRECTION
Switch to cream, Anton, Size
176. TypeINSURRECTIONin the black footer, commit, and rasterize it. Move it up so none of it hangs off the bottom of the canvas. Then marquee it and rotate it −11°.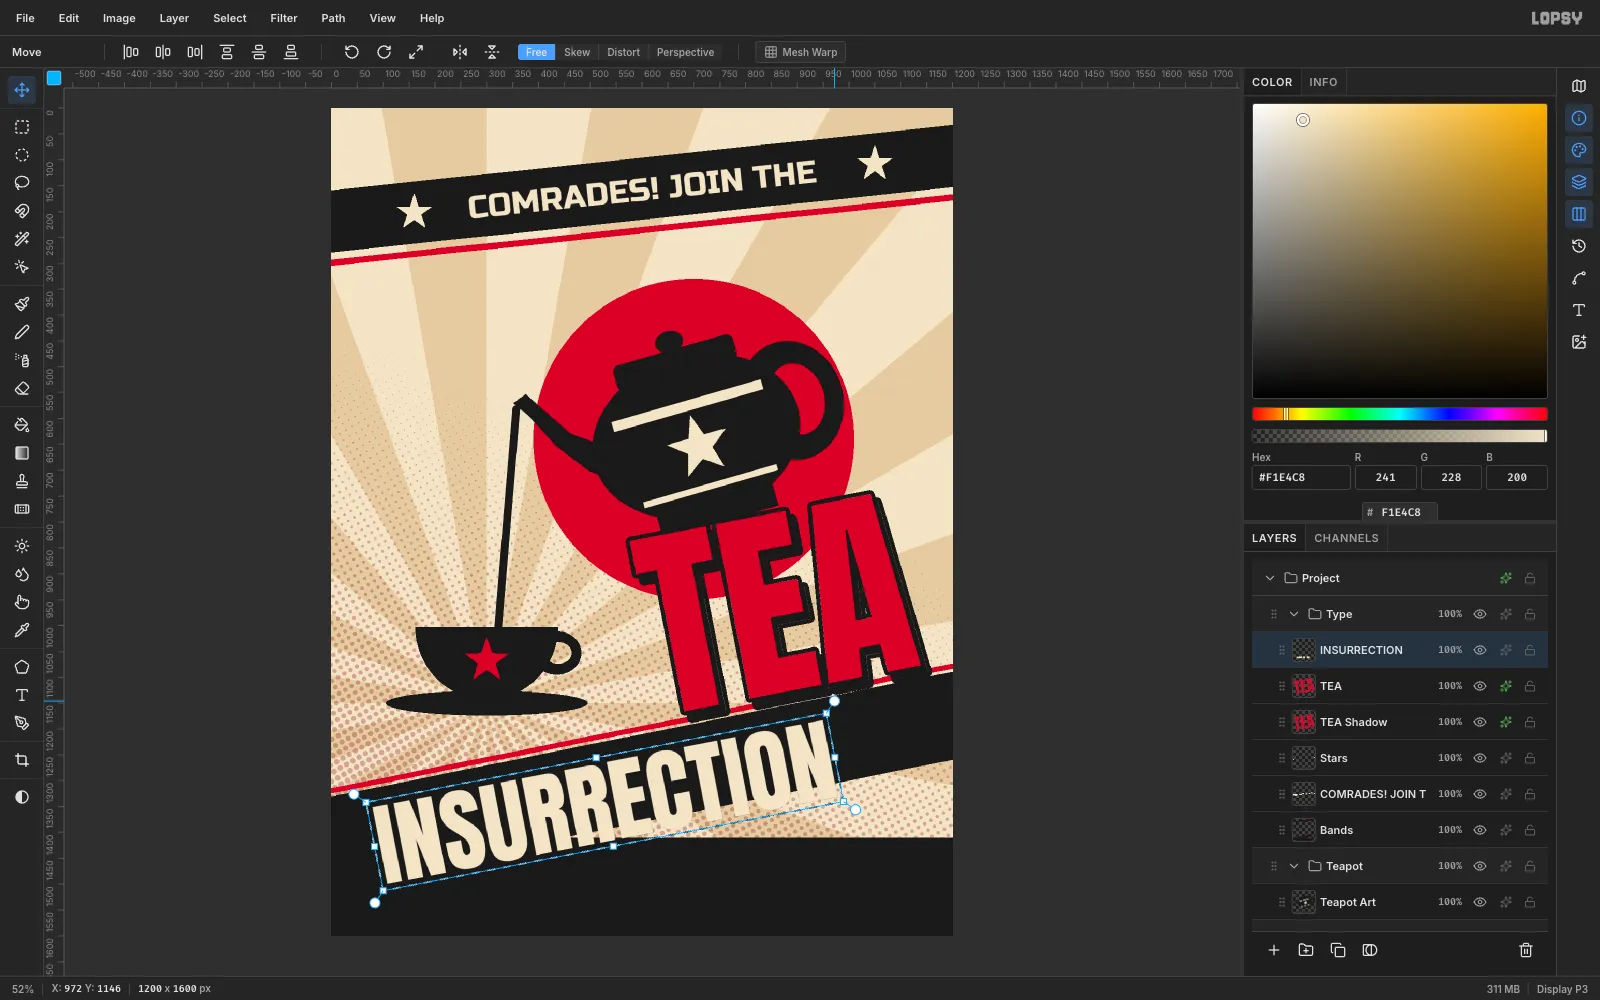
-
Seat the word inside the band
Move the word so it's centred in the diagonal band, directly under TEA. If the letters touch the band's lower edge, select
Bandsand lasso-fill a strip about 40 px thick along the bottom of the band to give the type room to breathe.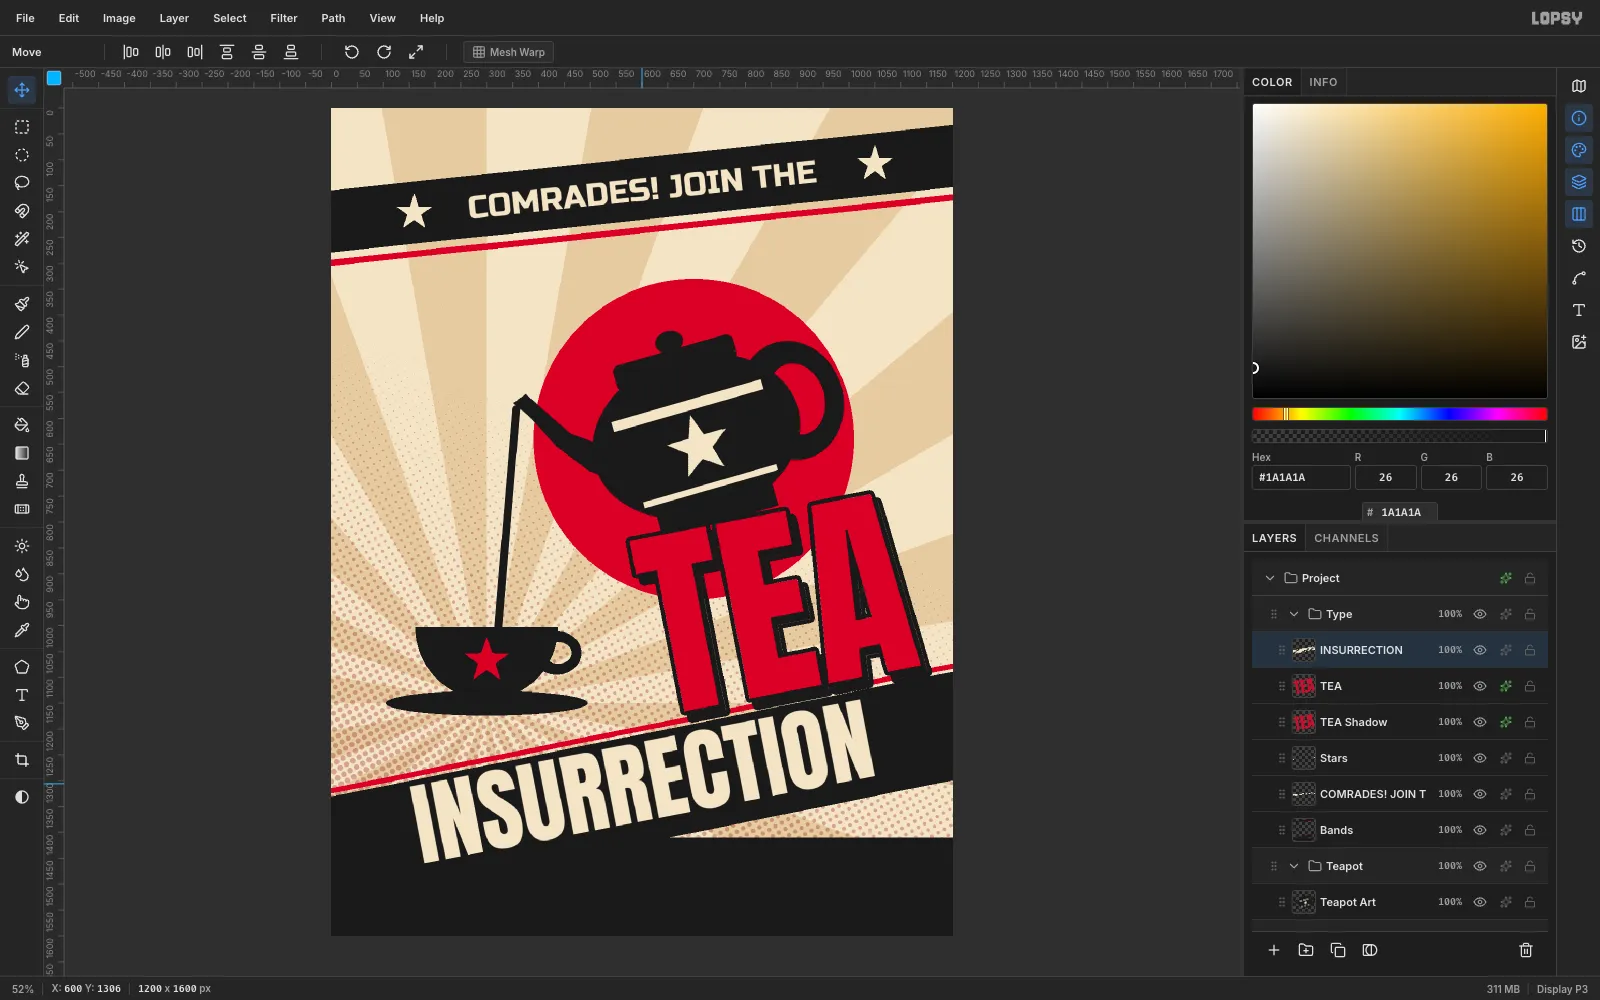
-
Make the details readable
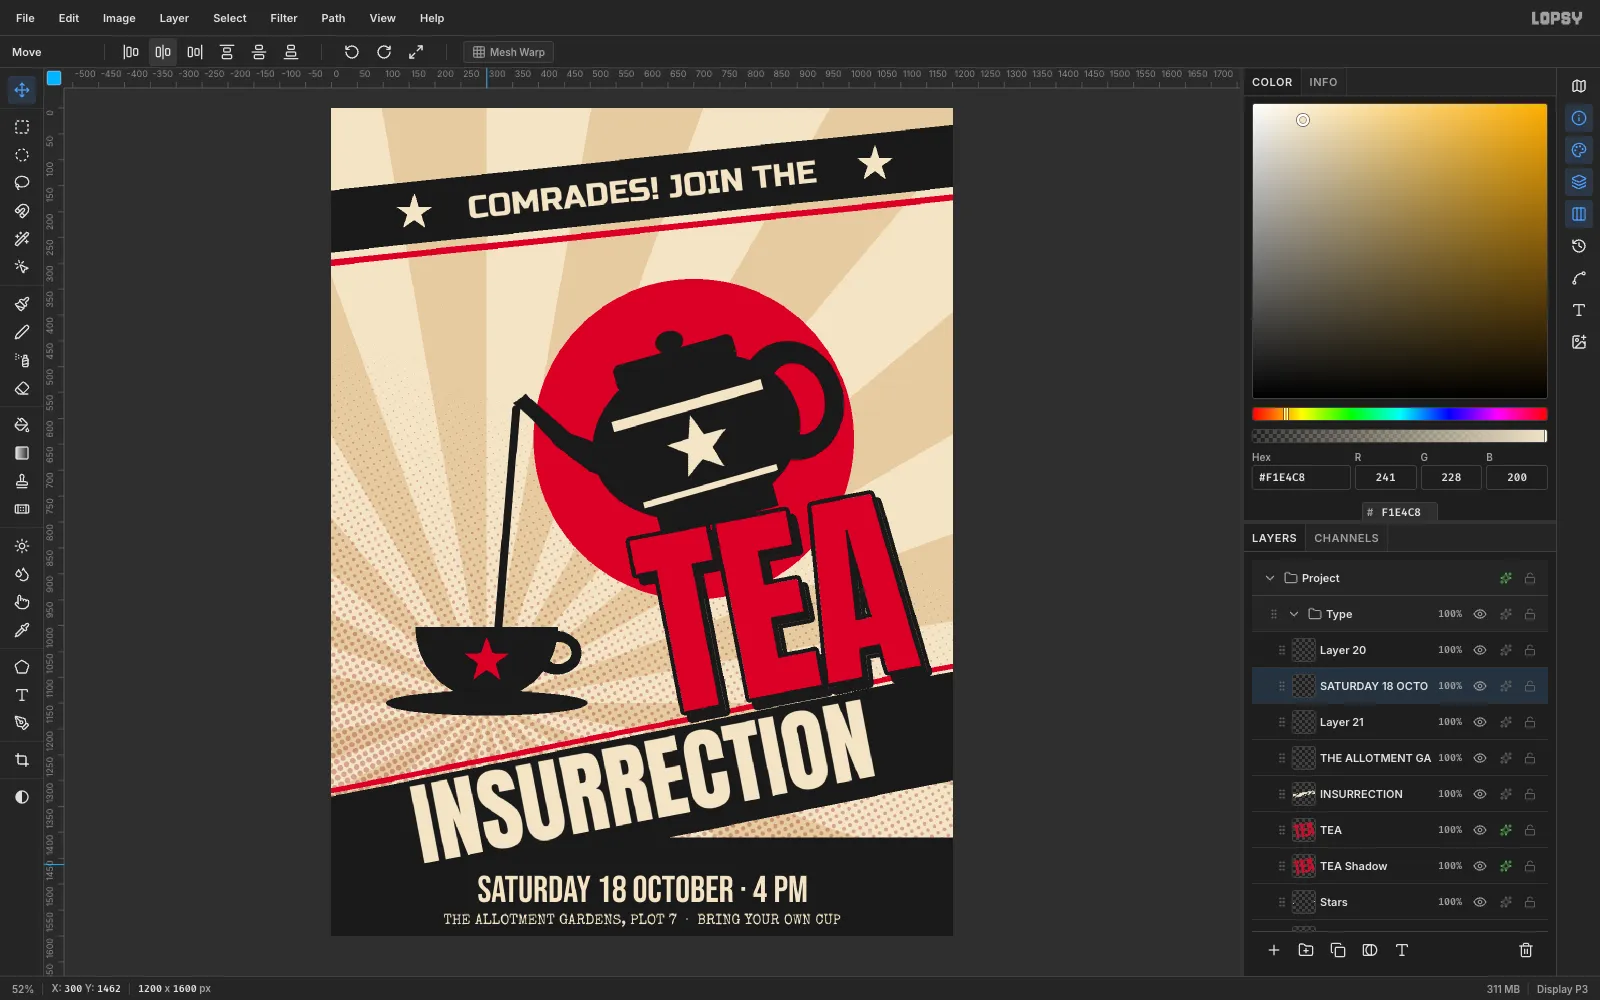
An invitation fails if nobody can read the when and the where. Set these two lines in cream, and centre each one with Align center horizontally in the Move tool's options bar:
- Special Elite, Size
28:THE ALLOTMENT GARDENS, PLOT 7 · BRING YOUR OWN CUP, near the bottom of the canvas. - Bebas Neue, Size
72:SATURDAY 18 OCTOBER · 4 PM, above it.
- Special Elite, Size
-
Stamp a FREE SCONES badge
Add a
Badgelayer. With the Shape tool set to Ellipse, hold Cmd and drag a red circle 200 px across, centred at (190, 430). Remove its fill, add a cream stroke with Width2, and draw a slightly smaller ring inside it.Type
FREE, press Enter, typeSCONES!in cream Russo One at Size36, and rasterize. Marquee just theFREEline and nudge it right until it's centred overSCONES!. Merge the text down intoBadge, marquee the badge and rotate it +12° so it looks hand-stamped.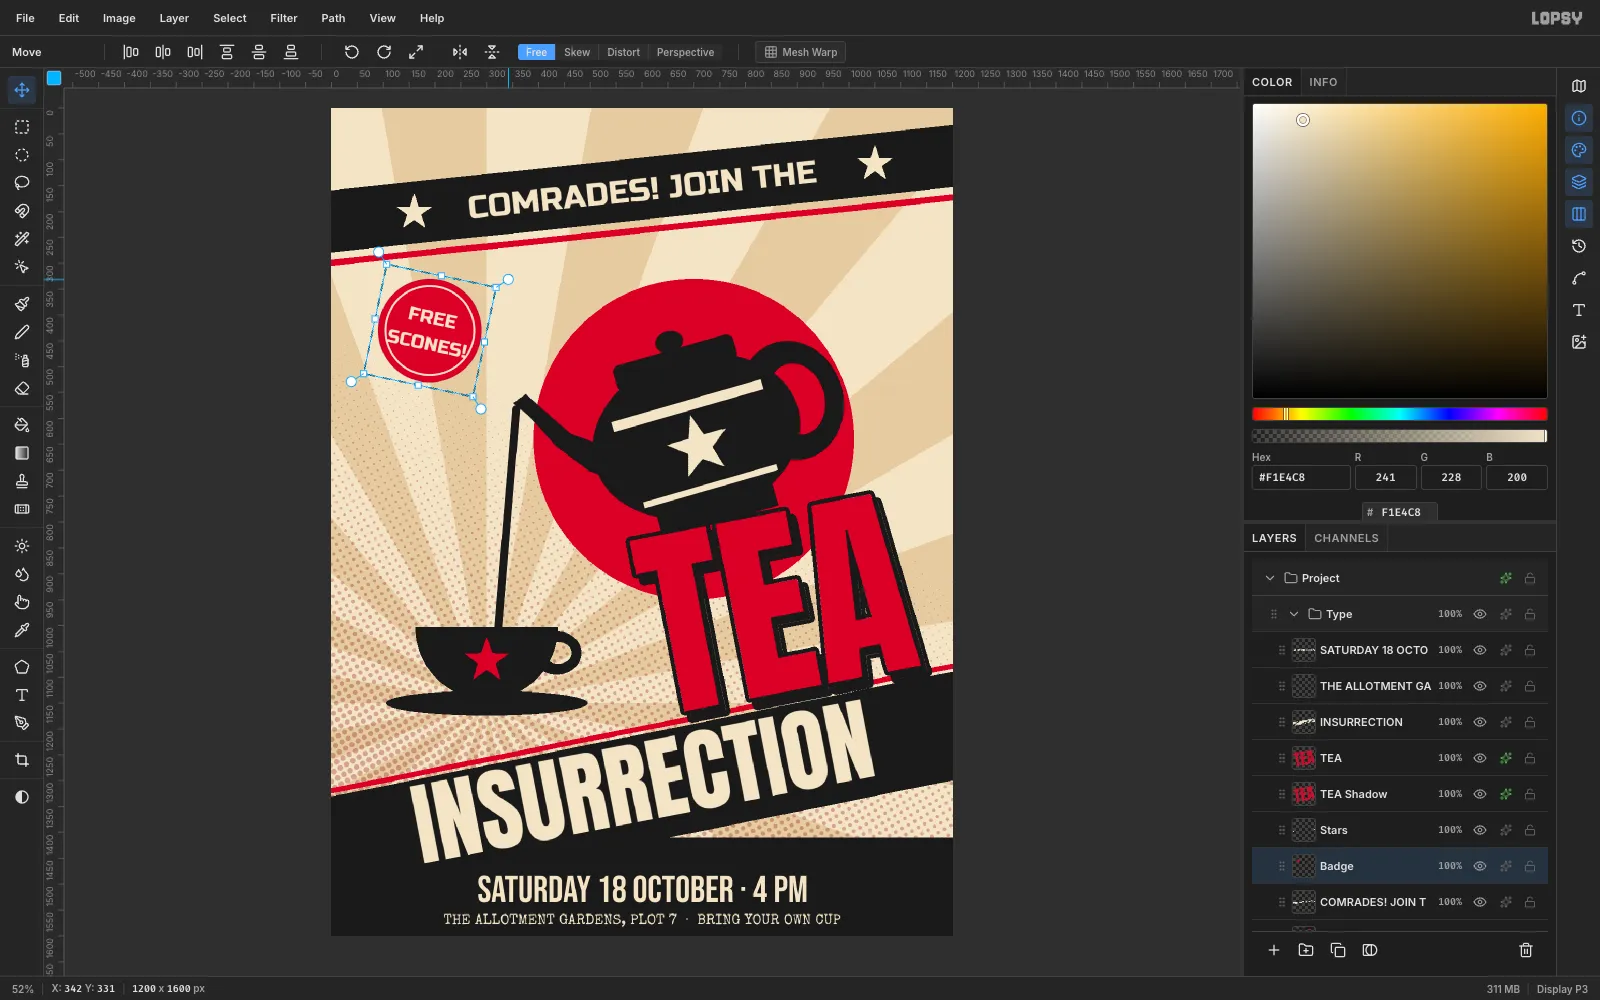
-
Add paper grain
Add a
Grainlayer at the top of theTypegroup and fill it with#808080. Choose Filter → Add Noise…, then pick Mono and Gaussian, set Amount to40and click Apply. Set the layer's blend mode to Overlay and its opacity to about 40%. Mid-grey disappears in Overlay, so only the speckle remains, which is enough to make the flat inks look printed.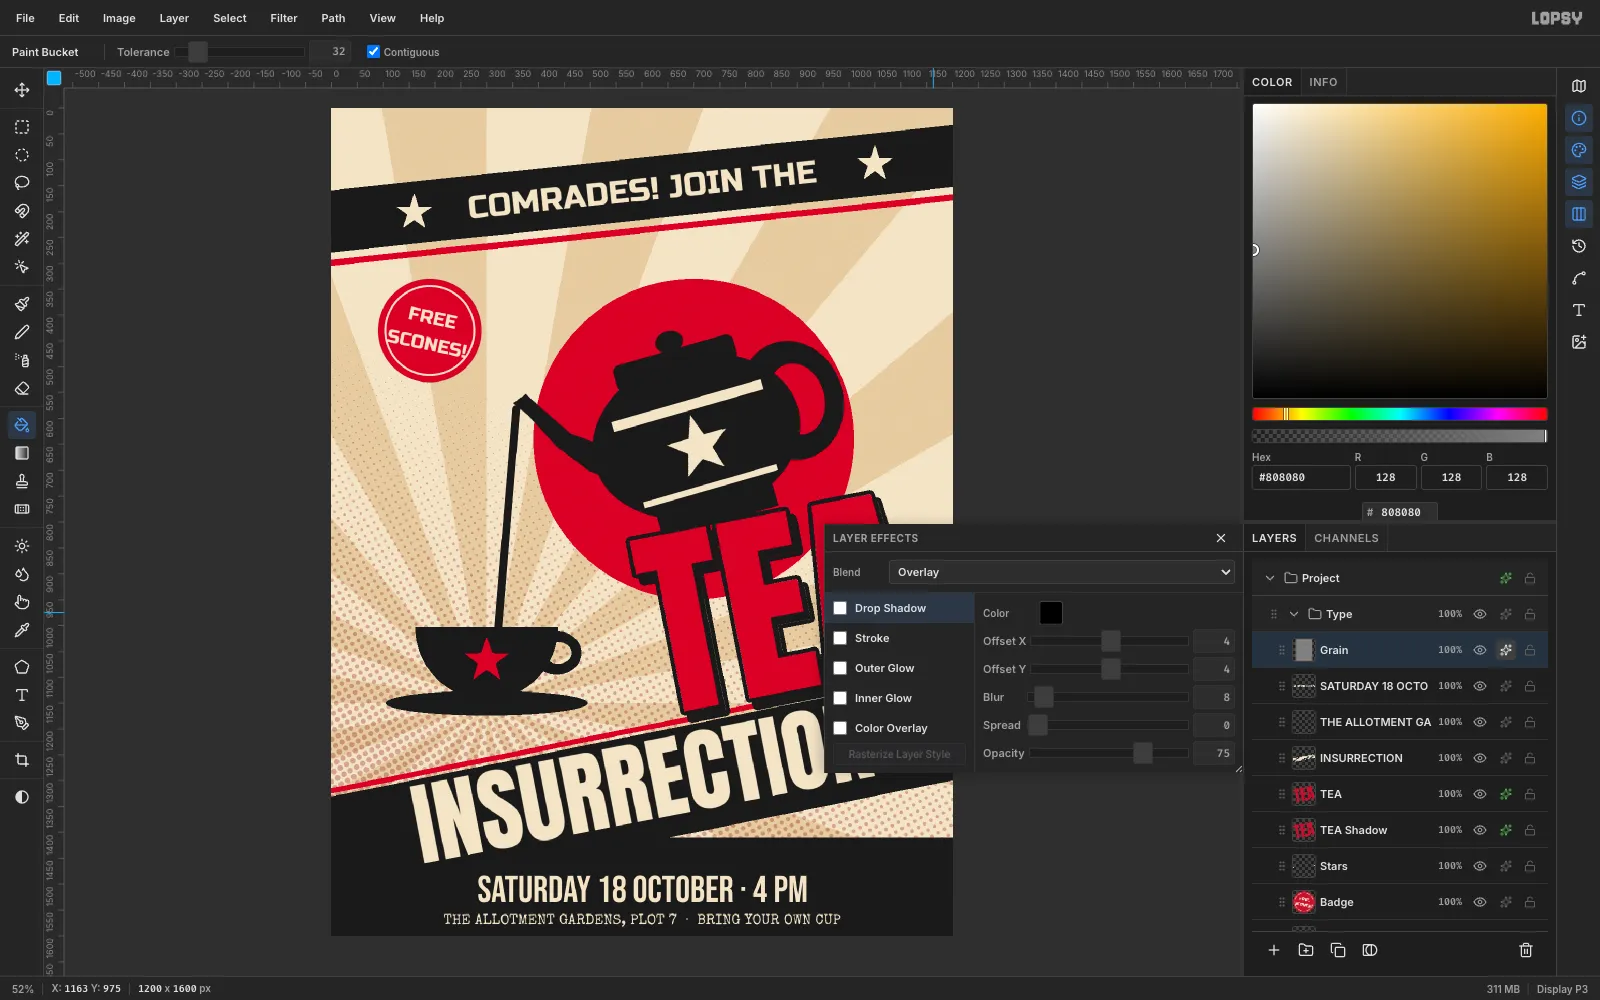
-
Export the finished invitation
Choose File → Quick Export PNG to export the poster, and File → Save Project to keep an editable
.lopsycopy with all the layers and groups.For the next one, try a different slogan, a different silhouette in the disc, or a second diagonal running the opposite way.