Design a Vaporwave Venice Poster
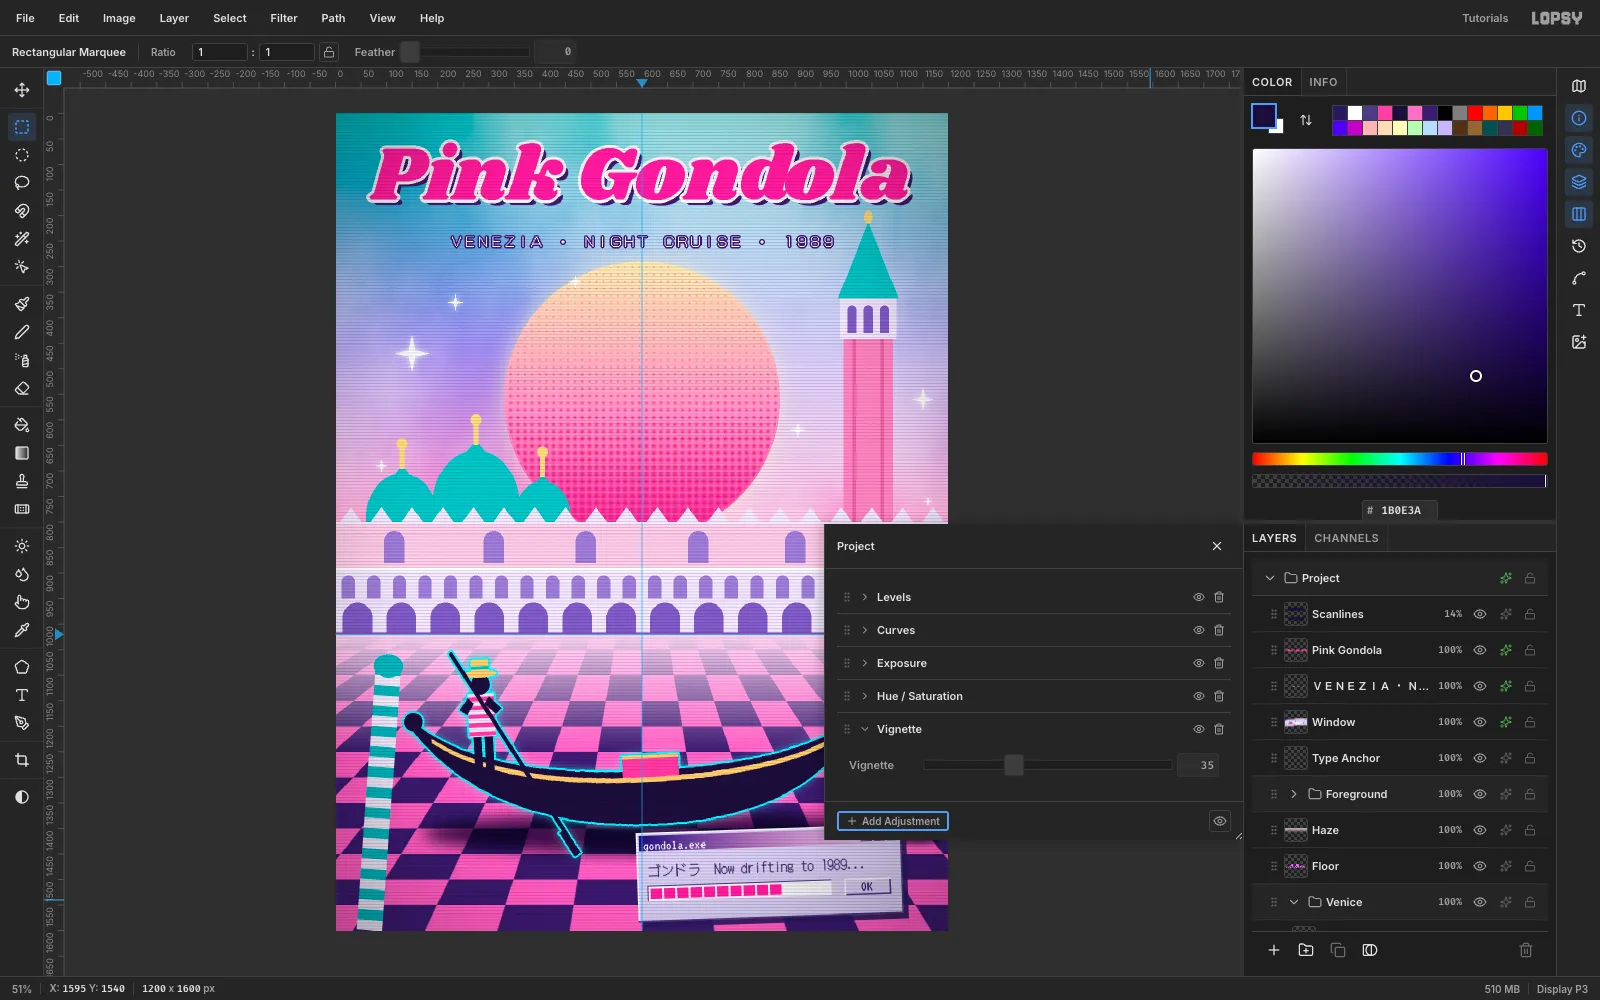
Make a pastel vaporwave poster in Lopsy with a halftone sun, a perspective checkerboard floor, a neon gondola and a retro Windows-style dialog.
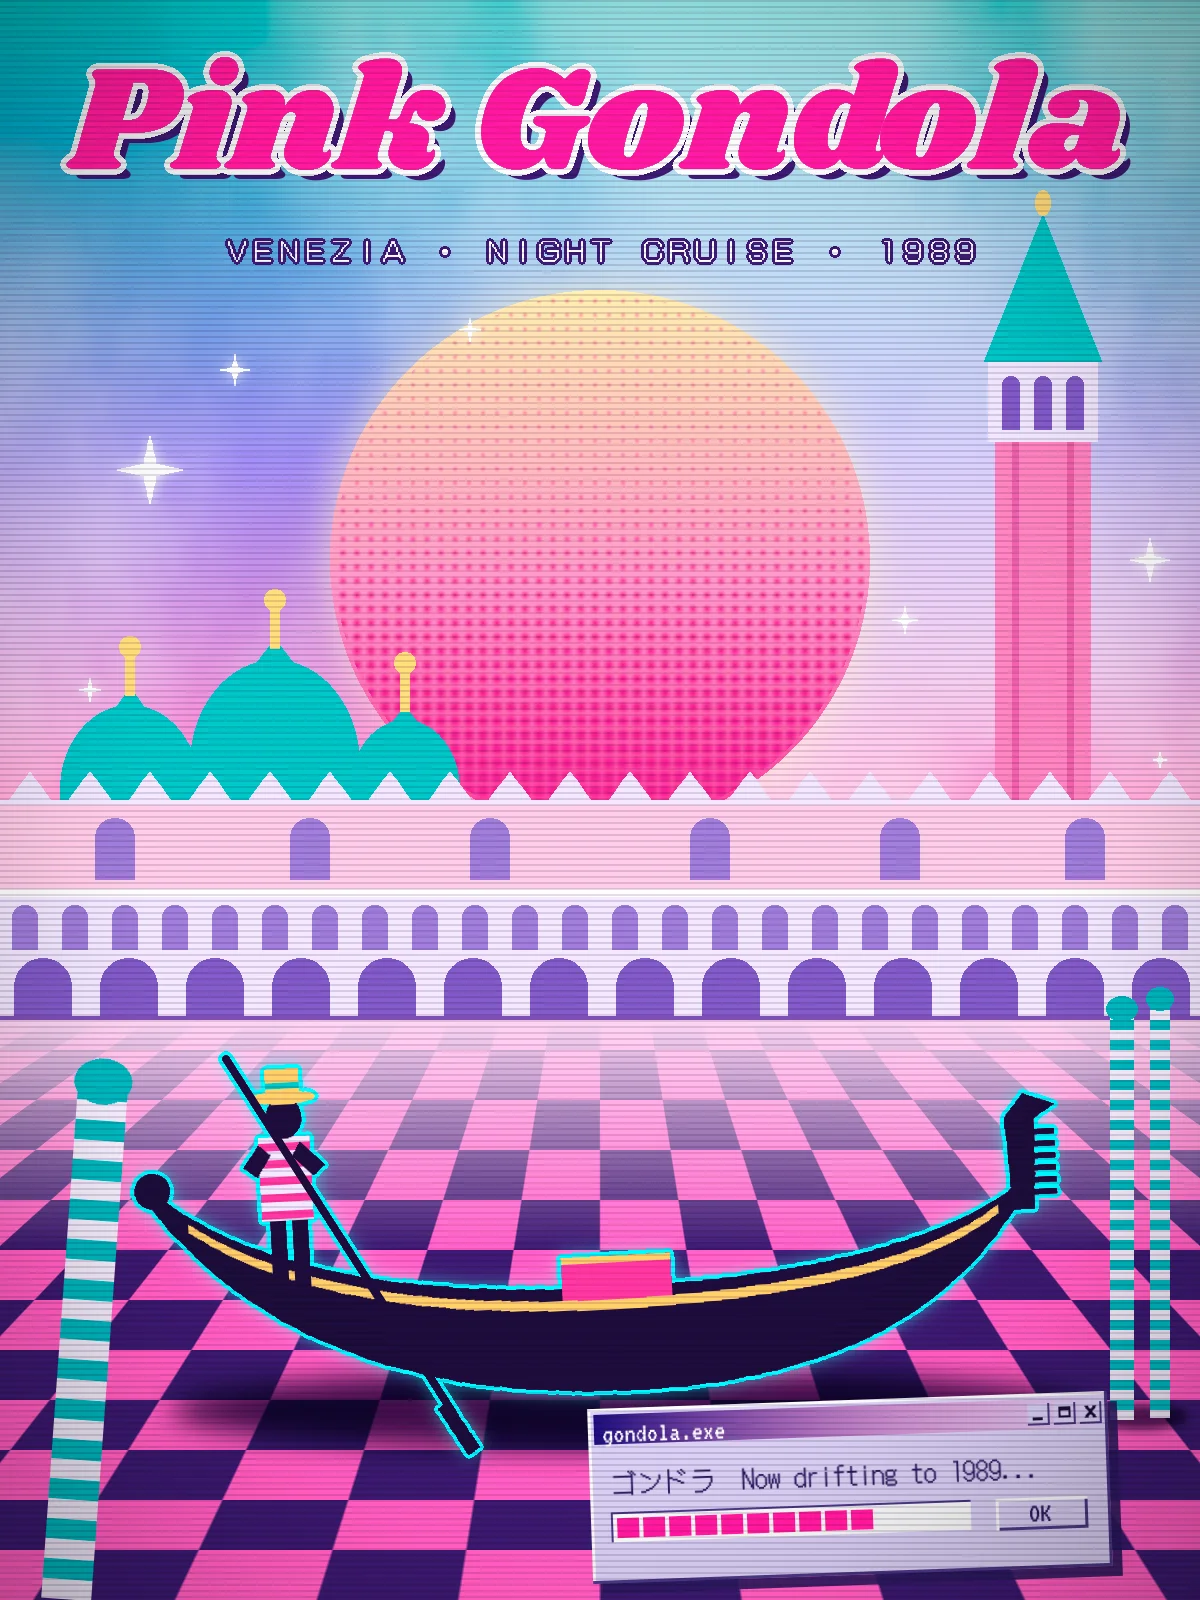
Vaporwave takes something familiar and makes it dreamlike. Here that's Venice. In this tutorial you'll make Pink Gondola, a 1200 × 1600 poster where a gondola floats across a checkerboard floor in front of a pastel Doge's Palace. A halftone sun sets behind it, and a Windows-style gondola.exe dialog reports that you're drifting to 1989.
Along the way you'll use:
- gradients with transparent stops
- the Clouds, Halftone and Pattern Fill filters
- the Perspective transform mode
- groups, Merge Down and rotations
- stroke, glow and drop-shadow effects
- three Google Fonts
- a root-level Vignette adjustment
Every piece stays on its own layer, so you can rearrange it later.
-
Set up a pastel sunset gradient
Choose File → New, set Width to
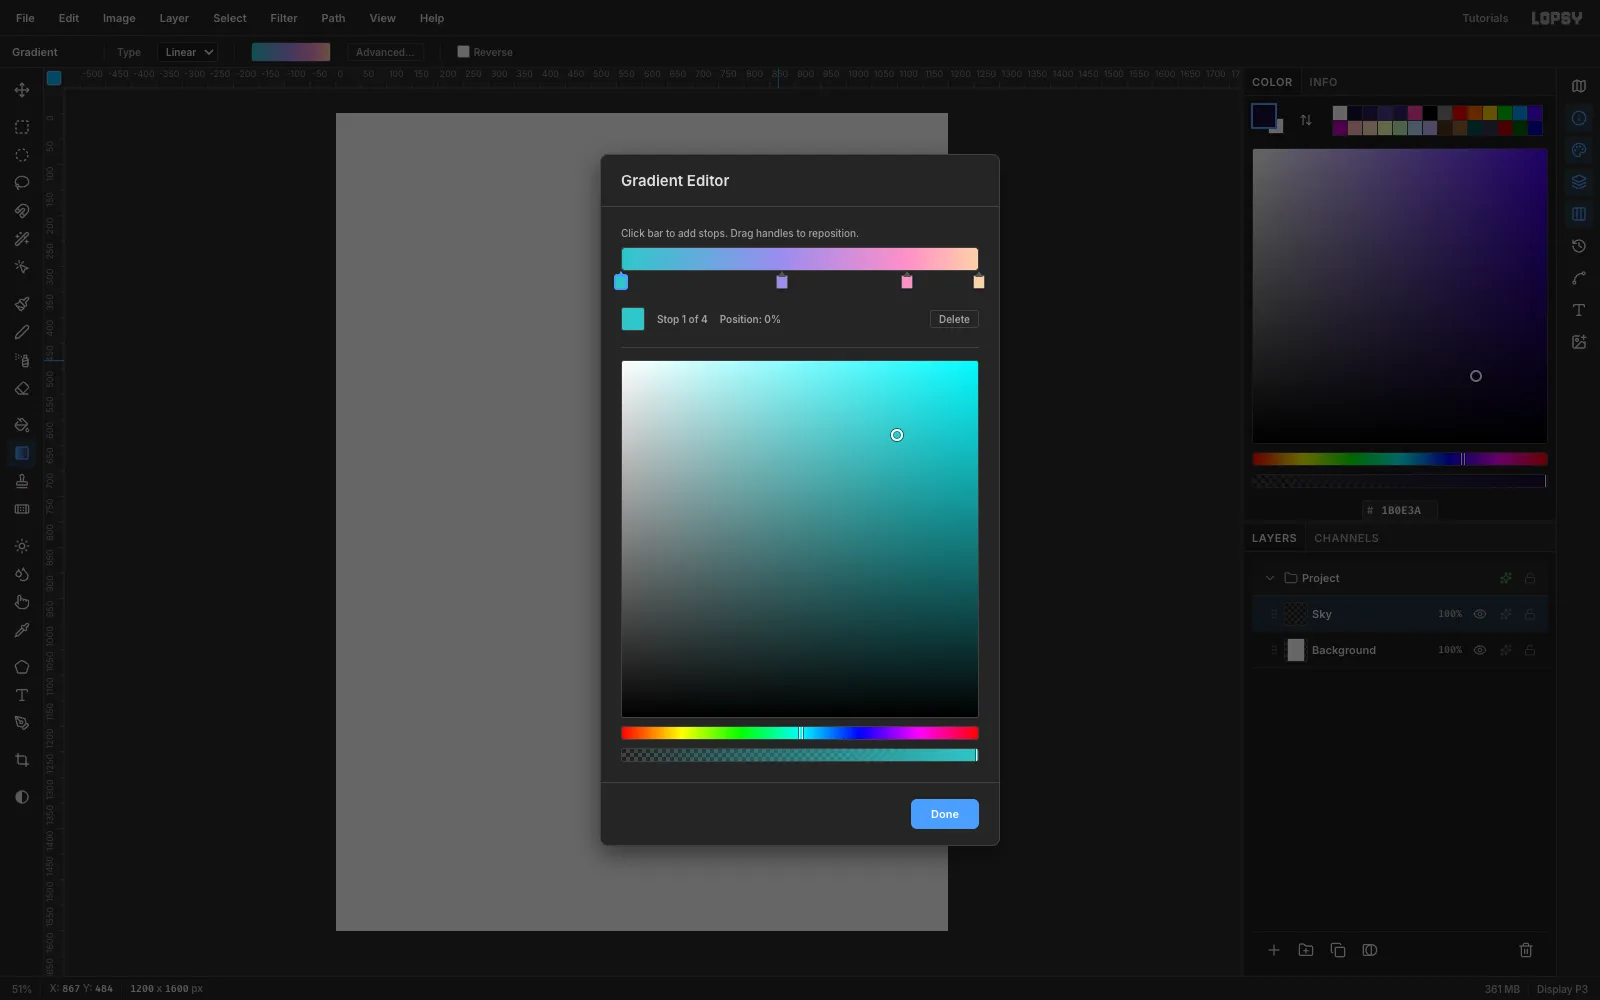
1200and Height to1600, keep a white background and click Create. Double-clickLayer 1and rename itSky.Pick the Gradient tool and click Advanced… to open the Gradient Editor. Click the handle row to add stops. Select each stop and pick its colour on the saturation square and hue strip:
- teal
#2EC4C9at 0 % - lavender
#9D8CF0at about 45 % - pink
#FF8FC8at about 80 % - peach
#FFD1A8at 100 %
Click Done.
- teal
-
Paint the sky and place guides
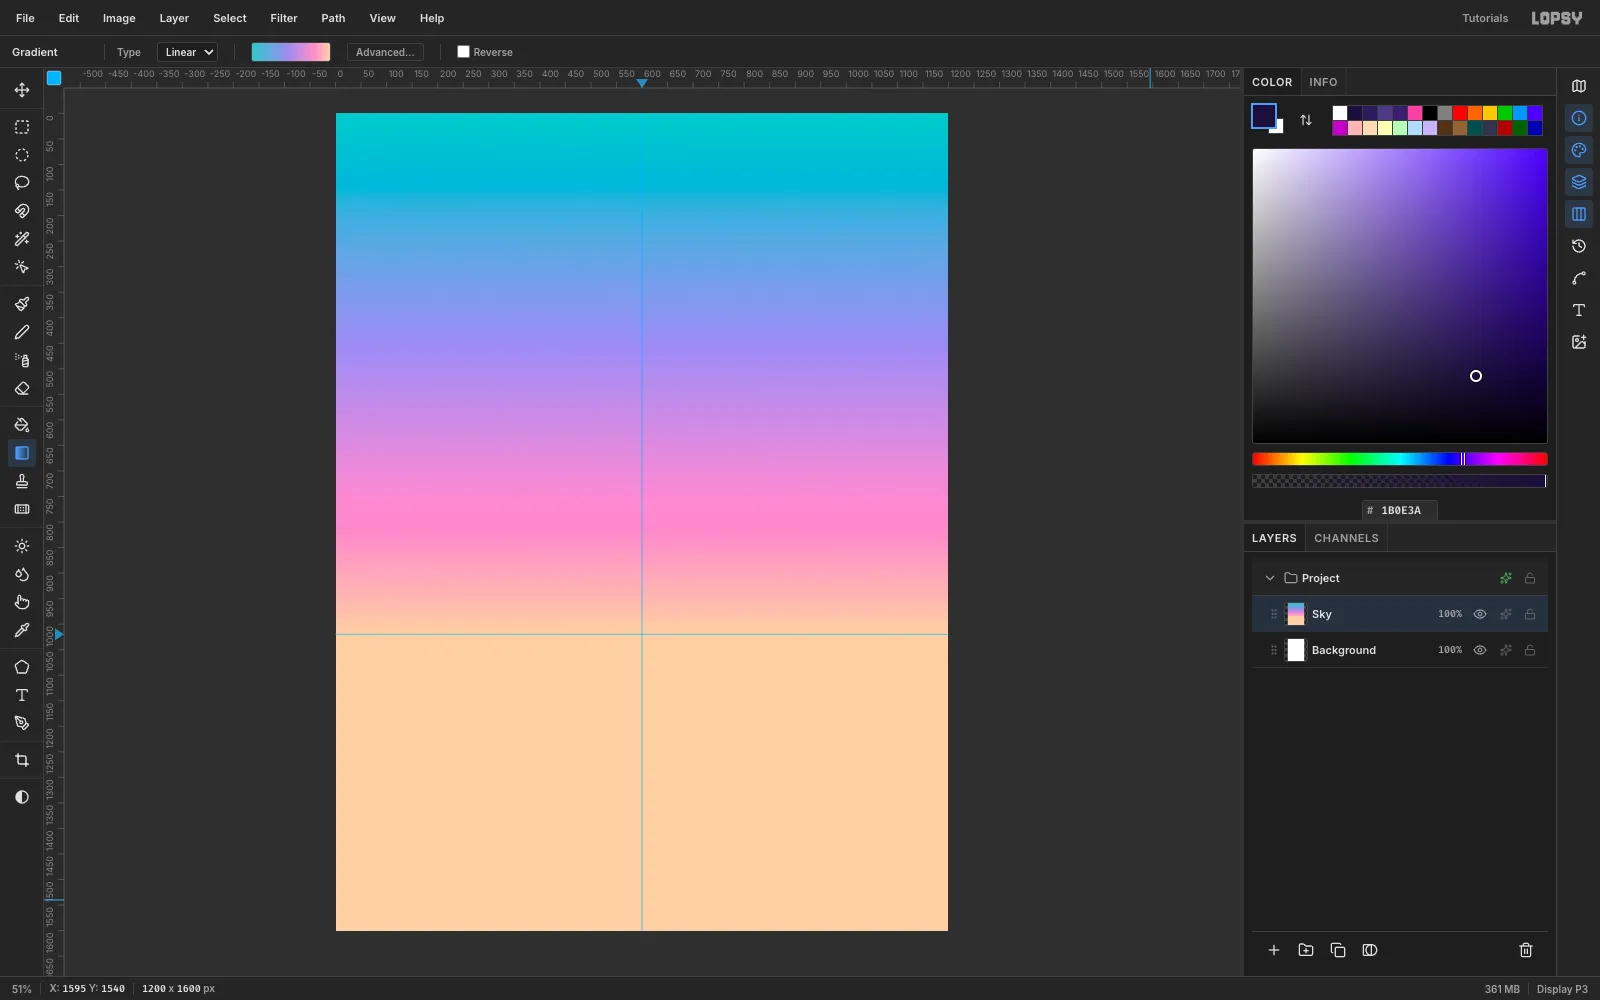
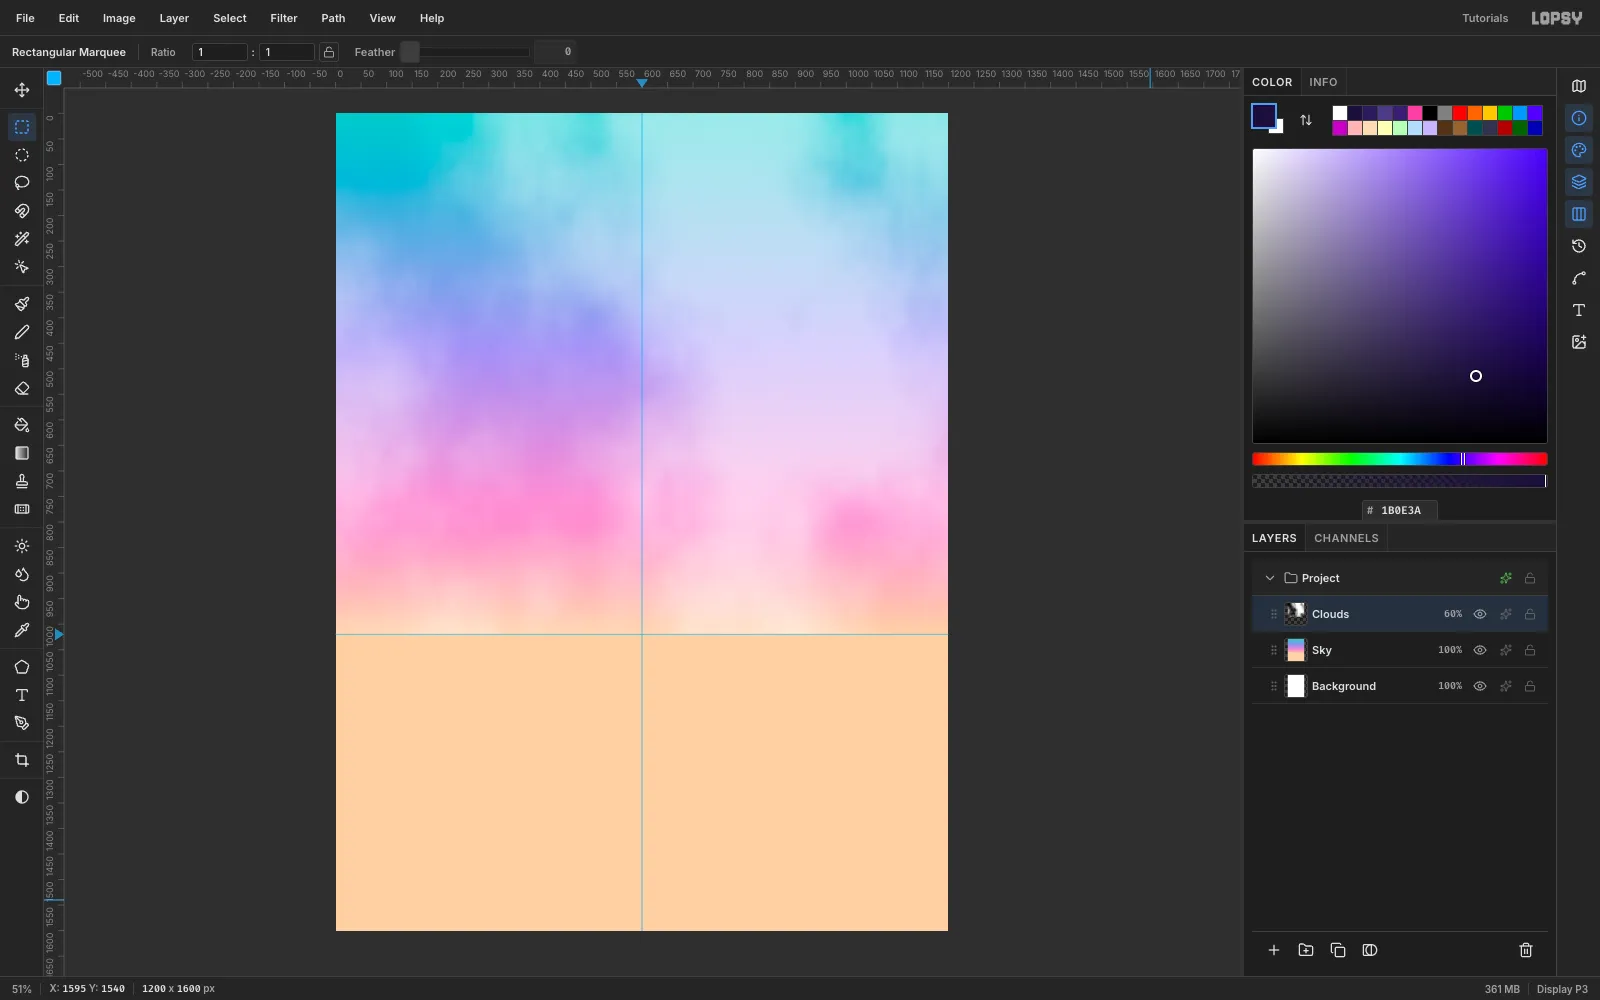
Drag the gradient straight down from the top edge to y 1020. That line will be the horizon, and everything below it is peach for now.
Click the top ruler above x 600 to drop a vertical center guide. Then click the left ruler at y 1020 to drop a horizontal horizon guide. You'll line up the sun, the palace and the floor against these two guides.
-
Render clouds
Click Add Layer and name the new layer
Clouds. Choose Filter → Clouds…, set Scale to3and tick Preview. Clouds is randomized, so if you don't like the pattern, preview it again for a new one. Click Apply.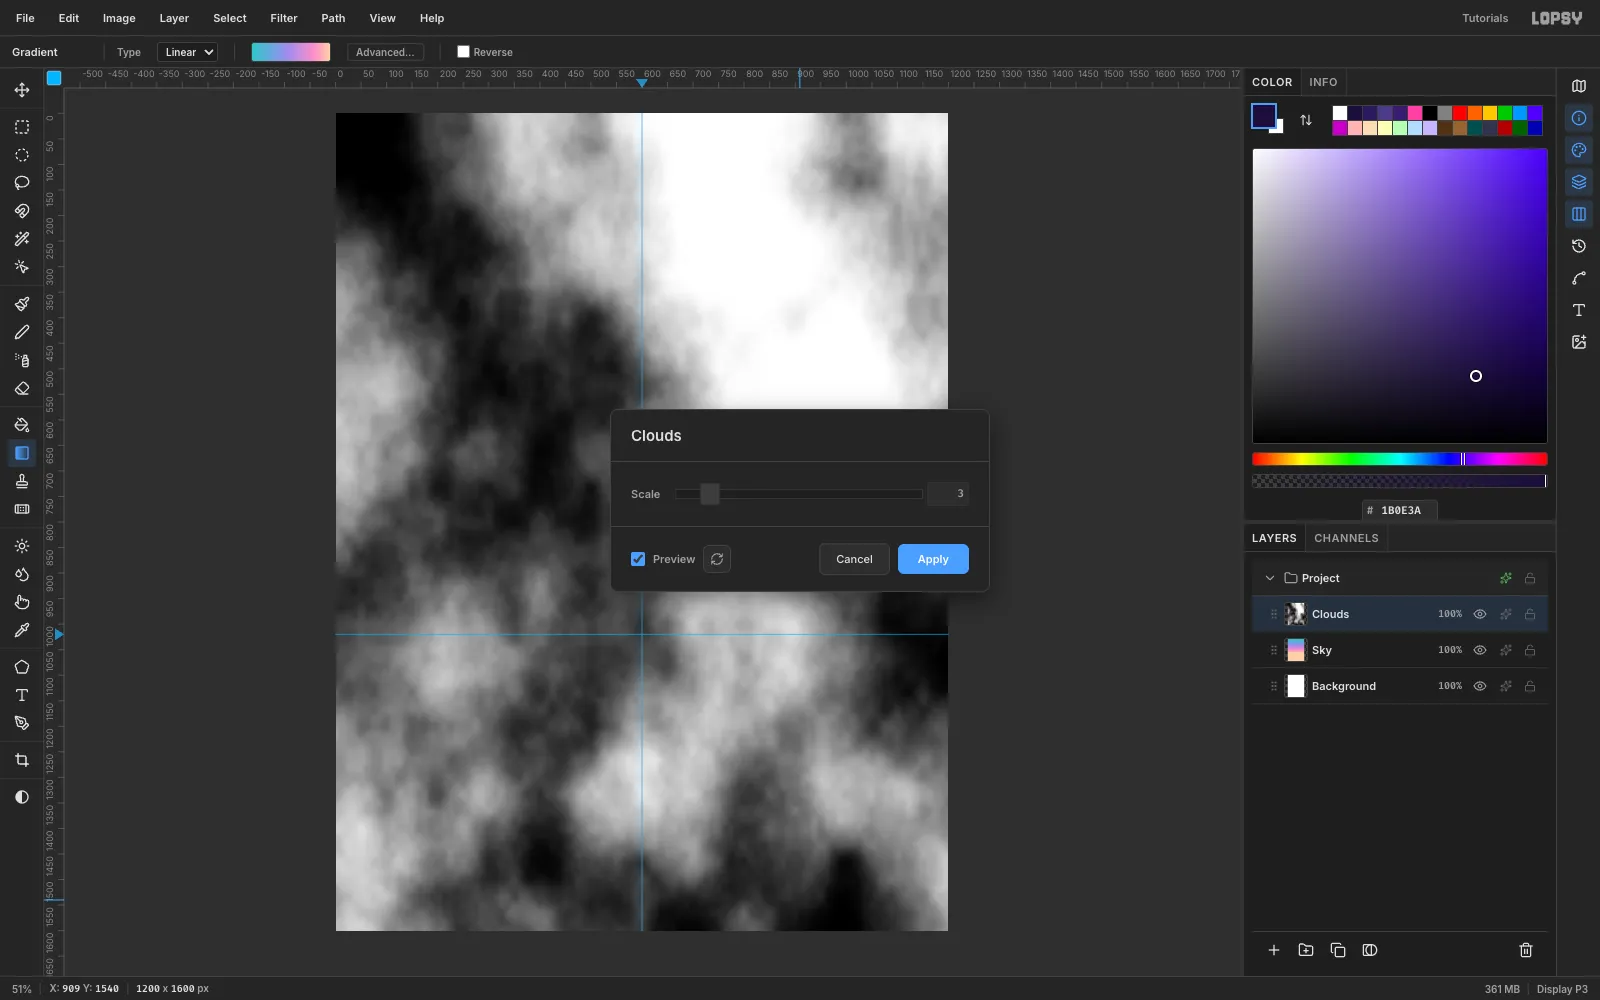
-
Blend the clouds into the sky
Open the layer's effects drawer (the ✦ button on its row), set Blend to Screen and close the drawer. Then set the row's opacity to 60 %. Screen only brightens, so the clouds glow over the gradient and don't go grey.
Rectangular-marquee everything below the horizon guide and press Delete. Press Cmd+D to deselect.
-
Draw the sun
Add a layer named
Moon. In the Gradient Editor, set three stops: pale yellow#FFF1B8, pink#FF9CC8at 55 % and hot pink#FF4F9E.With the Elliptical Marquee, draw a 540 × 540 circle from (330, 290). The Options bar's ratio lock or the guides help keep it round. Drag the gradient from the top of the circle to the bottom. Deselect.
Open the effects drawer, enable Outer Glow in cream
#FFF4D6, then set Size60, Spread10and Opacity70.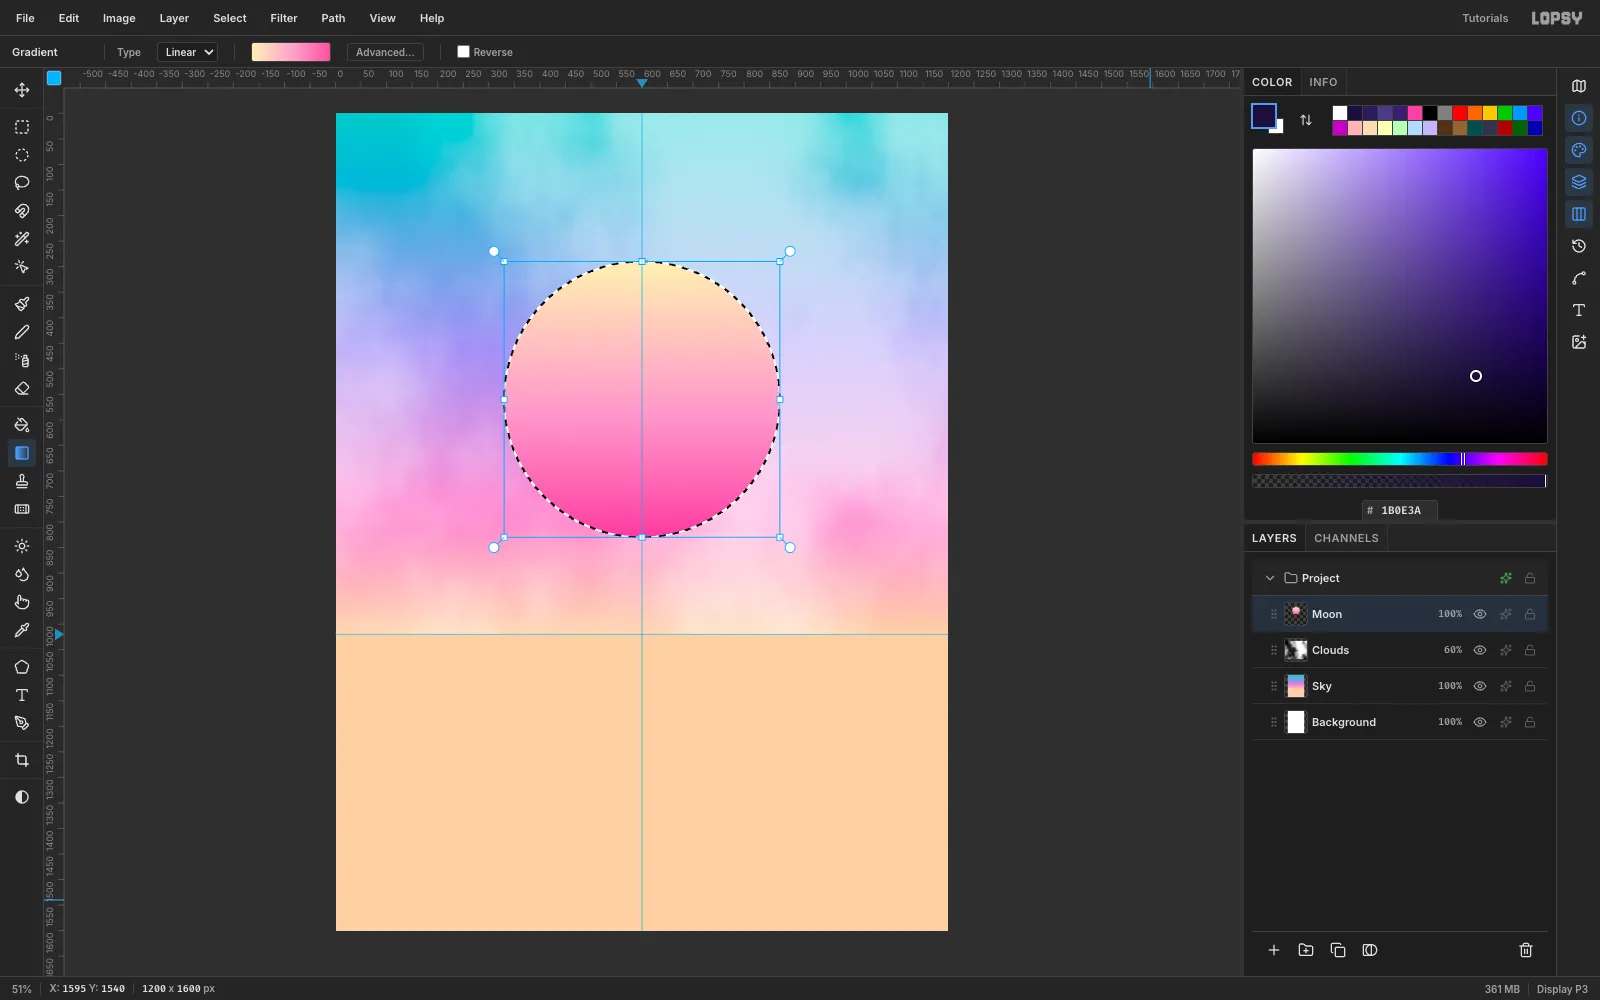
-
Add a halftone fade
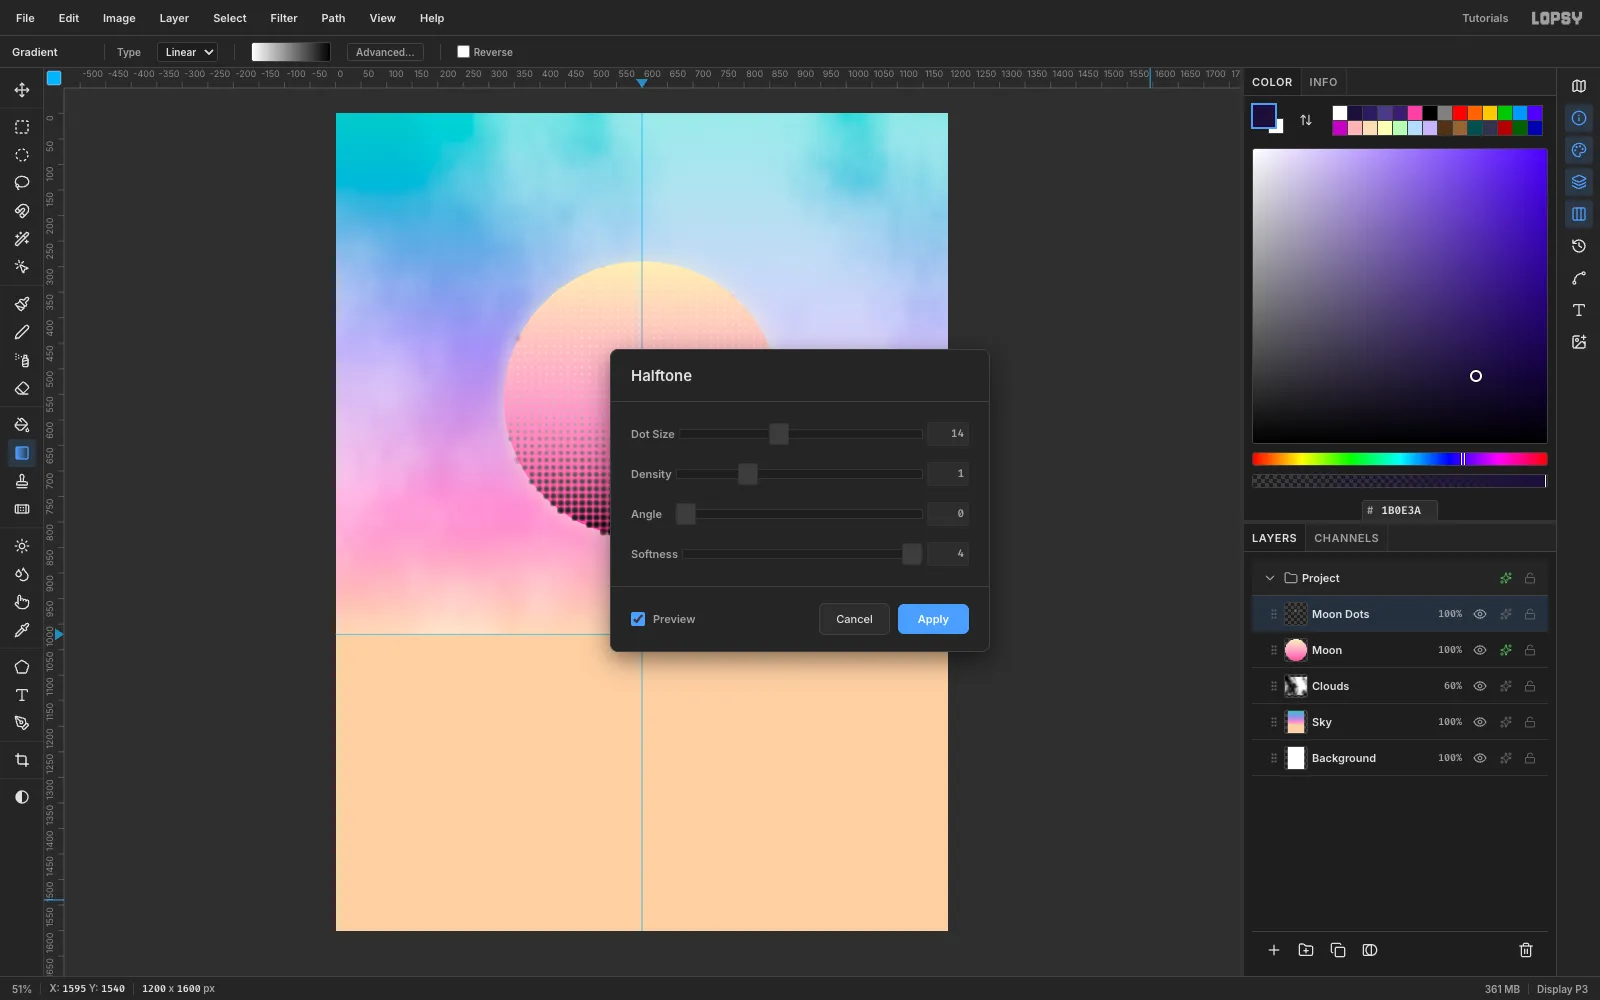
Most vaporwave suns are cut into stripes. This one fades out in halftone dots instead.
- Add a layer named
Moon Dotsand set the gradient to plain white → black. - Re-draw the same circle and drag the gradient from y 470 to the bottom of the sun, then deselect.
- Choose Filter → Halftone… and set Dot Size
14, Angle0and Softness10. Dark areas become big dots and light areas become tiny ones. Click Apply.
- Add a layer named
-
Recolor and trim the dots
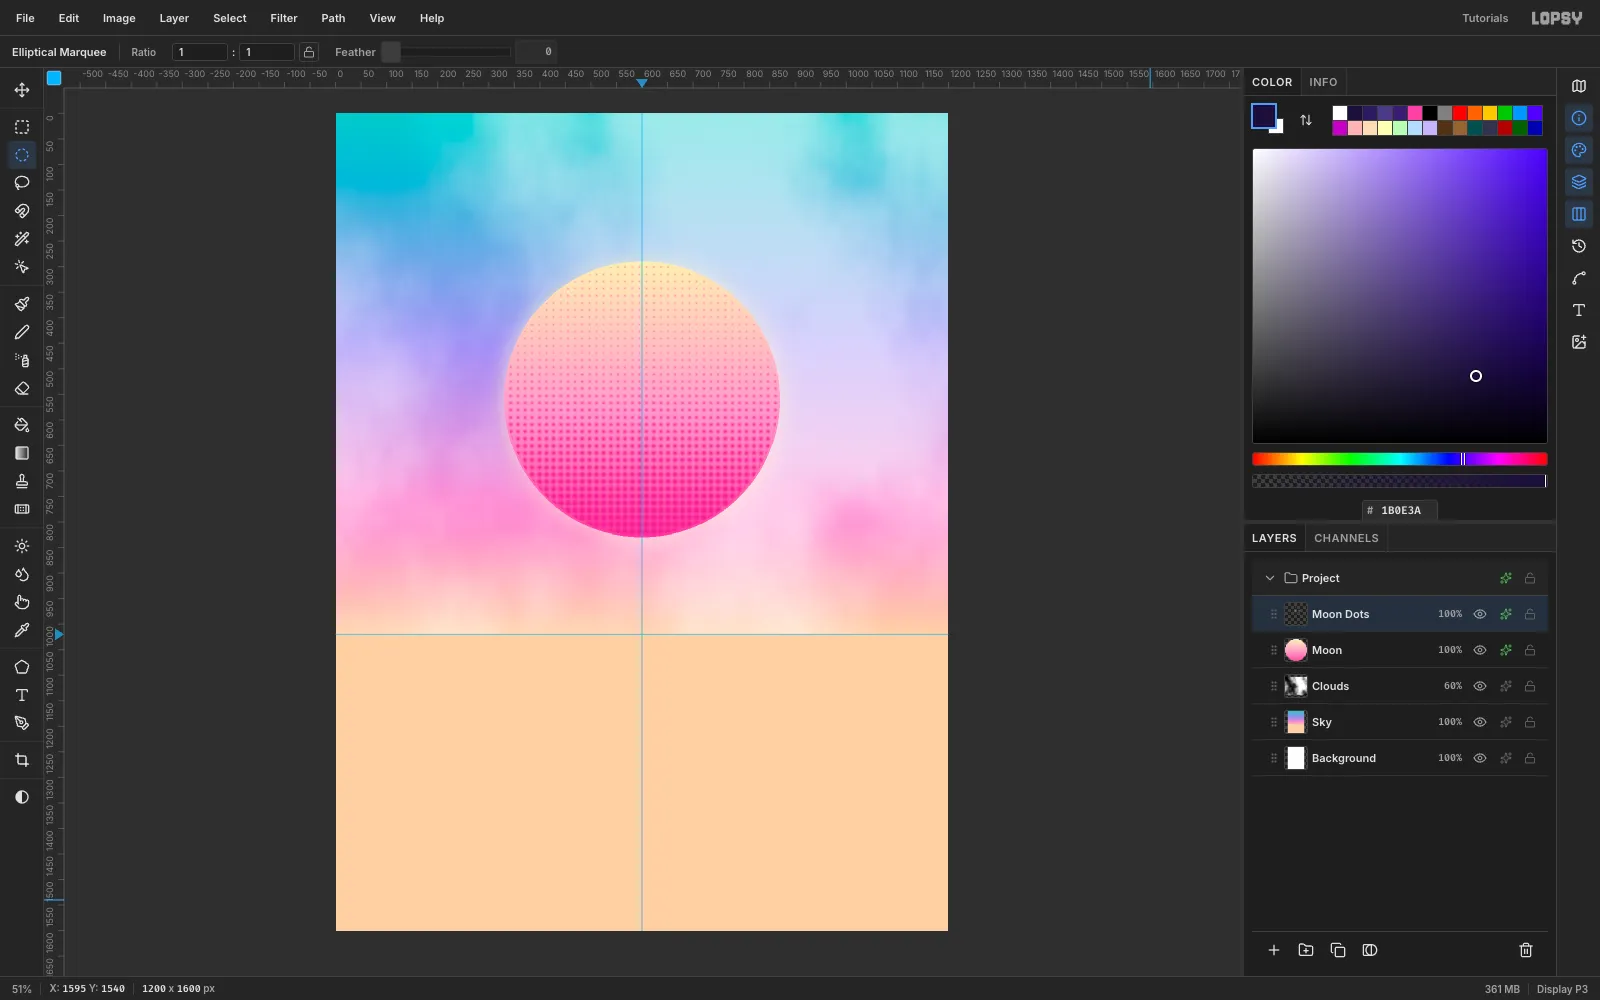
Enable Color Overlay on
Moon Dotsin#E23C93, so every dot turns a deep sunset pink.Dots near the rim poke out past the circle. Draw a slightly smaller circle (about 532 px) over the sun, choose Select → Inverse and press Delete. The edge is clean again.
-
Make a checkerboard tile
Add a temporary layer.
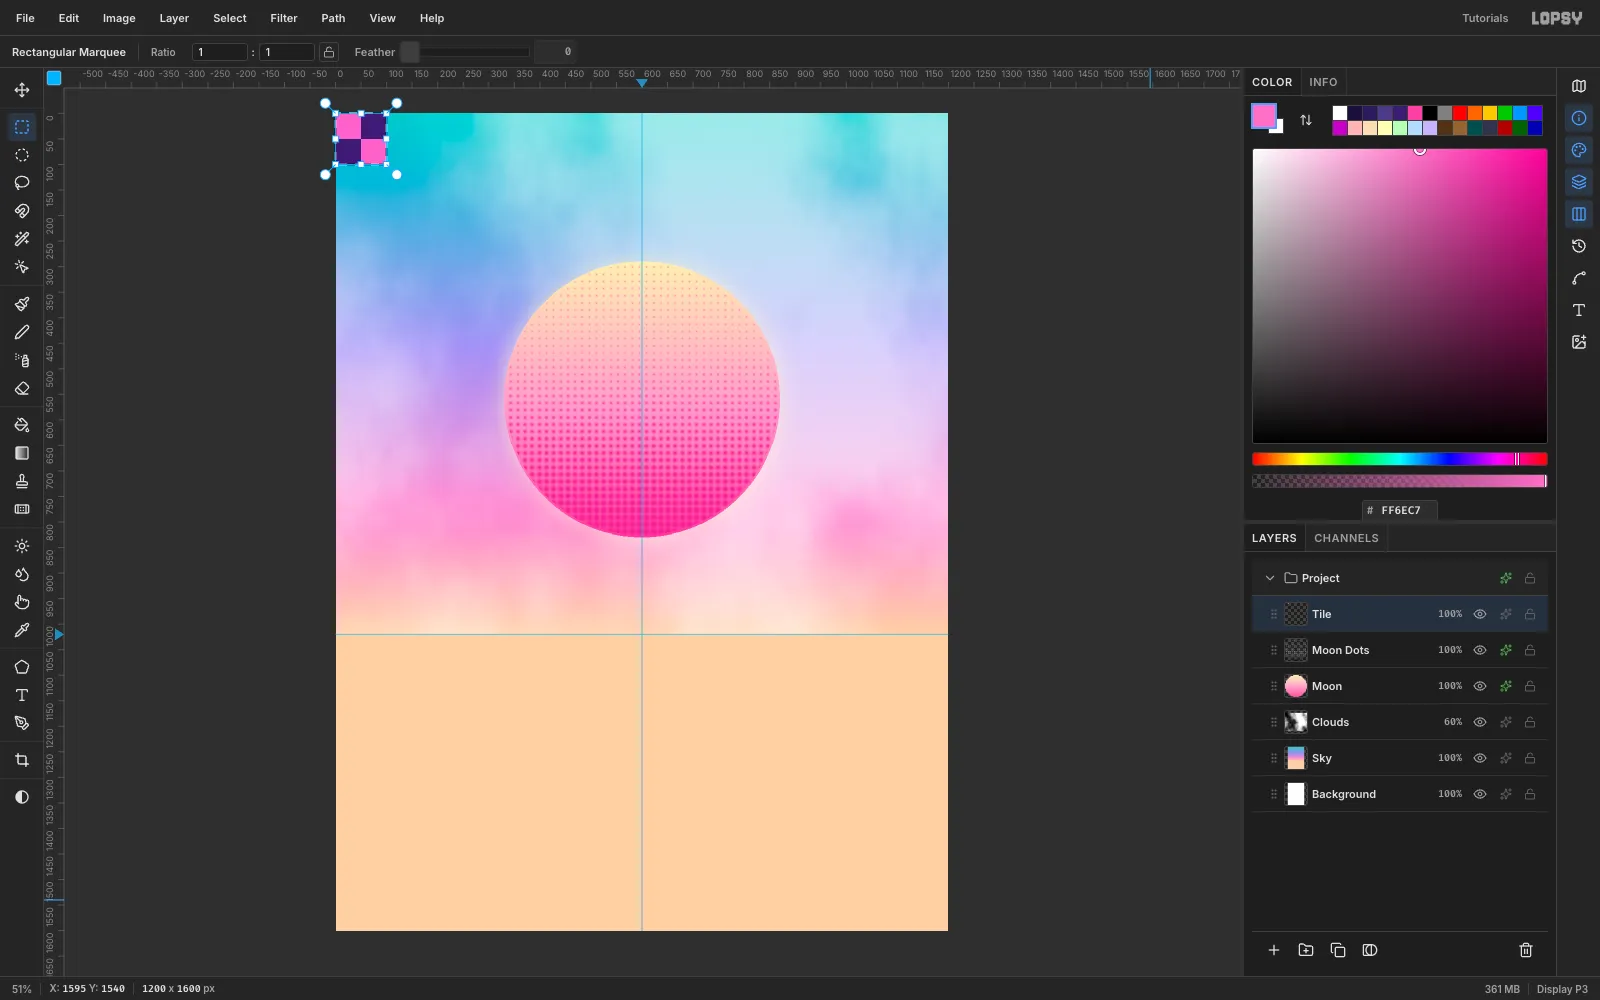
- Marquee a 100 × 100 square at the top-left corner and Edit → Fill it with deep purple
#3A1C71. - Fill the top-left and bottom-right 50 px quarters with pink
#FF6EC7. - Marquee the whole 100 × 100 tile and choose Edit → Define Pattern.
Delete the temporary layer.
- Marquee a 100 × 100 square at the top-left corner and Edit → Fill it with deep purple
-
Tilt the floor with Perspective
Click the
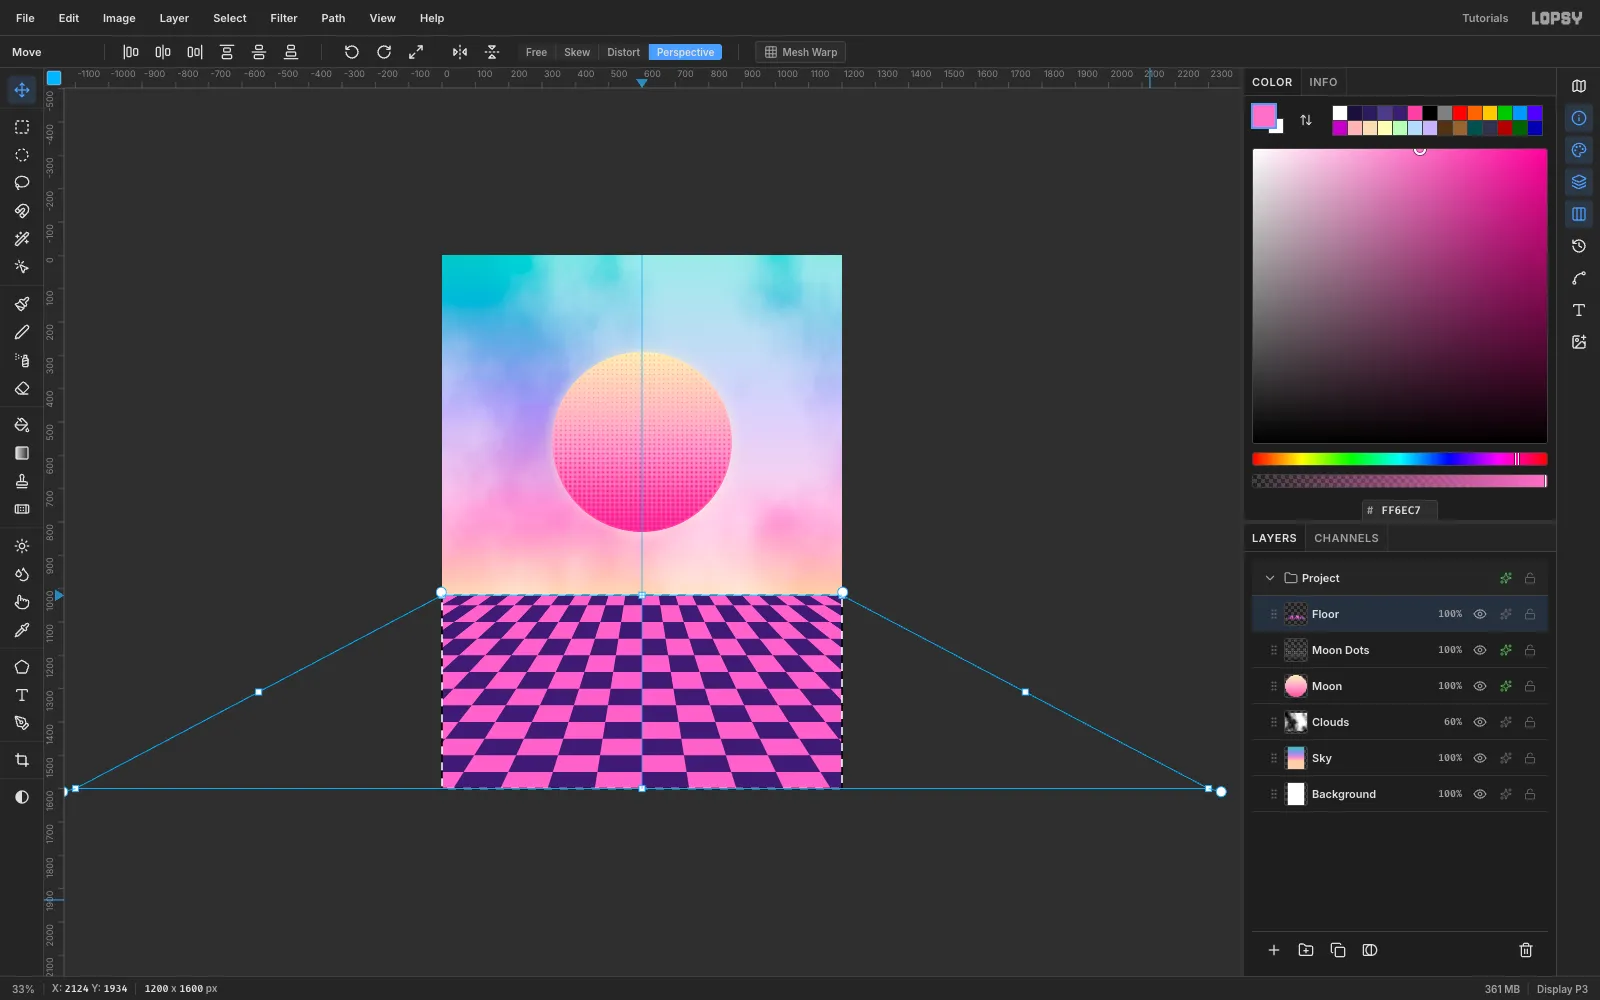
Moon Dotsrow, then add a layer namedFloor. Marquee from the horizon to the bottom of the canvas (0, 1020 to 1200, 1600). Choose Edit → Fill with Pattern…, pick the checker tile and click Apply.Zoom out with Cmd+- a couple of times so there's room around the canvas. Keep the marquee, switch to the Move tool and click Perspective in the Options bar. Drag the bottom-left corner about 1100 px out to the left. The bottom-right corner mirrors it, so the tiles now converge toward the horizon.
-
Commit the floor
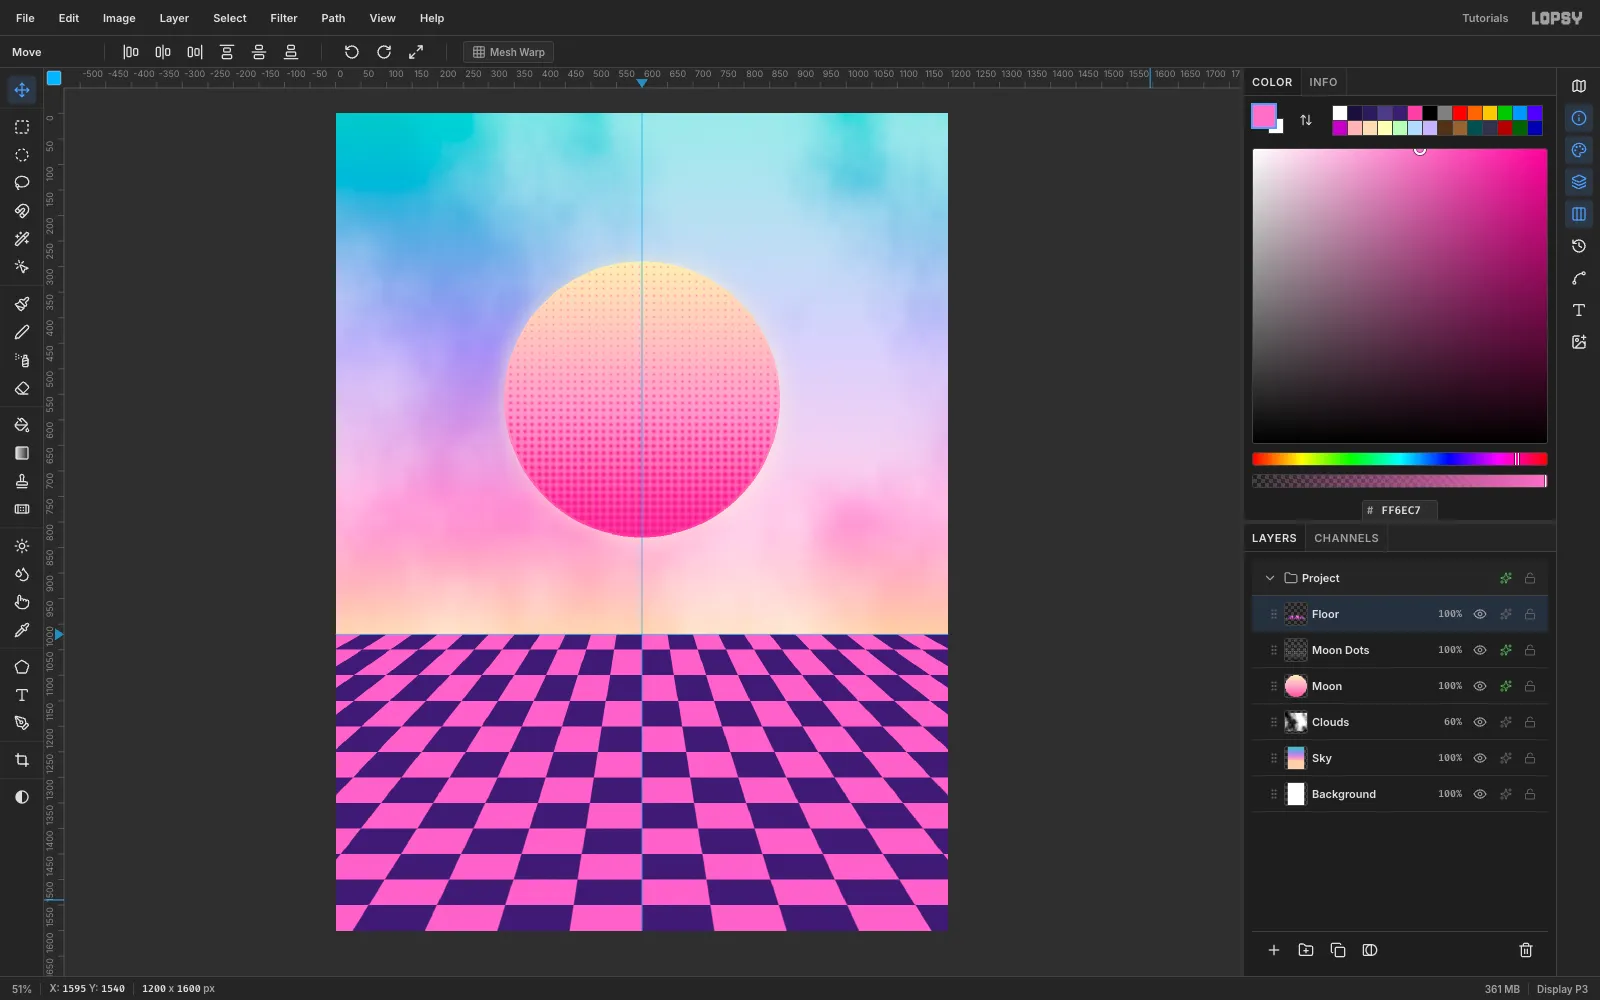
Click Free, then press Cmd+D to commit the transform. Press Cmd+0 to fit the canvas back in the window. Anything pulled past the canvas edge is simply cropped away.
-
Fade the floor into haze
Add a layer named
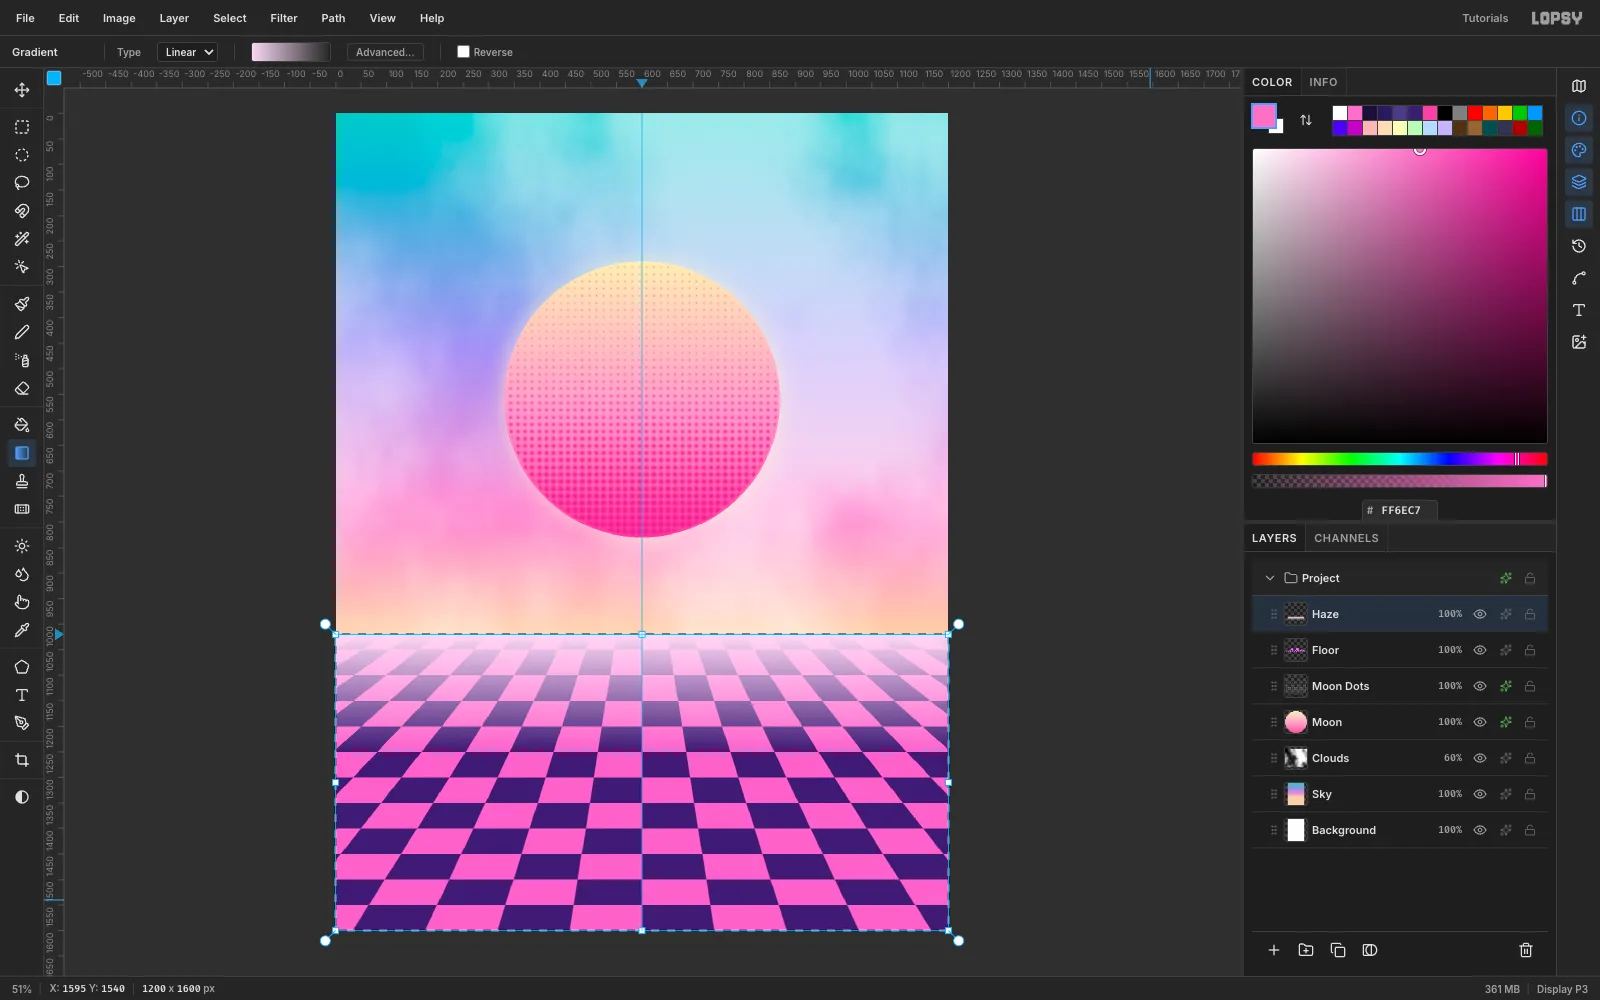
Haze. Set two gradient stops, both pale pink#F8D8F2. Select the right-hand stop and drag the Opacity bar under the colour picker all the way to transparent.Marquee the floor area, then drag the gradient from the horizon down to about y 1250. The far rows now dissolve into mist. Because the haze fades out, there's no hard seam between it and the floor.
-
Block in the palace
Click
Moon Dotsand add two layers:Towers, thenPalaceabove it.- On
Palace, marquee a band from y 800 down to the horizon and fill it with#F3E9FF. - Crenellate the roofline with the Lasso: make one small triangle every 60 px along y 800 and Edit → Fill each one.
- Fill a band from y 805 to 890 with pink
#FBD0E8. That's the Doge's Palace pink upper wall.
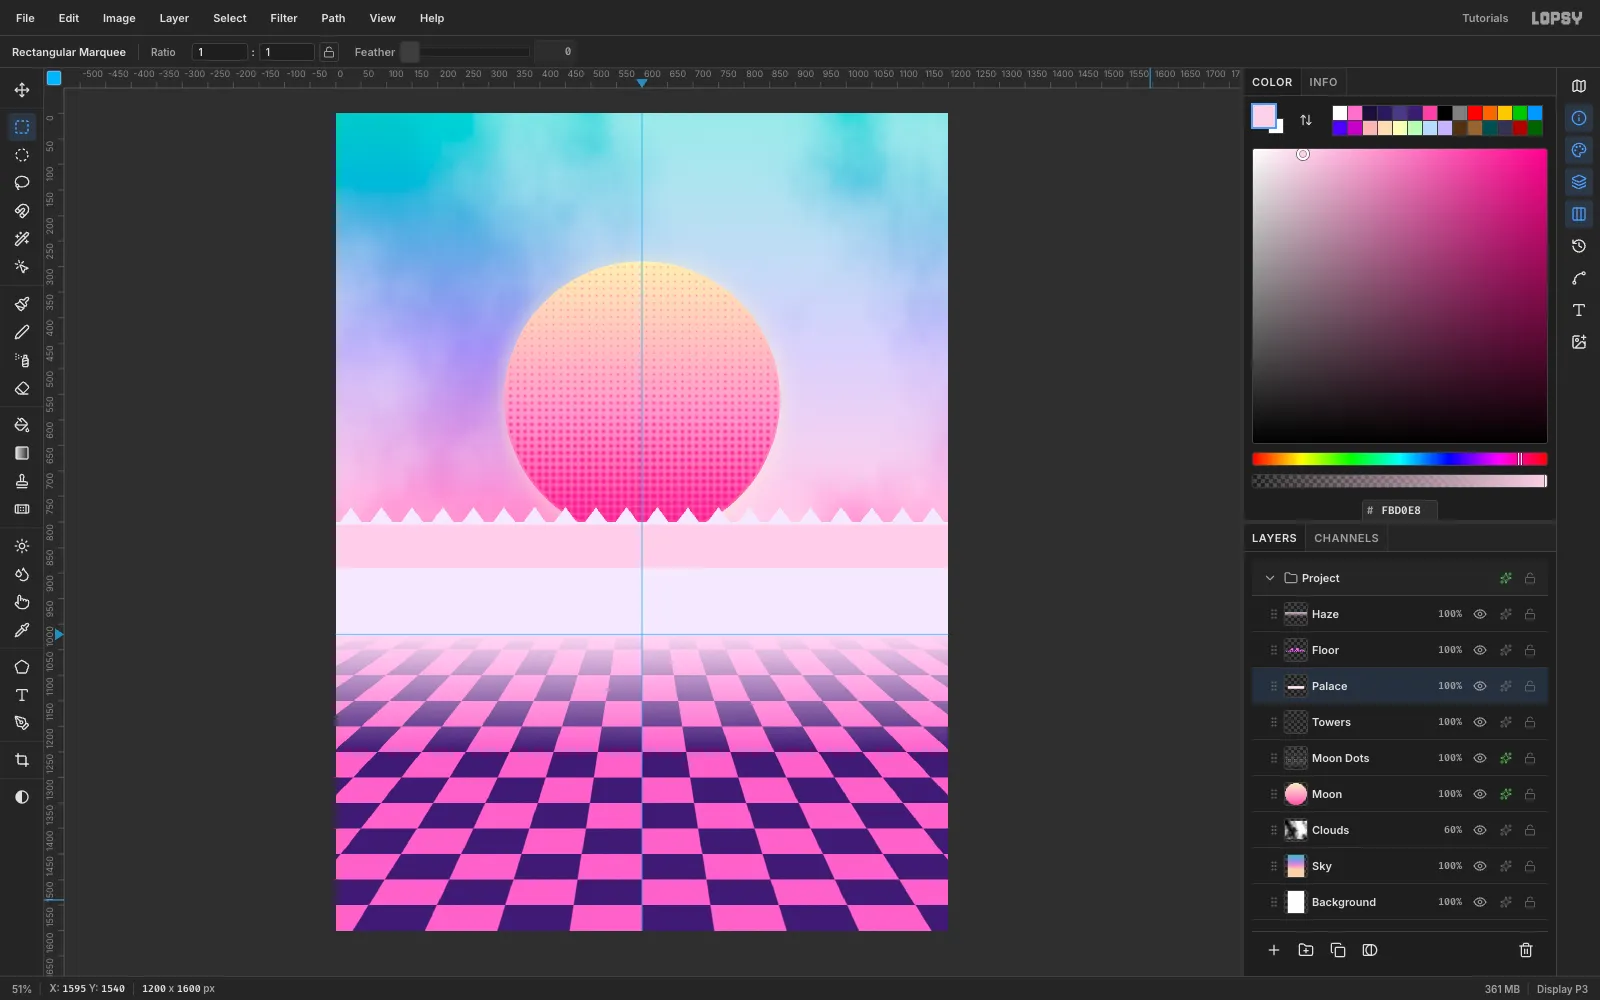
- On
-
Cut the arches
Each arch is a rectangle plus a circle on top, filled with the same colour:
- Wall windows: six tall windows in
#9C7FD6, each a 40 × 45 rectangle under a 40 px circle. - Upper loggia: small arches every 50 px, 26 px wide.
- Lower arcade: large 58 px arches every 86 px in deeper
#7E5DC4.
Finish with a white 8 px cornice at y 889 and a thin
#7A4FB0line on the horizon. The line gives the palace a clean base.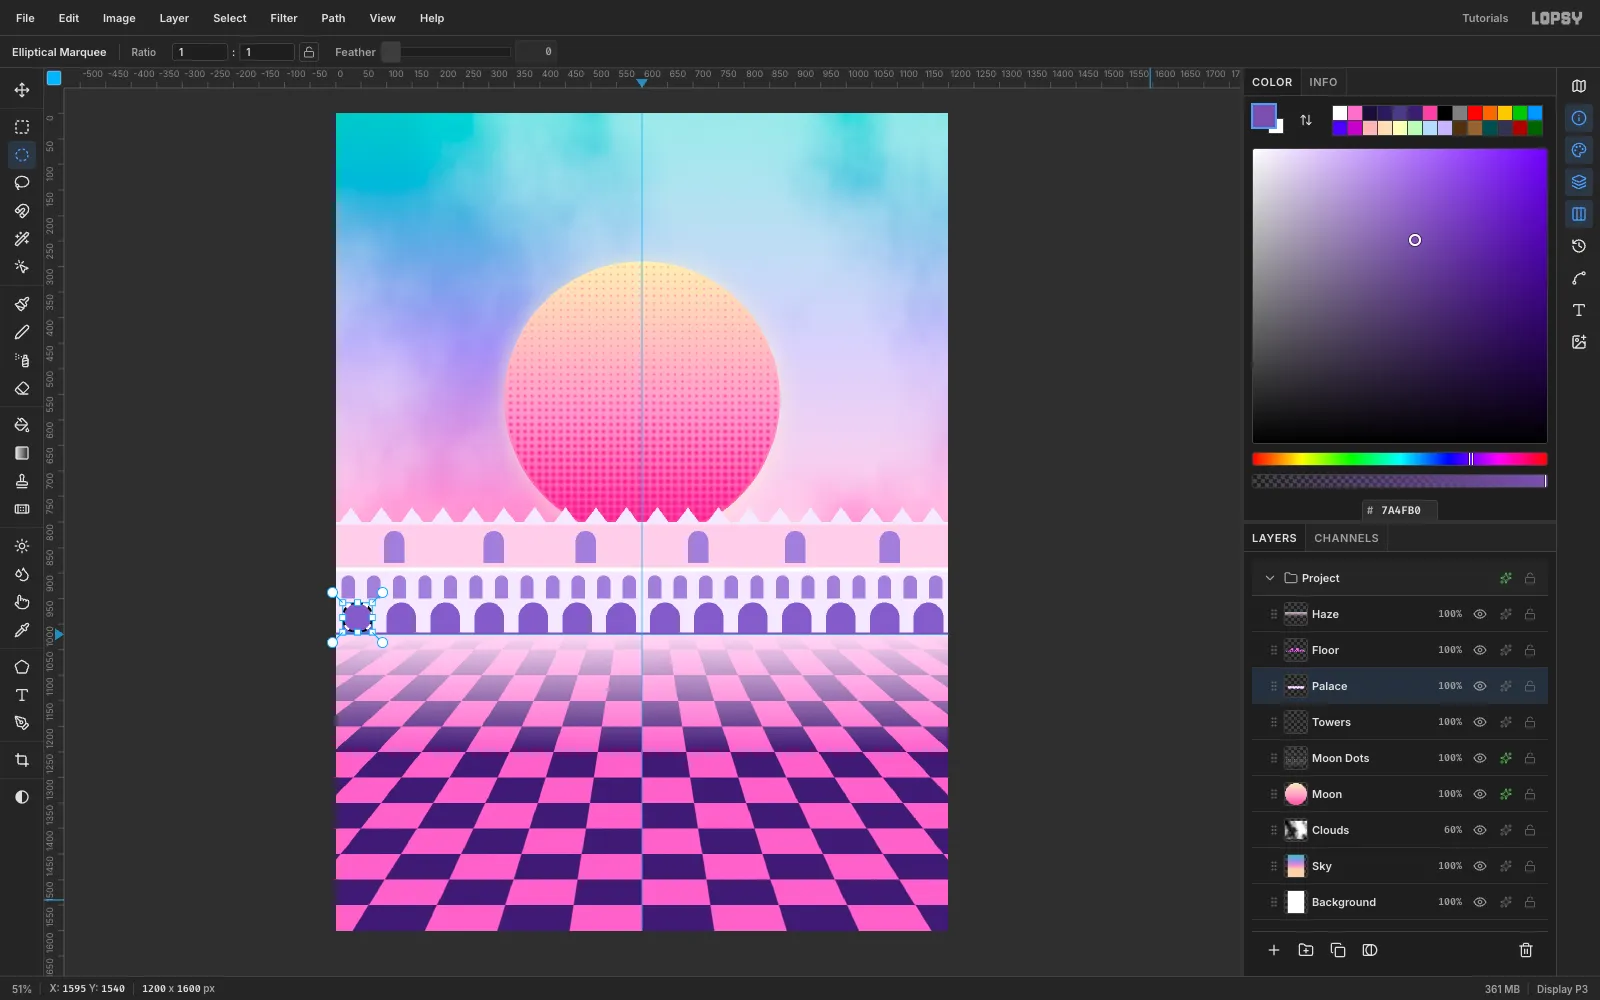
- Wall windows: six tall windows in
-
Add domes and the campanile
On
Towers, which sits behind the palace:- Domes: three teal
#3FC6C8domes made from elliptical fills, with a small lasso triangle on each for the onion point. Add gold#FFE08Afinials: a thin rectangle plus a small circle. - Campanile: a pink
#F48CC0shaft at x 995–1091 with two darker pilaster strips, a lavender belfry with three arches, a lasso-filled teal spire, and a gold angel at the tip.
The tower sits far enough right to leave room for the subtitle later.
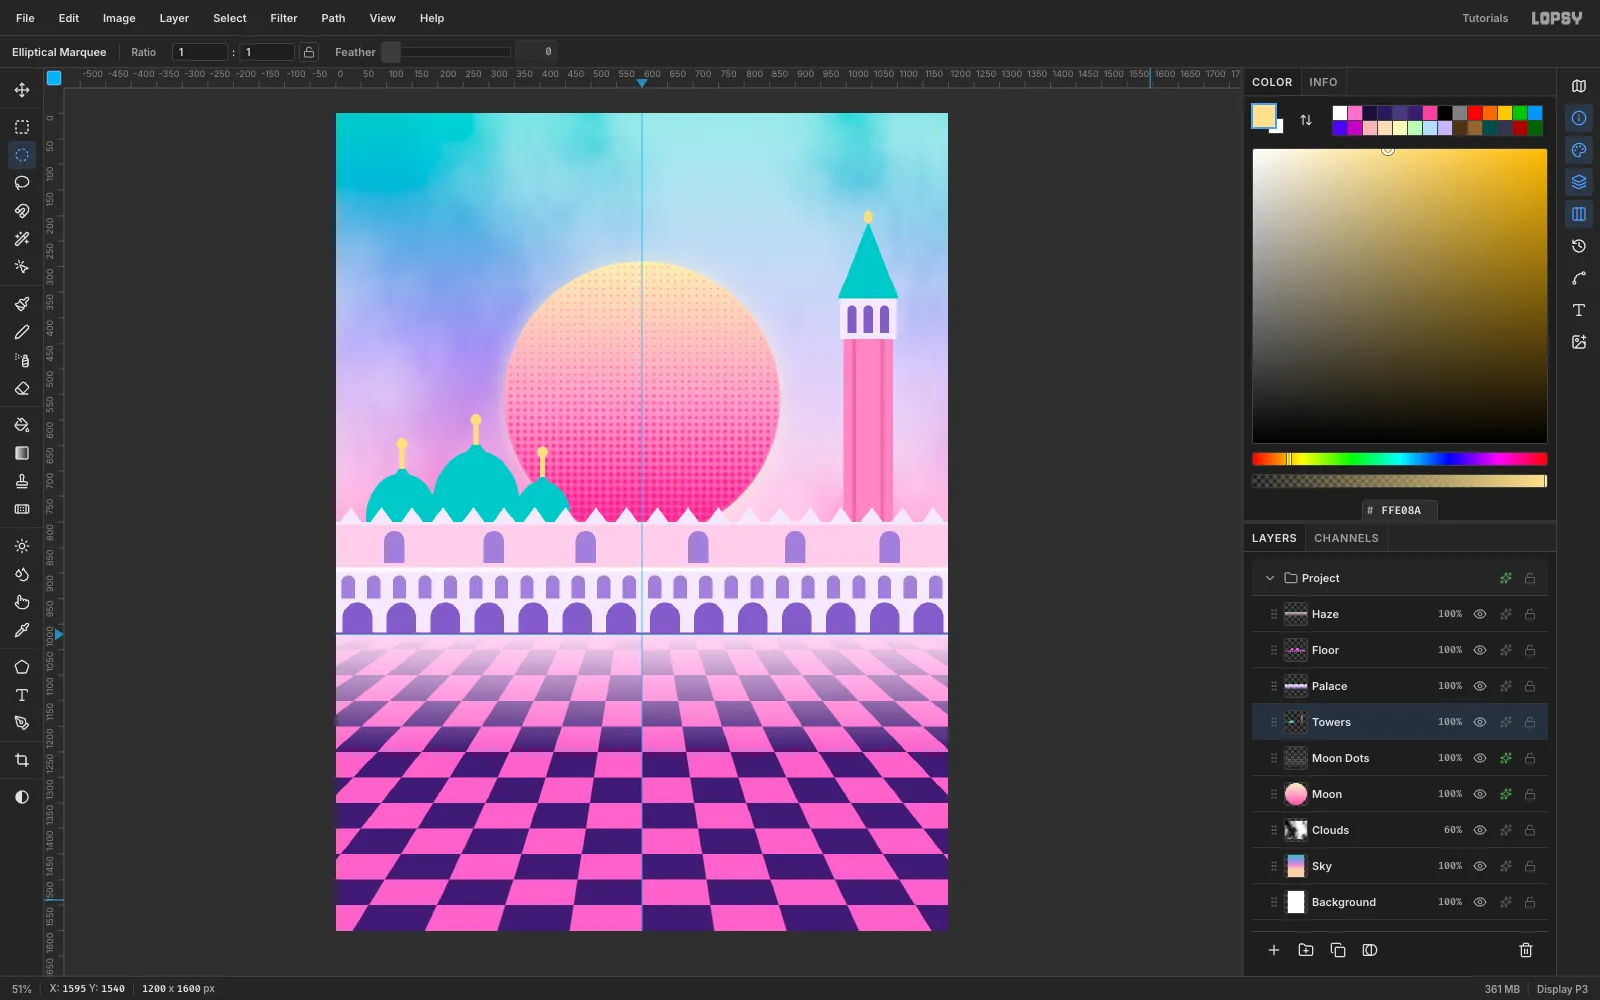
- Domes: three teal
-
Group the skyline
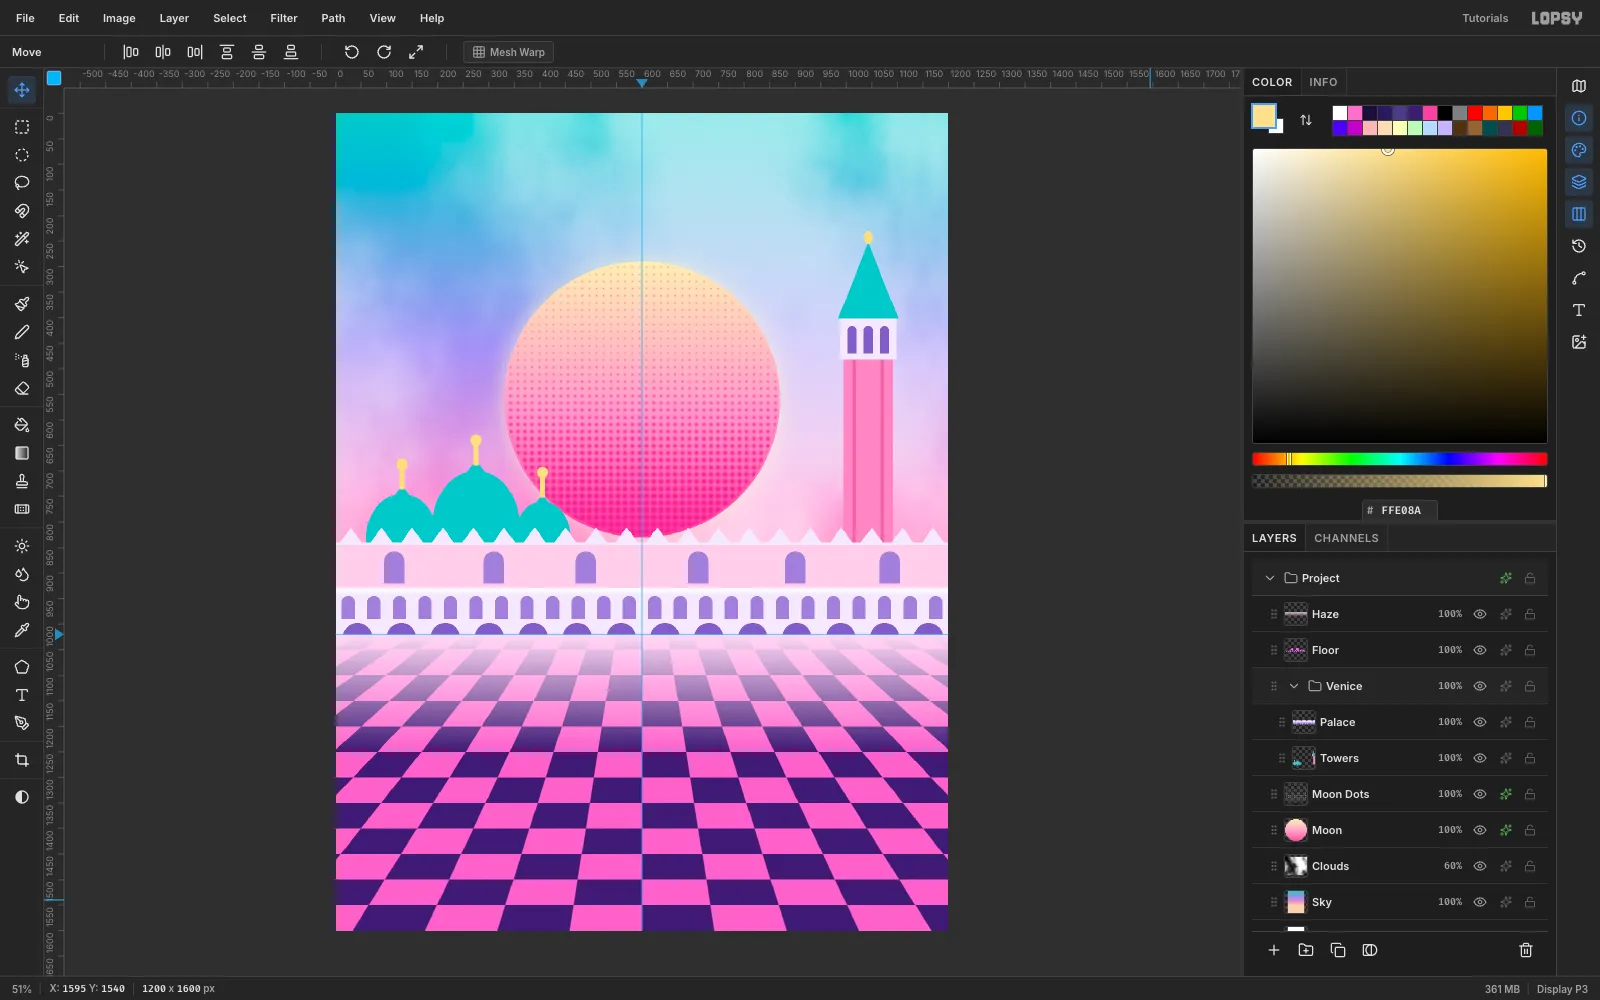
Click
Towers, Shift-clickPalaceand choose Layer → Group Layers. Rename the groupVenice.To try it out, click the group and drag with the Move tool, and the whole skyline moves together. Press Cmd+Z to put it back. Undo and redo restore it pixel-for-pixel.
-
Draw the gondola hull
Click
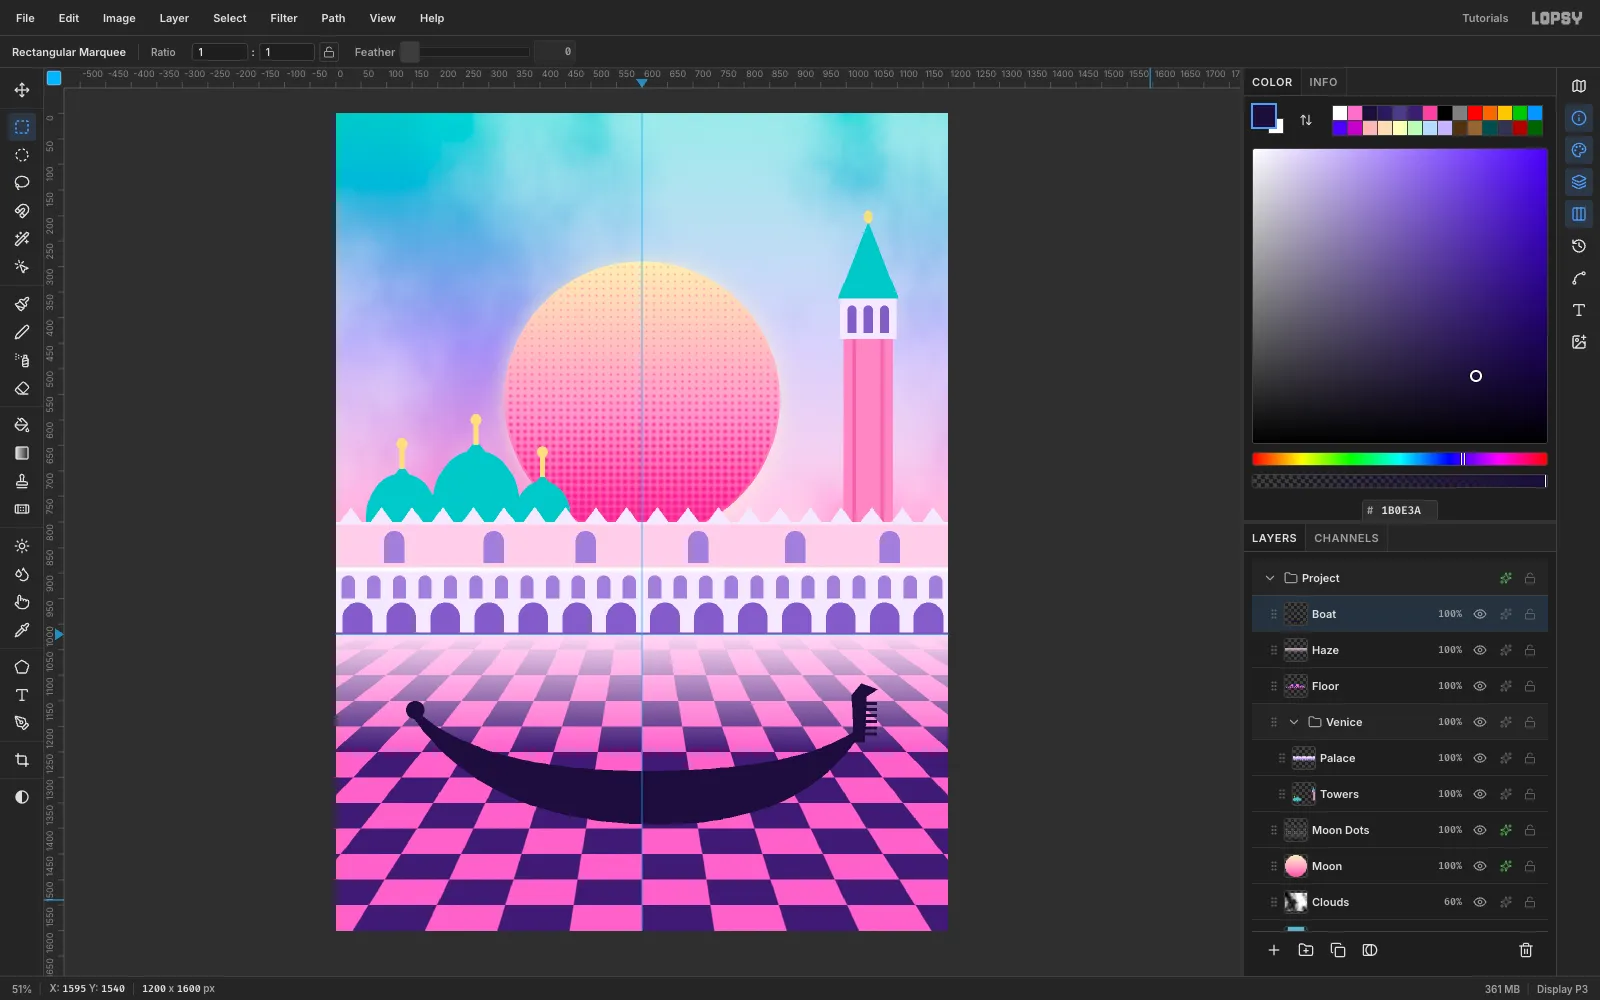
Hazeand add a layer namedBoat. With the Lasso, trace a long crescent that sits low in the middle and rises at both ends, and fill it with near-black purple#1B0E3A. Add:- a small circle for the stern curl
- a lasso blade for the bow ferro, with six short 6 px teeth made from marquee rectangles
-
Add the gondolier
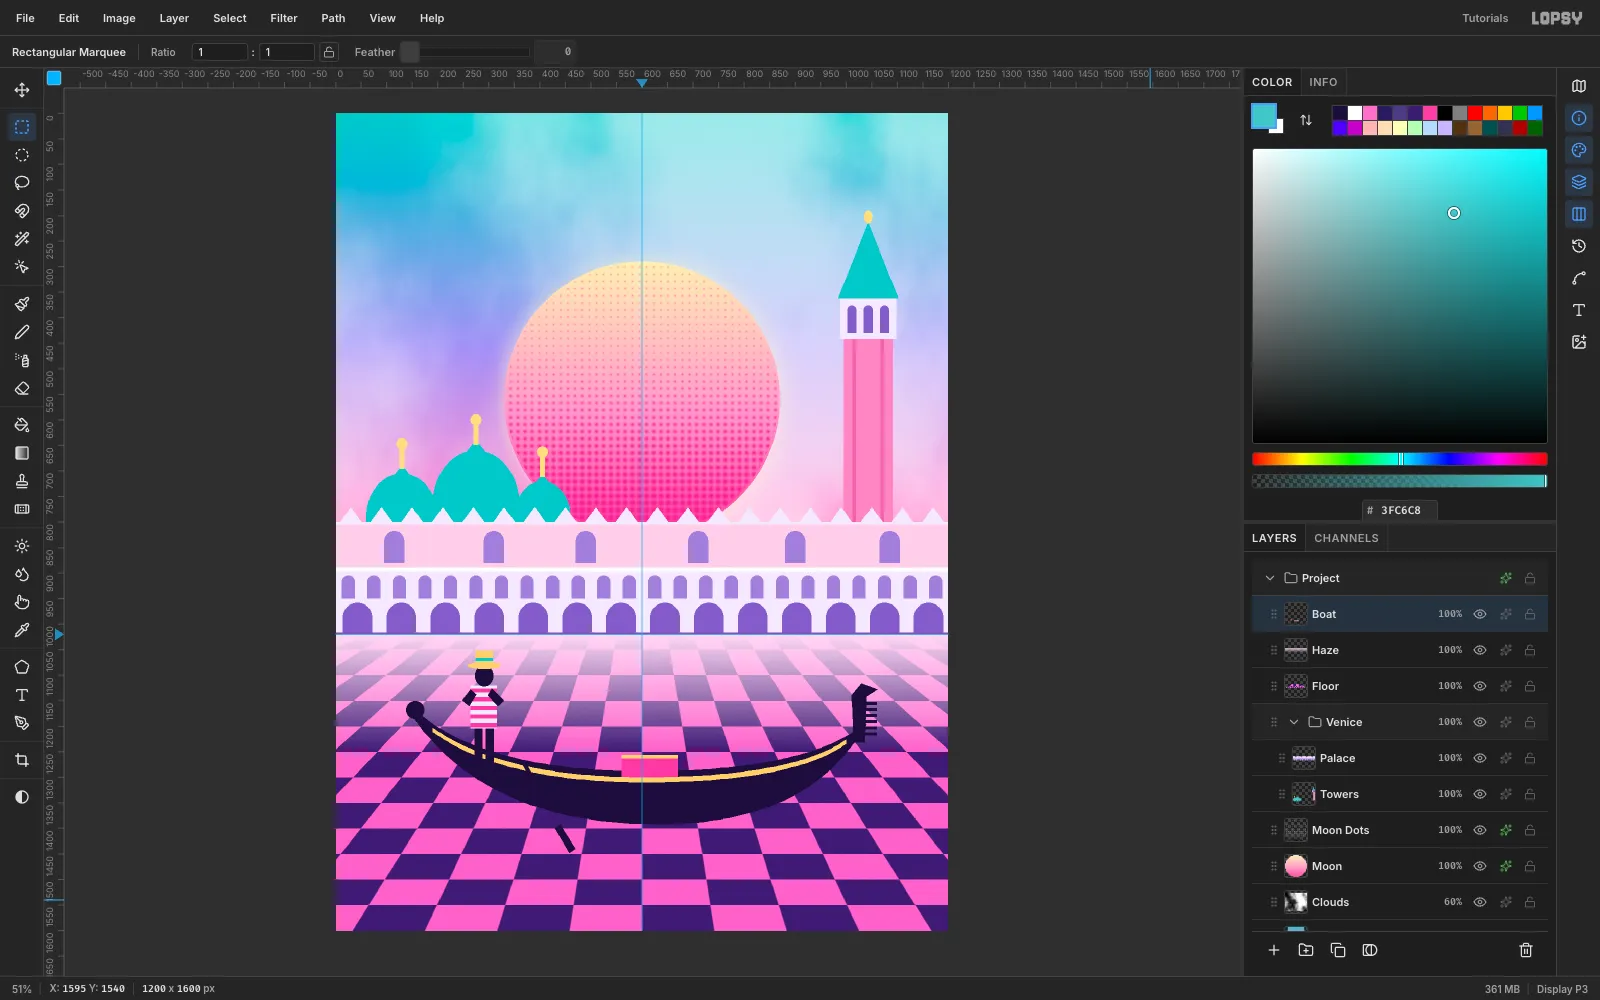
- Fill a pink
#FF4FA3velvet seat in the middle of the boat. - Lasso a thin gold
#FFD27Arail along the gunwale so it overlaps the bottom of the seat. - Build the gondolier from simple shapes:
- two dark legs
- a white torso with 8 px pink stripes every 17 px
- small lasso arms
- a round head
- a straw boater: a gold brim ellipse and crown, with a teal ribbon
- Press Cmd+D so no selection is left active.
- Fill a pink
-
Outline it in neon
Open
Boat's effects drawer:- Enable Stroke in cyan
#5CF6FFwith Width4, and click the outside position. - Enable Outer Glow in the same cyan with Size
28and Opacity75.
The boat now reads like a neon sign against the busy floor.
Under the boat, add a
Gondola Shadowlayer. Set the marquee Feather to30, fill a wide ellipse in#2A1450and set the layer to Multiply at 90 %. Reset Feather to0.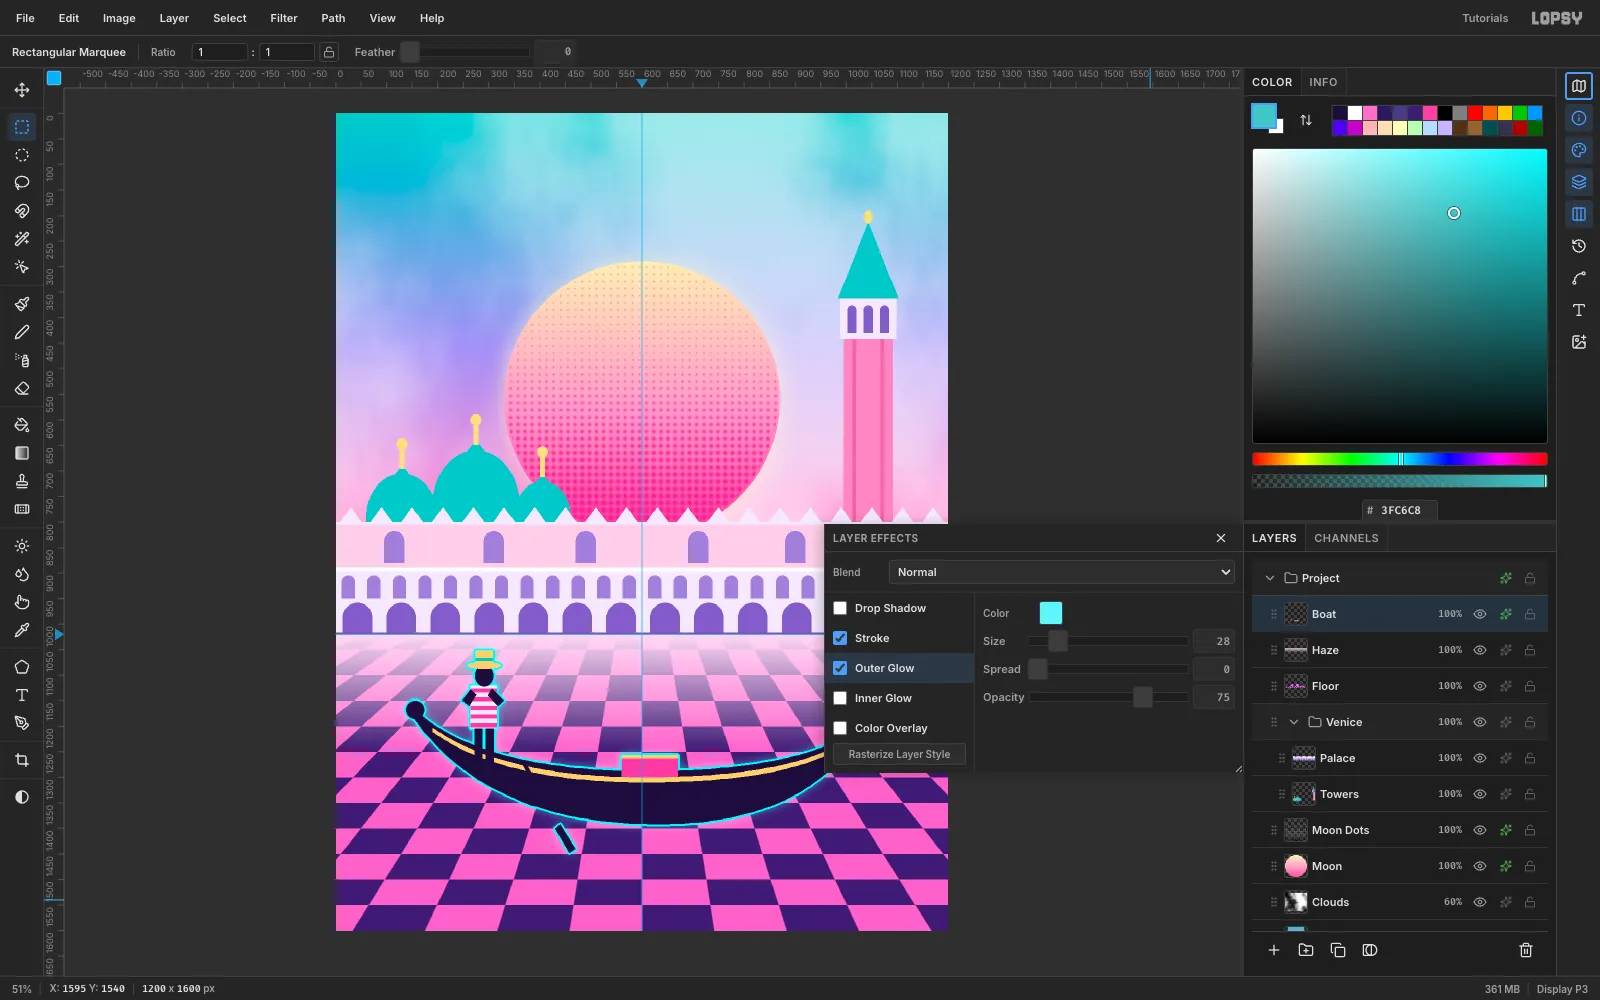
- Enable Stroke in cyan
-
Rock the boat
Click
Boatand marquee tightly around it, leaving a couple of spare pixels. Switch to Move, then drag just outside the top-right corner handle to rotate it about 3° counter-clockwise. Press Cmd+D to commit. The small tilt makes the gondola look like it's afloat, not parked.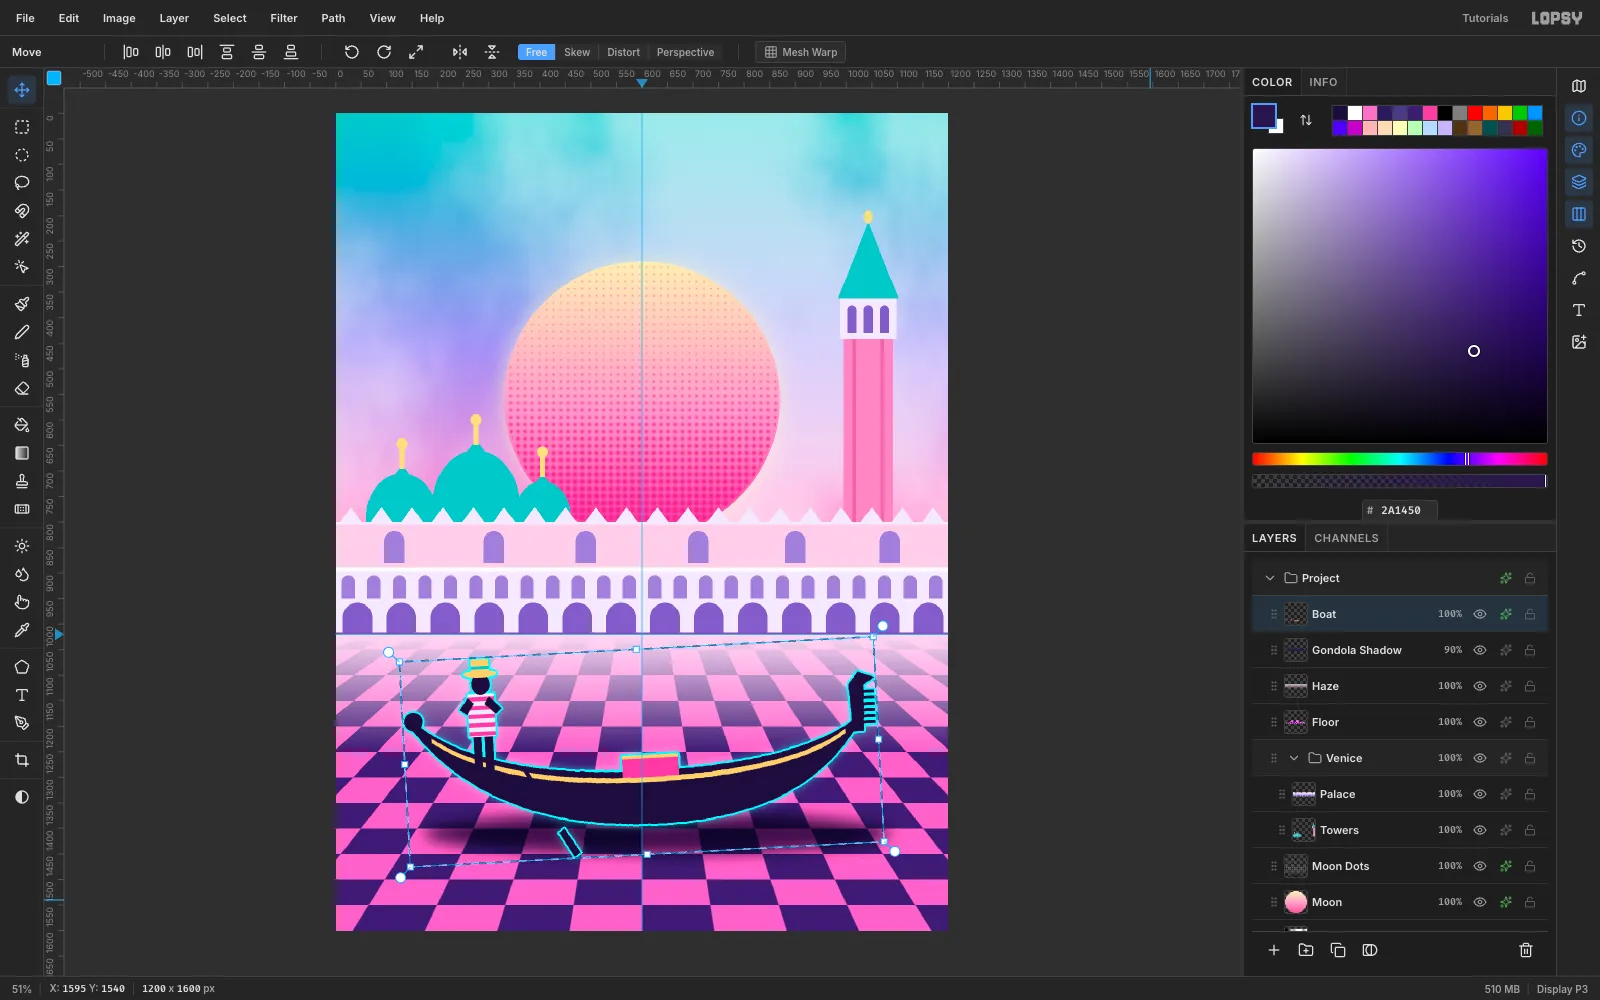
-
Give the gondolier an oar
With no selection active, pick the Brush at Size
9and Hardness100in the dark purple. Click above the gondolier's hands, then Shift-click down past the hull to draw a straight oar.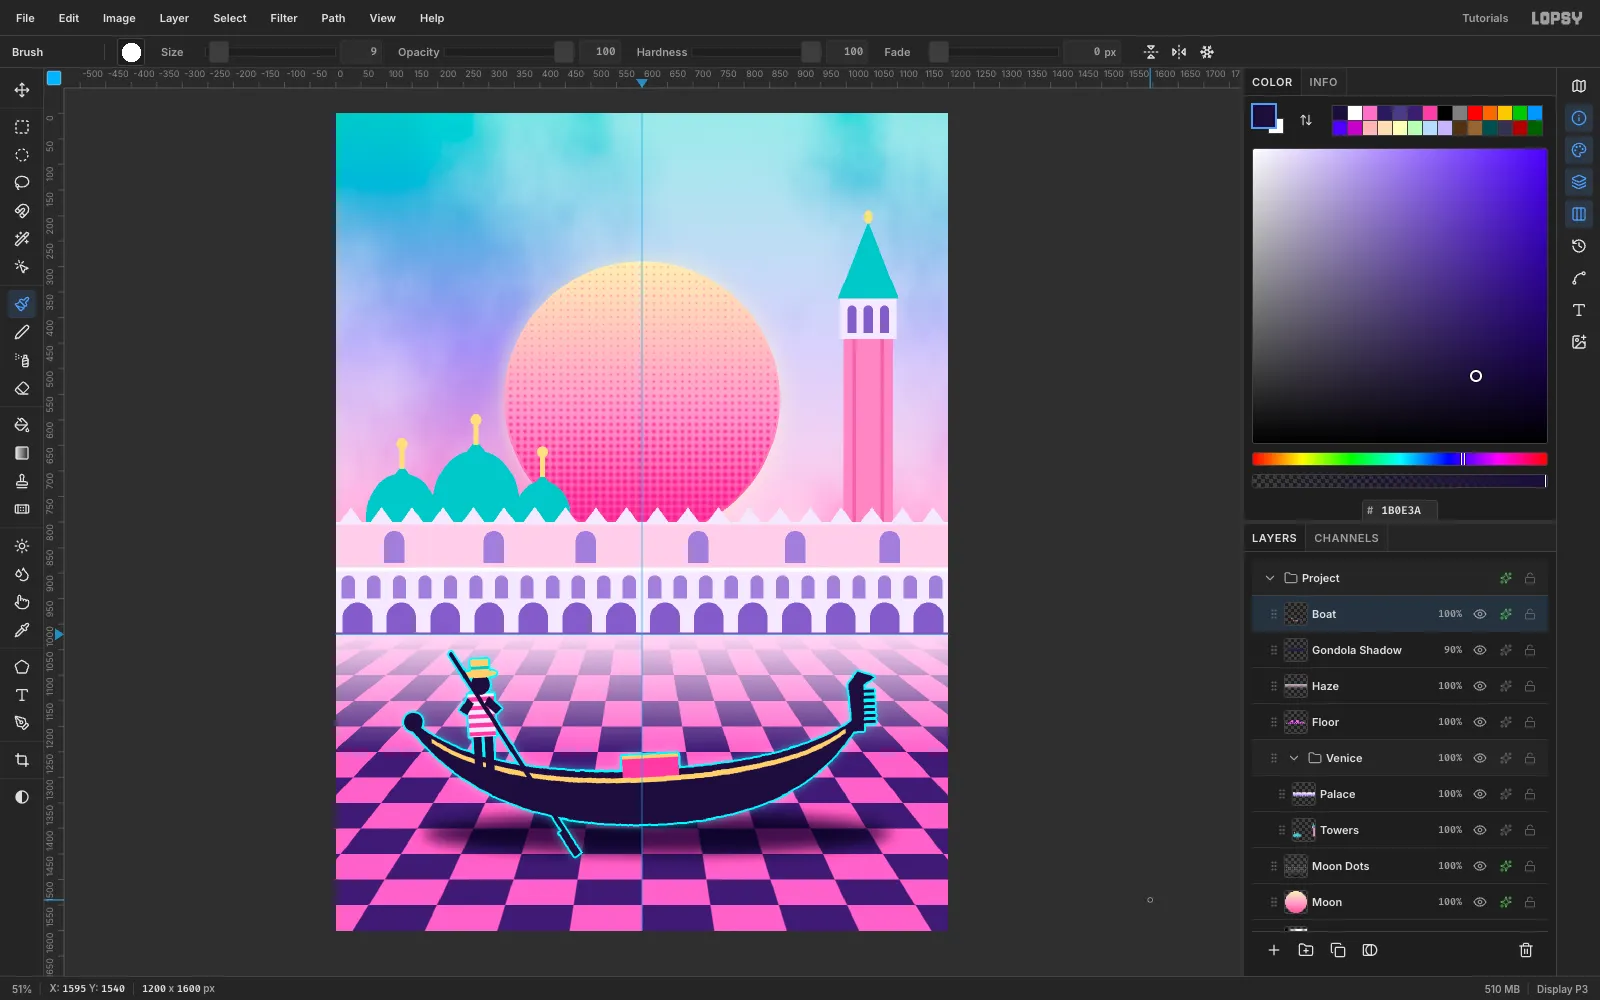
-
Pattern-fill striped mooring poles
Venice's striped pali poles are just another pattern:
- On a temporary layer, make a 40 × 40 tile: white on the bottom half, teal
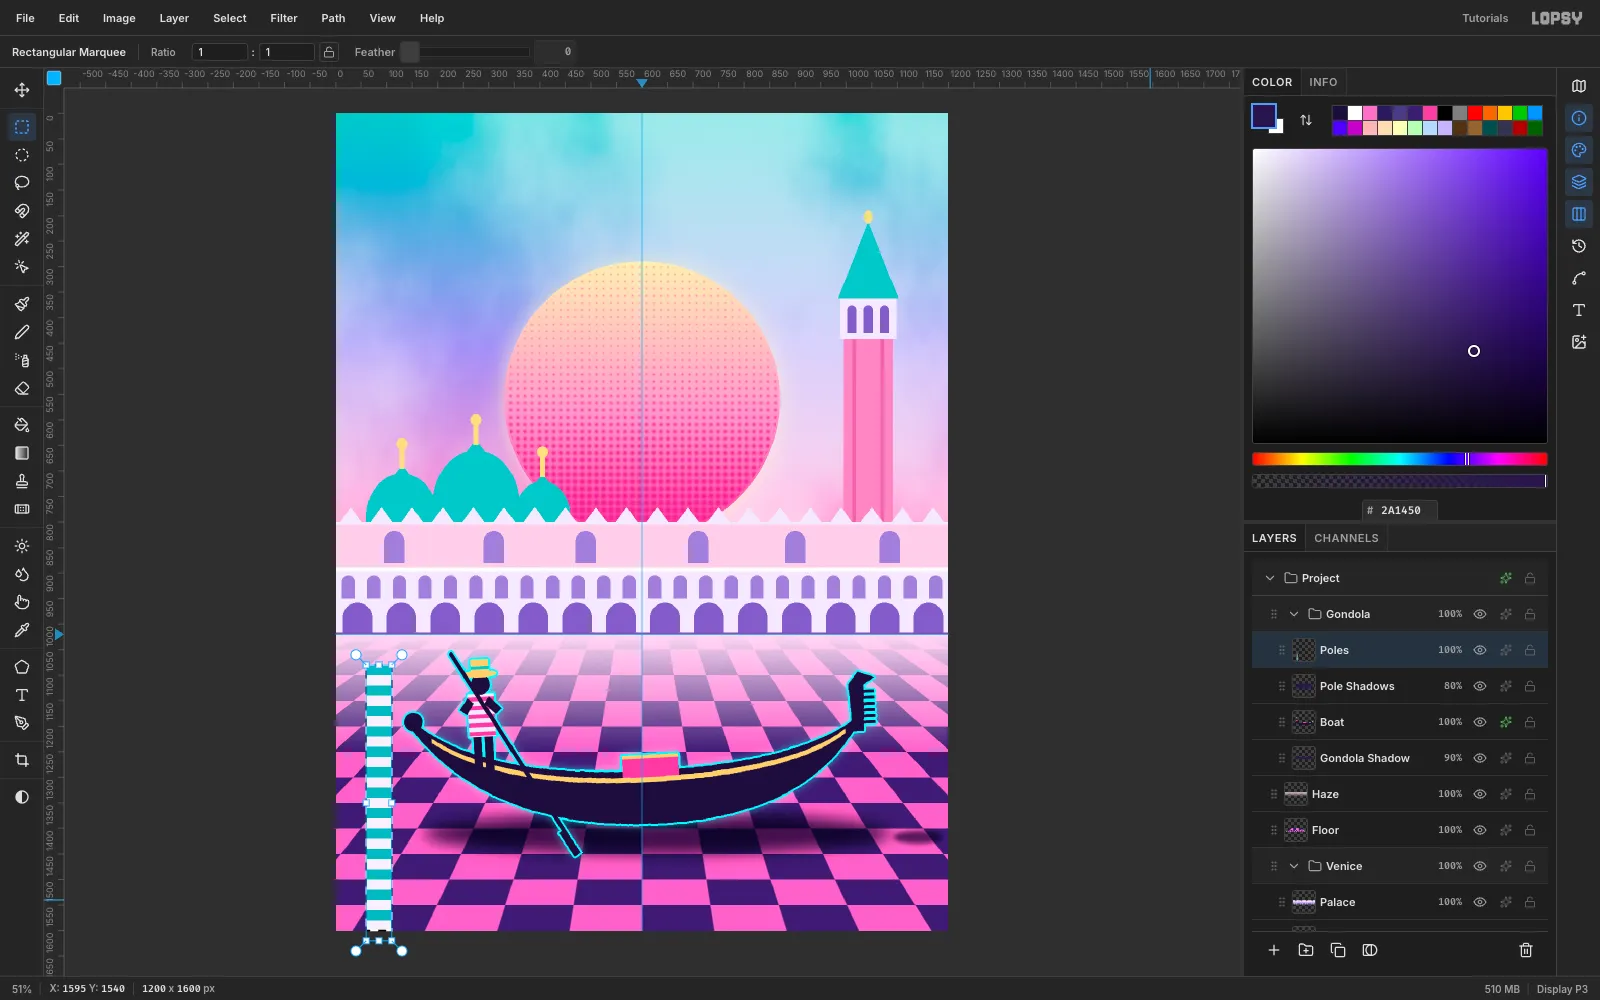
#2FB8C0on the top half. Define Pattern, then delete the layer. - Add a
Poleslayer. Marquee a 50 px-wide column at the bottom left and Fill with Pattern… with it. - Add two thinner poles on the right at Scale
50, running down to about y 1420. - Cap each pole with a teal ellipse. Put soft feathered Multiply shadows at the base of the right-hand poles.
- On a temporary layer, make a 40 × 40 tile: white on the bottom half, teal
-
Lean the foreground pole
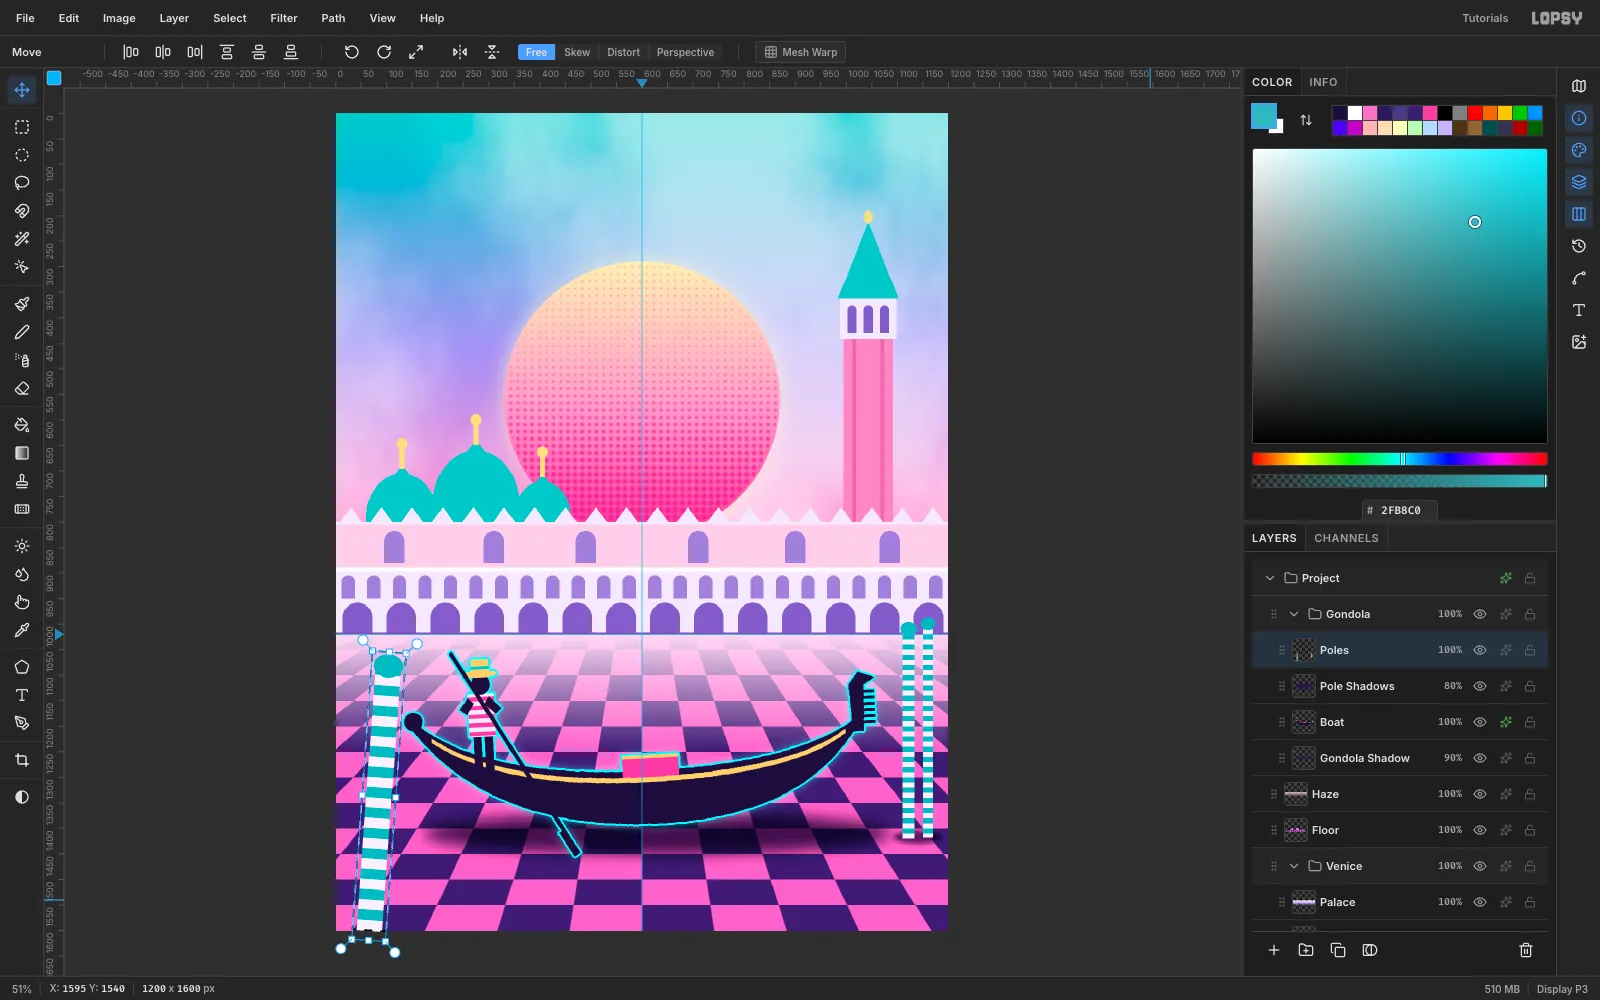
Marquee just the left pole and rotate it about 4° clockwise with the Move tool's rotate handle. Only the selected pixels turn, so the right-hand poles stay upright. Press Cmd+D to commit.
-
Set the Shrikhand headline
Add an empty layer, drag it to the top of the Layers panel, and click it. New text lands above the active layer, so this puts the type above everything else.
Pick the Text tool, set Size to
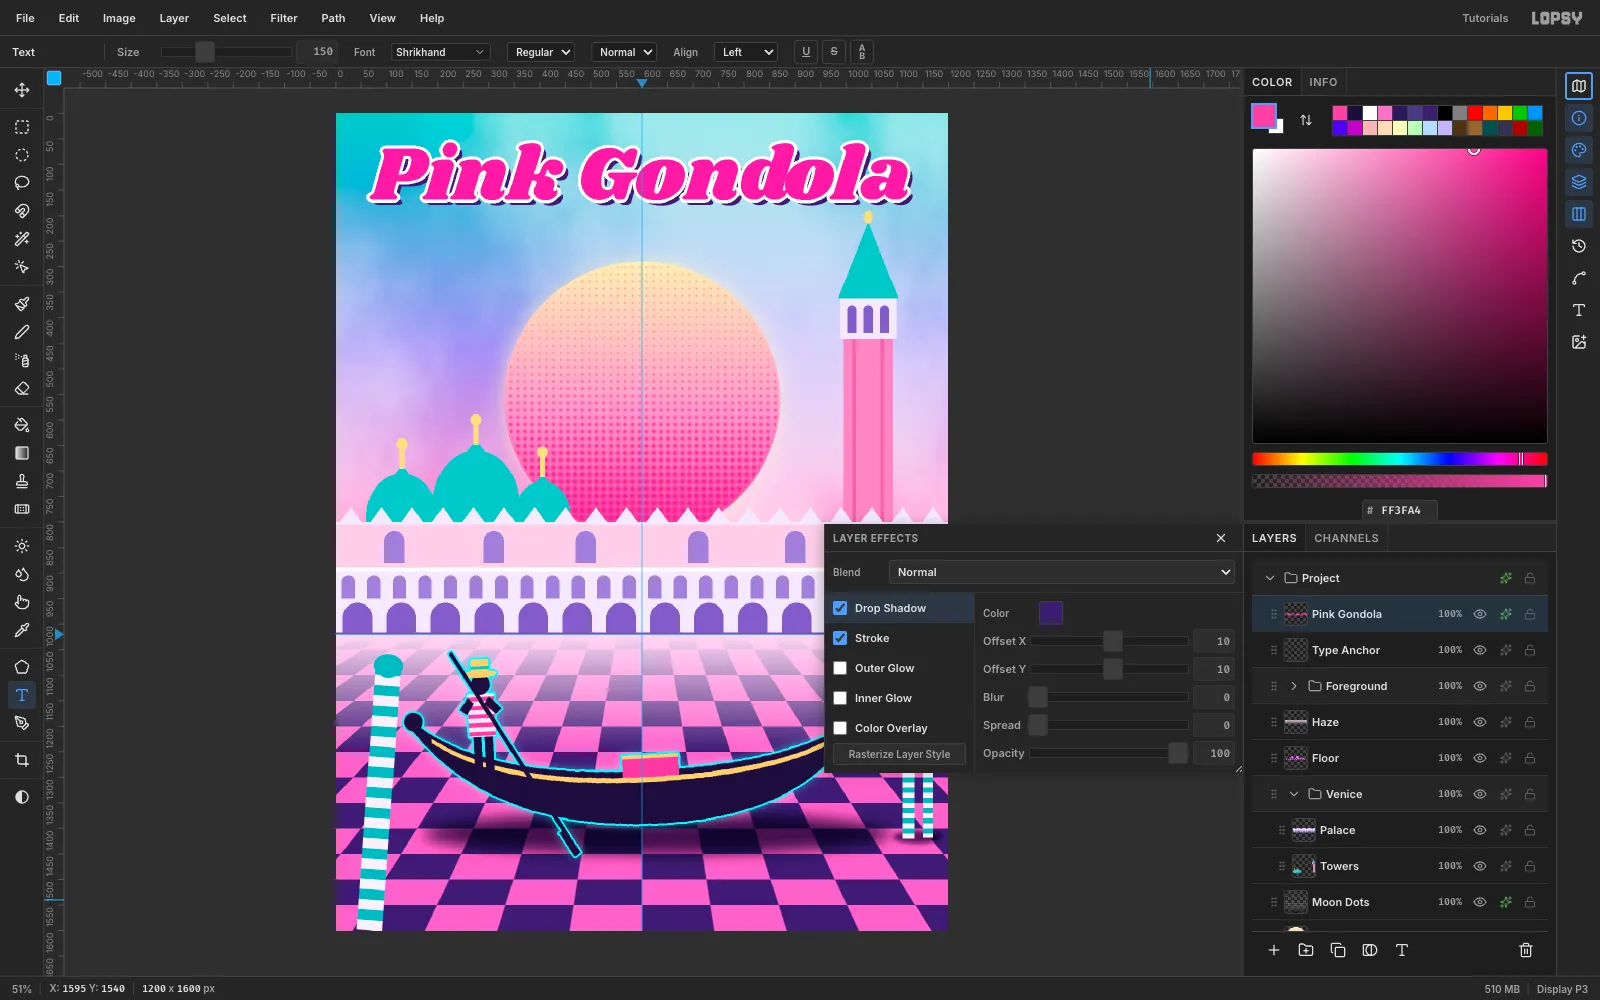
150, choose Shrikhand in the font browser and set the colour to#FF3FA4. Click near the top-left of the sky and typePink Gondola. Press Tab to commit.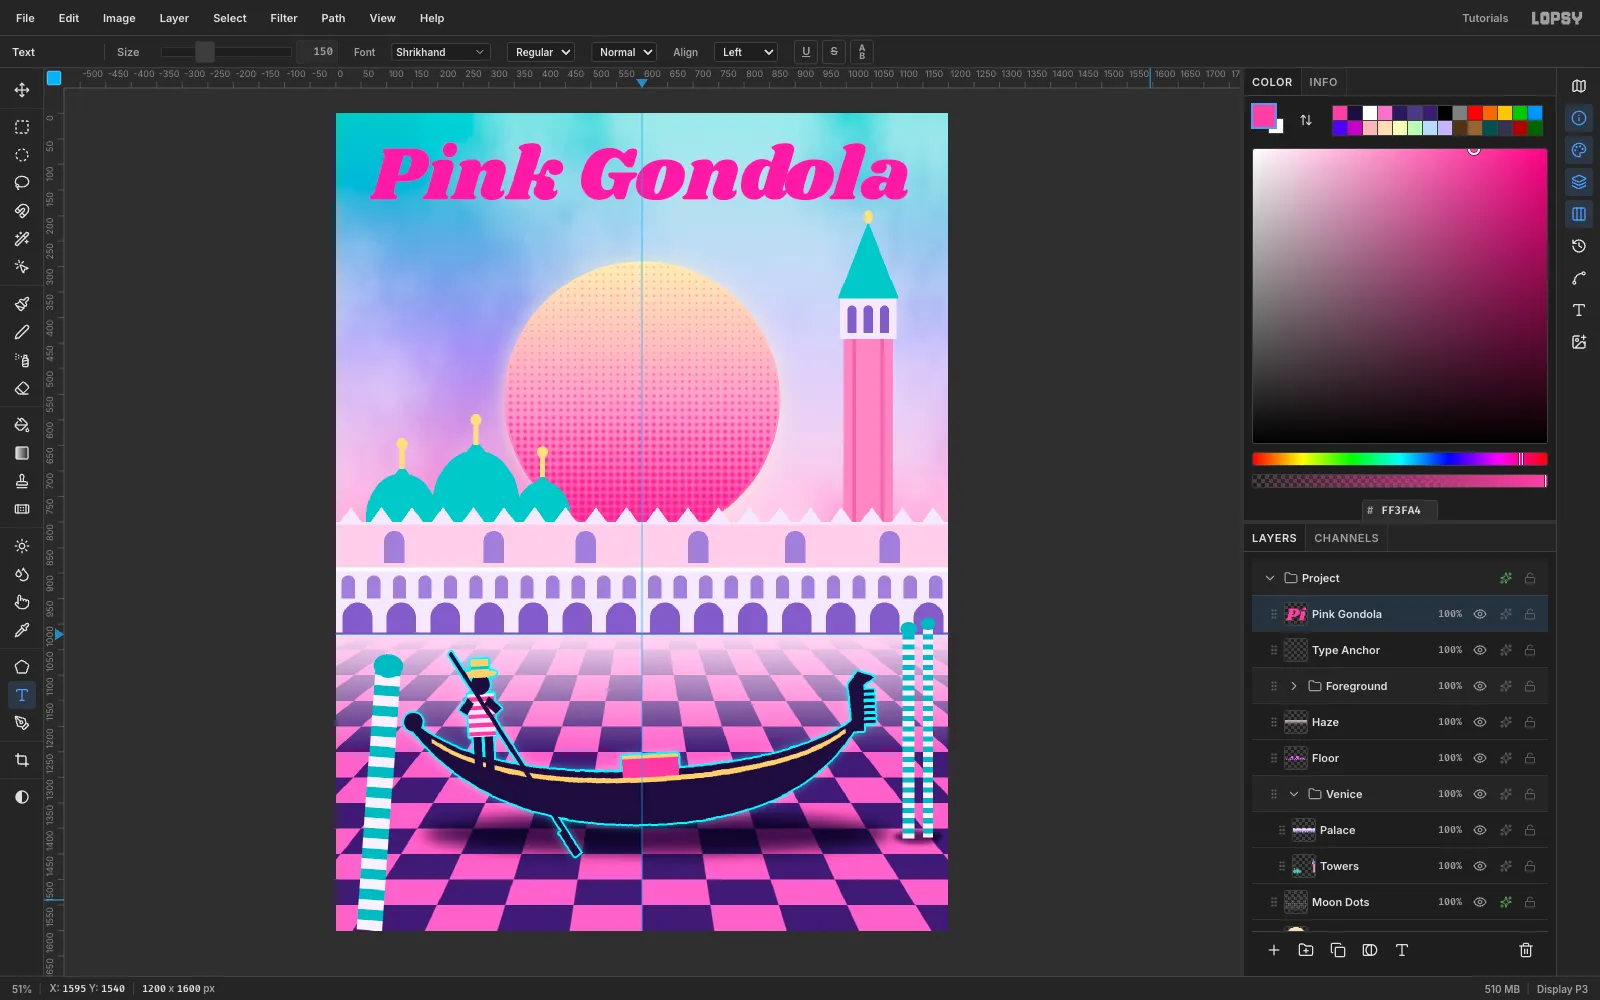
-
Style the headline
Open the headline's effects drawer:
- Enable an outside Stroke in white with Width
6. - Enable Drop Shadow in
#3A1C71with Offset X and Offset Y10, Blur0and Opacity100.
The hard purple shadow stands out against the teal sky. A cyan shadow would disappear into it.
- Enable an outside Stroke in white with Width
-
Add the full-width subtitle
Vaporwave loves full-width characters. Copy
VENEZIA ・ NIGHT CRUISE ・ 1989to your clipboard. Click the anchor layer, set Size26, choose DotGothic16 and white, click in empty sky, then paste with Cmd+V and press Tab.Give it an outside
#3A1C71Stroke of3, so the thin letters stay readable over the scanlines you'll add later. Then drag it with Move until it's centred under the headline, clear of the spire.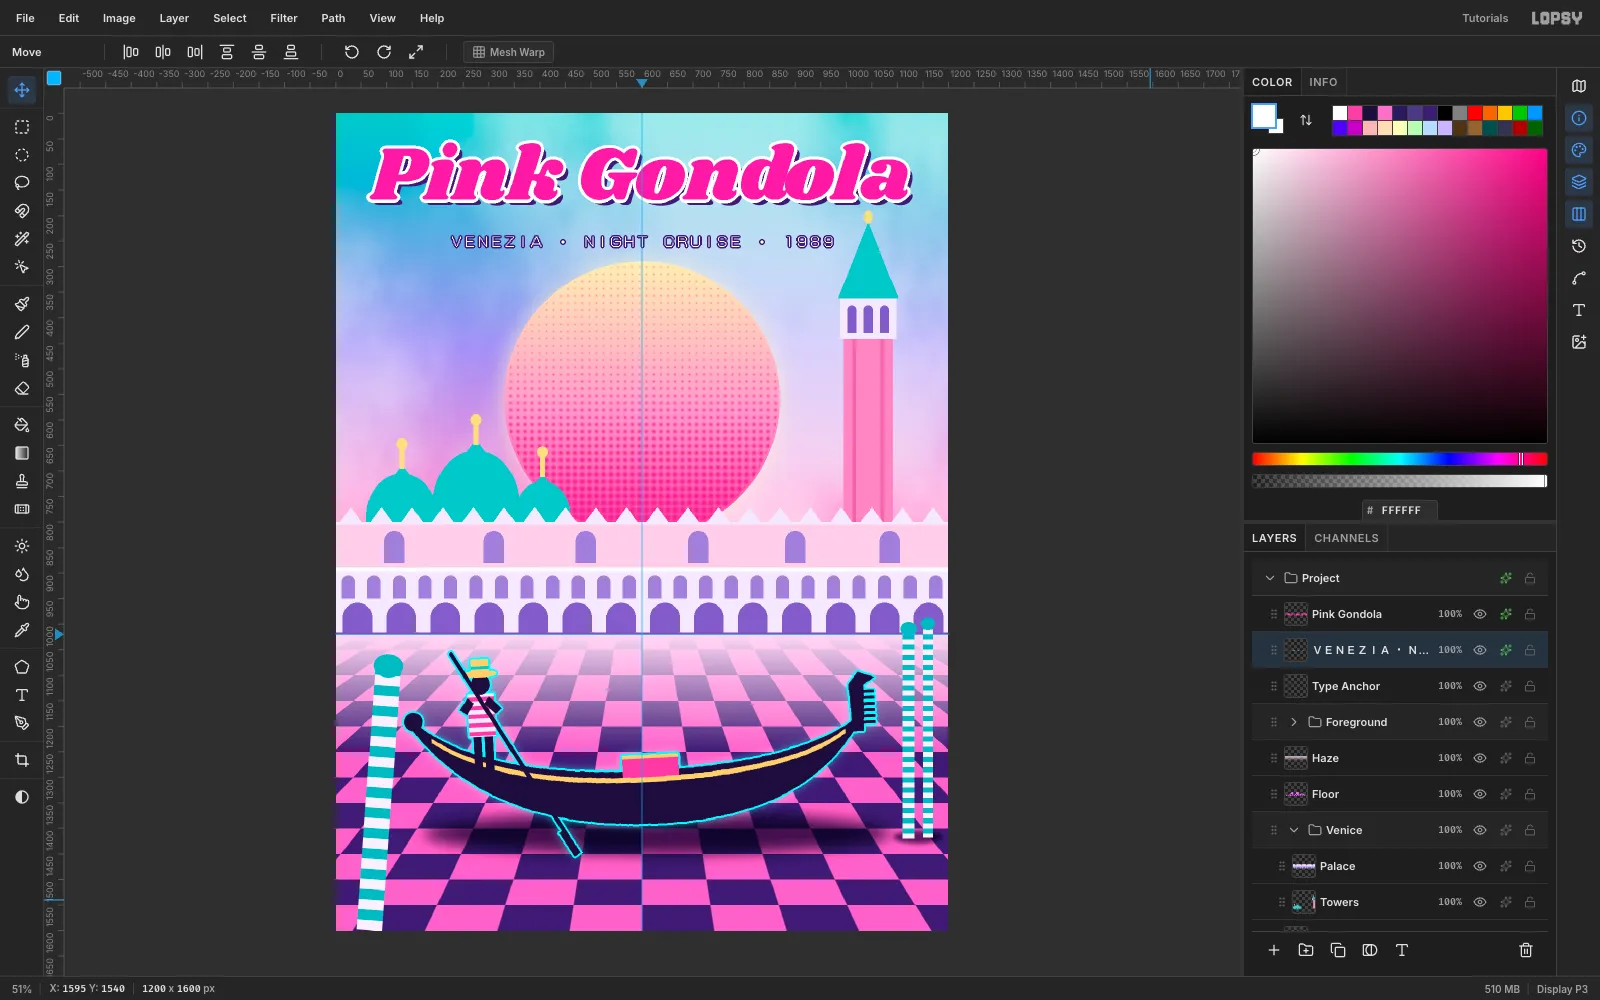
-
Scatter sparkles
Click
Moon Dotsand add aSparkleslayer. Lasso a few eight-point four-pointed stars in white, in a few sizes. Keep them in open sky, away from the type. Enable Outer Glow in white, Size18, Opacity90.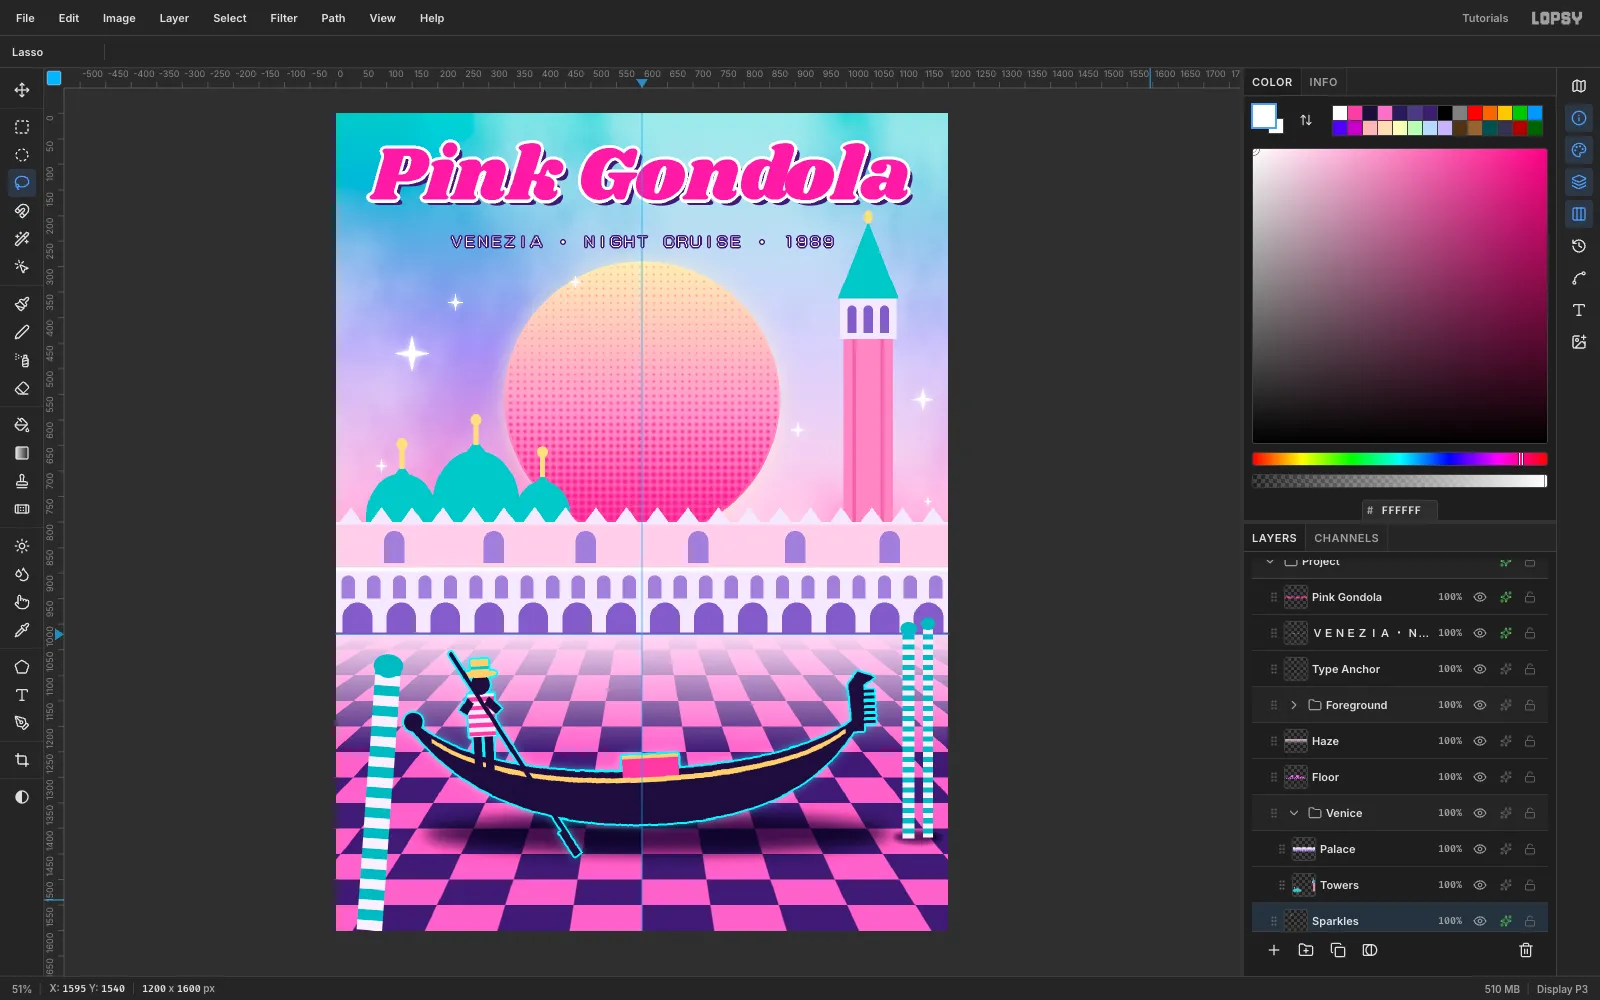
-
Build a retro dialog window
Click the anchor layer and add a
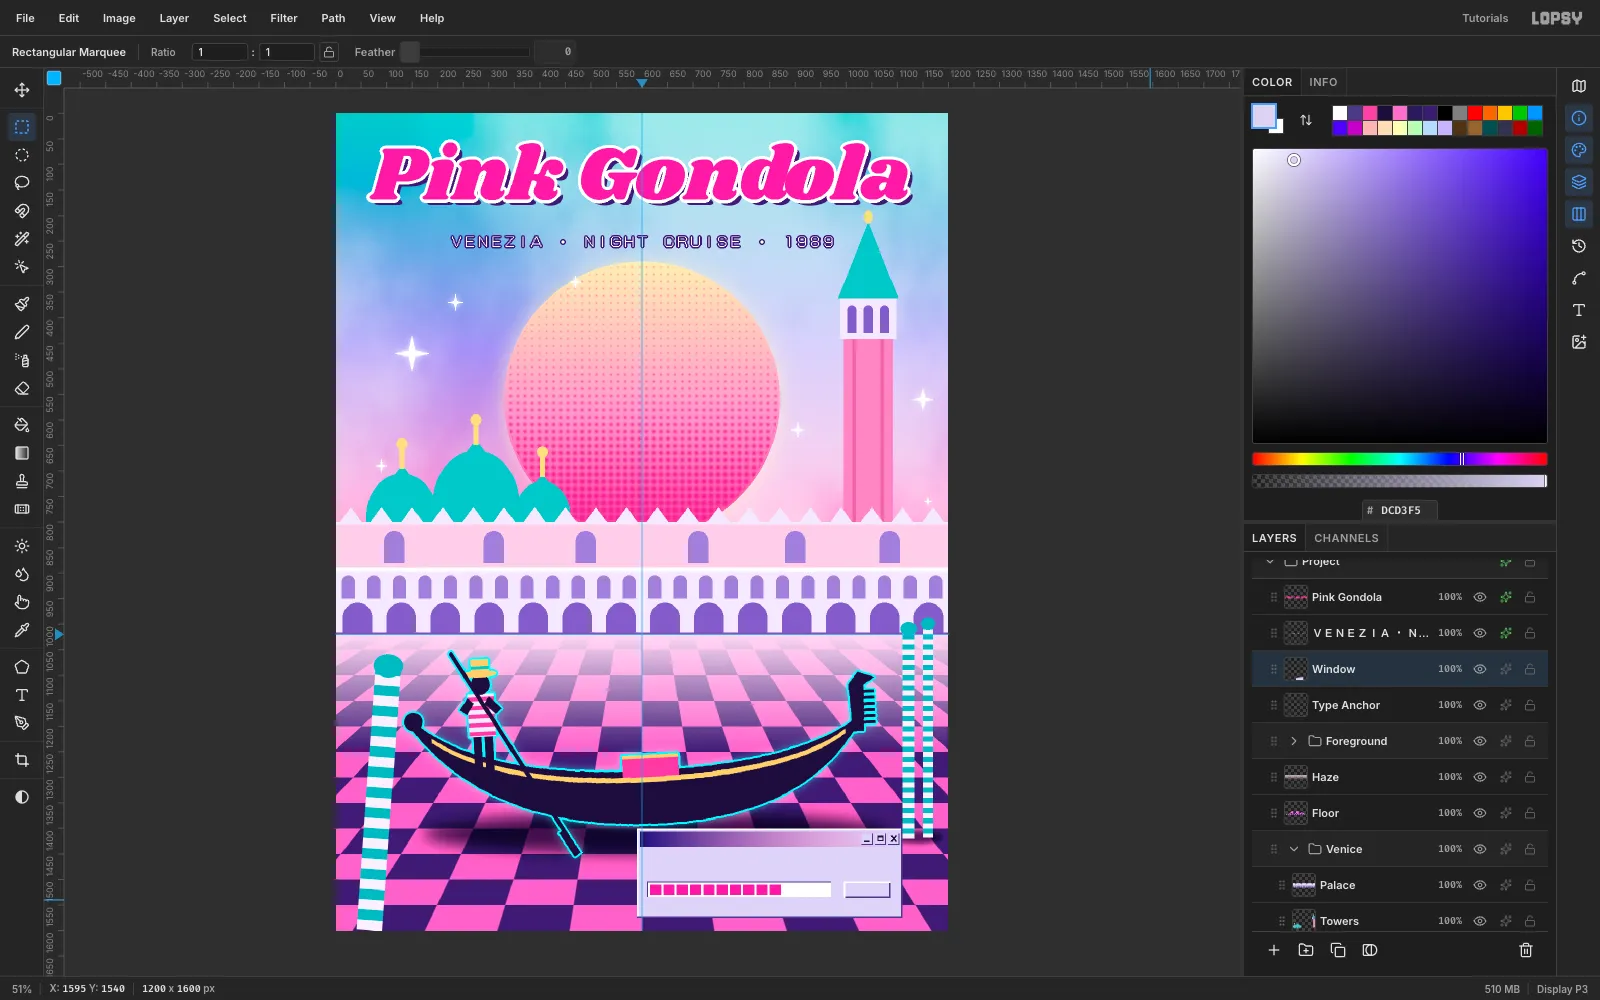
Windowlayer. Marquee a 520 × 175 box at (590, 1400) and fill it with lavender#DCD3F5. Fake the bevel with 3 px fills: white on the top and left edges, dark#4B3A86on the bottom and right.Then add the details:
- a navy-to-pink gradient title bar
- three small bevelled buttons, with a bar, a box and two lasso slashes for the × symbol
- a progress bar with ten pink blocks
- an OK button
-
Label the dialog
Click
Windowbefore each new text layer, so changing the font doesn't restyle the previous one:gondola.exein VT323 28 white, in the title barゴンドラ Now drifting to 1989...in DotGothic16 26 dark purple (paste it)OKin VT323 on the button
Then click each text layer from the top down and choose Layer → Merge Down until everything is flattened into
Window.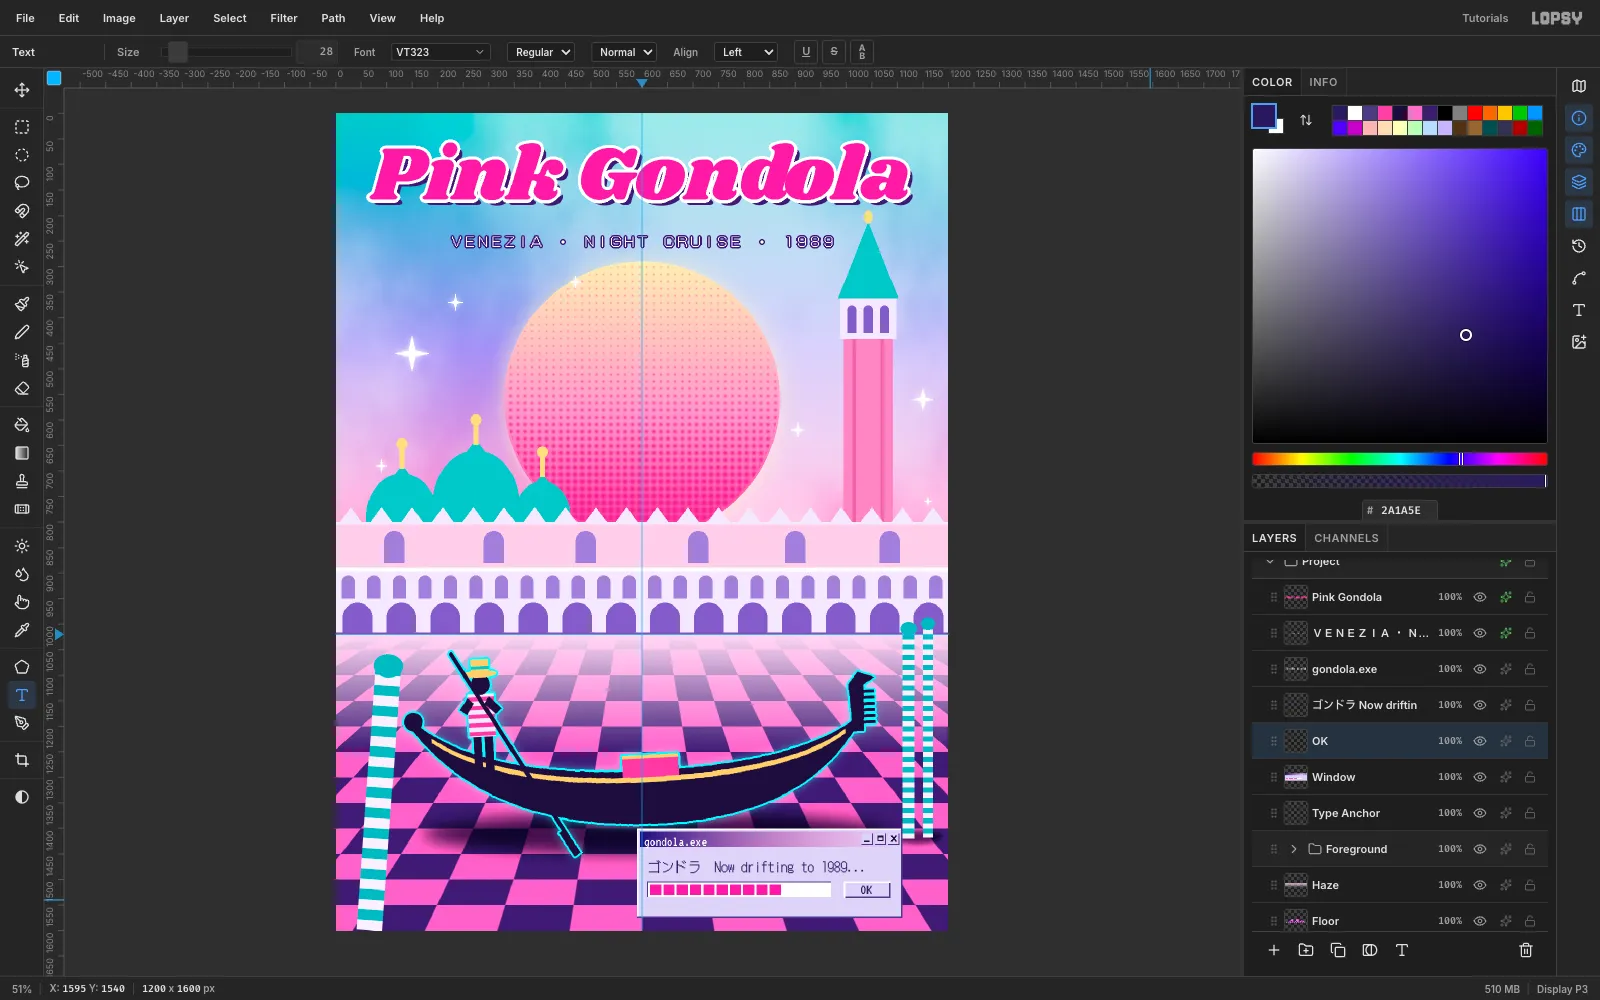
-
Tilt the dialog
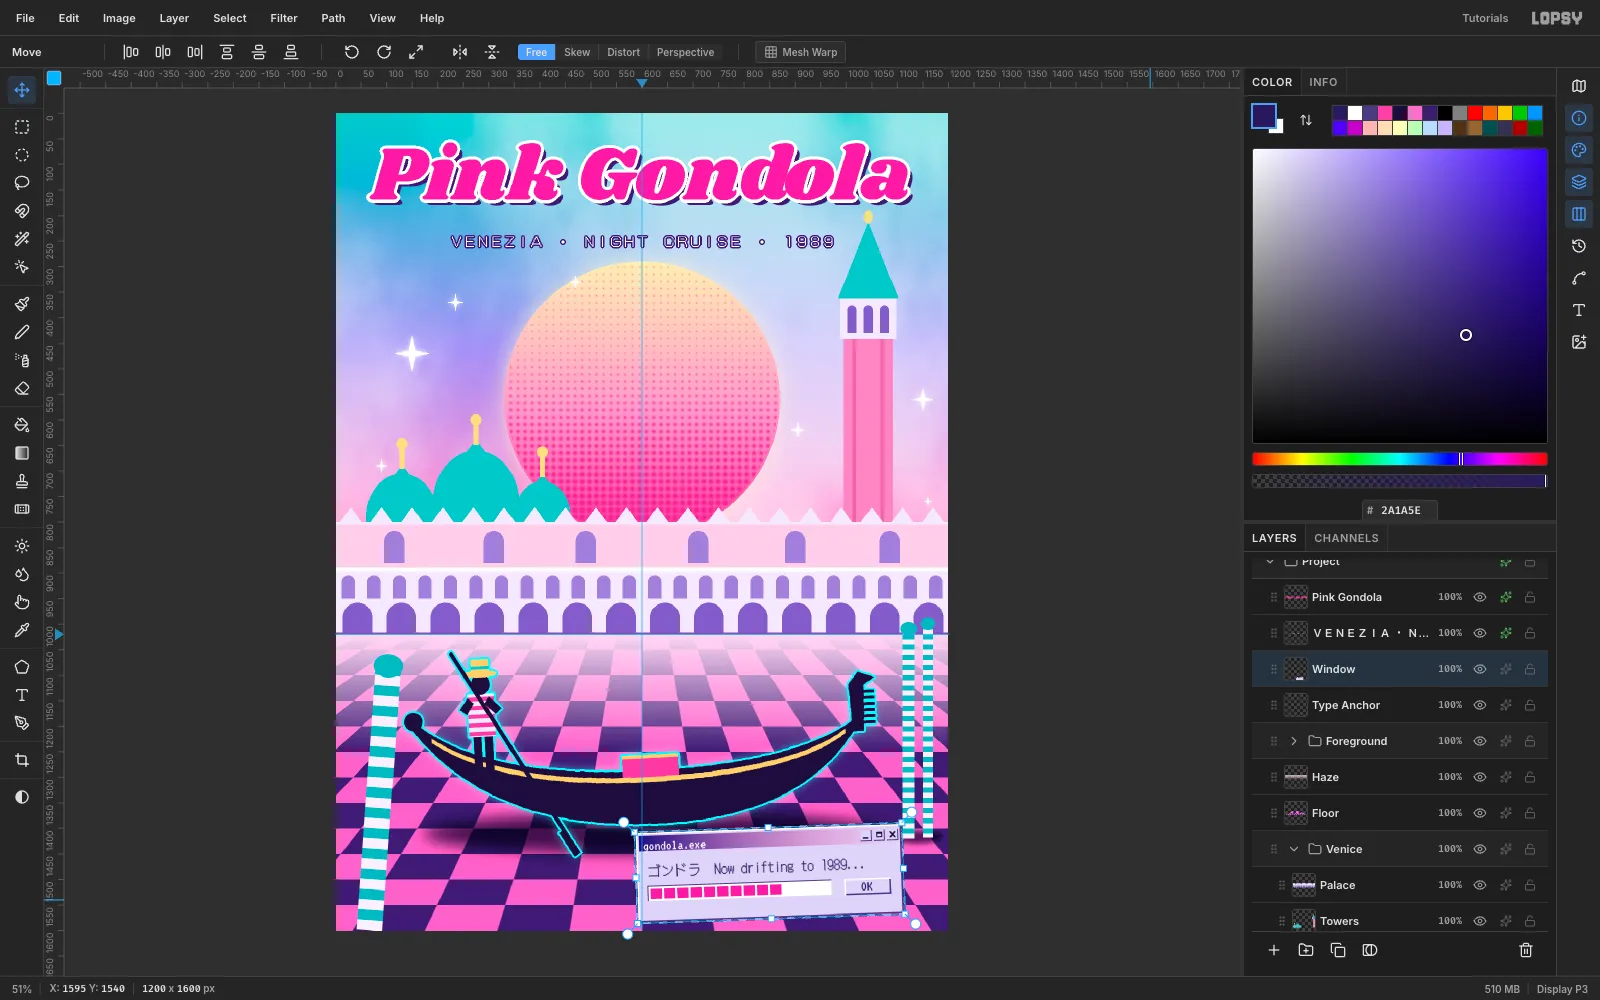
Marquee the window and rotate it about 2° counter-clockwise. A slight tilt makes it look dropped onto the poster, not printed on it. Press Cmd+D.
-
Drop a hard shadow under the dialog
Enable Drop Shadow on
Windowin#2A1A5E, with offset10/10, Blur0and Opacity90. It's the same flat, hard shadow as the headline, which ties the two together.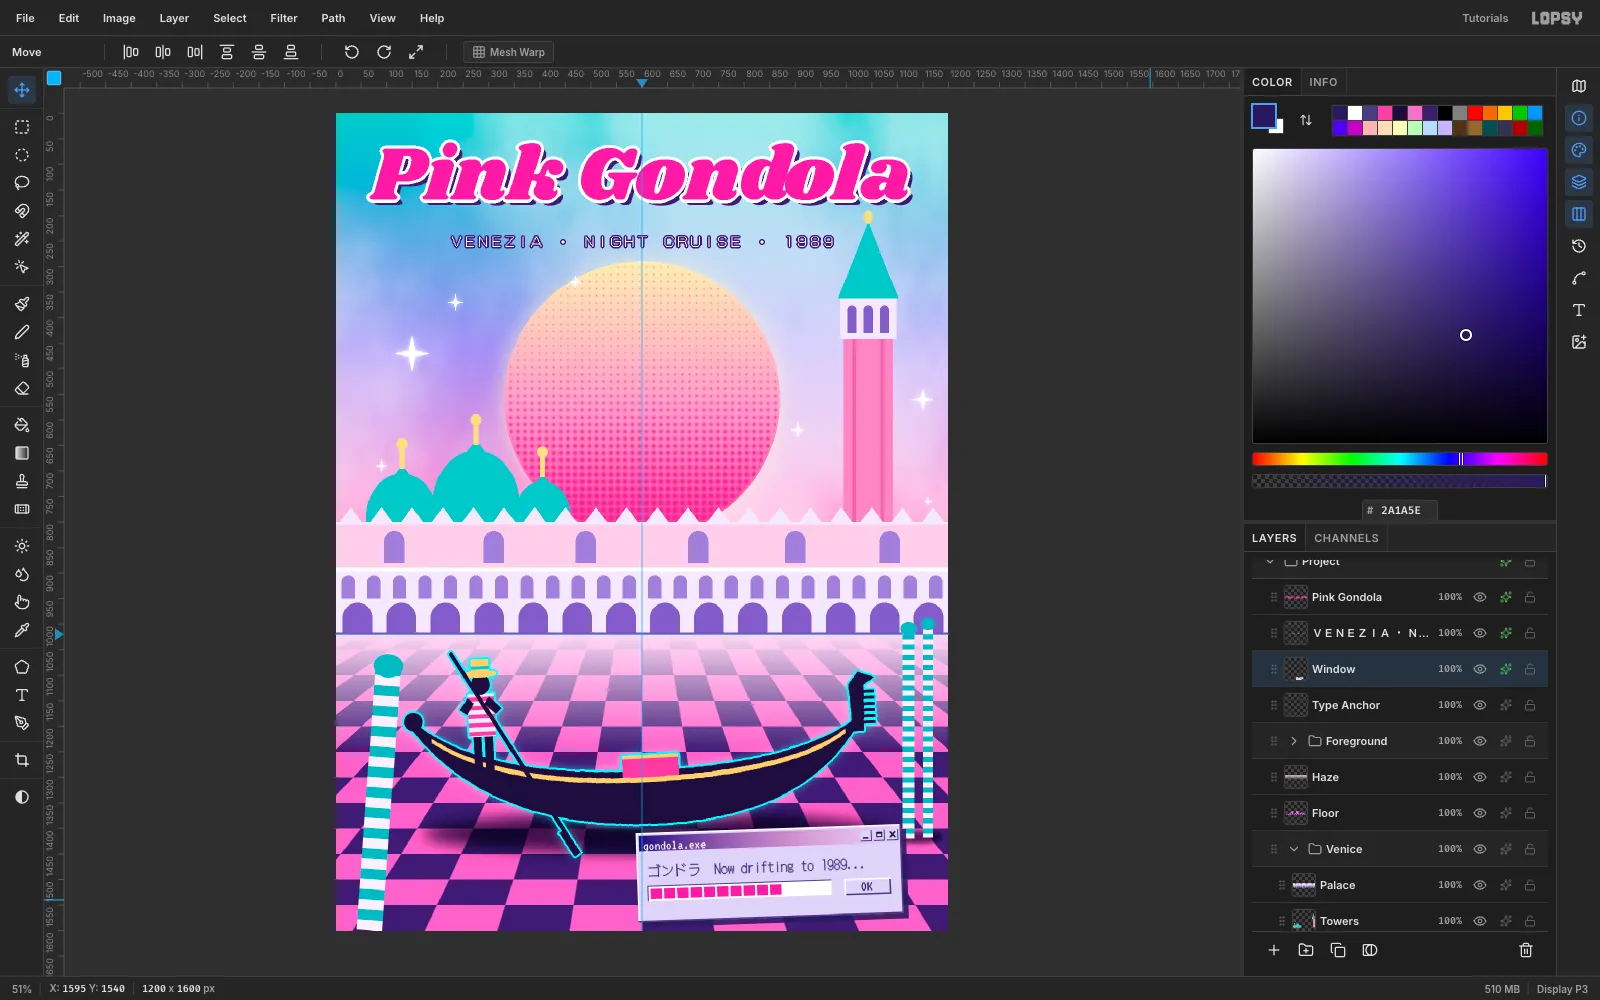
-
Add CRT scanlines
Click the headline row and add a
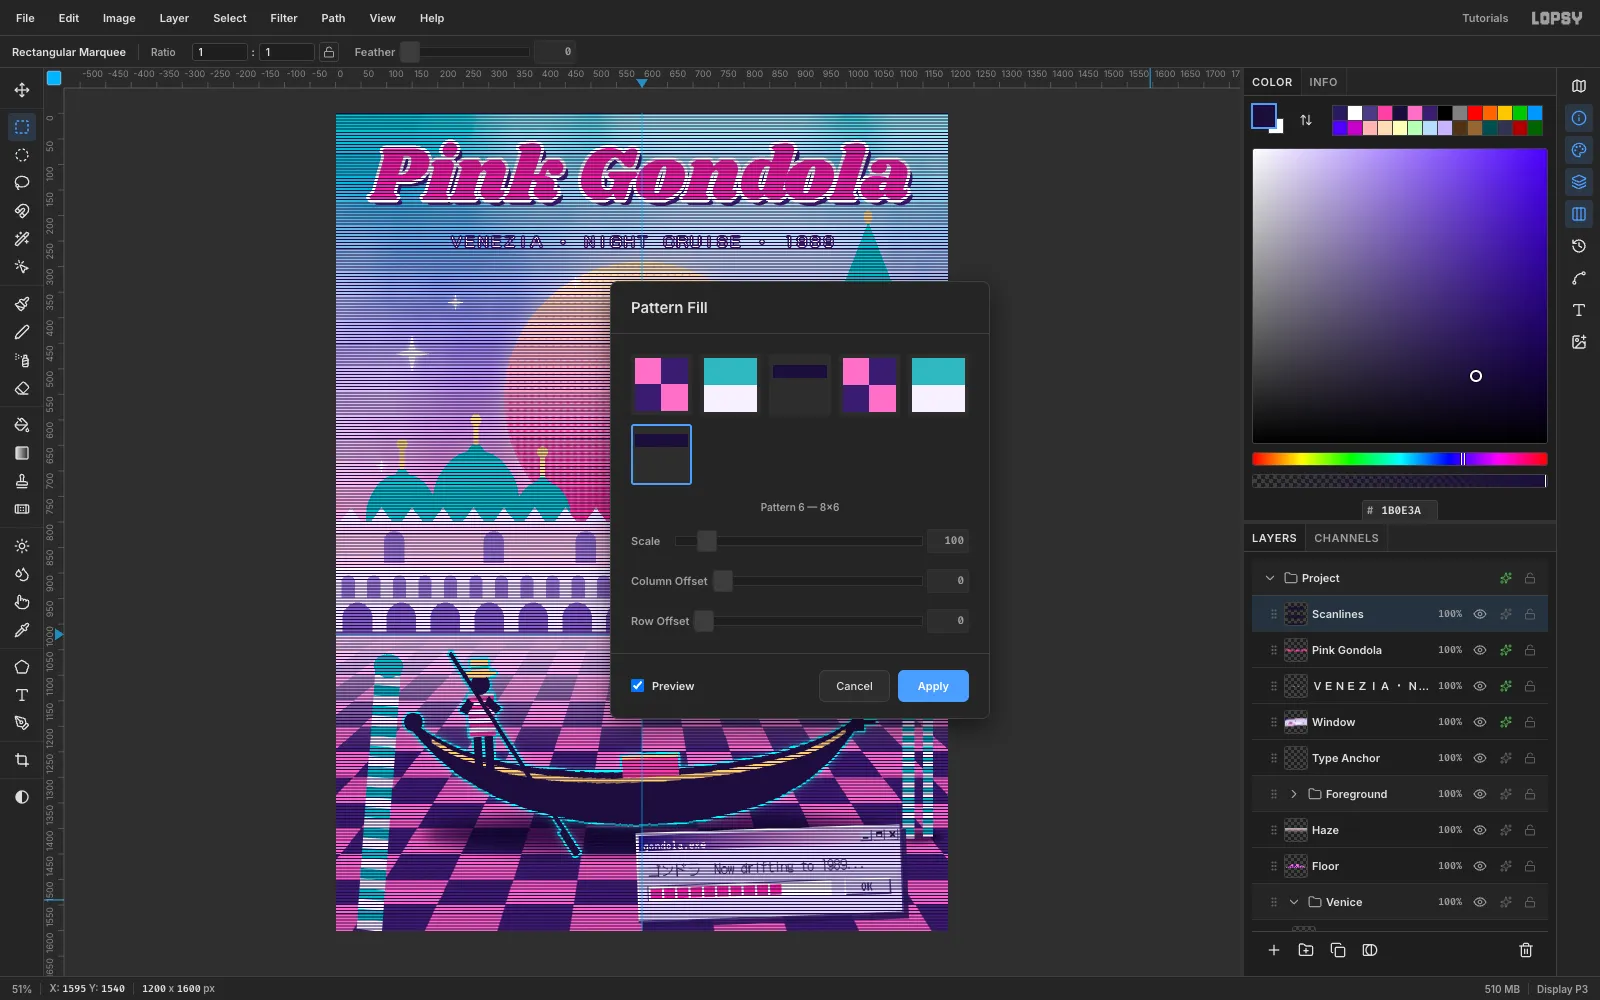
Scanlineslayer on top.- Fill an 8 × 2 strip at the top-left corner with
#1B0E3A. - Marquee 8 × 6 and Define Pattern. The transparent rows are part of the tile.
- Deselect and Fill with Pattern… the whole layer.
- Set the layer to Multiply at 14 %, for a faint old-monitor texture.
- Fill an 8 × 2 strip at the top-left corner with
-
Finish with a vignette
Choose Layer → Adjustment Layer… (click Got it on the info dialog). Click Add Adjustment → Vignette and set it to
35. The corners darken slightly, which pulls the eye into the centre and gives the pastel palette a little more depth.Save your project with File → Save Project, then File → Quick Export PNG to export your poster.