Design a Surrealist Cinema Logo
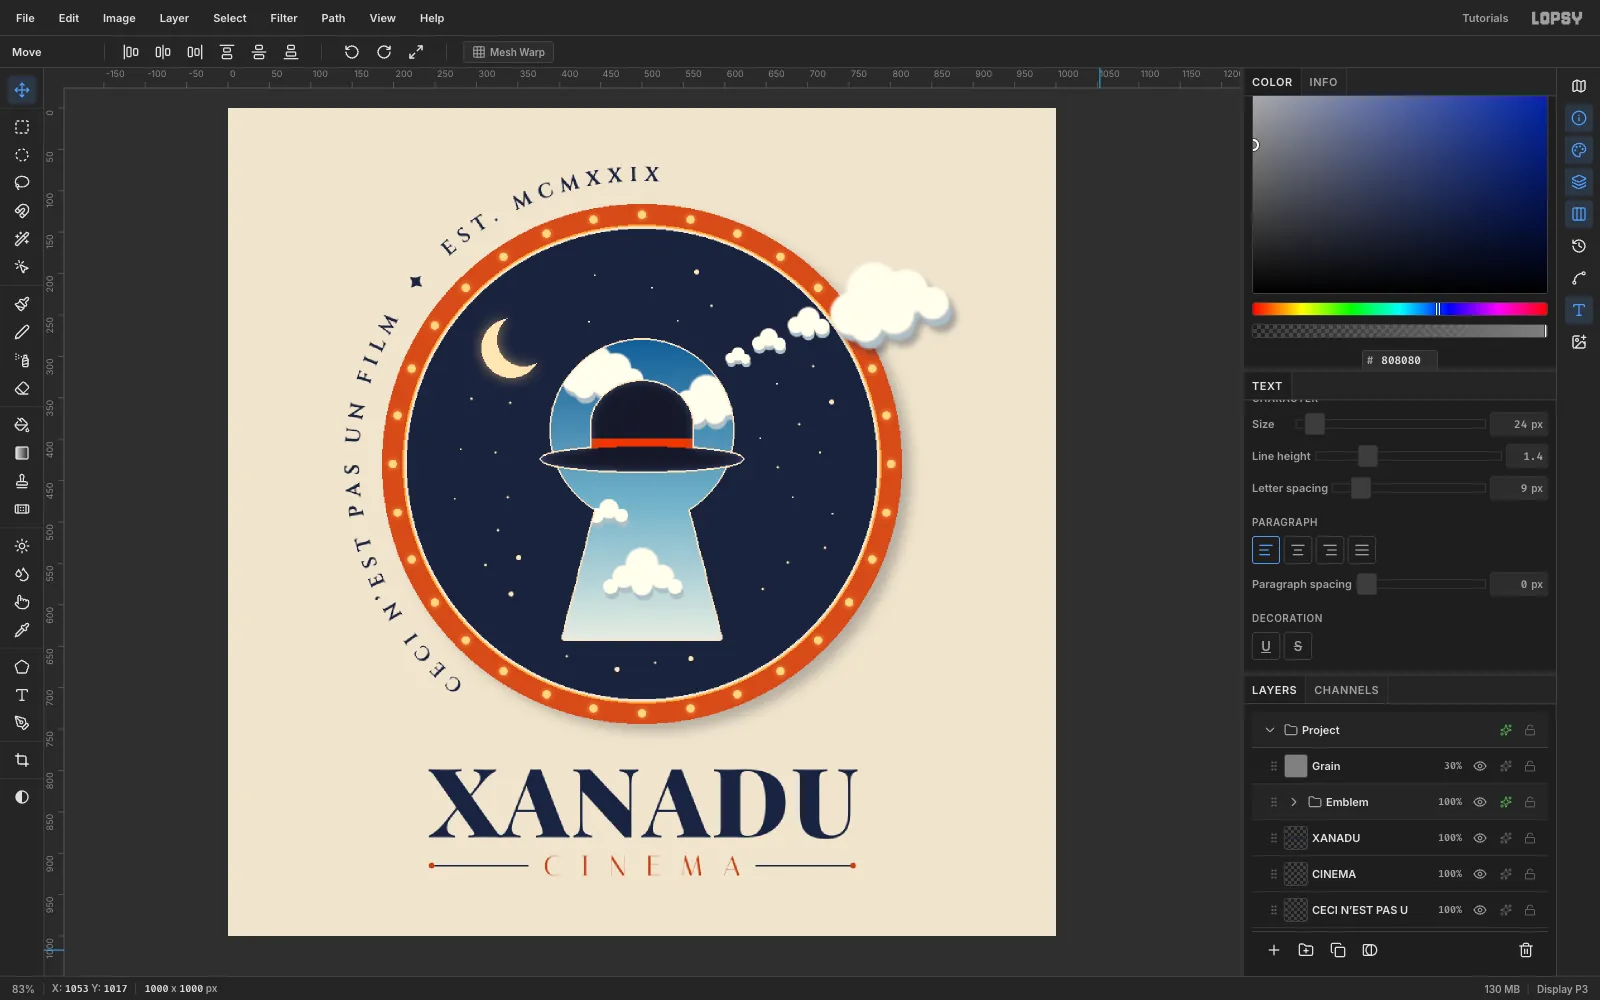
Make a Magritte-style logo in Lopsy with a keyhole of daytime sky in a night disc, a floating bowler hat, marquee bulbs and curved seal text.
Surrealist logos work by showing something impossible, drawn with plain, confident shapes. This one borrows two ideas from René Magritte:
- The Empire of Light, a daytime sky above a night street
- the floating bowler hat
In this tutorial you'll build an emblem for an imaginary arthouse cinema, Xanadu Cinema. A navy night disc has a keyhole cut into it, and through the keyhole you see a bright blue sky where a bowler hat floats. One cloud escapes past the edge of the badge. Theatre marquee bulbs ring it, and a curved seal line reads Ceci n'est pas un film, a nod to Magritte's This is not a pipe.
You'll use selections, gradients, the brush, copy and paste, transforms, layer effects, radial symmetry, the Pen tool, text on a path, filters, blend modes, and a group adjustment.
-
Set up the paper, guides and night disc
Open Lopsy and create a 1000 × 1000 document with a white background. Click the
Backgroundlayer, set the foreground color to#EEE4CFin the Color panel's hex field, and choose Edit → Fill to get a warm paper tone.Click the top ruler at x =
500to drop a vertical guide. Then click the left ruler at y =430(the center of the badge),66(top margin) and934(bottom margin) for three horizontal guides.Double-click
Layer 1and rename itInk Disc. Pick the Elliptical Marquee and drag from (216, 146) to (784, 714) to make a 568 px circle centered on the guides. Set the foreground to#1B2340and choose Edit → Fill. Press Cmd+D to deselect.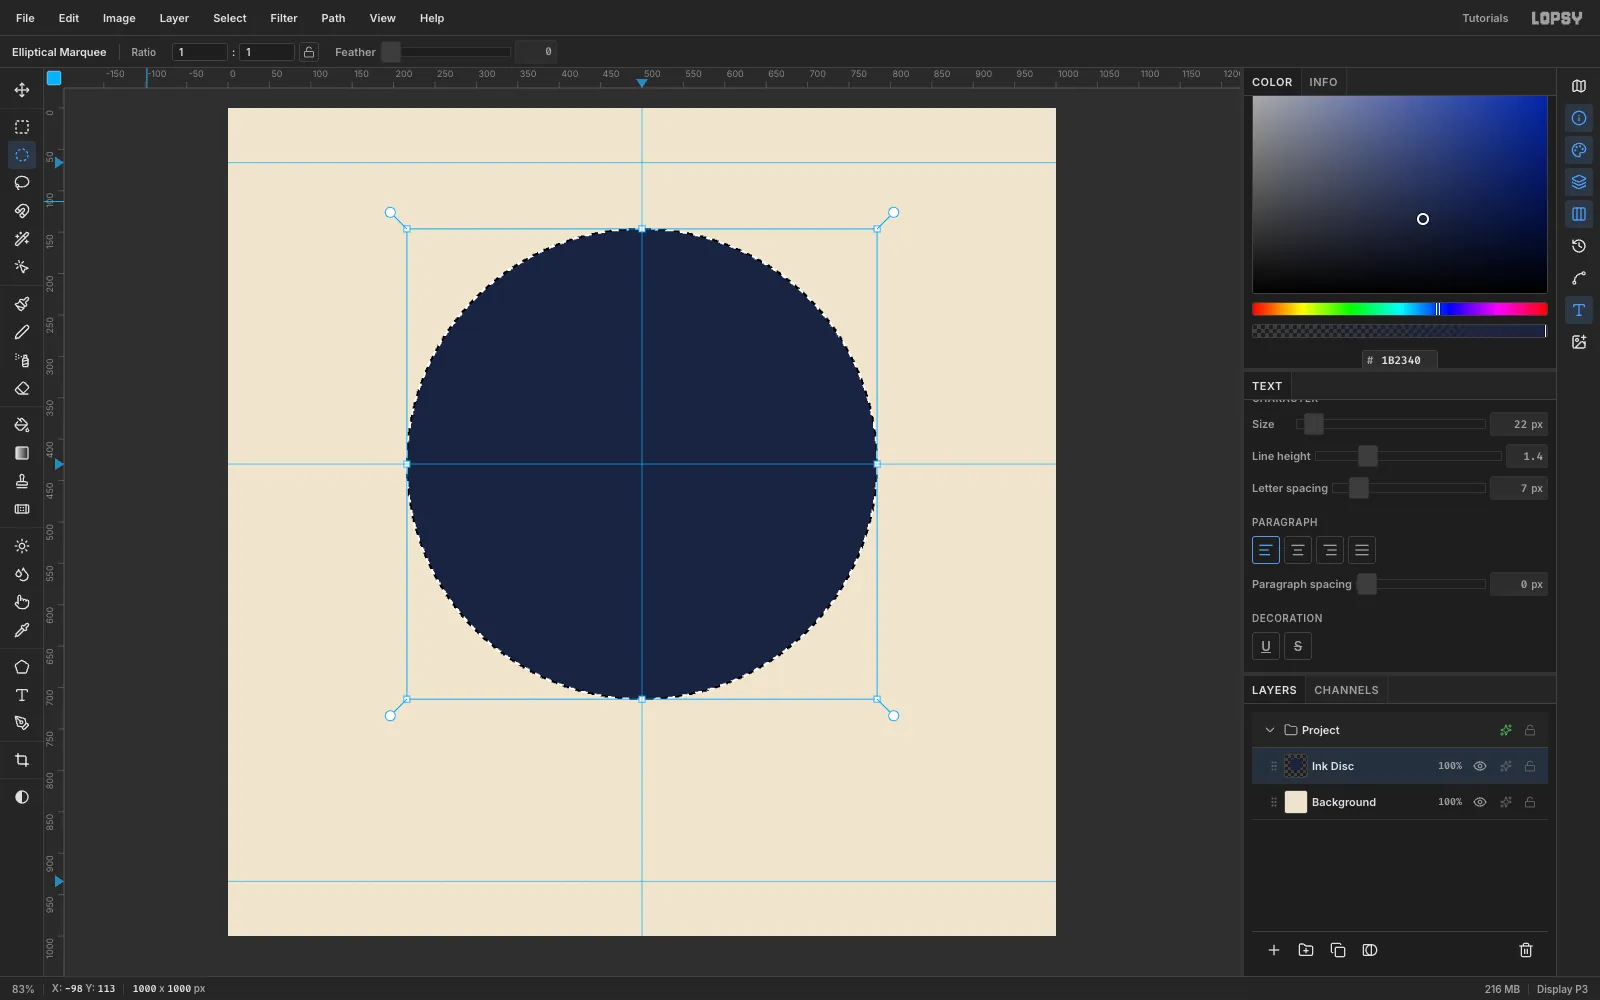
-
Draw the keyhole with the Lasso and a 1 px feather
Click Add Layer and name it
Keyhole. This white shape is a stencil you'll use to cut other layers, and you'll delete it at the end.- Set the foreground to
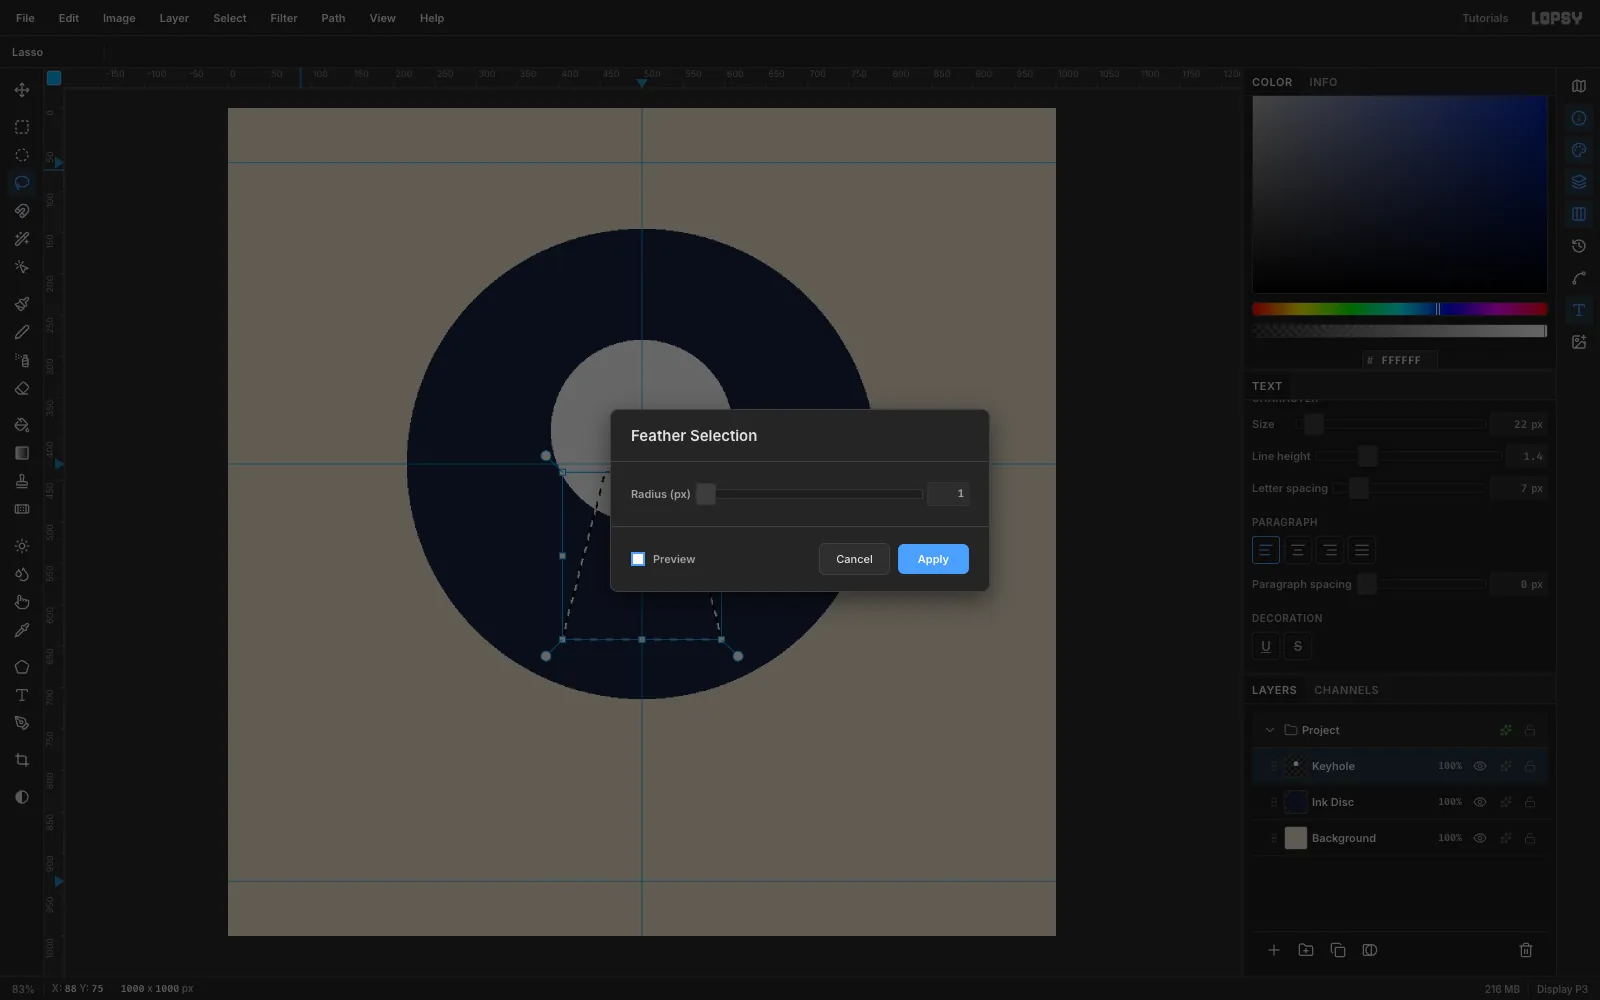
#FFFFFF. With the Elliptical Marquee, drag from (390, 280) to (610, 500) and choose Edit → Fill for the round top. Press Cmd+D. - Pick the Lasso. Drag straight lines from (456, 440) to (544, 440), to (596, 642), to (404, 642), and back to the start. That's the tapered bottom of the keyhole.
- Choose Select → Feather…, set Radius to
1and click Apply. The 1 px feather smooths the stair-stepped diagonal edges.
- Set the foreground to
-
Fill the keyhole stencil
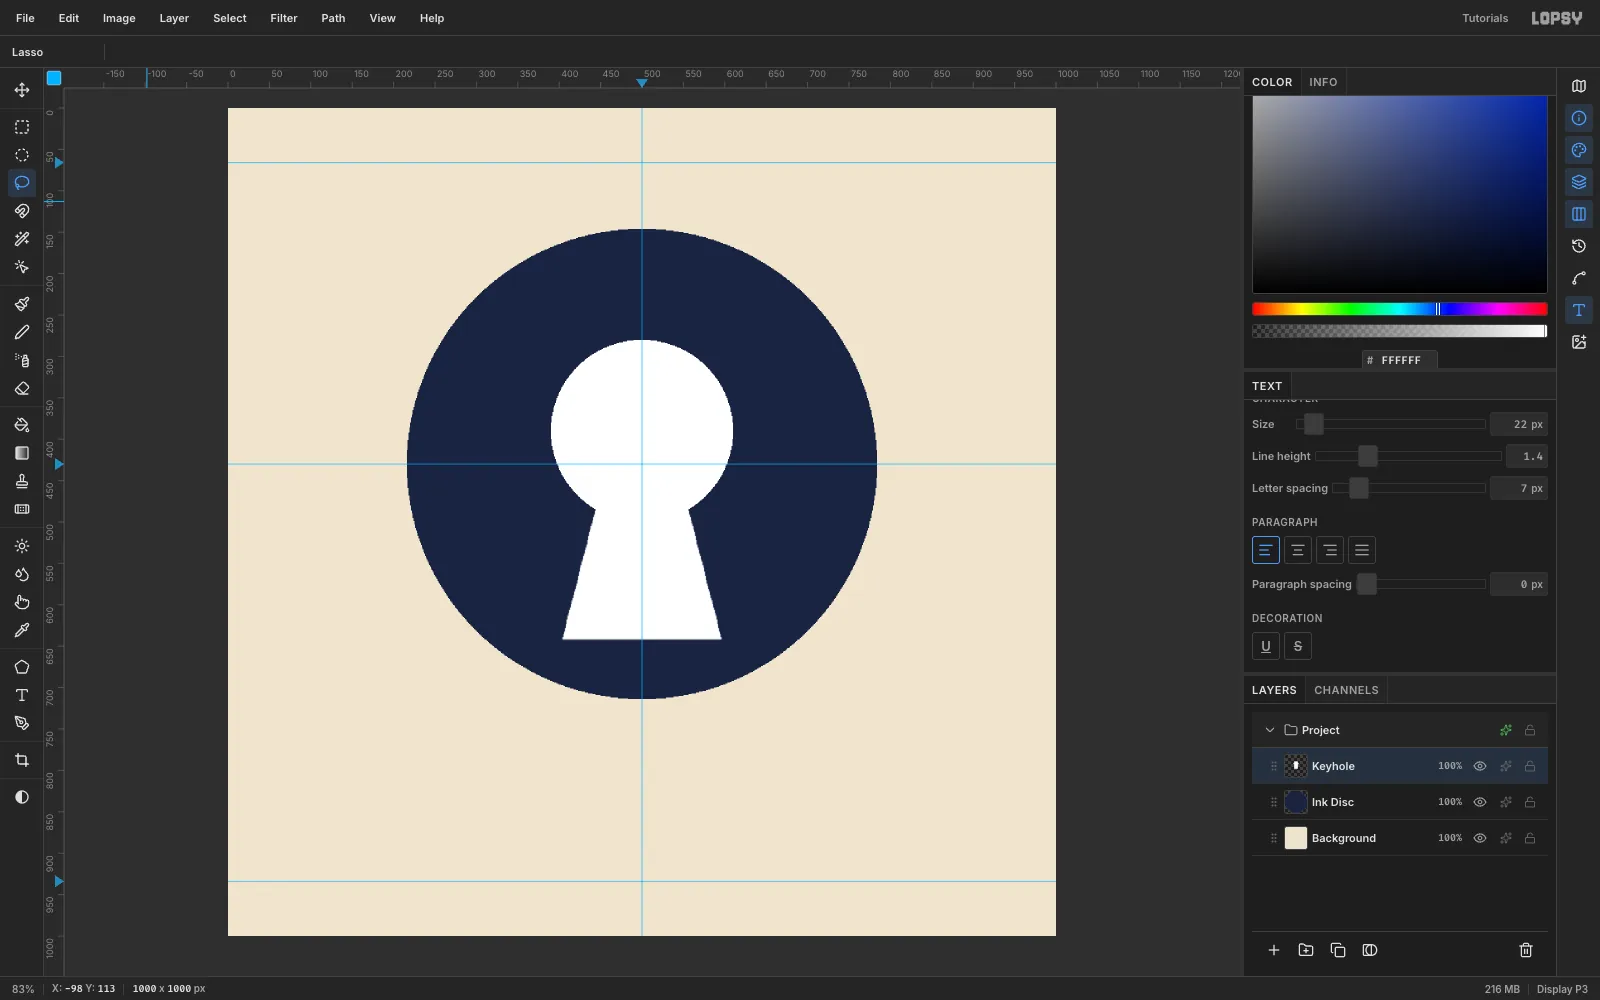
Choose Edit → Fill to fill the trapezoid white, then press Cmd+D. The two white shapes overlap at the neck, so they read as one keyhole.
-
Build a daylight sky gradient
Click Add Layer and name it
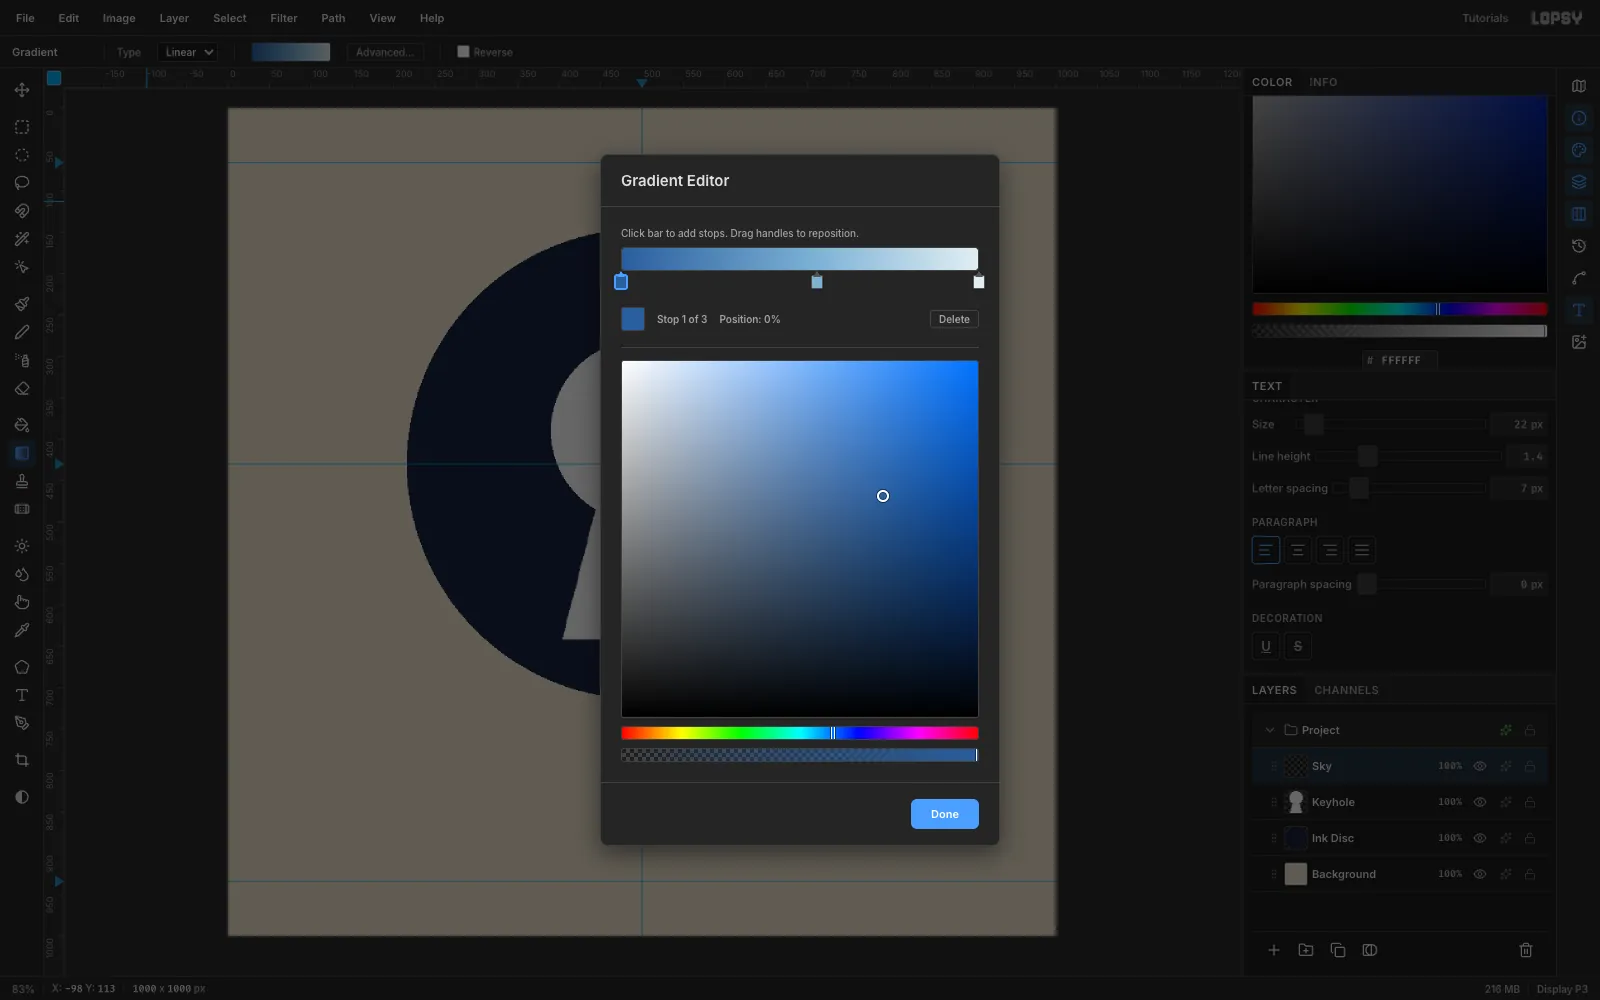
Sky. Pick the Gradient tool and click Advanced…. In the Gradient Editor, click the bar at about 55% to add a middle stop. Select each stop and pick its color in the square and hue strip:- A deep cerulean, about
#295C9E, at 0% - A soft sky blue, about
#7CB1D6, at 55% - A pale haze, about
#DFEDF2, at 100%
Click Done, then drag from (500, 282) straight down to (500, 644). The sky runs from the top of the keyhole to its bottom.
- A deep cerulean, about
-
Clip the sky to the keyhole
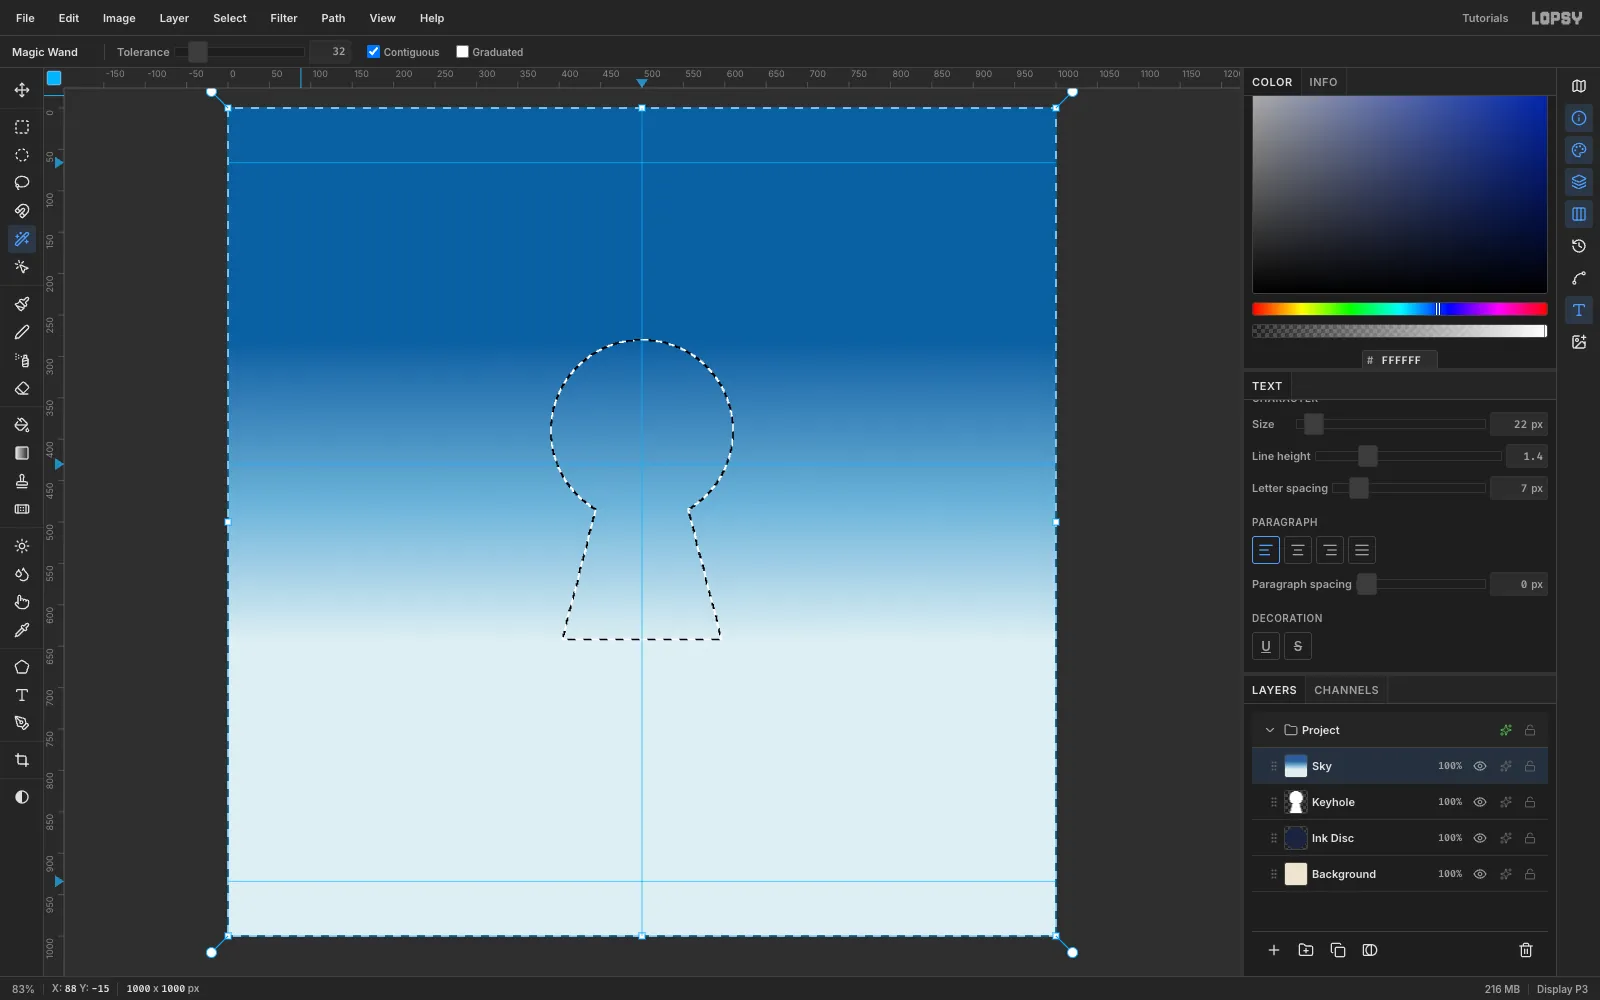
The sky covers the whole canvas, so cut it down to the stencil:
- Click the
Keyholelayer and pick the Magic Wand. Click inside the white keyhole to select it. - Click the
Skylayer and choose Select → Inverse. Everything except the keyhole is now selected. - Press Delete, then Cmd+D.
Now the daytime sky only shows through the keyhole.
- Click the
-
Outline the keyhole in cream
A thin light edge makes the keyhole read as a cut-out, even at small sizes. With
Skyactive, open its Layer effects (the sparkle icon on the layer row) and turn on Stroke. Set the color to#F1E4CC, the position to Outside and Width to2.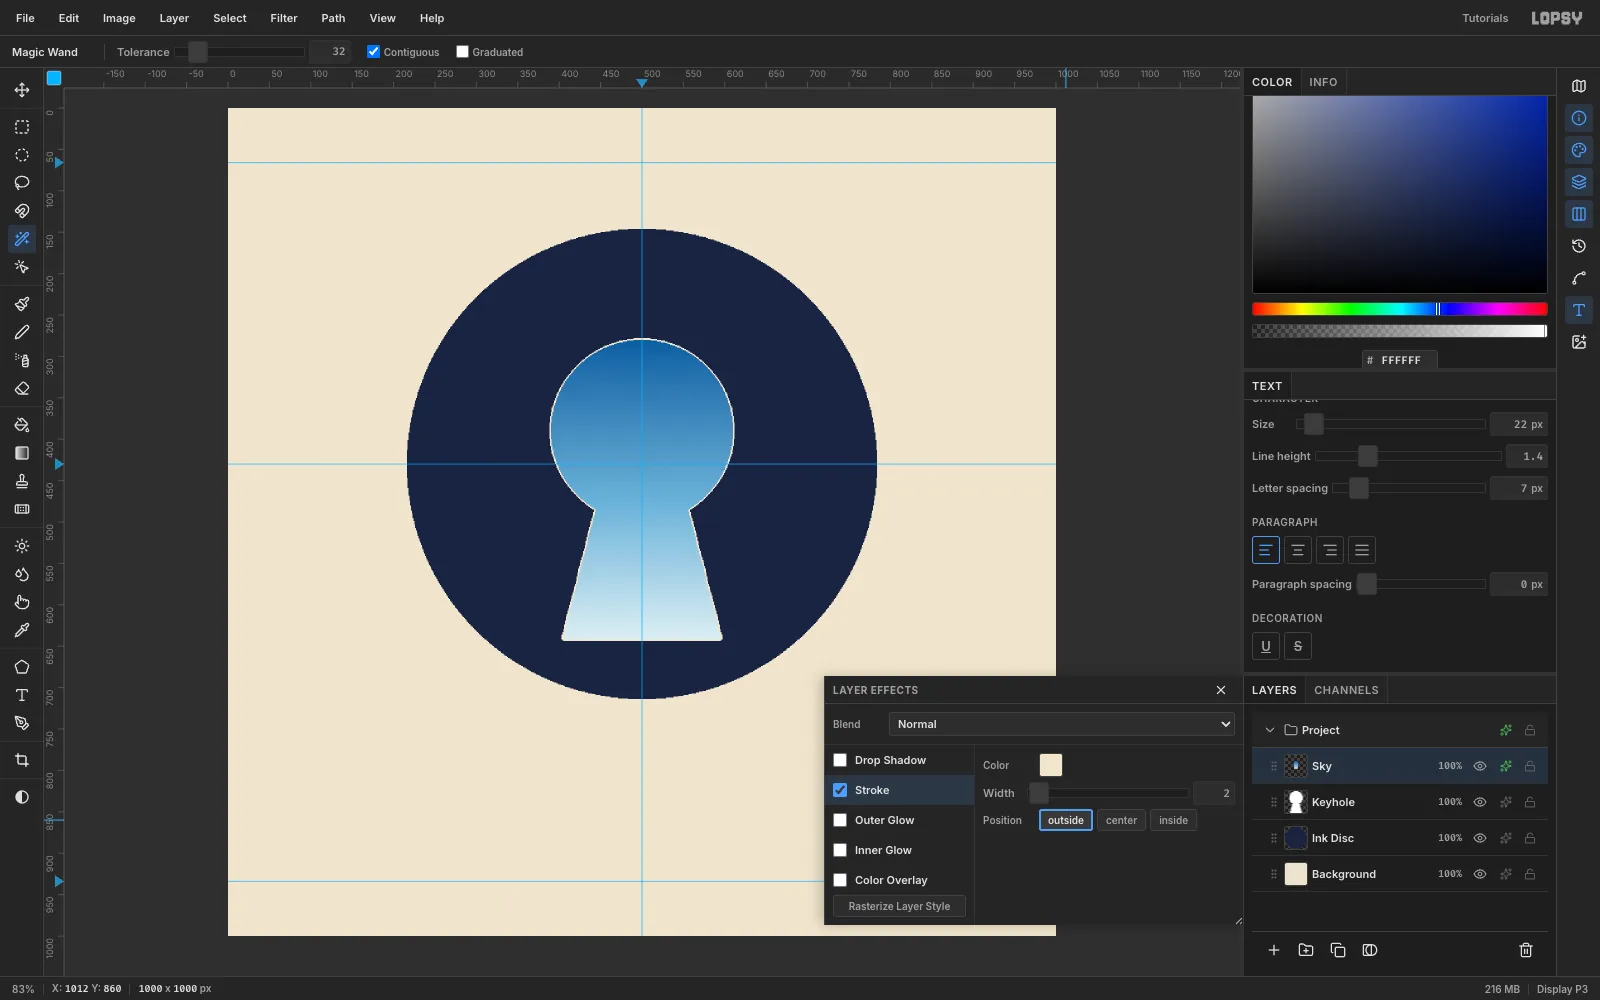
-
Paint Magritte-style clouds
Click Add Layer and name it
Clouds. Pick the Brush and set Hardness80and Opacity100. Each cloud is five or six overlapping round dabs, so click instead of dragging.- Set the foreground to
#A9BED3and click the underside of each cloud, a few pixels lower than where the white will go. - Set the foreground to
#FFFFFFand click the same spots again, about 6 px higher and at full size. The blue dabs that peek out below become the soft shadow on each cloud's belly.
Vary the Size between
20and52so the puffs look natural. Paint a cloud in the upper left of the keyhole, one on the right edge, one small cloud at the neck and one in the stem. It's fine for clouds to spill past the keyhole edge, because you'll trim them in a moment.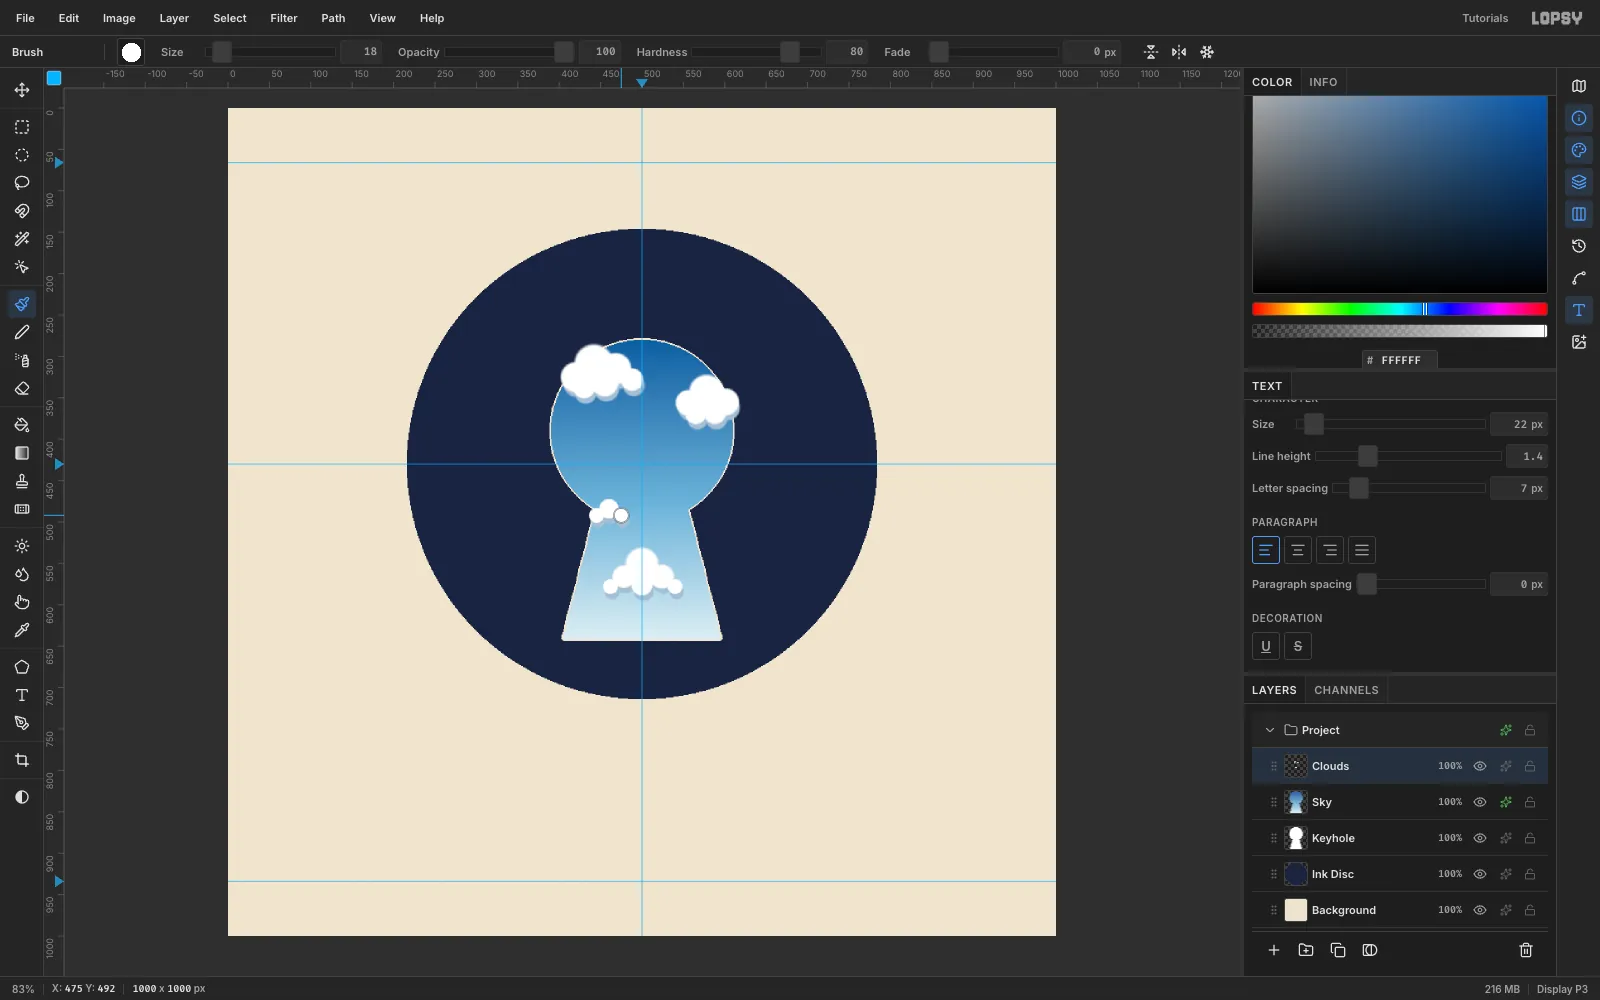
- Set the foreground to
-
Copy a cloud to let it escape
Here's the surreal move: one cloud slips out of the keyhole and drifts off the badge. With the Rectangular Marquee, drag around the upper-left cloud, from (396, 280) to (506, 362). Press Cmd+C, then Cmd+V. The copy is pasted in place on a new layer. Rename it
Drifter.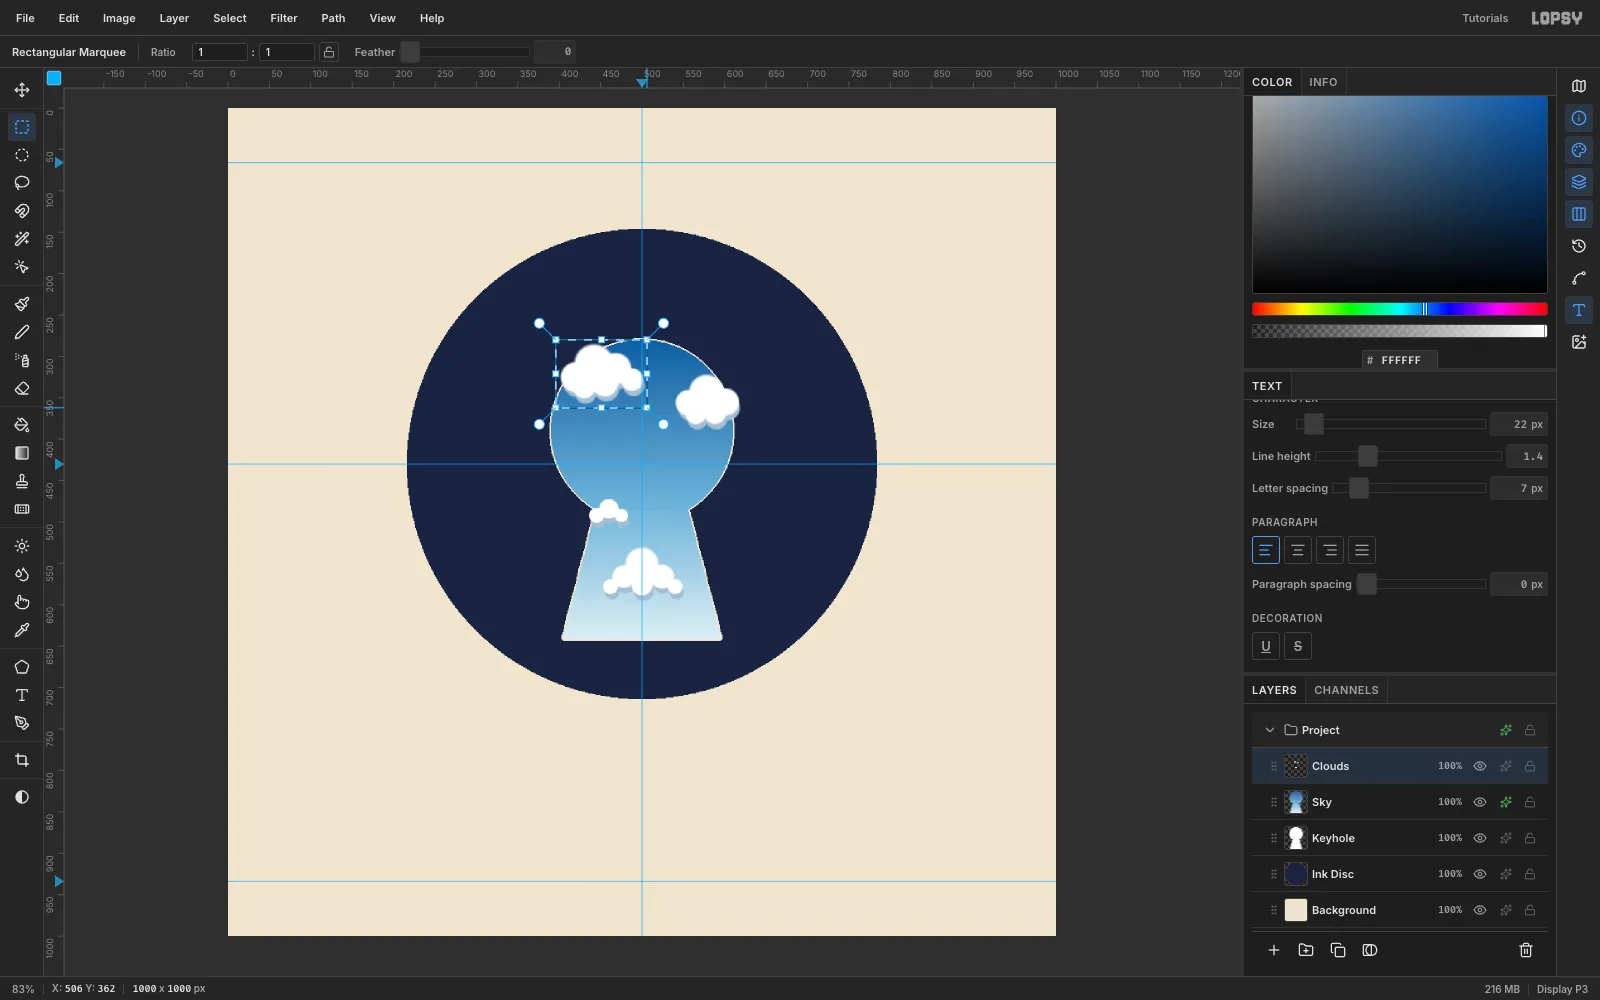
-
Move the escaping cloud
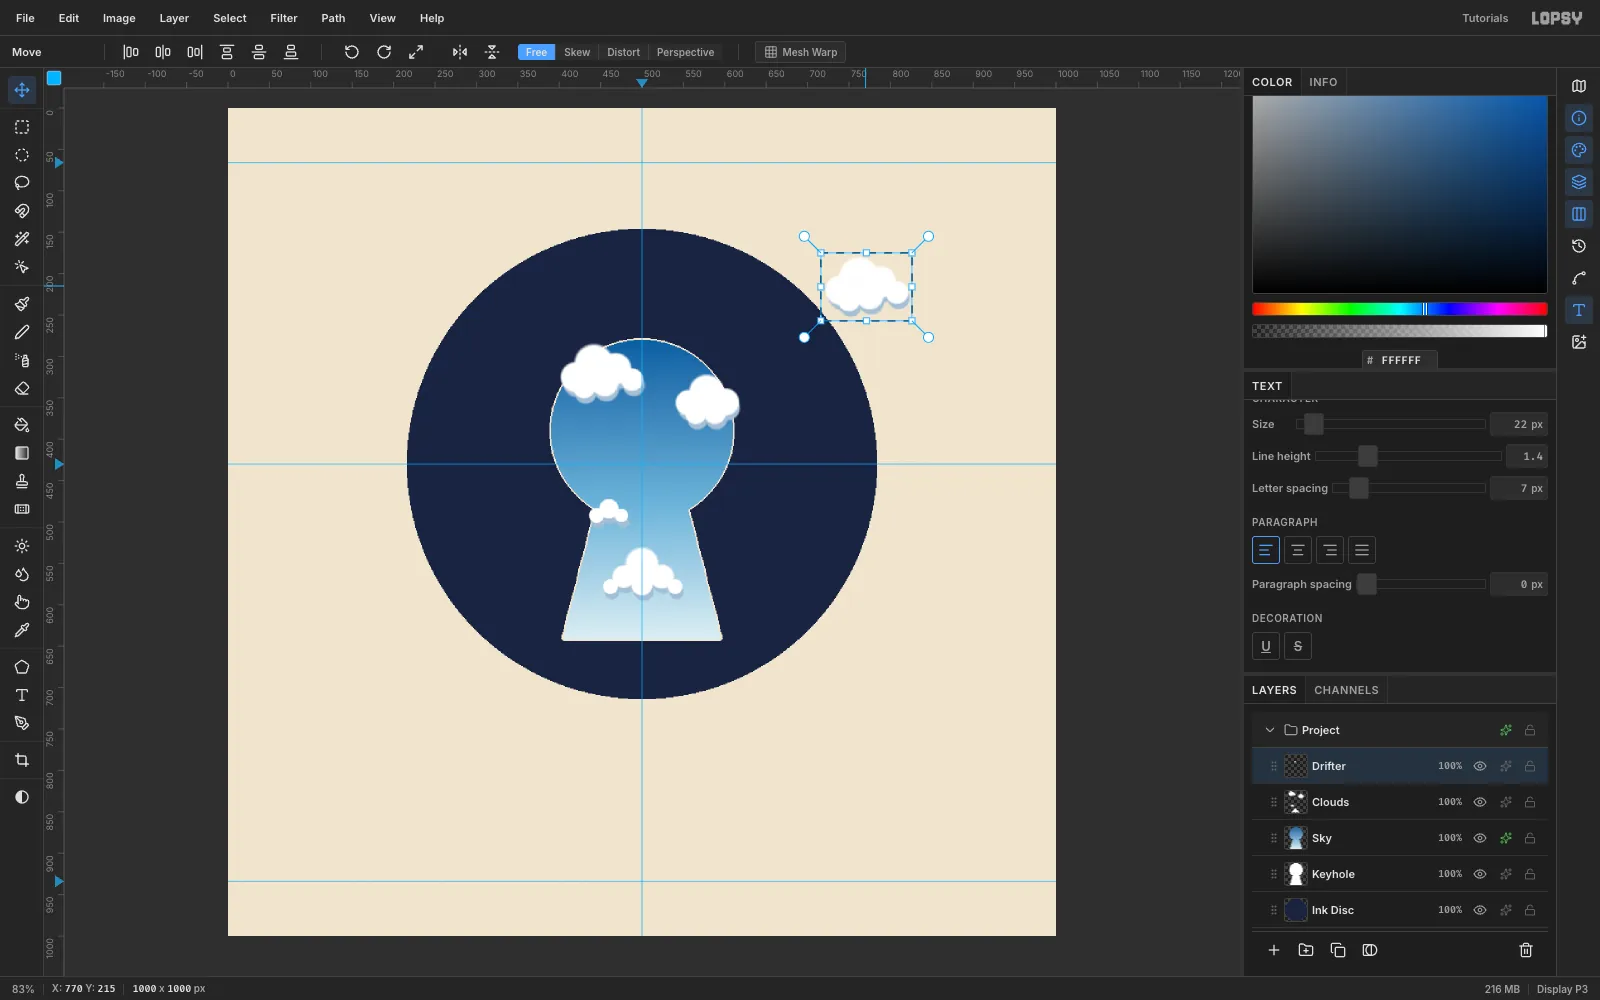
Draw the same marquee again over the copy and press V for the Move tool. Drag from inside the selection up and to the right, until the cloud sits across the top-right edge of the disc at about (770, 215).
-
Scale and rotate the cloud
Press Cmd+D to drop the moved cloud. Draw a marquee around it again, and use these steps:
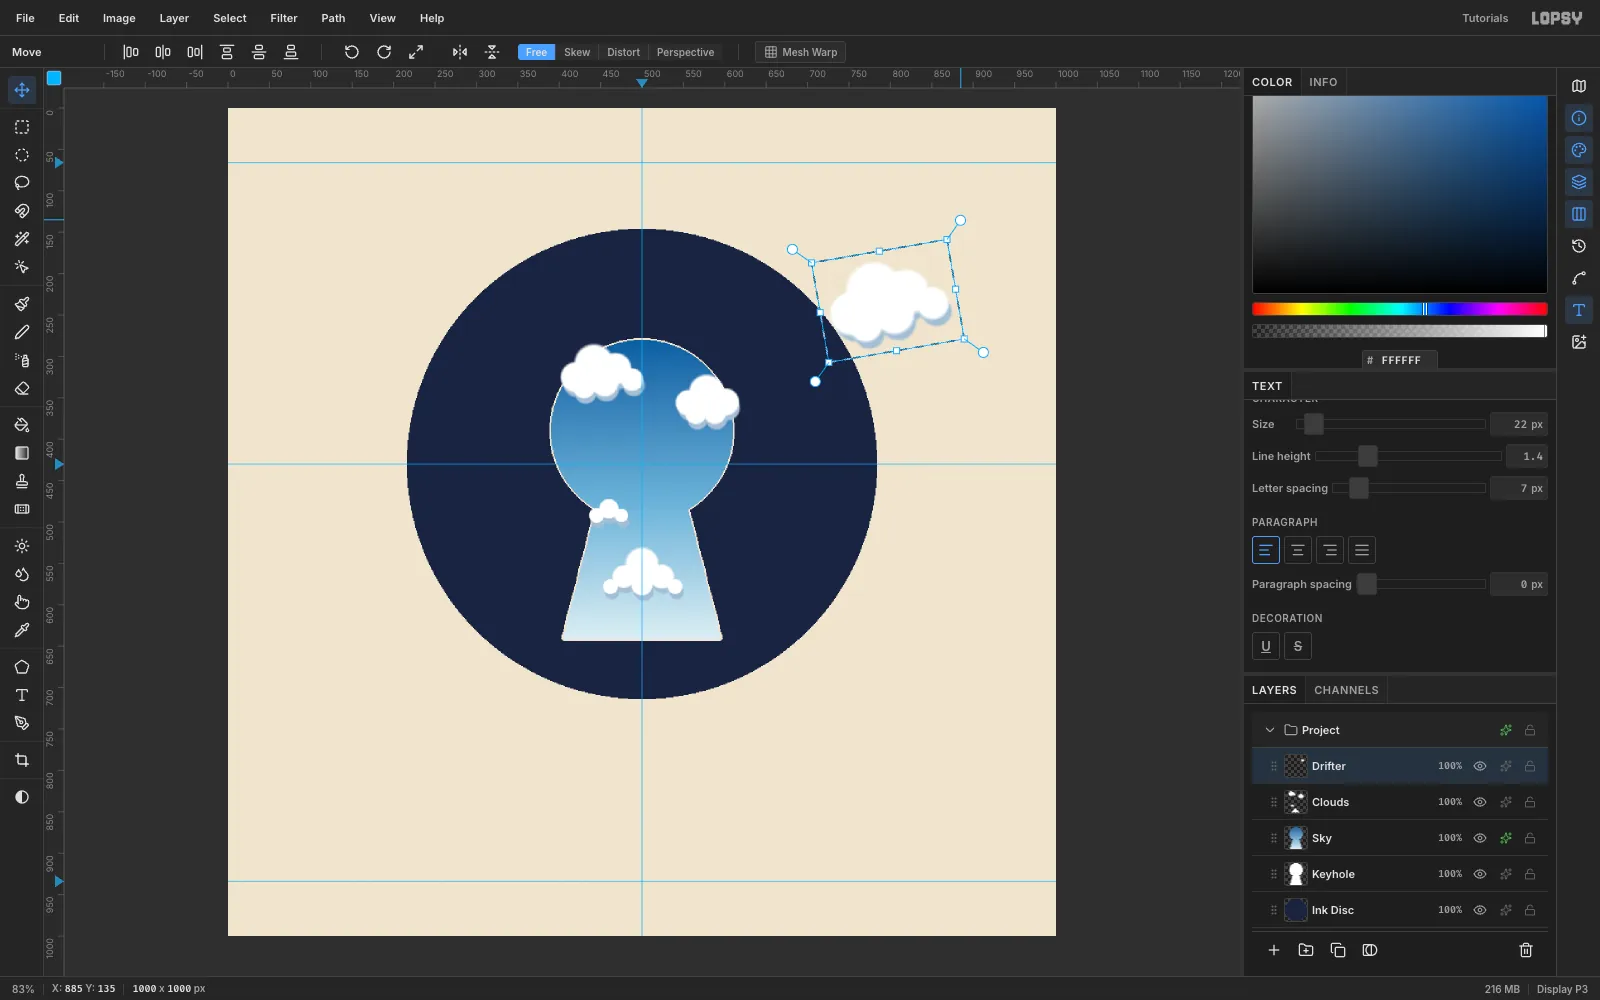
- Shift-drag the bottom-right corner handle out until the cloud is about 1.45× its size, then press Cmd+D.
- Marquee the bigger cloud once more. Drag the round rotation handle just outside the top-right corner counterclockwise by about 10°.
- Press Cmd+D to commit.
-
Trim the clouds to the keyhole
Repeat the clipping trick on
Clouds:- Magic Wand the
Keyholestencil. - Click
Cloudsand choose Select → Inverse. - Press Delete, then Cmd+D.
Drifteris on its own layer, so it stays outside the keyhole.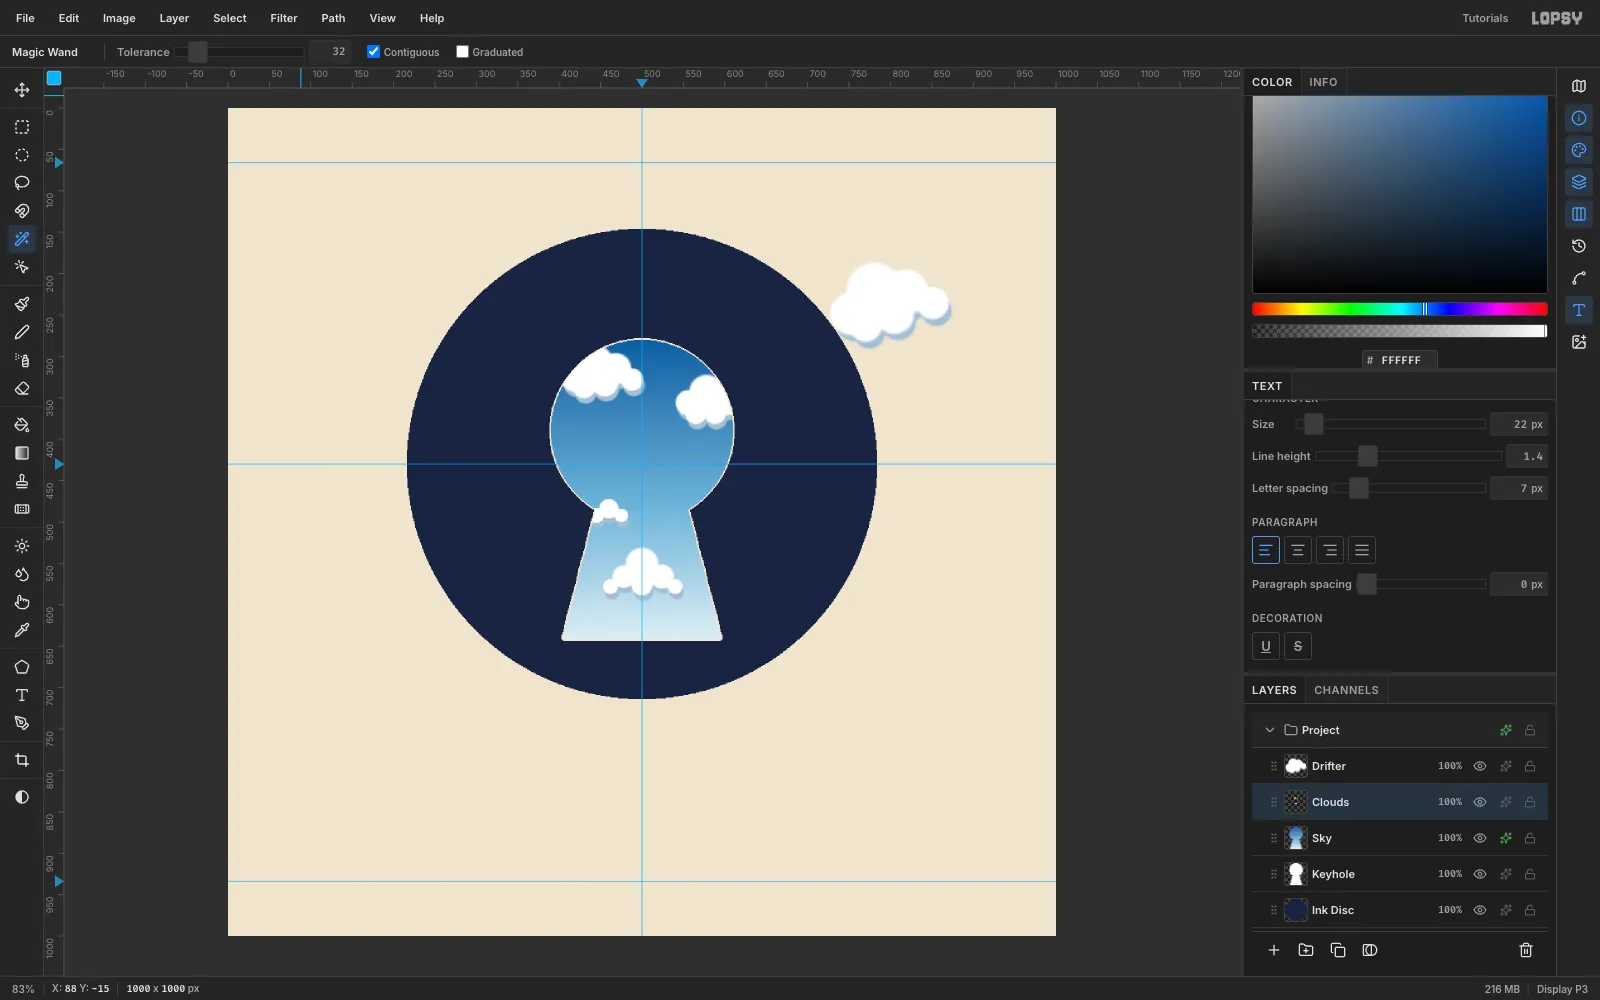
- Magic Wand the
-
Build the floating bowler hat
The hat is the hero, so make it big. Click the
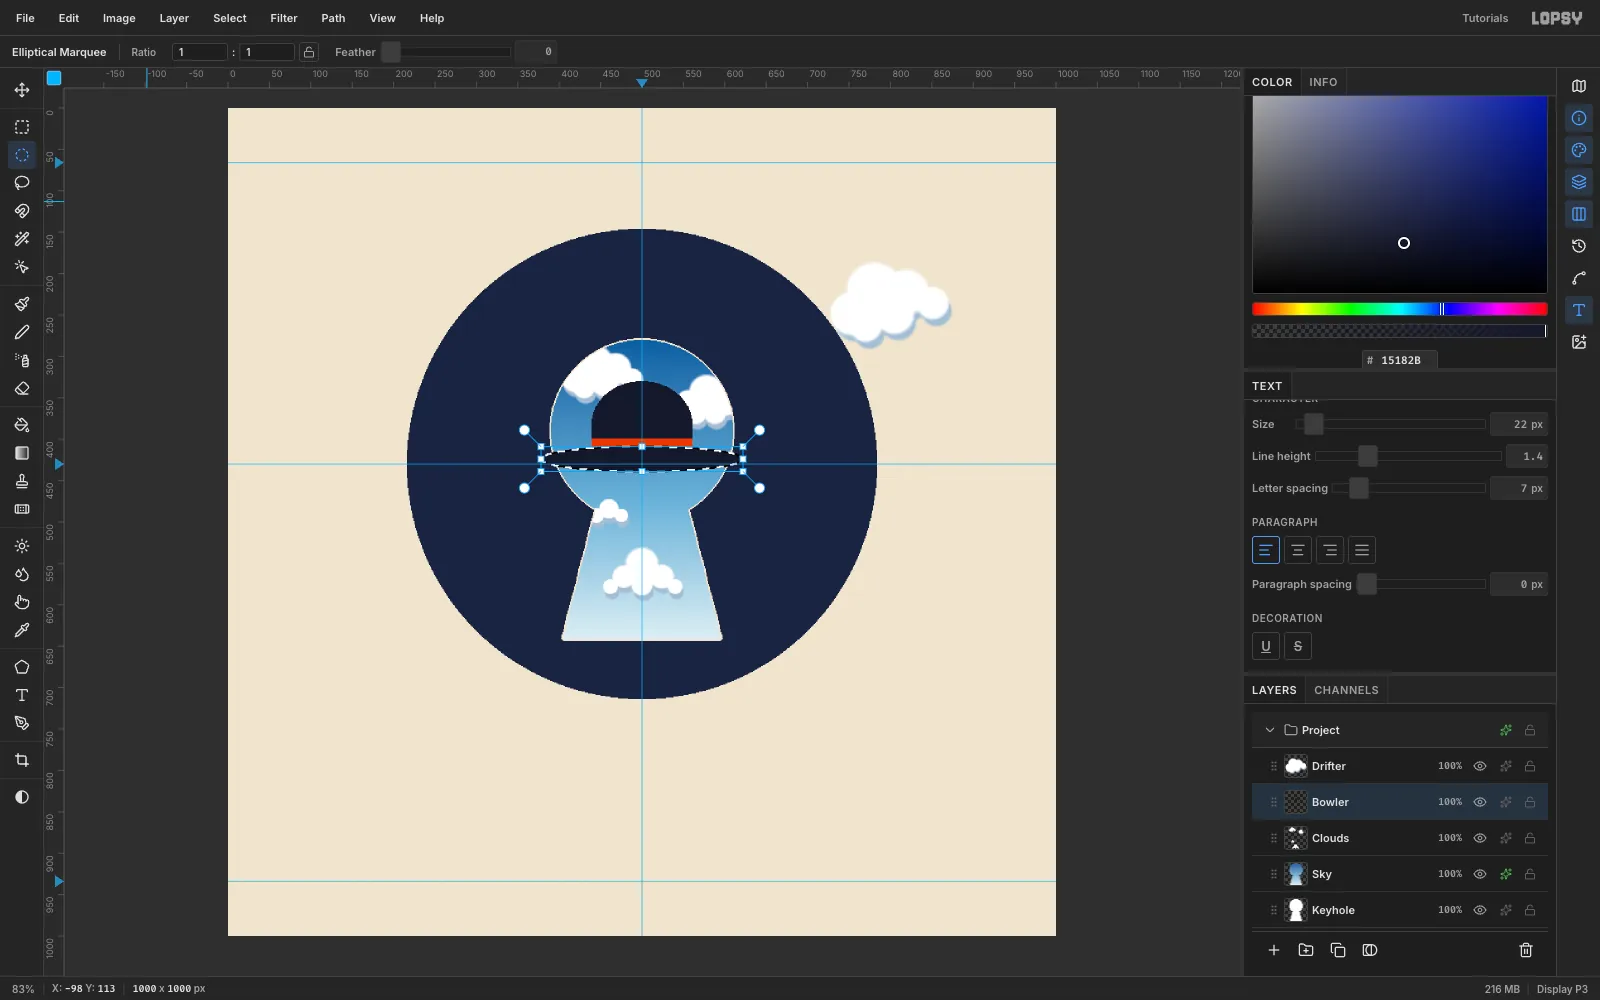
Cloudslayer and then Add Layer, and name the new layerBowler. Set the foreground to#15182Band build the hat from simple marquee fills. Press Cmd+D between shapes.- Crown top: Elliptical Marquee from (439, 330) to (561, 434), then Edit → Fill.
- Crown sides: Rectangular Marquee from (439, 381) to (561, 419), then Fill. This gives the dome straight sides.
- Band: Rectangular Marquee from (439, 399) to (561, 417). Set the foreground to
#D9481Cand Fill. - Brim: set the foreground back to
#15182B. Elliptical Marquee from (378, 409) to (622, 439), then Fill.
The brim pokes out past the keyhole onto the night sky. That's a second small paradox: the hat is in the daytime and the night at once.
-
Give the hat form and an outline
Open the Layer effects for
Bowler:- Inner Glow: color
#4B5A8C, Size16, Opacity70. It adds a soft sheen to the crown. - Stroke: color
#F1E4CC, Outside, Width2. This matches the keyhole outline and makes the brim visible where it crosses the navy disc.
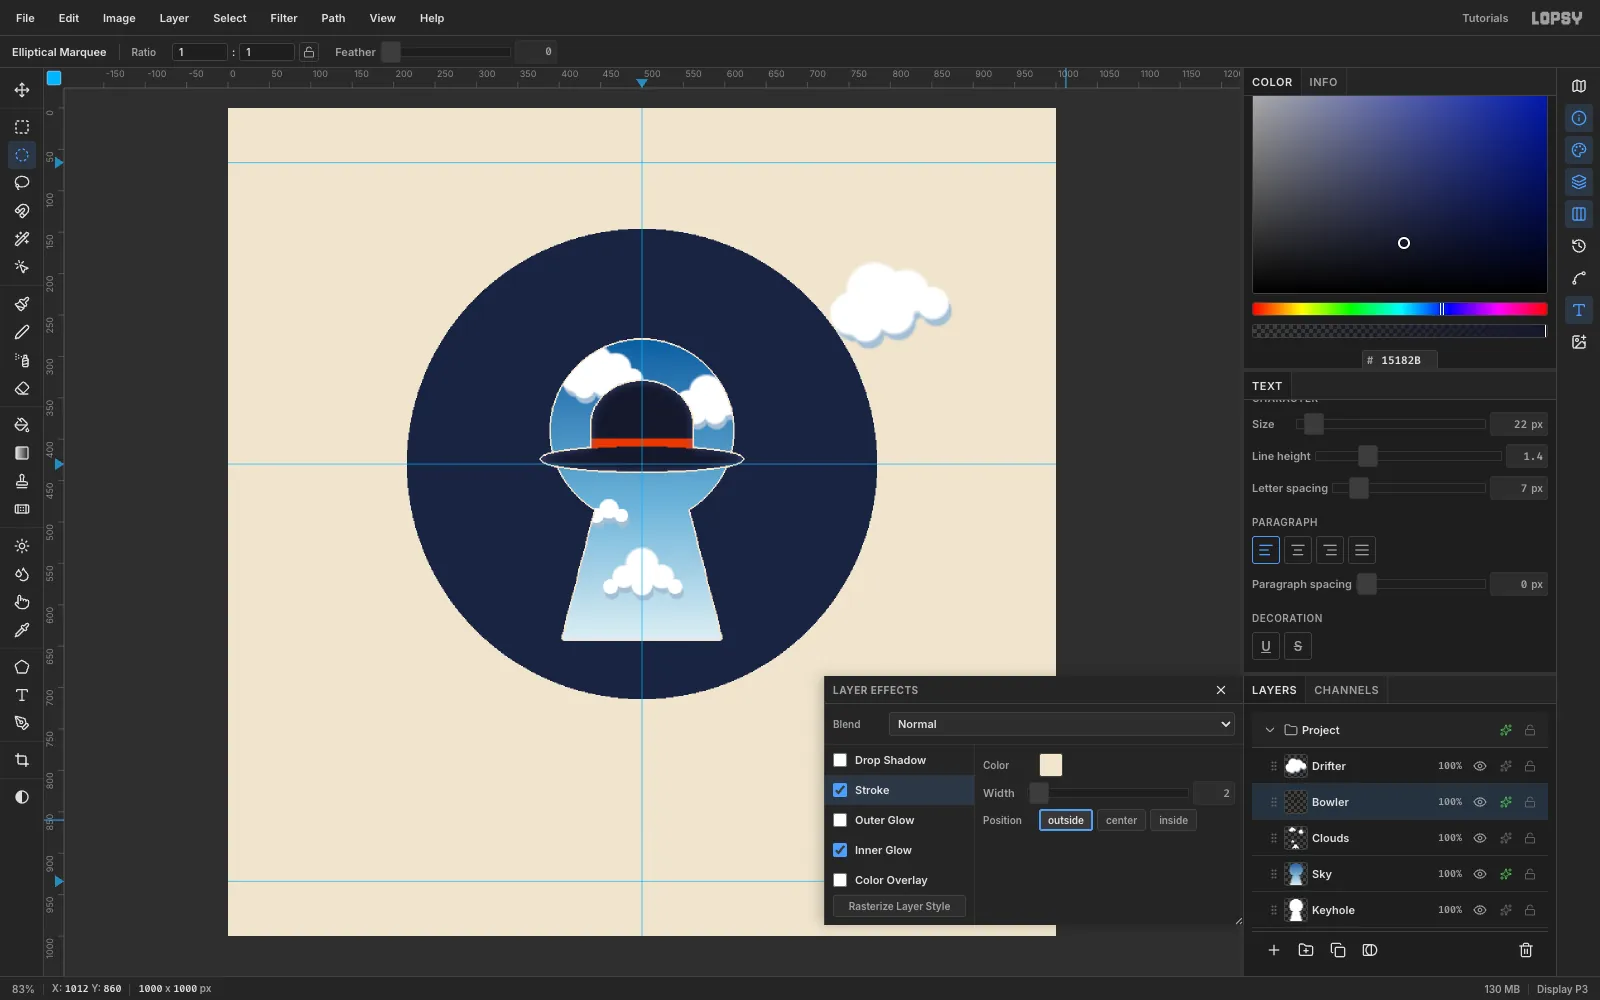
- Inner Glow: color
-
Add a crescent moon and stars
Click
Ink Discand then Add Layer, so the new layers sit under the sky. Name the new layerMoon.- Set the foreground to
#F4E7C6. Elliptical Marquee from (306, 254) to (378, 326) and Fill. - Marquee a second circle from (325, 248) to (389, 312) and press Delete to bite out a crescent.
- Give the moon an Outer Glow in
#F6D58Ewith Size22and Opacity55.
Add another layer,
Stars. Click about 30 small brush dabs across the disc with Size3,4and a few7. Keep them away from the keyhole, the moon and the escaping cloud.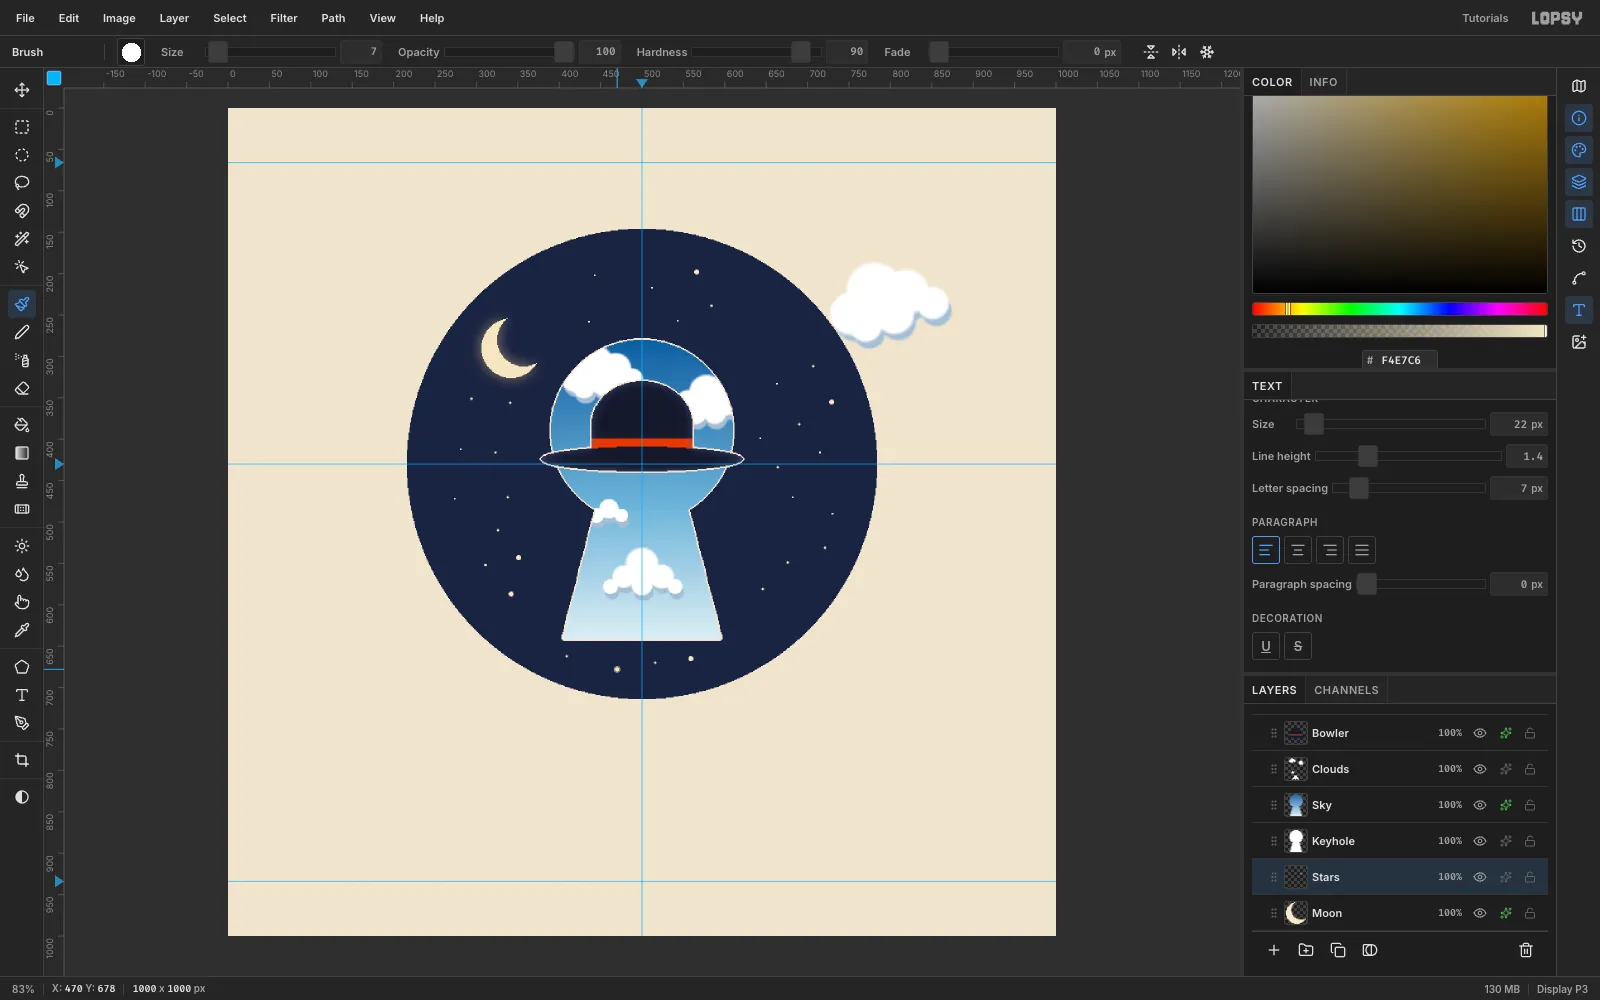
- Set the foreground to
-
Trail the cloud out of the keyhole
The big cloud should look like it came through the keyhole. Click
Drifter, add a layer calledPuffs, and paint three tiny clouds with the same shadow-then-white dabs. They step from the keyhole's upper-right edge toward the big cloud and get bigger as they go, from dabs of about Size14up to30.Give
Driftera soft Drop Shadow in#1B2340, with Offset X6, Offset Y8, Blur10and Opacity35, so it floats above the badge.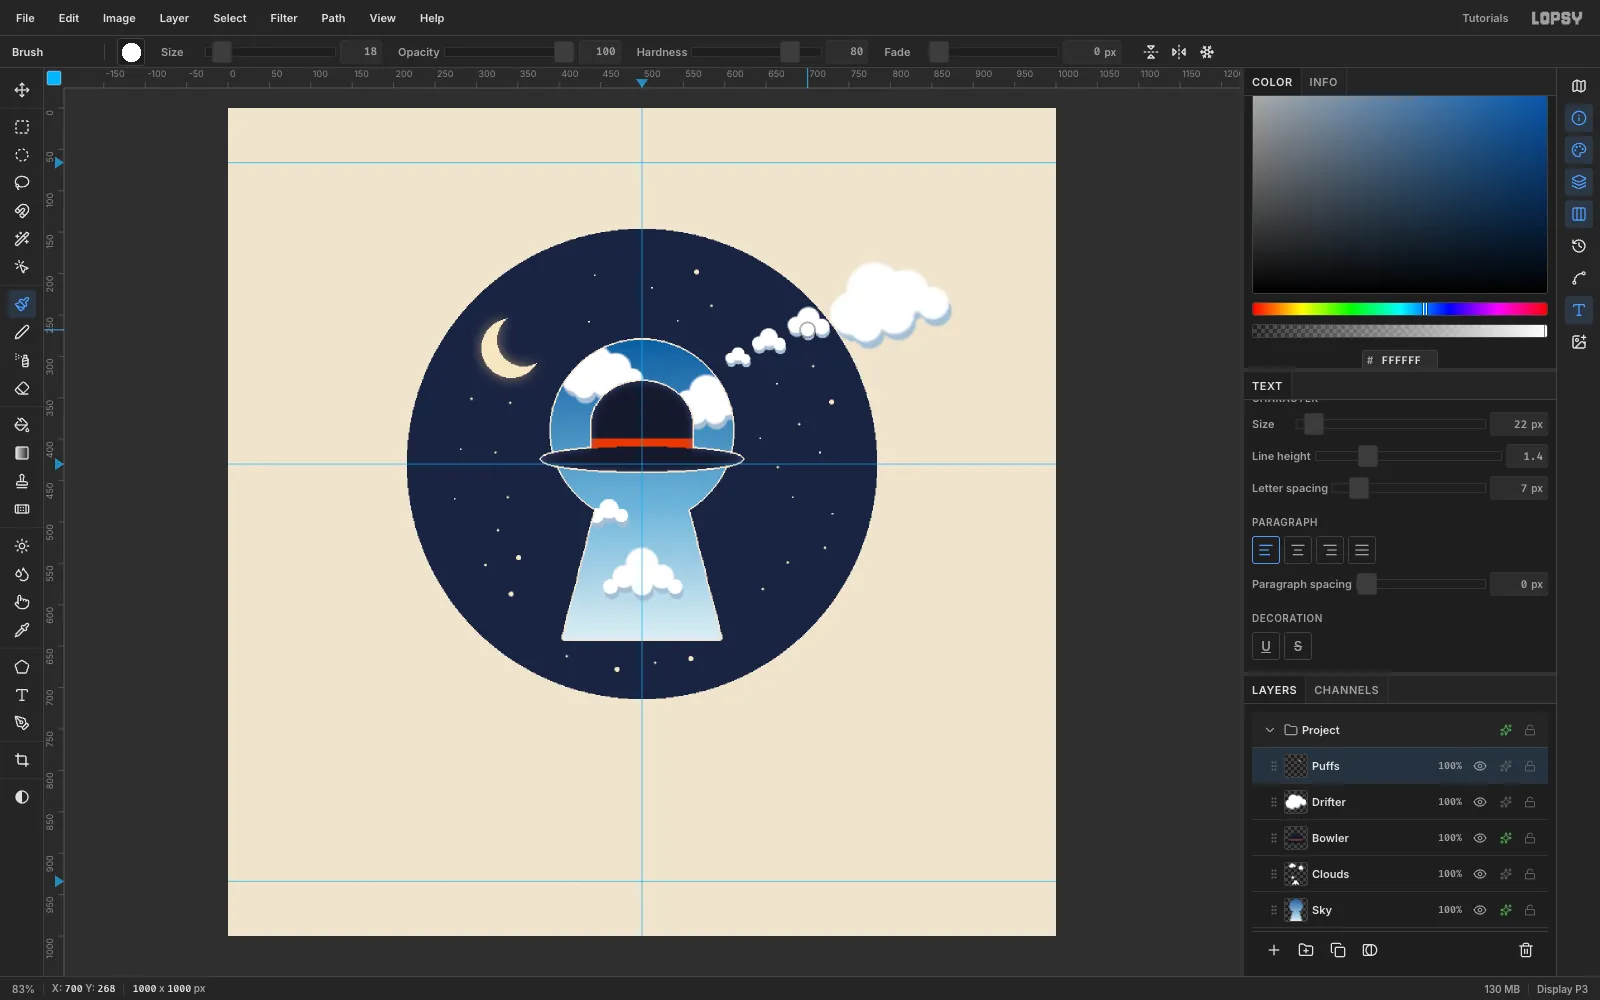
-
Frame it with a terracotta ring
Click
Bowlerand Add Layer so the ring sits below the drifting clouds. Name itRing.- Set the foreground to
#C2552F. Elliptical Marquee from (186, 116) to (814, 744), then Fill. - Marquee from (216, 146) to (784, 714) and press Delete to hollow it out.
- For a gold hairline, set the foreground to
#F3B35A. Marquee from (211, 141) to (789, 719) and Fill, then marquee from (213, 143) to (787, 717) and press Delete.
This leaves a thin gold line on the inside of the terracotta and a sliver of cream between the gold and the navy.
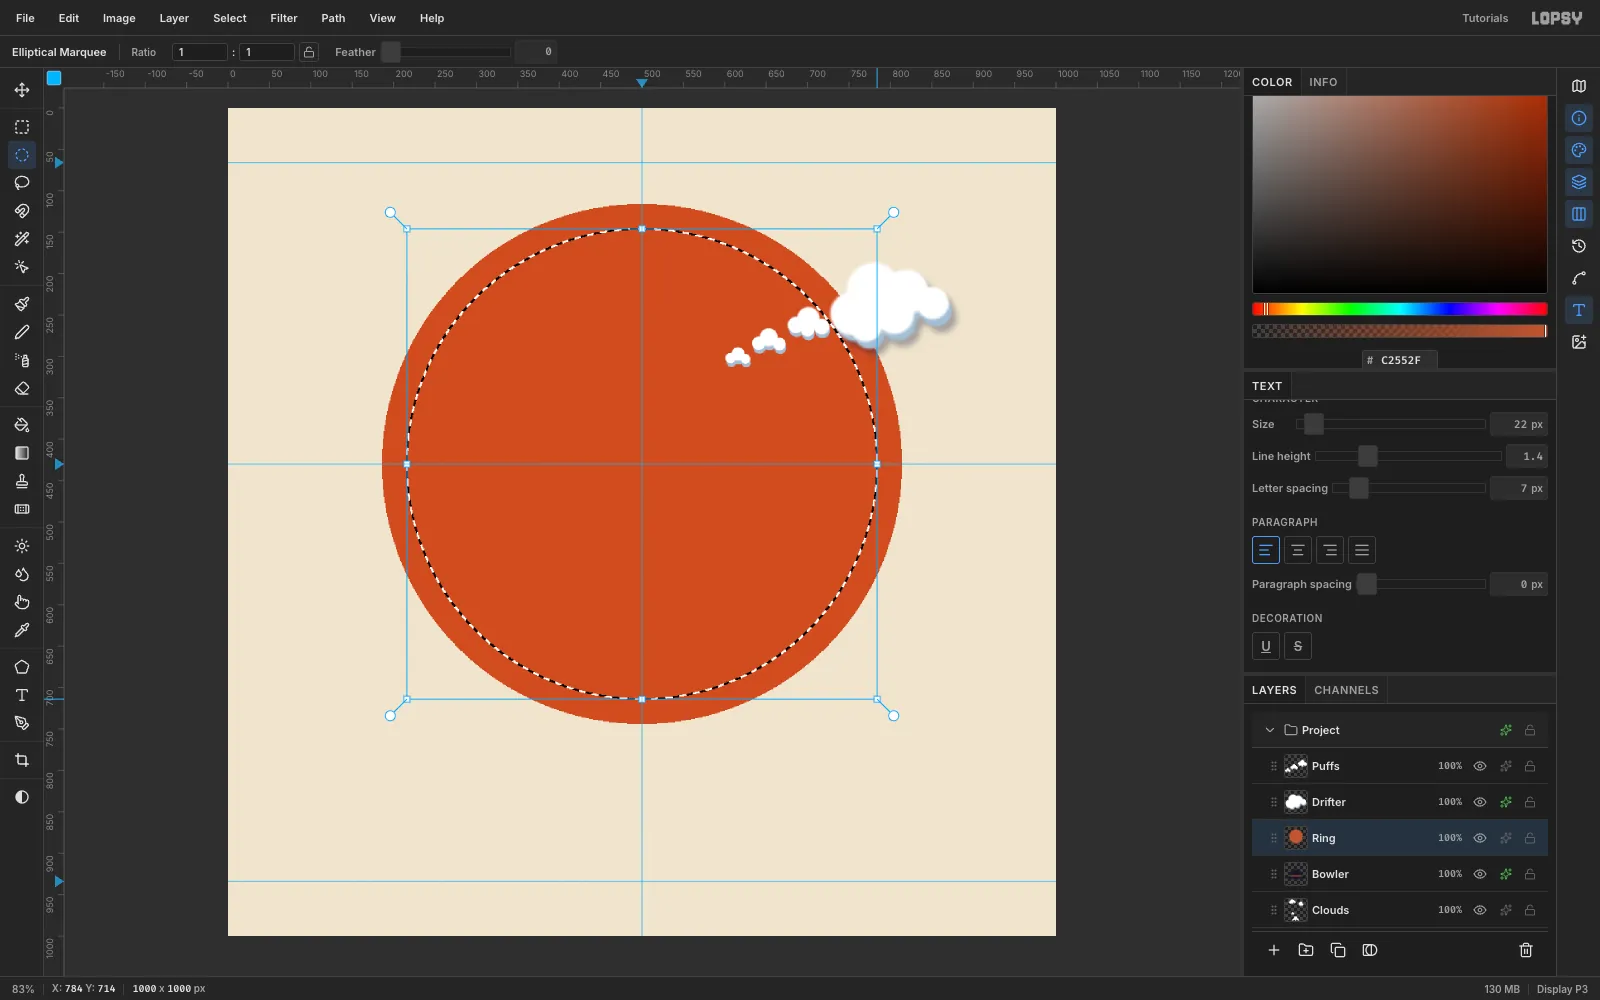
- Set the foreground to
-
Place 32 marquee bulbs with radial symmetry
Add a layer named
Bulbsand pick the Brush.- Click the Radial Symmetry button in the options bar and set Segments to
32. - Cmd-click the center of the disc at (500, 430) to move the symmetry center there.
- Set the foreground to
#F8DB94, Size11and Hardness95. Click once on the middle of the ring at (500, 129).
One click stamps all 32 bulbs. Turn Radial Symmetry off again, then give
Bulbsan Outer Glow in#FFD27Awith Size10and Opacity70.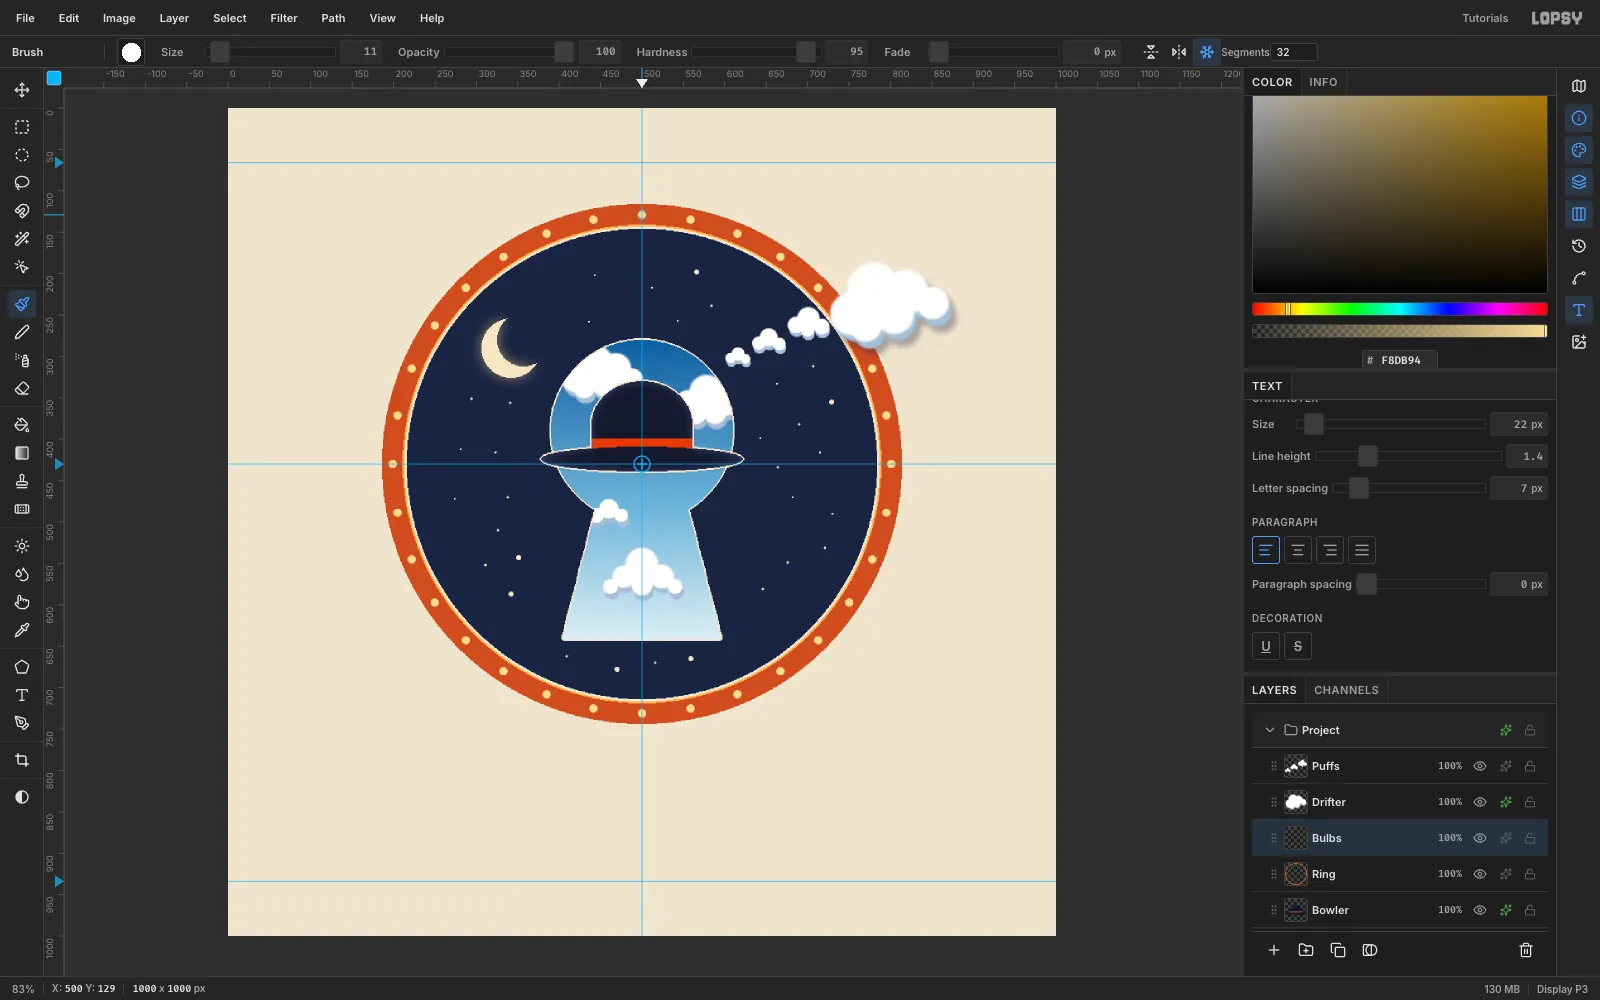
- Click the Radial Symmetry button in the options bar and set Segments to
-
Delete the stencil and group the emblem
You don't need the stencil any more. Click the
Keyholelayer and click Delete Layer.Click
Ink Disc, then Shift-clickPuffsto select everything in between. Choose Layer → Group Layers and rename the groupEmblem. Now you can move the whole badge in one drag or adjust it as a unit.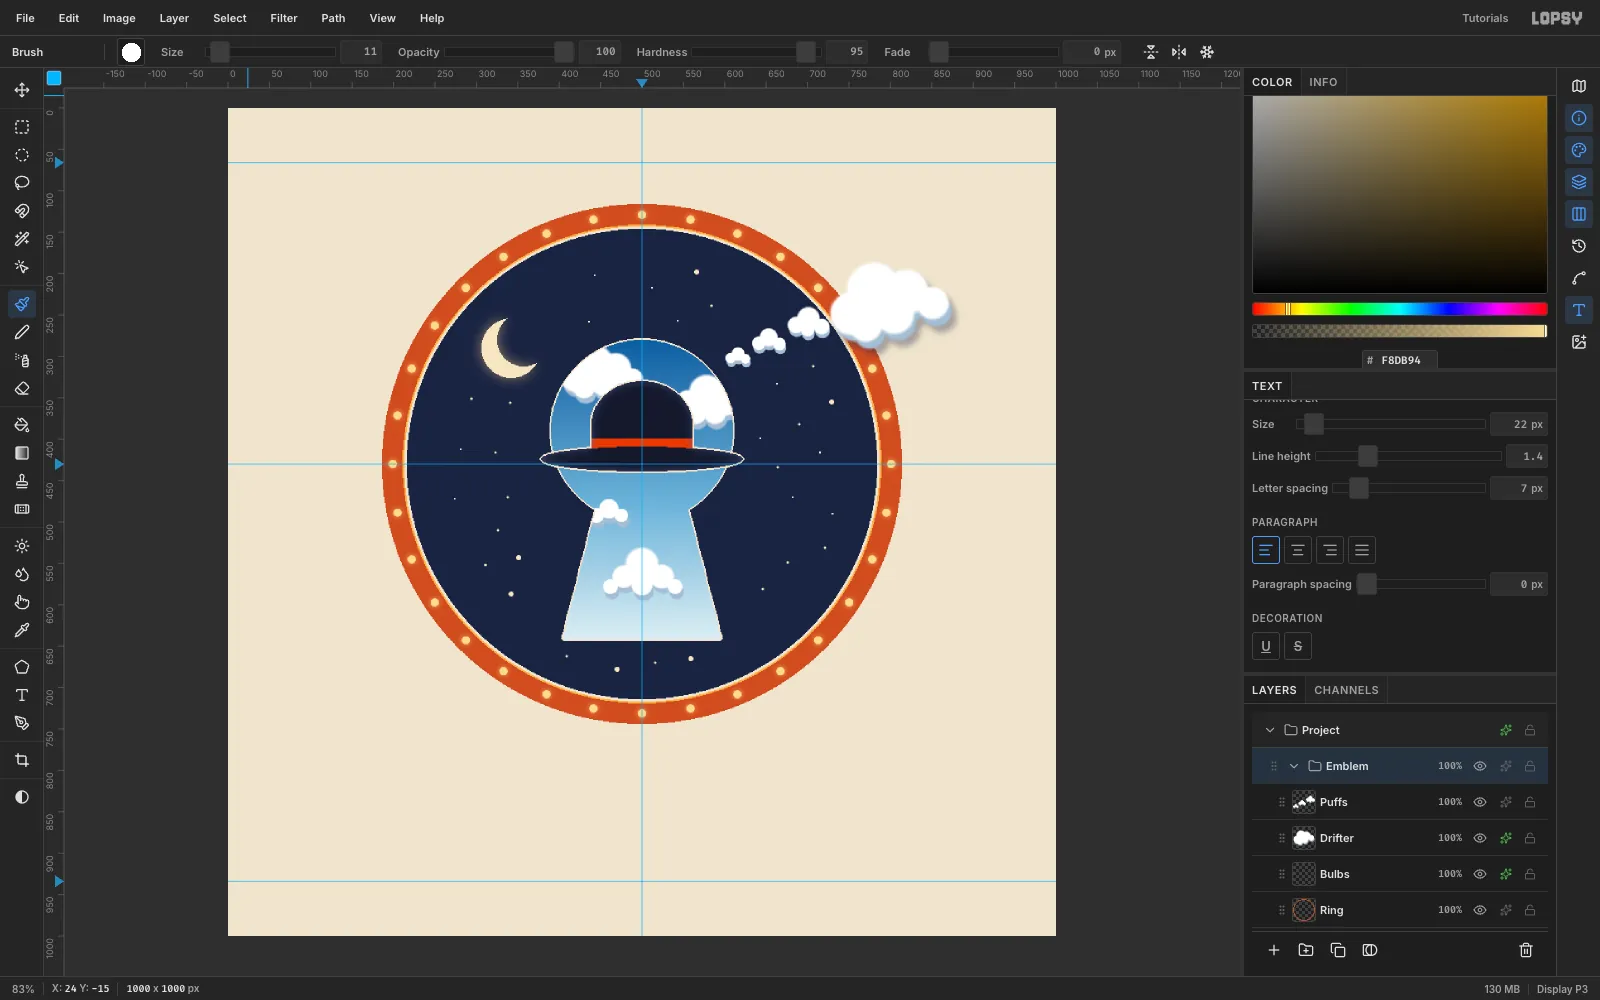
-
Make the seal float with a soft shadow
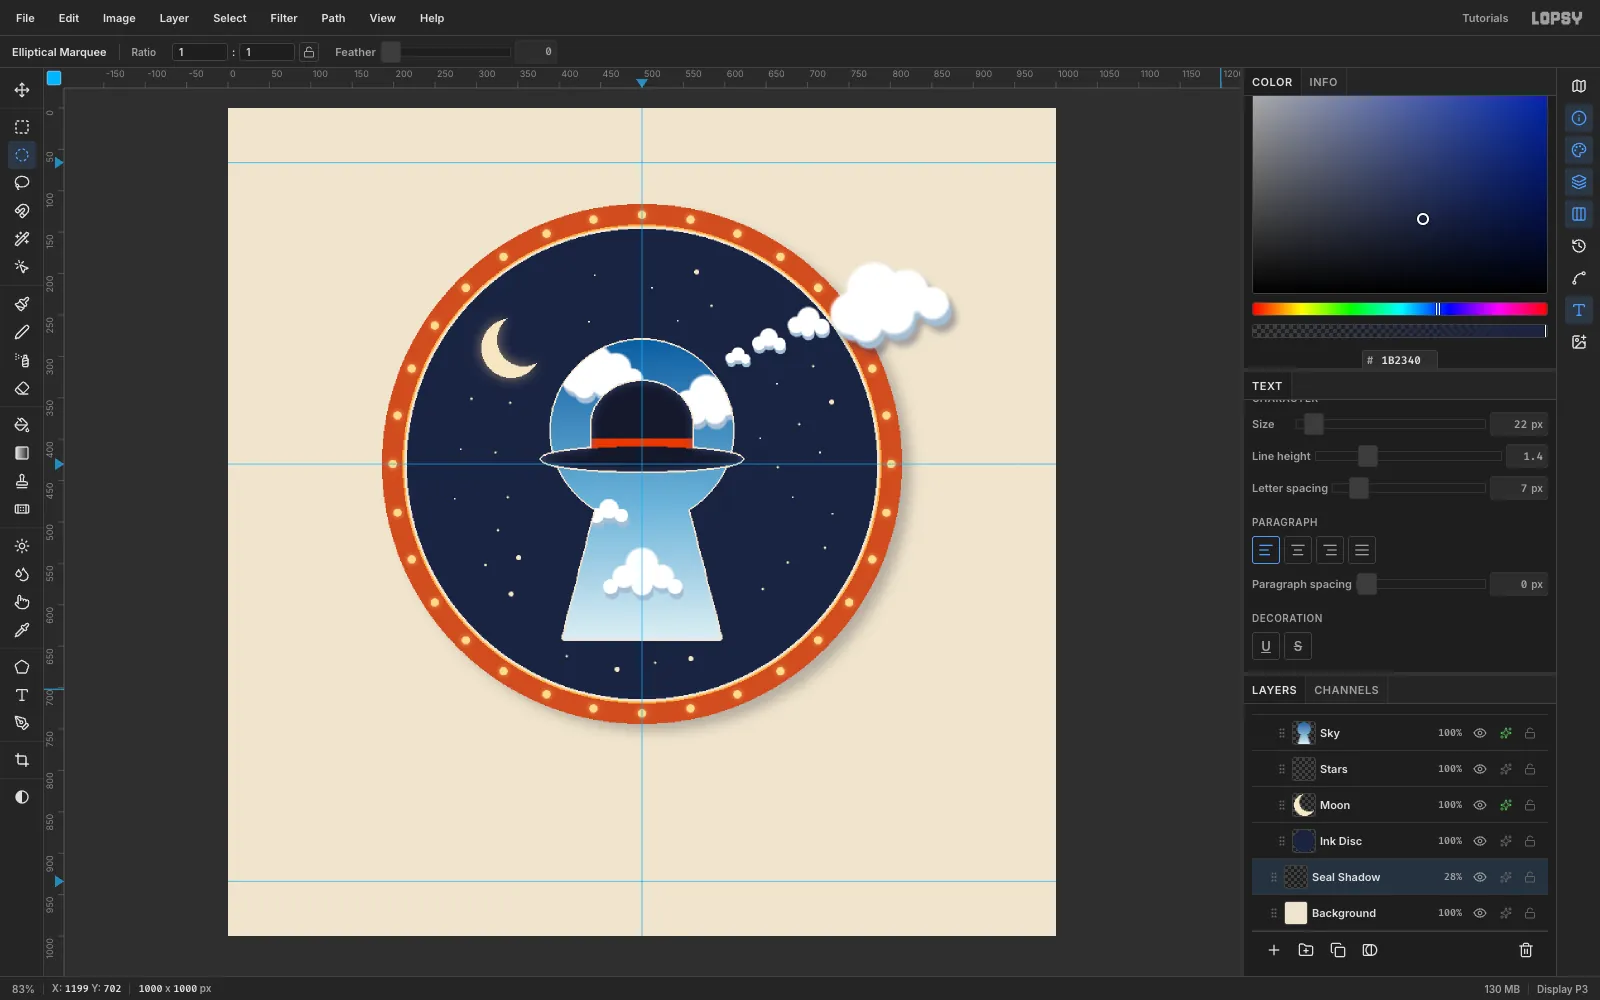
Floating objects that cast shadows are a staple of surrealism. Click
Backgroundand add a layer calledSeal Shadow.- Set the foreground to
#1B2340. Marquee from (200, 128) to (824, 752), which is slightly lower and to the right of the badge, and Fill. - Choose Filter → Gaussian Blur…, set Radius to
22and click Apply. - Marquee from (200, 130) to (800, 730) and press Delete. Only the shadow outside the ring is left, so it doesn't gray out the cream sliver.
- Set the layer's blend mode to Multiply and its opacity to
28%.
- Set the foreground to
-
Set the wordmark
With
Seal Shadowstill active (so you don't restyle another text layer), pick the Text tool:- XANADU: font Playfair Display, weight Black, size
116. Set Letter spacing to4in the Text panel and the color to#1B2340. Click in empty canvas, typeXANADU, press Tab, then Move-drag it so it's centered on the vertical guide, with its top about 55 px below the ring. - CINEMA: font Italiana, size
34, Letter spacing24, color#B84A26. Center it just under XANADU.
Add a
Ruleslayer. With the Brush at Size3and Hardness100, click and then Shift-click to draw a navy line on each side of CINEMA, matching XANADU's width. Finish each outer end with a single Size8terracotta dot.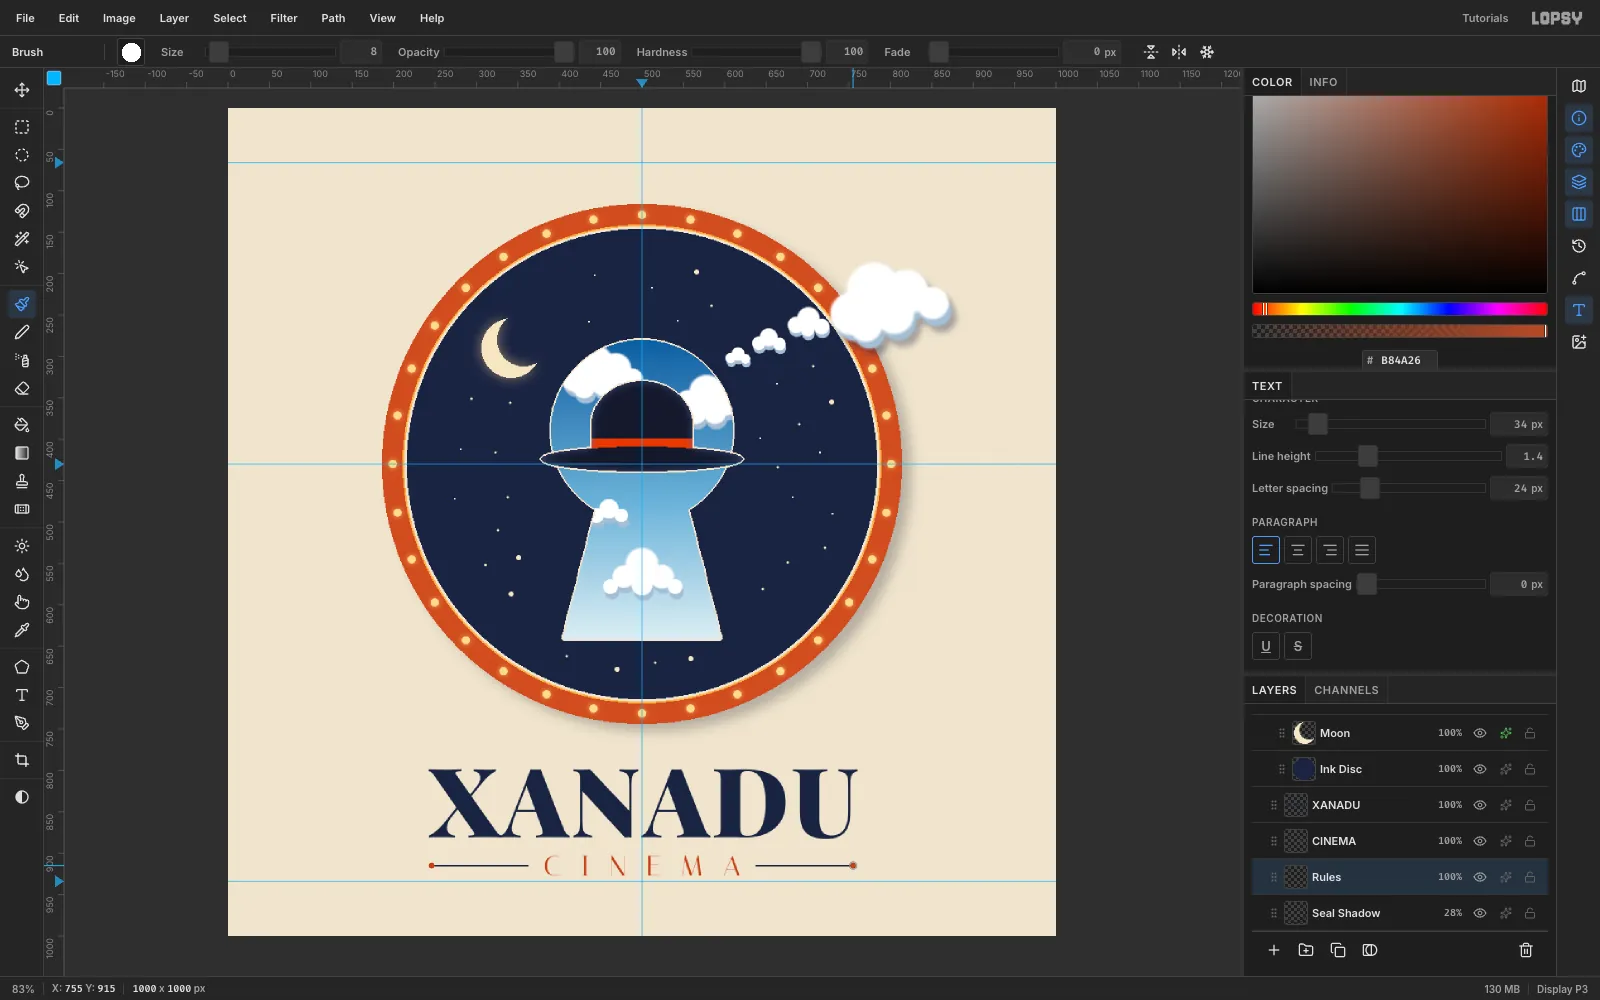
- XANADU: font Playfair Display, weight Black, size
-
Draw an arc with the Pen tool
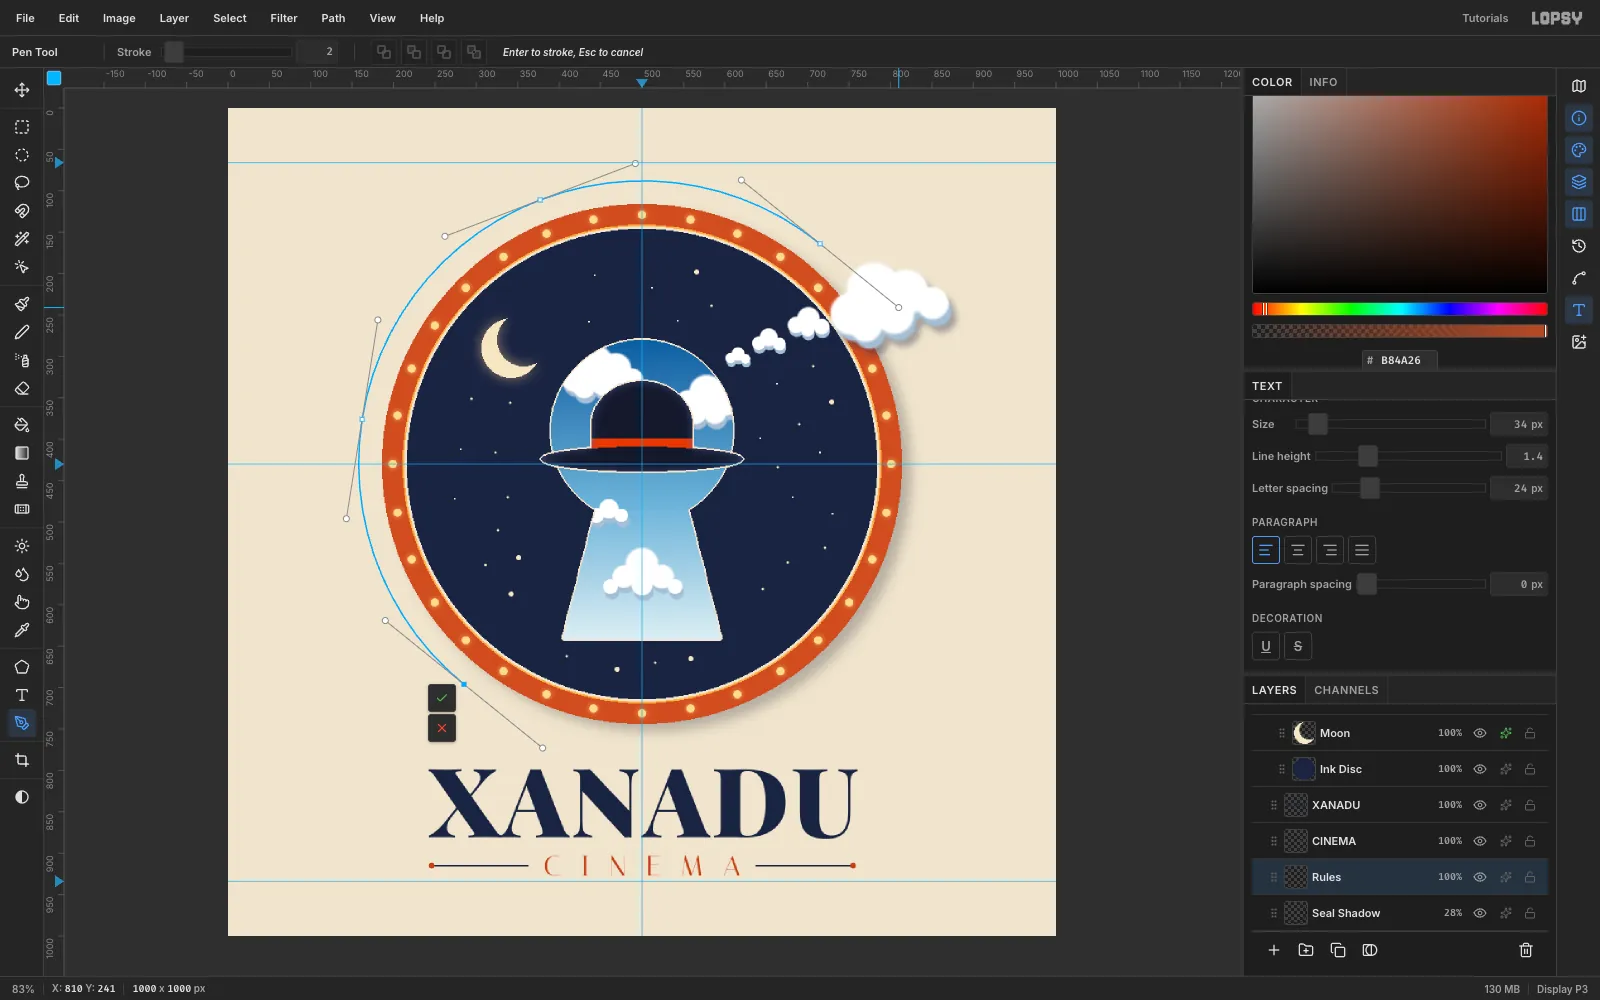
The seal text will run along a circle concentric with the ring. Pick the Pen tool and place four smooth anchors on a 342 px radius around (500, 430). Press at each point and drag along the circle to pull out handles about 122 px long:
- (285, 696), bottom left
- (162, 376), left
- (377, 111), top left
- (715, 164), top right
Click the ✓ Commit path button to store it as a path.
-
Put the seal text on the path
Click the
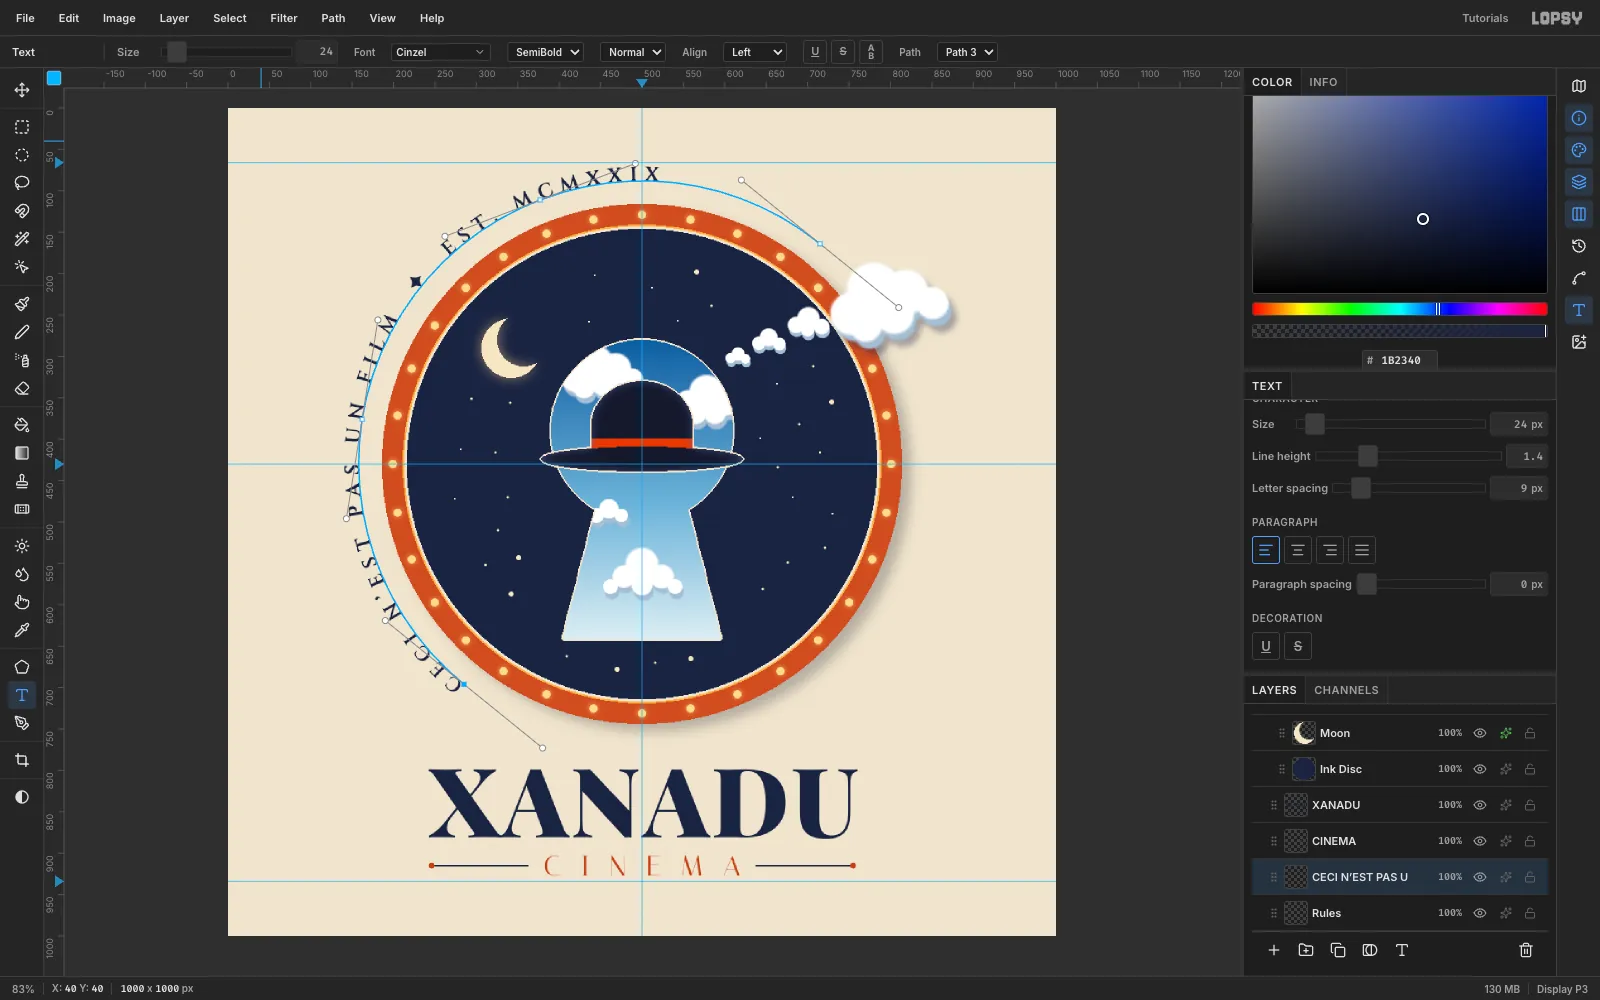
Ruleslayer so you start from a raster layer. Set the Text tool to Cinzel, weight SemiBold, size24, Letter spacing9, color#1B2340. Click in empty canvas near the top-left corner and type:CECI N’EST PAS UN FILM ✦ EST. MCMXXIXPress Tab. Then set the Path dropdown in the options bar to your new path. The line wraps around the badge, and the ✦ lands at about ten-thirty.
-
Add film grain
Add a layer called
Grain, set the foreground to#808080and choose Edit → Fill. Choose Filter → Add Noise…, pick Mono and Gaussian, set Amount to40and click Apply.Set
Grainto Overlay at30%opacity. Collapse theEmblemgroup, then dragGrainby its grip to the top of the Layers panel so it covers everything.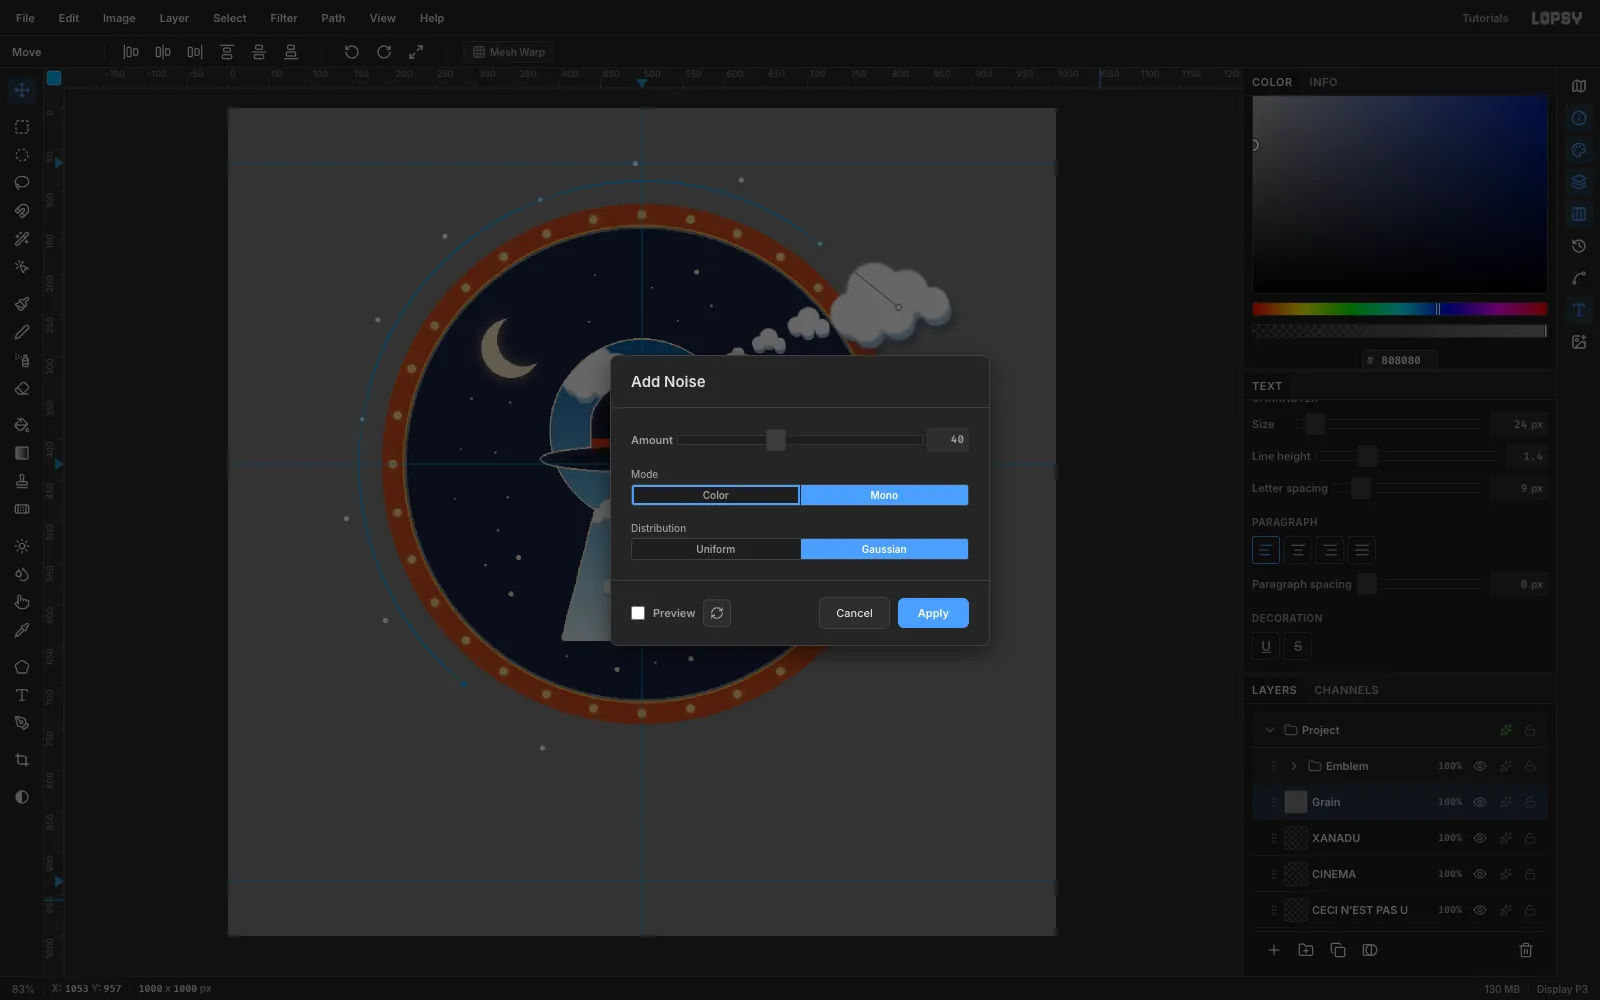
-
Warm the badge with a Photo Filter
Open the
Emblemgroup's effects drawer, click Add Adjustment and choose Photo Filter. Set Density to10. The warm filter turns the white clouds a creamy color and gives the terracotta a vintage-print feel, without touching the type.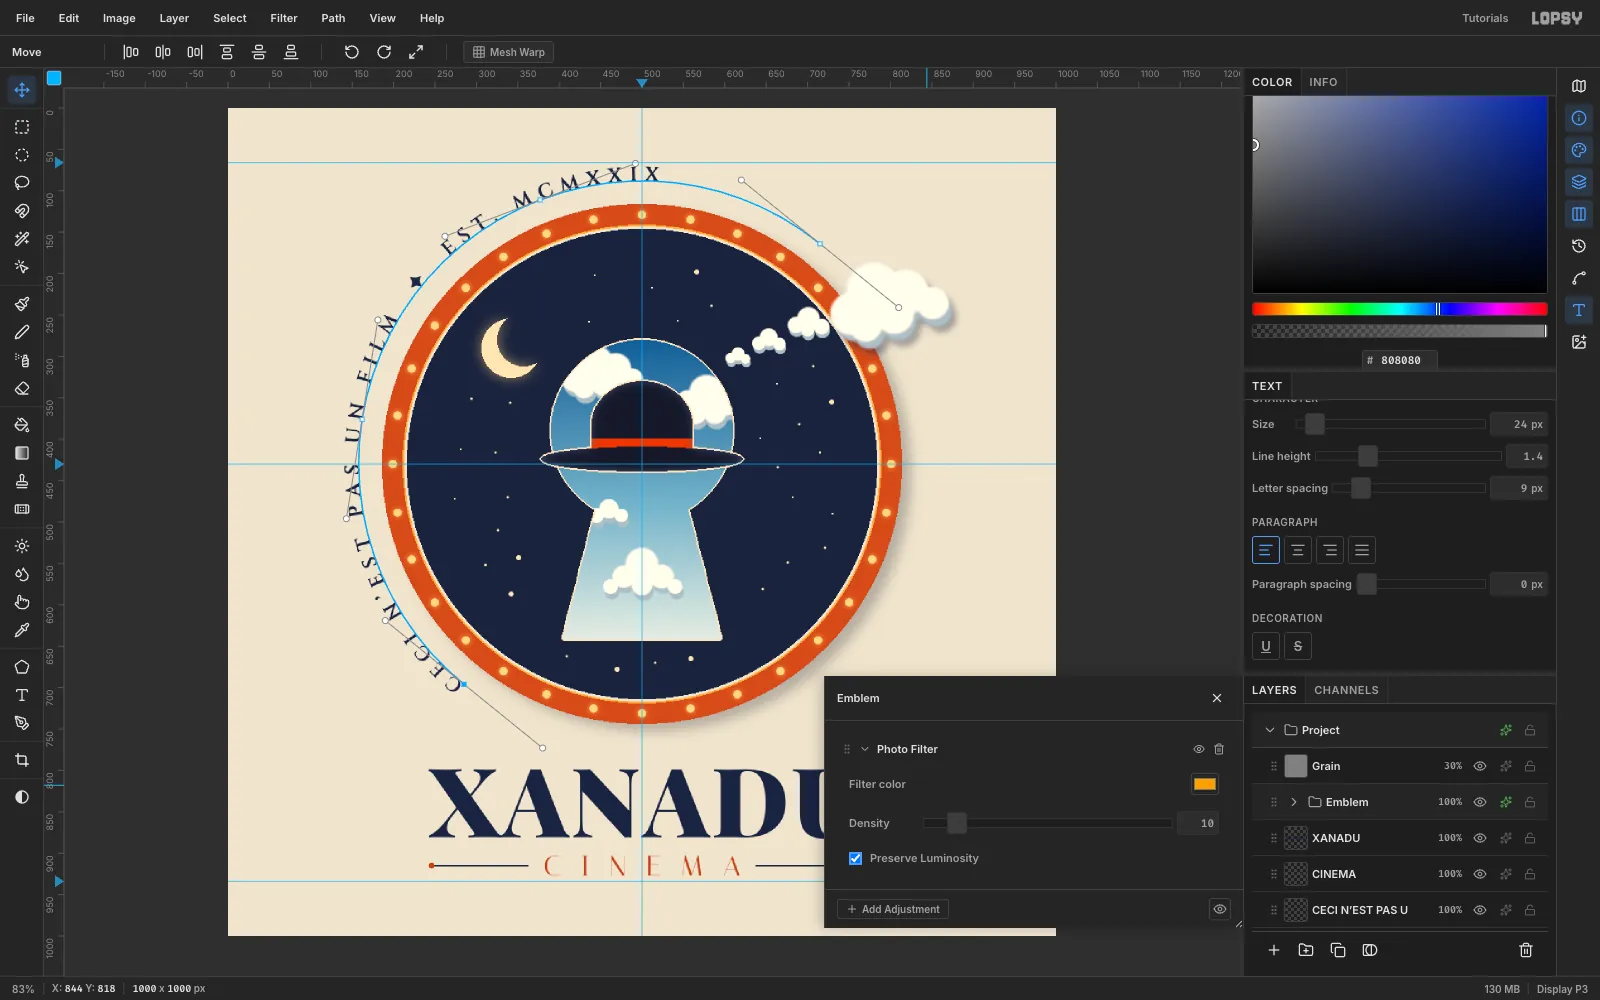
-
Export the finished logo
Toggle View → Show Guides off to check the composition. Choose File → Quick Export PNG for the artwork, and File → Save Project to keep the layered
.lopsyfile.For favicons and small sizes, save a simplified variant as well: hide the seal text and cut the bulbs down to 16. The keyhole and hat still read at 64 px.