Make a Liquid Chrome Text Billboard
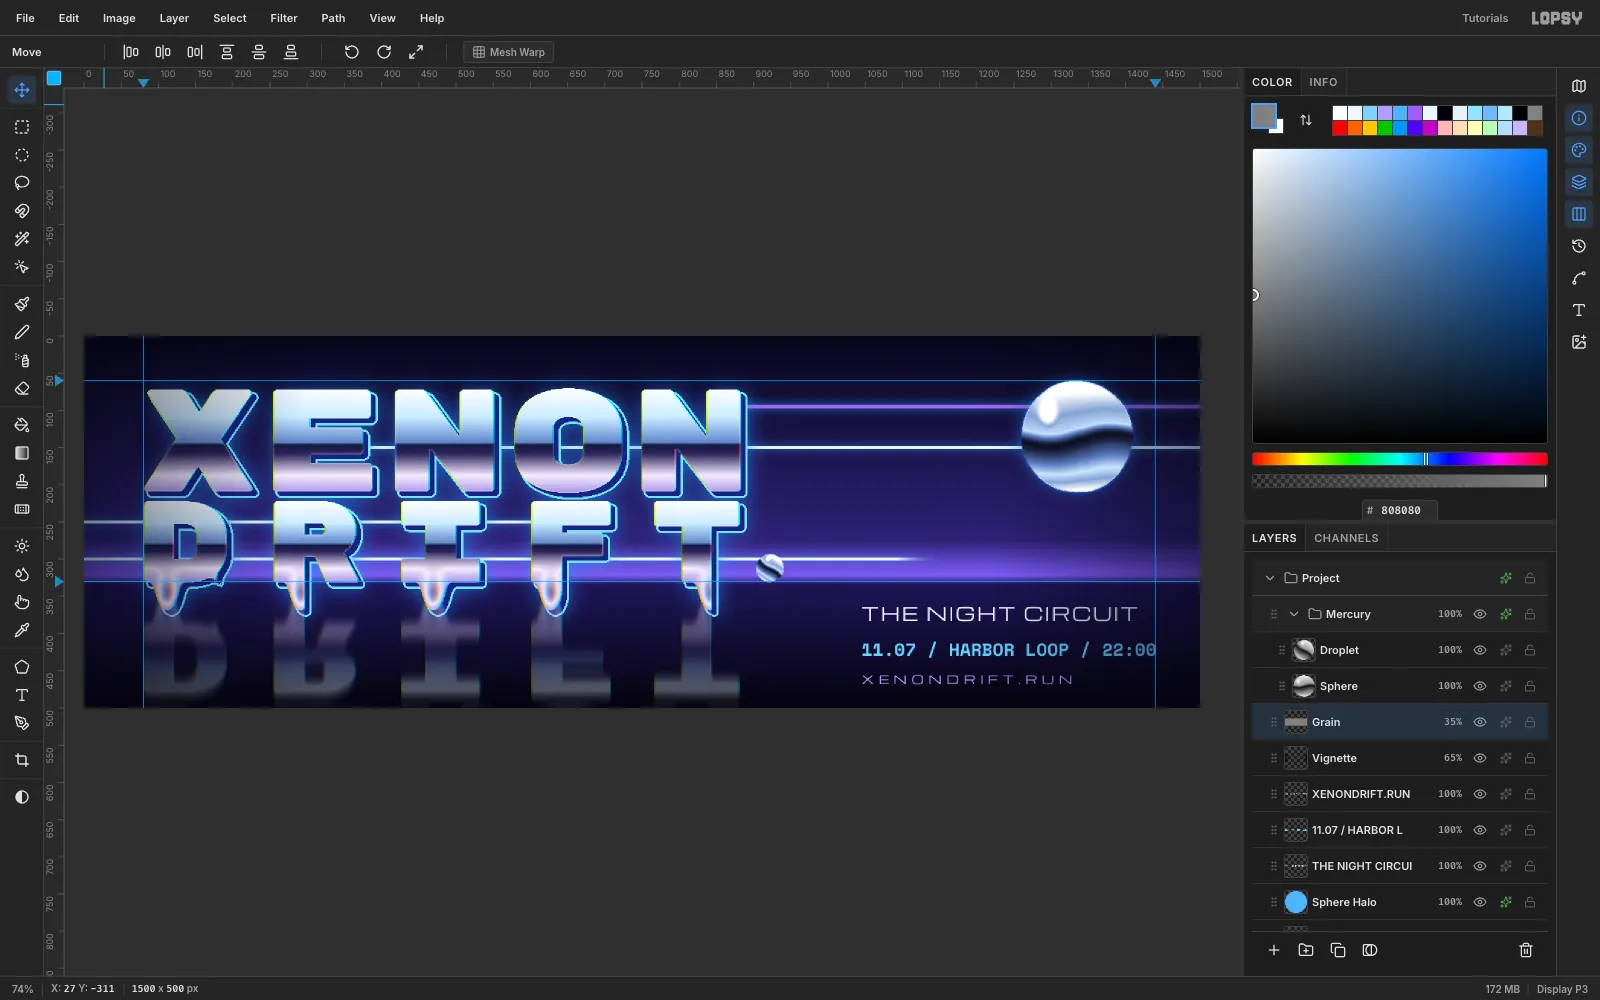
Build a liquid-metal billboard in Lopsy with dripping chrome type, a mirror-floor reflection, a molten chrome sphere, xenon light streaks and film grain.
Liquid metal has a simple recipe. You need a sky reflected as bands of light and dark, a sharp dark "horizon" line through every shape, and edges that look like they're still melting. In this tutorial you'll make a 3:1 roadside billboard for an imaginary night race, Xenon Drift. You'll build 80s-style chrome type that drips onto a mirror floor, a molten chrome sphere made with a group Gradient Map, and glowing xenon headlight streaks. You'll use gradients, the Magic Wand, Liquify, layer effects, filters, transforms and guides.
-
Paint a night sky with a hot horizon
Open Lopsy and create a 1500 × 500 document. Double-click
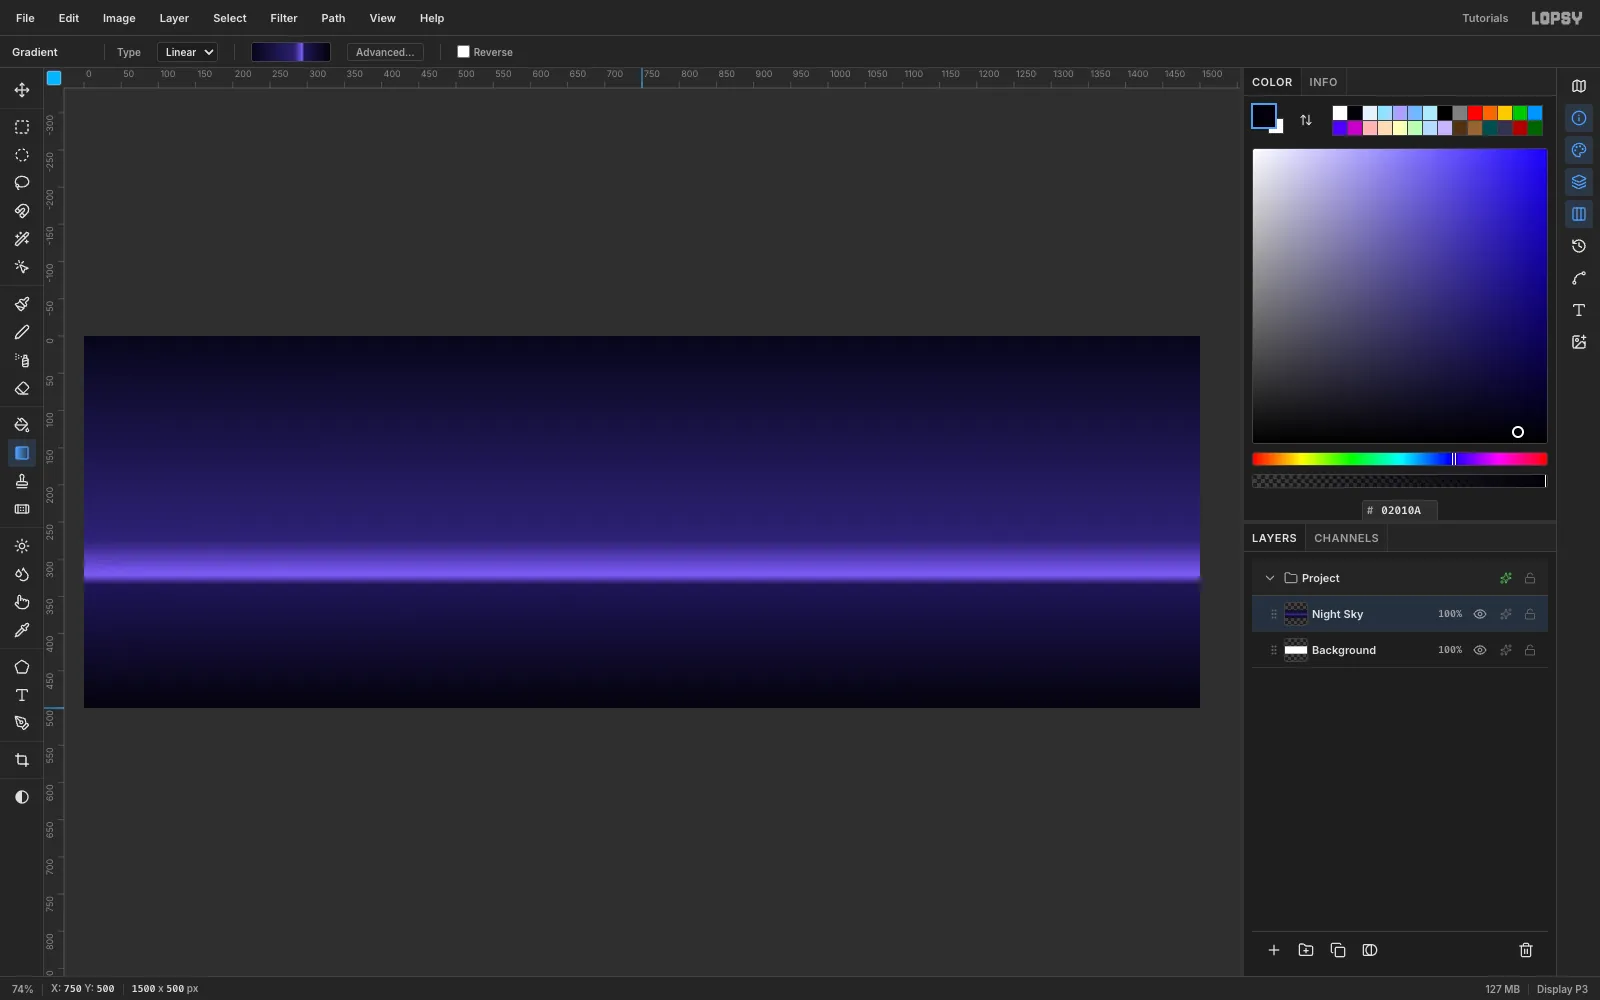
Layer 1in the Layers panel and rename itNight Sky.Pick the Gradient tool and click Advanced…. In the Gradient Editor, click the bar to add stops, then set these colors from left to right:
#07061Aat 0%#2C2170at 55%#7A5CF0at about 64%, the hot horizon#1C1552at 67%, where the floor starts#04030Cat 100%
Click Done. Hold Cmd and drag from the top edge of the canvas straight down to the bottom edge. Holding the key snaps the angle to vertical.
-
Add ruler guides
Click the top ruler above x =
80and x =1440to drop two vertical guides, one for each margin. Click the left ruler at y =60and y =330for two horizontal guides. The 330 guide is the horizon, where the headline will stand.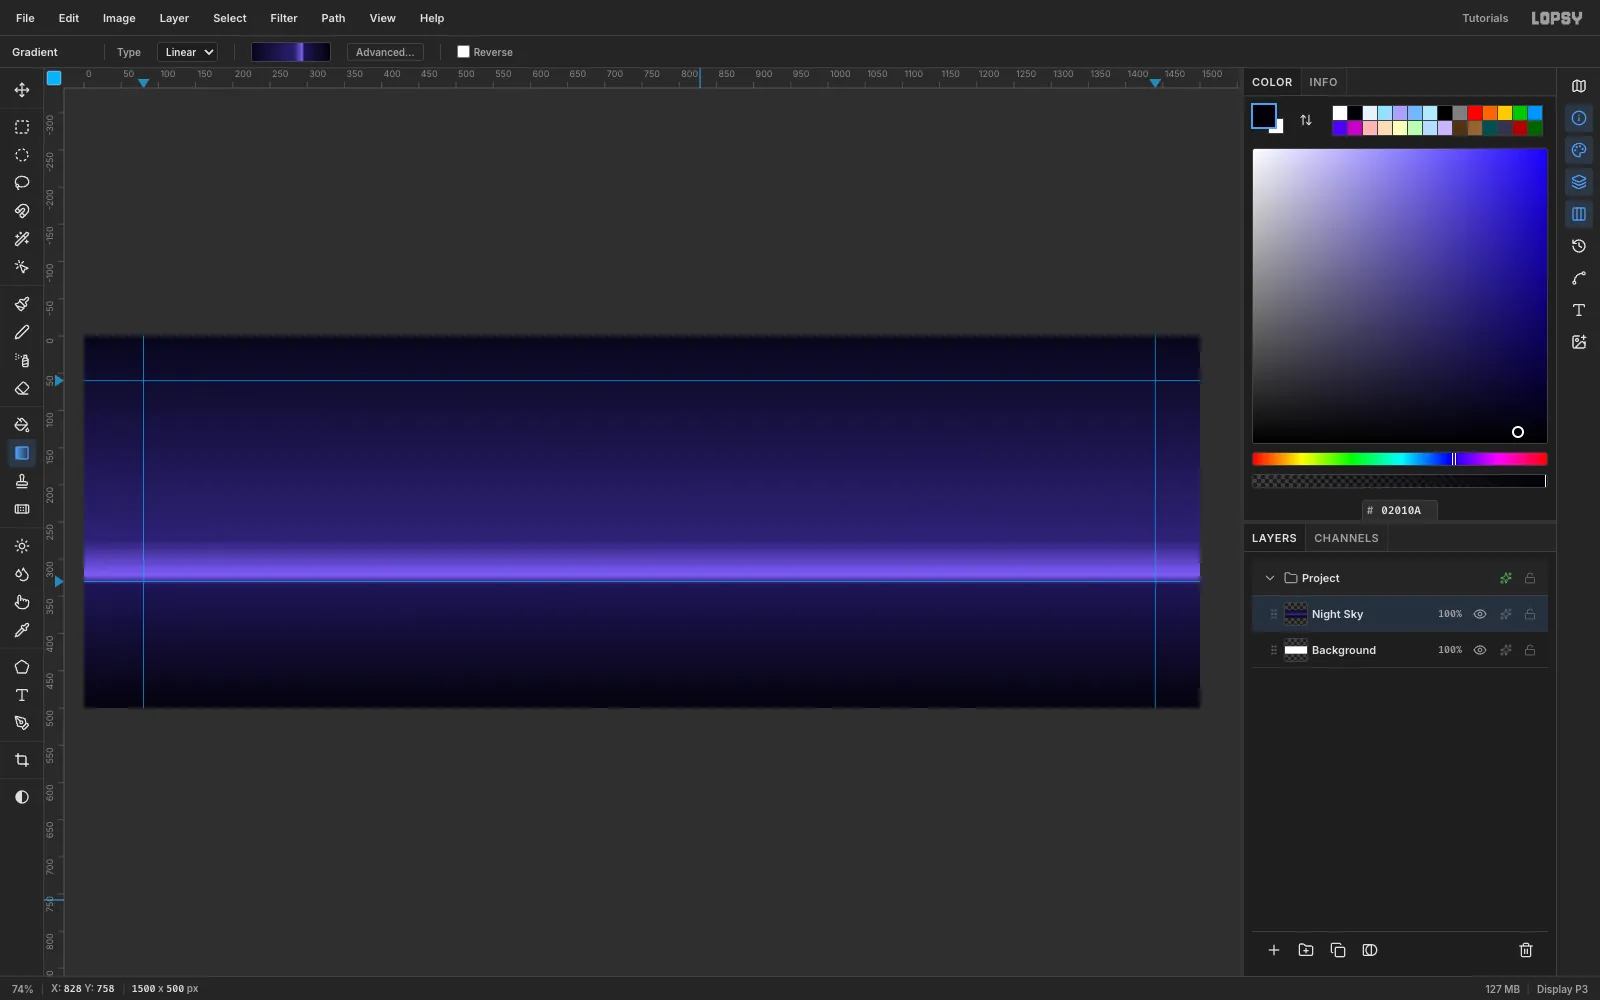
-
Draw the xenon streak cores
Click Add Layer and name it
Xenon Streaks. Pick the Brush and set Size5, Hardness90and Opacity100. Set the foreground to#EAF6FF.To draw a straight streak, click its start point, then Shift-click its end point:
- (360, 150) to (1500, 150)
- (0, 300) to (1120, 300)
- (0, 250) to (640, 250)
Change the foreground to
#9B5CFF, set Size to6, and draw one violet streak from (860, 95) to (1500, 95).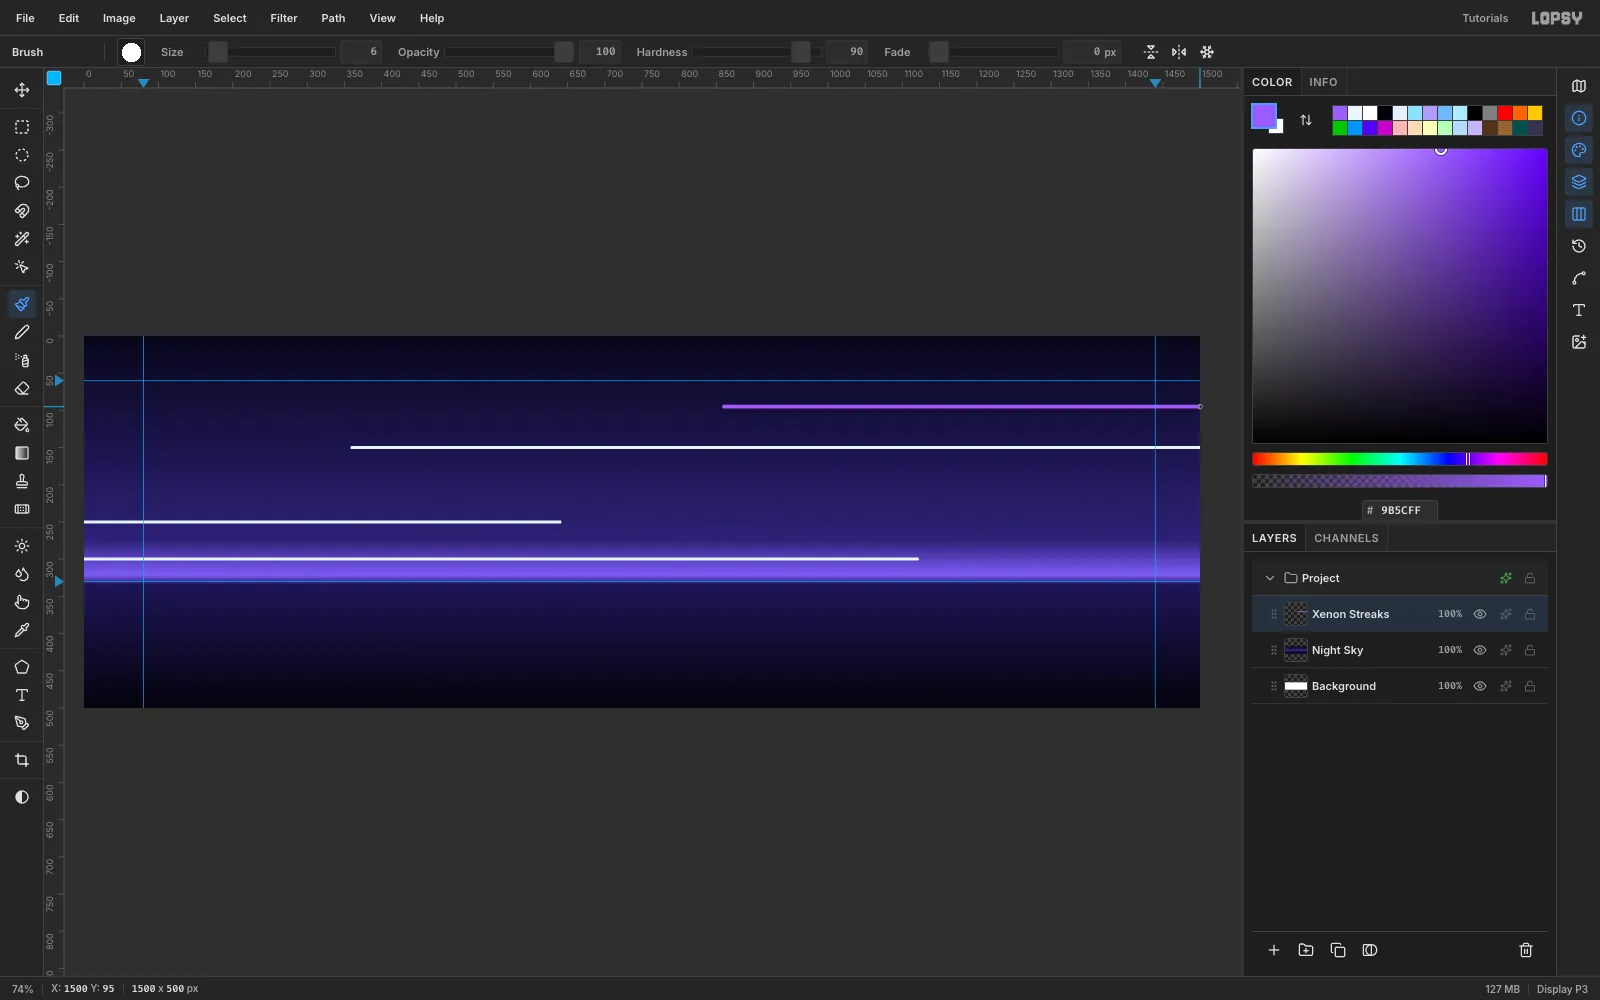
-
Blur and glow the streaks
Choose Filter → Motion Blur… and set Angle
0and Distance60, then click Apply. The ends taper off like passing headlights.Open the layer's effects (the sparkle button on the
Xenon Streaksrow). Set Blend to Screen and turn on Outer Glow with color#3AA6FF, Size18, Spread0and Opacity90.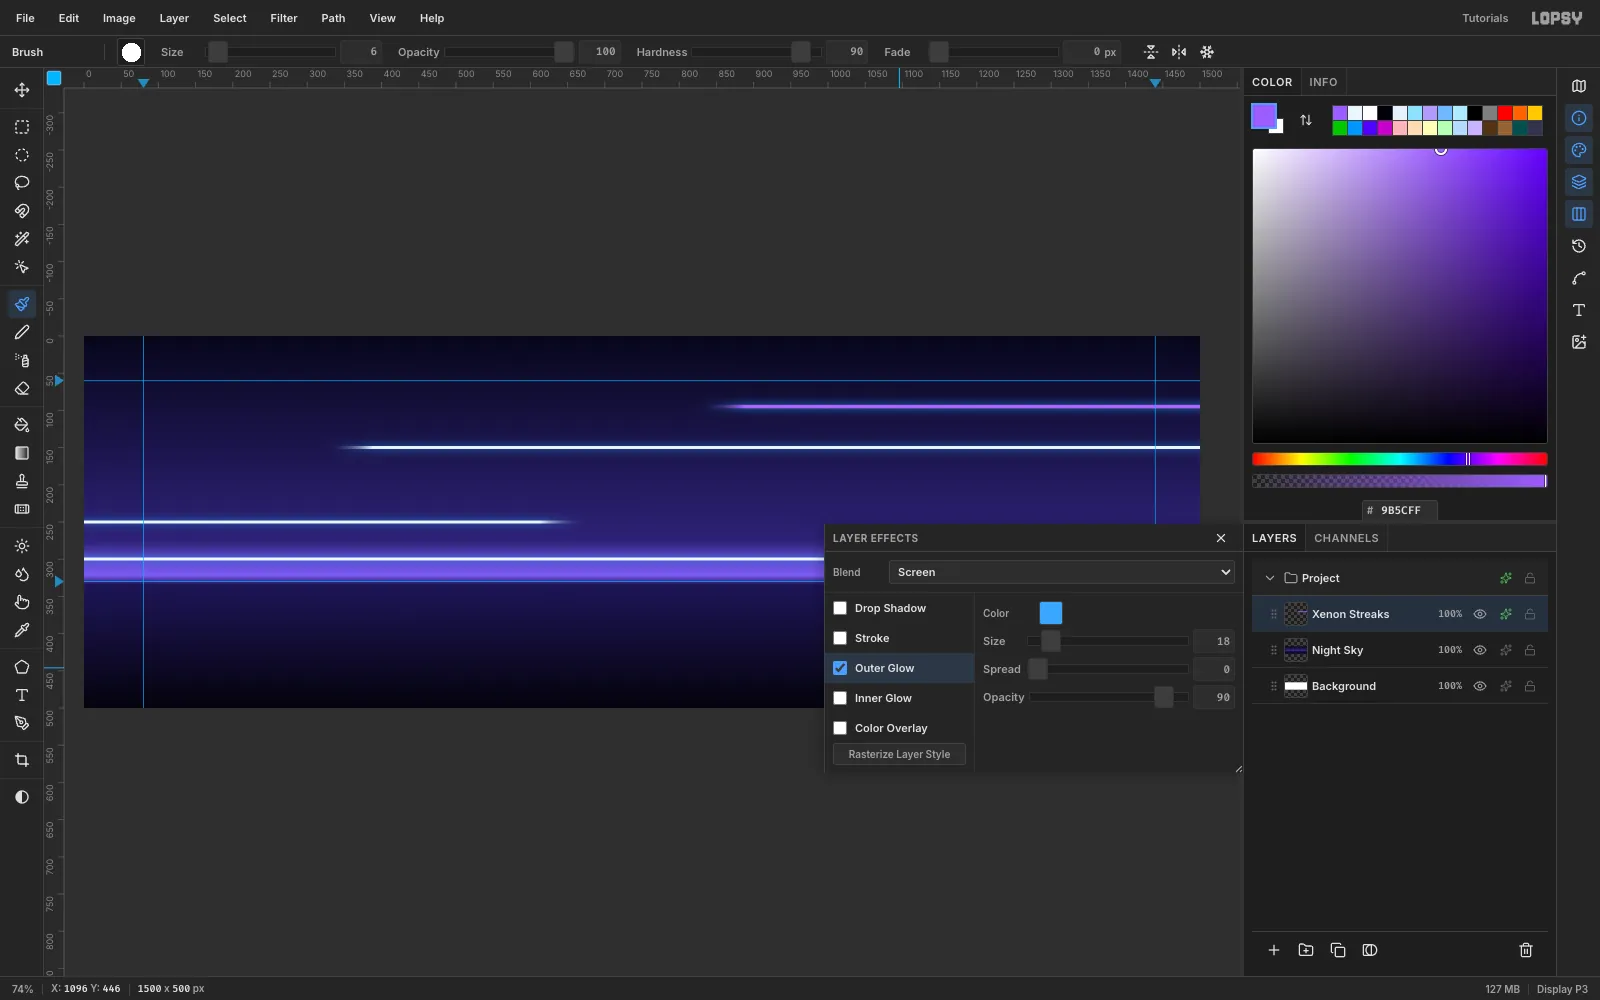
-
Set the headline lockup
Pick the Text tool. Choose the Rubik Mono One font, set Size to
195and the color to white. Click near the top left, typeXENON, and click the check mark to commit.Click the
Xenon Streaksrow before you set up the second line. If a text layer is active when you change the size, Lopsy restyles that layer. Set Size to155, click an empty spot on the right, typeDRIFTand commit.Open the Text panel and set Letter spacing to
40.5. DRIFT now matches XENON's width, about 803 px. Switch to the Move tool, drag DRIFT under XENON, and use the arrow keys to line them up. Both left edges go on the x = 80 guide, XENON's letter tops at y = 70, and DRIFT's baseline on the 330 horizon guide.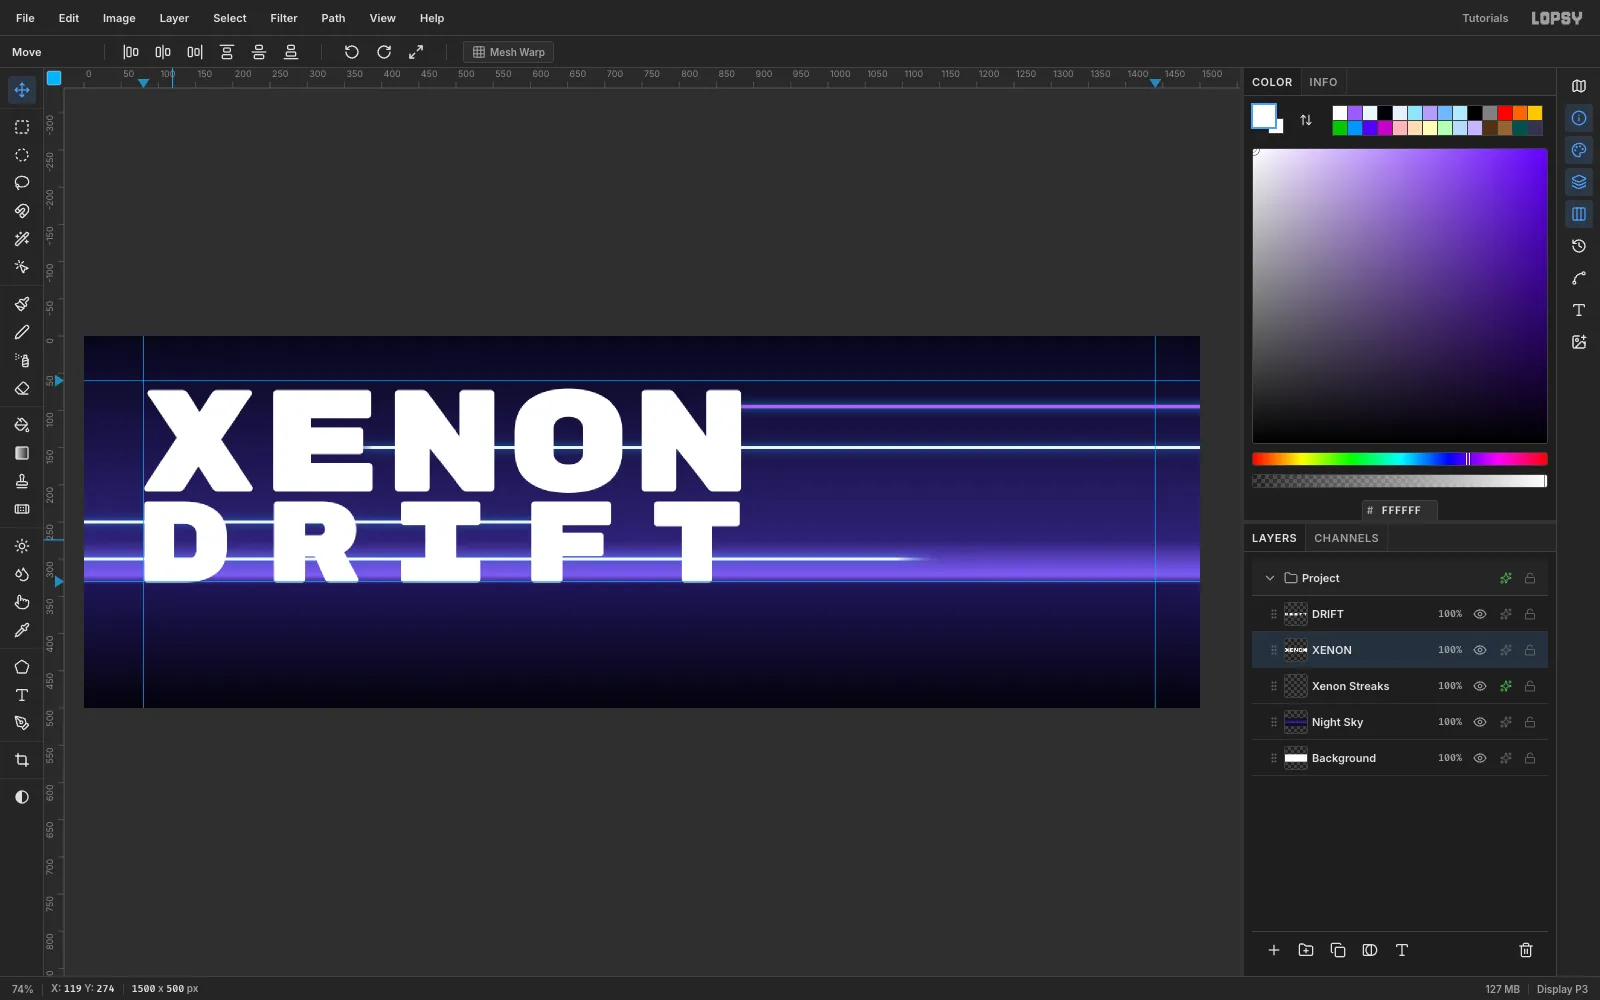
-
Select the letters with the Magic Wand
Select the
XENONlayer and click Rasterize Layer in the Layers footer. Pick the Magic Wand, untick Contiguous, set Tolerance to200, and click any letter. All five letters are selected, anti-aliased edges included.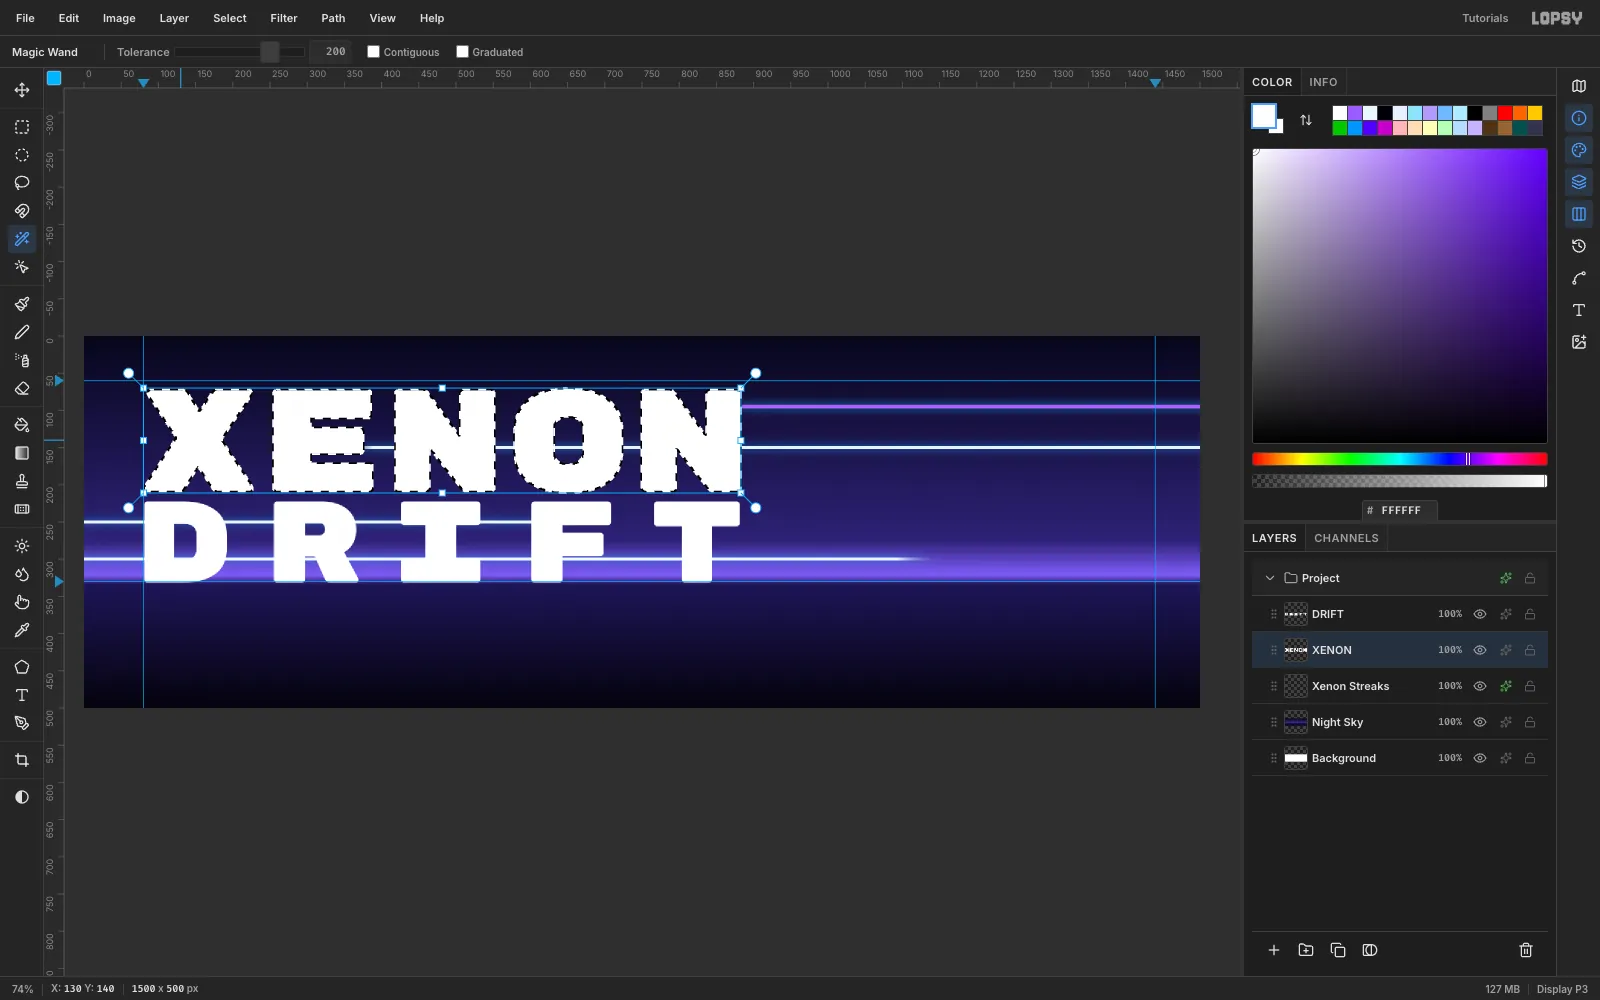
-
Fill the letters with chrome
With the Gradient tool, open Advanced… and build a classic chrome ramp:
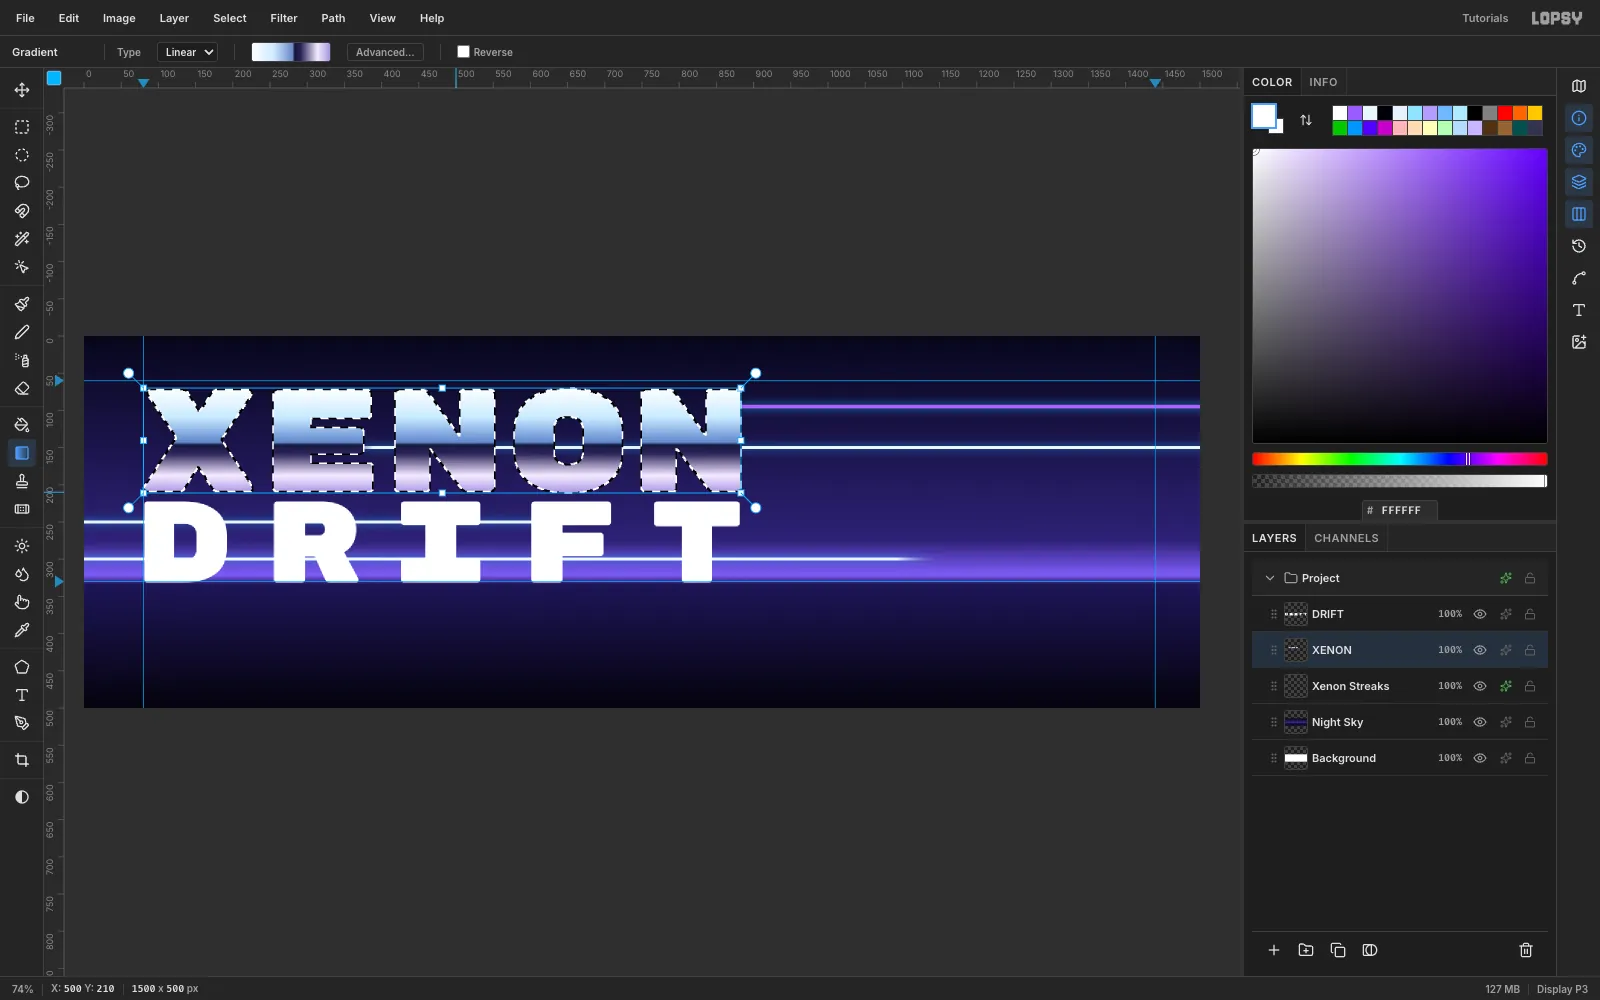
#FFFFFFat 0%#CFE8FFat 28%#6A86C8at 52%#15183Aat 55%, the dark horizon line#2B2458at 63%#F3EAFFat 84%#A898E0at 100%
Hold Cmd and drag from the top of XENON (y = 70) to its baseline (y = 210). Repeat for DRIFT: rasterize it, Magic Wand one letter, and drag from y = 222 to y = 330, so it gets its own sweep. Press Cmd+D when you're done.
-
Melt the bottoms into drips
Select the
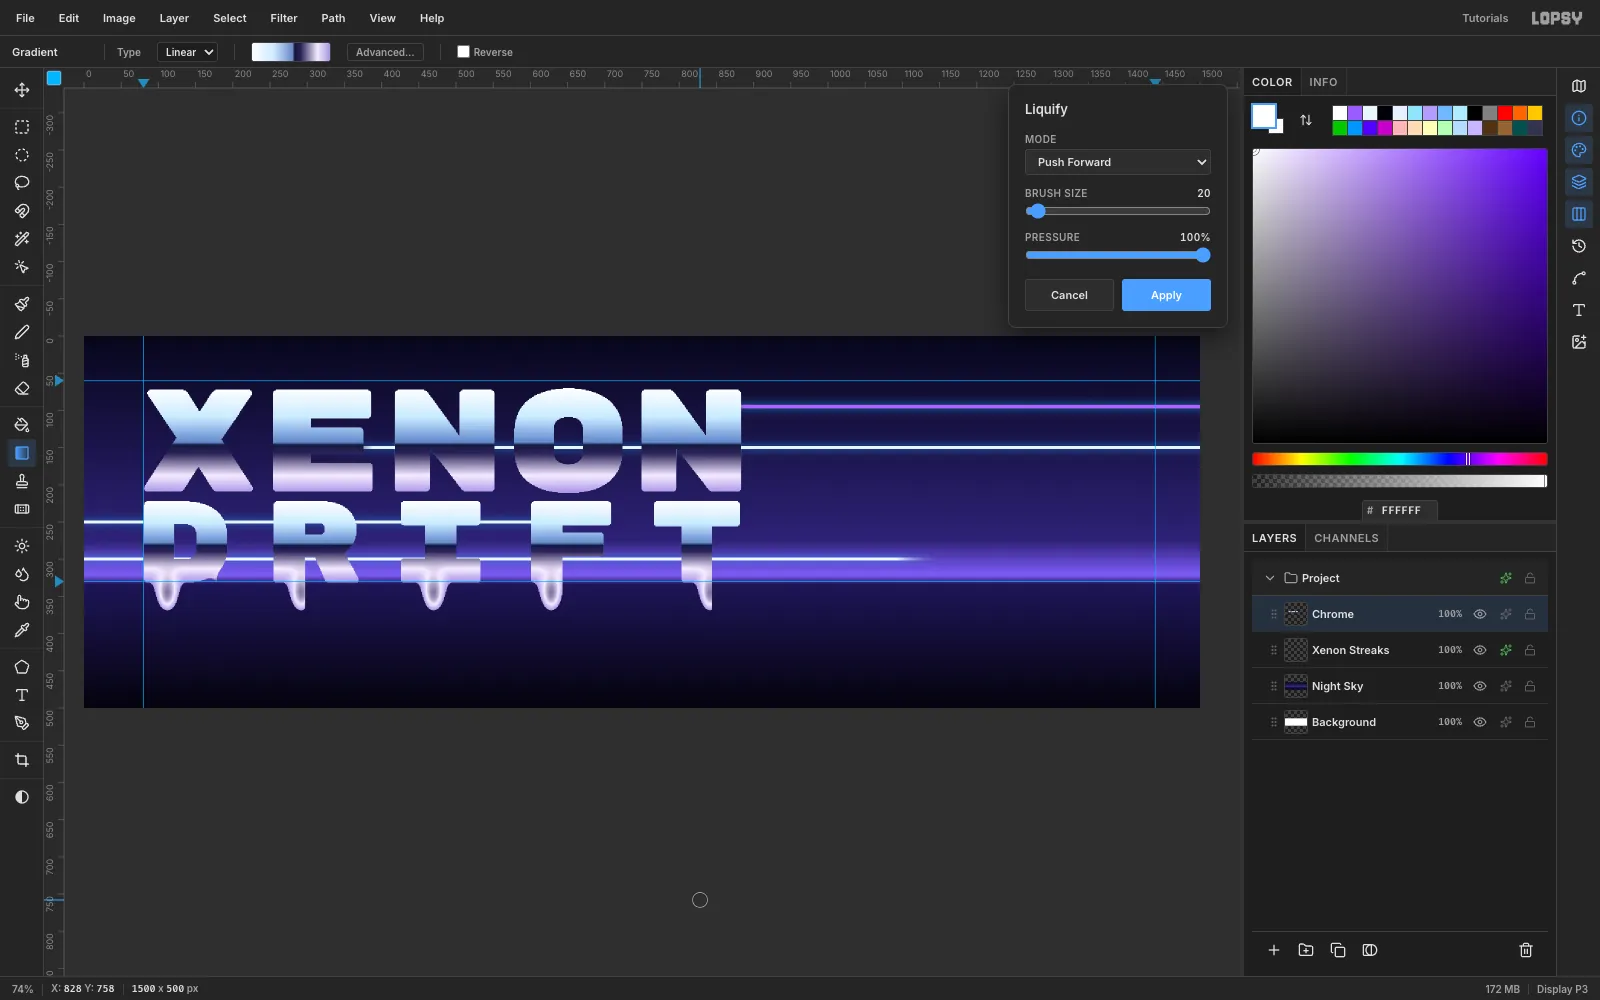
DRIFTlayer and choose Layer → Merge Down, then rename the resultChrome. Open Filter → Liquify…, keep Push Forward, and set Brush Size30and Pressure100%.Start about 30 px below a stem and drag straight up into the letter. Do this under each stem of DRIFT (x ≈ 112, 292, 470, 628 and 842), in three passes that each start a little lower. Then use a 20 px brush to add a few shorter drips. If the preview dents the letter instead of stretching it, drag the other way. Click Apply.
-
Add a 3D extrusion
With the Move tool active, click Duplicate Layer. The copy is offset 10 px, so select it and press ← and ↑ ten times each to put it back. Rename the copy
Chrome Faceand the originalExtrude.Select
Extrudeand nudge it 6 px right and 6 px down. In its effects, turn on these three:- Color Overlay
#1A2380 - Stroke: Width
3, outside, color#8FE3FF - Outer Glow
#3A8BFF: Size40, Spread10, Opacity75
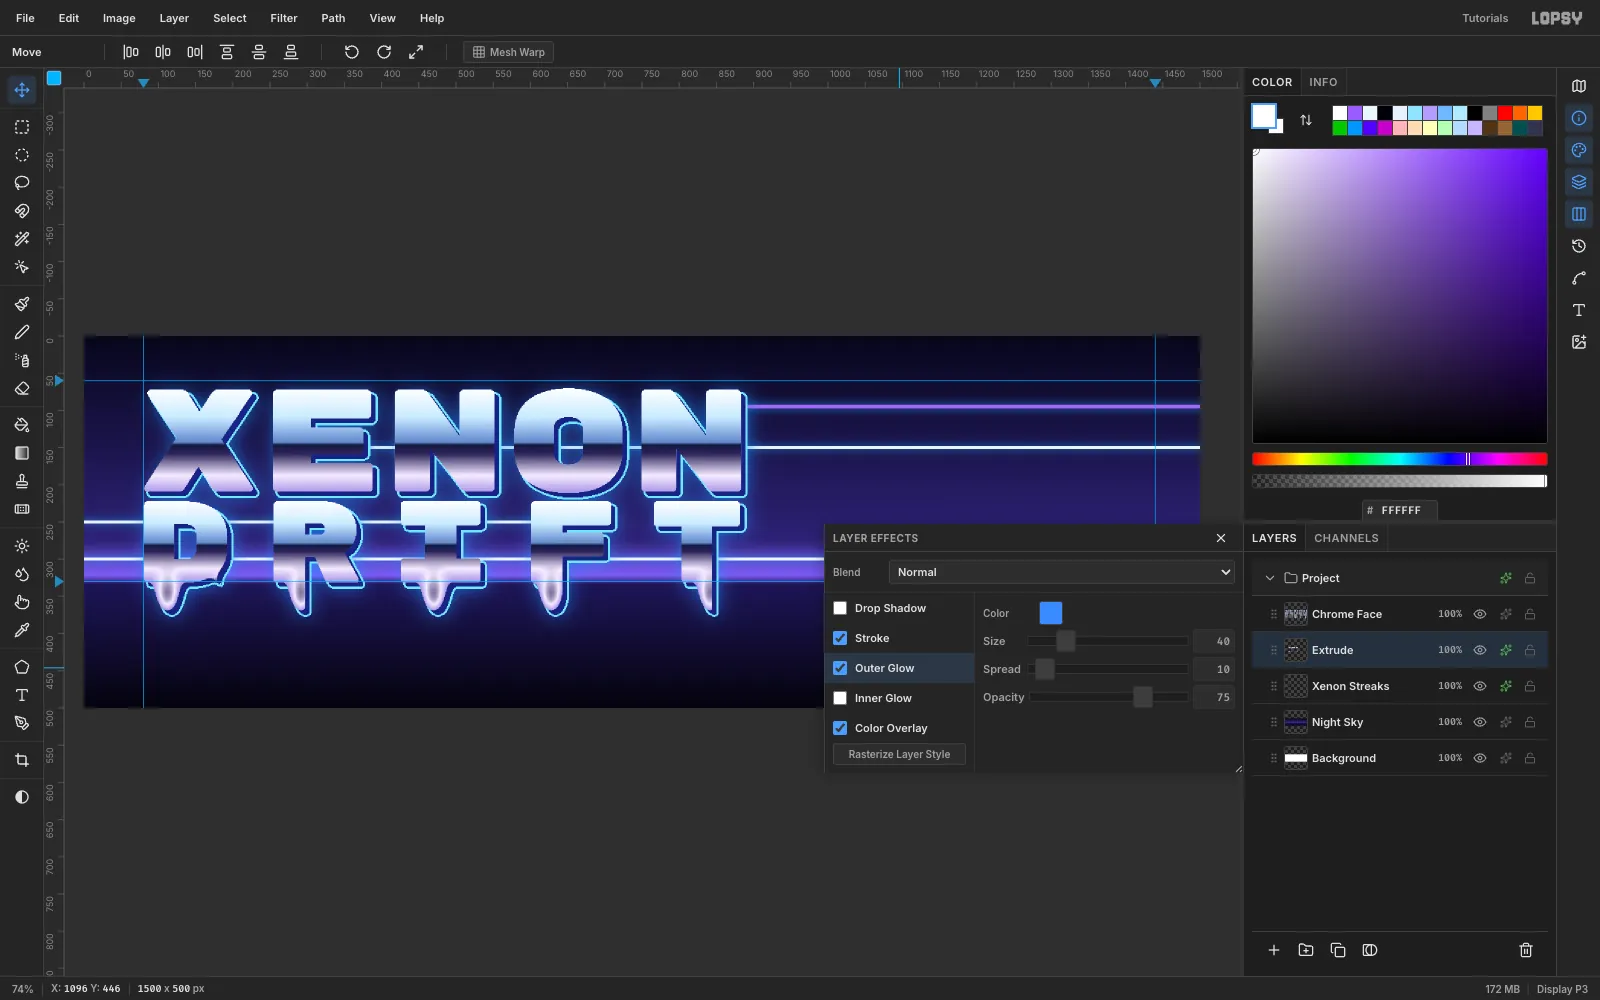
- Color Overlay
-
Add a rim light and lens fringe
Select
Chrome Face. Turn on Inner Glow with color#FFFFFF, Size5and Opacity70for a bright rim. Then choose Filter → Chromatic Aberration… with Amount2and Direction0, which splits the edges like a real lens.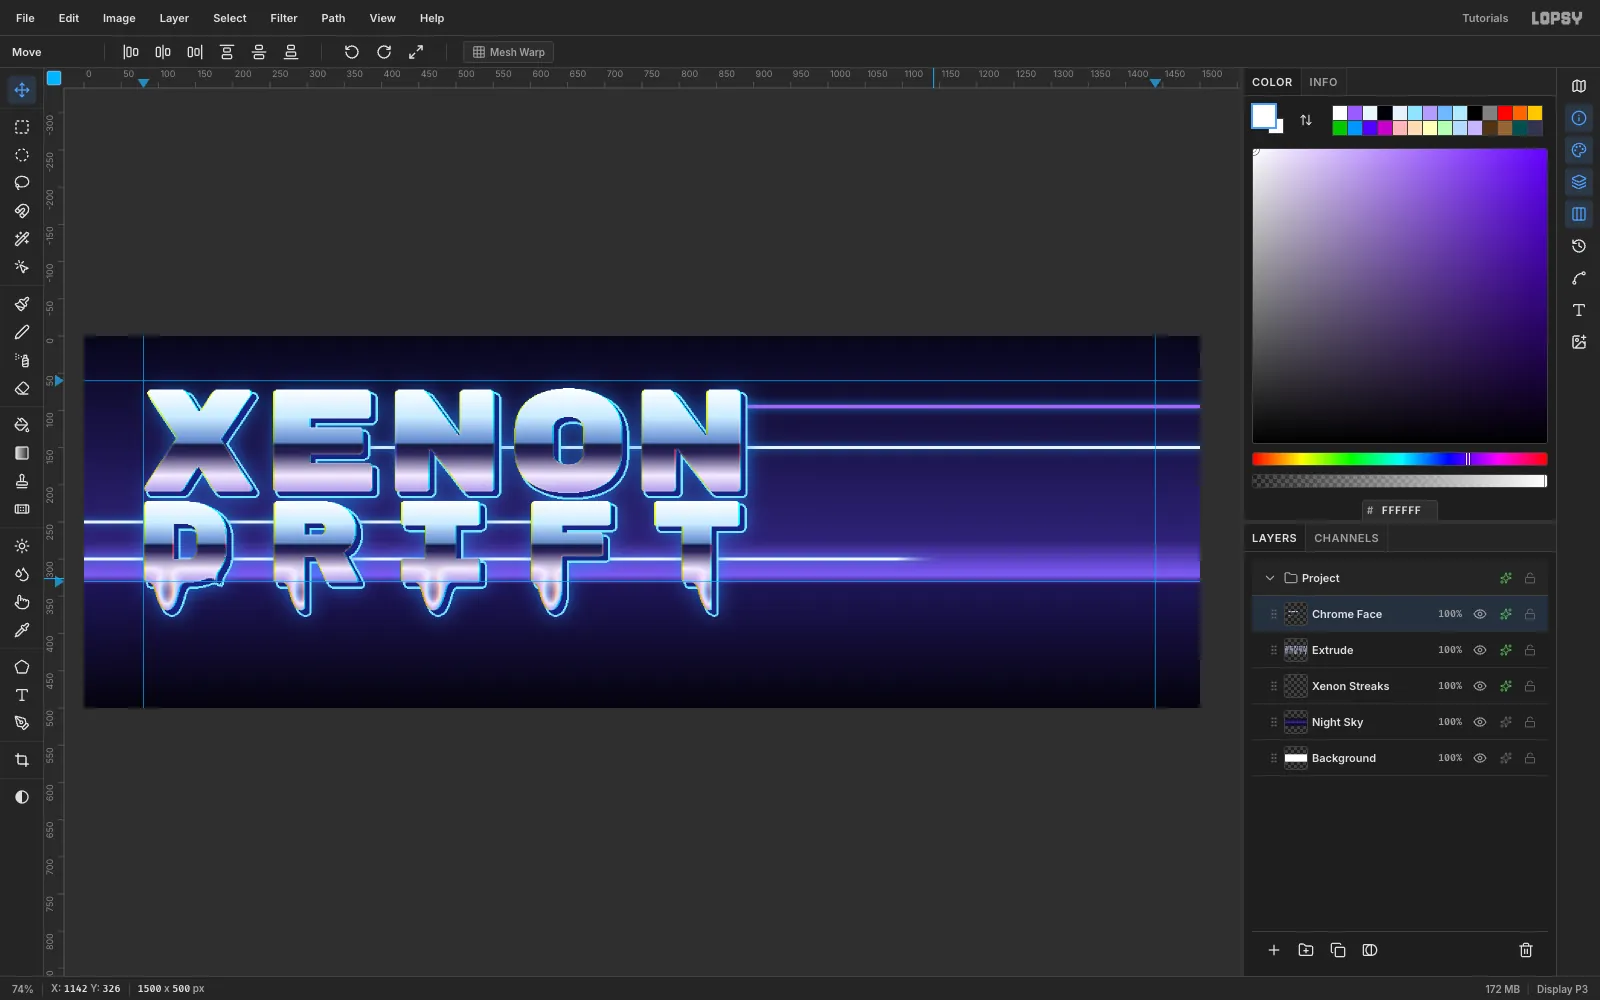
-
Flip a copy for the reflection
With
Chrome Facestill selected and the Move tool active, duplicate it again. Nudge the copy back 10 px up and left, and rename itChrome Face. Rename the original underneathReflectionand turn off its Inner Glow.On
Reflection, choose Filter → Motion Blur… with Angle90and Distance24. Blur it now, while it's still inside the canvas. Then choose Image → Flip Vertical.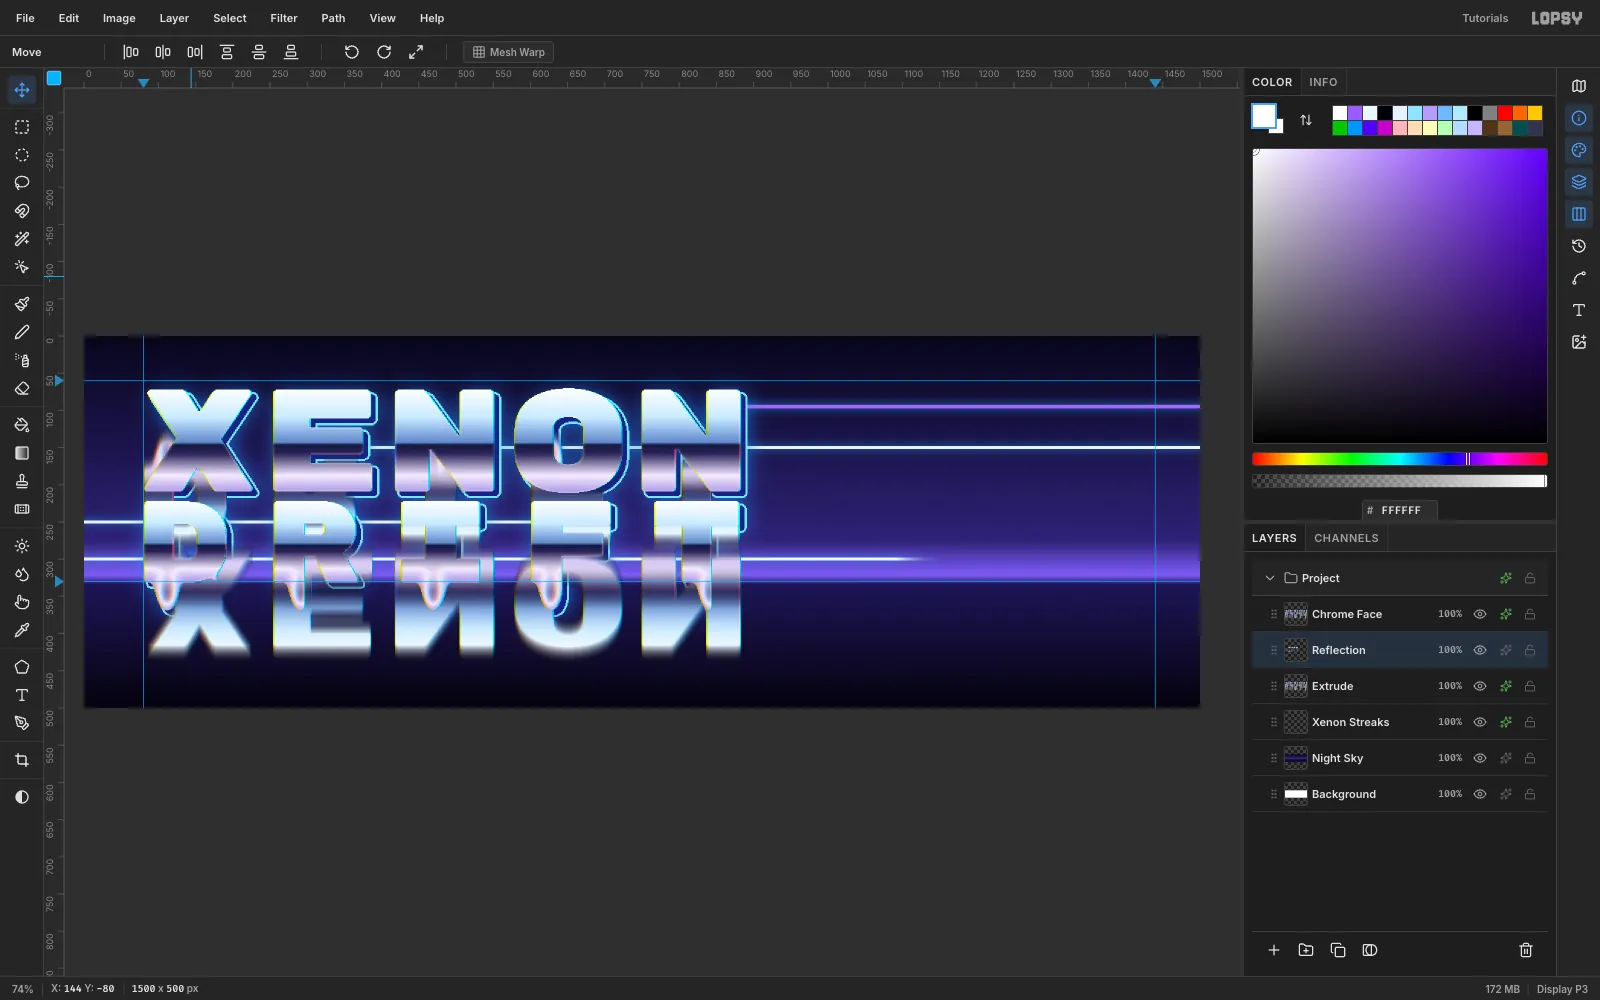
-
Drop the reflection onto the floor
With the Move tool, drag the reflection straight down until its top edge meets the 330 horizon guide. Set the layer's opacity to
32%with the percentage button on its row. The drips now hang toward their own mirrored tips, which gives you a glossy floor.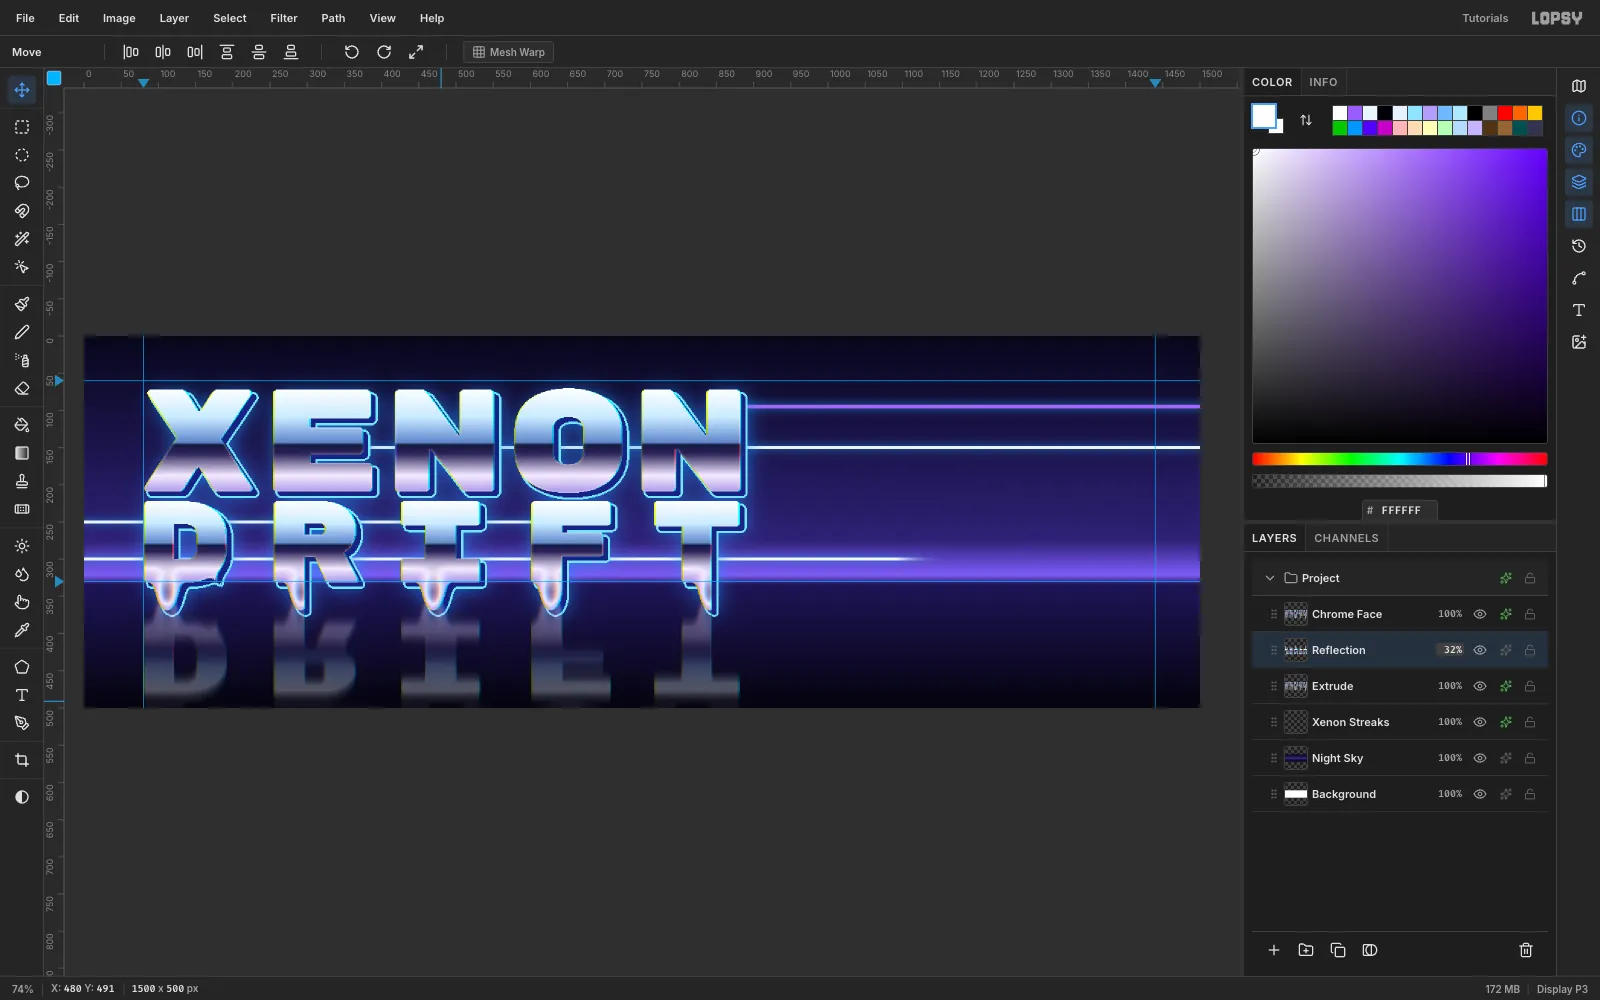
-
Set up the sphere
Add a layer called
Sphere HaloaboveChrome Face. Drag an Elliptical Marquee from (1262, 62) to (1408, 208), set the foreground to#4FB4FFand choose Edit → Fill. Press Cmd+D, then give it an Outer Glow in#3A8BFFwith Size34and Opacity80.Click New Group and name it
Mercury. Click Add Layer to make aSpherelayer inside it. Draw a circle marquee from (1260, 60) to (1410, 210).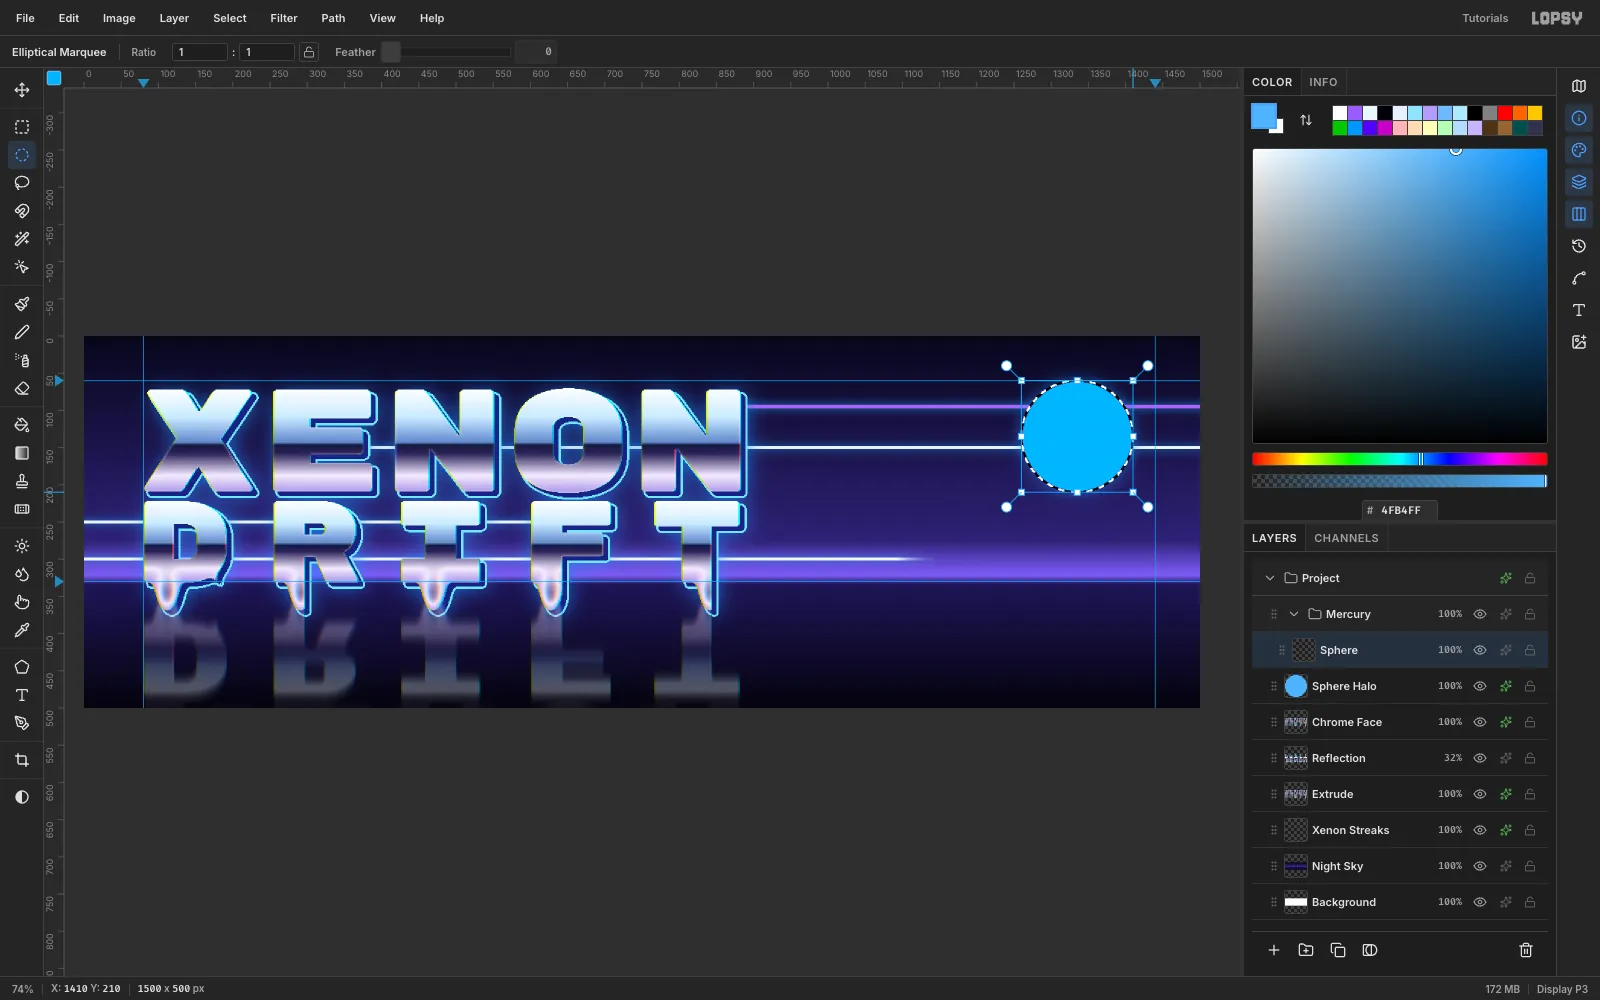
-
Shade the sphere in grayscale
Build a gray gradient with these stops:
#F2F2F2at 0%,#9A9A9Aat 42%,#0E0E0Eat 53%,#3C3C3Cat 62% and#E6E6E6at 100%. Hold Cmd and drag from the top of the circle to the bottom.Switch to the Brush and set Size
44, Hardness0and a white foreground. Click once at about (1300, 98) for the highlight. Press Cmd+D and run Filter → Gaussian Blur… at radius2to soften the edge.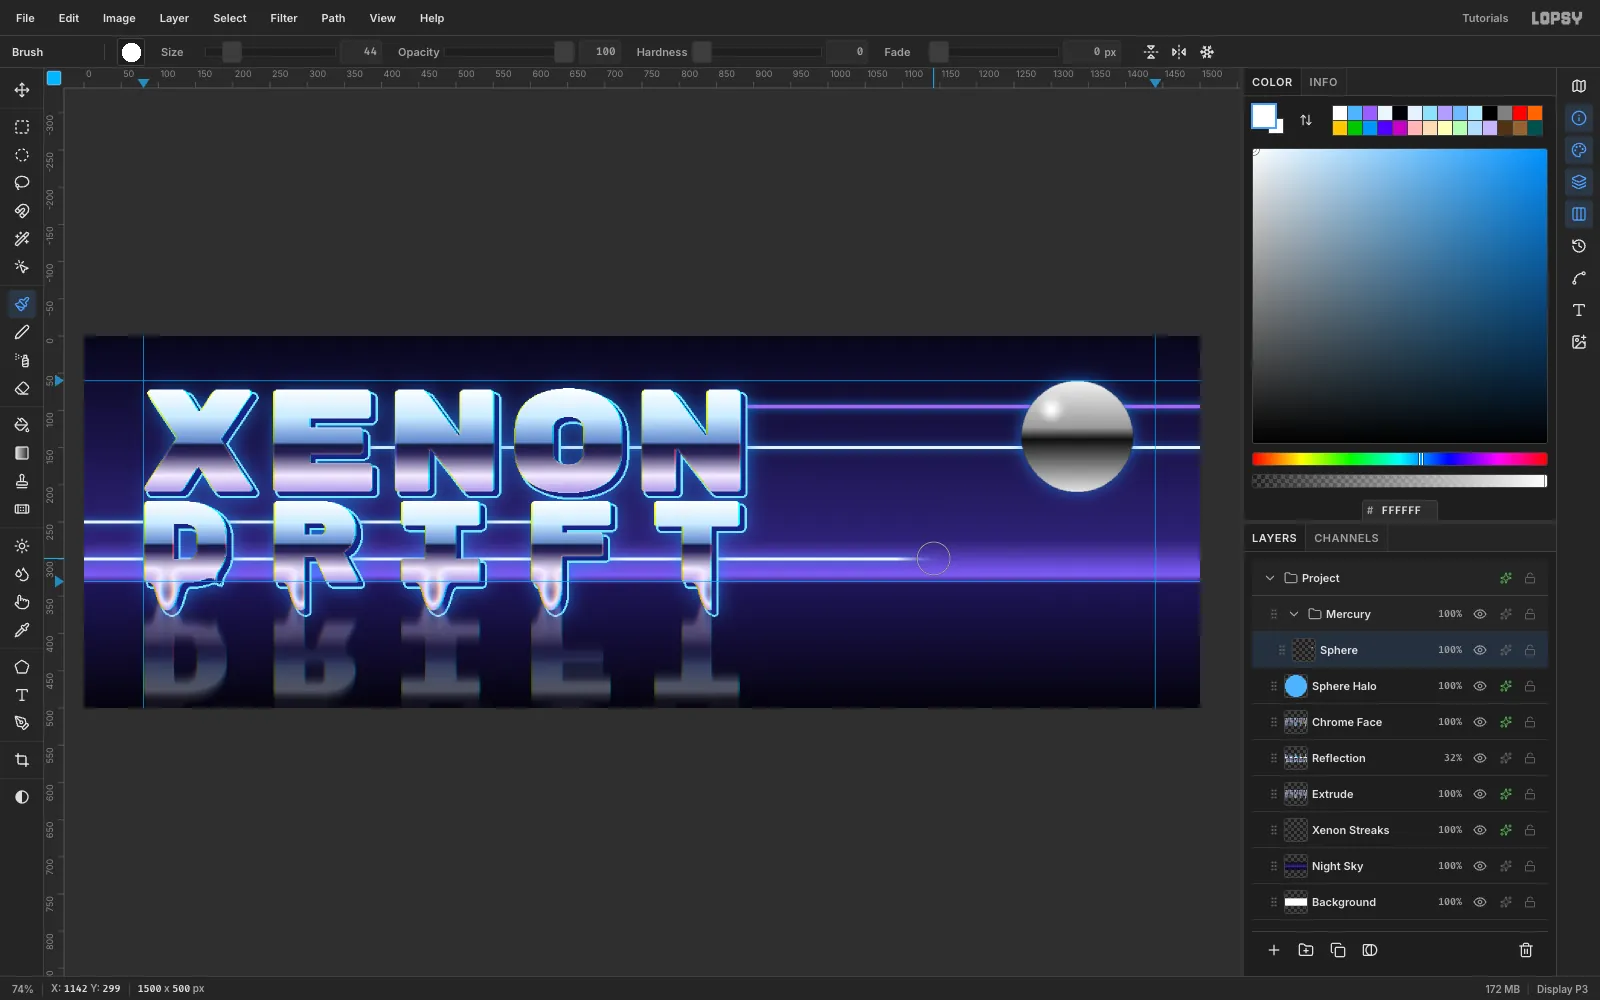
-
Turn it into chrome with a Gradient Map
Open the
Mercurygroup's effects and choose Add Adjustment → Gradient Map. Set these stops:#05060Cat 0%#1D2340at 18%#5F78B8at 40%#CFE3FFat 58%#8AA0D0at 72%#FFFFFFat 86%#FFFFFFat 100%
The group maps every gray inside it to this palette. Anything you paint in
Mercuryfrom now on comes out as chrome.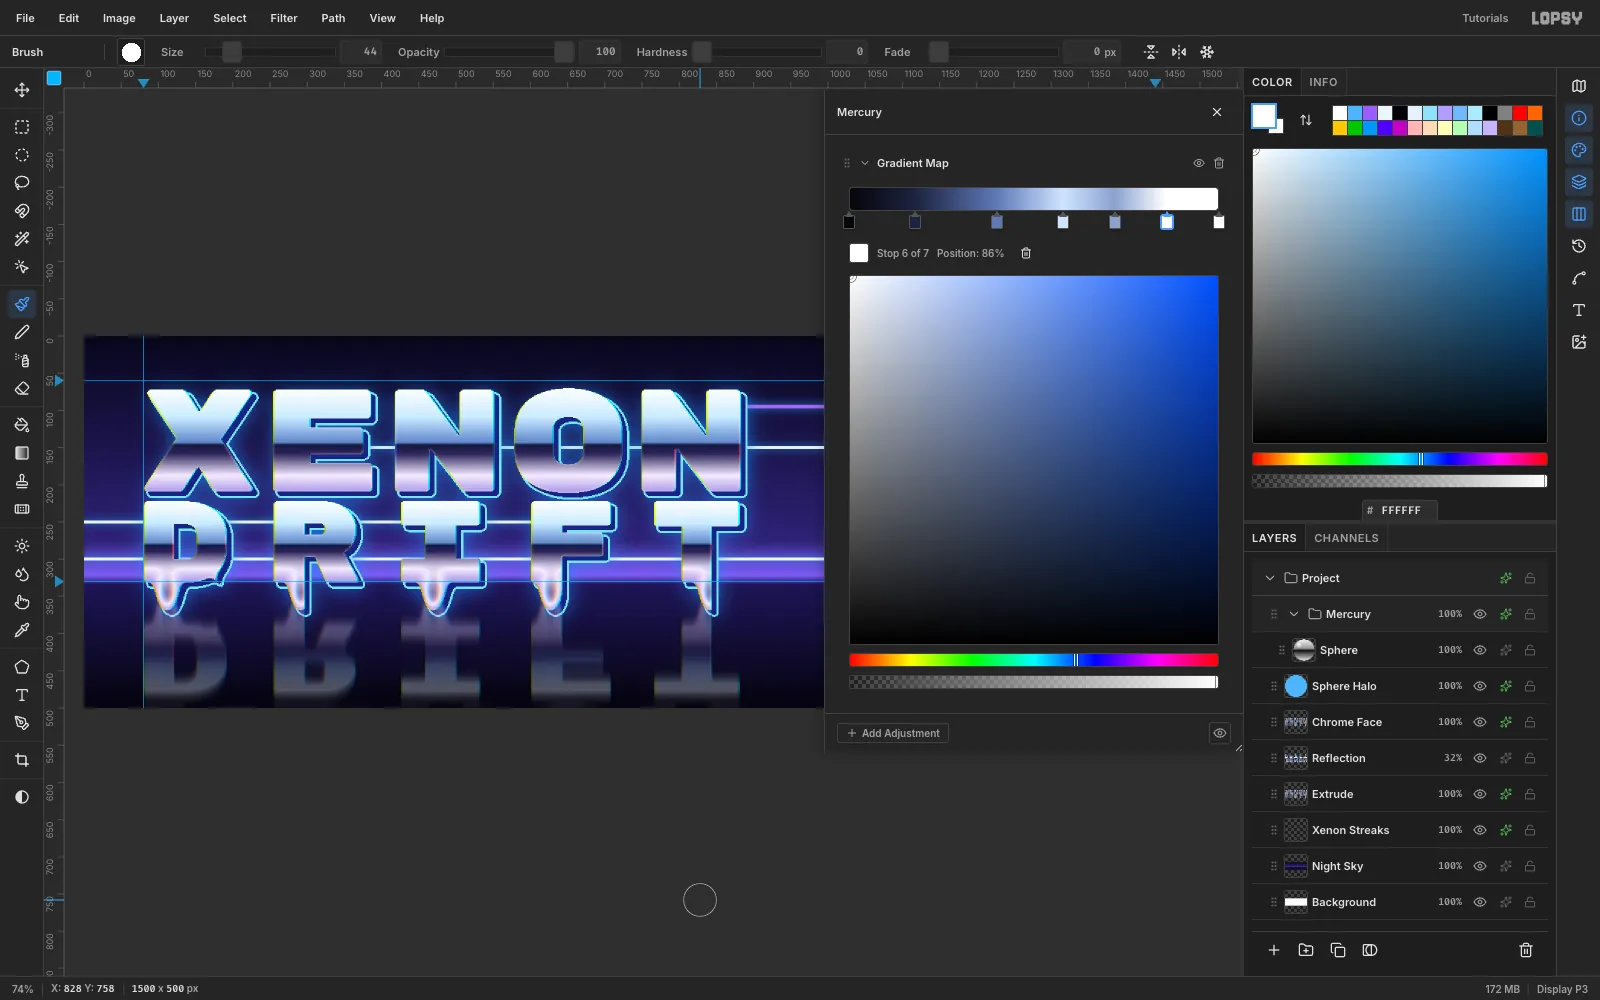
-
Swirl the sphere into liquid
Select
Sphereand open Filter → Liquify…. Set the mode to Twirl CW, Brush Size110and Pressure35%. Draw one small circle over the middle of the sphere. The horizon band bends into a wave, like mercury wobbling. Click Apply.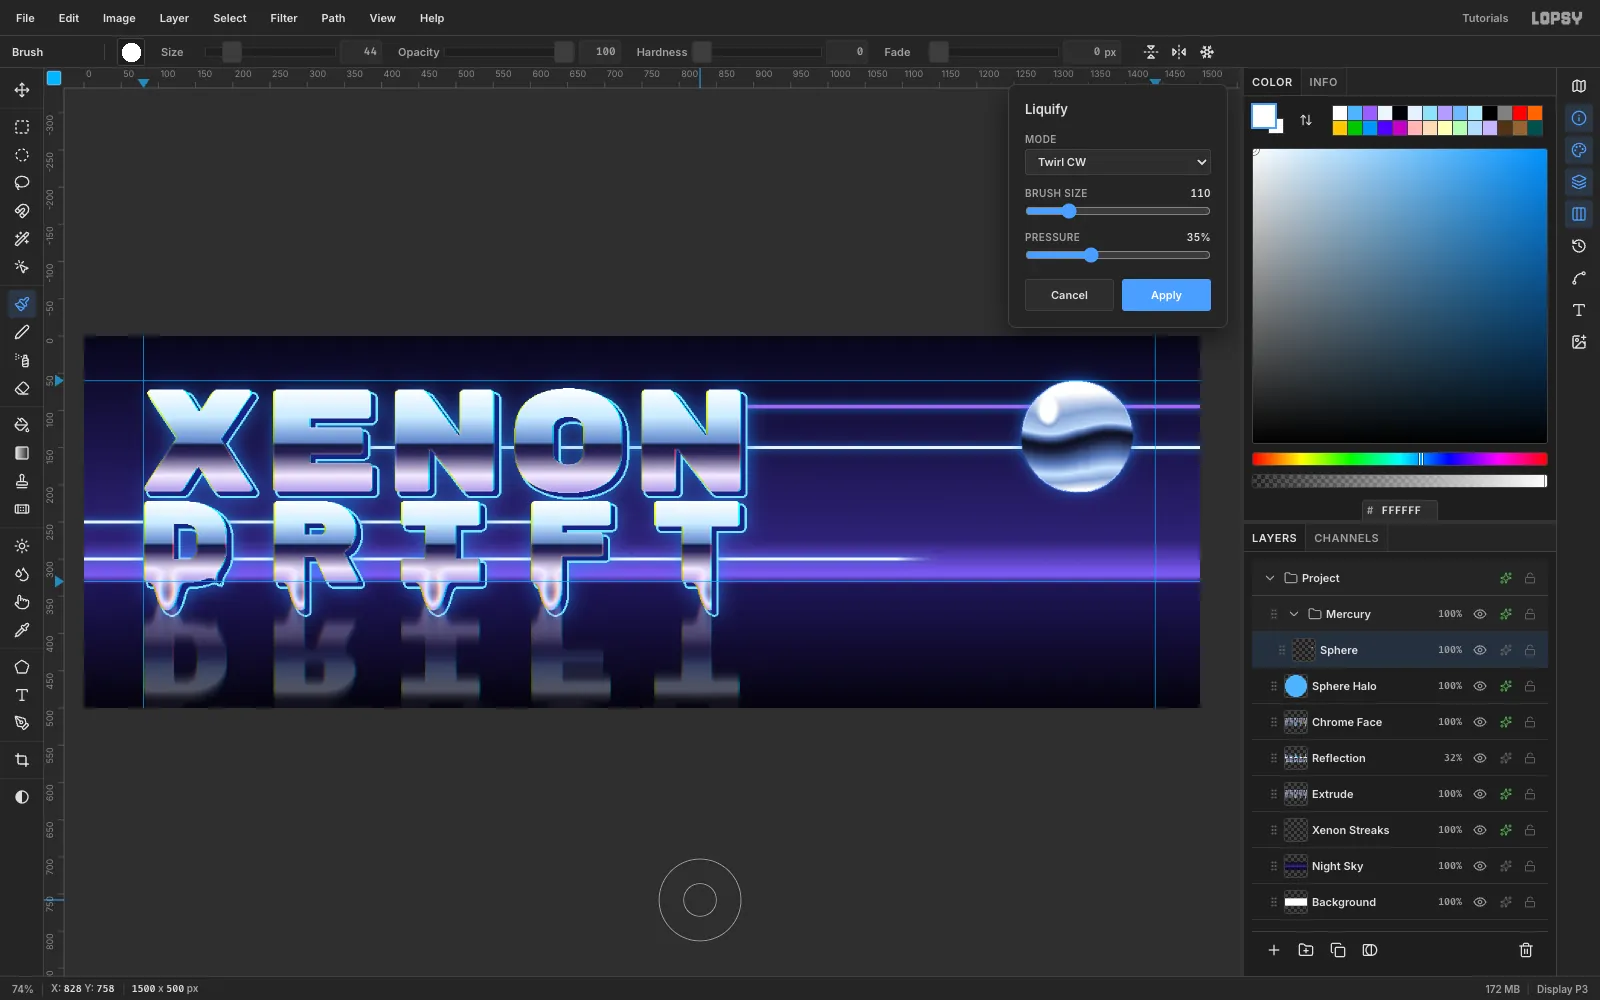
-
Scale a droplet from a copy
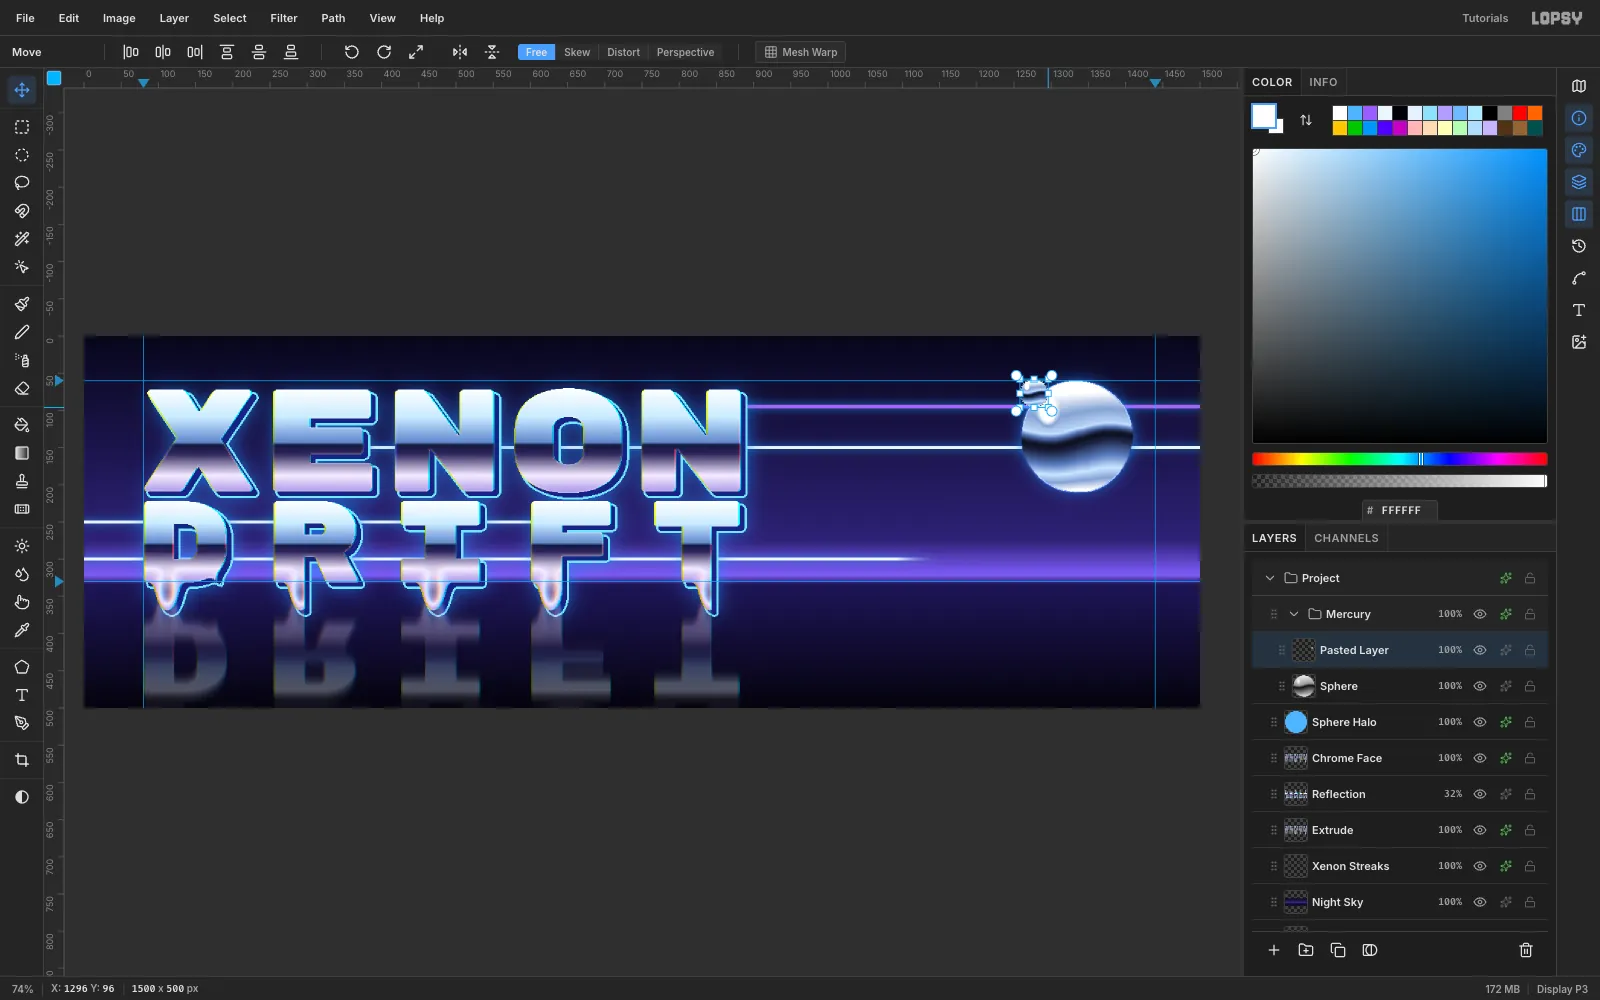
Draw an elliptical marquee just around the sphere, then press Cmd+C and Cmd+V. The pasted layer lands inside
Mercury. With the Move tool, drag the bottom-right corner handle toward the top left until the copy is about 38 px wide.Press Cmd+D to bake the scale in before you move it. If you drag inside the box first, the scale is thrown away.
-
Rotate the droplet
Name the layer
Droplet. Draw a rectangular marquee around it, switch to the Move tool, and drag the rotation handle just outside the top-right corner around by about 40°. The wave on the droplet tilts, so it doesn't look like a stamped copy. Press Cmd+D.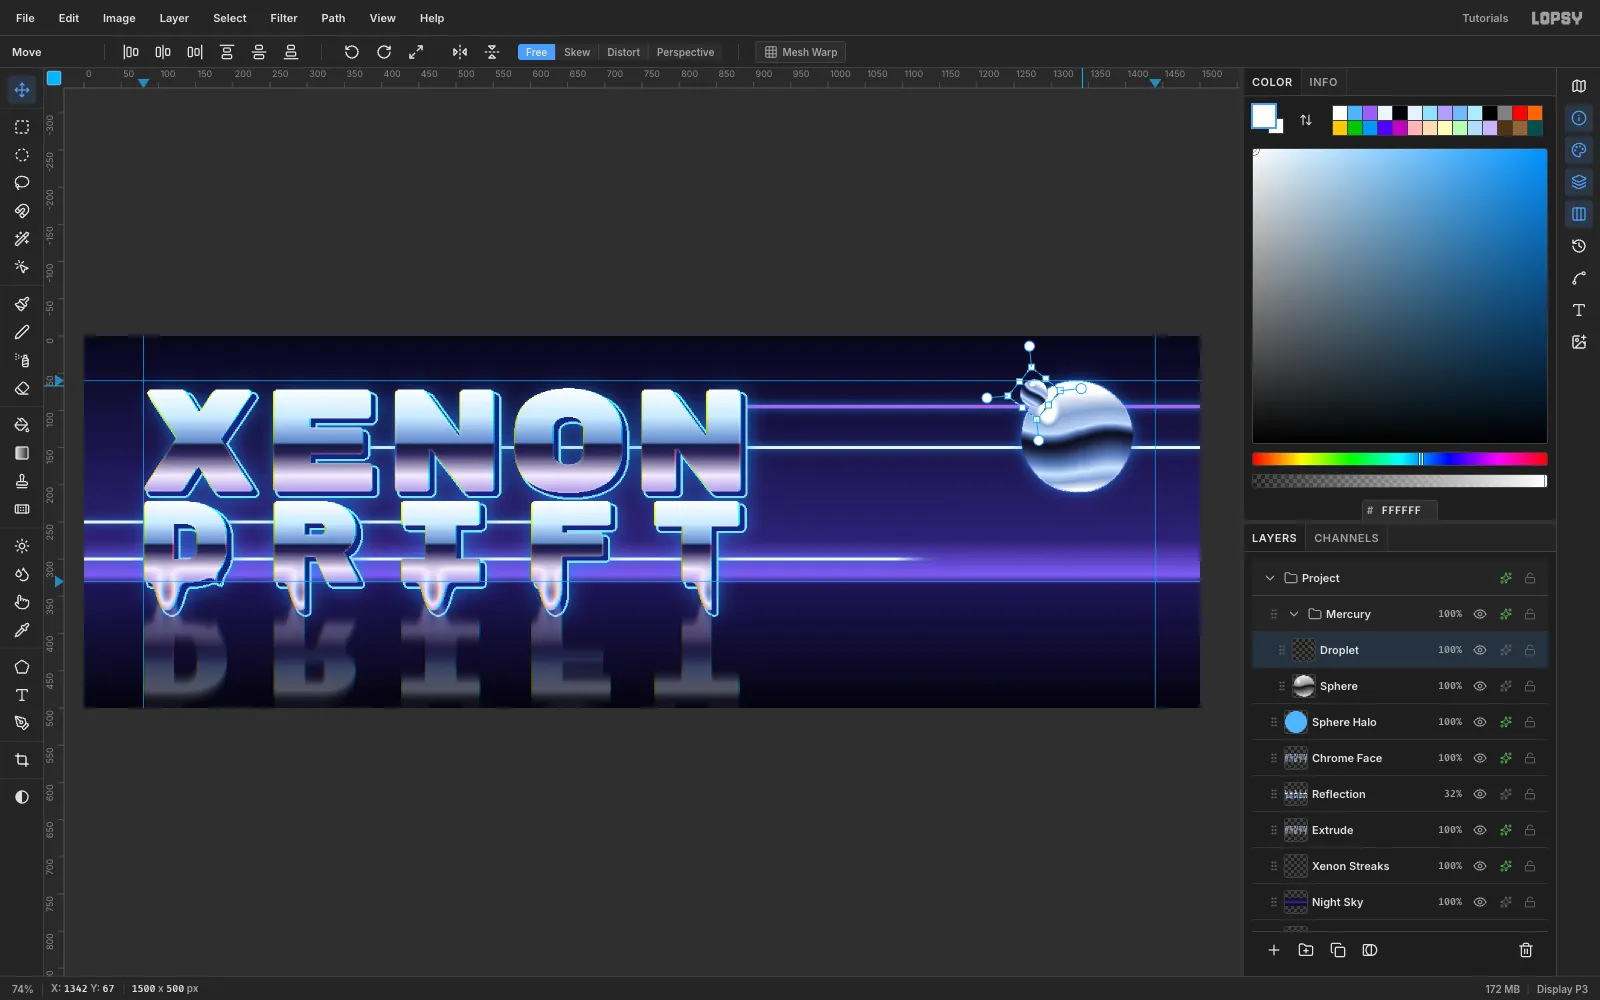
-
Use the droplet as a full stop
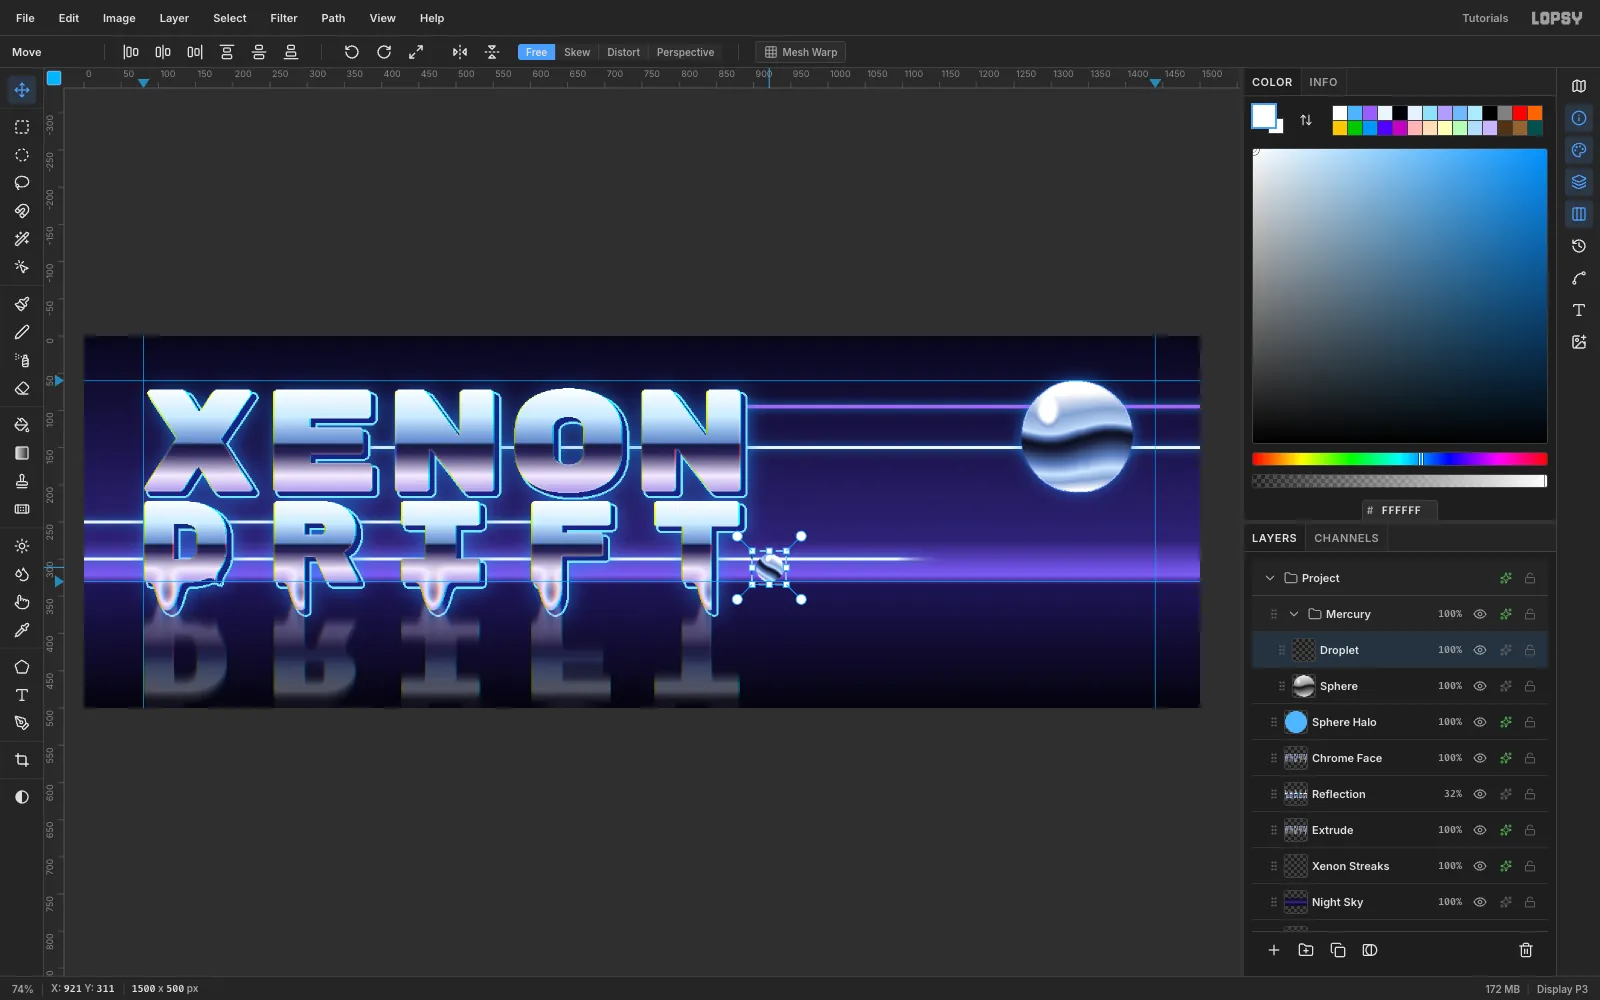
Draw a marquee around the droplet and drag it to the end of DRIFT, so it sits on the baseline at about (902–940, 292–330). Press Cmd+D. It works as a full stop and echoes the big sphere.
-
Set the event details
Select
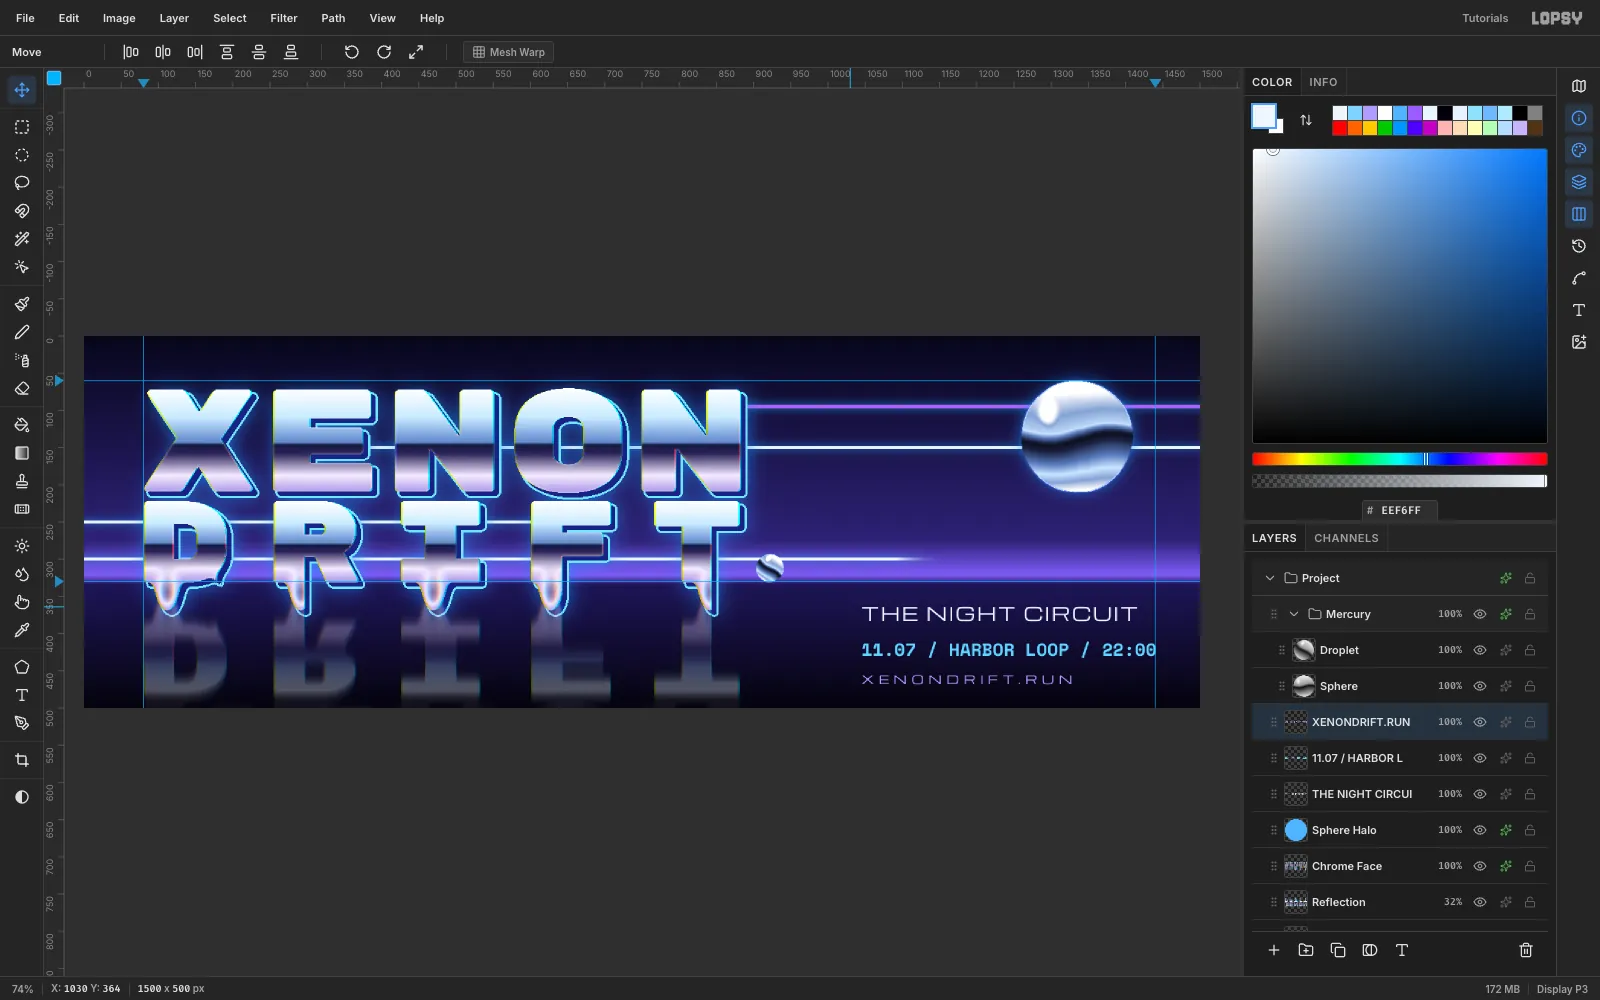
Sphere Halofirst, so no text layer is active while you change the settings. Create the three lines from the bottom up, so each click lands in empty space:XENONDRIFT.RUN: Michroma,16,#B39BFF, letter spacing611.07 / HARBOR LOOP / 22:00: Space Mono Bold,24,#7FD3FF, letter spacing0THE NIGHT CIRCUIT: Michroma,25,#EEF6FF, letter spacing2
Nudge all three lines by the same amount, so the widest one ends on the x = 1440 guide and the URL sits just above the bottom edge.
-
Build a soft vignette gradient
Select the top text layer and add a layer called
Vignette. Set the Gradient type to Radial and open Advanced…. Make three stops, all#05040F: 0% and 60% with the opacity bar at 0, and 100% with the opacity bar at about 92%.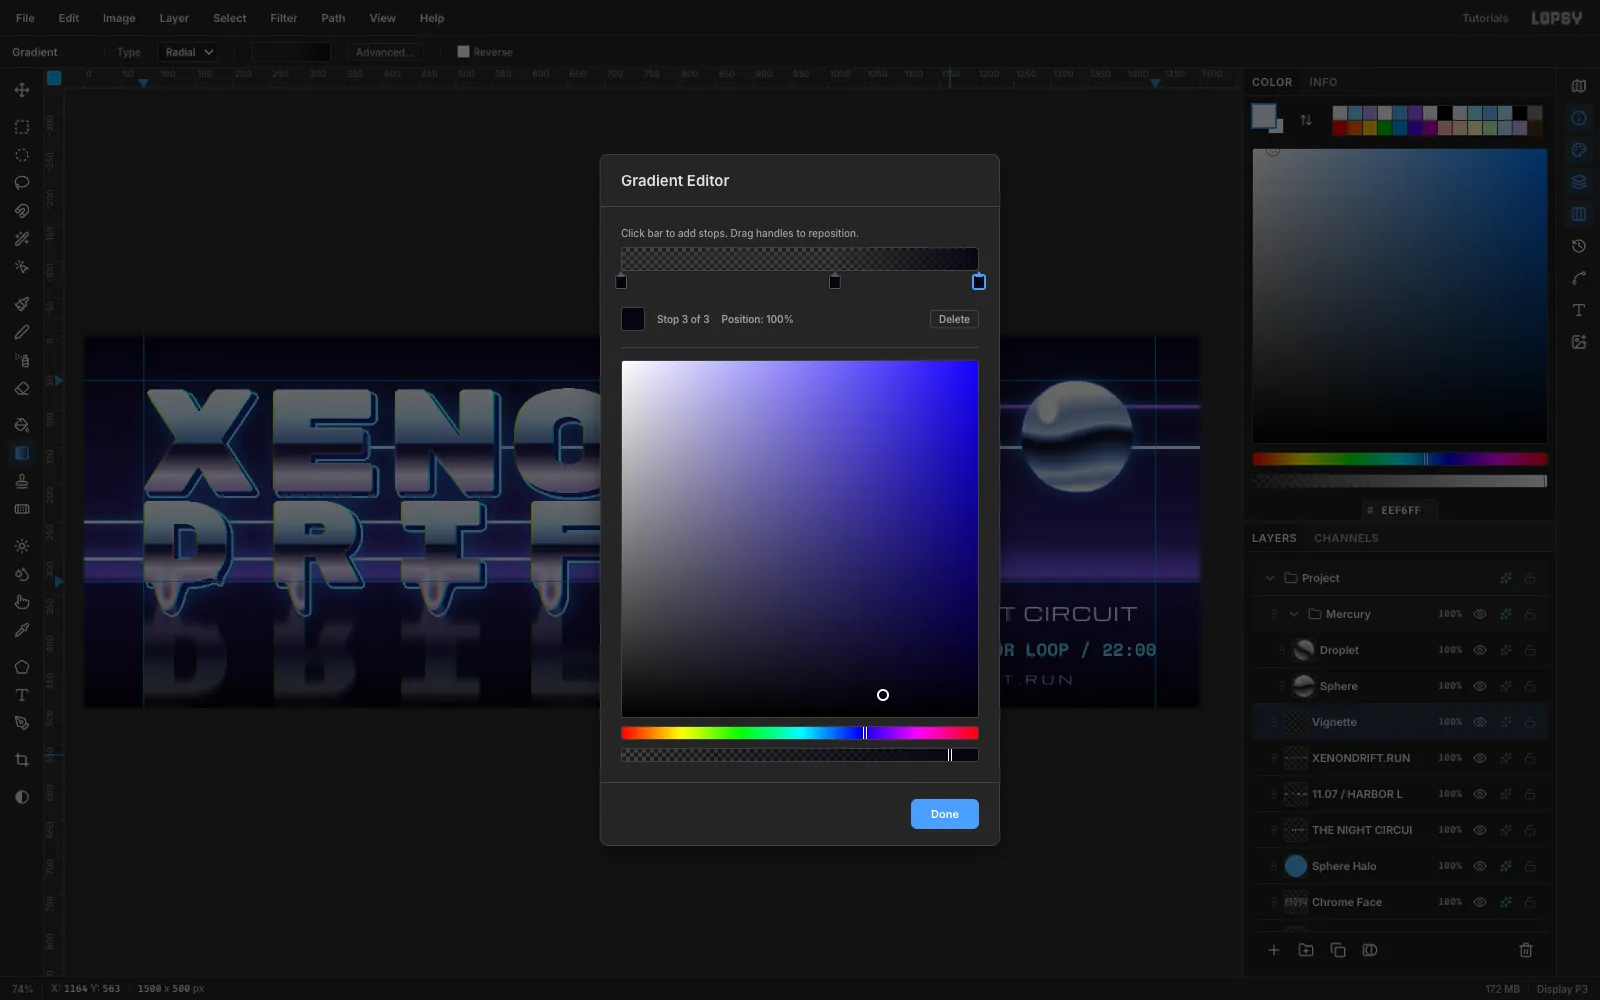
-
Darken the corners
Drag from the center of the canvas (750, 250) out past the right edge to (1550, 250). The fade starts well inside the frame, so no hard ellipse edge shows. Set the layer's opacity to
65%so the event text stays readable.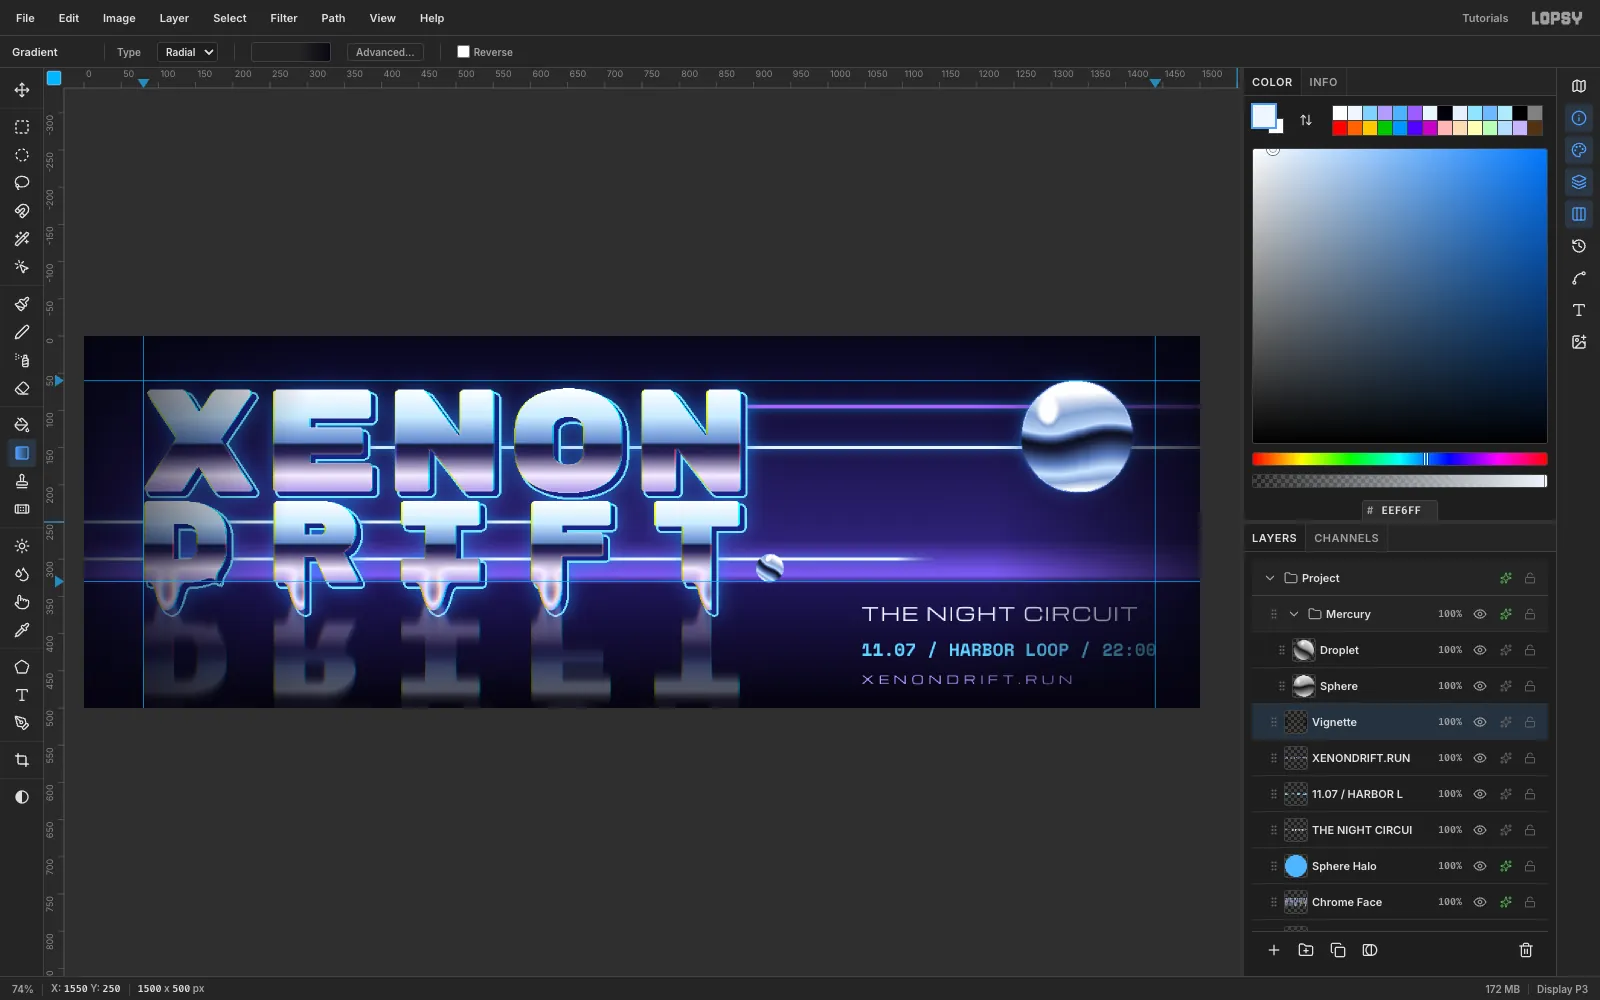
-
Add film grain
Add a layer called
Grain. Set the foreground to#808080and choose Edit → Fill. Run Filter → Add Noise… with Amount22, Mono and Gaussian. Set the layer's blend mode to Overlay and its opacity to35%. The grain hides gradient banding and gives the chrome some bite.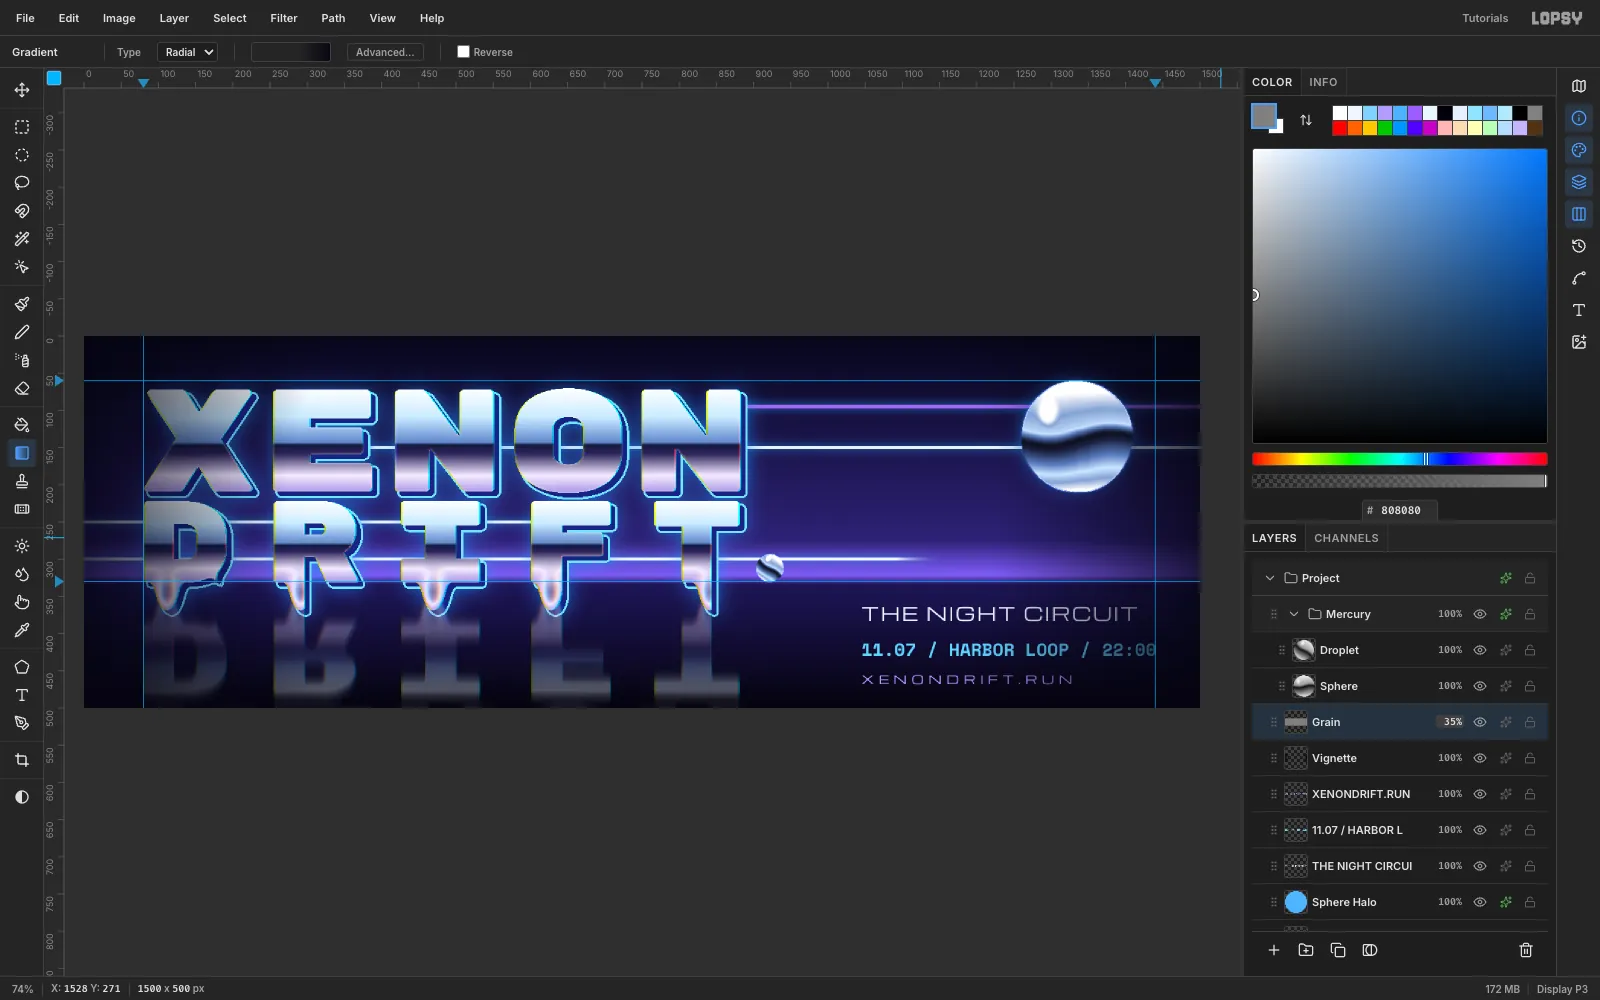
-
Export the billboard
Choose File → Quick Export PNG to save the billboard, and File → Save Project to keep every layer editable. To try other chrome, edit the
MercuryGradient Map: warm golds and browns turn the sphere into molten brass.