Design a Liquid Metal Ouroboros Album Cover
Make a chrome serpent eating its own tail around a solar eclipse in Lopsy, with Liquify drips, a mercury pool reflection and text on a circular path.
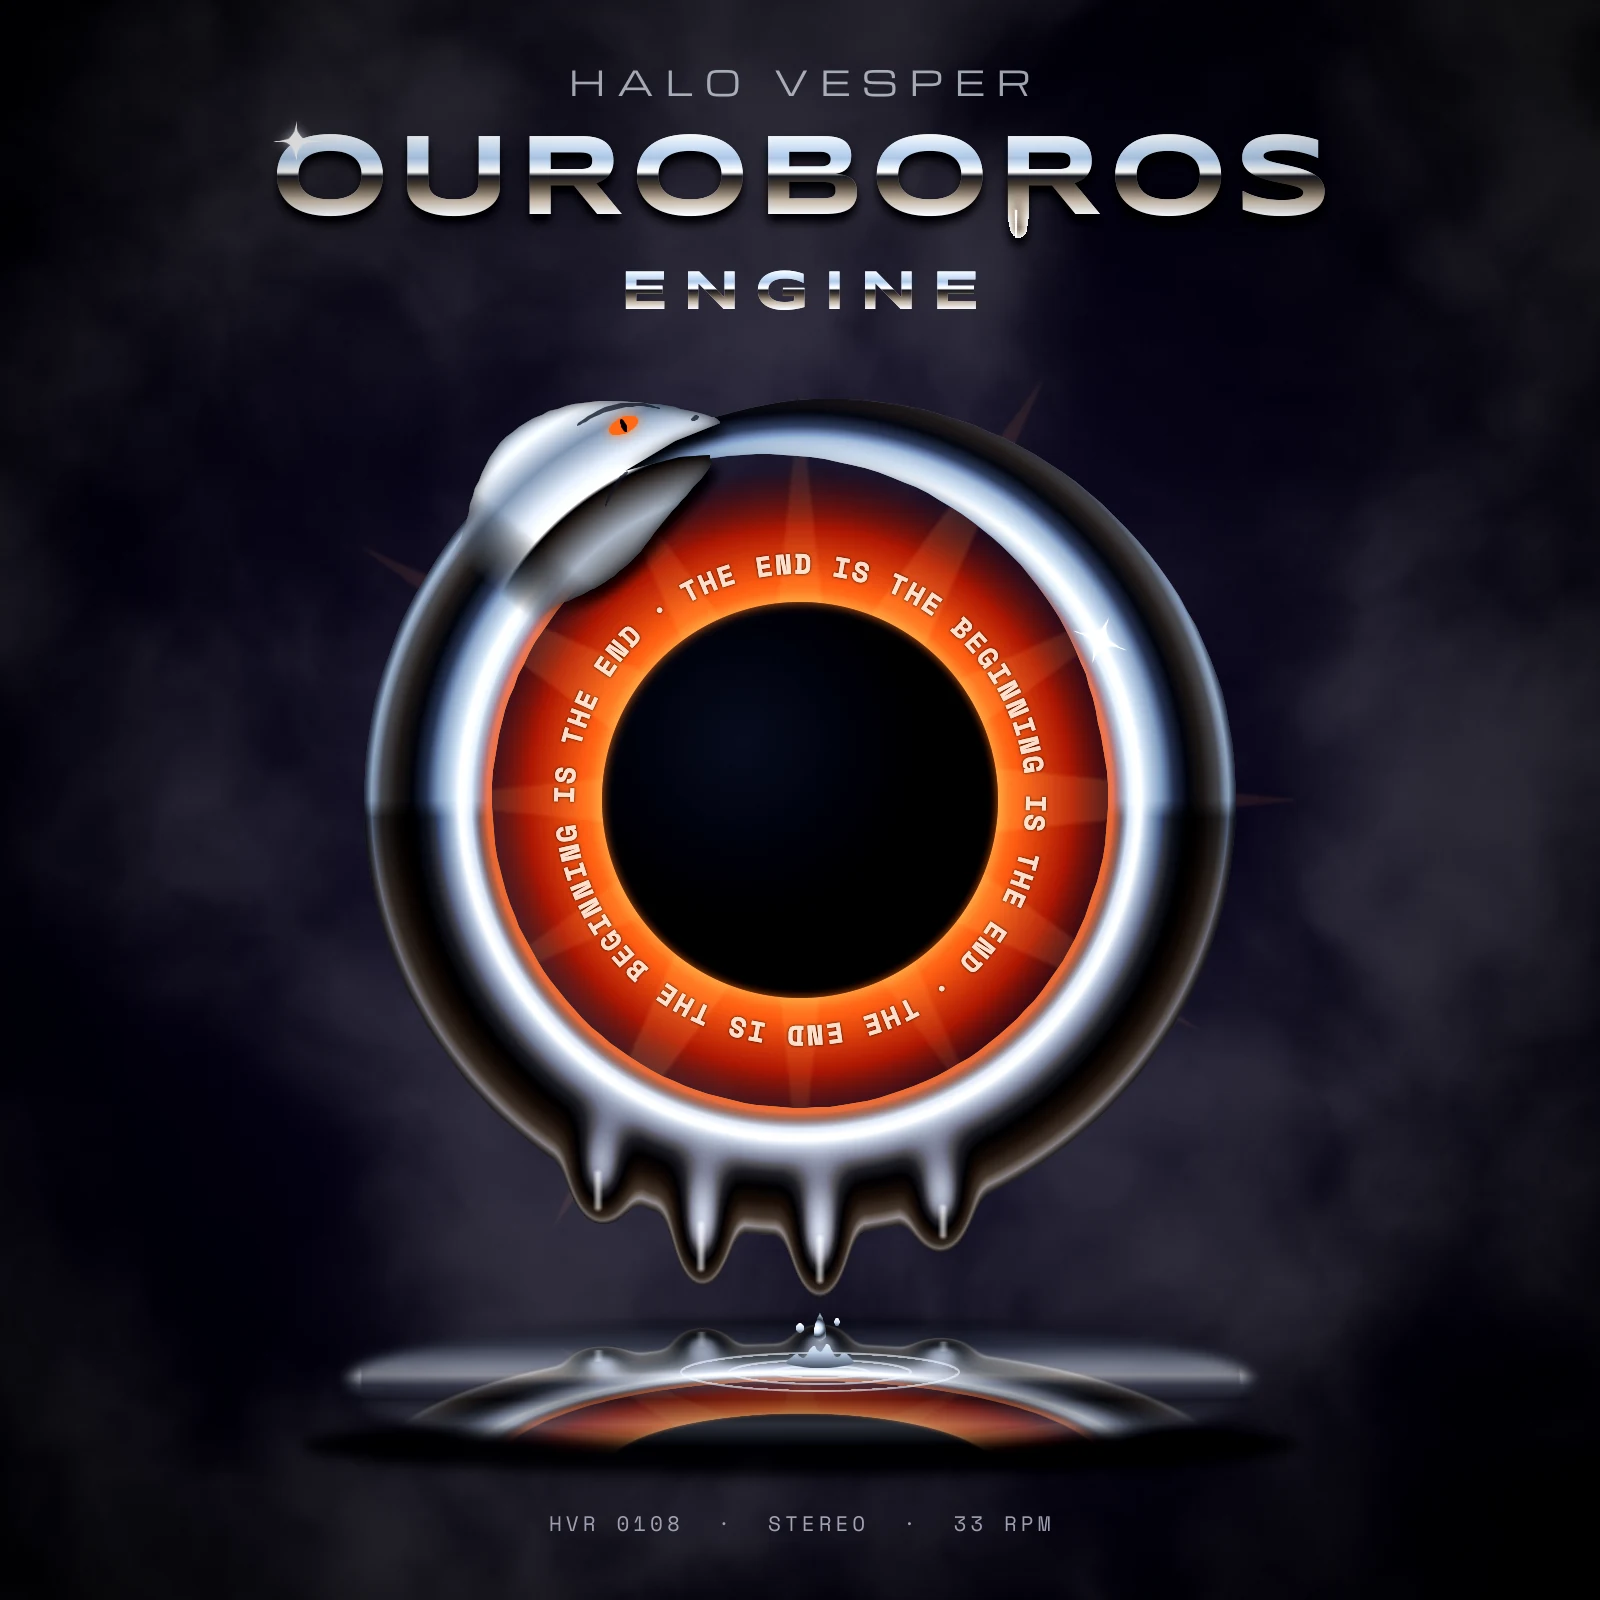
Liquid metal is chrome that has started to move. It still needs the hard reflections that make chrome read as metal: a bright crest, a dark band where the horizon would be, and a coloured bounce from whatever is nearby. On top of that it sags. It drips, pools and splashes.
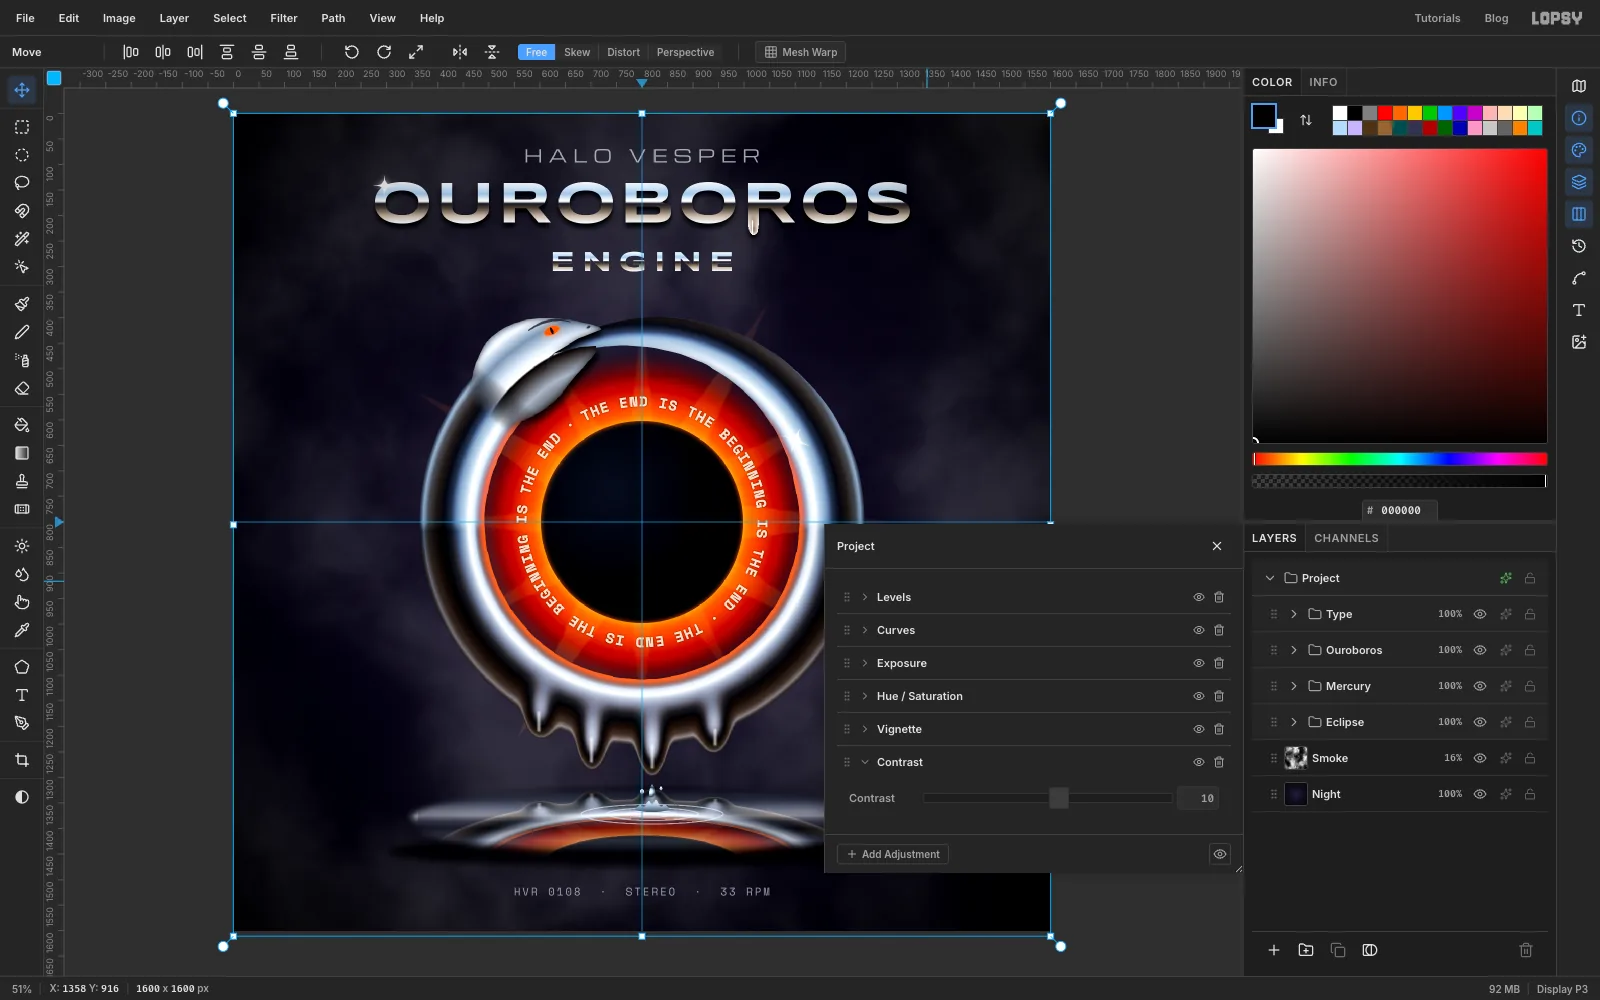
In this tutorial you'll make Ouroboros Engine, a 1600 × 1600 px album cover for the fictional band HALO VESPER. A chrome serpent bites its own tail around an eclipsed sun. The bottom of the ring melts into drips that fall into a mercury pool, and the pool reflects the whole scene. You'll use radial gradients for the chrome, a layer mask to blend the head into the body, Liquify for the drips, Copy Merged and a squash transform for the reflection, and a Pen-drawn circle for the motto.
The palette:
-
Night sky
-
Corona
-
Chrome tube
-
Fire bounce
-
serpent eye
-
Type
-
motto cream
-
footer
-
Paint a night sky
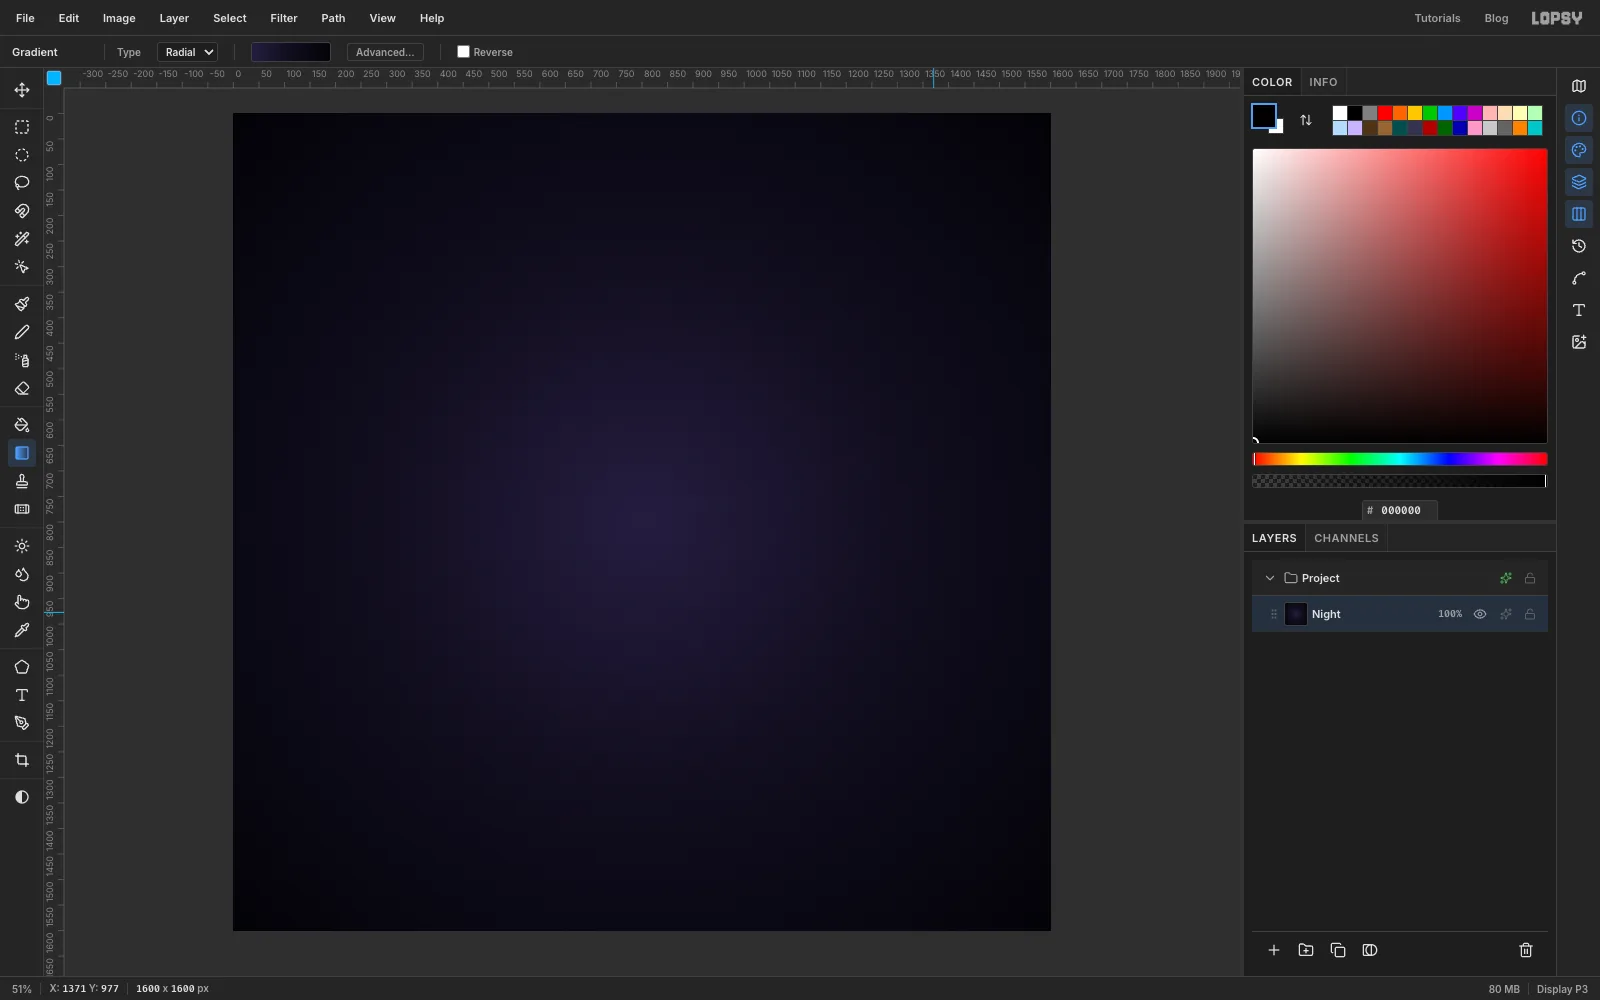
Choose File → New, set the unit to Pixels, and create a 1600 × 1600 document. Double-click Background in the Layers panel and rename it Night.
Pick the Gradient tool, set Type to Radial, and click Advanced… to set three stops:
- at 0%
- at 45%
- at 100%
Drag from the centre of the canvas straight down, past the bottom edge. Then run Filter → Add Noise… with Amount 4, Mono and Gaussian. The grain keeps the large dark areas from banding.
-
Add centre guides and a layer of smoke
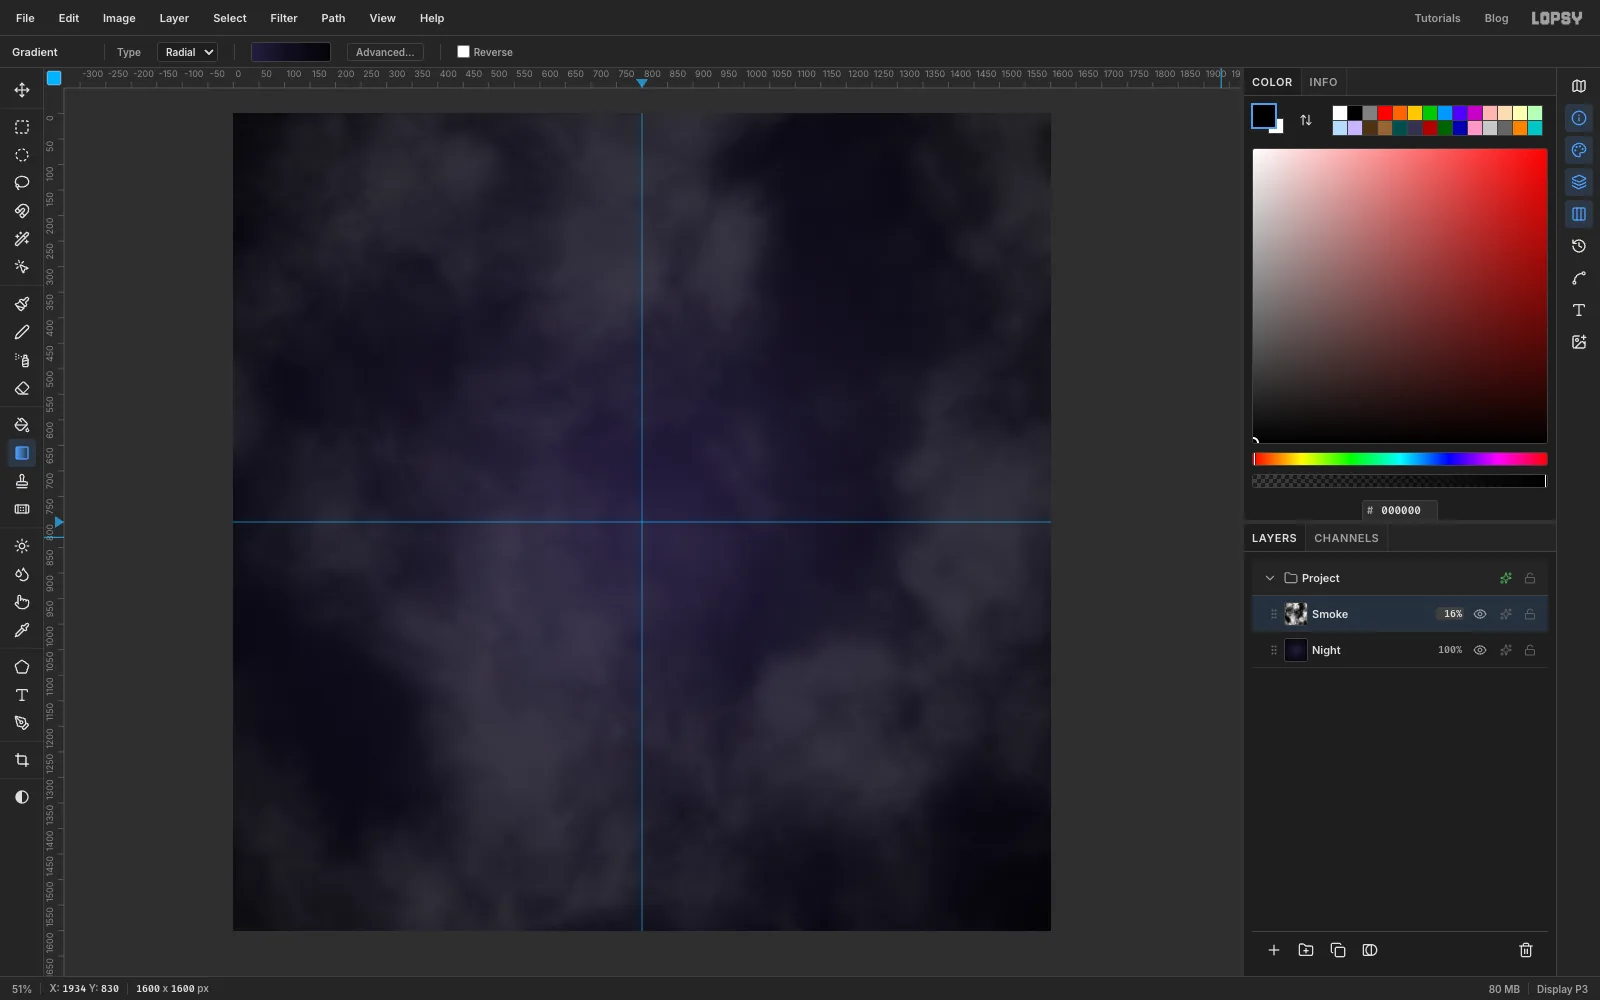
Click the top ruler at 800 and the left ruler at 800. That gives you two guides crossing at the exact centre, and everything in the ring is built around that point.
Click Add Layer and name the new layer Smoke. Run Filter → Smoke… with Scale 5 and Turbulence 60. Open the layer's effects drawer, set the blend mode to Screen, and lower the layer to 16% opacity. The smoke should only just be visible.
-
Build the corona
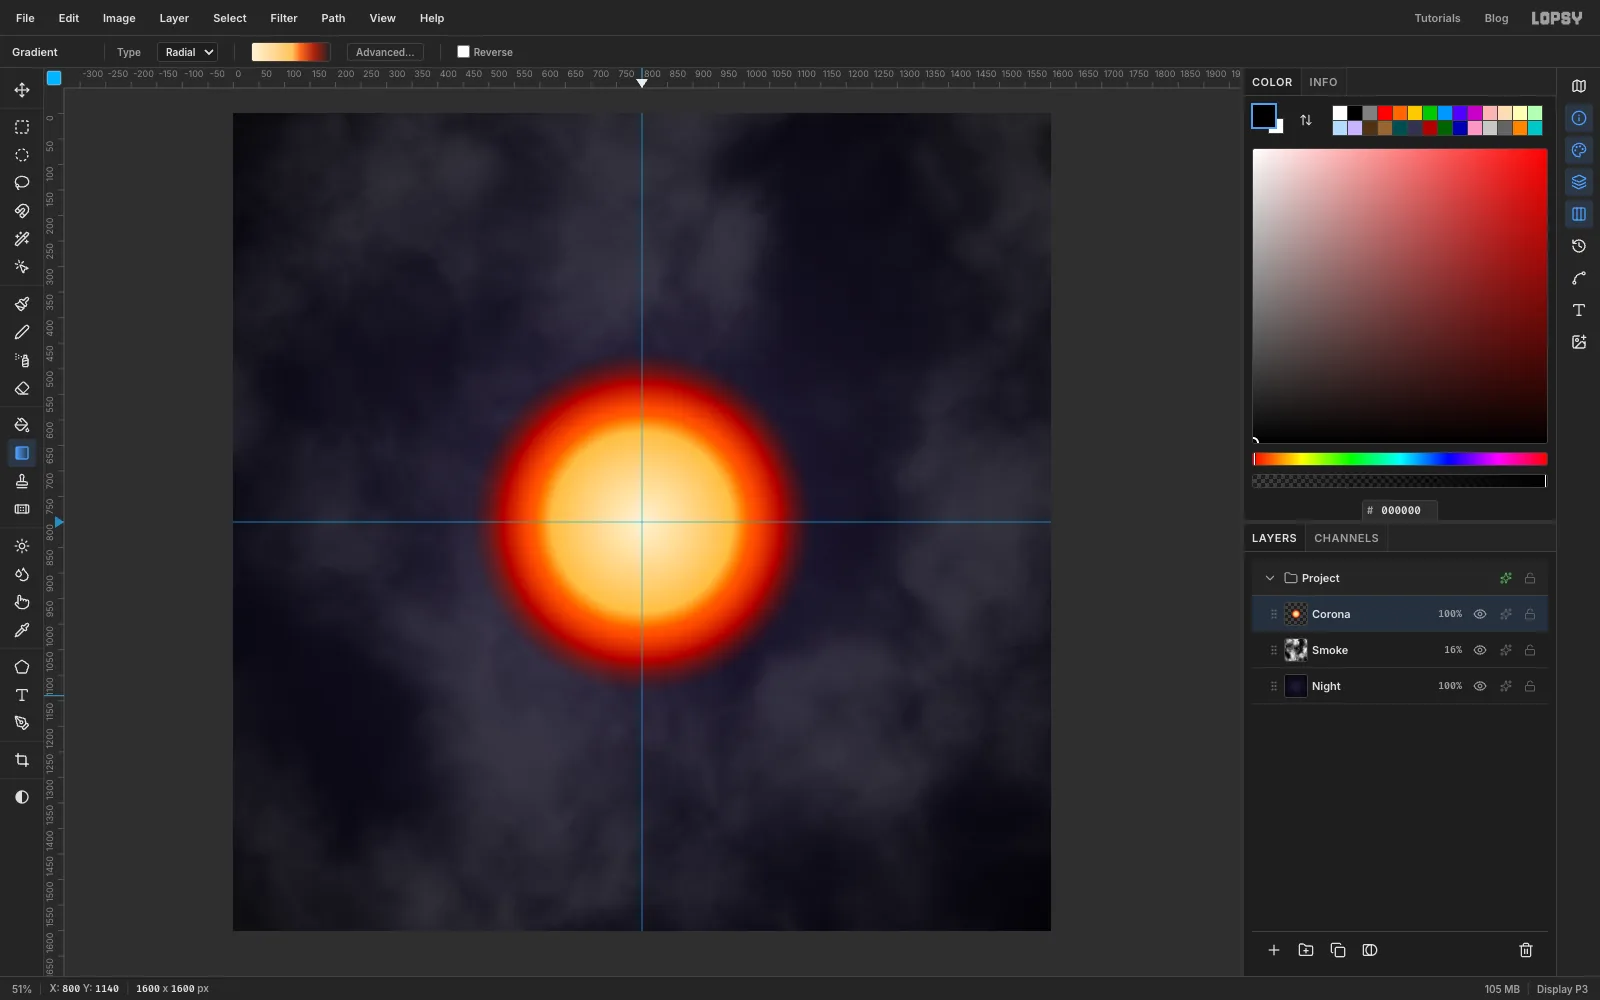
Add a layer called Corona. With the Elliptical Marquee, drag out a circle about 680 px across, centred where the guides cross. For an exact circle, click once without dragging and type From 460, 460 and To 1140, 1140 in the dialog that opens. Choose Select → Feather… and enter 30.
Set up a radial gradient with five stops:
- at 0%
- at 52%
- at 62%
- at 80%
- at 100%, with its opacity dragged to 0
Drag from the centre straight down to the edge of the selection, then press Cmd+D to deselect.
-
Add soft rays
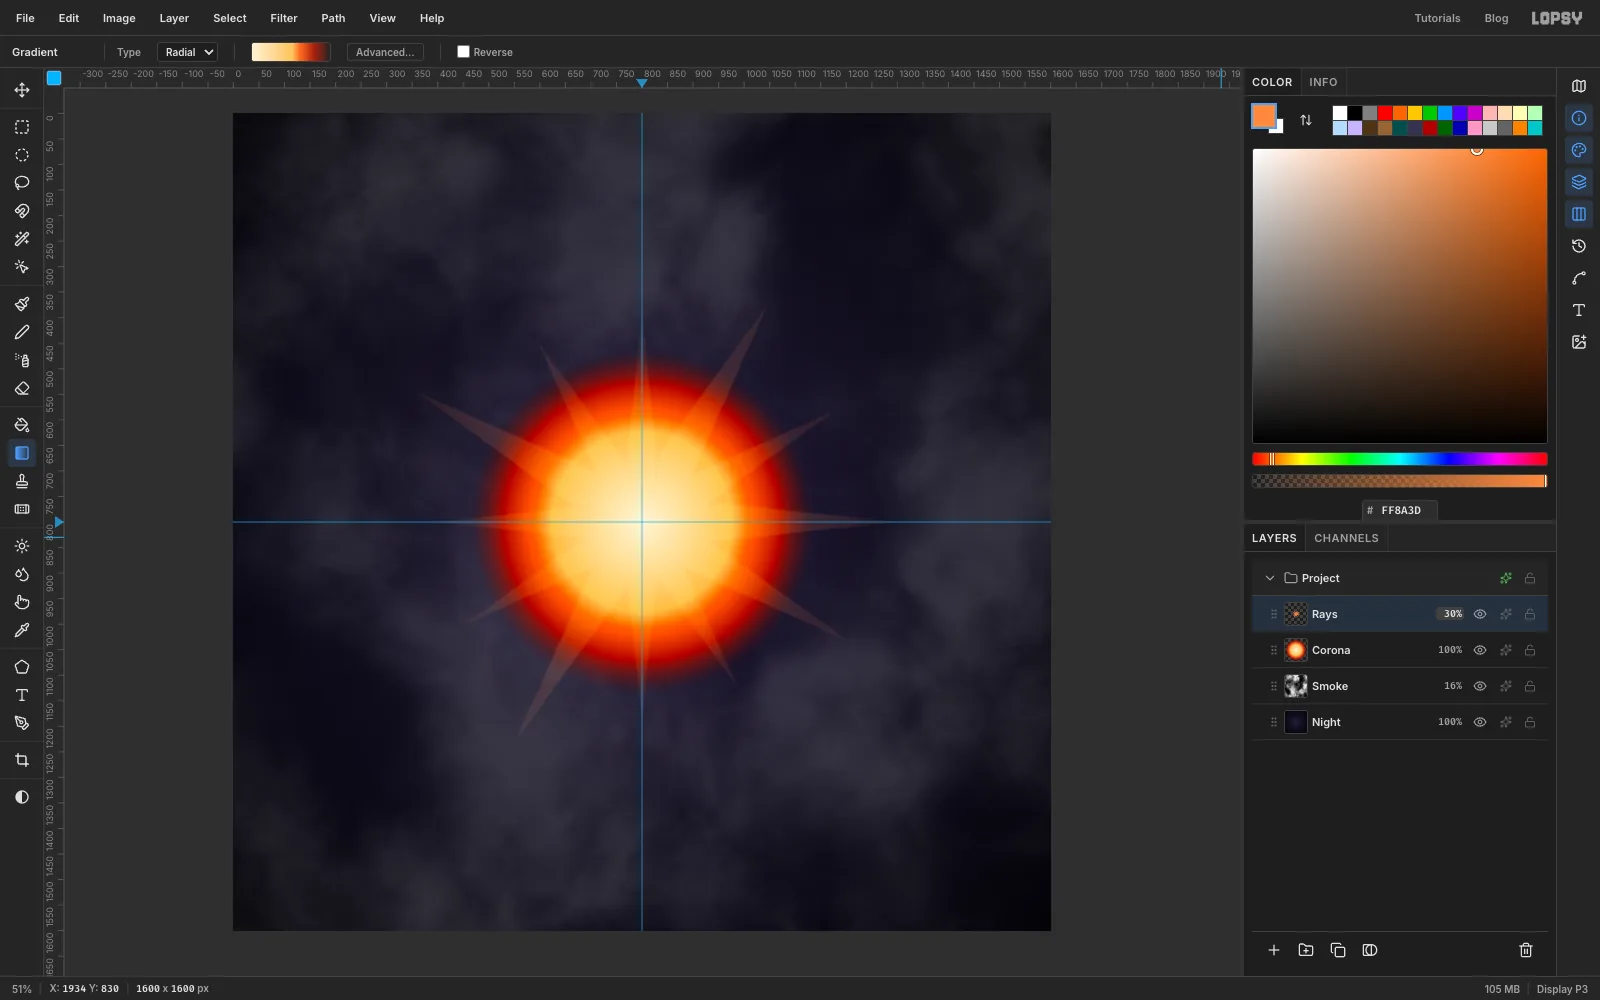
Add a layer called Rays and set the foreground colour to . Run Filter → Sunburst… with Rays 12, Length 45, Width 40, Taper 100, Fade 70 and Jitter 30.
Thin hairline rays look like scratches at album-cover size, so soften these with Filter → Gaussian Blur… at 4. Set the layer to Screen at 30%. You want broad, soft wedges of light.
-
Eclipse it with a moon
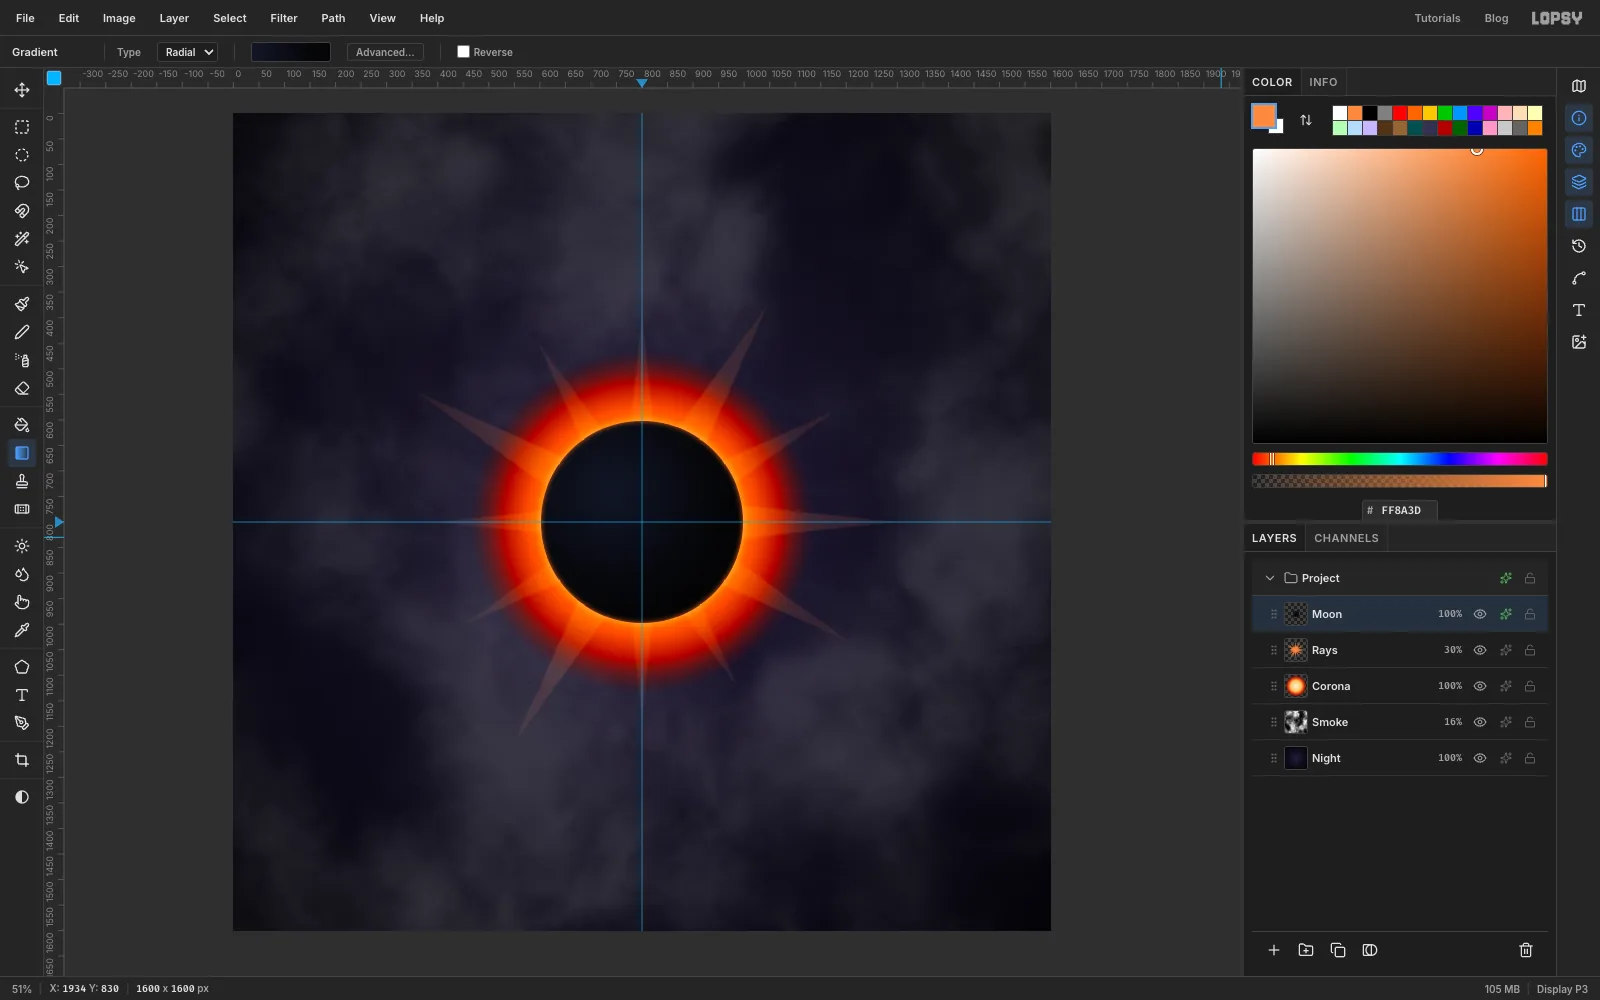
Add a layer called Moon. Make a circle about 400 px across, centred on the guides. The marquee dialog with From 602, 602 and To 998, 998 gives an exact one.
A flat black disc looks dead, so fill it with a radial gradient instead: → (65%) → . Drag from slightly above-left of the centre outwards, so the faint "earthshine" sits off-centre.
Deselect. In the effects drawer, add an Inner Glow (, Size 16, Opacity 80) and an Outer Glow (, Size 26, Opacity 70). Those give the moon the hot rim of a real eclipse.
-
Lasso the serpent's body
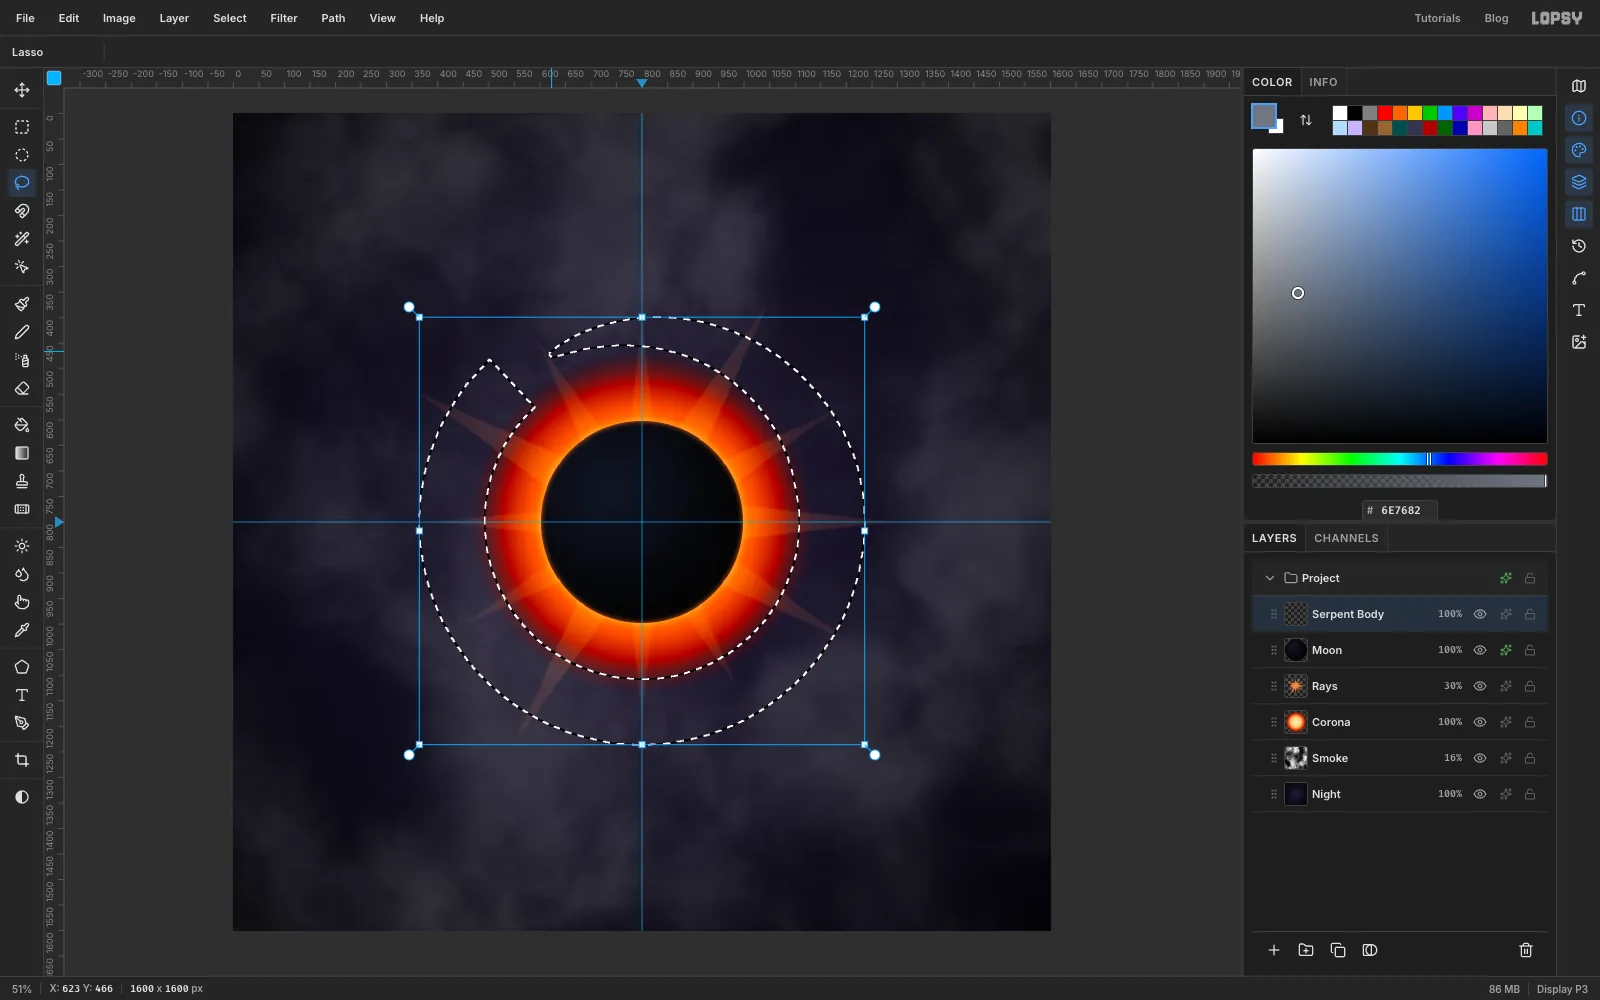
Add a layer called Serpent Body, just above Moon. The body is a ring about 128 px thick that starts as a fine tail at about 11 o'clock, thickens over the first third of the circle, and stays full width the rest of the way round. It's easiest to build from two circles:
- With the Elliptical Marquee, make a circle about 870 px across, centred on the guides (the dialog: From 365, 365, To 1235, 1235).
- Hold Alt and drag a second circle about 615 px across from the same centre to cut out the middle.
- Hold Alt and lasso a long sliver off the outer edge, from about 11 o'clock round to about 2 o'clock, so the ring narrows to a point at 11 o'clock. Also trim a matching sliver off the inner edge there, so the tail tapers from both sides.
Fill it with any mid grey, such as . The colour gets replaced by chrome in a moment. Deselect.
-
Lasso the head over the tail
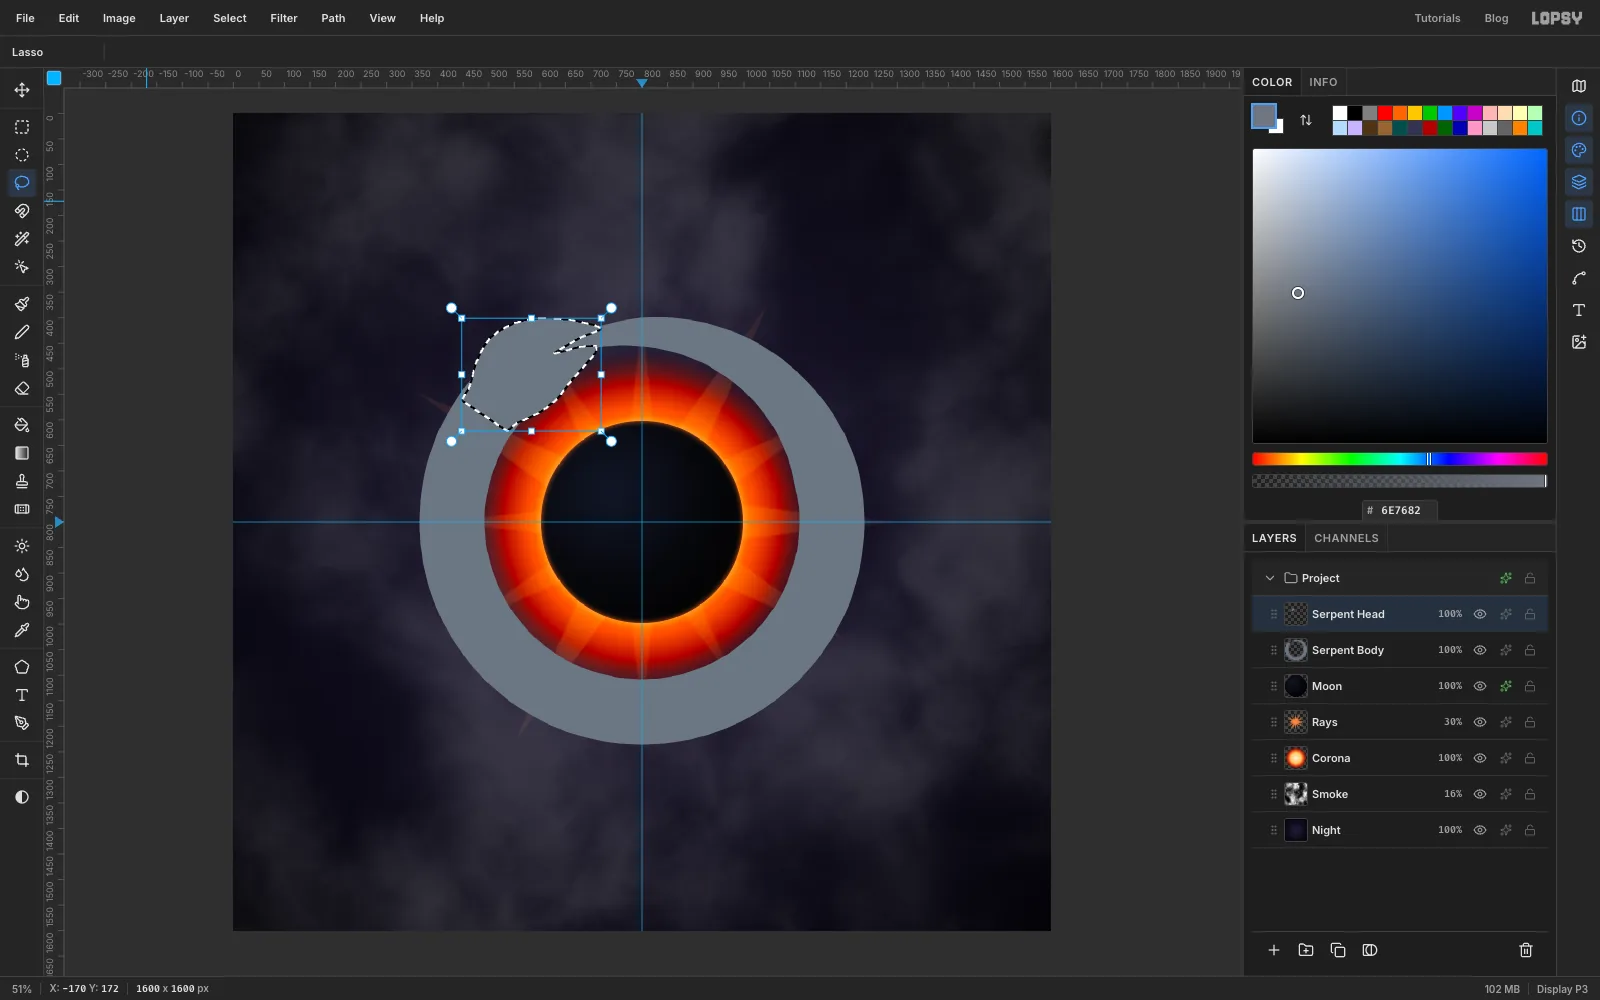
Add a layer called Serpent Head above the body. The head sits on the ring at about 10 to 11 o'clock and points clockwise at the tail. It's about 270 px long and about 175 px deep at the skull, a little wider than the body. With the Lasso:
- Start on the outer edge of the ring at the back of the neck.
- Swell out round the skull, then run along the top jaw to a narrow snout just past the tail tip.
- Cut back in about 100 px for the gape, and out again to the tip of the lower jaw, so the jaws make a thin V around the tail.
- Run back under the chin to the inner edge of the ring.
The tail should be thicker than the gape, so the jaws look as if they're biting down on it. Fill the head with the same grey and deselect.
-
Turn the body into chrome
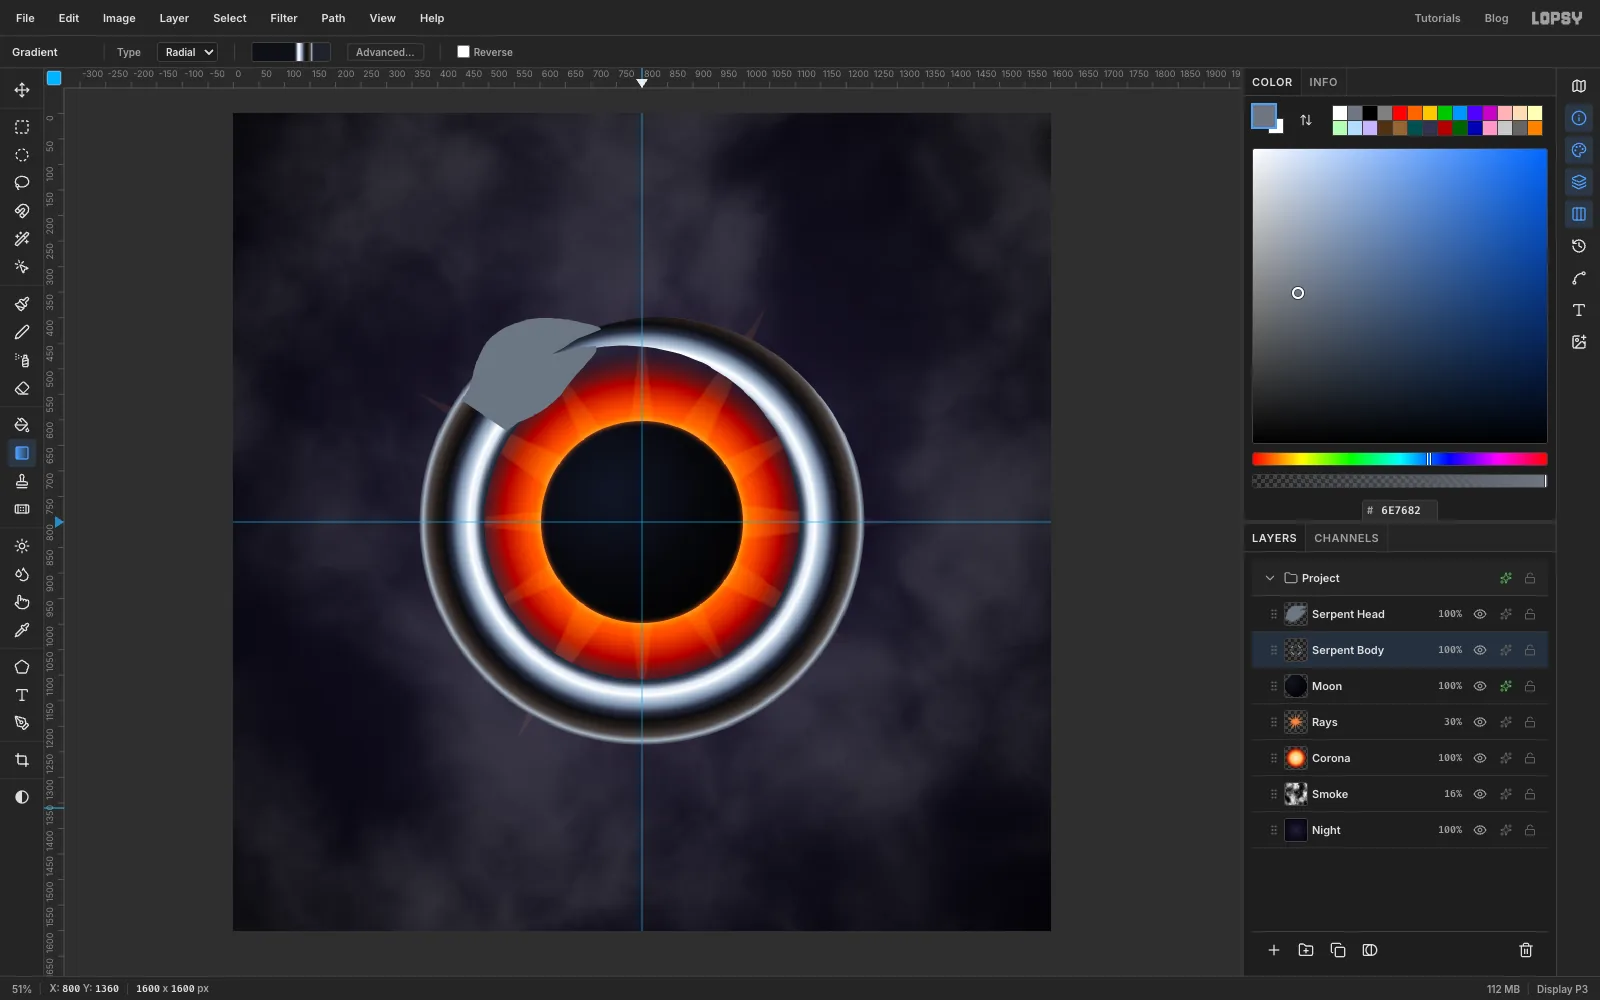
Select the Serpent Body layer and Cmd-click its thumbnail to load its shape as a selection. Set up a Radial gradient with stops that run across the thickness of the tube. You'll drag it 560 px, so 1% is about 5.6 px: the tube's inner edge sits at 55% and its outer edge at 78%.
- at 0% and 55%
- at 56%, at 59%
- at 61% (the hot crest)
- at 62%, at 65%
- at 67%, at 69%
- at 72%, at 75%
- at 77% (a thin rim light)
- at 78% and 100%
Drag from the centre of the guides straight down 560 px. The bands now follow the ring all the way round, so the tube looks round from every side. Deselect.
-
Give the head a curved horizon
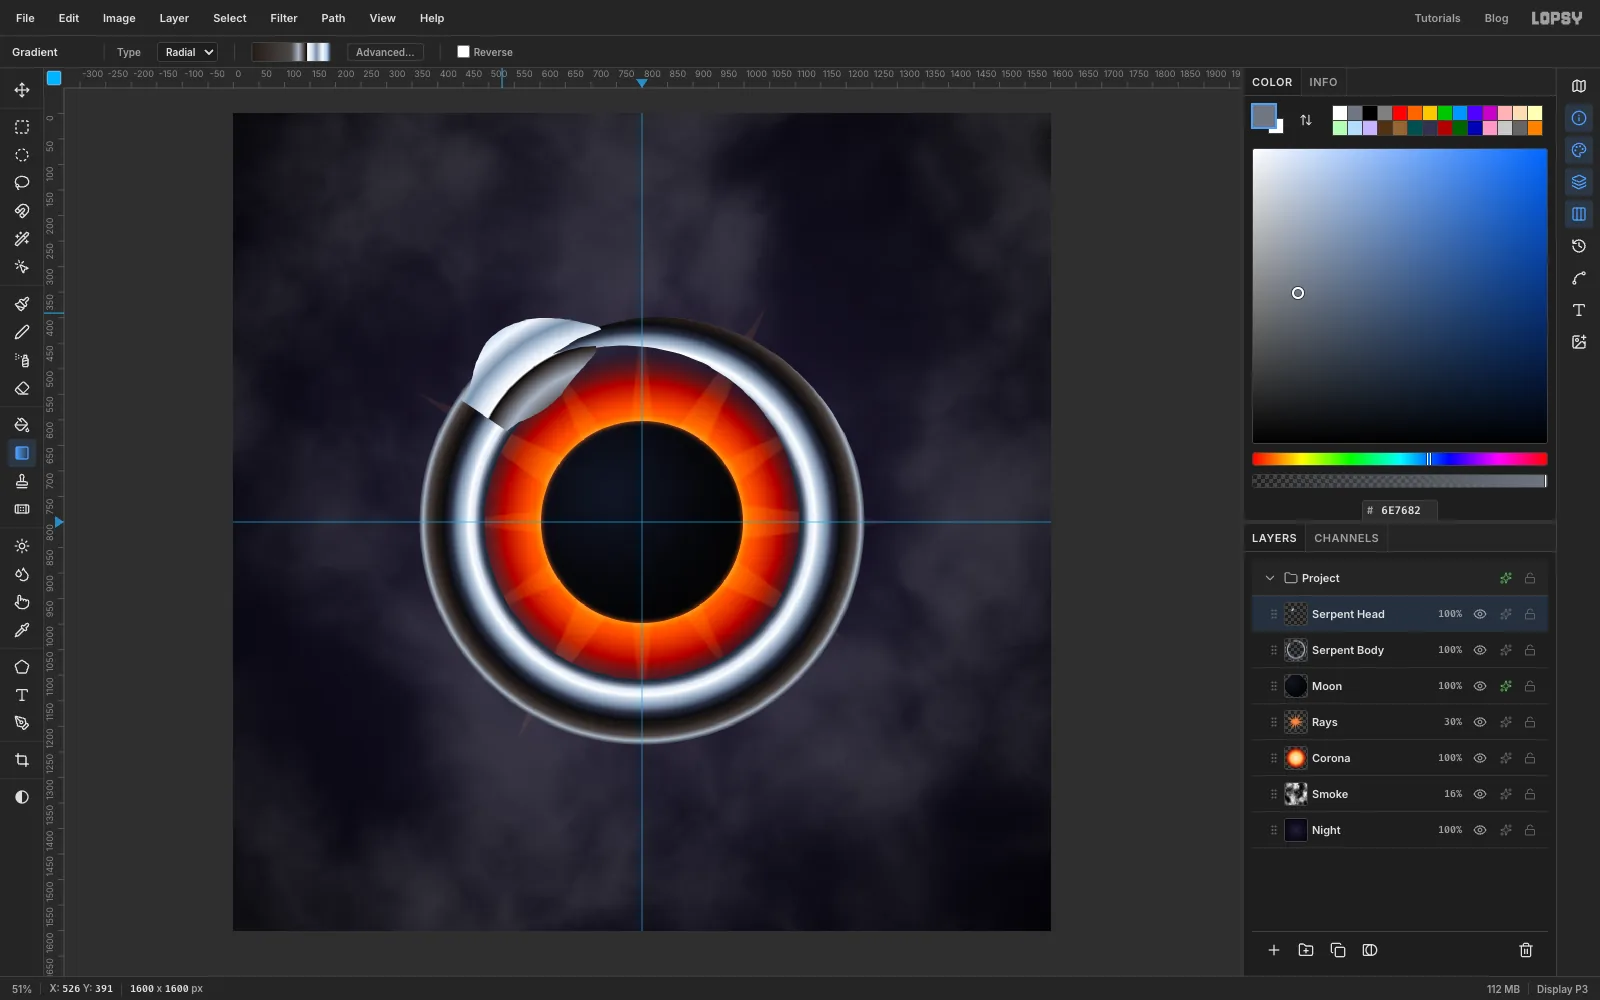
Select Serpent Head and Cmd-click its thumbnail. A straight horizon line across a rounded skull looks like two flat slabs, so the head gets a radial gradient whose centre is far below the jaw. That bends its horizon line into an arc that follows the skull.
Use these stops:
- at 0%, at 50%, at 60%, at 69%
- at 70.5% (the horizon), at 71.5%
- at 76%, at 83%, at 90%, at 96%
- at 100% (a deeper blue at the very top of the skull)
Start inside the ring, about 300 px from the jaw towards the moon, and drag outwards through the top of the skull, about 420 px in total. The horizon should land just above the jaw. Deselect.
-
Blend the neck with a layer mask
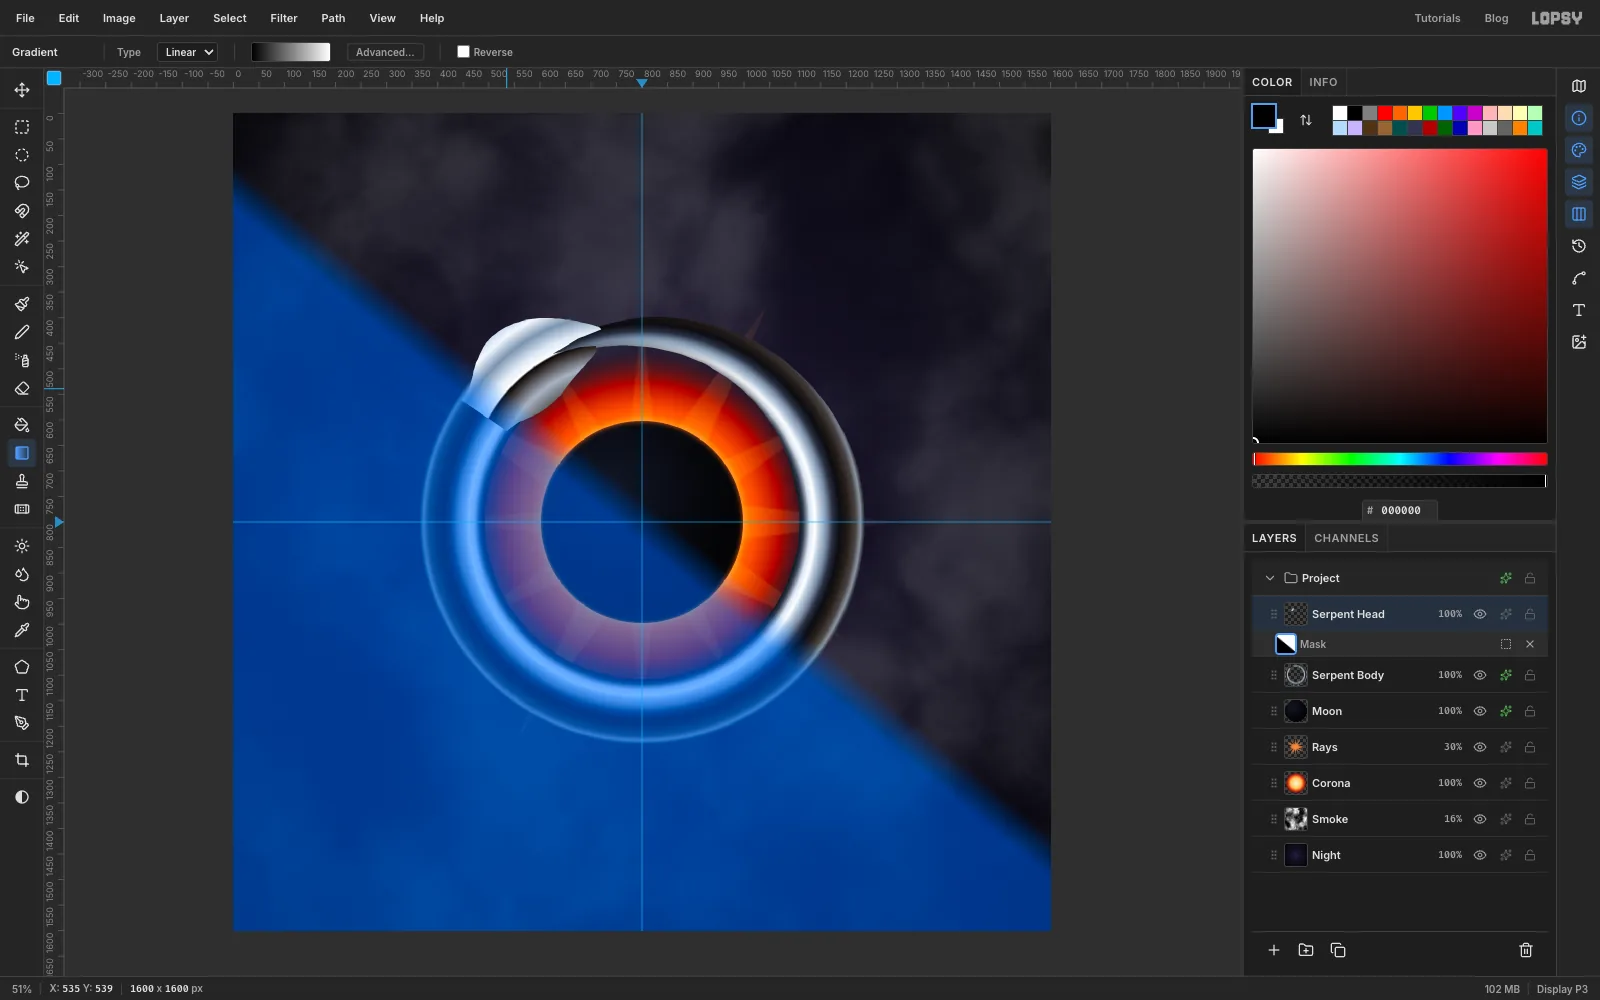
The body runs on under the back of the head, so the join can be blended instead of cut. With Serpent Head still selected, click Add Mask at the bottom of the Layers panel. Then click the new mask thumbnail under the layer row to edit the mask.
Set up a Linear gradient from black to white . Drag it along the neck, from where the head starts to about 65 px towards the snout. The back of the head now fades into the body's chrome. Click the layer row to leave mask edit mode.
-
Shade the head and add the eye
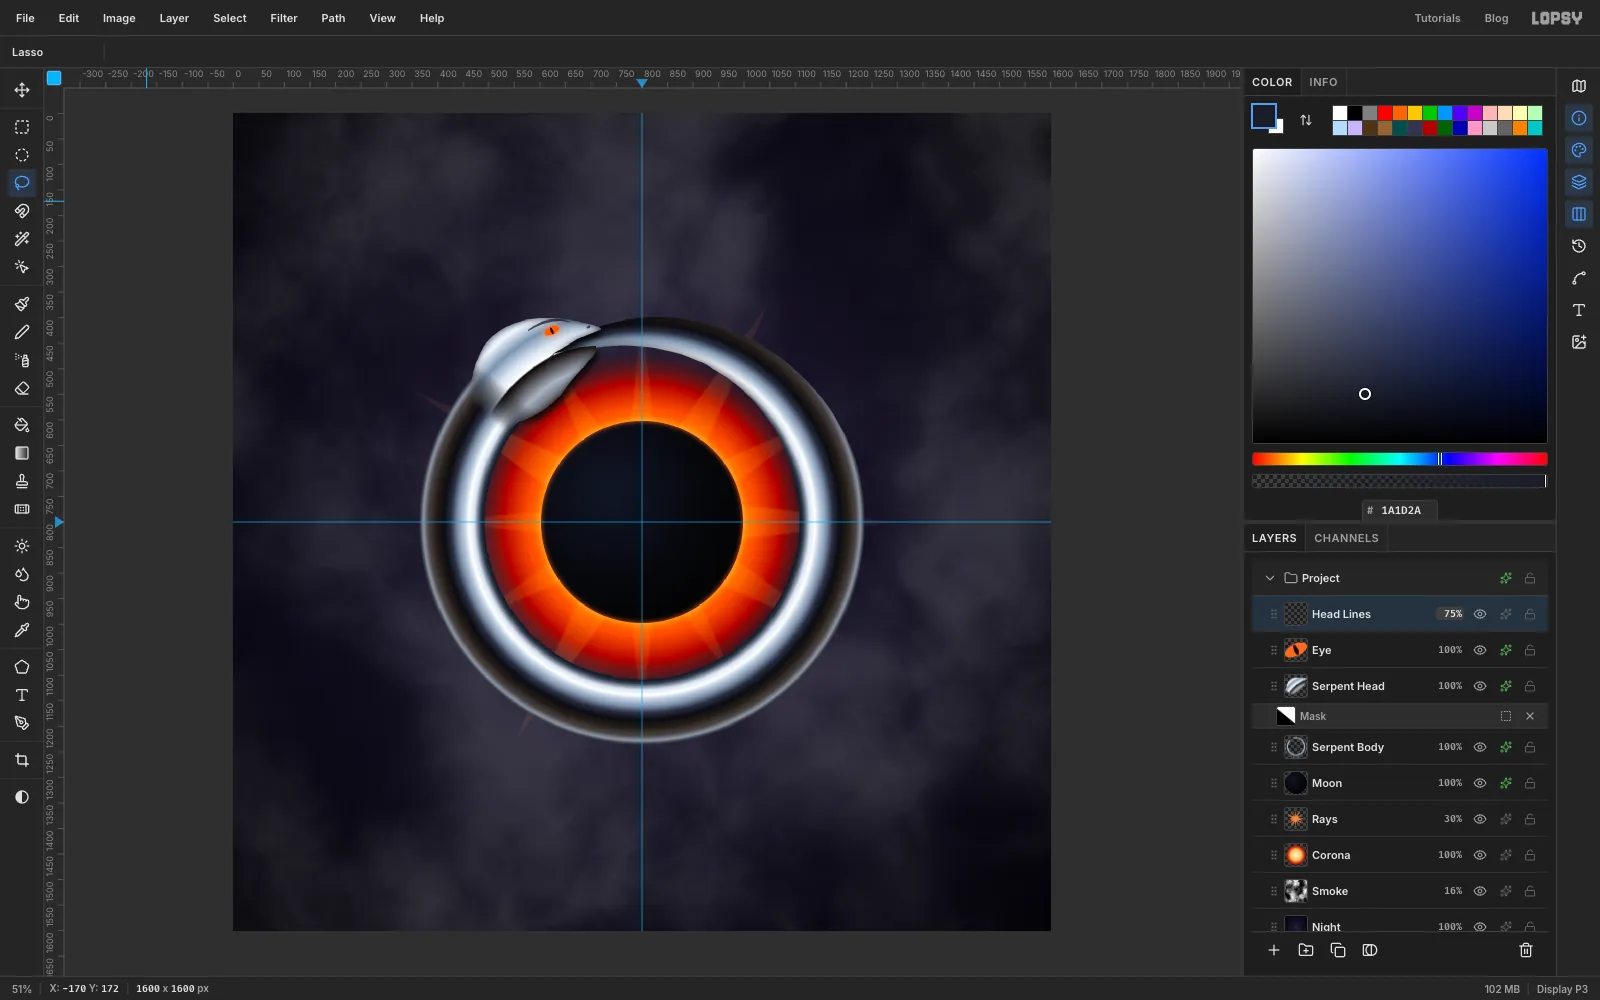
Give the body and the head an Inner Glow in near-black : Size 30 on the body and Size 20 on the head, both at 80% opacity. A dark edge glow rounds the tube off. Add a Drop Shadow to the head (Offset X 6, Offset Y 10, Blur 16, Opacity 75) so it sits on top of the tail.
Add a layer called Eye. Lasso a small slanted oval on the upper side of the skull, fill it with , then lasso a thin vertical slit inside it and fill that with . Give the layer an Outer Glow (, Size 18, Opacity 90).
Add a layer called Head Lines. With the Lasso, draw thin slivers that are pointed at both ends and about 5 px wide in the middle:
- a brow above the eye
- a short jaw crease running back from the corner of the mouth
- a tiny nostril near the snout
Fill them with dark steel and set the layer to 75%. Tapered marks look carved. Uniform lines look drawn on.
-
Melt the bottom of the ring with Liquify
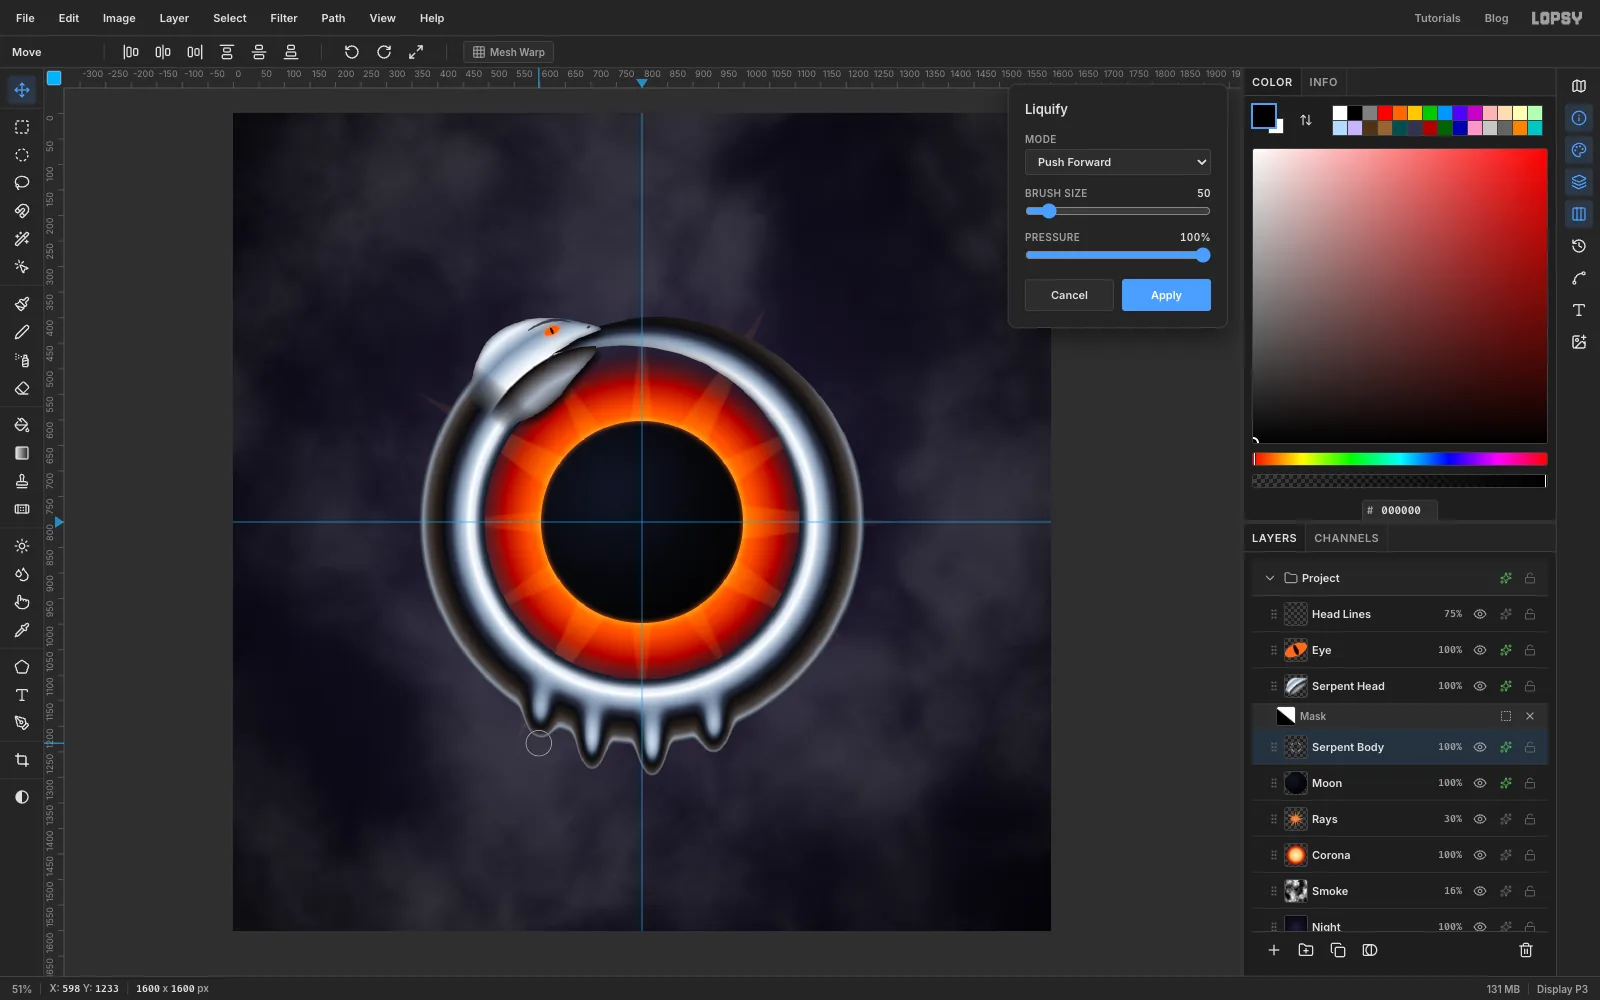
Select Serpent Body and open Filter → Liquify…. Set Mode to Push Forward, Brush Size to 50 and Pressure to 100%.
At four points spread across the bottom of the ring, slightly left of centre (about 5, 6, 7 and 7:30), drag straight down from just inside the tube. For a longer drip, start the next drag a little lower down the drip you just made. Do two passes for the outer drips and three for the middle ones, so they're different lengths. Keep the melt to the bottom only, because gravity pulls it there. Click Apply.
-
Light the metal with the world
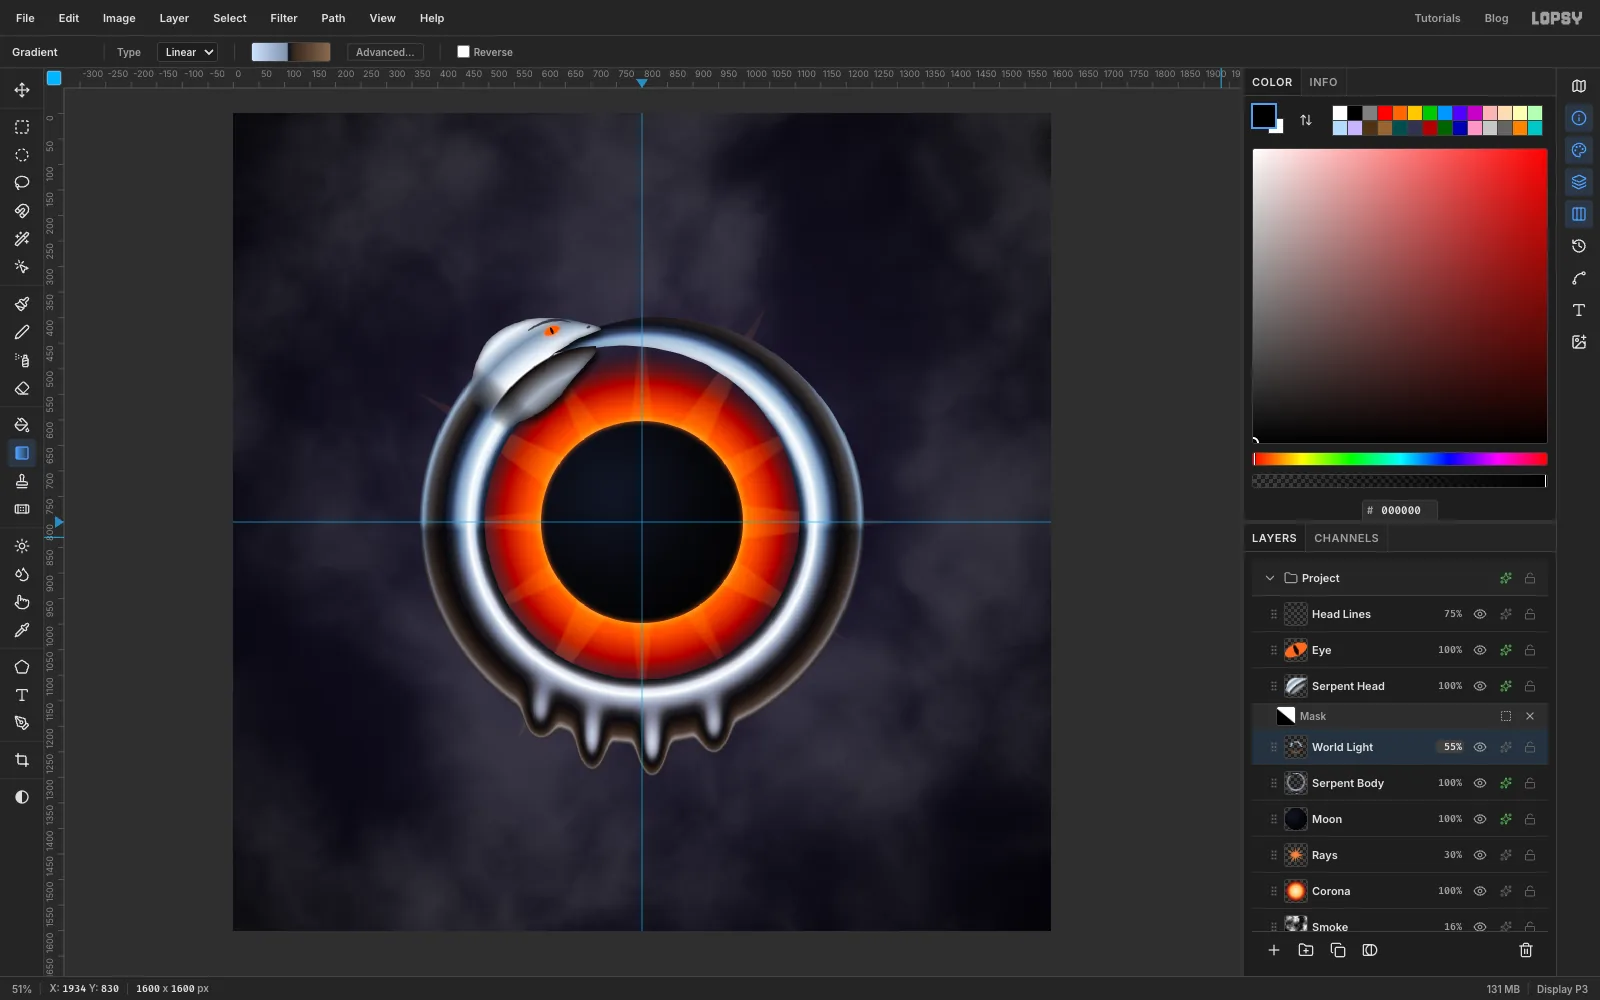
Real chrome reflects its surroundings: sky above and ground below. Add a layer called World Light and Cmd-click the Serpent Body thumbnail. Drag a Linear gradient from the top of the ring to the bottom of the drips:
- at 0%
- at 45%
- at 47%
- at 55%
- at 100%
Deselect, and set the layer to Overlay at 55%. Now the top of the ring catches sky and the bottom catches ground.
-
Bounce the fire onto the inner lip
Metal facing a fire picks up its colour, and leaving that out is the quickest way to make chrome look like plastic.
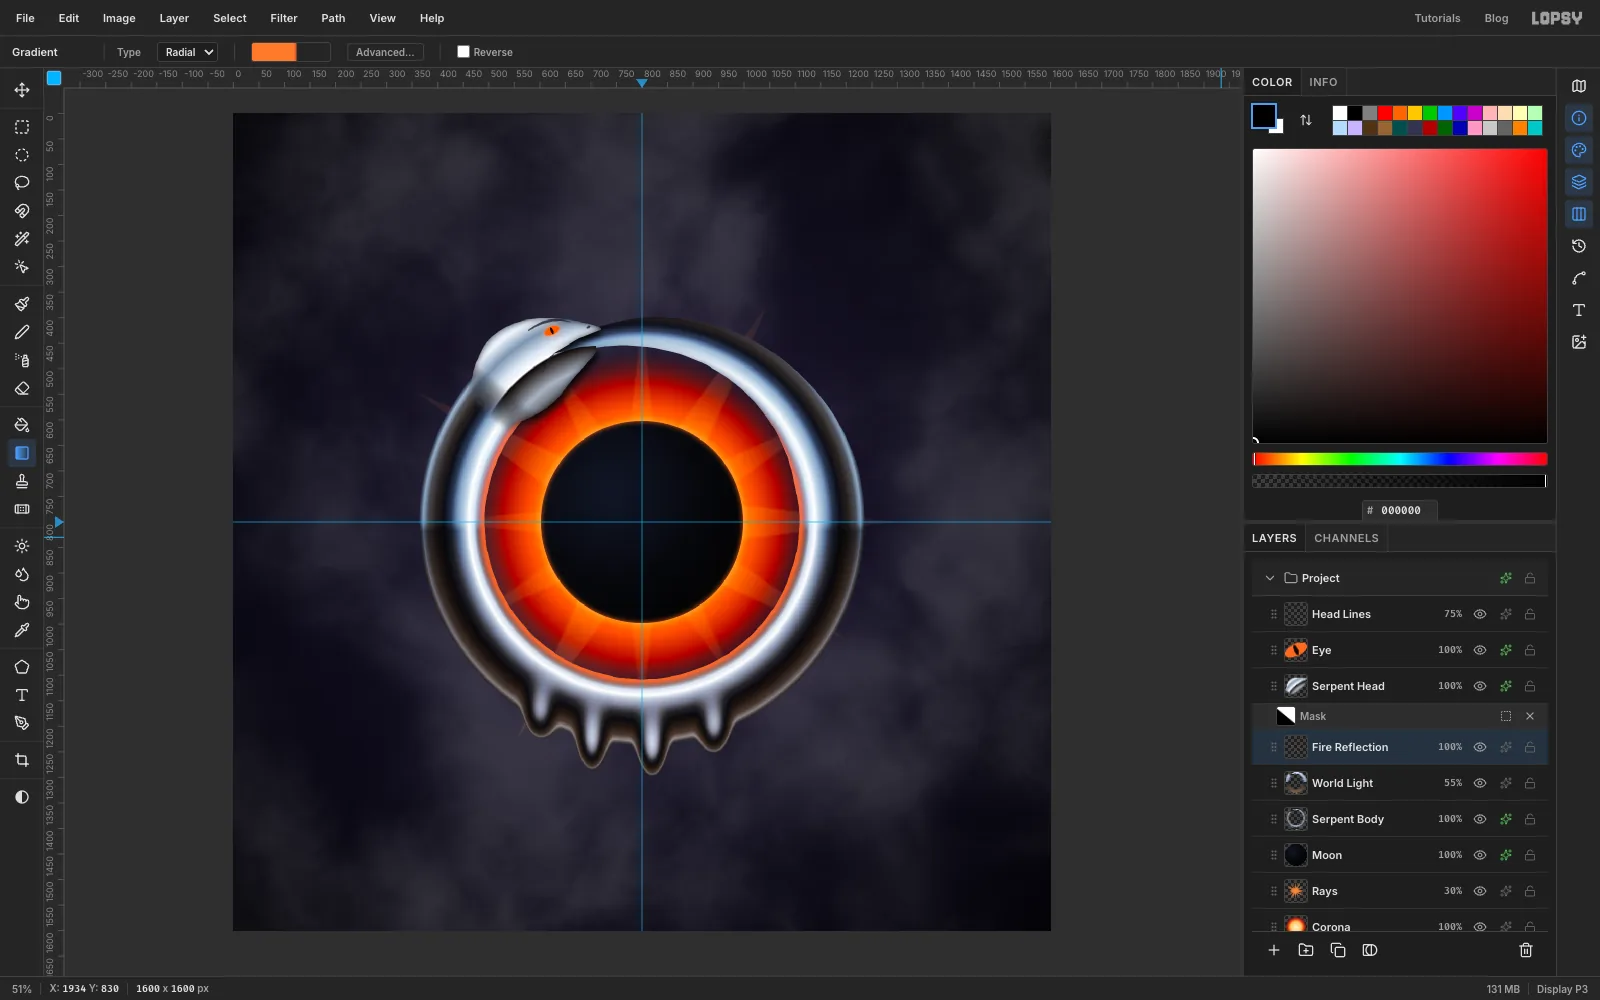
Add a layer called Fire Reflection and Cmd-click the body thumbnail again. Set up a radial gradient:
- at 0% and 53.5%
- at 56%, at 85% opacity
- transparent from 58.5% to 100%
Drag it from the centre down 560 px, the same as the chrome, so the orange lands exactly on the inner lip. Deselect and set the blend mode to Screen.
-
Add specular highlights
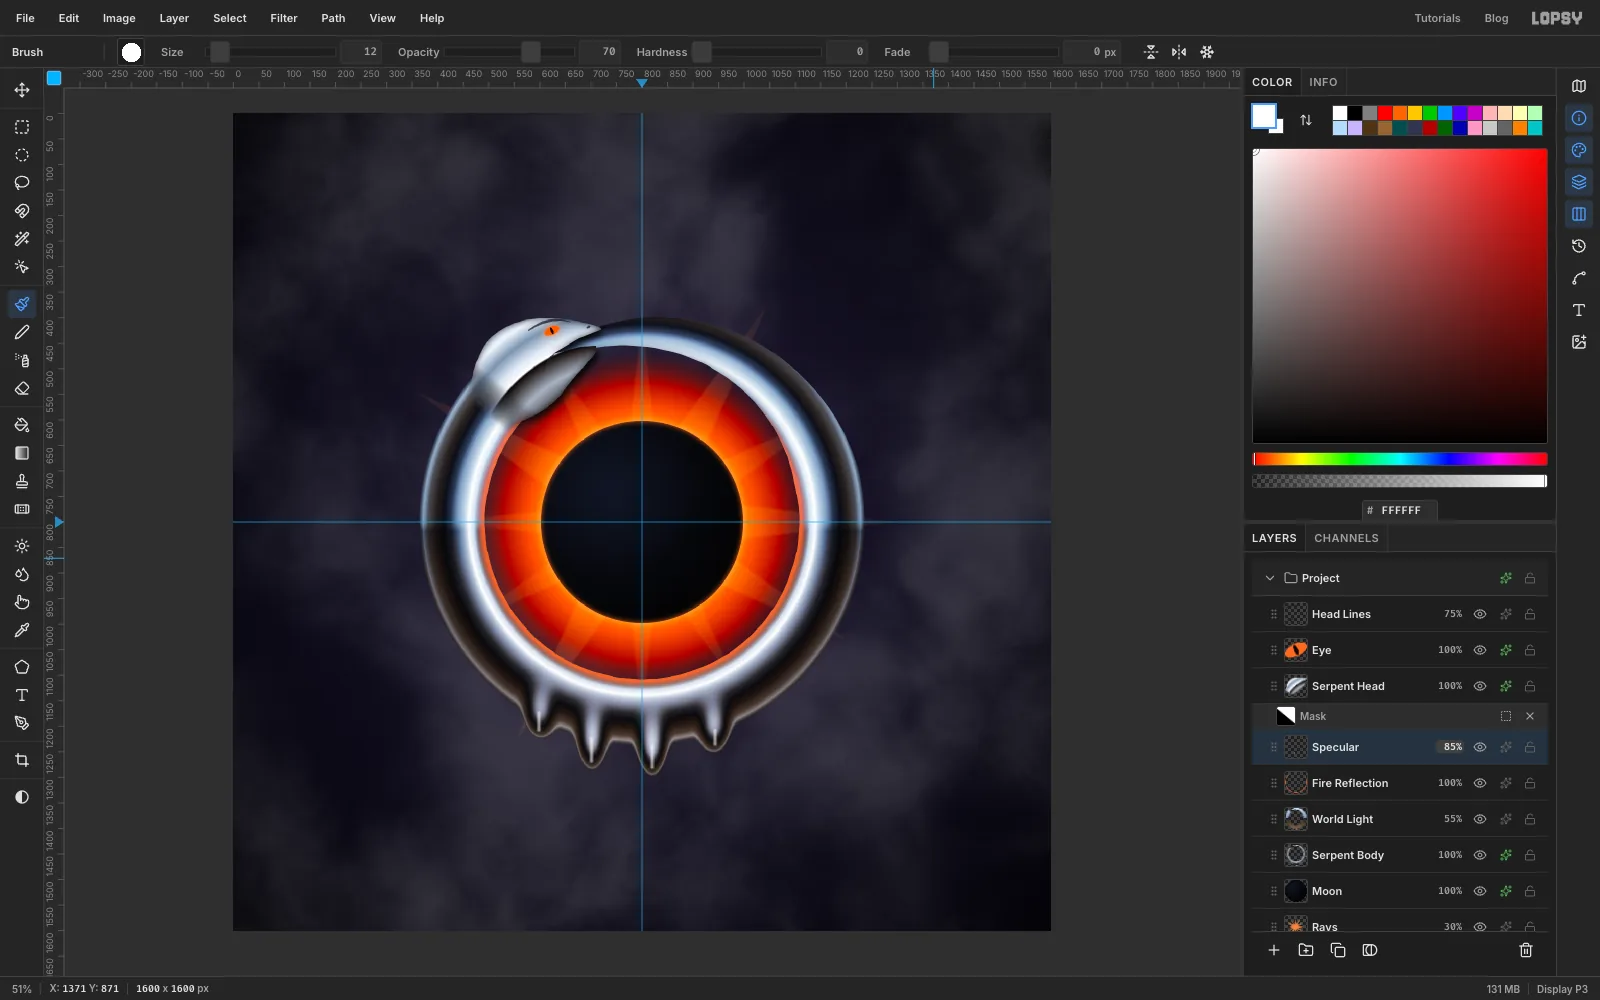
Add a layer called Specular and set the foreground to white. Pick the Brush, click the tip preview in the options bar to open the Brushes panel, and on the Shape tab set Size 4, Hardness 100 and Taper 80. Taper is a distance: the stroke starts full width and thins to nothing over 80 px, so each stroke becomes a short, pointed highlight. Paint two strokes along the white crest of the tube, one on the left and one on the upper right, starting where you want the highlight to be brightest.
Then set Size 12, Hardness 0, Opacity 70 and Taper 0. Paint a short stroke down the middle of each drip, stopping well short of the tip. Blur the layer slightly with Gaussian Blur 1.5, and set it to 85%.
-
Pour a mercury pool
Add a layer called Pool Shadow. Draw a flat elliptical marquee about 1000 × 60 px, centred under the ring, about 150 px below the drips. Fill it with black, blur it with Gaussian Blur 20, and set it to Multiply at 70%.
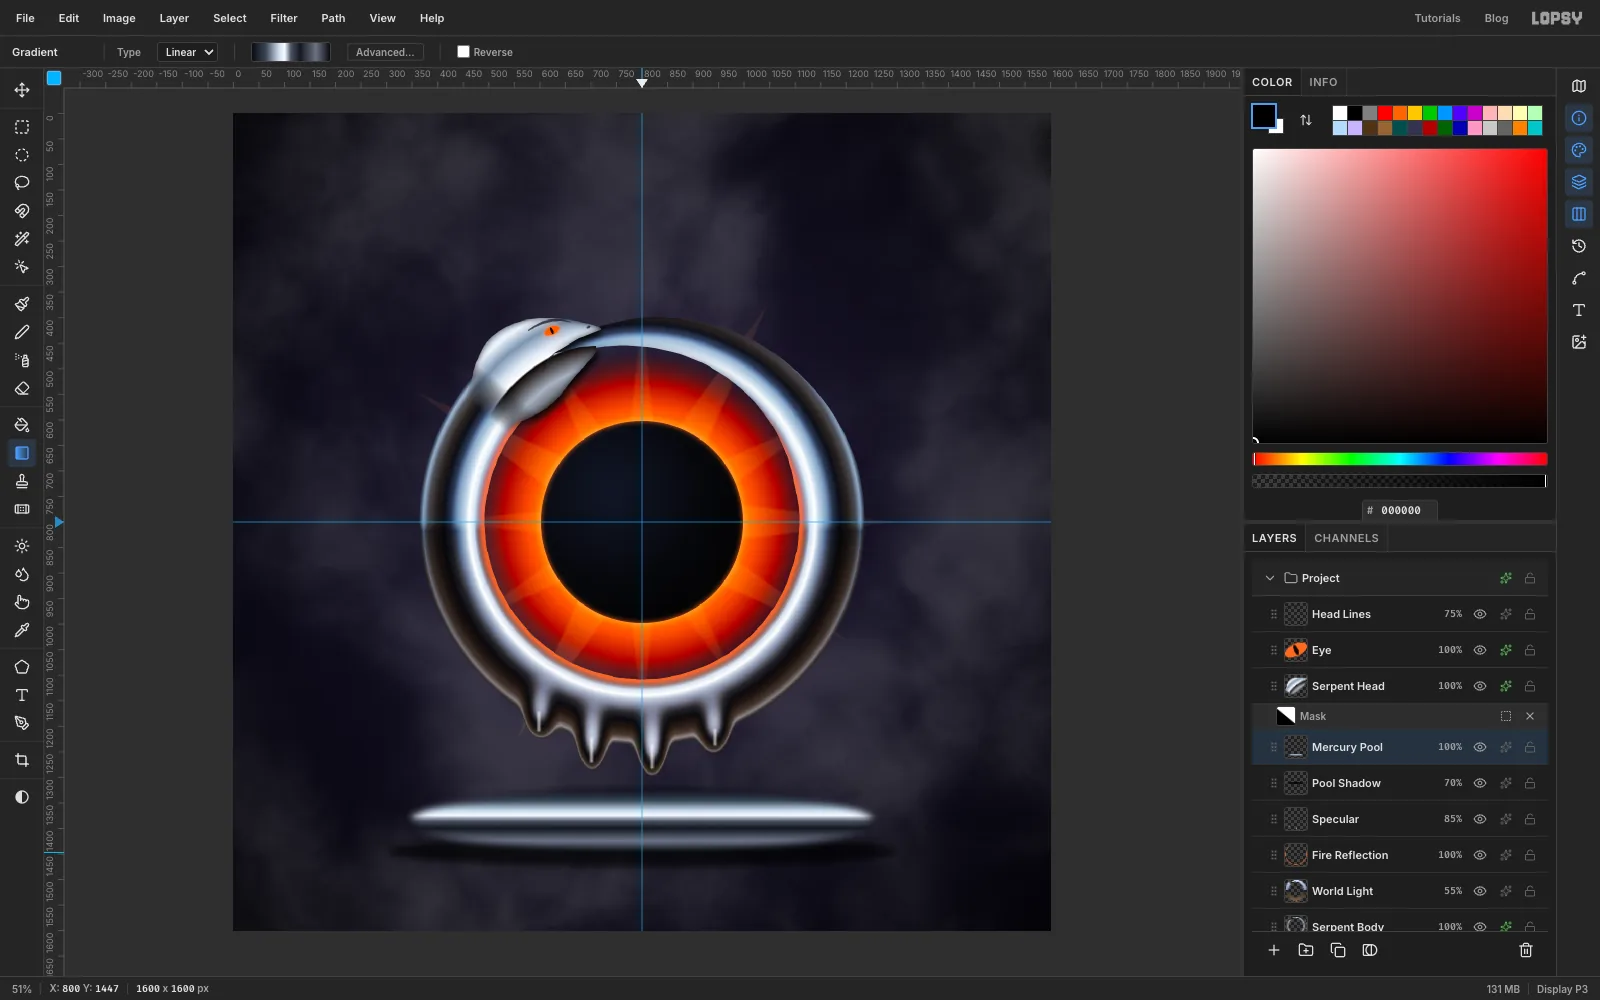
Add a layer called Mercury Pool above it. Draw an ellipse about 900 × 124 px, centred on the vertical guide, with its top edge about 25 px below the longest drip and its centre about 60 px above the shadow's. Feather it by 16. A hard edge reads as a glass disc rather than liquid. Drag a linear gradient from the top of the ellipse to the bottom with dark and light bands:
- at 0%
- at 18%
- at 34%
- at 42%
- at 50%
- at 62%
- at 82%
- at 100%
-
Copy the scene and squash it into a reflection
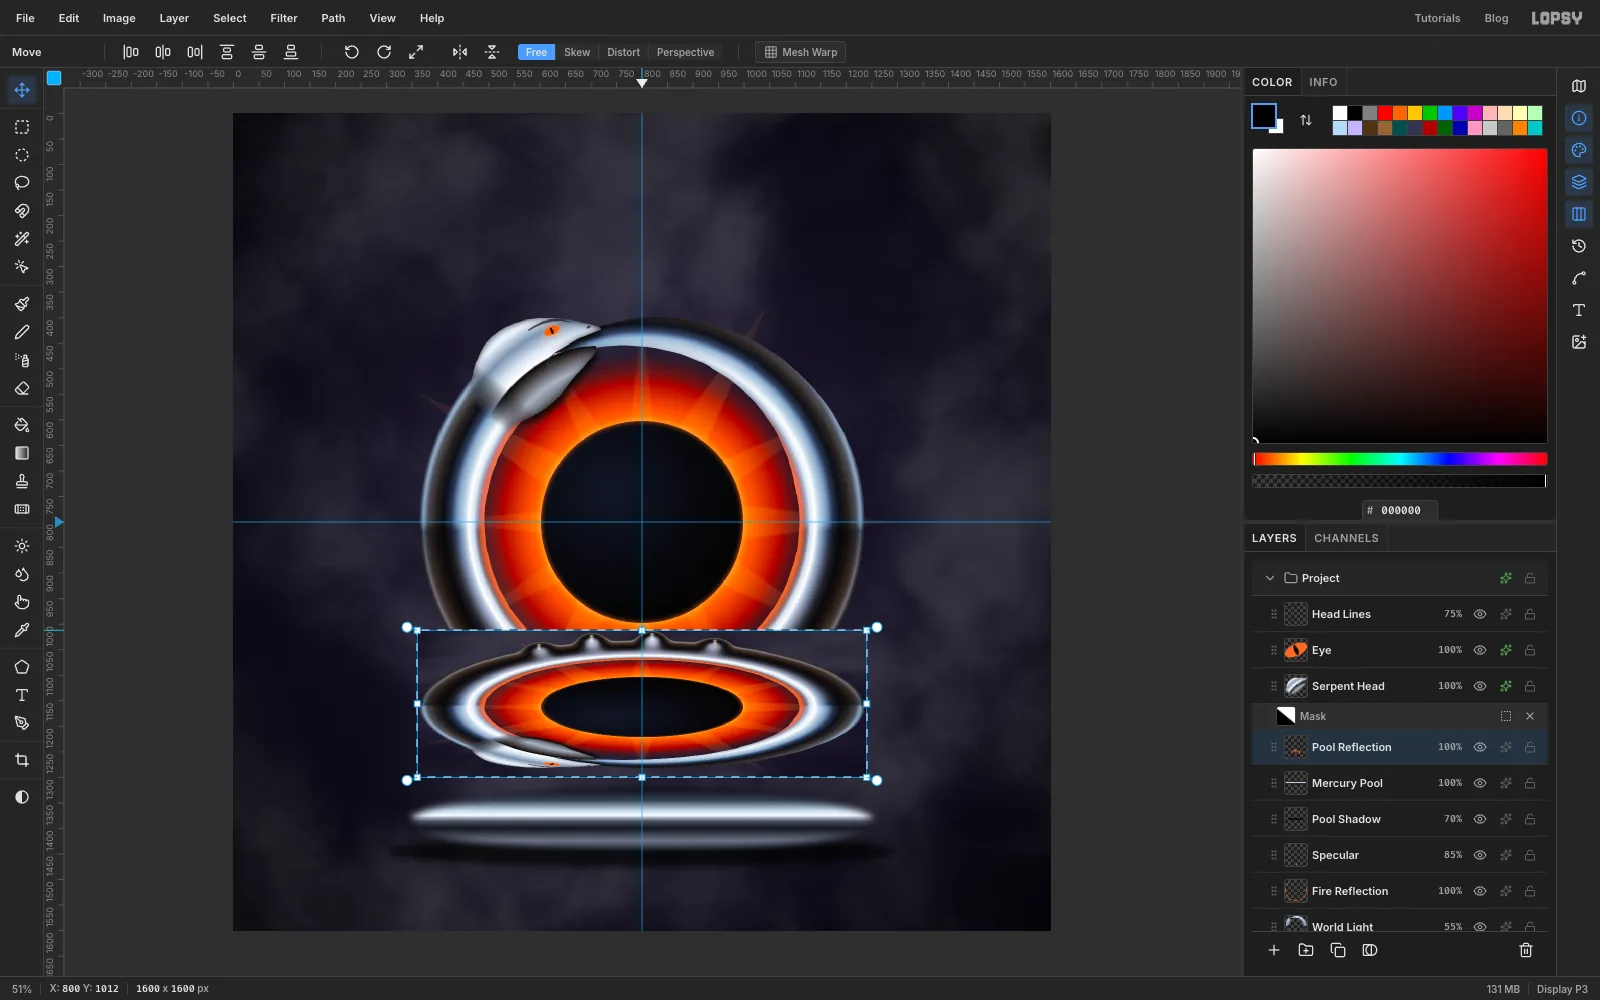
Draw a rectangular marquee around the whole ring, drips included. Choose Edit → Copy Merged, then Edit → Paste, and rename the pasted layer Pool Reflection. Choose Image → Flip Vertical.
Draw the same marquee around the flipped copy and switch to the Move tool. Drag the top-middle handle down until the copy is about 30% of its original height.
-
Slide the reflection into the pool
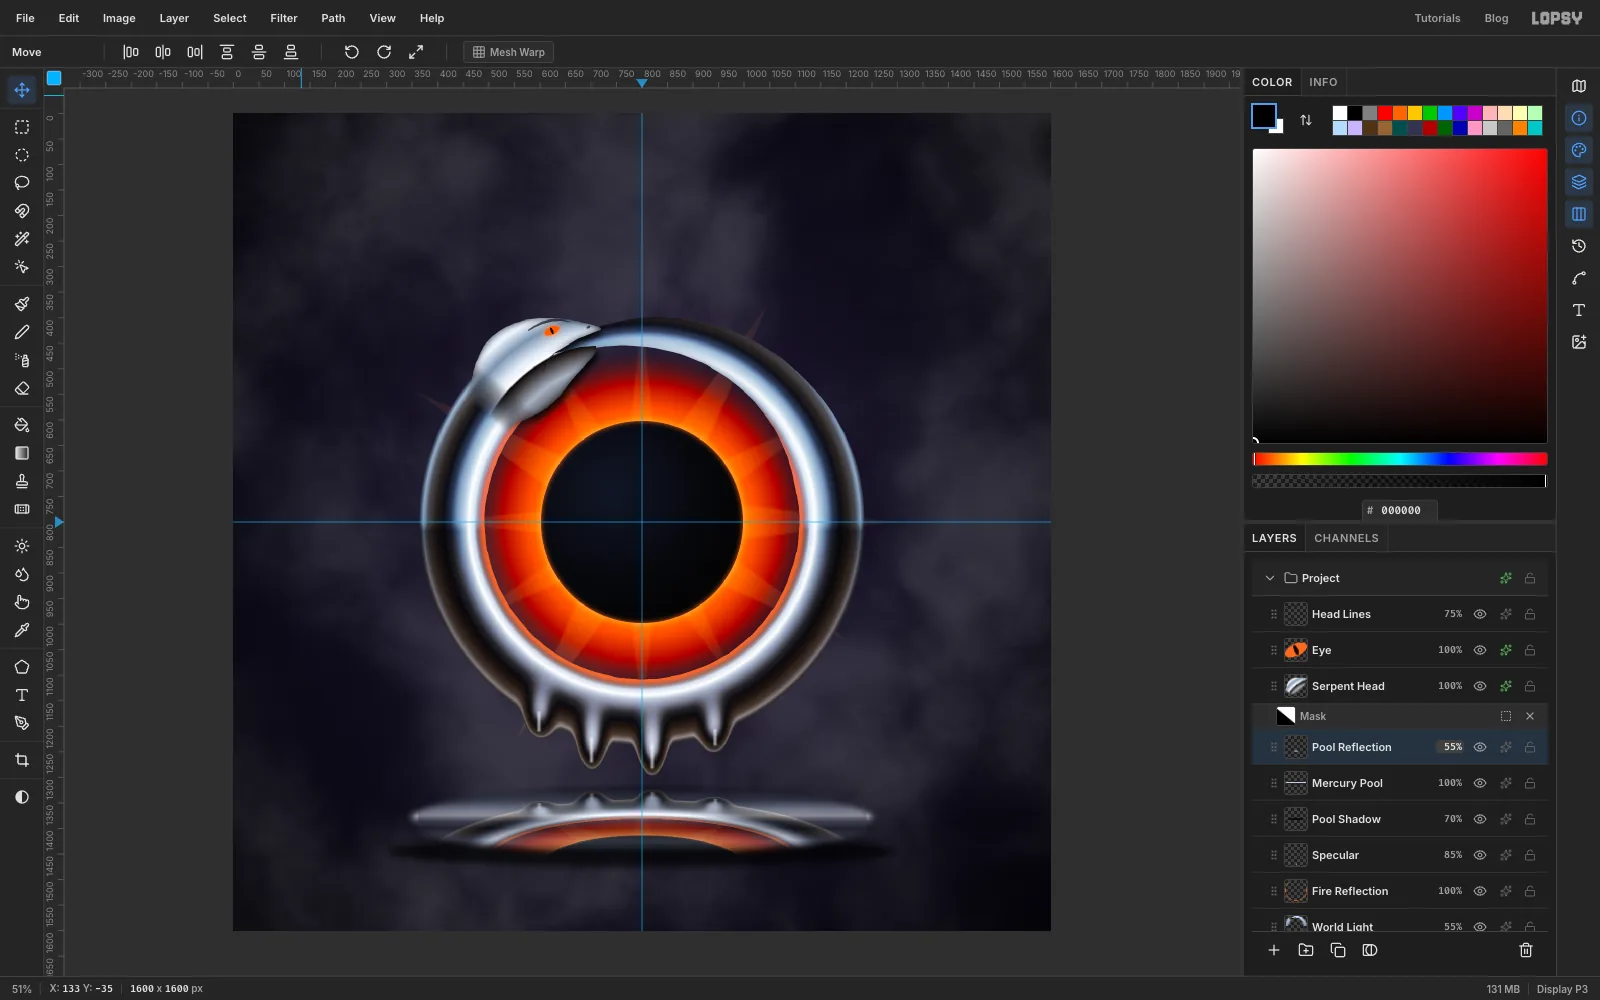
Drag the squashed copy down from inside the selection until its top edge sits on the far edge of the pool. Press Cmd+D: Lopsy applies a transform when you deselect.
Run Filter → Motion Blur… with Angle 0 and Distance 3. That gives the mirror image a slight liquid shimmer. To trim it to the pool:
- Cmd-click the Mercury Pool thumbnail.
- Choose Select → Inverse and press Delete.
- Deselect.
Lower the layer to 55%.
-
Draw ripples where the drip lands
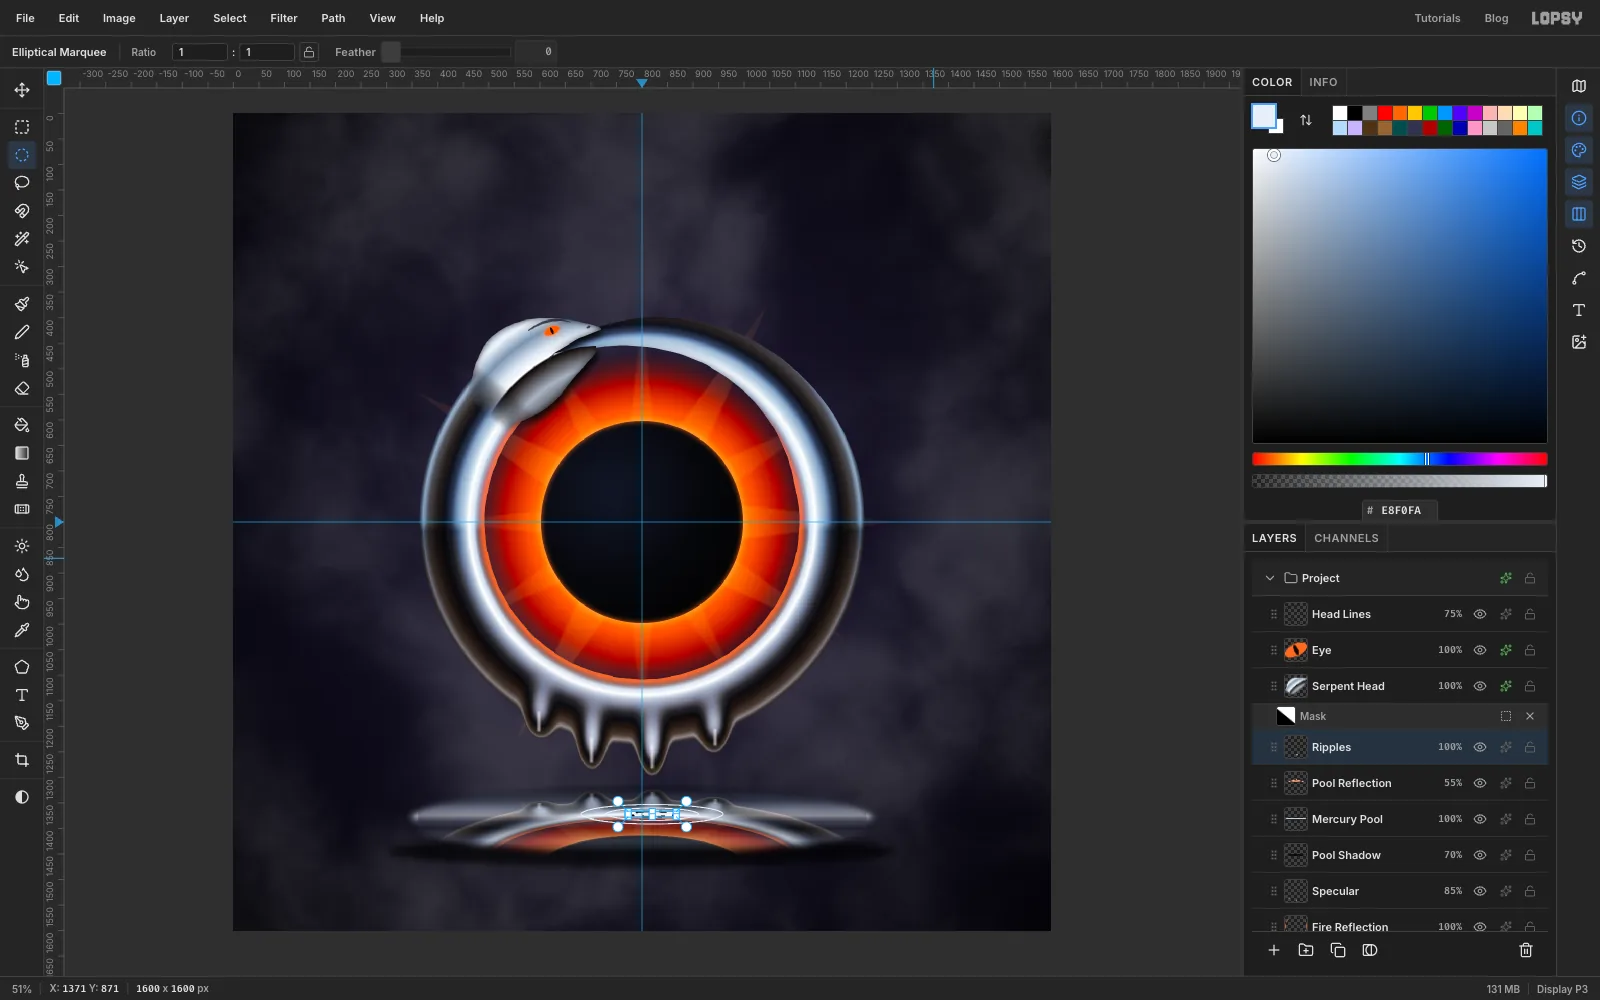
Add a layer called Ripples and set the foreground to . Make three rings directly under the longest drip, starting with the largest:
- Draw an elliptical marquee about 280 × 40 px, centred under the drip.
- Choose Edit → Fill.
- Choose Select → Shrink… by 2 and press Delete. That leaves a 2 px ring.
- Repeat with marquees about 184 and 100 px wide. Keep each one flattened to the same proportion as the pool.
Doing the biggest ring first means each Delete only clears the inside of the ring you've just filled. Deselect and lower the layer to 60%.
-
Drop a bead and splash it
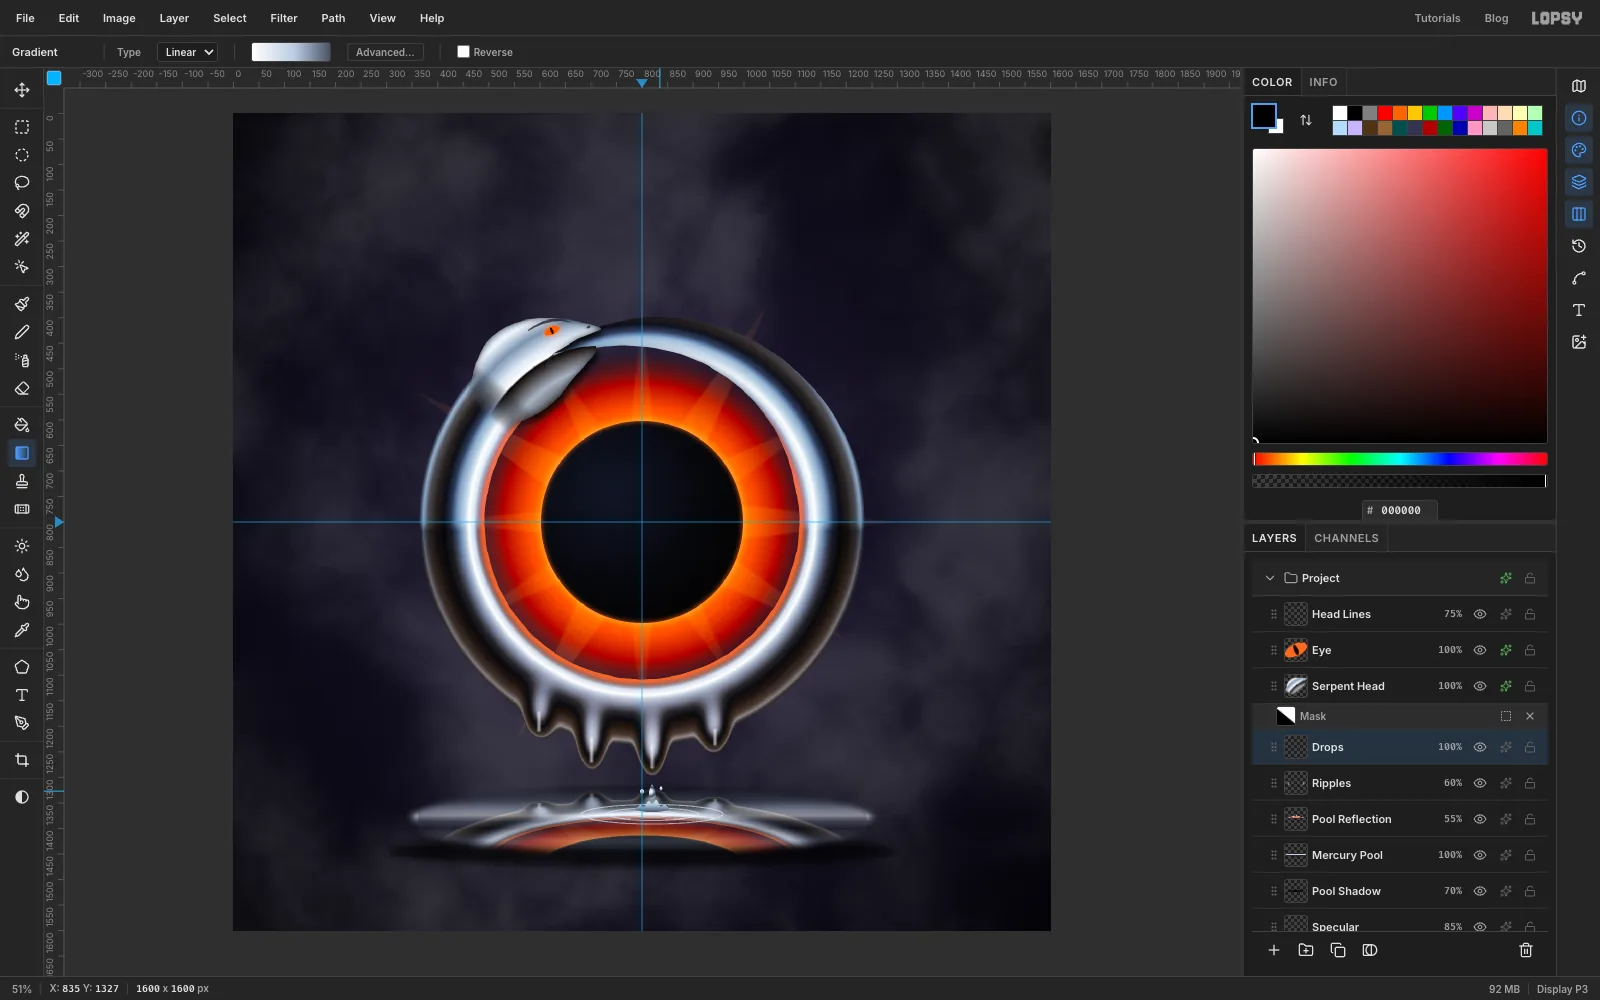
Add a layer called Drops. Lasso a small teardrop (about 18 × 30 px) just below the longest drip, with the point at the top. Fill it with a radial gradient that runs white → → → → , so it reads as a tiny chrome bead.
Where the drop meets the pool, lasso a low splash about 70 px wide with rounded lobes, not spikes. Fill it with a vertical gradient from white through to . Add two tiny oval droplets just above the splash, and give them the same gradient.
-
Organise the layers into groups
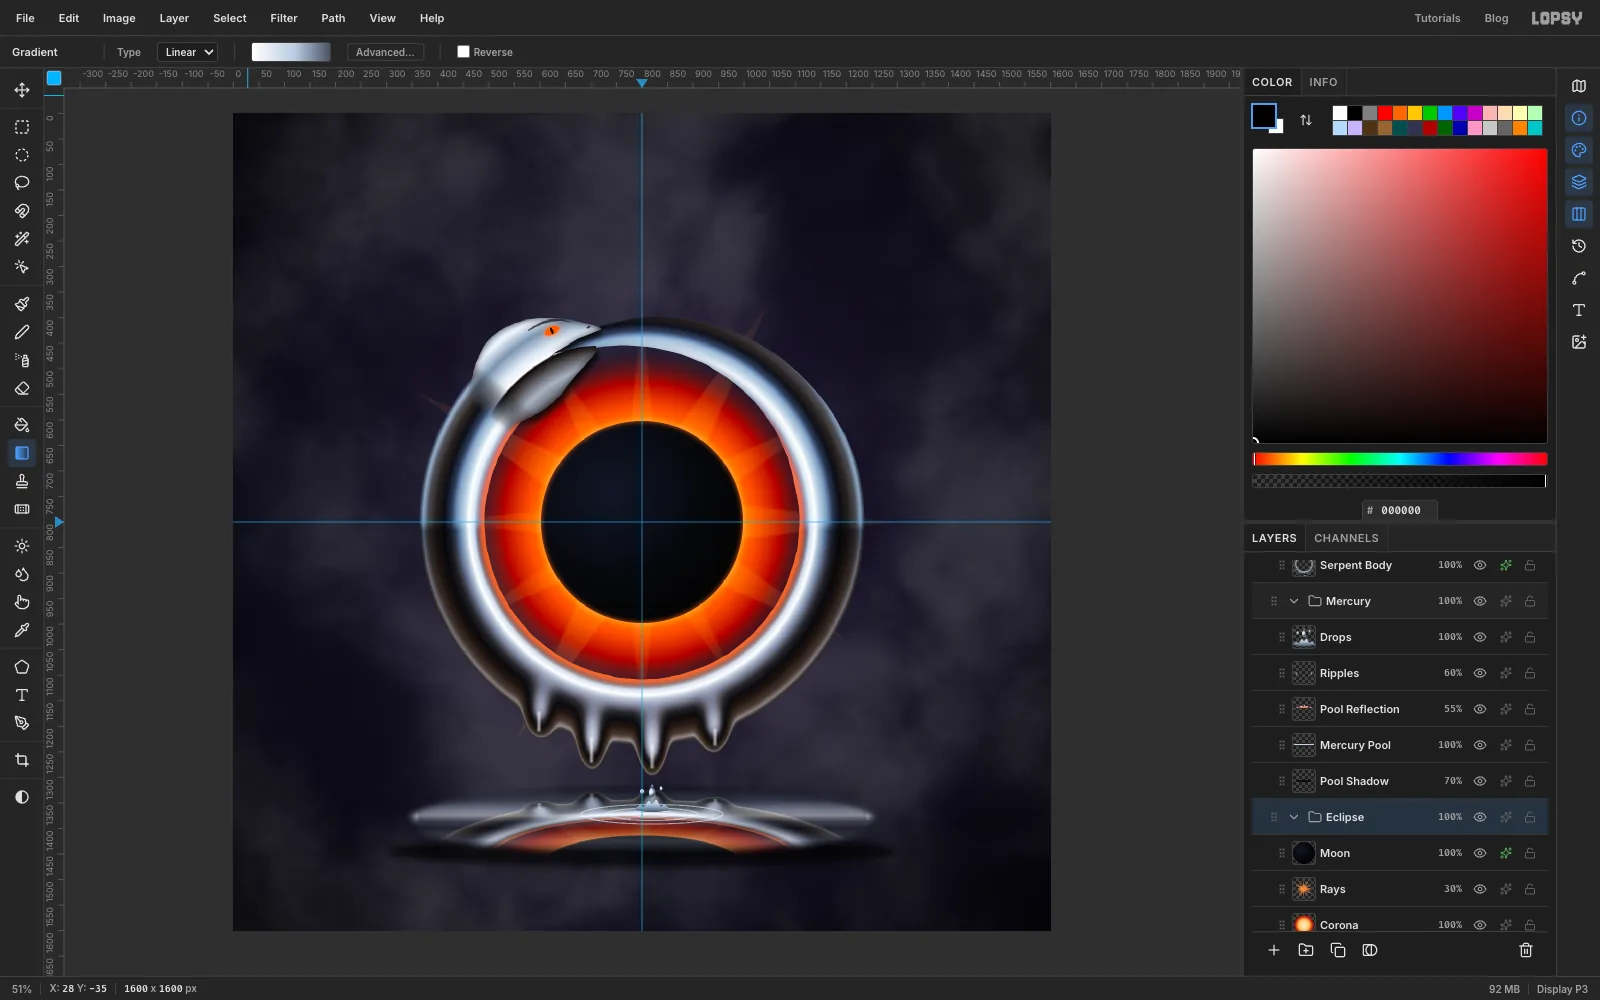
Click Serpent Body, then Cmd-click World Light, Fire Reflection, Specular, Serpent Head, Eye and Head Lines. Choose Layer → Group Layers and name the group Ouroboros. Do the same with Pool Shadow, Mercury Pool, Pool Reflection, Ripples and Drops to make a Mercury group, and with Corona, Rays and Moon to make an Eclipse group.
Selecting a group and using the Move tool now moves everything in it together, which is handy if you want to nudge the whole pool up or down.
-
Set the title stack
Collapse the three groups. Text options restyle whichever text layer is active, so for each line:
- Click the Ouroboros group row, so no text layer is active.
- Set the foreground colour, then pick the Text tool and set the font, weight and size in the options bar.
- Click in empty canvas, type, and press Tab.
- Set the Letter spacing in the Text panel, and rename the layer as given below.
- With the Move tool, click Align center horizontally in the options bar, then nudge the line into place with the arrow keys.
The lines, top to bottom:
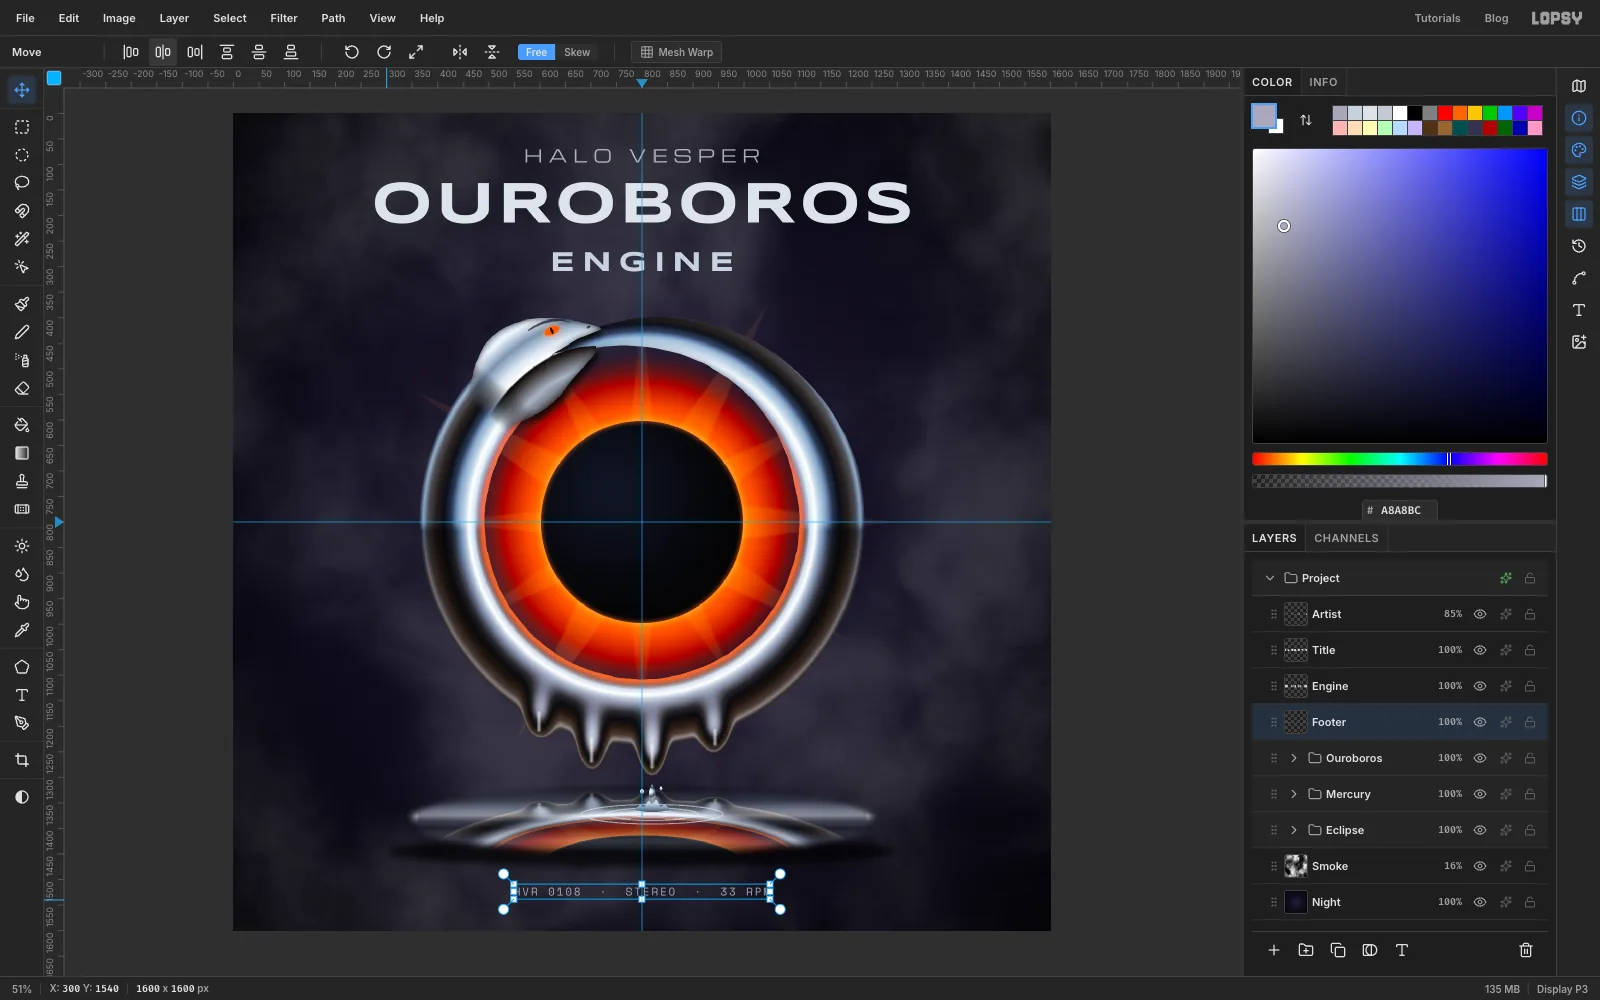
- HALO VESPER (layer Artist): Michroma, size 34, , letter spacing 12. Put its cap top 70 px from the top edge and lower the layer to 85%.
- OUROBOROS (layer Title): Syncopate Bold, size 116, , letter spacing 6. Leave about 38 px between it and the artist name.
- ENGINE (layer Engine): Syncopate Bold, size 56, , letter spacing 14. Make it big enough to read as half of the album title, not as a credit.
- HVR 0108 · STEREO · 33 RPM (layer Footer): Space Mono, size 21, , letter spacing 4. Sit it 70 px above the bottom edge so the top and bottom margins match.
-
Chrome the title and melt one letter
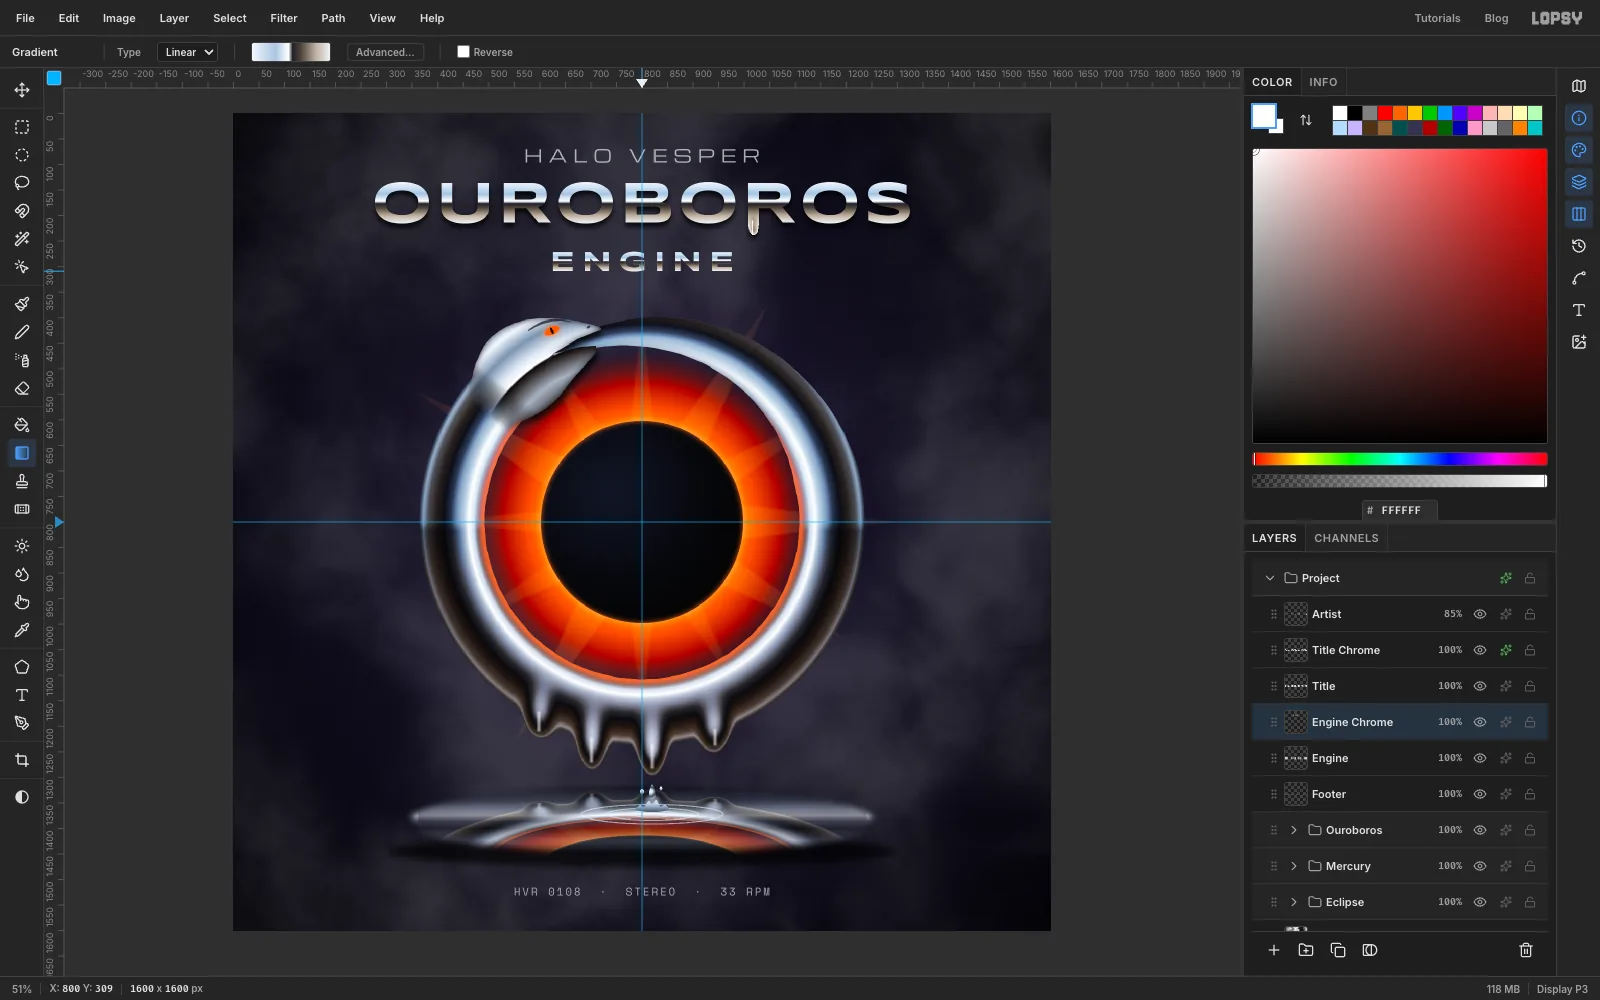
Add a layer called Title Chrome above Title and Cmd-click the Title thumbnail. Drag a linear gradient from the top of the capitals to the baseline:
- at 0%
- at 30%
- at 47%
- at 52% (the horizon)
- at 62%
- at 82%
- at 100%
Deselect. With Title Chrome active, open Liquify with a Brush Size of 18, and drag down twice from the bottom of the second R's left leg. Make one deliberate drip about 30 px long rather than several specks. Paint a 4 px white brush highlight down it on the same layer, then give Title Chrome a Drop Shadow (Offset Y 8, Blur 14, Opacity 80).
Repeat the gradient on a new Engine Chrome layer over ENGINE, so the whole title shares one material.
-
Draw a circle with the Pen for the motto
Text on a path starts at the path's first anchor, so the motto's seam goes wherever you start the circle. Starting under the head keeps it away from 12 o'clock, where people read first.
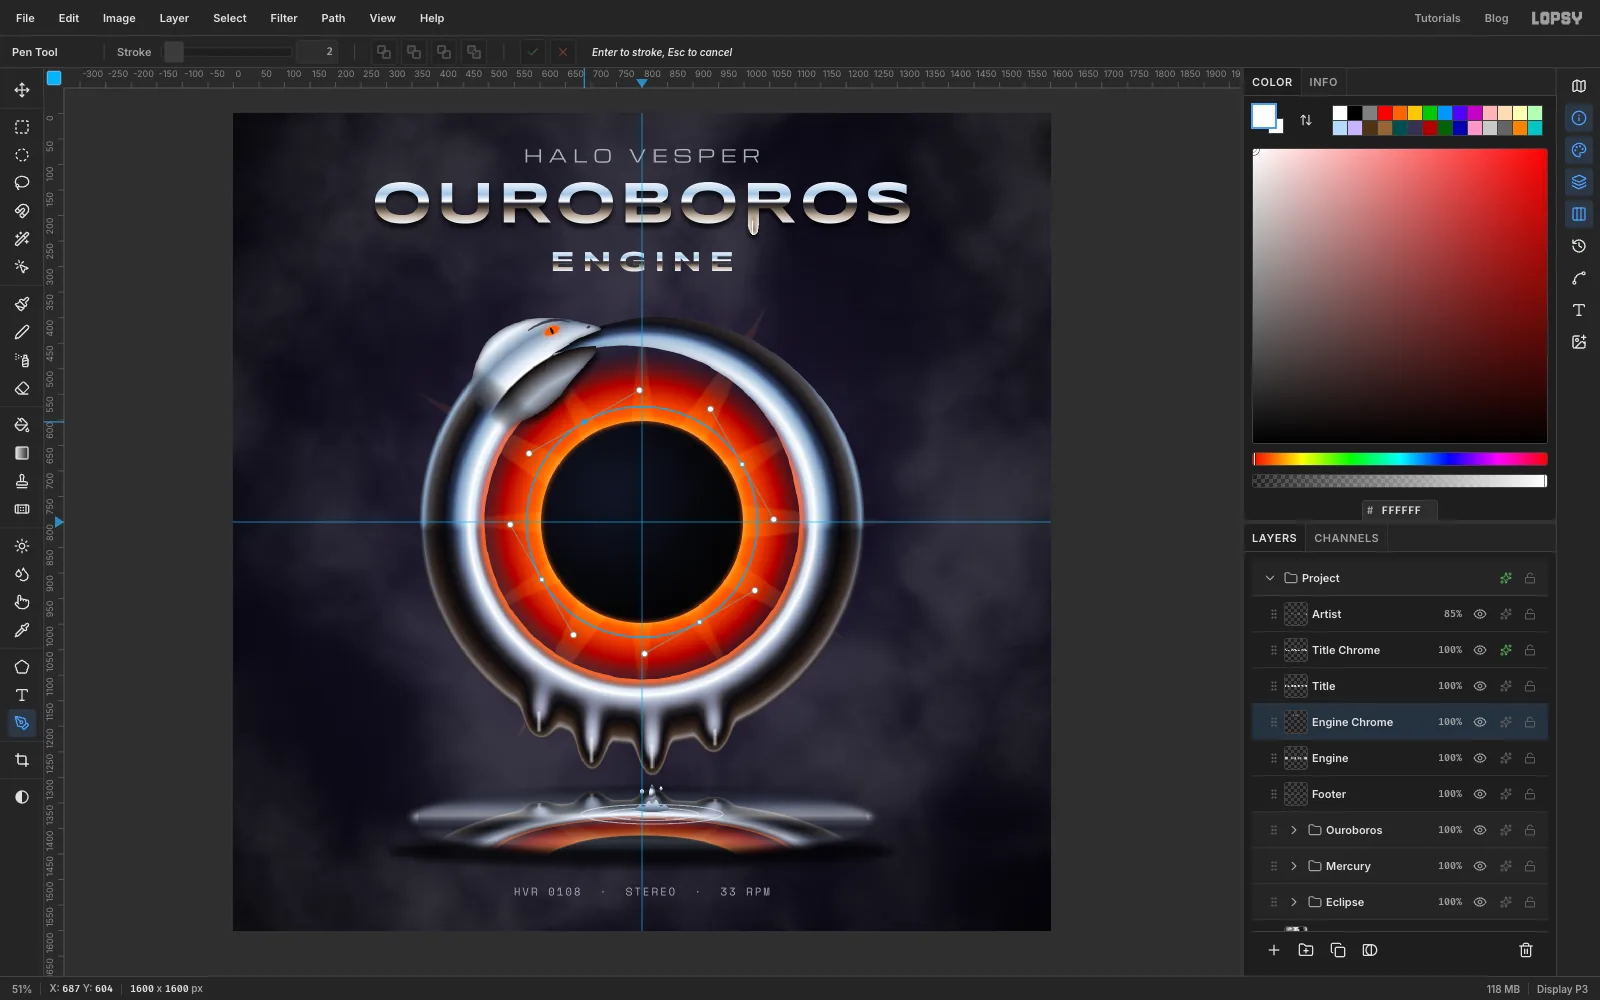
Choose the Pen tool. You need four anchors evenly spaced on a circle about 452 px across around the moon: at about 11, 2, 5 and 8 o'clock, starting at 11 o'clock under the head. At each anchor, press and drag along the circle's tangent in the clockwise direction to pull out smooth handles. Handles about 0.55 × the radius (here about 125 px) make a true circle. Click the first anchor to close the path. Don't press Enter, because that strokes the path onto the active layer.
-
Put the motto on the circle
Click the Ouroboros group row and set the foreground to . With the Text tool set to Space Mono Bold at size 28, click in empty canvas and type the phrase
THE END IS THE BEGINNING IS THE END ·two times in a row, then press Tab. Rename the layer Motto.In the options bar, set Path to the circle you just drew. In the Text panel, set Letter spacing to about 1.6 so the run fills the circle with an even
·at the seam. Add a 4 px black Outer Glow (Opacity 85). It keeps the cream letters legible on the brightest parts of the corona. Lower the layer to 90%.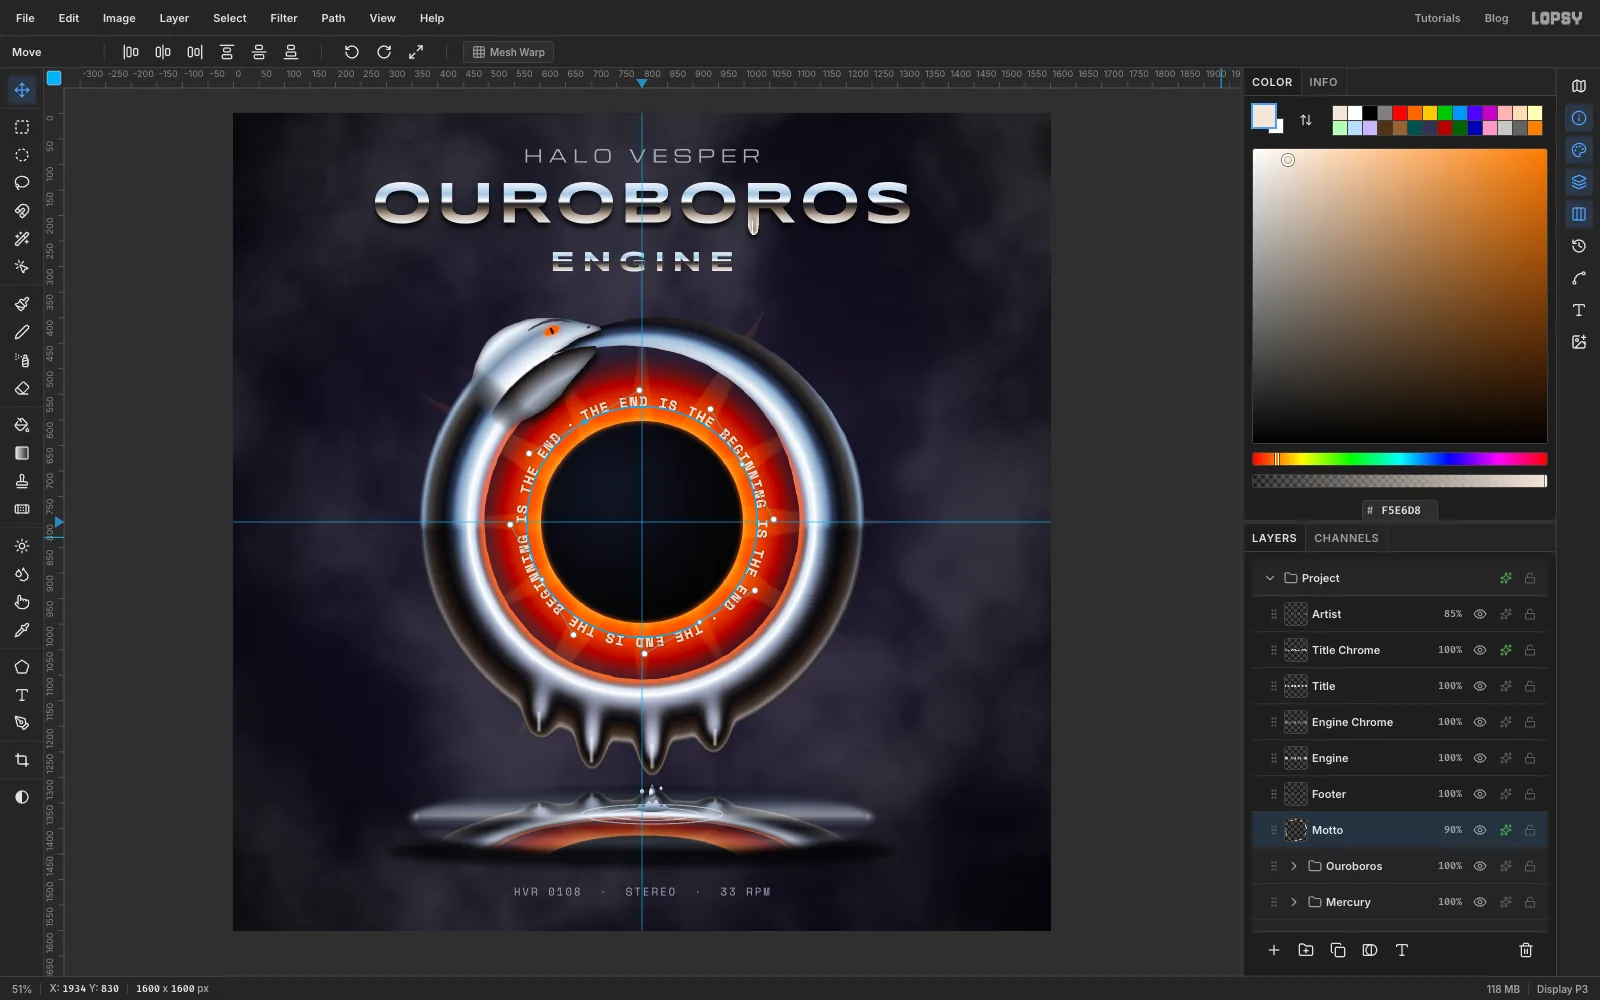
-
Add two glints
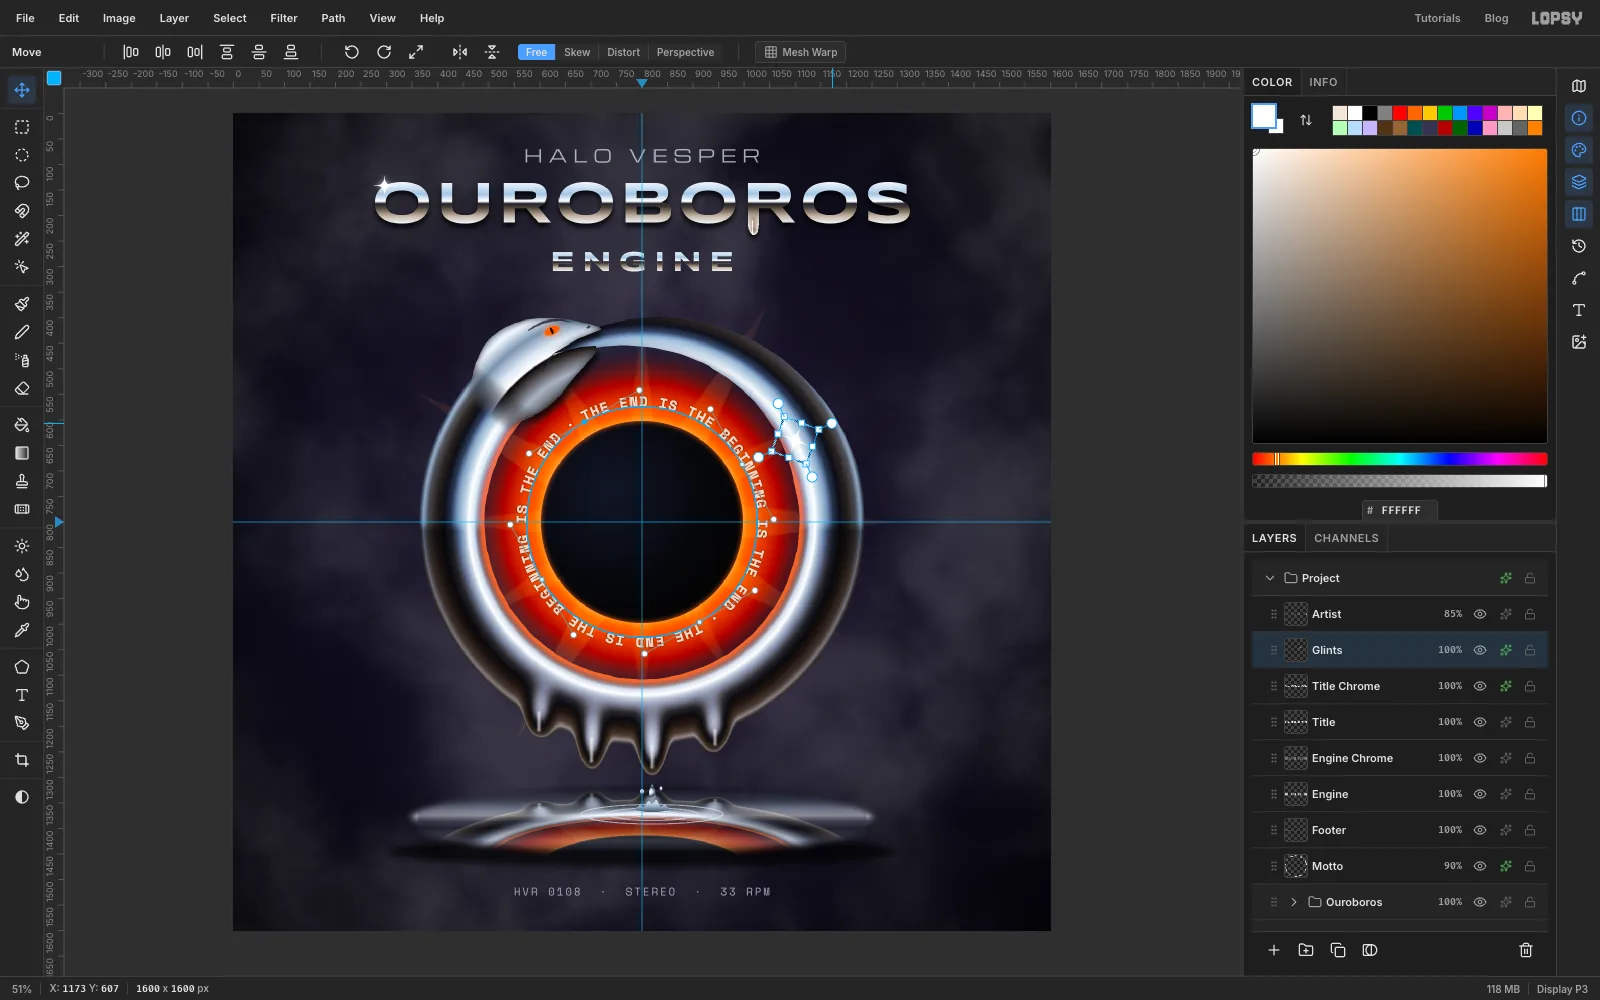
Add a layer called Glints above Title Chrome. Make a four-point star about 68 px across with thin arms: lasso a tall thin diamond, then hold Shift and lasso a wide thin diamond across it. Fill it white, and add a 10 px white dot in the middle. Place it on the crest of the ring at the upper right. Give it an Outer Glow (, Size 16, Opacity 80) and set the layer to Screen.
To make the second glint:
- Marquee around the star, then copy and paste it.
- Marquee the pasted copy and drag it onto the top-left curve of the first O in the title.
- Cmd-drag a corner handle to shrink it by about a fifth, press Cmd+D, and choose Layer → Merge Down.
Finally, marquee the ring glint and drag the rotation handle about 20°, so its arms follow the tube, then press Cmd+D. Two glints in one style look like reflections. More than two start to look like stickers.
-
Finish with a vignette
Select Artist, Glints, Title Chrome, Title, Engine Chrome, Engine, Footer and Motto, and group them as Type. Choose Layer → Adjustment Layer…. A note explains that Lopsy uses group adjustments; click Got it, and the adjustments drawer opens on the Project group. It already lists Levels, Curves, Exposure and Hue / Saturation at neutral settings, so leave those alone. Click Add Adjustment and add a Vignette at 60 and a Contrast of 10. The vignette darkens the empty bands at the sides, so they frame the ring instead of reading as dead space.
Save with File → Save Project and export with File → Quick Export PNG.