Design an 80s Chrome Sci-Fi Magazine Cover
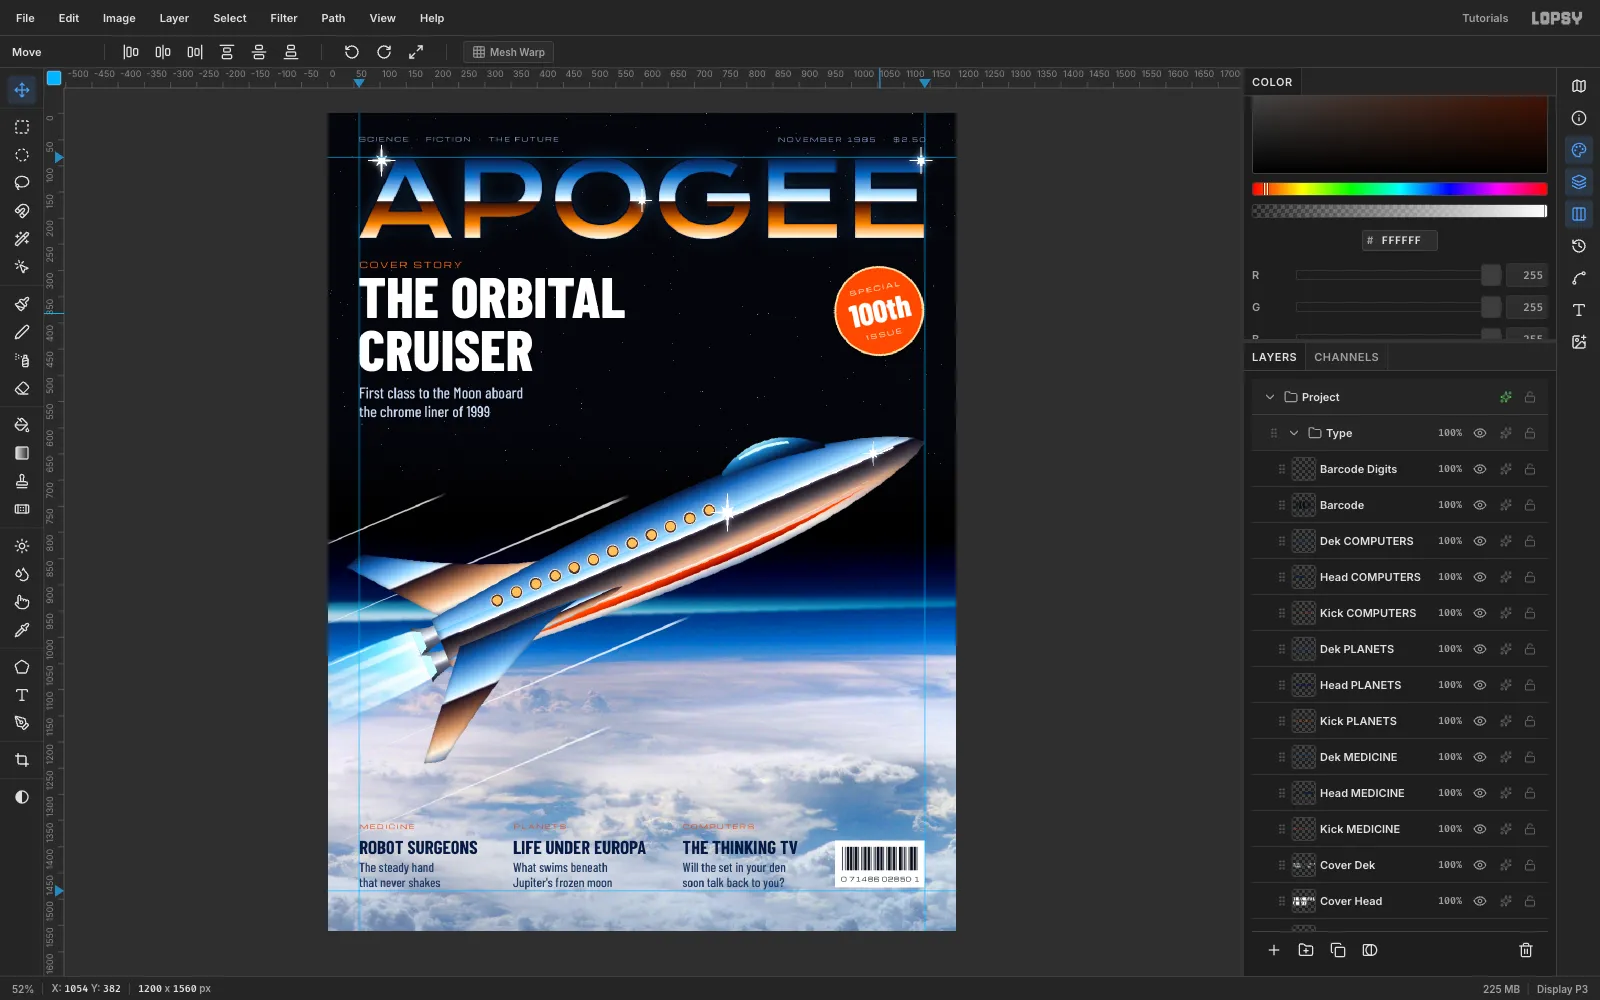
Build an 80s sci-fi magazine cover in Lopsy with chrome type, a chrome rocket liner over a NASA photo of Earth, and cover lines set on a grid.
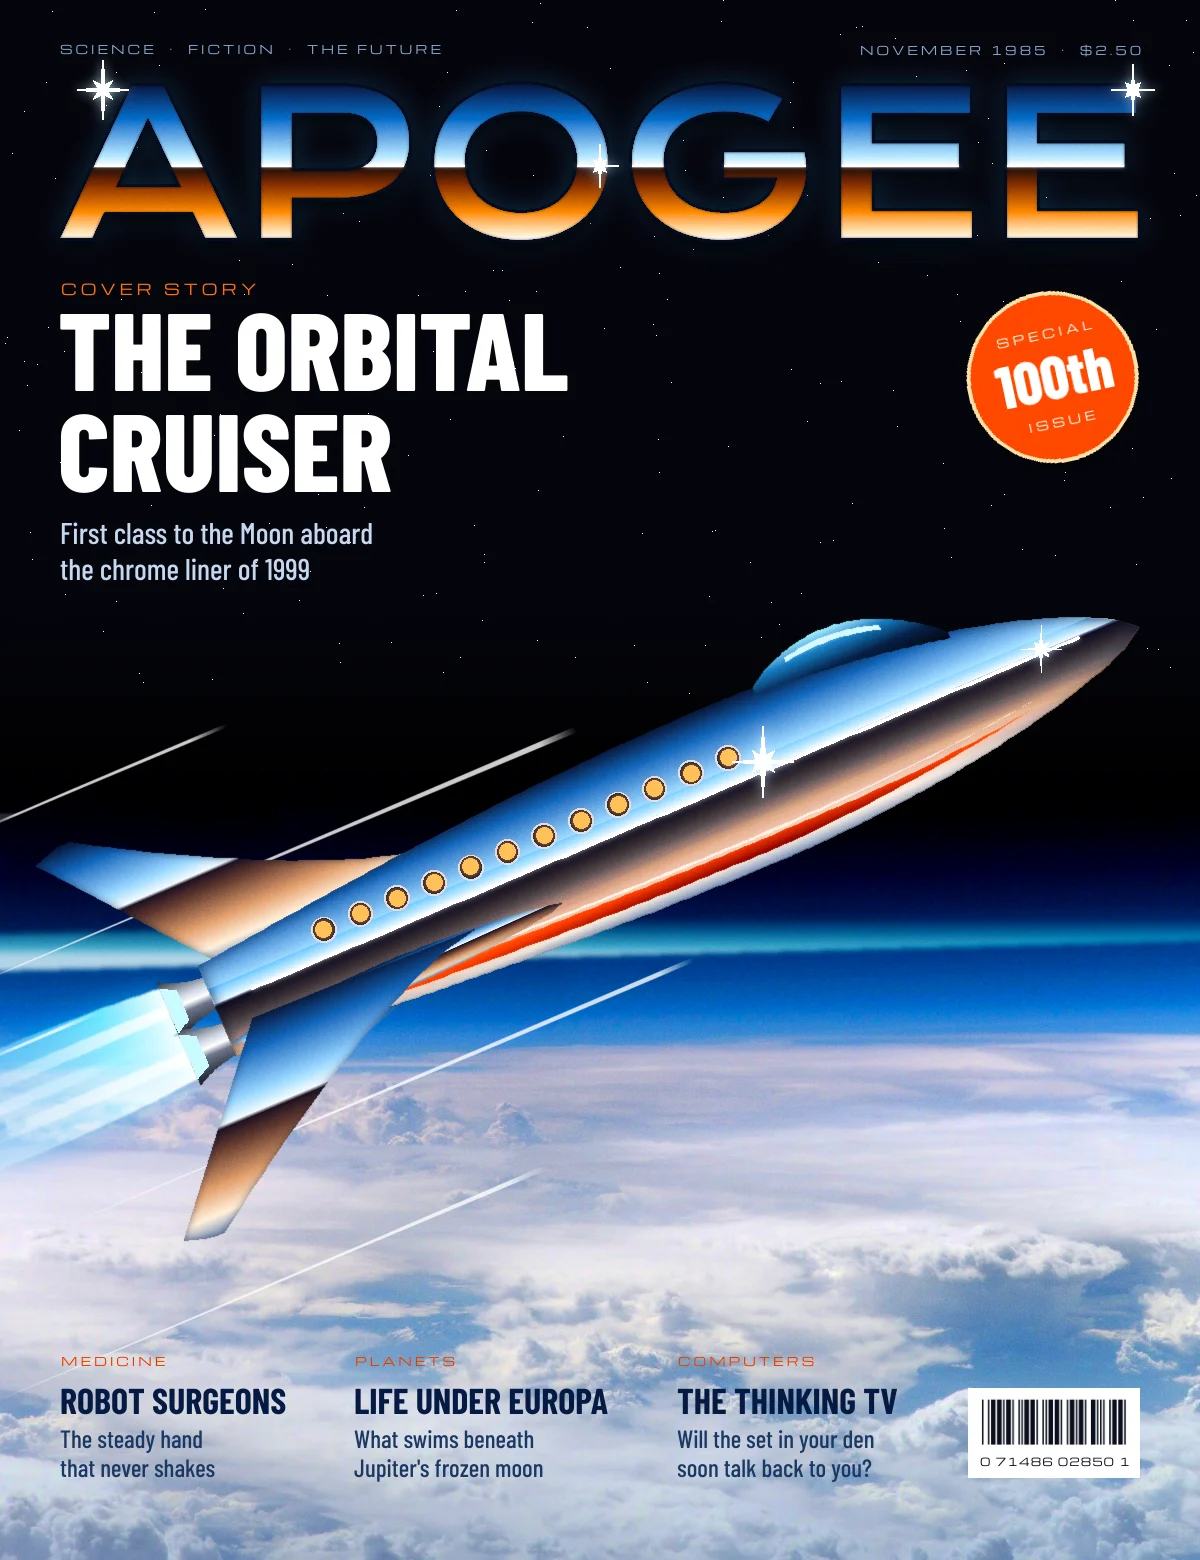
Science magazines of the late 70s and 80s sold the future with airbrushed chrome. Their mastheads reflected a sky and a desert horizon, and their spaceships gleamed like new cars. In this tutorial you'll recreate that look for an imaginary 1985 issue of APOGEE. The cover story is a chrome rocket liner, The Orbital Cruiser, flying over the real cloud tops of Earth.
The whole trick behind chrome is one gradient. It runs from a dark blue "sky" at the top down to a razor-sharp white horizon, then drops straight into a dark brown "ground" that warms to peach. You'll use that gradient on the masthead and on every part of the ship, always running across the shape rather than along it.
You'll need a space photo. This tutorial uses NASA's public-domain Top of Atmosphere, taken from the International Space Station. Any photo of Earth's horizon with black space above it will work.
-
Paste the NASA photo into a new document
Create a 1200 × 1560 document. That's roughly the proportion of a US magazine. Select
Background, set the foreground color to#04050B, and choose Edit → Fill.Copy the photo in your browser and press Cmd+V in Lopsy. The photo is larger than the canvas, so Lopsy scales it to fit and centers it on a new
Pasted Layer. The layer comes in already selected, with the Move tool active.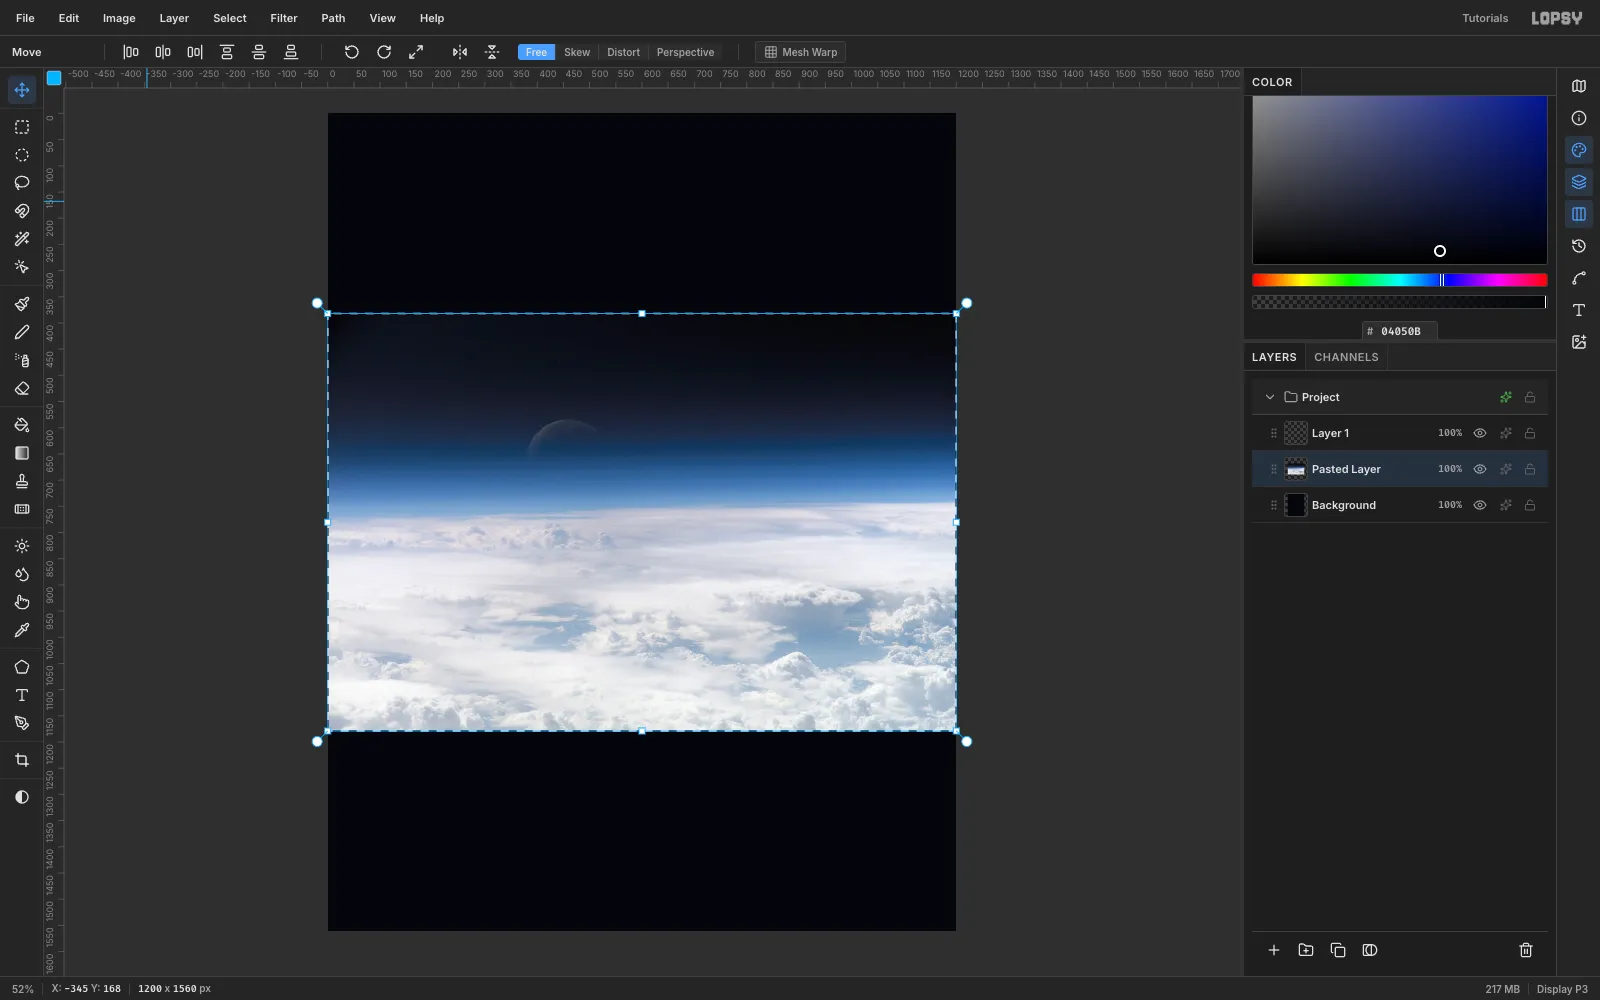
-
Scale the photo past the edges
The Earth needs to fill the bottom of the cover edge to edge, so make it bigger. Hold Cmd and drag the bottom-right handle outward until the photo is 1500 px wide. Cmd keeps the proportions locked. Press Cmd+D to commit the transform.
Double-click the layer name and rename it
Earth. With the Move tool, drag it 150 px left and 200 px down, so the curved blue edge of the atmosphere sits about two thirds of the way down the page.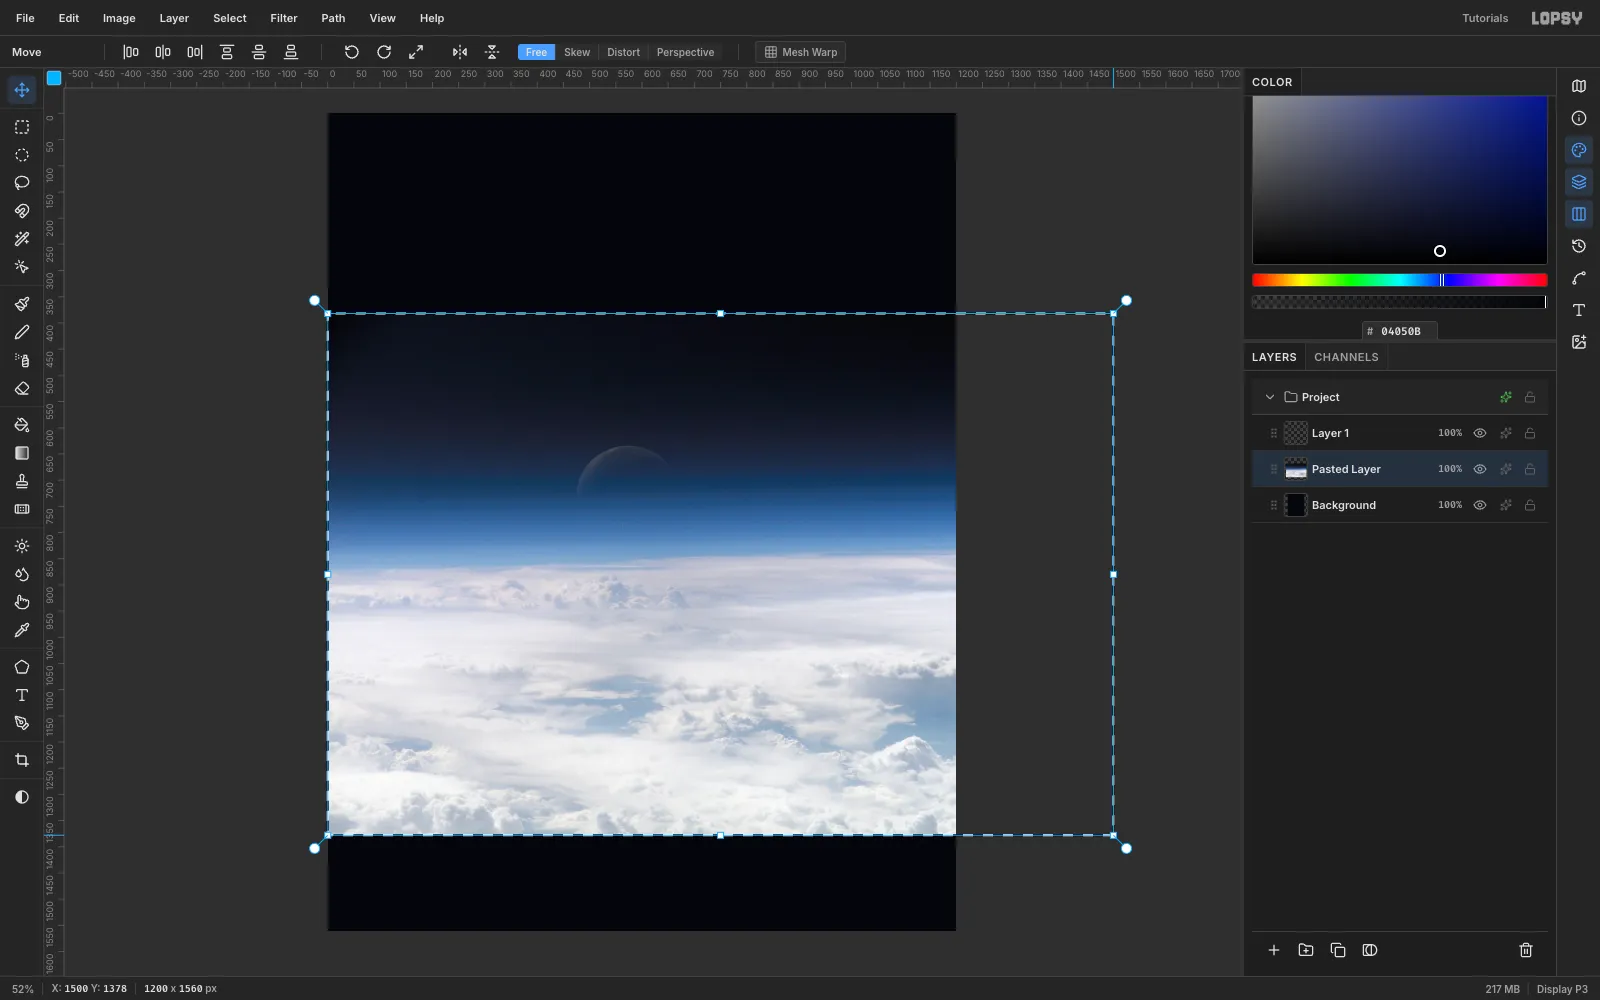
-
Fade the top of the photo with a layer mask
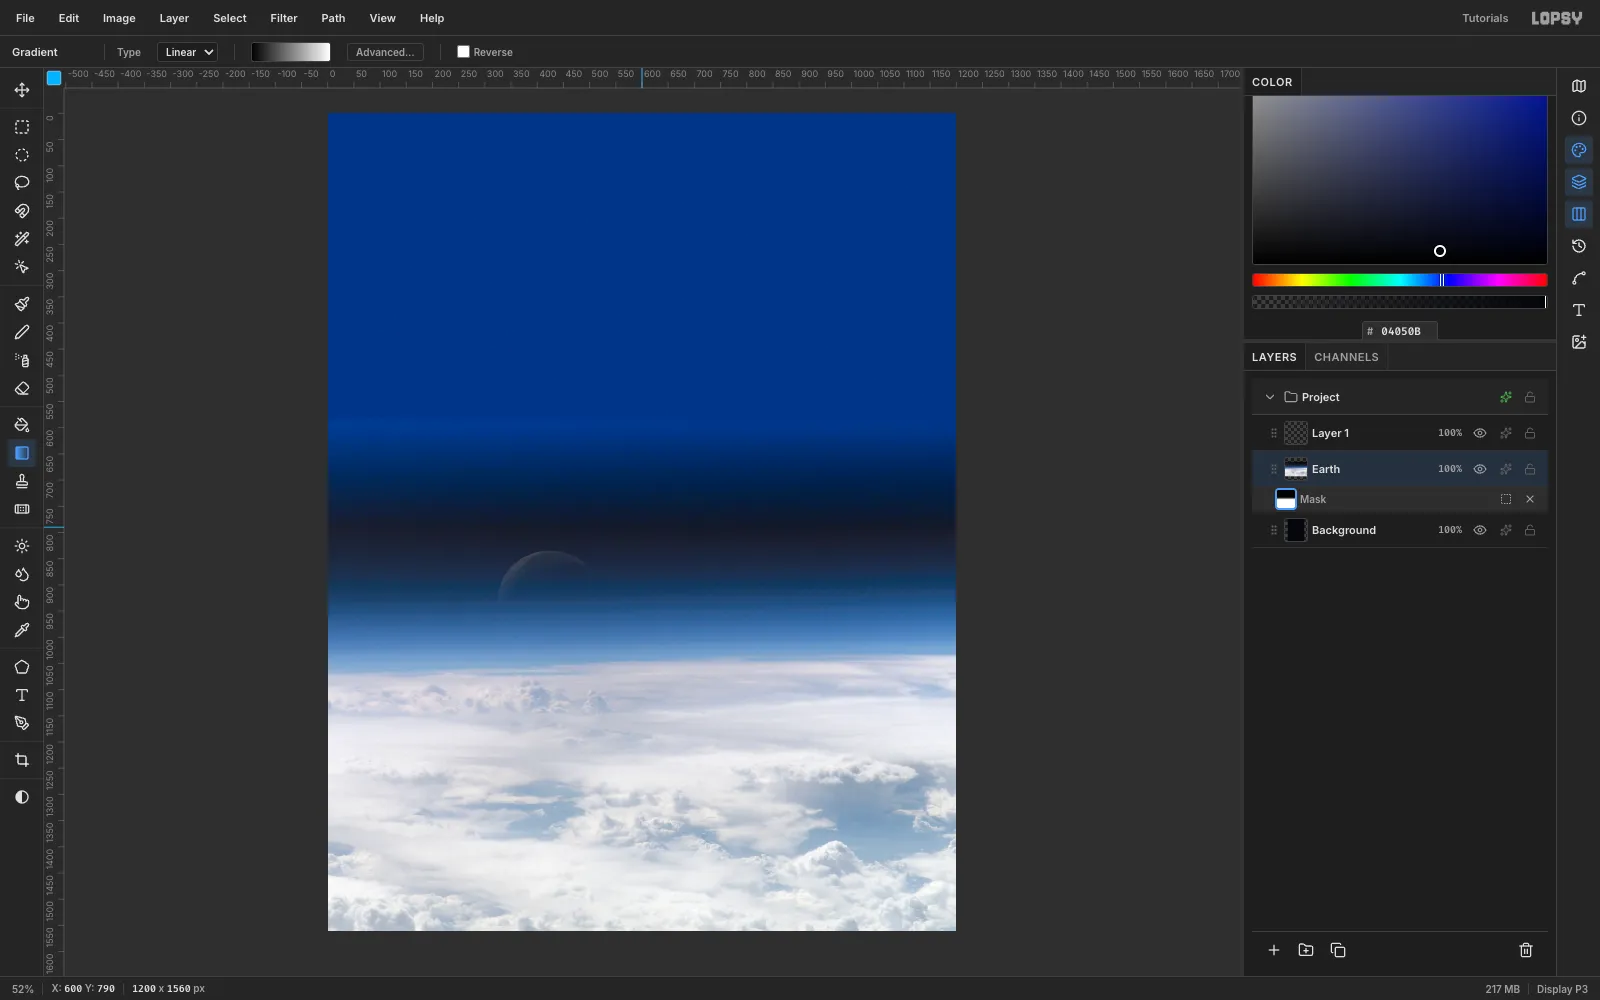
The top edge of the photo is a slightly lighter black than the background, so it shows as a visible seam. Click Add Mask at the bottom of the Layers panel, then click the mask row (Edit mask for Earth).
Pick the Gradient tool and open Advanced…. Set the stops to black at the left and white at the right. Drag from y ≈ 600 down to y ≈ 790. The top of the photo now melts into the background.
-
Grade the photo for the 80s
Airbrushed covers were never subtle. With
Earthselected, open Filter → Hue/Saturation… and set Saturation 30 and Lightness −4. Then open Filter → Brightness/Contrast… and set Brightness −6 and Contrast 22. The atmosphere turns electric blue, and the space above it goes properly black.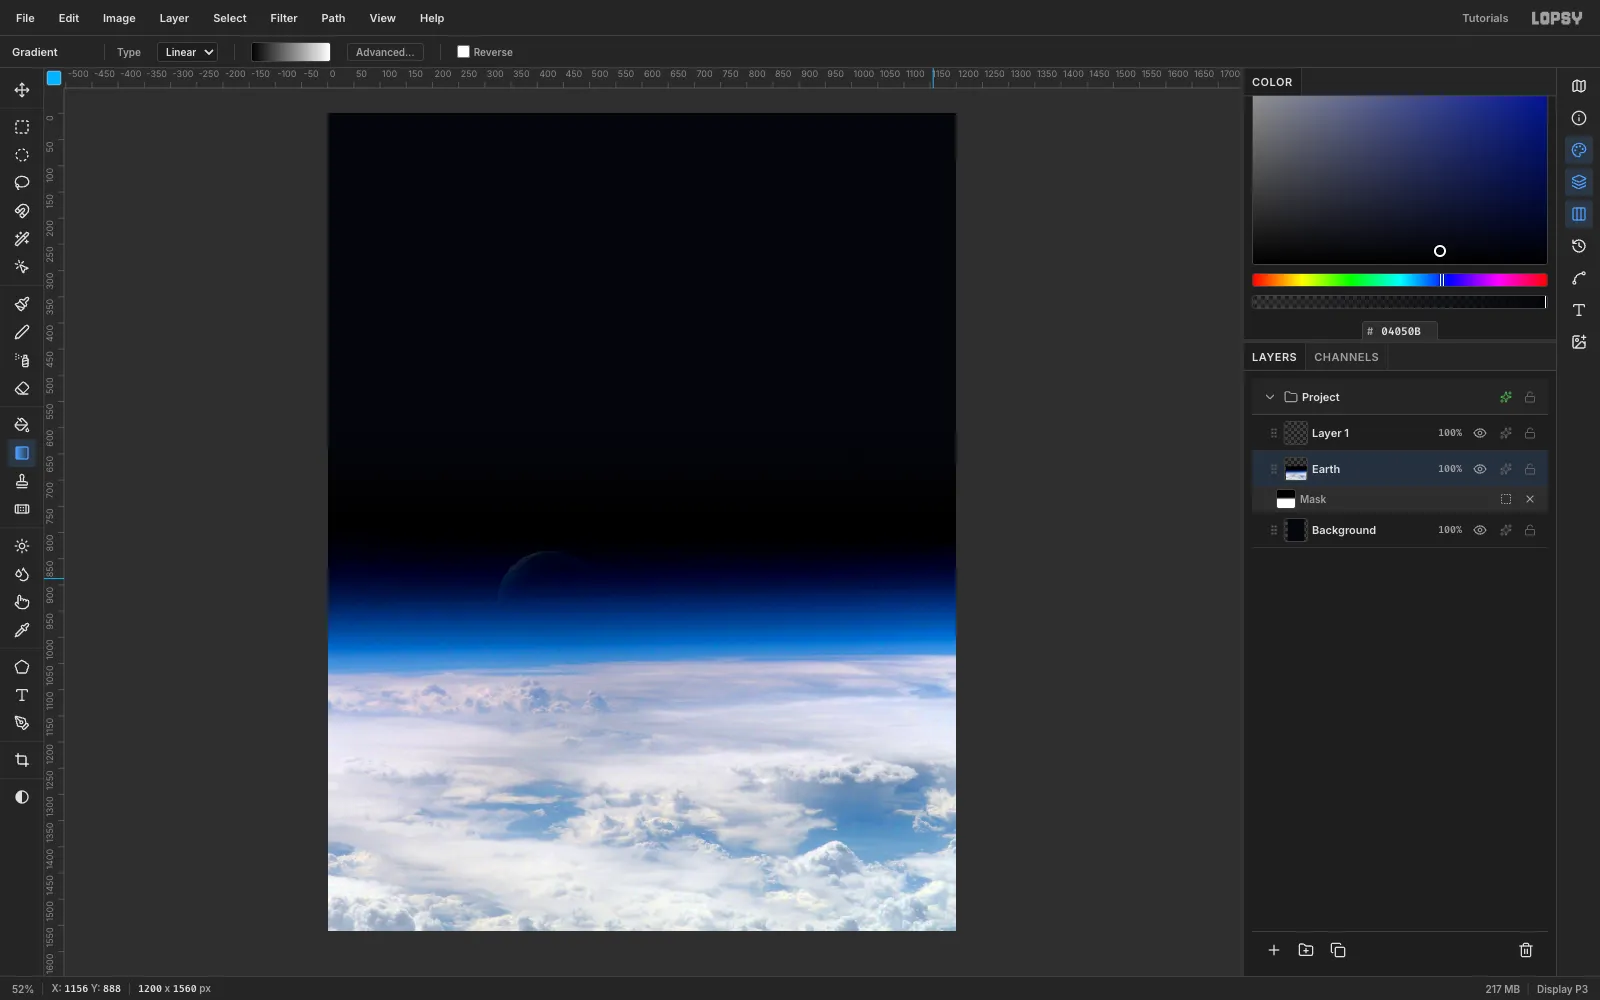
-
Add airglow and a starfield
Airglow. Add a layer named
Limb Glow. With the Lasso, draw a thin band that hugs the bright edge of the atmosphere, about 35 px tall, from edge to edge. In this photo that edge runs from y 968 at the left to y 938 at the right. Fill the band with a gradient that runs from transparent at the top to near-white cyan (#E4FCFF) at the bottom. Then apply Gaussian Blur at radius 3, set the blend mode to Screen, and set the opacity to 80%.Stars. Rename
Layer 1toStarsand fill it with mid-gray#808080. Run Filter → Add Noise… with Amount 100, Mono and Gaussian. Then run Filter → Threshold… at Level 185. Only about 0.03% of the pixels survive as white specks, which makes a believable, sparse starfield.Set
Starsto Screen so the black disappears. Marquee everything below y = 760, choose Select → Feather… 60 px, and press Delete. The stars now fade out before they reach the atmosphere.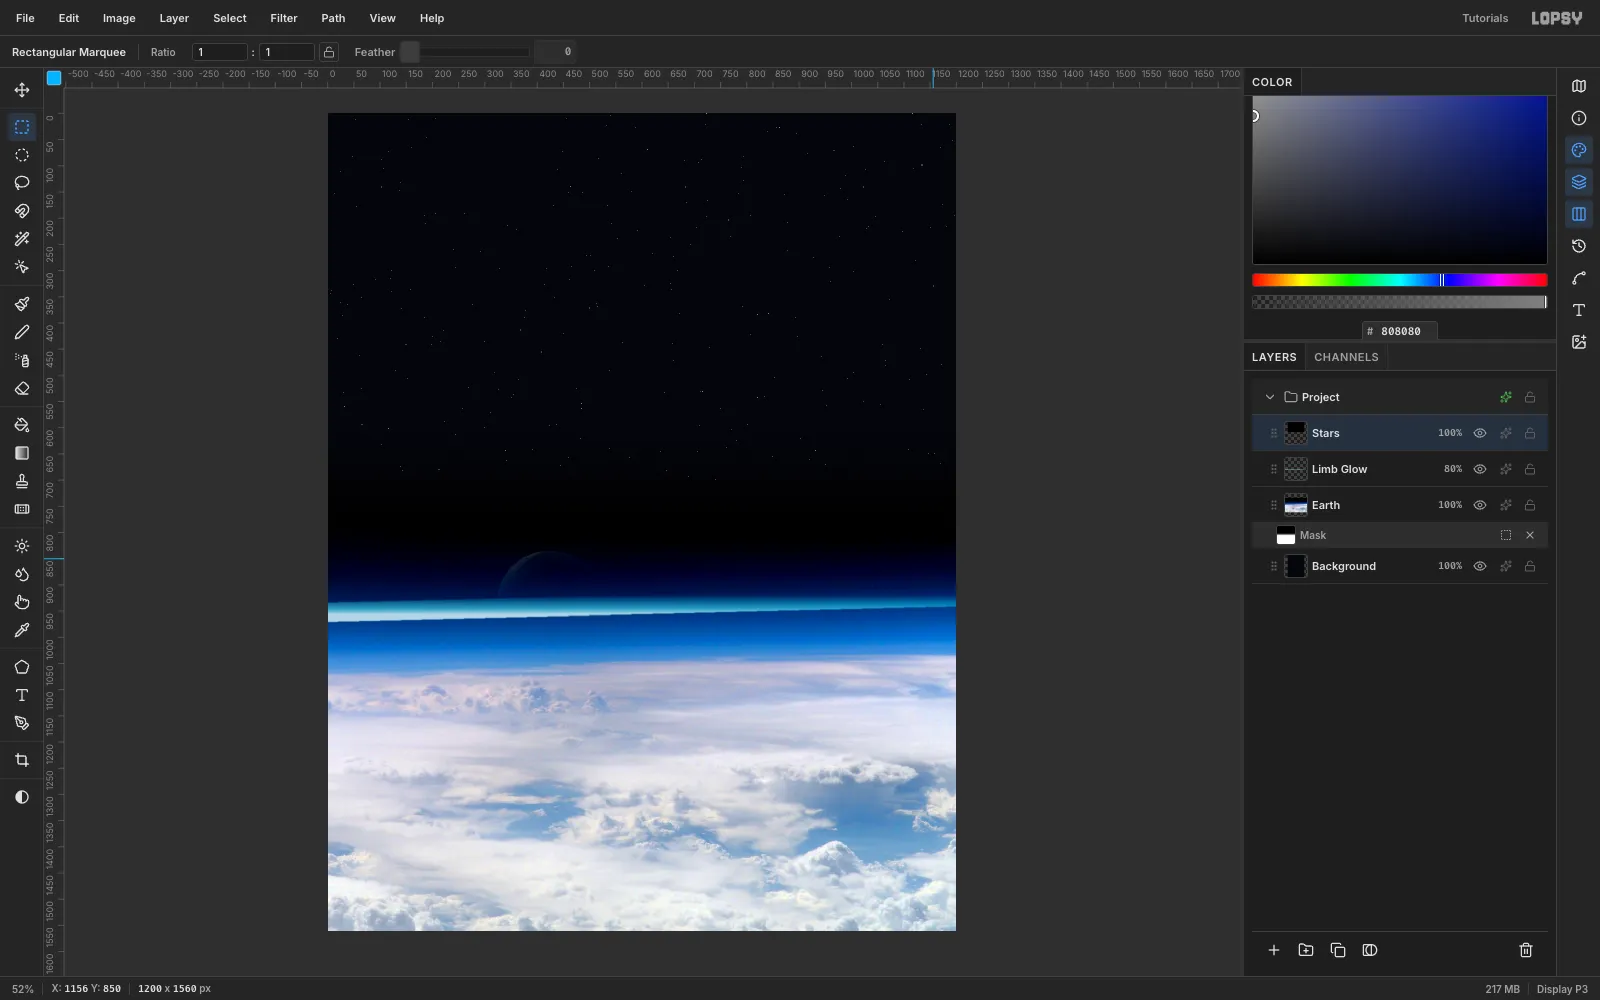
-
Set the masthead and the margin guides
With the Text tool, click near the top and type
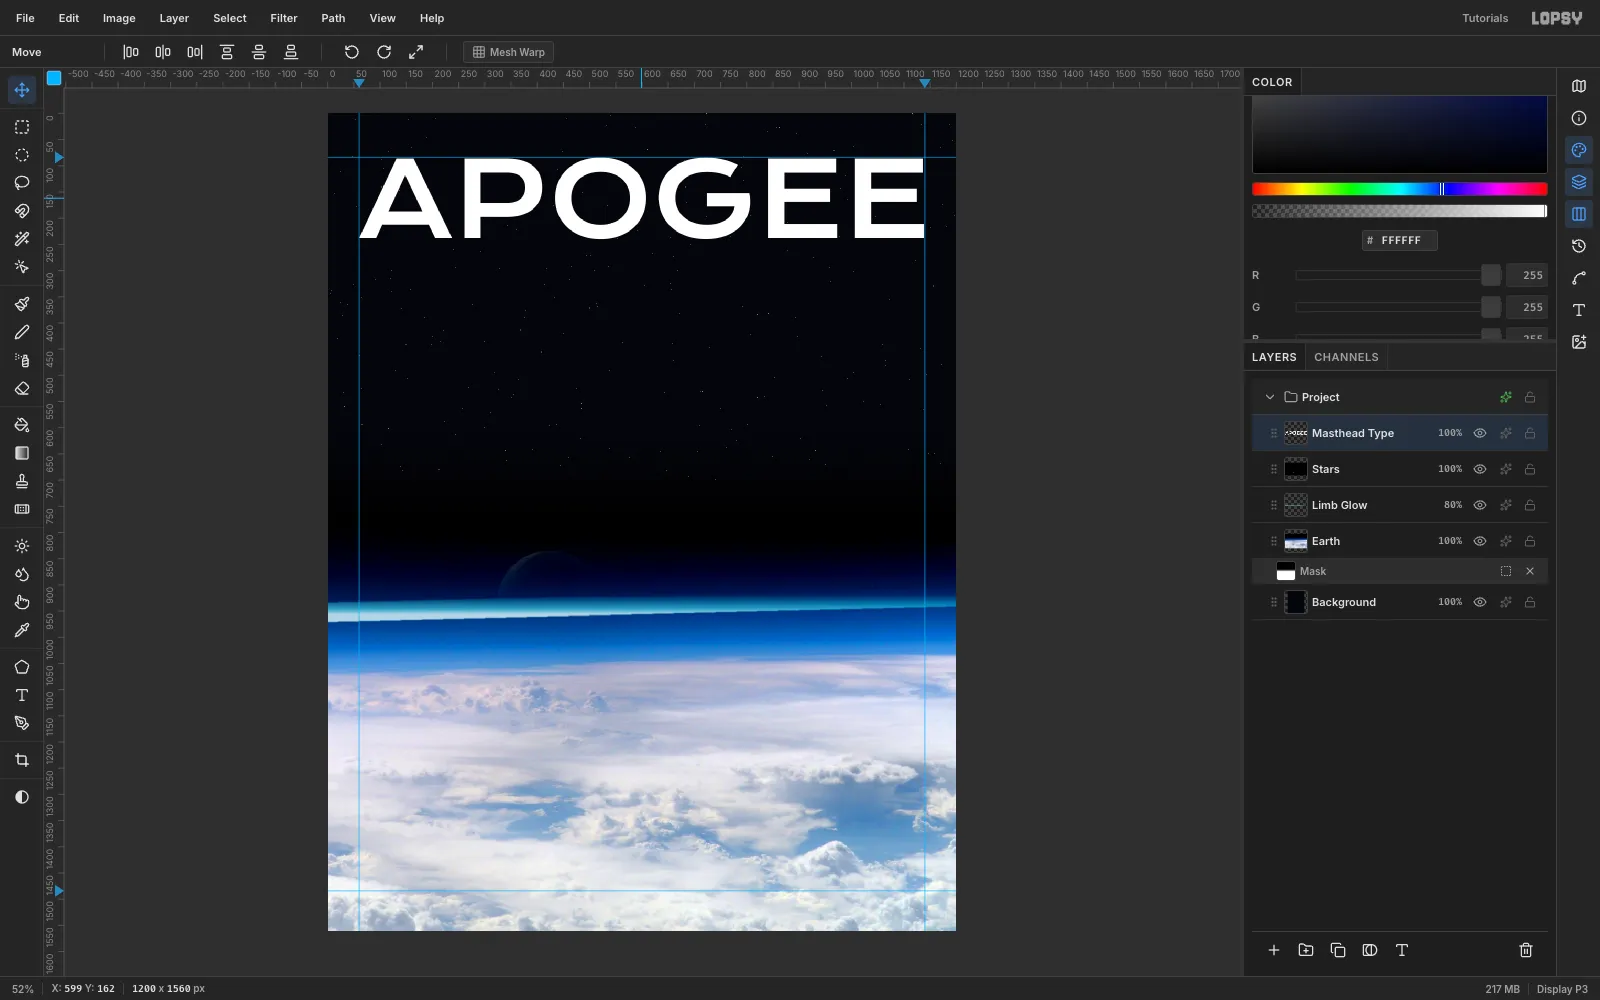
APOGEEin Krona One at 199 px. That size makes the word exactly span the page between 60 px margins.Click the top ruler at x = 60 and x = 1140 to add vertical guides. Click the left ruler at y = 84 and y = 1484 to add horizontal ones. With the Move tool, place the masthead so its top-left corner sits on the 60 / 84 guides.
-
Fill the letters with a chrome gradient
Click Rasterize Layer. Add a new layer named
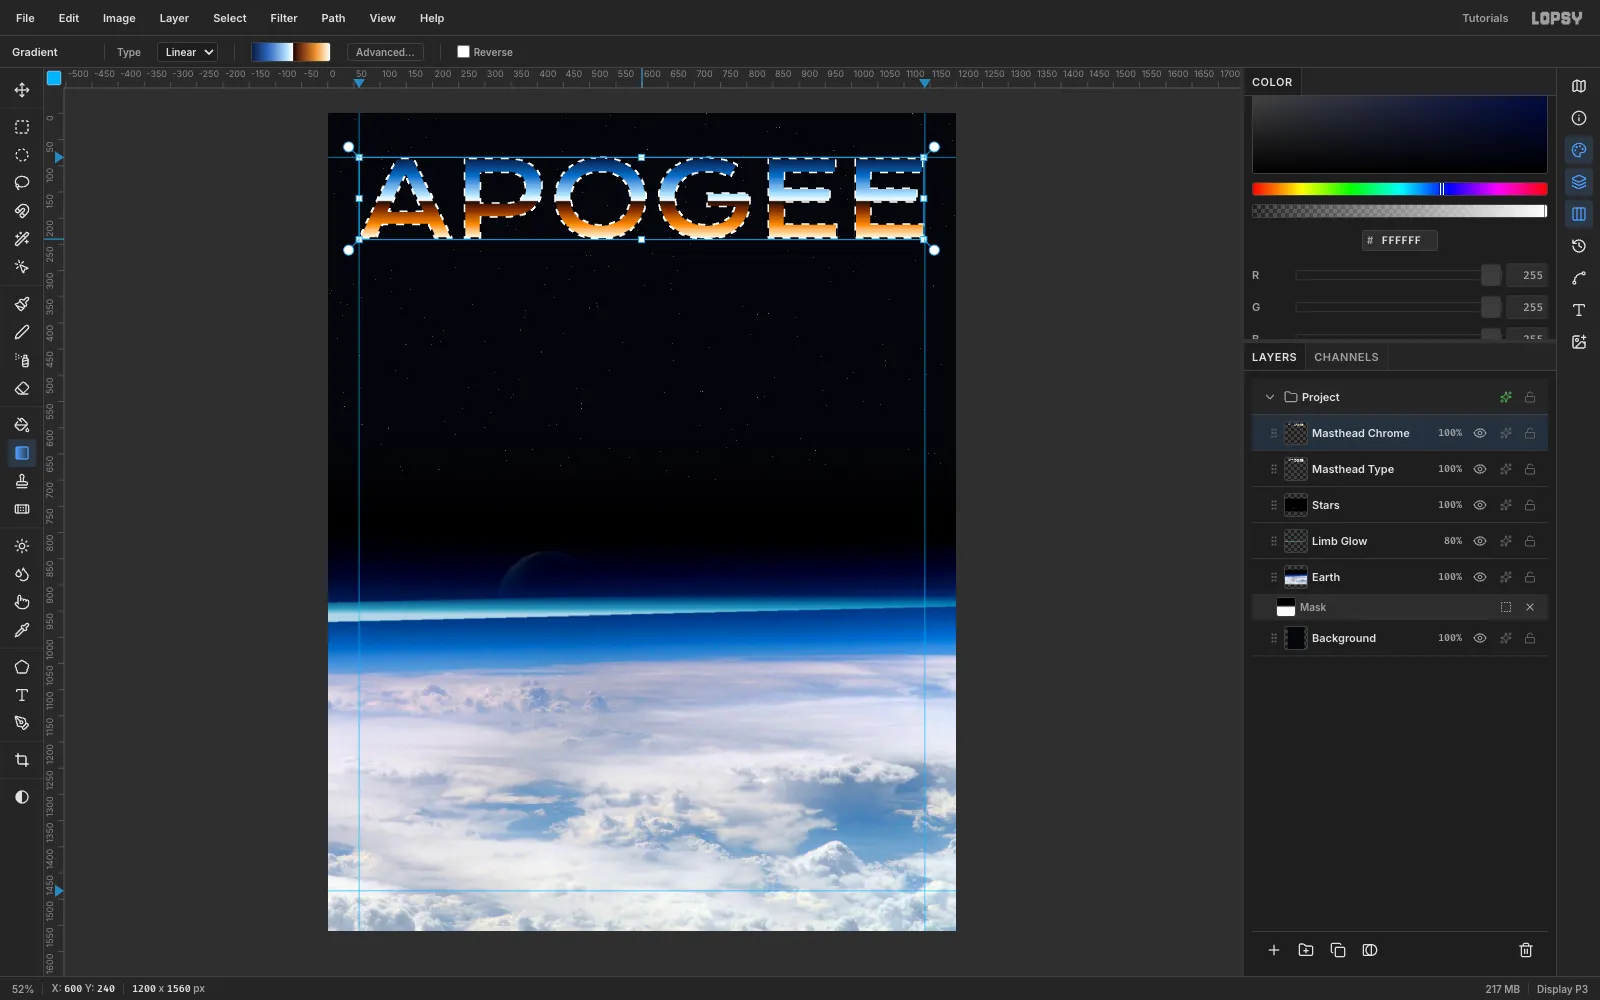
Masthead Chrome. Then Cmd-click theMasthead Typethumbnail to load the letters as a selection.Pick the Gradient tool, open Advanced…, and build the chrome stops:
#0B1A45at 0%, the deep sky at the tops of the letters#2F6BC4at 22%#BFE6FFat 46%#FFFFFFat 52%, the bright horizon#1E0E08at 53.5%, the hard dark ground right under it#7A3510at 64%#F0922Eat 82%#FFE2B0at 94%#FFFFFFat 100%
The 52% and 53.5% stops sit almost on top of each other. That's what makes the sharp horizon line. Drag straight down from the top of the letters to the bottom.
-
Bevel the chrome with layer effects
Open the Layer effects on
Masthead Chromeand turn on:- Stroke, 3 px,
#050B1E, for a crisp keyline - Inner Glow,
#1A0C05, Size 4, Opacity 70, which darkens the inside edges like a bevel - Drop Shadow, black, Offset 0 / 10, Blur 18, Opacity 80
- Outer Glow,
#4FA8FF, Size 40, Opacity 30, for a faint glow in space
Hide
Masthead Type. For the specular highlight, add a layer namedMasthead Specular, marquee a 2 px strip across the horizon line (y 165–167), and fill it white. Then Cmd-click theMasthead Typethumbnail, choose Select → Inverse, and press Delete so the line only survives inside the letters. Finish with a small white Outer Glow (Size 6).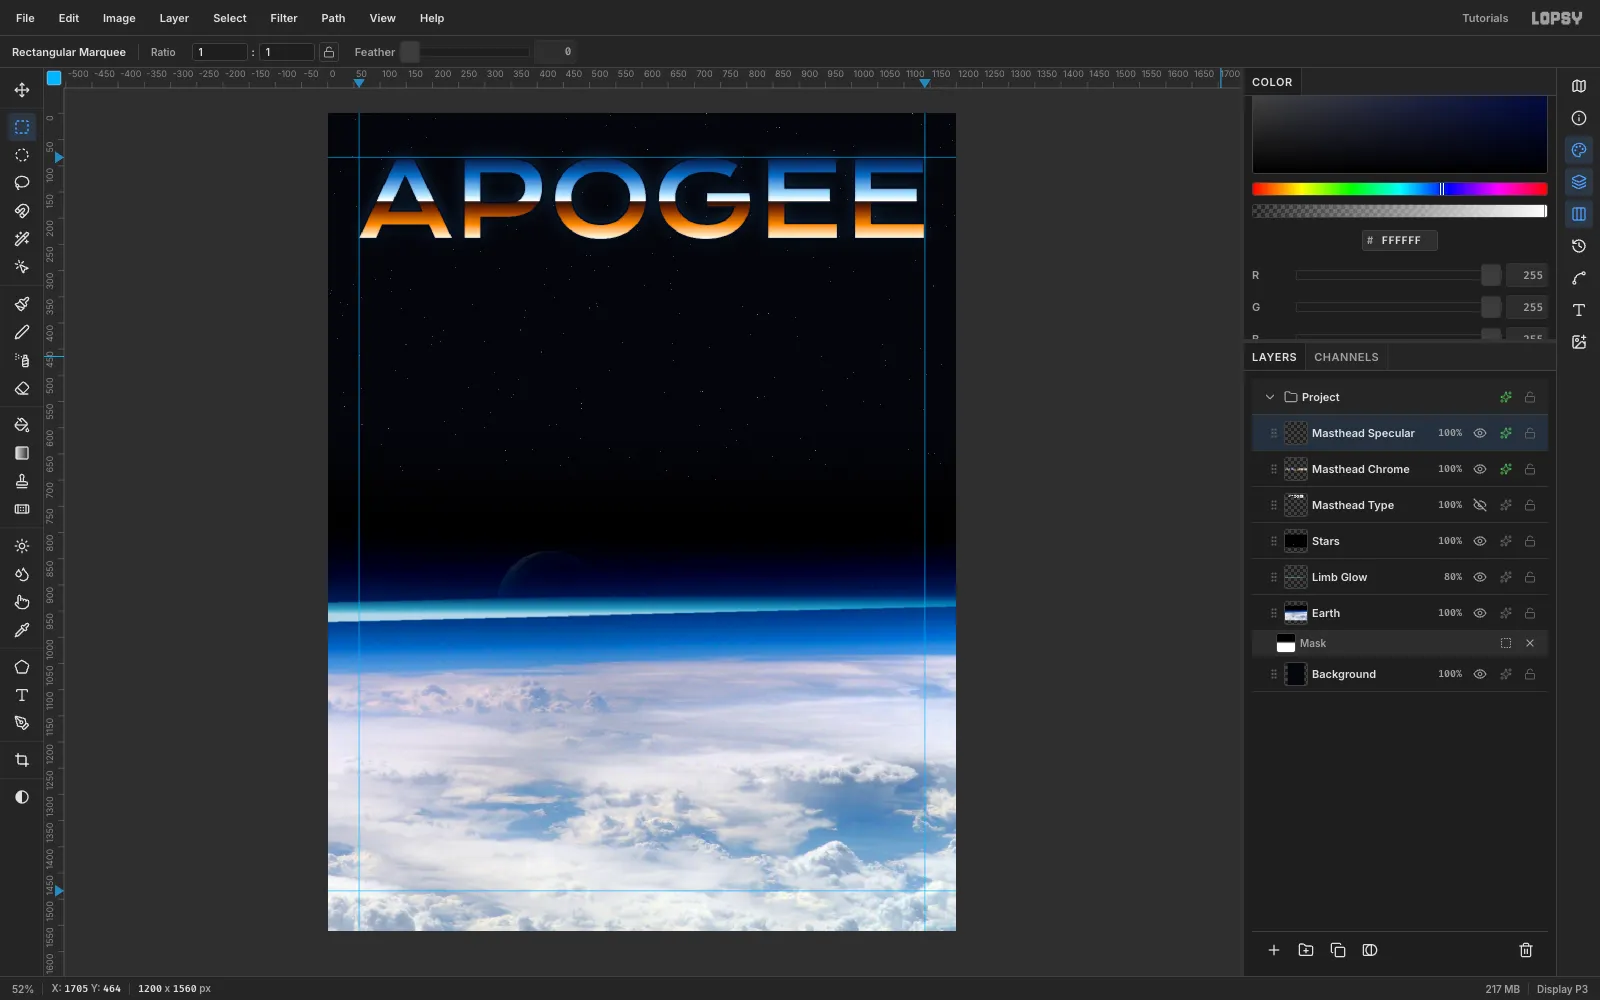
- Stroke, 3 px,
-
Draw the chrome hull
Select
Starsand click New Group. Name itCruiser, then add a layer inside it namedHull.With the Lasso, draw a long cigar shape for the hull. Give it a pointed nose at the upper right and a blunt tail at the lower left, tilted up at about 23°. Choose Select → Feather… 1 px so the edges come out anti-aliased.
Set the Gradient stops to the hull version of the chrome ramp:
#0A1638,#2F63B5,#A9D8FF,#F4FBFFat 47%,#1C1220at 49%,#5A3A30,#D9A274,#FFF1DCand#7F93B8. Drag the gradient across the hull, at right angles to its length, from the top edge to the bottom edge. Chrome reflects its surroundings across the shape, so a lengthwise gradient never reads as metal.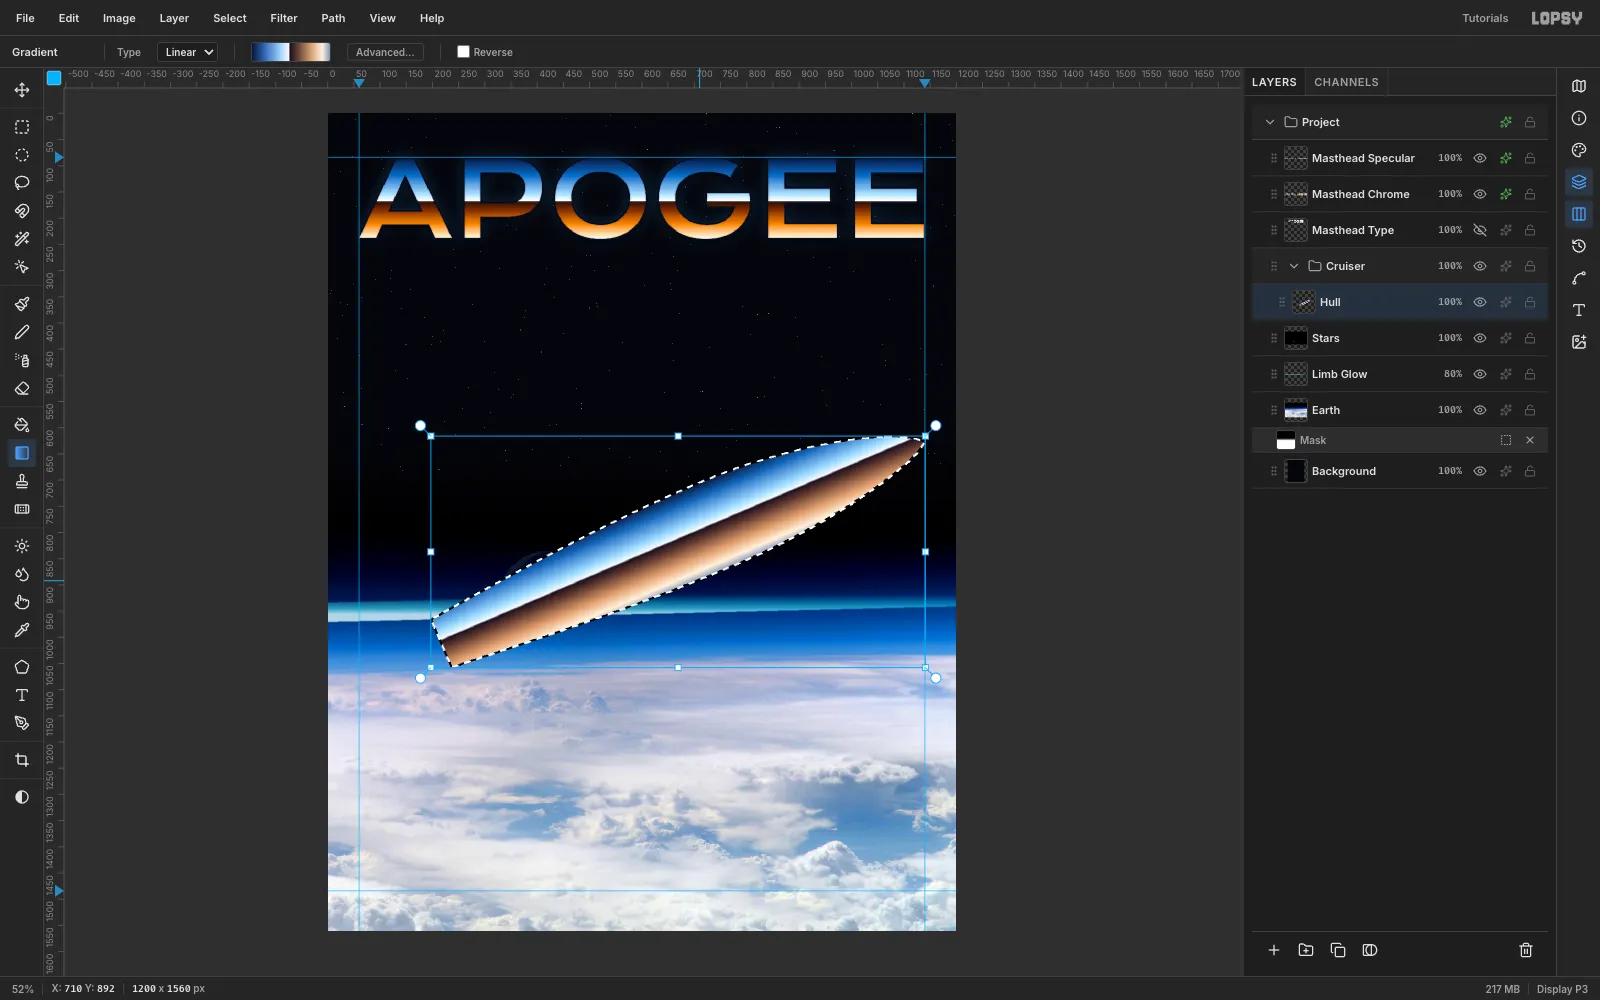
-
Add the tail fins and engine bells
Add a layer named
Fins Backand drag it belowHullin the Layers panel. Lasso a tall swept fin rising from the top of the tail, and a smaller one hanging below it.Feather each by 1 px and fill it with the same chrome gradient. Again, drag across each fin at right angles to the hull, spanning that fin's own height. The horizon line then lands at the same point on every surface.
On a new
Bellslayer, lasso two flared nozzles at the tail. Fill them with a gunmetal gradient (#20242F→#C9D0DE→ white →#6E7488→#141720). Then fill their open mouths with pale cyan#D4FAFF.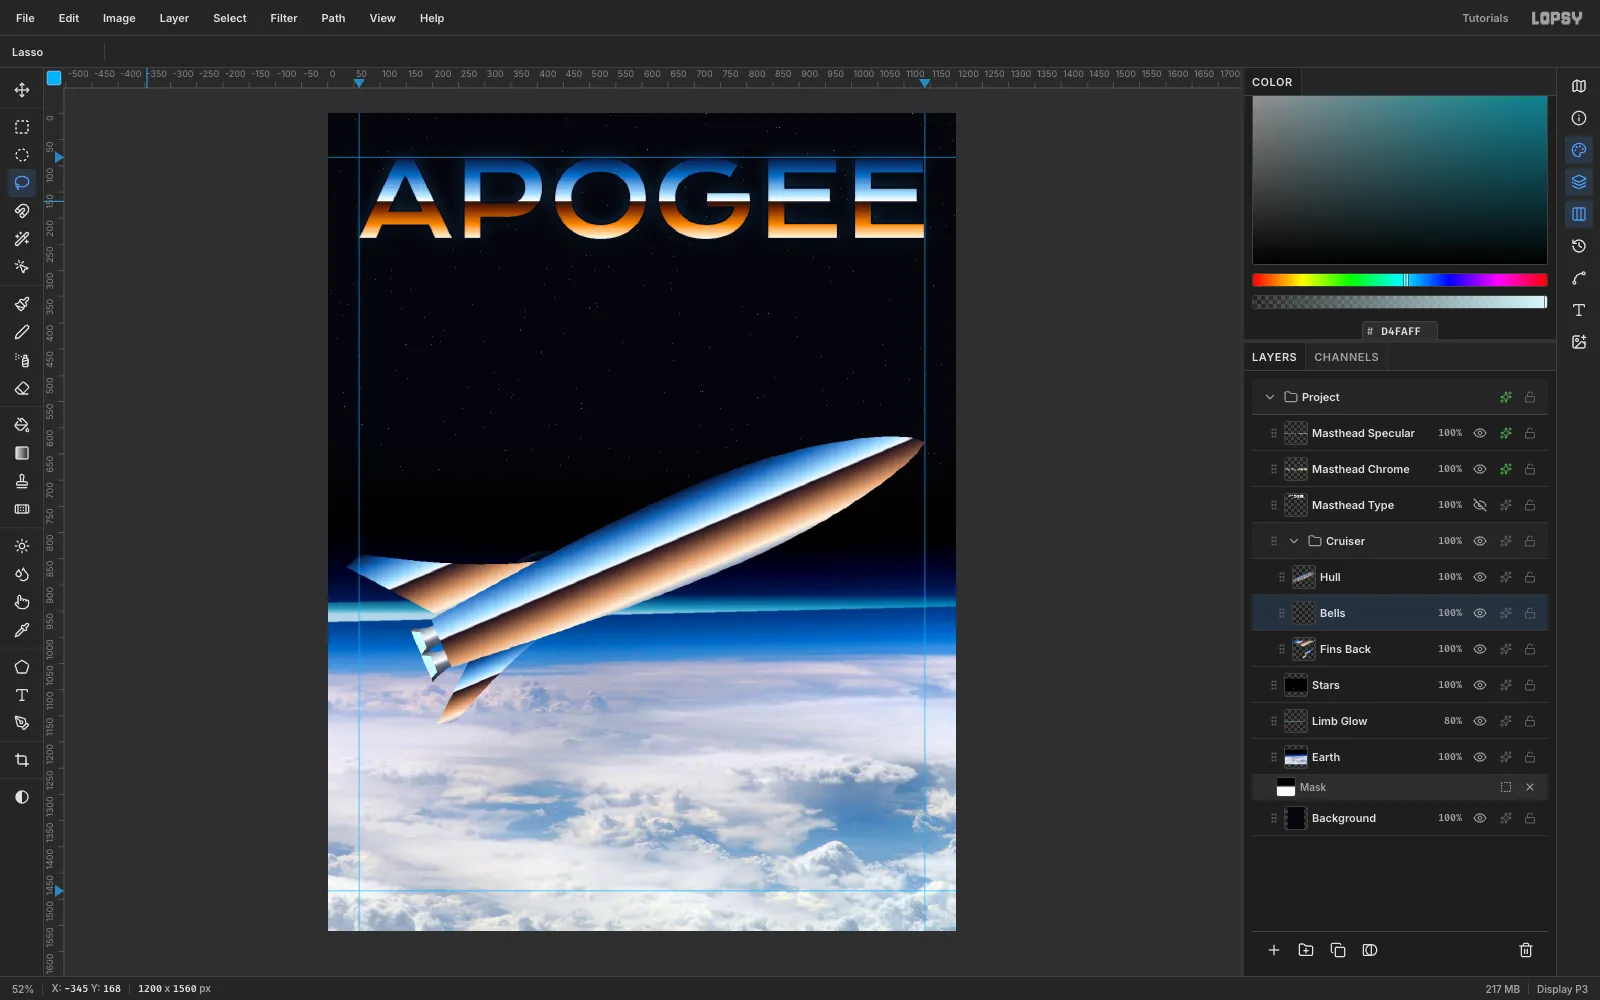
-
Fire the engines and add speed lines
Add an
Exhaustlayer and drag it belowFins Back. Lasso a plume from each nozzle that widens slightly and then tapers, about 330 px long. Fill it with a gradient that runs along the plume: white-cyan#F4FFFF, then#7FDCFFat 20%, fading to transparent blue. Lasso a narrow core inside each plume and fill it with white fading to transparent.Apply Gaussian Blur 3, add an Outer Glow in
#2FA8FF(Size 40, Opacity 70), and set the layer to Screen.On a
Speed Lineslayer below the exhaust, lasso five long, thin white slivers parallel to the hull. Blur them with Gaussian Blur 1.5, then apply Filter → Motion Blur… with Angle 337 and Distance 40. Set the layer to Screen at 80%.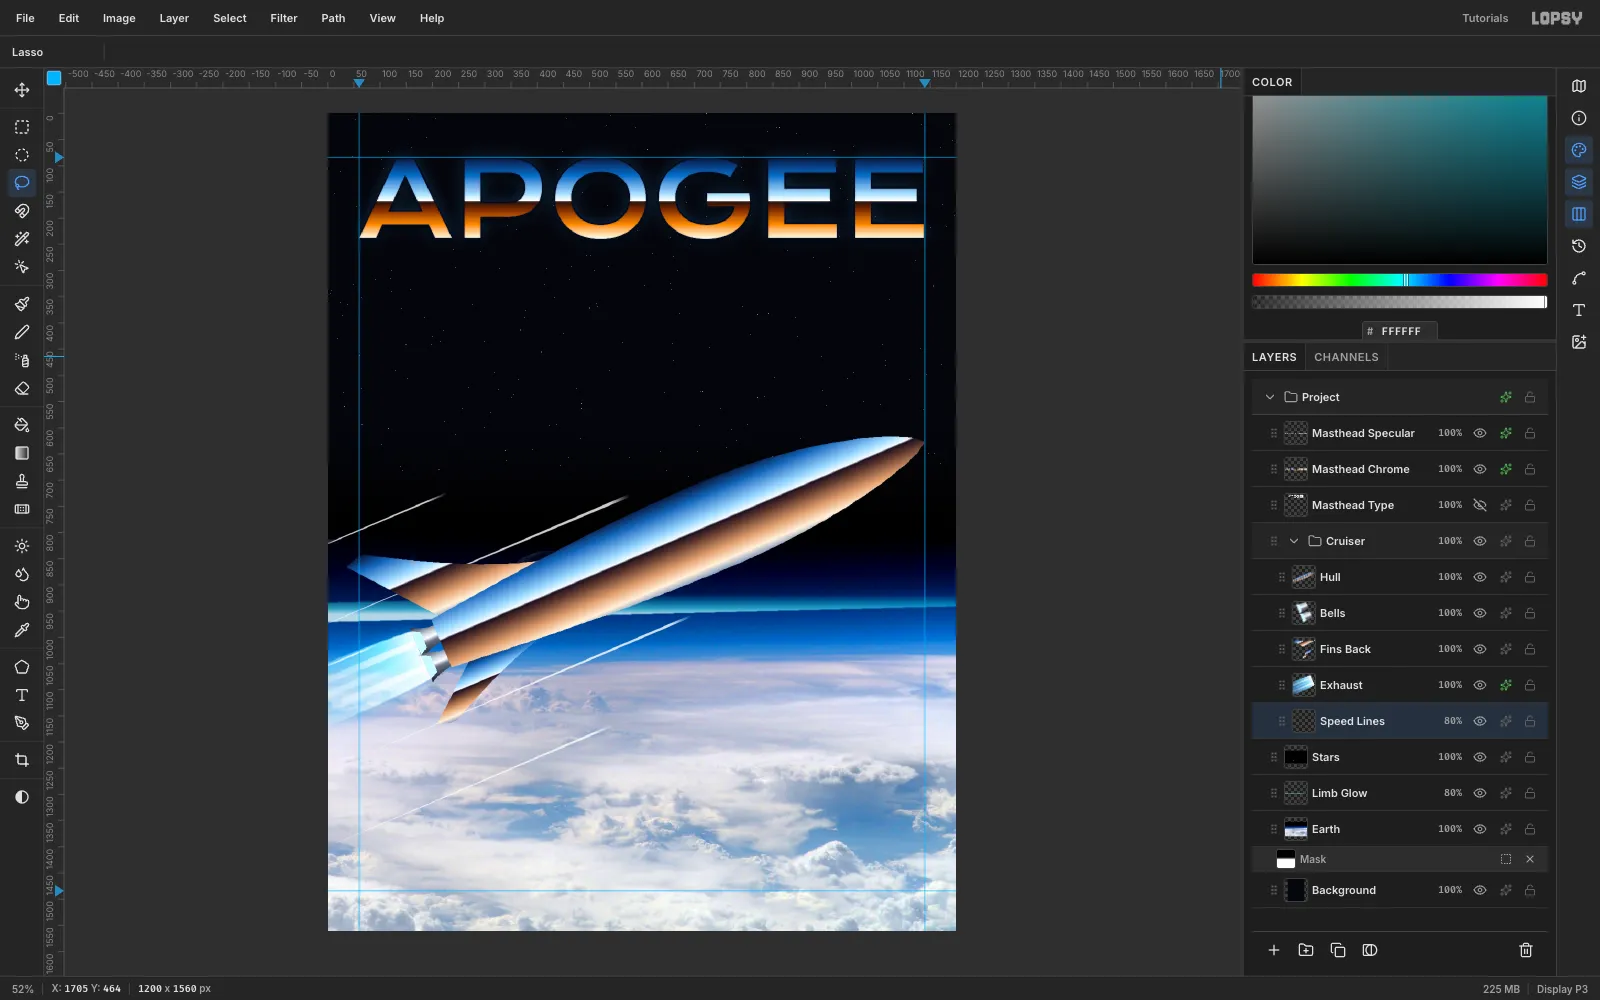
-
Duplicate the portholes with copy and paste
First, give the hull a specular line. Add a
Hull Specularlayer aboveHull, lasso a 3 px sliver along the chrome's horizon line, fill it white, and add a white Outer Glow (Size 8, Opacity 70).A liner needs a row of windows. On a new
Liverylayer above the hull, lasso a thin orange stripe that tapers to a point near the nose. Fill it with an orange gradient (#FFC08A→#FF5A1F→#7A1404), and add a cream pinstripe just above it.Add a
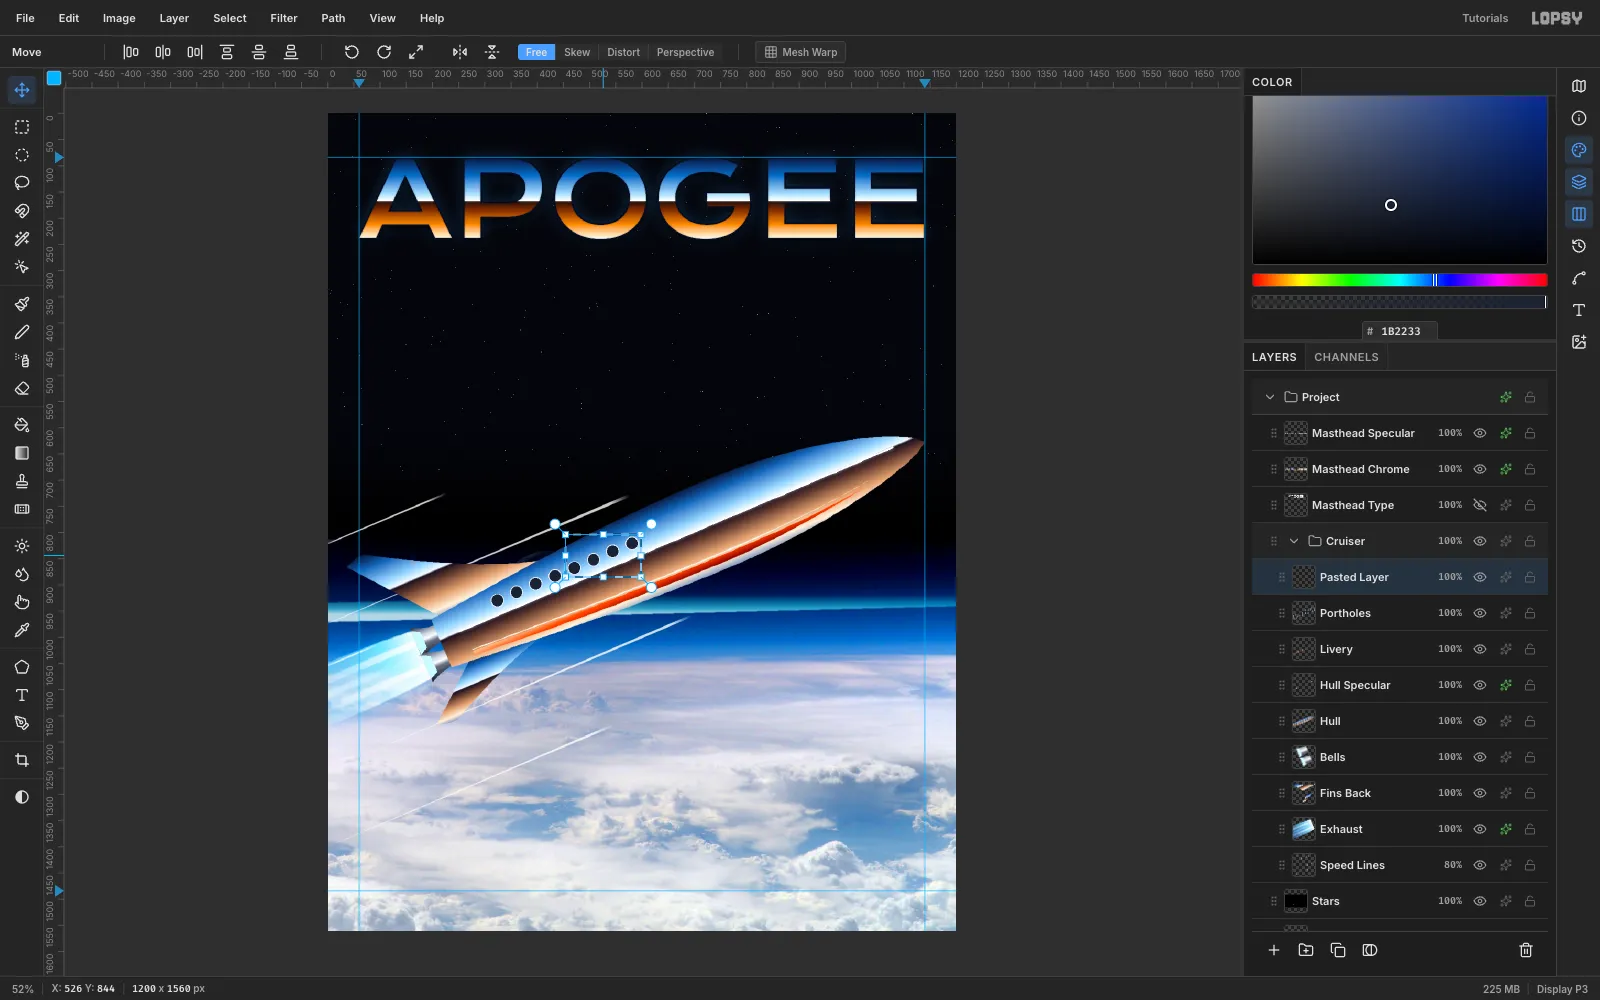
Portholeslayer. Use the Elliptical Marquee to draw four chrome rims (radius 13,#DCE6F4) with dark insets (radius 11,#1B2233) along the upper hull.Marquee all four and press Cmd+C and then Cmd+V. The copy pastes in place. Drag it along the hull by the width of four portholes, then choose Layer → Merge Down. Repeat once more for twelve windows.
-
Light the windows and add the canopy and near fin
On a
Porthole Glasslayer, fill amber#FFC46Bcircles inside each rim, and add an orange Outer Glow (#FF8A2A, Size 10).For the
Canopy, lasso a dome on top of the hull near the nose. Fill it with a glass gradient (#B8F0FF→#3A7CC0→#0D1F45→#03060F), then add a small pale crescent highlight.Finish the hull with a
Near Finlayer: a small fairing pod along the hull, and a large fin sweeping down and back toward you. Fill both with the chrome gradient, dragged across the hull as before.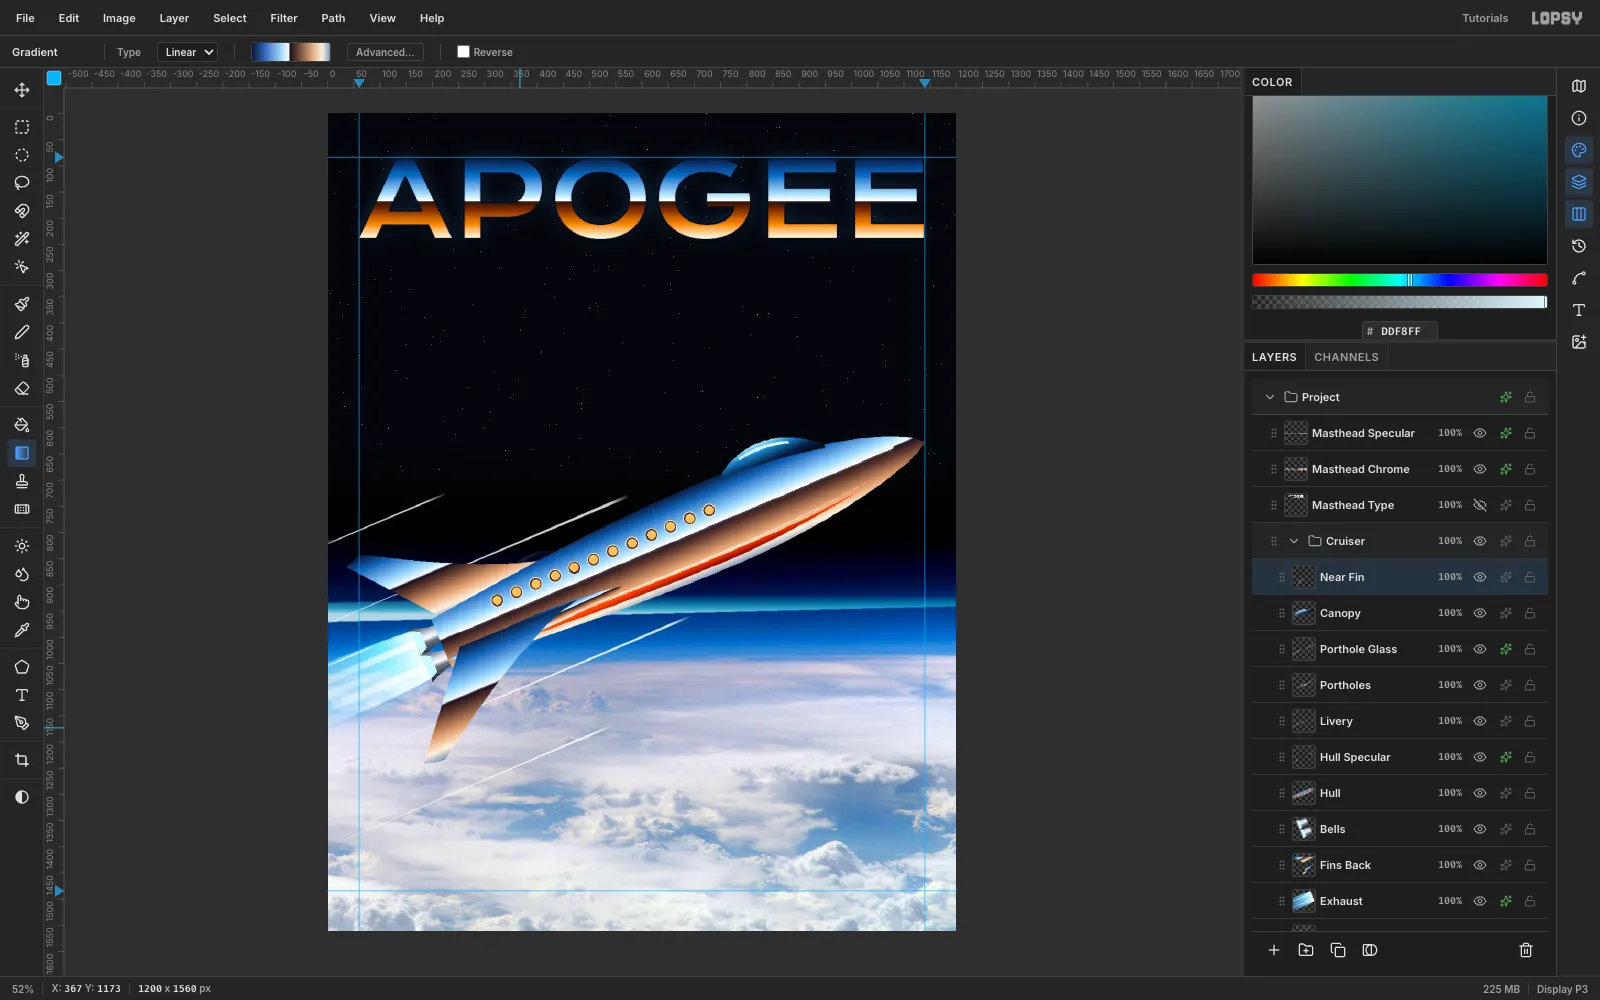
-
Scale a strip of the photo into a reflection
Real chrome reflects what's around it. Select
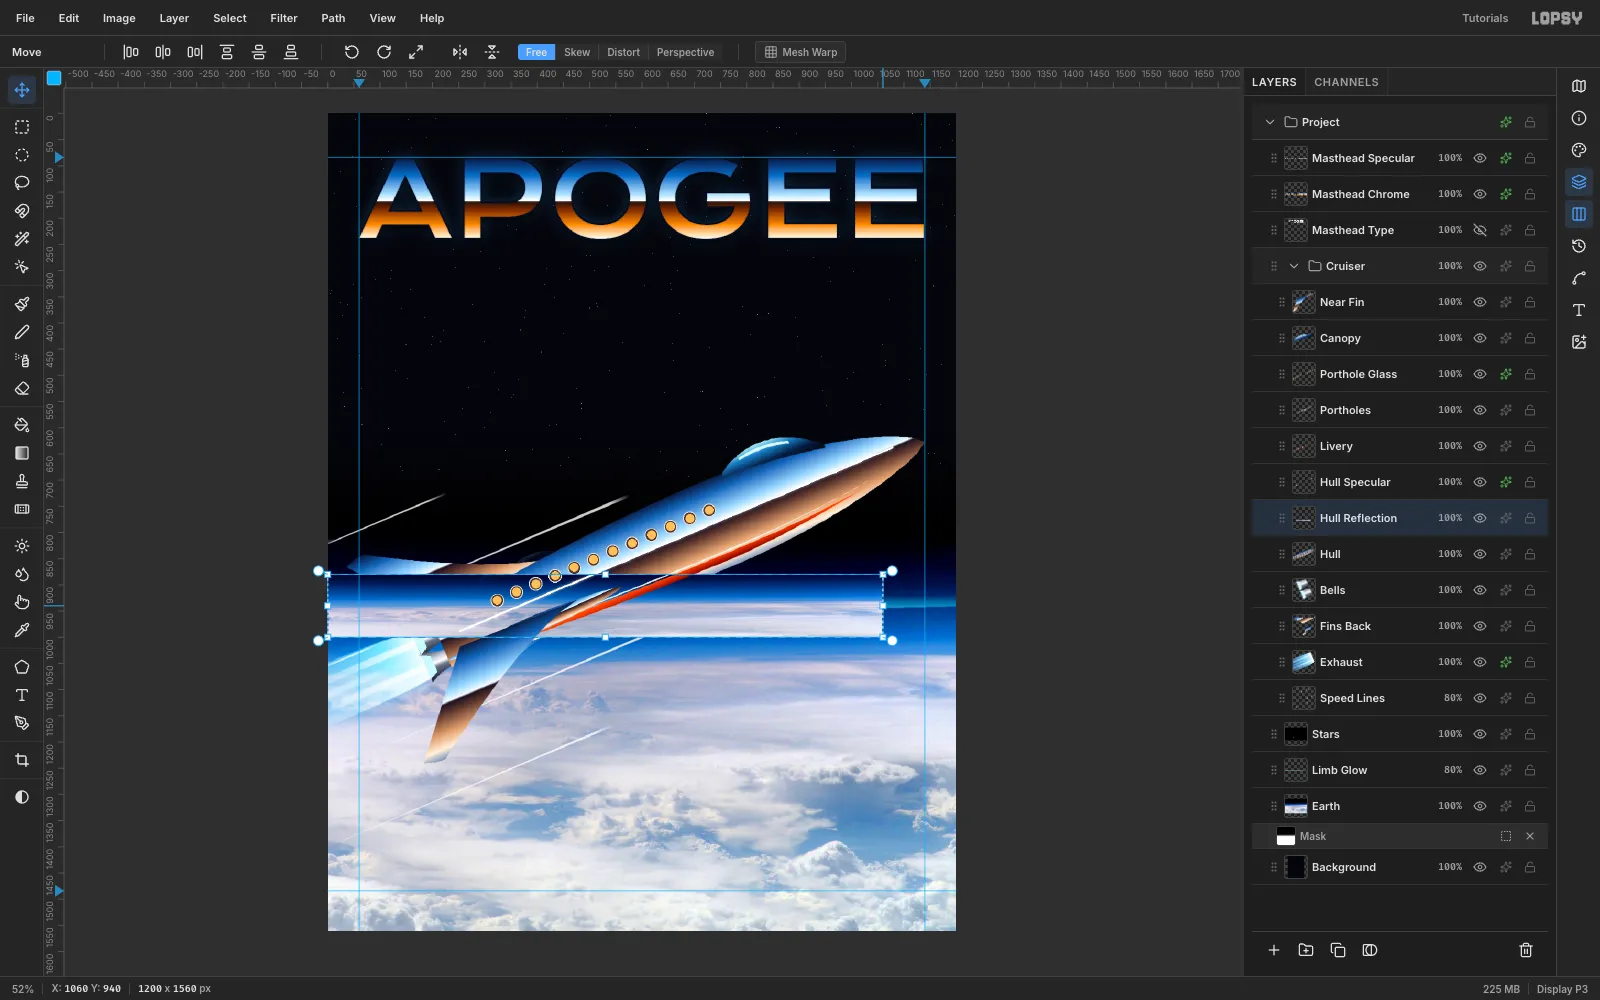
Earth, marquee a strip across the horizon (0,880 → 1200,1240), then press Cmd+C and Cmd+V. Rename the pasteHull Reflectionand drag it into theCruisergroup, just aboveHull.With the strip still selected and the Move tool active, drag the bottom-middle handle up to squash the strip to 120 px tall. Then drag the right-middle handle in to make it 1060 px wide. Press Cmd+D.
-
Rotate the reflection to match the hull
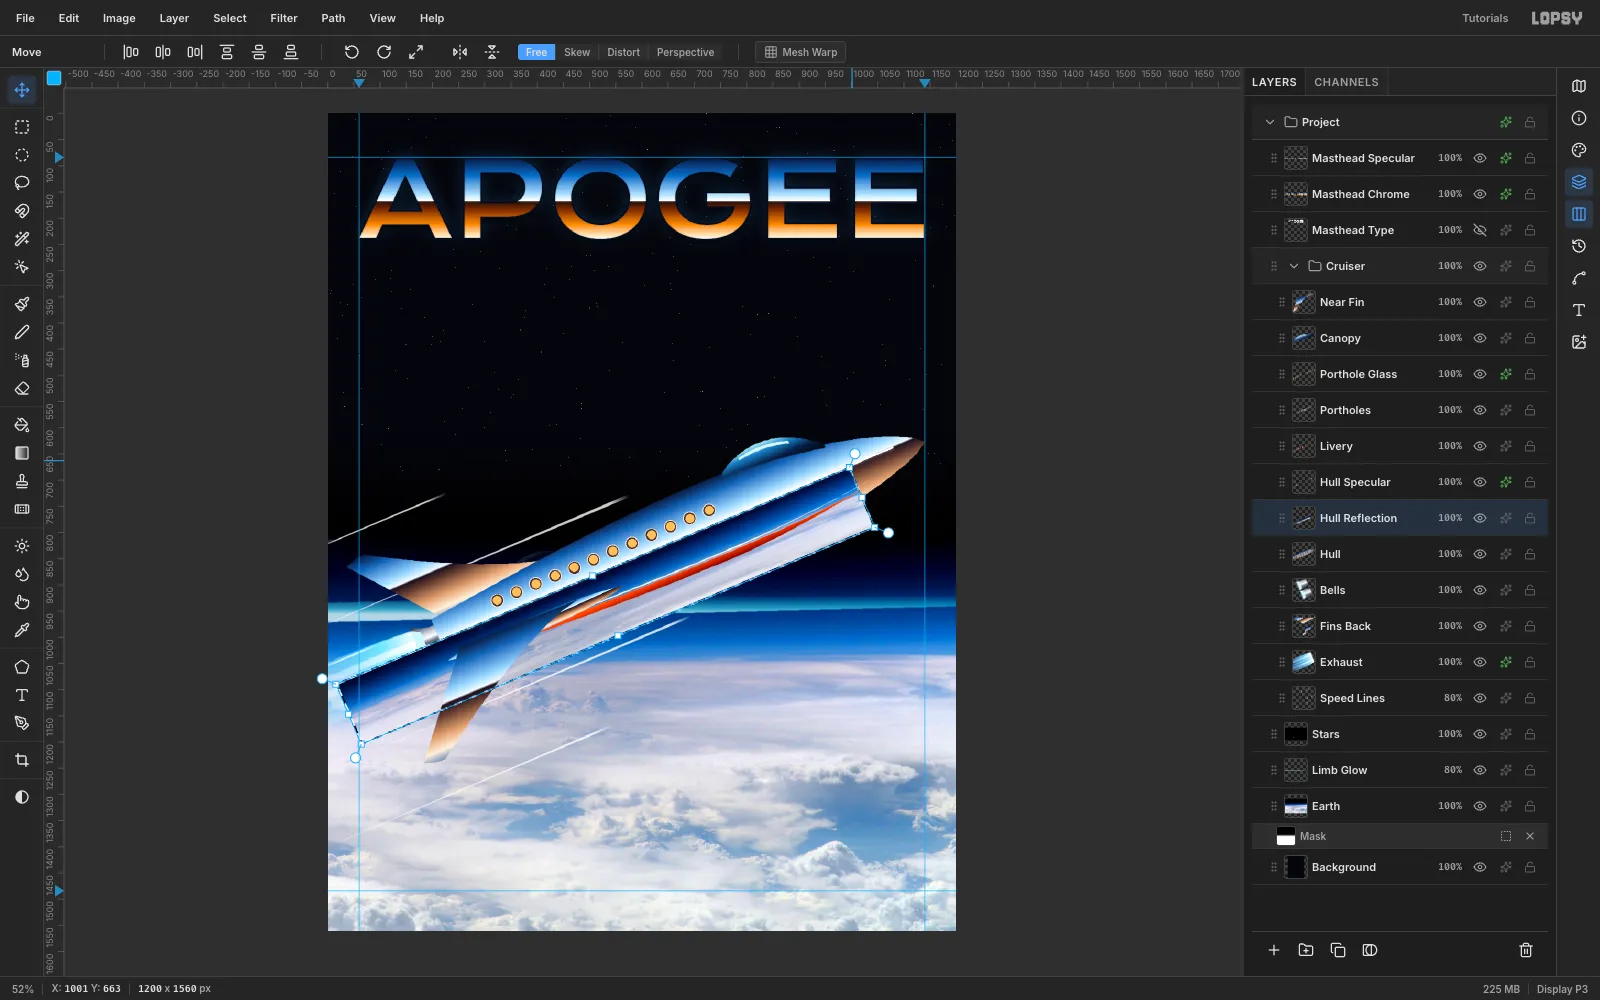
Marquee the strip again. Grab the round rotation handle just outside a corner and turn the strip about −23°, until it lines up with the hull. Press Cmd+D to commit, then drag it so it covers the lower half of the hull.
-
Clip the reflection into the hull
Cmd-click the
Hullthumbnail to select its outline. ClickHull Reflection, choose Select → Inverse, and press Delete. Only the part over the hull survives. Set the layer to Overlay at 45%, so the chrome picks up the blues and whites of the planet below.To make the hull read as a curved surface, add an Inner Glow in dark navy
#0A1430toHull(Size 22, Opacity 65) and a smaller one to both fin layers (Size 12). The edges darken the way a curved surface falls away from the light.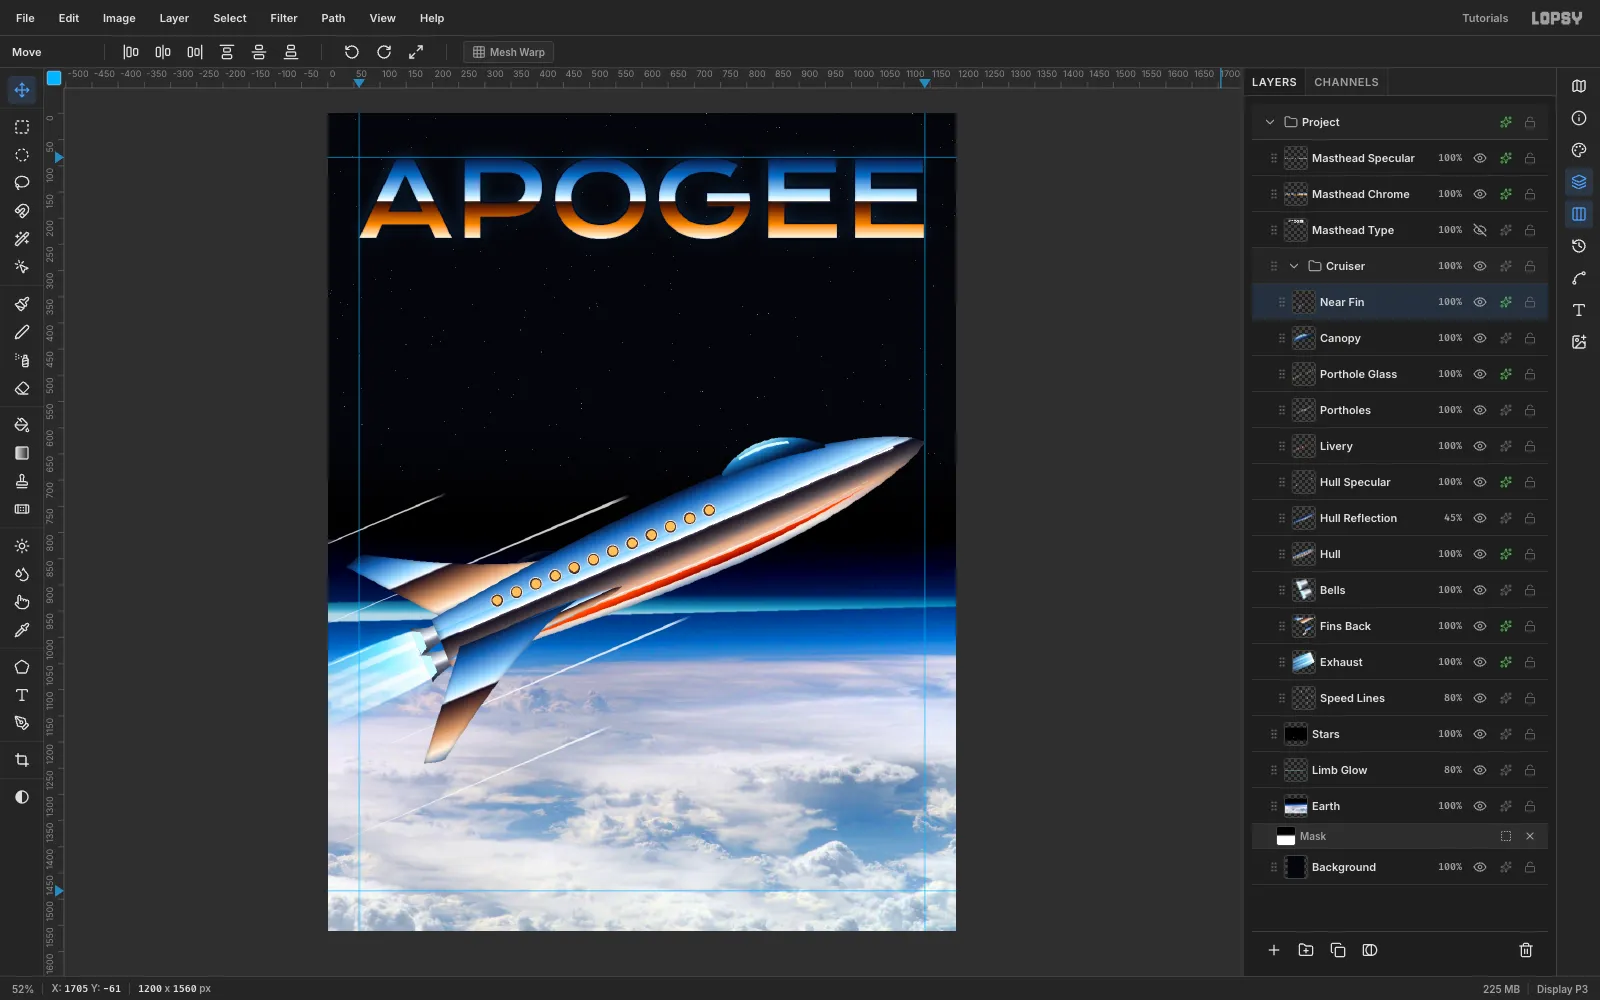
-
Add star glints and film grain
Every 80s chrome job needs glints. On a
Glintslayer above the masthead, lasso four-point stars, each a long thin cross with a shorter diagonal cross on top. Place them where the chrome is brightest: the tops of the A and the last E, the masthead horizon, and the highlight line on the hull. Give the layer a pale blue Outer Glow (#CFE9FF, Size 16).For grain, add a
Grainlayer and fill it with#808080. Run Add Noise (Amount 40, Mono, Gaussian), then set the layer to Overlay at 55%.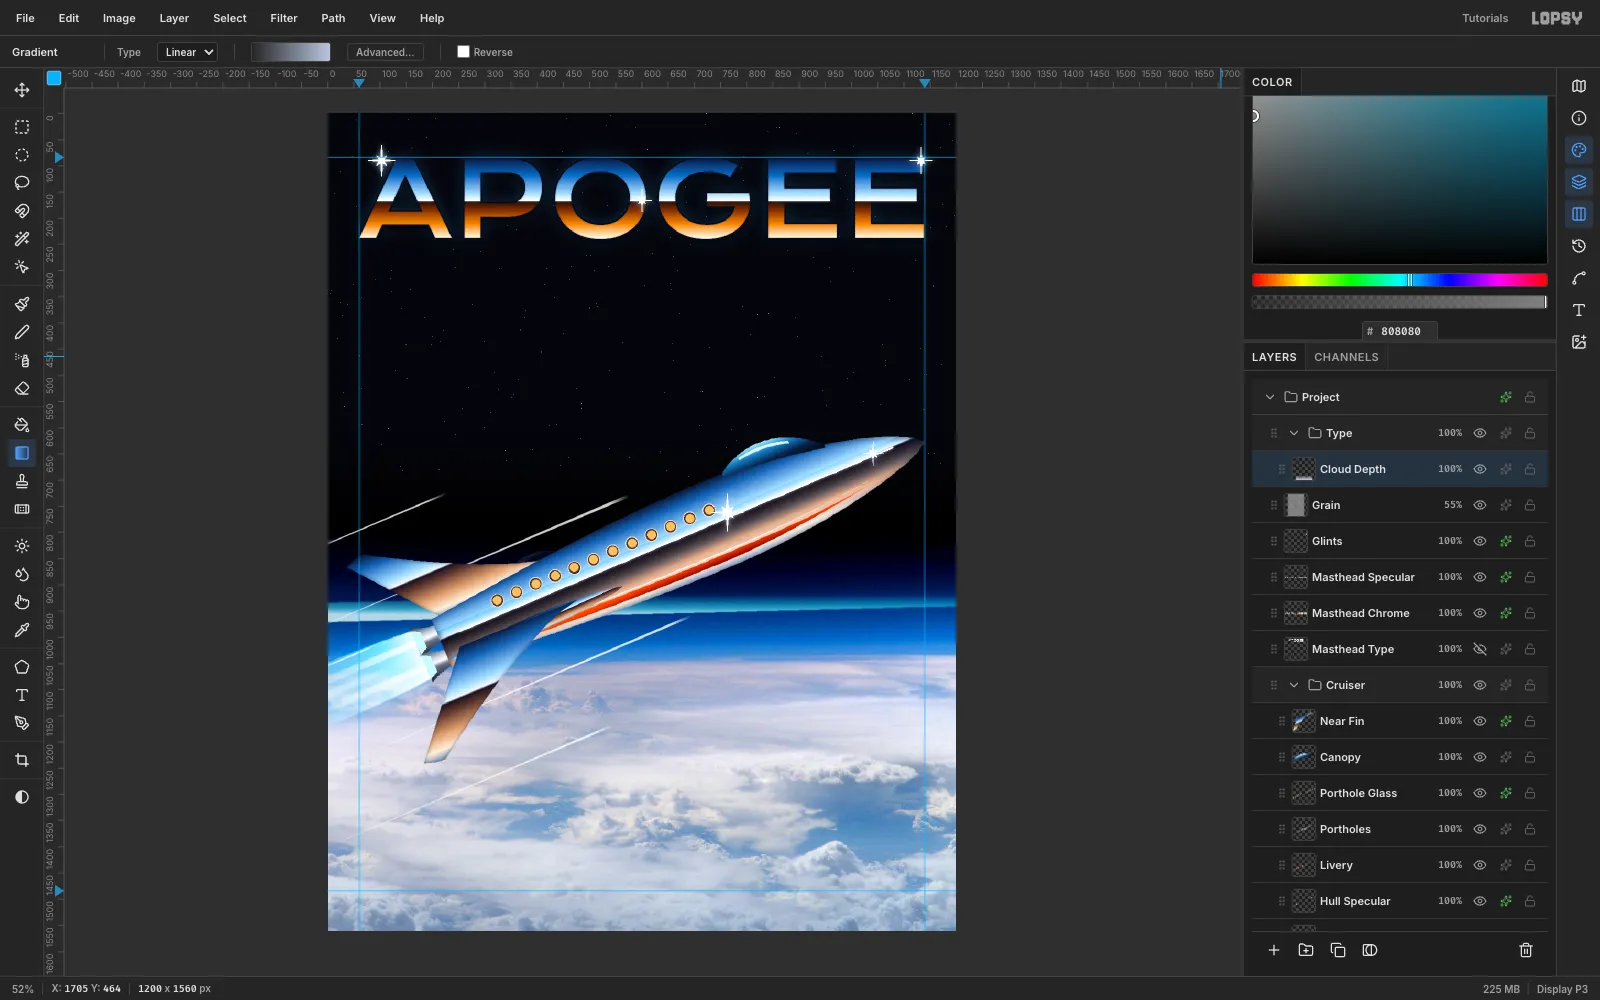
-
Snap the barcode box to the grid
Click New Group, name it
Type, and add aCloud Depthlayer inside it. Give that layer a gradient from transparent at y 1250 to light slate blue#B9C6E0at the bottom, and set it to Multiply. It gently darkens the clouds behind the bottom cover lines.Turn on View → Show Grid, which also turns on Snap to Grid. On a new
Barcode Boxlayer, marquee the bottom-right corner. The marquee snaps to the 16 px grid, so it's easy to get it square and aligned. Fill it with white. Then turn the grid off and trim the box to the 1140 px margin guide and to y = 1478.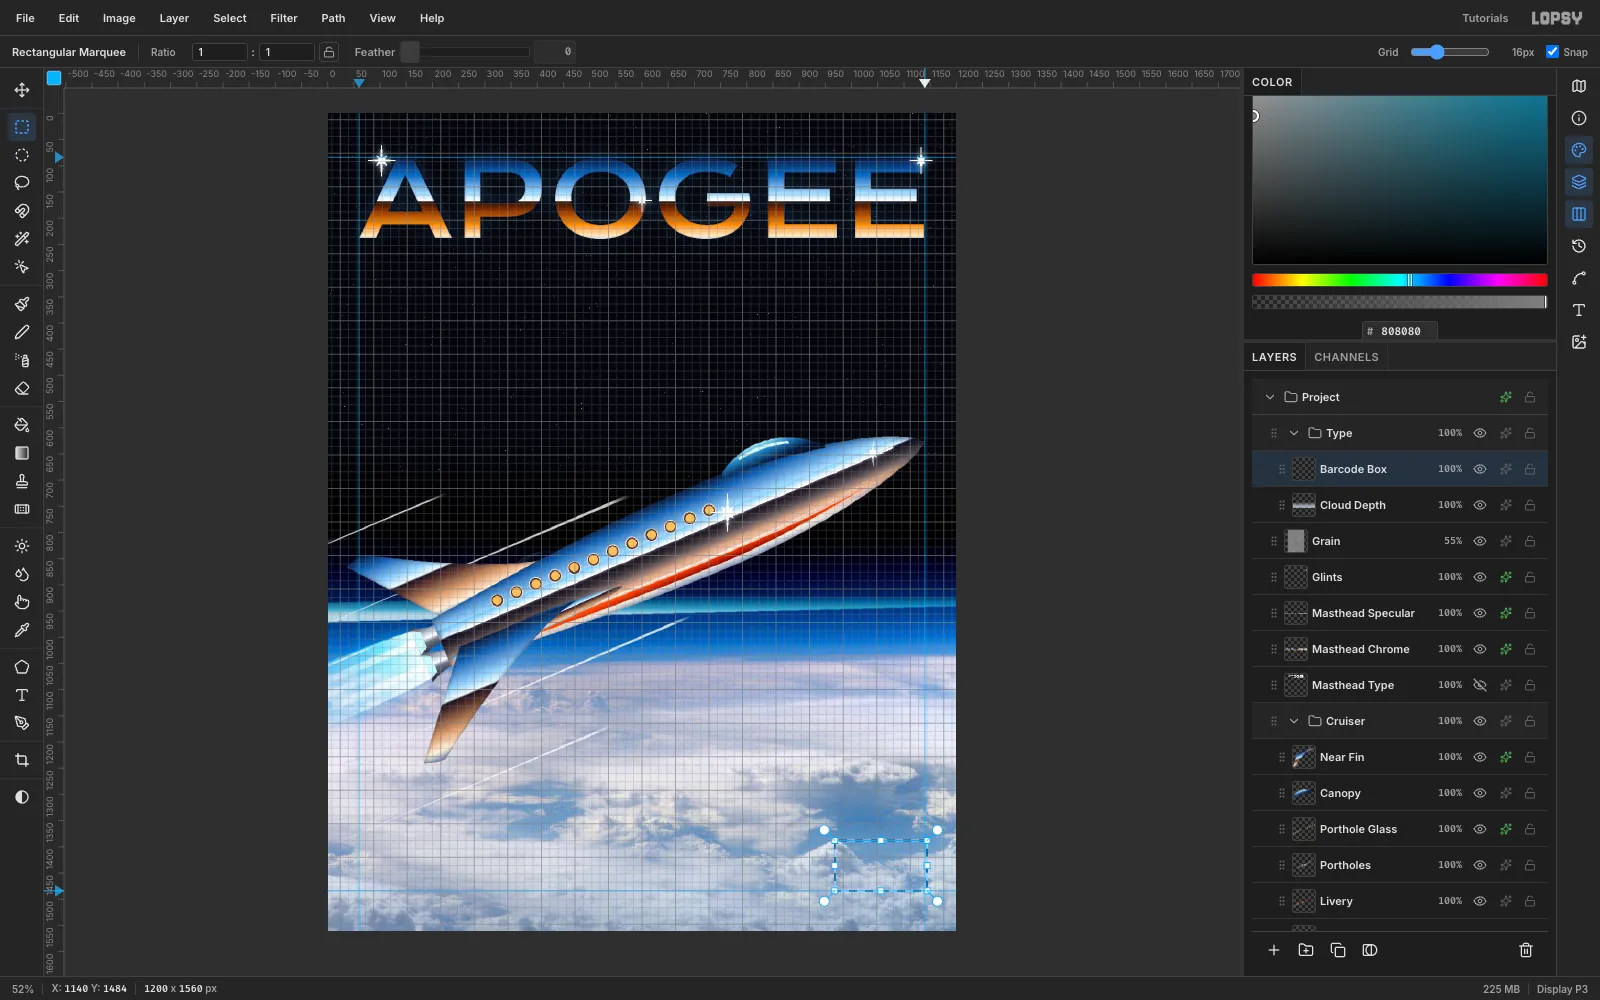
-
Stretch the barcode to fit
Type the numbers
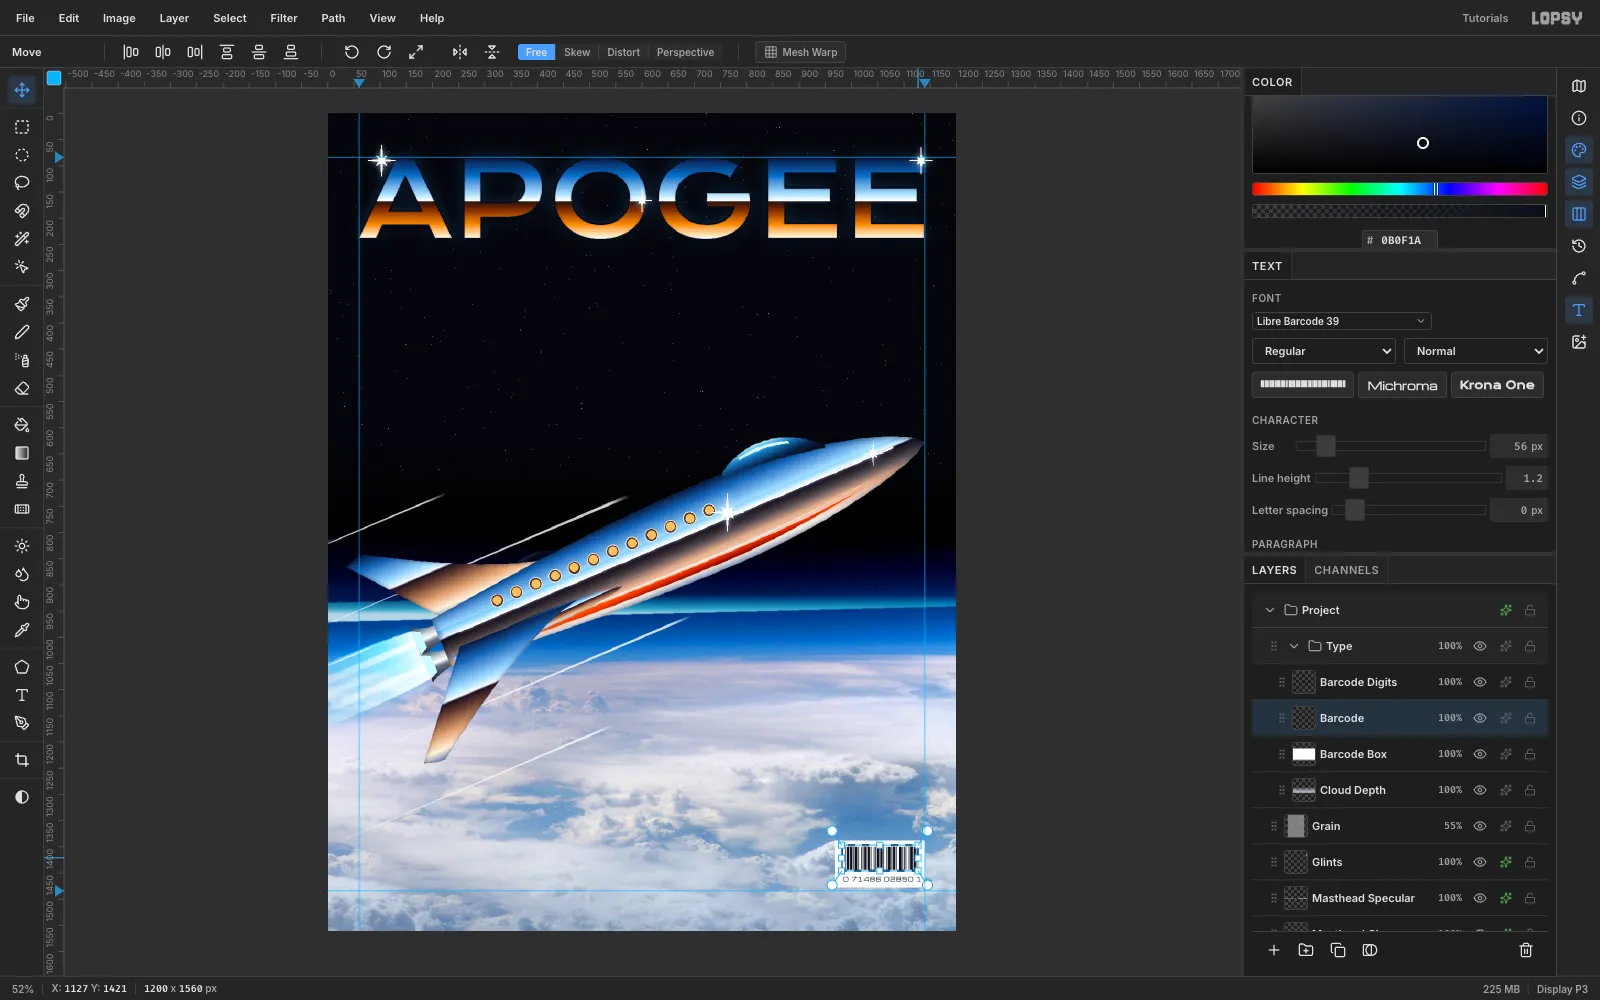
0 71486 02850 1in Michroma at 11 px along the bottom of the box. Then type*1185*in Libre Barcode 39 at 56 px above them. The asterisks are the barcode's start and stop characters.The bars come out too short, so click Rasterize Layer. Then marquee the barcode and drag the bottom handle down 13 px and the right handle in 16 px. Center the bars and the digits in the box.
-
Set the bottom cover lines
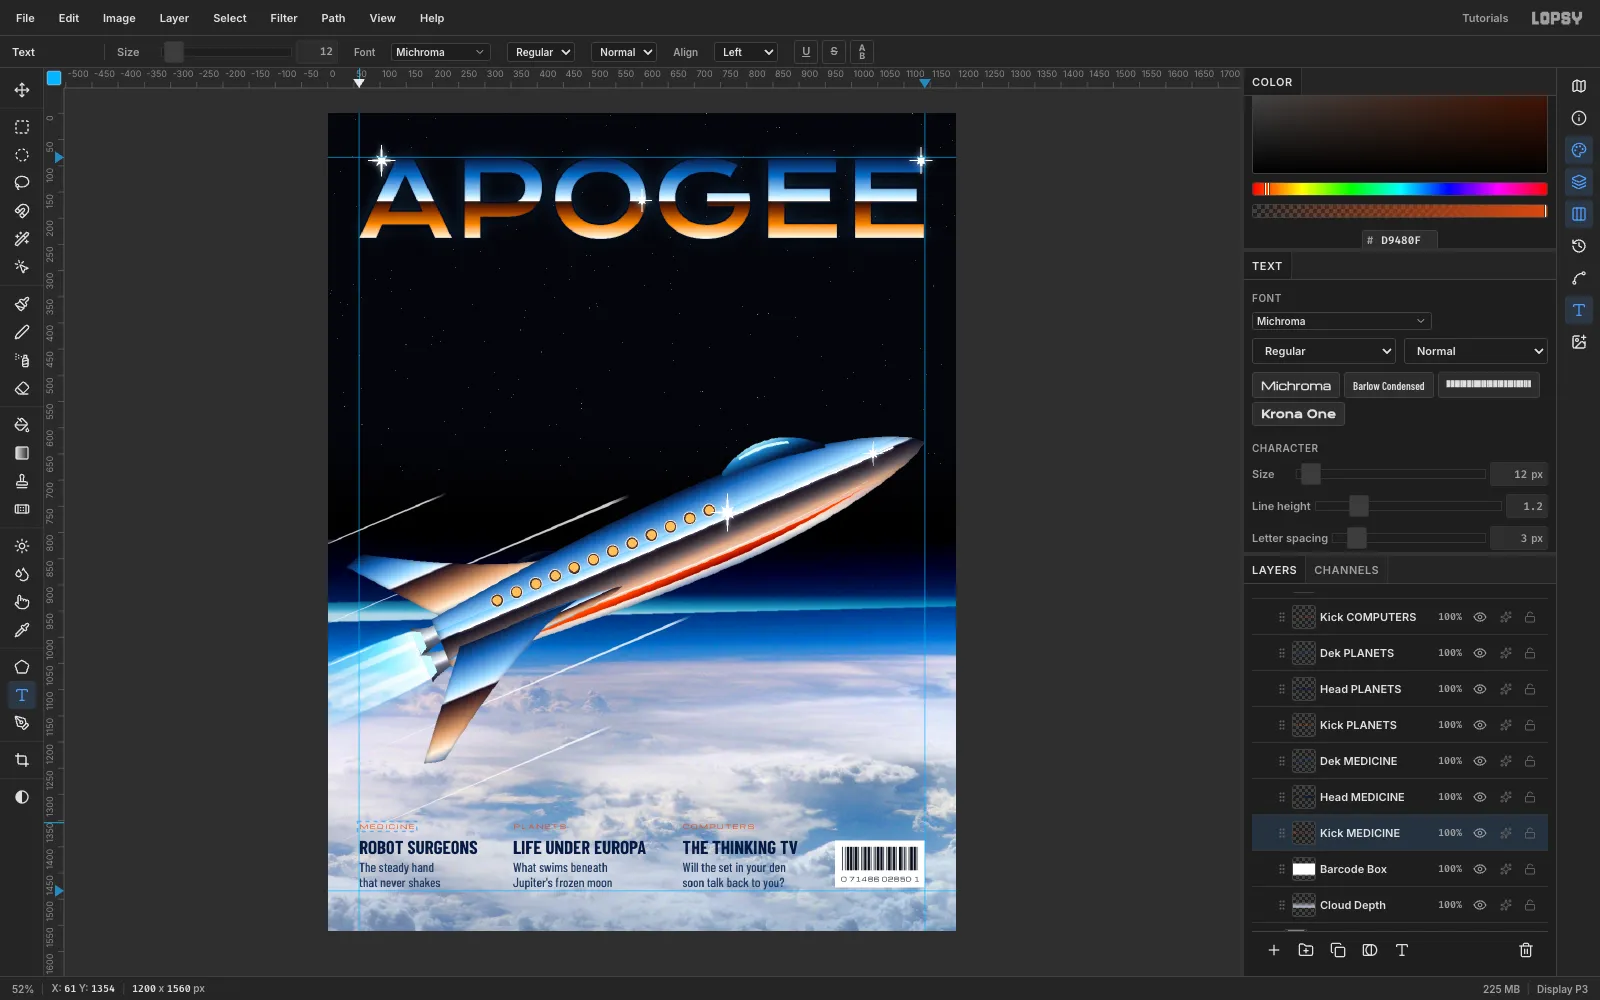
Each cover line has three parts. The kicker is Michroma 12 px in orange
#D9480Fwith 3 px letter spacing. The headline is Barlow Condensed Bold 36 px in navy#0B1A3F. The description is Barlow Condensed Medium 25 px in#22375Fwith a line height of 1.15.Set the three columns at x 60, 354 and 677, which leaves about 70 px between each column and the next, and before the barcode. Align the headline cap tops with the top of the barcode box at y ≈ 1388.
-
Set the cover story headline
This is the text that sells the issue, so make it big:
- Kicker:
COVER STORYin Michroma 15 px,#FF7A2F, letter spacing 4, at y 283. - Headline:
THE ORBITAL/CRUISERin Barlow Condensed ExtraBold 110 px, white, with a line height of 0.92. Put its cap tops 18 px under the kicker. - Description: "First class to the Moon aboard the chrome liner of 1999" in Barlow Condensed Medium 30 px,
#C8D6EE, 30 px under the headline.
Everything starts on the 60 px guide. Across the very top, set
SCIENCE · FICTION · THE FUTUREandNOVEMBER 1985 · $2.50in Michroma 12 px,#8FA6CC. The date goes flush right to the 1140 guide.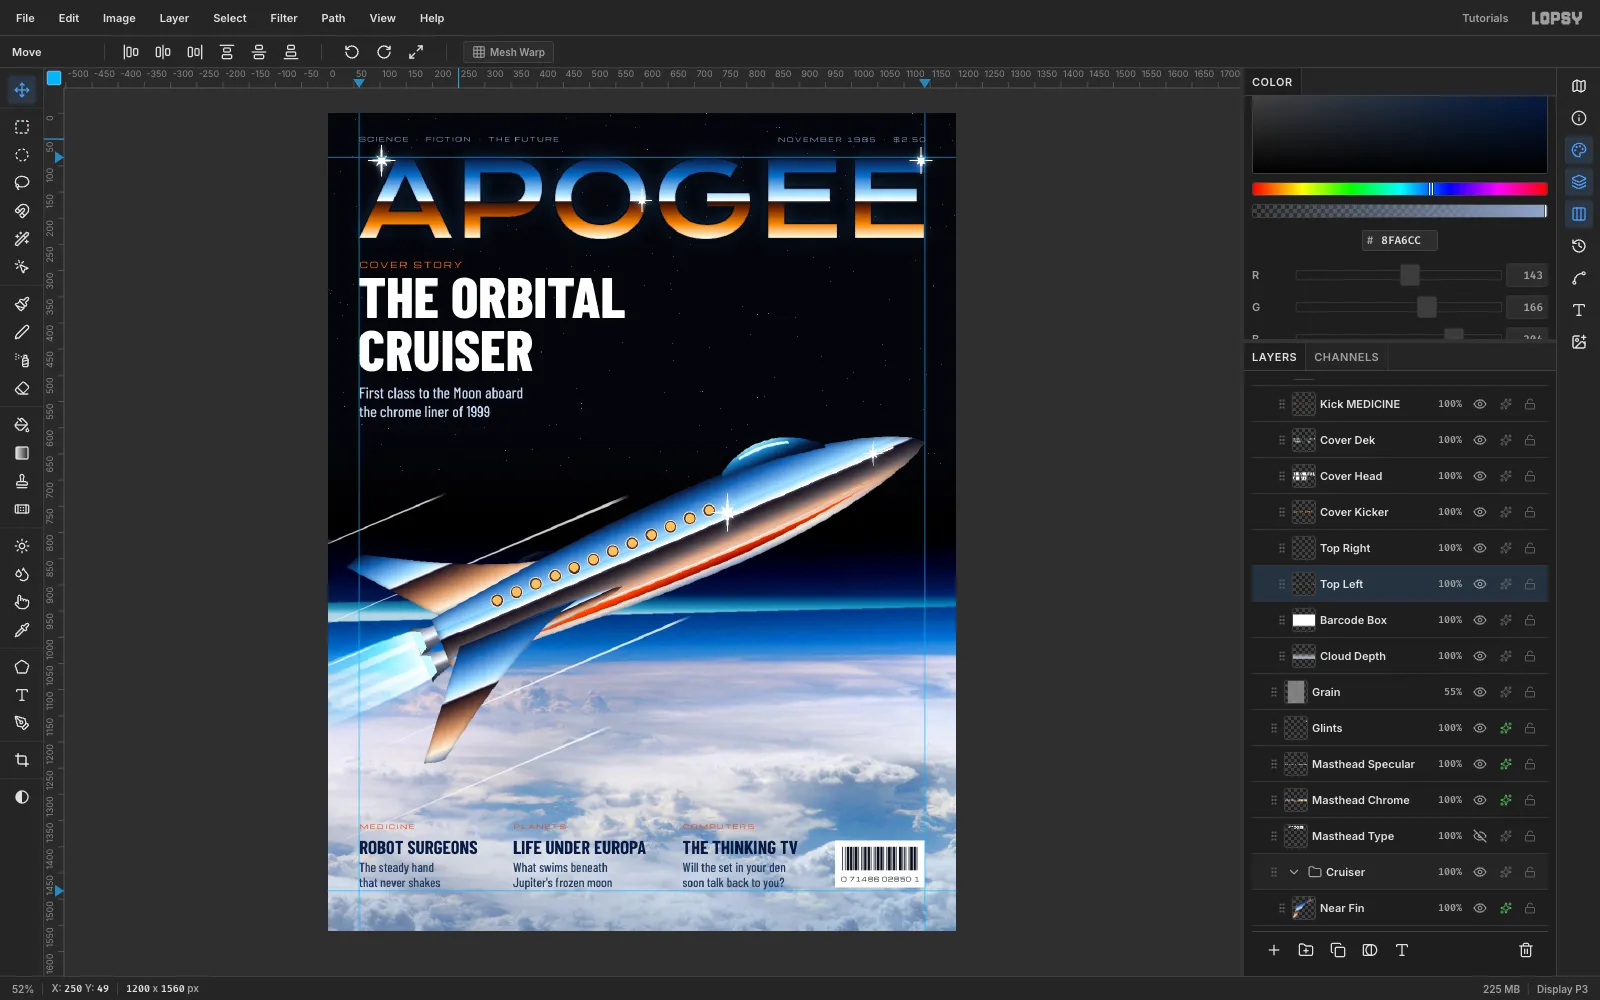
- Kicker:
-
Build the anniversary badge
Select
Starsand add aBadgelayer. That keeps the badge below the ship. Fill an 82 px-radius circle with#FF5A1F, and give it a cream Stroke (#FFE2B0, 4 px) and a soft Drop Shadow.Type
SPECIALandISSUEin Michroma 12 px, and100thin Barlow Condensed ExtraBold 60 px, all in white. Center the three lines on the disc with equal 18 px gaps.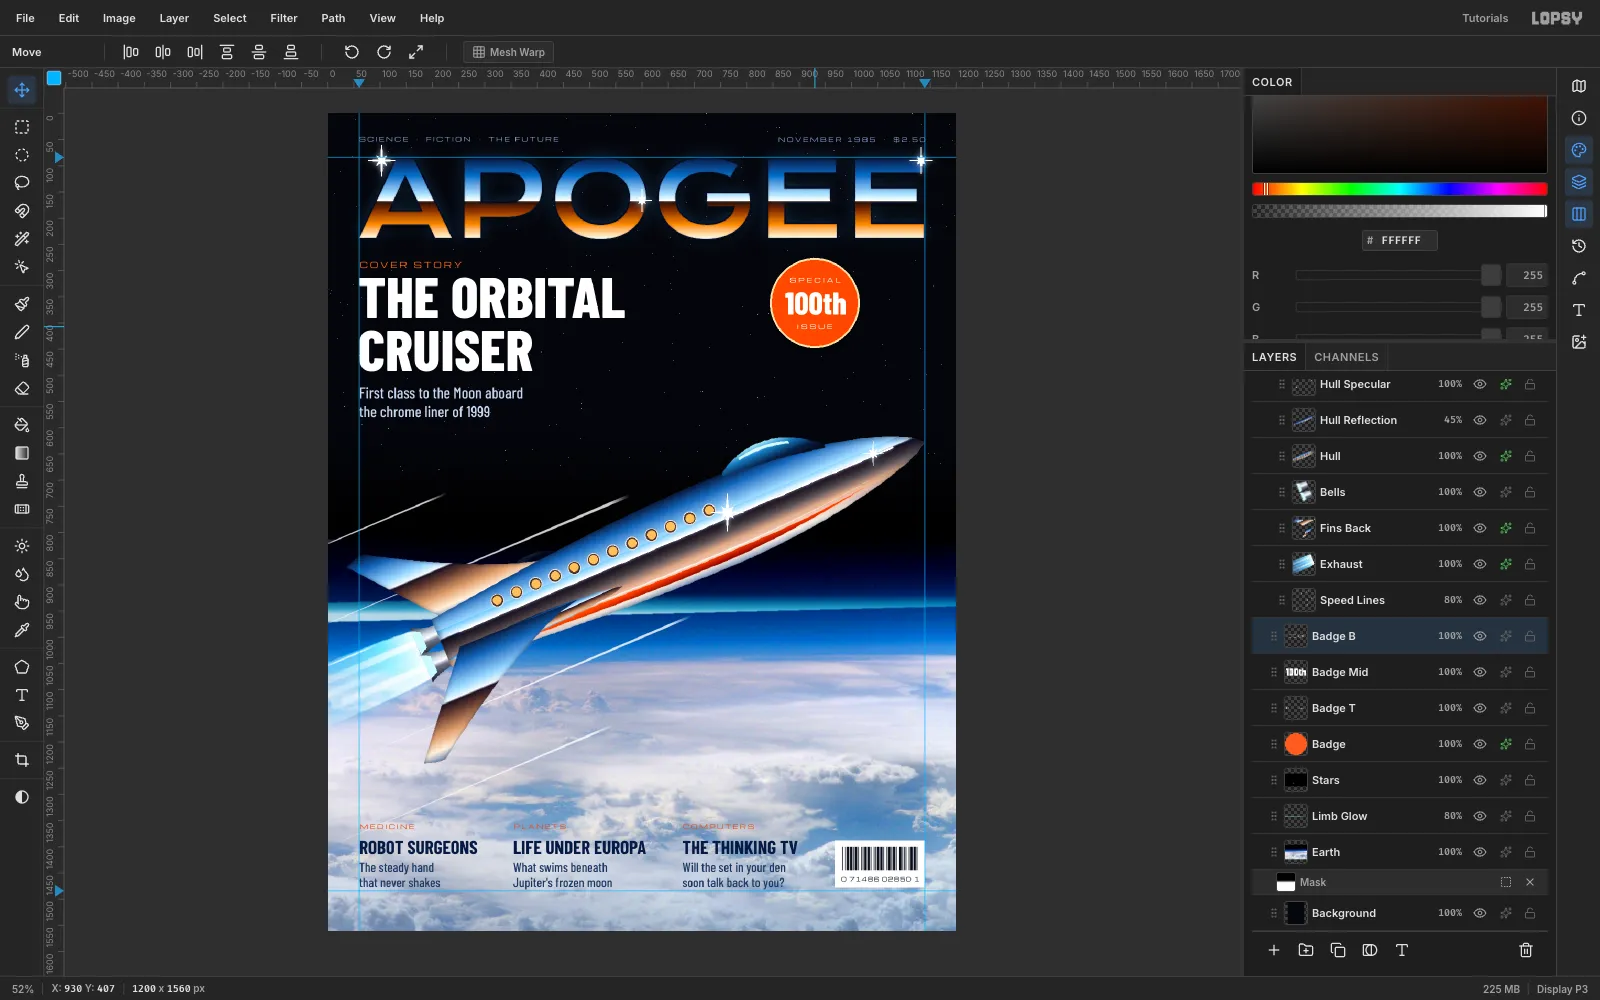
-
Merge and rotate the badge
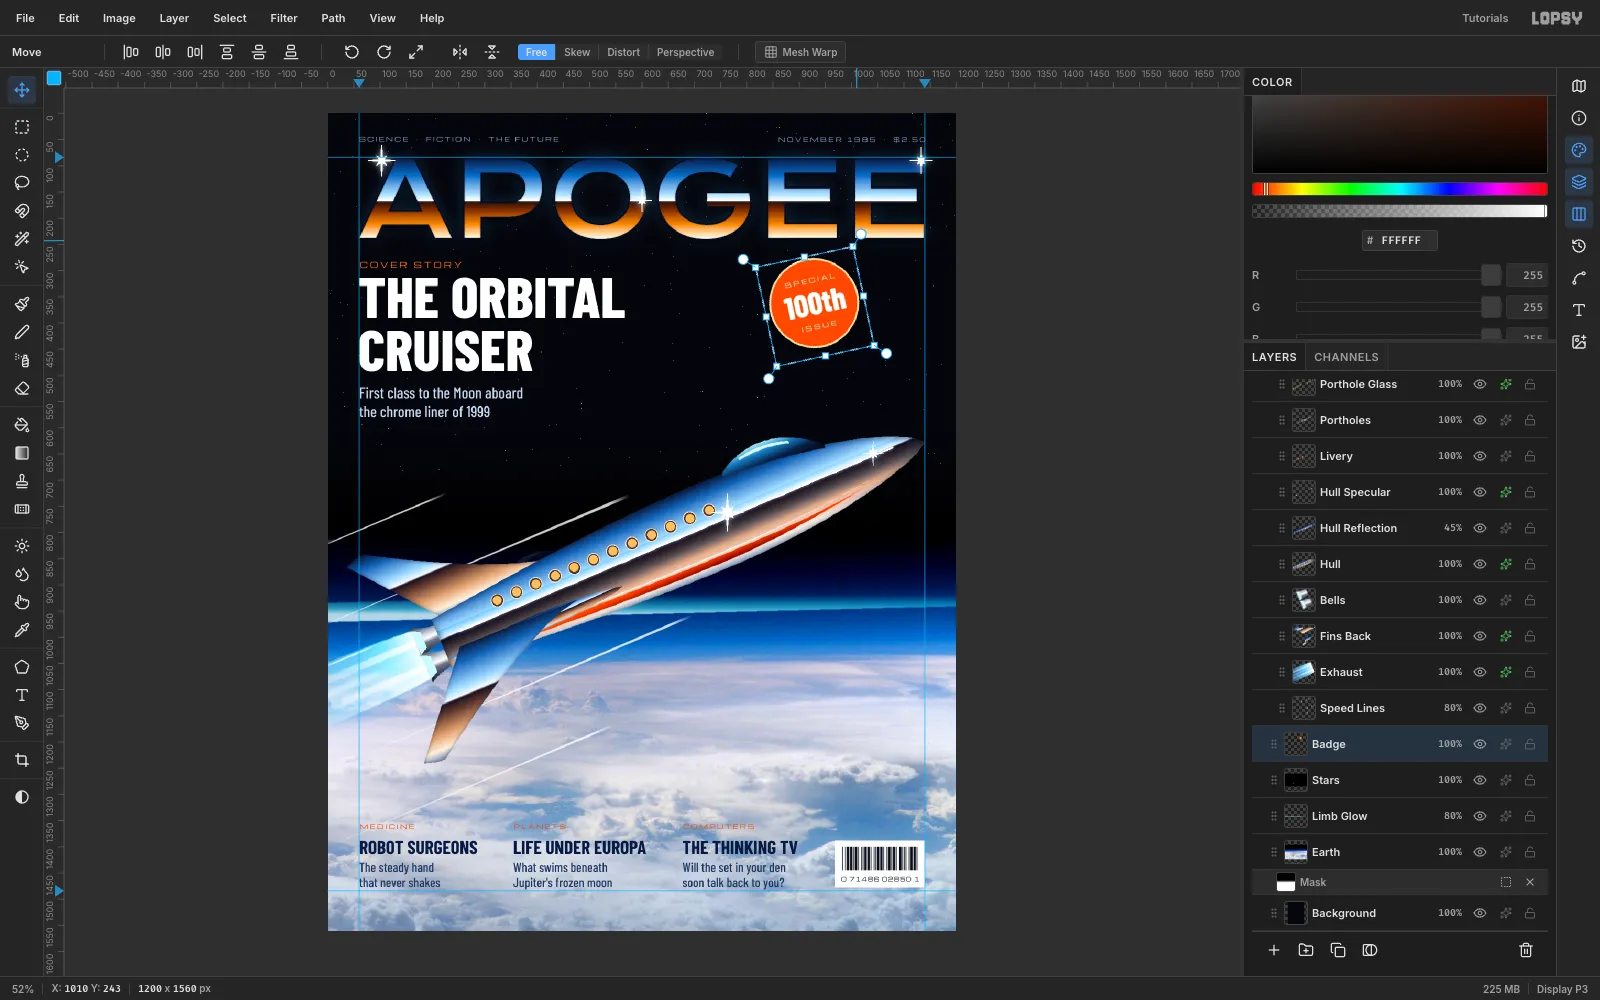
Click Rasterize Layer on each of the three text layers. Then choose Layer → Merge Down three times from the top one to fold them into
Badge.Marquee the badge, drag the rotation handle to tilt it about −12°, and press Cmd+D. The tilt gives it the slapped-on-sticker look of a newsstand special.
-
Clone the Moon out of the sky
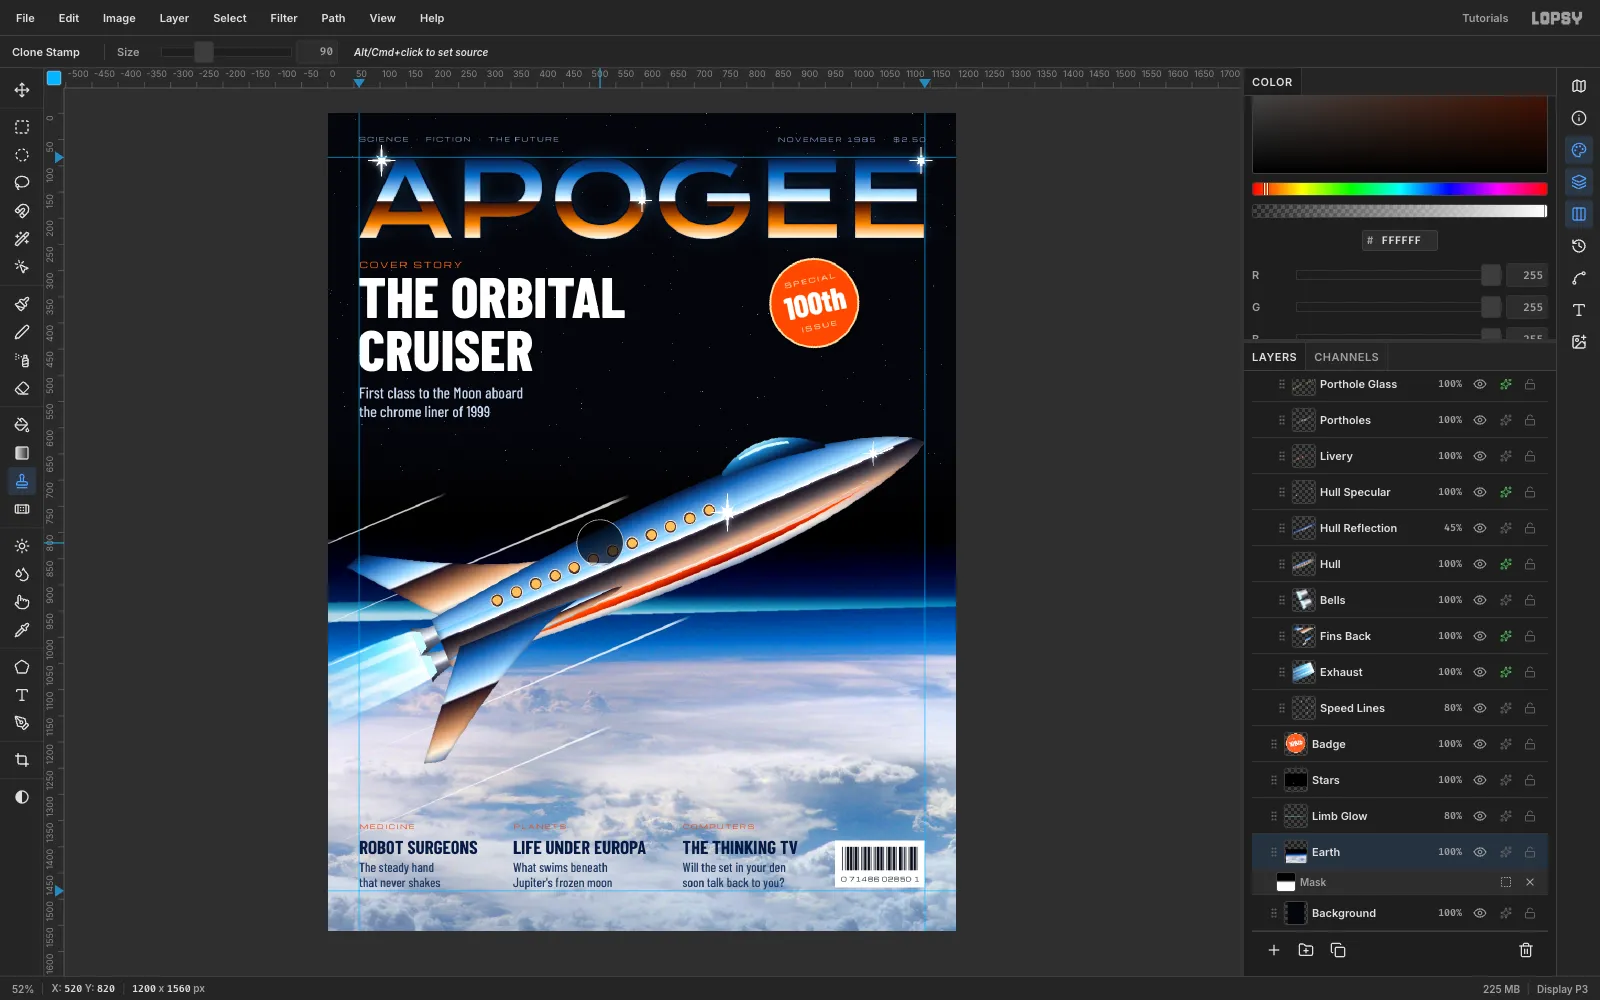
The photo's faint crescent Moon peeks out from behind the tail fin, and there it reads as a mistake. Select
Earthand pick the Clone Stamp at Size 90.Alt-click clean sky at x ≈ 20, y ≈ 820. Then start your first stroke 300 px to the right, at the same height. Paint horizontal strokes across the Moon, working down to the clouds.
-
Check the retouch with the ship hidden
Click the eye on the
Cruisergroup to hide the whole ship at once. Check that the sky behind it is clean and has no repeated patterns, then click the eye again to bring the ship back.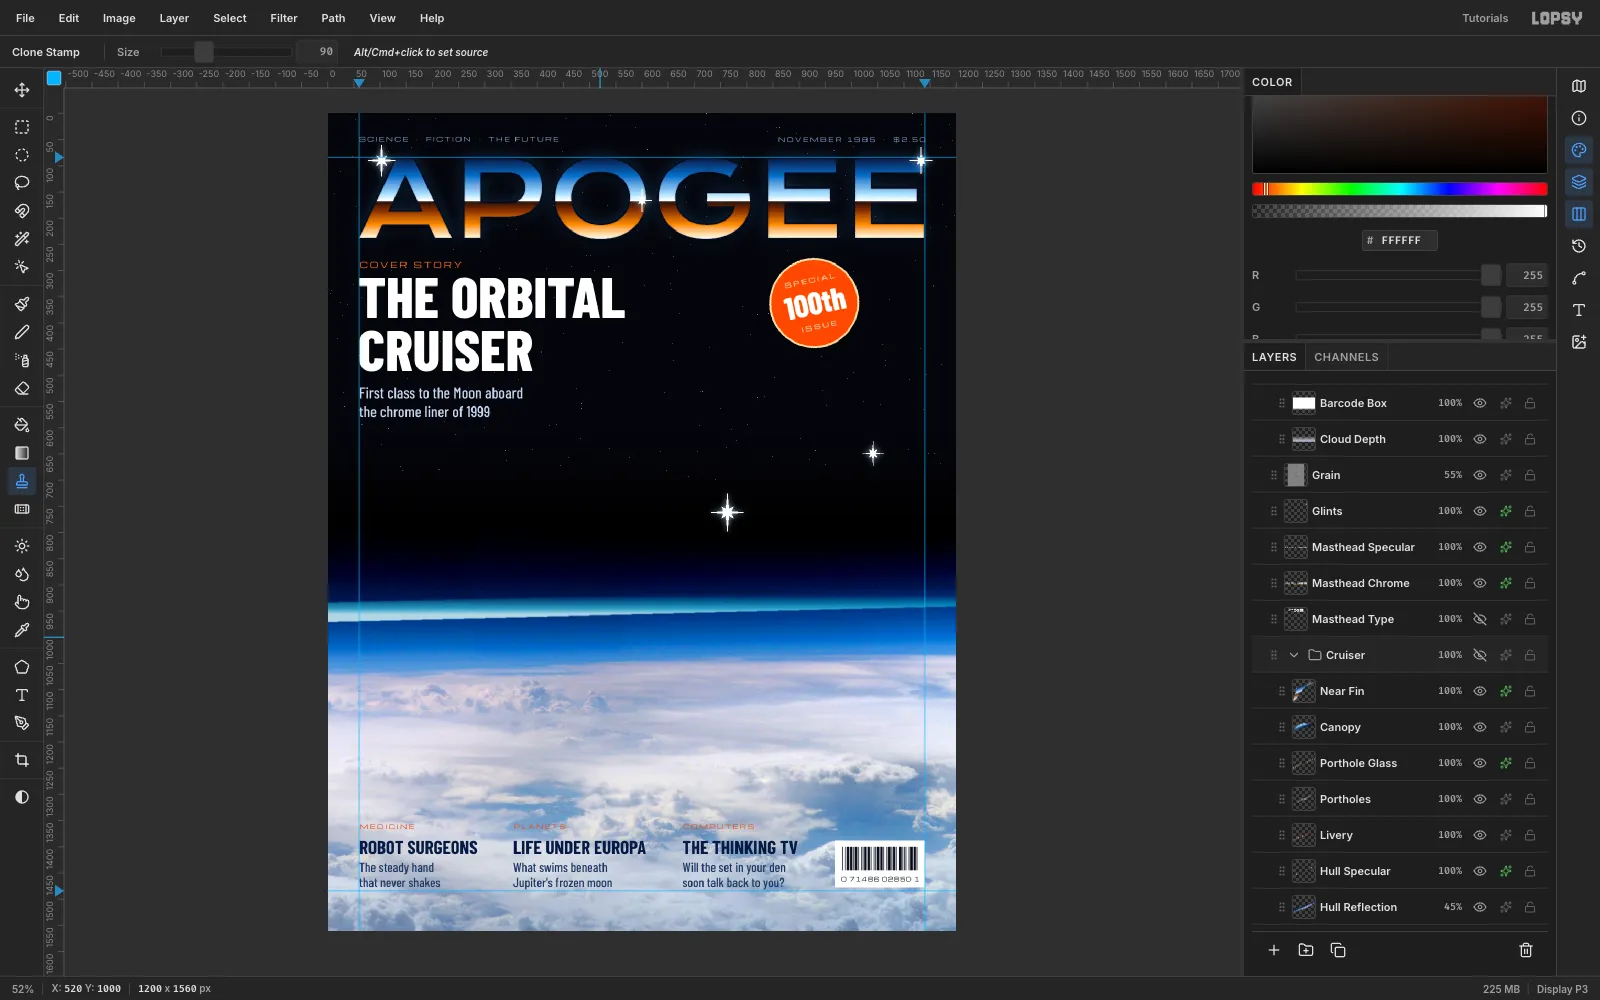
-
Do a final polish pass
Step back and check the cover against the grid. Two things are worth a last pass:
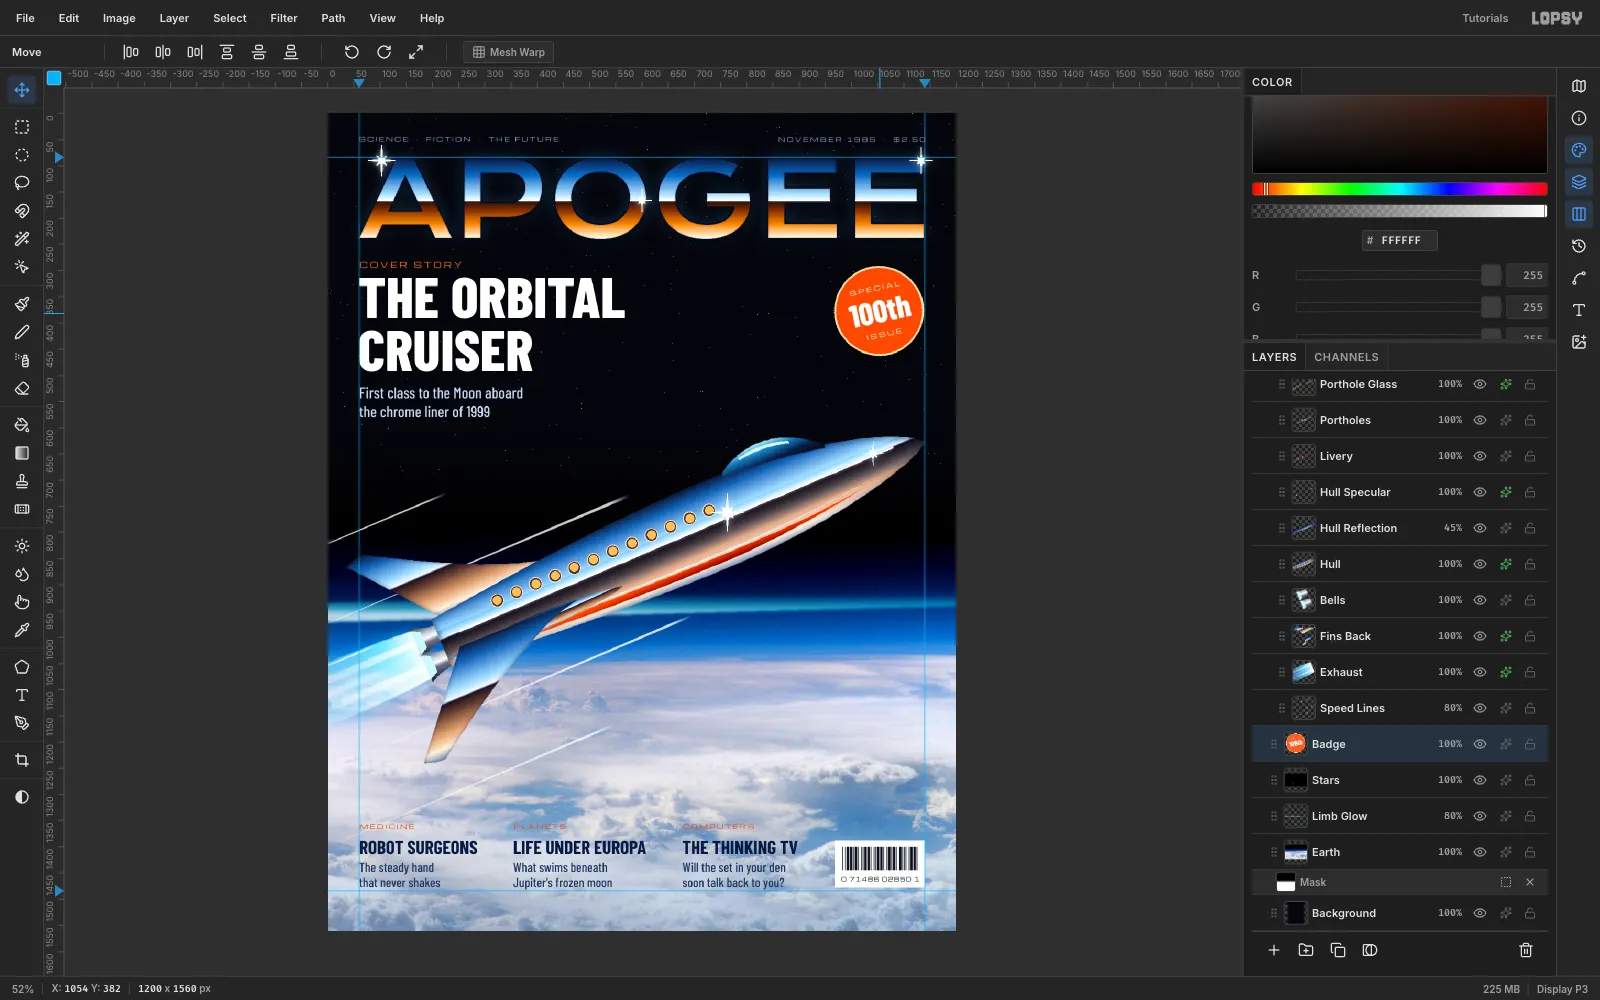
- The airglow's lower edge can still read as a stripe laid on top of the photo. Run Gaussian Blur at radius 8 on
Limb Glow, so it fades into the atmosphere below as well as the black above. - The badge floats in the space with nothing to line up with. With the Move tool, drag it right until its edge sits on the 1140 px guide, then drop it about 15 px so it clears the kicker line.
- The airglow's lower edge can still read as a stripe laid on top of the photo. Run Gaussian Blur at radius 8 on
-
Save and export
Everything now sits on the 60 px margins: the masthead, the cover story block, the bottom cover lines, the barcode and the badge. Choose File → Save Project to keep an editable
.lopsyfile, then File → Quick Export PNG for the finished cover.