Design a Deconstructivist Magazine Cover in Lopsy
Build a deconstructivist magazine cover in Lopsy with a split masthead, brush-drawn concrete shells, a faulted blue plane and a two-color headline.
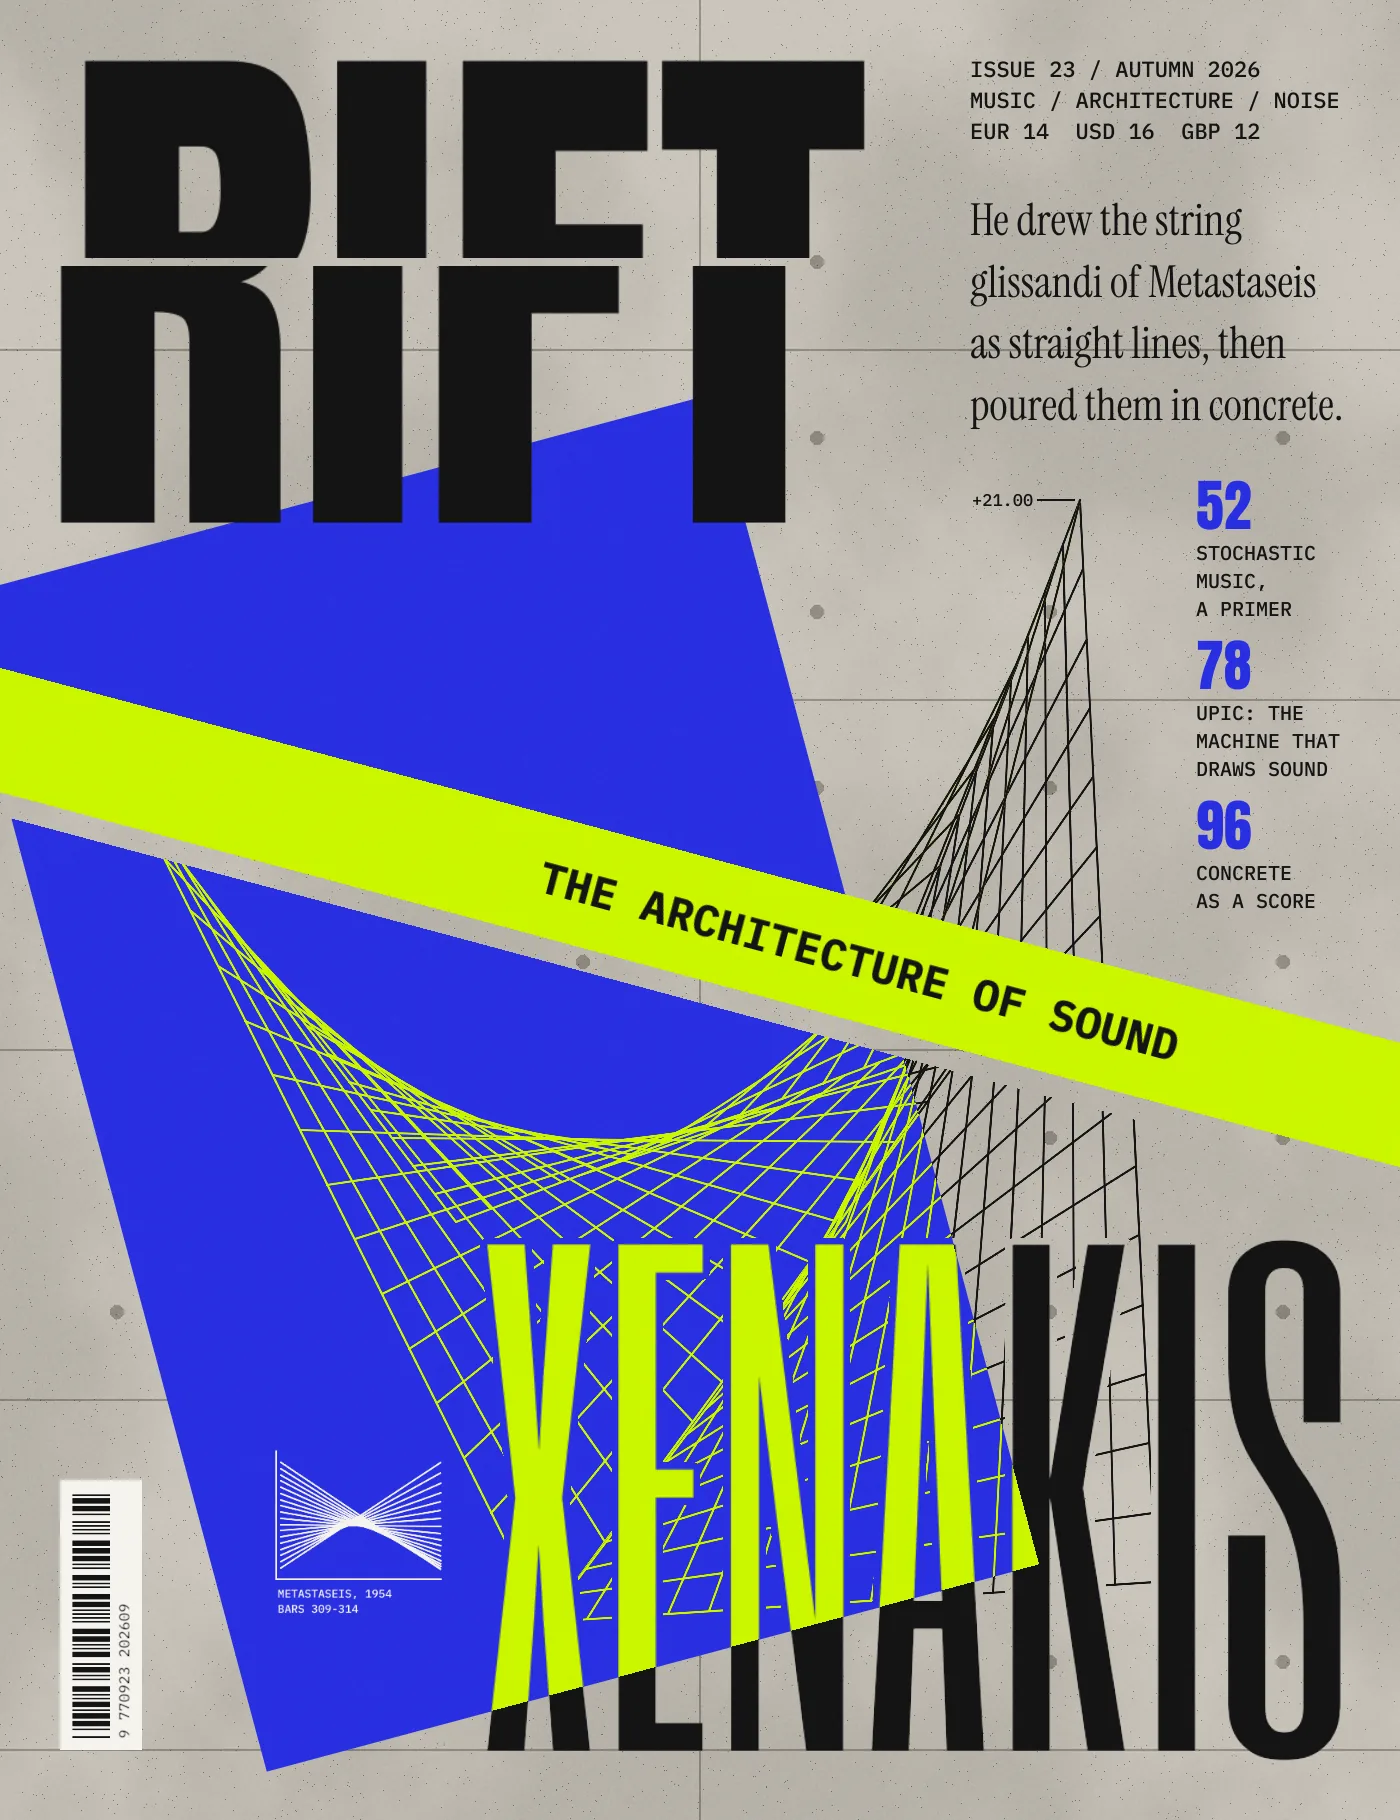
Deconstructivist graphic design came out of Cranbrook in the 1980s and David Carson's Ray Gun in the 1990s. It breaks the grid on purpose: type is sliced and shifted, planes collide at conflicting angles, and one colour rule holds all the chaos together. The architects of the same name, such as Hadid, Libeskind and Gehry, did the same thing to buildings.
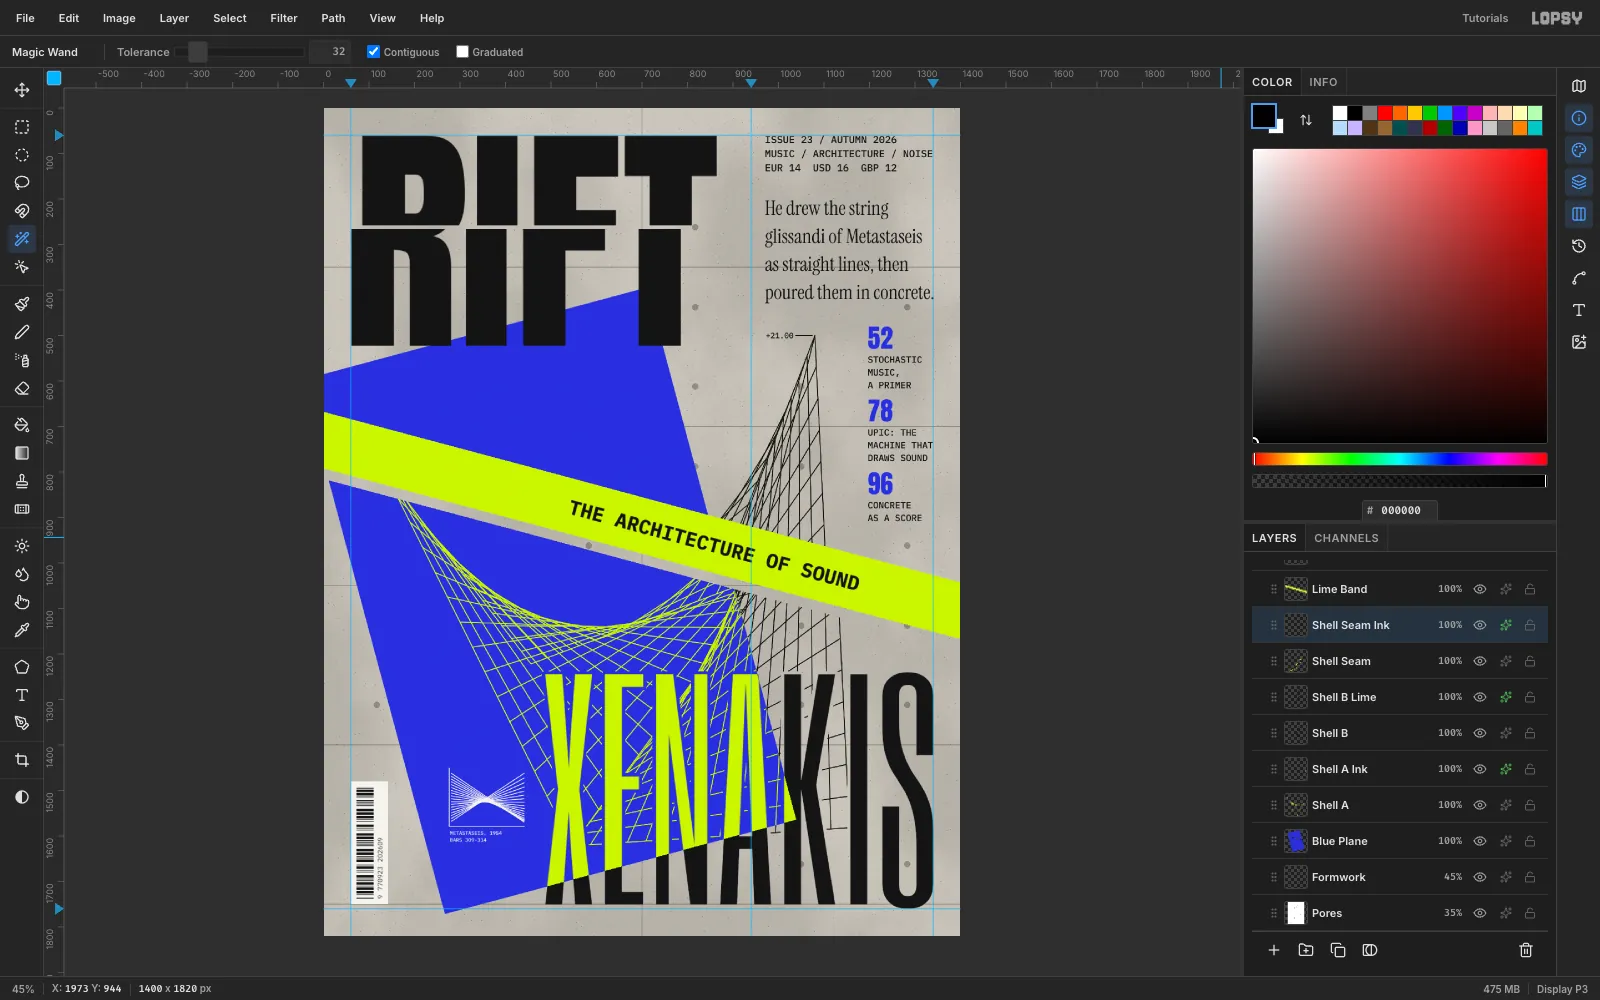
This cover is for a made-up music and architecture quarterly, RIFT. Its cover story is Iannis Xenakis, the composer who was also Le Corbusier's engineer. In 1954 he drew the string glissandi of Metastaseis as straight lines on a pitch/time graph. Four years later those ruled lines became the hyperbolic-paraboloid shells of the Philips Pavilion. You'll draw those shells from straight brush lines and cut a literal rift through the page. You'll also split the masthead and make the headline change colour as it crosses a plane. The document is 1400 × 1820 px.
The palette:
- Concrete
#C9C5BC, with formwork seams in#6F6B64 - Ink
#141414 - Ultramarine
#2A2FD8 - Acid lime
#D3F53A - Off-white
#F4F3EE
-
Pour the concrete
Choose File → New, set Unit to Pixels and enter 1400 × 1820 with a White background. Fill the Background with
#C9C5BCusing Edit → Fill. Rename Layer 1 to Concrete Mottle and run Filter → Clouds at Scale 6. Then set the layer to Multiply at 10 % in the effects drawer.For pores, add a Pores layer and fill it with
#808080. Run Filter → Add Noise… with Mono, Gaussian and Amount 100, then Filter → Threshold at Level 84. Set the layer to Multiply 35 %. Only a scatter of dark specks survives.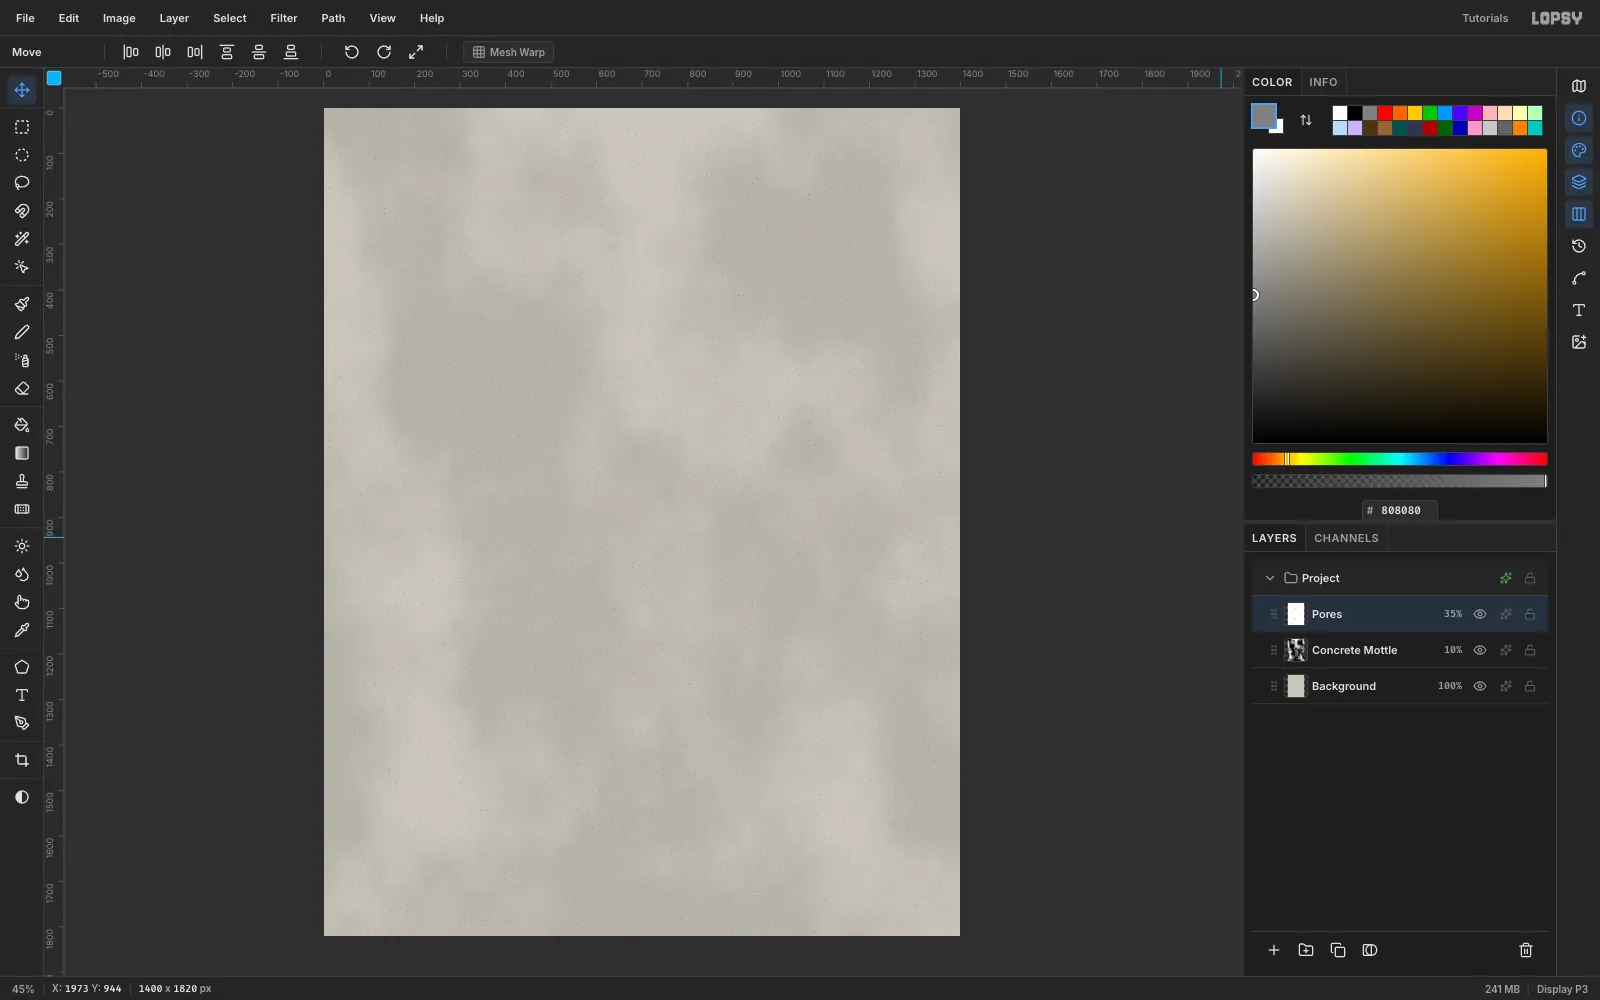
-
Add board-form seams and tie holes
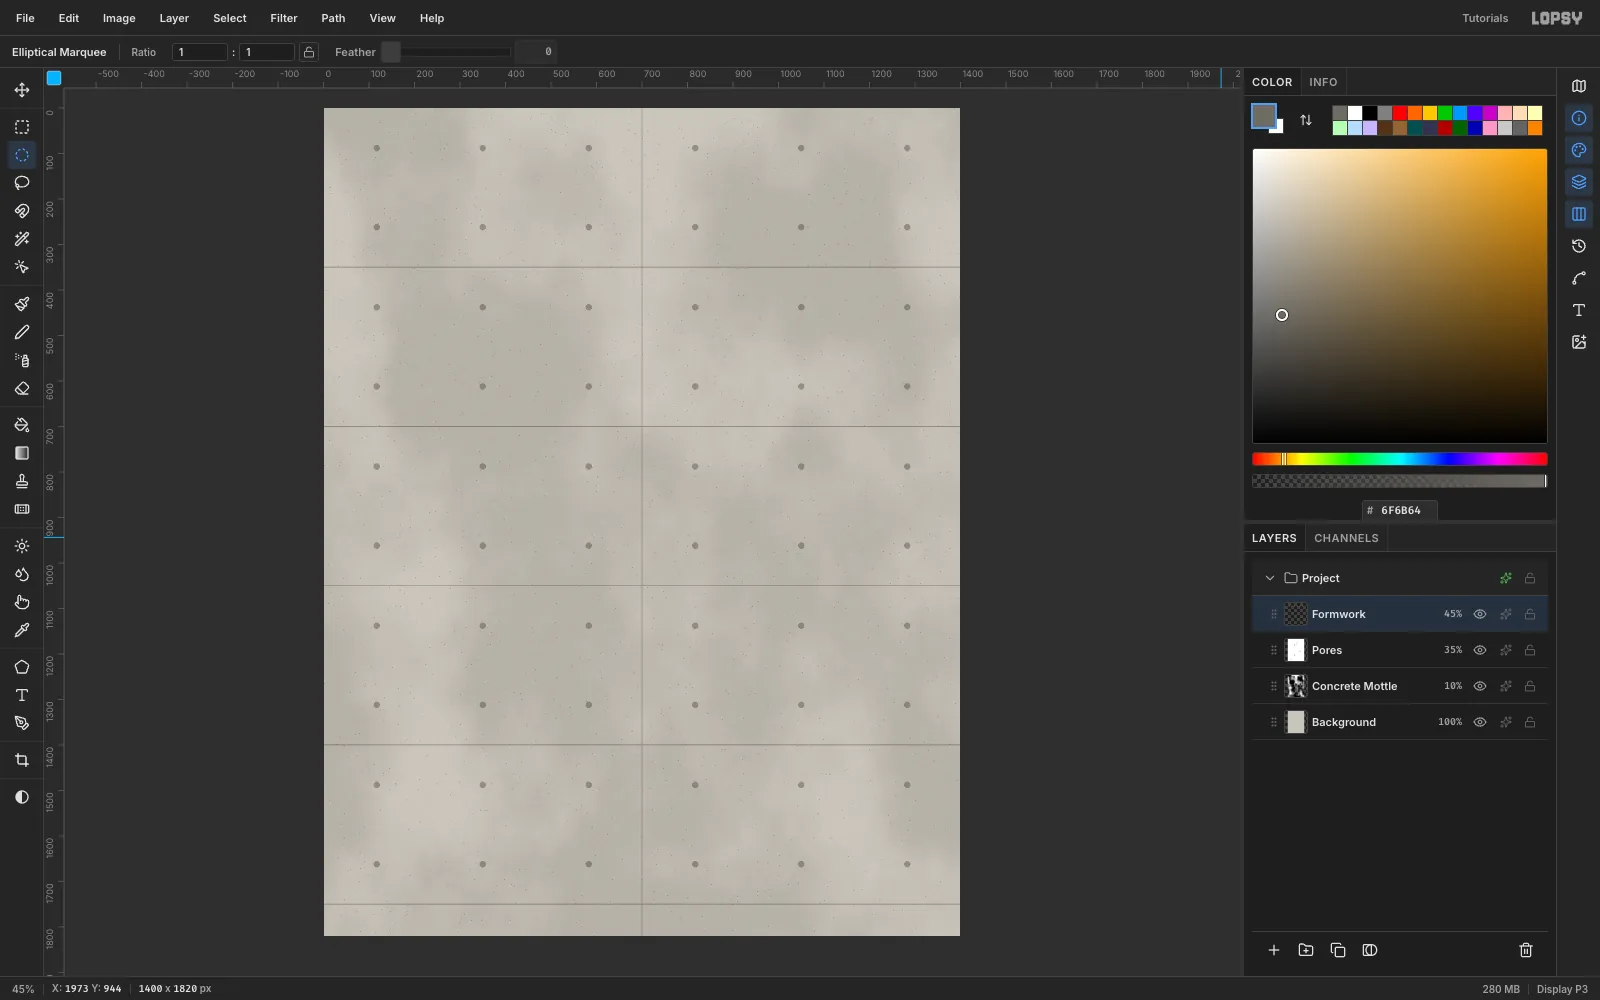
Poured concrete remembers its formwork. Add a Formwork layer and pick the Brush at Size 3, Hardness 100, in
#6F6B64. For each seam, click once at one end, then Shift-click the other end to draw a straight line. Draw horizontal seams at y = 350, 700, 1050, 1400 and 1750, and one vertical seam at x = 700.For the tie holes, drag a small Elliptical Marquee (14 px across) at x = 117, 350 and 583 in each panel, 88 px and 262 px below the top of each panel. Fill each one. Set the layer to Multiply 45 %.
-
Tilt the blue plane
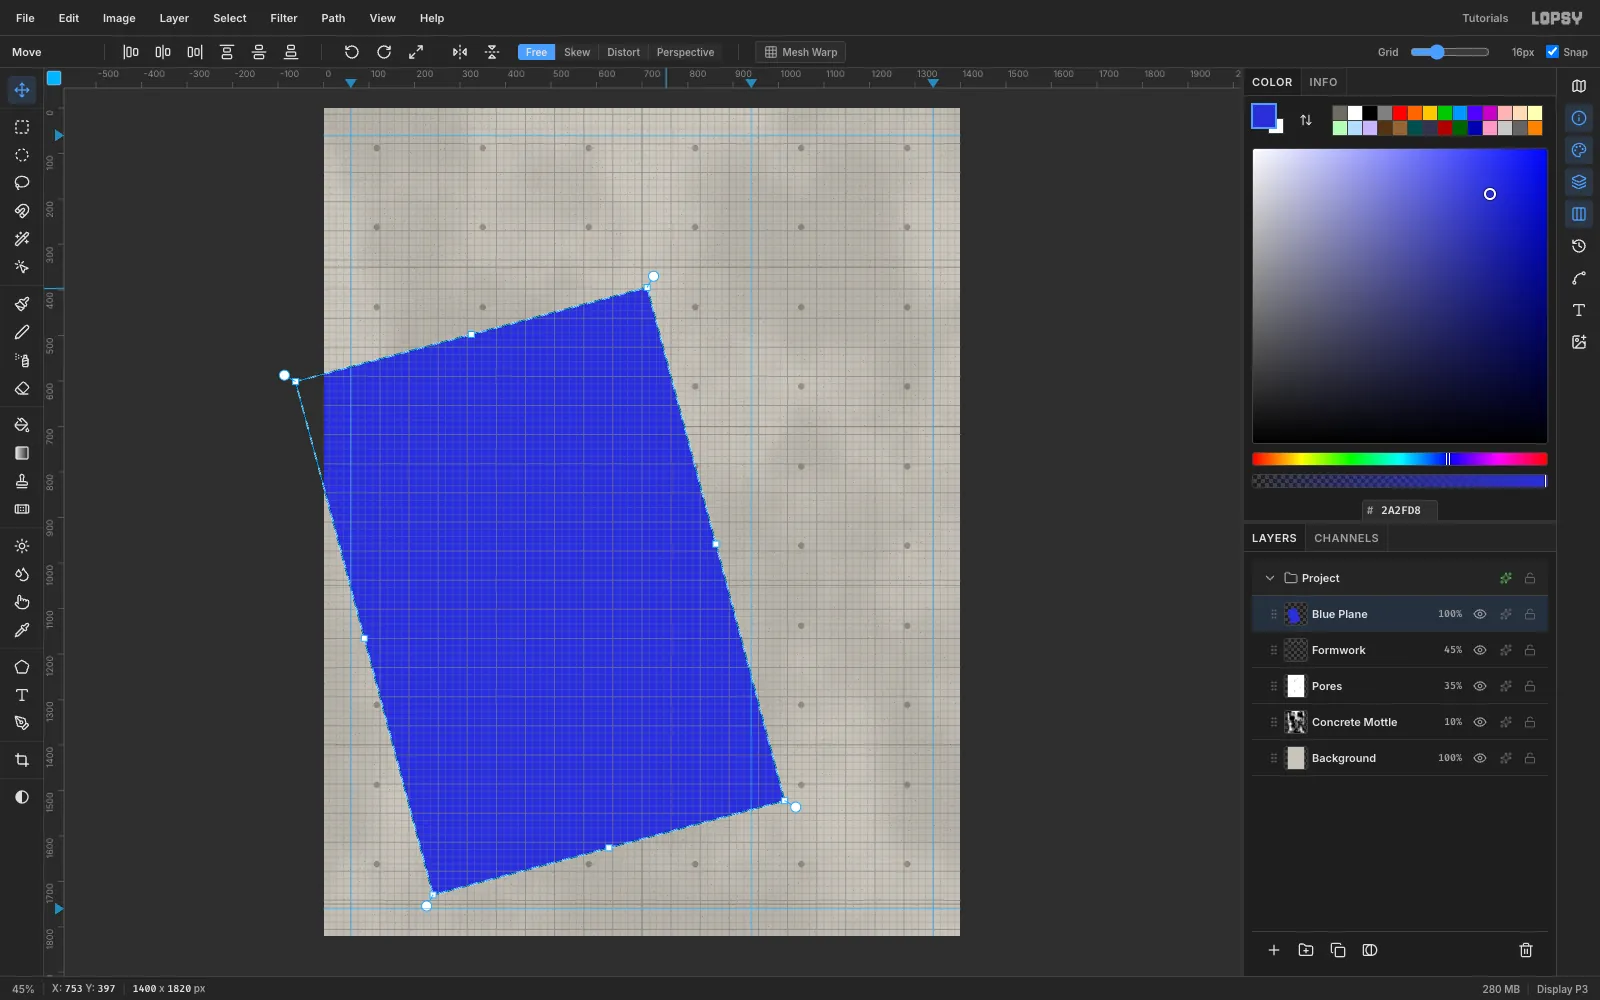
Click the top ruler at x = 60, 940 and 1340 and the left ruler at y = 60 and 1760 to set margin guides. Then turn on View → Show Grid, which also switches on Snap. Add a Blue Plane layer, drag a Rectangular Marquee from (80, 470) to (880, 1640) and fill it with
#2A2FD8.Switch to the Move tool, grab the rotate handle just outside the top-right corner, and drag it counter-clockwise. With grid snap on, rotation snaps in 15° steps, so stop at −15°. Press Cmd+D to commit, then turn the grid off again.
-
Draw the first ruled lines
A hyperbolic paraboloid is a curved surface built entirely from straight lines. Take a twisted four-corner frame. Join evenly spaced points on one edge to evenly spaced points on the opposite edge, and the lines sweep a curve out of nothing.
Add a Shell A layer and set the Brush to Size 3, Hardness 100, in lime
#D3F53A. Use corners A (110, 760), B (520, 1580), C (960, 980) and D (430, 1180). Divide edge A→B and edge D→C into 16 evenly spaced points each. Click a point on A→B, then Shift-click the matching point on D→C. After 16 lines the saddle curve already shows.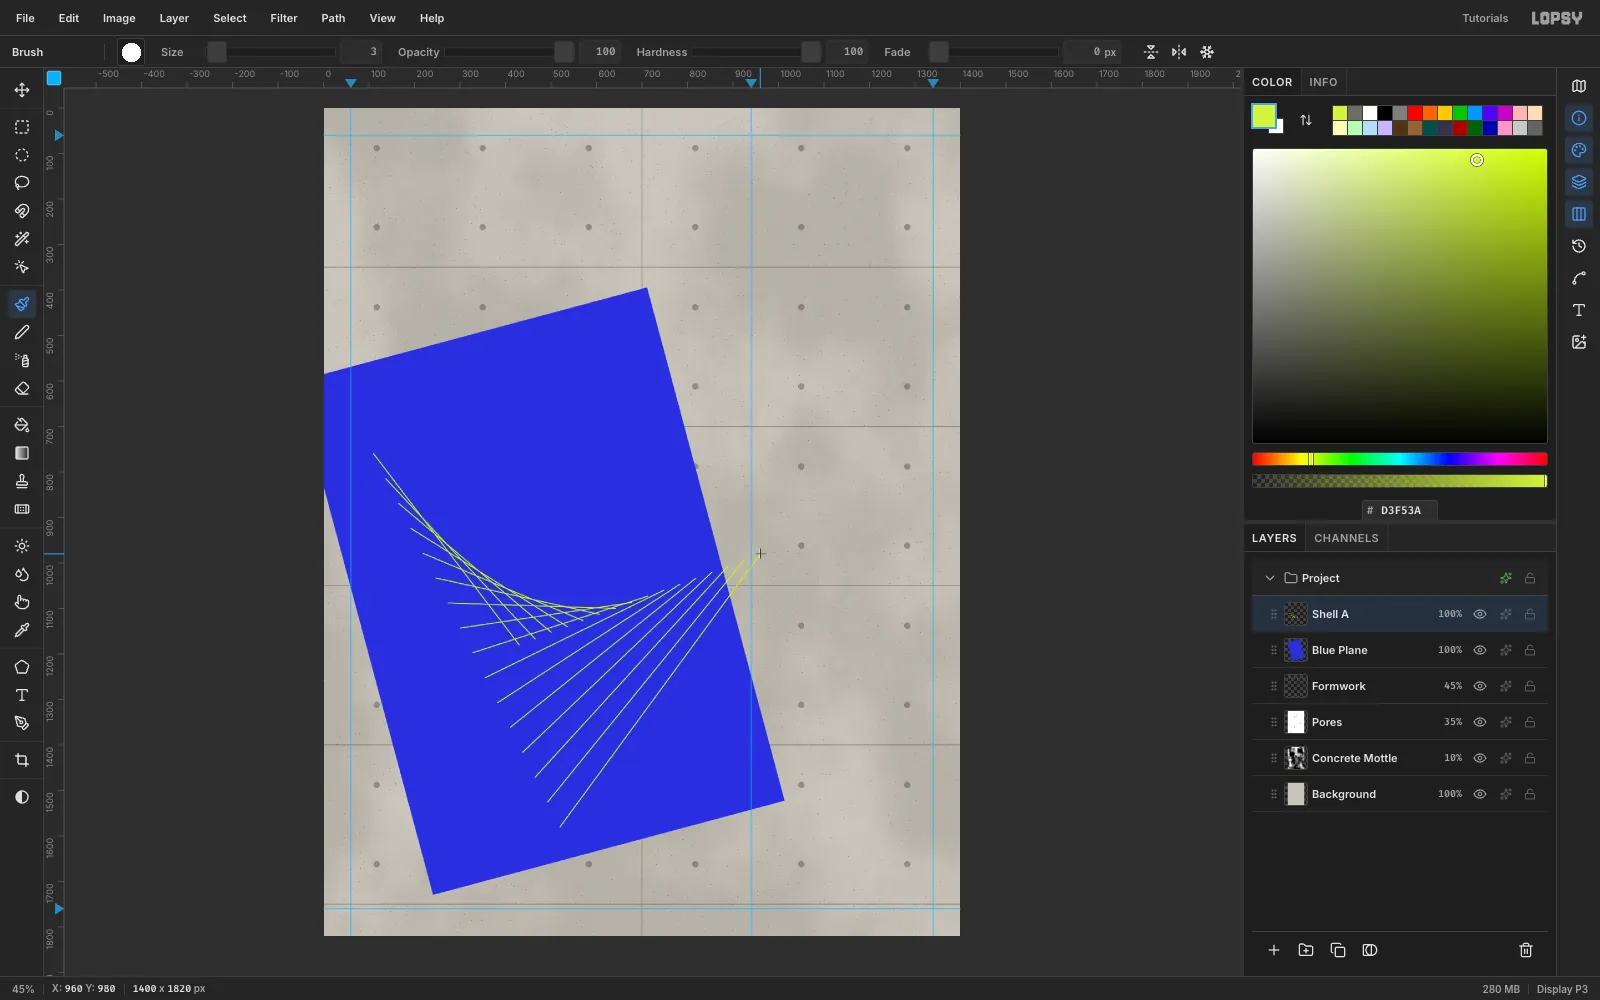
-
Complete three shells
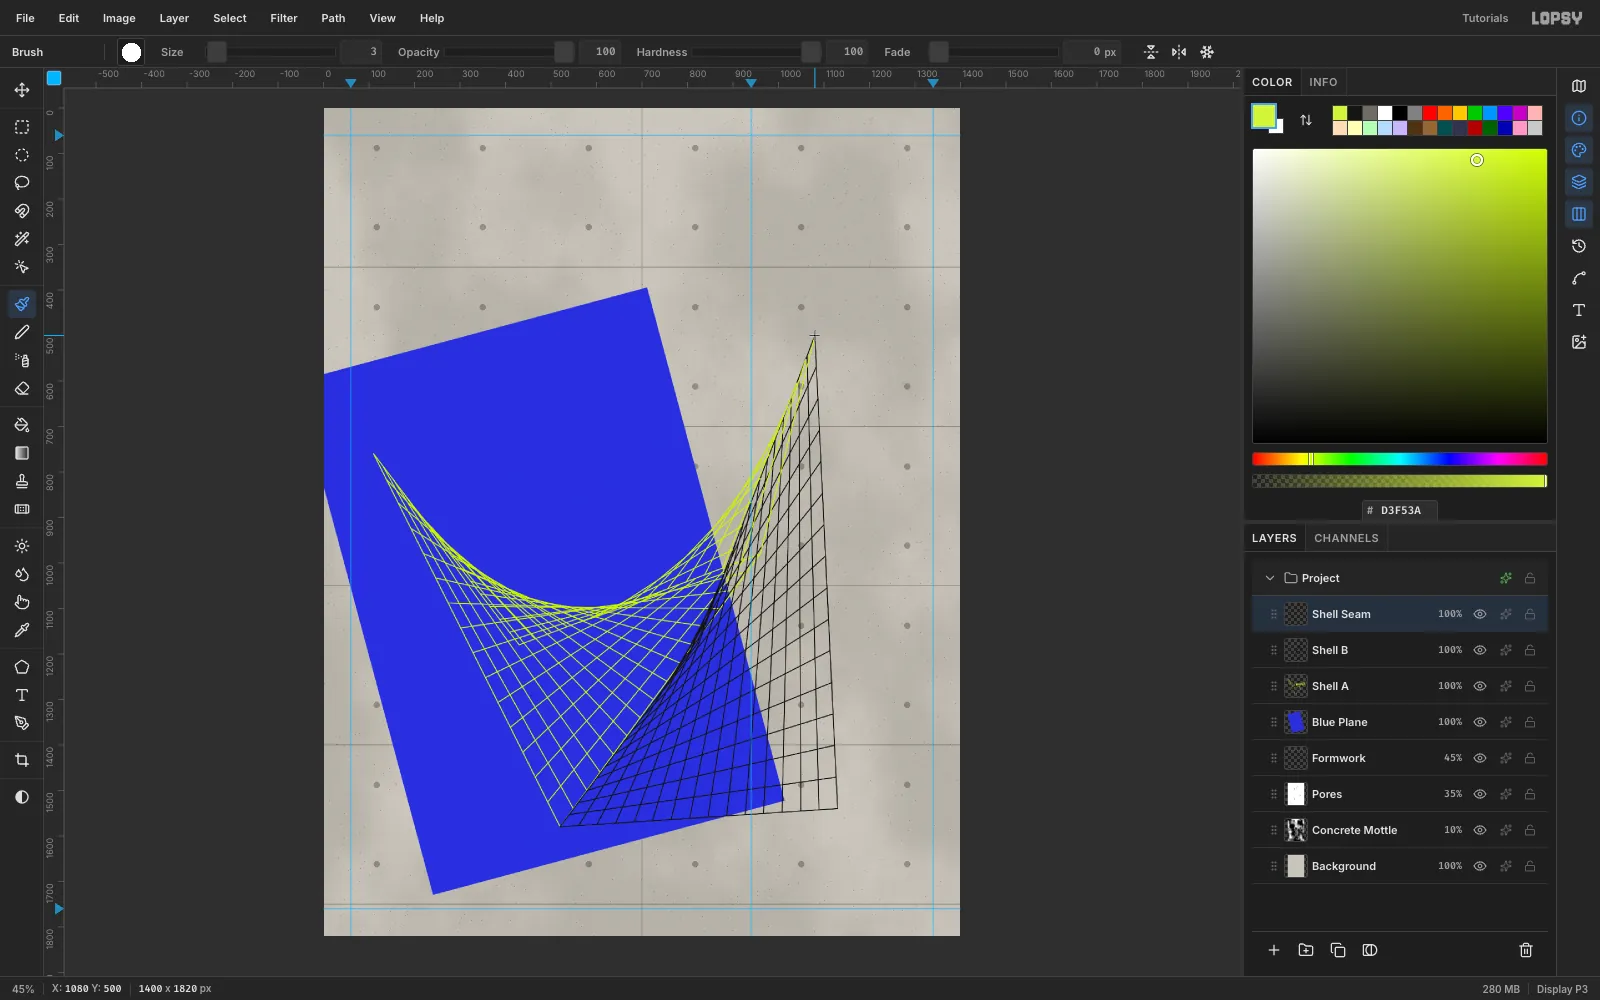
For the second family of lines on Shell A, join the points on A→D to the points on B→C. Then add a Shell B layer in ink
#141414with corners (520, 1580), (1130, 1540), (1080, 500) and (820, 1180), and draw both families the same way. It rises past the plane onto the concrete, like the Philips Pavilion's spike.Finish with a Shell Seam layer in lime: a single family of 11 lines linking Shell A's D→C edge to Shell B's D→C edge.
-
Slice a lime band across everything
Add a Lime Band layer on top of the shells. With the Lasso, click a thin parallelogram from (−30, 660) to (1430, 1051) to (1430, 1175) to (−30, 784). That's a 124 px band descending at +15°, the mirror of the plane's −15°, so the two form an X for Xenakis. Fill it with
#D3F53Aand deselect. Because it sits above the shells, it cuts straight through them.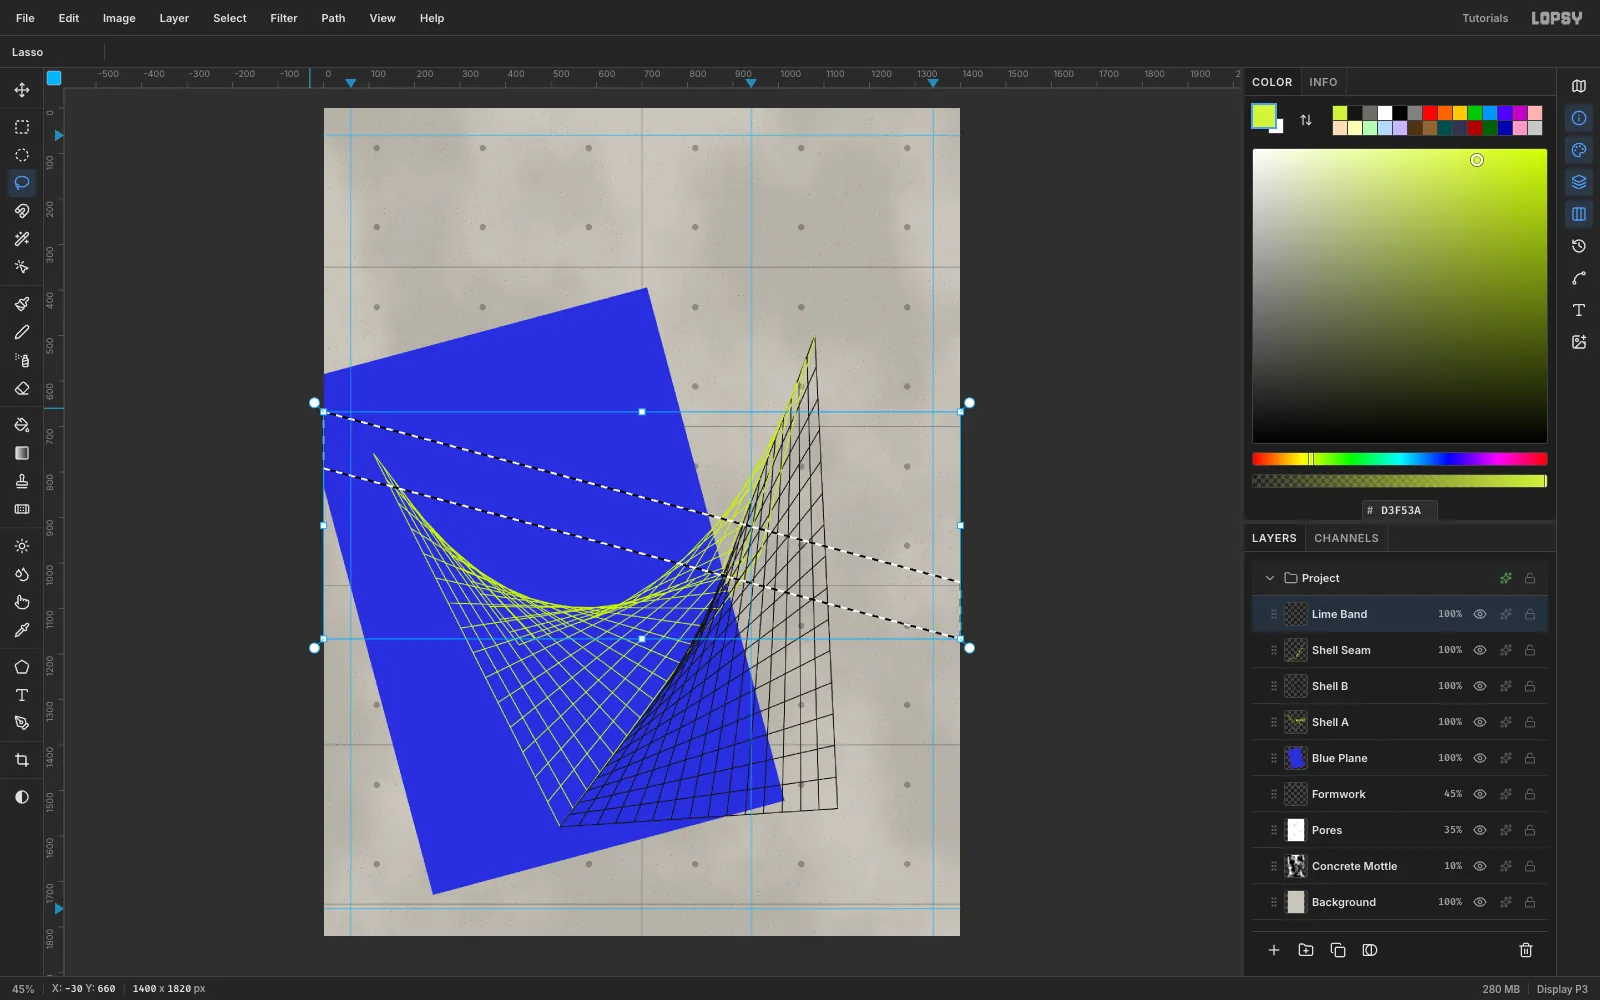
-
Slide everything below the band
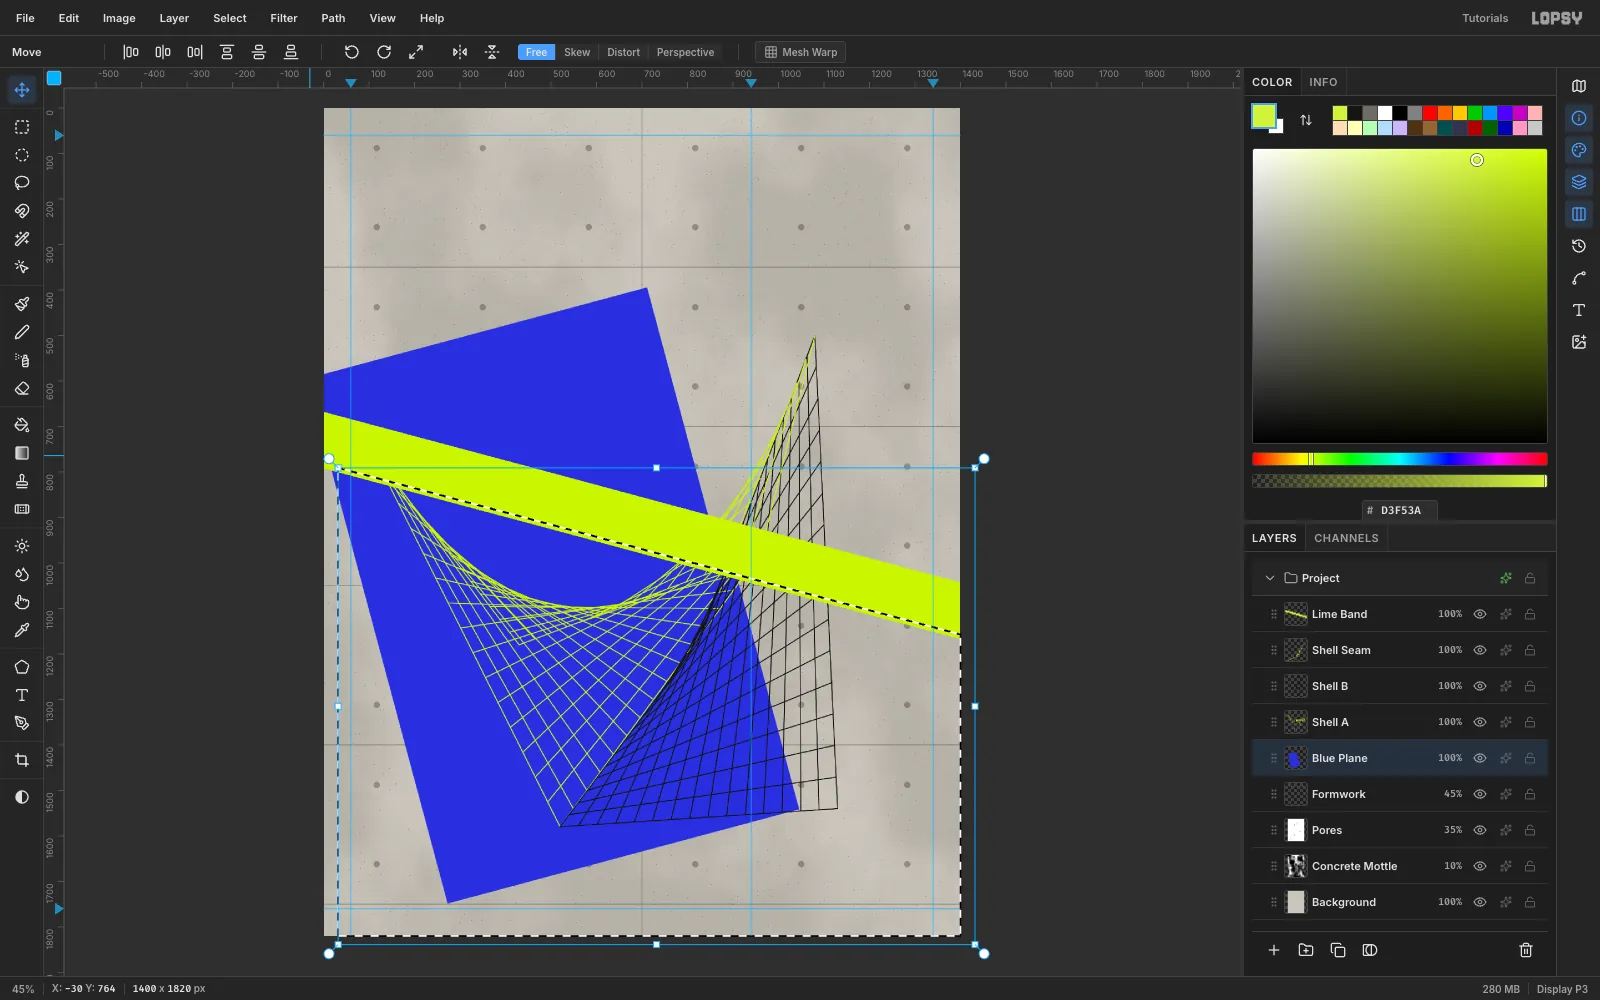
Deconstructivist planes don't line up; they slip. Select Blue Plane and lasso everything below the band's lower edge: start 20 px inside the band at (−30, 764) and (1430, 1155), then run down past the bottom of the page. Switch to the Move tool and nudge 32 px right and 19 px down (Shift+Right three times, Right twice, Shift+Down once, Down nine times).
The selection moves with the pixels, so re-draw the same lasso before nudging Shell A, Shell B and Shell Seam by the same amount.
-
Set and scale the masthead
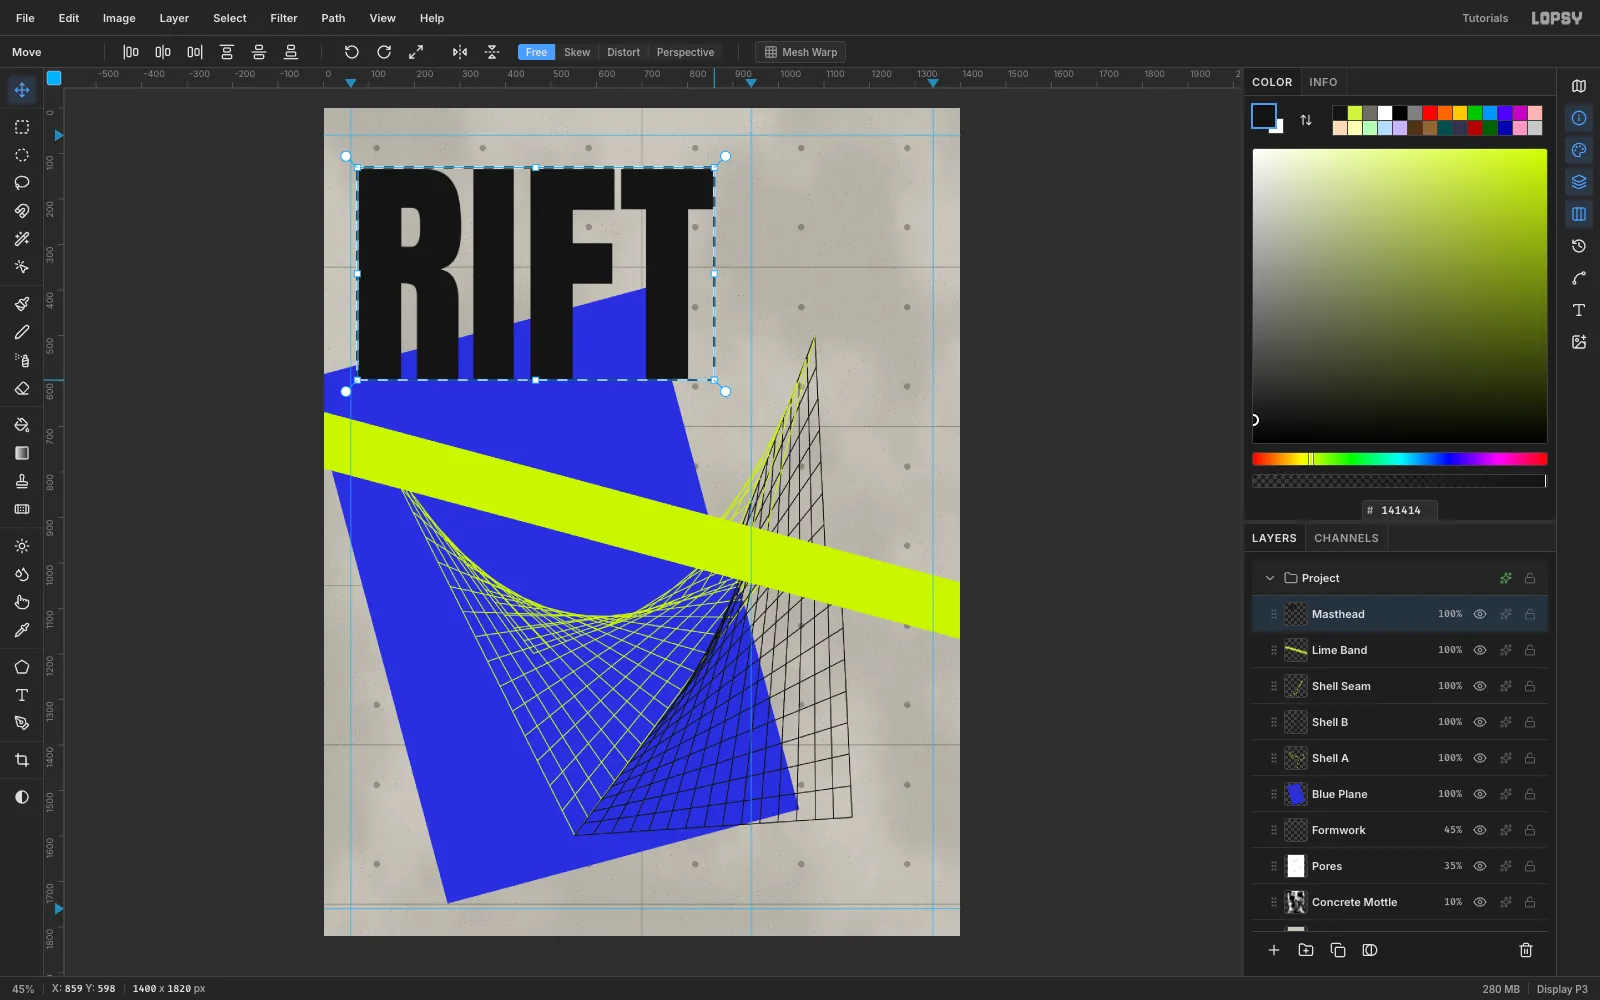
Choose the Text tool, set the font to Anton and the size to 430, and click near the top-left. Type RIFT in ink and press Tab. Click Rasterize Layer in the Layers panel, marquee the word, and hold Cmd while dragging the bottom-right handle to scale it uniformly to 125 % (about 780 × 462 px). Press Cmd+D, then drag it until its top-left snaps to the margin guides at (60, 60).
-
Split the masthead
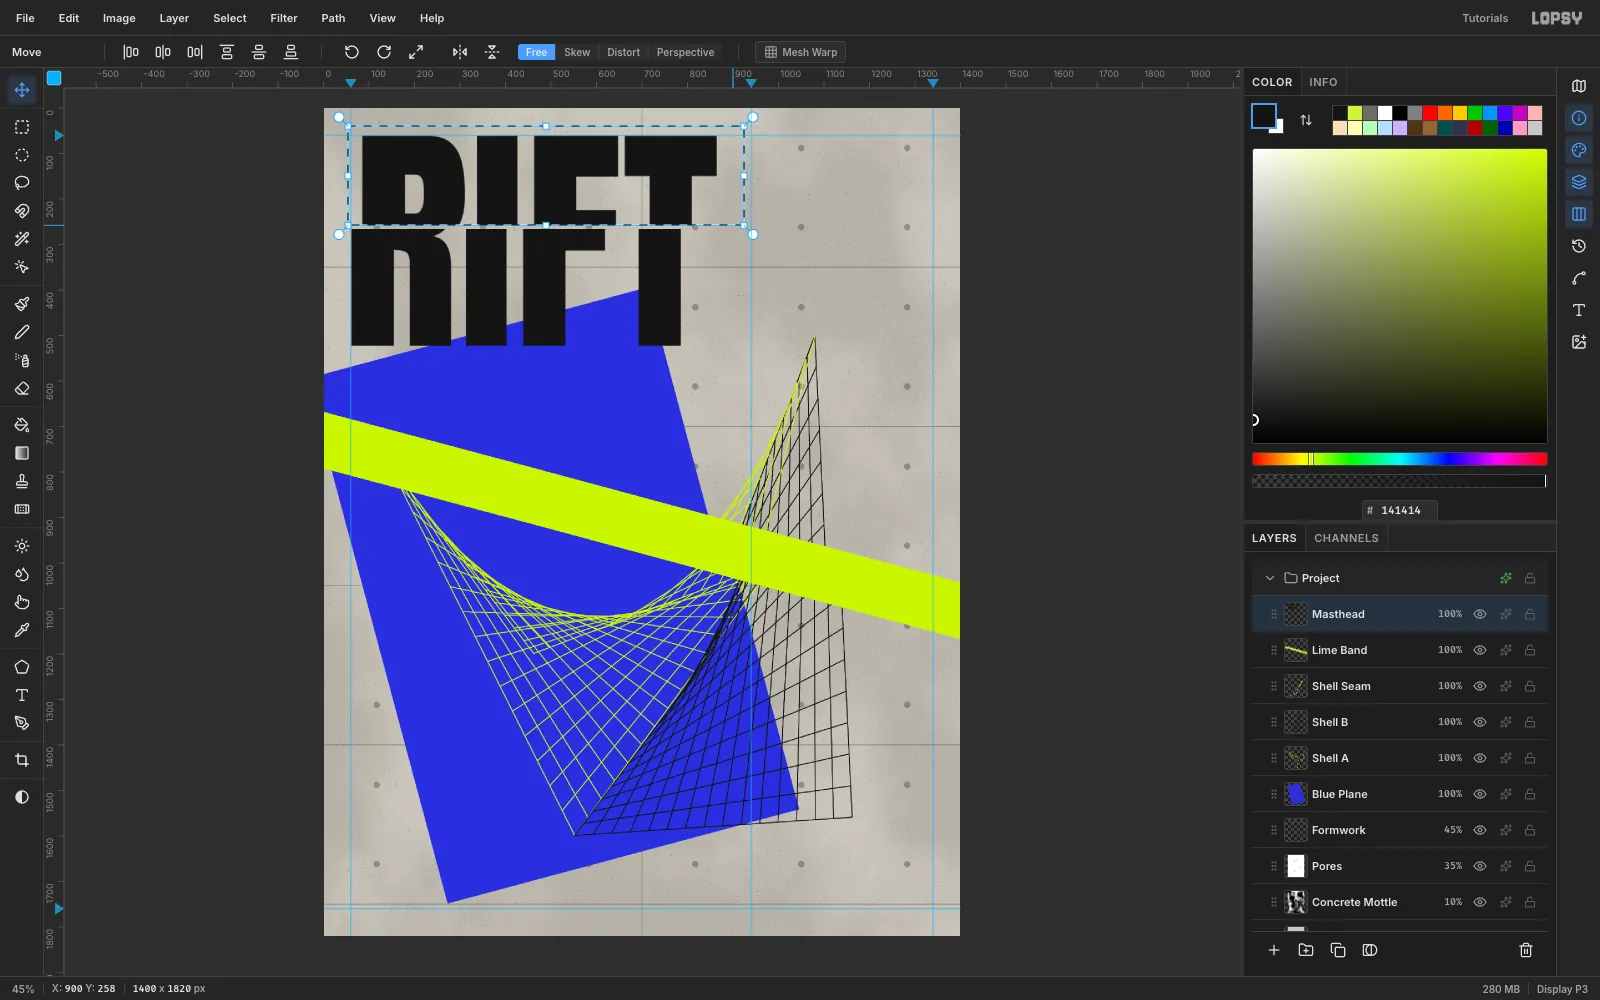
Marquee a thin strip from (30, 258) to (900, 266) and press Delete to open an 8 px gap. Then marquee everything above the cut, (30, 40) to (900, 258), and nudge it 24 px right with the Move tool. Press Cmd+D. The word still reads as RIFT, but it's visibly torn.
-
Set the headline
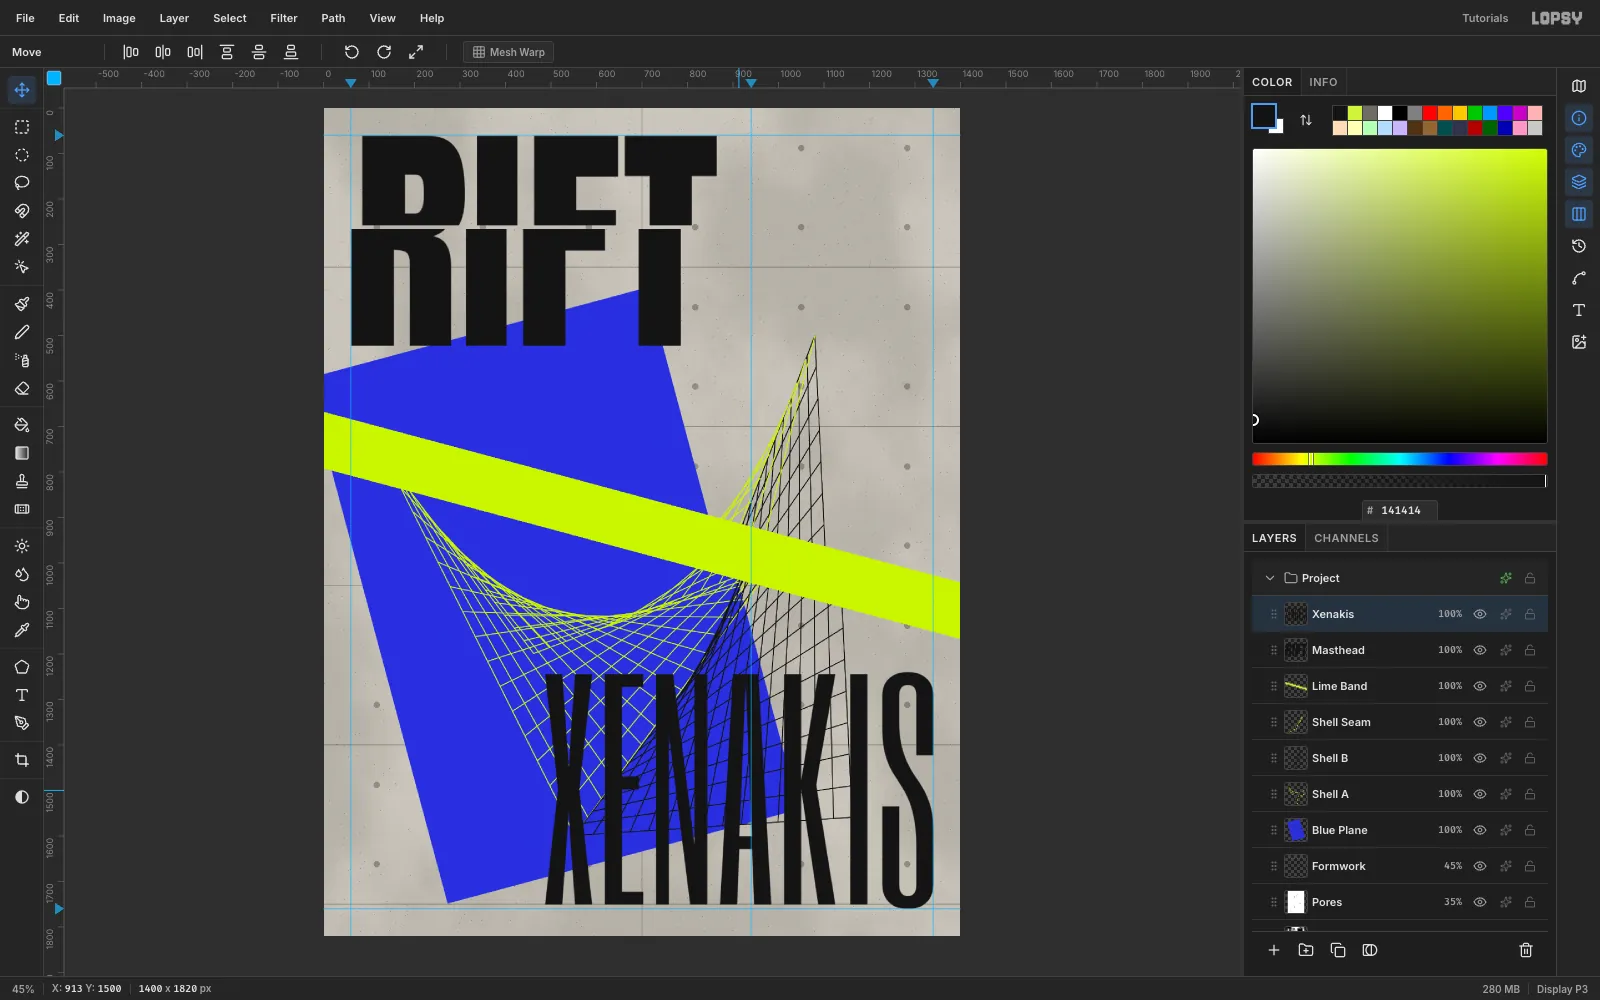
Set Six Caps at 500 in ink, click in empty space and type XENAKIS. Rasterize it, marquee it and Cmd-drag a corner to 120 % (855 × 522 px). Press Cmd+D and move it so its bottom-right corner sits exactly on the guides at (1340, 1760).
-
Turn the letters lime over the plane
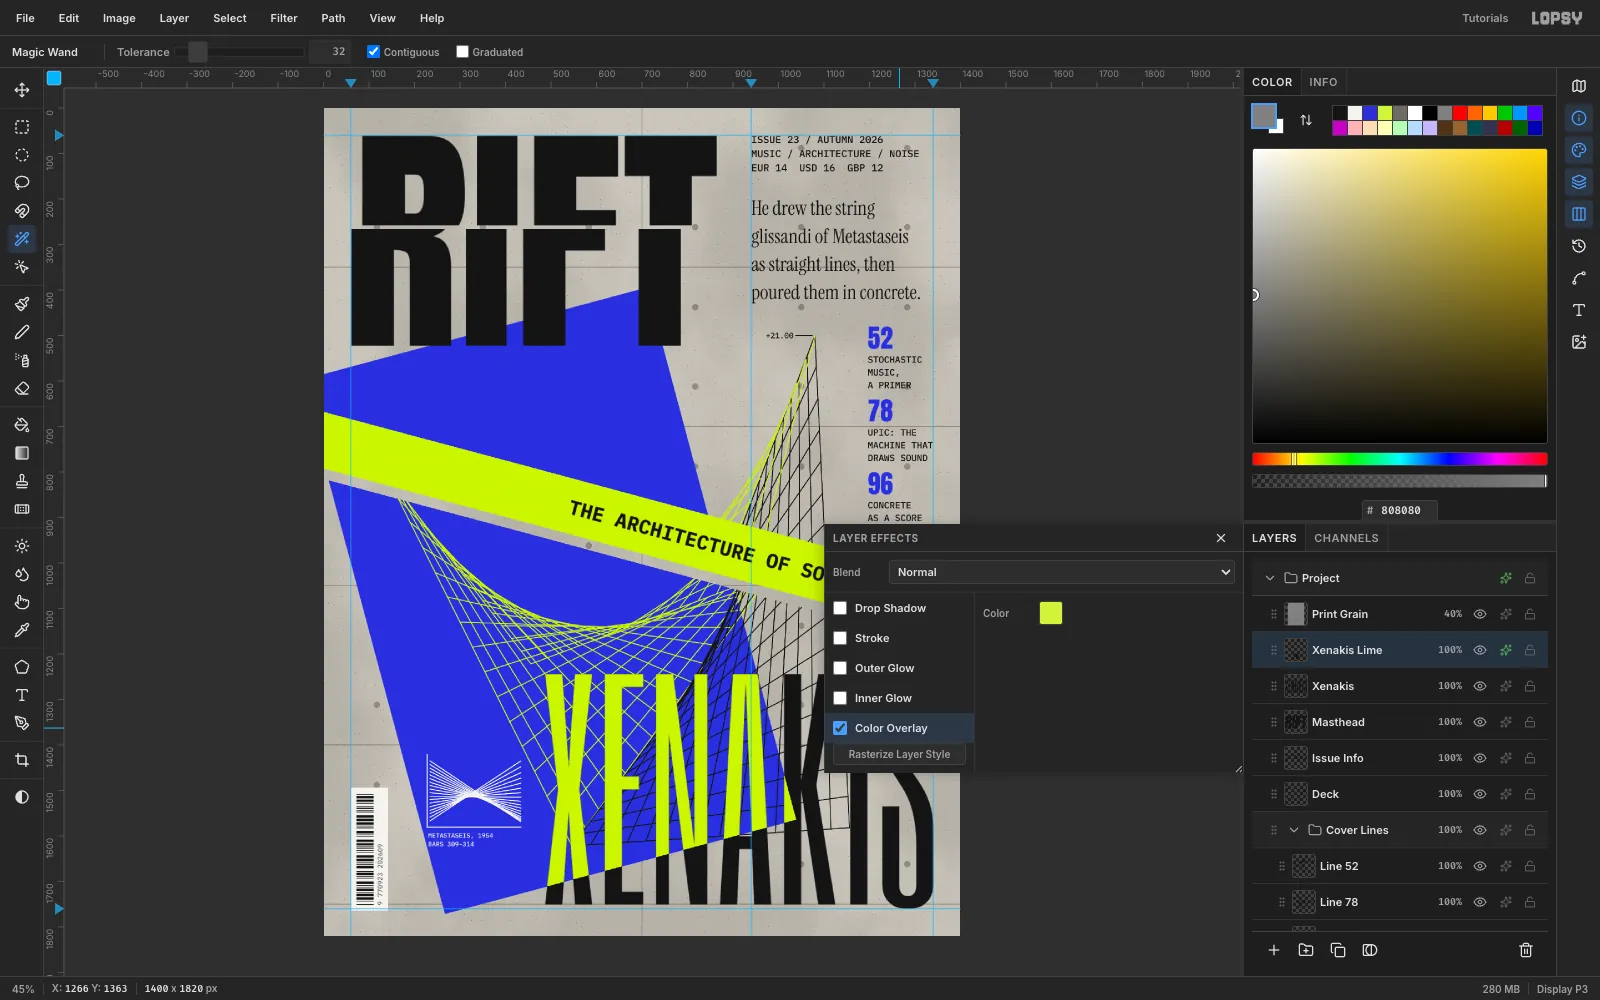
Marquee the headline, press Cmd+C, wait a moment, then press Cmd+V. The copy lands in place on a new layer, so rename it Xenakis Lime.
Select Blue Plane, choose the Magic Wand and click anywhere on the blue: the wand selects the plane's pixels only. Click the Xenakis Lime row (the selection stays), choose Select → Inverse and press Delete. Deselect, open the layer's effects and enable Color Overlay in
#D3F53A. The headline now changes colour exactly at the plane's edge.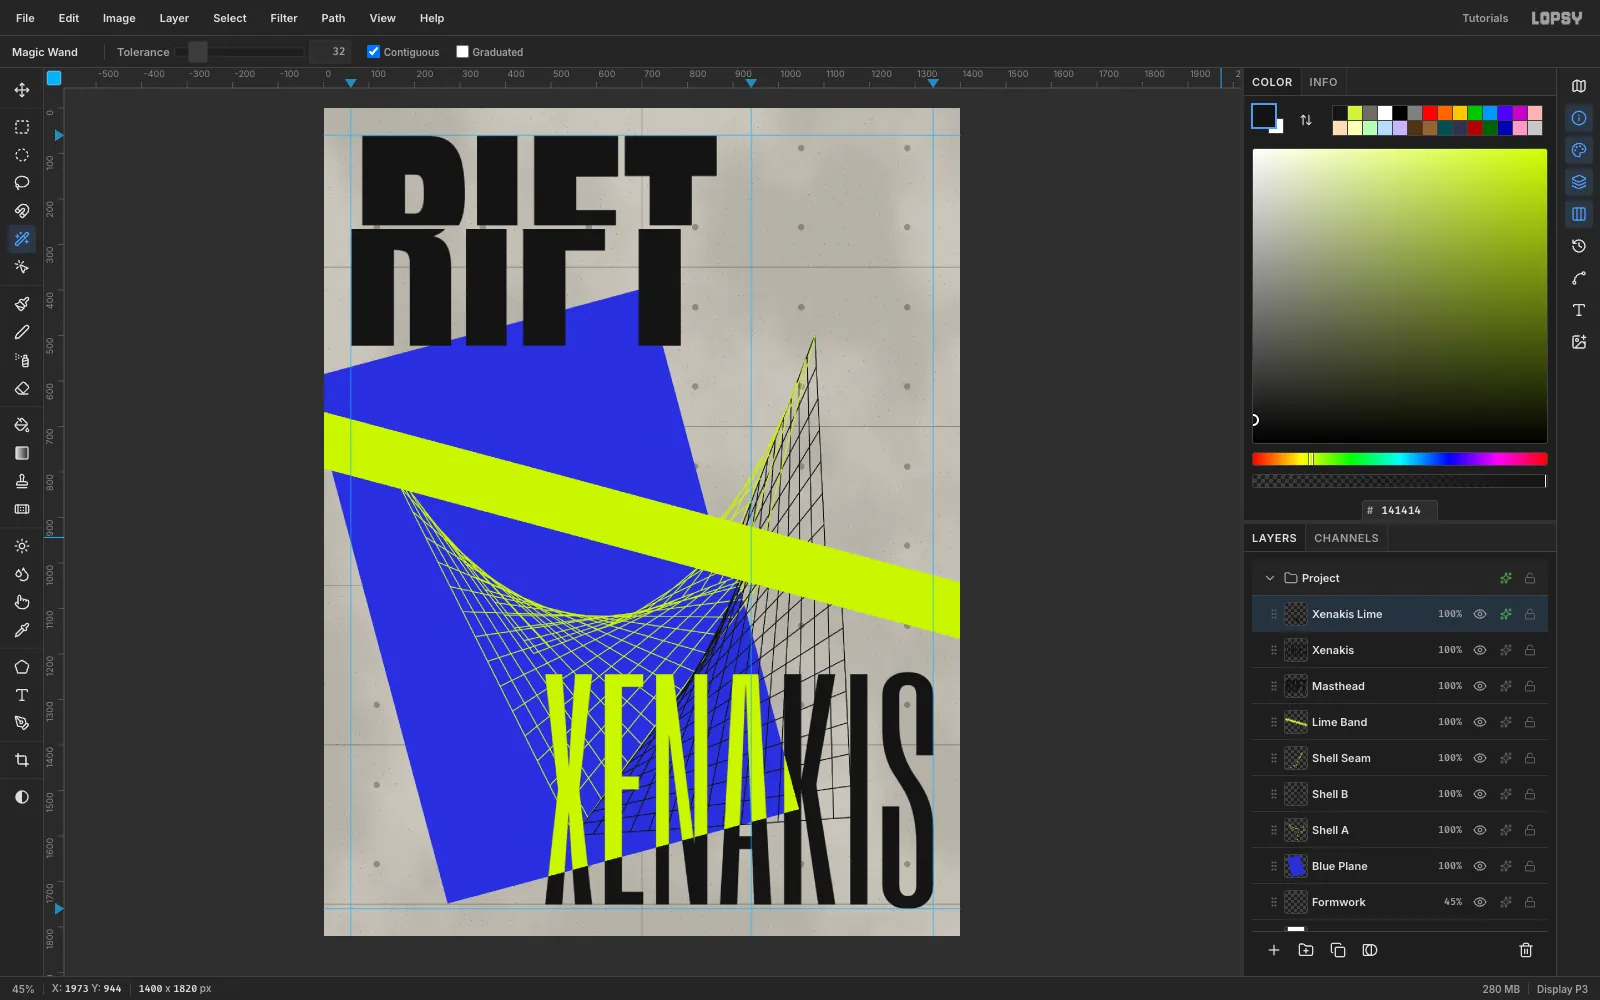
-
Rotate the kicker to the band's angle
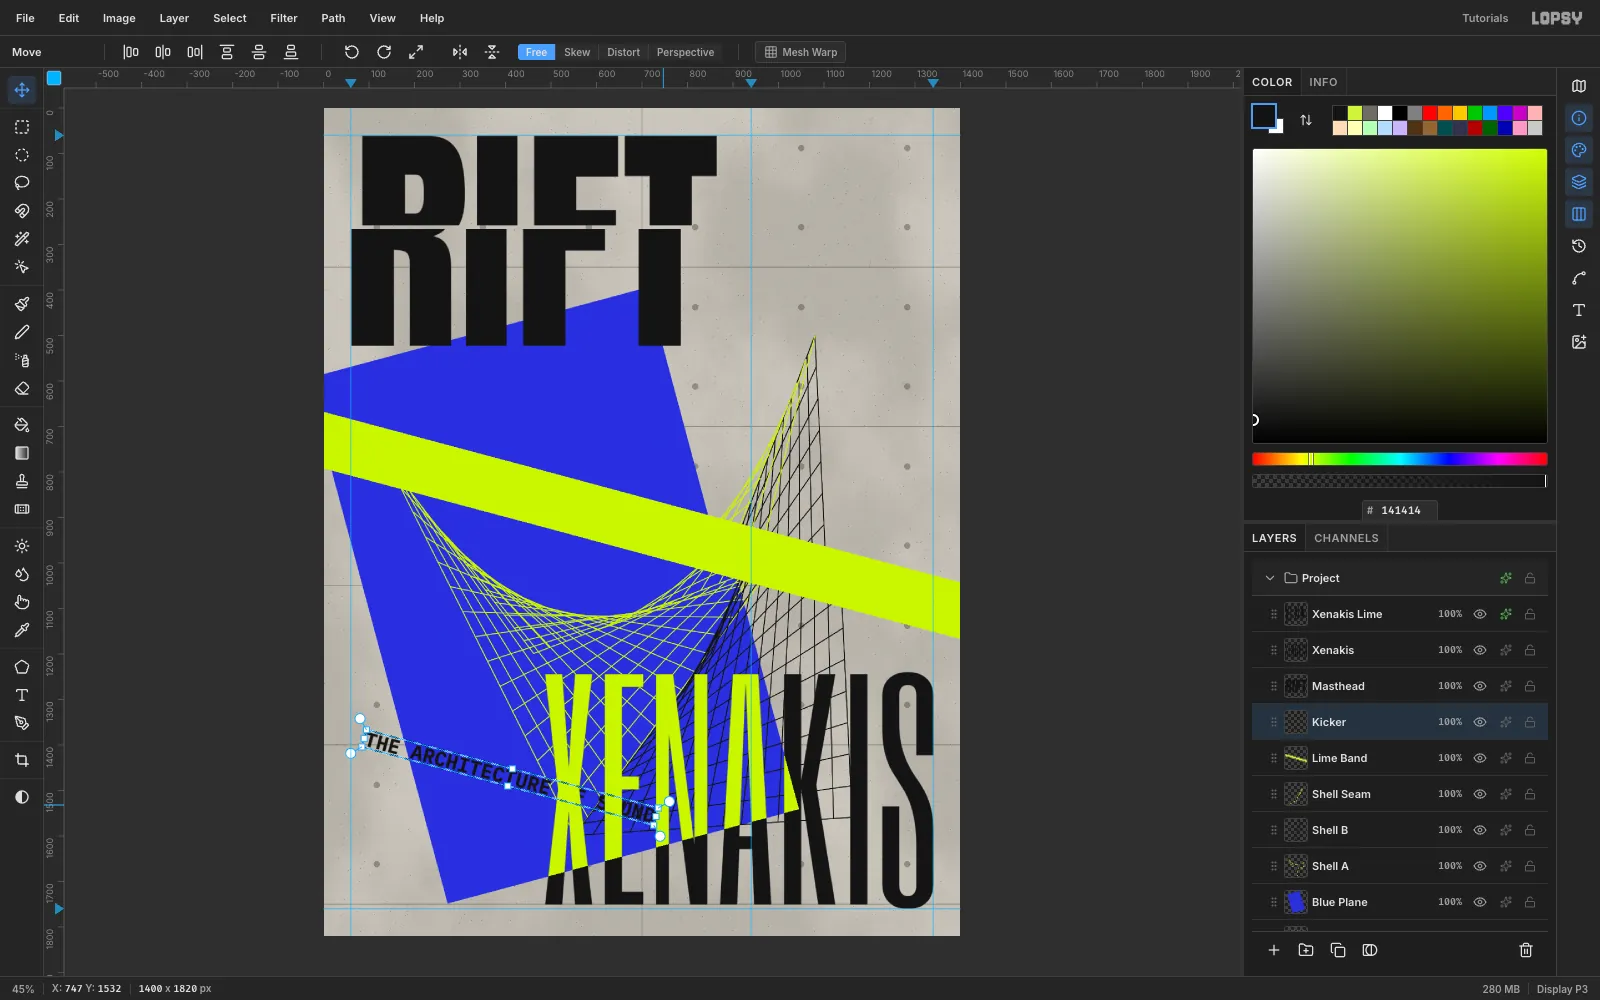
Set IBM Plex Mono, weight 700, size 44, and type THE ARCHITECTURE OF SOUND in ink somewhere empty. Rasterize it and marquee it. With the Move tool, hold Cmd and drag the rotate handle clockwise: Cmd snaps rotation to 15° steps, so stop at +15°. Press Cmd+D.
-
Seat the kicker on the band
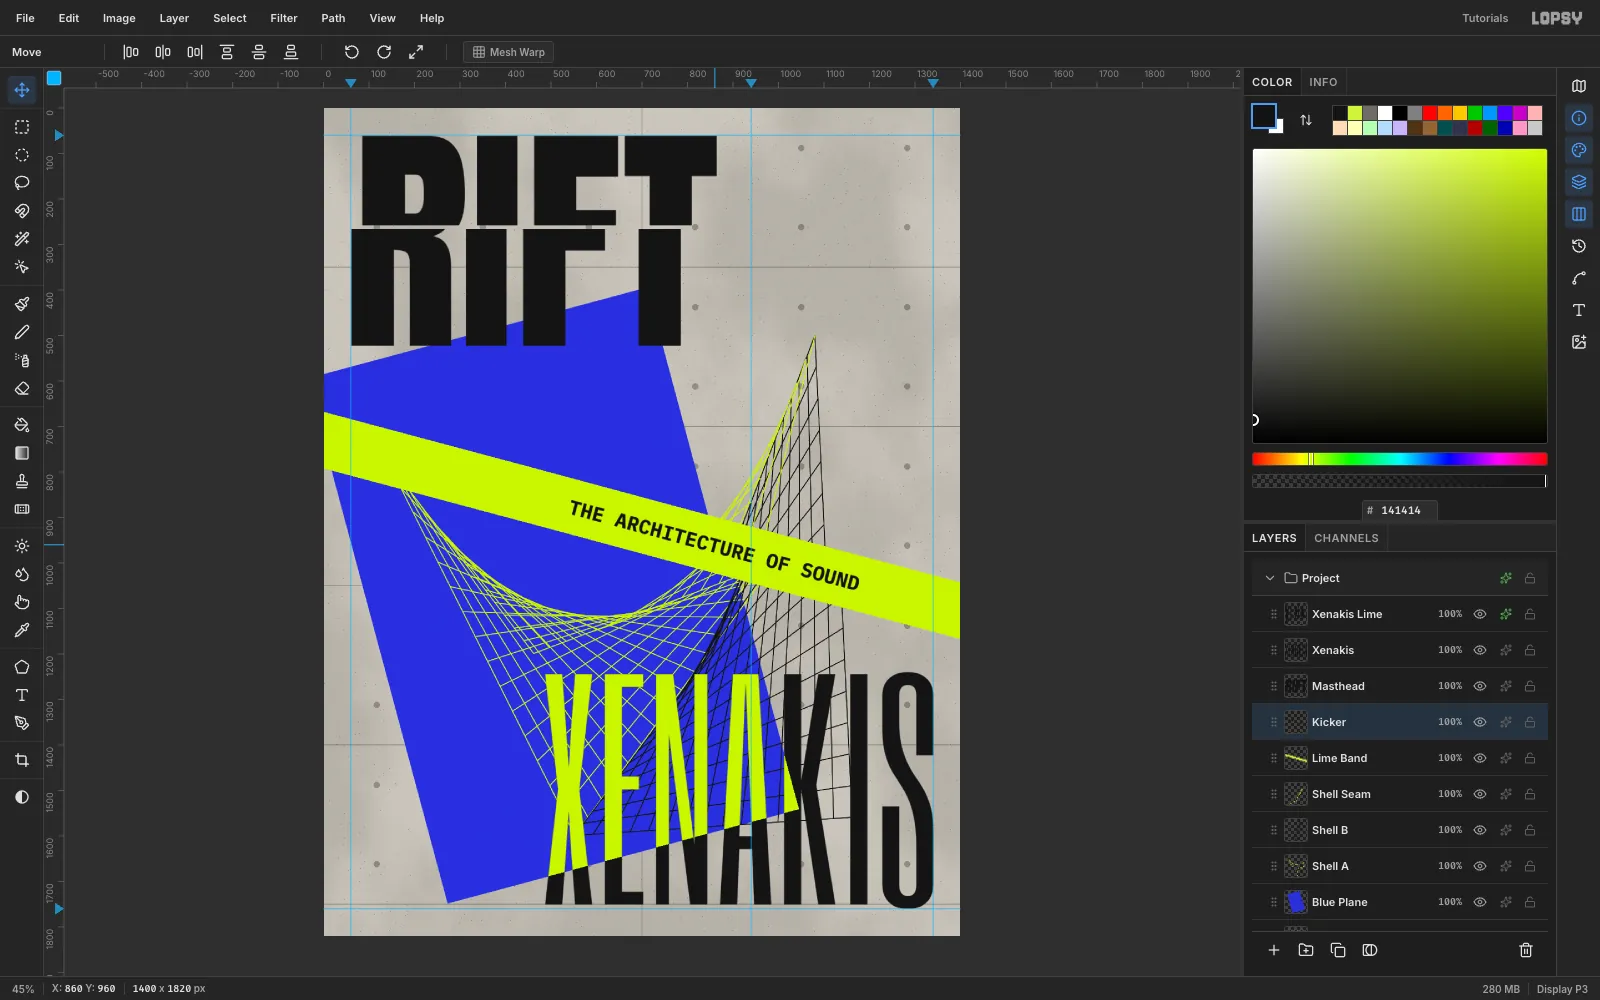
Drag the kicker so its centre sits on the band's centre line at about (860, 961), with the same space above and below the caps. That puts it right above the headline, so the two read as one cover line.
-
Add the issue line and the deck
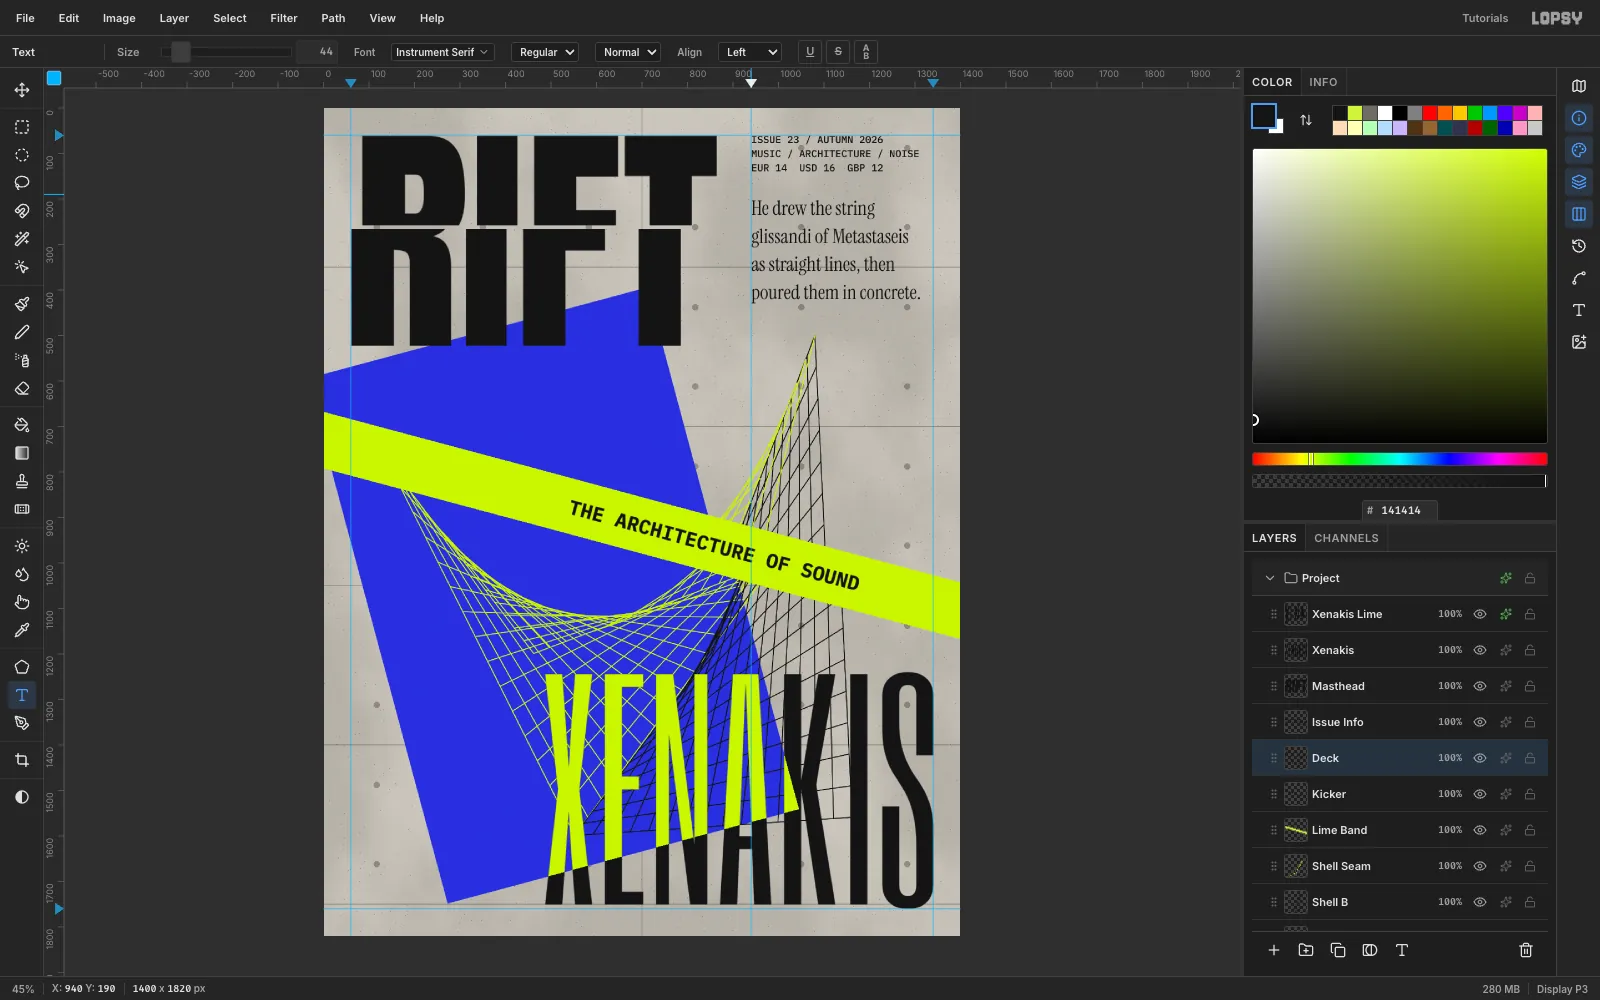
At the right-hand guide (x = 940), set IBM Plex Mono 500 at 22 for three lines: ISSUE 23 / AUTUMN 2026, MUSIC / ARCHITECTURE / NOISE and EUR 14 USD 16 GBP 12. Below it, set the deck in Instrument Serif 44: He drew the string / glissandi of Metastaseis / as straight lines, then / poured them in concrete. The calm serif against the torn masthead is the contrast deconstructivism needs.
-
Stack the cover lines and group them
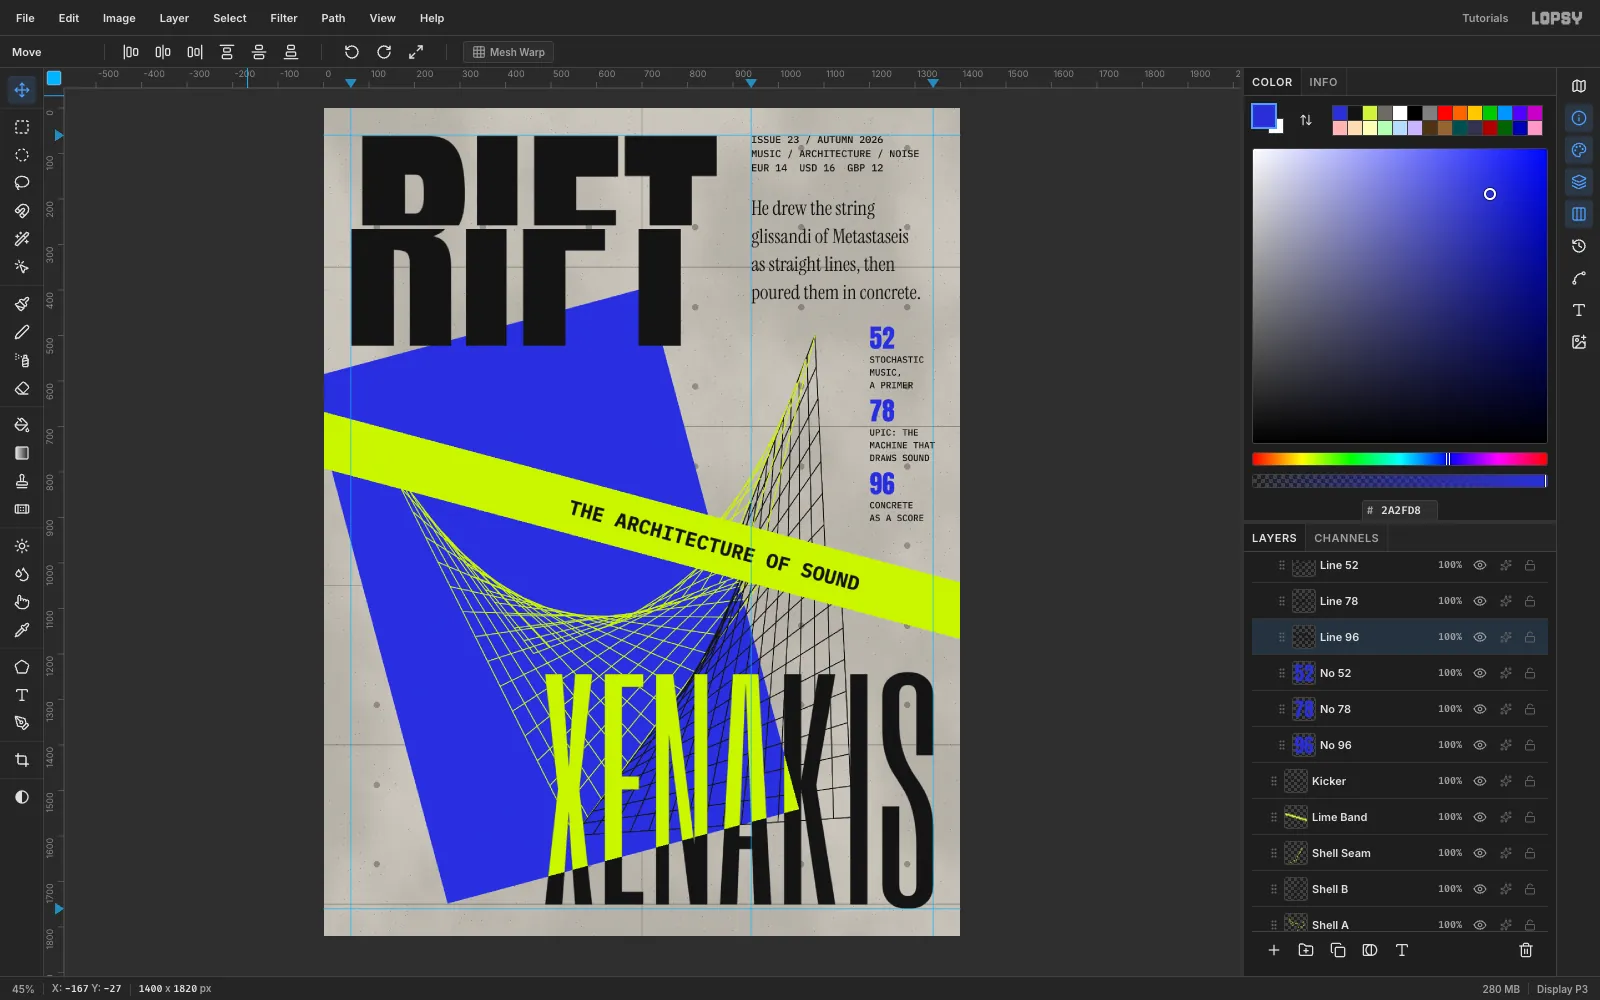
In the narrow column right of the black shell, set three page numbers in Anton 56 ultramarine at y = 480, 640 and 800. Under each, 65 px lower, add a cover line in IBM Plex Mono 500 at 20: STOCHASTIC / MUSIC, / A PRIMER, UPIC: THE / MACHINE THAT / DRAWS SOUND and CONCRETE / AS A SCORE. Click the first row, Shift-click the last and choose Layer → Group Layers. Name the group Cover Lines, then nudge the group so the longest line ends on the 1340 margin (x ≈ 1196).
-
Add a vertical barcode
Add a Barcode Label layer and fill a rectangle from (60, 1494) to (142, 1764) with
#F4F3EE. Set*RIFT23*in Libre Barcode 39 at 64, rasterize it, and turn it with the Move tool's Rotate 90° CCW button. Set the digits 9 770923 202609 in IBM Plex Mono 15, rotate them the same way, and stand them next to the bars.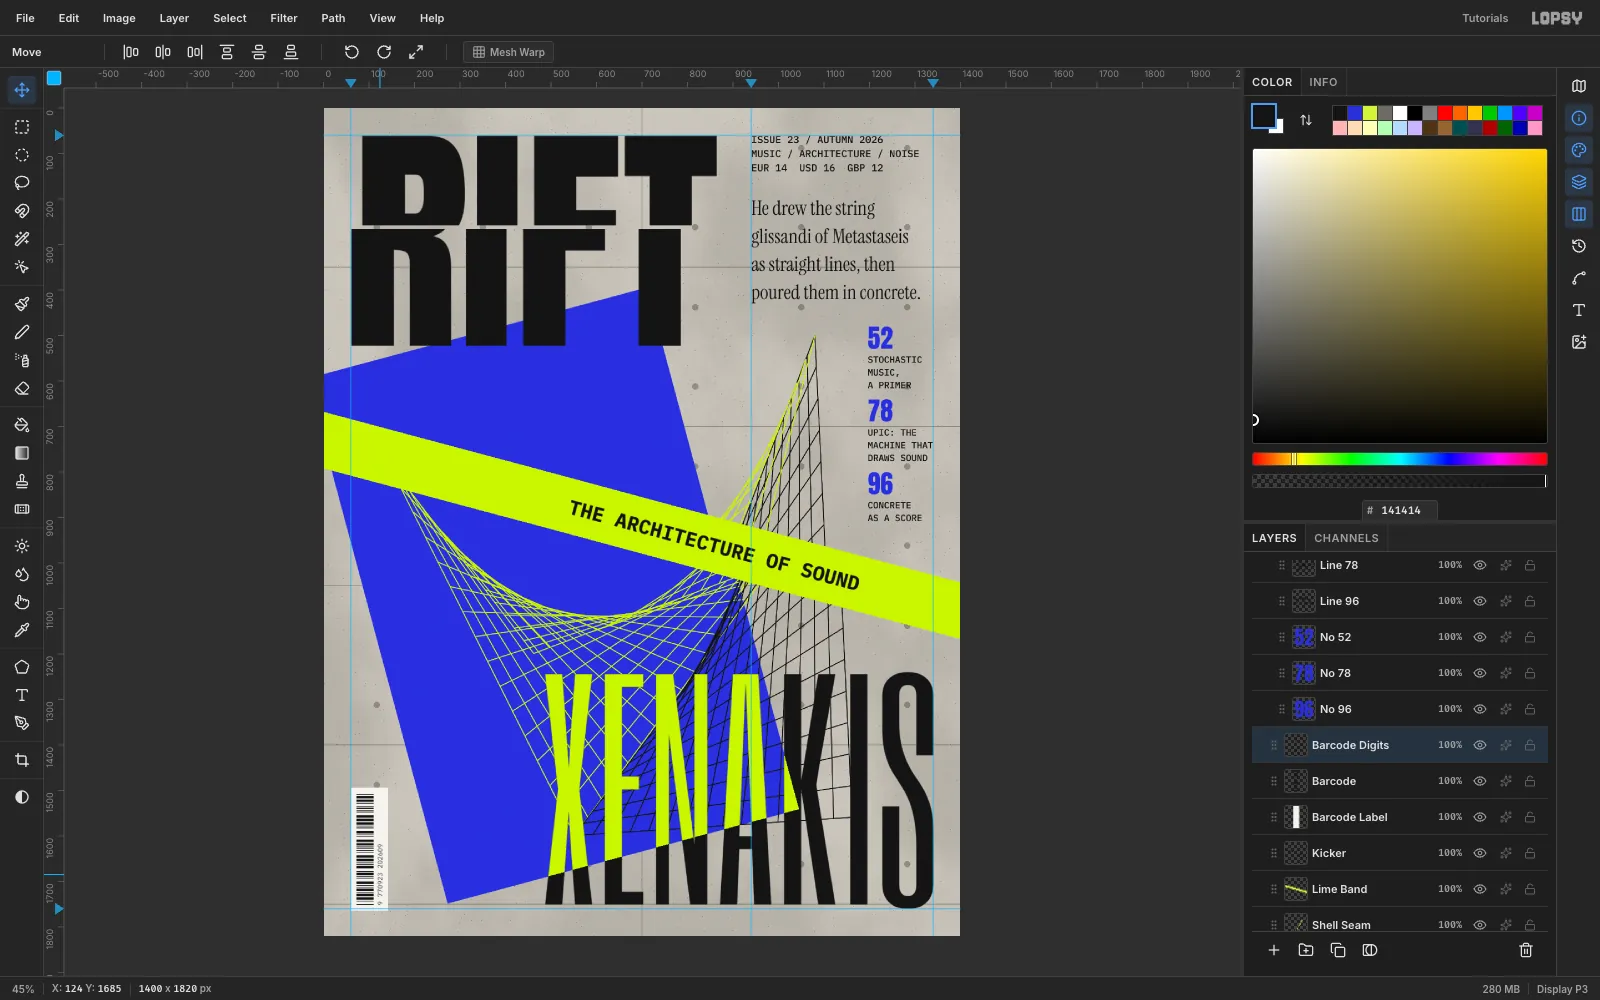
-
Draw the Metastaseis score
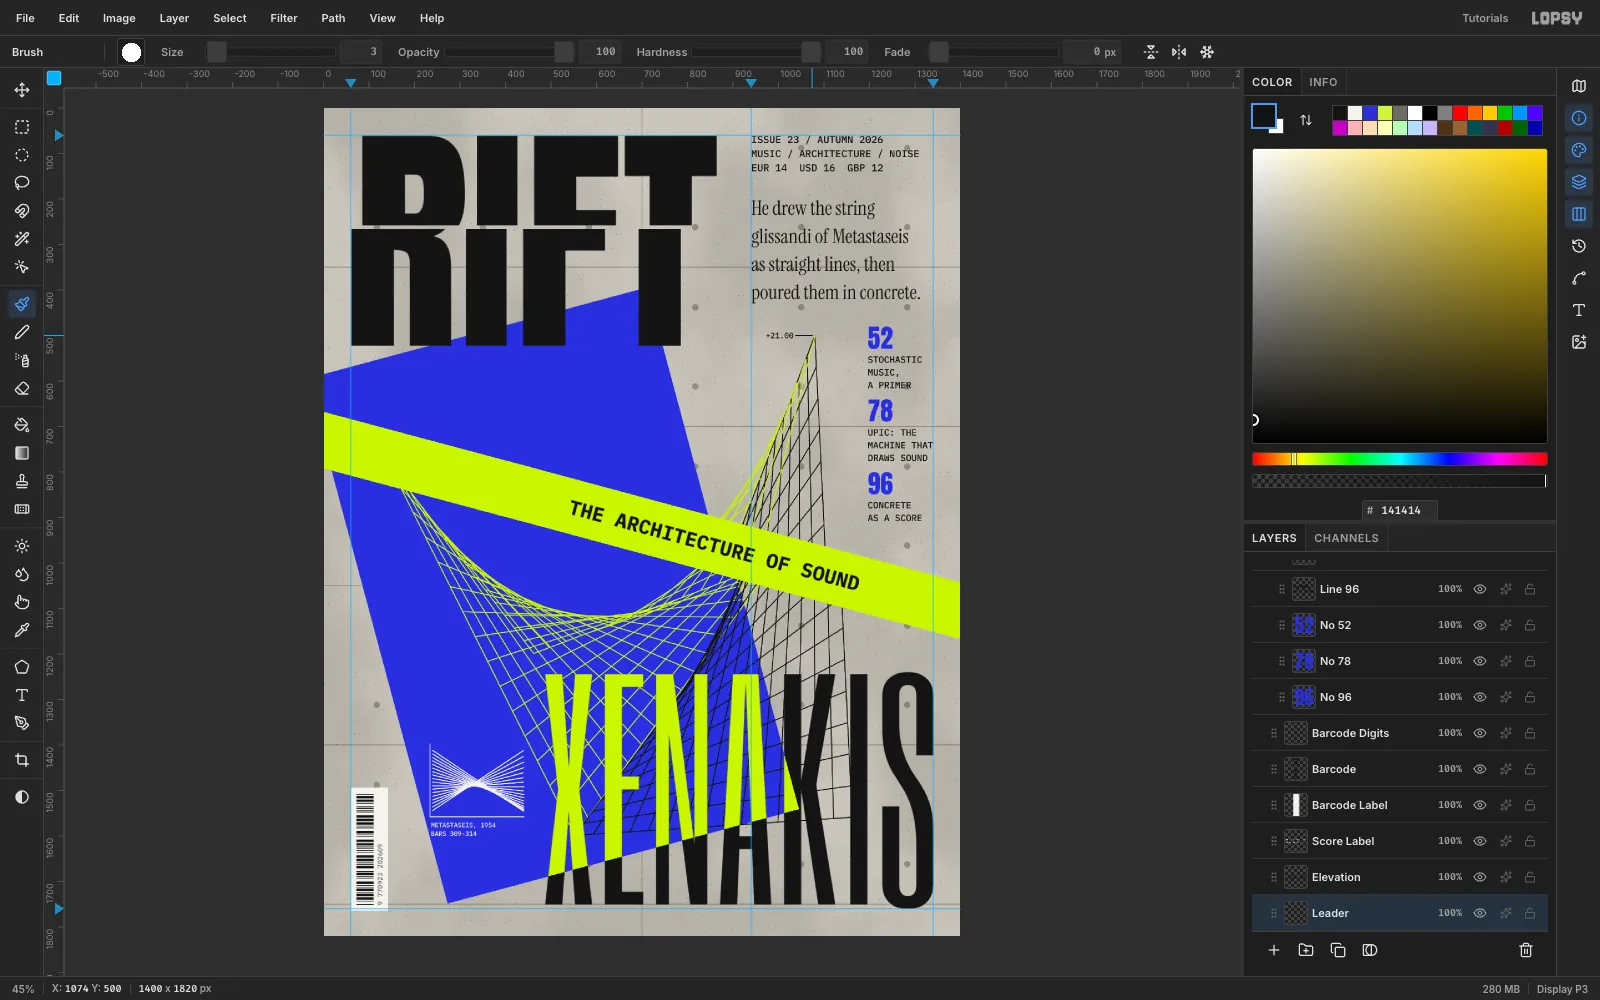
This is the idea behind the whole cover, drawn small. On a Score layer, use the white Brush at Size 3 to draw an L-shaped axis about 206 × 160 px. Then draw 18 straight lines across it. They start evenly spaced on the left and end bunched on the right, so their crossings trace the same curve as the shells. Caption it in IBM Plex Mono 14 white: METASTASEIS, 1954 / BARS 309-314.
Add an elevation mark too: +21.00 in Plex Mono 17 at the black shell's apex, with a short Shift-click leader line.
-
Add print grain
Select the top layer and add Print Grain. Fill it with
#808080, run Add Noise with Mono, Gaussian and Amount 60, and set it to Overlay 40 %. The flat inks pick up a printed tooth.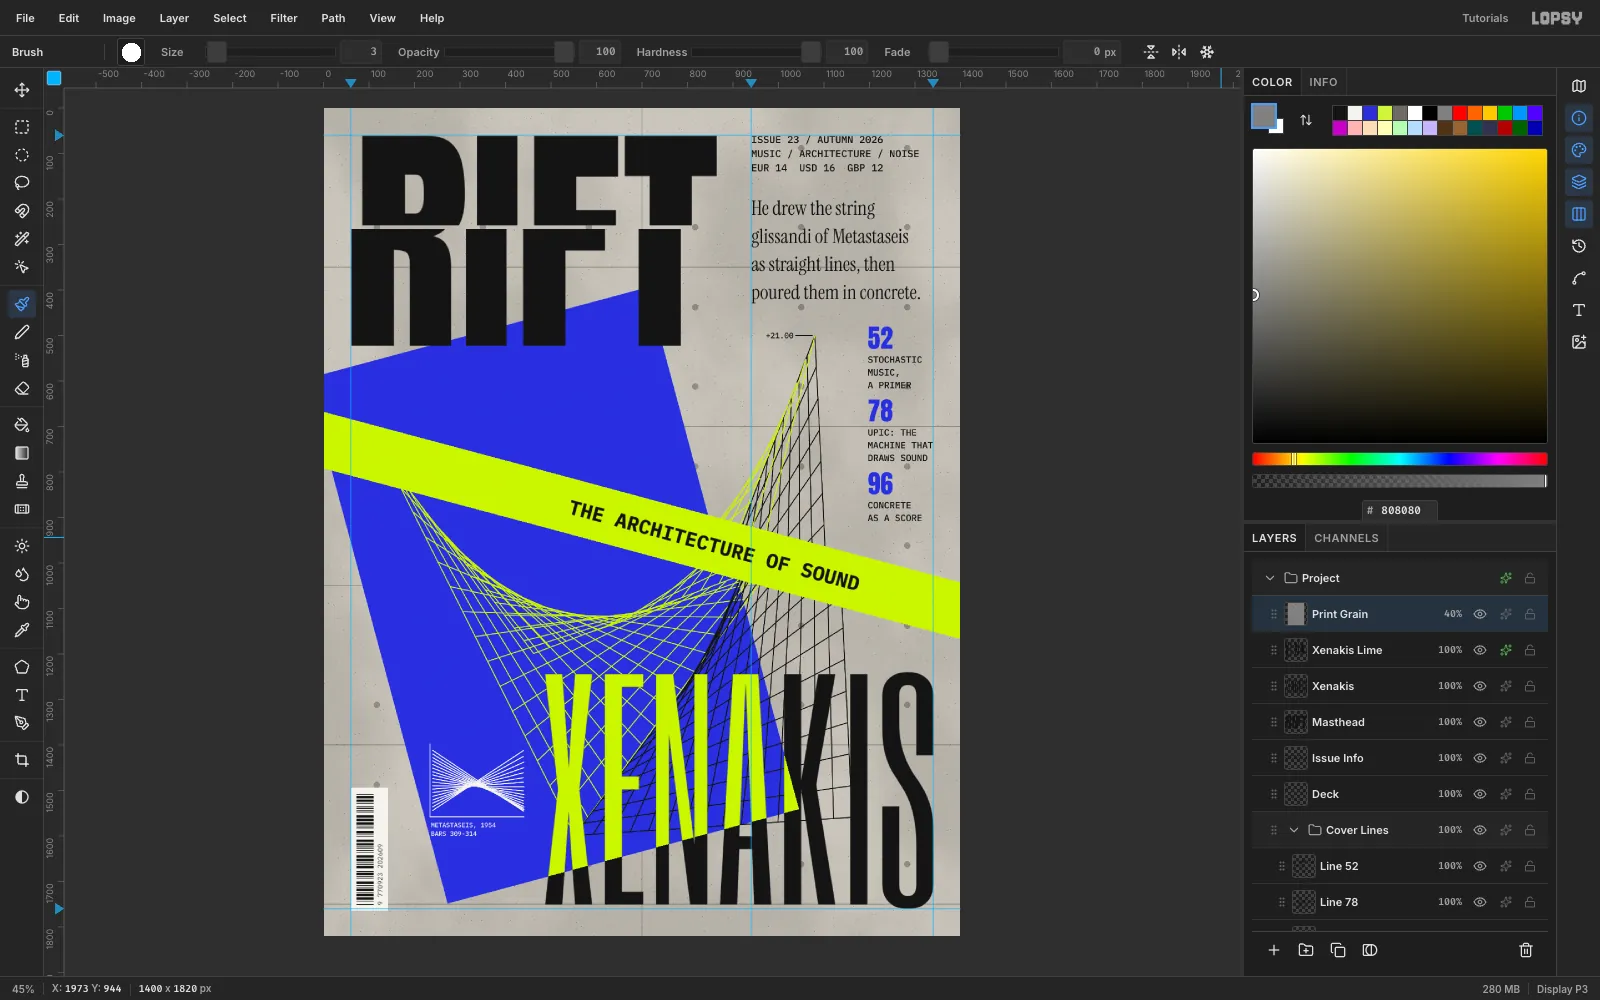
-
Open the rift
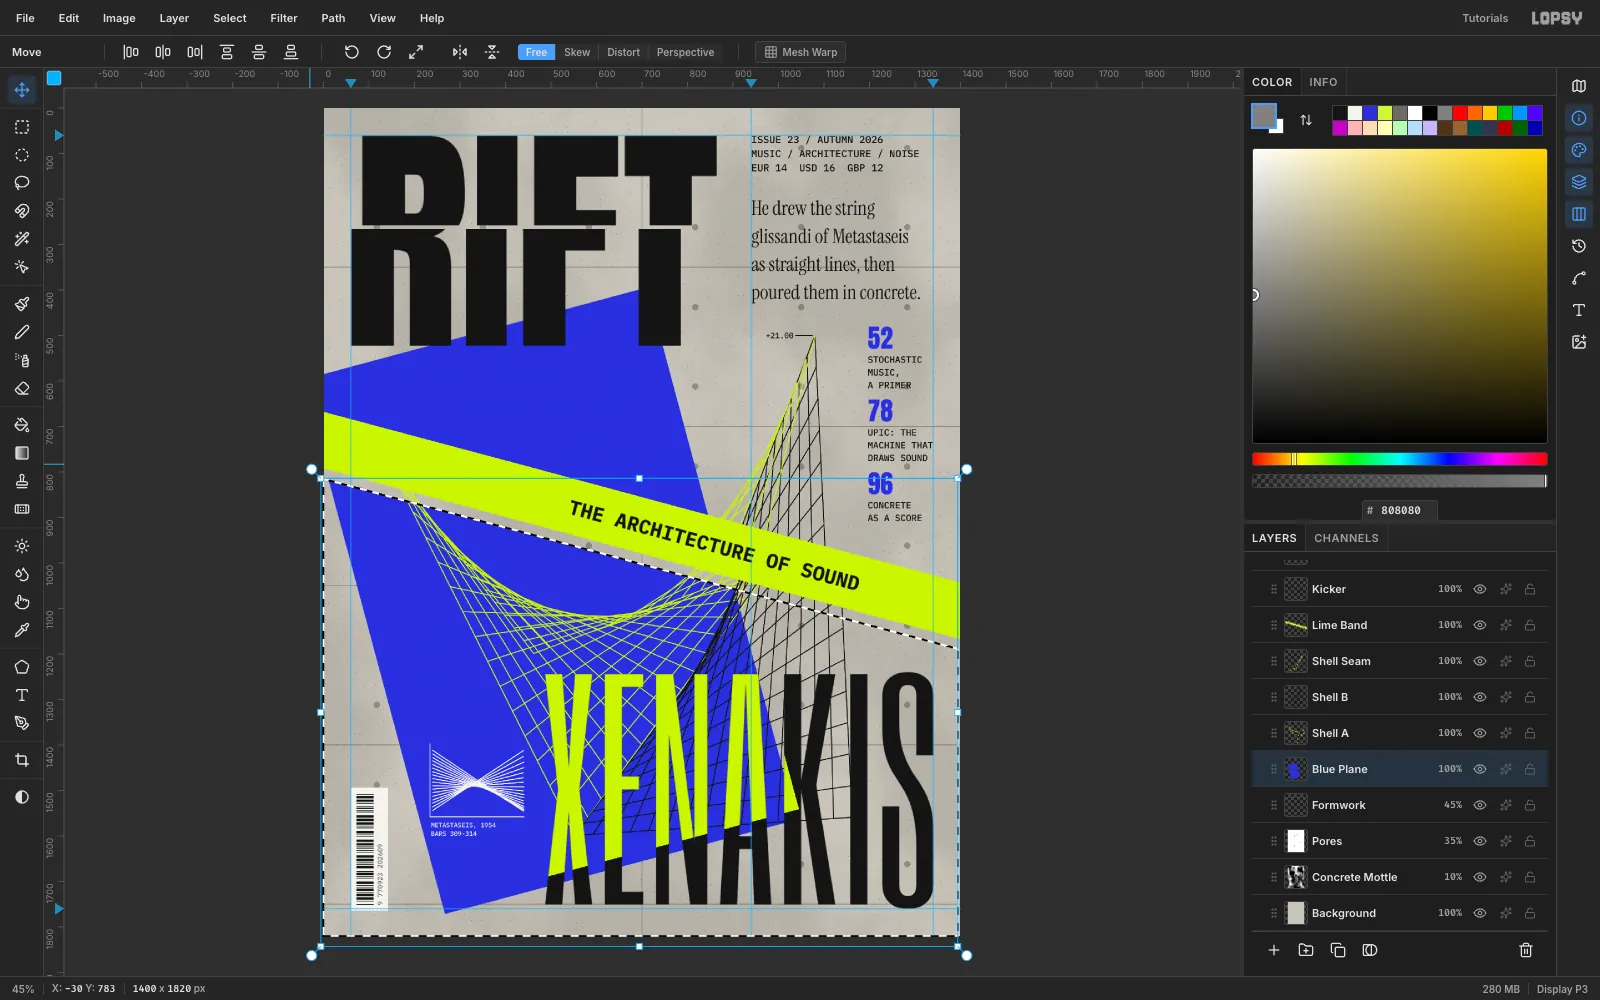
The slide in step 7 is hidden under the band, so the break needs to be visible. Lasso along the band's lower edge exactly, from (−30, 783) to (1430, 1174) and down past the bottom of the page. Nudge Blue Plane, Shell A, Shell B and Shell Seam 6 px left and 23 px down, re-drawing the lasso for each layer. Move the score layers by the same amount with no selection.
A strip of raw concrete opens under the band. That's the rift the magazine is named after.
-
Re-clip the lime headline
The plane moved, so the lime/black split in XENAKIS no longer follows its edge. Delete Xenakis Lime and repeat step 11: copy and paste the headline in place, wand-select the plane, choose Select → Inverse, press Delete and add the lime Color Overlay.
-
Turn the black shell lime over the plane
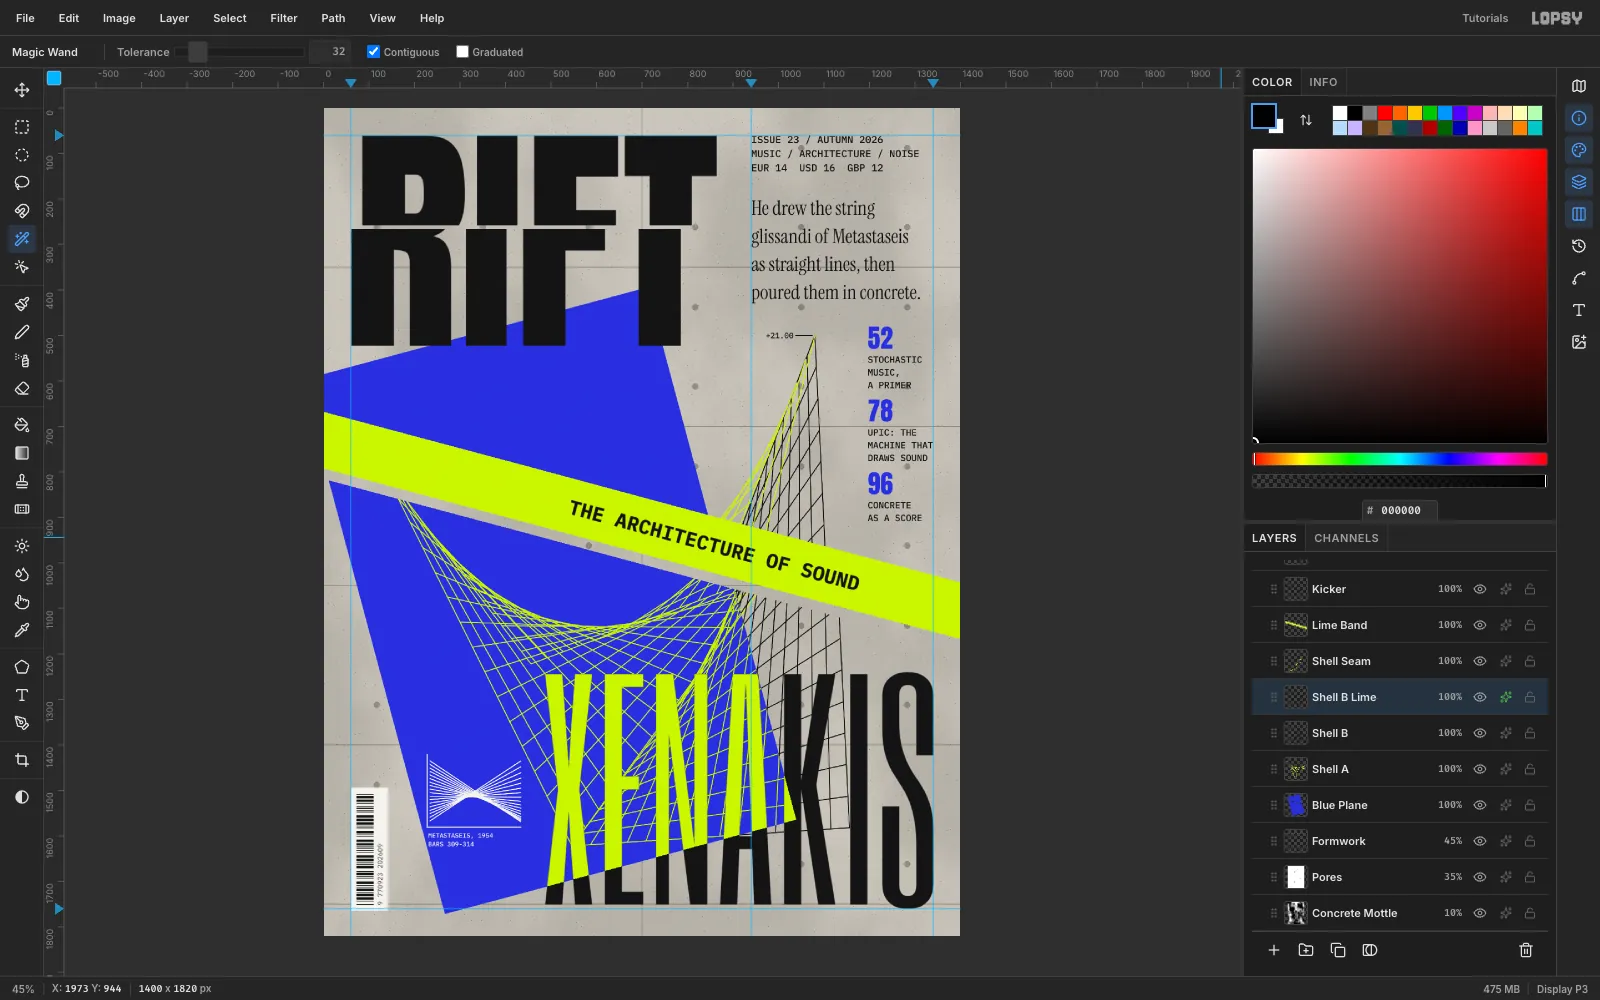
Apply the same rule to the black shell: black lines on ultramarine have almost no contrast. Wand-select the plane on Blue Plane, click Shell B, then copy and paste in place. Name the copy Shell B Lime and give it a lime Color Overlay. Now one rule runs through the whole cover: lime on blue, ink on concrete.
-
Select the headline with a margin
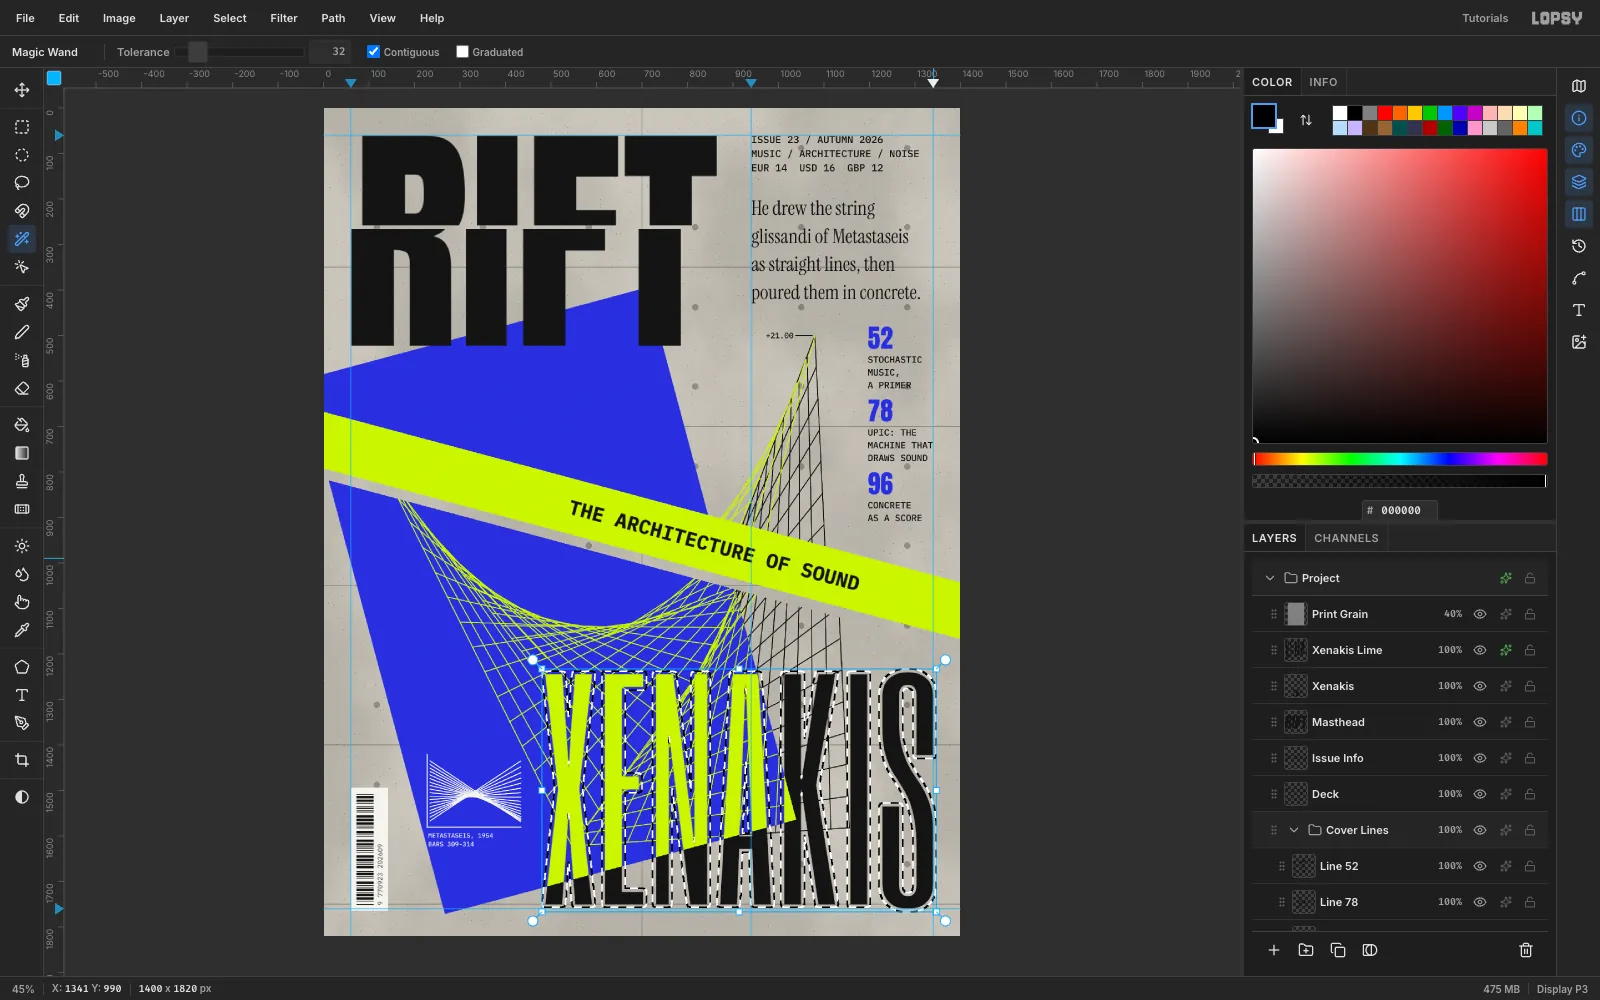
The shells run straight through the headline's letters. Cmd-click the Xenakis layer thumbnail to load its letters as a selection. Then choose Select → Grow… and enter 6 px.
-
Knock the lines out around the letters
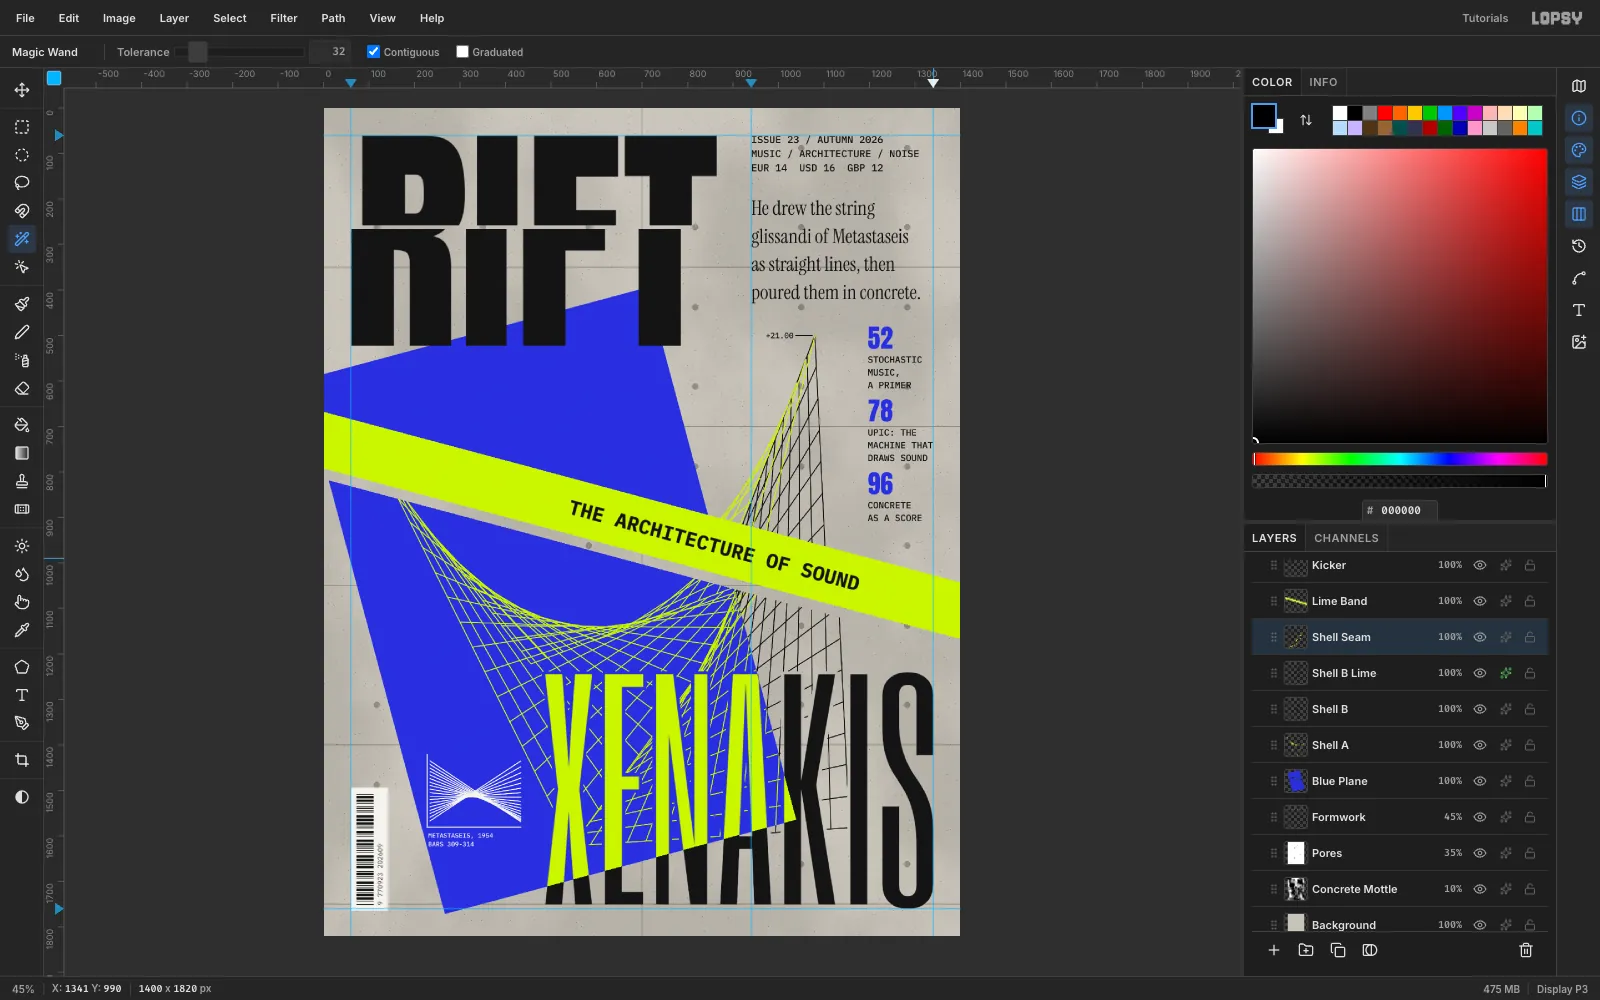
With the grown selection still active, click Shell A, Shell B, Shell B Lime and Shell Seam in turn and press Delete on each. Every letter now has a 6 px gap where the lines stop short. Press Cmd+D.
-
Reseat the score
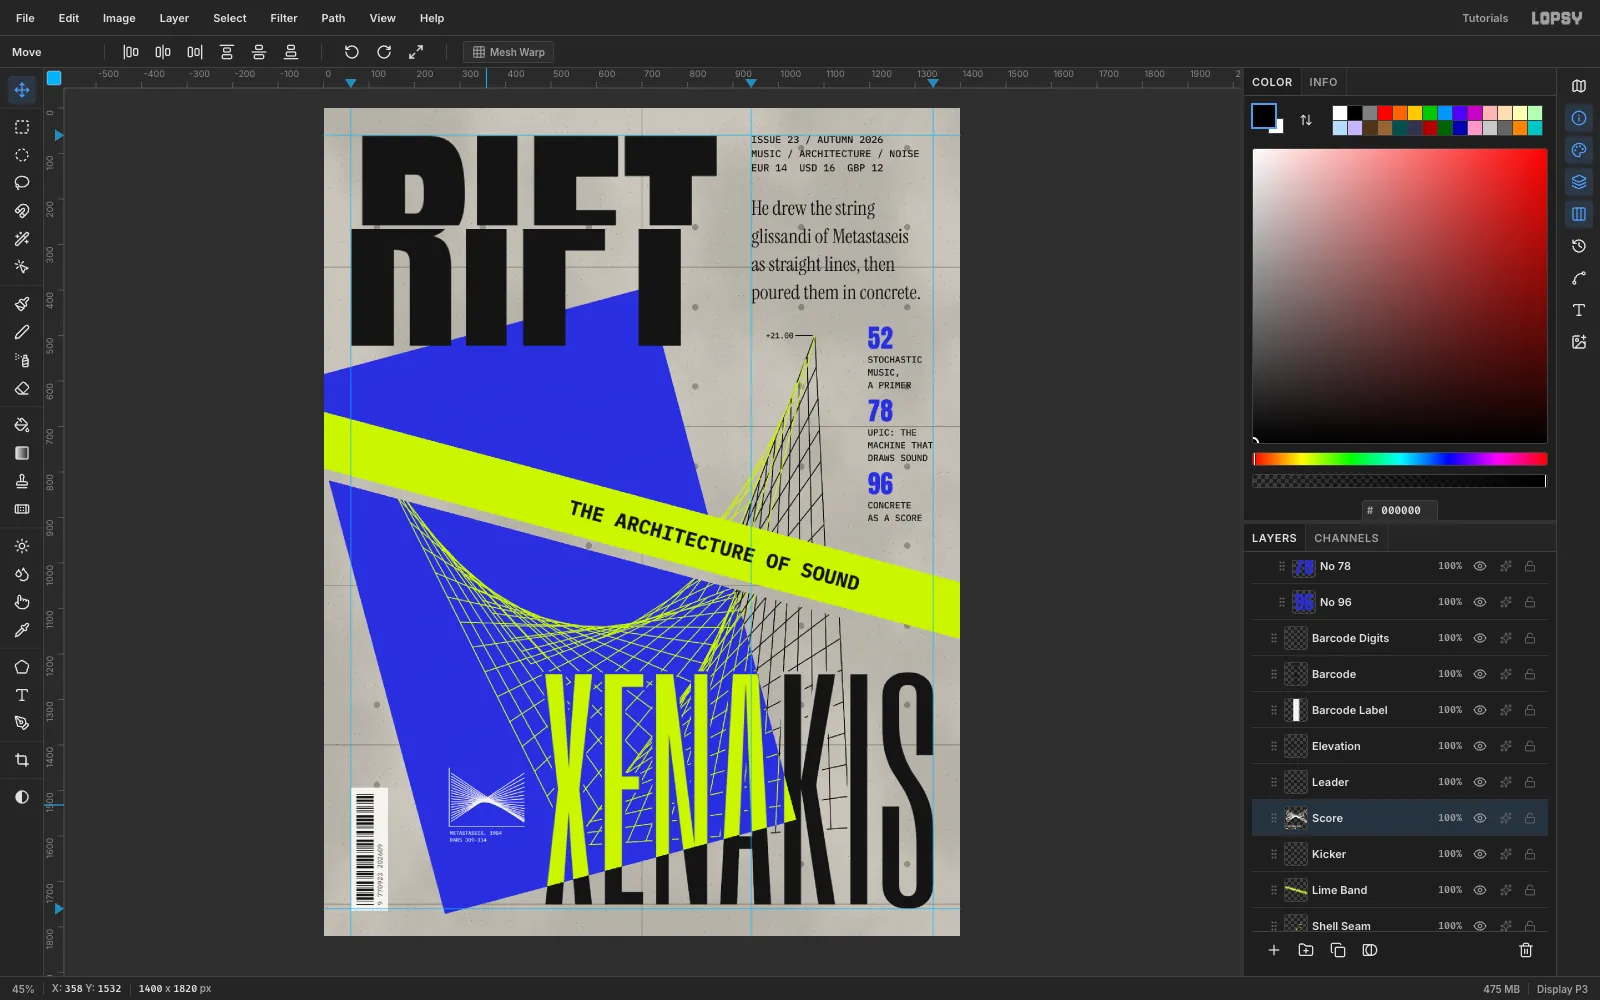
Drag the Score Label row directly above Score, rasterize it and choose Layer → Merge Down. Marquee the merged score, Cmd-drag a corner down to 80 %, press Cmd+D and move its top-left to (275, 1450). It now has about 90 px of blue to the plane's edge and 45 px to the X.
-
Share one right edge
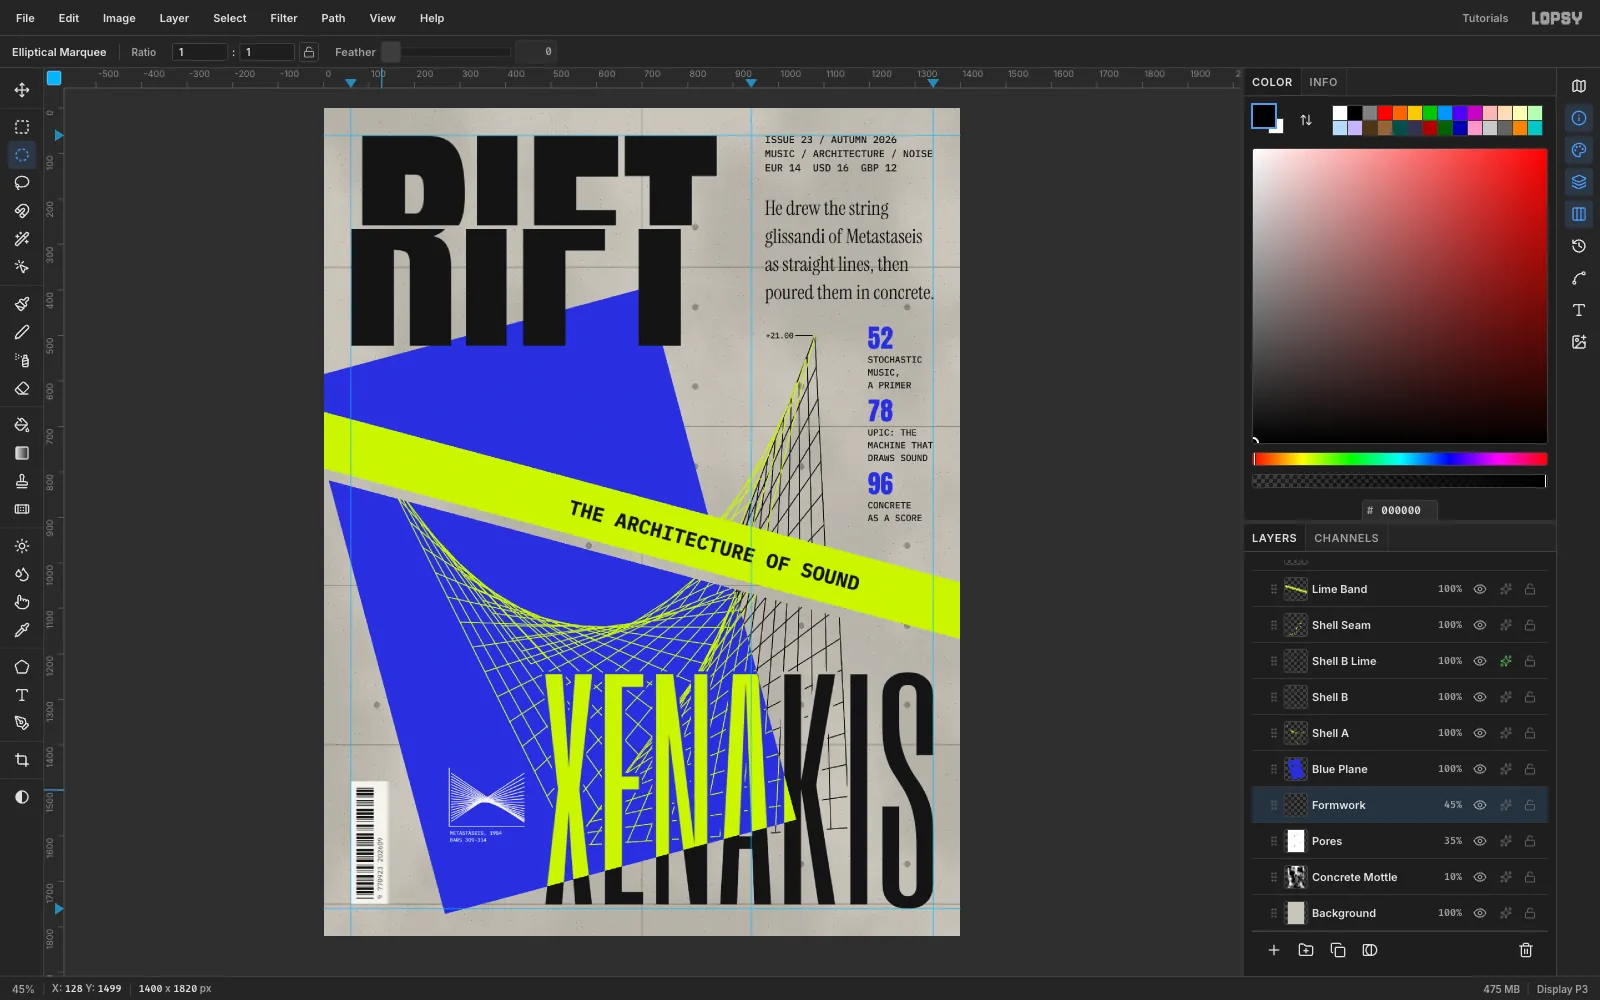
Shift-click the Issue Info and Deck rows and nudge both 30 px right so the deck's longest line ends at 1340, the same edge as the cover lines and XENAKIS. Select the three barcode layers the same way and nudge them 14 px up so the label's bottom sits on the 1750 seam. Finally, on Formwork, delete the tie holes that sit under type or peek through the masthead gap: an Elliptical Marquee over each one, then Delete.
-
Ink the lines that leave the plane
The lime strands that climb over the concrete toward the apex are nearly invisible there. Wand-click the lower plane, Shift-click the upper plane to add it, and choose Select → Inverse. Copy Shell A and paste in place as Shell A Ink, with a Color Overlay in
#141414. Repeat for Shell Seam. Then choose File → Quick Export PNG, and File → Save Project to keep the layers.