Design a Ukiyo-e Great Wave Album Cover
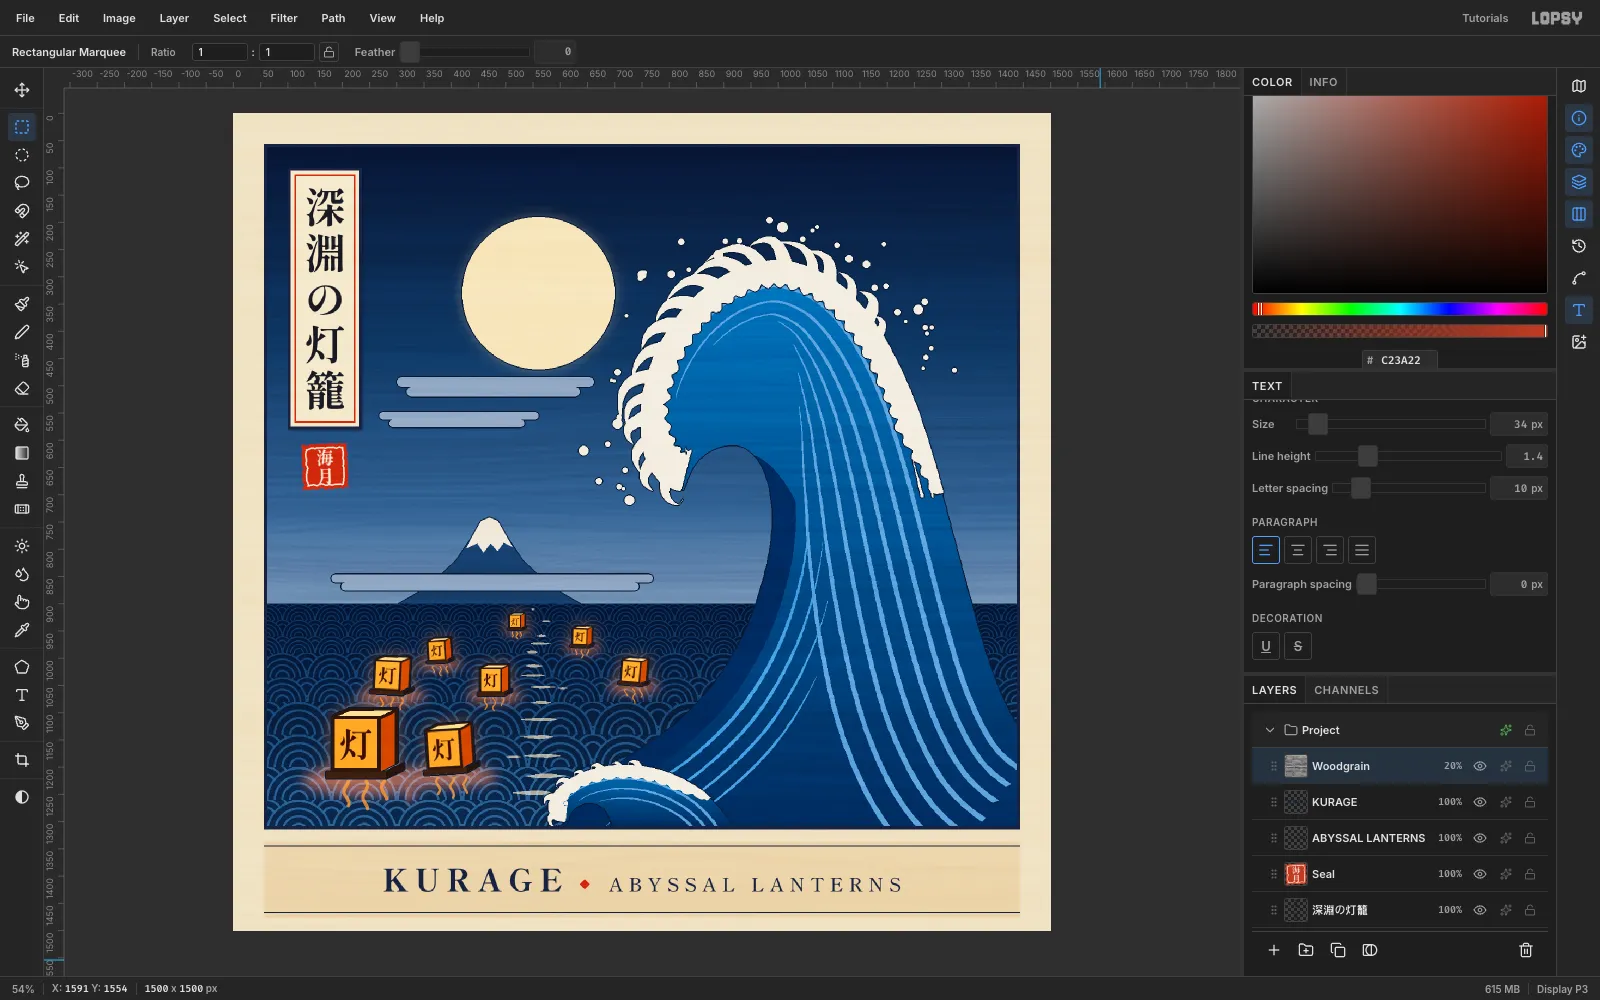
Make a Hokusai-style woodblock album cover in Lopsy with a curling great wave, seigaiha sea pattern, paper lanterns, vertical Japanese type and a hanko seal.
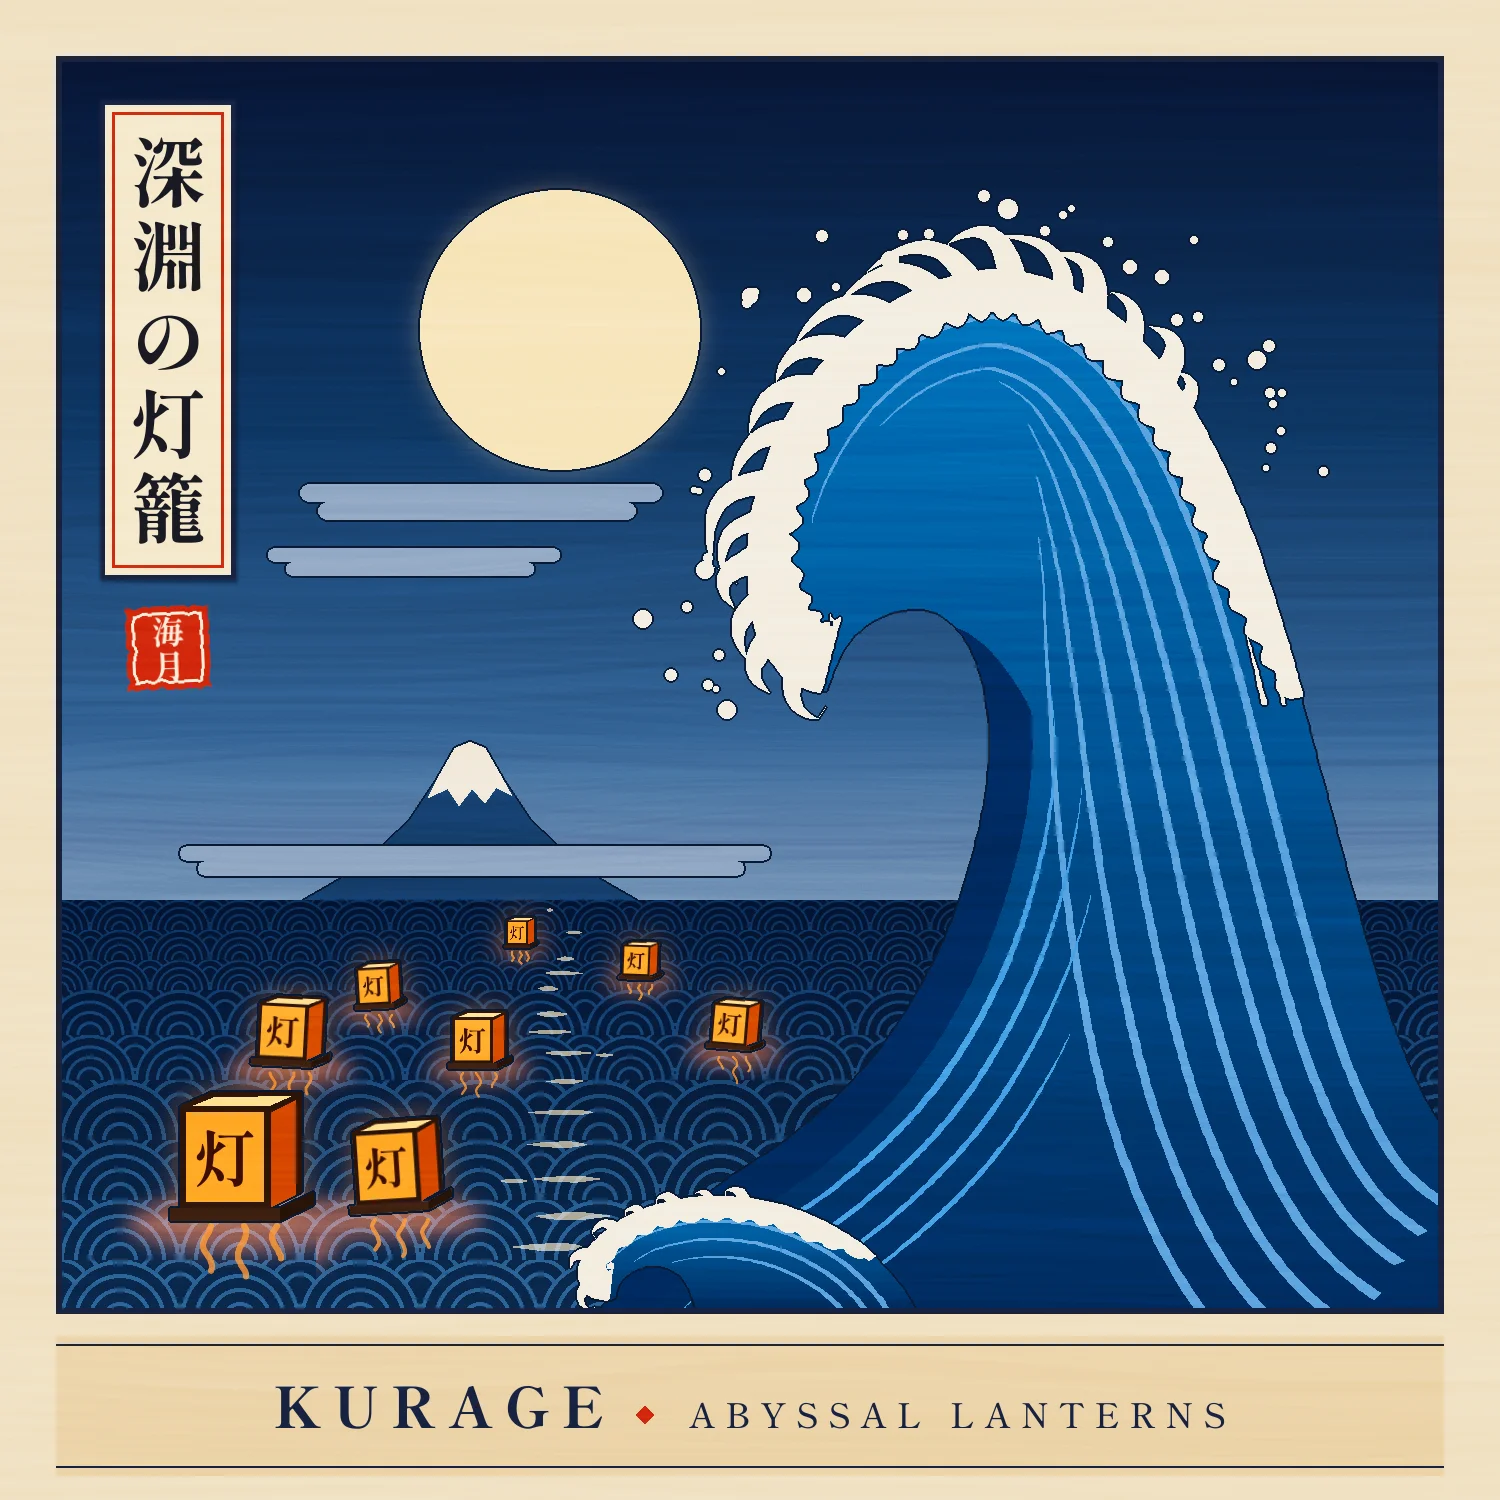
Ukiyo-e prints are built from a few flat colours, one dark outline block and a lot of pattern. You get Prussian-blue gradients (bokashi), stepped mist bands (kasumi), and a cartouche and seal that carry the title.
In this tutorial you'll make Abyssal Lanterns, a 1500 × 1500 px album cover for the band KURAGE (海月, "jellyfish"). It's a great wave in the style of Hokusai curling toward a full moon, with floating tōrō nagashi paper lanterns on a patterned night sea. Everything is drawn in Lopsy with lasso and marquee fills, gradients, one pattern, a few filters and layer effects.
The palette:
- Sky:
#0A1532→#1B3764→#3F6190→#7D95B5 - Wave:
#2F6FB5→#0E2A5C, stripes#6FA3DA, trough#0A2A5E - Foam and moon:
#F2EDE1,#F4E6C0 - Lanterns:
#F5B04A,#C8541E,#FFE3A0, frame#2B160C - Ink
#0D1A33/#1A2340, seal red#C23A22, paper#EEE2C6
-
Set up the sheet and paint a bokashi sky
Choose File → New, set the unit to Pixels, and create a 1500 × 1500 document with a white background.
Add the margins:
- Click the top ruler at 60, 750 and 1440.
- Click the left ruler at 60, 900 (the horizon) and 1310 (the bottom of the picture area).
Fill the Background with paper cream
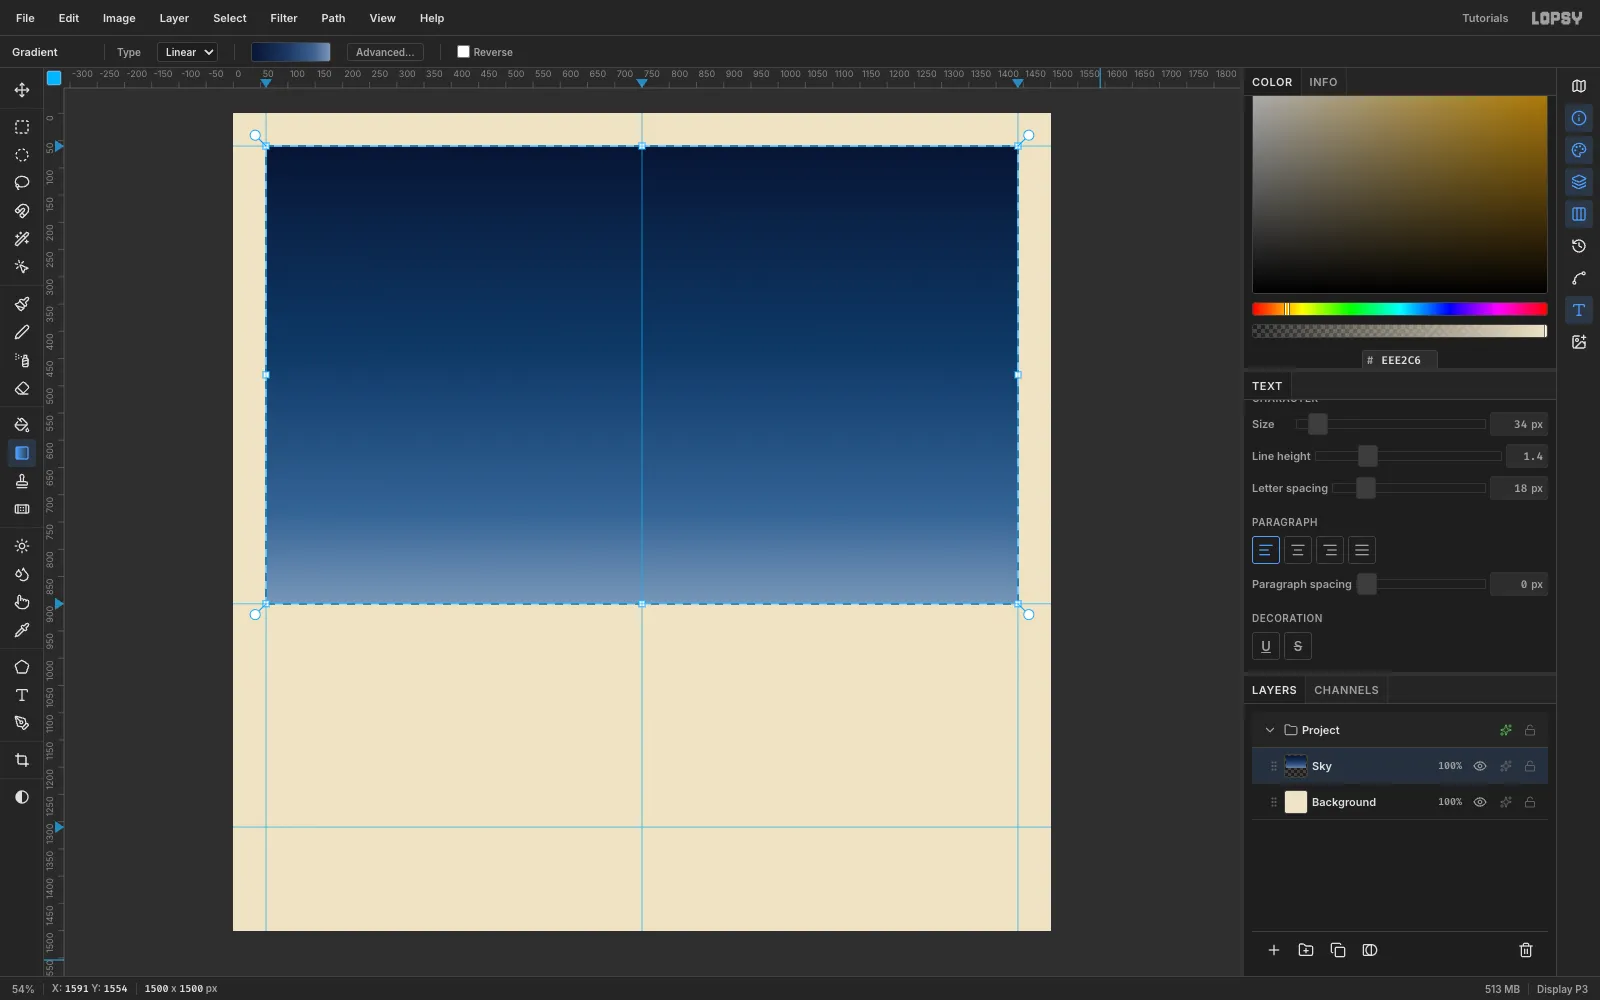
#EEE2C6(Rect Marquee over the whole page, then Edit → Fill).Rename Layer 1 to Sky. Marquee the picture area from (60, 60) to (1440, 900). Pick the Gradient tool, open Advanced… and set four stops:
#0A1532at 0%#1B3764at 45%#3F6190at 80%#7D95B5at 100%
Drag a Linear gradient from the top guide straight down to the horizon. Keep the horizon a cool blue-grey. A warm peach band reads as sunset and fights the moon.
-
Add the moon, Mount Fuji and kasumi clouds
Build these three pieces on new layers:
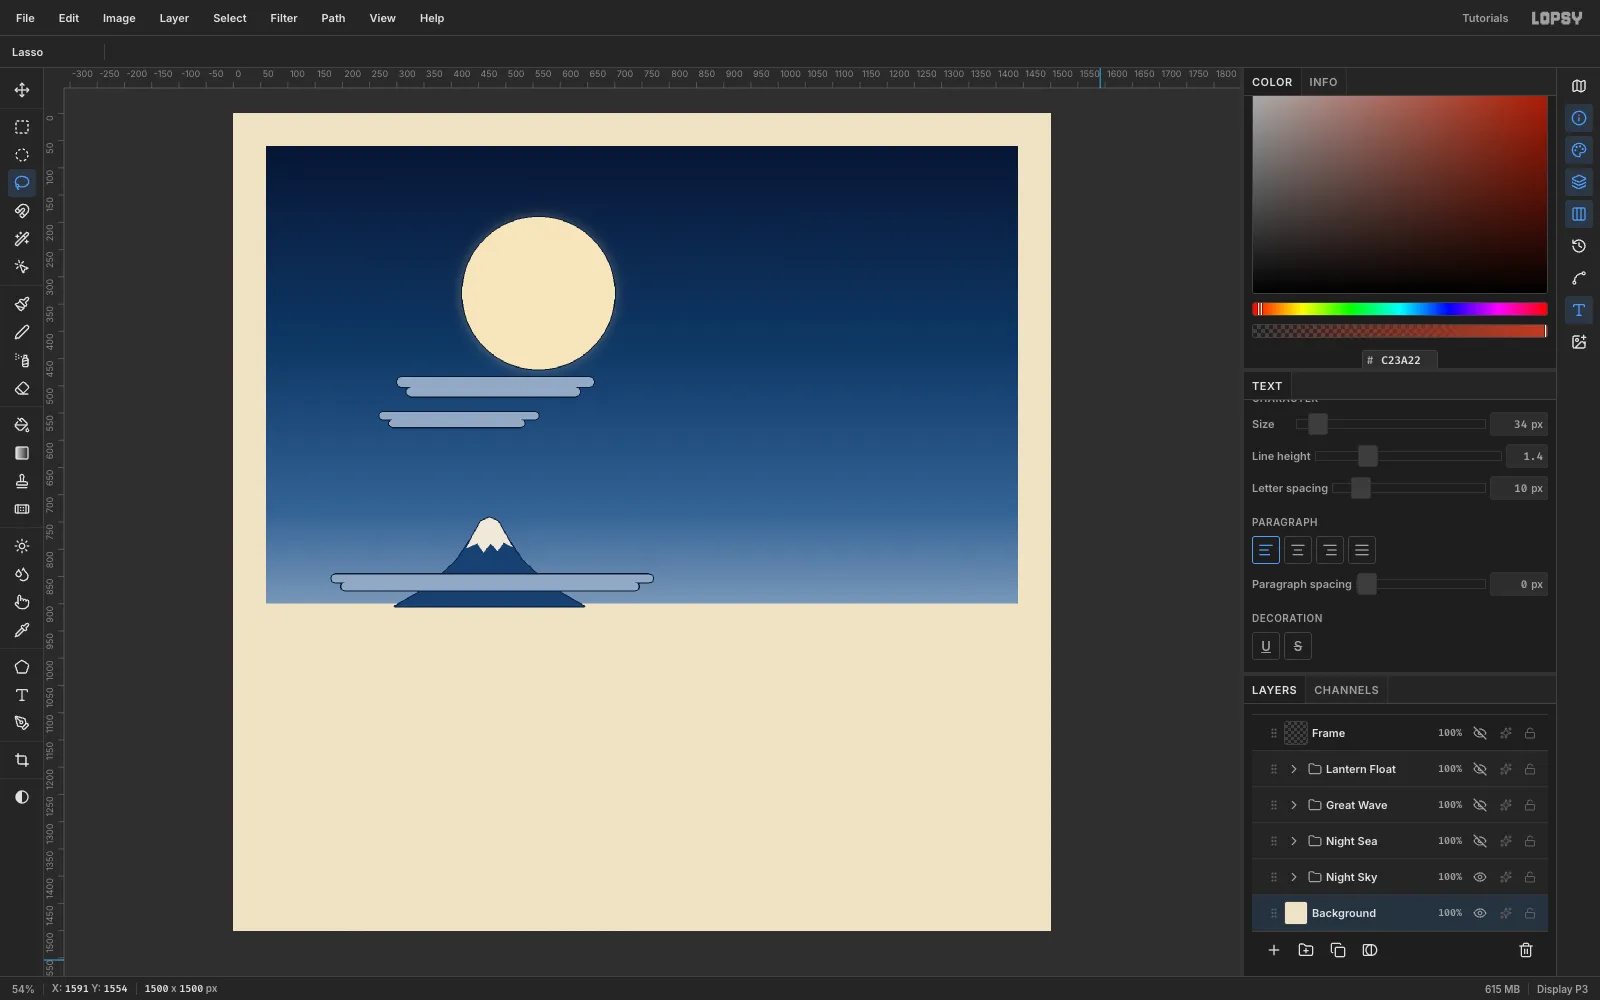
- Moon. Draw an Elliptical Marquee circle from (420, 190), 280 px wide. Fill it
#F4E6C0. Open Layer effects and add an Outer Glow (#F3DDA6, Size 34, Opacity 35) and a Stroke (#0D1A33, Width 2). - Fuji. Lasso a low cone from (296, 905) up to a flat peak at about (470, 742) and back down to (644, 905). Fill it
#22406E. Lasso a zigzag snow cap over the top, fill it#EFE8DA, and add the same 2 px Stroke. - Mist. Kasumi are long ribbons whose ends step in as two rounded lobes: the upper lobe sticks out further than the lower one. Lasso three of them and fill them
#97A8C2at 100% opacity: - x 300–662 at y 484
- x 268–560 at y 548
- x 180–770 across Fuji's lower slopes at y 846
Give them the 2 px Stroke too.
- Moon. Draw an Elliptical Marquee circle from (420, 190), 280 px wide. Fill it
-
Draw a seigaiha tile
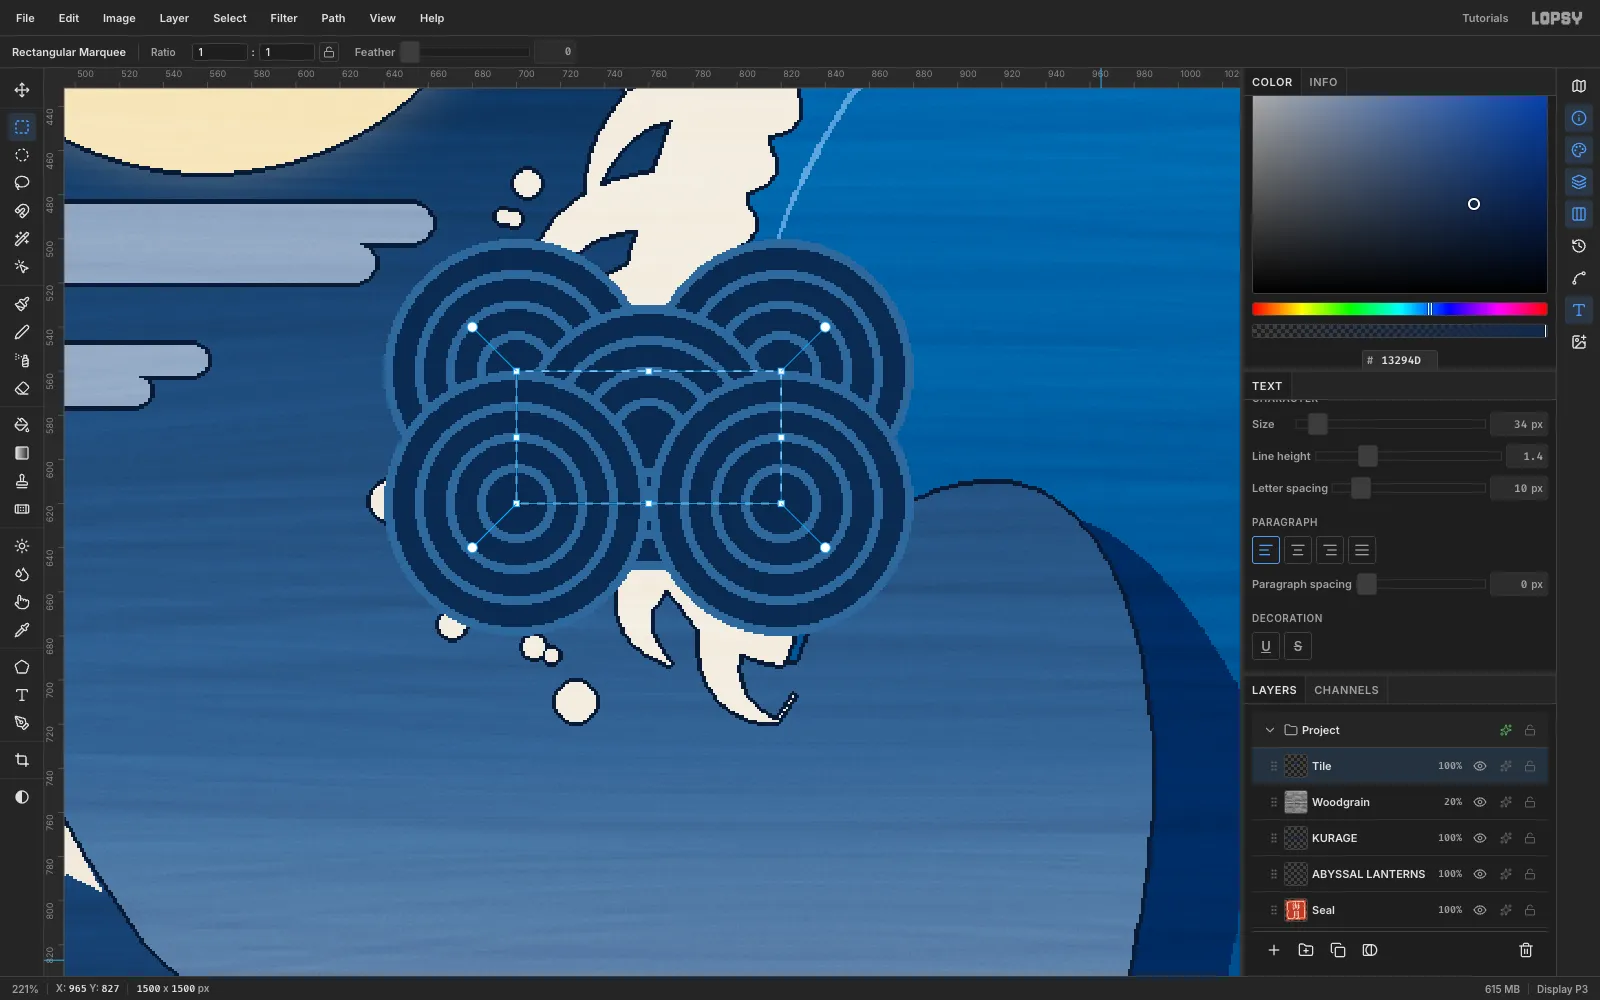
Seigaiha ("blue ocean waves") is overlapping fans of concentric rings. Make one tile on a scratch layer:
- Rect Marquee a 120 × 60 box and fill it
#13294D. - Circles are centred on the tile's corners (0,0), (120,0), (0,60), (120,60) and its middle (60,30). Draw them in rows: top corners first, then the middle, then the bottom corners, so each row overlaps the one above.
- For each circle, fill concentric Elliptical Marquee discs with radius 60
#3E6899, 56#13294D, 46#3E6899, 42#13294D, 32#3E6899, 28#13294D, 18#3E6899and 14#13294D. Each smaller disc covers the last, which leaves 4 px light rings.
Marquee exactly the 120 × 60 tile, choose Edit → Define Pattern, then delete the scratch layer.
- Rect Marquee a 120 × 60 box and fill it
-
Fill the sea in receding zones
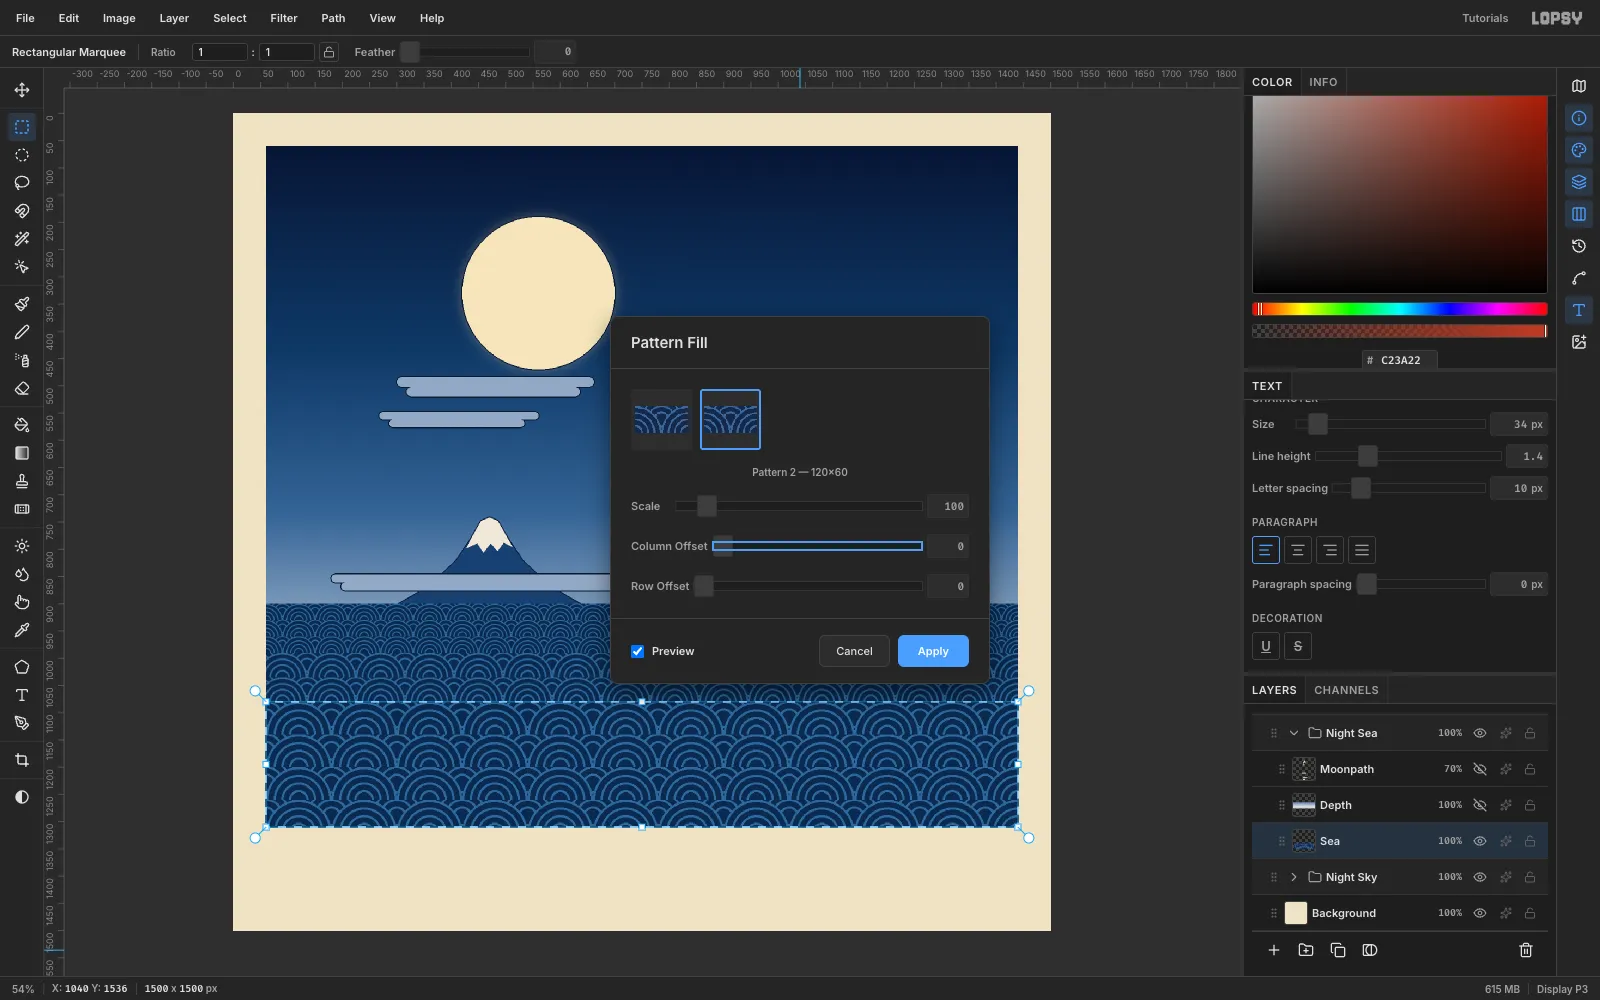
Add a Sea layer. The pattern should get smaller toward the horizon, so fill it in three bands with Edit → Fill with Pattern…:
- y 900–990 at Scale 50
- y 990–1080 at Scale 75
- y 1080–1310 at Scale 100
Each band's height is a whole number of tile rows (30, 45 and 60 px), so the zone edges fall on tile edges.
-
Add depth and a broken moon path
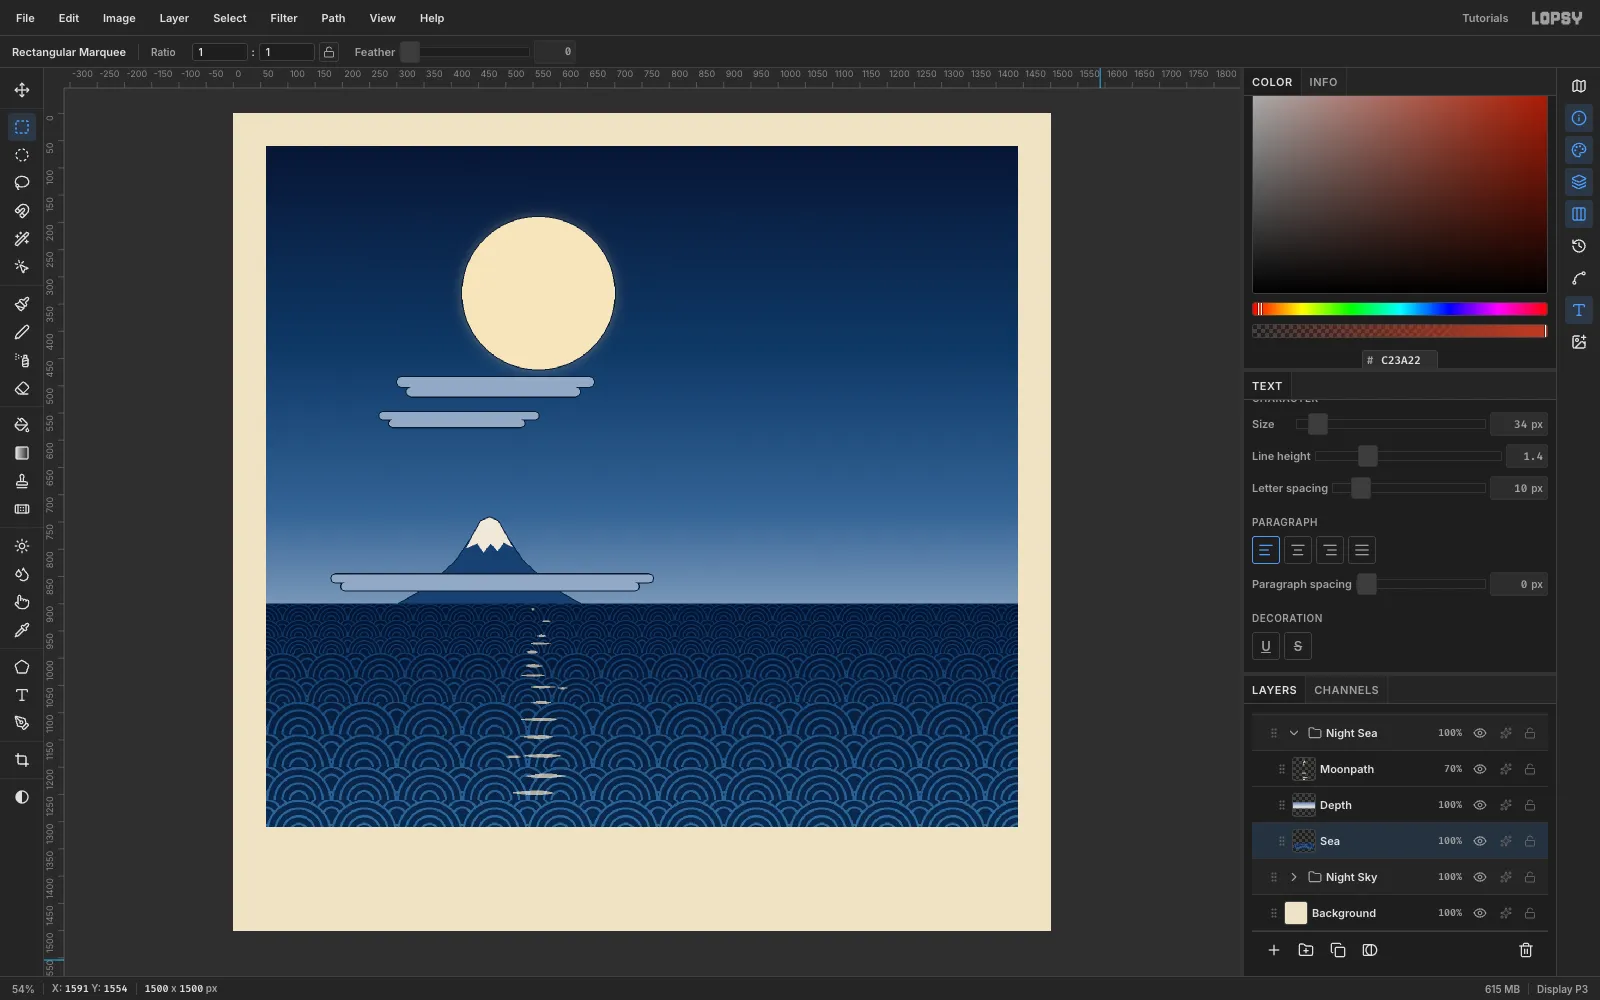
Depth. Add a Depth layer. Marquee the sea and drag a vertical Linear gradient from
#5B769Cat the horizon to white at the bottom. Set the layer to Multiply. White multiplies to nothing, so only the far sea darkens.Moon path. Add a Moonpath layer and lasso about a dozen thin, pointed shards in
#F3E3B0under the moon (x ≈ 560):- Near the horizon, make them about 20 × 3 px. Near the bottom, make them about 90 × 8 px.
- Vary the x-offset by ±15 px and use uneven gaps.
- Split a few into two pieces.
Set the layer to Screen at 70%. An evenly spaced stack reads as a ladder, so irregularity is the point.
-
Build the wave body and its stripes
Add a Wave layer. Lasso the wave's outline:
- Start at the right edge around (1440, 1125). Climb the back slope to a crest at about (1000, 272).
- Curl over and down to a lip that hooks inward at about (826, 692).
- Run back up under the lip, then down the concave face through (990, 760) and (880, 1050) to the bottom at about (600, 1310).
Fill the lasso with a vertical Linear gradient from
#2F6FB5under the crest to#0E2A5Cat the base.For the stripes, lasso seven thin bands (about 9 px wide, tapering to a point) that follow the crest line at increasing depths inside the wave. Fill them
#6FA3DA. Let the outer ones run almost to the lip and end the inner ones sooner, so they don't pinch together at the summit.They'll spill outside the wave. To clip them, lasso the wave outline again, choose Select → Inverse and press Delete. Then marquee the picture area (60, 60 to 1440, 1310), Inverse, and Delete again to trim anything past the frame. Add a 2 px
#0D1A33Stroke.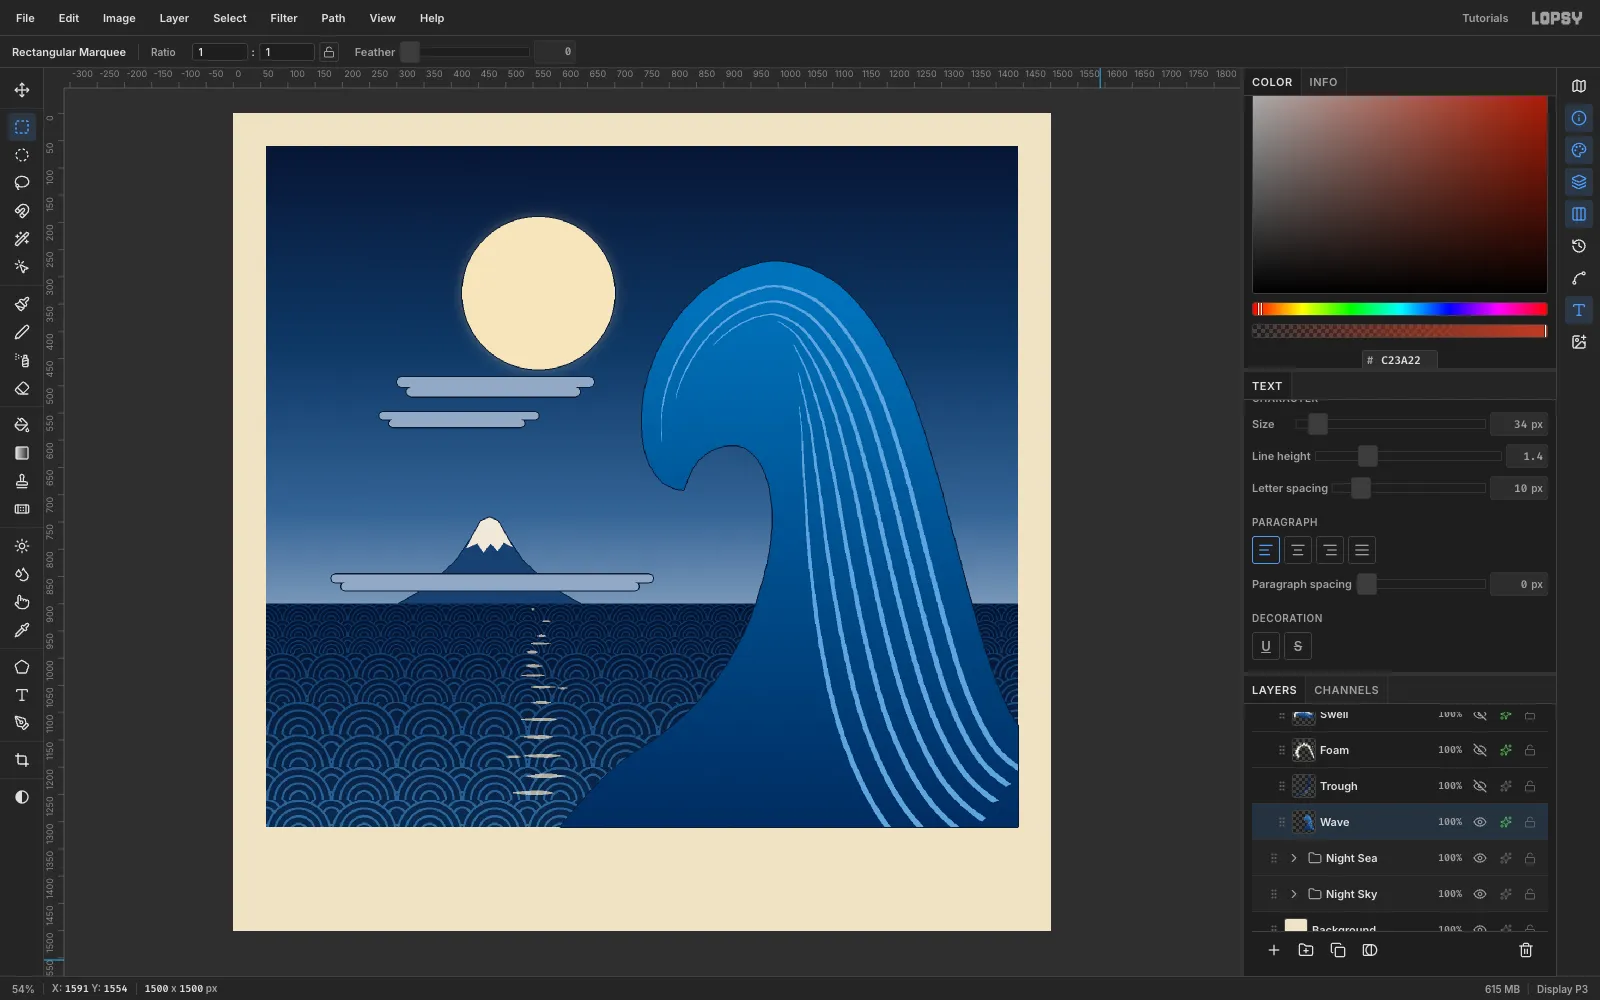
-
Break up the trough
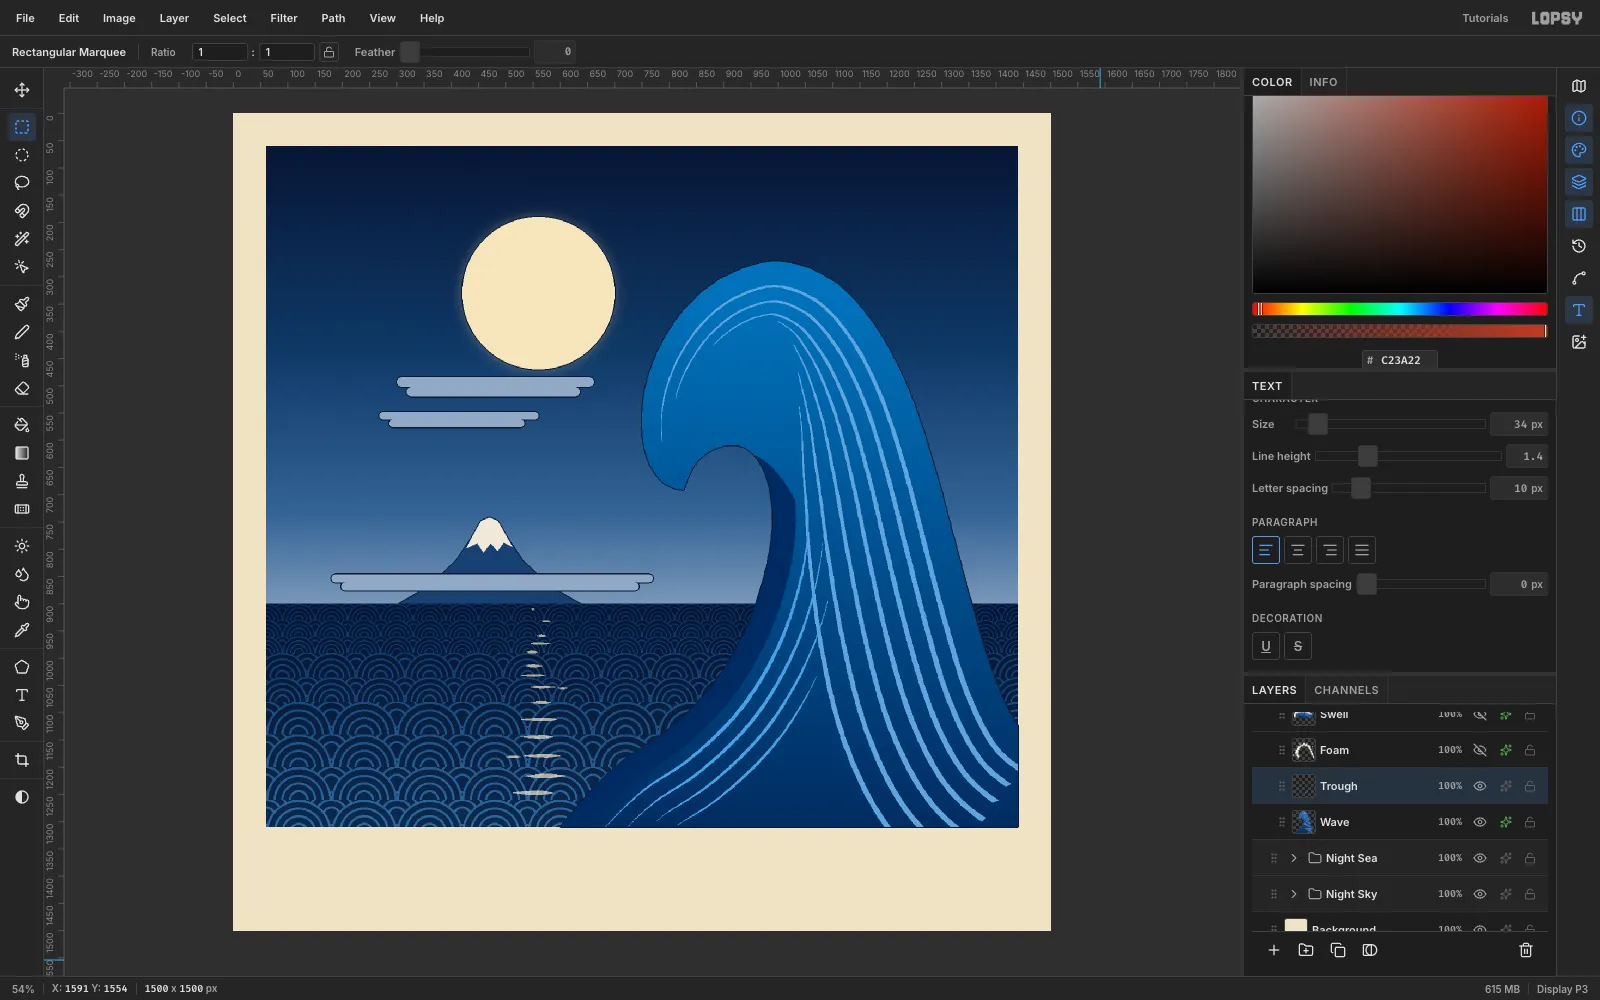
The face under the curl is a big empty slab. On a new Trough layer above Wave:
- Lasso a band about 46 px wide that hugs the inside of the face. Fill it
#0A2A5E. - Lasso four short stripes, 5–6 px at their widest and tapering at both ends, at 64, 94, 124 and 154 px from the face. Fill them
#5FA0E0.
Clip them to the wave the same way (lasso the wave, Inverse, Delete).
- Lasso a band about 46 px wide that hugs the inside of the face. Fill it
-
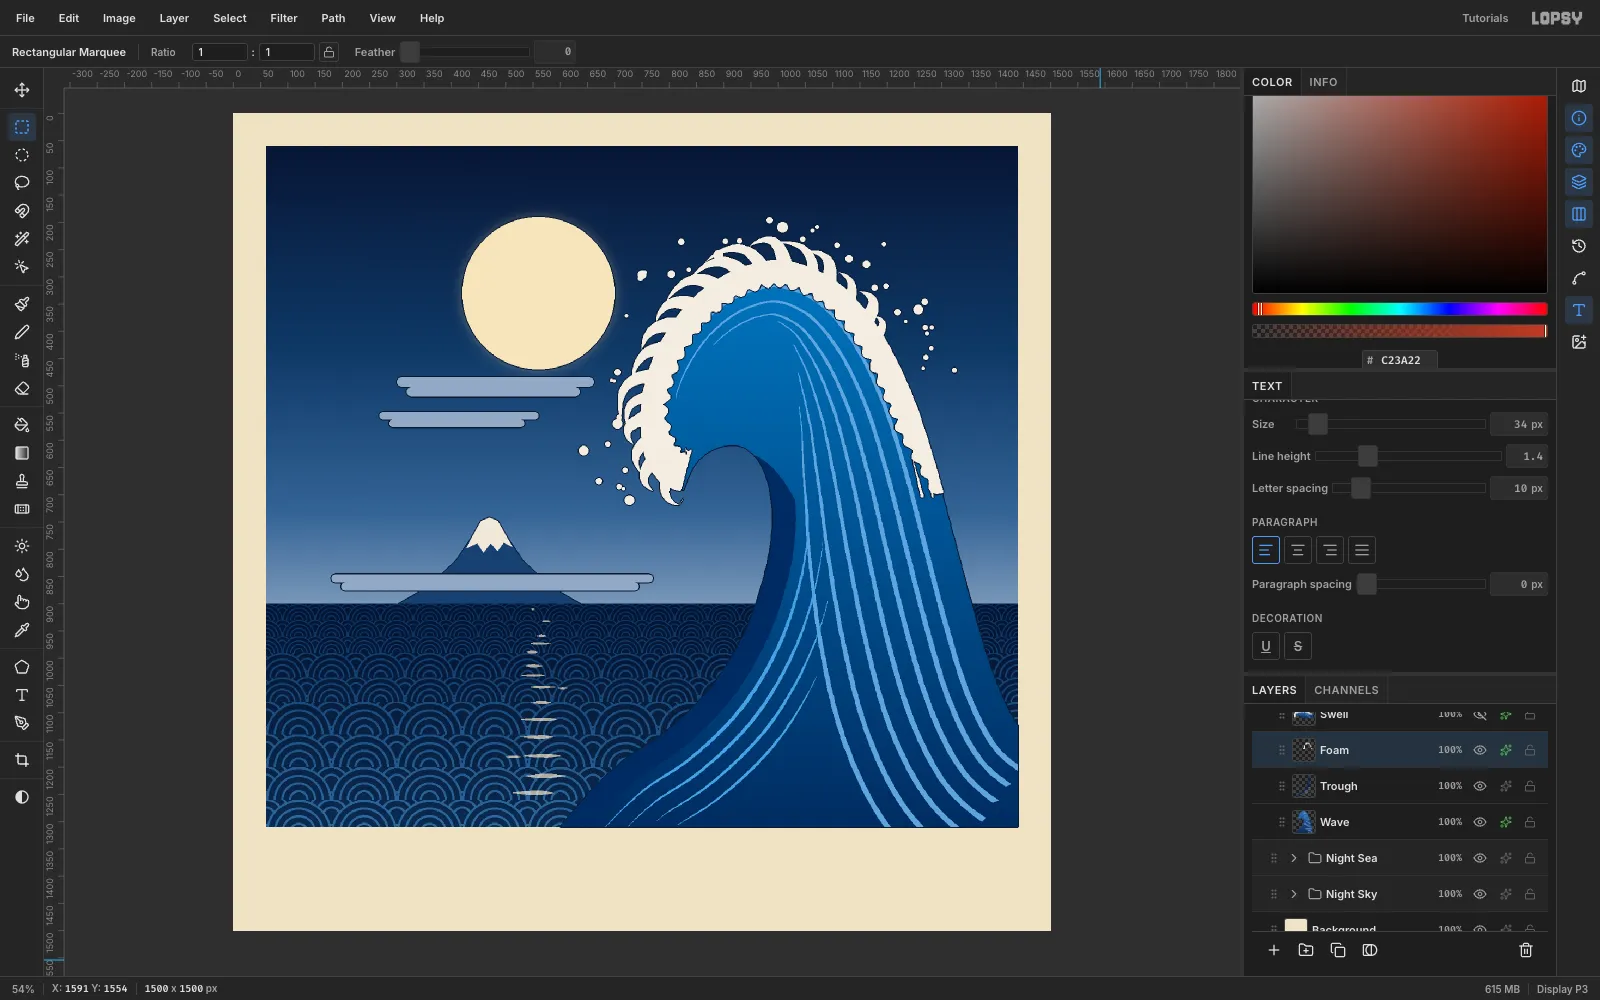
Add the foam claws and spray
On a Foam layer, use
#F2EDE1for:- The foam band. Lasso a band along the top of the crest that starts thin on the back slope, grows to about 40 px, and has a scalloped inner edge.
- The claws. Lasso a dozen or more curved, tapering fingers off the front of the crest. Give them different lengths (40–100 px) and bend angles, each ending in a small hook back toward the wave. Identical teeth look like a comb.
- The spray. Fill about 45 small Elliptical Marquee circles (radius 3–10 px) in a loose cloud outside the claws.
Trim to the frame and add a 2 px Stroke.
-
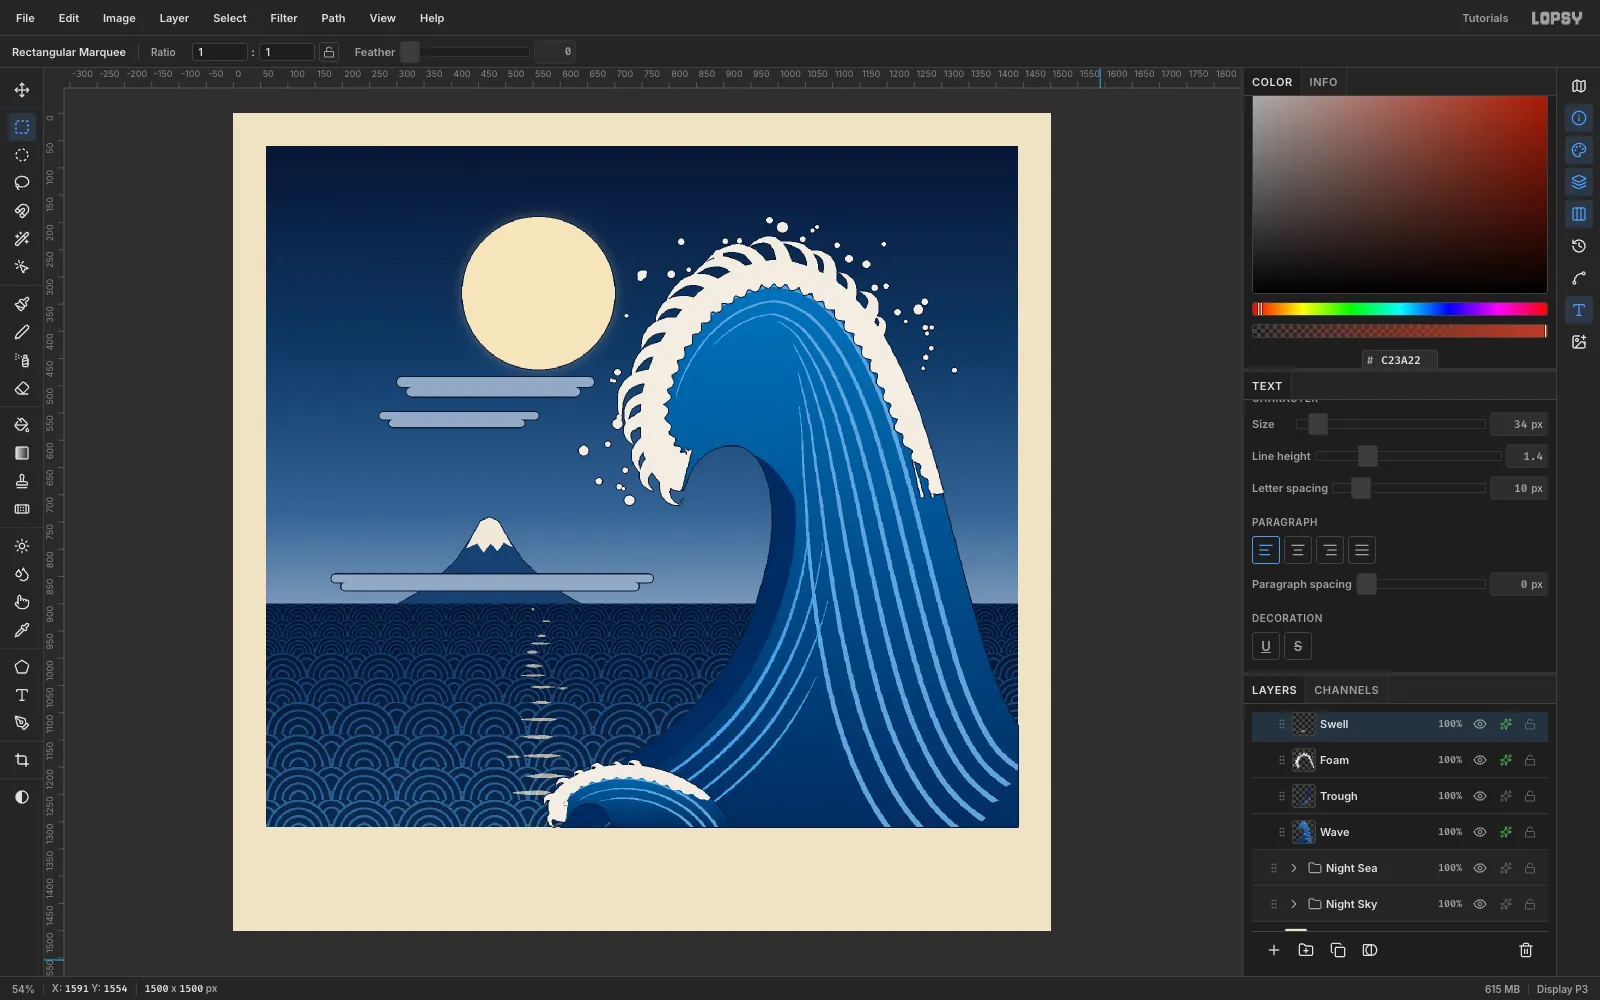
Add a foreground swell
A second, smaller wave gives the big one scale. On a Swell layer:
- Lasso a small curl from about (930, 1340) up to a crest at y 1198, hooking left to a tip at (614, 1300).
- Give it the same blue gradient and three short
#6FA3DAstripes, then clip it. - Add a thin foam band and a few small claws.
Trim to the frame and add the 2 px Stroke.
-
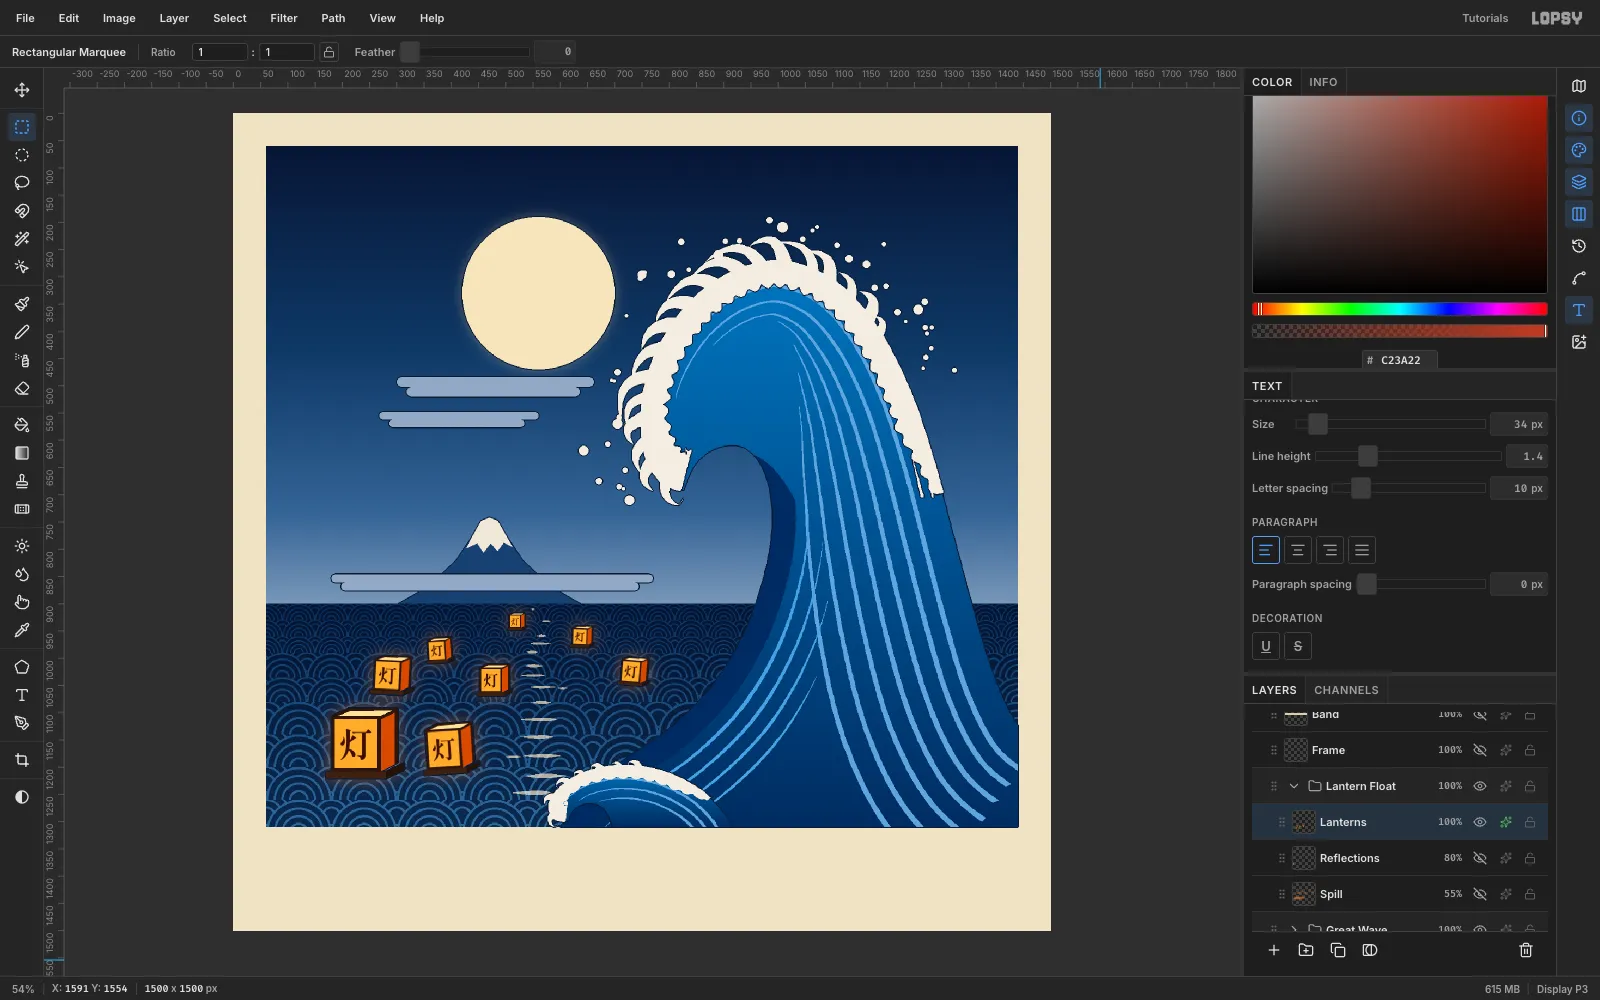
Make one paper lantern
On a Lantern layer near the bottom-left, draw a small box with flat colours only, using Lasso and Rect Marquee fills:
- Top opening:
#FFE3A0. - Front face: 90 × 100 px in
#F5B04A. - Side face: a narrow parallelogram in
#C8541E. - Frame: 6 px posts and rails in
#2B160C. - Base: a two-tone board,
#3A2214and#24140B.
For the character, select the Text tool. Pick Shippori Mincho B1, ExtraBold (800), size 62, colour
#3A1208. Click in empty space and paste 灯 ("light"). Press Tab to commit, click Rasterize Layer, drag the glyph onto the centre of the front face, and choose Layer → Merge Down.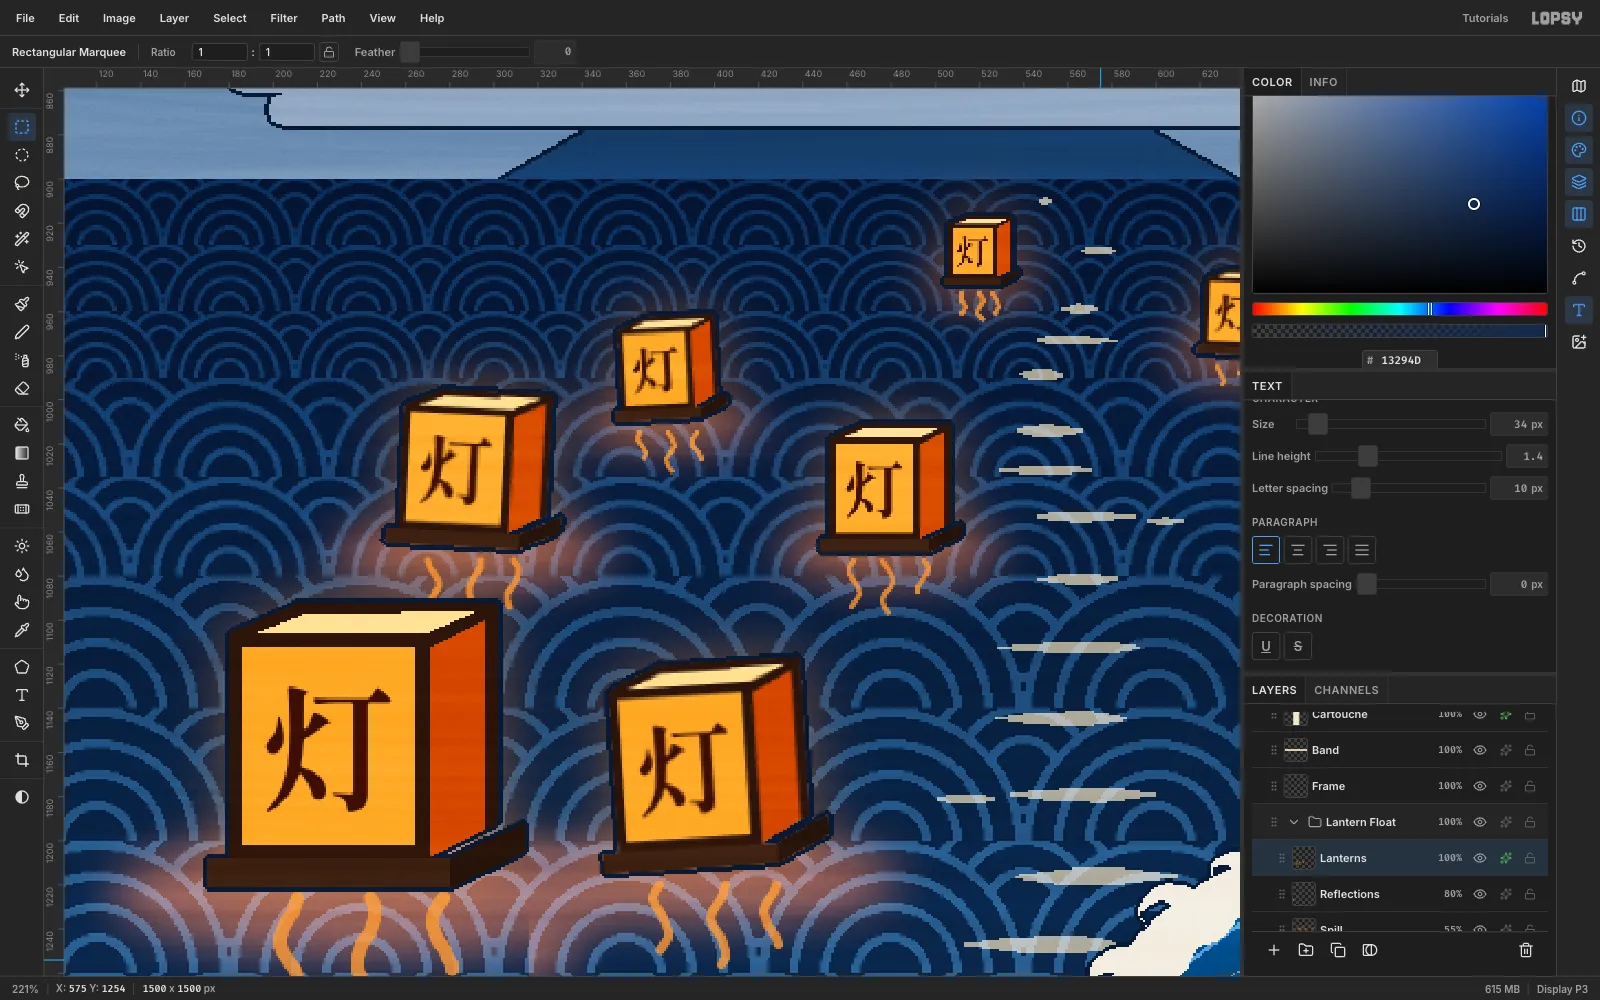
- Top opening:
-
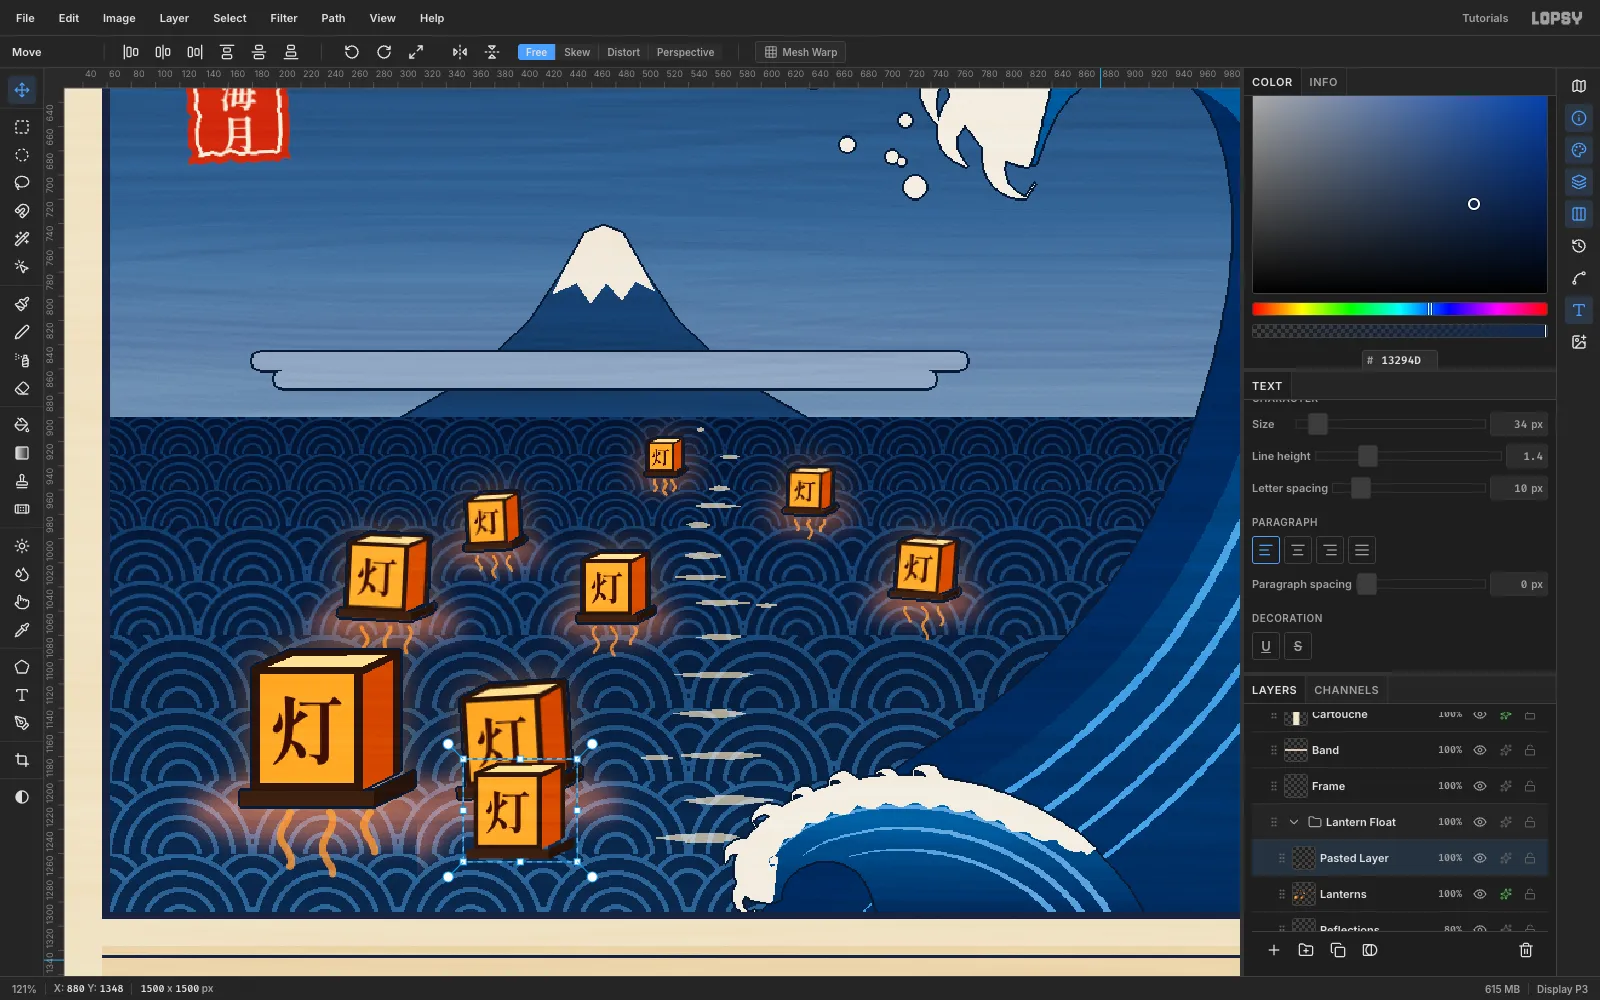
Clone and scale the flotilla
Marquee the lantern and press Cmd+C, then Cmd+V straight away. The copy pastes in place on a new layer.
- Drag it to its spot with the Move tool.
- Marquee it, hold Cmd and drag the bottom-right corner handle to scale it uniformly. Press Cmd+D to commit.
- Tilt a few by 3–5° with the rotate handle just outside the top-right corner, then Cmd+D.
Make seven copies at 72%, 55%, 45%, 40%, 36%, 30% and 24%. Place the smallest near the horizon and the largest toward the viewer.
-
Merge the lanterns and make them glow
Select the top copy and run Layer → Merge Down seven times, so all eight lanterns end up on one Lanterns layer. Add:
- a Stroke of
#0D1A33at Width 2, the same key-block line as everything else - an Outer Glow of
#FF9A3Aat Size 40, Opacity 45
- a Stroke of
-
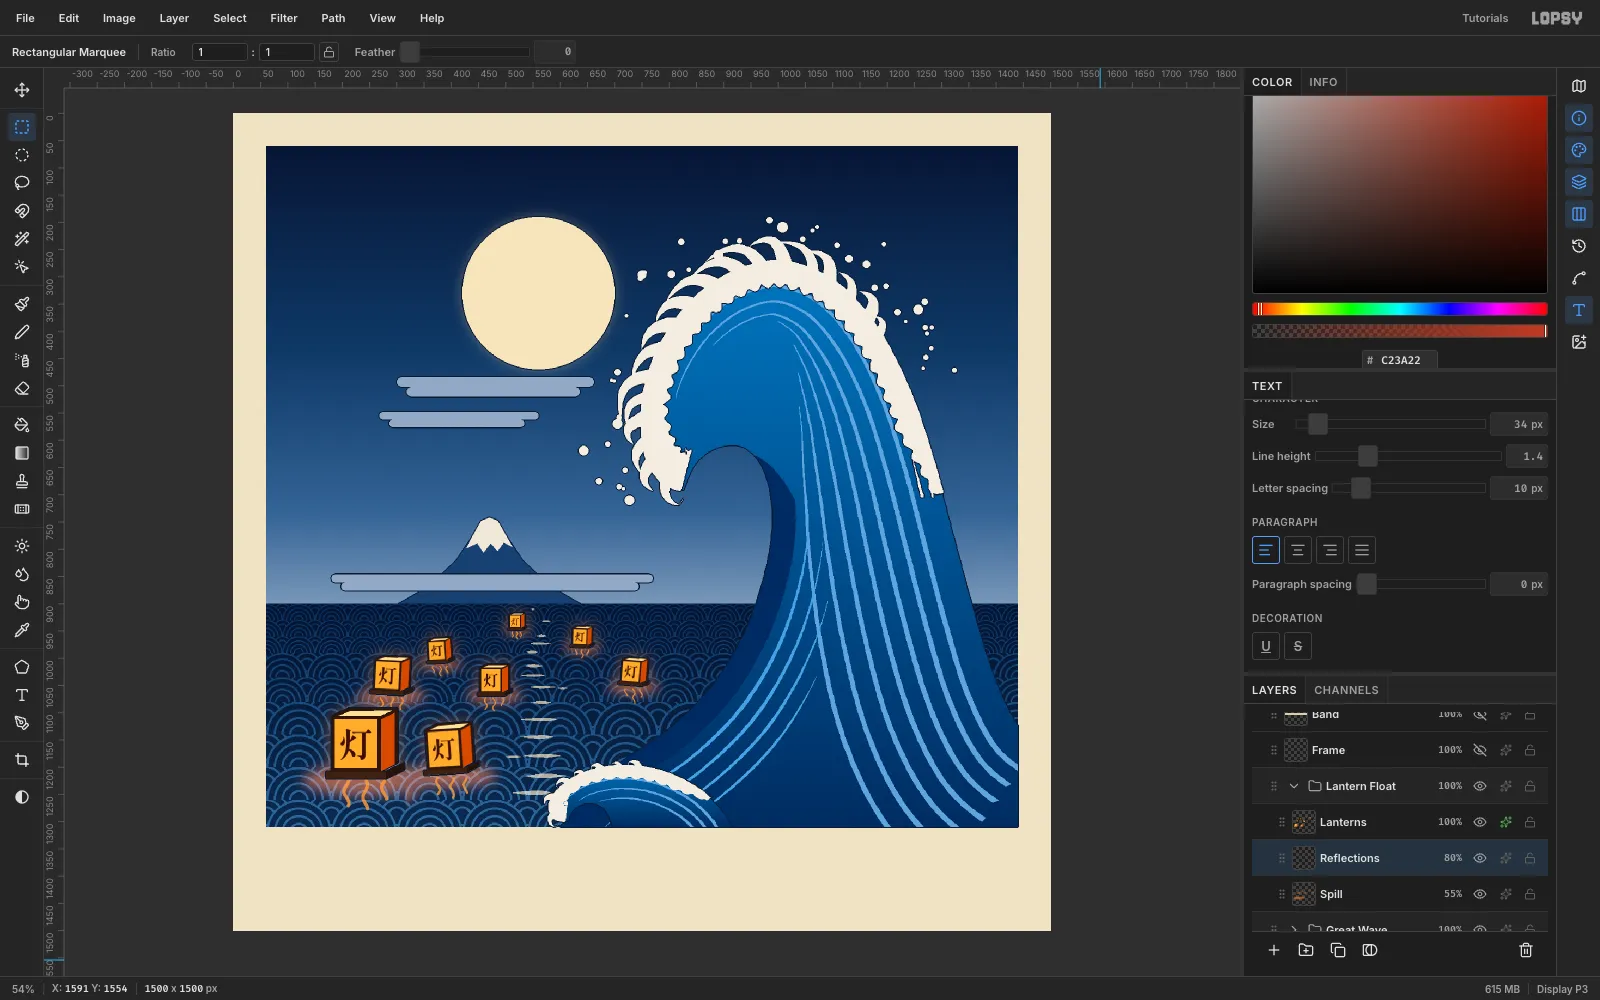
Paint wavering reflections
Spill. On a Spill layer below the lanterns, set the marquee Feather to 20. Fill a flat orange (
#E8782C) ellipse under each lantern, then set Feather back to 0. Set the layer to Screen at about 50%.Reflections. On a Reflections layer, use the Brush (Hardness 100, colour
#F2A04A, Size about 5% of the lantern's width). Draw three short, gently wavy vertical strokes under each lantern: a long one in the middle and shorter ones at the sides. Set the layer to 80%. They double as jellyfish tentacles, which fits a band called KURAGE.Select the layers of each part and choose Layer → Group Layers to make four groups: Night Sky, Night Sea, Great Wave and Lantern Float.
-
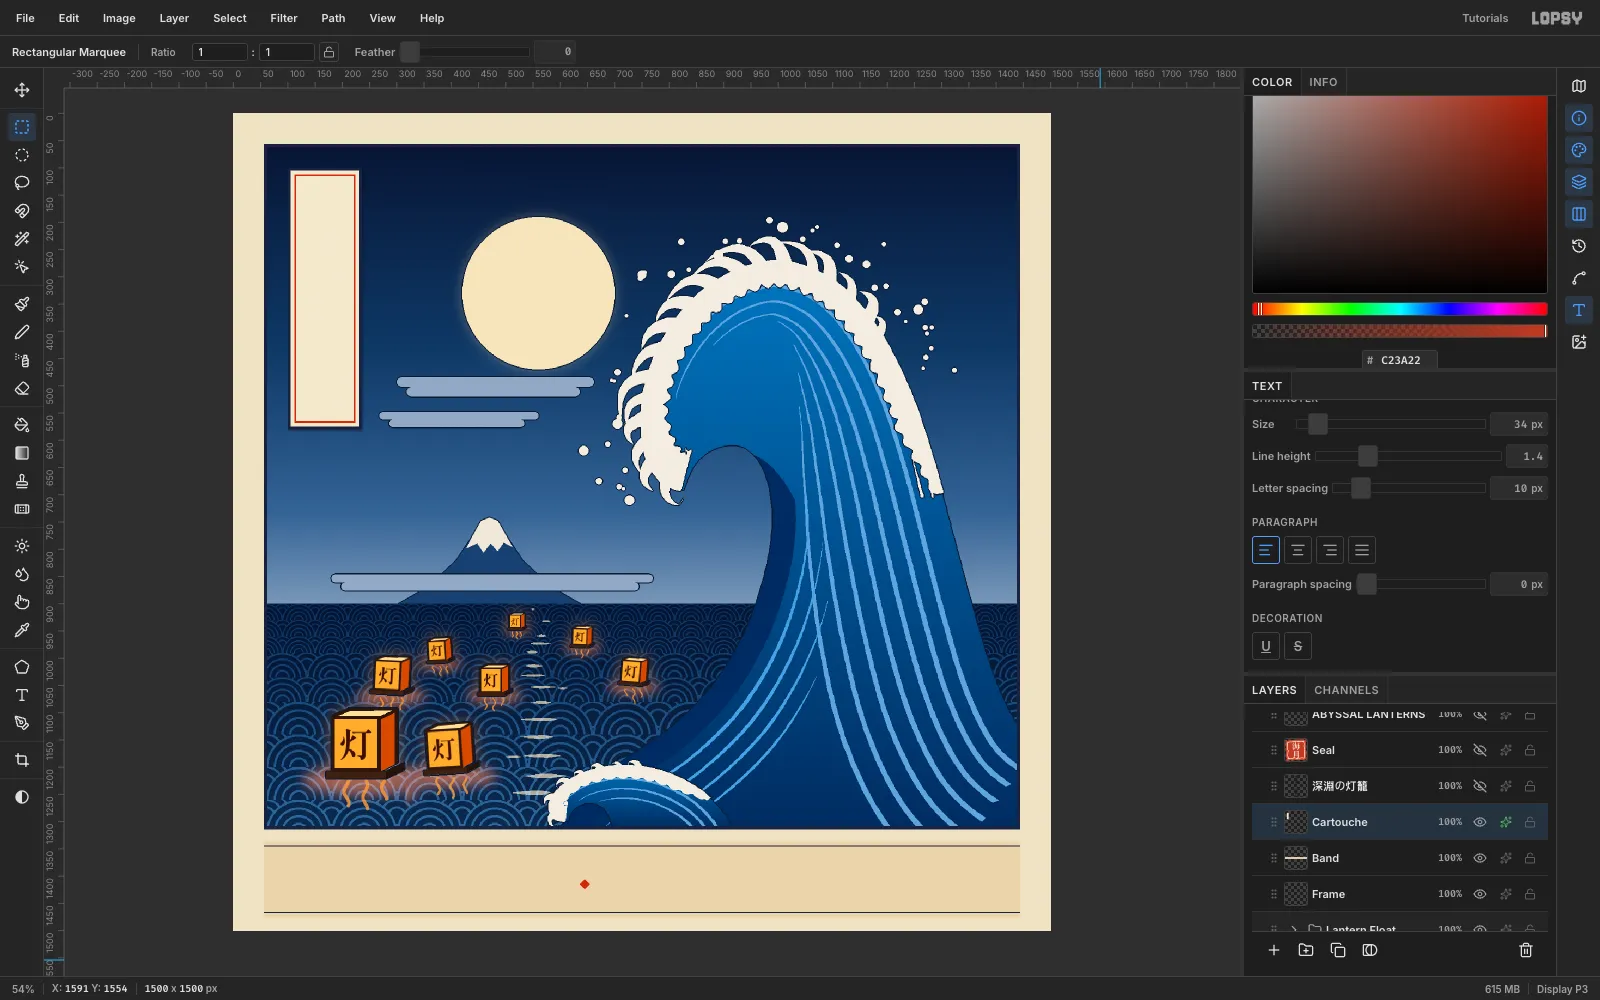
Frame the print and add the cartouche
Frame. On a Frame layer at the top:
- Marquee from (56, 56), 1388 × 1258. Fill it
#1A2340. - Choose Select → Shrink… 5 px and press Delete, which leaves a crisp 5 px keyline.
Band. On a Band layer, fill (56, 1336, 1388 × 140) with
#E8D5AE. Draw 2 px#1A2340rules at y 1344 and y 1466.Cartouche. On a Cartouche layer, marquee (100, 100, 136 × 480) and fill it in rings using Shrink:
#1A2340- shrink 4, fill
#F3E9CF - shrink 6, fill
#C23A22 - shrink 2, fill
#F3E9CF
Add a soft Drop Shadow (Offset 2/3, Blur 5, Opacity 40).
- Marquee from (56, 56), 1388 × 1258. Fill it
-
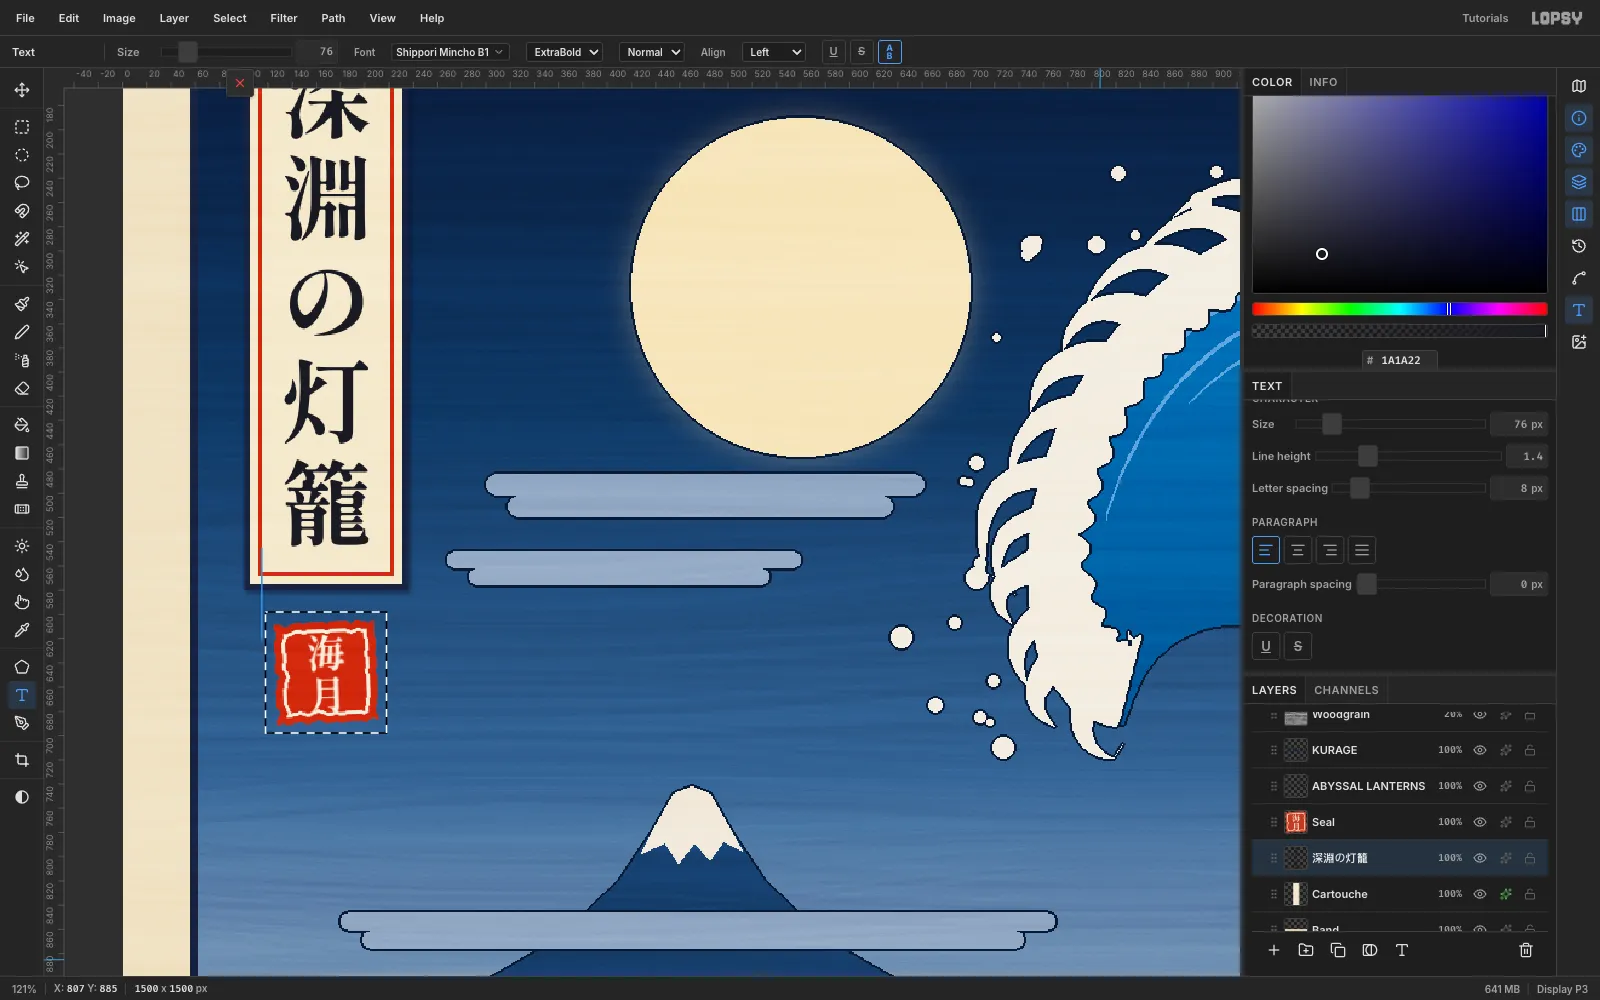
Set the vertical title
Select the Text tool with the Cartouche layer active. Set:
- Shippori Mincho B1, ExtraBold, size 76
- Vertical on (the stacked A-over-B toggle in the options bar)
- Letter spacing 8 (in vertical mode that's the gap between glyphs), Line height 1.4
Click inside the cartouche, paste 深淵の灯籠 ("lanterns of the abyss") and press Tab.
Centre it with the Move tool and arrow keys. The glyphs should sit 25 px from the red rule at both top and bottom, centred on x 168.
-
Carve the hanko seal
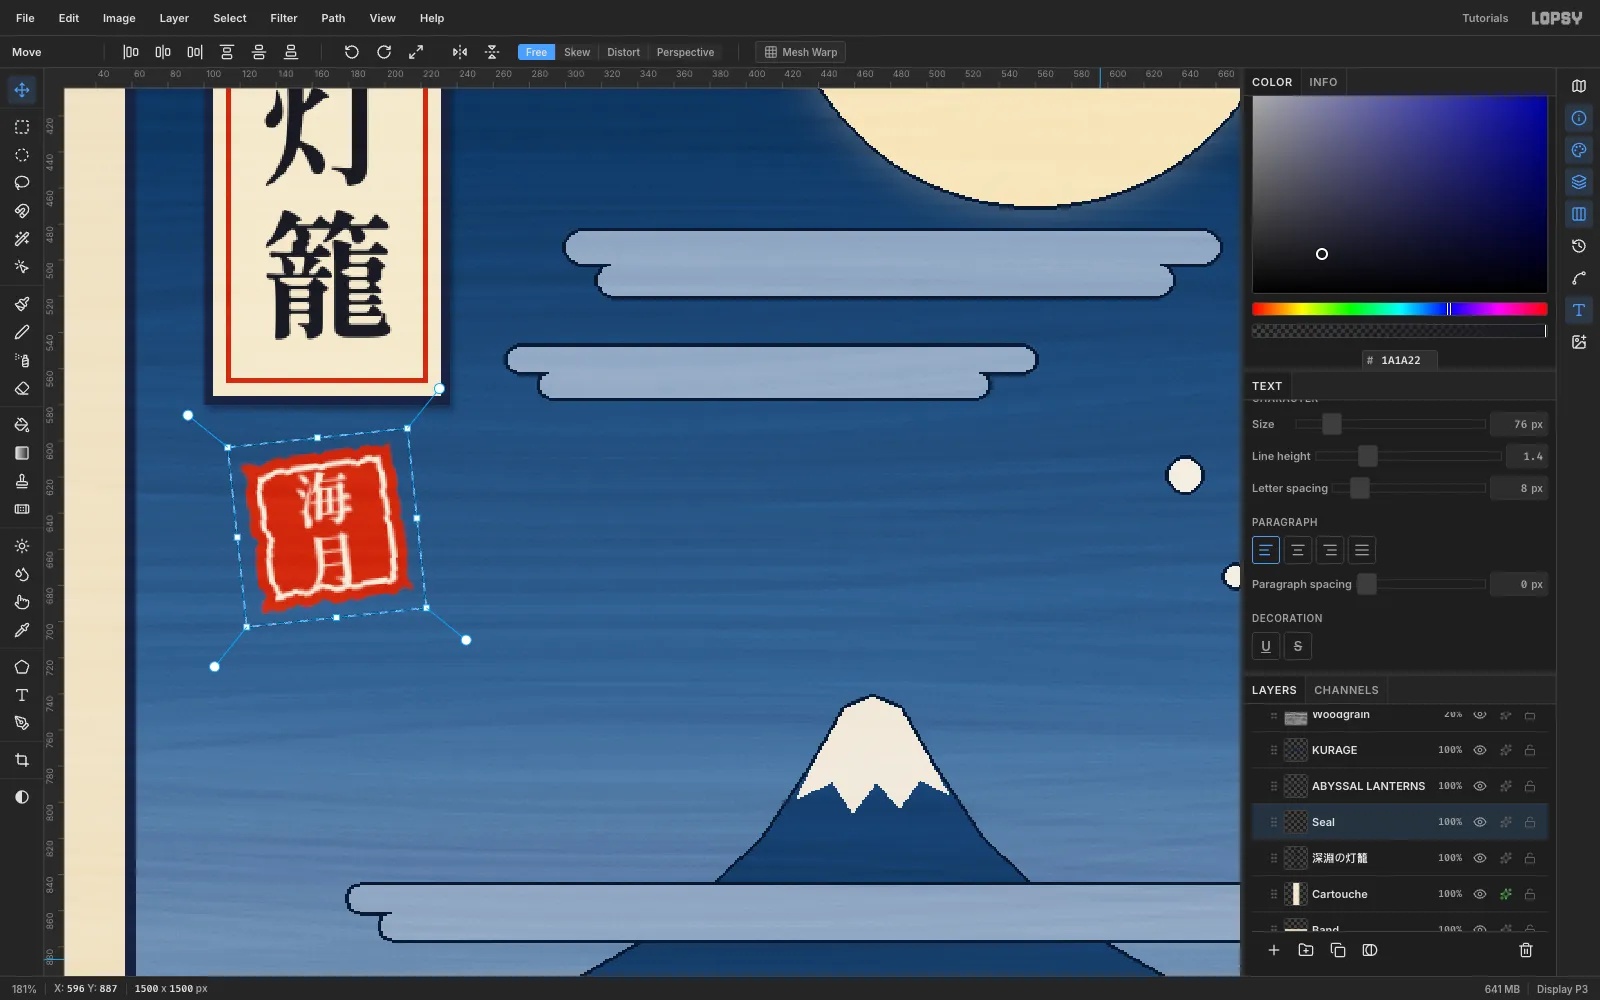
On a Seal layer, lasso an 84 px square at (126, 606) with slightly jittered edges and a couple of nicks (a point every 5 px, pushed in 0–3 px at random). Fill it
#C23A22. For the inner keyline, shrink 5 and fill#F6EEDC, then shrink 2 and fill#C23A22again.Add vertical text 海月 at size 32 in
#F6EEDC. Rasterize it, centre it on the seal and Merge Down.To rotate the seal by −2°, marquee it and drag just outside the top-right corner with the Move tool, then press Cmd+D. A stamp that's slightly off square looks hand-pressed.
-
Add a woodgrain texture
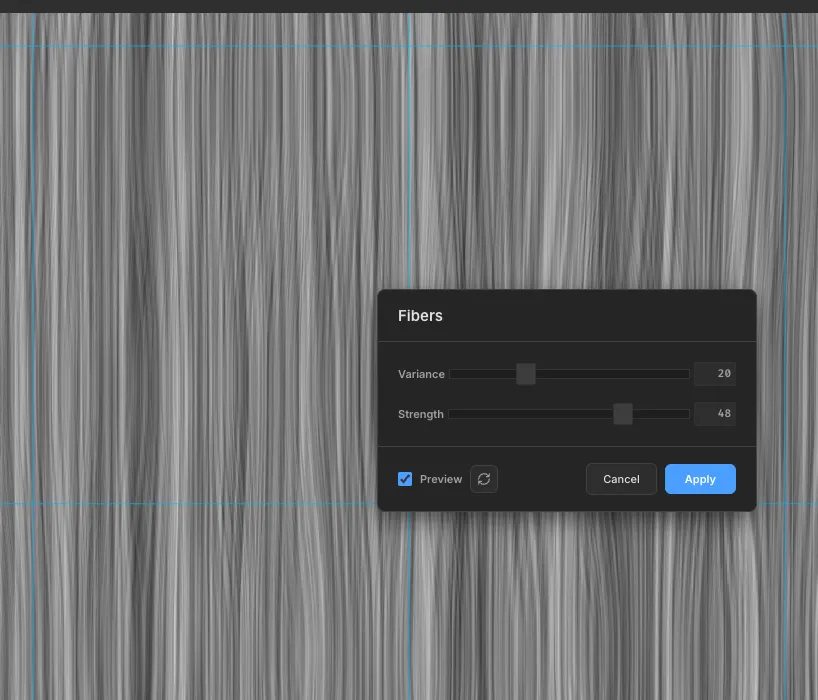
Add a Woodgrain layer at the very top and fill it
#808080.- Run Filter → Fibers… with Variance 20 and Strength 48.
- The fibers are vertical. With the Move tool and no selection, click Rotate 90° CW in the options bar to turn them into horizontal grain.
- Run Filter → Add Noise…, Mono, Amount 24.
- Set the layer to Overlay at 20%.
The grain now runs through the sky, the sea and the paper, like ink printed from a cherry block.
-
Set the band typography
The band name should lead:
- KURAGE: Shippori Mincho B1 ExtraBold, size 56, letter spacing 12
- ABYSSAL LANTERNS: Medium (500), size 34, letter spacing 10
Both are
#1A2340. Create each one in empty space so the text tool doesn't grab the other layer, then line them up:- Put the two words on one shared baseline (y 1428).
- Centre KURAGE's caps between the rules.
- Leave 35 px, then a small
#C23A22lassoed diamond, then another 35 px before the title.
Measure the whole line and nudge it until it centres on x 750. Finally, check that Woodgrain is still the top layer, so the type is textured too, then File → Save Project and File → Quick Export PNG.