Design a Tropical Paper-Cut Restaurant Menu
Make a layered paper-cut jungle menu in Lopsy with lasso monstera leaves, palm fronds, hibiscus, cacao pods and a clean three-column price list.
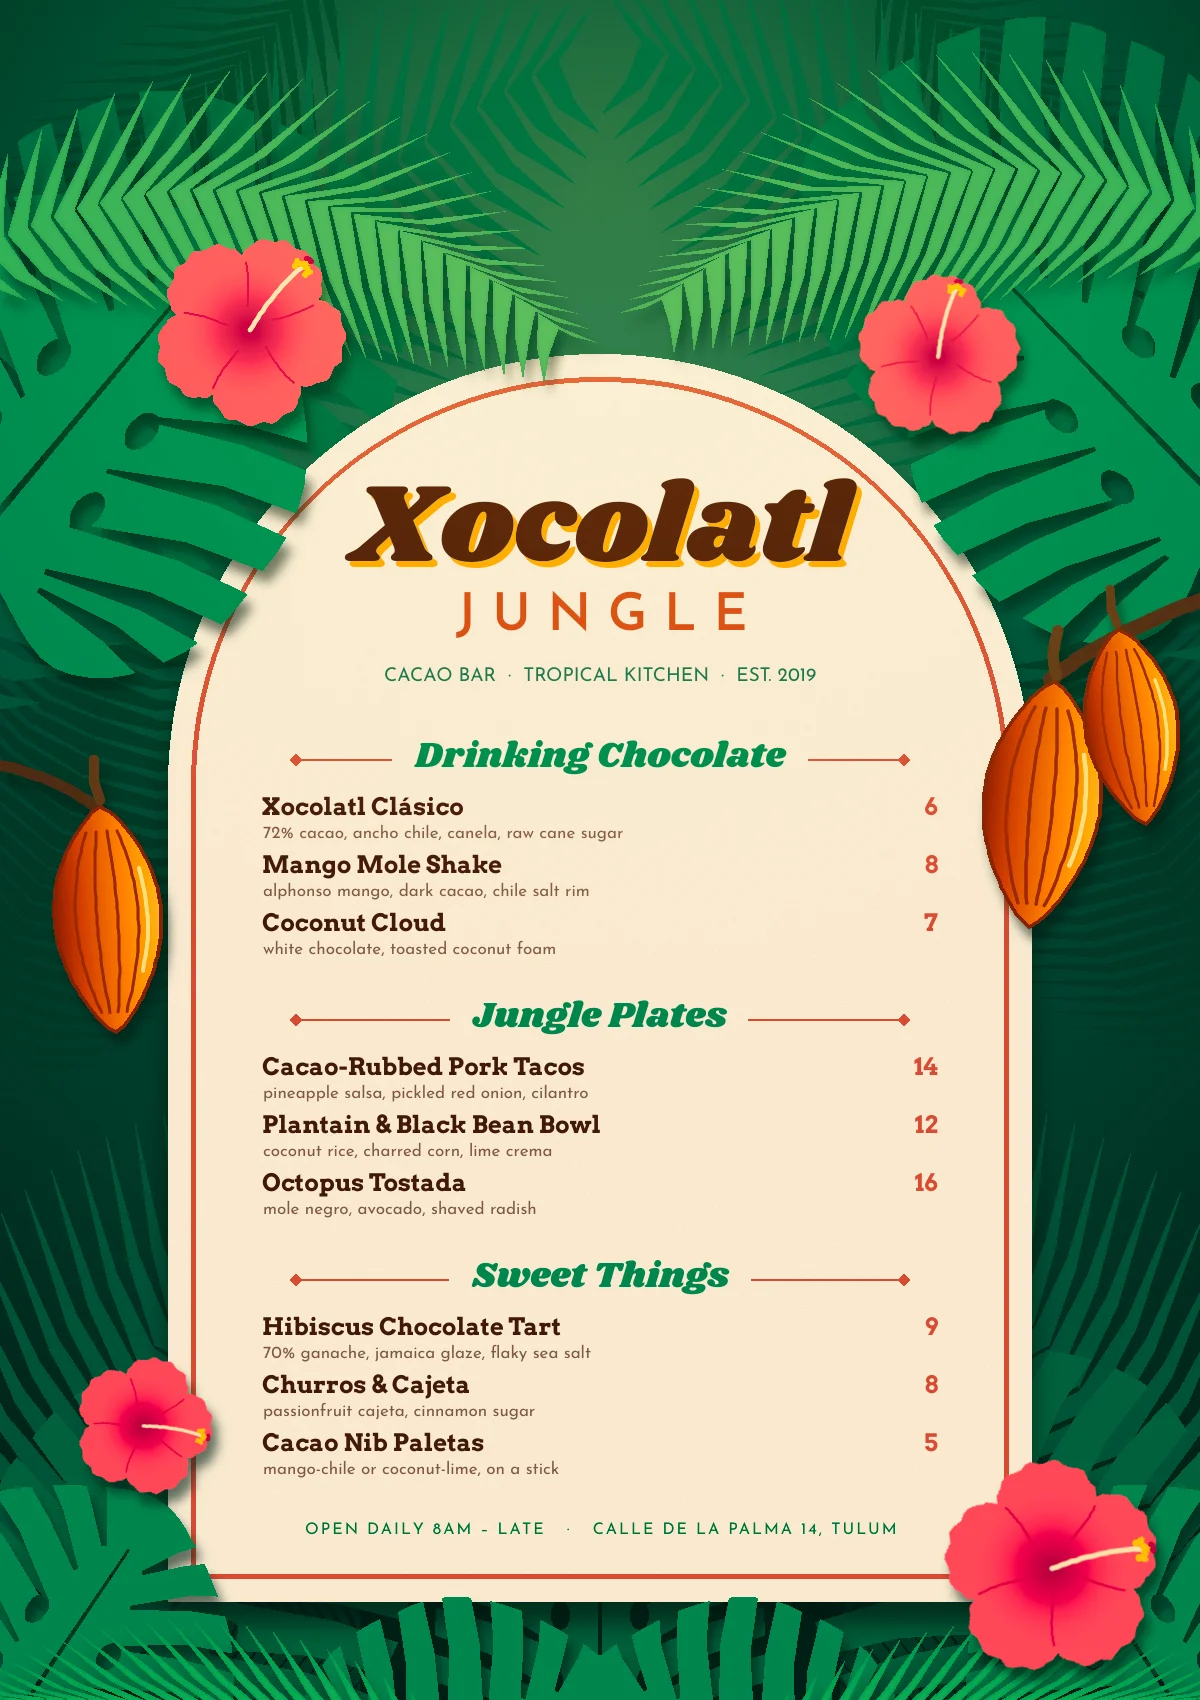
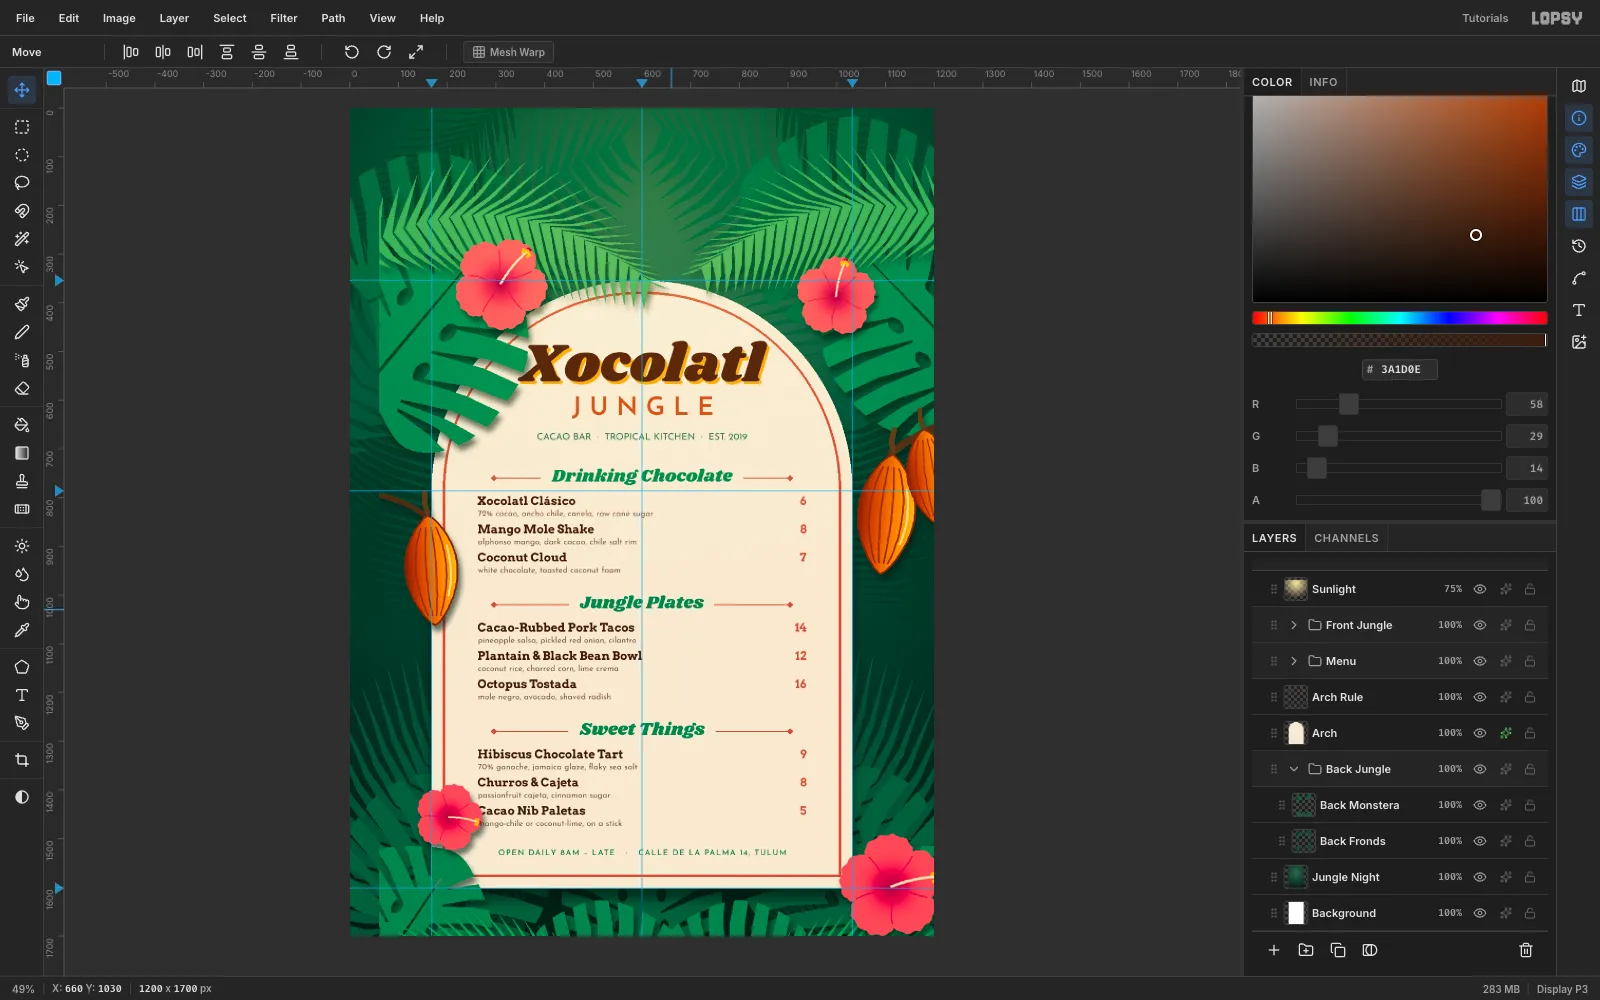
Paper-cut illustration builds depth from flat shapes. Each layer of leaves is a single colour, and a soft drop shadow lifts it off the layer behind. In this tutorial you'll use that trick to make a menu for Xocolatl Jungle, an imaginary cacao bar and tropical kitchen. The card is 1200 × 1700 px.
Every leaf is a Lasso fill, cut with more lasso shapes and the Delete key. The flowers and cacao pods add gradients and brush details. The menu itself is three blocks of area text per section (names, descriptions, prices) so the columns line up exactly.
The palette:
- Jungle greens:
#061A13,#0B3727,#11513A,#17603F,#2A8452and#4FAA5E - Paper
#F6EAD2, terracotta rule#C8553D - Cacao brown
#3B1A0E, mango#F2A531, coral#C24A26, leaf-green type#2A8452 - Hibiscus
#FF5A5Ffading to crimson#A0103A, cacao pods#FFC04A→#7E2610
-
Paint the jungle backdrop
Choose File → New, set the unit to Pixels, and create a 1200 × 1700 document with a white background. Rename Layer 1 to Jungle Night.
Pick the Gradient tool and set Type to Radial. Click Advanced… and set three stops:
#2A6B4Fat 0%,#123F2Fat 55% and#061A13at 100%. Drag from (600, 520) down to (600, 1750). The glow sits behind where the title will go, and the corners fall away into darkness.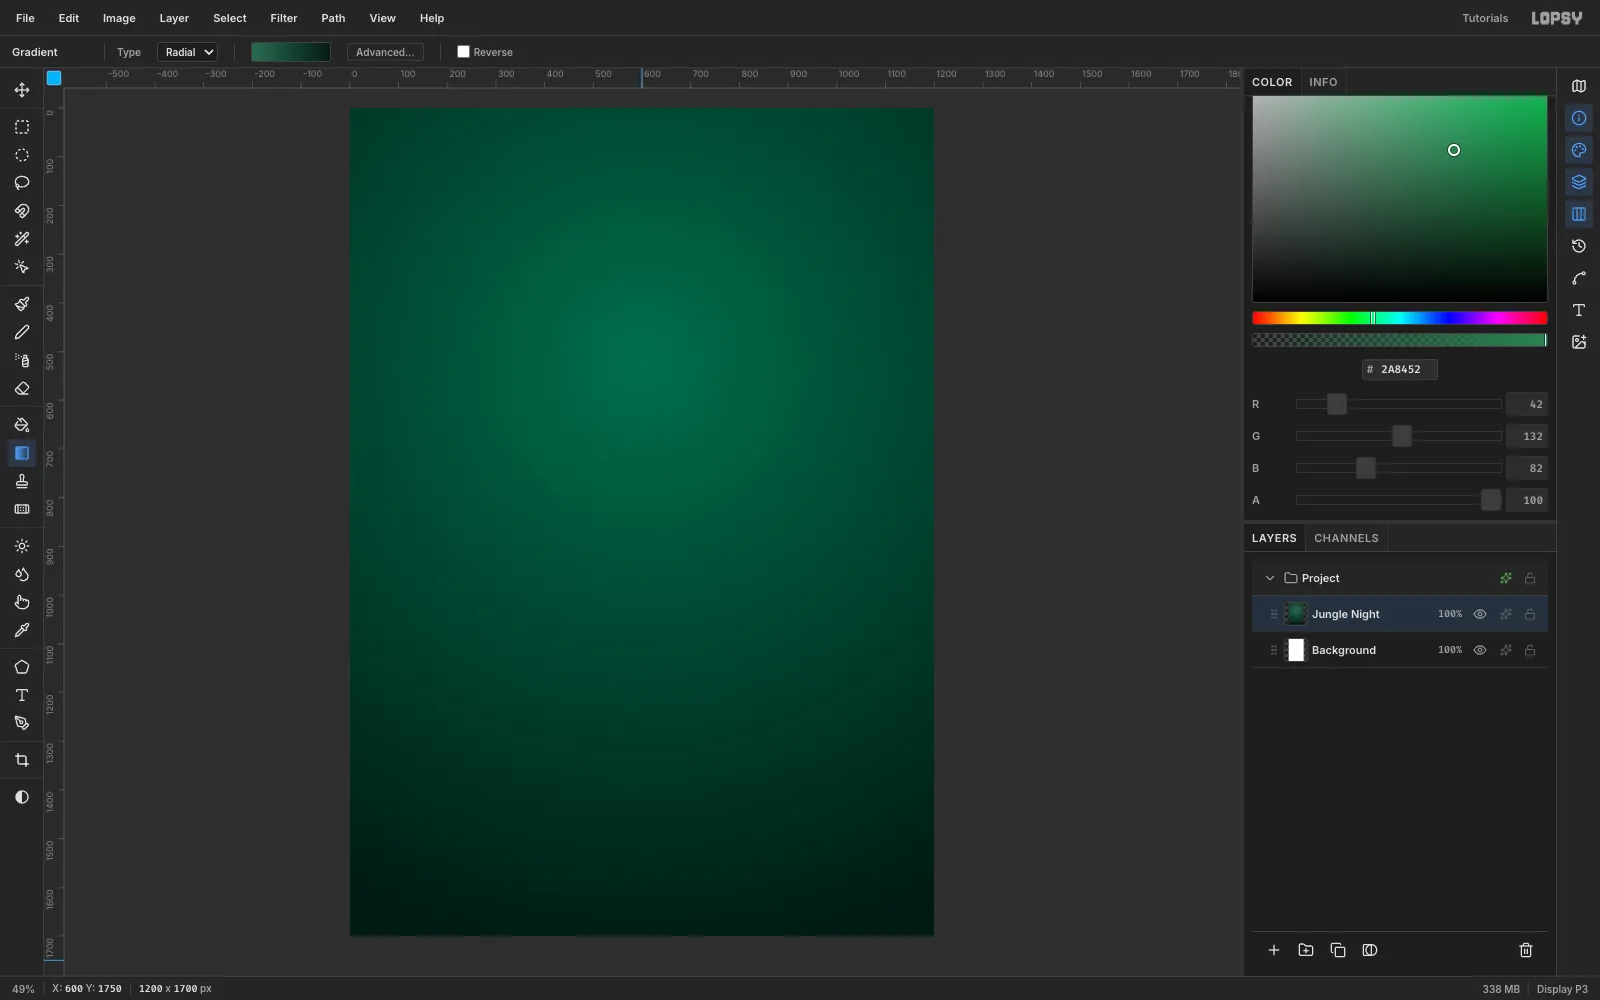
-
Add guides and a grid
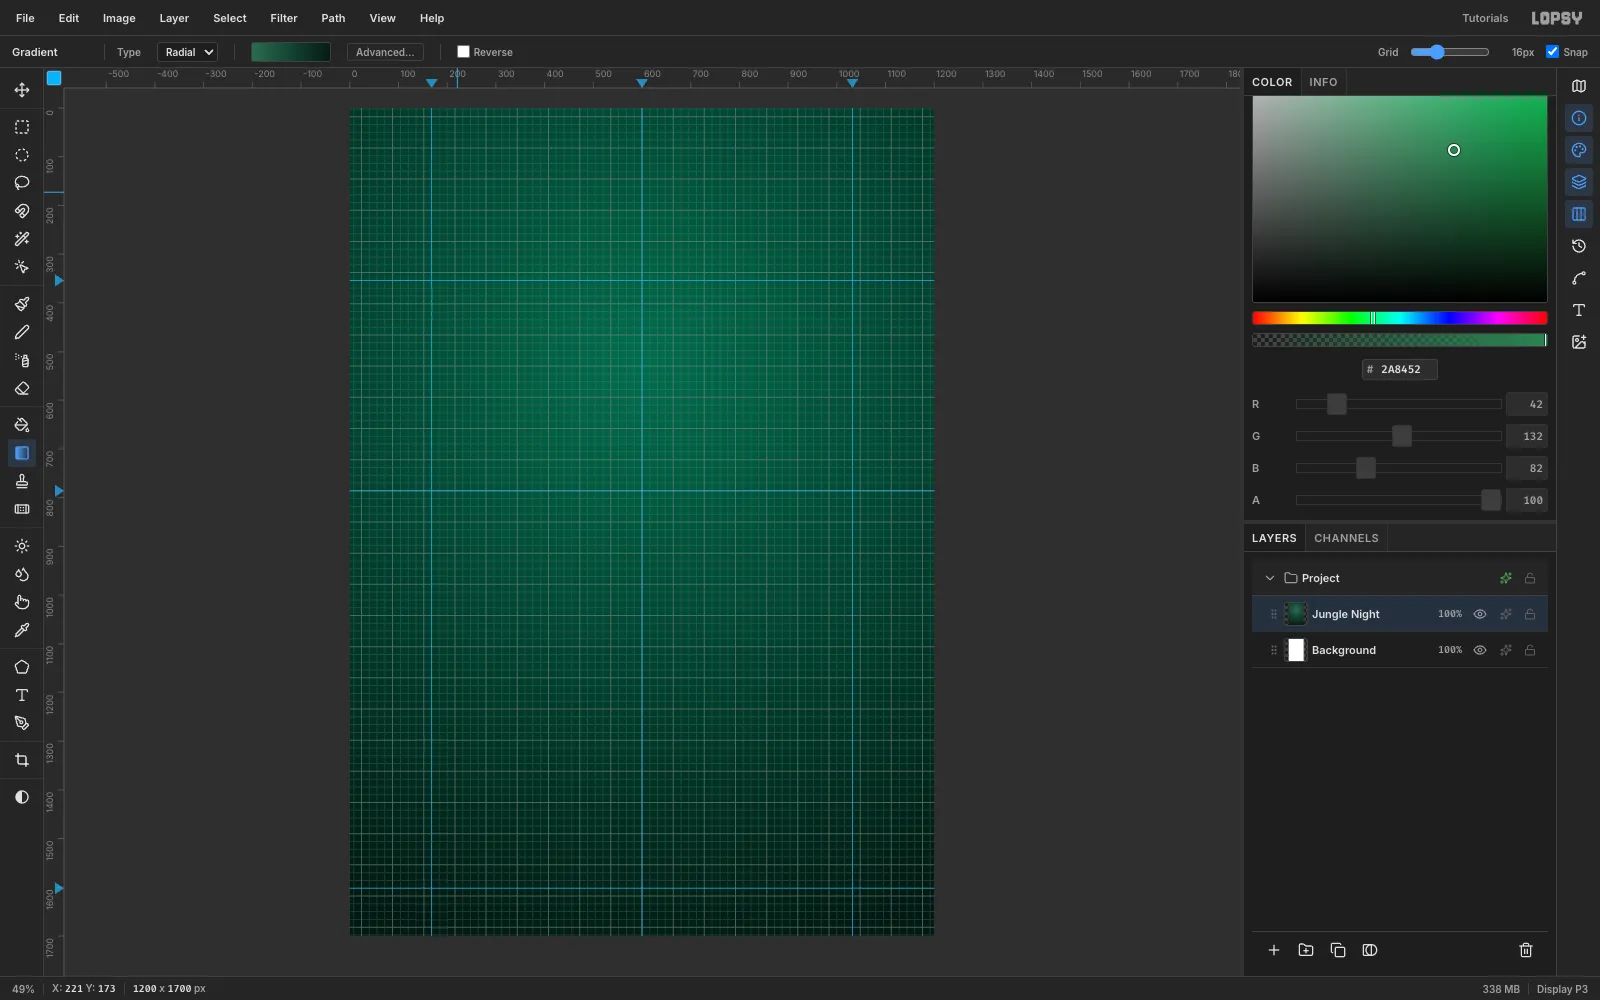
Click the top ruler at 168, 600 and 1032 for vertical guides, and the left ruler at 354, 786 and 1602 for horizontal ones. They mark the arch's sides, its centre line, the top of the dome, where the dome meets the straight sides, and the bottom.
Turn on View → Show Grid. Snap switches on with it, so your marquees land on the 16 px lattice.
-
Draw the dome of the arch
Add a layer named Arch. Set the foreground colour to
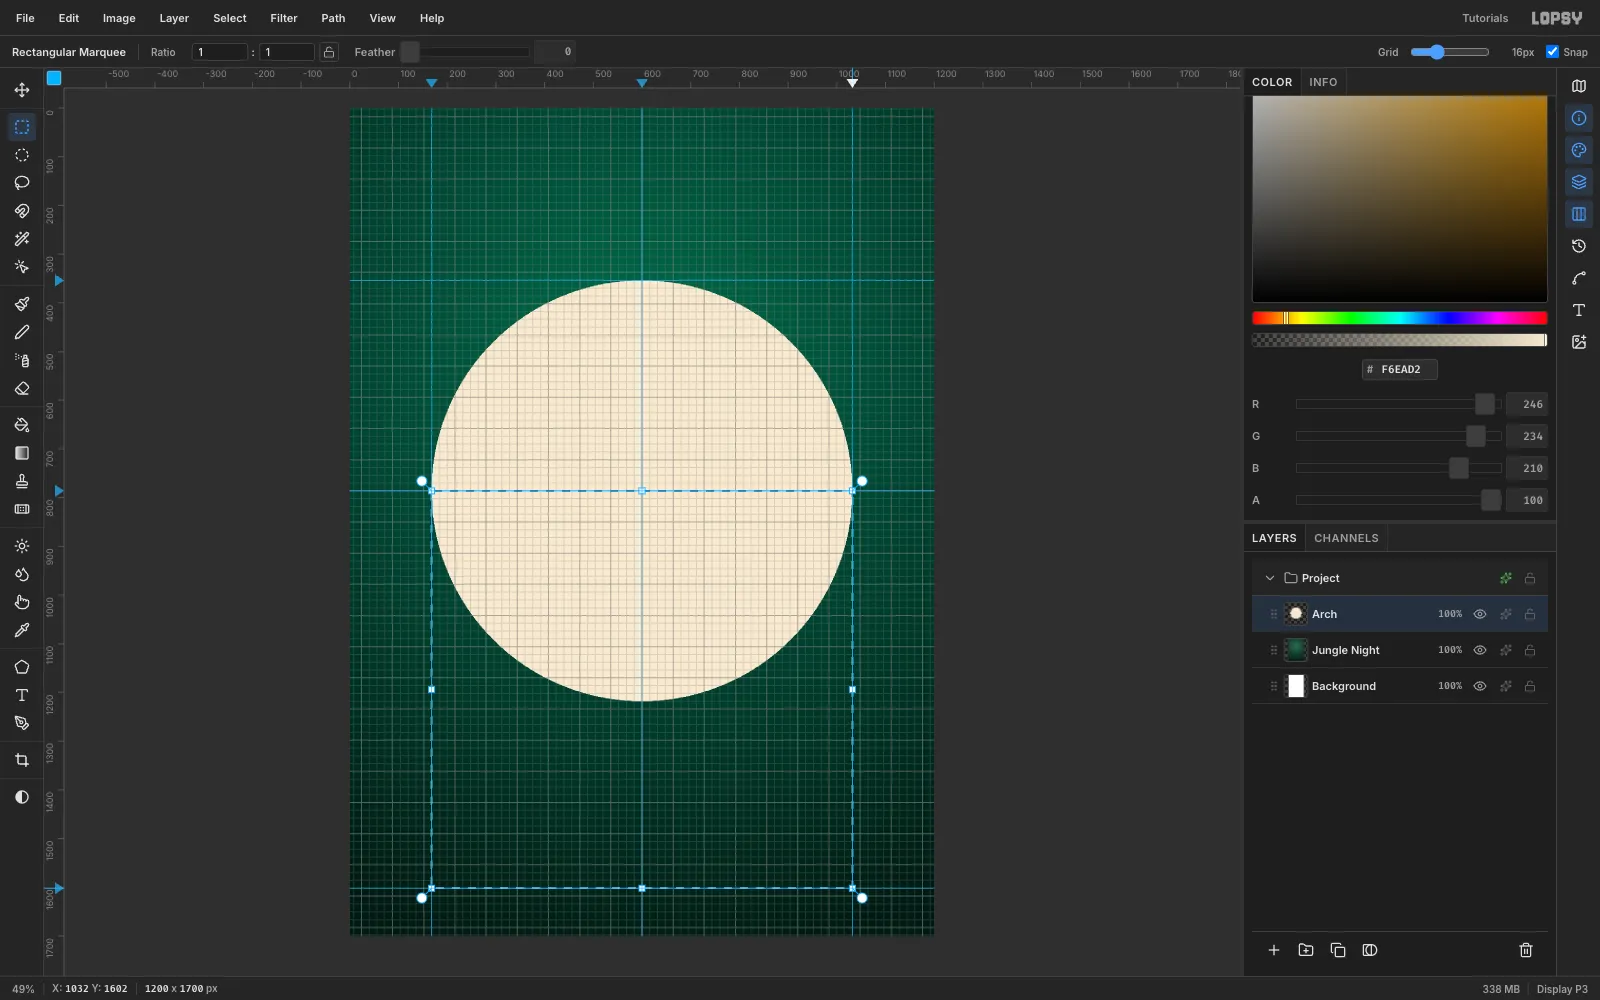
#F6EAD2. With the Elliptical Marquee, drag a circle from (168, 354) to (1032, 1218). That's 864 px wide, so its centre sits exactly on the 786 guide. Choose Edit → Fill.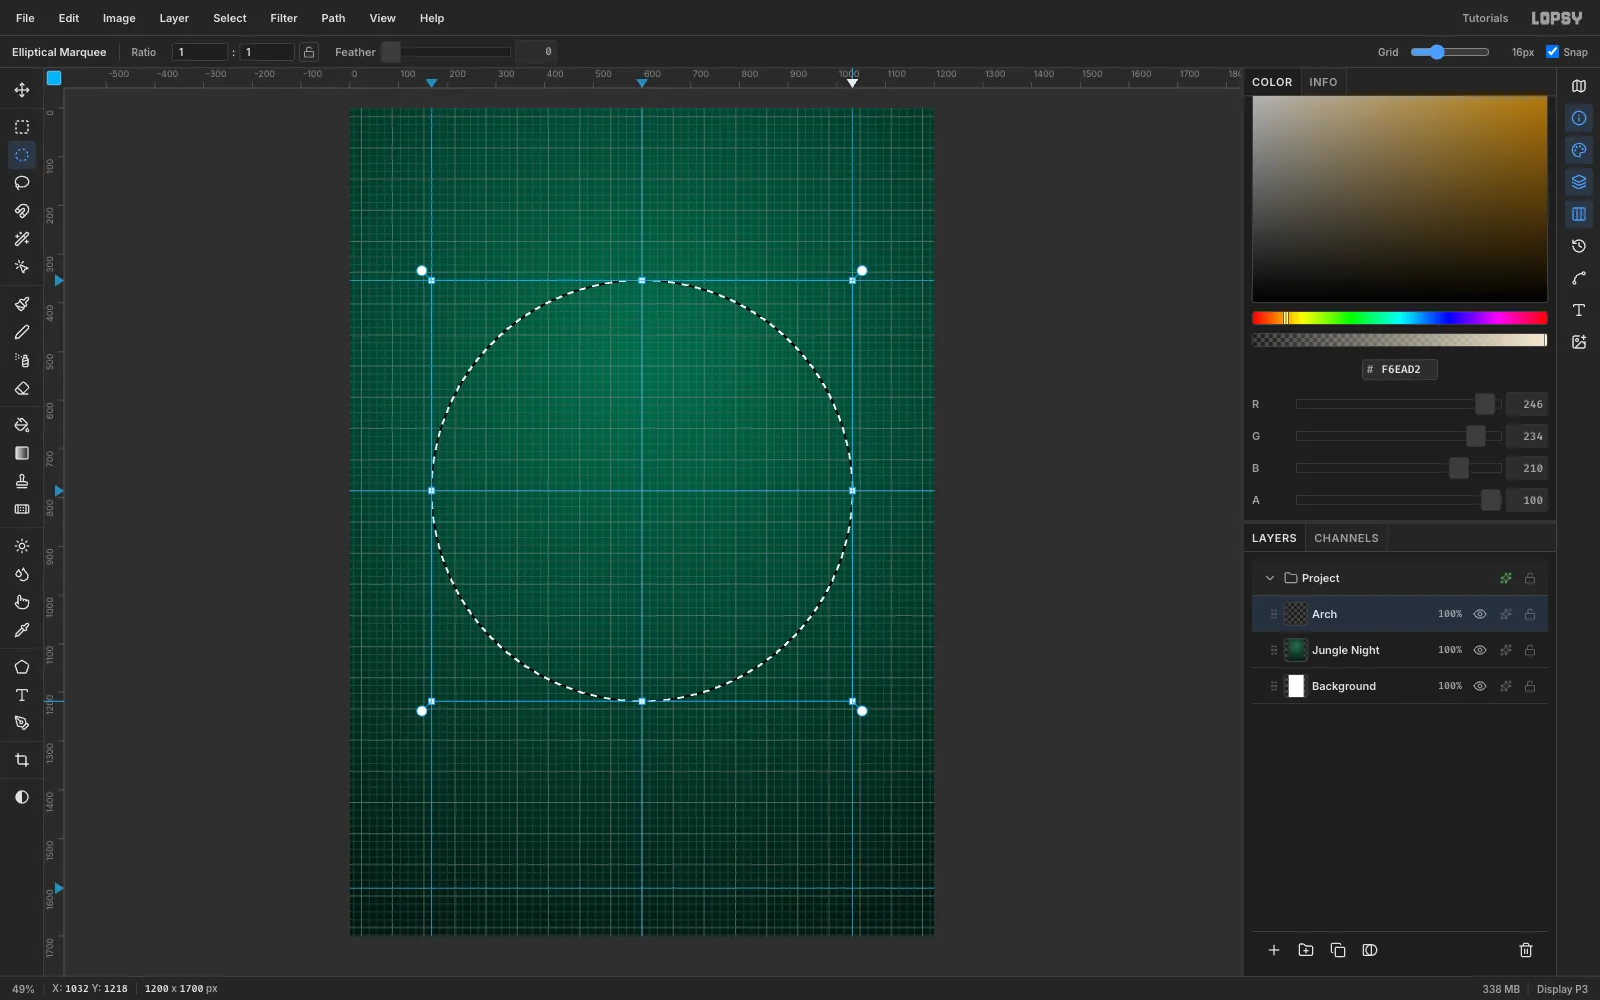
-
Add the straight sides
Switch to the Rectangular Marquee and drag from (168, 786) to (1032, 1602). Choose Edit → Fill again. The rectangle's top edge cuts through the circle's widest point, so the two shapes merge into one seamless arched window. Press Cmd+D to deselect.
Untick Snap in the options bar before you continue. The organic shapes that follow should land exactly where you draw them.
-
Give the paper some grain
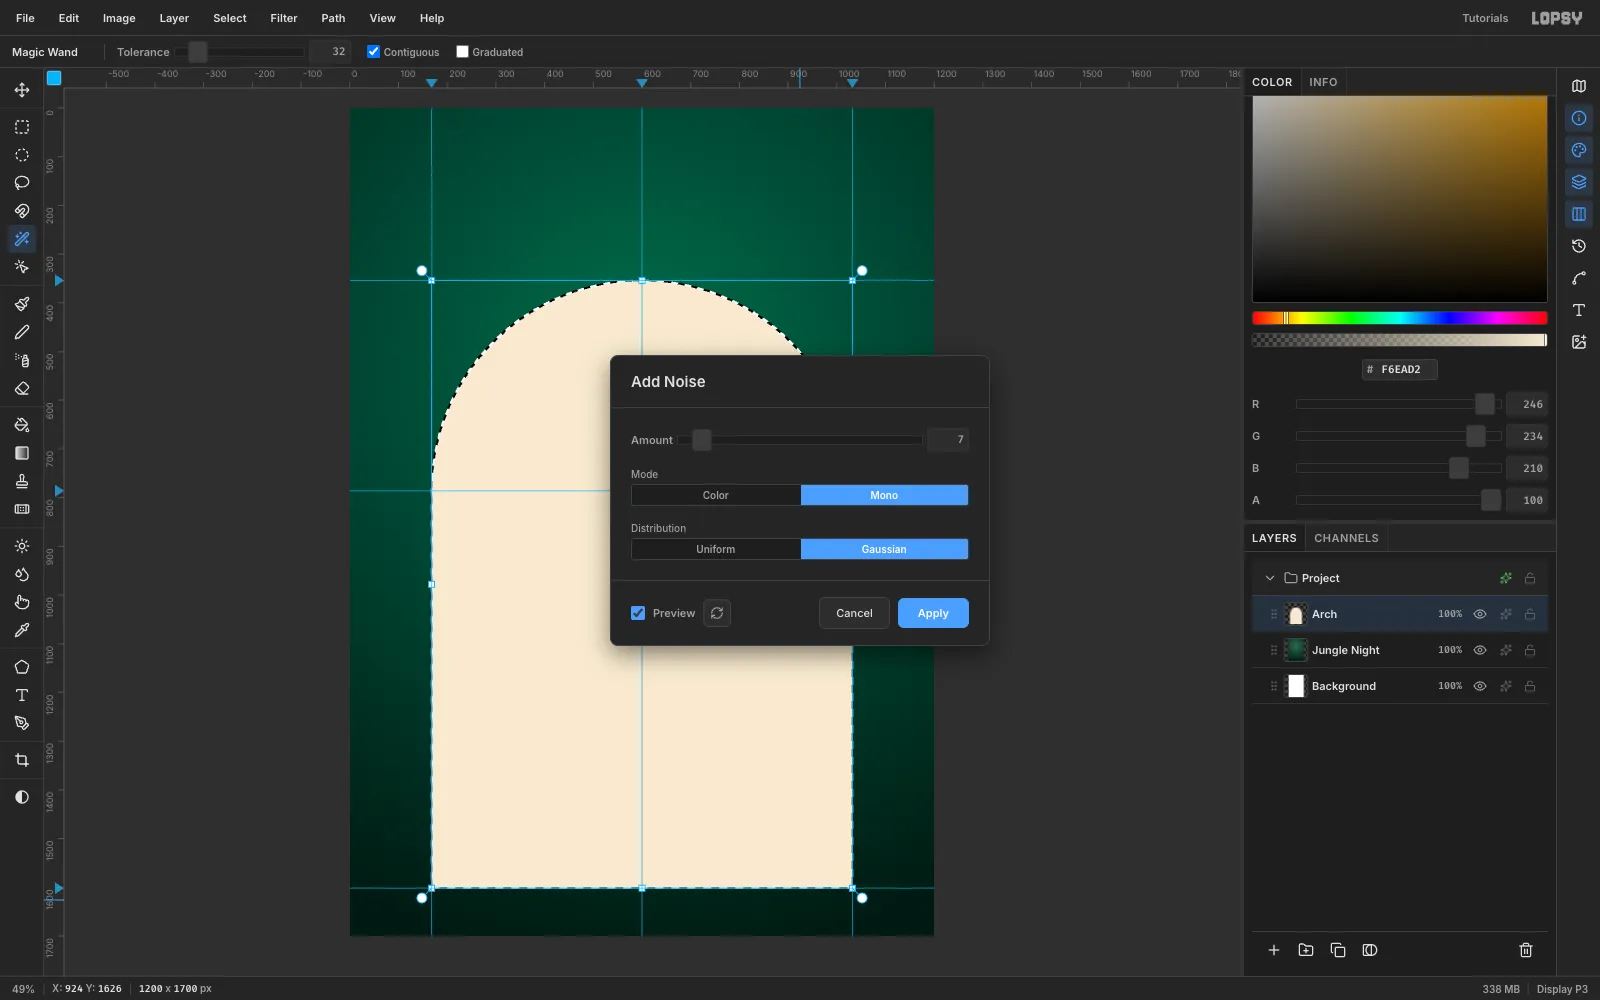
Click inside the arch with the Magic Wand to select it. Choose Filter → Add Noise, pick Mono and Gaussian, set Amount to 7, and click Apply. The grain is faint, but it stops the cream looking like flat plastic.
-
Draw an inset rule
Keep the selection. Choose Select → Shrink… and shrink by 22 px. Add a layer named Arch Rule, and fill it with terracotta
#C8553D. Choose Select → Shrink… again with 4 px, then press Delete. That leaves a 4 px line that follows the arch 22 px in from its edge. Press Cmd+D.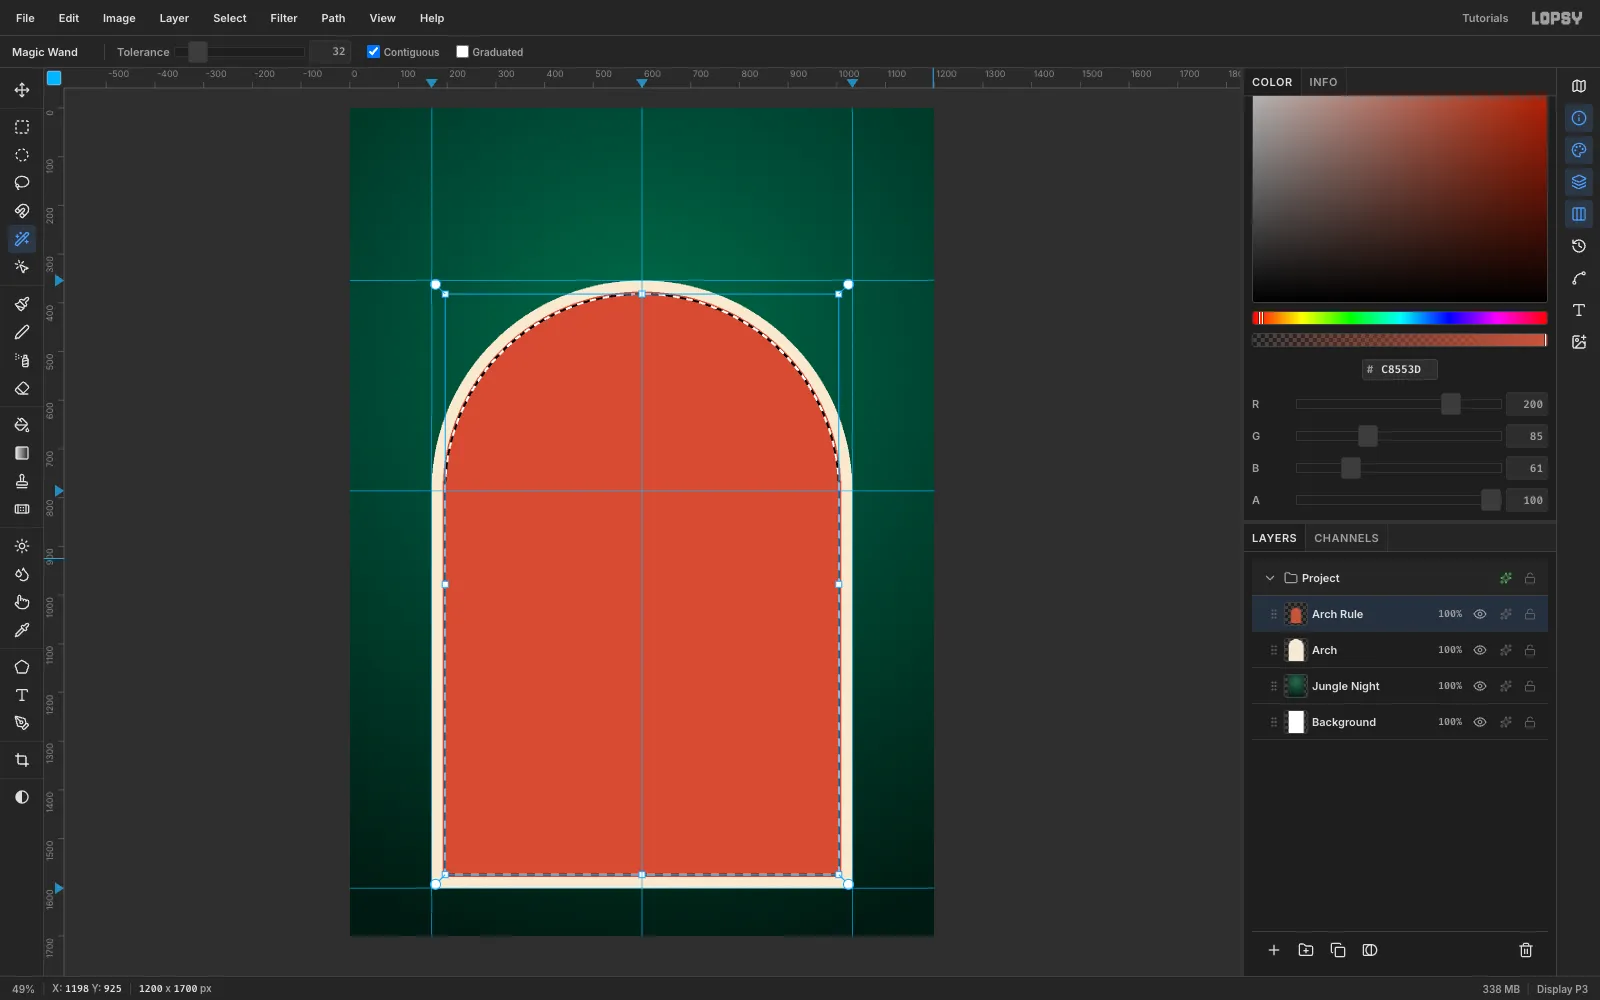
-
Lift the card with a shadow
Select Arch and open its layer effects. Enable Drop Shadow with colour
#03140E, Offset X 0, Offset Y 22, Blur 40, Spread 0 and Opacity 70. It's subtle against the dark green, but it separates the paper from the jungle once leaves start overlapping it.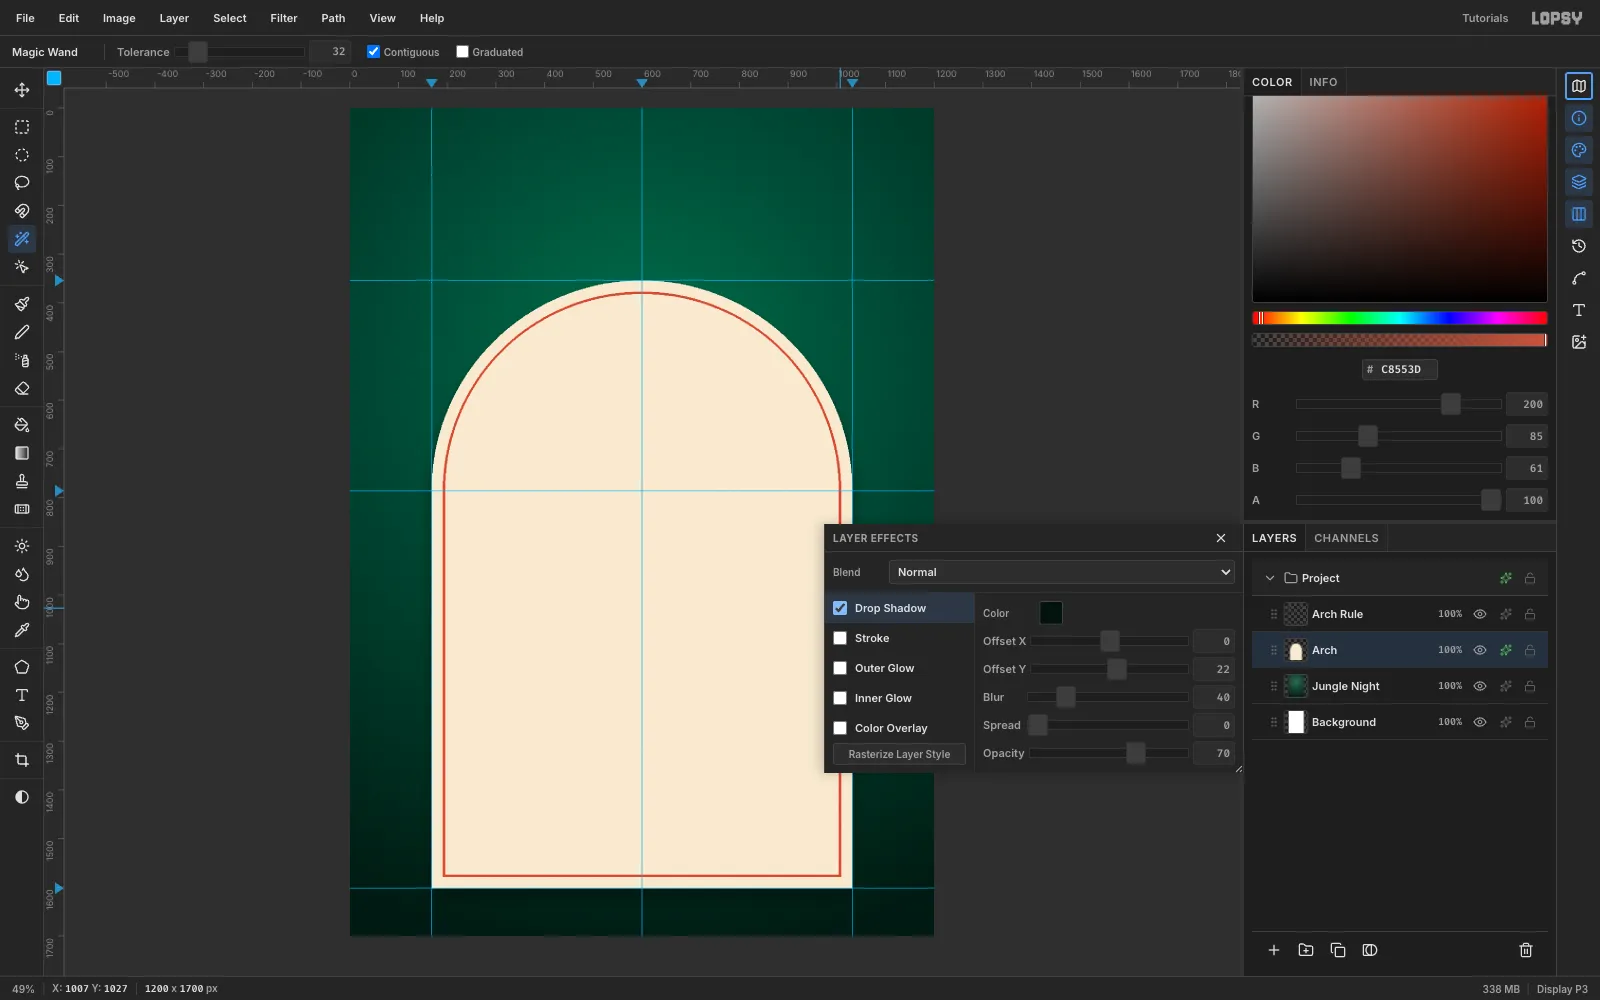
-
Cut the back palm fronds
Select Jungle Night and click New Group. The group lands above the active layer, so it sits under the arch. Name it Back Jungle and add a layer inside called Back Fronds.
Each frond is one Lasso polygon:
- Plan a curved spine, for example from the bottom-left corner up and over towards the top centre.
- Along one side of the spine, walk out to a leaflet tip and back to the spine. Repeat about 26 times. Make the leaflets longest in the middle, and let them droop more towards the tip.
- Come back down the other side the same way and close the shape.
Fill six fronds in the darkest green,
#0B3727: two from the top corners, one from each side, and two meeting at the bottom centre. Then fill four bigger fronds in#11513A, sweeping in from each corner. The two tones give the back layer some depth of its own.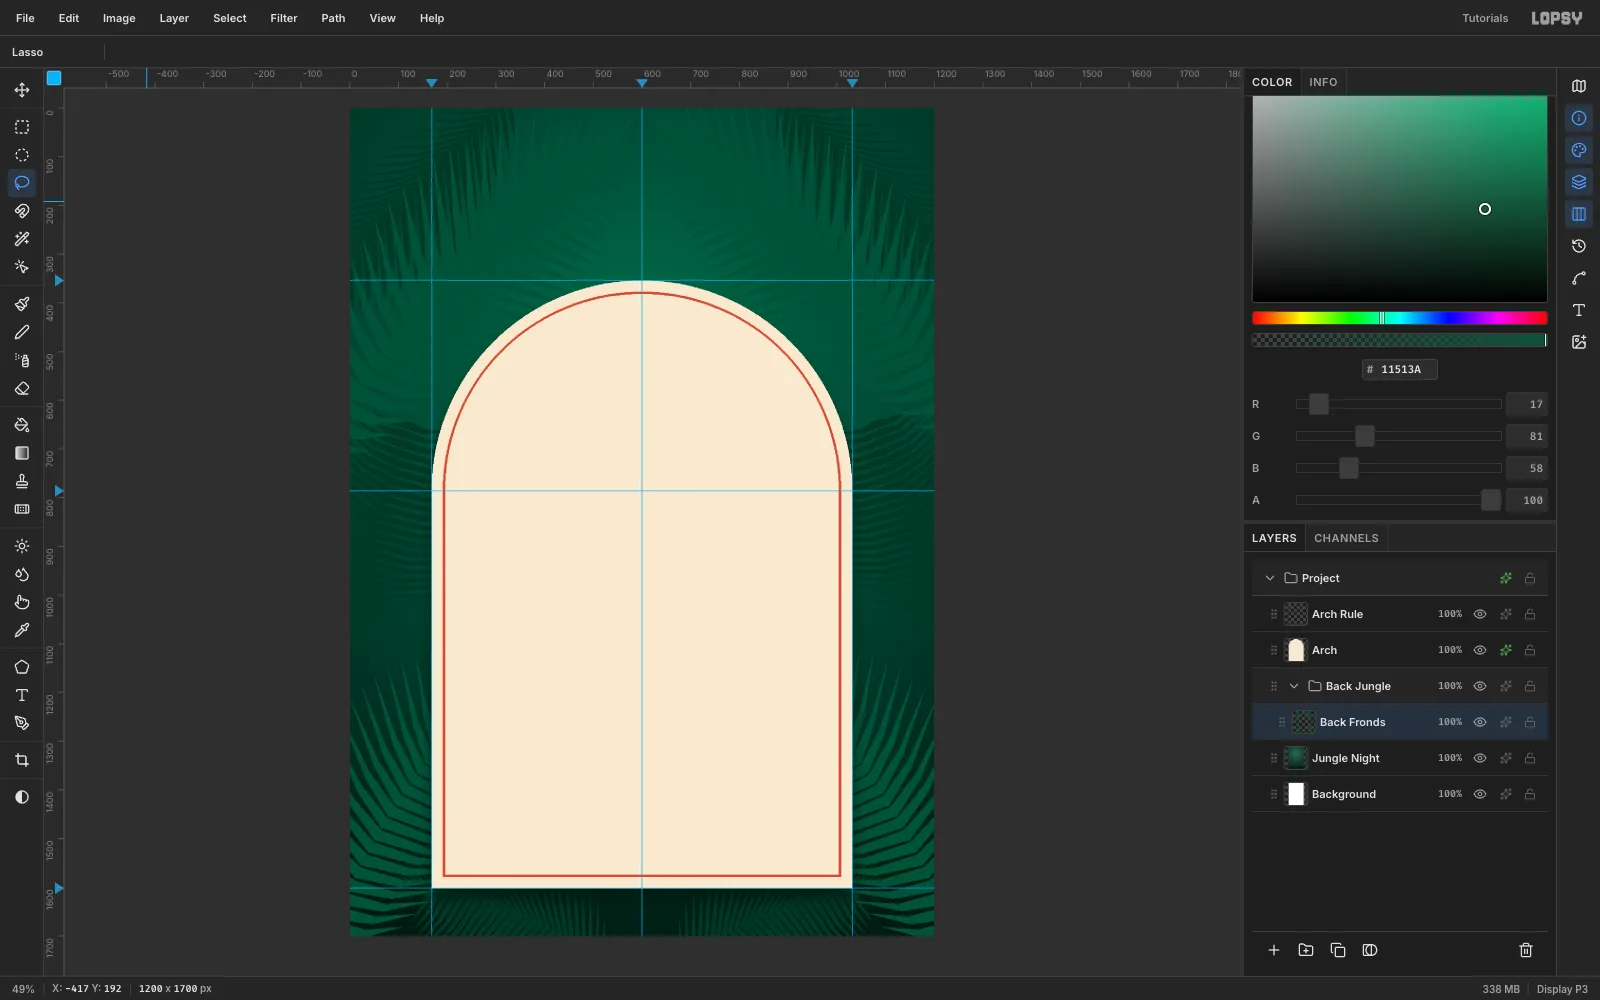
-
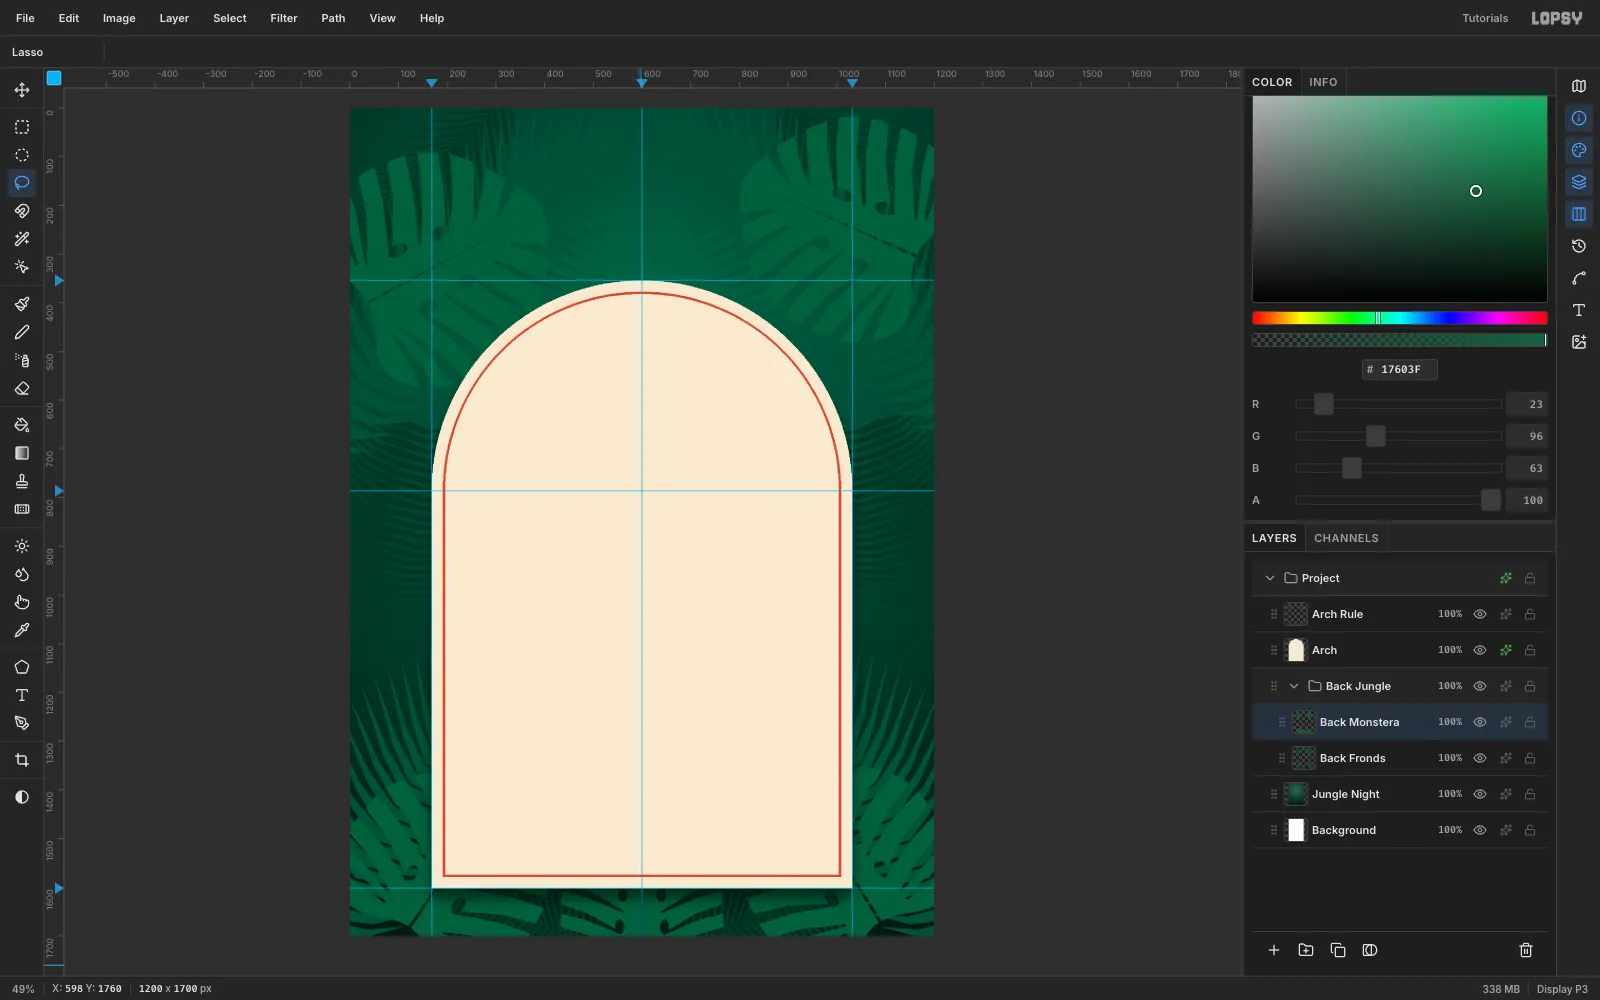
Add back monstera leaves
Add a layer named Back Monstera. A monstera leaf is a rounded heart shape, about as wide as it is tall, with a notch where the stem joins:
- Lasso the outline and fill it with
#17603F. - Cut seven slits on each side with thin, slightly curved lasso wedges. Each slit starts just outside the edge and tapers to a point about three-quarters of the way to the midrib. Press Delete after each one.
- Delete four small oval holes near the midrib, and a hairline down the midrib itself.
Place leaves in each corner and one at the bottom centre, rotated so they point out from the arch.
- Lasso the outline and fill it with
-
Frame the arch with front leaves
Select Arch Rule and create another group, Front Jungle, with a layer called Monstera. Cut six larger leaves in
#2A8452:- one at each top shoulder, rotated about ±42°, just overlapping the dome
- one in each bottom corner
- two lying almost flat along the bottom edge, so the card sits in the foliage
Keep the leaf tips out of the dome's interior; the title goes there. Add a Drop Shadow of
#041C14, Offset 6 / 12, Blur 16 and Opacity 60. That shadow is the whole paper-cut effect: each layer now floats over the one behind it.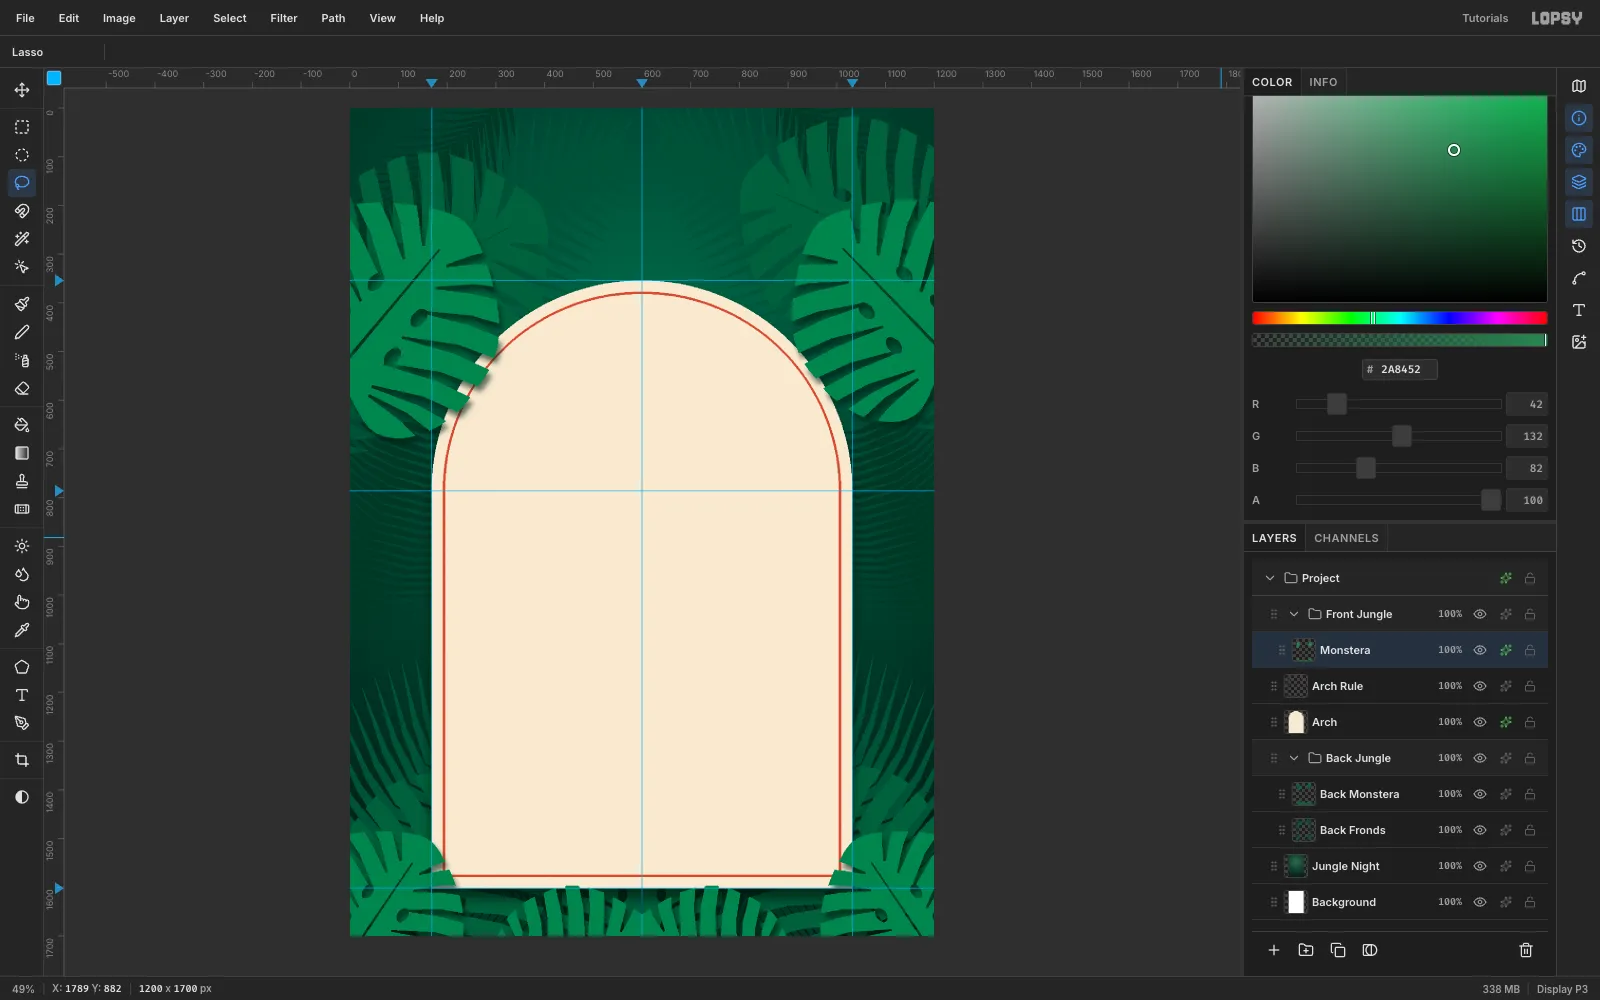
-
Add light palm fronds
Add a layer named Palms and cut four fronds in
#4FAA5E. Two arc over the top corners, and their leaflets droop towards the arch. Two run low along the bottom edge, below the arch, so their leaflets never reach the text.Give the layer an Inner Glow in
#1E6B3A(Size 7, Opacity 45), so each leaflet has a darker edge. Then add the same Drop Shadow as the monstera layer.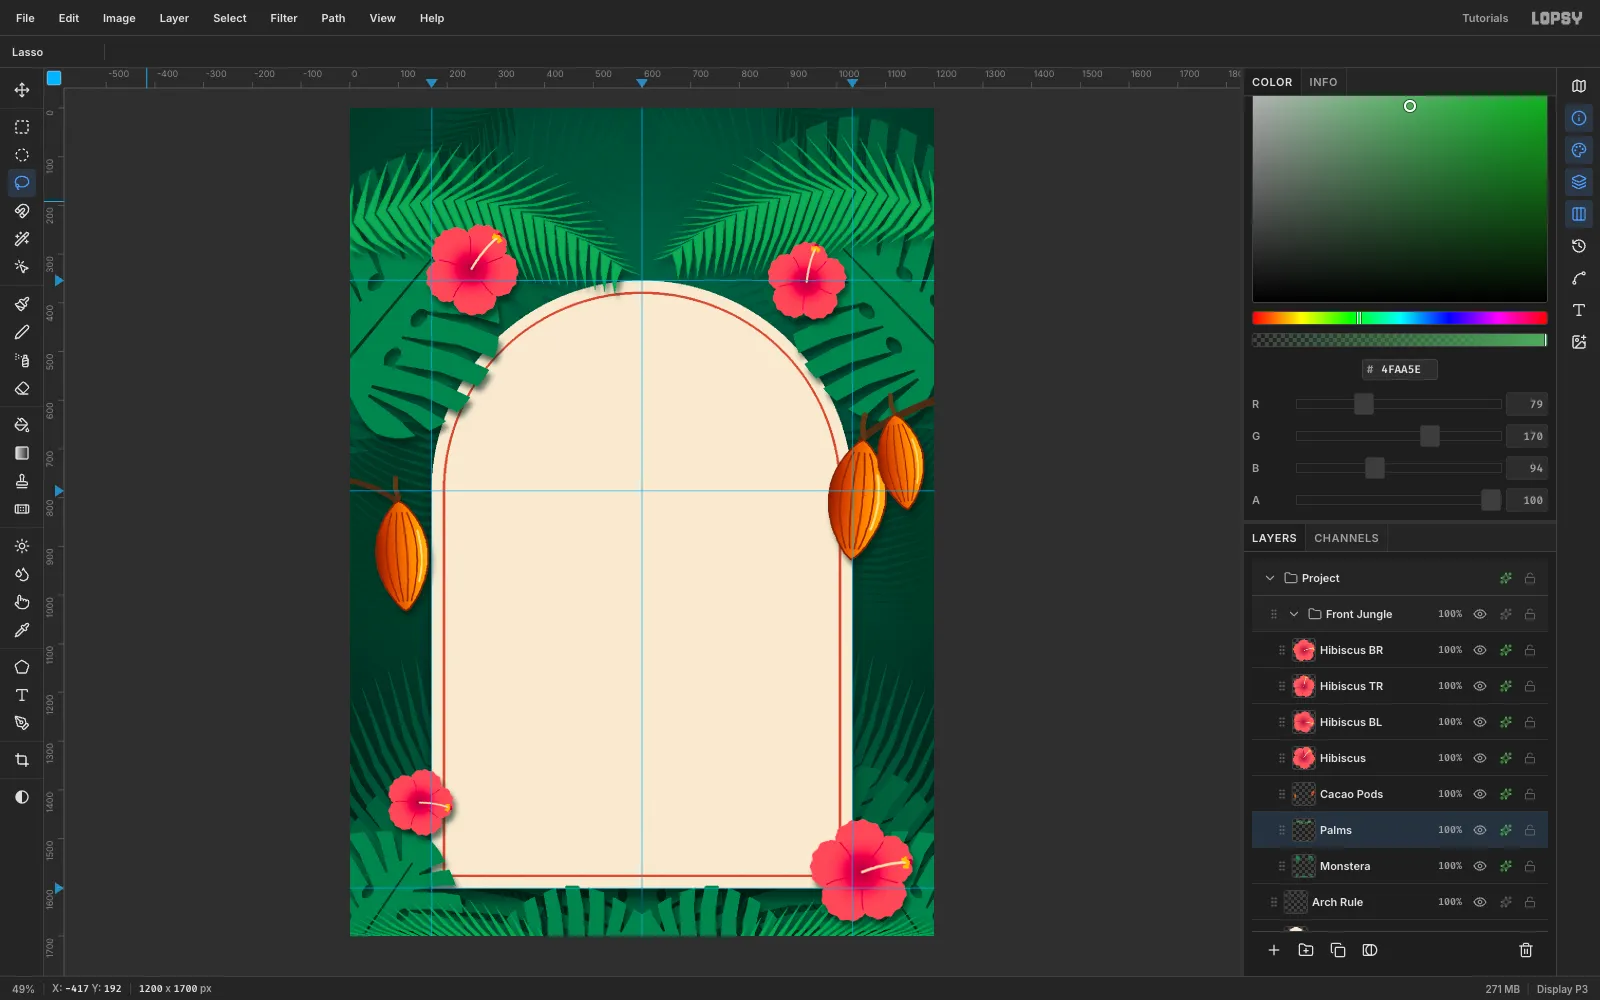
-
Hang some cacao pods
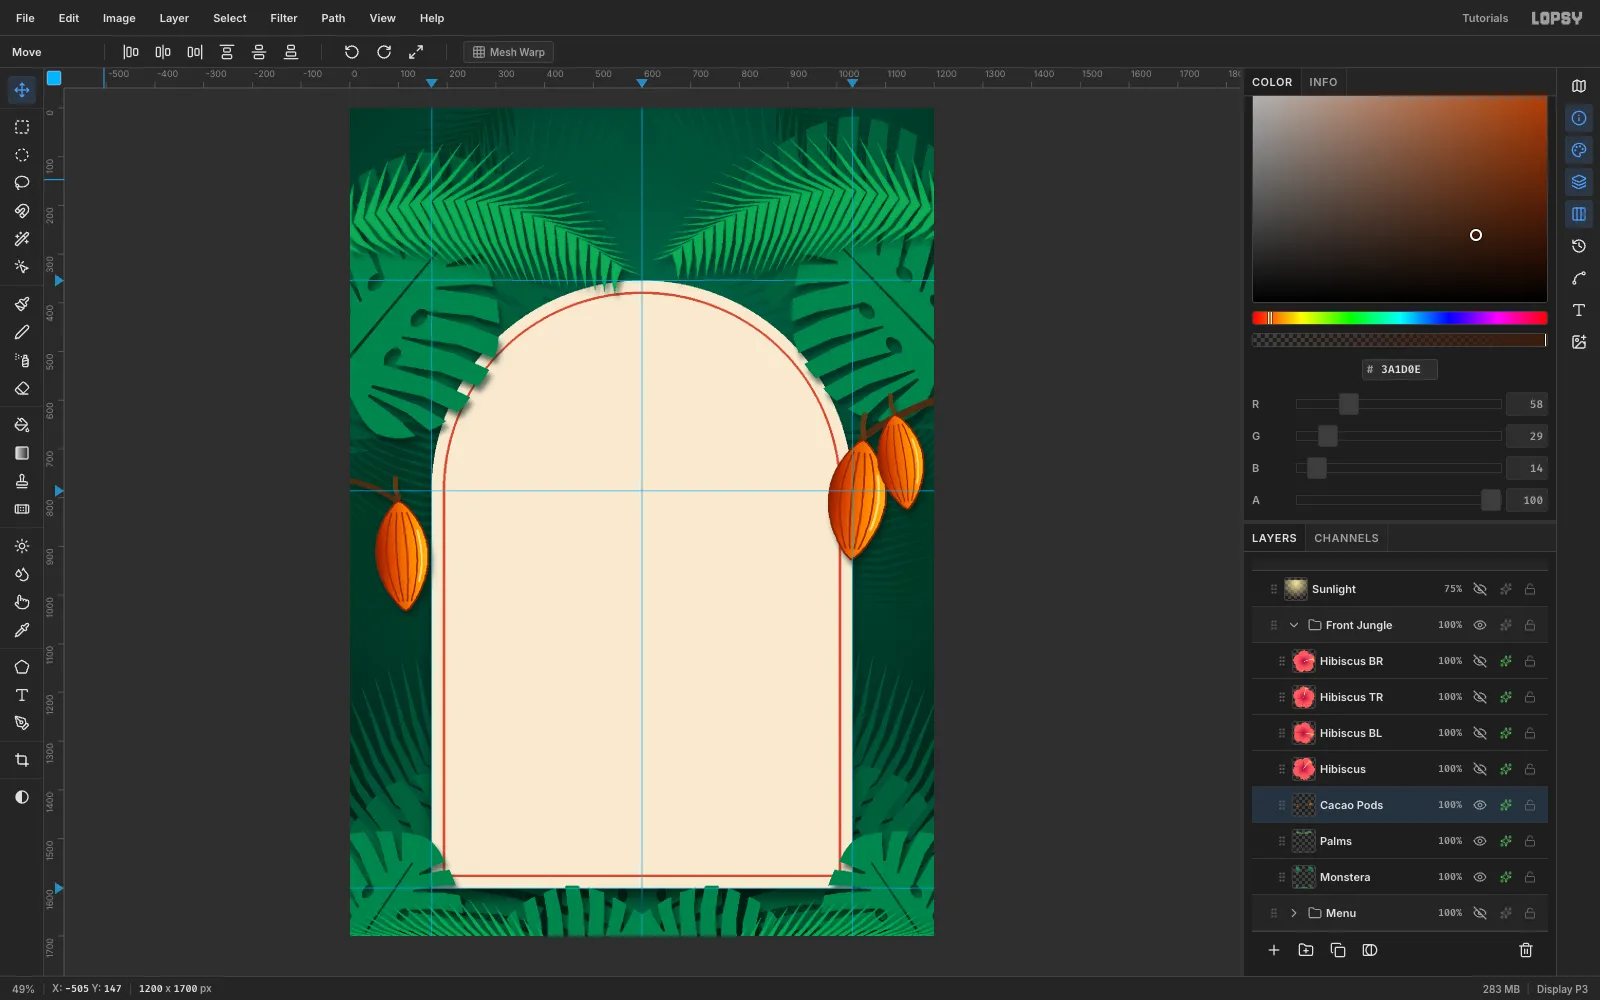
Xocolatl is the Nahuatl drink that gave us chocolate, so the menu needs cacao pods. Add a Cacao Pods layer. With a hard 16 px Brush in
#4A2E18, paint a stem in from the right edge, and a thinner one from the left.For each pod:
- Lasso a long lemon shape that's pointed at both ends, and fill it with
#7A2A12. - Select → Shrink… 3 px, then drag a Linear gradient across the pod's width:
#FFC04A,#F08A24,#C24A17and#7E2610. The shrink leaves a dark rim. - Brush four curved ribs down the pod in
#8E3212, plus one pale#FFE08Ahighlight on the lit side.
Run Filter → Gaussian Blur with Radius 1 to soften the lasso's stair-stepped edges, then add the leaf Drop Shadow.
- Lasso a long lemon shape that's pointed at both ends, and fill it with
-
Paint a hibiscus
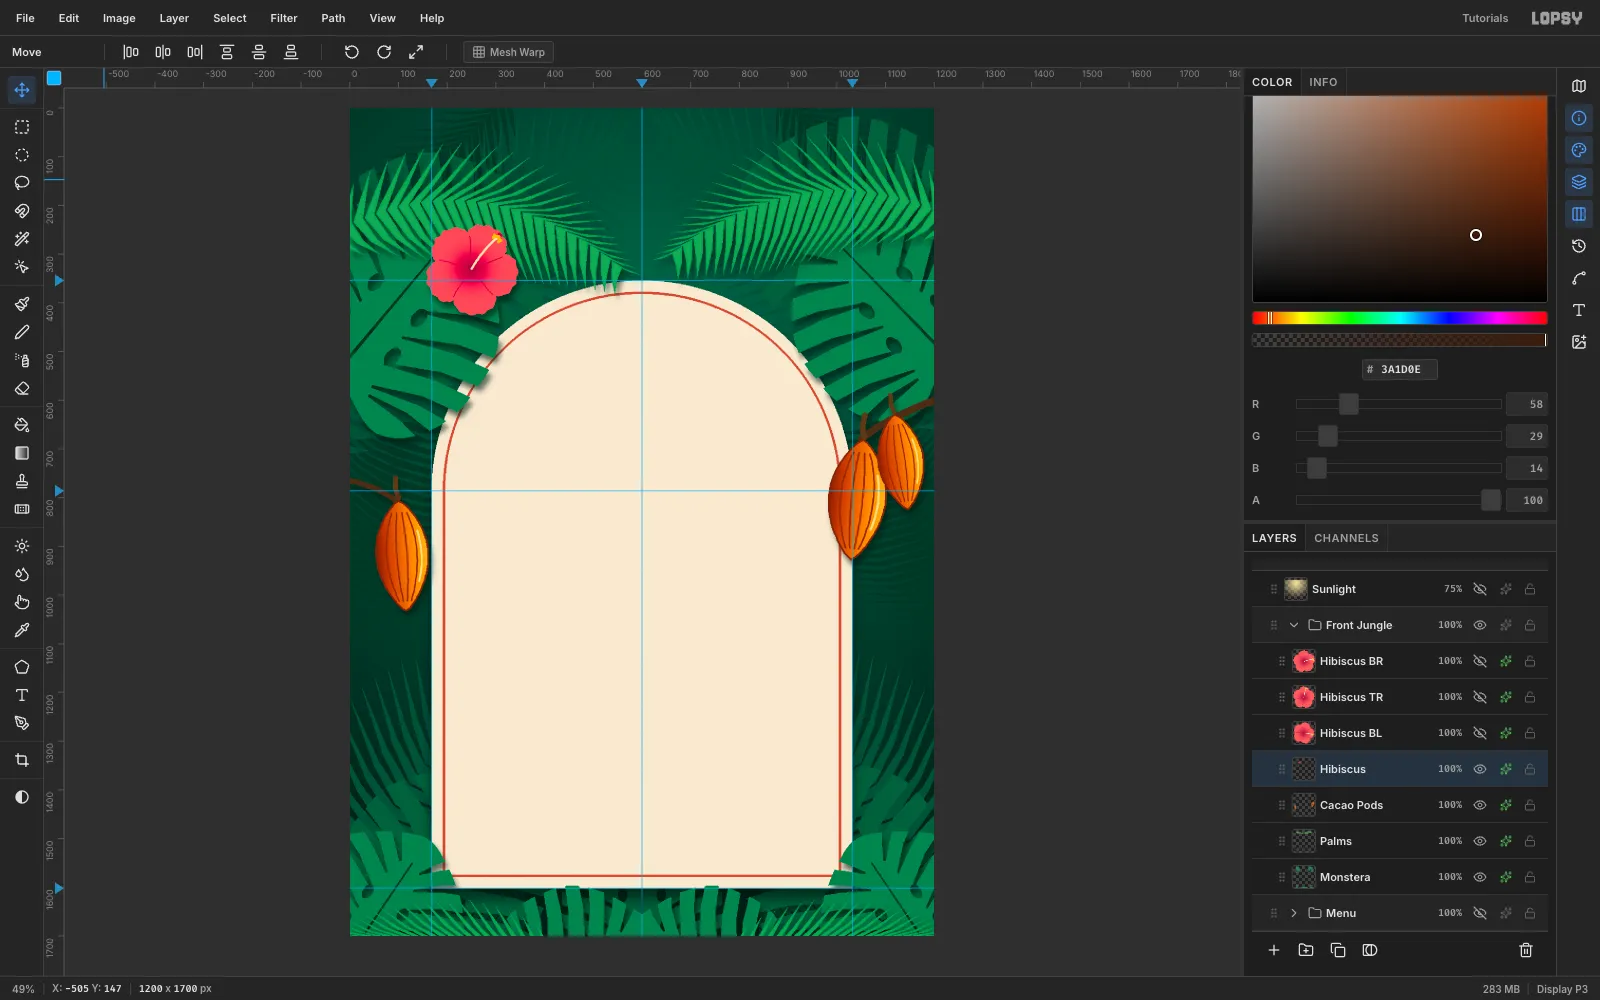
Add a Hibiscus layer. Lasso a five-lobed flower about 190 px across, with rounded, slightly ruffled petals, and fill it with
#FF5A5F. While it's still selected, drag a Radial gradient from the centre outwards:#A0103A,#E0304Fand#FF5A5Ffading to transparent. The throat of the flower goes deep crimson.Then add the details with a hard brush:
- five short
#C81E45lines from the centre towards the gaps between petals - a curved stamen, 6 px wide, in
#FFE3B0 - a cluster of small
#FFC23Apollen dots at the stamen's tip, with three crimson dots at the very end
Add the leaf Drop Shadow.
- five short
-
Copy, scale and rotate more flowers
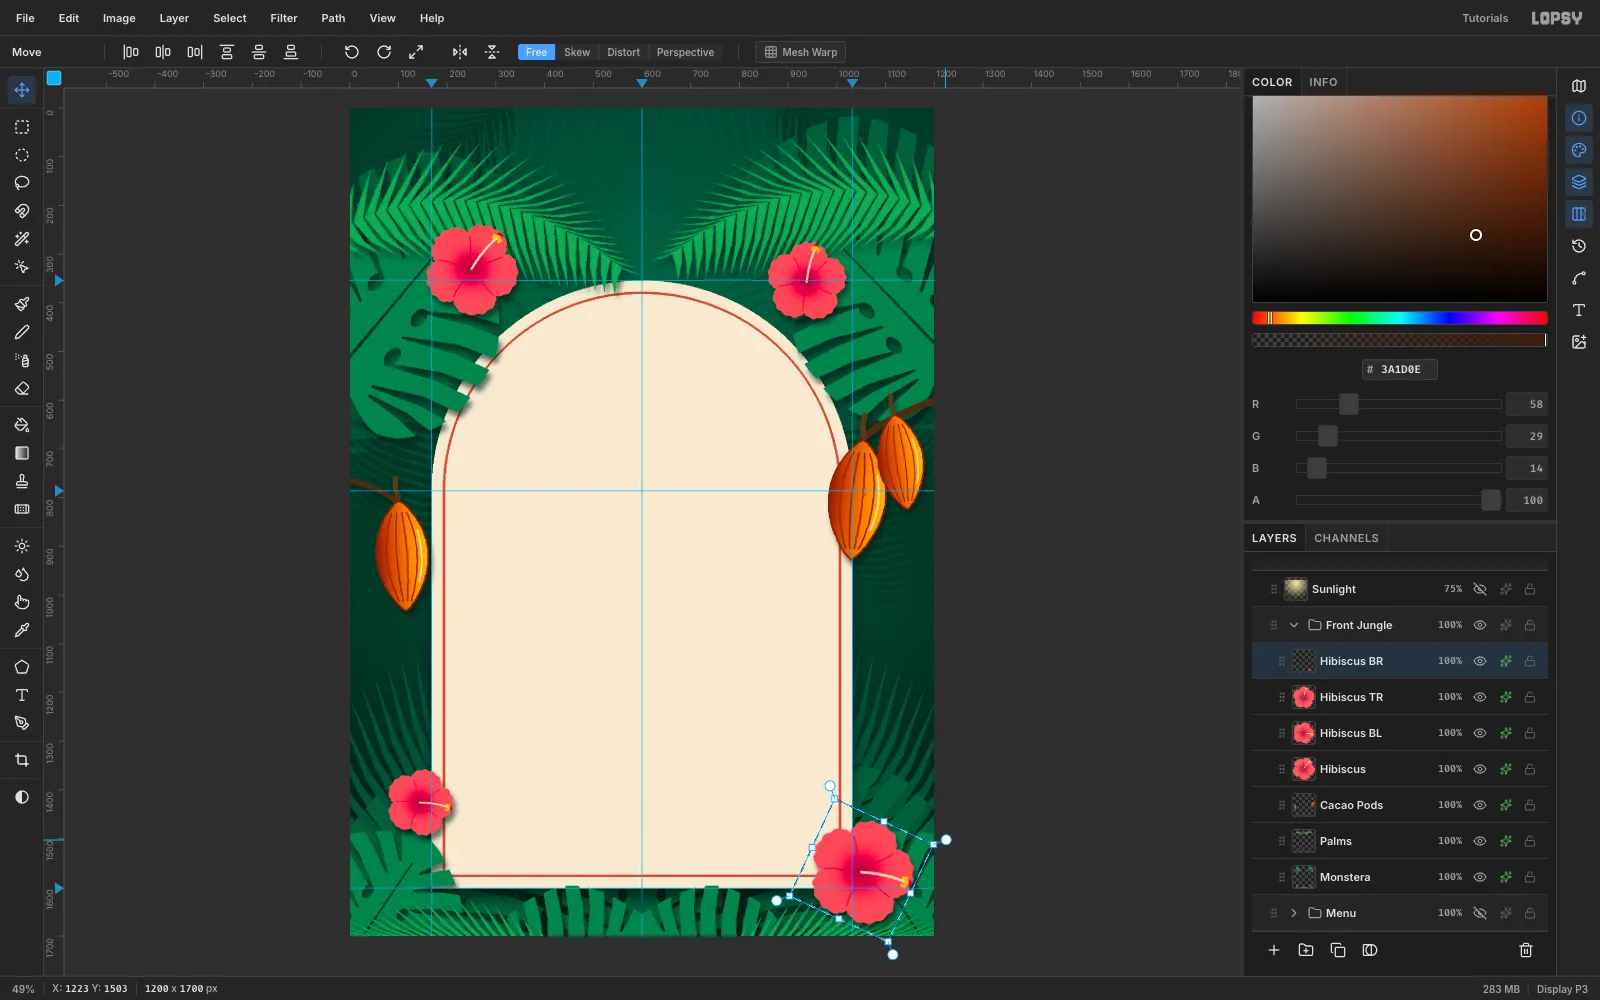
Draw a marquee around the flower, press Cmd+C, wait a second, and press Cmd+V. The copy lands in place on a new layer. Rename it Hibiscus BR, then:
- Drag it with the Move tool to the bottom-right corner of the arch, and press Cmd+D.
- Marquee it again and hold Cmd while you drag a corner handle to scale it to about 112%. Press Cmd+D.
- Marquee it once more and drag just outside the top-right handle to rotate it. Press Cmd+D to commit.
Committing between moves, scales and rotations keeps each transform clean. Rotating each copy also changes the angle of its stamen, so the flowers don't look stamped.
-
Finish the flower quartet
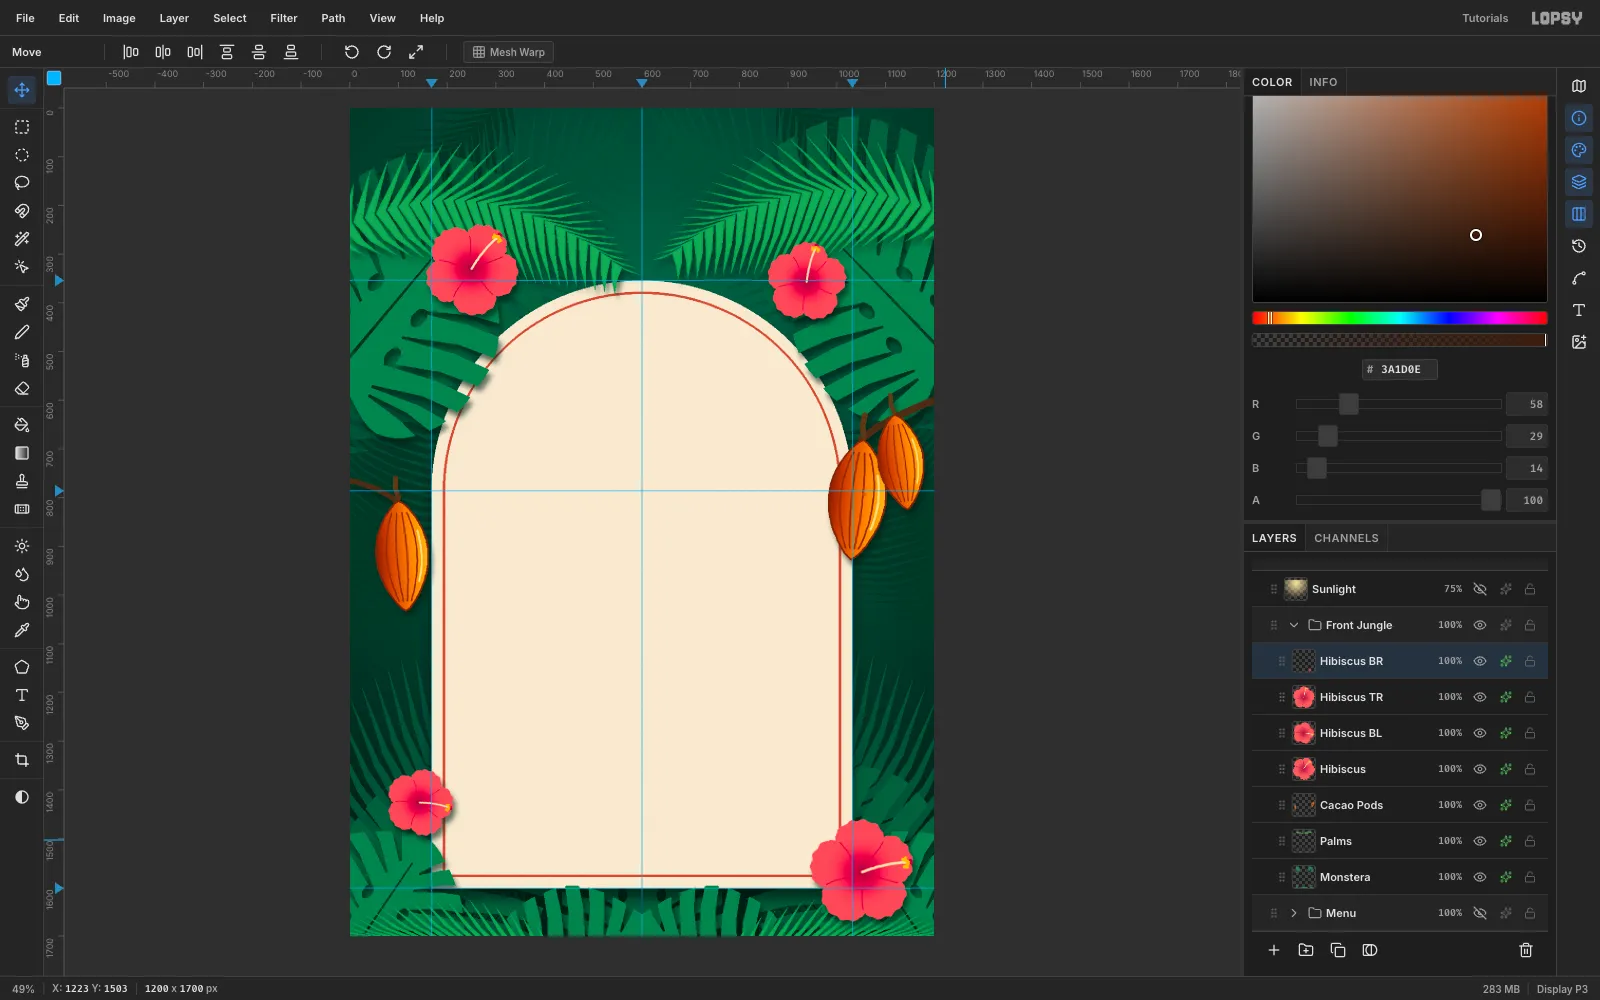
Paste two more copies. Hibiscus TR goes on the top-right shoulder, scaled to 85% and rotated −25°. Hibiscus BL goes on the lower-left edge, scaled to 72% and rotated 60°. Pasted layers don't bring their effects with them, so add the Drop Shadow to each copy.
The big–small–small–big diagonal balances the frame without making it symmetrical.
-
Set the title
Create a Menu group above Arch Rule with a raster layer inside called Ornaments. New text goes above the active layer, and keeping a raster layer active means changing type settings never restyles a text layer you've already committed.
Pick the Text tool, choose Shrikhand, set Size to 112, and set the colour to cacao brown
#3B1A0E. Click inside the dome, type Xocolatl, and press Tab to commit.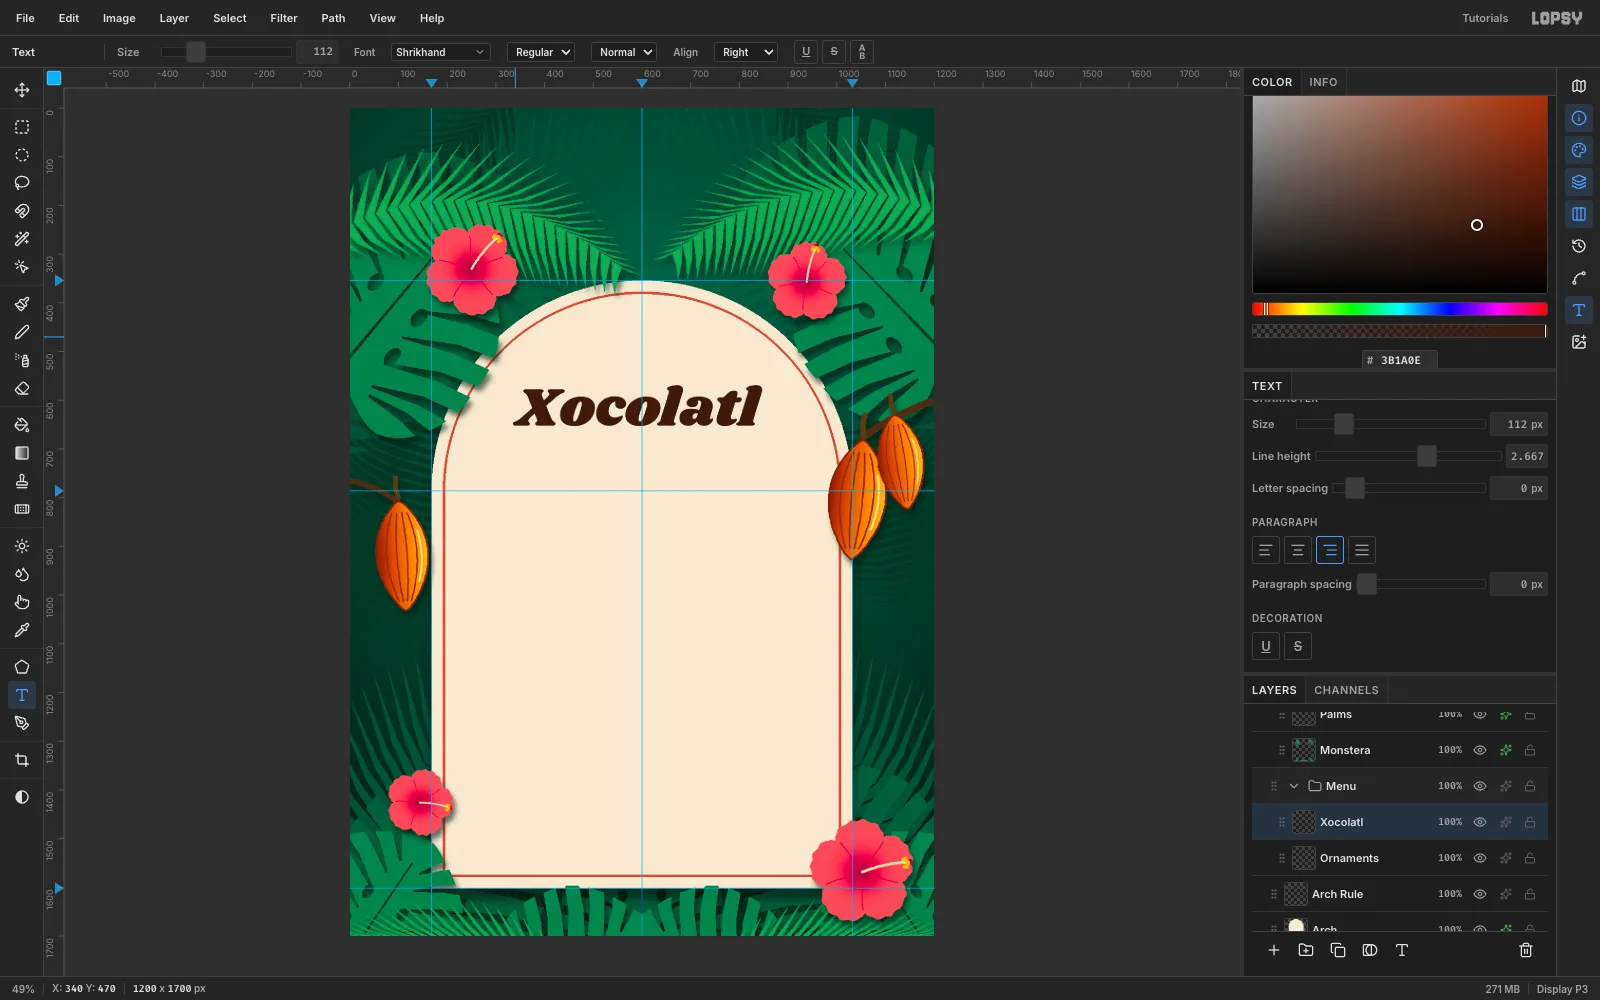
-
Build the title lockup
With the Move tool, click Align center horizontally, then use the arrow keys to put the top of the letters at y 478. Add a Drop Shadow with colour mango
#F2A531, Offset 5 / 6, Blur 0 and Opacity 100. It gives the title a retro, screen-printed feel.Below it, add J U N G L E in Josefin Sans SemiBold at 52 px in coral
#C24A26, with its top at y 590. Then add the tagline CACAO BAR · TROPICAL KITCHEN · EST. 2019 in Josefin Sans 19 px,#2A6B4F, at y 666. Centre both with Align center horizontally.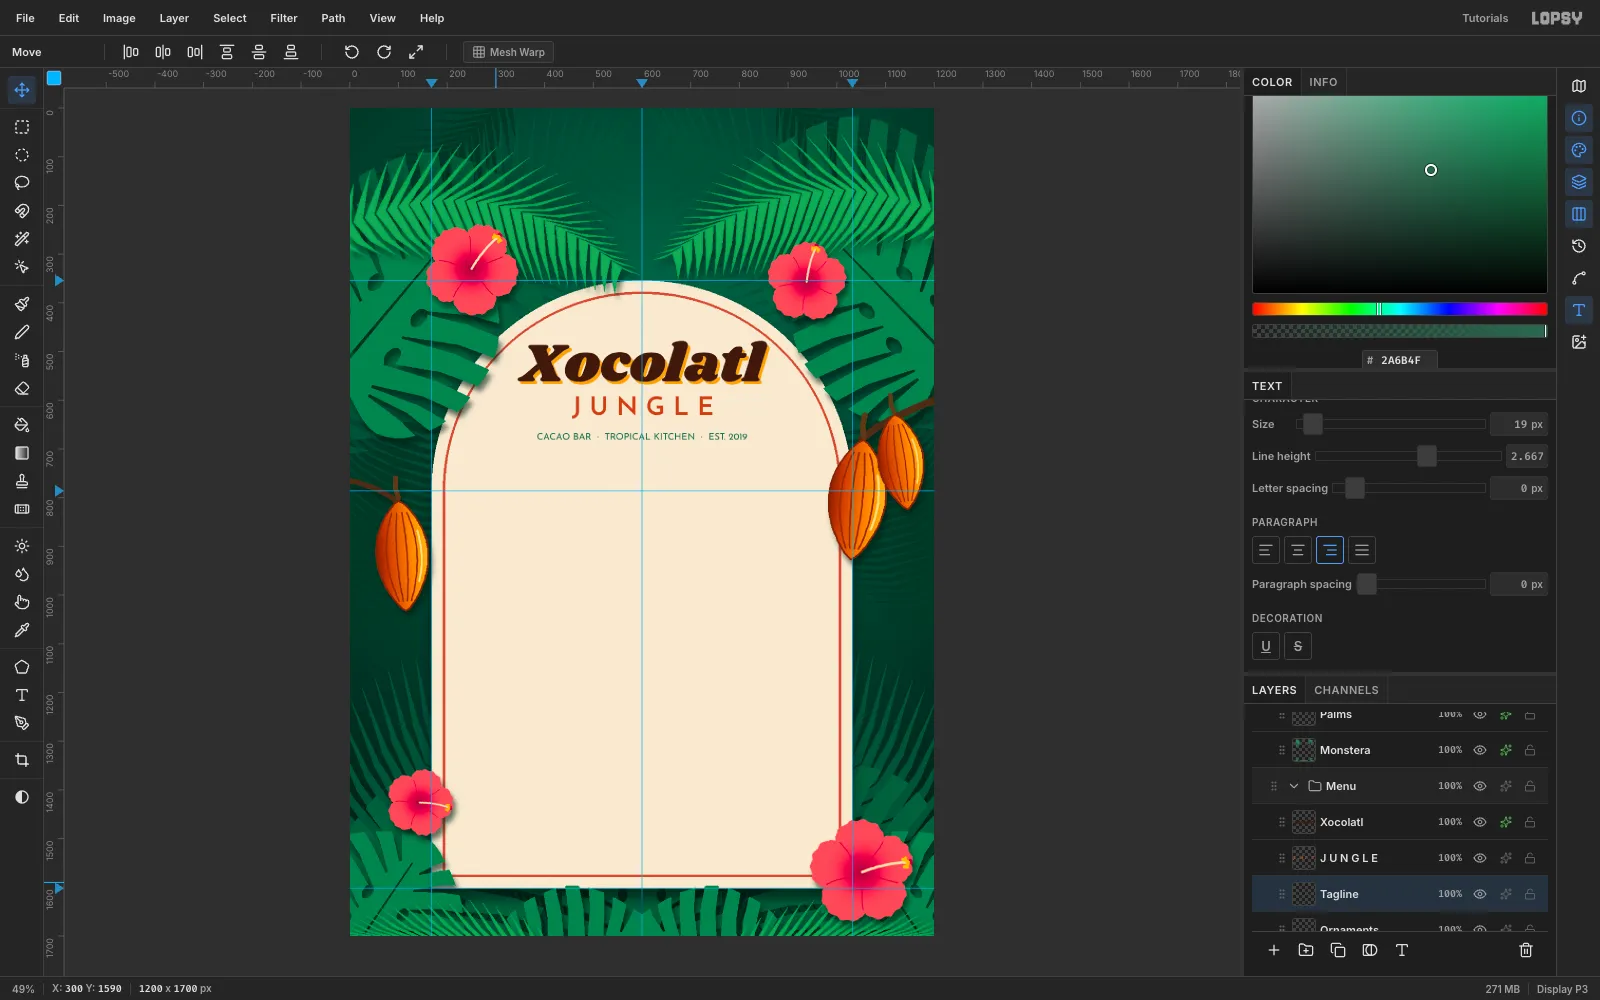
-
Set the first section
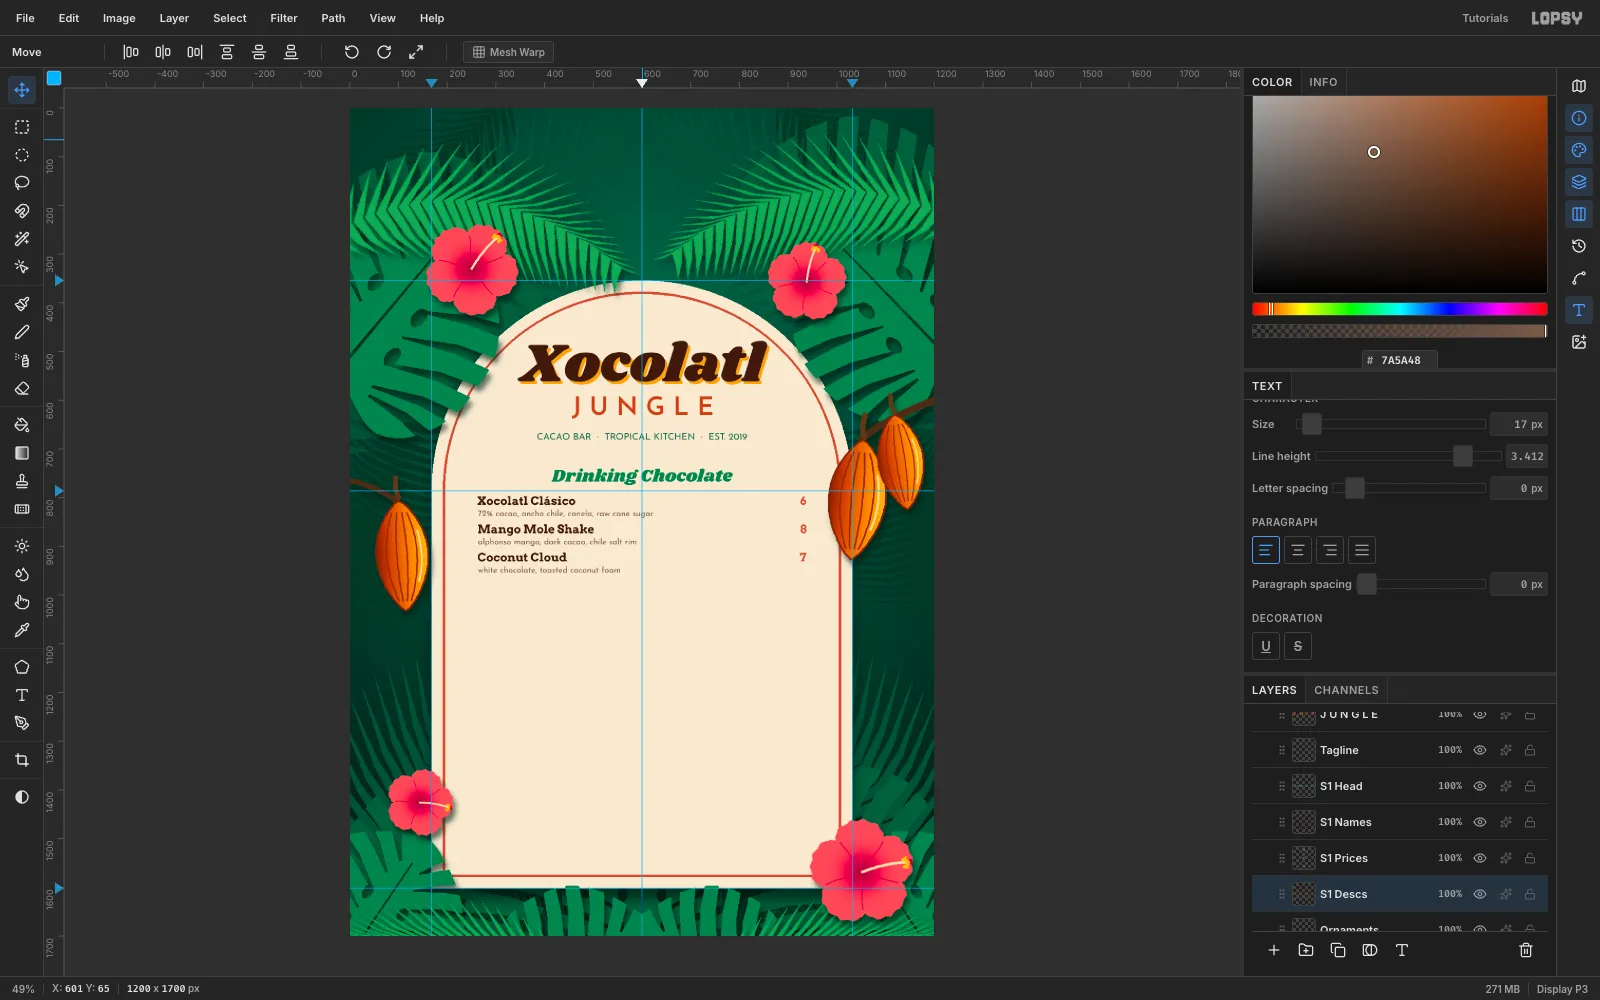
Each section has four text layers:
- Header: Shrikhand, 36 px,
#2A8452, centred with its top at y 740. - Names: an area-text box from x 262 to 790 in Arvo Bold, 24 px,
#3B1A0E. One item per line, with Line height set to 2.417 in the Text panel, which gives a 58 px pitch. Put its first line 56 px below the header. - Prices: an area-text box from x 800 to 938 with the same font, size and line height, Align right, in
#C8553D. Line its first line up with the names, and put its right edge at x 937. - Descriptions: an area-text box in Josefin Sans 17 px,
#7A5A48, with Line height 3.412 (the same 58 px pitch). Put it 28 px below the names, so each description sits closer to its own item than to the next one.
Set the line height in the Text panel before you drag each box. Because the three blocks share a pitch, every price stays level with its dish.
- Header: Shrikhand, 36 px,
-
Add the other two sections
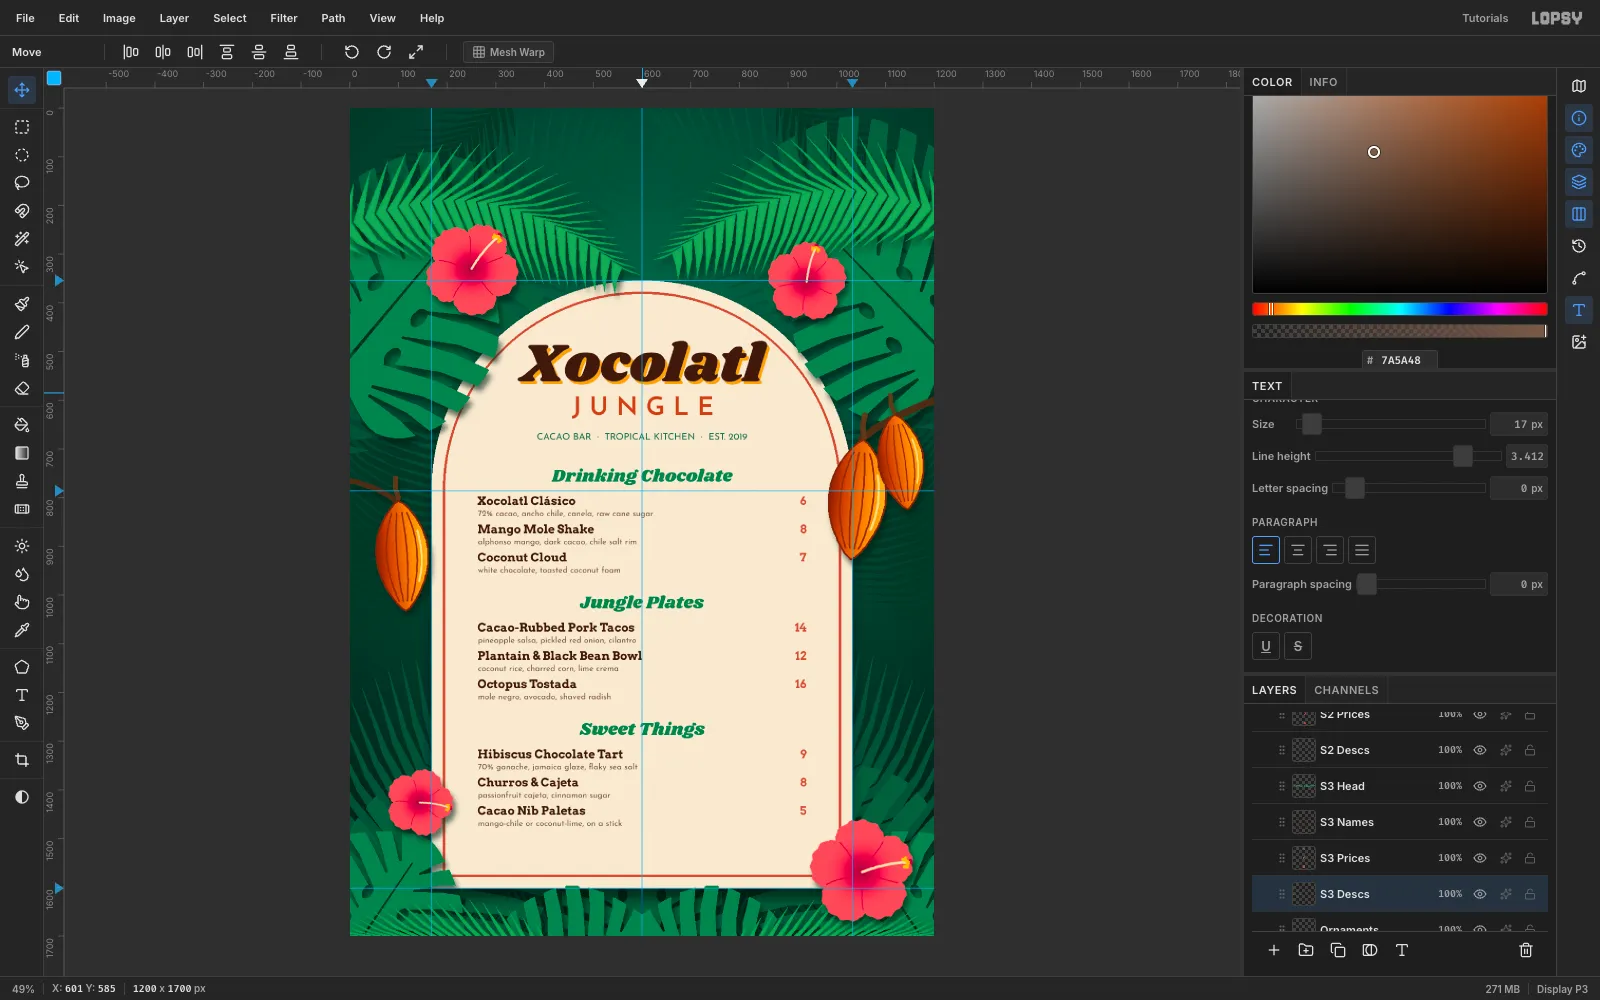
Repeat for Jungle Plates (header top at y 1000) and Sweet Things (y 1260). Leave about 45 px between each section's last description and the next header. That's clearly more than the space between items, so the sections read as separate groups.
-
Draw the header rules
On Ornaments, draw a 2 px tall rectangular marquee from x 300 to 22 px left of each header, and another from 22 px right of it to x 900. Fill both with
#C8553D. At the outer ends, lasso a small diamond, 12 px across, and fill it with the same colour. The rules frame each header like a label on a crate.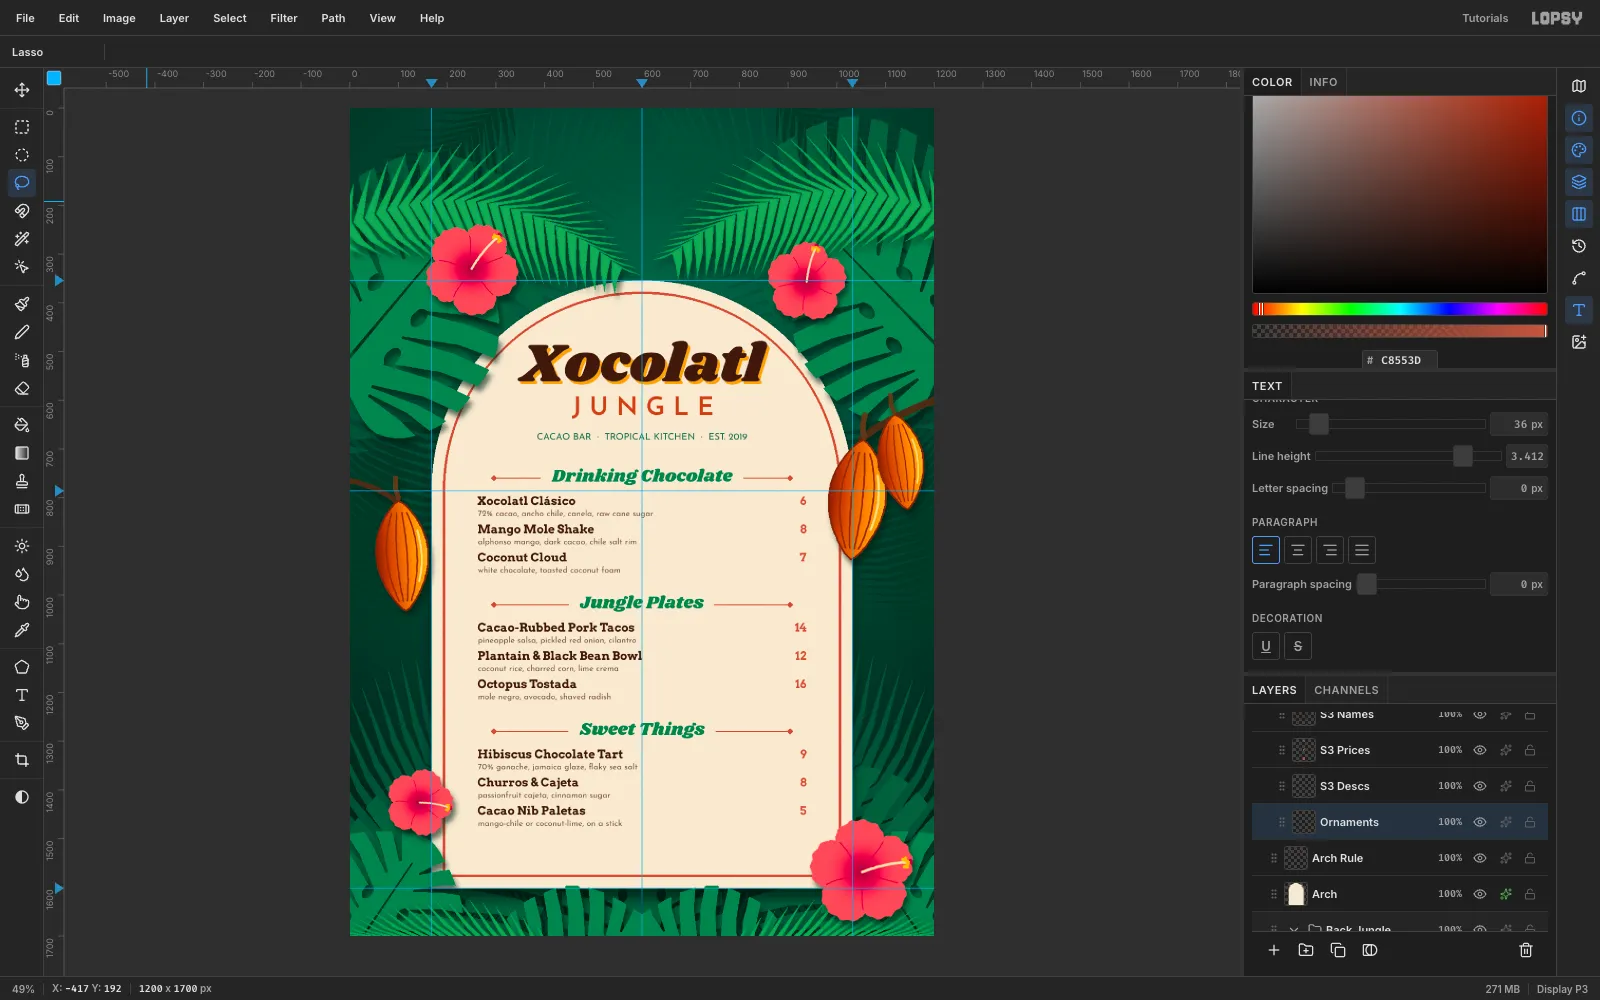
-
Add the footer
Set Letter spacing to 2 in the Text panel. Then type OPEN DAILY 8AM – LATE · CALLE DE LA PALMA 14, TULUM in Josefin Sans at 16 px. Centre it with its top at y 1522. That leaves about 45 px above it and below it, to the rule.
Give it a Color Overlay of deep leaf green
#0F6B3A, so it's strong enough to hold the bottom of the card. Reset Letter spacing to 0 afterwards.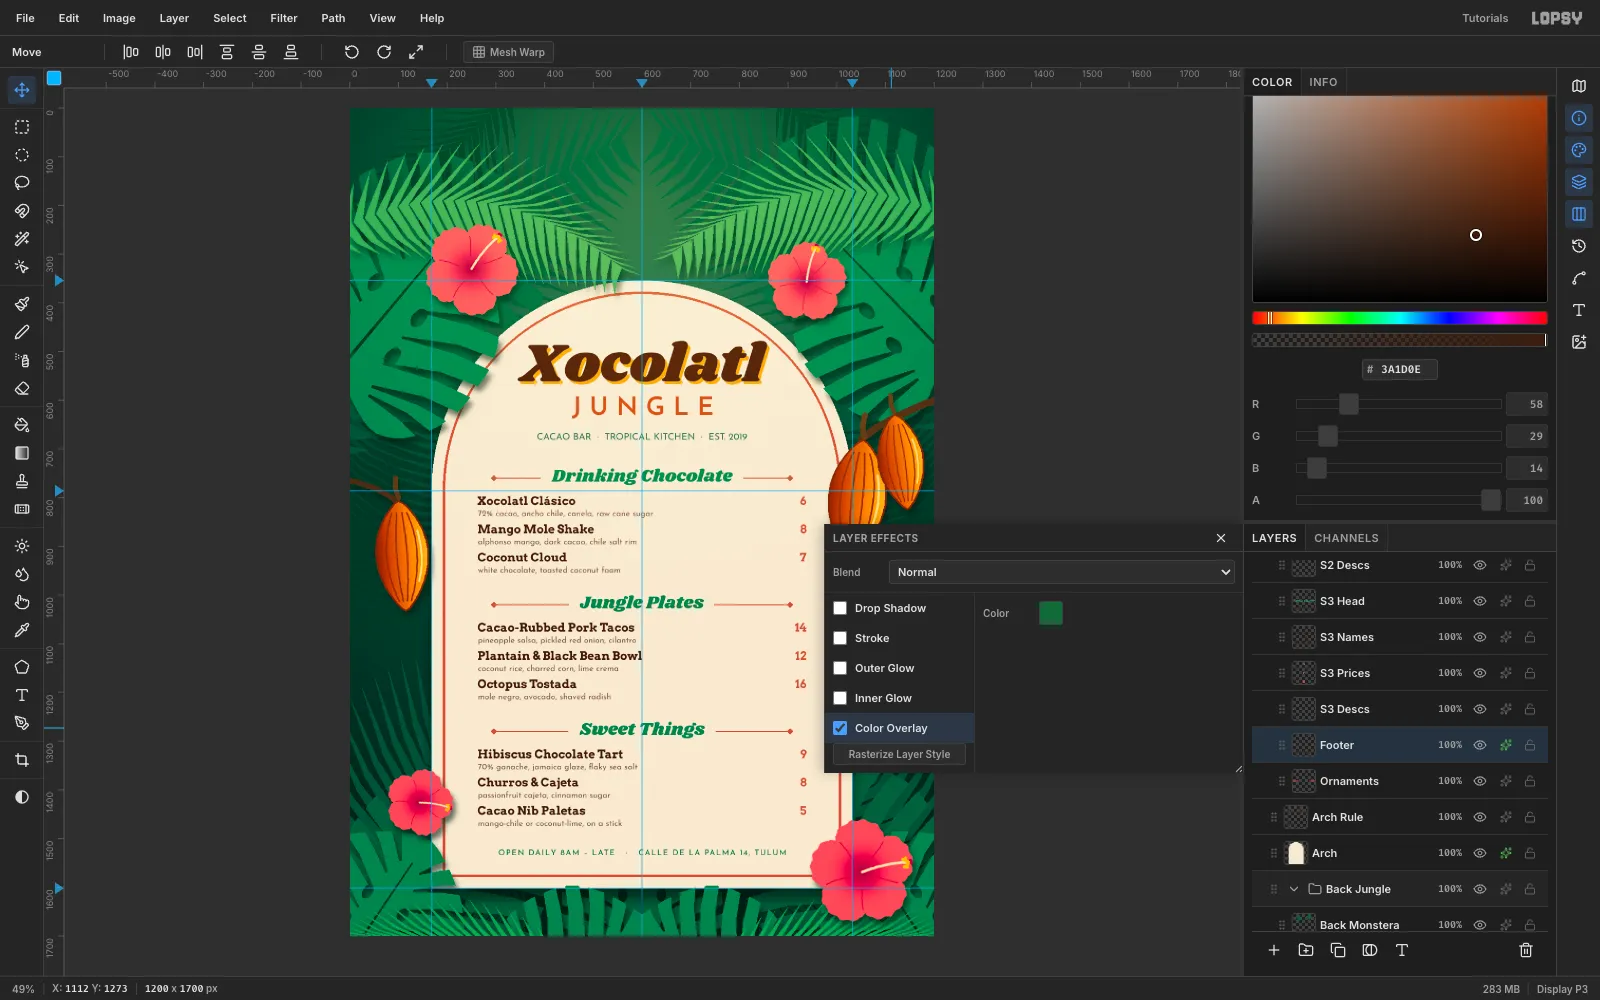
-
Warm it up with sunlight
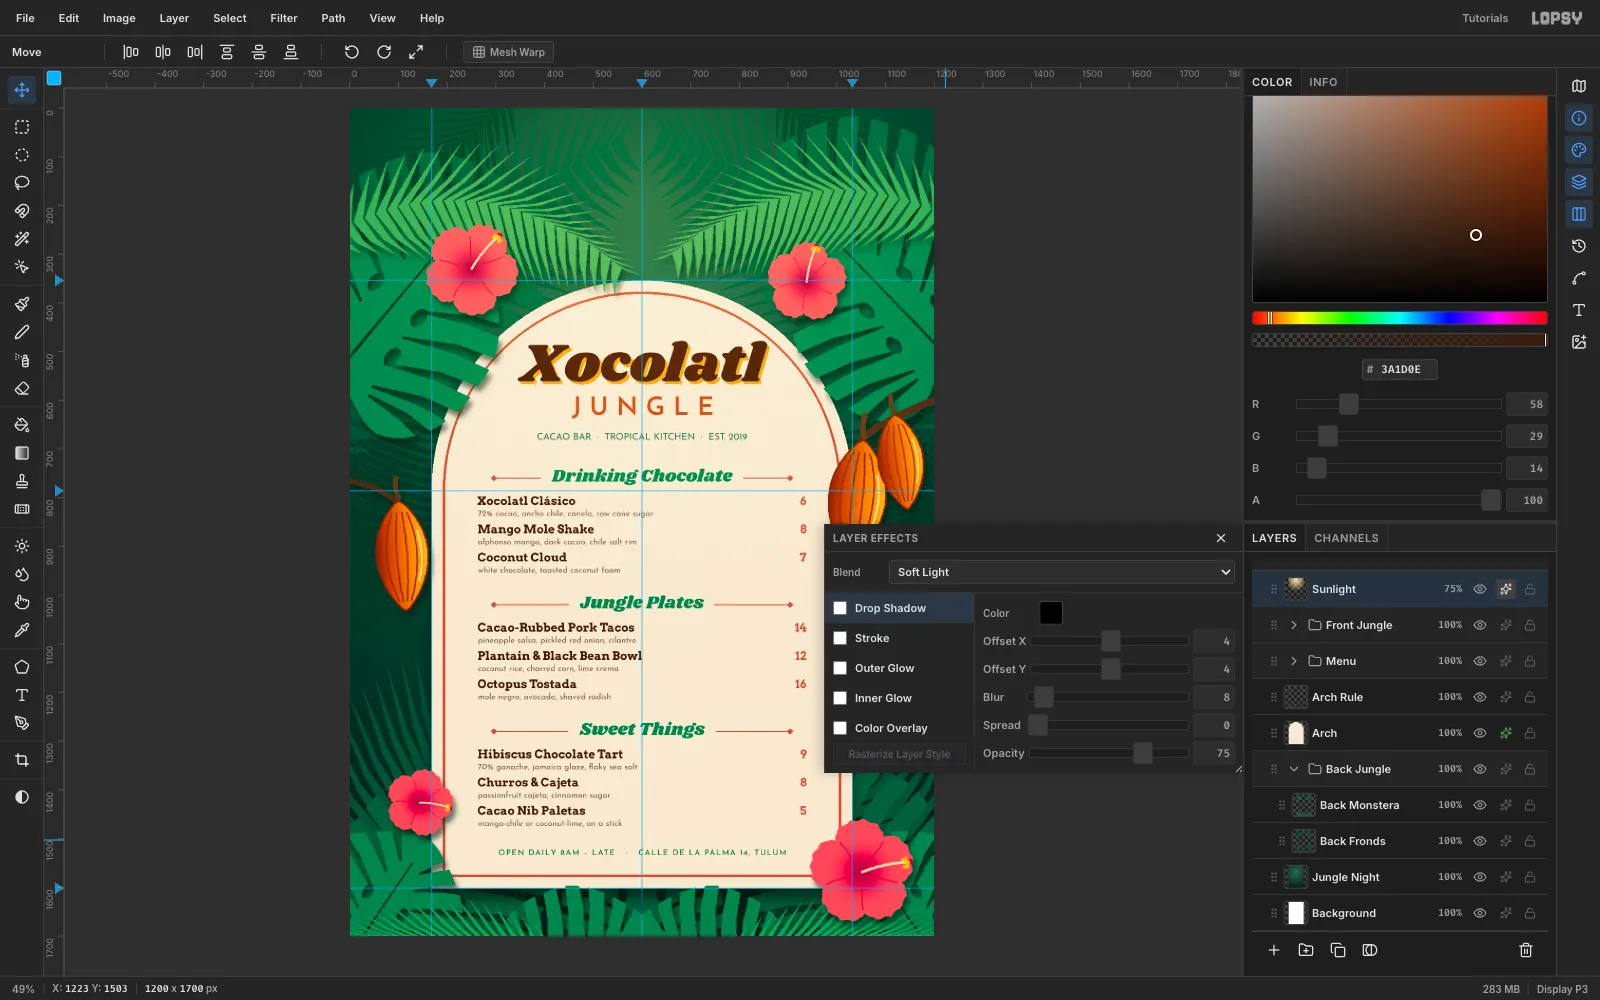
Add a layer named Sunlight and drag its row above Front Jungle, so it sits at the top of the stack. Drag a Radial gradient of
#FFE7A0at full opacity fading to transparent, from (600, 180) to (600, 1000). Set the blend mode to Soft Light and the layer opacity to 75%.The top leaves pick up a warm, sunlit yellow-green, and the glow draws the eye to the title.
-
Check your groups
Before exporting, select the Front Jungle group and drag it with the Move tool. Everything in the group moves together: leaves, pods and flowers. Press Cmd+Z to put it back. It returns pixel for pixel, which confirms the group is complete and nothing is stranded on another layer.
Finally, choose File → Save Project to keep the editable
.lopsy, and File → Quick Export PNG for the finished menu.