Design a Memphis-Style Restaurant Menu
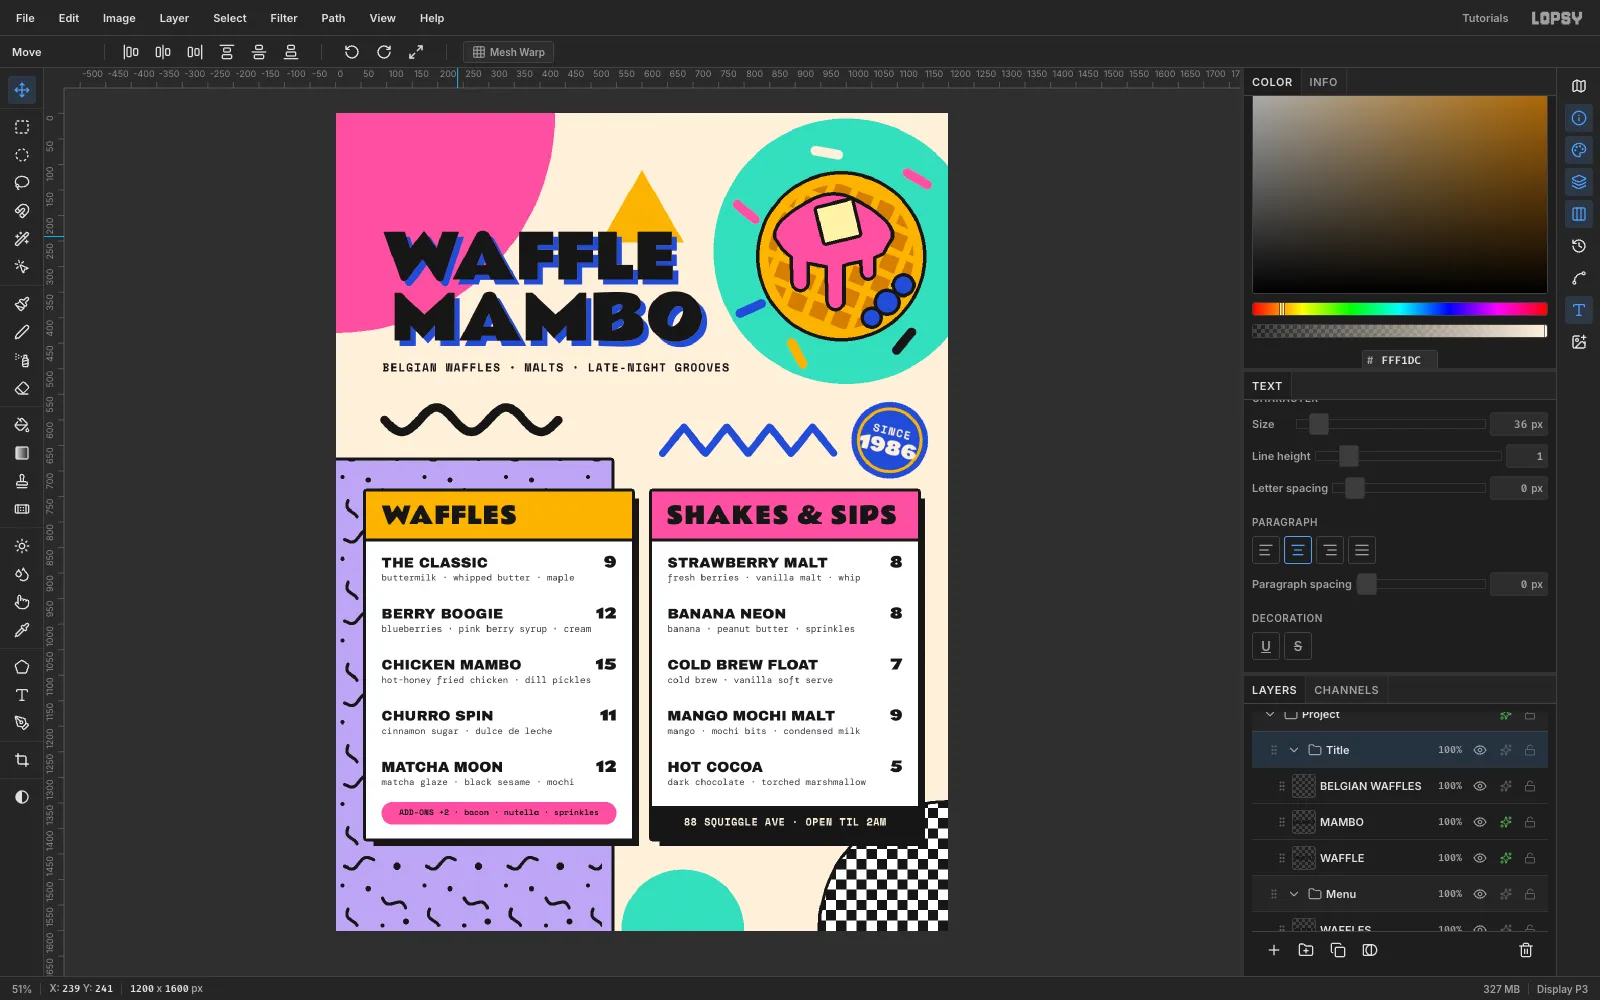
Make an 80s Memphis Group waffle-bar menu in Lopsy with squiggle pattern fills, flat geometric shapes, hard shadows, rotated confetti and area-text columns.
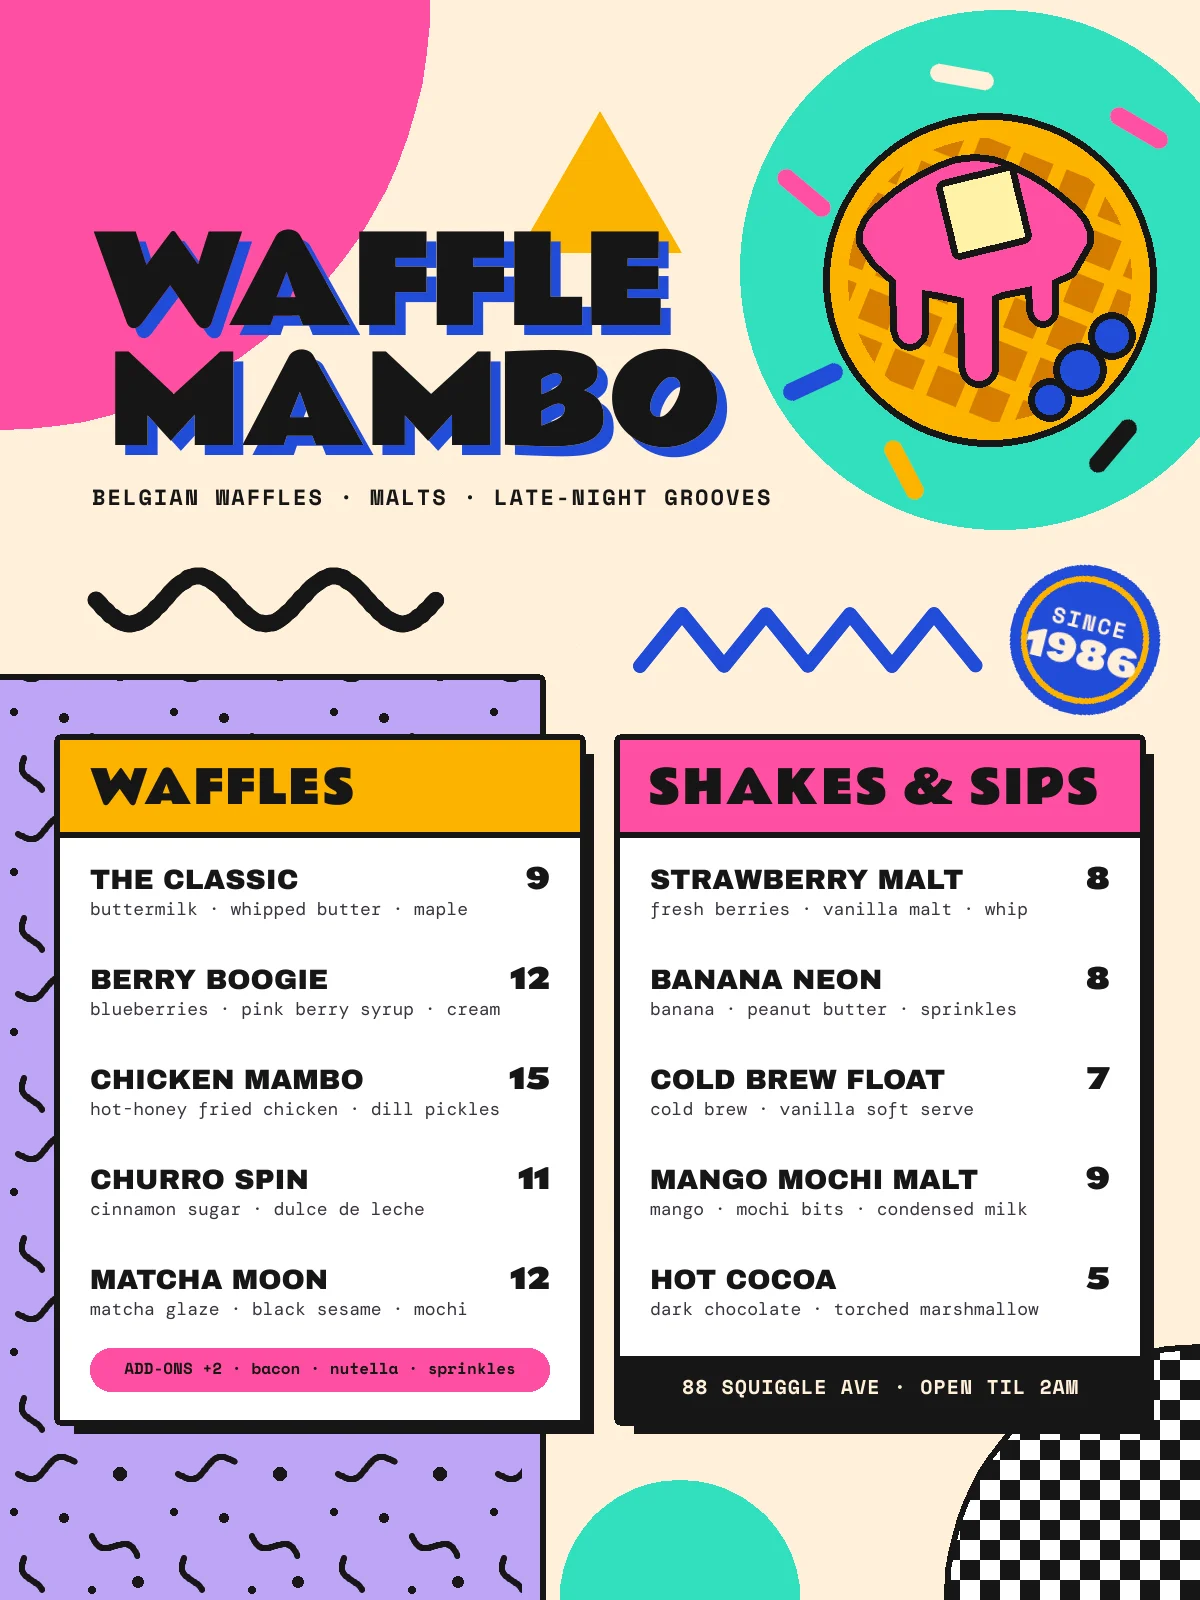
In the early 1980s the Milan collective Memphis Group, led by Ettore Sottsass, threw out good taste on purpose. Their furniture and prints used hot pink next to mint next to mustard, black-and-white checkerboards, squiggly "Bacterio" prints and loose confetti of triangles and dashes. In this tutorial you'll use that language to design a 1200 × 1600 menu for an imaginary waffle bar, Waffle Mambo.
Along the way you'll use:
- Custom patterns with Define Pattern and Fill with Pattern
- Flat shape fills from marquees, lassos and the Shape tool
- Stroke and hard Drop Shadow layer effects
- Rotating with the Move tool's transform handles
- Copy and paste
- Groups, guides and area text
The palette is five flat colours on cream:
- Cream
#FFF1DC - Ink
#161616 - Hot pink
#FF5FA2 - Mint
#6FDCC0 - Mustard
#F2B632 - Cobalt
#2C4BD1 - Lilac
#B9A6F0
-
Set up the canvas, guides and a lilac block
Choose File → New and create a 1200 × 1600 pixel document with a White background. Click the Background row, set the foreground to cream
#FFF1DCand choose Edit → Fill.Add guides by clicking the rulers: click the top ruler at 60, 600 and 1140 for the outer margins and the centre line. Then click the left ruler at 740 and 1420 for the top and bottom of the menu cards.
Rename
Layer 1toLilac Block. Drag a Rectangular Marquee from (0, 680) to the bottom of the canvas at x 540, fill it with lilac#B9A6F0, and press Cmd+D. Open its Layer effects and turn on a black Stroke of width6. Letting the block bleed off the left and bottom edges makes it feel like part of a bigger print.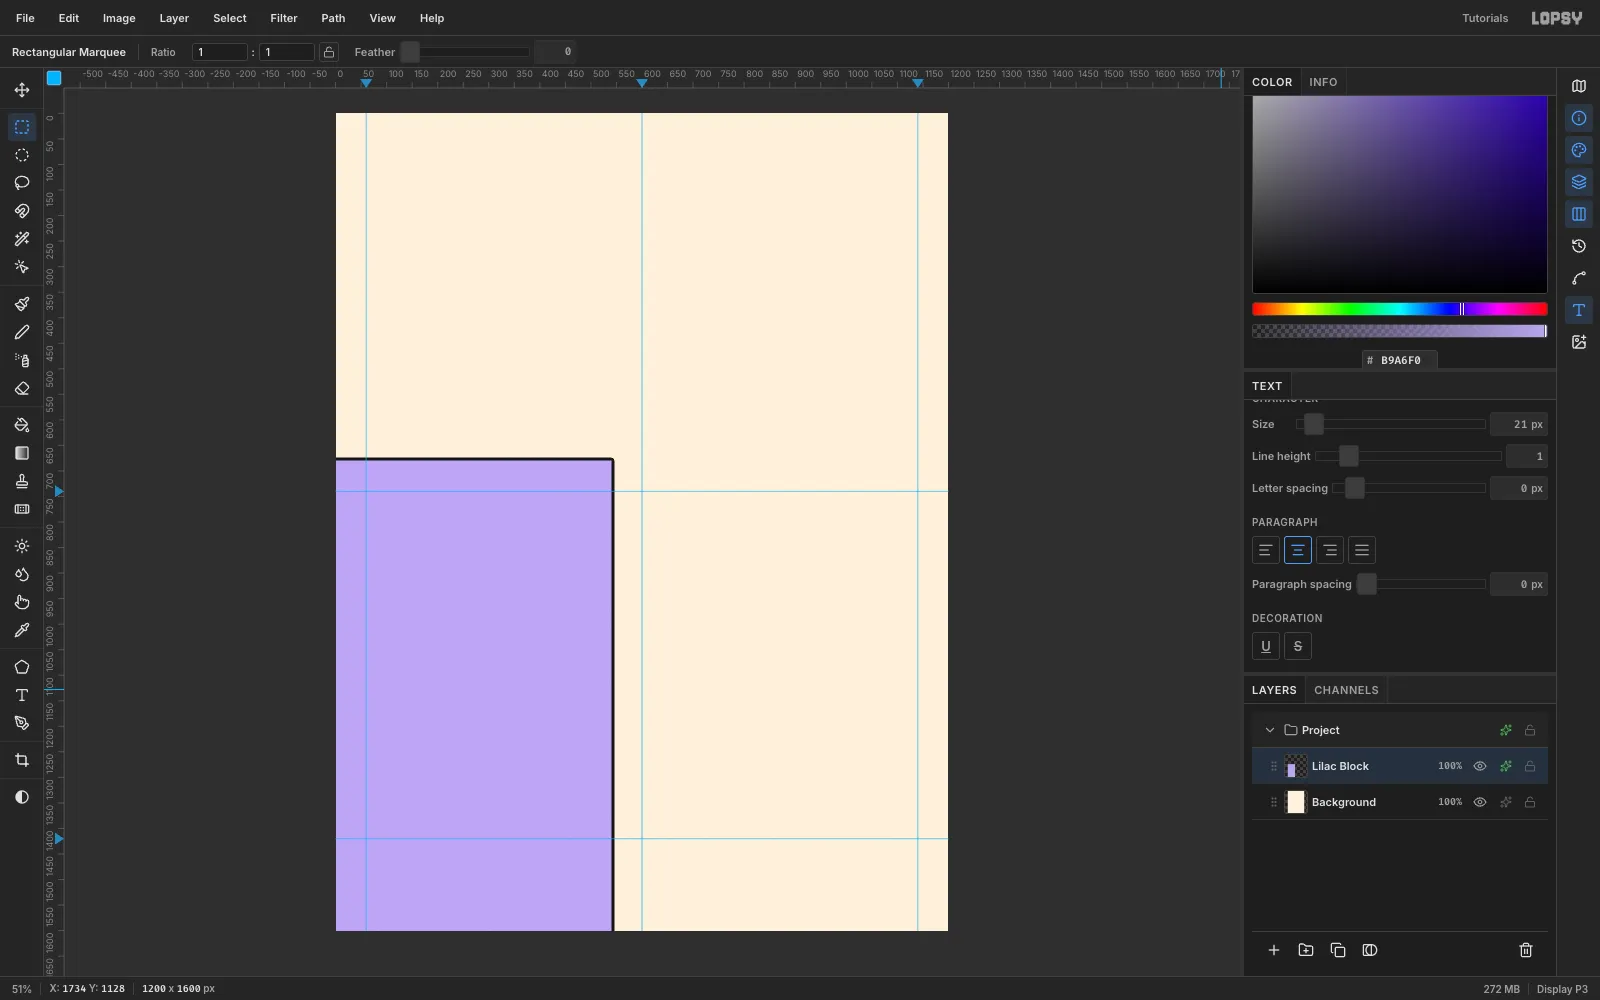
-
Draw a Bacterio squiggle tile
Add a new layer and name it
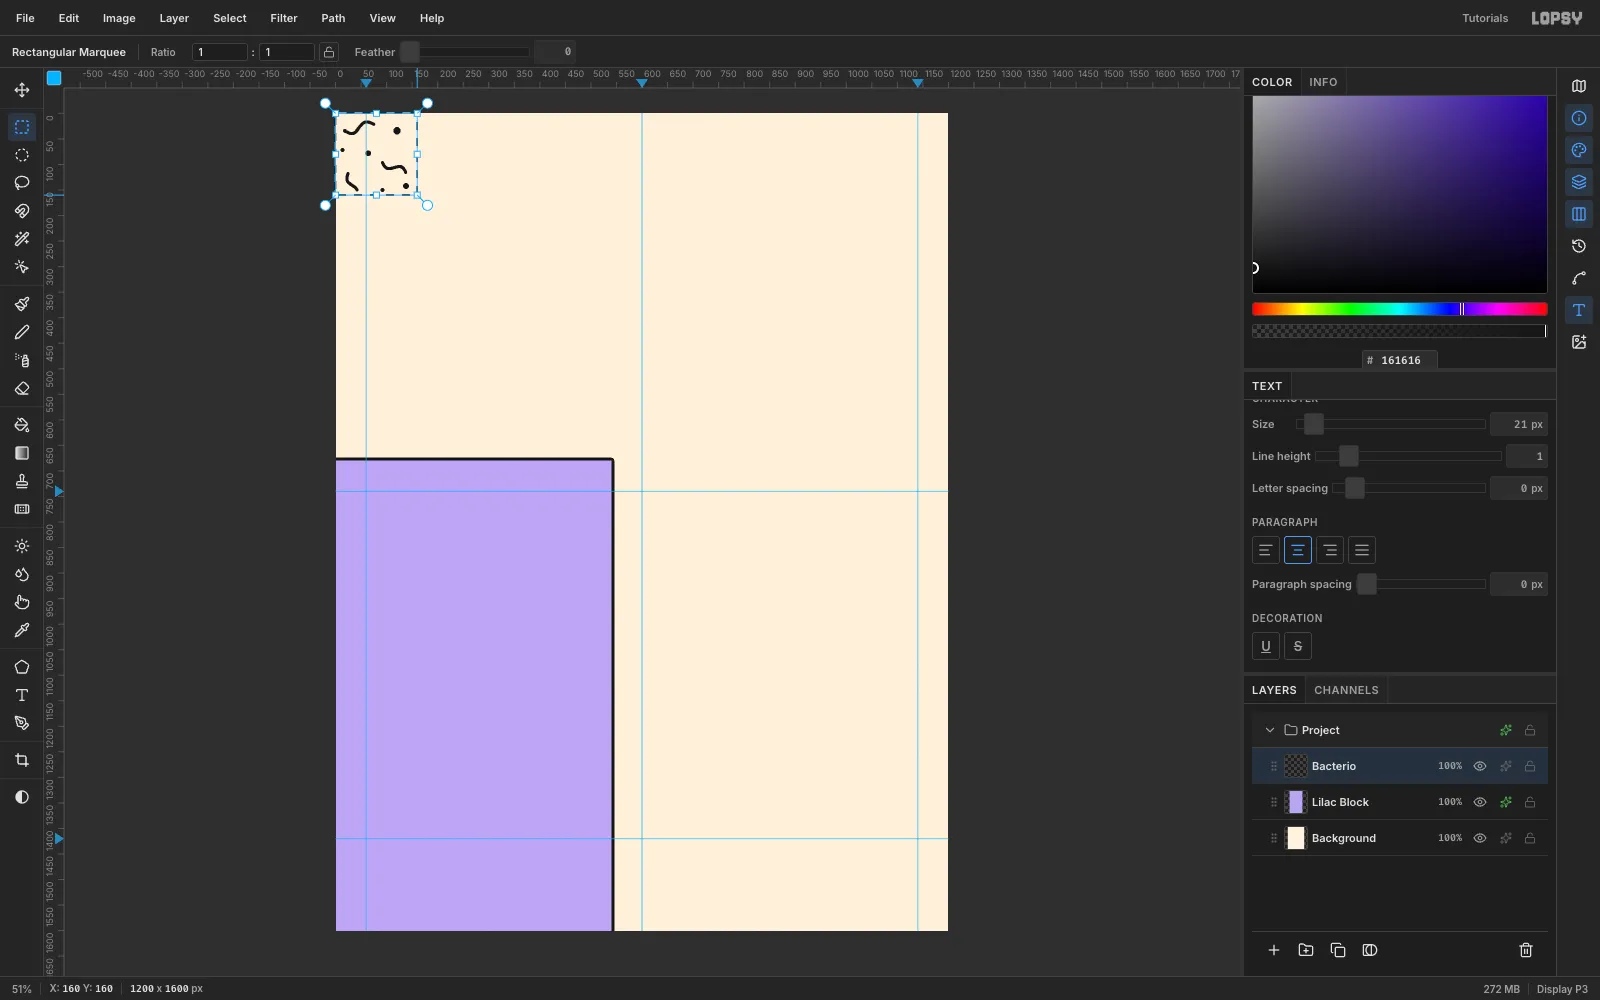
Bacterio. Work in the top-left 160 × 160 corner of the canvas:- Choose the Brush, set Size
7, Hardness100and ink#161616. - Paint three short squiggles at different angles. Two full S-curves about 50–60 px long and one half-wave work well.
- Add five dots of 8–14 px with small Elliptical Marquee fills.
- Drag a Rectangular Marquee over exactly (0, 0) to (160, 160).
Keep marks away from the edges of the tile so nothing is cut when it repeats.
- Choose the Brush, set Size
-
Fill the lilac block with the pattern
With the tile still selected, choose Edit → Define Pattern. Then press Cmd+A and Delete to clear the tile, and Cmd+D.
Select the lilac block's area again, from (0, 680) to (540, 1600). Choose Edit → Fill with Pattern…, pick the new 160 × 160 pattern and click Apply.
The pattern goes on its own
Bacteriolayer above the lilac block, not on the block itself. Pattern Fill replaces the pixels inside the selection with the tile, so the transparent parts of the tile would punch holes in the lilac. On a separate layer, the squiggles sit on top of the colour.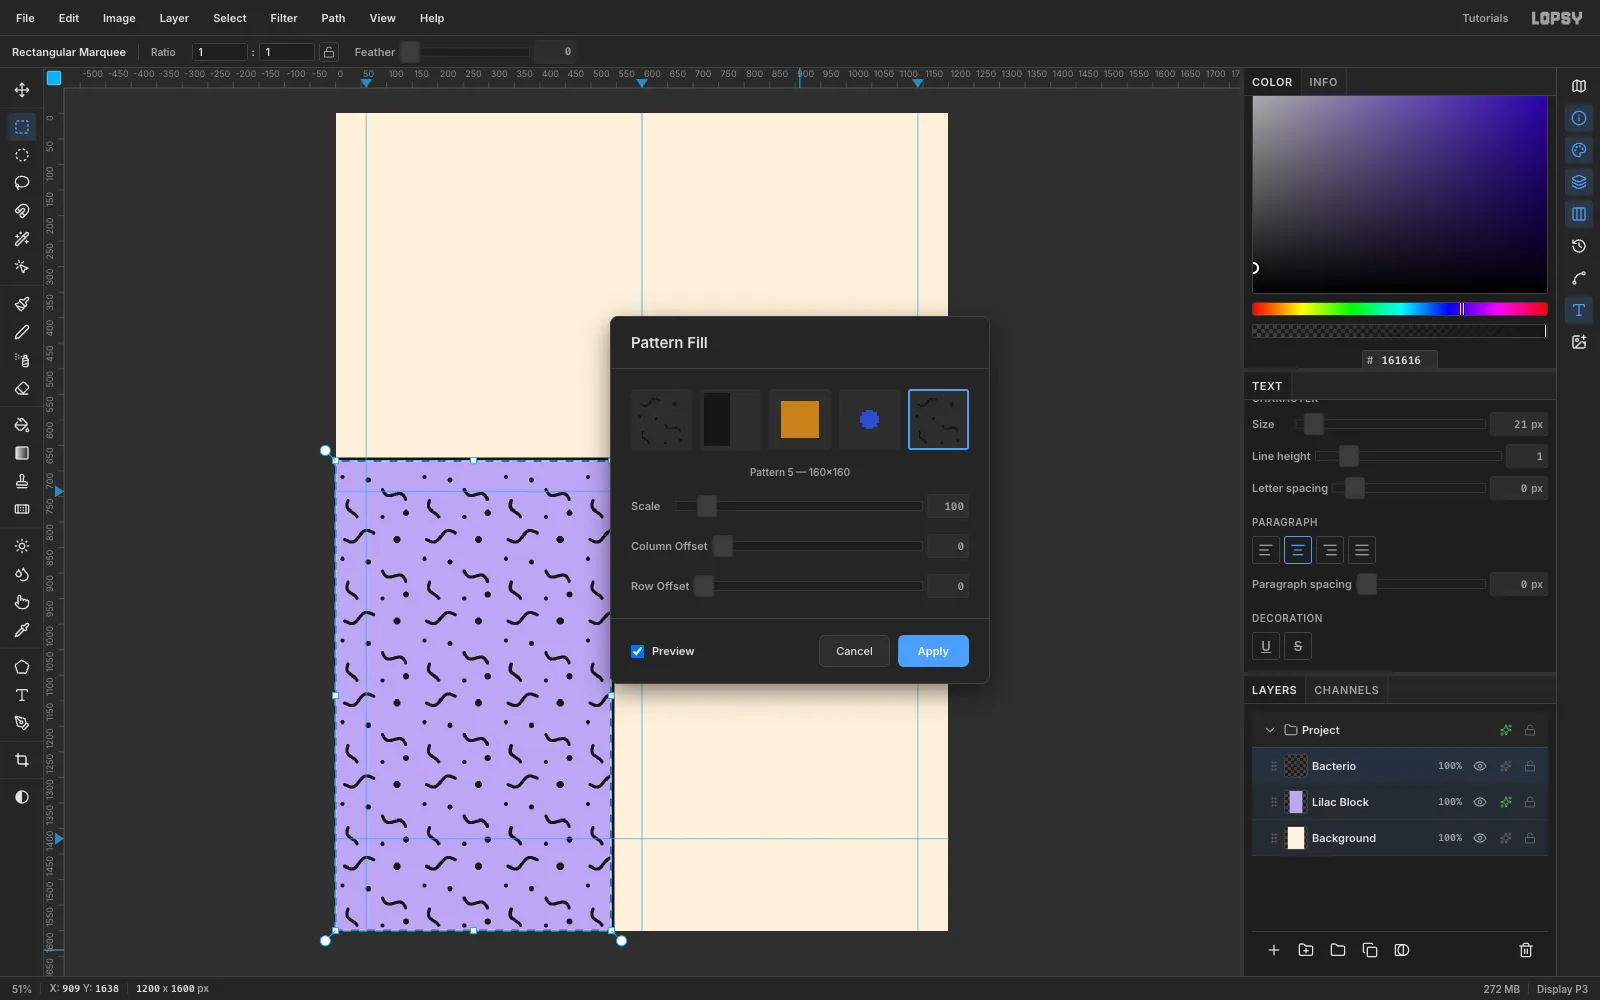
-
Add the big Memphis shapes
Click
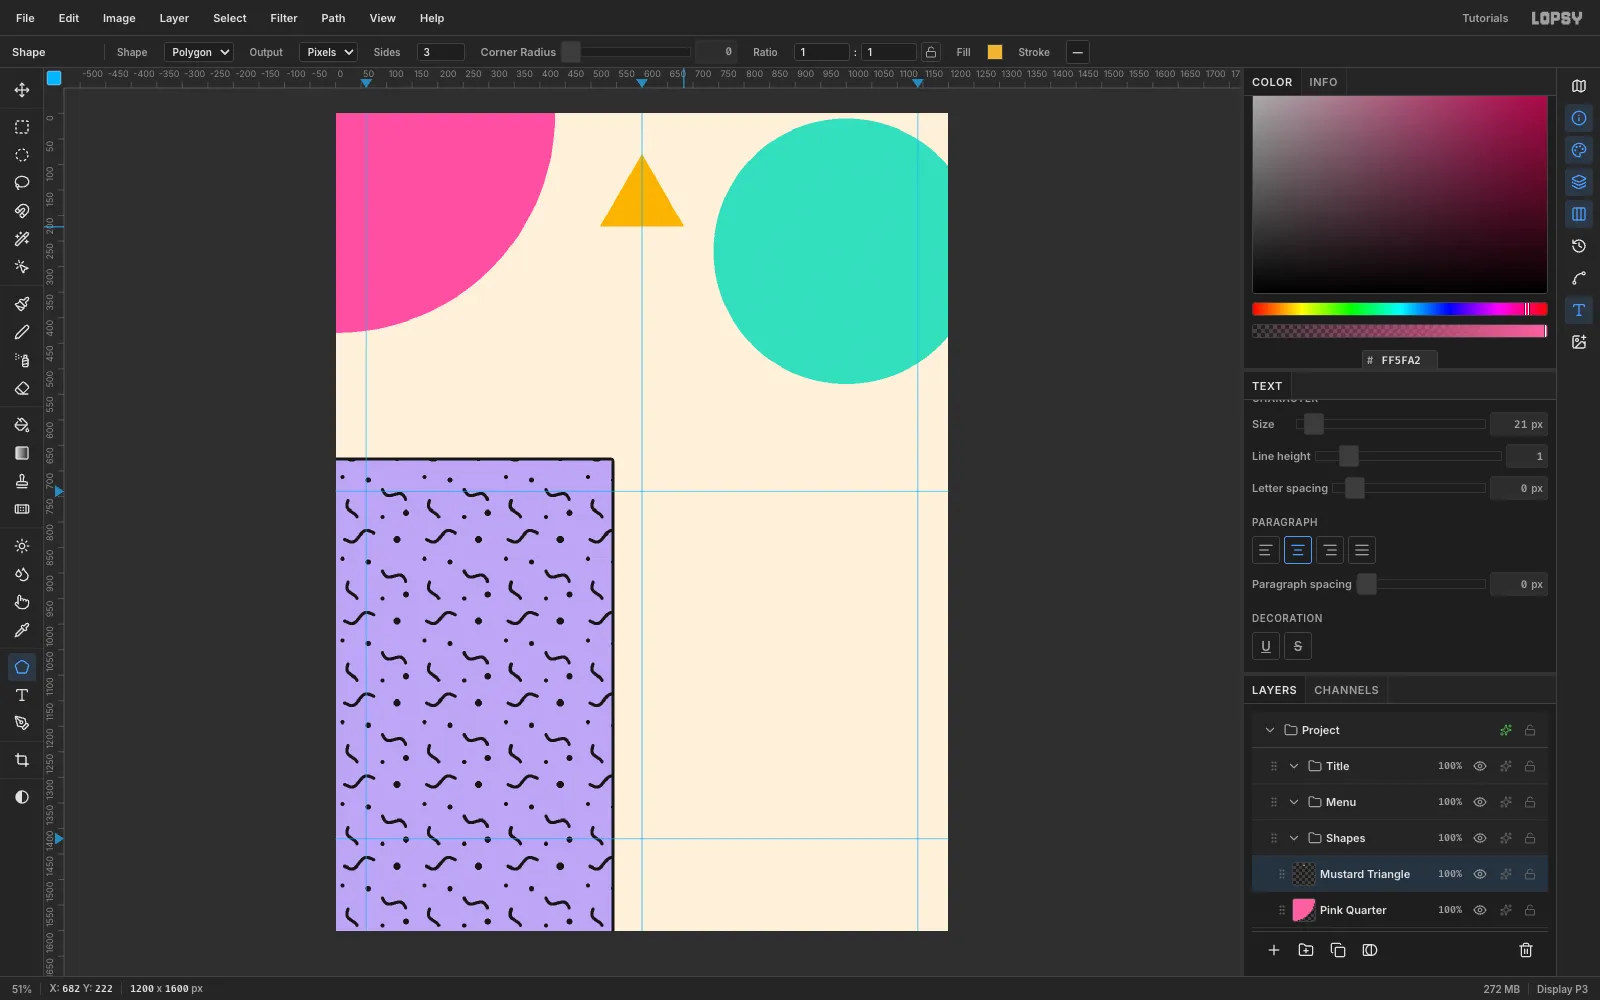
Bacterioand use New Group three times to makeShapes,MenuandTitlegroups, withTitleat the top. ClickShapesand add three layers inside it:- Mint Circle: an Elliptical Marquee from (740, 10), 520 × 520, filled with mint
#6FDCC0. It runs off the right edge. - Pink Quarter: a Lasso from the top-left corner around a 430 px arc, filled with hot pink
#FF5FA2. - Mustard Triangle: the Shape tool with Polygon, Sides
3and a mustard fill. Shapes draw from the centre, so drag from (600, 150) to (682, 222).
Big, flat, overlapping primitives are the heart of Memphis. Don't outline them; they should read like cut paper.
- Mint Circle: an Elliptical Marquee from (740, 10), 520 × 520, filled with mint
-
Add a checkerboard quarter circle
Add a
Checkerlayer. Fill a 40 × 40 white square at (0, 0), then fill two 20 × 20 ink squares at (0, 0) and (20, 20). Select the 40 × 40 square, Define Pattern, and clear the layer.Lasso a 250 px quarter circle into the bottom-right corner and choose Edit → Fill with Pattern… with the checker tile. Give it the same 6 px black Stroke. On a
Mint Halflayer, lasso a 120 px half circle sitting on the bottom edge at x 740 and fill it mint.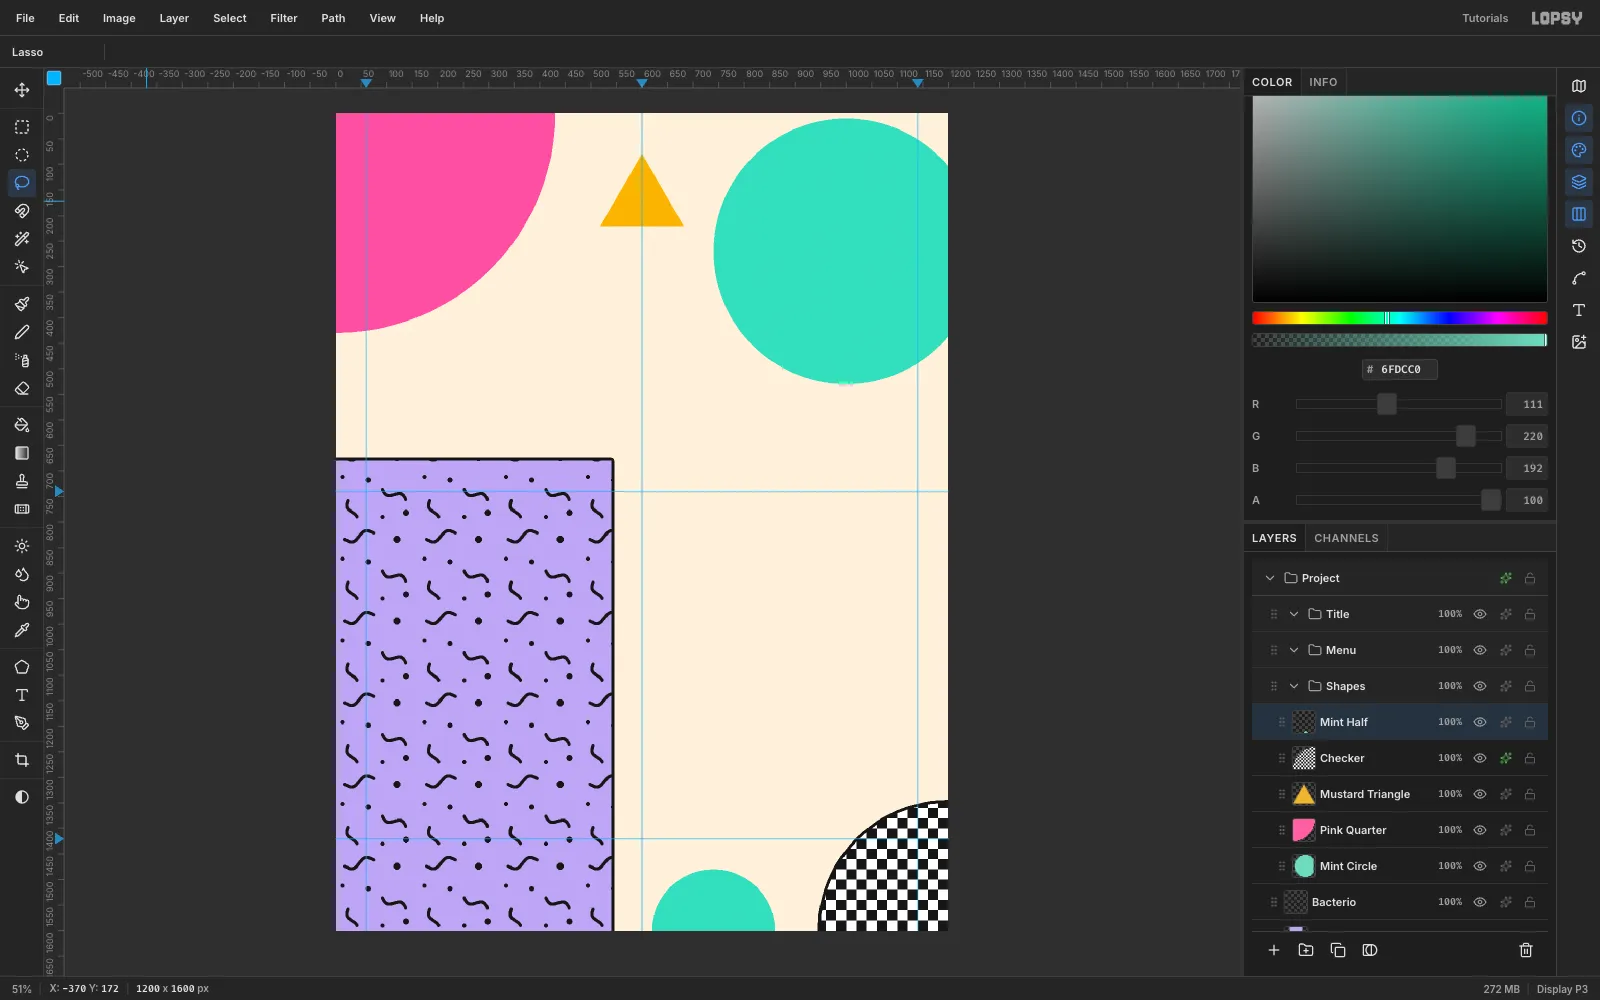
-
Set the title
Click the
Titlegroup and choose the Text tool:- Choose Rammetto One, size 120, ink
#161616. - Click in the empty canvas and type
WAFFLE. Press Tab to commit. - Click
Titleagain, then click lower down and typeMAMBO. - With the Move tool, stack them:
WAFFLEat about y 225,MAMBOat y 344, withMAMBOindented about 30 px.
Give both layers a Drop Shadow in cobalt
#2C4BD1with Offset X10, Offset Y10, Blur0and Opacity100. A hard, coloured shadow is a classic 80s lift. Finally, drag the mustard triangle down so its point tucks behind the top of WAFFLE, which ties the shapes to the type.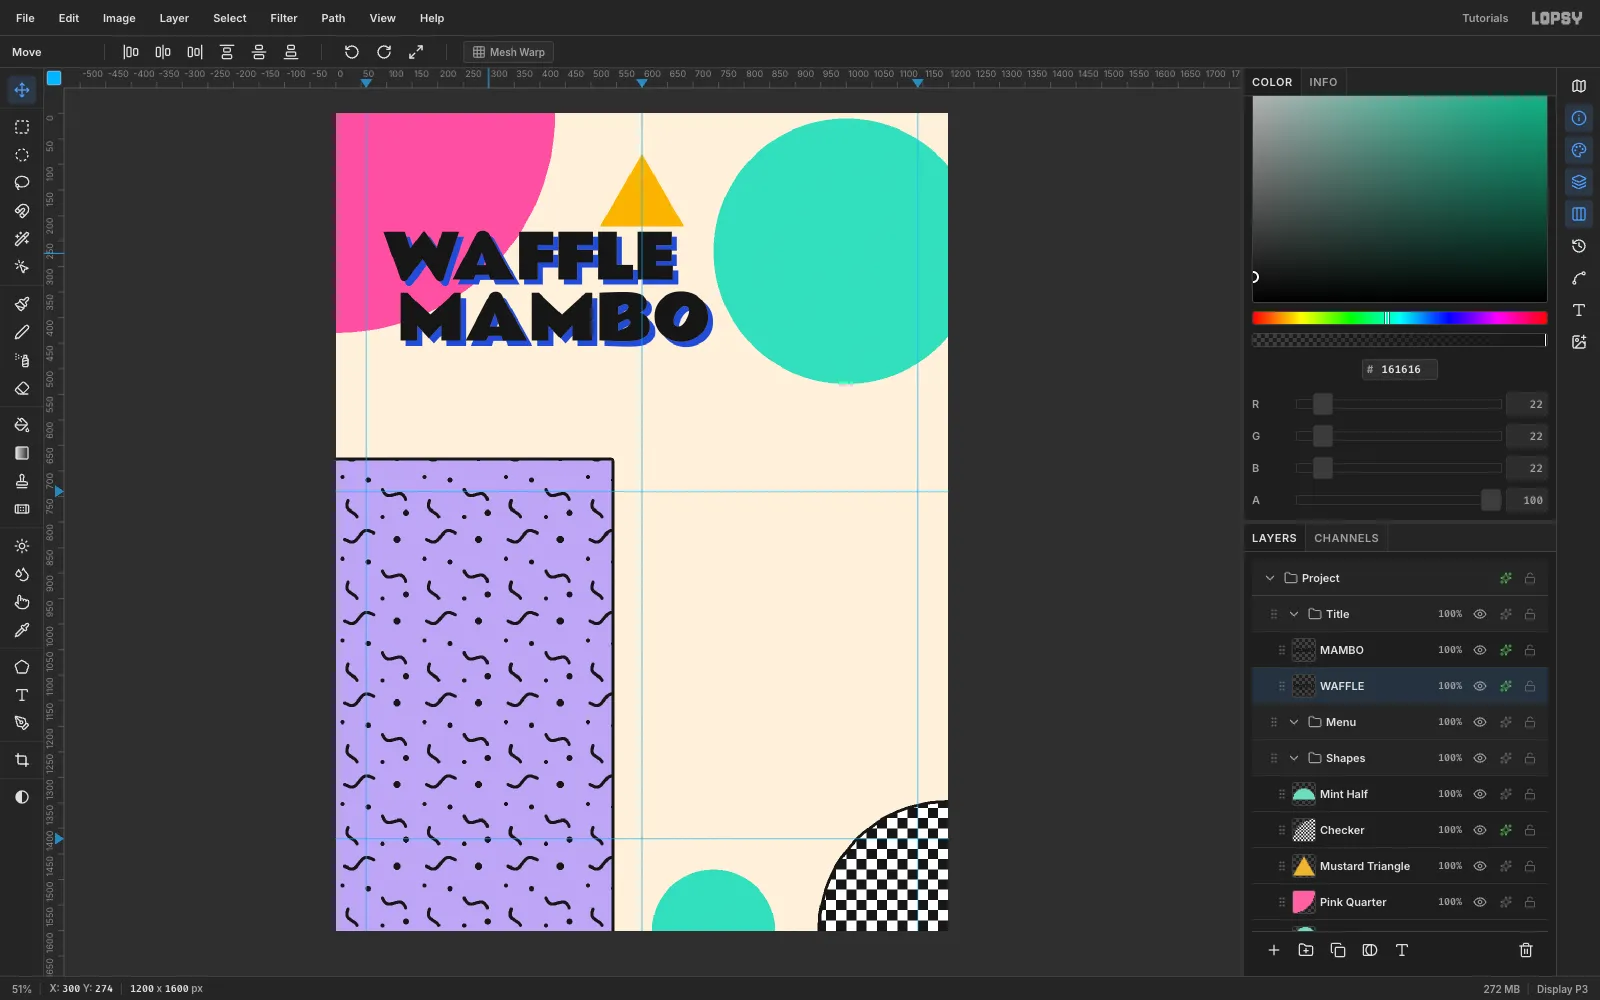
- Choose Rammetto One, size 120, ink
-
Add a tracked tagline
Open the Text panel and set Letter spacing to
2. Choose Space Mono Bold at 22 and typeBELGIAN WAFFLES · MALTS · LATE-NIGHT GROOVES(paste it if the·characters don't come through). Move it so its left edge lines up with WAFFLE at x 93, about 40 px under MAMBO.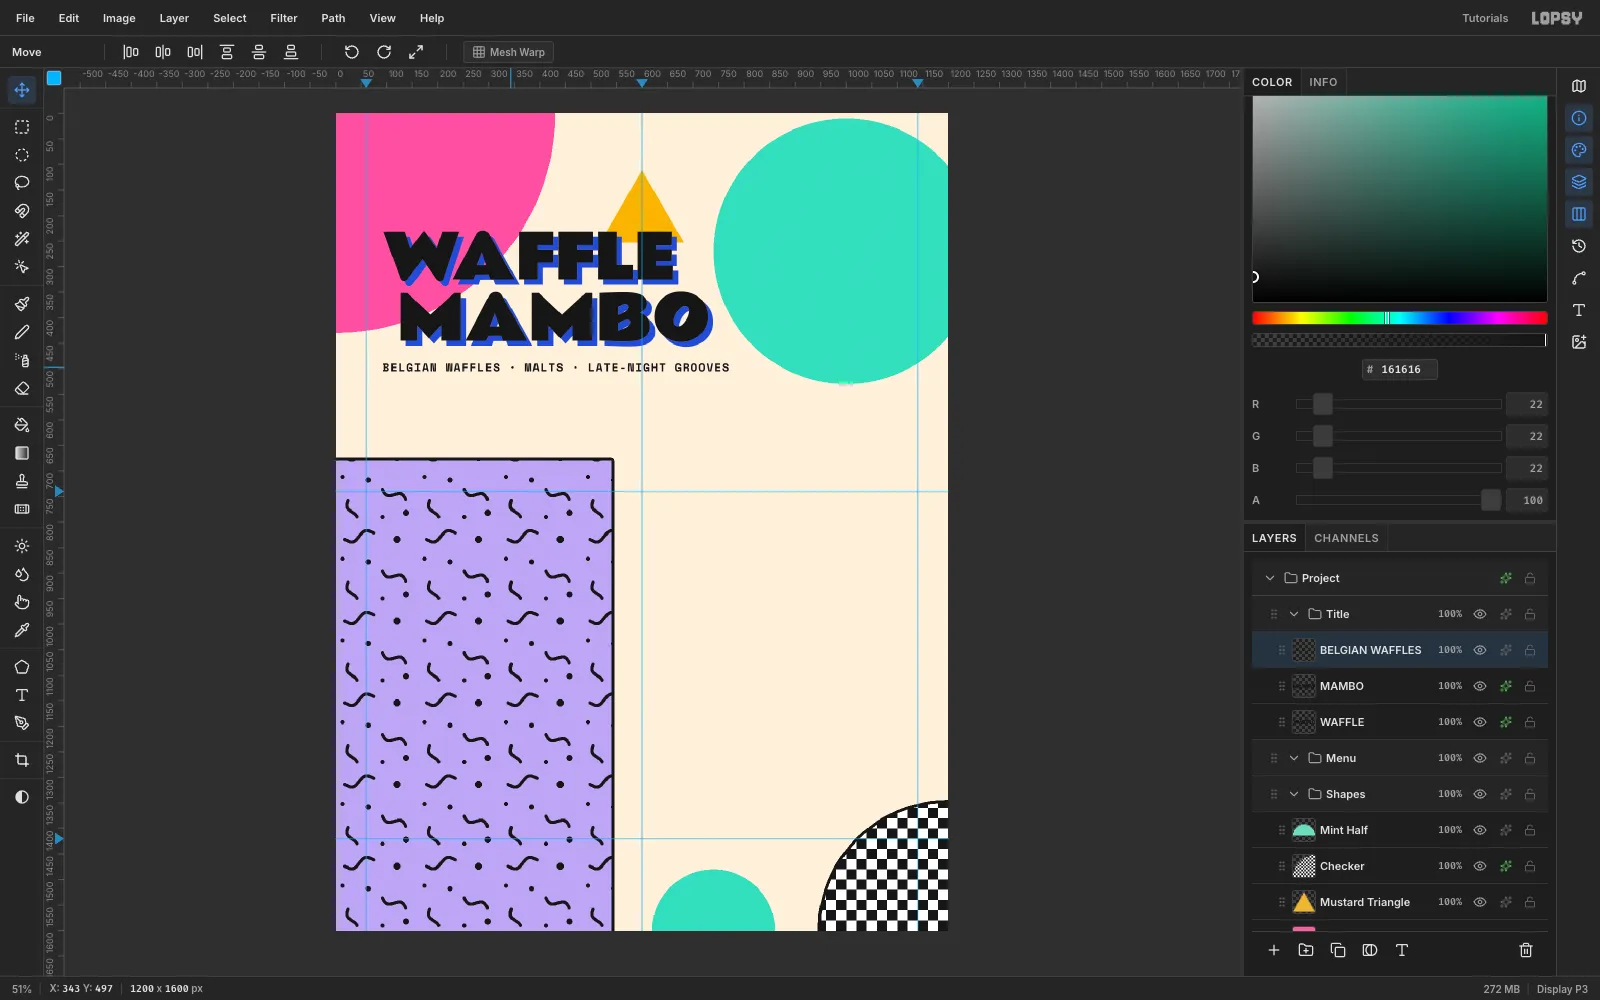
-
Build the waffle grid
Click
Mint Halfand add a New Group calledWaffle. Inside it:- On a
Waffle Disclayer, fill a 320 × 320 circle at (830, 120) with mustard. - On a
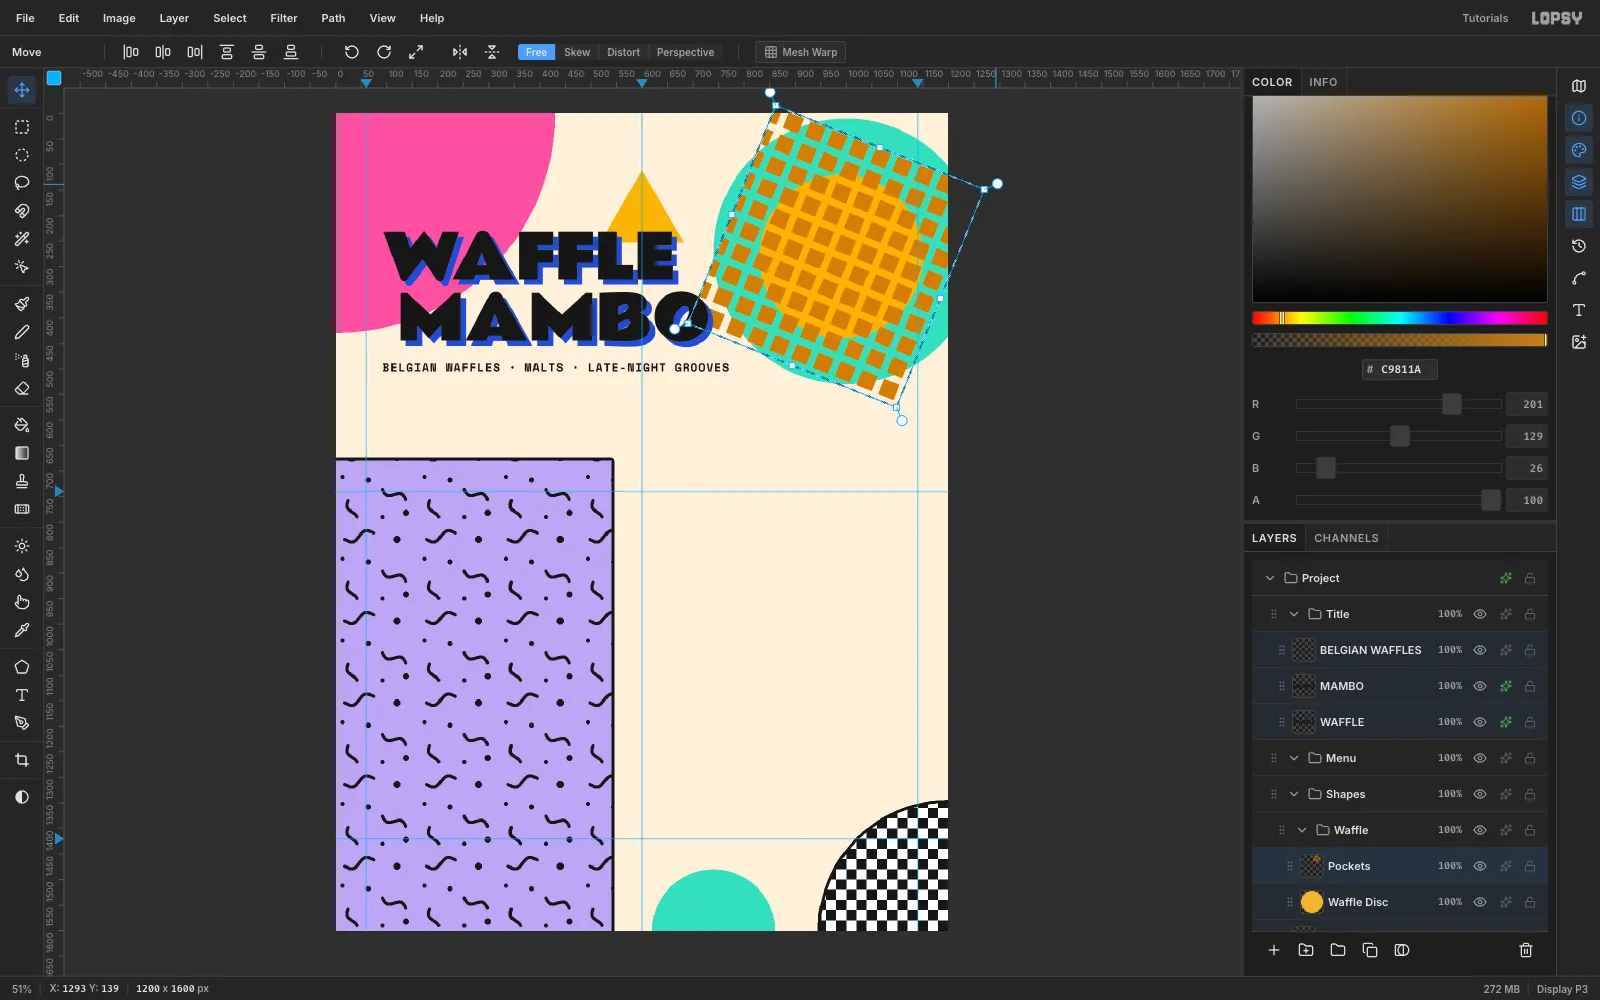
Pocketslayer, fill a 32 × 32 square at (7, 7) with toasted brown#C9811A. Select (0, 0)–(46, 46) and Define Pattern, then clear the layer. - Marquee (760, 50) to (1200, 510) and Fill with Pattern… with the 46 px tile.
- Switch to the Move tool, drag the rotation handle outside the top-right corner about 22°, then press Cmd+D to commit.
Rotating the grid keeps it from looking like graph paper.
- On a
-
Clip the grid to the waffle
Draw an Elliptical Marquee from (848, 138), 284 × 284, just inside the disc. Choose Select → Inverse and press Delete. Deselect, then Layer → Merge Down the pockets into
Waffle Disc.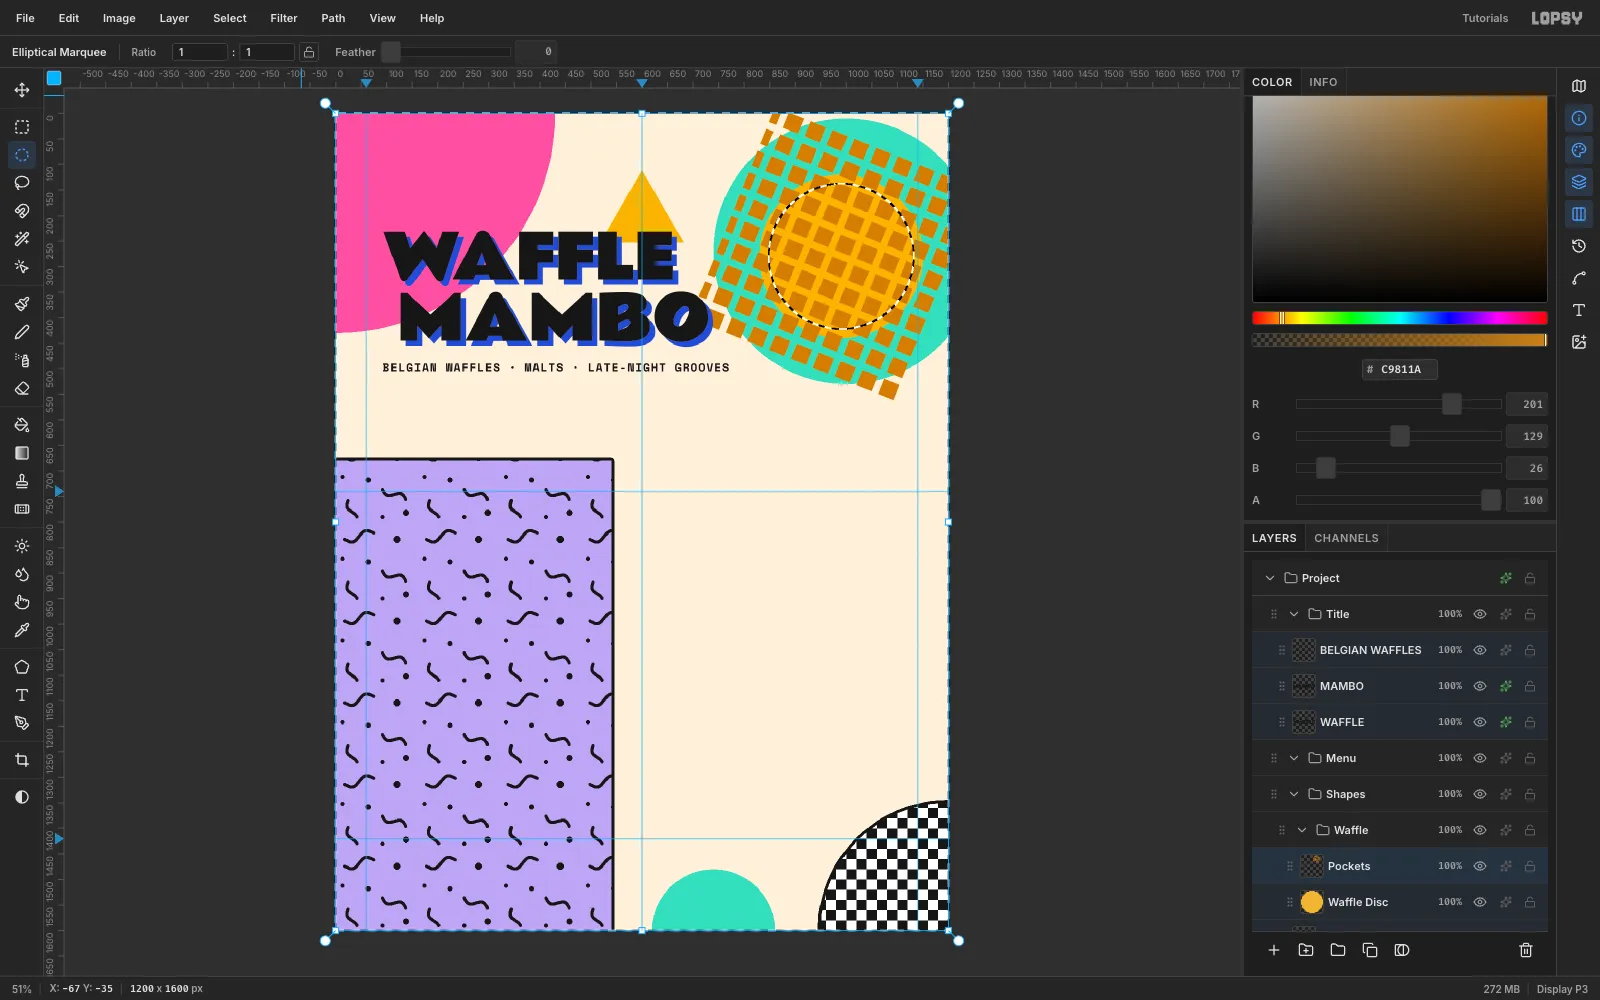
-
Add syrup, butter, blueberries and outlines
Add three more layers above the disc:
- Syrup: lasso a wavy pink blob over the upper half, with three finger-shaped drips. Round each drip with a small circle fill.
- Butter: lasso a 68 px square rotated −14° in pale yellow
#FFF3B0. - Blueberries: three cobalt circles of 30–40 px in the lower right.
Give all four layers a black Stroke of width
7. One consistent outline weight makes the illustration read as a single sticker.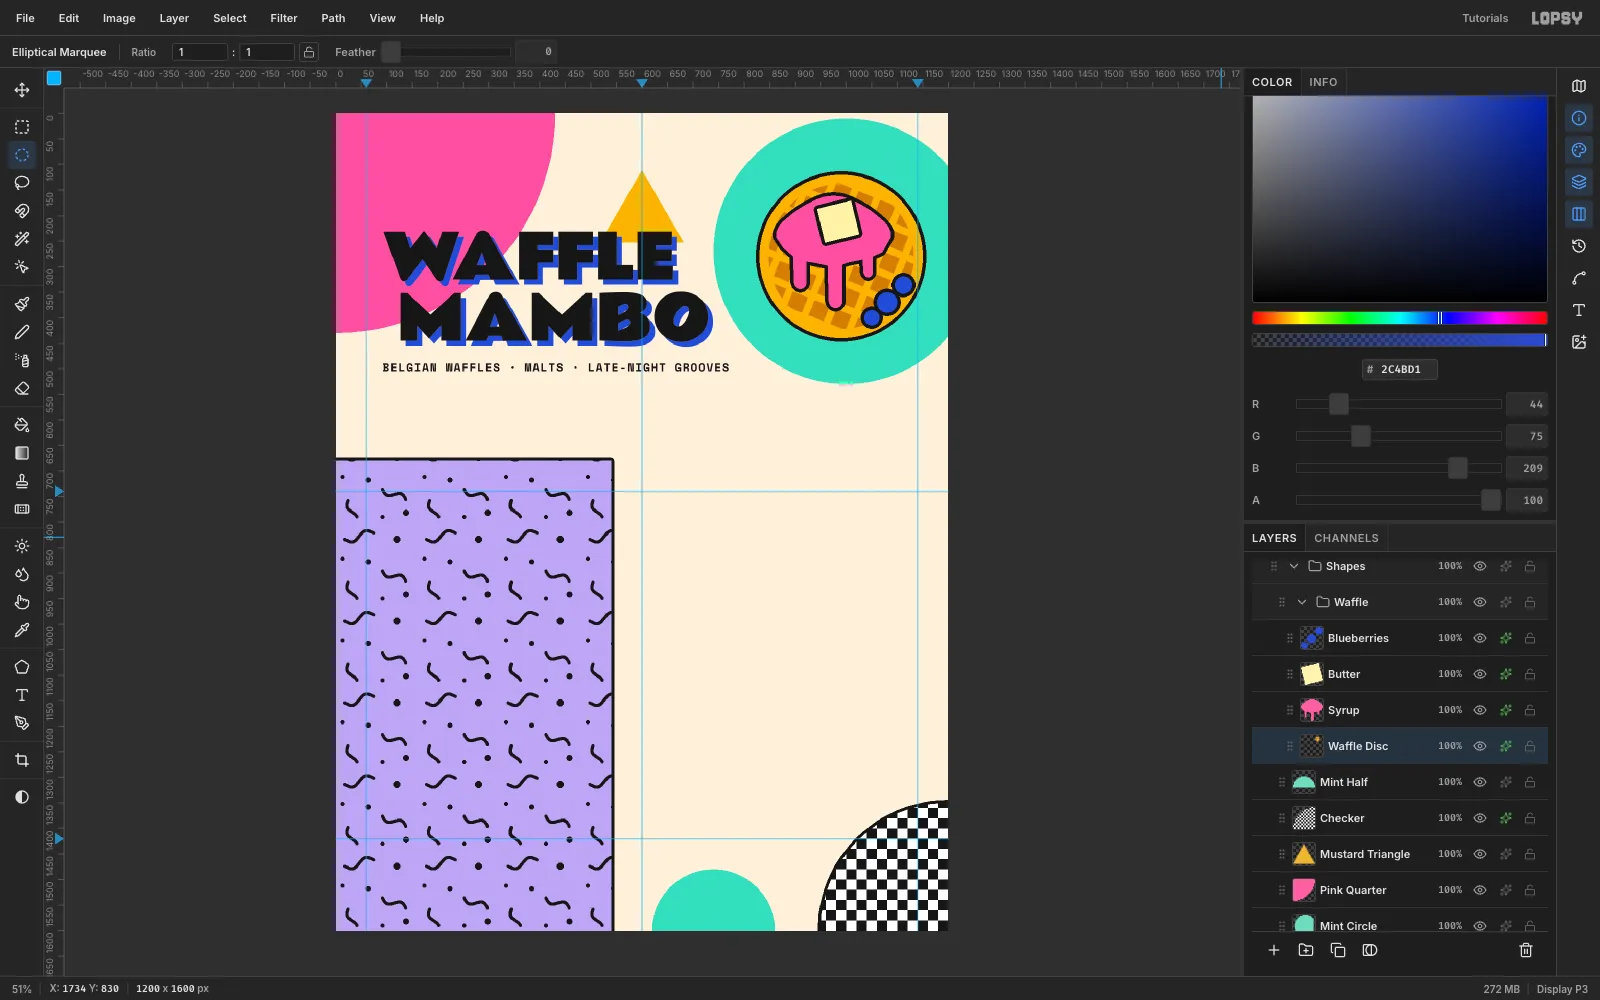
-
Sprinkle confetti with copy and paste
Add a
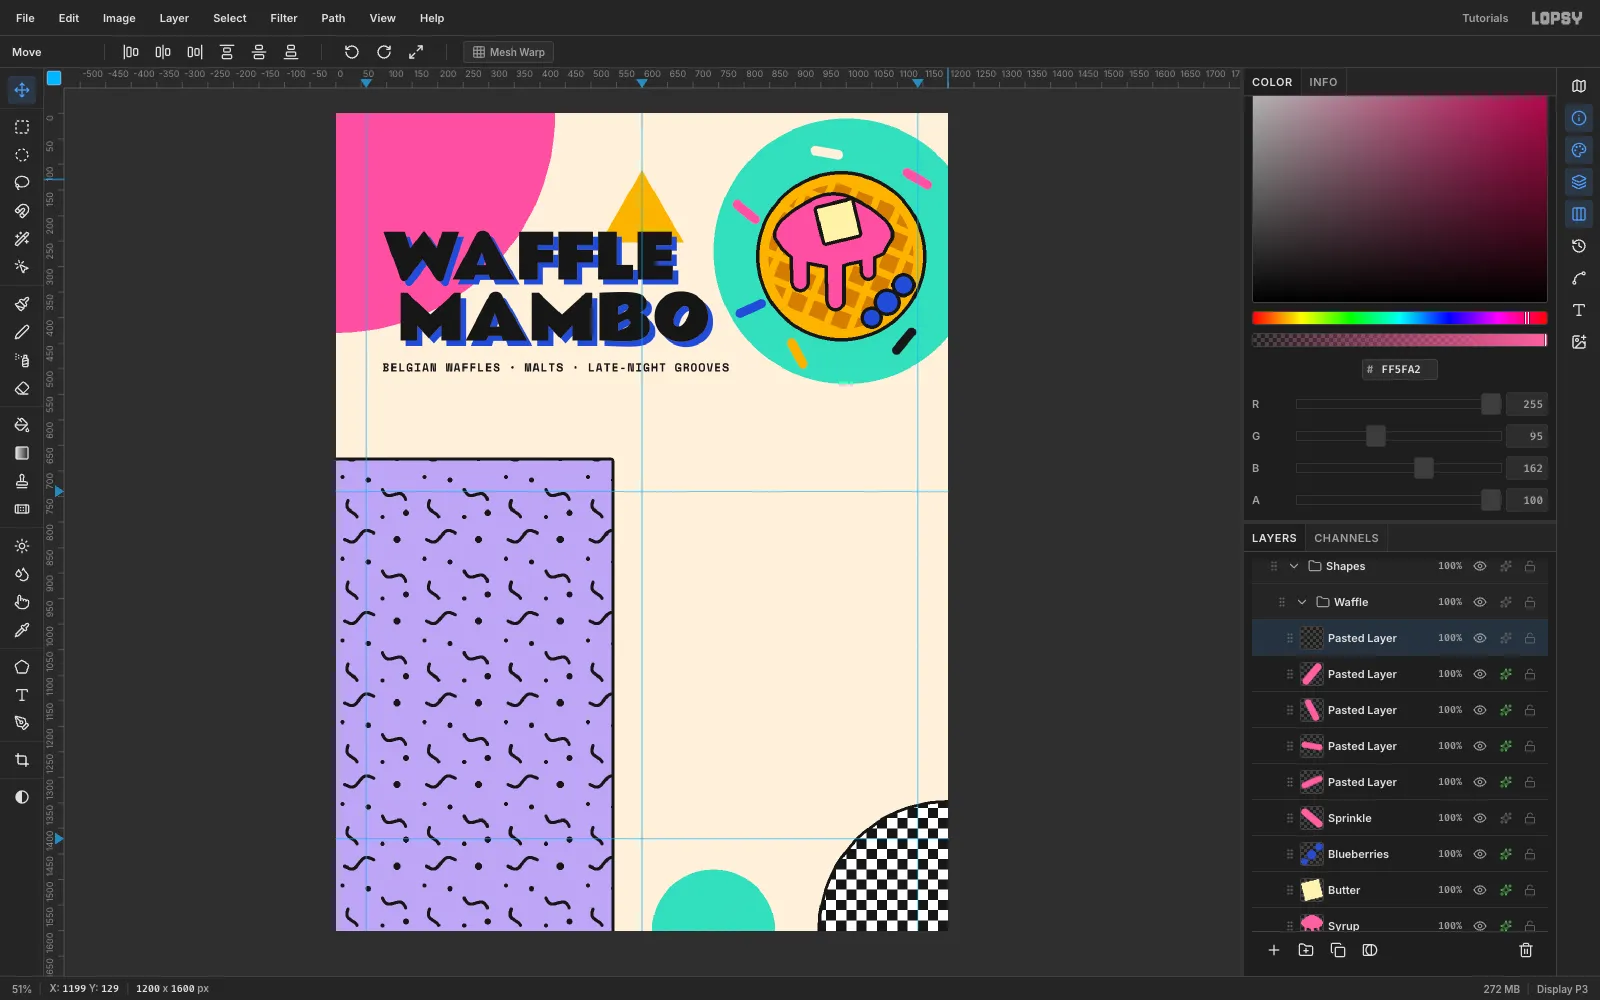
Sprinklelayer and build one pink capsule, 64 × 18: a rectangle plus a circle fill at each end. Marquee it and press Cmd+C. Then rotate the original about 40° with the Move tool and press Cmd+D.For each extra sprinkle:
- Press Cmd+V.
- Drag it with the Move tool to a spot around the waffle.
- Marquee it, rotate it to a new angle, and press Cmd+D.
- Recolour it with a Color Overlay effect in cobalt, cream, mustard or ink.
Five copies around the rim is plenty. Scattered confetti is very Memphis, but it looks timid if it spreads over the whole page.
-
Paint a squiggle and a zigzag
Click
Mint Half, add aSquiggleslayer and choose the Brush at Size18, Hardness100. Paint one wide black wave from about (96, 600) to (436, 600). Hold the shape steady by moving in small, even steps. At Size15in cobalt, paint a zigzag of eight 42 px segments, starting at (640, 640).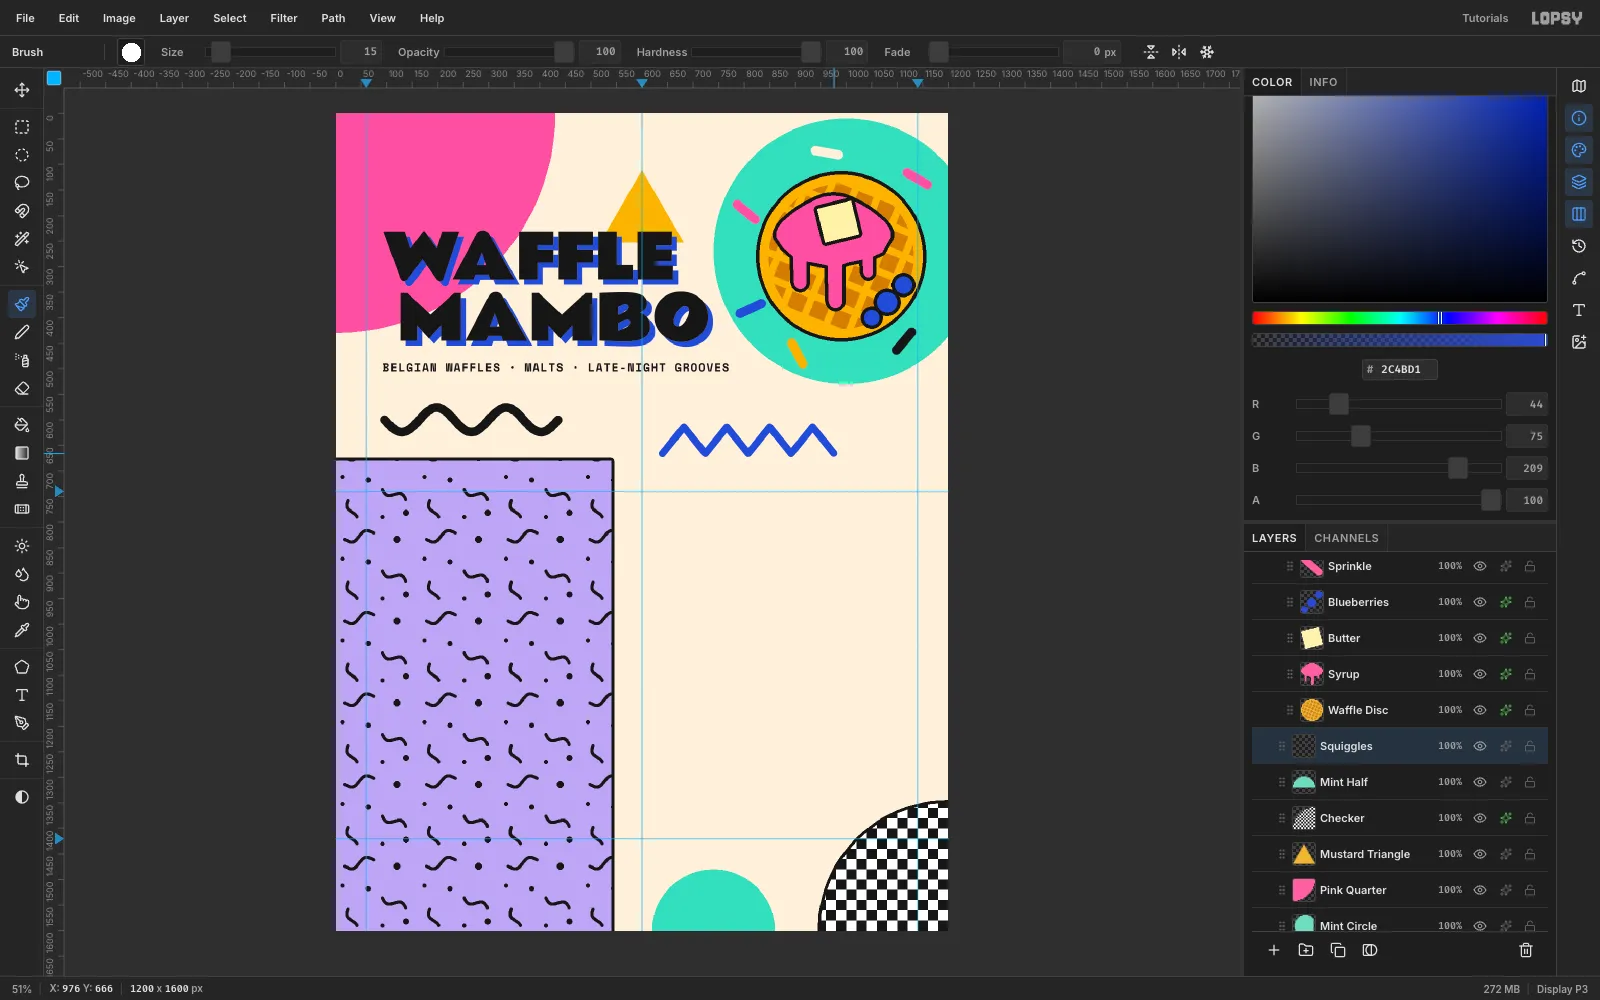
-
Make the menu cards
Click the
Menugroup and add aLeft Cardlayer. Fill a white rectangle from (60, 740), 520 × 680. That puts its top and bottom on your two horizontal guides. Give it:- A black Stroke of width
6. - A black Drop Shadow with Offset X
14, Offset Y14, Blur0and Opacity100.
Add
Right Cardat (620, 740), the same size with the same effects. Matching tops, bottoms and shadows across both cards is what makes a busy Memphis page still feel designed.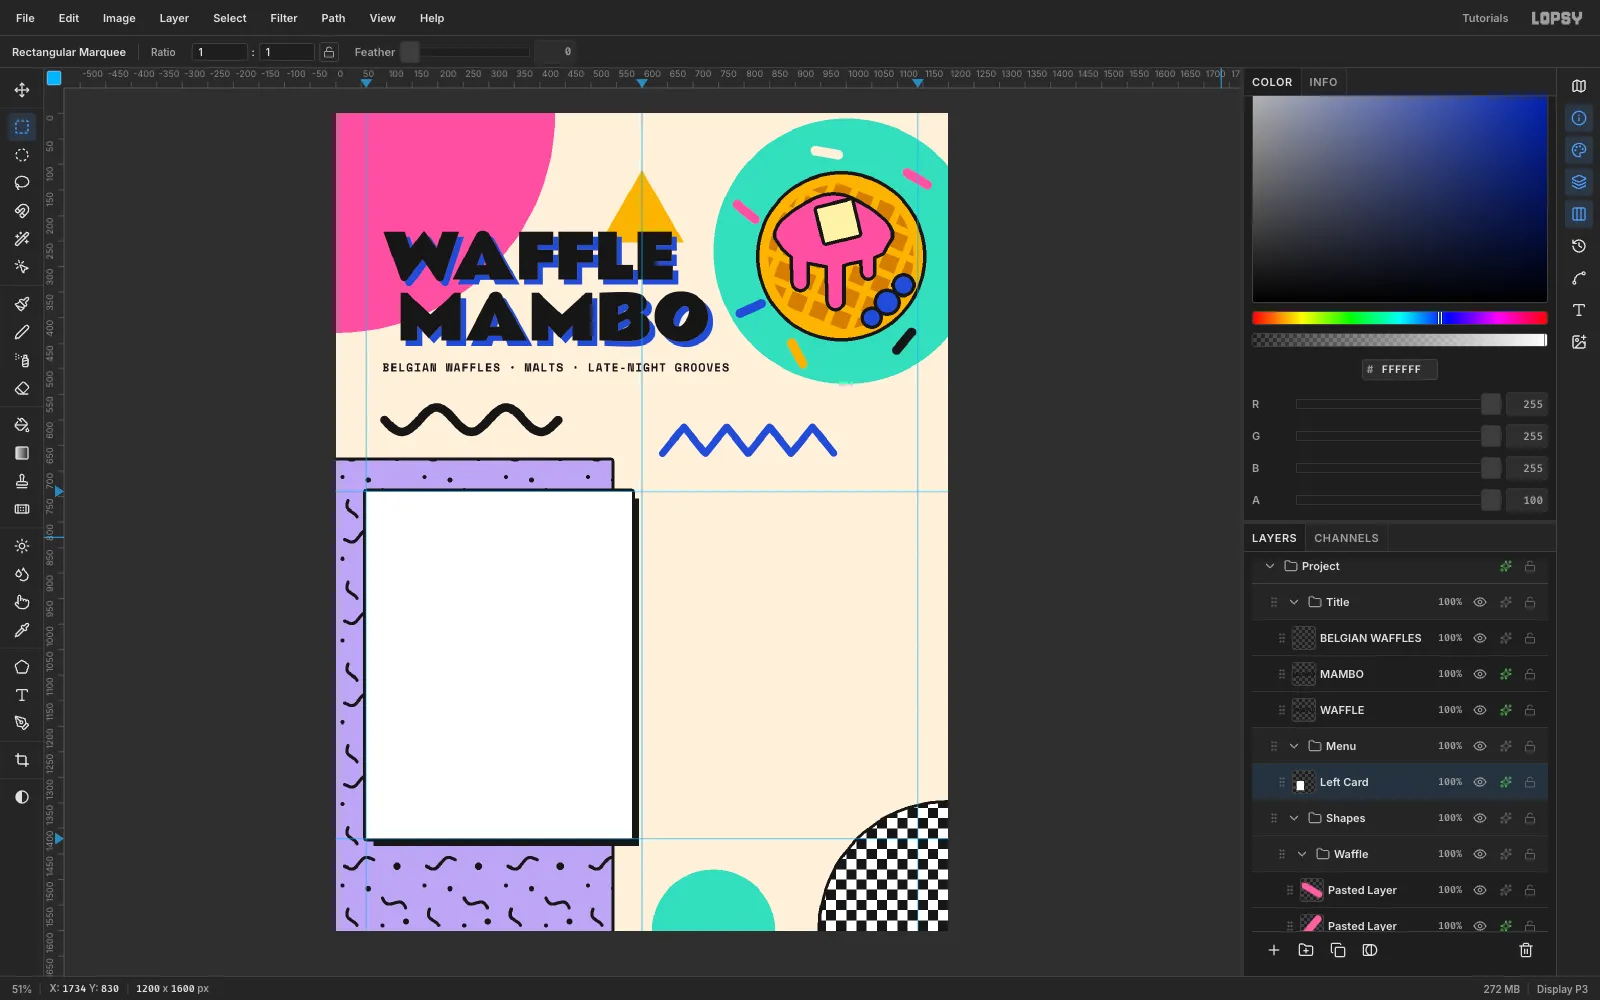
- A black Stroke of width
-
Add header bands, a pill and a footer
Add a
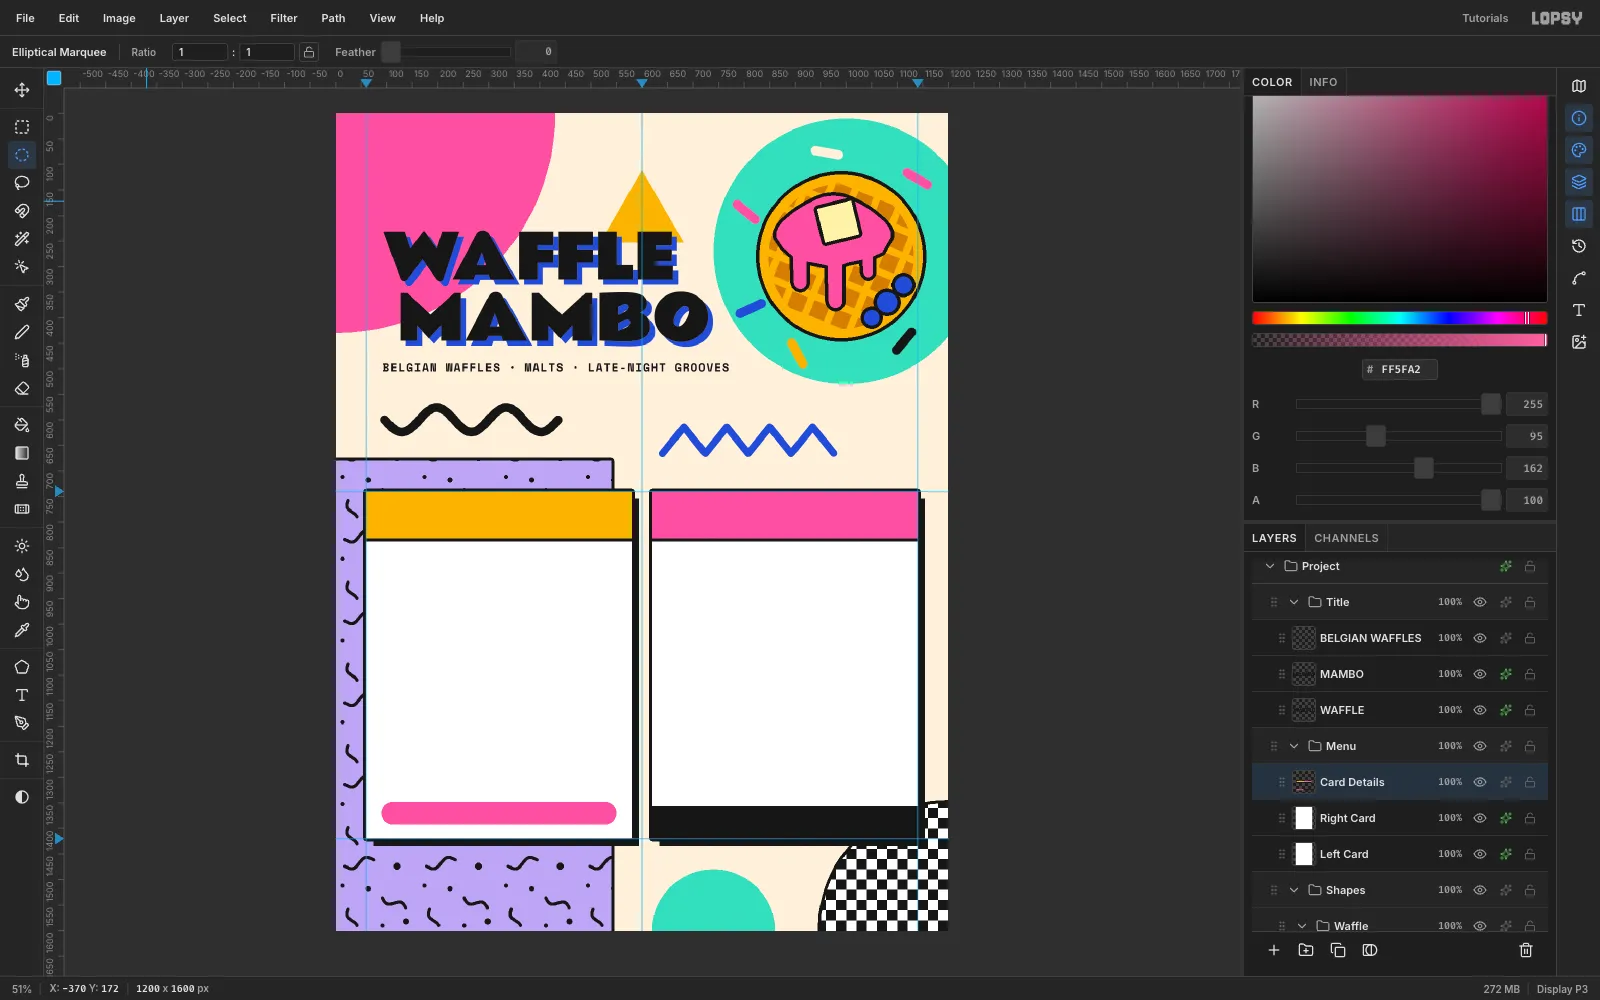
Card Detailslayer and fill:- A mustard band, 520 × 92, at the top of the left card.
- A pink band, 520 × 92, at the top of the right card.
- A 6 px ink rule under each band.
- A black 64 px footer band along the bottom of the right card, from y 1356.
- A 460 × 44 pink pill on the left card at (90, 1348). Build it from a rectangle plus a circle at each end.
-
Set the menu items with area text
Put WAFFLES and SHAKES & SIPS in the bands in Rammetto One 46, 30 px in from the card edge and centred vertically in the band.
For the items, use area text, dragging a text box instead of clicking. Each column is one layer, so the rows stay perfectly spaced. Set Line height
1, and use Paragraph spacing to control the gap between items:- Prices: Rammetto One
28, Align right, paragraph spacing72, in a 100 px box ending at the card's inner edge. - Descriptions: DM Mono
18in plum#3A3340, paragraph spacing82, starting 36 px below the prices. - Names: Archivo Black
28, paragraph spacing72, starting at the same y as the prices.
Make them in that order: prices, descriptions, then names. A text click or drag that lands inside an existing text box edits it instead of starting a new layer, so each new box should start in space that no text covers yet.
Finish with the footer,
88 SQUIGGLE AVE · OPEN TIL 2AM, in Space Mono Bold20, cream, centred in the black band. Then addADD-ONS +2 · bacon · nutella · sprinklesin Space Mono Bold16, centred in the pink pill.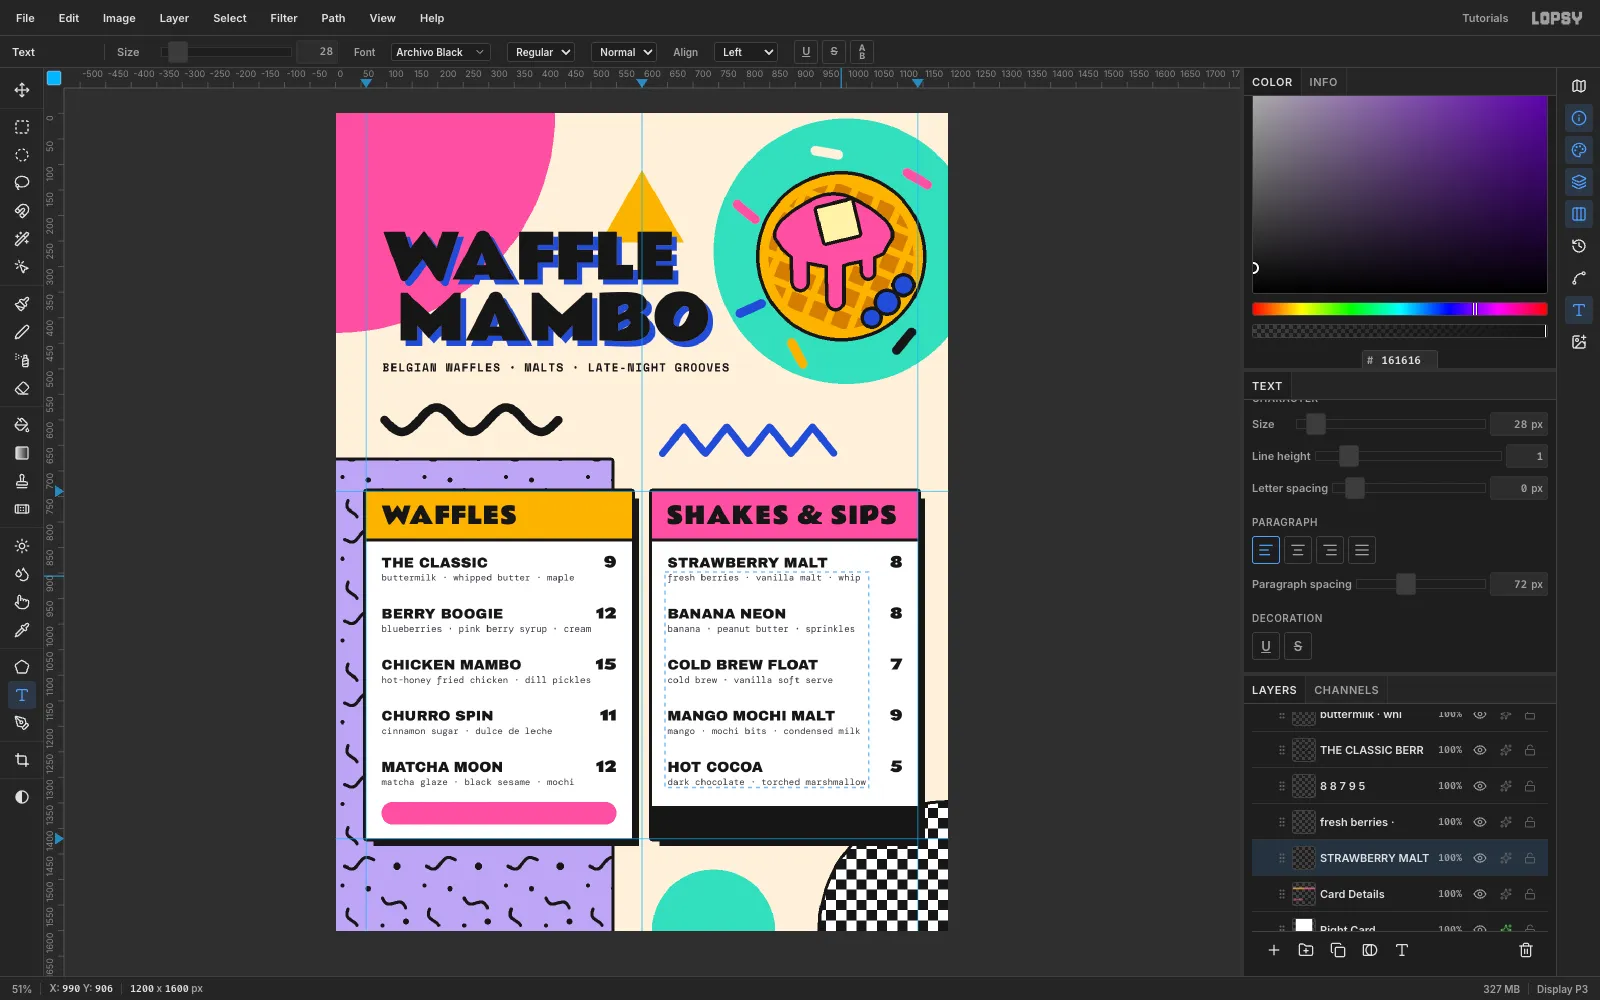
- Prices: Rammetto One
-
Make a rotated badge
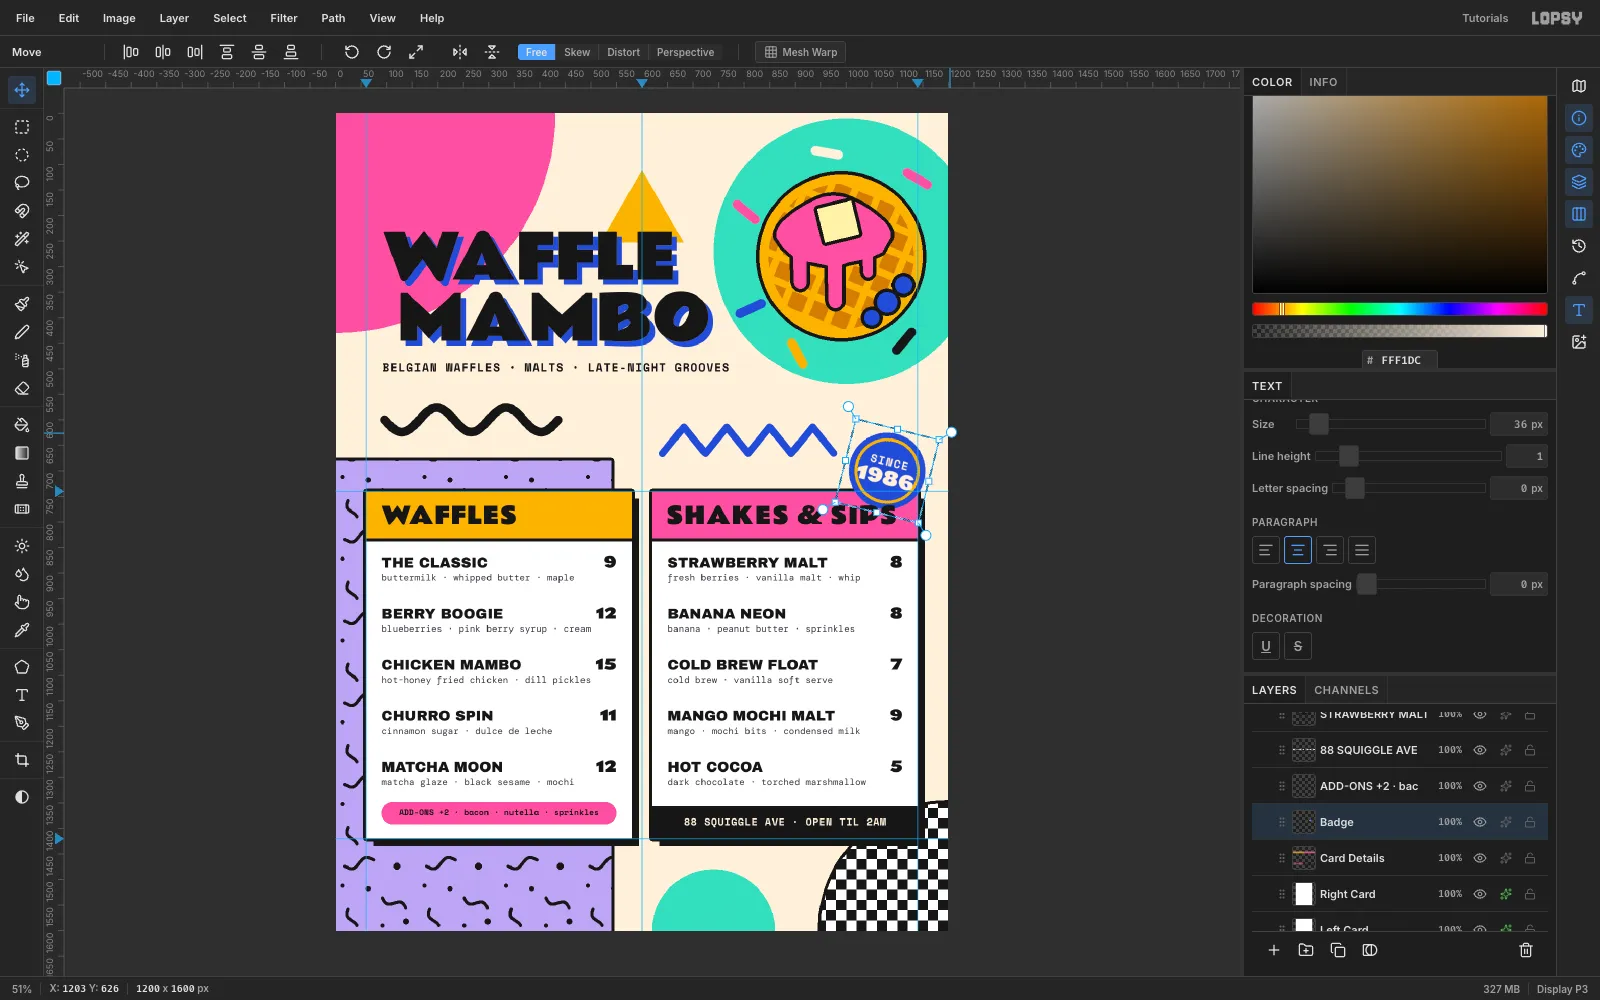
Build the badge above
Card Details:- On a
Badgelayer, fill a 150 px cobalt circle. - On a
Badge Ringlayer, fill a 128 px mustard circle centred on it. Choose Select → Shrink…5and press Delete to leave a ring, then Merge Down. - Type
SINCE(Space Mono Bold 22, tracking 2) and1986(Rammetto One 36) in cream in empty space. Move them onto the badge, Rasterize each, and Merge Down twice intoBadge. - Marquee the badge, rotate it 14° with the Move tool, and press Cmd+D.
Park it above the top-right corner of the Shakes card, with at least 15 px of clear space above the band.
- On a
-
Add print grain
Click the Background row and choose Filter → Add Noise…. Set Amount
8, Mono and Gaussian, and click Apply. The grain is subtle, but it takes the digital flatness off the cream so the menu feels printed.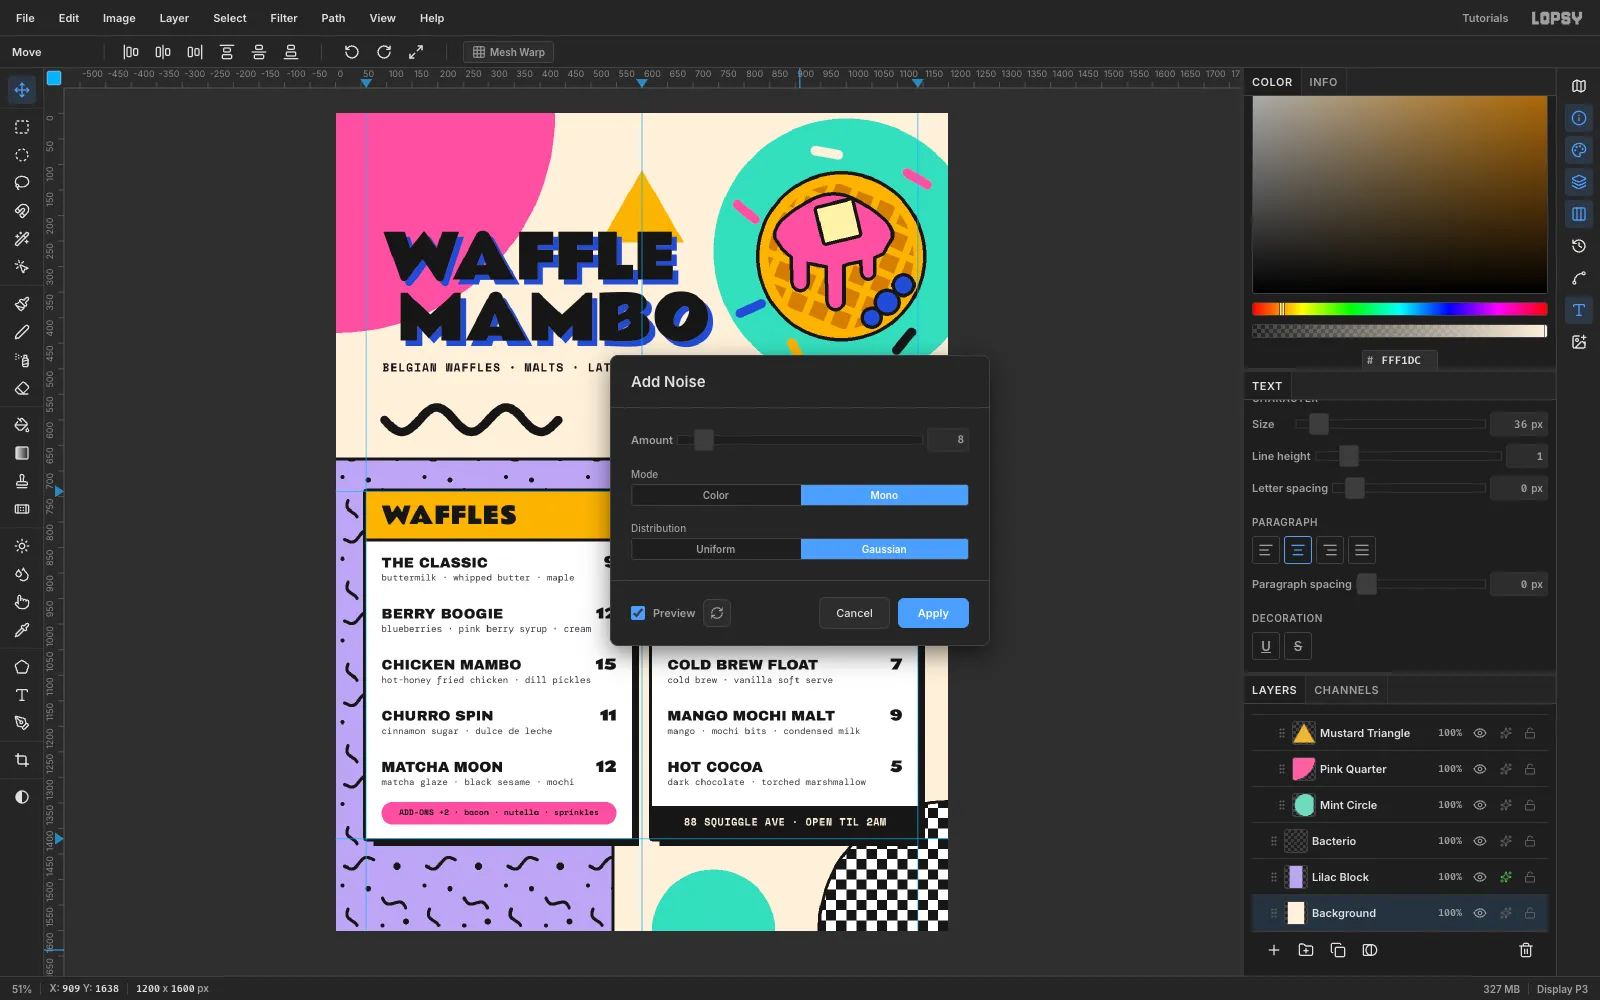
-
Polish the details
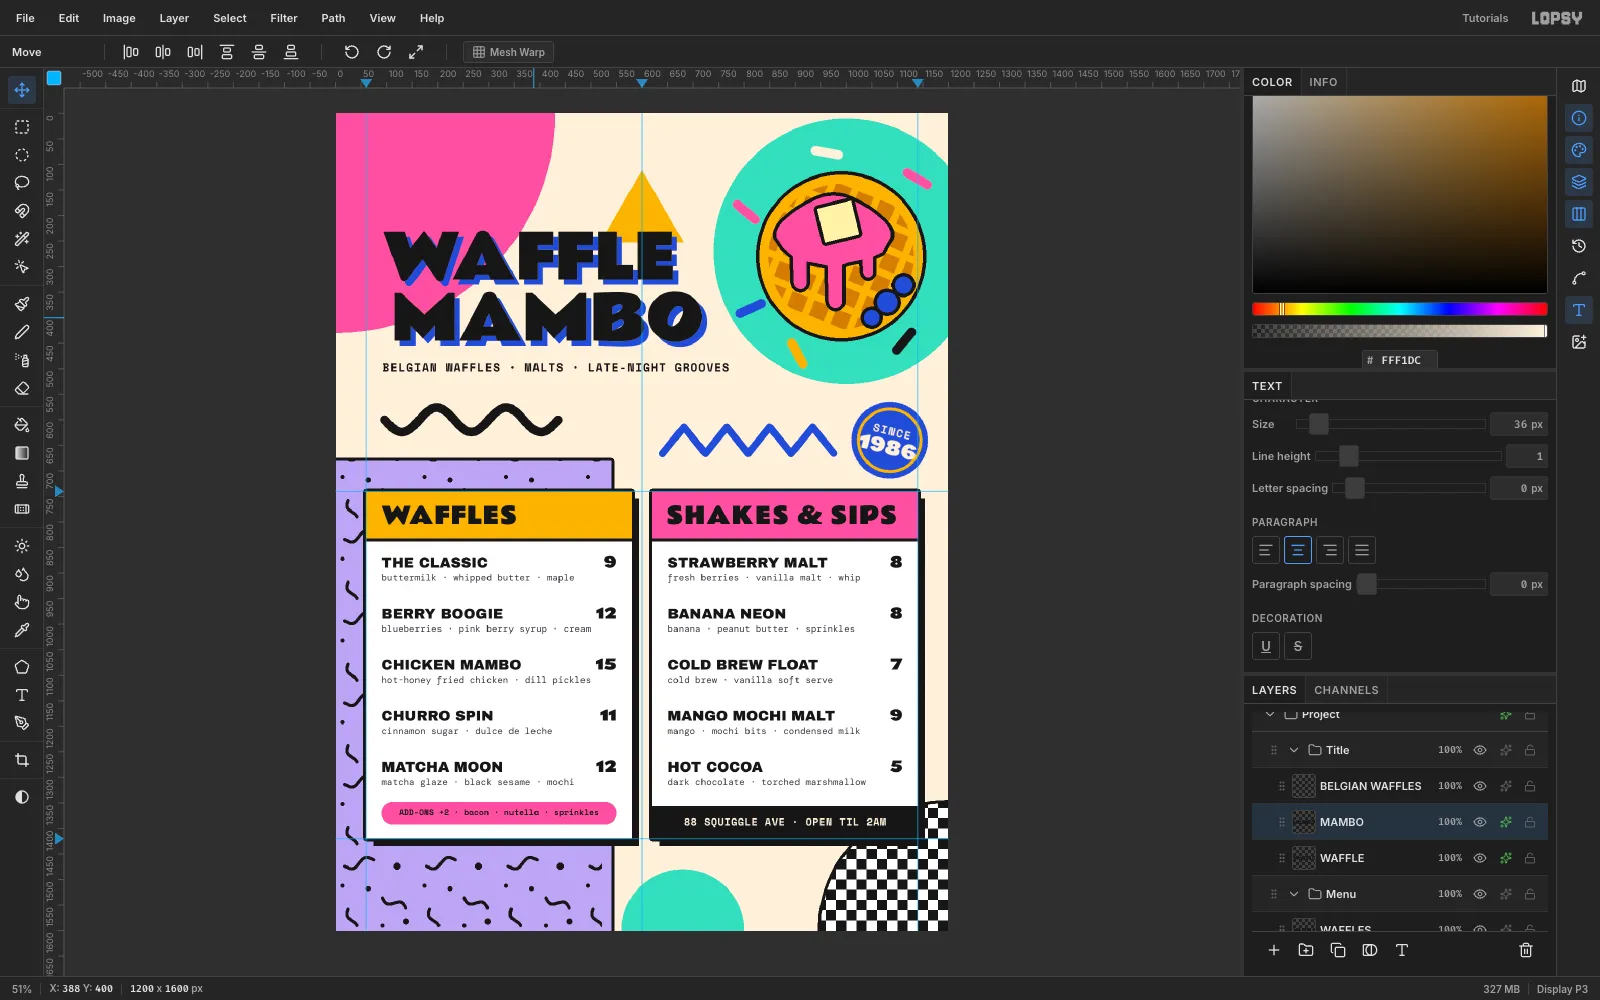
Step back and look for near-misses: things that almost touch read as mistakes. In this piece that meant four fixes:
- Badge: moved up so it clears the Shakes card instead of grazing its corner.
- Bacterio pattern: marqueed the pattern layer from x 522 to the block's edge and pressed Delete, so no squiggle is sliced by the outline.
- Mint half circle: slid 60 px left so it tucks under the card shadows.
- MAMBO: nudged 12 px left so the O clears the mint circle.
-
Export the menu
Choose View → Show Guides to hide the guides. Use File → Quick Export PNG for the image and File → Save Project for an editable
.lopsyfile with every group and effect intact.To make your own Memphis piece, keep these rules:
- Flat colours that clash on purpose.
- At least one black-and-white pattern.
- Big geometric primitives that overlap the content.
- One outline weight.
- Hard shadows with zero blur.