Design a Neubrutalist Party Invitation
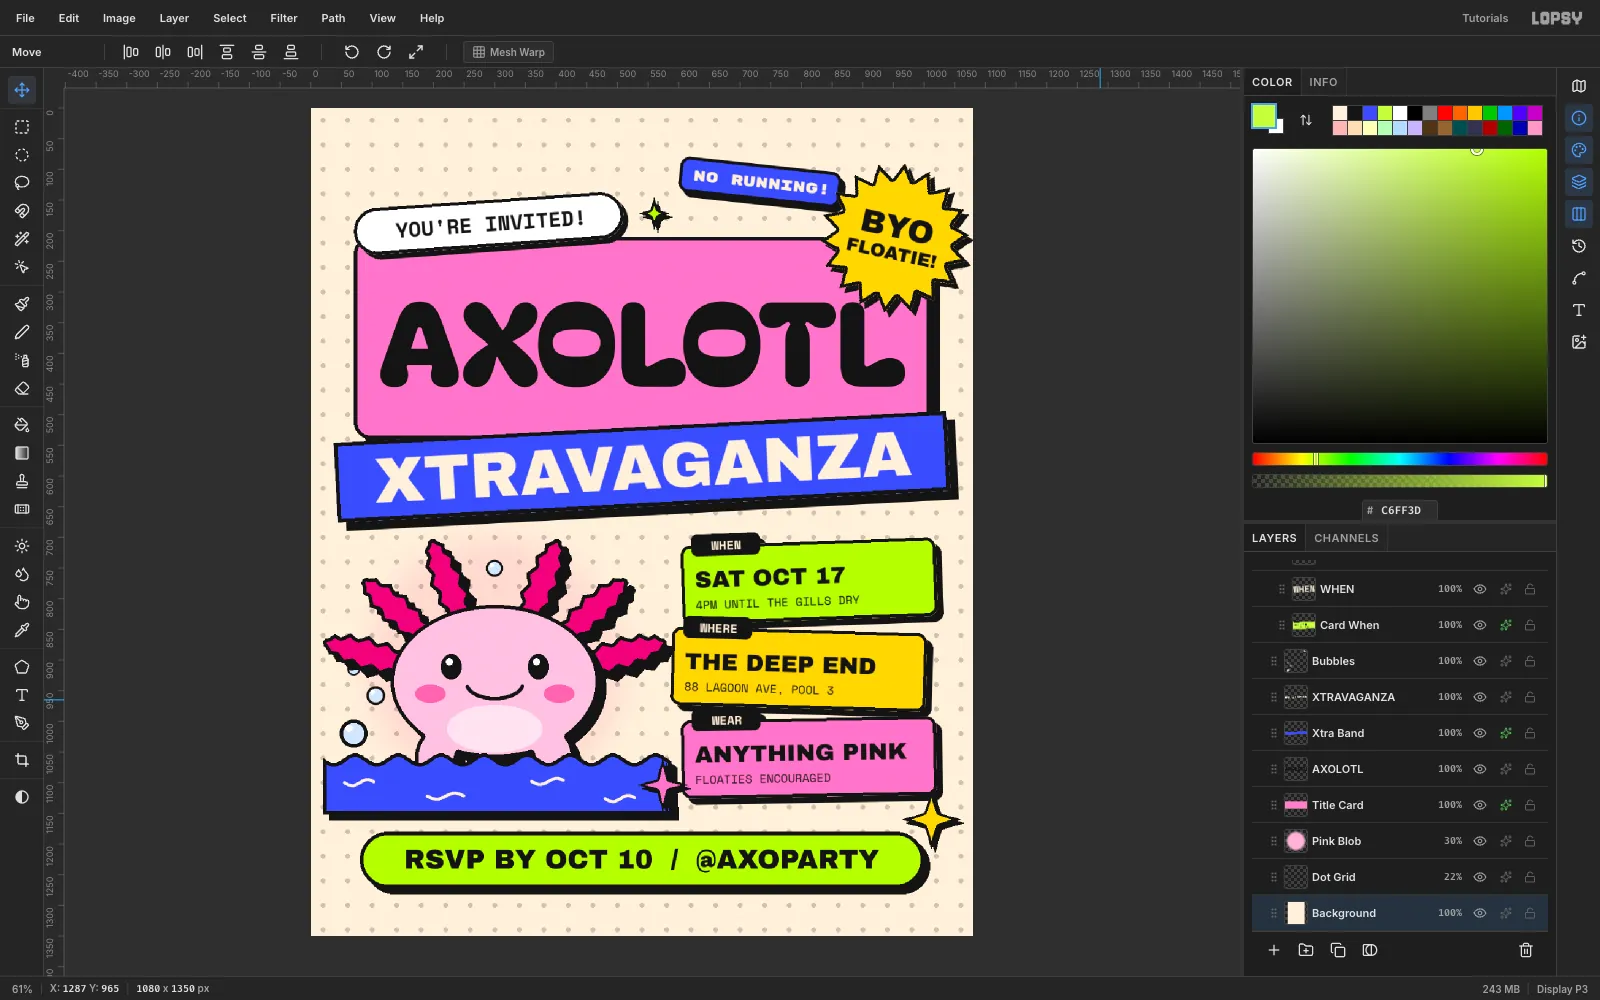
Build a neubrutalist pool-party invitation in Lopsy with chunky outlines, hard offset shadows, rotated stickers, a flat axolotl mascot and snapped info cards.
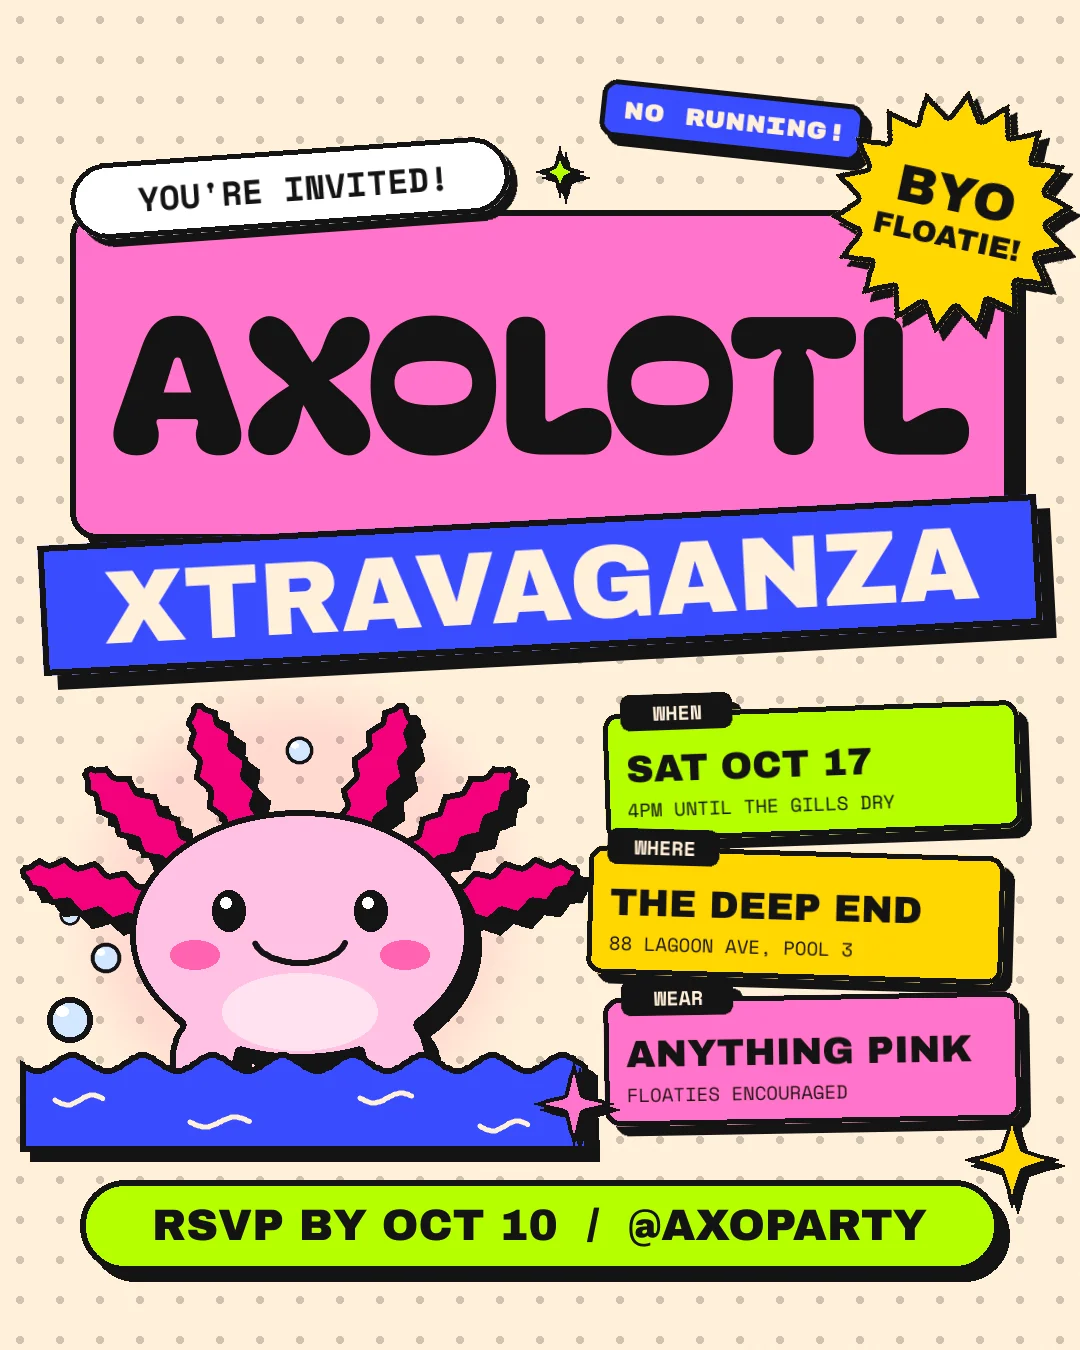
Neubrutalism takes the flat colour blocks of web UI and makes them loud: thick black outlines, hard offset shadows with no blur, saturated fills and chunky type, all slightly askew like stickers slapped on a page. In this tutorial you'll design a 1080 × 1350 invitation for an imaginary axolotl pool party, Axolotl Xtravaganza. You'll use a pattern fill, layer effects, rotate and scale transforms, copy and paste, groups, the snap grid and a filter.
The palette is five flat colours plus near-black:
- Ink
#141414 - Cream
#FFF1DC - Bubblegum
#FF7EC8 - Cobalt
#3D4BFF - Acid lime
#C6FF3D - Sun yellow
#FFD93D
Almost every shape in this piece is a rounded rectangle. Lopsy doesn't have a rounded-rectangle tool, so you'll build one from selections: fill a rectangle inset by the corner radius horizontally, fill another inset vertically, then fill a circle with a diameter of twice the radius in each corner. It takes six quick fills and gives you a crisp, exact shape.
-
Create the invitation document
Open Lopsy and choose File → New. Set Width
1080and Height1350in pixels, pick a White background and click Create. At 4:5 this fits an Instagram post and prints nicely as a postcard.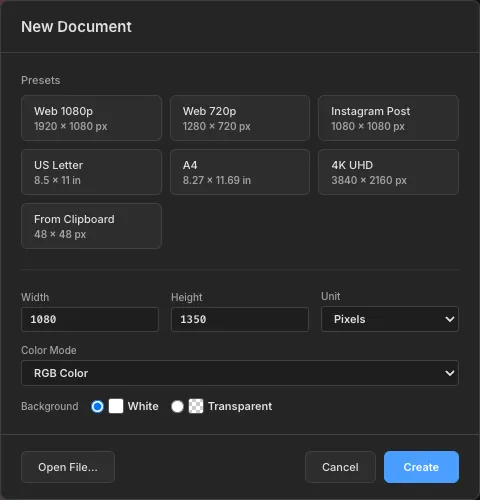
-
Tile a dot-grid background
Click the Background row, set the foreground to cream
#FFF1DCand choose Edit → Fill. Then double-clickLayer 1and rename itDot Grid.- With the Elliptical Marquee, drag an 8 px circle at (16, 16) and fill it with
#1A1A1A. - With the Rectangular Marquee, select the 40 × 40 square from (0, 0) and choose Edit → Define Pattern.
- Press Cmd+D, choose Edit → Fill with Pattern…, pick the new 40 × 40 pattern and click Apply.
Set the layer's opacity to
22%so the dots read as graph paper. Then click the top ruler at 60, 540 and 1020, and the left ruler at 60 and 1290, to drop margin and centre guides.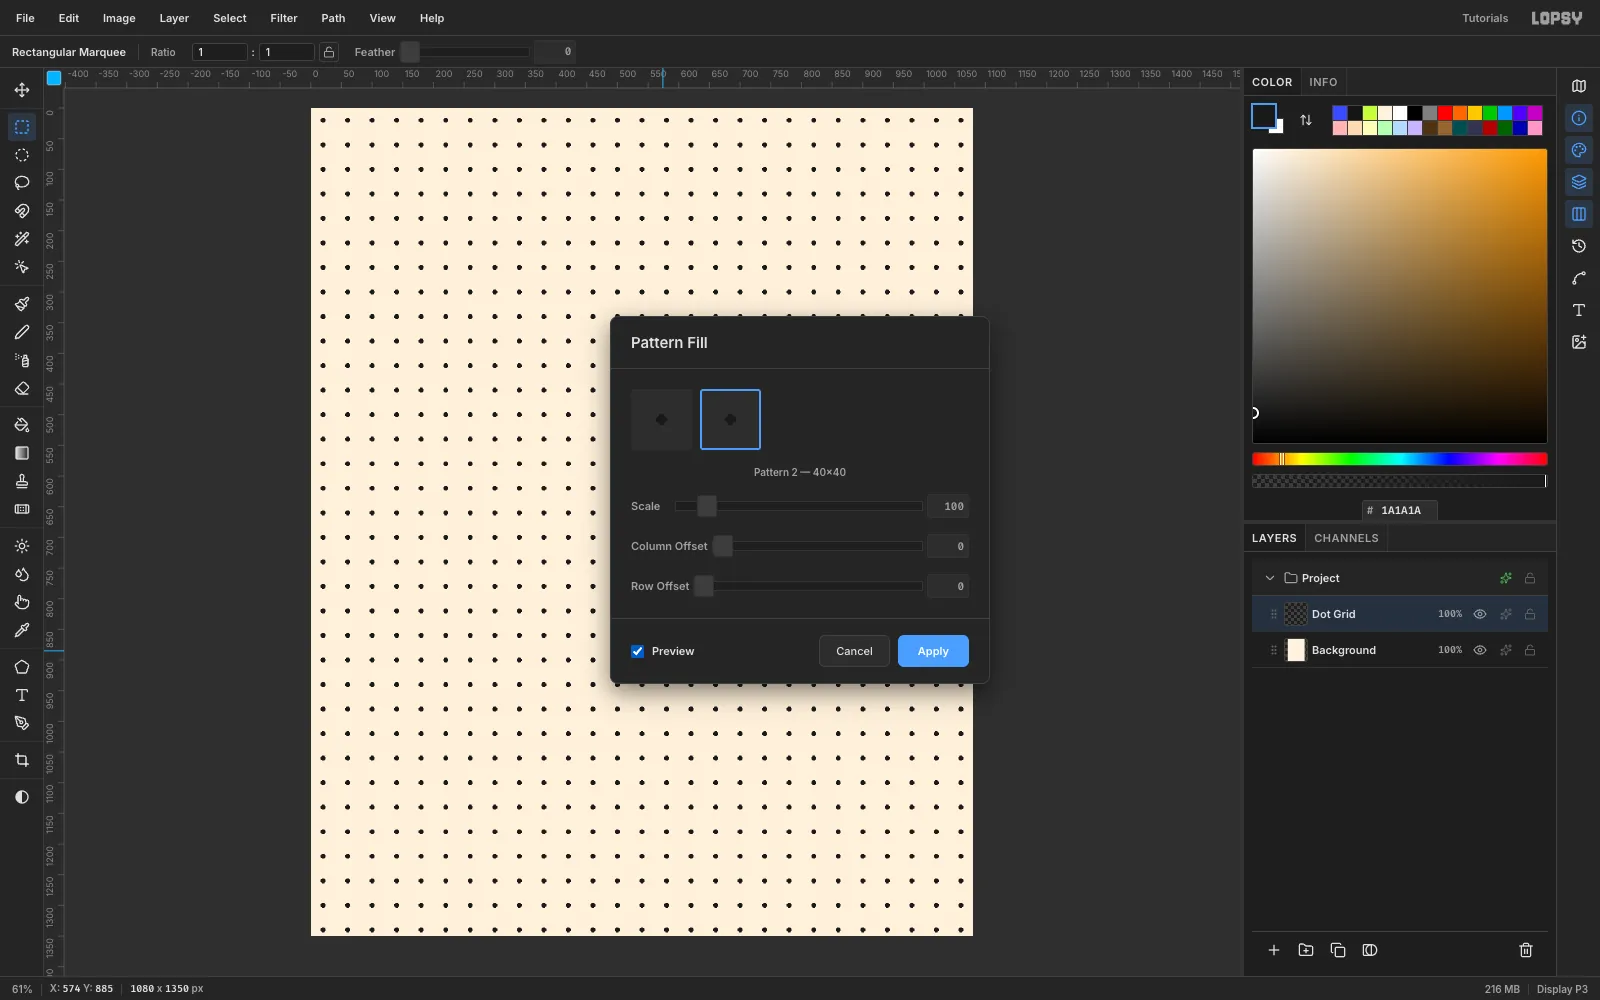
- With the Elliptical Marquee, drag an 8 px circle at (16, 16) and fill it with
-
Add a soft pink glow
Click Add Layer and name the new layer
Pink Blob. Choose the Elliptical Marquee, set Feather to45in the options bar, and drag from (90, 700) to (510, 1120). Fill it with#FFB3D9, then deselect.Open the layer's effects (✦ on the row), set Blend to Multiply, and drop the row opacity to
30%. This faint halo sits behind the mascot later. Set Feather back to0before you draw anything else.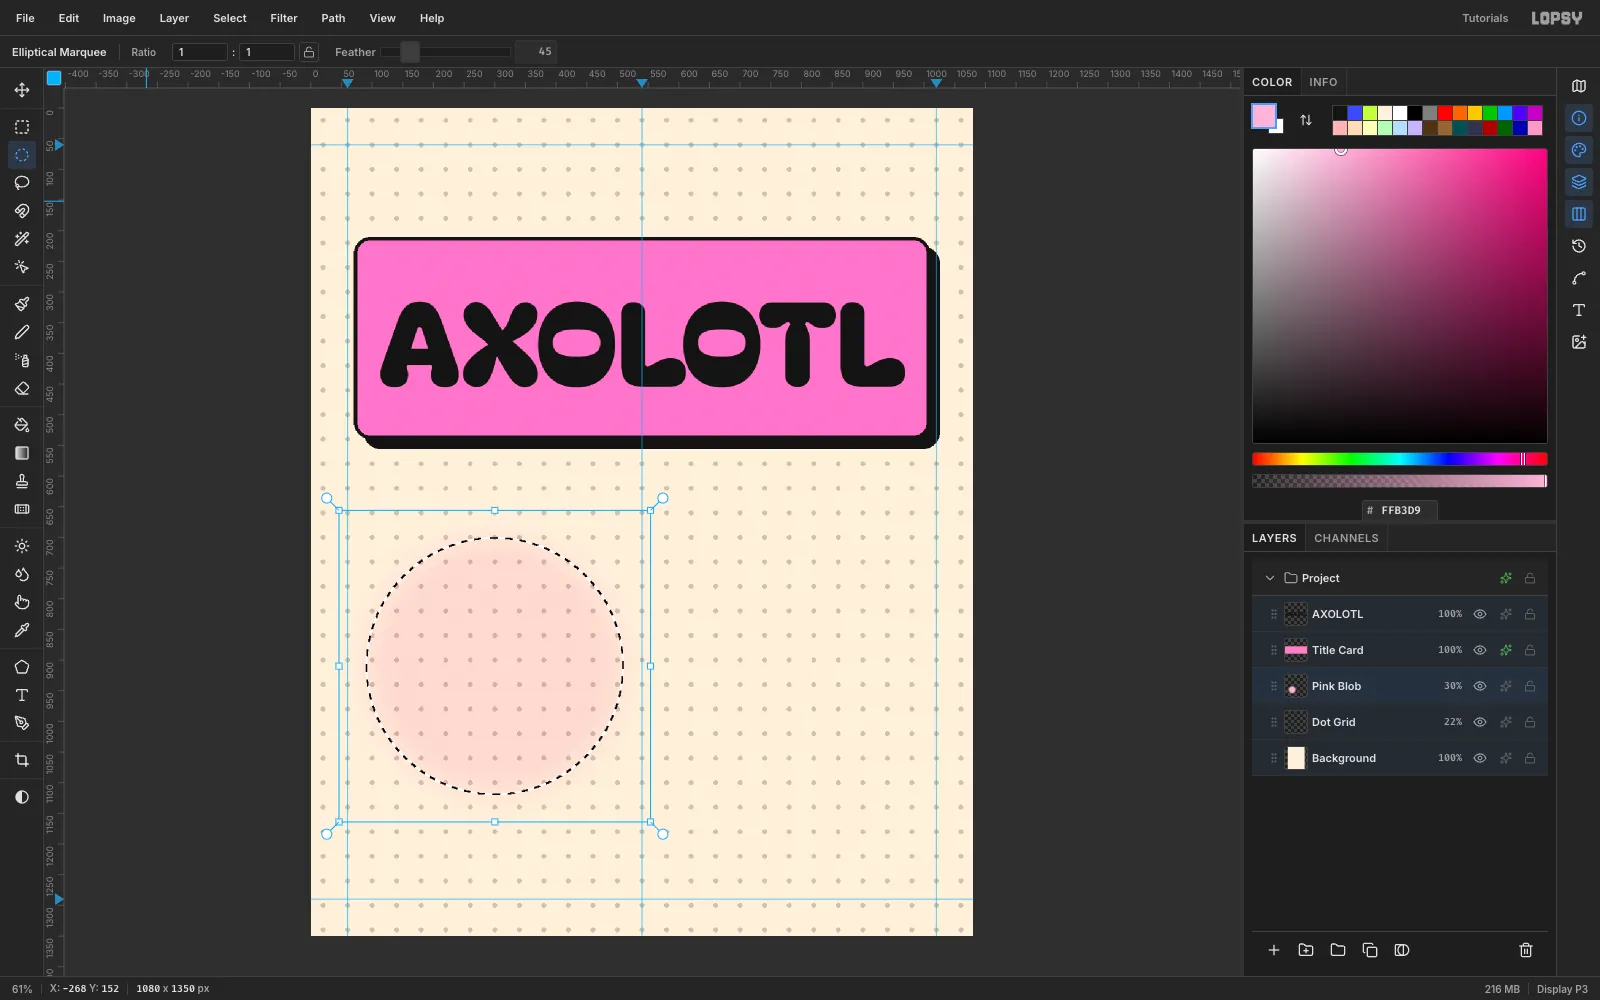
-
Build the title slab with a stroke and hard shadow
Add a layer called
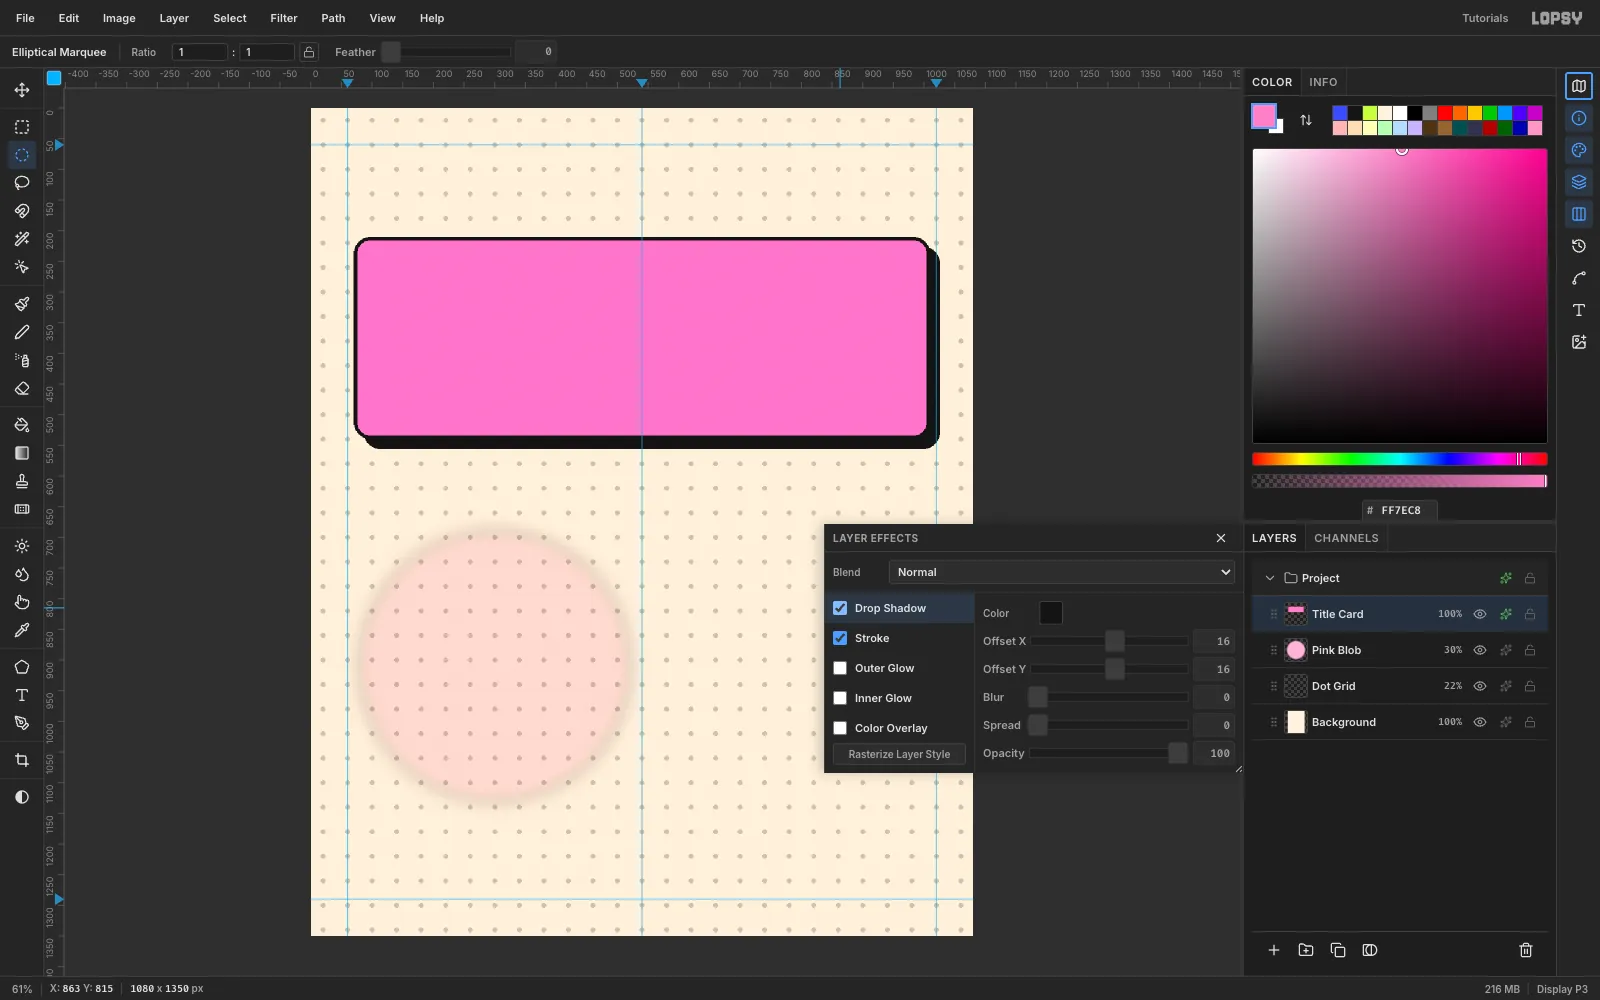
Title Cardand set the foreground to#FF7EC8. Build a rounded rectangle at (70, 210), 940 × 330 with a 28 px radius, using the six-fill trick from the intro.Open the layer's effects and set:
- Stroke: colour
#141414, Width6, position Inside - Drop Shadow: colour
#141414, Offset X16, Offset Y16, Blur0, Spread0, Opacity100
That zero-blur shadow is the signature neubrutalist look. It reads as a second, solid slab sitting behind the first. You'll reuse these two effects, at smaller sizes, on nearly every shape in the design.
- Stroke: colour
-
Set the headline
Choose the Text tool. In the options bar set Size
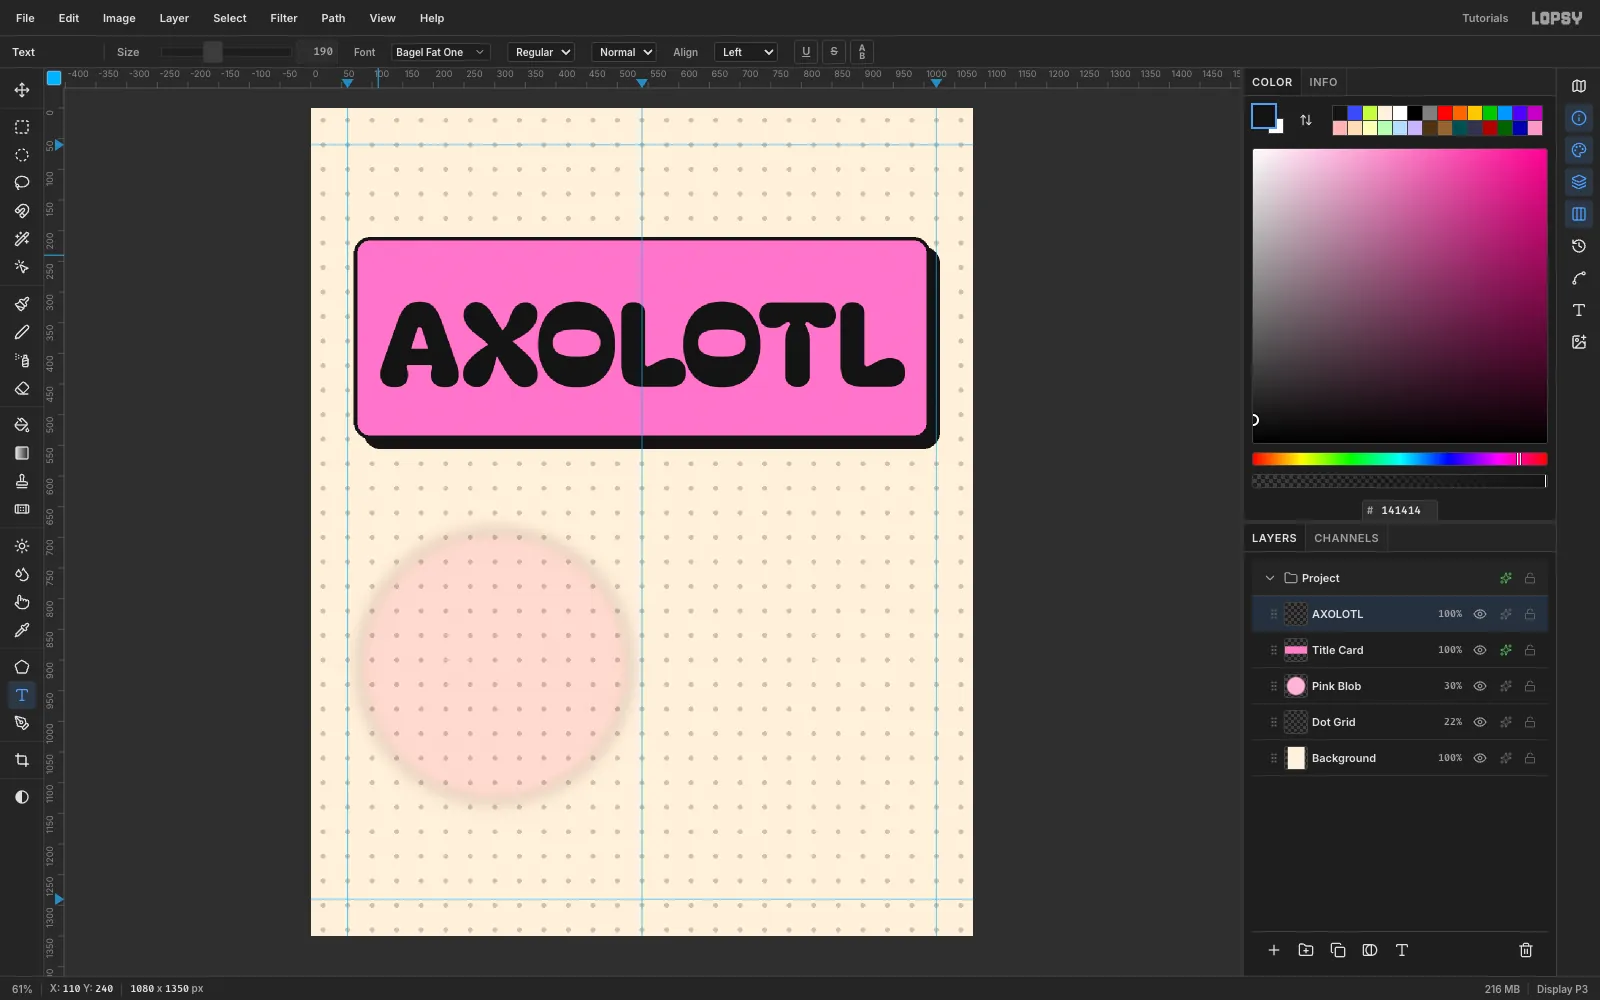
190and pick Bagel Fat One from the font browser. Set the foreground to#141414, click at about (110, 240) and typeAXOLOTL. Press Tab to commit.Bagel Fat One's soft, blobby letters match the mascot. The line is about 860 px wide, which fills the slab with a comfortable margin.
-
Tilt a contrasting band across the slab
Add a layer called
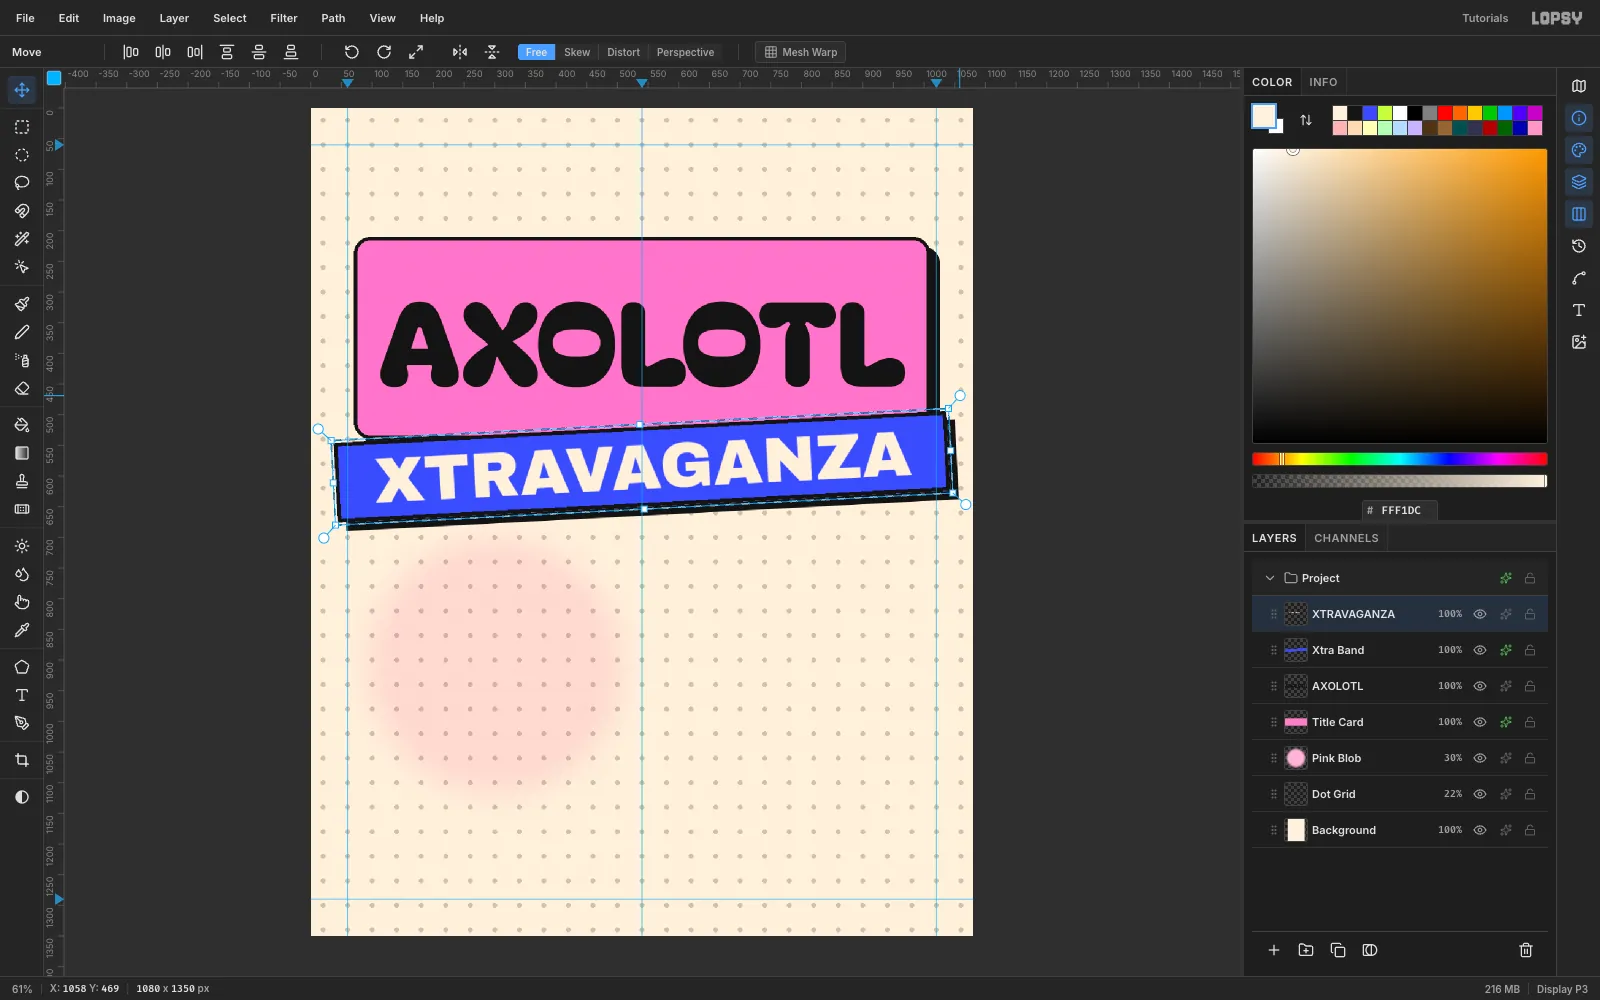
Xtra Band. Select the rectangle (40, 520) to (1040, 650), fill it with cobalt#3D4BFF, and give it an Inside Stroke of6and a hard Drop Shadow of14/14.Type
XTRAVAGANZAin Archivo Black at size104in cream#FFF1DC. Drag it with the Move tool until it's centred on the band, then click Rasterize Layer in the Layers footer.Now tilt both layers the same way:
- Click the
Xtra Bandrow and draw a marquee from (36, 516) to (1044, 654). - Switch to the Move tool and drag the rotate handle (just outside the top-right corner) until the band tilts about −3°. Press Cmd+D to commit.
- Click the
XTRAVAGANZArow, draw the same marquee and rotate it by the same amount, then press Cmd+D.
Using an identical marquee for both layers means they pivot around the same centre, so the type stays locked to its band.
- Click the
-
Add the RSVP pill
Click Add Layer twice. Name the first layer
Bubblesand leave it empty for now. Name the secondRSVP Pill. Build a pill at (80, 1180), 920 × 92, with a 46 px radius (half the height), and fill it with lime#C6FF3D. Give it an Inside Stroke of6and a Drop Shadow of10/10.Type
RSVP BY OCT 10 / @AXOPARTYin Archivo Black at size44in ink, centre it on the pill, and rasterize it.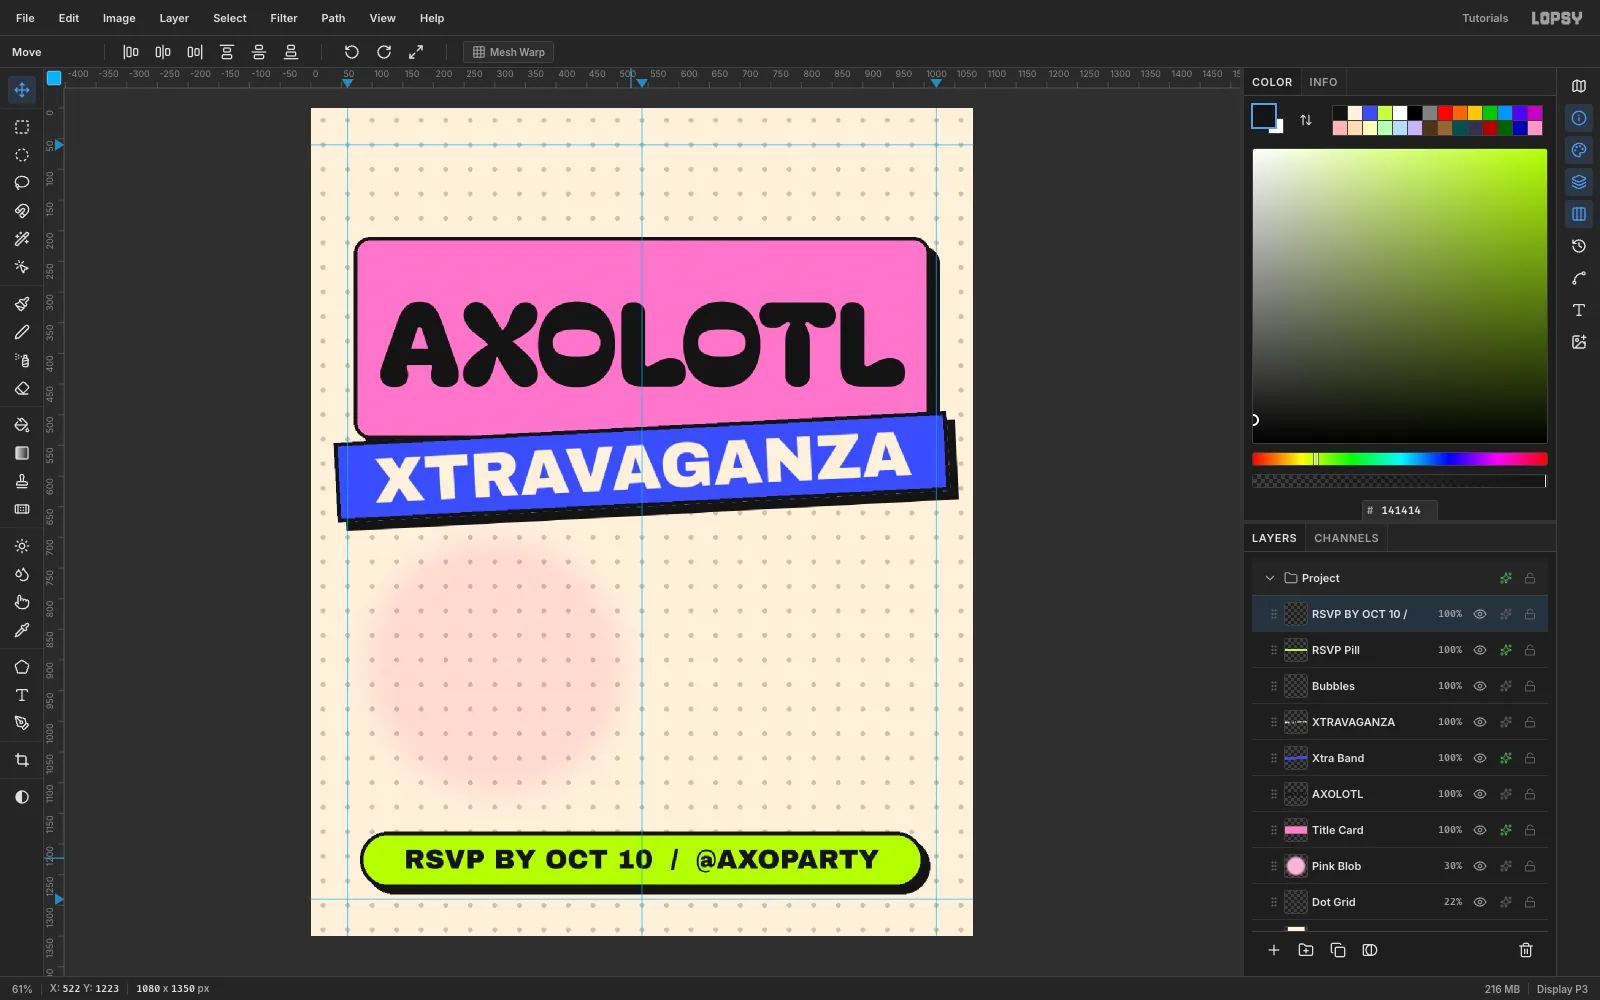
-
Make the stickers
Stickers overlap the edges of other shapes, which gives the layout its collage energy. Each one is a filled shape with a thinner stroke (
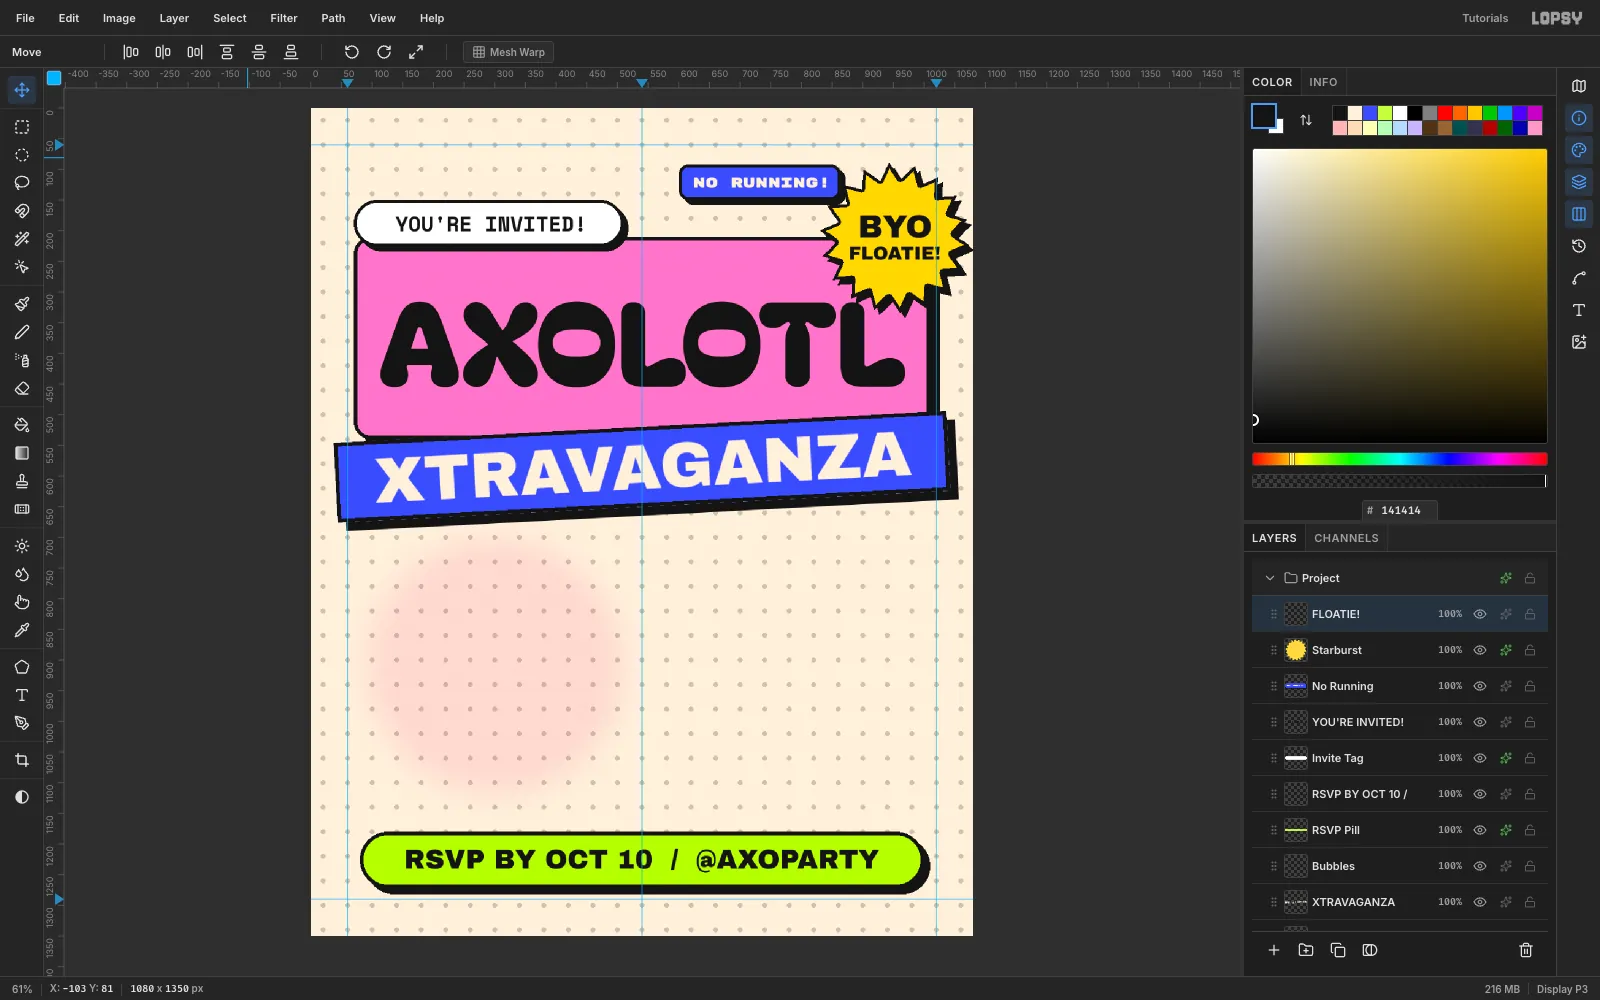
5) and a smaller shadow (8/8):- Invite tag: a white pill at (70, 150), 440 × 76 (radius 38). Its bottom edge overlaps the slab. Add
YOU'RE INVITED!in Space Mono Bold at34. - No Running: a cobalt rounded rectangle at (600, 92), 264 × 58 (radius 16). Add
NO RUNNING!in Rubik Mono One at24in cream, rasterize it, and Merge Down onto the sticker. - Starburst: with the Lasso, click an 18-point star centred on (952, 212), alternating between radius 122 and 95, then fill it with
#FFD93D. AddBYO(Archivo Black,52) andFLOATIE!(30), rasterize both, and Merge Down one text layer onto the other.
- Invite tag: a white pill at (70, 150), 440 × 76 (radius 38). Its bottom edge overlaps the slab. Add
-
Rotate the stickers
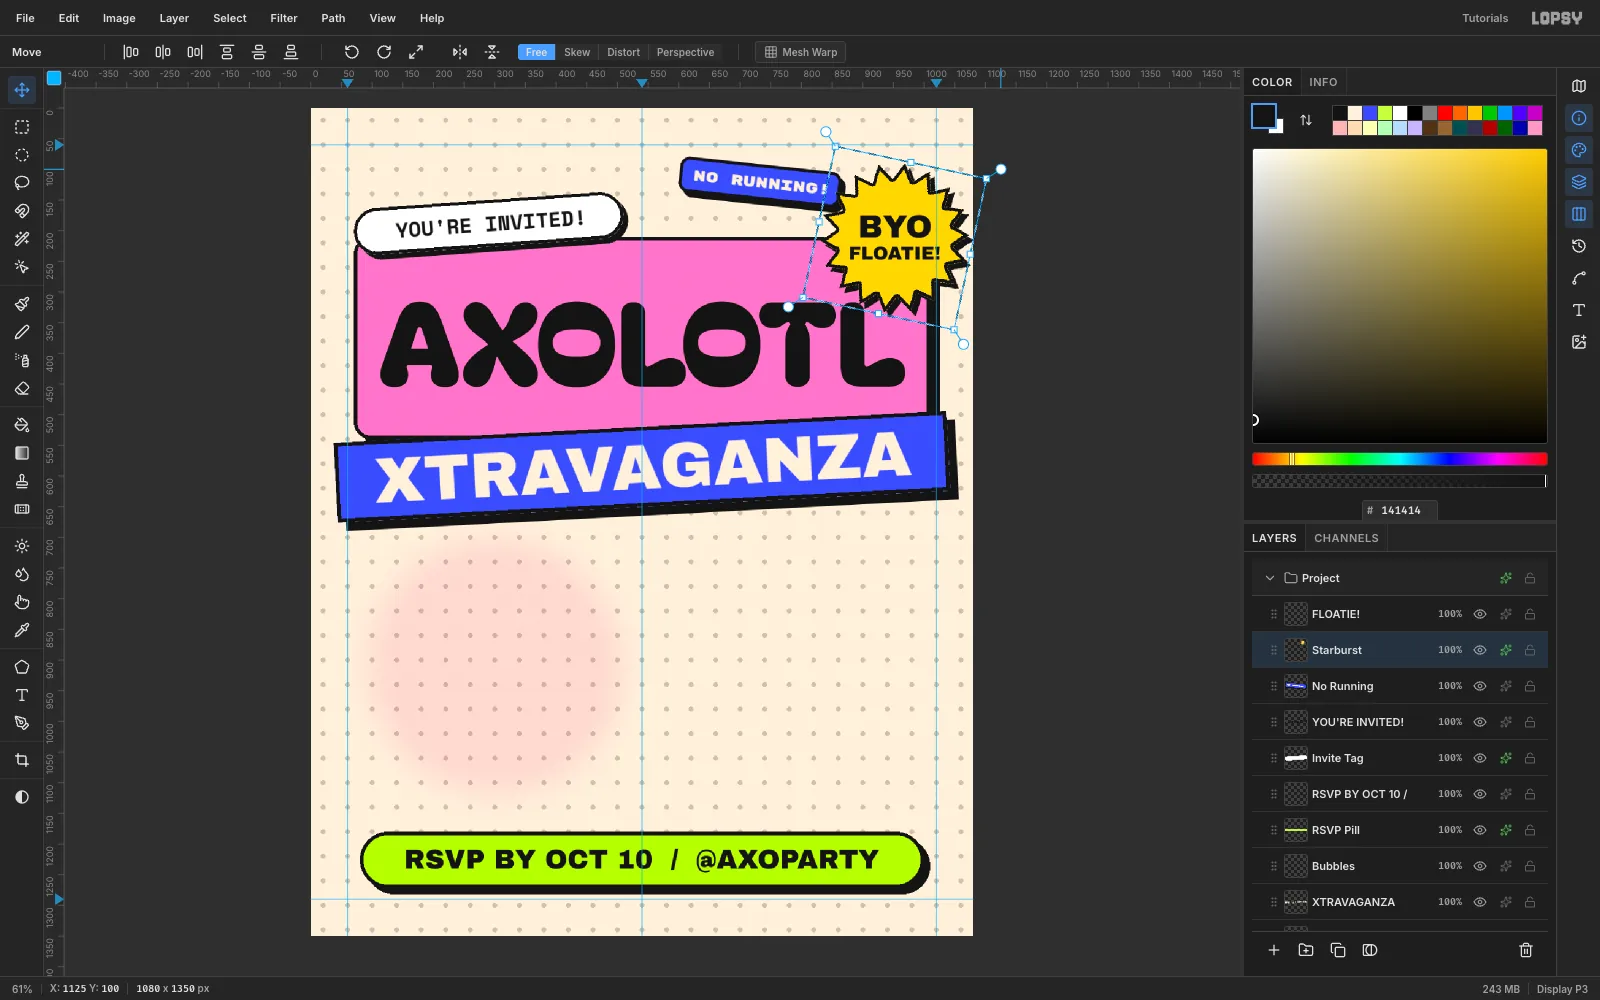
Rotate each sticker and its text together, the same way you did the band: the same marquee for both layers, then drag the rotate handle and press Cmd+D.
- Invite tag: marquee (64, 144) to (520, 236), −4°
- No Running: marquee (590, 82) to (880, 166), +6°
- Starburst: marquee (826, 86) to (1078, 338), +12°
-
Blow bubbles with copy, paste and scale
Click the
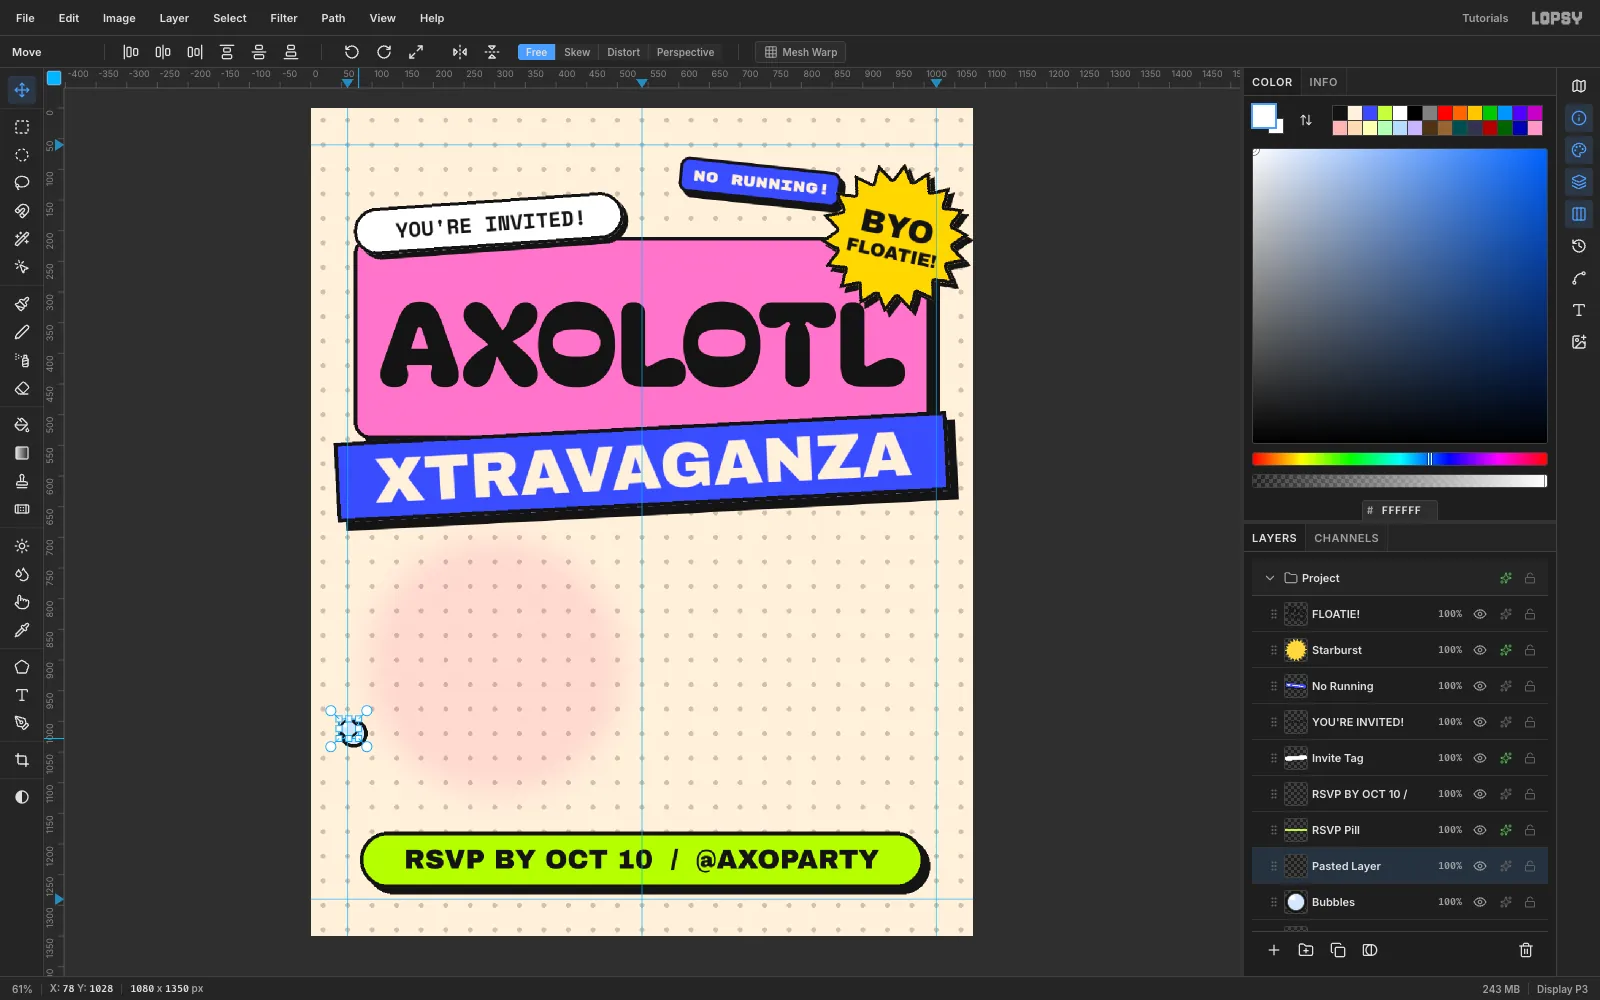
Bubbleslayer. Make a 46 px black circle at (47, 997), choose Select → Shrink by5, and fill the smaller circle with pale blue#D6E6FF. Add a 13 × 11 white highlight near its top left.Now make smaller copies:
- Marquee the bubble, press Cmd+C, then Cmd+V. The copy is pasted in place on a new layer.
- Marquee it again, switch to the Move tool, and Cmd-drag the bottom-right handle inward to about 66%. Press Cmd+D.
- Marquee the smaller bubble, drag it up and to the right, press Cmd+D, and choose Layer → Merge Down.
Repeat at 45% and 60% to get a rising trail: one bubble beside the head and one between the gills.
-
Draw the axolotl
Click the
Bubblesrow, click New Group and name itAxolotl. The group lands aboveBubbles, and new layers now go inside it.- Gills: Add a layer. With the Lasso, click six feathery fronds around the top half of an imaginary head centred on (300, 935). Make each frond a long zigzag oval, about 156 × 40, fanning outward. Fill them with
#E0287A. - Head: Add a layer above. Fill an elliptical marquee 340 × 250 around (300, 935) with
#FFC4E1. Lasso two small tilted ovals under it for arms, then fill a 156 × 78 belly ellipse in#FFE3F0.
Give both layers an Inside Stroke of
6and a Drop Shadow of12/12. The head's outline cuts cleanly across the base of the gills.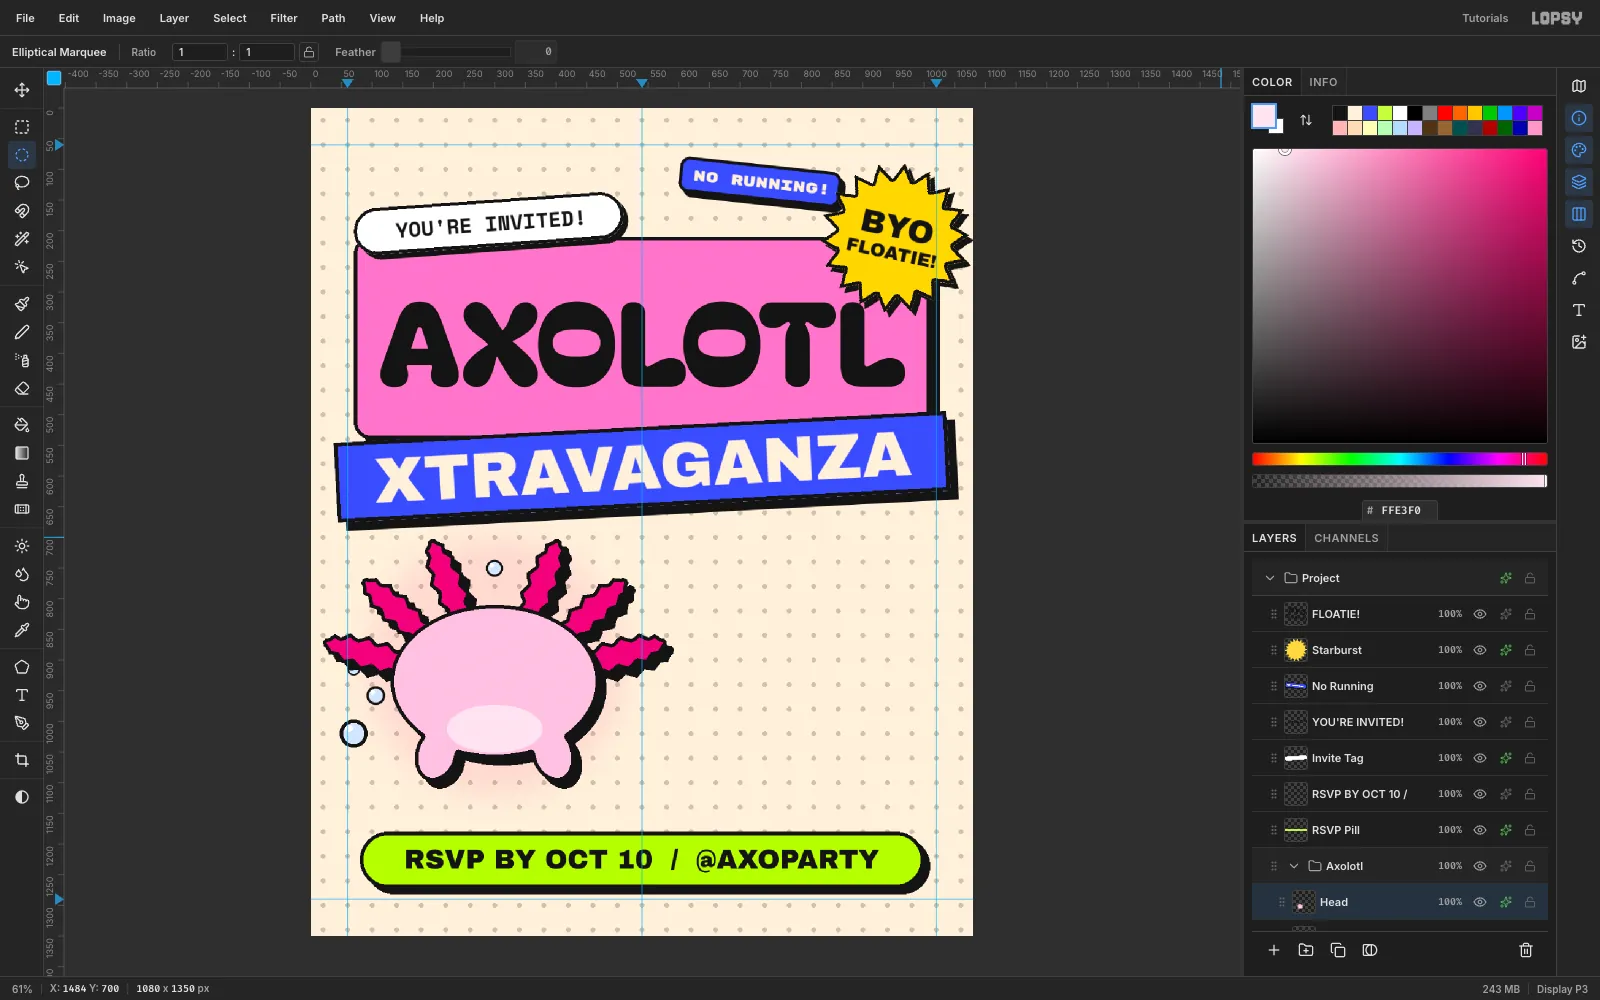
- Gills: Add a layer. With the Lasso, click six feathery fronds around the top half of an imaginary head centred on (300, 935). Make each frond a long zigzag oval, about 156 × 40, fanning outward. Fill them with
-
Add a face and drop it in a pool
On a new
Facelayer:- Blush: two 50 × 30 ellipses in
#FF6FAE. - Eyes: two 34 × 42 black ovals.
- Highlights: a 12 px white dot in each eye.
- Smile: a Brush arc at size
7, hardness100.
Add a
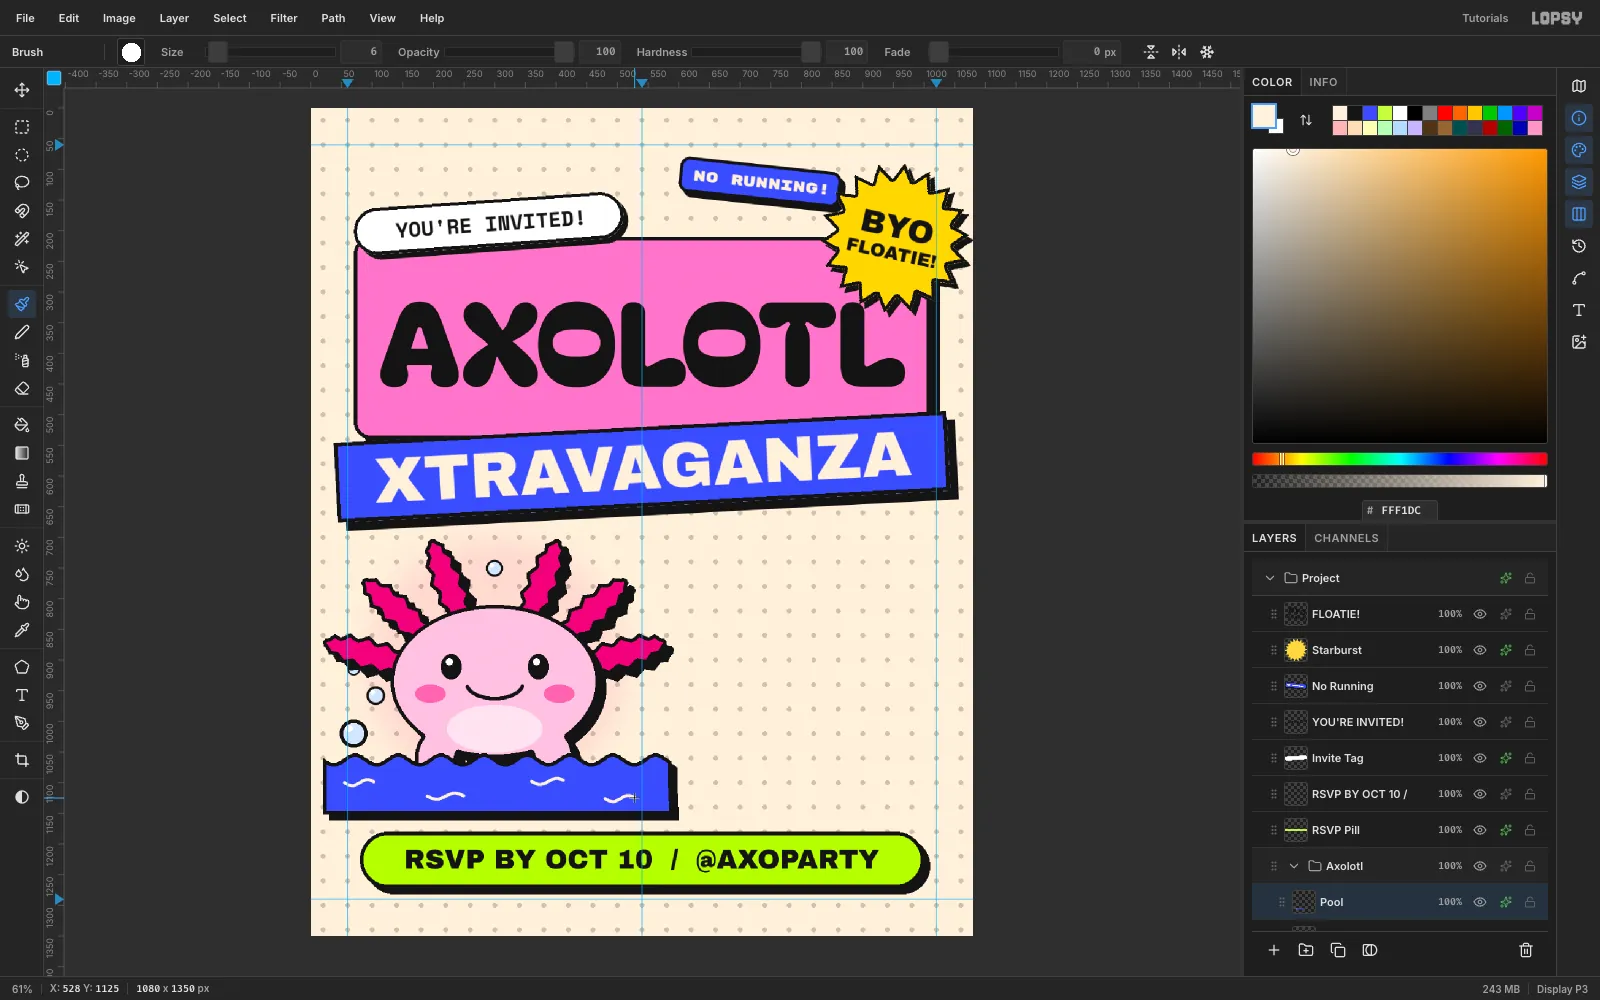
Poollayer on top. With the Lasso, click a wavy line from (20, 1060) to (590, 1060) that rises and falls about 8 px every 70 px. Then click down to (590, 1152) and (20, 1152) to close the shape. Fill it with cobalt, and give it an Inside Stroke of6and a Drop Shadow of10/10.Finish with four short cream brush squiggles for ripples. The pool covers the bottom of the head and the arms, so the axolotl is sitting in the water.
- Blush: two 50 × 30 ellipses in
-
Lay out the info cards on the snap grid
Click
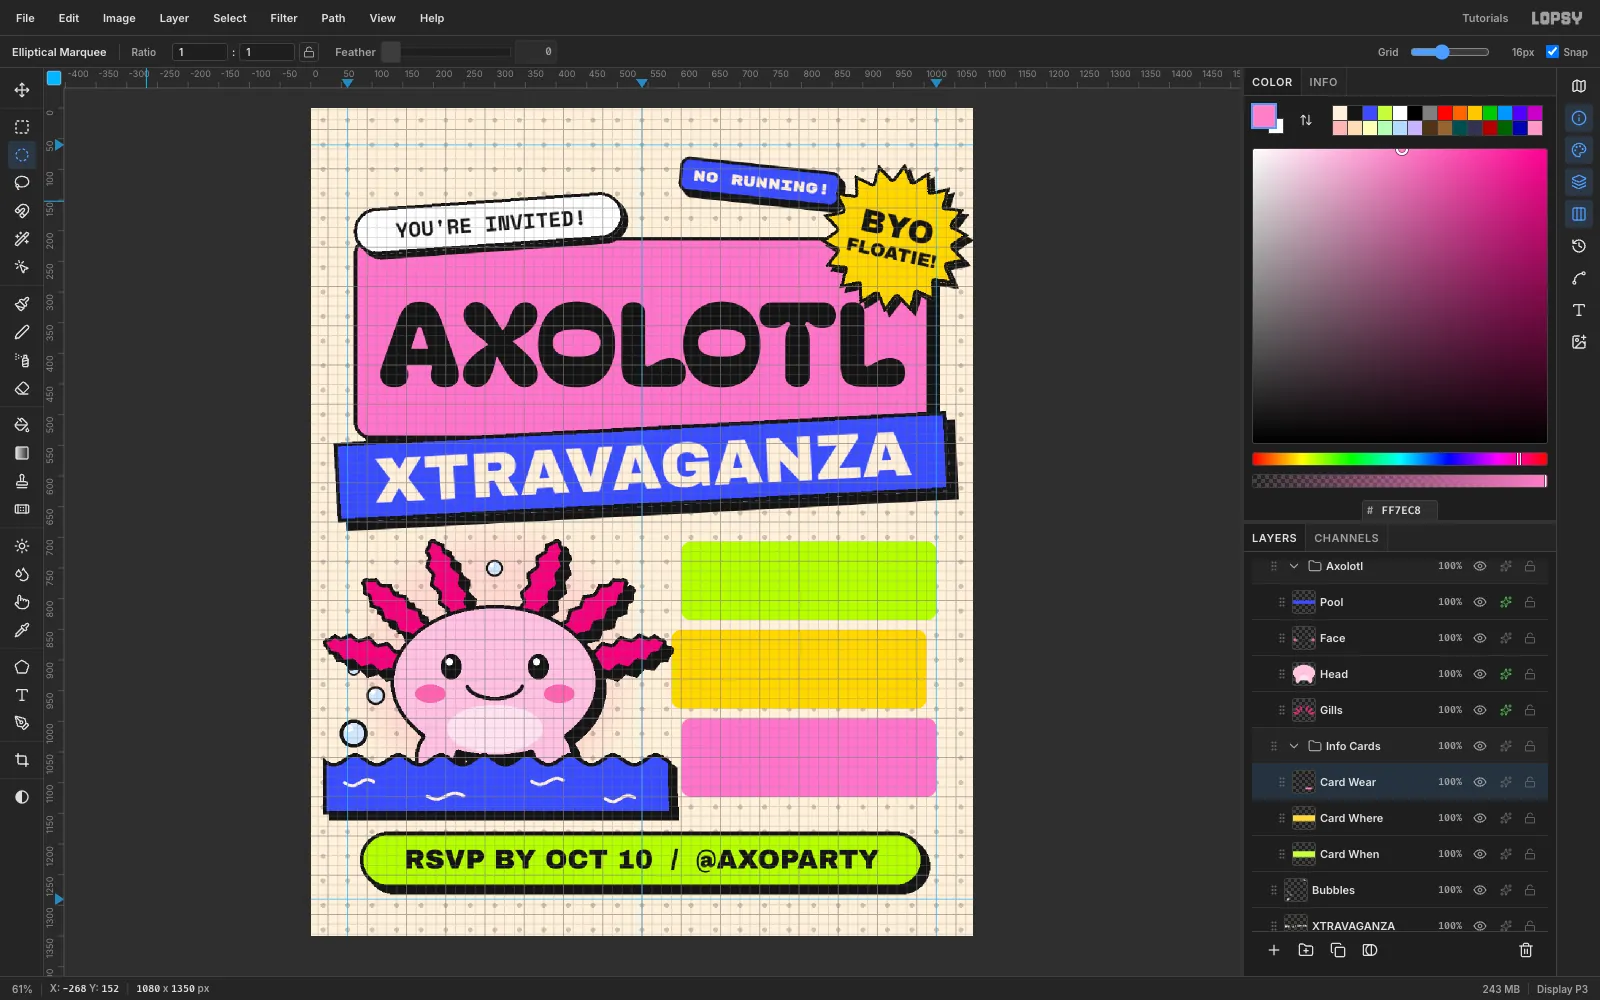
Bubblesagain and create a New Group calledInfo Cards. Choose View → Show Grid. The grid defaults to 16 px, with Snap turned on. Marquee corners snap to the grid lines, so the cards line up perfectly.Add three layers and build a 416 × 128 card (radius 16) on each:
Card When: lime, at (604, 707)Card Where: yellow, at (588, 851)Card Wear: pink, at (604, 995)
The middle card sits 16 px to the left, which breaks up the stack. Hide the grid again, then add a black 112 × 36 tab (radius 10) to each card at its top-left, 18 px in and hanging 18 px above the edge.
-
Write the card details
Each card gets three lines. Click the card's row before creating each one so the text lands in the group:
- The detail line in Space Mono Regular
19, e.g.4PM UNTIL THE GILLS DRY. - The value in Archivo Black
38, e.g.SAT OCT 17. - The label in Space Mono Bold
20in cream, centred on the tab, e.g.WHEN.
Create them bottom line first. A text-tool click just below an existing line of text edits that line instead of starting a new one.
Rasterize all three, click the top text layer and press Merge Down three times so everything ends up in the card layer. Stop there: the card is the bottom layer of its group, so a fourth Merge Down would pull it out of the group. Then give the card an Inside Stroke of
5and a Drop Shadow of10/10.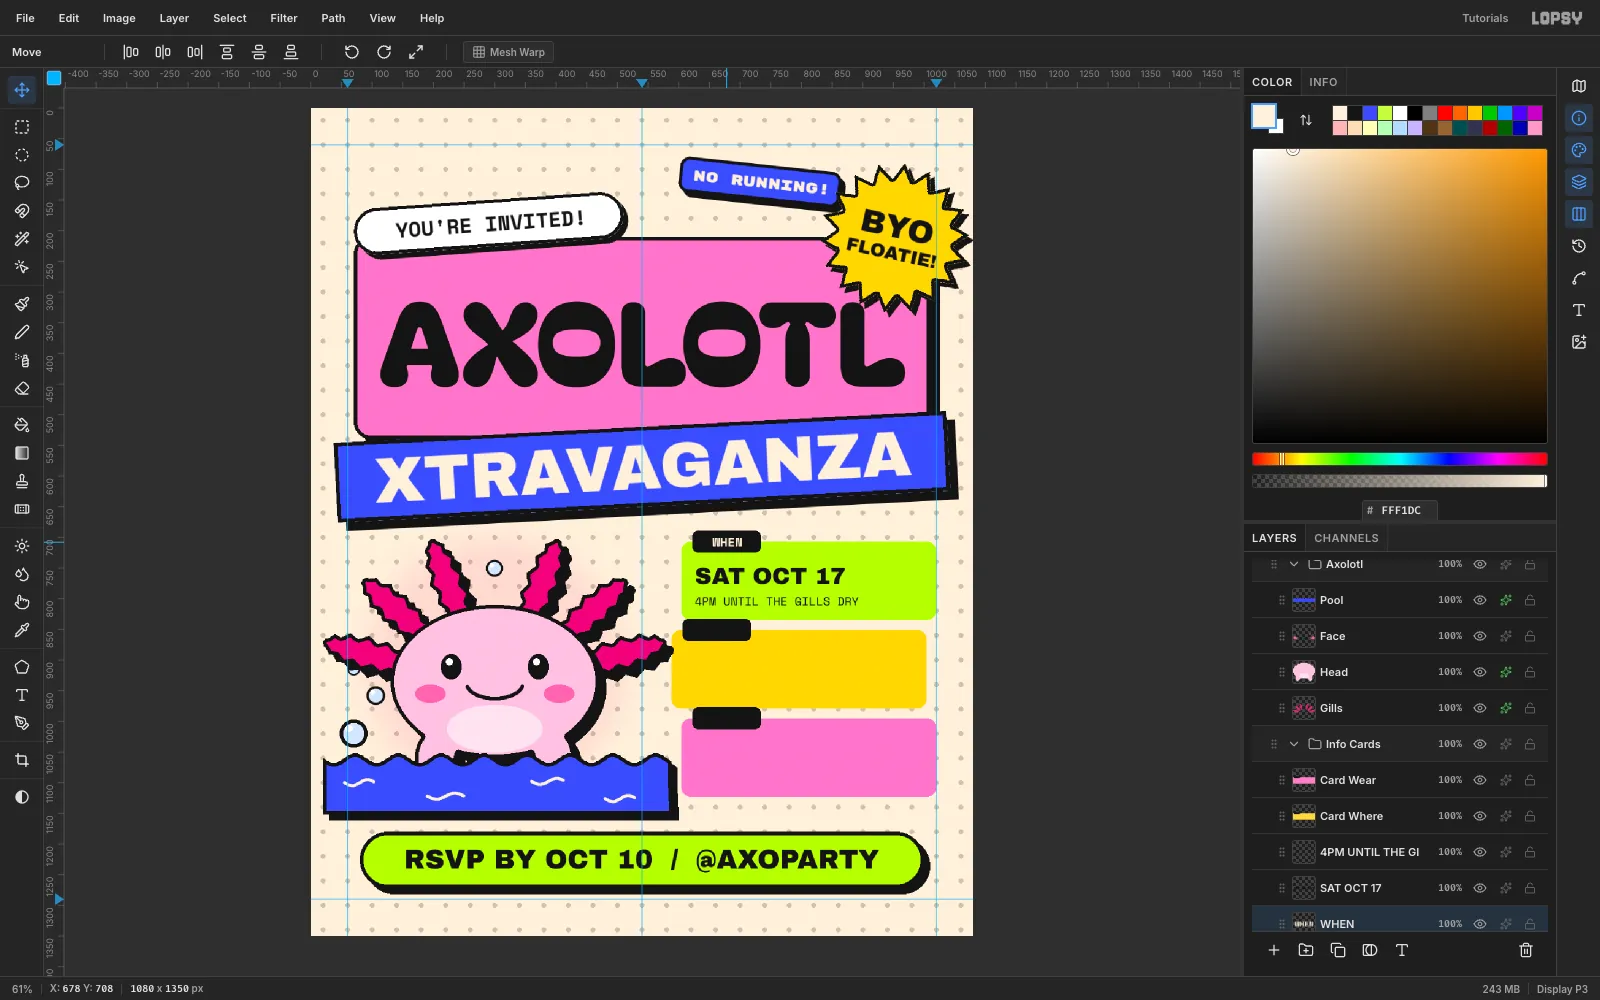
- The detail line in Space Mono Regular
-
Tilt the cards
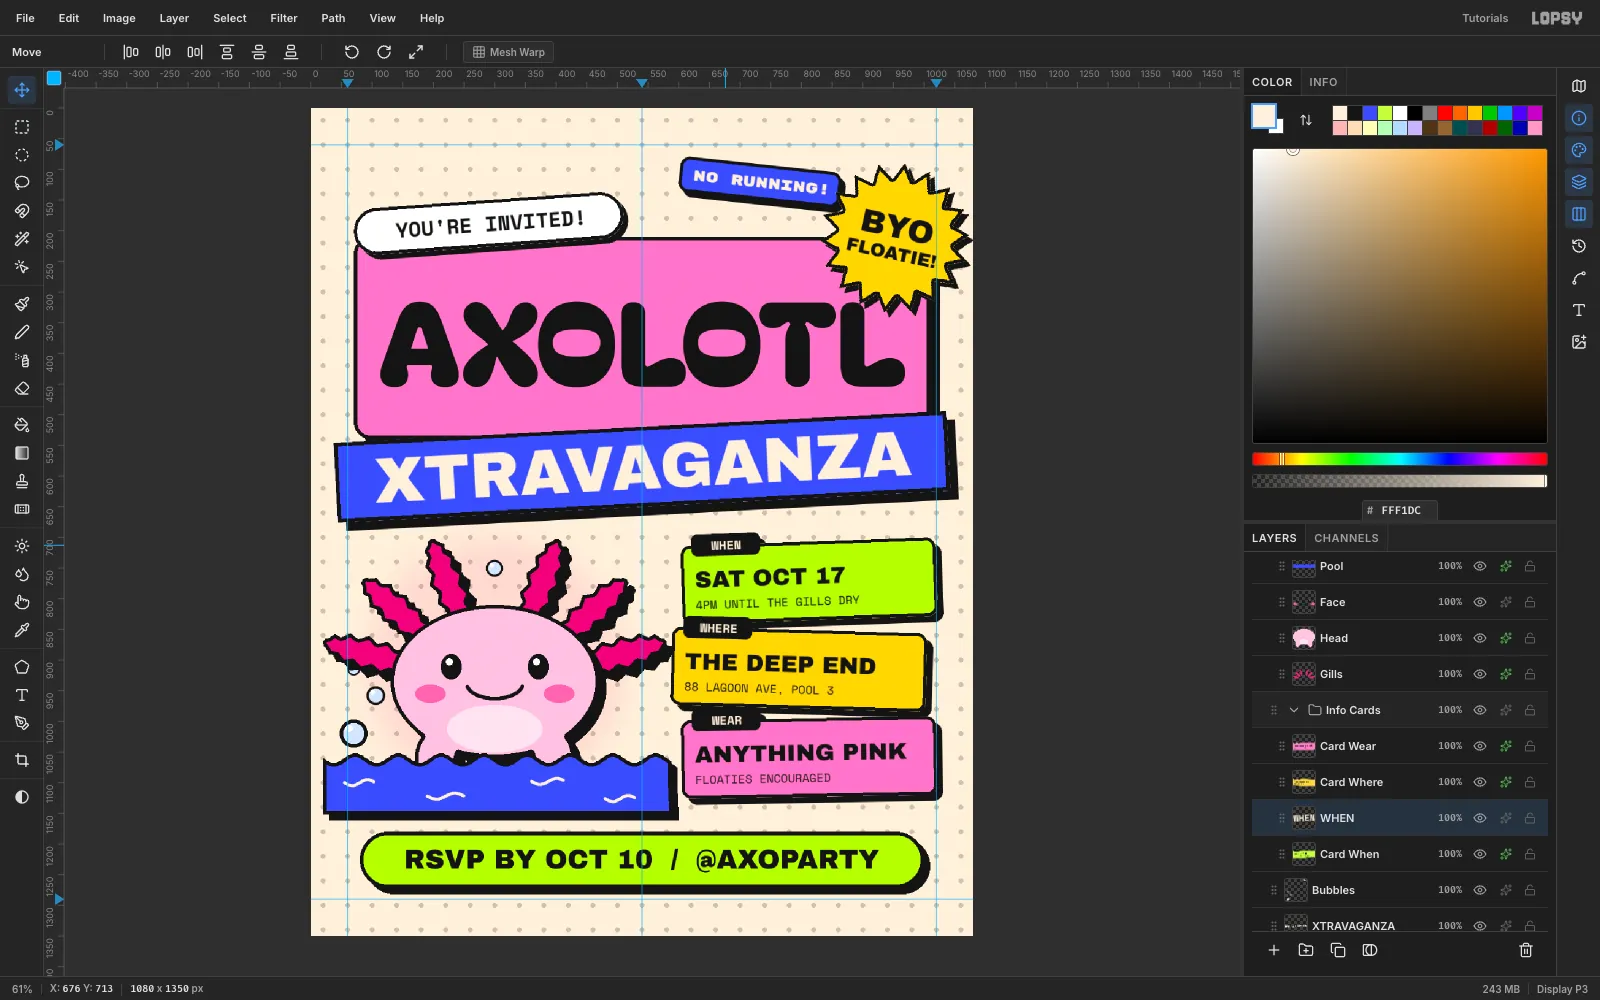
Identical upright cards read like a form. Tilt them a little in alternating directions. For each card, draw a marquee that covers the card and its tab with a few pixels to spare, rotate with the Move tool, and press Cmd+D:
Card When: −2°Card Where: +1.5°Card Wear: −1°
-
Finish with sparkles and print grain
Click the top layer and add a
Sparkleslayer. Lasso three four-pointed stars (inner radius about 30% of the outer) and fill them:- Sun yellow, 48 px, on the corner of the RSVP pill
- Bubblegum, 42 px, on the pool's corner
- Acid lime, 26 px, between the tag and the sticker
Give them a
4px Inside Stroke and a6/6shadow.Finally, click the Background row and choose Filter → Add Noise…. Set Amount
5and Mono, then click Apply. The grain is barely visible, but it takes the digital flatness off the cream and makes the piece feel printed.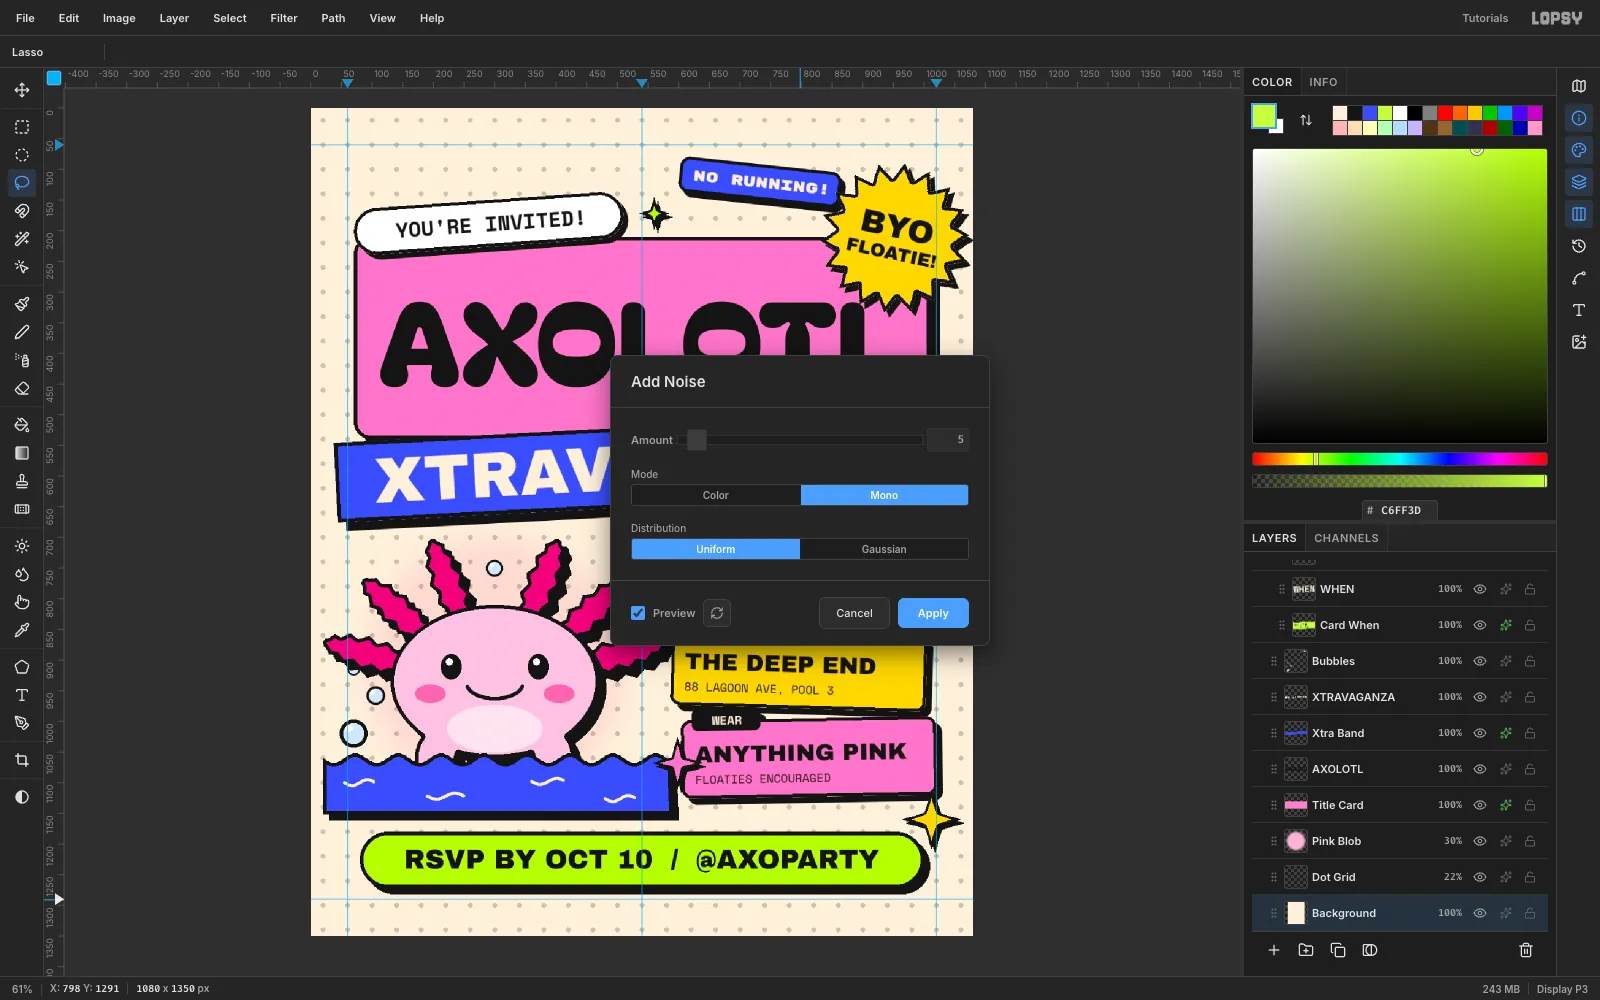
-
Export the invitation
Choose View → Show Guides to hide the guides. Then use File → Quick Export PNG for a shareable image and File → Save Project to keep an editable
.lopsyfile with every layer, group and effect intact.To make your own version, swap the mascot and the copy, and keep the rules that make it neubrutalist:
- Flat fills only
- One outline colour
- Hard shadows with zero blur
- Every sticker a few degrees off square