Make a Stencil Street Art Billboard
Paint a Banksy-style stencil billboard in Lopsy with a cinder-block wall, spray-paint overspray, a bandit koala, dripping stencil type and paper tape.
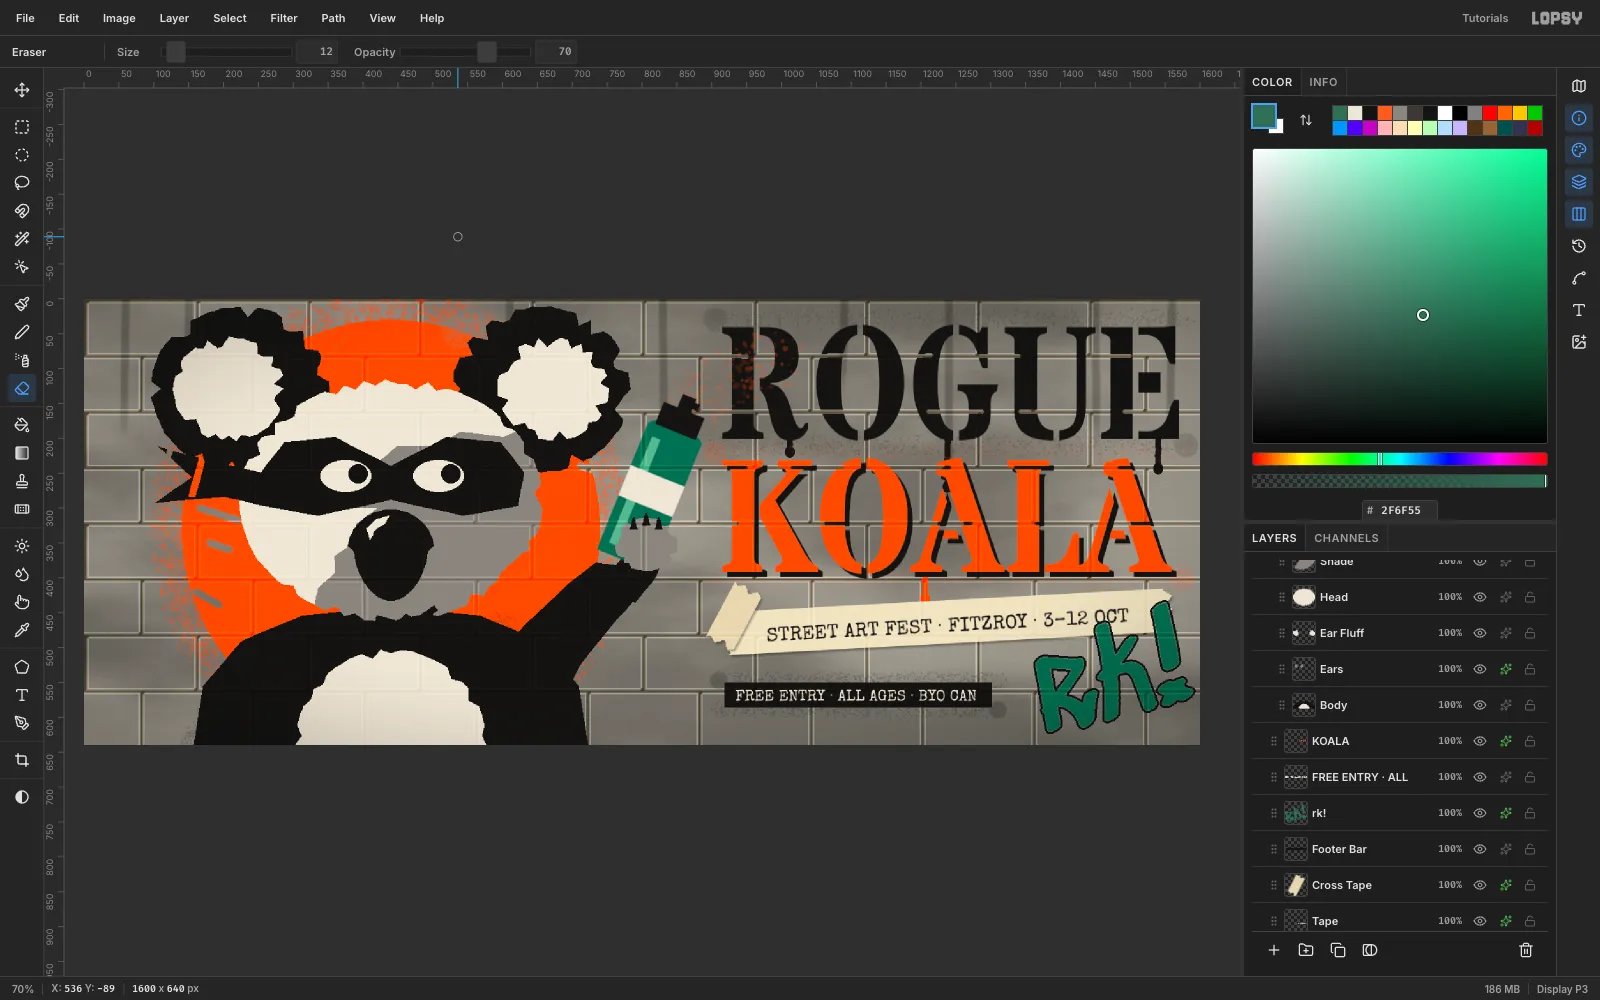
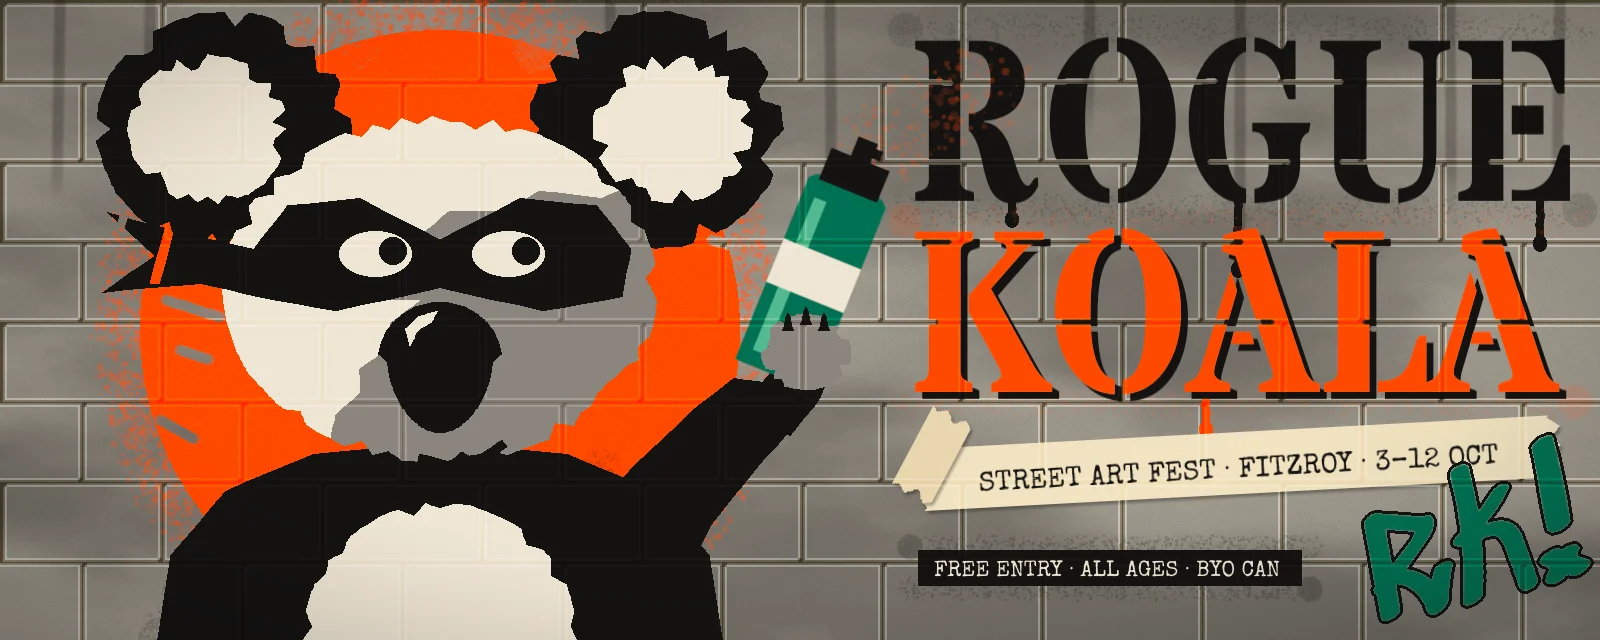
Stencil art is flat shapes in two or three tones, cut with sharp edges and sprayed onto a rough wall, so a little paint always drifts past the edge. In this tutorial you'll make a 1600 × 640 billboard for an imaginary street art festival, Rogue Koala. You'll build a cinder-block wall from a pattern, cut a three-tone koala in a bandit mask, and set dripping stencil type with a paper-tape tagline and a graffiti tag. On the way you'll use pattern fills, filters, the Spray tool, lasso selections, groups, copy and paste, transforms, layer effects and a group adjustment.
The palette has five colors:
- Ink
#141312 - Bone
#EEE6D6 - Mid grey
#8A8580 - Safety orange
#FF5B1F - Eucalyptus green
#2F6F55
-
Look at the finished billboard
This is where you're headed. Every shape is a flat fill made with a selection and Edit → Fill. The wall texture comes back over the top at the end, so the paint looks sprayed onto the blocks rather than pasted over them.
-
Create the billboard document
Open Lopsy and choose File → New. Set Width
1600and Height640in pixels, pick a White background and click Create. That's a 2.5:1 ratio, close to a roadside billboard.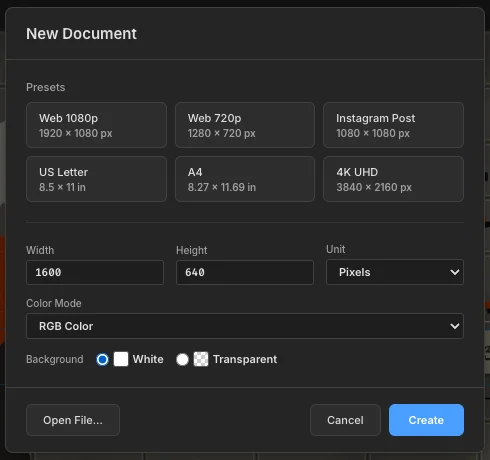
-
Start with grainy concrete
Click the Background row. Set the foreground color to
#9D988Eand choose Edit → Fill. Then choose Filter → Add Noise… and set Amount14, Mono and Gaussian. Click Apply. This fine grain is what the concrete looks like up close.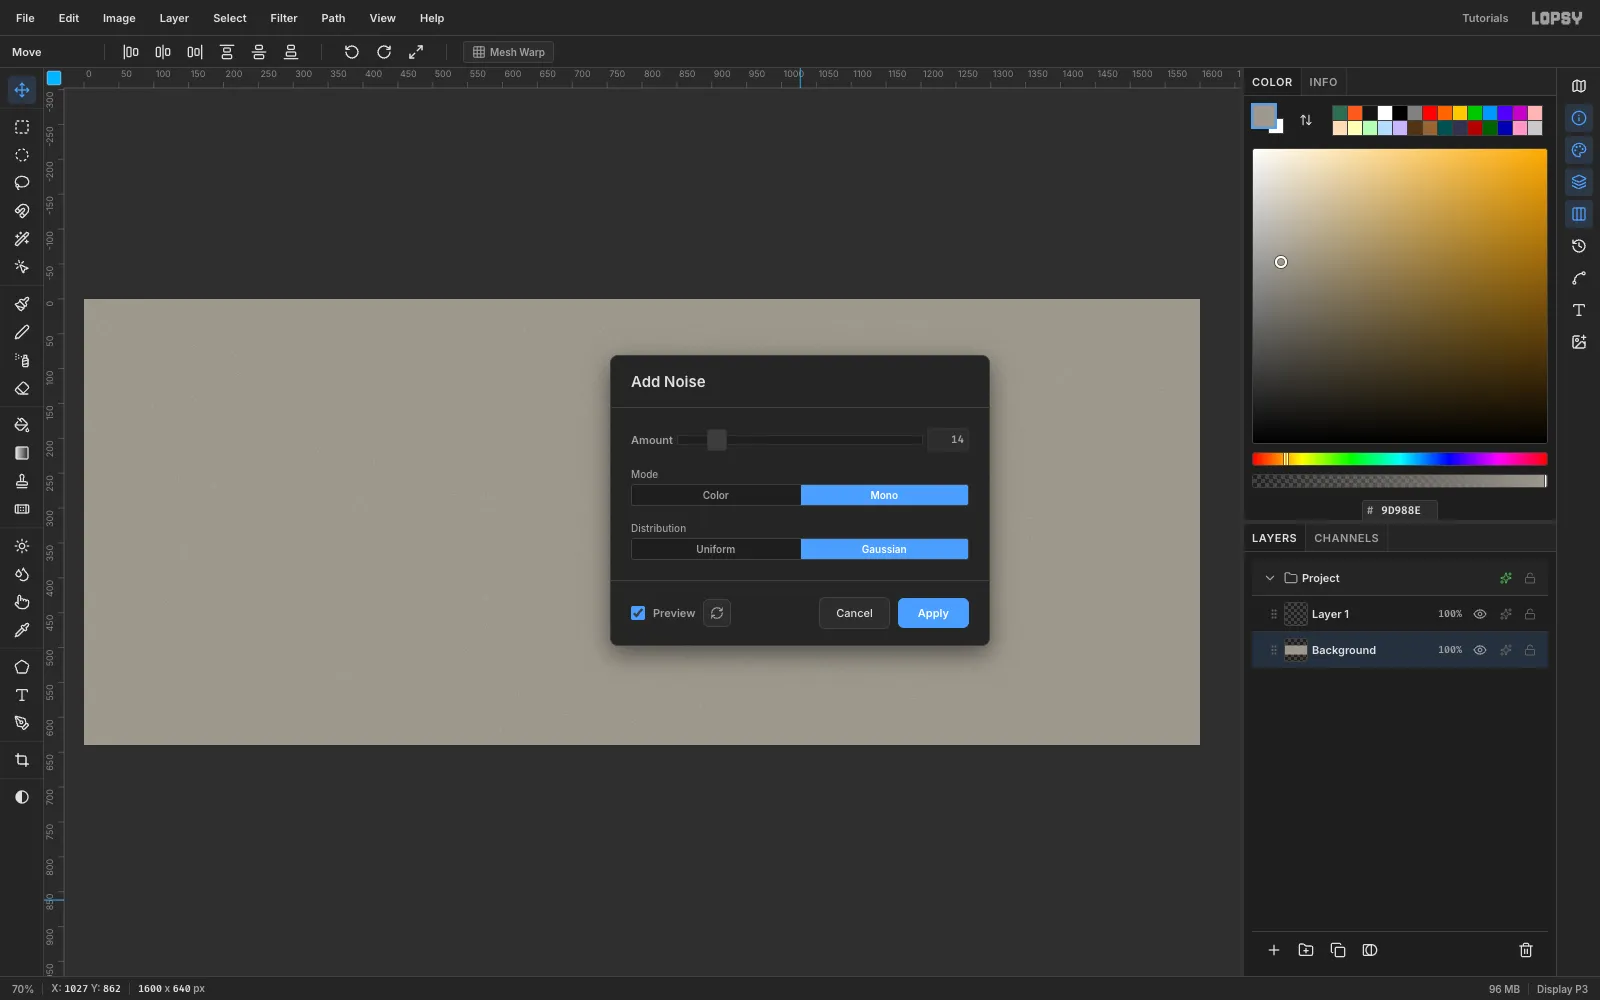
-
Draw one cinder-block tile
Double-click
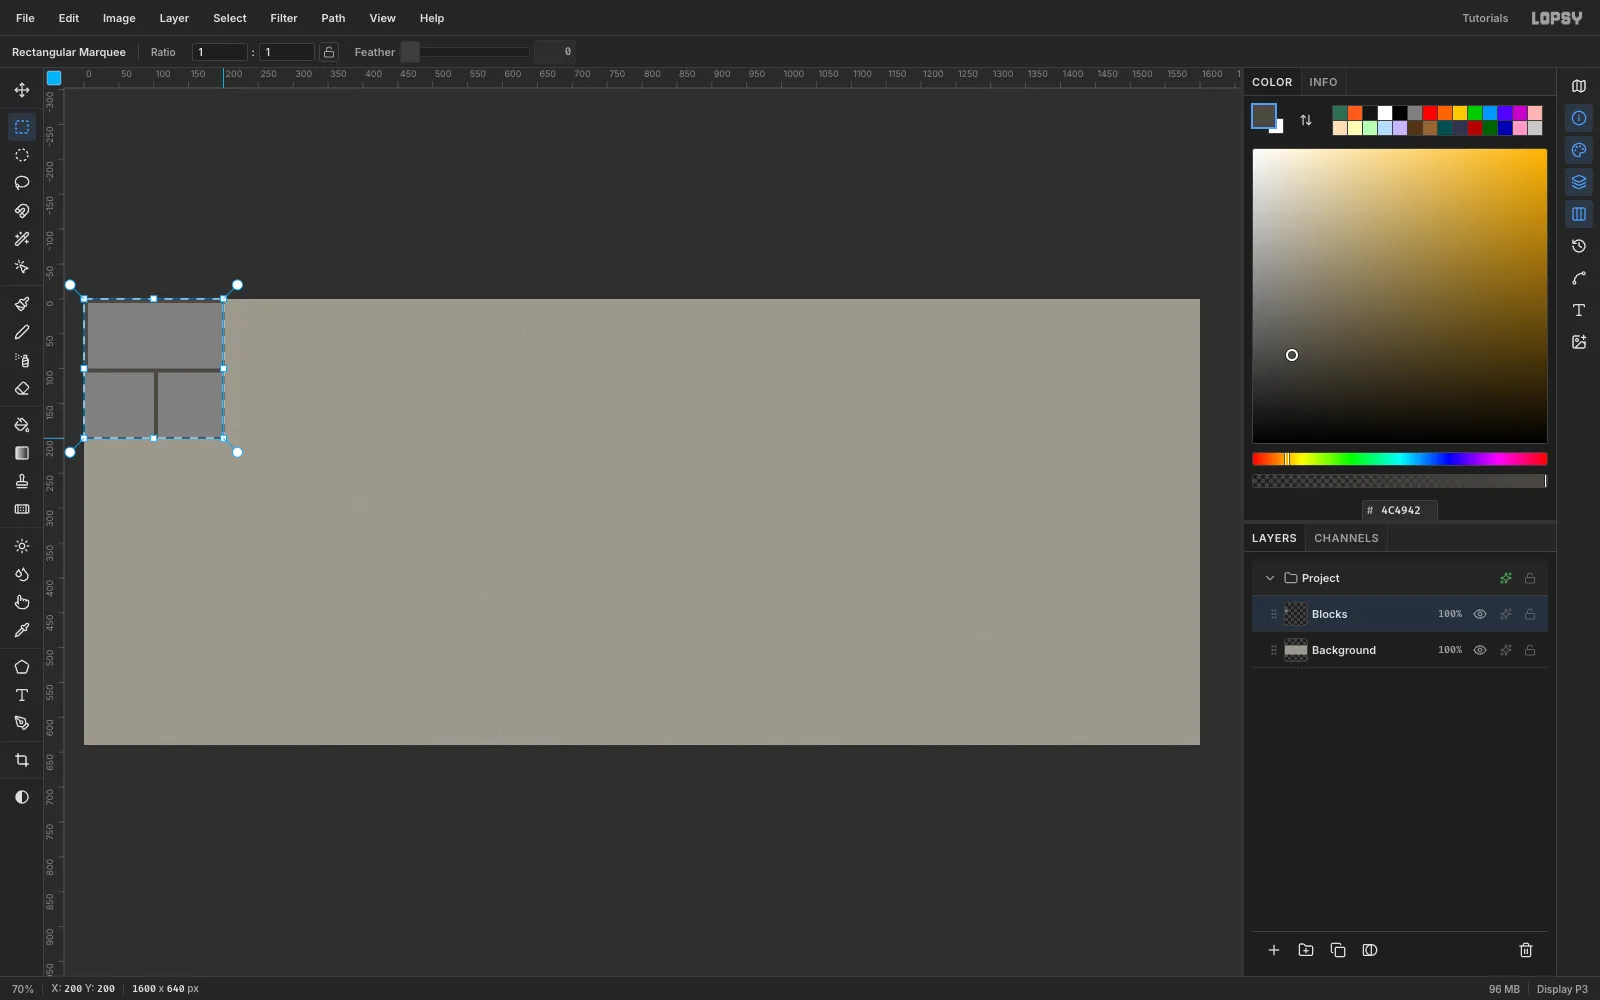
Layer 1and rename itBlocks. With the Rectangular Marquee, select (0, 0) to (200, 200) and fill it with#808080. Switch the foreground to#4C4942and fill four thin selections for the mortar:- (0, 0), 200 × 6, the top joint
- (0, 100), 200 × 6, the middle joint
- (0, 0), 6 × 100, the vertical joint in the top course
- (100, 100), 6 × 100, the vertical joint in the bottom course, offset by half a block
Select the whole 200 × 200 tile again and choose Edit → Define Pattern.
-
Tile the wall with Fill with Pattern
Press Cmd+D to deselect, then fill the whole
Blockslayer with#808080. Choose Edit → Fill with Pattern…, pick your new pattern and set Scale80. Leave both offsets at0and click Apply.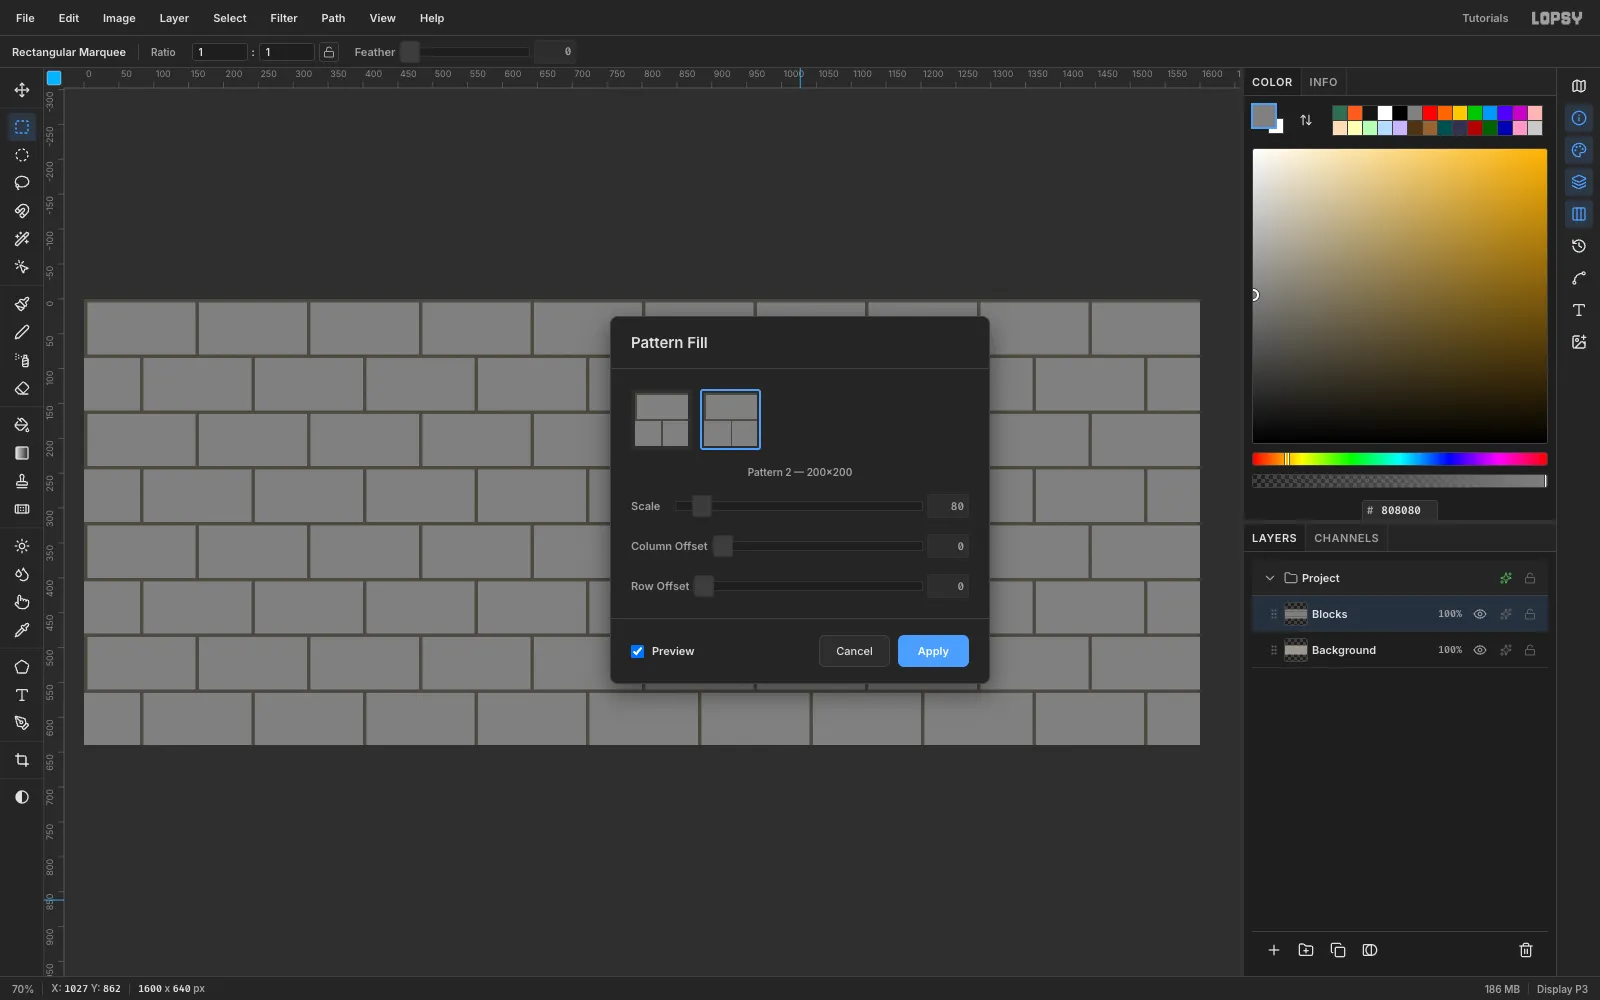
-
Emboss the blocks
Choose Filter → Emboss… and set Angle
135, Strength30and Pillow Emboss, then click Apply. Open the layer's effects (✦) and set its Blend to Overlay. Mid grey disappears in Overlay, so only the light and dark edges of each block show on the concrete.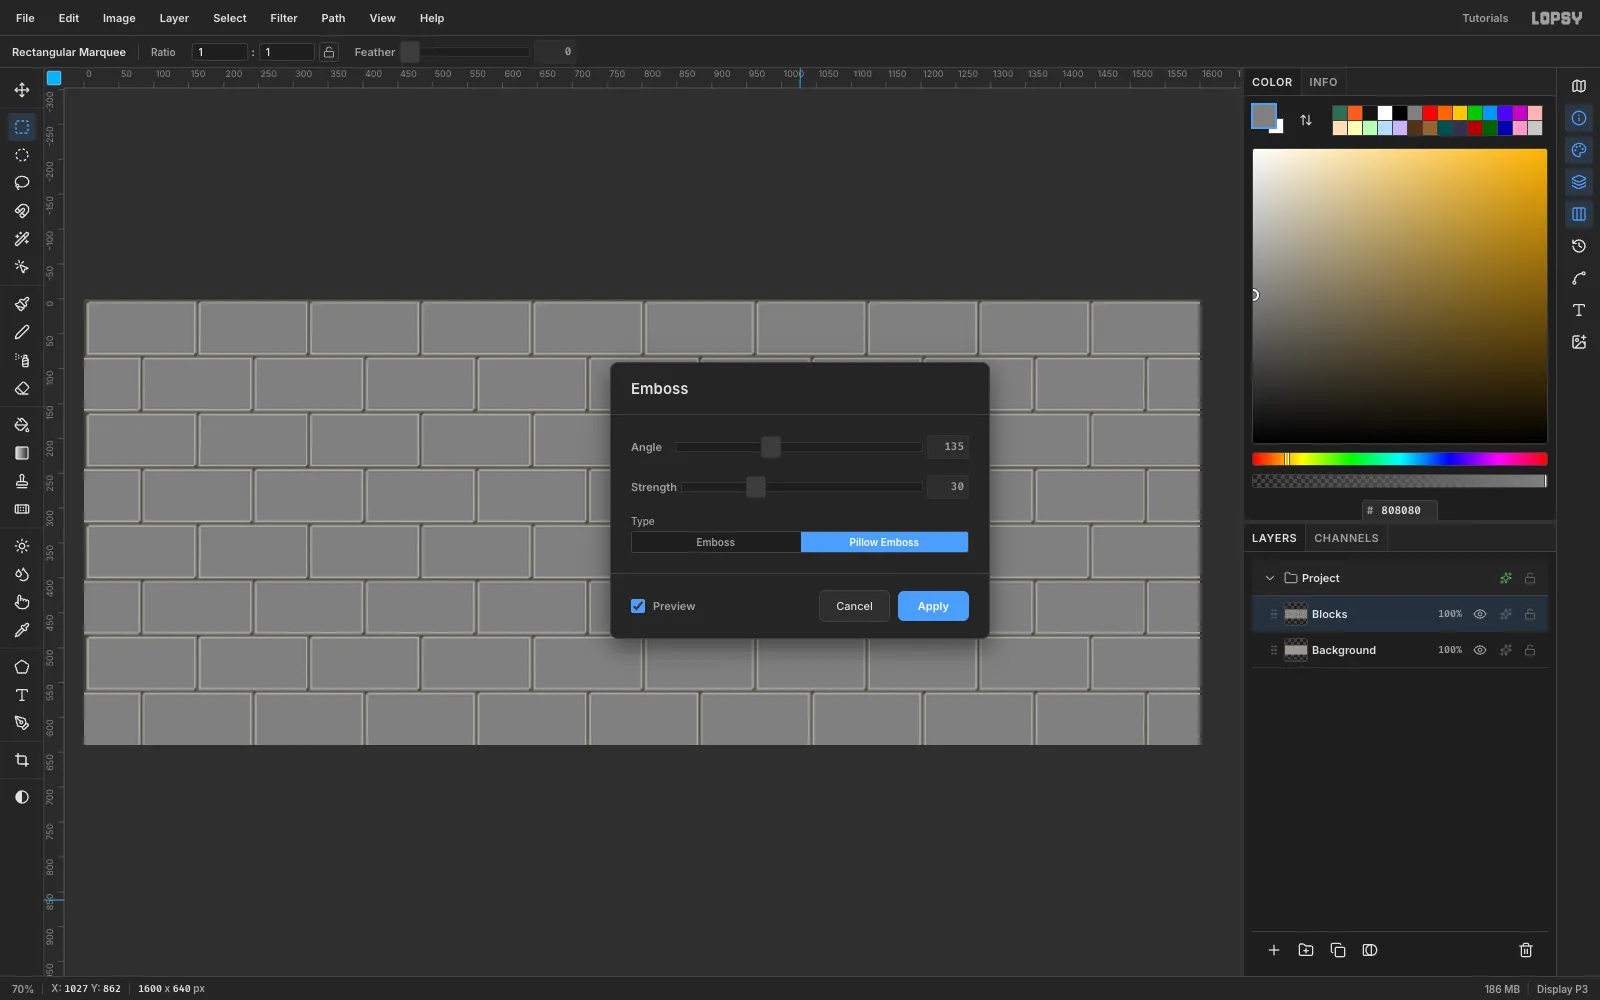
-
Add cloudy grime
Click Add Layer and name it
Grime. Choose Filter → Clouds…, set Scale4and apply it. Set the blend mode to Multiply and the layer's opacity to28%for uneven, weathered patches.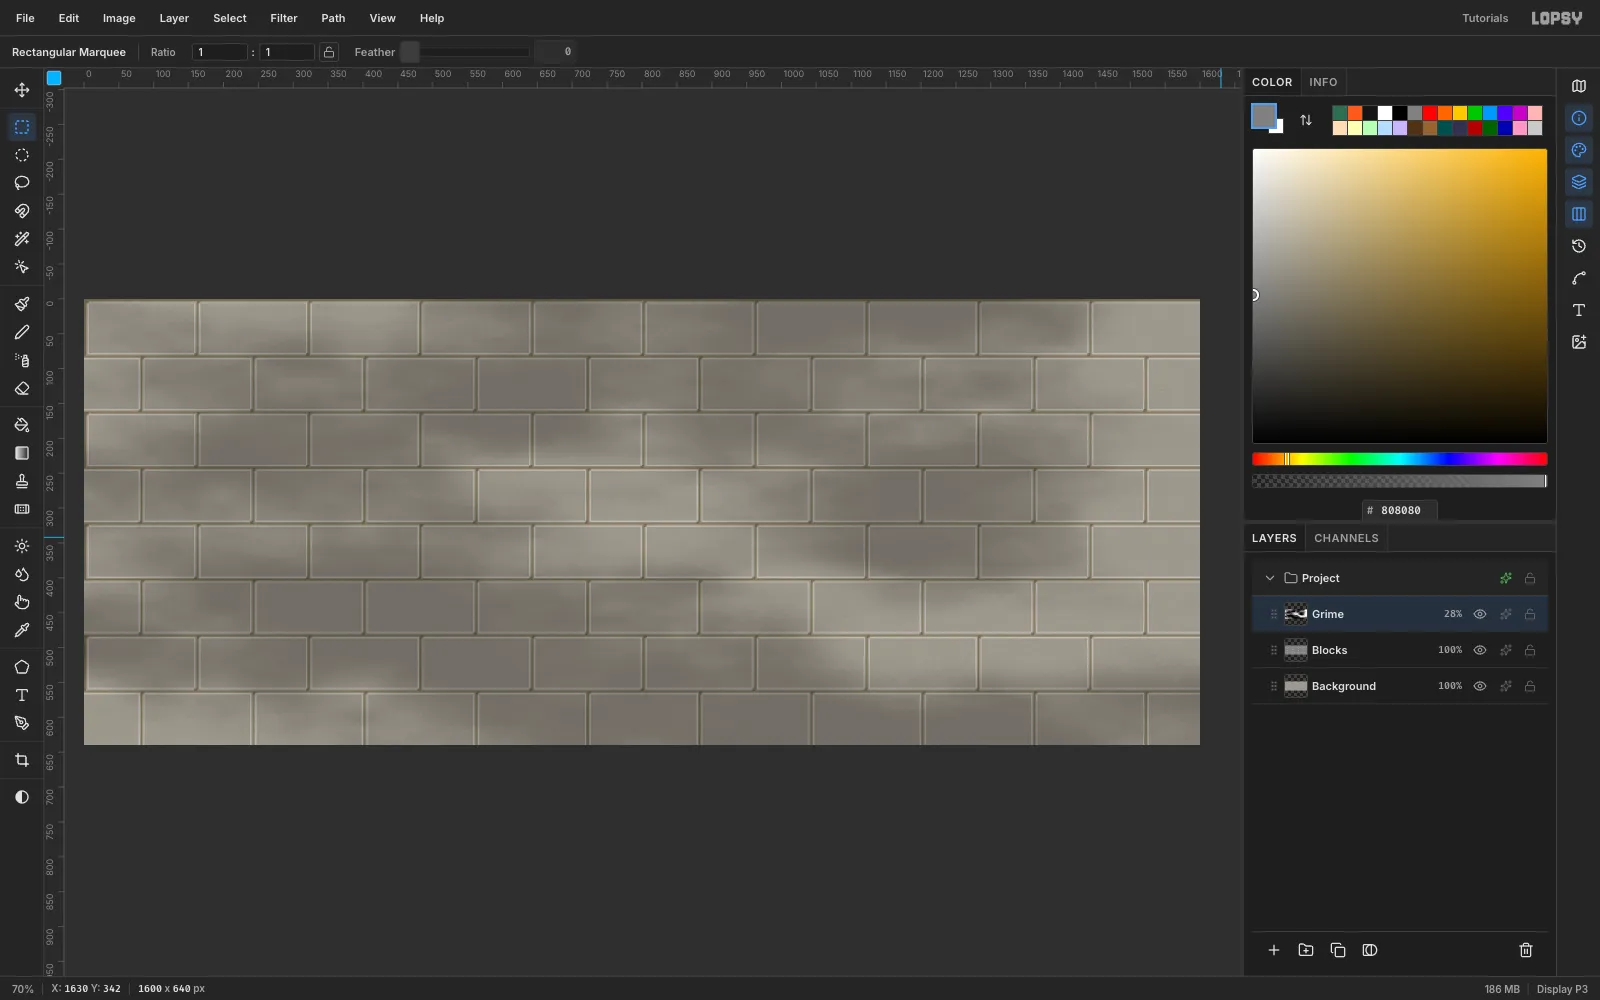
-
Streak the wall with Motion Blur
Add a layer called
Streaks. Pick the Brush and set Size16, Hardness40and Opacity70, with the color#3B3833. Drag eight short vertical strokes down from the top edge, 90–270 px long, at x ≈ 60, 150, 610, 830, 1090, 1240, 1450 and 1560.Choose Filter → Motion Blur… with Angle
90and Distance60. Set the layer to Multiply at40%to get soft rain stains.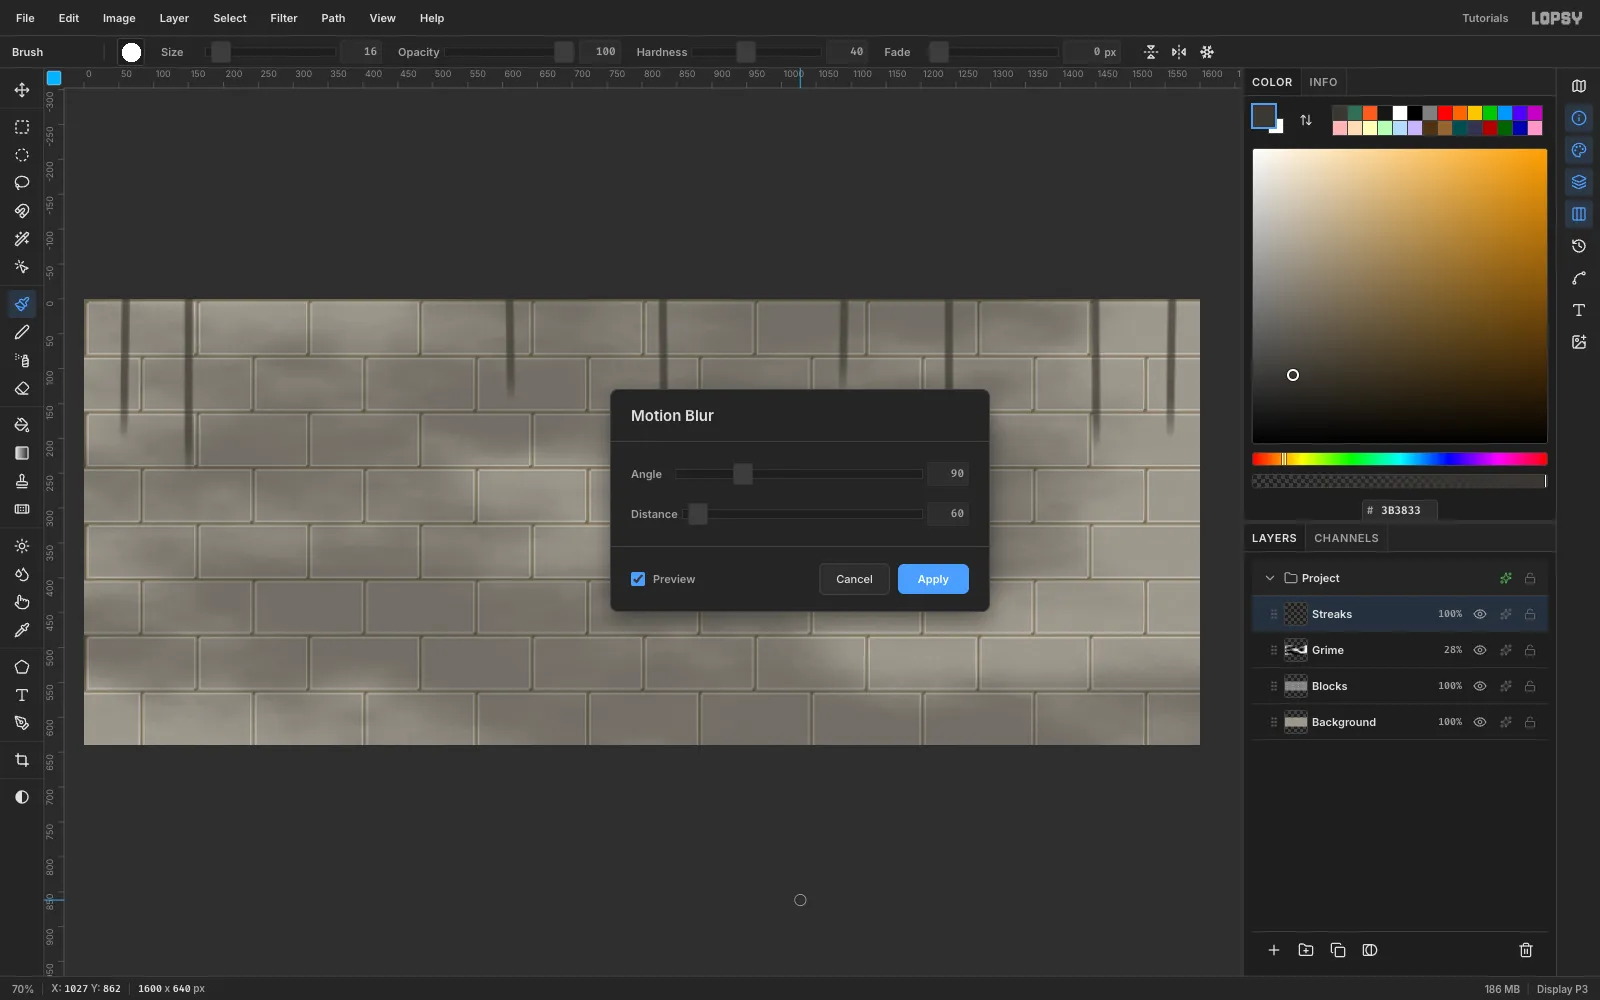
-
Spray the orange disc
Add a layer called
Disc. With the Elliptical Marquee, select a 600 × 600 circle starting at (140, 30), then fill it with#FF5B1F.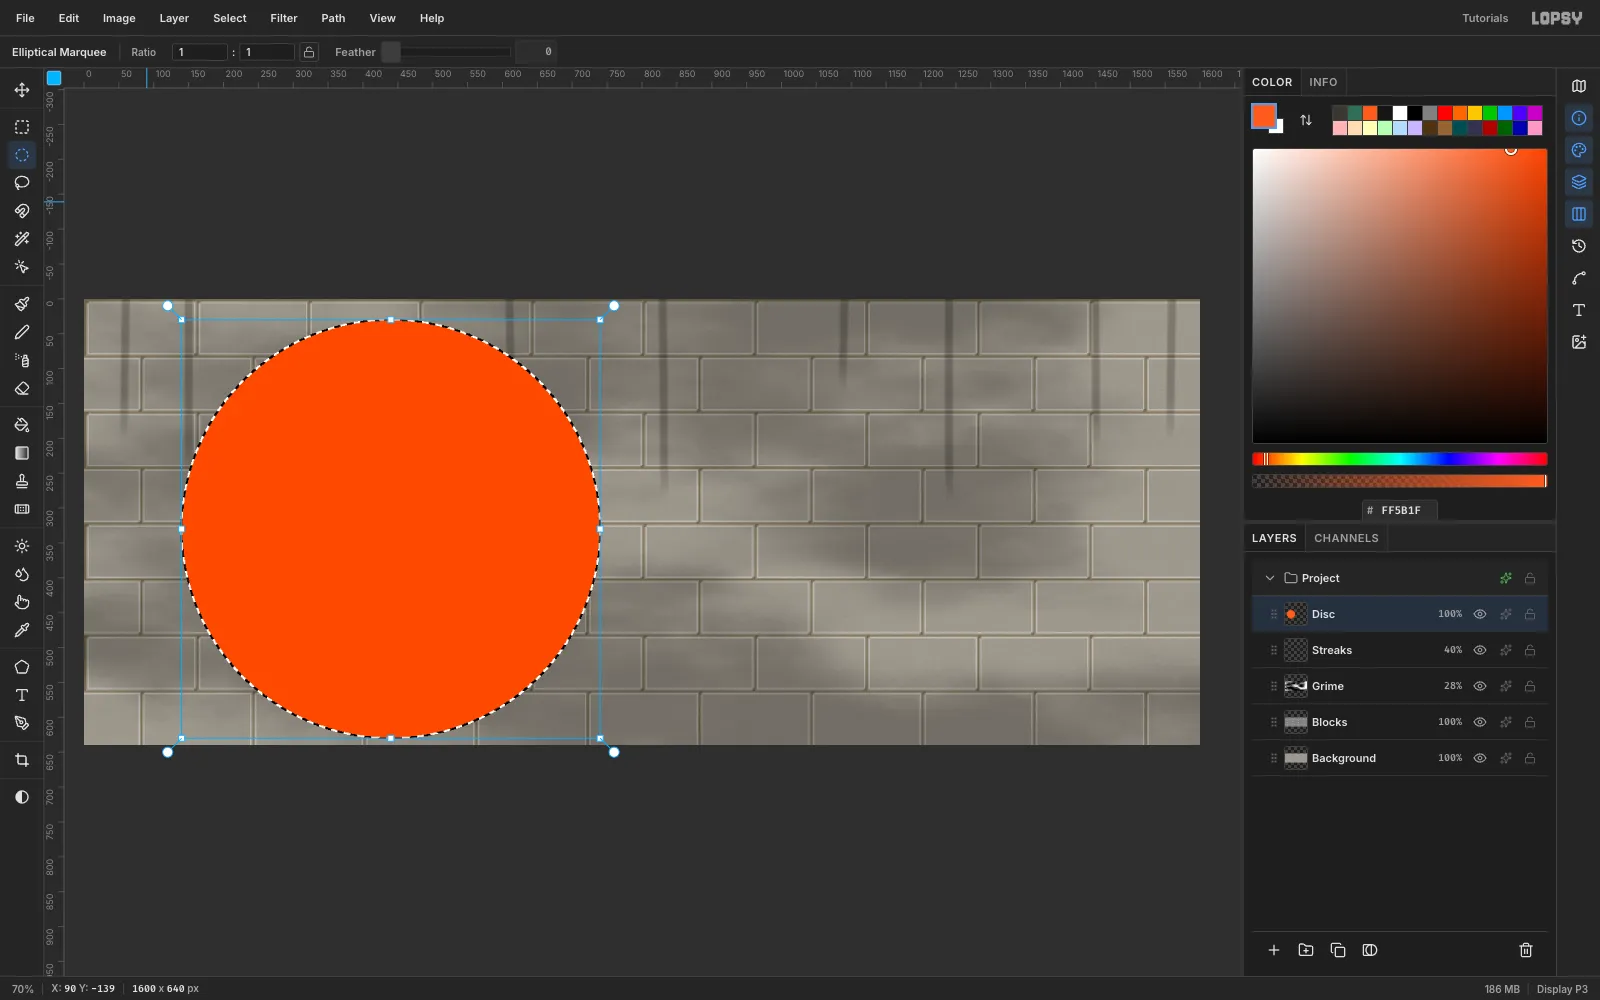
-
Add overspray with the Spray tool
A stencil holds paint back, but some always drifts past the edge. Add a layer called
Oversprayand choose Select → Inverse, so you can only paint outside the circle.Pick the Spray tool and set Size
70, Density45, Opacity55and Softness60. Drag two laps around the disc, just outside its edge. Move in big steps of about 30 px, because the Spray tool skips very short drag segments. Start each lap at the bottom, where the koala will cover the denser cloud you get at pointer-down.Deselect, click the
Discrow and add Add Noise at10, Mono, for spray-can grain.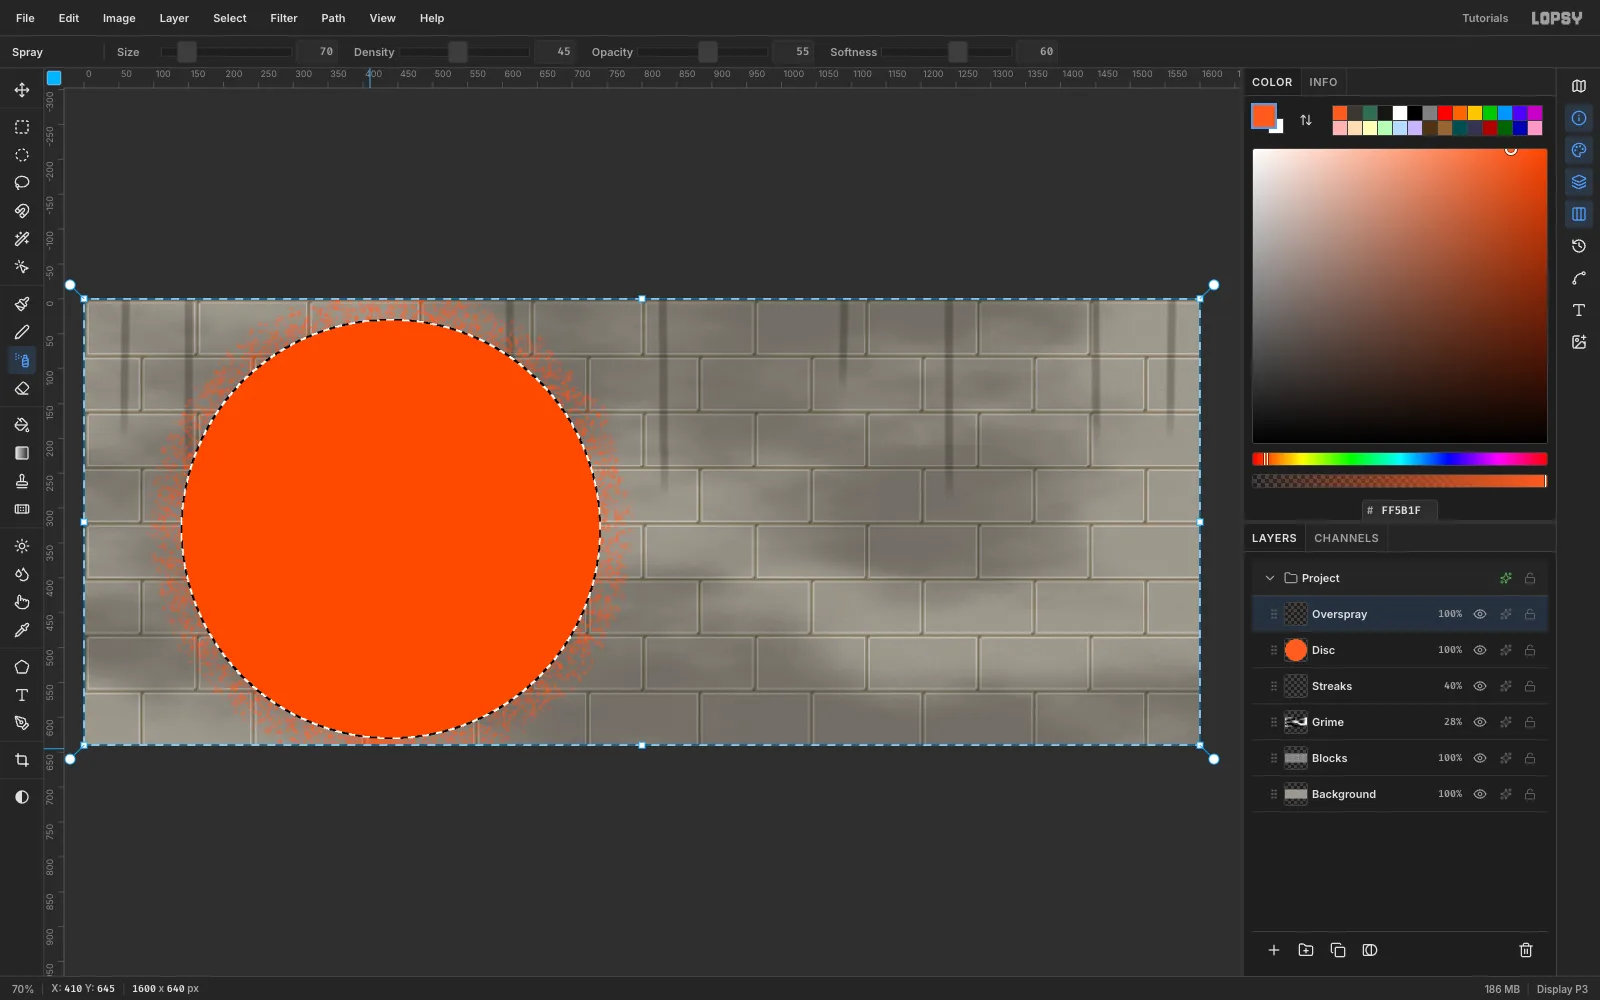
-
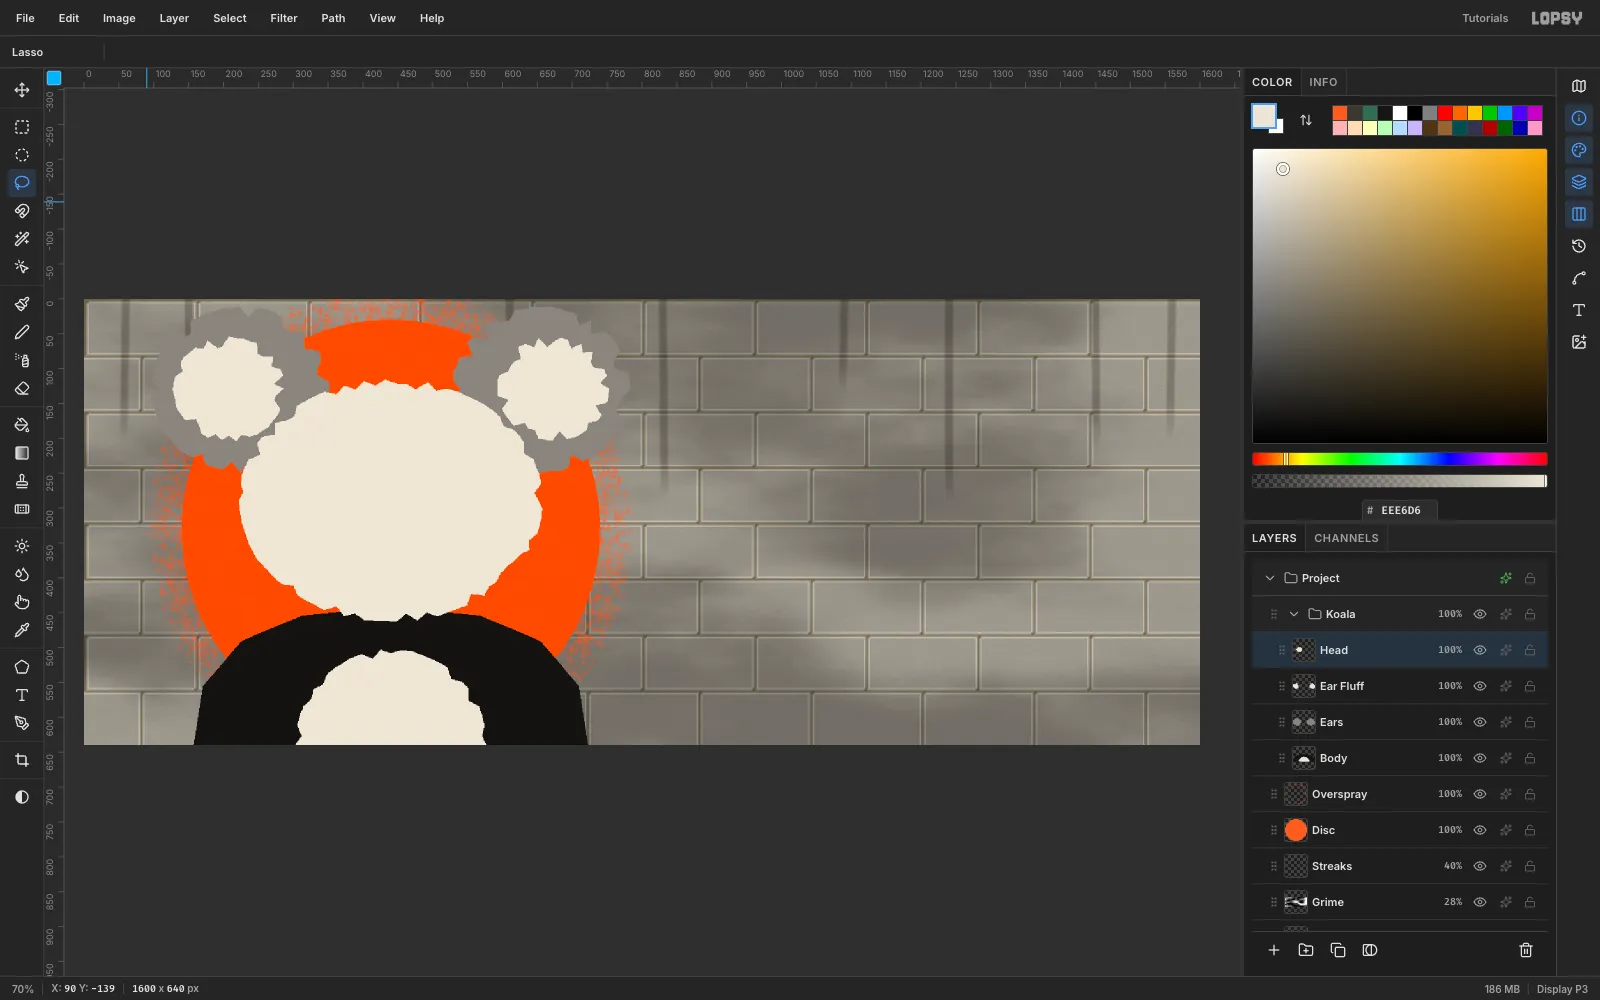
Cut the koala silhouette in a group
With
Oversprayactive, click New Group and name itKoala. Layers you add while inside the group stay inside it. Build four layers from the bottom up with the Lasso and Edit → Fill:Body: a wide ink trapezoid for the shoulders that runs off the bottom edge, plus a jagged bone chest patch centered at (440, 640)Ears: two jagged mid-grey circles about 250 px across, centered at (237, 129) and (656, 129)Ear Fluff: smaller jagged bone circles inside each earHead: a jagged bone oval about 435 × 350 centered at (440, 289)
Click short, uneven zig-zags into the lasso edges so they read as cut fur rather than smooth vector curves.
-
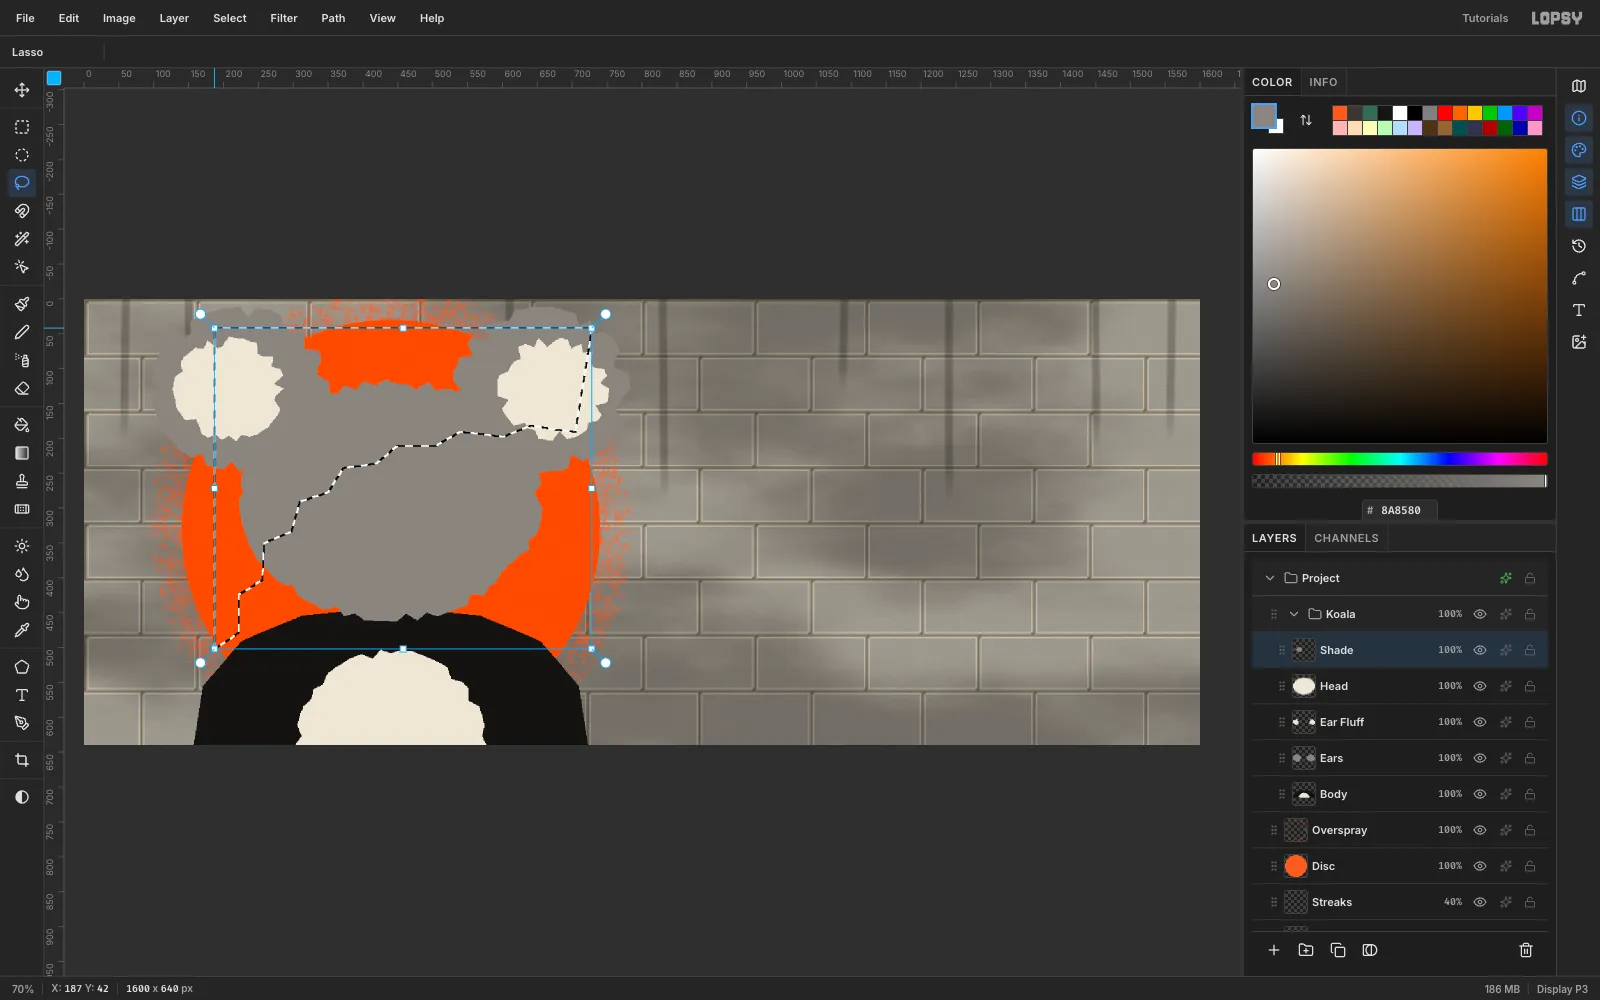
Shade the face with the Magic Wand
Click the
Headrow, pick the Magic Wand and click inside the head. Add a layer calledShadeand fill the selection with mid grey#8A8580.Now cut the lit side out of it. Lasso a jagged diagonal region over the top of the head and press Delete. Then lasso the left cheek and delete that too. What's left is a hard-edged shadow down the right side, the classic two-tone stencil split.
-
Cut the bandit mask
Add a layer called
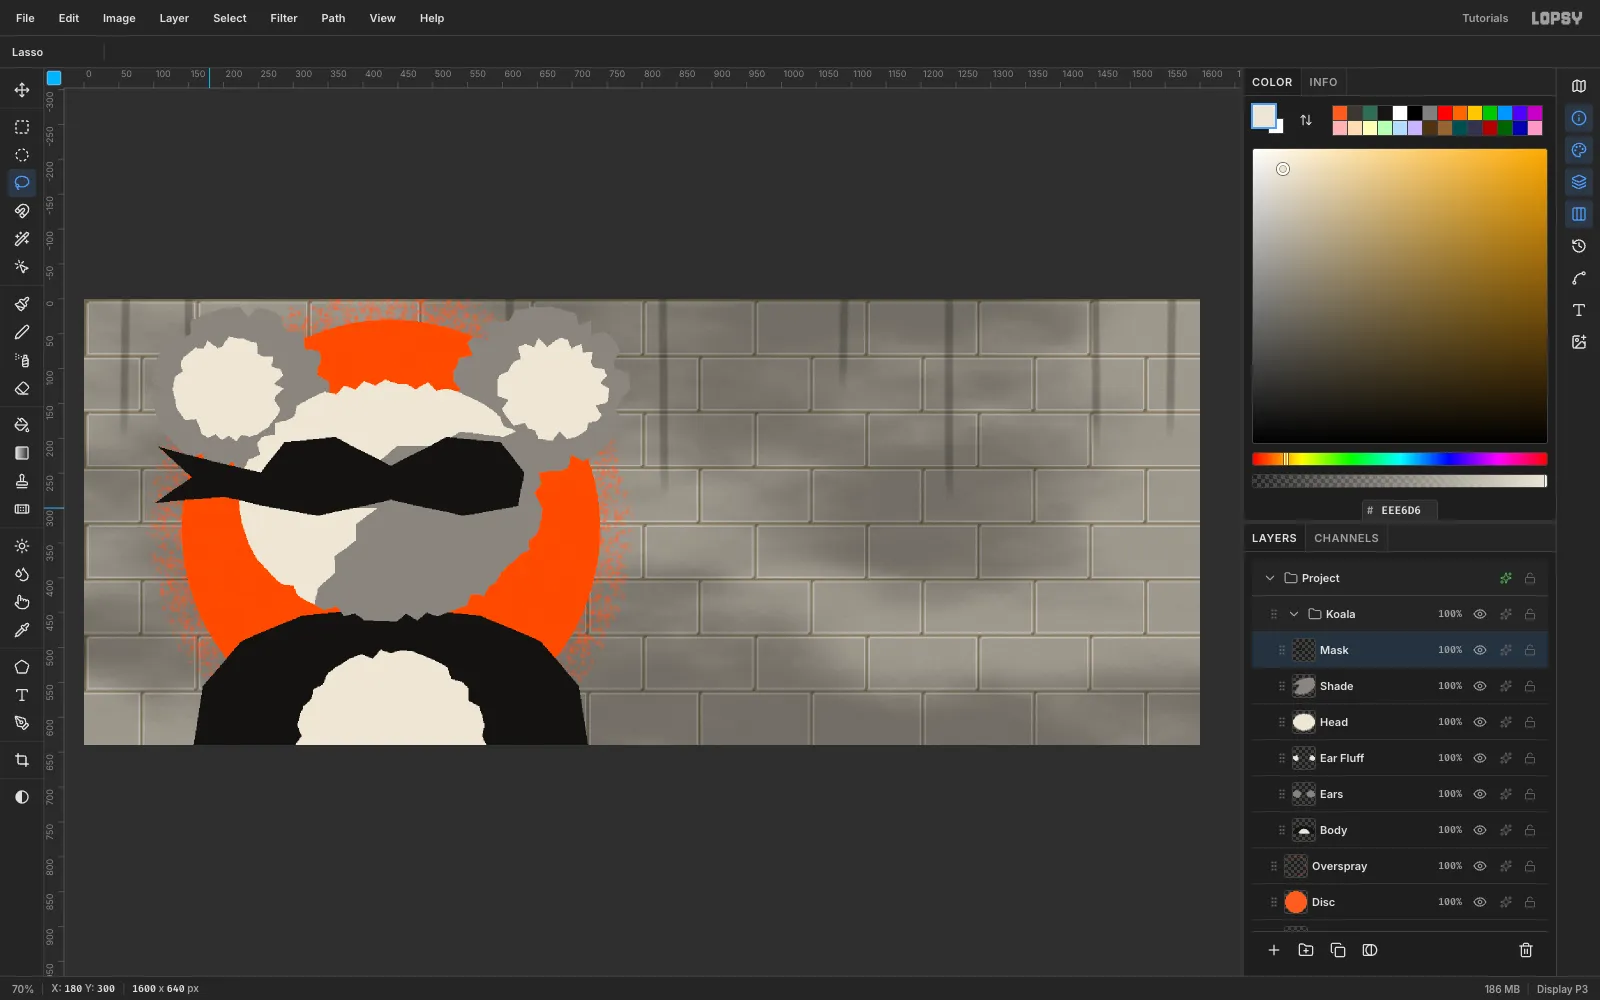
Maskand lasso-fill it in ink. Give the top edge a V that dips between the eyes, for a scowl. Add two pointed tails flying out to the left, like a knot blowing in the wind.Stencils need bridges, thin uncut strips that hold the stencil sheet together. Lasso two thin slivers across the mask tails and press Delete, so the orange shows through as gaps.
-
Copy and paste the second eye
Add a layer called
Eyes. Fill a 74 × 46 ellipse in bone at (339, 231). Then fill a 28 px ink pupil against its right side, so he's giving shifty side-eye.Marquee around the eye, press Cmd+C then Cmd+V. Use the Move tool to drag the pasted copy 133 px to the right. Deselect and choose Layer → Merge Down to fold it back into
Eyes.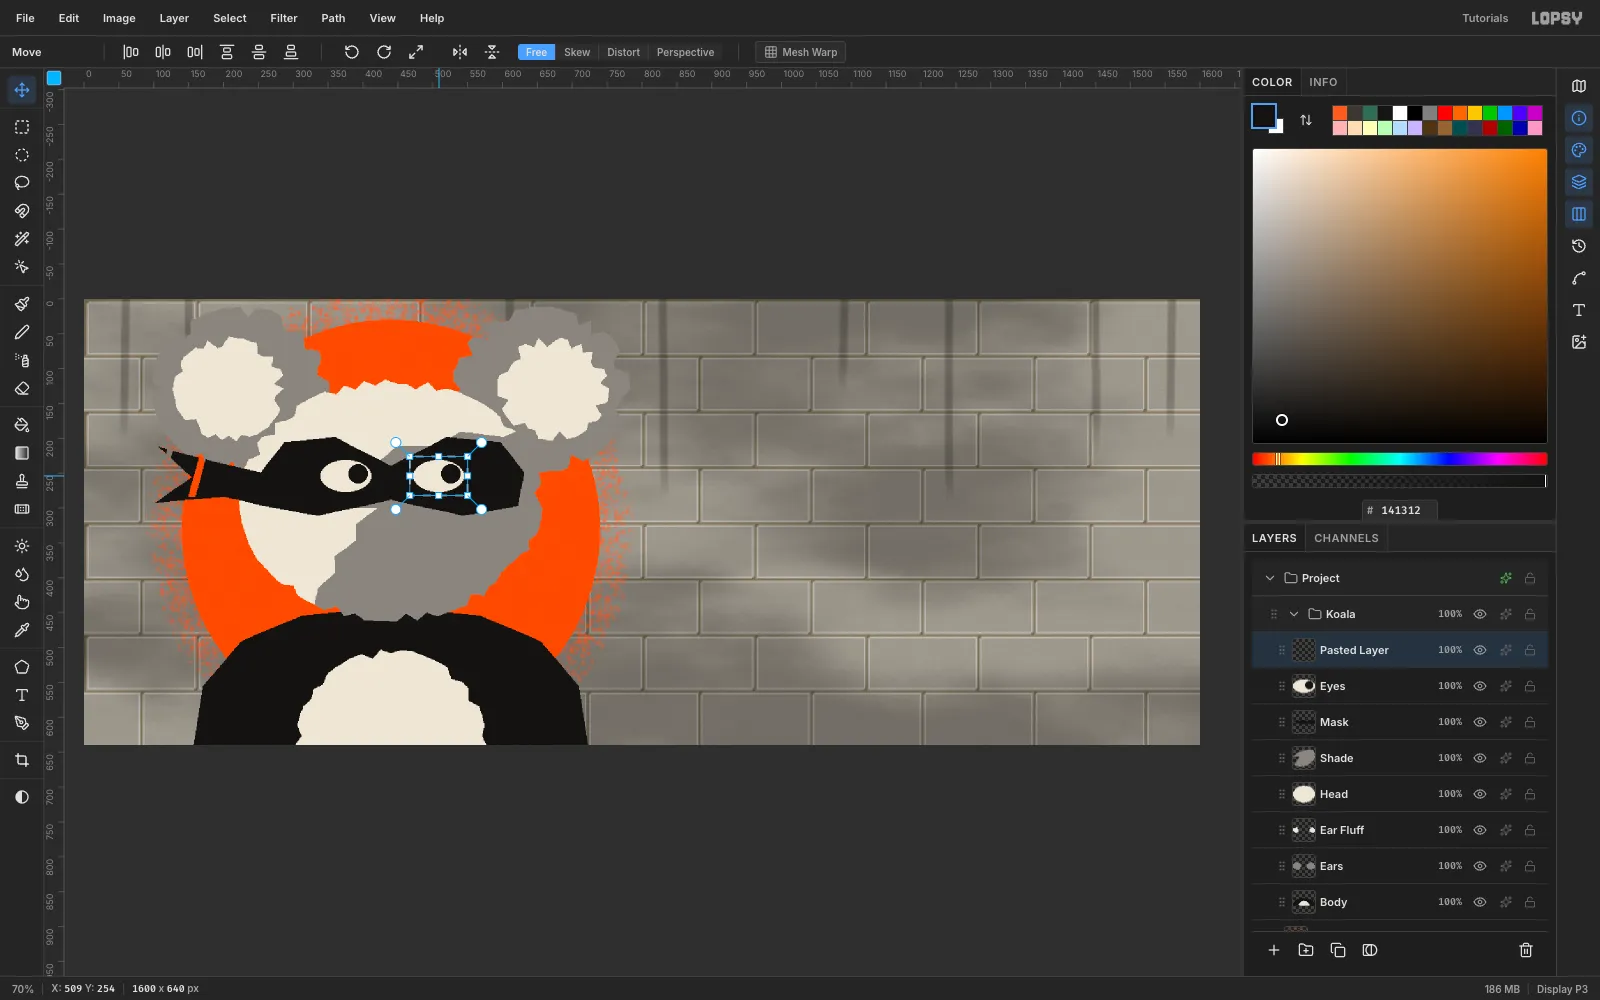
-
Add the nose and smirk
Add a layer called
Nose. Lasso-fill a big rounded ink shape about 115 × 130, centered at (440, 362), slightly wider at the top. Koala noses are huge. Add a small bone crescent at its upper left as a highlight, and a thin ink smirk curving up to the right below it.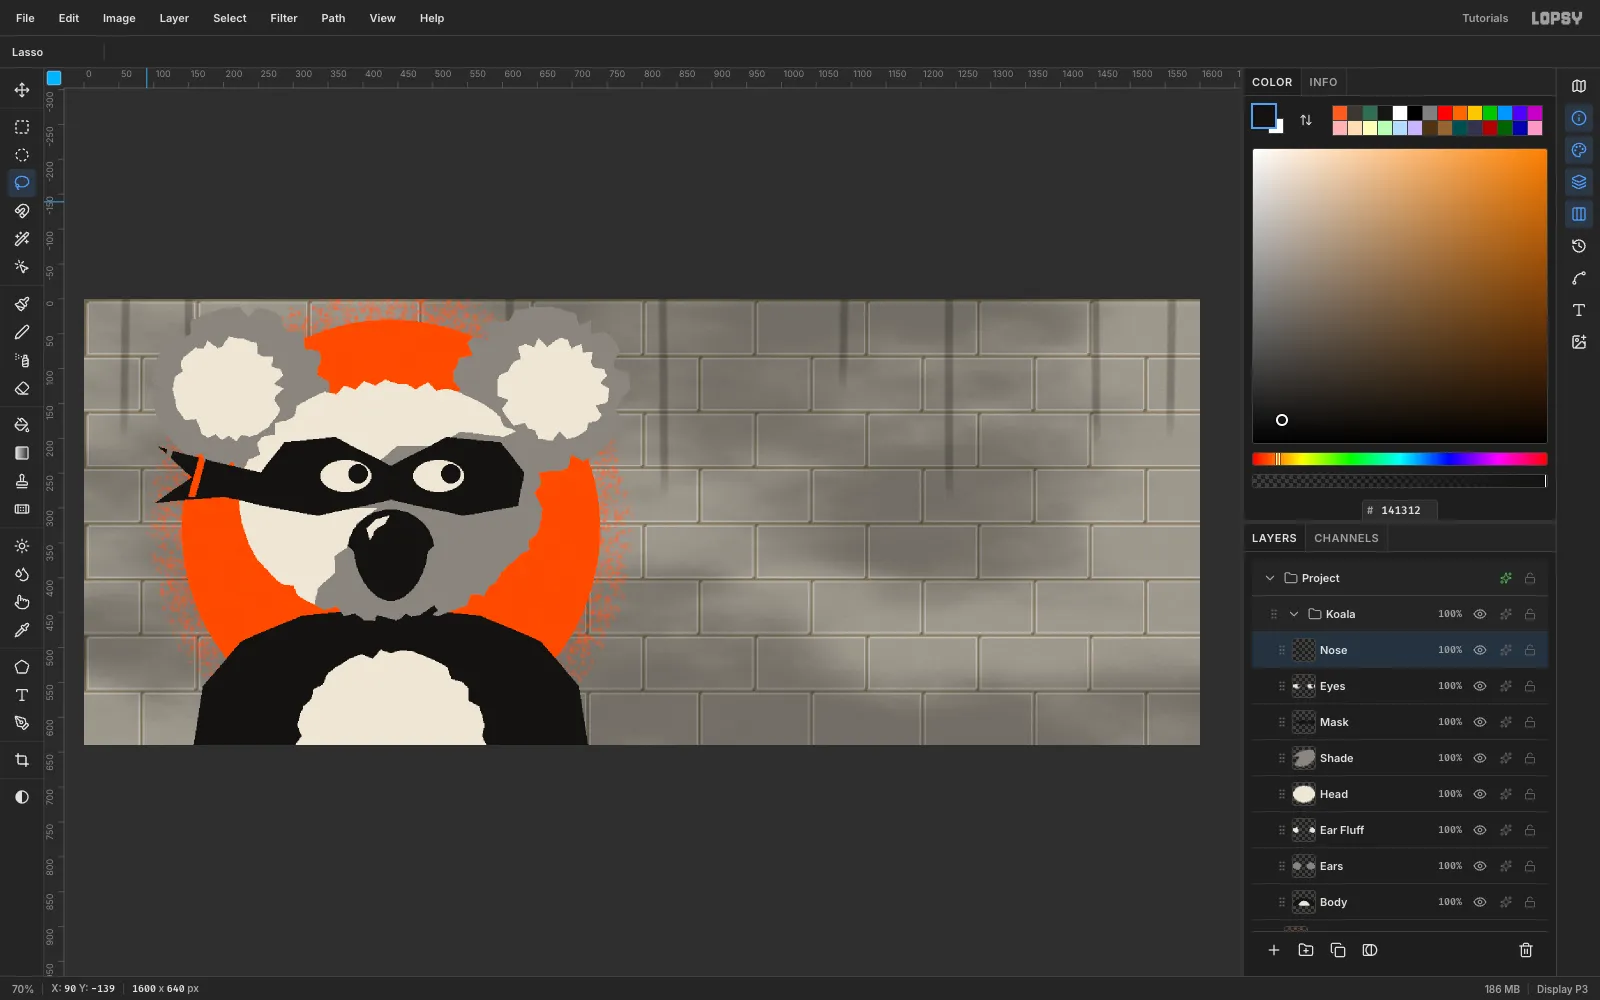
-
Draw the arm and spray can
Add an
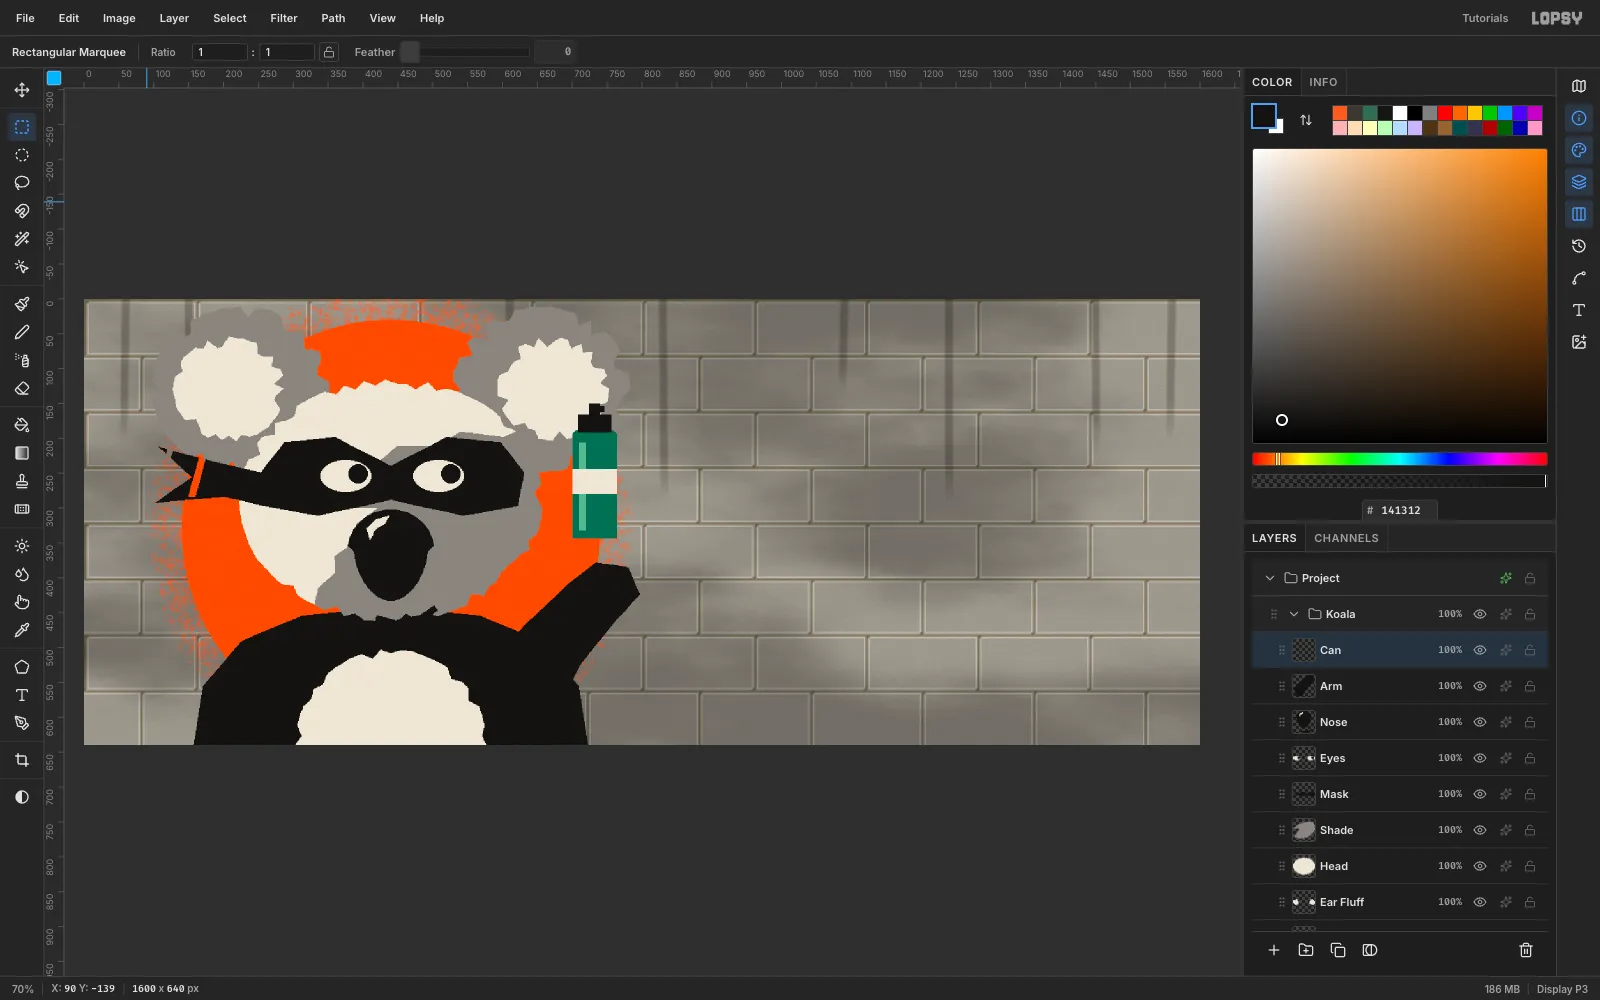
Armlayer and lasso-fill an ink arm that rises from the right shoulder toward (790, 380).Add a
Canlayer and draw the can upright at (700, 150) from marquee fills:- a 64 × 150 body in green
#2F6F55 - a 10 px highlight stripe in
#6FB893 - a bone label band
- a green ellipse for the shoulder
- an ink cap and nozzle
- a 64 × 150 body in green
-
Scale the can up
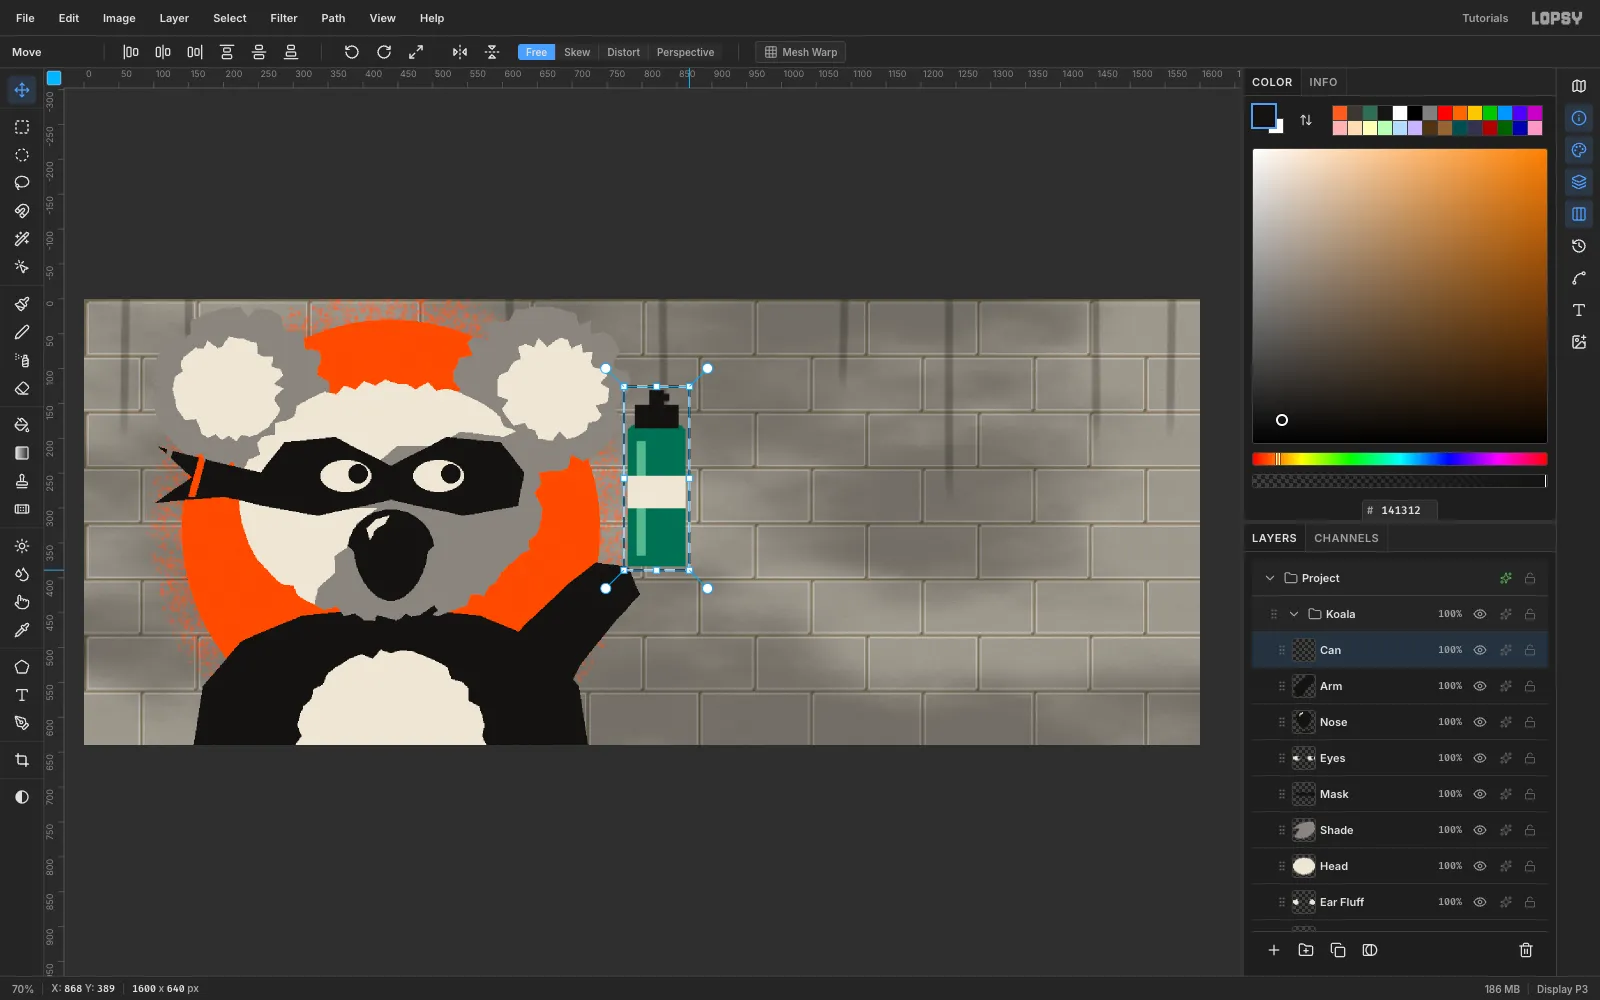
Select the can with a marquee and Move-drag it about 80 px to the right, then press Cmd+D. Marquee it again and hold Cmd while you drag the bottom-right handle outward to about 130%. The Cmd key keeps the proportions locked. Press Cmd+D to commit.
-
Tilt the can
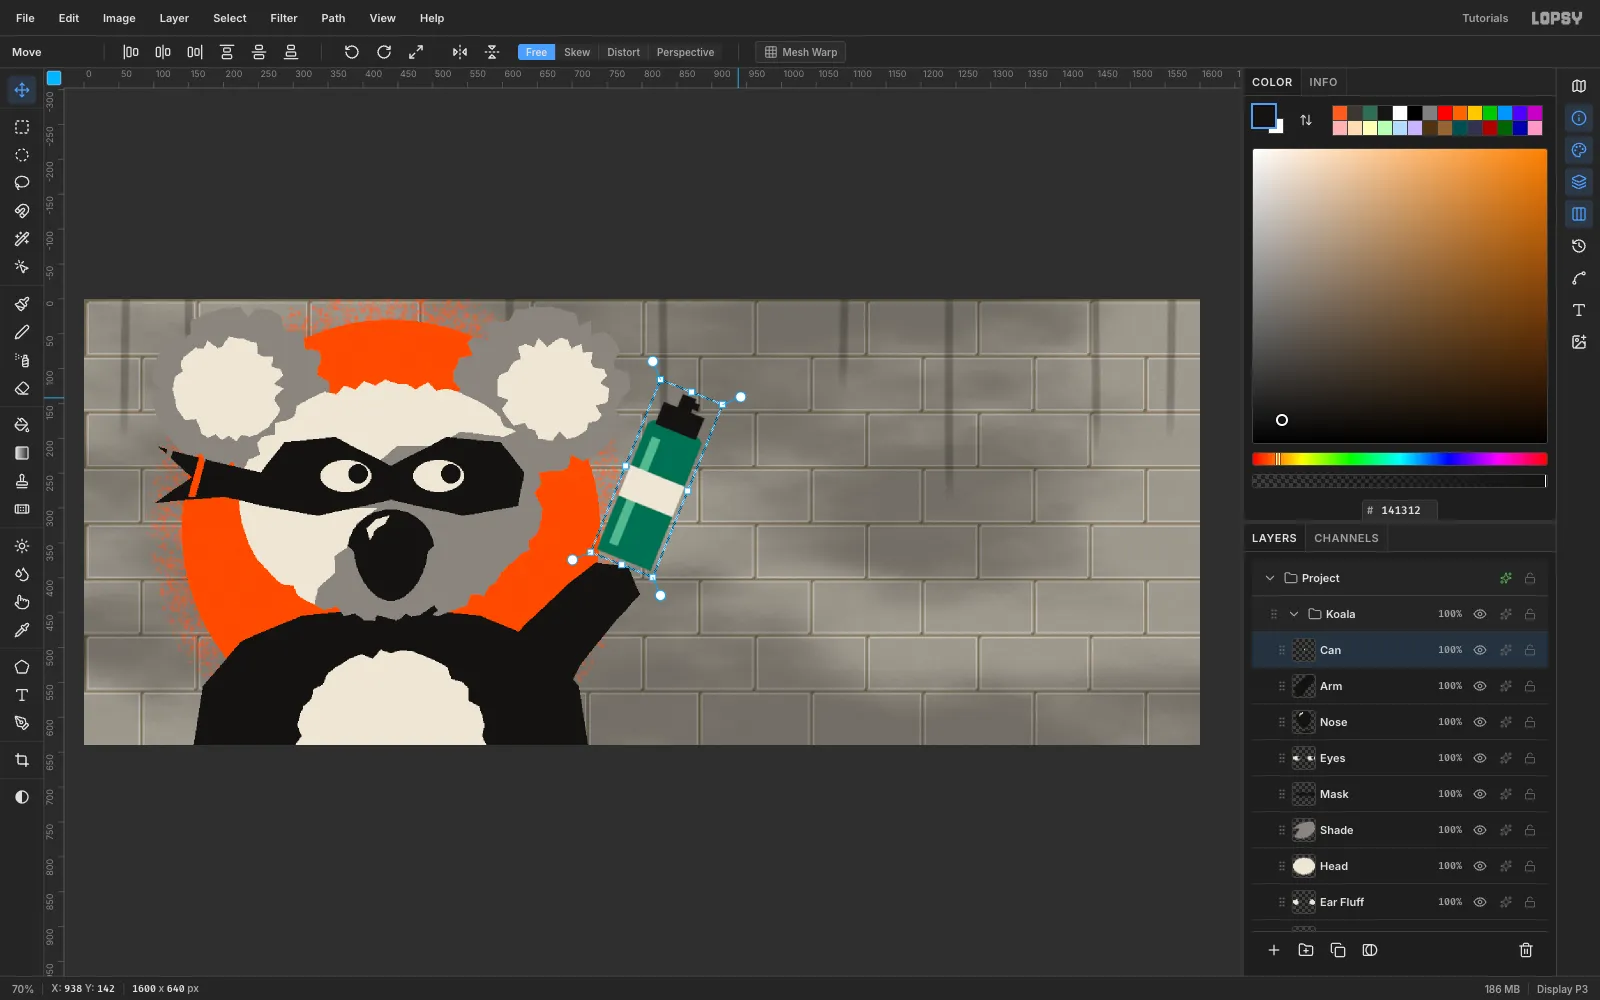
Marquee the can once more. Drag the round rotation handle just outside the top-right corner clockwise, about 22°, so the nozzle points at the headline. Press Cmd+D.
-
Add the paw and claws
Extend the arm up to the can on the
Armlayer. Then add aPawlayer aboveCan, with a jagged mid-grey blob about 90 × 80 over the lower third of the can. Fill three small ink triangles across the top of it for claws.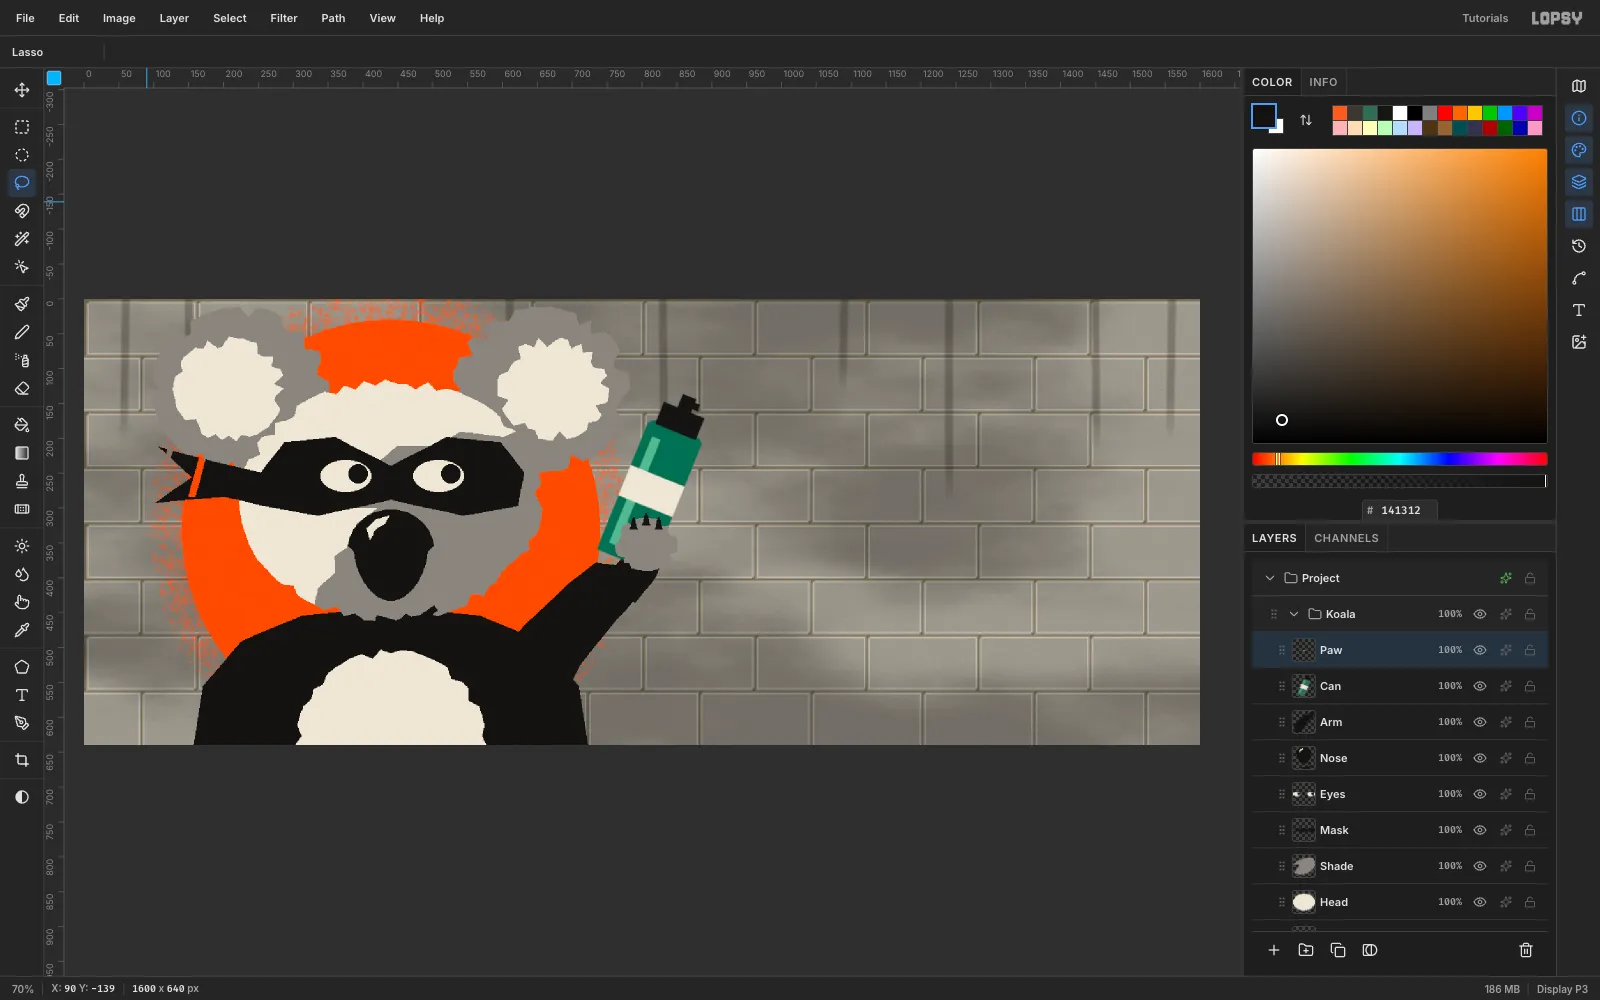
-
Set the stencil headline
Click the
Oversprayrow so the type lands outside the group. Pick the Text tool and set Stardos Stencil, Bold, Size195.Type
KOALAfirst, in orange, clicking at (930, 200). Then click theOversprayrow again and typeROGUEin ink, clicking at (930, 5).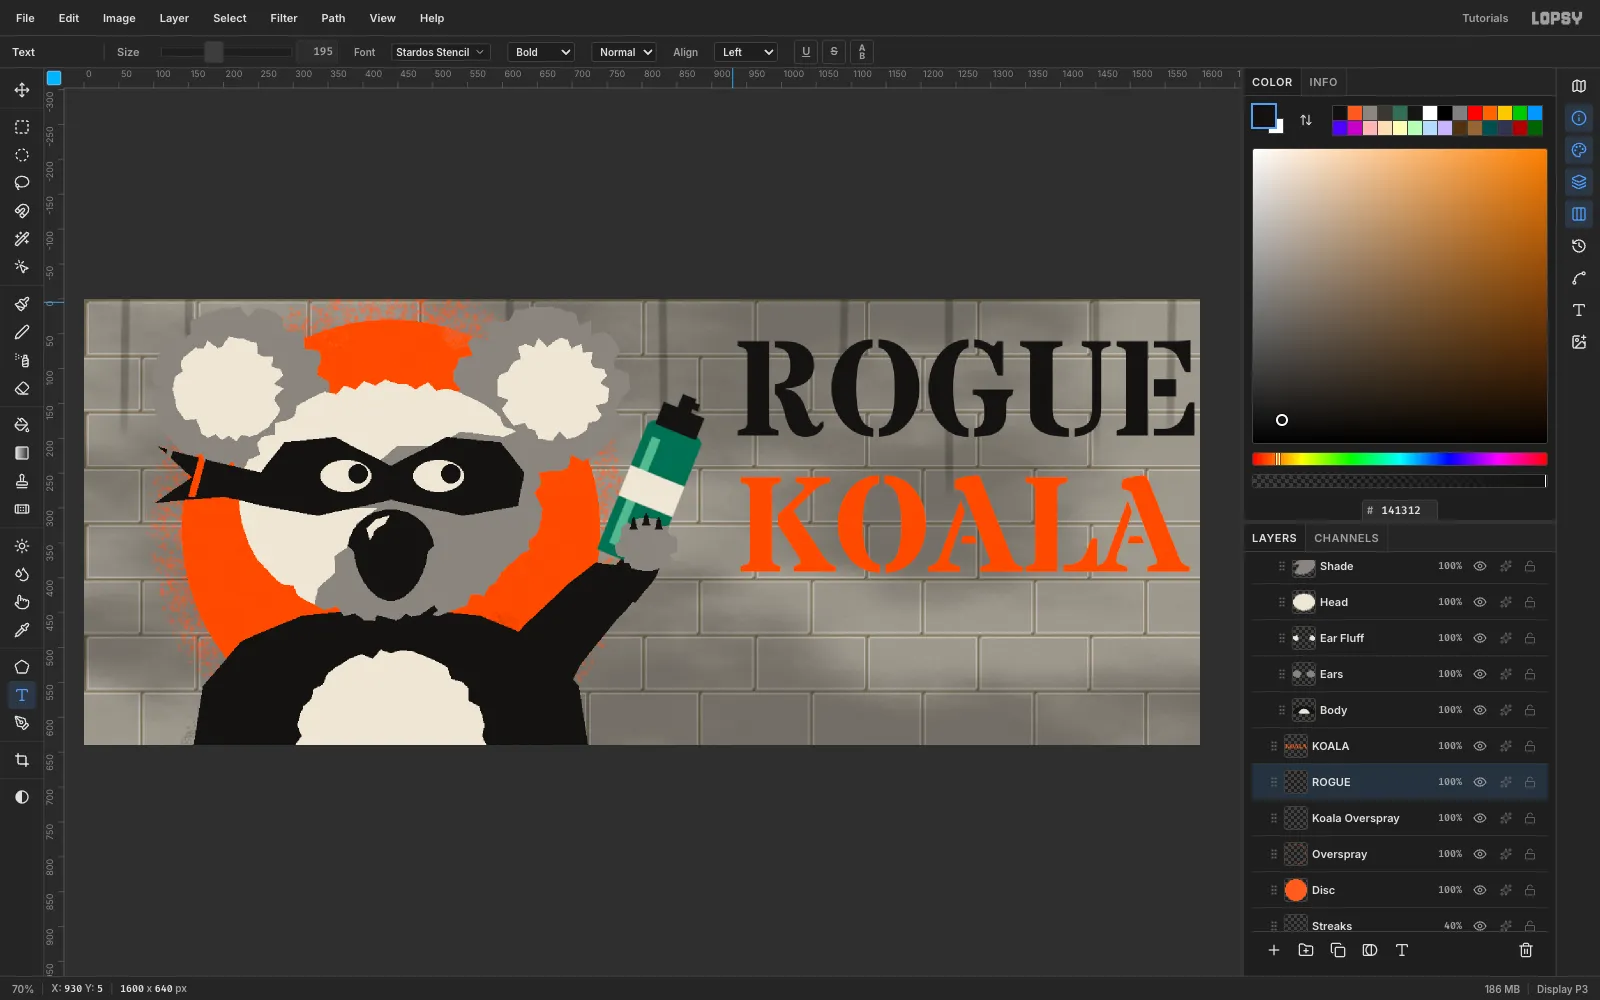
-
Stretch the letters taller
Real stencil lettering is often condensed. Click
ROGUEand click Rasterize Layer. Marquee tightly around the word and drag the bottom-middle handle down 28 px, about 120% taller. Press Cmd+D, then Move-drag the word so its left edge sits at x = 915 and its top at y = 36.Repeat for
KOALA, placing it at x = 915, y = 227.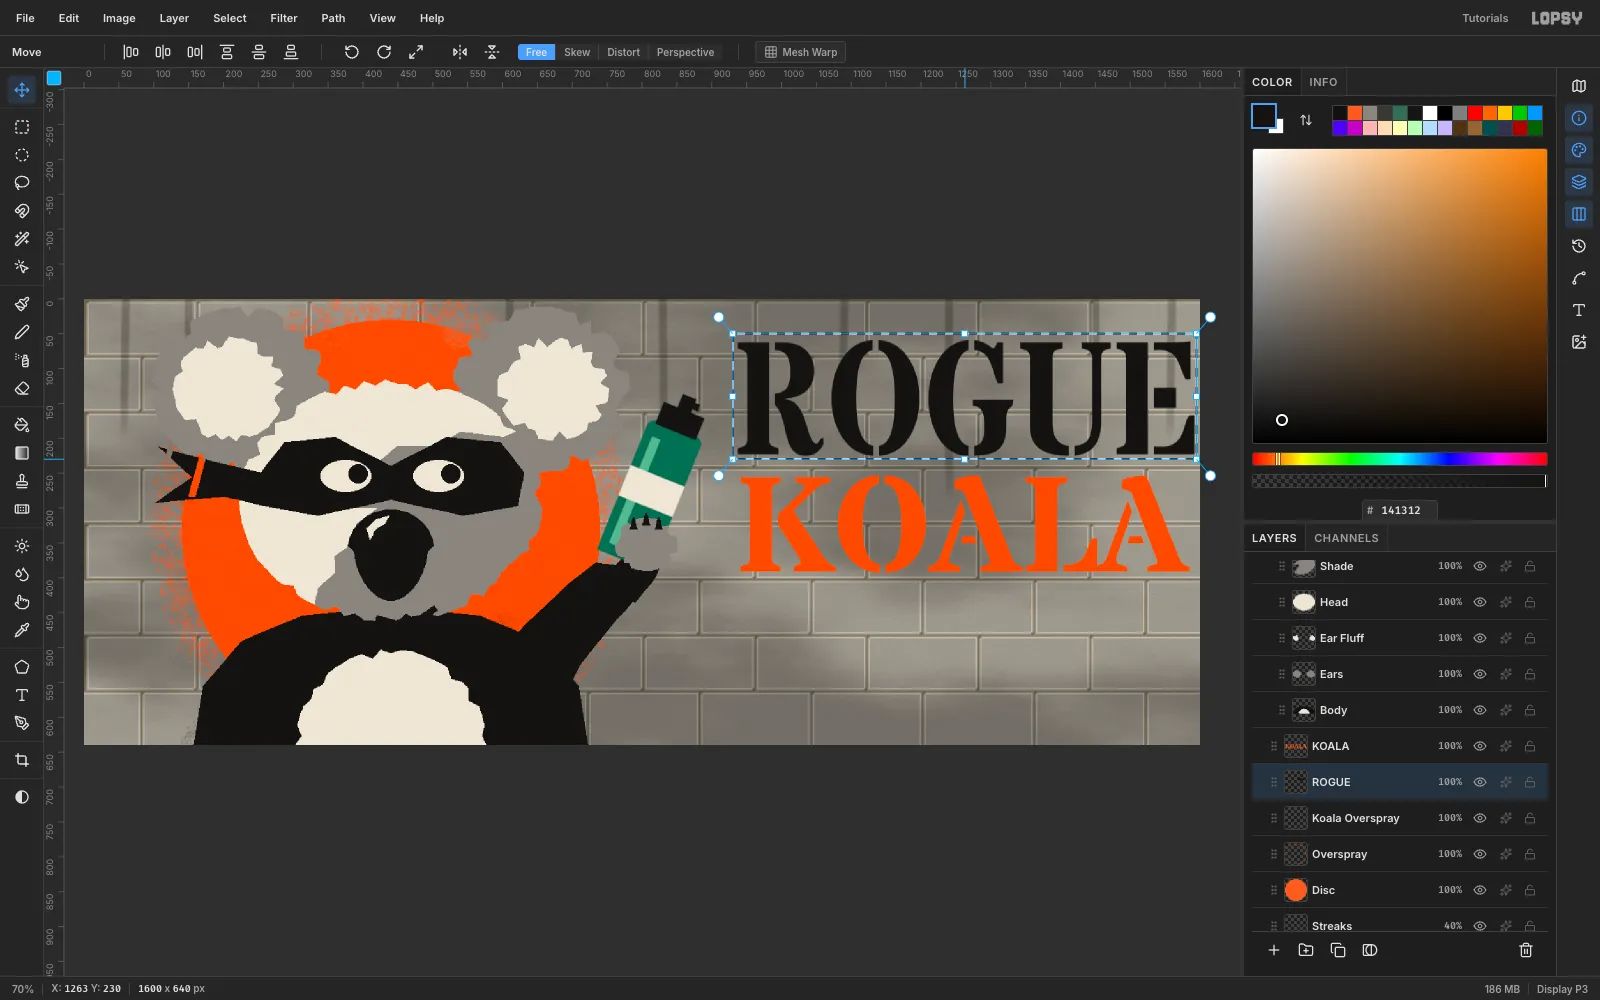
-
Add a hard shadow and paint drips
Give
KOALAa Drop Shadow in ink with Offset X7, Offset Y7, Blur0and Opacity100. It looks like a second, misregistered spray pass.Add a
Dripslayer aboveROGUE. Set the Brush to Size9and Hardness100. Drag three drips of uneven length straight down from the bottoms of the letters: 22, 72 and 46 px. Let the longest run intoKOALA. Fill a small ellipse at the end of each drip for the bead of paint. Add one orange drip fromKOALAthat reaches the tape line.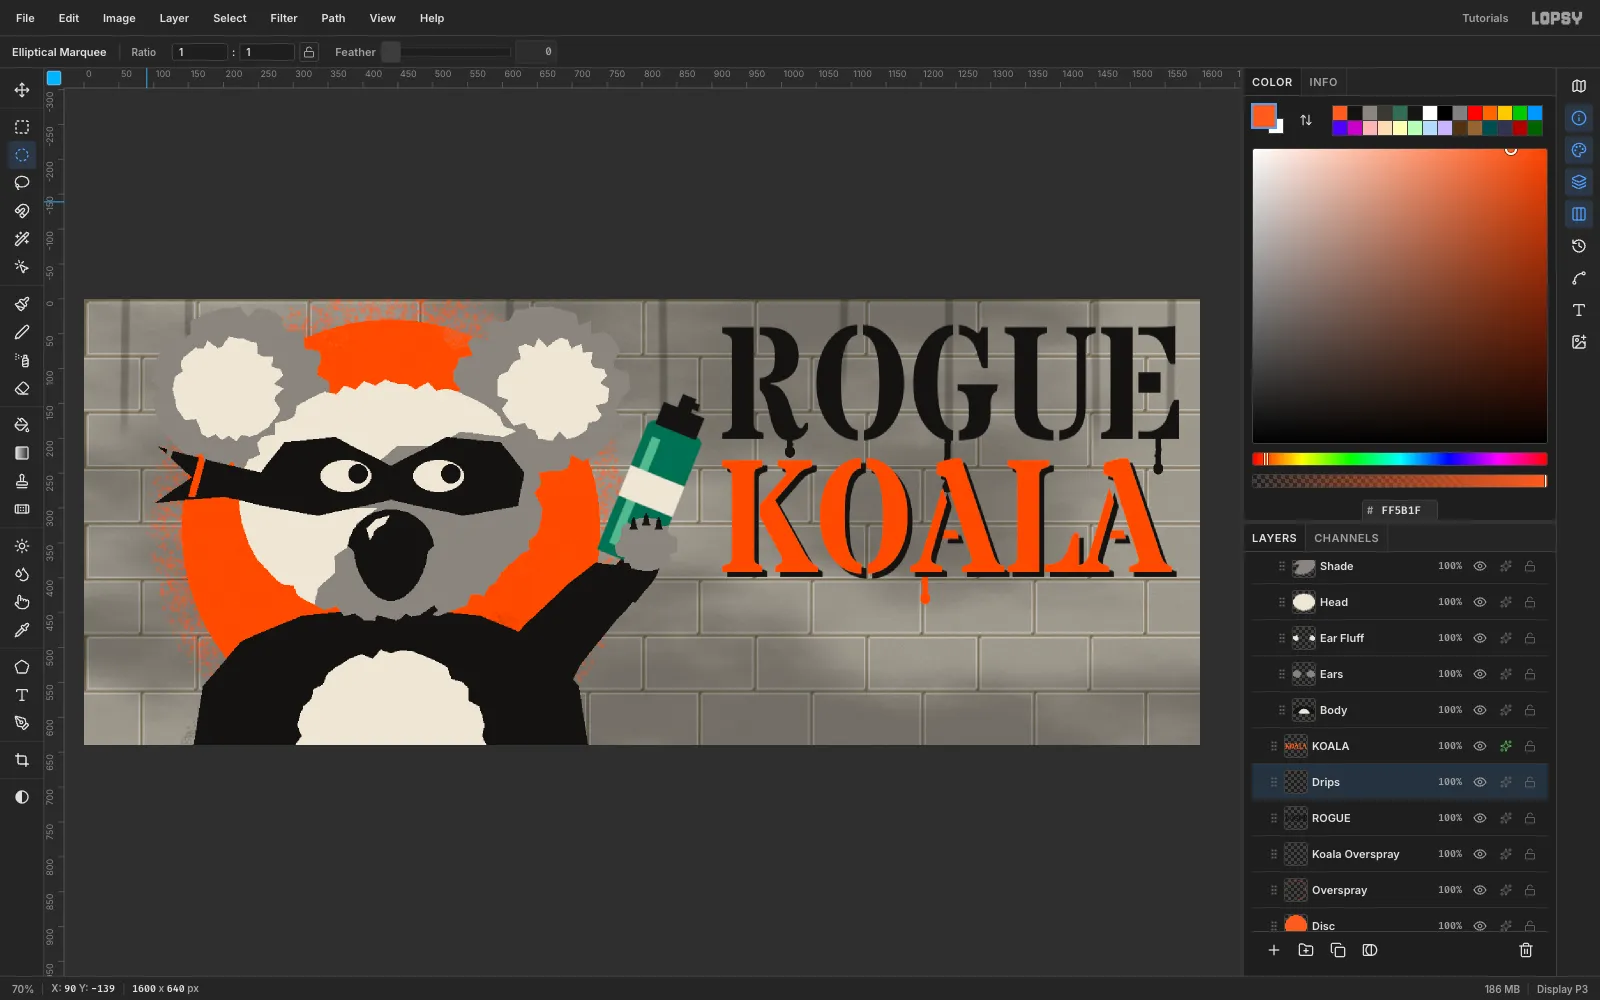
-
Spray the type edges and the nozzle mist
Add a
Title Overspraylayer. Set the Spray to Size34, Density30and Opacity22. Drag slow horizontal passes just above and belowROGUEin ink, and just above and belowKOALAin orange.Add a
Mistlayer. Spray a short orange puff (Size90, Opacity35) from the nozzle up toward the top of the R, as if the koala is tagging the headline.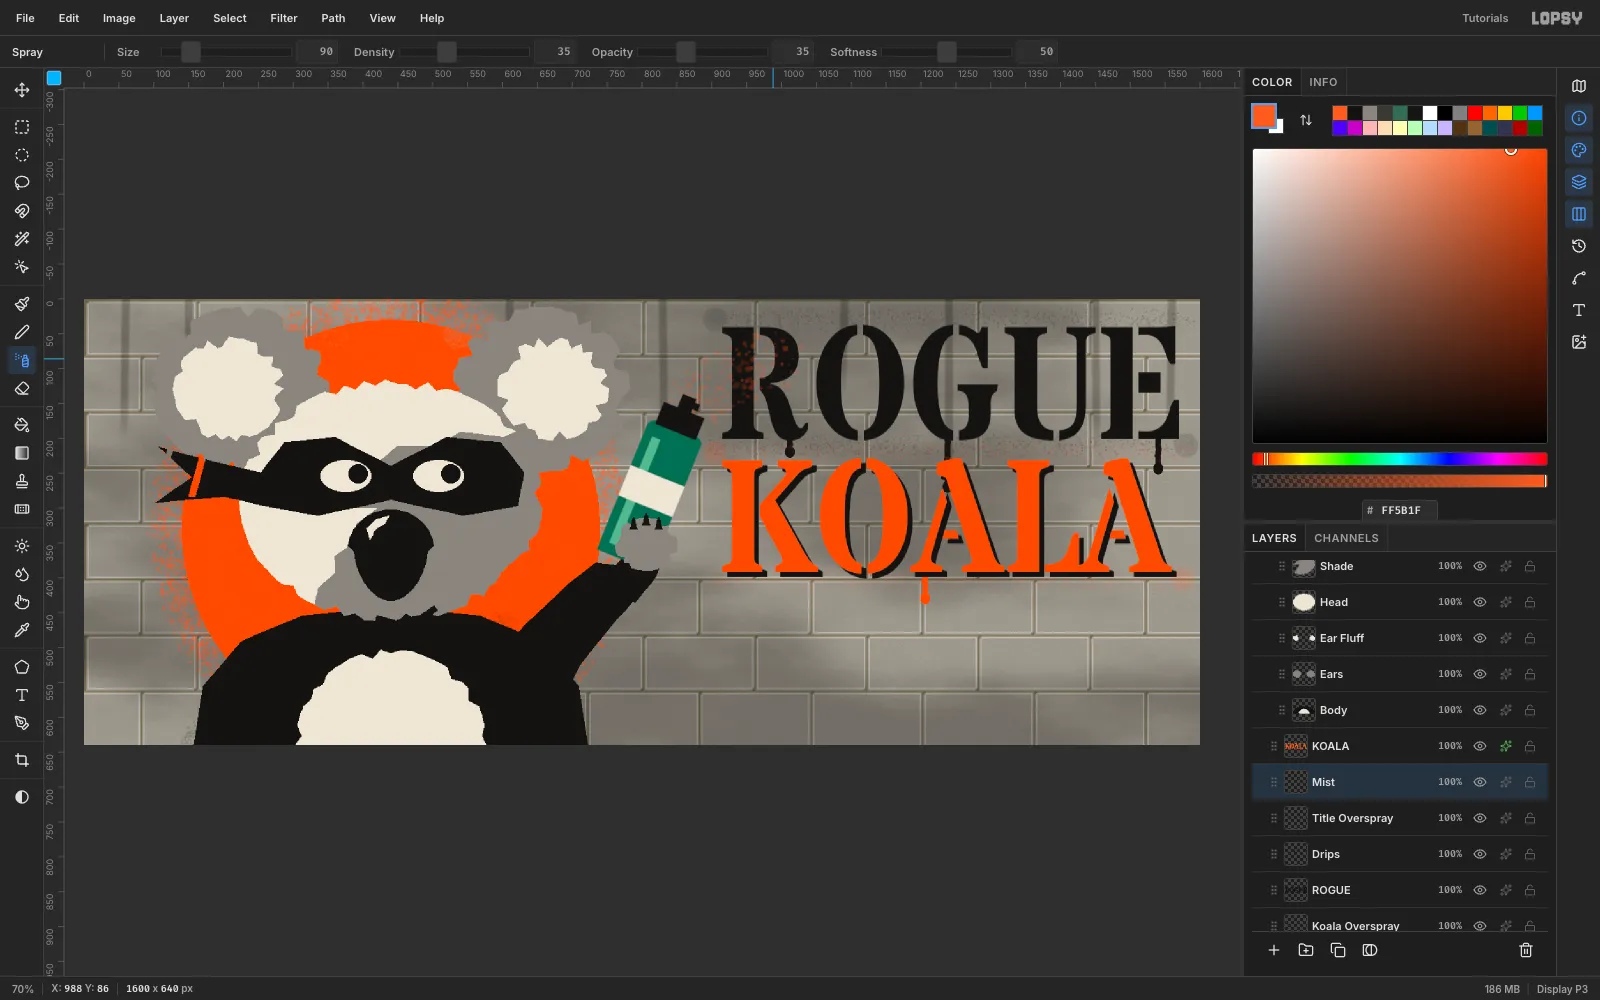
-
Make a paper-tape tagline
Add a
Tapelayer and fill a 670 × 62 rectangle at (905, 432) with#EFE3C4. For torn ends, lasso a zig-zag over each end of the strip and press Delete.Set the Text tool to Special Elite, Size
28and ink. Click at (978, 452) and pasteSTREET ART FEST · FITZROY · 3–12 OCT. Pasting is the easiest way to get the middle dots and the dash. Click Rasterize Layer, then Layer → Merge Down ontoTape.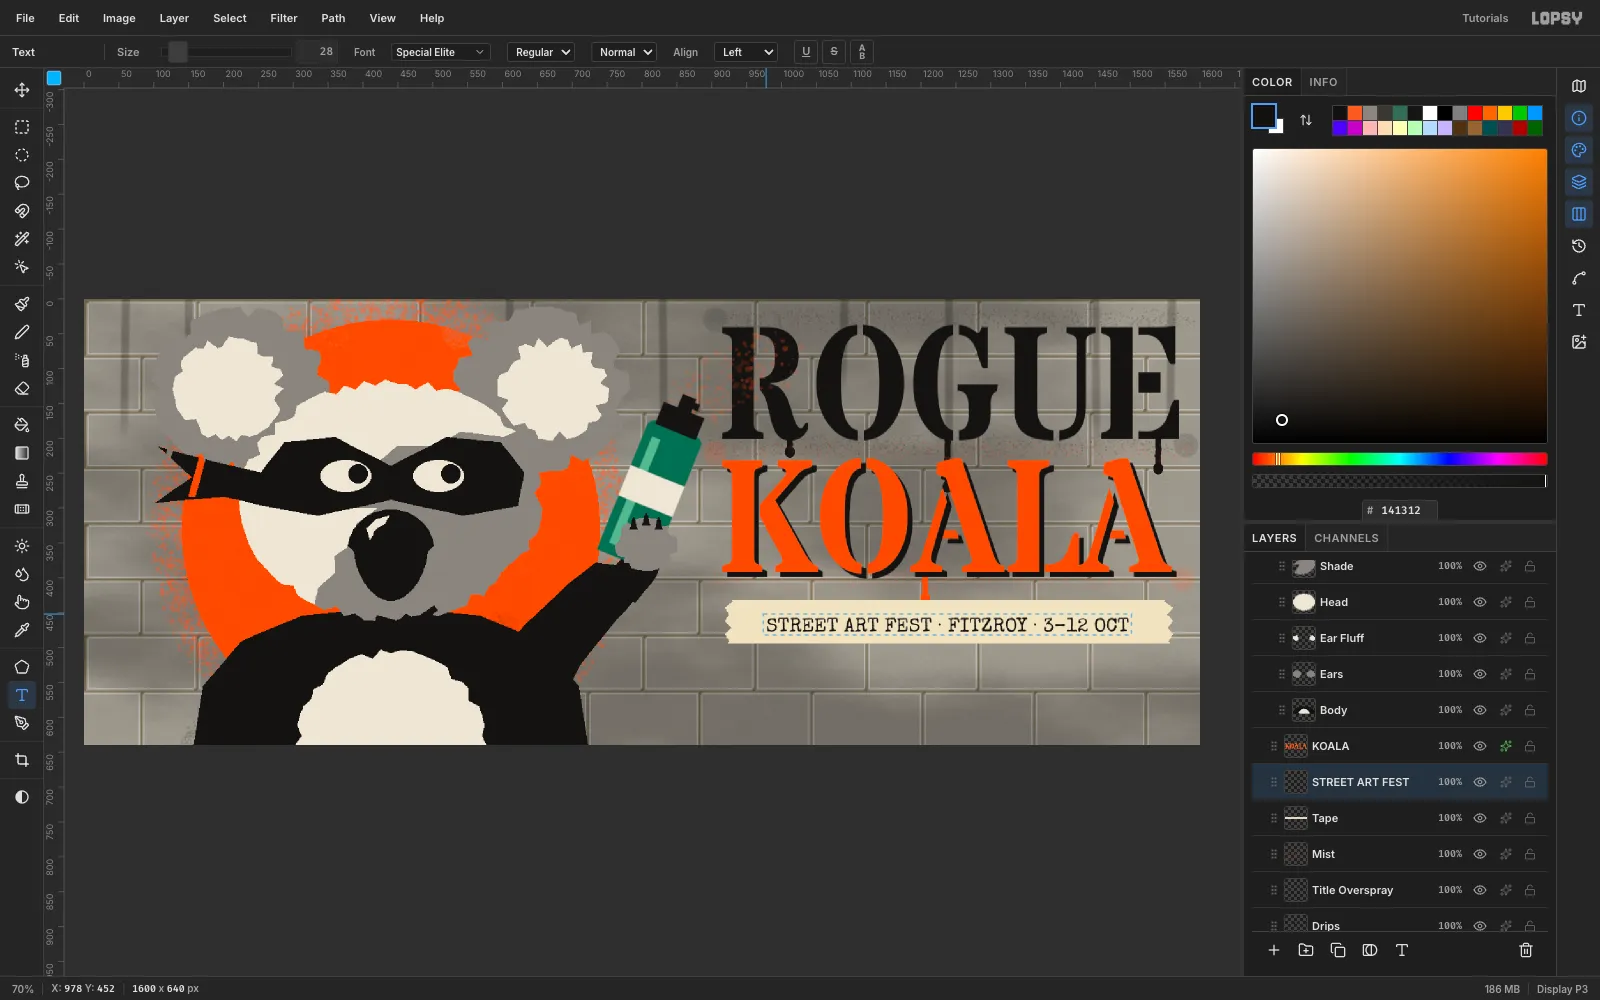
-
Rotate the tape
Marquee around the tape and drag the rotation handle about 3° counter-clockwise. Press Cmd+D. Give
Tapea soft Drop Shadow: Offset2/3, Blur4, Opacity35.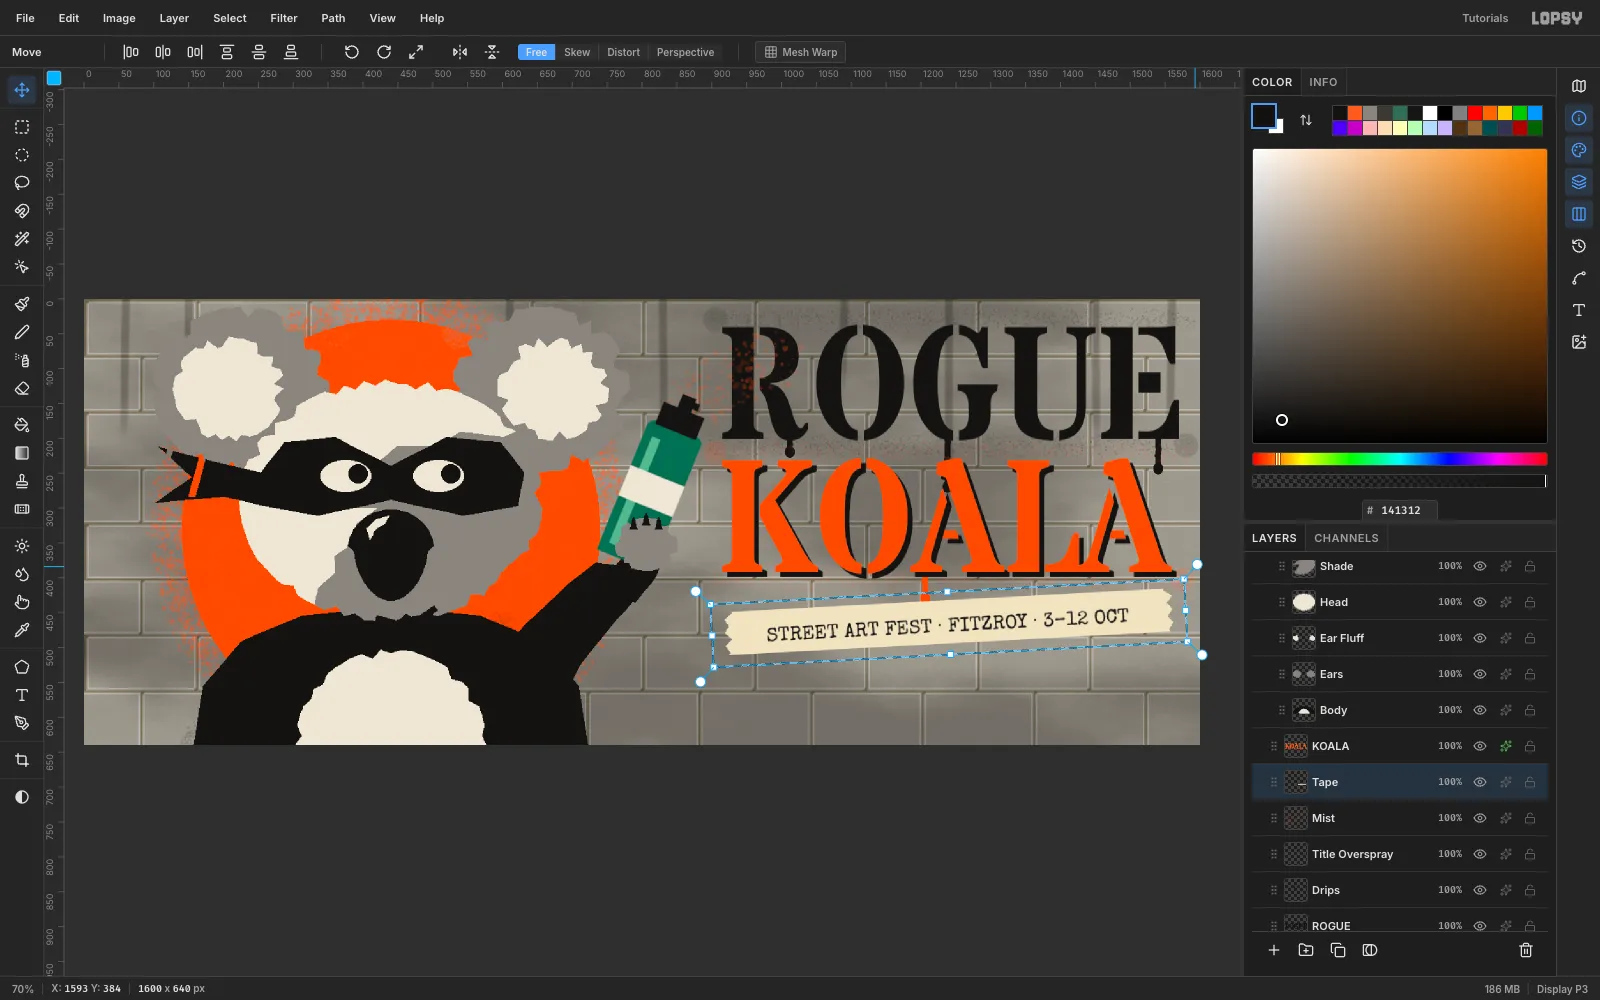
-
Pin it with a cross-strip
Add a
Cross Tapelayer. Fill a 44 × 110 strip with#E6D7B3and tear its top and bottom the same way. Rotate it about 28°, commit, and nudge it over the left end of the tape with Shift+Right. Give it the same soft shadow.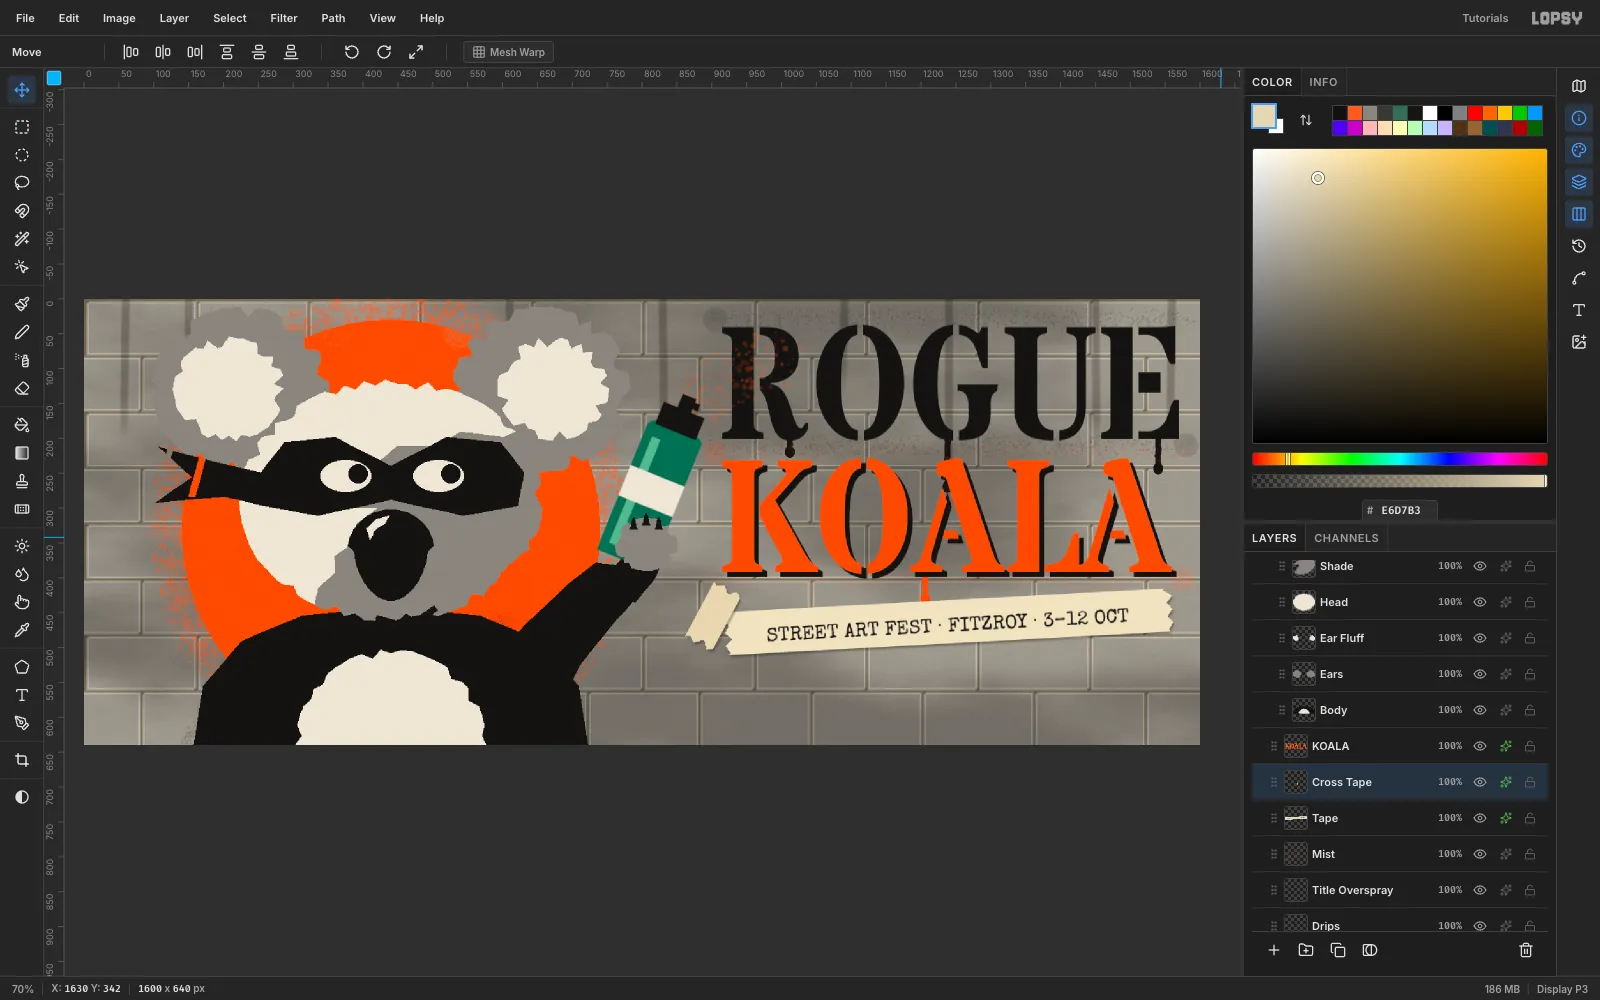
-
Spray a footer bar
Add a
Footer Barlayer. Fill a 384 × 36 ink rectangle at (918, 550), left-aligned with the tape. Spray along its top and bottom edges in ink at Size24and Opacity30.Set Special Elite, Size
22and bone#EEE6D6. Click at (934, 557) and pasteFREE ENTRY · ALL AGES · BYO CAN.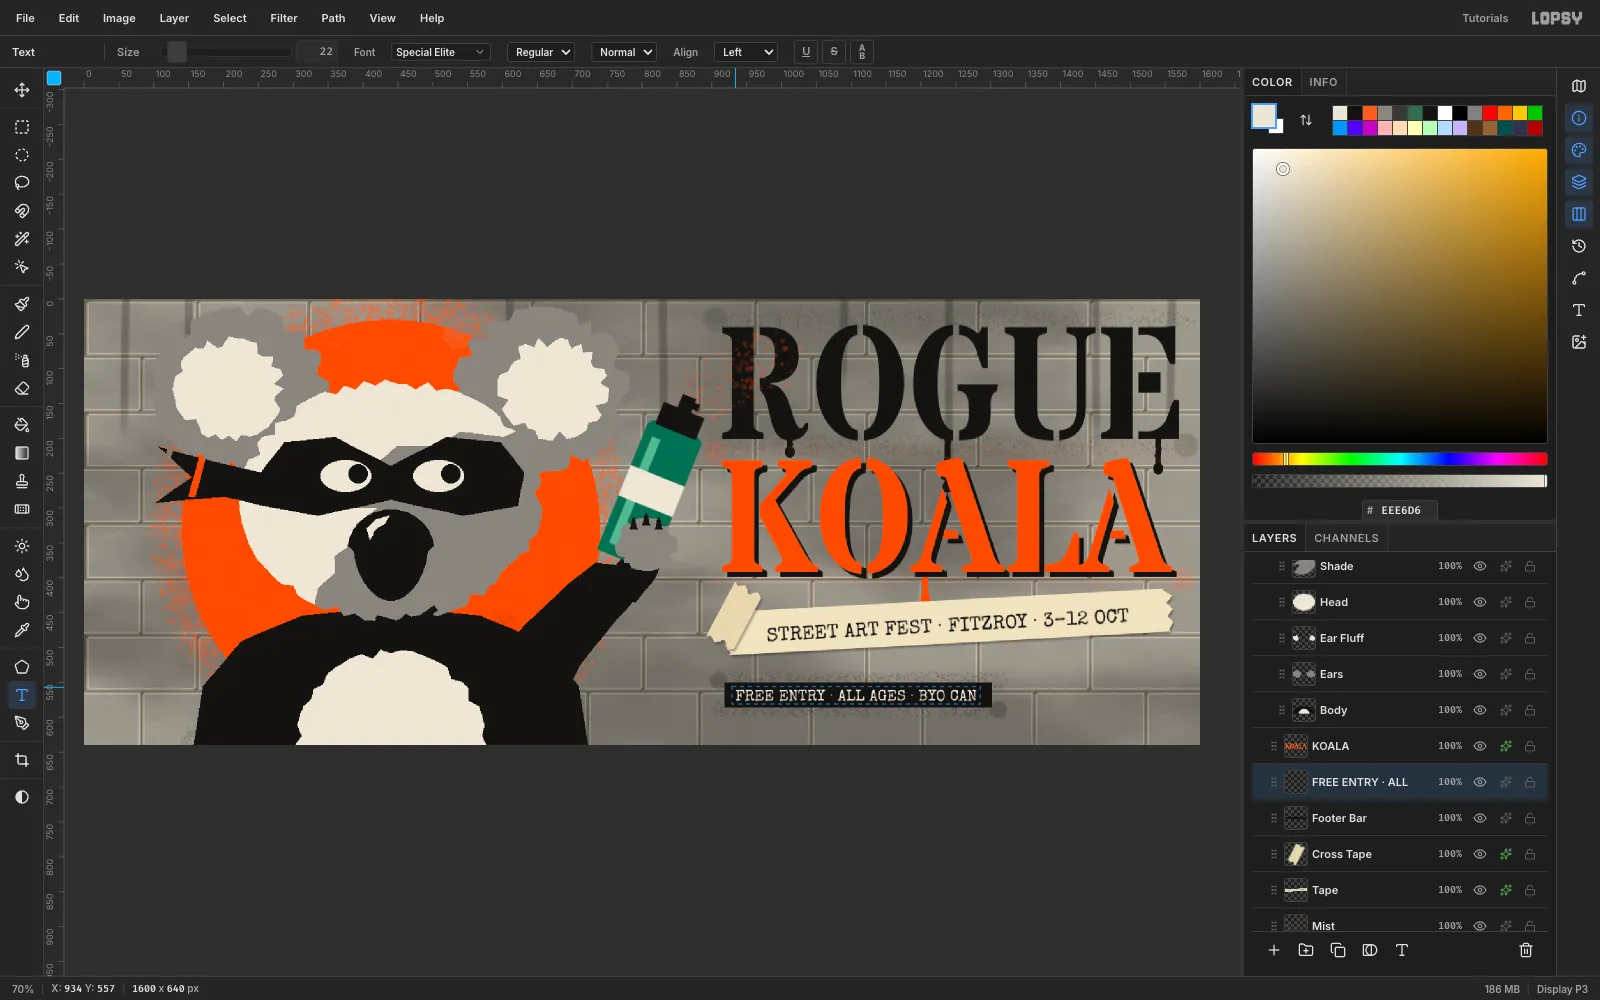
-
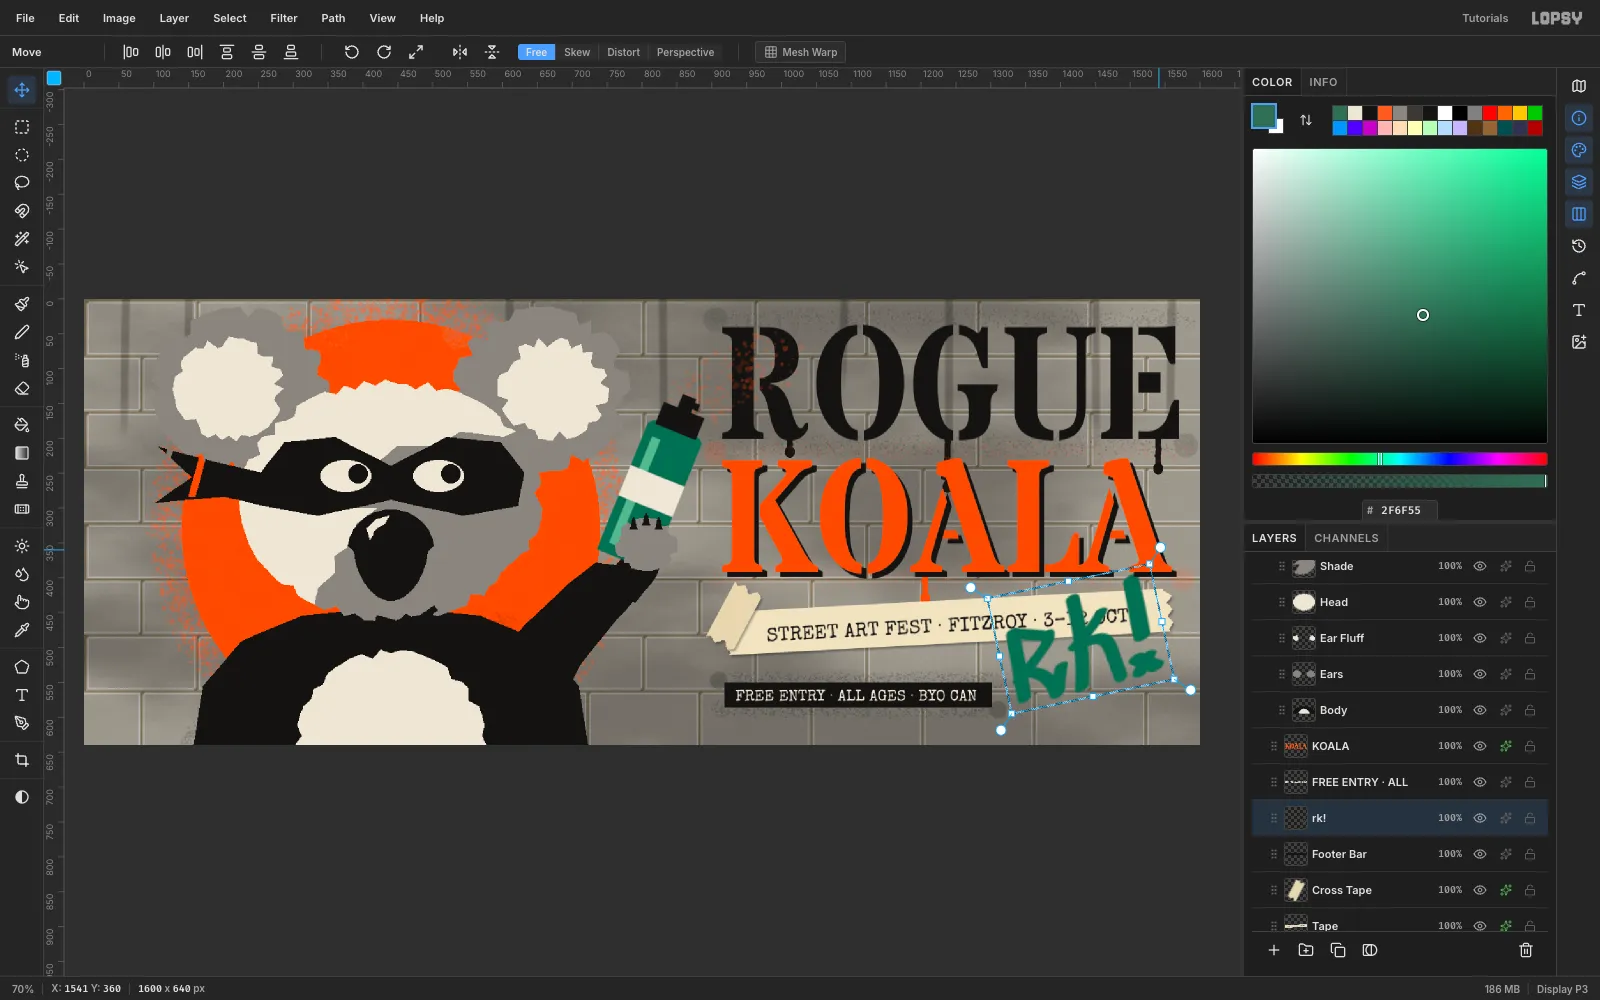
Throw up a graffiti tag
Set the Text tool to Sedgwick Ave Display, Size
96, green#2F6F55. Typerk!at (1420, 470), then click Rasterize Layer.Marquee it and Cmd-drag the top-left handle out to about 180%. Commit, marquee again and rotate it about 12° counter-clockwise. Commit, then Move-drag it so it overlaps the lower-right corner of the tape. Taggers always hit on top of other work.
-
Outline the tag
Open the tag's effects and enable Stroke. Set the color to ink and Width to
3, positioned outside. The outline makes the tag pop off the busy wall.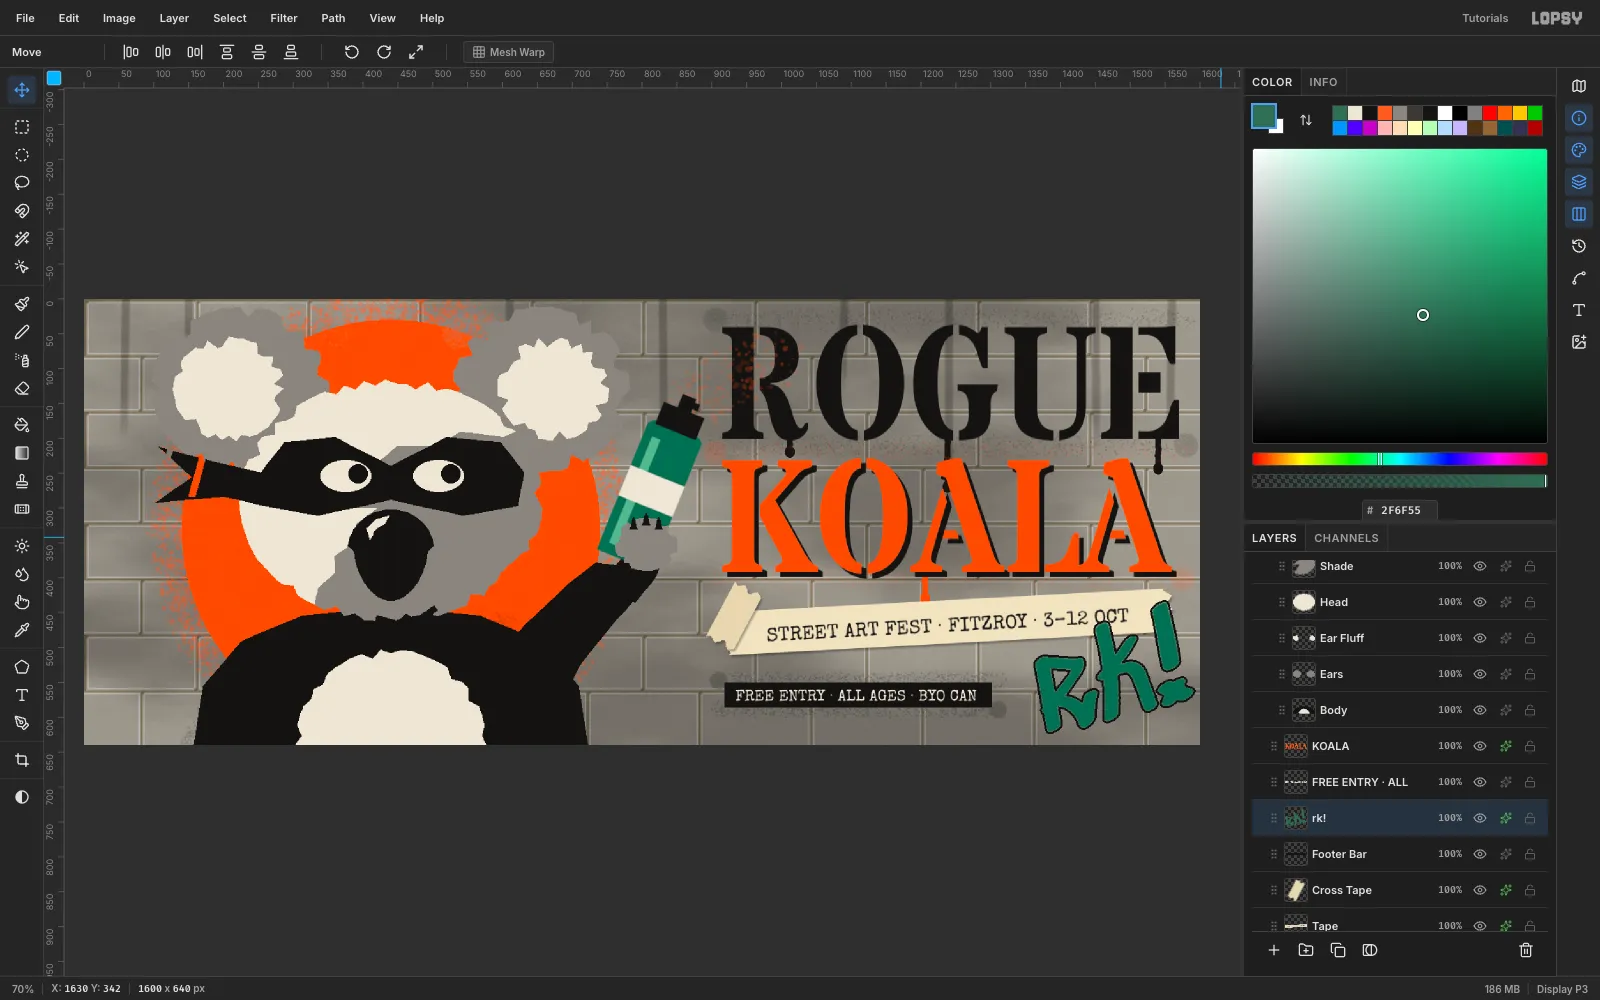
-
Put the wall texture back on top
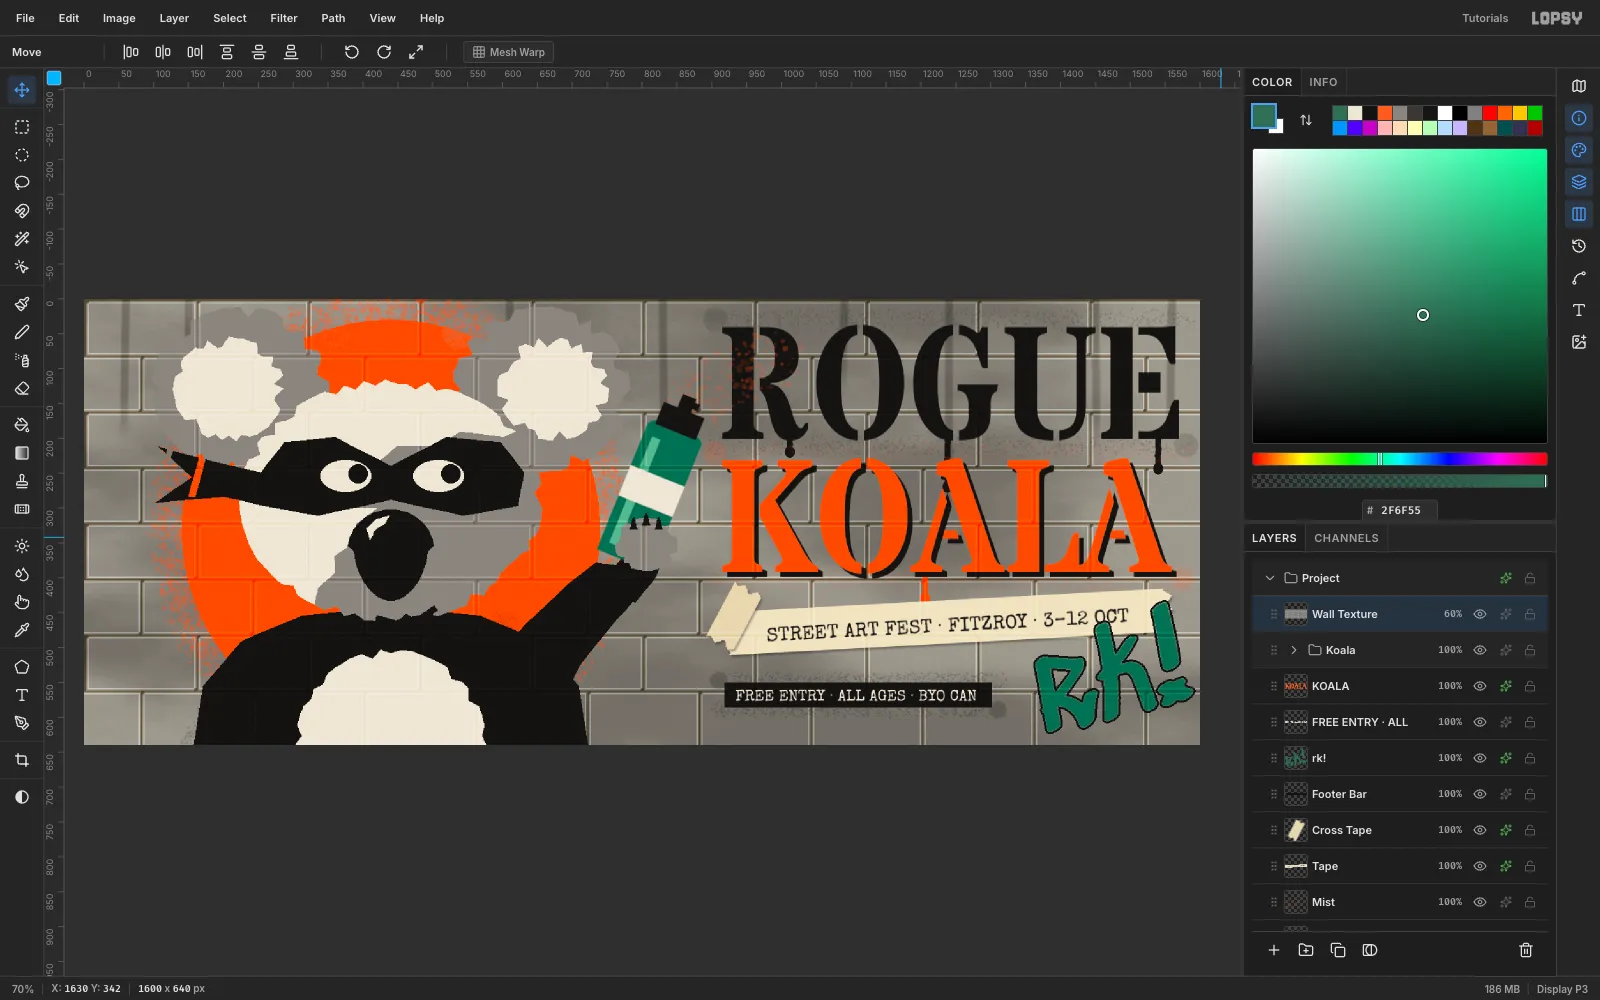
Click
Blocksand click Duplicate Layer. Drag the copy's grip to the very top of the Layers panel and rename itWall Texture. It keeps the Overlay blend. Set its opacity to60%.Now the mortar lines and block edges run through every shape. That's the single biggest step in making digital paint look sprayed onto a wall.
-
Add a vignette
Choose Layer → Adjustment Layer… and click Got it. Lopsy puts adjustments on the document's root group. Click Add Adjustment → Vignette and set it to
30, then close the drawer.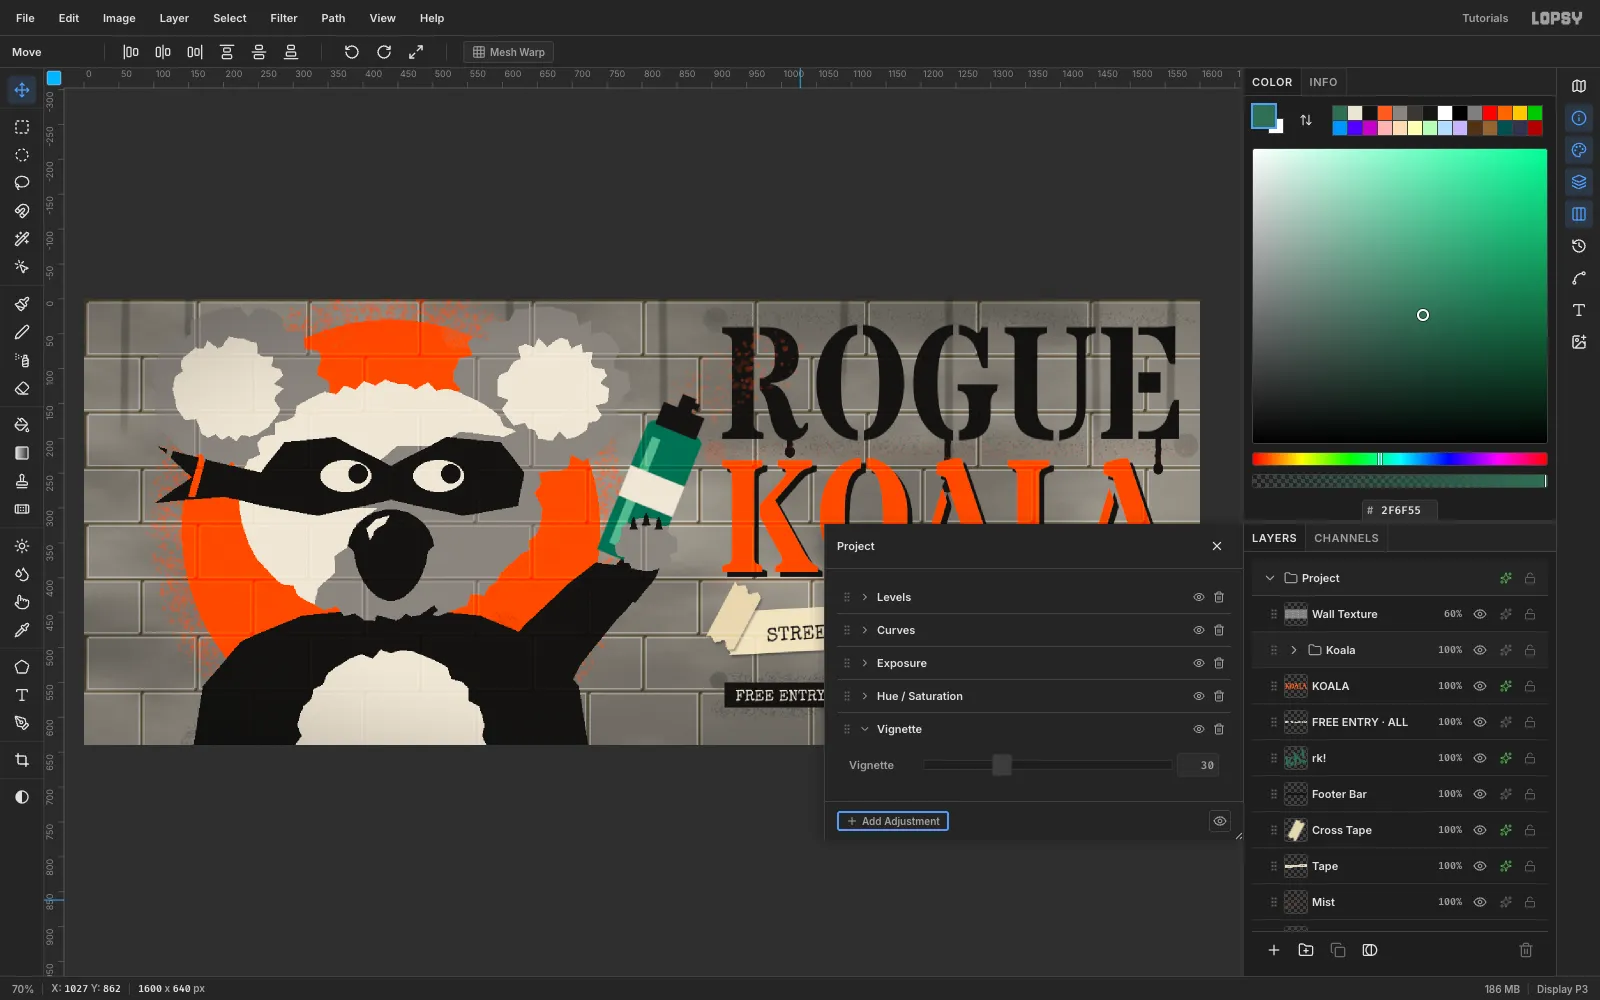
-
Ink the ears with Color Overlay
With the wall texture on, mid-grey ears almost vanish into the concrete. Click the
Earslayer inside theKoalagroup and enable Color Overlay in its effects, set to ink#141312. Solid black ears make a much stronger silhouette.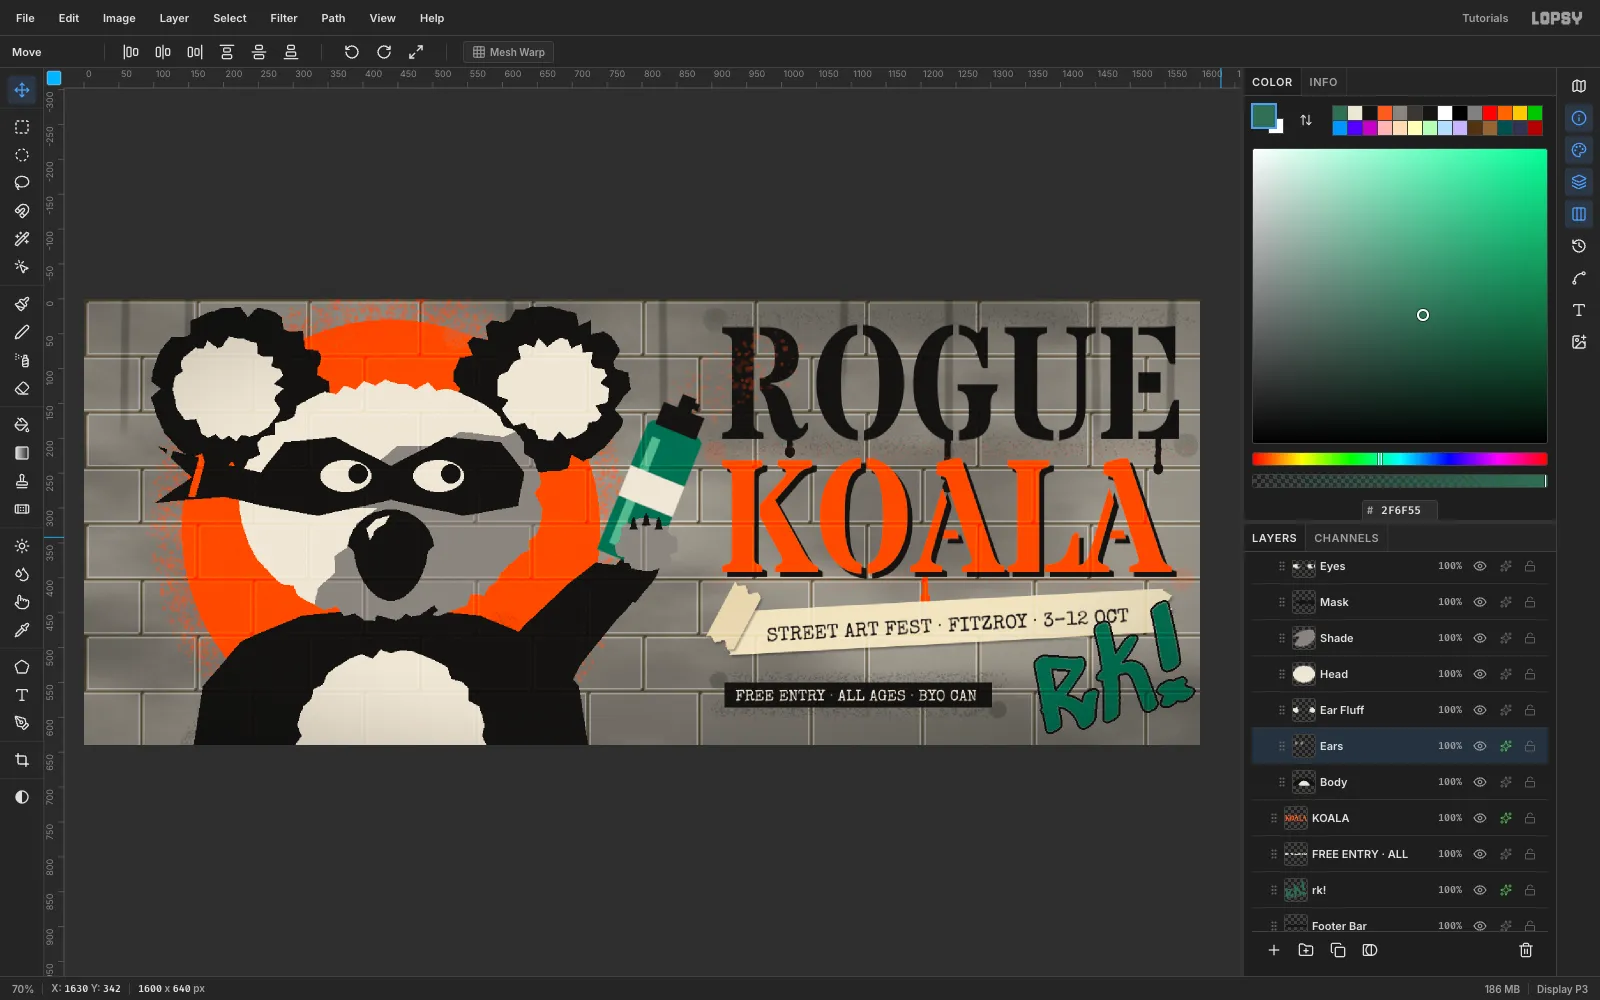
-
Erase paint skips along the mortar
Spray paint skips over the recessed mortar joints. Pick the Eraser at Size
6and Opacity65. OnROGUE, drag short broken strokes along the mortar lines at y = 80 and 160. Do the same onKOALAat y = 240 and 320. Then set Size12and add a few diagonal scuffs to the edges ofDisc.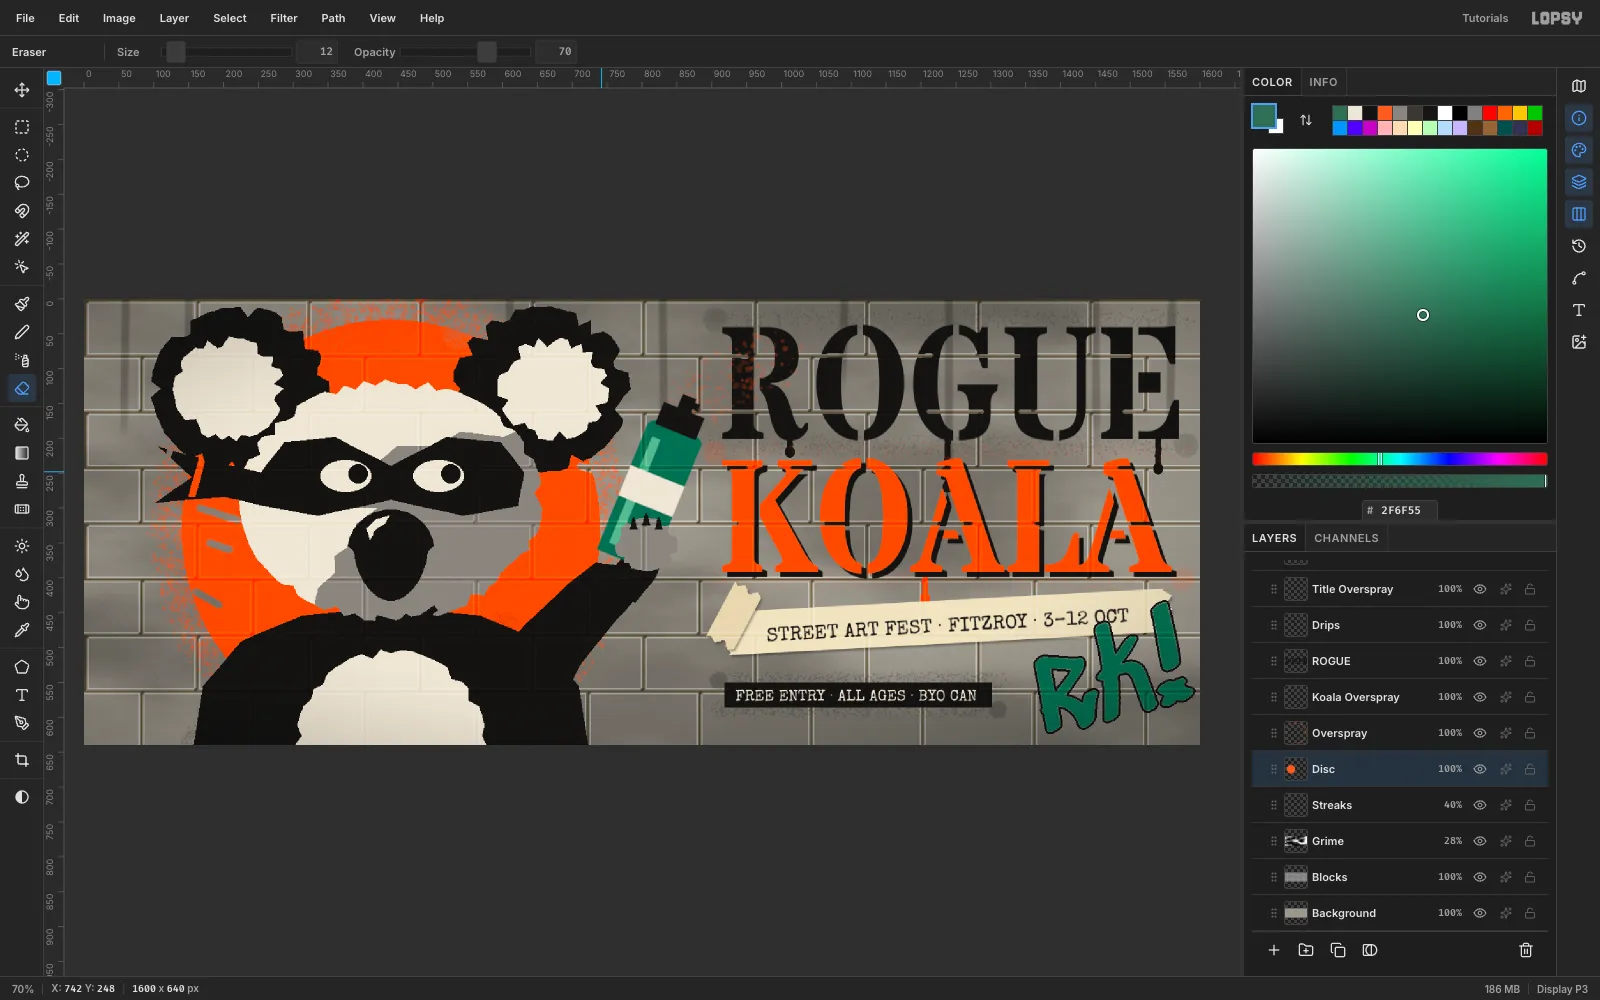
-
Export the billboard
Choose File → Quick Export PNG for the finished billboard, and File → Save Project to keep every layer editable. You now have:
- a concrete wall that's embossed, grimy and rain-streaked
- a three-tone stencil koala with bridges and overspray
- condensed stencil type with drips and a hard shadow
- paper tape, a sprayed footer bar and a graffiti tag
For another take on outdoor type, try the liquid chrome text billboard.