Draw an Etching-Style Lighthouse Illustration
Engrave a moonlit lighthouse scene in Lopsy with line patterns, Threshold-swelled sky lines, cross-hatching, Mesh Warp waves and a copperplate caption.
A 19th-century etching builds all of its tone from lines. The plate is never painted. Engravers darkened a sky by cutting ruled lines deeper and thicker, and brightened it by thinning them to hairlines. Rock was shaded with cross-hatching, and water with long wavering strokes.
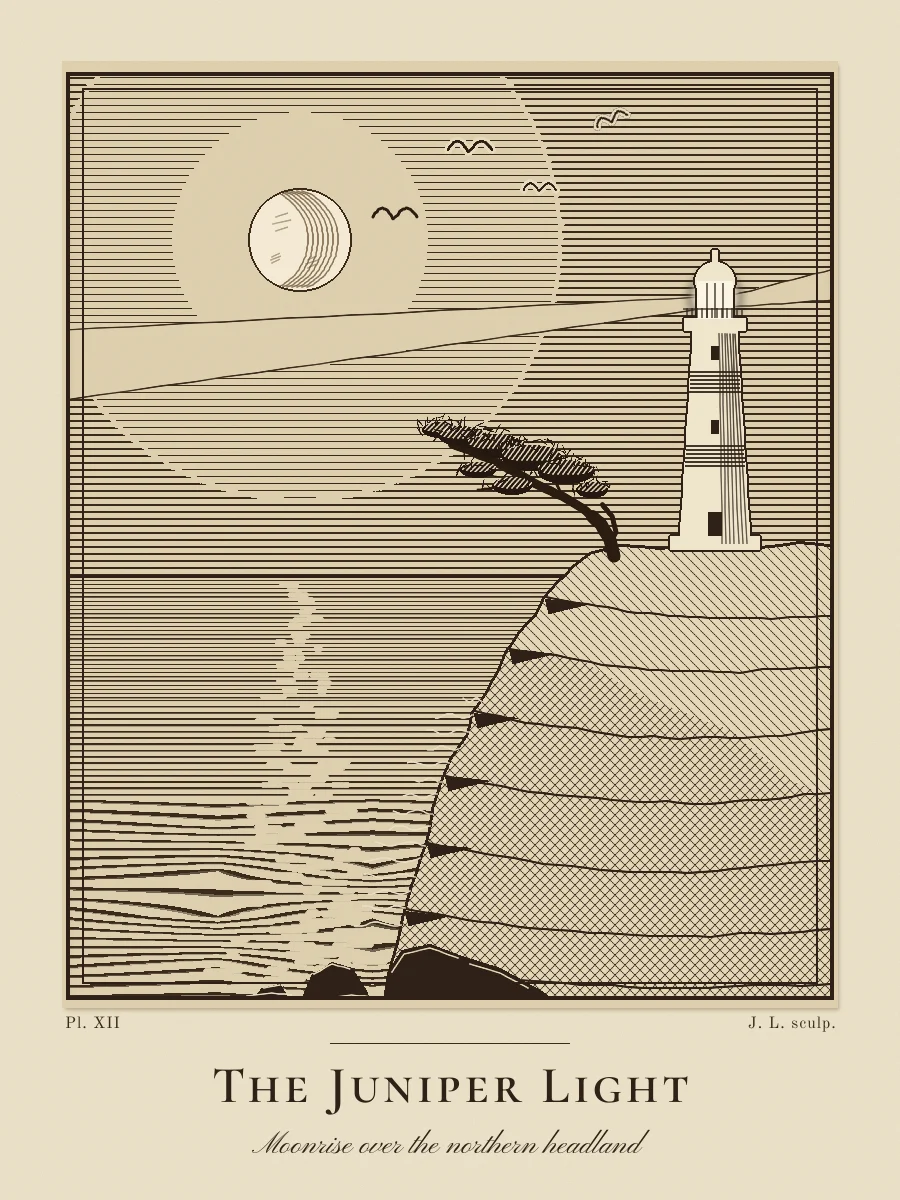
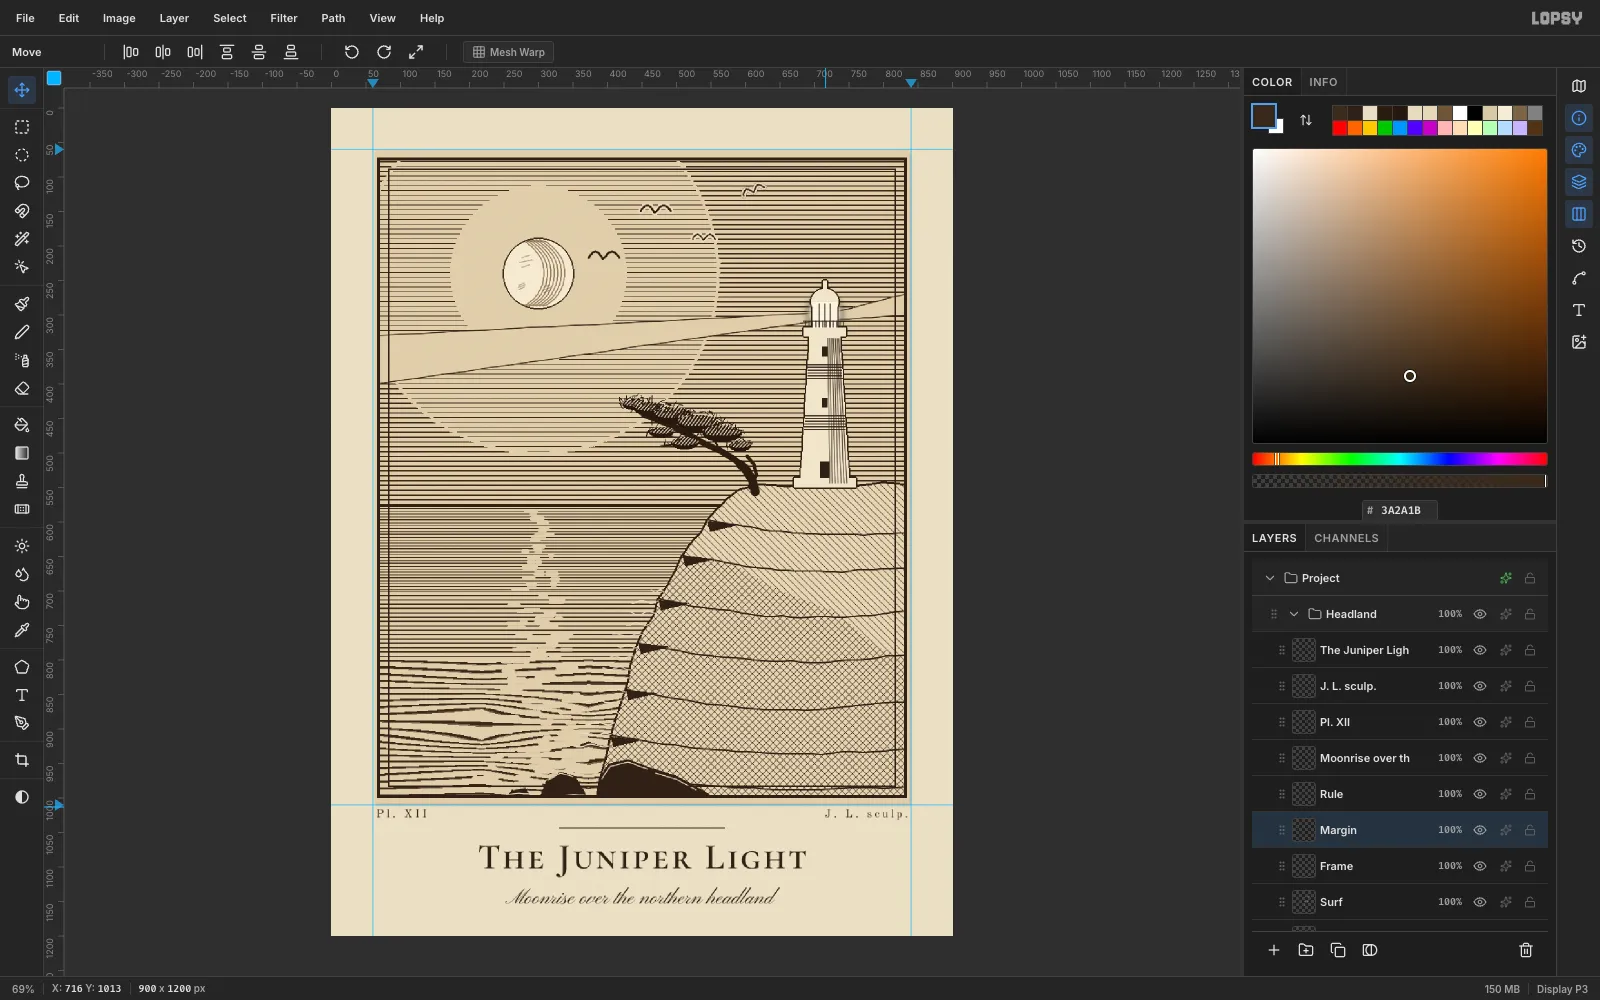
In this tutorial you'll use that line-only rule for a sepia plate called The Juniper Light: a lighthouse on a headland, a wind-bent juniper, and a moon that thins the sky lines around it. A copperplate caption goes underneath.
Along the way you'll use:
- Define Pattern and Fill with Pattern
- Gaussian Blur plus Threshold to make lines swell
- Mesh Warp for the sea
- the magic wand, lasso and elliptical marquee
- brush presets with jitter
- rotation handles and grid snapping
- Google fonts
The palette is small:
- paper
#E9DFC6and plate tone#DDCFAE - ink
#3A2A1Band deep ink#2E2117 - highlight cream
#EFE5CC
-
Make the paper and the plate
Create a 900 × 1200 document with File → New and a white background. Click the top ruler at 60 and 840, and the left ruler at 60 and 1010, to drop four guides that mark the plate.
- Fill Background with
#E9DFC6(Edit → Fill). Run Filter → Add Noise at Amount 6, with Mono and Gaussian, for a paper tooth. - Rename Layer 1 to Plate. Marquee from (63, 62) to (837, 1007), fill it with
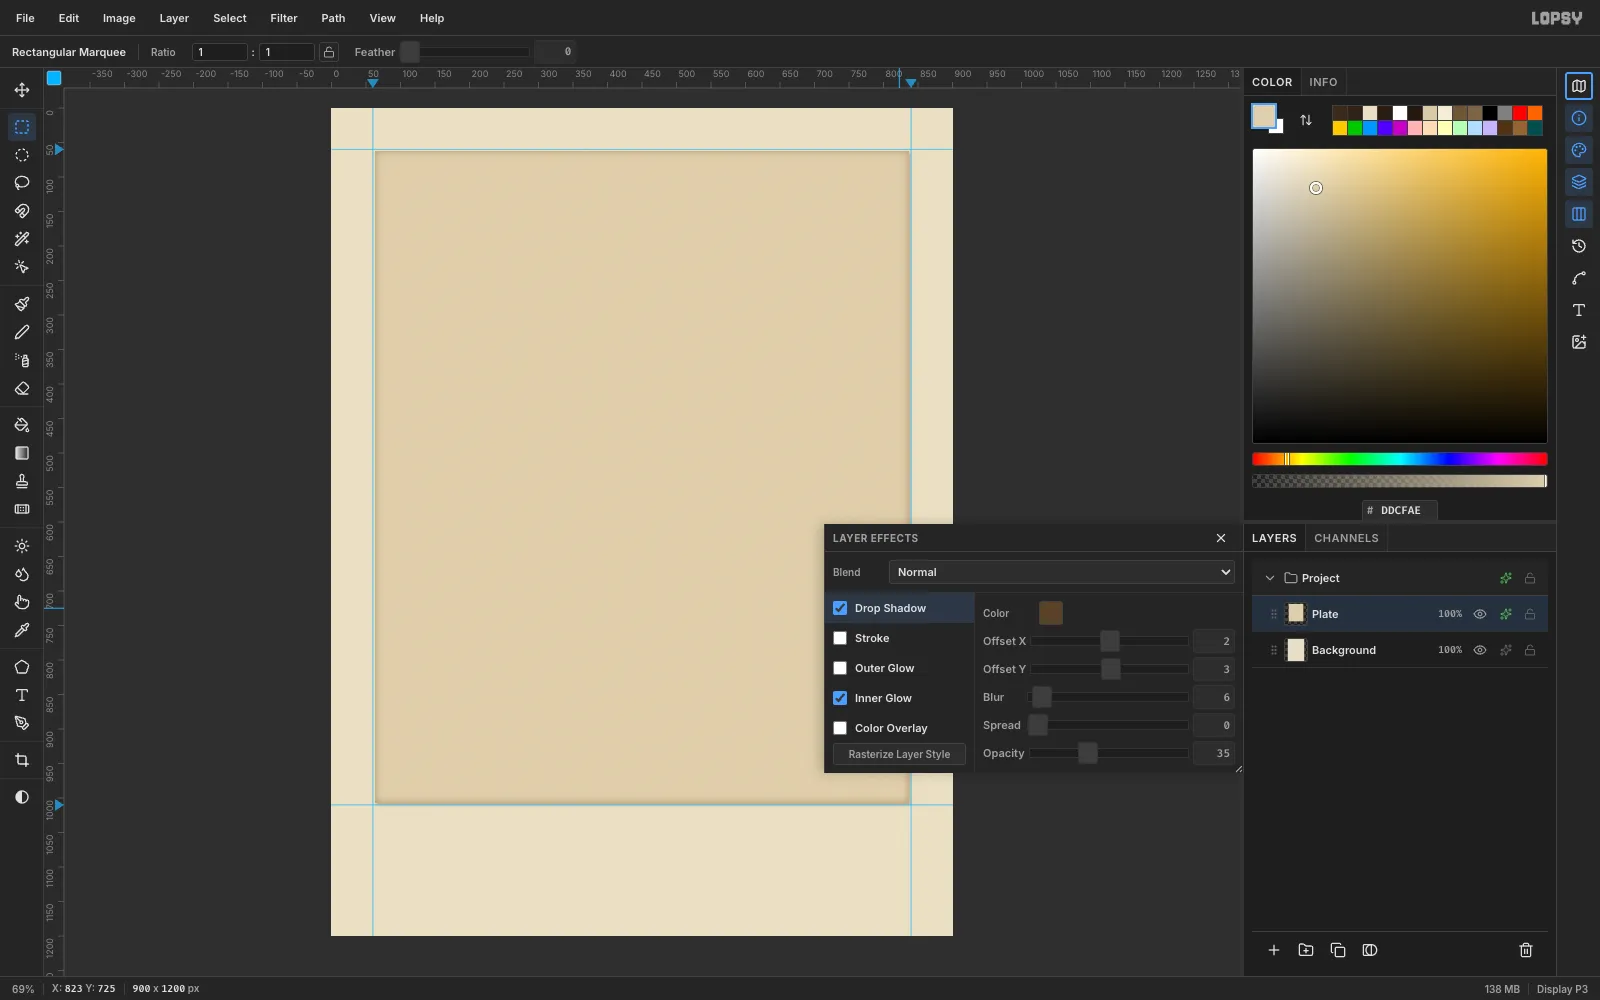
#DDCFAE, then run Add Noise again at 5. - Open the Plate's layer effects. Add an Inner Glow (
#6B4F2E, Size 18, Opacity 45) and a Drop Shadow (#5A4128, offset 2/3, Blur 6, Opacity 35). This makes the bevelled edge a copper plate presses into the paper.
- Fill Background with
-
Rule the sky with a line pattern
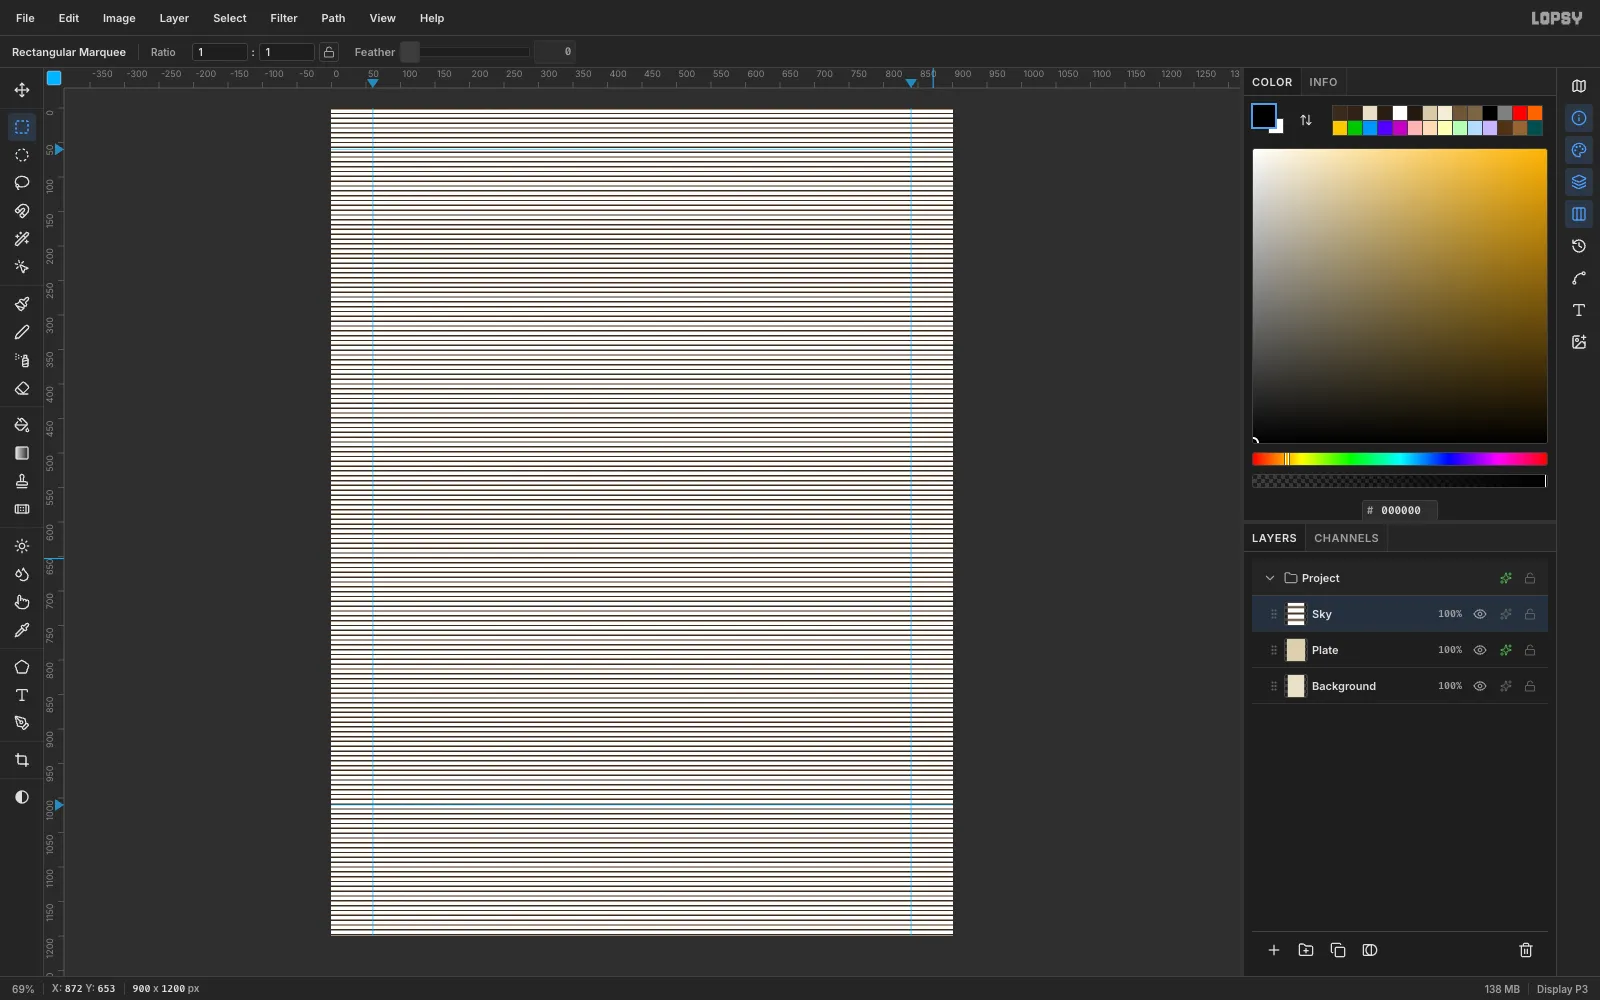
Next, make the tile. On a scratch layer, fill a 48 × 2 px black bar, then marquee it together with 5 px of empty space beneath it (48 × 7 in total). Choose Edit → Define Pattern, then delete the scratch layer.
- Add a layer called Sky and fill it white with no selection active.
- Add a layer called Sky Rule and fill it black. Then choose Edit → Fill with Pattern…, pick your 48 × 7 tile at Scale 100 and click Apply.
- Choose Layer → Merge Down to put the lines onto the white.
-
Add a radial tone
The ruled lines are all the same weight at this point. To make them swell, give the layer a tone:
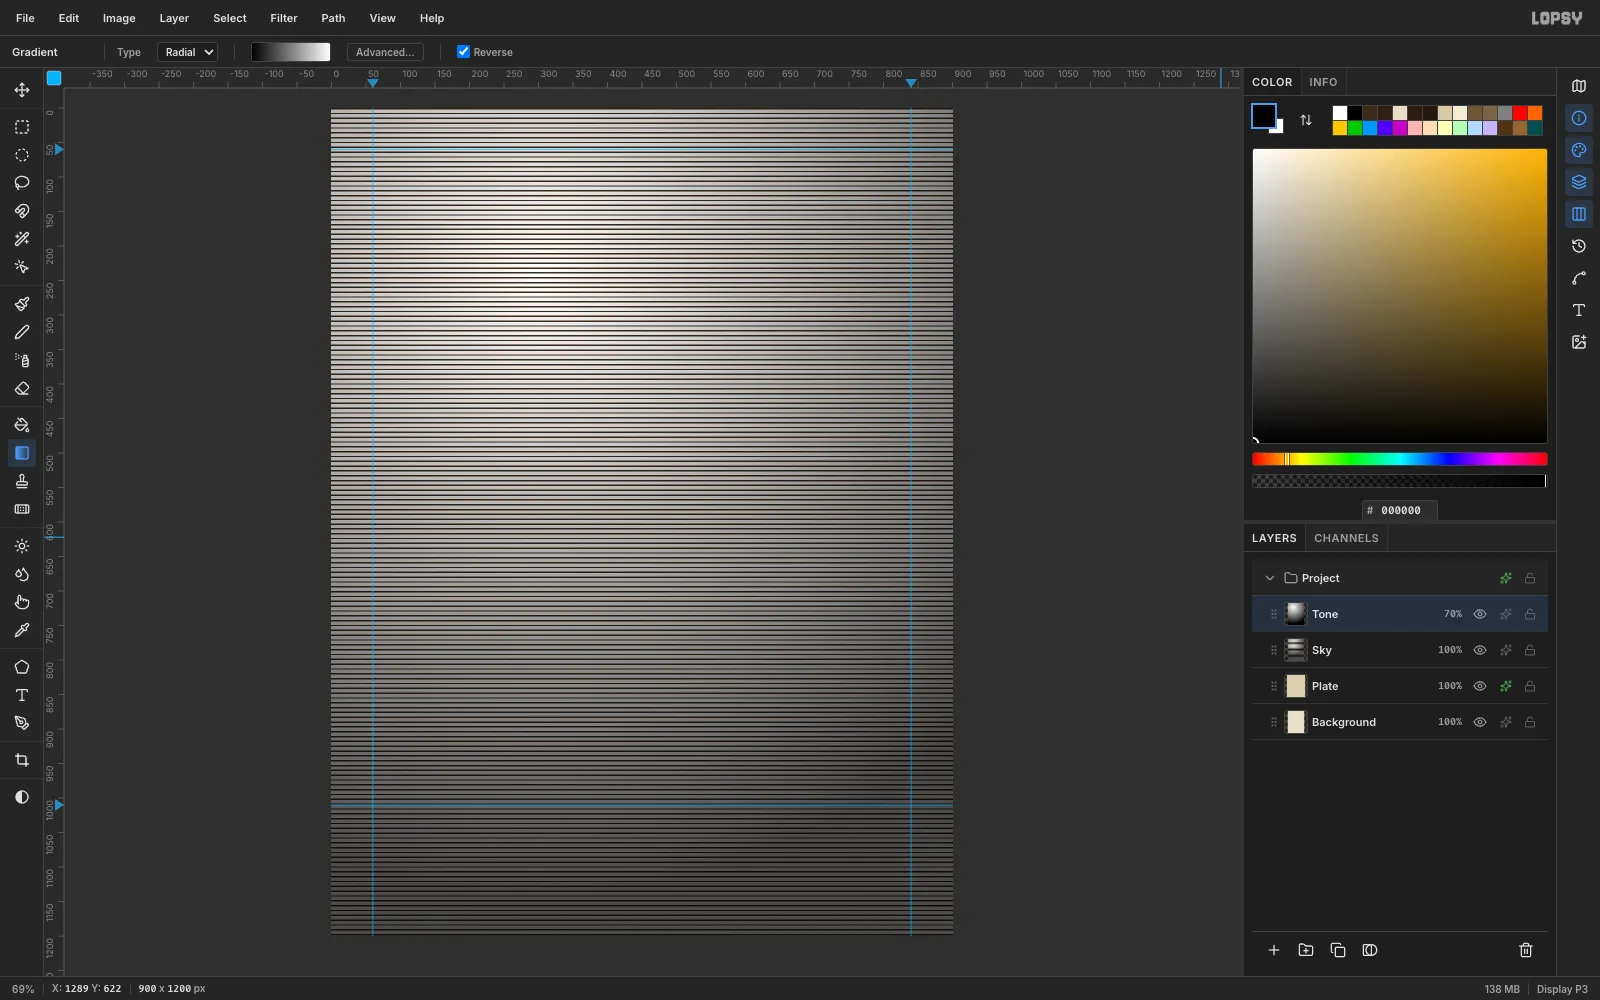
- Add a layer called Tone and pick the Gradient tool.
- Set Type to Radial and tick Reverse.
- Drag from where the moon will sit, at (300, 240), out past the far corner to about (1000, 800).
- Set the layer's blend mode to Multiply and its opacity to 70 %, then Merge Down.
Now the lines are white at the moon and grey toward the corners.
-
Threshold the lines into an engraved sky
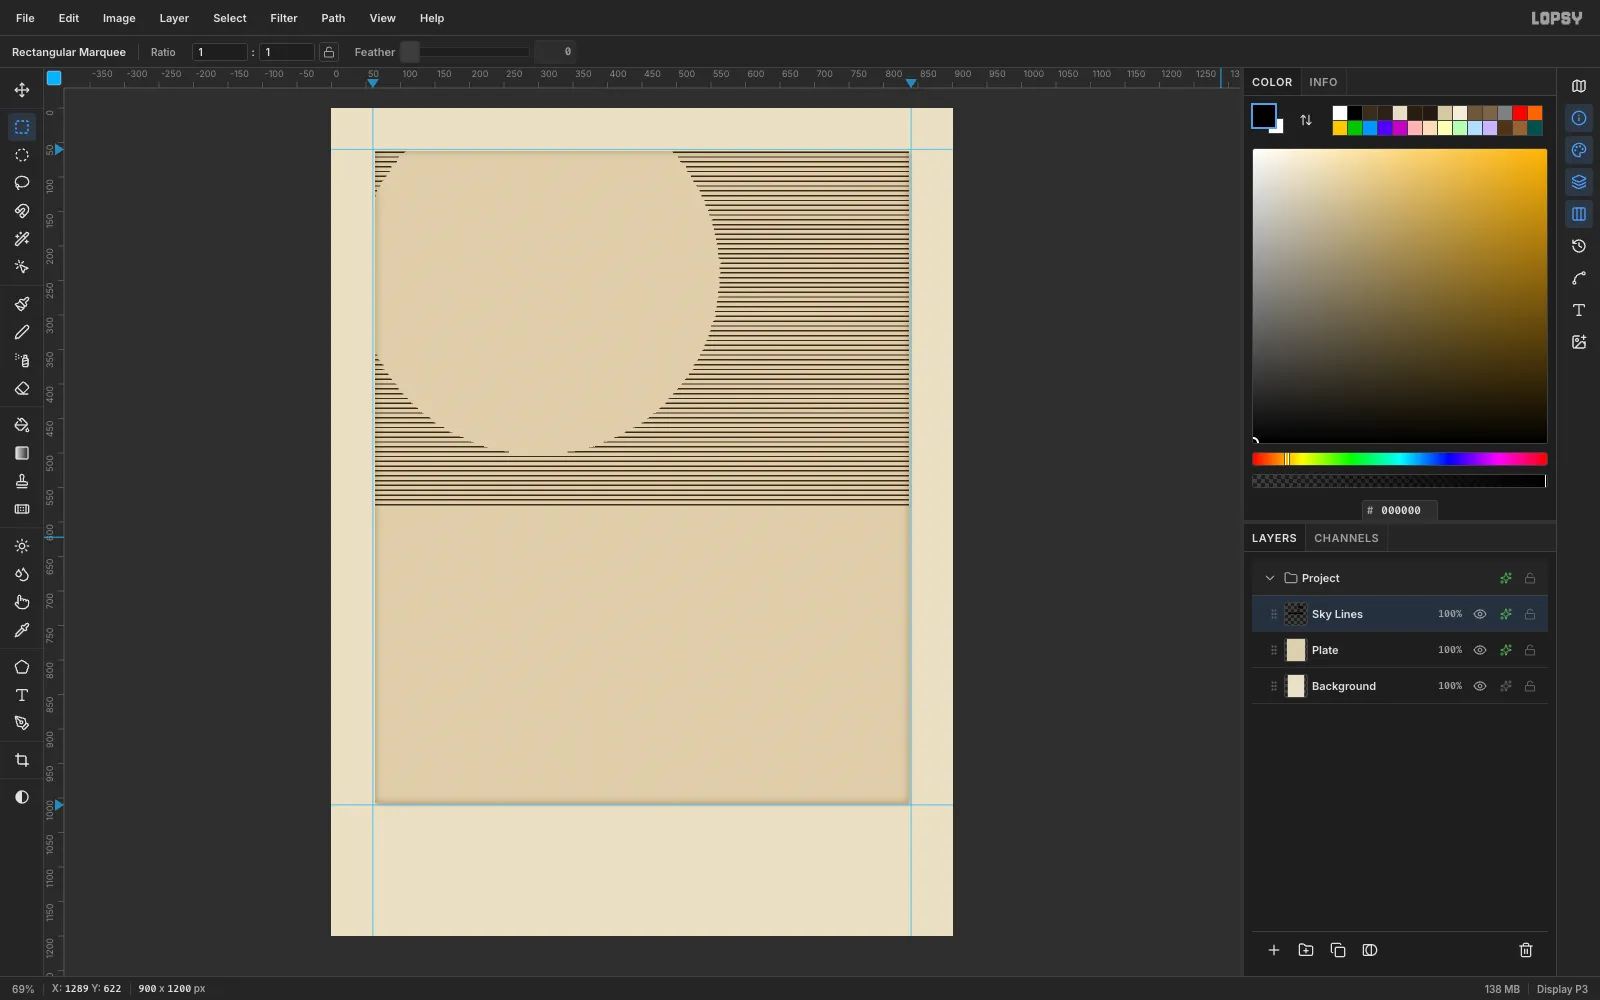
Run Filter → Gaussian Blur at 3 px. Then run Filter → Threshold at 96. Where the tone is light, the blurred lines drop below the threshold and disappear. Where it's dark, they come back full strength.
- Pick the Magic Wand, untick Contiguous, click any white pixel and press Delete.
- Marquee the sky area, from (63, 63) to (837, 576). Choose Select → Inverse and delete the rest.
- Add a Color Overlay of
#3A2A1Bto turn the black lines into sepia ink. - Rename the layer Sky Lines.
-
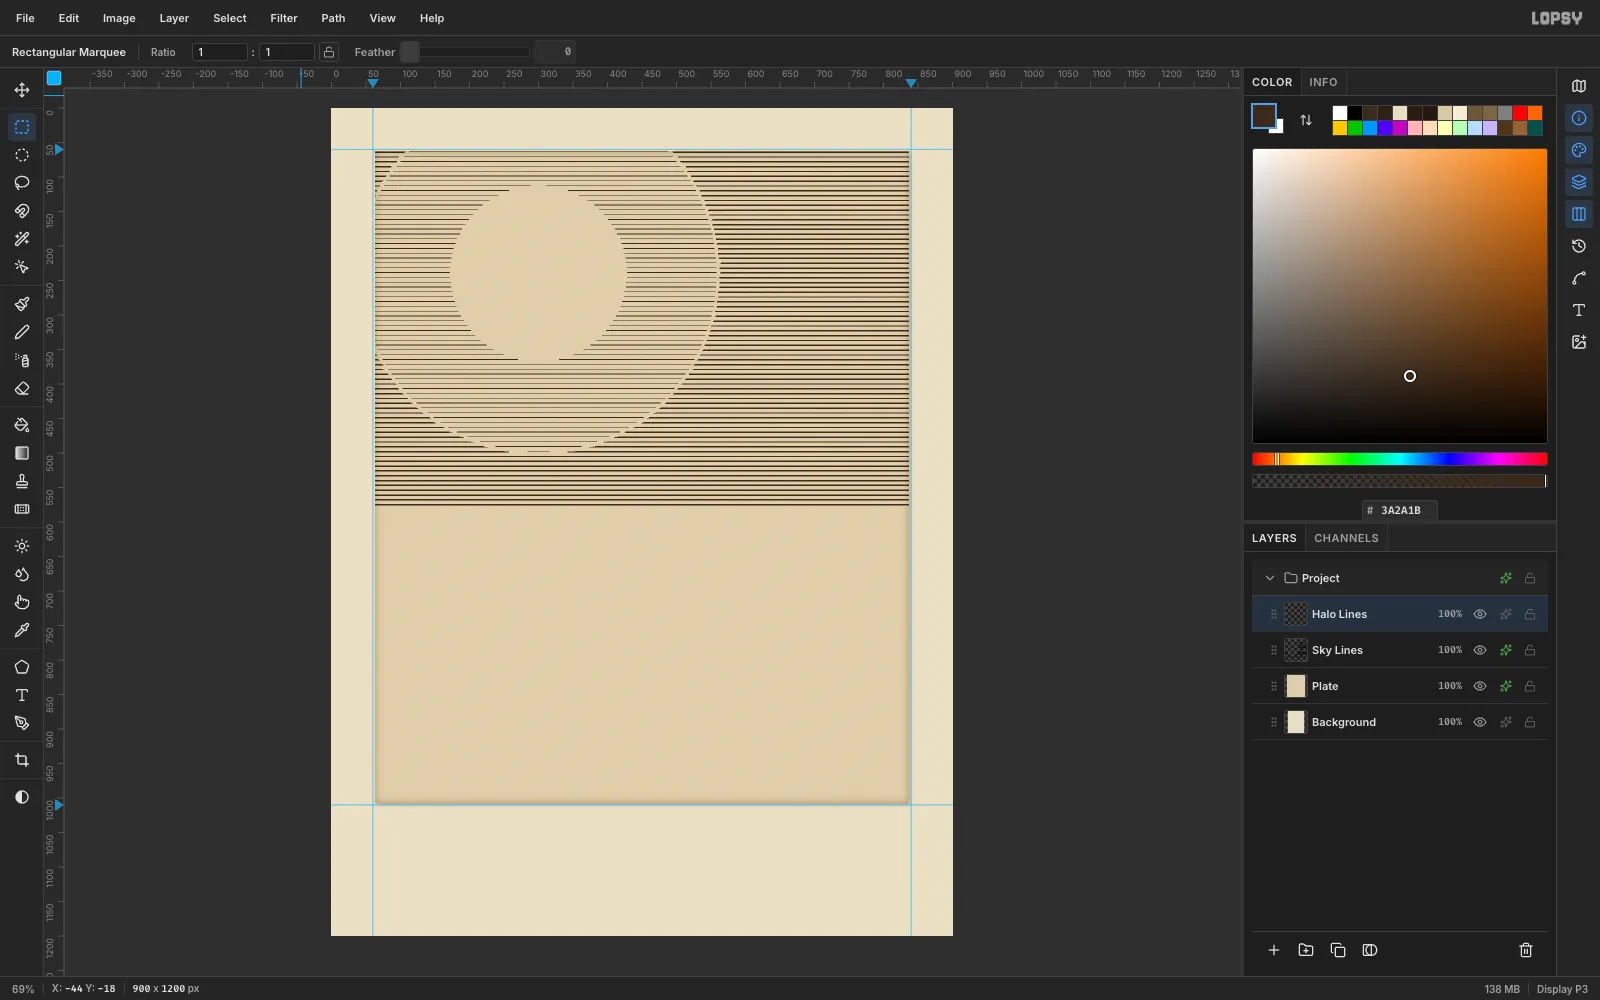
Engrave the moon's halo rings
Define a second tile with a 1 px line (48 × 1 px of ink over 6 px of space). Then:
- Add a layer called Halo Lines. Fill it, then pattern-fill it with the 1 px tile.
- Use the Elliptical Marquee to draw a circle from (42, −18) to (558, 498). Choose Select → Inverse and delete everything outside it.
- Draw a second circle from (172, 112) to (428, 368) and delete its inside.
- Trim everything outside the sky rectangle.
The result is two rings of hairline rules, which is how an engraver fakes glow.
-
Draw and hatch the moon
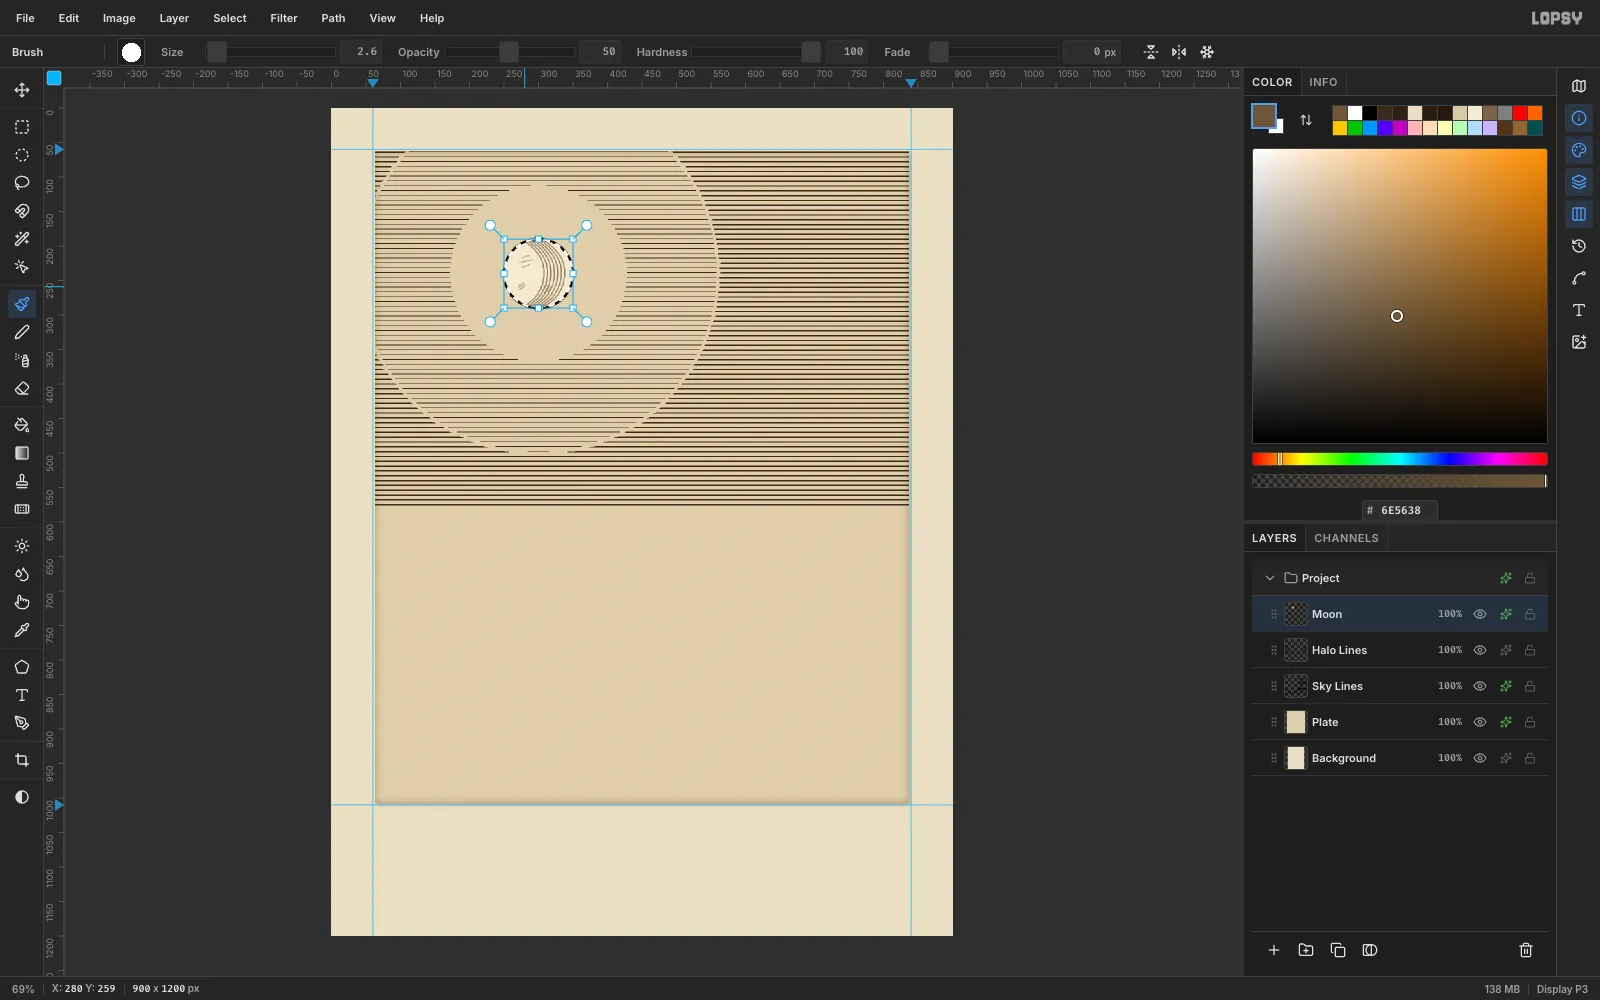
- Add a layer called Moon. Fill an ellipse from (248, 188) to (352, 292) with
#F3EAD3, then add an inside Stroke of#3A2A1Bat Width 2. - Leave a slightly smaller circle selected. The selection clips the brush, so hatching can't escape the disc.
- Pick the Brush with the Hard Round preset at Size 2.6 and Opacity 80. Draw seven arcs that bow toward the right limb.
- Add a few short strokes at 50 % opacity for craters.
- Add a layer called Moon. Fill an ellipse from (248, 188) to (352, 292) with
-
Swell the sea with Mesh Warp
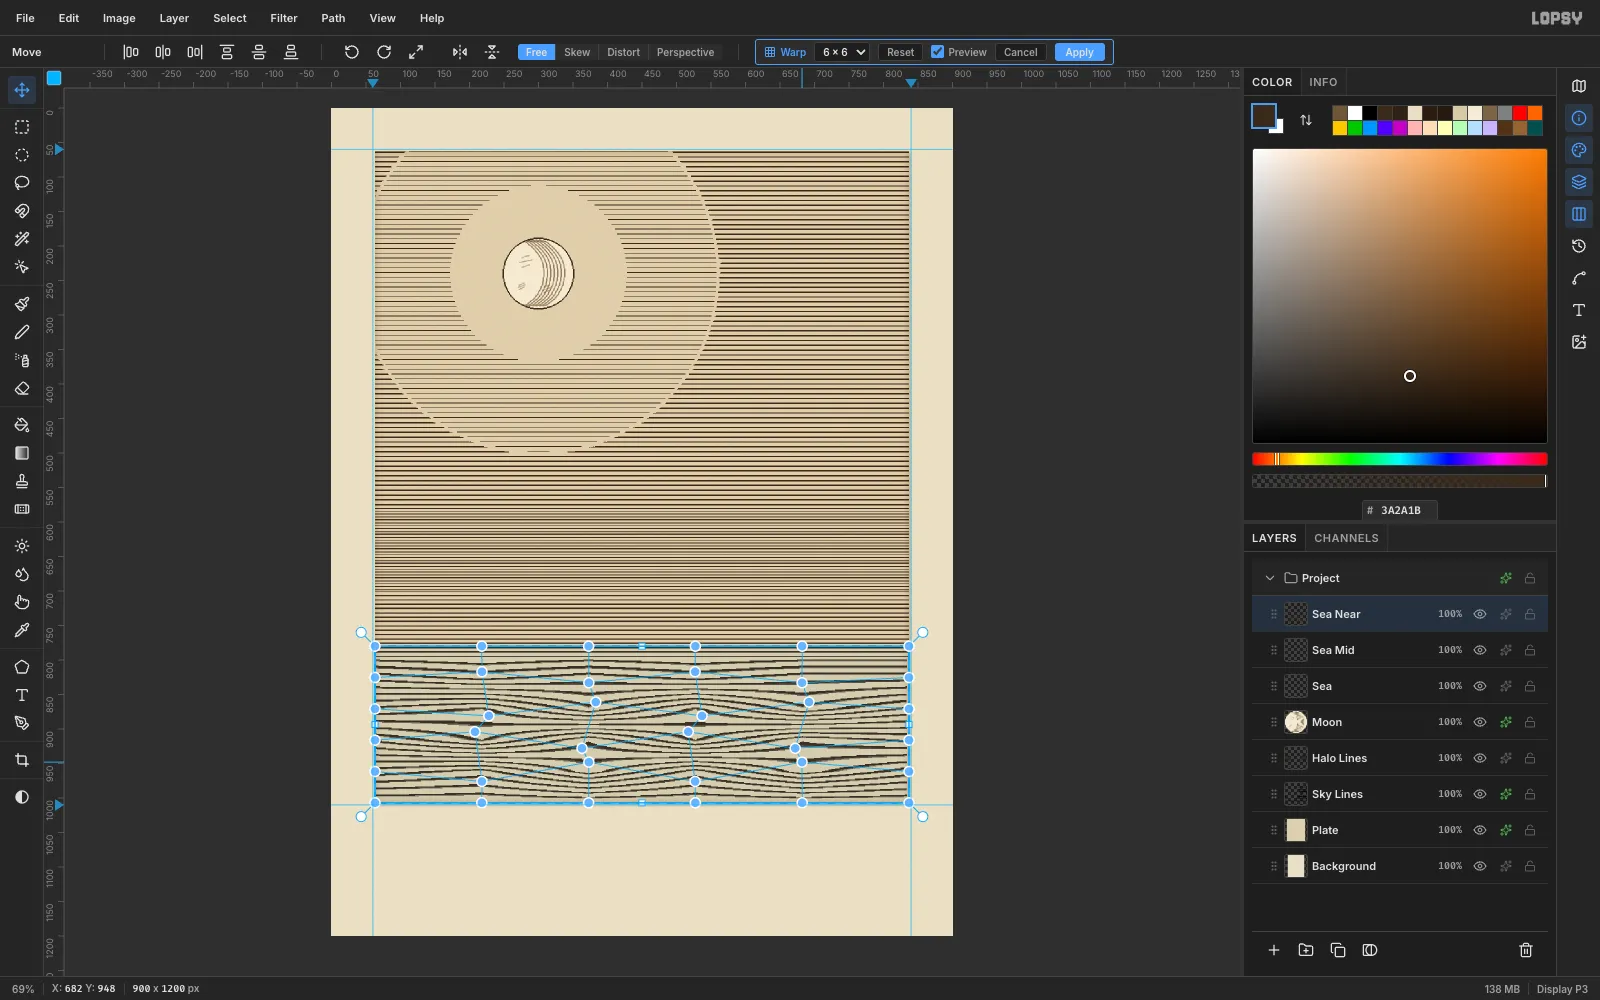
Water is made of three bands of ruled lines. Each is a layer that you fill, pattern-fill with the 2 px tile, then trim to its band:
- (63, 578) to (837, 700) at Scale 60
- (63, 700) to (837, 800) at Scale 90
- (63, 800) to (837, 1007) at Scale 140
The lines get coarser as they come closer.
To bend the nearest band, marquee it and pick the Move tool, then click Mesh Warp. Set the grid to 6 × 6 and tick Preview. Drag the inner handles alternately up and down by 8–16 px, with small sideways offsets. Click Apply, then merge the three bands into one Sea layer.
-
Cut a crisp horizon and a glitter path
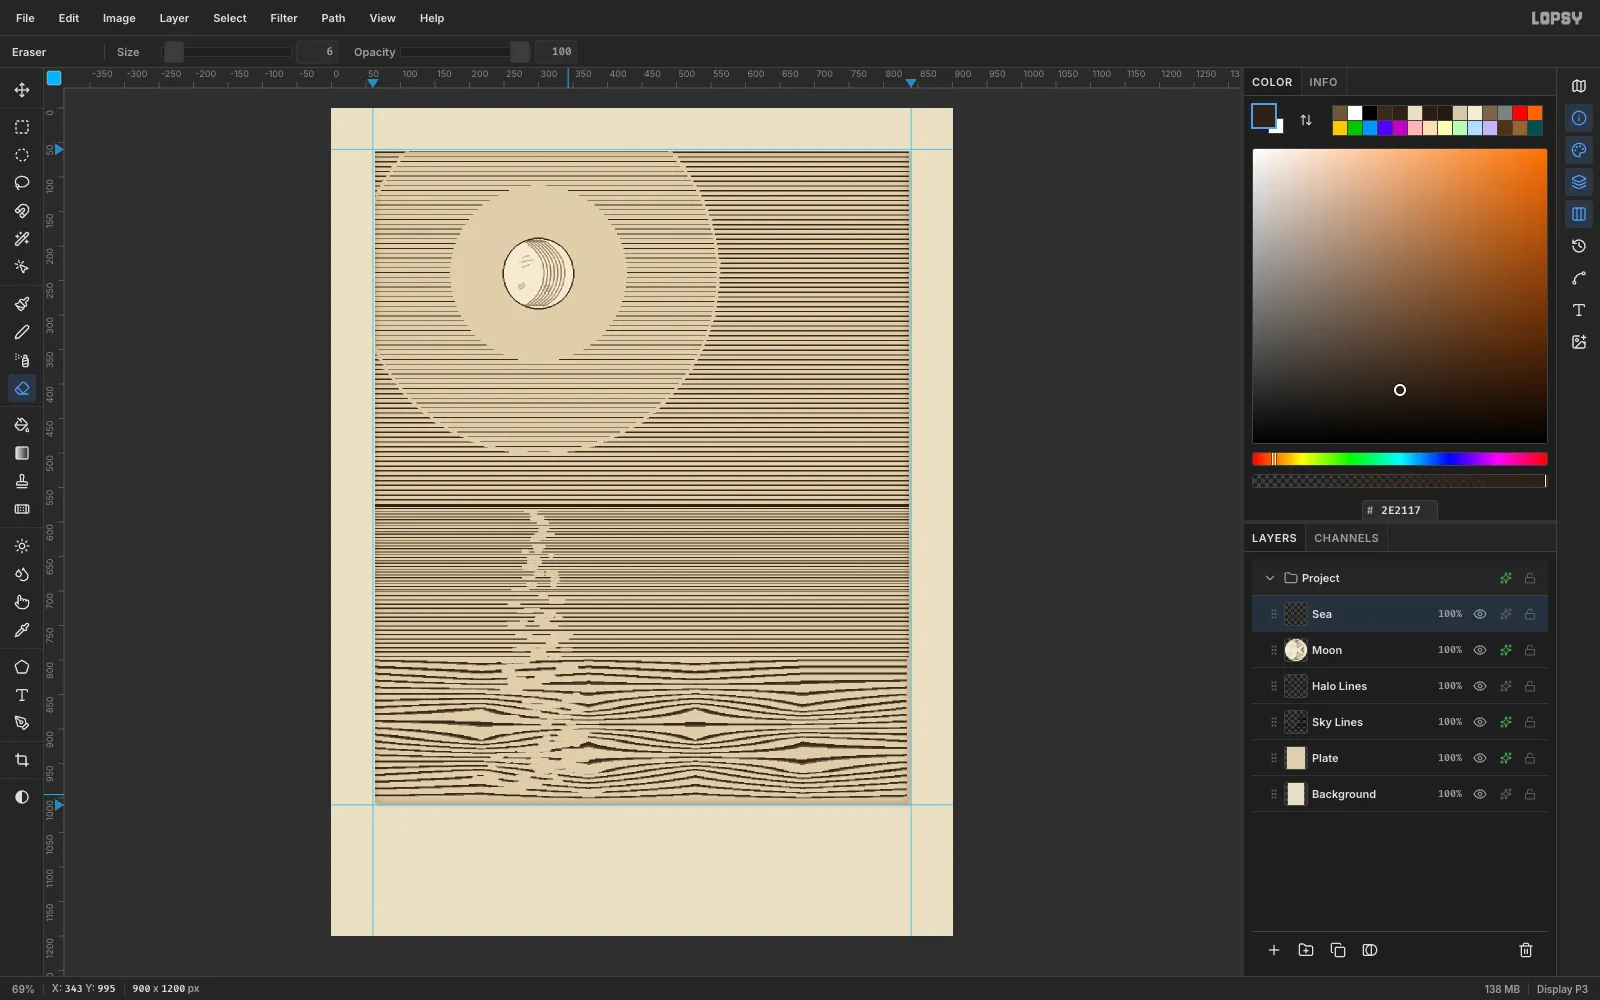
Engravings don't have soft haze. Fill a 3 px rectangle from (63, 575) to (837, 578) with
#2E2117for a hard horizon.Then pick the Eraser at Size 6 and Opacity 100. Cut short horizontal dashes down the sea, centred under the moon (x ≈ 300). Keep them narrow near the horizon and let them spread to about ±80 px and grow longer near the bottom. The gaps read as moonlight dancing on the water.
-
Build the headland silhouette
Click New Group and name it Headland. Add a layer inside it called Cliff.
Use the Lasso to draw the cliff. Curve the edge from the bottom at (385, 1007) up to the top at (590, 552), bowing out toward the sea, with a little jitter so it reads as rock. Run it along the top at y ≈ 545 to the right edge.
Fill it with
#E4D7B8and add an inside Stroke of#2E2117at Width 3.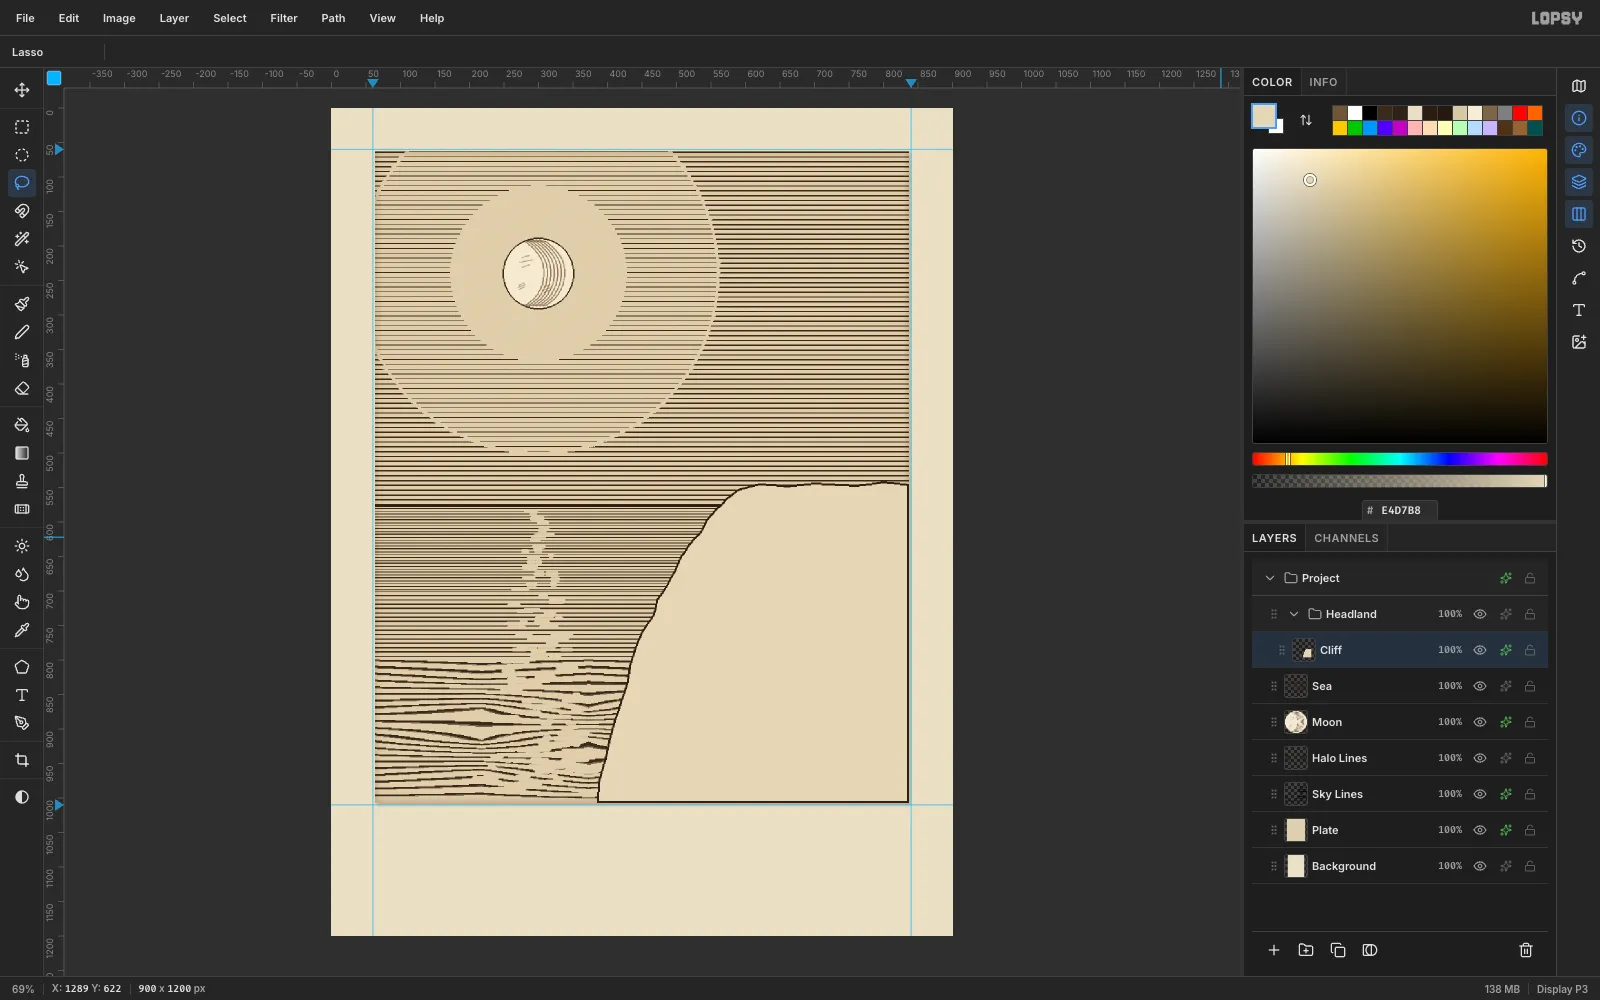
-
Cross-hatch the rock
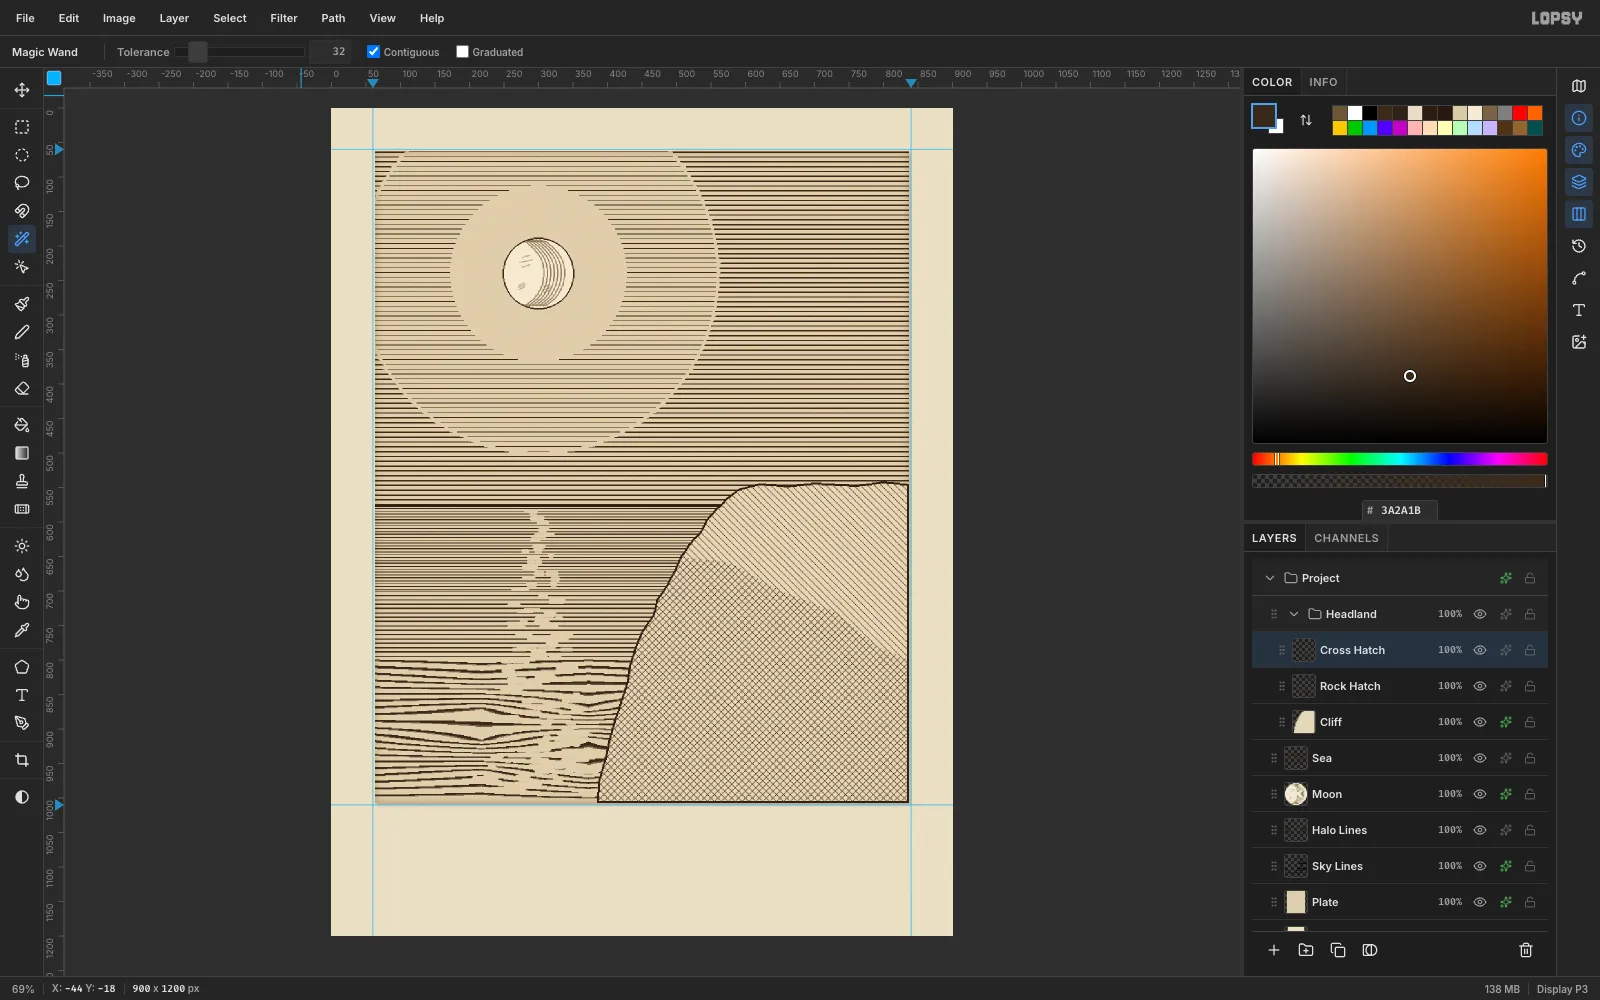
Define a 10 × 10 tile with a single diagonal line. This one tiles seamlessly.
- Add a layer called Rock Hatch, fill it, pattern-fill it with the diagonal tile, and clip it to the cliff. To clip, click the Cliff with the contiguous Magic Wand, return to Rock Hatch, then choose Select → Inverse and press Delete.
- Repeat on a layer called Cross Hatch, then run Image → Flip Horizontal so its lines cross the first set.
- Lasso the shadowed lower face. Invert, delete, and clip it to the cliff again.
-
Model the strata and crevices
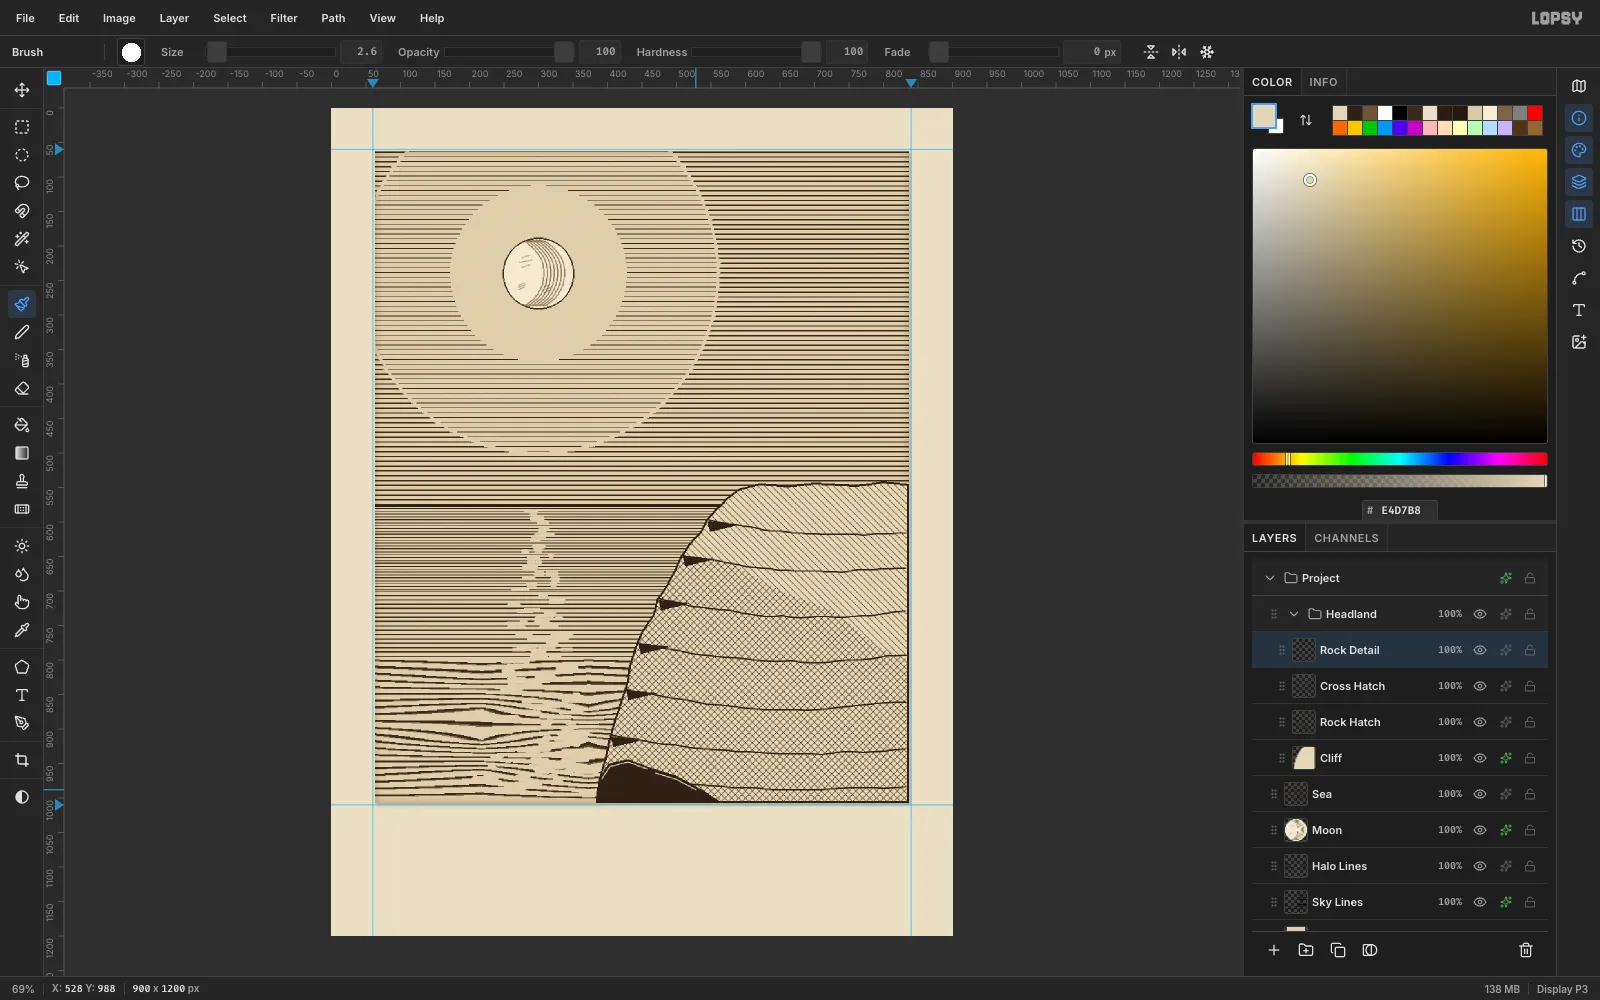
Add a Rock Detail layer and pick the Hard Round brush at Size 3.2. Draw seven strata lines from the cliff edge to the right side. Each one slopes down about 18 px and sags in the middle like a bedding plane.
Under each of the top six strata, lasso a thin wedge at the cliff edge and fill it with
#2E2117for a crevice. Then lasso a heavy rock mass along the cliff foot and fill it solid. Finish it with two cream highlight strokes at Size 2.6.This gives the bottom of the plate the deep darks it needs.
-
Build the lighthouse and its beam
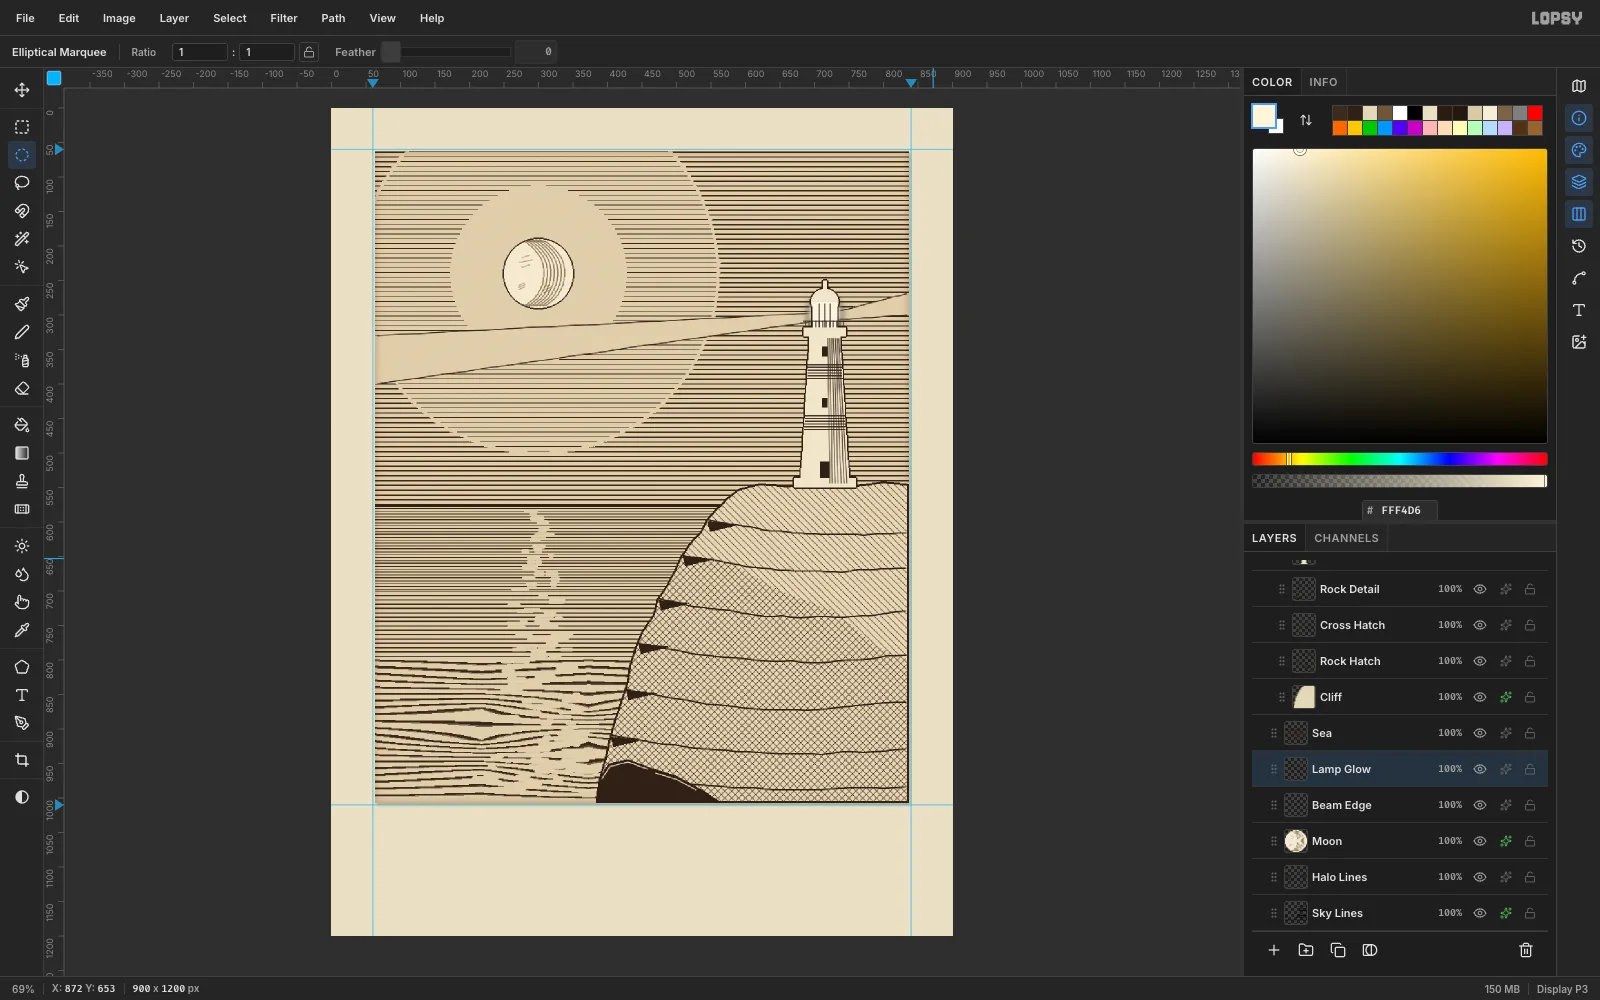
On a Tower layer, build the tower from fills:
- Lasso a tapered shaft, 70 px wide at the base (y 546) and 44 px at the top (y 330). Fill it with
#EFE5CC. - Add rectangles for the gallery deck and the plinth, an ellipse for the dome, a lighter
#FBF5E4lantern and a thin finial. - Give the layer a 2 px outside Stroke.
On Tower Detail, at Size 2.6:
- draw three lantern mullions and railing ticks
- add seven vertical hatch strokes down the right third for shadow
- add two banded rings of horizontal lines
- fill the door and two windows
For the beam, lasso a long wedge from the lantern (706, 297) to the left edge of the plate. Delete that wedge from Sky Lines and Halo Lines, then rule its two edges with the brush. A blurred cream disc behind the lantern (Gaussian Blur 14) makes the lamp the brightest point on the plate.
- Lasso a tapered shaft, 70 px wide at the base (y 546) and 44 px at the top (y 330). Fill it with
-
Paint the wind-bent juniper
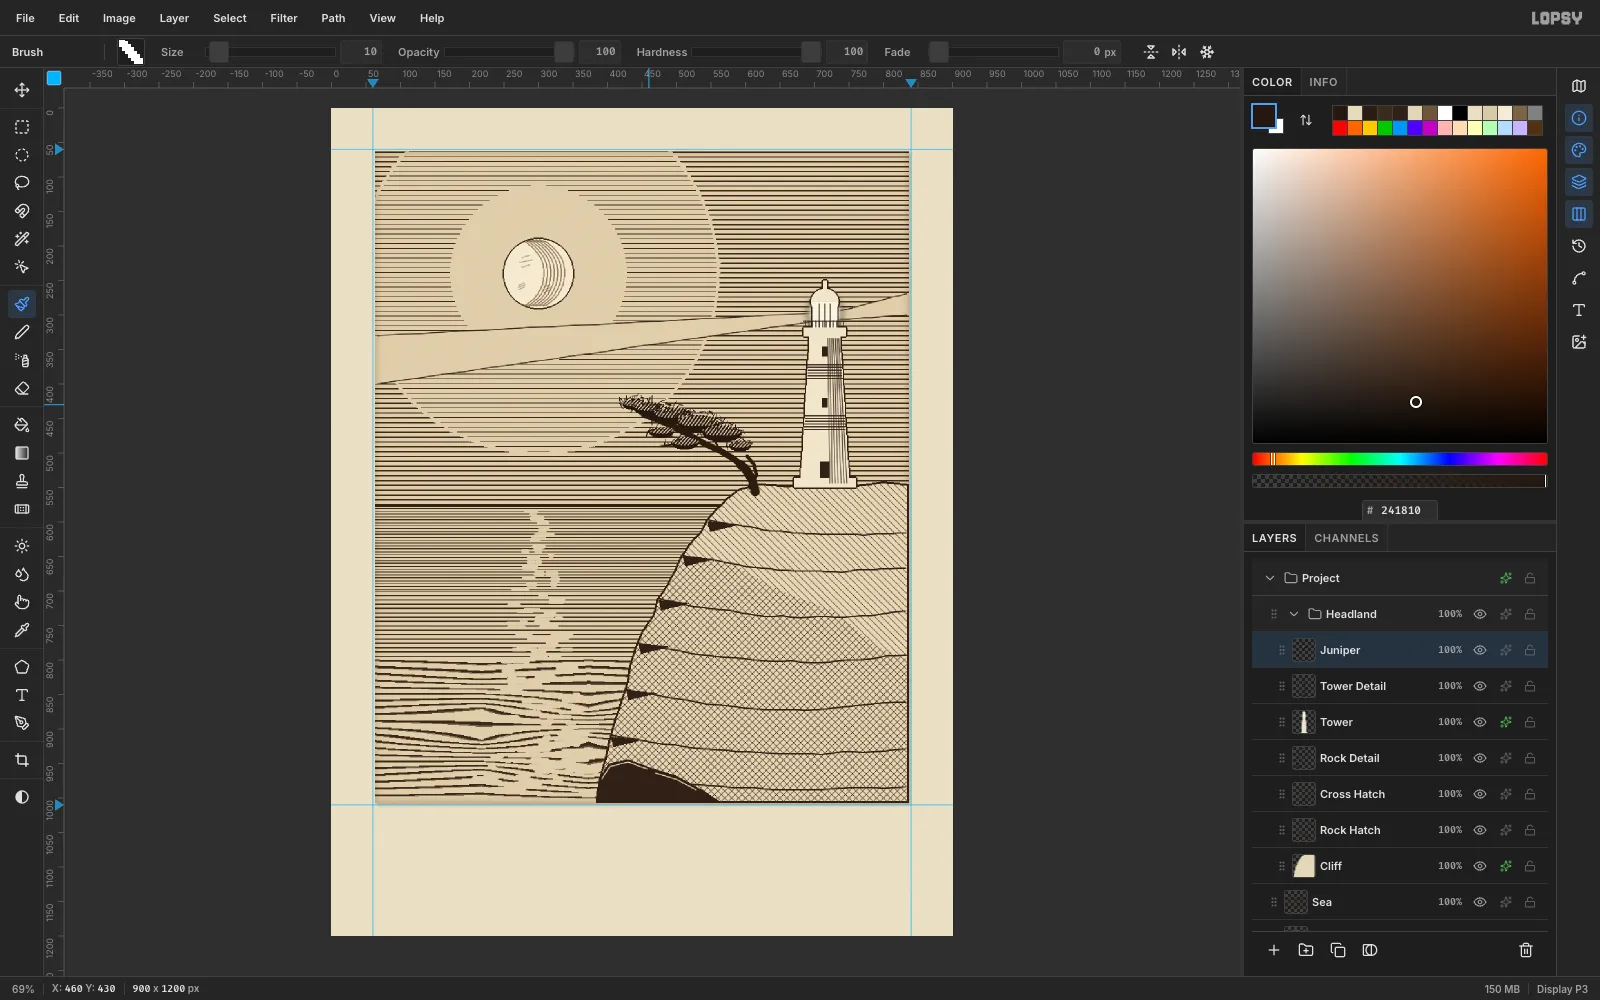
On a Juniper layer, brush the trunk from the cliff top at (612, 552) in a curve out to (452, 444). Go from Size 14 at the root to 10, and add 3–6 px side branches.
Fill eight small ellipses with
#241810for the foliage pads. Then select the top part of each pad with the elliptical marquee and brush paper-coloured diagonal strokes through it. This is engraved highlight.Finally, open the brush presets and pick Slash:
- in the Shape tab, set Size 10 and Spacing 40
- in the Dynamics tab, set Scatter 35, Angle Jitter 50 and Size Jitter 40
Stroke around the top of each pad for needles.
-
Duplicate and rotate the gulls
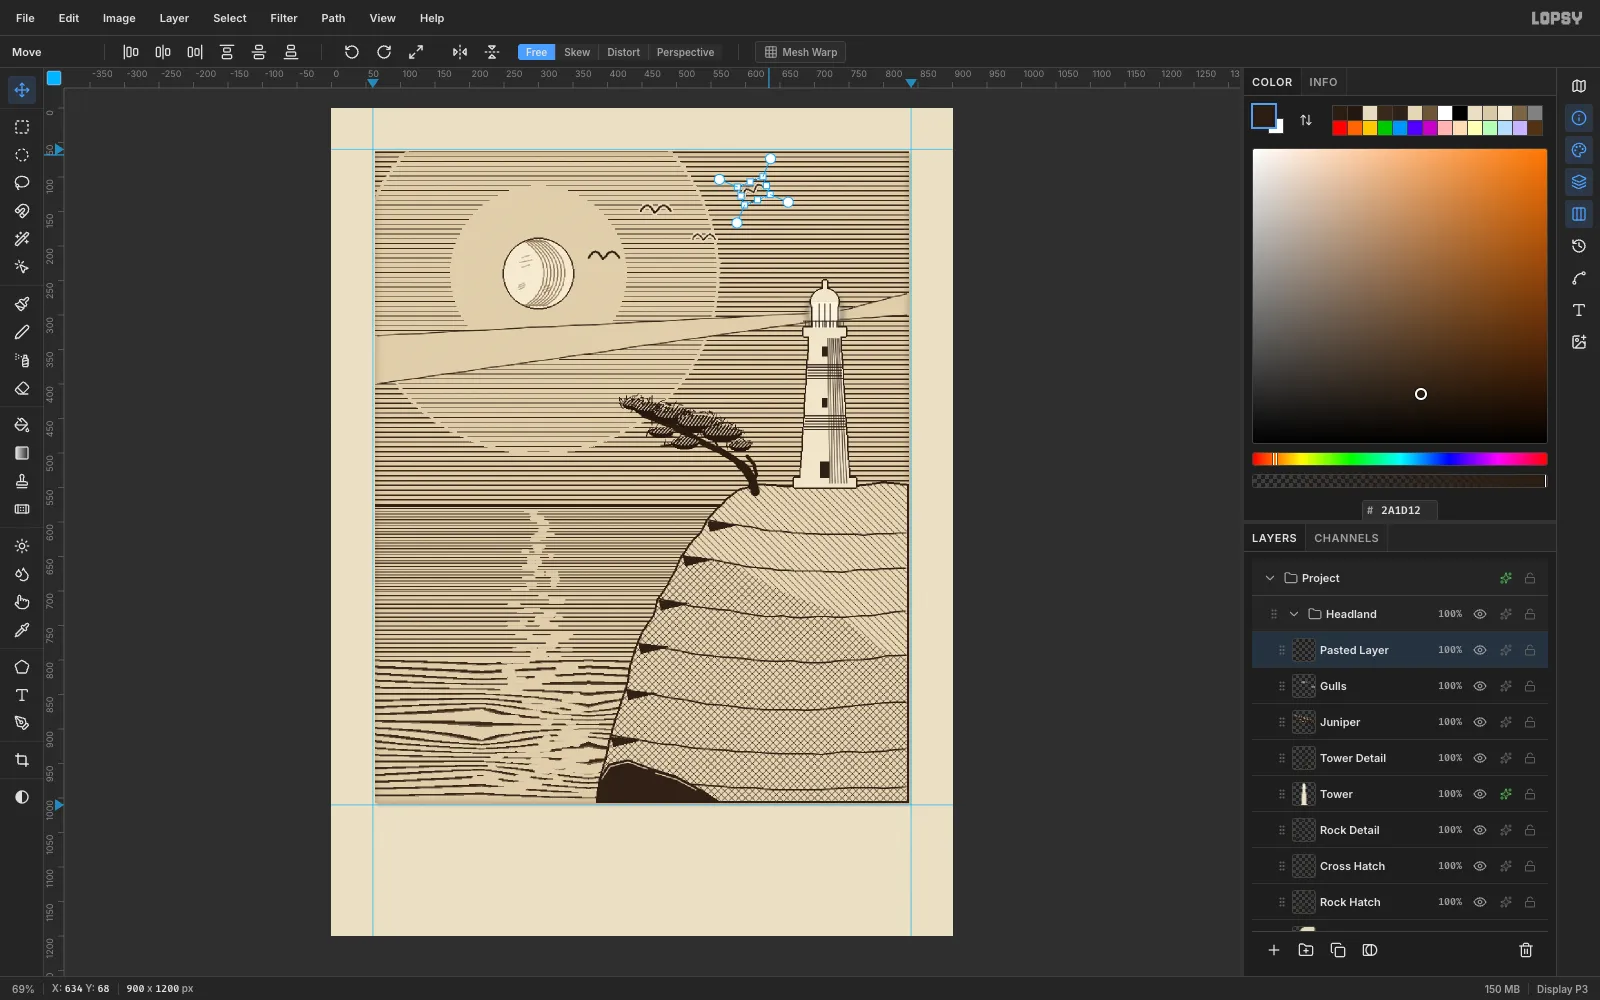
On a Gulls layer, draw two gulls as a pair of arcs each, at Size 4 and 3.2. Add an outside Stroke of paper colour at Width 3 so each bird knocks the sky lines away around itself.
For more birds:
- Marquee a gull, press Cmd+C then Cmd+V, drag the copy into place, and press Enter.
- Choose Merge Down so the copy picks up the stroke.
- For the third gull, marquee it and pick Move. Drag the round handle just outside a corner to bank it about 20°, then press Enter.
-
Add sea stacks and surf
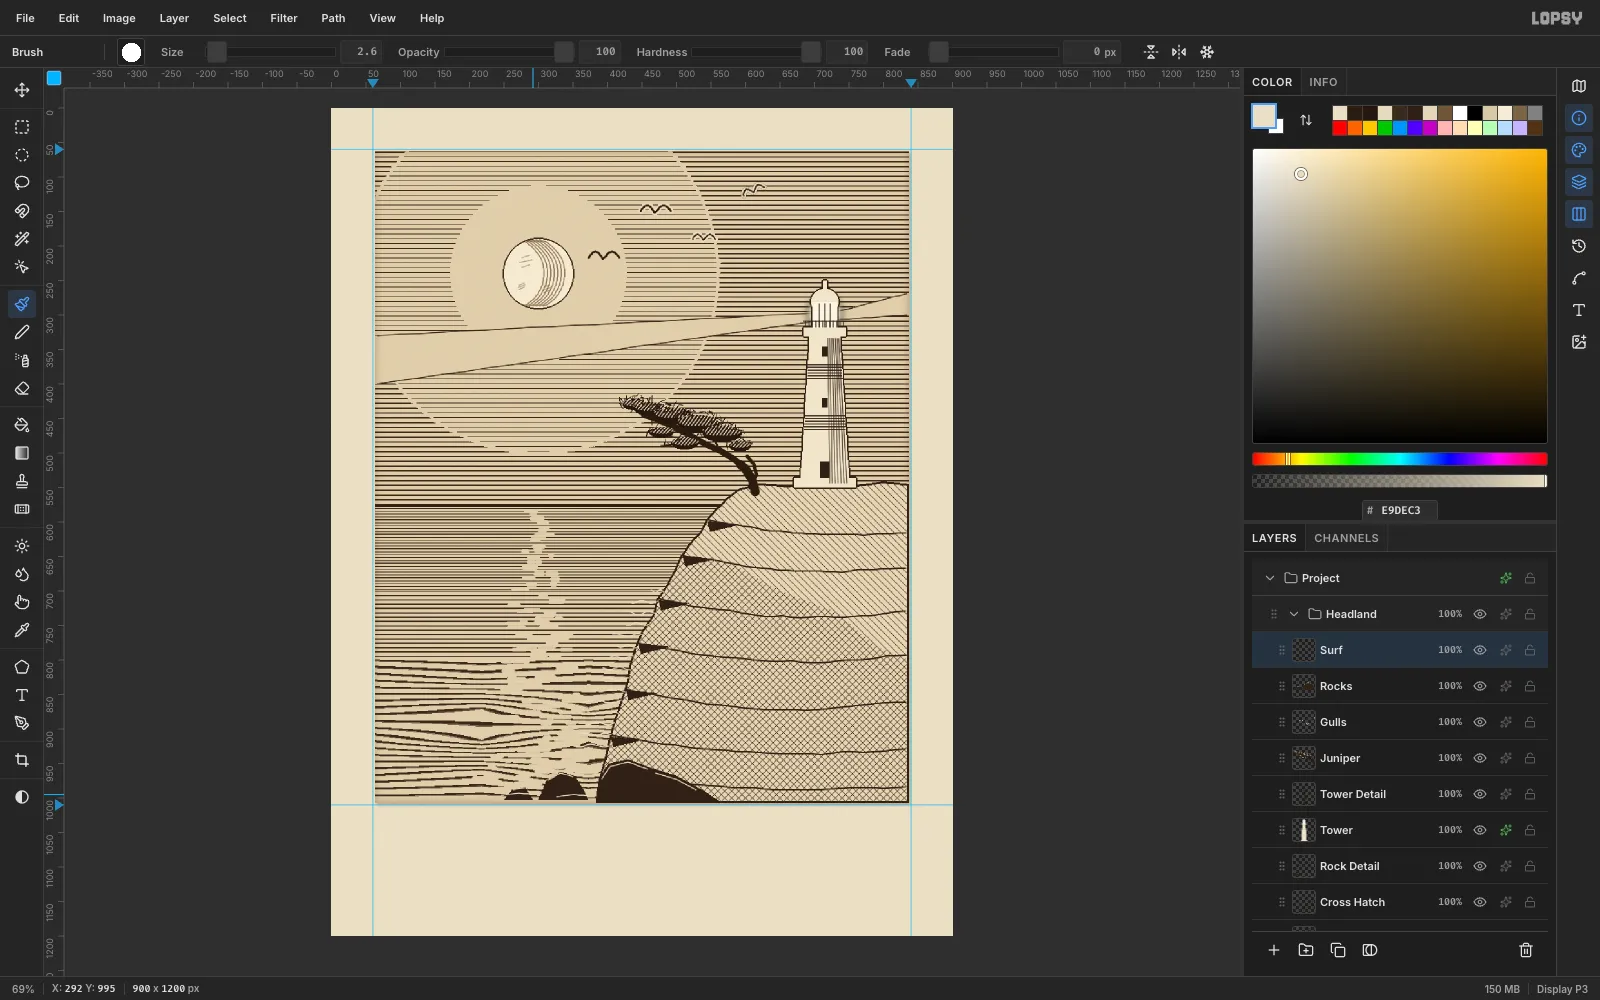
On a Rocks layer, lasso and fill two low sea stacks at the waterline with
#2E2117, and give each a cream highlight stroke.On Surf, brush short wavy cream strokes that start at the cliff edge and trail out to sea, every 16 px down the cliff. Add a couple of foam curls beside the rocks.
-
Snap the double-rule frame
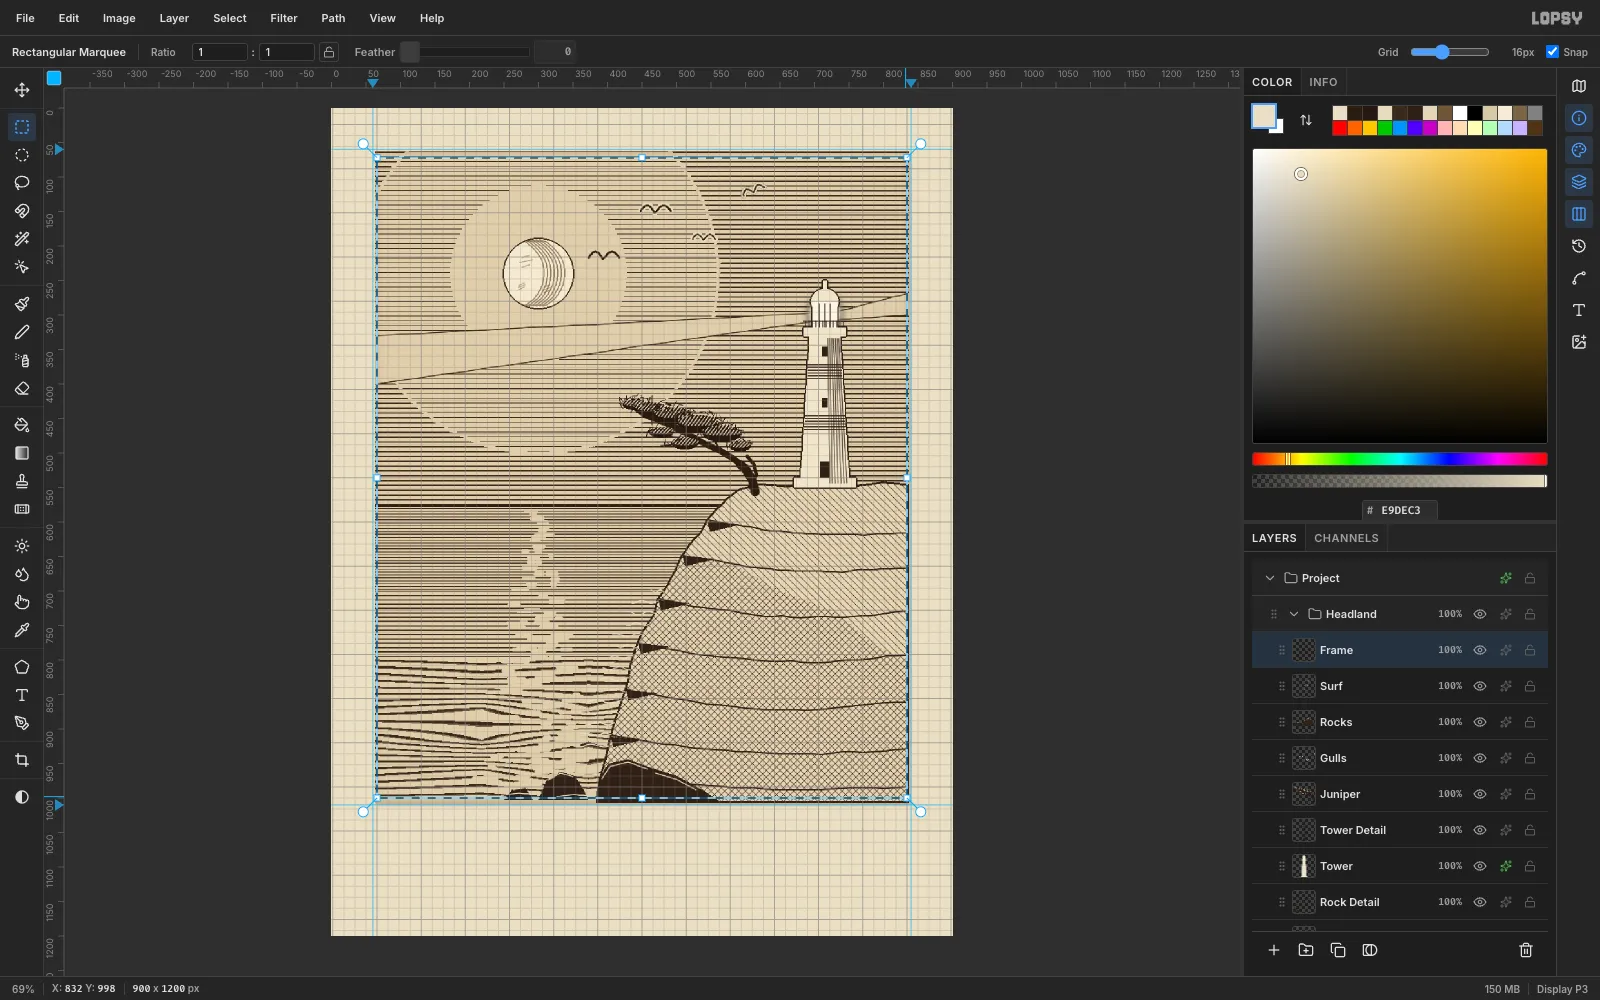
Choose View → Show Grid. Snap turns on with it, so marquees land on the 16 px lattice.
- On a Frame layer, marquee from about (68, 73) to (832, 998) and fill it with deep ink.
- Choose Select → Shrink by 3 px and press Delete to leave a 3 px outer rule.
- Repeat 16 px further in with a 1 px shrink for the inner hairline.
- Hide the grid again.
Last, add a Margin layer: a plate-toned ring between the plate edge and the frame, so no line work peeks past the rule.
-
Set the copperplate caption
Period plates carry a plate number and an engraver's credit under the corners, and a centred title below.
- Fill a 1 px Rule from (330, 1043) to (570, 1044).
- With the Text tool, set the subtitle first so it can't catch the title's hit box. Use Pinyon Script at 30 px in
#2E2117: Moonrise over the northern headland. - Set the title in Cormorant SC SemiBold at 52 px: The Juniper Light. In the Text panel, give it Letter spacing 4.
- Add the plate marks in Old Standard TT at 16 px, with Letter spacing 1: Pl. XII on the left and J. L. sculp. on the right.
Centre the lines with arrow-key nudges (Shift + arrow moves 10 px). Line the marks up with the frame.
-
Export the finished etching
Choose File → Quick Export PNG for the flat image and File → Save Project to keep every layer. The whole plate is built from about thirty layers of ruled, hatched and cut line. Nothing in it is airbrushed, which is what makes it read as a print rather than a painting.