Make a Grunge Photocopy Album Cover
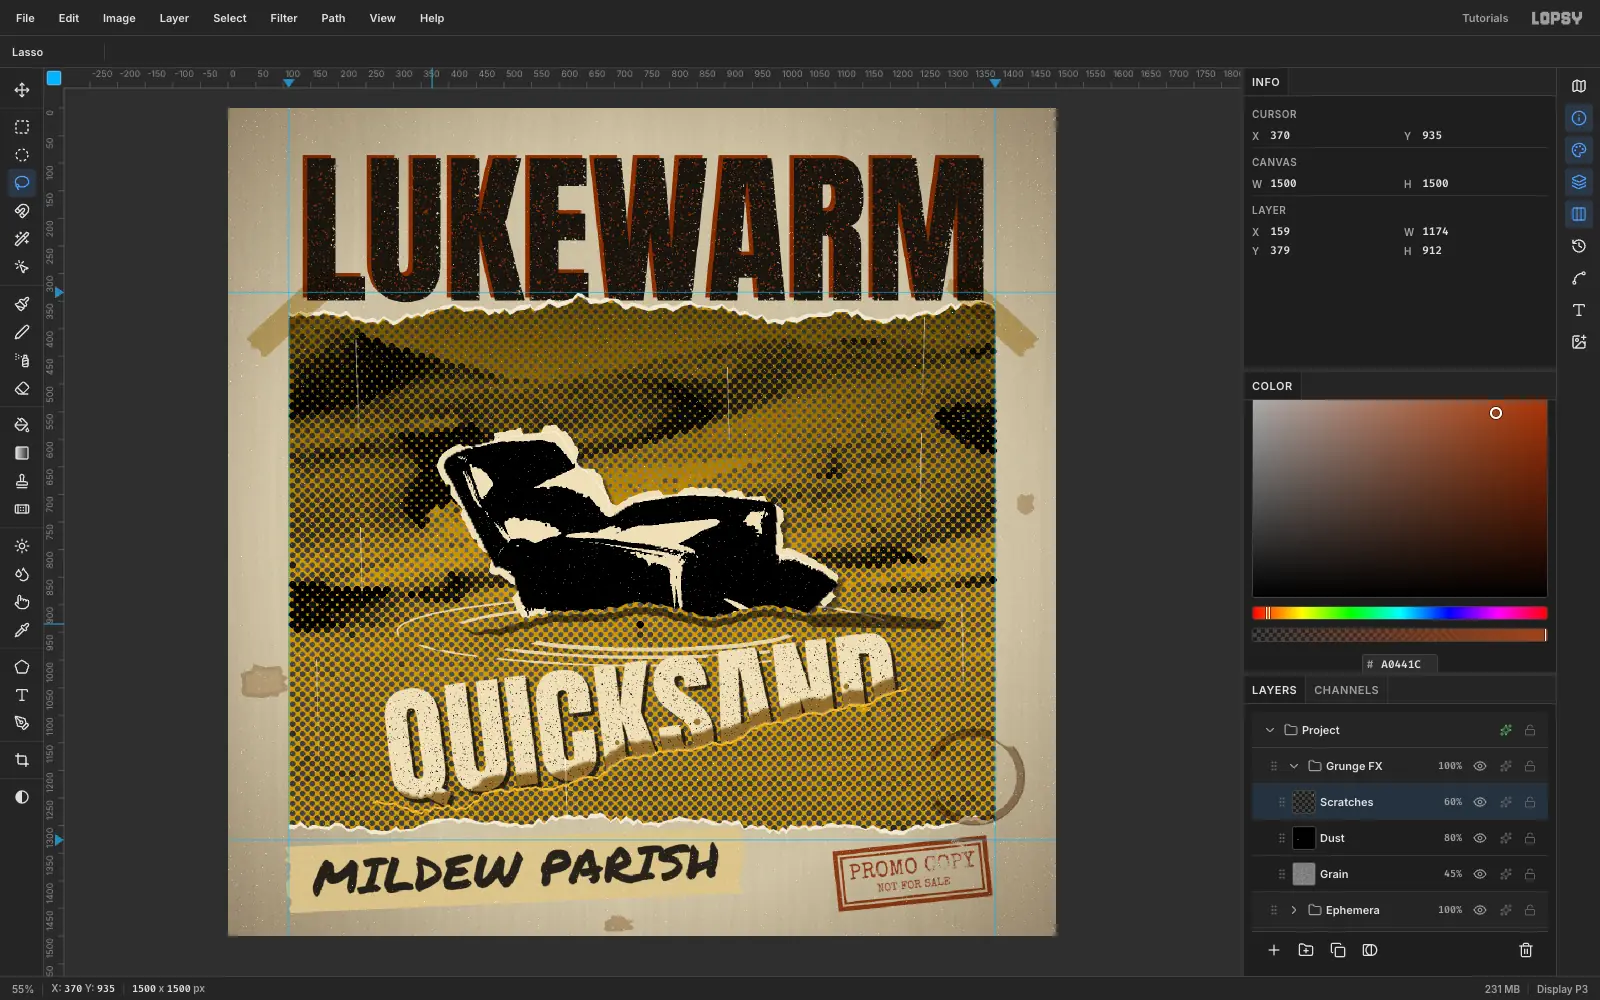
Build a 90s grunge album cover in Lopsy with a halftoned photo, torn print edges, a xeroxed cut-out chair sinking into sand, toner-dropout type and tape.
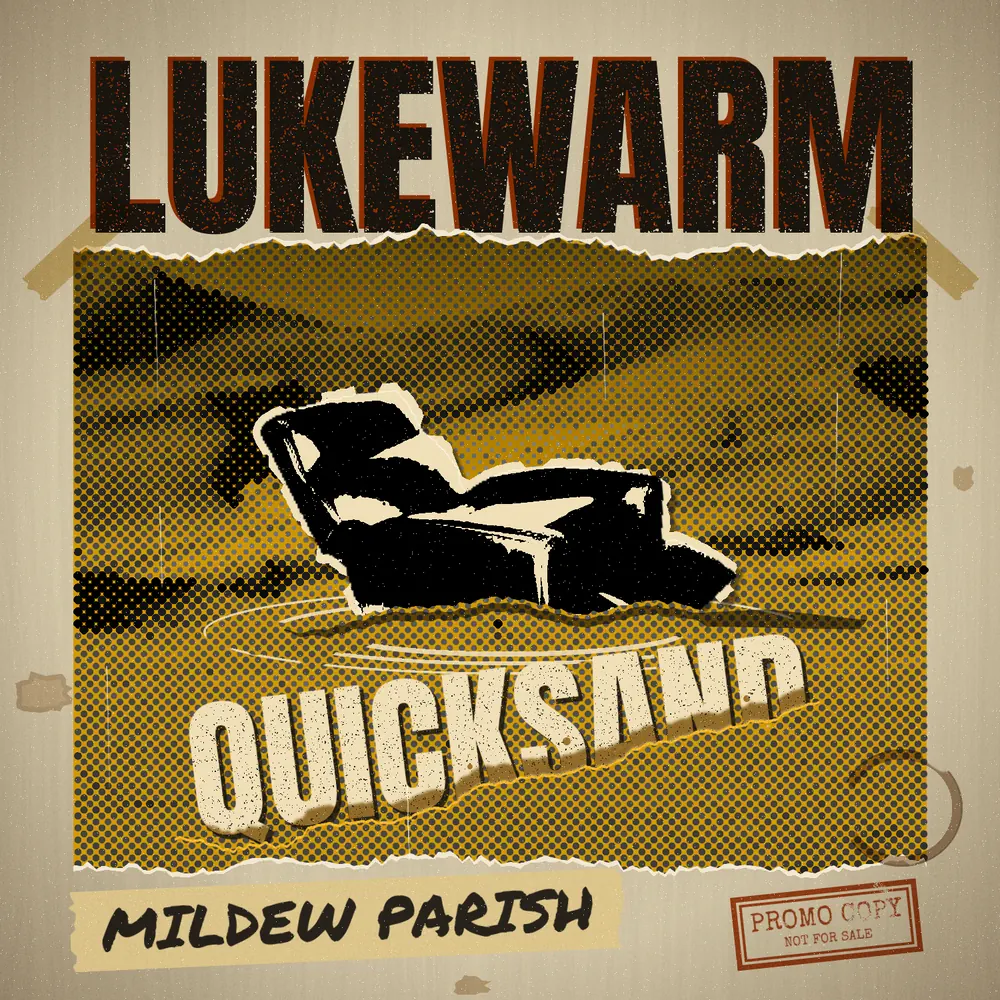
Early-90s Seattle sleeves were made with scissors, a photocopier and whatever turned up in a junk shop. Art Chantry's Sub Pop covers are the classic examples. This tutorial rebuilds that cut-and-paste process digitally for a made-up band, Mildew Parish, and their album Lukewarm Quicksand.
The idea: a comfy recliner (complacency) slowly sinking into a desert. Everything is photocopied. There are two public-domain photos, both from Wikimedia Commons:
- US National Park Service dunes at Great Sand Dunes National Park (
Great_Sand_Dunes_National_Park_and_Preserve_GRSA4390.jpg). - A
Black_Recliner.jpgproduct shot on white.
The palette is dirty manila, mustard, toner black, rust and one olive tint.
The one rule that makes it look real rather than filtered: every texture has hard edges. Toner either sticks or it doesn't, so use Threshold after every noise or blur, not soft opacity.
-
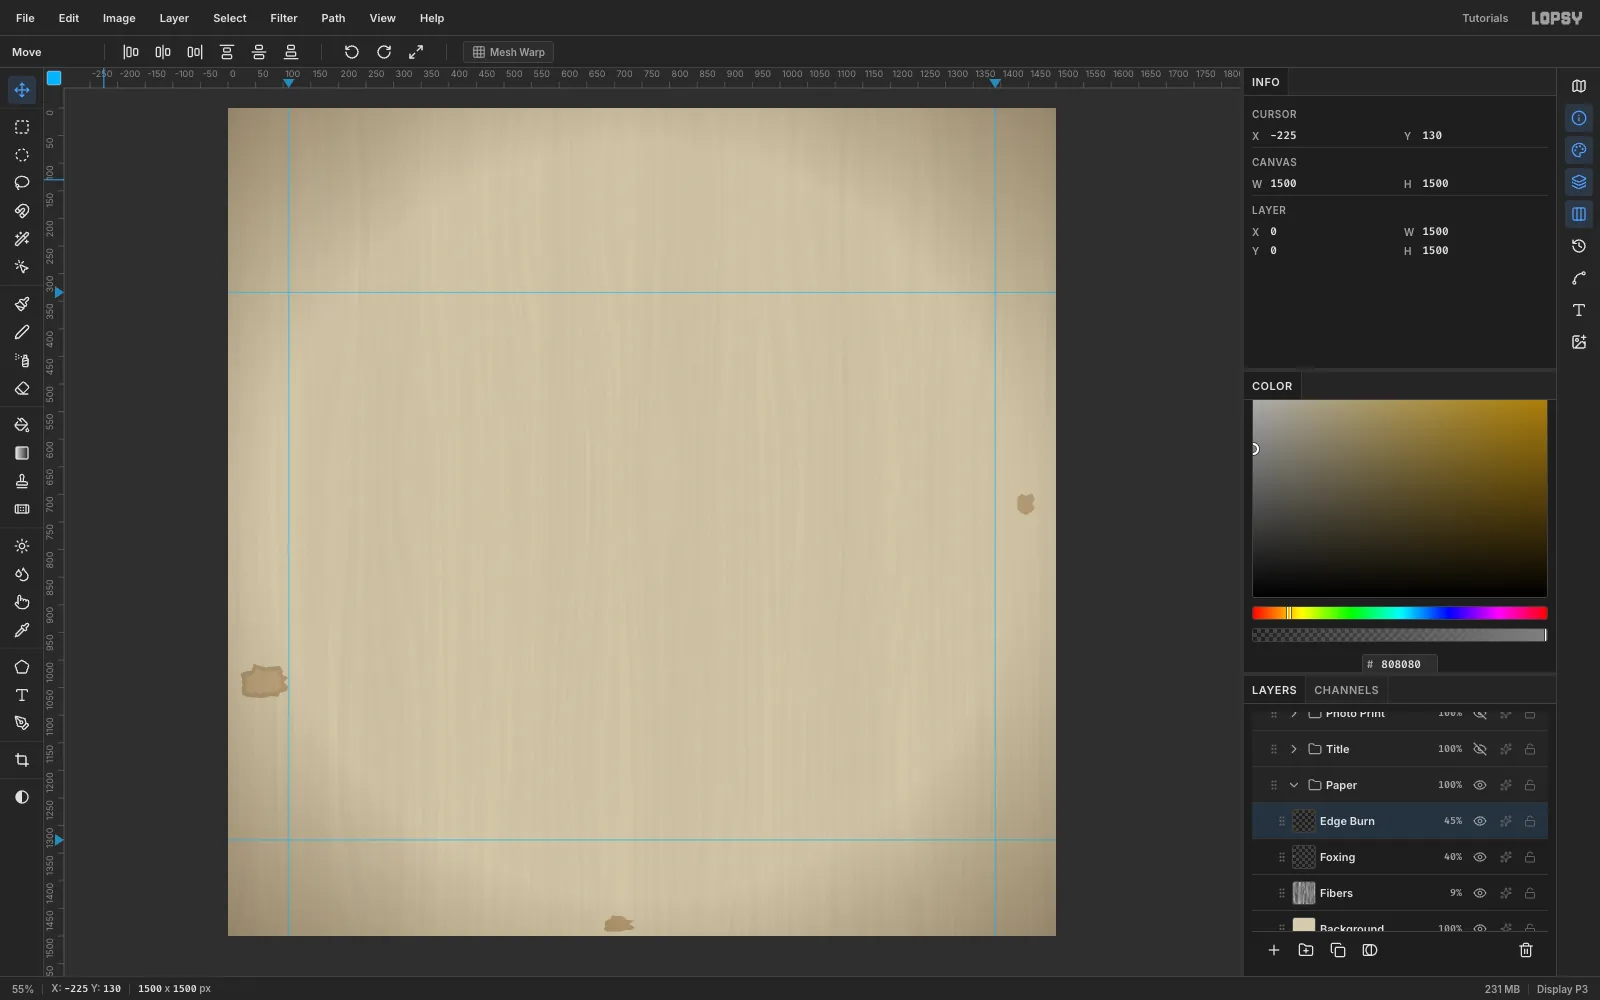
Lay down dirty manila paper
Create a 1500 × 1500 document. Make sure Unit is Pixels before you type the size. Build the paper in a
Papergroup:- Background. Fill with
#D6CBAE, then run Filter → Add Noise… at Amount 10, Mono, Gaussian. - Fibers. On a new layer, run Filter → Fibers… with Variance 24 and Strength 40. Set it to Multiply at 9%. This gives the paper a faint grain direction.
- Foxing. On a
Foxinglayer, lasso three stains of different sizes and shapes in browns (#8E6A3A,#A07C4C,#94703F). Give the biggest one a paler centre: Select → Shrink… by 7, then fill#B8966A. Apply Gaussian Blur 0.8, and set the layer to 40%. - Edge Burn. On an
Edge Burnlayer, set the Gradient tool to Radial. In Advanced…, use three#4A3A24stops at 0%, 0% and 100% opacity, with the middle stop at 62%. Drag from the centre to just past a corner. Set the layer to Multiply at 45%, so only the edges darken.
- Background. Fill with
-
Snap a print area to guides
Turn on View → Show Grid, choose the Move tool, set Grid to 32 px and tick Snap. Click the top ruler at x 110 and 1390, and the left ruler at y 334 and 1326. These four guides frame the photo print.
On a
Printlayer, marquee from guide to guide. Snap pulls the corners onto the guides, giving 110, 334 → 1390, 1326. Fill the marquee with mustard#C99A2E. This is the ink colour that shows through the halftone later.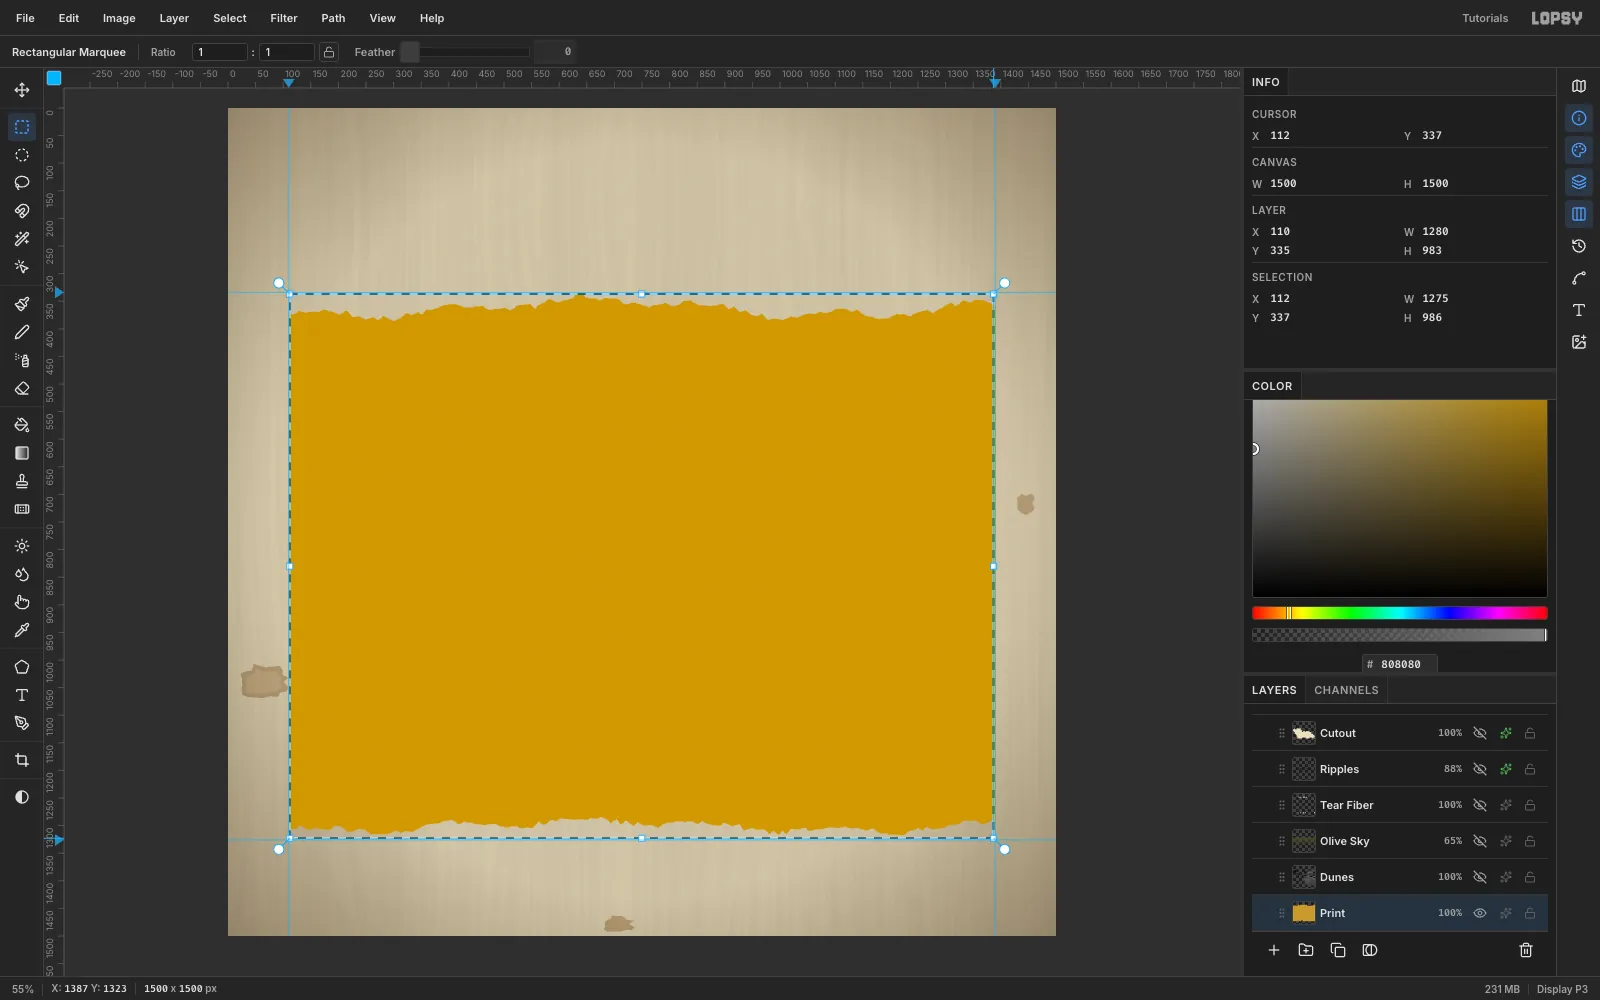
-
Halftone the desert photo
Crop the dune photo to 1280 × 992 and paste it with Cmd+V. Lopsy drops external images at the canvas origin and switches to the Move tool. Drag the photo down to the guides, and grid snap lands it exactly at (110, 334).
If the photo has a stray dark shape at an edge, remove it first. Pick the Clone Stamp, Alt-click some clean sky to set the source, and paint over the shape.
Then photocopy the photo:
- Filter → Desaturate.
- Filter → Brightness/Contrast… at Brightness −14, Contrast 55. Push it until the shadows almost plug, but keep the dune ridges visible.
- Filter → Halftone… with Dot Size 14, Density 1.1, Angle 45, Softness 0.4.
The halftone paints black dots over white, so on this layer the white gaps become the mustard of the
Printlayer below. GroupDunesandPrintinto aPhoto Printgroup.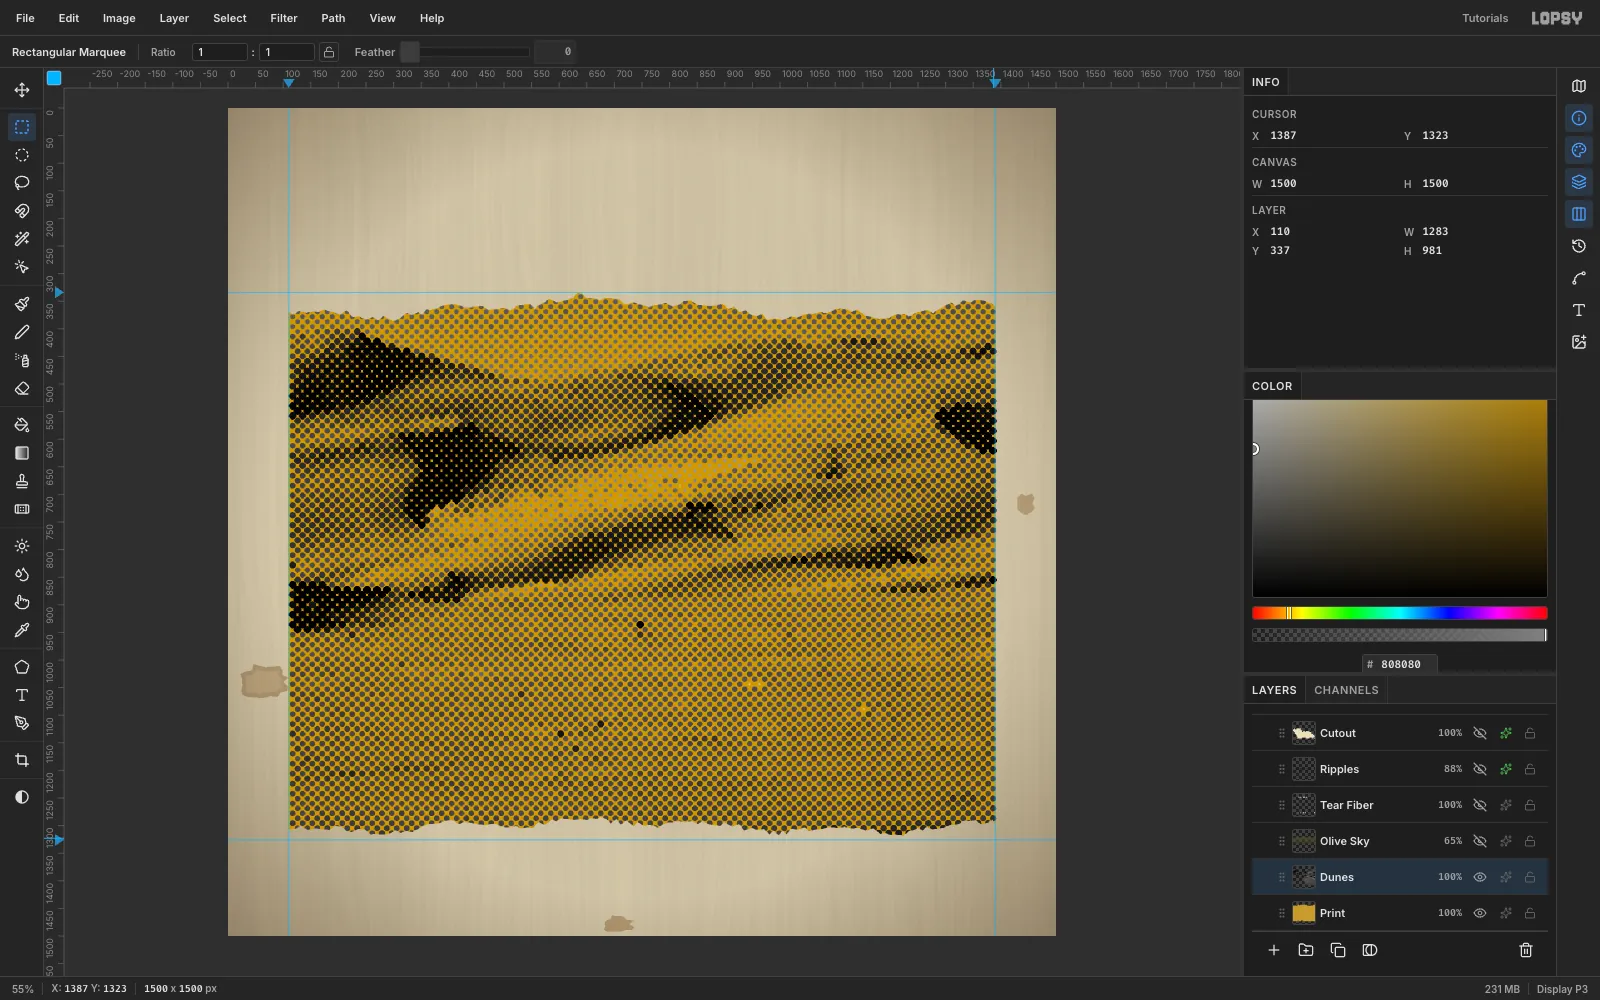
-
Tear the print's top and bottom edges
A ruler-straight edge gives the collage away. Lasso a strip above a jagged line that wobbles about 10–20 px along the top of the photo, then press Delete on both
DunesandPrint. Do the same along the bottom edge.For the paper fibre that shows where a print tears, add a
Tear Fiberlayer. Lasso a thin band, 3–10 px deep, following each torn line, and fill it with off-white#EFE8D6.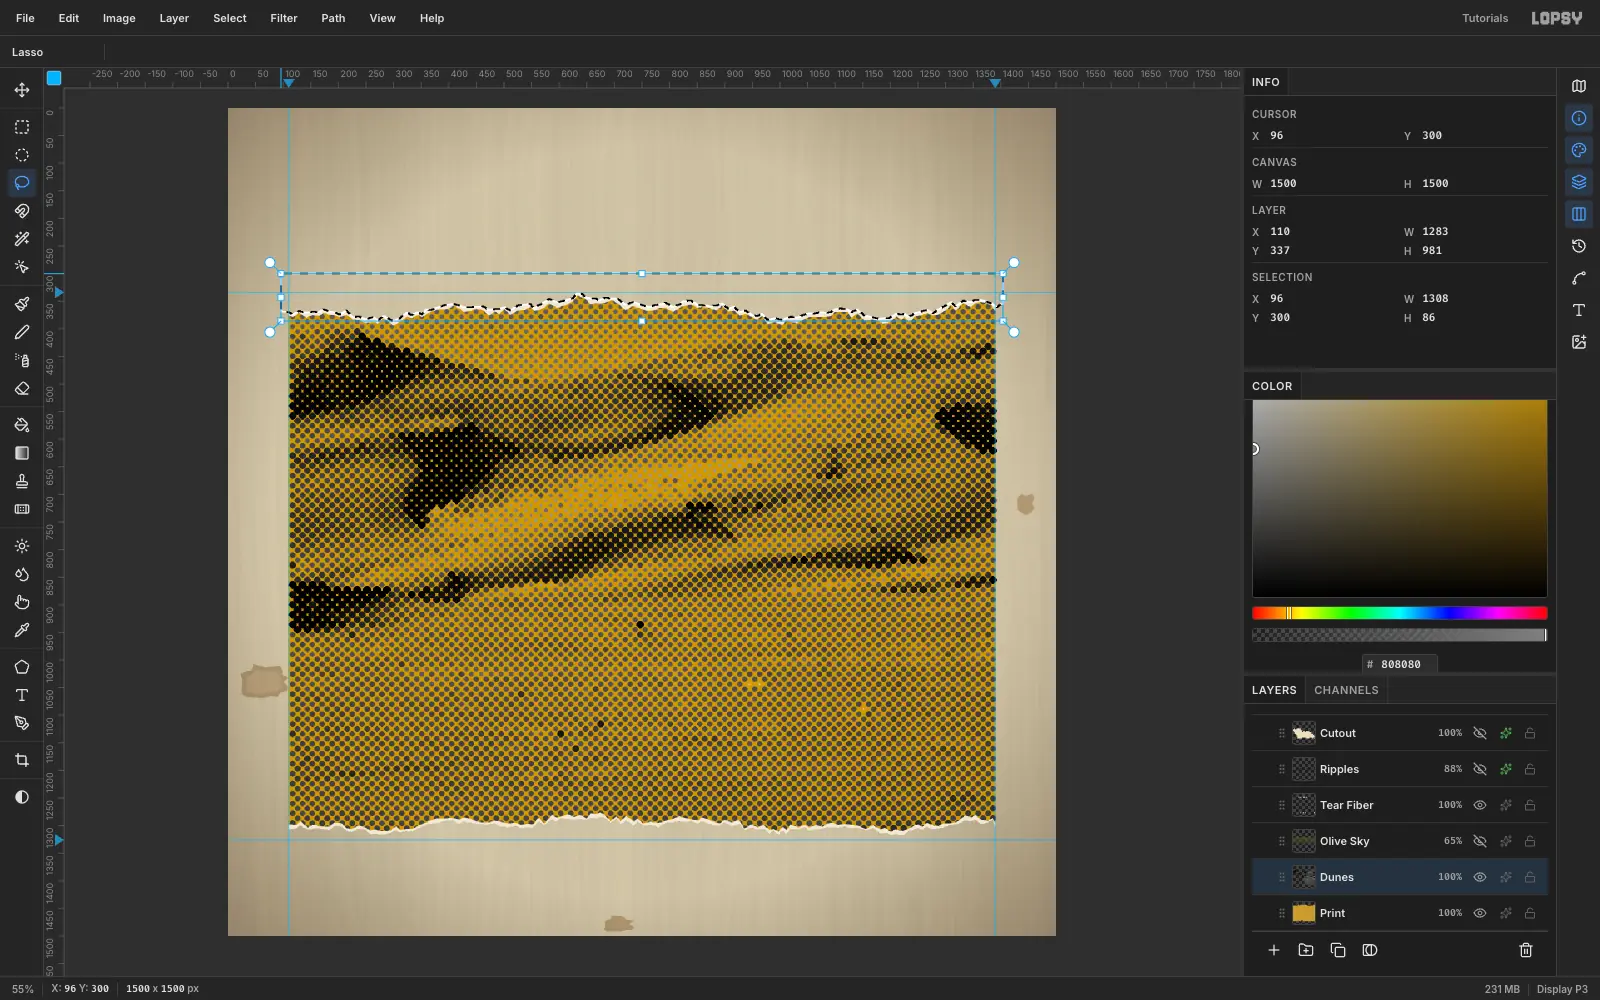
-
Cut the recliner out with the Magic Wand
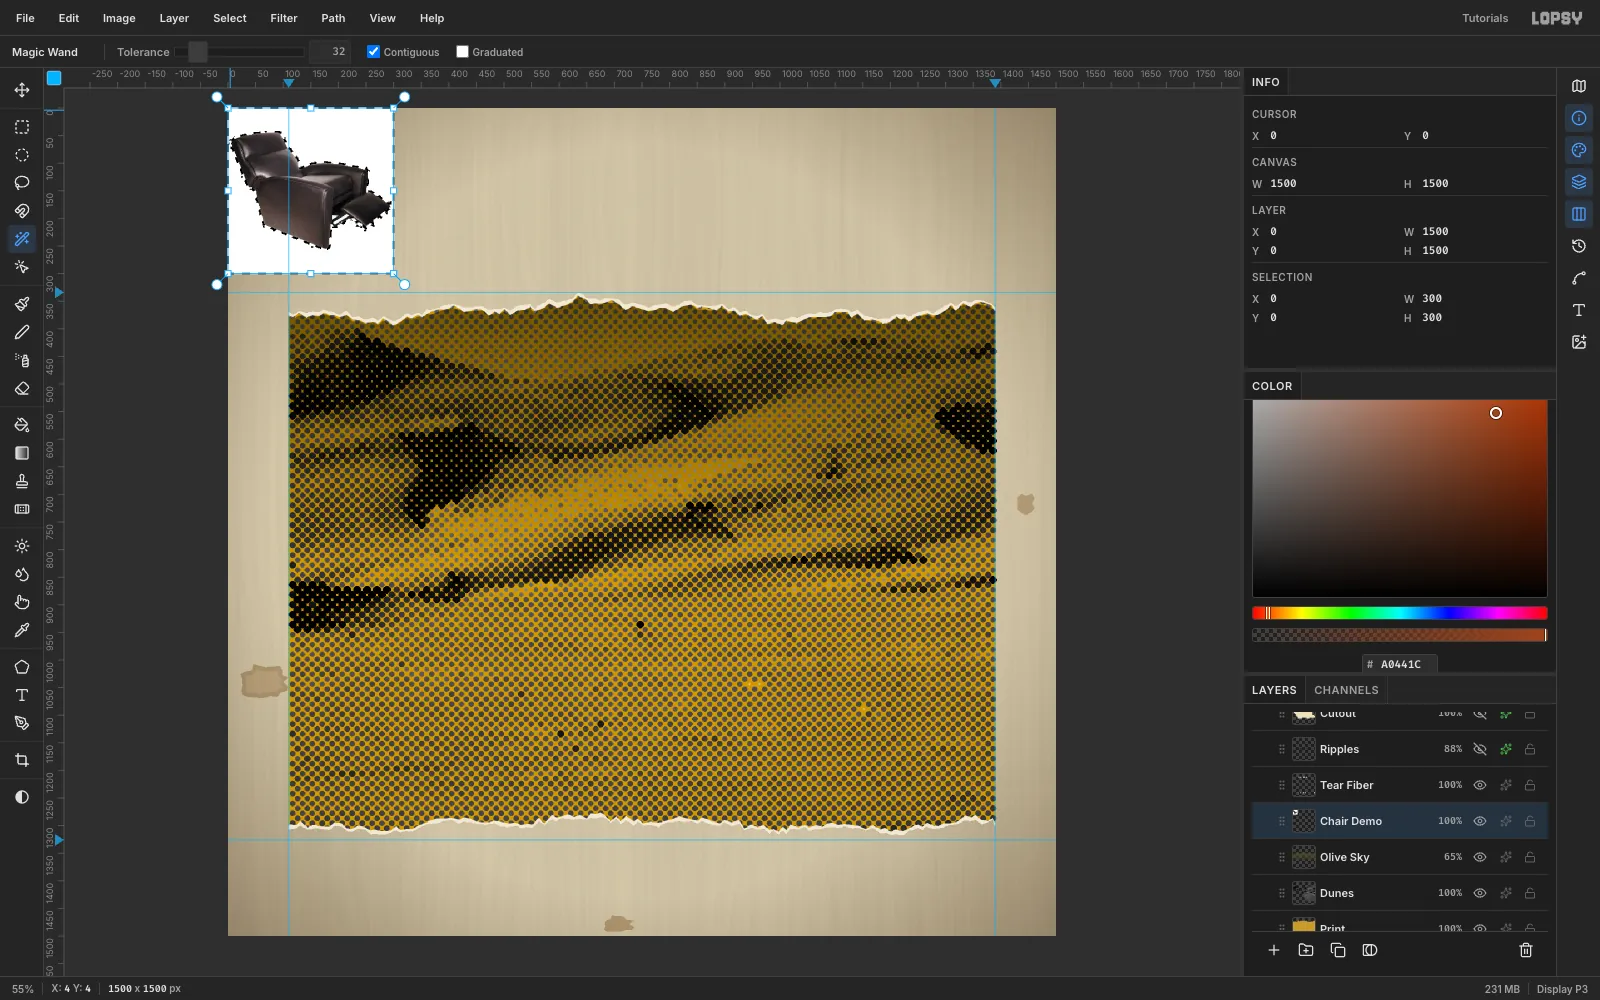
Paste the recliner photo. Pick the Magic Wand with Contiguous on and Tolerance 32. Click the white background and press Delete.
A pale halo usually survives around the edges. Click the background again, run Select → Grow… by 2, and delete once more. This removes the fringe without touching the chair.
-
Scale and rotate the chair
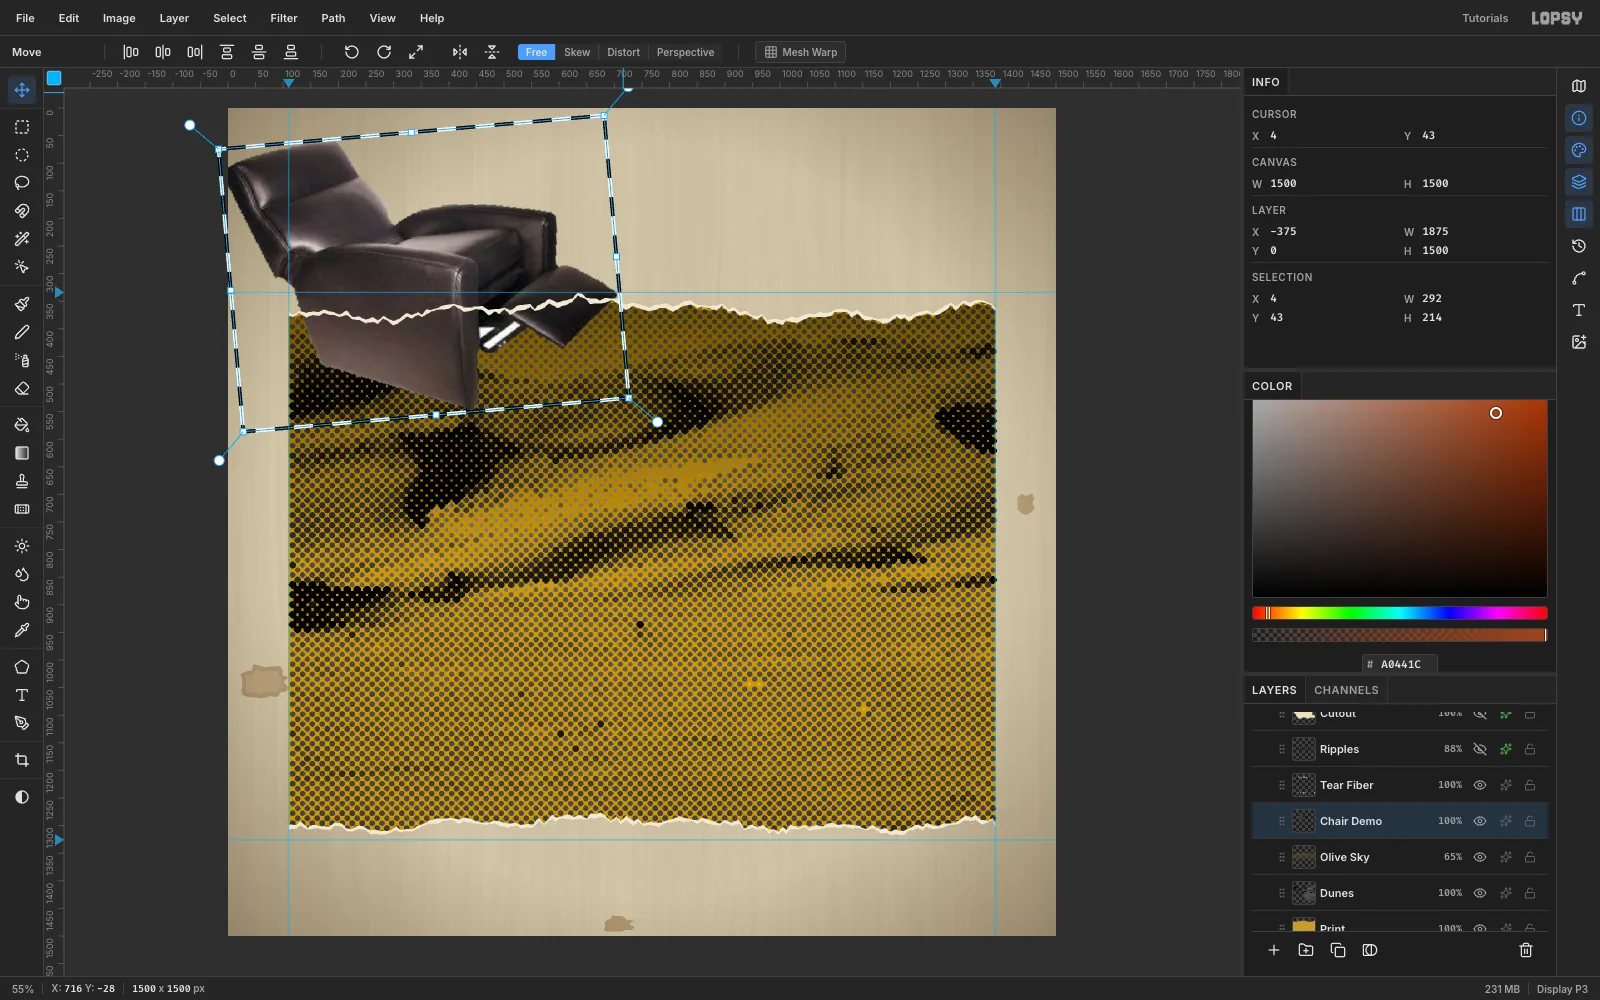
Turn Snap off for this step. Marquee around the chair and switch to the Move tool. Hold Cmd and drag the bottom-right handle to scale it to about 240%. Then drag the rotation handle outside the corner to tip it back about 5°, as if it's already sagging into the sand. Press Cmd+D to commit.
Move the chair so its seat sits just above the middle of the dunes. Do this before you run any Fill on it, while the whole chair is still on-canvas.
-
Photocopy the chair
- Run Filter → Desaturate.
- Run Brightness/Contrast at +25 / +45.
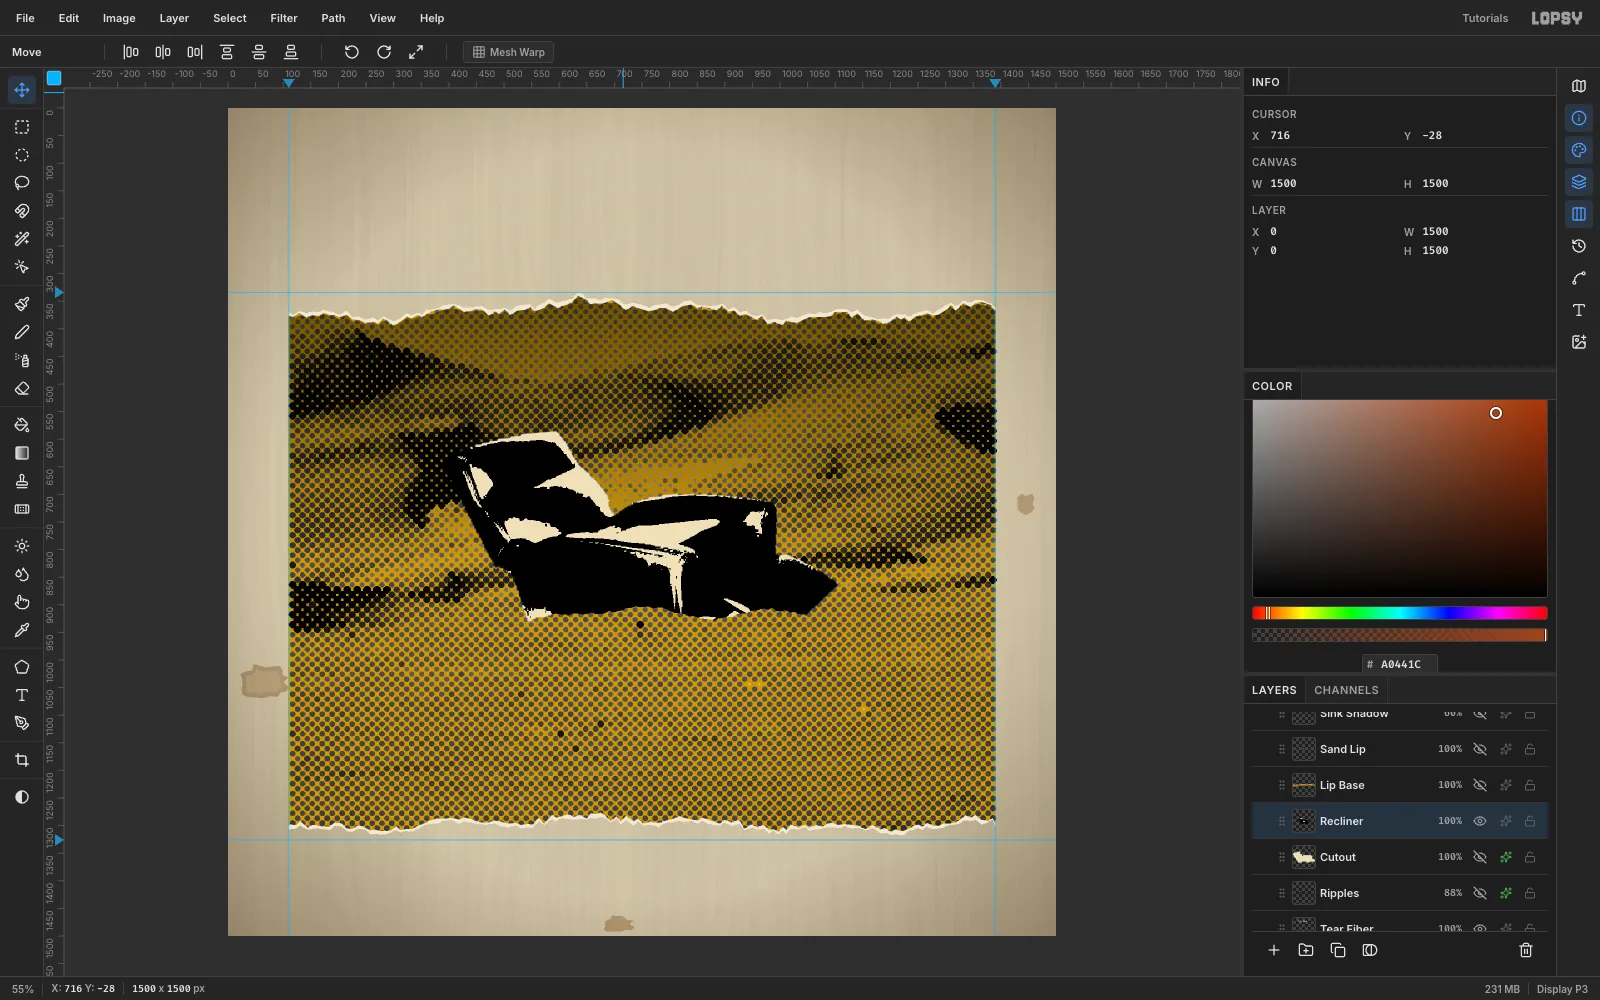
- Run Filter → Threshold… with Preview ticked. Level 104 keeps the highlights on the headrest, arm and footrest, so it still reads as a recliner.
- With the Magic Wand, turn Contiguous off and click one of the white highlights. Fill with cream
#EDE0BC.
The chair is now two flat inks, like a real photocopy.
-
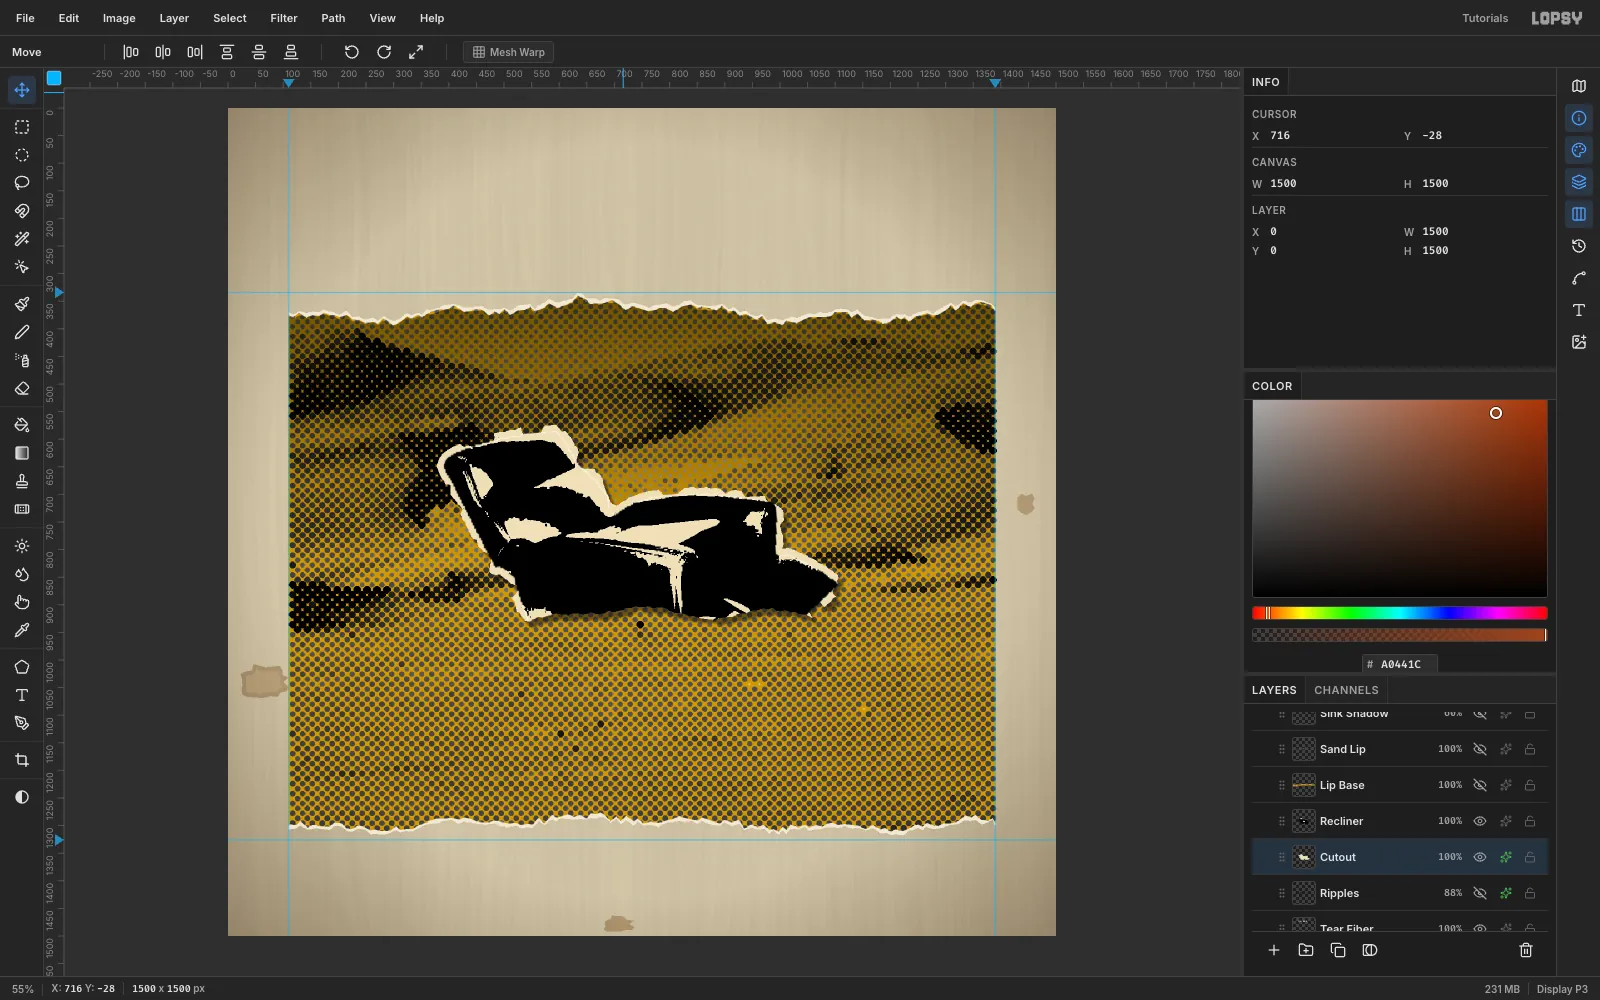
Give it a scissor-cut paper border
Draw the border on a
Cutoutlayer below the chair, so the chair looks cut out of paper by hand:- On a temporary
Border Helperlayer filled with black, Magic Wand the transparent area around the chair (Contiguous on). - Run Select → Inverse and Grow… by 13, then fill white.
- Run Filter → Voronoi… with Cells 42, Edge Width 0, Seed 12, then Threshold 128. The Voronoi cells break the smooth outline into straight facets, the way scissors cut.
- Wand the white shape and fill it cream on the
Cutoutlayer. Delete the helper. - Trim the border back to about 11 px: wand the chair's surroundings, Select → Inverse, Grow 11, Select → Inverse again, and press Delete on
Cutout. That keeps the scissor facets but cuts off the big spikes.
- On a temporary
-
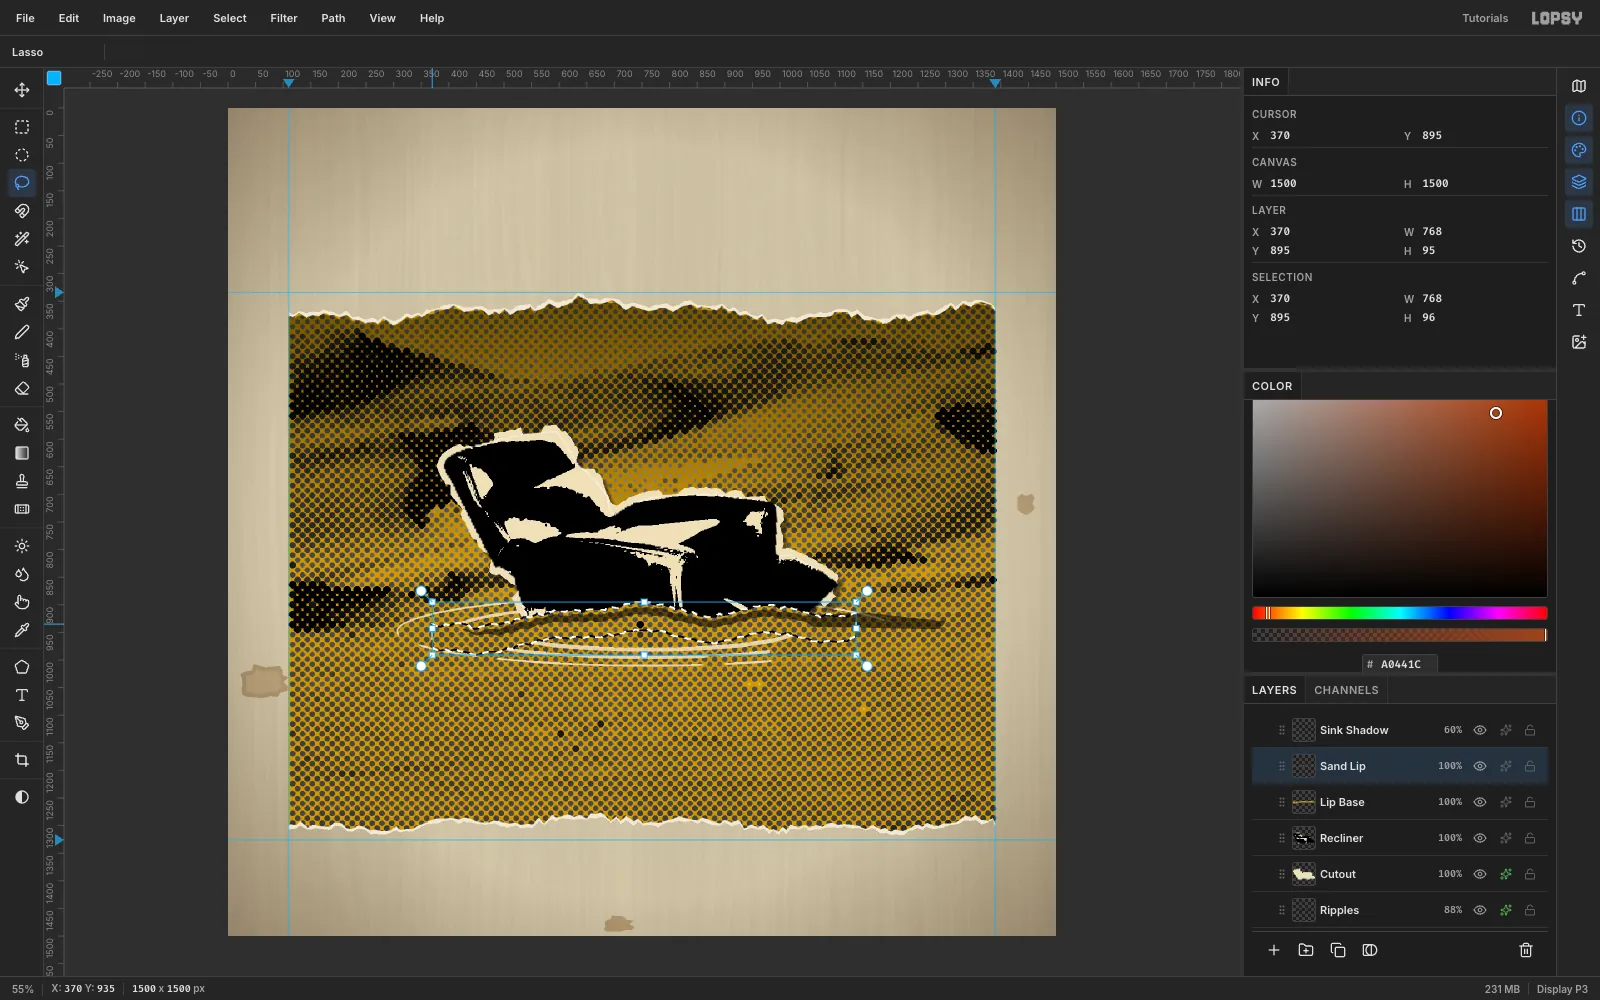
Sink the chair into the sand
Pick a lumpy sand line across the chair's base, rising slightly in the middle where the sand heaps up. Lasso from that line down, and press Delete on both
ReclinerandCutout.Now lay sand over the cut, so the chair sinks into the dunes instead of stopping at a flat edge:
- On the
Duneslayer, lasso a 40 px band that runs along the same line. Give its top edge a little extra wobble. - Press Cmd+C and Cmd+V. The band pastes back in place as
Sand Lip. - Drag
Sand LipaboveRecliner, and put a mustardLip Basefill of the same band under it. - On a
Sink Shadowlayer, fill a thin hard-edged dark band just under the sand line, plus a short cast shadow to the right. Set it to 60%.
- On the
-
Add quicksand ripples
On a
Rippleslayer behind the chair, draw three rings, largest first. For each: elliptical marquee, fill, Select → Shrink… by the ring width, then Delete:- 570 × 82, 3 px wide.
- 470 × 62, 4 px wide.
- 380 × 45, 5 px wide.
If you draw the small ring first, the next fill covers it.
Break the rings into arcs with a few dabs of a 46 px Eraser. Then give the layer a cream Color Overlay (
#EDE0BC) at 88%, so the rings catch the light on the dark sand.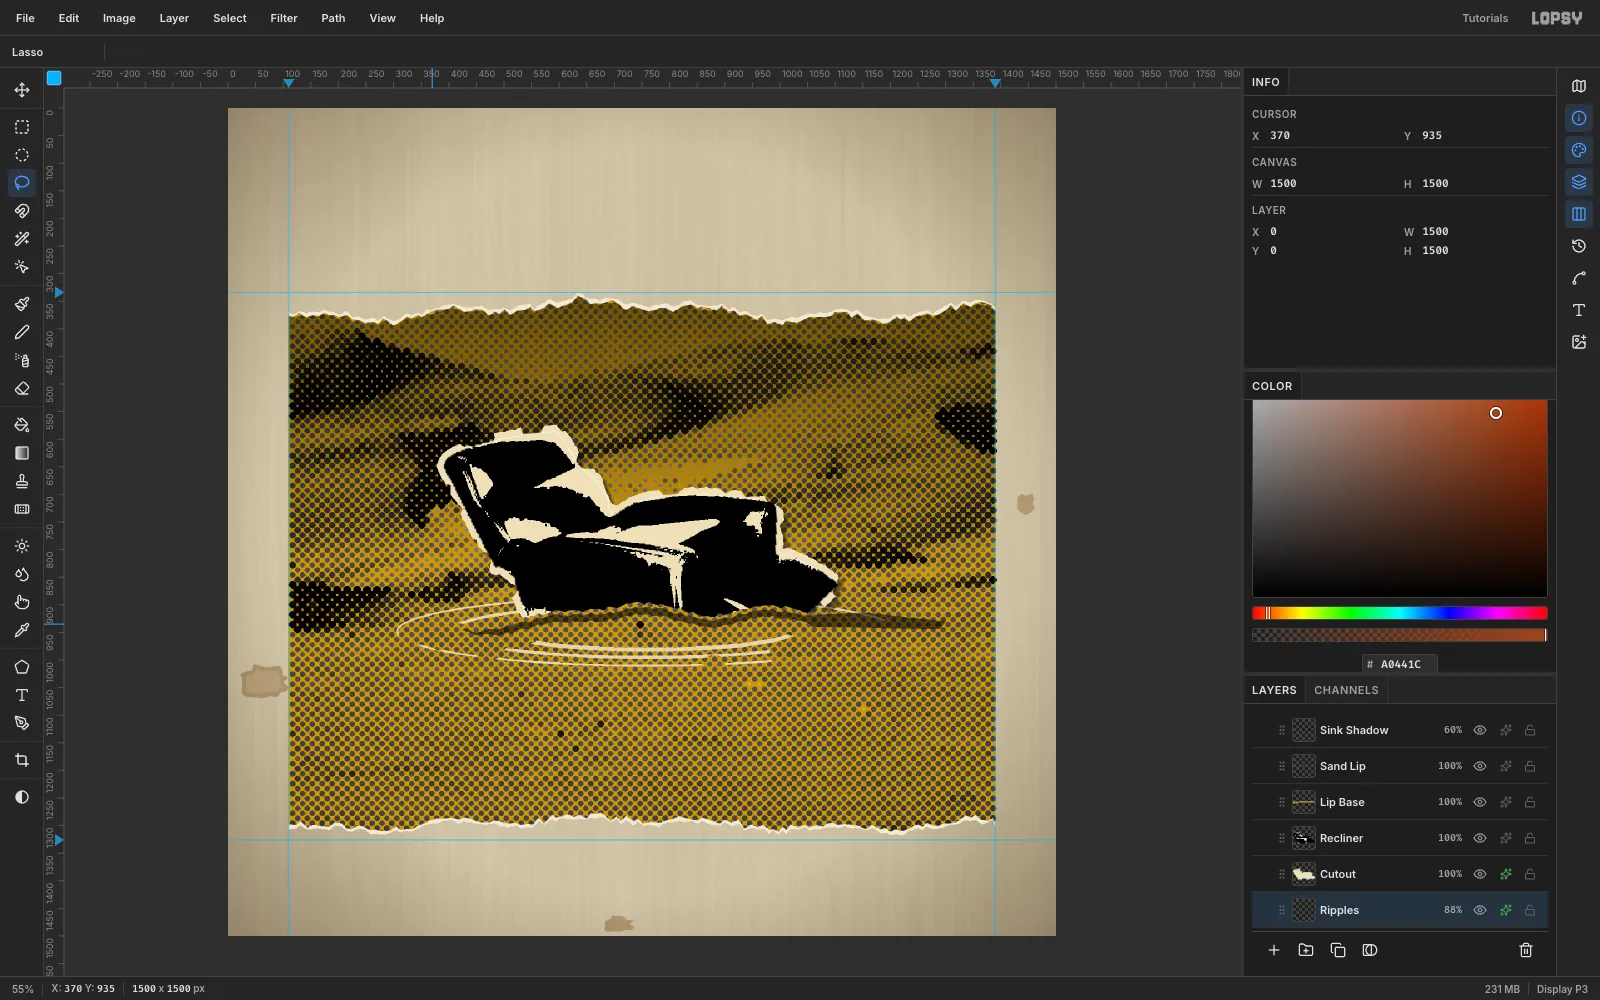
-
Xerox the title
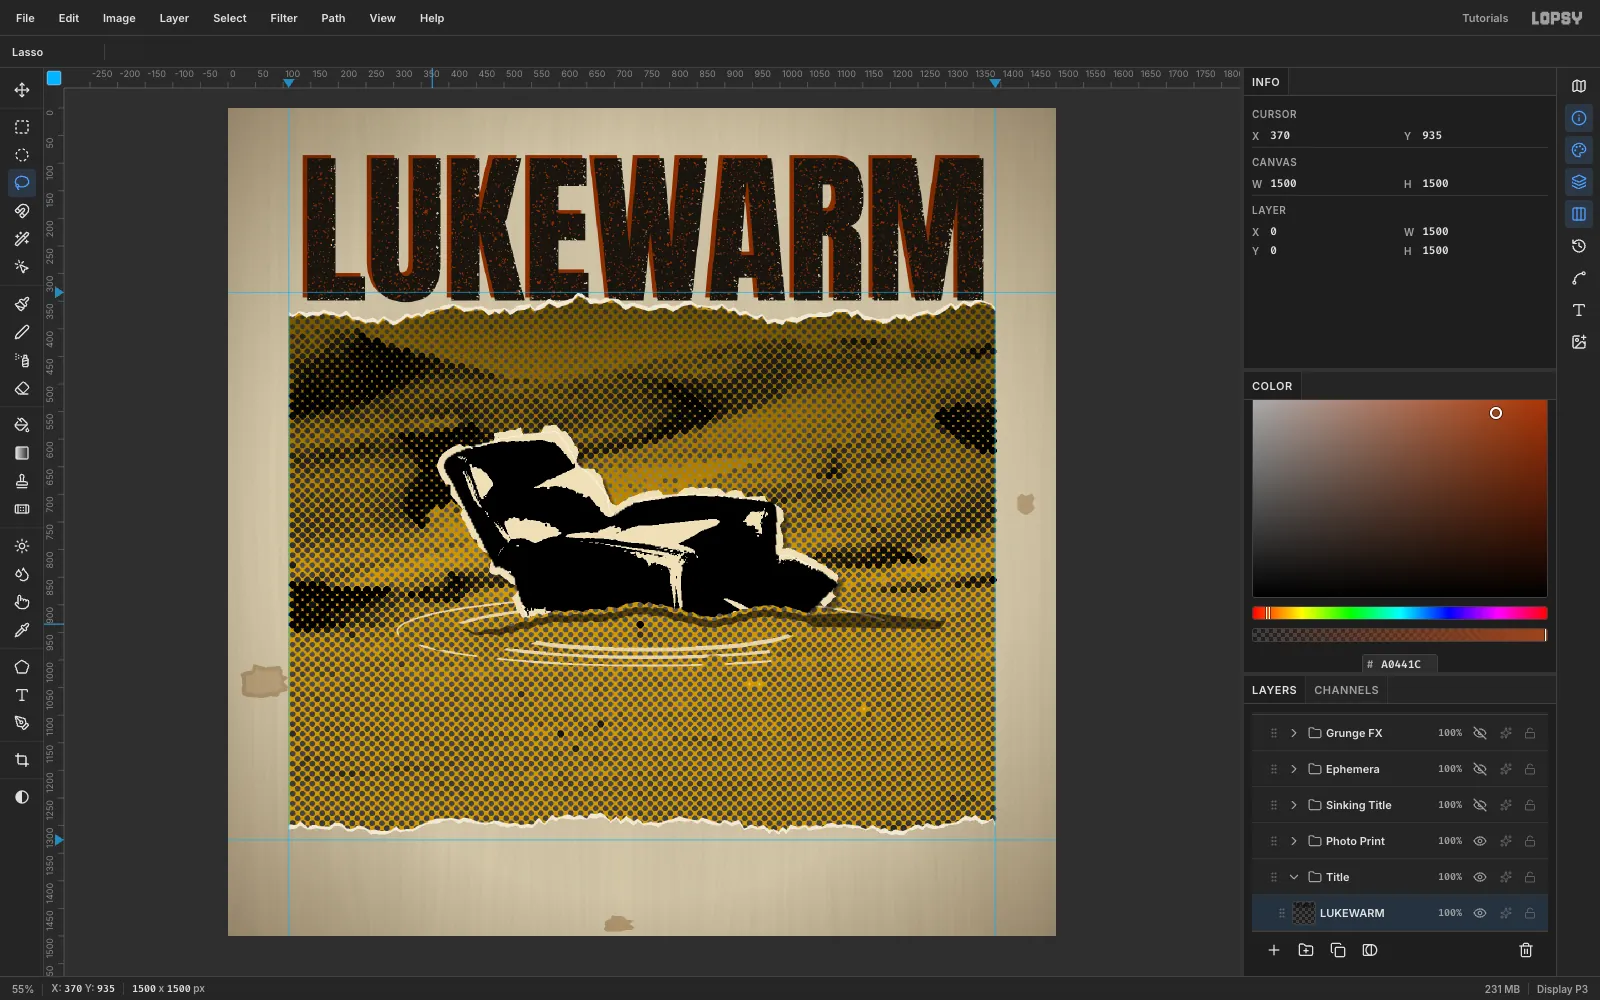
In a
Titlegroup, typeLUKEWARMin Anton at 300 px,#17140F. Create it in empty canvas, then move it so its baseline tucks just under the torn top edge of the photo.Rasterize it and build the toner dropout:
- Add a
Specklehelper: marquee just the title area and fill it grey. - Run Add Noise 100 and Gaussian Blur 3.2, then Threshold at a level that leaves about 7% white.
- Magic Wand a white speck with Contiguous off, and press Delete on
LUKEWARM. Delete the helper afterwards.
For the misregistered second plate:
- Duplicate the title, add a rust Color Overlay
#A0441C, and set it to Multiply. - Drag it under the black copy.
- Nudge it with the arrow keys so it sits 8 px left and 6 px up. A down-right offset reads as a drop shadow.
- Add a
-
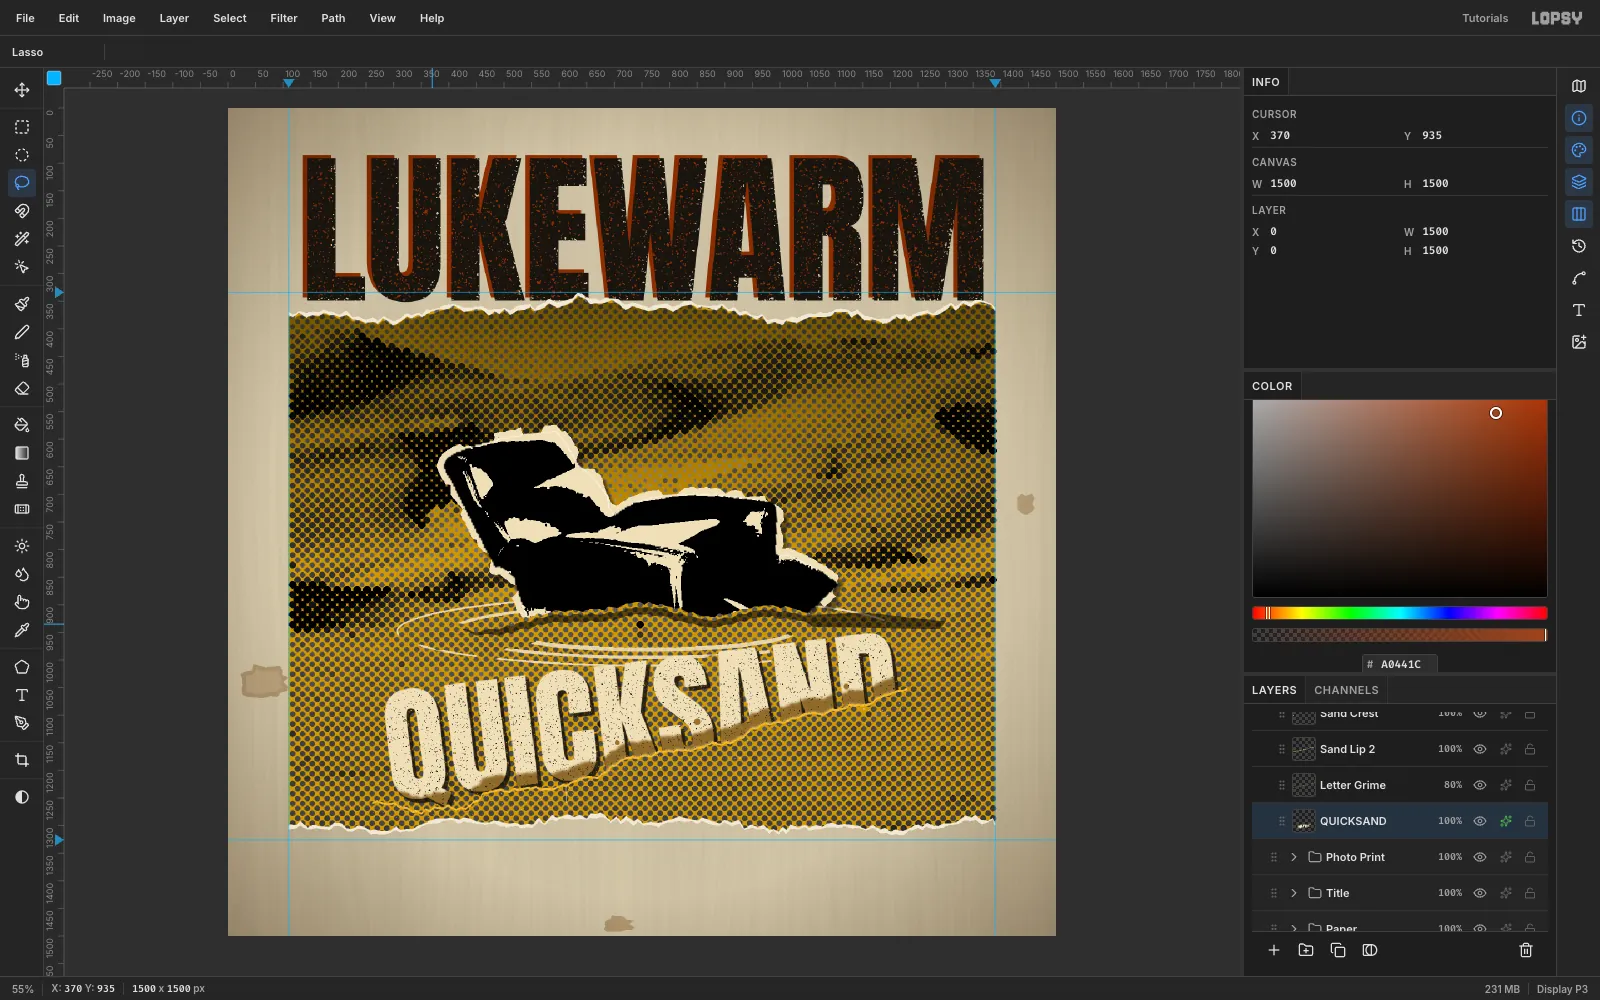
Sink QUICKSAND into the foreground
In a
Sinking Titlegroup, typeQUICKSANDin Anton at 230 px in cream#EDE0BC. Move it to about (288, 1000), rasterize it, and rotate it −7° with a marquee and the rotation handle.Lasso everything below a sand line that stays flat under the Q (so its tail survives) and then climbs toward the D. Press Delete, so the right end of the word sinks deepest. Then:
- Toner specks. Make another speckle helper that leaves about 4% white, and delete those specks from the letters. Keep the damage light, because the word has to read at thumbnail size.
- Shadow. Add a hard Drop Shadow:
#17140F, offset 7 / 7, Blur 0, Opacity 85. - Sand band. Hide the word, lasso a lumpy band along the cut, and Copy Merged Cmd+Shift+C. Show the word again and paste the band above it.
- Grime. Add a blurred brown band on Multiply, plus a few sand-coloured dots on the letter faces, clipped to the letters. The sand then clings to the letters.
-
Tape on the band name and stamp it
In an
Ephemeragroup:- Tape Band. Lasso a strip about 820 × 120 with ragged ends, fill it
#D9C690, and add Mono noise 14. - Band name. Type
MILDEW PARISHin Permanent Marker at 88 px. Centre it on the tape, rasterize it and Merge Down onto the tape. Rotate the tape −2.5°. - Corner tapes. Draw one short tape across the photo's top-left corner. Copy it, paste it, and use the Move tool's Flip Horizontal for the other corner. Set both to Multiply at 88%.
- Stamp. Make two rust
#A0441Cframes with fill → Shrink → Delete. AddPROMO COPYandNOT FOR SALEin Special Elite, and merge them into the stamp. - Stamp ink. Delete a speckle selection from the stamp for uneven ink, set it to Multiply, and rotate it −6°. Keep every word of the stamp legible.
- Coffee ring. Build a broken ring from three thin rings in browns, with a darker rim. Place it straddling the photo's bottom-right edge on Multiply at 55%.
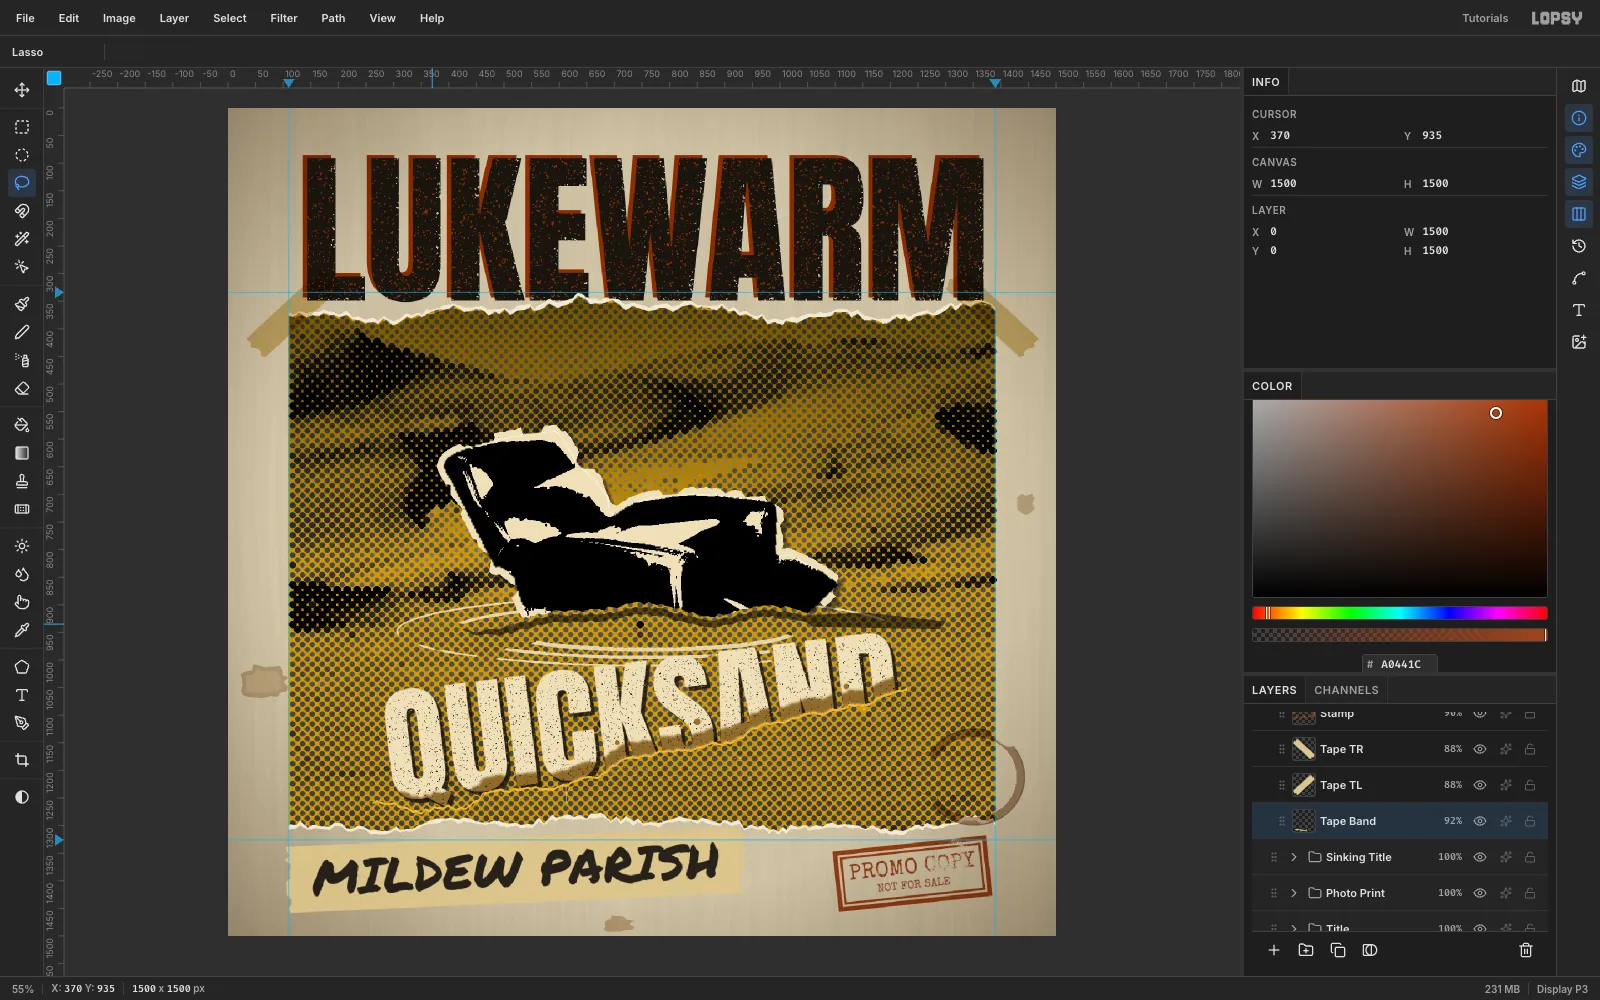
- Tape Band. Lasso a strip about 820 × 120 with ragged ends, fill it
-
Finish with grain, dust and scratches
Build these in a
Grunge FXgroup on top:- Grain. Fill a layer grey, run Add Noise 70 (Mono, Gaussian), and set it to Overlay at 45%.
- Dust. Fill a layer black, run Add Noise 100 and Gaussian Blur 1.2, then Threshold so only about 0.4% of pixels stay white. Set it to Screen at 80%.
- Scratches. Use a 3 px Brush with Fade 240 and paint short, mostly vertical strokes in
#F4EEDC, so each scratch tapers off. Set the layer to Screen at 60%.
Save the project, and use File → Quick Export PNG for the finished cover.