Make a Vintage Halftone Christmas Card
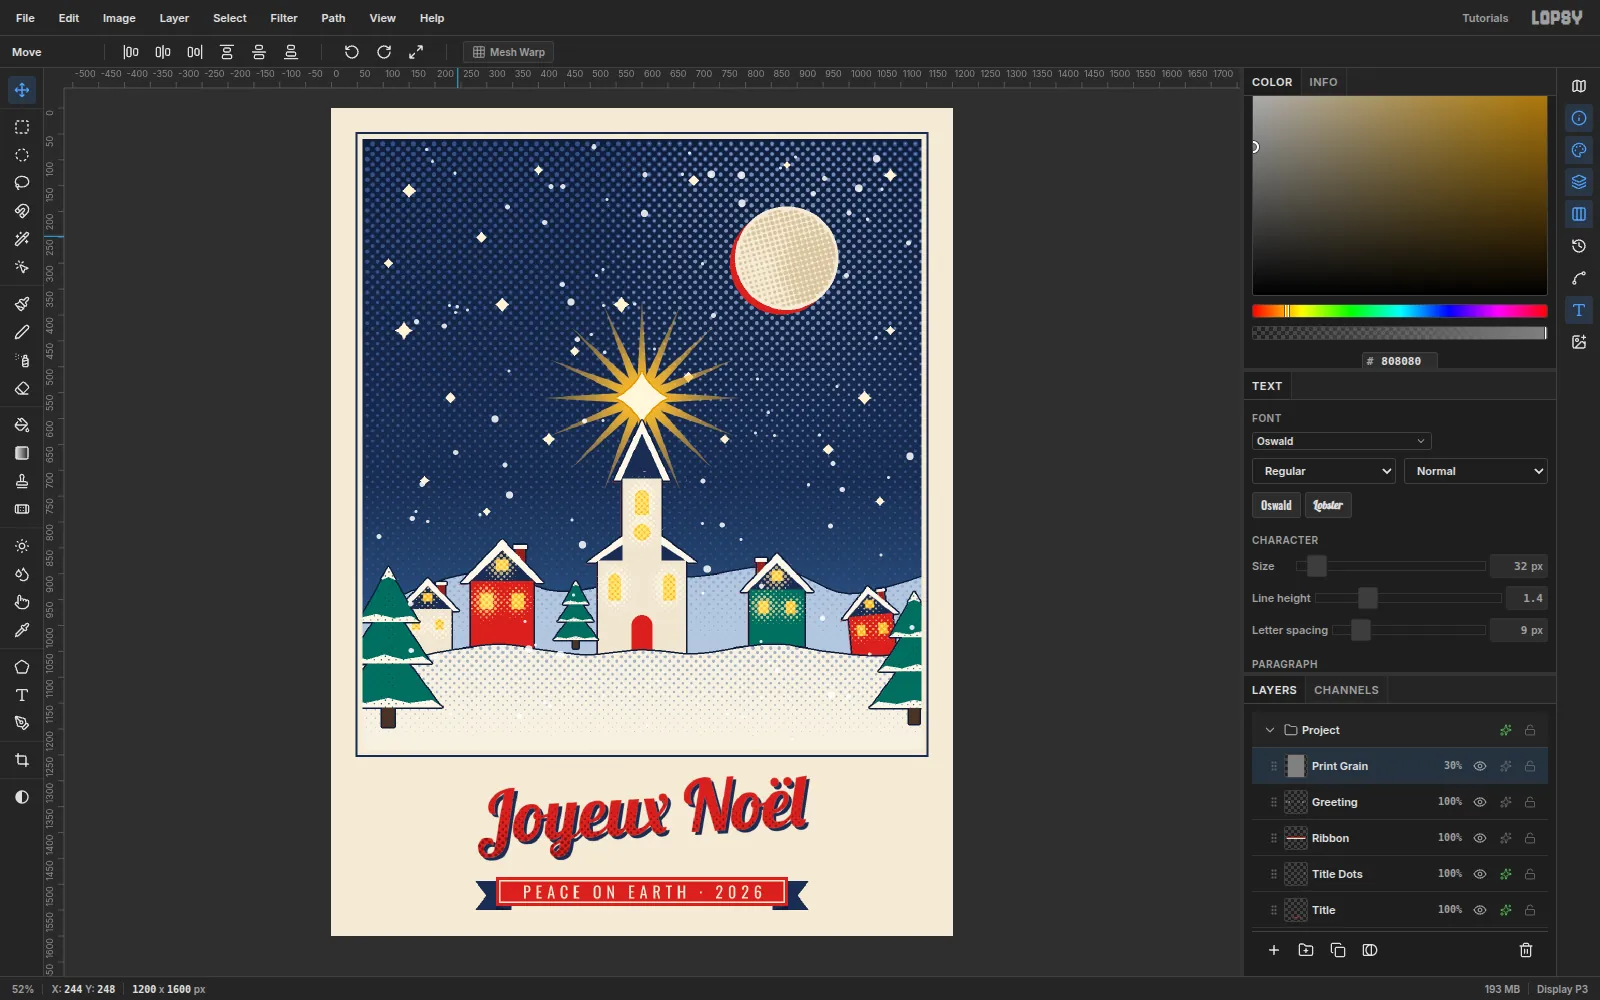
Design a retro screen-printed Christmas card in Lopsy. Halftone dots shade the sky, snow and script title, and a snowy village glows under a guiding star.
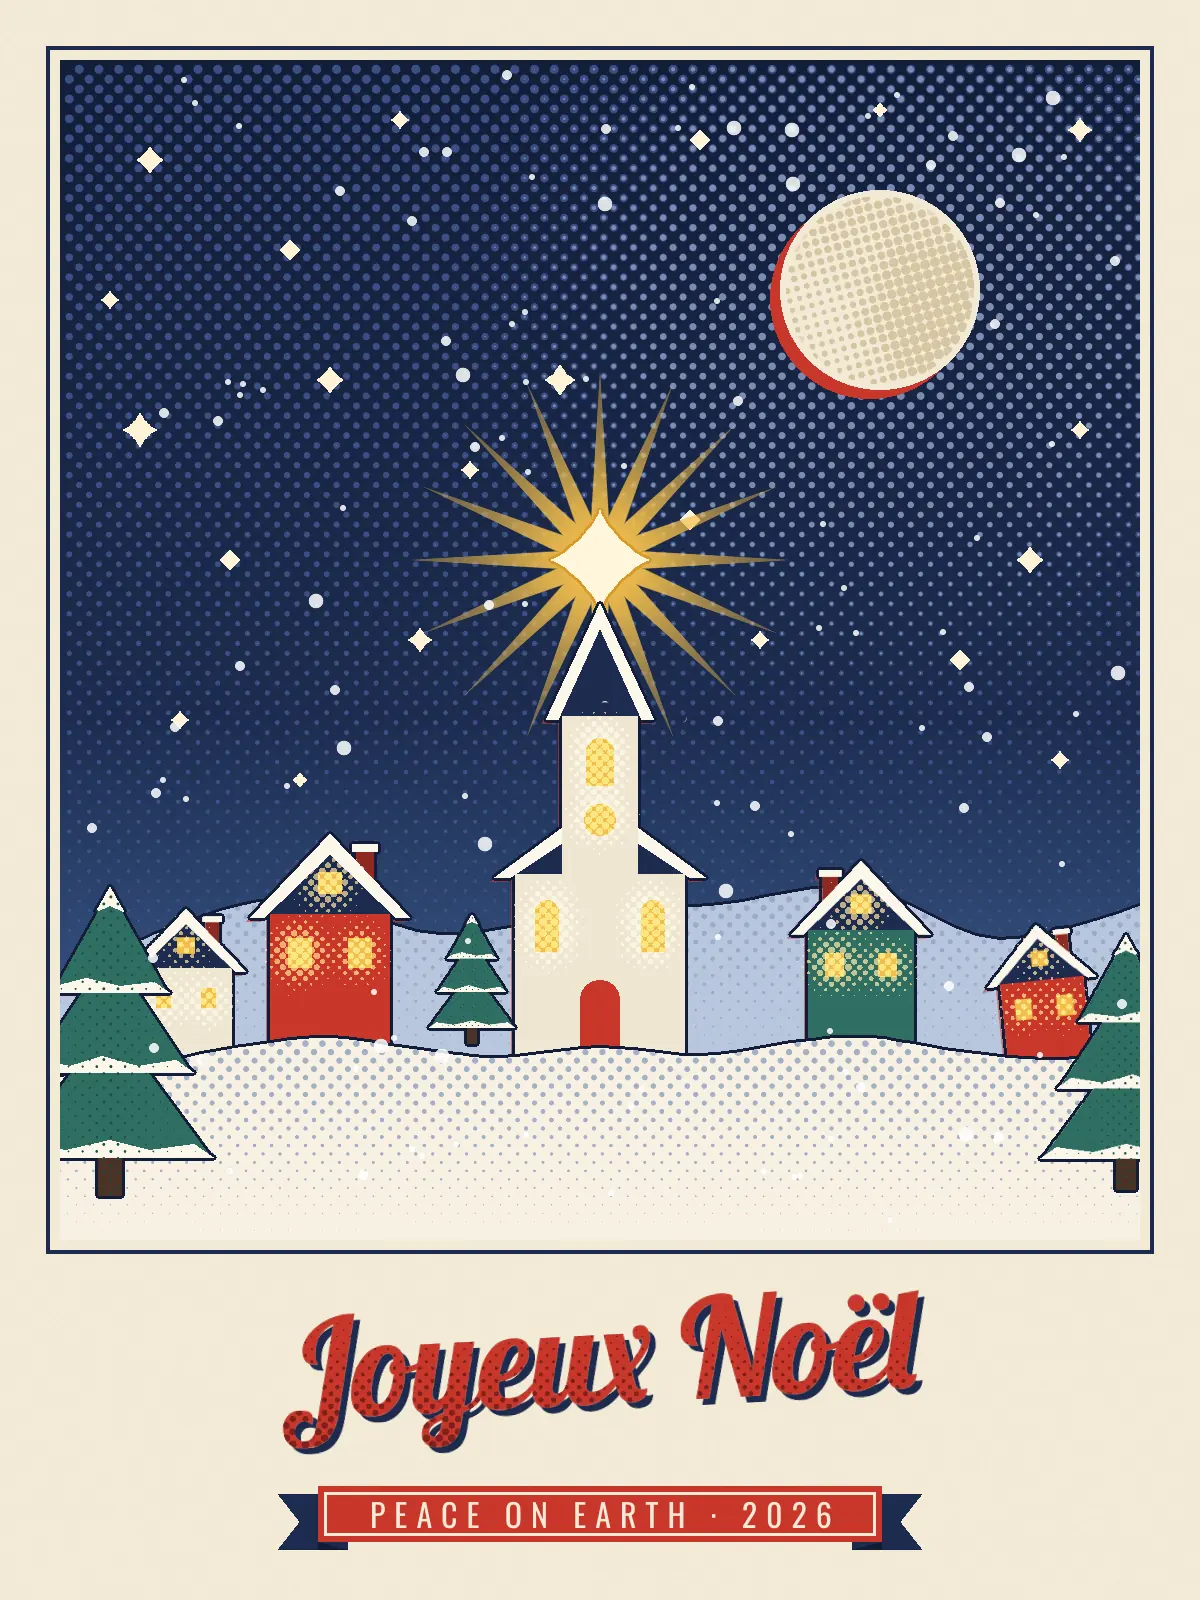
Mid-century Christmas cards were printed in two or three flat inks, and all the shading was done with halftone dots. The plates rarely lined up perfectly, so a sliver of red peeked out from behind the moon and the lettering. This tutorial rebuilds that look in Lopsy for Noël Village, a 1200 × 1600 px card.
The whole trick is one idea you'll reuse six times. Paint a grayscale gradient inside a selection, run Filter → Halftone, then recolor the dots with a Color Overlay. Dark gray becomes big dots, light gray becomes small dots, and white disappears.
Along the way you'll also use:
- guides, the Gradient Editor and the Sunburst filter
- Lasso fills, copy / paste in place, Flip Horizontal, scaling and rotating with the transform handles
- the Magic Wand with Select → Grow to recolor a copy
- groups, a Snap to Grid group drag, and undo / redo checks
- text: a tilted script title with dots inside the letters, and small caps seated in a ribbon
The palette is four inks on cream paper:
- Paper
#F3EAD6, snow#F7F1E3/#FBF6EA - Navy
#1D2B4Fand night#131D38, dot inks#3A4F85and#8A9CC0 - Red
#C9362B, teal#2F6E62, gold#F2BE4B
-
Set up the card and its guides
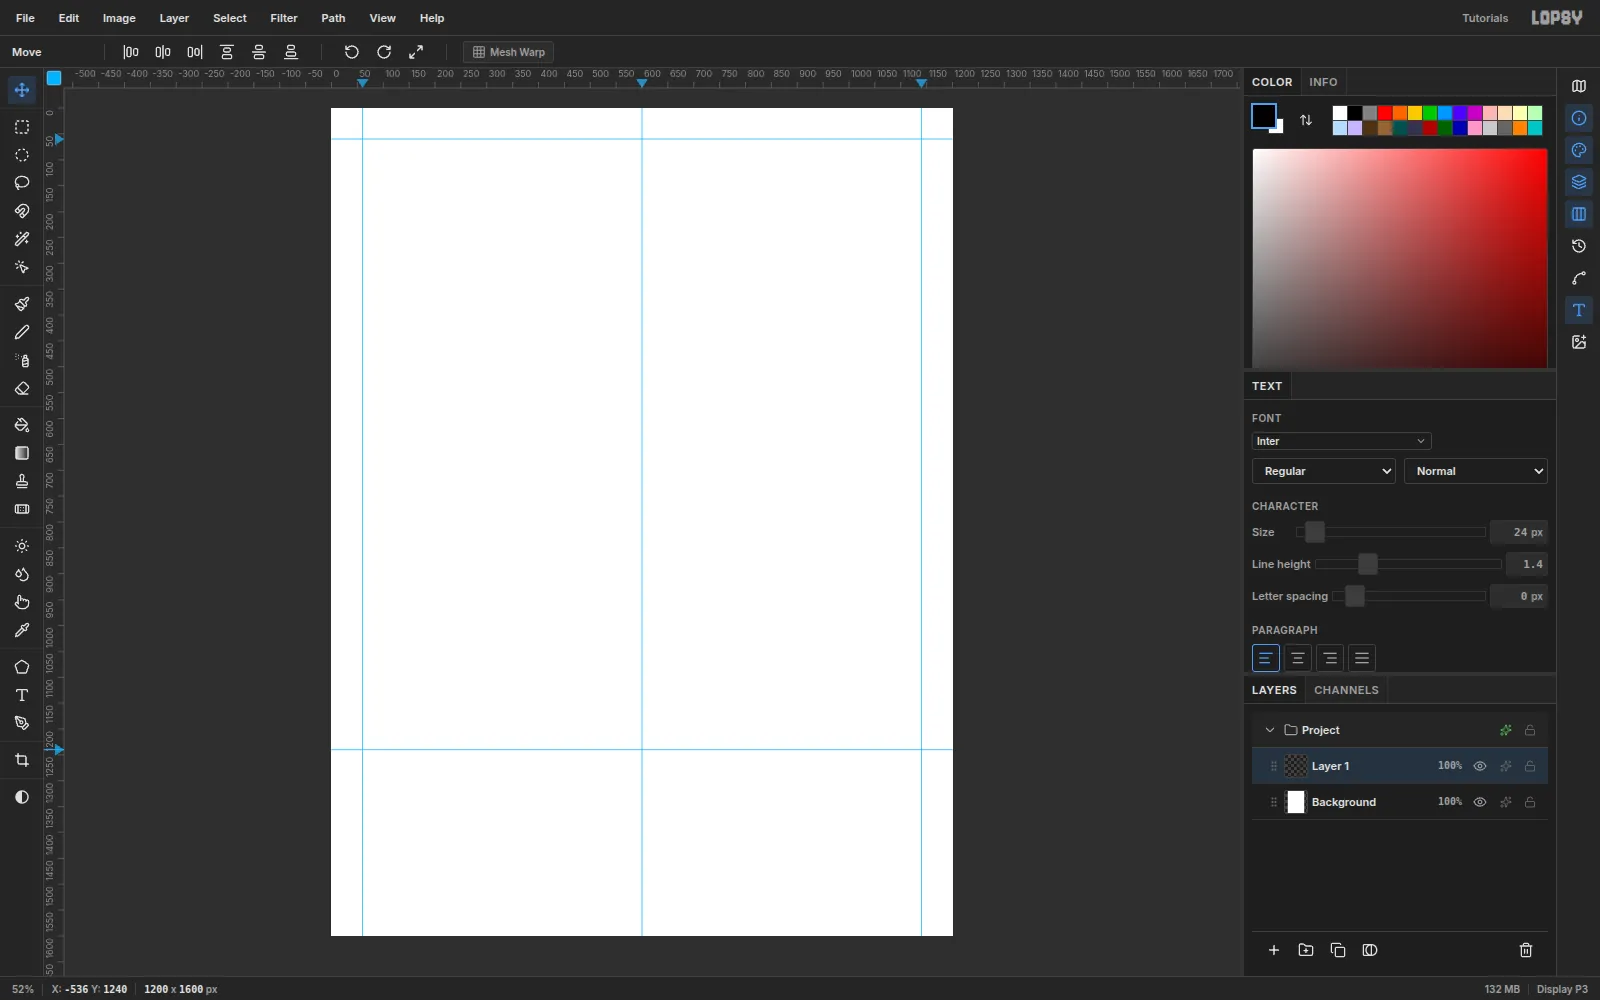
Choose File → New and make a 1200 × 1600 px document with a white background.
Make sure View → Show Rulers and Show Guides are on. Then click the top ruler at 60, 600 and 1140, and the left ruler at 60 and 1240. The rectangle between the outer guides is the picture. The cream border outside it and the band under it hold the lettering. The center guide lines up the star, the steeple and the title.
-
Paper and night sky
Select Background, set the foreground to
#F3EAD6and choose Edit → Fill. Run Filter → Add Noise… at Amount 6 with Mono on for a faint paper tooth.Rename Layer 1 to Night Sky by double-clicking its name. Drag a Rectangular Marquee (M) from guide to guide, (60, 60) to (1140, 1240).
Pick the Gradient tool, set Type to Linear, and open Advanced… to build three stops:
#131D38,#1D2B4Fat 70% and#34507F. Drag from (600, 60) straight down to (600, 1000).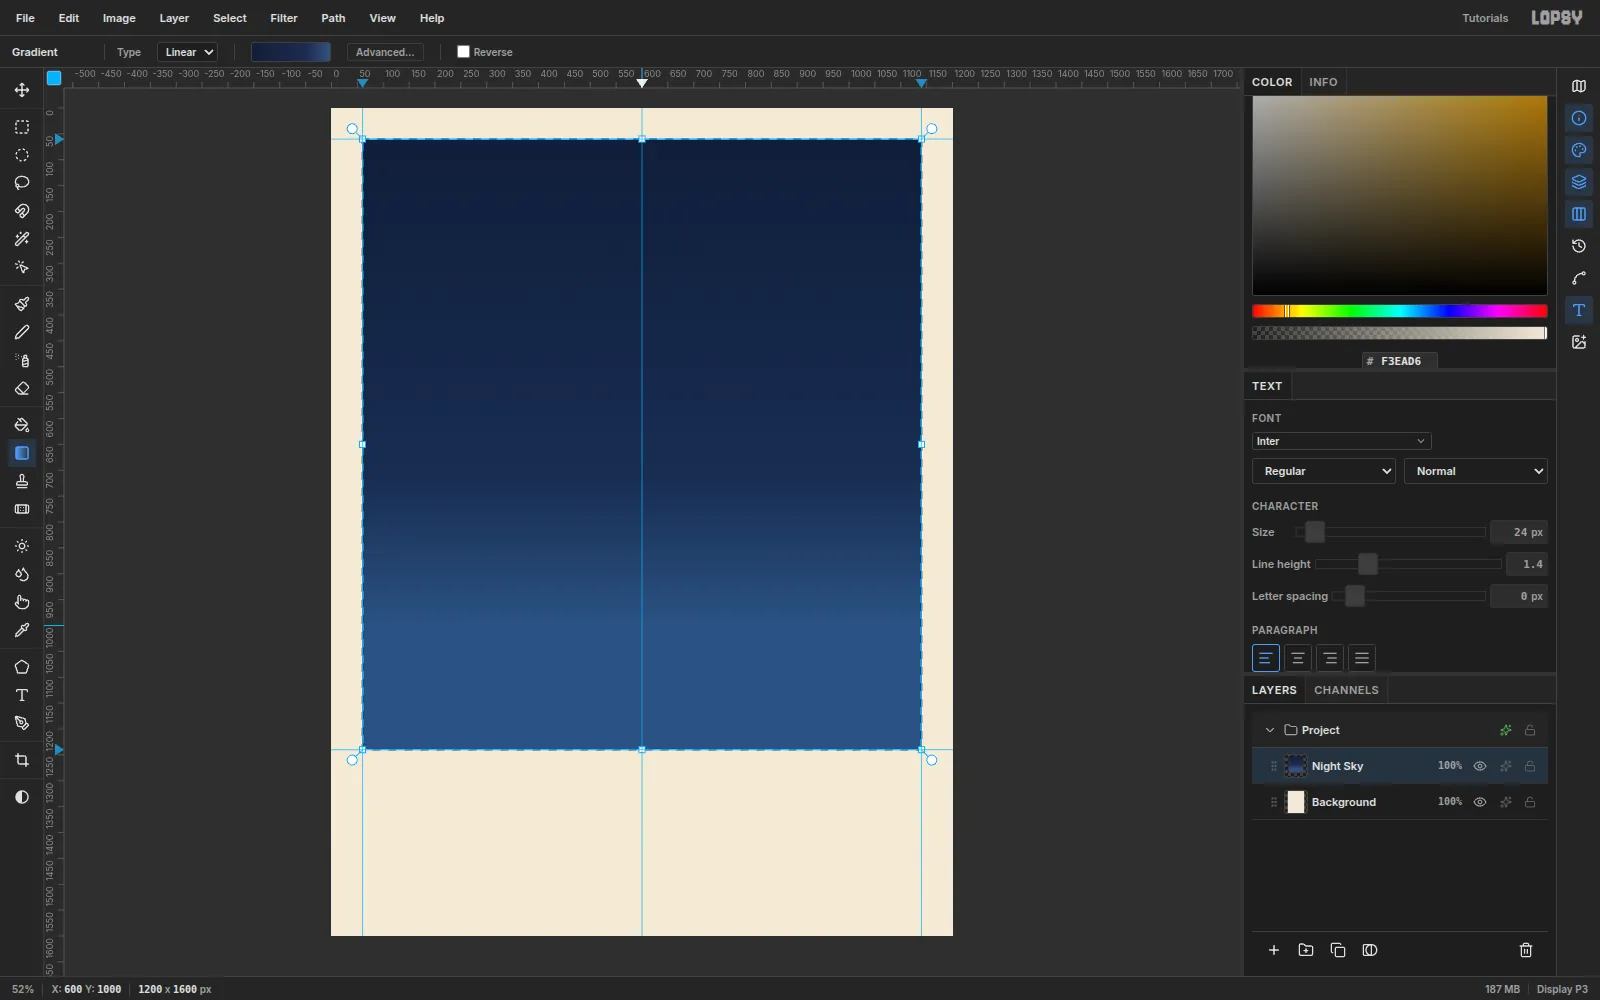
-
Screen the sky with halftone dots
This is the core technique, so take it slowly.
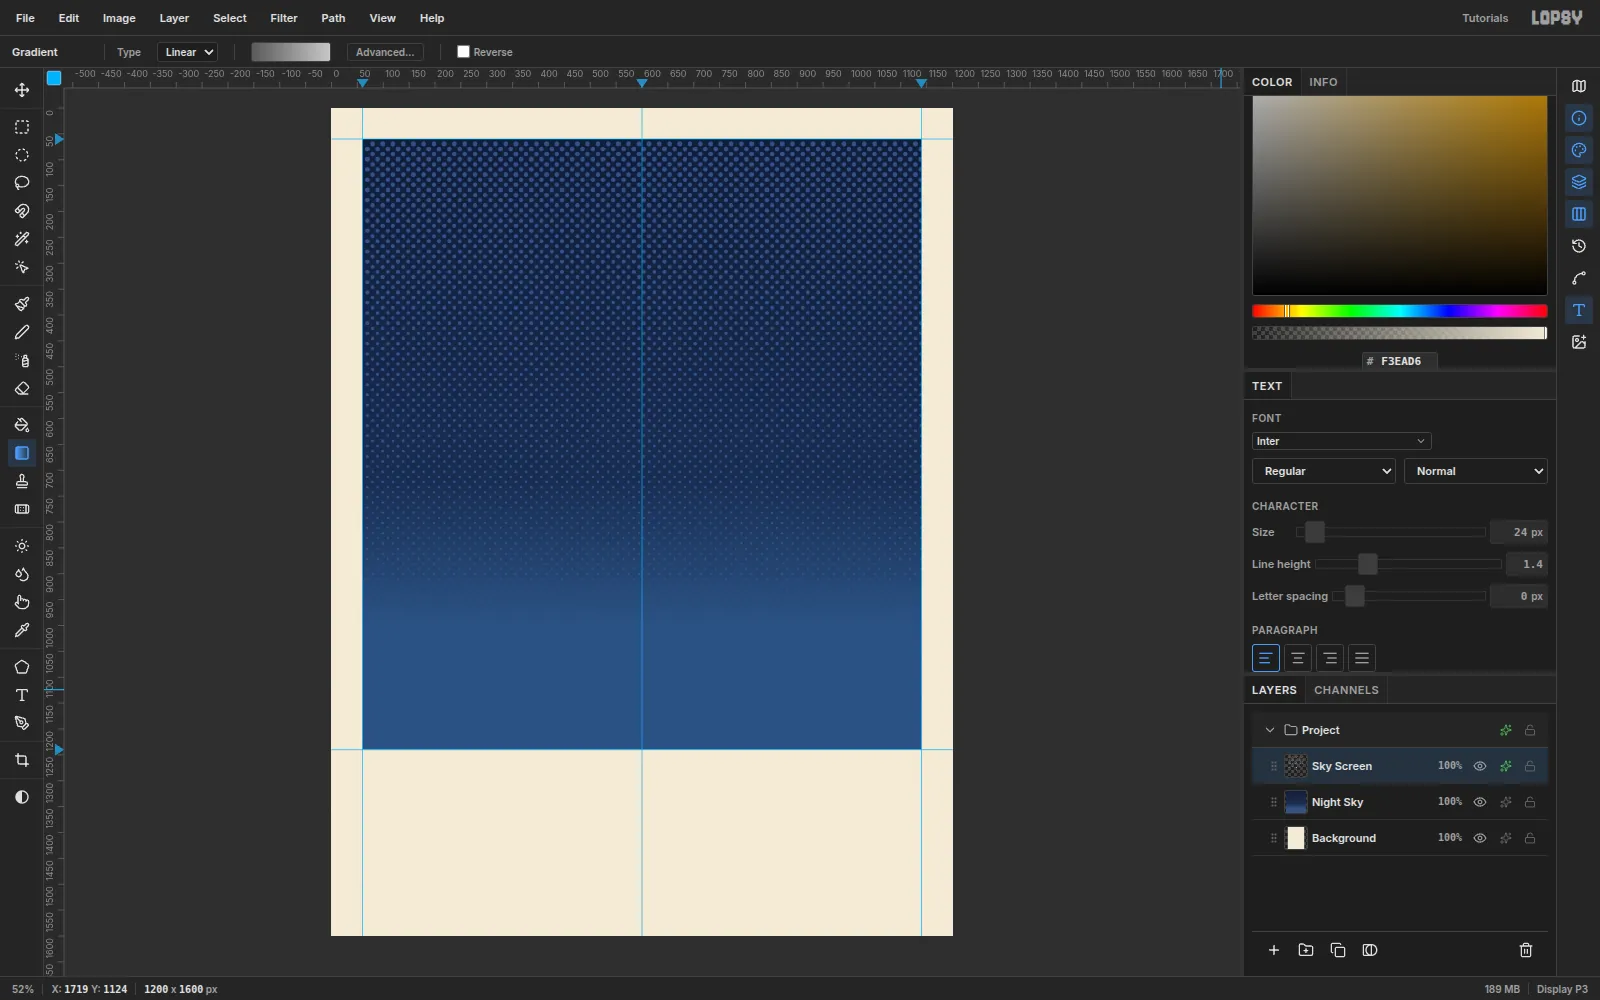
- Add a layer called Sky Screen. Marquee the sky rectangle again.
- With the Gradient tool, make a two-stop gradient from
#5A5A5Ato#C8C8C8and drag from (600, 60) down to (600, 1000). - Choose Filter → Halftone… and set Dot Size 14, Density 1, Angle 45, Softness 0.6. Click Apply.
- Press Cmd+D. Open the layer's effects and turn on Color Overlay with
#3A4F85.
Halftone turns every cell of a rotated grid into one dot, sized by how dark the cell is. The gray gradient becomes dots that shrink toward the horizon. The overlay then recolors them in a lighter ink than the sky, like a second screen printed over the navy.
-
Add a halo of pale dots around the moon
Add a layer called Moon Glow Dots and marquee the sky again. Set the Gradient tool to Radial, with stops
#000000,#8A8A8Aat 50% and#FFFFFF. Drag from the moon's center at (880, 290) out 440 px to (1320, 290).Run Halftone with the same settings (Dot Size 14, Angle 45). Deselect, then give the layer a Color Overlay of
#8A9CC0and set its opacity to 80%. The dots are big near the moon and fade to nothing, which makes a glow without any blur.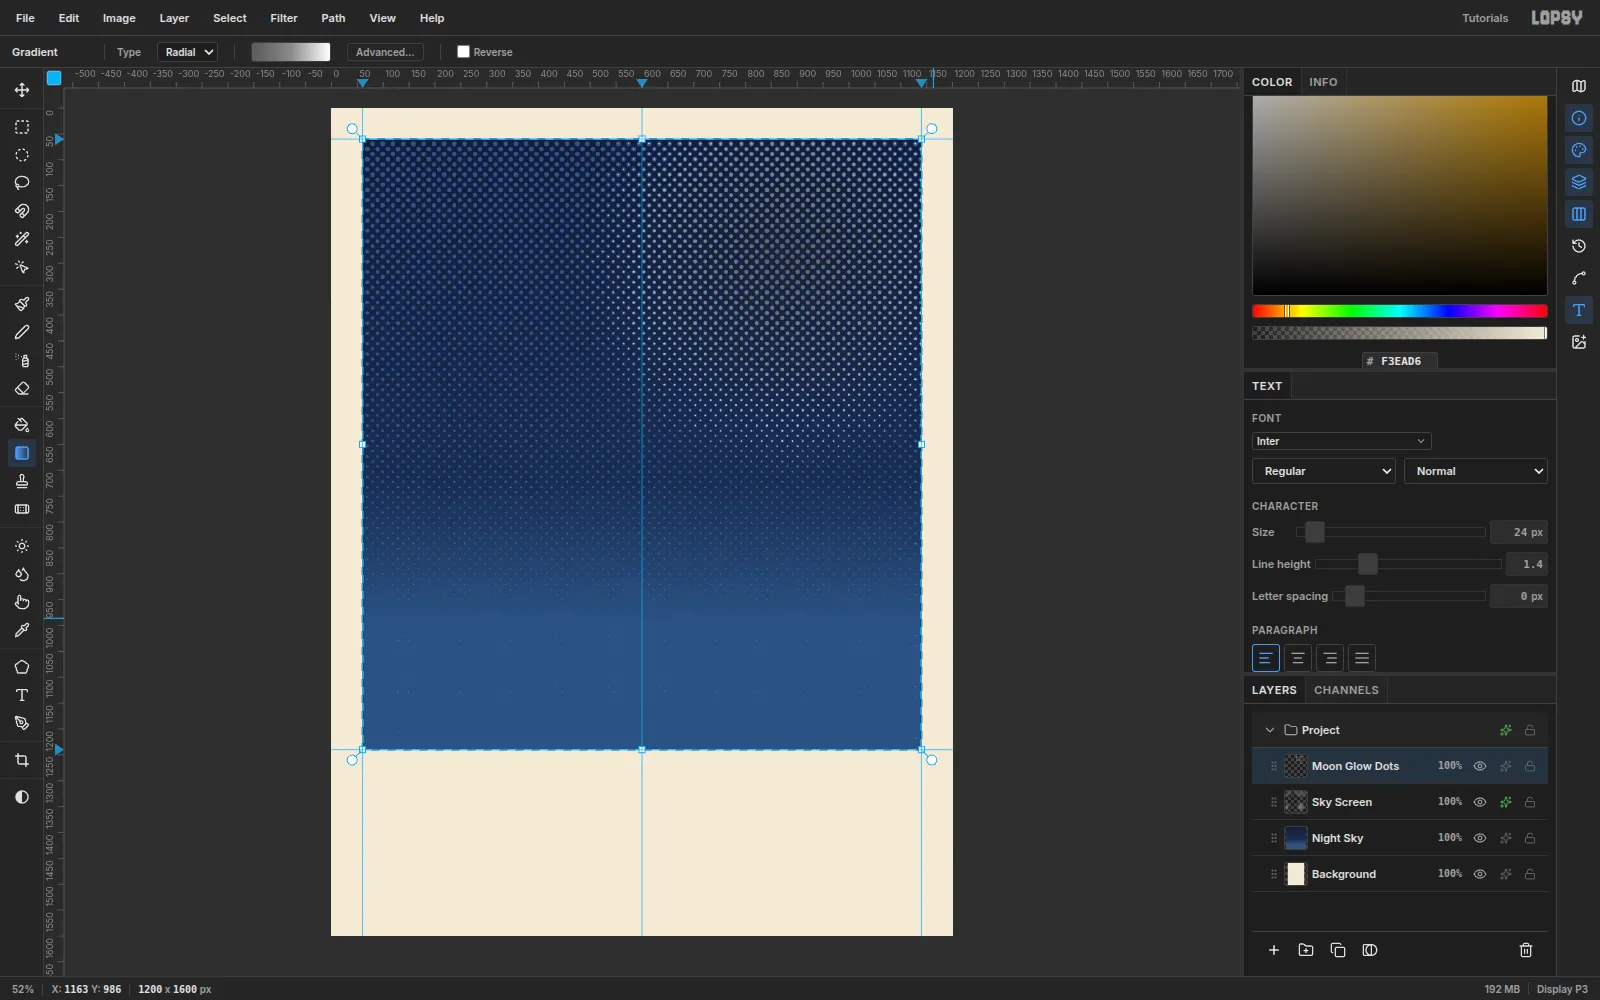
-
Print the moon slightly out of register
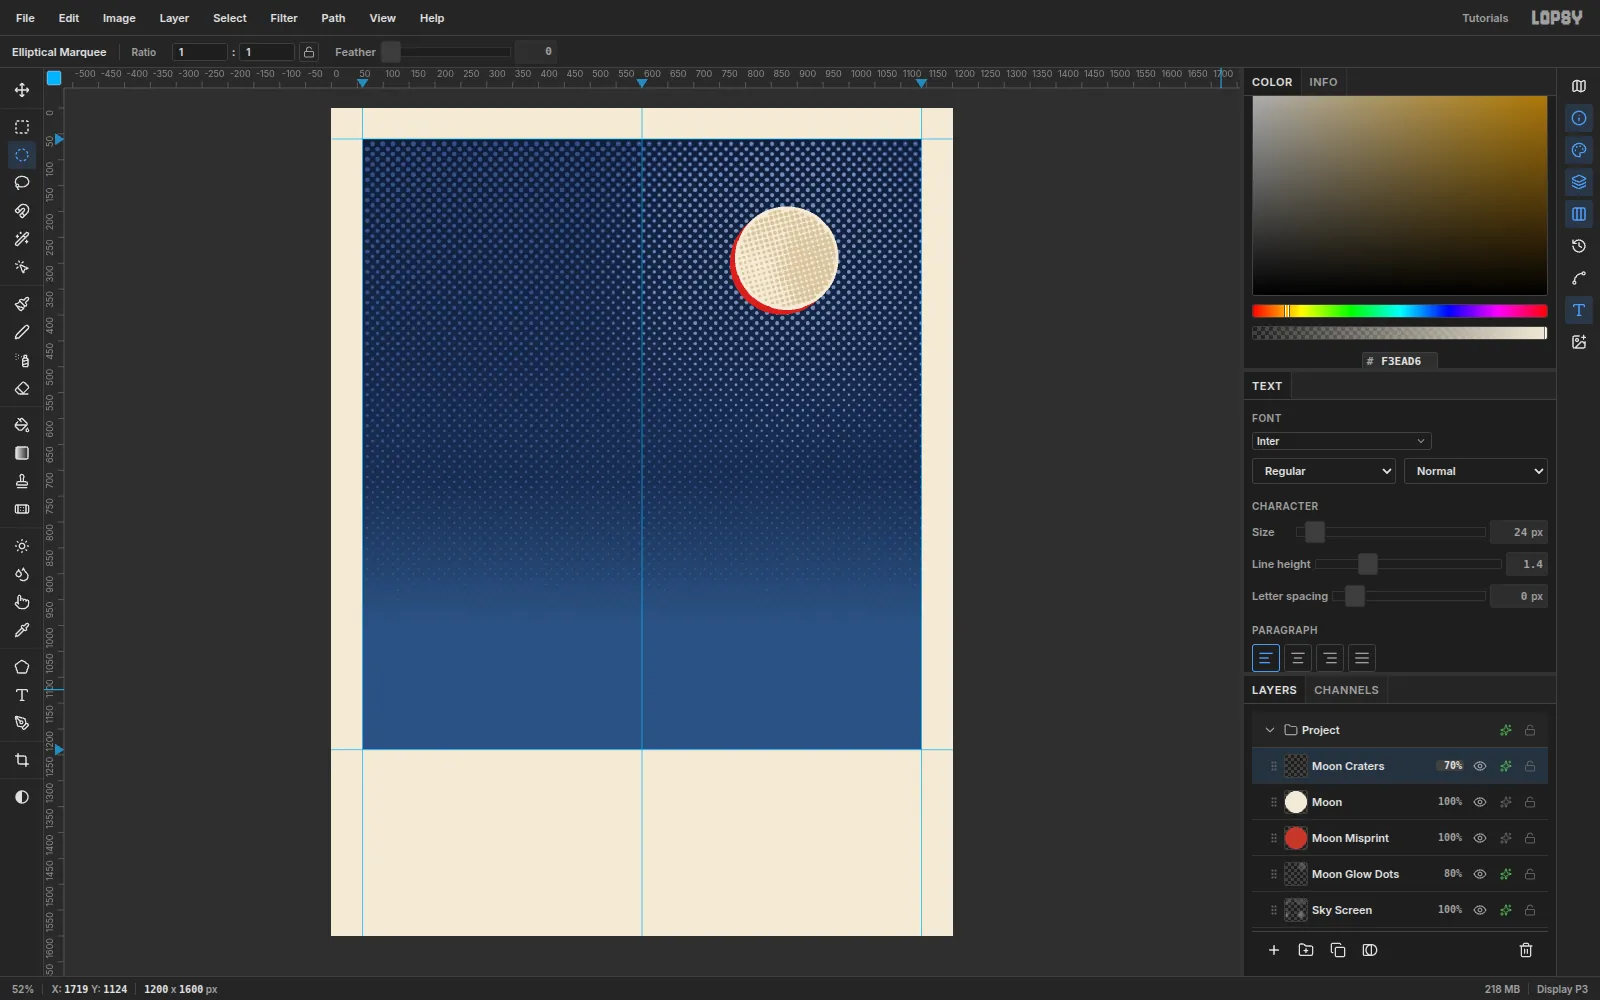
- Add a Moon Misprint layer. Hold Cmd as you drag the Elliptical Marquee to make a circle of radius 100 centered on (870, 299), and fill it with red
#C9362B. - Add a Moon layer and fill the same size circle centered on (880, 290) with the paper color
#F3EAD6. The red plate now shows as a thin crescent at the lower left. - Add Moon Craters. Marquee a circle of radius 94 on the moon's center and run Filter → Clouds… at Scale 5, then Halftone at Dot Size 10, Angle 15.
- Deselect, add a Color Overlay of
#C9B68C, and set the layer to 70%.
The Clouds filter's light and dark patches turn into large and small dots, which read as the moon's seas.
- Add a Moon Misprint layer. Hold Cmd as you drag the Elliptical Marquee to make a circle of radius 100 centered on (870, 299), and fill it with red
-
Scatter stars and raise the guiding star
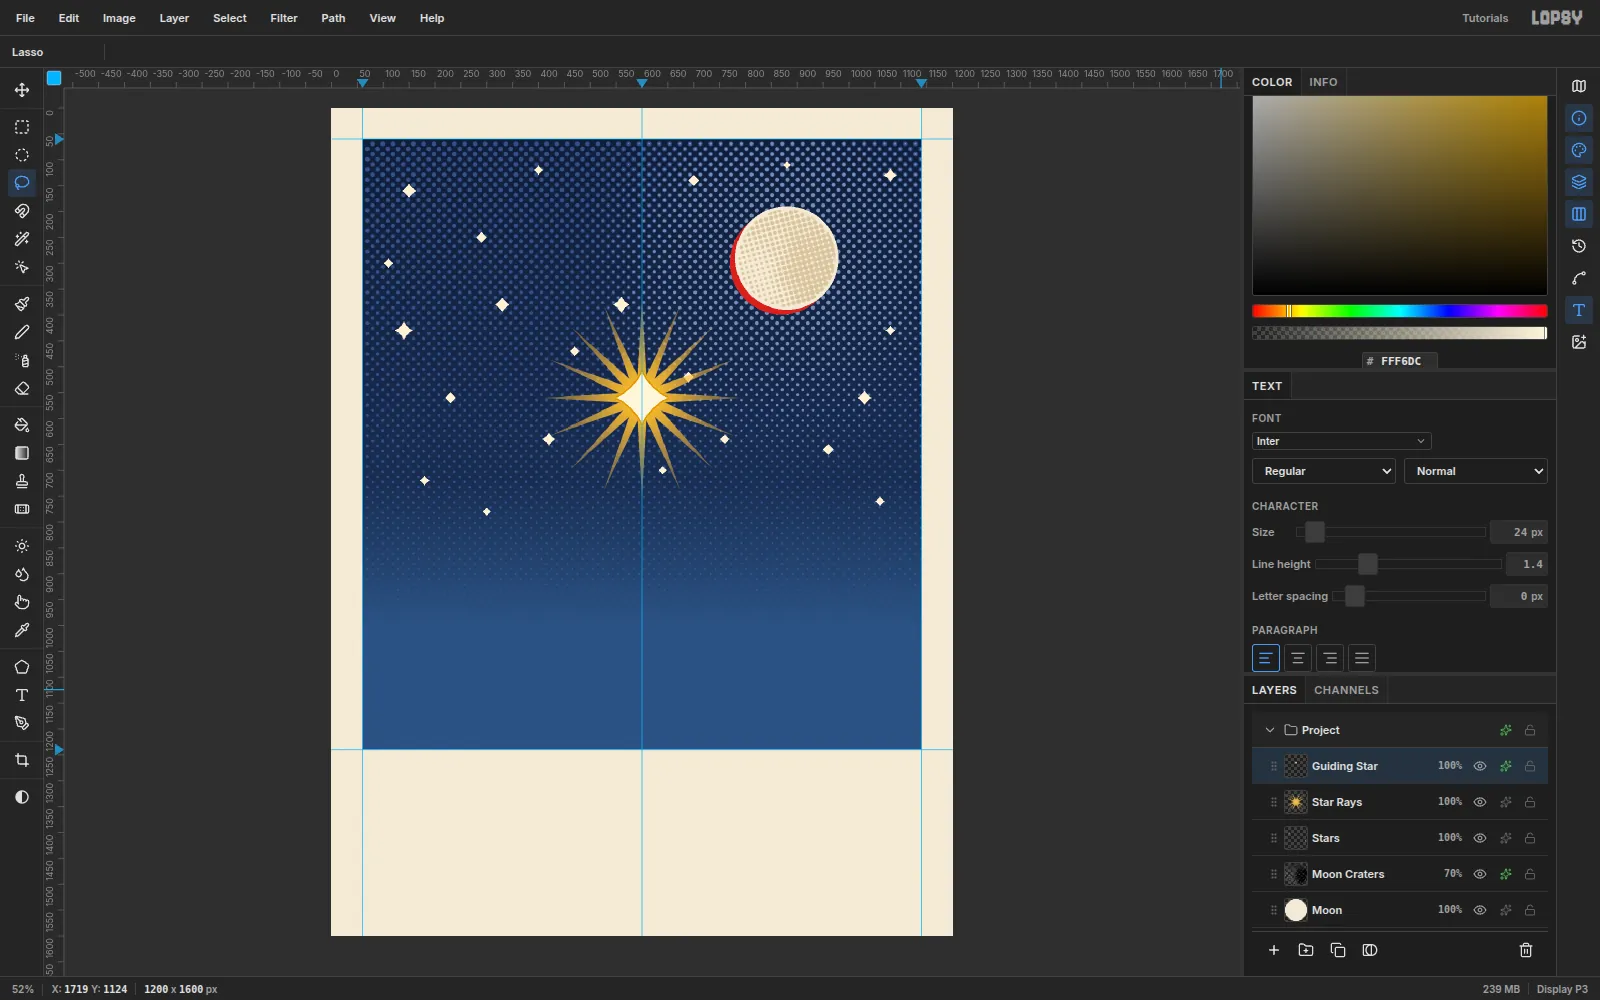
Add a Stars layer. With the Lasso (L), draw small four-point sparkles (concave diamonds 10 – 18 px across) and fill each one with
#FFF3D6. Scatter about twenty. Put a few in the empty upper left and keep them away from the moon.For the guiding star:
- Add Star Rays, set the foreground to gold
#F2BE4Band choose Filter → Sunburst…. Use Rays 16, Length 16, Width 30, Taper 100, Fade 60, Softness 10, Center X 50, Center Y 35. Taper 100 turns the wedges into needle-sharp spikes. - Add Guiding Star and lasso a larger sparkle, 100 px across, centered on (600, 560). Fill it with
#FFF6DCand give it a 3 px Stroke of#D89A2A.
- Add Star Rays, set the foreground to gold
-
Lay down the snow drifts
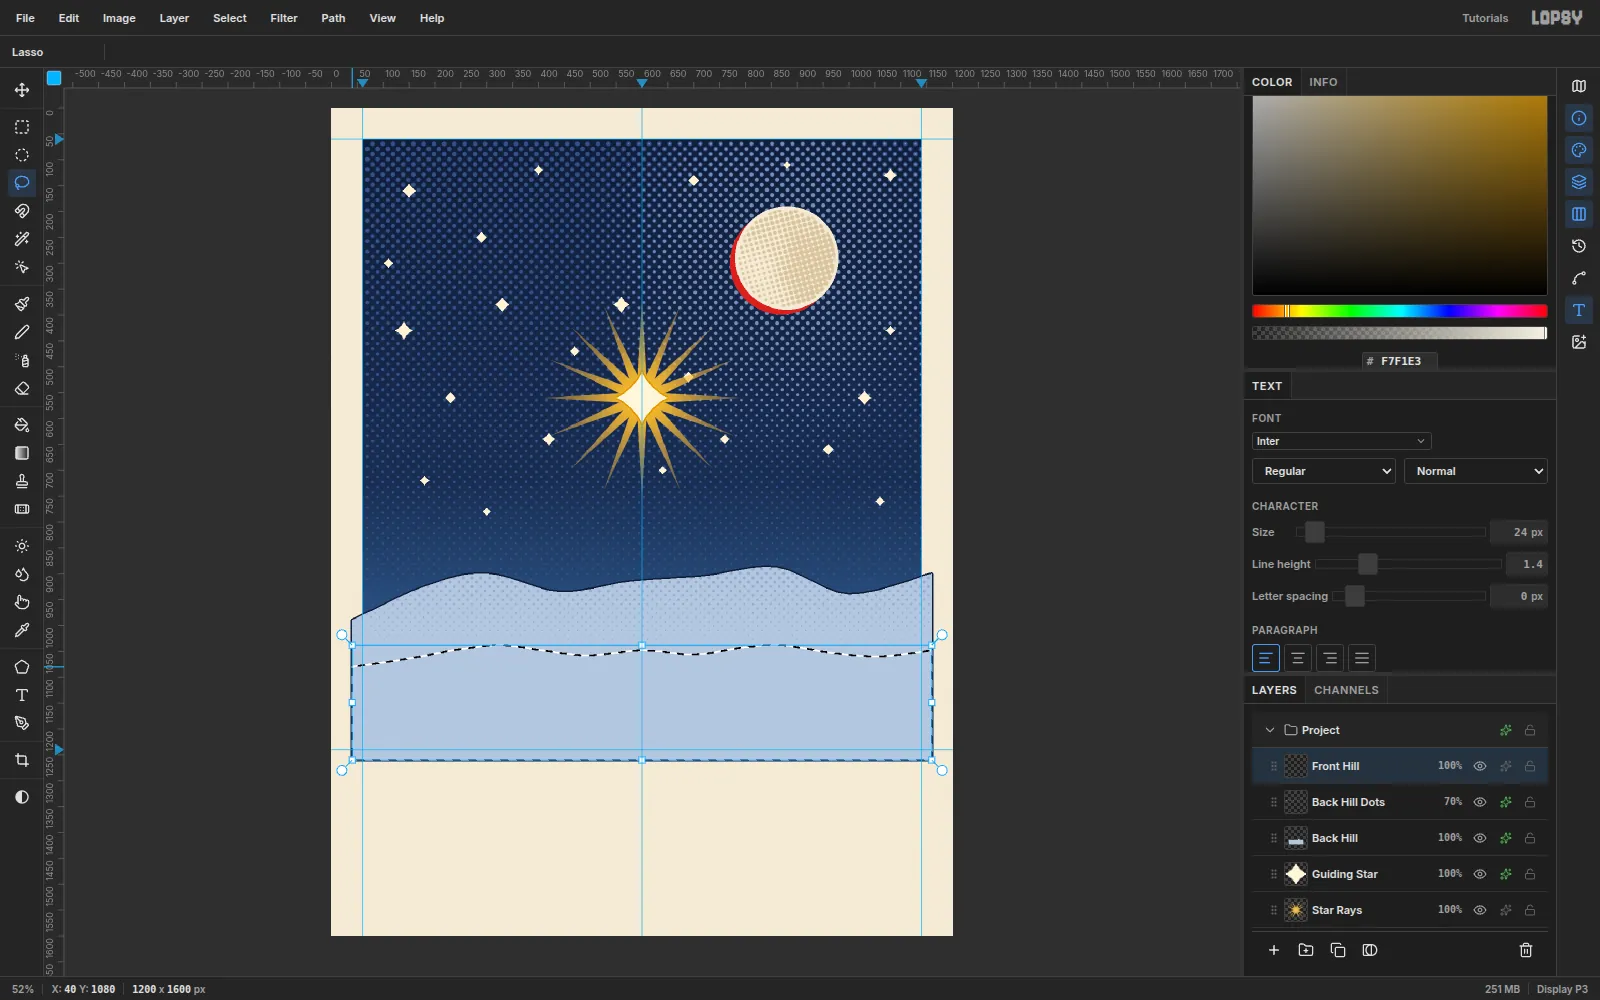
Real screen prints have a dark key line around every shape. You'll give each shape a 3 px Stroke in night
#131D38.- Add Back Hill. Lasso a gently rolling horizon from (40, 990) up to around y 890 – 940 and across to (1160, 900), then down past the bottom of the picture. Fill it with
#B7C6DDand add the stroke. - Add Front Hill and lasso a second, lower drift whose top edge dips between y 1038 and 1080. Fill it with
#F7F1E3and add the stroke.
Start and end both drifts 20 px outside the picture. The border you add later hides their outer key lines.
- Add Back Hill. Lasso a gently rolling horizon from (40, 990) up to around y 890 – 940 and across to (1160, 900), then down past the bottom of the picture. Fill it with
-
Shade the drifts with dots
Use the same halftone recipe, but load the drift's shape as the selection.
- Add Drift Shadow Dots. Cmd-click the Front Hill thumbnail to select its pixels.
- Drag a linear gradient (
#000000→#9A9A9Aat 40% →#FFFFFF) from the top of the drift at y 1036 down to y 1240. - Run Halftone at Dot Size 12, Angle 45, deselect, and add a Color Overlay of
#7F95BAat 70%.
Do the same for the back hill on a Back Hill Dots layer. Use a
#707070→ white gradient from y 890 to 1080, the overlay#8C9FC4, and 70% opacity.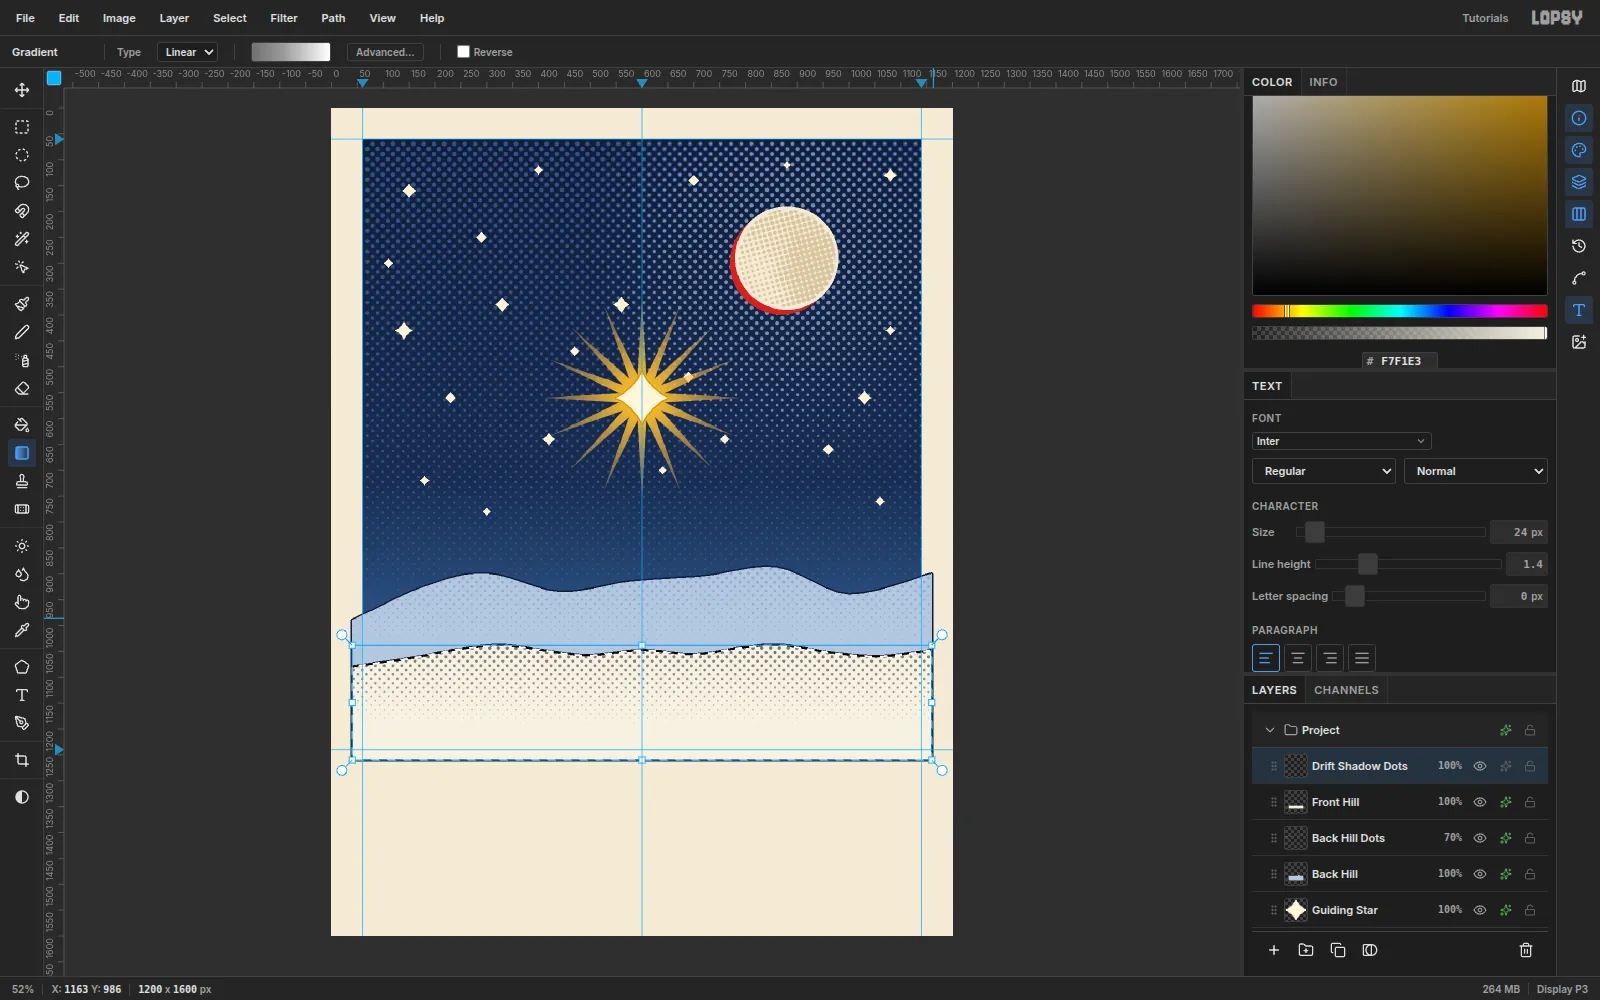
-
Build the first cottage
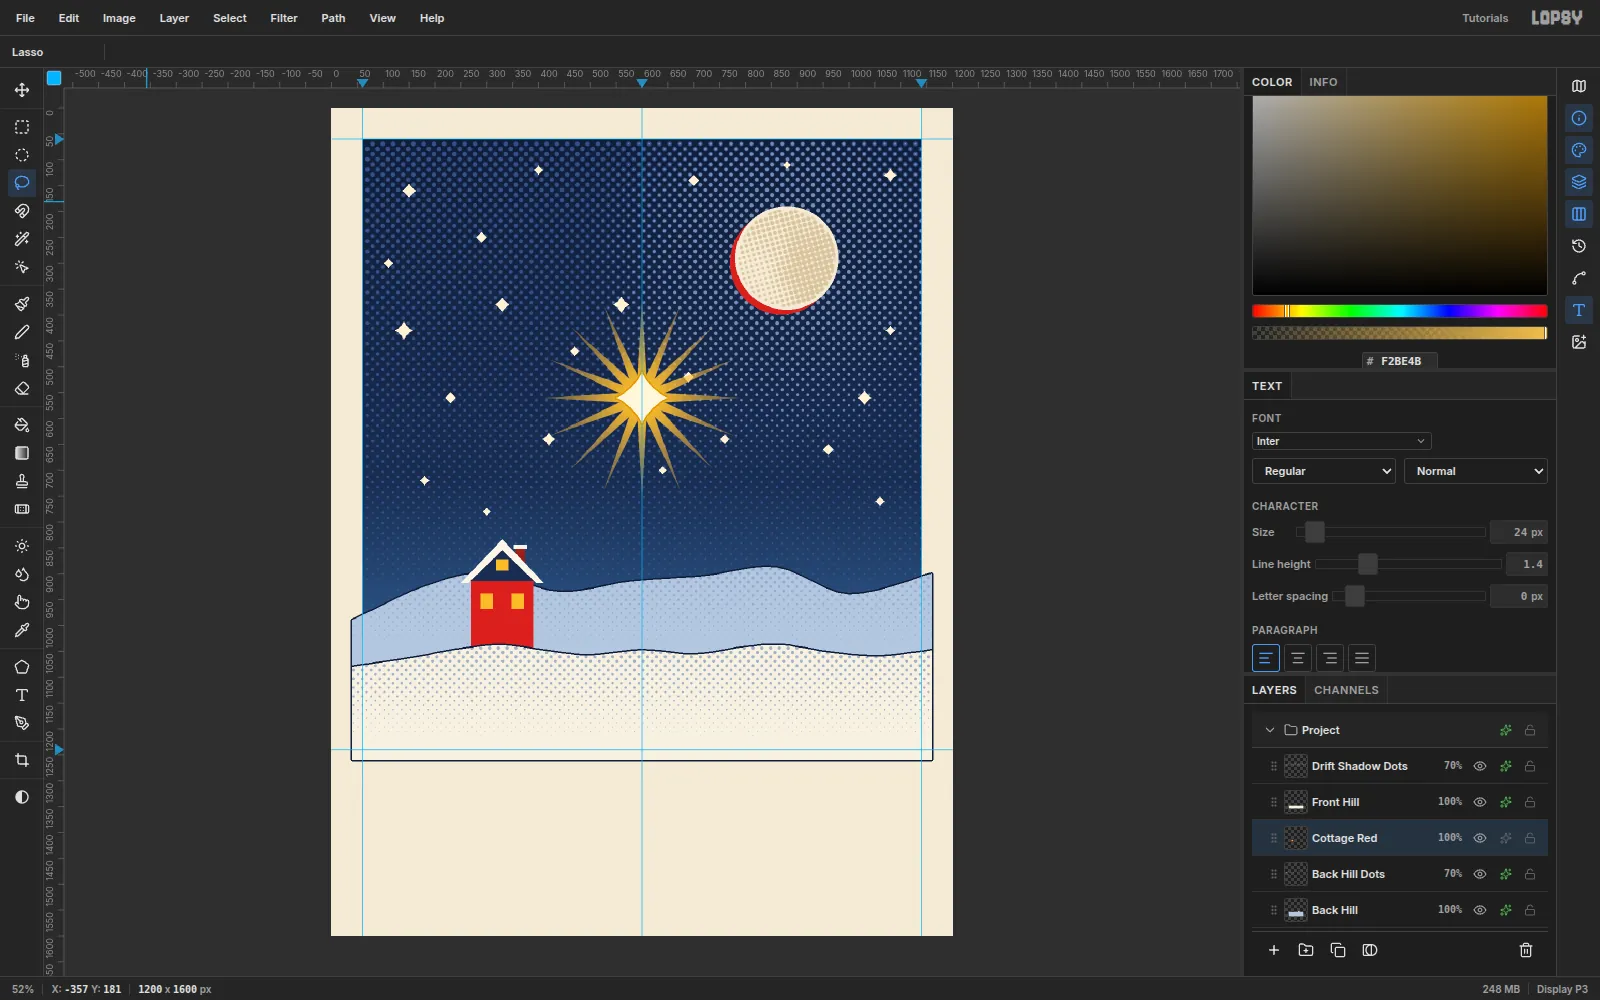
Select Back Hill Dots and add a Cottage Red layer, so the village sits behind the front drift. Build the house from lasso fills around a base point at (330, 1000):
- Chimney
#8E2A22: x 356 – 374, y 850 – 905 - Walls
#C9362B: x 270 – 390, from y 908 down to 1060 (the drift hides the bottom) - Roof
#1D2B4F: a triangle from (256, 914) up to (330, 840) and down to (404, 914) - Snow
#FBF6EA: a chevron hugging the roof edge, plus a cap on the chimney - Windows
#F2BE4B: two 24 × 30 px windows and one small gable window
Keep all the colors flat. The halftone layers do the shading.
- Chimney
-
Copy, flip, move and scale a second cottage
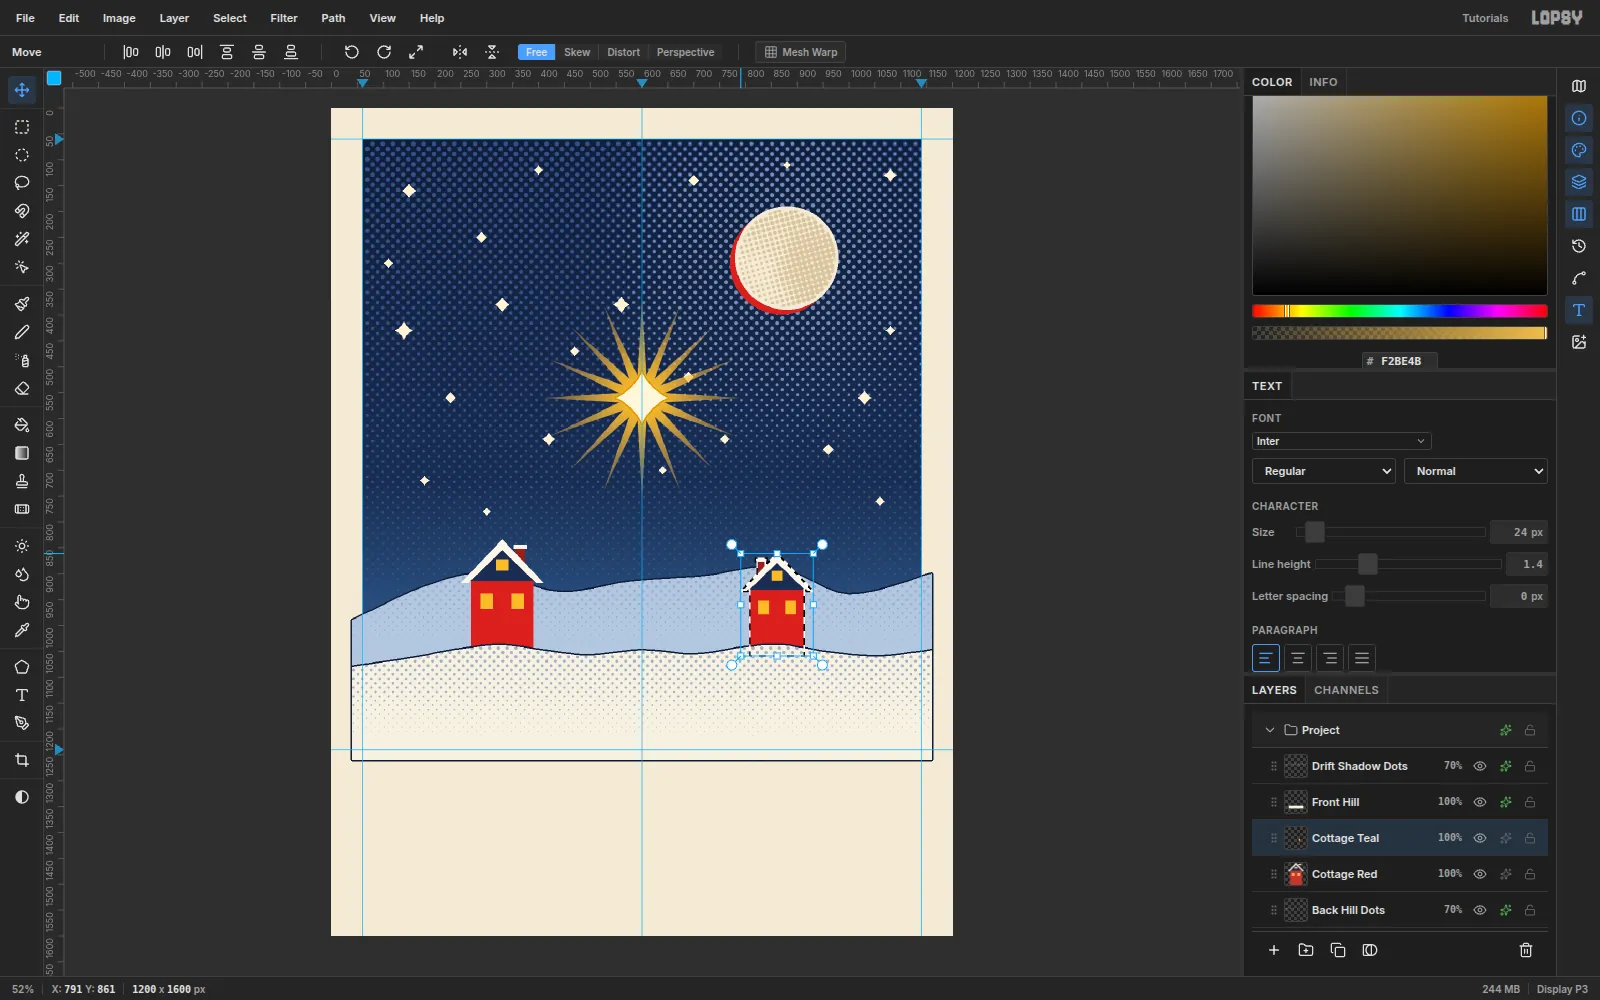
Marquee the cottage and press Cmd+C, then Cmd+D and Cmd+V. The copy is pasted in place on a new layer. Name it Cottage Teal.
- Cmd-click its thumbnail to select it. The transform handles appear.
- Press V and click Flip Horizontal in the options bar. The chimney moves to the left.
- Drag from inside the selection 520 px to the right.
- Hold Cmd and drag the top-left corner handle 20 px in to scale it evenly to about 87%.
- Press Enter to commit, then Cmd+D.
-
Recolor the copy with the Magic Wand
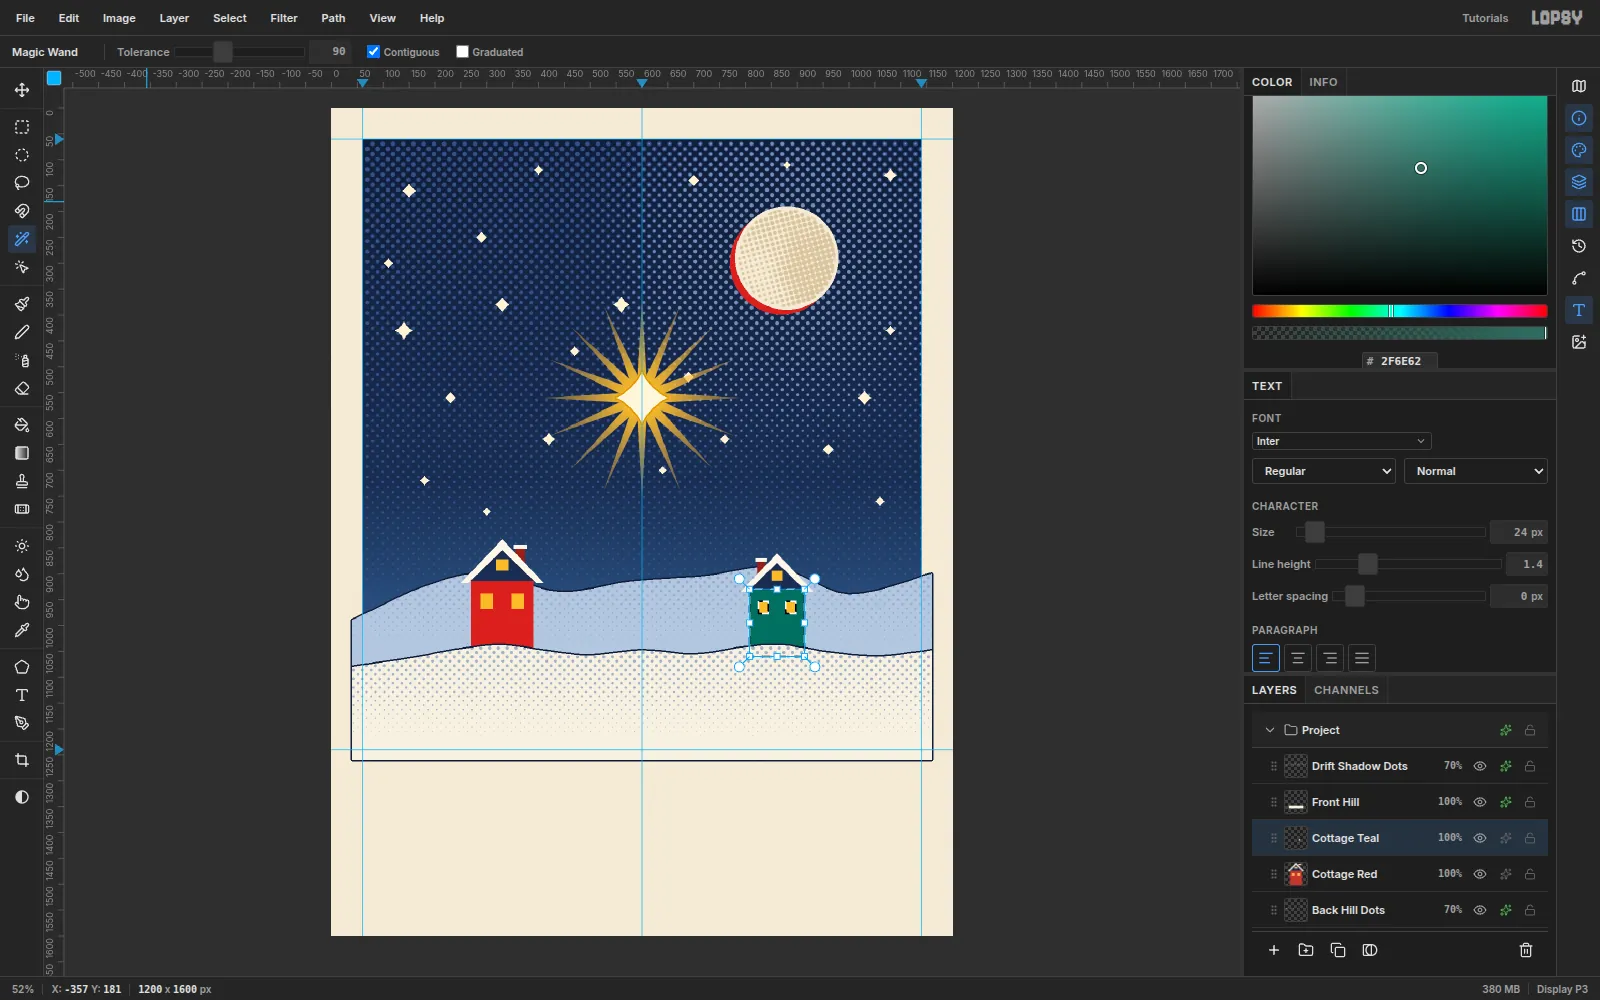
Choose the Magic Wand (W), set Tolerance to 90 and click the red wall. Scaling softened the edges into a 1 px red fringe, so choose Select → Grow… and grow the selection by 1 px before you fill. Then fill with teal
#2F6E62.The windows, roof and snow stay as they were. Only the walls change color.
-
Add two more cottages and tilt one
Paste twice more:
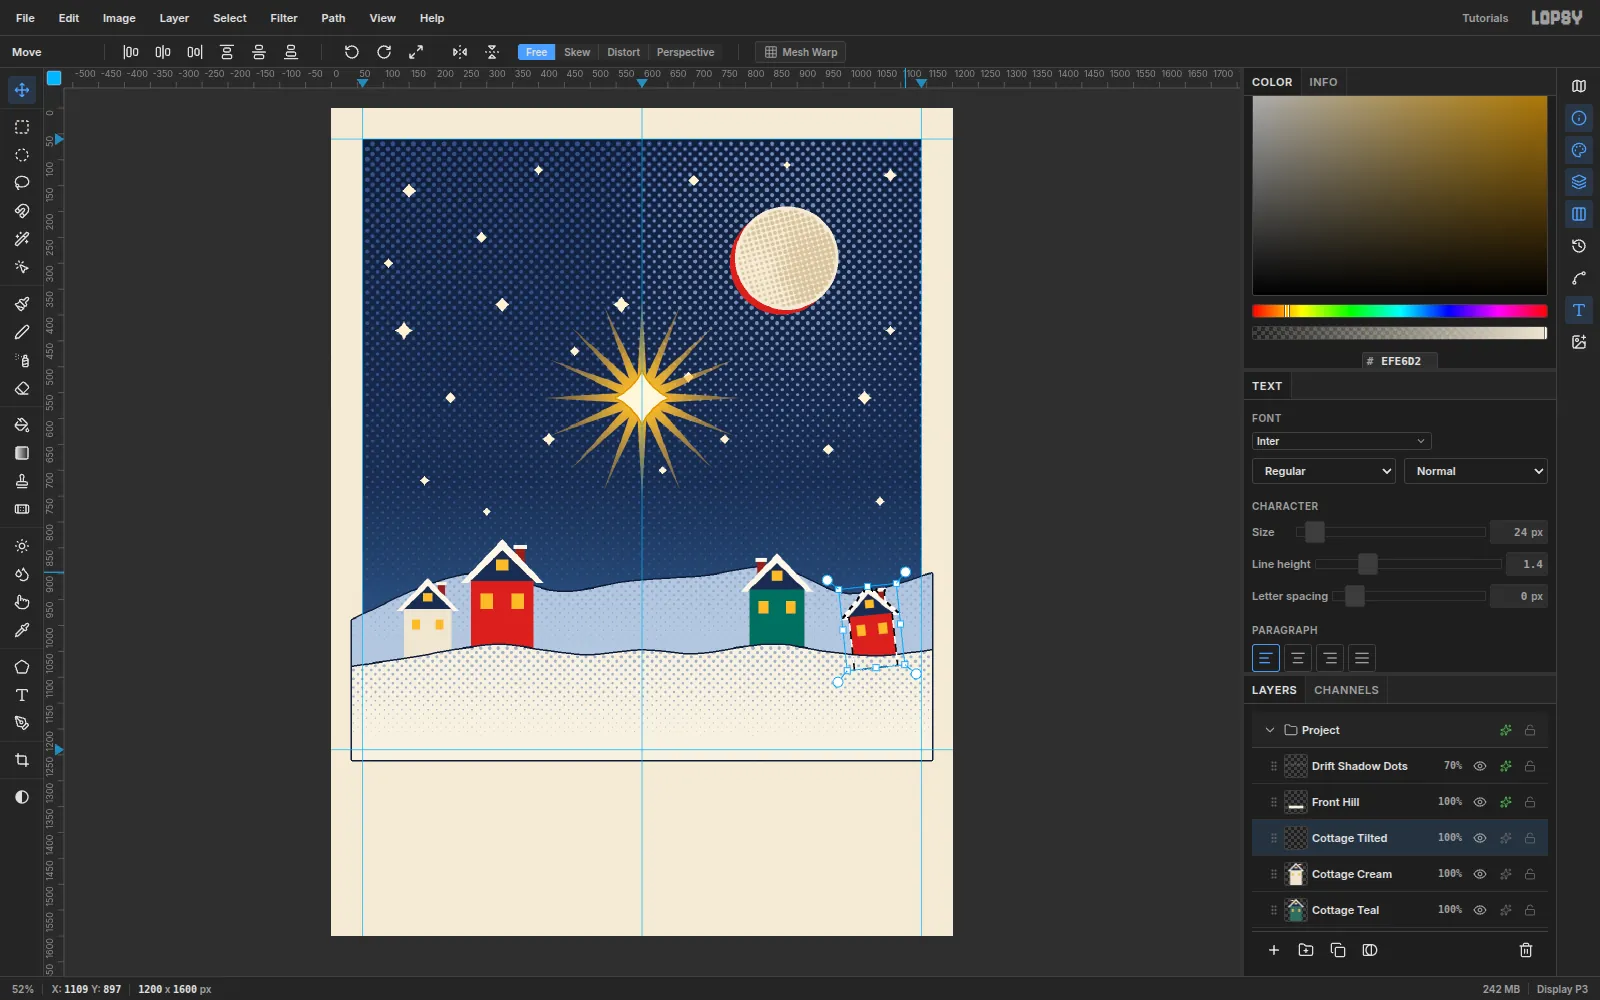
- Cottage Cream: move it 165 px left, scale it to 75%, and wand-recolor the walls
#EFE6D2. - Cottage Tilted: move it 690 px right and scale it to 70%. Keep it red.
Select the tilted cottage's pixels and drag the top-right rotation handle (the circle outside the corner) about 6°. A slightly crooked house gives the village a hand-drawn feel. Press Enter.
- Cottage Cream: move it 165 px left, scale it to 75%, and wand-recolor the walls
-
Raise the chapel
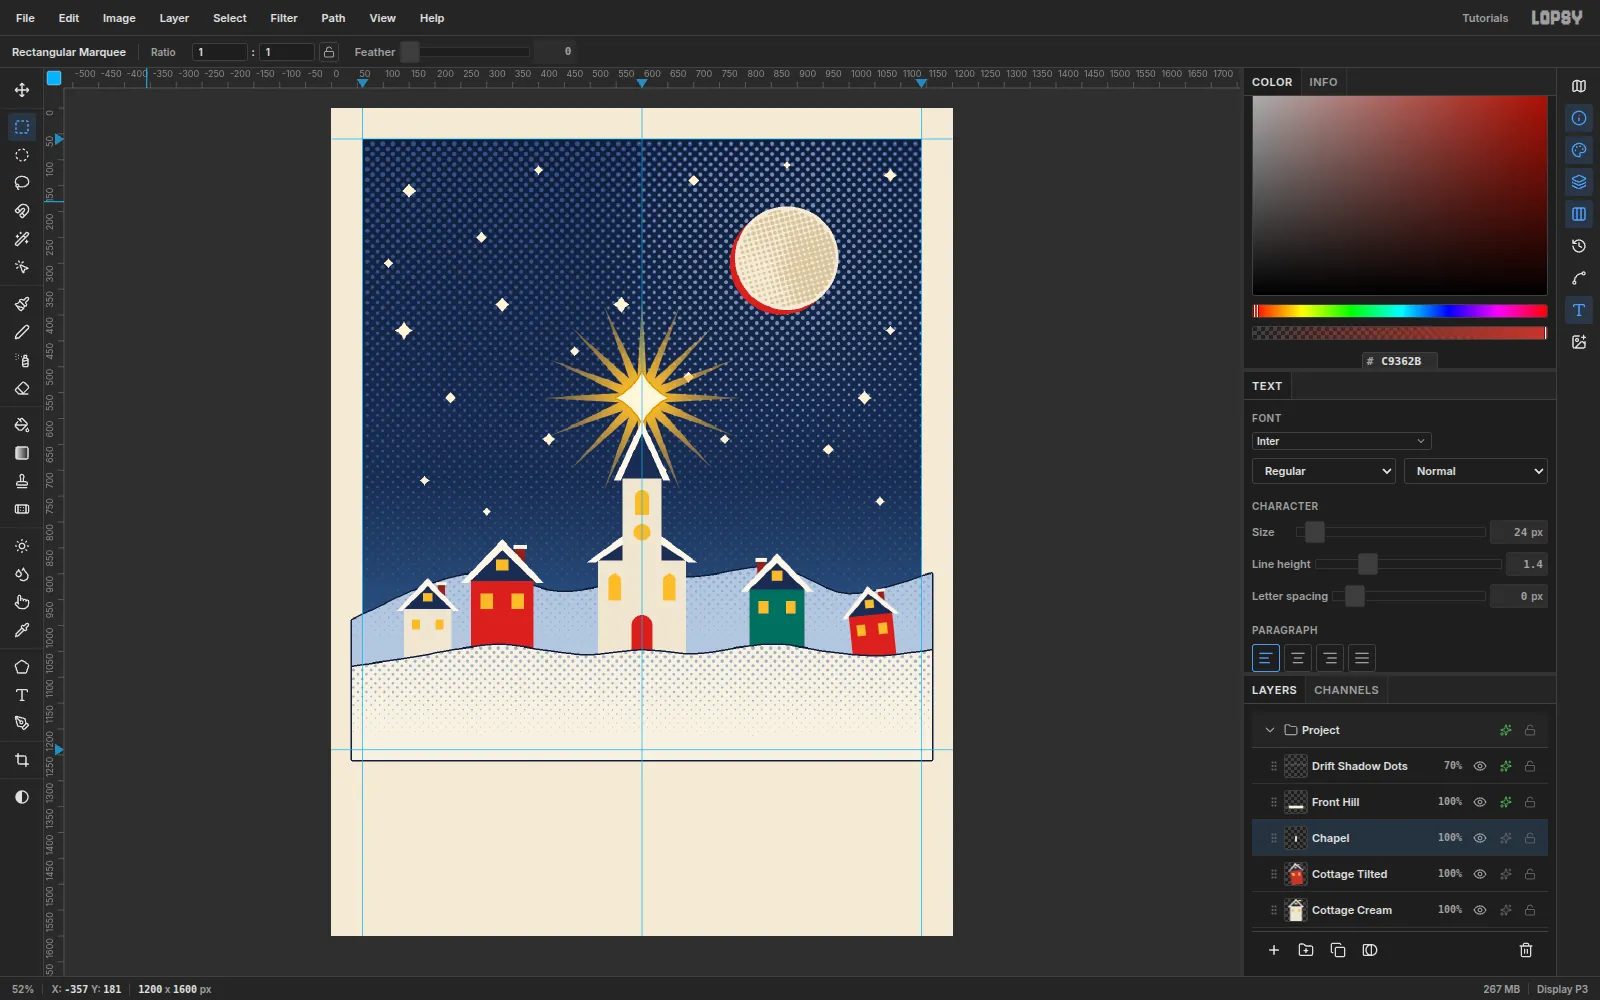
Add a Chapel layer and build it on the center guide:
- Nave
#EFE6D2: x 515 – 685, y 868 – 1080, with a navy roof and a snow chevron - Tower
#EFE6D2: x 562 – 638, y 712 – 880 - Spire
#1D2B4F: from (552, 716) up to (600, 612) and down to (648, 716), edged in snow up to y 604 - Gold arched windows (circle plus rectangle) in the tower and the nave, and a red arched door
The snow tip of the spire ends just inside the bottom point of the guiding star, so the star appears to rest on the steeple.
- Nave
-
Paint the window light
A soft glow would break the print look, so the window light is made of dots too.
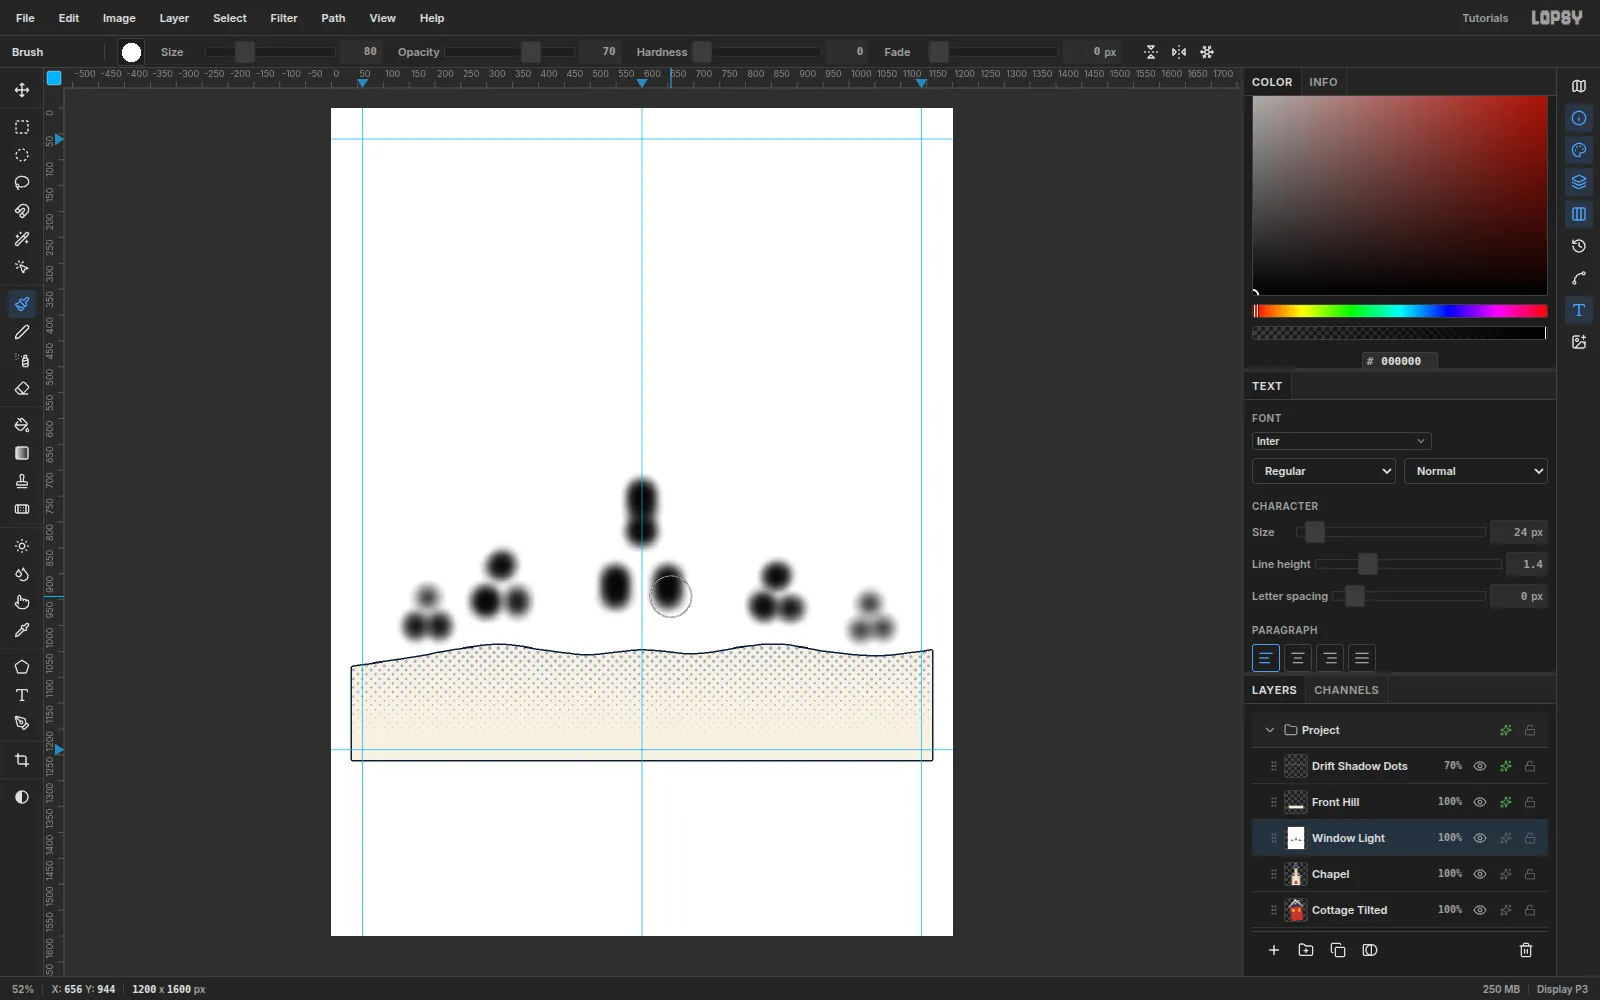
- Add a Window Light layer, set the foreground to white and choose Edit → Fill with nothing selected to fill the whole layer.
- Pick the Brush (B). In the brush settings, use Size 80, Hardness 0, Opacity 70.
- With black selected, click once on every gold window.
-
Screen the light into gold dots
Run Halftone at Dot Size 8, Softness 0. The white area turns into nothing, and each soft dab becomes a cluster of dots that shrink as the dab fades.
Give the layer a Color Overlay of
#F2D06B, set its Blend to Screen, and set its opacity to 75%.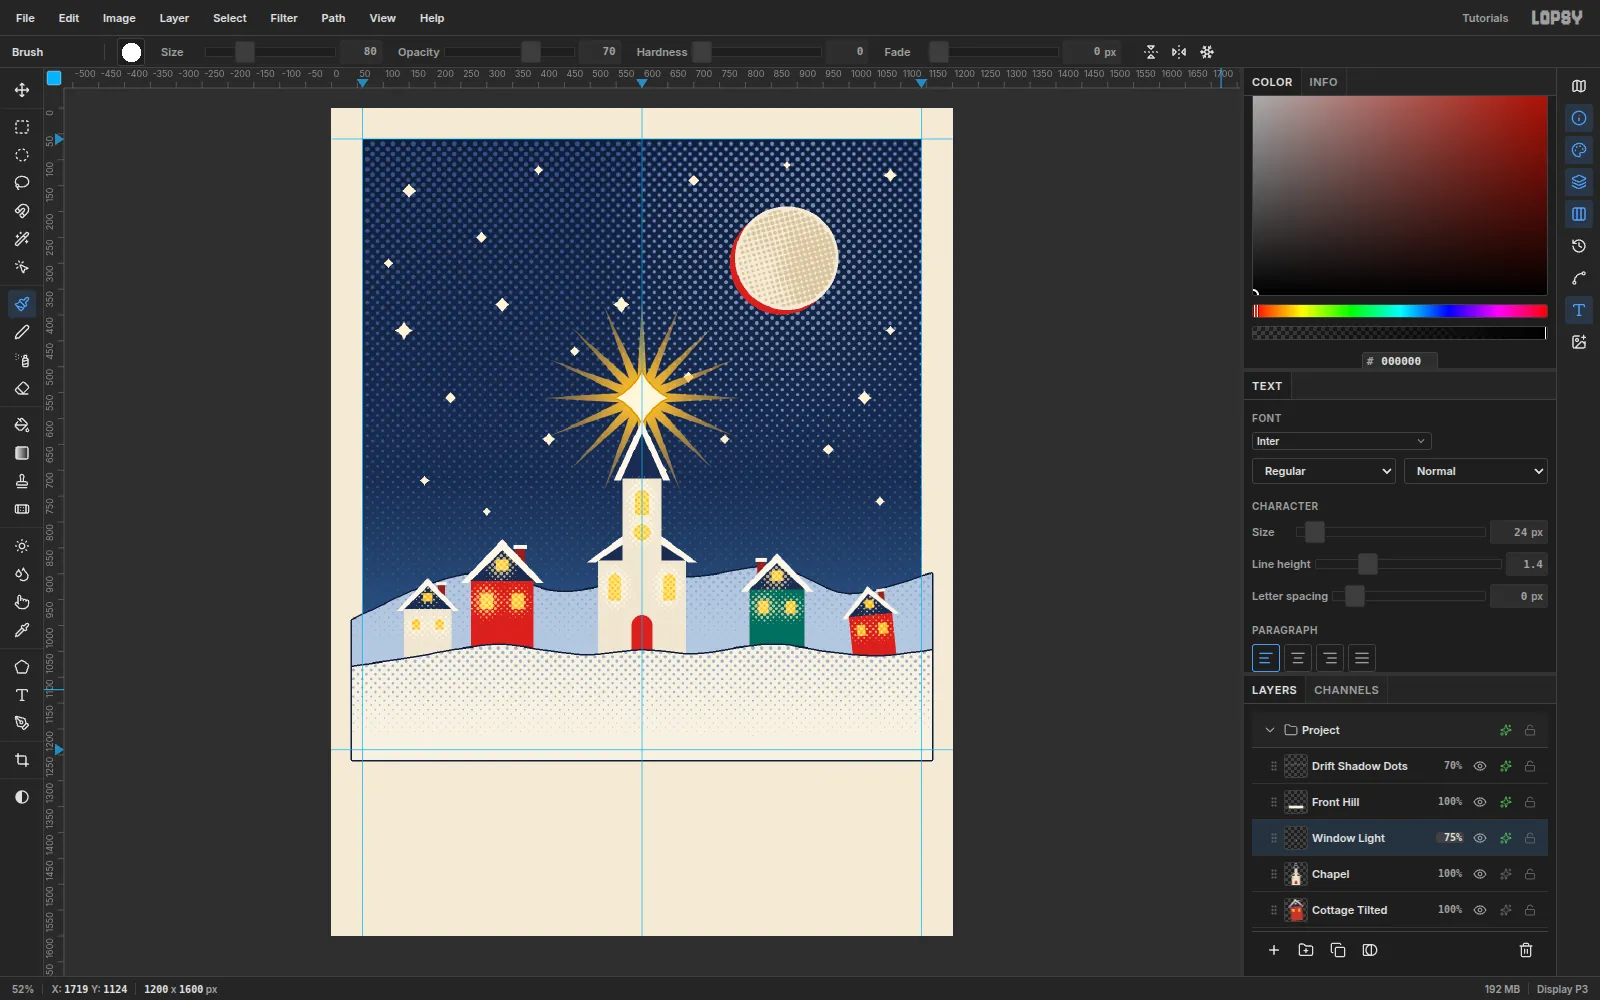
-
Key-line the village and move it as a group
Give each cottage and the chapel two effects:
- Stroke: 3 px,
#131D38 - Drop Shadow: Offset X −4, Offset Y 4, Blur 0, Opacity 60, color red
#C9362B. This is a red plate printed slightly out of register.
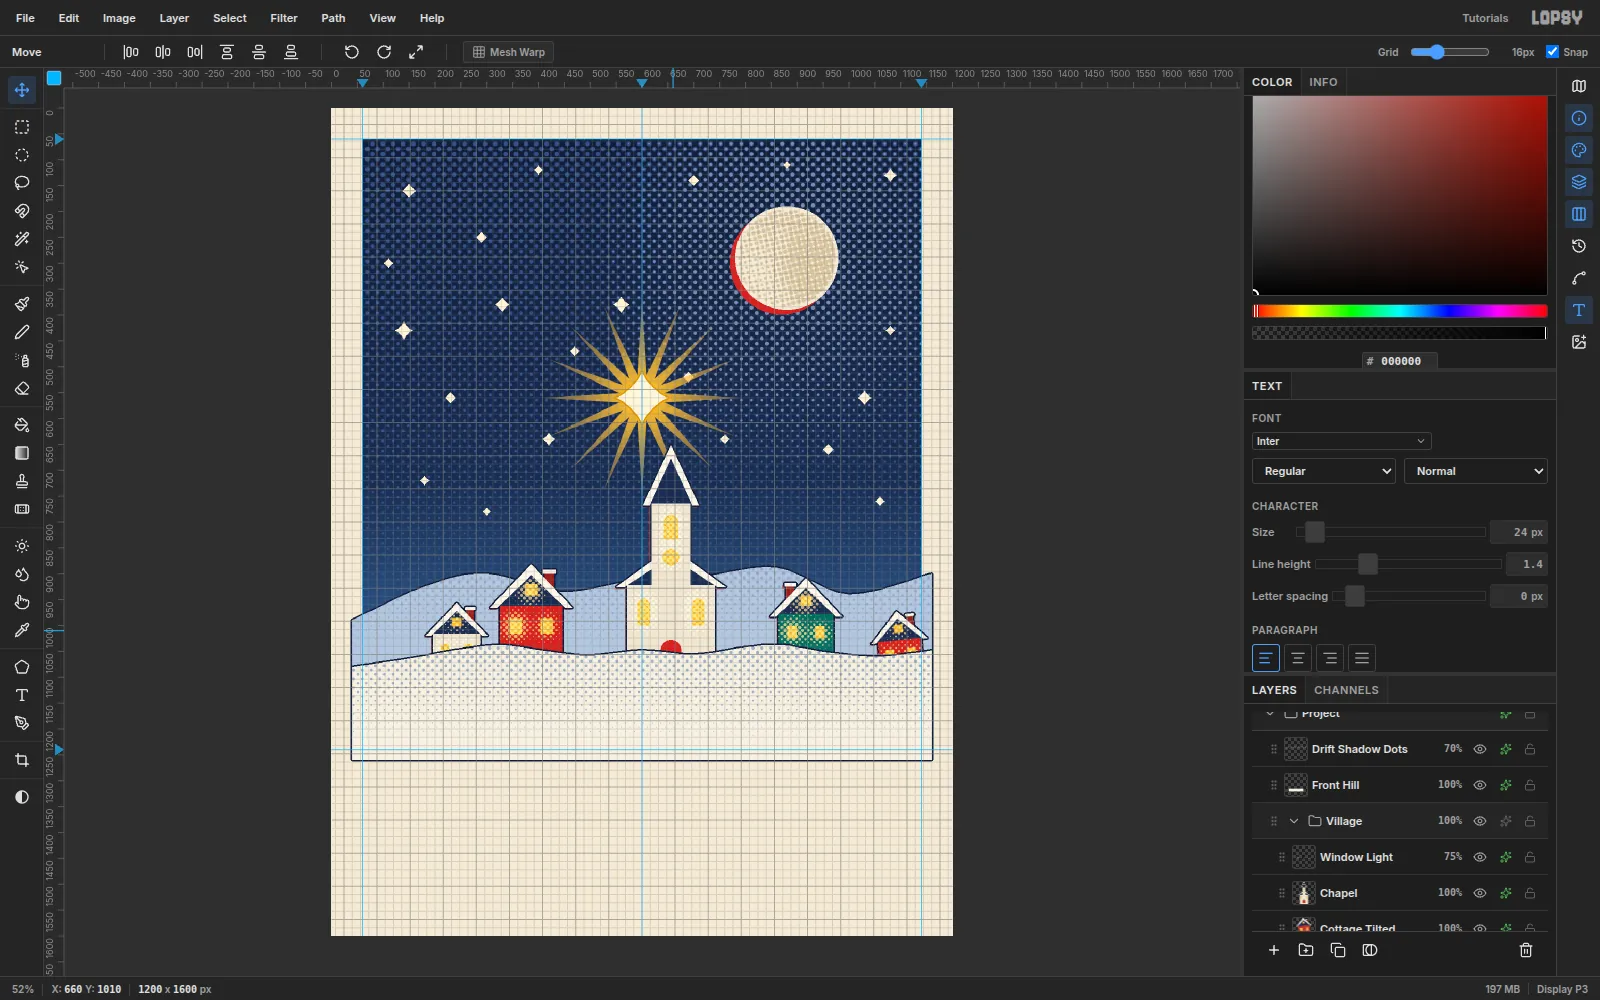
Click Cottage Red, Shift-click Window Light, and choose Layer → Group Layers. Name the group Village and select it.
To try a different spot, turn on View → Show Grid and Snap to Grid, then drag the group with the Move tool. Everything moves together in grid steps. This village looks best where it started, so press Cmd+Z, then turn the grid and snapping back off.
- Stroke: 3 px,
-
Draw a pine and shade it with dots
Select Drift Shadow Dots and add a Pine layer above it. With a base point at (190, 1190), lasso-fill:
- a brown trunk
#4A3226, 24 × 40 px - three teal
#2F6E62triangles: 200 px wide at y 1150 – 1015, 160 px at 1065 – 945, and 112 px at 985 – 885 - a wavy snow ledge
#FBF6EAunder each tier and a cap on the tip
For the shading, add a Pine Shade layer and Cmd-click the pine's thumbnail. Drag a linear gradient (white →
#B0B0B0→ black) from left to right across the tree. Then run Halftone at Dot Size 10 and deselect.Add a Color Overlay of
#1F4F46and click Rasterize Layer Style. Then choose Layer → Merge Down to bake the dots into Pine.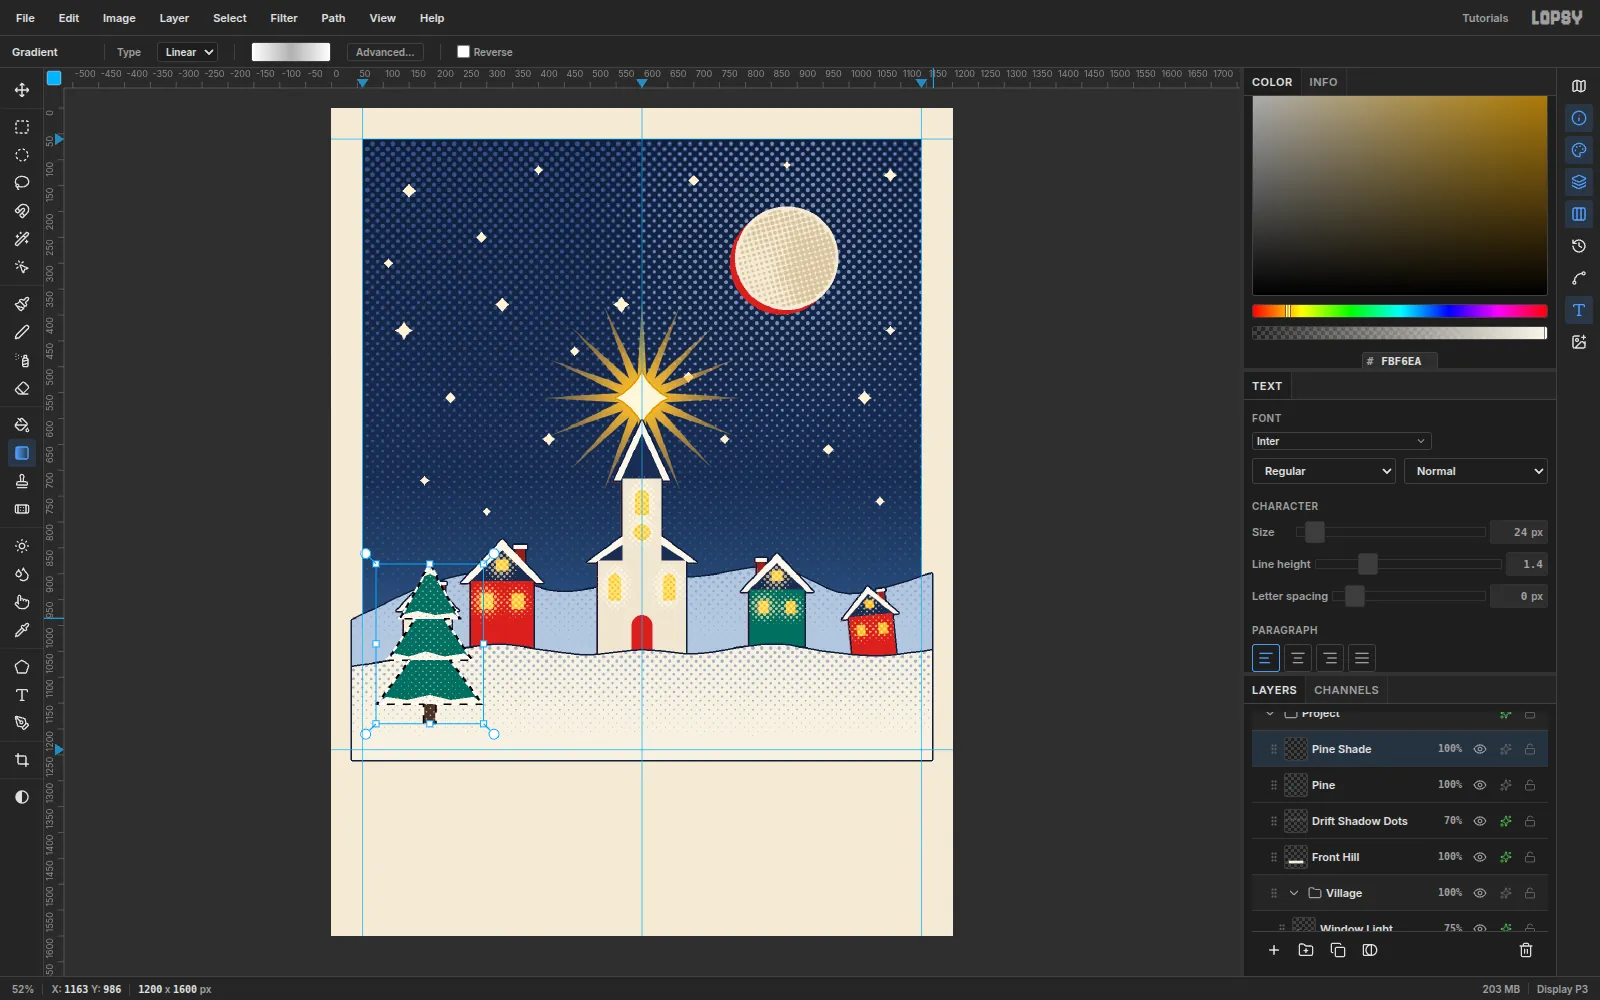
- a brown trunk
-
Clone the pine
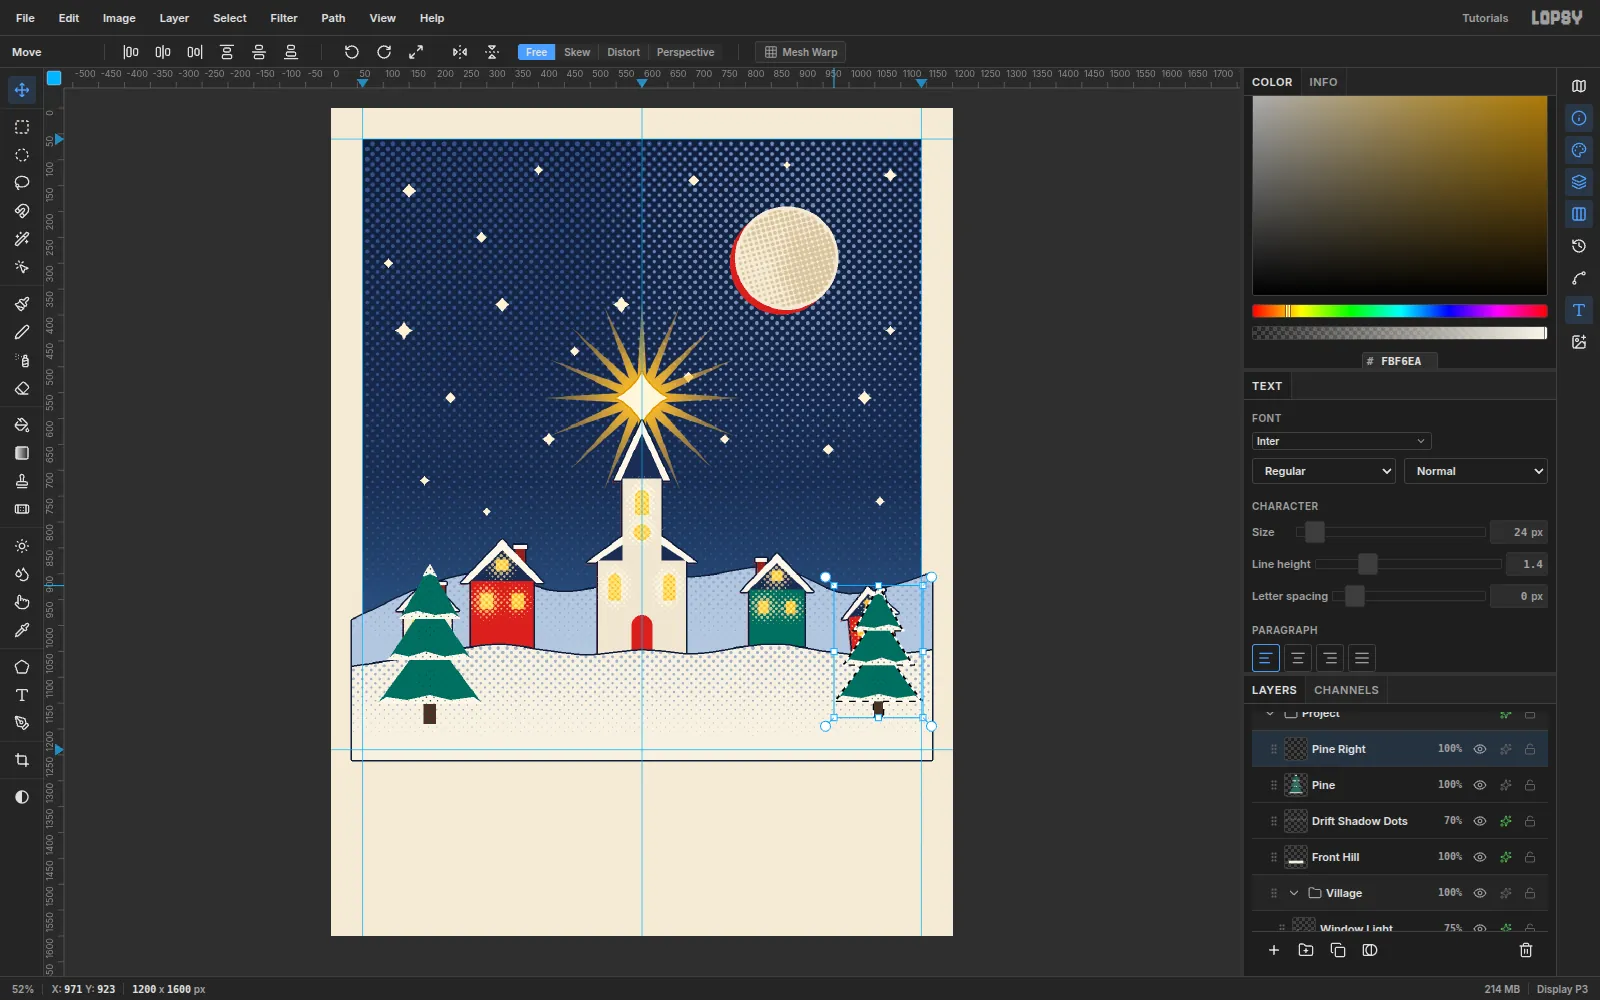
Marquee the pine and copy it. Use the cottage routine again:
- Pine Right: paste, flip, move it 850 px right and scale it to 84%.
- Pine Small: paste, move it up behind the drift near (455, 1040) and scale it to 45%.
-
Place the trees and key-line them
Drag each tree with the Move tool so the cottages can breathe. Move the big pines out past the picture edges, and move the small pine left of the chapel so it doesn't touch the chapel wall.
Add the same 3 px Stroke (
#131D38) to all three. Adding it after scaling keeps the key line the same weight on the small tree as on the big ones.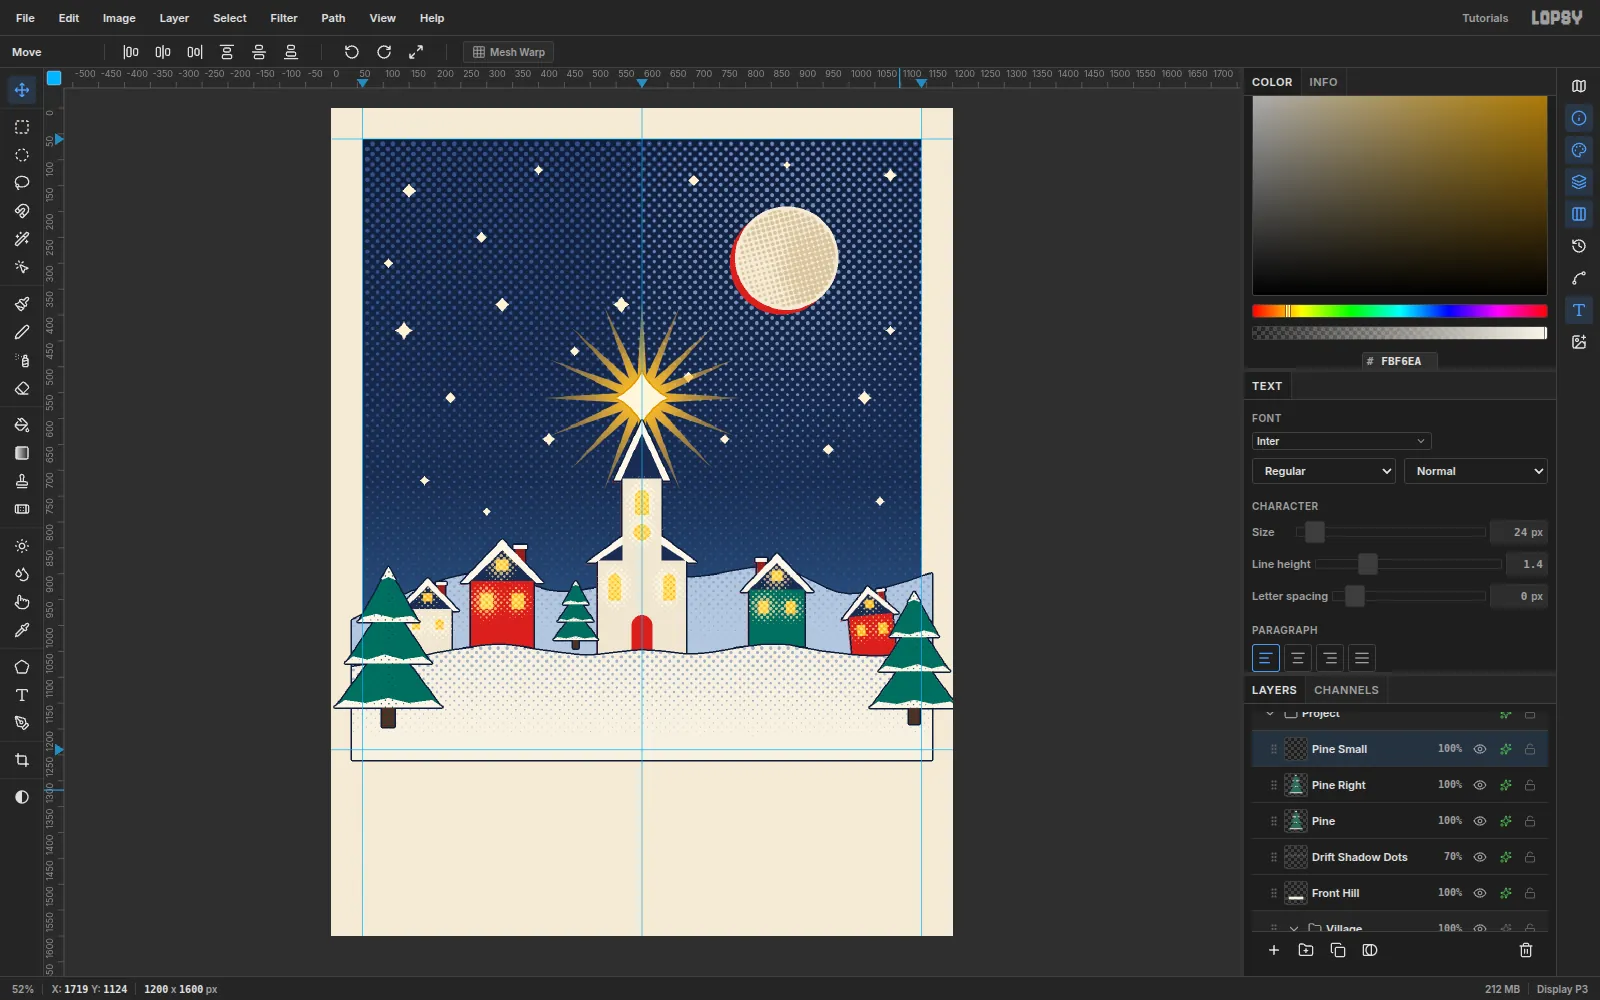
-
Mat the picture with a paper border
Select Pine Small and add a Card Border layer above everything so far. Marquee the picture rectangle (60, 60) to (1140, 1240) and choose Select → Inverse.
Fill with paper
#F3EAD6and run Add Noise at Amount 6, Mono. Everything that hangs past the picture edge disappears under the mat, like art trimmed by a printed border.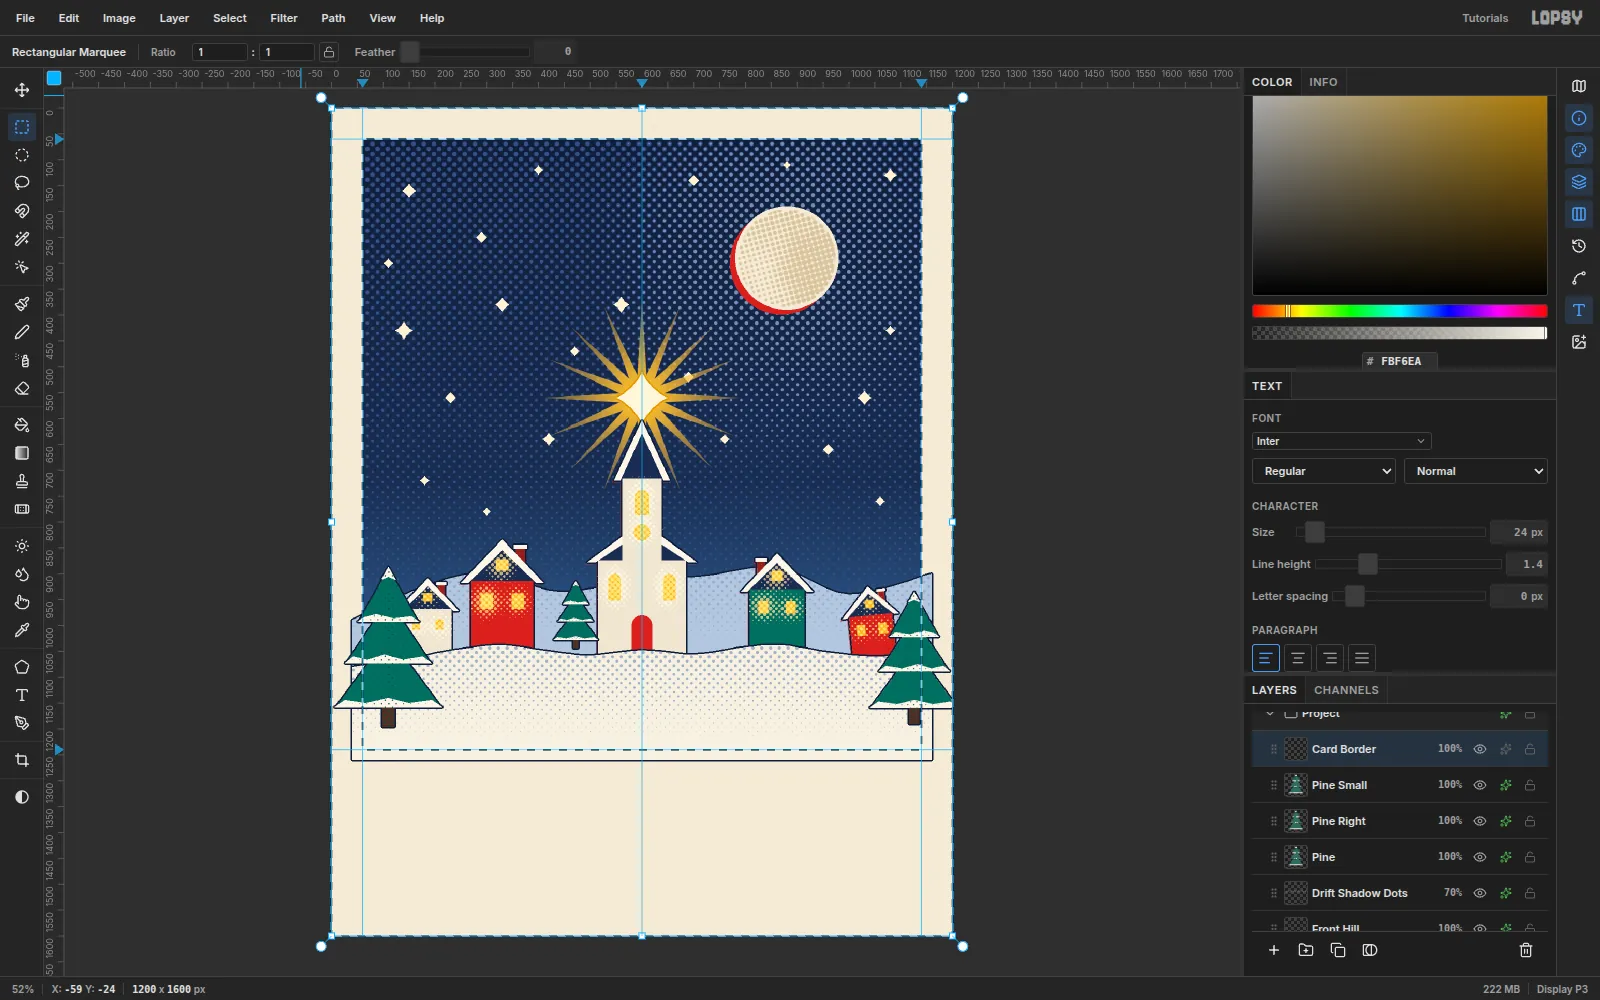
-
Add a keyline frame
Add a Keyline layer. Marquee from (46, 46) to (1154, 1254) and fill it with navy
#1D2B4F. Then choose Select → Shrink… by 3 px and press Delete. What's left is a crisp 3 px rule.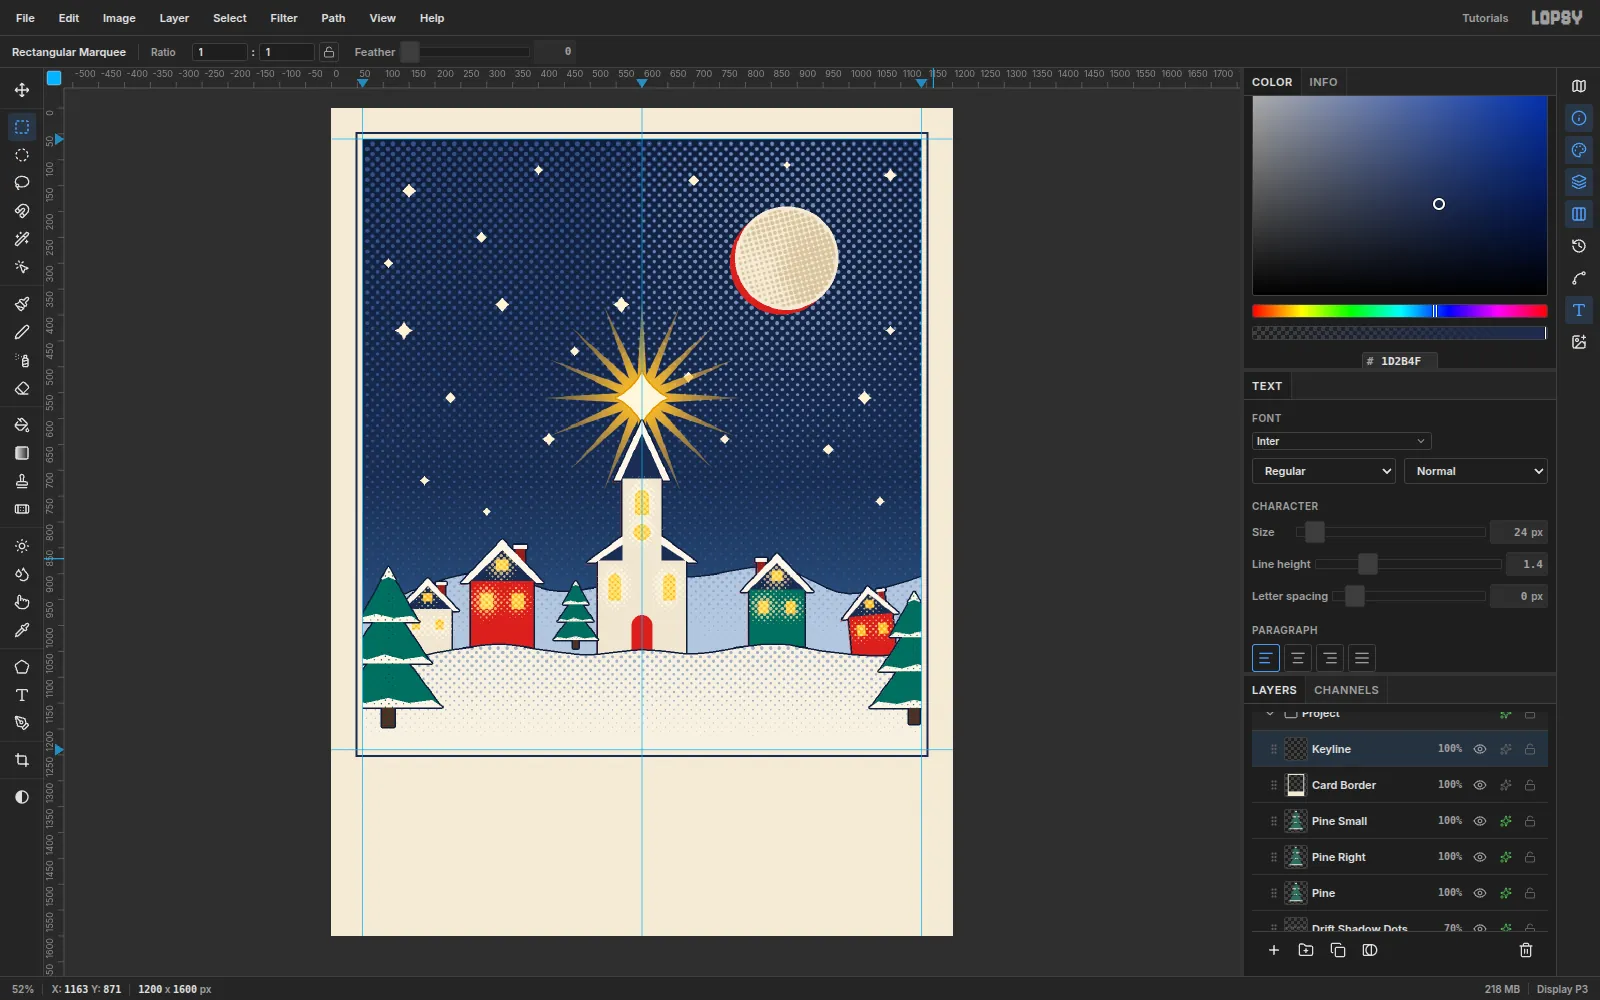
-
Let it snow
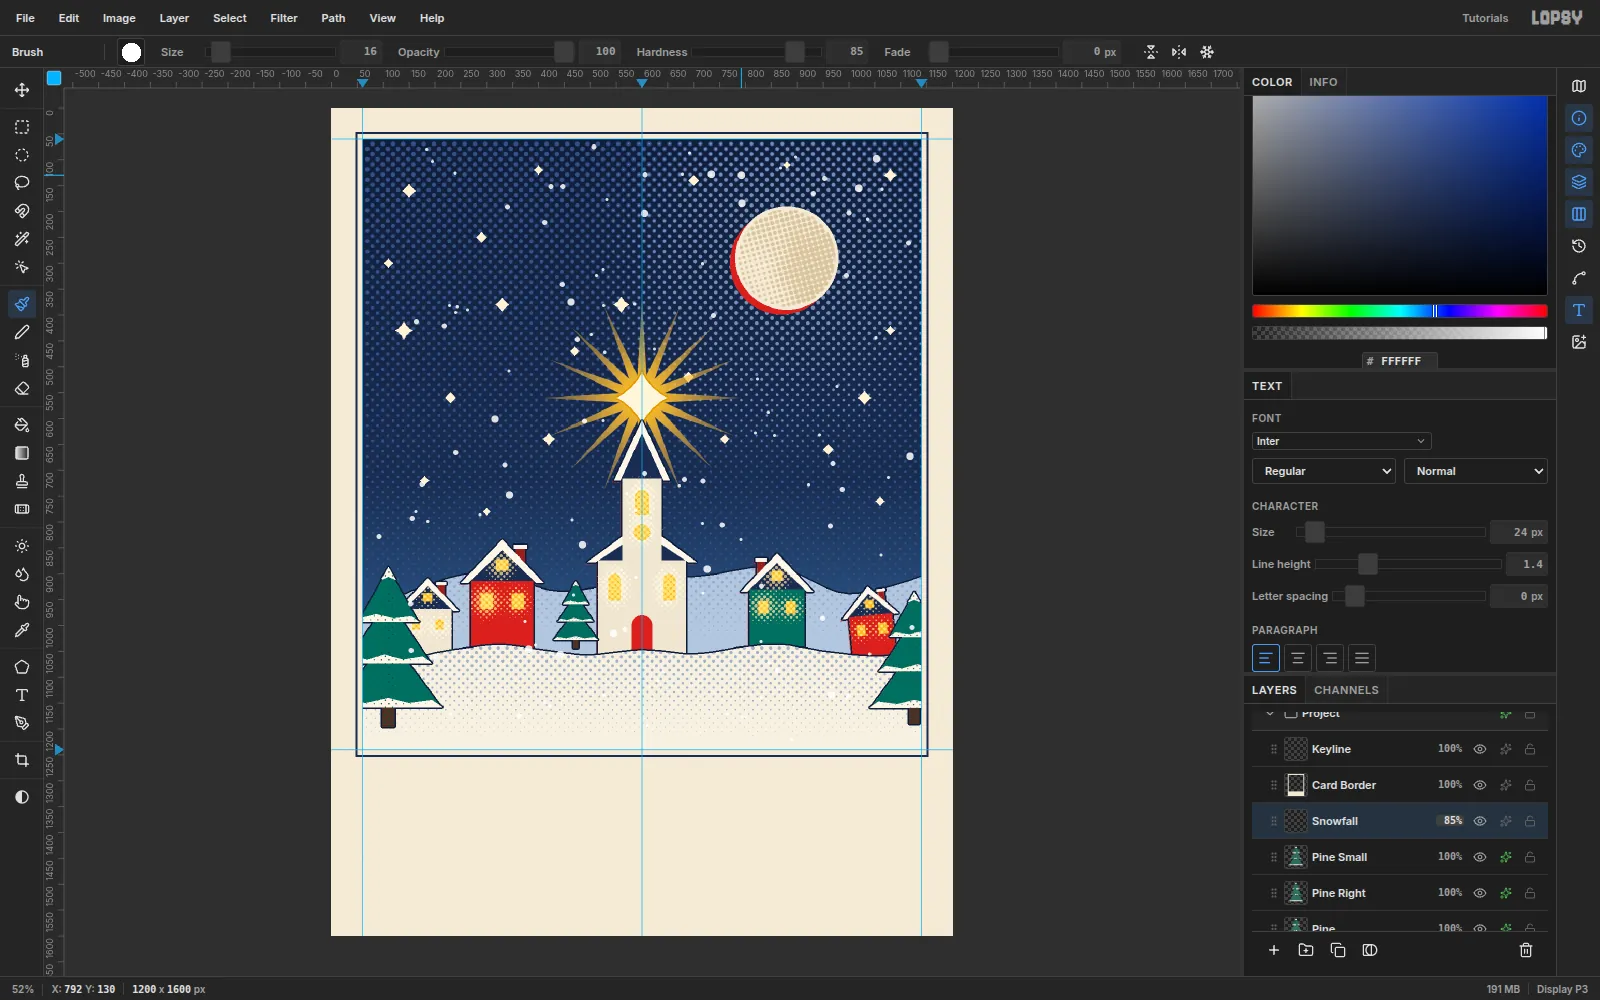
Select Pine Small and add a Snowfall layer (so it stays under the border). Choose the Brush, set Hardness 85 and pick white. Click single flakes across the sky, about 70 at Size 7, 40 at Size 11 and 16 at Size 16. Keep them off the moon and the star.
Set the layer to 85%.
-
Type the title
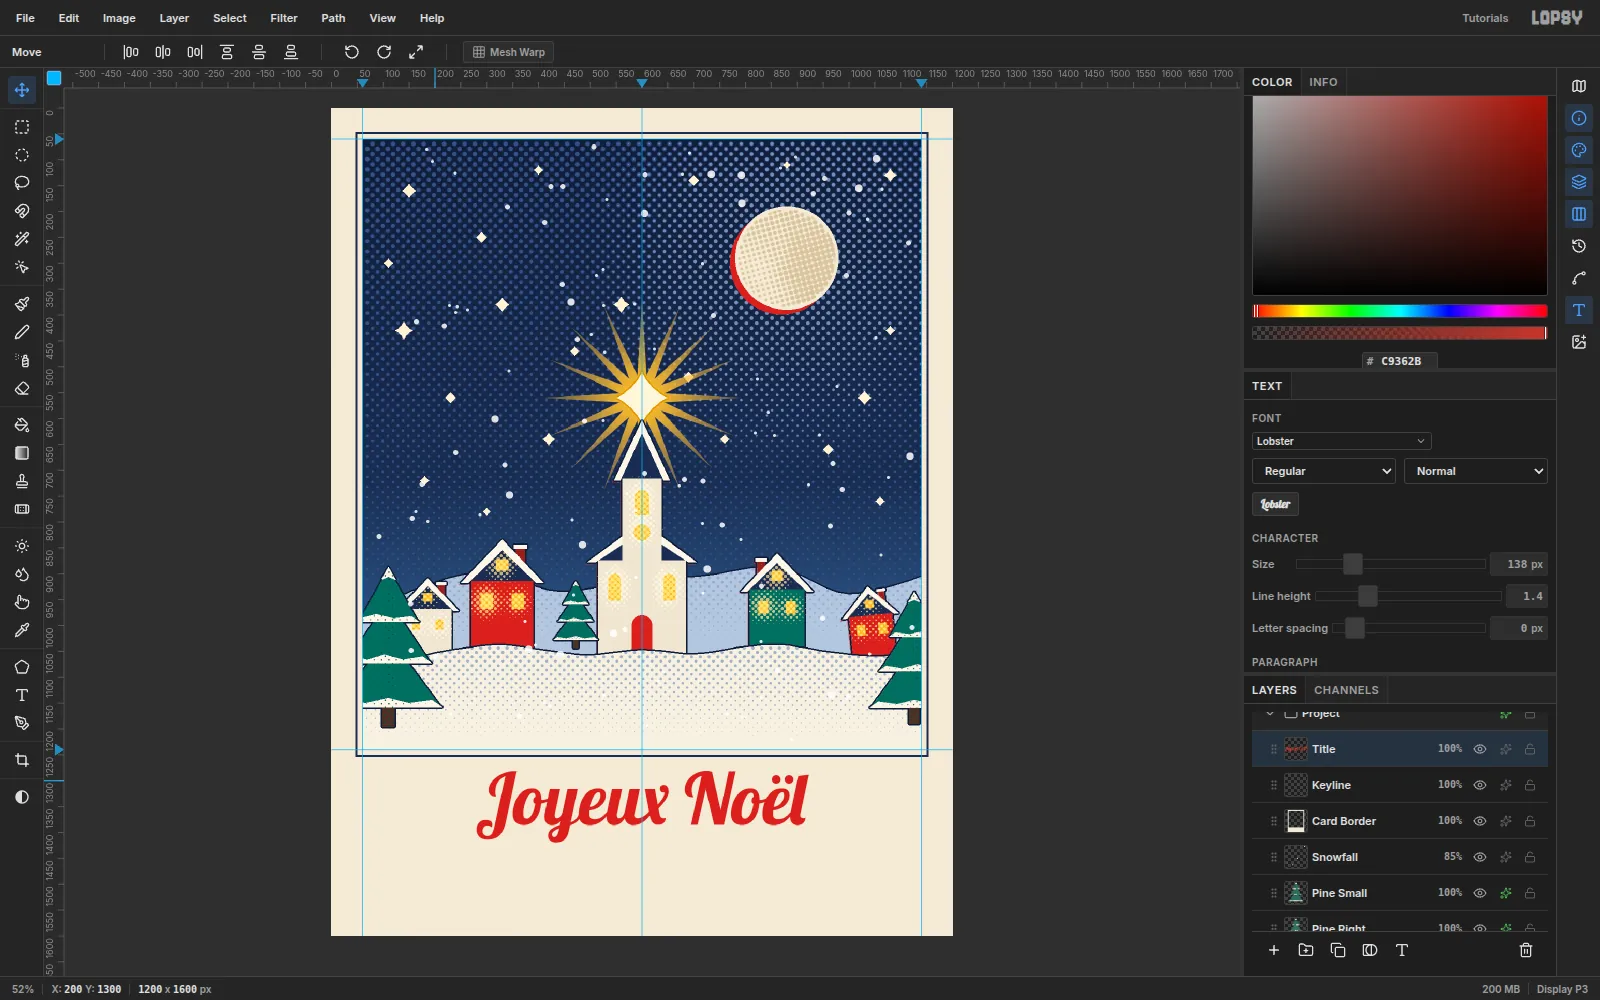
Select Keyline. Pick the Text tool (T), set Size 138 and the font to Lobster, and choose red
#C9362B. Click in the lower band and typeJoyeux Noël. Press Tab to commit, and rename the layer Title.Center it on (600, 1350) with the Move tool. Arrow keys nudge 1 px, and Shift+arrow nudges 10 px.
-
Tilt the title
Cmd-click the Title thumbnail to select the lettering. Press V and drag the top-right rotation handle up by about 3°, so the baseline rises to the right. Press Enter.
Now seat it. Nudge the title until its highest point (the dots on the ë) is 36 px below the keyline, at y 1290, and the inked width is centered on x 600. Check the gap below the J's descender too. It should be about the same as the gap above.
Add a Drop Shadow: Offset X 6, Offset Y 6, Blur 0, opacity 100, navy
#1D2B4F. With no blur, it reads as a second ink plate slipping out of register.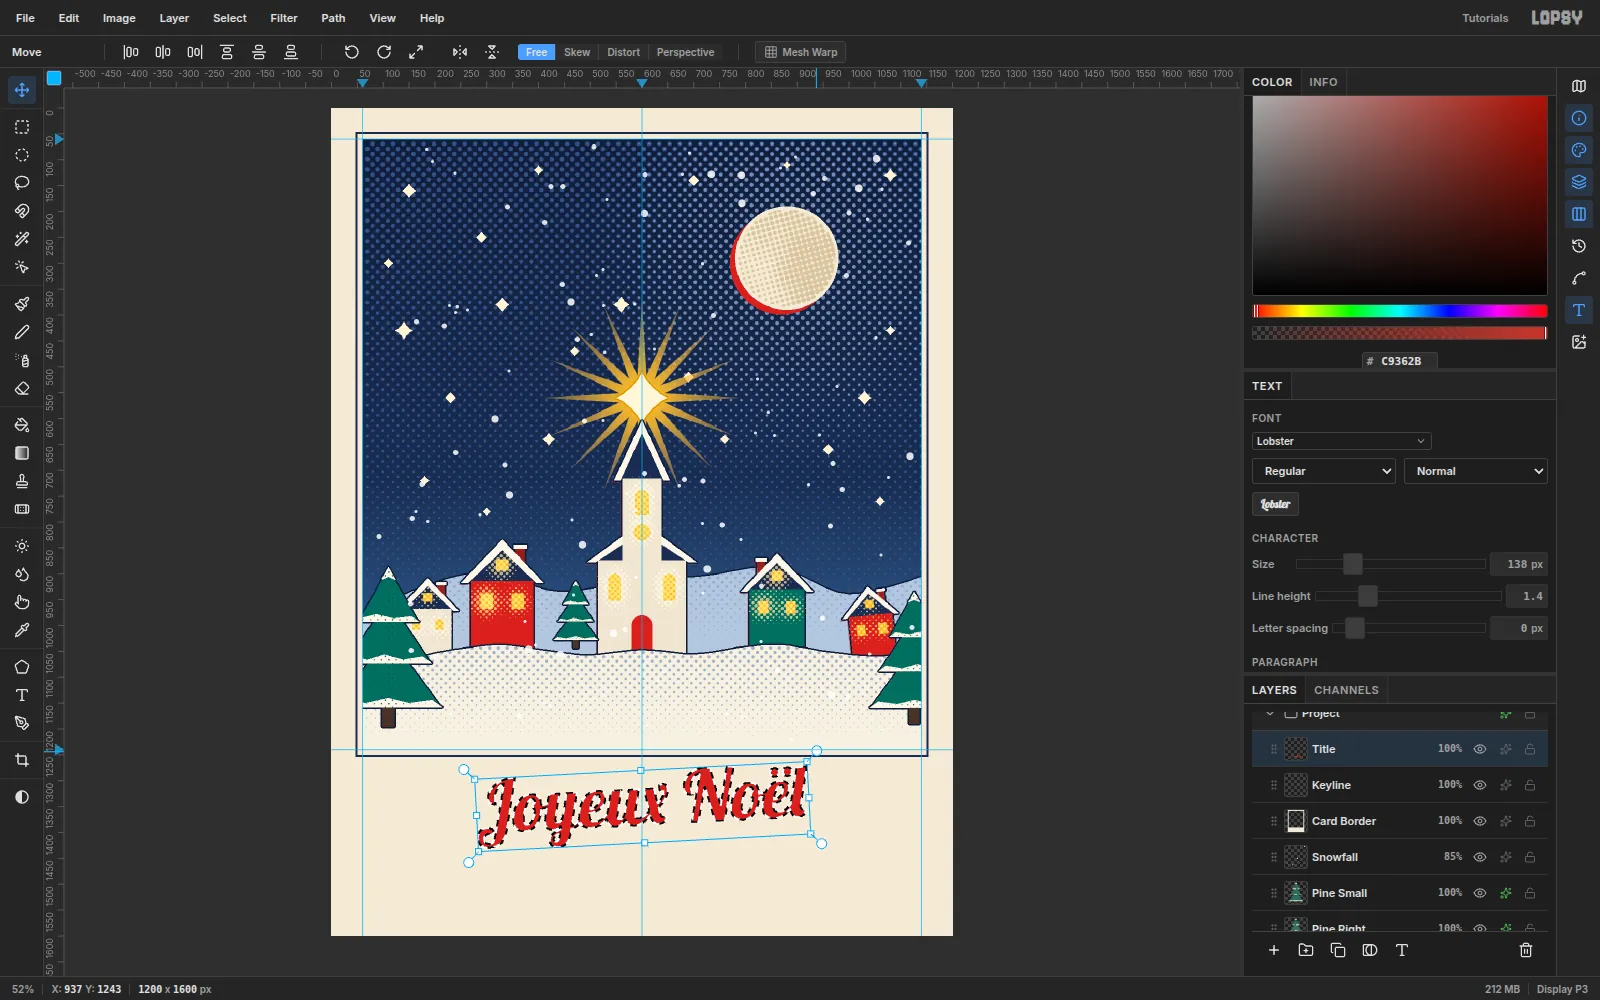
-
Screen dots into the letters
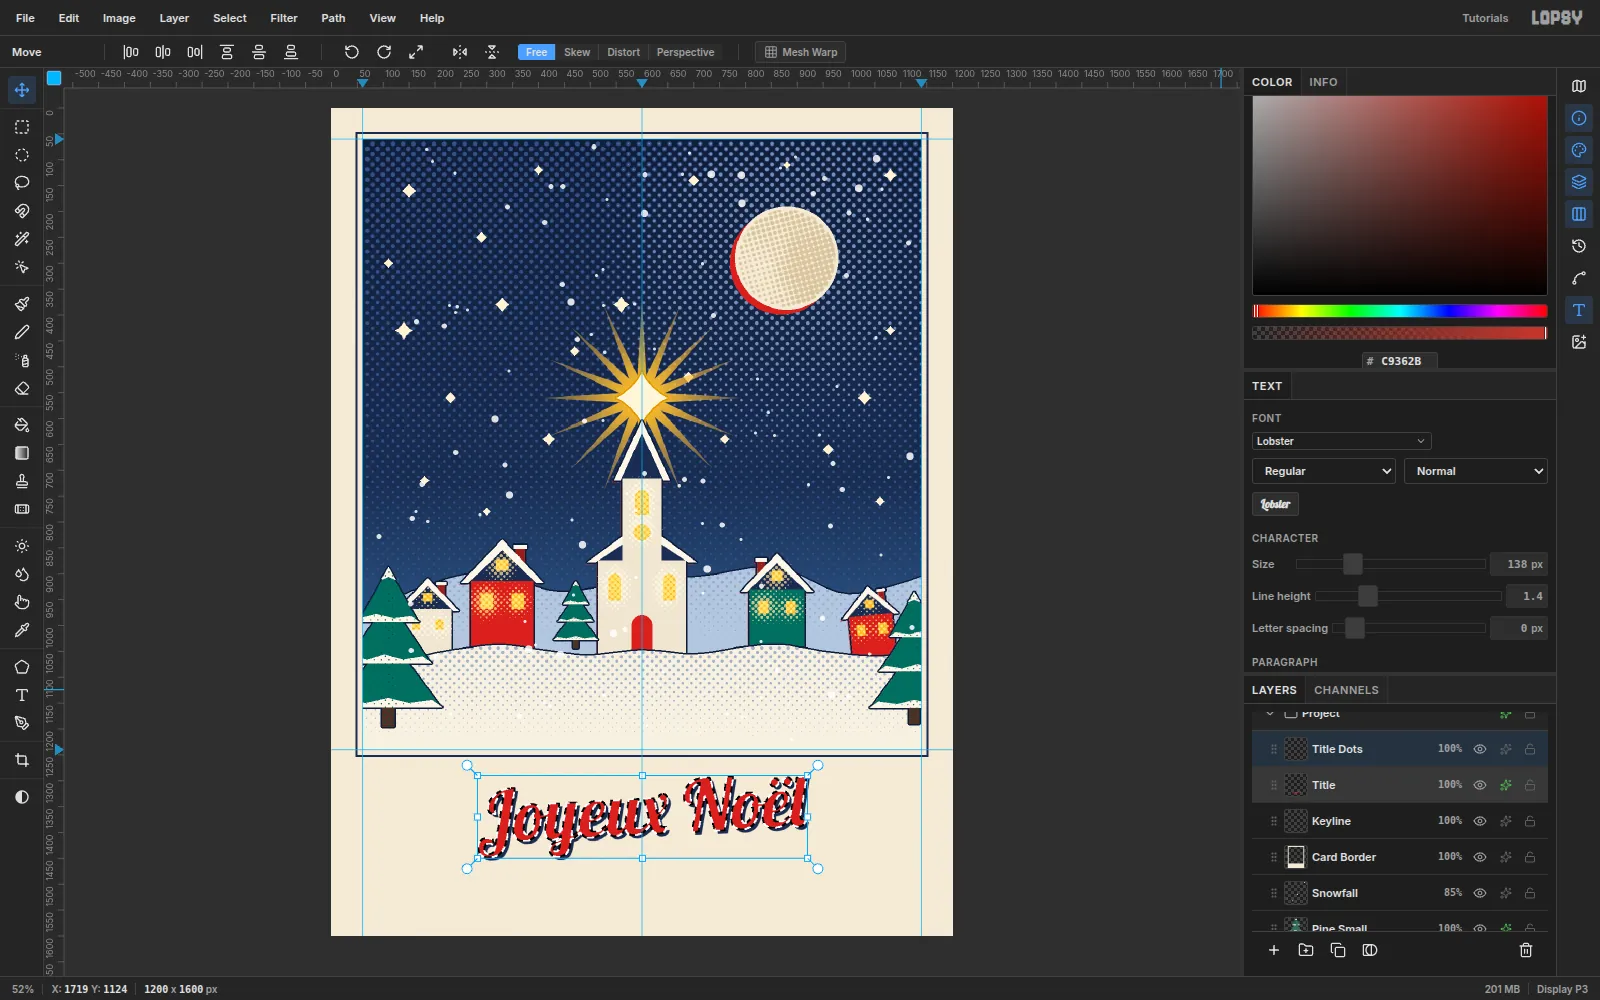
Add a Title Dots layer and Cmd-click the Title thumbnail to select the letter shapes.
Drag a linear gradient (white →
#C4C4C4at 35% →#202020) from the top of the lettering to the bottom. Run Halftone at Dot Size 9, then deselect and add a Color Overlay of dark red#7E211B.The script now shades from clean red at the top to a dotted lower half, like a screen-printed sign.
-
Build the ribbon
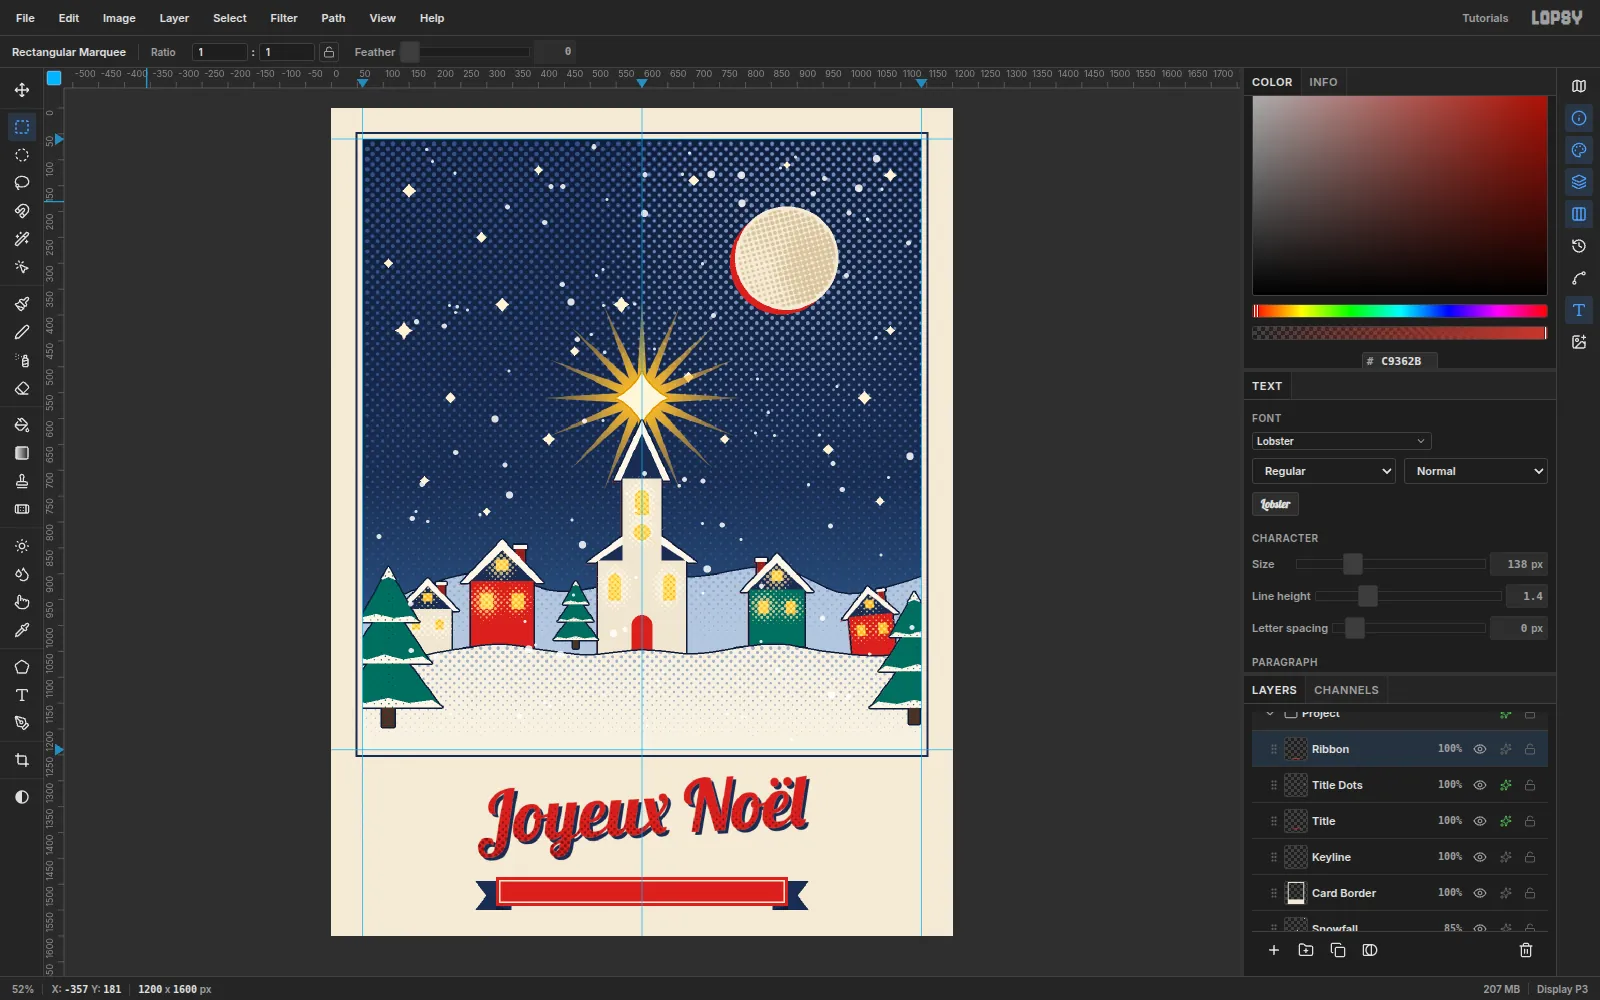
Add a Ribbon layer.
- Tails: lasso-fill two navy
#1D2B4Fswallowtails behind the band ends. They run from x 278 to 348 on the left and 852 to 922 on the right, 8 px lower than the band, with a 22 px notch. - Folds: fill a small triangle in
#121B35where each tail tucks under the band. - Band: marquee (318, 1486) to (882, 1542) and fill it red.
- Inner rule: Select → Shrink by 5 px and fill with paper. Then shrink by 2 px more and fill red again.
- Tails: lasso-fill two navy
-
Recolor the greeting with Select All
With the Text tool, set Size 32 and the font to Oswald, and type
PEACE ON EARTH · 2026in navy. Commit it and name the layer Greeting. In the Text panel, set Letter spacing to 9 px. Wide tracking suits small capitals.To recolor it, click into the text, press Cmd+A to select every character, and pick paper
#F3EAD6. Press Tab to commit.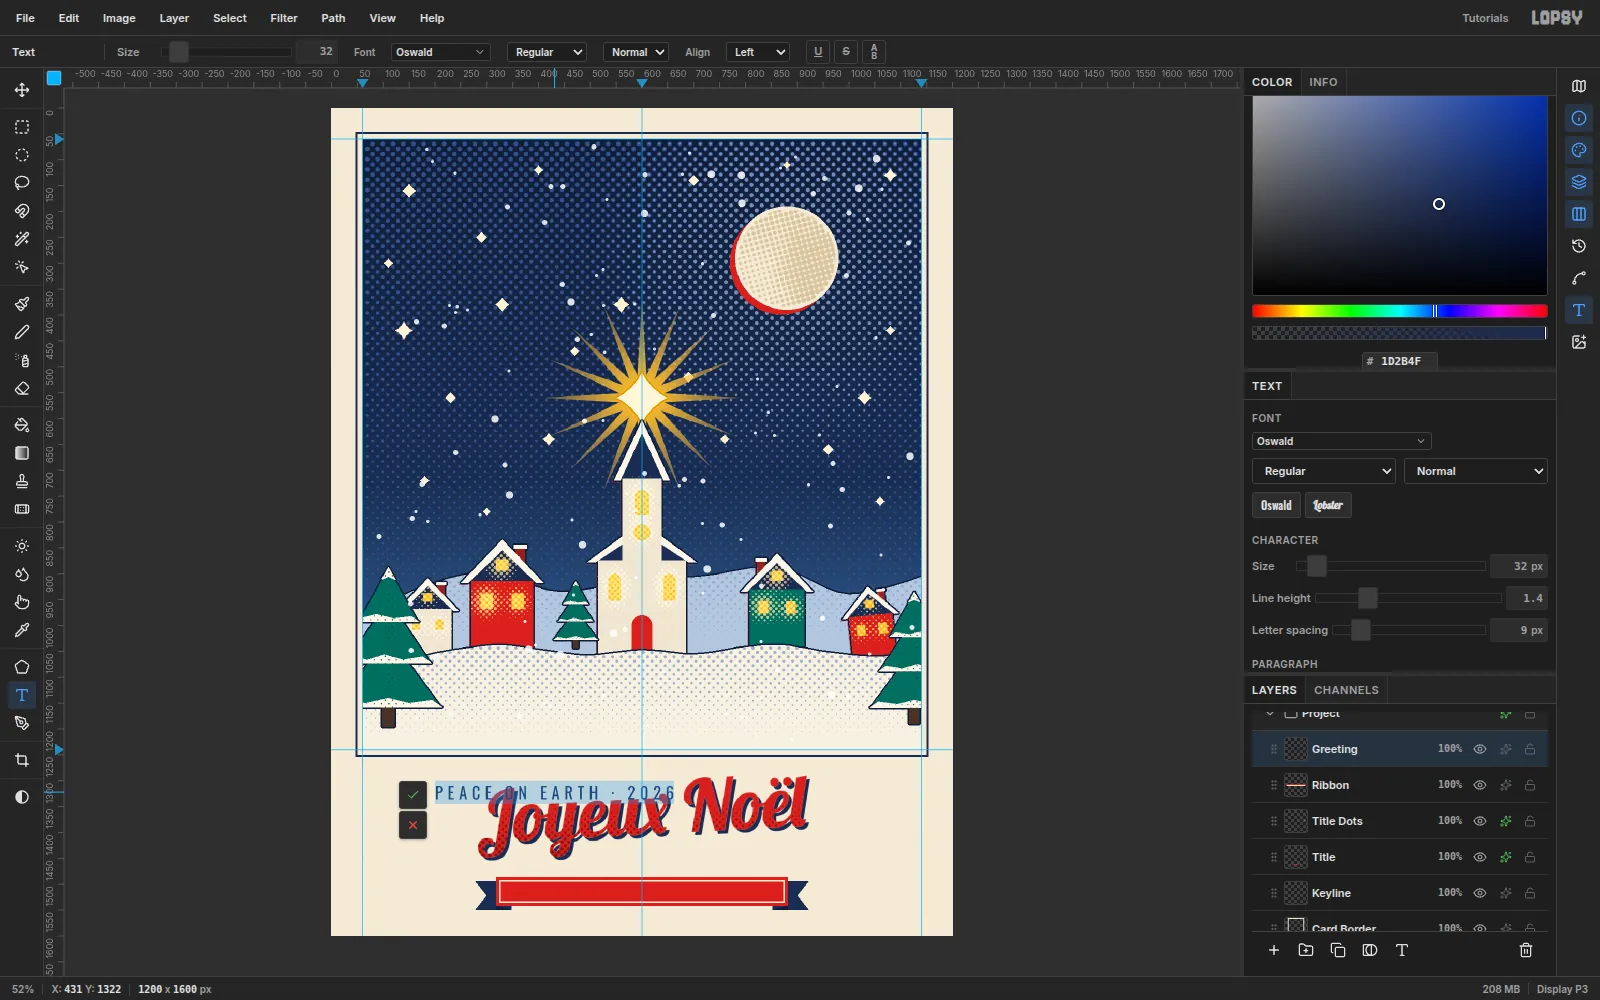
-
Seat the greeting in the ribbon
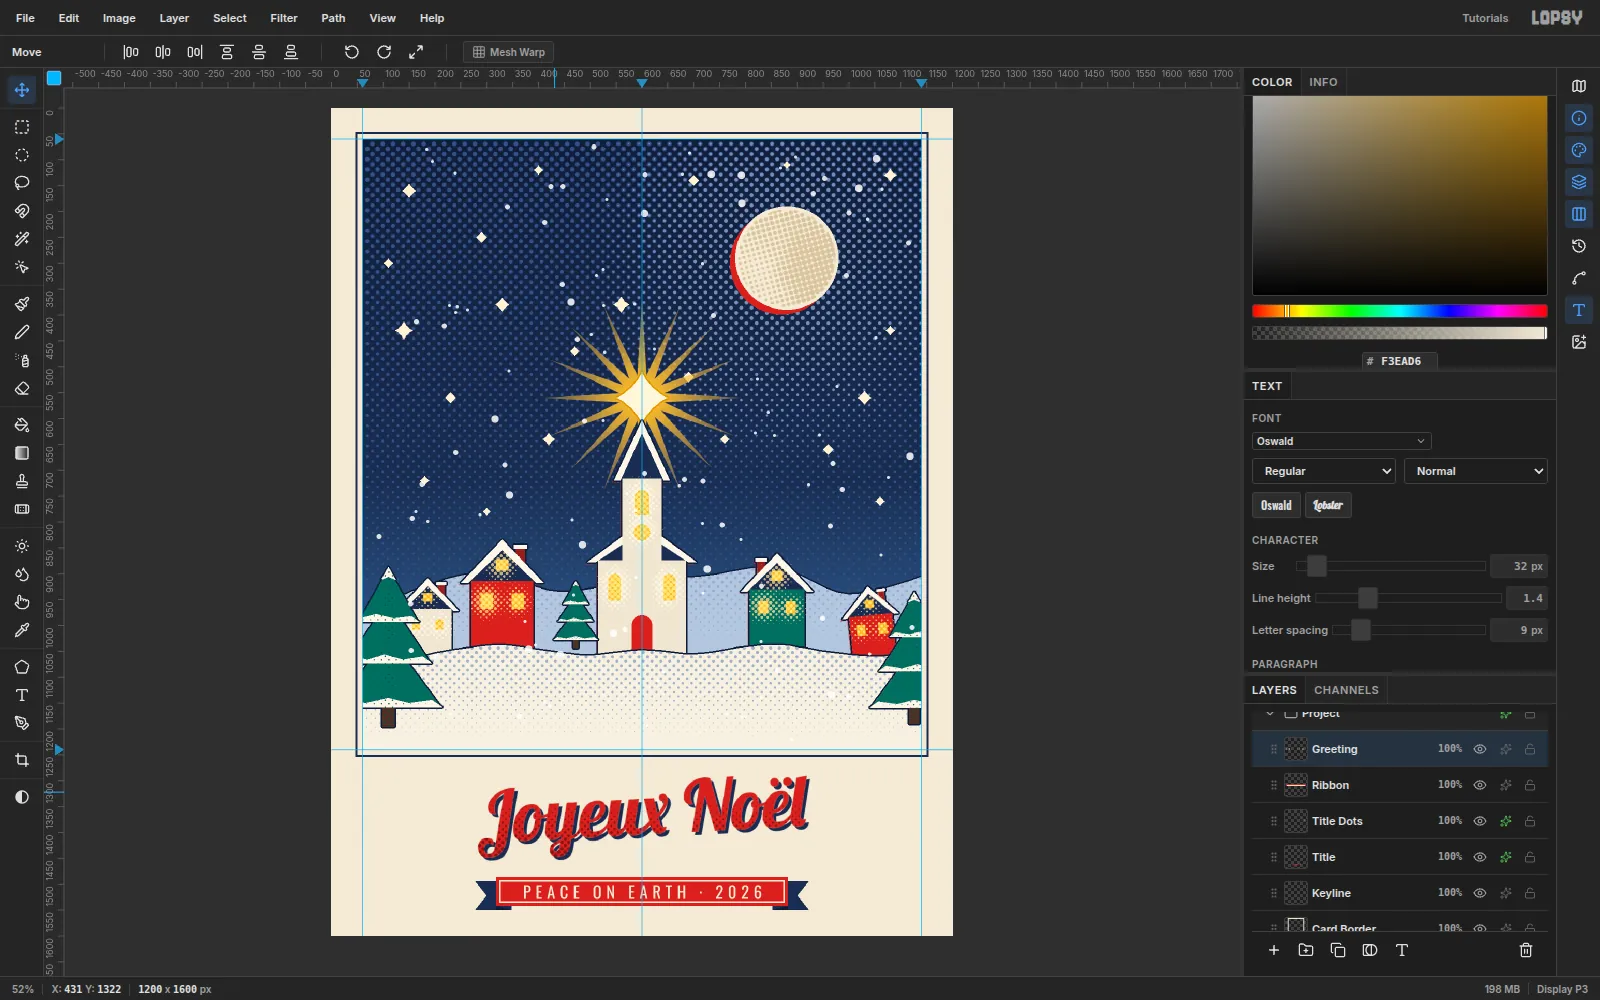
Nudge the greeting so the inked caps sit halfway between the inner rules. The band is y 1486 – 1542 and the rules end at y 1493 and 1535. The caps are about 25 px tall, so they belong at about y 1502 – 1527, with 9 px above and 8 px below. Center them horizontally on x 600.
Capitals have no descenders, so centering the inked box also centers them optically.
-
Clean the flakes off the chapel
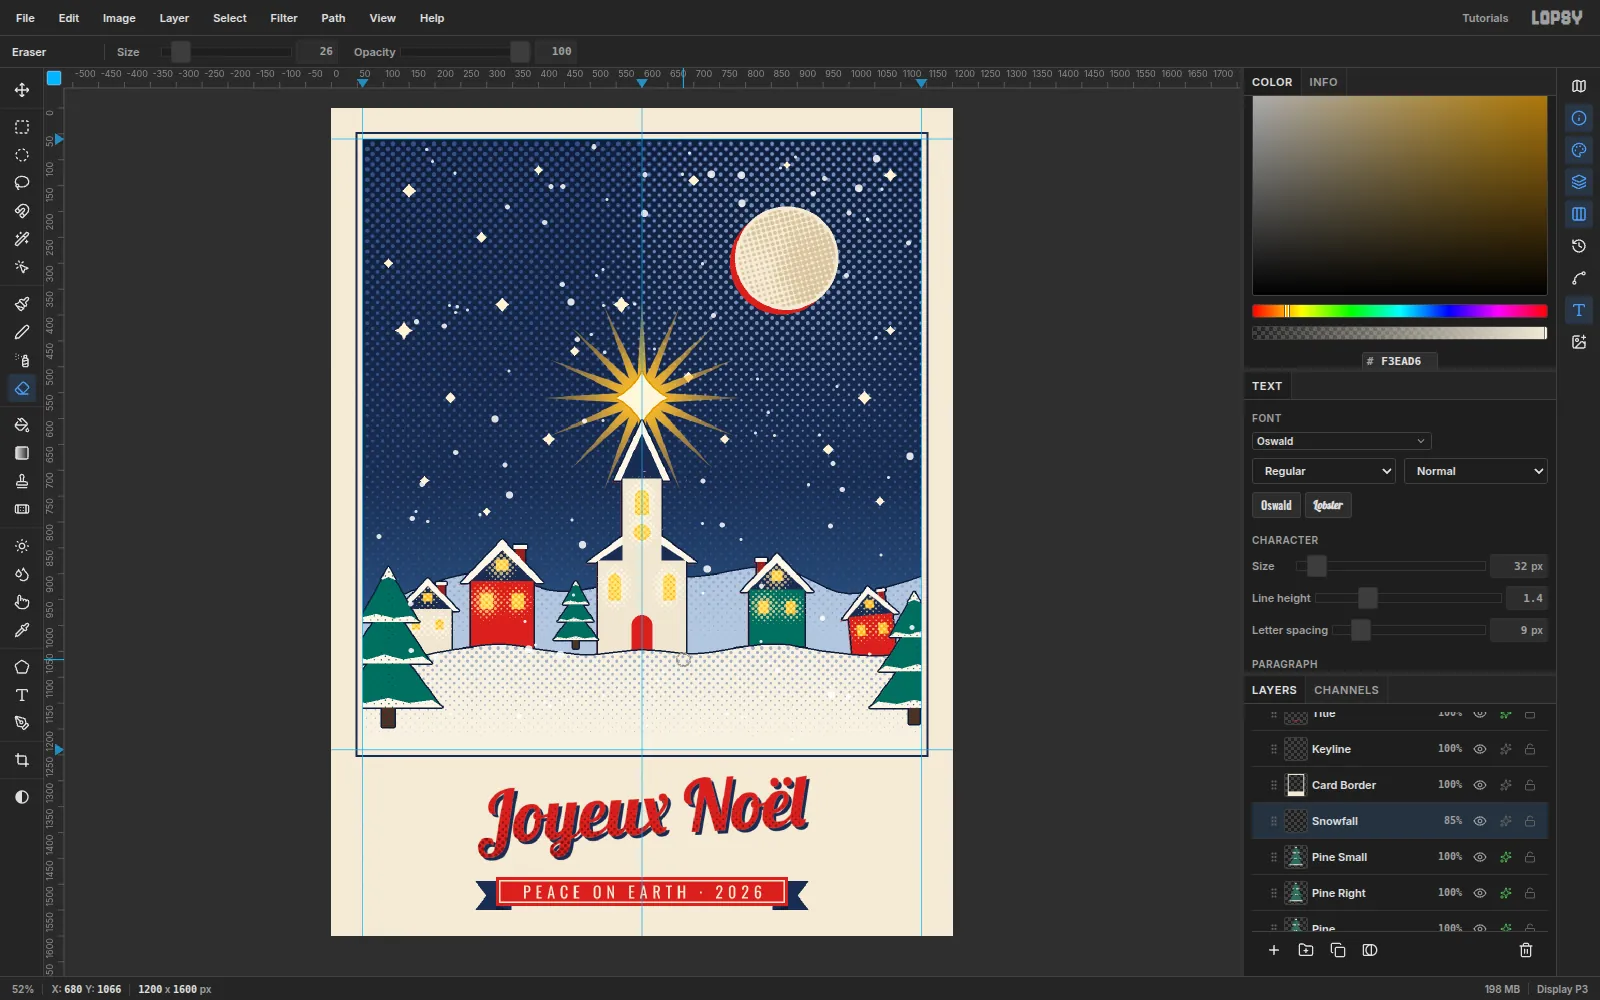
A few flakes landed on the chapel and disappear into its cream walls. Select Snowfall, pick the Eraser (E) at Size 26, and sweep over the chapel facade.
-
Add print grain
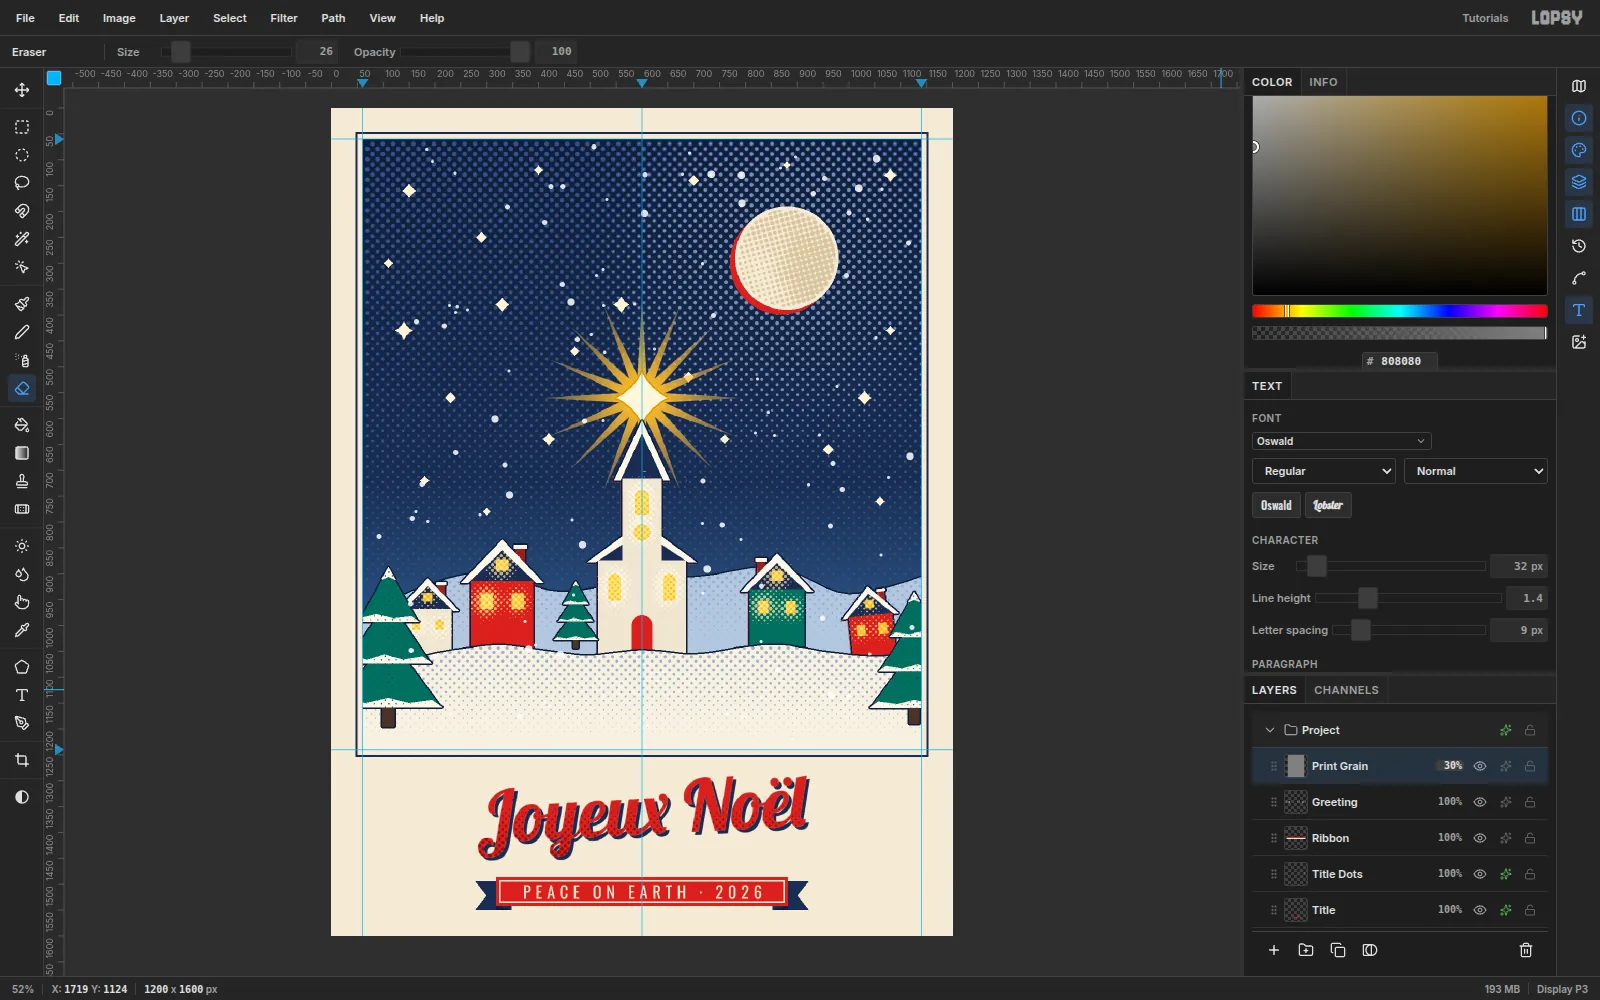
Select Greeting and add a Print Grain layer at the very top. Fill it with
#808080, then run Add Noise at Amount 22 with Mono and Gaussian. Set Blend to Overlay and the opacity to 30%.The mid-gray disappears in Overlay, and only the grain is left, over the paper and the inks alike.
-
Export the card
Turn off View → Show Guides and choose File → Quick Export PNG.
At 1200 × 1600 it prints at 4 × 5.3 in at 300 dpi. For a 5 × 7 in card, start at 1500 × 2100 and scale every coordinate by 1.25.