Design an Infographic Christmas Card with a Bar-Chart Tree
Make a data-viz holiday card in Lopsy. Build a bar-chart Christmas tree on graph paper, plot ornaments as data points, then add a legend, axis and script.
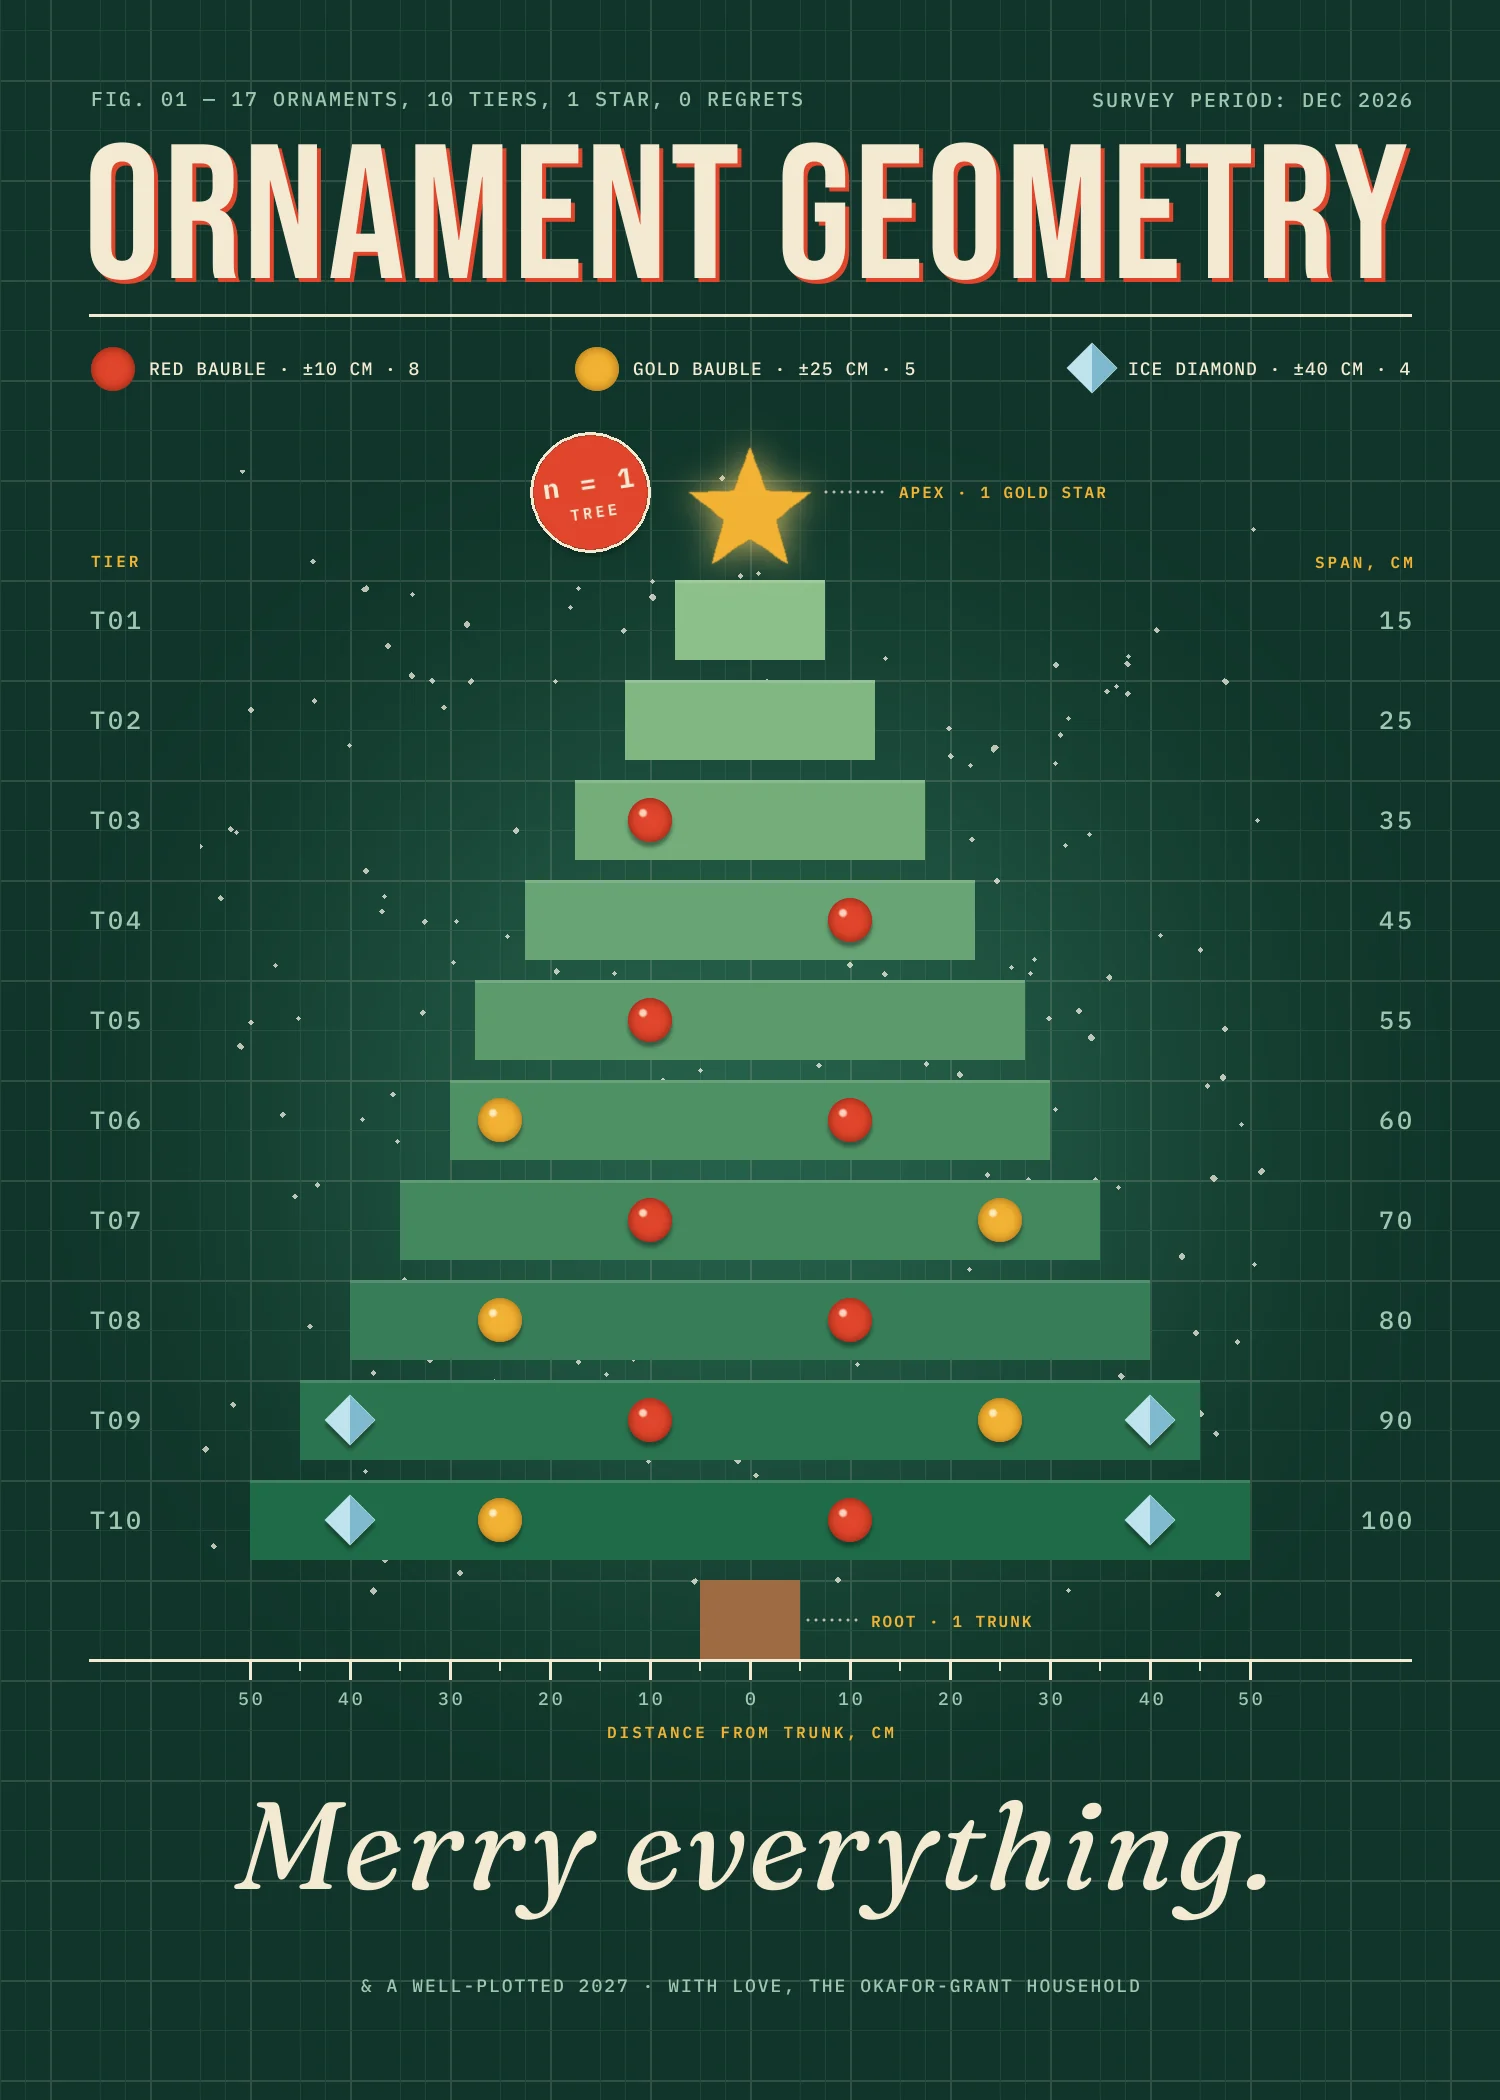
Infographic Christmas cards are a nerdy genre with a big payoff. The tree is a real chart, the ornaments are data points, and the season's greetings come with a legend and an axis. The joke only works if the chart is honest, so every number on the card matches what's drawn.
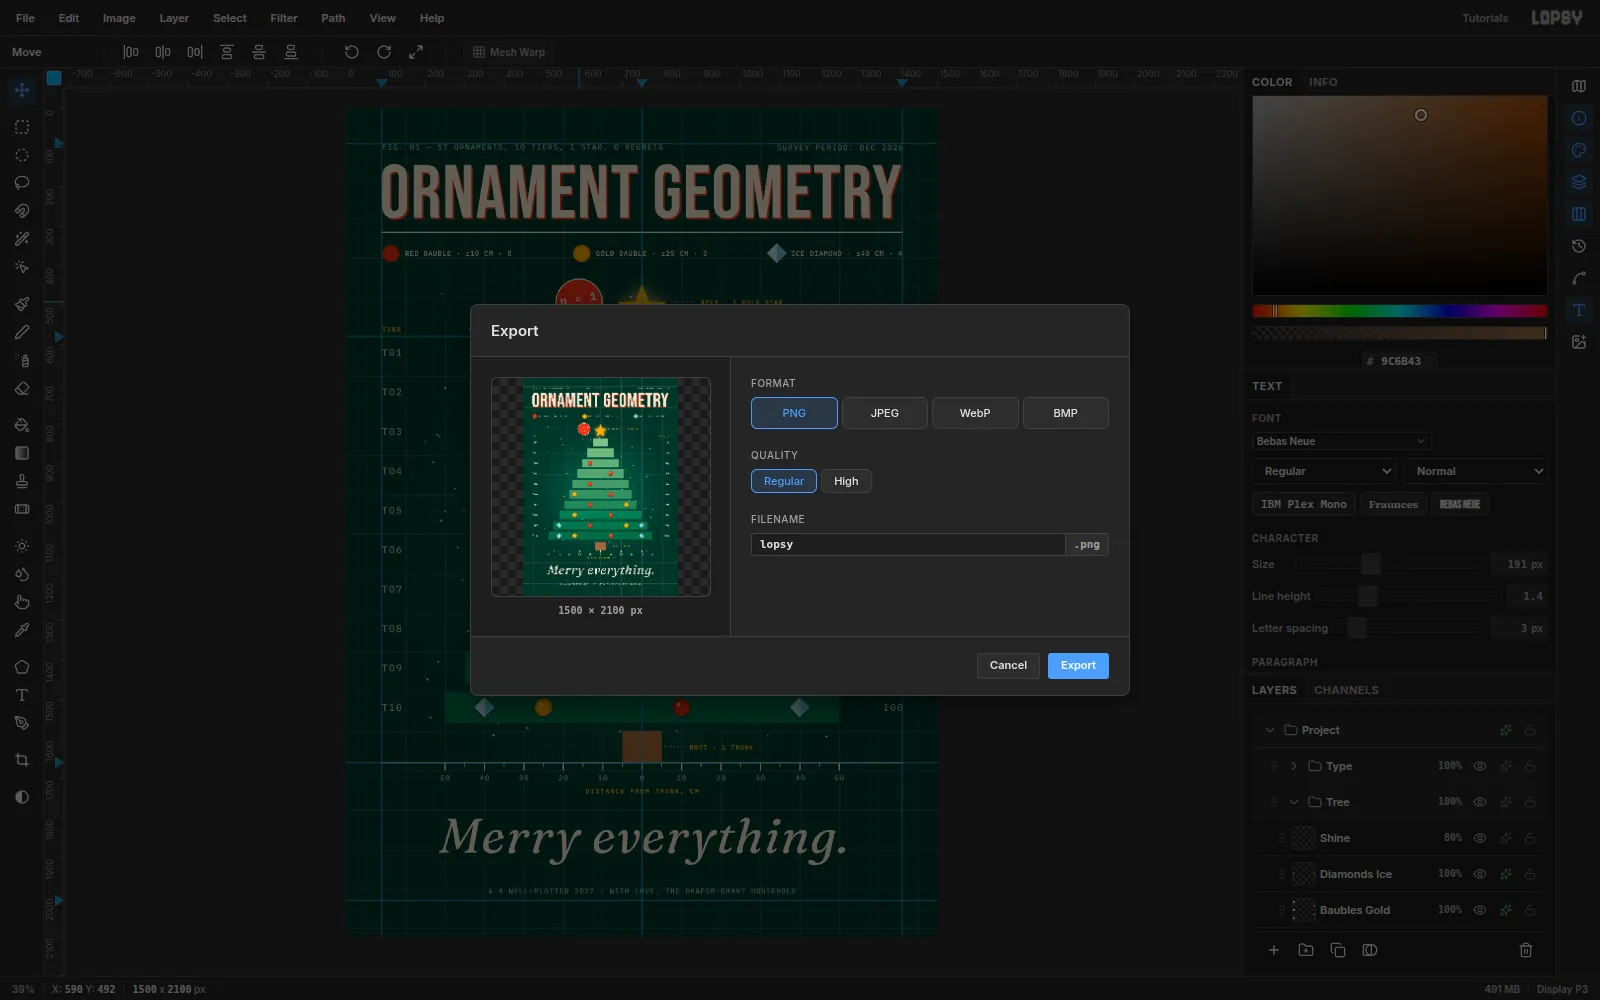
In this tutorial you'll make Ornament Geometry, a 1500 × 2100 px card (5 × 7 in at 300 dpi). Along the way you'll use:
- Define Pattern and Fill with Pattern to make graph paper
- stacked marquee fills for the bar chart
- the Shape tool, Color Overlay and Alt-drag duplication for the ornaments
- the transform handles to rotate a diamond and a badge
- Add Noise, Threshold and the Magic Wand to make snow
- text layers, groups and copy/paste for the typography, legend and axis
The palette:
- Paper: pine
#10352A, grid cream#F3E9D2and sage#6F8F80 - Bars: a ten-step ramp from
#8CC08Adown to#1F6B48 - Ornaments: red
#E0452B, gold#F2B233, ice#BFE3EE/#7FB9CE - Type: cream
#F3E9D2, sage#9FC7B0, gold#F2B233
The whole layout runs on a 100 px = 10 cm scale. The trunk's center line is x 750, and the tree is drawn in document pixels.
-
Set up the card, guides and background
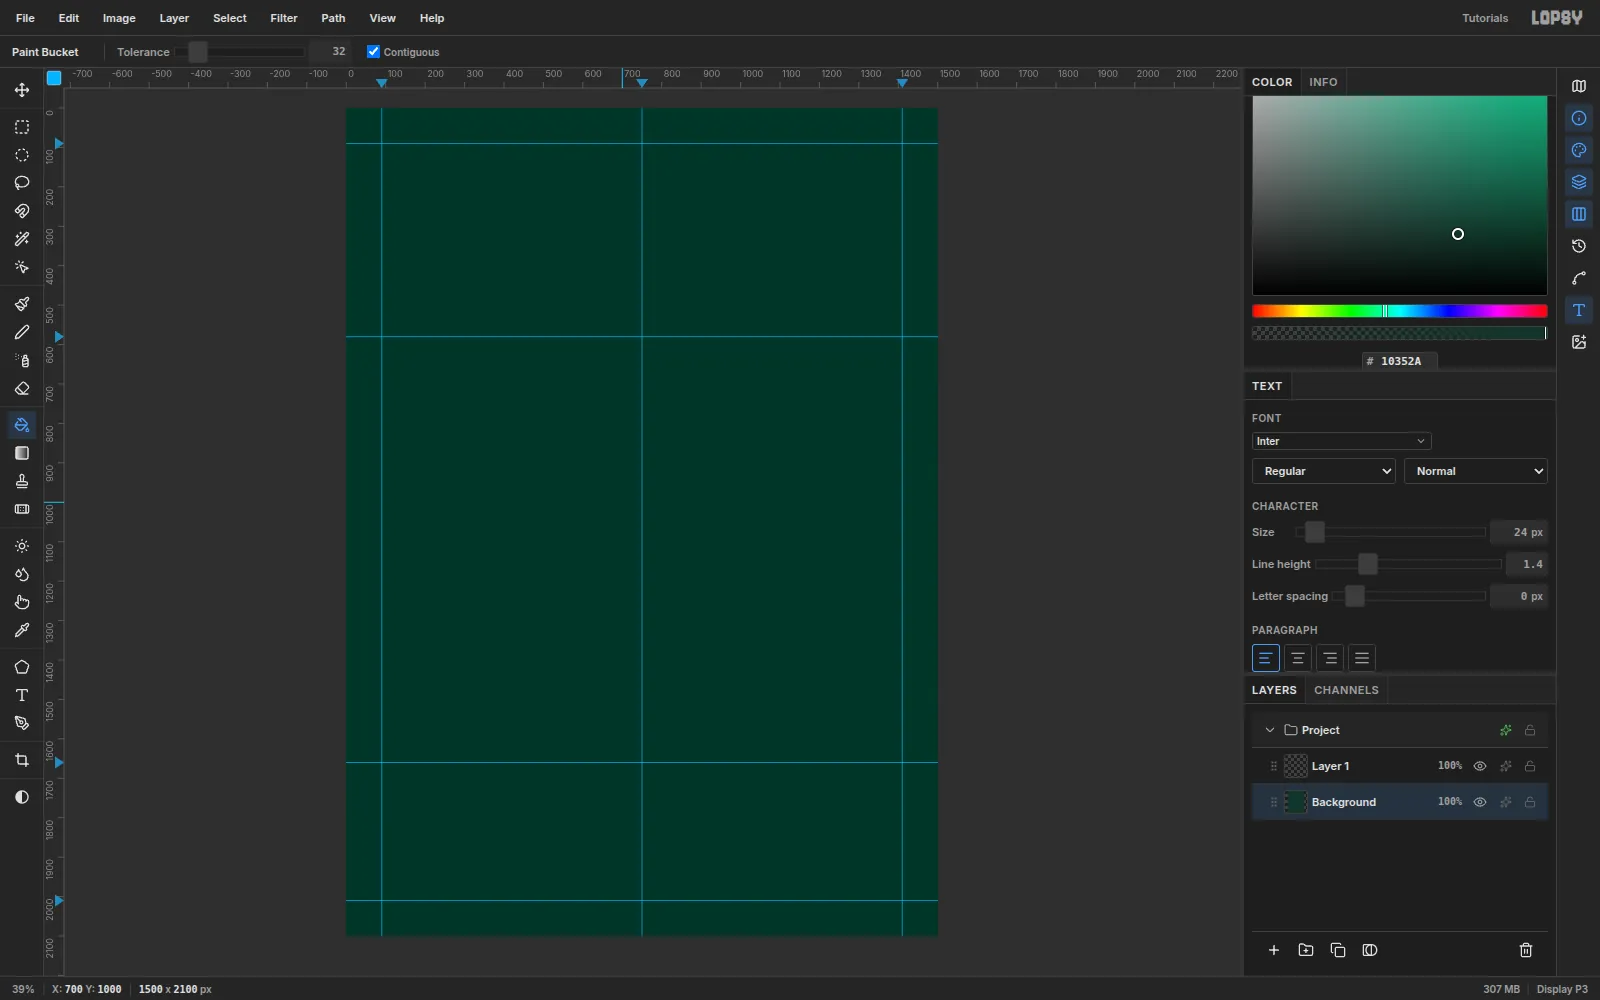
Choose File → New and make a 1500 × 2100 px document.
- Click the top ruler at 90, 750 and 1410 to place the side margins and the center line.
- Click the left ruler at 90, 580, 1660 and 2010. These mark the top margin, the top of the chart, the axis baseline and the bottom margin.
- Select Background, set the foreground to
#10352A, and click the canvas with the Paint Bucket (G).
Rename Layer 1 to Graph Paper by double-clicking its name.
-
Draw one graph-paper tile
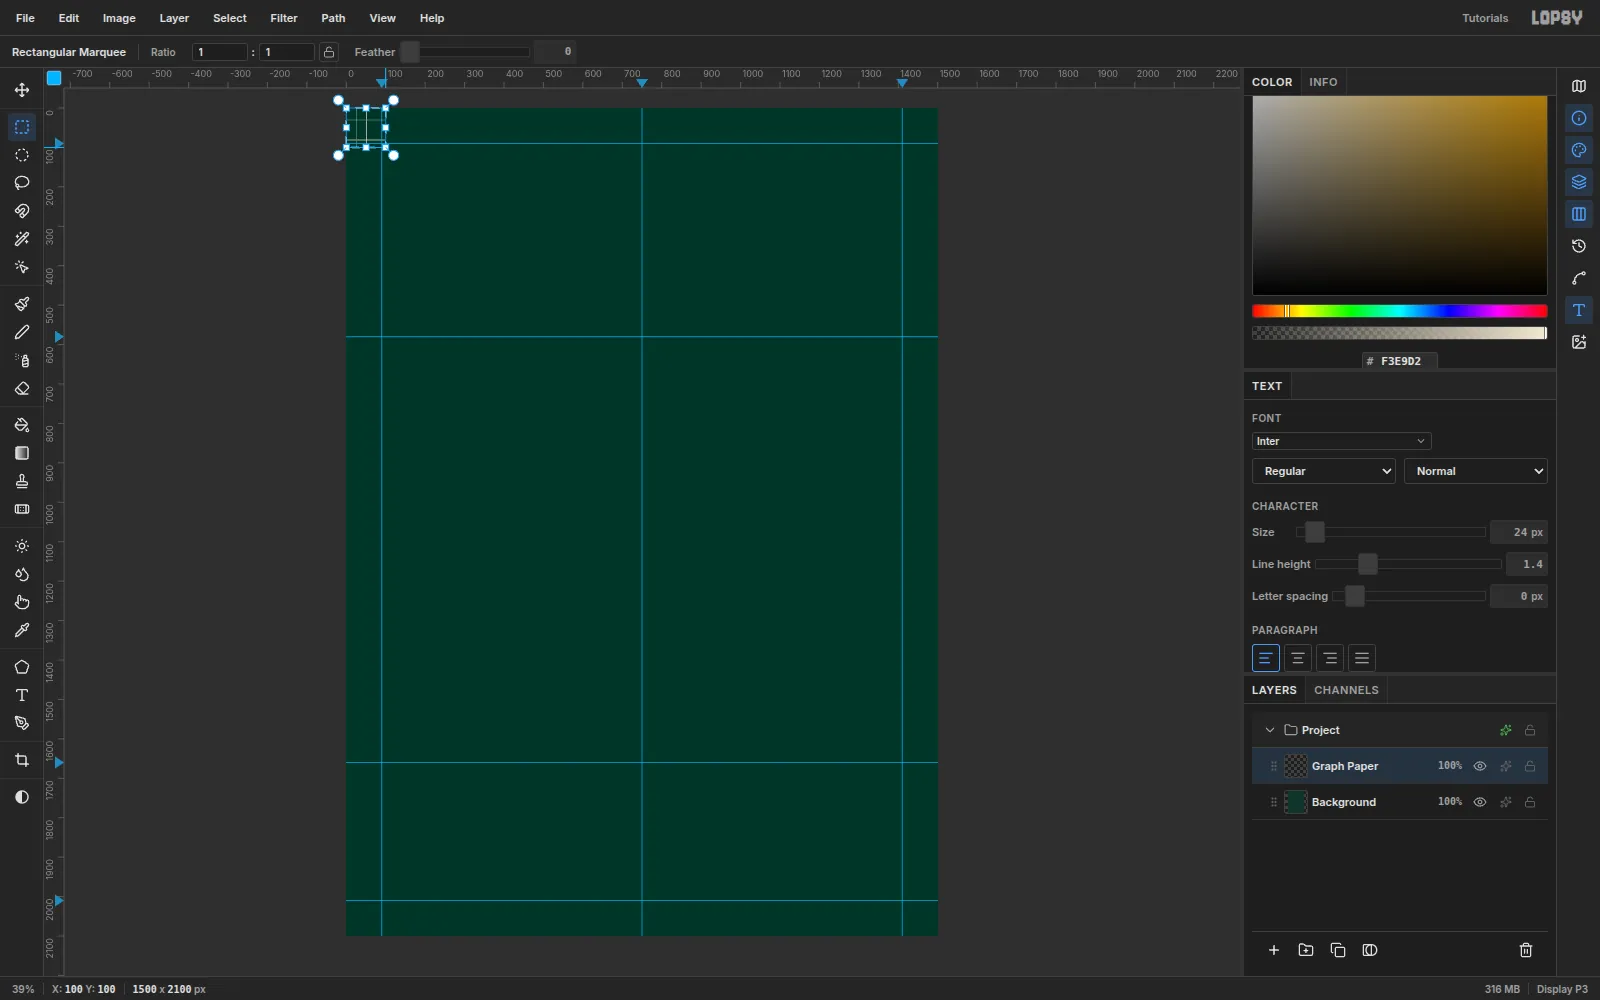
On Graph Paper, draw a 100 × 100 px tile in the top-left corner. Use the Rectangular Marquee (M) and Paint Bucket to fill thin strips:
- Minor lines,
#6F8F80, 1 px wide: vertical at x 0, 25 and 75, horizontal at y 5, 30 and 55. - Major lines,
#F3E9D2, 2 px wide: vertical at x 50, horizontal at y 80.
The major lines sit off-center in the tile on purpose. Once it tiles, they land on x 250, 350 … 1250 and y 580, 680 …, which are exactly the chart's 10 cm ticks and the tops of the bars.
Marquee (0, 0) to (100, 100) and choose Edit → Define Pattern.
- Minor lines,
-
Tile the pattern across the card
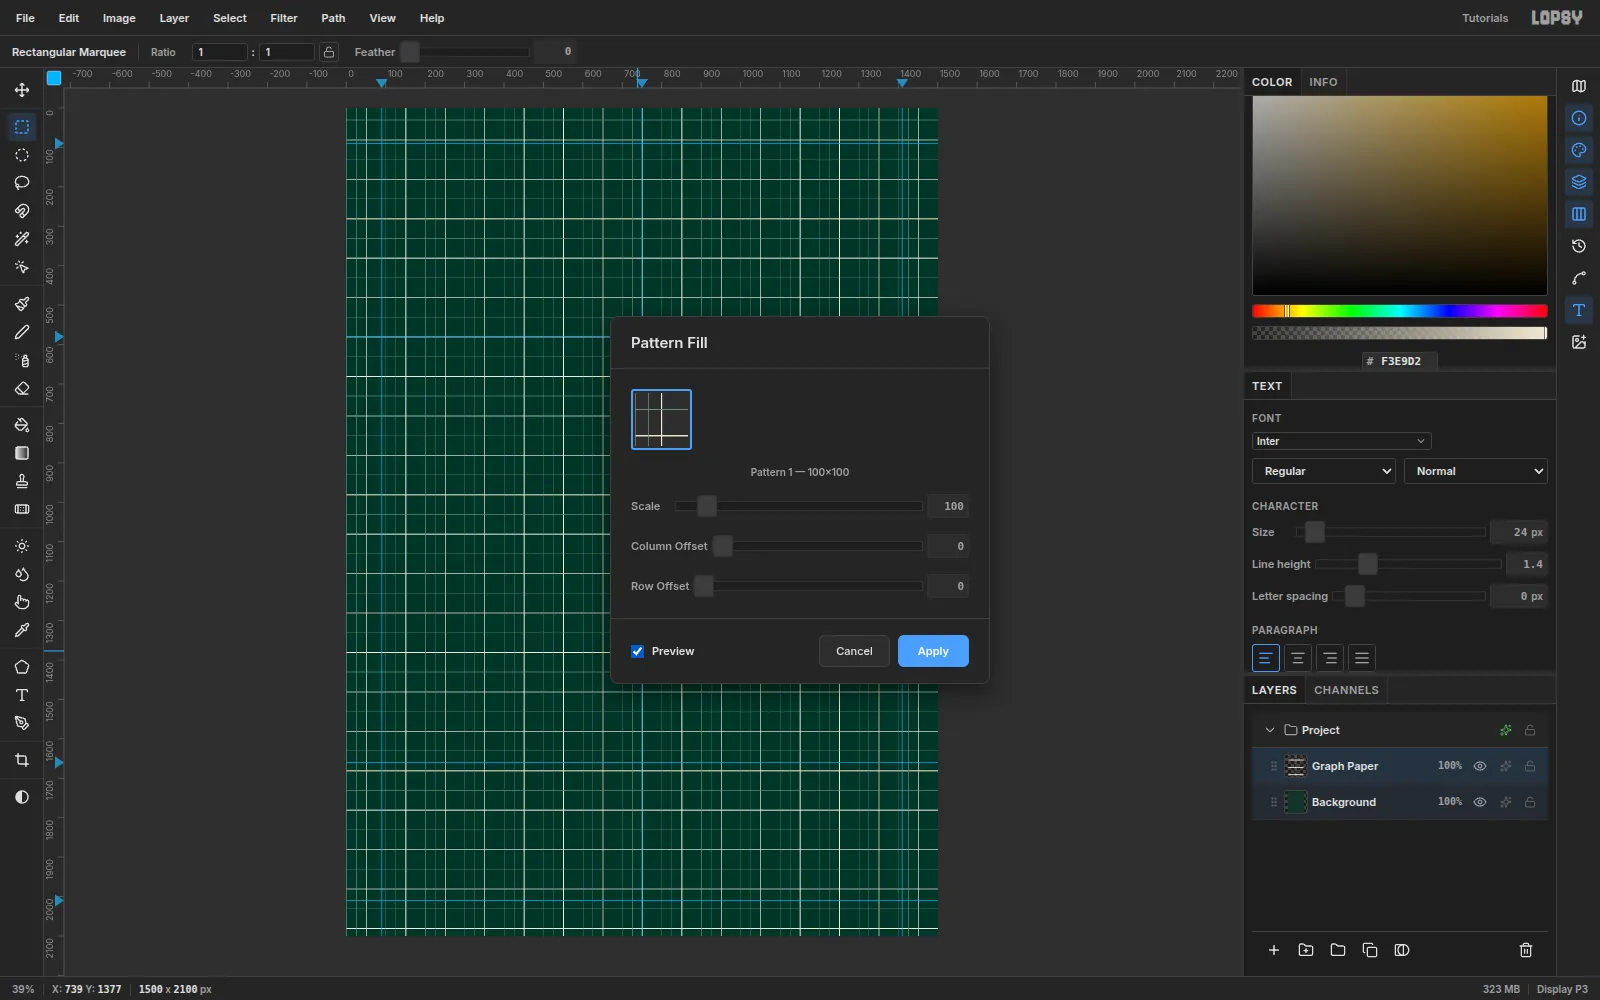
Press Cmd+A, then Delete to clear the tile, and Cmd+D.
Choose Edit → Fill with Pattern…, pick the new tile, turn on Preview, and click Apply. Leave Scale at 100 and both offsets at 0.
Click the layer's opacity readout and drag it to 14%. Then open its effects drawer and set Blend to Screen. The grid should be barely there.
-
Add a soft center glow
Add a layer called Glow. Pick the Brush (B) and set Size 1500, Hardness 0, Opacity 100.
With
#4FB37E, click once at (750, 1120). Set the layer to Screen at 30%. It lifts the middle of the card without looking like a gradient.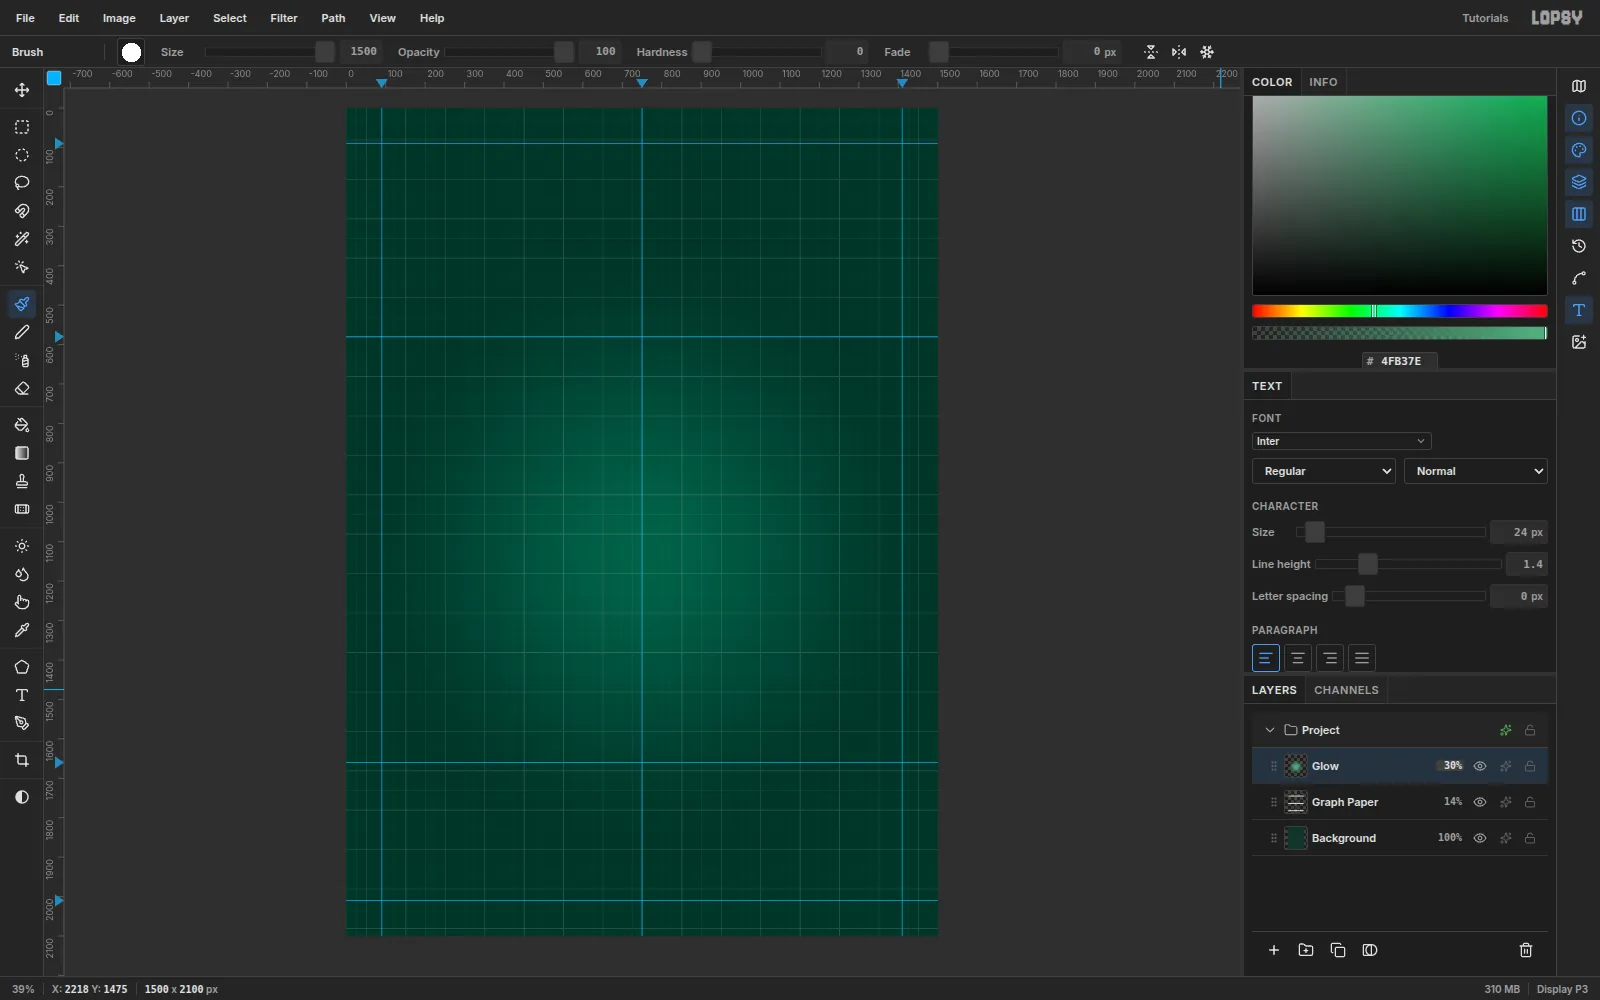
-
Marquee the first chart bars
Click New Group in the Layers panel and name it Tree. Inside it, add a layer called Bars.
Each tier is a bar 80 px tall on a 100 px pitch, centered on x 750. Tier i (0 for the top bar) starts at y = 580 + 100 × i. The widths in px are the spans in cm × 10:
150, 250, 350, 450, 500, 600, 700, 800, 900, 1000For each bar, drag the marquee from (750 − w/2, y) to (750 + w/2, y + 80), set the foreground to the next ramp color, and click inside with the Paint Bucket. The ramp runs in ten even steps from
#8CC08Aat the top to#1F6B48at the bottom.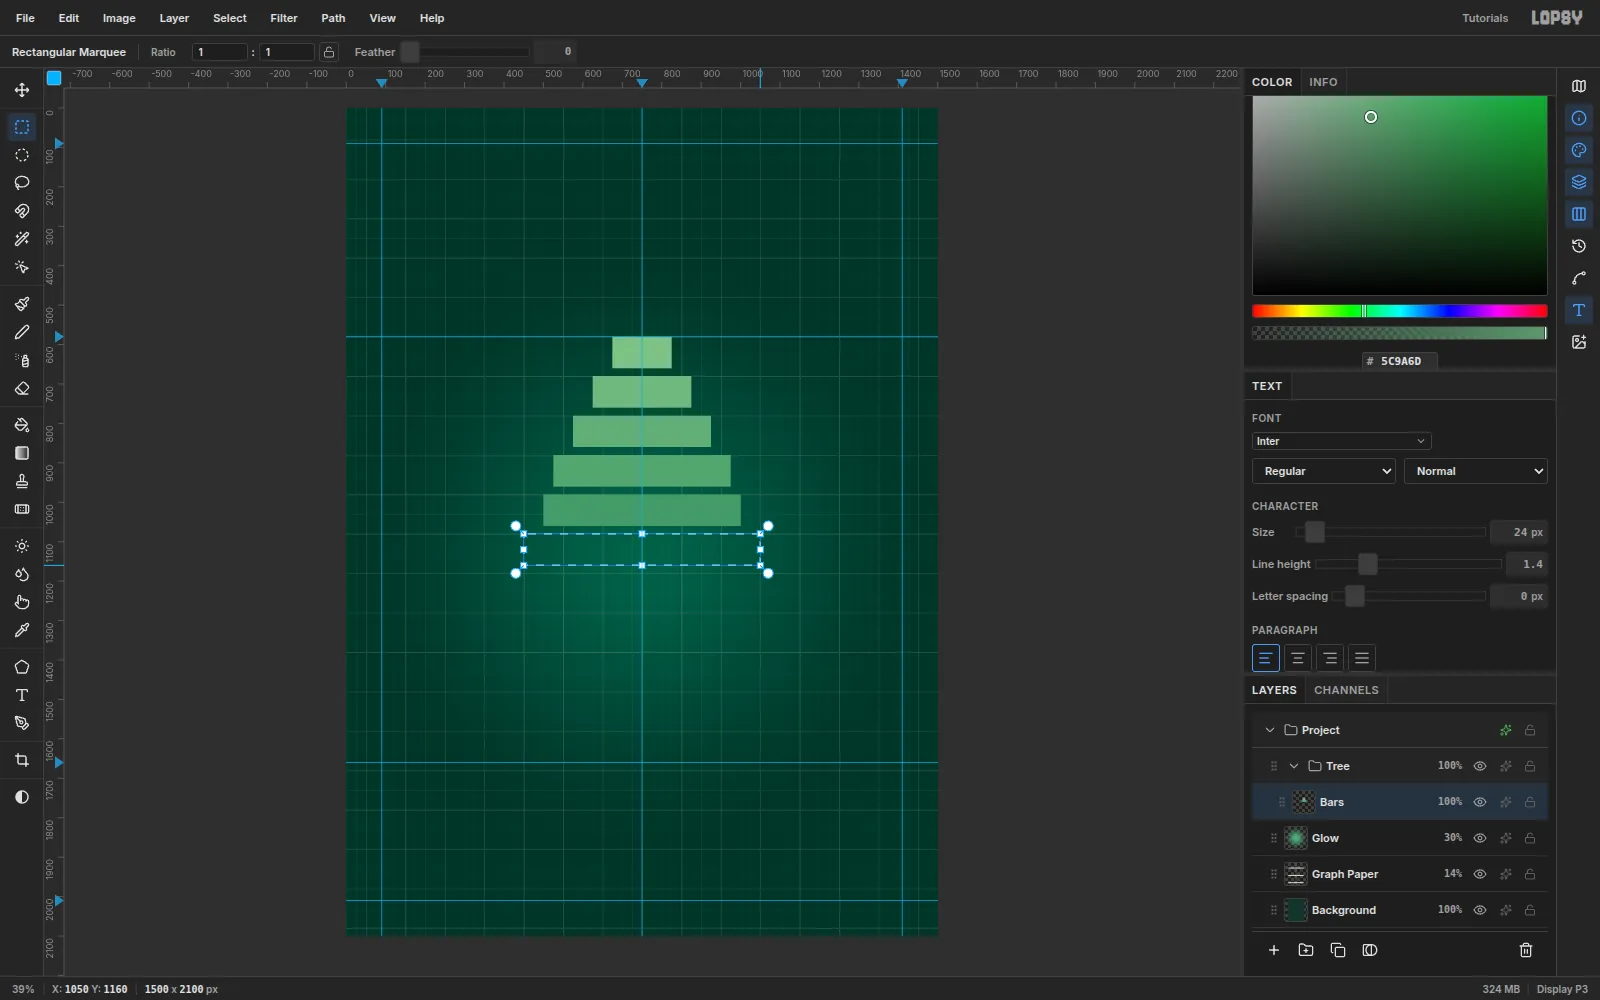
-
Finish the stack
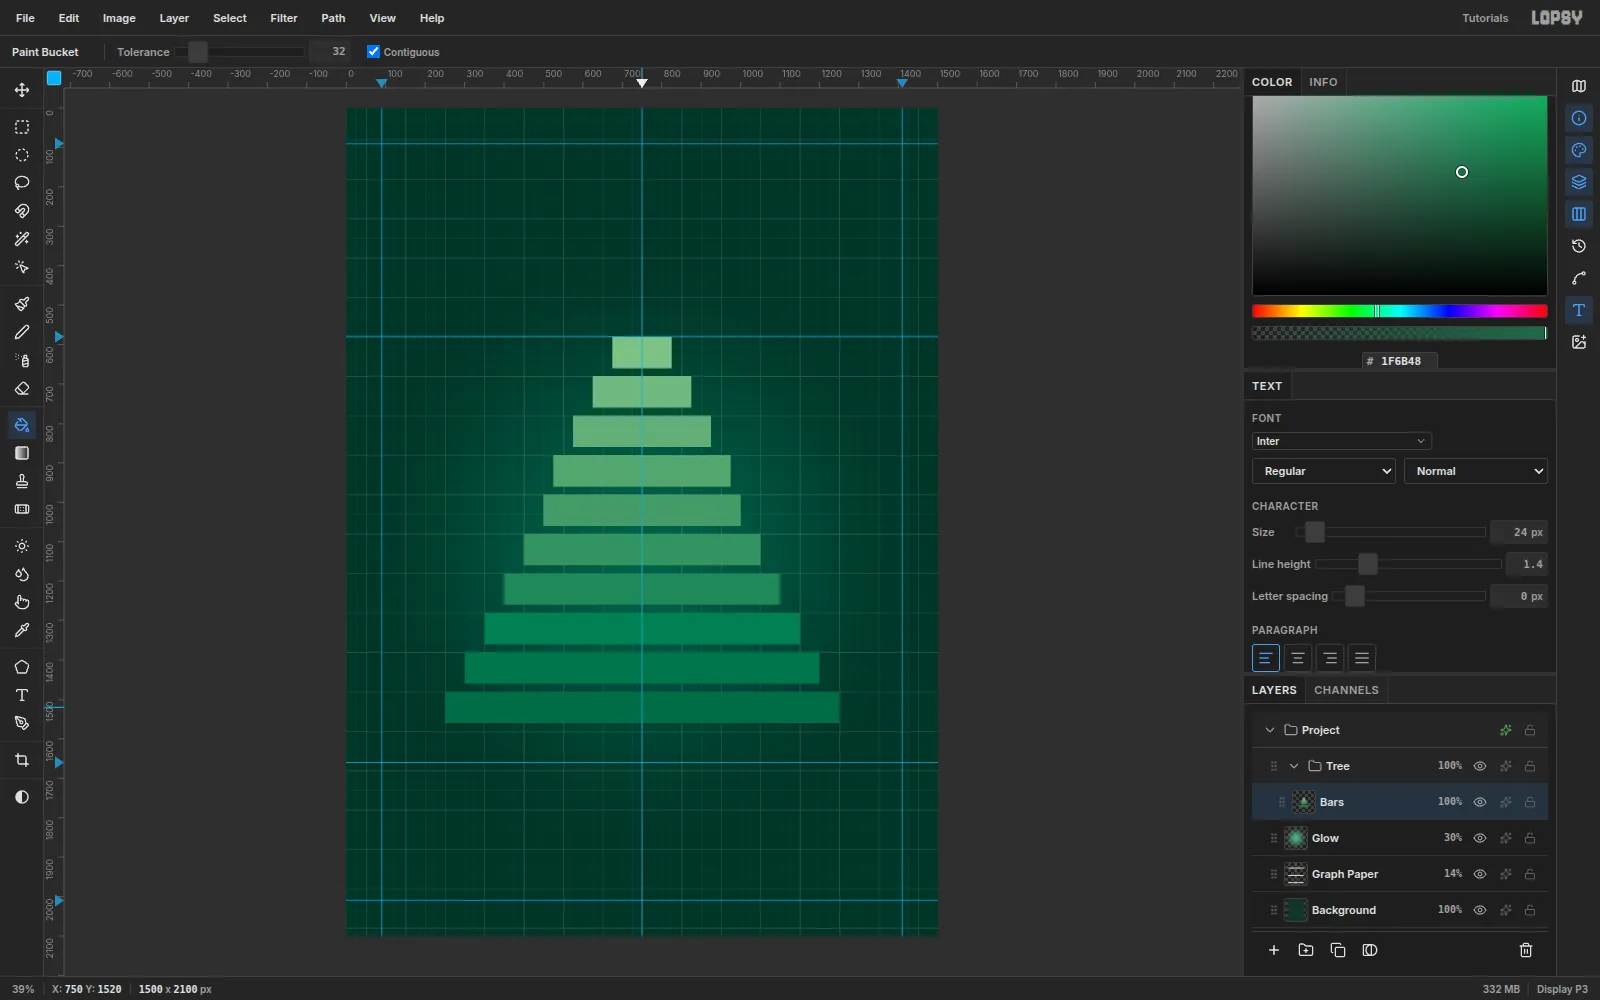
Press Cmd+D when the last bar is filled. The stack already reads as a tree, and each bar's top edge sits on a major grid line.
Keep the width list handy. The tier table later on quotes the same numbers.
-
Add bar highlights, a trunk and the axis
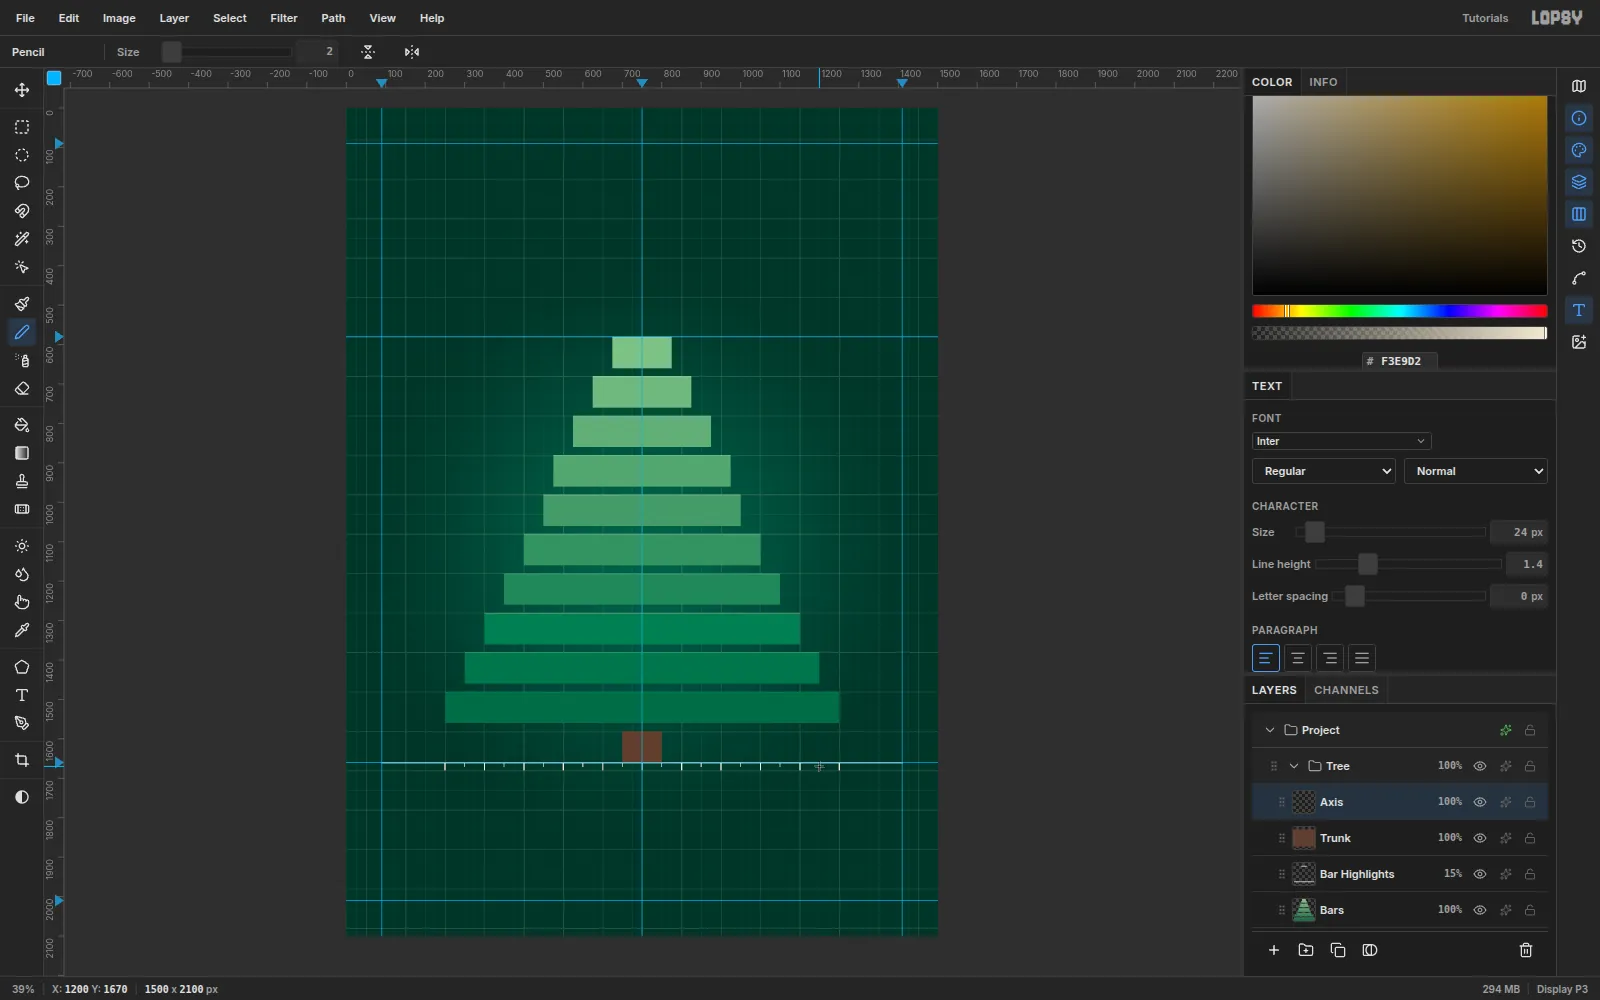
- Highlights: add a Bar Highlights layer and fill a 3 px white strip along the top of every bar. Set the layer to 15%.
- Trunk: add a Trunk layer and fill a marquee from (700, 1580) to (800, 1660) with
#5E4030. You'll warm it up later. - Axis: add an Axis layer and pick the Pencil (N) at Size 3 in
#F3E9D2. Click (90, 1660), then Shift-click (1410, 1660) for a dead-straight baseline.
For the major ticks, click each point from x 250 to 1250 in steps of 100 at y 1660, then Shift-click 18 px below it. For the minor ticks, switch to Size 2 and draw 10 px ticks at x 300, 400 … 1200.
-
Draw the star with the Lasso
Add a Star layer. With the Lasso (L), drag through the ten points of a five-pointed star centered on (750, 512). The outer points are 64 px from the center and the inner points are 27 px.
Fill it with
#F2B233and deselect.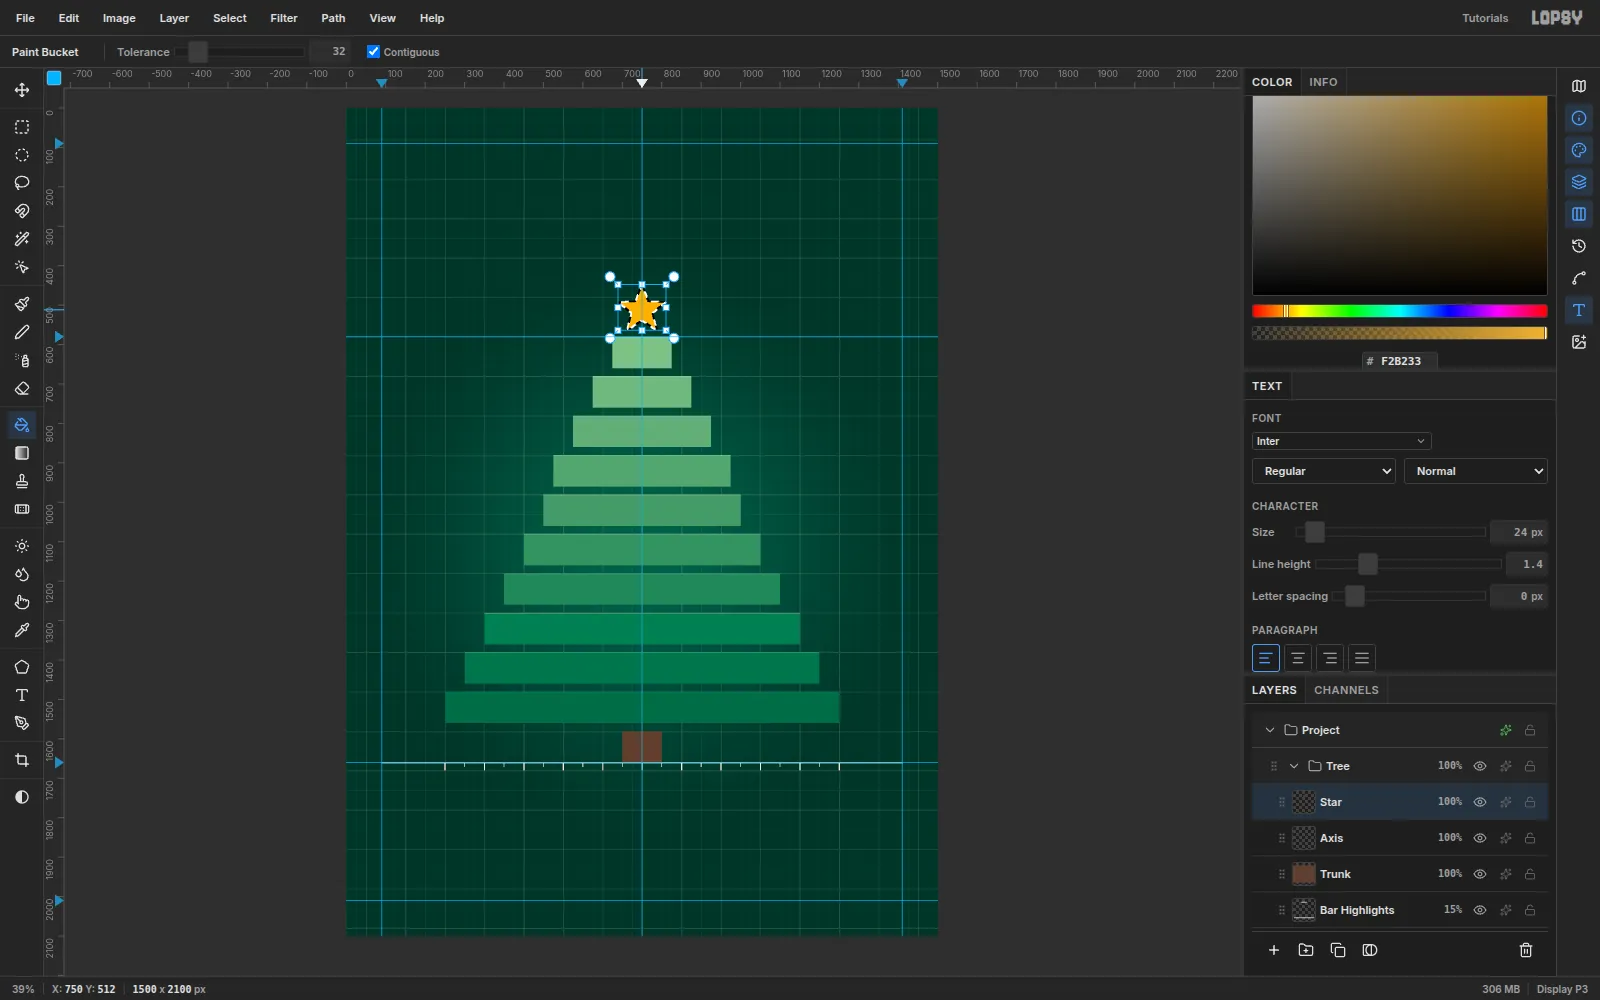
-
Soften and light the star
Lasso fills have hard, stair-stepped edges. Run Filter → Gaussian Blur… at Radius 2 to soften them.
Open the star's effects and enable Outer Glow: color
#FFD873, Size 48, Spread 10, Opacity 75.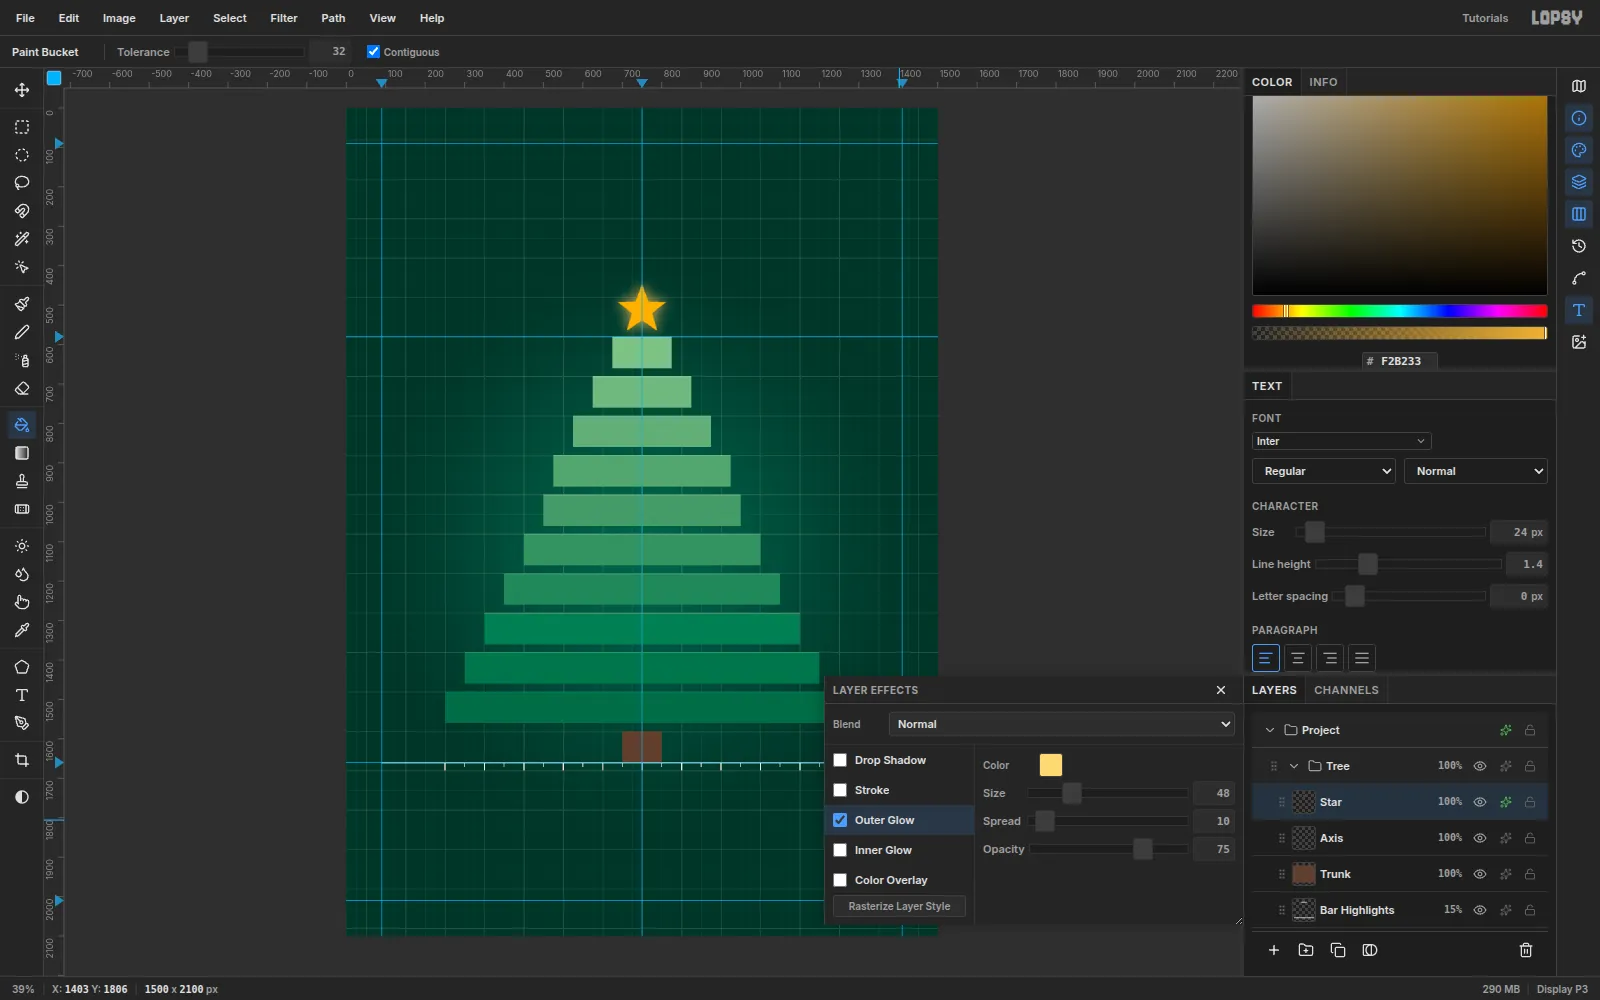
-
Make the first bauble
Ornaments sit in fixed slots, so their positions carry data:
- Red baubles: ±10 cm (x 650 / 850), on T03 – T10
- Gold baubles: ±25 cm (x 500 / 1000), on T06 – T10
- Ice diamonds: ±40 cm (x 350 / 1150), on T09 and T10
Each ornament is centered on its bar's vertical middle, at y = 620 + 100 × i.
Add a Baubles Red layer. Choose the Shape tool (U), set Shape to Ellipse, Fill white and Stroke none. The Shape tool draws from the center, so drag from (650, 820) to (672, 842) for a 44 px circle.
Then open the layer's effects and turn on Color Overlay with
#E0452B. The overlay gives you an exact hex color without touching the pixels.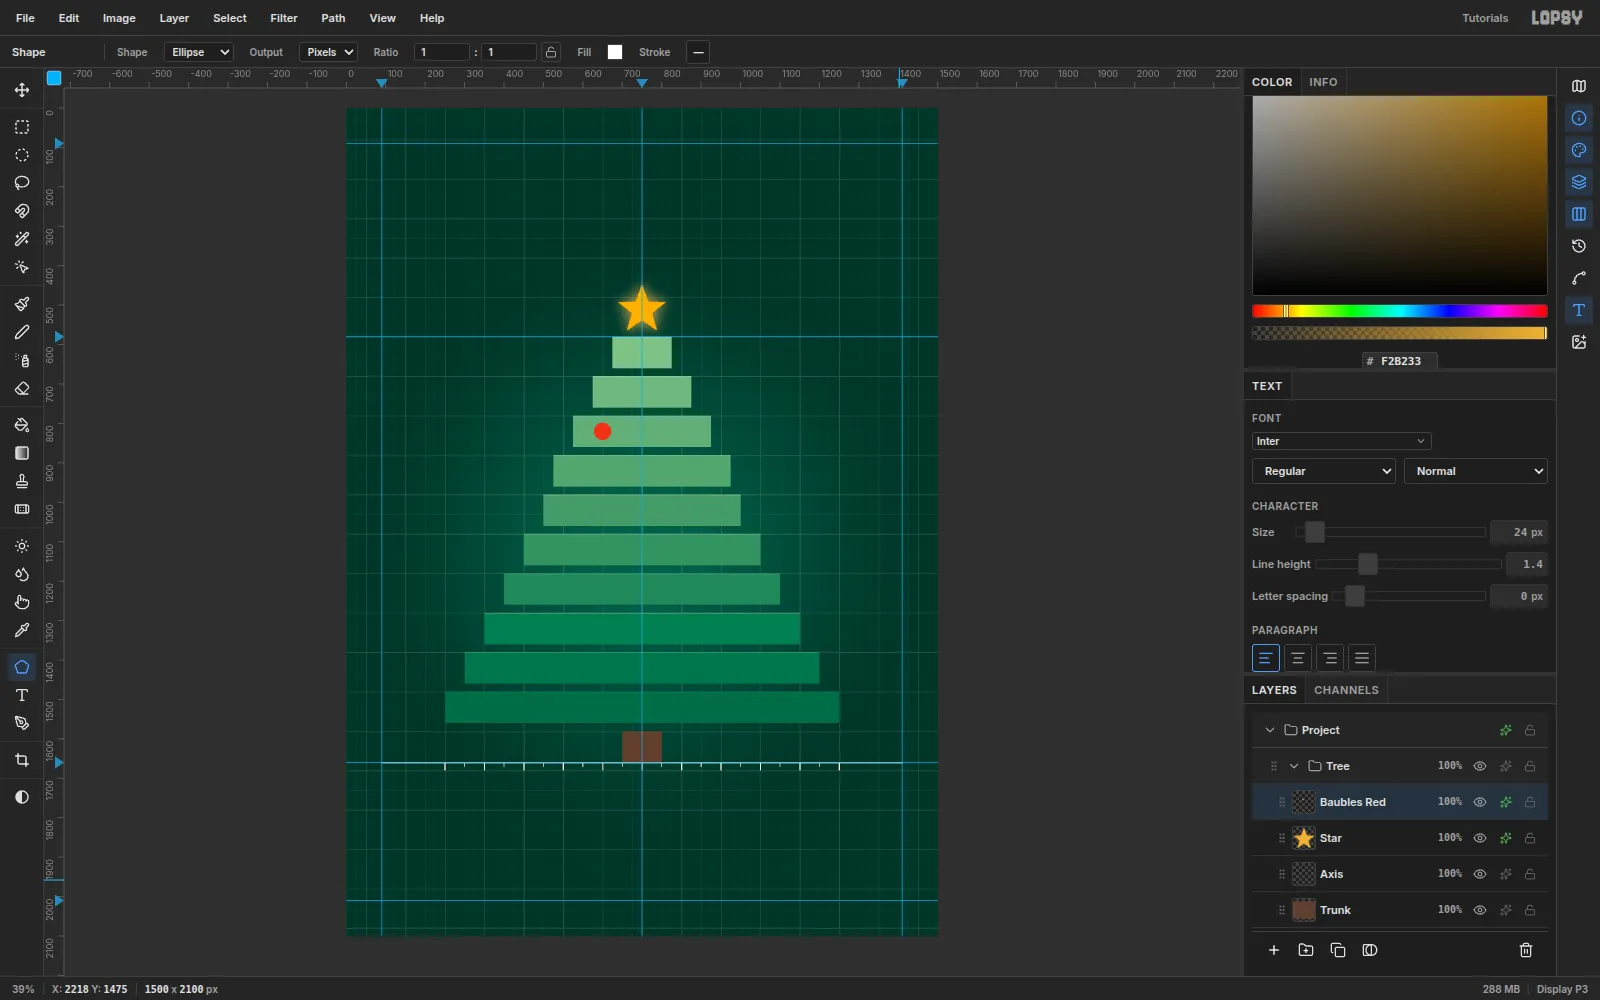
-
Stamp the other red baubles with Alt-drag
For each remaining red slot:
- Draw an Elliptical Marquee just around the first bauble (radius 25).
- Press V and Alt-drag from its center to the new slot.
- Press Cmd+D.
Alternate sides from tier to tier: 850 on T04, 650 on T05, and so on down to 850 on T10.
Repeat on a new Baubles Gold layer with a
#F2B233overlay, starting at (500, 1120) on T06.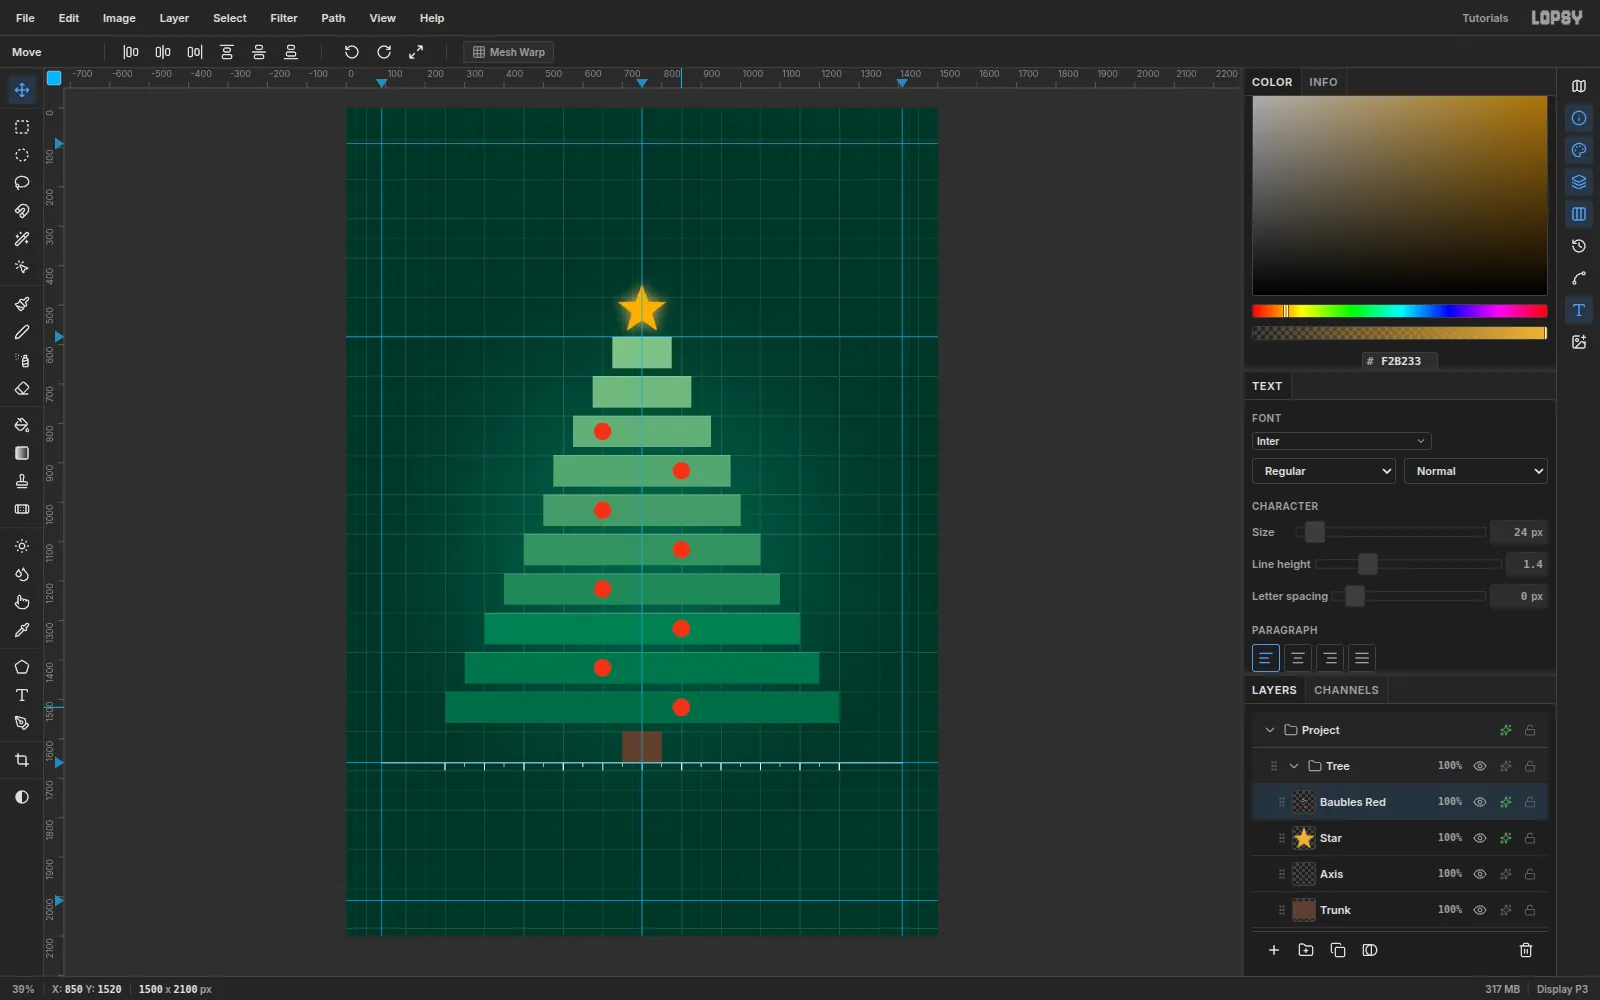
-
Rotate a square into a diamond
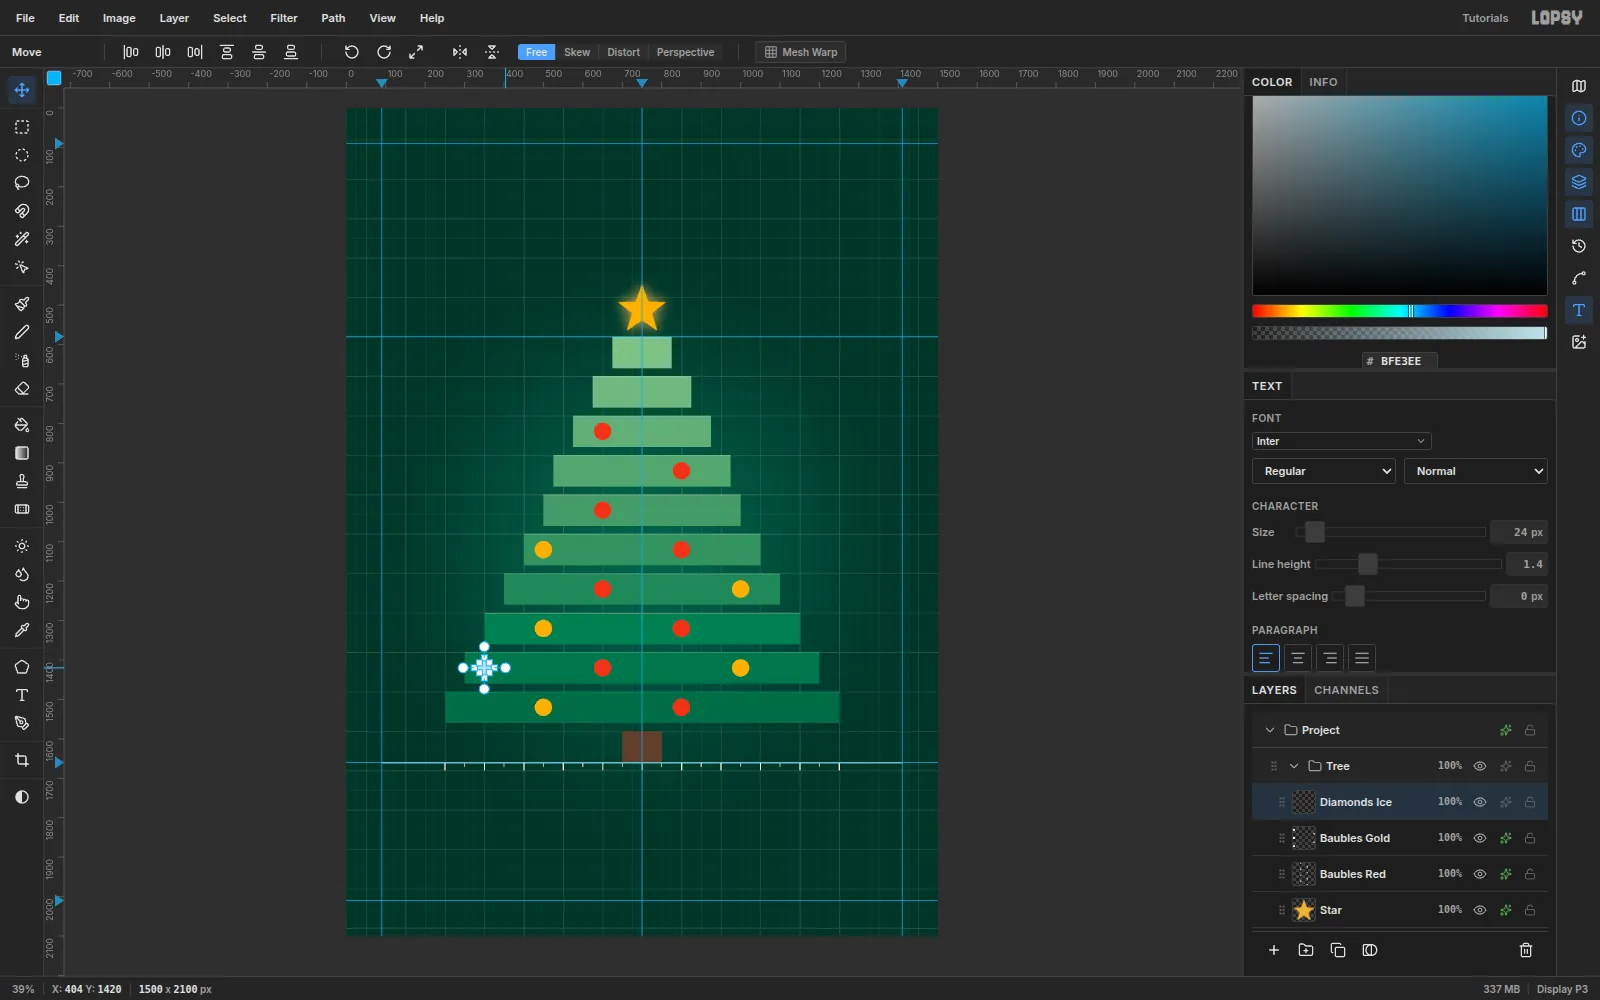
Add a Diamonds Ice layer. Marquee a 36 px square centered on (350, 1420) and fill it with
#BFE3EE.Keep the marquee and press V. Hold Cmd and drag the top-right rotation handle clockwise. Cmd snaps rotation to 15° steps, so stop at 45°. Press Cmd+D to commit.
-
Facet the diamond and place all four
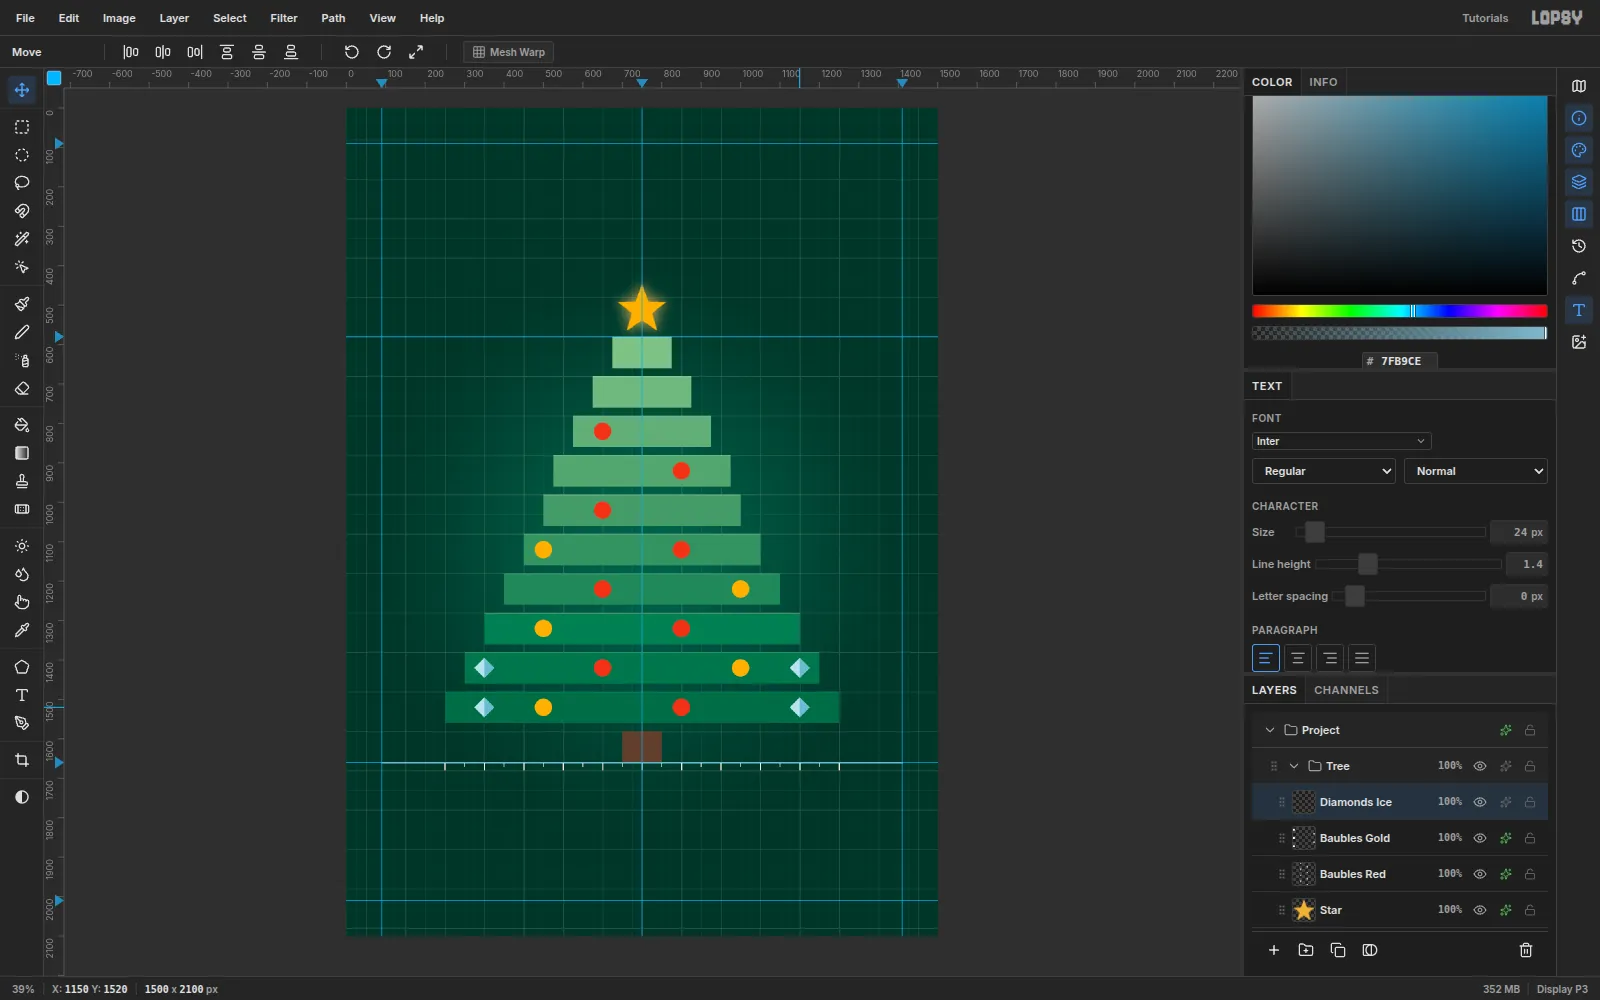
Give the diamond a cut-glass look. Marquee its right half, from (350, 1390) to (380, 1450), and fill it with the darker
#7FB9CE.Then stamp it to (1150, 1420), (350, 1520) and (1150, 1520) with the same marquee + Alt-drag routine, using a rectangular marquee this time.
That makes 8 red, 5 gold and 4 ice: 17 ornaments.
-
Shade the ornaments with effects
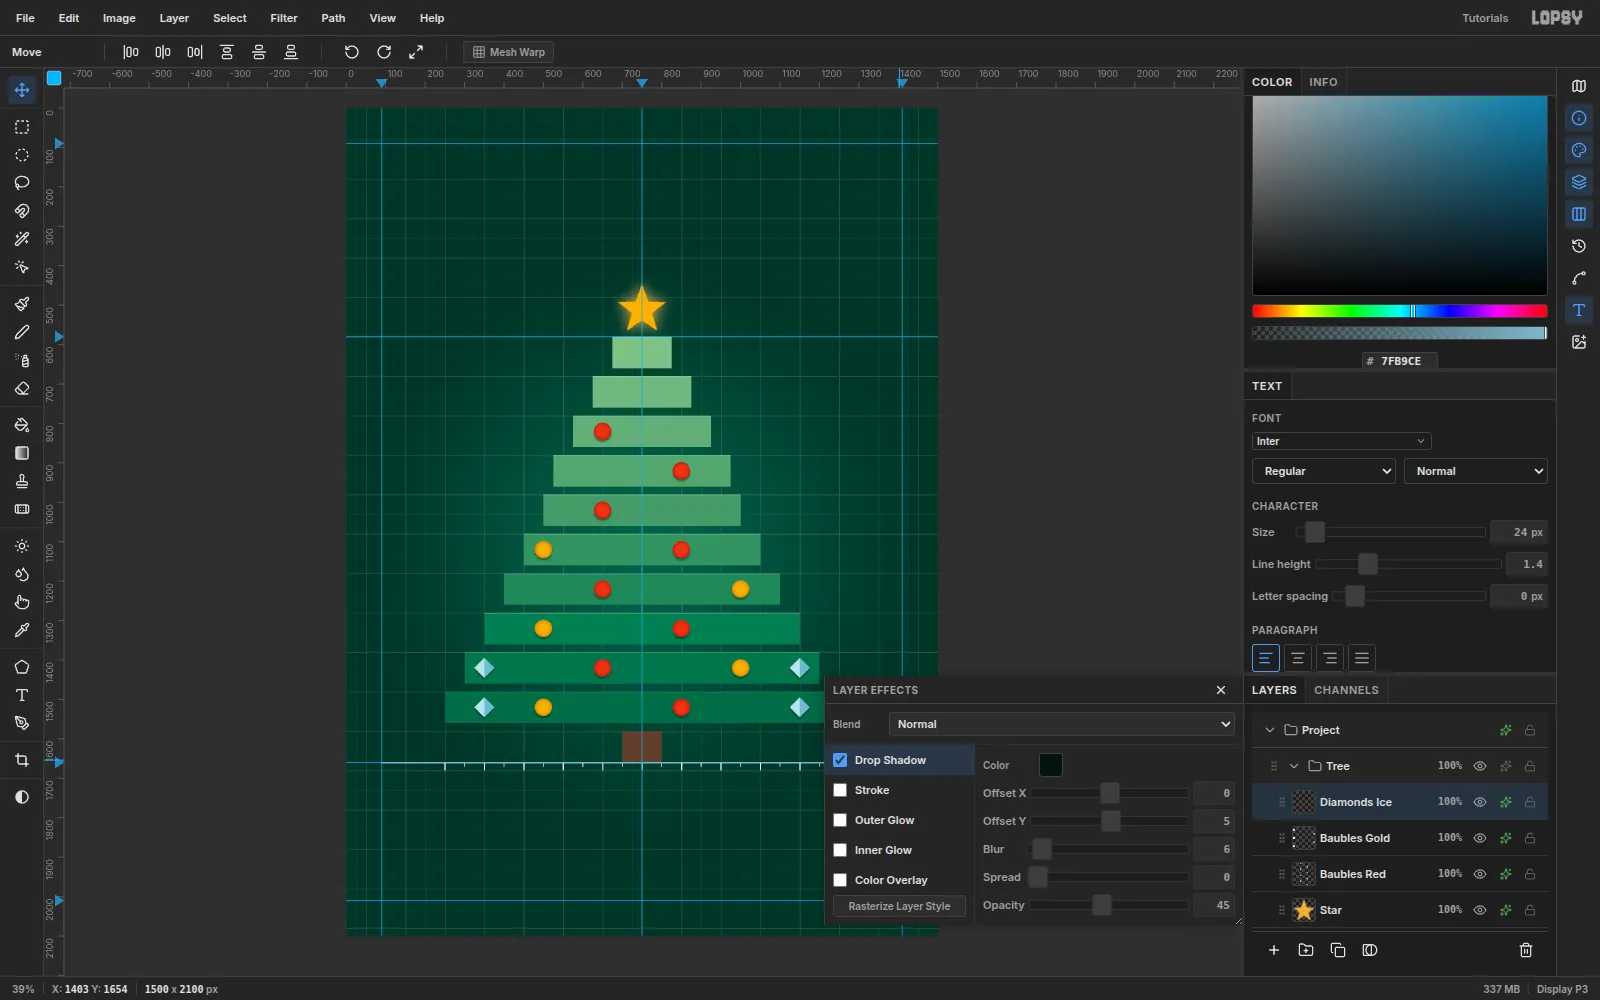
Add effects to each ornament layer:
- Baubles Red: Inner Glow
#6E1409, Size 15, Spread 0, Opacity 80, and Drop Shadow#04150F, Offset 0 / 5, Blur 6, Opacity 45. - Baubles Gold: Inner Glow
#8A5206with the same settings, and the same drop shadow. - Diamonds Ice: the drop shadow only. The facet already gives it form.
The inner glow darkens each rim, so flat discs turn into spheres.
- Baubles Red: Inner Glow
-
Add specular highlights
Add a Shine layer. Pick the Brush at Size 11, Hardness 40 in
#FFF6E0. Click once 7 px up and left of every bauble's center, then set the layer to 80%.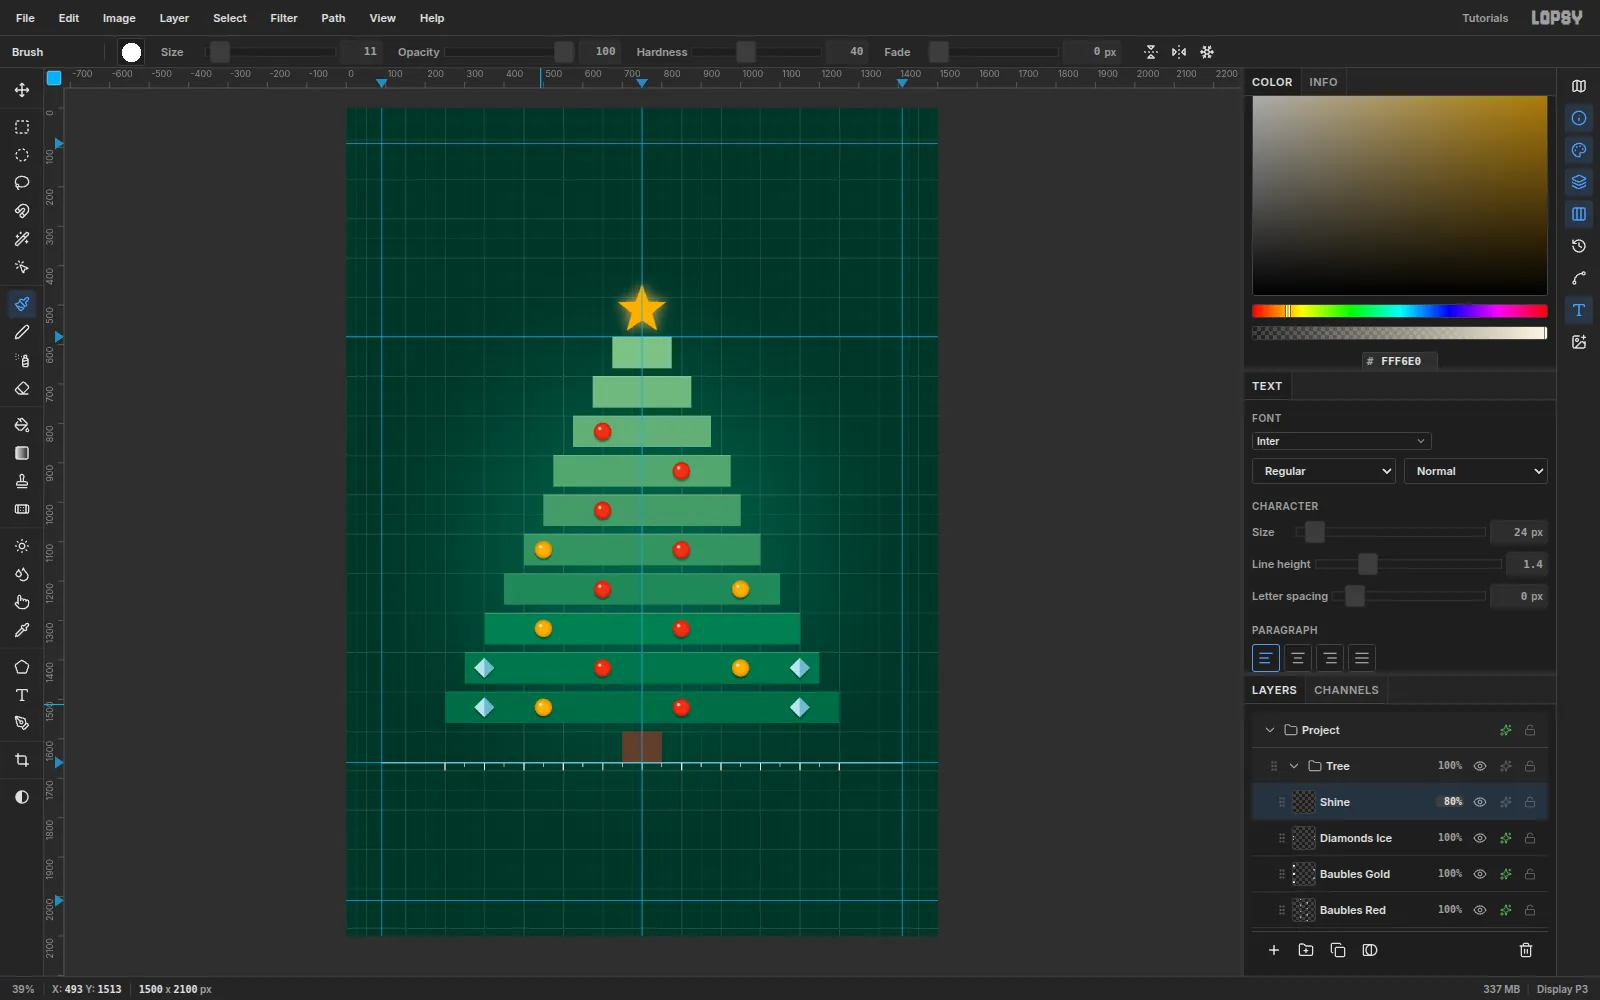
-
Generate snow from noise
Select Glow and add a Snow layer above it. Fill the layer with black.
- Filter → Add Noise…: Amount 100, Mono, Uniform.
- Filter → Gaussian Blur…: Radius 3. Run it twice.
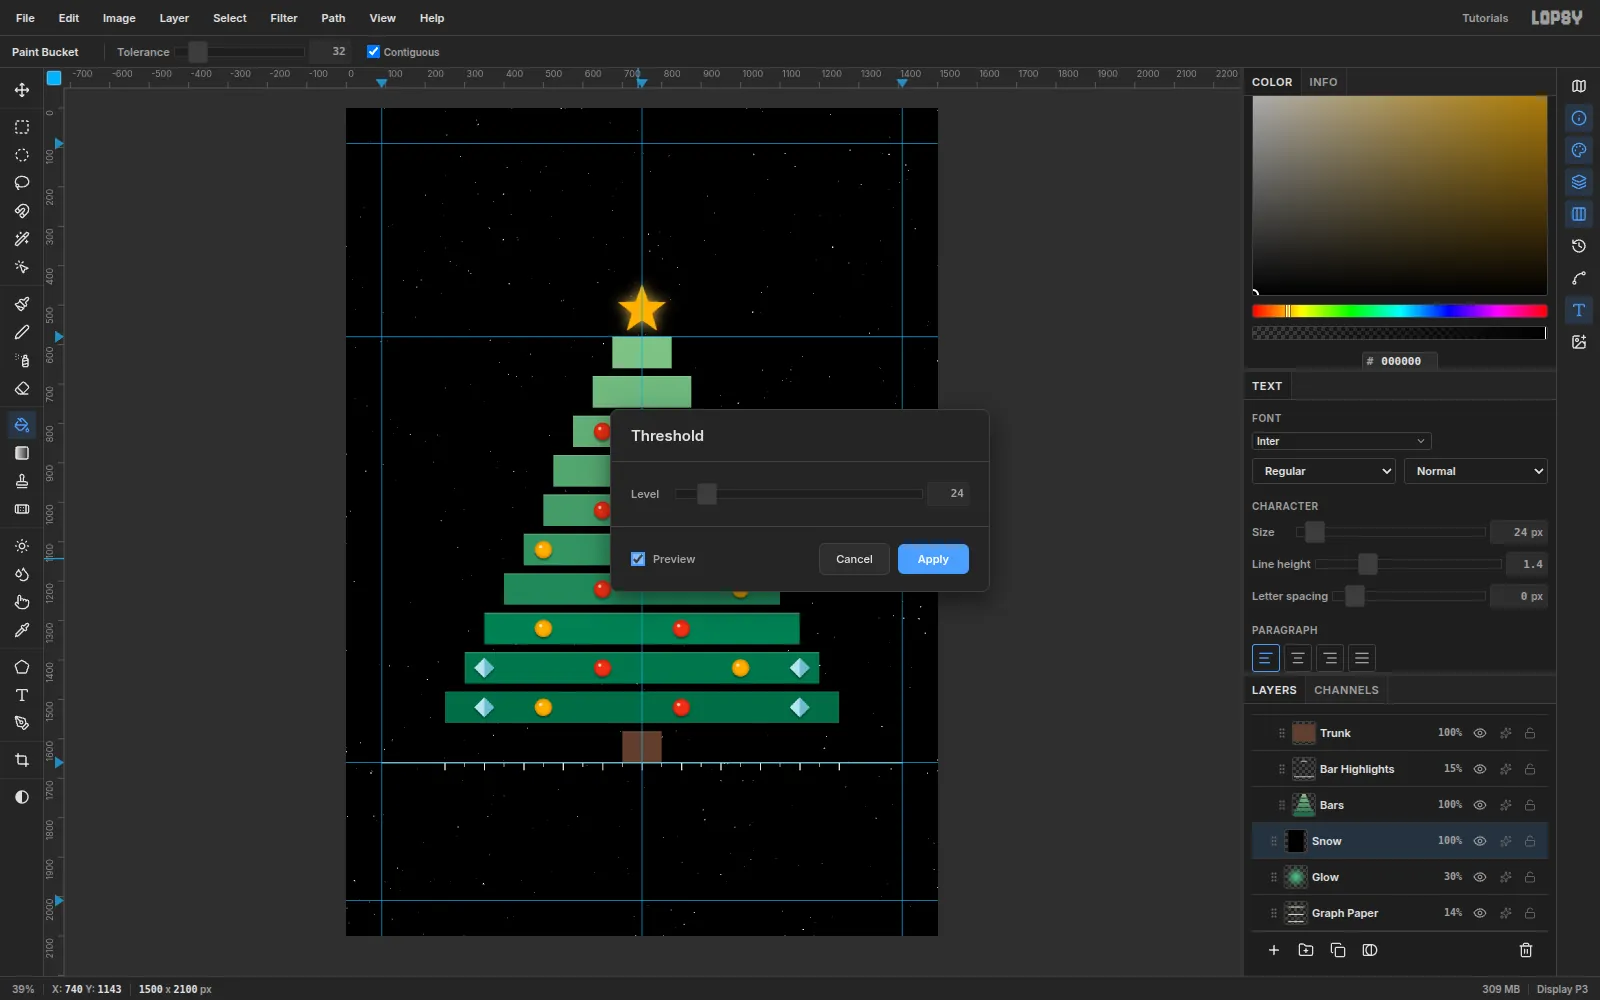
- Filter → Threshold… with Preview on. Raise the Level until only about one pixel in a thousand stays white. That was around 24 here.
The blur clumps the noise, so the survivors are round specks rather than single pixels.
-
Turn the specks into snowflakes
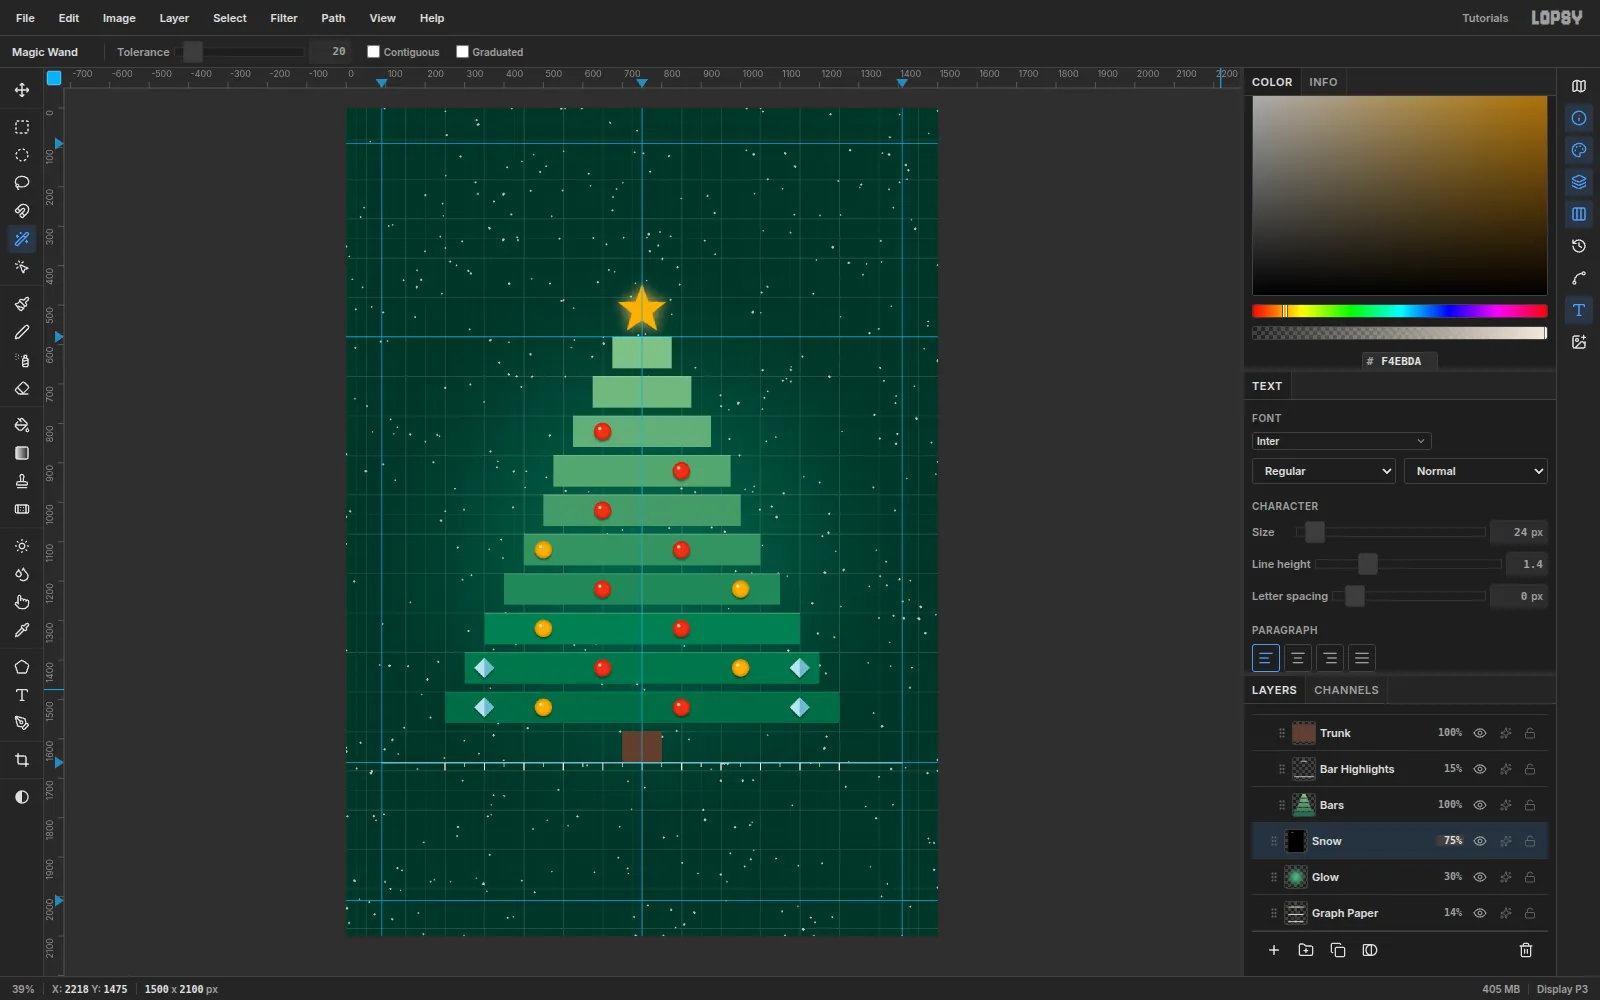
- Pick the Magic Wand (W), turn Contiguous off, set Tolerance 20, and click the black.
- Select → Inverse (Shift+Cmd+I), then Select → Grow… by 2 px.
- Set the foreground to
#F4EBDAand choose Edit → Fill. Then Cmd+D.
Set Snow to Screen at 75%. Screen drops the black and leaves just the flakes.
-
Make a Type group above the tree
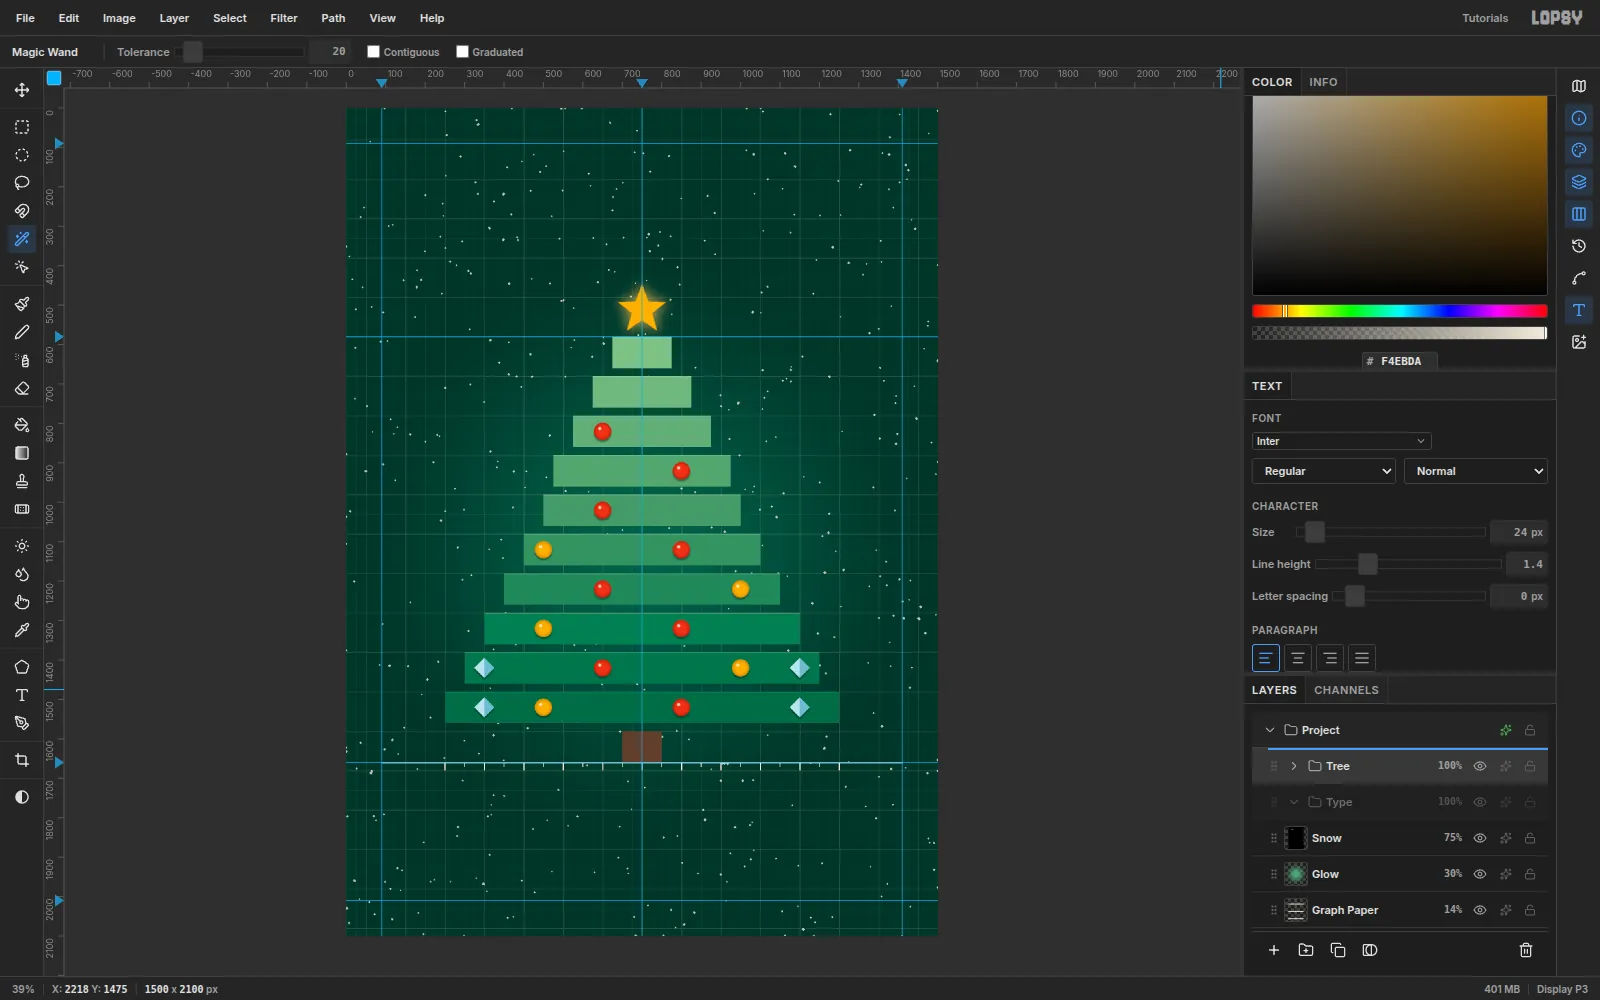
With Snow selected, click New Group and name it Type. It lands under Tree. Collapse Tree, then drag Type by its grip above the Tree row.
Every text layer goes in this group, so type always sits on top of the chart.
-
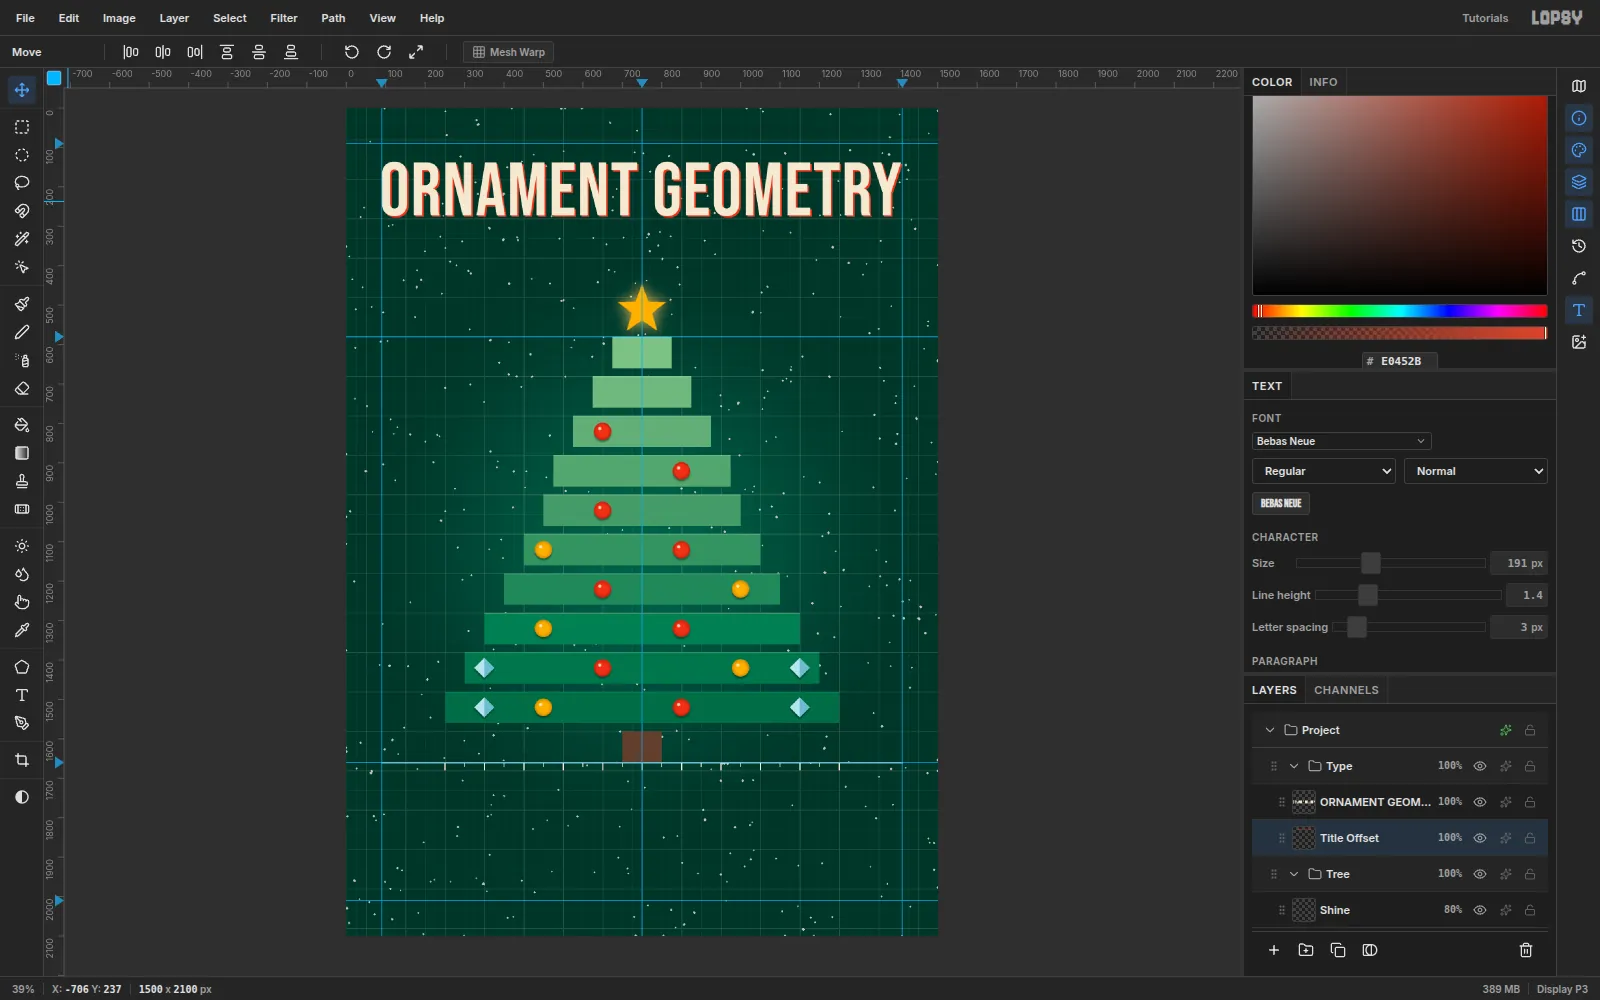
Set the headline
Pick the Text tool (T) and choose Bebas Neue in the font browser, Size 191, color
#F3E9D2. Open the Text panel and set Letter spacing to 3.Click in empty canvas, type
ORNAMENT GEOMETRY, and press Shift+Enter to commit. Then drag it with the Move tool so the cap tops start at (90, 136). At that size it runs almost exactly margin to margin.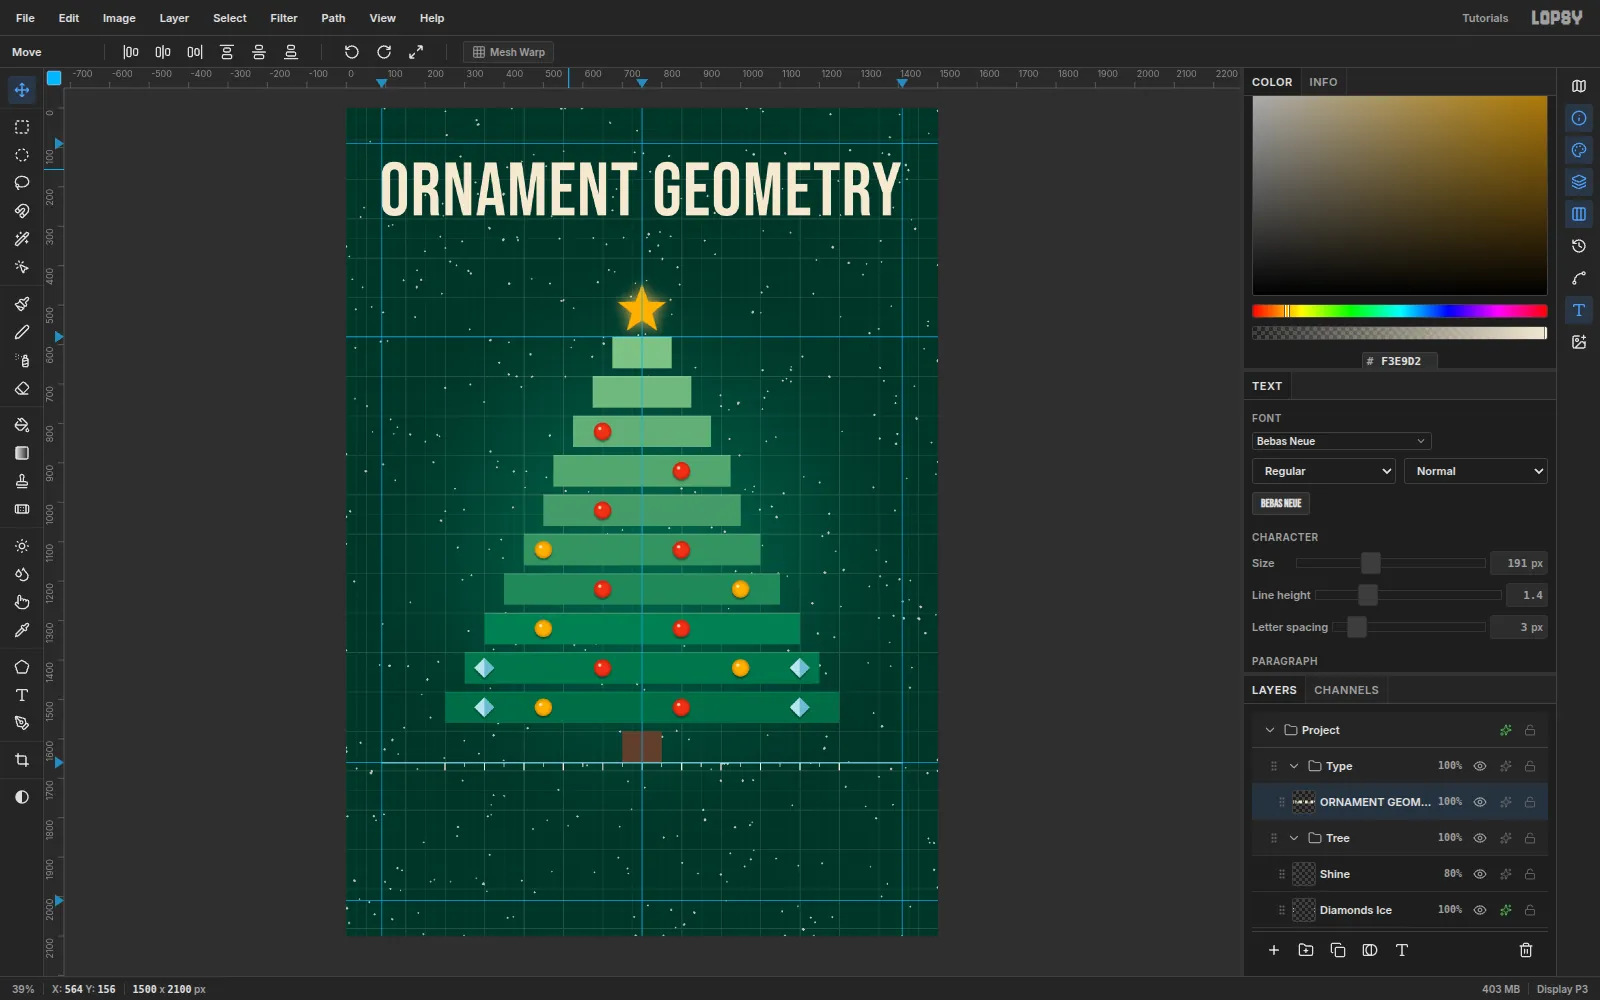
-
Add a misregistered red shadow
- Cmd-click the title's thumbnail in the Layers panel to select its letter shapes.
- Add a layer called Title Offset, set the foreground to
#E0452B, and choose Edit → Fill. - Cmd+D, press V, then nudge the layer 4 px right and 4 px down with the arrow keys.
- Drag Title Offset below the title in the Layers panel.
Keep it to 4 px. A thicker extrusion makes the letters touch each other.
-
Add the kicker, dateline and rule
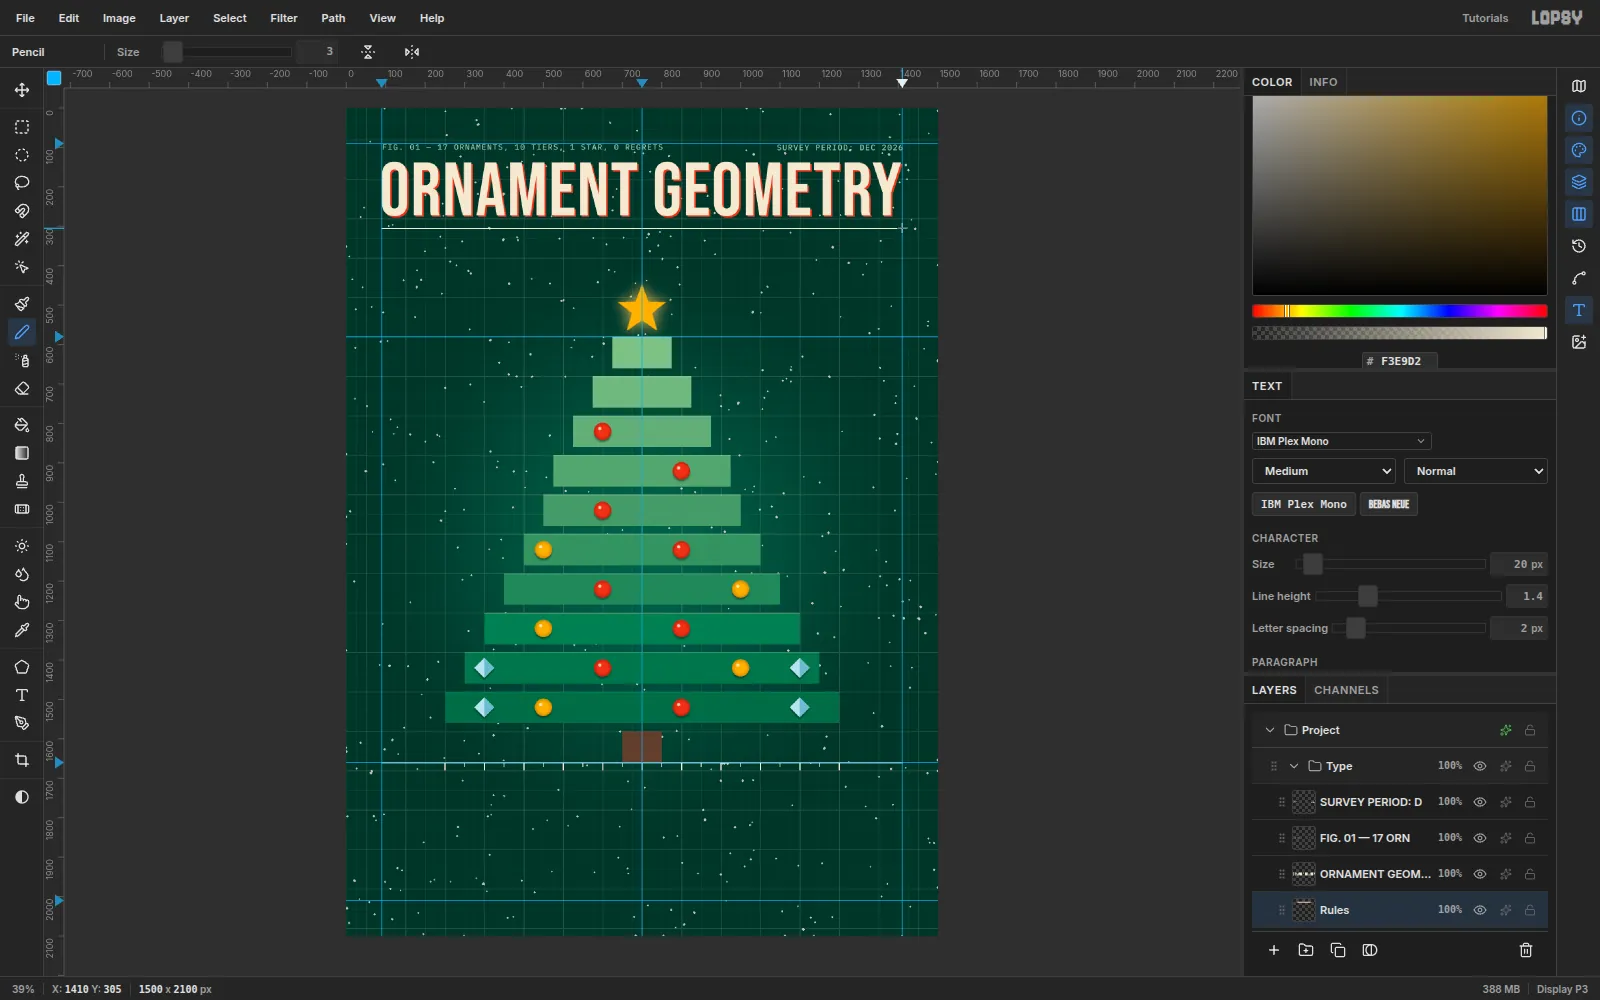
In IBM Plex Mono Medium, Size 20,
#9FC7B0, Letter spacing 2:FIG. 01 — 17 ORNAMENTS, 10 TIERS, 1 STAR, 0 REGRETS, top-left at (91, 92)SURVEY PERIOD: DEC 2026, right edge on the 1410 guide
Add a Rules layer and draw a 3 px Pencil line from (90, 305) to (1410, 305) with Shift-click.
-
Copy real ornaments into a legend
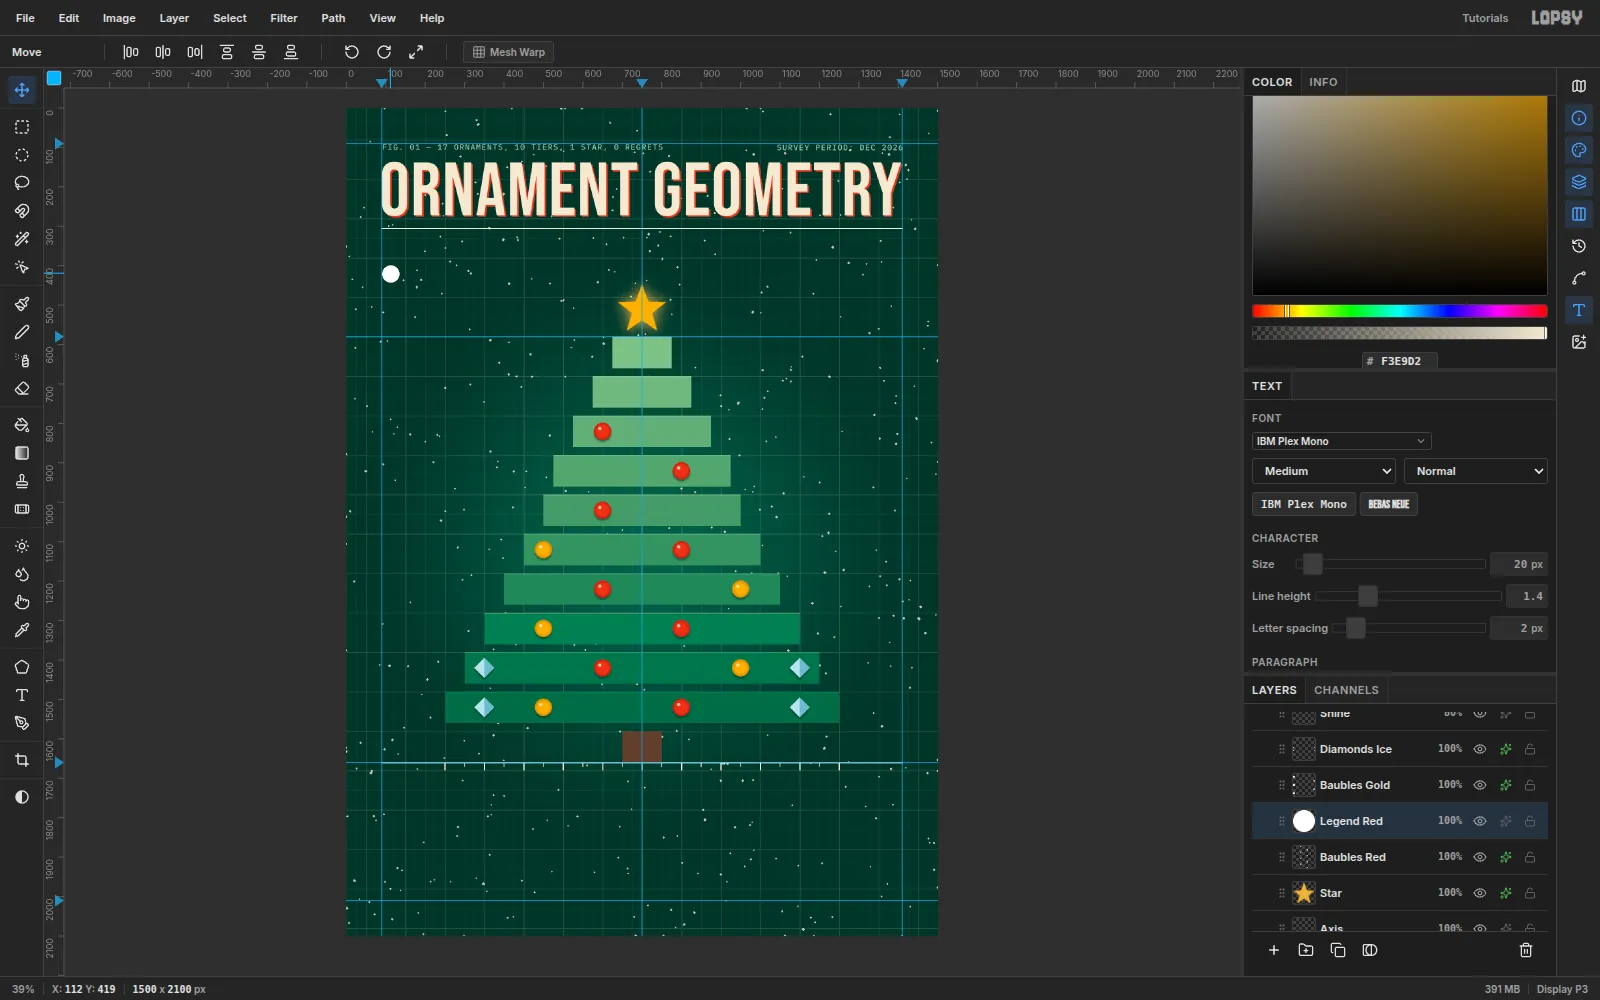
Legend swatches should be the real ornaments, not new drawings.
- On Baubles Red, draw an elliptical marquee around one bauble. Press Cmd+C and then Cmd+V.
- Rename the pasted layer Legend Red and drag it to the legend row, at x 112.
Layer effects don't come along with a paste, so the swatch arrives white. Give it the same Color Overlay and Inner Glow as the tree baubles. Do the same for the gold bauble and an ice diamond.
-
Label the legend and move it as a group
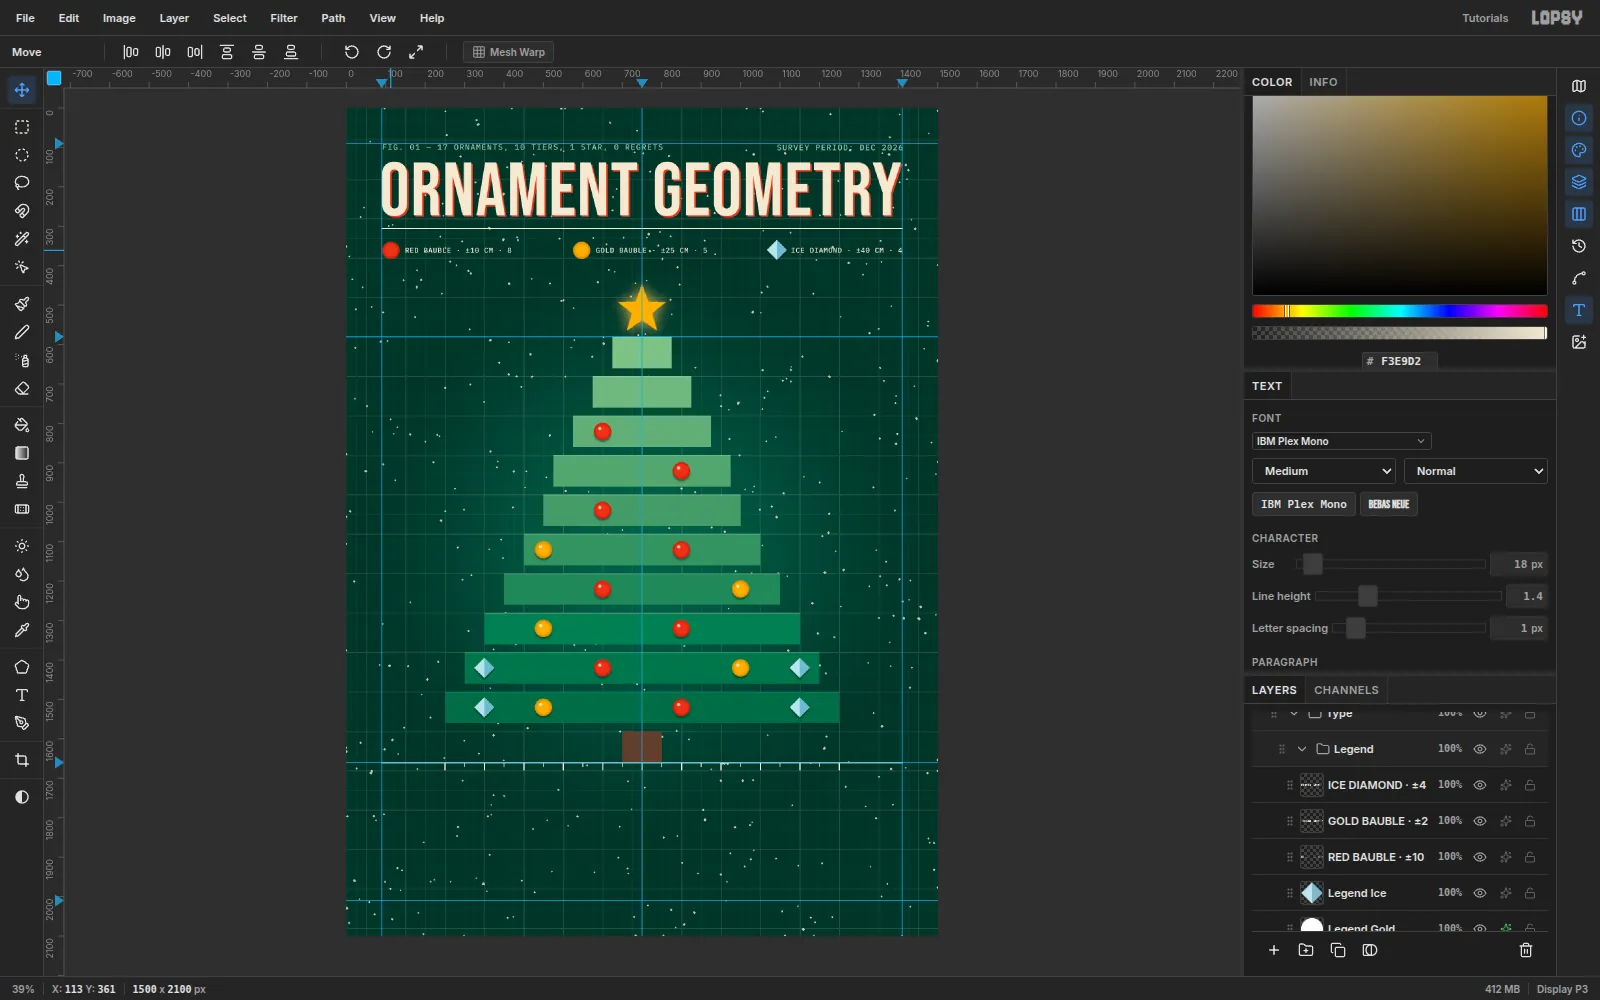
Next to each swatch, add a label in IBM Plex Mono Medium 18,
#F3E9D2, Letter spacing 1:RED BAUBLE · ±10 CM · 8GOLD BAUBLE · ±25 CM · 5ICE DIAMOND · ±40 CM · 4
Leave 16 px between each swatch and its label. Make the gaps between the three pairs equal so the row spans 90 → 1410.
Cmd-click the six legend rows in the Layers panel and choose Layer → Group Layers. Name the group Legend. With the group selected, one Move drag positions all six layers at once. Try Cmd+Z / Shift+Cmd+Z on the move; the whole group jumps back and forth together.
-
Label the tiers and spans
- Headers:
TIERandSPAN, CMin Plex Mono SemiBold 16,#F2B233, Letter spacing 3, at y 556. PutTIERon the left margin and right-alignSPAN, CMto 1410. - Tier column: one text layer,
T01toT10on separate lines, in Plex Mono 25#9FC7B0. In the Text panel, set Line height to 4: 25 px × 4 = 100 px, the bar pitch. Nudge it so each label is vertically centered on its bar. - Span column: drag out an area-text box, set Align to Right, type the ten values (
15,25,35,45,50,60…100), and give it the same line height. Move it so the right edge sits on 1410.
Right-aligned area text keeps
100flush with the two-digit values.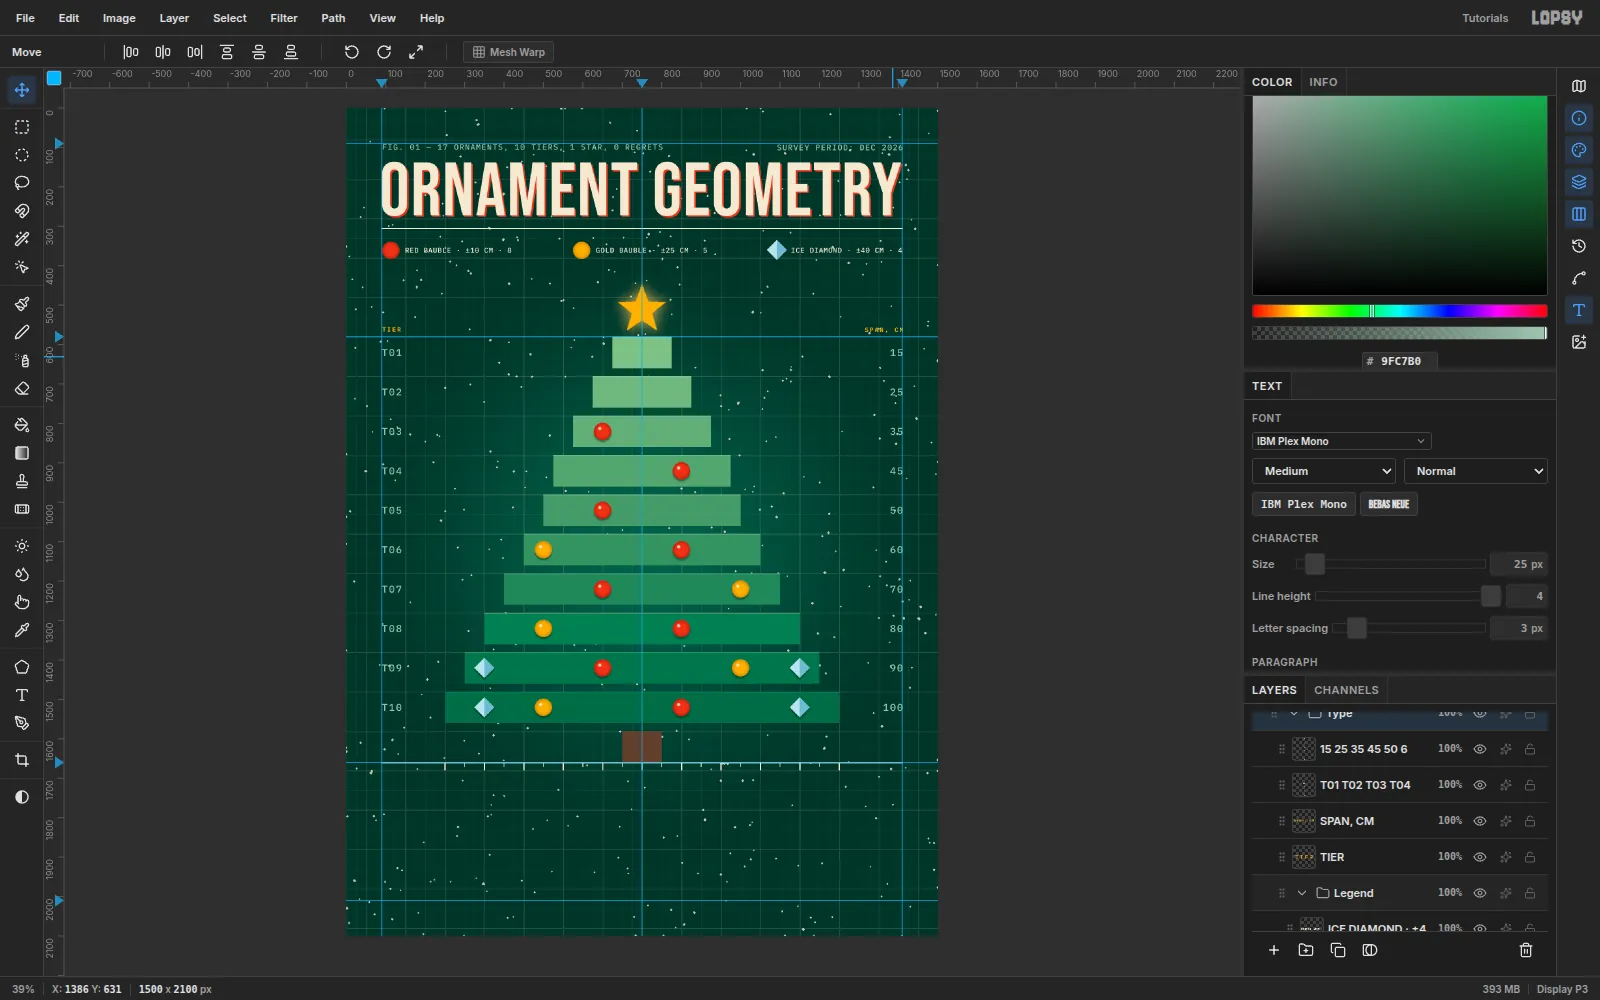
- Headers:
-
Label the axis
Under each major tick, add its value in Plex Mono 18
#9FC7B0, centered on the tick:50 40 30 20 10 0 10 20 30 40 50. The labels' tops sit at y 1692.Center
DISTANCE FROM TRUNK, CMbelow them at y 1726, in SemiBold 16 gold with Letter spacing 3.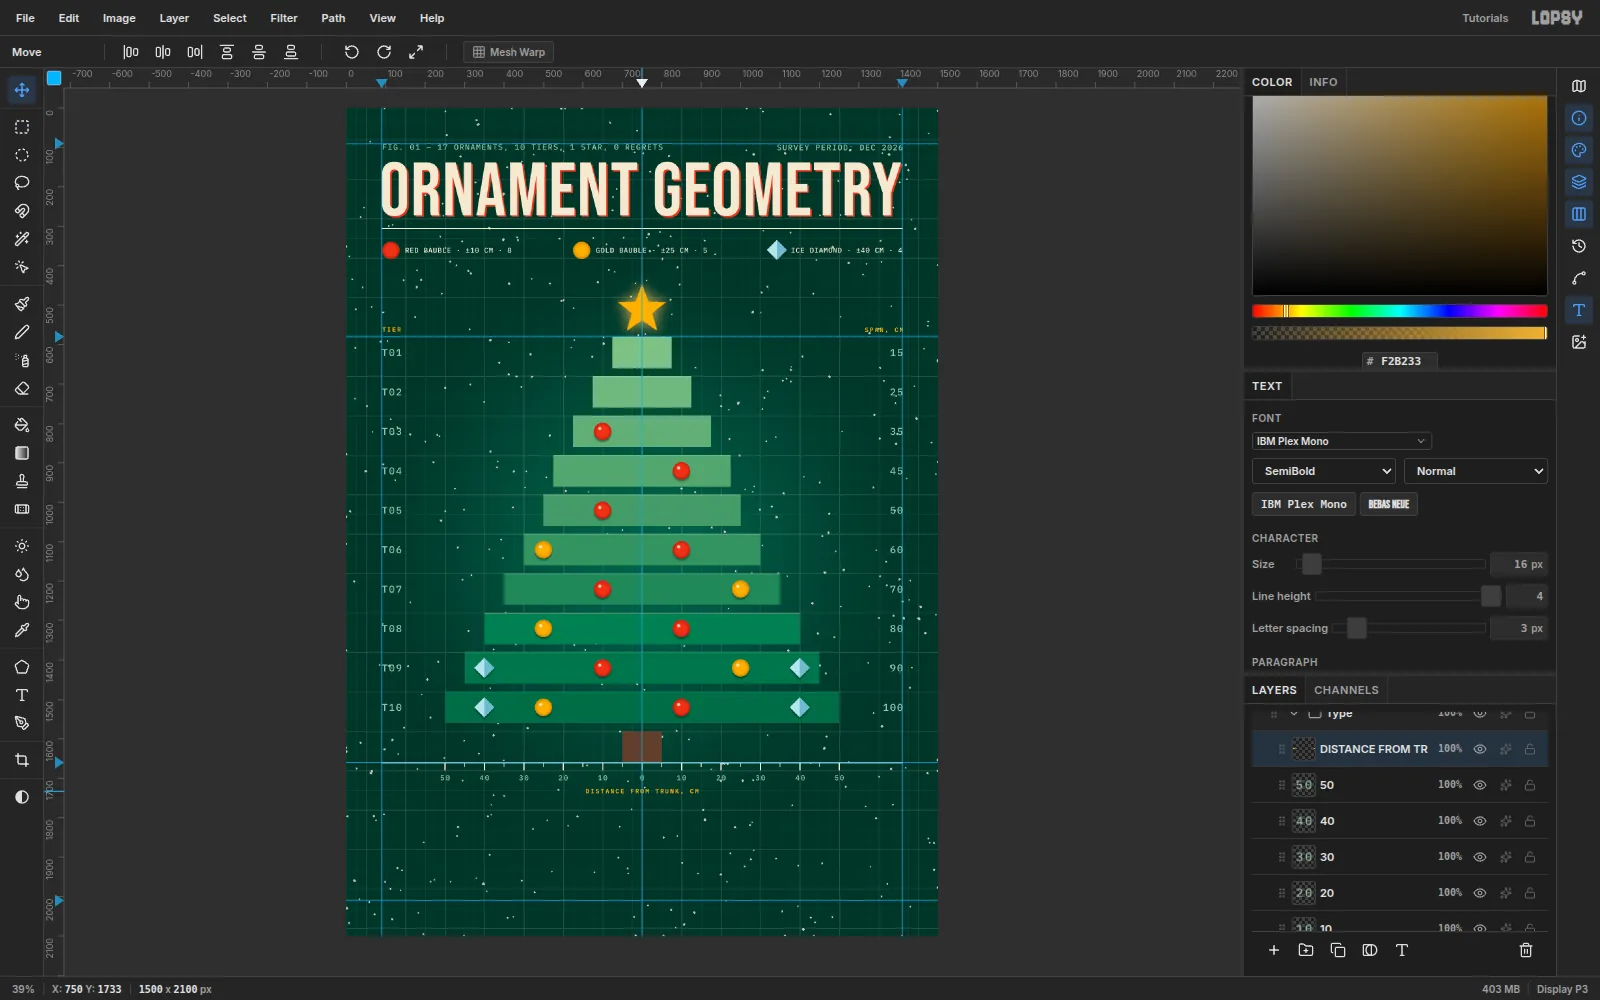
-
Add callouts with dotted leaders
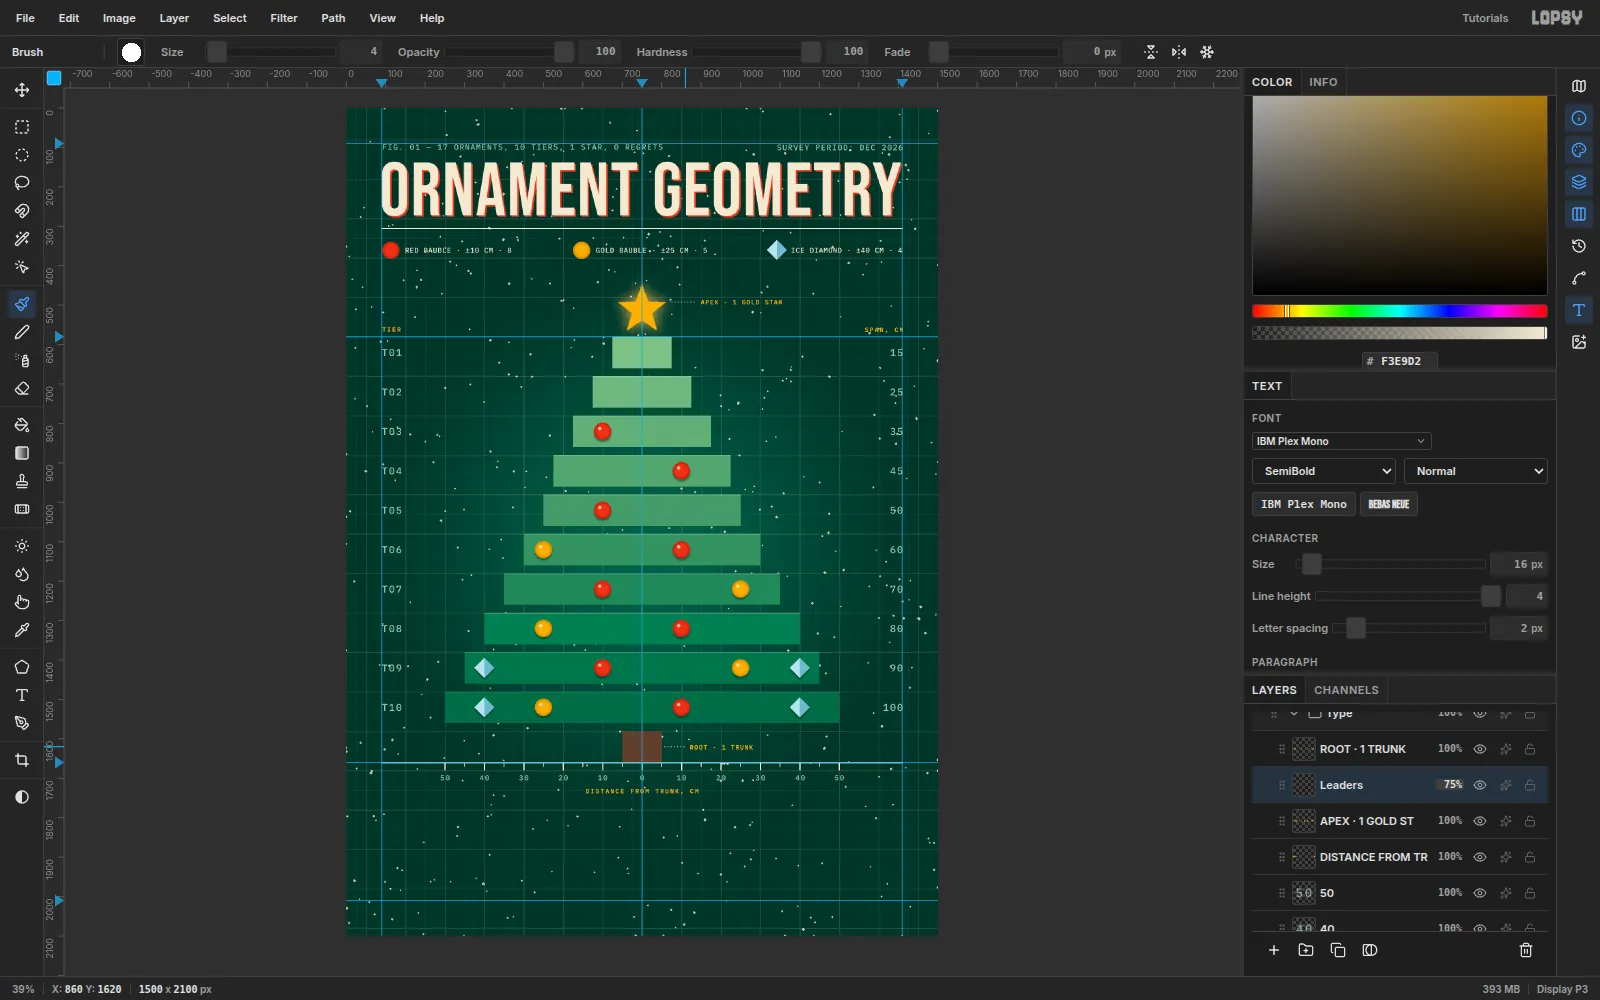
Add two callouts in Plex Mono SemiBold 16 gold, Letter spacing 2:
APEX · 1 GOLD STAR, starting at x 900, level with the star's center (y 492)ROOT · 1 TRUNK, starting at x 872, level with the trunk (y 1620)
For the leaders, add a Leaders layer. In the Brush's presets, set Size 4, Hardness 100 and Spacing 200%, so each dab lands as a separate dot. Shift-click lines from the star (826 → 888) and the trunk (808 → 860) to their labels. Set the layer to 75%.
-
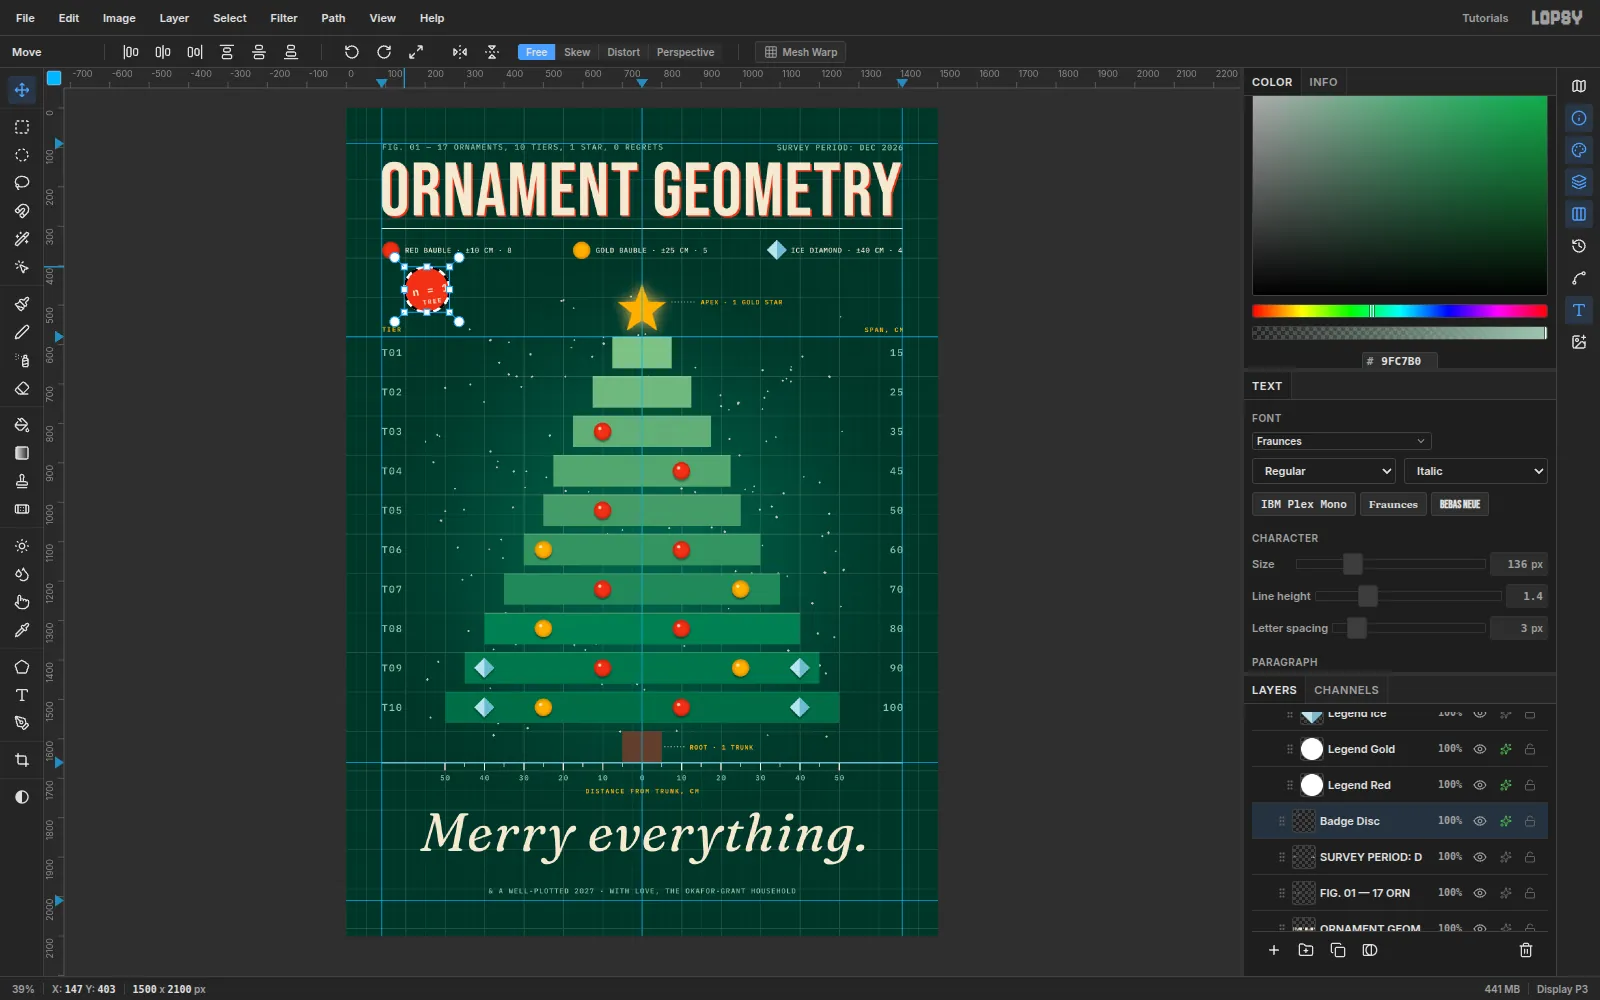
Build a tilted n = 1 badge
Add a Badge Disc layer. Draw a white 96 px circle with the Shape tool, then add effects:
- Color Overlay
#E0452B - Stroke 3 px
#F3E9D2 - Drop Shadow: 0 / 6, Blur 10, Opacity 50
Set
n = 1in Plex Mono Bold 28, andTREEin Bold 16 with Letter spacing 3. Rotate each one −8°:- Cmd-click the text layer's thumbnail.
- Press V, drag a rotation handle counter-clockwise, and press Cmd+D.
Then drag both lines onto the disc, stacked along the tilt:
n = 1above center,TREEbelow it.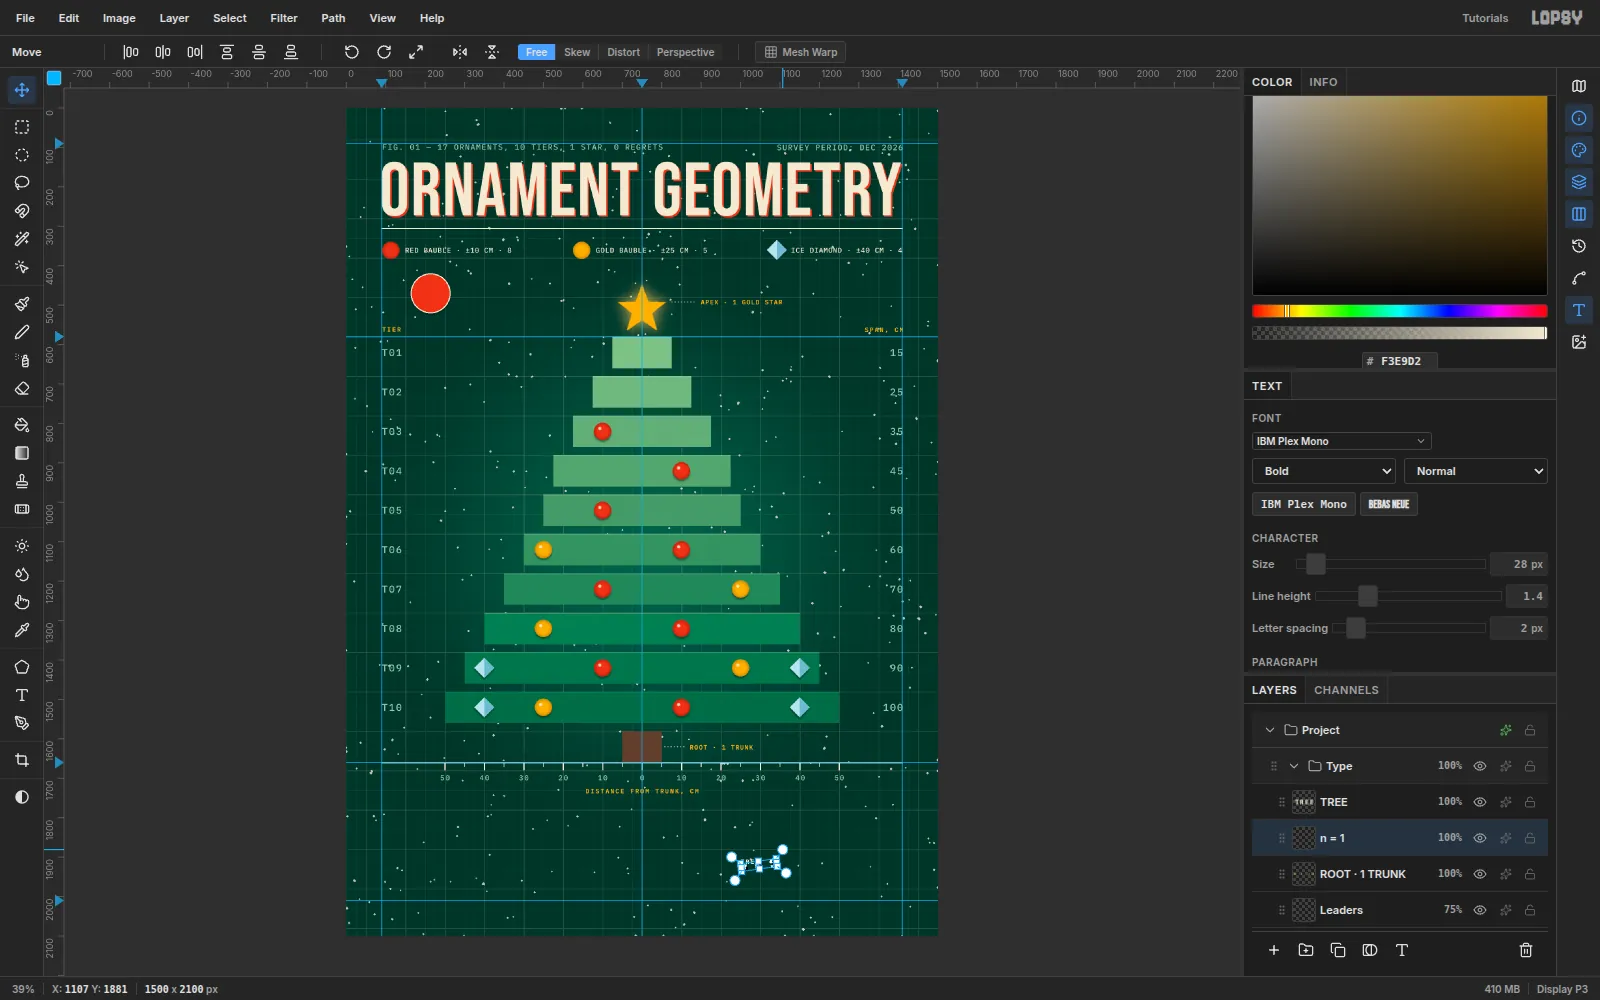
- Color Overlay
-
Set the greeting
Choose Fraunces, then set Style to Italic and Weight to Regular in the Text panel. Set it at Size 136 in
#F3E9D2and typeMerry everything.. Center it on x 750 at about y 1786.Below it, add the sign-off in Plex Mono 18,
#9FC7B0, Letter spacing 2:& A WELL-PLOTTED 2027 · WITH LOVE, THE OKAFOR-GRANT HOUSEHOLD. Center it at y 1978.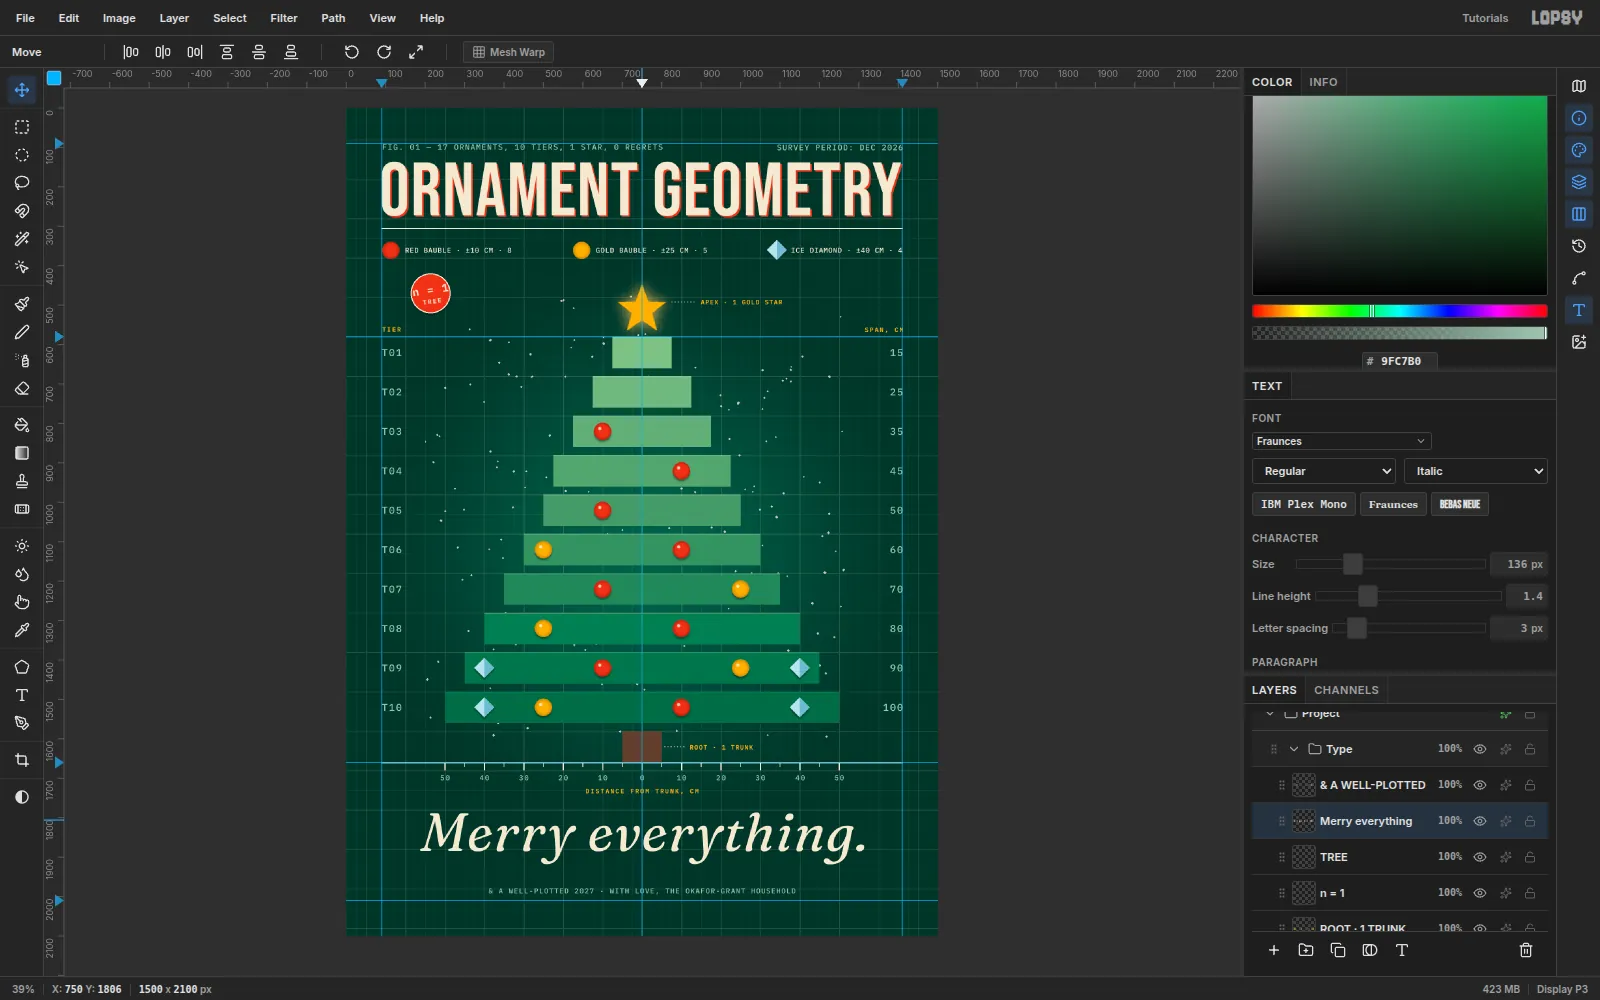
-
Scale the badge and group it
The badge needs more presence. Cmd-click Badge Disc's thumbnail, press V, and Cmd-drag the top-left corner handle outward to about 120%. Cmd keeps the scale uniform. Press Cmd+D.
Re-center the two text lines on the disc. Then select all three layers and choose Group Layers. Name the group Badge so it moves as one.
-
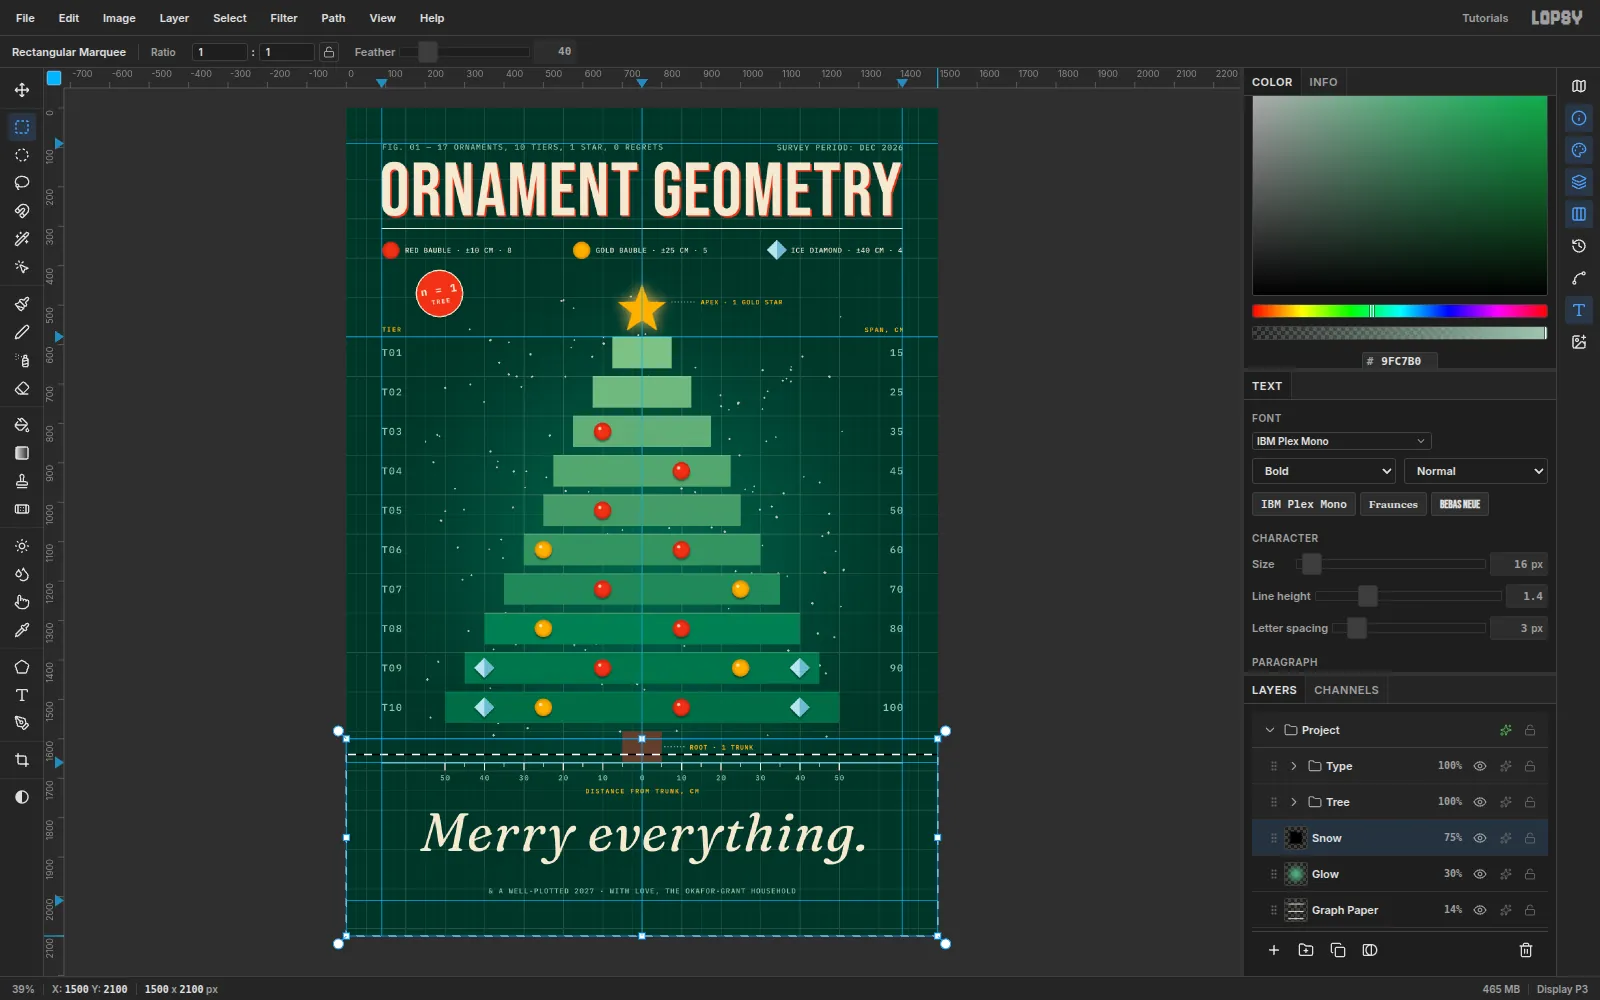
Clear snow from the type
Snow behind small type looks like dust on a scan. Select the Snow layer and the Rectangular Marquee, and set Feather to 40.
- Marquee (0, 0) → (1500, 430) and press Delete.
- Marquee (0, 1640) → (1500, 2100) and press Delete.
- At Feather 20, clear the two side columns behind the tier and span labels (x 0–180 and x 1330–1500).
- At Feather 12, clear small boxes behind both callouts.
The feather lets the snow fade out gently instead of stopping at a hard line.
-
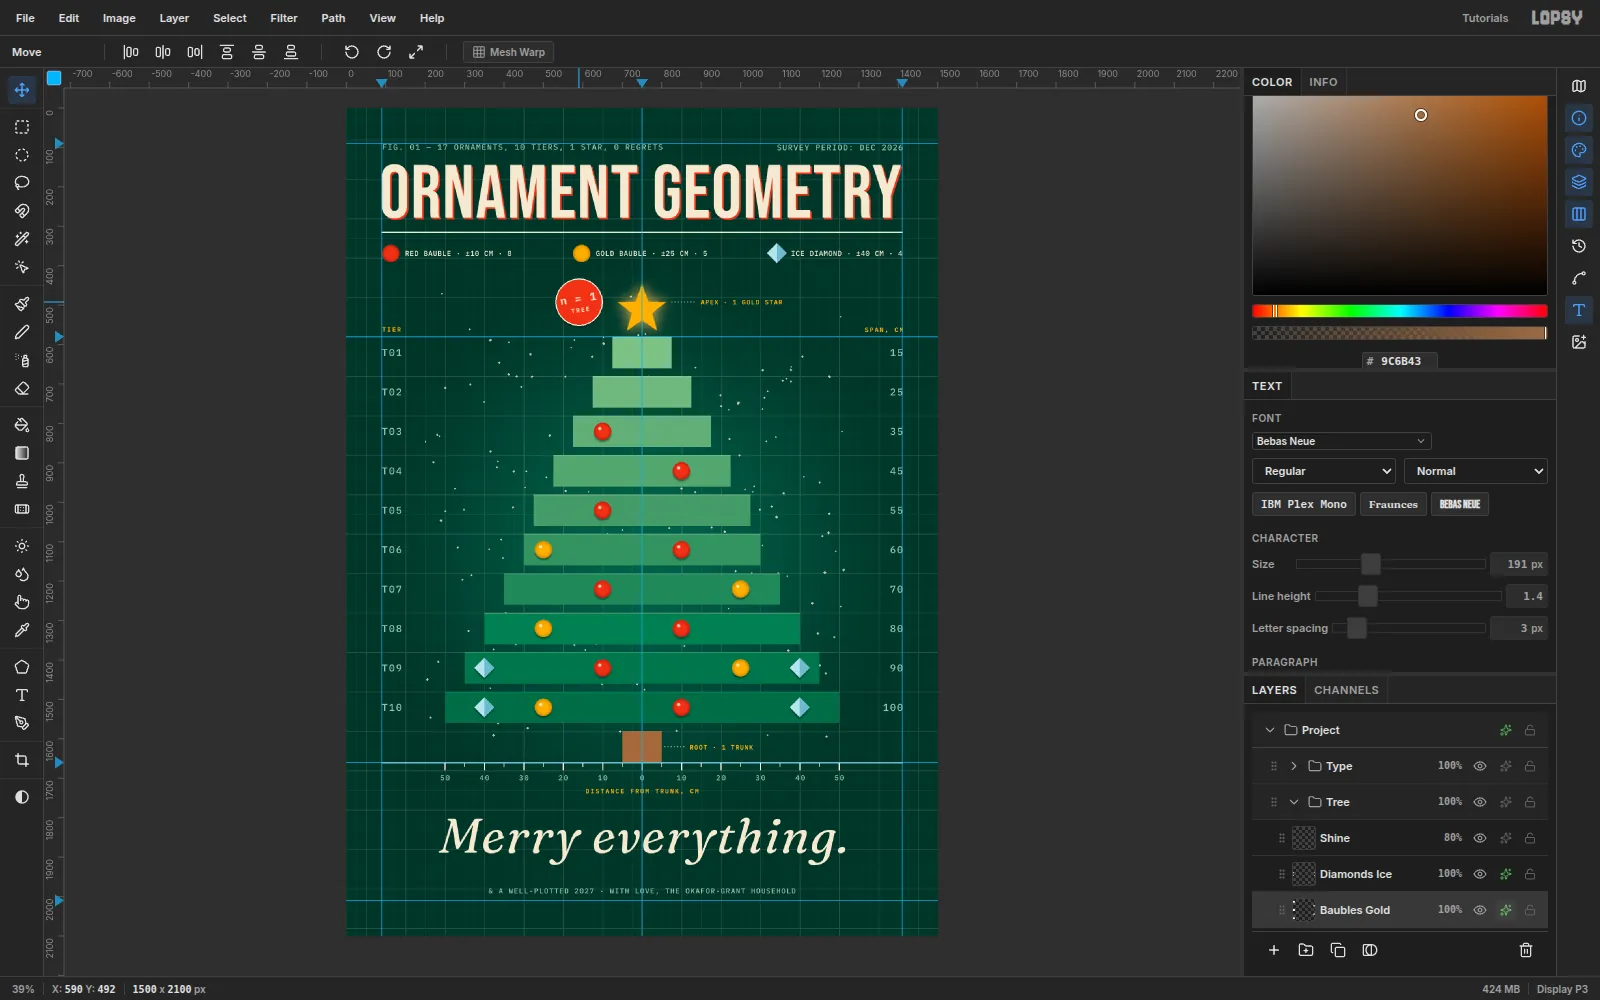
Refine the details
Step back and check the chart like a reviewer would.
- T05: the jump from 45 to 50 cm kinks the outline. Widen the bar 25 px on each side with the marquee and bucket (
#5C9A6D, plus its highlight strip). With the Text tool, double-click50in the span column and type55. - Trunk: bucket-fill it
#9C6B43so it reads against the dark green. - Greeting: reduce it to Size 124 so it stops competing with the headline. Re-center it at y 1800.
- Badge: drag the Badge group next to the star, centered at about (590, 492).
- Title block: Cmd-click the title and Title Offset rows and nudge both 6 px down. Nudge Rules 10 px down and the Legend group 8 px down.
- T05: the jump from 45 to 50 cm kinks the outline. Widen the bar 25 px on each side with the marquee and bucket (
-
Export the card
Choose File → Export…, pick PNG, and click Export. For print, send the 1500 × 2100 px file to a 5 × 7 in card at 300 dpi.
Want a different card? Swap the data. Tiers could be family members and ornaments cookies eaten, and the chart still decorates the tree.