Make a Raccoon Kung Fu Monk Movie Poster Photo Collage
Build a superhero-style movie poster in Lopsy from three photos. Cut out a kung fu fighter, give him a raccoon head, and grade it like a blockbuster.
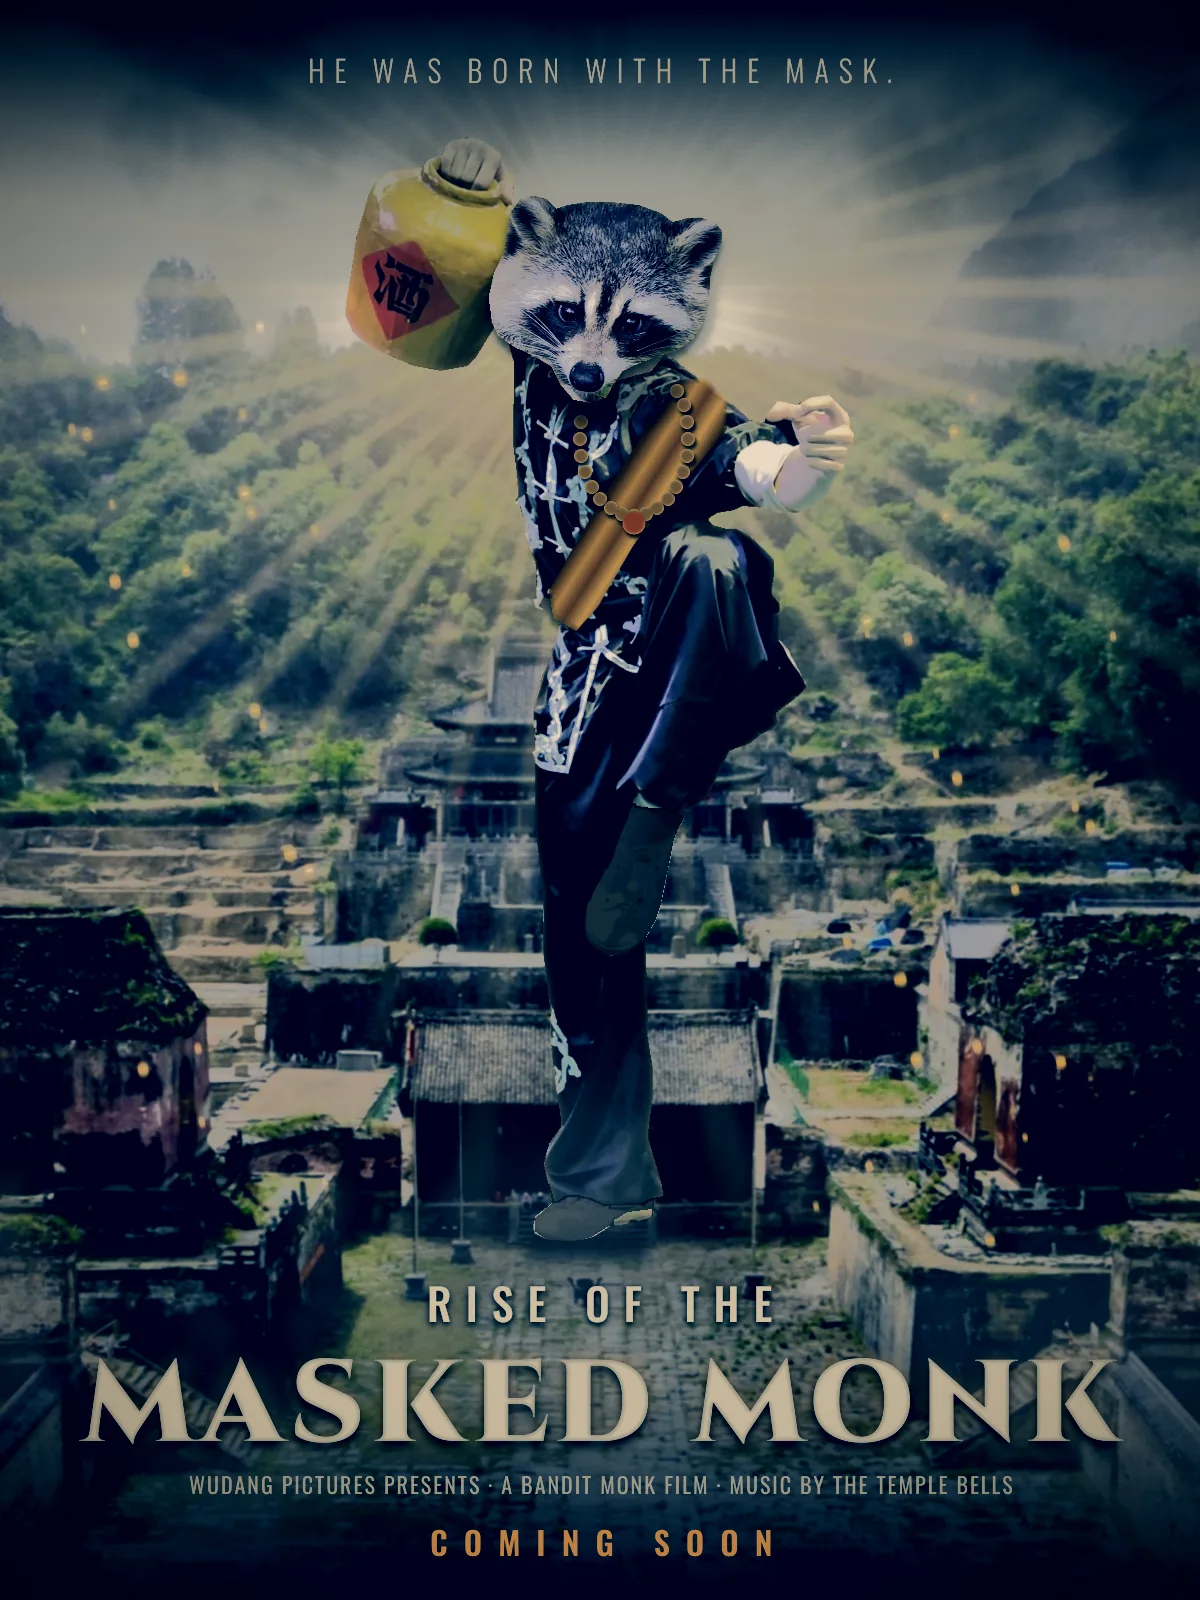
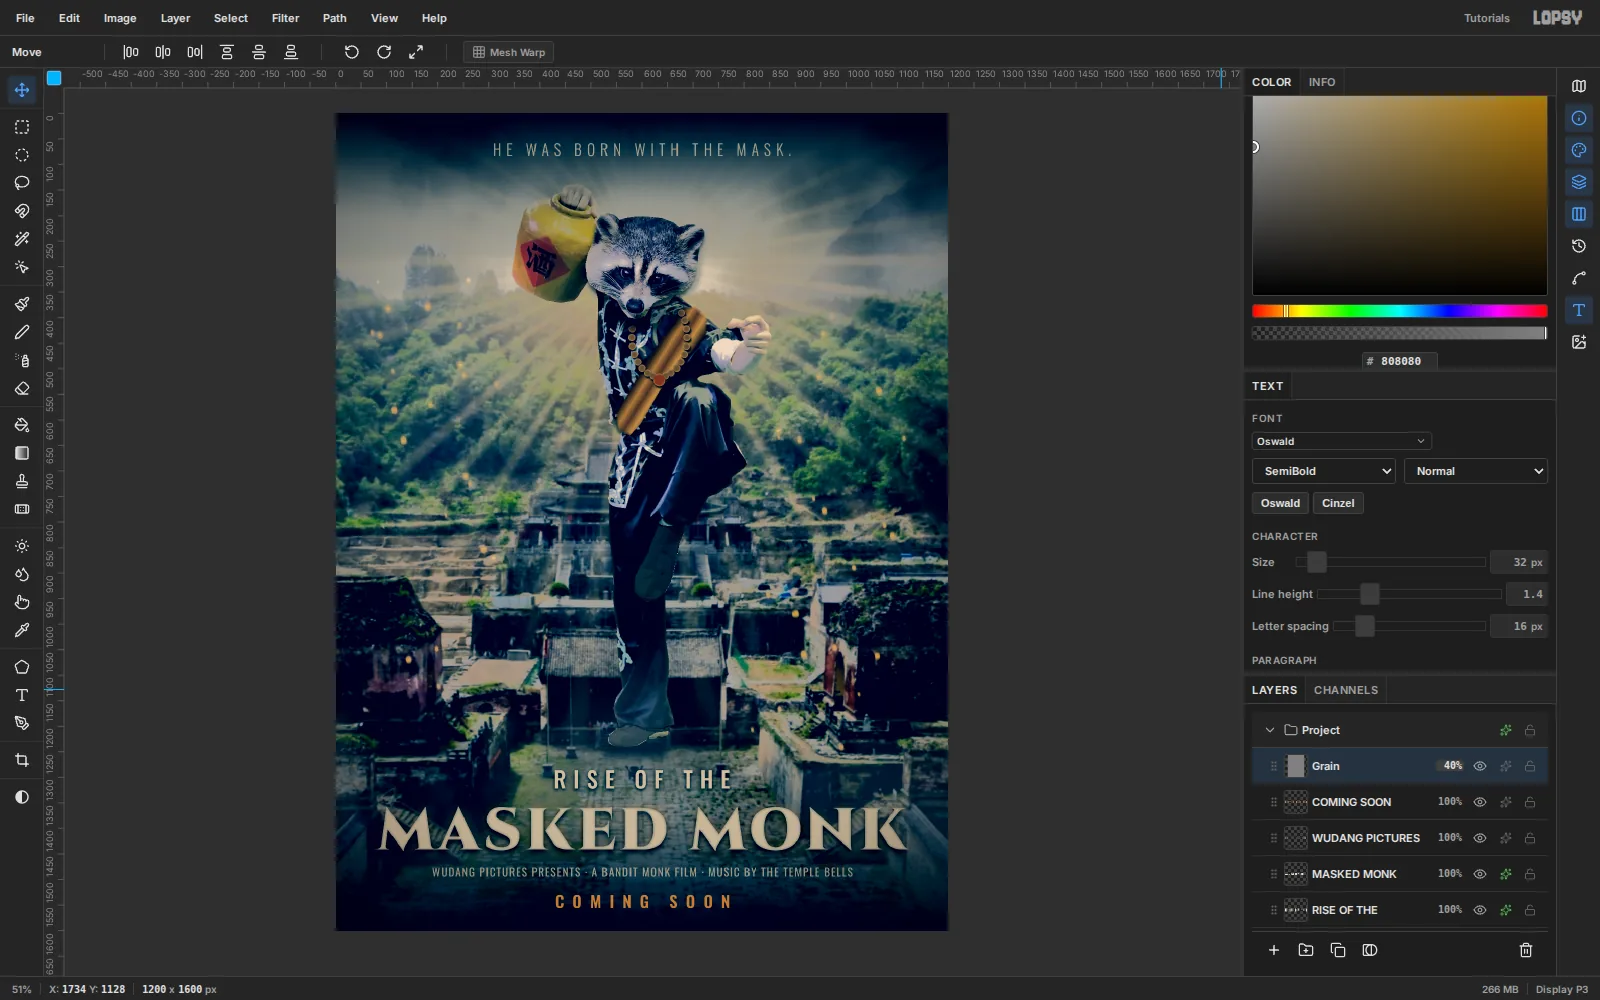
This poster is a photo collage of three photos: a raccoon's head on a kung fu fighter, in front of an ancient stone temple on Wudang Mountain. A raccoon's natural mask makes him a born superhero. Cutting the pieces out is the easy part. Most of the steps here are about making them look like one photo: matching scale and light, shadows that touch the ground, haze between near and far, and a single muted teal-and-amber grade over everything, like The Dark Knight and the Avengers posters.
Download the three photos first:
- The temple: a Wudang Mountains ruin from the ChinaHeritaQA dataset (
DATA/Images/Image_data/Ancient_Building_Complex_in_the_Wudang_Mountains/5182767886762148_5.jpg). - The fighter: a wushu athlete in a drunken-fist pose from the KungfuAthlete project (
docs/xyh_1.jpg). - The raccoon: the public-domain (CC0) raccoon on Pixnio.
The temple and fighter photos come from research projects and aren't licensed for commercial use. They're fine for practice. For anything you publish, swap in your own or public-domain photos.
-
Set up the poster canvas
Choose File → New, enter 1200 × 1600 (a 3:4 one-sheet) and click Create. Click the Background row, set the foreground to
#0E1216and choose Edit → Fill. The dark base shows through wherever later layers are transparent, so the edges never flash white.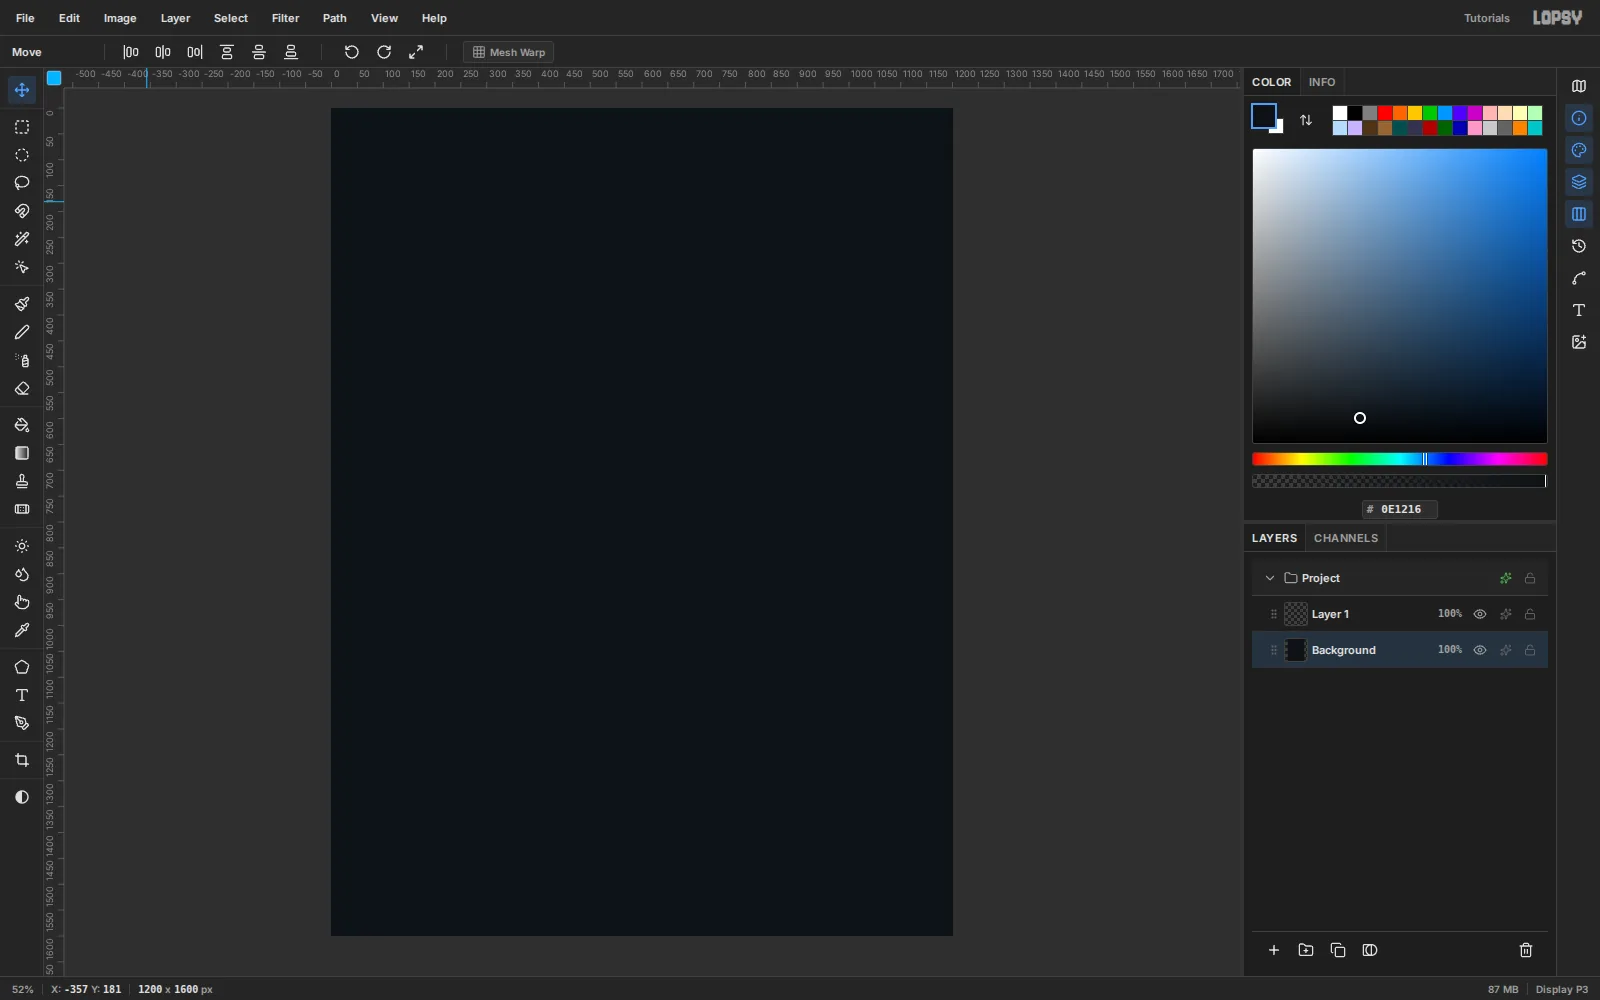
-
Drop in the temple
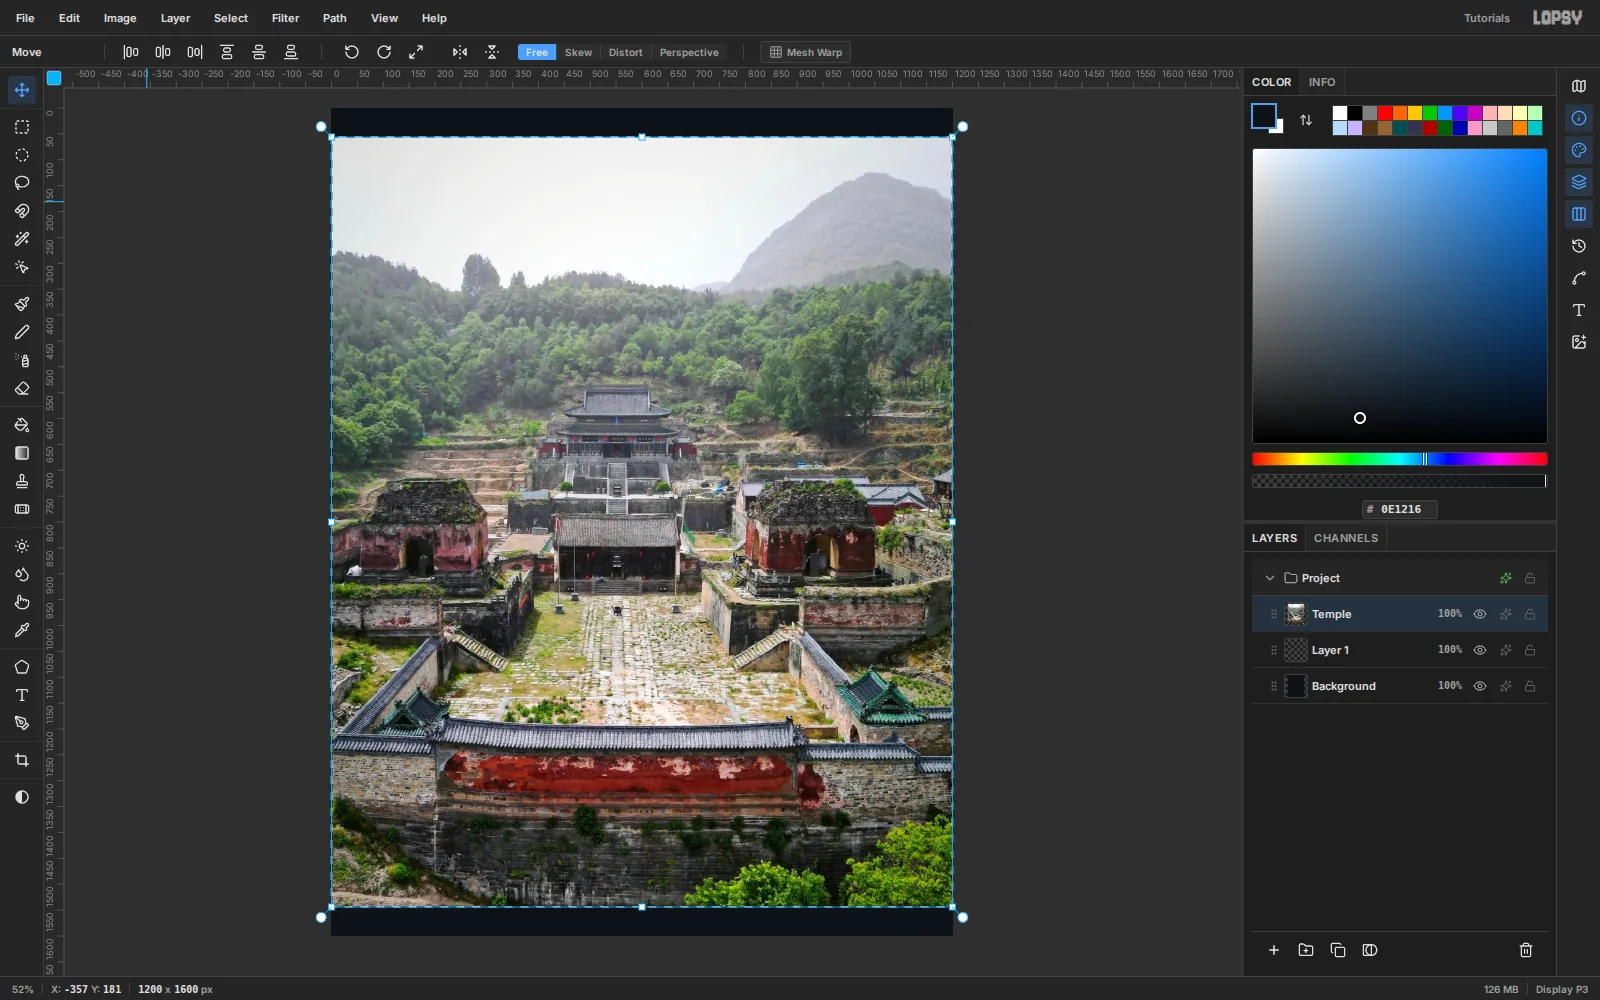
A new document comes with an empty Layer 1. Click it, then drag the temple photo from your file browser onto the canvas. Lopsy adds the photo as a new layer above the one you clicked. Because the photo is bigger than the canvas, Lopsy shrinks it to fit (1200 × 1488) and switches to the Move tool with transform handles ready. Double-click the layer name and rename it Temple.
-
Scale the temple into a stage
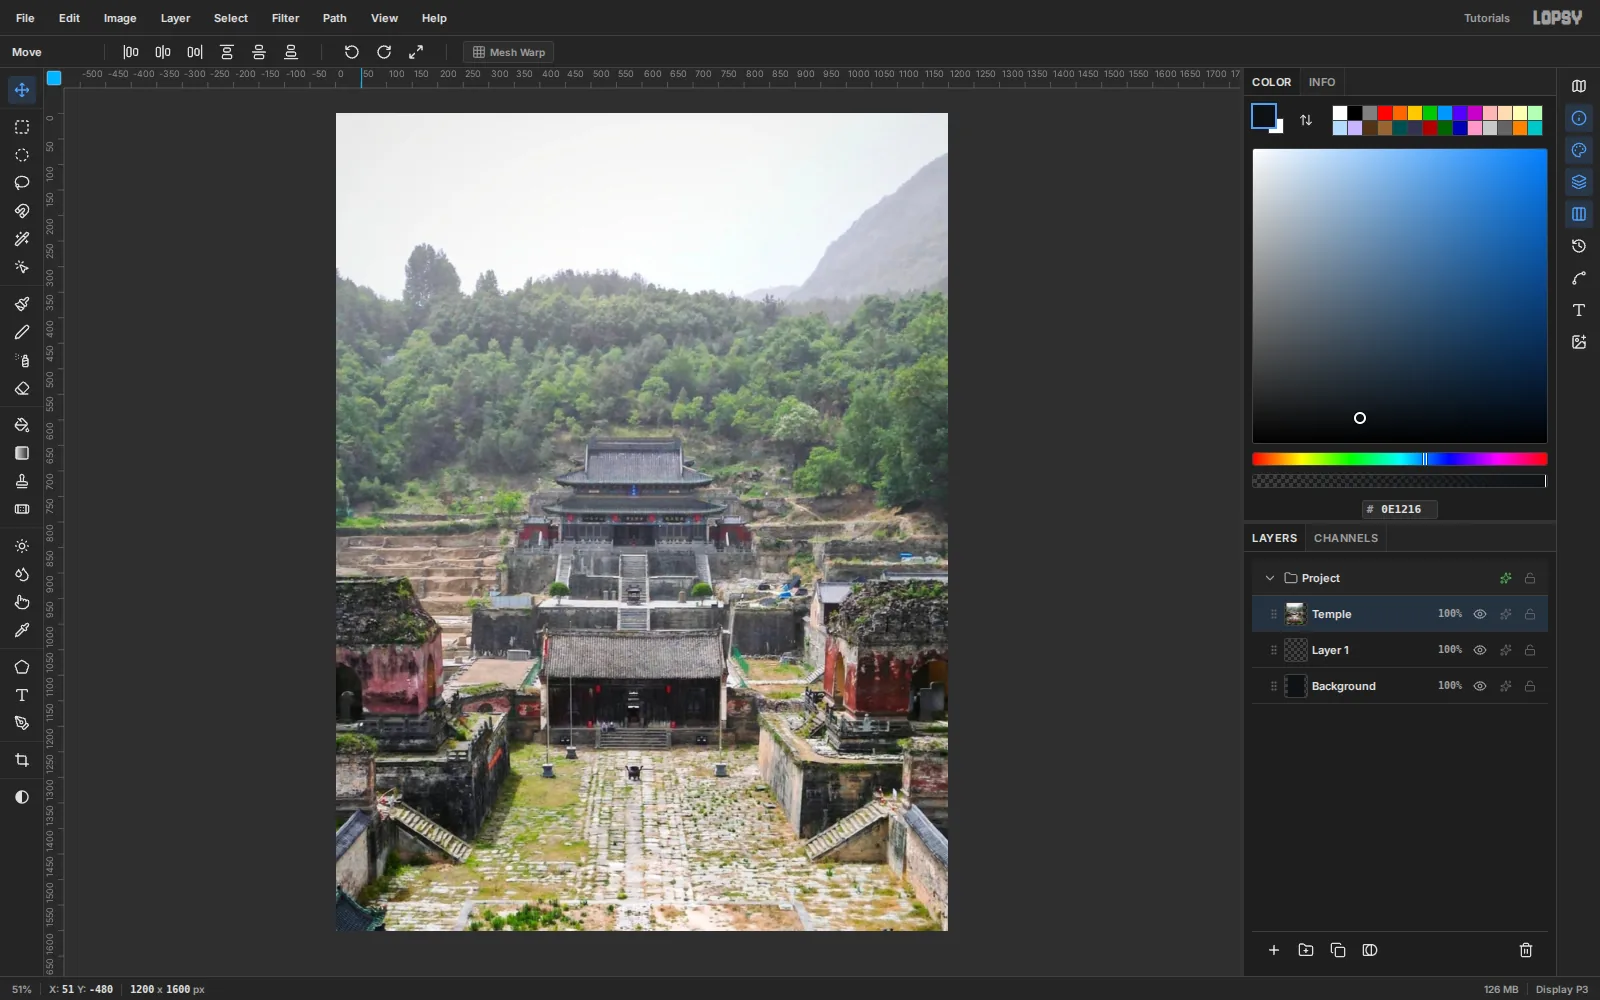
At the fitted size the courtyard is tiny, and anyone standing in it looks like a giant hovering over the wall. Make the ground big enough to stand on. Press Cmd+- twice to zoom out so you can reach the corners. Hold Cmd (which keeps the proportions) and drag the bottom-right handle out until the box is about 1800 × 2232, 1.5 times the fitted size.
Now drag inside the box to move the photo 244 px left and 138 px up. The X / Y readout in the status bar shows where the pointer is, so you can measure the drag. The front of the courtyard should meet the bottom edge, with the central hall in the middle of the poster. Press Cmd+D to apply the transform (it also clears the selection), then Cmd+0 to fit the view.
-
Brew a storm over the ridge
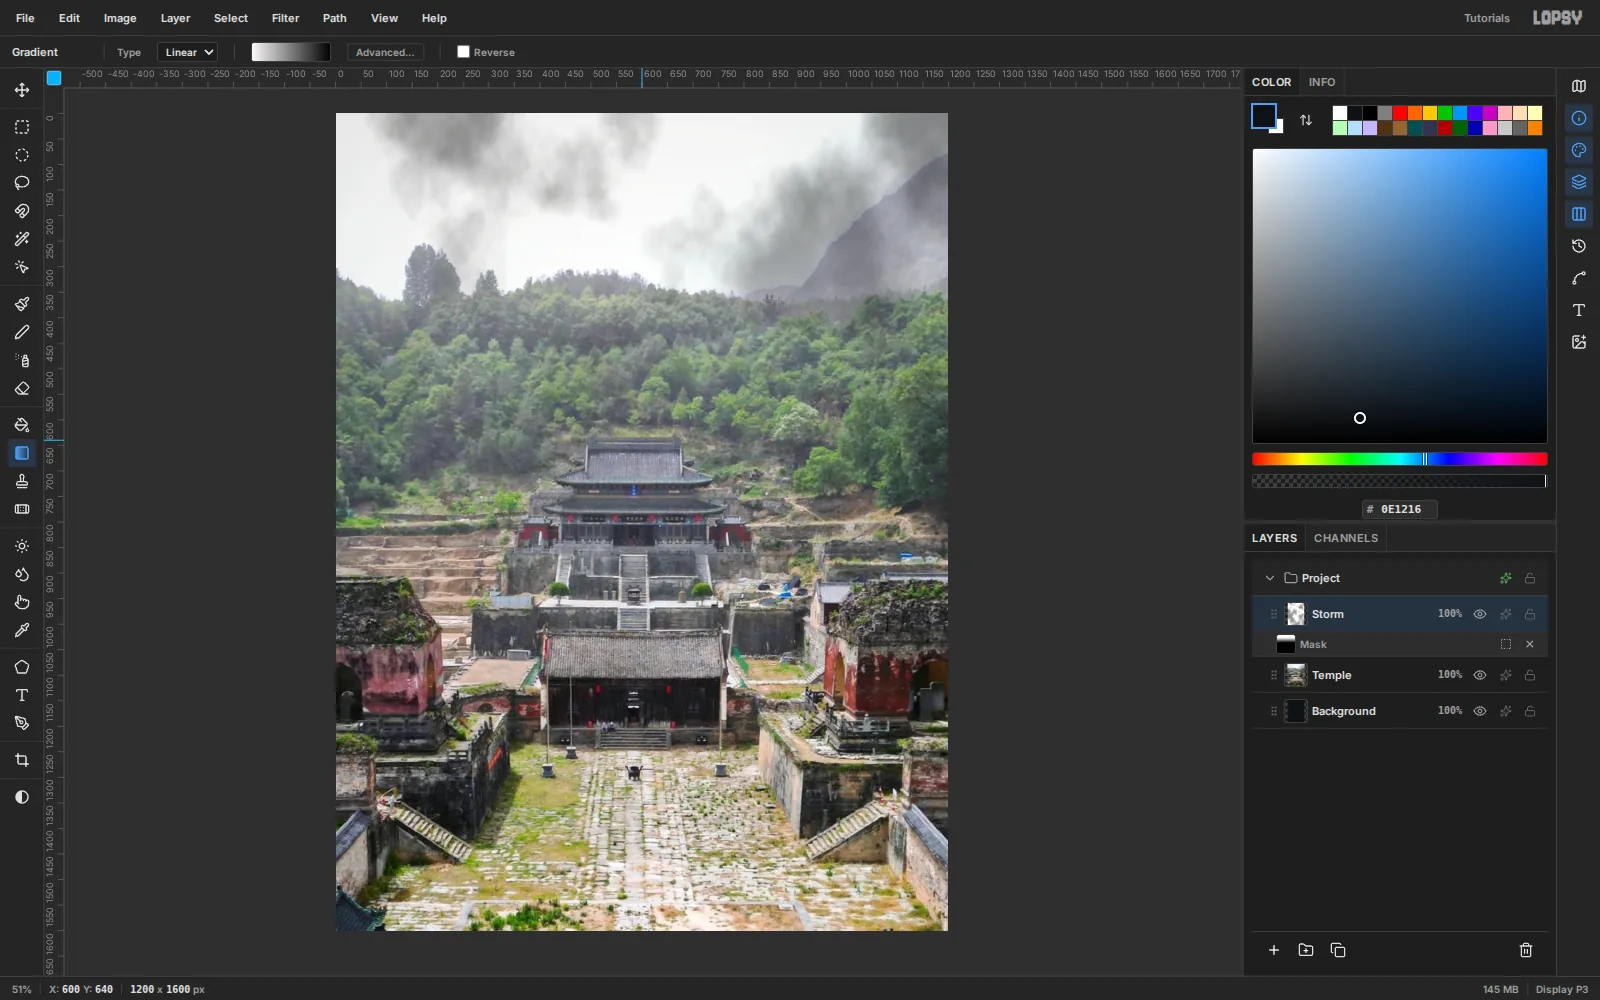
Select the empty Layer 1 and click the trash can to delete it. Select Temple and add a layer named Storm. Run Filter → Clouds… at Scale 5. Clouds is always greyscale; click Regenerate until you like the pattern. Then run Filter → Brightness/Contrast… with Brightness 30 and Contrast −50. That squeezes the clouds into greys, so they darken the sky without going black. Set the blend mode to Multiply.
Click Add Mask, then click the new mask thumbnail so you paint on the mask, not the layer. Pick the Gradient tool, set a white-to-black linear gradient in Advanced…, and drag from y 200 down to y 640. The storm stays in the sky and fades out before the forest.
-
Cut out the fighter with the Lasso
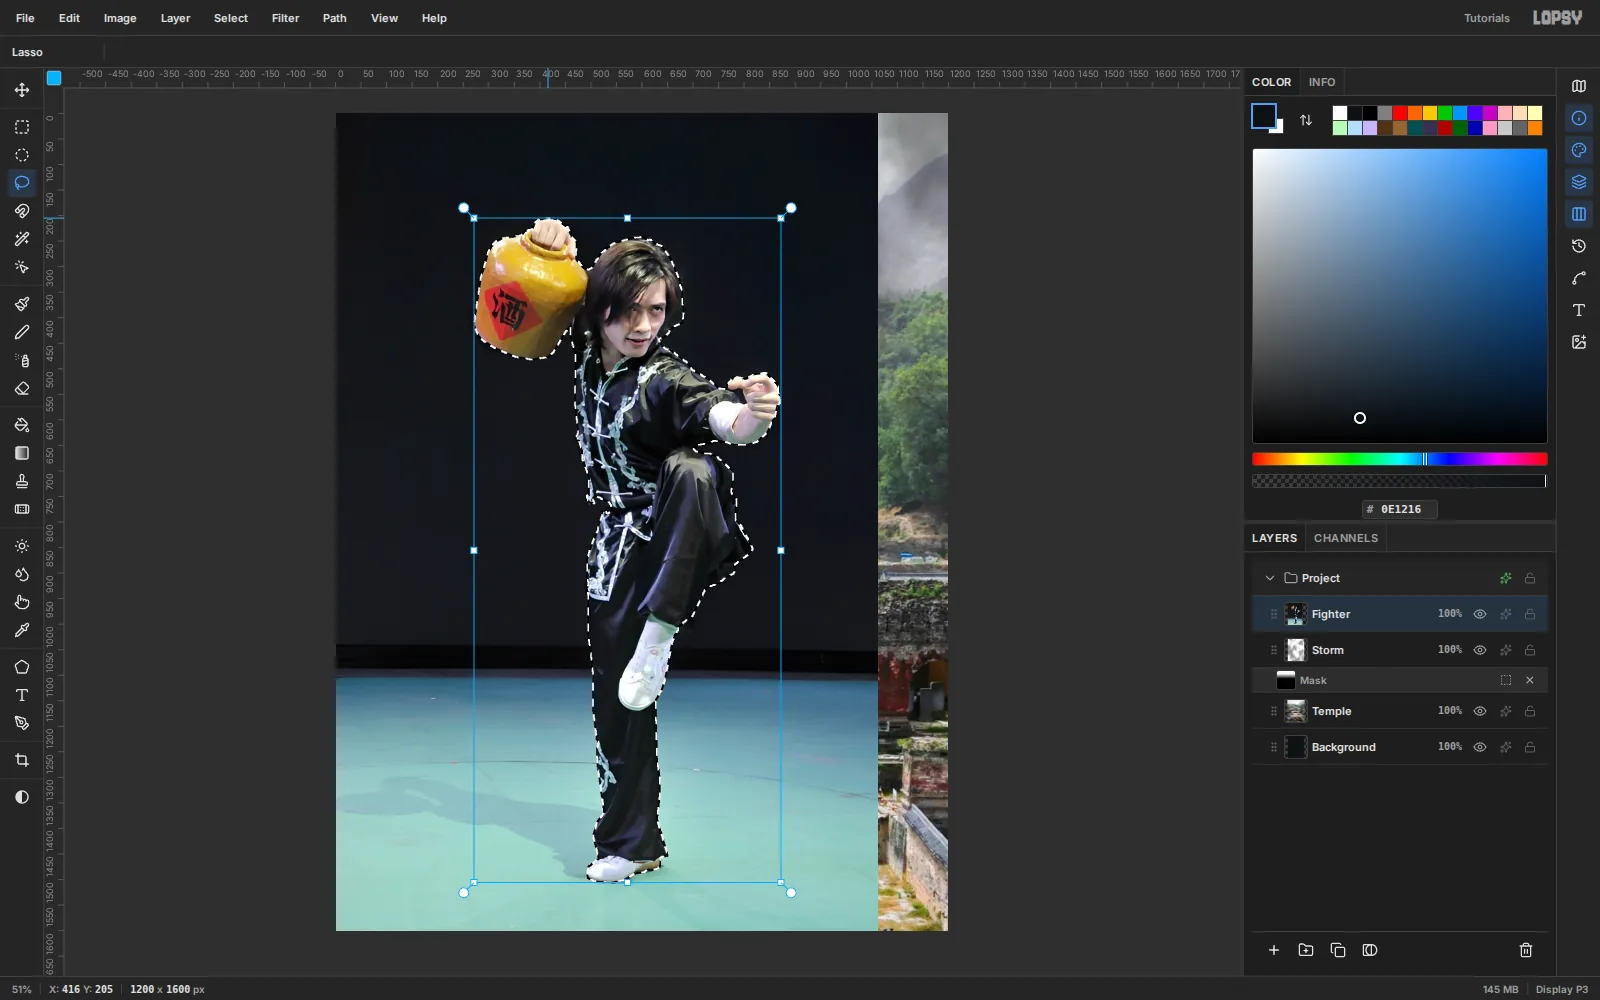
Select Storm and drop the fighter photo on the canvas. Rename it Fighter. Press Cmd+D to clear the automatic selection, pick the Lasso (L), and trace around him: the wine jar, the fist, the raised knee, and down both trouser legs to the shoes. Zoom in for the fingers and the gap under his knee.
Choose Select → Feather… at 1 px to soften the cut, then Select → Inverse (Cmd+Shift+I) and press Delete. Press Cmd+D.
-
Stand him on the temple steps
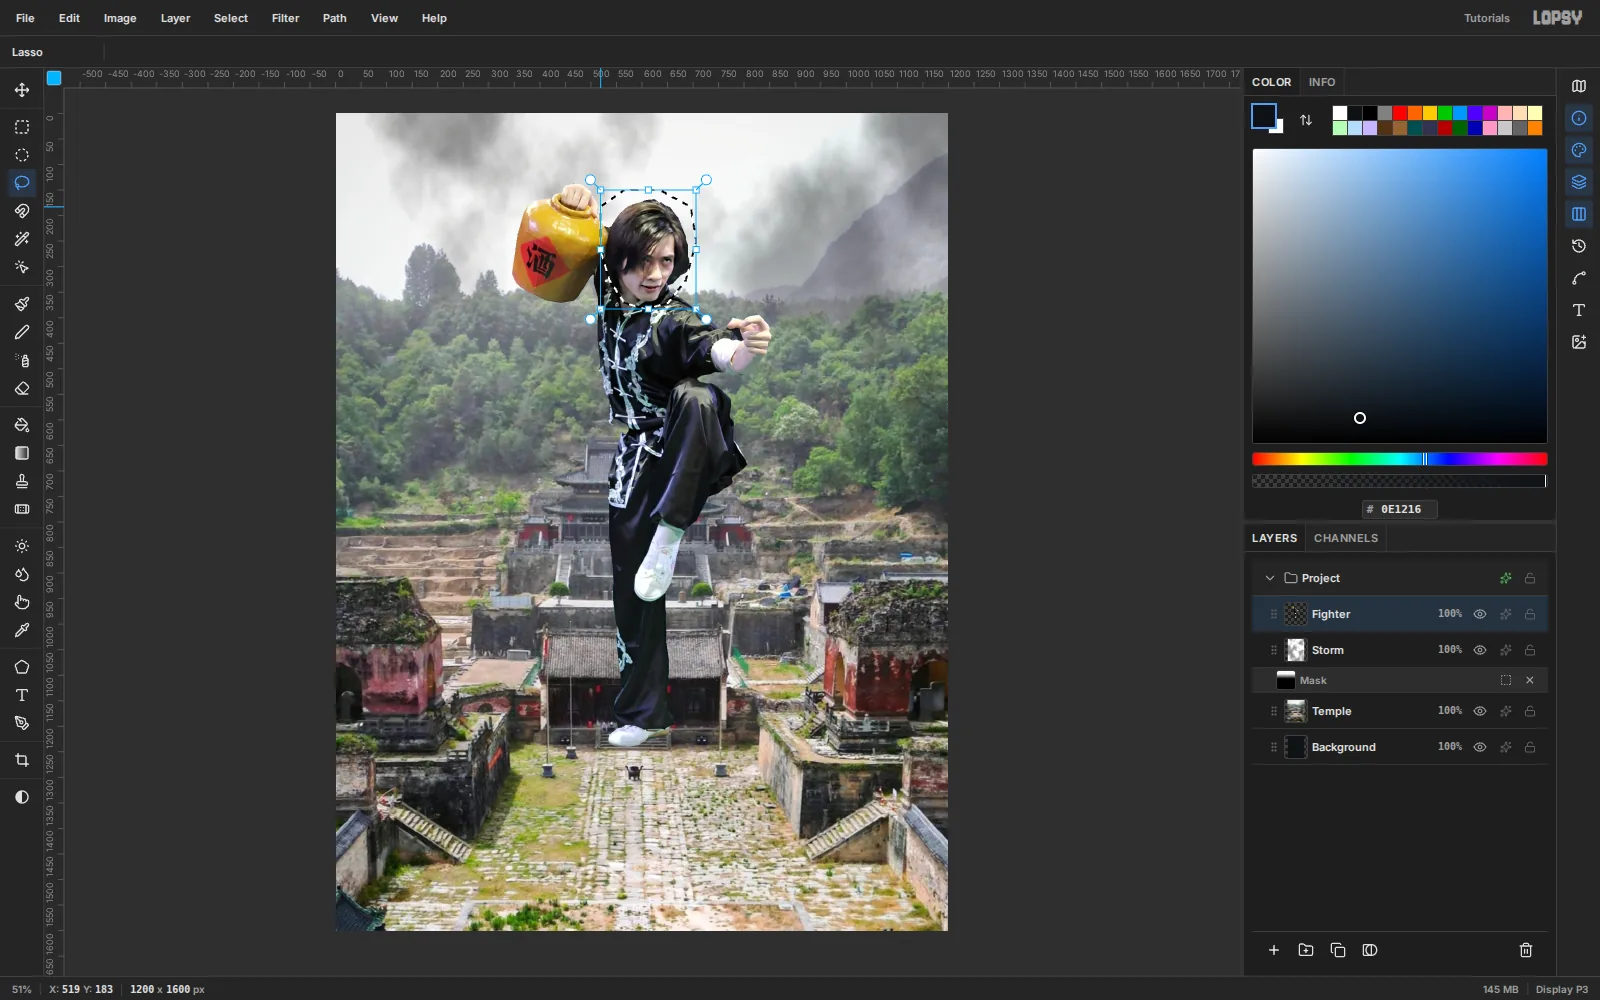
With Move (V), drag the fighter 28 px right and 40 px down. Cmd-click the Fighter thumbnail to select his pixels, which gives transform handles around just his body. Cmd-drag the bottom-right handle in to 85%, press Cmd+D, and nudge him with the arrow keys until his planted shoe rests on the hall steps at about y 1240. There it sits in the photo's perspective, above where the title will go.
Now lasso around his hair and face, stopping at the top of the collar, and press Delete. The raccoon's head will sit in that gap. His shoulders, collar and the wine jar stay.
-
Cut out the raccoon's head
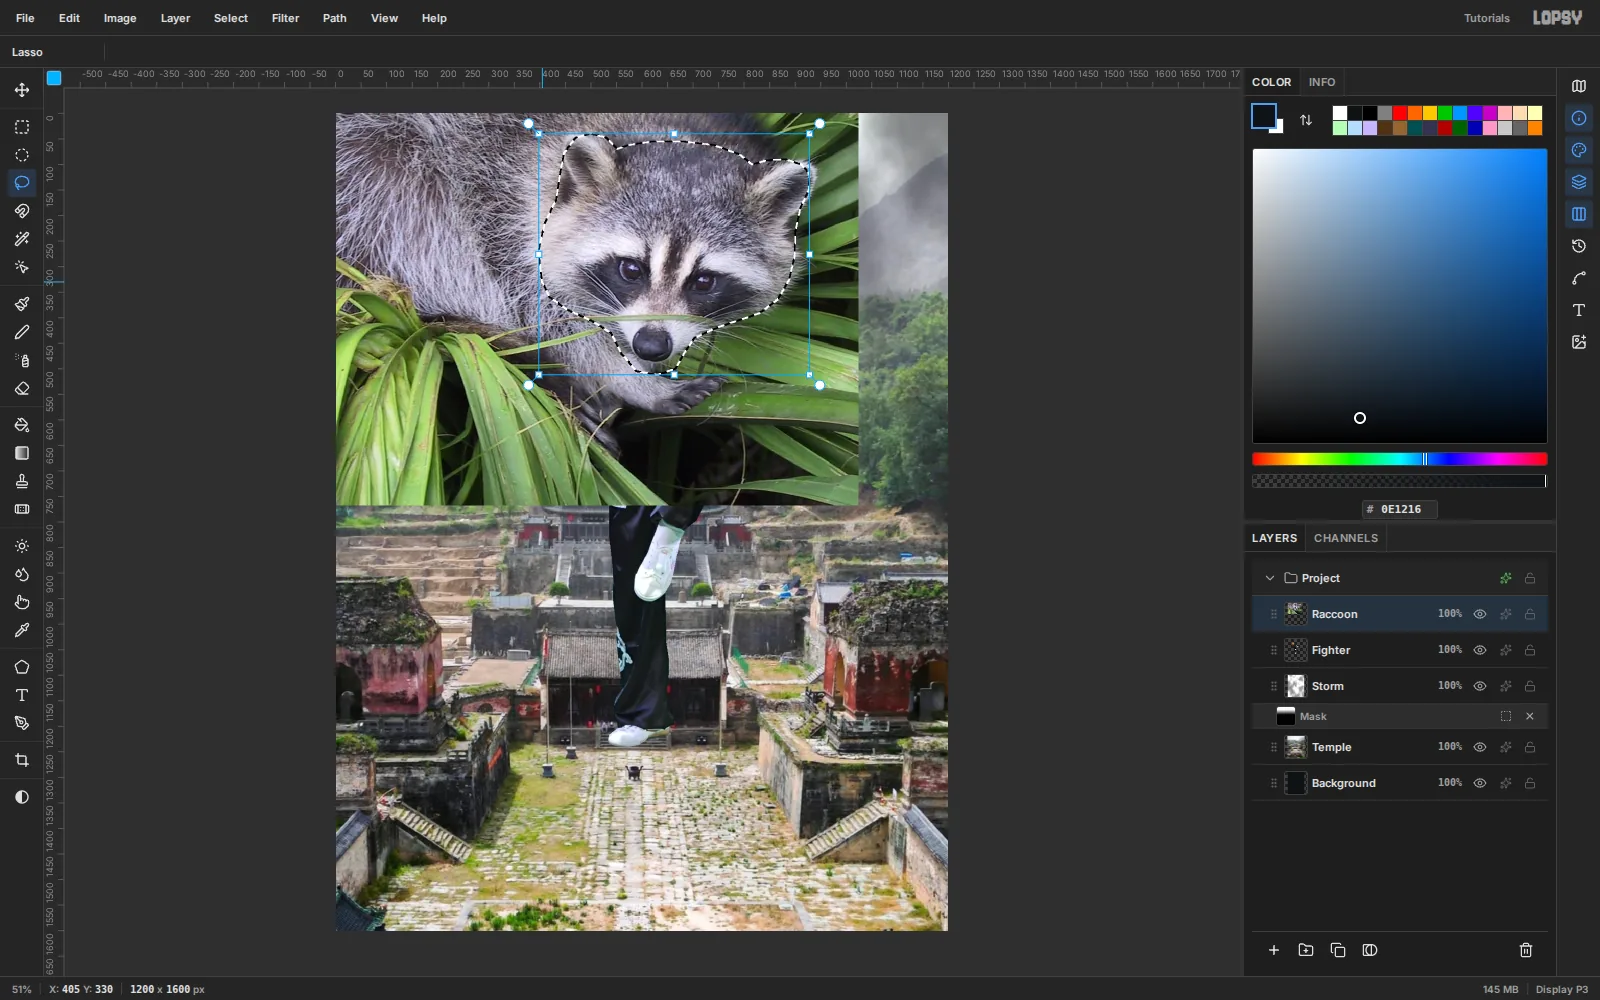
Select Fighter and drop the raccoon photo. Rename it Raccoon. Lasso the head: both ears, the crown, the fluffy cheek ruffs and the white chin under the nose. Leave the leaves under the chin outside the loop. Feather 1 px, then press Cmd+Shift+I, Delete and Cmd+D.
-
Clone out the grass blade
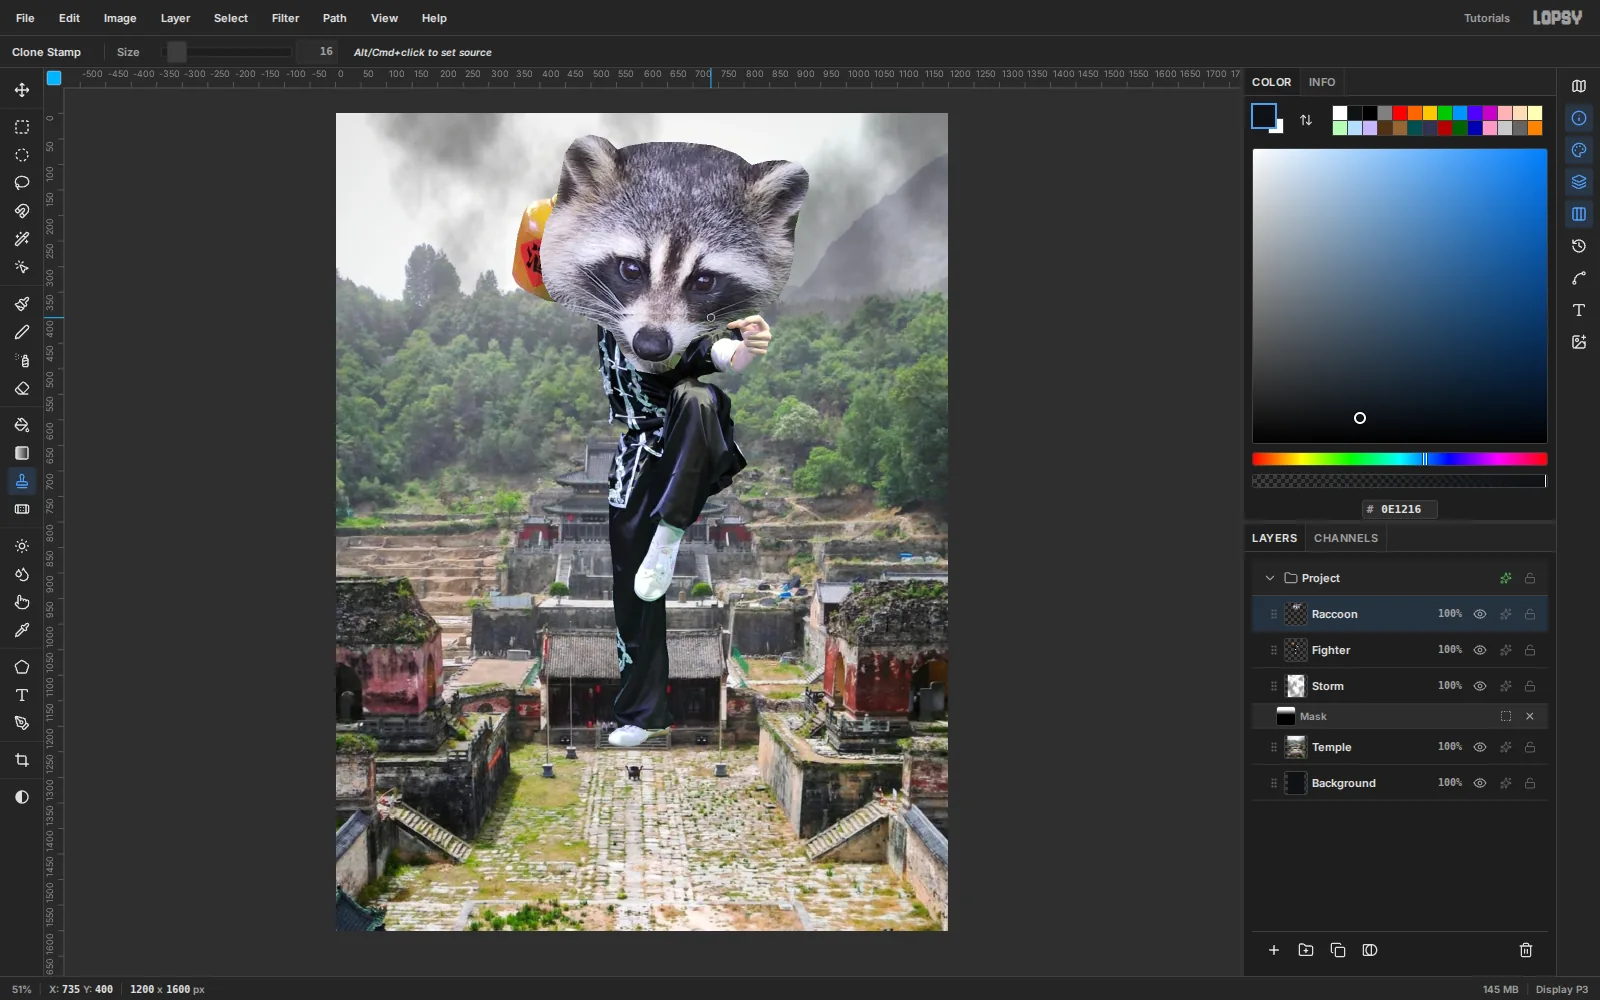
A blade of grass cuts across the raccoon's muzzle. Pick the Clone Stamp (S) at Size 16, Alt-click the fur about 18 px above the blade, then paint along the blade in one stroke. The source moves with your brush, so every dab copies the fur just above it.
-
Seat the head on the collar
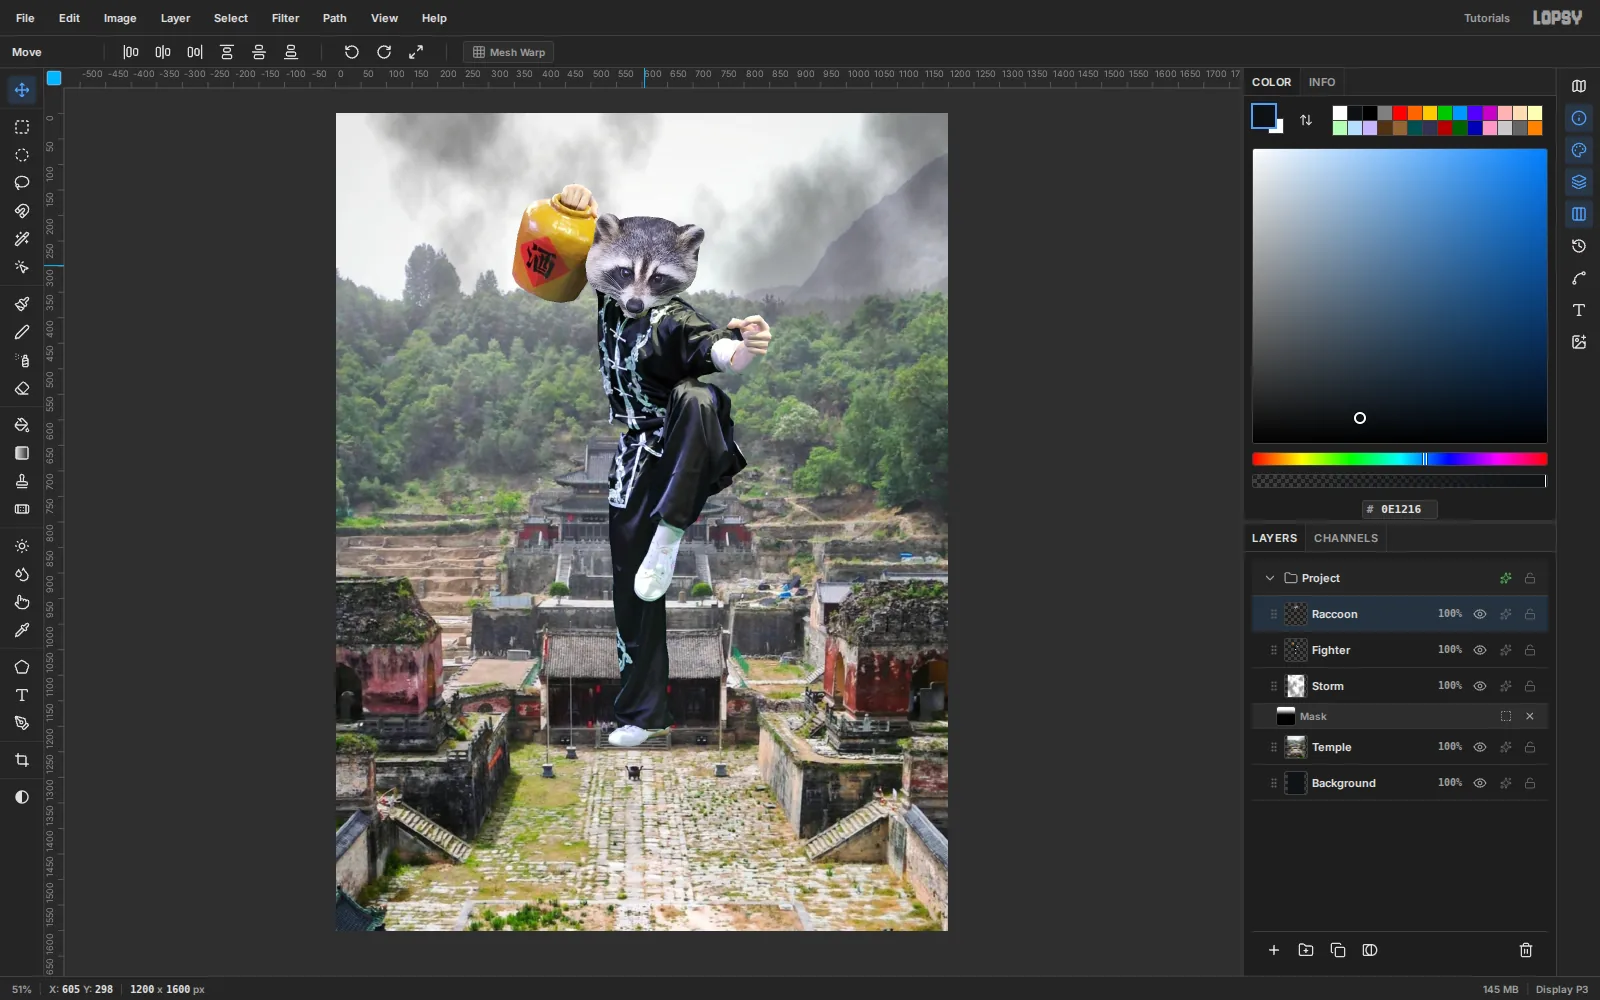
Cmd-click the Raccoon thumbnail to get handles around the head. Cmd-drag the bottom-right handle in to 44% of the photo's head, about 233 px wide. Drag it onto the collar, centred near (605, 298). The cheek ruffs and chin should overlap the collar, so there is no gap at the neck. Press Cmd+D.
-
Match the head to the body
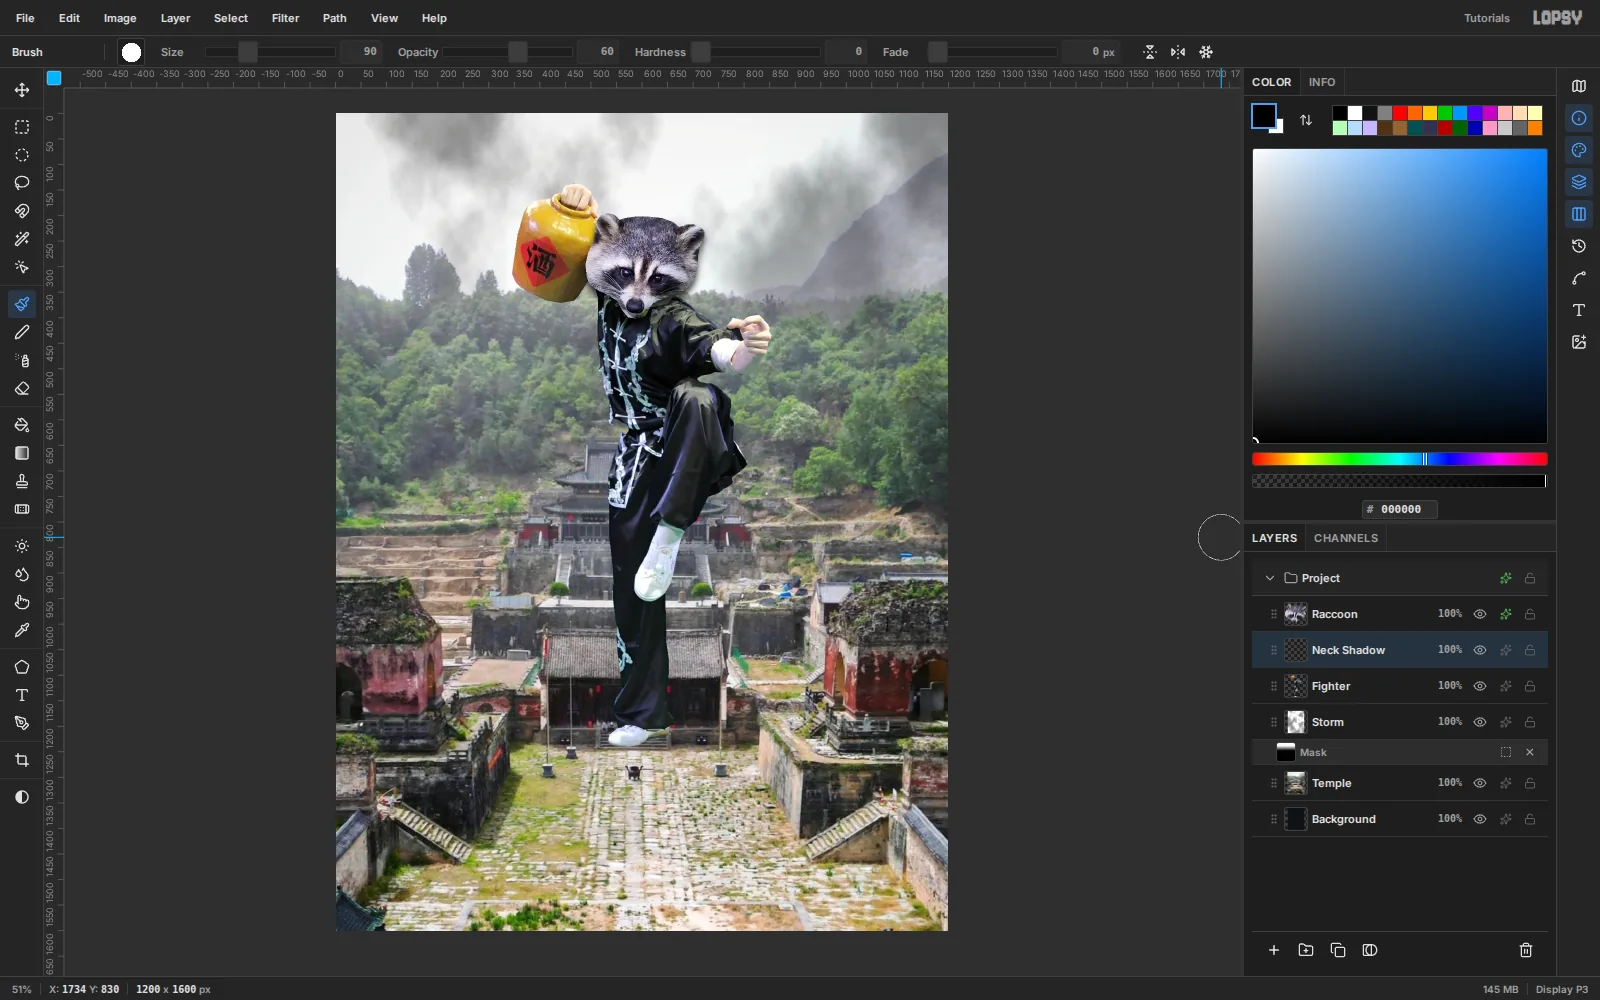
The raccoon was shot in flat daylight and the fighter under stage lights. With Raccoon selected, run Brightness/Contrast… at Brightness −6, Contrast 12. More than that and the fur turns crunchy. Add a Drop Shadow (Offset Y 10, Blur 18, Opacity 70).
Then select Fighter, add a Neck Shadow layer, and paint one stroke along the collar just under the chin with a black Hardness 0 brush at Size 90, Opacity 60. Set it to Multiply. The collar now sits in the head's shade.
-
Drape a saffron kasaya
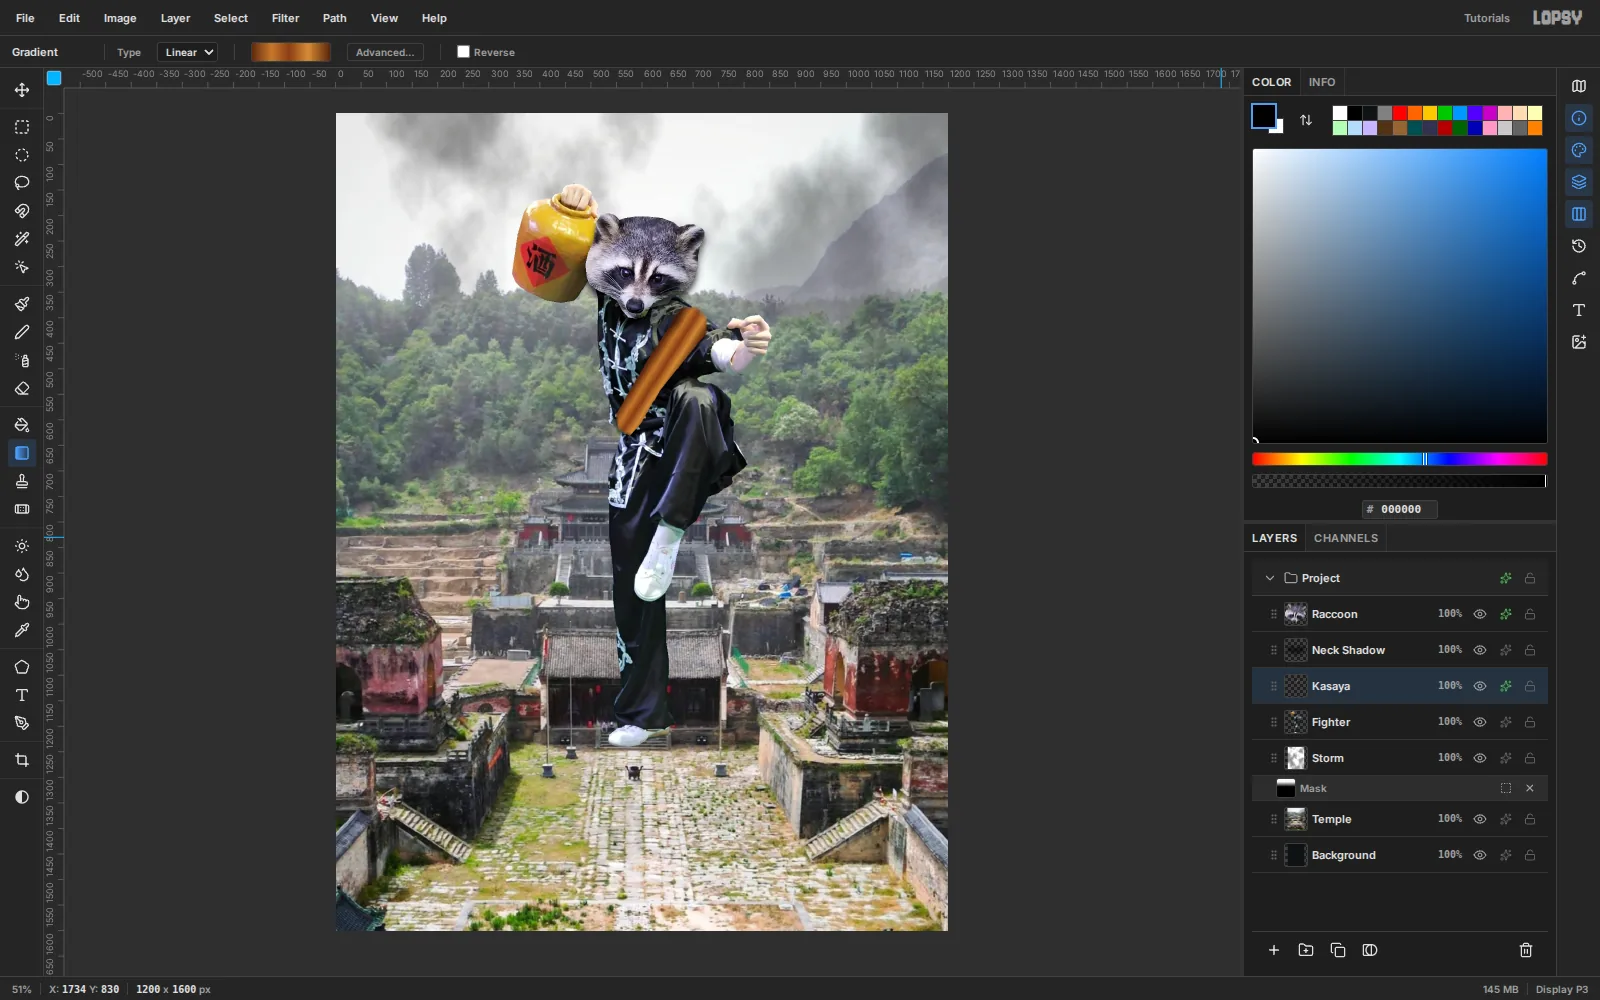
Select Fighter and add a Kasaya layer. Lasso a band about 50 px wide from his left shoulder, around (702, 387), down to his right hip at (566, 620). Set a five-stop linear gradient:
#5E250C,#C9772A,#8A3A14,#D98A34,#5A230A. Drag it a short way across the band, from (612, 489) to (665, 523). The stripes run the length of the sash and read as creases in the cloth.Run Add Noise… (Amount 14, Mono) and Motion Blur… (Angle 124, Distance 14) for a woven texture. Then run Hue/Saturation… with Saturation −20, so the orange doesn't shine like brass. Deselect and add a Drop Shadow (X −4, Y 6, Blur 10, Opacity 60).
-
String the prayer beads
Add a Mala layer. Pick the Brush (B) at Size 15, Hardness 95, in light walnut
#8A5A30. Beads darker than that disappear against the black jacket. Click once for each bead around a U that starts at the collar, dips to about y 515, and comes back up: 21 clicks. Add one Size 24 guru bead in#B0421Cat the bottom of the loop.Give the layer a pale Inner Glow (
#F7C98F, Size 5, Opacity 70) for a polished highlight, and a tight Drop Shadow (X 2, Y 4, Blur 5, Opacity 75).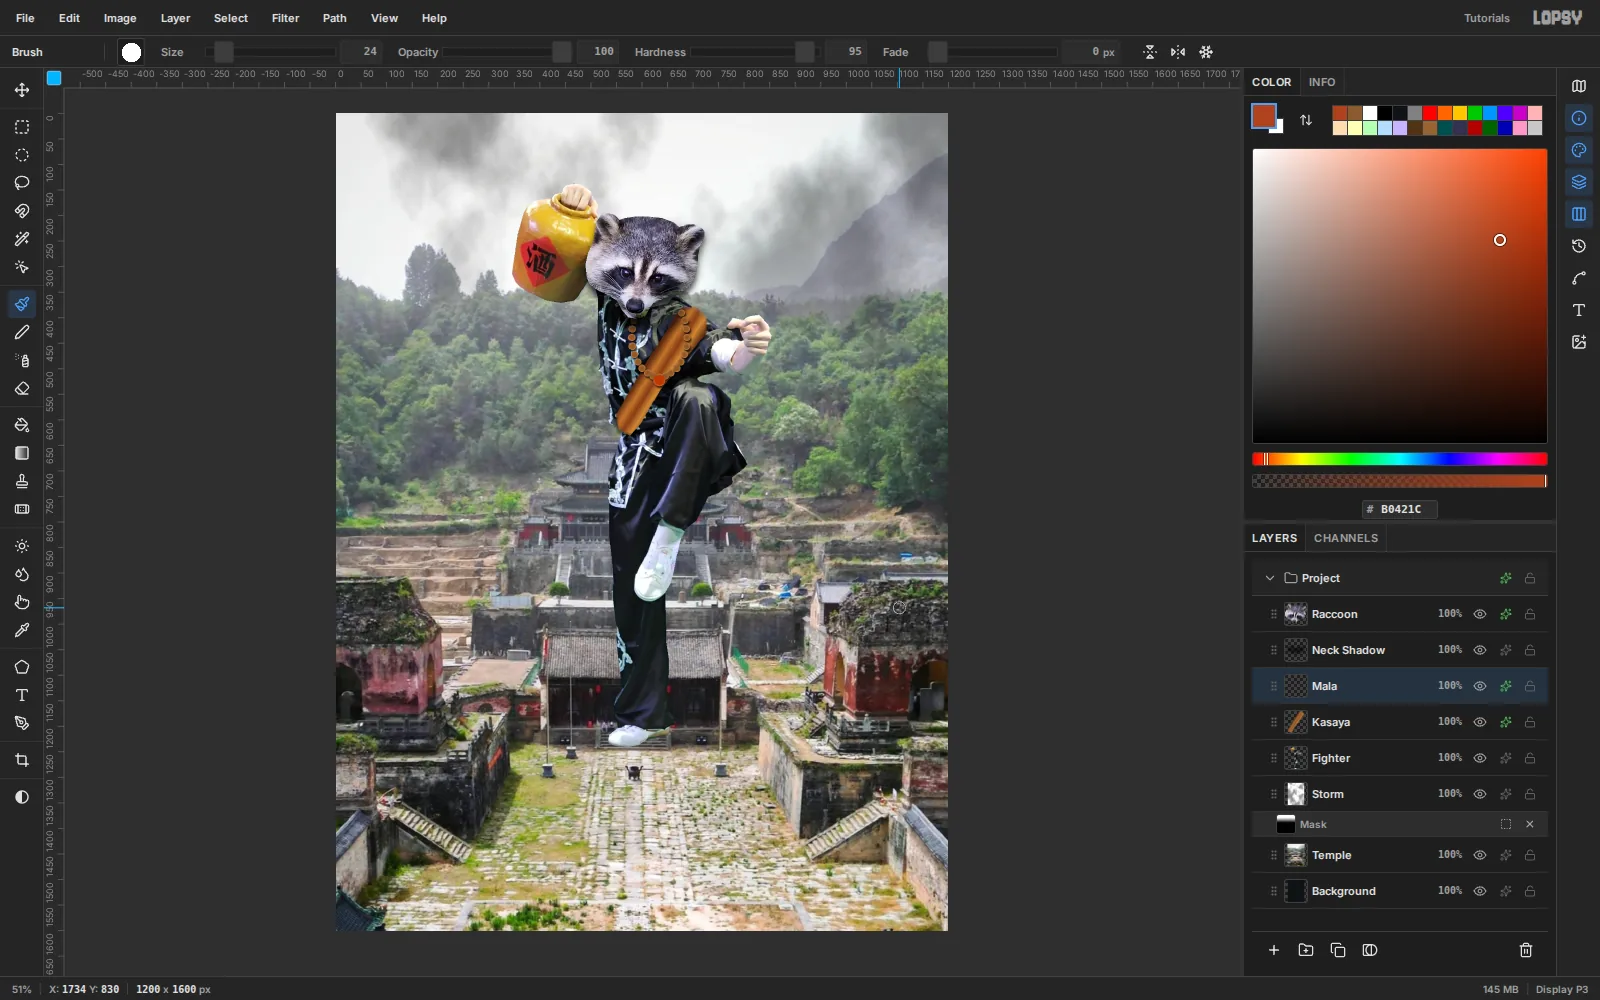
-
Darken the stage shoes
The fighter's white stage trainers are the brightest thing in the lower half of the poster, and they pull the eye away from the head. Select Fighter and add a Shoes layer. Set the foreground to
#4A4038. Lasso each shoe, just inside the edge, and choose Edit → Fill after each one. Then deselect and set the layer to Multiply. Multiply keeps the folds and seams but turns the trainers dark, so they read as black cloth kung fu shoes.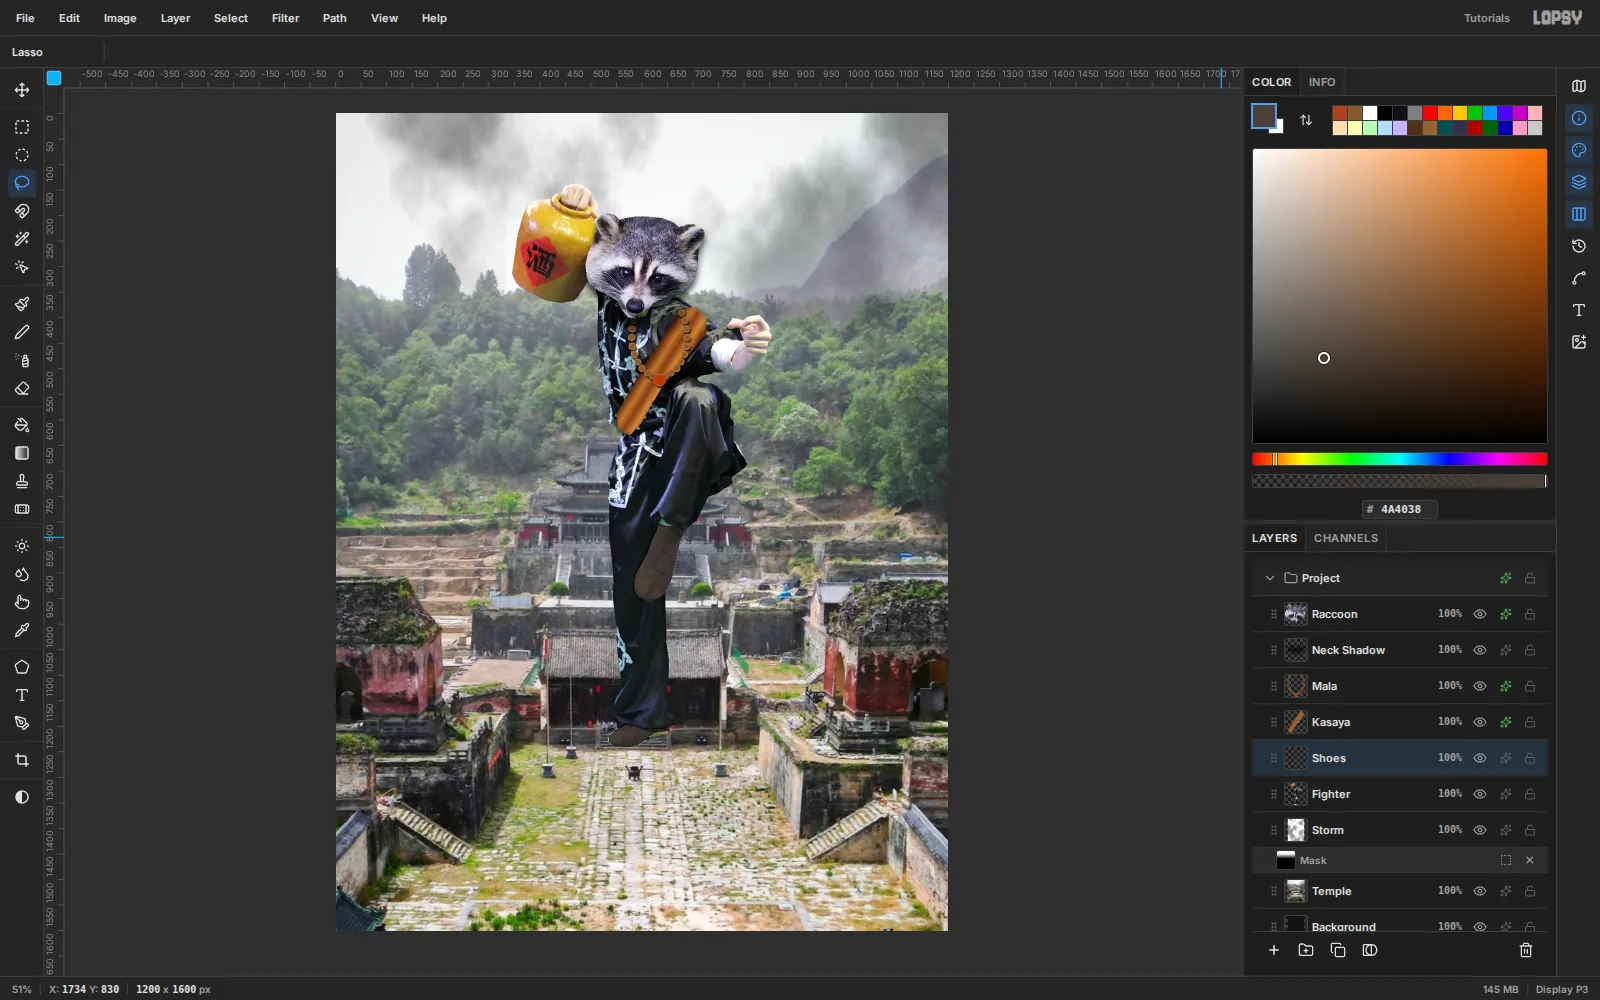
-
Light the hero from behind
Superhero posters light the hero from behind. Select Storm and add a Halo layer. Set a three-stop radial gradient:
#FFE0AEat 0%,#F7A955at 55% opacity at the 35% mark, and#F7A955at 0% opacity at 100%. Drag it from the head, about (605, 285), 480 px out. Set the layer to Screen.Add a Rays layer, set the foreground to
#FFD08A, and run Filter → Sunburst… with Rays 44, Length 95, Width 30, Fade 85, Softness 70, Jitter 35, Opacity 60, and the centre at 50%, 18%. Set the layer to Screen. Then lower the layer's own opacity to 45%, which you can tune later without re-running the filter.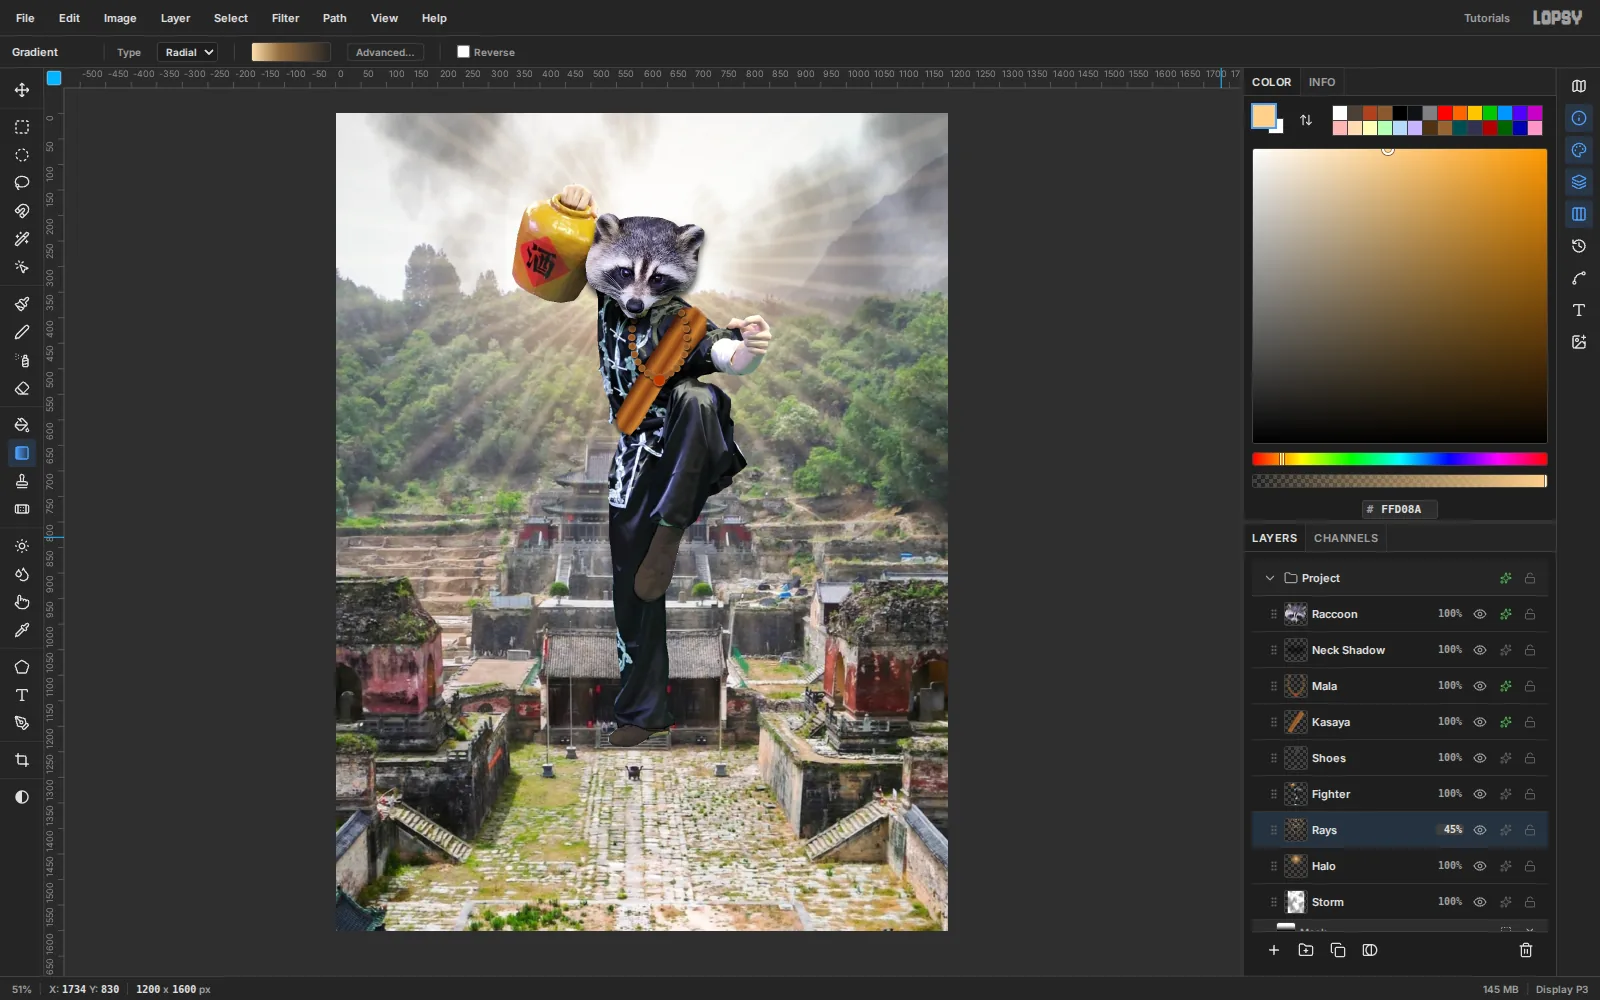
-
Push the temple back and add a rim light
Select Temple and run Gaussian Blur… at Radius 3, then Brightness/Contrast… at Brightness −18, Contrast 10. A slightly soft, darker background reads as further away than the sharp fighter.
Backlight also wraps around a subject's edges. Give Fighter a warm Inner Glow (
#FFB766, Size 14, Opacity 45), and Raccoon the same glow at Size 10, Opacity 35.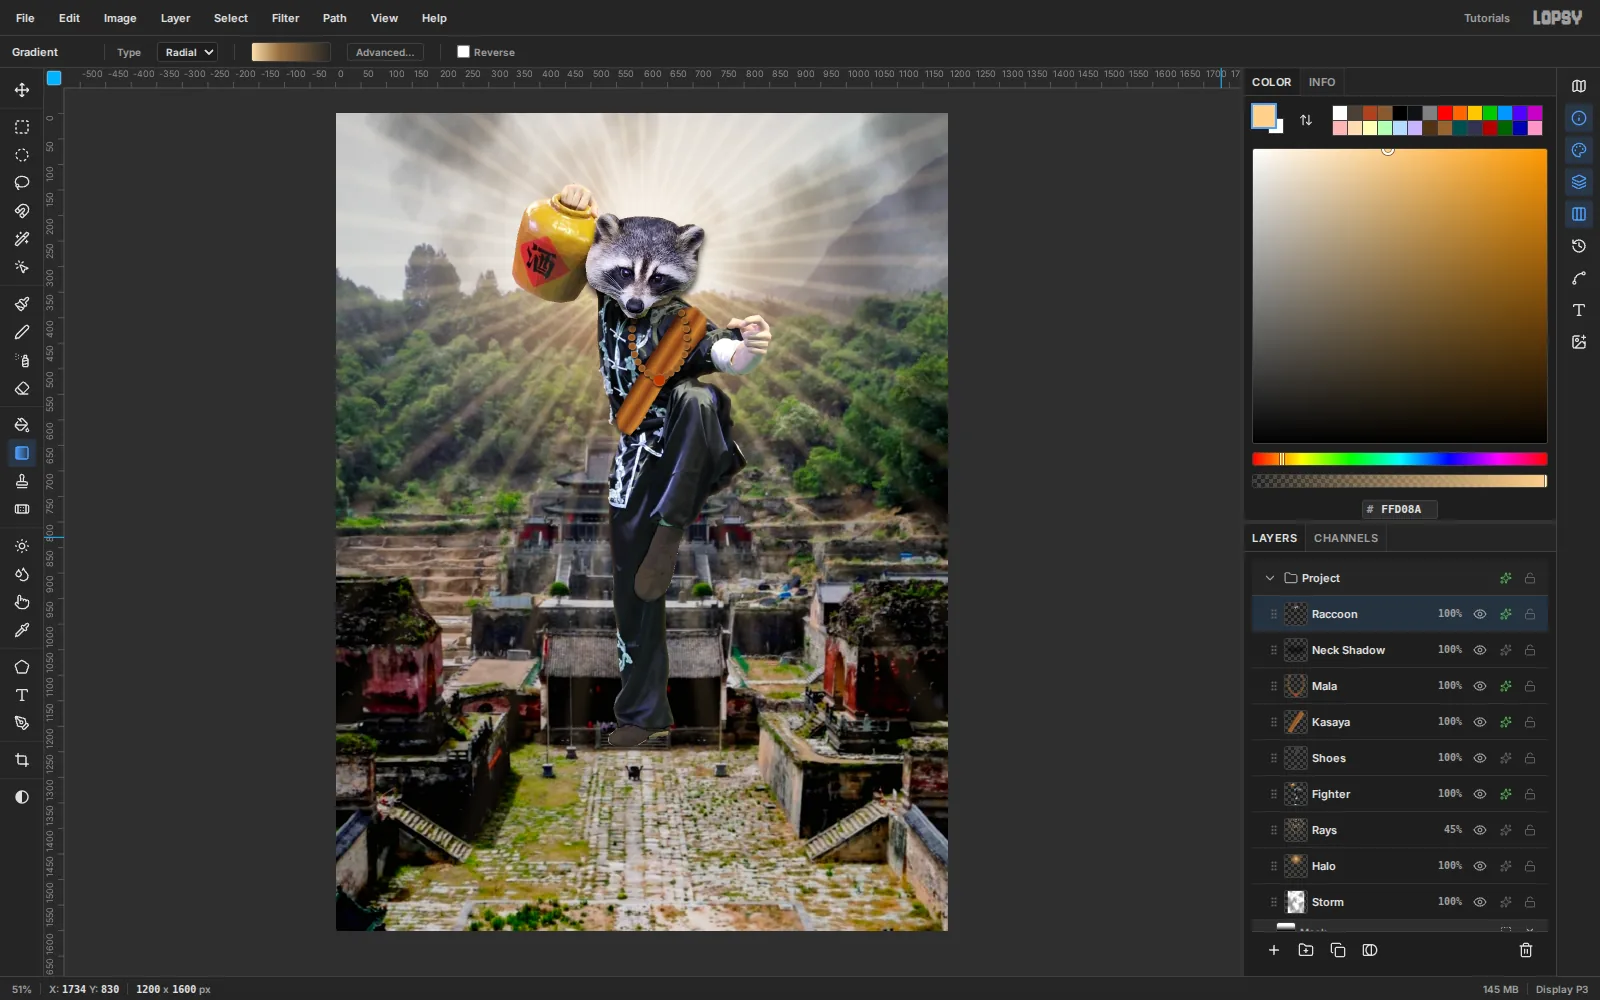
-
Throw sparks into the air
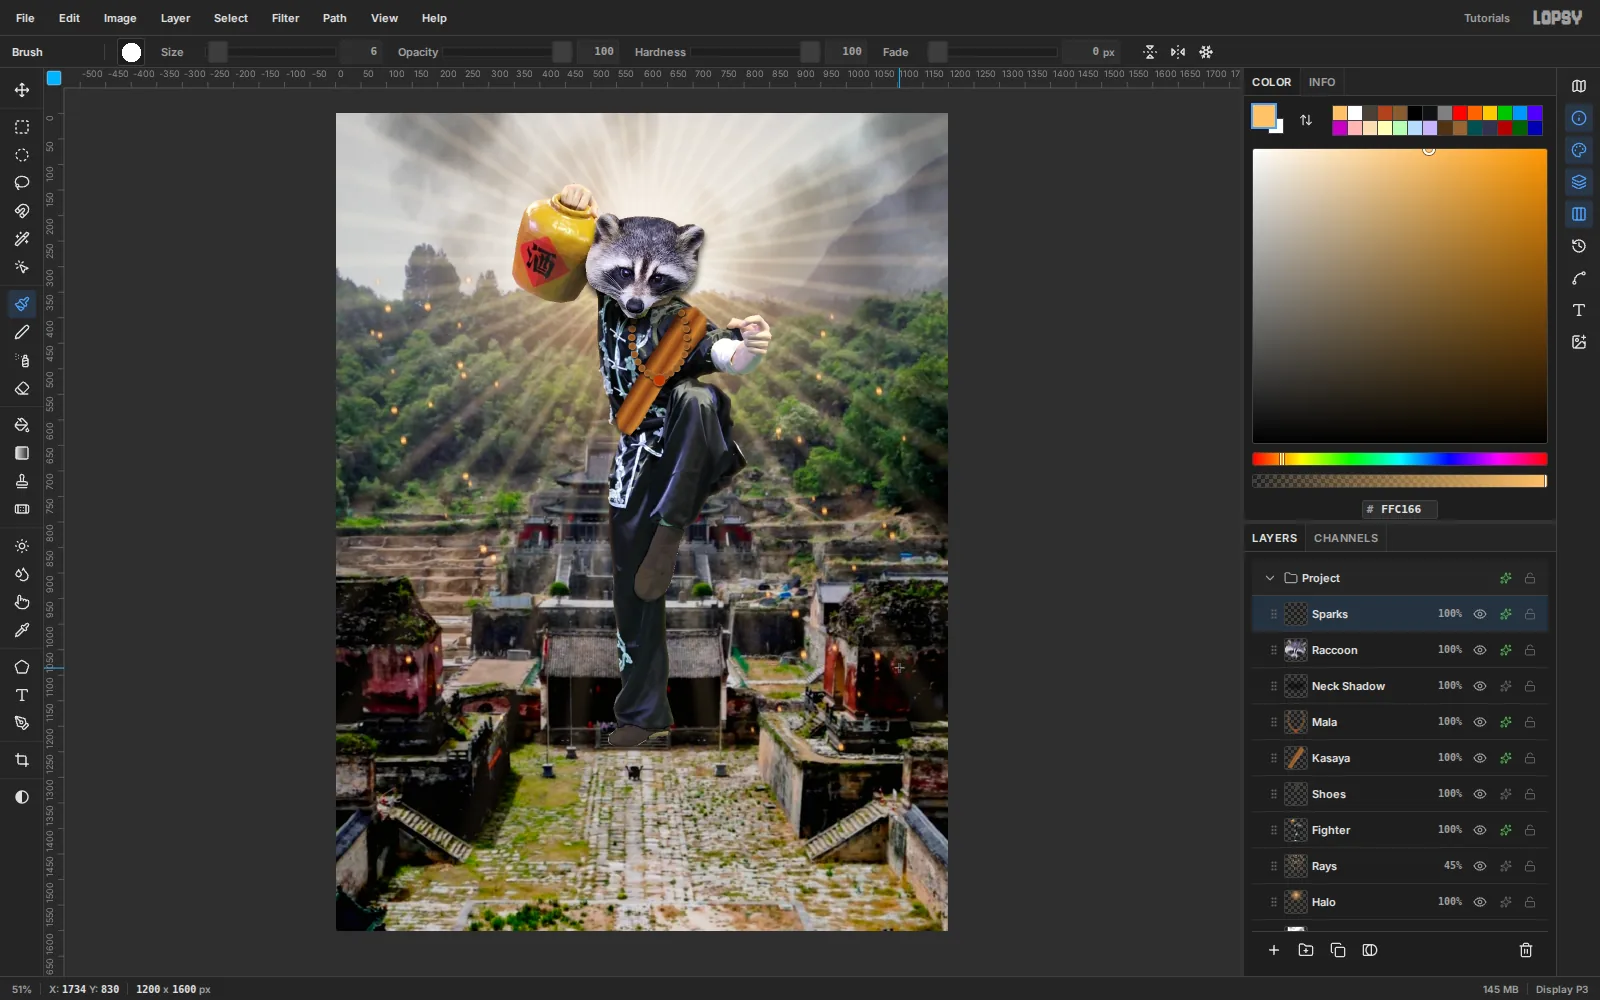
Select Raccoon and add a Sparks layer. With a Hardness 100 brush in
#FFC166, click about 45 dots of 6–13 px on both sides of the fighter, from his feet up to his shoulders. Space them further apart higher up. Run Motion Blur… at Angle 80, Distance 8 to streak them upward. Add an orange Outer Glow (#FF6A1A, Size 10, Opacity 90) and set the layer to Screen.Last, click Rasterize Layer Style at the bottom of the layer effects drawer to bake the glow into pixels. Live effects are redrawn every frame, and the poster has plenty of them.
-
Ground the fighter in the scene
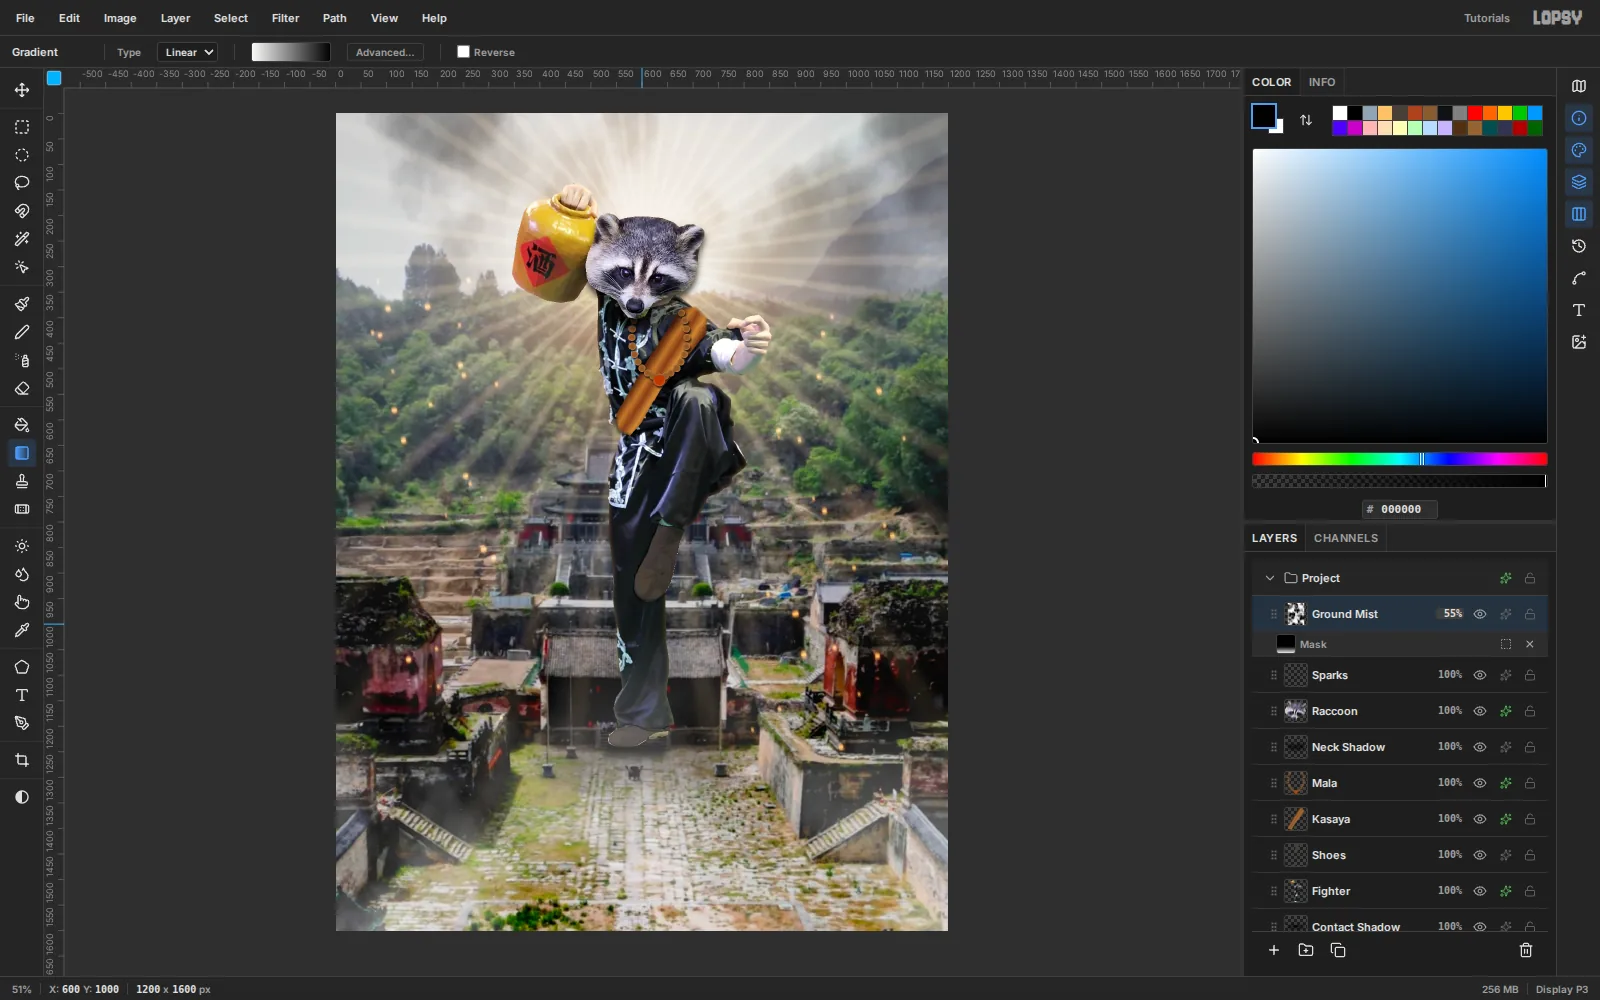
Three things make him stand in the courtyard rather than on top of it:
- Haze in the distance: select Temple, add a Haze layer, fill it with
#8FA3B3and set it to Screen at 22%. Add a mask and drag a white-to-black gradient on it from y 300 down to y 1250. Far things turn paler and bluer, while the steps at his feet keep their contrast. - Contact shadow: select Rays and add a Contact Shadow layer set to Multiply. Use a Hardness 0 black brush: one wide pass at Size 240, Opacity 40 under both feet, then a tight pass at Size 60, Opacity 85 right under the planted shoe.
- Ground mist: select Sparks and add a Ground Mist layer. Run Clouds… at Scale 6 and set it to Screen. Add a mask and drag a white-to-black gradient on it from the bottom edge up to y 1000, then set the layer to 55%.
- Haze in the distance: select Temple, add a Haze layer, fill it with
-
Set the title block
Select Ground Mist and add a Title Shade layer. Set a gradient from
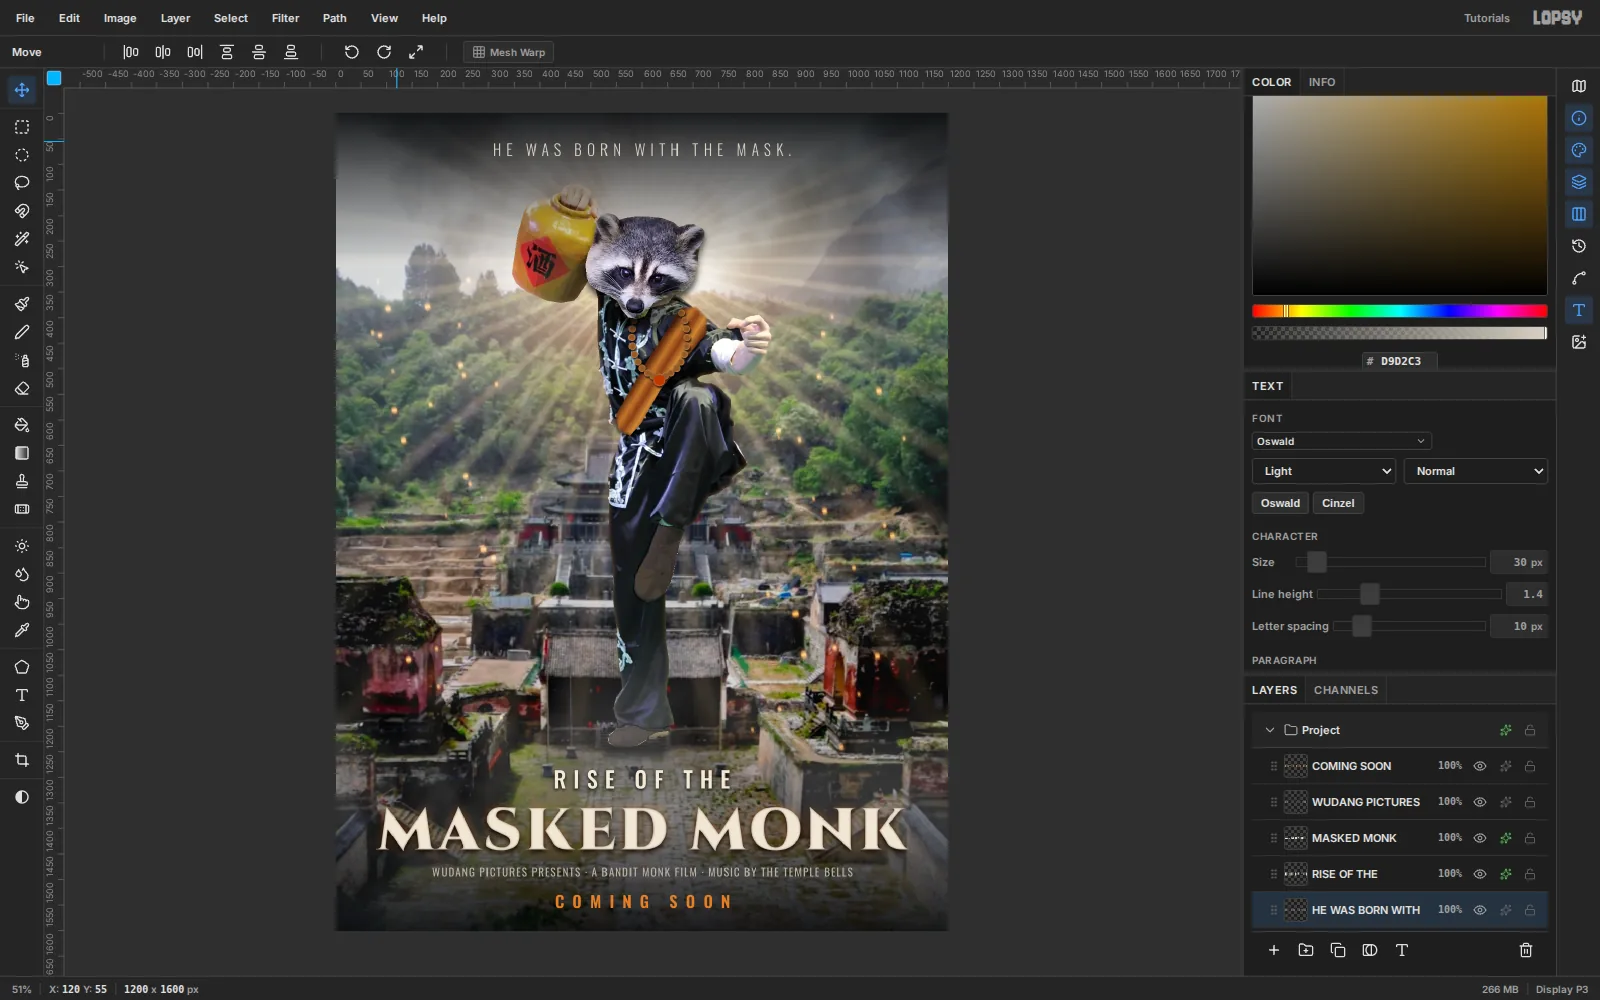
#05070Aat 92% opacity to fully clear. The gradient tool fills the whole layer, so fence each band with a marquee first. Marquee the bottom 420 px and drag from the bottom edge up to y 1180. Then marquee the top 300 px and drag from the top edge down.Type each line with the Text tool. The options bar edits whichever text layer is active, so click Title Shade in the Layers panel before you set up each new line. Work from the bottom up, so a click never lands inside an earlier text box. Set the letter spacing in the Text panel, then centre each line on x 600 with Move and the arrow keys:
COMING SOON: Oswald SemiBold 32, spacing 16,#D9843A, centred on y 1542.WUDANG PICTURES PRESENTS · A BANDIT MONK FILM · MUSIC BY THE TEMPLE BELLS: Oswald 22, spacing 2,#B8B0A2, on y 1484.MASKED MONK: Cinzel Black 116, spacing 6,#EFE7D6, on y 1400. Add an Inner Glow (#4A4038, Size 6, Opacity 75) for a stamped-metal edge, an Outer Glow (#FF8A2A, Size 26, Opacity 40), and a Drop Shadow (Y 6, Blur 14, Opacity 85).RISE OF THE: Oswald Medium 44, spacing 14,#F2EADA, on y 1304, with a Drop Shadow (Y 3, Blur 10, Opacity 95).HE WAS BORN WITH THE MASK.: Oswald Light 30, spacing 10,#D9D2C3, on y 70.
-
Grade it like a blockbuster
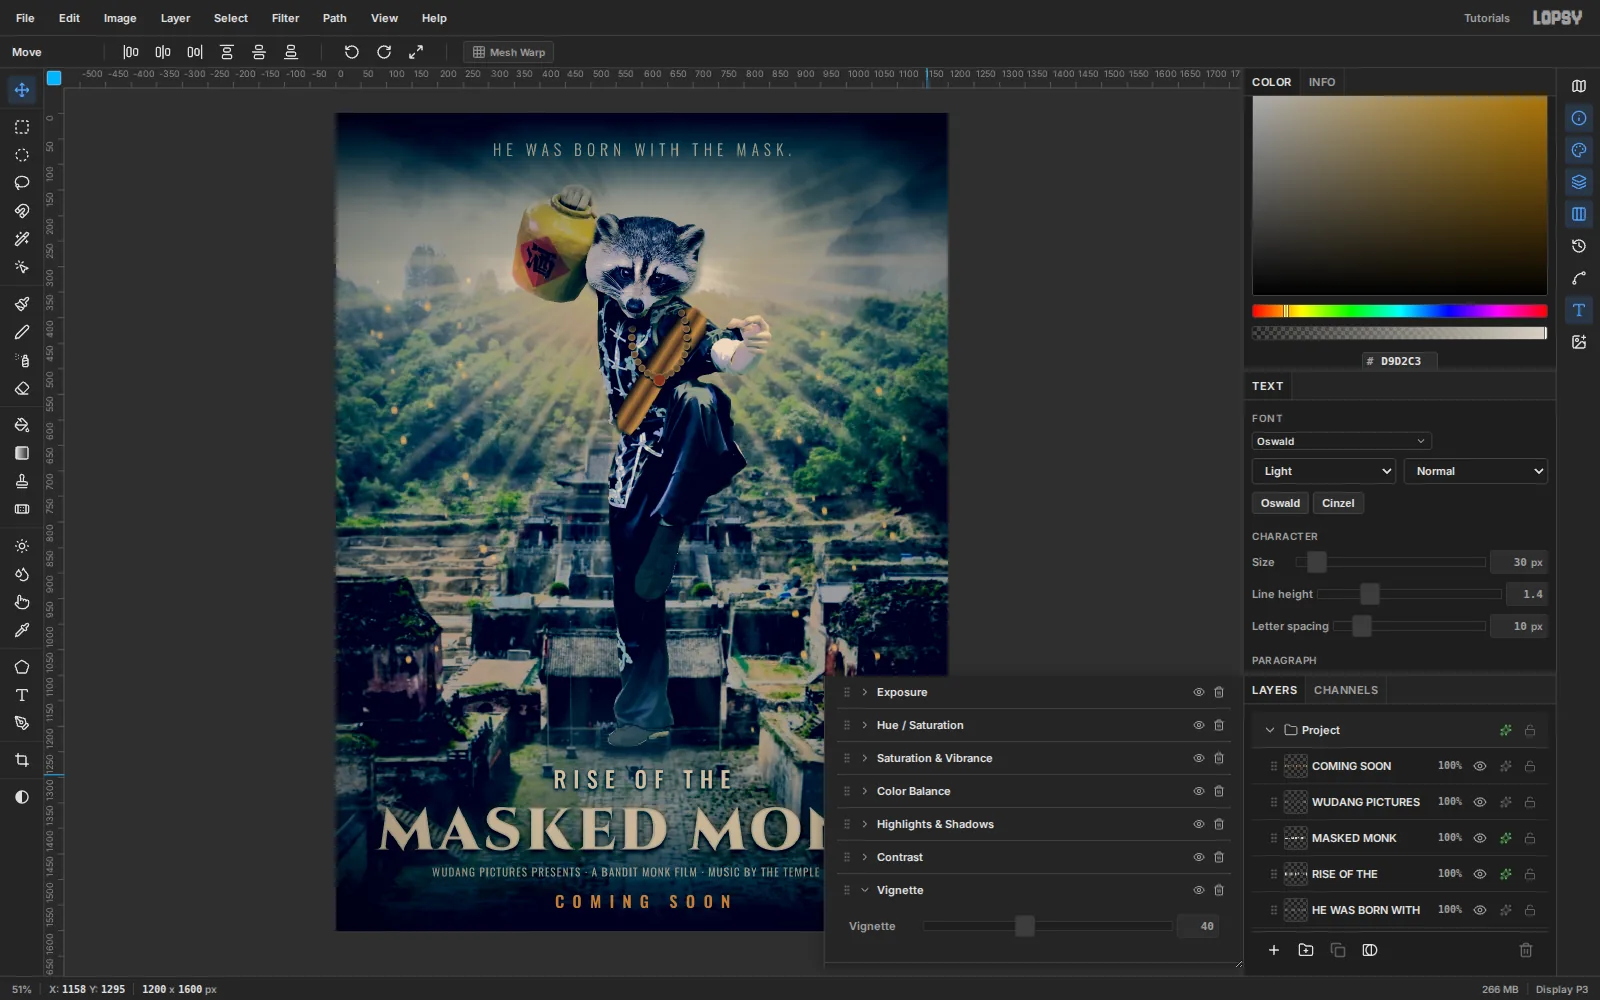
A single grade over every layer is what makes three photos read as one film still. Choose Layer → Adjustment Layer… to open the document's adjustment stack. It already holds four nodes that do nothing yet: Levels, Curves, Exposure and Hue / Saturation.
- Levels: expand it and drag the input black handle to 14 and the white handle to 242. That sets a firm black point, so the image isn't milky.
- Click Add Adjustment → Saturation & Vibrance: Saturation −40, Vibrance 6. Muted colour is the core of the look.
- Color Balance: on the Shadows tab, Cyan–Red −18 and Yellow–Blue +12. On Midtones, Cyan–Red −4. On Highlights, Cyan–Red +12 and Yellow–Blue −12. That gives steel-teal shadows and warm highlights.
- Highlights & Shadows: Highlights −30, to tame the sky.
- Contrast: 22.
- Vignette: 40, to pull the eye to the hero.
Leave Curves, Exposure and Hue / Saturation as they are.
-
Finish with film grain
The three photos each have their own noise. One grain layer on top gives them the same texture. Close the adjustments drawer, select the topmost layer (COMING SOON) and add a Grain layer. Fill it with
#808080and run Add Noise… with Amount 28, Mono and Gaussian. Set it to Overlay at 40%. Export with File → Quick Export PNG.