Design an Anti-Aesthetic Clip-Art Book Cover
Make a deliberately tacky book cover in Lopsy, with a sloppy photo cut-out, WordArt title, starburst badge, lens flare and speech bubble, all placed on purpose.
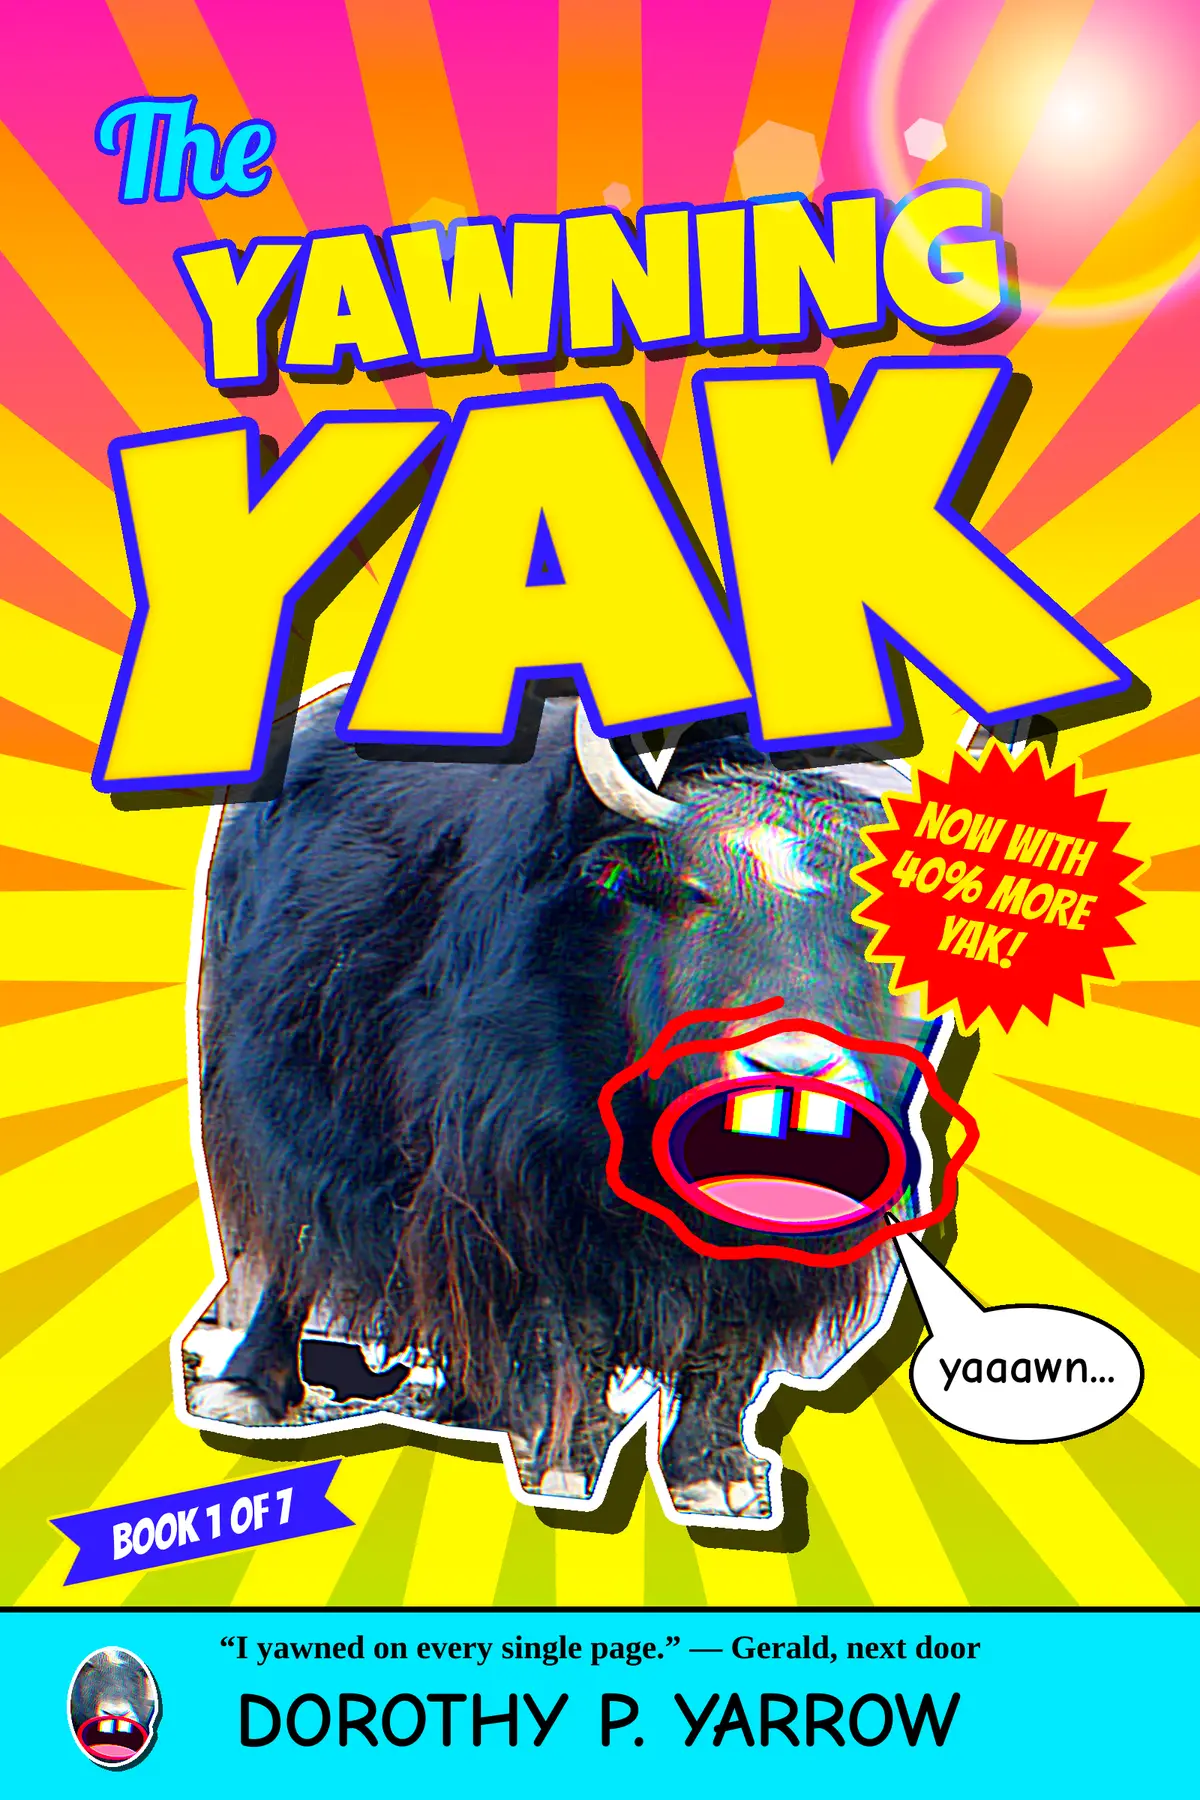
Anti-aesthetic design breaks the rules of good taste on purpose. It uses clashing colours, cheesy effects, crude cut-outs and the fonts designers love to hate. A famous version is the "clip-art cover": a cover remade as if someone had only stock photos, WordArt and an afternoon in a paint program. The joke only works when the mess is controlled. Every tacky element has to sit exactly where you meant it, read clearly from across a shop, and look ugly on purpose rather than by accident.
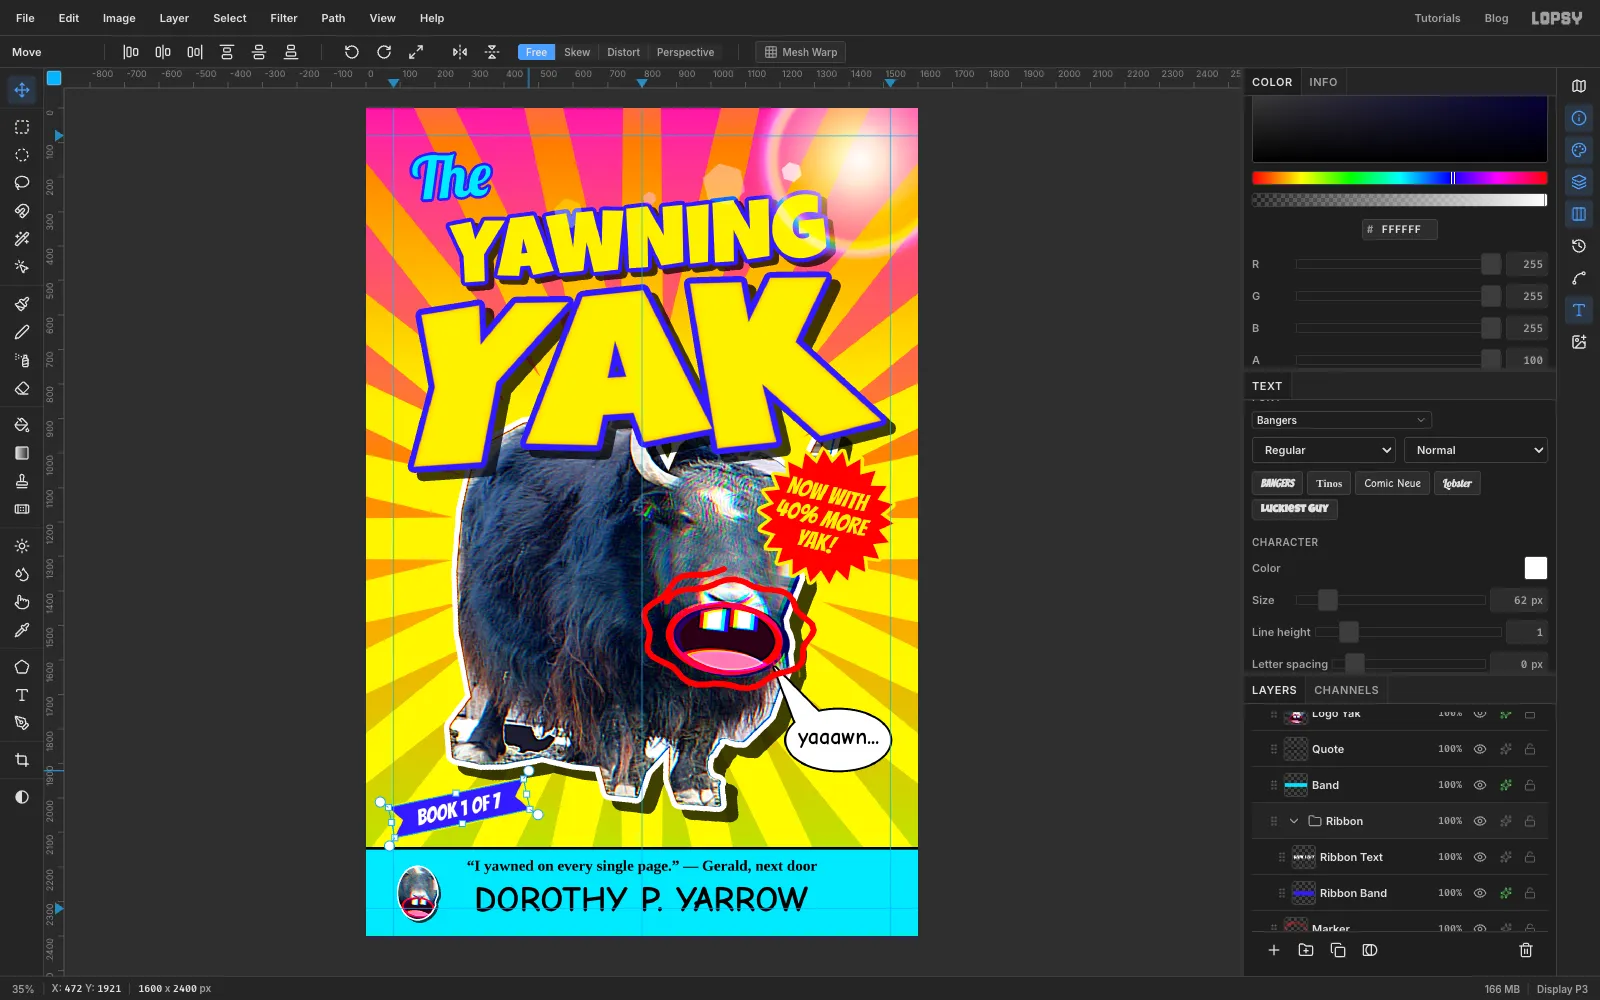
In this tutorial you'll make the cover of The Yawning Yak, a comic novel by an imaginary author, Dorothy P. Yarrow. The canvas is a 2:3 book cover, 1600 × 2400 px. The yak is a real photo, public-domain Bos grunniens – Syracuse Zoo from Wikimedia Commons. You'll cut it out badly, and paint a yawn onto it.
You'll use:
- guides, the Gradient tool (linear and radial, with stop opacity in the Gradient Editor) and Filter → Sunburst
- a dropped photo, the Lasso, the Magic Wand, Select → Inverse, Shrink, Grow and Feather, plus Cmd-click on a thumbnail to load a layer's shape
- the Elliptical and Rectangular Marquee with Shift to add and Shift+Option to intersect
- the Move tool's scale and rotate handles, Perspective mode, and rotating whole groups
- the filters Hue/Saturation, Unsharp Mask, Chromatic Aberration and Add Noise
- the layer effects Stroke, Drop Shadow and Inner Glow, and the Overlay and Screen blend modes
- the Pen tool with Path to Selection, the Brush, Copy and Paste, and Merge Down
- live text in Luckiest Guy, Lobster, Bangers, Comic Neue and Tinos
The palette:
-
Sunset
-
WordArt yellow
-
outline blue
-
Cyan
the word "The" and the author band
-
Lips
-
throat
-
tongue
-
Badge and marker red
-
Hole fill
-
grain grey
-
Set up the canvas and a stock-photo sunset
Choose File → New, keep the units on Pixels, and make the document 1600 wide and 2400 high. That's a standard 2:3 book cover.
Click the top ruler at 80, 800 and 1520 to drop three vertical guides: two margins and the centre line. Click the left ruler at 80 and 2320 for the top and bottom margins.
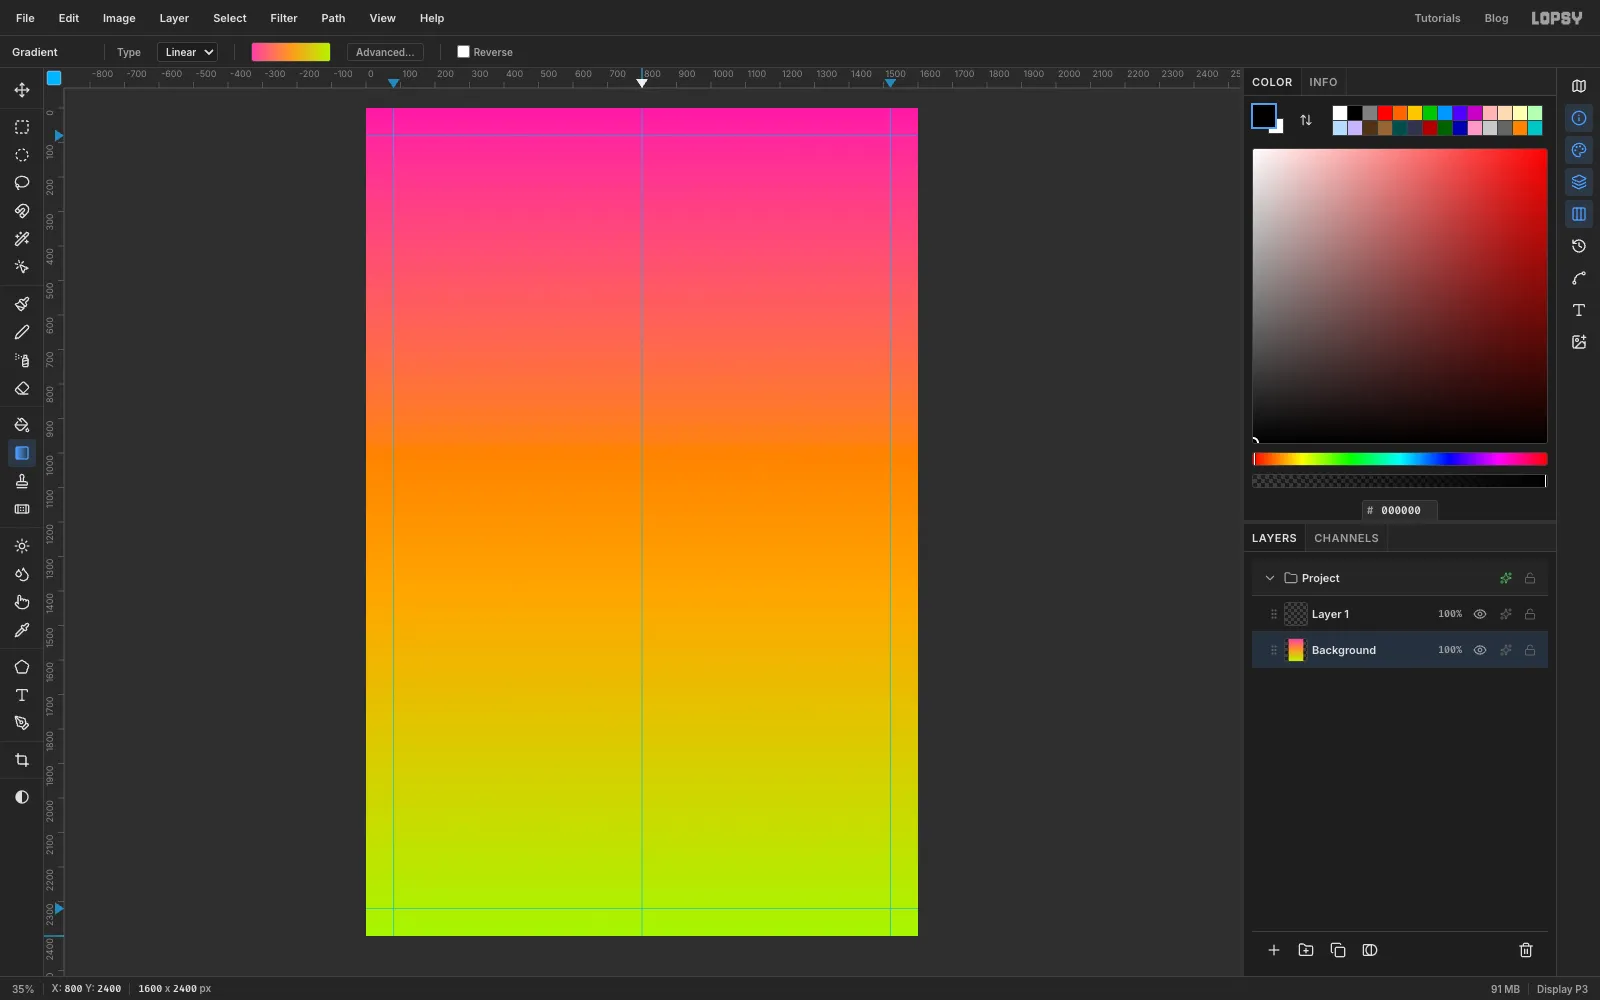
Click the Background layer. Pick the Gradient tool, set the type to Linear, and click Advanced… to open the Gradient Editor. Make the left stop , click the middle of the bar to add a stop and make it , then make the right stop . Click Done. Drag from the top edge of the canvas straight down to the bottom edge. Hold Cmd while you drag to snap the line to straight down.
-
Add clip-art glory rays
Click Add Layer and name the layer Glory Rays. Set the foreground colour to . Sunburst always paints in the foreground colour.
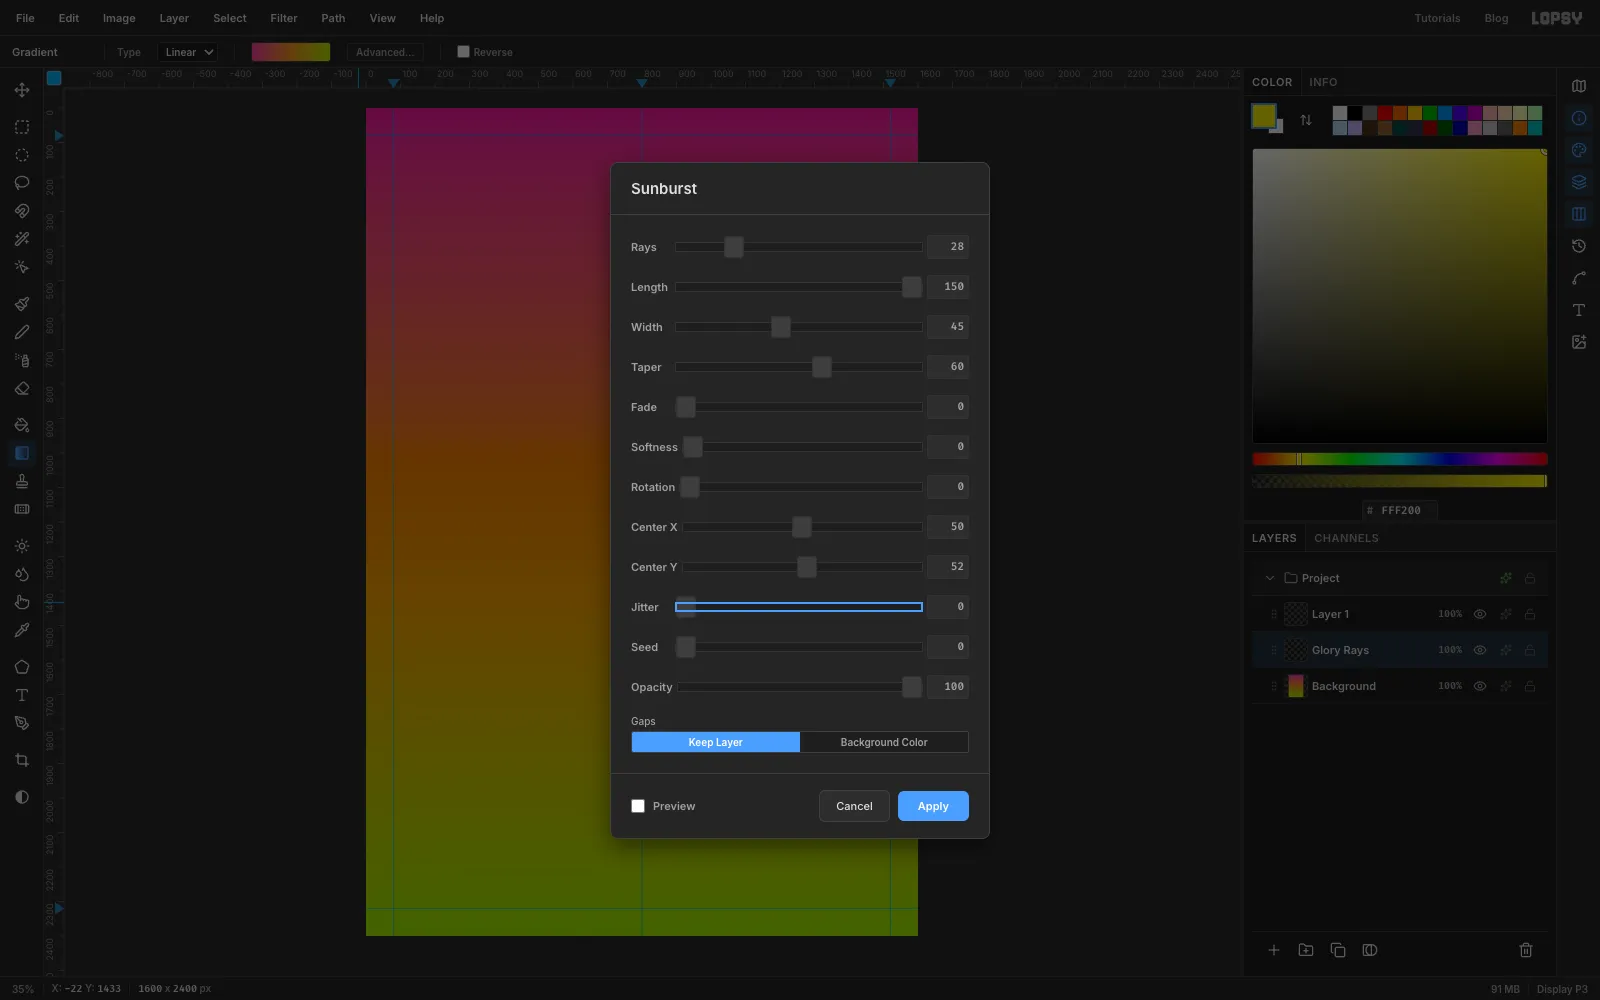
Choose Filter → Sunburst… and set Rays 28, Length 150, Width 45 and Taper 60. Leave Center X at 50 and set Center Y to 52, so the rays burst from just below the middle, behind where the yak will stand. Click Apply.
Open the layer's effects with the ✦ button on its row and set the blend mode to Overlay. The rays now brighten and saturate the gradient instead of covering it, like a cheap "glory" backdrop.
-
Bring in the yak photo
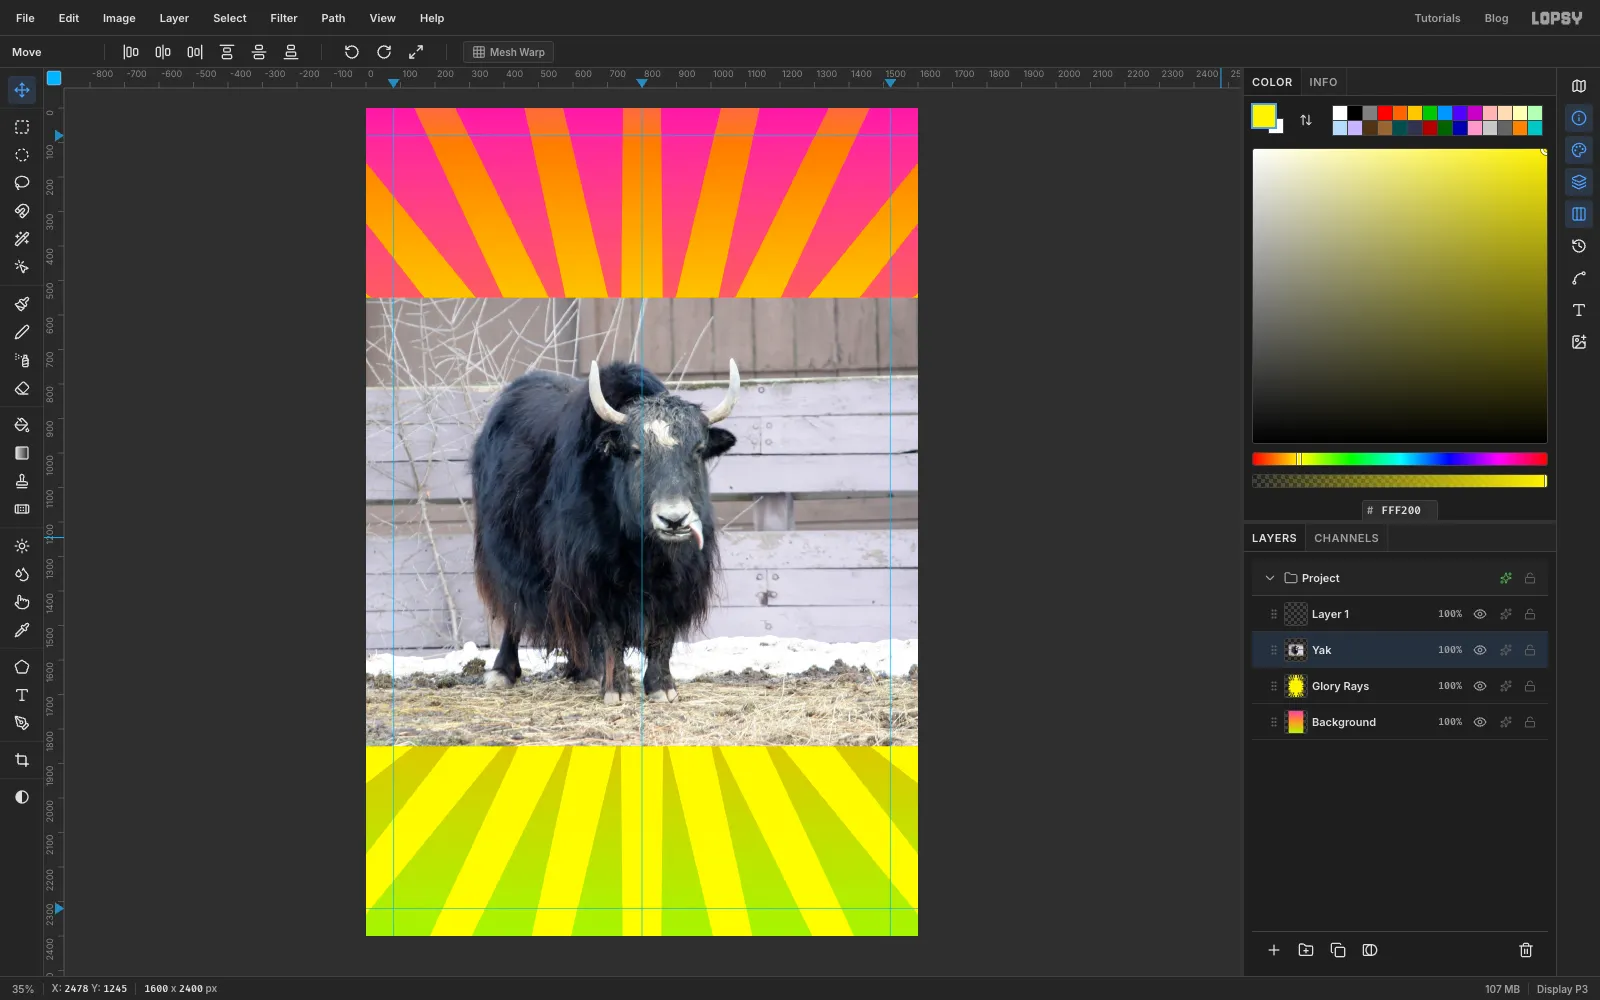
Drag the yak photo from your desktop onto the canvas. Lopsy shrinks a photo that's bigger than the document to fit inside it, and centres it. Double-click the new layer's name and call it Yak.
Any face-on animal photo works. A dark animal against a pale background, like this one, is the easiest to cut out.
-
Cut it out with a sloppy lasso
The cut-out should look like it was done in a hurry. A loose freehand line gives you the slightly wonky, chunky edge of a bad cut-out.
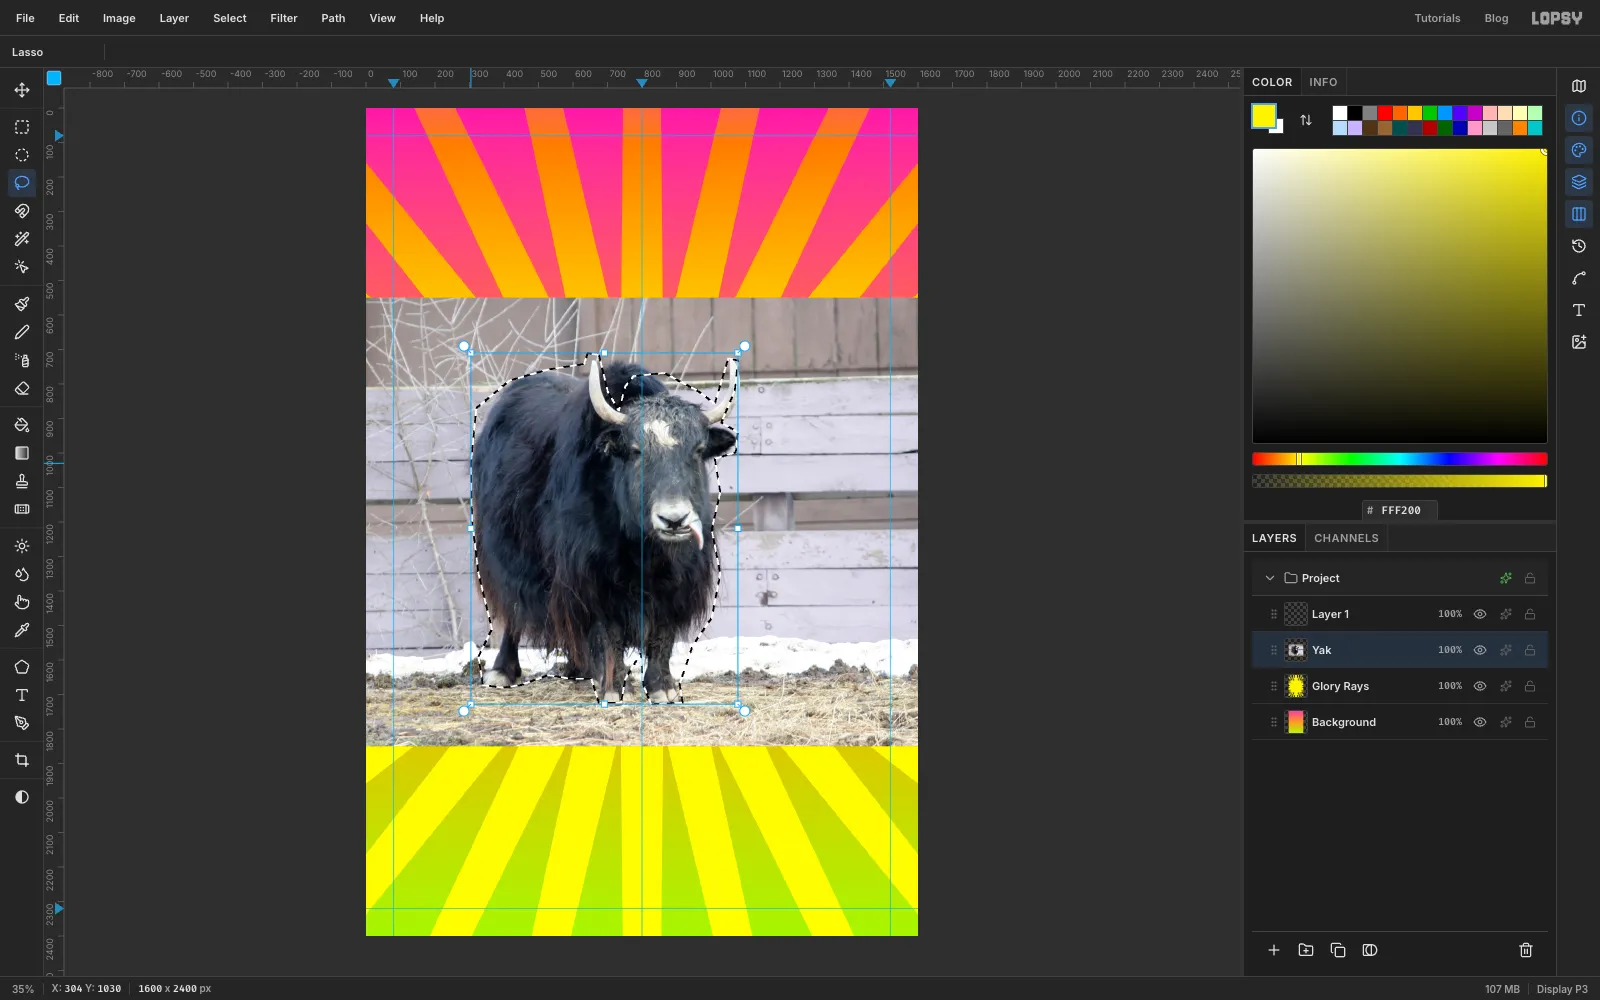
Pick the Lasso and drag one continuous line around the yak. Stay close to the outside of the horns, and to the inside edge of each horn where it meets the head. If you leave a big gap there, a grey sliver of wall gets stuck between horn and hair. Around the body and legs, be loose: cut straight across under the belly and leave a few bits of straw.
Choose Select → Inverse, press Delete, then Cmd+D to deselect. Only the yak is left, plus whatever wall, snow and straw the lasso caught.
-
Knock out the gaps between the legs
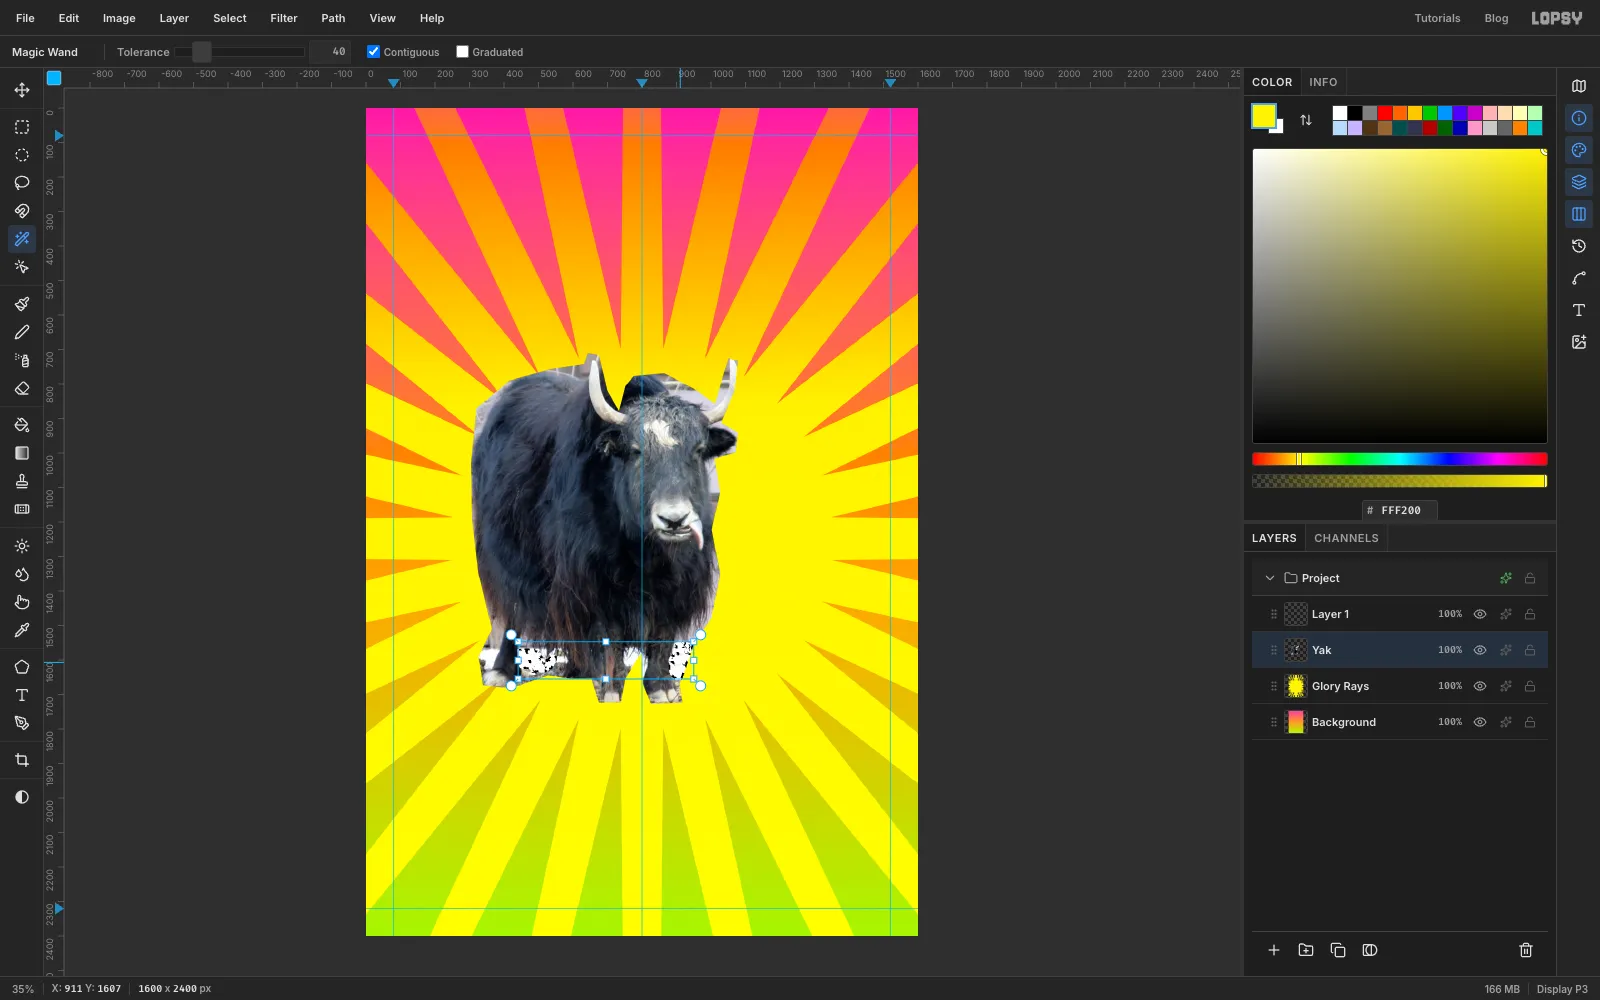
There's still pale snow and straw between the legs. Pick the Magic Wand, set Tolerance to 40, and leave Contiguous on. Click a patch of snow between the legs, then Shift-click each of the other pale patches to add them. The yak is nearly black, so the wand stops cleanly at the fur.
Press Delete and deselect. A few white flecks of snow by the hooves can stay. They add to the rushed look.
-
Sweep up the crumbs
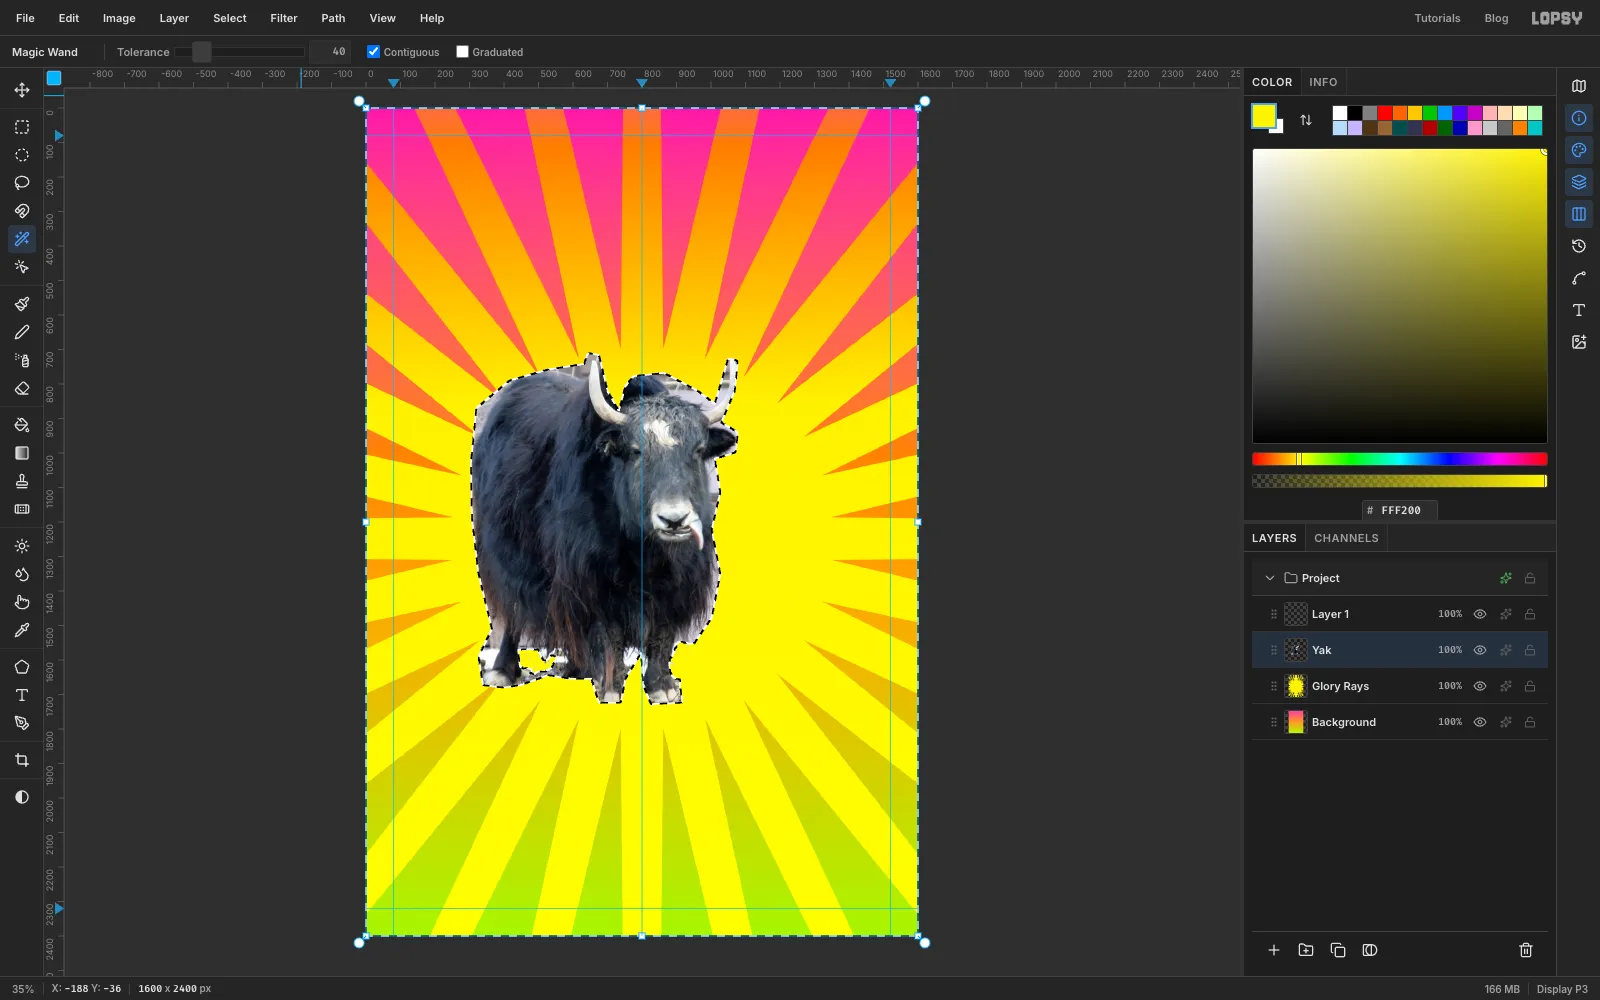
Deleting with the wand leaves tiny floating crumbs, and each one will grow its own white outline when you add the sticker effect later. You'll clean them up with a trick:
- Cmd-click the Yak thumbnail to select the layer's shape.
- Choose Select → Shrink…, type 6, and click Apply. Every crumb narrower than 12 px vanishes from the selection.
- Choose Select → Grow… with 6. The big shape grows back to its old outline, but the crumbs don't come back.
- Choose Select → Inverse and press Delete, then deselect.
-
Plug the holes in the body
Where the wand ate right through the fur, the yak now has small see-through holes. You'll fill them with a dark colour on a layer underneath.
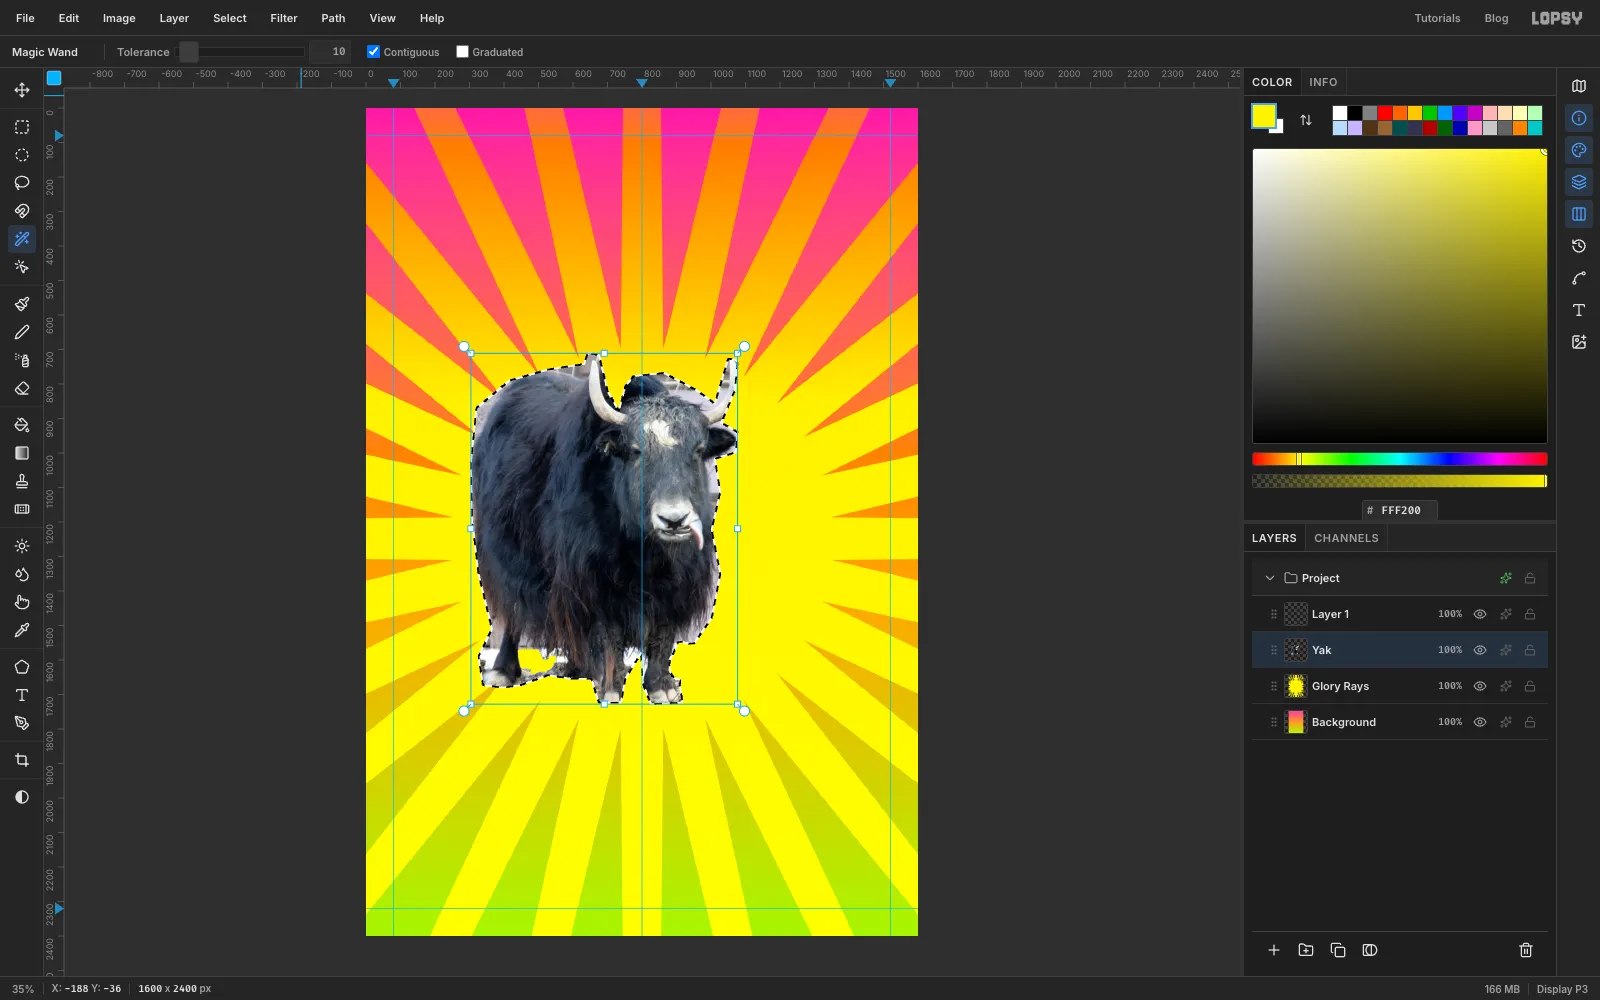
With the Magic Wand at Tolerance 10, click the empty area in a corner of the canvas. That selects everything outside the yak. Choose Select → Inverse: now the selection is the yak's outline with the holes filled in.
Click Glory Rays, click Add Layer, and name the new layer Underfill. It sits between the rays and the yak. Set the foreground to , choose Edit → Fill, and deselect. Click Yak, choose Layer → Merge Down, and rename the merged layer Yak. The holes now read as deep shadow between the legs.
-
Paint a yawning mouth: lips and throat
Time for the joke. You'll paint a cartoon mouth straight onto the photo, MS-Paint style. Keep Yak active.
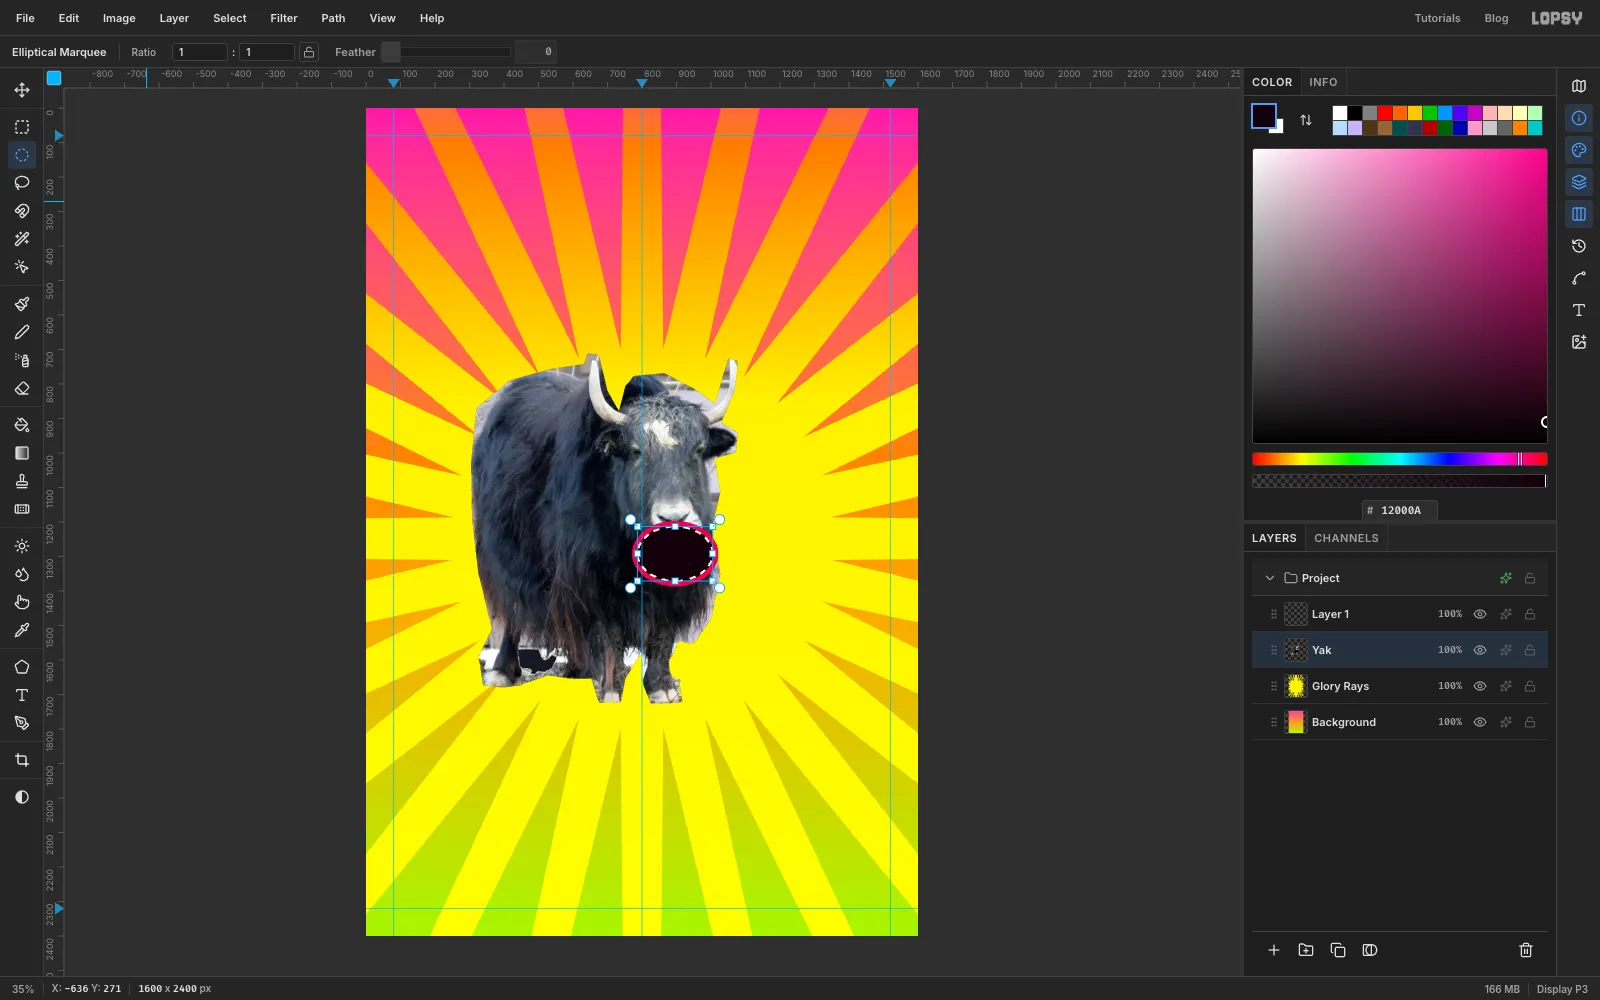
Pick the Elliptical Marquee and drag an oval about 250 px wide and 190 px tall over the bottom of the muzzle. Its top edge should sit just under the nostrils. Set the foreground to and choose Edit → Fill.
Choose Select → Shrink… with 16. Set the foreground to and fill again. That leaves a 16 px crimson lip around a near-black throat. Keep the selection.
-
Add the tongue
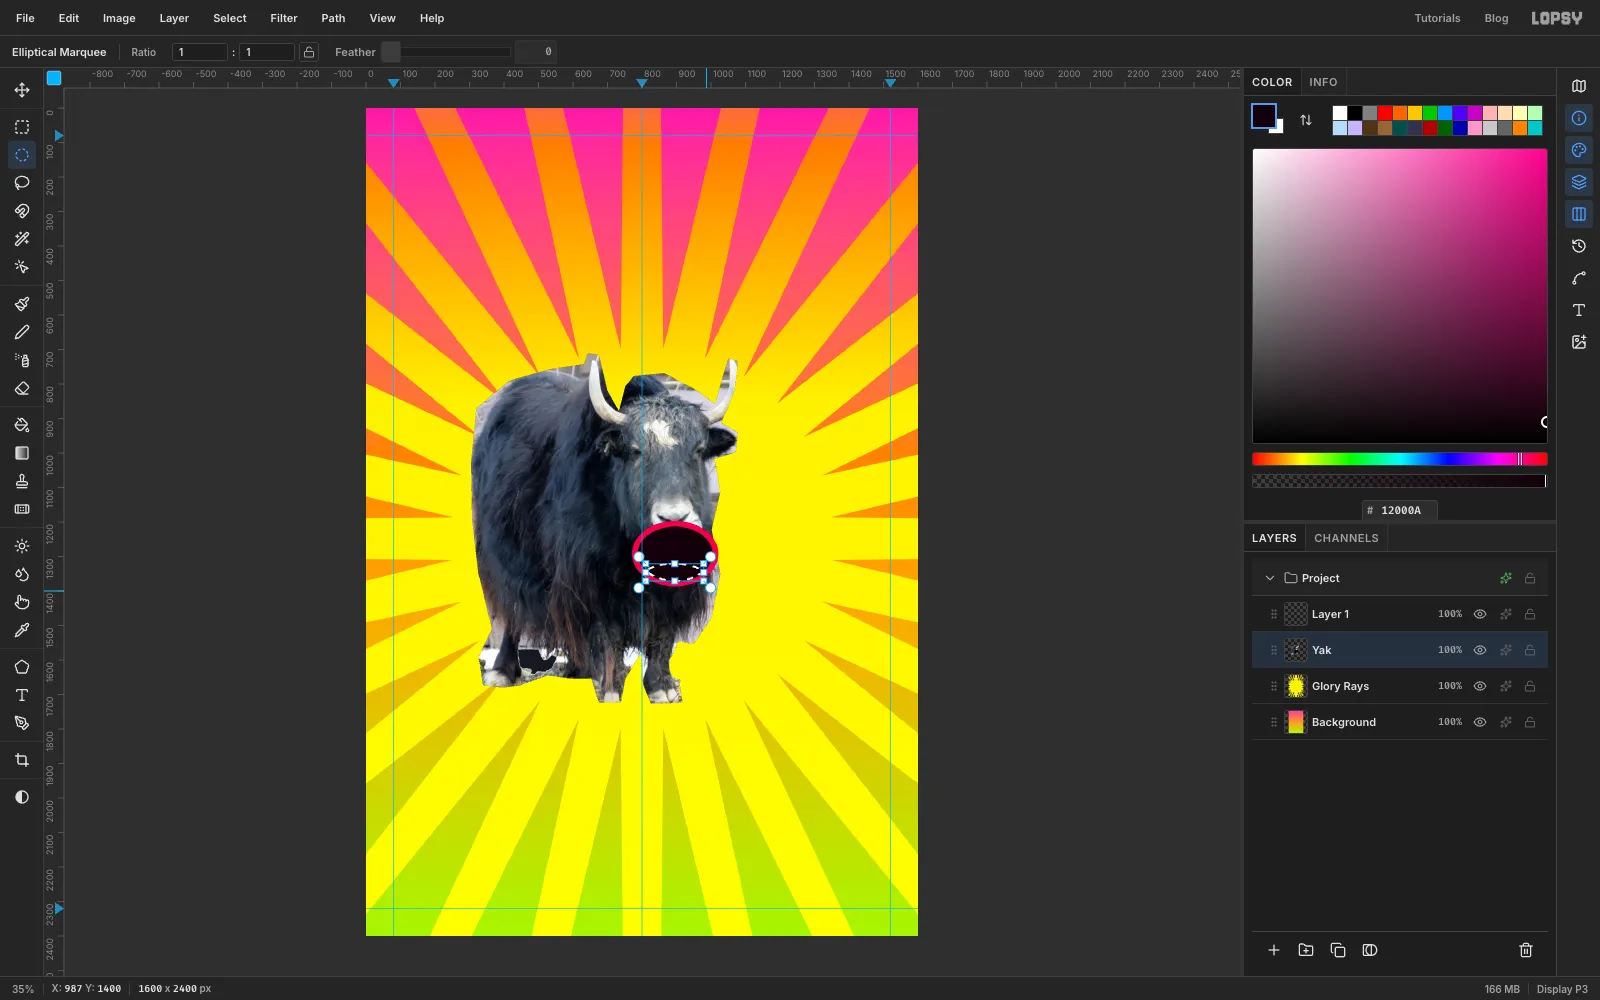
Hold Shift+Option and drag a second, wider-than-tall ellipse across the lower part of the mouth. It should start about halfway down the throat and run past the bottom edge. Shift+Option intersects the two shapes, so only the part inside the mouth stays selected.
Set the foreground to and fill. The tongue is clipped neatly to the mouth.
-
Hang two chunky teeth
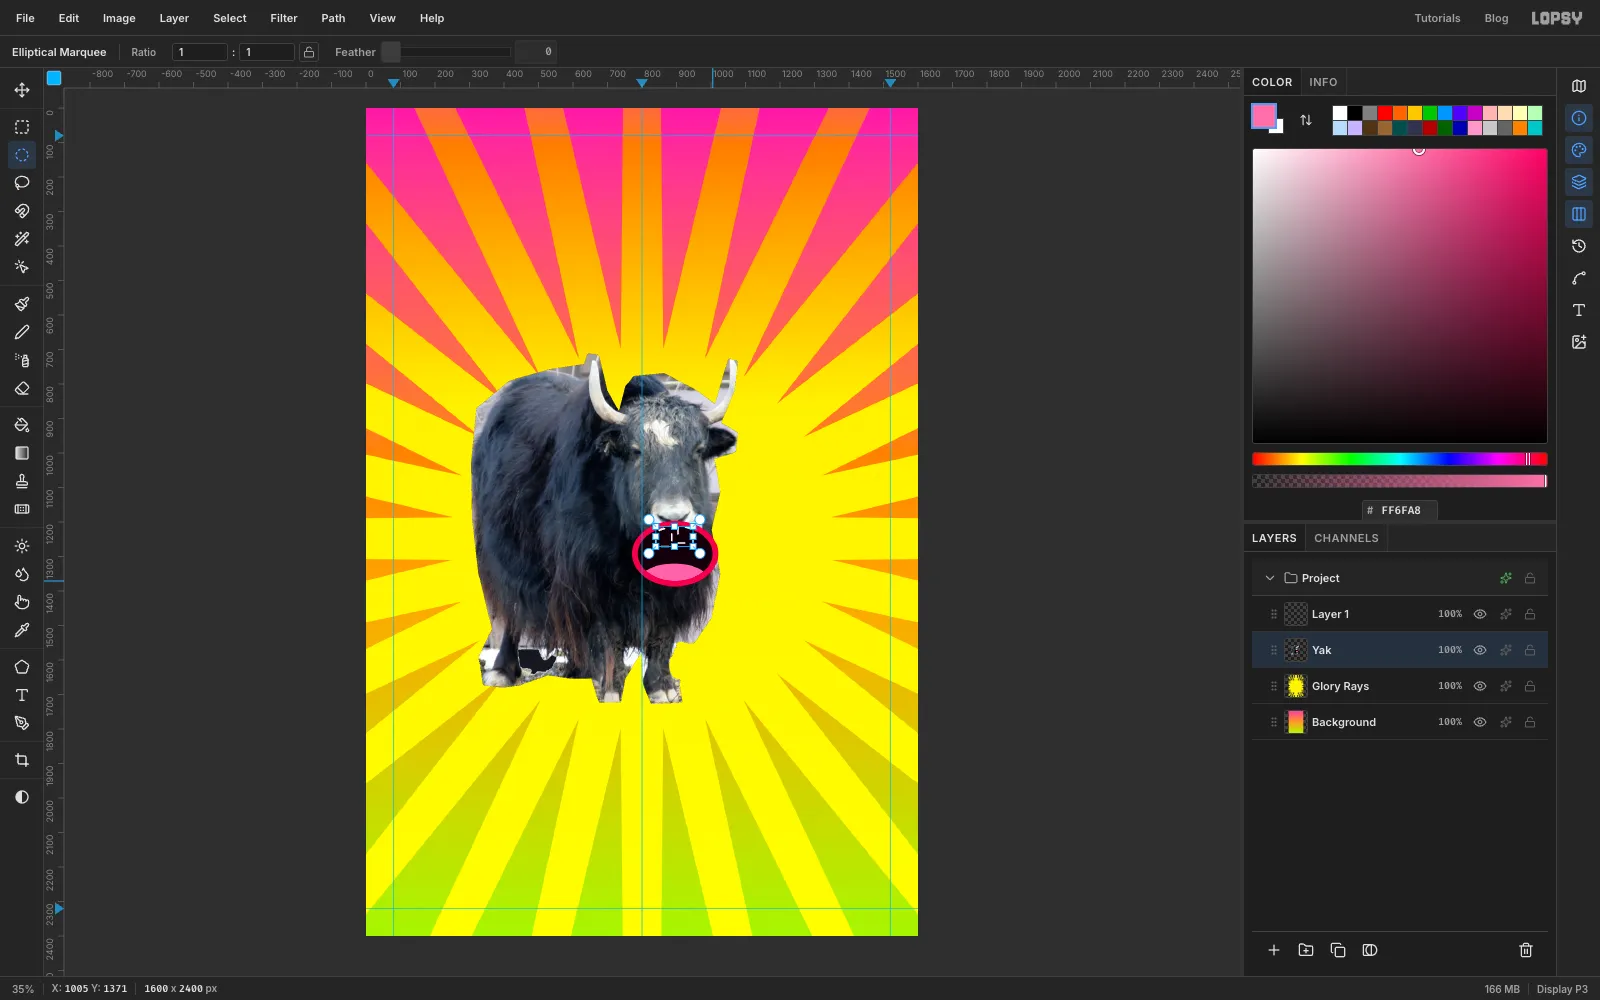
Pick the Rectangular Marquee. Drag a tall rectangle down from the top edge of the lip, just left of centre, about 45 px wide and 75 px tall. Hold Shift and drag a slightly shorter one just right of centre. Leave a small gap between them.
To trim the teeth to the inside of the mouth, pick the Elliptical Marquee, hold Shift+Option, and drag an oval about 16 px inside the lip. Set the foreground to white, fill, and deselect.
-
Stretch the yak (badly)
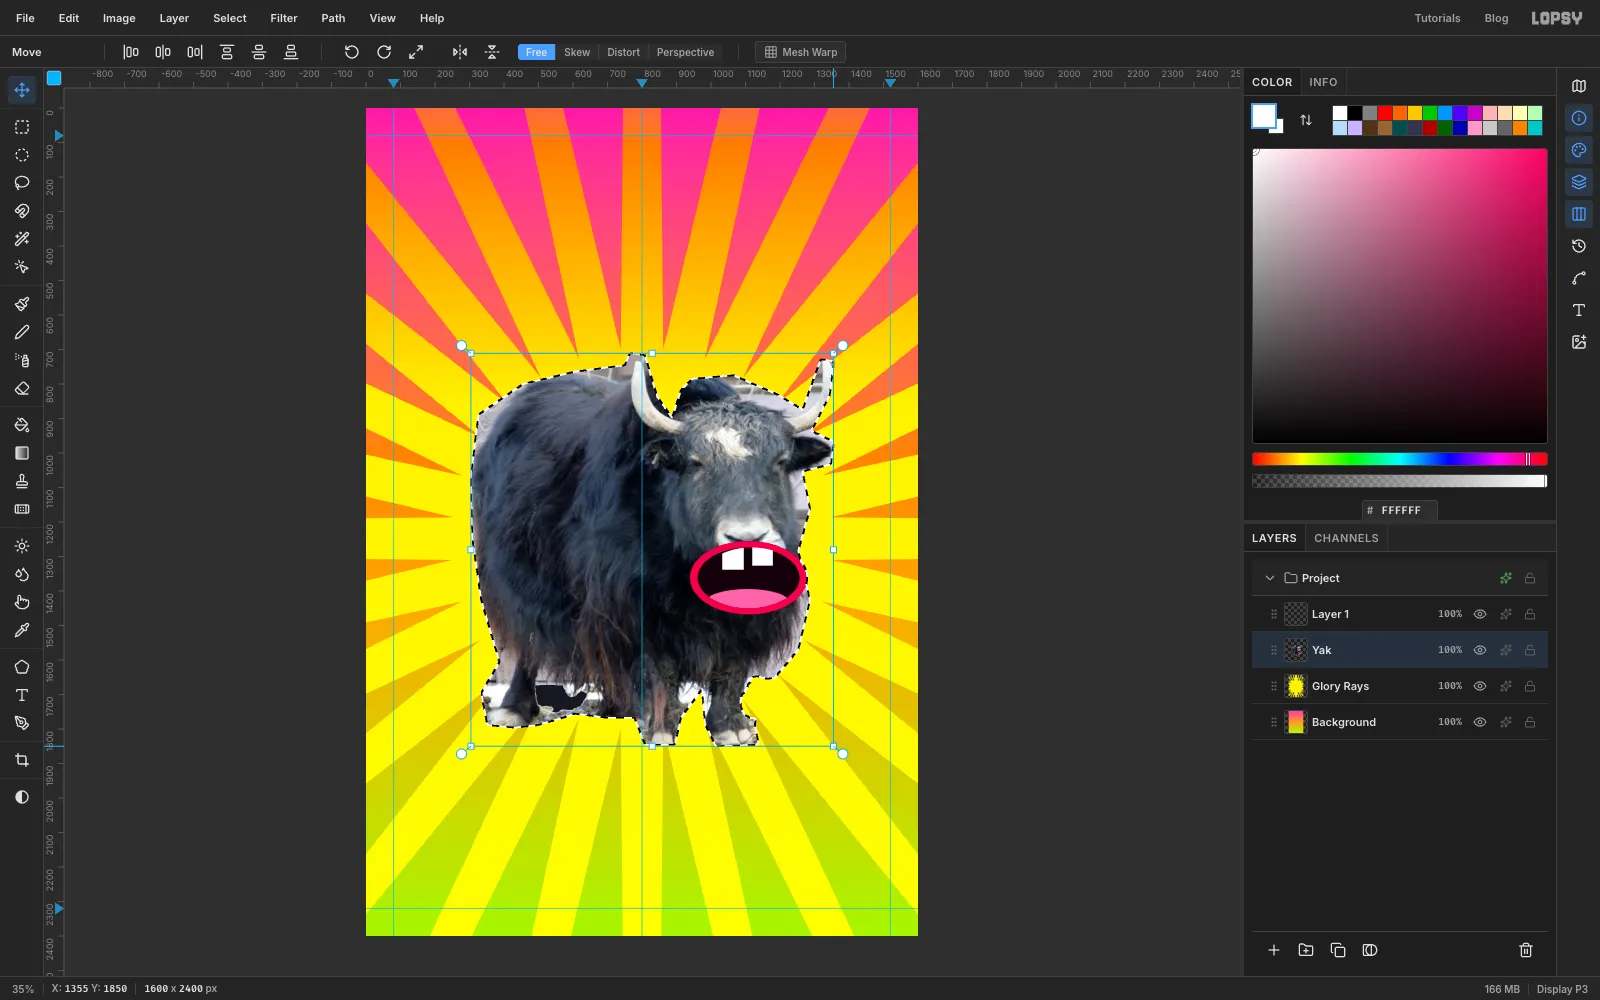
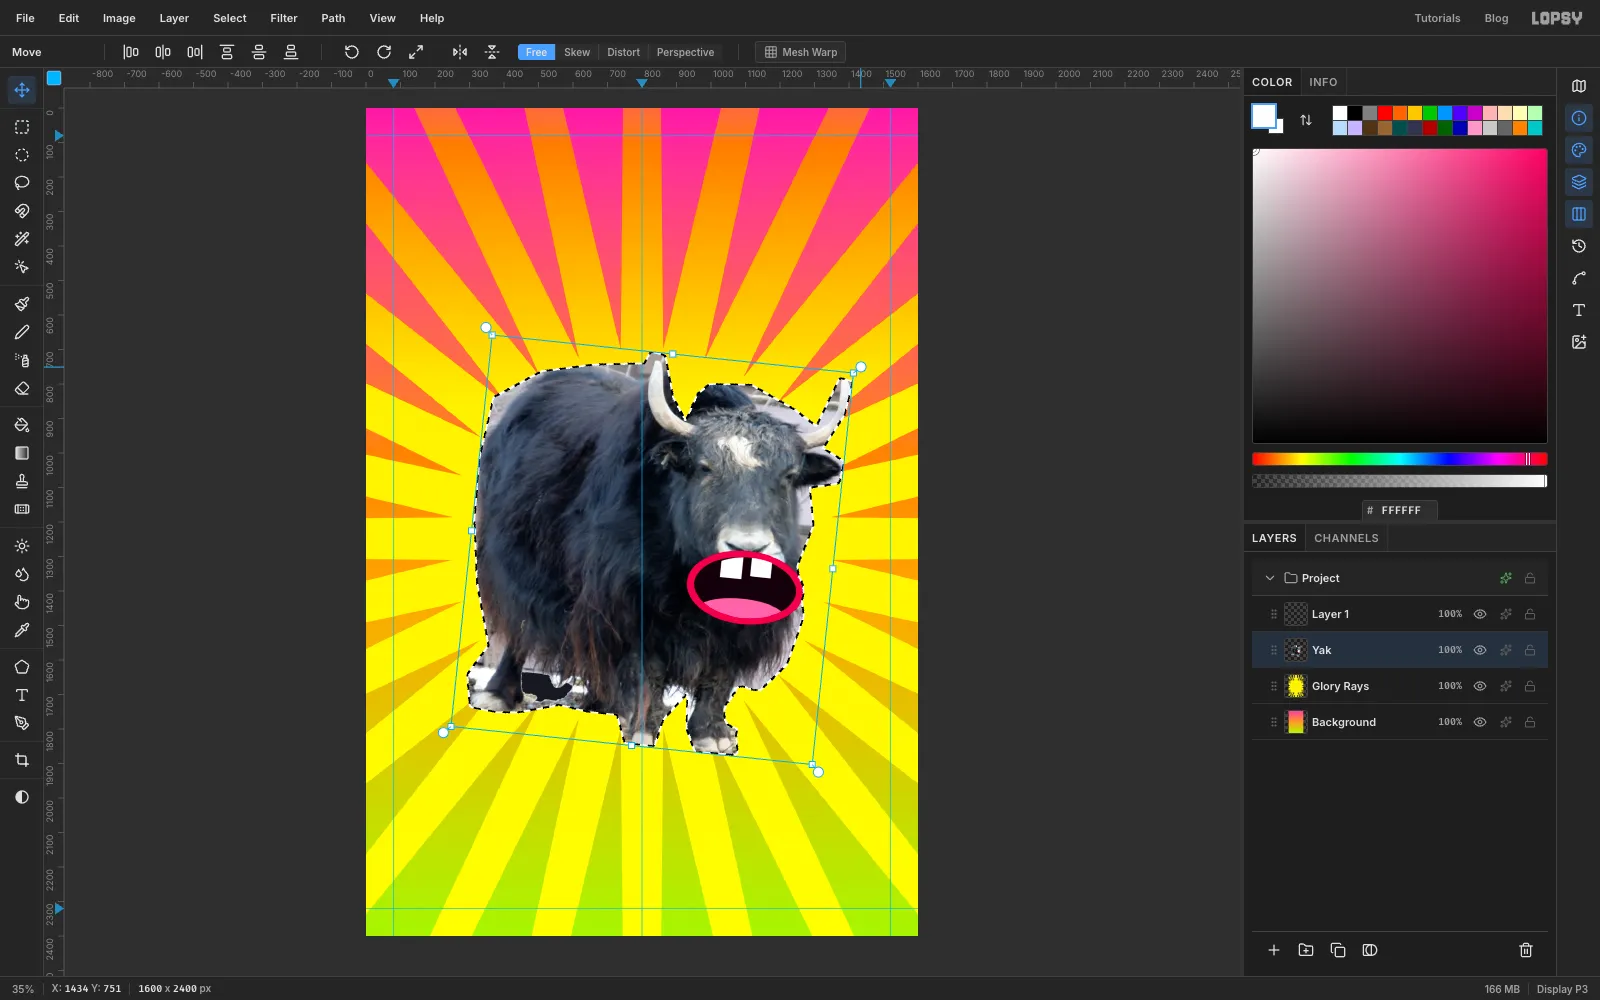
Nothing says "I don't know how to resize a photo" like a stretched one. Cmd-click the Yak thumbnail and switch to the Move tool so the transform handles appear.
Drag the bottom-right corner handle out without holding any keys. This scales the width and height separately. Make the yak about a third wider and about an eighth taller. Press Return to apply.
-
Tilt it
Cmd-click the thumbnail again. Move the pointer just outside the top-right corner until it turns into the rotate cursor, then drag down a little to turn the yak about 6° clockwise. Press Return and deselect.
Drag the yak so it stands in the middle of the cover, a little below centre. Its hooves should end around 2020 on the left ruler, about 300 px above the bottom margin, so they stay clear of the author band you'll add later.
-
Over-process it like a bad JPEG
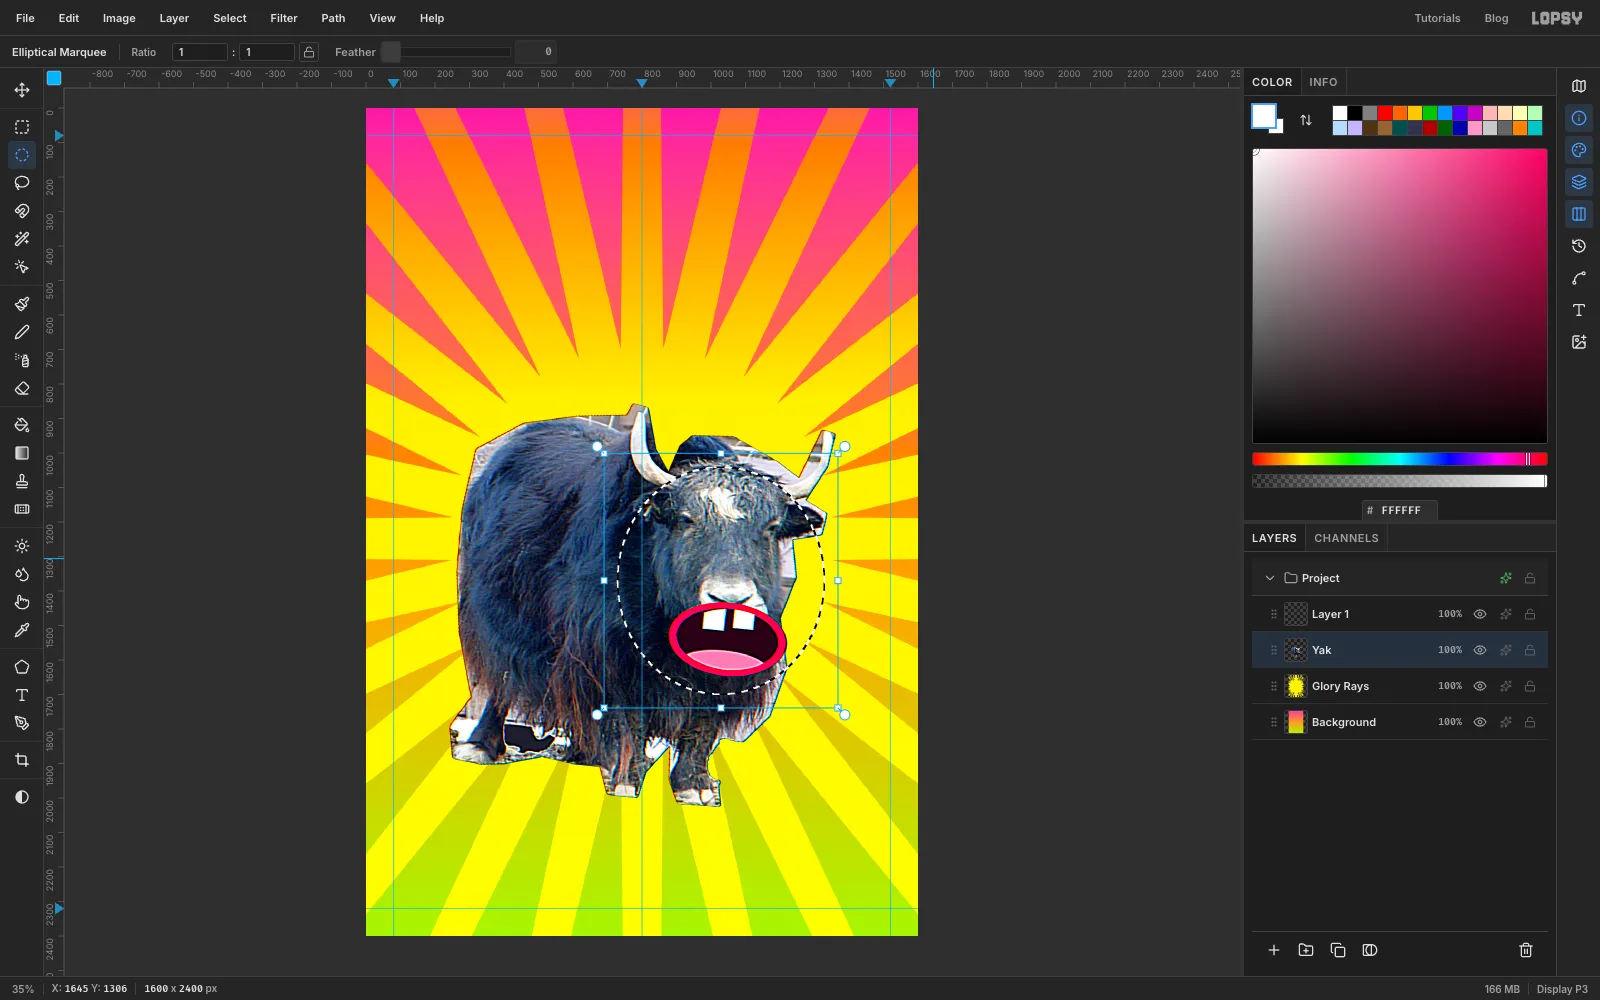
Stock photos on bad covers are always over-cooked. With Yak active and nothing selected:
- Filter → Hue/Saturation… with Saturation +60 and Lightness +4.
- Filter → Unsharp Mask… with Radius 5, Amount 1.6 and Threshold 0, which gives crunchy halos round the fur.
- Filter → Chromatic Aberration… with Amount 2 and Direction 20, which adds a faint red and blue fringe.
The face should look the most broken. Draw an Elliptical Marquee around the whole head, roughly 600 × 660 px, then choose Select → Feather… with 40. Run Chromatic Aberration again with Amount 9, so the fringing is strong on the face and fades off into the body. Deselect.
-
Make it a sticker with a hard shadow
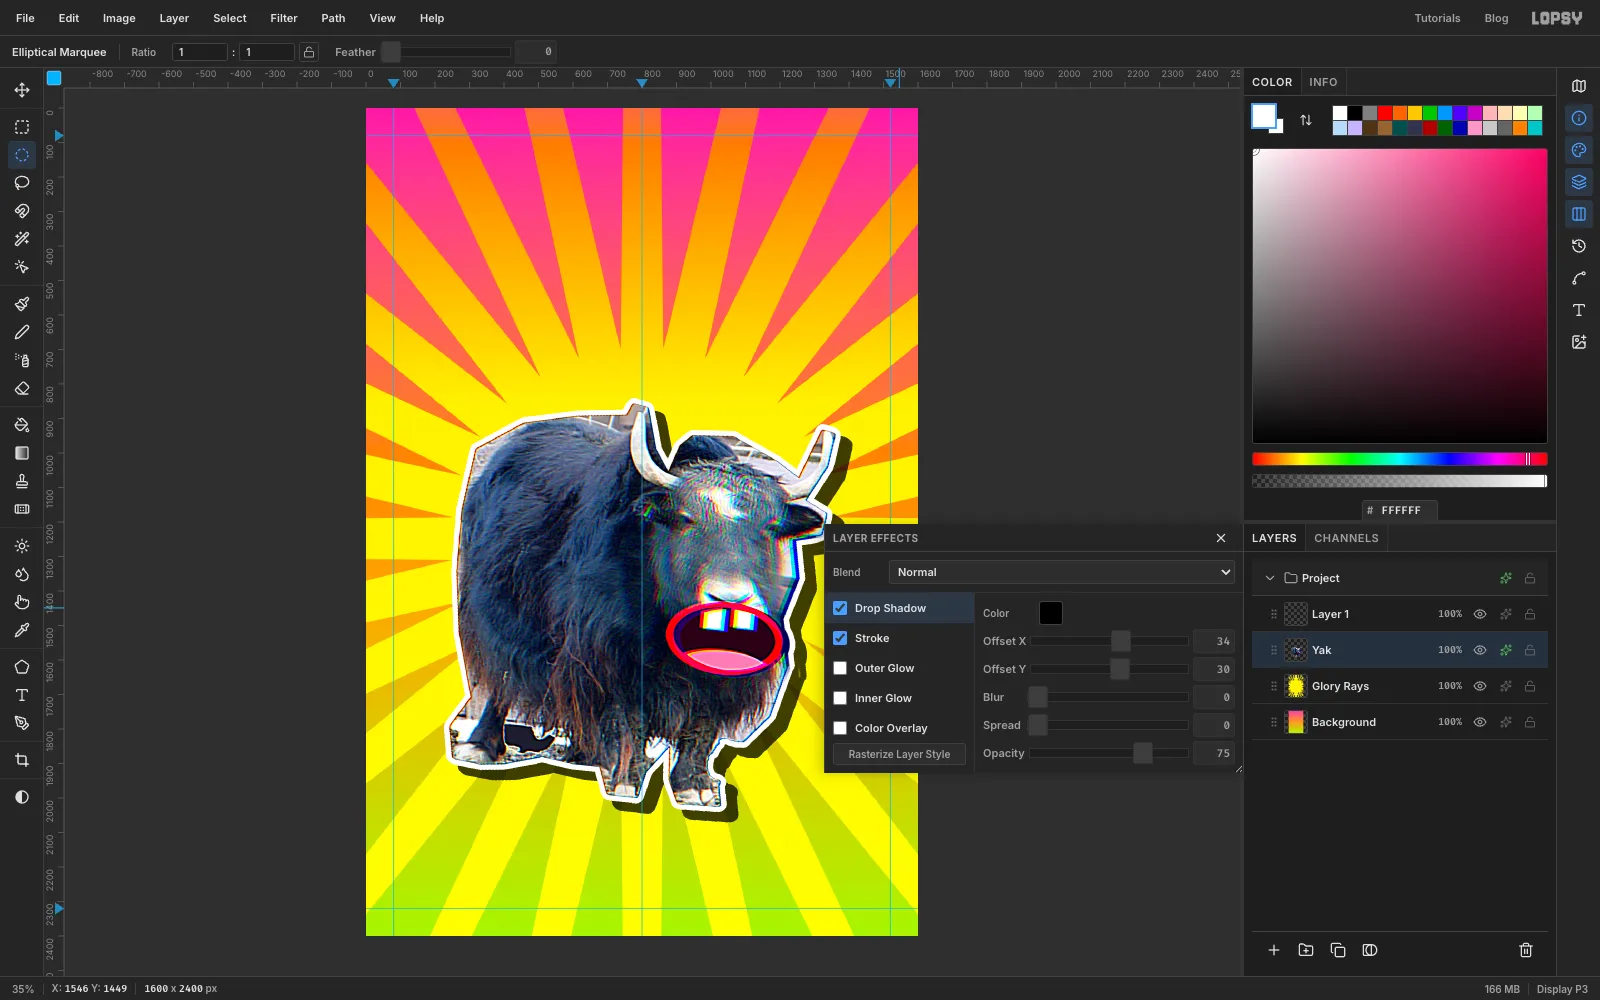
Open the yak's effects with ✦. Tick Stroke and set Width 16, the colour to white and the position to Outside. Tick Drop Shadow and set Offset X 34, Offset Y 30, Blur 0, Spread 0, Opacity 75 and the colour to black.
A zero-blur shadow is the classic "I found the drop shadow button" look. Close the drawer.
-
Type the title
Click Yak, click New Group, and name the group Title. Click Add Layer to put an empty layer inside it, and name it Title Base.
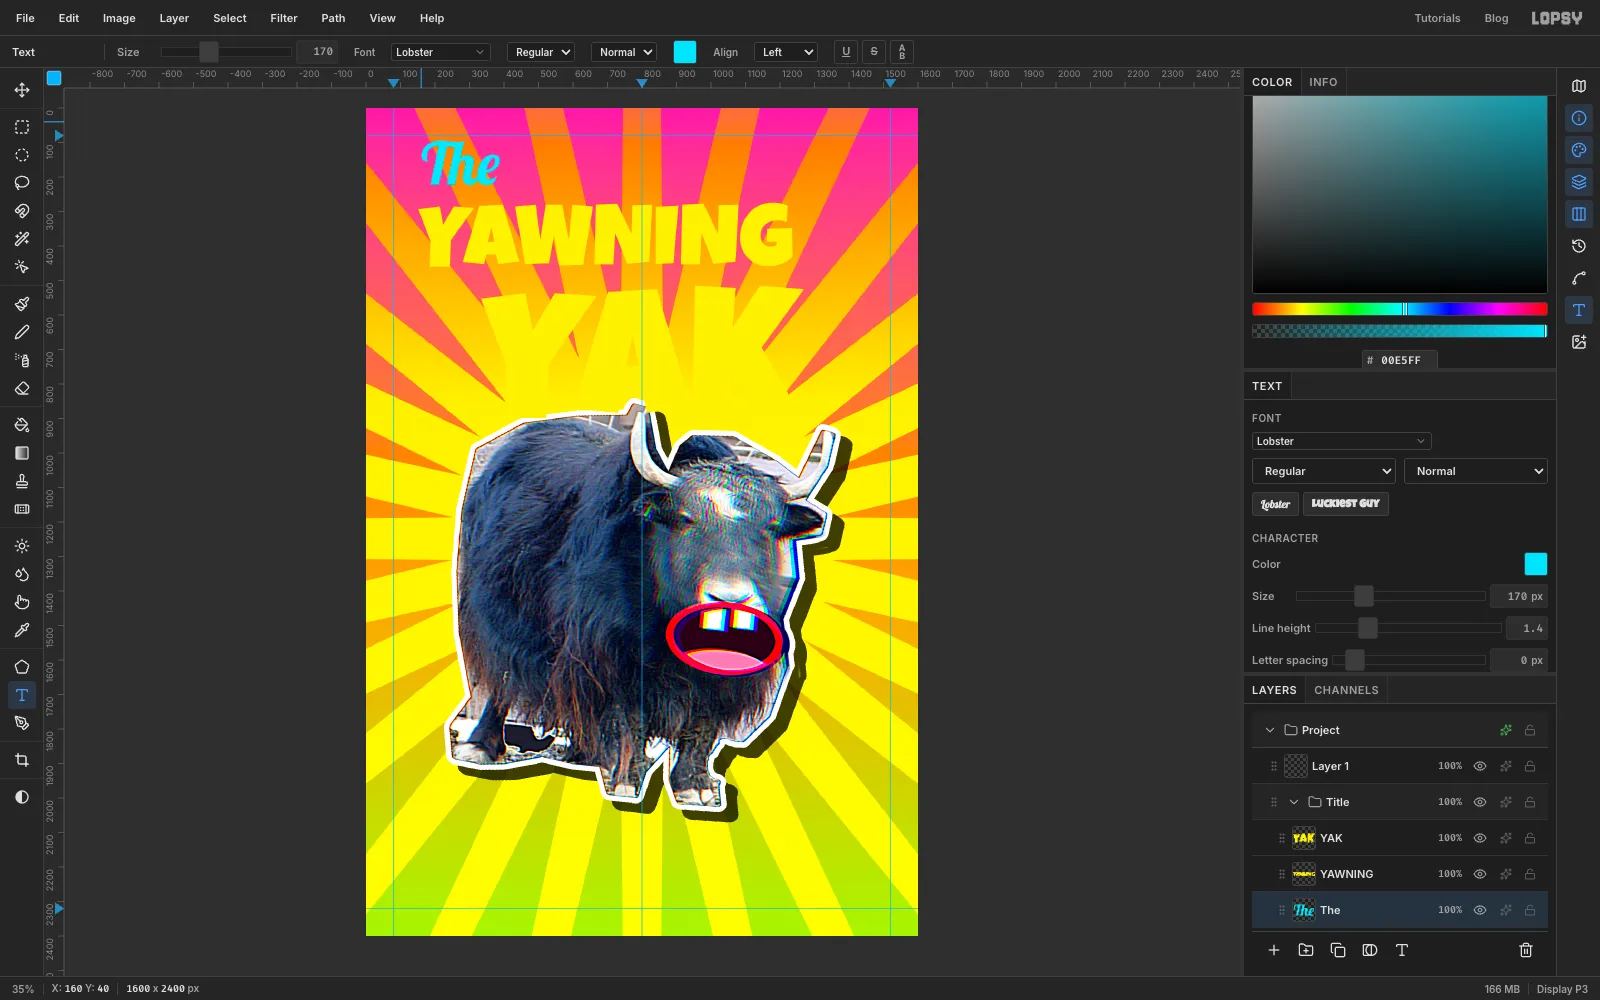
Pick the Text tool (T). With a text layer selected, the Text tool's options restyle that layer. So click Title Base before you start each line. Type the lines bottom-up, so a click never lands inside a line you've already set. Set Letter spacing to 0 for each one.
- YAK: Luckiest Guy, Size 520, . Click about a sixth of the way down the canvas and a fifth of the way in from the left, and type YAK. Press Tab to finish.
- YAWNING: Luckiest Guy, Size 250, . Click above the YAK line and type YAWNING.
- The: Lobster, Size 170, . Click near the top-left margin and type The.
Lobster is famously overused, which makes it perfect here. Lopsy names each text layer after its text, so these layers are already called YAK, YAWNING and The.
-
Warp YAK into WordArt
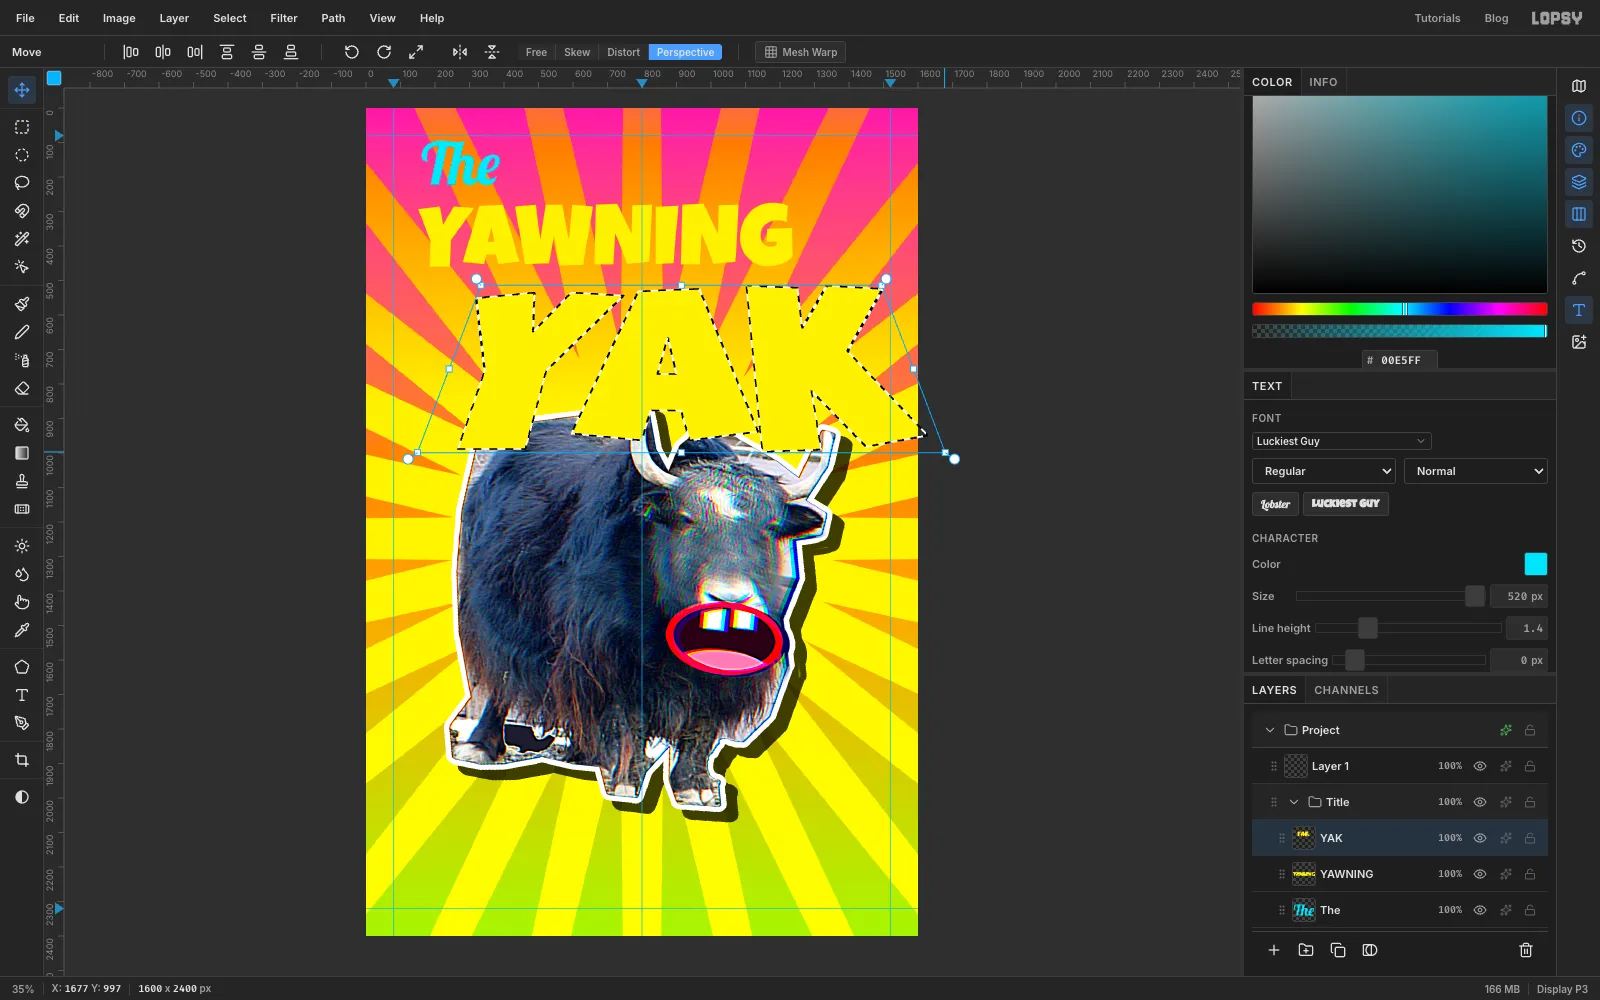
Click the YAK layer and press Rasterize Layer in the Layers panel, because perspective works on pixels.
Cmd-click the YAK thumbnail, switch to the Move tool, and Cmd-drag the bottom-right handle out until the word is about a quarter bigger. Cmd keeps the proportions. Press Return.
Cmd-click the thumbnail again and choose Perspective in the options bar. Drag the bottom-right corner about 185 px to the right. In Perspective mode the bottom-left corner moves out to match, so the word fans out towards the bottom like an old WordArt preset. Press Return, then click Free to switch the mode back.
Use the arrow keys (Shift+arrow moves 10 px) to centre YAK just left of the middle guide, with its top about 520 px down. Centre YAWNING over it the same way.
-
Outline, shadow and bevel
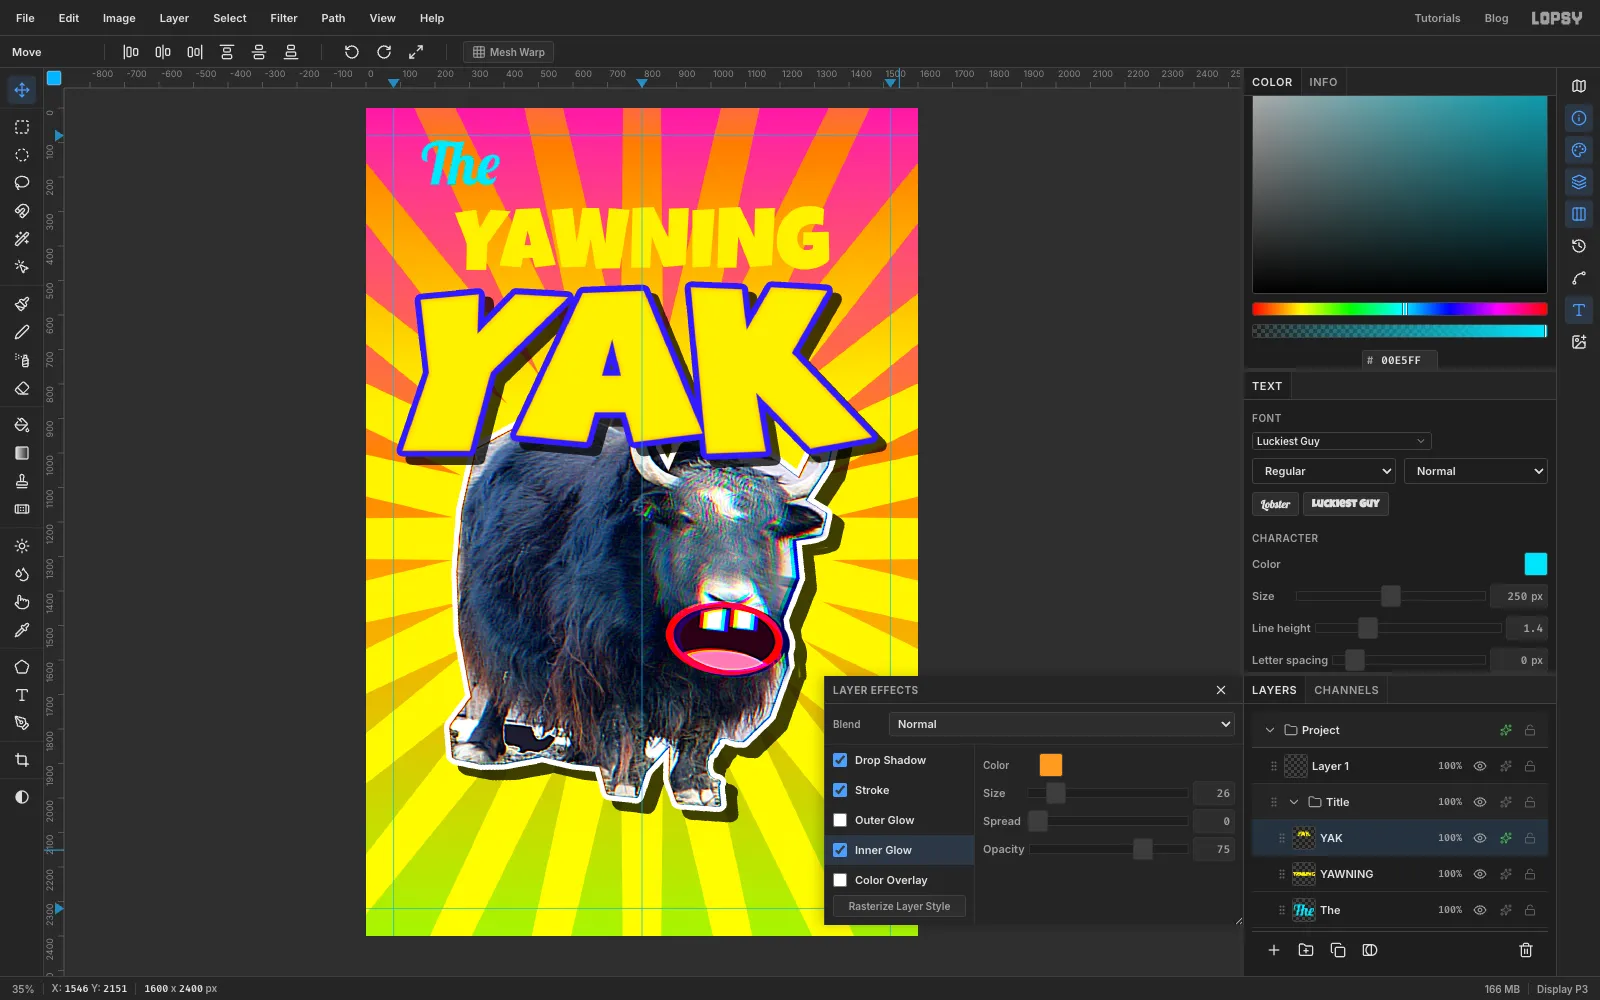
Open the effects for YAK and set:
- Stroke: Width 18, colour
- Drop Shadow: Offset X 26, Offset Y 24, Blur 0, Opacity 75, black
- Inner Glow: Size 26, colour . The orange glow along the inside edges fakes WordArt's cheap bevel.
Give YAWNING a Stroke of 12 in and a Drop Shadow of 16 / 14 with Blur 0. Give The a Stroke of 8 in the same blue.
-
Tilt the whole title at once
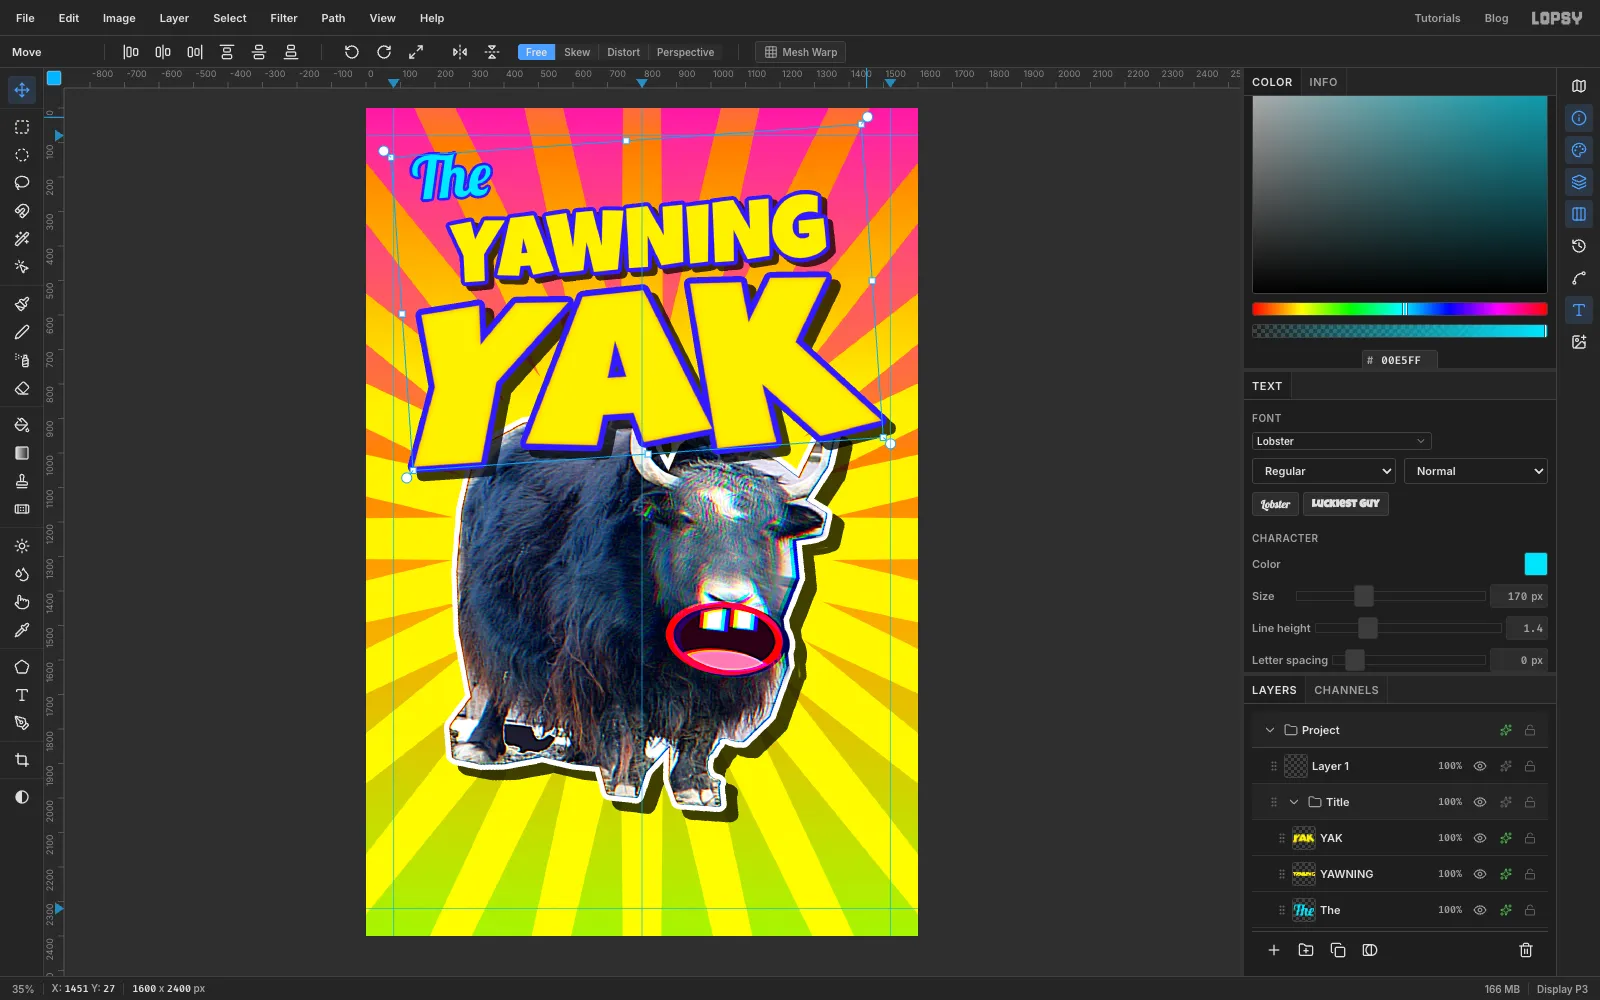
Click the Title group's row and make sure nothing is selected (Cmd+D). With the Move tool, one set of handles now frames all three words. Drag just outside the top-right corner to rotate the group about 4° counter-clockwise, so the title climbs to the right. Press Return.
-
Draw a starburst with the Pen
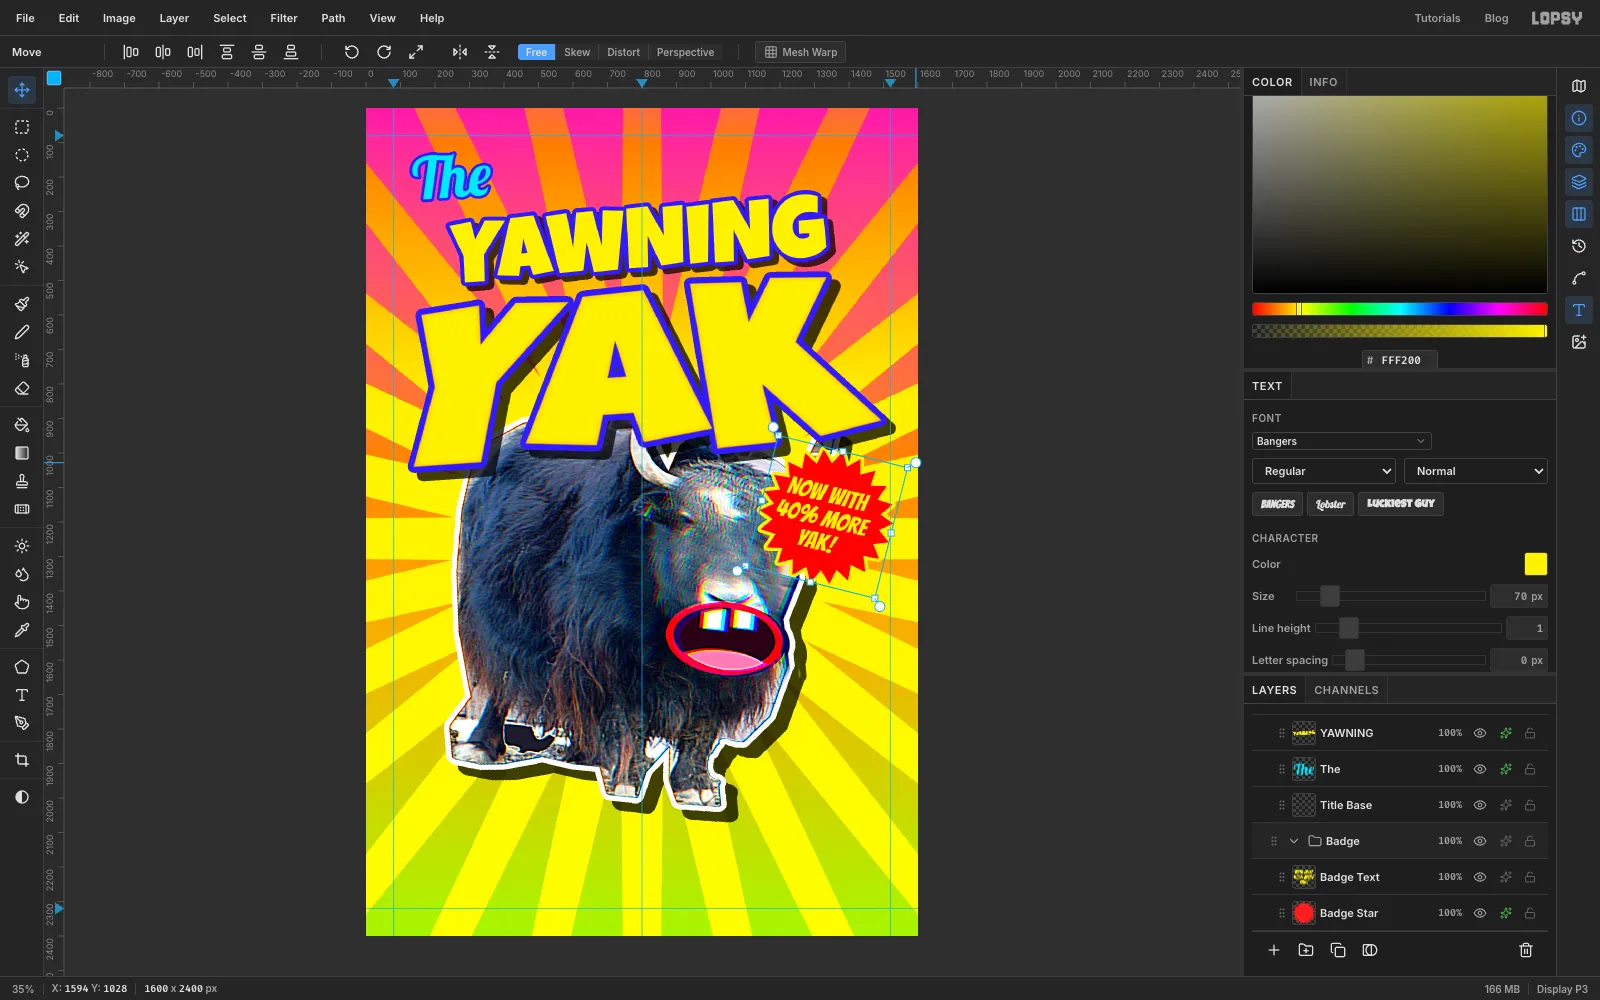
Click Yak, click New Group and name it Badge, then Add Layer named Badge Star.
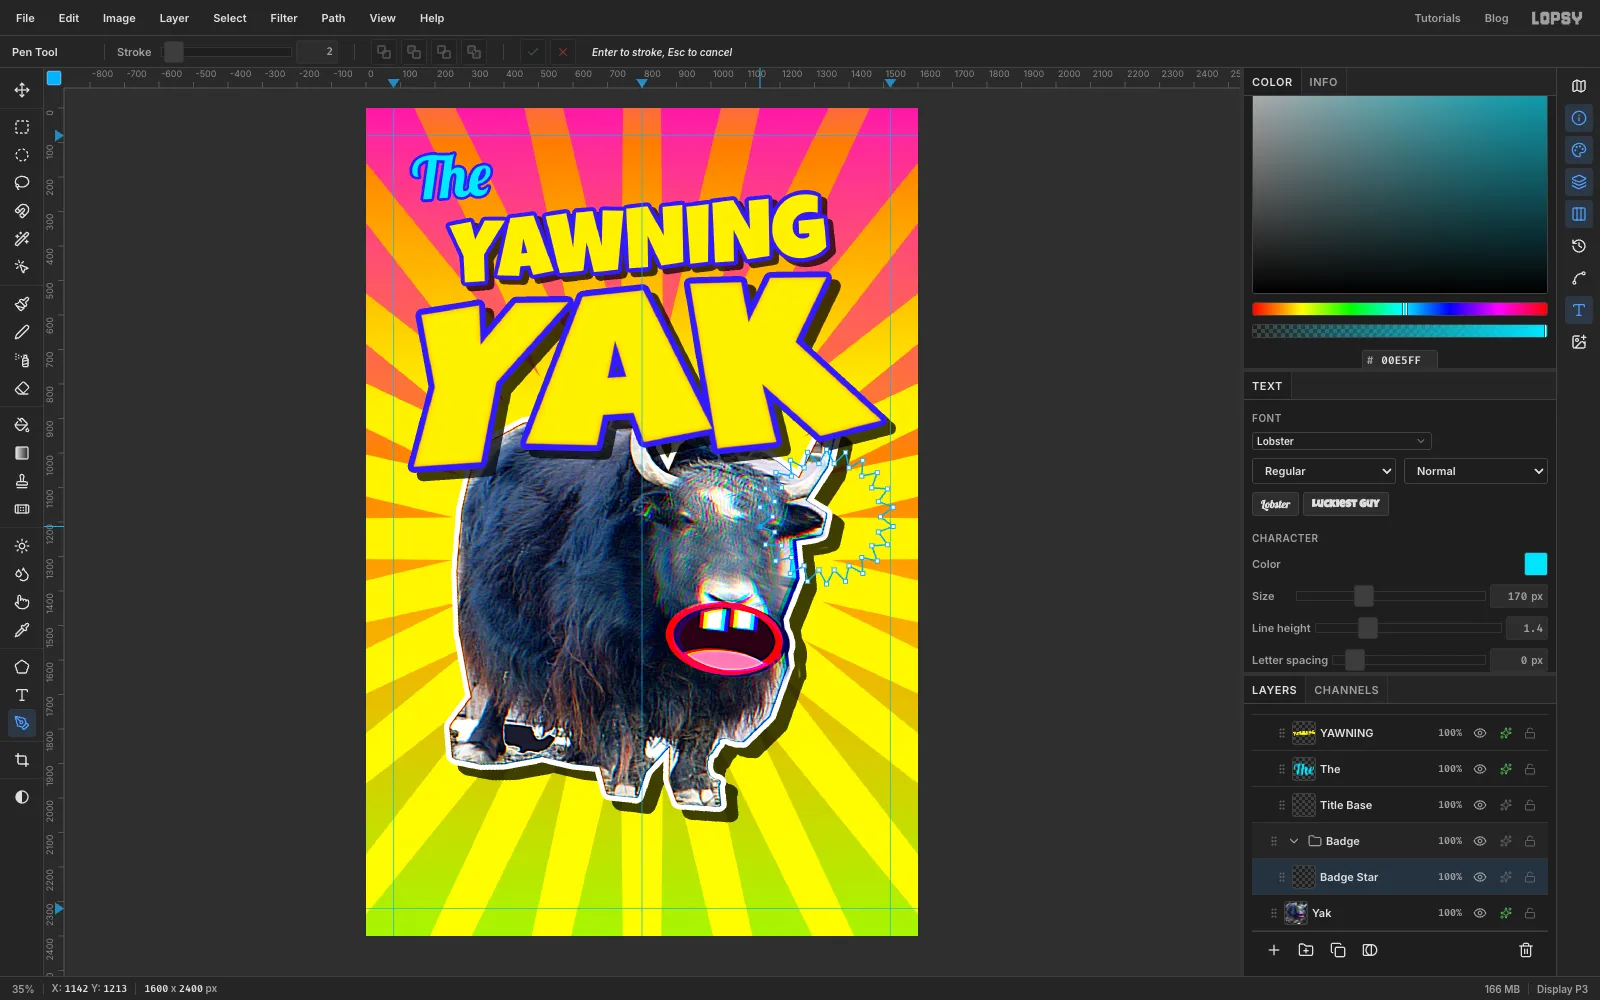
Lopsy's Shape tool has no star, so draw one with the Pen tool (P). The centre goes over the yak's right shoulder, about 265 px in from the right edge and halfway down the canvas. Click your way round that centre, alternating a spike tip and a valley. Put the tips roughly 195 px from the centre and the valleys roughly 40 px closer in, for about 20–22 spikes in all. Click the first point again to close the path.
Spikes that aren't perfectly even are fine: they look hand-made. Open the Paths panel from the strip of panel buttons on the right, then click Path to Selection and Delete Path. Fill the selection with , deselect, and give the layer a yellow Stroke of 10.
-
Add the badge copy and rotate the badge
Click Badge Star so the next text doesn't restyle anything. Pick the Text tool and choose Bangers at Size 70 in , and set Align to Center. With centre alignment, the point you click becomes the middle of each line.
Click at the top of the star's centre and type NOW WITH, press Return, type 40% MORE, Return, YAK!, then press Tab. Rename the layer Badge Text. In the Text panel, set Line height to 1 so the three lines pack together. Nudge the text with the arrow keys until it sits in the middle of the star, a few pixels left of centre so MORE doesn't crowd the right-hand spikes.
Click the Badge group, deselect, and rotate it about 14° clockwise with the Move tool, just like the title.
-
Add a speech bubble
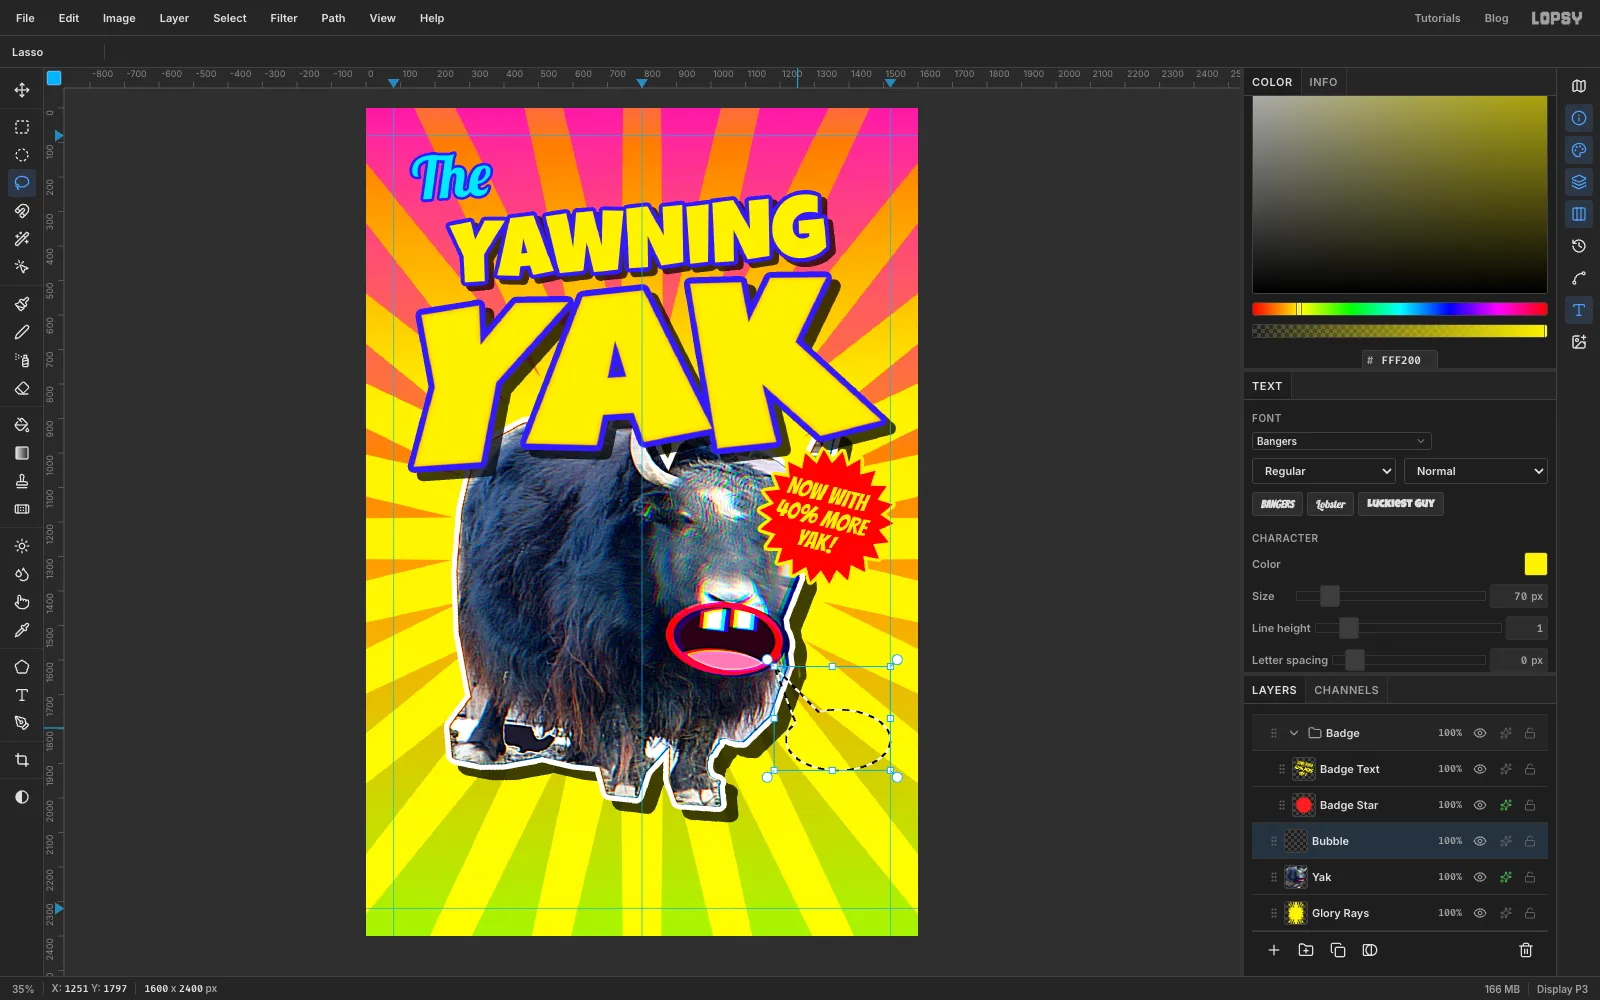
Click Yak and Add Layer named Bubble. Drag an Elliptical Marquee about 300 × 176 px below and to the right of the mouth, inside the right margin.
Pick the Lasso, hold Shift, and draw a narrow wedge. Start inside the bubble's upper-left edge, go up to the lower-right corner of the mouth, and come back into the bubble a little further along. Shift adds the wedge to the oval. Fill with white, deselect, and add a black Stroke of 6.
Click Bubble. Pick the Text tool and set Comic Neue, Bold, Size 64, black, still centre-aligned. Click in the middle of the bubble, type yaaawn... and press Tab. Rename the layer Bubble Text and nudge it until it's centred.
-
Circle the joke with a marker
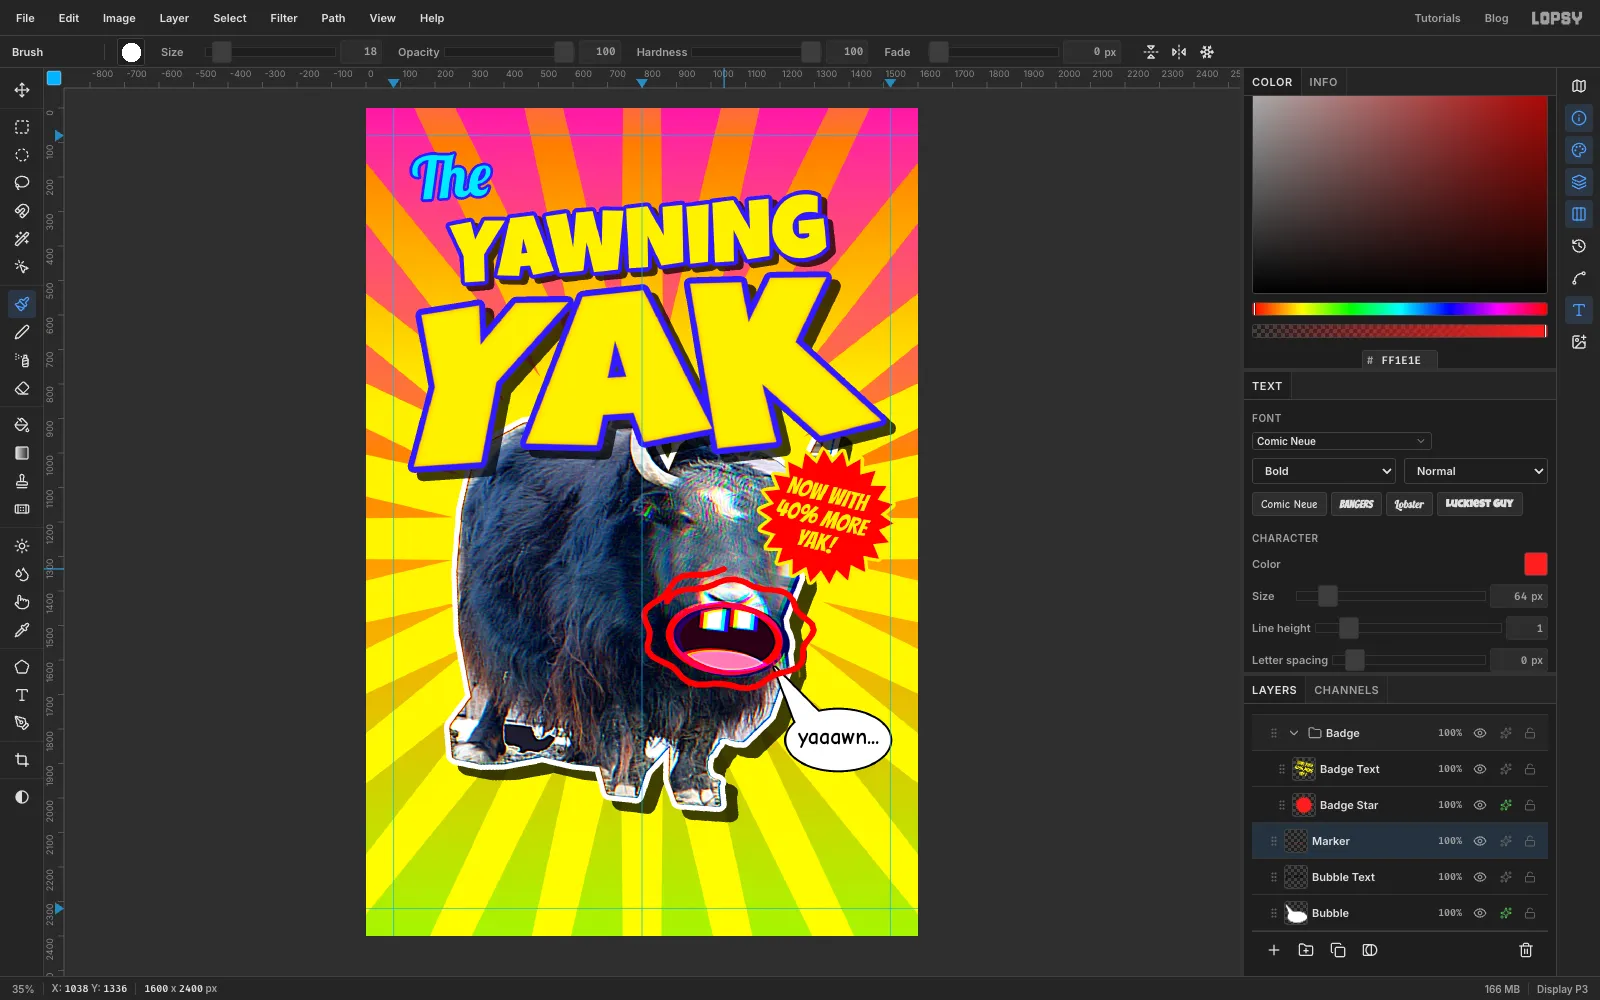
Click Bubble Text and Add Layer named Marker. Pick the Brush at Size 18 and Hardness 100, and set the foreground to .
Draw one quick, wobbly loop around the mouth, about 70 px outside the lips. Go round about one and a quarter times, so the end overshoots the start like a real annotation. Don't try to make it neat.
-
Fake a lens flare
Click Layer 1, the empty layer that came with the new document at the top of the stack, and rename it Lens Flare.
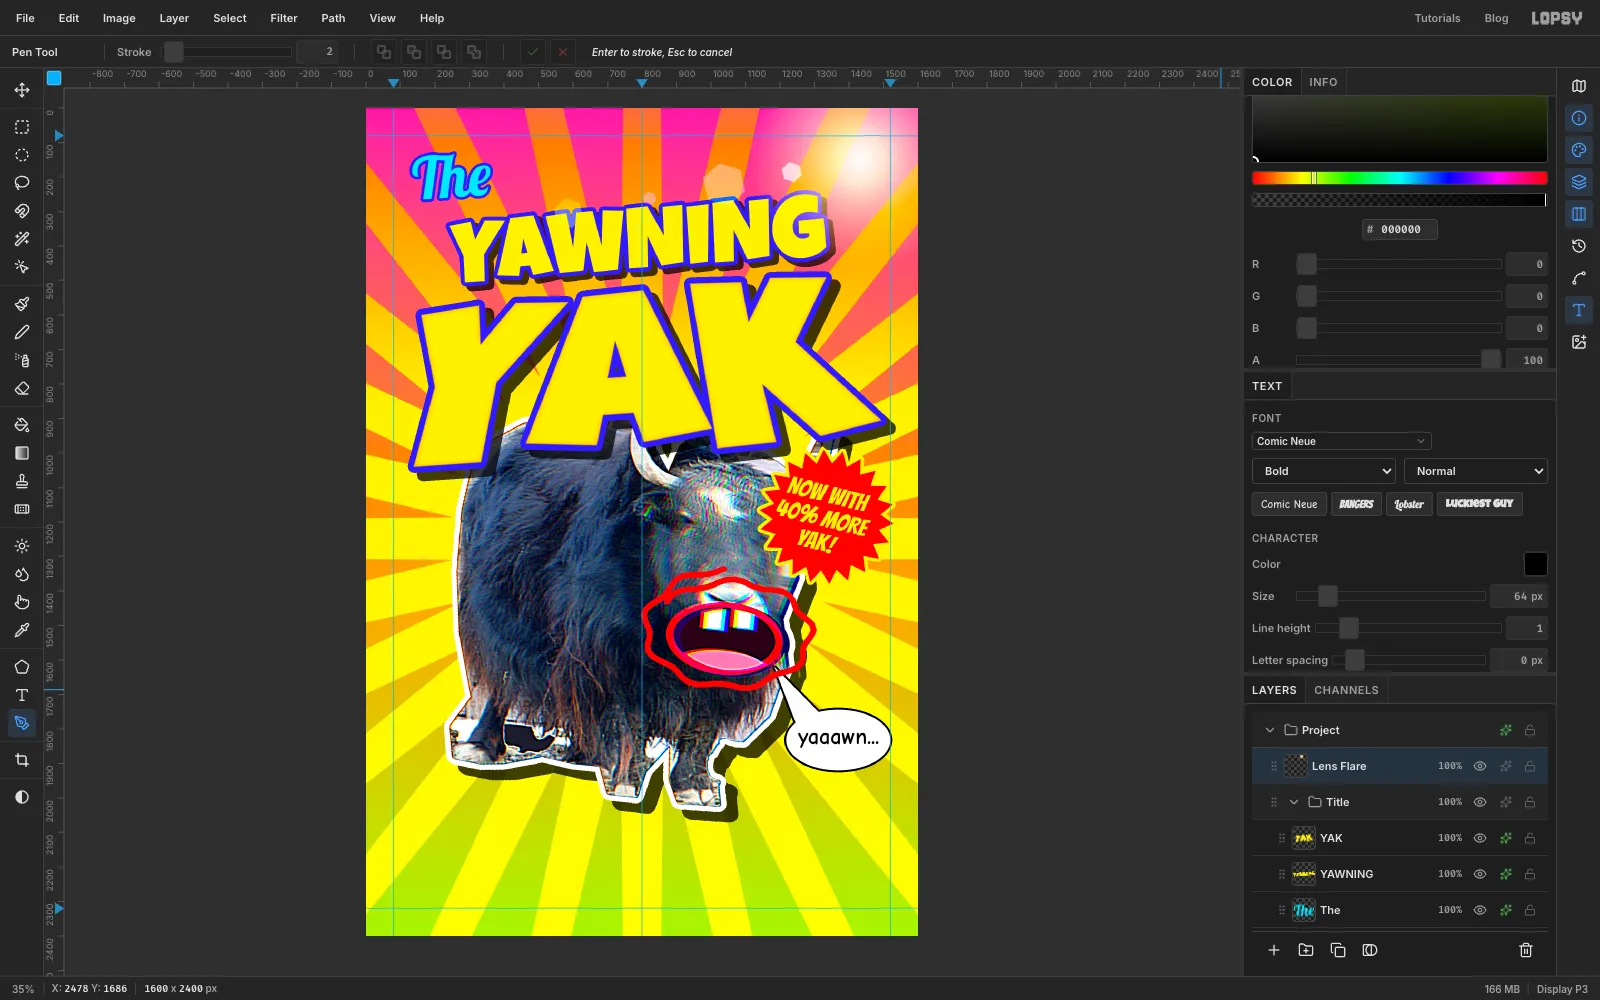
Choose the Gradient tool, set Type to Radial, and open Advanced…. Set three stops:
- white at the left with Opacity 100
- a pale yellow about a fifth of the way along with Opacity 90
- orange at the right with Opacity 0
Select each stop and set its opacity on the checkered Opacity bar under the colour picker. To place a stop, drag it along the bar until the Position readout shows the value you want. Click Done. Drag from a point about 170 px in from the right edge and 150 px down, 320 px to the right.
Now add the "ghosts" a real lens makes. They line up on one straight, shallow line from the sun down towards the left end of YAWNING. For each one, click the six corners of a hexagon with the Pen tool, then use Path to Selection and Delete Path. Set the foreground colour, and set its opacity with the A field in the Color panel. Then fill:
- a small white hexagon (about 60 px across) at 70% opacity, closest to the sun
- a big cyan one (about 130 px) at 38%
- a tiny pink one (about 40 px) at 75%
- a lime one (about 90 px) at 40%, furthest away
Set the opacity back to 100 when you're done. In the layer's ✦ effects drawer, set the blend mode to Screen.
-
Add a rainbow ring
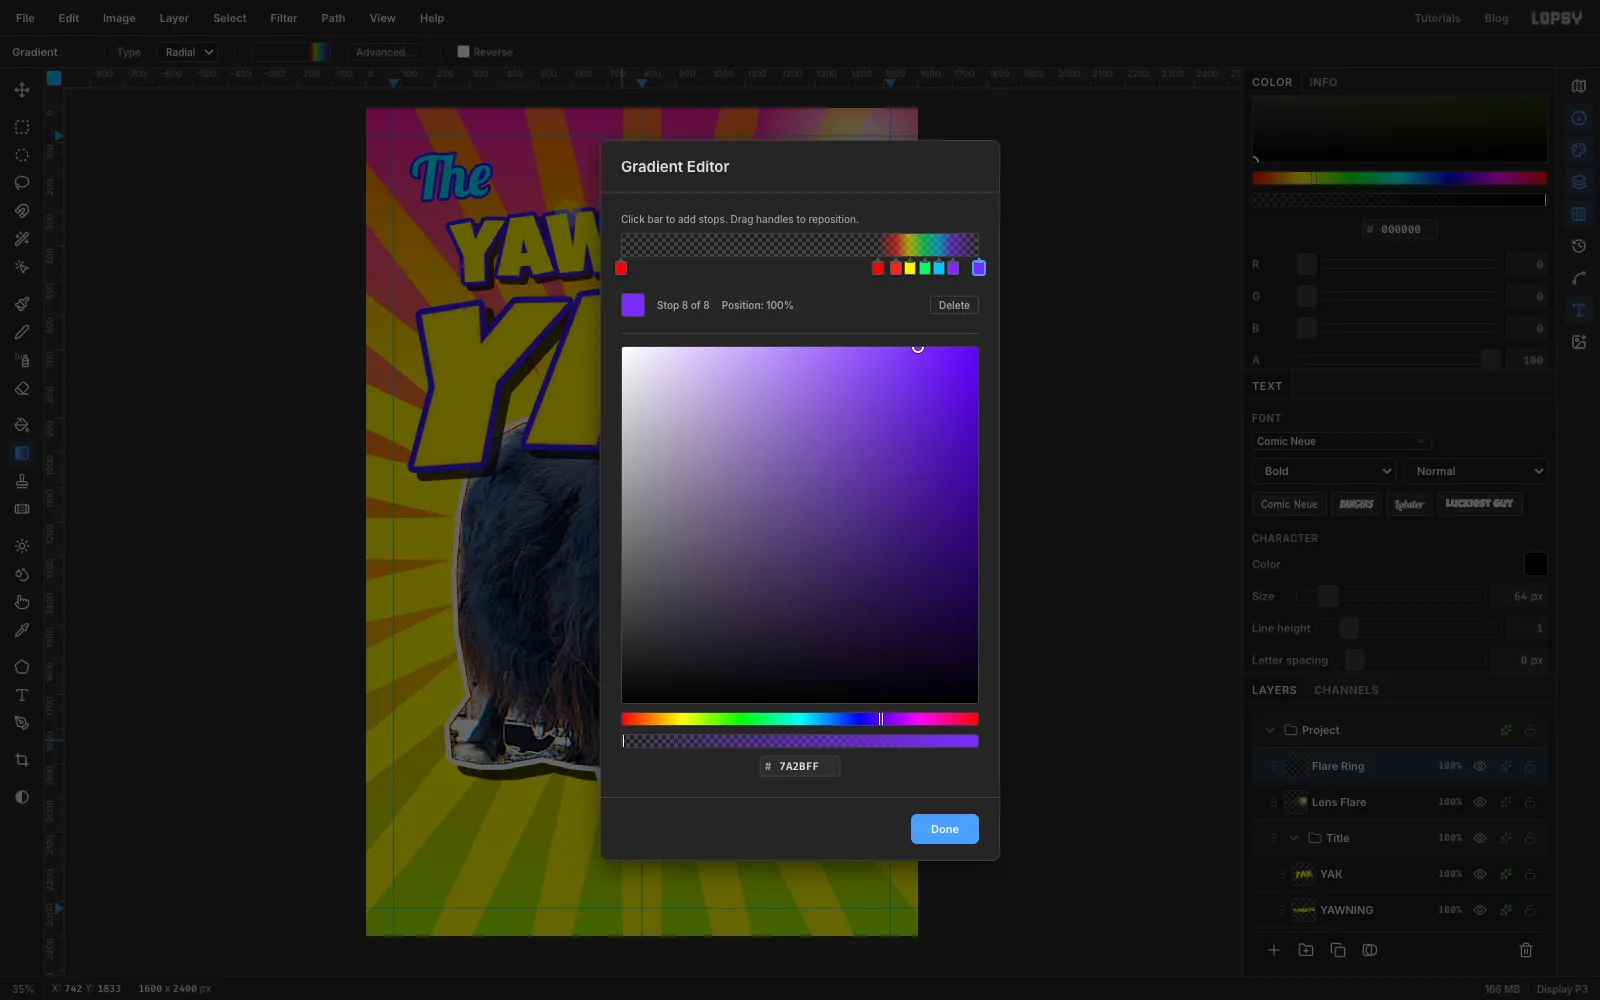
Add Layer named Flare Ring. Open the Gradient Editor again and build a thin rainbow near the outer end of the bar. Use the bar to add stops, and set the opacity on each:
- at 0% and at 72%, both at Opacity 0
- at 77% (55), at 81% (60), at 85% (60), at 89% (60) and at 93% (55)
- at 100% with Opacity 0
Drag a Radial gradient from the same sun centre, 300 px to the right. You get a faint rainbow halo round the sun. Set this layer's blend mode to Screen in its ✦ drawer too.
-
Build the author band
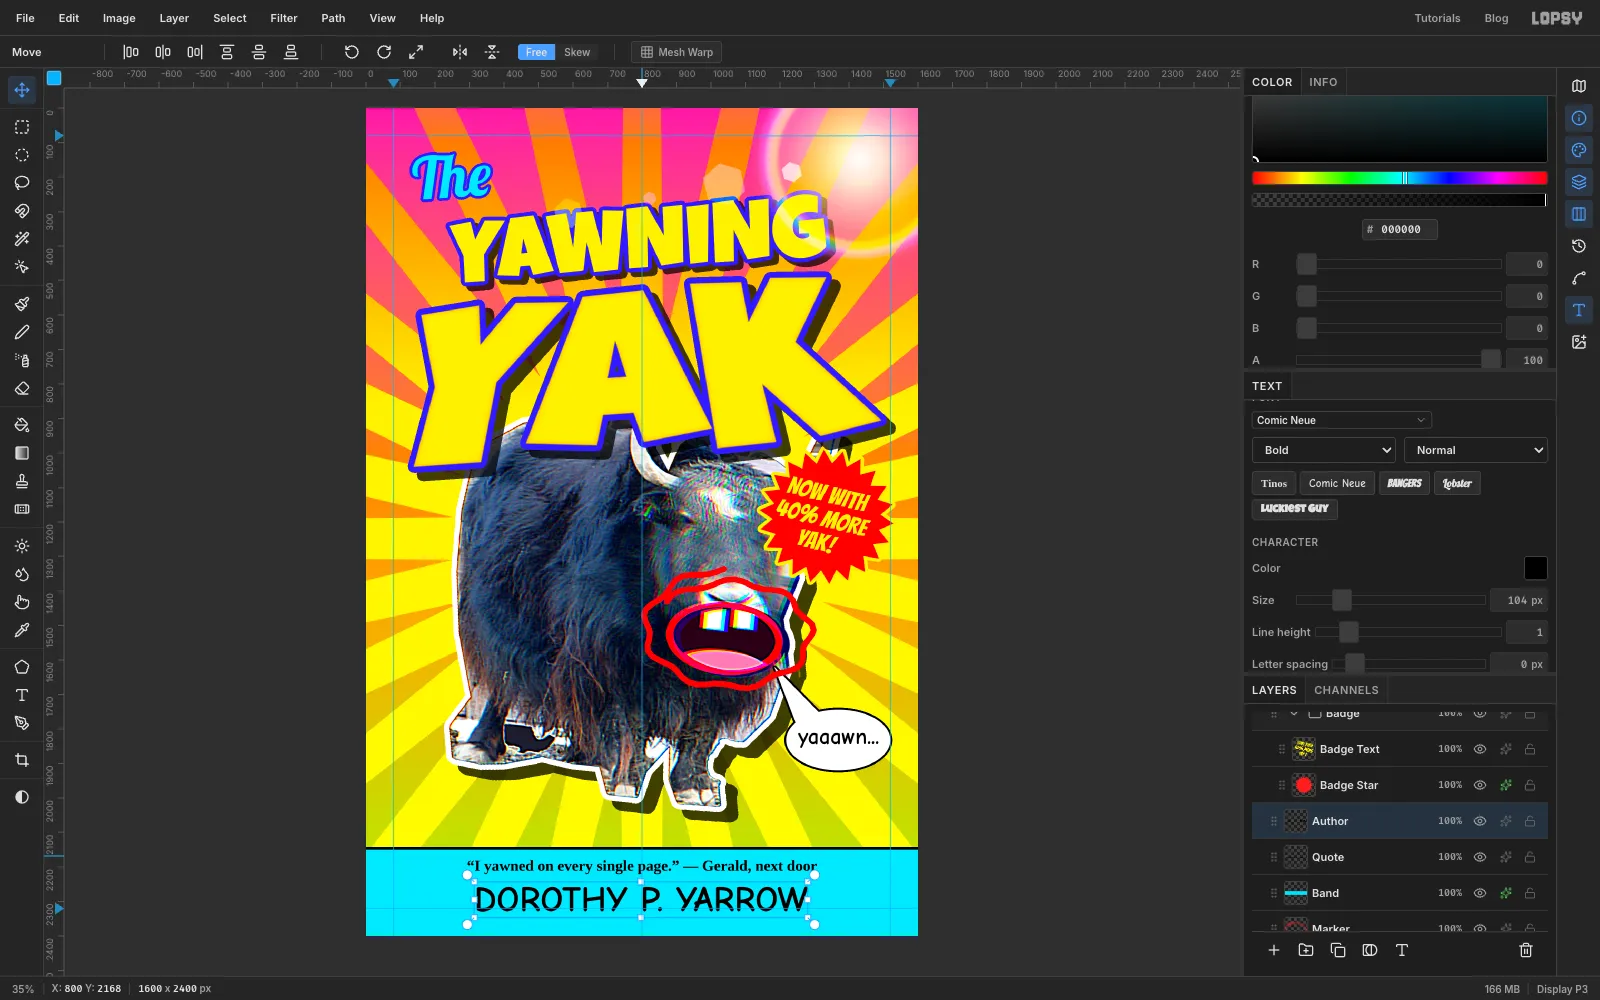
Click Marker and Add Layer named Band. Drag a Rectangular Marquee from just off the left edge, about 250 px above the bottom, to just past the bottom-right corner. Fill it with , deselect, and give it a black Stroke of 8. On the canvas you'll only see the stroke along the top edge.
Pick the Text tool, set Align to Center, and type the two lines bottom-up on the middle guide, clicking Band before each one. Rename the layers Author and Quote as you go:
- the author: Comic Neue, Bold, Size 104, black, DOROTHY P. YARROW
- the pull quote: Tinos, Size 44, black, “I yawned on every single page.” — Gerald, next door
Nudge them so the quote sits near the top of the band and the name sits under it, with roughly equal space above the quote and below the name.
-
Paste in a tiny publisher logo
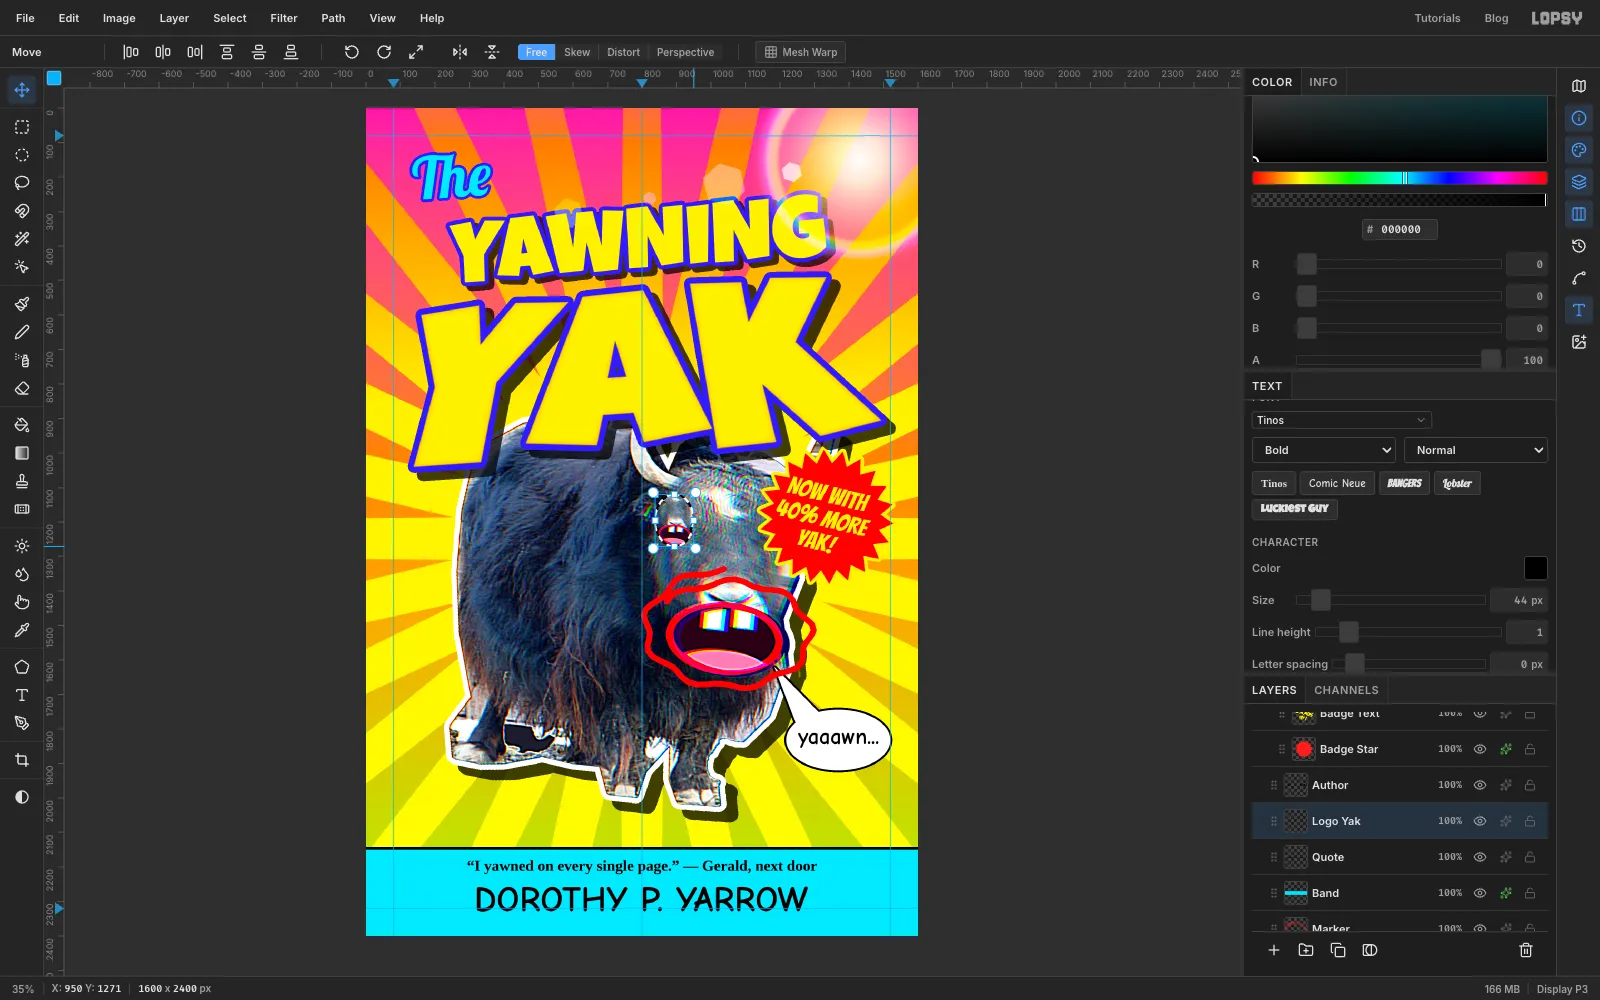
Every self-published cover needs a homemade logo. Click Yak and draw an Elliptical Marquee around its head, about 400 × 540 px, including the mouth. Press Cmd+C.
Click Quote, then press Cmd+V. The copy lands exactly where it came from, on a new layer above the band. Name it Logo Yak. With the Move tool, Cmd-drag a corner handle inward until the oval is about 110 px wide. Press Return, then drag it to the left end of the band. Give it a white Stroke of 5 and a Drop Shadow of 6 / 6 with Blur 0, so it looks like an oval sticker.
-
Add a layer of grain
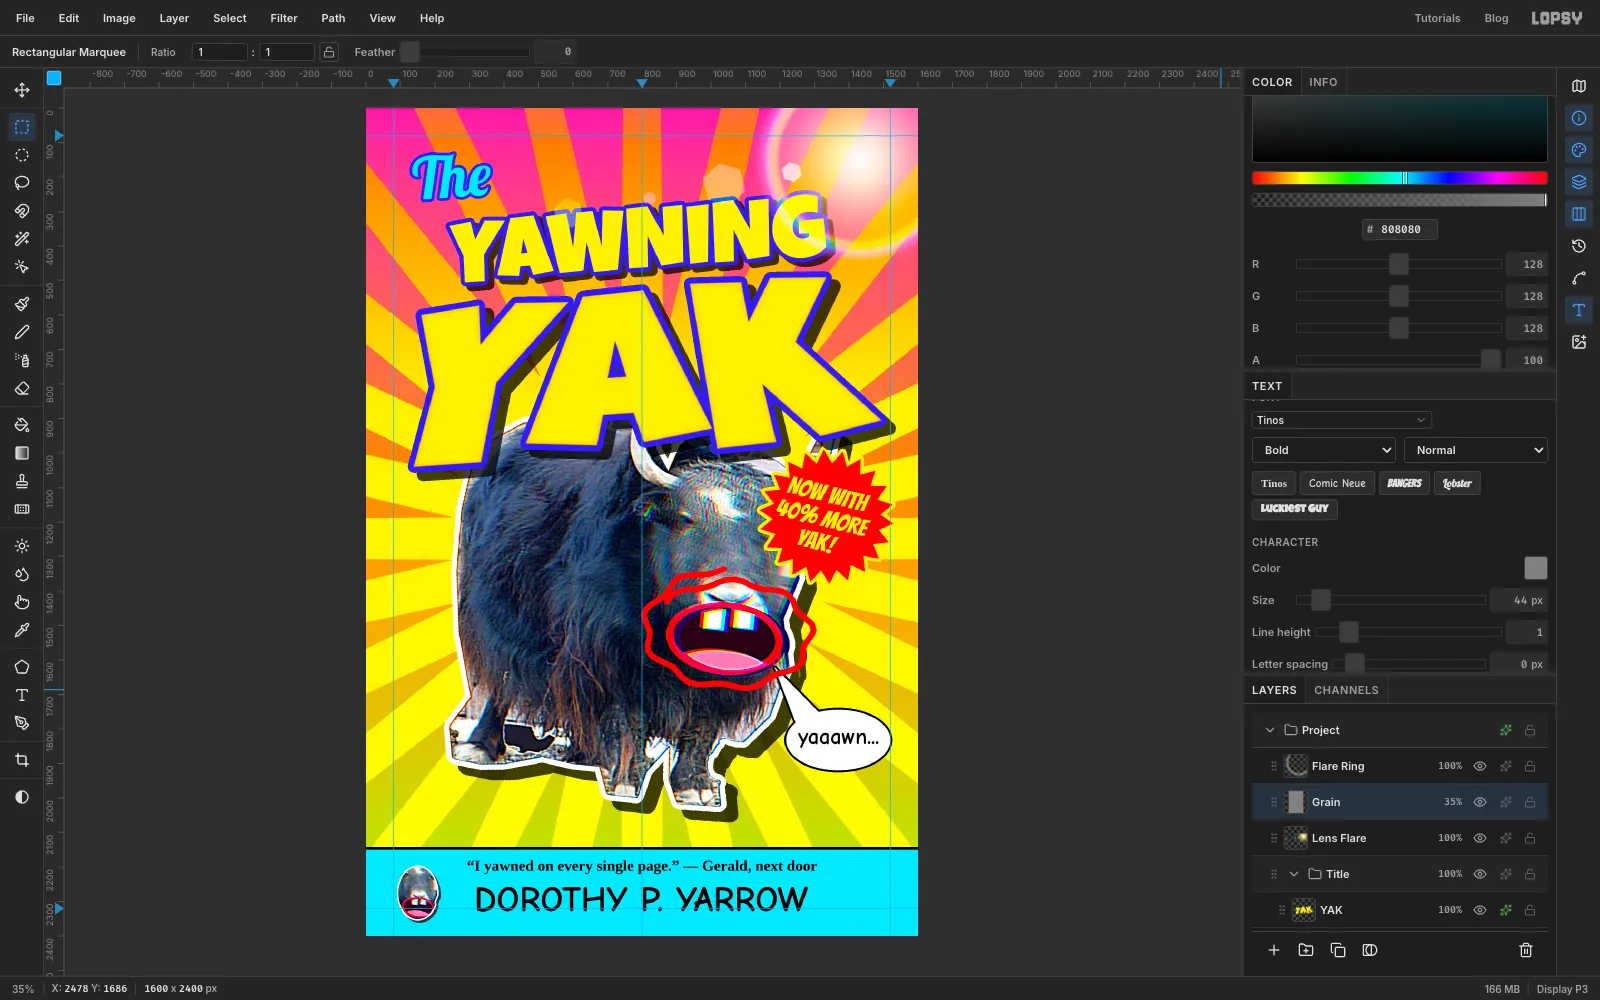
Click Lens Flare and Add Layer named Grain. It lands between the flare and its ring, near the top of the stack, so it covers the yak, the title and everything you add below it later. Select the whole canvas, fill it with , and deselect.
Choose Filter → Add Noise… with Amount 40, and pick Mono and Gaussian. In the ✦ drawer set the blend mode to Overlay, then set the layer's opacity to 35% with the opacity control on its row. Overlay leaves 50% grey invisible, so only the noise shows, as a fine cheap-print texture over everything.
-
Fill the empty corner with a ribbon
The bottom-left corner beside the yak's legs is empty, and tacky covers can't stand empty space. Click Marker, click New Group named Ribbon, and Add Layer named Ribbon Band.
With the Pen, click the six corners of a ribbon about 400 × 90 px that starts 70 px in from the left edge, just above the band. Each end has a V-shaped notch cut about 34 px deep. Use Path to Selection, then Delete Path. Fill with and add a yellow Stroke of 5.
Click Ribbon Band. Pick the Text tool and set Bangers at Size 62 in white, centred. Click in the ribbon, type BOOK 1 OF 7, press Tab, rename the layer Ribbon Text, and nudge it into the middle of the ribbon. Then click the Ribbon group, deselect, and rotate it about 12° counter-clockwise.
Choose File → Save Project to keep every layer, group and effect editable. Then use File → Export… for a PNG to print, post or wrap around a real book.