Design a Y2K Book Cover with Chrome Type and an LCD Clock
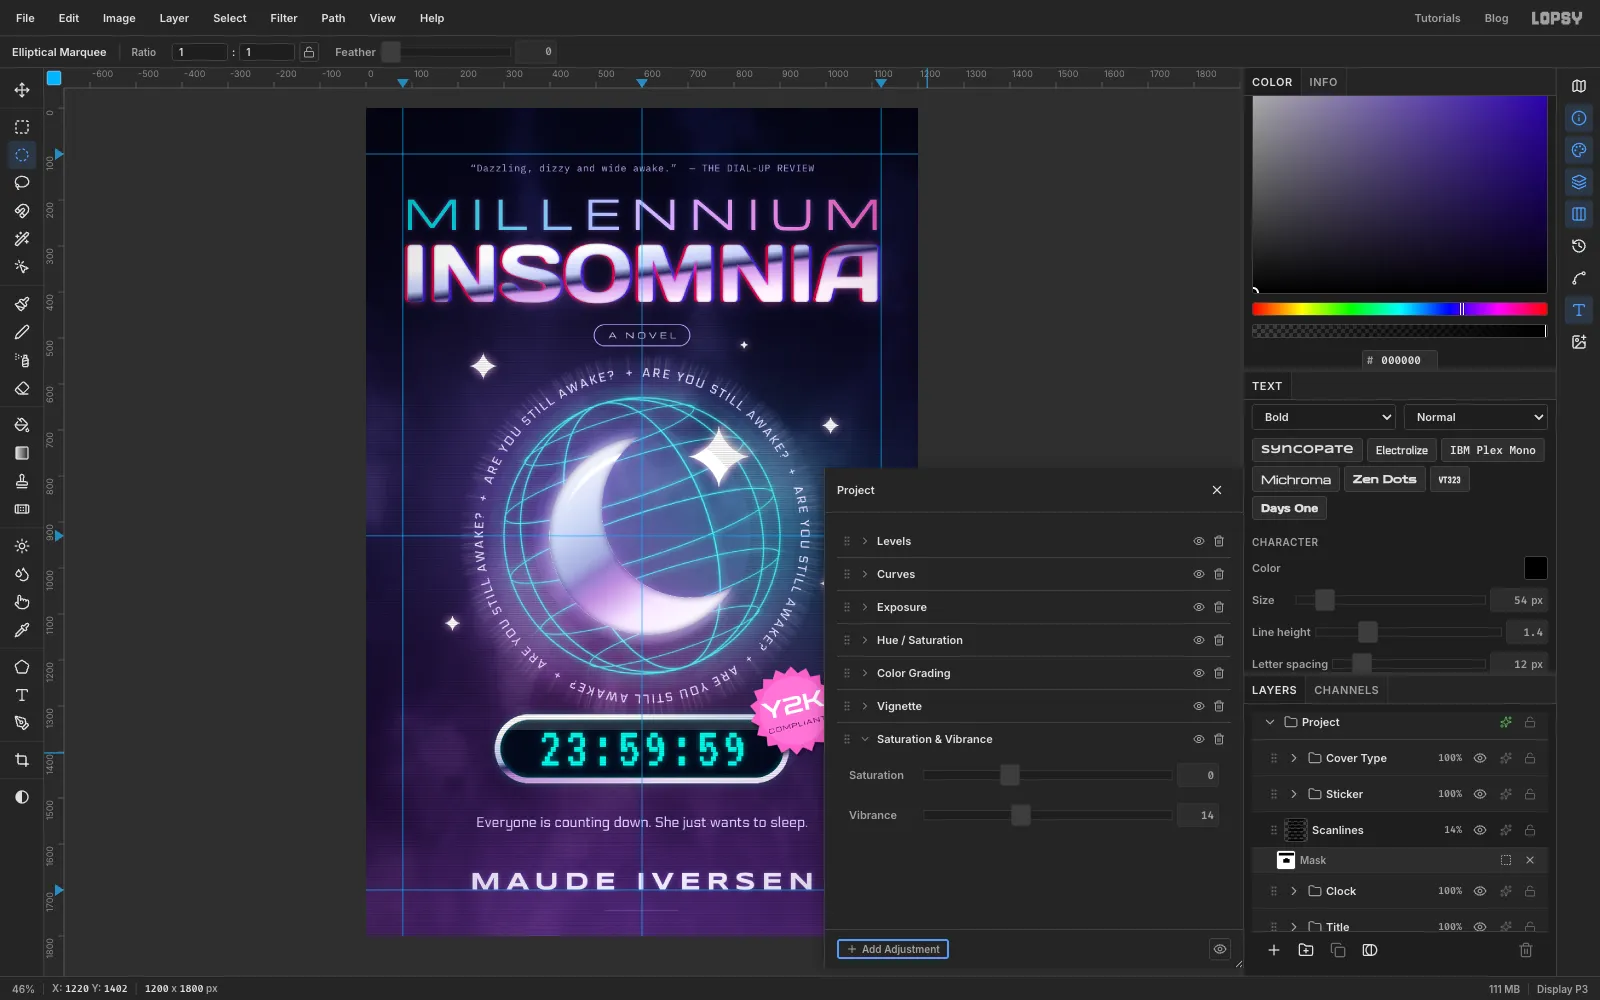
Make a Y2K novel cover in Lopsy with a wireframe globe, a liquid-chrome moon, chrome title type, ring text on a path, an LCD clock and scanlines.
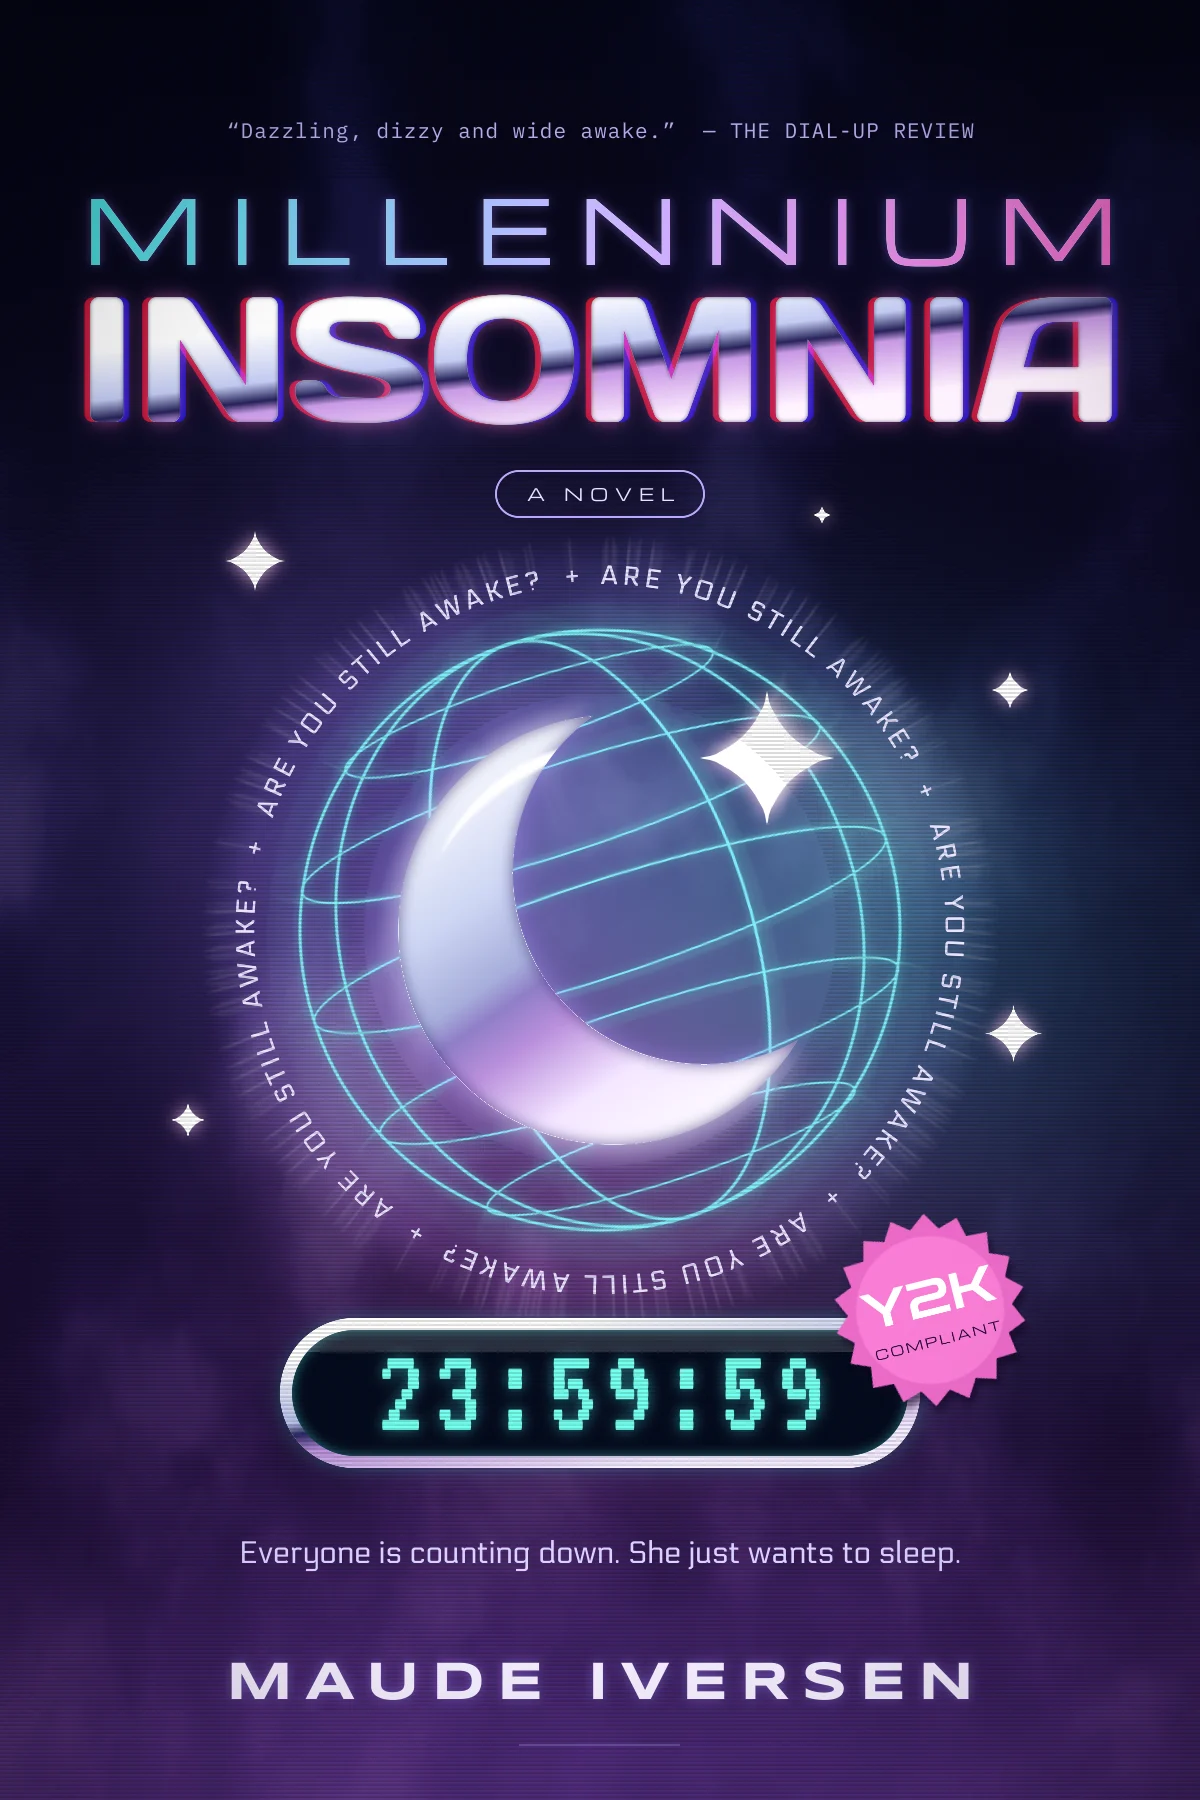
Y2K design is the future as people pictured it around 1999: chrome lettering, wide techno type, glossy plastic buttons, wireframe globes and little four-point sparkles. Here you'll use that look on the cover of an invented techno-thriller, Millennium Insomnia, about a girl who can't sleep through the last minute of the millennium. The cover is a night scene, so the usual pastel Y2K sky becomes deep violet, with chrome and cyan glowing against it.
Everything is drawn in Lopsy. Along the way you'll use:
- the Shape tool with a stroke and no fill to draw a wireframe globe, then tilt it with the rotation handle
- an Option-subtracted marquee and a seven-stop gradient for a liquid-chrome crescent, with Pillow Emboss for relief
- copy, paste and scale to repeat a sparkle
- Chromatic Aberration on a duplicate of the title for an RGB-split ghost
- text on a path that runs all the way round the globe
- an LCD clock made from rounded rectangles, with a gloss strip cut by an intersecting marquee
- the Pen tool and Path to Selection for a starburst sticker, rotated as a group
- Copy Merged and Radial Blur for a light burst
- Define Pattern scanlines with a layer mask that keeps them off the title and moon
- Vignette and Saturation & Vibrance on the whole document
The document is 1200 × 1800 px, a 2:3 paperback cover.
The fonts are free Google Fonts:
- Days One for INSOMNIA
- Michroma for MILLENNIUM, A NOVEL and COMPLIANT
- Electrolize for the ring text and the tagline
- VT323 for the clock digits
- Zen Dots for the sticker's Y2K
- IBM Plex Mono for the review quote
- Syncopate (Bold) for the author name
The palette:
-
Night sky
-
Aura lilac
-
aqua
-
pink
-
floor glow
-
Wireframe
-
Moon chrome
-
Title chrome
-
MILLENNIUM
-
Clock bezel
-
LCD screen
-
digits
-
Sticker
-
disc
-
sticker ink
-
Ring text
-
quote
-
tagline
-
Author
-
pill outline
-
hairline
-
Glow colours
A few habits make the whole build easier:
- Exact marquees. With nothing selected, click once on the canvas with the Rectangular or Elliptical Marquee. A dialog opens where you type the corners (From X/Y, To X/Y). It only opens when nothing is selected, so press ⌘D first.
- ⌘-click a thumbnail in the Layers panel to select that layer's pixels. That's how gradients stay inside a shape.
- The sparkle icon on a layer's row opens its effects drawer. The Blend mode lives there too. Click the percentage on a row to change the layer's opacity.
- New layers appear right above the selected layer. Click the layer you want to build on before you add the next one.
- Select a non-text layer before you start new text. If a text layer is selected, changing the font or size restyles that layer instead.
- Rename layers as you go (double-click the name), because later steps refer to them by name.
- Read the pointer position in the status bar. The X and Y at the bottom left are in document pixels, so you can drag to a target point.
- Edit → Fill uses the foreground colour. Set the colour first, then fill.
- Gradient stops carry over from one gradient to the next. In the Gradient Editor, select a stop you don't need and click the trash button to delete it before you set the new colours.
- Shapes grow from the point you press. Press at the centre and drag out to a corner. Hold ⌘ while dragging to keep a circle round.
-
Set up the guides
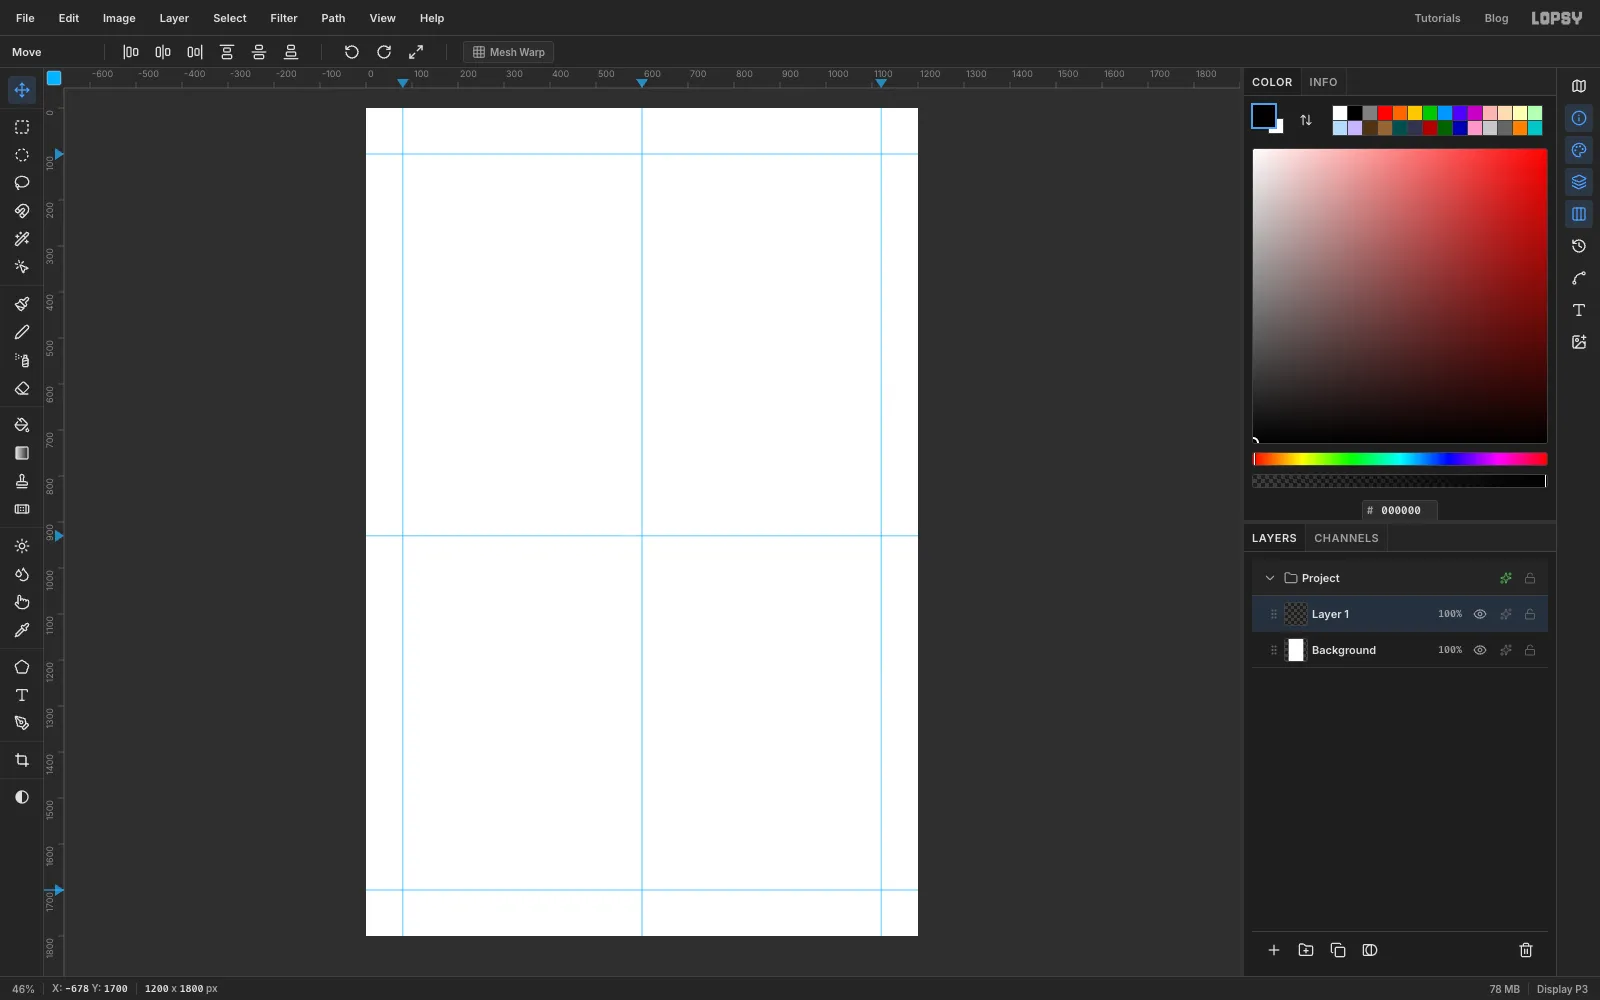
Create a 1200 × 1800 document. Click the top ruler at 80, 600 and 1120 to drop three vertical guides: the two side margins and the centre line. Click the left ruler at 100, 930 and 1700 for three horizontal guides: the top margin, the centre of the globe and the bottom margin.
-
Paint the midnight sky
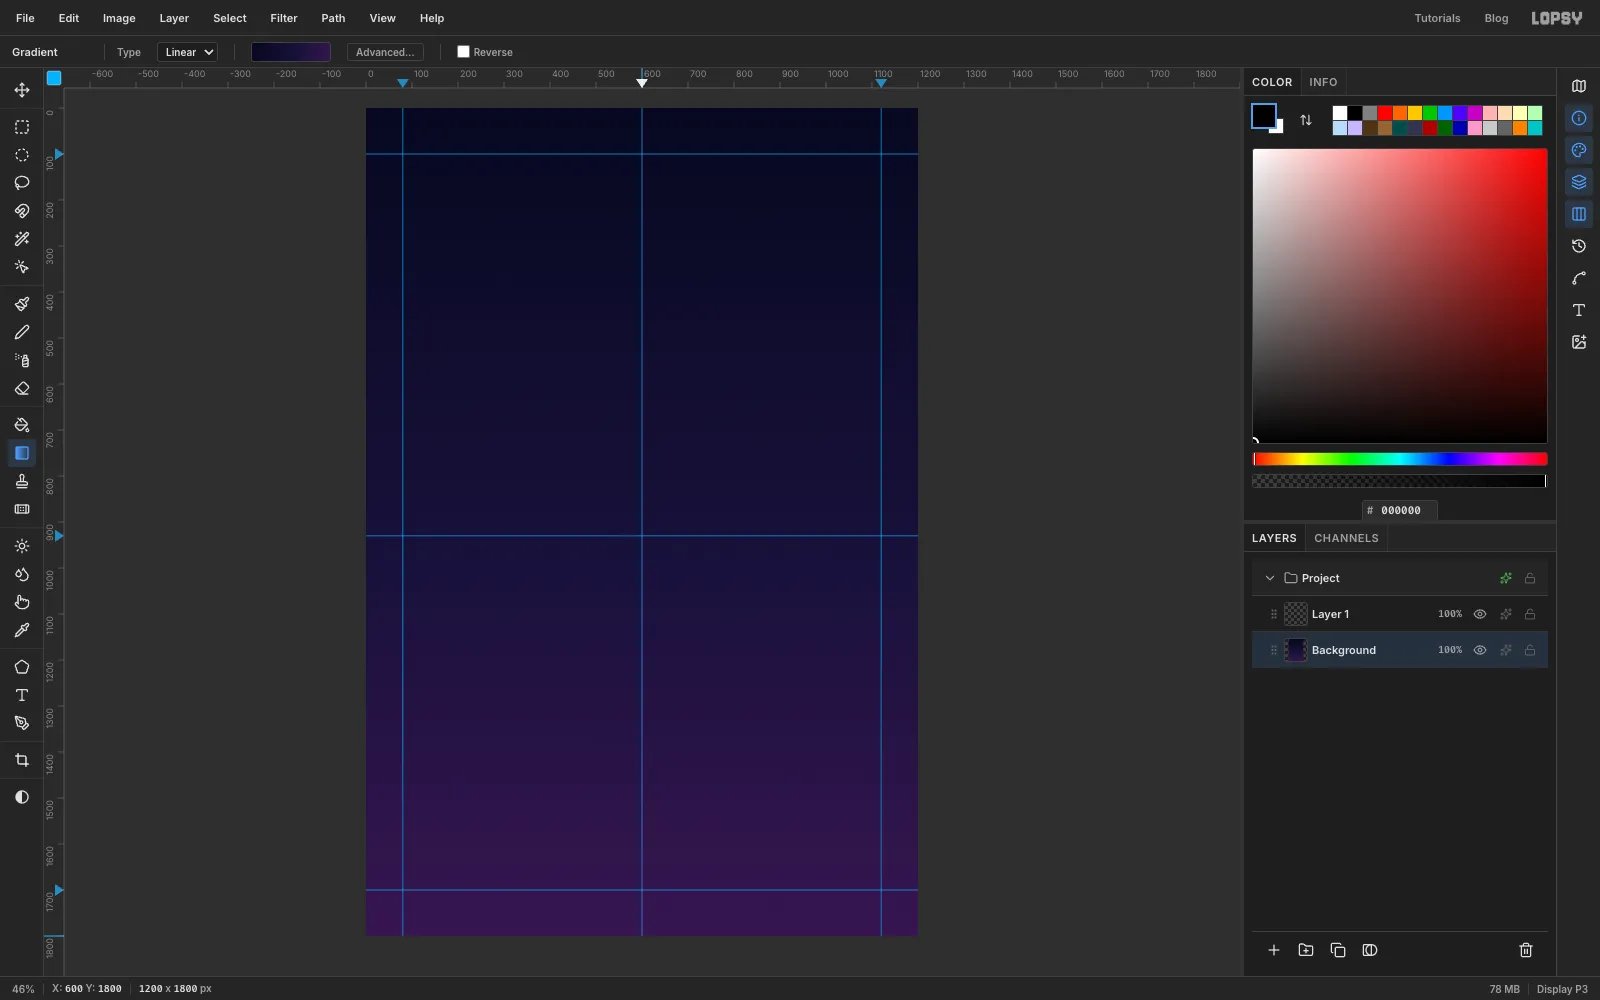
Select Background and choose the Gradient tool. Set Type to Linear and click Advanced…. Make three stops: on the left, at about 55% and on the right. Click a stop to type its hex, and click the bar to add a stop. Drag from the top edge of the canvas straight down to the bottom.
-
Drop three colour pools
Select Layer 1 and rename it
Aura. With the Elliptical Marquee, drag a big oval a little up and left of the centre, about 600 px wide and 520 px tall. Set the foreground colour to and choose Edit → Fill, then press ⌘D. Fill a second oval of about the same size in , overlapping it down and to the right. Fill a flatter oval, about 520 × 320 px, in underneath the two, around the bottom of the centre line.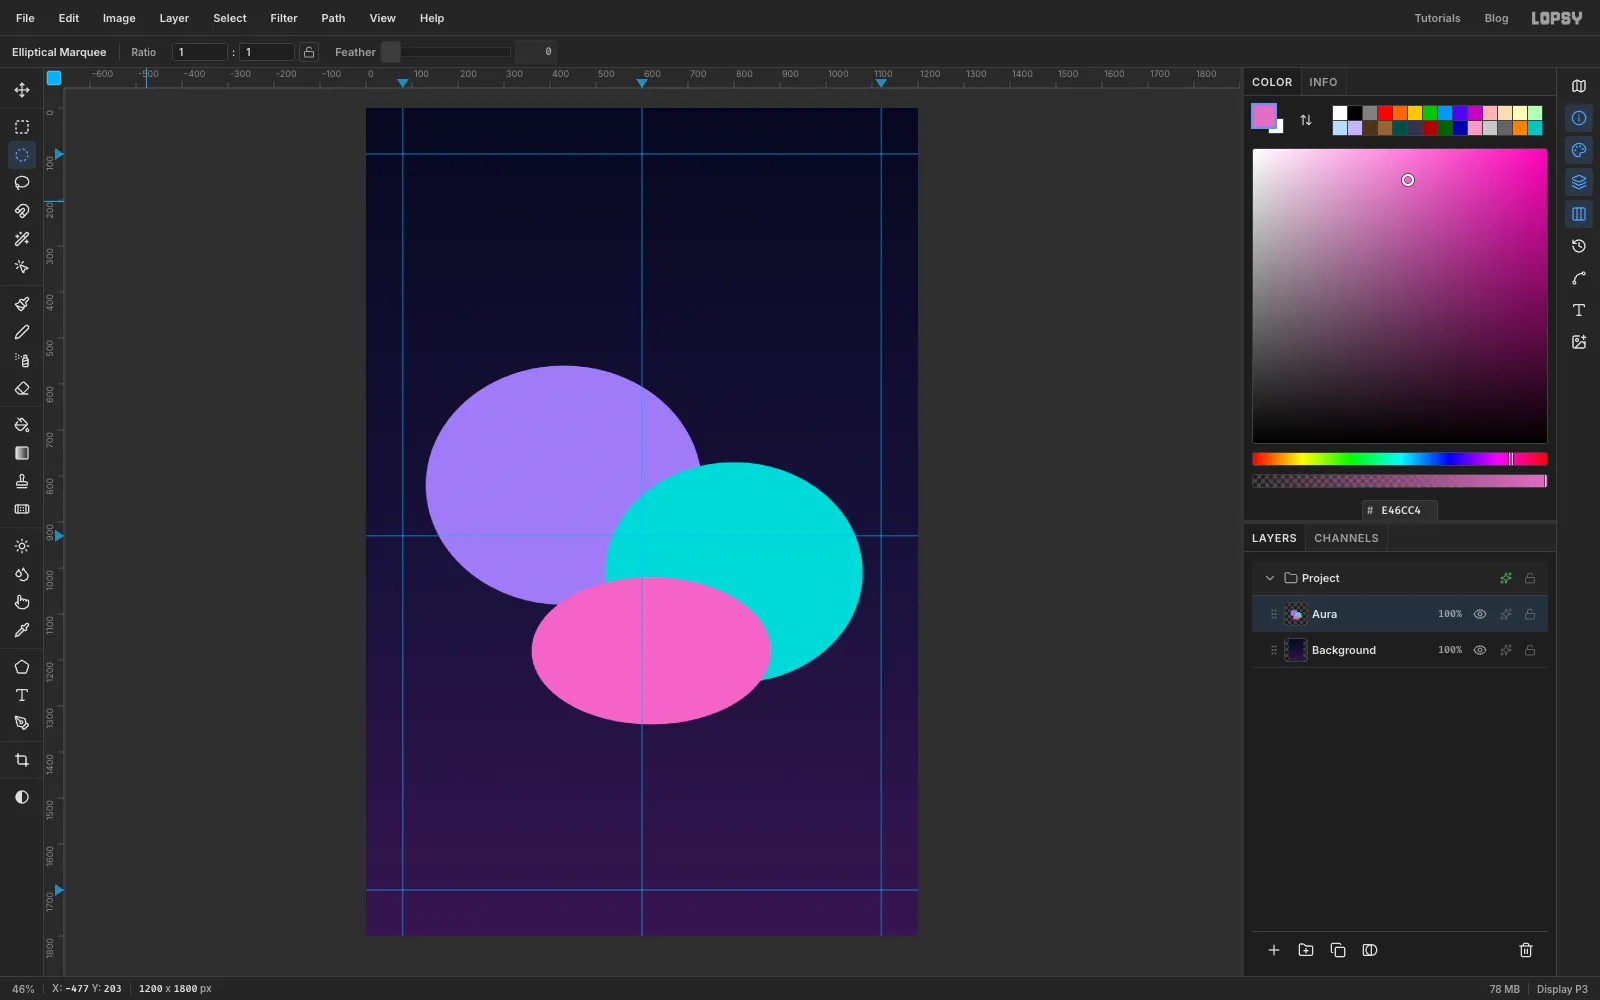
-
Blur them into an aura
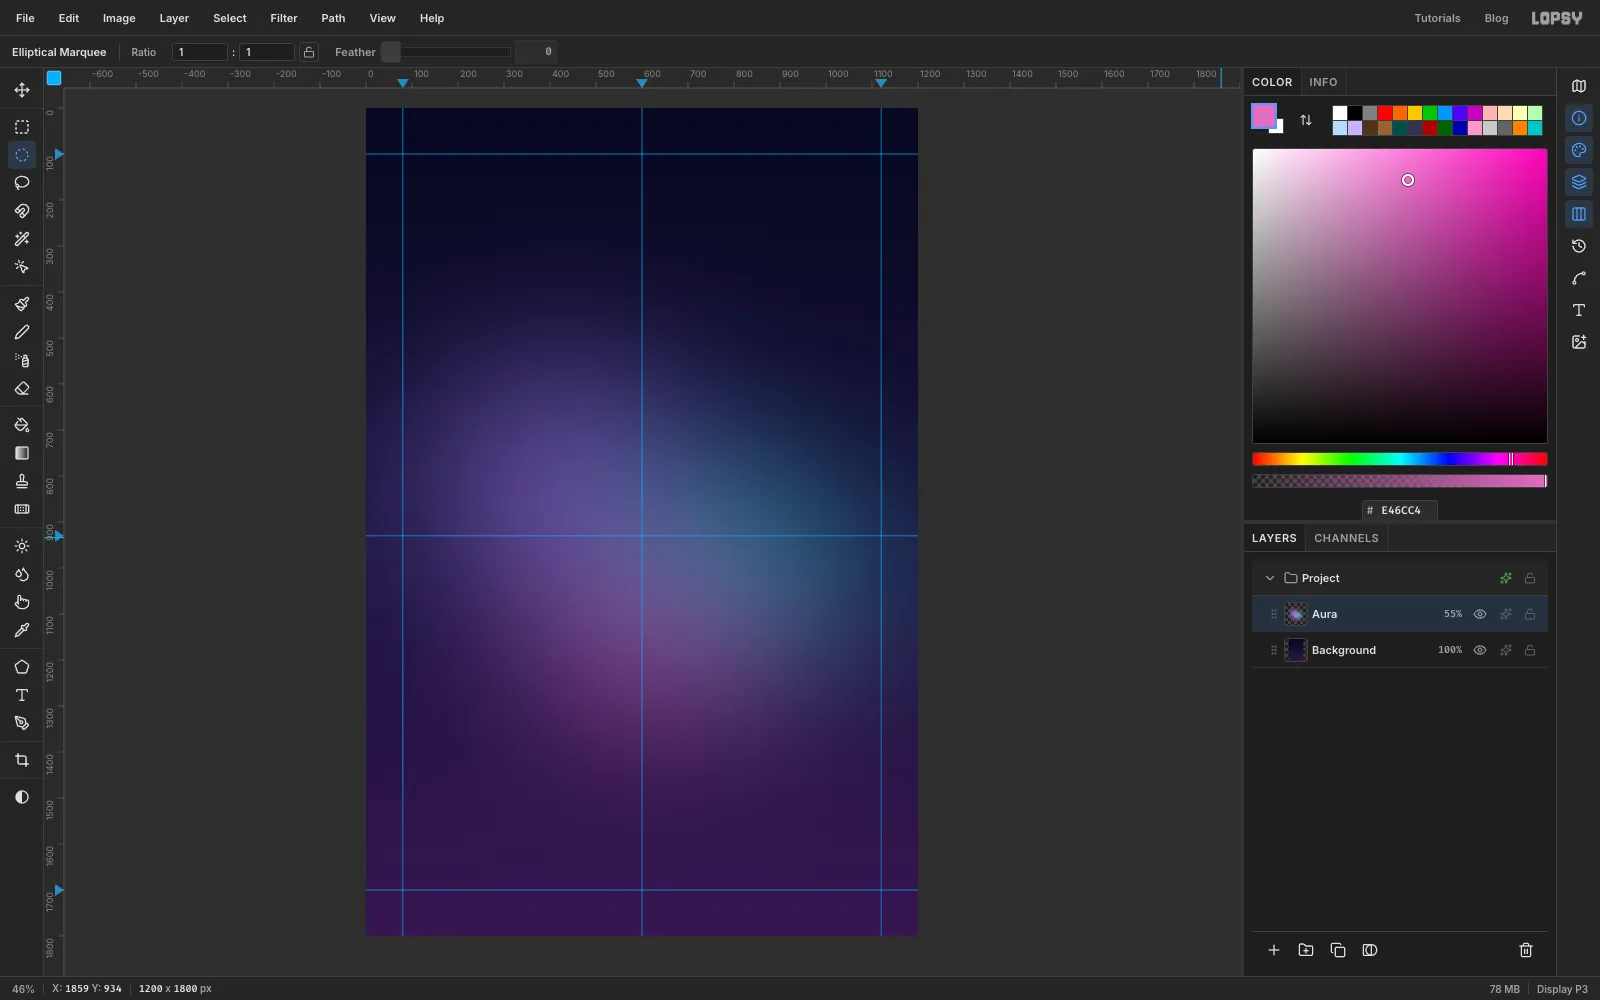
Run Filter → Gaussian Blur... with a Radius of 160. Open the effects drawer, set Blend to Screen, and set the layer's opacity to 55%. The hard ovals melt into a soft iridescent glow where the globe will go.
-
Add smoke and a floor glow
Click Add Layer and name it
Haze. Run Filter → Smoke... with Scale 6 and Turbulence 60. Set Blend to Soft Light and the opacity to 35%.Add another layer,
Floor Glow. Draw an oval about 1280 × 340 px centred on the bottom edge of the canvas, so only its top half is on the page. Fill it with , deselect, blur it by 120 and set it to Screen at 40%. It lifts the bottom of the cover so it doesn't go dead.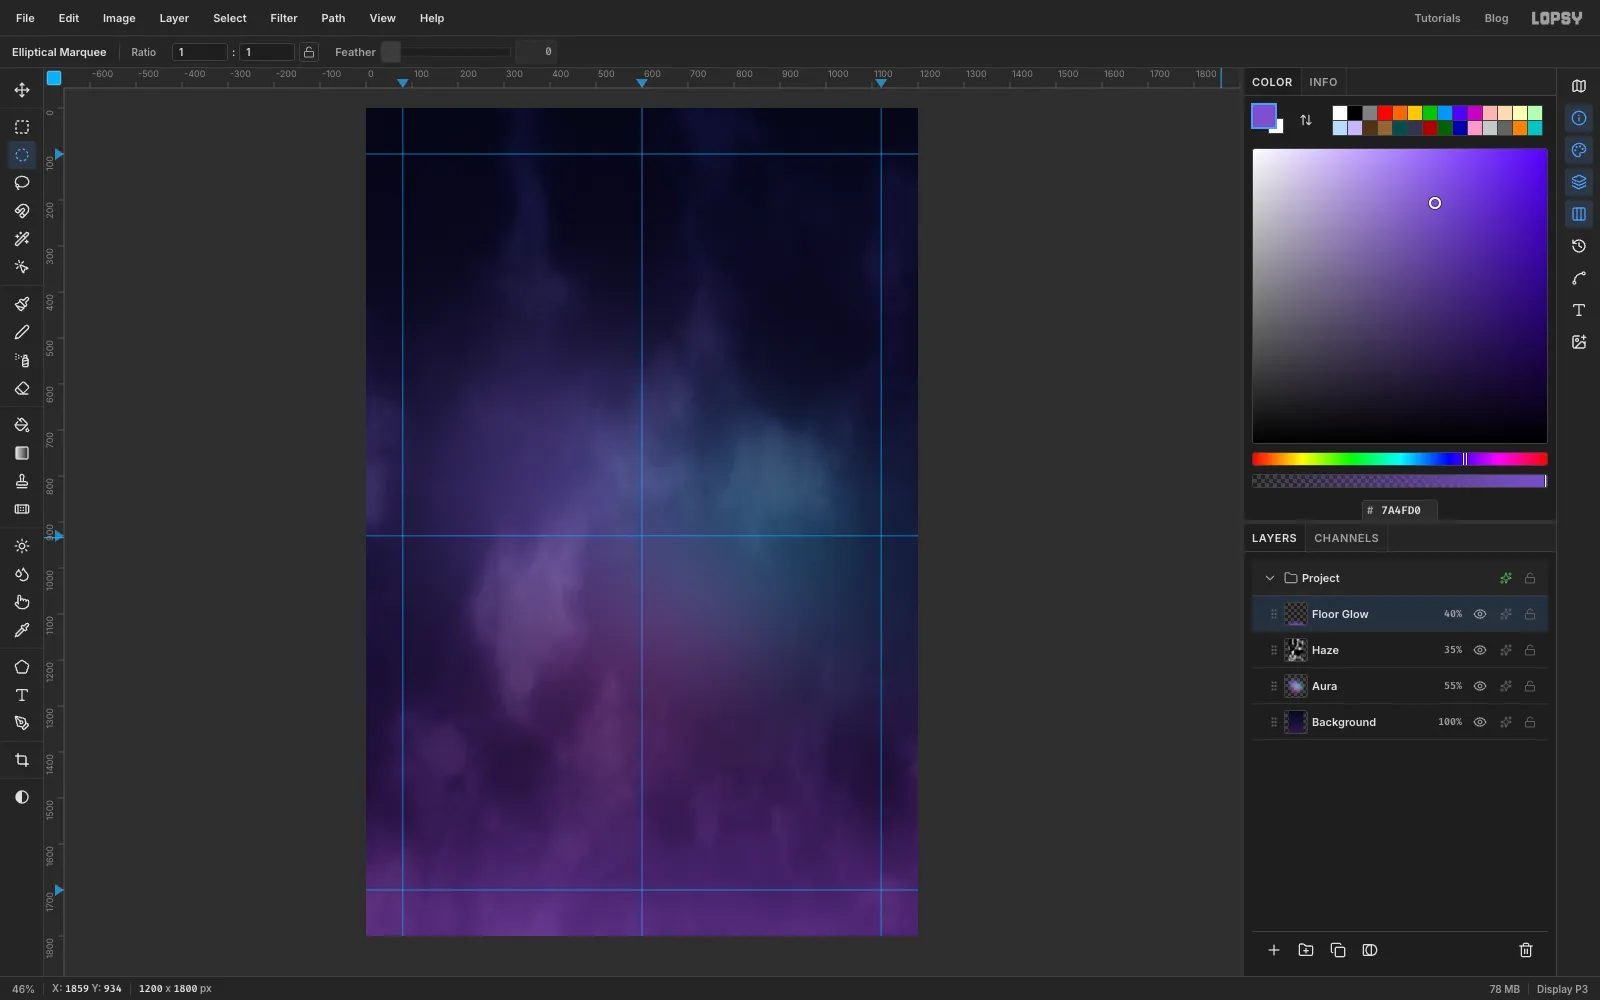
-
Draw the globe outline
Add a layer called
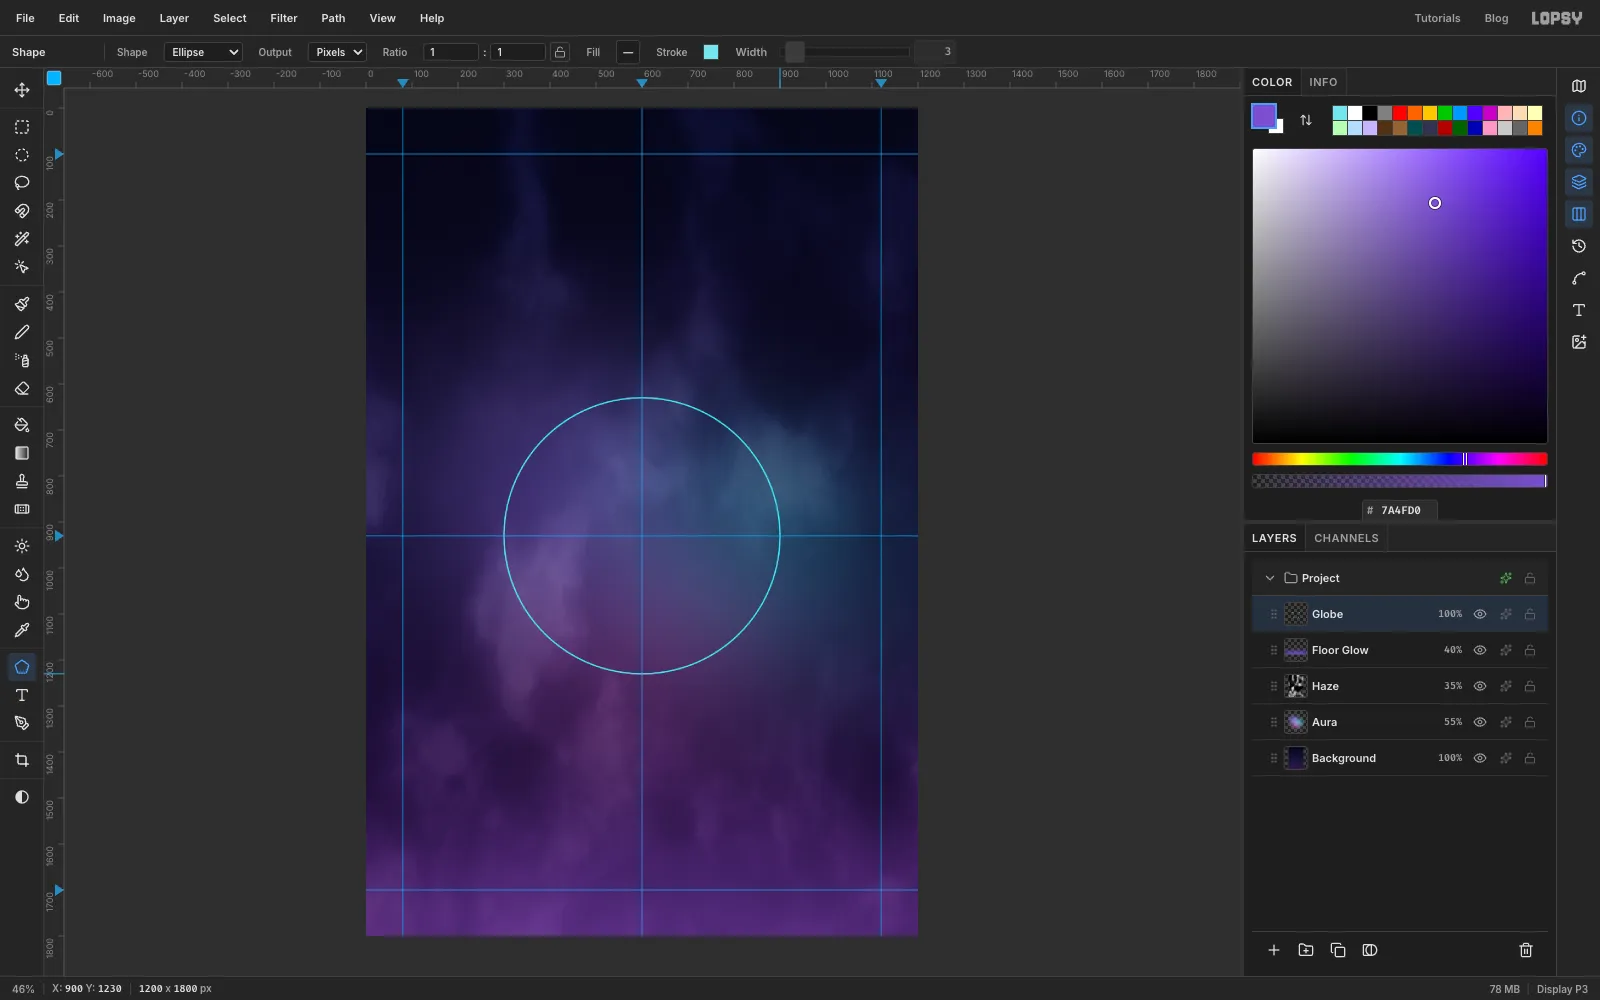
Globe. Choose the Shape tool and set Shape to Ellipse and Output to Pixels. Click the Fill swatch and choose Remove fill. Click the dash next to Stroke, type and set Width to 3.Press at the crossing of the centre guides (600, 930), hold ⌘, and drag down and right until the status bar reads about 900, 1230. That makes a circle about 600 px across.
-
Add meridians and parallels
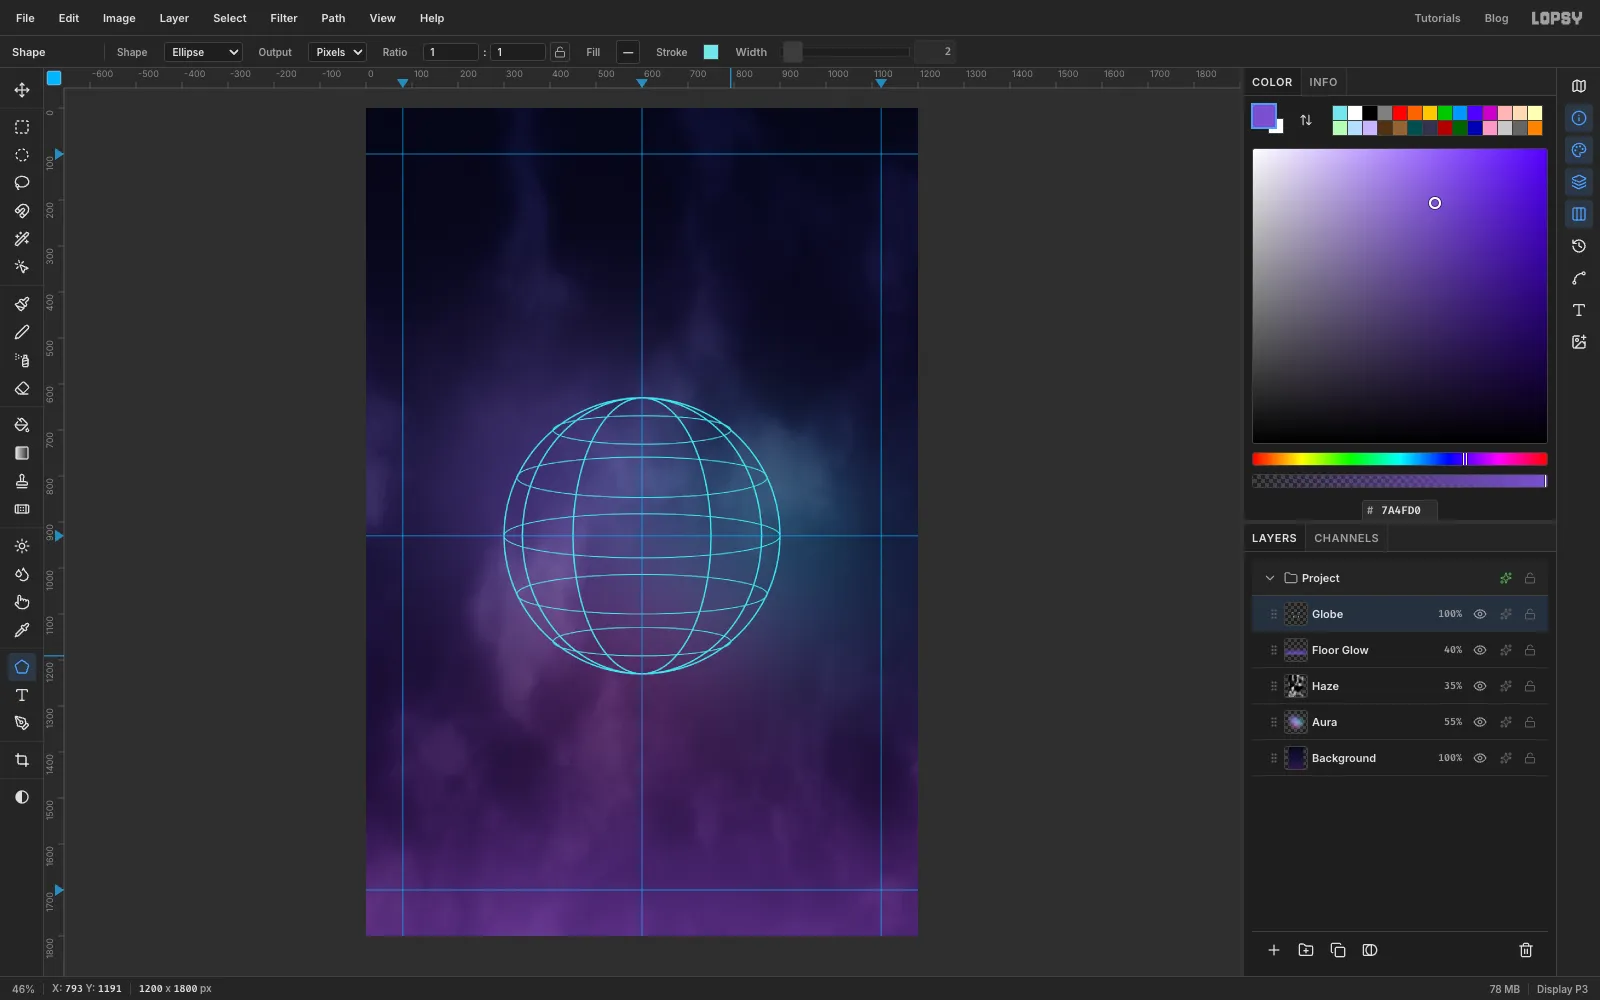
The meridians are ovals as tall as the globe but narrower. Without ⌘, press at the same centre point and drag out to the bottom edge of the circle. Make one oval about 520 px wide (drag to x 860) and another about 300 px wide (drag to x 750).
Set Width to 2 for the parallels. They're flat ovals stacked down the globe. Draw one through the centre as wide as the globe and about 100 px tall. Draw two more about 125 px above and below it, slightly narrower. Draw two near the poles, about 230 px above and below the centre and roughly two-thirds the globe's width. Keep each one about a sixth as tall as it is wide.
-
Tilt the globe
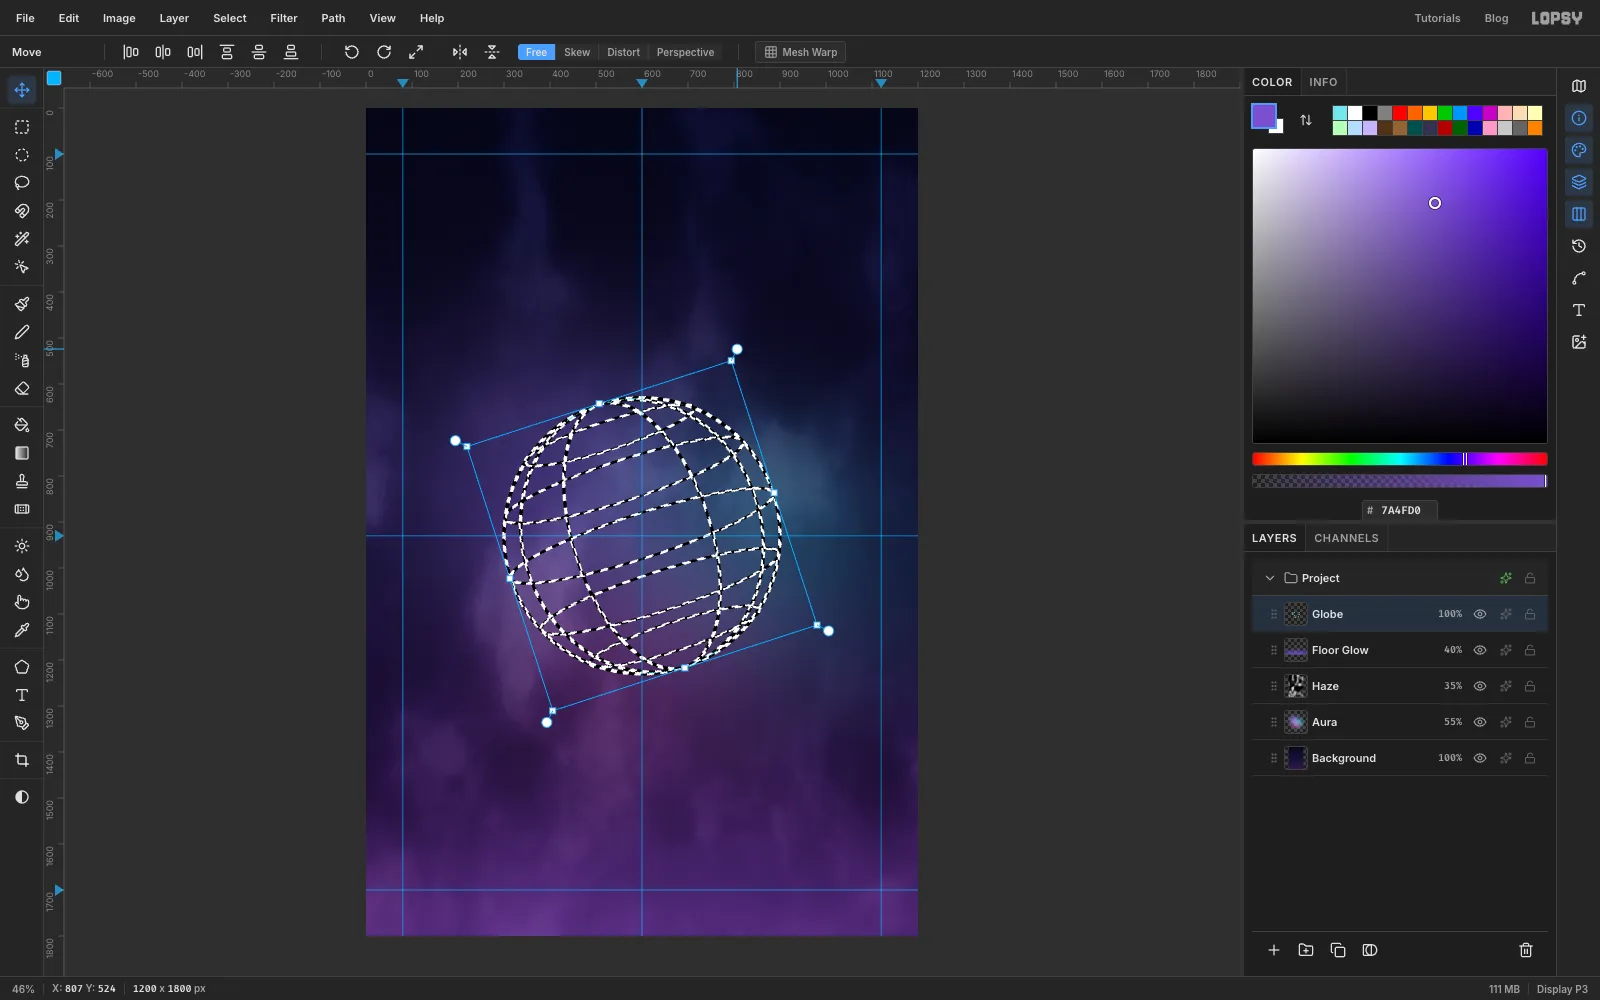
⌘-click the Globe thumbnail to select its pixels and switch to the Move tool. Drag a rotation handle (the round handles just outside the corners) anticlockwise by about 18°, so the globe looks tipped on its axis. Press ⌘D to commit.
-
Make the globe glow
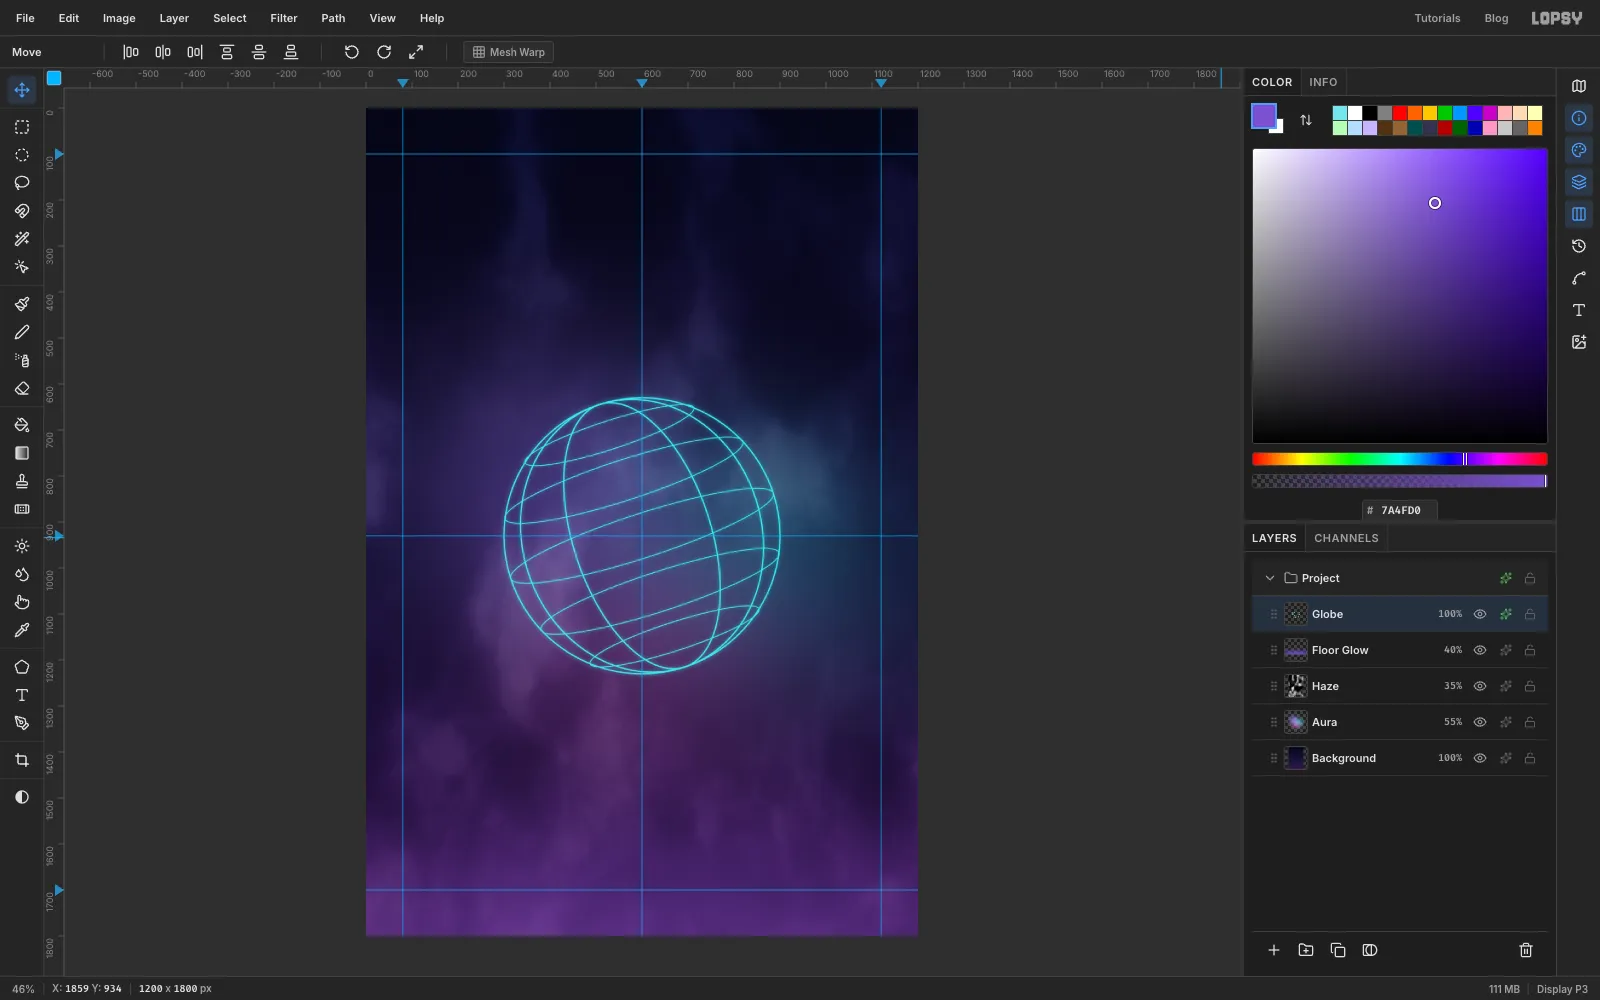
Open the Globe's effects drawer and turn on Outer Glow. Set the colour to , Size to 14 and Opacity to 70.
-
Cut a crescent
Add a layer called
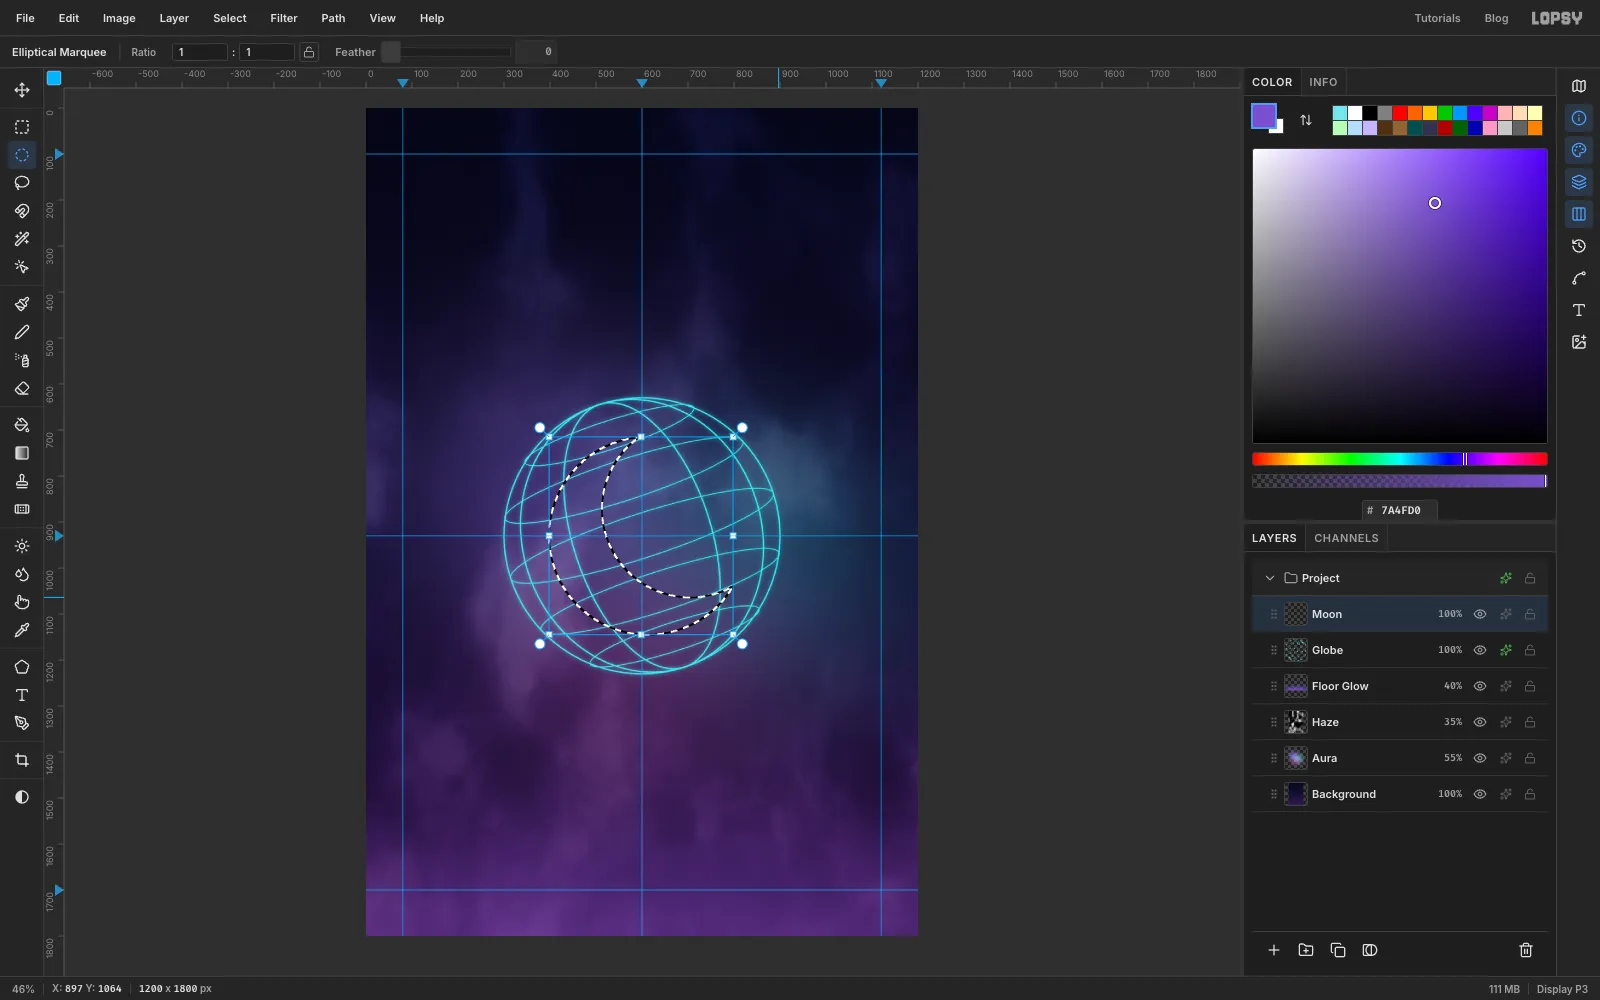
Moon. With nothing selected, click the canvas with the Elliptical Marquee and type a circle: From 398, 715 To 828, 1145. That's a 430 px circle on the globe's centre line, set a touch right of centre.Now hold Option and drag a second circle a little smaller than the first, shifted about 90 px right and 60 px up, so it bites out the upper right. Holding Option subtracts it, leaving a crescent that opens to the upper right.
-
Fill the crescent with chrome
Chrome is a gradient that looks like a reflected sky over a dark horizon. With the Gradient tool on Linear, open Advanced… and set seven stops:
- at 0%
- at 30%
- at 45%
- at 51%
- at 60%
- at 78%
- at 100%
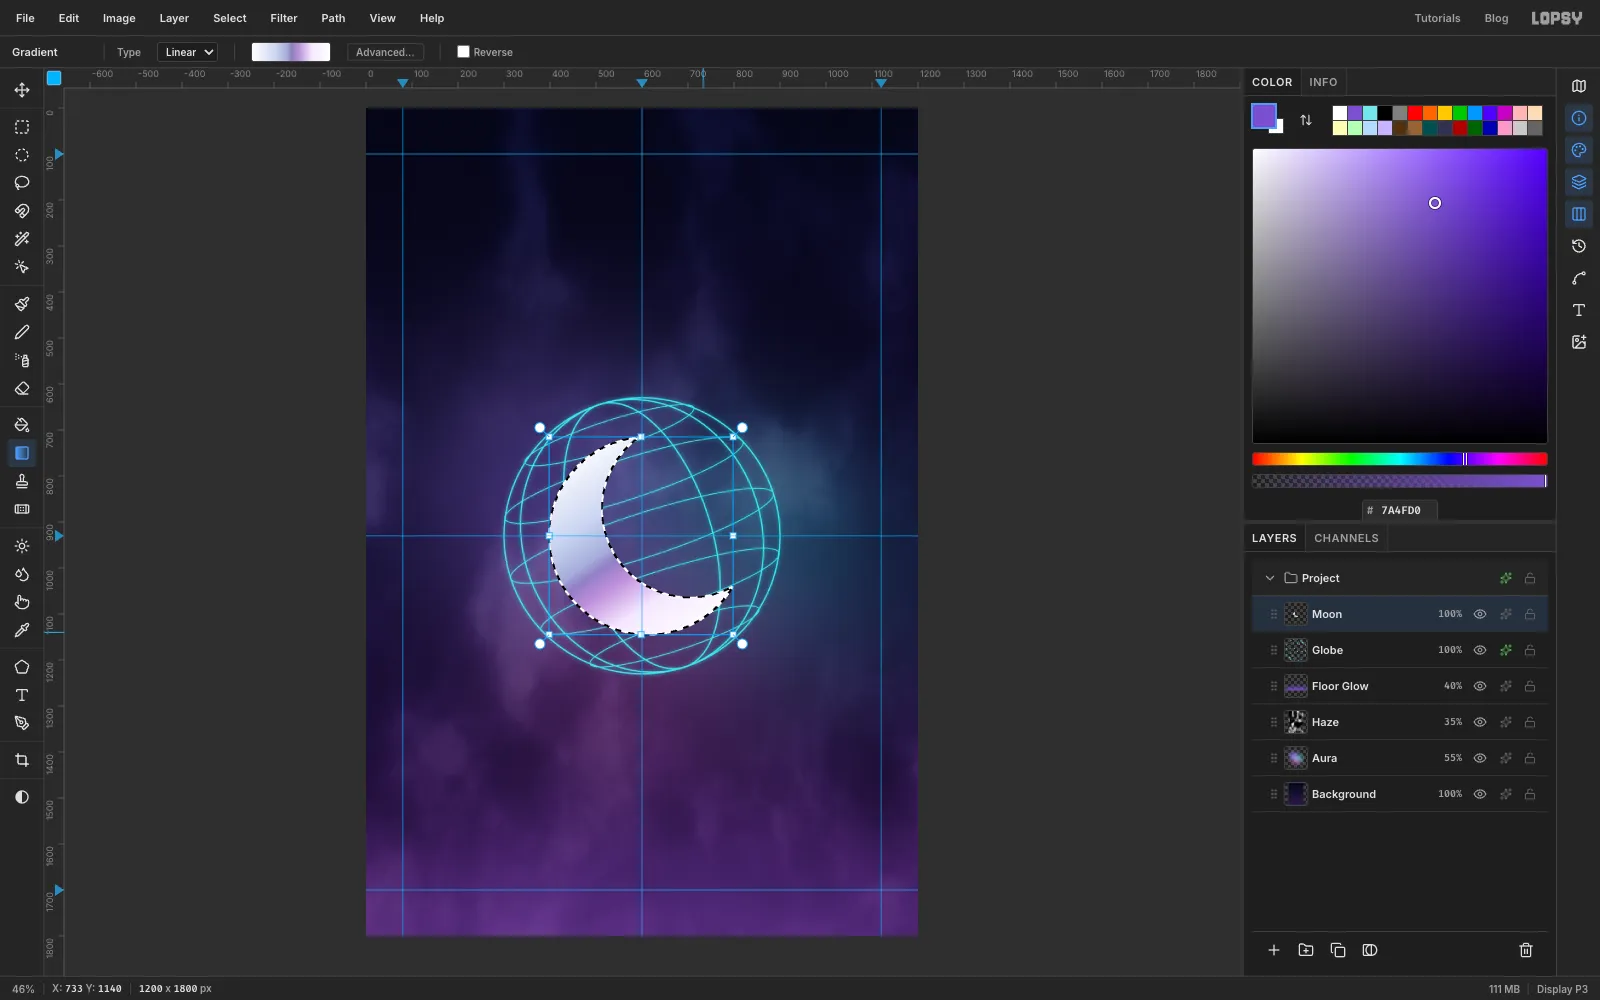
Drag from just above the moon's top-left edge to below its lower tip, a long diagonal slightly steeper than 45°. The dark violet band becomes the moon's horizon reflection. Press ⌘D.
-
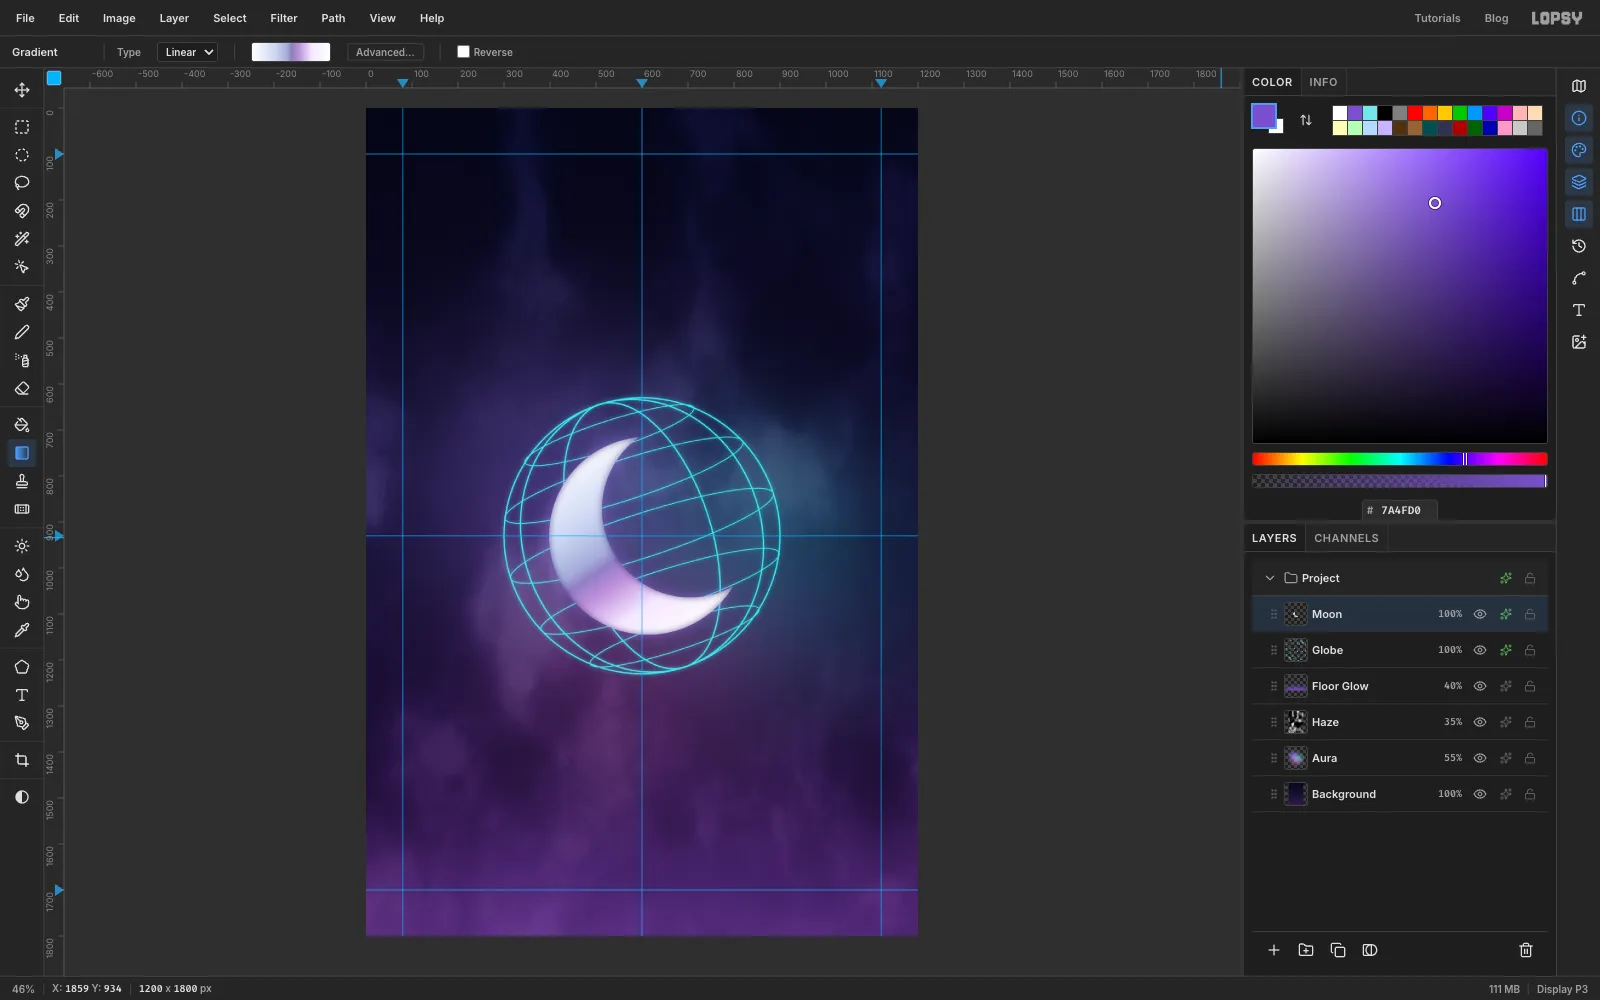
Give the moon depth and a glow
Open the Moon's effects drawer. Turn on Inner Glow with , Size 22 and Opacity 65, which darkens the edges so the crescent looks rounded. Then turn on Outer Glow with , Size 40 and Opacity 55.
-
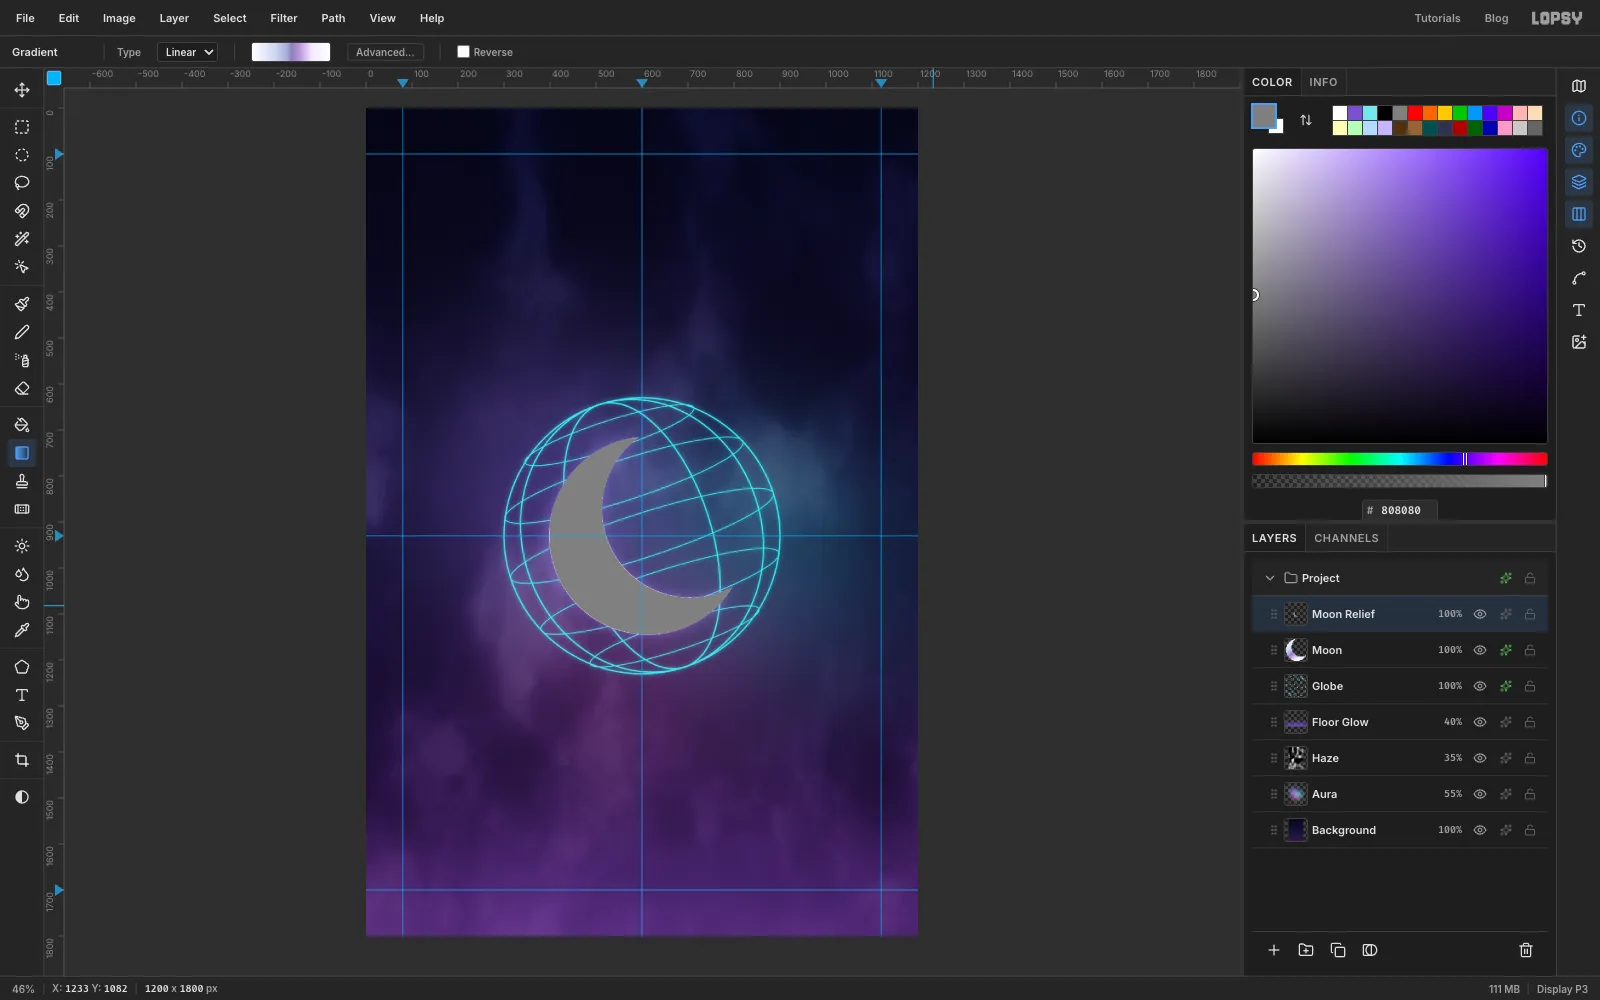
Pillow-emboss a grey copy
Add a layer called
Moon Relief. ⌘-click the Moon thumbnail, set the foreground colour to and choose Edit → Fill. Press ⌘D.Run Filter → Emboss... with Angle 135, Strength 14 and Type set to Pillow Emboss. Pillow emboss lights the inside edge, which makes a flat shape look inflated.
-
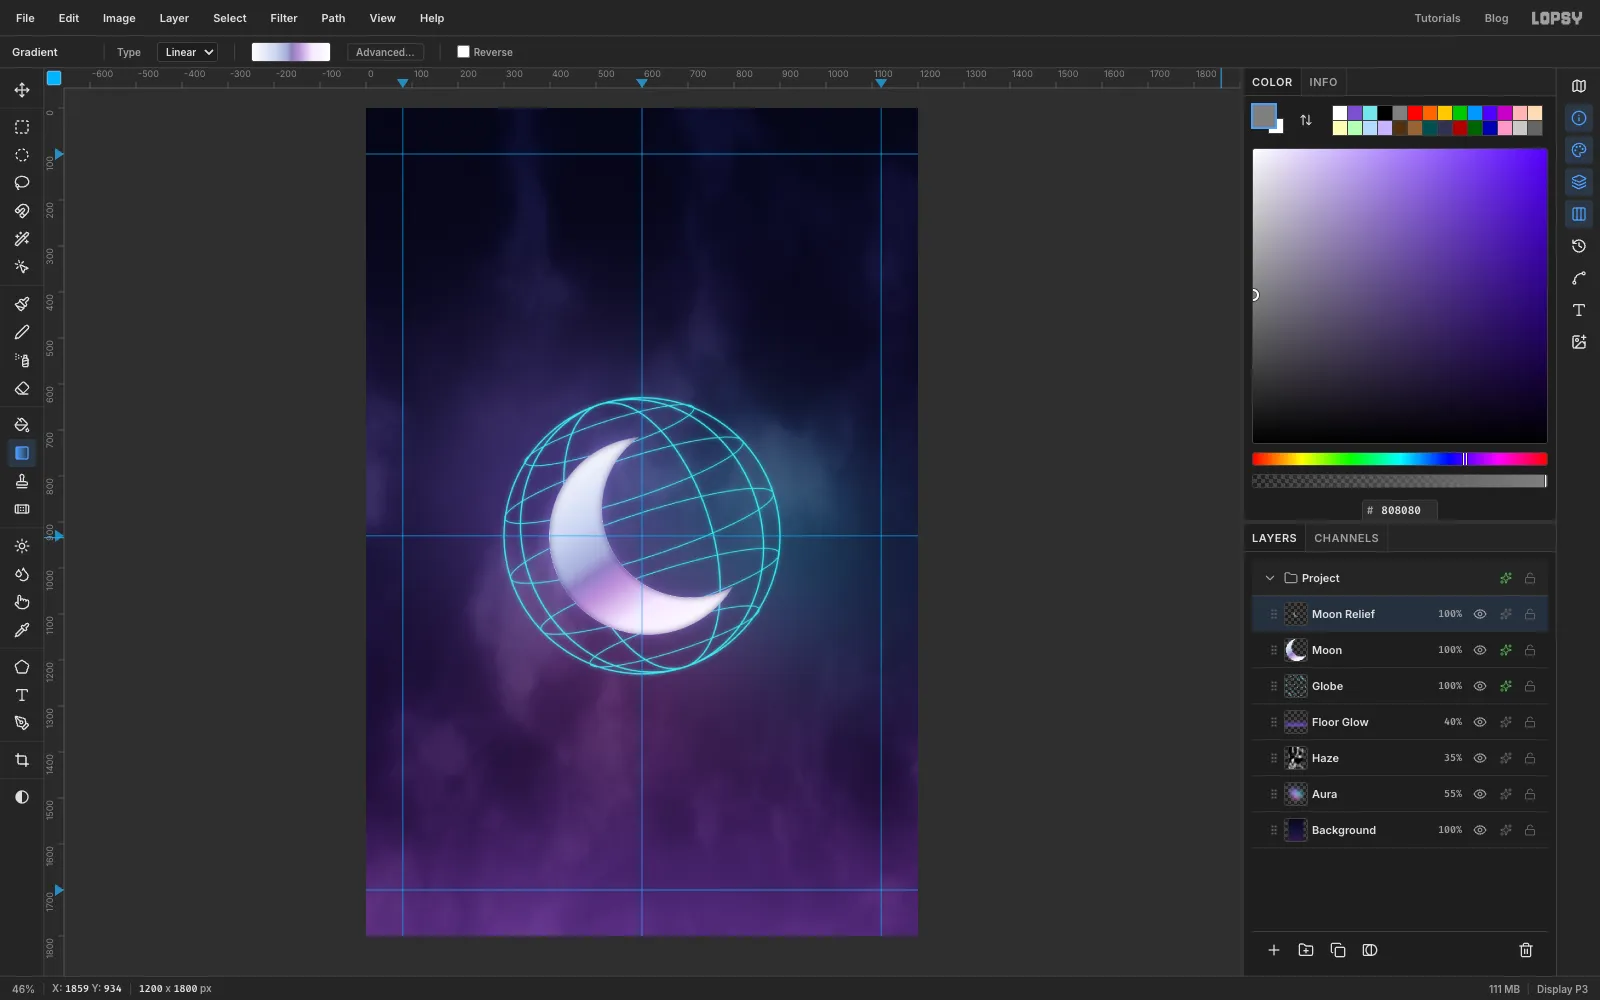
Overlay the relief
The emboss leaves a little grey outside the crescent. ⌘-click the Moon thumbnail again, choose Select → Inverse and press Delete, then ⌘D. Set Moon Relief to Overlay. The grey vanishes, and only the light and shade of the bevel stay on the chrome.
-
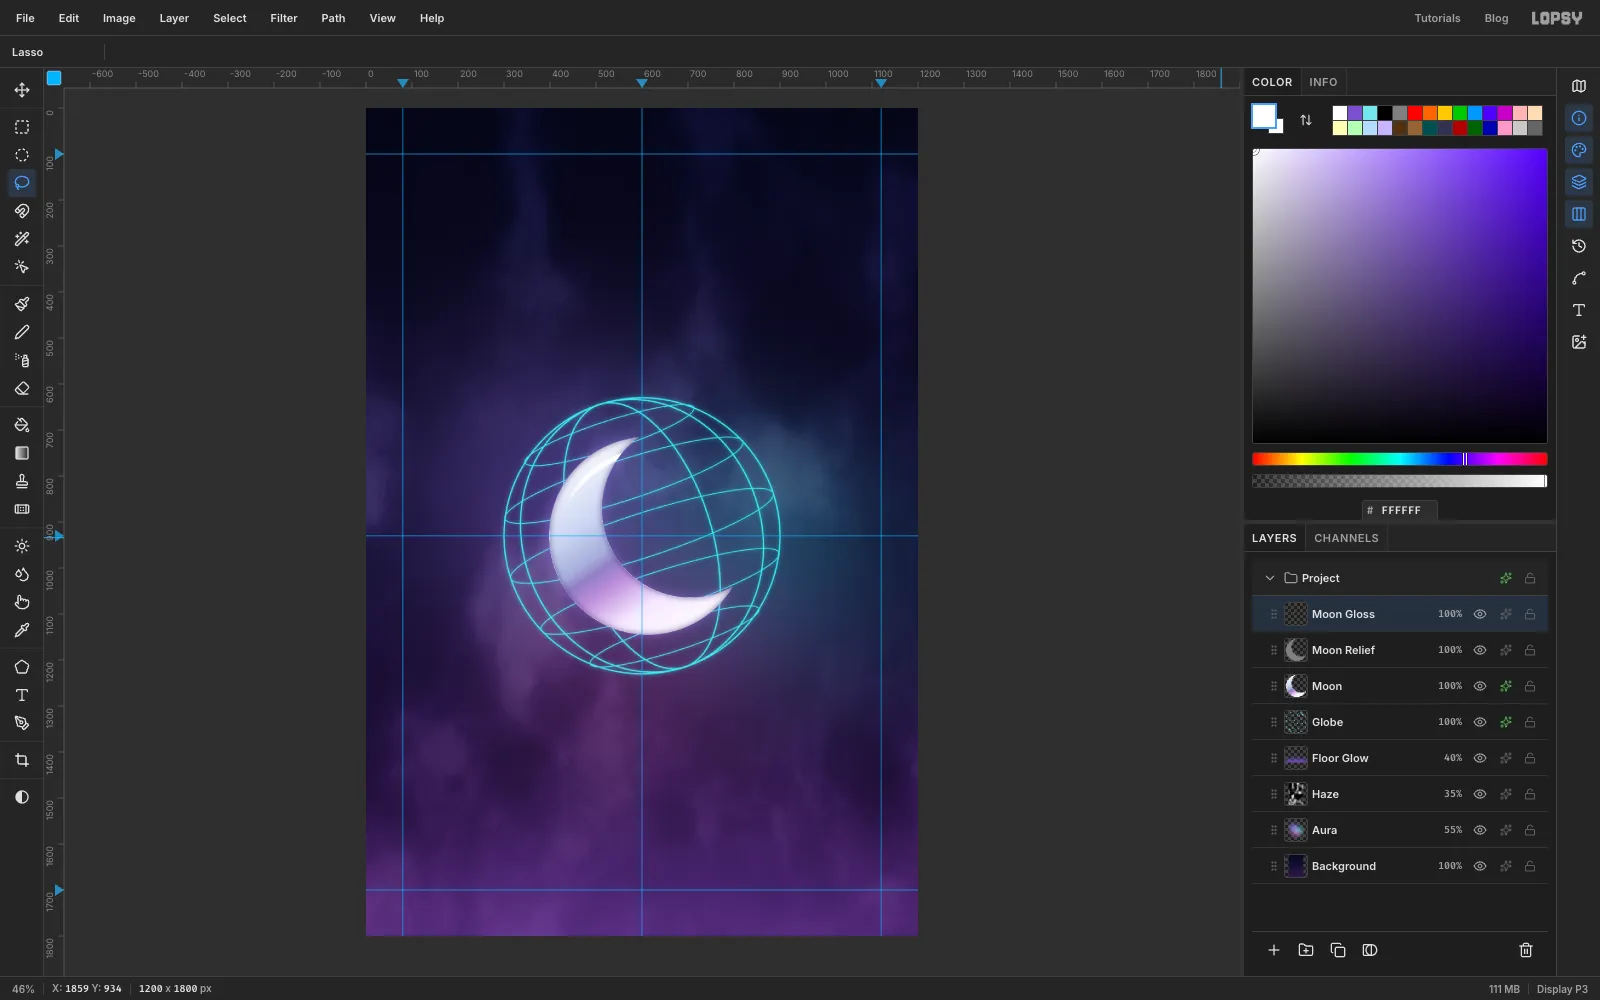
Add a gloss streak
Add a layer called
Moon Gloss. With the Lasso, draw a thin sliver that follows the outer curve on the upper left, just inside the edge, about 12 px thick in the middle and tapering to points at both ends. Set the foreground to white, fill it and press ⌘D.Blur it by 5 (Gaussian Blur). ⌘-click the Moon thumbnail, choose Select → Inverse and press Delete so the gloss can't spill past the edge. Deselect and set the layer to Screen.
-
Draw the first sparkle
Add a layer called
Sparkles. Just above and right of the moon's upper tip, lasso a four-point sparkle about 140 px across. Start at the top point and curve inward to the right point, then the bottom, then the left, then back to the top. With white as the foreground, fill it and press ⌘D.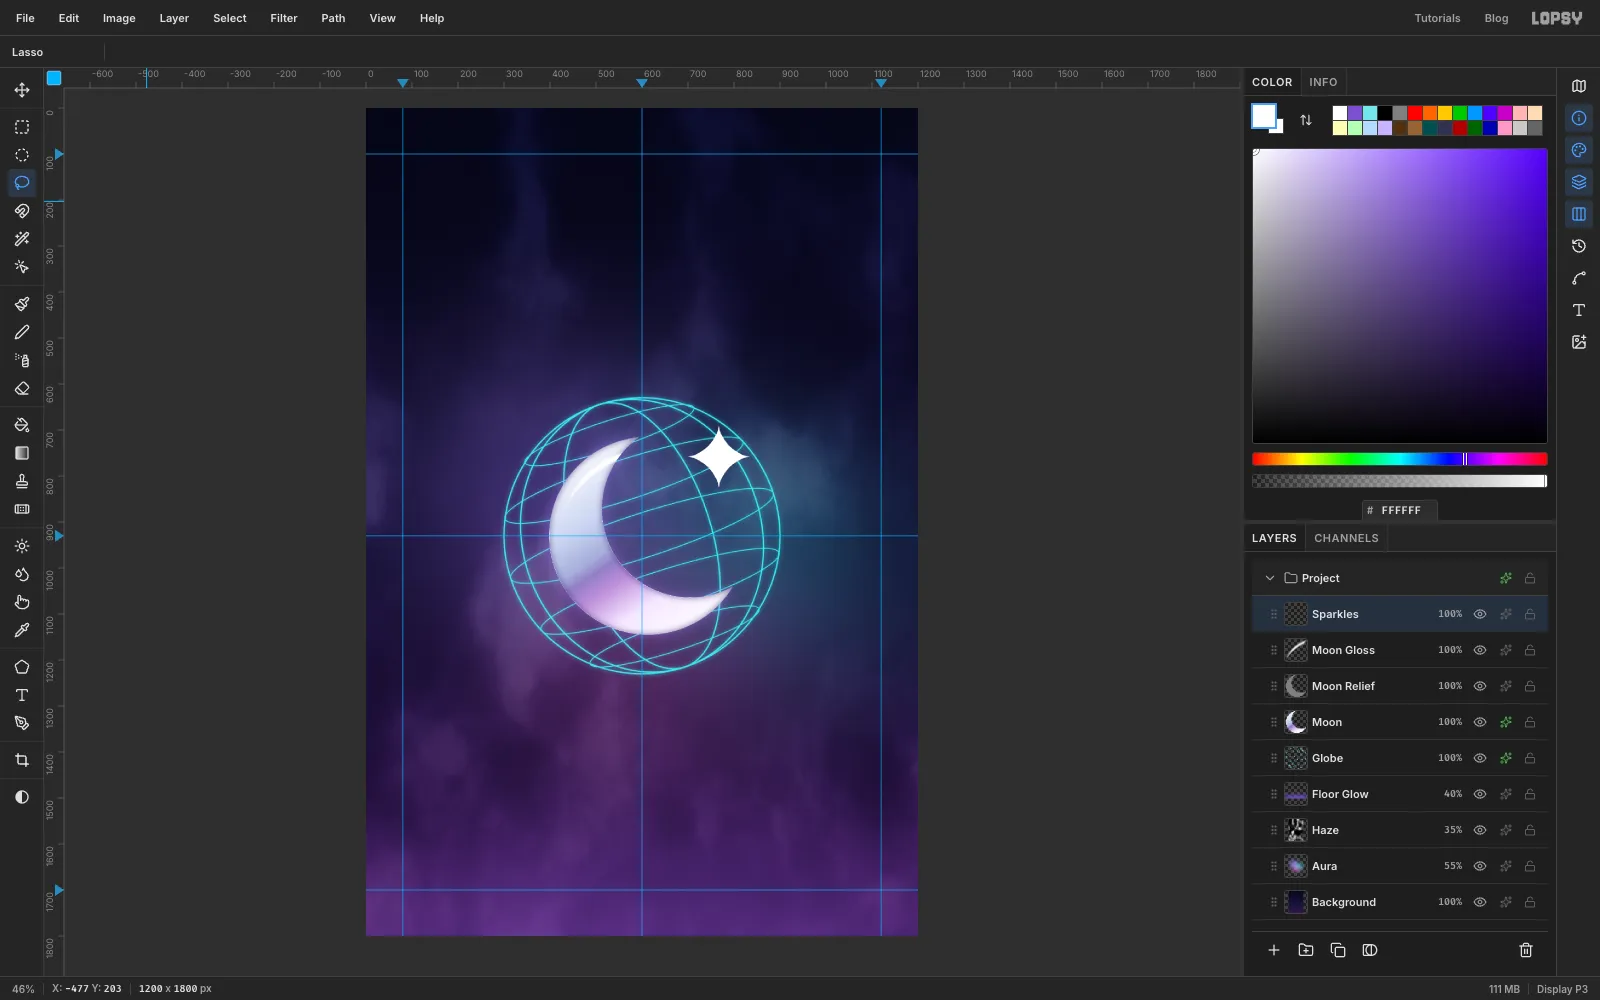
-
Paste a copy and move it
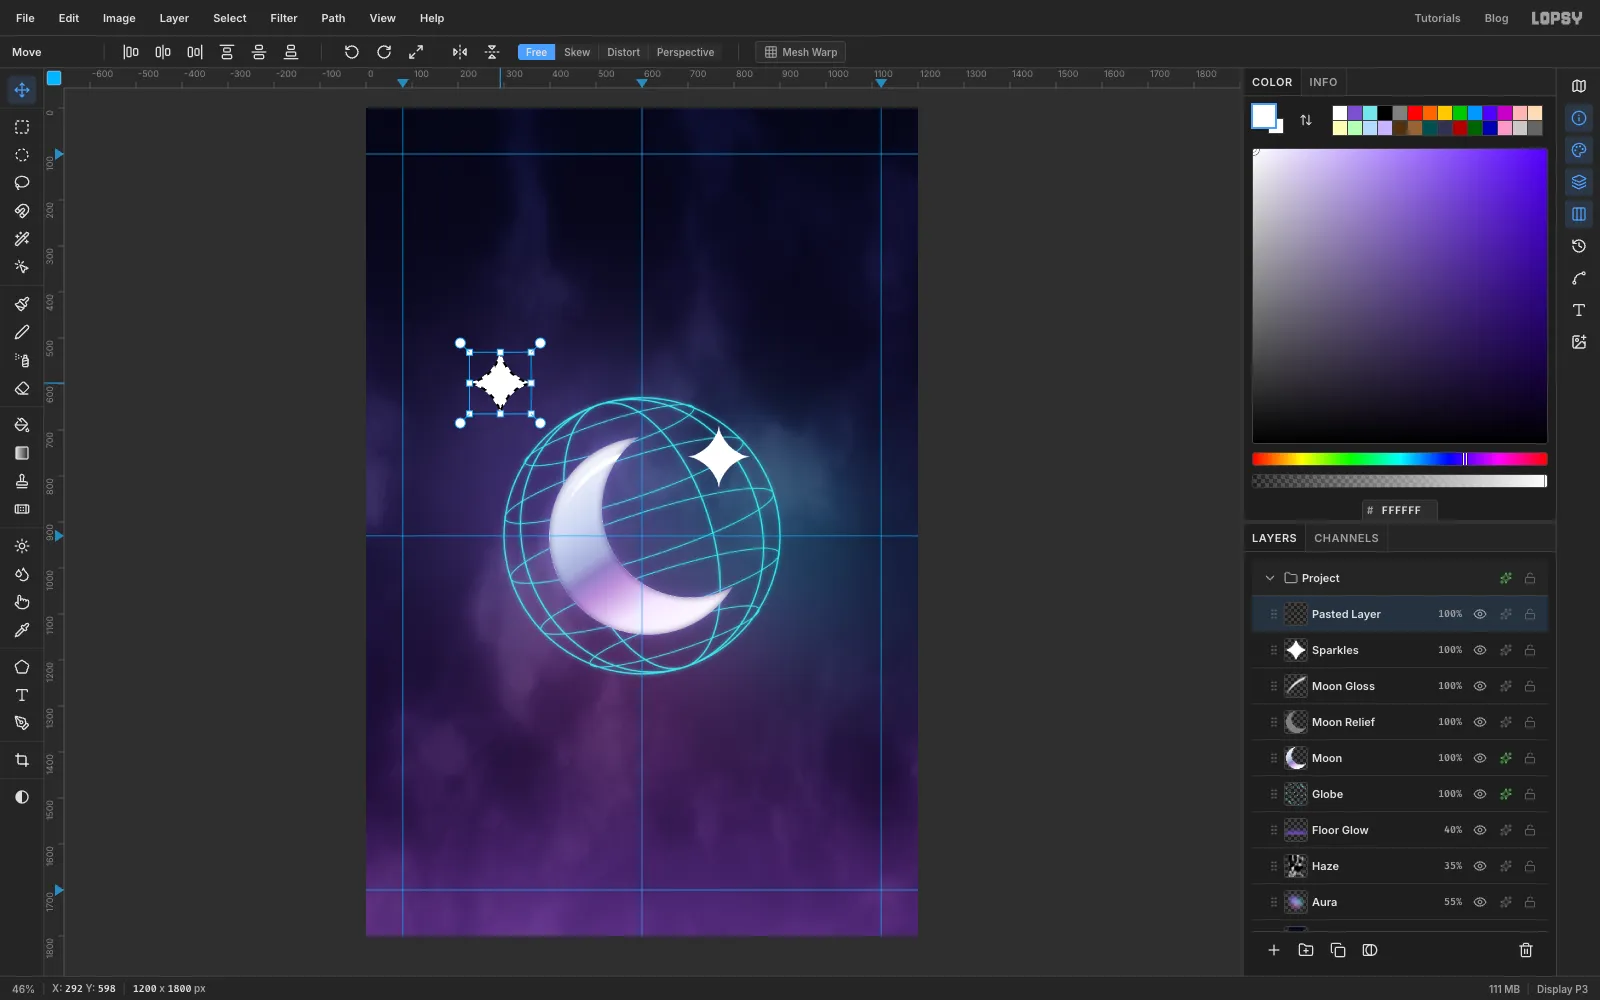
Draw a marquee around the sparkle, press ⌘C and then ⌘V. The copy pastes in place on a new layer. With the Move tool, drag it up and to the left until it sits just outside the globe's top-left edge.
-
Scale the copy down
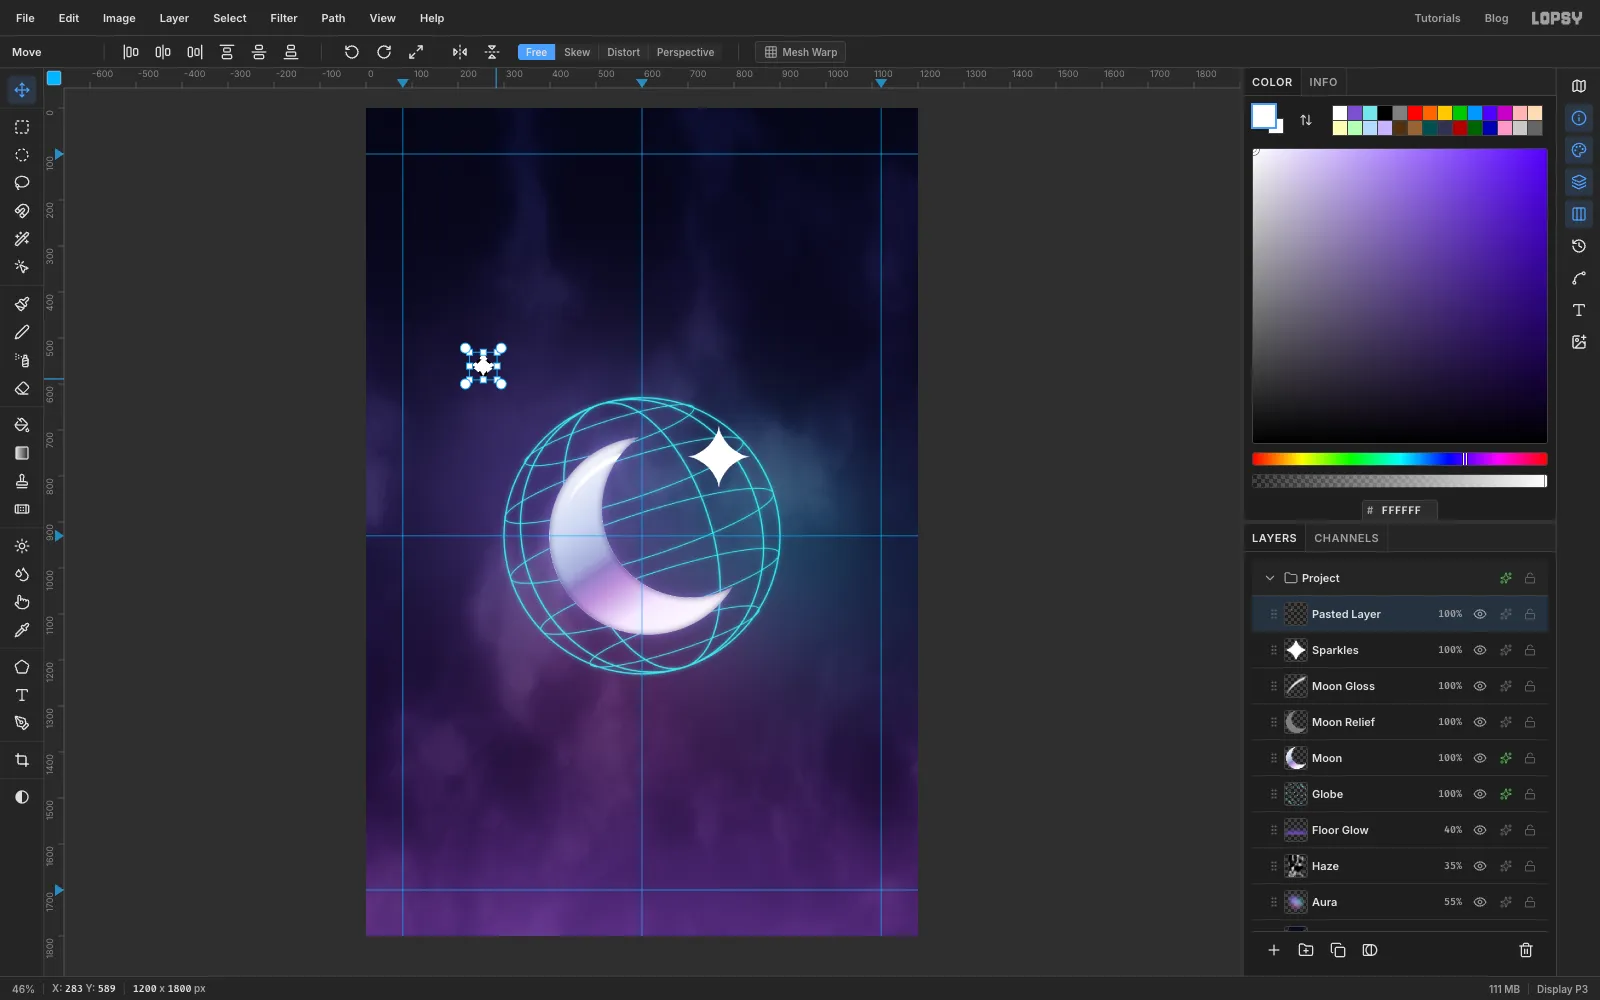
⌘-click the pasted layer's thumbnail so handles appear around it. Hold ⌘ to keep the proportions, and drag the bottom-right handle in until the sparkle is a little under half its size, about 60 px across. Press ⌘D, then choose Layer → Merge Down to put it back on
Sparkles.Do the same once more for a copy just outside the globe's right side, below its middle, scaled to about 56 px.
-
Scatter the small sparkles
On
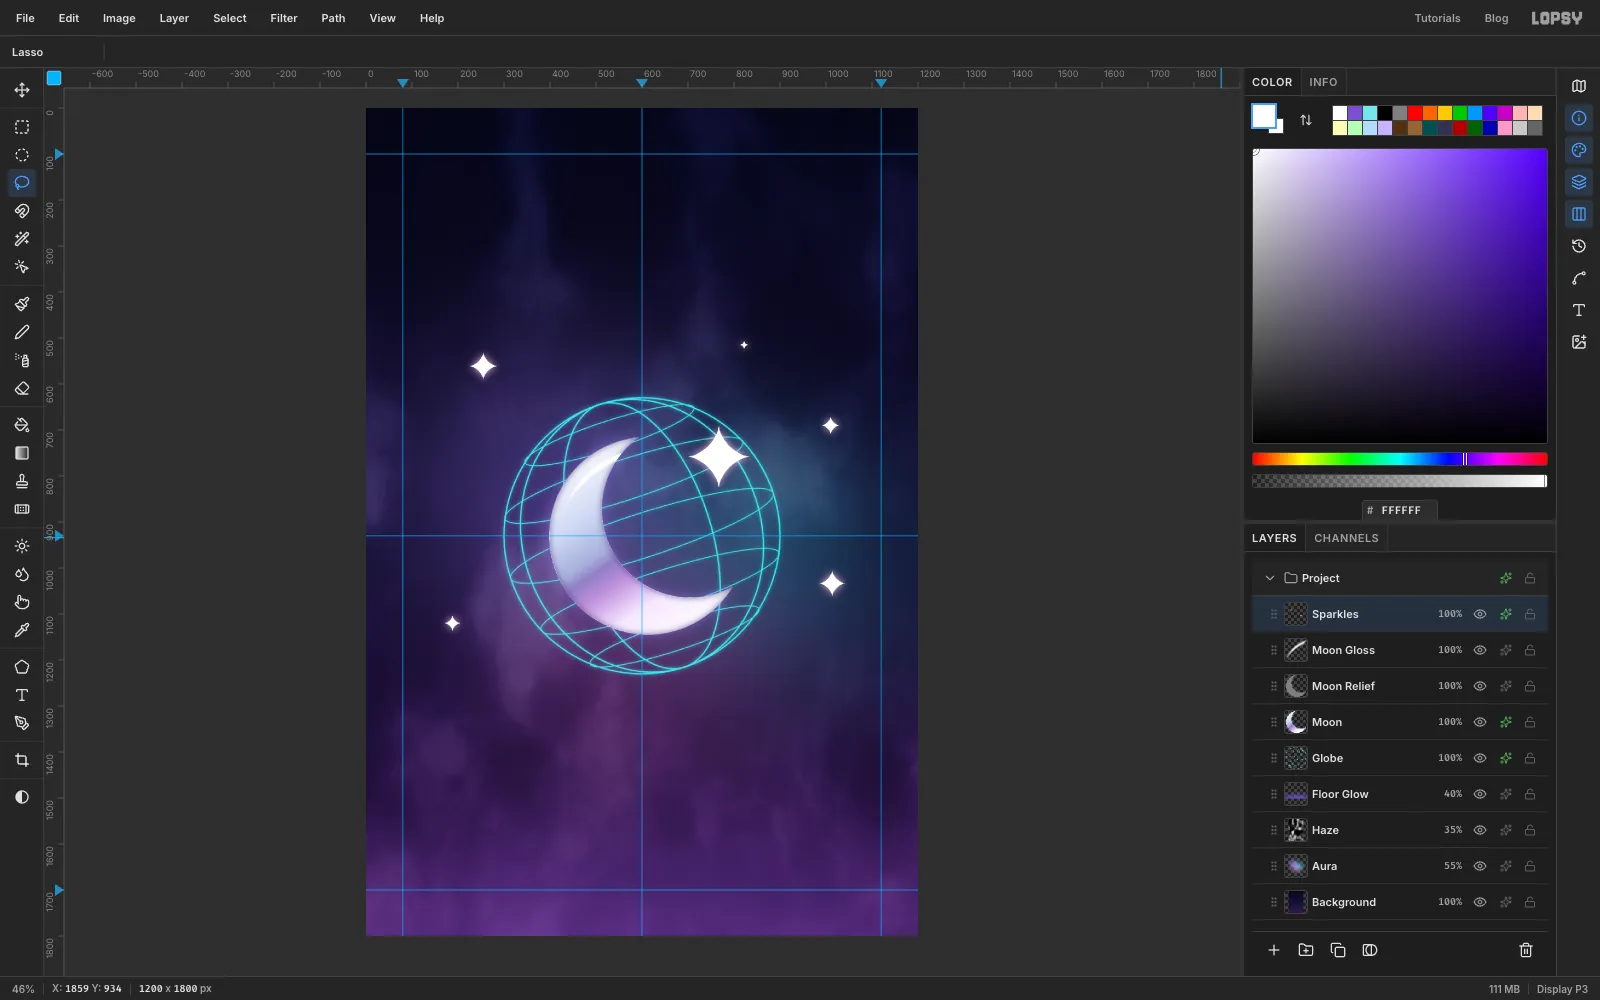
Sparkles, lasso and fill three smaller sparkles: a 36 px one at the lower left, a 40 px one at the upper right, and a tiny one above the globe, to the right of the centre guide. Keep them clear of the ring of text that will circle the globe, about 350 px from its centre.Turn on Outer Glow with , Size 26 and Opacity 90.
-
Set INSOMNIA
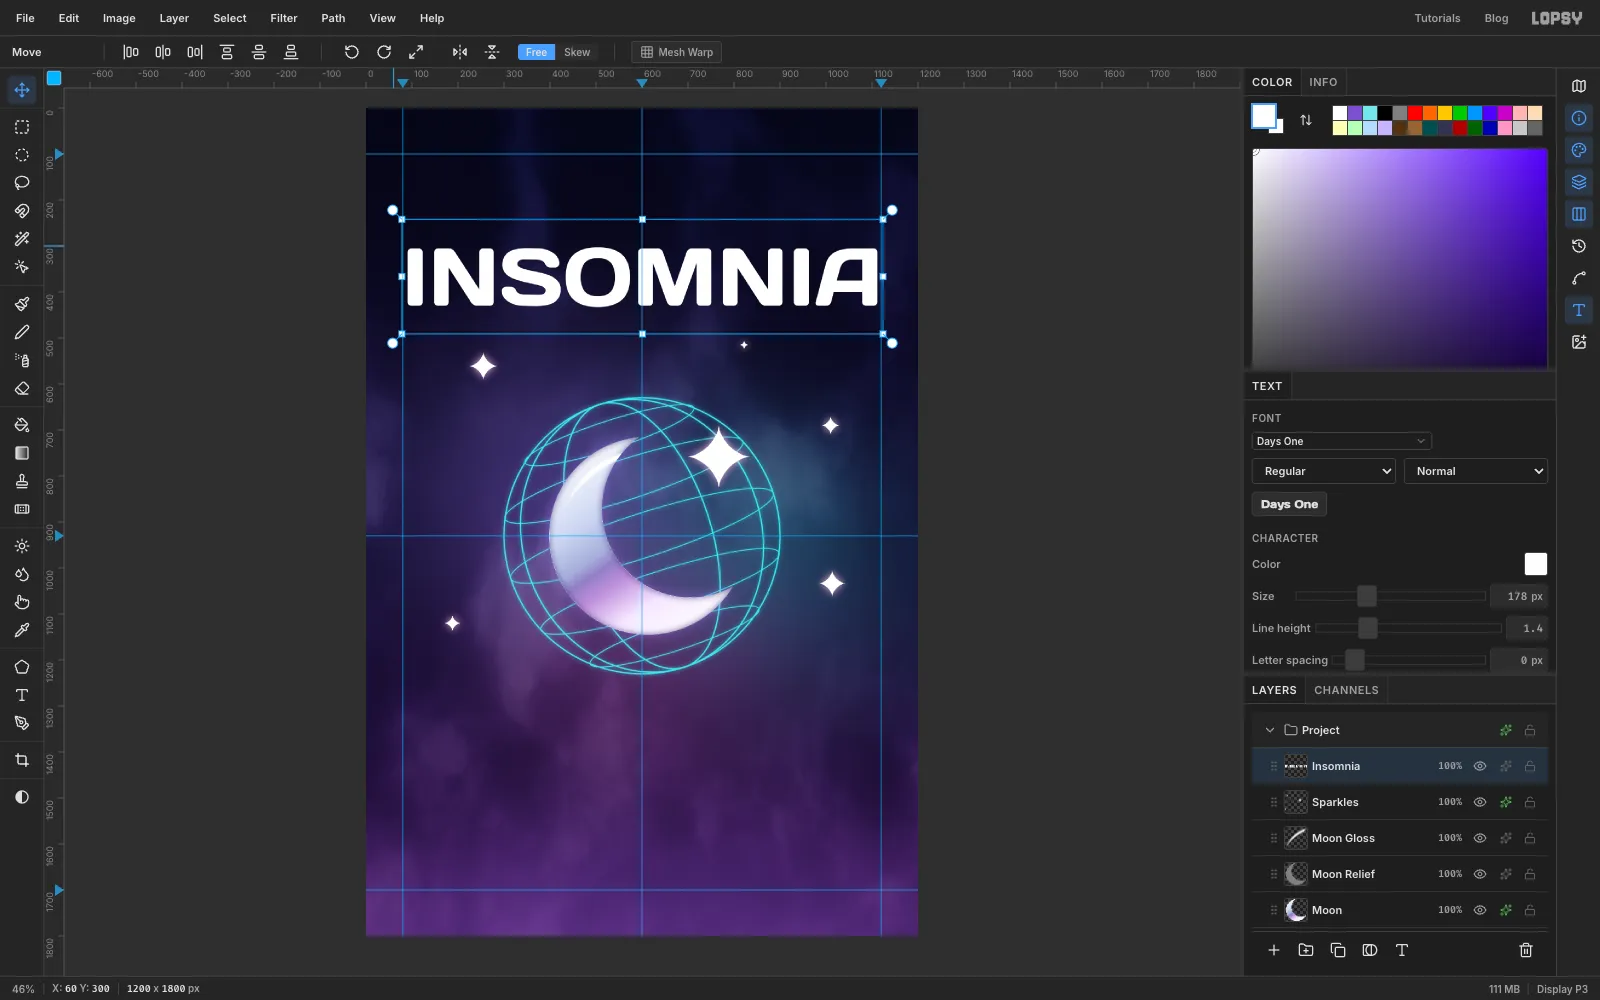
With Sparkles selected, choose the Text tool. Set the font to Days One, the size to 178 and the colour to white. Click in an empty area, type
INSOMNIAand press Tab. Rename the layerInsomnia.Switch to the Move tool and position the word so it spans just inside the margin guides (about 90 to 1110), centred on the centre guide. Its letters should sit between about y 300 and y 430.
-
Make an RGB-split ghost
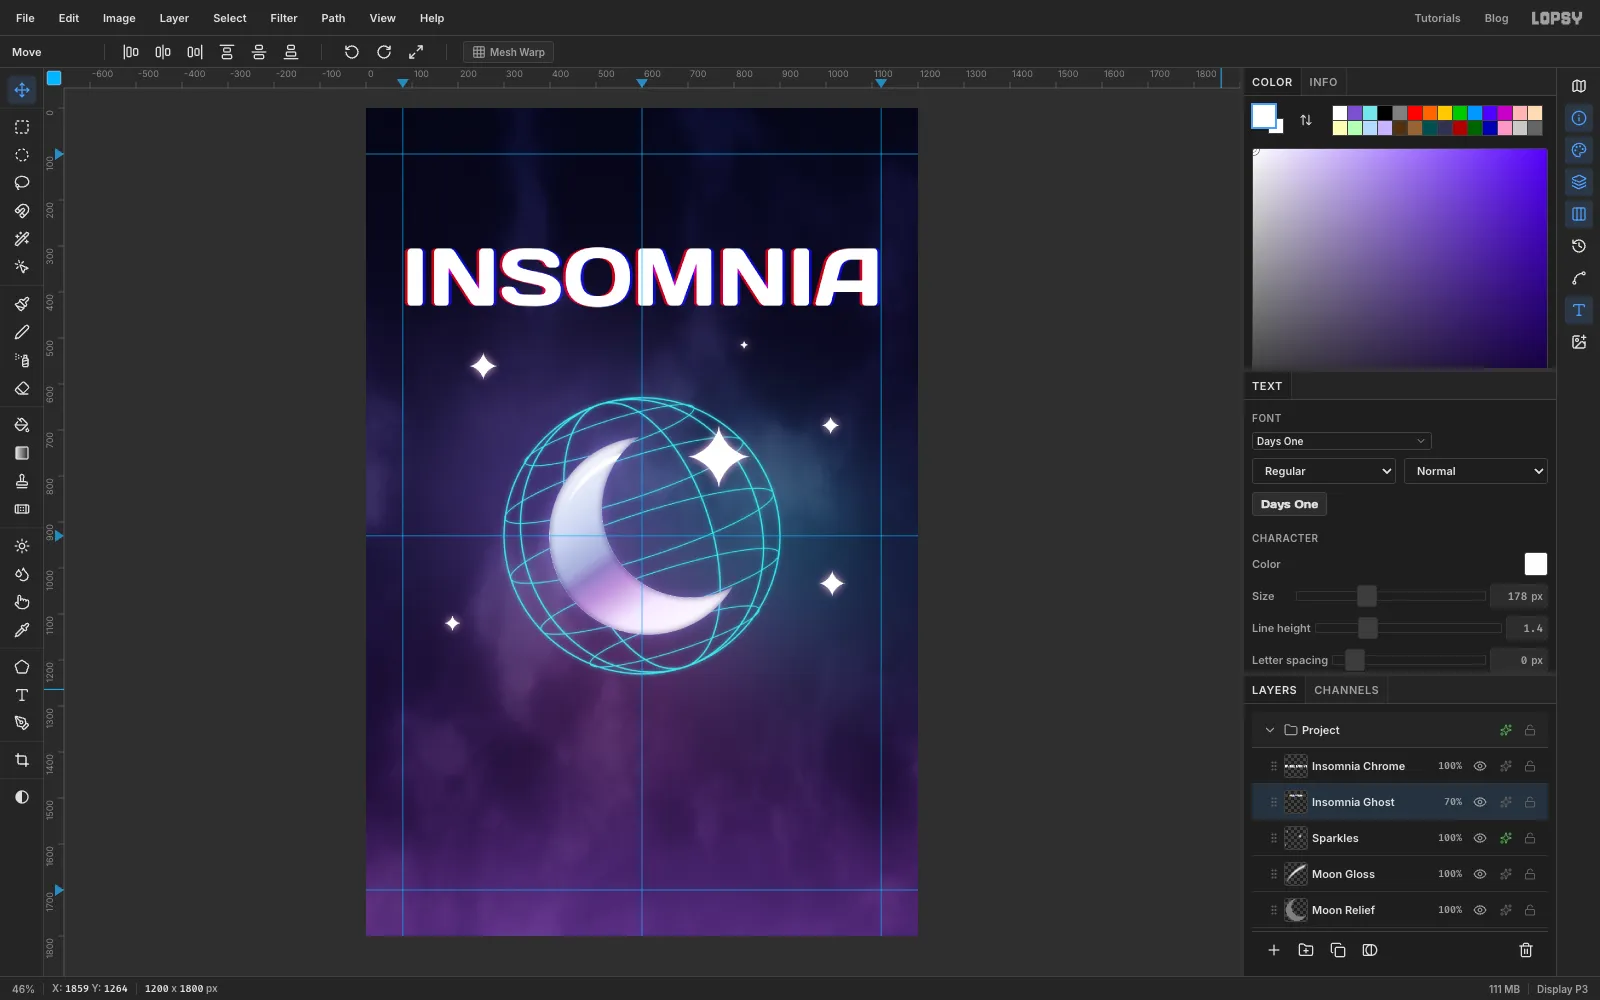
Click Rasterize Layer at the bottom of the Layers panel, then Duplicate Layer. Rename the copy
Insomnia Chrome. It should sit exactly over the original; if it's offset, nudge it back with the arrow keys. Rename the original, underneath, toInsomnia Ghost.Select Insomnia Ghost and run Filter → Chromatic Aberration... with Amount 6 and Direction 0. Set it to Screen at 70%. Only thin red and blue fringes show past the edges of the copy on top.
-
Fill the title with chrome
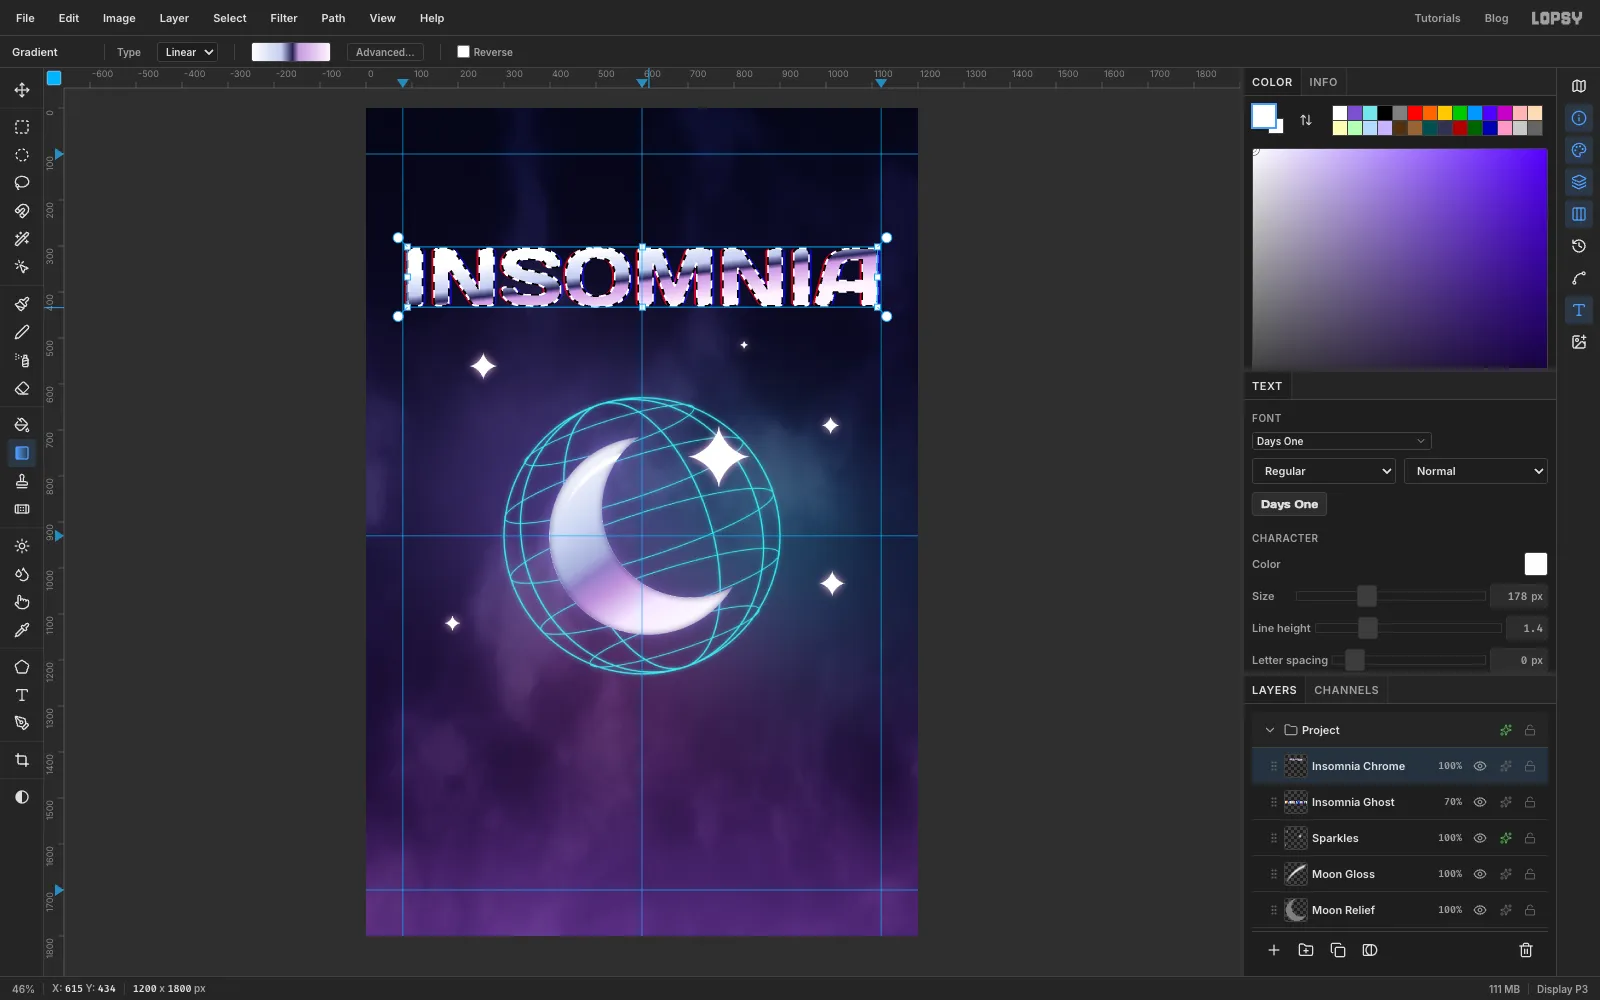
Select Insomnia Chrome and ⌘-click its thumbnail. With the Gradient tool, open Advanced… and delete stops until five are left. Set them to at 0%, at 38%, at 52%, at 60% and at 100%. Drag from the top of the letters to their bottom, leaning slightly to the right, so the hard dark line runs just below the middle with a slight slant. Press ⌘D.
-
Glow the title
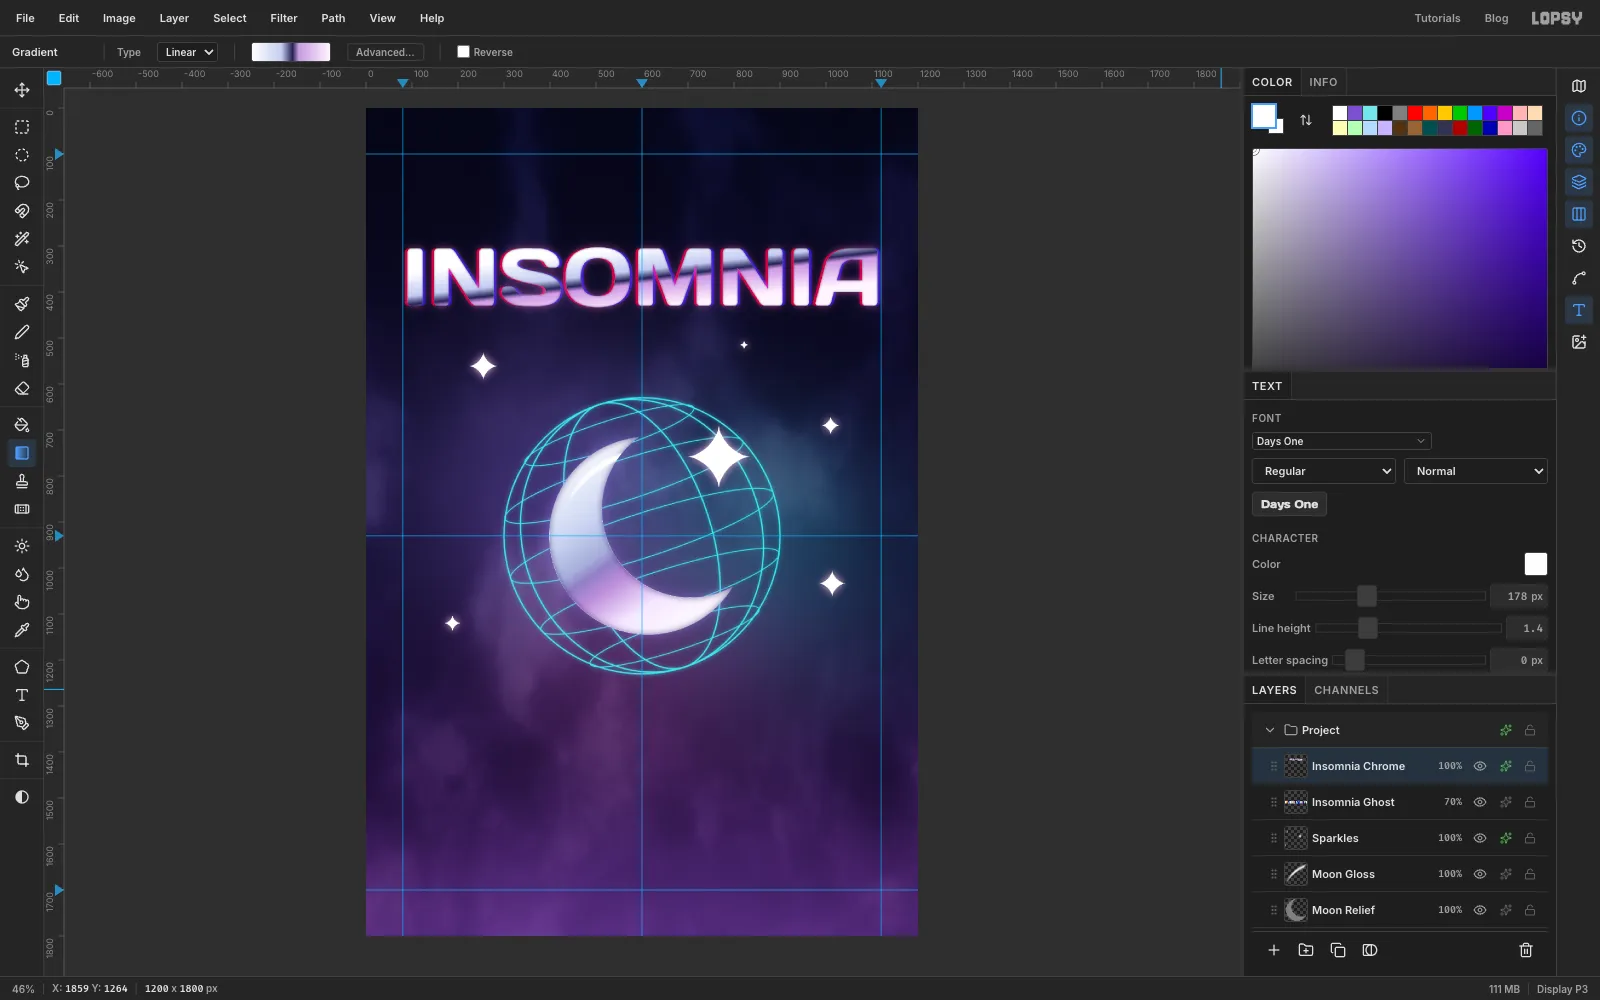
Open its effects drawer. Turn on Inner Glow with , Size 6 and Opacity 60. Then turn on Outer Glow with , Size 26 and Opacity 60.
-
Add MILLENNIUM above it
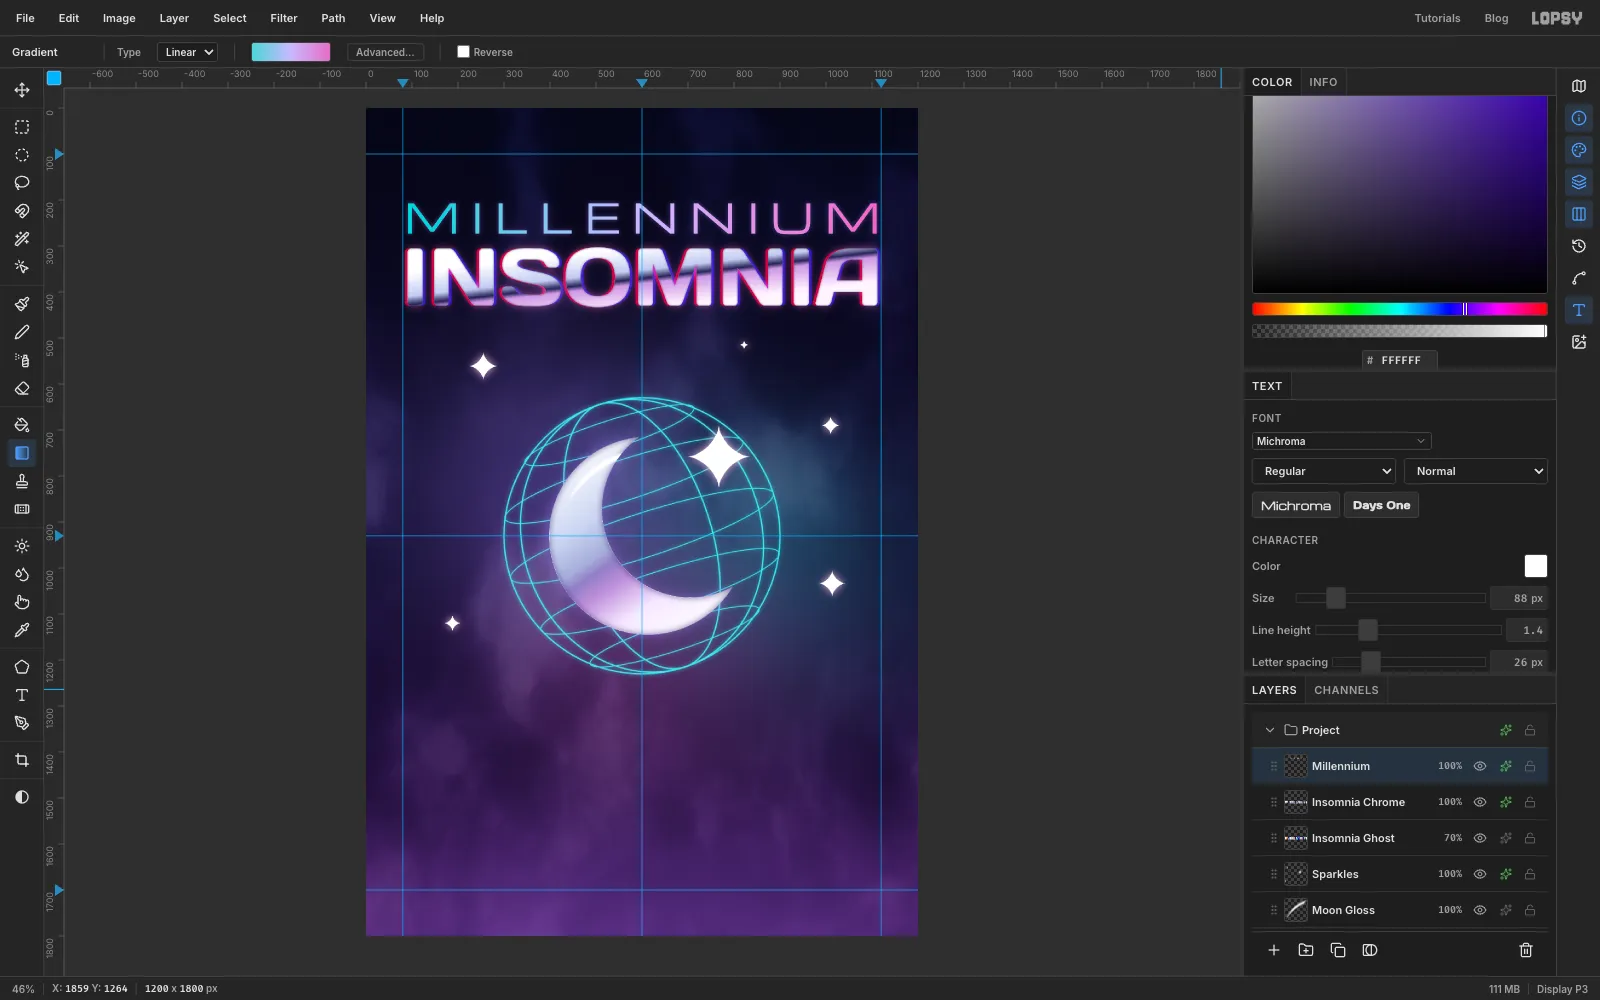
With Insomnia Chrome still selected, choose the Text tool and set Michroma at 88, white. Type
MILLENNIUM, press Tab, rename the layerMillenniumand set Letter spacing to 26 in the Text panel. Move it so it spans the same width as INSOMNIA, with its letters from about y 207 to y 273. That leaves a gap of about 30 px above INSOMNIA.Rasterize it and ⌘-click its thumbnail. Delete stops until three are left and set them to at 0%, at 50% and at 100%. Drag from the left end of the word straight across to the right end. Deselect and add an Outer Glow of , Size 16, Opacity 45.
-
Draw a circle path for the ring text
Choose the Shape tool, keep Ellipse, and set Output to Path. Press at the globe's centre (600, 930), hold ⌘ and drag out to make a circle about 692 px across (a radius of 346). It appears in the Paths panel as
Path 1.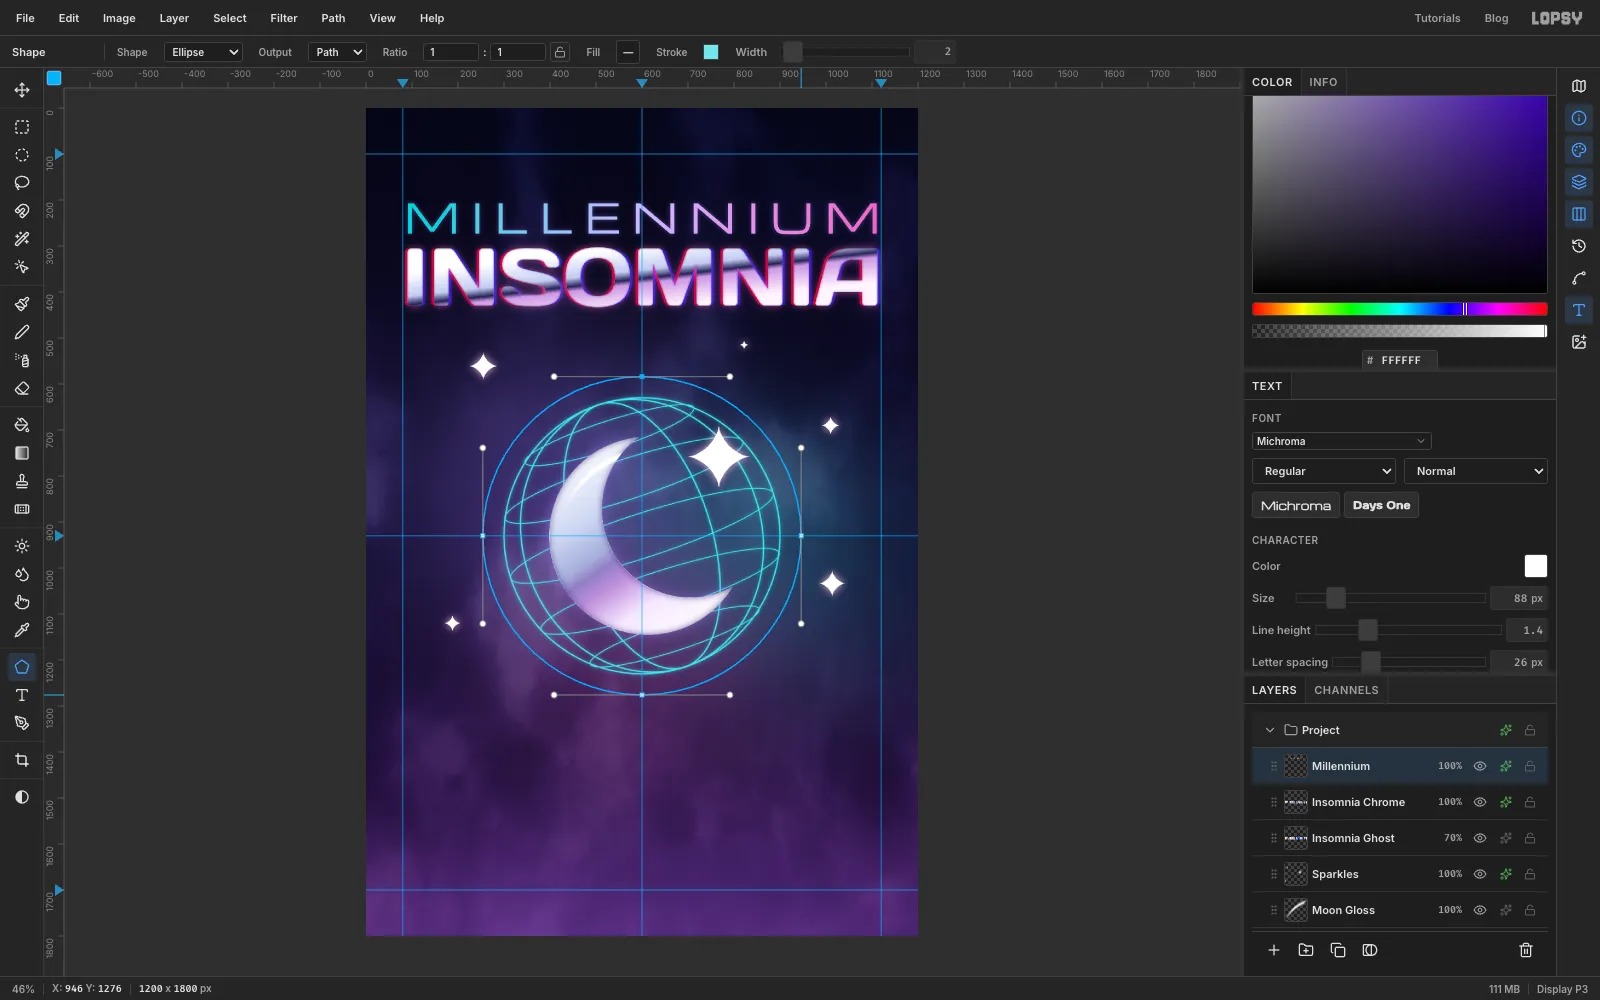
-
Run the text round the globe
Select Globe, so the text sits under the moon. Choose the Text tool with Electrolize at 26 and the colour . Click in an empty area and type
ARE YOU STILL AWAKE? +five times, with two spaces either side of each plus. Press Tab, rename the layerRing Textand set Letter spacing to 4.In the Text options bar, set Path to Path 1. The text wraps round the circle, starting at the top. Check the seam at the top: every plus should have the same space either side. If the end crowds into the start, the text is too long for the circle. Lower Letter spacing by 0.5, or draw the circle a few pixels bigger. If the gap at the seam is wider than the others, do the opposite. To redraw, delete
Path 1in the Paths panel, draw a new circle and pick it under Path. When the seam is even, click the path in the Paths panel to deselect it, so its outline stops showing.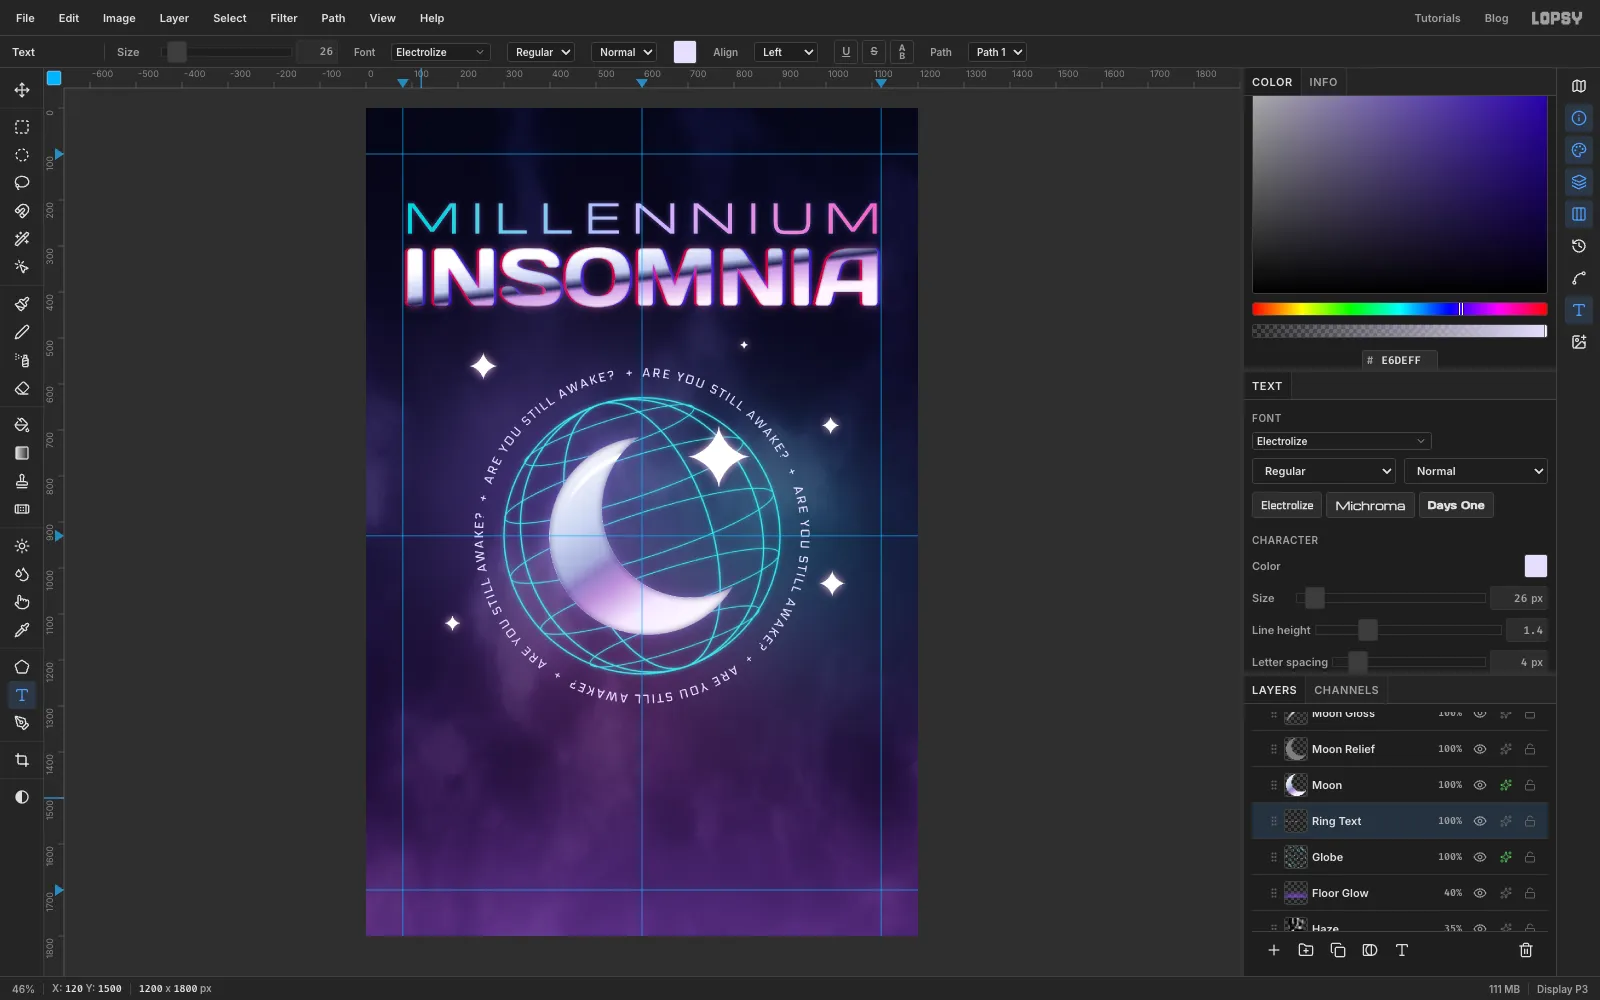
-
Draw the clock bezel
Select Millennium, click New Group and name it
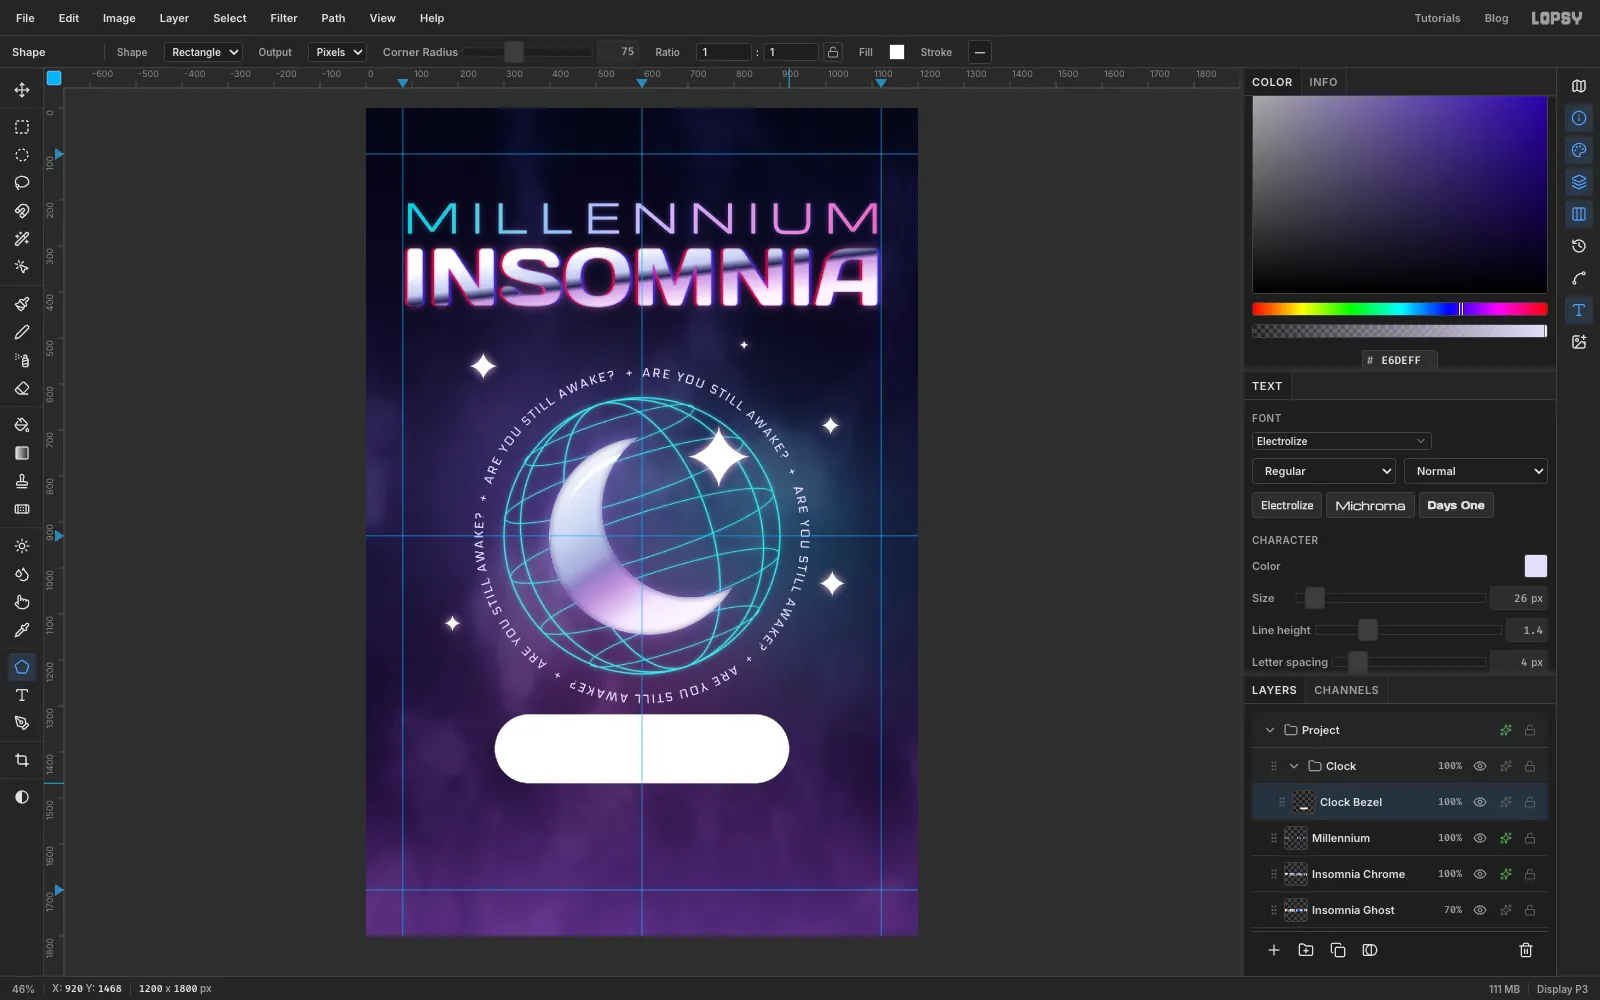
Clock. Add a layer inside it calledClock Bezel.With the Shape tool, set Shape to Rectangle, Output to Pixels, the fill to white, no stroke and Corner Radius to 75. Press on the centre guide where the status bar reads y 1393, and drag down and right to about 920, 1468. That makes a pill 640 × 150 px.
-
Chrome the bezel and add the screen
⌘-click the Clock Bezel thumbnail and fill it with a vertical chrome gradient of five stops: at 0%, at 42%, at 50%, at 62% and at 100%. Drag from the top of the pill to the bottom. Deselect and give it an Outer Glow of , Size 30, Opacity 30.
Add a layer called
Clock Screen. Draw another rounded rectangle from the same centre, with fill and Corner Radius 63. Press at the same point (600, 1393) and drag to about 908, 1456, for a 616 × 126 px screen with a 12 px chrome rim all round. Give it an Inner Glow of , Size 18, Opacity 55.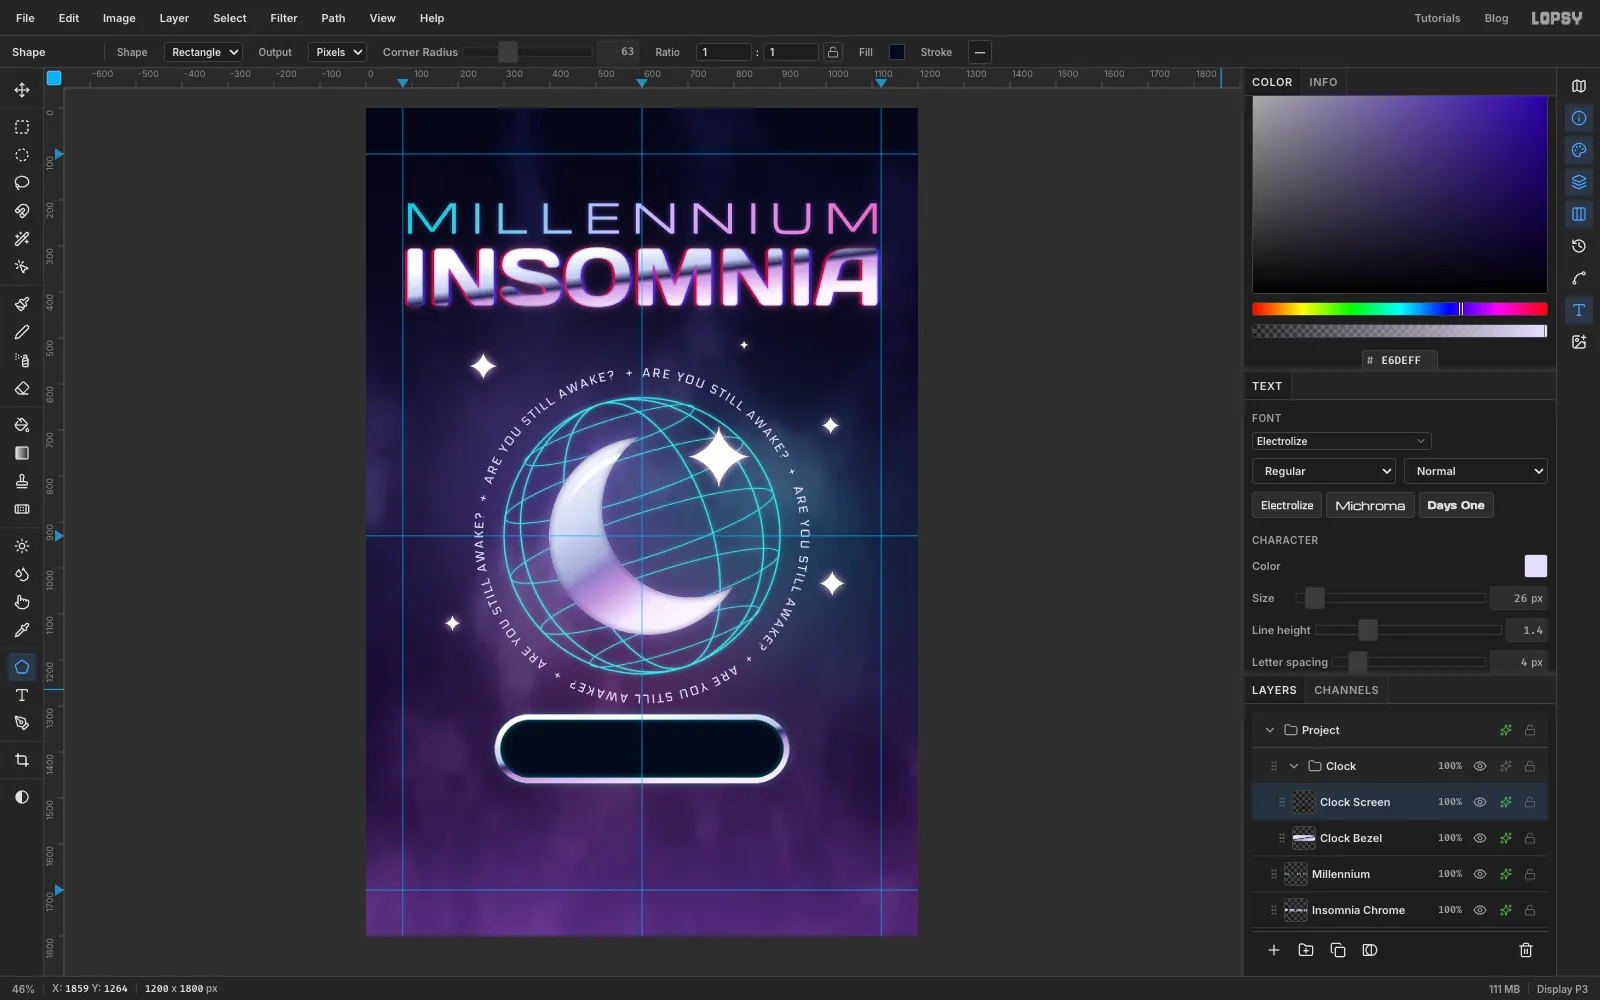
-
Type the time
With Clock Screen selected, set the Text tool to VT323 at 128 with the colour . Type
23:59:59, press Tab, rename the layerDigitsand set Letter spacing to 6. Centre the digits in the screen. They should have about the same space above and below, and roughly 90 px either side. Add an Outer Glow of , Size 22, Opacity 60.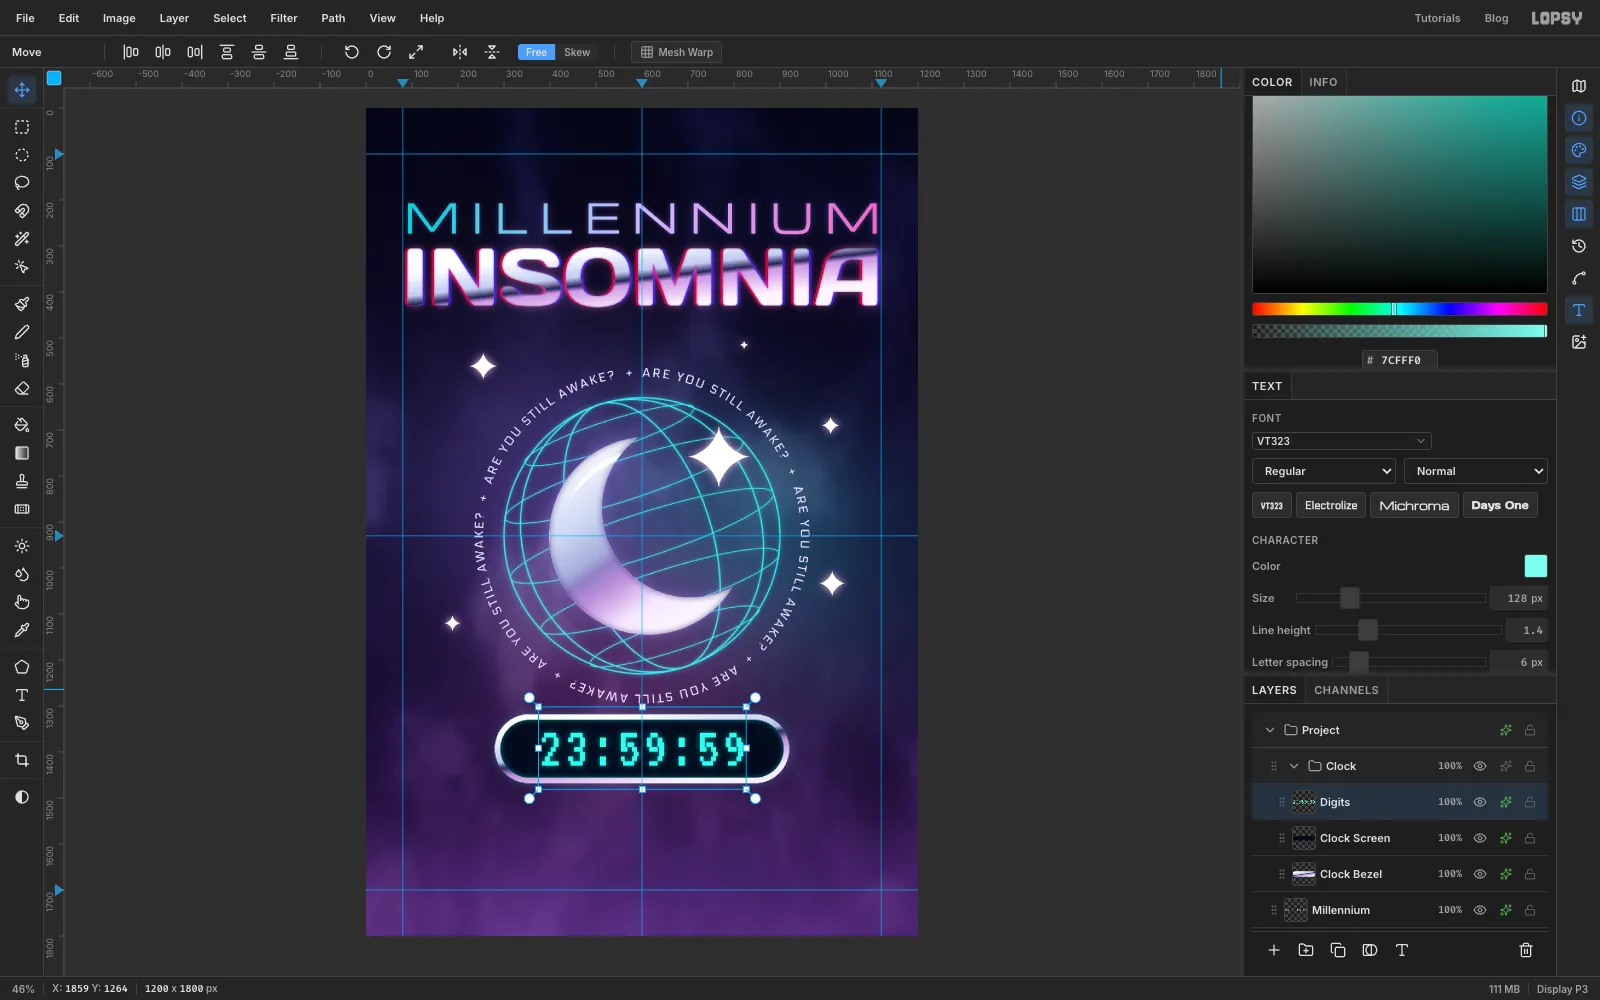
-
Cut a gloss strip with an intersecting marquee
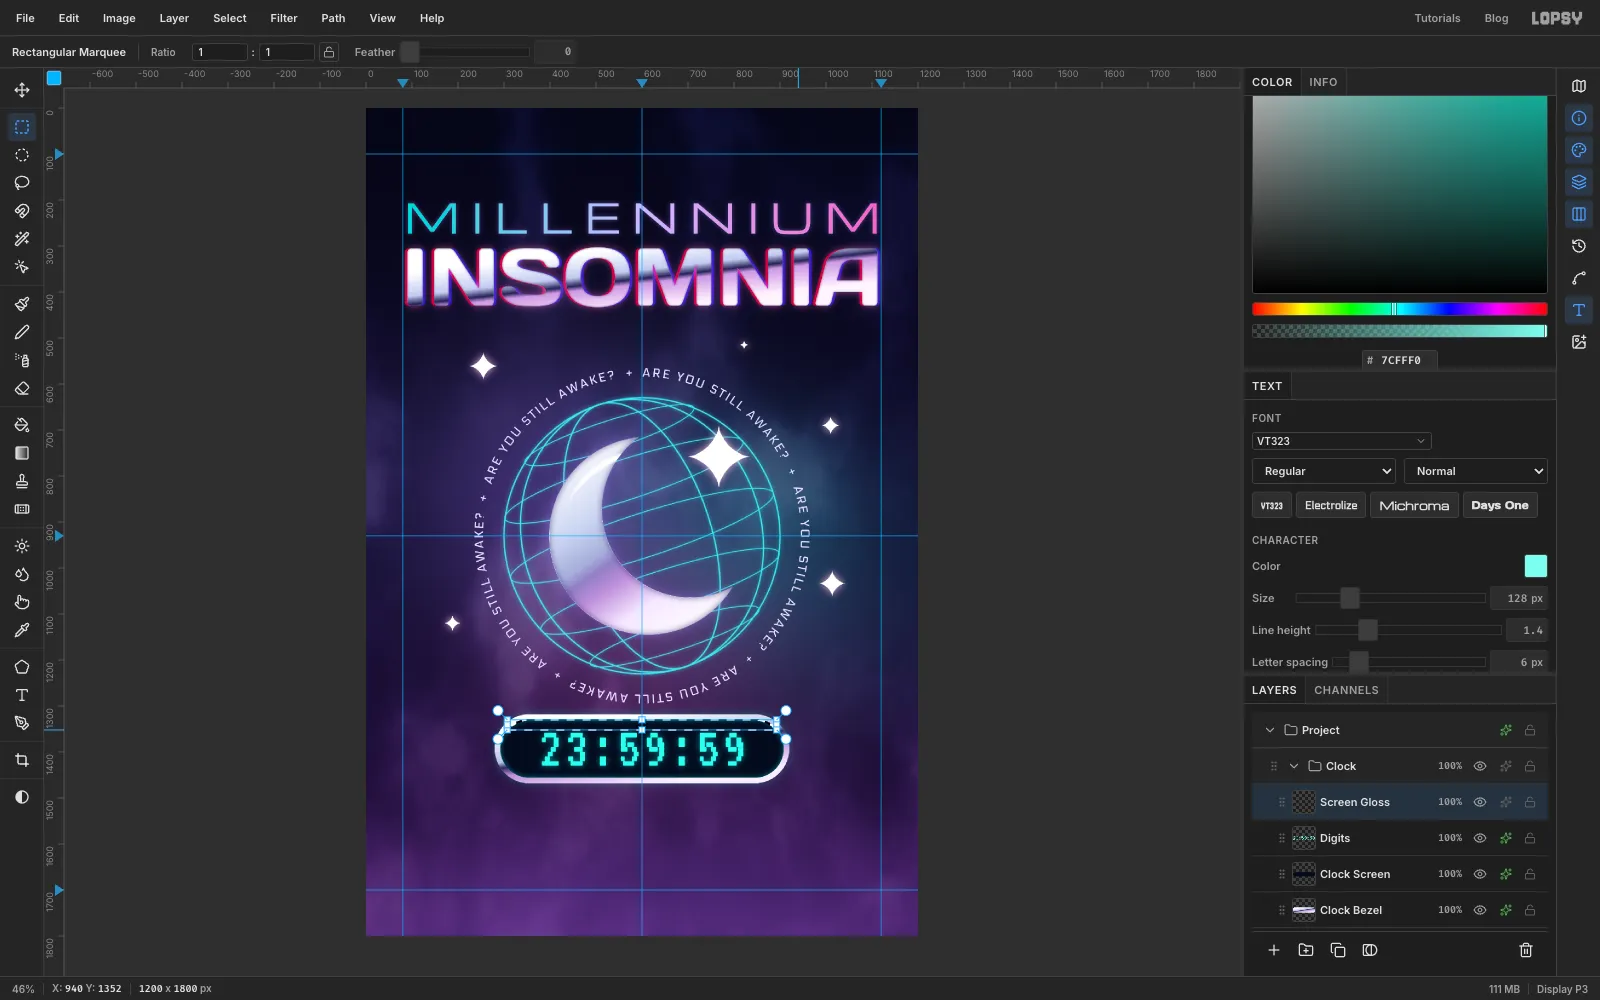
Add a layer called
Screen Gloss. ⌘-click the Clock Screen thumbnail. With the Rectangular Marquee, hold Shift and Option and drag a rectangle from above the top-left of the pill across to the right, ending just above the tops of the digits. Holding both keys intersects the two shapes, leaving only a rounded strip along the top of the screen.Fill it with white (set the foreground first), deselect, set it to Screen and set the opacity to 16%. That's the glassy Aqua-button highlight.
-
Draw the starburst with the Pen
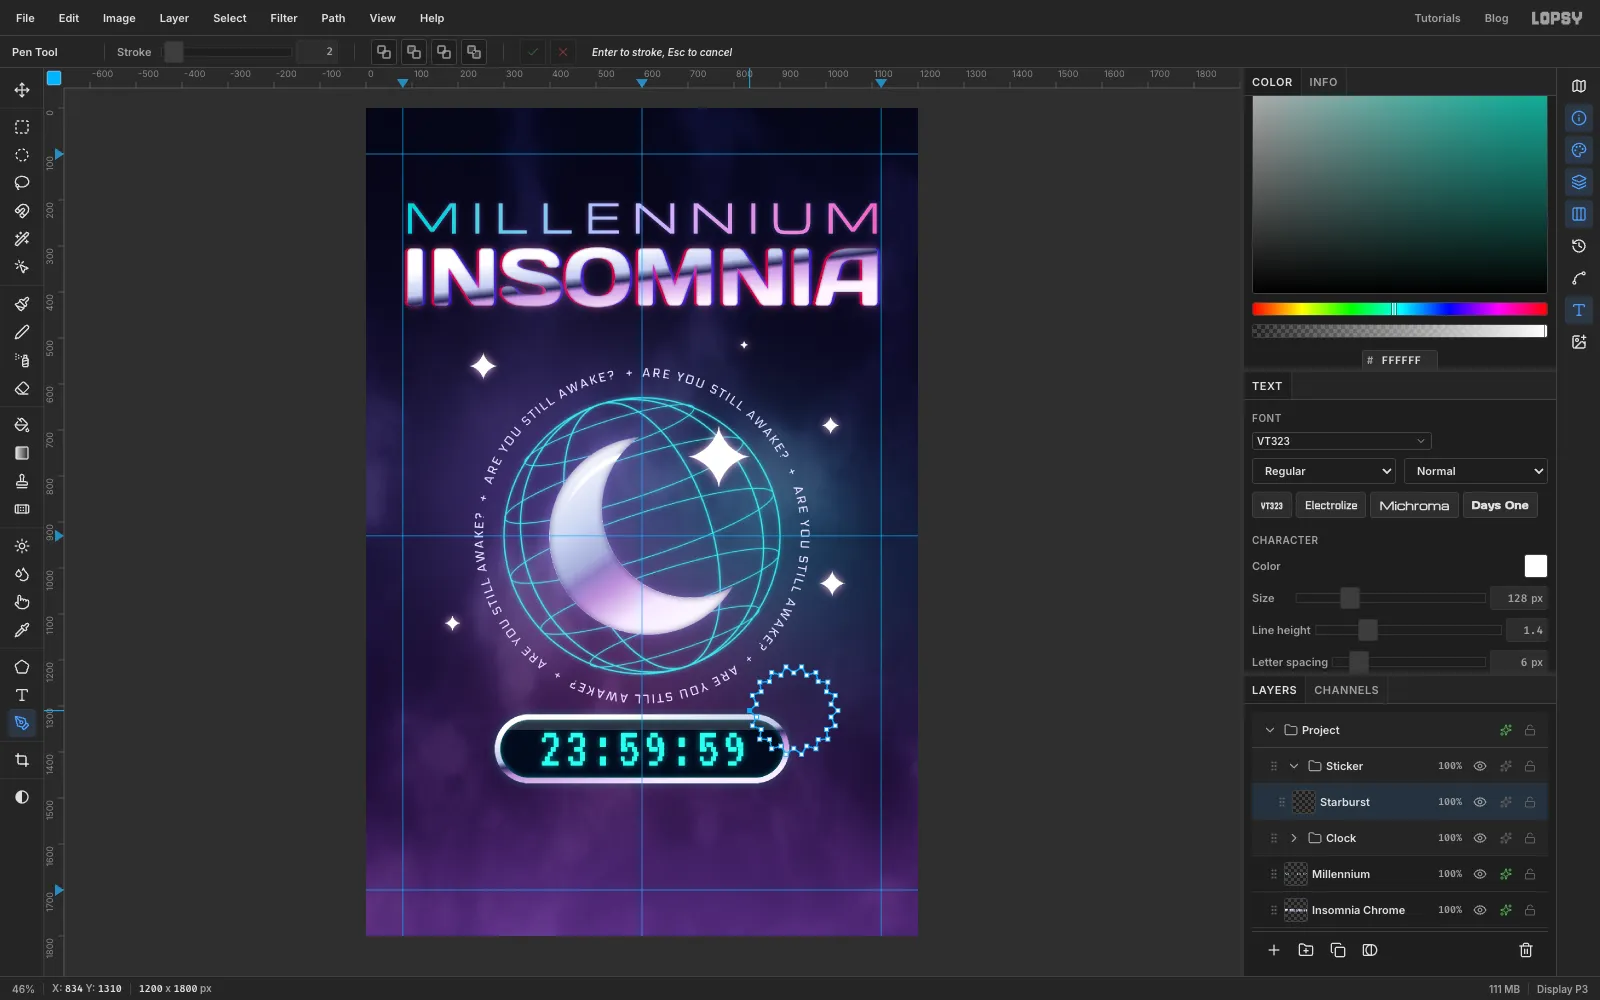
Collapse the Clock group, select its row, click New Group and name it
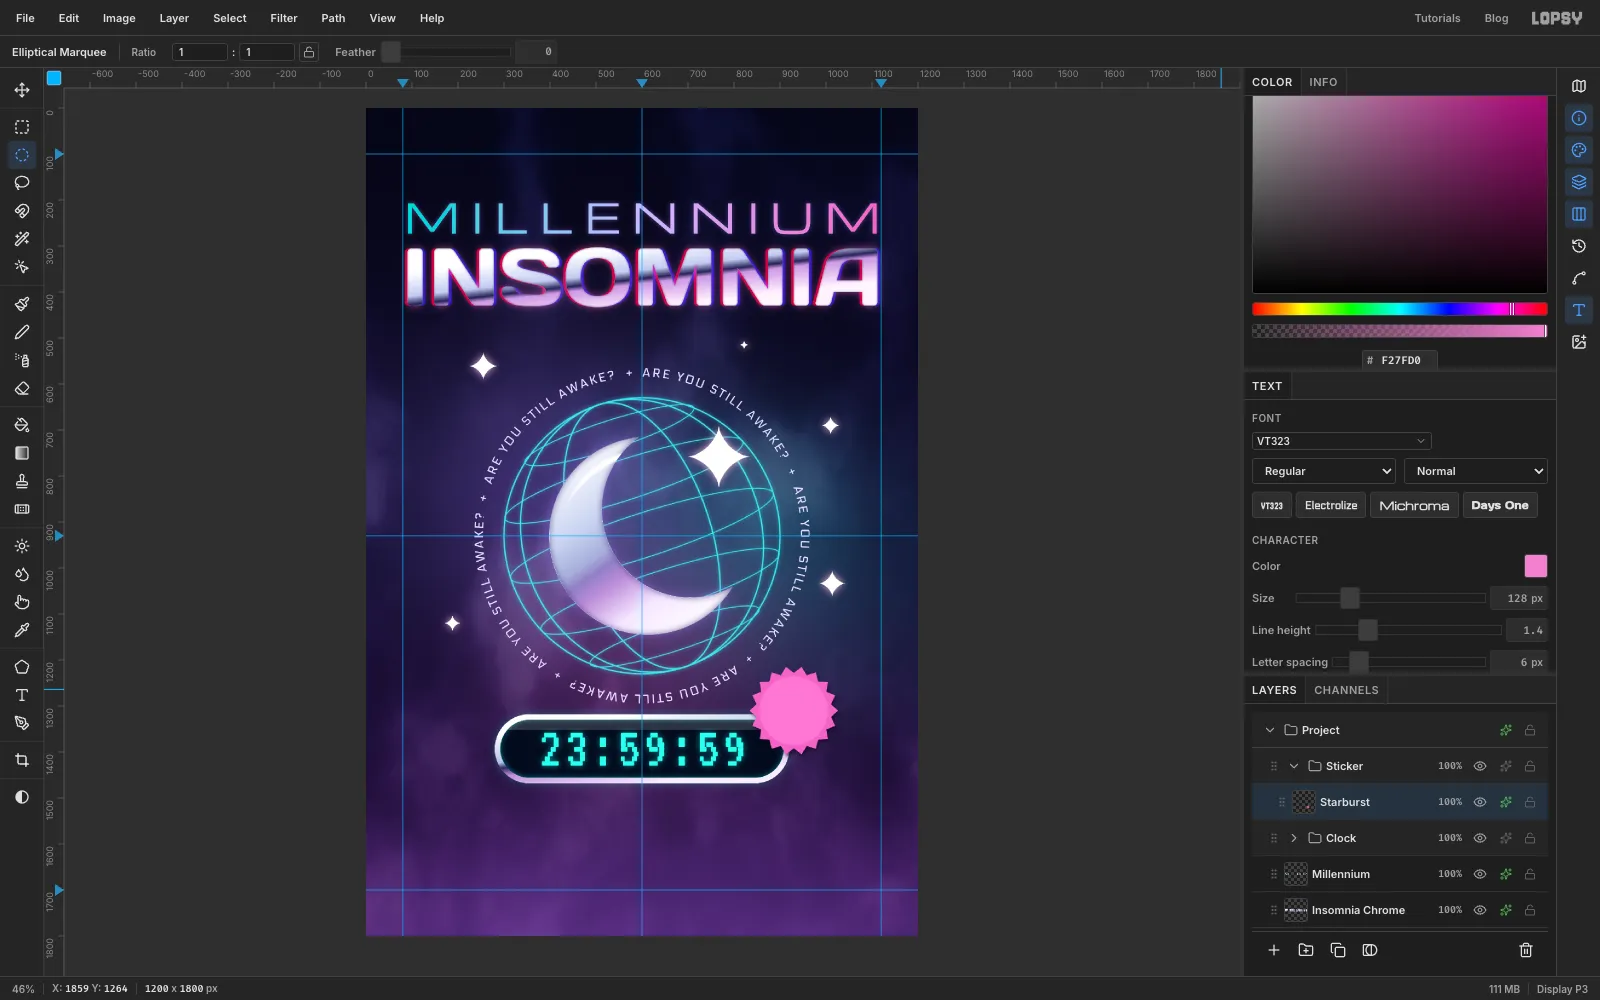
Sticker. Add a layer calledStarburst.Choose the Pen tool. Centred at about (930, 1310), where the starburst overlaps the right end of the clock, click corner points round in a circle. Alternate between an outer ring about 96 px from the centre and an inner ring about 82 px from it, for 18 points. That's 36 clicks, one every 10°. Zoom in first, and don't worry if it isn't perfect: a slightly uneven edge looks more like a real die-cut sticker. Click the first anchor to close the path.
-
Turn the path into a sticker
In the Paths panel, click Path to Selection, then Delete Path. Set the foreground to , choose Edit → Fill and press ⌘D. With the Elliptical Marquee, draw a circle about 148 px across on the same centre and fill it with for the inner disc.
Turn on Drop Shadow with the colour , Offset X 4, Offset Y 7, Blur 10 and Opacity 60.
-
Letter the sticker
With Starburst selected, set the Text tool to Zen Dots at 50, white, type
Y2Kand press Tab. Set Letter spacing to 0 (it remembers the 6 from the clock) and rename the layerSticker Y2K. Centre it slightly above the middle of the disc.Select Starburst again so the next text doesn't restyle Y2K. Set Michroma at 13 in , type
COMPLIANT, press Tab, set Letter spacing to 2 and rename itSticker Compliant. Centre it under Y2K, inside the disc.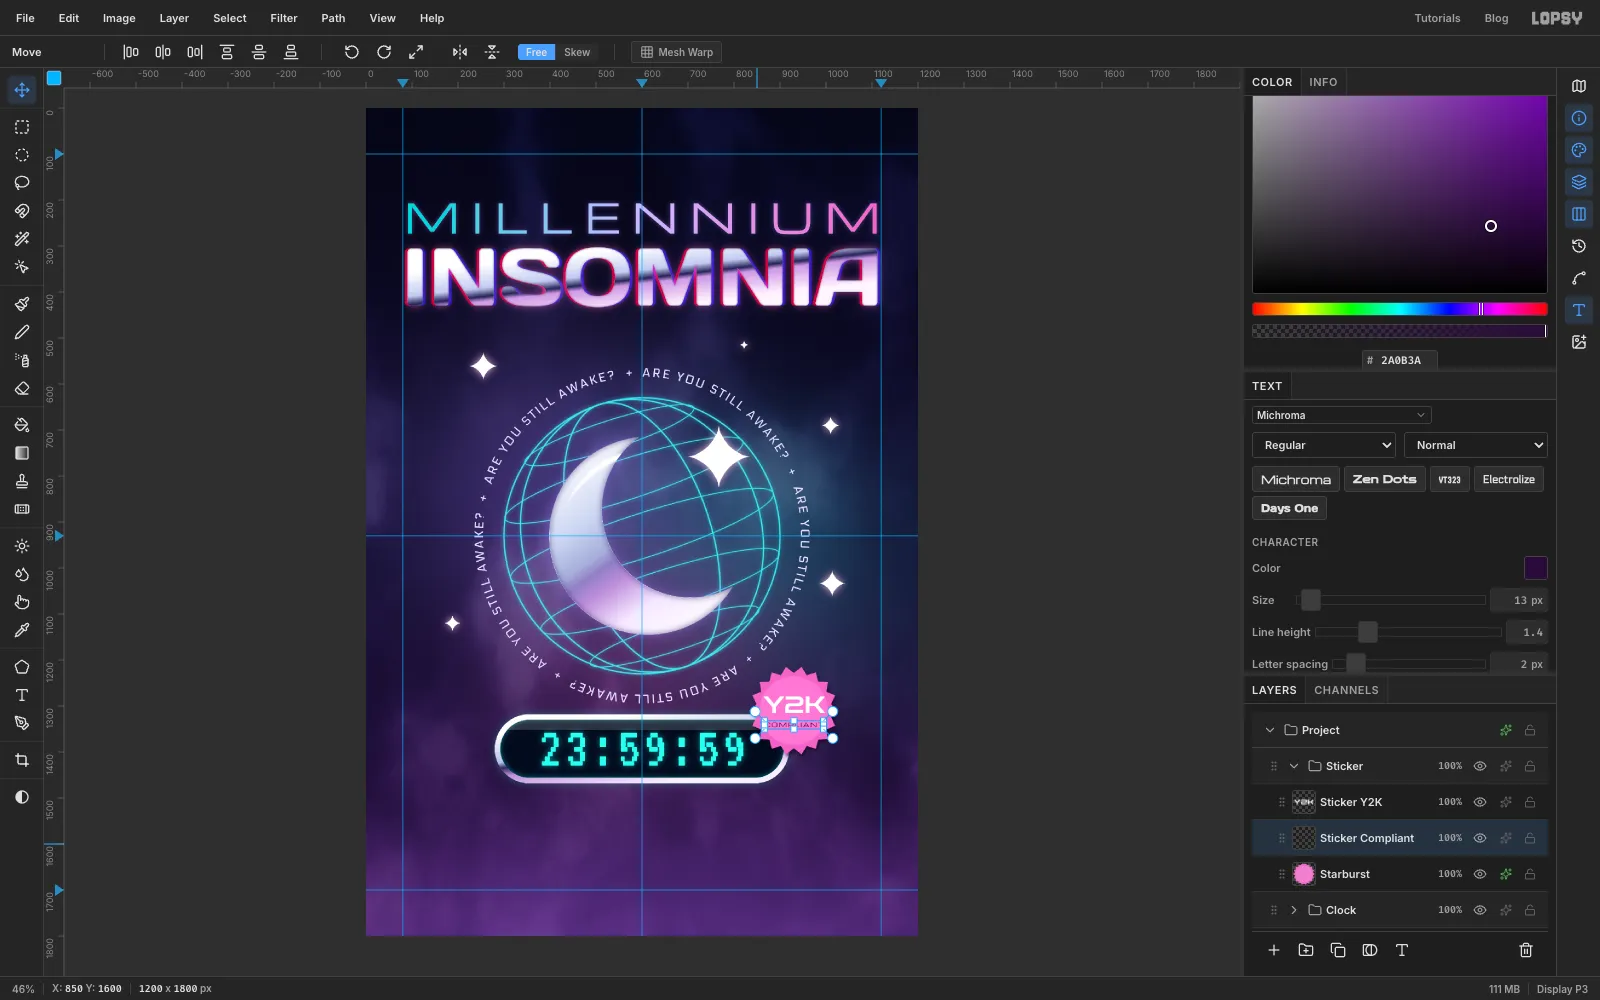
-
Rotate the whole sticker
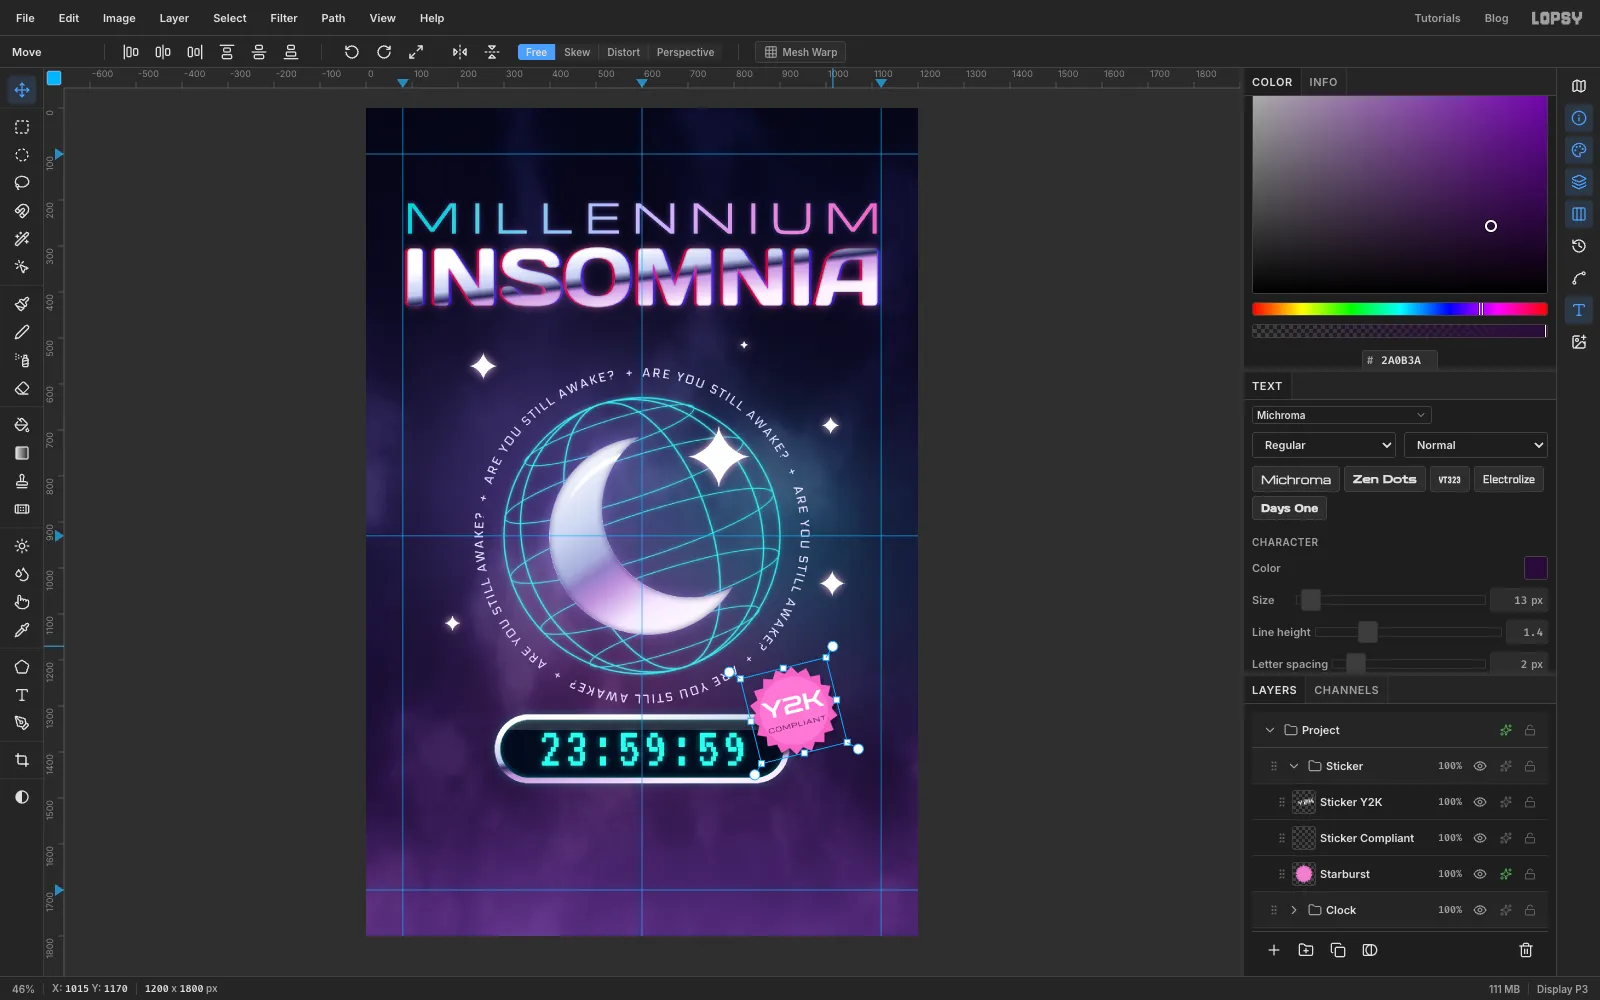
Click the Sticker group's row and press ⌘D. With the Move tool, drag a rotation handle anticlockwise by about 14°. Everything in the group, text included, turns together. Press Escape to commit it. Escape drops the Move tool's transform into the layers, just like ⌘D.
-
Add the A NOVEL pill
Collapse Sticker, select its row, click New Group and name it
Cover Type. Add a layer calledNovel Pill.With the Shape tool on Rectangle, remove the fill, set the stroke to , Width 2 and Corner Radius 23. Press on the centre guide at about y 494 and drag out to a 208 × 46 pill.
Type
A NOVELin Michroma at 17, , with Letter spacing 7. Press Tab and rename itA Novel. Centre it in the pill so the gap is equal on the left and the right.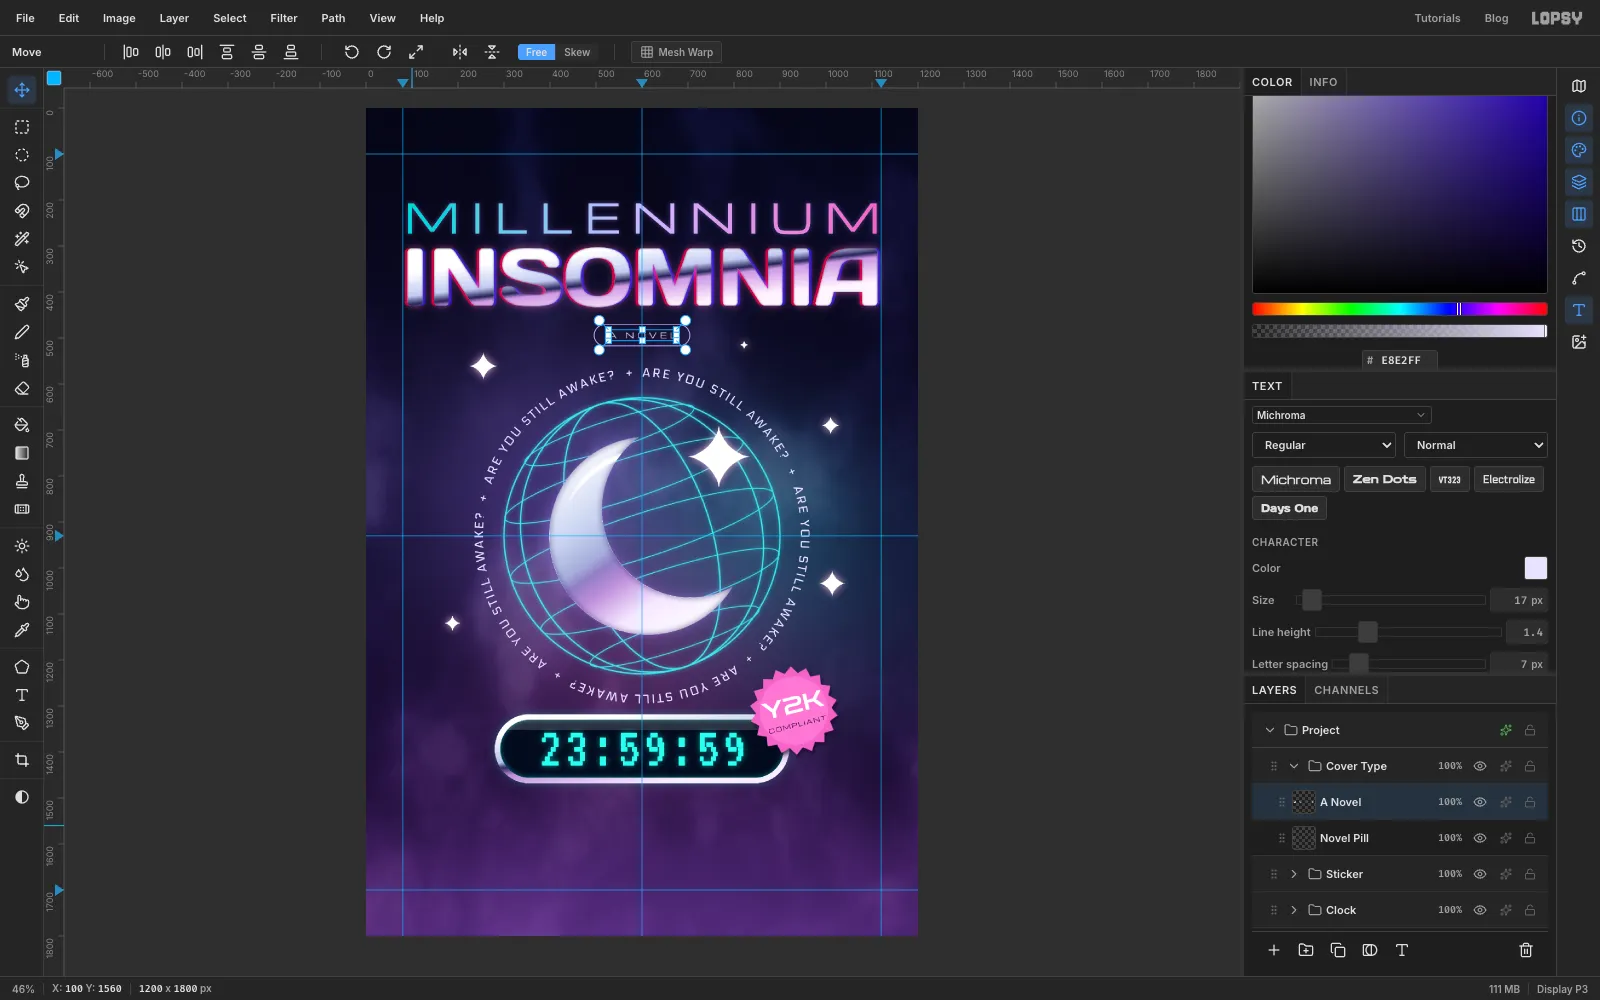
-
Set the quote, tagline and author
Select Novel Pill before each new piece of text, and rename each layer after you press Tab (
Review Quote,Tagline,Author):- Review quote:
“Dazzling, dizzy and wide awake.” — THE DIAL-UP REVIEWin IBM Plex Mono at 21, , Letter spacing 1, centred just below the top guide (around y 132). - Tagline:
Everyone is counting down. She just wants to sleep.in Electrolize at 31, , Letter spacing 0, centred about 70 px below the clock. - Author: choose Syncopate and set Font weight to Bold before typing
MAUDE IVERSENat 54, , Letter spacing 12. Centre it around y 1680 and add an Outer Glow of , Size 18, Opacity 50.
For the hairline, add a layer called
Rule. Pick the Pencil at Size 2 with . Click about 80 px left of the centre guide, a little under the name (y 1745), then hold Shift and click the same distance right of the guide to draw a straight line about 160 px long. Set the layer to 45%.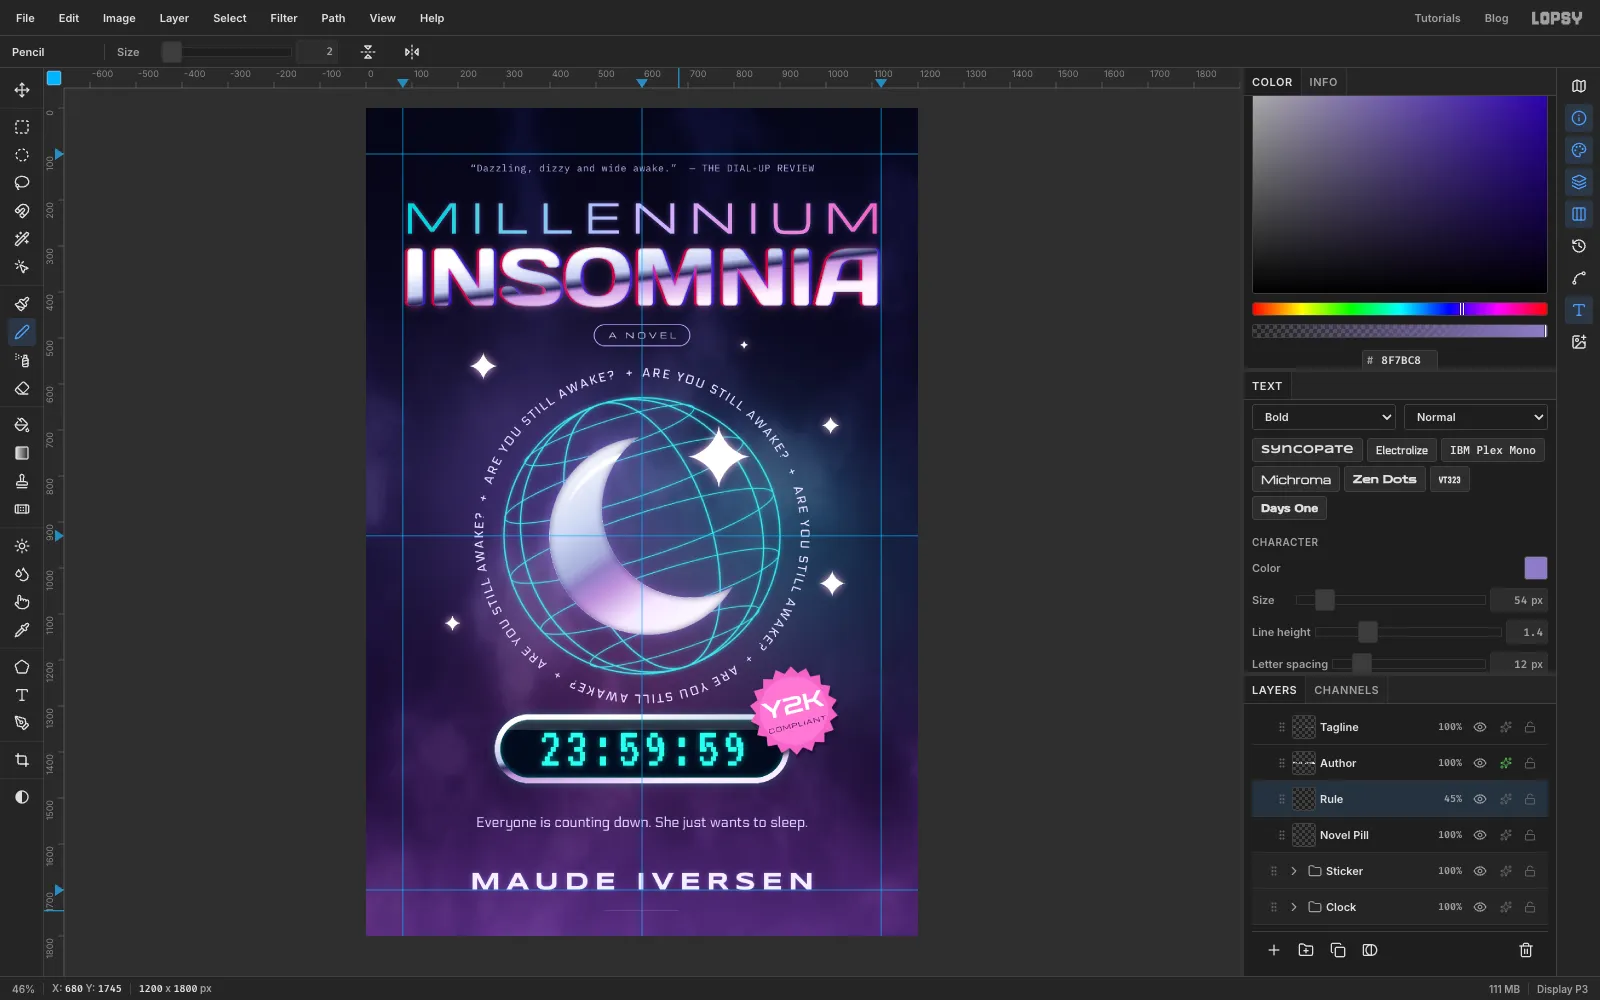
- Review quote:
-
Group the title and nudge it
Click Insomnia Ghost, then Shift-click Millennium to select all three title layers. Choose Layer → Group Layers and name the group
Title. With the group selected and the Move tool active, press ↑ eight times. The title moves up 8 px as one piece, which evens the space above and below it.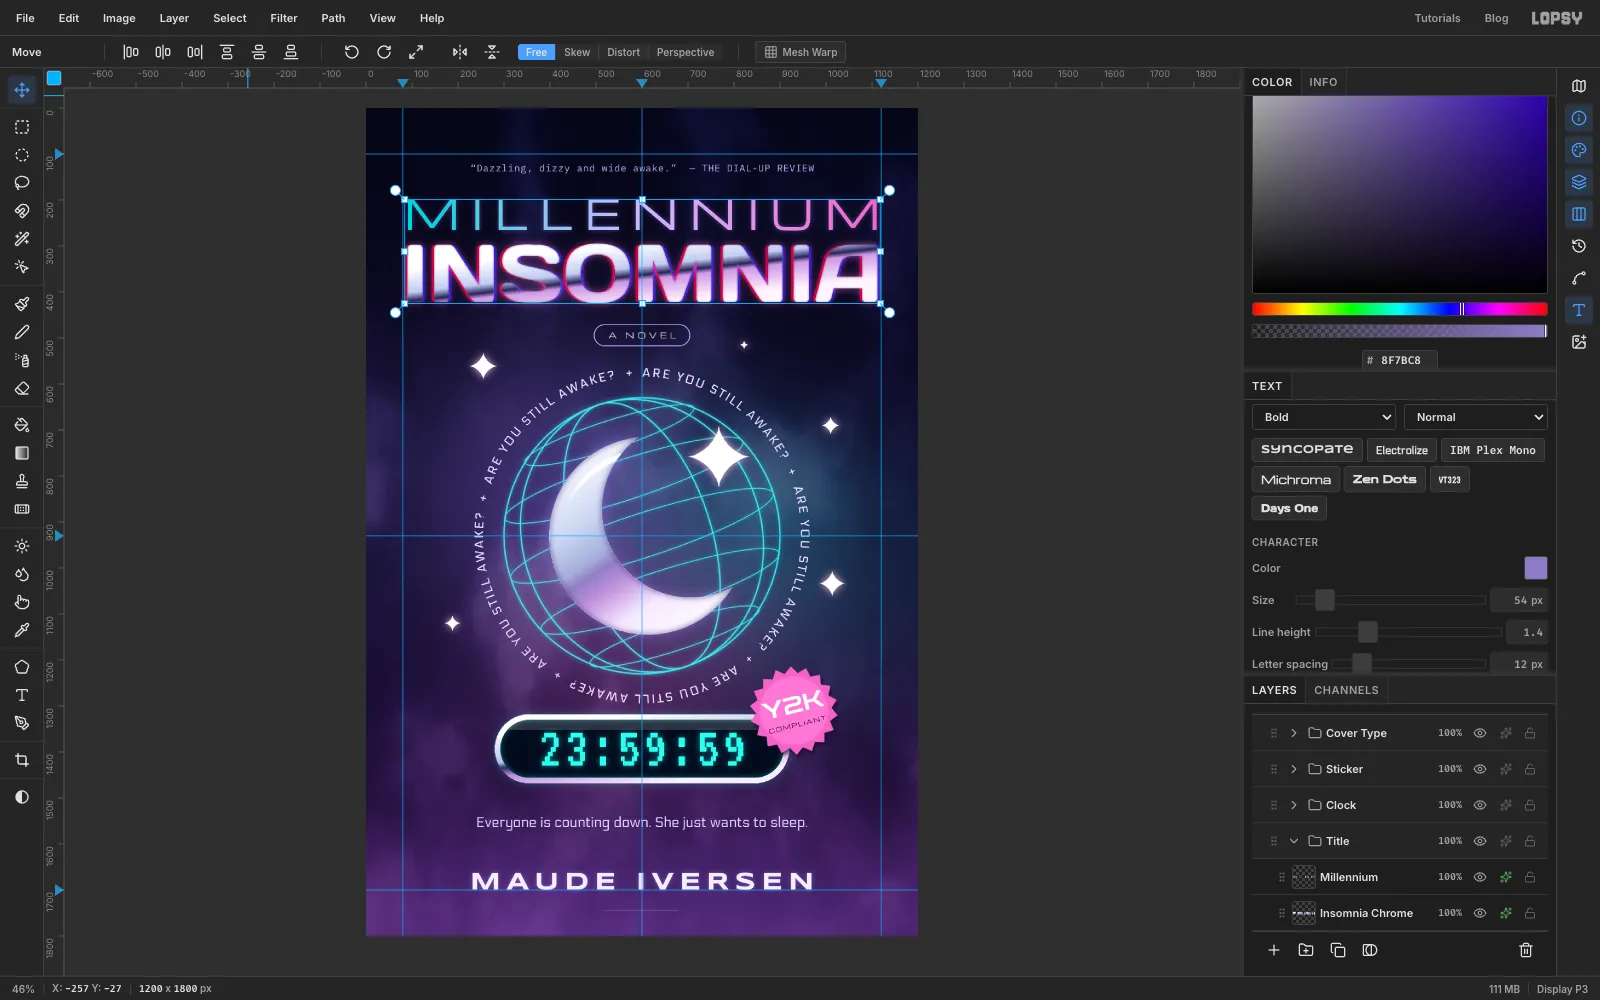
-
Add a light burst
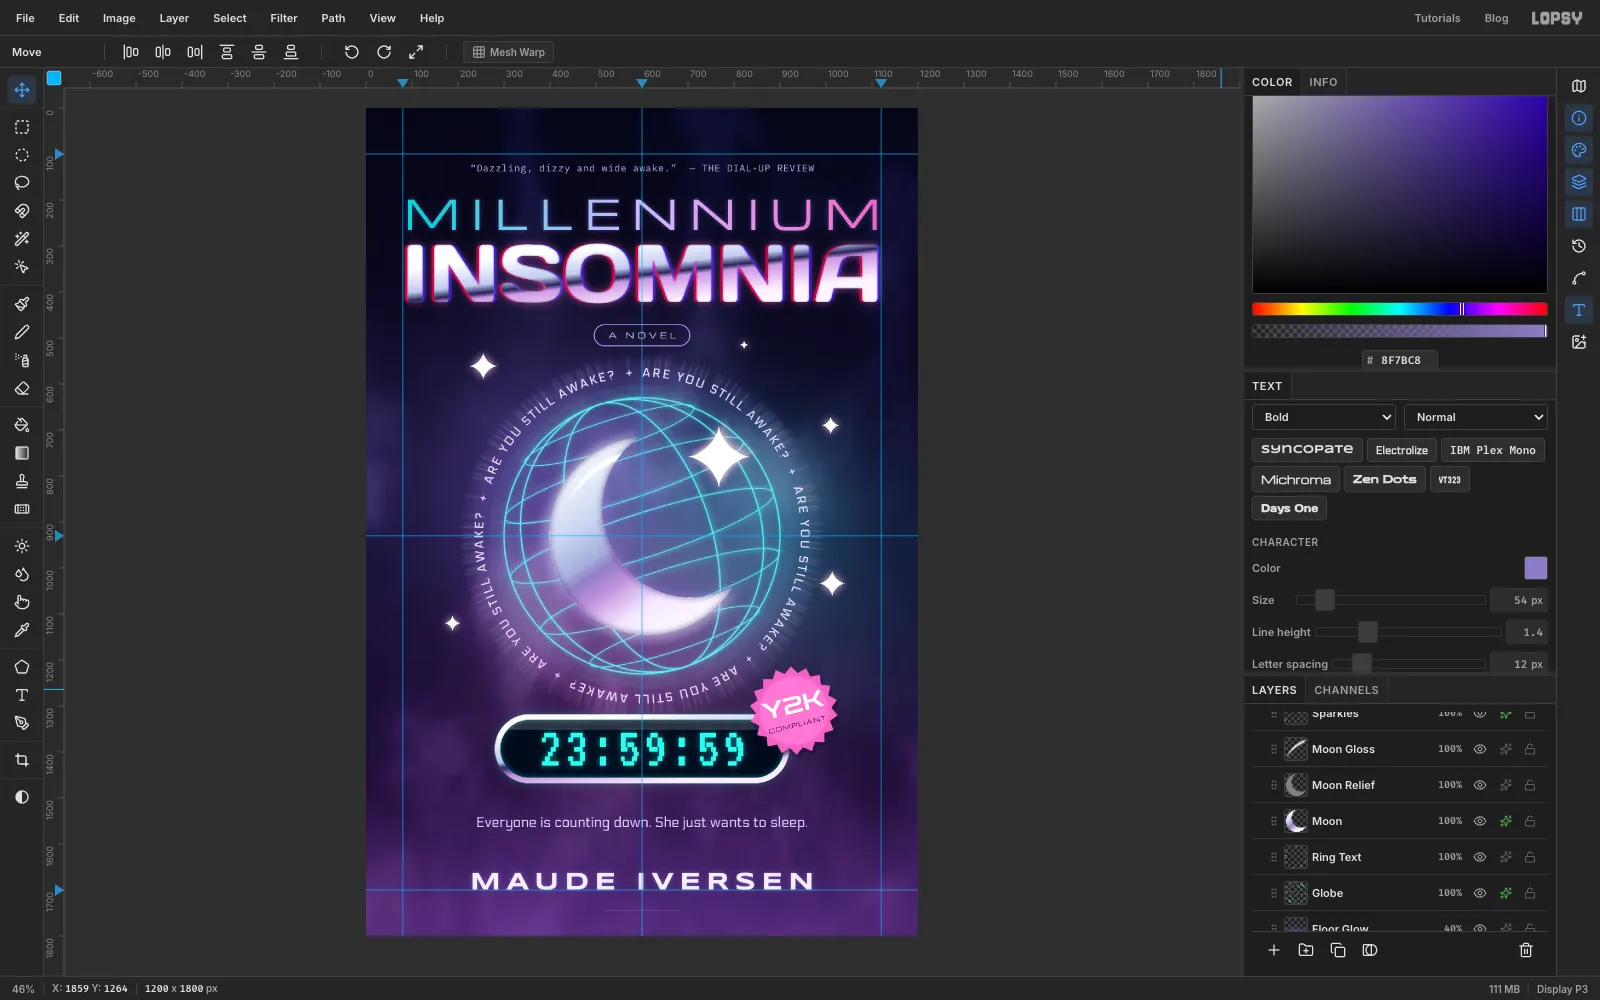
Select Sparkles. With the Elliptical Marquee, click once and type a circle round the globe: From 240, 570 To 960, 1290. Choose Edit → Copy Merged, then Edit → Paste. Rename the new layer
Light Burstand press ⌘D.Run Filter → Radial Blur... with Amount 45. Radial Blur zooms out from the canvas centre, which is almost exactly the globe's centre. Set it to Screen at 45%. The burst also lays a faint copy of the wireframe over the moon. ⌘-click the Moon thumbnail and press Delete to clear it from there, then ⌘D.
-
Make CRT scanlines
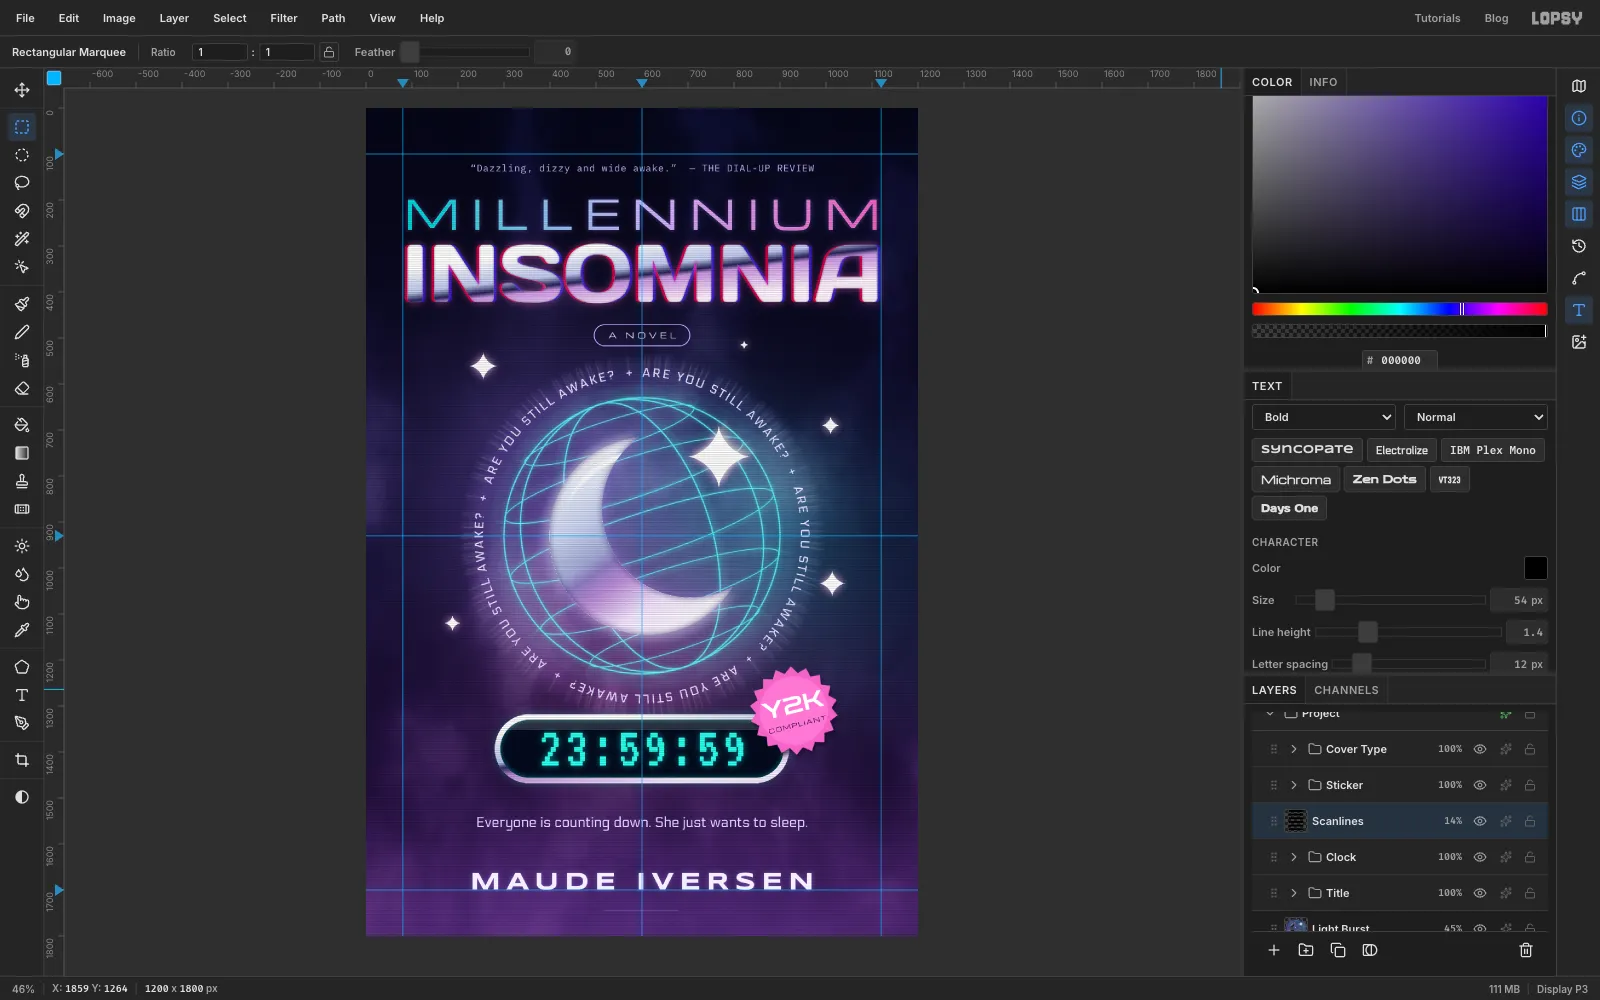
Collapse Clock, select its row and click Add Layer. The new layer lands above the clock but below the sticker and the cover type, so those stay crisp. Name it
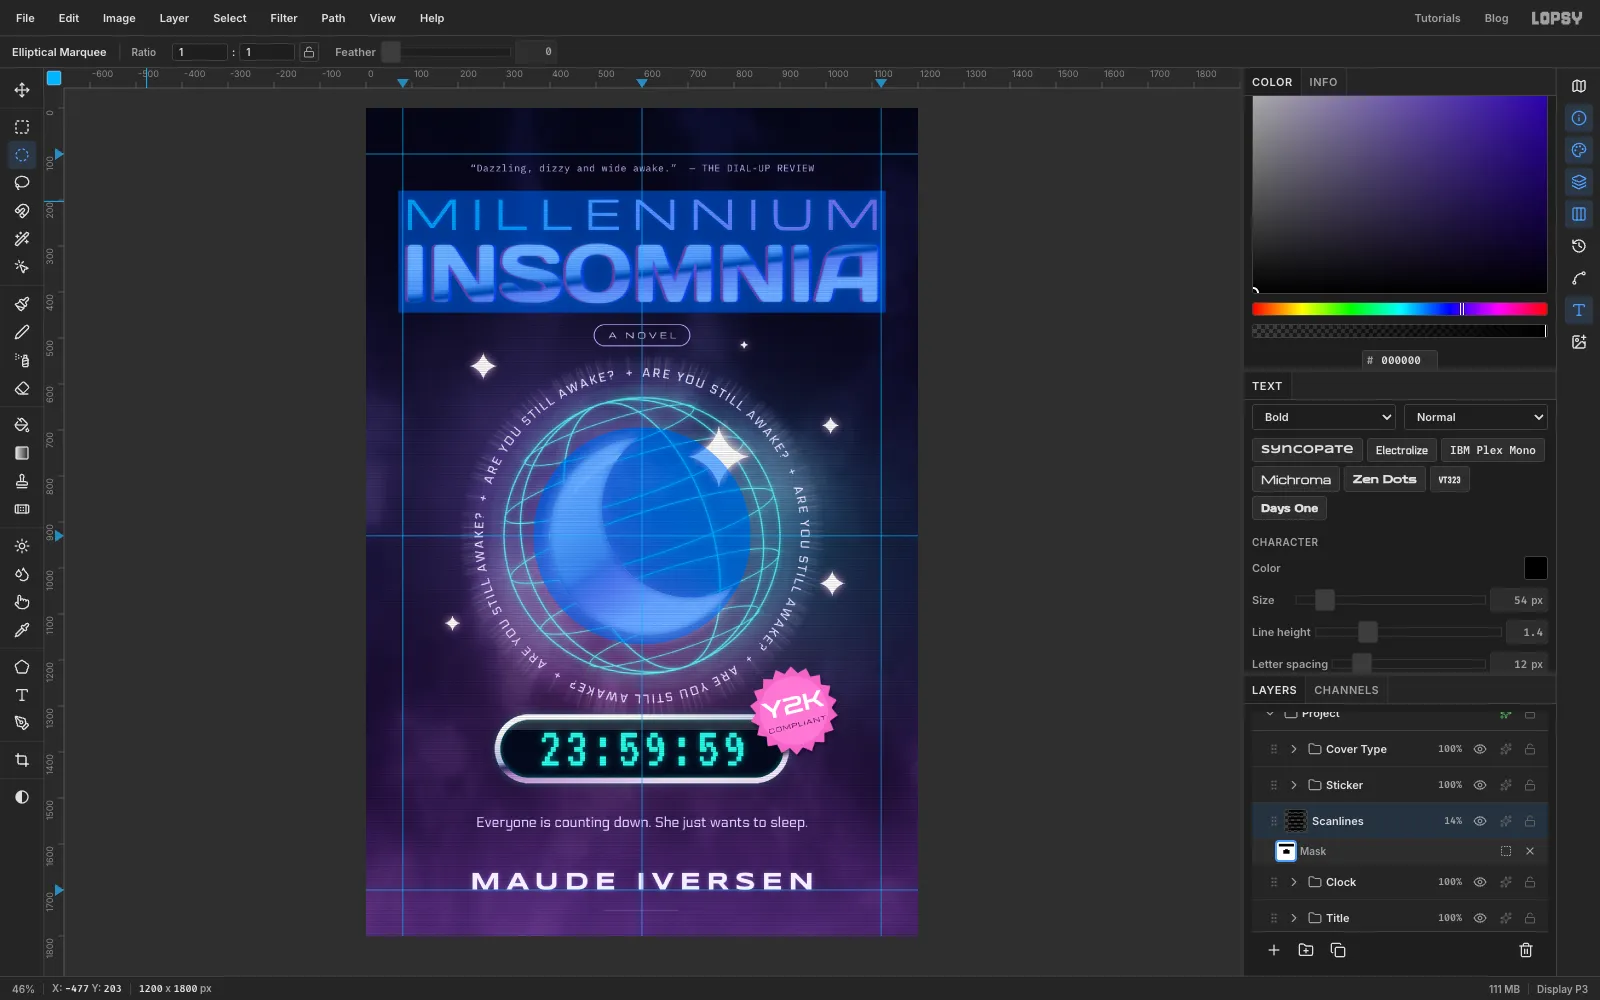
Scanlines.Make a tiny tile with exact marquees. Select From 0, 0 To 4, 2, set the foreground to black and fill it. Select From 0, 0 To 4, 4 and choose Edit → Define Pattern. Press Delete and ⌘D, then choose Edit → Fill with Pattern... and click Apply. The 2 px black, 2 px clear tile repeats into lines. Set the layer to Multiply at 14%.
-
Mask the scanlines off the title and moon
The lines stripe the chrome too hard, so mask them off the shiny parts. Click Add Mask, then click the mask thumbnail to edit it. With black as the foreground:
- Select From 70, 180 To 1130, 445 with the Rectangular Marquee and choose Edit → Fill. That covers the title.
- Select a circle From 364, 694 To 836, 1166 with the Elliptical Marquee and fill it. That covers the moon.
Press ⌘D and click the Scanlines name to leave mask editing.
-
Grade the whole cover
Click the sparkle icon on the Project row to open its adjustments. A new document already has five neutral nodes (Levels, Curves, Exposure, Hue / Saturation and Color Grading); leave those alone. Click Add Adjustment → Vignette and set Vignette to 34. Then click Add Adjustment → Saturation & Vibrance and set Vibrance to 14. The corners darken and the cyan and pink lift a little.
Turn off View → Show Guides and export with File → Quick Export PNG.