Make a Y2K Restaurant Menu with Chrome Type and Gel Buttons
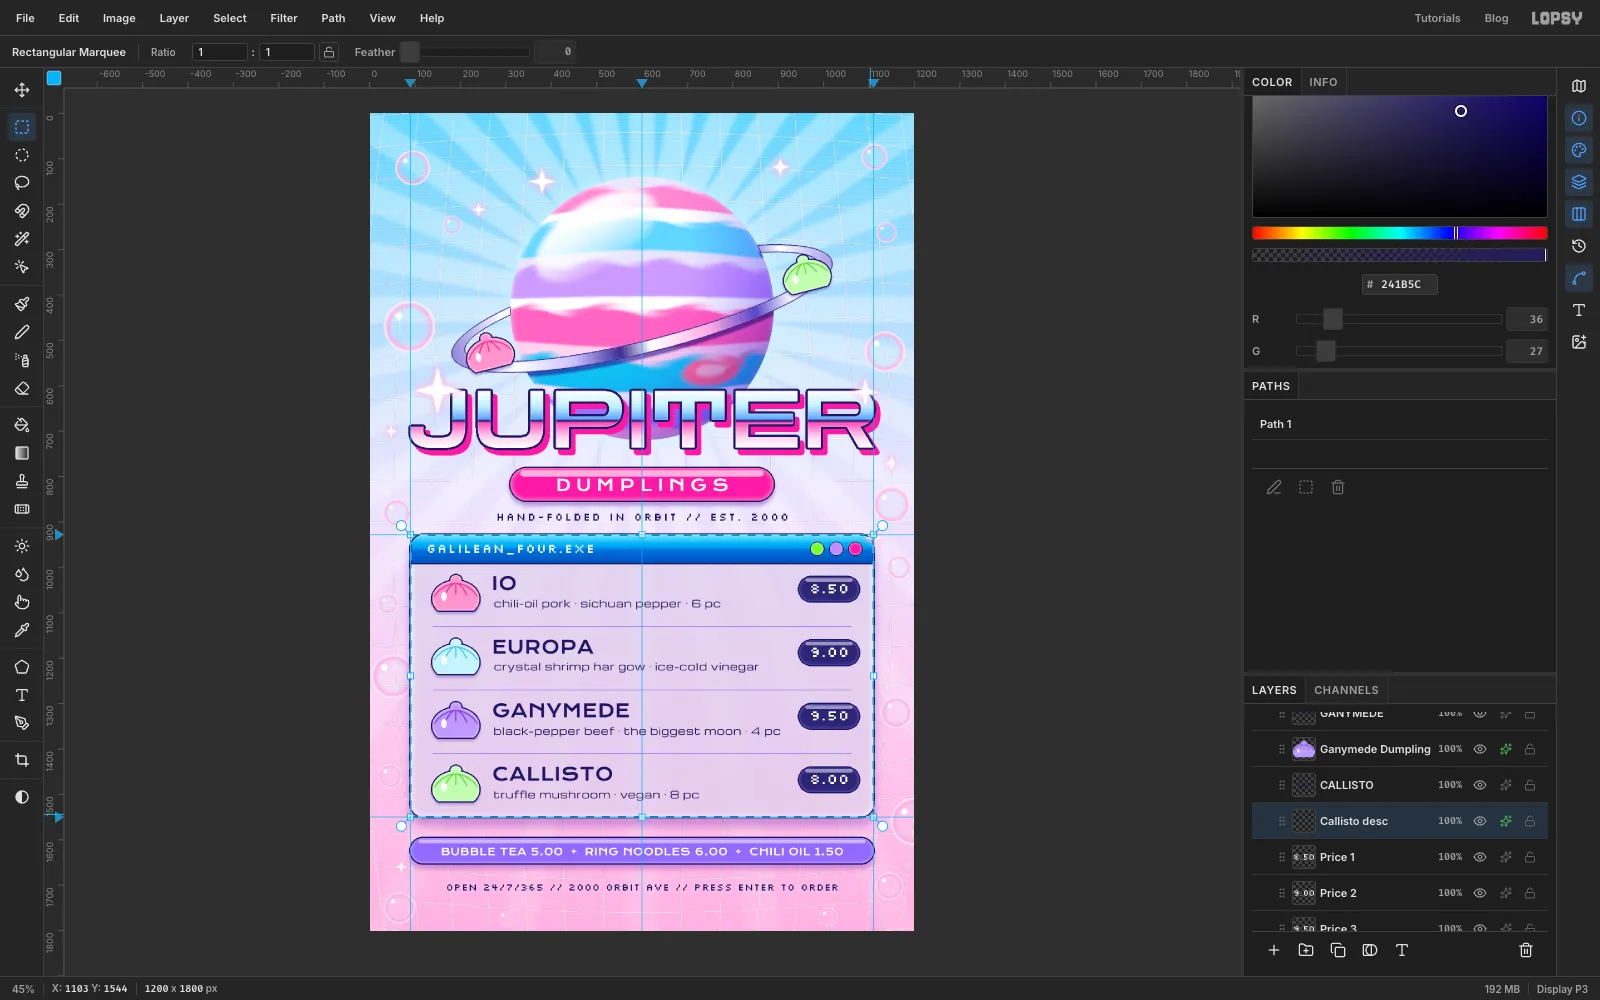
Make a Y2K dumpling bar menu in Lopsy with a pastel Jupiter, a chrome ring and title, a frosted-glass OS window, gel buttons, sparkles and bubbles.
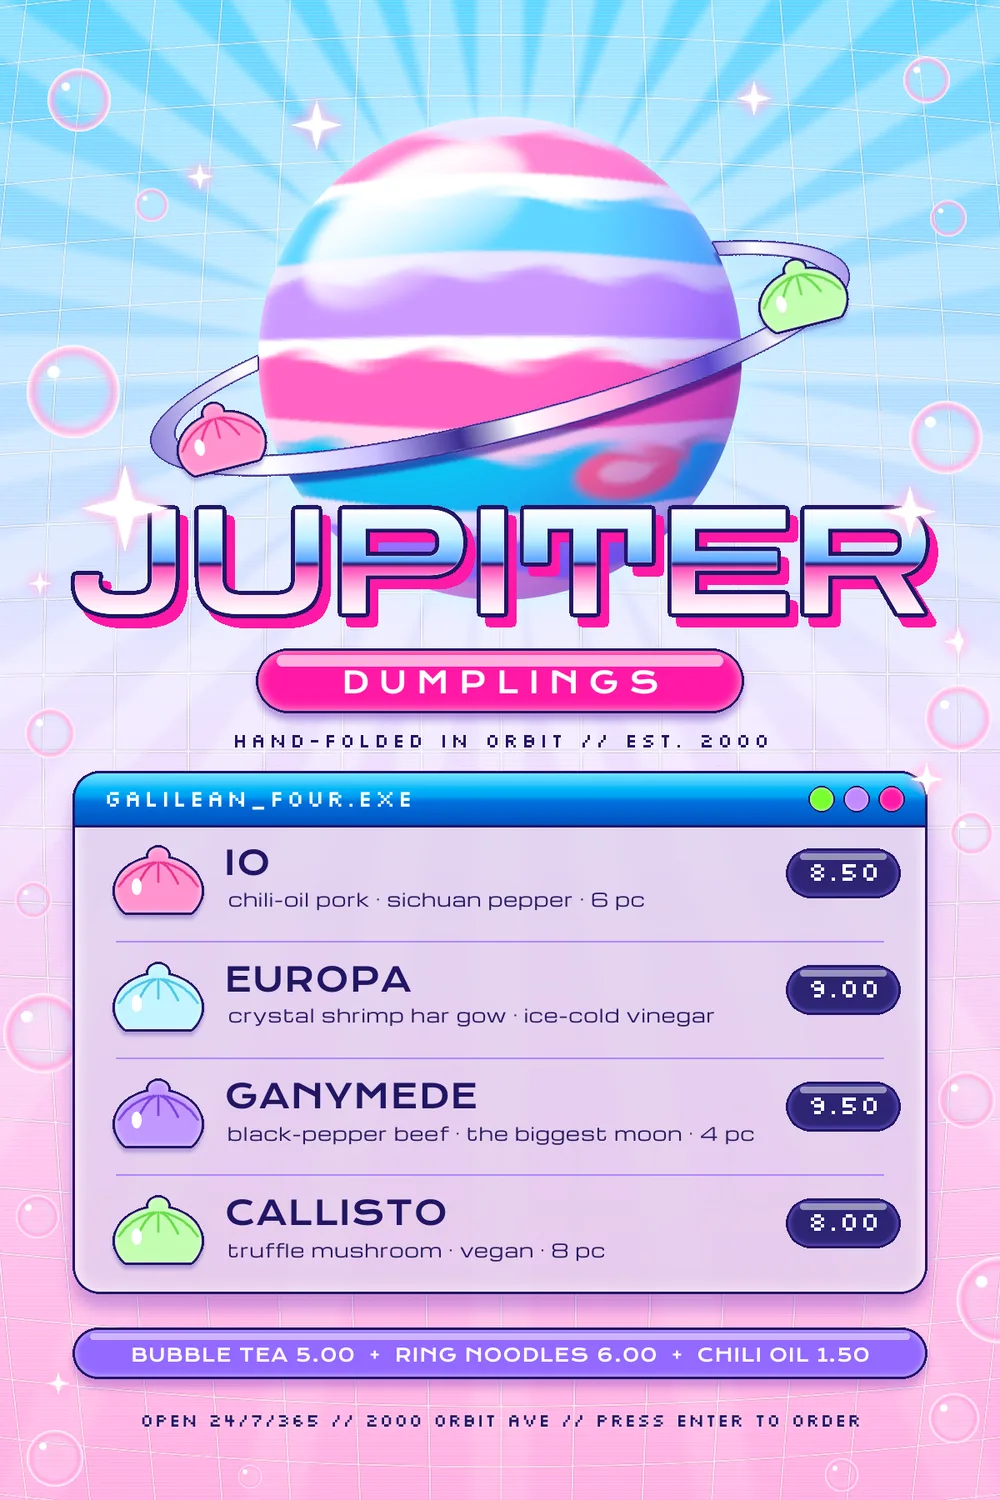
Y2K design is the future as people imagined it in 1999. Everything is glossy, translucent or chrome. Buttons look like sweets, type is wide and techno, and the background is a soft pastel sky full of sparkles, bubbles and grids. In this tutorial you'll make a 1200 × 1800 px menu for Jupiter Dumplings, an imaginary dumpling bar whose four dumplings are named after Jupiter's four big moons.
The page has:
- a pastel sky with grain, a bulging cyber grid made with Pattern Fill and Lens Distortion, scanlines and Sunburst rays
- a banded planet painted with stripes and the Smudge tool, rounded out with Liquify, then shaded and glossed
- a chrome ring that passes behind the planet and in front of it, with a shadow where it crosses
- a chrome title with a hard reflection line, made with a multi-stop gradient on rasterized type
- gel pills and buttons built from rounded rectangles and layer effects
- a frosted-glass "OS window" made with Copy Merged and a blur, holding the four dishes
- dumpling icons drawn once and recoloured with Hue/Saturation
- sparkles drawn with the Pen tool, copied around the page and given a Bloom
The fonts are free Google Fonts:
- Zen Dots for the JUPITER title
- Krona One for DUMPLINGS, the dish names and the sides bar
- Michroma for the dish descriptions
- Silkscreen for the window title, tagline, prices and footer
The palette:
-
Sky
-
Planet bands
-
Chrome
-
Hot pink
-
navy ink
-
Window bar
-
Price tags
-
sides bar
-
Dumpling pink
-
pleats
Each part of the page gets its own group: Planet, Title and Menu. New layers appear above whichever layer is selected, so select a layer inside a group before you add to it. Collapse a group before you select it and click New Group, so the new group sits next to it instead of inside it.
-
Paint the sky
Create a 1200 × 1800 document and select
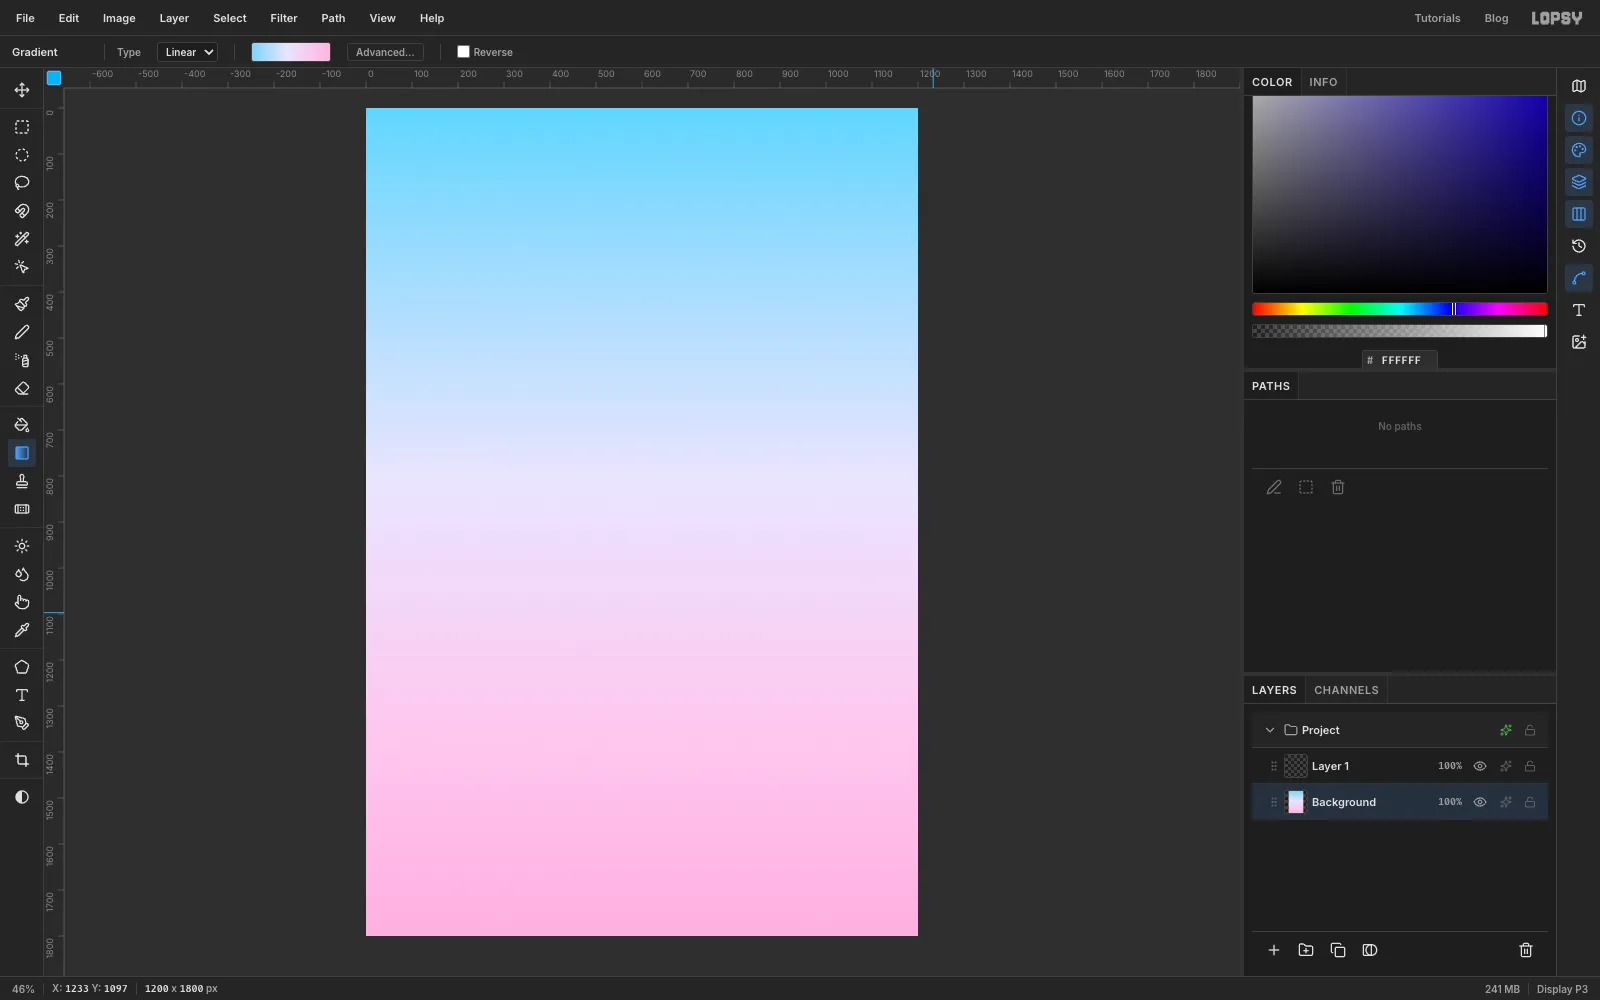
Background. Choose the Gradient tool, set the type to Linear and click Advanced.... Make three stops: at the left, at about 45%, and at the right. Drag from the top edge of the canvas straight down to the bottom.Run Filter → Add Noise... at 3, Mono. You'll barely see it, but it stops the gradient looking like flat plastic.
-
Draw one grid cell
Rename
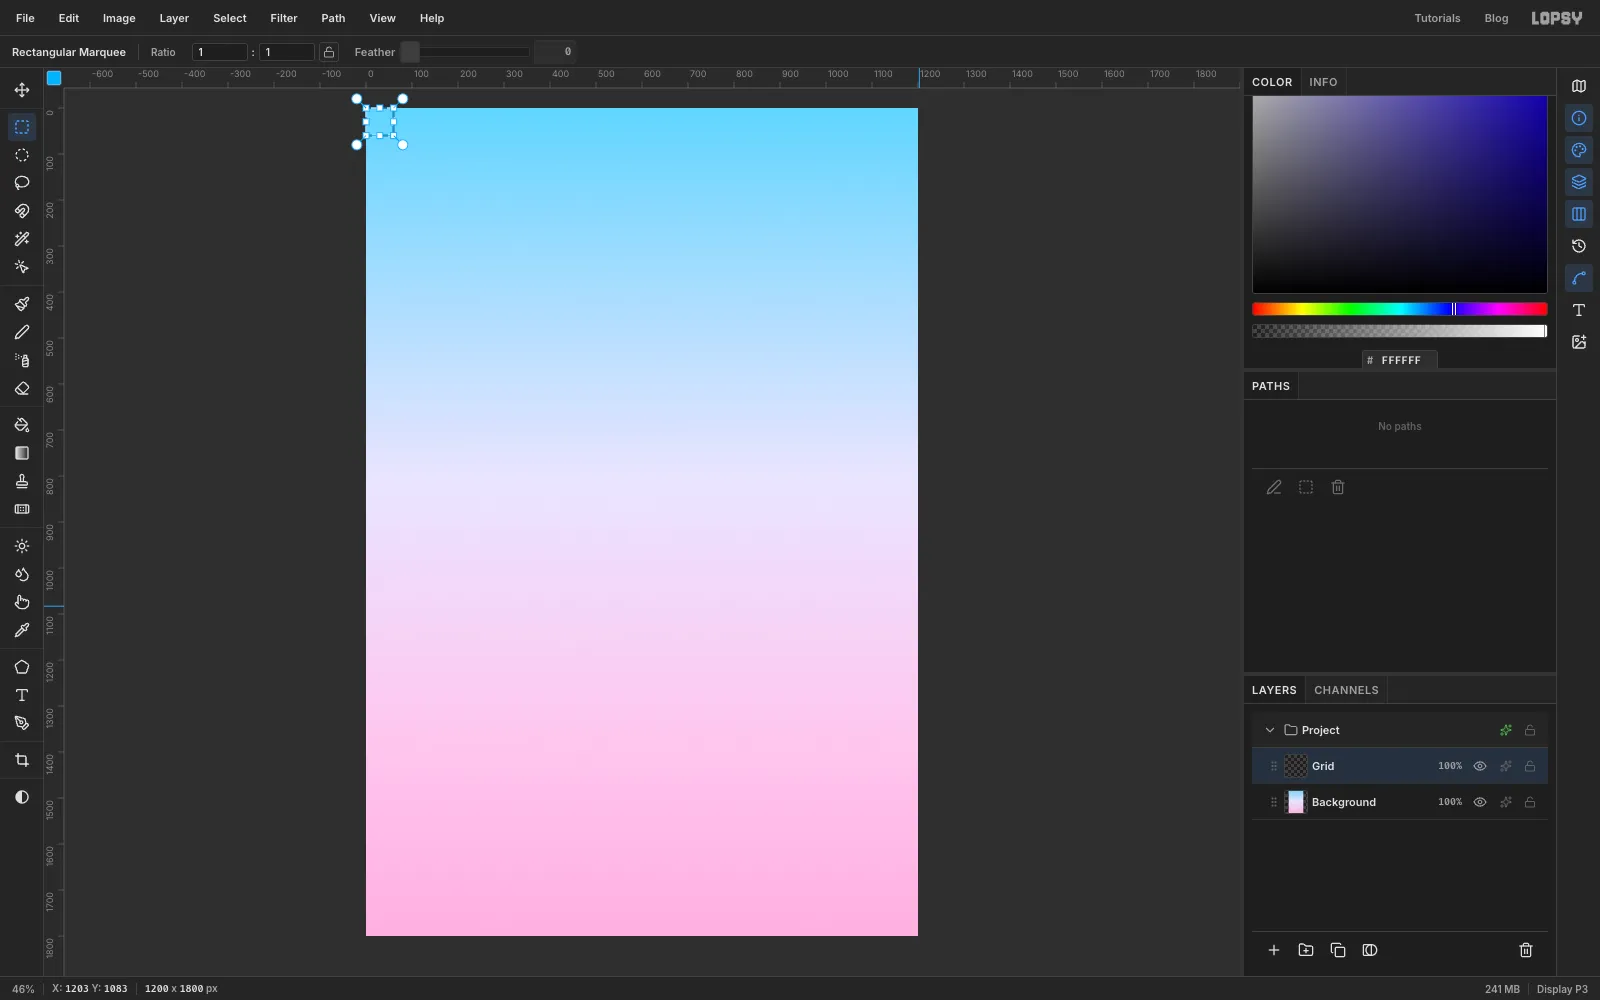
Layer 1toGrid. The grid is one 60 px cell repeated across the page.Choose the Pencil at Size 2 with white. Click at the very top-left corner of the canvas and Shift-click 60 px to the right. Then click the corner again and Shift-click 60 px straight down. To select the cell exactly, click once on the canvas with the Rectangular Marquee (without dragging) and enter From 0, 0 and To 60, 60.
Choose Edit → Define Pattern.
-
Tile the grid
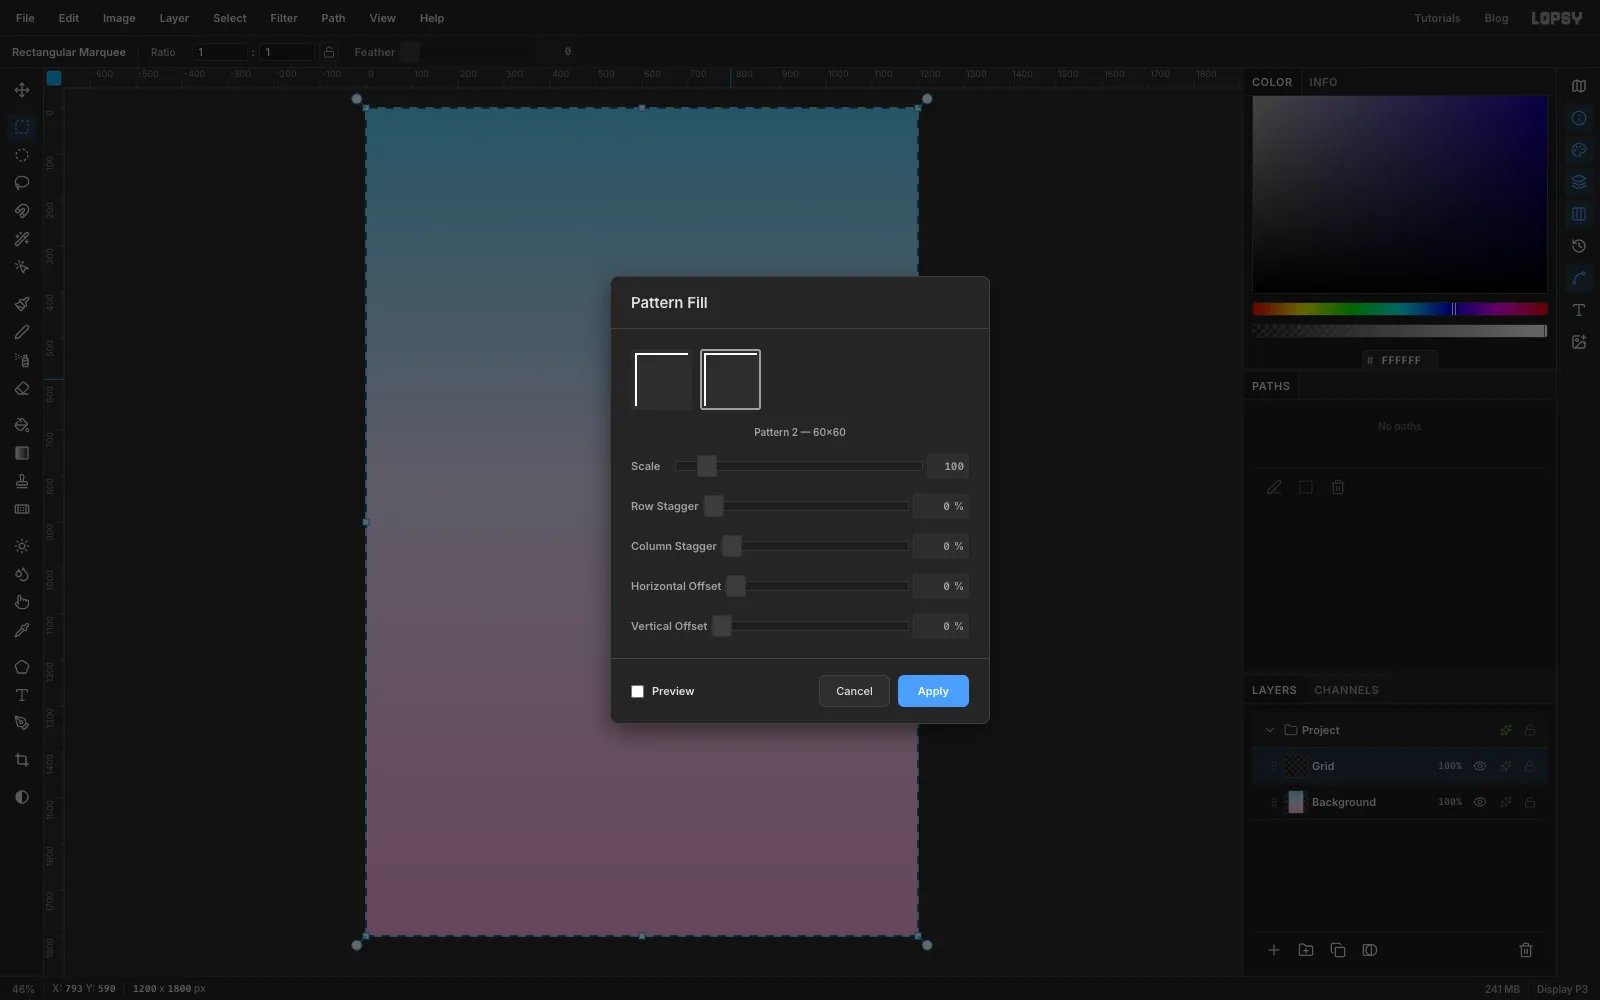
Select all and press Delete to clear the cell you drew. Choose Edit → Fill with Pattern..., pick the new 60 × 60 pattern and click Apply. The whole layer fills with a white grid.
-
Bend the grid
Run Filter → Lens Distortion... with Strength 60 and Zoom 160. Positive strength bows the lines outward, and the high zoom pushes the bent edges back out past the canvas so no empty corners show. The grid now looks like it's wrapped around a globe, a very Y2K effect.
Set the
Gridlayer to 50% opacity.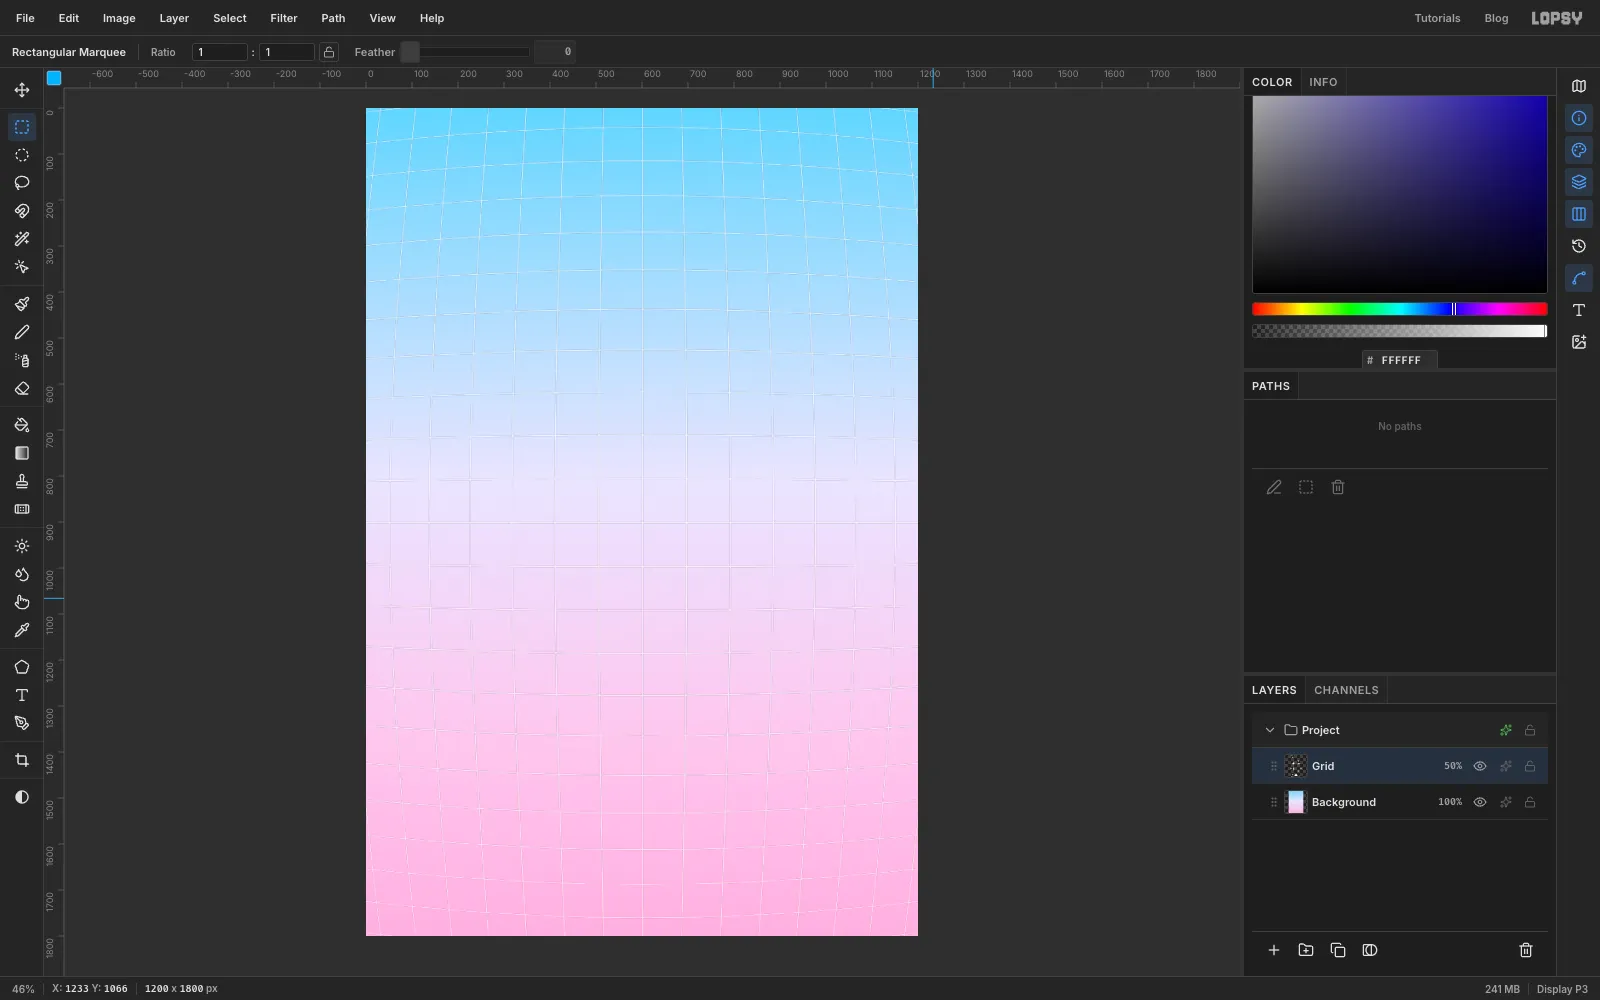
-
Add scanlines
Add a layer called
Scanlines. Use the same pattern trick at a tiny size:- Set the Pencil to Size 1, click at the top-left corner and Shift-click a few pixels to the right.
- Click once with the Rectangular Marquee and enter From 0, 0, To 4, 4, then choose Edit → Define Pattern.
- Select all, press Delete, then Edit → Fill with Pattern... with the new 4 × 4 pattern.
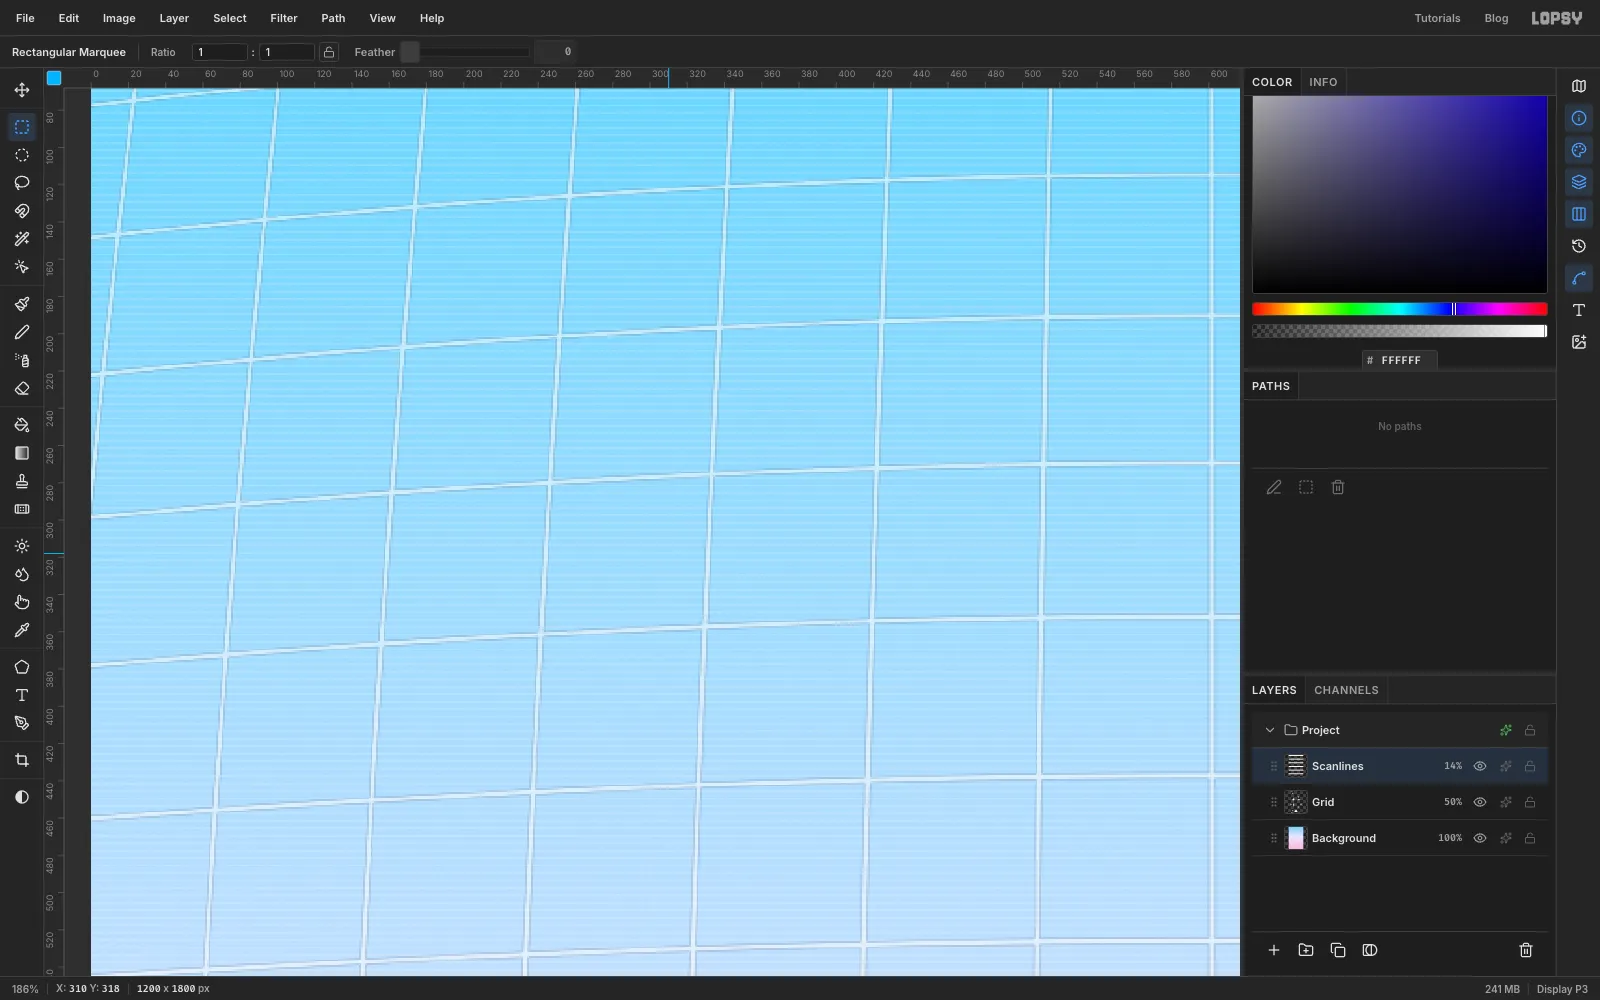
Set the layer to 14% opacity. Zoom in to check it. You should see a fine stripe every 4 px, like an old monitor.
-
Add sunburst rays
Add a layer called
Raysand set the foreground to white. Run Filter → Sunburst... with Rays 32, Width 42, Taper 40, Fade 75, Softness 25 and Center Y 24. That puts the burst's centre about a quarter of the way down, where the planet will sit. Set the layer to 40% opacity.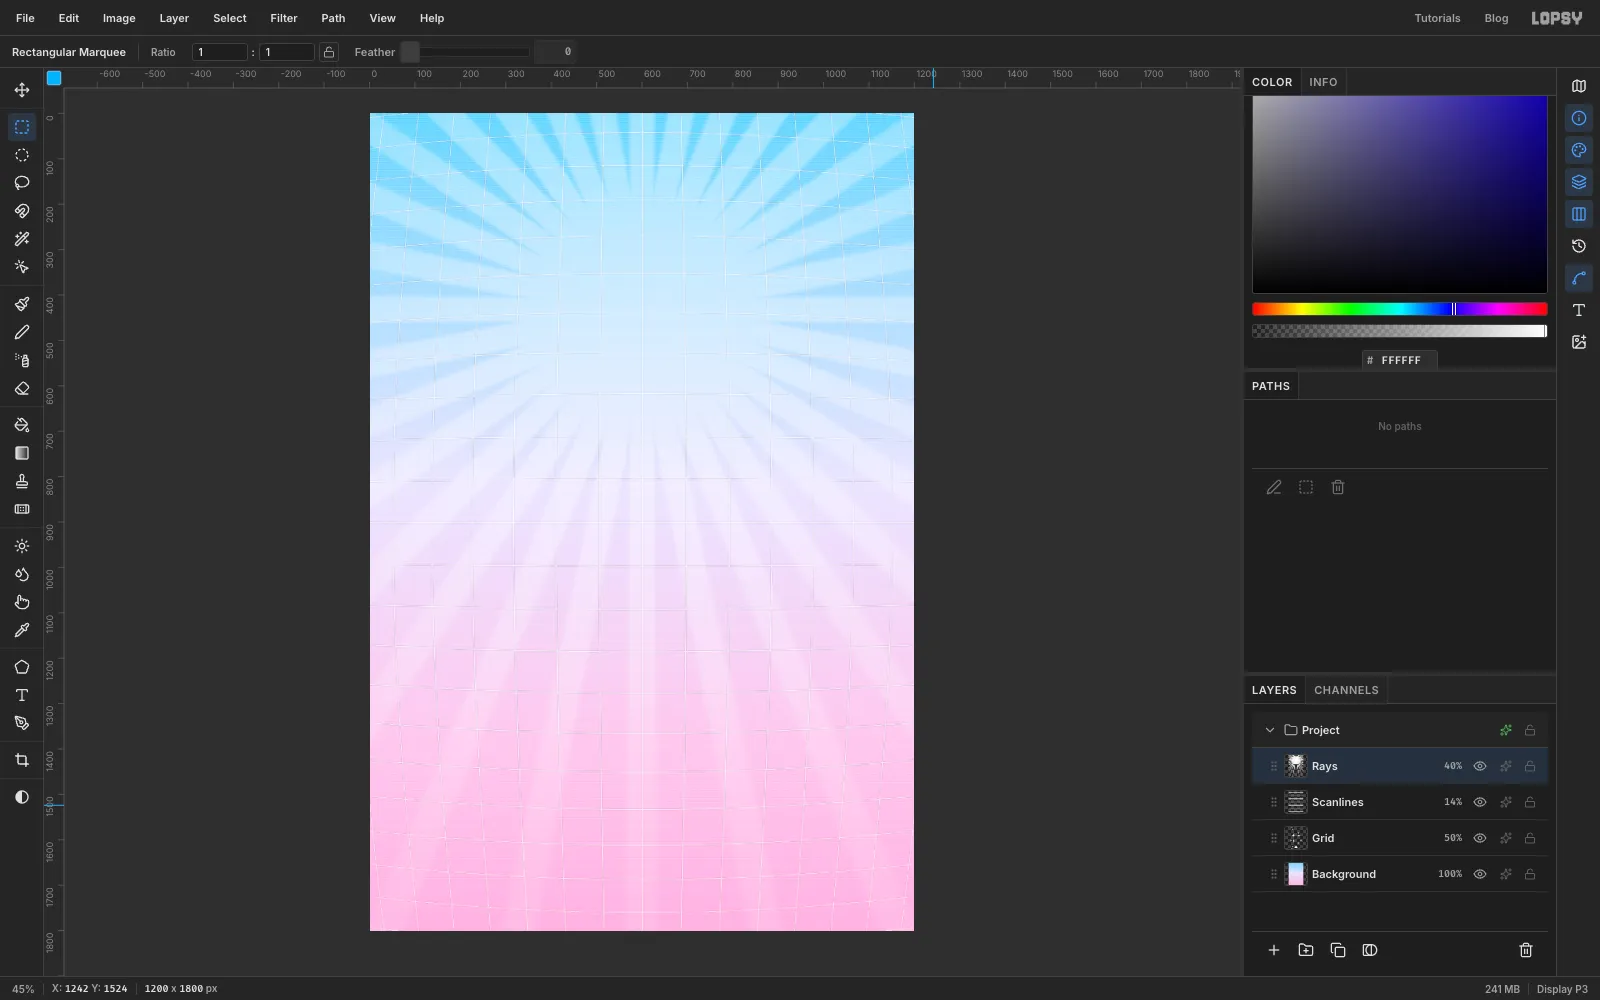
-
Stripe the planet
Click New Group and call it
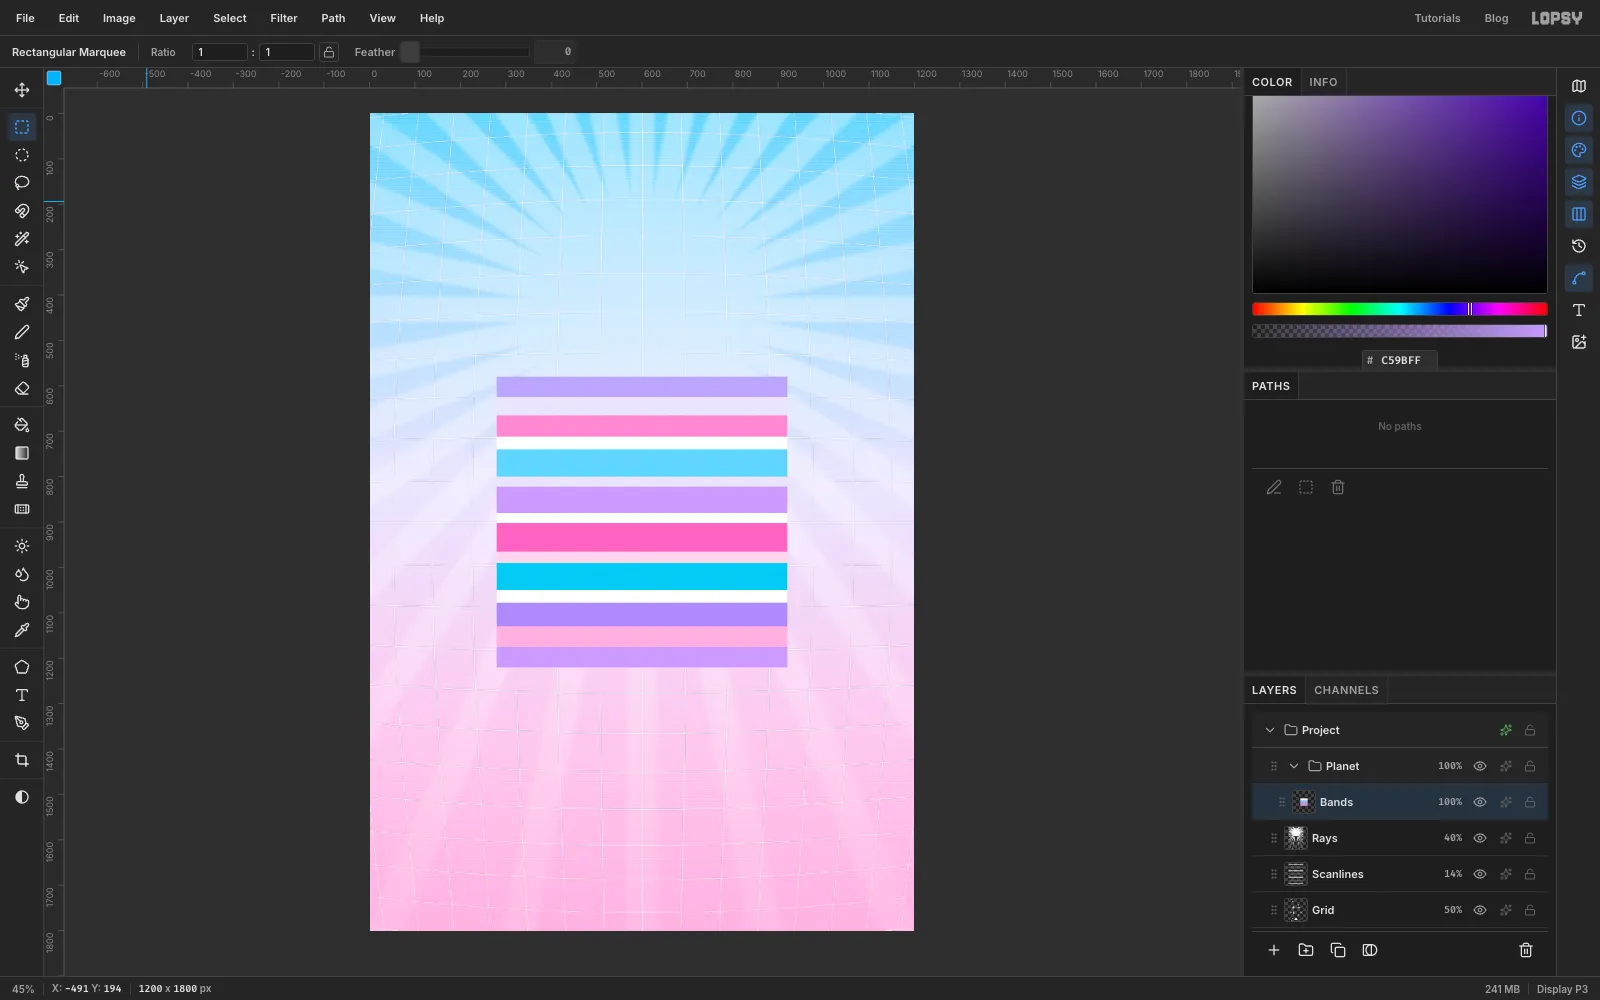
Planet, then add a layer inside it calledBands. Build the planet in the middle of the canvas, where there's room to work. You'll move it up once it's finished.With the Rectangular Marquee, fill a stack of 15 stripes from x 280 to x 920, starting at y 580. Start each stripe exactly where the last one ended. From the top, the colours and heights are:
- , 45 px
- , 40 px
- , 47 px
- white, 28 px
- , 60 px
- , 22 px
- , 58 px
- white, 22 px
- , 63 px
- , 25 px
- , 60 px
- white, 28 px
- , 52 px
- , 45 px
- , 45 px
For each one, draw the marquee, set the foreground and choose Edit → Fill. Uneven stripe heights look more like a gas giant than even ones.
-
Swirl the stripes
Run Filter → Gaussian Blur... at 5 to soften the stripe edges.
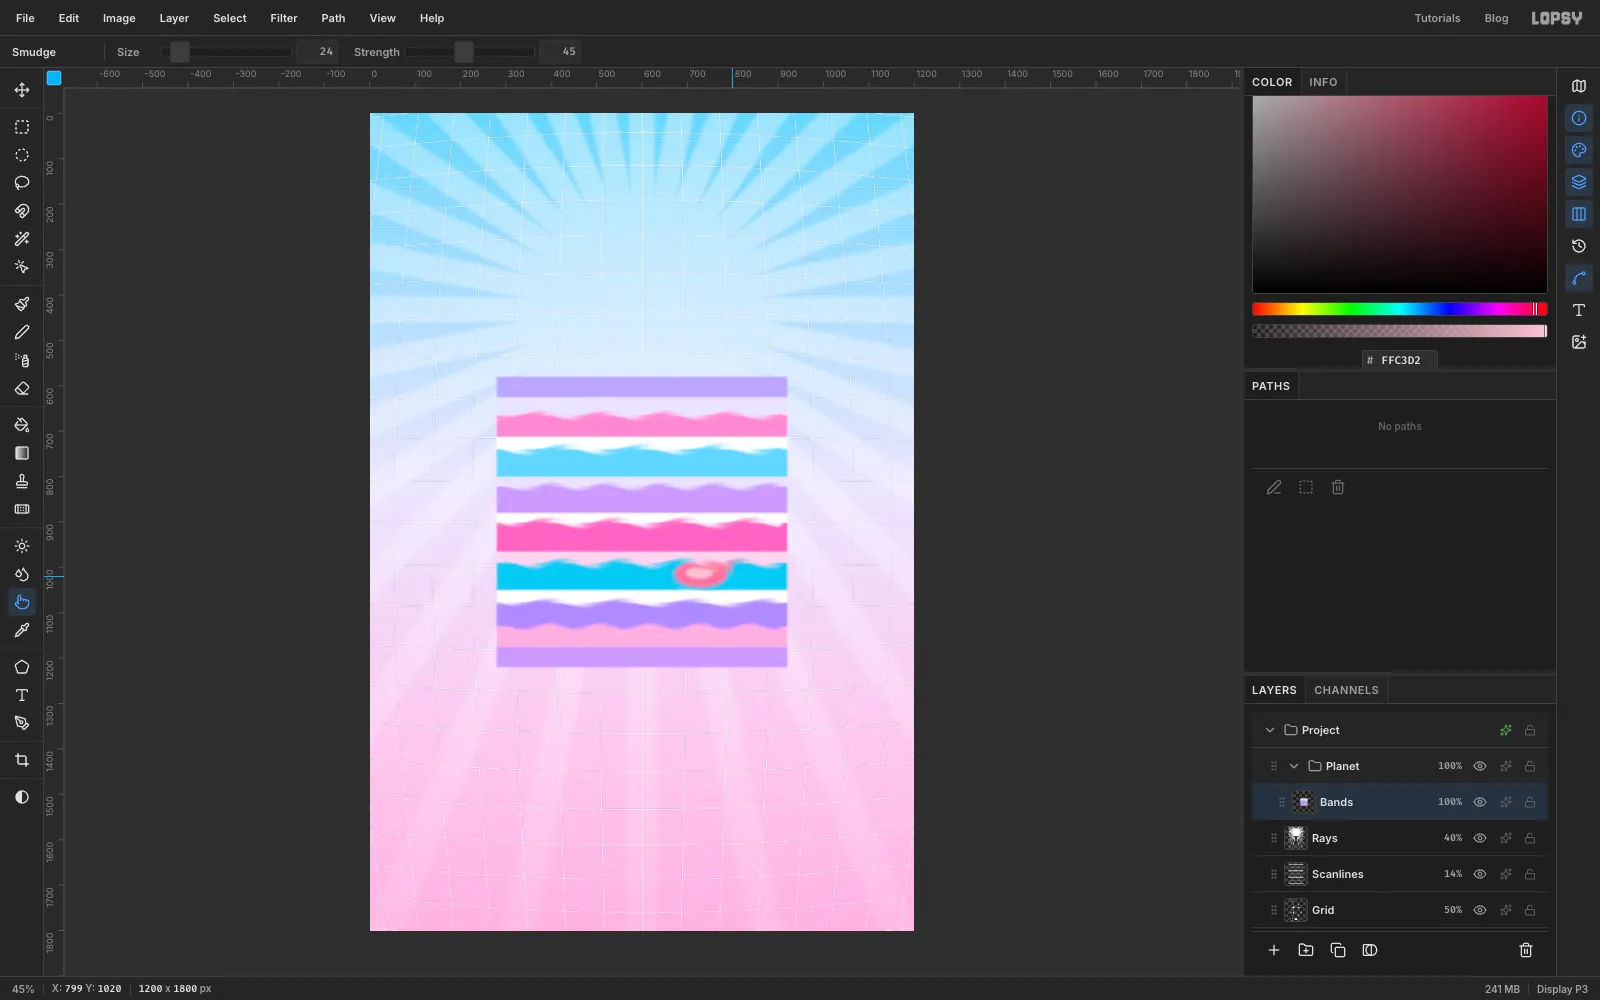
Now paint a storm. Draw an Elliptical Marquee about 116 × 60 px on the lower blue band, right of centre. Choose Select → Feather… at 8 and fill it with . Draw a smaller oval inside it, about 60 × 26 px, feather it by 6 and fill it with for a lighter core.
Choose the Smudge tool at Size 34 and Strength 70. Drag a gentle wave along each line where two stripes meet, from the left end of the block to the right. A shallow up-and-down zigzag is enough. Finish with a loop around the storm at Size 24, Strength 45, so it looks like it's turning.
-
Cut out the planet
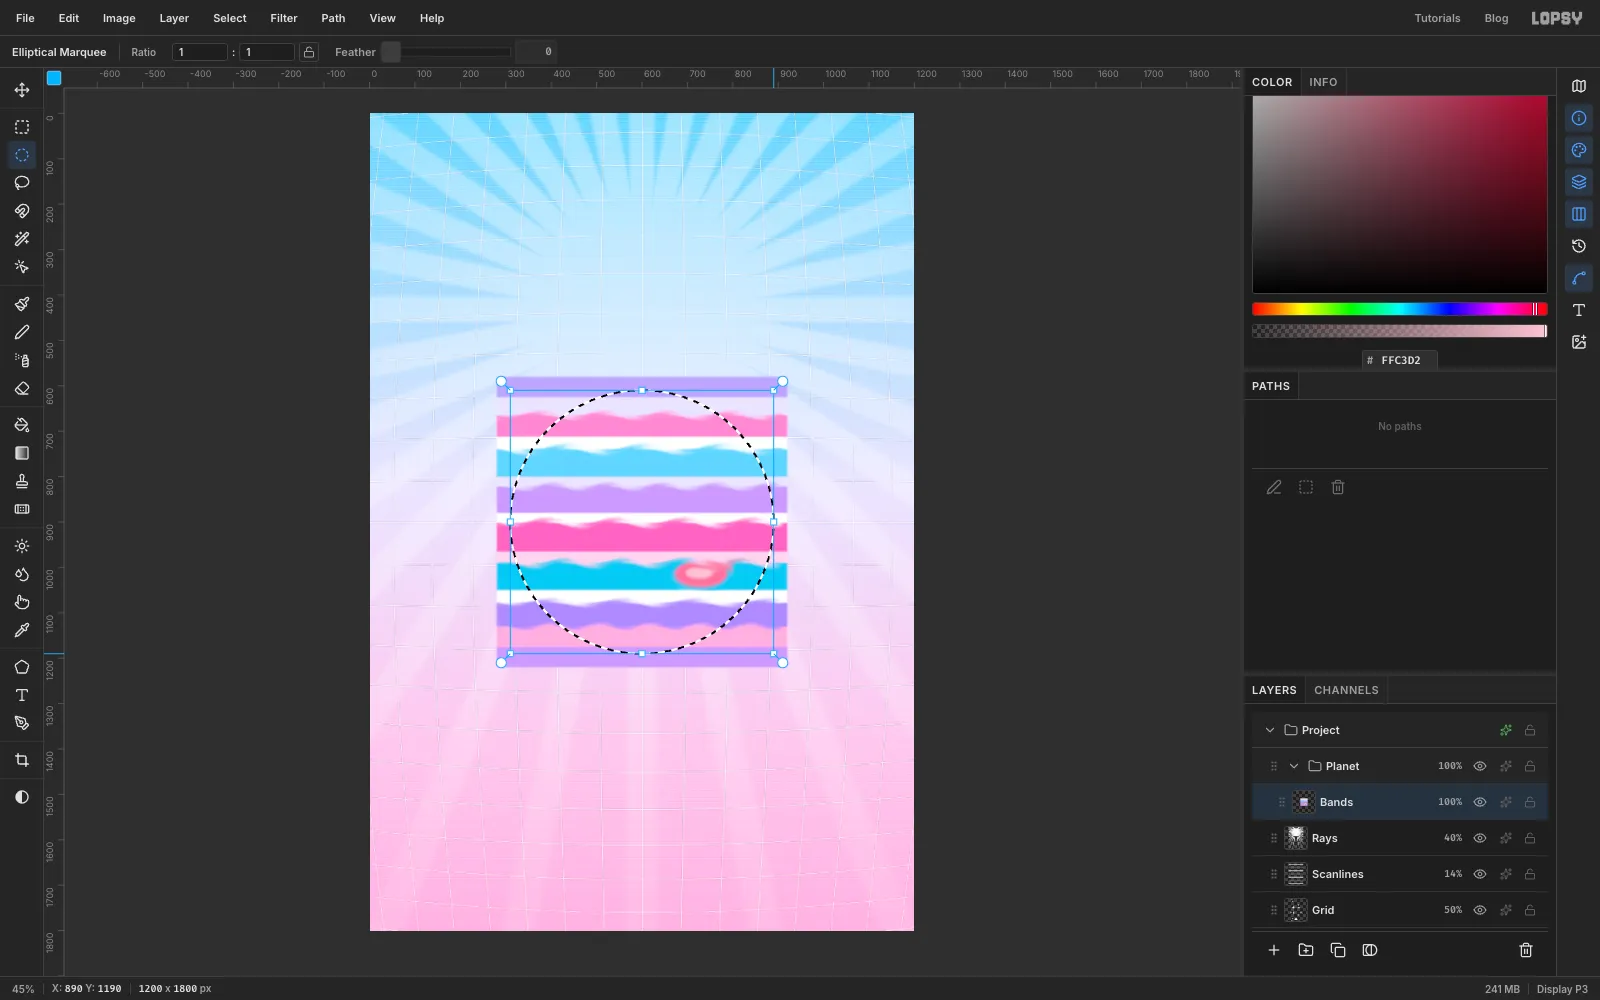
Draw an Elliptical Marquee circle 580 px across, centred on the stripes. Choose Select → Inverse and press Delete. You're left with a striped disc.
-
Round it out with Liquify
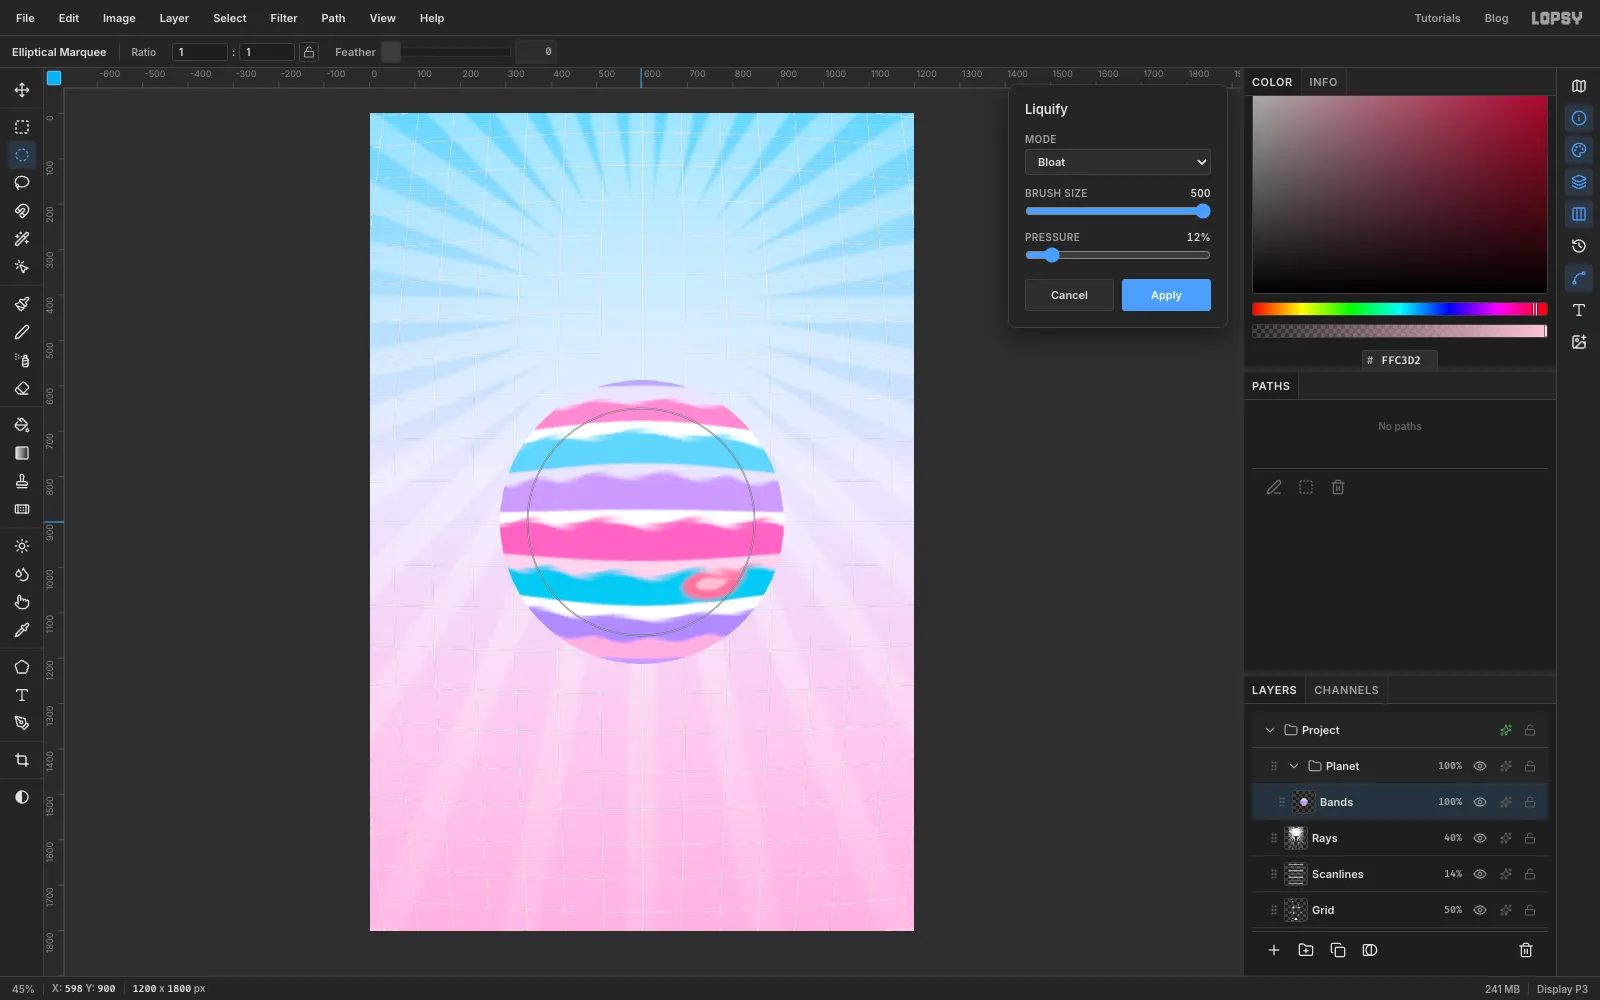
Stripes on a flat disc look like a badge, not a ball. A small bloat in the middle fixes that by stretching the centre bands and squeezing the edge ones.
Choose Filter → Liquify..., set Mode to Bloat, Brush Size to 500 and Pressure to 12%. Press on the centre of the planet and hold it for half a second without moving, then click Apply. If the bands bulge too much, cancel and try a shorter press.
Bloat also pushes the disc's edge outward a little, so trim it again: draw the same 580 px circle, choose Select → Inverse and press Delete.
-
Shade the planet
Add a layer called
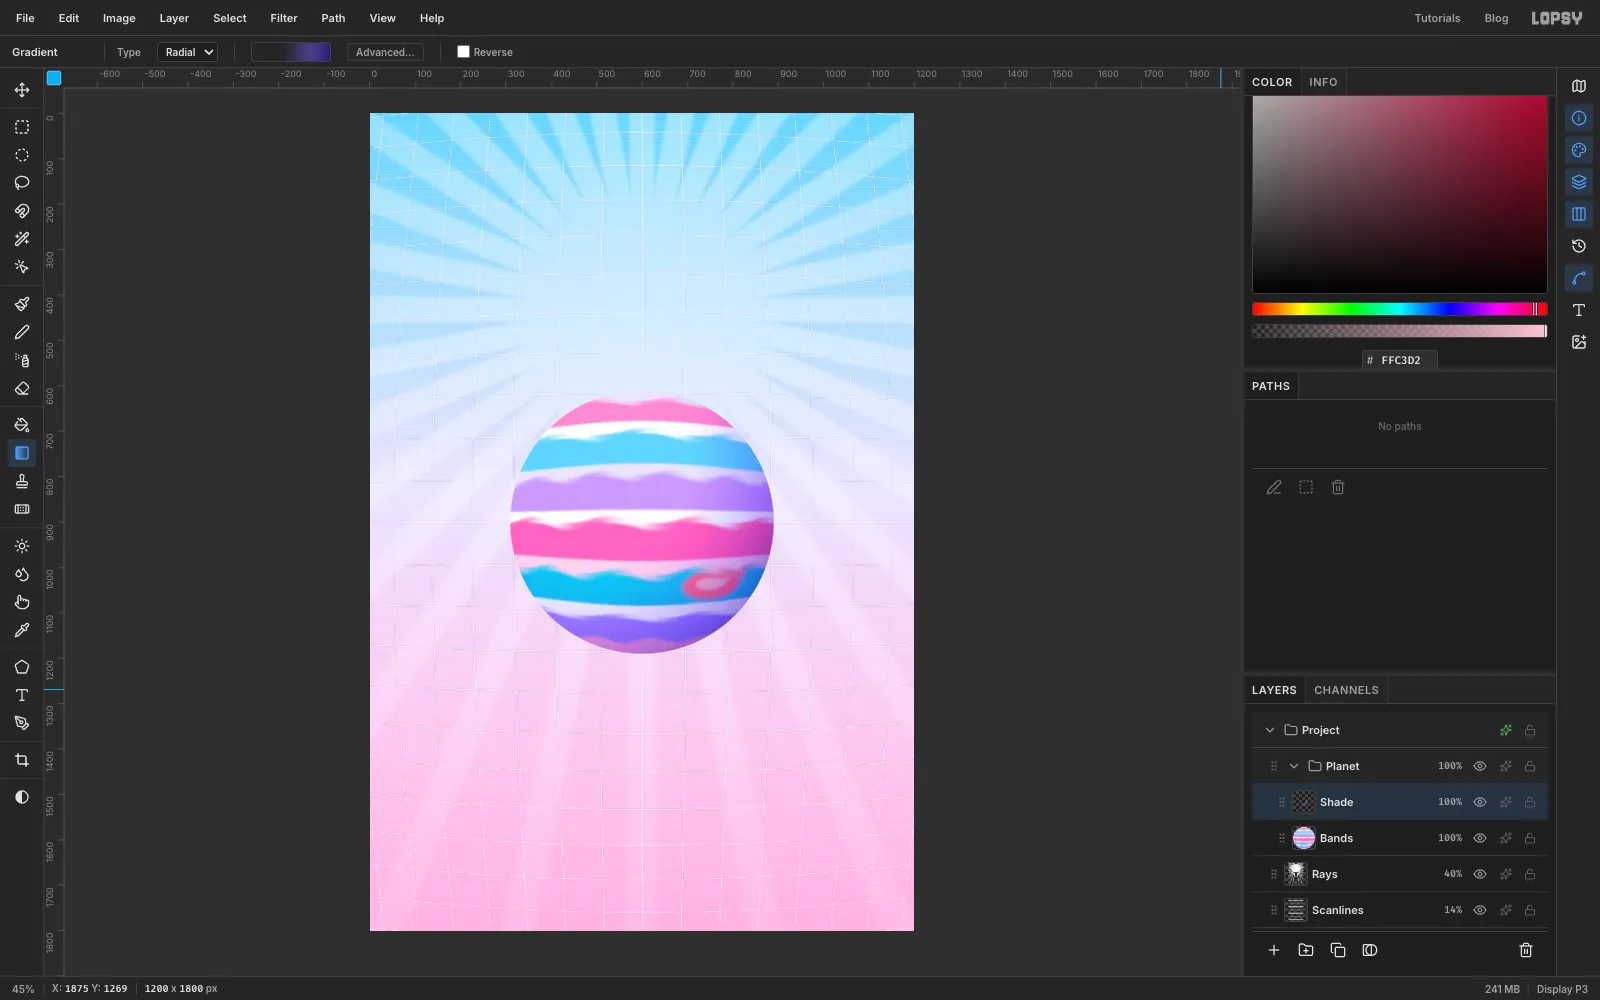
ShadeaboveBandsand draw the 580 px circle selection again.Choose the Gradient tool, set the type to Radial and open Advanced.... Use four stops:
- white at 0% opacity, at the left end
- at 0% opacity, at about 40%
- at about 55% opacity, at about 75%
- at full opacity, at the right end
Drag from the upper left of the planet to its lower-right edge. Deselect and set the layer's blend mode to Multiply. The light now seems to come from the upper left.
-
Add a glossy highlight
Add a layer called
Gloss. Draw an Elliptical Marquee about 300 × 150 px over the upper left of the planet and choose Select → Feather… at 14.Make a linear gradient from white at 95% opacity to white at 0%, and drag it from the top of the oval to its bottom. Deselect. Draw a rectangle around the highlight, switch to the Move tool and drag a corner's rotate handle to tilt it about 32° counter-clockwise, so it follows the curve of the planet. Press Cmd+D to finish.
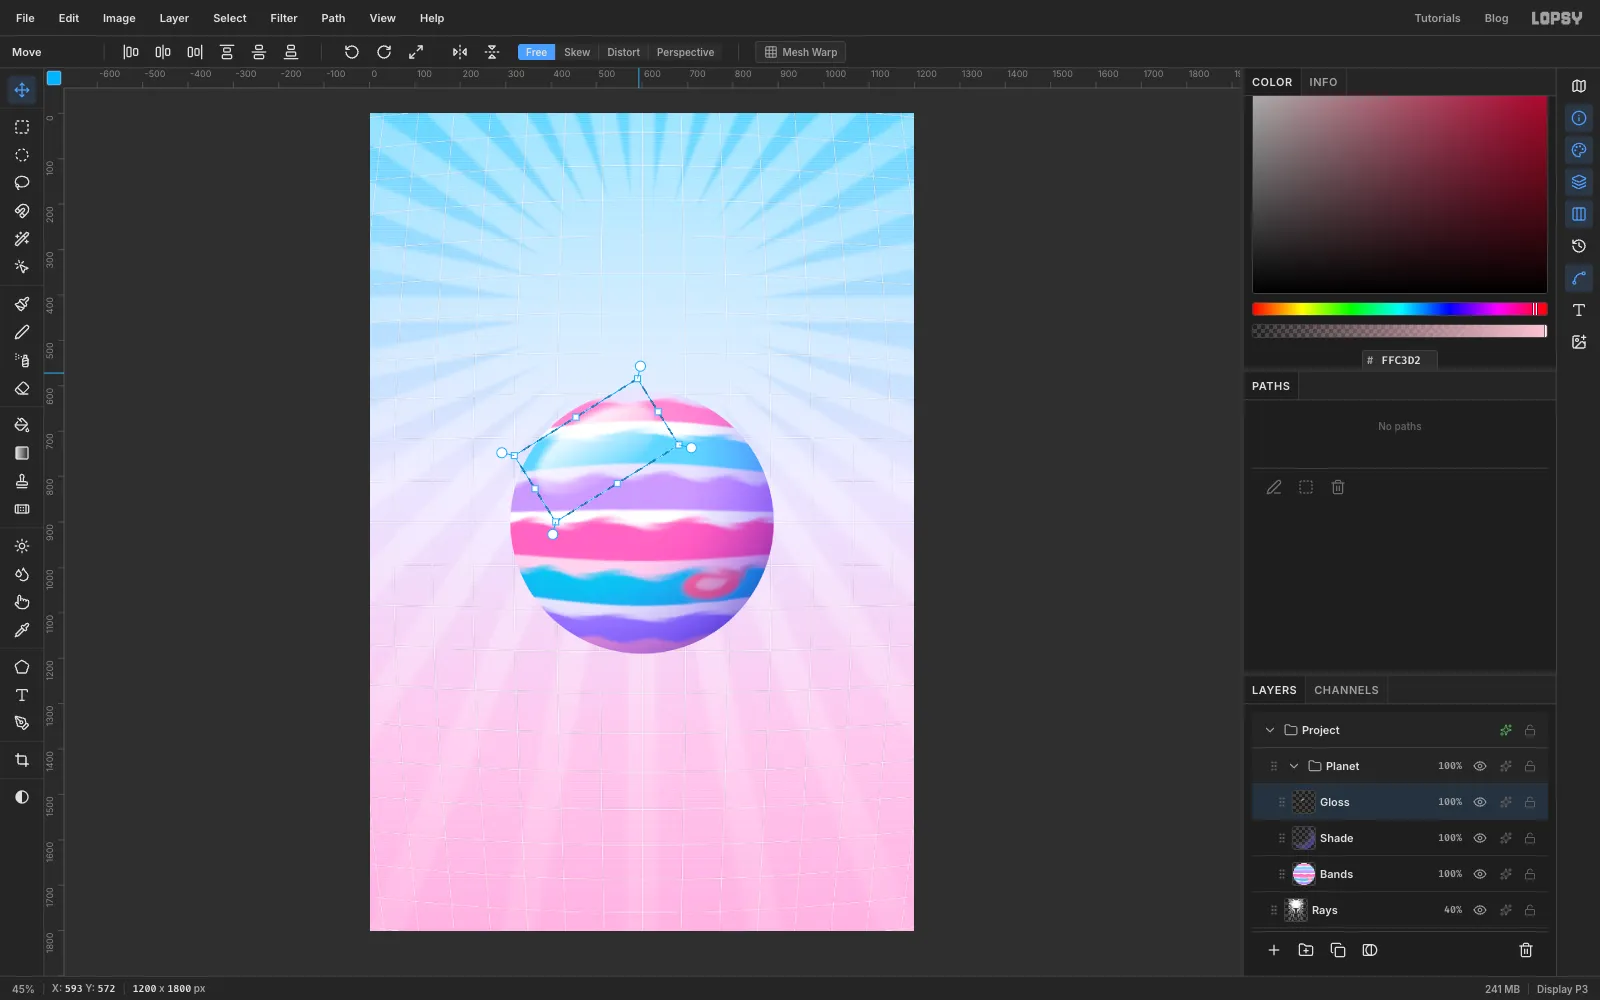
-
Make it glow
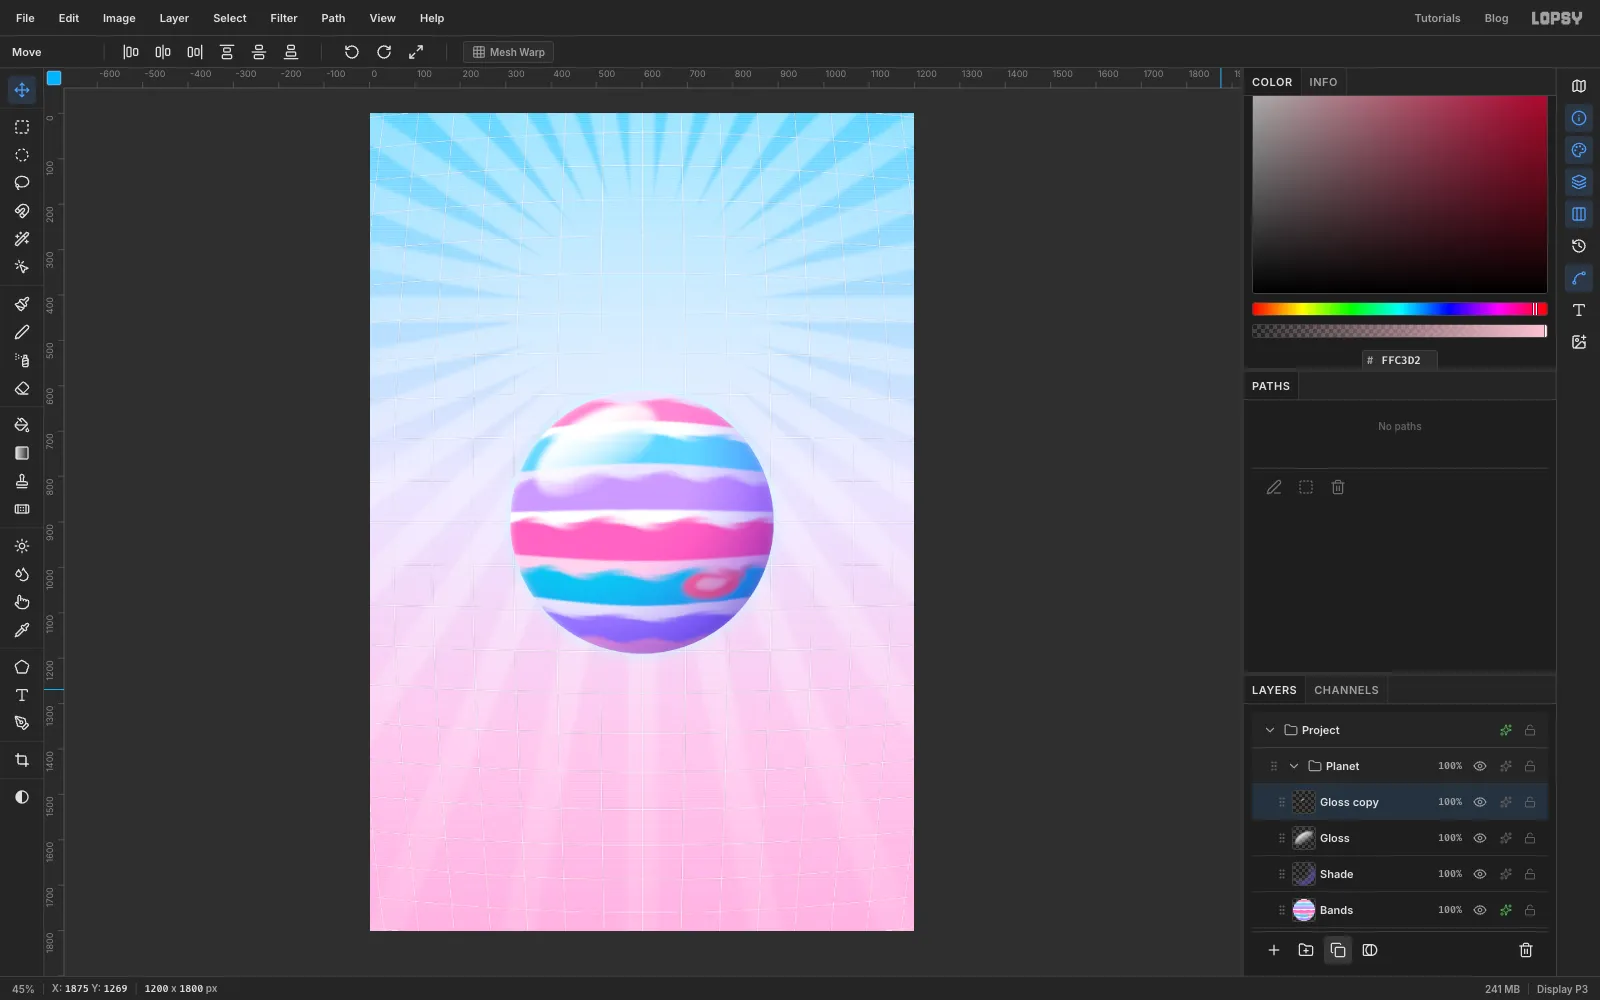
The feathered highlight is a little faint, so click Duplicate Layer on
Glossto double its strength. Then choose Layer → Merge Down to foldGloss copyback intoGloss.Select
Bandsand open the layer effects:- Outer Glow in , Size 44, Spread 6, Opacity 90, for a hazy atmosphere
- Inner Glow in white, Size 22, Opacity 70, for a glassy rim
-
Draw the ring
Add a layer called
Ring FrontaboveGloss. Draw an Elliptical Marquee 860 × 192 px centred on the planet and fill it white. Then draw an inner ellipse 804 × 152 px, centred 4 px higher, and press Delete. The ring is thicker at the bottom, which reads as perspective: the near side is closer to you.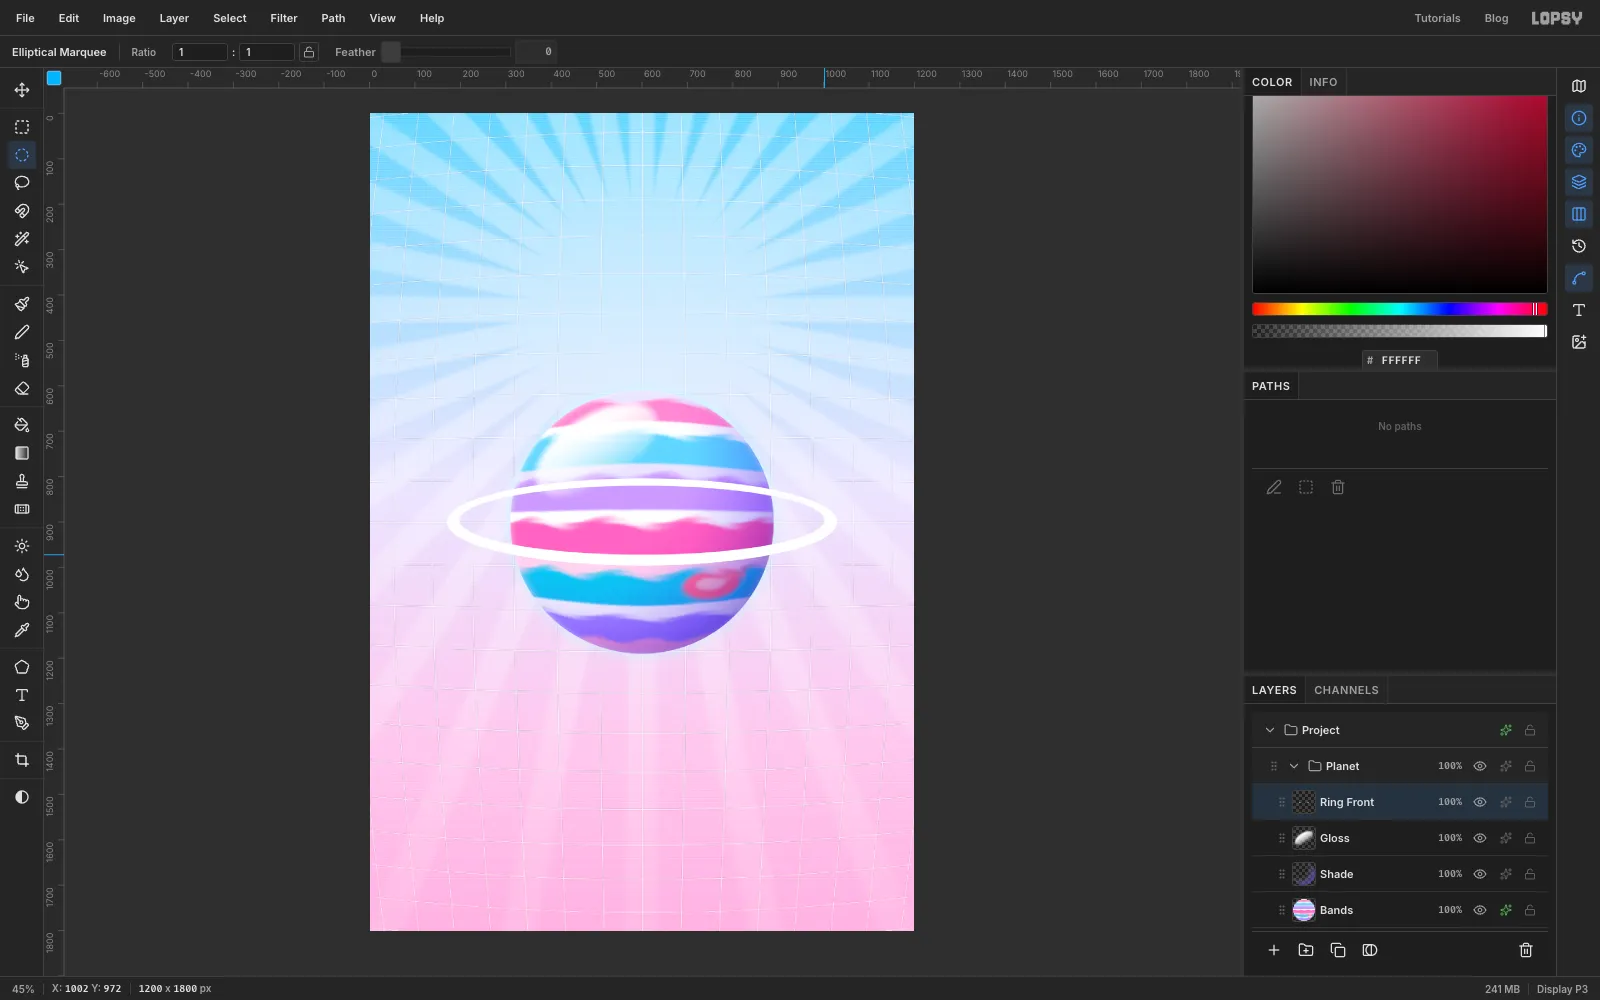
-
Give the ring a chrome finish
Cmd-click the
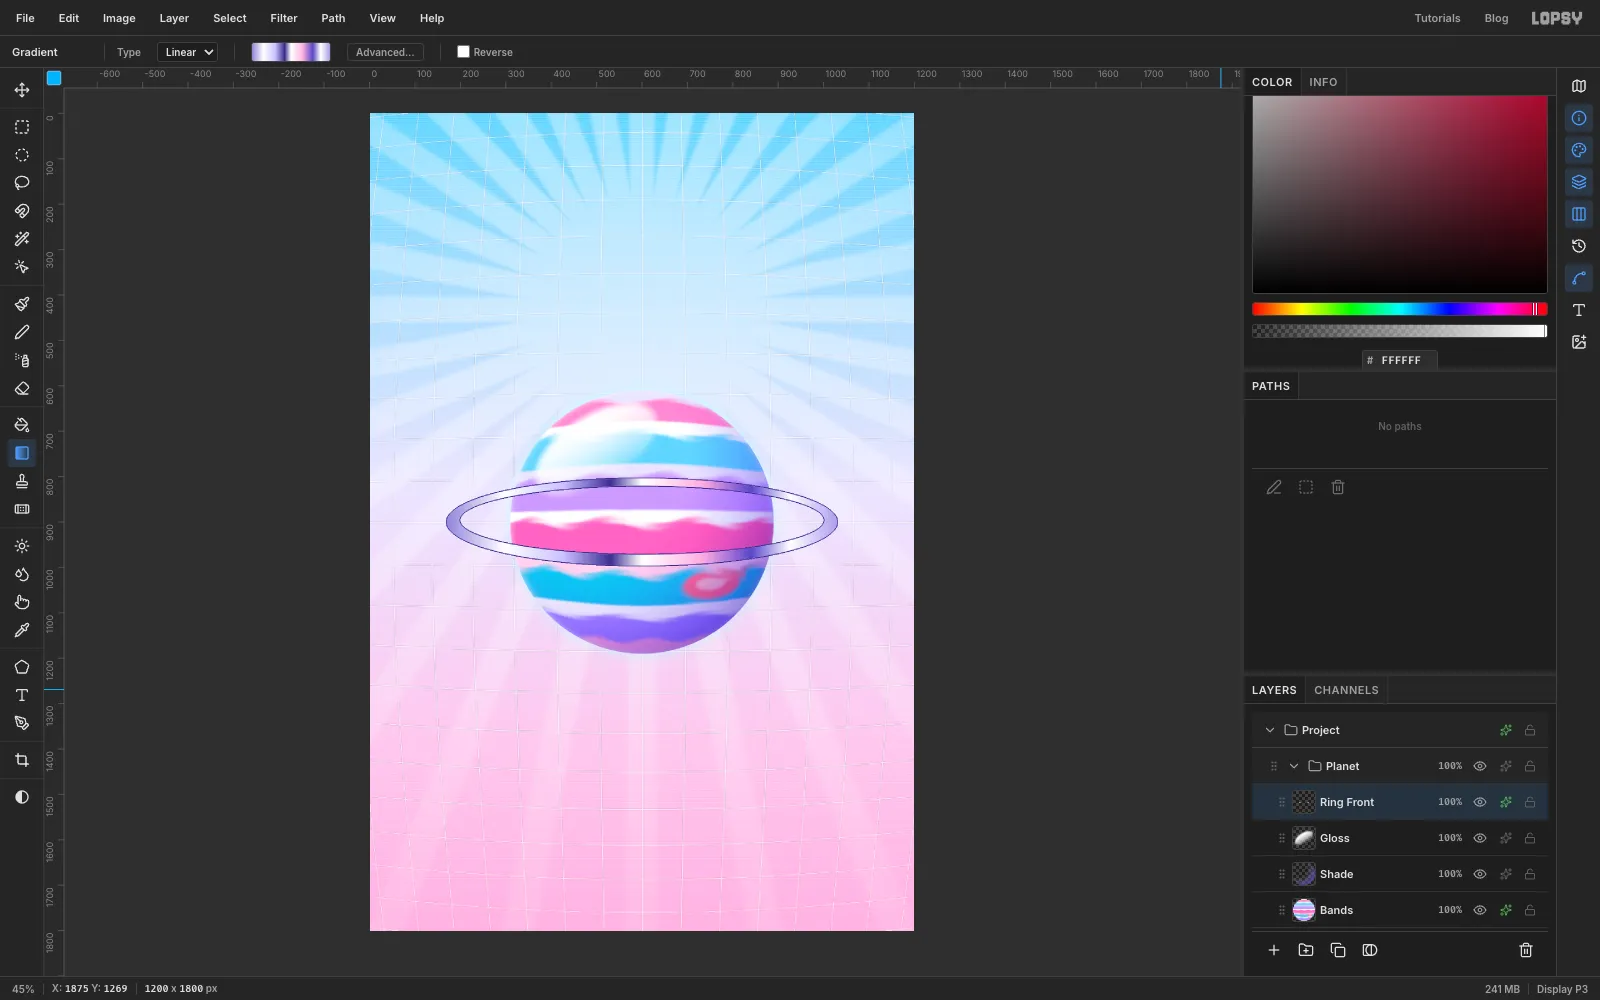
Ring Frontthumbnail to select its pixels. Make a linear gradient with nine stops, evenly spaced: , white, , , white, , , white, . Drag it from the left end of the ring to the right end.On a ring this thin, alternating light and dark bands along its length read as polished metal much better than a top-to-bottom gradient would. Deselect and add a Stroke effect, Width 2, in .
-
Tilt the ring
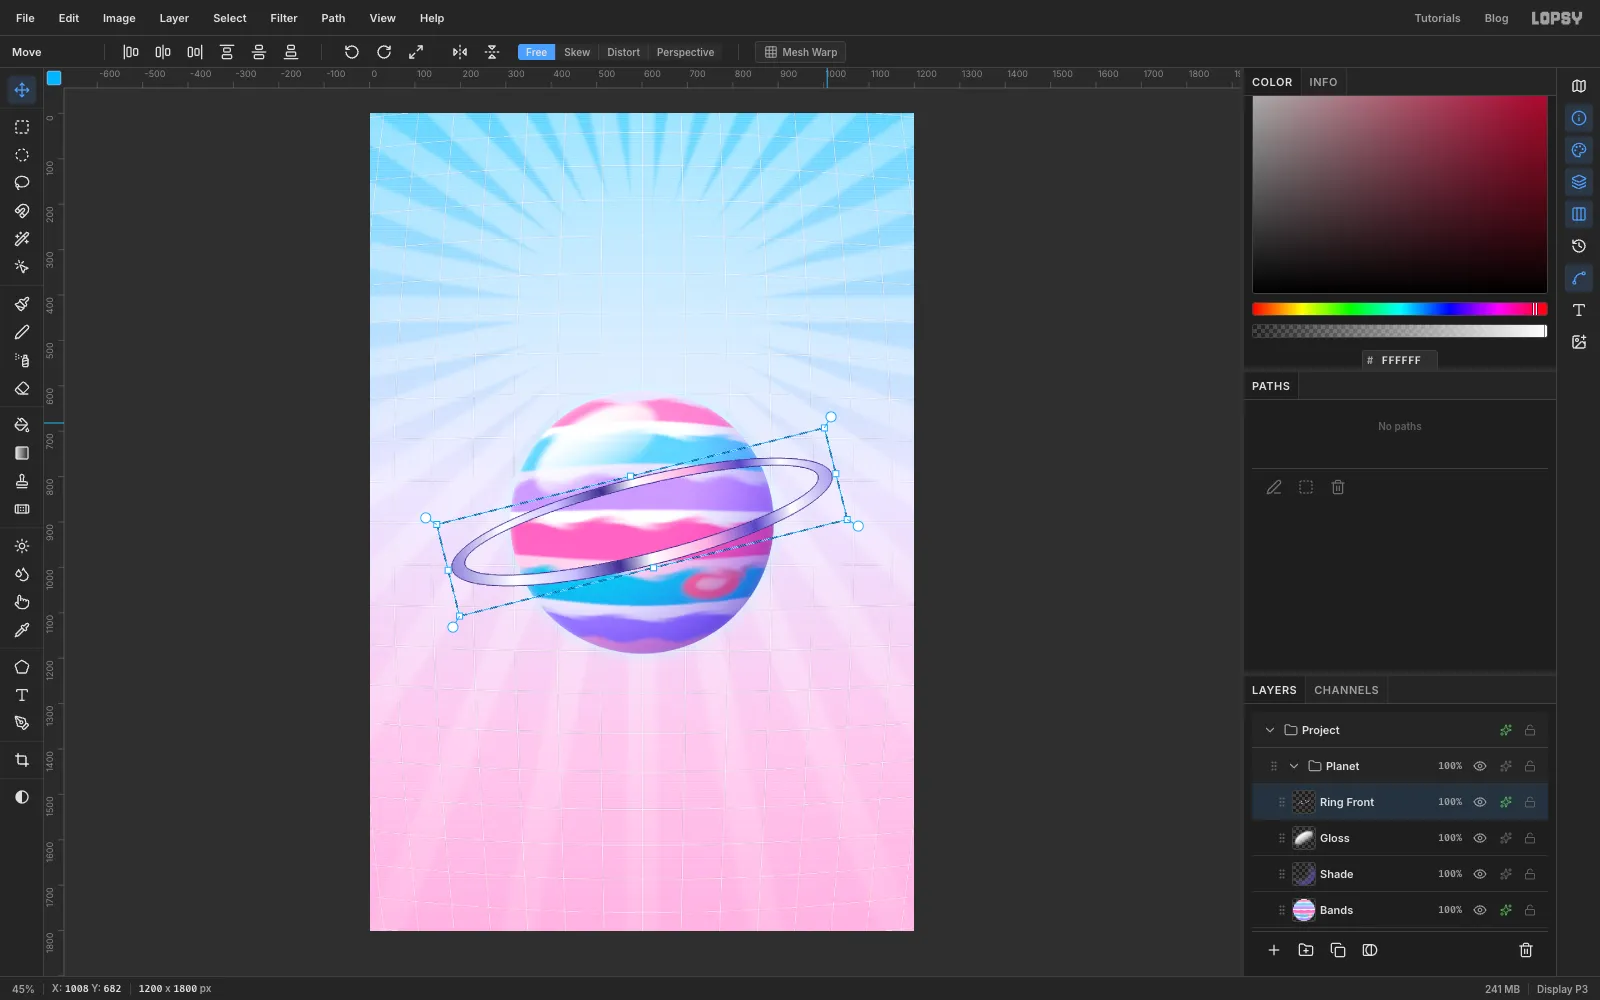
Draw a rectangle around the whole ring, switch to the Move tool and drag a rotate handle to tilt it 14° counter-clockwise, so the right end rises. Press Cmd+D.
-
Send the back of the ring behind the planet
Right now the whole ring is in front of the planet. You'll keep a copy behind the planet and cut the back half out of the front one.
- With
Ring Frontselected, select all, copy, then select theRayslayer and paste. The copy lands in the same place, aboveRaysand below the planet. Rename itRing Back. - Run Filter → Hue/Saturation... on
Ring Backwith Lightness −20, so the far side of the ring is a bit darker. Give it the same Stroke as the front. - Select
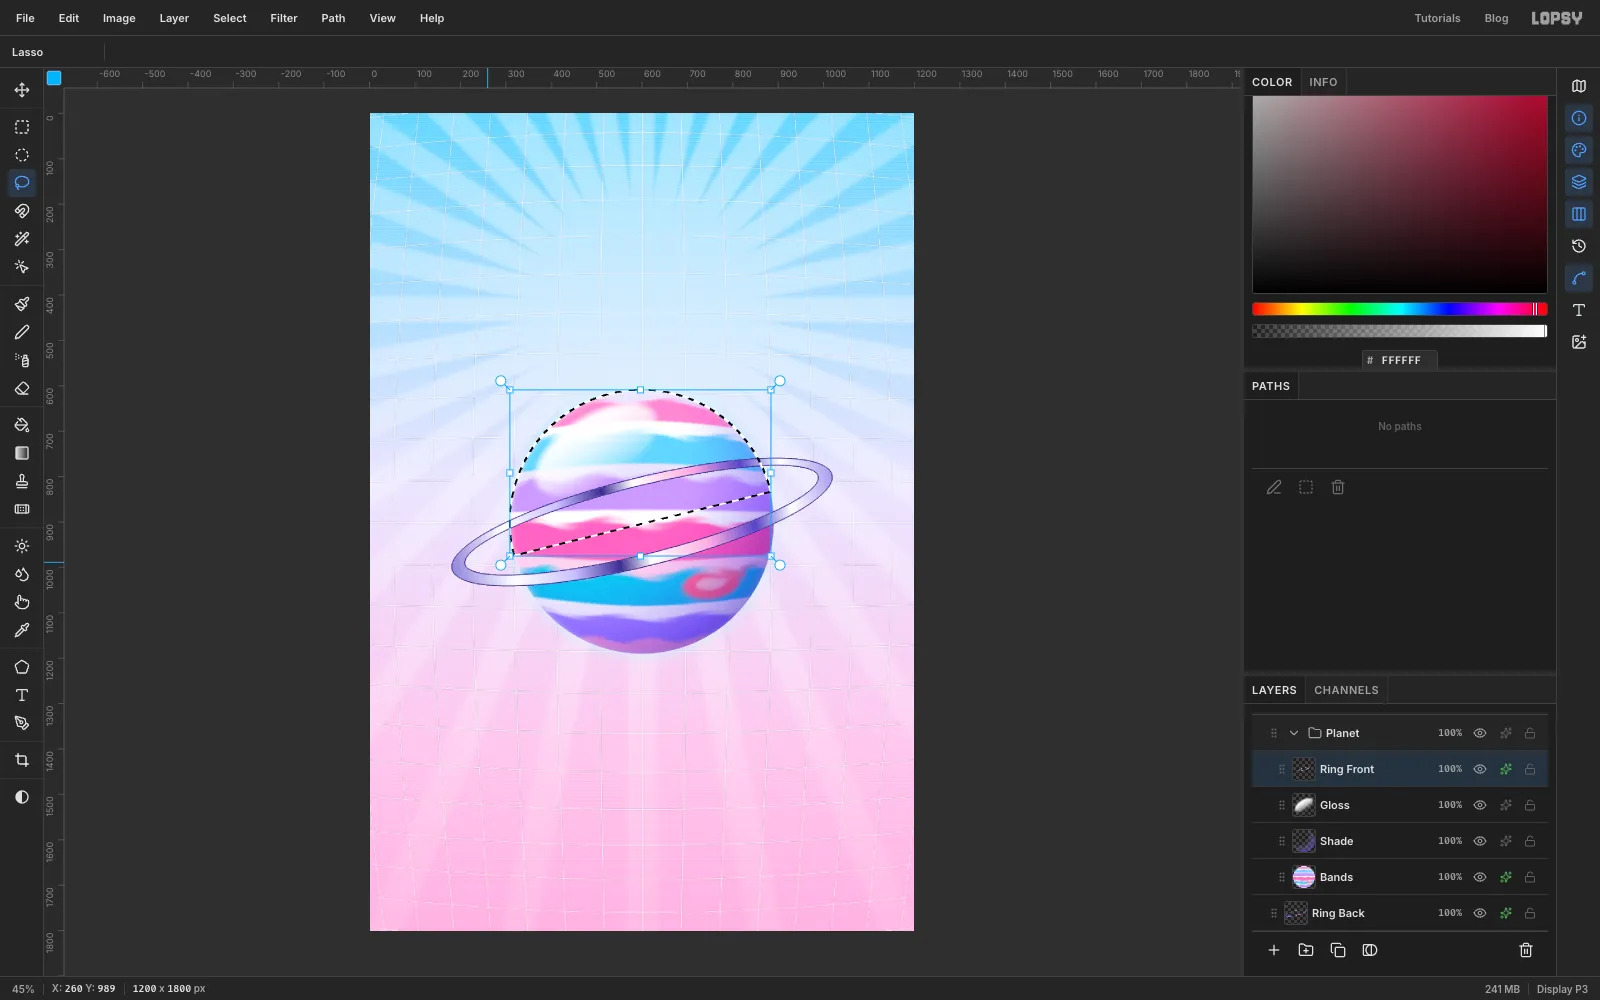
Ring Frontagain and draw the 580 px circle over the planet. Then hold Shift+Alt and, with the Lasso, drag a rough shape over the top of the planet whose lower edge runs along the middle of the ring. The ring hides small wobbles. Holding both keys keeps only the overlap: the part of the planet above the ring's centre line. - Press Delete. The top arc of the ring now disappears behind the planet, and the bottom arc still crosses in front.
- With
-
Cast the ring's shadow
The ring needs a shadow on the planet to really sit in front of it. Select all on
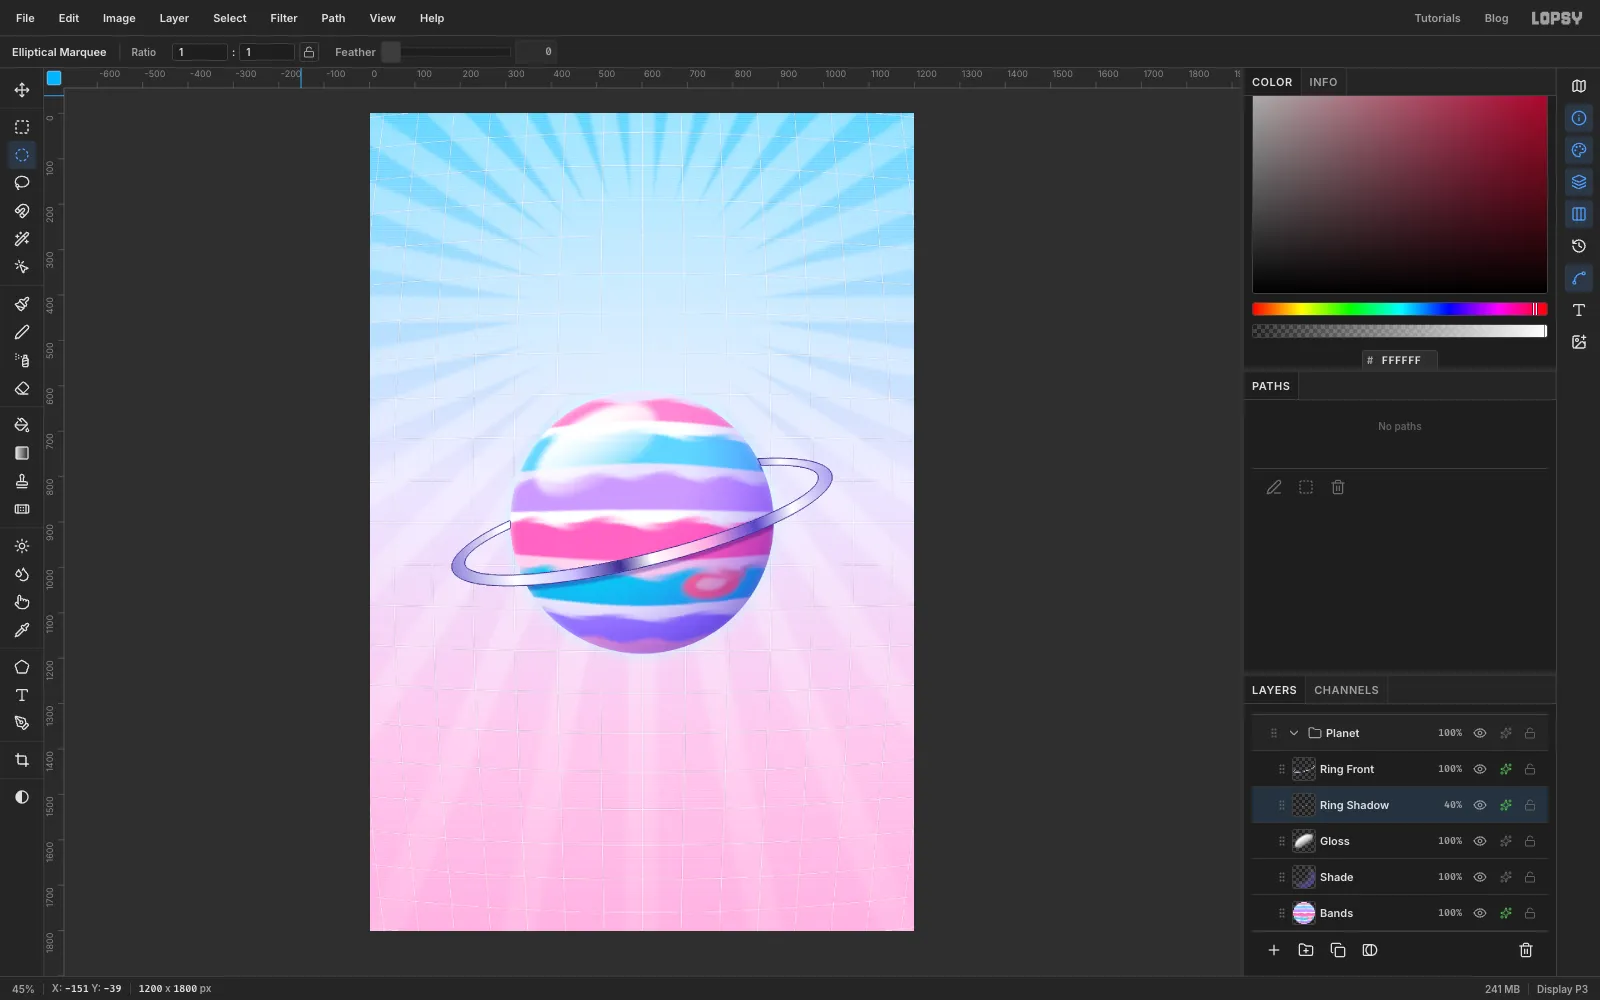
Ring Front, copy, selectGlossand paste. Rename the copyRing Shadow.With the Move tool, press Down 12 times to move it 12 px down. Run Filter → Gaussian Blur... at 6 and turn on Color Overlay in . Set the layer to Multiply at 40%. Raise it to about 65% later if the shadow gets lost once the title is in place; the finished file uses 65%. Finally, draw the 580 px circle, choose Select → Inverse and press Delete, so the shadow only falls on the planet.
-
Move the planet into place
Collapse the
Planetgroup and click it, then Cmd-clickRing Backso both are selected. Press Cmd+D so nothing is selected on the canvas, and the Move tool moves whole layers. With the Move tool, drag the planet straight up about 470 px, so its centre sits roughly a quarter of the way down the page, right on the centre of the sunburst.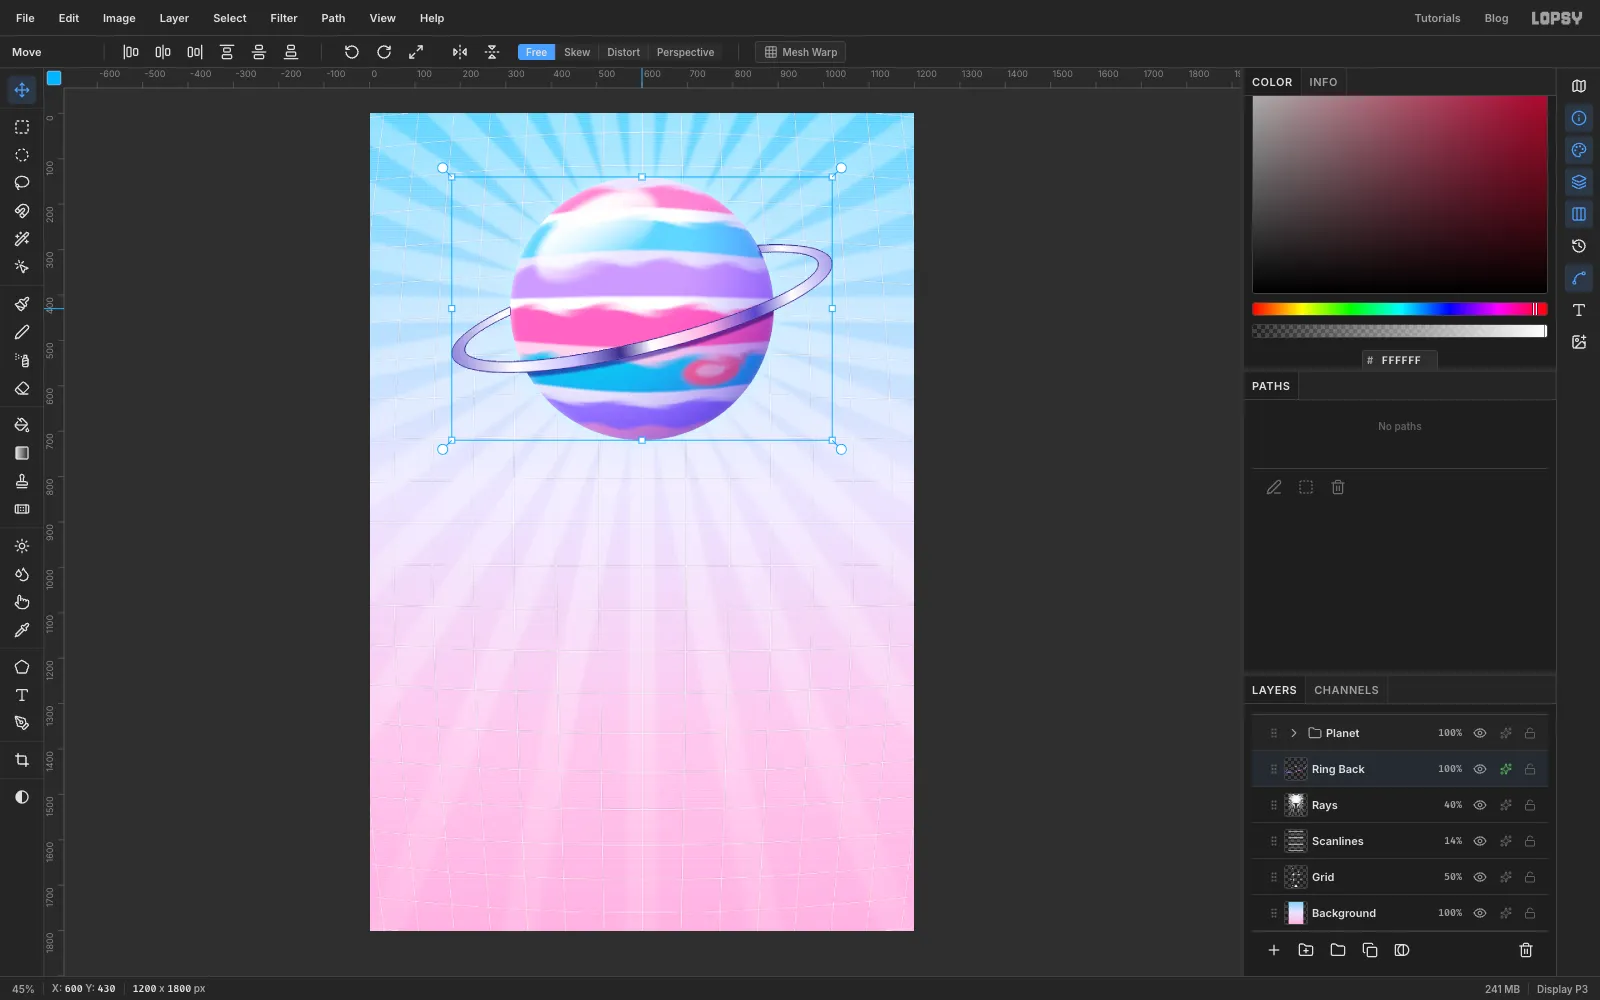
-
Set and chrome the title
Click the
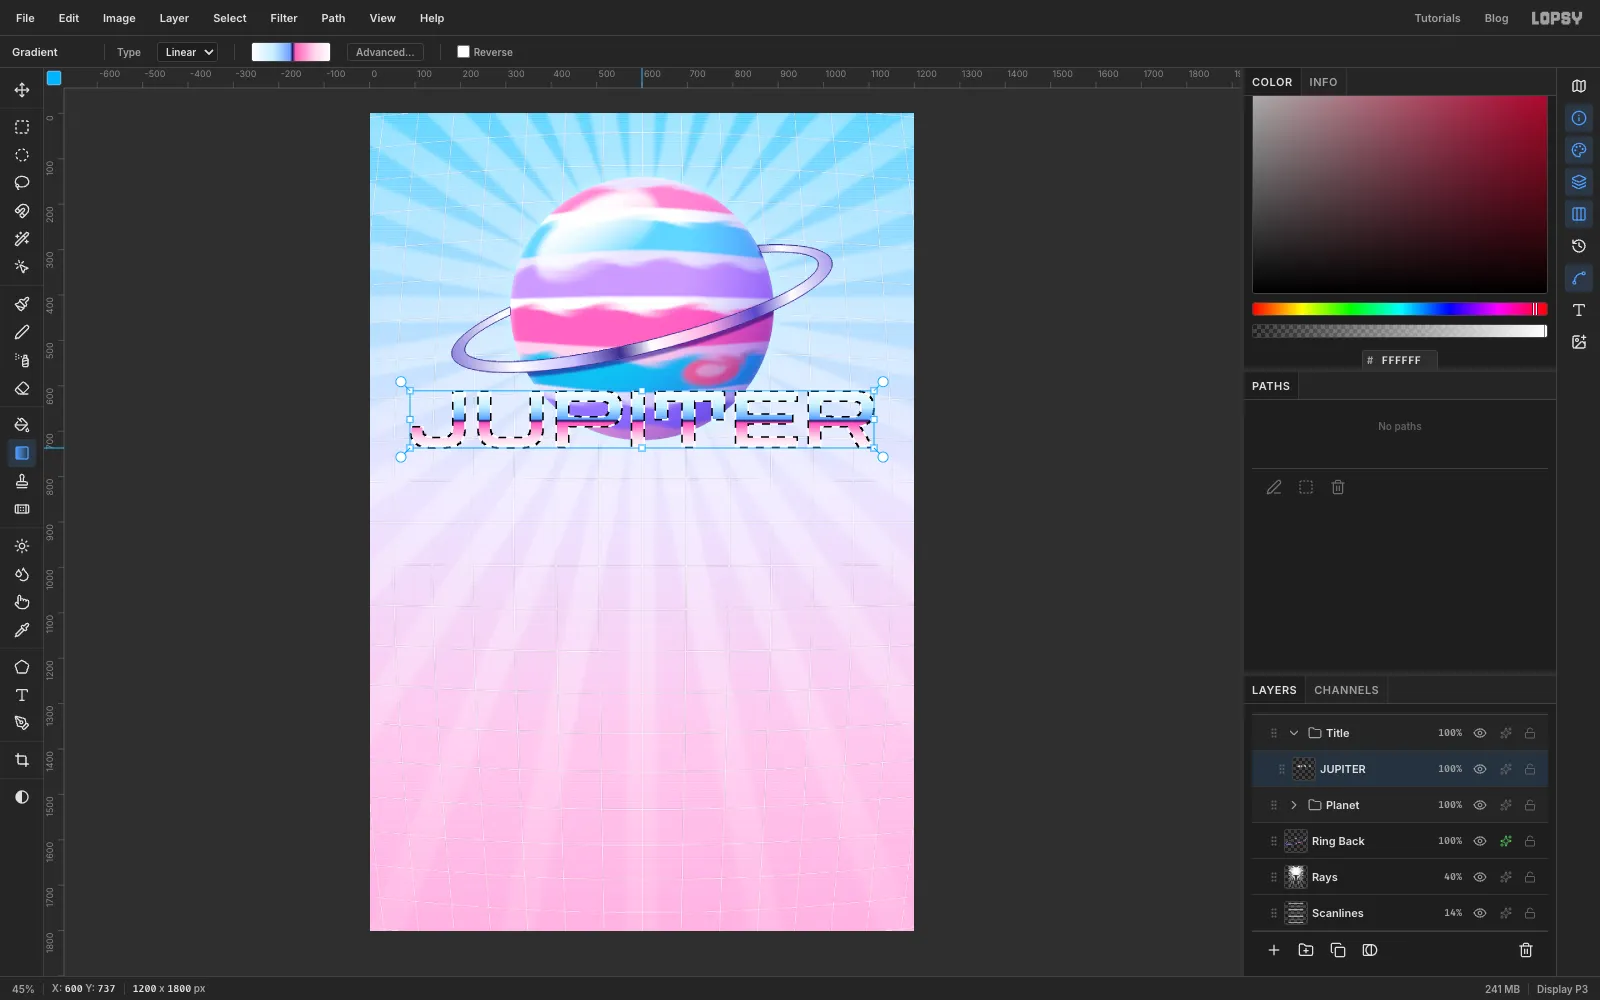
Planetrow on its own, so only it is selected, and click New Group. Call itTitle. Choose the Text tool, set Zen Dots at 174 px in white and typeJUPITERin some empty space. Move it so it's centred across the page with its top just over the bottom of the planet. The planet should peek out from behind the letters.Click Rasterize Layer, then Cmd-click its thumbnail to select the letters. Make a linear gradient with seven stops:
- white at the left end
- at about 28%
- at about 49%
- at about 52%
- at about 56%
- at about 80%
- white at the right end
Drag it from the top of the letters to the bottom. The two close-together stops around 50% make the hard "horizon" line that makes chrome look like chrome: sky reflected above, ground below.
-
Outline the title
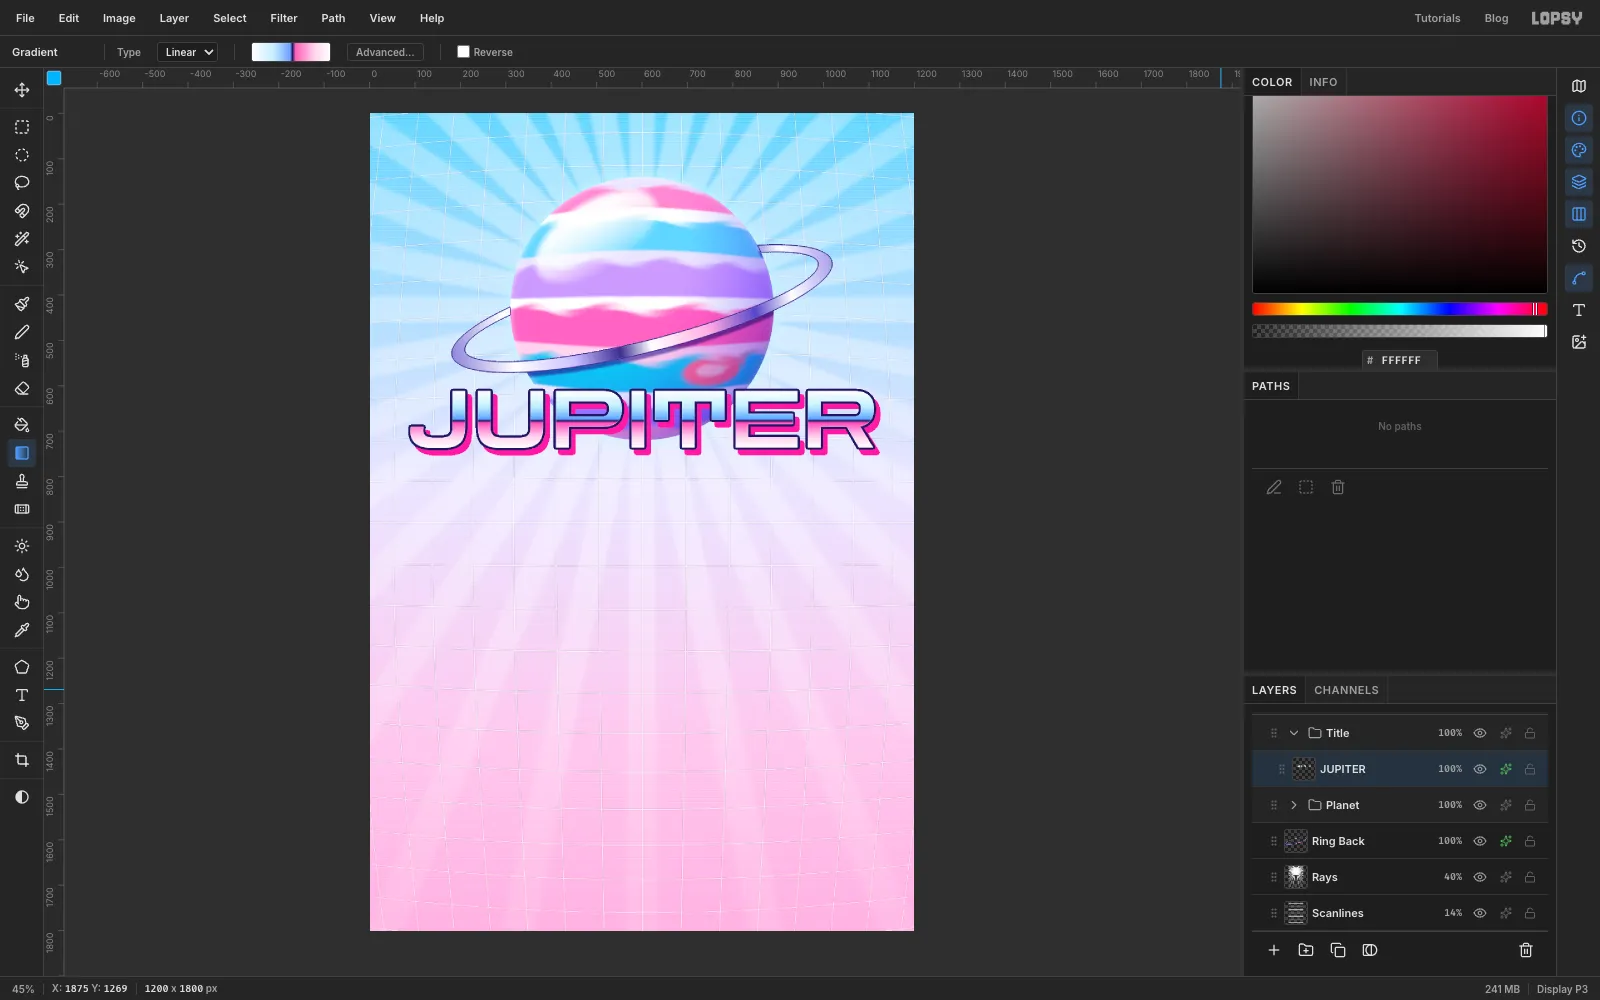
Deselect and add three effects to the title:
- Stroke in , Width 5
- Drop Shadow in , Offset X 10, Offset Y 12, Blur 0, Spread 3, Opacity 100, for a hard sticker-style shadow
- Inner Glow in white, Size 3, Opacity 90, a thin bright edge inside the outline
-
Add the DUMPLINGS pill
Add a layer called
Pill. Choose the Shape tool, set Shape to Rectangle, Output to Pixels, Corner Radius to 36 and the fill to . Shapes grow out from where you press, so press at the pill's centre, about 600, 807, and drag out to 890, 843 to make a 580 × 72 pill. That leaves about 30 px between the title's pink shadow and the top of the pill. Give it:- Stroke, , Width 3
- Inner Glow, white, Size 16, Opacity 60
- Drop Shadow, , Offset Y 8, Blur 14, Opacity 45
For the gel shine, add a layer called
Pill Shineand draw a white rounded rectangle about 536 × 14 px with Corner Radius 7, just inside the top of the pill. Set it to 60% opacity. Keep the shine thin so the lettering sits on solid pink.Set
DUMPLINGSin Krona One at 36 px in white, then set Letter spacing to 12 in the Text panel. Centre it in the pill both ways. Under the pill, setHAND-FOLDED IN ORBIT // EST. 2000in Silkscreen, 24 px, , letter spacing 4, centred, and rename the layerTagline.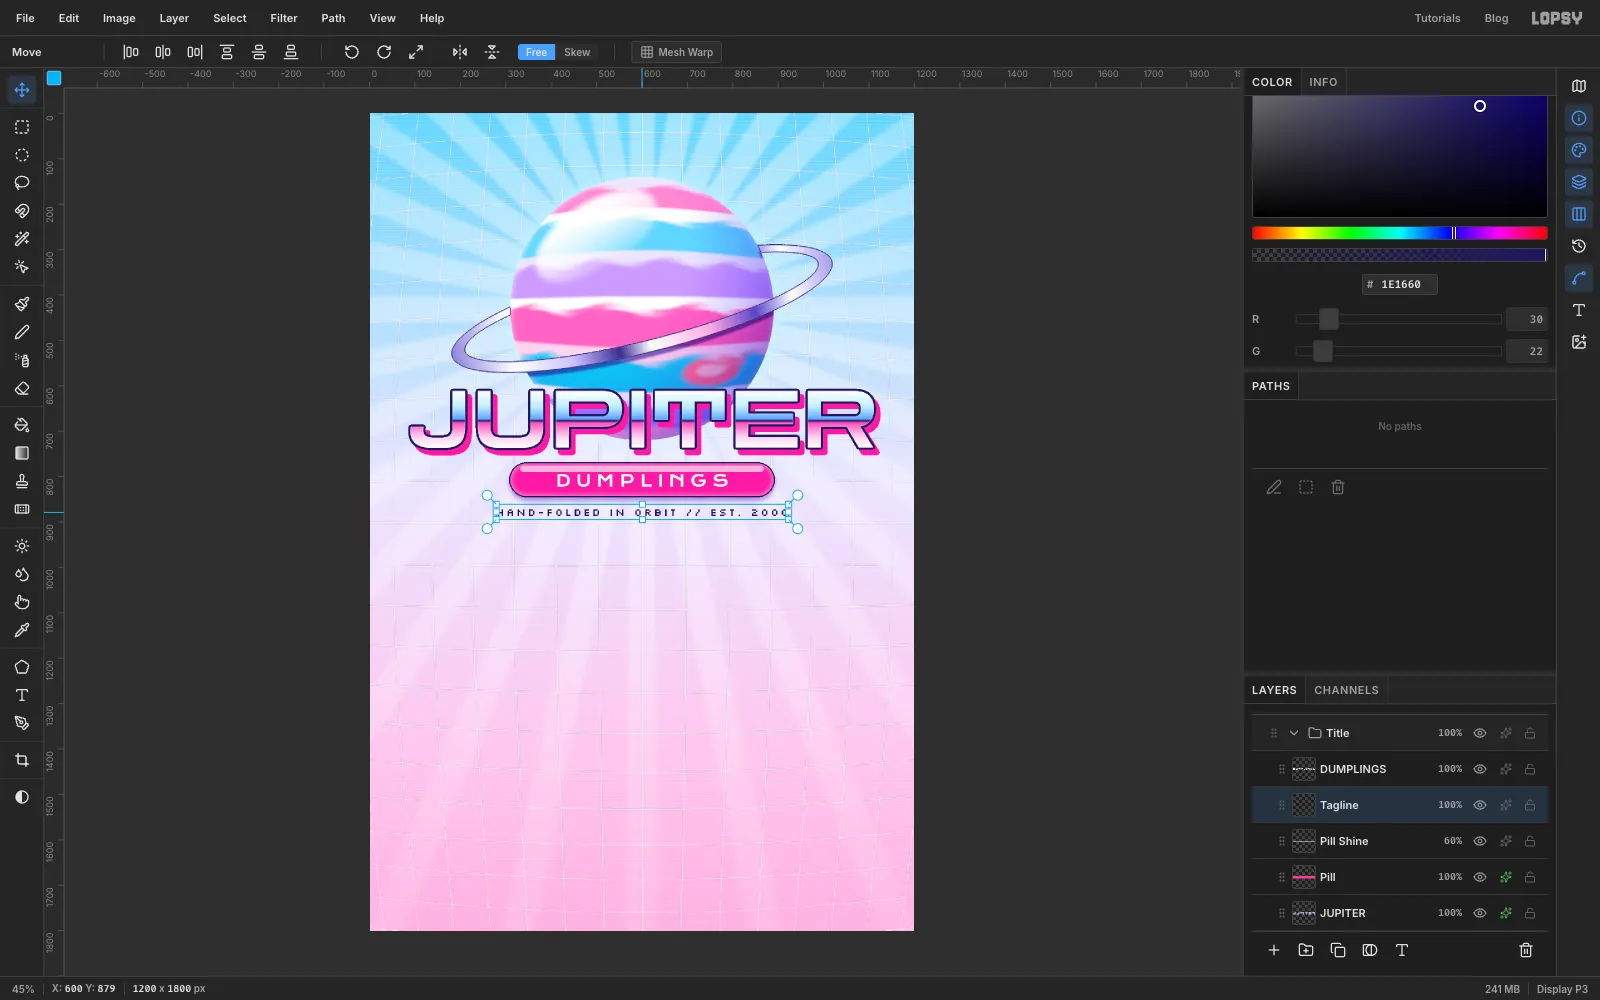
-
Float some bubbles
Collapse
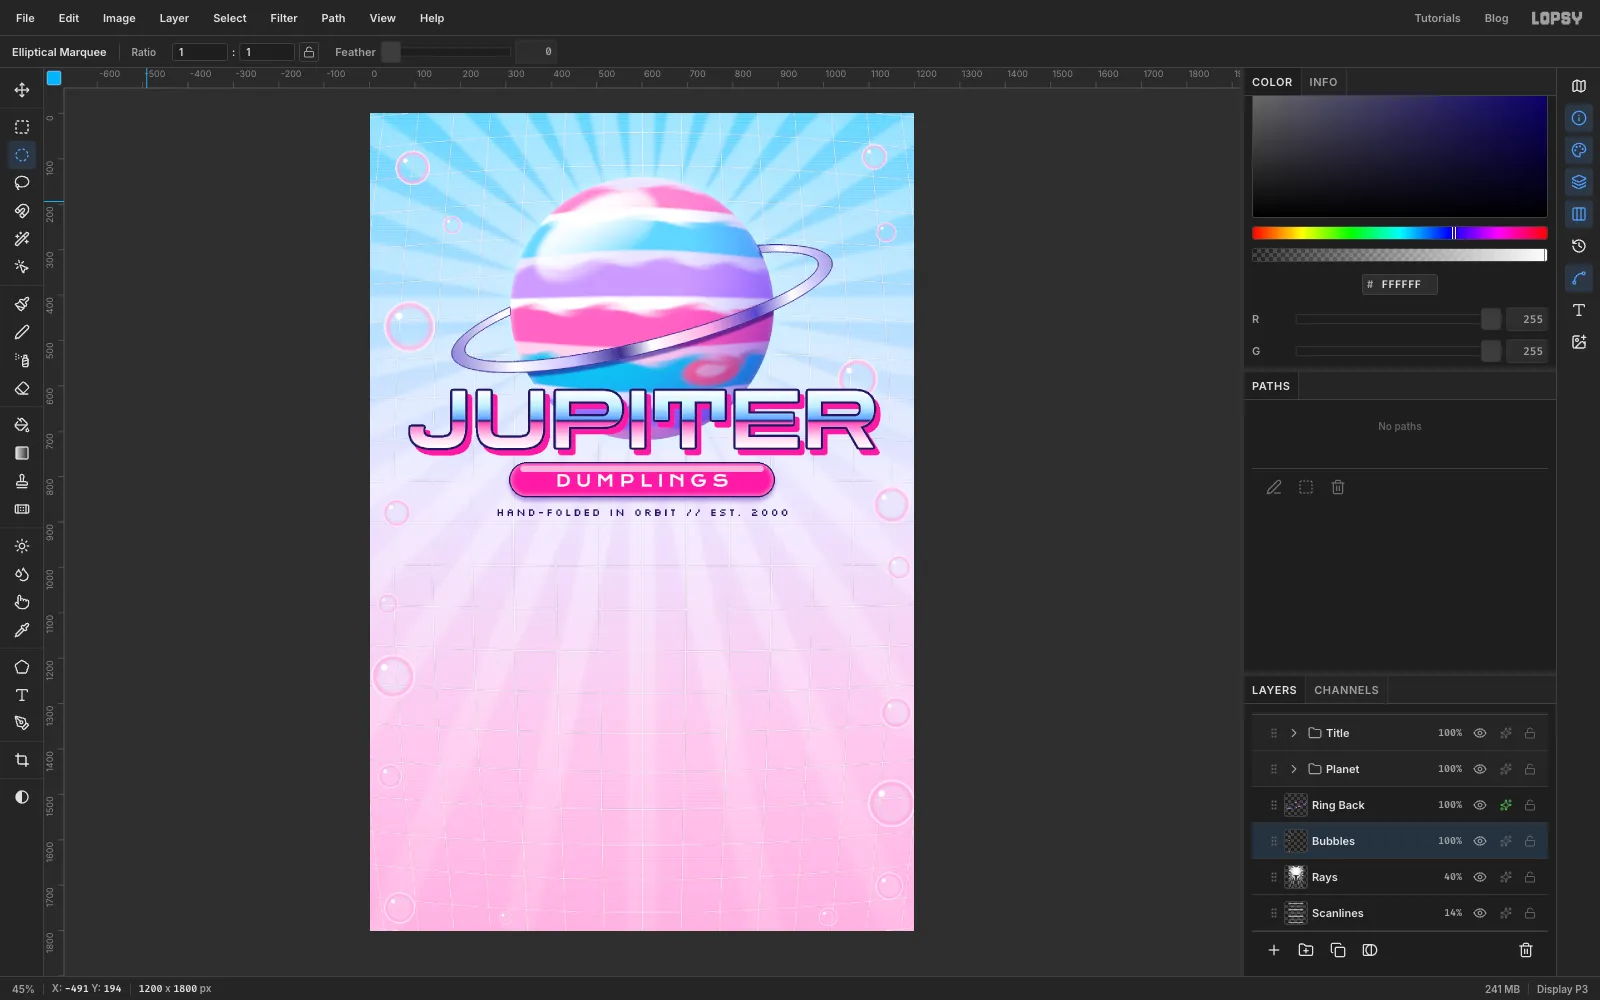
Title, selectRaysand add a layer calledBubbles. Each bubble is a circle with a radial gradient that's clear in the middle and bright at the rim. Make a radial gradient with four stops:- white at 0% opacity, at the left end
- at 10% opacity, at about 60%
- at 60% opacity, at about 85%
- white at full opacity, at the right end
Start with one: draw a 90 px circle with the Elliptical Marquee in the left margin and drag the gradient from its centre to its edge. Then draw a 12 px circle near its upper left and fill it white with Edit → Fill for the highlight.
Repeat at different sizes until you have about 18 bubbles, from 30 to 110 px across. Keep them in the margins and the sky, clear of the middle of the page where the menu will go. Keep every highlight dot in the same upper-left spot so they all share one light source.
-
Make a frosted-glass window
Select the
Titlegroup, click New Group and call itMenu.Frosted glass blurs whatever is behind it. Click once with the Rectangular Marquee and enter From 90, 928, To 1110, 1550. Then choose Edit → Copy Merged, which copies everything visible in that area as one image. Paste it, rename the layer
Frostand run Filter → Gaussian Blur... at 14.Add a layer called
Windowabove it. With the Shape tool set to a white Rectangle with Corner Radius 30, press at the centre of that area, 600, 1239, and drag out to its bottom-right corner at 1110, 1550. Set it to 55% opacity and add:- Stroke, , Width 3
- Inner Glow, white, Size 24, Opacity 80
- Drop Shadow, , Offset Y 18, Blur 30, Opacity 35
The blurred copy still has square corners. Cmd-click the
Windowthumbnail, choose Select → Inverse, selectFrostand press Delete.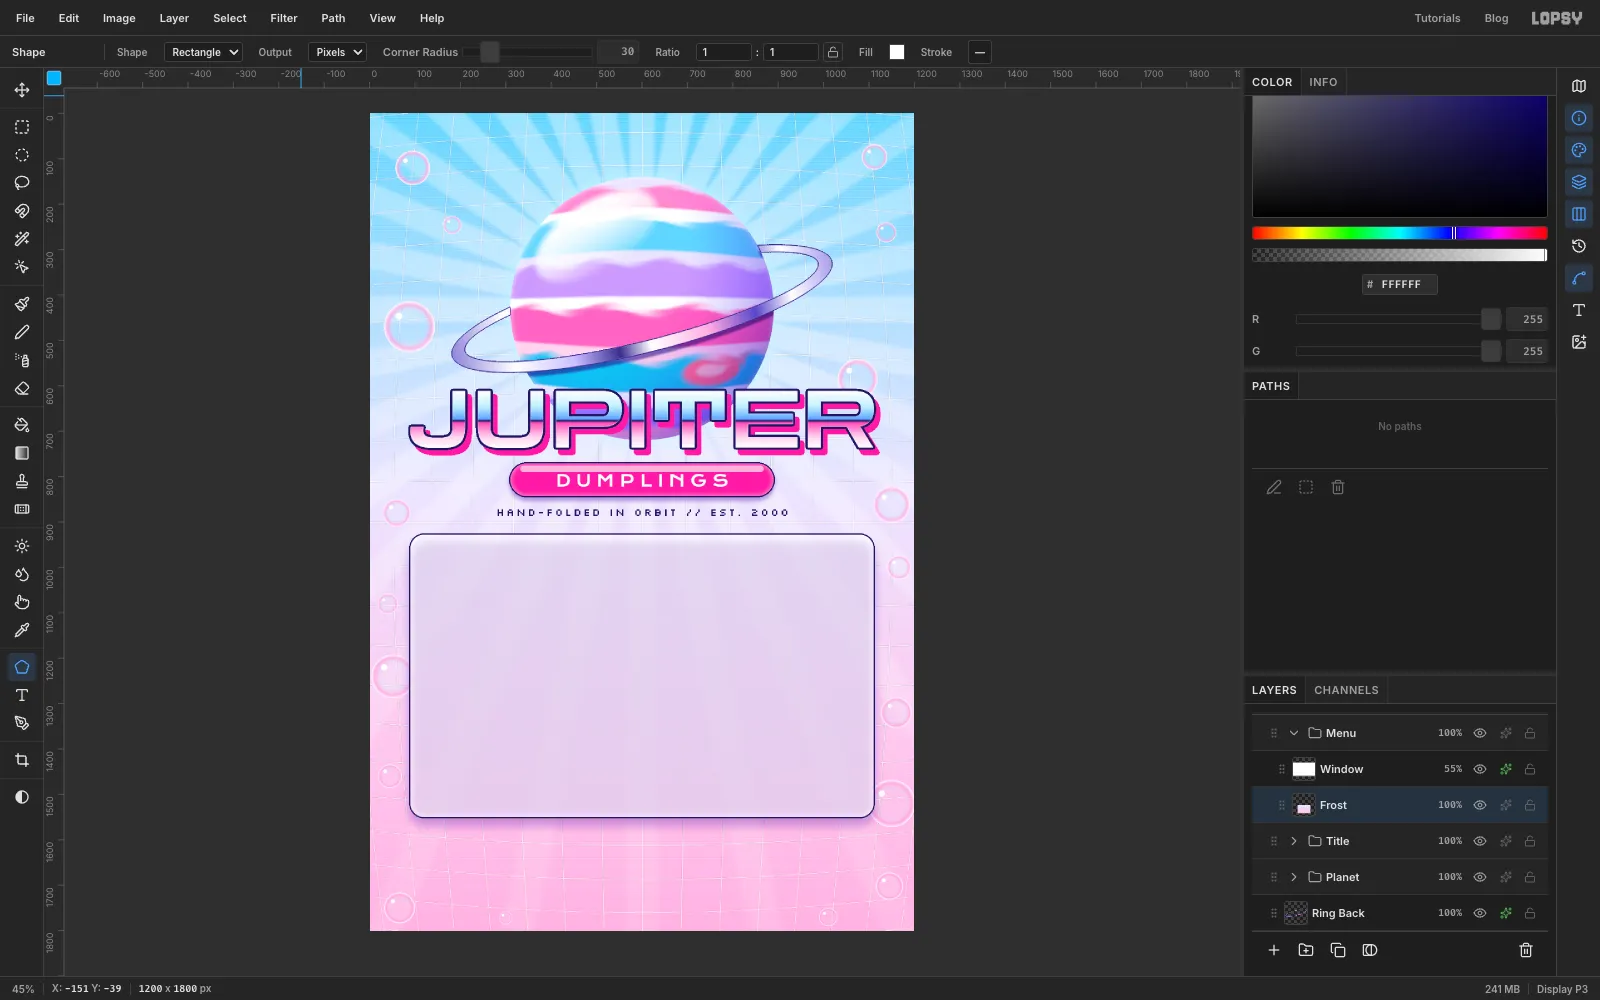
-
Add the title bar
Add a layer called
Title Bar. With the same Corner Radius 30, press at 600, 972 and drag out to 1110, 1016. That makes a rounded rectangle the full width of the window, sitting on its top edge. Then click once with the Rectangular Marquee, enter From 80, 990 and To 1120, 1024, and press Delete, so only the top corners stay rounded and the bar is 62 px tall.Cmd-click the thumbnail and fill it with a linear gradient from top to bottom: at the left end, at about 45%, at about 55%, and at the right end. It's deep enough for white text to read. Add a Stroke in , Width 3.
On a layer called
Window Buttons, draw three 28 px circles at the right end of the bar in , and . Give them a Stroke of at Width 2 and a white Inner Glow at Size 6. Then setgalilean_four.exein Silkscreen, 28 px, white, letter spacing 3, about 38 px in from the left of the bar and centred vertically.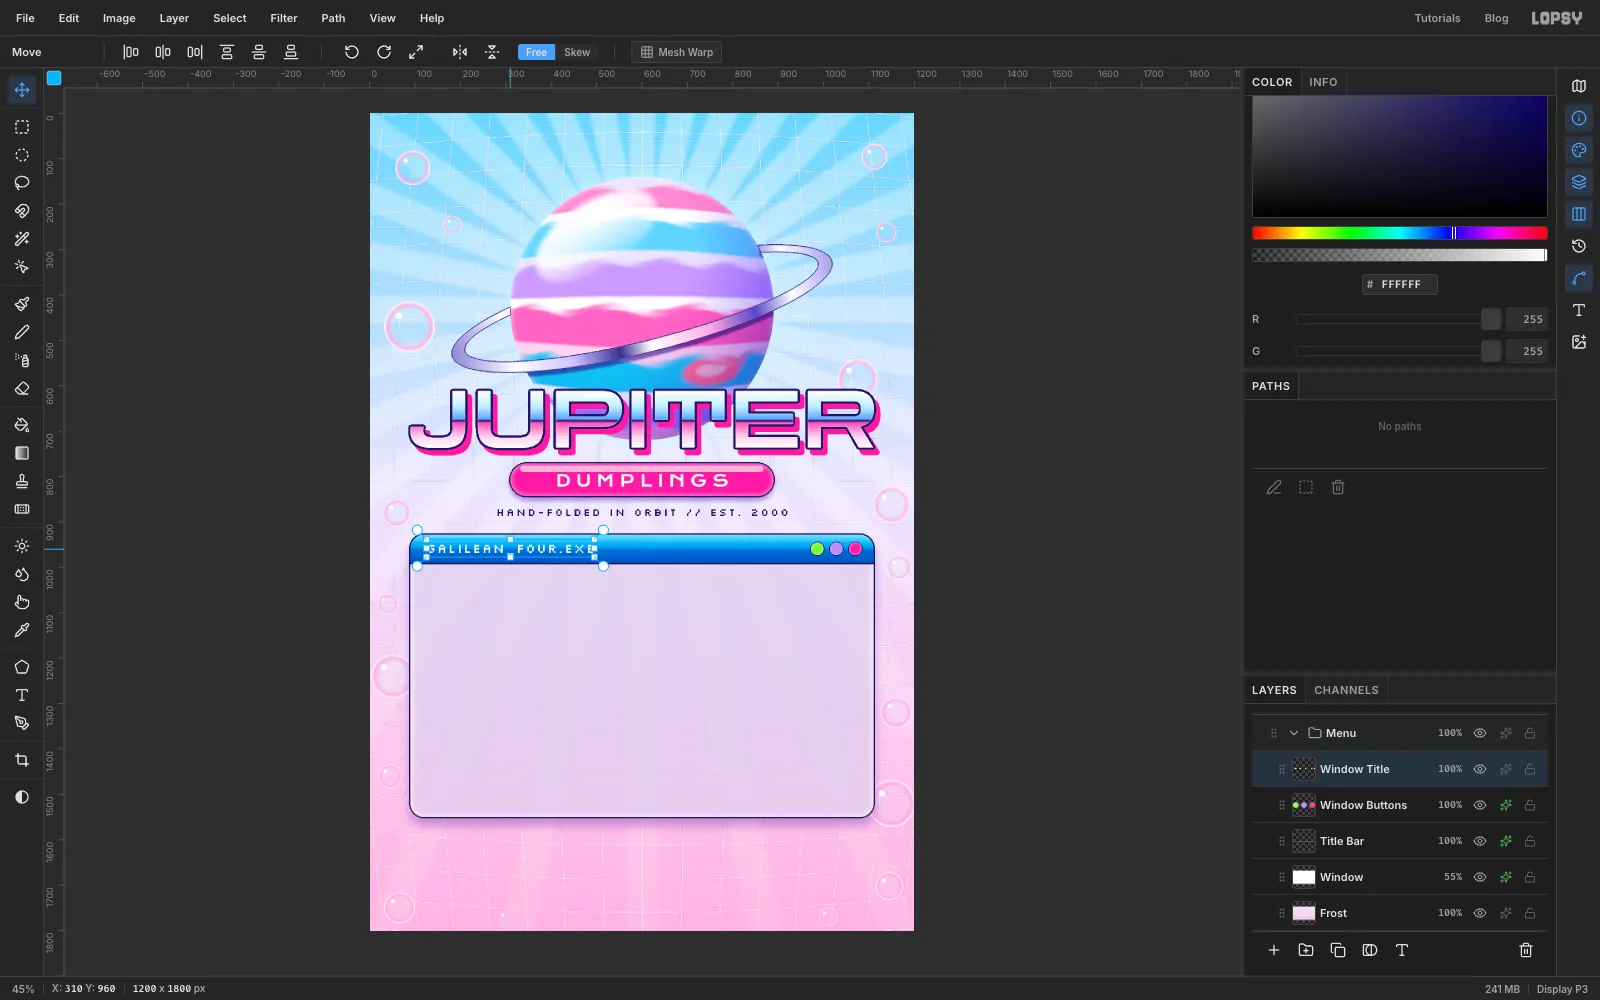
-
Draw a dumpling
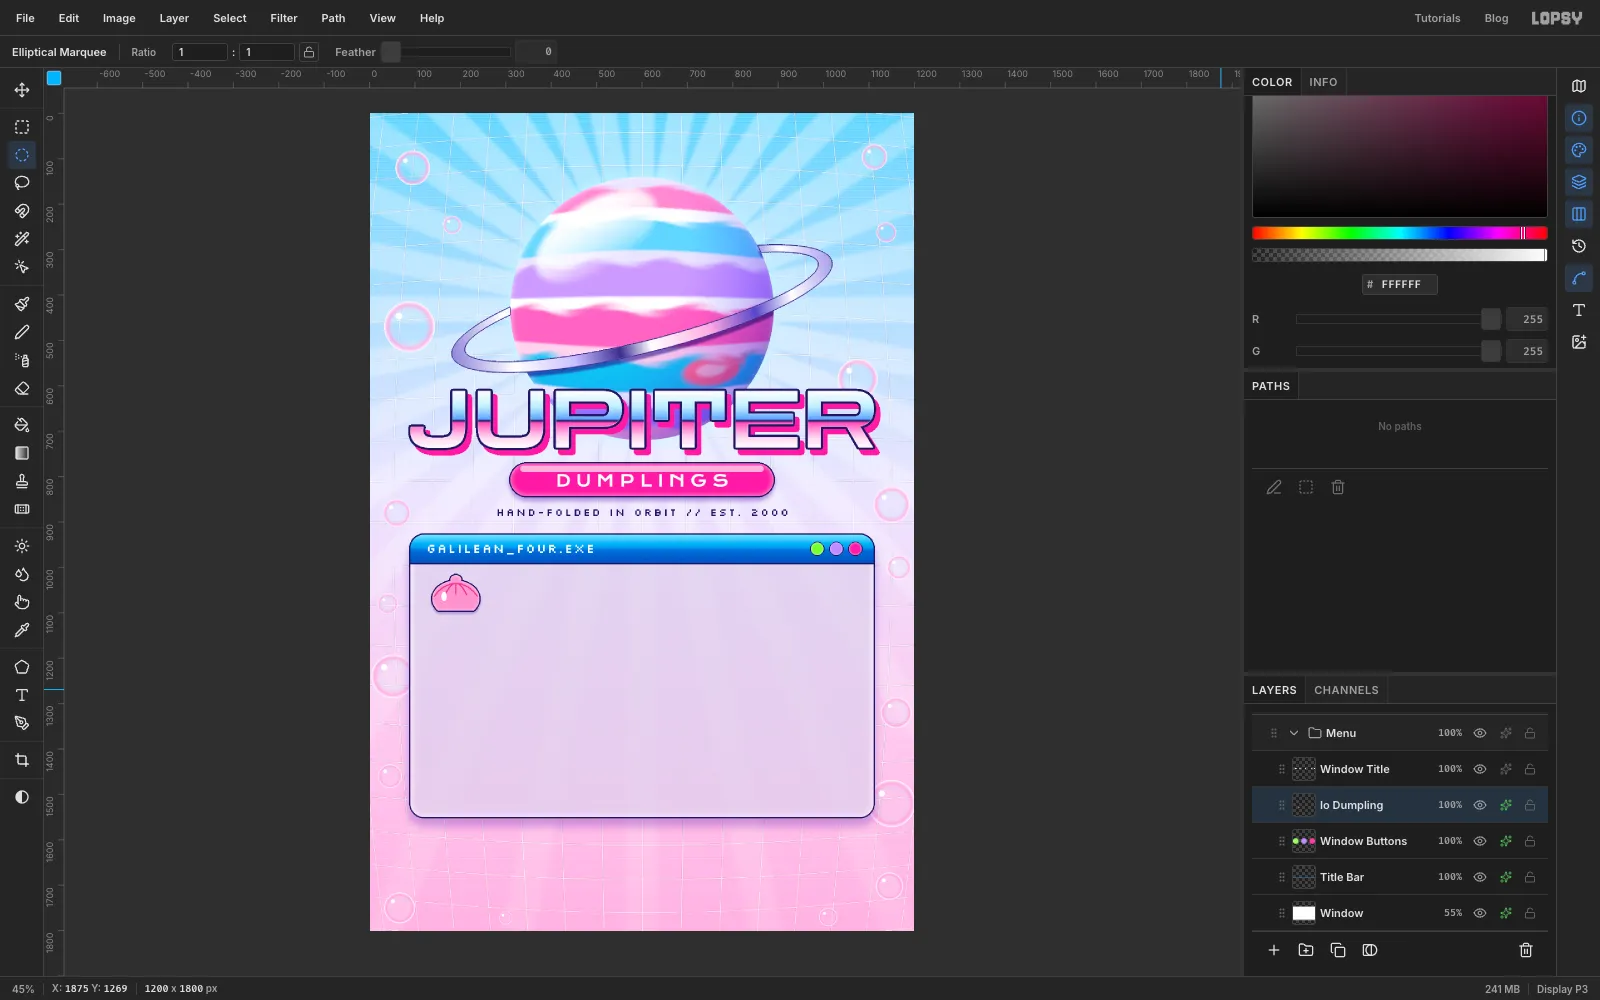
Add a layer called
Io Dumpling. The window has room for four rows of 140 px each, and the icon goes about 100 px in from the window's left edge.- Draw an Elliptical Marquee about 104 × 80 px, centred about 190, 1070, and Edit → Fill it with . Select a strip across its bottom fifth and press Delete to give it a flat base.
- Draw a small 24 × 20 px ellipse on top for the twisted knob, and fill it with the same pink.
- Choose the Brush at Size 4, Hardness 100, in . Paint five short curved pleats fanning out from the knob down over the top of the dumpling.
- Add a small white oval highlight on its left side.
Give the layer a Stroke in at Width 3, a white Inner Glow at Size 10, Opacity 70, and a soft Drop Shadow in , Offset Y 5, Blur 6, Opacity 30.
-
Make four moons
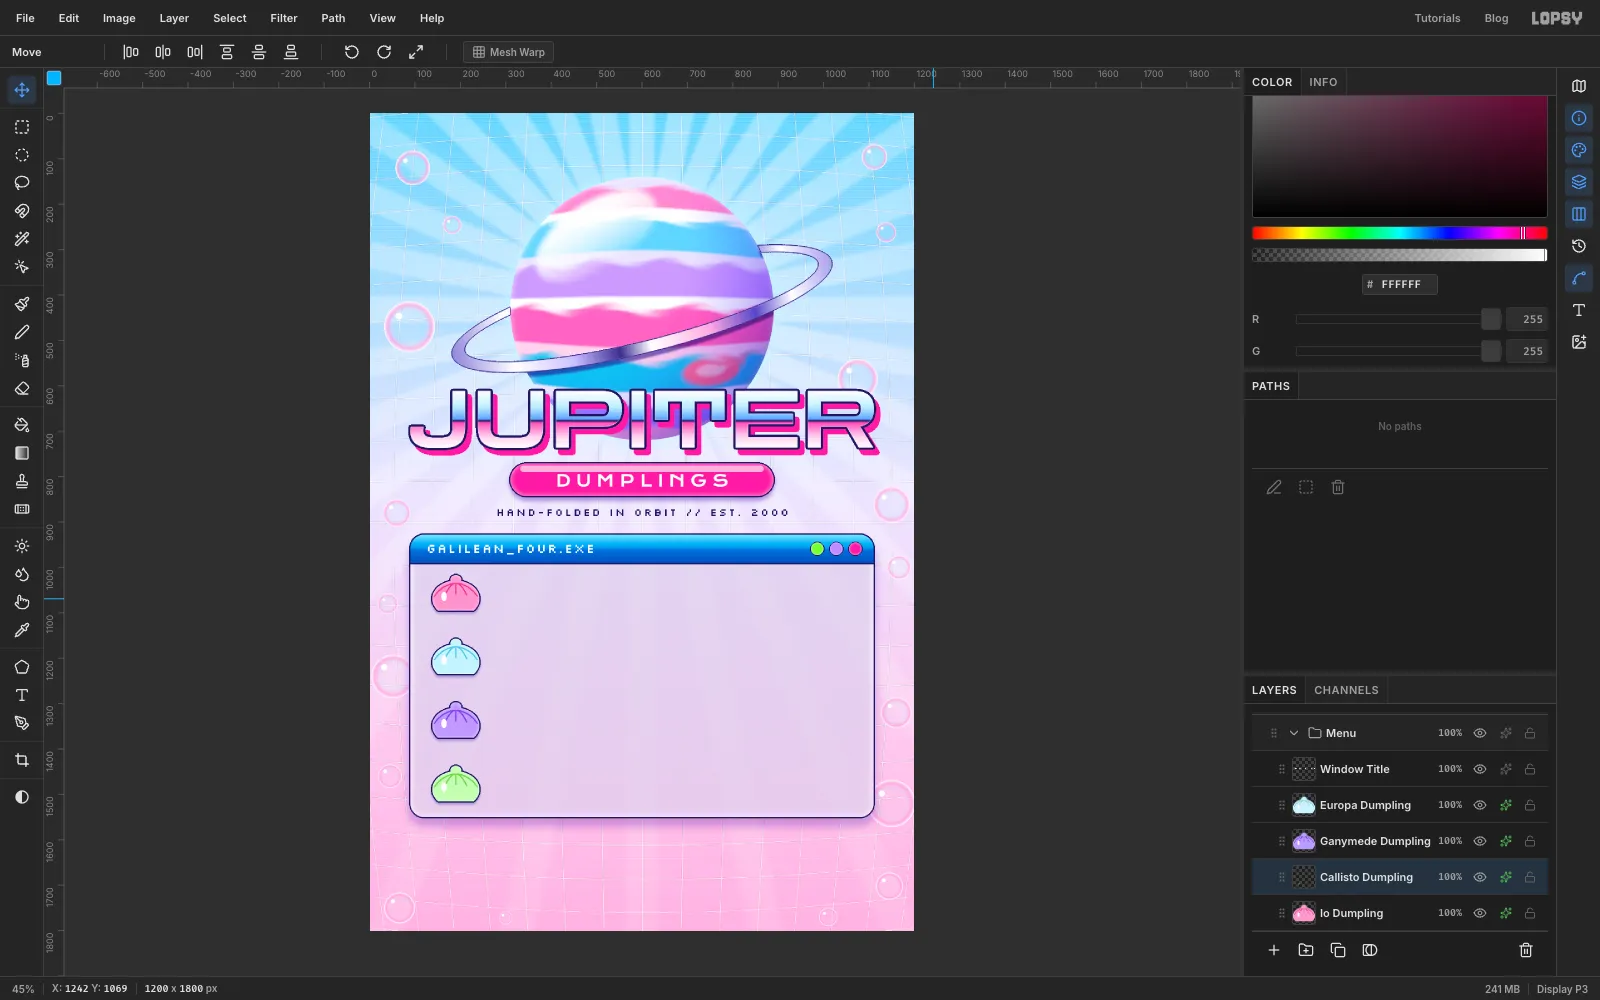
Click Duplicate Layer, click the copy's row and, with the Move tool, press Shift+Down 14 times. Each press moves it 10 px, so it lands 140 px down, in the next row. Rename it
Europa Dumplingand run Filter → Hue/Saturation... with Hue −135 and Lightness +10 to turn it ice blue. Duplicate the original twice more:Ganymede Dumpling: 280 px down, Hue −70 for lilacCallisto Dumpling: 420 px down, Hue +130, Saturation −10, Lightness +5 for lime green
Duplicating keeps the effects, so every copy already has its outline, rim and shadow.
-
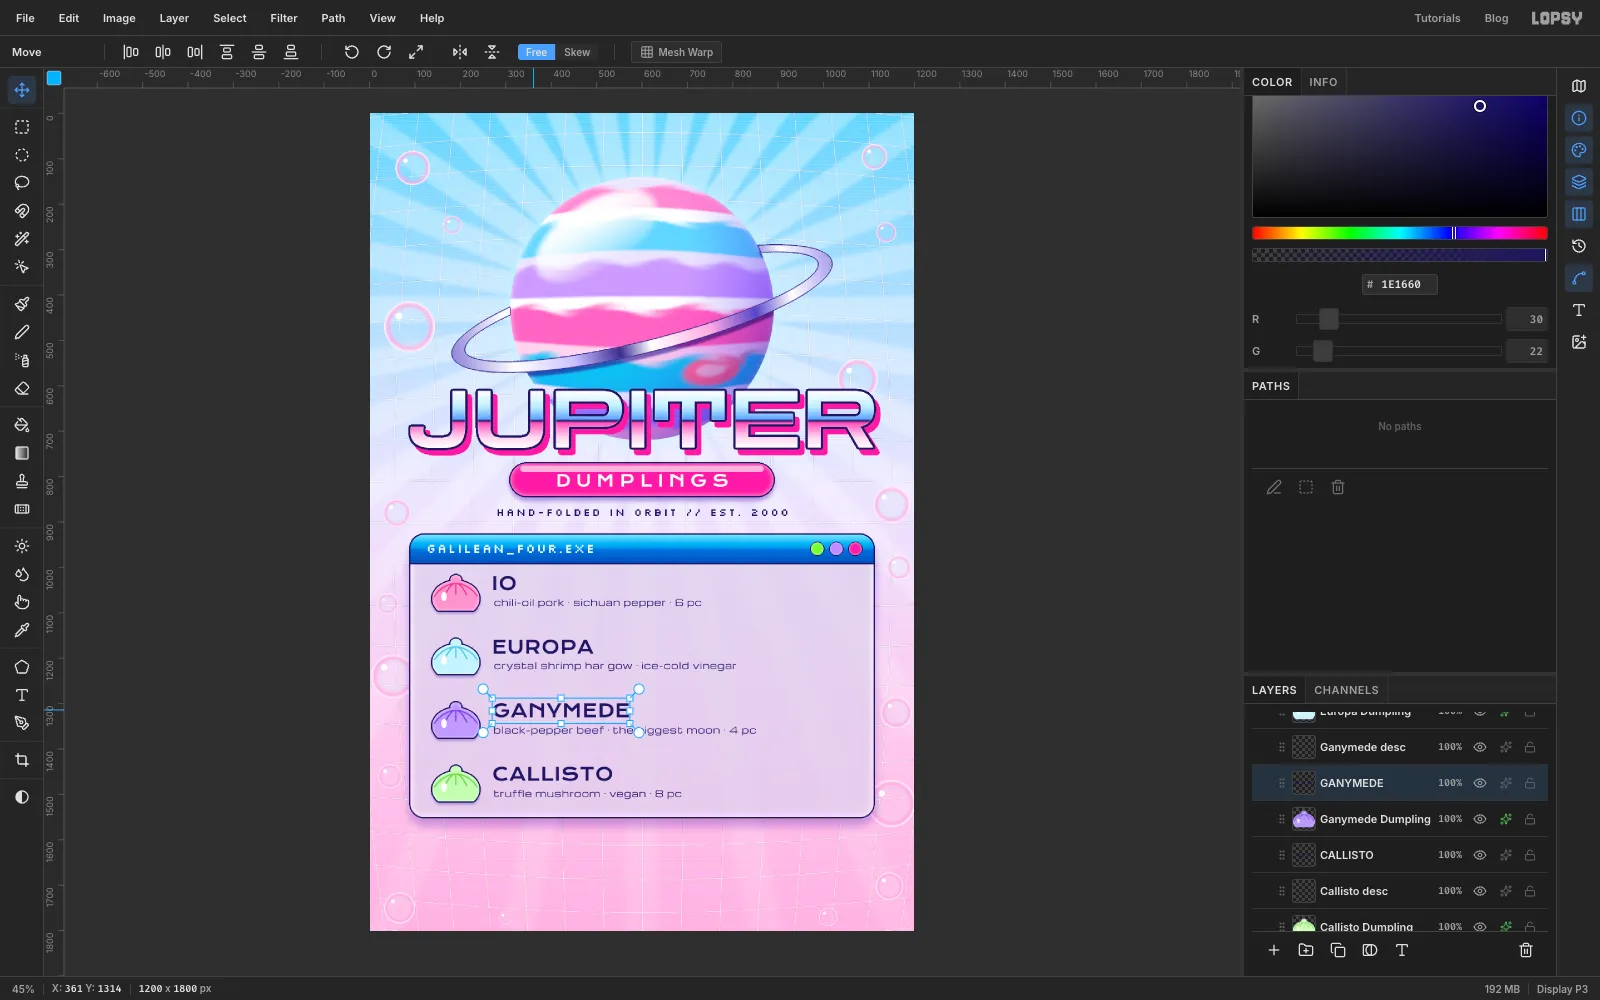
Set the dishes
Set the names in Krona One, 40 px, , letter spacing 2, starting about 80 px right of the icons, with the top of each name level with the top of its icon. Krona One's round O keeps a two-letter name like IO legible. Just below each name, set the description in Michroma, 20 px, :
chili-oil pork · sichuan pepper · 6 pccrystal shrimp har gow · ice-cold vinegarblack-pepper beef · the biggest moon · 4 pctruffle mushroom · vegan · 8 pc
-
Add the price tags
On a layer called
Price Tags, draw a 132 × 54 rounded rectangle, Corner Radius 27, in at the right end of each row, a little above the row's middle. Add a Stroke of at Width 3 and an Inner Glow in at Size 10, Opacity 85, which gives navy gel a lit edge.On a
Price Shinelayer, add a slim white rounded bar, about 104 × 8 px, along the top of each tag at 50% opacity. Keep it clear of where the digits will go.Set each price in Silkscreen, 32 px, white:
8.50,9.00,9.50,8.00. Centre each one in its tag, then nudge it up 2 px. Pixel digits look low when they're mathematically centred.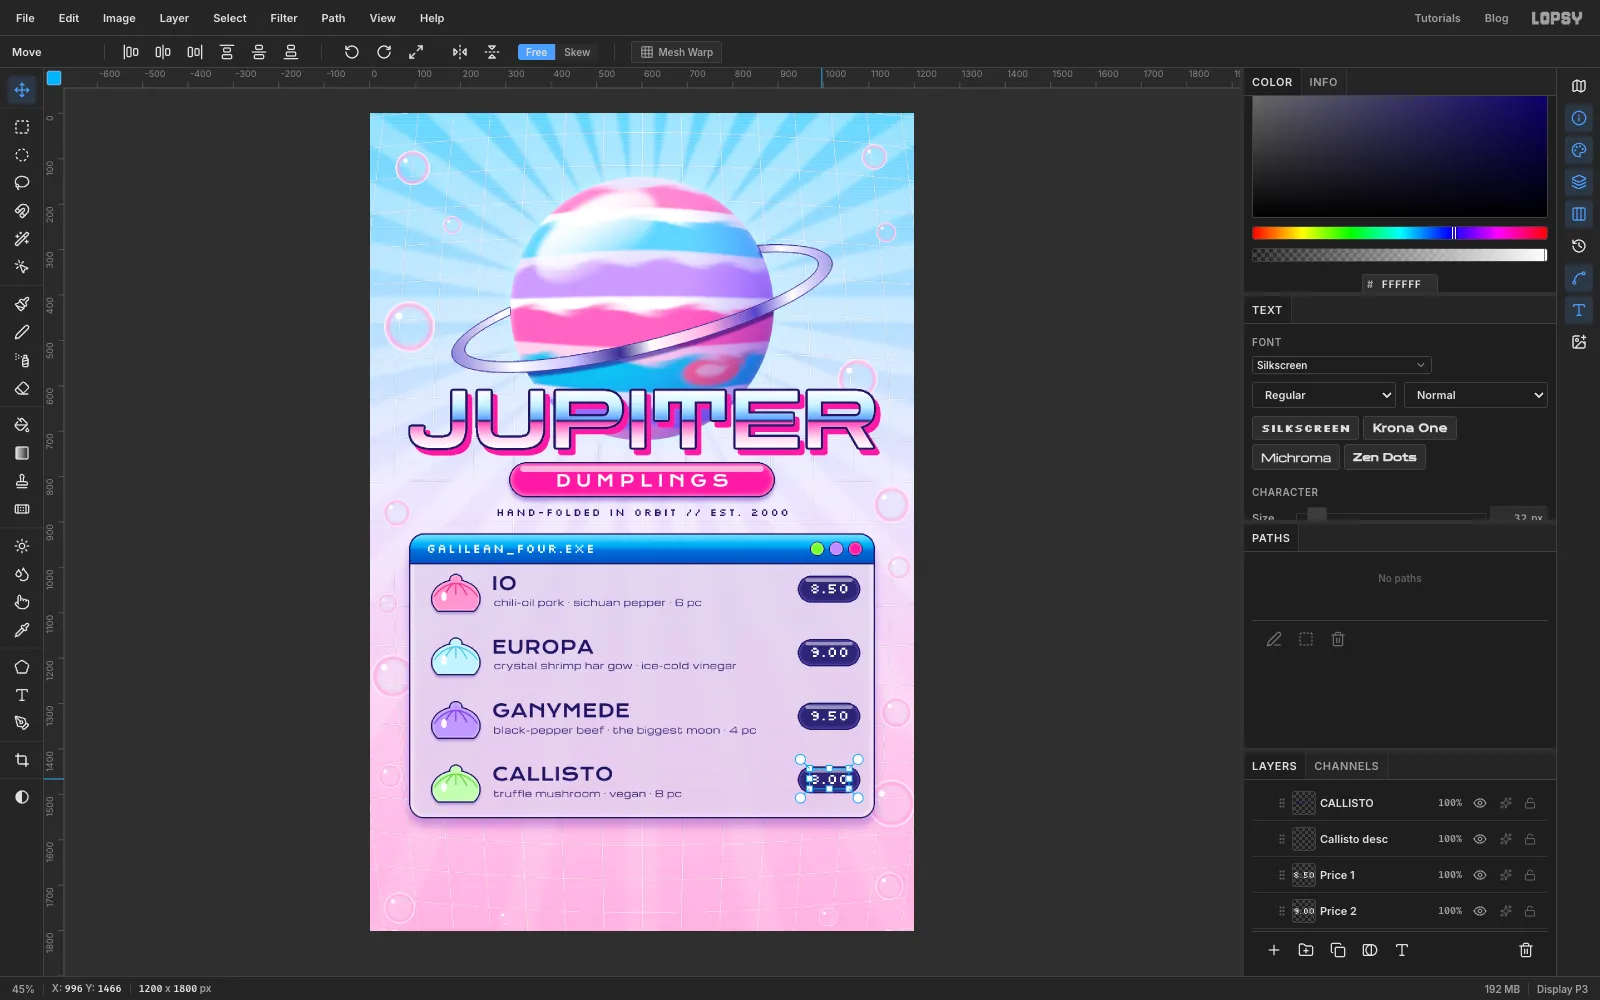
-
Add the sides bar and footer
On a layer called
Dividers, choose the Pencil at Size 2 in . Between each pair of rows, click near the left of the window and Shift-click near the right.Under the window, add a
Sides Barlayer with a 1020 × 56 rounded rectangle, Corner Radius 28, in , with the same Stroke, Inner Glow and Drop Shadow as the window. On a layer calledSides Shine, add a slim white shine along its top at 50% opacity. Inside the bar, setBUBBLE TEA 5.00 + RING NOODLES 6.00 + CHILI OIL 1.50in Krona One, 22 px, white, letter spacing 1, centred, and call the text layerSides.Below the bar, set
OPEN 24/7/365 // 2000 ORBIT AVE // PRESS ENTER TO ORDERin Silkscreen, 22 px, , letter spacing 1, centred, and call itFooter.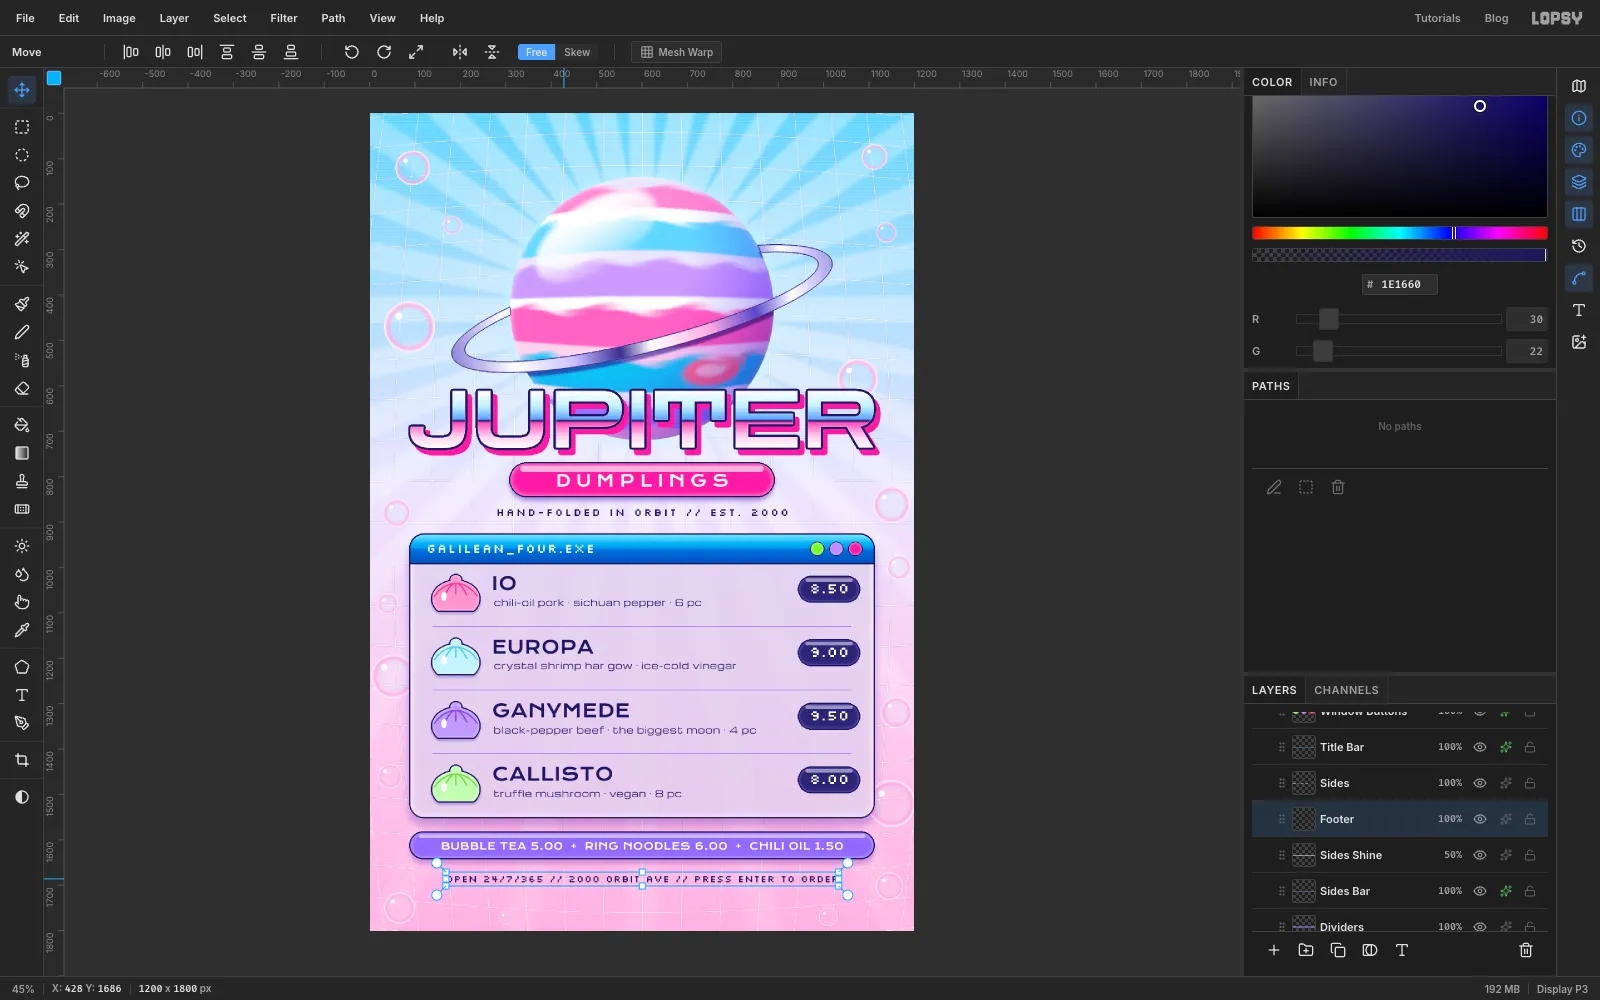
-
Put two dumplings in orbit
Duplicate
Io Dumpling, click the copy and drag it up onto the front of the ring, on the left, so its base sits on the ribbon. Rename itMoon Io. Draw a rectangle around it and rotate it 14° counter-clockwise to match the ring's tilt. Its drop shadow now reads as a contact shadow on the ring.Do the same with a copy of
Callisto Dumplingon the right-hand part of the ring. Call itMoon Callisto.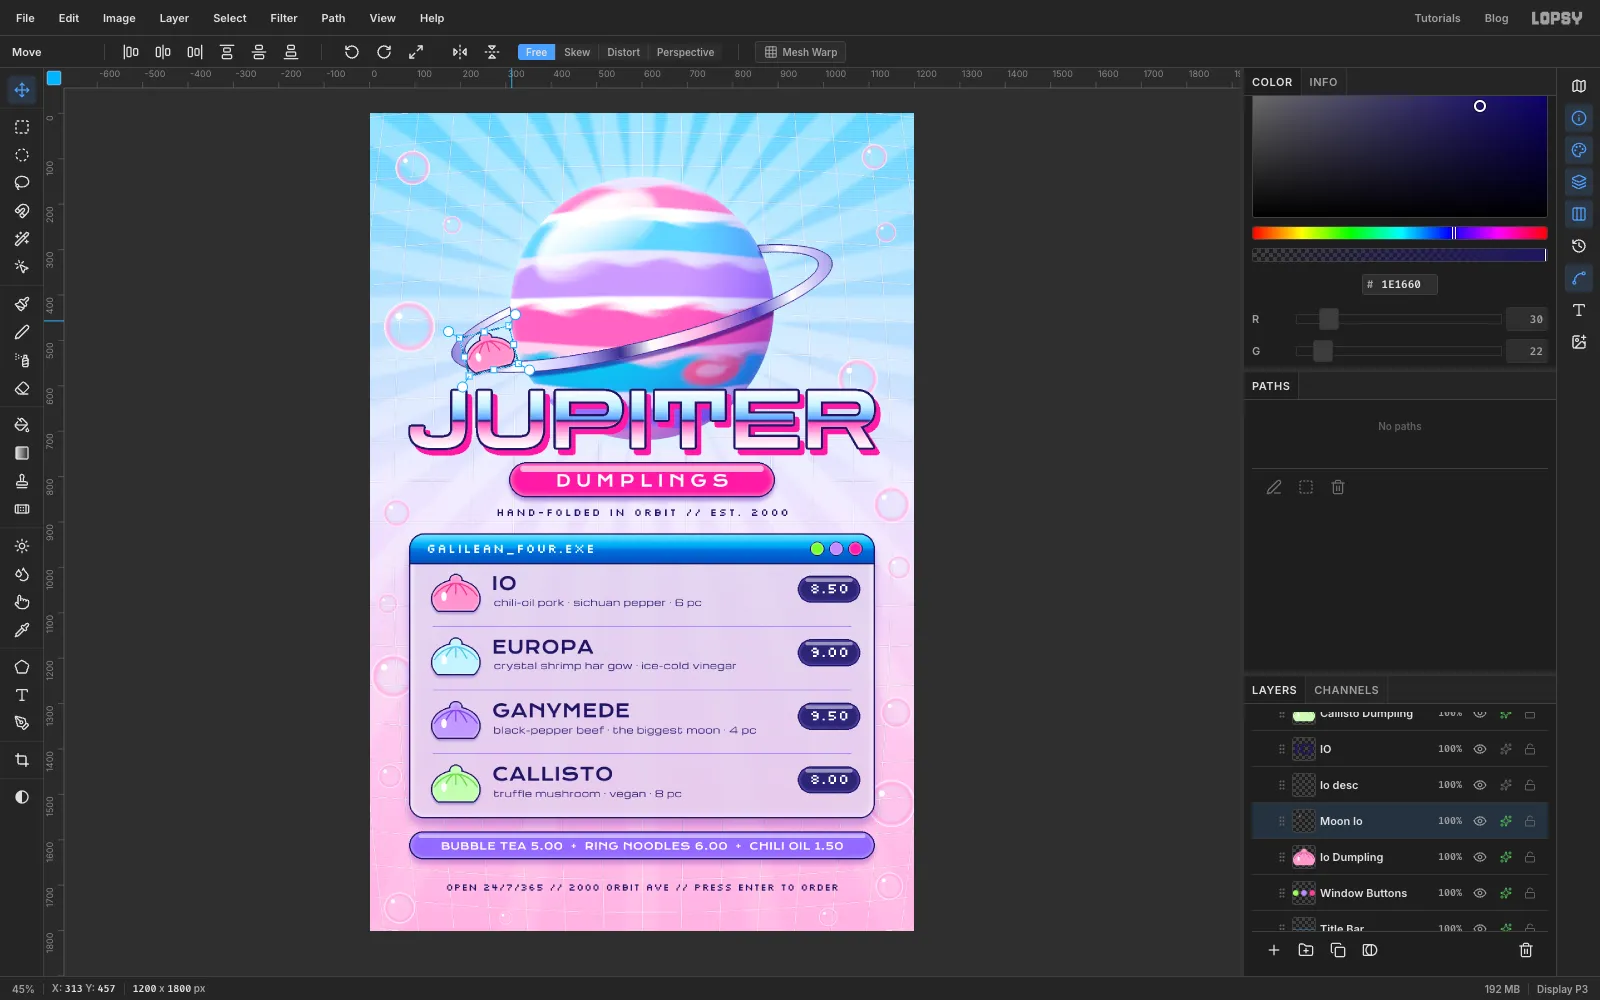
-
Draw a sparkle with the Pen
Select
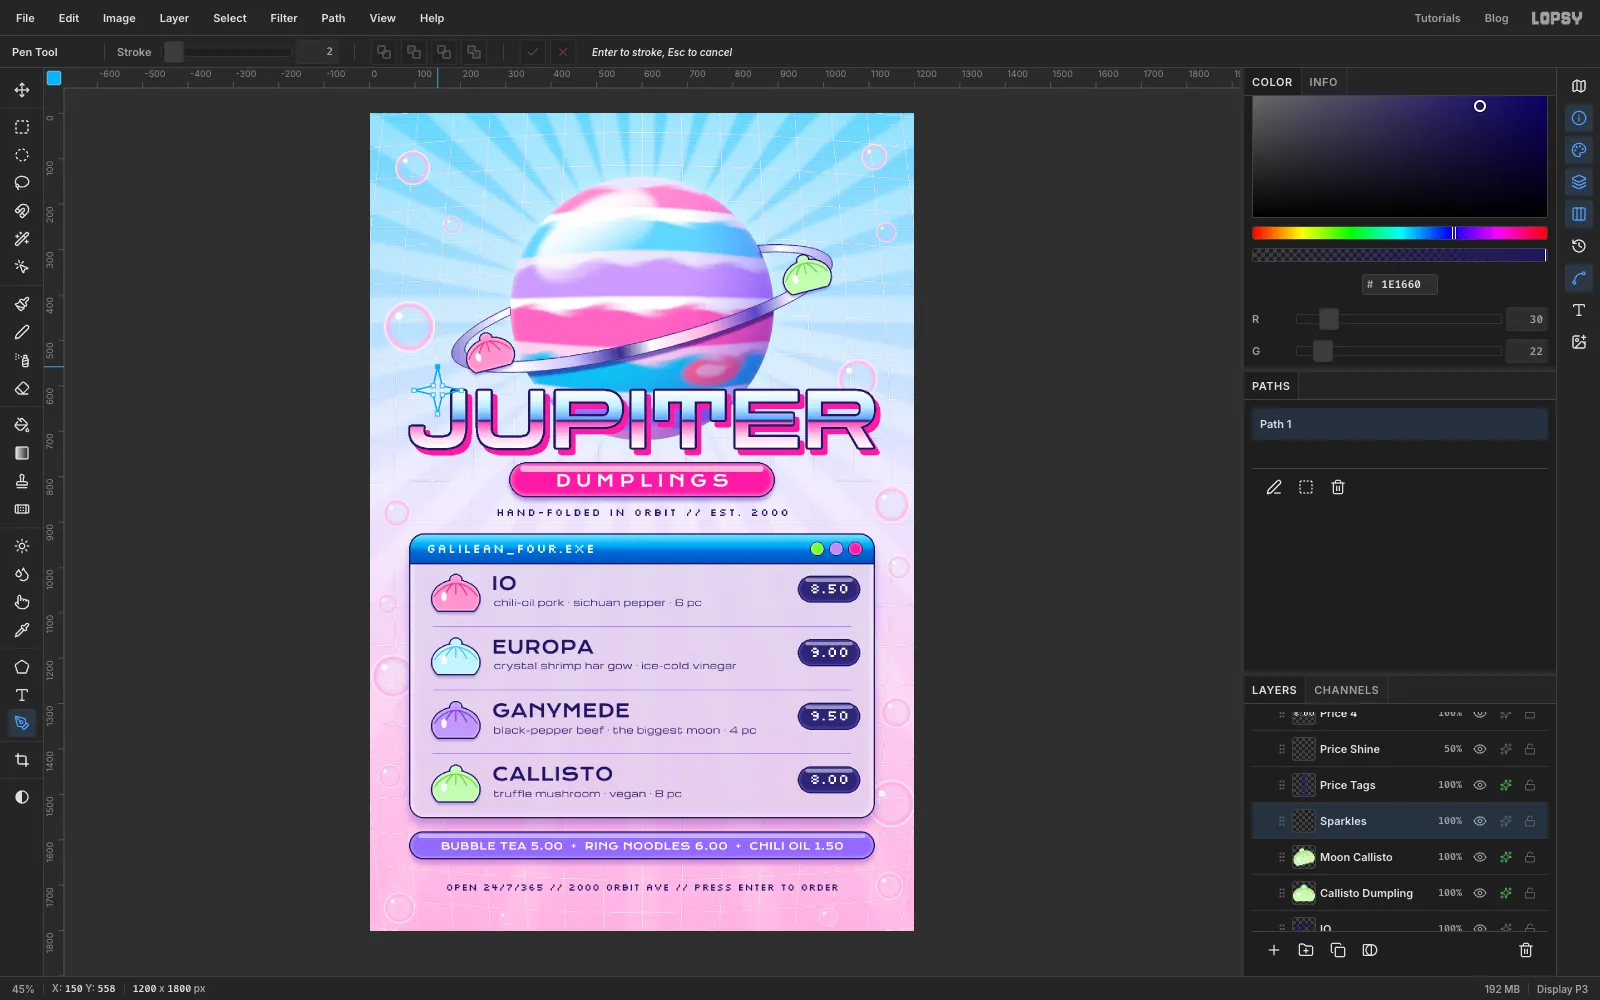
Moon Callistoand add a layer calledSparklesabove it, so the sparkles sit over the title and the window. Choose the Pen tool and click eight points around the top-left corner of the J, going clockwise: a long point straight up, a short one just to the upper right of the centre, a long point to the right, and so on round. The long points are about 50 px from the centre and the short ones about 10 px. Click the first point again to close the shape.Open the Paths panel, click Path to Selection, then fill the selection with white. Click the path in the panel again to deselect it. Add an Outer Glow in , Size 16, Opacity 90.
-
Copy the sparkle around
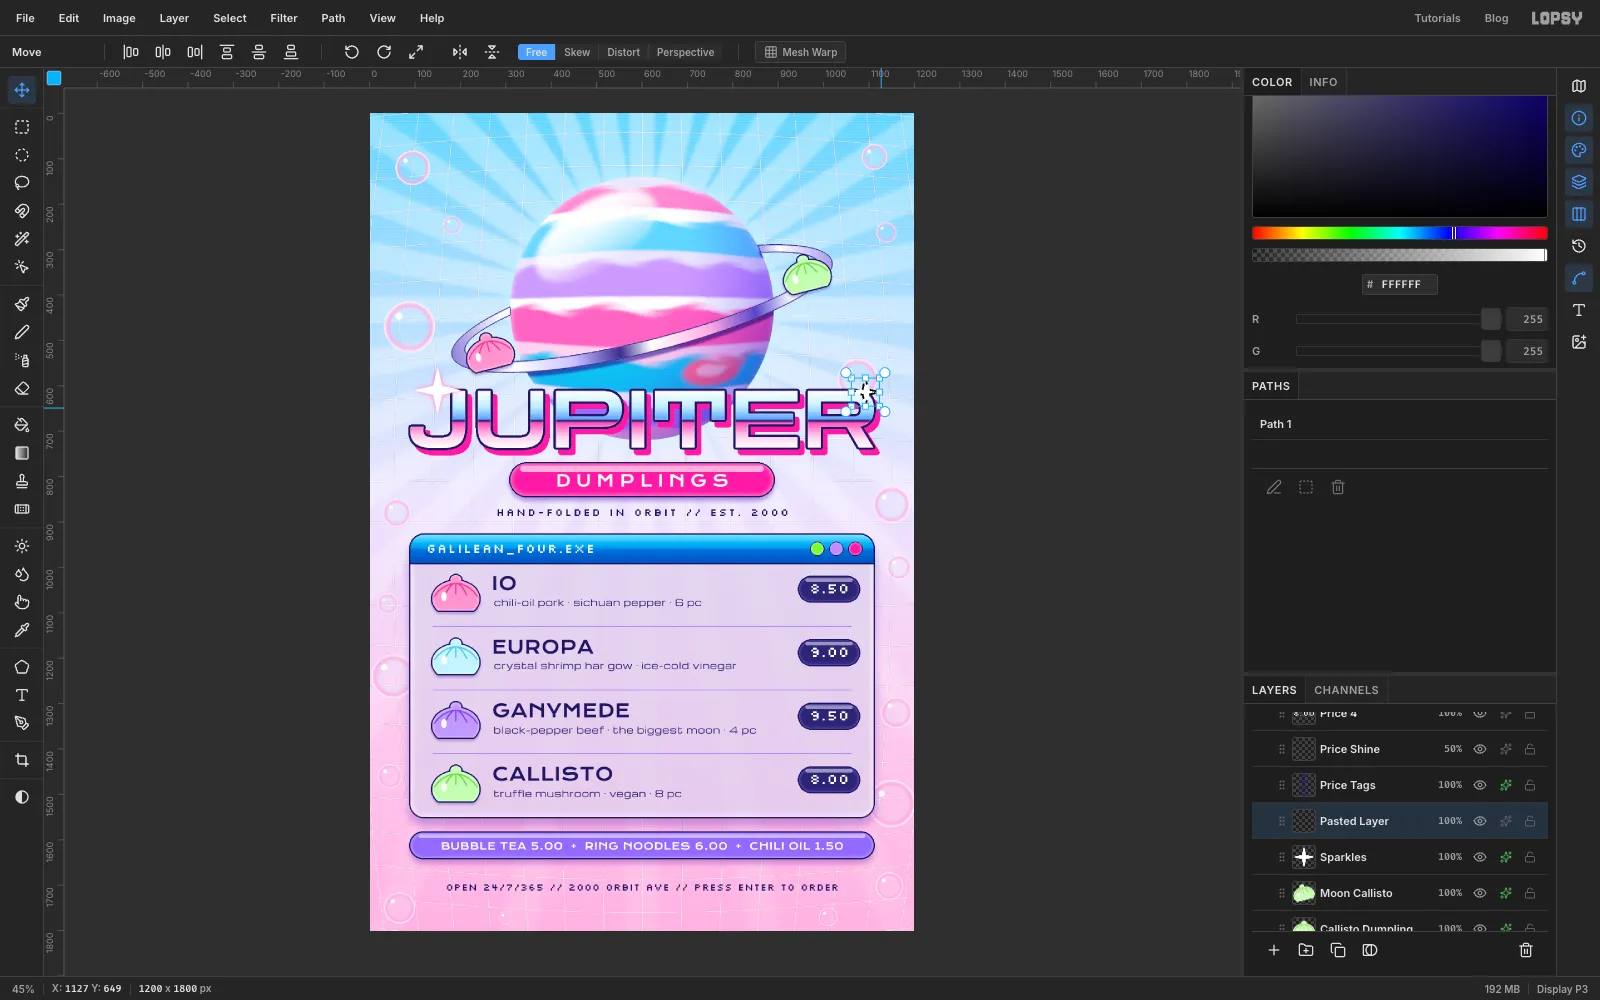
Draw a rectangle around the sparkle, copy, and paste. The paste lands in place, already selected and with the Move tool active. Drag it somewhere new, then hold Cmd and drag a corner handle inward to shrink it. Cmd keeps its proportions. Press Cmd+D and choose Layer → Merge Down to fold it back into
Sparkles.Make about eight sparkles at different sizes. Put one on the top-right corner of the R to balance the J, one near the planet's highlight, and the rest in the sky and margins.
-
Make the sparkles bloom
With
Sparklesselected, run Filter → Bloom... with its default settings. It picks out the brightest pixels and spreads a soft glow around them, so the sparkles look like light instead of cut-out shapes.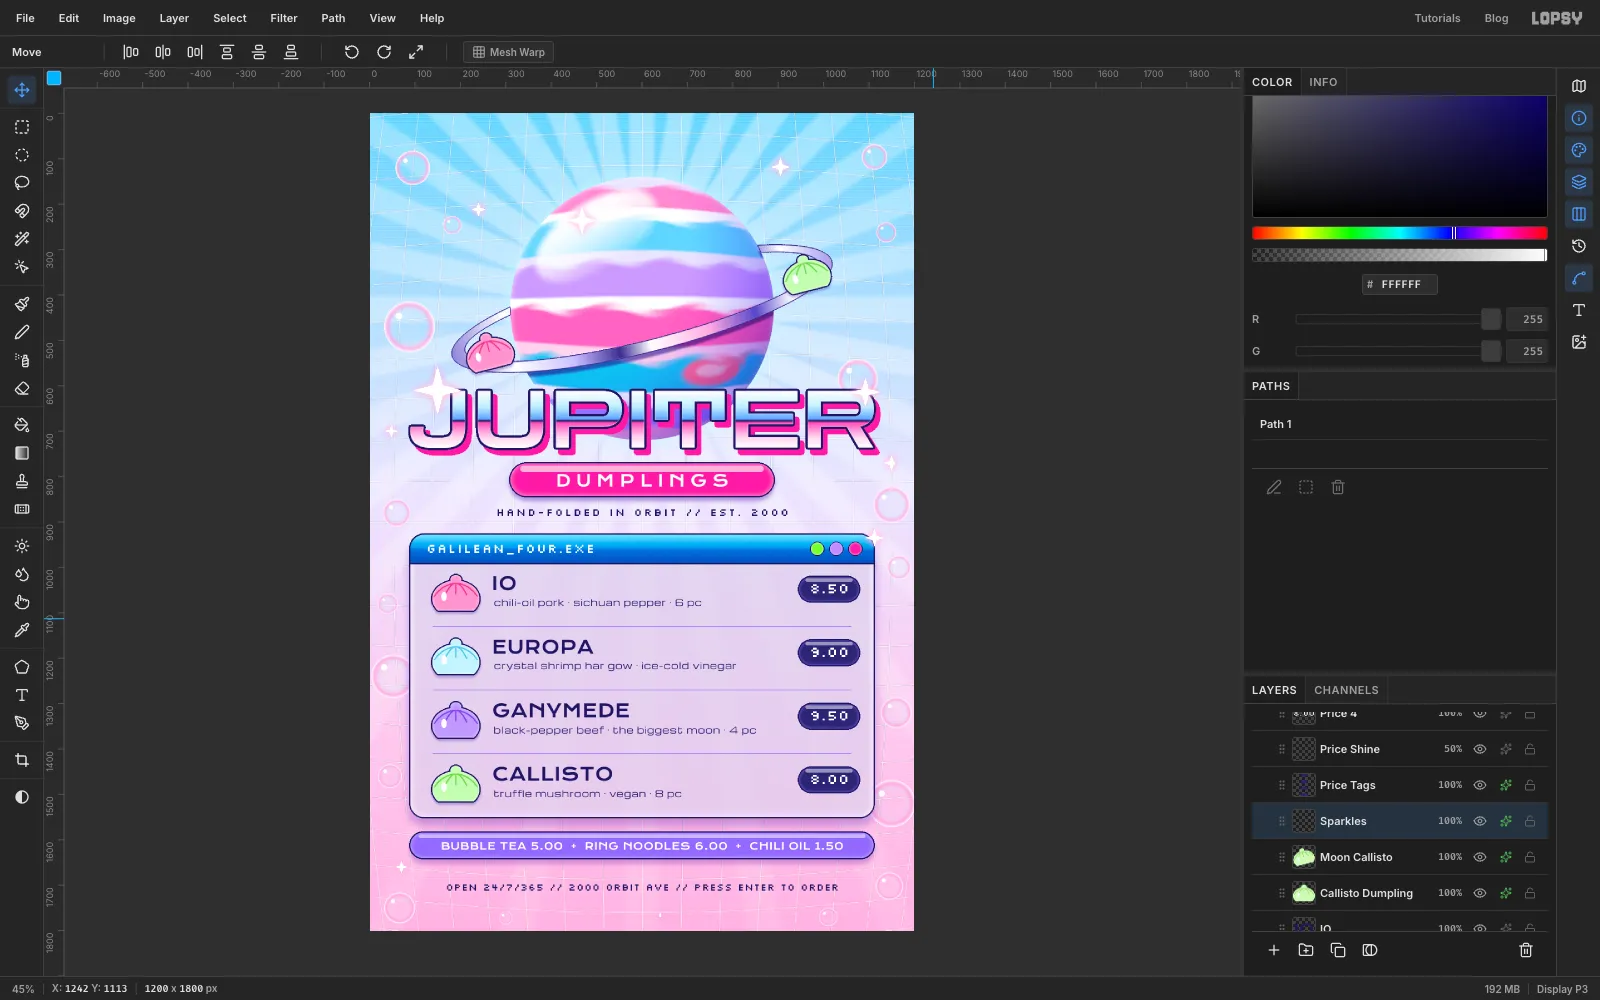
-
Polish the spacing
Step back and look at the whole page at fit zoom. Check these:
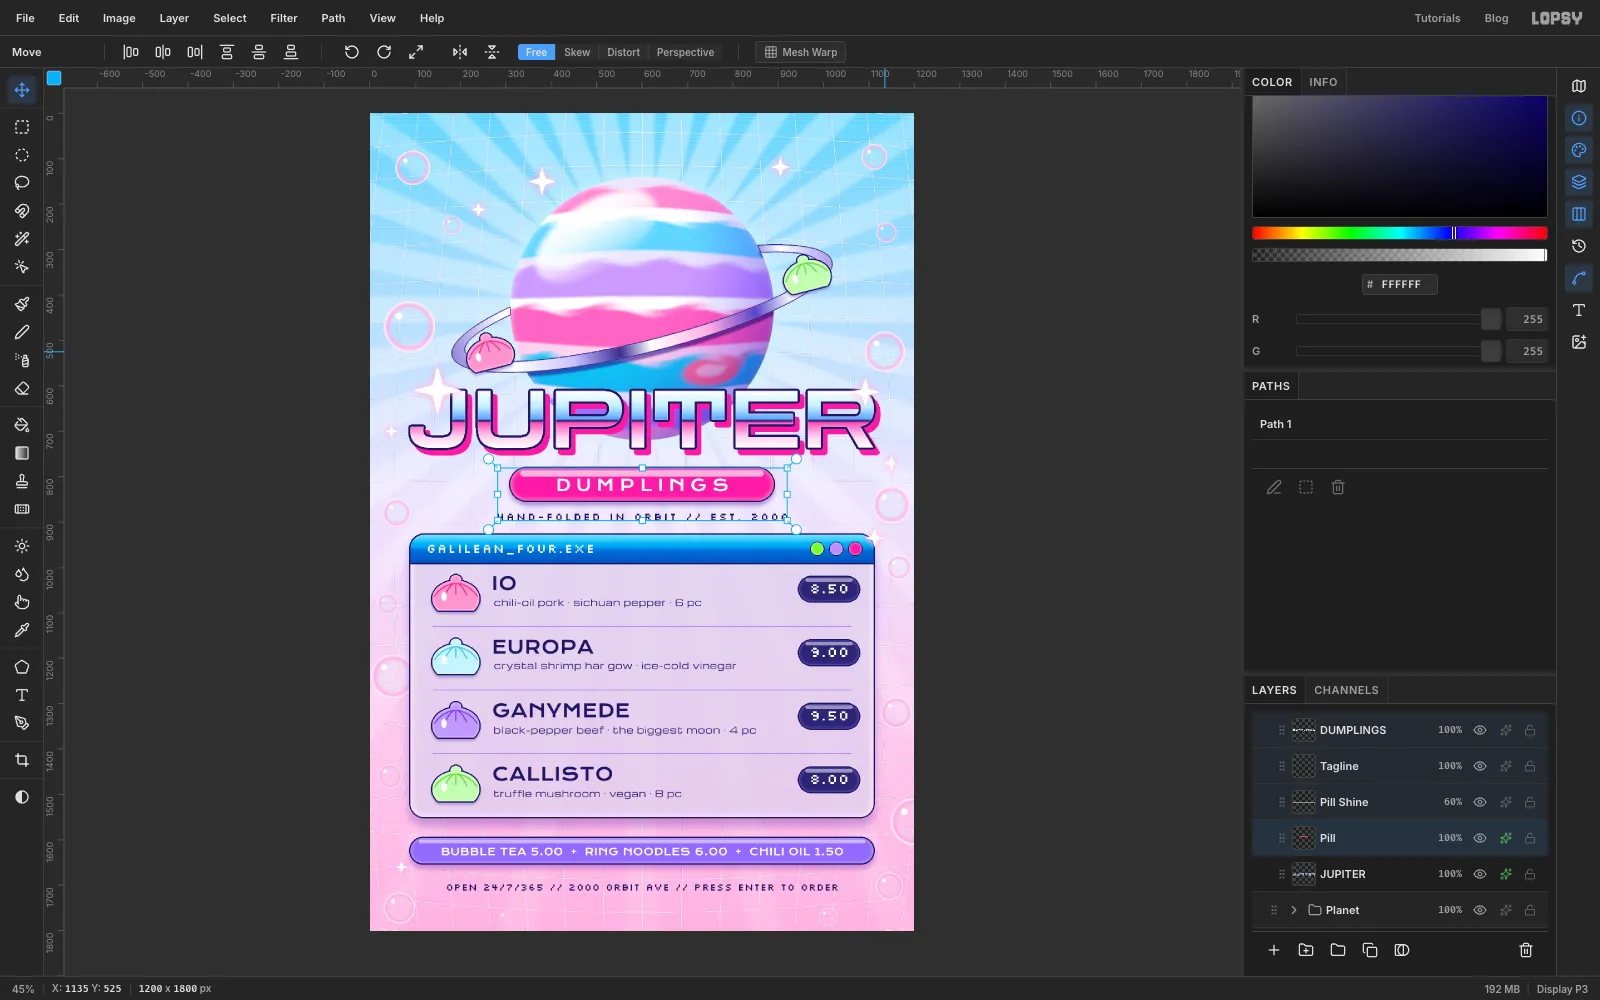
- Tiny sparkles. Anything under about 20 px across, like the one under the footer in the last screenshot, reads as a stray mark rather than a sparkle. Select it with the marquee on the
Sparkleslayer and delete it. - Depth. A sparkle sitting on the planet's surface looks stuck to it instead of floating in front. Select it and drag it out into the sky.
- Crowding. Move any bubble that's half hidden behind the window, or crowding a letter, fully clear of it. Select it on the
Bubbleslayer and drag it. - Even gaps. The gap between the window and the sides bar should match the gap between the bar and the footer, about 45 px each. Cmd-click
Sides Bar,Sides ShineandSidesin the Layers panel and press Down with the Move tool until they match. All three move together. Do the same withPill,Pill Shine,DUMPLINGSandTaglineuntil there's about 30 px of air between the title's shadow and the pill. - Small type. Against the frosted glass and scanlines, the descriptions look a little thin. Raise them to 22 px and add a Color Overlay in to darken them. Give
TaglineandFootera white Outer Glow at Size 4, Spread 20, Opacity 55, so the scanlines don't eat into the pixel type.
- Tiny sparkles. Anything under about 20 px across, like the one under the footer in the last screenshot, reads as a stray mark rather than a sparkle. Select it with the marquee on the
-
Check the margins with guides
Click the top ruler at 90, 600 and 1110, and the left ruler at 928 and 1550. Everything should line up: the title's left and right edges, the window, the sides bar and the centre of every centred line.
With View → Snap to Guides on, drag a marquee from near the window's top-left corner to near its bottom-right. It snaps exactly to the guides, which is a quick way to confirm nothing has drifted.
Save the project, then use File → Quick Export PNG for the finished menu.