Make a Vaporwave Billboard with a Marble Bust
Build a vaporwave billboard in Lopsy from a public-domain statue photo, a perspective pool, Voronoi caustics, chrome type and a Windows 95 pop-up.
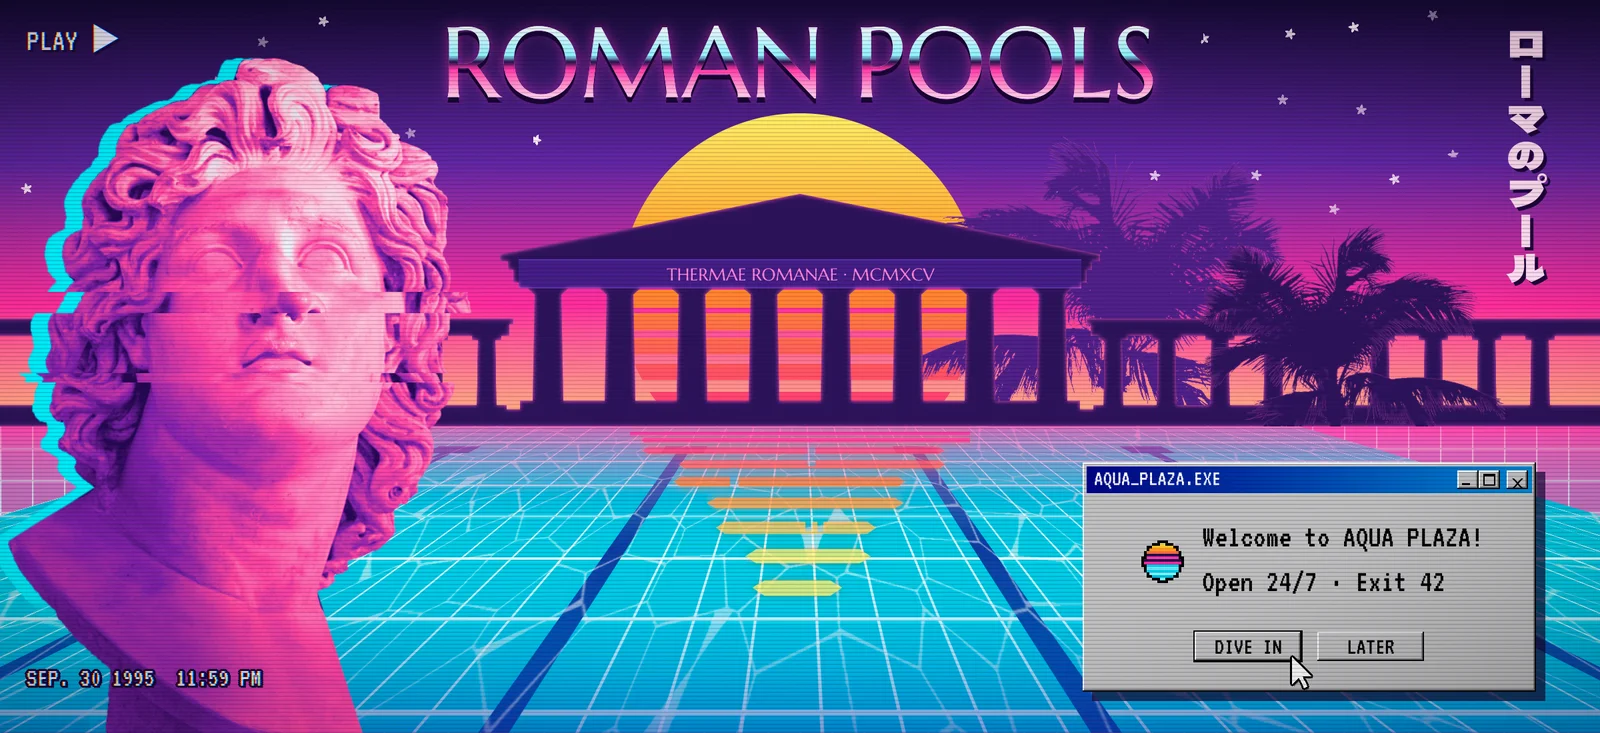
The look is built from a few parts. A classical marble bust, a sunset, a swimming pool, palms, Japanese type and old computer UI, all drenched in pink and cyan. In this tutorial you'll make Roman Pools, a 2400 × 1100 billboard for an imaginary 1995 mall water park. A real statue photo carries it. You'll cut it out, then recolour it with a Gradient Map. Everything else is built around it, step by step:
- a backlit temple
- a pool floor tiled with your own pattern and pushed into perspective
- caustics made with the Voronoi filter
- a chrome headline
- a pixel-perfect Windows 95 pop-up
The palette:
-
Sky
-
Sun
-
Temple
-
frieze
-
rim glow
-
Pool tile
-
grout
-
lane
-
Bust map
-
Echo cyan
-
Window grey
-
title bar
The bust is Alexander-Helios (Capitoline Museums), a public-domain photo from Wikimedia Commons. The palm is Palm Tree in Key West, Florida, which is CC0 on Wikimedia Commons.
-
Set up the billboard and guides
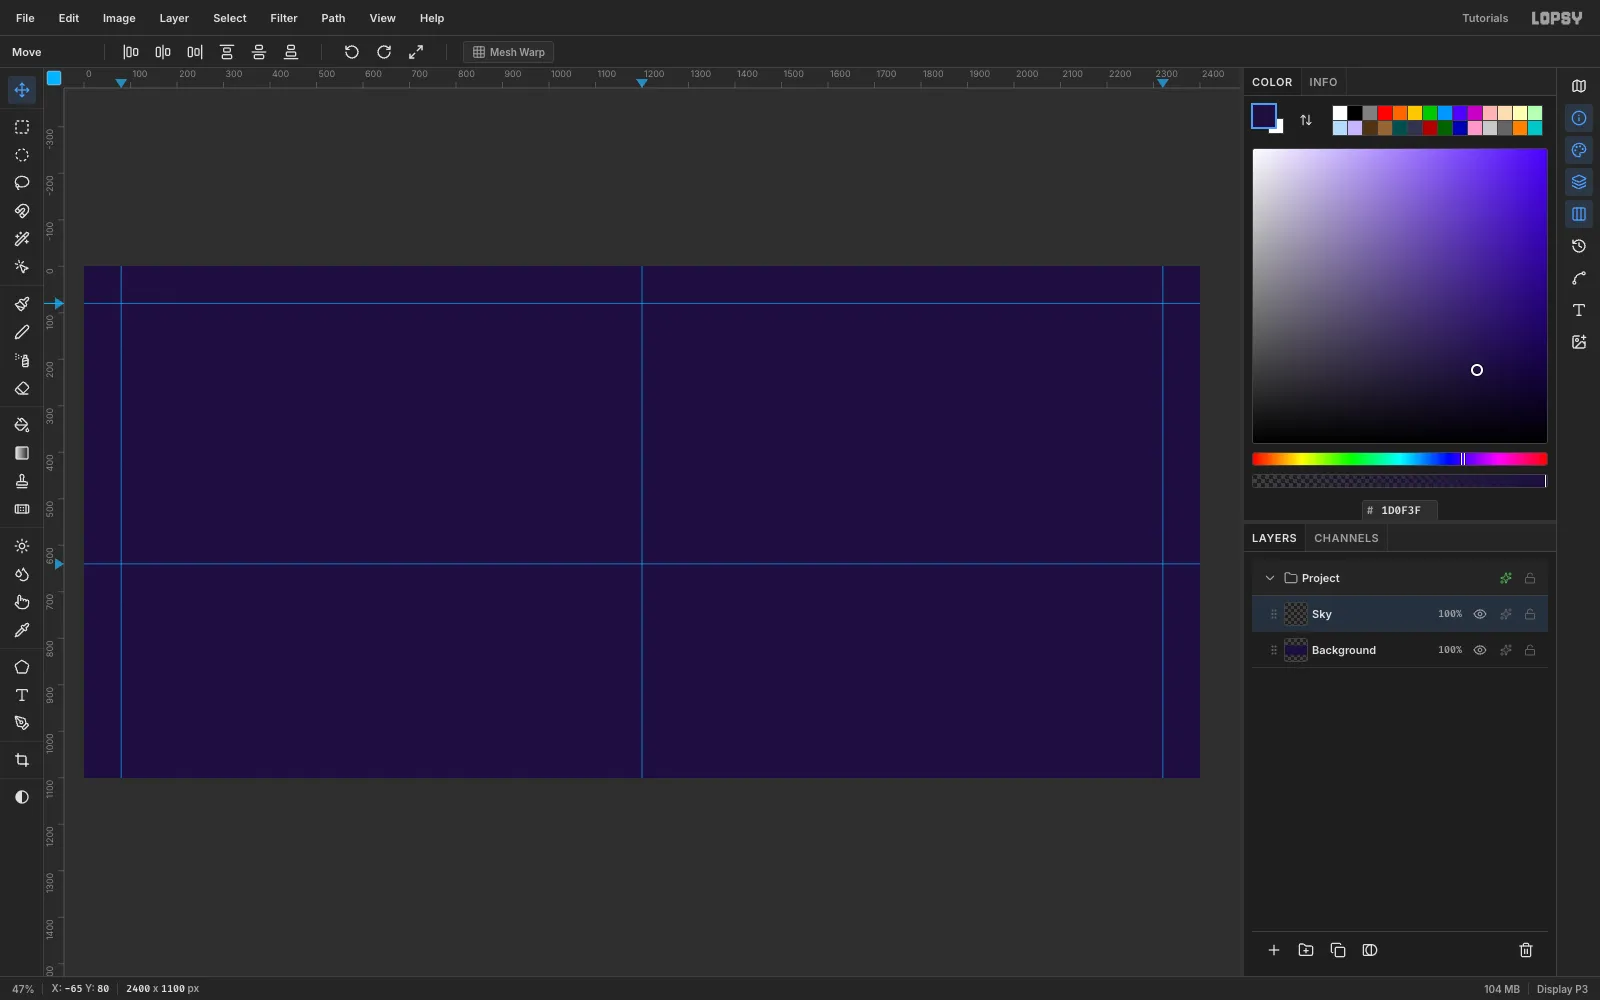
Open Lopsy. In the New Document dialog, choose Pixels and enter
2400×1100. That's close to the 2.2:1 shape of a 30-sheet poster billboard.Click the rulers to drop guides:
- Vertical guides: click the top ruler at x
80,1200and2320. These are the side margins and the centre line. - Horizontal guides: click the left ruler at y
80and640. The 640 guide is the horizon.
- Vertical guides: click the top ruler at x
-
Paint the sunset sky
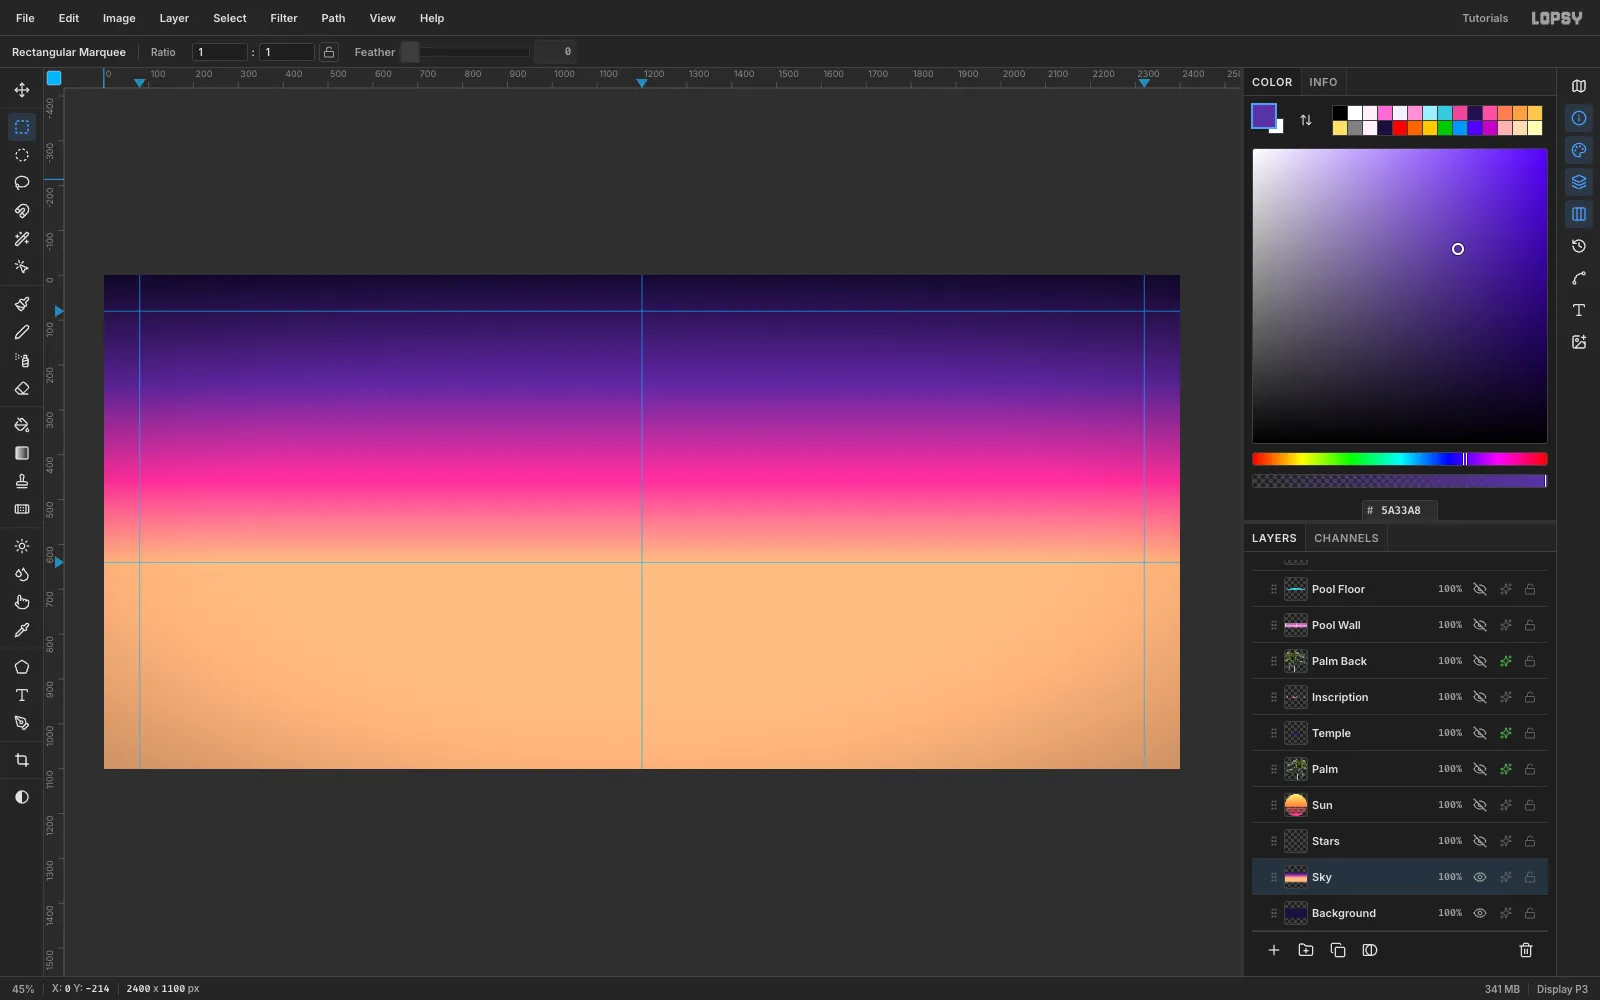
Fill the Background with (Edit → Fill with nothing selected). Add a layer and name it
Sky.Pick the Gradient tool and click Advanced…. Set four stops: , at 38%, at 72% and . Then drag from the top of the canvas straight down to the horizon guide.
-
Slice a striped sun
Add a layer named
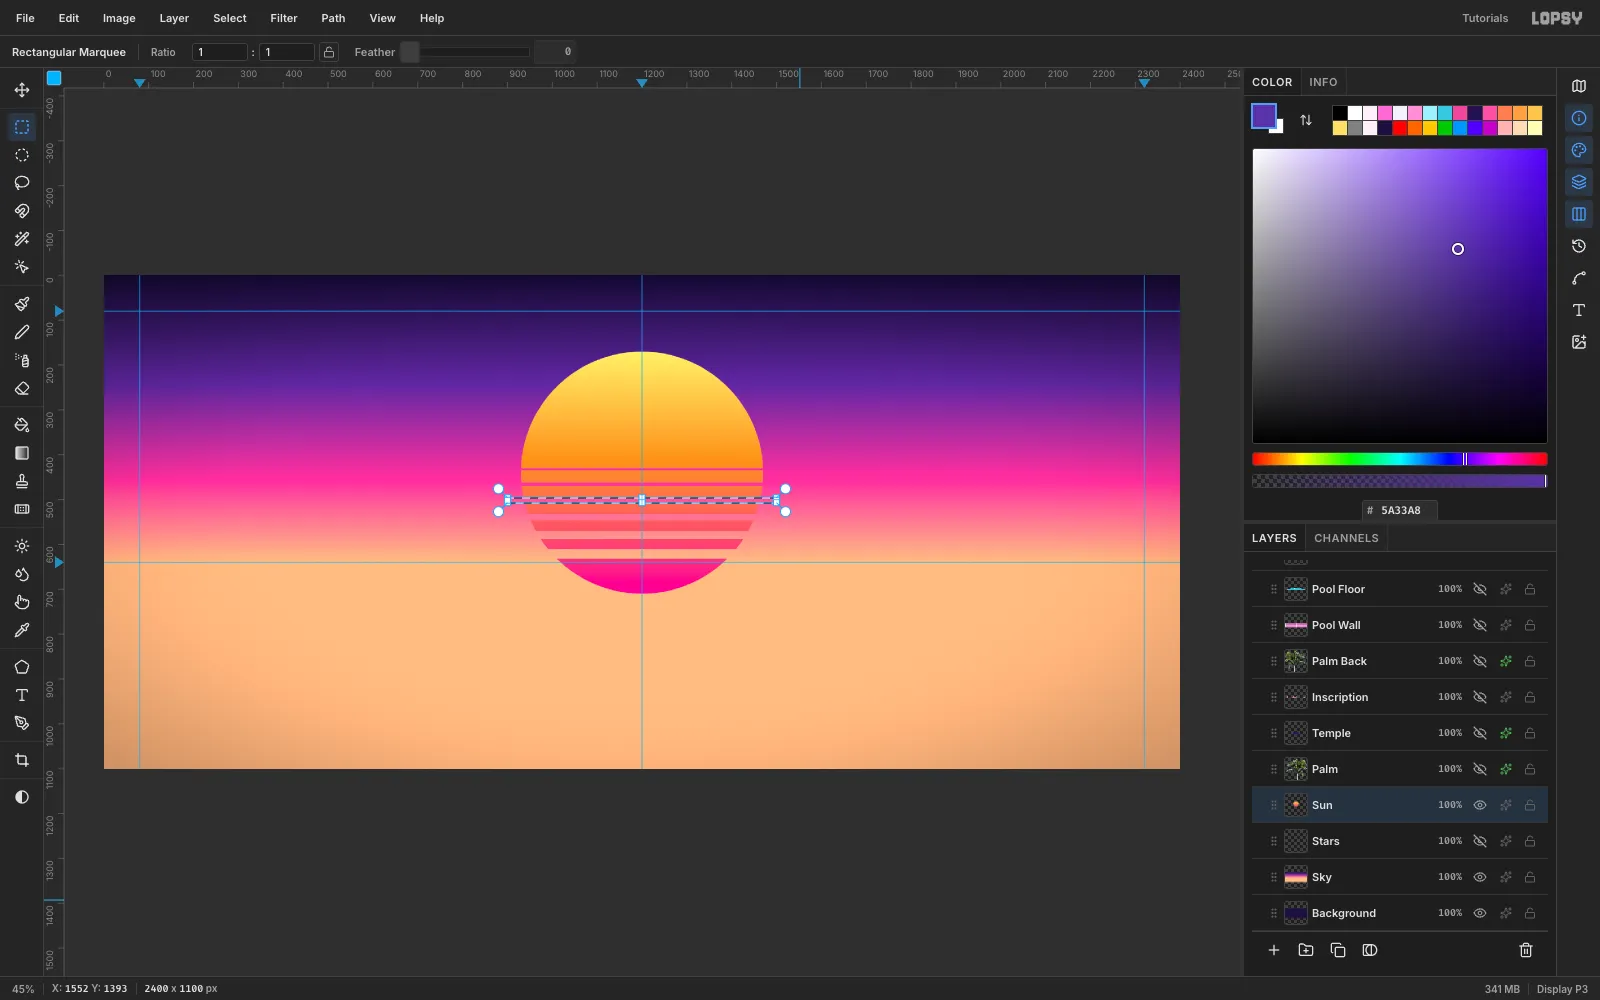
Sun.- With the Elliptical Marquee, select a 540 px circle centred at (1200, 440).
- Fill it with a linear gradient: , then , then , dragged top to bottom.
- Switch to the Rectangular Marquee. Click the canvas once without dragging to open the Region dialog, which lets you type exact coordinates.
- Cut six bands with Delete, each thicker than the last. Use y
430(5 px tall),462(8),496(11),532(14),570(18) and610(22).
-
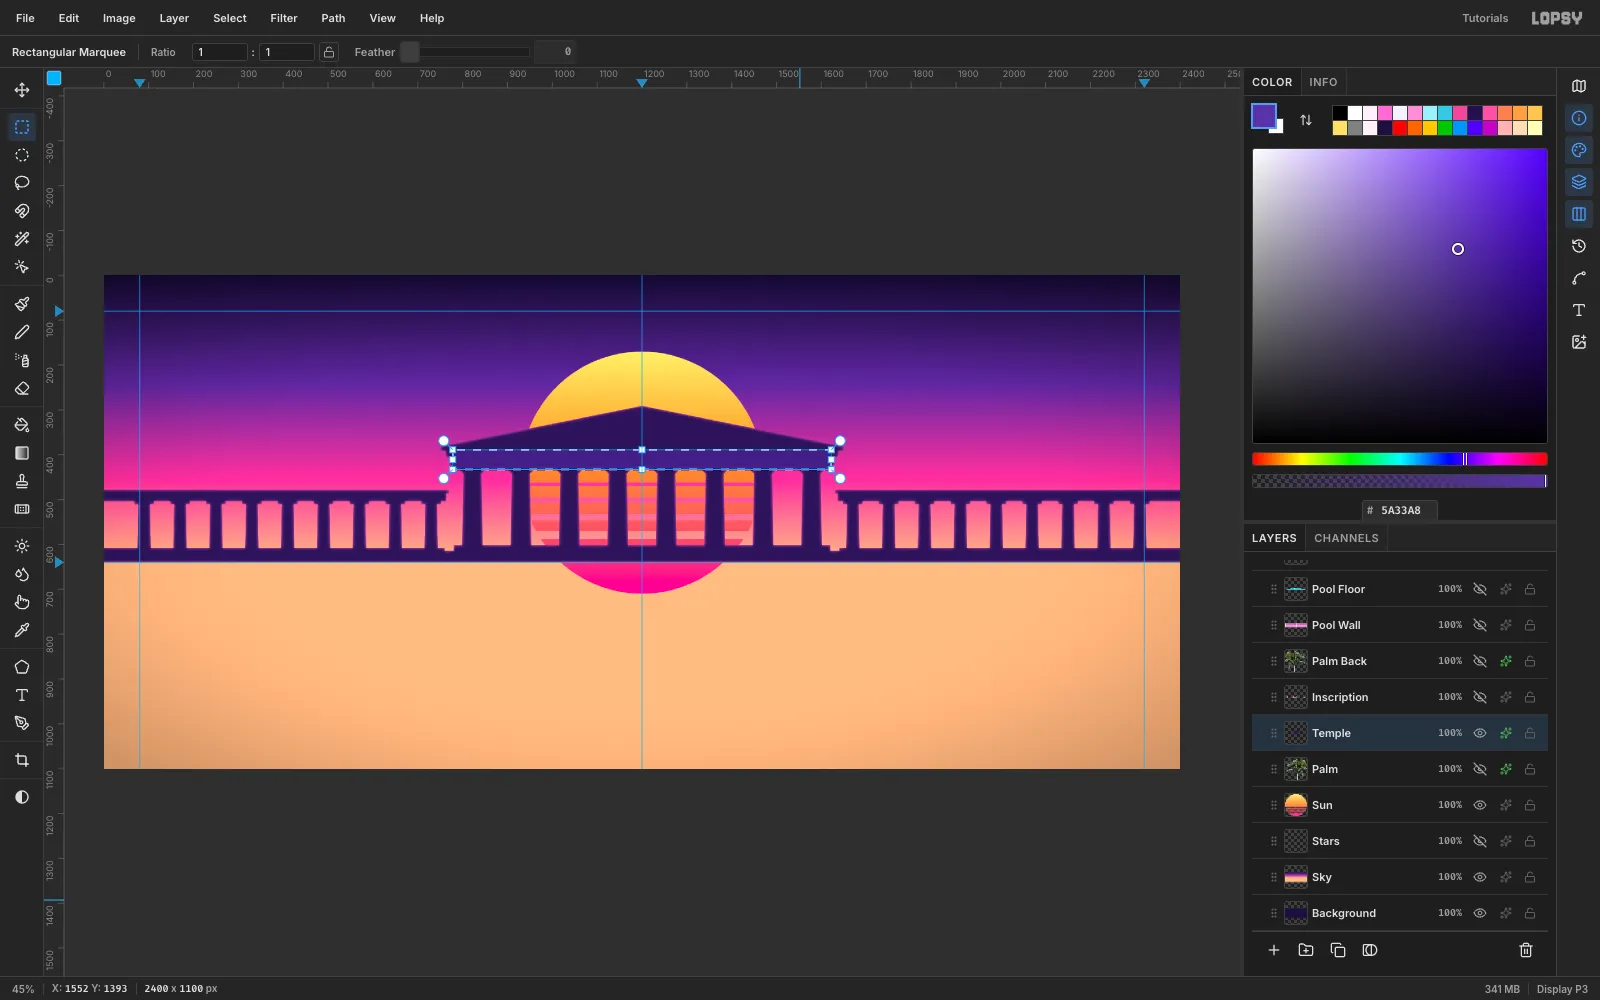
Build the temple and its frieze
Add a layer named
Templeand set FG to .- Draw the temple from rectangles and lasso polygons, filling each with Edit → Fill: steps, eight tapered columns with capitals, the entablature and a triangular pediment.
- Add low colonnades that run out to both edges of the canvas.
- Open the layer effects and add Inner Glow in (Size 9, Spread 10, Opacity 85). The sun now rims every edge.
- Marquee the whole temple, switch to the Move tool and drag the top-middle handle down until the height is about 80%. Press Cmd+D to commit. That lets the striped sun rise above the roof.
- Fill a 44 px frieze band in . Deselect, and draw 2 px fillet lines in along its top and bottom edges with the Pencil at Size 2: click at one end, then Cmd+Shift-click at the other for a dead-level line.
-
Tile the pool and push it into perspective
Make a pool tile:
- Add a layer and fill a 64 × 64 square with .
- Deselect, and with the Pencil at Size 3 draw a grout line along its top and left edges, with a line just inside. Click at one end of each line and Cmd+Shift-click at the other.
- Select the tile and choose Edit → Define Pattern.
- Clear the tile, name the layer
Pool Floor, and select everything below the horizon (0, 640 → 2400, 1100). - Choose Edit → Fill with Pattern… and pick the tile.
- Fill four 24 px lane lines, each with a T-shaped end at the far wall.
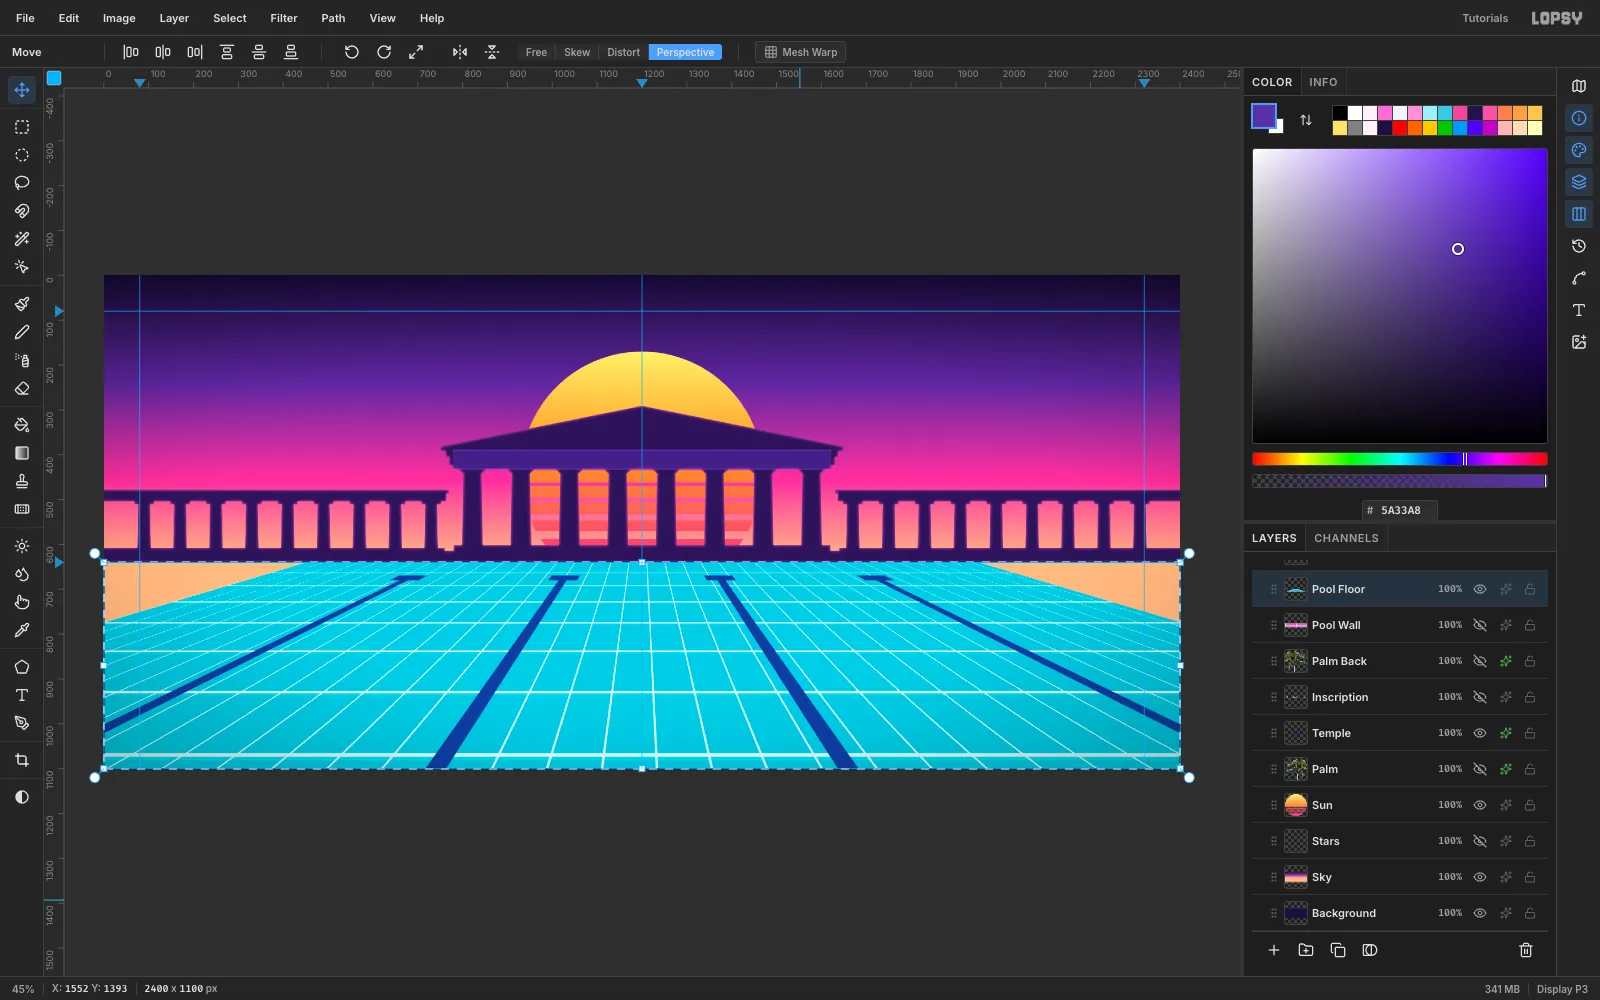
Put the floor in perspective:
- Select the floor again and switch to the Move tool.
- Choose Perspective in the options bar.
- Drag the bottom-left corner handle about 1100 px further left. The bottom-right corner mirrors it.
- Drag the top-left handle 450 px inward.
- Press Cmd+D to commit.
Perspective mode foreshortens properly, so the far rows of tiles shrink toward the horizon.
-
Add the side walls and Voronoi caustics
Side walls. Add a
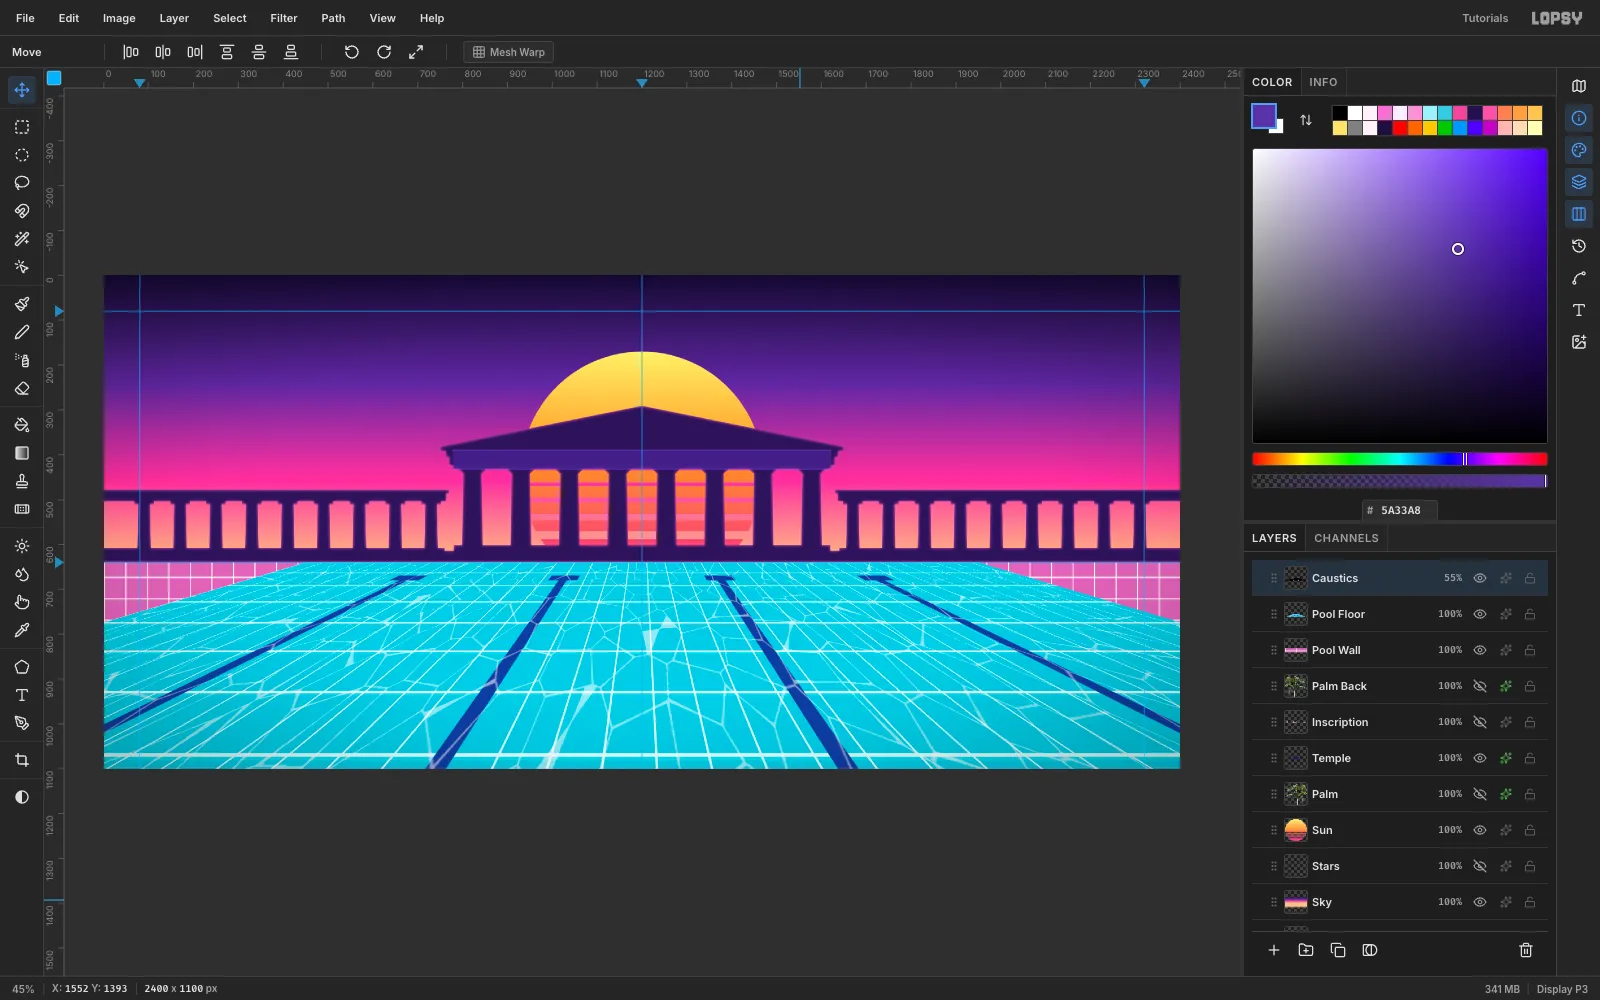
Pool Walllayer under the floor. Pattern-fill the same area at Scale 75. Then run Filter → Hue/Saturation… with Hue 128, Saturation −25 and Lightness 8, which turns the tiles pink. They show around the edges of the floor.Caustics. Add a
Causticslayer and fill the pool area with mid-grey, then run these filters in order:- Add Noise (Amount 100, Mono).
- Voronoi (Cells 16, Edge Width 5, Seed 42). This draws a web of cell edges.
- Invert, so the edges turn white.
- Threshold at 205, so only the edges stay white.
- Gaussian Blur (Radius 2).
Set the layer to Screen at 55% opacity. Give it the same Perspective transform as the floor (bottom corner −1100, top corner +450).
-
Tint the water and add the sun's reflection
Tint. Add a
Waterlayer. Select the pool and drag a gradient from the horizon down, with three stops:- at 70% alpha
- at 0% alpha (40%)
- at 45% alpha
The pink reflects the sky at the far end.
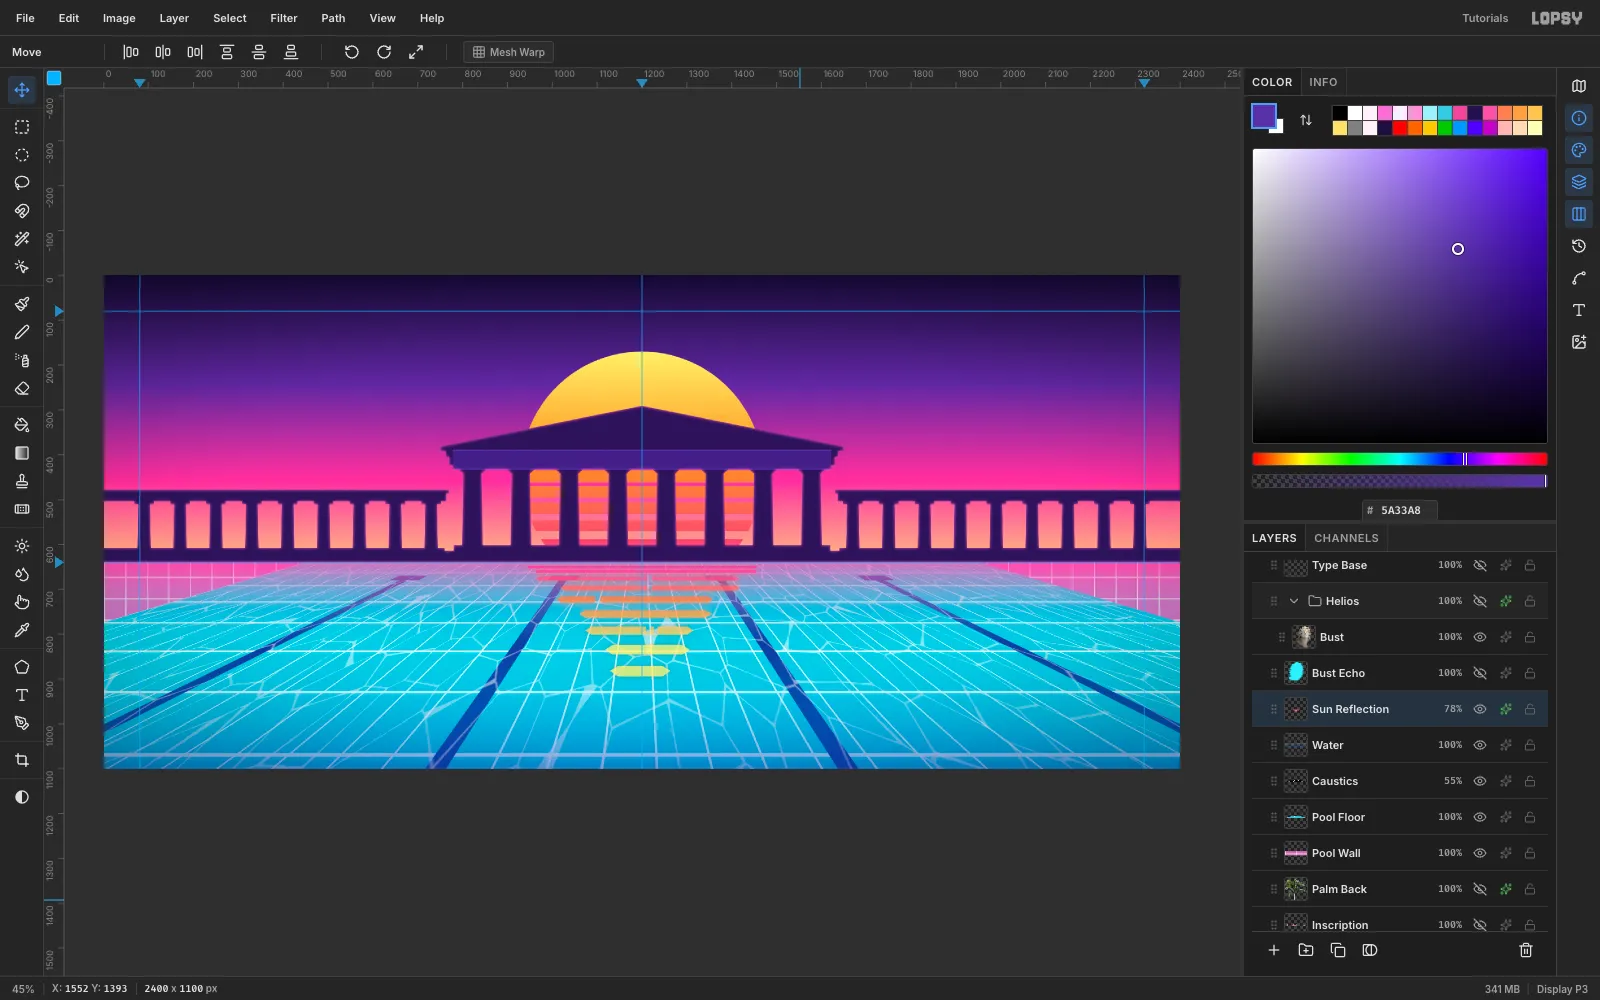
Reflection.
- On a
Sun Reflectionlayer, lasso nine flat, pointed bars under the sun. Make each one shorter and thicker than the one above, and offset each a little sideways. - Fill them white. Then Cmd-click the layer thumbnail to select the bars and drag a pink-to-orange-to-yellow gradient through them.
- Run Gaussian Blur at 1.5 px.
- Cut a few narrow gaps with Region-dialog marquees, so the ripples break up.
- Add an orange Outer Glow (Size 18, Opacity 45) and set the layer to 78% opacity.
-
Cut out the marble bust
Click New Group and name it
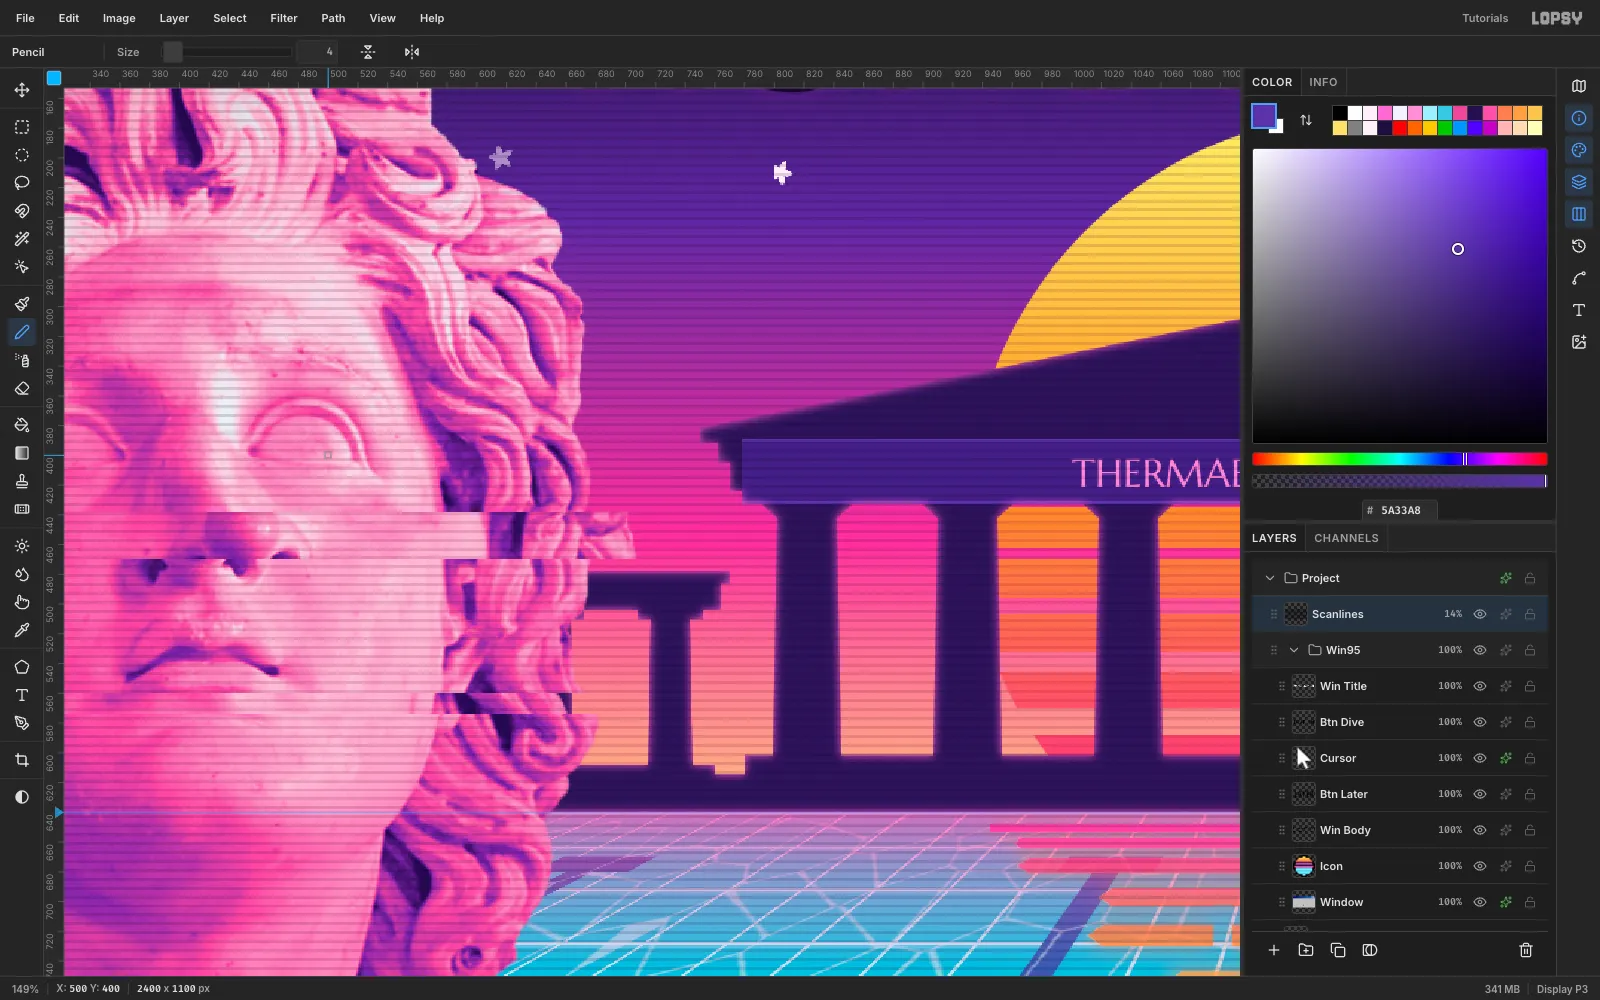
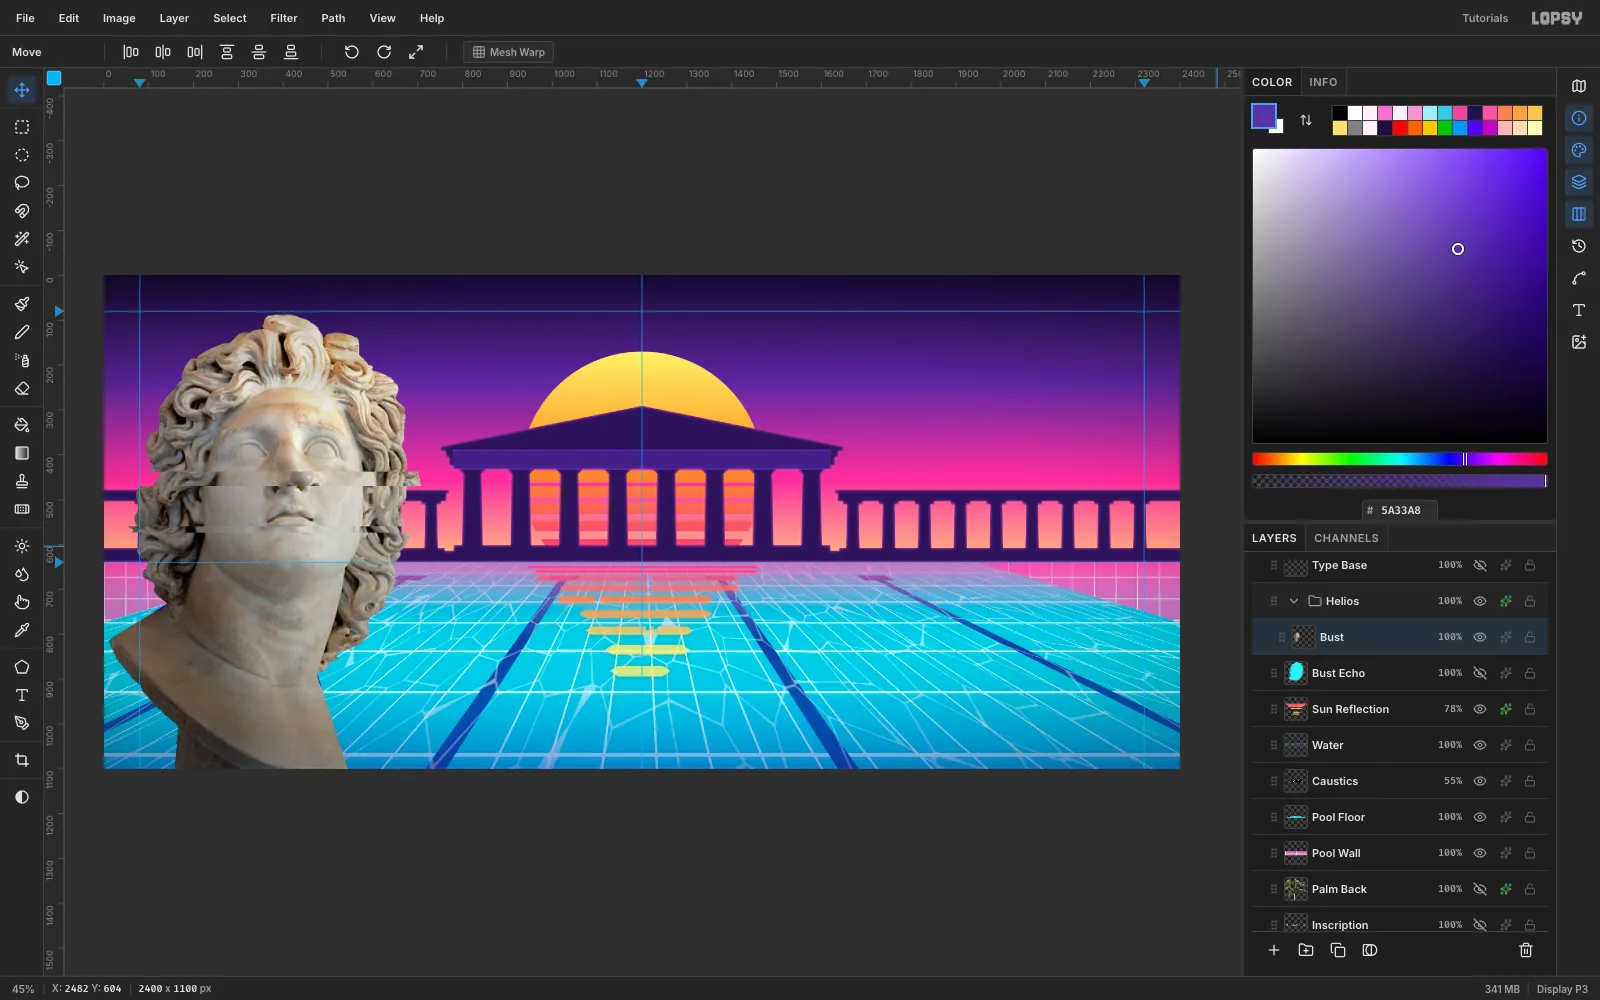
Helios. Paste the bust photo with Cmd+V. Lopsy places it with a live transform. Click Flip Horizontal in the Move options bar so he looks toward the temple, then press Cmd+D.The photo has a dark blue backdrop. Magic Wand (Tolerance 40) picks most of it, but it leaks into the blue-lit shadow side of the neck. A traced outline is cleaner:
- Trace the bust with the Lasso.
- Choose Select → Feather… with a radius of 1 px.
- Choose Select → Inverse, then press Delete.
Marquee the bust and Cmd-drag the bottom-right corner handle to scale it to 117%.
-
Recolour it with a Gradient Map
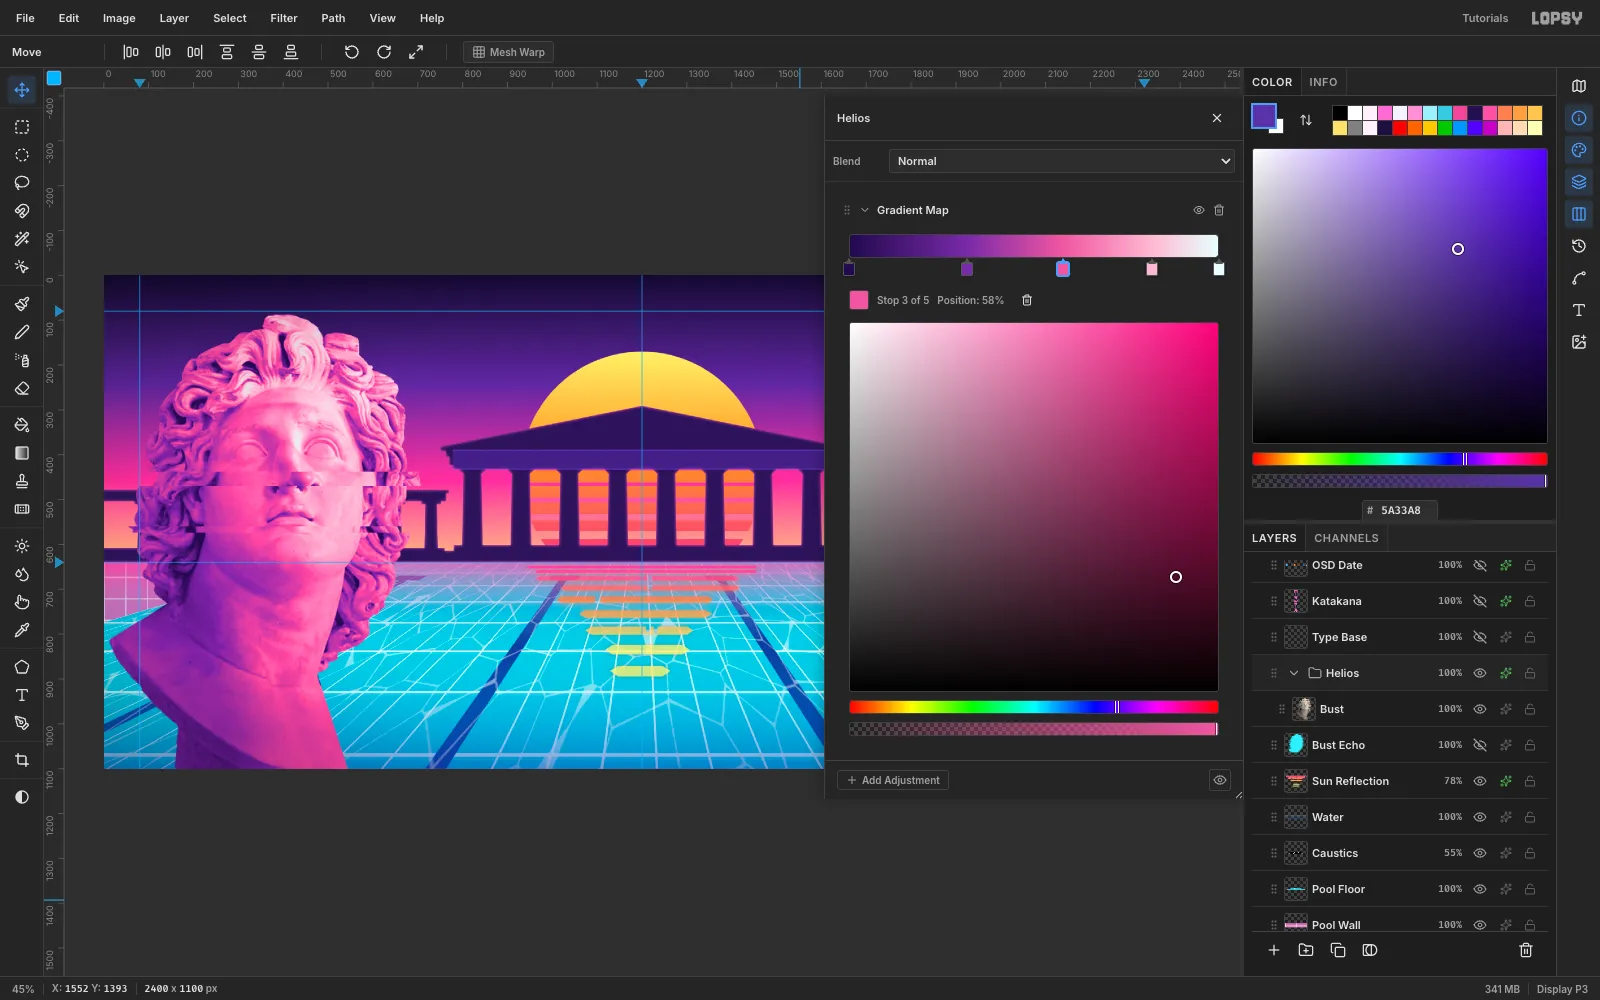
Select the
Heliosgroup row and open its drawer. Click Add Adjustment → Gradient Map. Click the gradient bar to add stops and set five colours: , at 32%, at 58%, at 82% and .Because the adjustment lives on the group, the photo underneath stays untouched. You can turn it off with Disable adjustments at any time.
-
Glitch the face with slice offsets
Click the
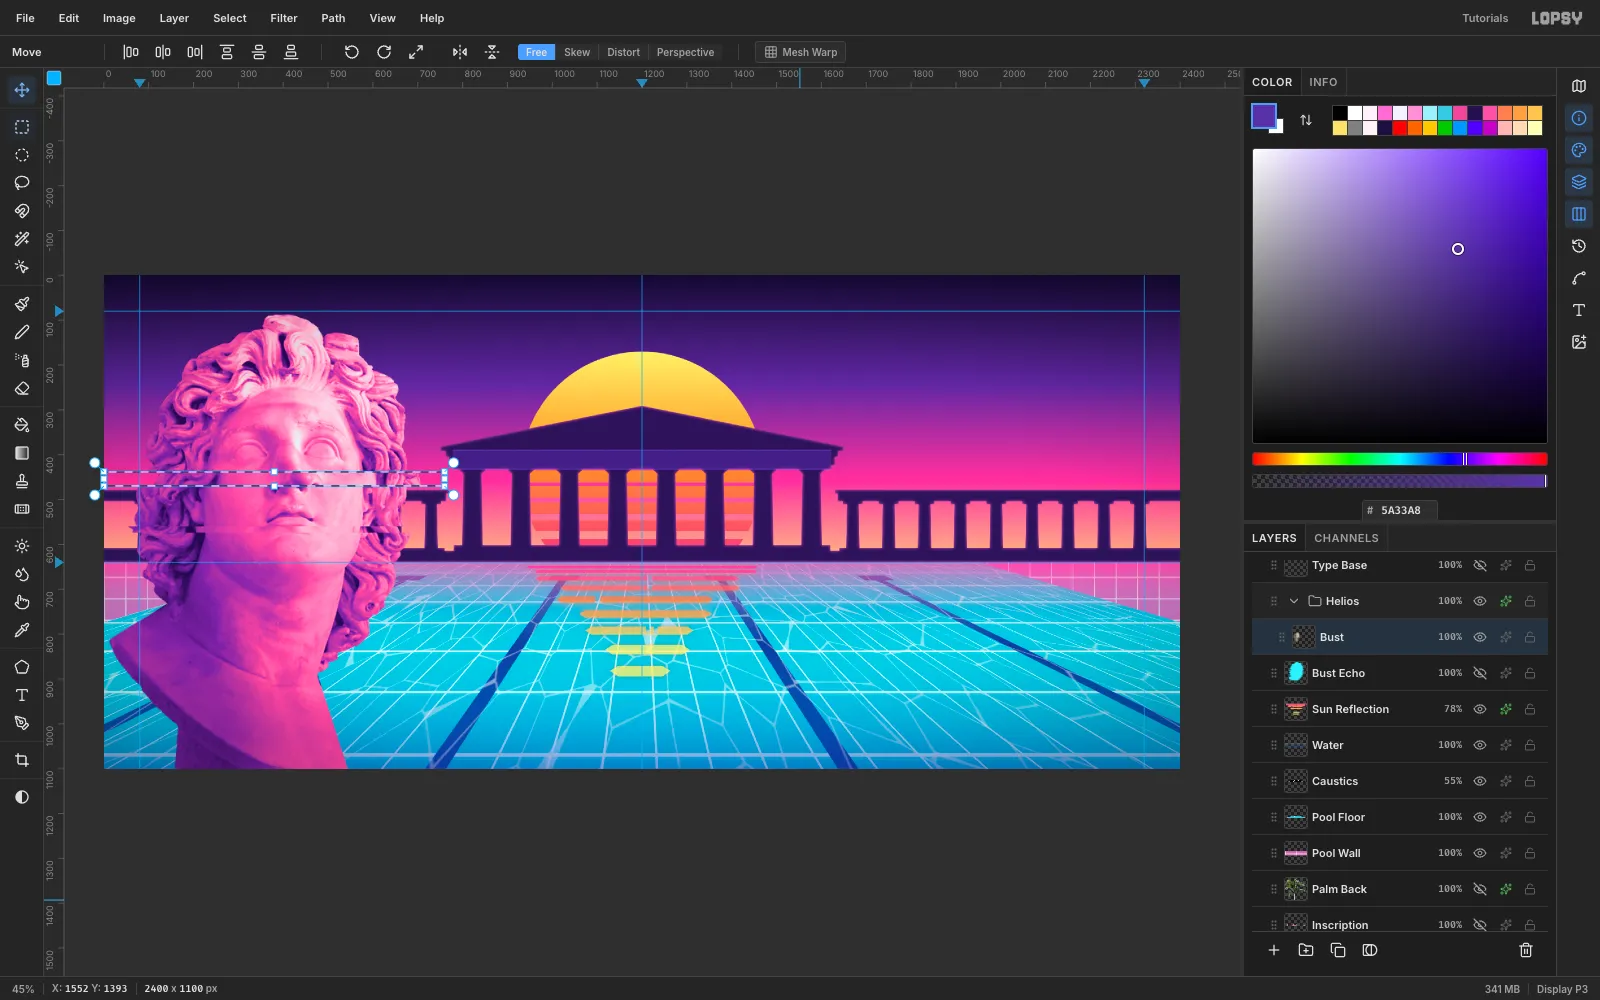
Bustlayer.- Select a 32 px band across the nose with the Region dialog (0, 438 → 760, 470).
- Switch to Move. Press Shift+Right three times to slide the band 30 px.
- Press Cmd+D.
- Select a thinner band at y 560–574 and press Shift+Left twice.
Keep the slices small, about 15–30 px. Bigger offsets read as broken letterforms rather than a VHS glitch.
-
Add a cyan echo
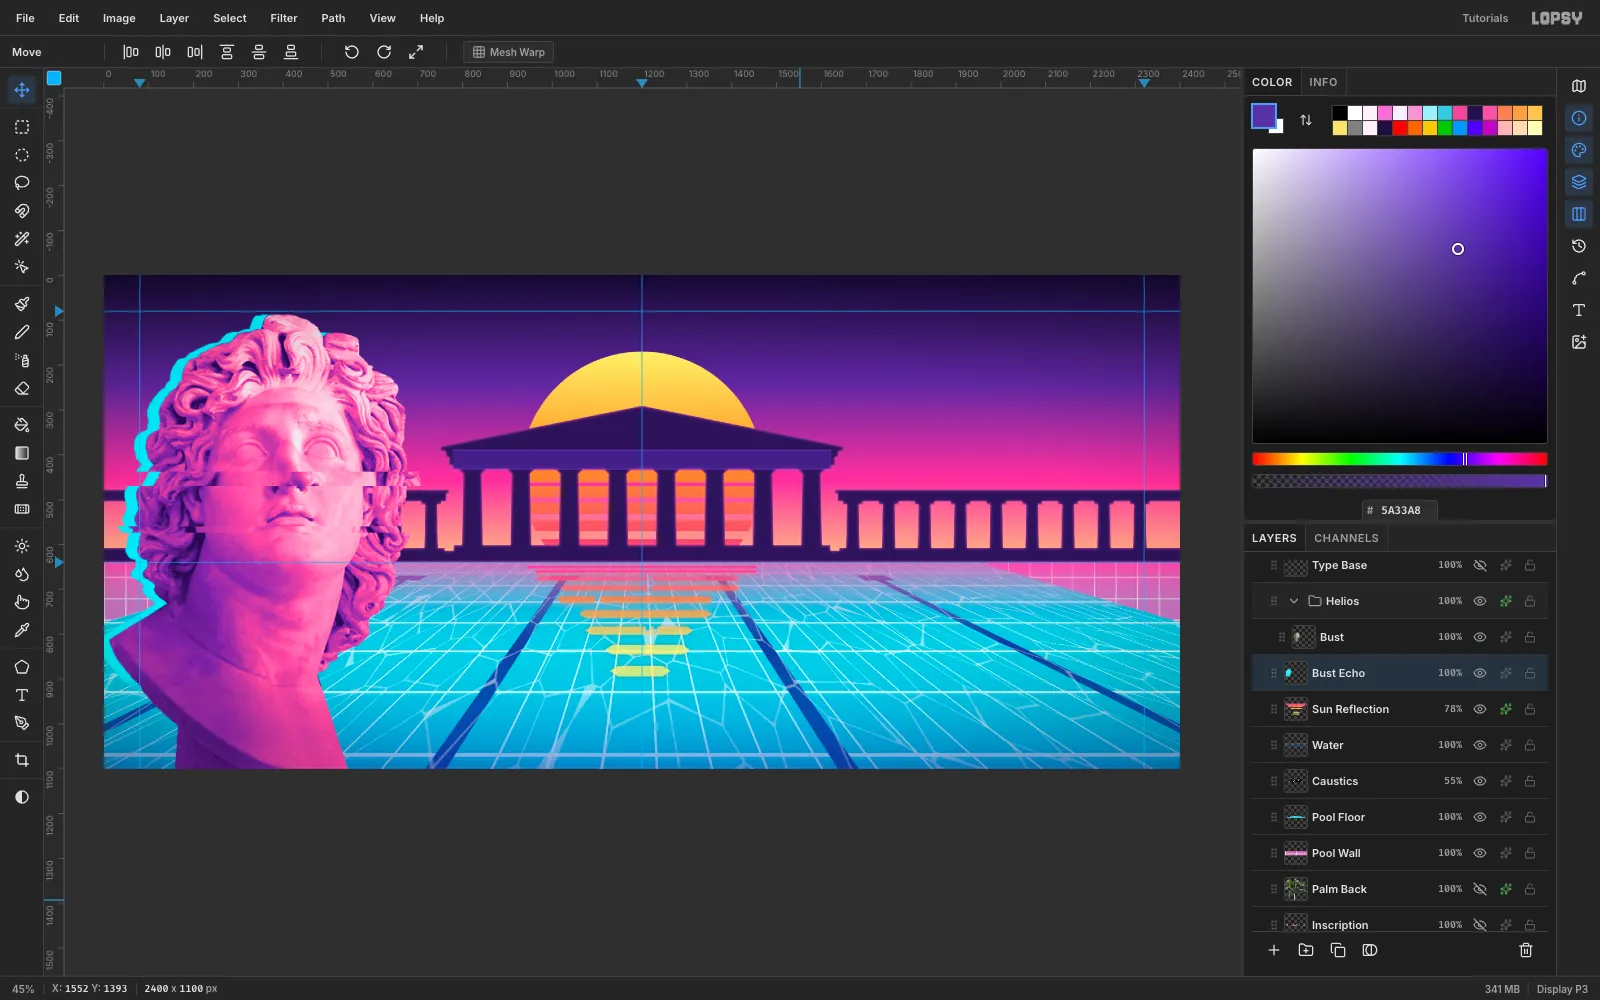
Cmd-click the
Bustthumbnail to select its outline. Add a layer namedBust Echobelow the group and fill the selection with . Press Cmd+D, switch to Move, and nudge it 26 px left.Set the Eraser to Size 180 and Opacity 55. Brush along the bottom so the echo fades out.
-
Place the palm silhouettes
Paste the palm photo. Its sky is clean blue, so here the wand works well:
- Choose Magic Wand with Tolerance 48 and Contiguous off, and click the sky.
- Shift-click near the bottom to add the rest of the sky.
- Press Delete.
Add a Color Overlay in and a thin pink Inner Glow so the palm turns into a backlit silhouette. Scale it to 60%.
Click Duplicate Layer, scale the copy to 78%, and drag it right.
Drag the first palm's row below
Templeso the temple sits in front of it. Then give that palm a slightly lighter overlay () so the two silhouettes don't merge.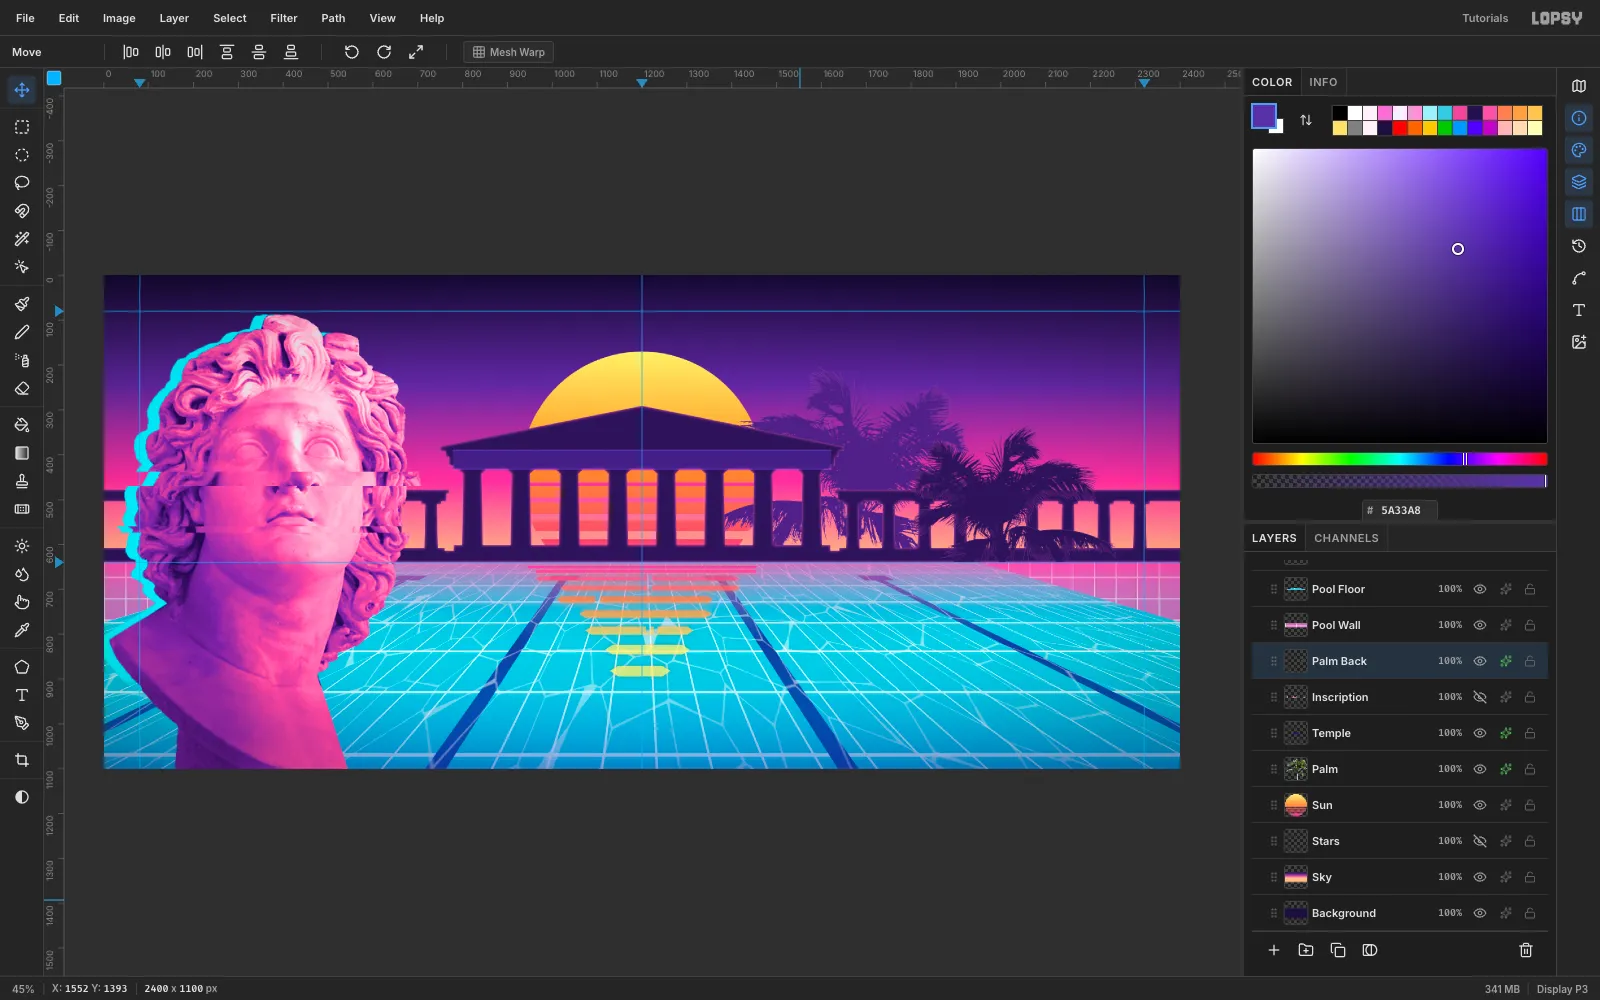
-
Set the chrome headline
Set the type. Choose the Text tool with Marcellus SC at 150 px and colour . Type
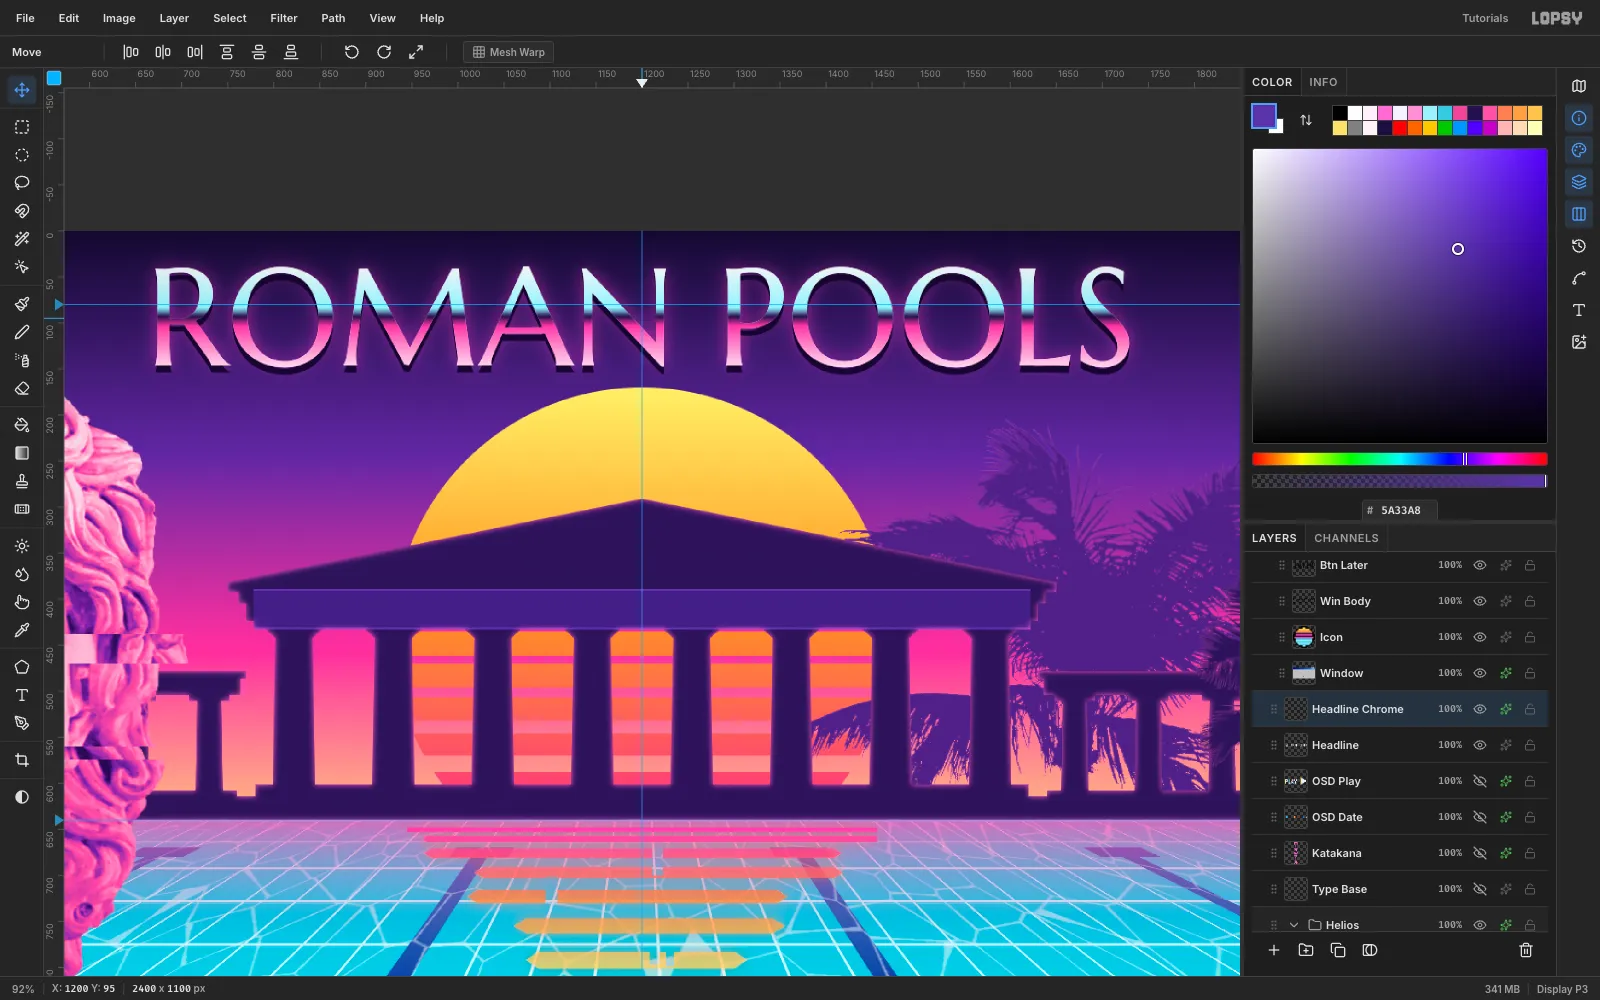
ROMAN POOLSin empty sky. With the Move tool, click Align center horizontally, then nudge it up to y 38.Make it chrome:
- Cmd-click the text thumbnail to select the letters.
- Add a
Headline Chromelayer. - Drag a five-stop gradient from the cap tops to the baseline: , at 42%, at 50%, at 60% and . The hard dark stop at 50% is the "horizon" that makes it read as chrome.
- Add a Drop Shadow (Offset Y 8, Blur 0, Opacity 100, ) and a pink Outer Glow (Size 28, Opacity 55).
-
Add the inscription, katakana and VHS labels
Inscription. Type
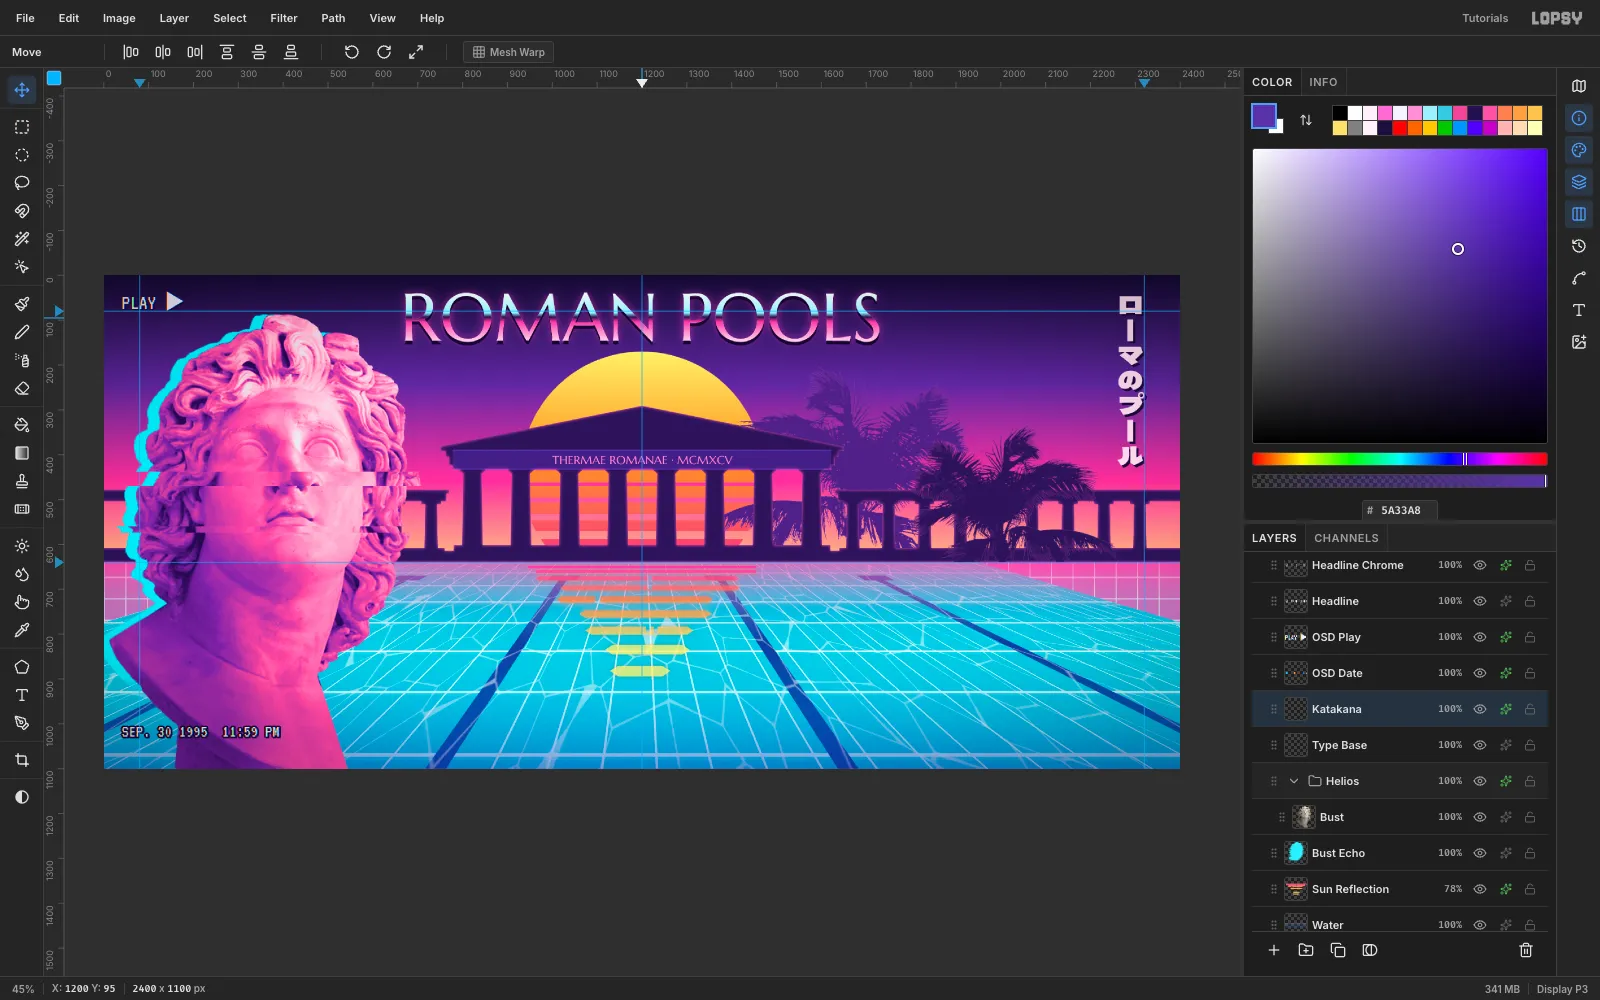
THERMAE ROMANAE · MCMXCVin Marcellus SC at 26 px, colour . Centre it in the frieze band.Katakana.
- Click
Headline Chromeand turn on the Toggle vertical text button. - Type or paste
ローマのプールin Dela Gothic One at 56 px. A Japanese input method works in the text tool.
Give the column a 5 px hard drop shadow and a pale Color Overlay.
VHS labels. Click
Headline Chrome, turn vertical text off, and typePLAY ▶in VT323 at 48 px at the top left. ClickHeadline Chromeagain and typeSEP. 30 1995 11:59 PMat 40 px, 60 px up from the bottom edge.- Rasterize both labels.
- Run Filter → Chromatic Aberration… with Amount 1. Higher amounts split the thin pixel strokes into rainbow blocks.
- Give the date a 3 px dark Stroke so it reads over both the bust and the water.
- Click
-
Draw a Windows 95 dialog on the grid
Click New Group and name it
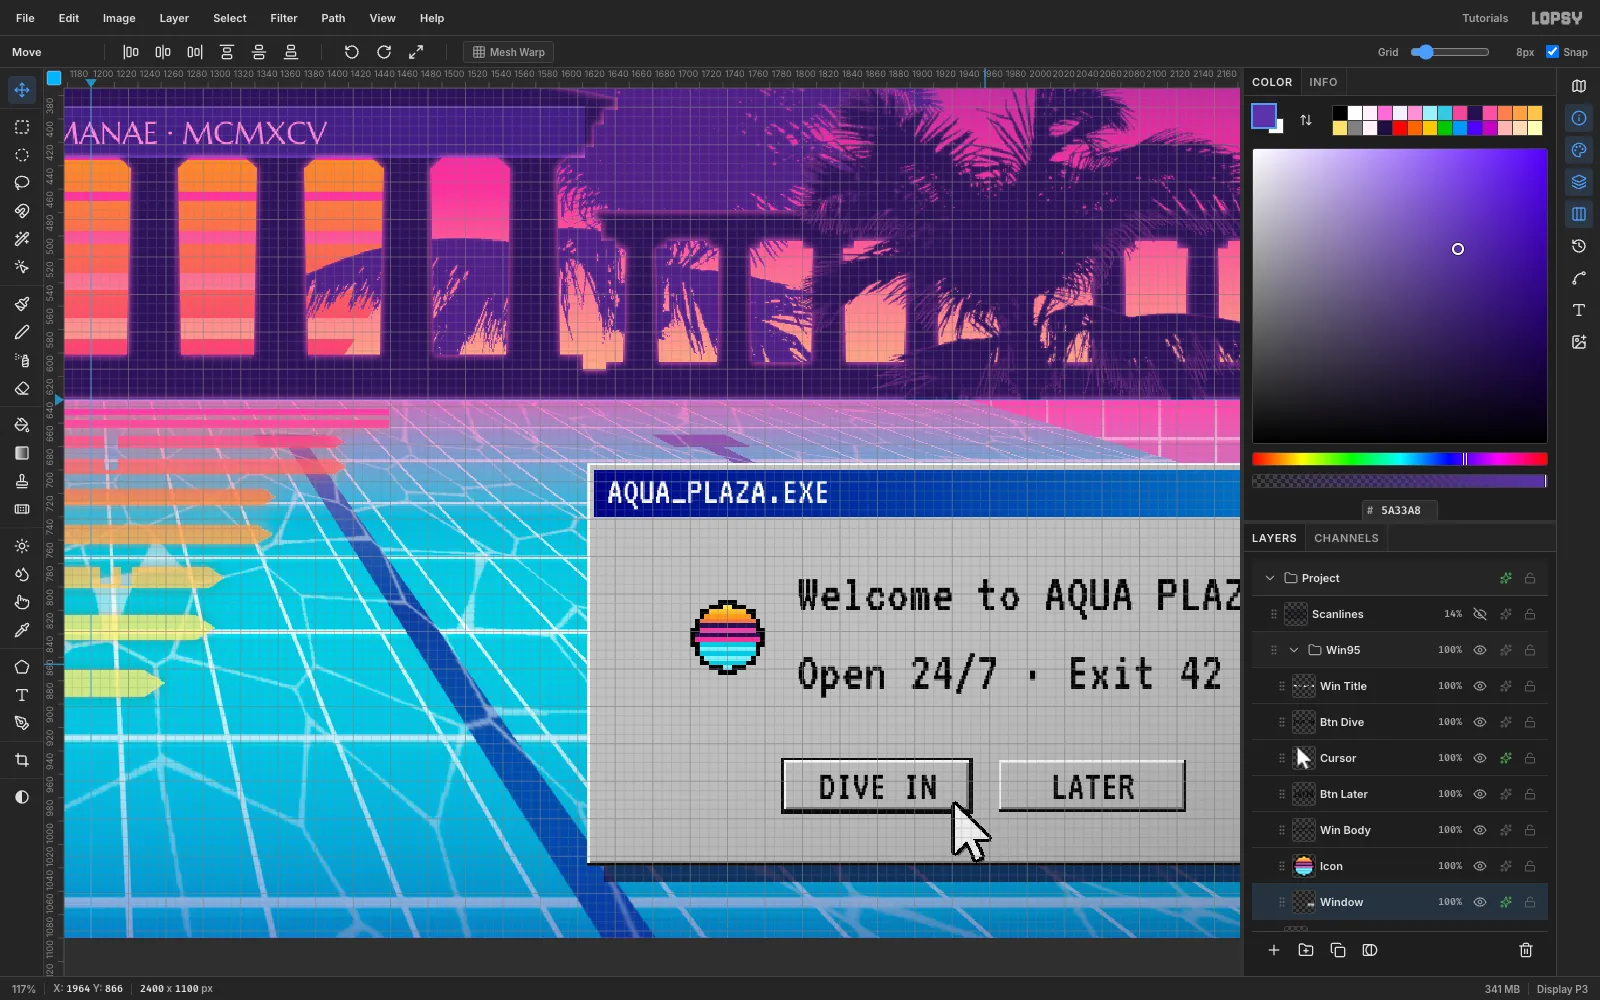
Win95. Turn on View → Show Grid, set the Grid size to 8 px and leave Snap on. Drag the window marquee and it snaps to the grid (1624, 694 → 2304, 1038).Chrome. Build the classic bevel from 2 px strips:
- a face
- a white top and left edge
- a black bottom and right edge, with a grey strip inside it
Drag a → gradient across the title bar. Bevel the three title buttons and the two dialog buttons the same way. Give
DIVE INan extra black outline, because it's the default button.Text. Use VT323. Pick each colour before you click, and set the size while the caret is still in the text: a white
AQUA_PLAZA.EXEtitle at 34 px, two black body lines at 48 px, and 36 px button labels centred in their buttons.Cursor. Draw a white arrow with a 3 px black Stroke and rest its tip on the lower-right of the DIVE IN button. Give the window a hard 14 px Drop Shadow.
-
Draw the pixel-art icon with the Pencil
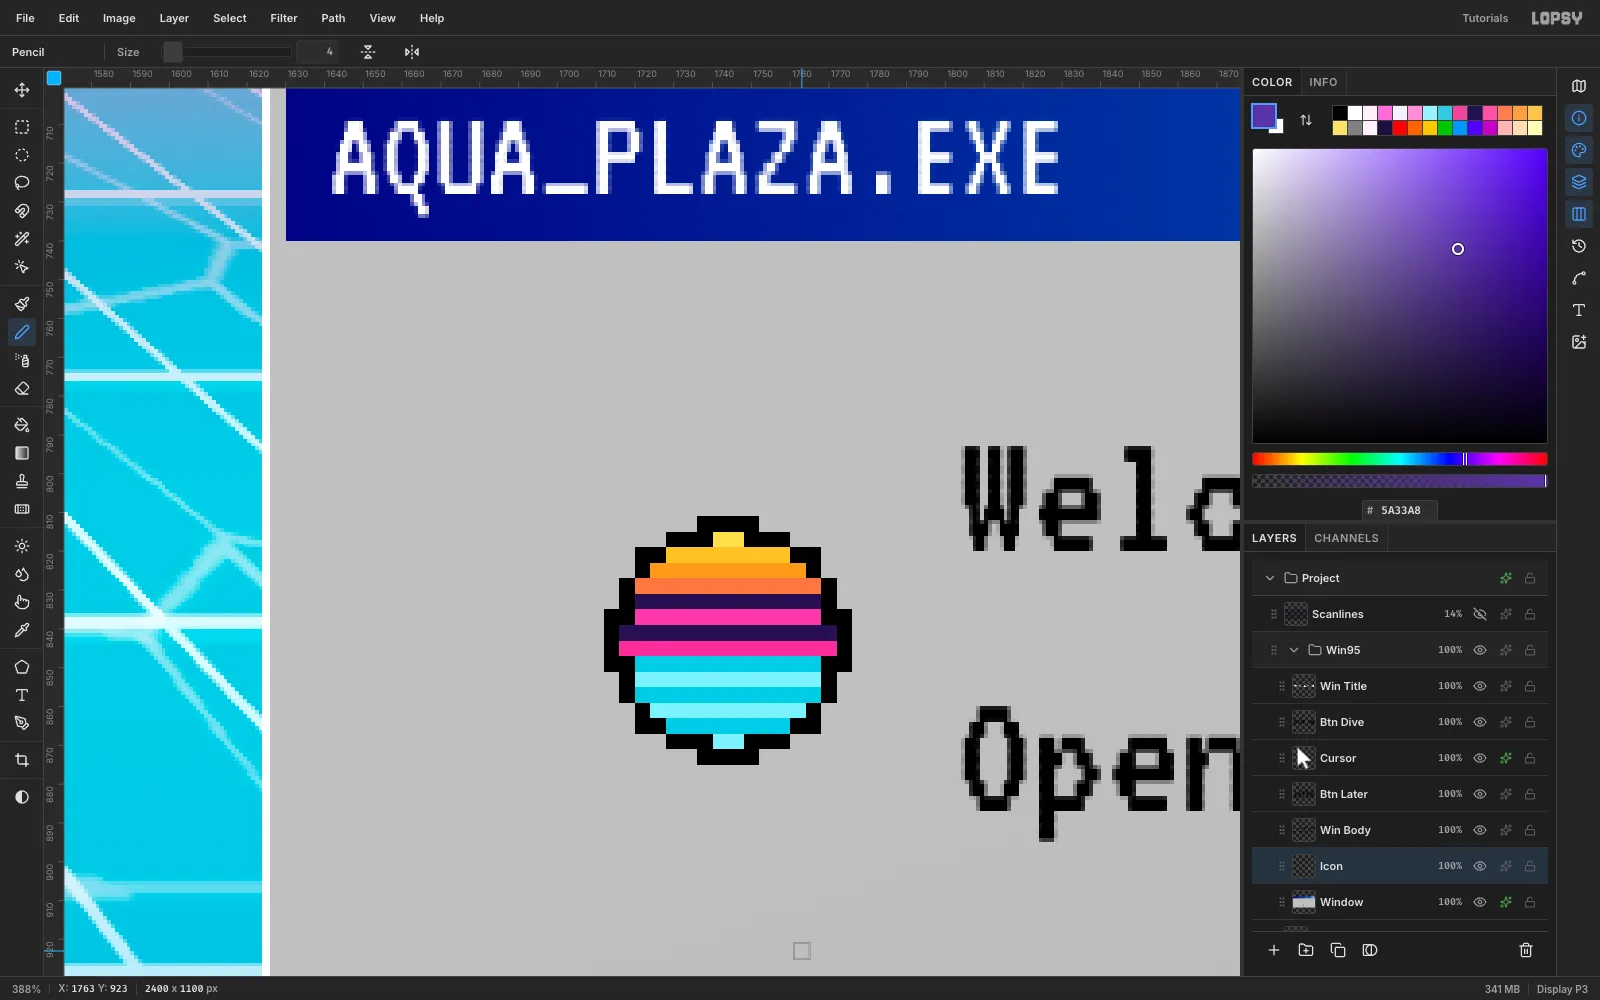
Zoom to about 400% over the dialog. Choose the Pencil at Size 4, so each "pixel" is a crisp 4 × 4 block.
Draw a black 16 × 16 circle outline. Fill the top half with sun bands ( to , with two gaps) and the bottom half with alternating and water rows.
The Pencil has no anti-aliasing, so the icon stays sharp at any zoom.
-
Finish with stars, scanlines and a vignette
Stars. On a
Starslayer above the sky, open the brush presets and pick Star. On the Dynamics tab, set Size Jitter 70, Angle Jitter 100 and Opacity Jitter 55, then set Size 18 on the Shape tab. Click about 45 times in the upper sky. Then marquee-delete any stars that touch the headline, PLAY or the katakana.Scanlines. Fill a 2 px strip in an 8 × 6 selection and choose Define Pattern. On a top-level
Scanlineslayer, Fill with Pattern across the whole canvas and set the layer to 14% opacity.Vignette. Add a root Vignette adjustment of 28.
Finally, save with File → Save Project and export with File → Quick Export PNG.