Paint an Art Deco Egyptian Night Scene with a Zodiac Wheel
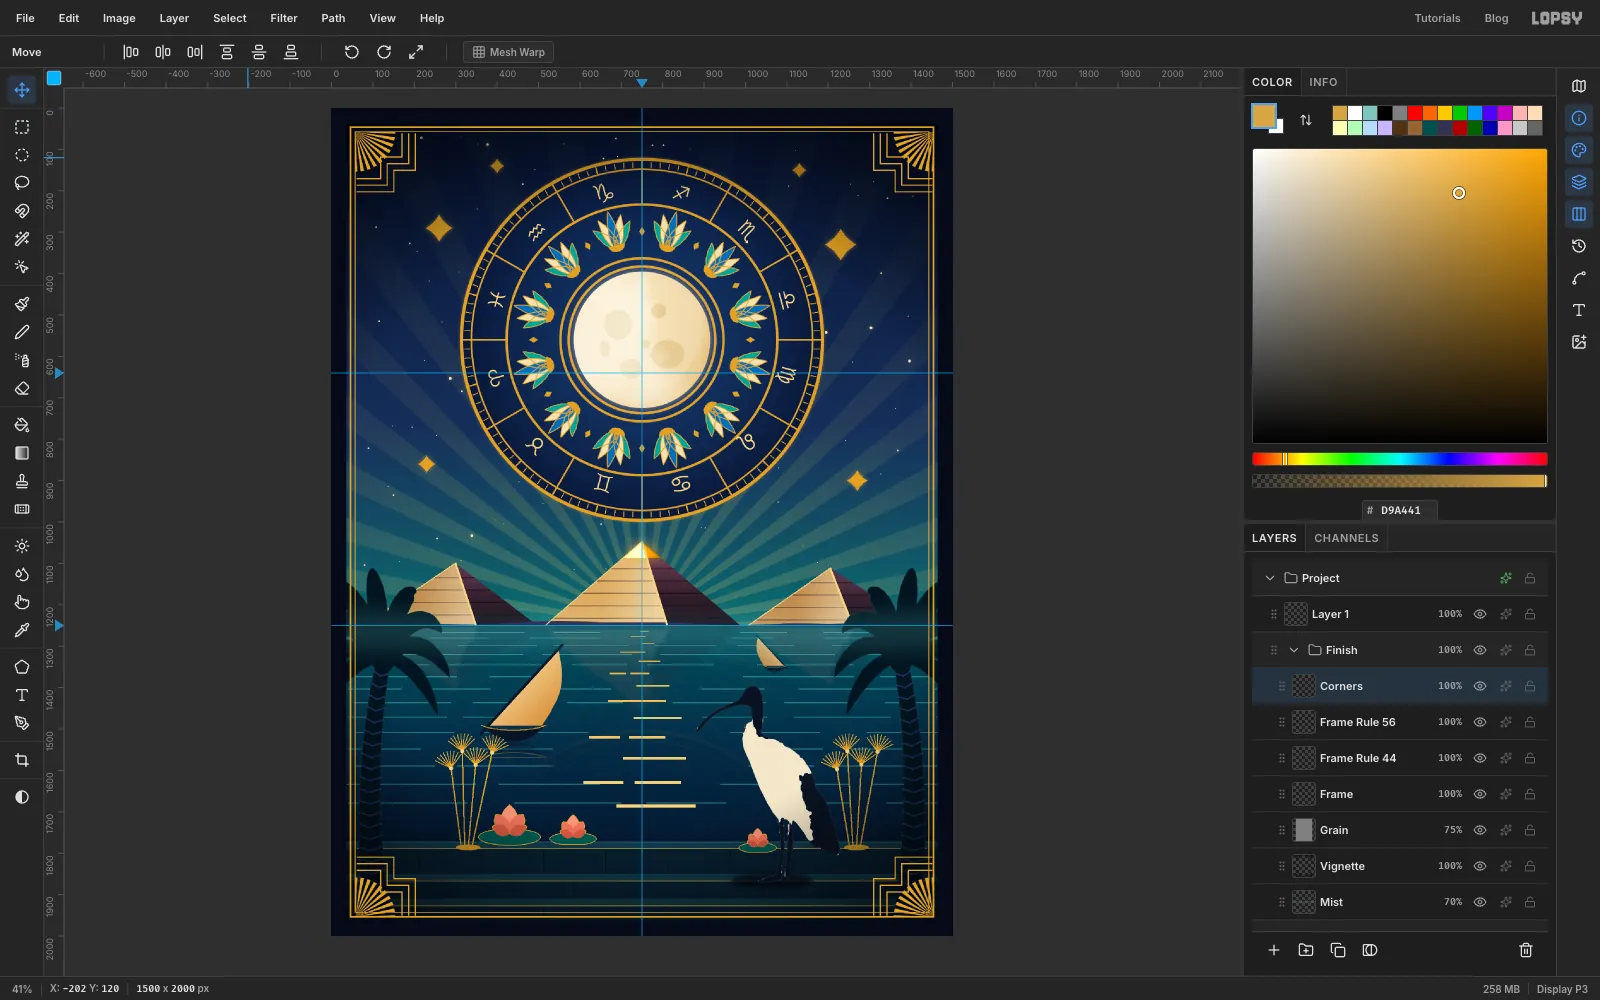
Paint an Art Deco Egyptian-revival night scene in Lopsy, with a kaleidoscope zodiac wheel, gold-capped pyramids, a rippling Nile and a sacred ibis.
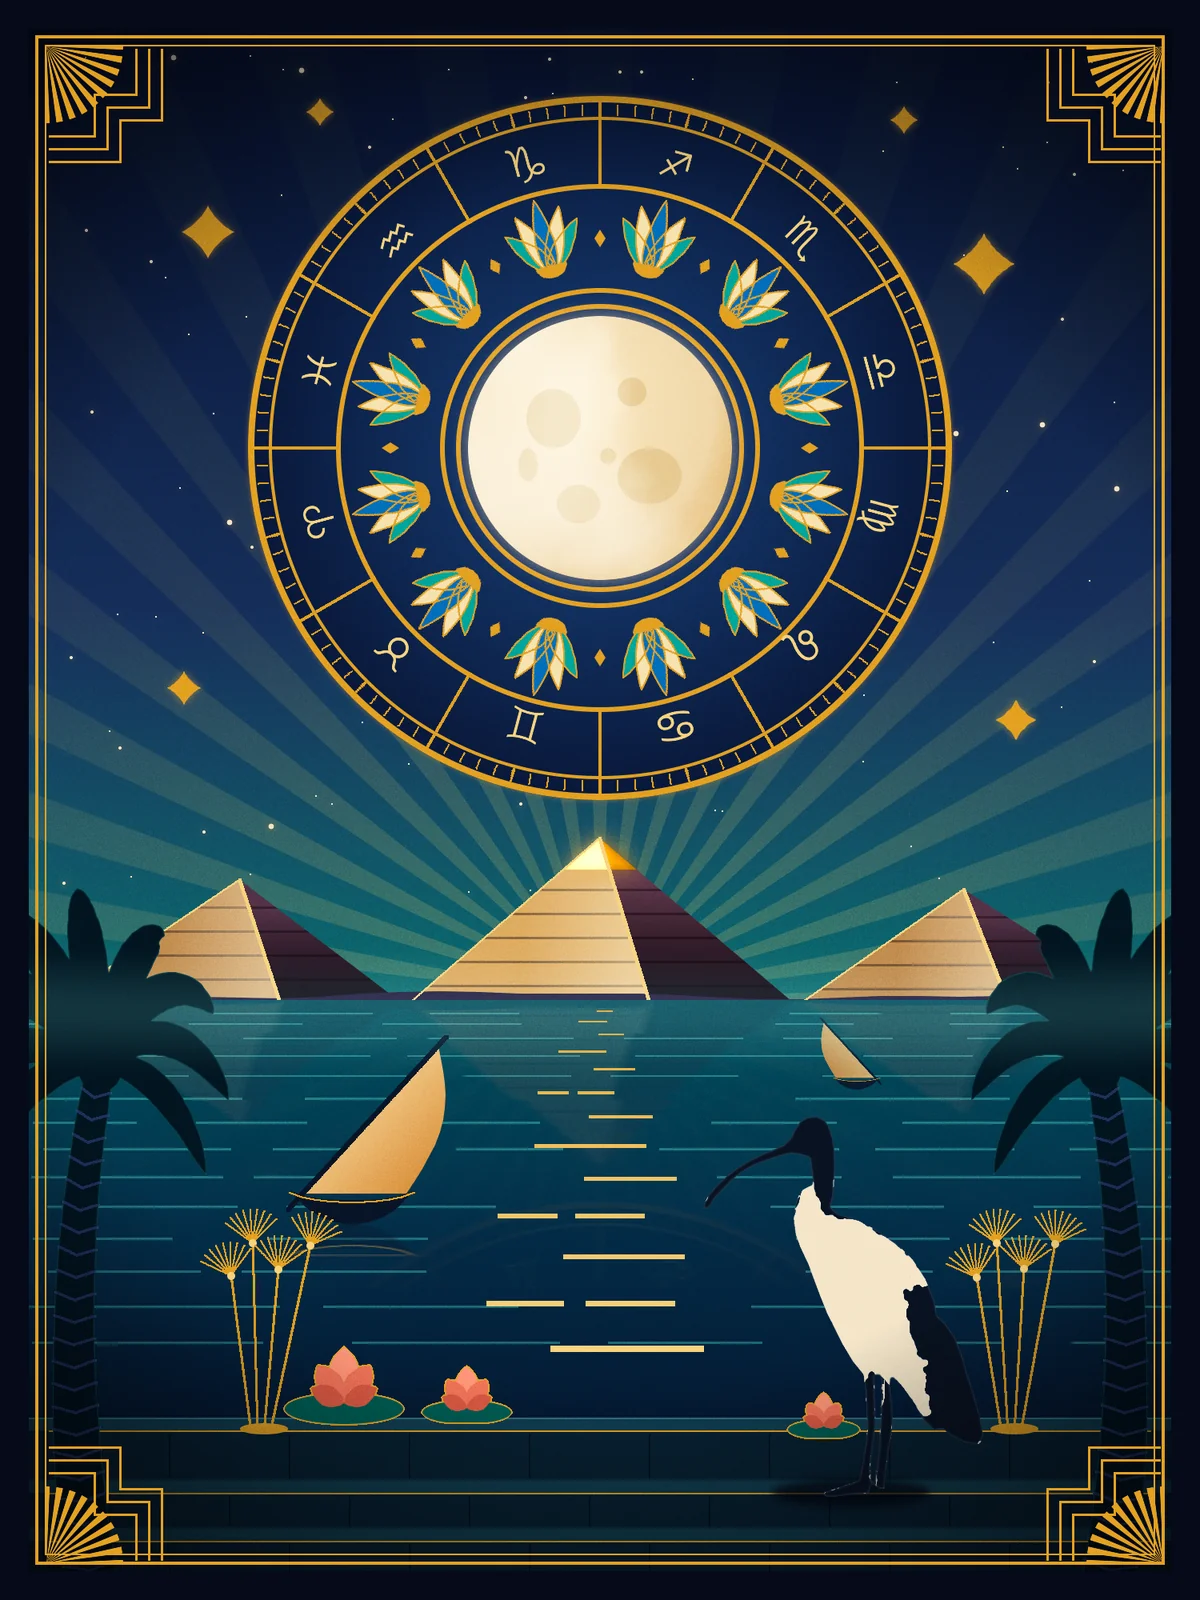
In the 1920s, the discovery of Tutankhamun's tomb set off a craze for Egyptian motifs, and Art Deco designers turned pyramids, lotus flowers, sun discs and ibises into crisp geometry. This tutorial paints Nile Zodiac, a 1500 × 2000 px night scene in that style. A gold zodiac wheel rises behind the pyramids of Giza, the Nile carries a broken path of moonlight, and a sacred ibis watches from a stone quay.
Nearly everything is built from selections filled with flat colour and gradients, which is how Deco posters were printed. The ornament comes from two filters doing the repetitive work for you. Kaleidoscope turns a single wedge of ornament into a full ring, and Sunburst draws the fan of rays.
The ibis is traced from a photo, Helig ibis-2.jpg by David Castor on Wikimedia Commons, which is released under CC0 (public domain). Open its Commons page and download the 1,280 px wide version. Any side-on photo of a standing ibis or heron on a plain background works too.
Along the way you'll use:
- ruler guides, the Gradient tool (linear and radial, with transparent stops) and Edit → Fill
- the Sunburst, Kaleidoscope, Clouds, Pixel Stretch, Motion Blur, Gaussian Blur, Threshold, Bloom and Add Noise filters
- elliptical marquees combined with Shift (add), Alt (subtract) and Shift+Alt (intersect), the Lasso, Quick Selection, the Magic Wand, Grow, Shrink, Feather and Inverse
- the Pencil, Brush and Eraser, including Shift-click straight lines
- text layers in Noto Sans Symbols, rotated with the Move tool's handles
- Copy Merged, copy and paste in place, Flip Horizontal / Vertical, scaling with the corner handles, arrow-key nudges and Merge Down
- a layer mask, a group Gradient Map, groups moved as one, and undo / redo
- Outer Glow, Inner Glow and Stroke effects, and the Soft Light, Multiply, Screen and Overlay blend modes
The palette:
-
Night sky
-
Gold
-
pale gold
-
deep gold
-
cream
-
Wheel disc
-
cloisonné turquoise
-
Egyptian blue
-
Moon
-
craters
-
Pyramid lit faces
-
shadow faces
-
courses
-
Water
-
ripples
-
Sail
-
hulls
-
Quay
-
quay edge
-
palms
-
palm rim
-
trunk rings
-
Lotus
-
lily pad
-
Ibis ink
-
ibis cream
-
frame
-
Create the canvas and place guides
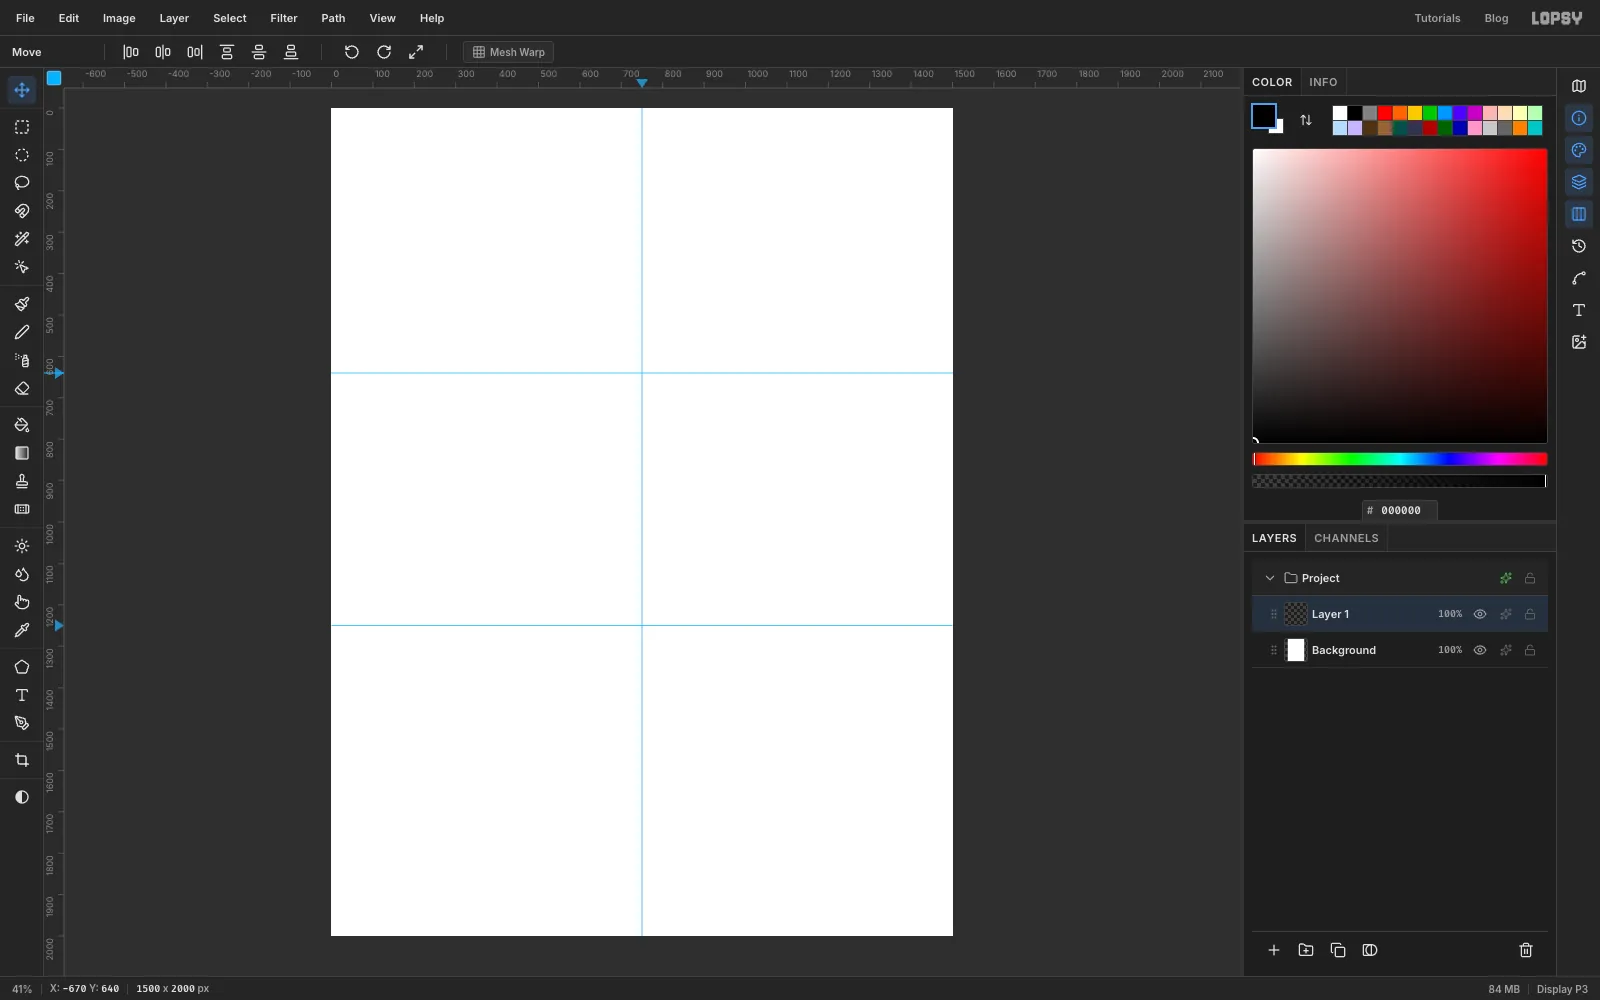
Create a new document 1500 × 2000 px. Click the top ruler at the middle of the canvas (x 750) to drop a vertical guide. Then click the left ruler at y 640, where the centre of the zodiac wheel will start, and at y 1250, which will be the horizon. A click on a ruler is all it takes to make a guide. Lopsy also adds an empty Layer 1 to new documents; you can ignore it or delete it.
-
Paint the night sky
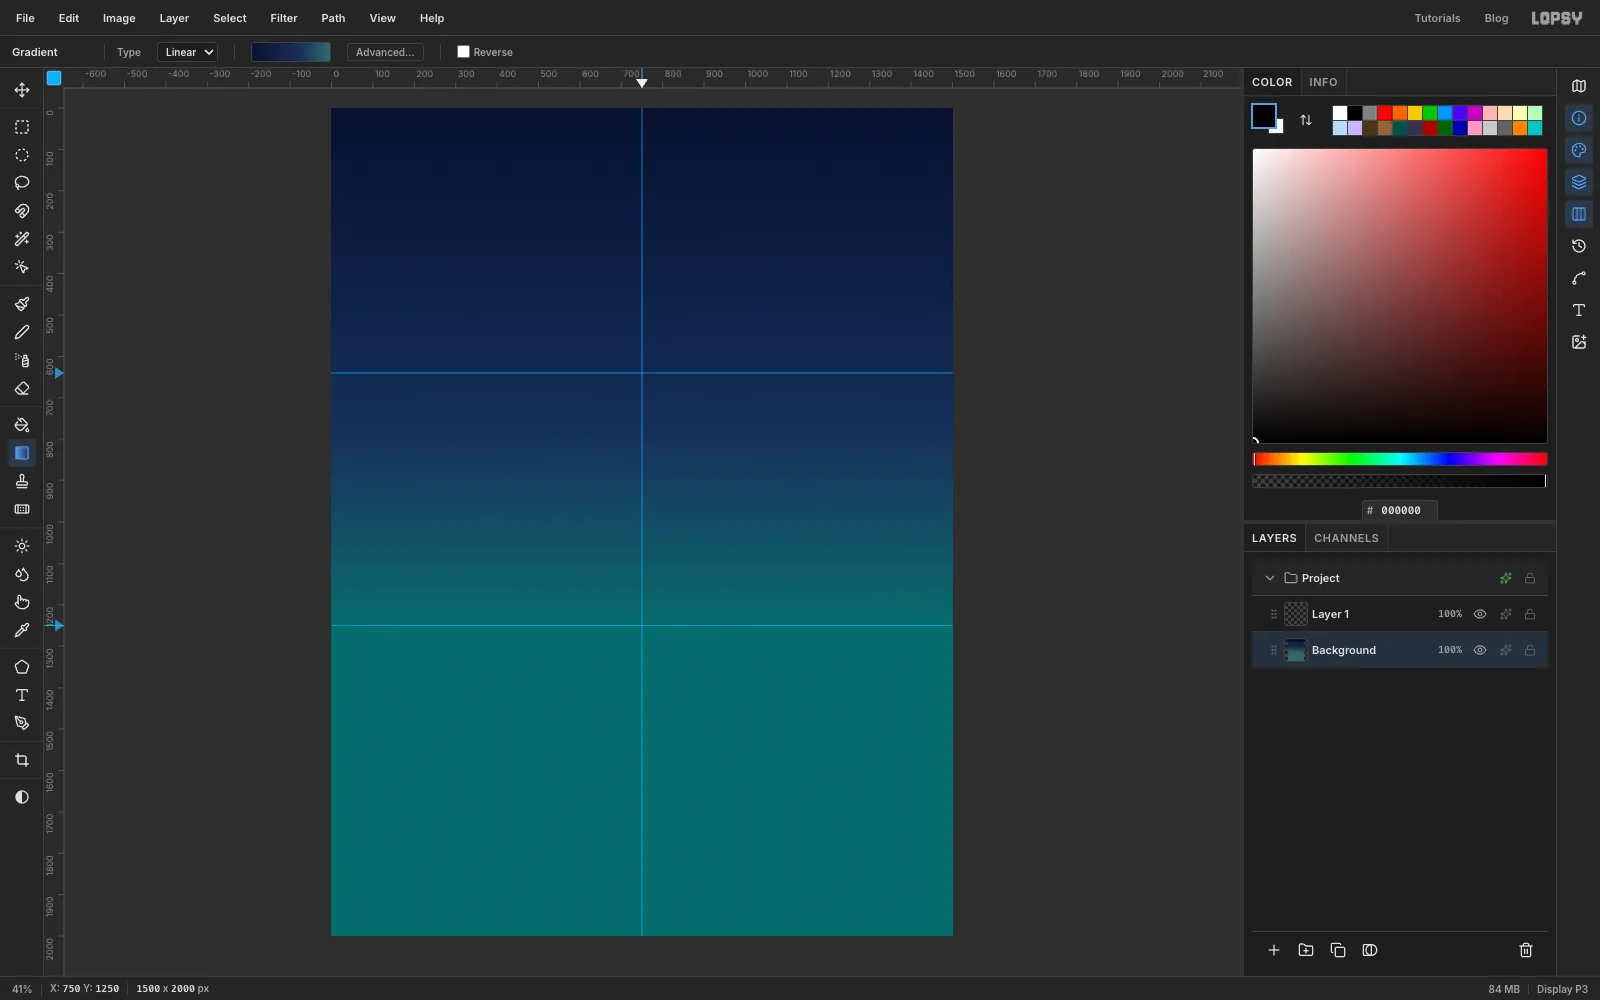
Select the Background layer and pick the Gradient tool (Linear). In Advanced…, set three stops: at the left, at about 60 % and at the right. Drag from just below the top of the canvas straight down to the horizon guide. Everything below the horizon will be covered by water later.
-
Select the sky for the fan rays
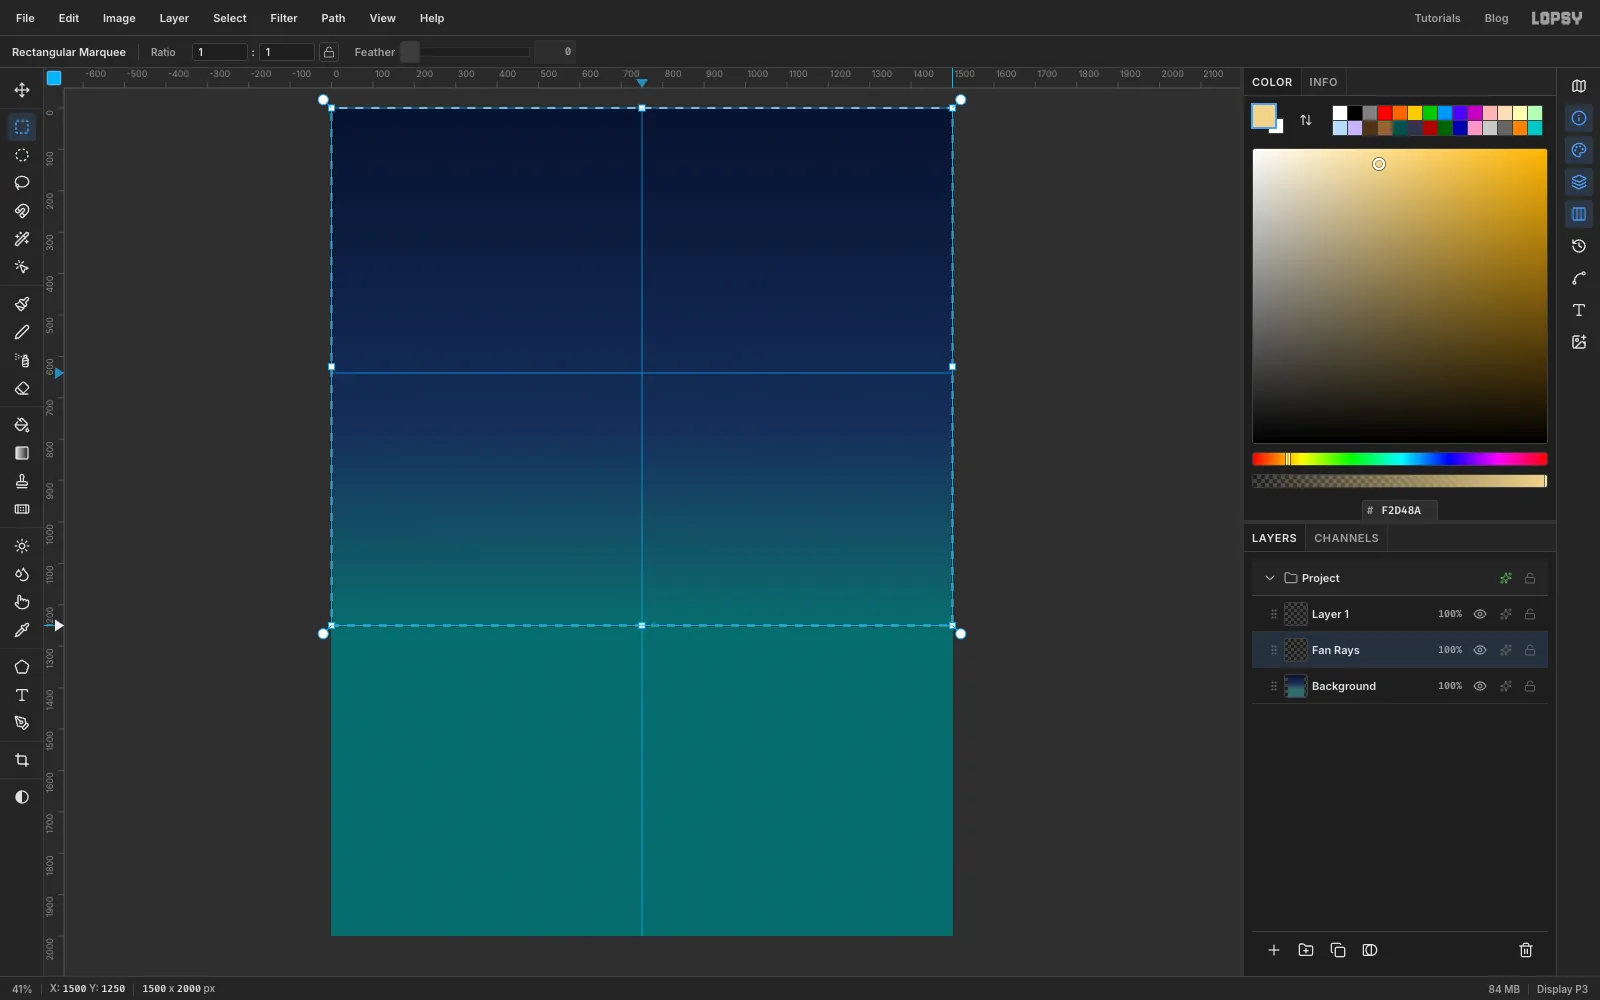
Add a layer named Fan Rays. With the Rectangular Marquee, drag from the top-left corner of the canvas to the right edge at the horizon guide, so the rays can't spill into the water. Set the foreground colour to pale gold .
-
Draw the Deco fan with Sunburst
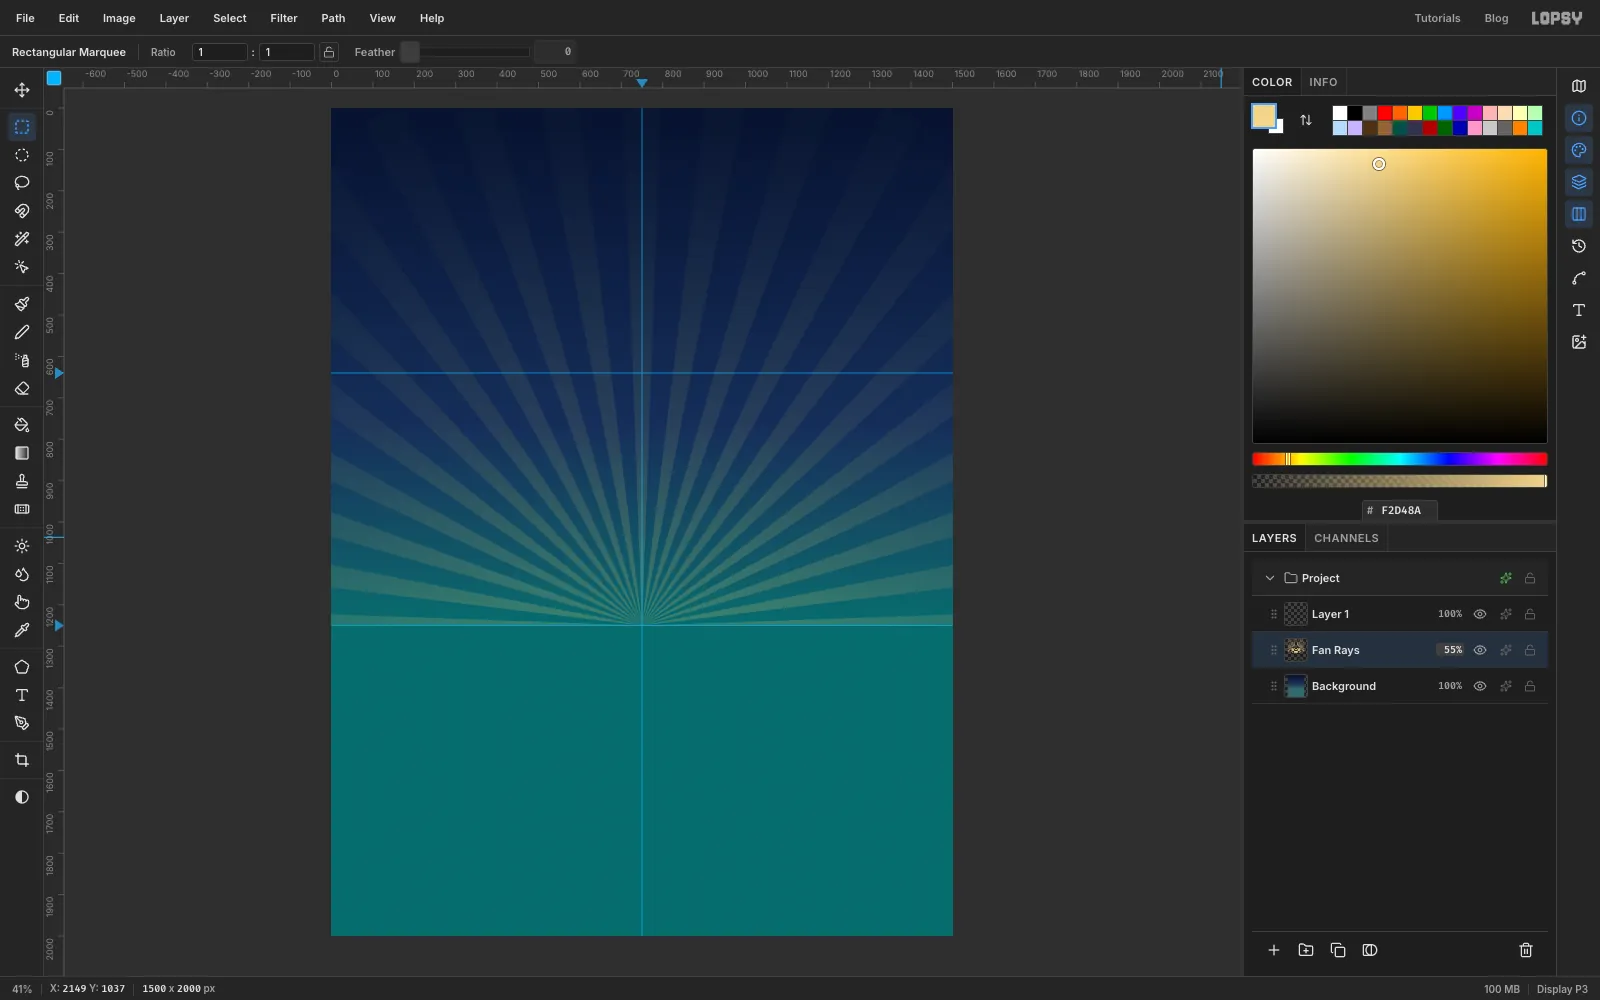
Choose Filter → Sunburst… and set Rays 40, Length 95, Width 45, Taper 0, Fade 80 and Softness 6. Set Center X to 50 and Center Y to 62.5, which puts the origin on the horizon guide at the middle of the canvas. Apply, then press Cmd+D. Click the effects button (the sparkle icon) on the Fan Rays row in the Layers panel to open the effects drawer, and set Blend to Soft Light there. Then click the row's opacity readout and lower it to 55 % so the rays read as a glow rather than stripes. Every later step that mentions a blend mode or an effect uses this same drawer.
-
Dot in the stars
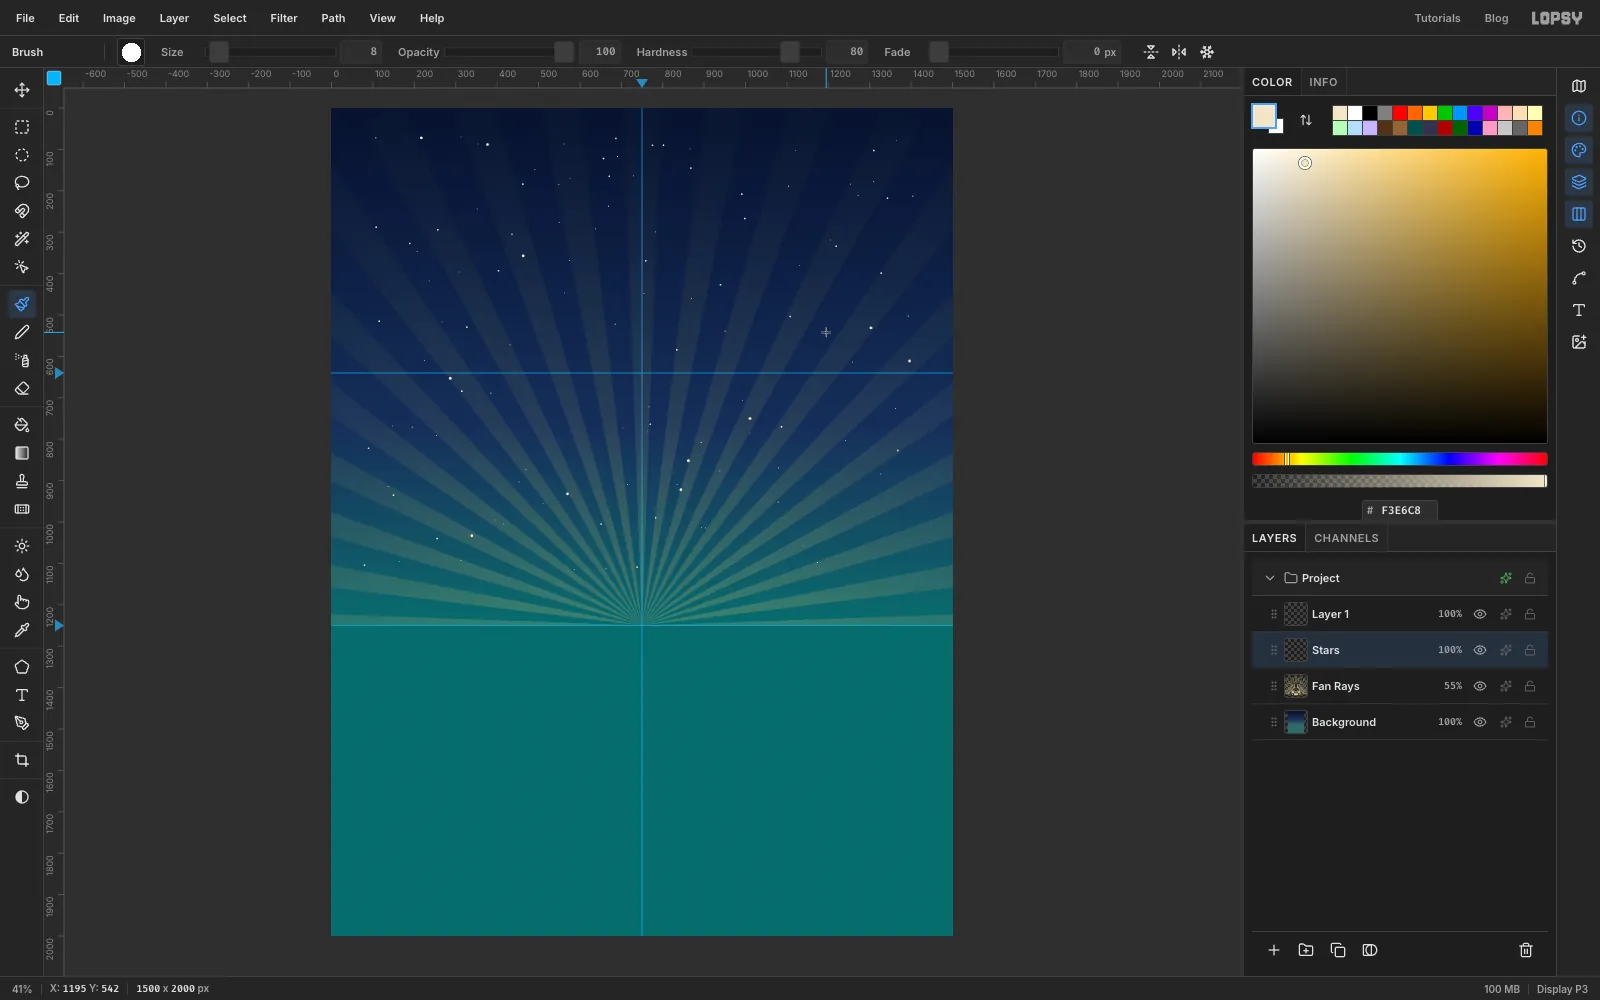
Add a layer named Stars and choose the Brush with the foreground set to . Click single dots across the sky. Use Size 3 for most of them, switch to 5 for a few dozen more and 8 for about a dozen bright ones. Keep them denser near the top and thinner towards the horizon.
-
Add four-point gold sparkles
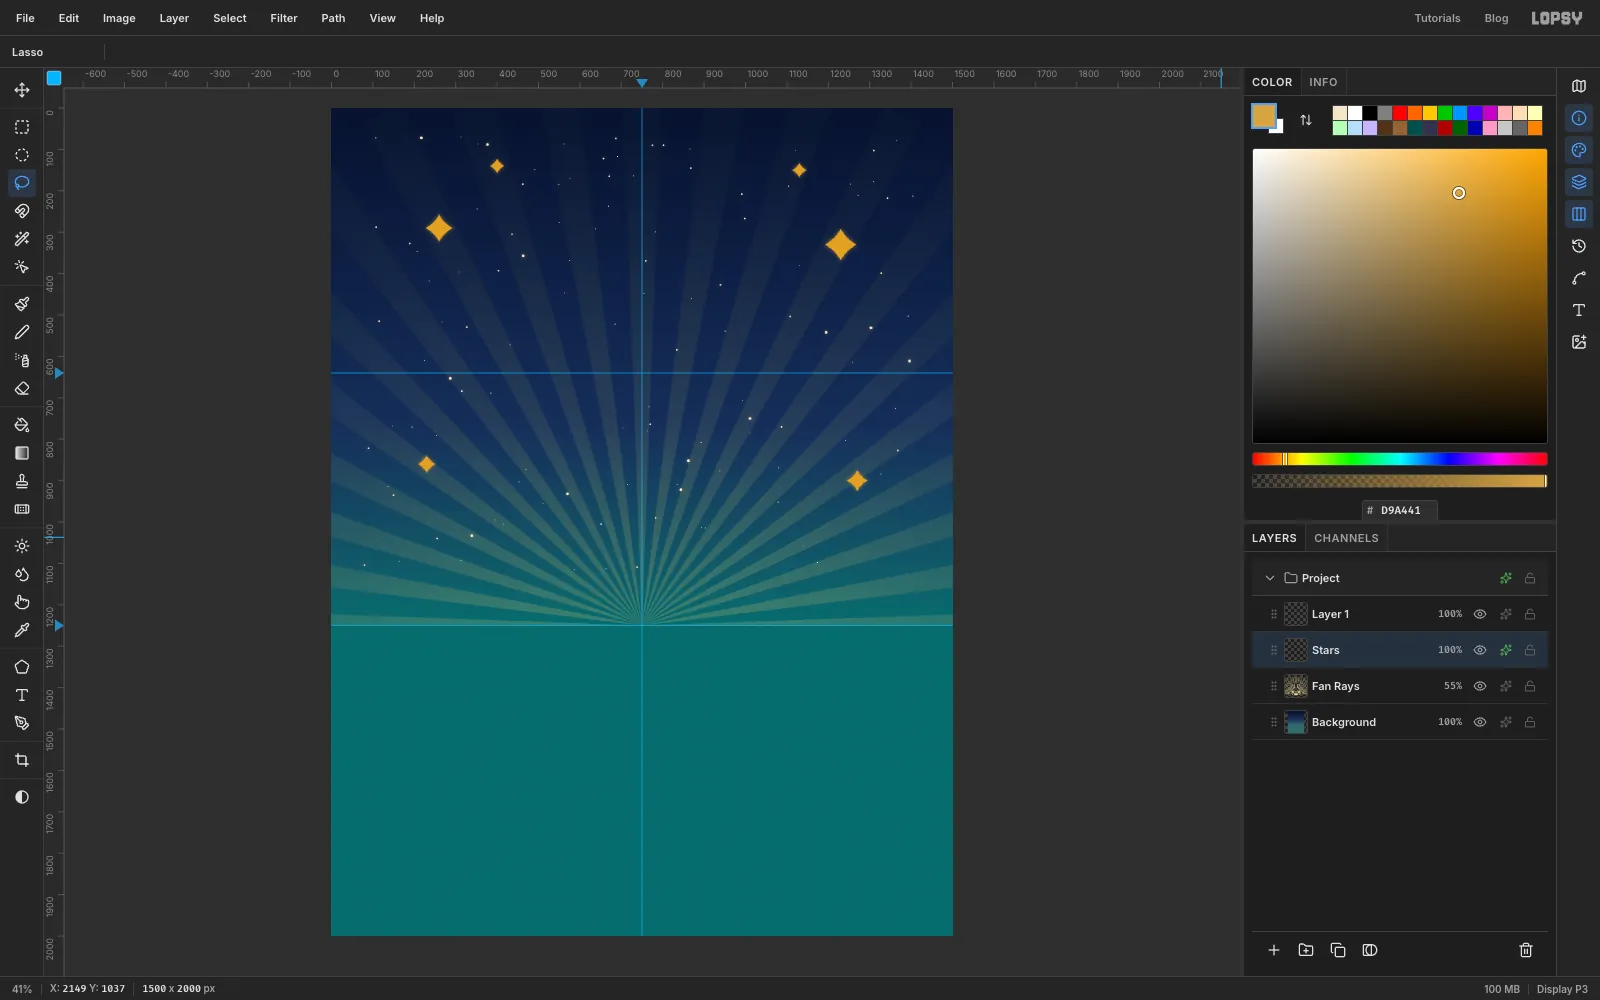
Still on the Stars layer, lasso six four-point stars with concave sides (like a stretched diamond) and fill them with gold . Keep them well inside the canvas, away from the corners, because the frame's fan corners go there at the end. Give the layer an Outer Glow of Size 14 and Opacity 60 in gold.
-
Make the wheel's disc
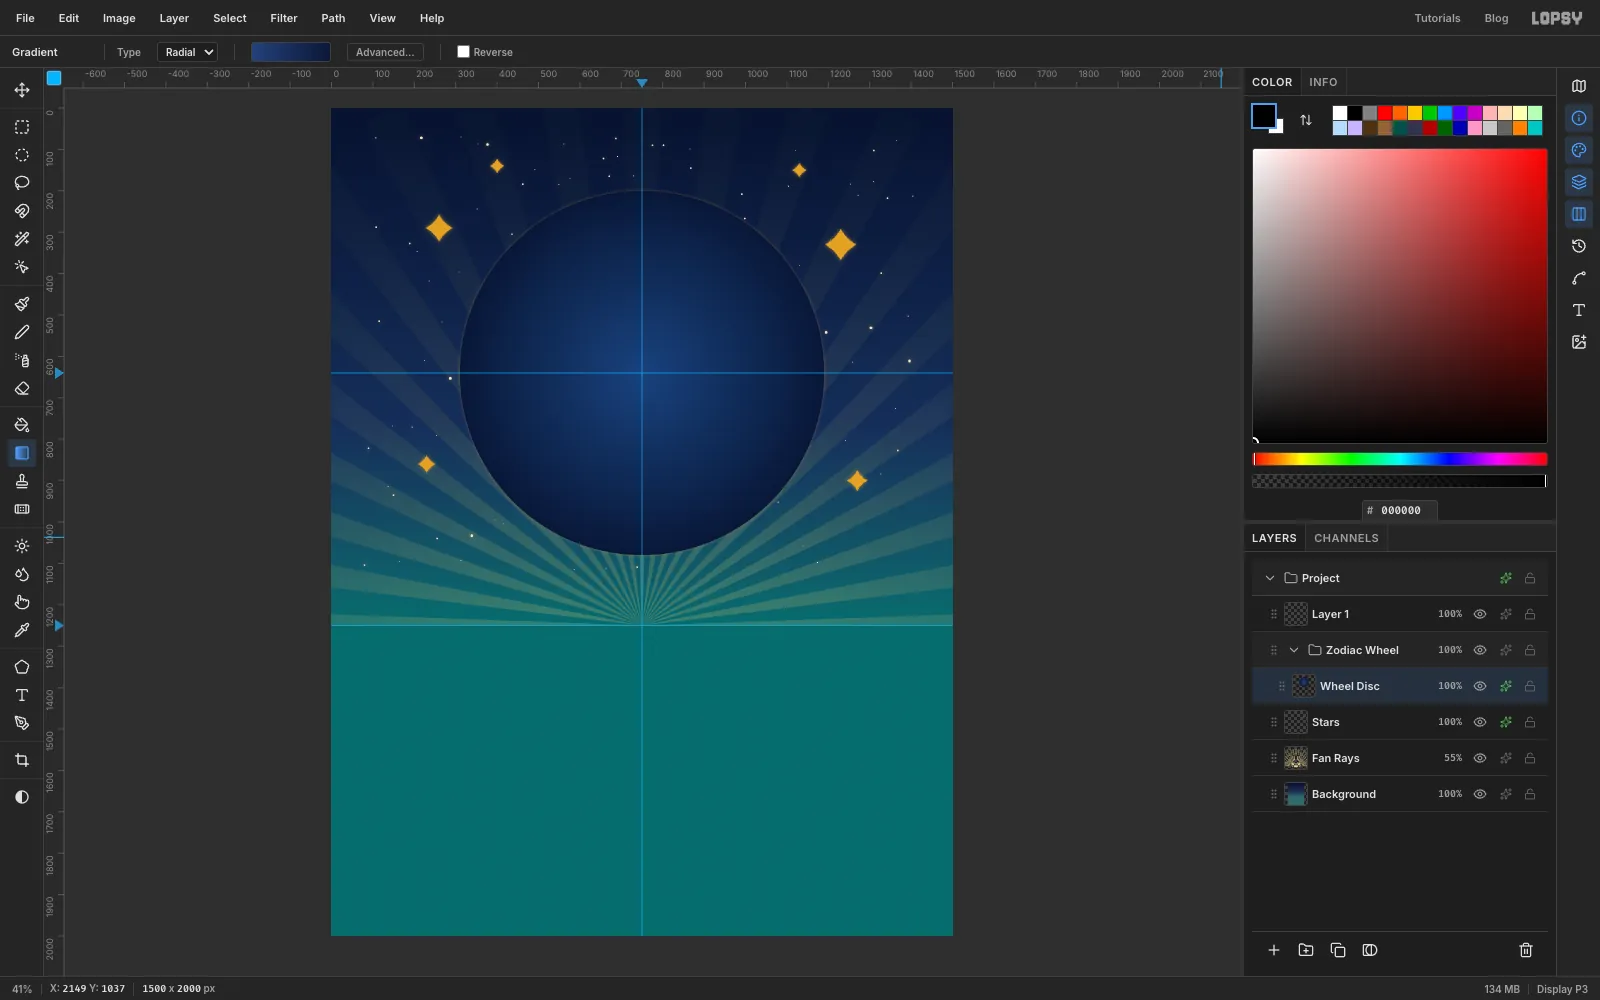
Click New Group in the Layers panel and name it Zodiac Wheel. Inside it, add a layer called Wheel Disc. With the Elliptical Marquee (hold Cmd or set Ratio 1:1 to keep it round), drag a circle 880 px across, centred where the guides cross (750, 640). Choose the Gradient tool, set it to Radial with in the middle and at the edge, and drag from the centre to the rim. Deselect, then add an Outer Glow of Size 10, Opacity 40, in gold.
-
Build the rings as one selection
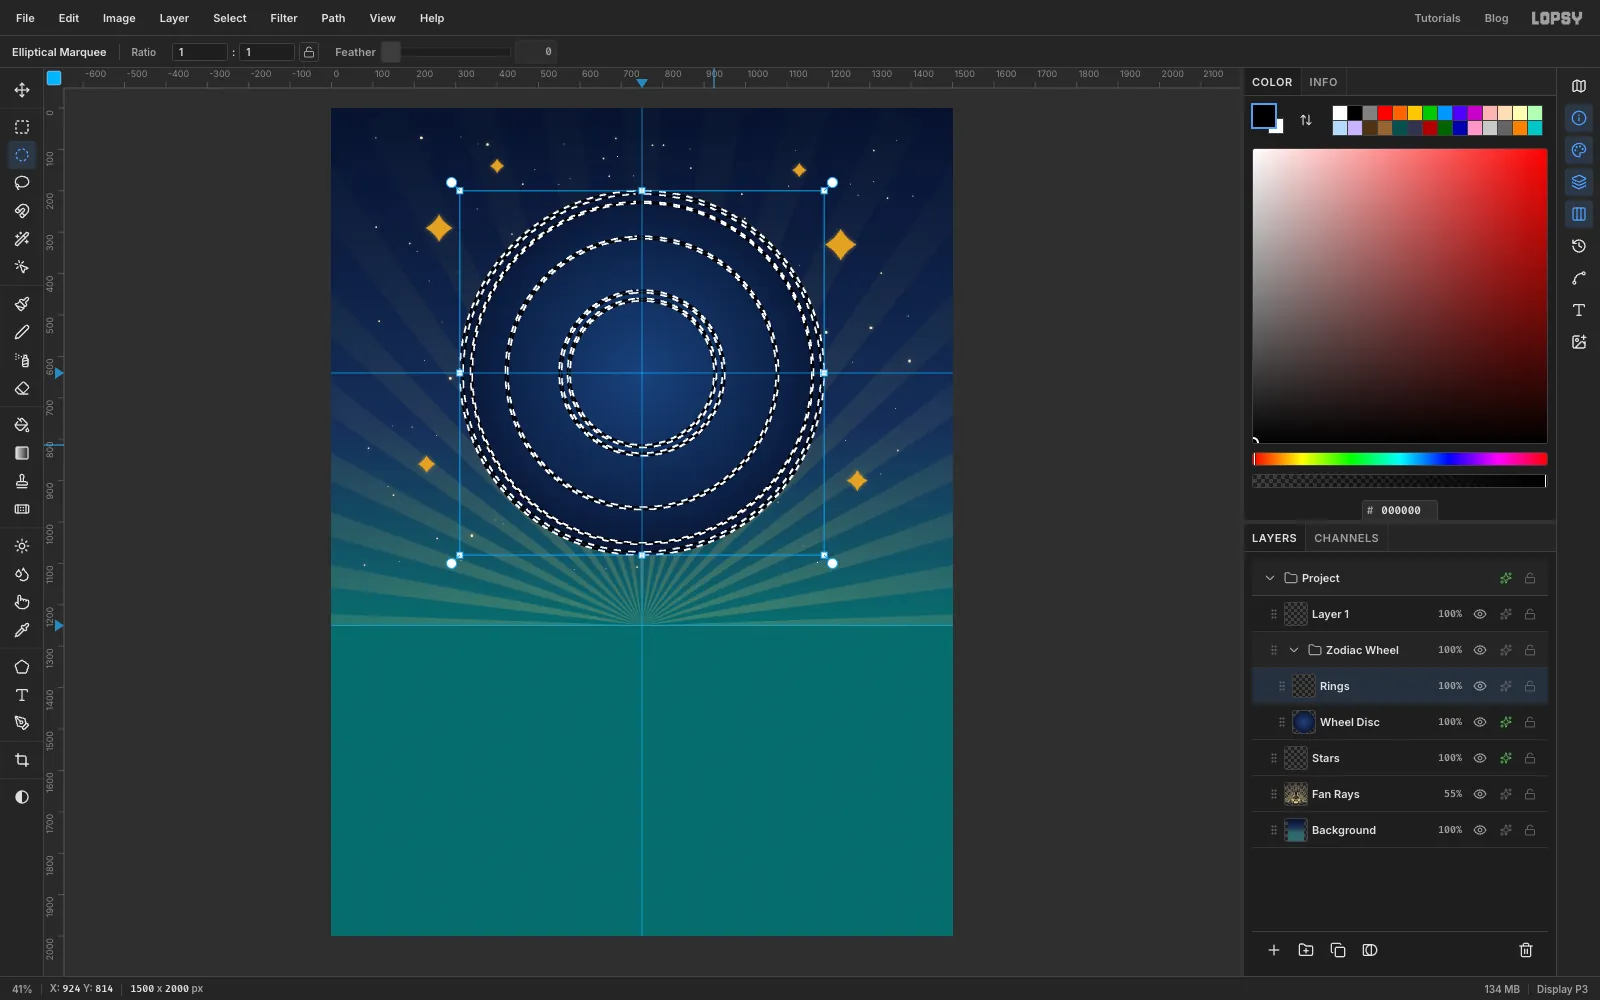
Add a layer called Rings. Draw the outer circle again (radius 440). For exact circles, click once with nothing selected to open the Elliptical Selection dialog and type the corners, here From 310, 200 To 1190, 1080. Modifier drags don't open the dialog, so zoom in for the smaller circles and watch the size readout as you drag. Hold Alt and drag a circle 8 px smaller from the same centre to cut a thin ring out of it. Then hold Shift and drag the next circle (radius 414), and Alt-drag one 4 px smaller inside it. Repeat for rings at radius 330, 200 and 180, each about 4–6 px thick. Each Shift drag adds and each Alt drag subtracts, so you end up with five rings in one selection. Fill it with gold and deselect.
-
Draw one wedge of ornament
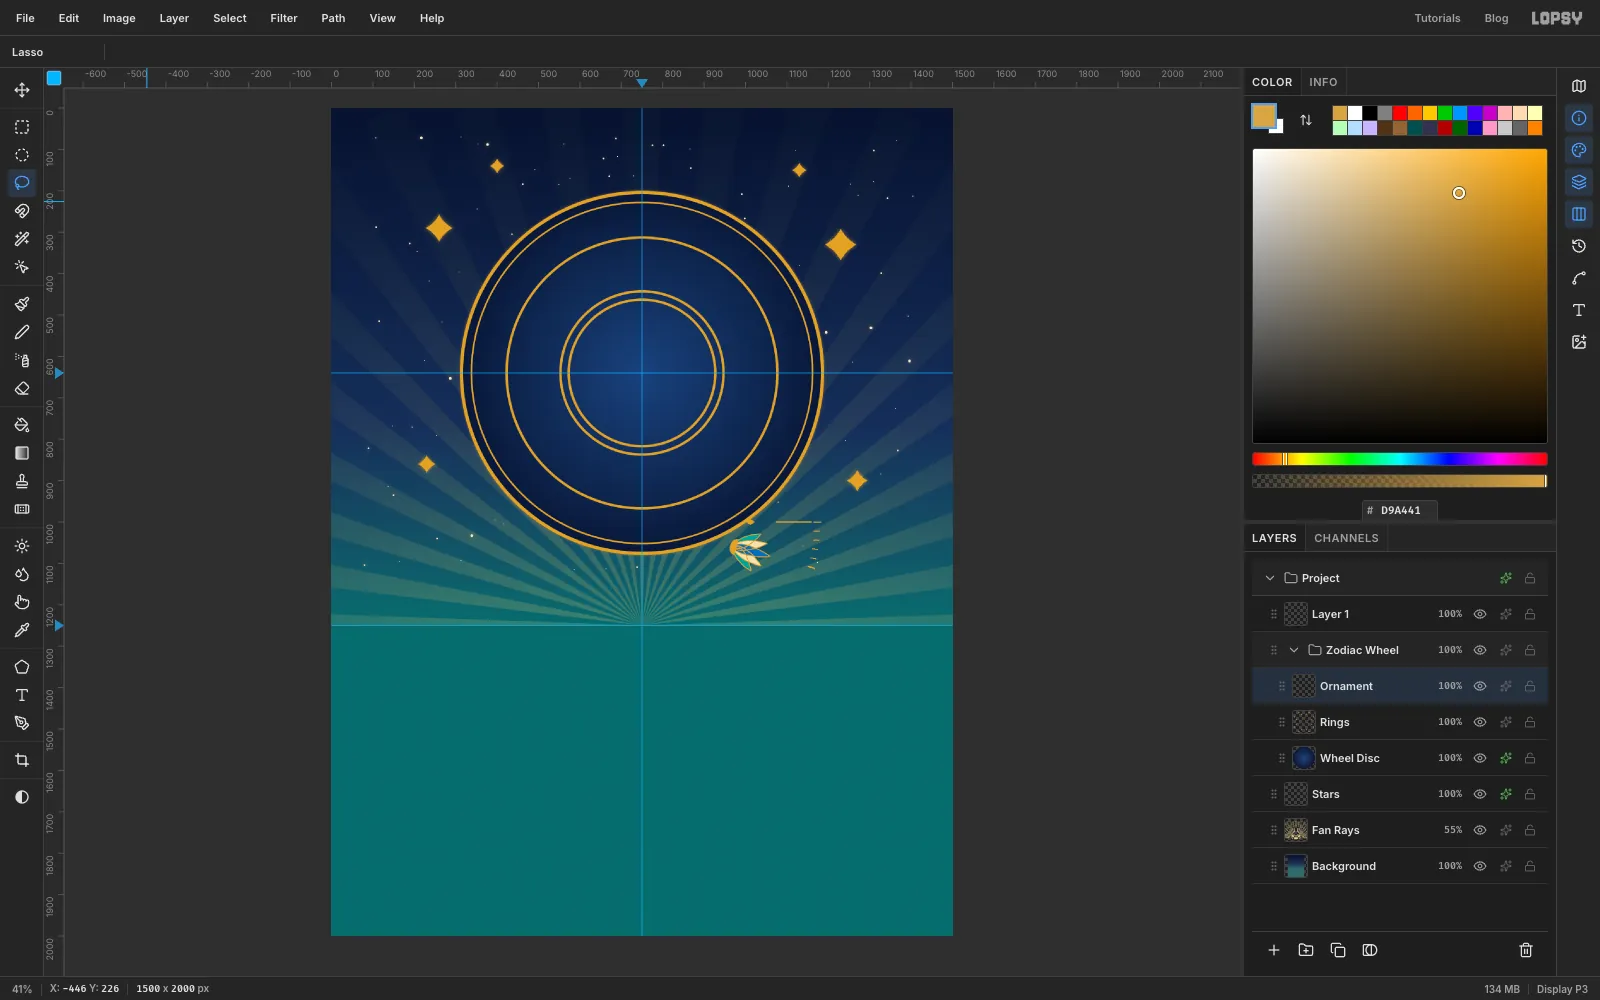
Add a layer called Ornament. Kaleidoscope mirrors around the centre of the canvas (750, 1000), so draw this wedge there, not on the wheel. Kaleidoscope only keeps a thin slice: from three o'clock round to where the hour hand would sit at half past three (15°). Keep everything inside that slice:
- With the Pencil, click and Shift-click a 4 px spoke straight right along three o'clock, in the band where the outer ring of signs will be (about 330 to 410 px from the centre). Just beyond its tip, fan five short 2–3 px ticks down across the slice.
- About halfway along the spoke's line, lasso a small gold diamond.
- Lower in the slice, about 220 px from the centre, lasso a lotus seen from the side, pointing outward: a gold cup, two turquoise outer petals, two cream inner petals and a tall Egyptian blue centre petal.
- Outline each petal with a 3 px gold Brush by clicking round its edge with Shift held. The gold lines become the cloisonné cells.
-
Repeat it with Kaleidoscope
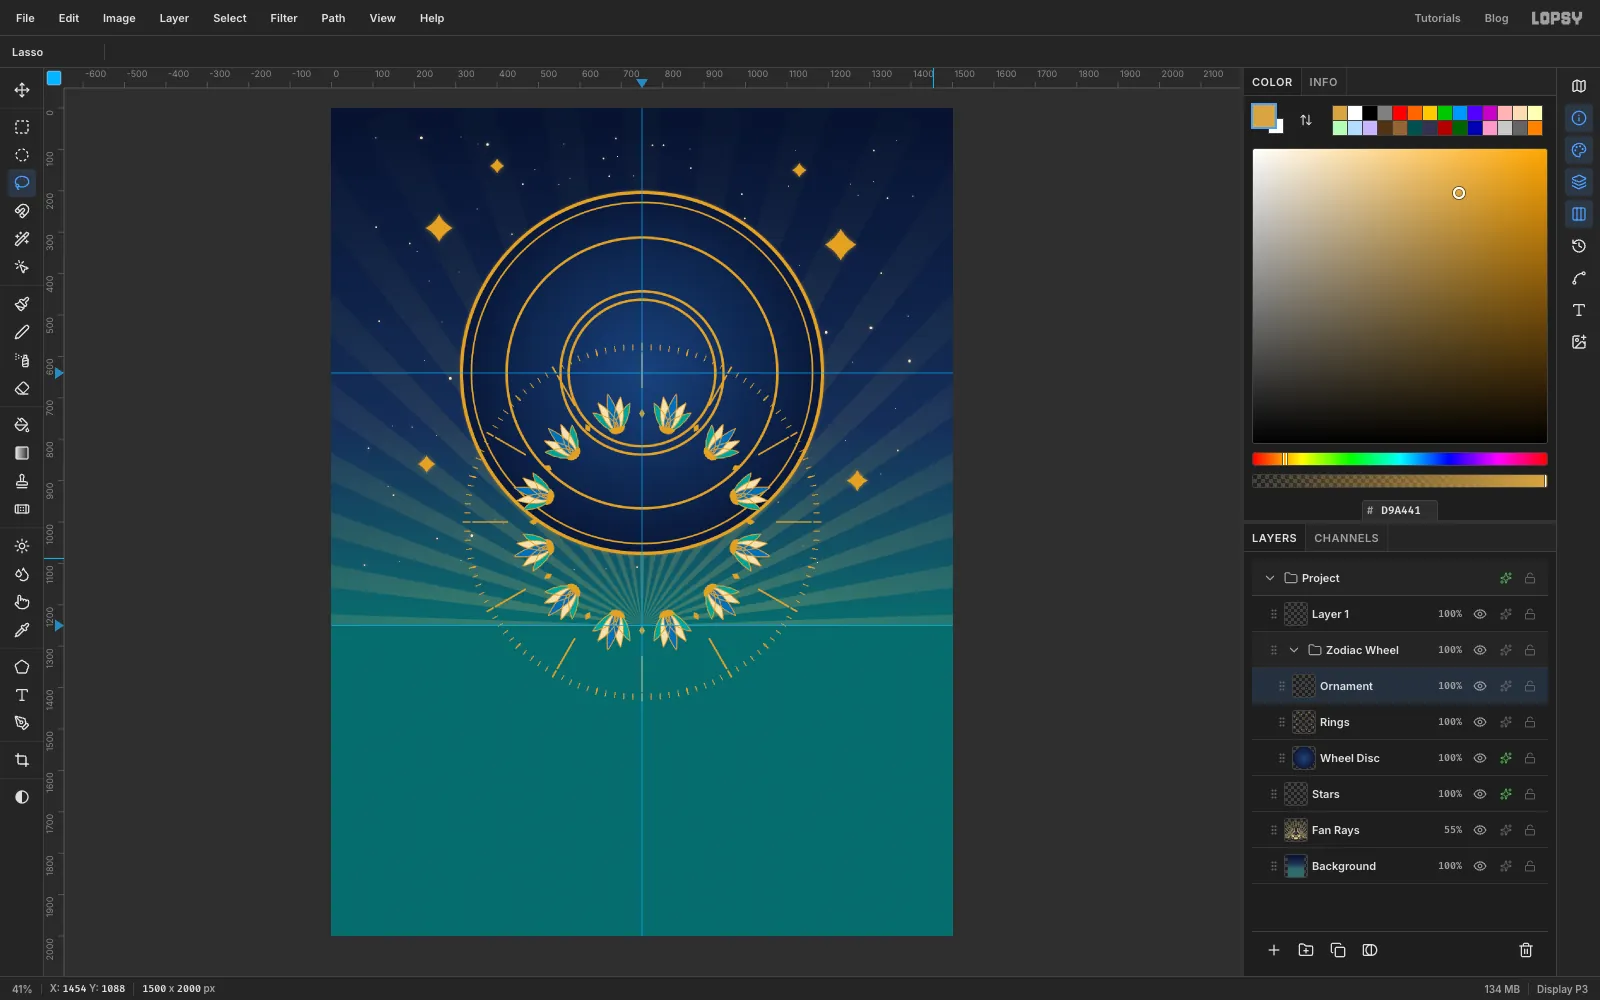
Choose Filter → Kaleidoscope… with Segments 12 and Rotation 0. The wedge's two edges are mirror lines, so one lotus becomes twelve and the spoke becomes twelve dividers. Run Filter → Gaussian Blur… at Radius 1 to soften the stair-stepped edges the mirroring leaves behind.
-
Nudge the ornament onto the wheel
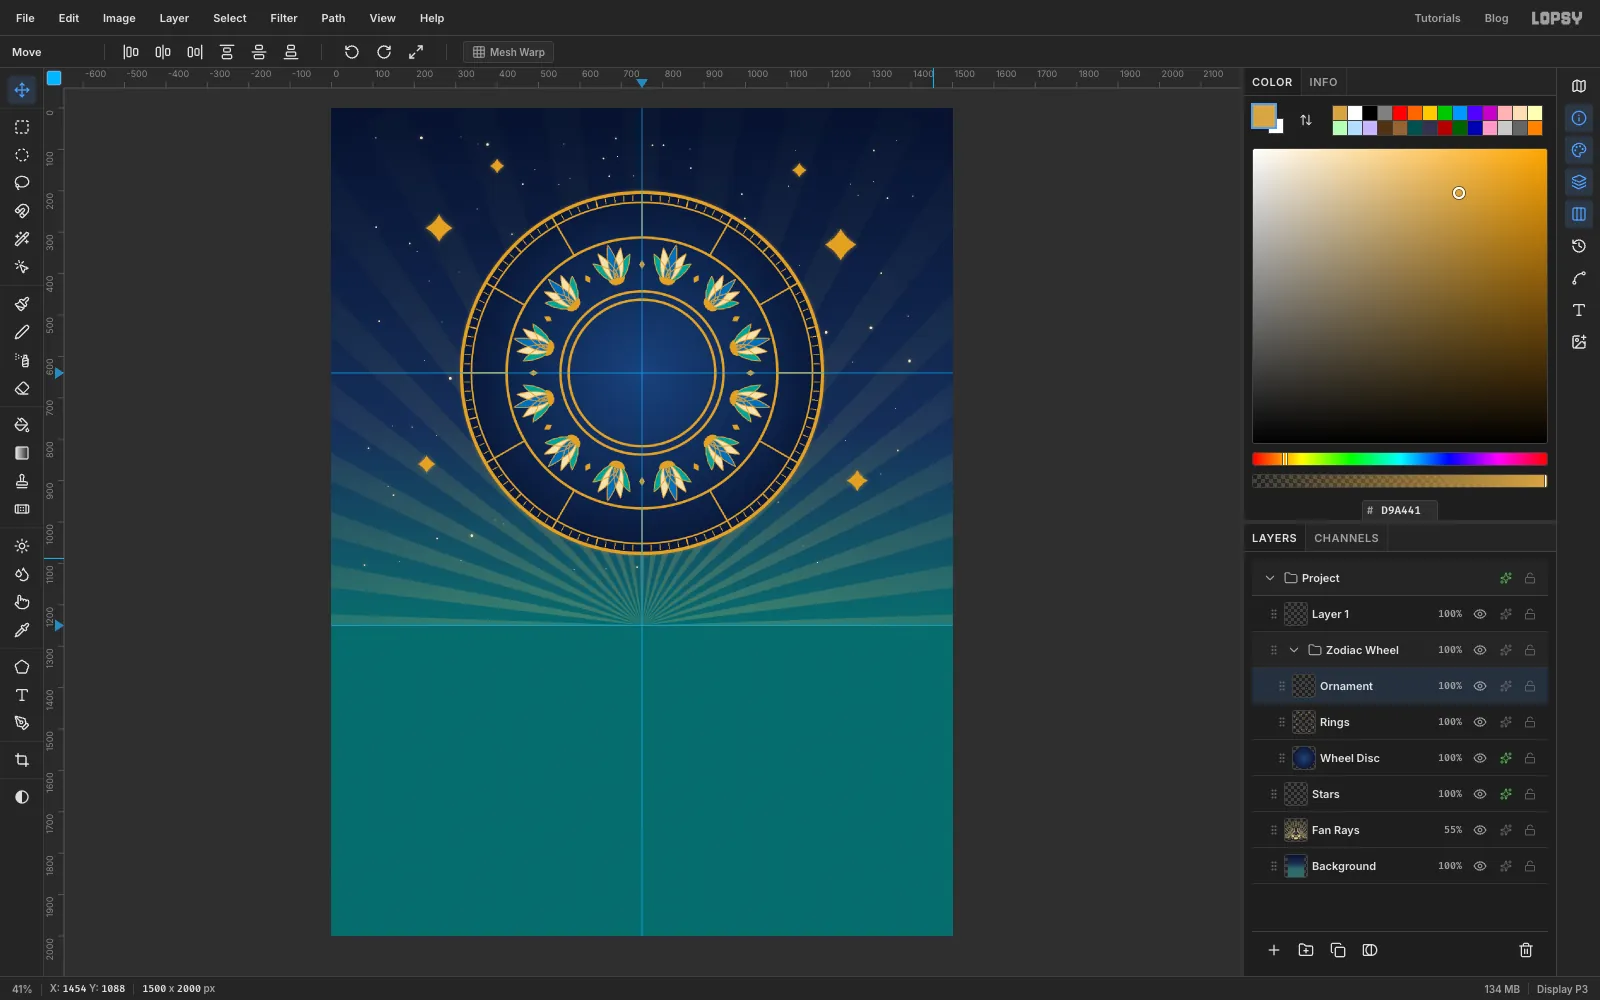
Press V for the Move tool. With nothing selected, press Shift+Up 36 times to lift the layer 360 px, from the canvas centre to the wheel's centre. The lotuses now sit between the inner rings, and the spokes and ticks land in the outer band.
-
Add the moon
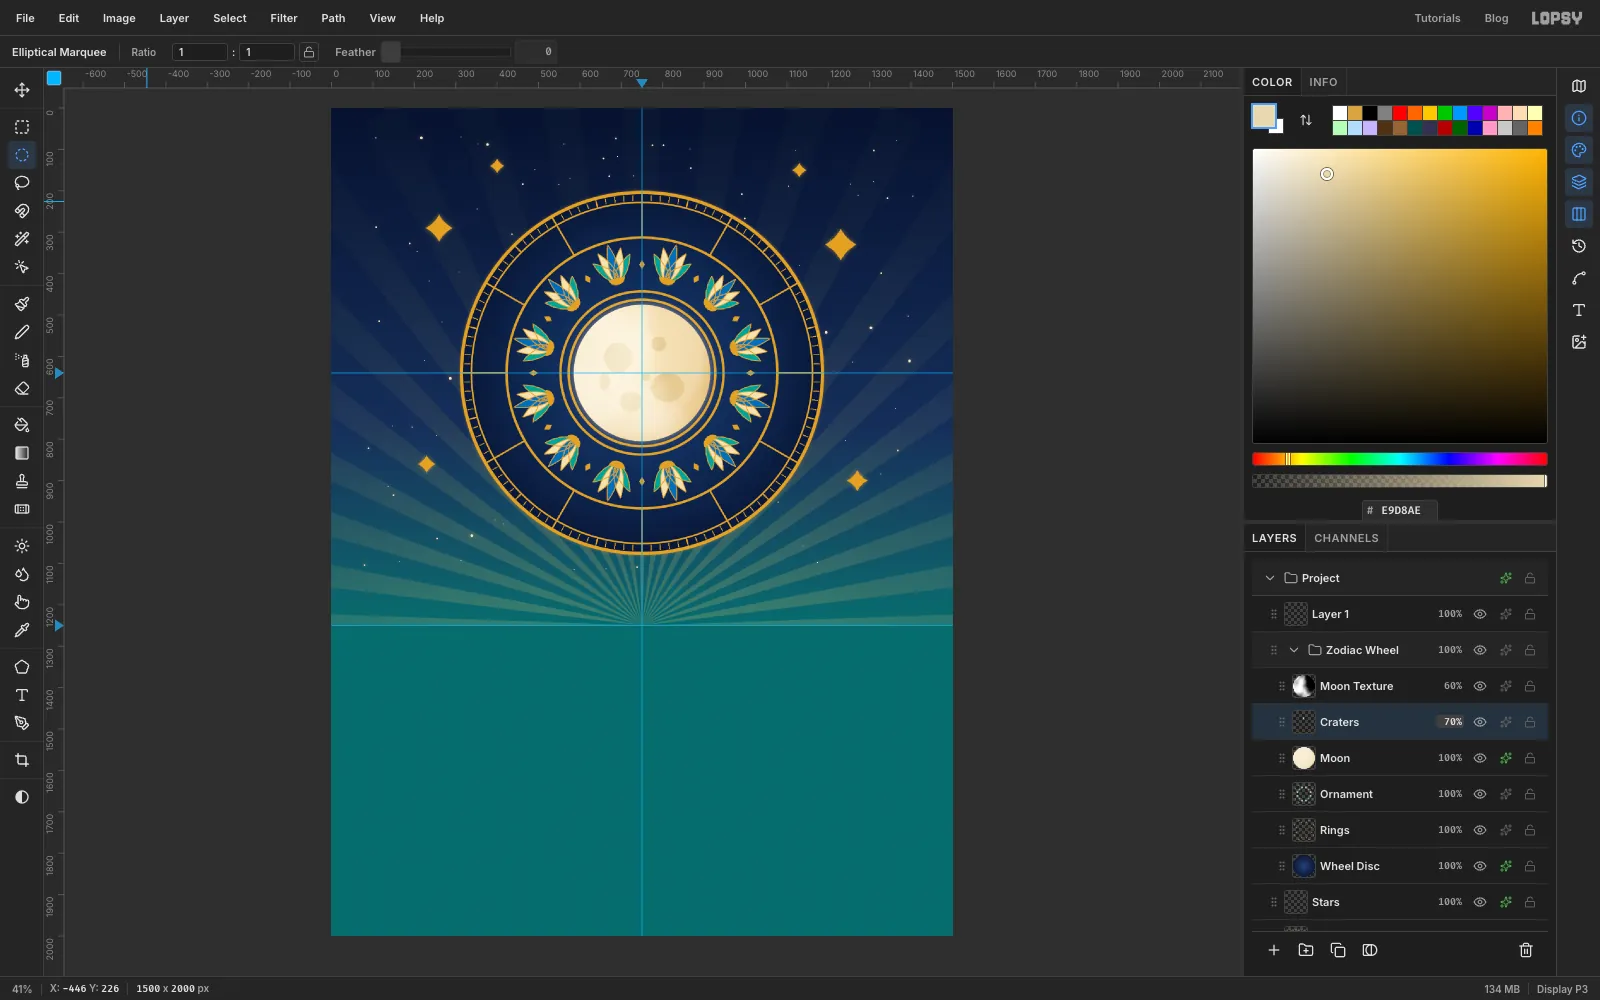
Add a layer called Moon and select a circle 330 px across in the middle of the wheel. Fill it with a radial gradient of → → , dragged from up and left of centre towards the lower right.
While the selection is still active, add a layer Moon Texture, run Filter → Clouds… at Scale 7, deselect, and set Moon Texture to Soft Light at 60 %.
Back on the Moon layer, add an Outer Glow (Size 34, Opacity 55, ). Finally add a Craters layer and fill six flat circles of different sizes in , at 70 % opacity.
-
Type the first zodiac sign and turn it
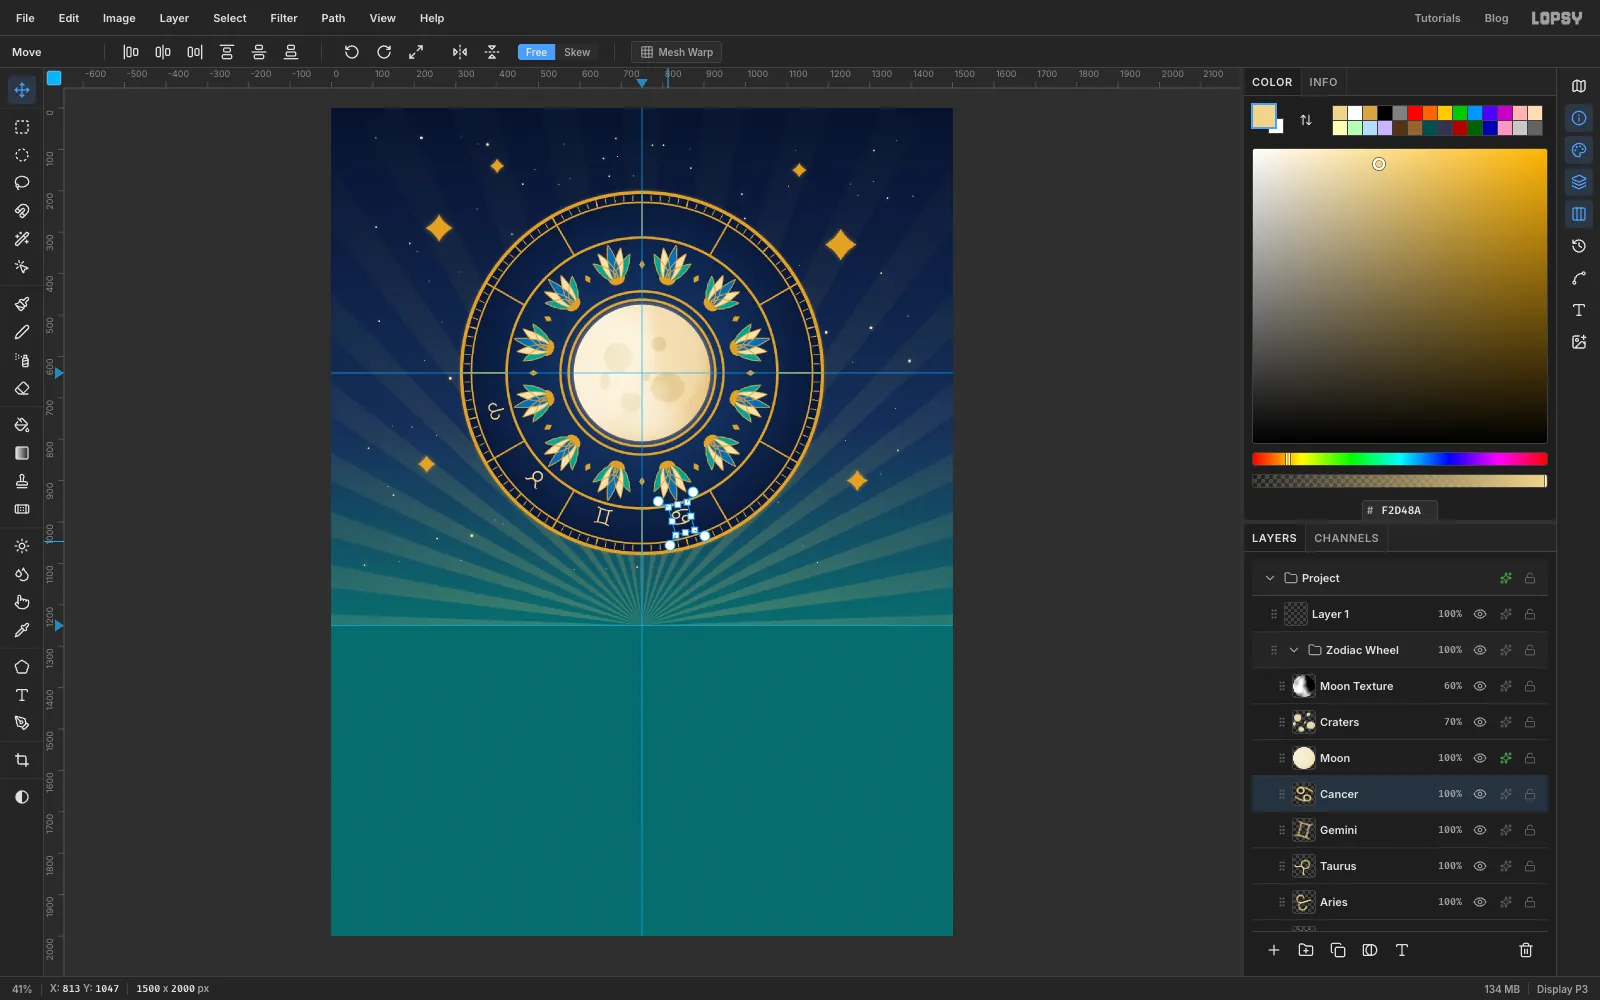
Select the Ornament layer first, so the text tool starts a new layer instead of editing an old one. Choose the Text tool, pick the font Noto Sans Symbols at Size 50 with pale gold , click in an empty area and type ♈ (Aries). Press Tab to commit. Nudge it into the outer band, just below the nine o'clock spoke. Then switch to the Move tool, hold Cmd and drag the round rotation handle just off the top-right corner of the text box. Cmd snaps the angle to 15° steps, so count the snaps: Aries needs -105°, seven snaps anticlockwise. Check by eye that the top of the glyph points away from the centre. The screenshot shows the fourth sign, Cancer, being turned the same way.
-
Place all twelve signs
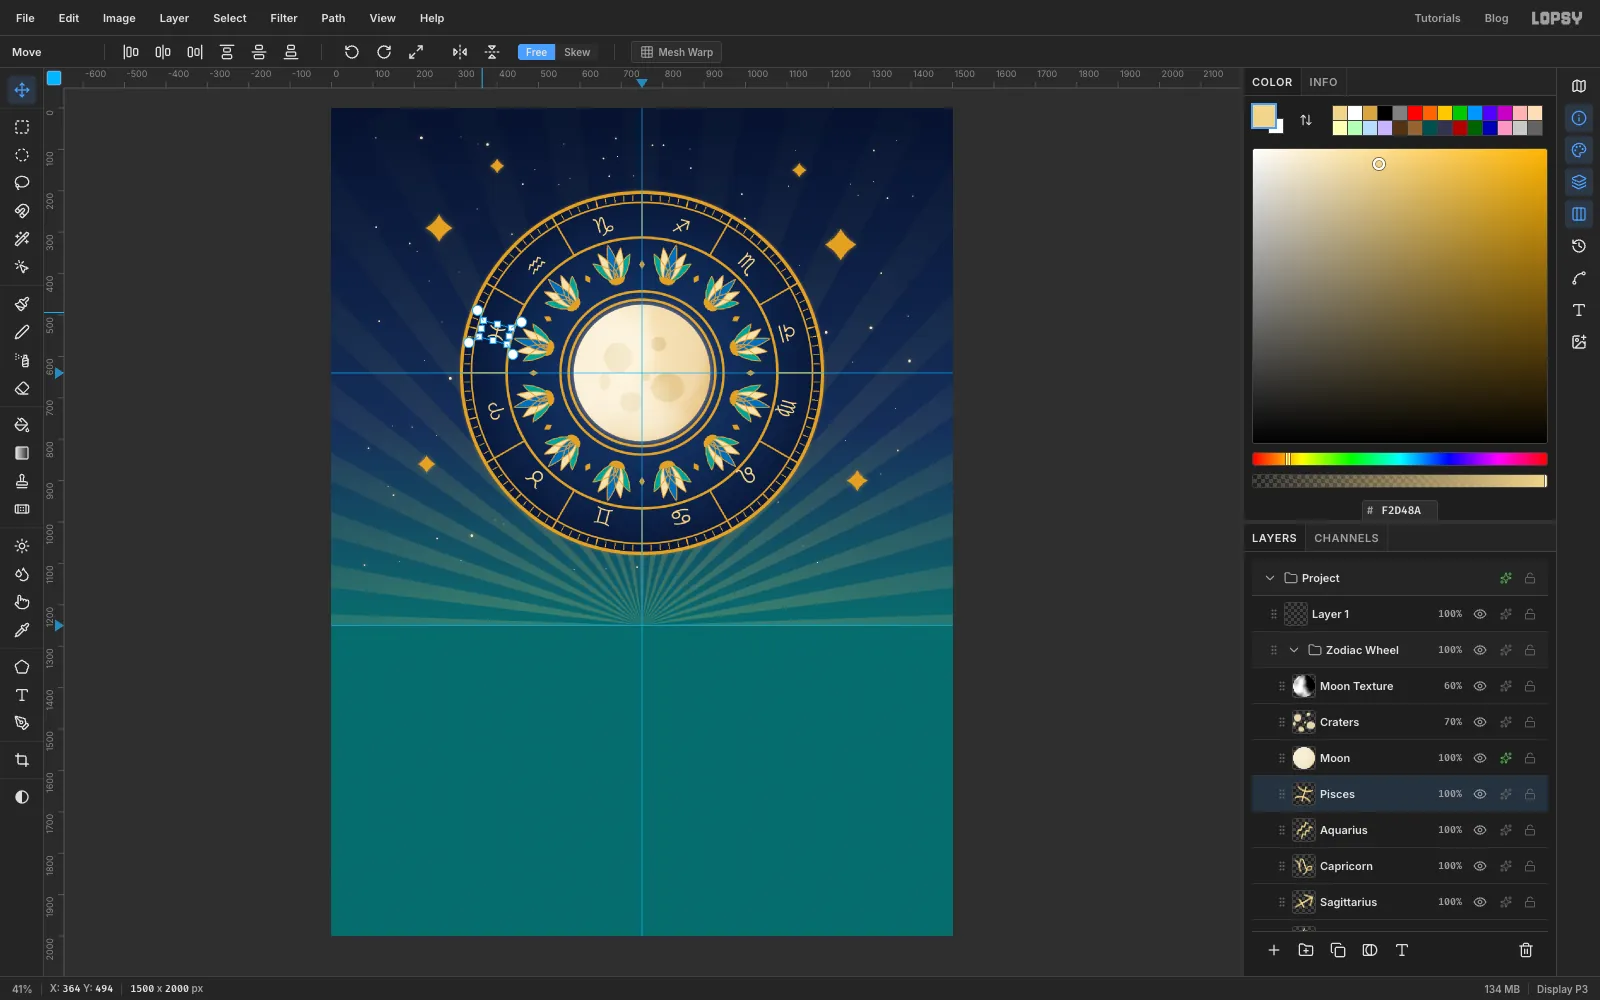
Repeat for the other eleven signs (♉ ♊ ♋ ♌ ♍ ♎ ♏ ♐ ♑ ♒ ♓), going anticlockwise one cell at a time. Each one turns 30° further than the last: Aries -105°, Taurus -135°, Gemini -165°, then Cancer 165°, Leo 135° and so on. Rename each layer after its sign so the Layers panel stays readable.
-
Move the whole wheel group
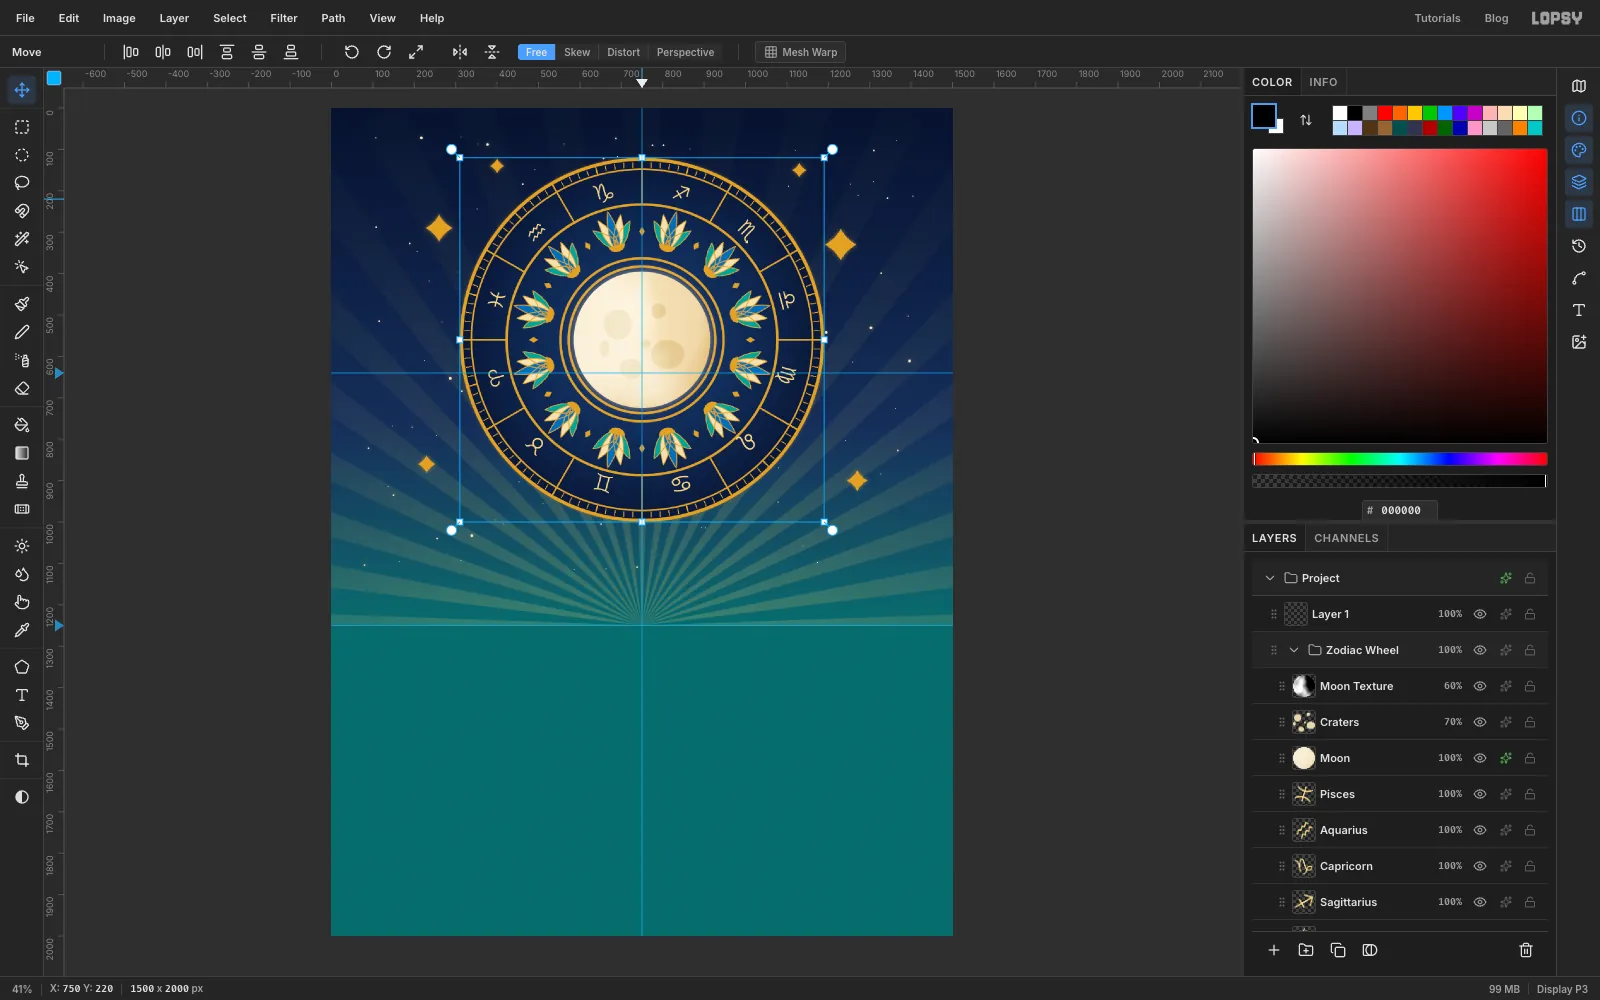
The wheel has to clear the Great Pyramid's tip, so lift it. Click the Zodiac Wheel group's row, press V, and drag inside the wheel straight up by 80 px. Pressing Shift+Up 8 times does the same thing exactly. Every layer in the group moves together, including the rotated text, so nothing needs re-aligning.
-
Lasso the pyramid faces
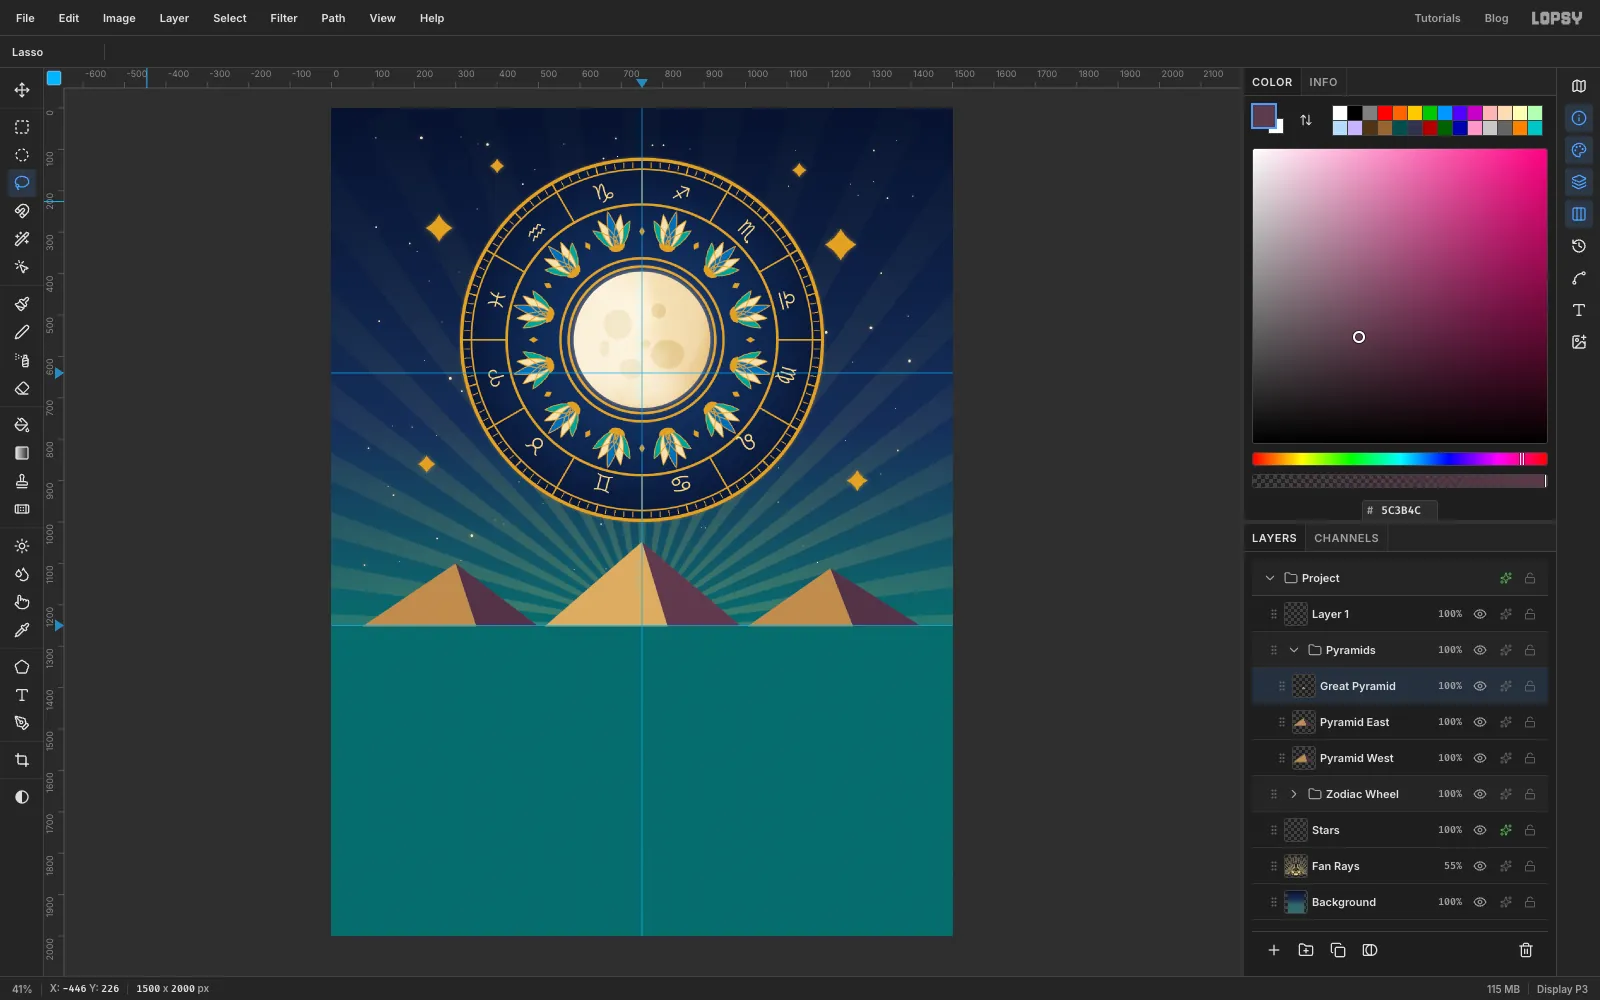
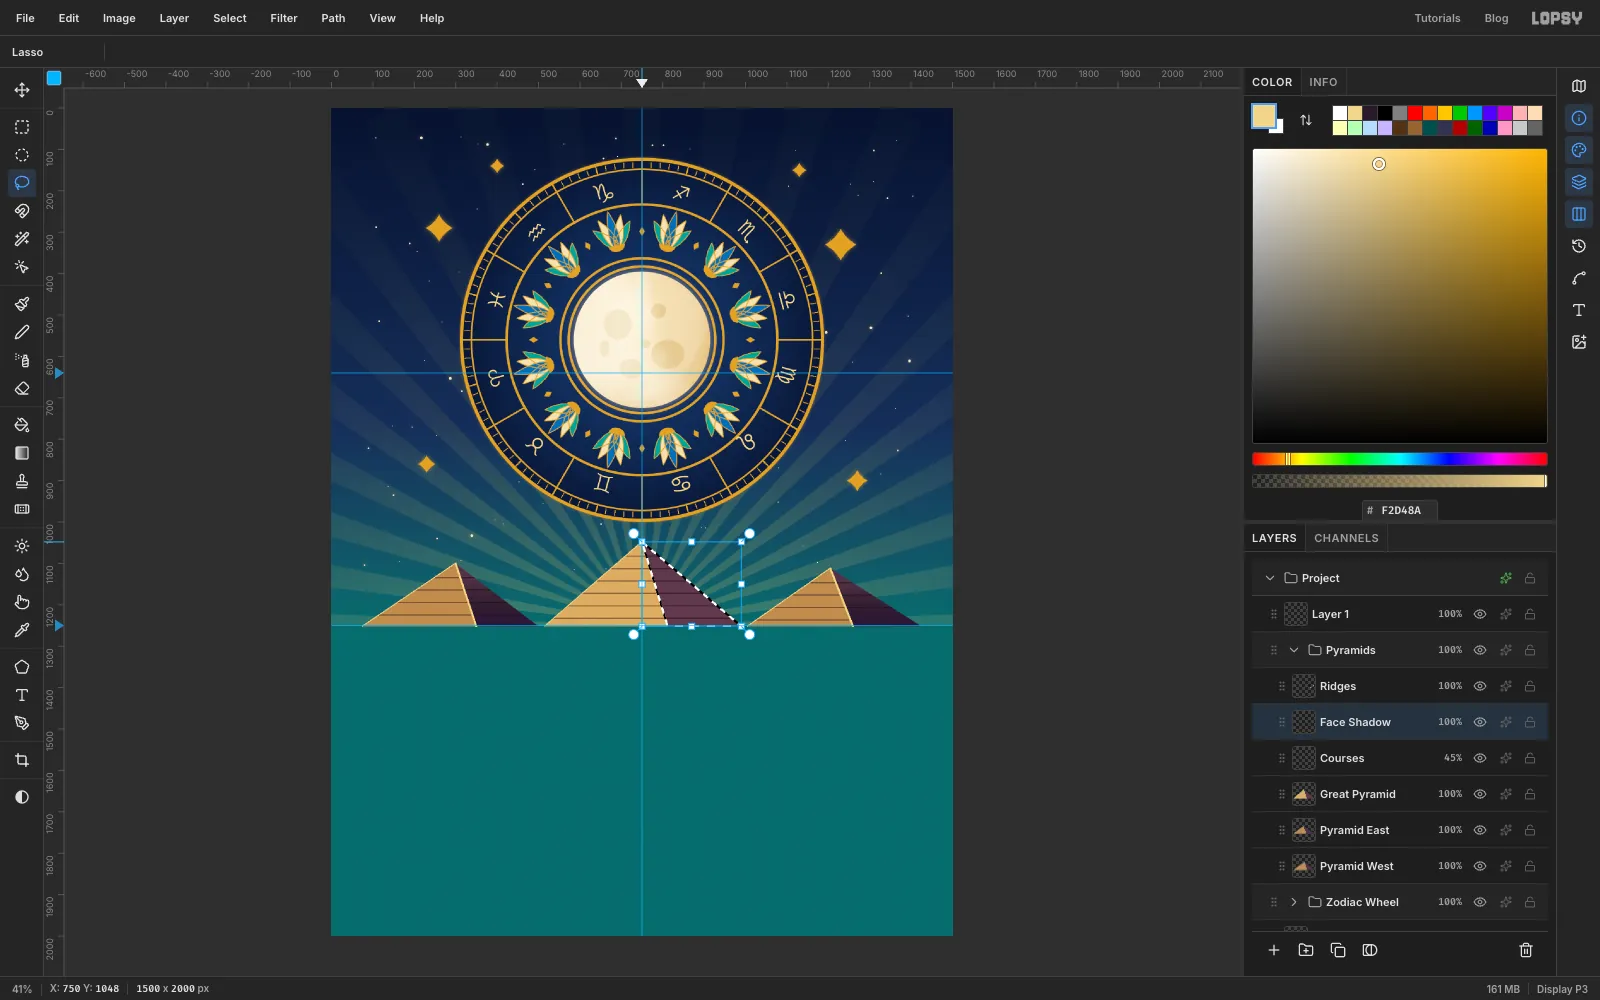
With the wheel group collapsed and selected, click New Group and name it Pyramids. Collapsing it first makes the new group sit beside it, not inside it. Make one layer per pyramid, named Pyramid West, Pyramid East and Great Pyramid. For each one, select the left face (apex, left corner, the point where the ridge meets the ground) and fill it sandy gold, then select the right face and fill it plum. For perfectly straight edges, click the three corners with the Pen tool and use Path → Selection in the Paths panel; a steady Lasso works too. The Great Pyramid's apex sits at about (750, 1048), well below the wheel, with its base running from 515 to 990 along the horizon. The two smaller pyramids are shorter and sit on either side.
-
Load a pyramid as a selection
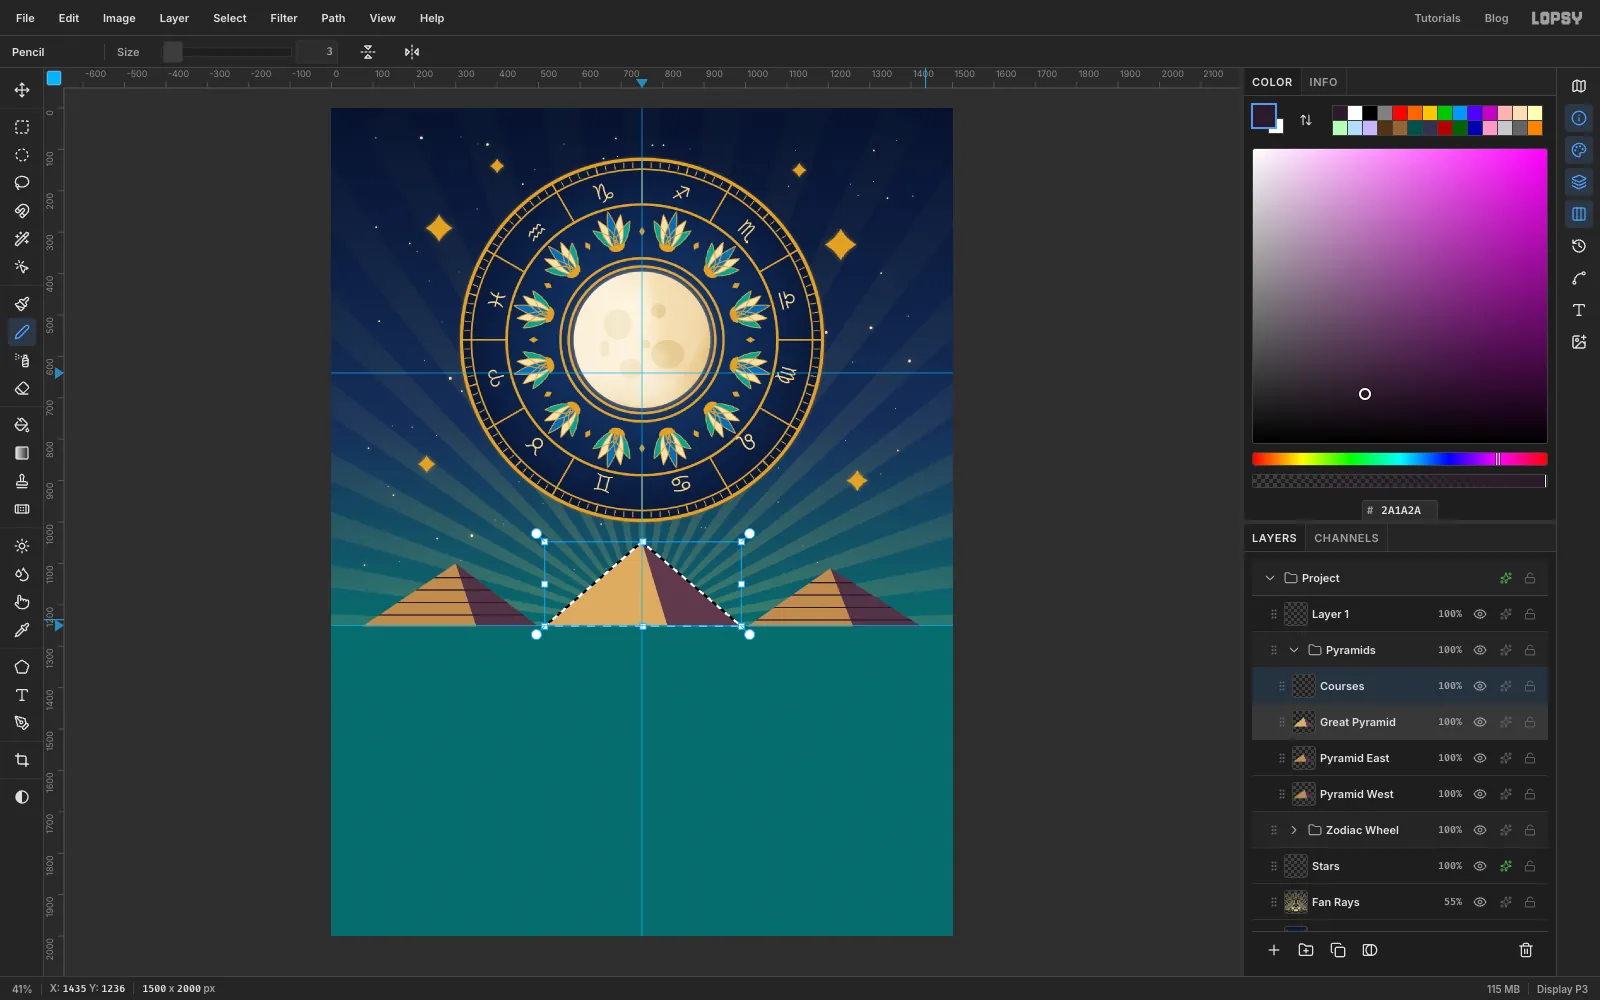
Add a layer called Courses. Cmd-click a pyramid layer's thumbnail to load that pyramid's outline as a selection. Anything you draw now stays inside the pyramid, even though you're painting on the Courses layer.
-
Rule the stone courses
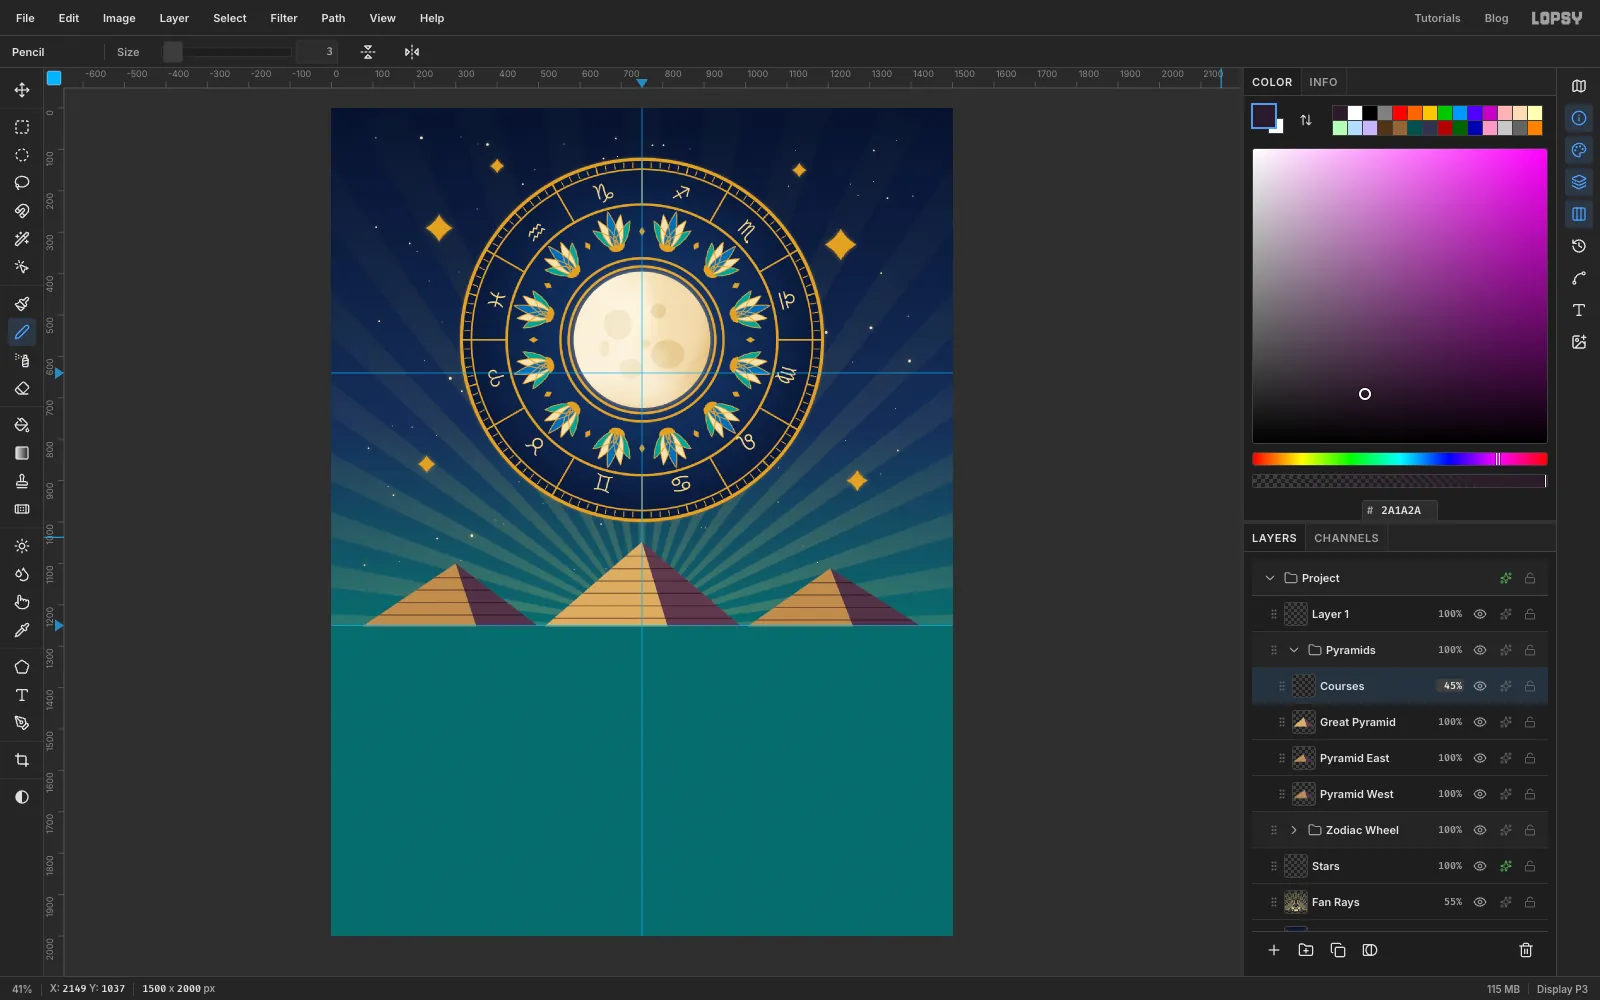
Pick the Pencil at Size 3 in . Click at the left edge and Shift-click at the right edge to draw a straight line every 30 px down the pyramid. Repeat the Cmd-click and the lines for the other two pyramids, then deselect. Set the layer to Multiply at 45 %.
-
Catch the moonlight on the ridges
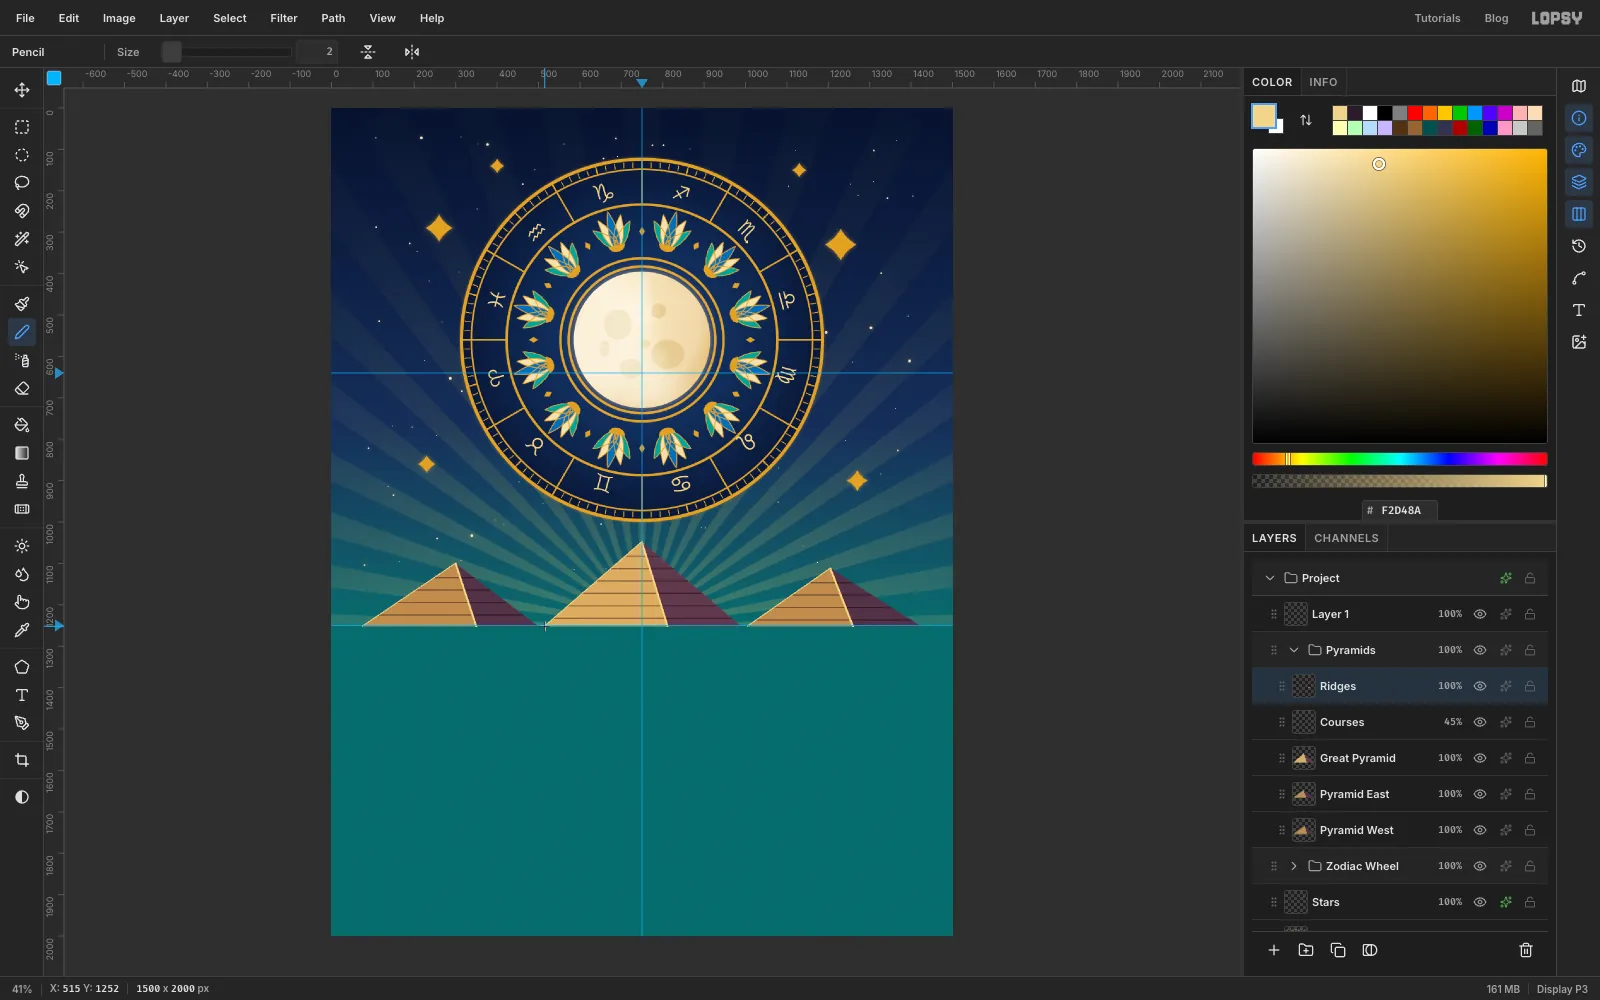
Add a Ridges layer and draw pale gold Pencil lines: 4 px from each apex down the ridge, and 2 px down each left edge.
-
Select a shadow face
Add a layer called Face Shadow. Set the Gradient tool to linear, from fully transparent white to . To make a stop transparent, open Advanced…, select the stop and drag its alpha bar (under the hue strip) all the way left. Lasso the right-hand face of the Great Pyramid.
-
Shade the faces with gradients
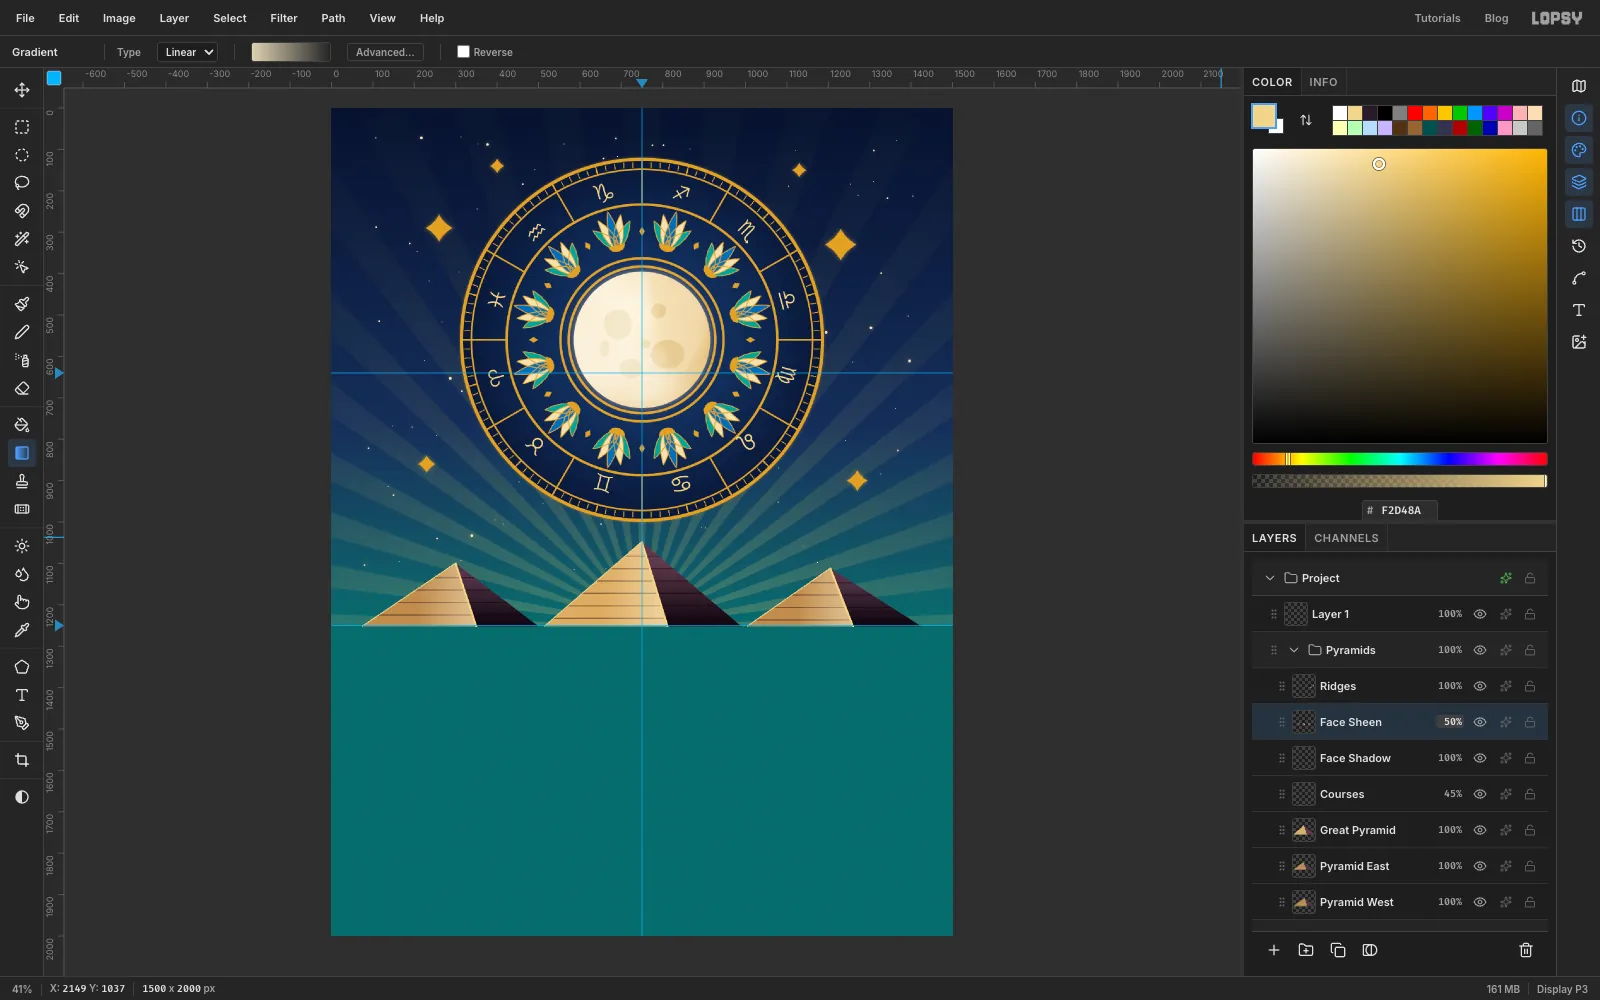
Drag the gradient from a quarter of the way down the ridge to the ground, then repeat the lasso and drag for the other two pyramids. Set the layer to Multiply. Add a Face Sheen layer. On each lit face, drag a gradient from cream at 85 % alpha near the ridge to transparent towards the left edge. Set it to Screen at 50 %.
-
Cap the Great Pyramid in gold
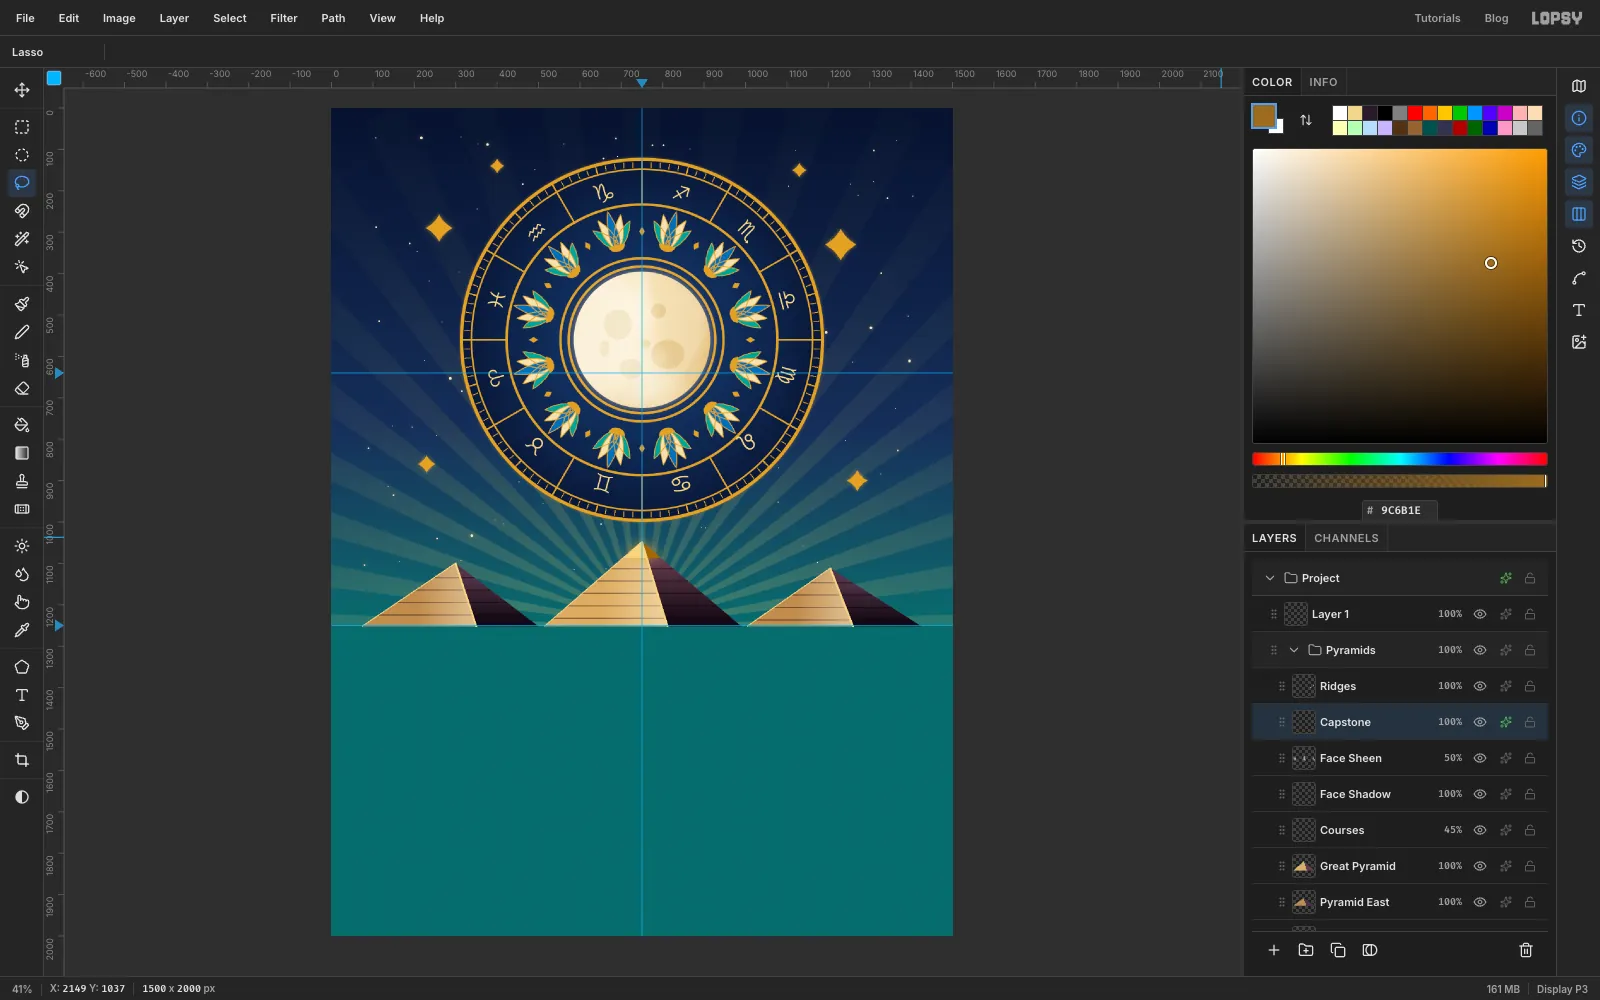
Add a Capstone layer. Lasso the top fifth of the Great Pyramid's left face and fill it pale gold . Lasso the same strip on the right face and fill it deep gold . Give it an Outer Glow of Size 40 and Opacity 80 in gold.
-
Lay the far bank
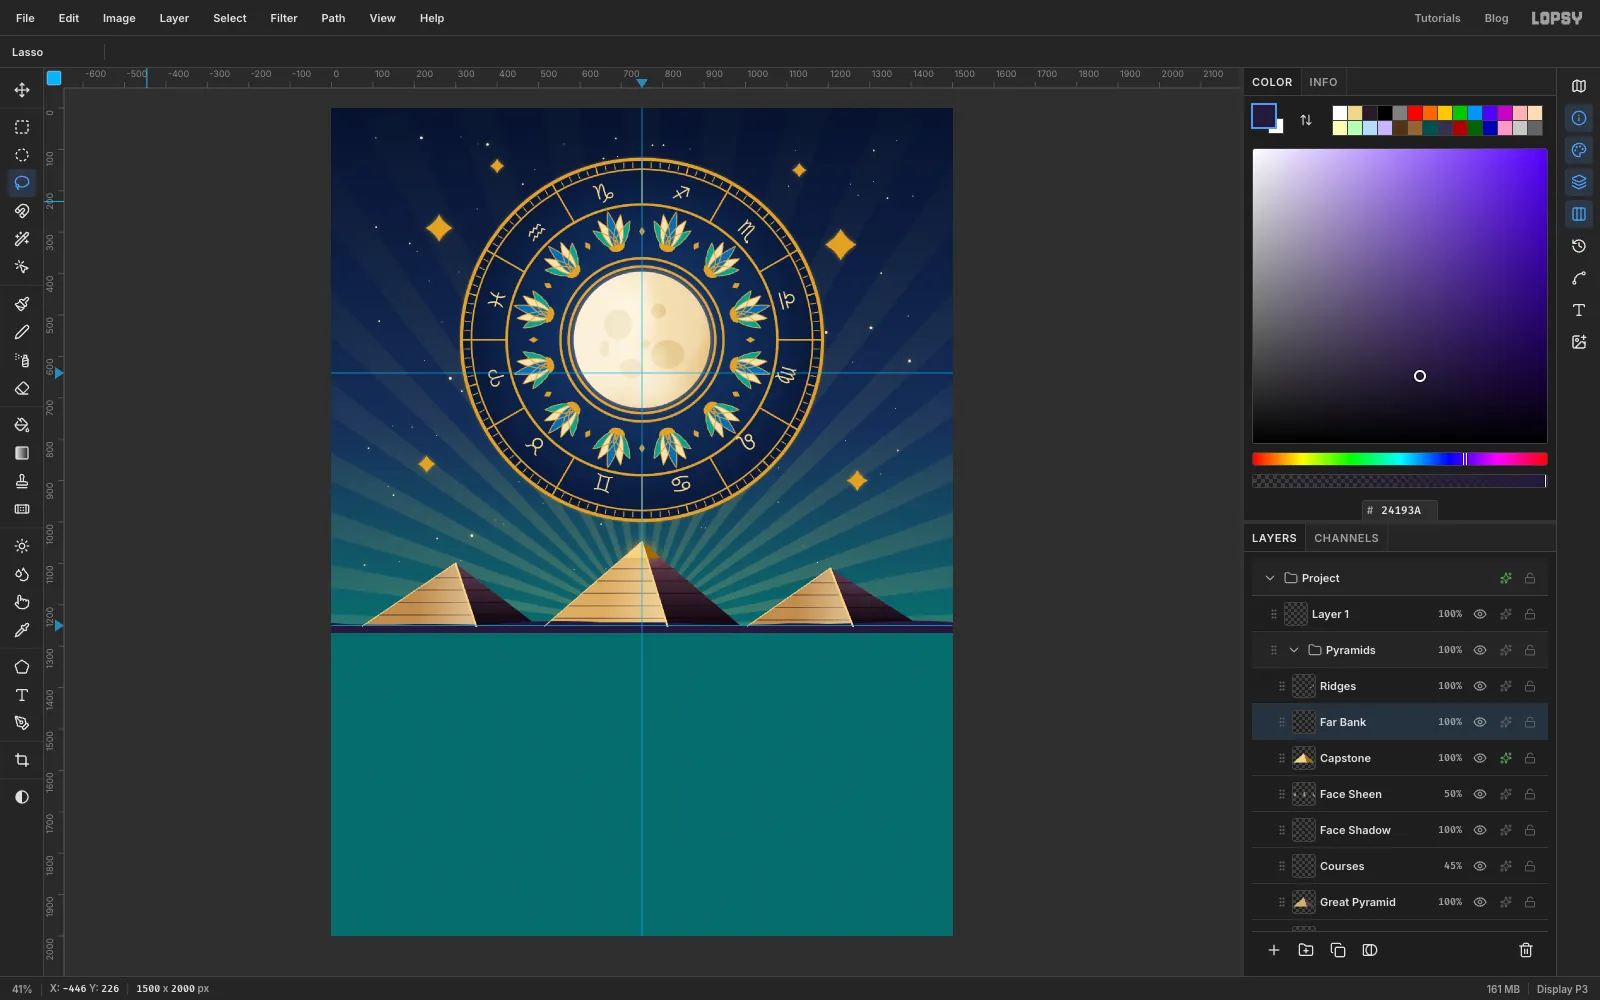
Add a Far Bank layer and lasso a thin, gently uneven strip across the whole width, from just above the horizon to about 15 px below it. Fill it with so the pyramids stand on ground.
-
Fill the river
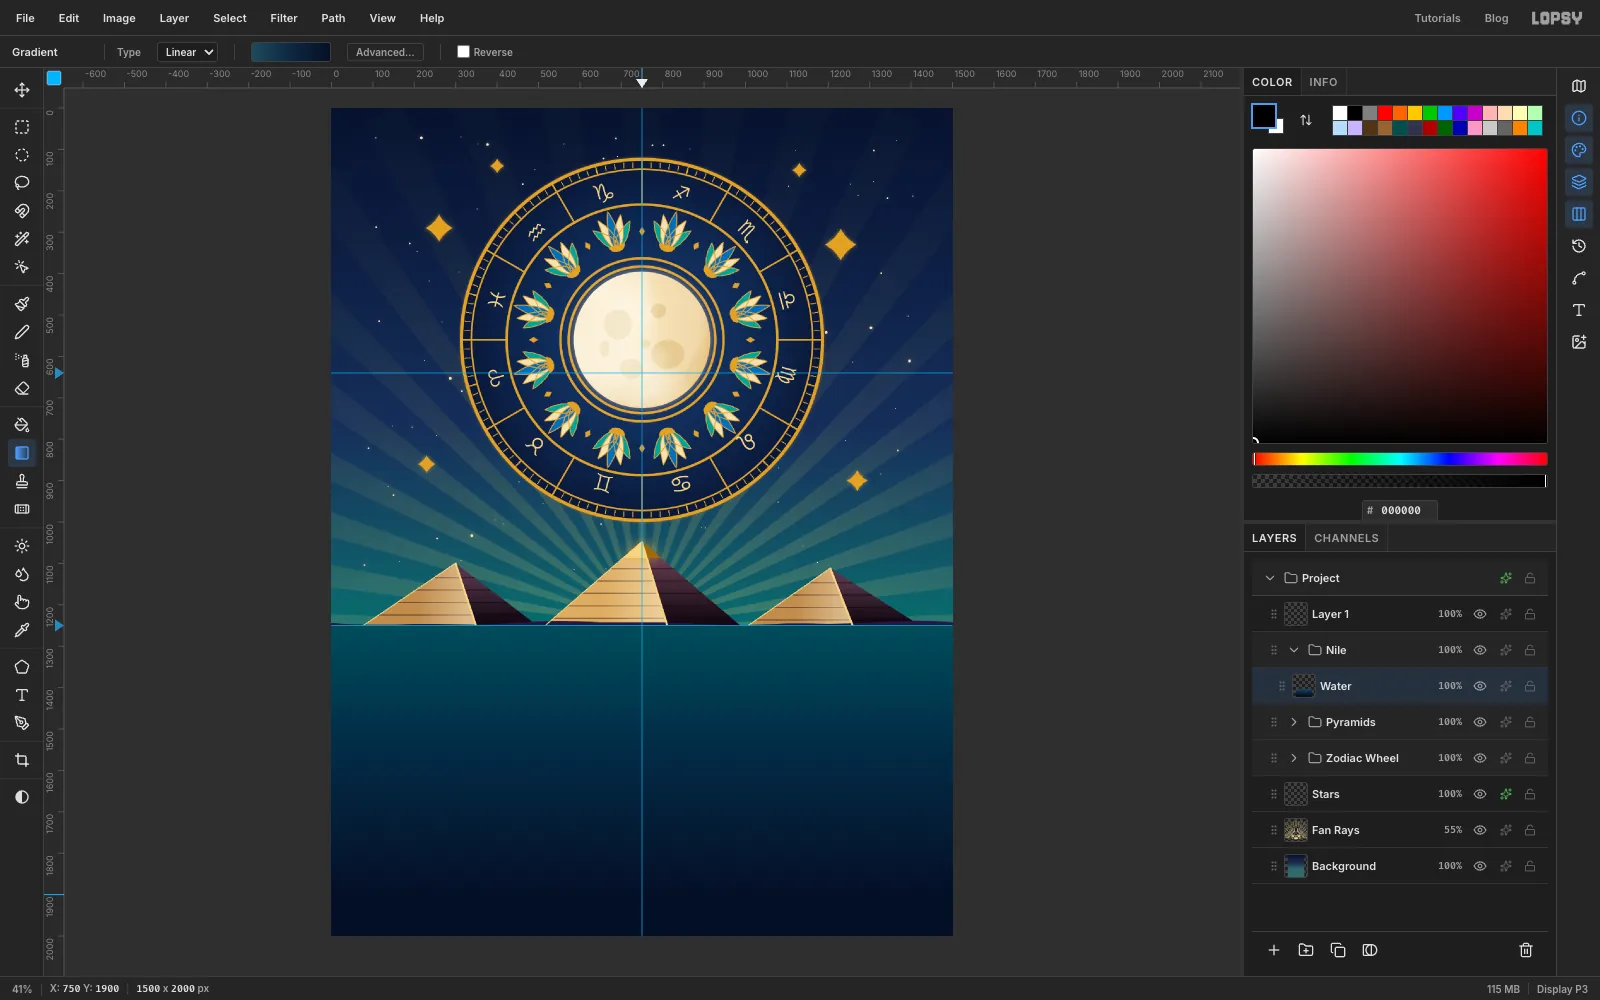
Collapse Pyramids, select it and add a Nile group. Add a Water layer, select everything below the horizon and drag a linear gradient of → → from the horizon down towards the bottom.
-
Flip a Copy Merged strip for the reflection
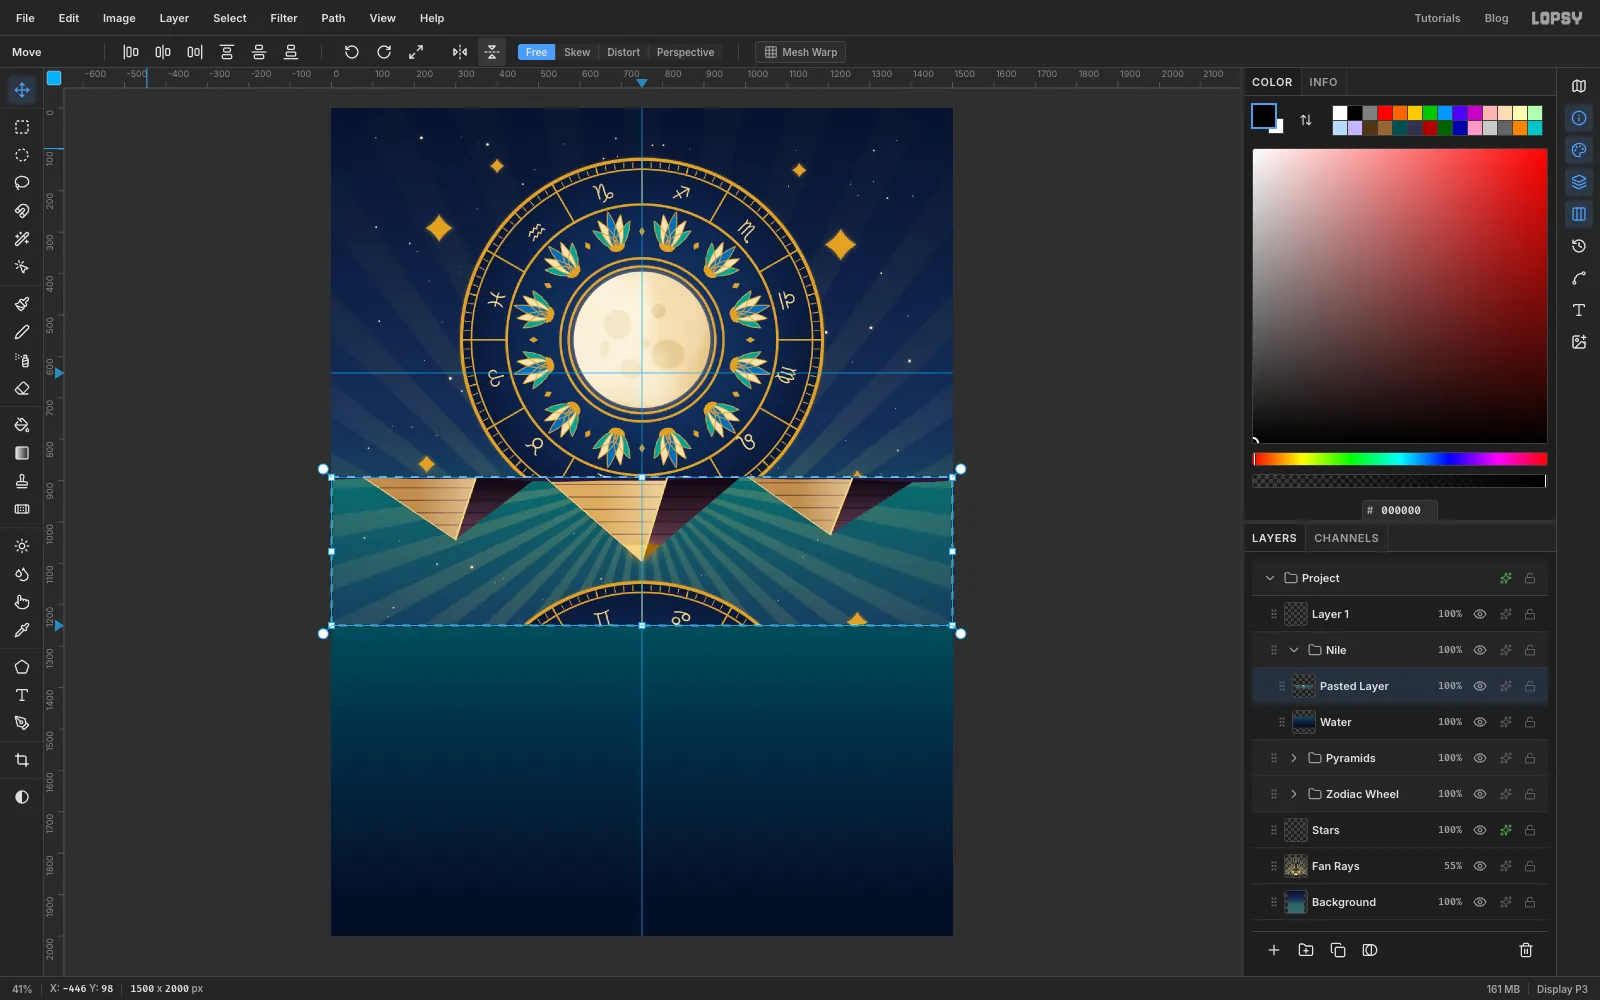
Draw a marquee across the full width over the band of sky and pyramids just above the horizon, about 360 px tall. Choose Edit → Copy Merged, which copies what you see from every layer. Then press Cmd+V: the paste lands in place as a new layer and switches to the Move tool. Click Flip Vertical in the options bar, the second of the two mirror icons just right of the rotate buttons.
-
Ripple and fade the reflection
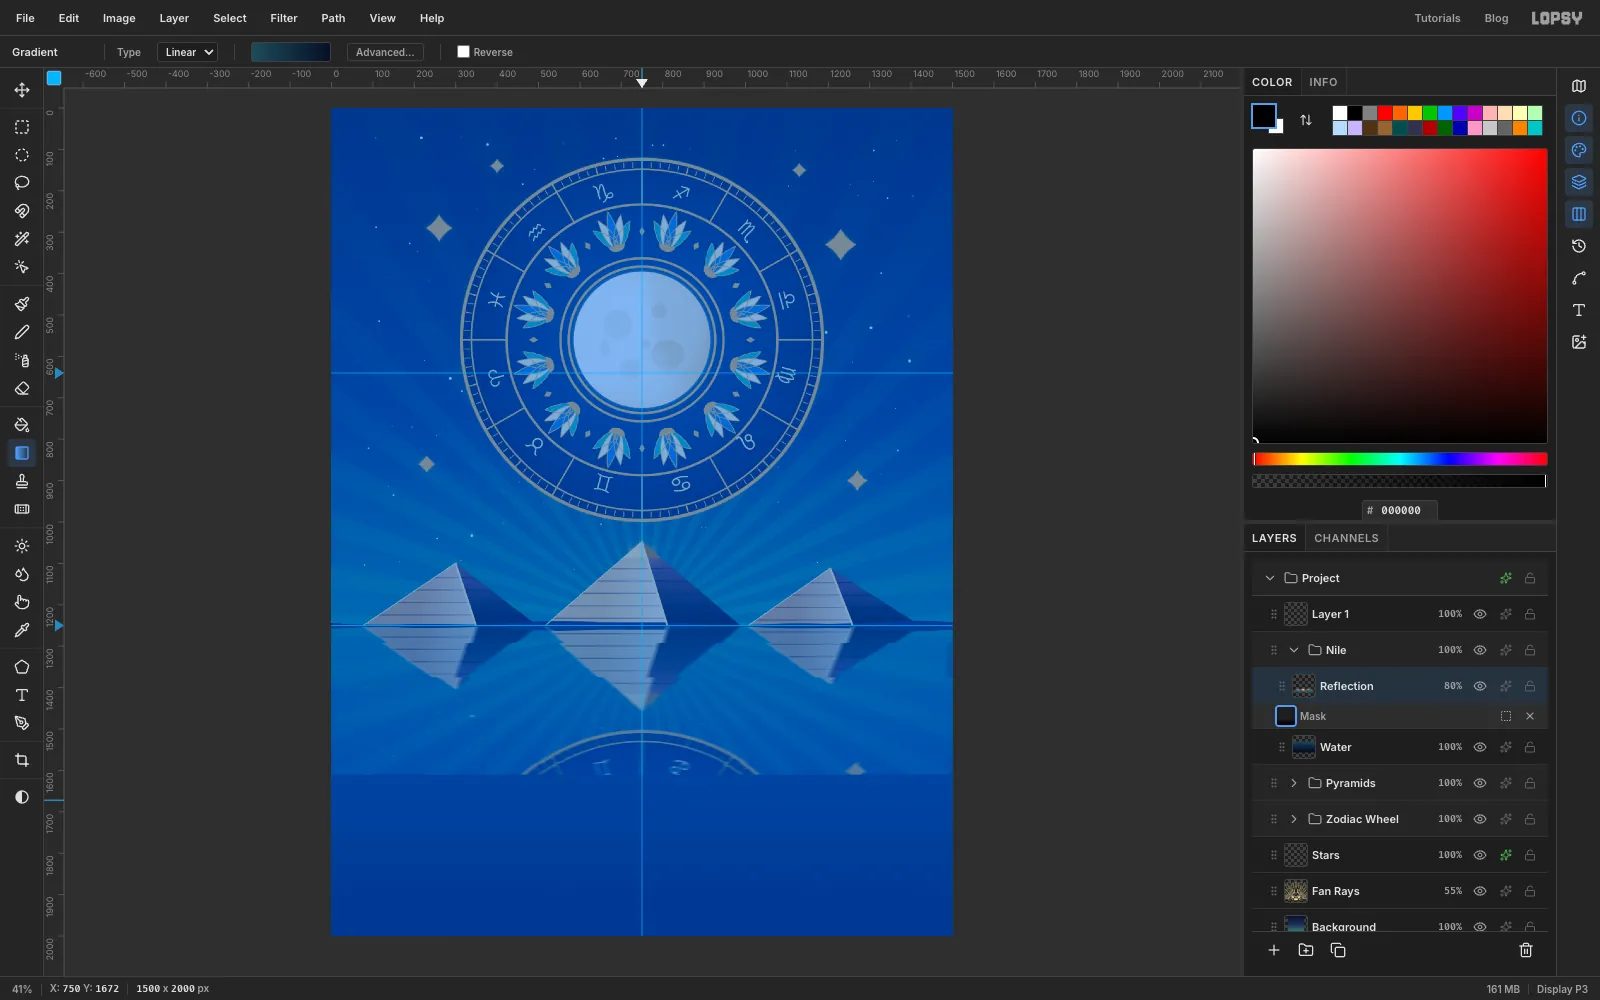
Press Shift+Down 36 times to drop the flipped strip just below the horizon, then deselect and name the layer Reflection. Run Filter → Pixel Stretch… with Amount 22, Bands 48 and RGB Split 0 for a broken water ripple. Then run Motion Blur… at Angle 0 and Distance 14, and set the layer to 80 %. Click the Add Mask button (the fourth icon along the bottom of the Layers panel), then click the new mask thumbnail on the row to edit it. The canvas is tinted while you edit a mask; that's only an overlay. Drag a white-to-black gradient from just below the horizon about 380 px down, so the reflection fades out. To go back to painting pixels, click the Reflection layer's own thumbnail.
-
Rule the ripples
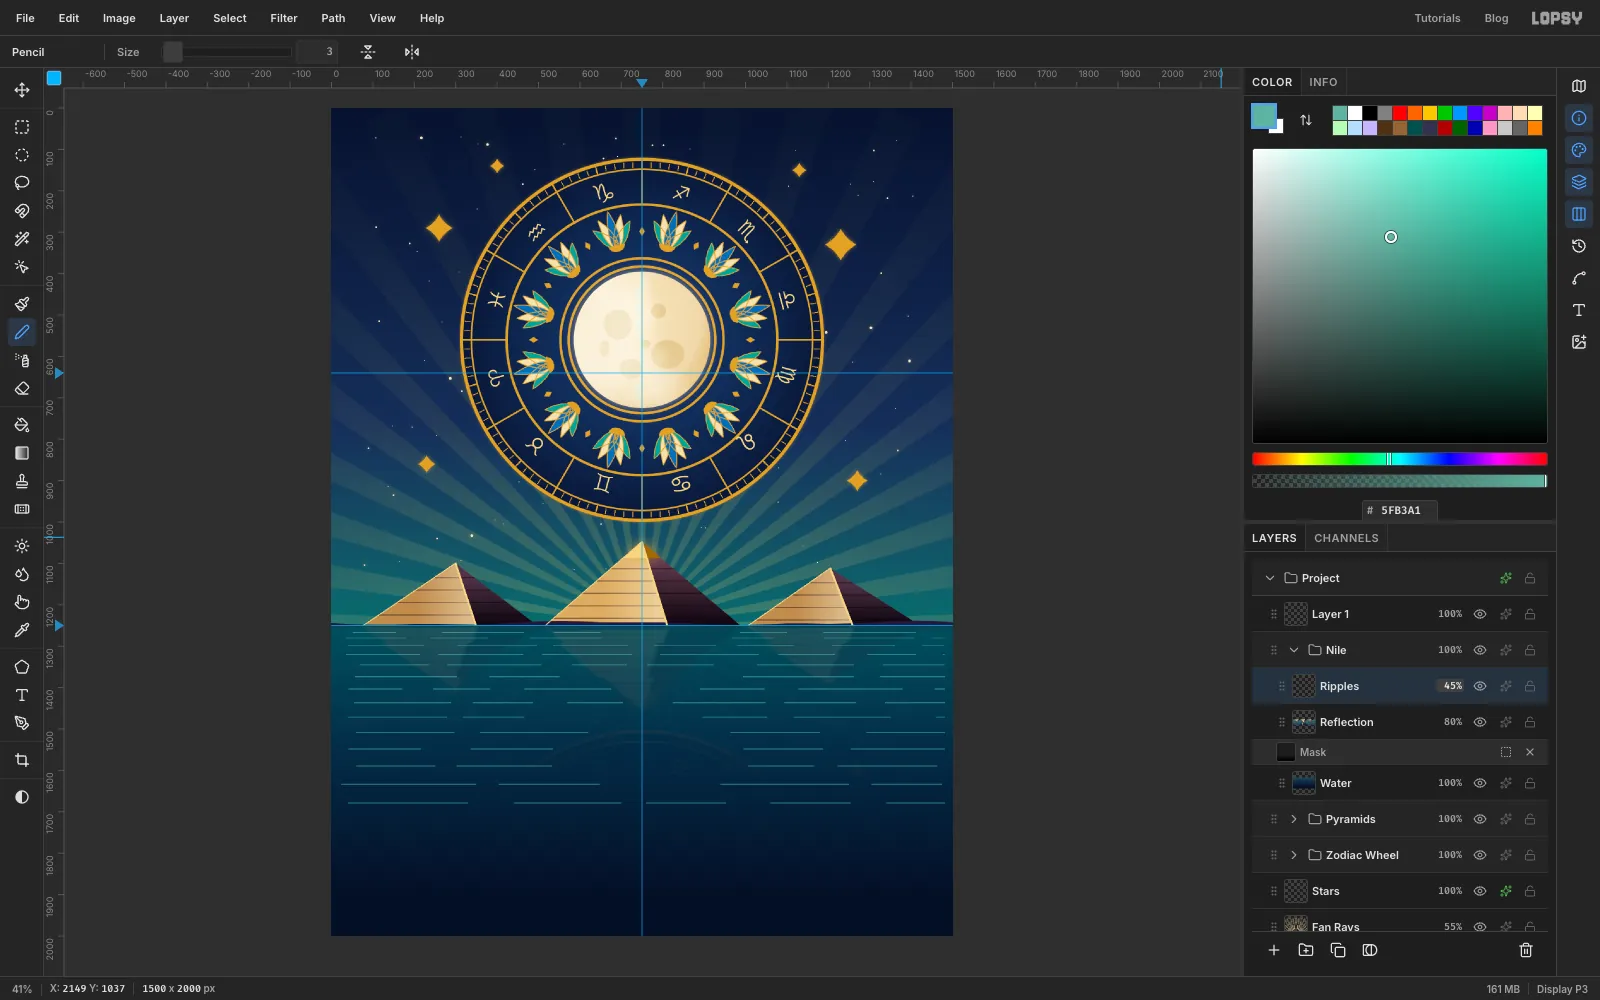
Add a Ripples layer. With the Pencil in , draw dashed horizontal lines across the river by clicking and Shift-clicking short runs with gaps between them. Keep the rows close together near the horizon and spread them out towards the viewer. Leave a gap down the middle for the moon path. Set the layer to Screen at 45 %.
-
Lay the moon path
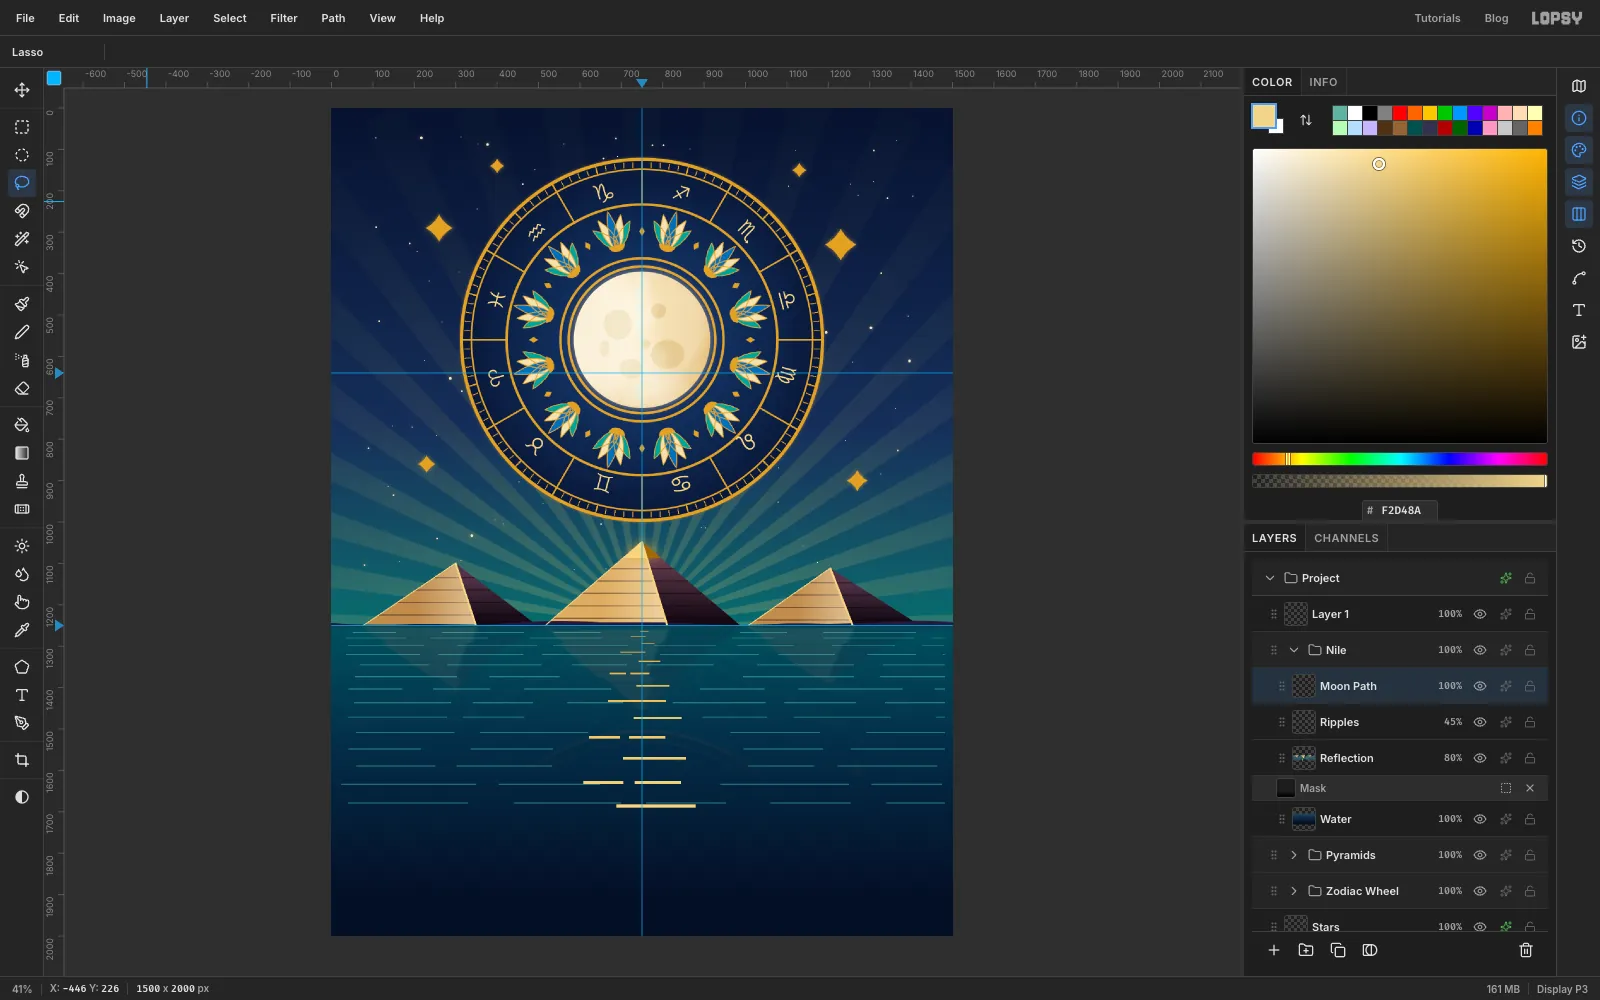
Add a Moon Path layer. Below the Great Pyramid, lasso thin horizontal bars, starting about 20 px wide at the horizon and growing to about 230 px near the bottom. Shift each bar a little left or right of centre, make the gaps uneven, and split three of them into two pieces. Fill the top bars in gold and lighten each one towards pale gold at the bottom. The irregularity is what keeps it from looking like runway lights.
-
Build the felucca
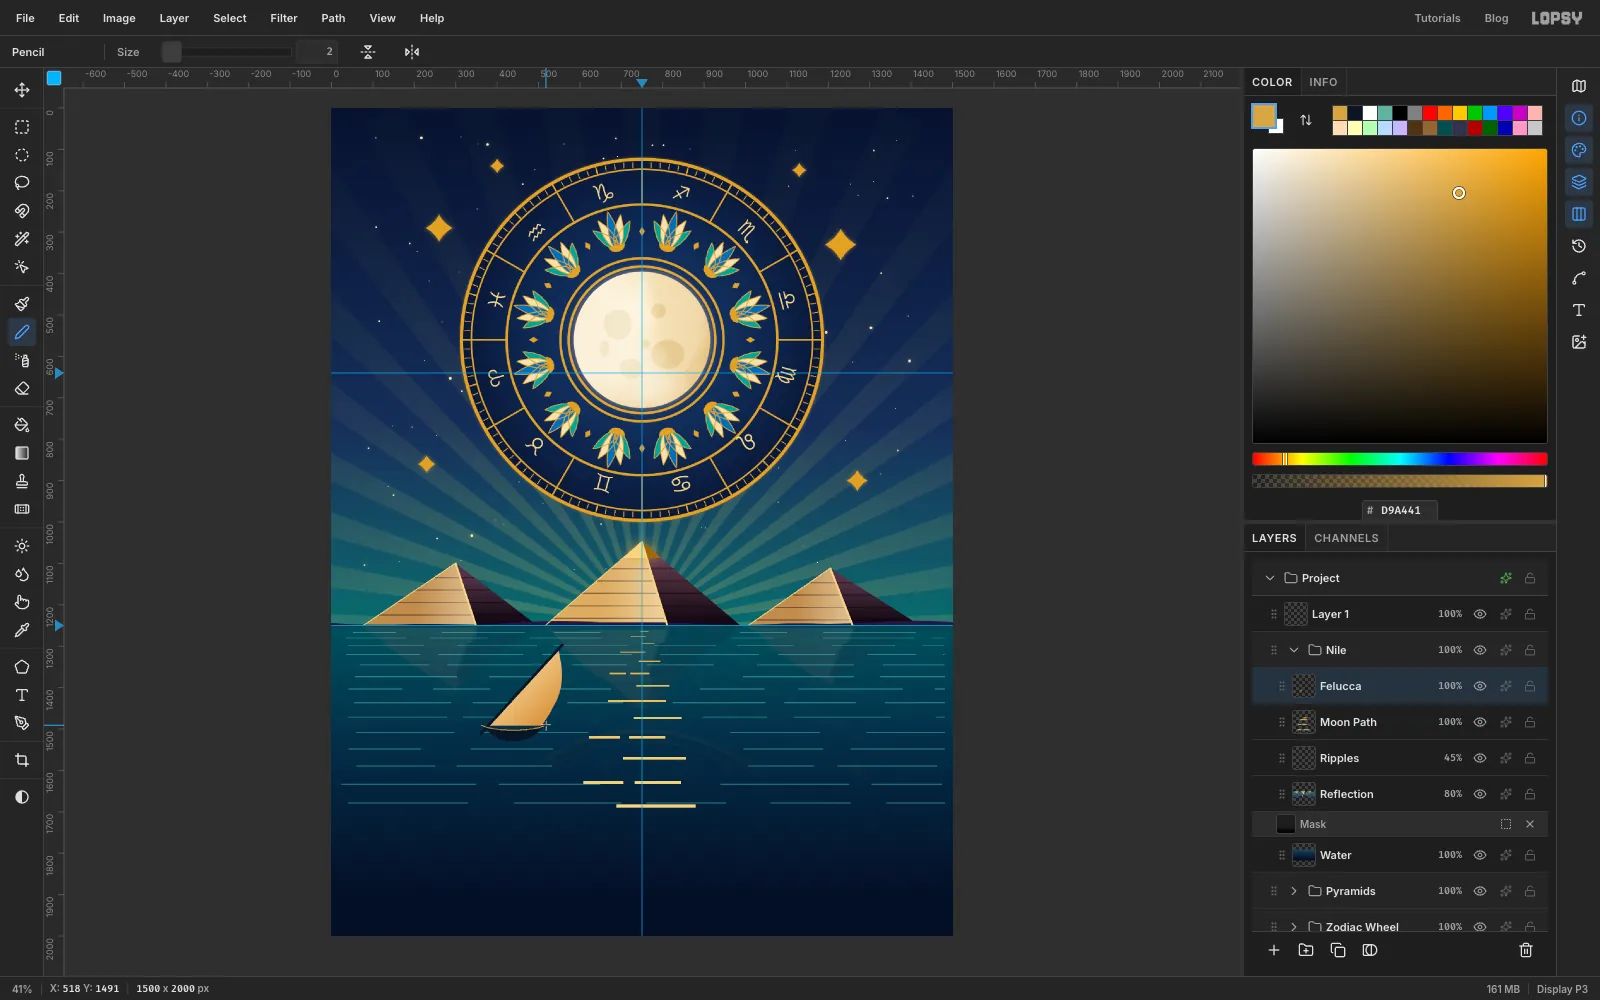
Add a Felucca layer, left of the moon path. Lasso a crescent hull about 150 px long and 30 px deep, and fill it . Lasso a tall triangular sail above it with a gently curved back edge, and drag a linear gradient from to across it. Draw the yard with a 5 px Pencil line raked through the sail's leading edge, and keep its tip at least 40 px below the horizon. Finish with a 2 px gold line along the top of the hull.
-
Reflect the boat
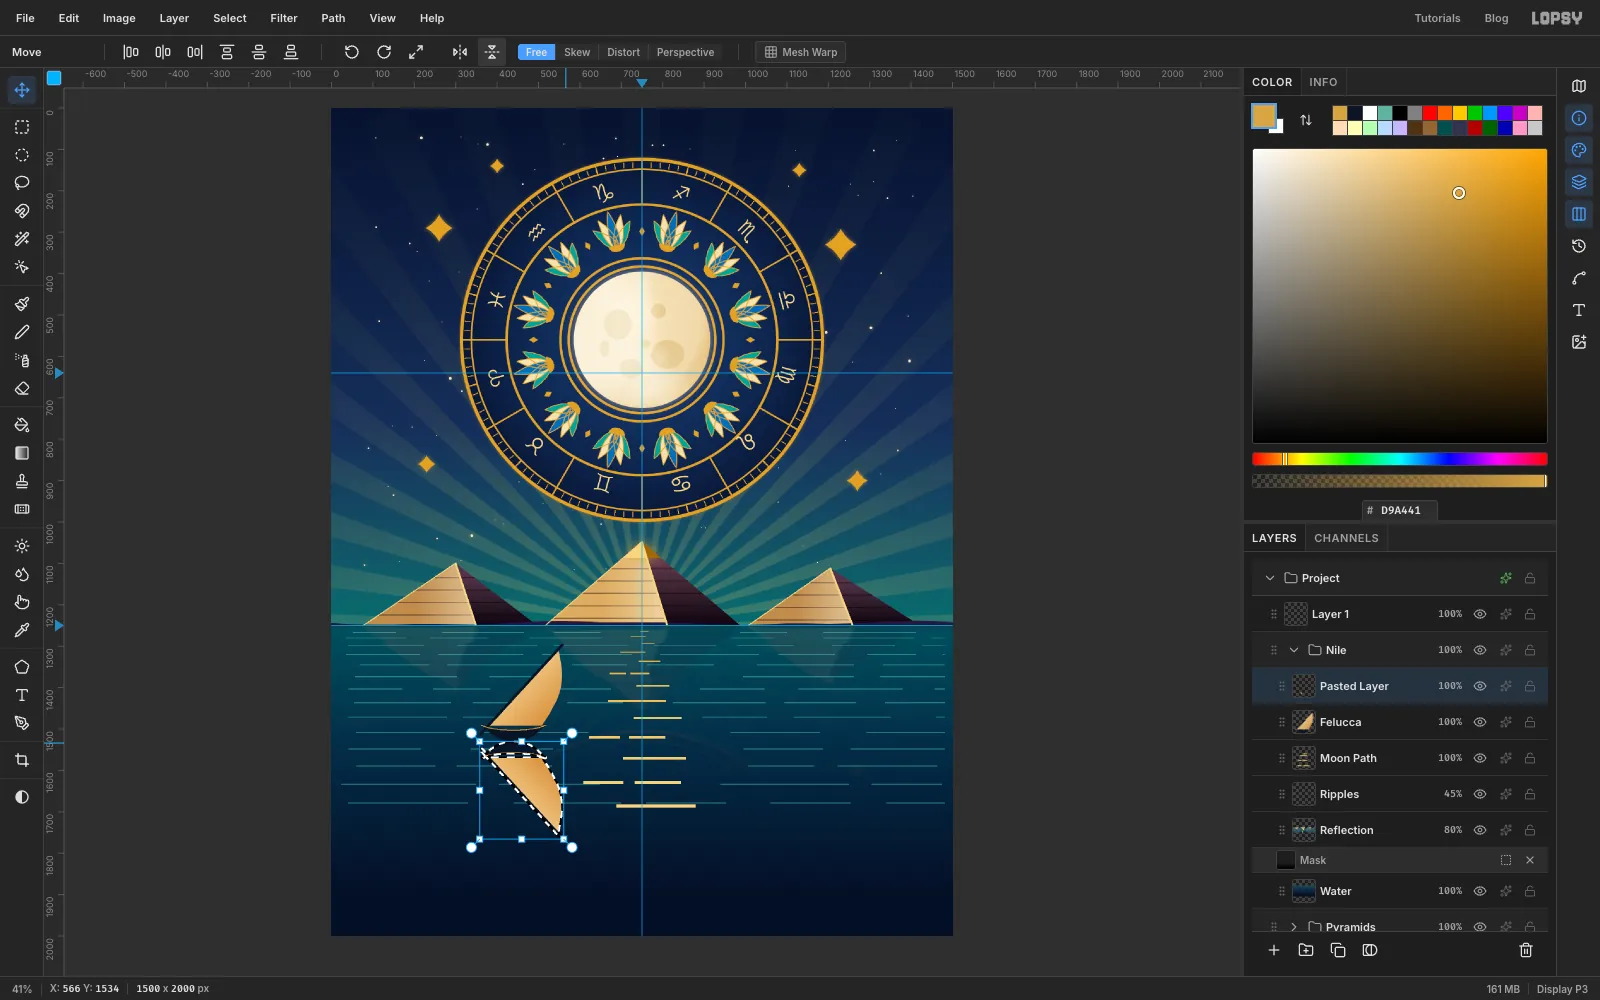
Draw a marquee around the boat, copy and paste it, and click Flip Vertical. Then nudge the copy down with the arrow keys until it mirrors the hull at the waterline. Deselect, name it Felucca Reflection, then marquee from 60 px below the waterline to below the reflection and press Delete. Run Pixel Stretch (Amount 6, Bands 50) and Motion Blur (Distance 10), soften the bottom edge with a few passes of the Eraser, and set the layer to 35 %.
-
Sail a second boat in the distance
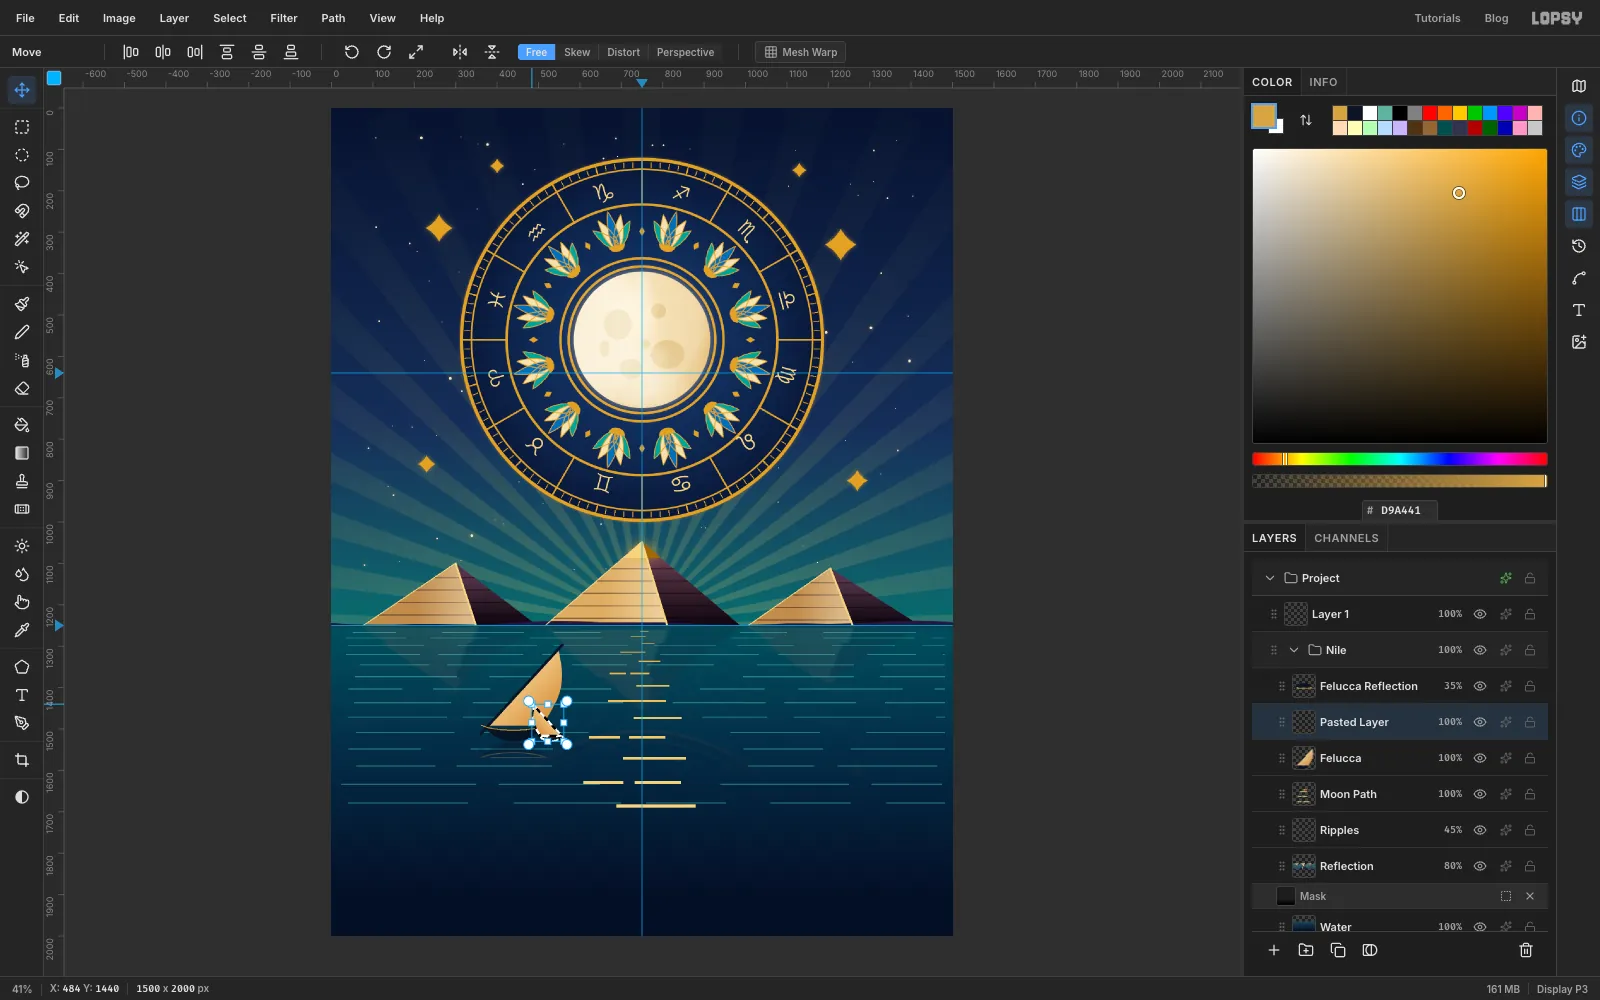
Select the Felucca layer, marquee the boat, then copy and paste it. Click Flip Horizontal so it sails the other way. Hold Cmd and drag the top-left corner handle towards the middle until it's a little over a third of the size. Nudge it up towards the horizon, right of the moon path, so its hull sits around y 1360. Deselect, name it Felucca Far and set it to 85 %.
-
Build the stepped quay
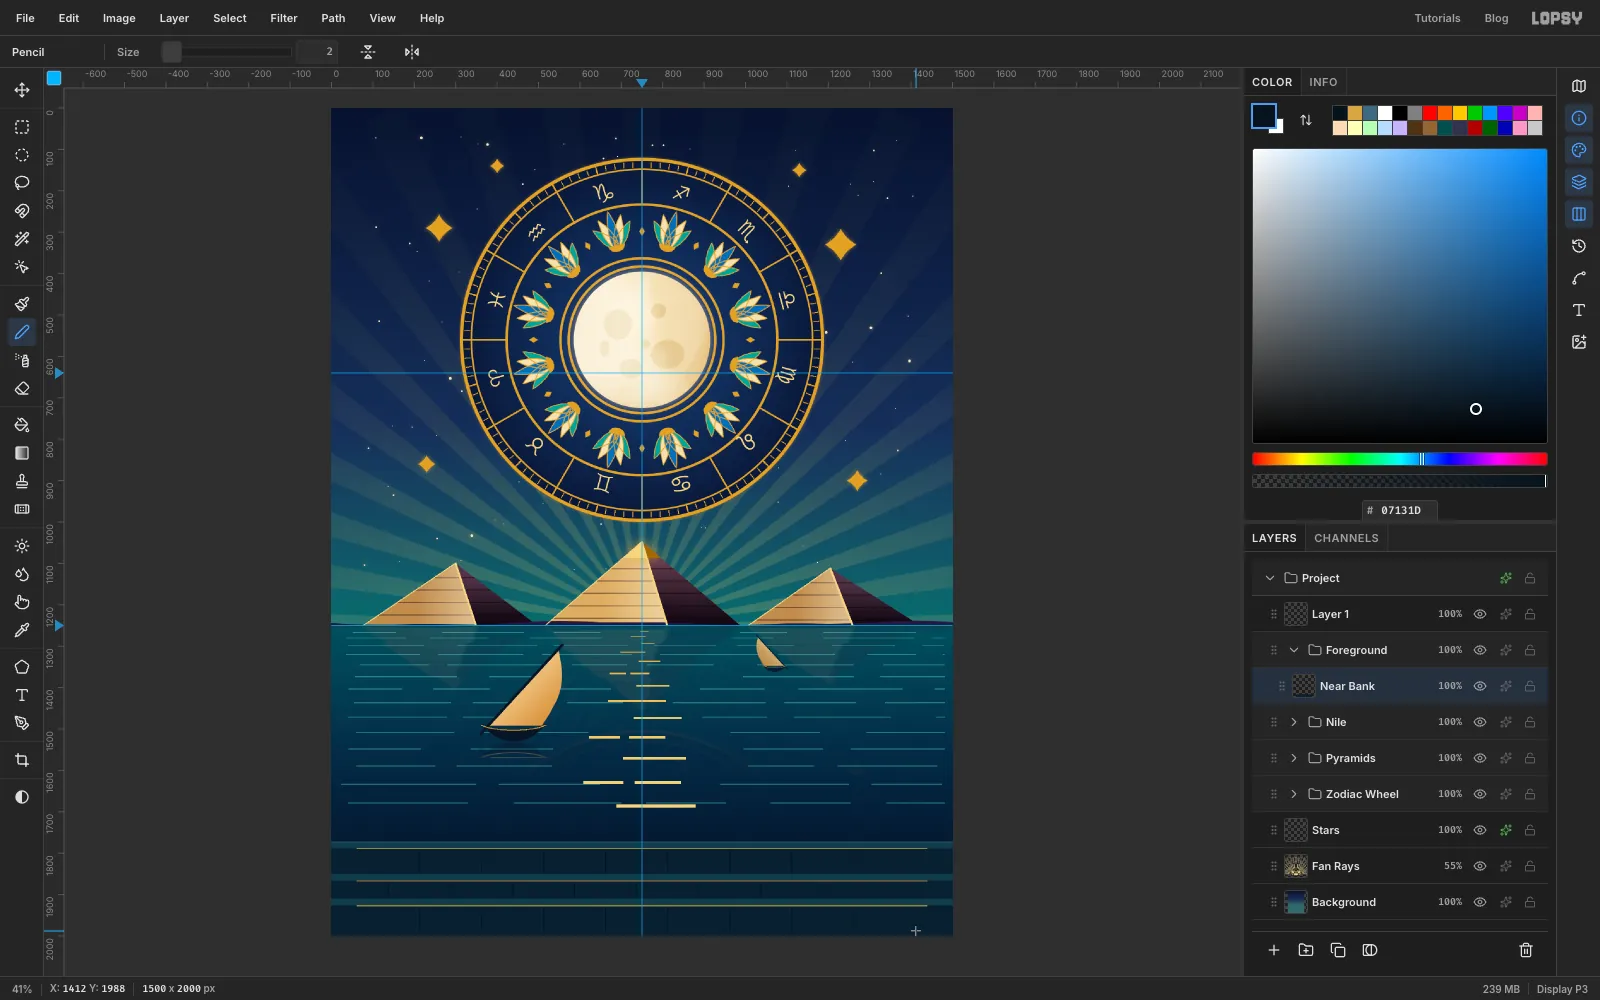
Collapse Nile, select it and add a Foreground group. Add a Near Bank layer and fill everything from y 1772 down (about 230 px up from the bottom) with . Fill three 16 px treads in : one along the top and two more about 80 and 140 px lower. Rule a 2 px line along the top edge, and 2 px gold lines along each step's nose, stopping about 62 px from each side, where the frame will go later. Add short dark vertical joints every 150 px, staggered by half a slab on each step.
-
Draw a lotus flower
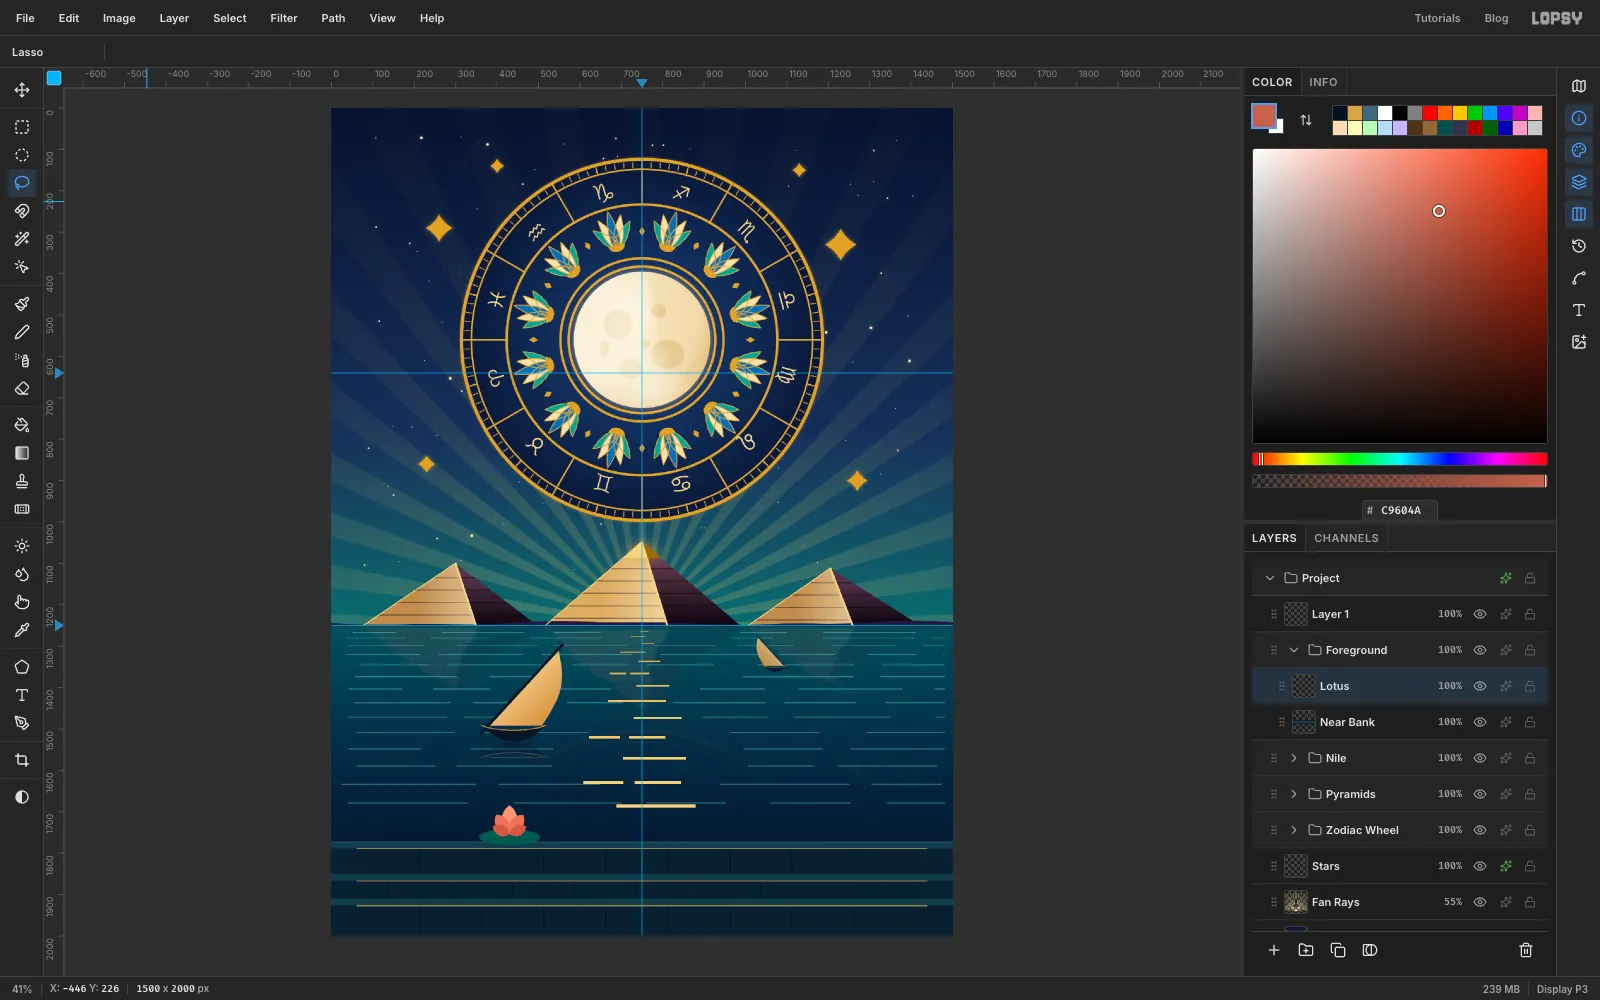
Add a Lotus layer. Fill a flat ellipse in for the pad. Then lasso five pointed petals fanning up from its centre: the tallest in , two beside it in and two low ones in .
-
Copy and scale more lotuses
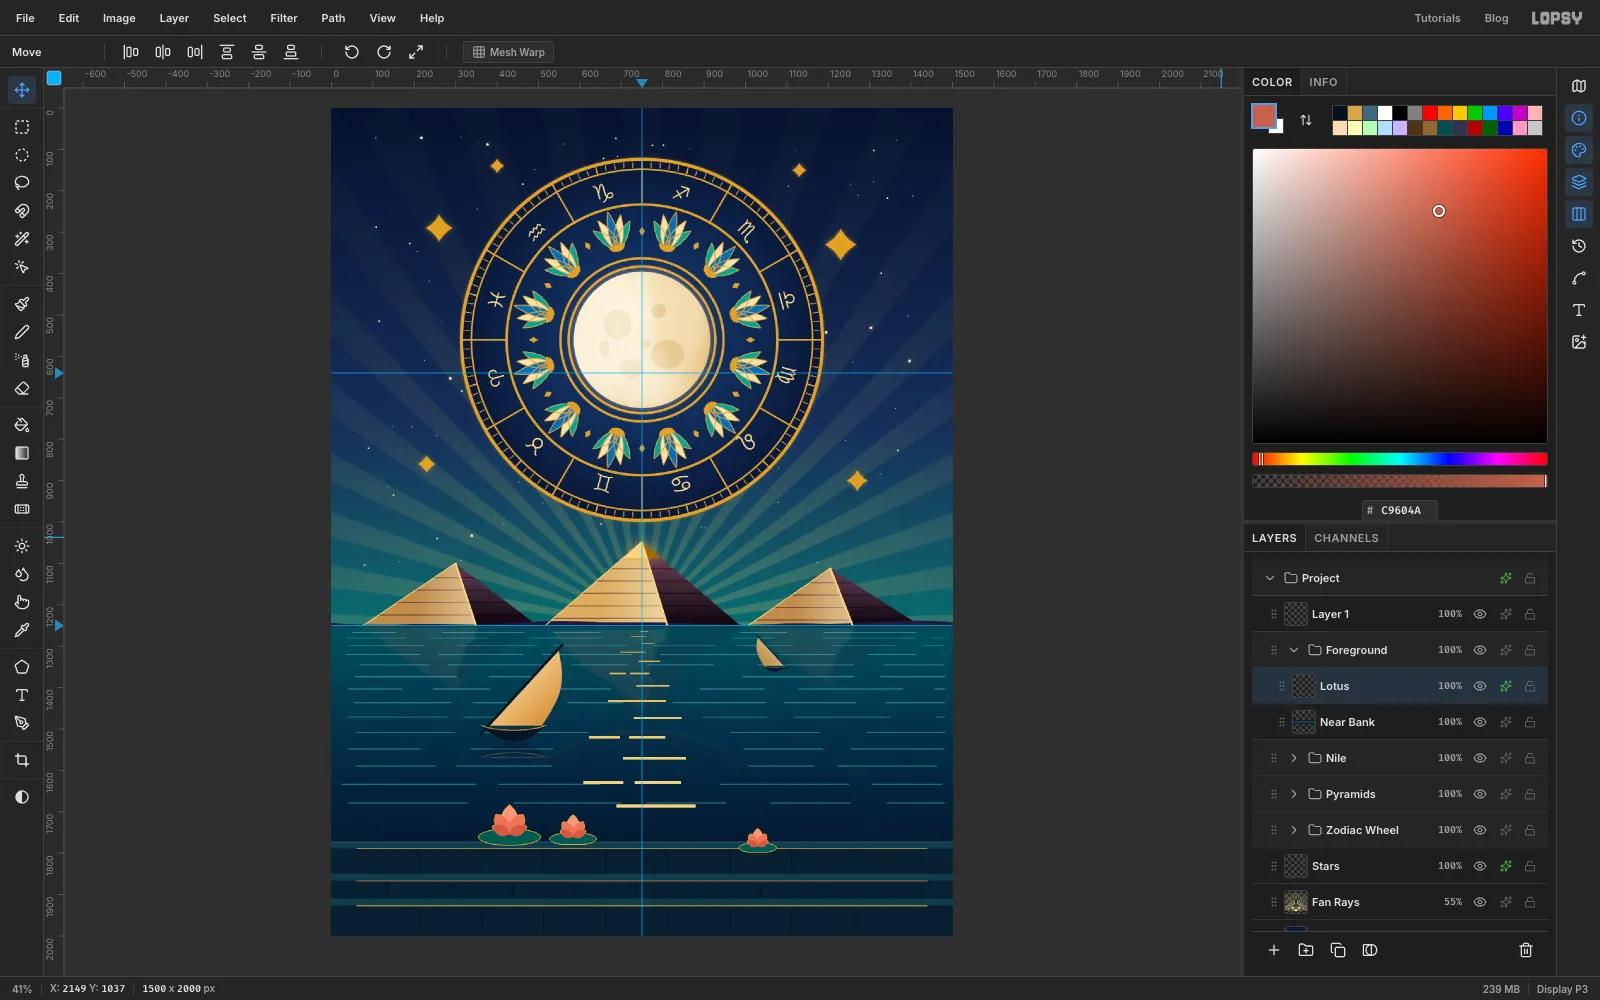
Marquee the flower, copy and paste it, and drag a corner handle with Cmd held to shrink it to about three quarters. Nudge it right and up a little, then choose Layer → Merge Down. Make a third, smaller copy and put it further right. Stagger the heights so they don't march in a straight line. Add a 2 px gold Stroke to the layer.
-
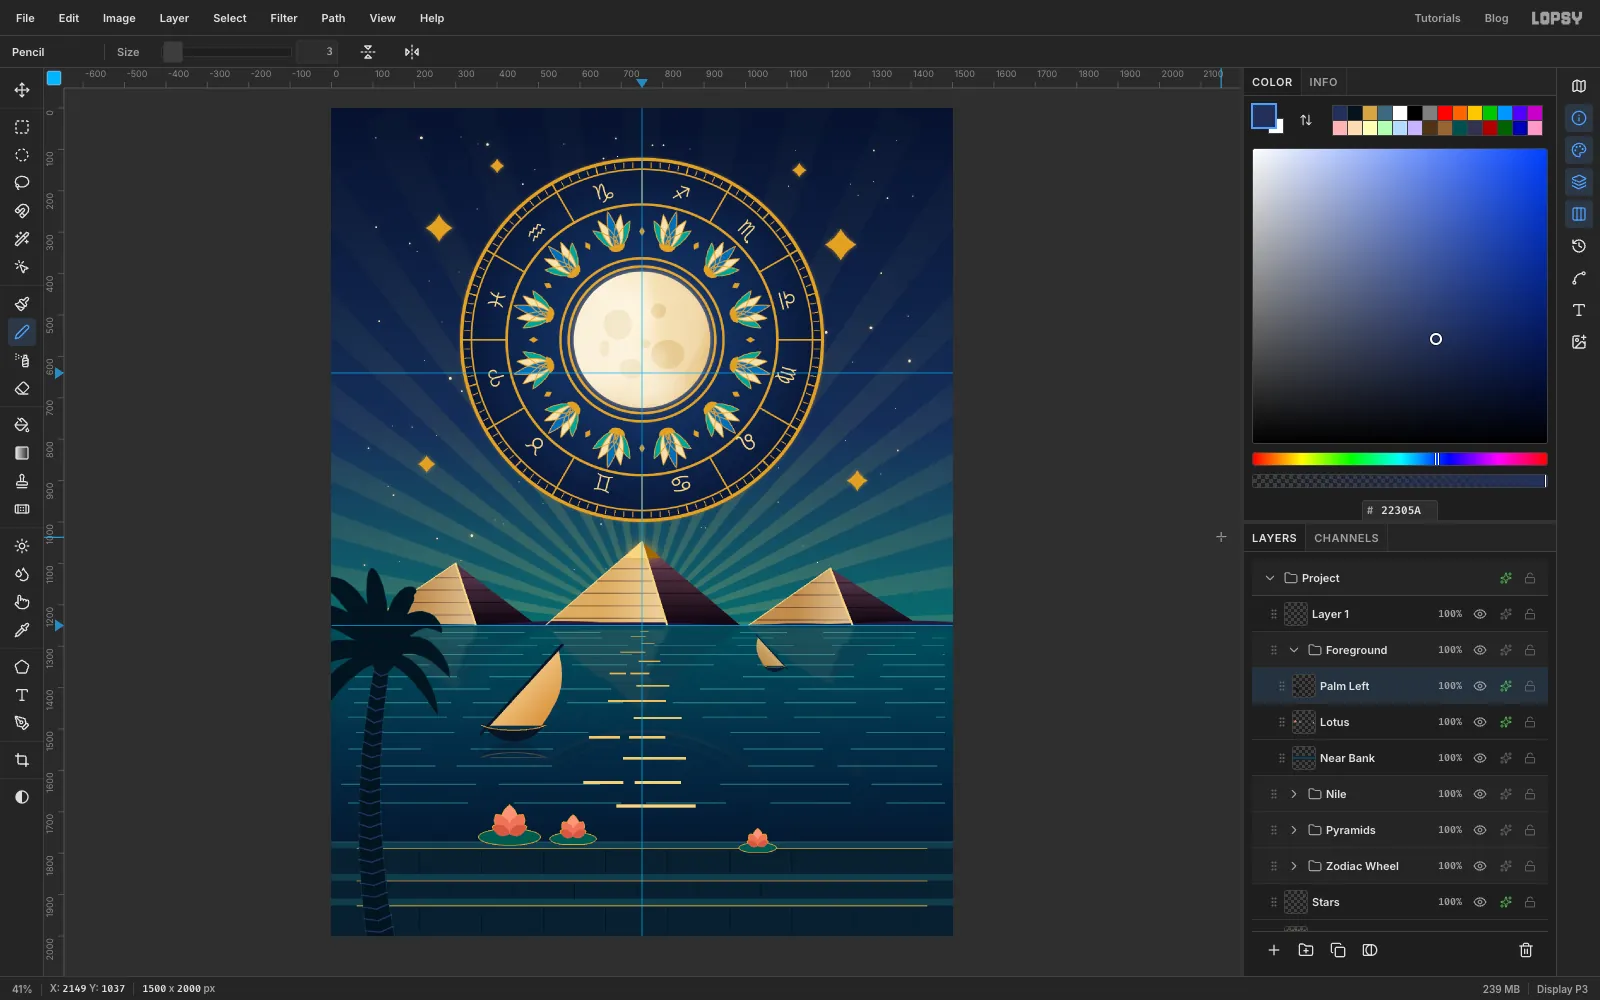
Draw a palm silhouette
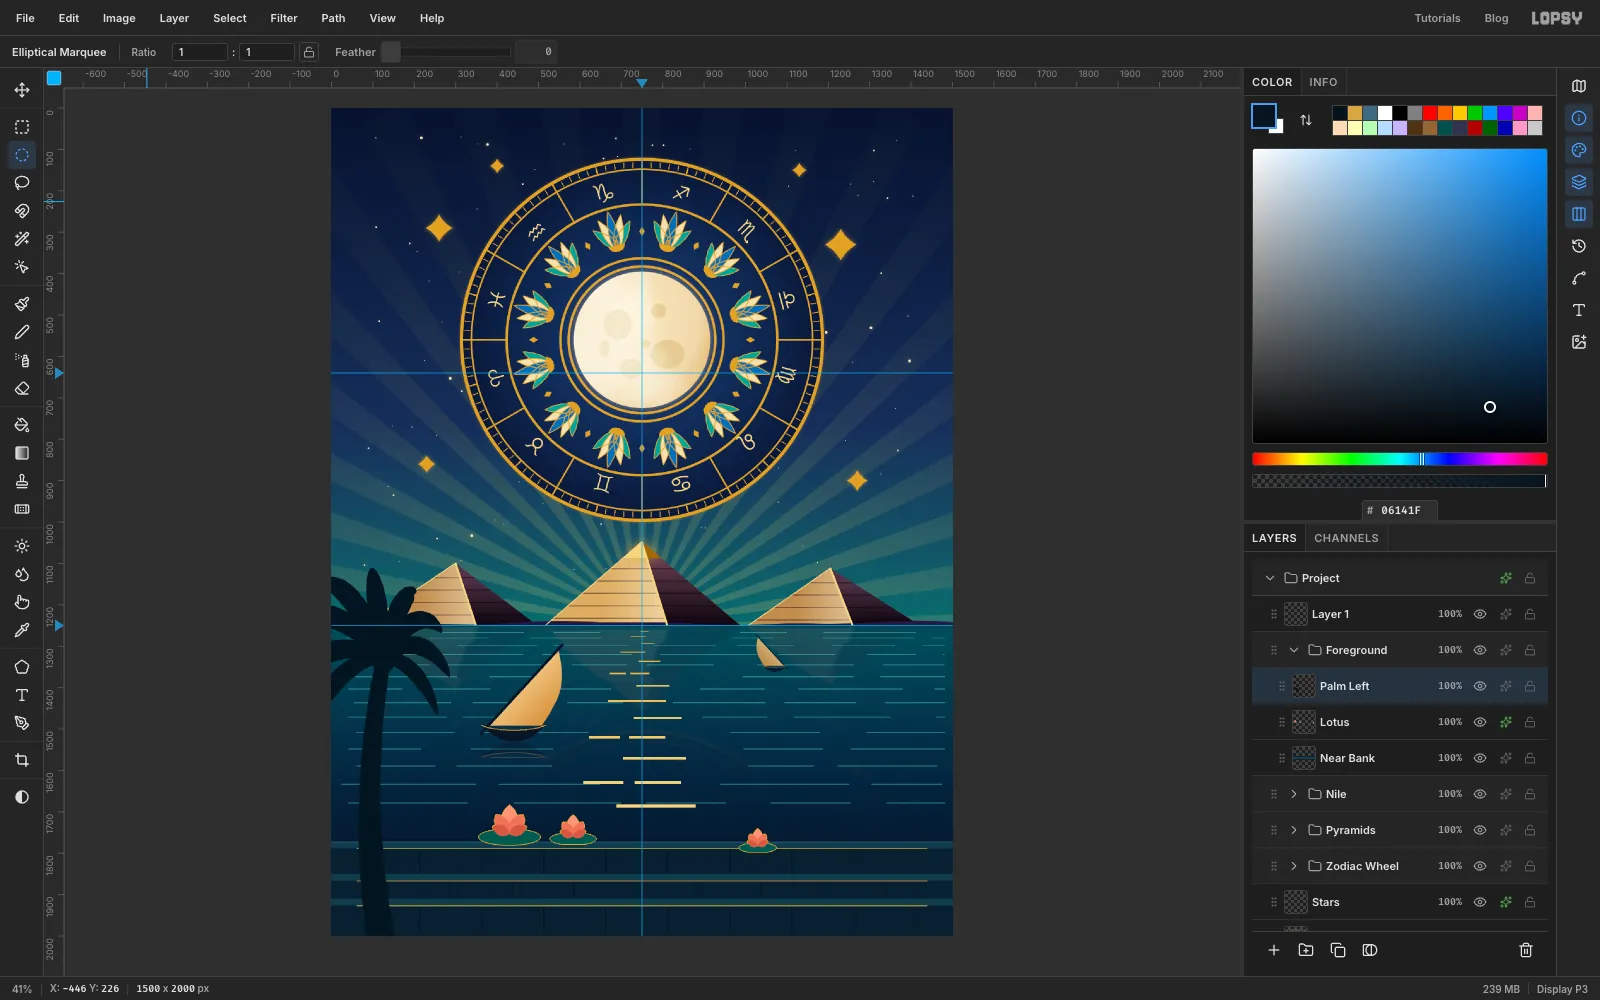
Add a Palm Left layer. Lasso a gently curving trunk from the bottom-left corner up to a crown at about (125, 1335), wider at the base. Then lasso nine smooth, tapered fronds. The ones on the outside arch up and then droop, the ones towards the river are shorter, and none of them should reach the boat. Fill them all with , and fill a small oval to tidy the crown.
-
Ring the trunk and add rim light
With a 3 px Pencil in , draw a shallow chevron across the trunk every few dozen pixels by clicking one edge, Shift-clicking the middle point slightly lower, then the other edge. Add an Inner Glow of Size 3 and Opacity 80 in teal . It works like moonlight catching the edges.
-
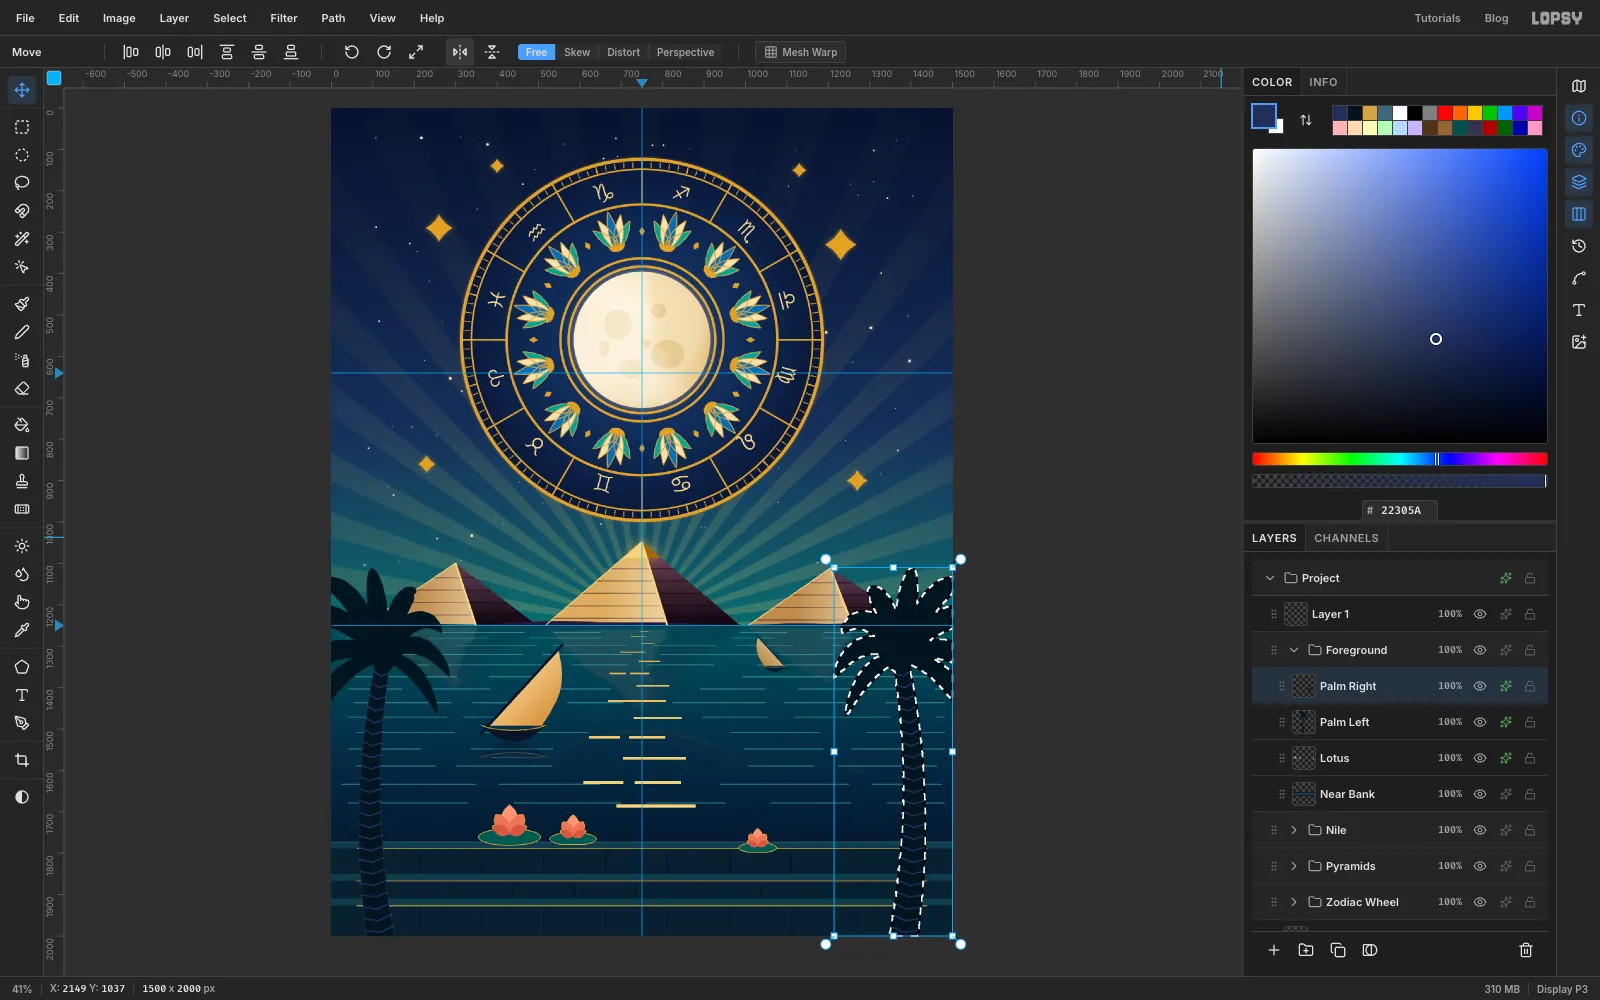
Mirror the palm to the right
Click Duplicate Layer, rename the copy Palm Right and click its row. With the Move tool, press Cmd+A and click Flip Horizontal. The flip mirrors around the selection's centre, which is the middle of the canvas, so the palm lands at exactly the same place on the right side.
-
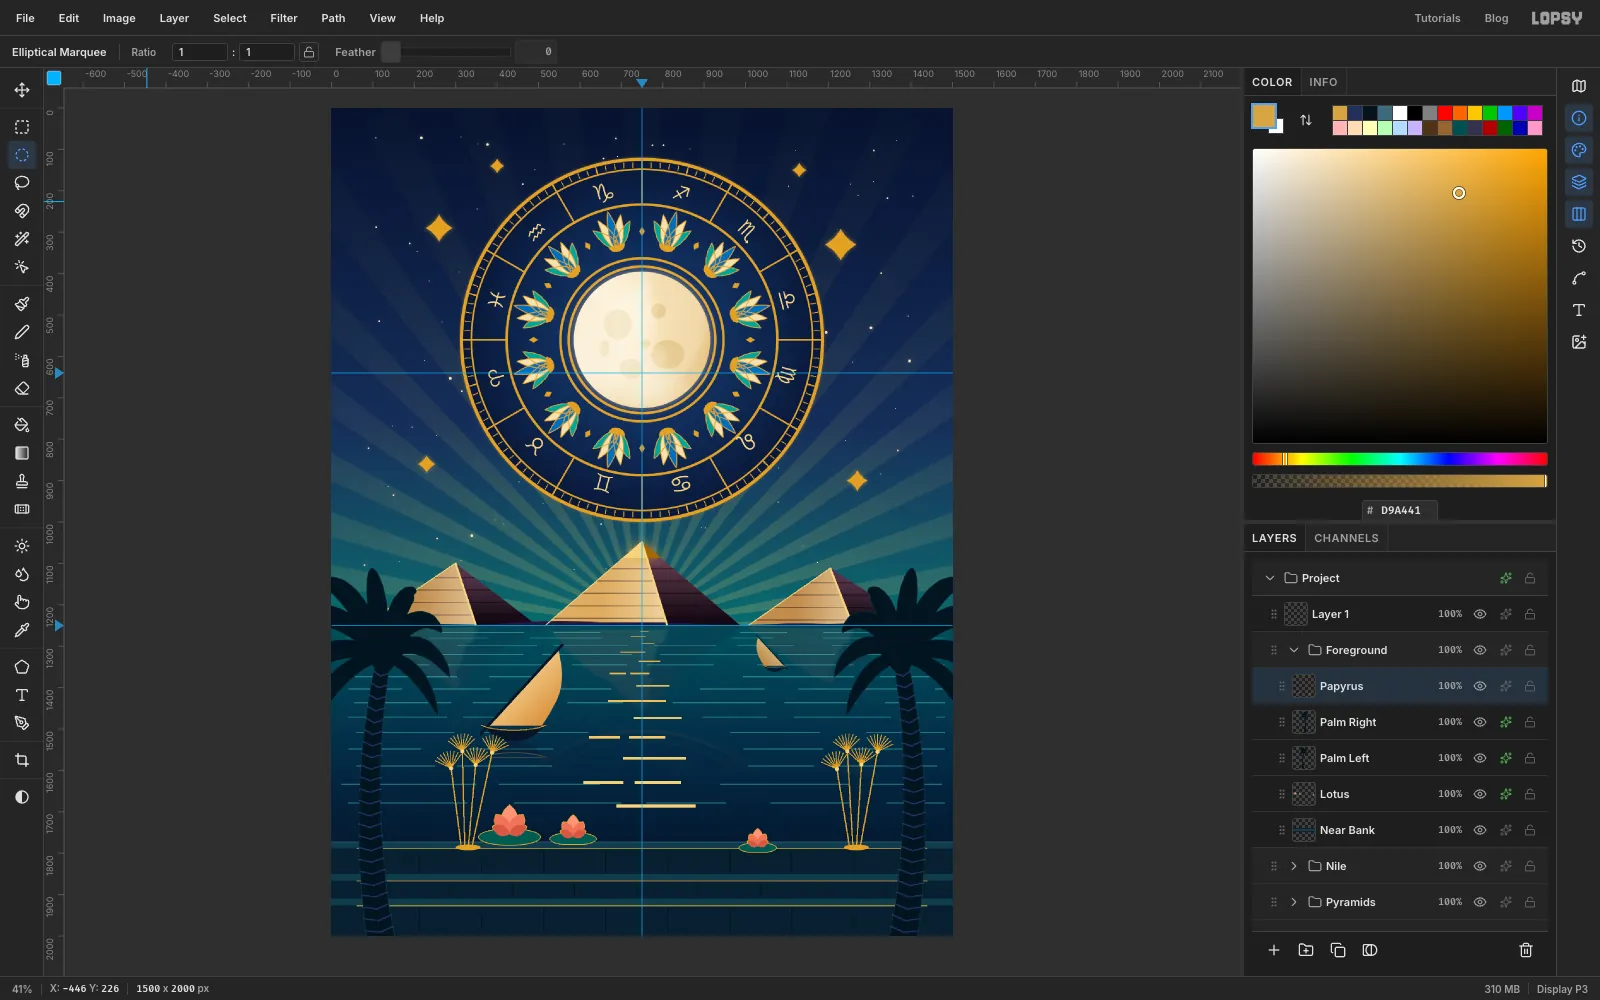
Add gold papyrus
Add a Papyrus layer. With a 3 px gold Pencil, draw four or five stems rising from the quay's front edge, leaning slightly apart. Fan nine 2 px lines out from the top of each stem for the umbel, and dot a small pale gold circle where they meet. Keep the clumps at least 60 px in from the frame's corner brackets. Finish each clump with a small gold oval collar where it meets the quay.
-
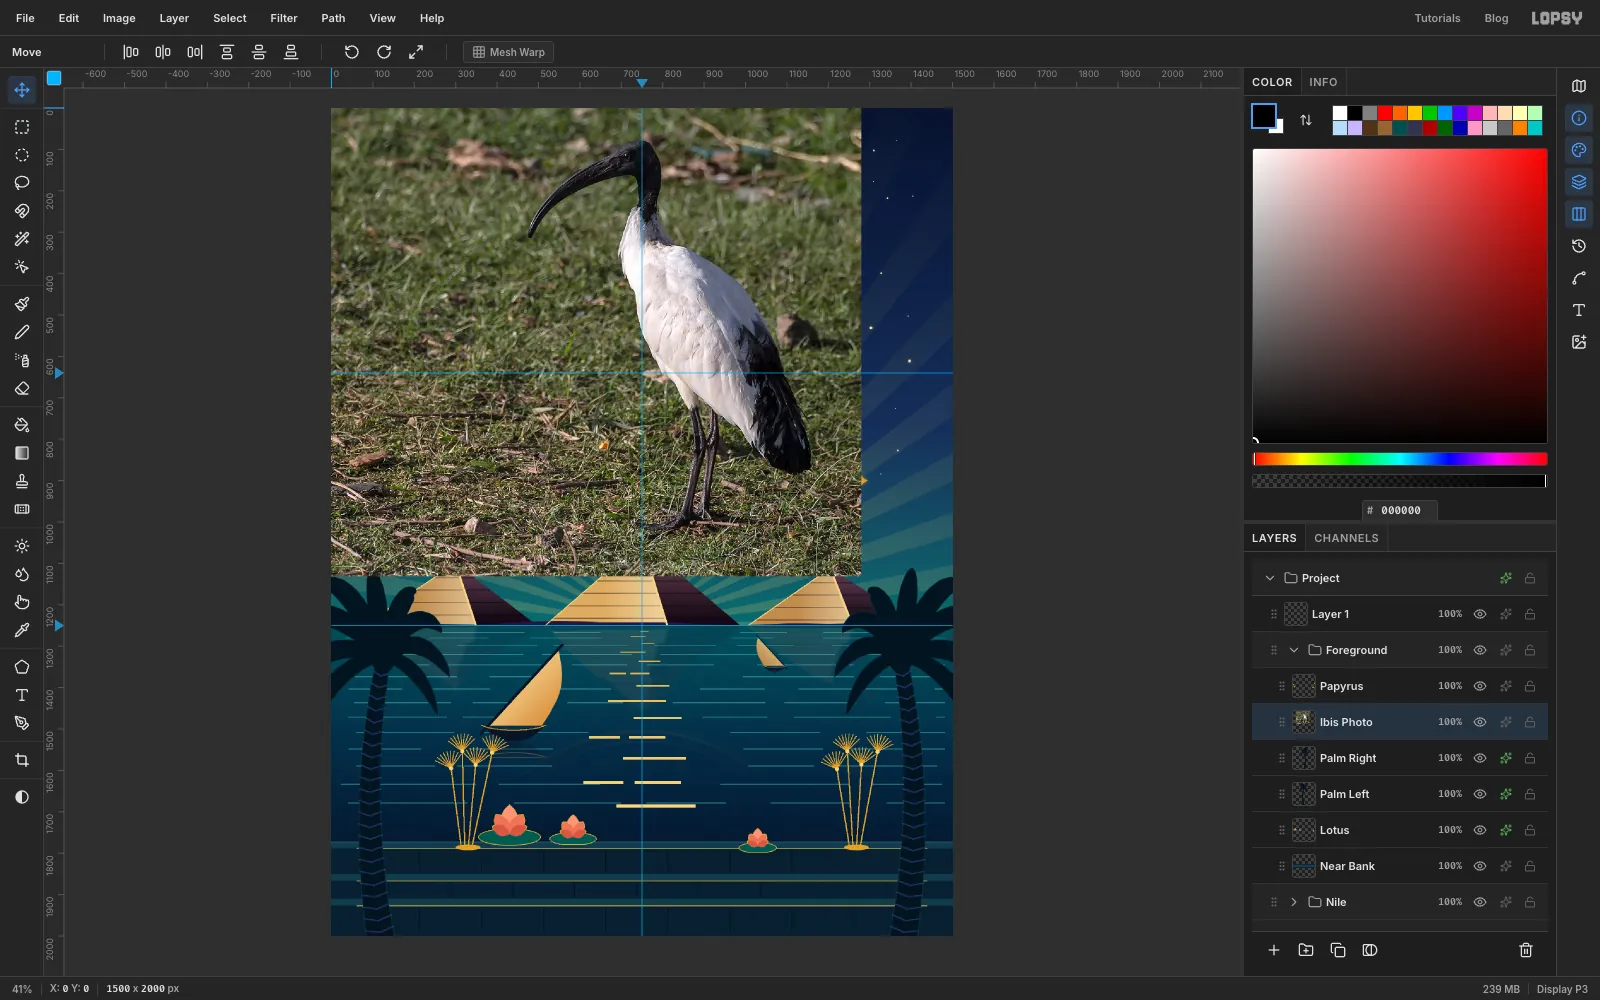
Paste the ibis photo
Select the Palm Right layer, open the ibis photo in your browser, copy it and press Cmd+V in Lopsy. It lands at the top left as a new layer. Rename it Ibis Photo and deselect.
-
Grab the white feathers with Quick Selection
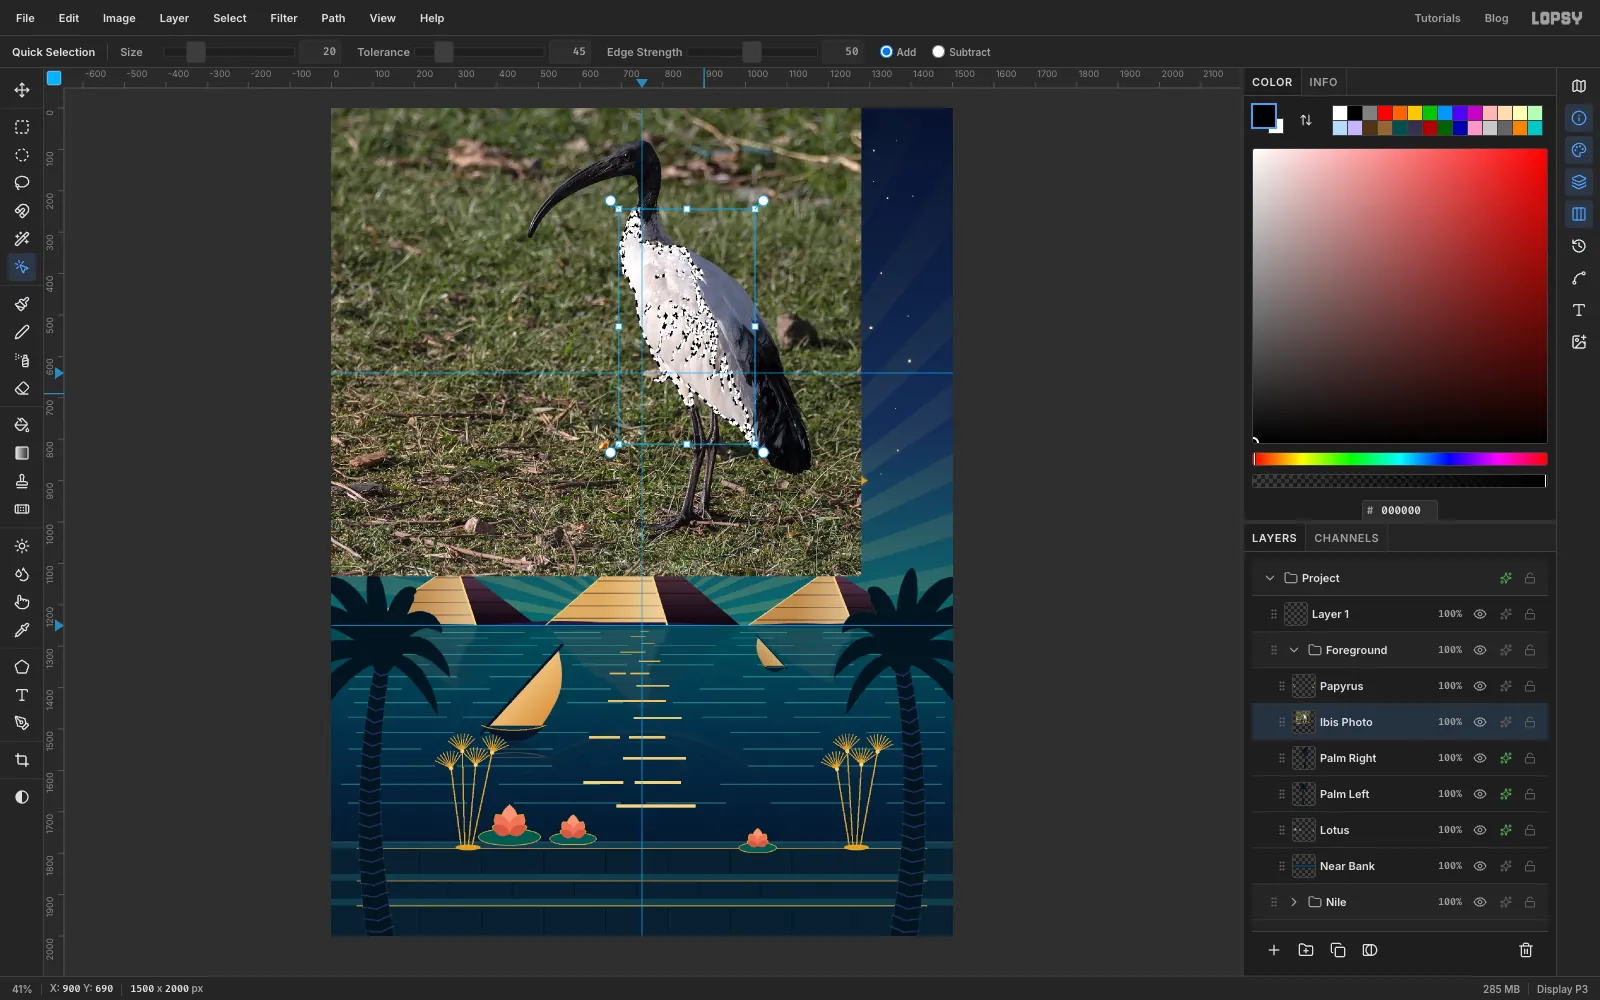
Choose Quick Selection with Size 20, Tolerance 45 and Edge Strength 50, and paint two strokes down the white breast and back. Quick Selection compares colour only, so it may also catch some bright grass highlights. Keep it off the black head and tail; dark strokes spread into the dark grass and even into the empty part of the layer.
-
Keep only the body
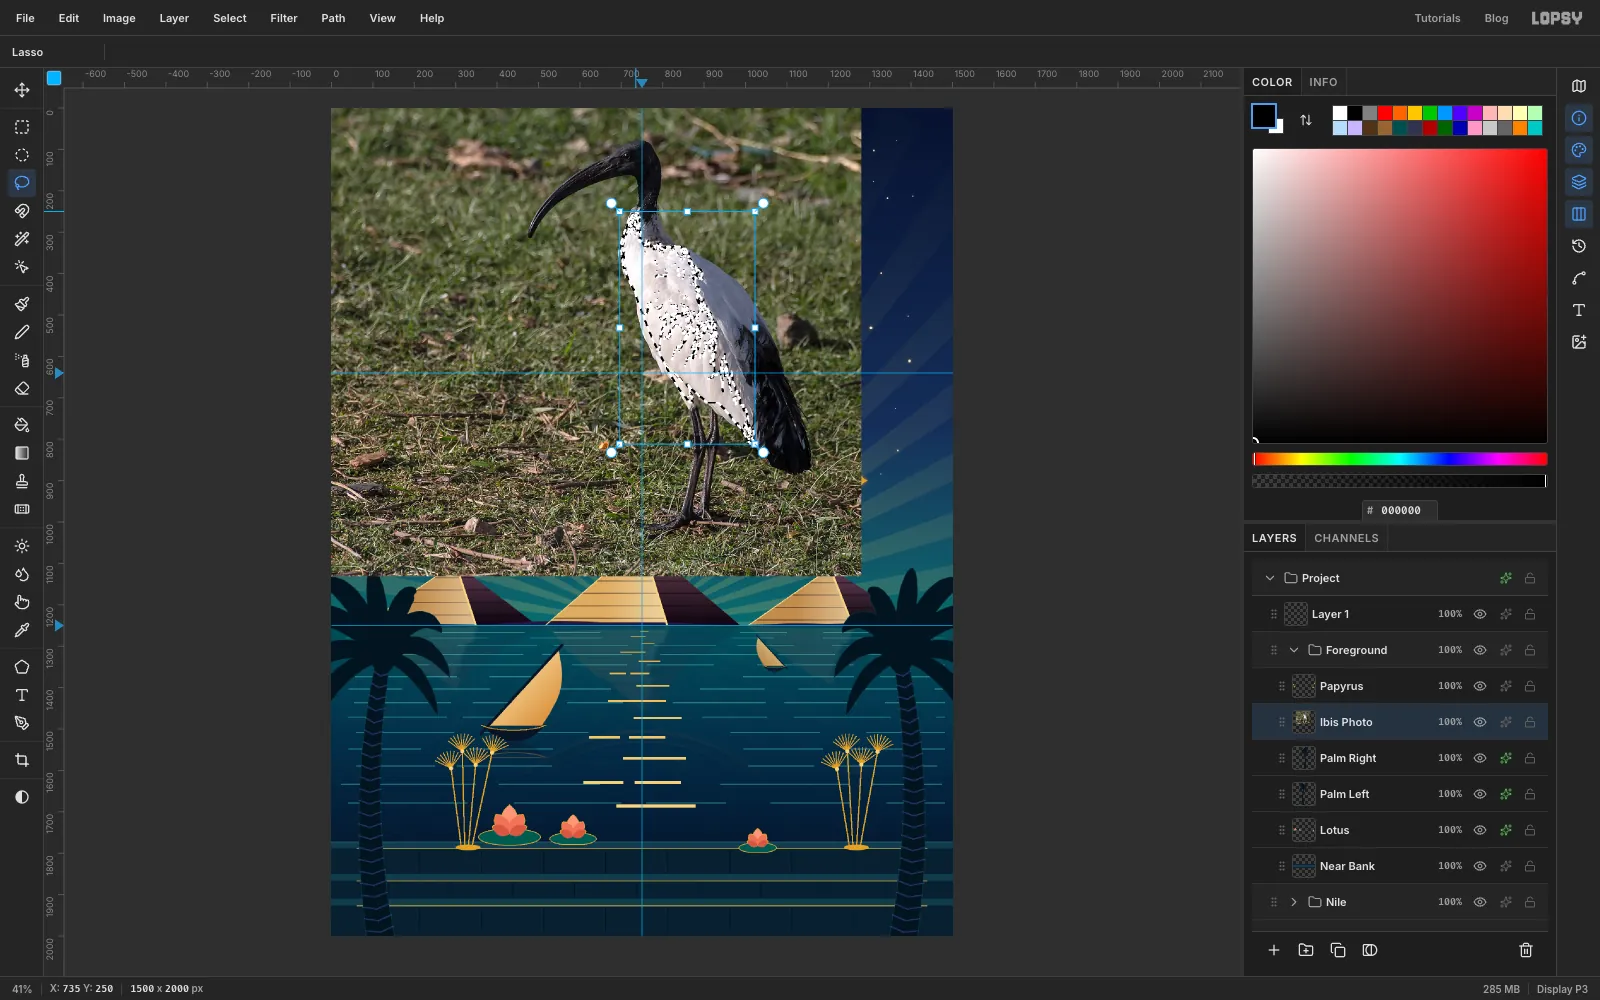
Switch to the Lasso, hold Shift+Alt and draw a loose outline around the body. That combination keeps only the overlap of the two selections, so every speck in the grass disappears.
-
Add the head, legs and tail
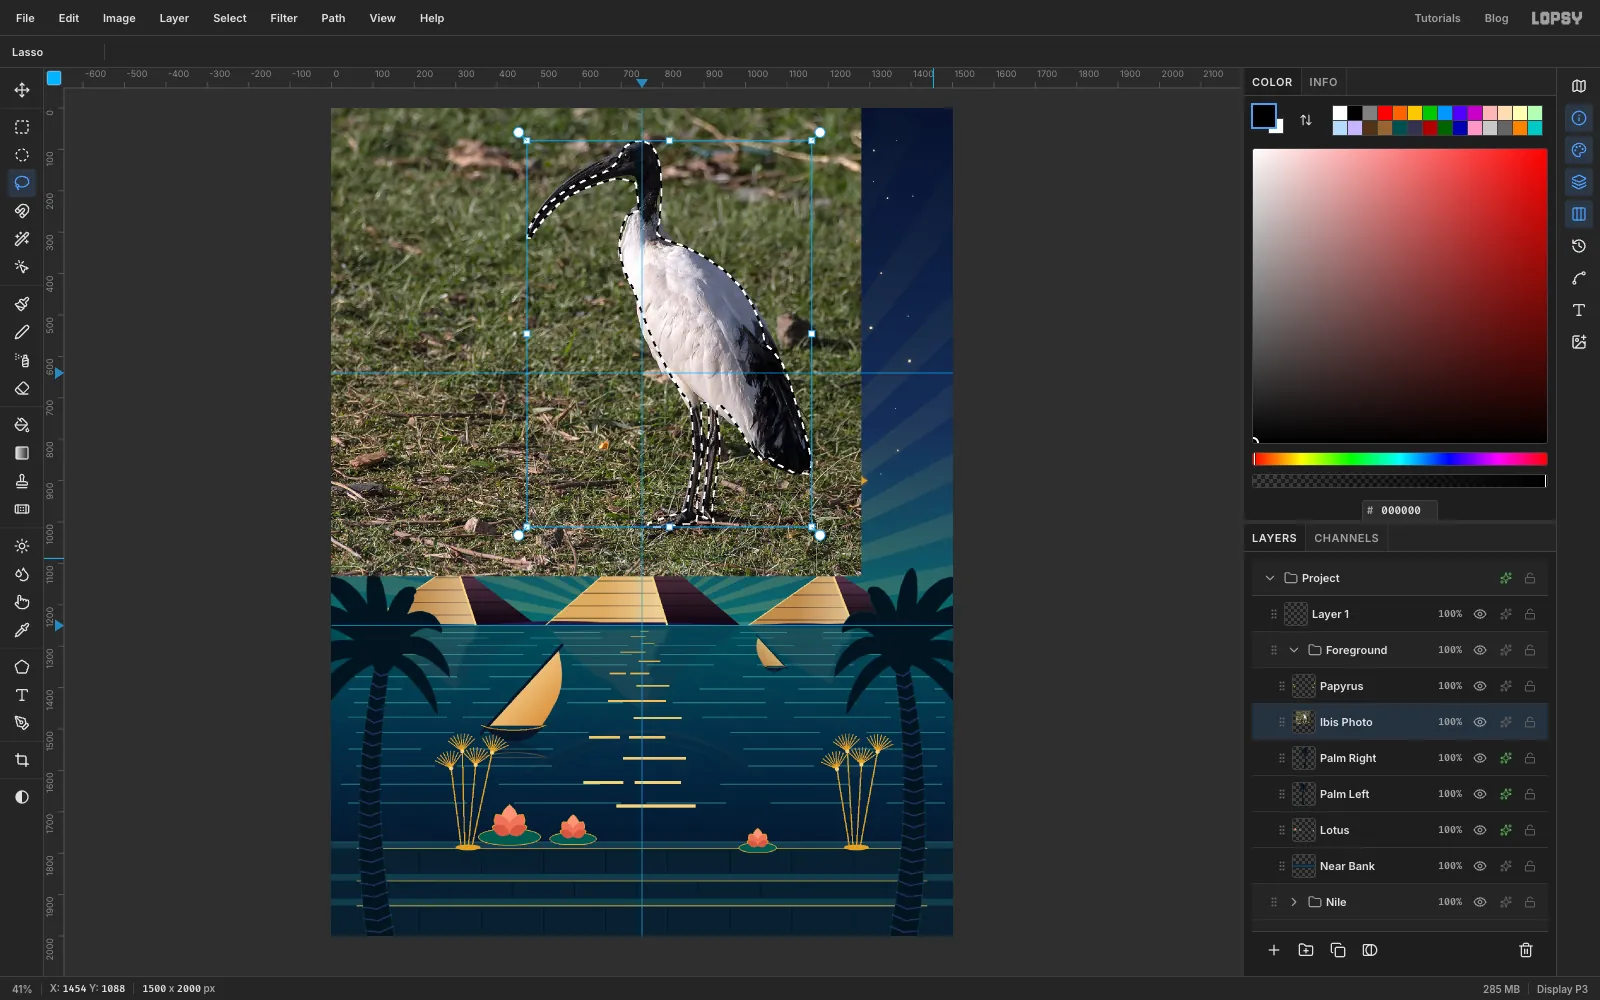
Hold Shift and lasso around the body again to fill in the shaded feathers Quick Selection missed. Keep Shift held and lasso the black head and curved beak, each leg and the black tail plumes. Then run Select → Grow… 6 px and Shrink… 6 px to close the pinholes.
-
Lift the bird onto its own layer
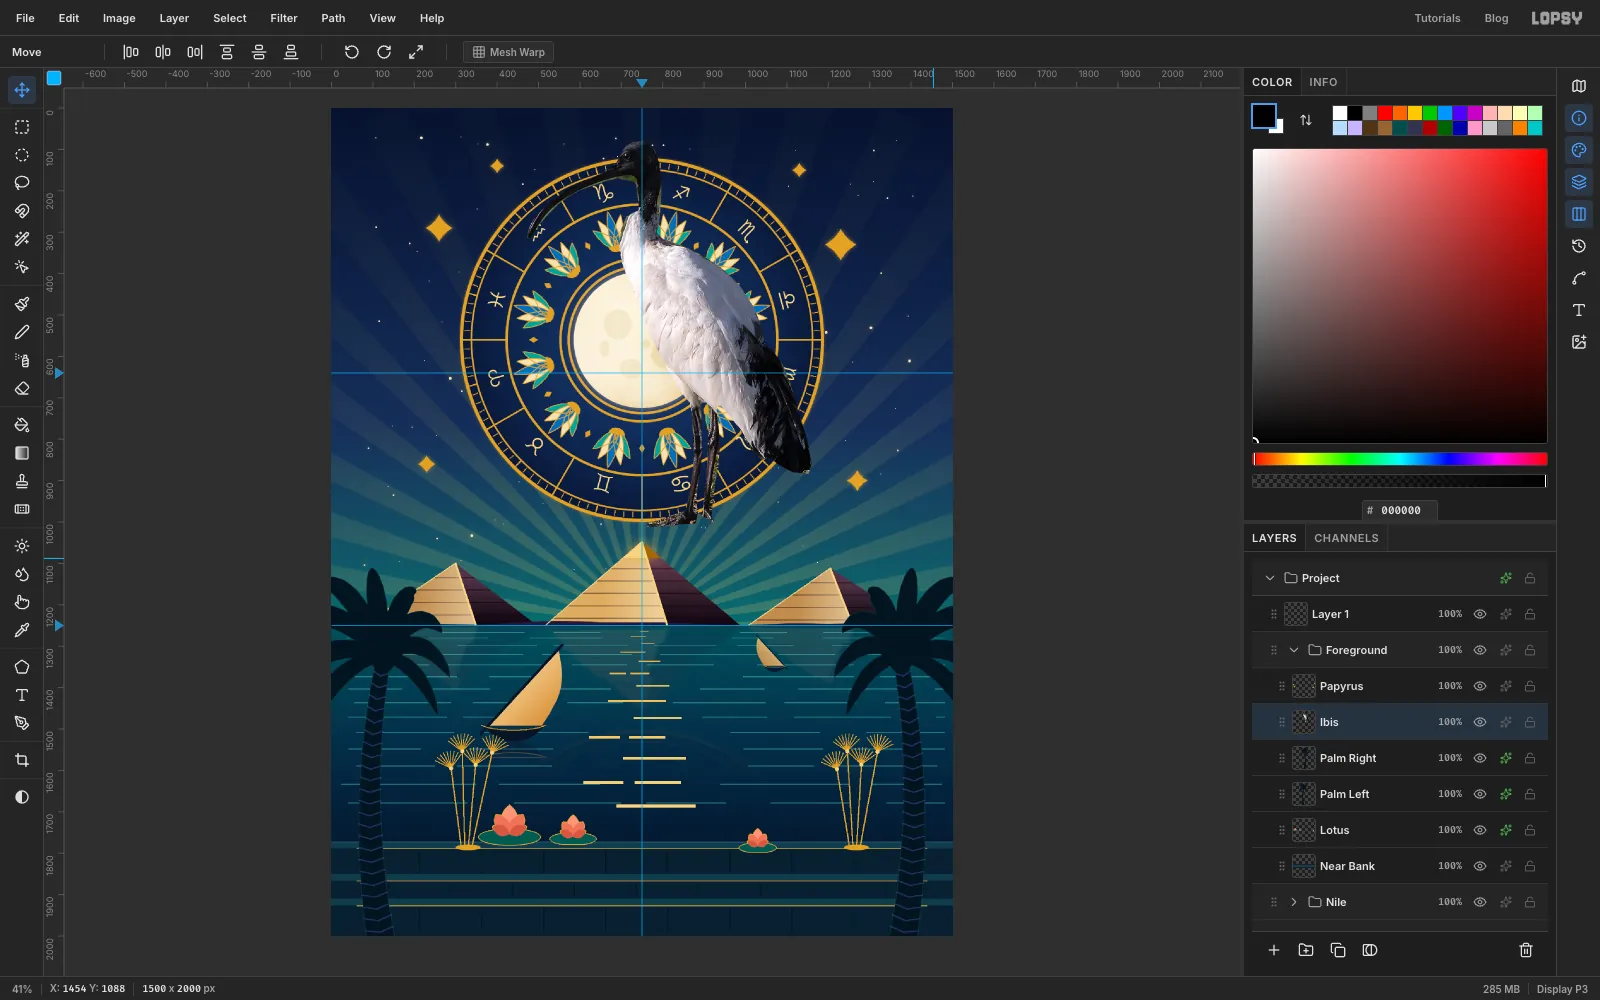
Press Cmd+C and Cmd+V to copy the bird to a new layer in place, and name it Ibis. Select the Ibis Photo layer and click Delete Layer.
-
Flatten it to two tones
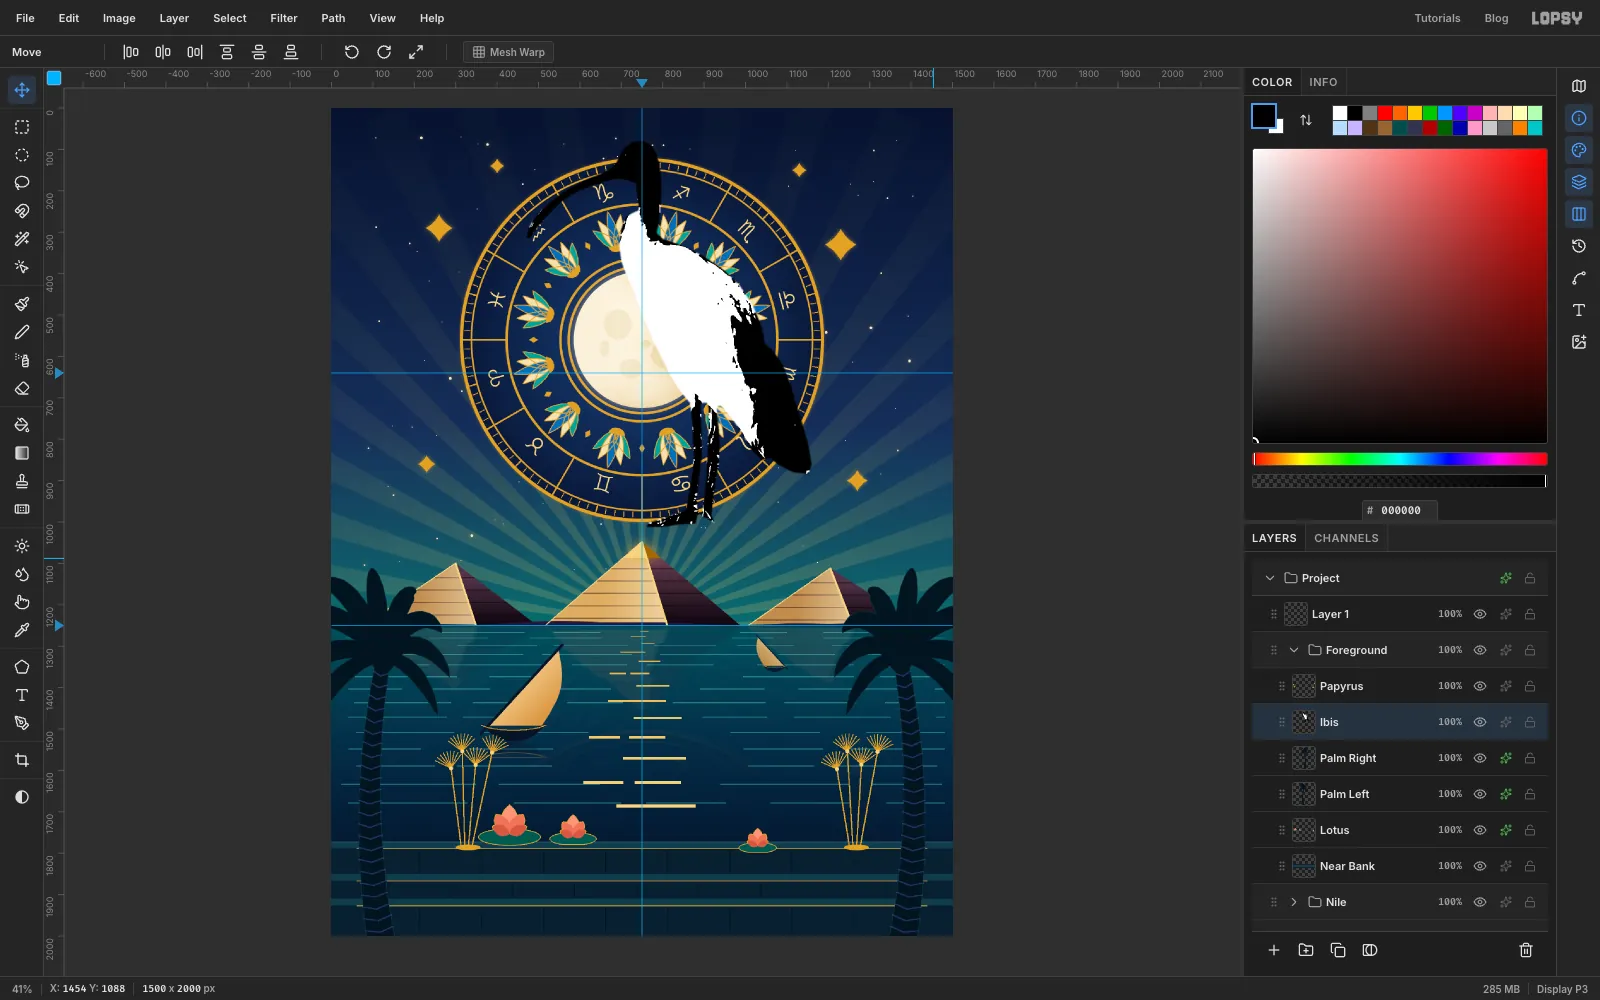
On the Ibis layer, choose Filter → Desaturate, then Gaussian Blur… at Radius 4, then Threshold… at Level 105. The blur first is what keeps the threshold from turning feathers into noise. To tidy the outline, Cmd-click the thumbnail and run Grow 10, Shrink 10, Shrink 6 and Grow 6. Then choose Select → Inverse, press Delete and deselect.
-
Clean up the speckle with the Magic Wand
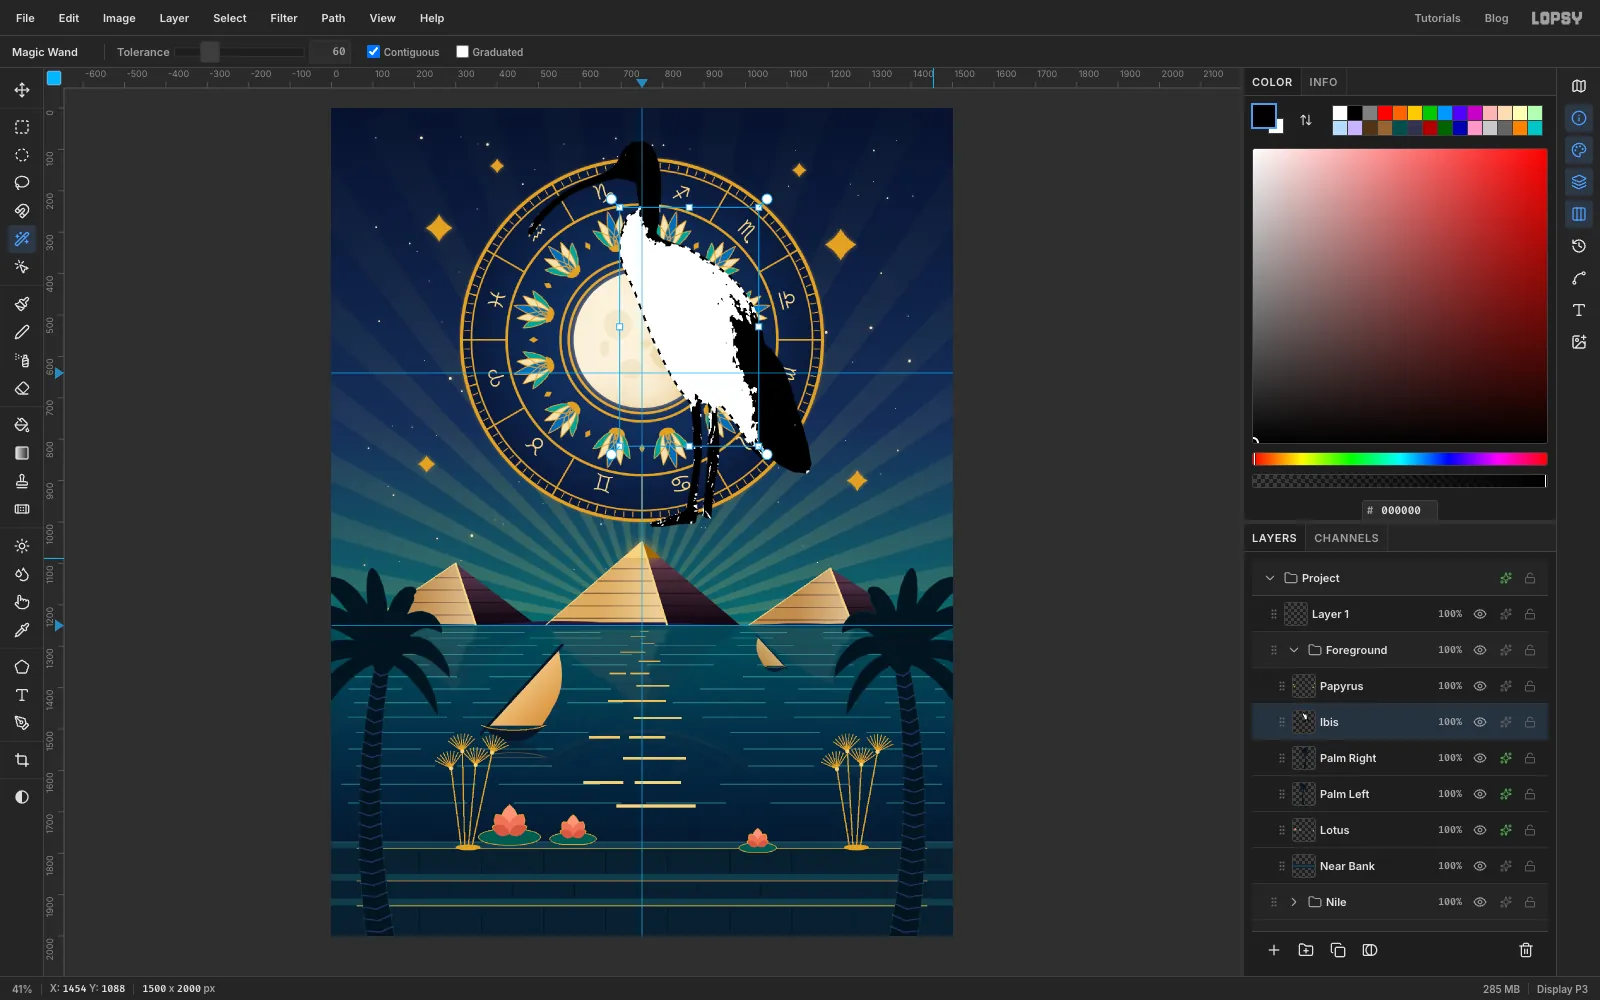
Choose the Magic Wand at Tolerance 60 and click the white body. Run Grow 6 and Shrink 6, which swallows the black specks inside, and fill it: set the foreground to white and choose Edit → Fill. Do the same on the head, the tail and each leg, filling those with black.
-
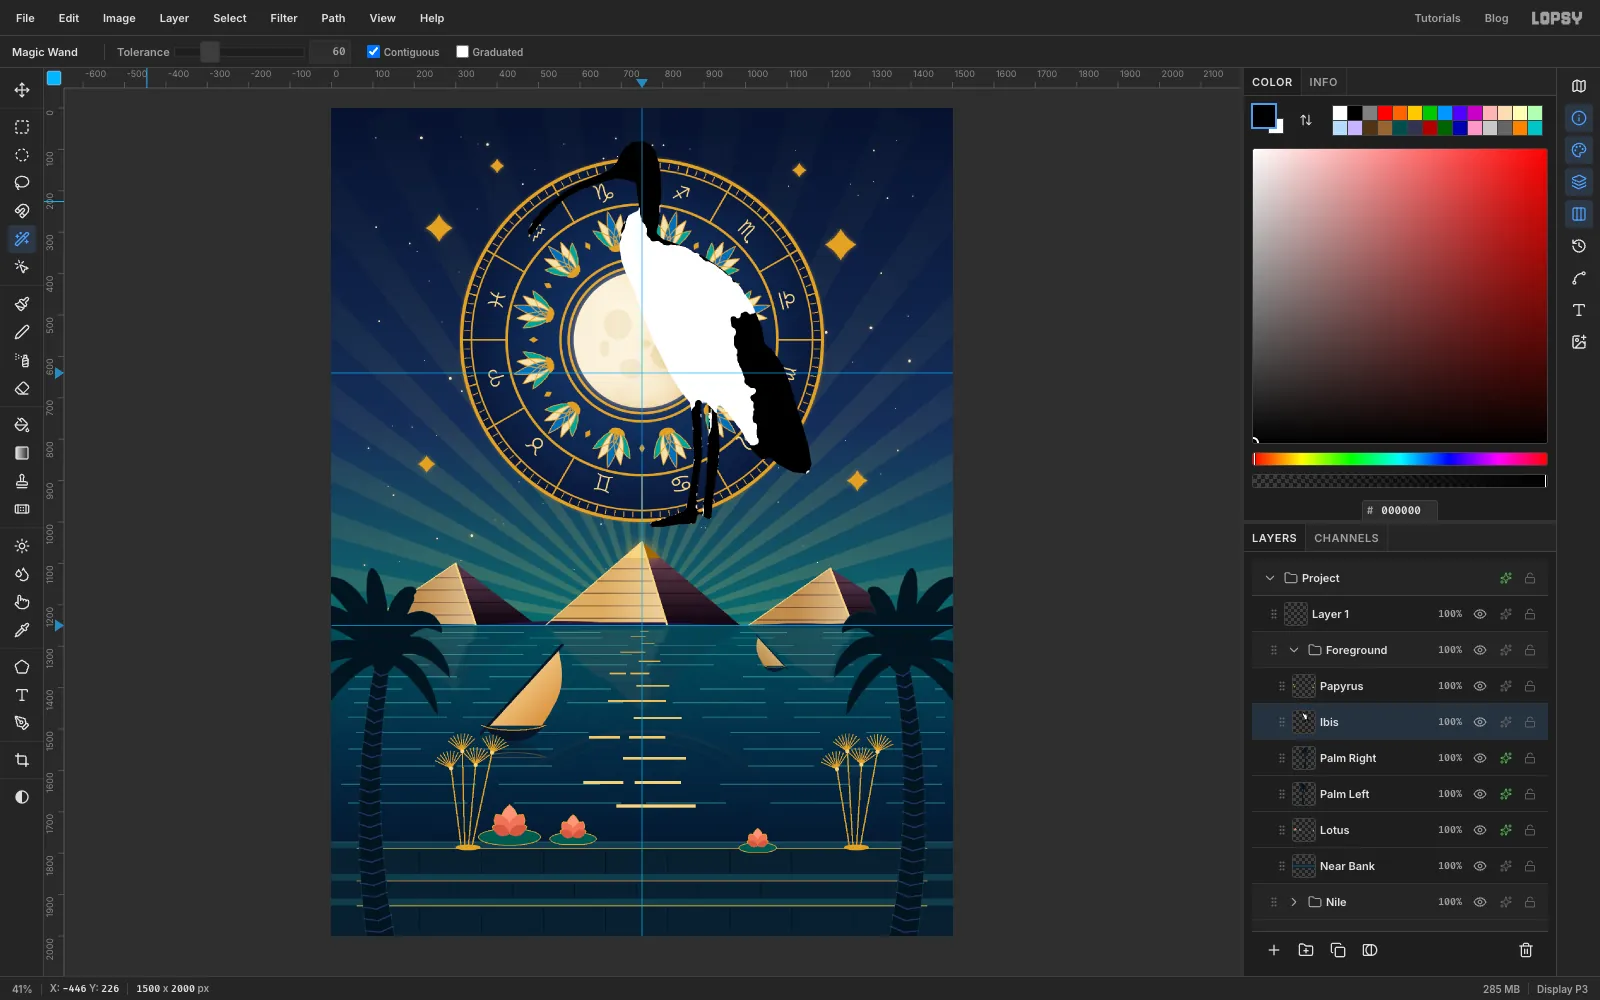
Check the silhouette
You now have a clean two-tone silhouette, like a Deco print, built on the real bird's proportions.
-
Scale the ibis down
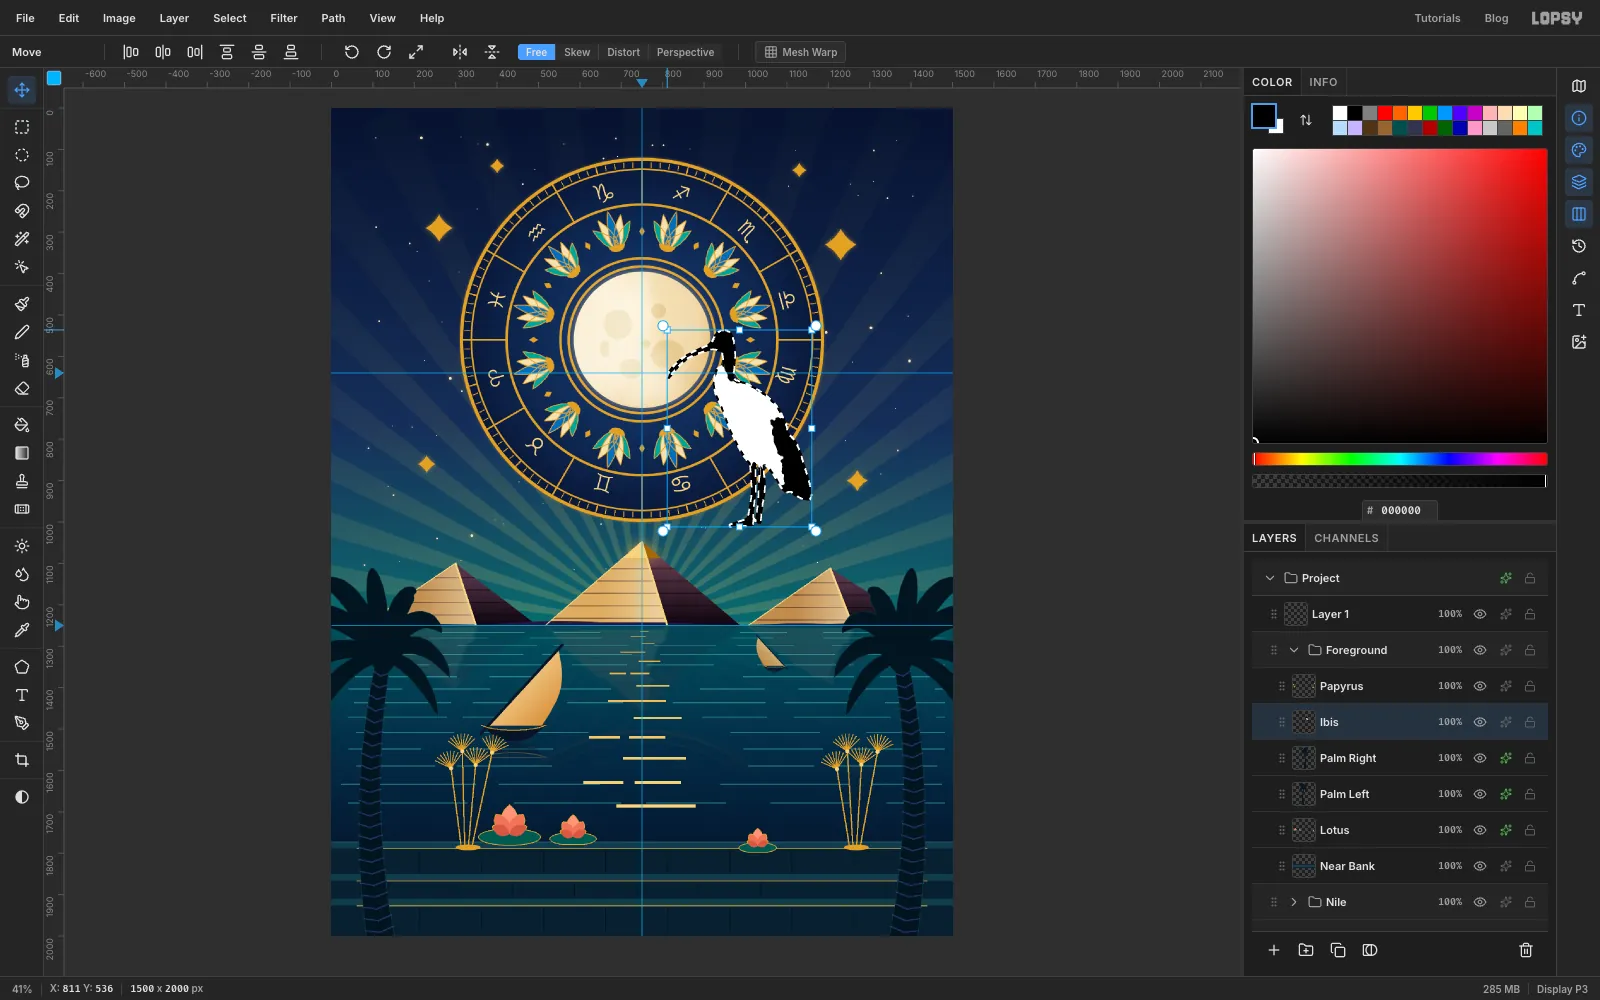
Cmd-click the Ibis thumbnail, then hold Cmd and drag the top-left handle in until the bird is about half its size, about 480 px tall. Deselect.
-
Stand it on the quay
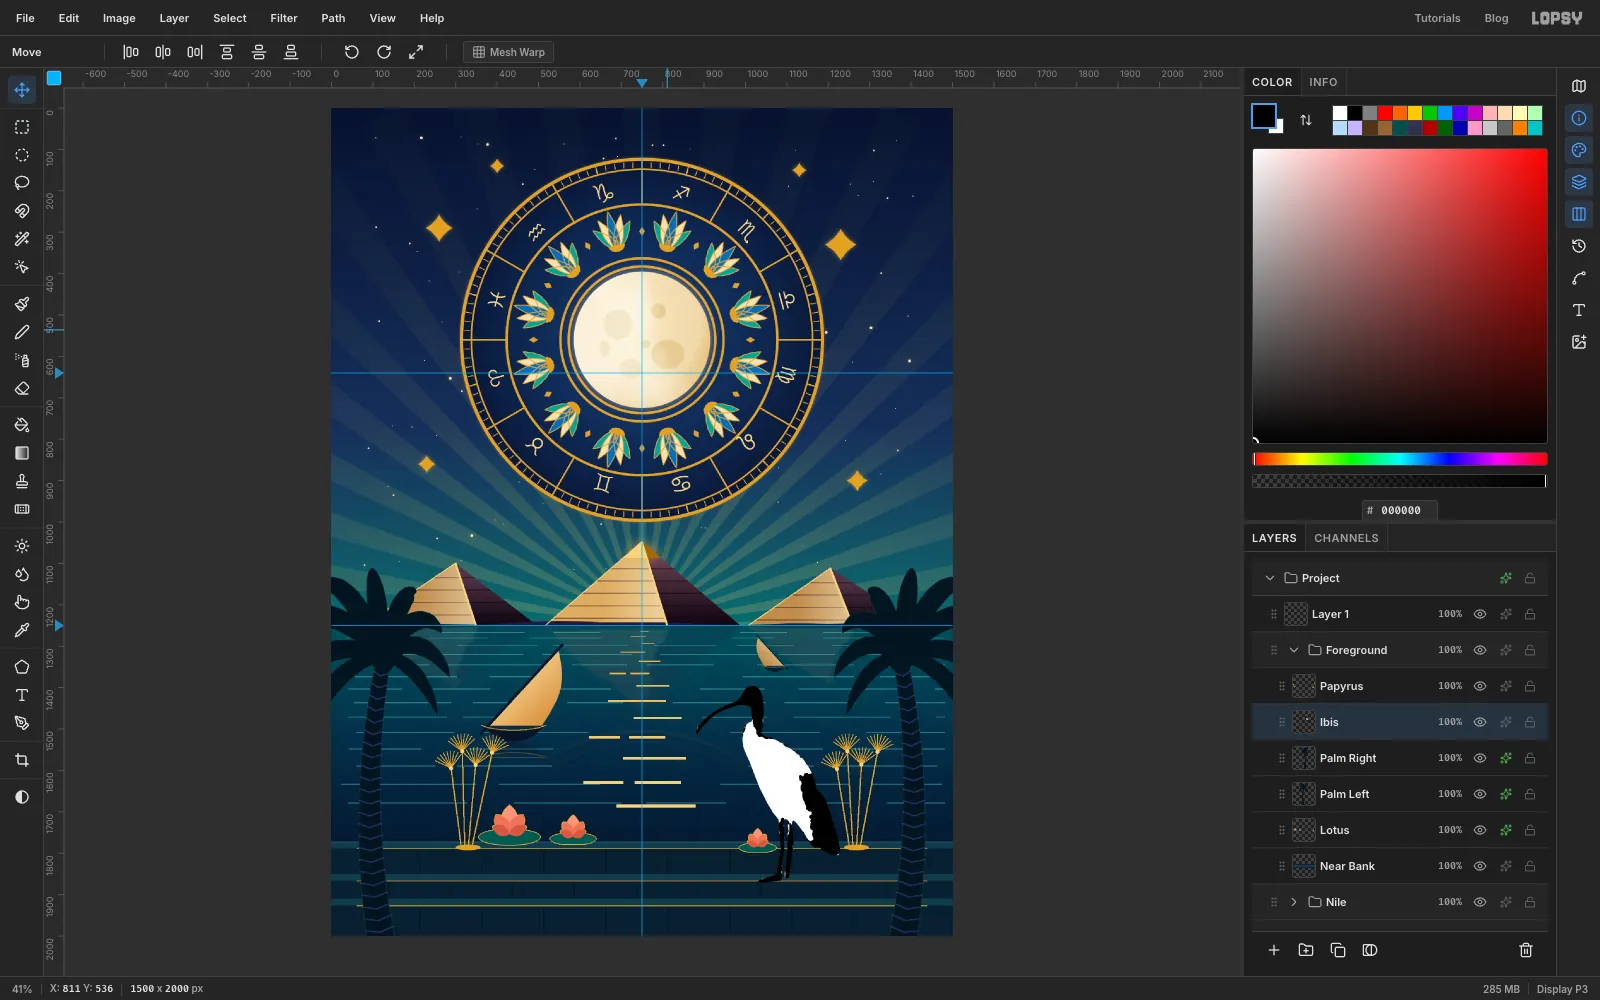
Nudge the bird with the arrow keys until its feet rest on the quay at about y 1870 and its beak points at the moon path. Select Palm Right and add an Ibis Shadow layer, which places it under the bird. Draw a flat ellipse under the feet, Feather it 10 px, fill it with and set the layer to 70 %.
-
Recolour it with a Gradient Map
Select the Ibis layer and choose Layer → Group Layers, then name the group Ibis Group. Open the group's effects drawer and choose Add Adjustment → Gradient Map. Click the left stop and type
0B1220in its hex field, then click the right stop and typeF2E6CC. The bird turns from stark black and white into ink and moonlit cream. Click the middle of the handle row to add a slate stop; it only affects the grey edges. Finally, give the Ibis layer a faint Inner Glow (Size 4, Opacity 45) in pale gold.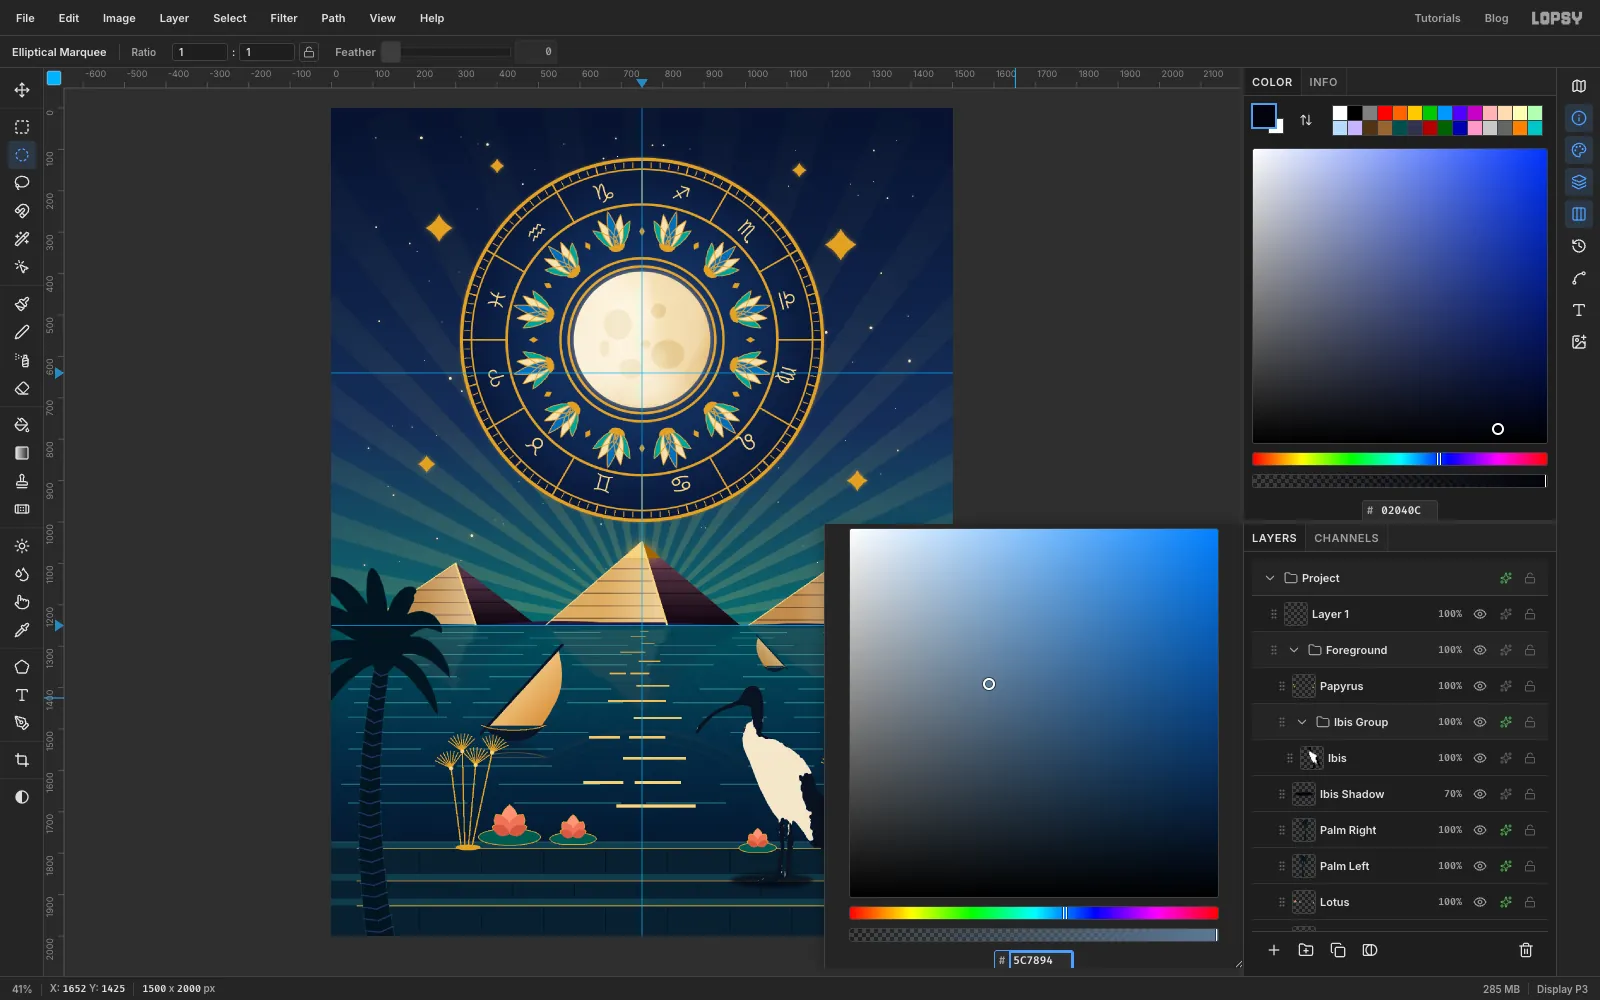
-
Bloom the capstone
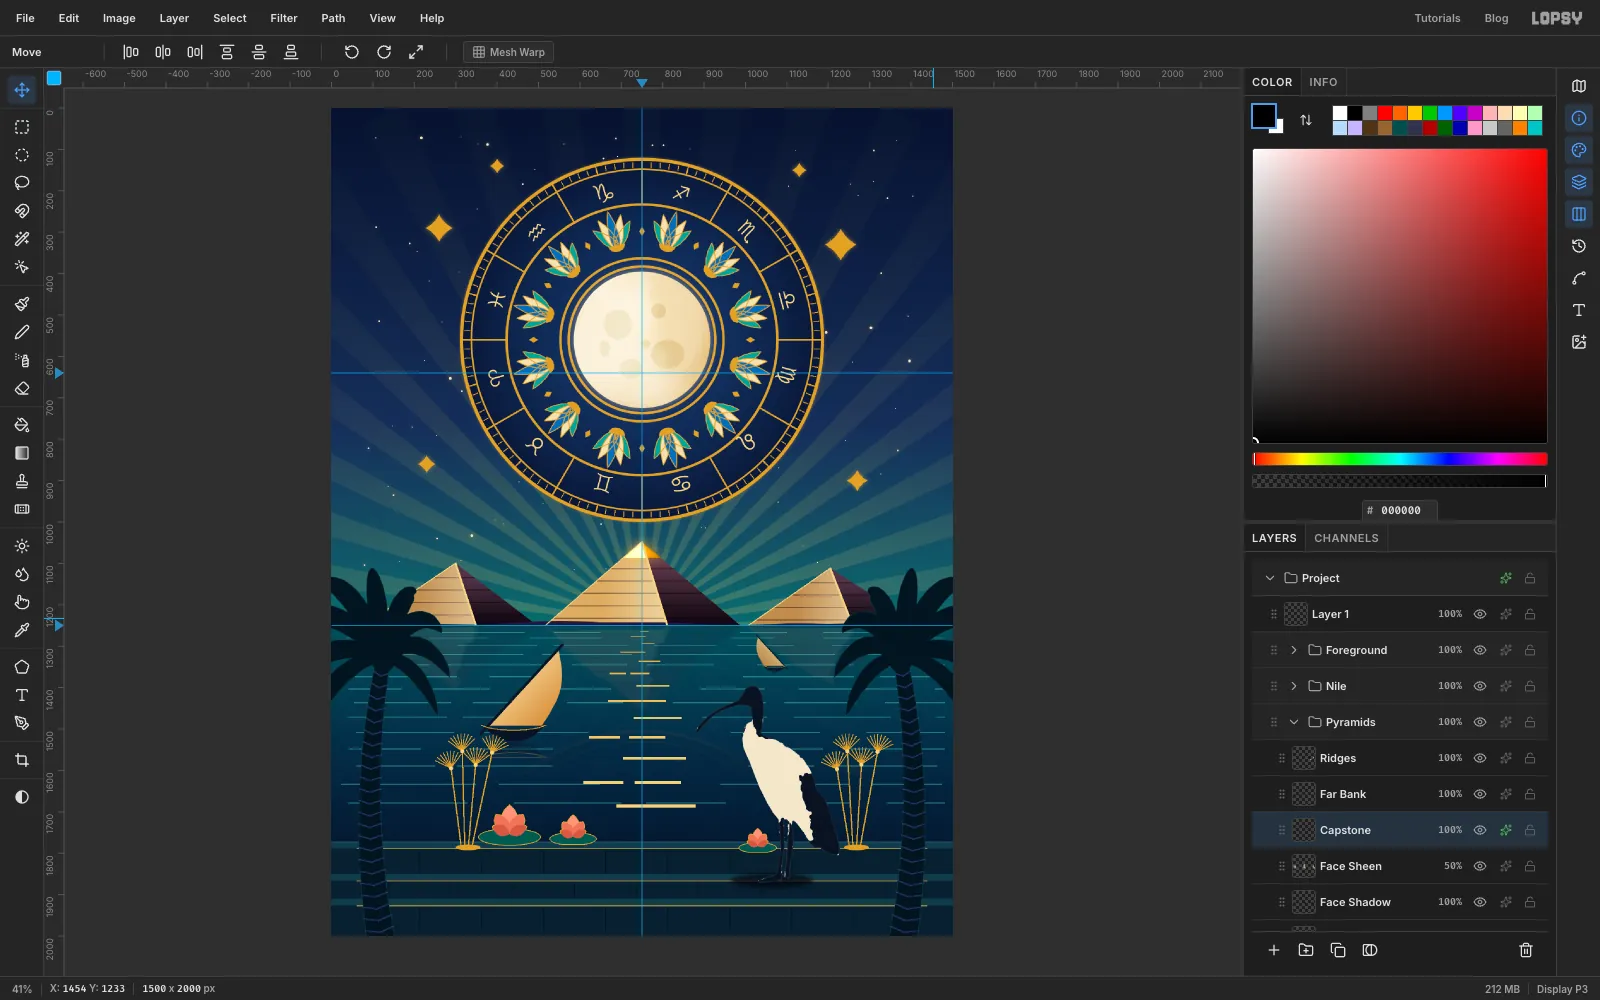
Expand Pyramids, select Capstone and run Filter → Bloom… with Threshold 40, Soft Knee 50, Radius 16 and Intensity 60. It makes the gold tip look lit by the moon. Collapse the group again.
-
Breathe mist over the horizon
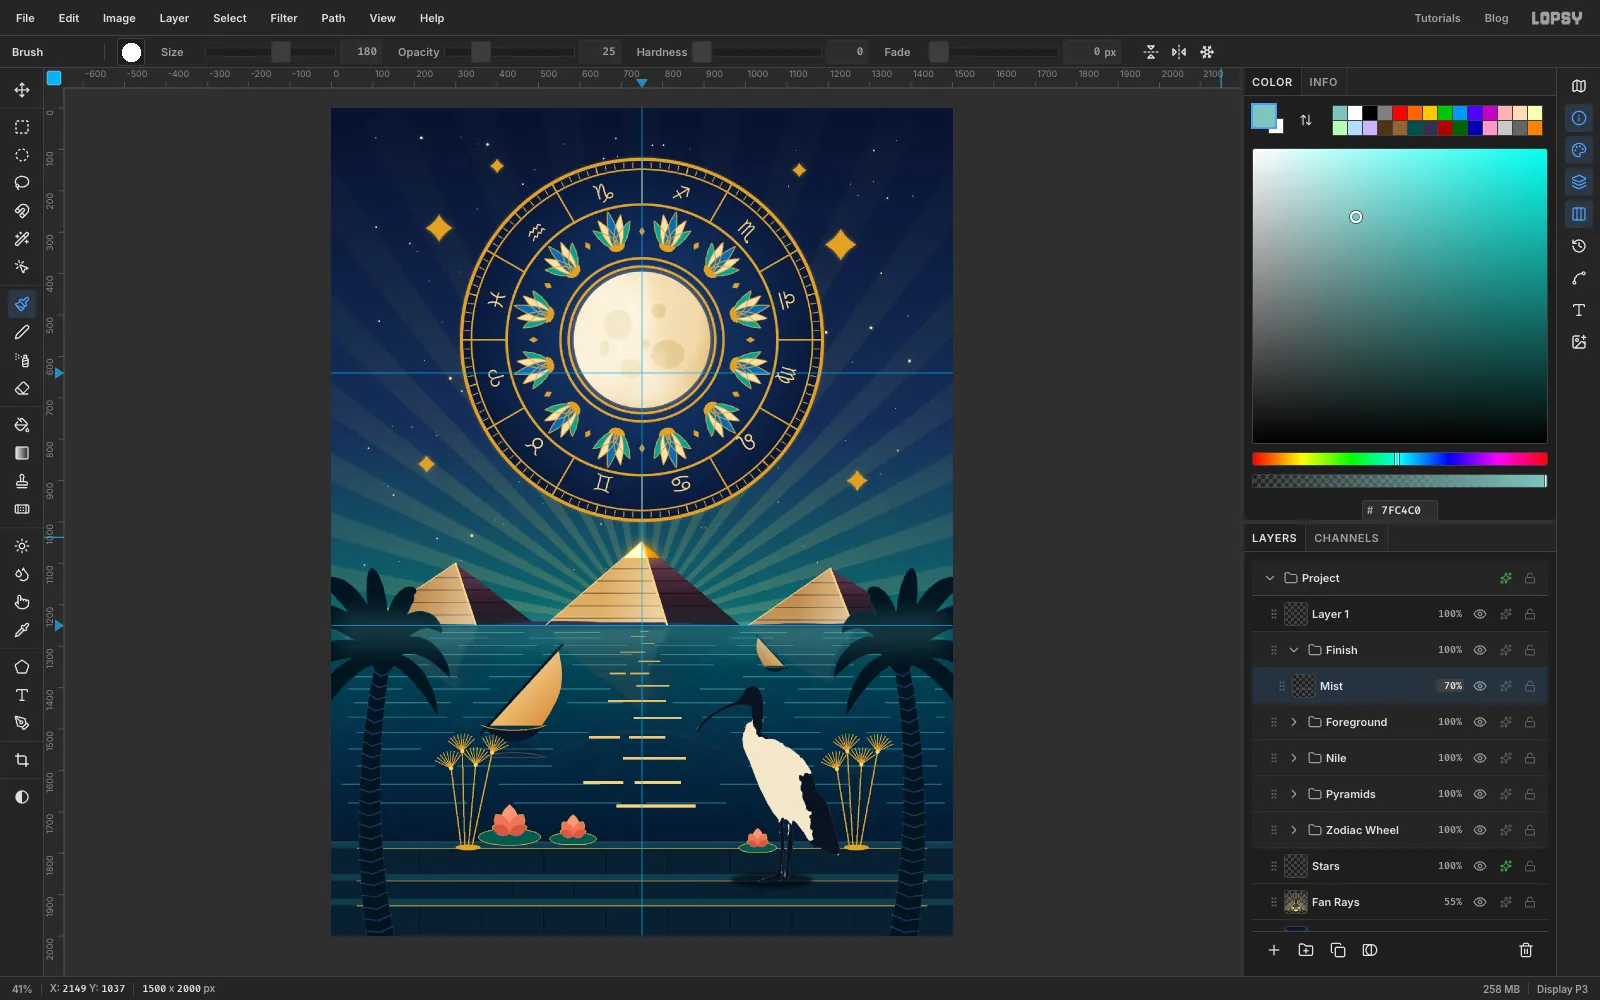
Collapse Foreground, select it and add a Finish group. Add a Mist layer and choose the Brush at Size 180, Hardness 0 and Opacity 25 in . Paint one slow stroke along the horizon. Set the layer to Screen at 70 %.
-
Darken the edges
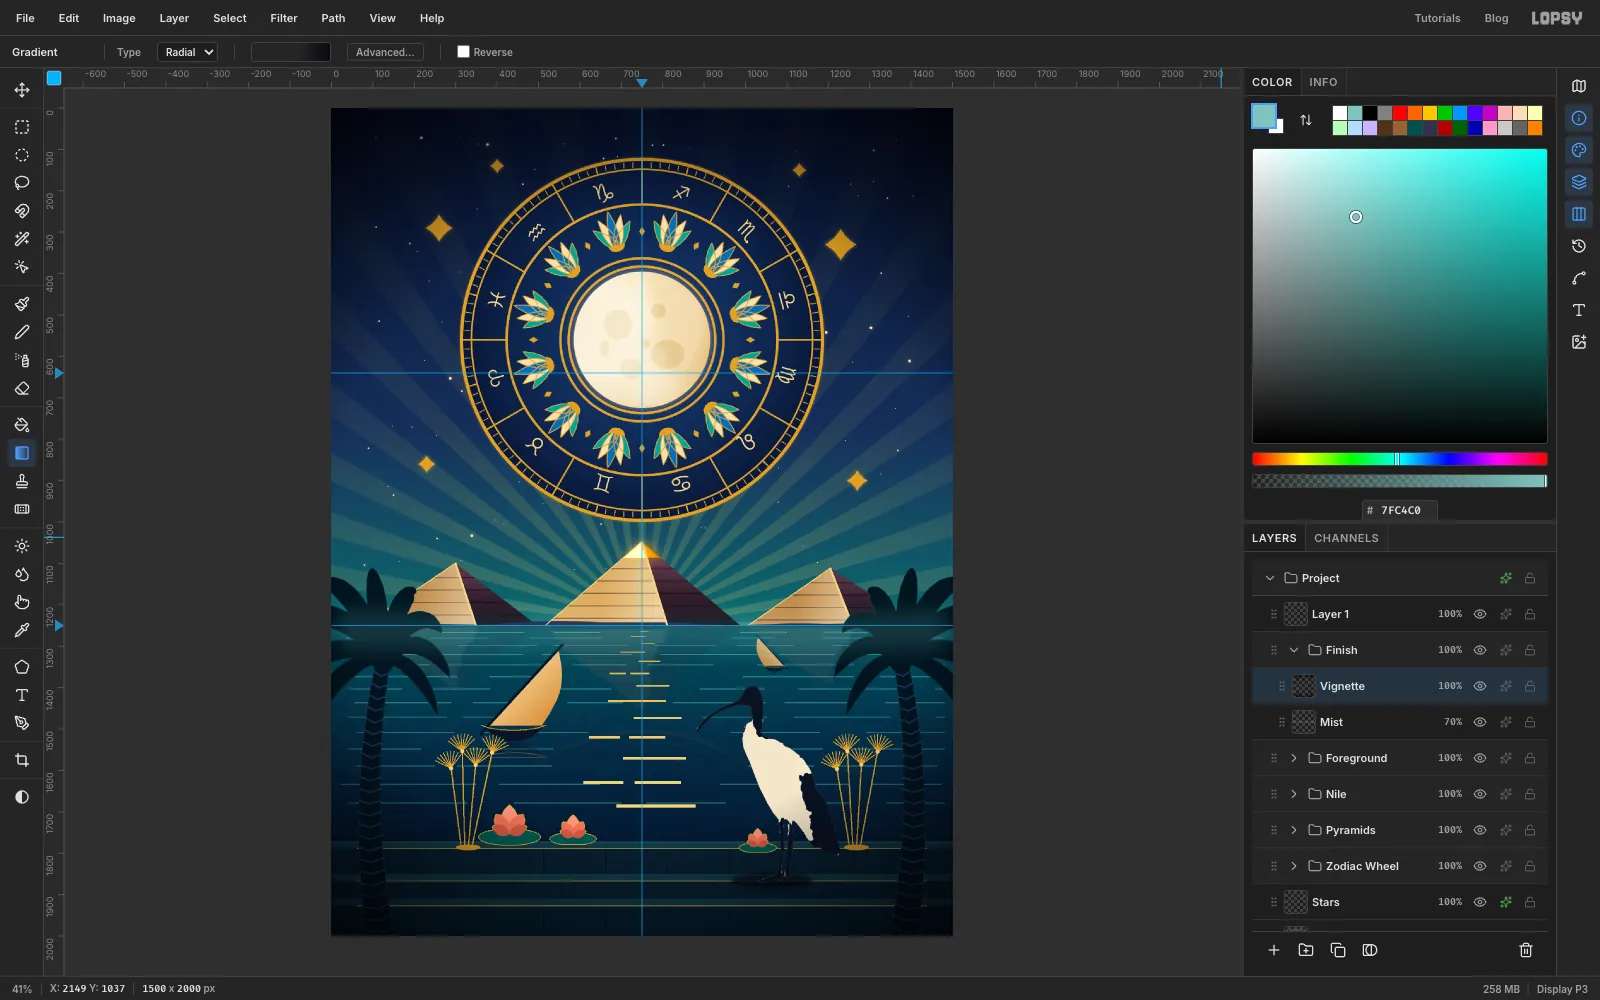
Add a Vignette layer and press Cmd+A. Drag a radial gradient from the canvas centre to a corner. Make it transparent black to 60 %, then at 85 % at the edge. Deselect and set the layer to Multiply.
-
Add print grain
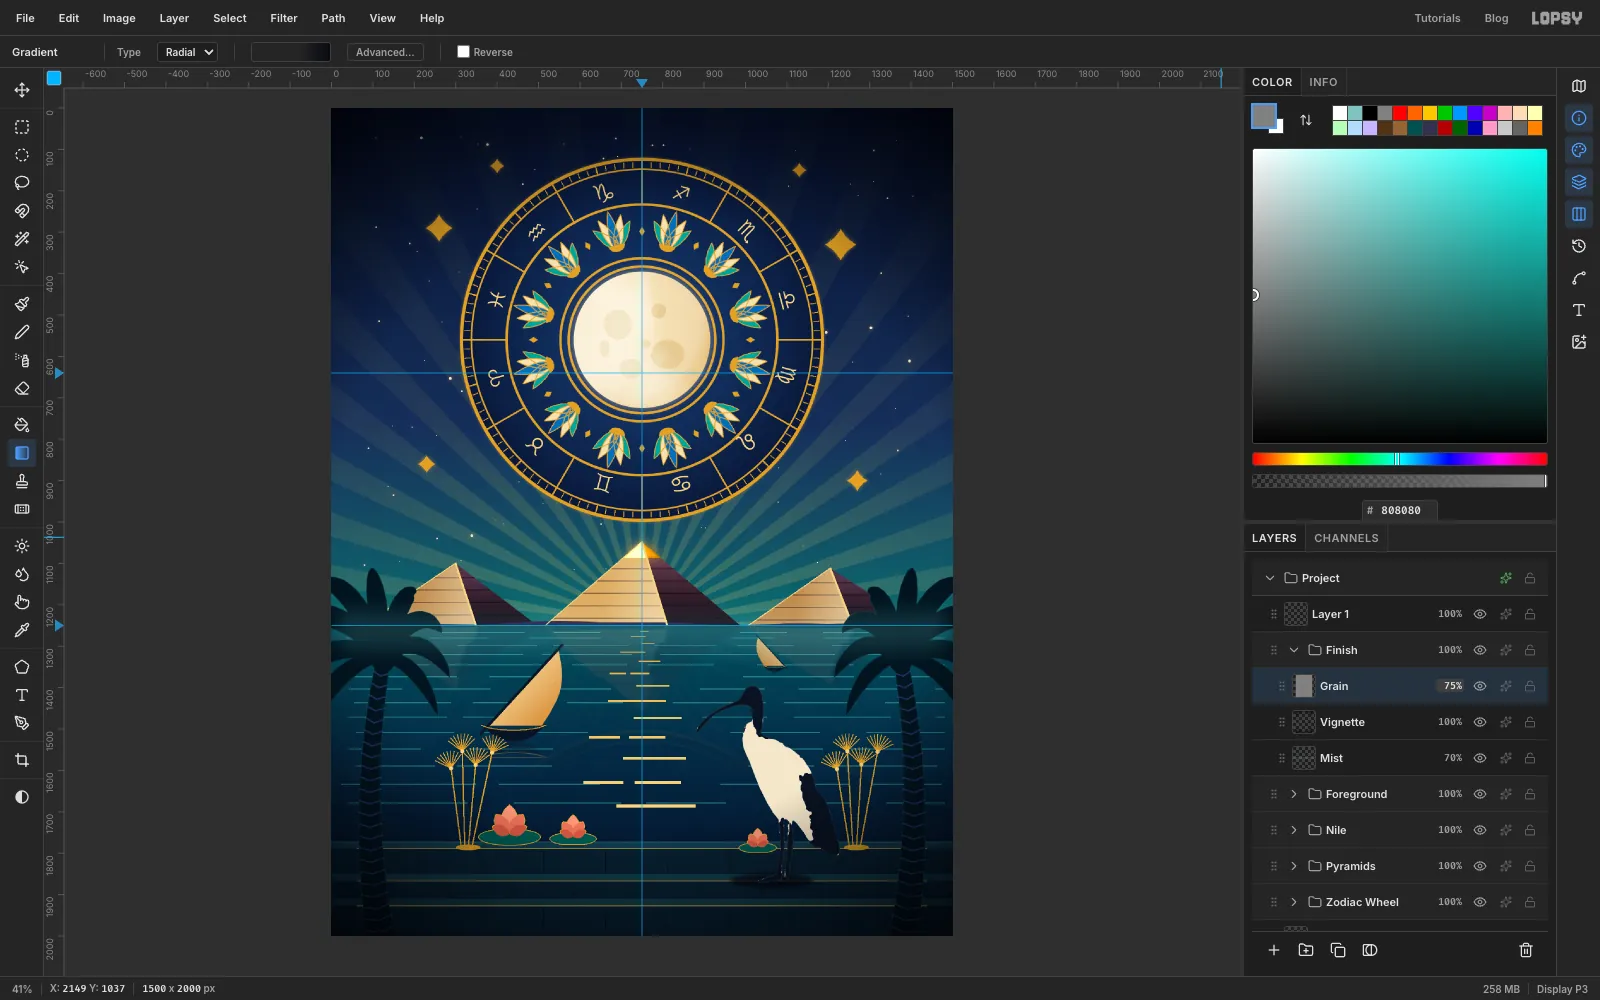
Add a Grain layer, fill it with mid grey and run Filter → Add Noise… at Amount 45 with Mono and Gaussian. Set it to Overlay at 75 %. The grey disappears and only the grain is left.
-
Frame it in gold
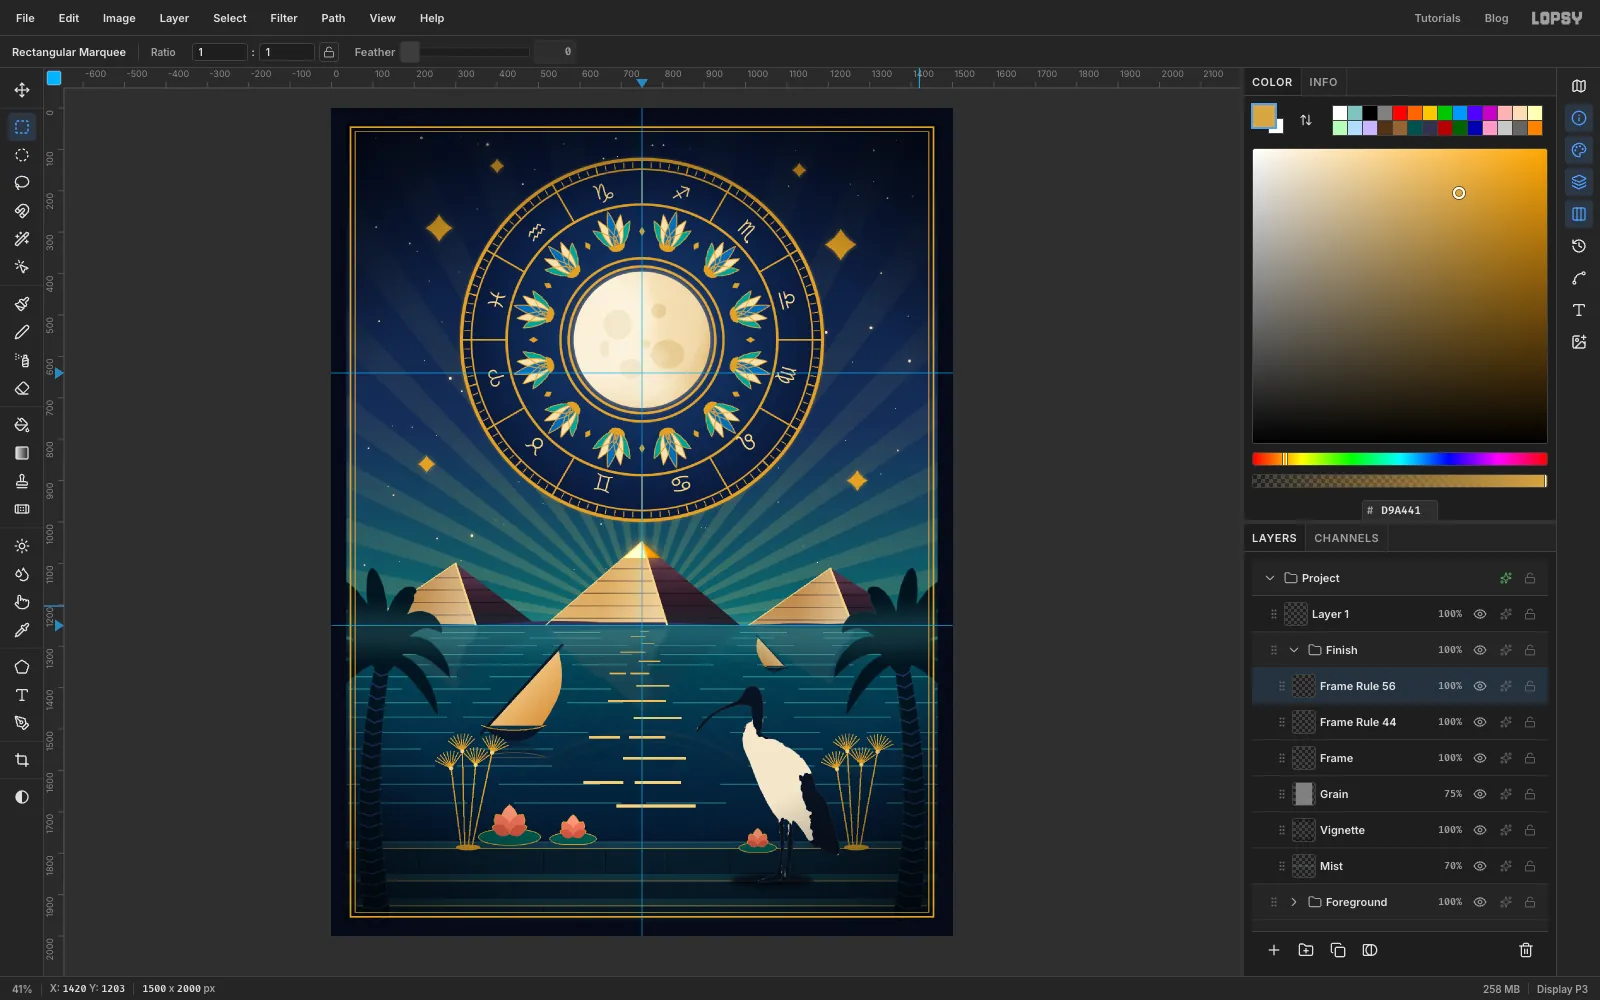
Add a Frame layer. With the Rectangular Marquee, click once on the canvas to open the exact-corners dialog, enter From 36, 36 and To 1464, 1964, and click Select. Choose Select → Inverse and fill with . For the gold rules, add a layer named Frame Rule 44 and use the dialog to select from 44, 44 to 1456, 1956. Fill it gold, then select from 48, 48 to 1452, 1952 and press Delete, which leaves a 4 px rule. Make a 2 px rule the same way on a Frame Rule 56 layer, starting 56 px in.
-
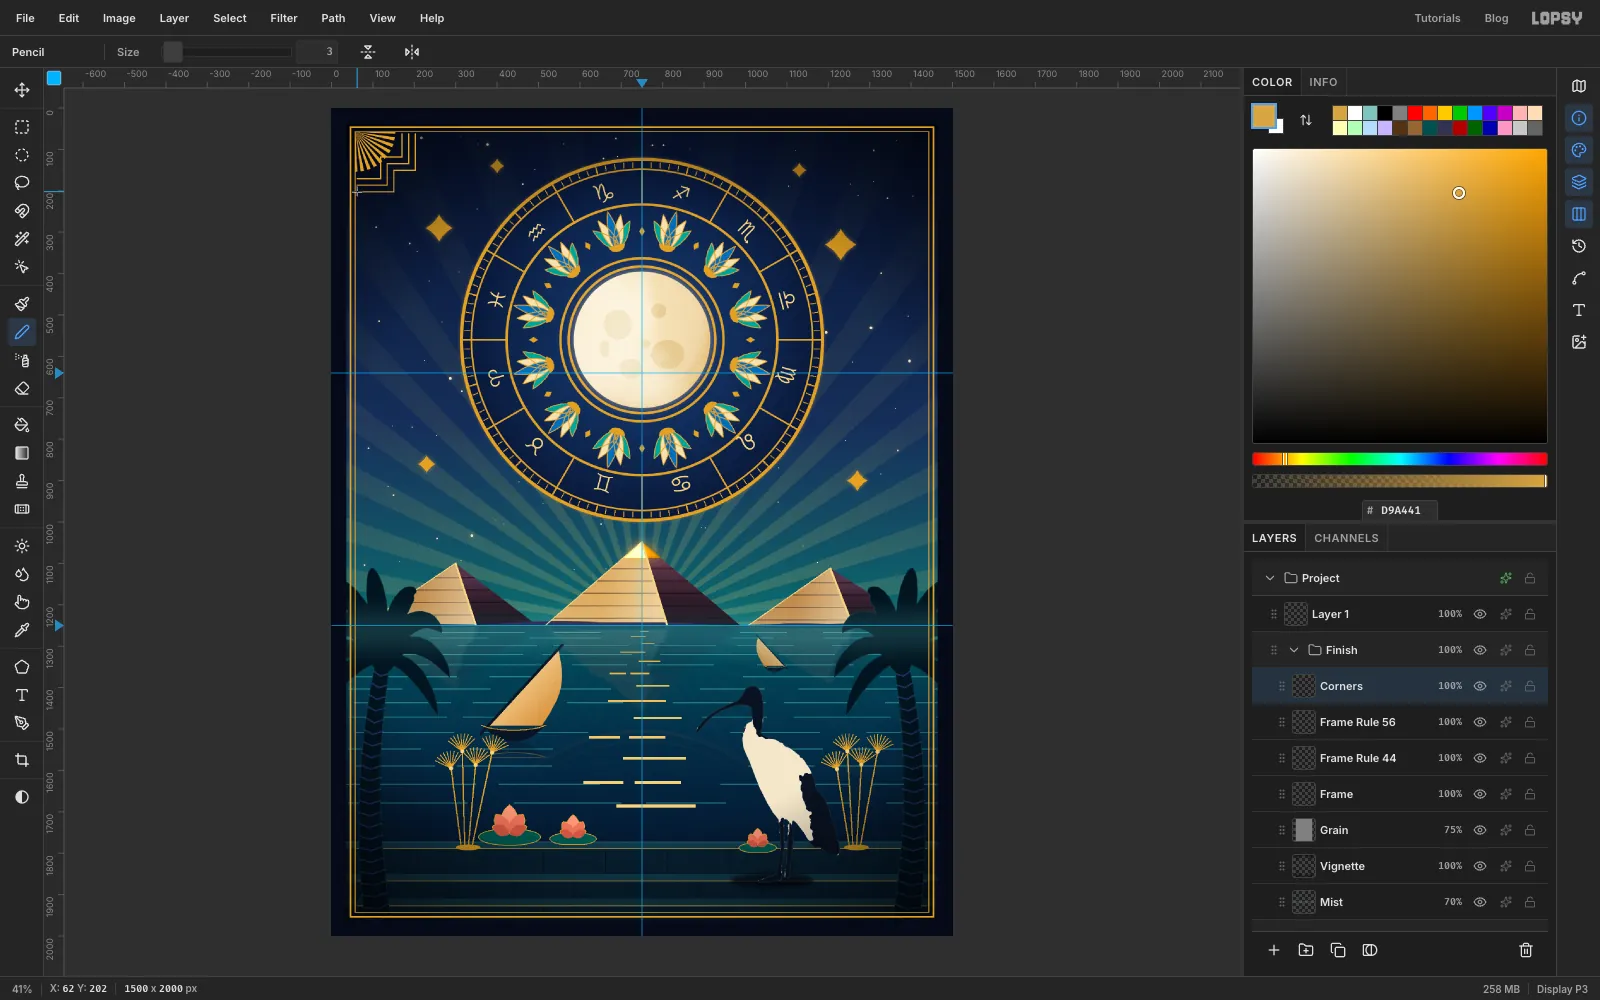
Select a corner fan
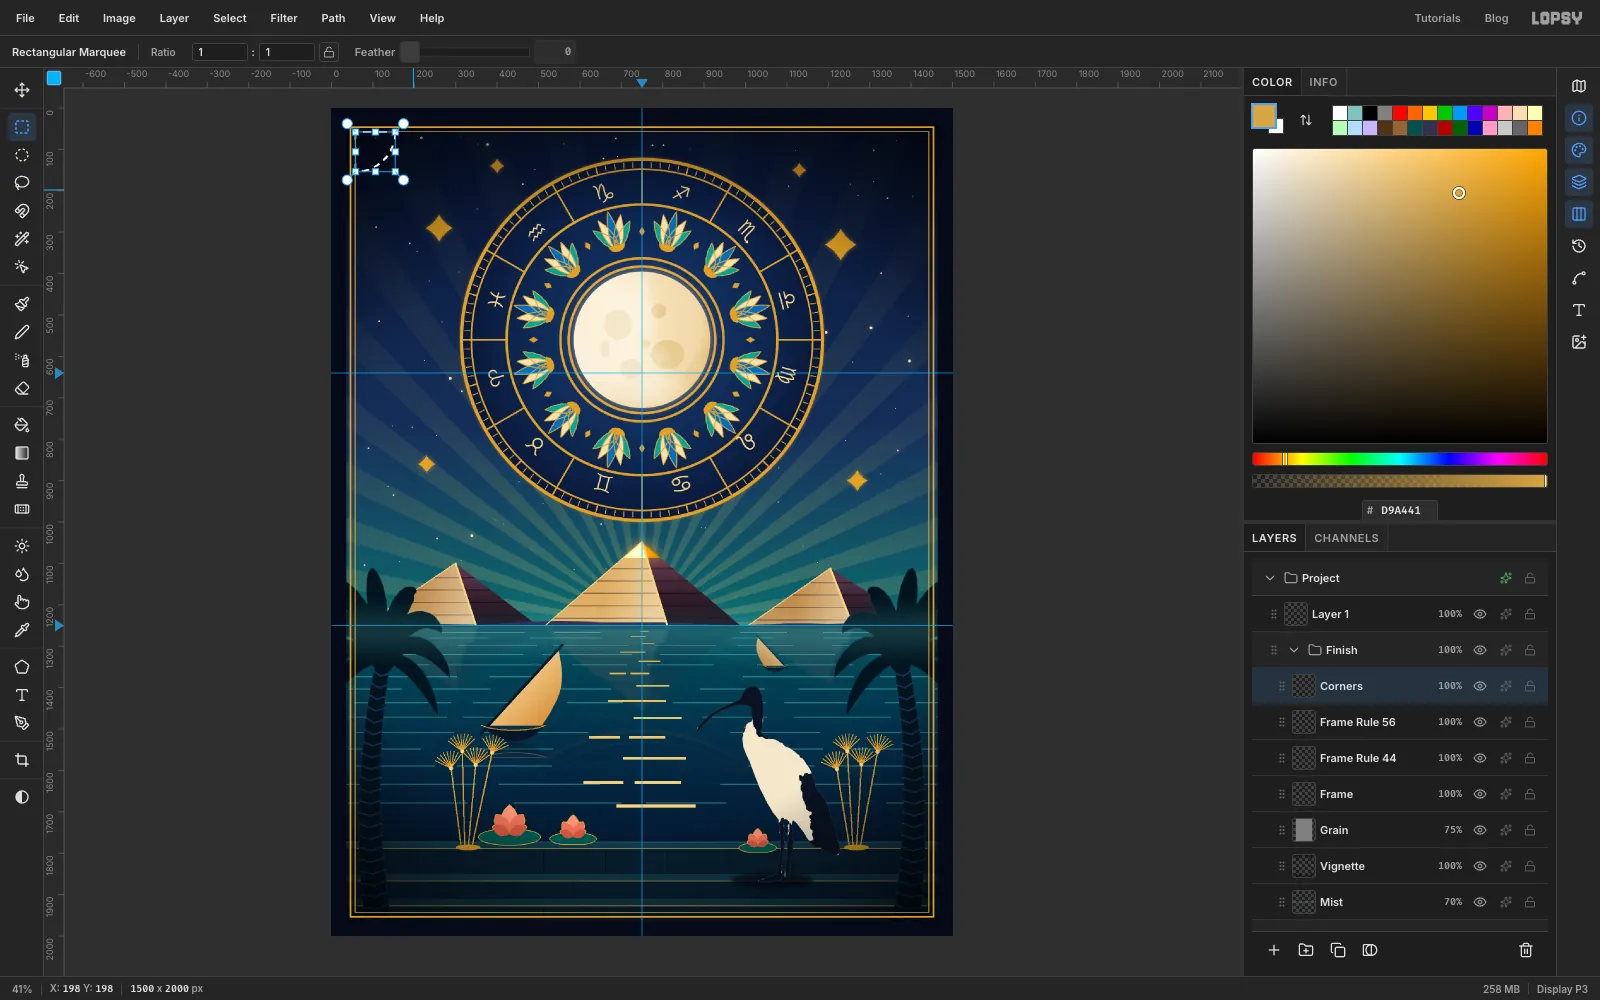
Add a Corners layer. Draw a circle 192 px across centred on the inner rule's corner (58, 58). Then hold Shift+Alt with the Rectangular Marquee and drag a square from that corner down and right. Only the quarter circle inside the frame stays selected.
-
Fill it with a sunburst and stepped brackets
Run Sunburst again in gold with Rays 36, Width 50 and no fade. Set Center X to 3.87 and Center Y to 2.9, so the fan radiates from the corner. Deselect, and with a 3 px Pencil draw three stepped brackets around it: start on the top rule, step down and in, then back out to the side rule.
-
Copy the corner to the others
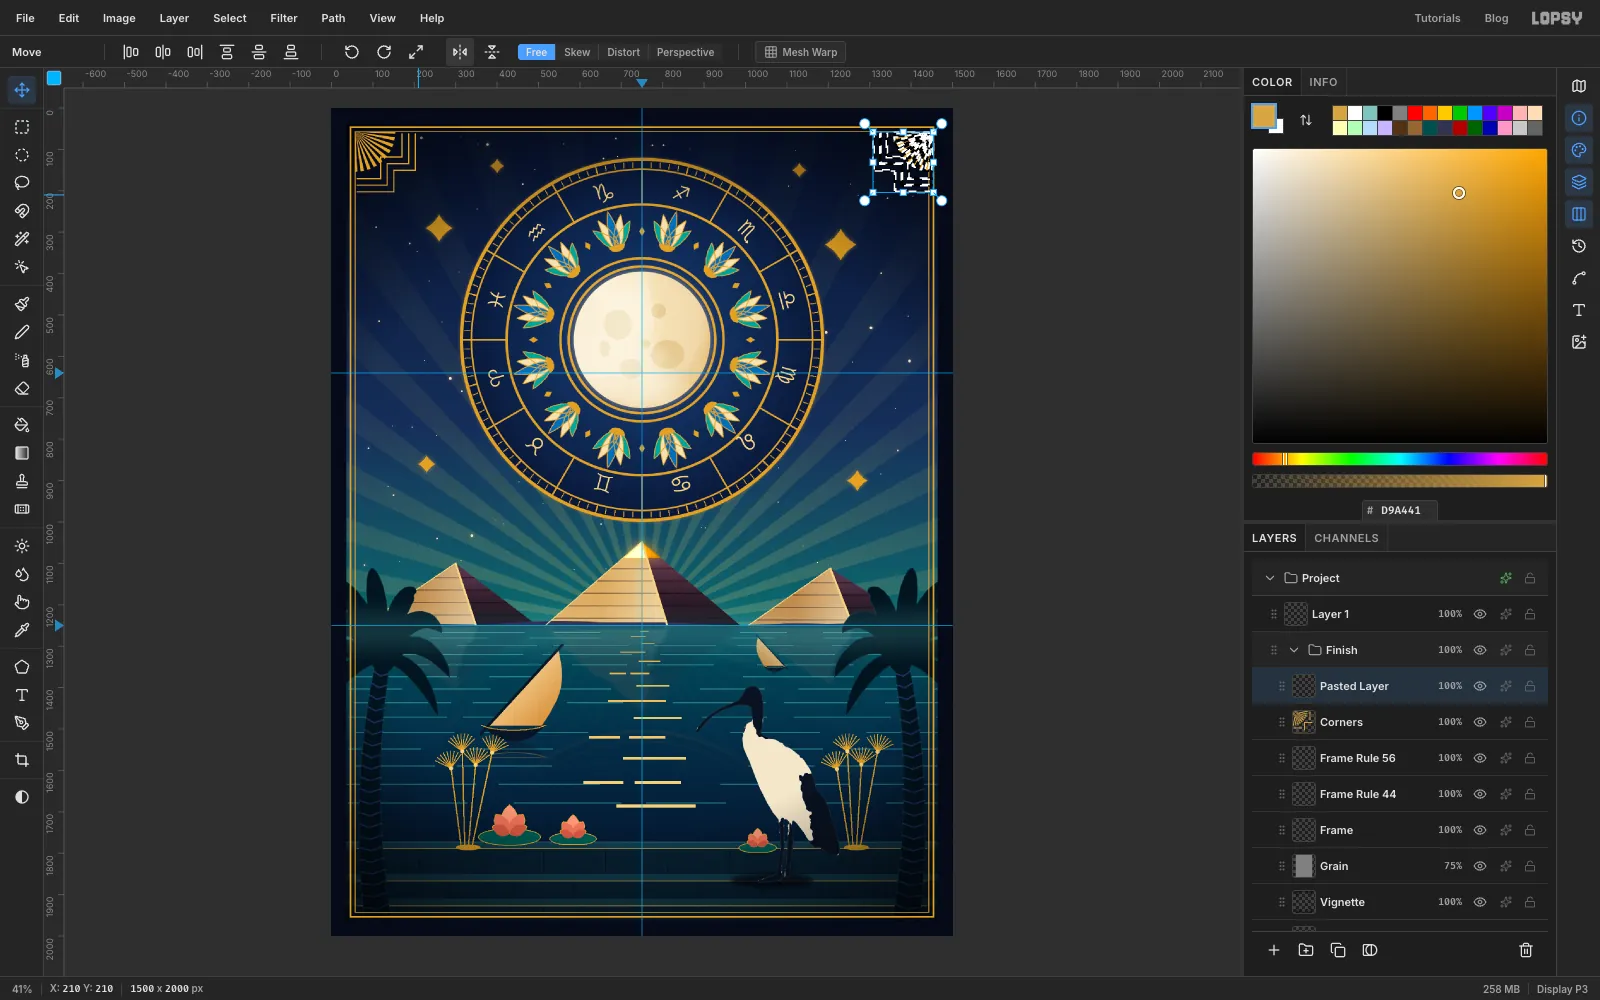
Use the palm trick. Click Duplicate Layer, press Cmd+A with the Move tool and click Flip Horizontal: the copy mirrors around the canvas centre and lands exactly in the top-right corner. Deselect and choose Layer → Merge Down. Then duplicate again, press Cmd+A, click Flip Vertical and merge down, which fills the two bottom corners.
-
Finish
That's the finished piece. Save it with File → Save Project and export it with File → Export…. Deco travel posters worked in a few flat inks, so if you push this further, keep adding shapes and lines rather than textures. A second moon path in the reflection or a row of hieroglyph borders along the quay would both fit the style.