Design an Art Deco Supper Club T-Shirt
Build a 1930s Art Deco T-shirt print in Lopsy, with a Chrysler-style crown, a sunburst arch, a chevron pattern fill, Limelight type and a worn-print texture.
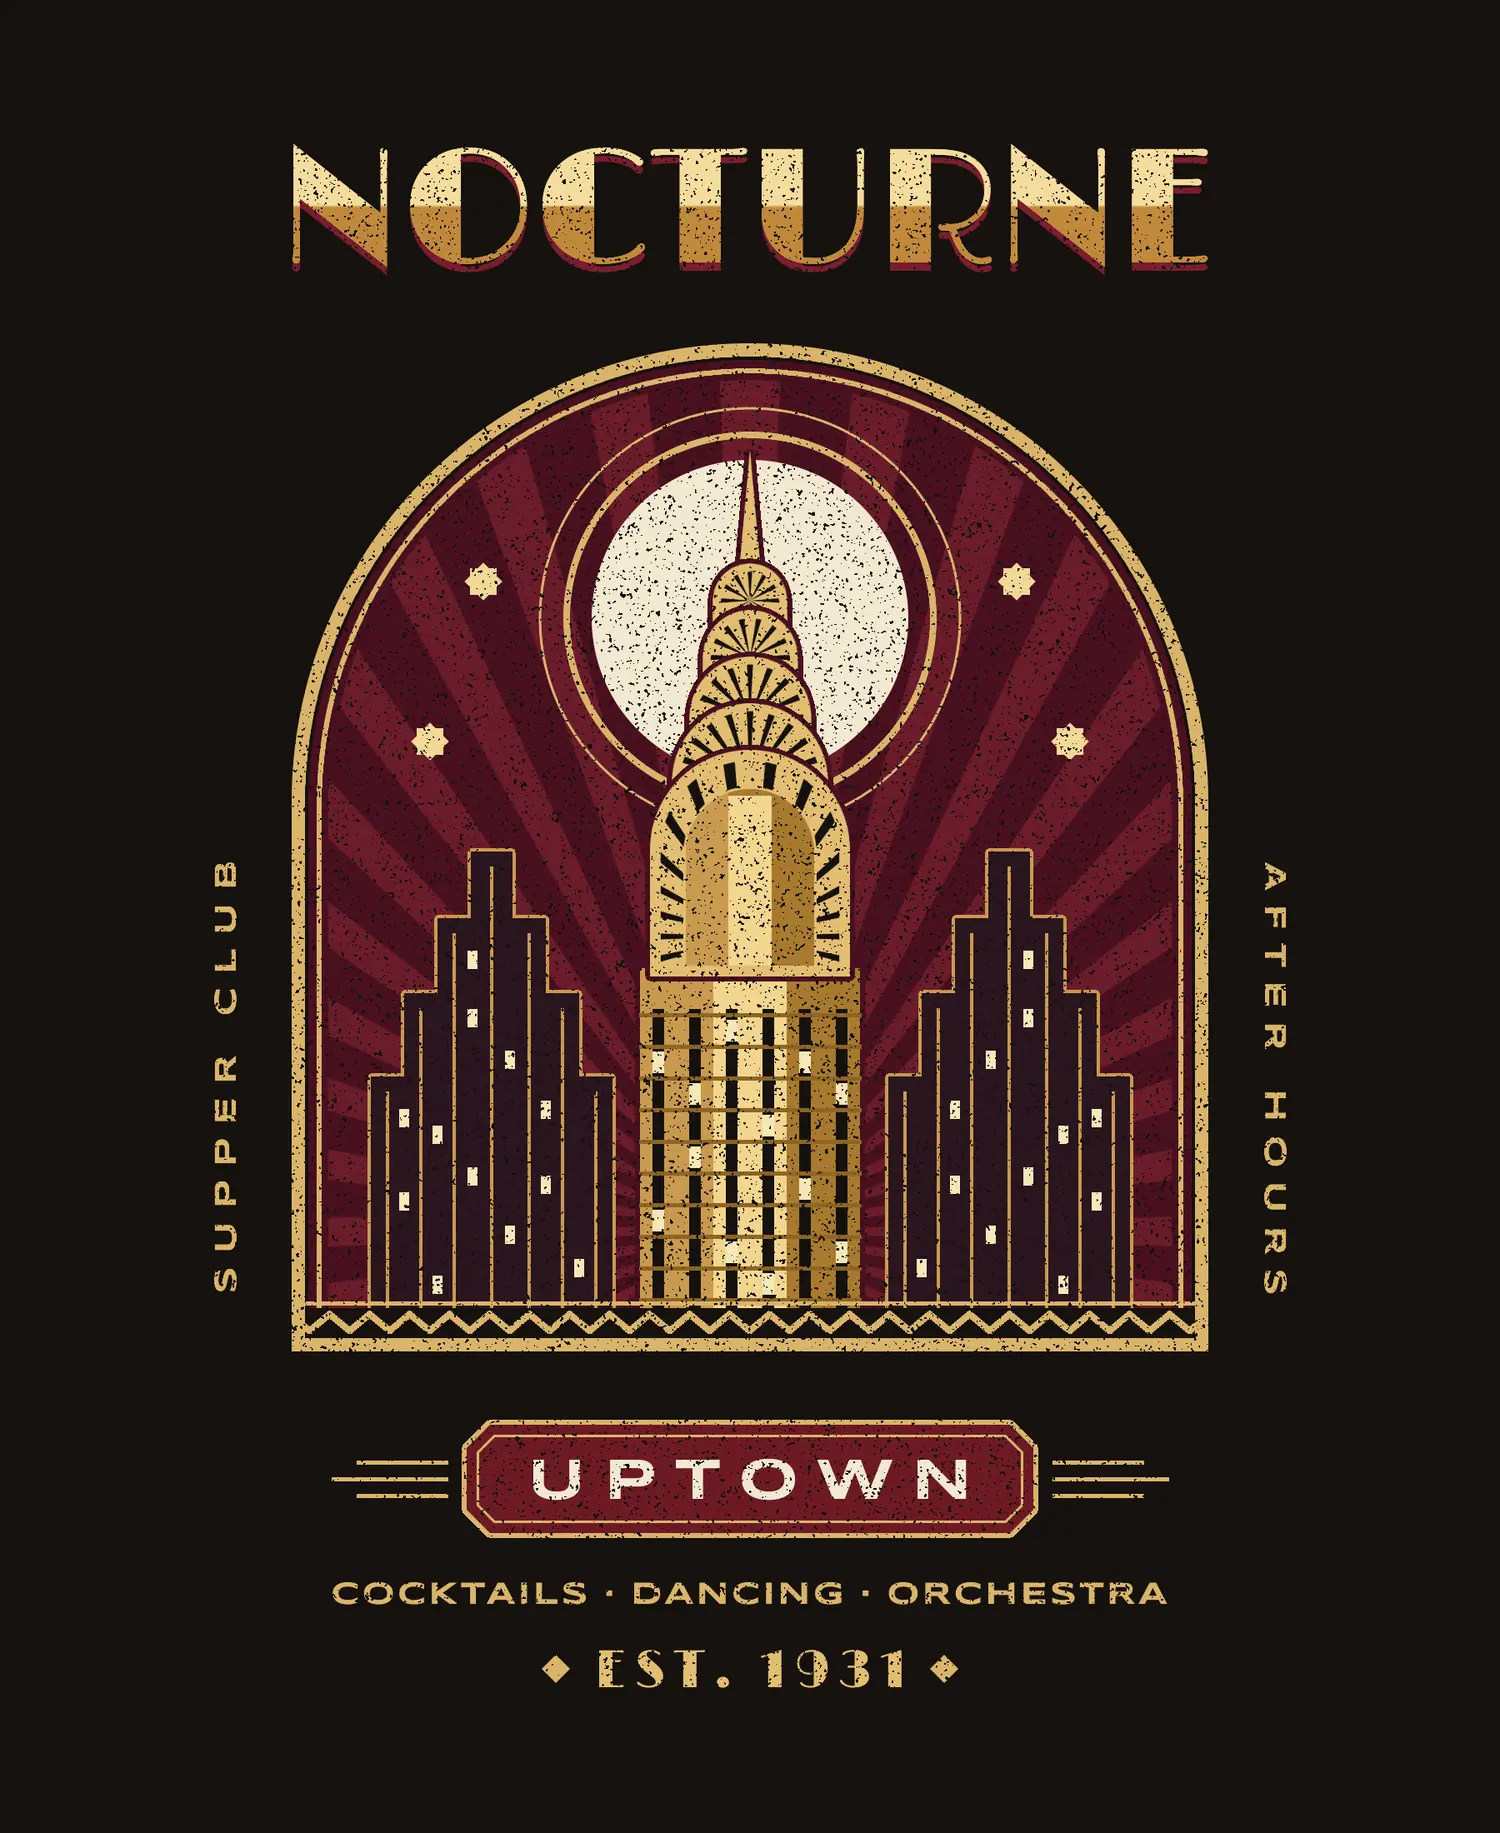
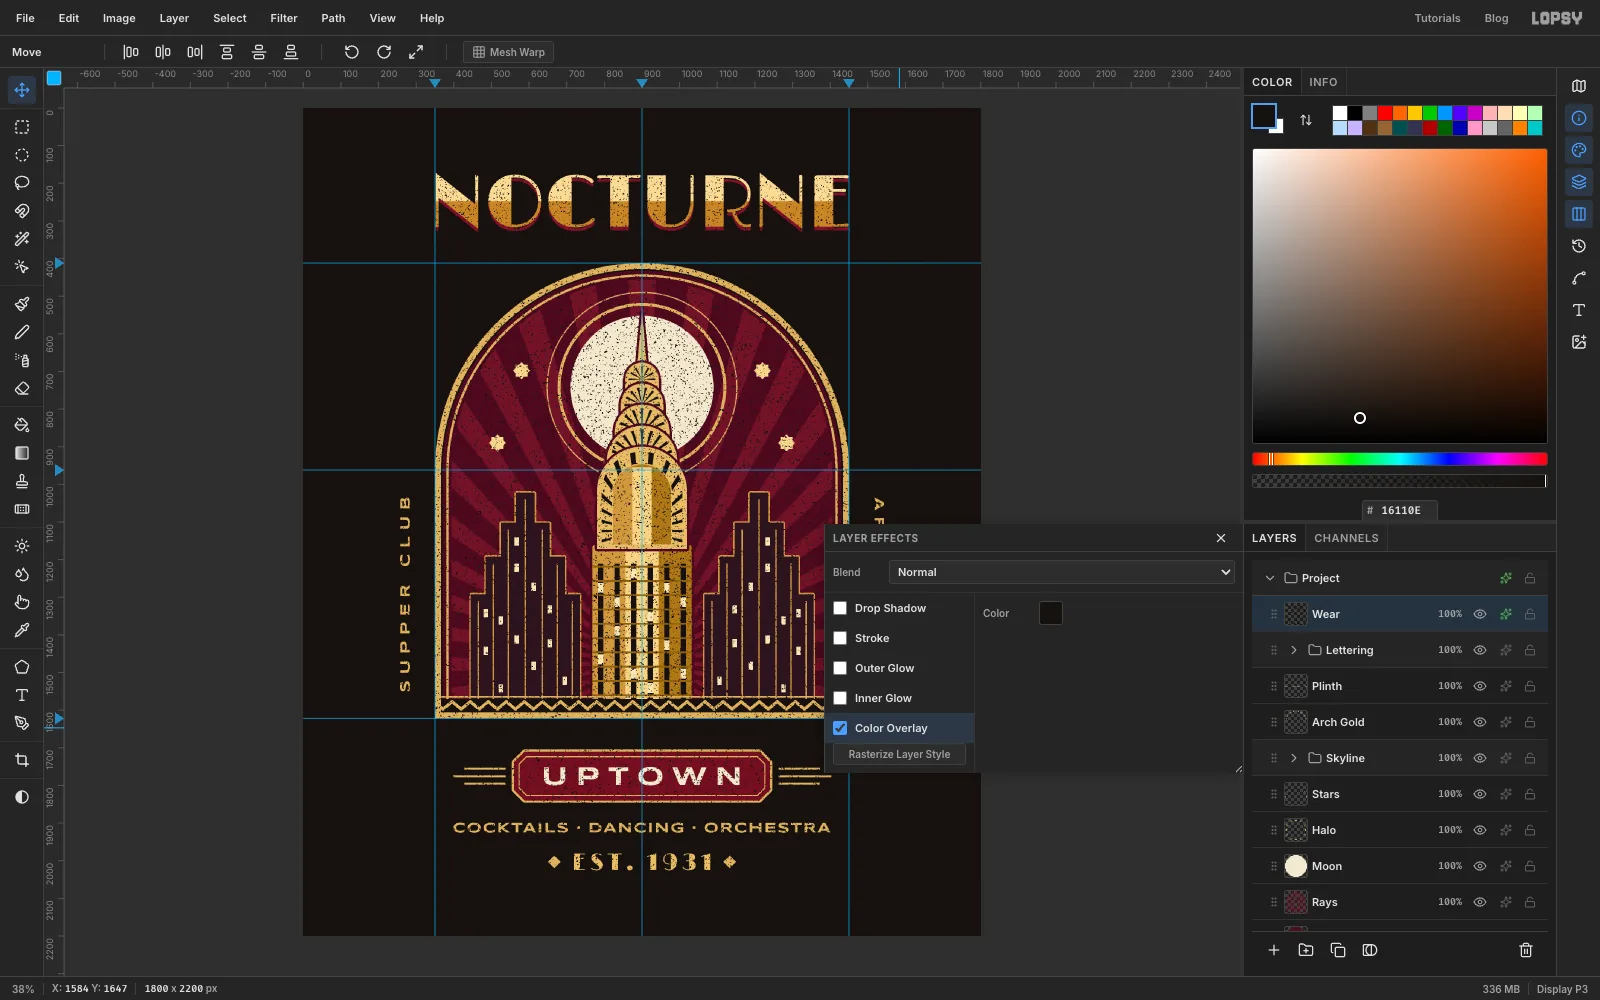
Art Deco print design is all about symmetry, stepped shapes and rays: a skyscraper climbing in setbacks, a sunburst fanning out behind it, and tall geometric capitals in gold. This tutorial builds a T-shirt front for an imaginary 1931 supper club, NOCTURNE UPTOWN, at 1800 × 2200 px. The warm black background stands in for the shirt, so anything you leave unpainted is the fabric showing through.
The look is kept flat on purpose. Every colour is a solid fill, as it would be in a screen print, and the metallic shine comes from three flat bands of gold side by side rather than a gradient. At the end you'll knock tiny specks out of the whole design so it looks like a print that has been through the wash a few times.
The tools you'll meet along the way:
- ruler guides, the Elliptical and Rectangular Marquee with Shift to add, and Select → Shrink
- Filter → Sunburst for the sky and for the crown's windows
- the Shape tool for stroke-only rings and eight-point stars
- Edit → Define Pattern and Edit → Fill with Pattern for a chevron band
- Image → Flip Horizontal to mirror a tower across the page
- Limelight and Syncopate text, letter spacing, two-tone gold and rotated live text
- the Stroke, Drop Shadow and Color Overlay layer effects
- Add Noise, Gaussian Blur, Threshold and the Magic Wand for the worn texture
- groups, group scaling, and undo / redo
The screenshots come from the finished project file, with later layers hidden until their step. So the Layers panel sometimes lists a layer you haven't made yet, with its eye switched off. Everything sits inside the Project group, the root group every Lopsy document starts with.
The palette is one shirt colour and a handful of inks:
-
Shirt
the background, not an ink
-
Gold
-
Gold bands
-
rails
-
Star gold
-
Title gold
-
Ivory
-
window light
-
Oxblood
-
Tower plum
-
Set up the shirt and guides
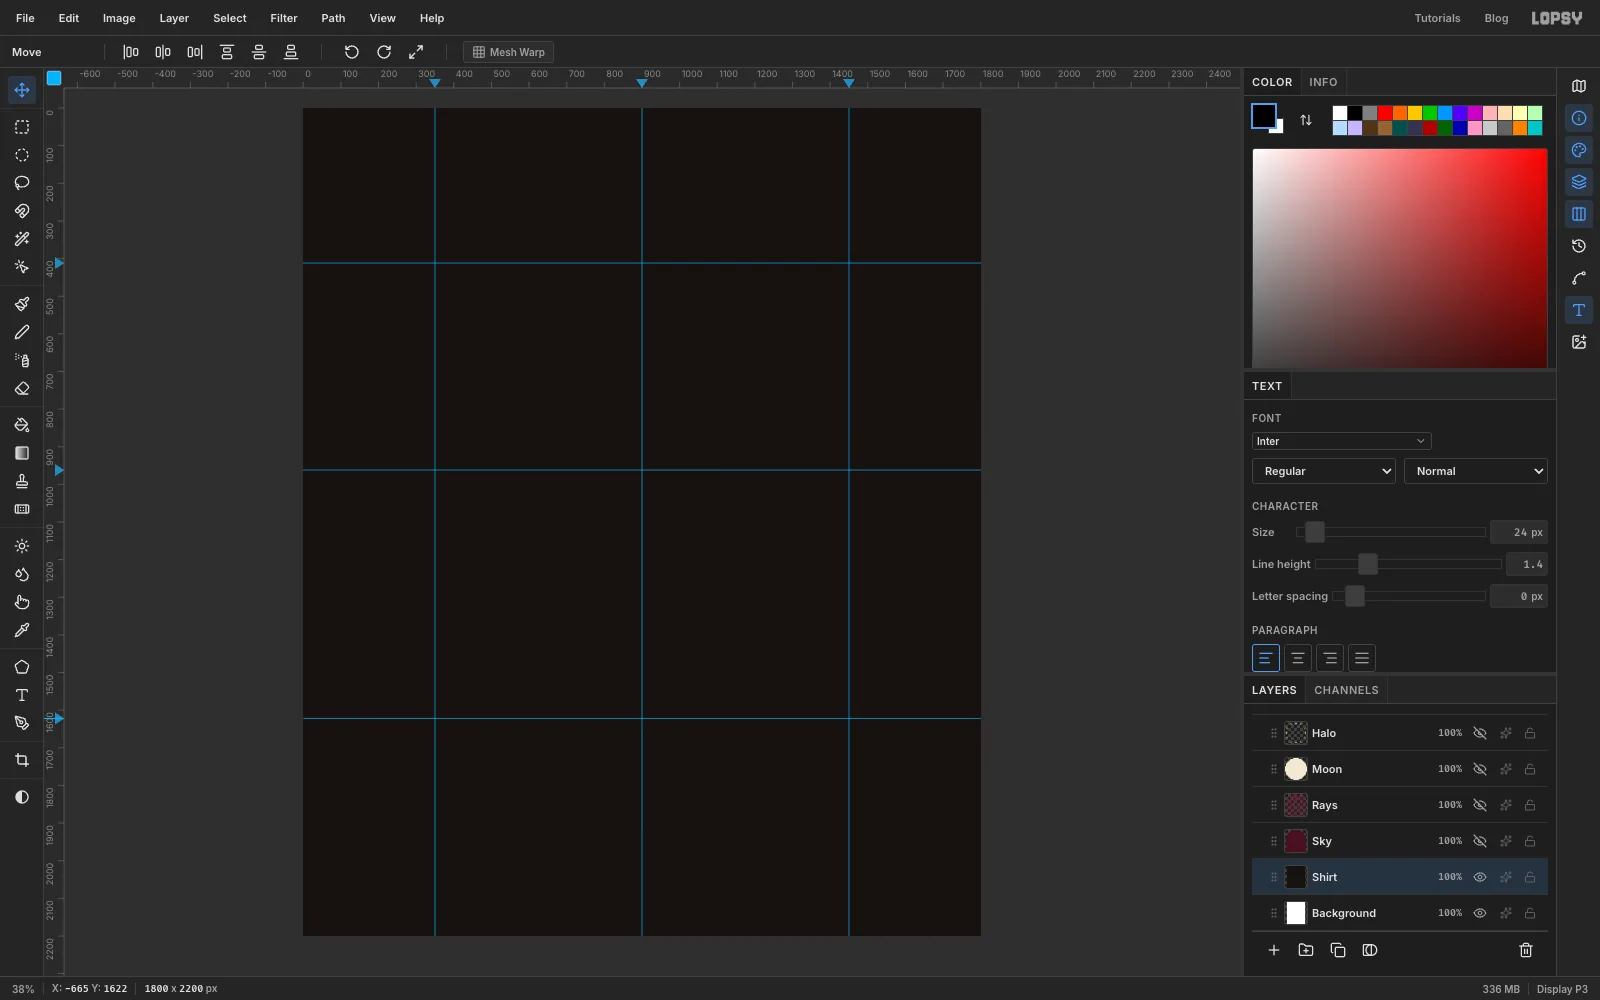
Choose File → New, set the units to Pixels, make the document 1800 × 2200 and click Create. Double-click Layer 1, rename it Shirt, set the foreground to and choose Edit → Fill.
Now lay out the guides the whole design hangs on. Click once on the top ruler at 350, 900 and 1450 to drop three vertical guides: the arch's two sides and the centre line. Then click the left ruler at 412, 962 and 1622 for the top of the arch, the point where its curve meets the straight sides, and the arch's base. A click on a ruler adds a guide. Click the same spot again if you need to remove one.
-
Draw the gold arch
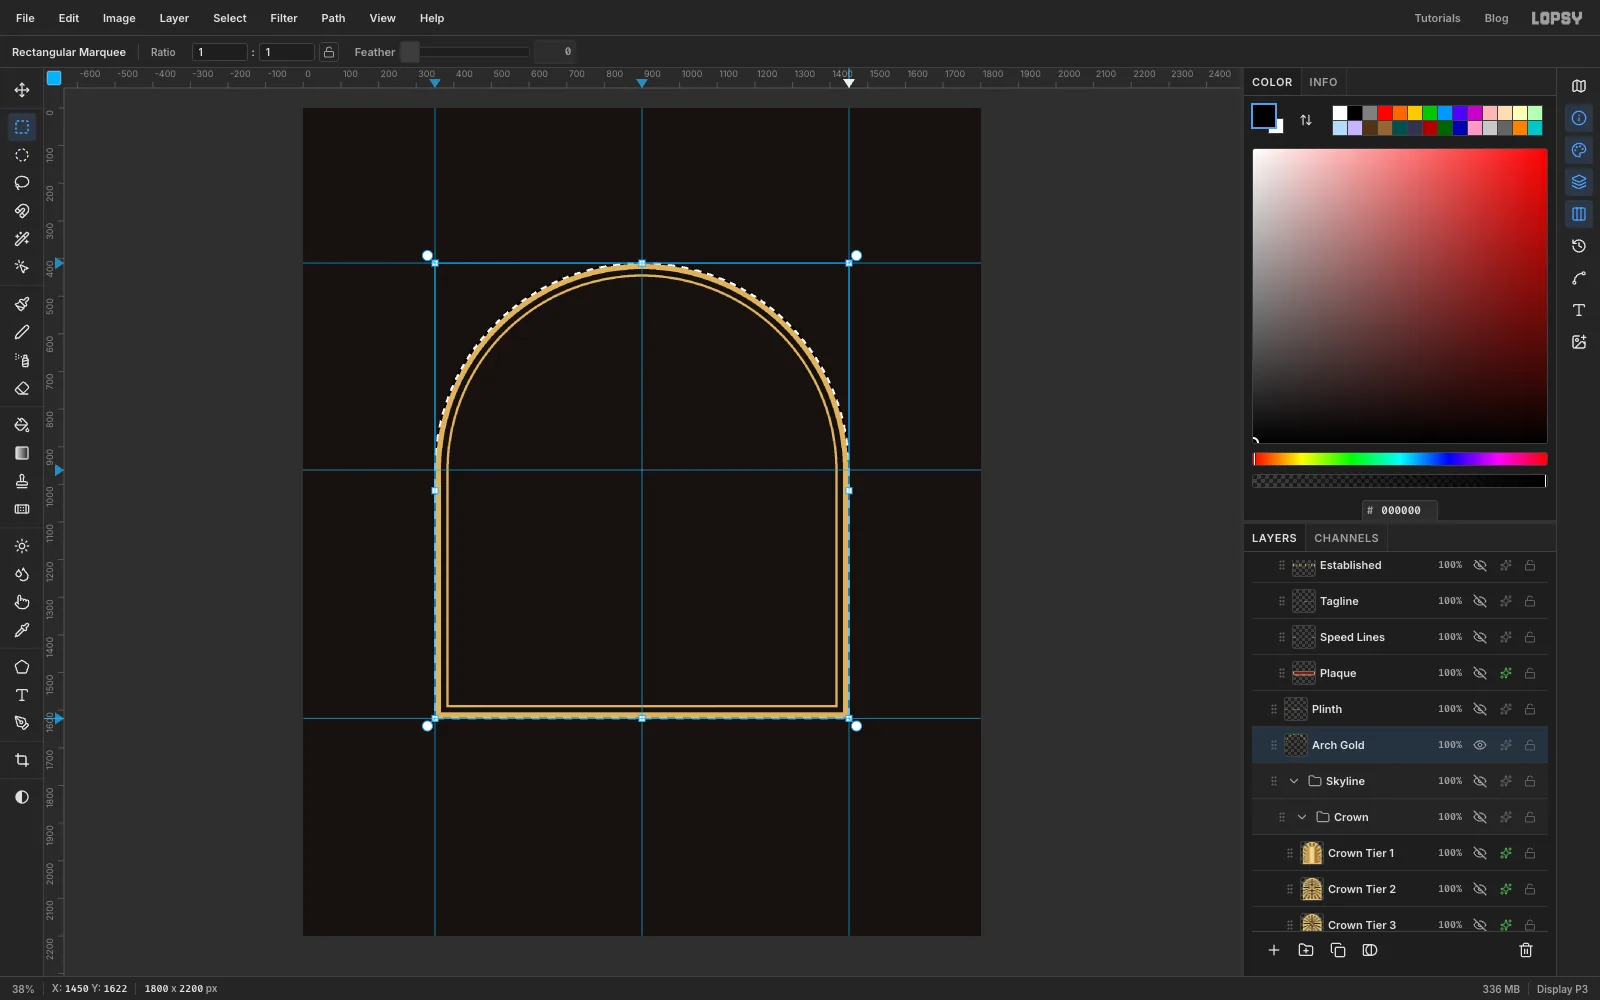
Add a layer called Arch Gold. An arch is a circle with a rectangle under it, so build the selection in two pieces:
- With the Elliptical Marquee, hold Shift and drag a circle that touches the left and right guides and the top guide. Because the circle is 1100 px wide, its middle lands right on the 962 guide.
- Switch to the Rectangular Marquee. Hold Shift to add to the selection, and drag from where the circle's middle meets the left guide down to the bottom-right guide crossing. Marquee drags snap to guides, so the corners click into place.
Set the foreground to gold and choose Edit → Fill. The selection stays put, so you can keep working inward from it:
- Select → Shrink by 16 and press Delete to hollow out a thick outline.
- Shrink by another 14 and fill again.
- Shrink by 6 and press Delete, which leaves a thin second line inside the first.
Press Cmd+D to deselect.
-
Fill the night sky
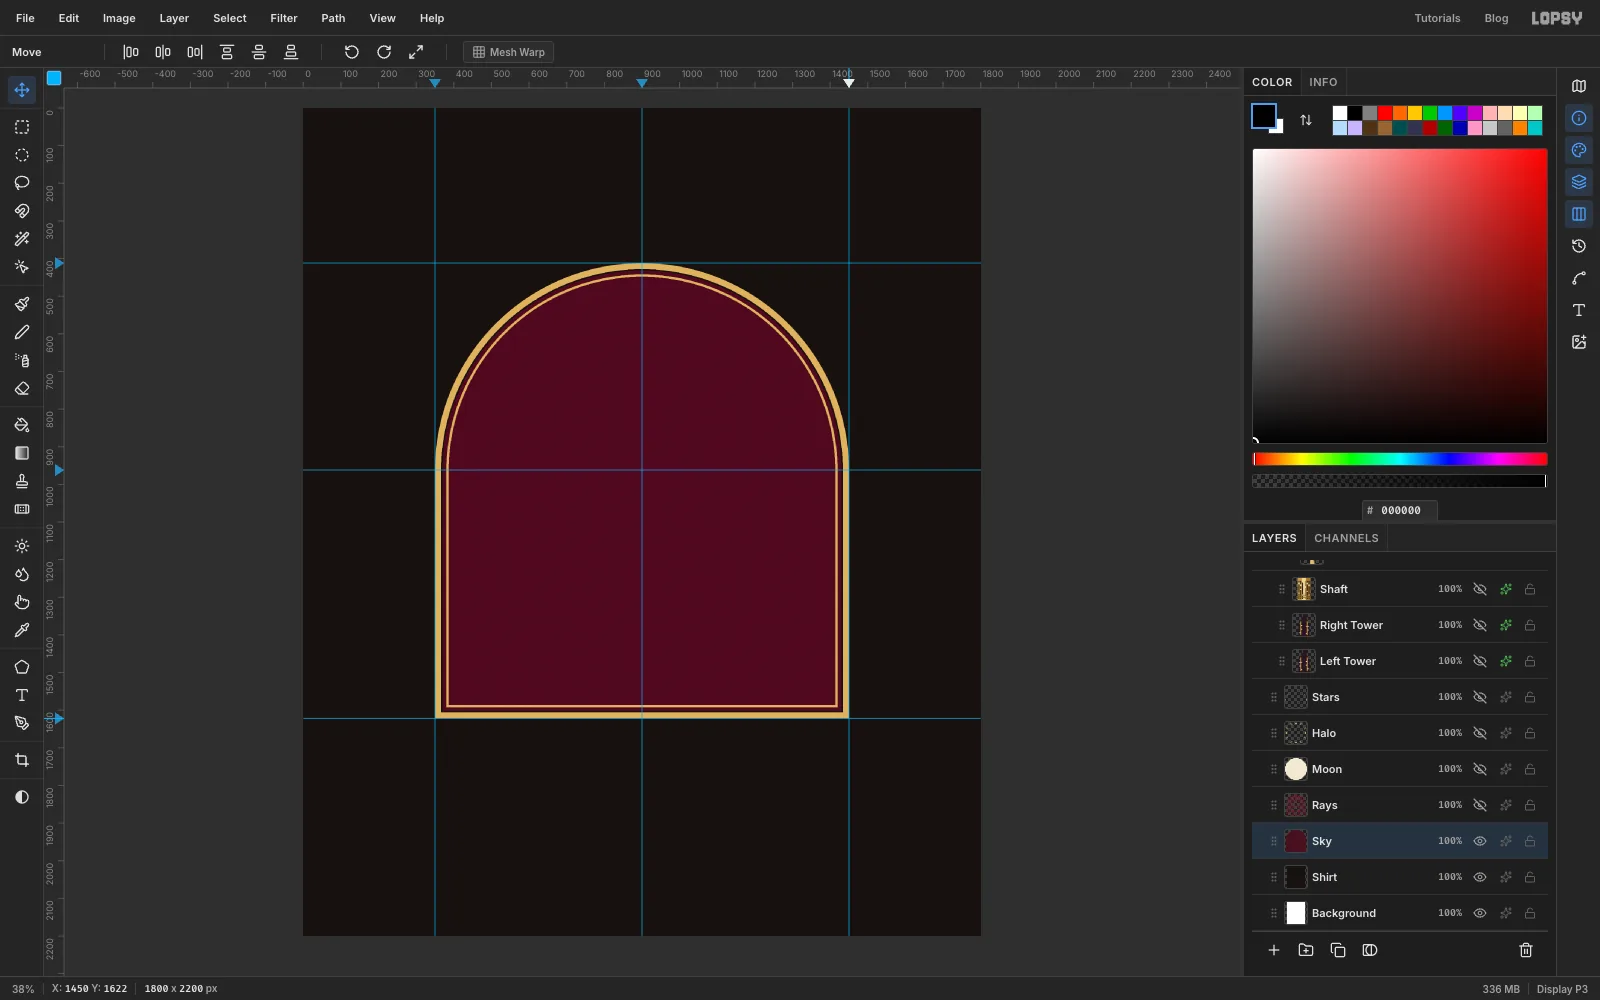
Click the Shirt layer and add a layer called Sky, so it sits under the gold. Build the arch selection once more, shrink it by 20 so the colour tucks just under the gold lines, and fill it with oxblood . This is the last time you need to build the arch by hand: from now on, Cmd-click the Sky thumbnail in the Layers panel to get the arch shape back.
-
Burst some rays across the sky
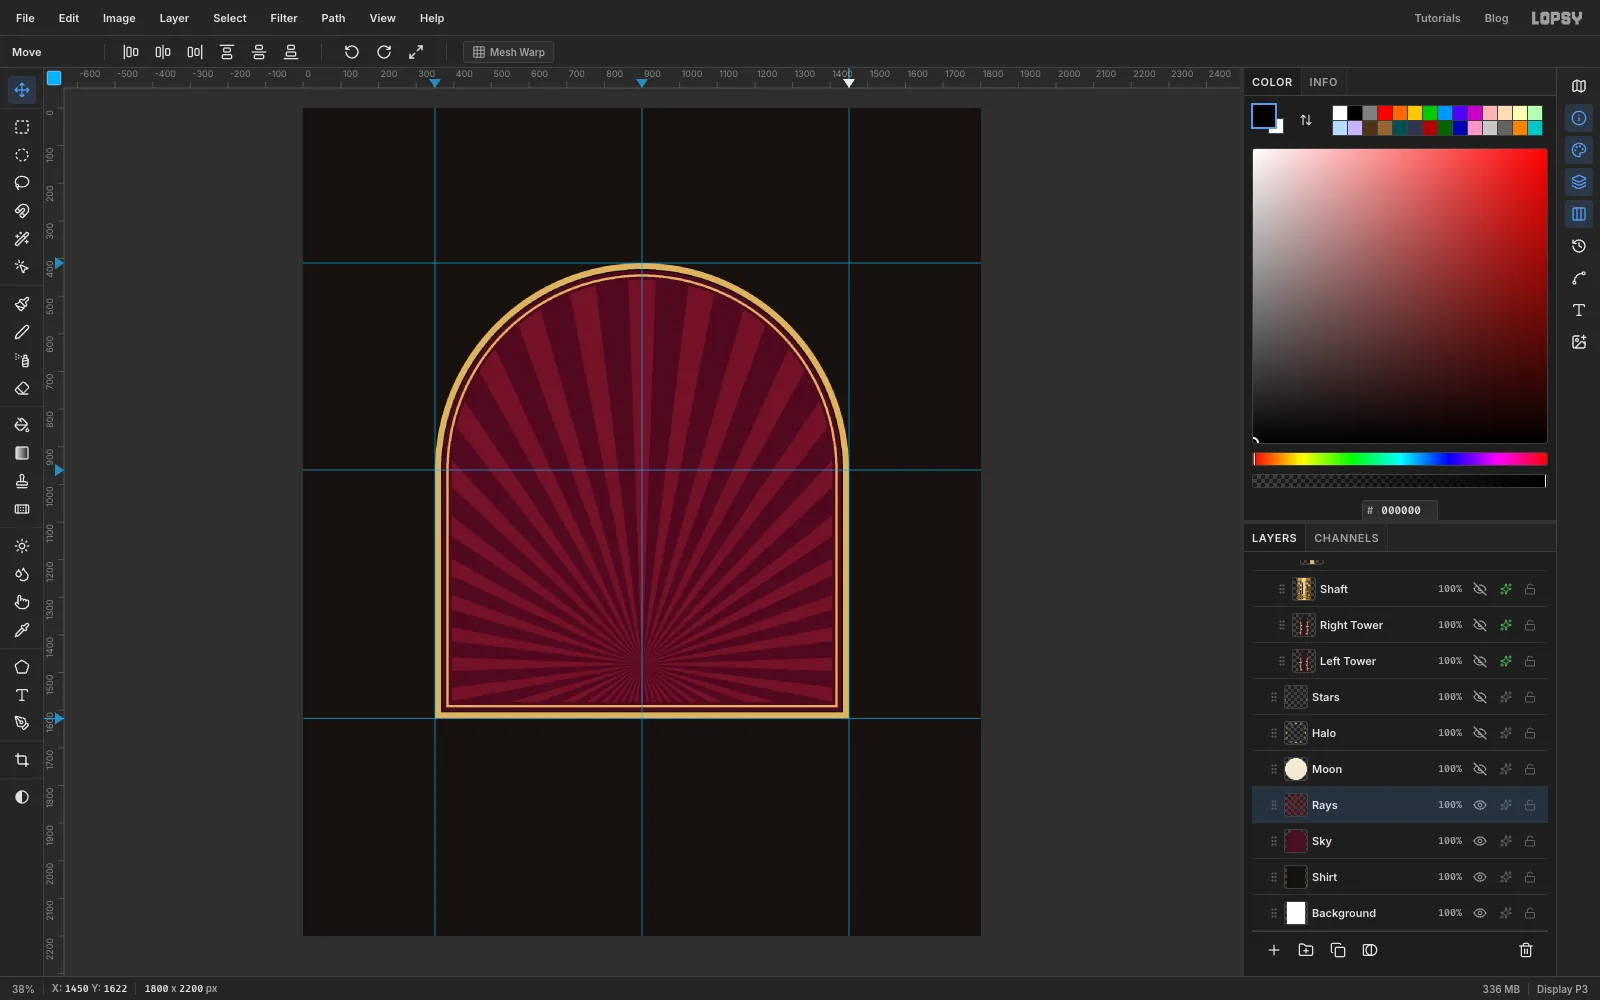
Add a layer called Rays above Sky. Cmd-click the Sky thumbnail and shrink the selection by 24. Set the foreground to and open Filter → Sunburst:
- Rays 40, Length 60, Width 45
- Taper, Fade and Softness 0
- Center X 50, Center Y 67
- Opacity 100
That puts the burst's origin low in the arch, right behind where the skyscraper will stand. The selection keeps the rays inside the arch. Click Apply and deselect.
-
Hang the moon and its halo
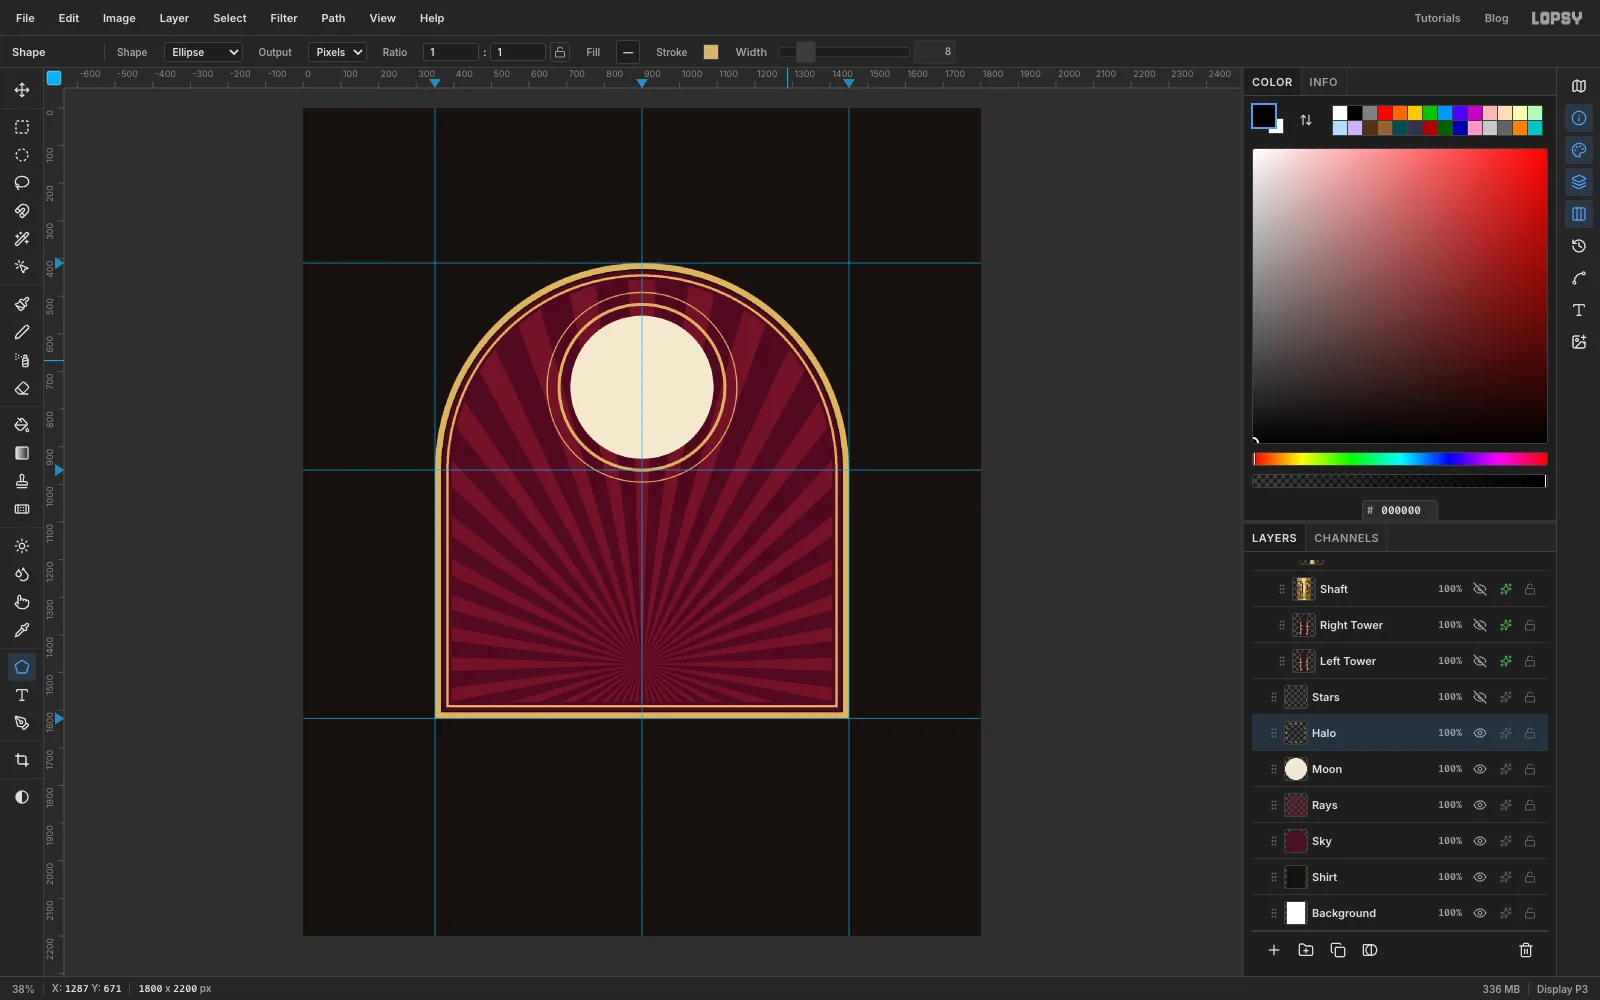
Add a layer called Moon. With the Elliptical Marquee, hold Shift and drag a circle about 380 px across, centred on the middle guide, a little way below the top of the arch. Fill it with ivory .
Add a layer called Halo and pick the Shape tool. Set Shape to Ellipse, click the Fill swatch and choose Remove fill, then add a Stroke in gold with Width 8. The Shape tool draws outward from where you press, so hold Cmd (for a perfect circle) and drag from the centre of the moon to draw a ring a little outside it. Drop the Width to 3 and draw a second, thinner ring a little further out.
-
Add four eight-point stars
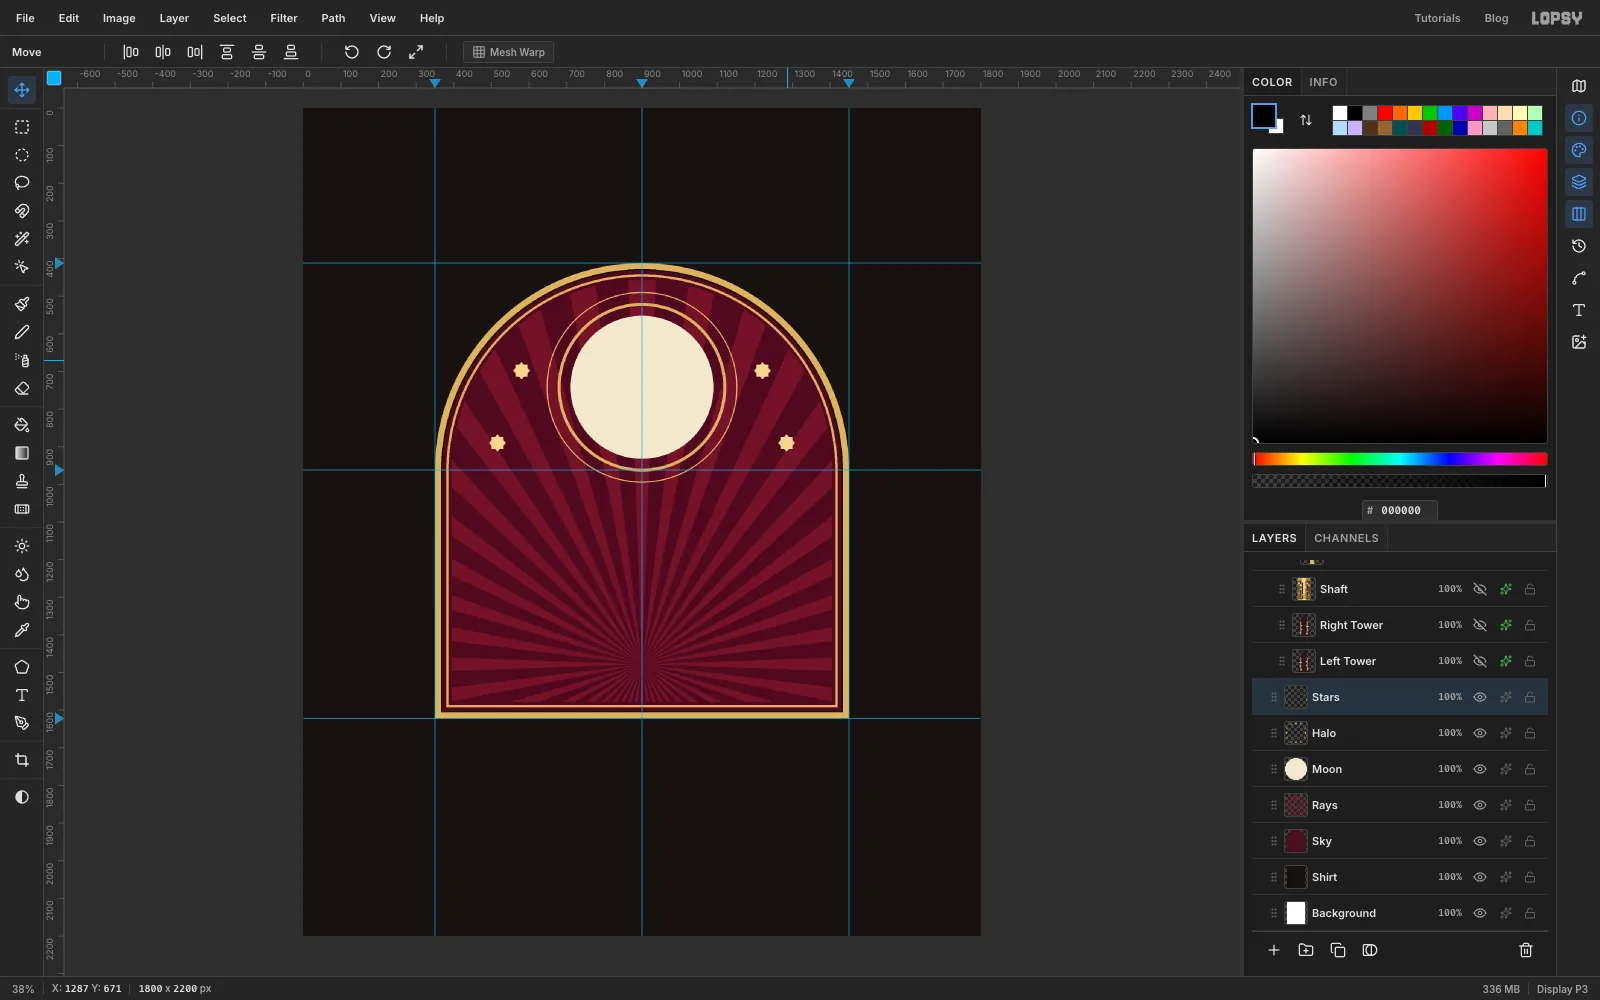
Add a layer called Stars. In the Shape tool choose Rectangle, set the fill to and remove the stroke. Hold Cmd and drag out a small square, about 30 px across, up and to the left of the moon.
To turn it into a star, marquee the square, switch to the Move tool and drag the rotation handle just outside a corner while holding Cmd (it snaps in 15° steps) until it turns 45°. Press Cmd+D to commit. Draw a second, unrotated square of the same size directly on top, and the two make an eight-point star.
Marquee the star, press Cmd+C and Cmd+V, and drag the pasted copy down and a little left. Choose Layer → Merge Down to fold it back into Stars. Then mirror the pair: Layer → Duplicate Layer, Image → Flip Horizontal, and Merge Down again.
-
Build a pair of stepped towers
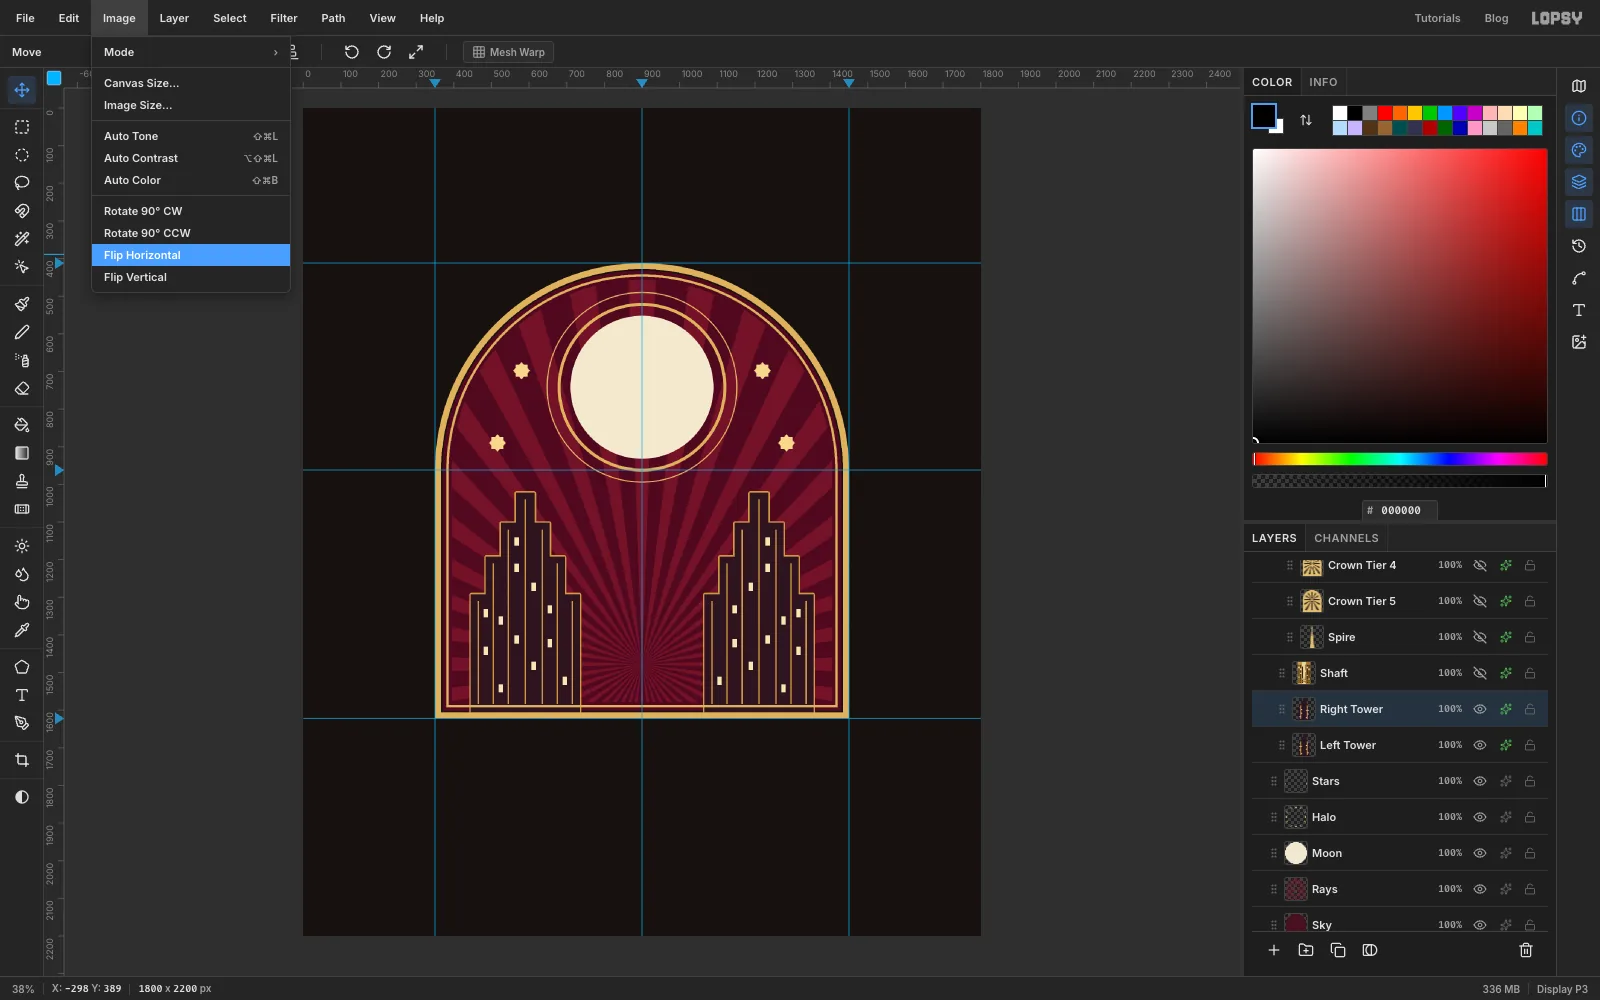
Click the New Group button and name the group Skyline. Inside it, add a layer called Left Tower. Draw the tower as a stack of rectangles with the Rectangular Marquee, holding Shift for each one to add it:
- a wide base from about 95 px inside the left guide to about 165 px left of the middle guide, running down to the arch's base guide
- three narrower setbacks stacked on top, each one 40 px narrower on both sides and about 100 px tall
Fill it with plum . Open the layer's effects drawer and turn on Stroke, 4 px, gold . Pick the Pencil, set Size 4 and the same gold, then click at the top of each setback and Shift-click at the bottom to rule a pinstripe down the tower. For lit windows, marquee small rectangles, about 12 × 22 px, here and there and fill them with .
When the left tower looks right, choose Layer → Duplicate Layer, rename the copy Right Tower, and choose Image → Flip Horizontal. Flip mirrors the layer across the whole canvas, so the copy lands on the right side, already in position.
-
Band the skyscraper's shaft
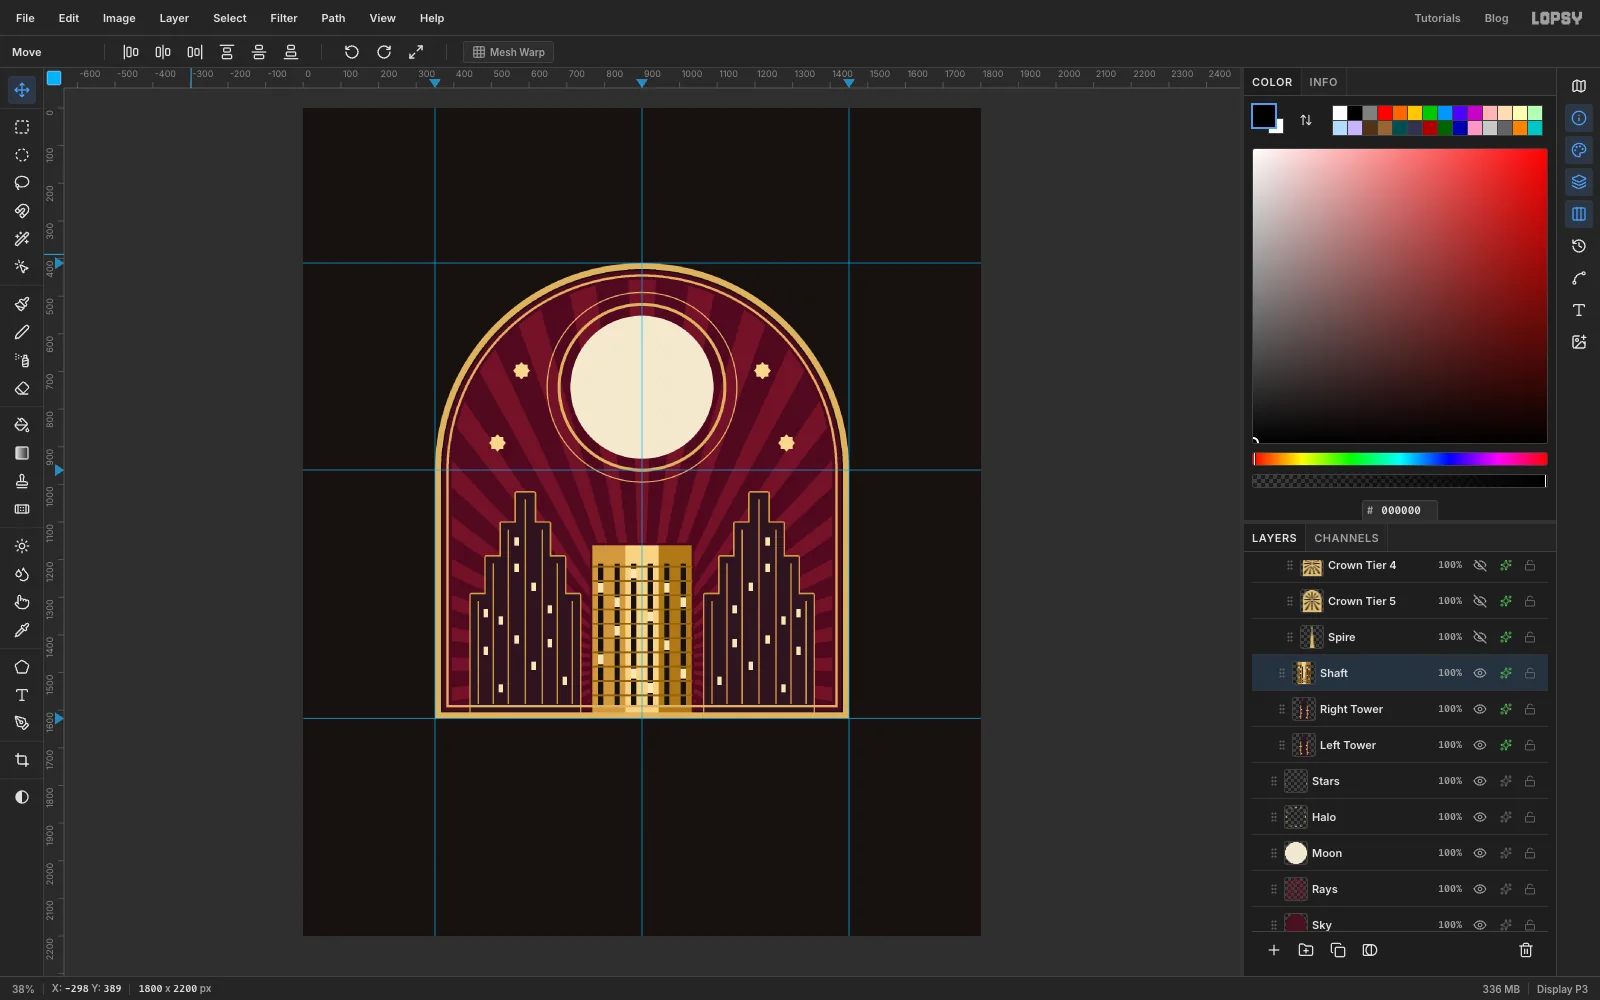
Add a layer called Shaft above the towers. Here's the trick for metal without a gradient: three flat bands side by side. Marquee and fill three tall rectangles, each about 88 px wide and 450 px tall, standing on the arch's base guide and centred on the middle guide. Use on the left, in the middle and on the right, so the light seems to hit the middle.
With the Pencil at Size 14 in shirt black , Shift-click six evenly spaced vertical window strips down the shaft. Switch to Size 5 in and Shift-click horizontal rails right across the shaft, edge to edge, every 38 px. Fill a few window slots between the rails with , and give the layer a Stroke of 6 px in oxblood .
-
Stack the crown
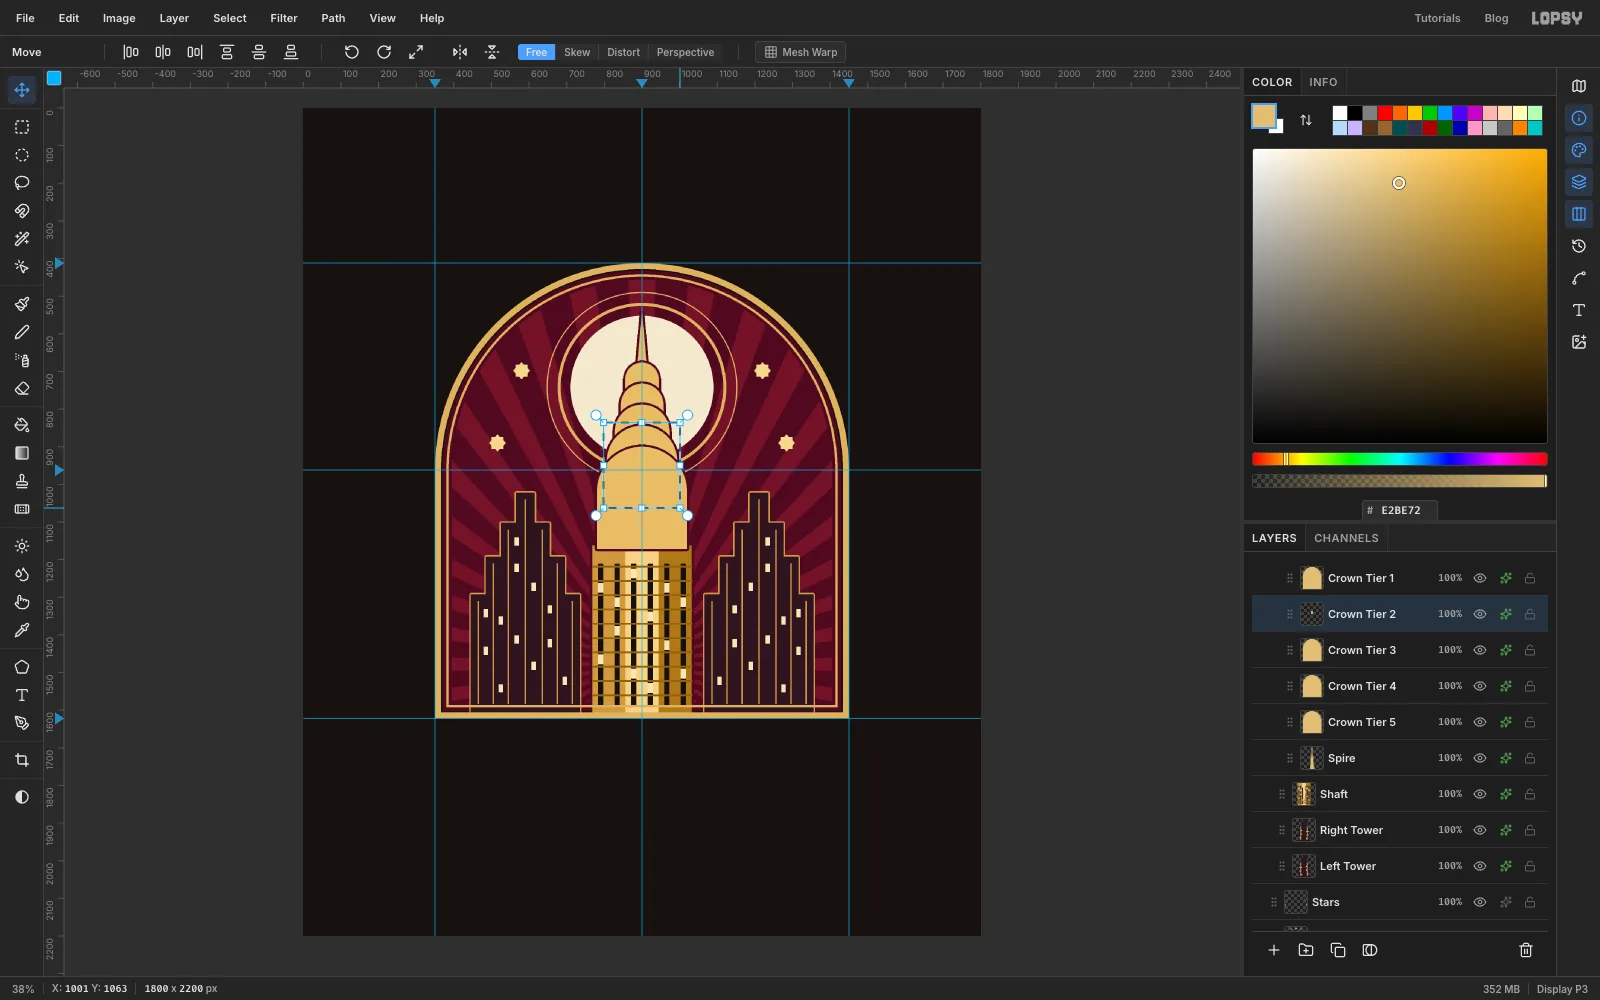
The Chrysler-style crown is a stack of shrinking arches. Add a layer called Crown Tier 1. Build an arch selection the same way as the big one, an Elliptical Marquee circle plus a Shift-dragged rectangle under it, about 240 px wide. That's a little narrower than the shaft, so it reads as a setback. Sit it on top of the shaft and fill it with . Give it a Stroke of 6 px in oxblood . Oxblood outlines separate the gold from the pale moon without the harshness of black.
Now make the smaller tiers:
- Duplicate the layer and Cmd-click the copy's thumbnail to select it.
- With the Move tool, hold Cmd and drag a corner handle inward until it's about 78% of the size, then press Cmd+D.
- Drag the copy up so it overlaps the top of the tier below.
Repeat until you have five tiers, named Crown Tier 1 (bottom) to Crown Tier 5 (top). Duplicates keep the stroke. On a layer under the tiers, hold the mouse down and drag the Lasso around a tall, thin triangle for the spire. Fill it with the same gold and give it the same stroke.
-
Cut sunburst windows into the crown
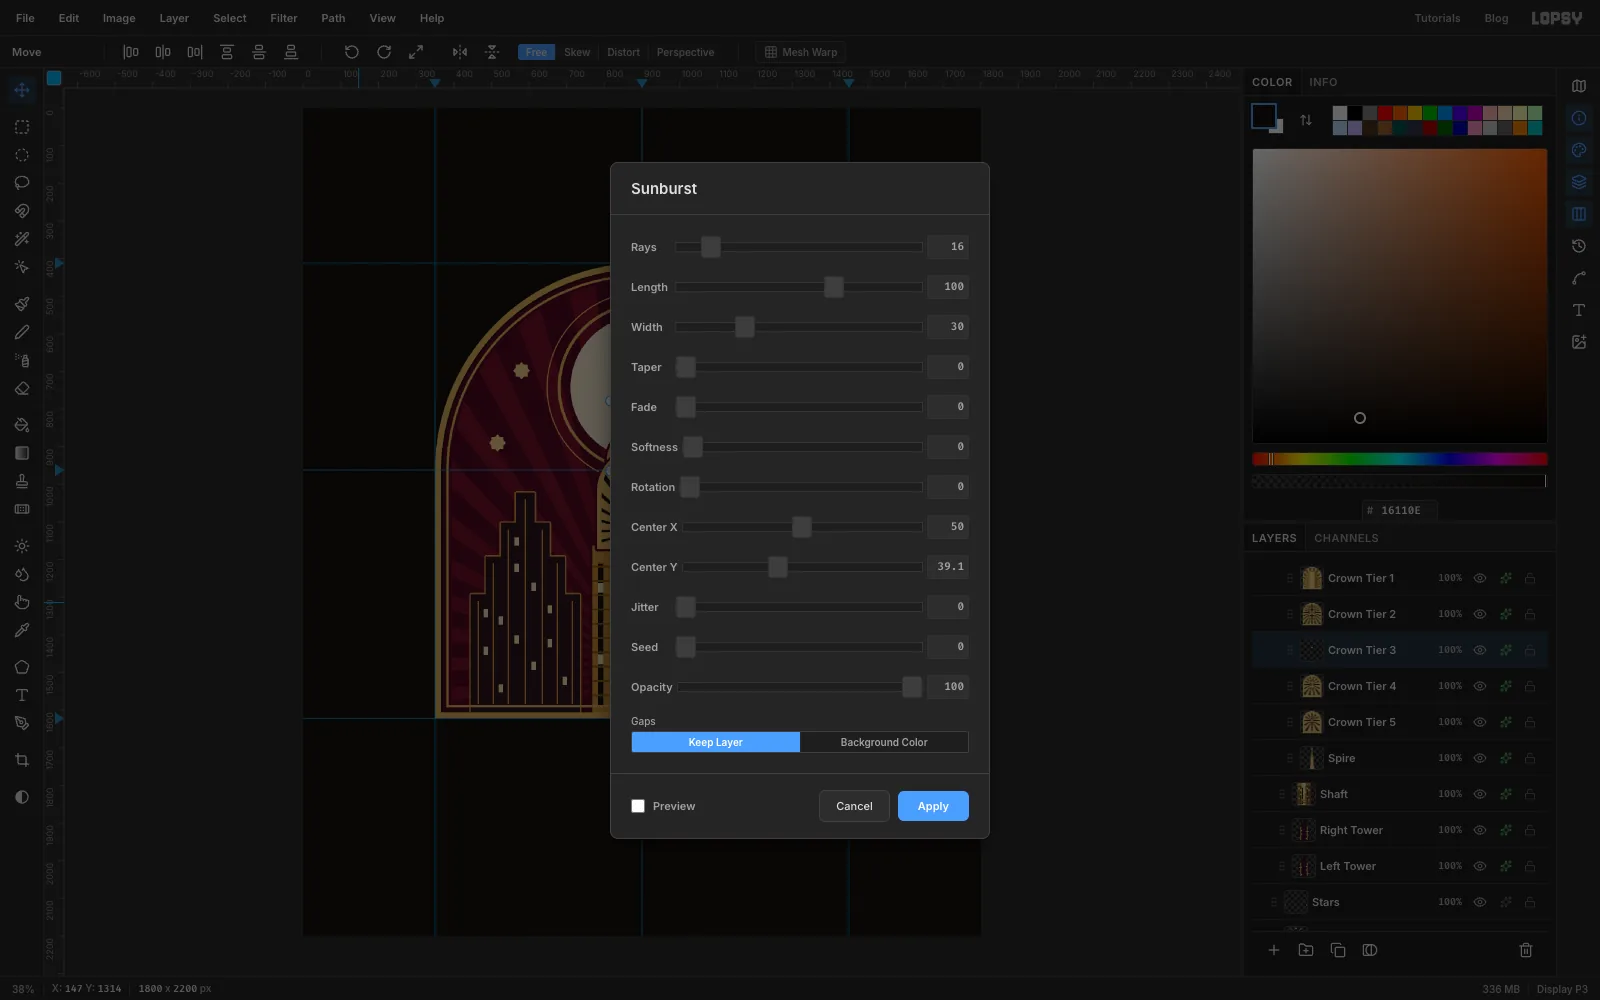
The crown's famous triangular windows are just another sunburst. For each tier:
- Cmd-click the tier's thumbnail to select its shape.
- Select → Shrink by 12 (use 16 on the bottom tier) so the windows stop short of the edge.
- Set the foreground to shirt black and open Filter → Sunburst. Use Length 100, Width 30 and Opacity 100, with Taper, Fade and Softness at 0, and Center X 50.
- Tick Preview and drag Center Y until the rays fan out from the centre of that tier's curve.
- Use more rays on the bigger tiers: about 26 on the bottom tier, then 20, 16, 14 and 12.
-
Add a door and group the crown
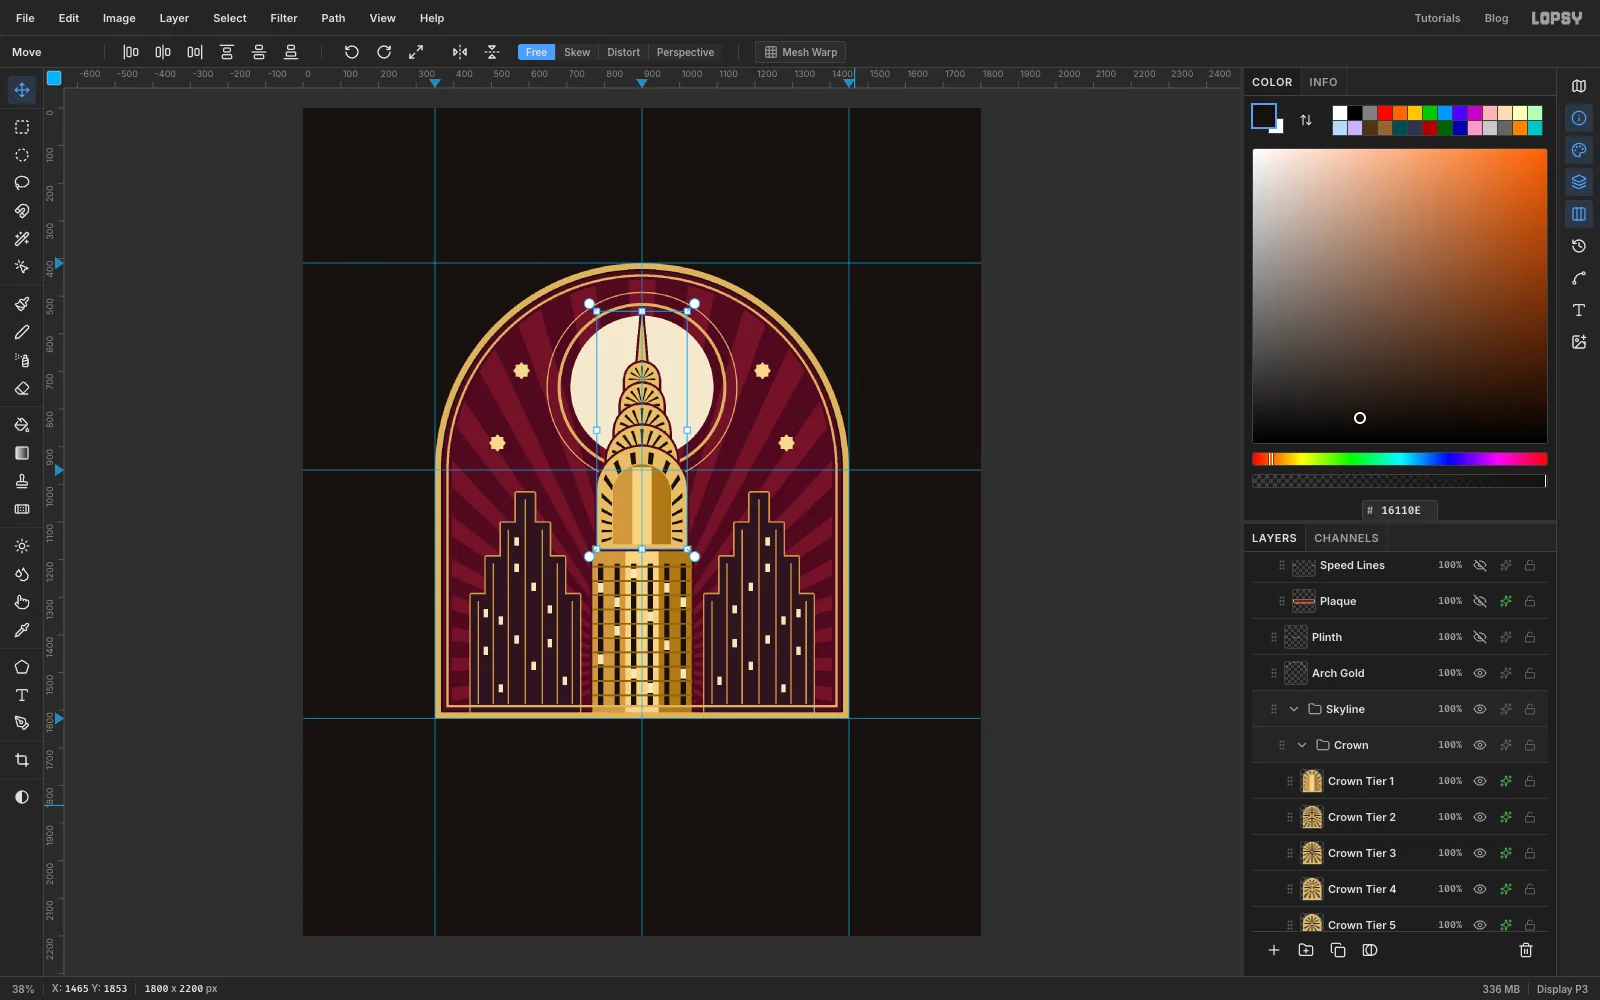
Give the bottom tier a door in the same three gold bands as the shaft:
- Build a small arch selection inside the tier and fill it with .
- Alt-drag a rectangle over its right two-thirds to take that part out of the selection, and fill what's left with .
- Marquee the middle third and fill it with .
Cmd-click the five tier rows and the spire in the Layers panel to select them all, choose Layer → Group Layers, and name the group Crown. With the group row selected, the arrow keys nudge the whole crown at once (Shift moves 10 px). Use them to centre it on the middle guide, sitting neatly on the shaft.
-
Lay a chevron band along the base
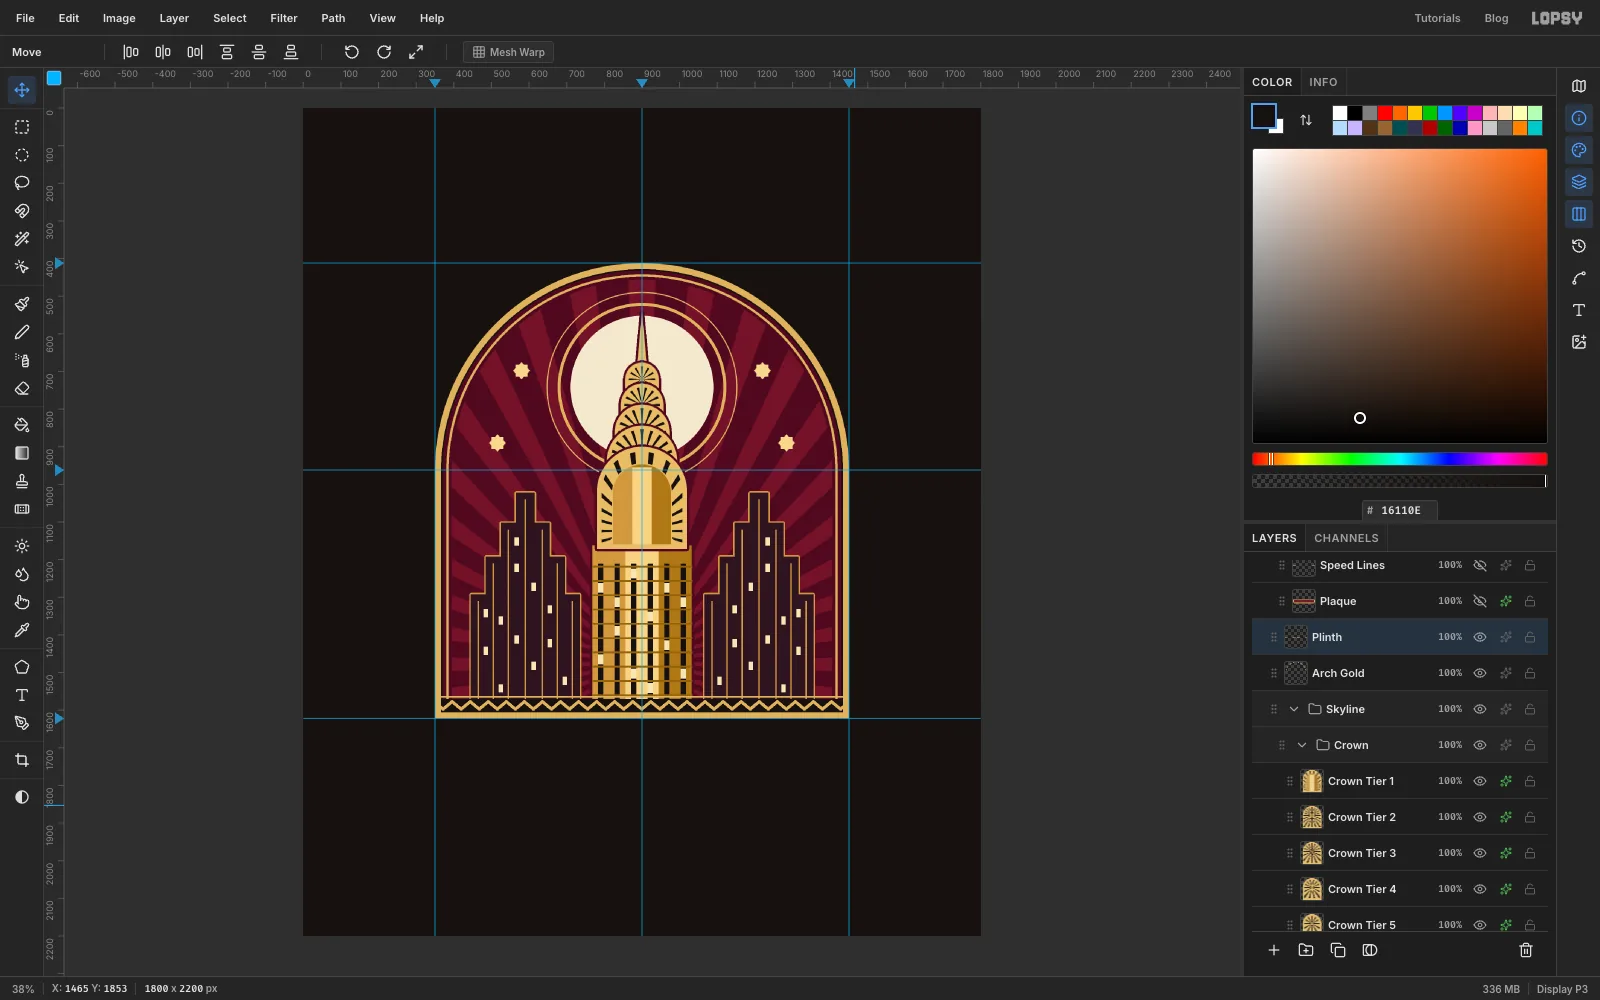
Make the pattern tile first. Add a temporary layer, marquee a 48 × 36 px rectangle in an empty corner and fill it with . With the Pencil at Size 6 in gold , click at the tile's top-left and Shift-click the bottom middle, then Shift-click the top-right to draw a V. Marquee the tile again and choose Edit → Define Pattern.
Delete the tile layer and add a layer called Plinth above Arch Gold. Marquee a strip about 36 px tall across the bottom of the arch, just inside the gold lines. Choose Edit → Fill with Pattern…, pick the new pattern and set Horizontal Offset 25 % and Vertical Offset 11 % so a full V sits at each end. Click Apply. Finish with a Pencil line at Size 5 in gold: click at one end just above the band and Shift-click the other end.
-
Set the title
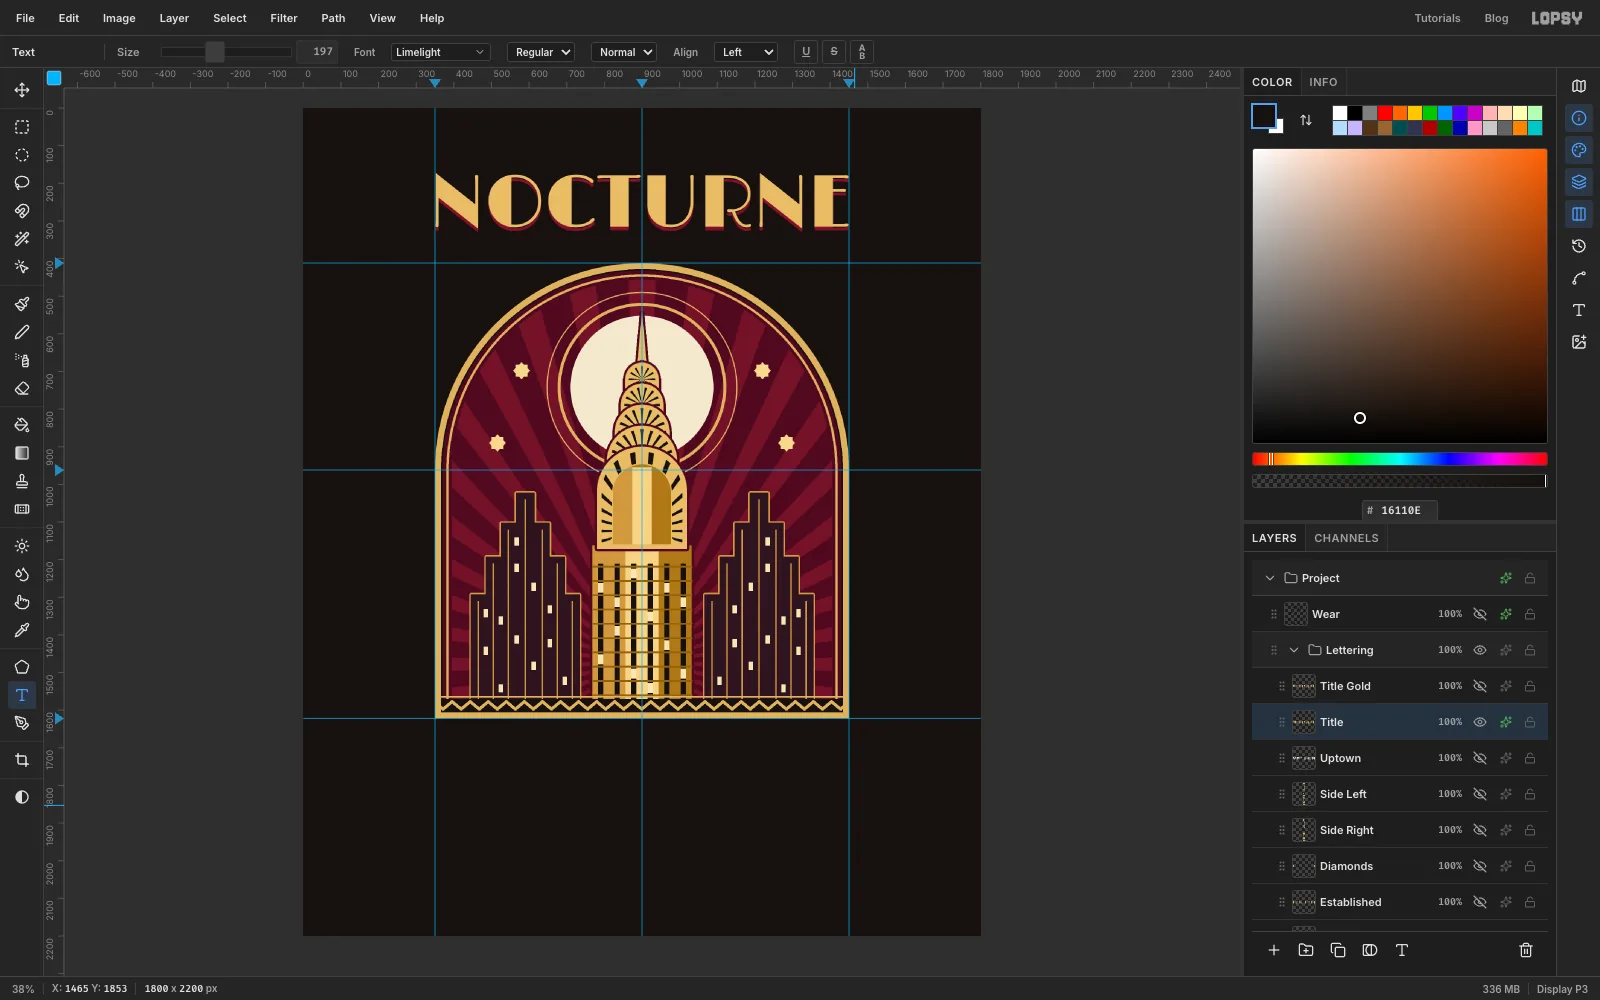
Pick the Text tool, choose Limelight and set the colour to . Click above the arch, type NOCTURNE, and press Tab to finish. Adjust Size in the Text panel until the word reaches from the left arch guide to the right one. That's just under 200 px here.
Switch to the Move tool and click Align center horizontally in the options bar. Then nudge it up or down until the bottom of the letters sits about 90 px above the top of the arch. Open the effects drawer and add a Drop Shadow in with Offset X 0, Offset Y 10, Blur 0 and Opacity 100. A hard, offset shadow is the classic Deco "inline" look.
-
Paint the title two-tone gold
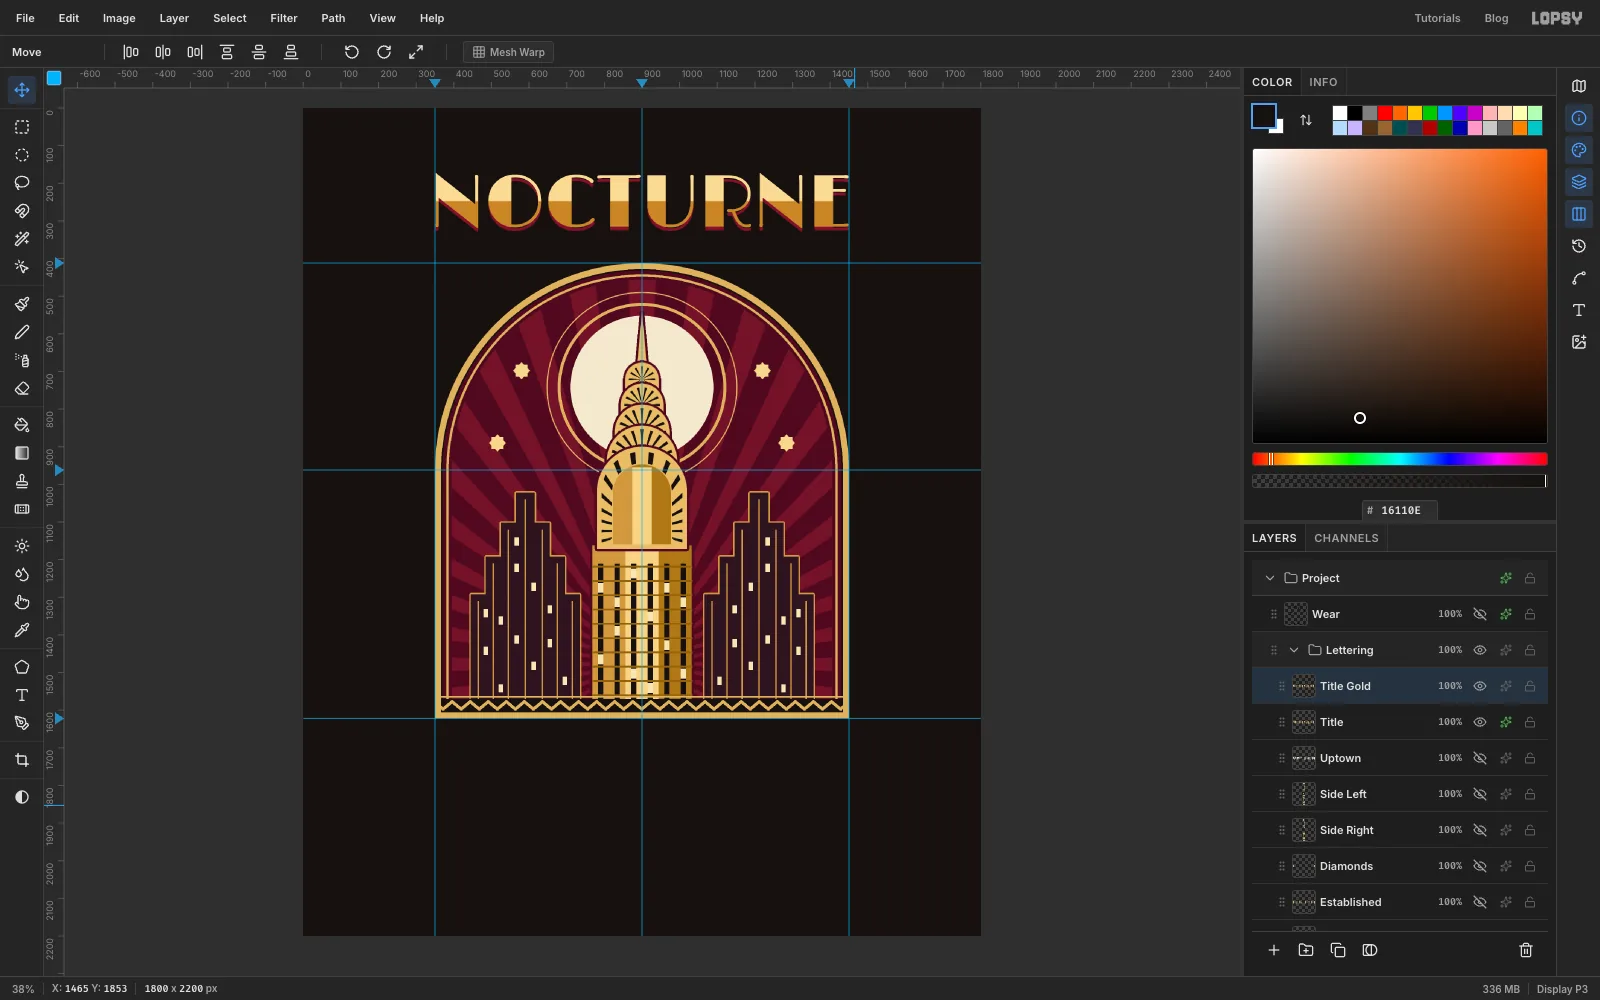
Add a layer called Title Gold above the title, then Cmd-click the title's thumbnail to select its letters. Keep Title Gold as the active layer, pick the Gradient tool and click Advanced… in the options bar. Click empty spots on the gradient bar to add stops until you have four, then set them to:
- at 0 % and 50 %
- at 52 % and 100 %
Two stops that sit almost on top of each other give a hard break instead of a blend. Click Done, drag the gradient from the top of the letters to the bottom, and deselect. The title is now pale gold on top and deep gold underneath, split across the middle like a polished metal sign.
-
Seat UPTOWN in a plaque
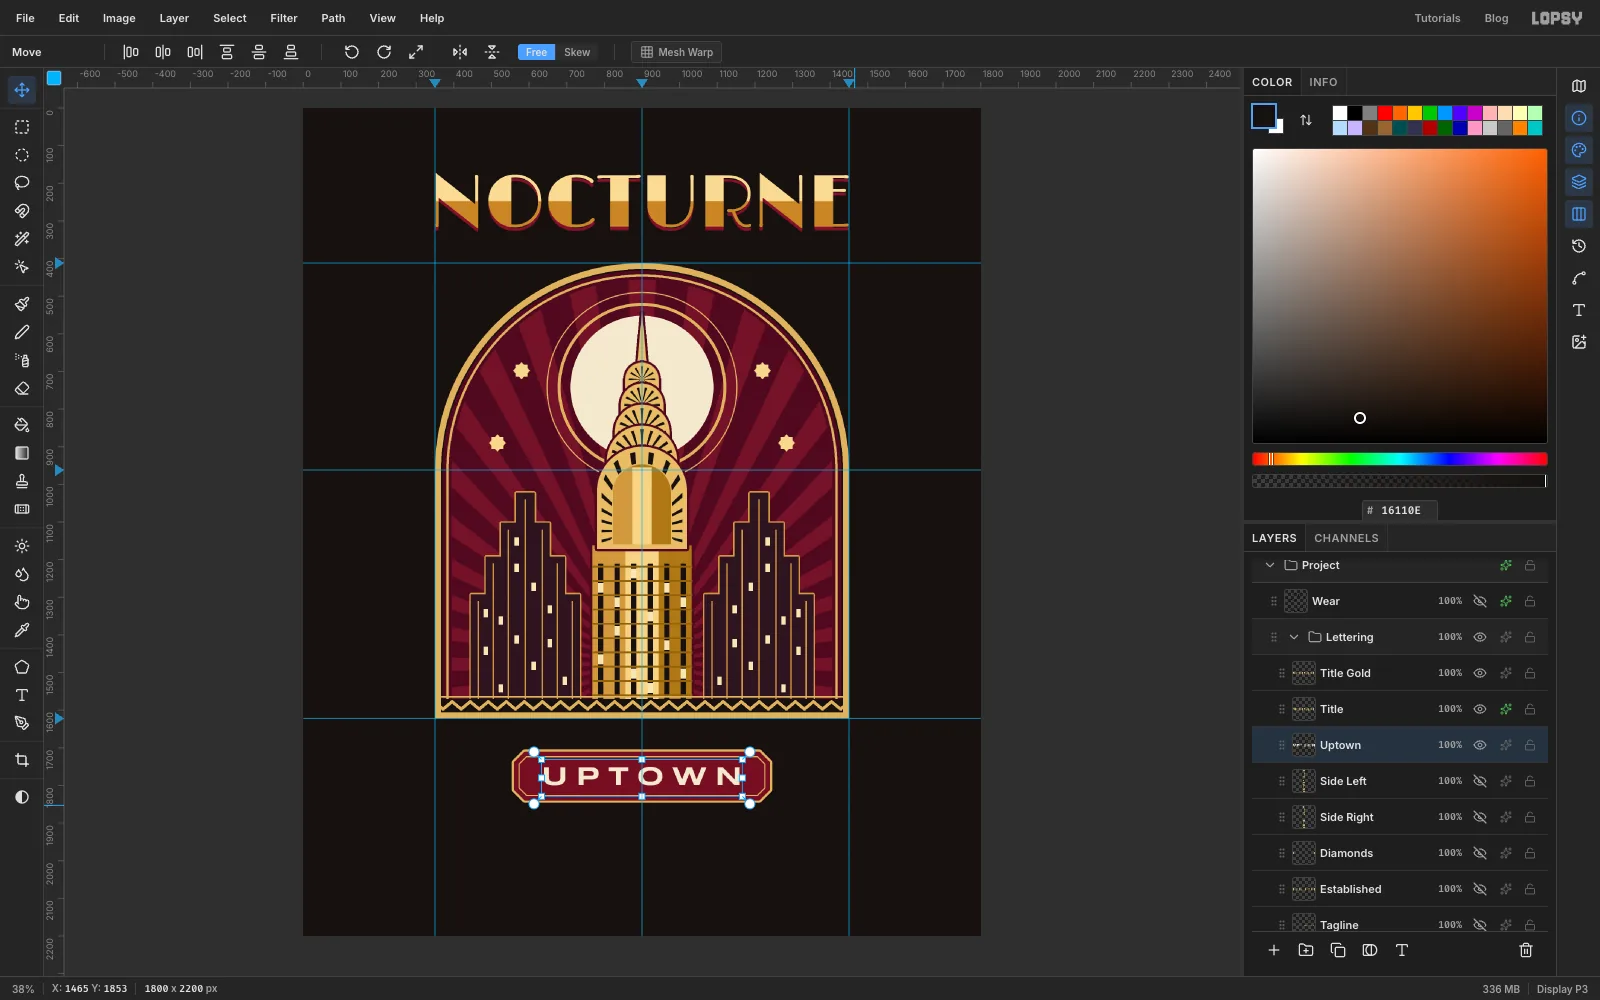
Add a layer called Plaque. With the Rectangular Marquee, drag a box about 680 × 130 px, centred on the middle guide and about 90 px below the arch. Clip its corners: pick the Lasso, hold Alt and drag a small triangle over each corner, about 28 px along each side, to take it out of the selection. Then:
- fill with
- Shrink by 12 and fill with gold
- Shrink by 3 and fill with again
That leaves a hairline of gold just inside the edge. Add a Stroke of 6 px in gold.
Type UPTOWN in Syncopate, Bold, Size 70, ivory , with Letter spacing 22. Move it into the plaque so the space on its left and right is equal and the letters sit in the vertical middle of the inner panel.
-
Add the tagline and date
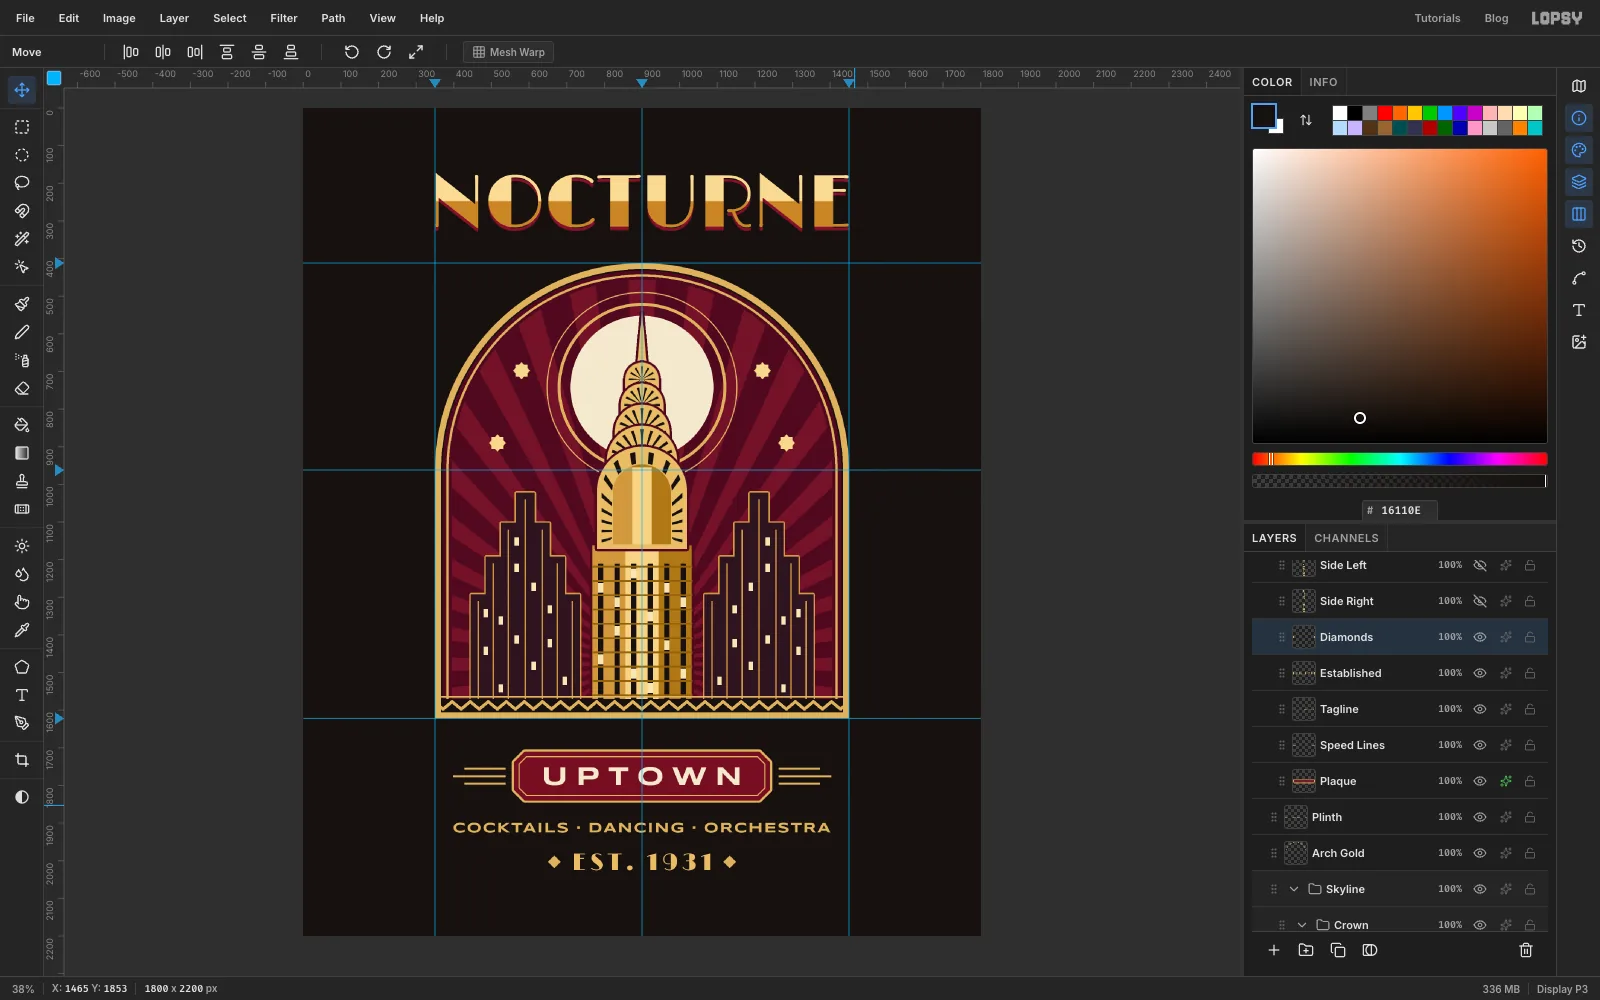
On a Speed Lines layer, use the Pencil at Size 5 in gold to draw three short horizontal lines on each side of the plaque. Click, then Shift-click for each one, with the middle line reaching a little further out.
Type COCKTAILS · DANCING · ORCHESTRA in Syncopate Regular, Size 38, in gold . On a Mac, Alt+Shift+9 types the middle dot. Centre it under the plaque and adjust Letter spacing (about 3) until its ends line up with the outer ends of the speed lines. Below it, type EST. 1931 in Limelight, Size 64, Letter spacing 10, in .
For the diamonds, add a layer called Diamonds, marquee a 24 px square just left of the date and fill it with gold. Switch to the Move tool, hold Cmd and drag the rotation handle to 45°, then press Cmd+D. Duplicate the layer, Flip Horizontal to send the copy to the other side of the date, and Merge Down.
-
Run the side text up the arch
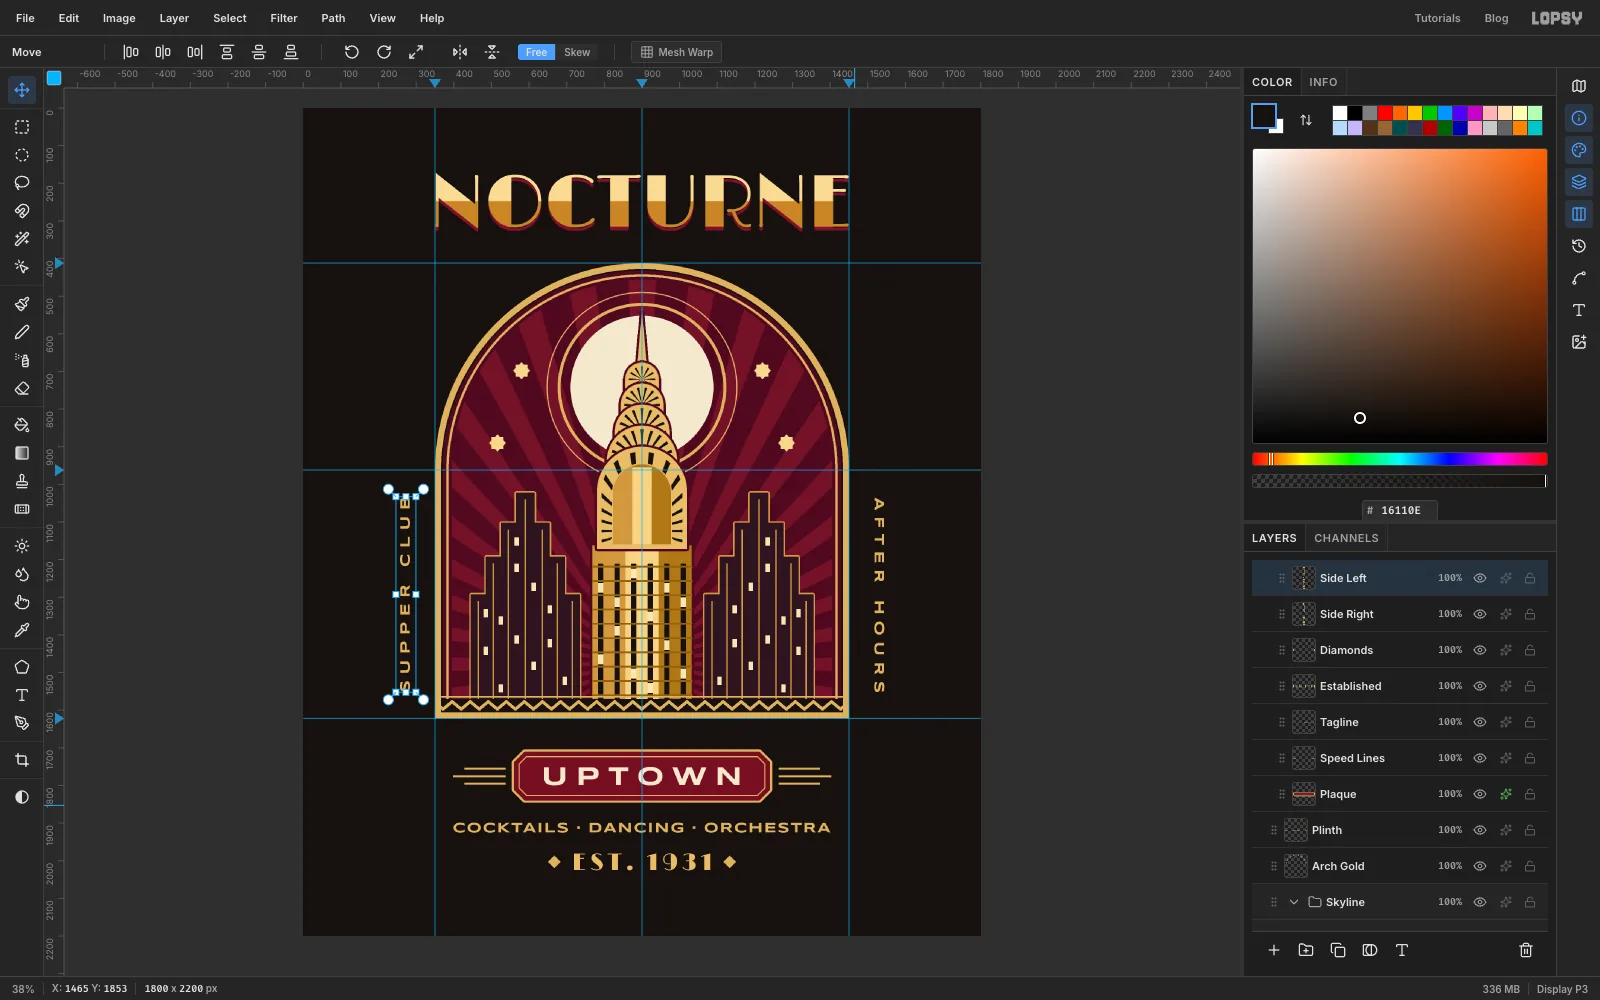
Type SUPPER CLUB and AFTER HOURS as two separate text layers in Syncopate, Size 38, Letter spacing 16, gold. They're the same length, so the two sides balance.
Select SUPPER CLUB, pick the Move tool and hold Cmd while you drag the rotation handle a quarter turn anticlockwise, to -90°. Press Cmd+D. Do the same to AFTER HOURS, turning it clockwise to +90°. Both stay live text. Move each one just outside the arch, with the same gap on both sides, and centre it on the arch's straight sides.
-
Group the lettering and try a resize
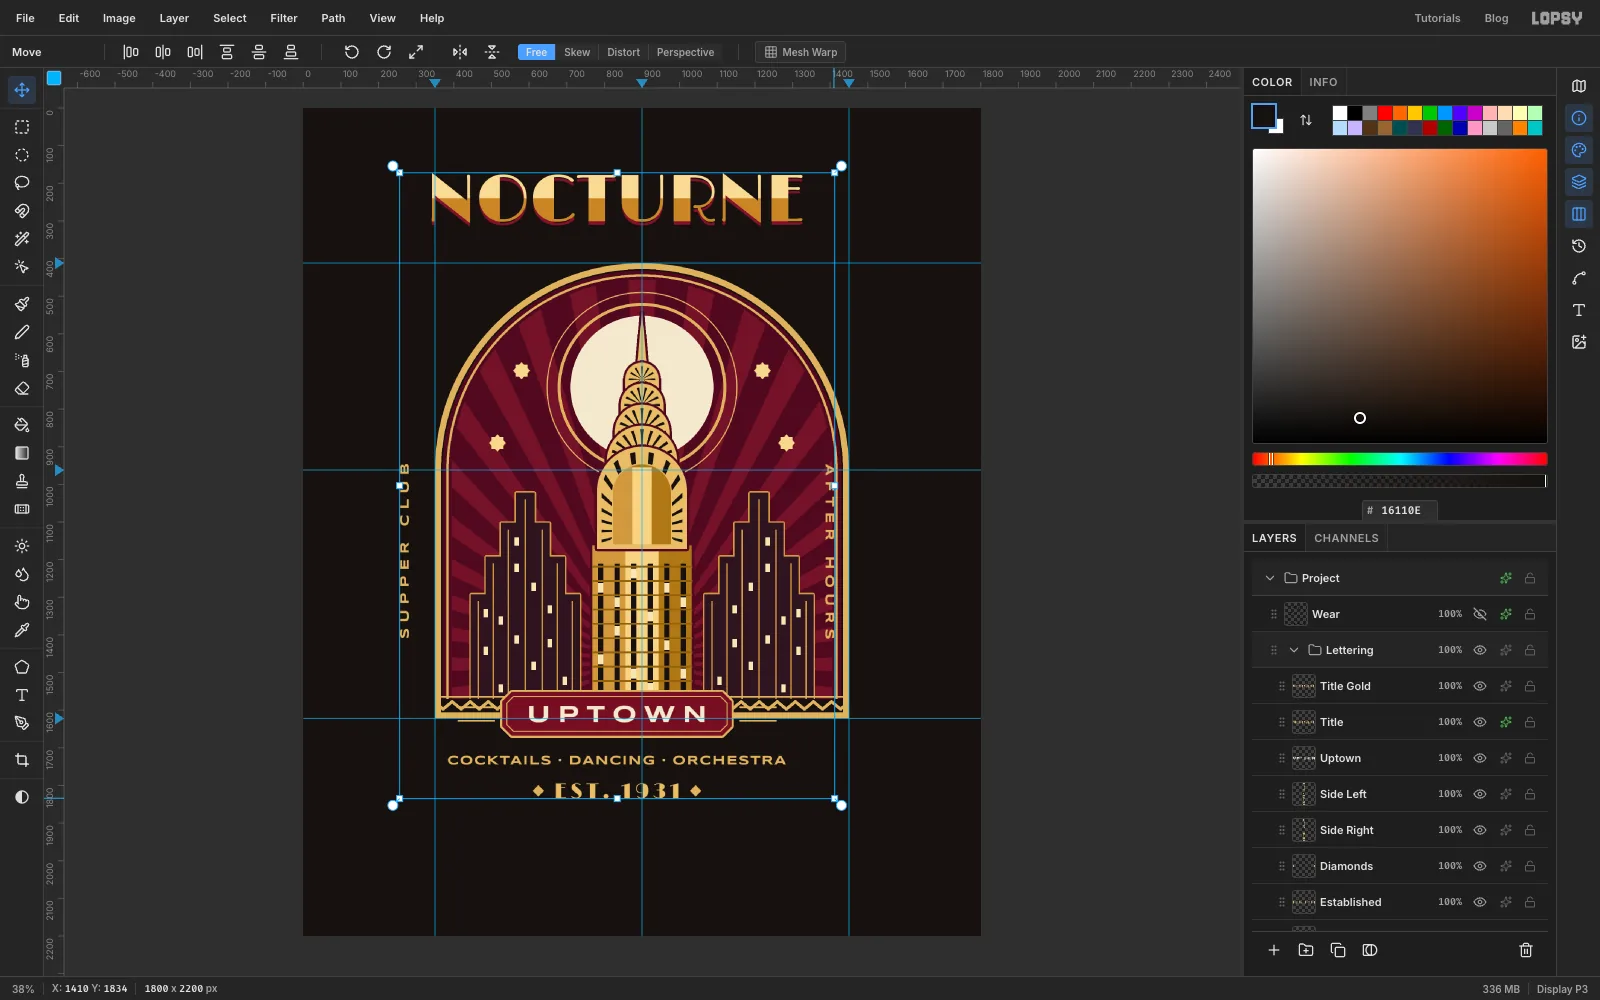
Cmd-click every text, plaque, speed-line and diamond row, choose Layer → Group Layers and name the group Lettering. Now everything moves together.
Try it: select the Lettering group, pick the Move tool, hold Cmd and drag the bottom-right handle inward. All the type and the plaque shrink together around the arch, and the rotated side text stays rotated. Press Cmd+D to commit, then Cmd+Z to undo it. Everything goes back exactly where it was, and Cmd+Shift+Z would redo it. Leave it at full size.
-
Wear it in
A good worn print loses a little ink everywhere, in small clumps, never as dirty blotches. Add a layer called Wear at the very top and fill it with mid grey . Then:
- Filter → Add Noise: Mono, Gaussian, Amount 100.
- Filter → Gaussian Blur, Radius 3, which clumps the noise.
- Filter → Threshold, Level 121. Only the darkest clumps turn black, about 7 % of the layer.
- Pick the Magic Wand, untick Contiguous, set Tolerance to 40 and click a white area. Press Delete, then Cmd+D. With thousands of tiny islands selected, the selection can take a few seconds to clear.
- Open the effects drawer and turn on Color Overlay in the shirt colour .
The specks now read as bare fabric showing through the ink. Export with File → Quick Export PNG, and use File → Save Project to keep the layers.