Draw a Victorian Kraken Plate T-Shirt Design
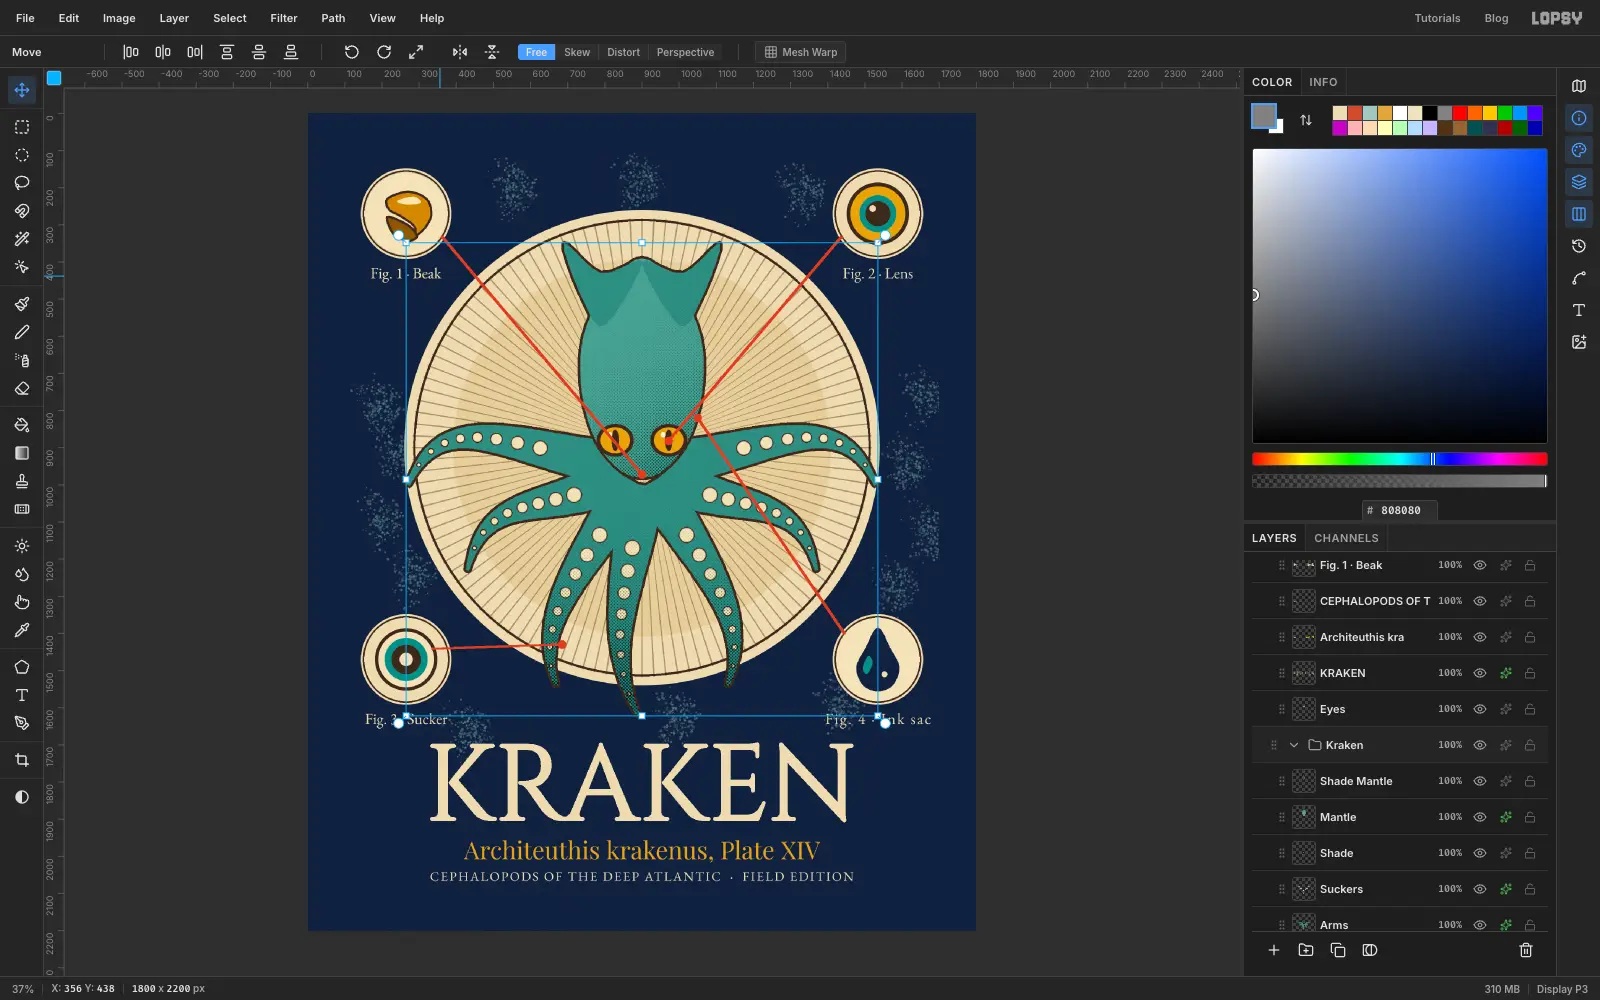
Build a Victorian natural-history plate of a kraken in Lopsy, with a ray medallion, halftone shading, four inset figures, leader lines and a Cinzel title.
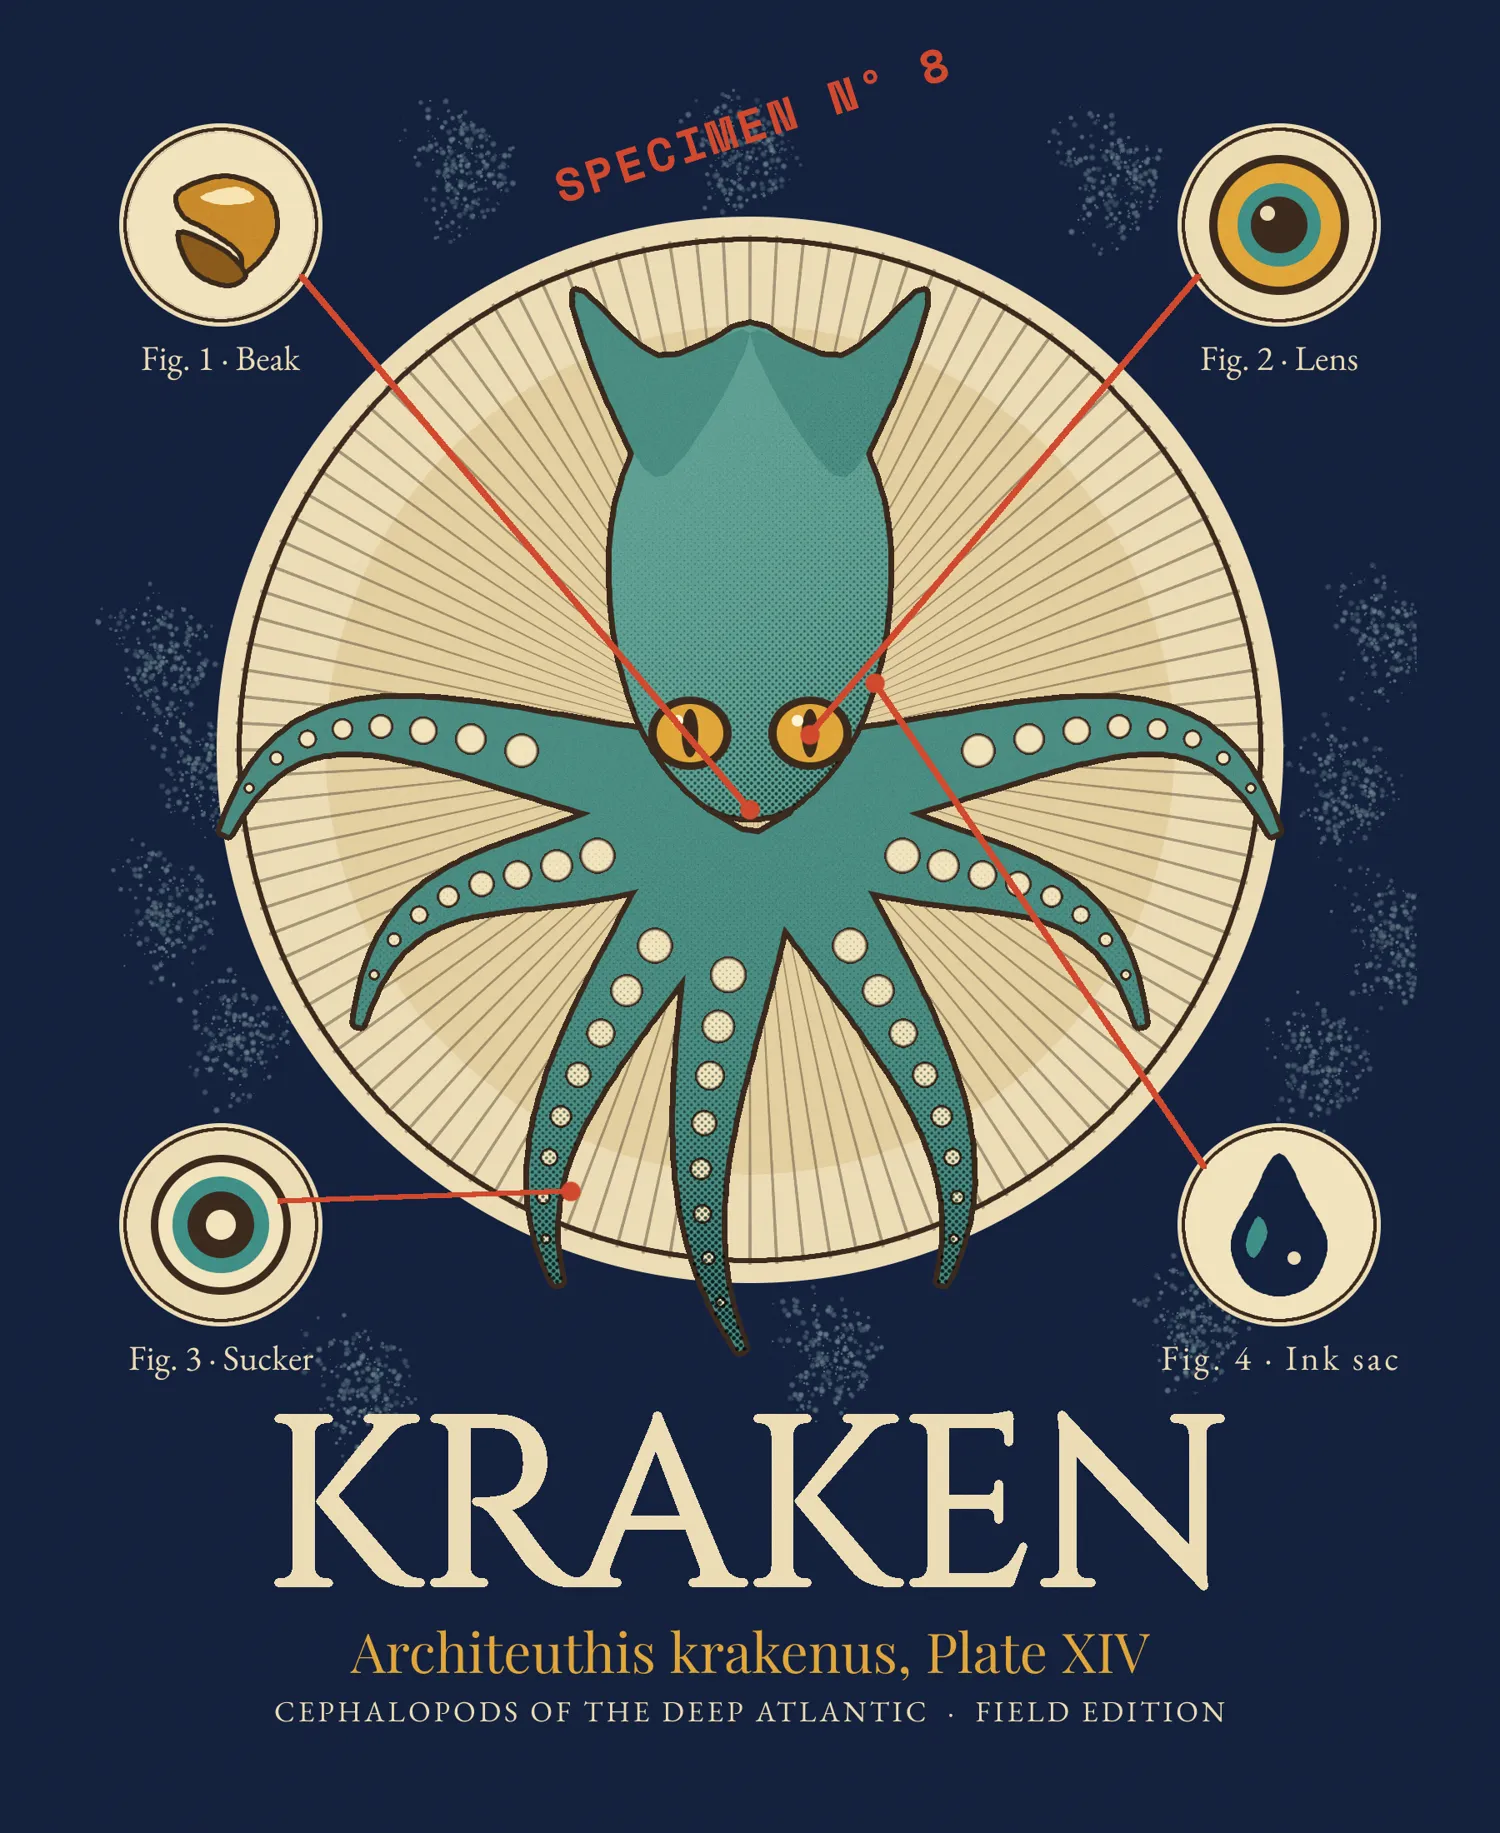
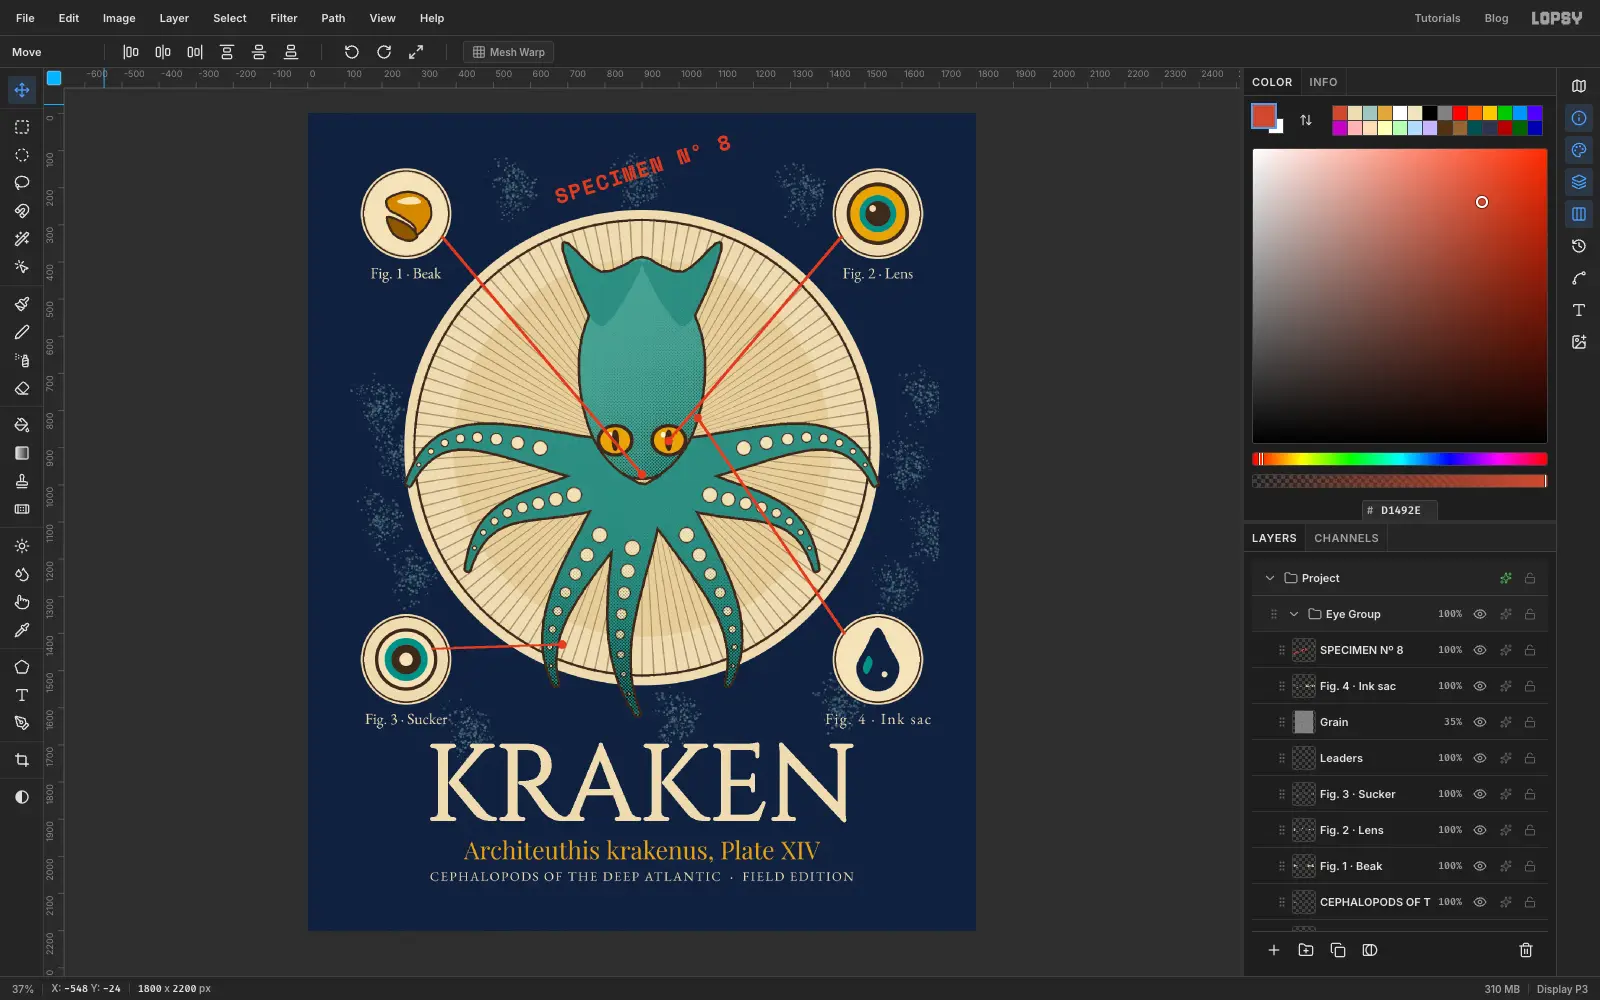
Victorian naturalists drew every new creature as a plate: one big, carefully shaded specimen, a handful of numbered close-ups, and a Latin name underneath. That layout works well on a T-shirt, because it is a single bold centrepiece with small, charming details around it. This tutorial builds a KRAKEN plate at 1800 × 2200 px, with the indigo background standing in for the shirt itself.
Most of the drawing is lasso fills, outlined with a Stroke layer effect so that every shape gets the same clean ink line. The engraved look comes from one trick: paint a gradient on its own layer, set it to Multiply, and run Filter → Halftone on it so the shadow turns into dots.
The tools you'll meet along the way:
- Elliptical Marquee and Lasso fills, plus Select → Shrink and Select → Inverse
- the Magic Wand to trace a drawing's outline
- Filter → Sunburst, Filter → Halftone and Filter → Add Noise
- the Brush, Pencil with Shift-click lines, and Spray
- Cinzel, Playfair Display, EB Garamond and Space Mono text, with a rotated live text layer
- groups, group scaling, and undo / redo
The palette is a shirt colour and six inks:
-
Shirt indigo
-
Parchment
-
Sepia ink
-
Verdigris
the kraken
-
Ochre
the eyes and the Latin name
-
Cream
suckers and eye highlights
-
Vermilion
leader lines and the stamp
-
Set up the shirt
Choose File → New, set the units to Pixels, make the document 1800 × 2200 and click Create. Double-click Layer 1 and rename it Garment. Click the foreground colour box, type
14213Din the hex field, and choose Edit → Fill. This is the shirt. Anything you leave unpainted shows it through, so the colour is part of the design.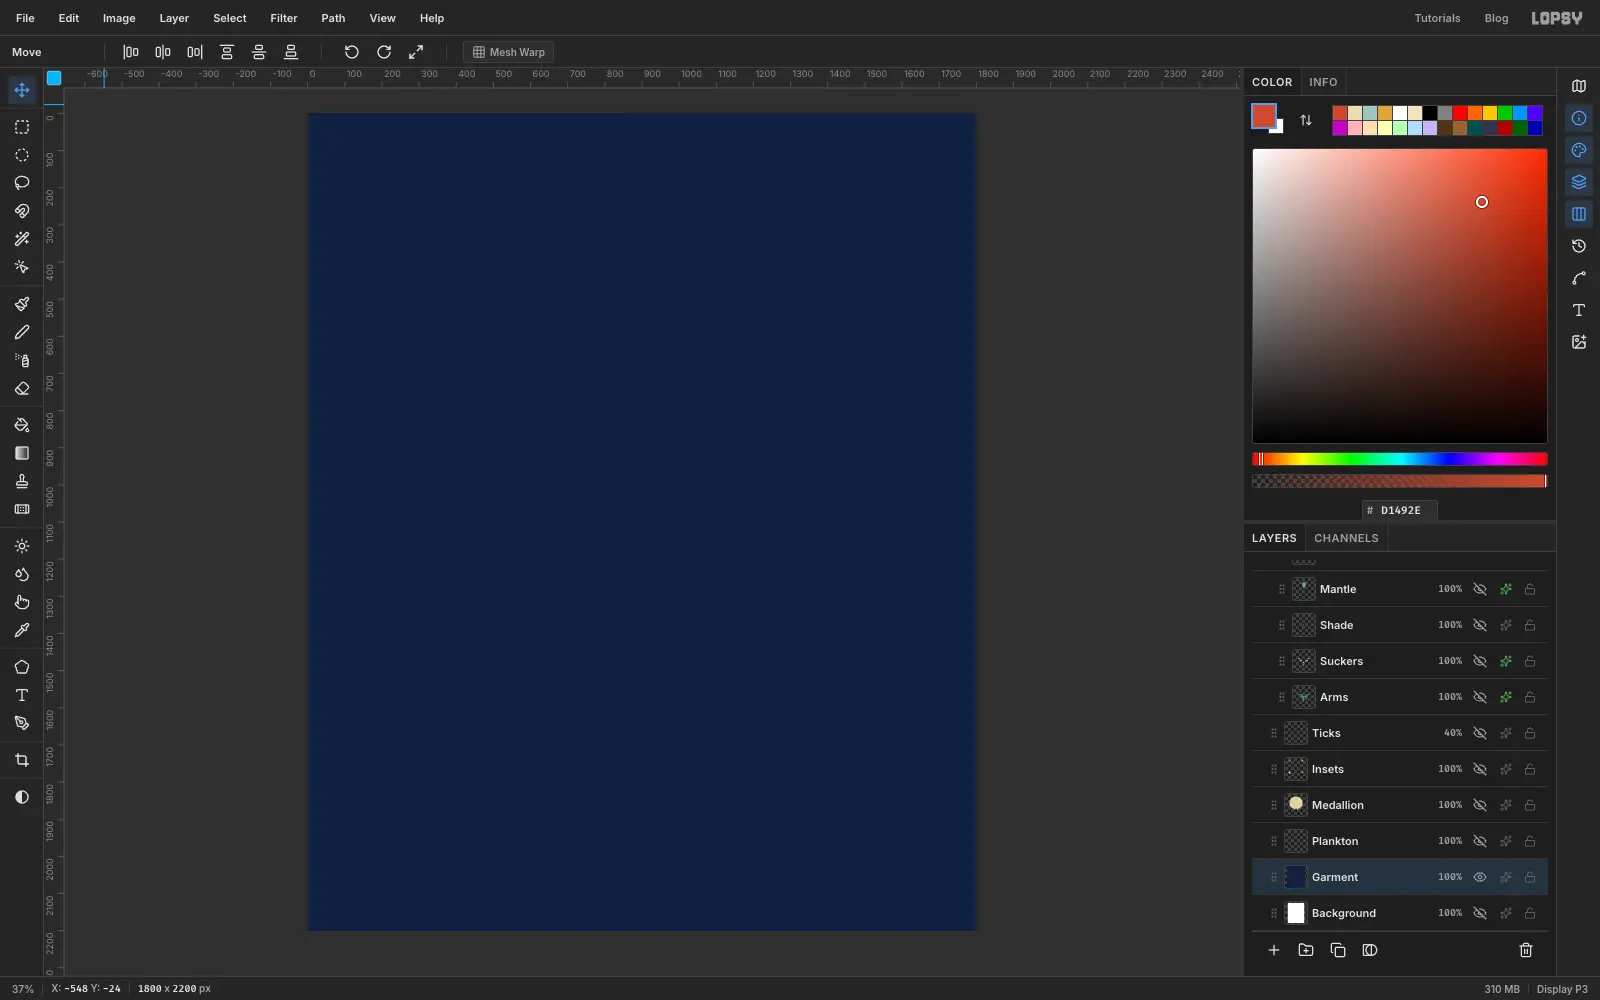
-
Draw the medallion
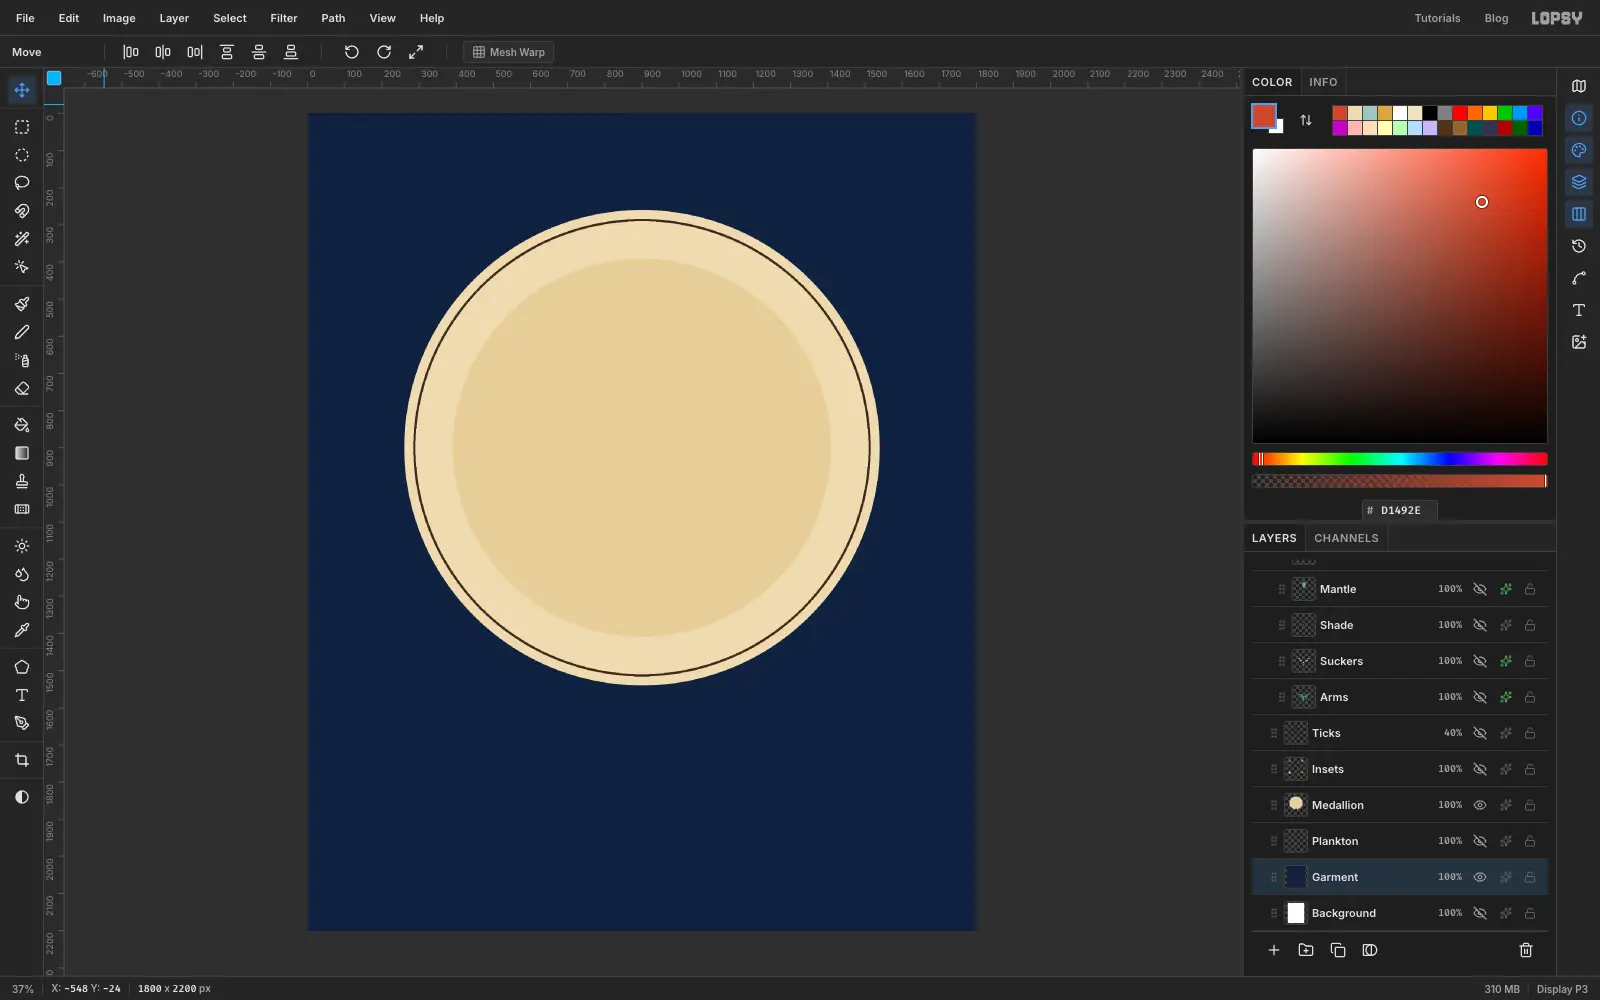
Add a layer called Medallion. Pick the Elliptical Marquee, hold Shift and drag a big circle in the middle of the canvas, leaving a good margin on every side and room below it for the title. Fill it with parchment . Now stack the rings with Select → Shrink: shrink by 24 and fill with sepia , shrink by 6 and fill with parchment again, then shrink by 150 and fill with the darker . You end up with a thin ink ring and a soft inner disc for the animal to sit on.
-
Cut out the arms
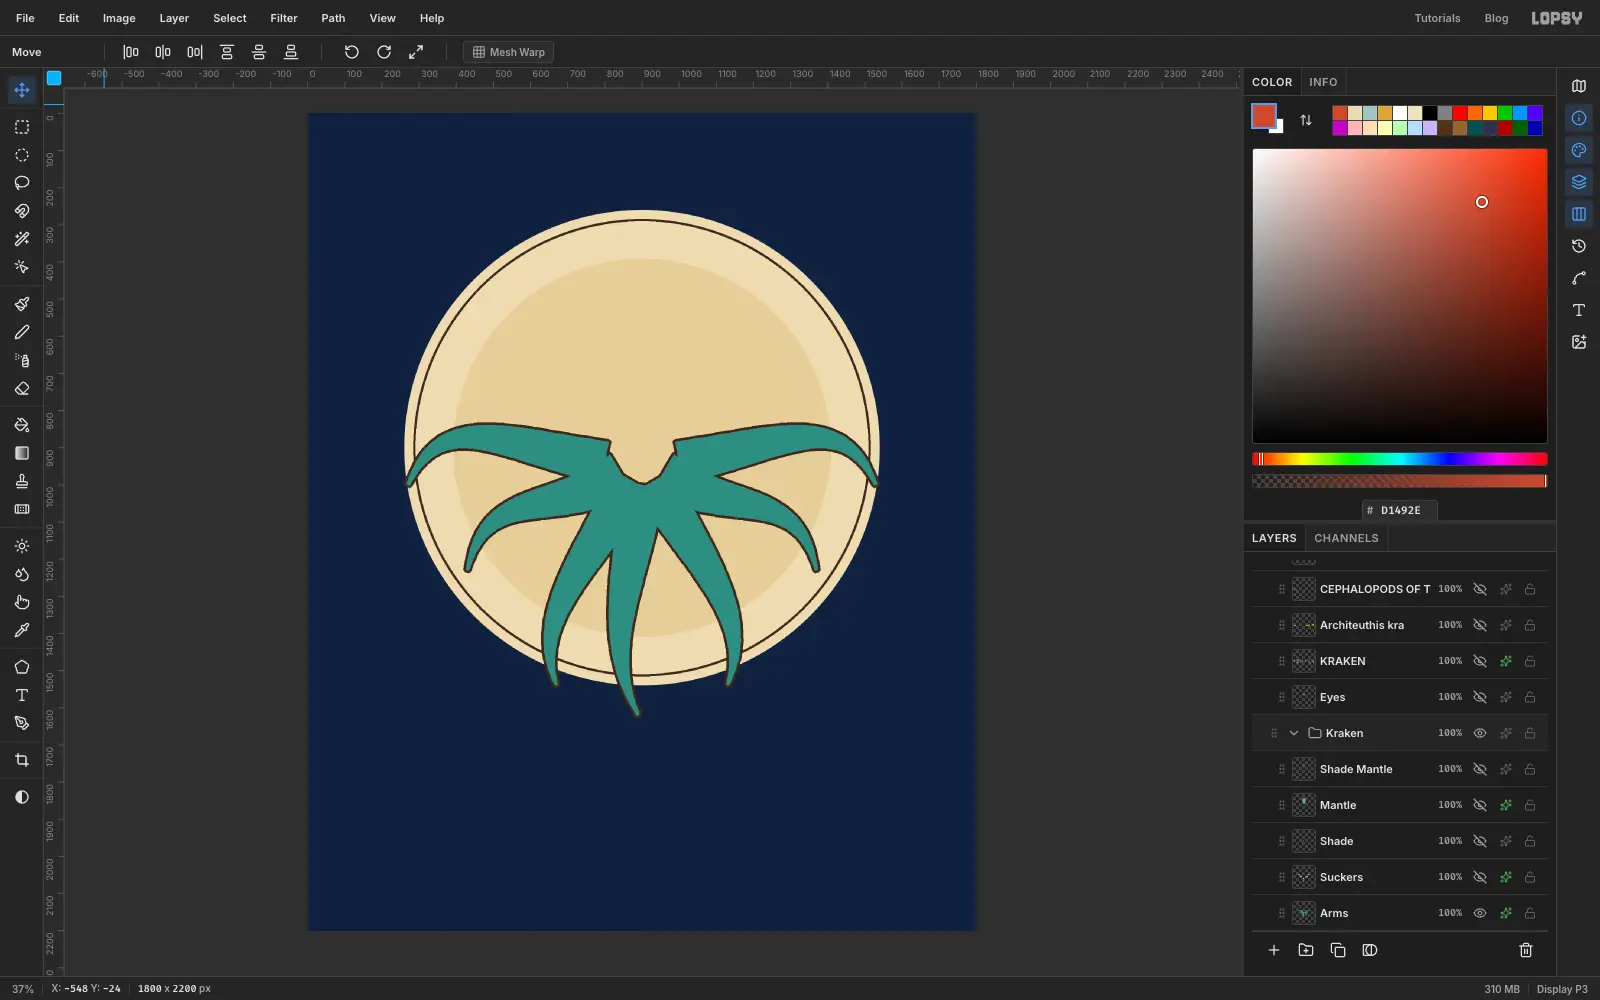
Add a layer called Arms, set the foreground to , and pick the Lasso. Draw each arm as a curved, tapering finger: click a point at the base, then click short steps along one side out to the tip, come back along the other side and click the first point to close it. Many small steps give a smooth curve. Start with the two long ones that sweep out sideways, then fill in the five hanging below. After each shape choose Edit → Fill. Let the lowest arms reach a little past the bottom of the ring, so the animal breaks out of its frame.
Open the layer's effects drawer, switch on Stroke, set the colour to sepia and the width to 7. All the arms get one tidy outline.
-
Add the mantle
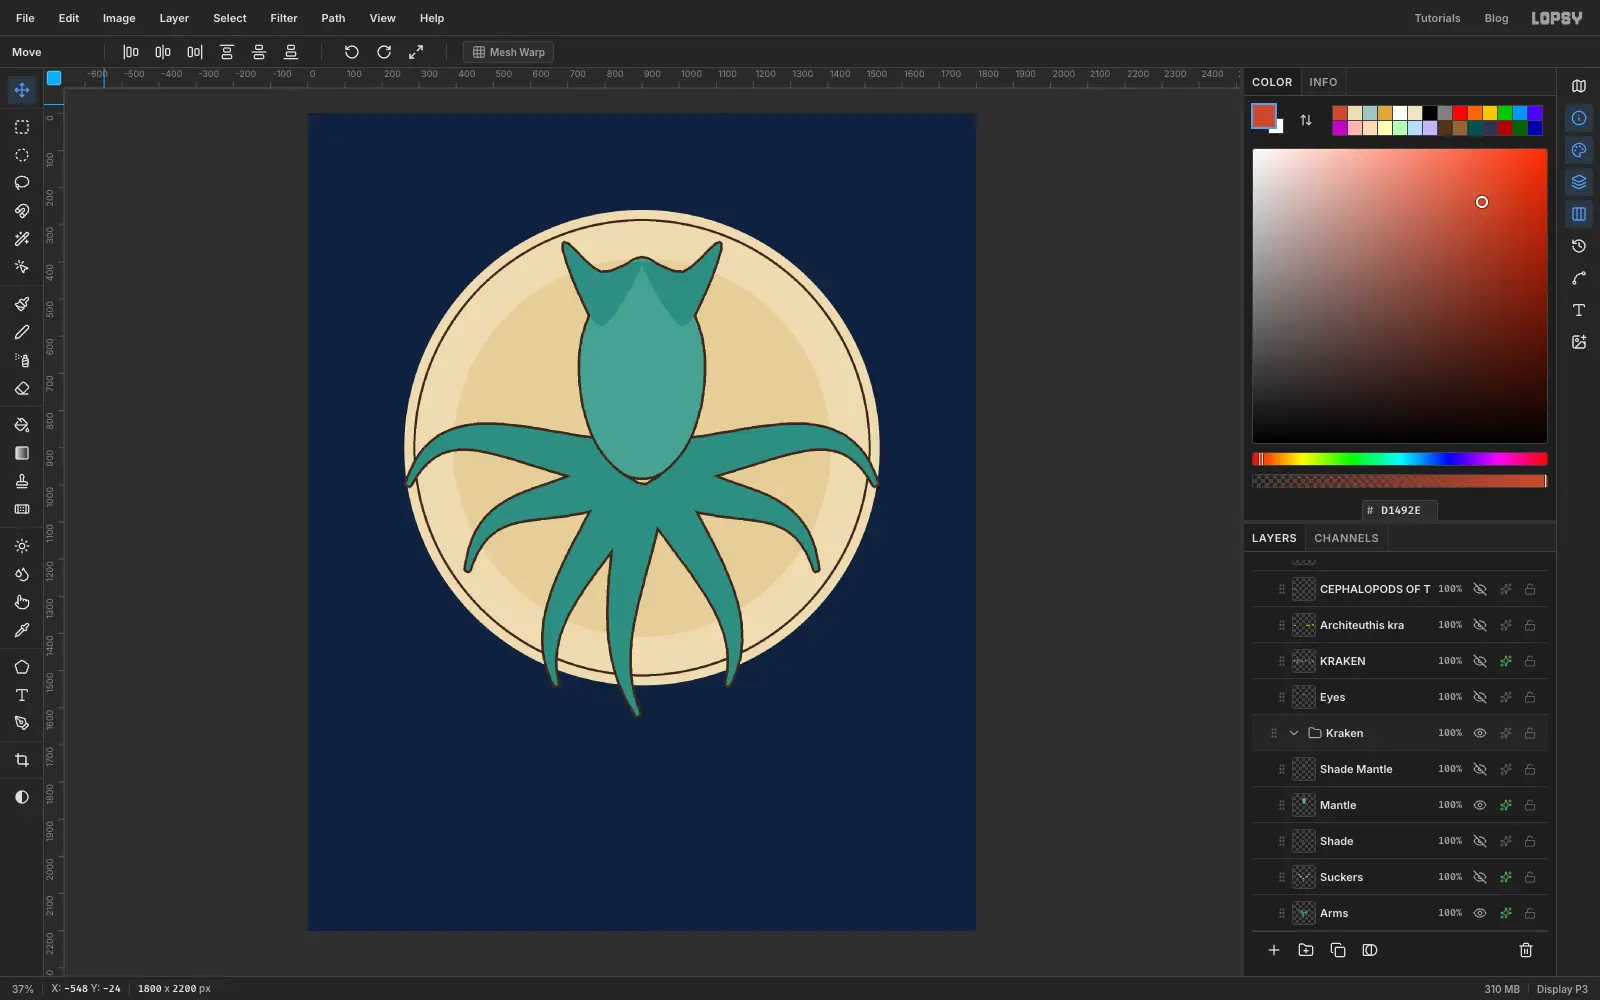
Add a layer called Mantle above Arms and set the foreground to . With the Lasso, draw a tall teardrop that overlaps the top of the arms. Fill it, then switch to and fill two pointed fins at its top corners. Give the layer the same Stroke: sepia, width 7.
-
Give it eyes
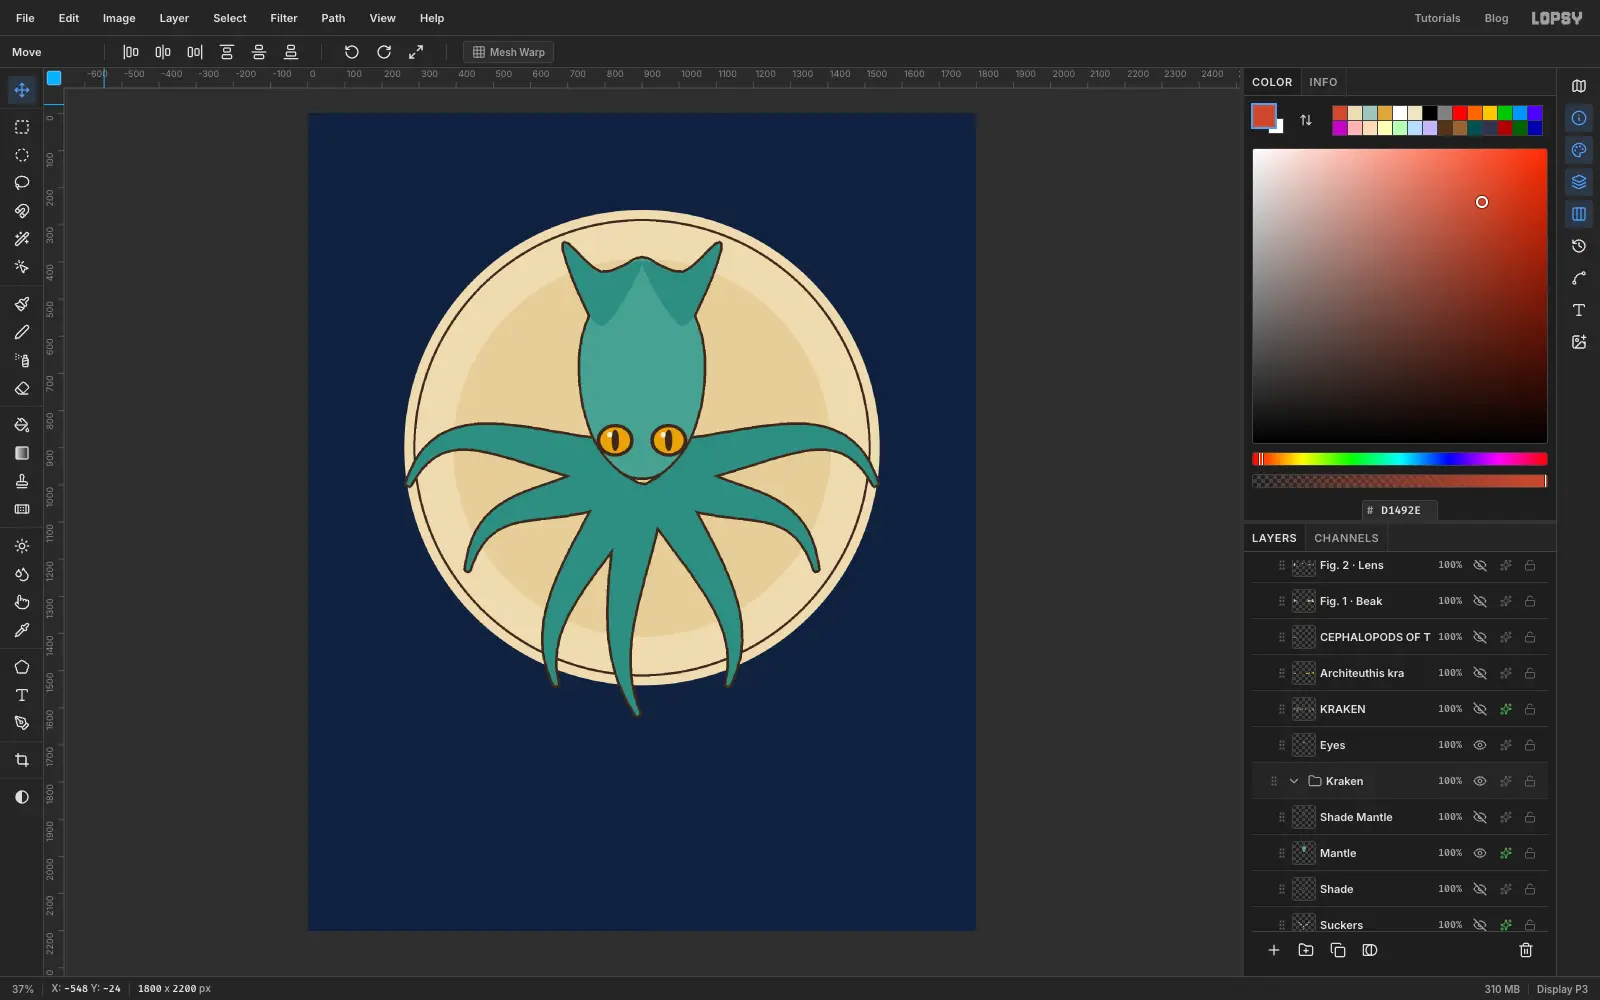
Add a layer called Eyes. If it lands beneath the Mantle, drag its row up in the Layers panel until it sits on top. Use the Elliptical Marquee to build each eye in four fills: sepia for the outer ring, ochre , a tall thin ellipse of sepia for the slit pupil, and a tiny cream-white dot for the highlight. Each eye is about 100 px wide. Build the first, then make the second the same way a short distance to the right.
-
Paint the suckers
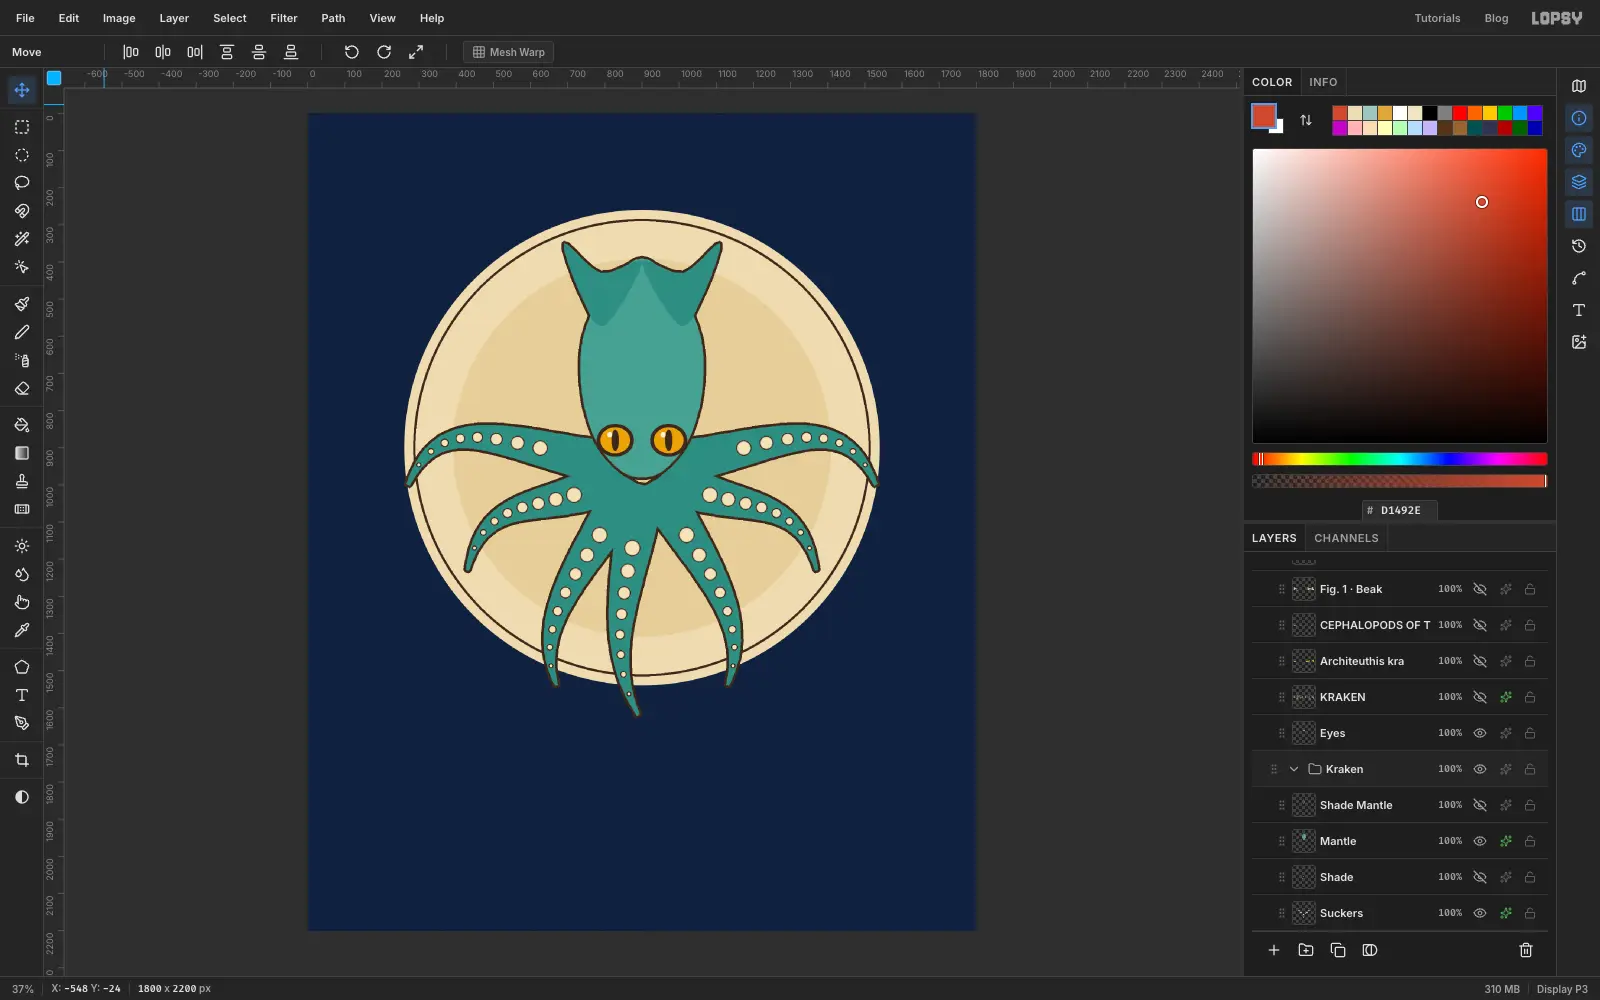
Add a layer called Suckers above the Arms. Pick the Brush and the colour . Set the Size to roughly 40% of the arm's width at that point, then click once for each sucker. Work from the body outwards, making the Size a little smaller every click or two. About eight dots per arm is plenty. Add a Stroke effect (sepia, width 3) so each dot gets a ring.
-
Shade it with halftone dots
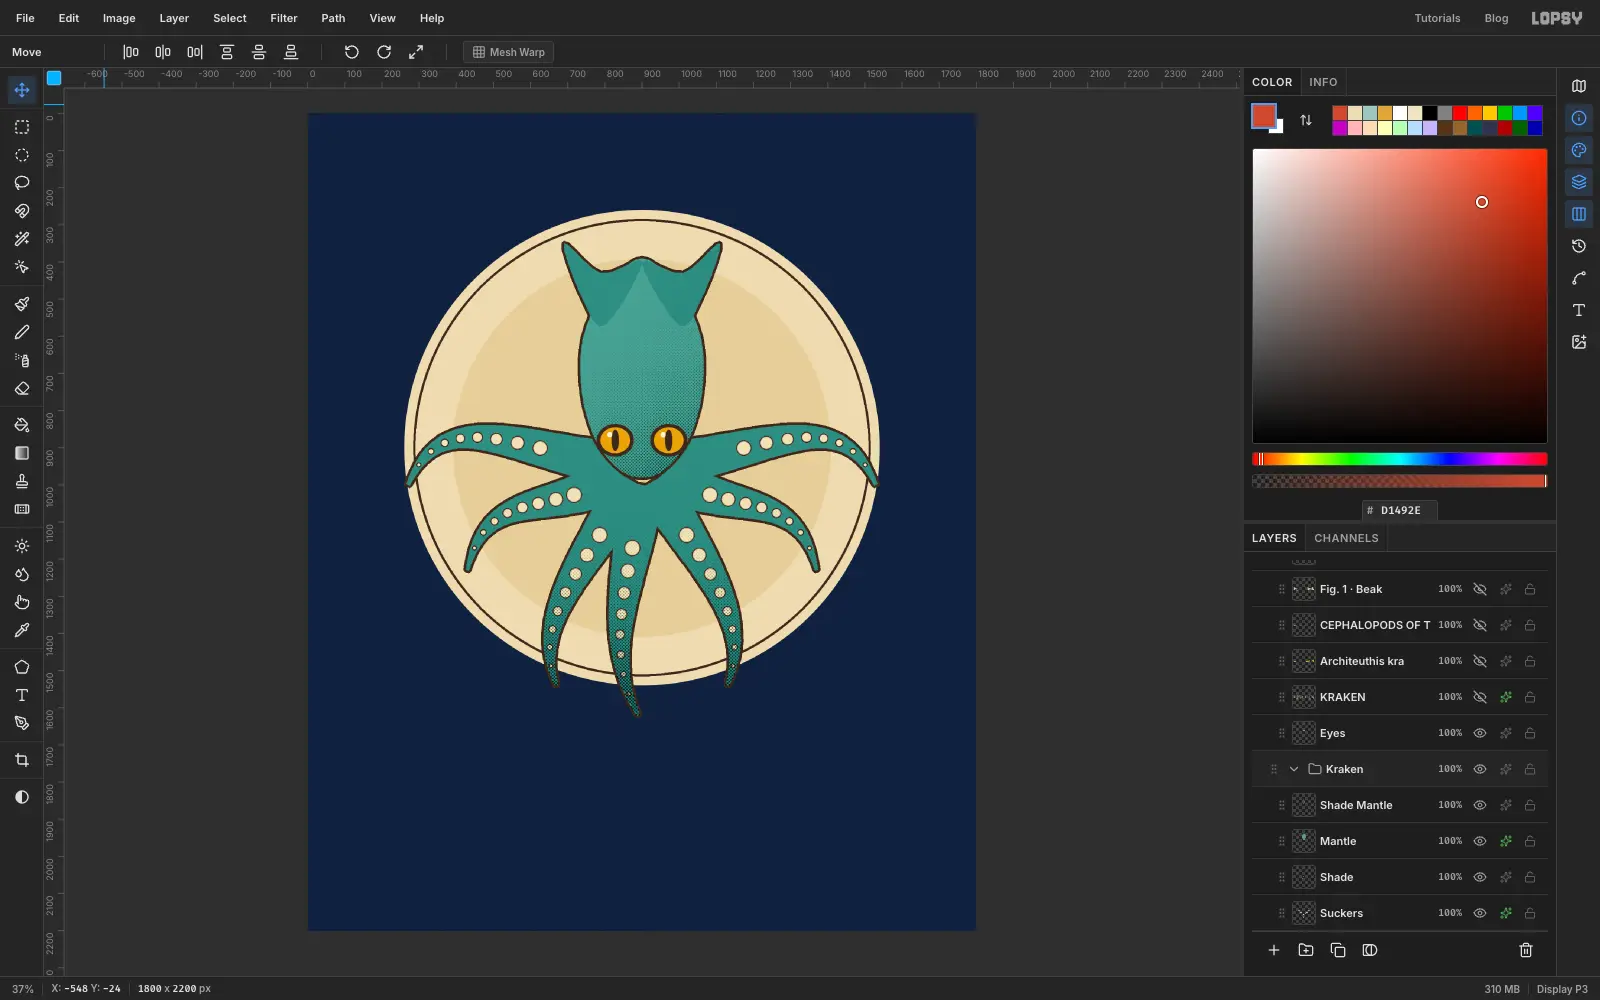
Select the Arms layer and pick the Magic Wand. Click once on the empty area outside the drawing, then choose Select → Inverse to select the arms. Add a layer called Shade, pick the Gradient tool, and set a linear gradient from white through grey-green to dark teal . Keep the selection active and drag from the middle of the animal down to the tips. To add the middle colour, double-click the gradient bar in the options bar. In the effects drawer set the layer's Blend to Multiply.
Choose Select → Deselect, then Filter → Halftone. Set Dot Size to 6, Density 1, Angle 45 and Softness 1. The smooth gradient turns into the dots of an engraving. Repeat on a second layer called Shade Mantle, wand-selecting the Mantle and using a white to gradient over the head.
-
Add the rays
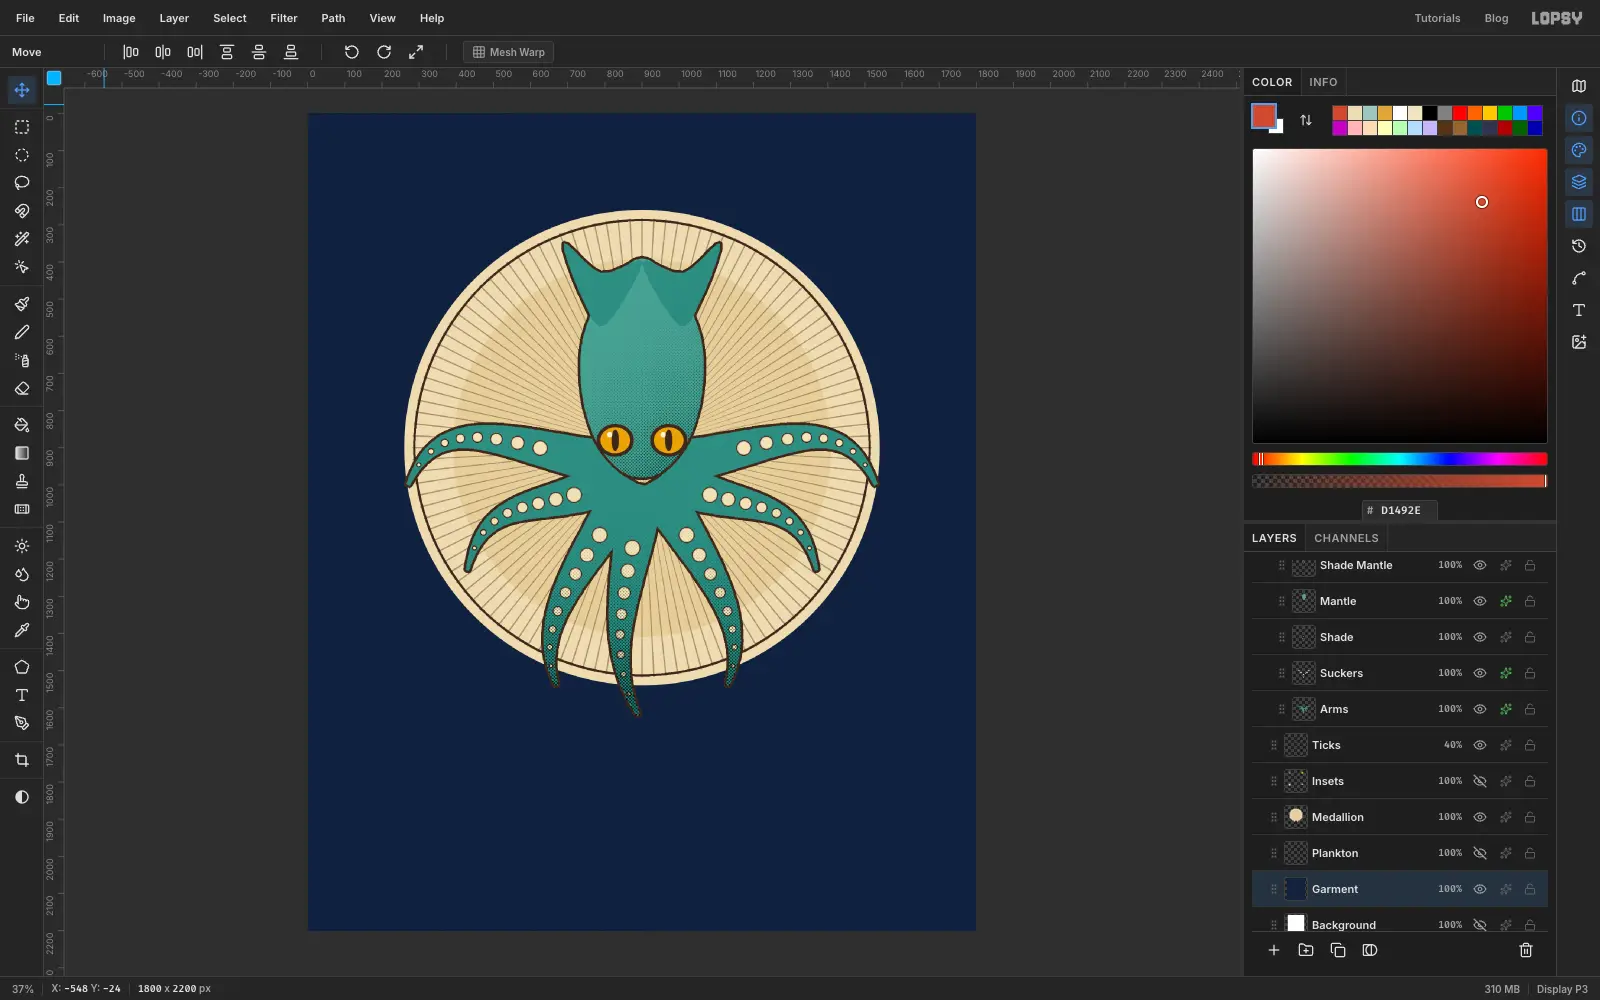
Add a layer called Ticks above the Medallion and below the Arms. Set the foreground to sepia and choose Filter → Sunburst. Set Rays to 120, Width 12, and move Center X to 50 and Center Y to about 41 so the burst starts at the middle of the medallion. Click Apply.
The rays fill the whole canvas, so trim them. Draw an Elliptical Marquee just inside the sepia ring, choose Select → Inverse, press Delete, then deselect. Finally drop the layer's opacity to 40%.
-
Group the animal
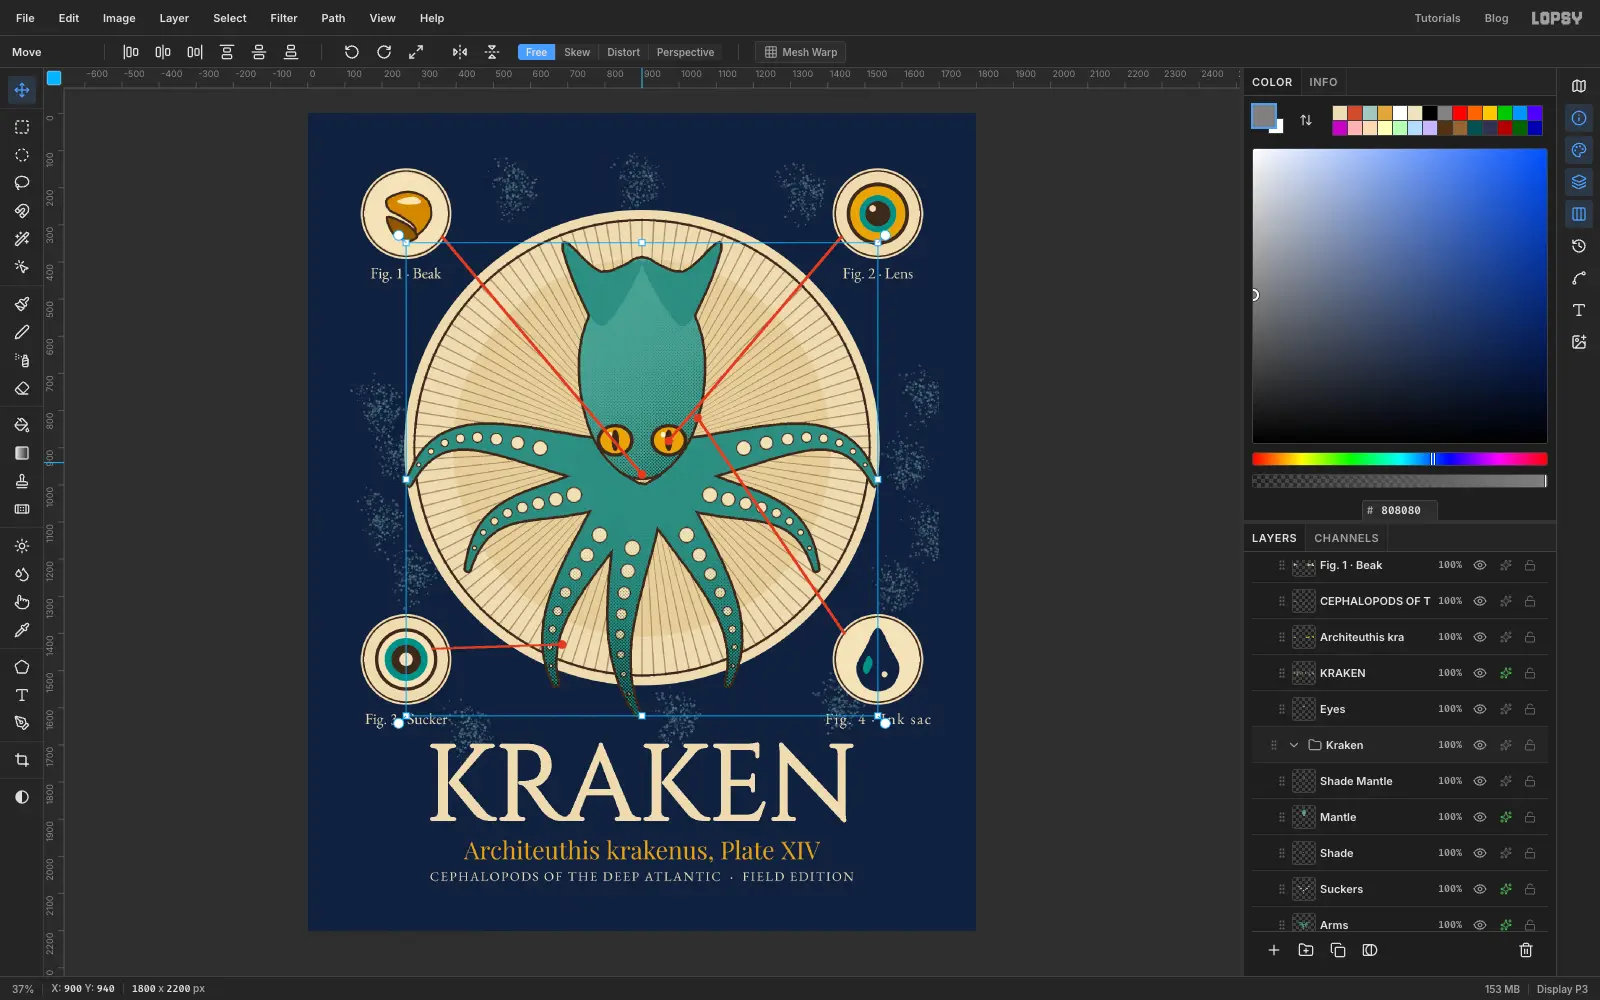
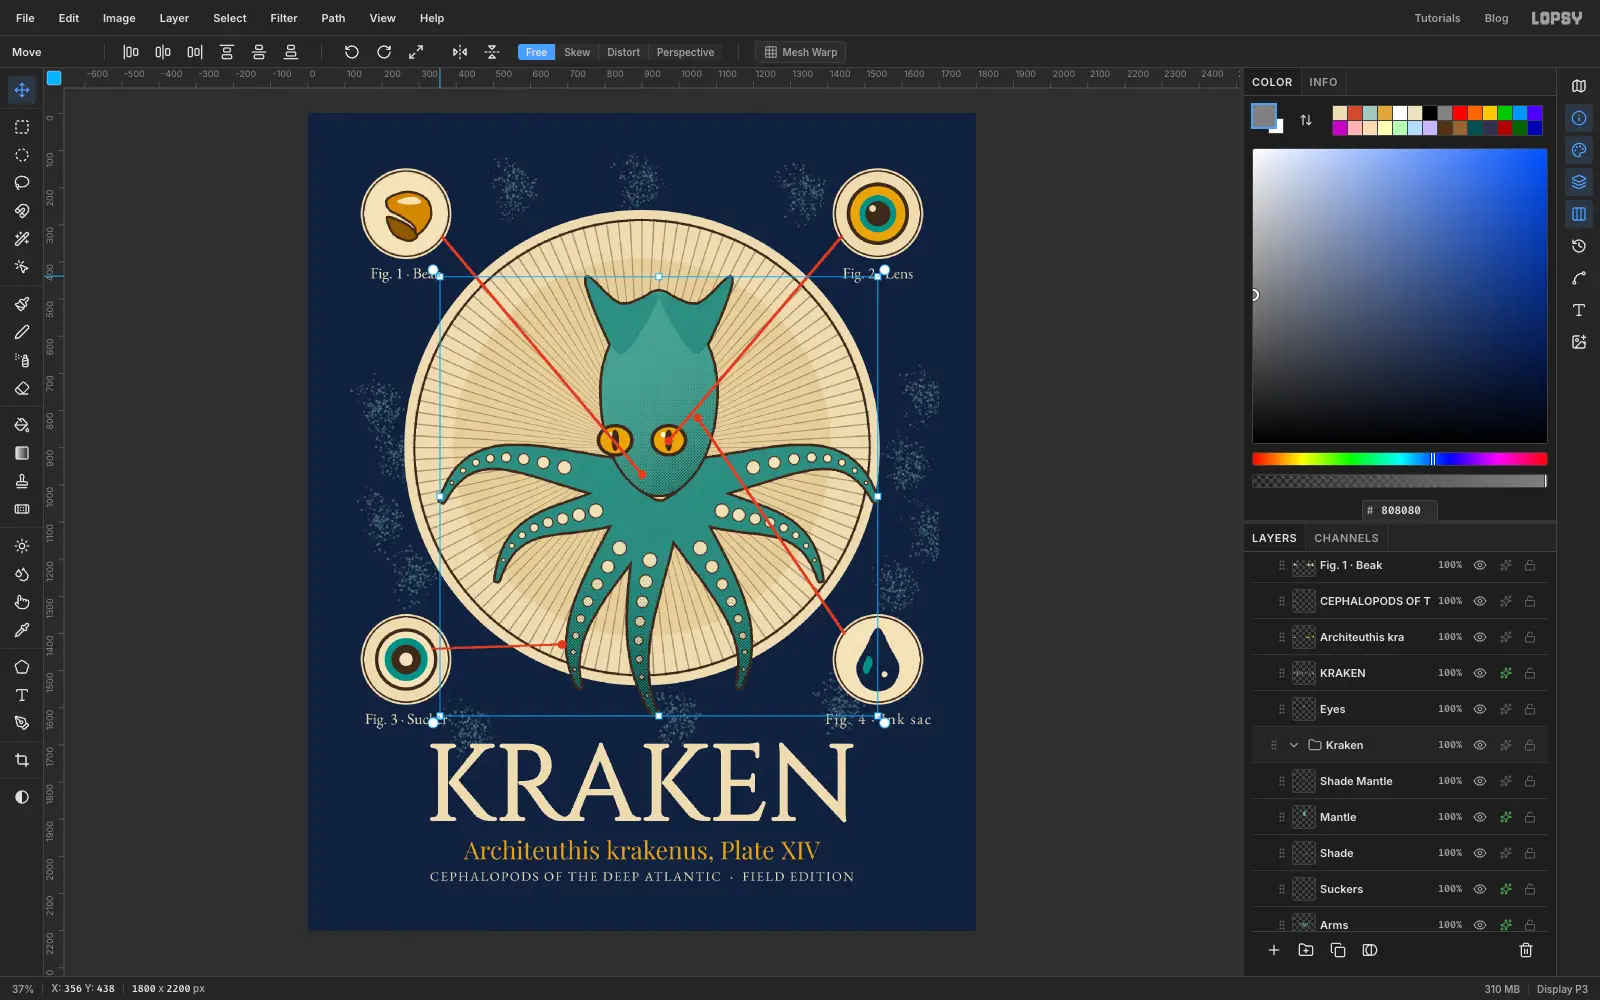
Drag the Eyes layer to the top of the stack so the shading never covers the pupils. Then select the Arms row, Shift-click the Shade Mantle row to select the range, and choose Layer → Group Layers. Rename the new group Kraken. Now you can move or scale the whole animal in one go. We'll try that at the end.
-
Draw four inset figures
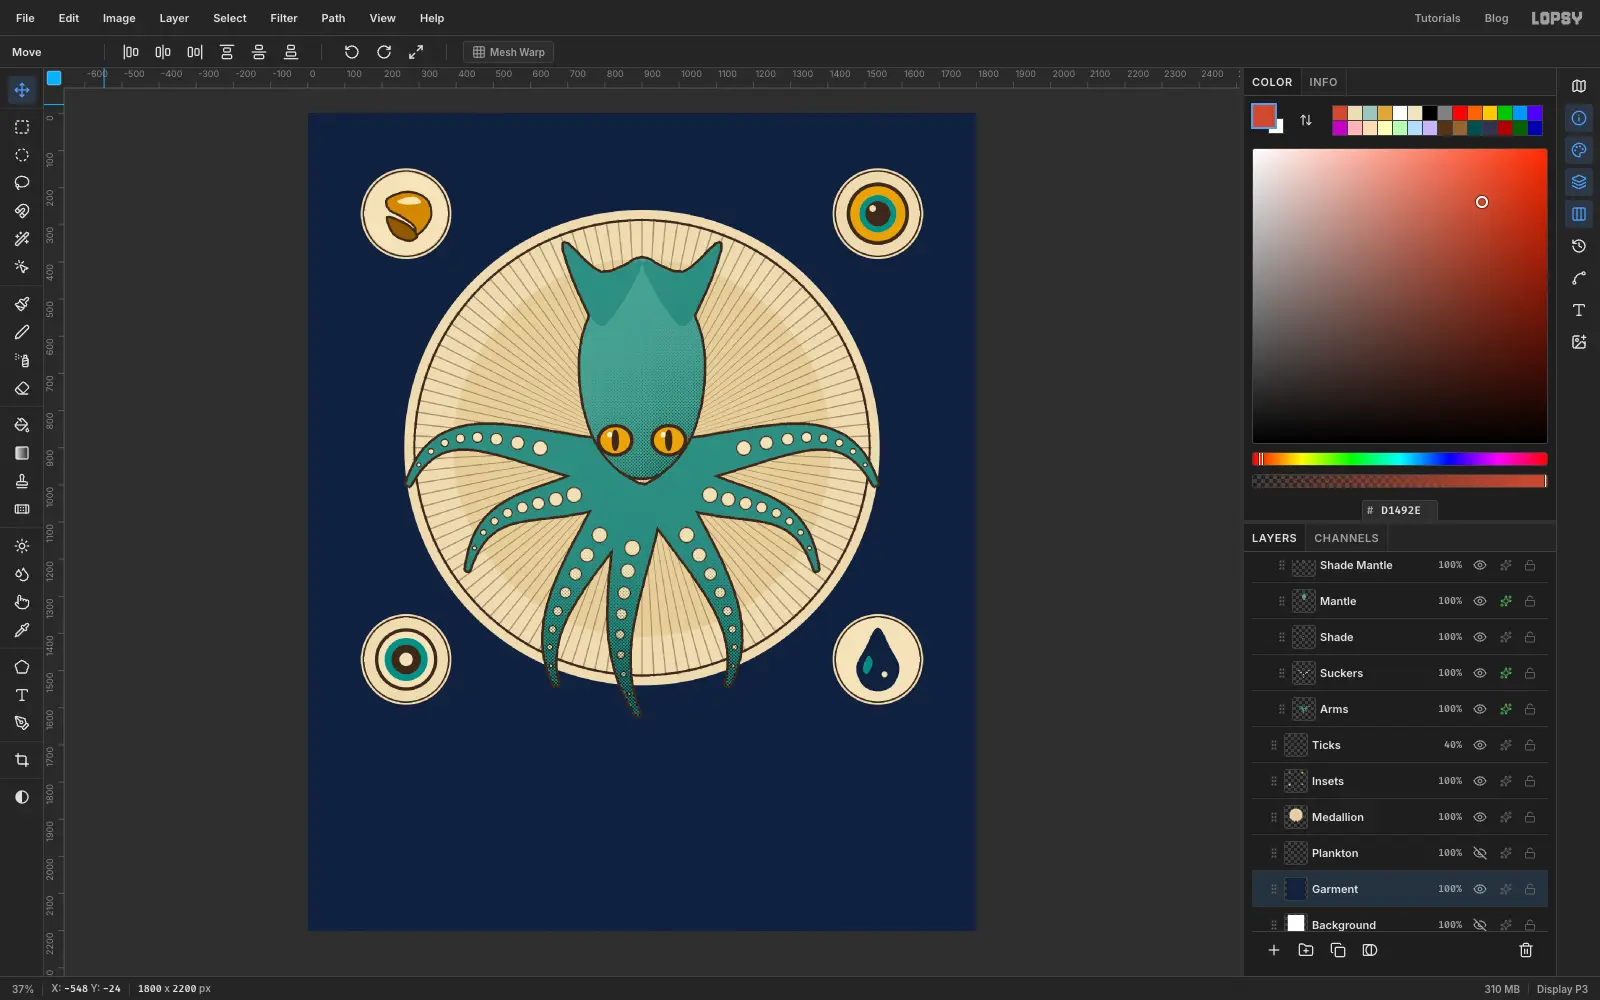
Add a layer called Insets. Draw a circle in each corner with the Elliptical Marquee, fill it with parchment, Shrink by 5 and fill with sepia, Shrink by 4 and fill parchment again for a thin ring. Keep every circle the same size and the same distance from the edges. The Marquee options show the size if you want to check.
Inside them, use the Lasso and the Marquee to draw: a hooked beak from two sepia shapes shrunk by 6 and filled with ochre and brown, a lens from an eye-sized circle filled sepia, then ochre after Shrink 10, teal after another Shrink 24, and sepia after another Shrink 16, with one tiny white Brush click for the glint, a sucker from concentric rings, and an ink sac as a dark teardrop with a small teal gleam.
-
Label the figures and draw leader lines
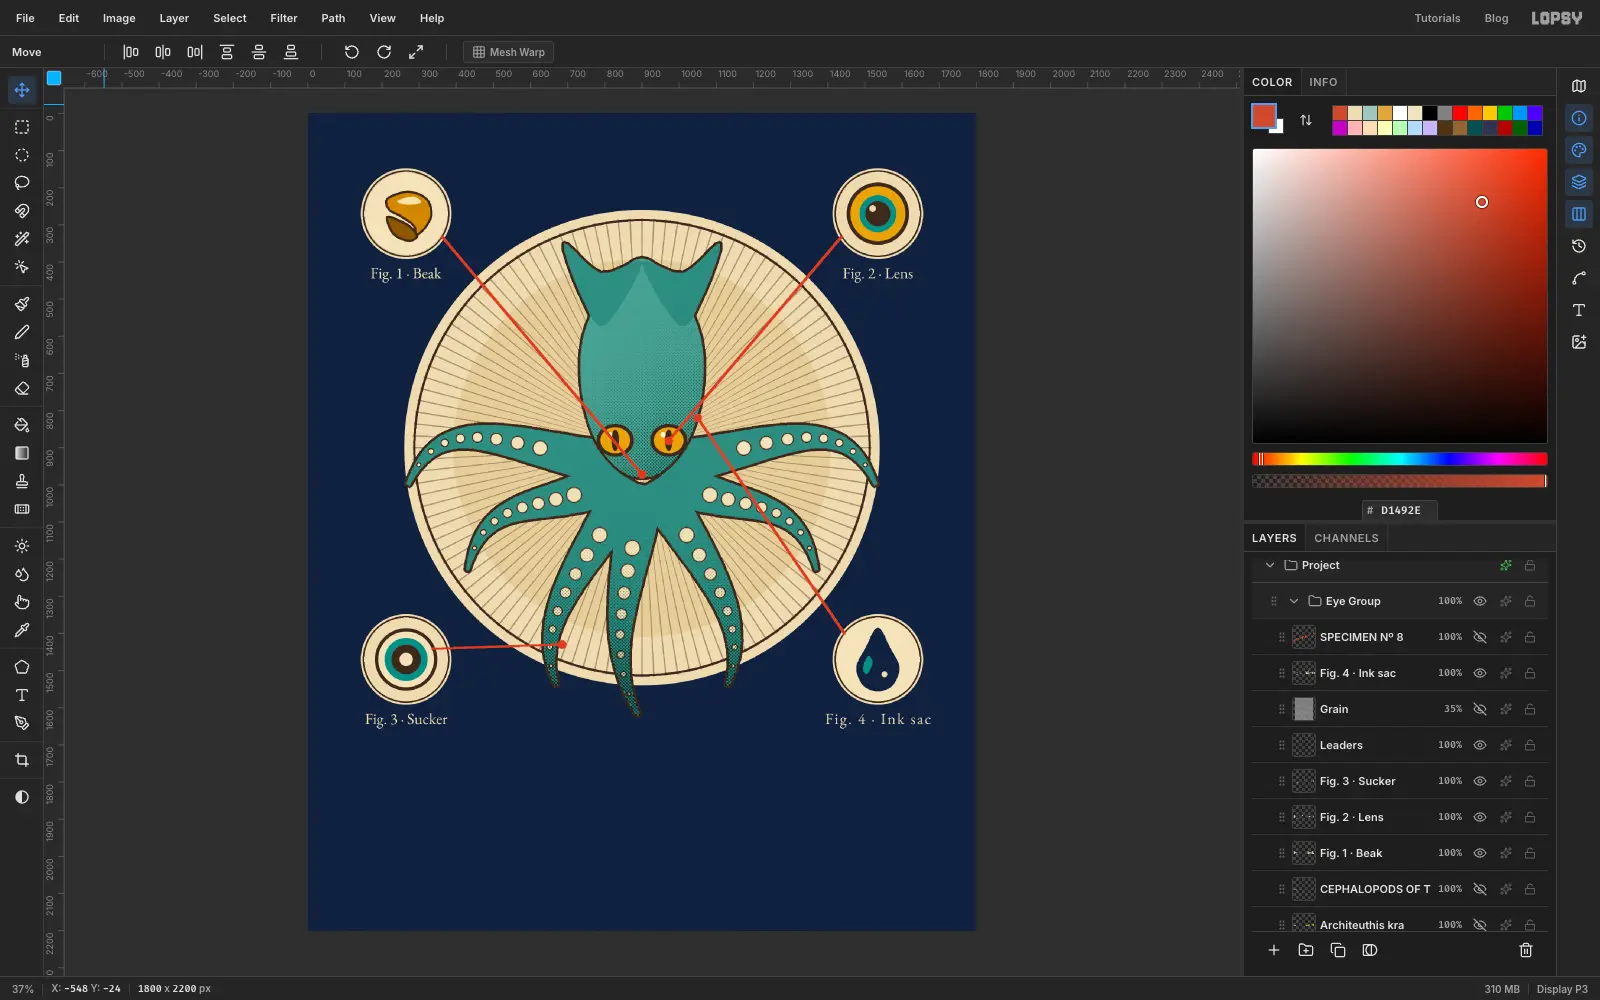
Select any layer that is not text, then pick the Text tool, choose EB Garamond, size 42, cream , and click under each circle to type Fig. 1 · Beak, Fig. 2 · Lens, Fig. 3 · Sucker and Fig. 4 · Ink sac. Centre each label under its circle.
Add a Leaders layer on top. Choose the Pencil, set the colour to vermilion and the size to 6. Click on the edge of an inset, then Shift-click the part of the animal it describes. The lines will cross the animal. That is the point, they are pointing into it. With the Brush at size 26, click once at the end of each line for the dot.
-
Set the title
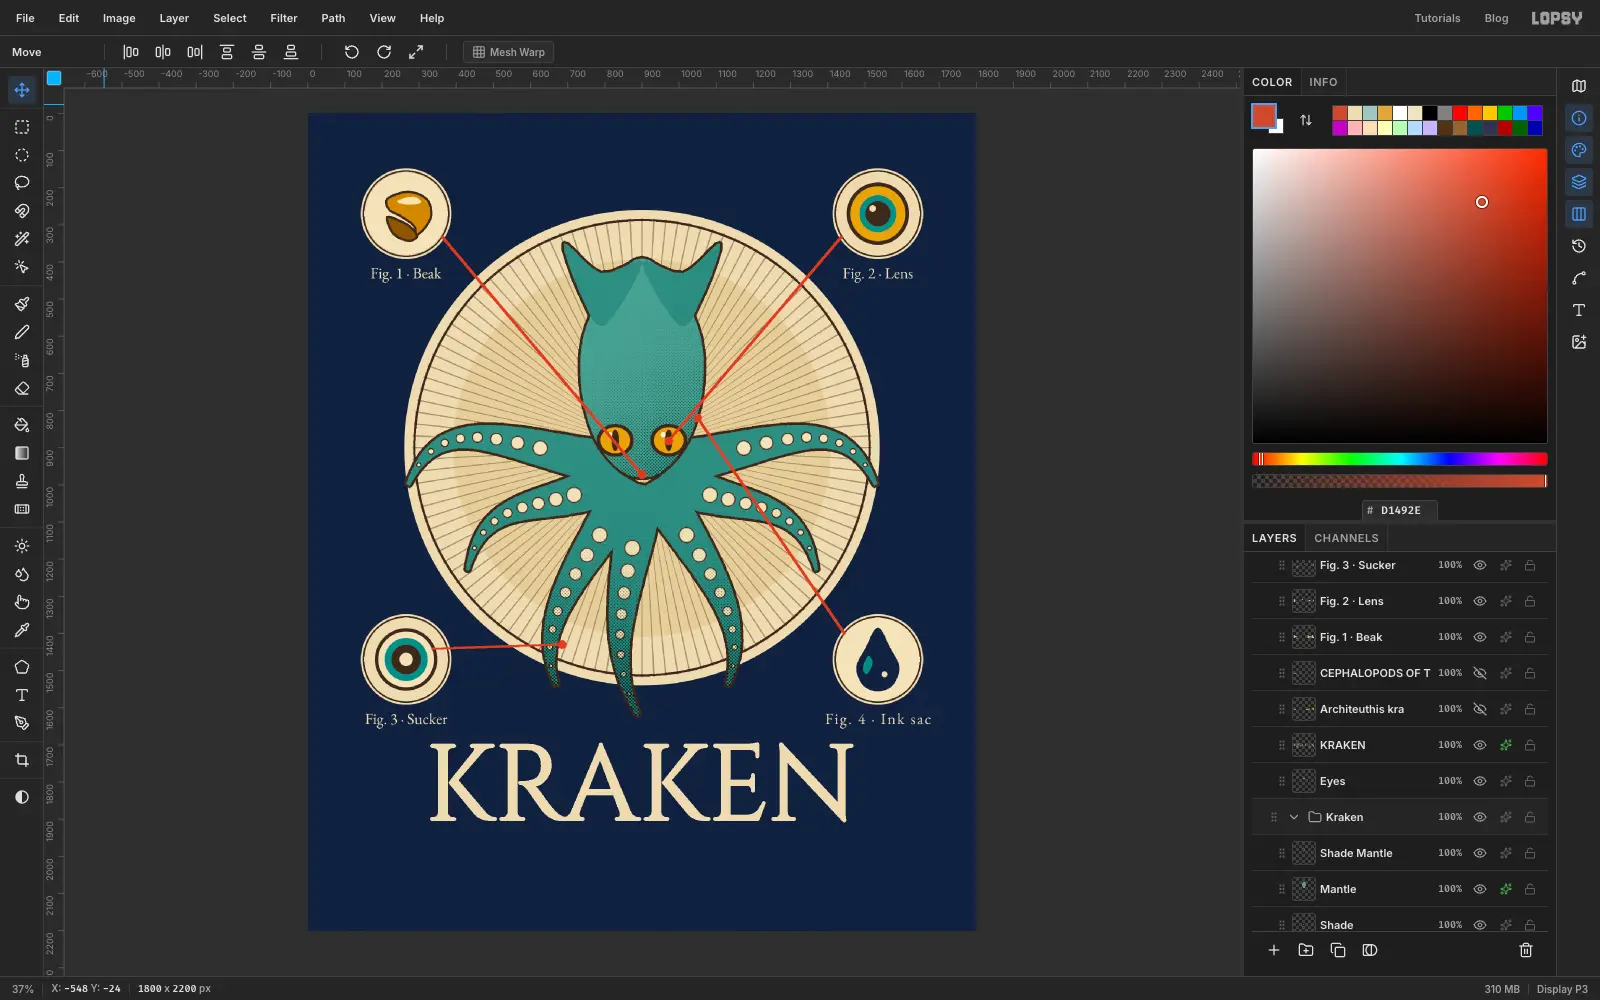
Pick the Text tool, choose Cinzel, set the size to about 285 and the colour to cream , then click below the medallion and type KRAKEN. Leave a clear gap between the lowest arm tip and the top of the letters. With the Move tool and the text layer selected, press Align center horizontally in the options bar.
Cinzel's thin strokes can break up when printed on a shirt, so add a Stroke effect in the same cream colour at width 4 to thicken them.
-
Add the Latin name and the caption
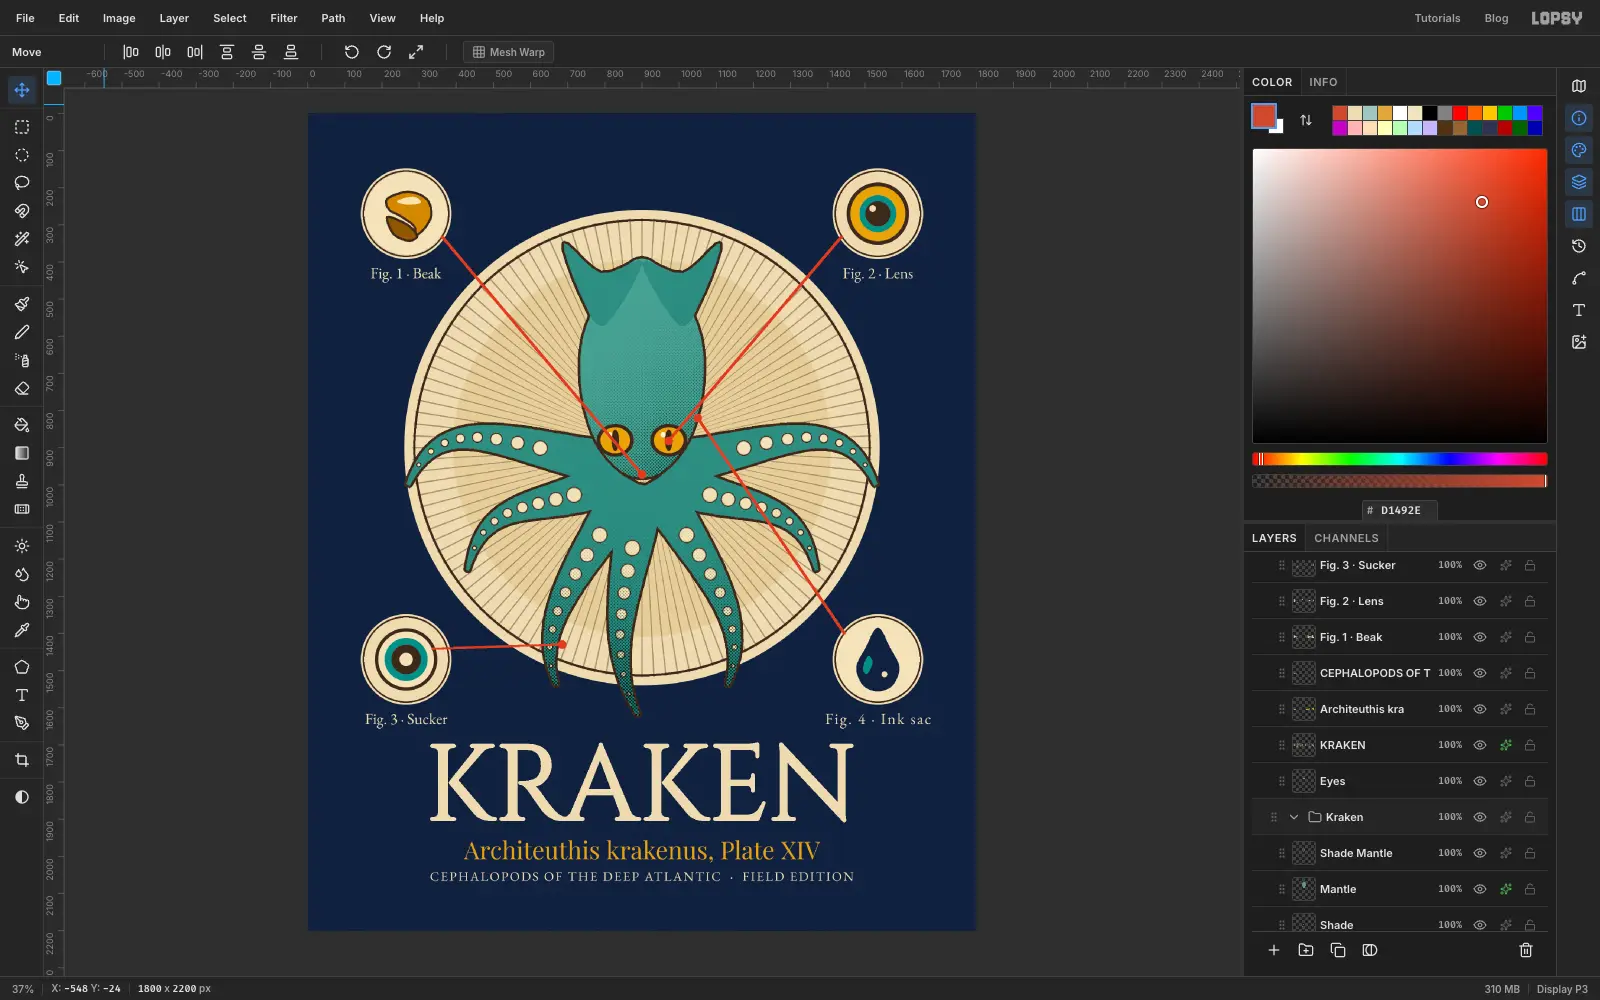
Make a new text layer in Playfair Display at size 66 in ochre , typed as Architeuthis krakenus, Plate XIV. Open the Text panel and set Font style to Italic. Then add the caption in EB Garamond at size 35, cream, with Letter spacing set to 4: CEPHALOPODS OF THE DEEP ATLANTIC · FIELD EDITION. Centre both lines and check that the descenders in the Latin name stay clear of the caption and that the caption keeps a generous margin from the bottom edge.
-
Stamp it
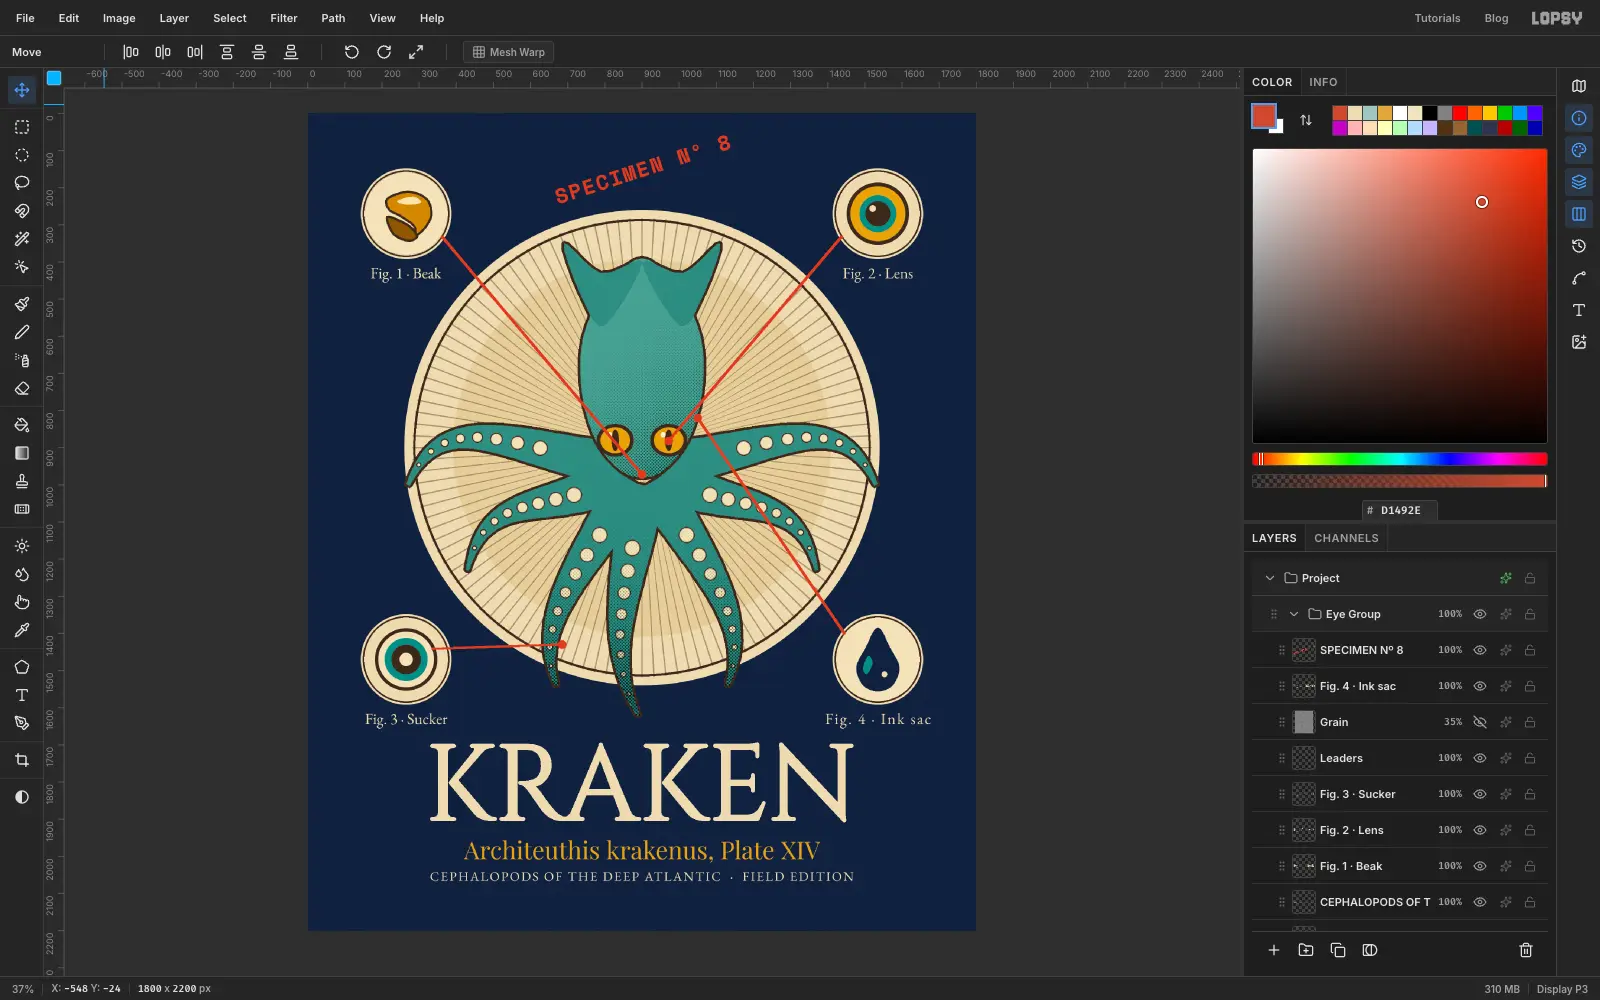
Make a text layer in Space Mono at size 56 in vermilion, typed as SPECIMEN Nº 8, and set Font weight to Bold. Pick the Move tool and hover just outside a corner of the text box until the cursor changes to a rotation crosshair. Drag around the centre to tilt it anticlockwise; a modest angle is enough. The text stays live, so it can still be edited. Drag it into the clear space at the top, clear of the medallion ring and the figures.
-
Sprinkle some marine snow
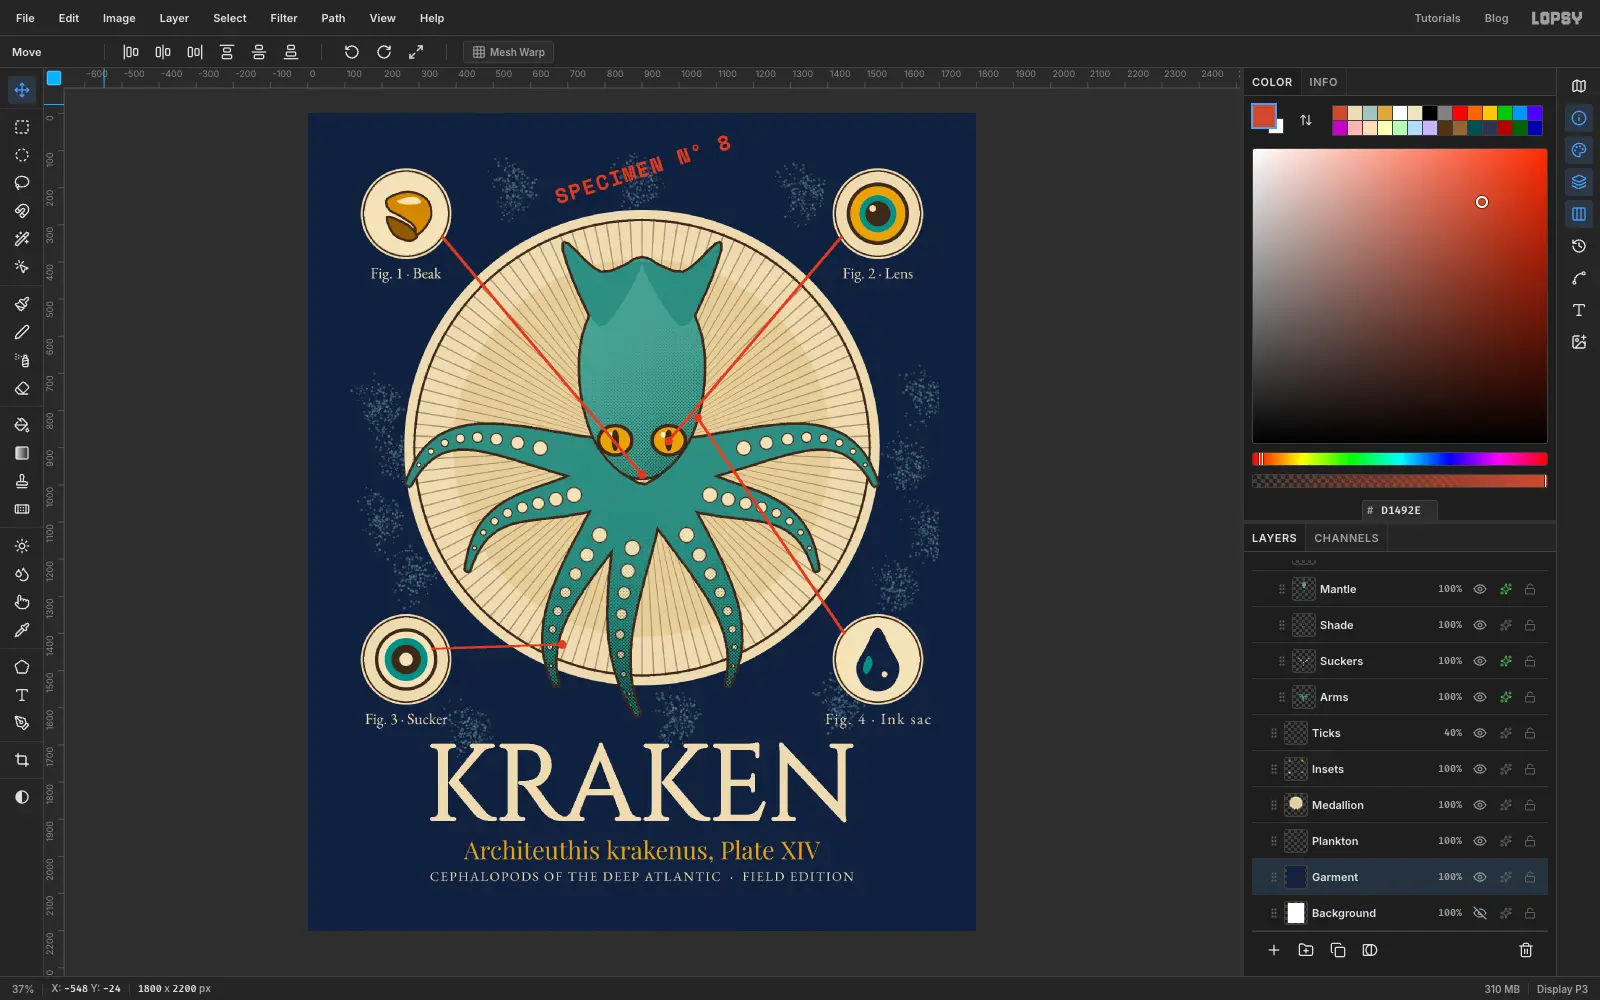
Select the Garment layer and add a layer above it called Plankton. Pick the Spray tool, set the colour to , Size 90, Density 20, Opacity 60 and Softness 70, and drag short wiggly strokes in the empty corners and margins. Keep the spray away from the labels so the type stays readable.
-
Add paper grain
Add a layer called Grain above everything. Set the foreground to mid grey and fill the whole layer with Edit → Fill. Choose Filter → Add Noise, switch to Mono, set Amount to 45 and apply. Then set the layer's Blend to Overlay and drop its opacity to 35%.
-
Try resizing the animal
This is optional, and you can undo it. Select the Kraken group row and pick the Move tool. Hold Cmd and drag a corner handle inward to scale the whole group uniformly, then press Cmd+D to commit. Every layer in the group scales together. The eyes stay put because they sit outside the group, so drag the Eyes layer into it first if you ever want to resize the whole animal.
-
Undo it and export
Press Cmd+Z and the group returns exactly to where it was. Cmd+Shift+Z redoes the scale. Undo once more, then export with File → Quick Export PNG, or save the project to keep the layers.