Make a Scientific Illustration Magazine Cover
Turn a kingfisher photo into a science-magazine cover in Lopsy with Find Edges ink, layer masks, Voronoi cells, Radial Symmetry and a Pen-tool chart.
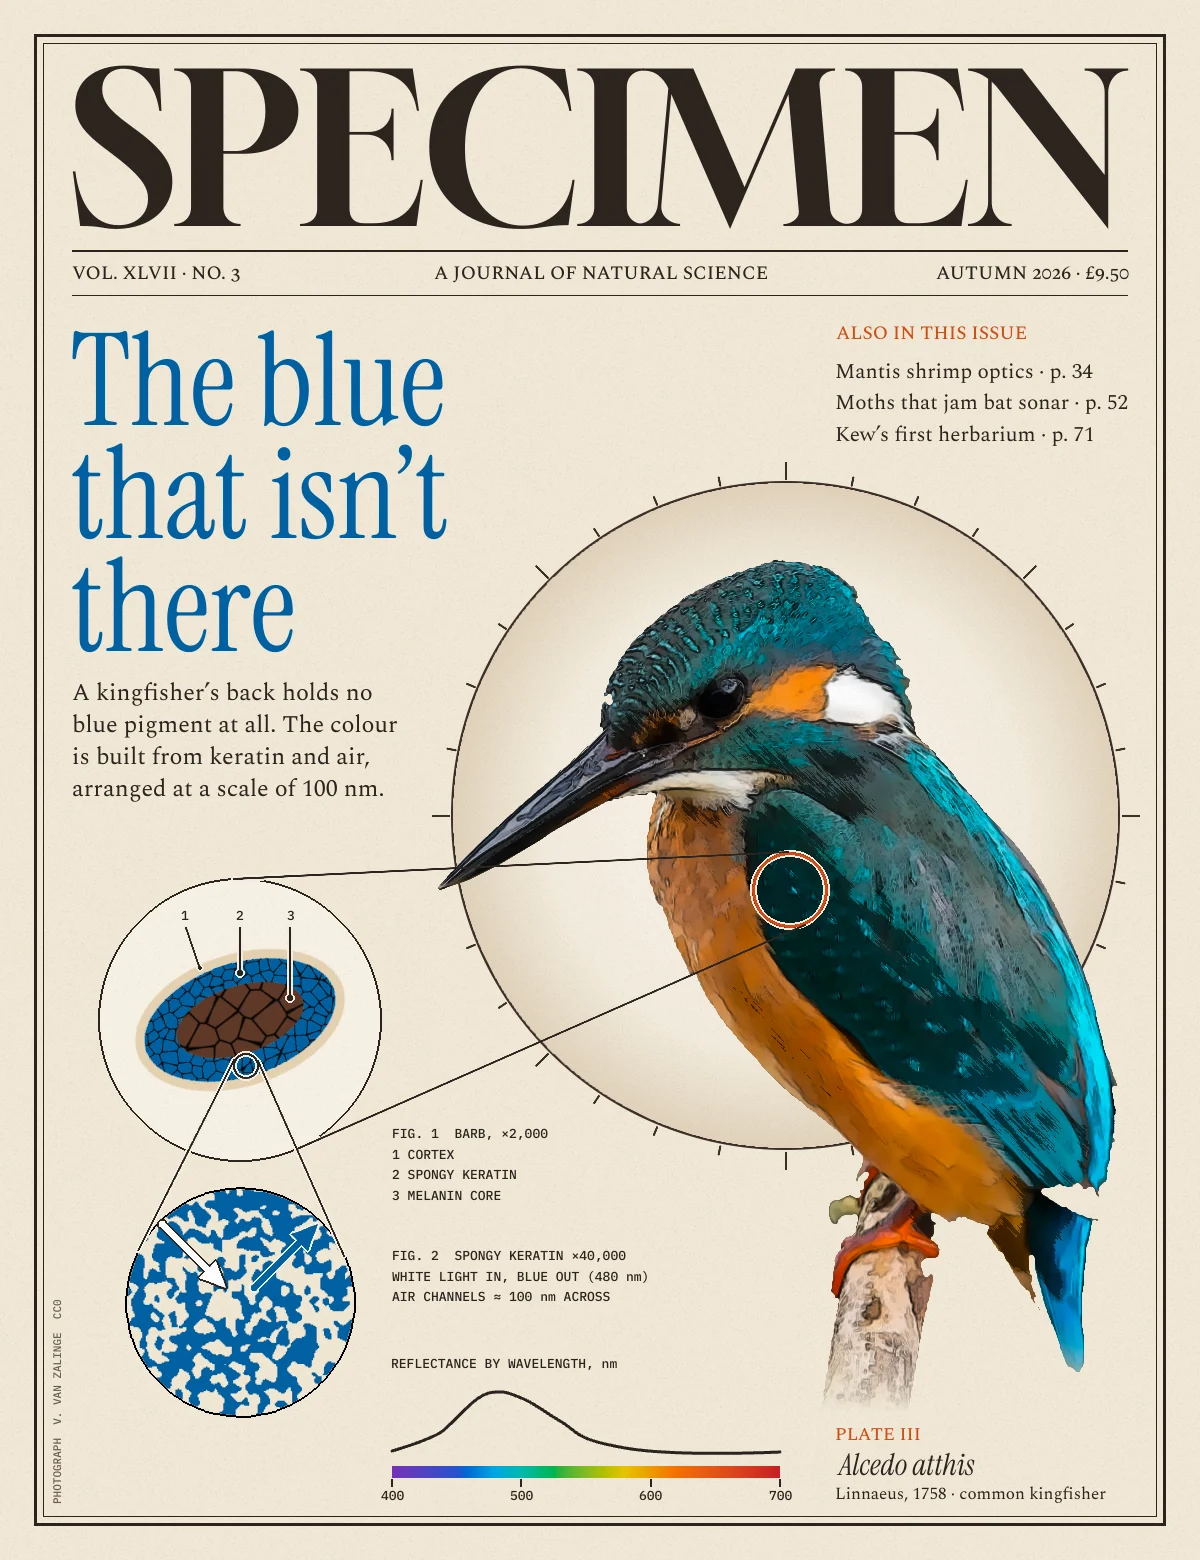
Science magazines love a cover that is half photograph and half diagram. The animal is the hook, and a chain of magnified figures explains what you're looking at. This tutorial builds one for a made-up natural-history quarterly, SPECIMEN. The cover story is "The blue that isn't there": a kingfisher's back has no blue pigment. Its colour comes from a sponge of keratin and air that scatters blue light.
The bird is a real photo, pushed towards a hand-coloured engraving. Everything else is drawn in Lopsy with selections, filters and the Pen tool.
The photo is Perched blue and orange bird (Unsplash).jpg by Vincent van Zalinge on Wikimedia Commons, released under CC0. Download the 1920 px wide version.
The palette is warm paper, one ink, one blue and one accent:
-
Paper
-
disc
-
Microscope field
-
Ink
-
Cobalt
headline and every structural blue
-
Loupe orange
-
section heads
-
Keratin
-
cortex
-
melanin
-
Set up the paper
- Choose File → New, set the Unit to Pixels, and enter 1200 × 1560.
- Rename
BackgroundtoPaperand fill it with (Edit → Fill). - Run Filter → Add Noise… at Amount 5, Mono, Gaussian. It's barely visible, but it stops the paper looking like a flat screen colour.
-
Paste and scale the photo
- Copy the photo and press Cmd+V. Lopsy fits the paste to the canvas width, centres it, and switches to the Move tool with the transform box live.
- Press Cmd+- twice to zoom out to 33%, so you can see past the canvas edge.
- Hold Cmd and drag the bottom-right handle until the photo is back at its native 1920 × 1282. Cmd keeps the proportions, and the top-left corner stays pinned.
- Press Cmd+D to commit, then drag the photo so its top-left corner sits at (−482, 308).
The bird's crown now sits about 560 px down, and the twig runs off the bottom edge. Rename the layer
Photo.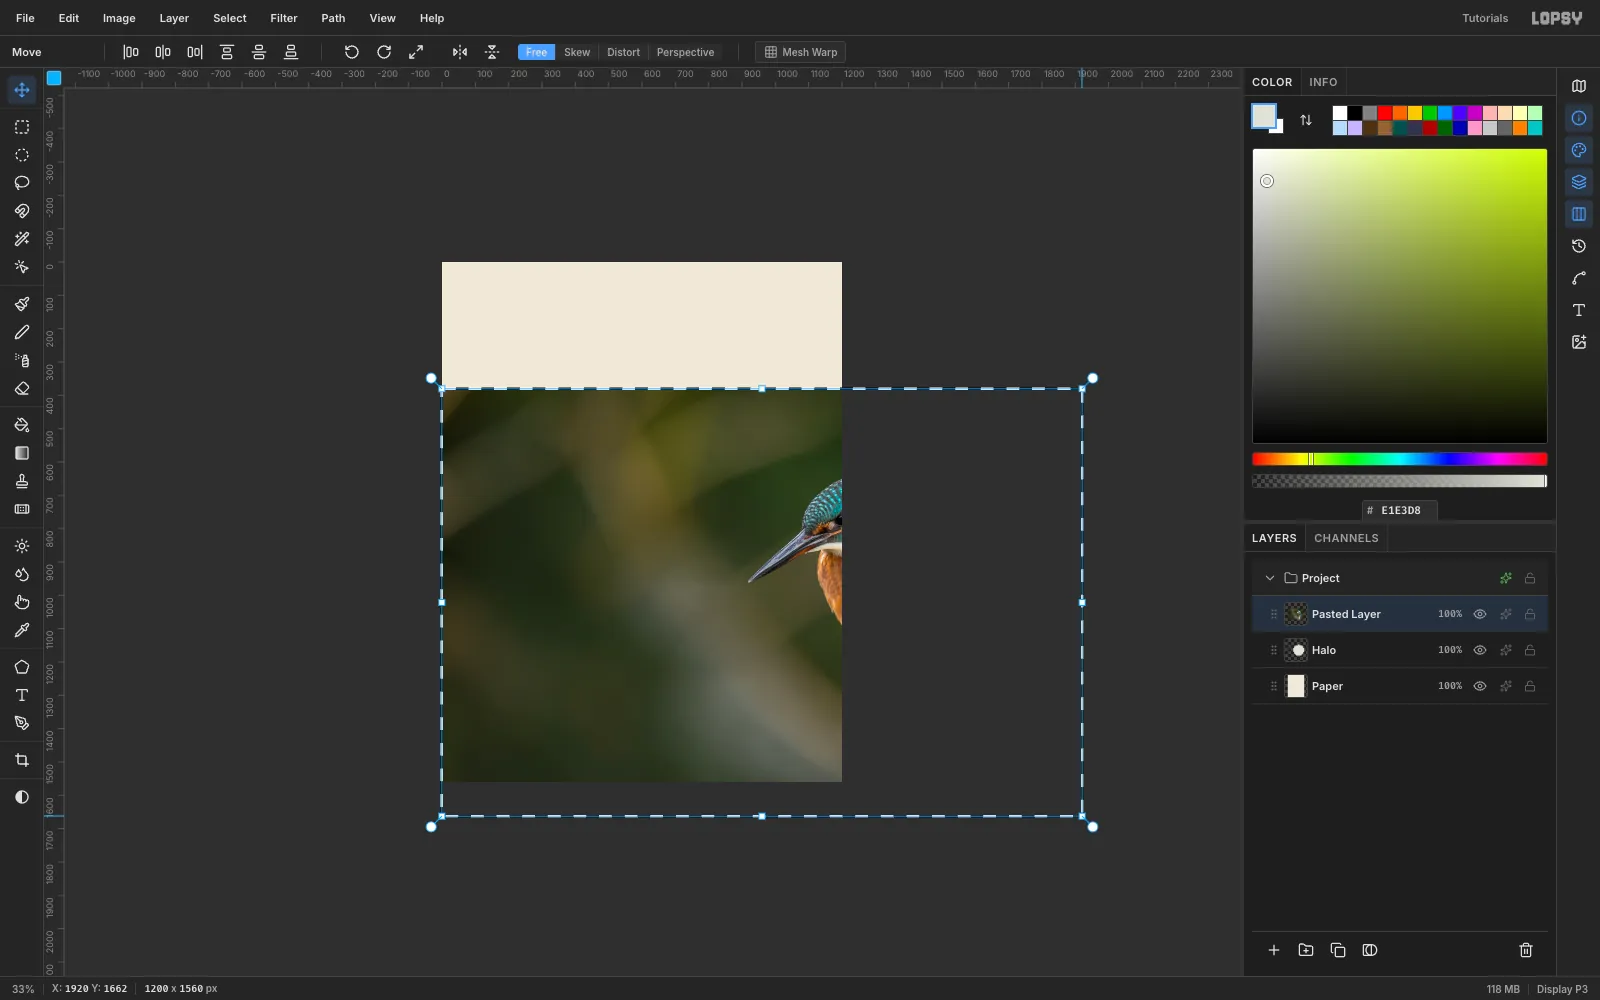
-
Select the background with the Magic Wand
The soft bokeh background is easy to select and the bird is not, so select the background and invert.
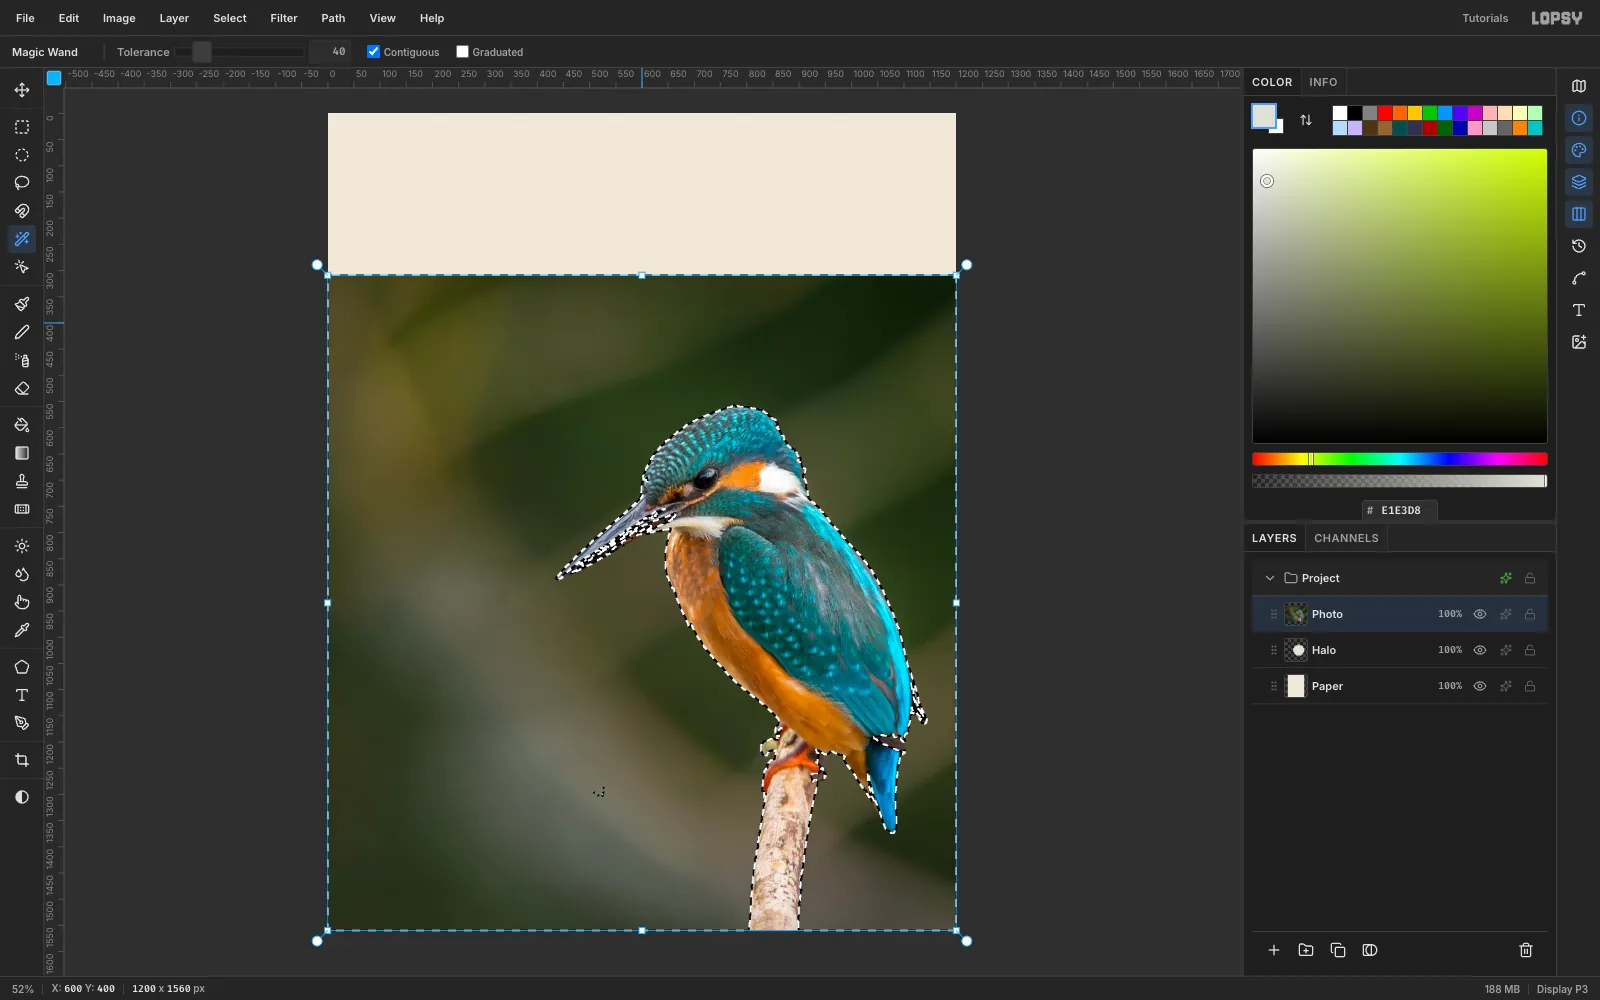
- Pick the Magic Wand with Tolerance 40 and Contiguous on.
- Click the background once. Then Shift-click seven more spots, including the corners and the patches beside the twig, until the ants hug the bird.
- Choose Select → Inverse.
- Choose Select → Shrink… 1 px, then Select → Feather… 1 px. This drops the green fringe and softens the edge.
-
Cut out the bird and clean the edges
- Press Cmd+C, then Cmd+V. The paste lands in place on a new layer above the photo. Name it
Kingfisherand hidePhoto. - To clear any faint pixels along the photo's old edges, draw a generous Lasso around the bird and twig, choose Select → Inverse, and press Delete.
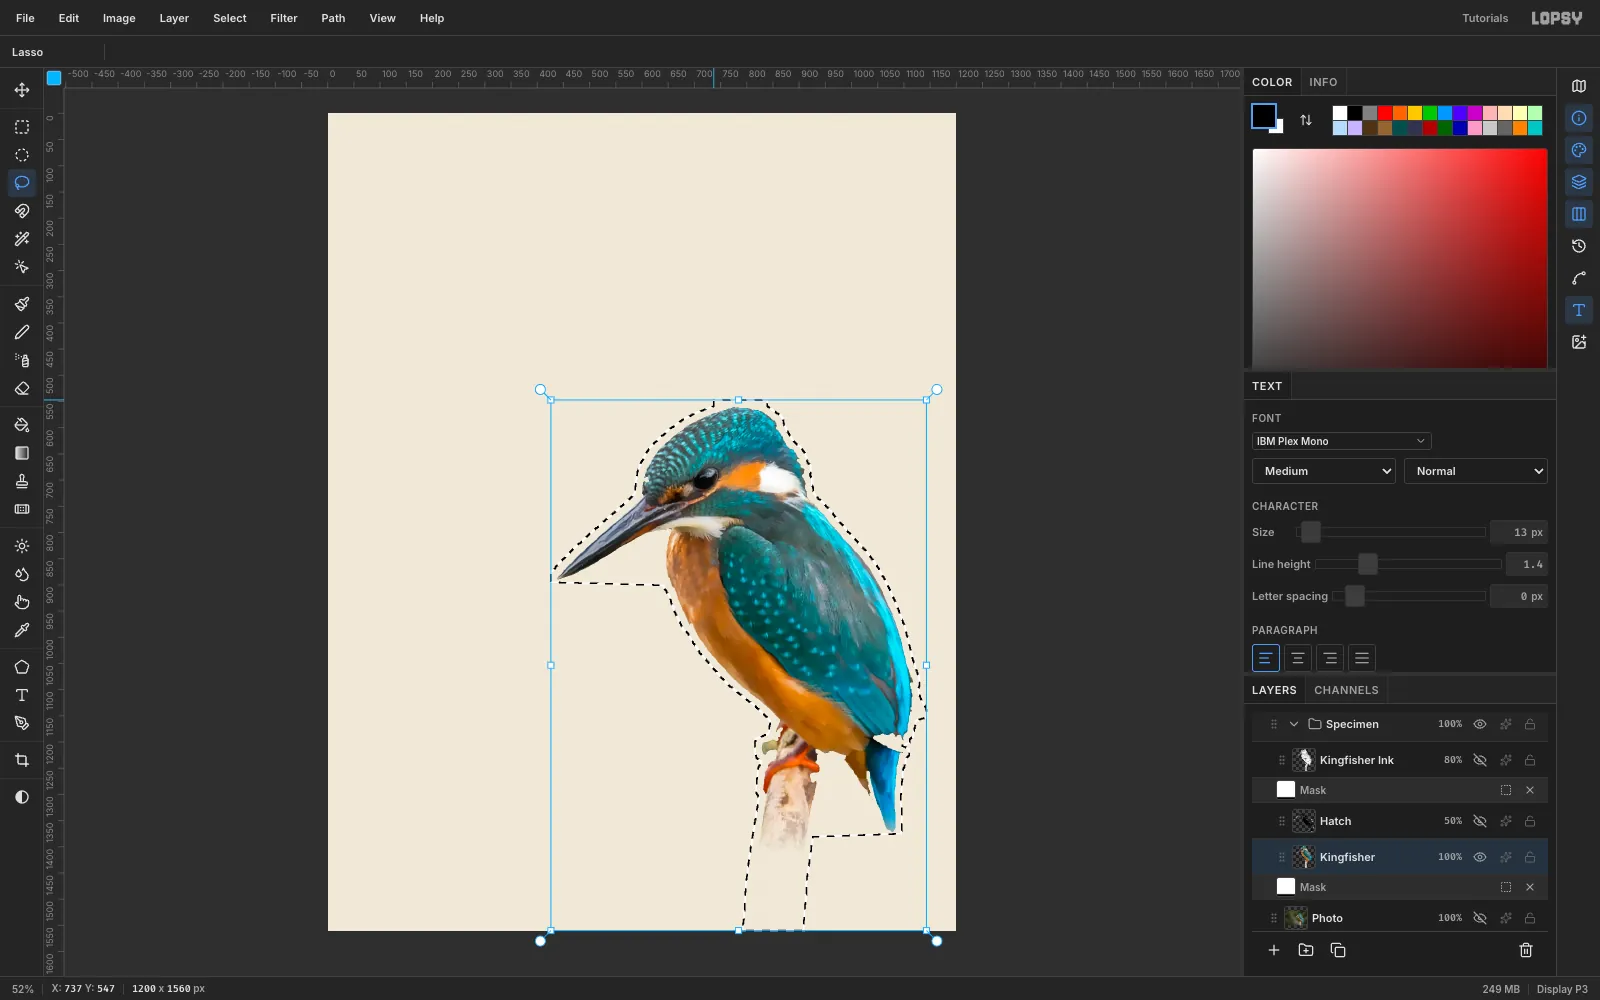
- Press Cmd+C, then Cmd+V. The paste lands in place on a new layer above the photo. Name it
-
Patch the beak from the photo
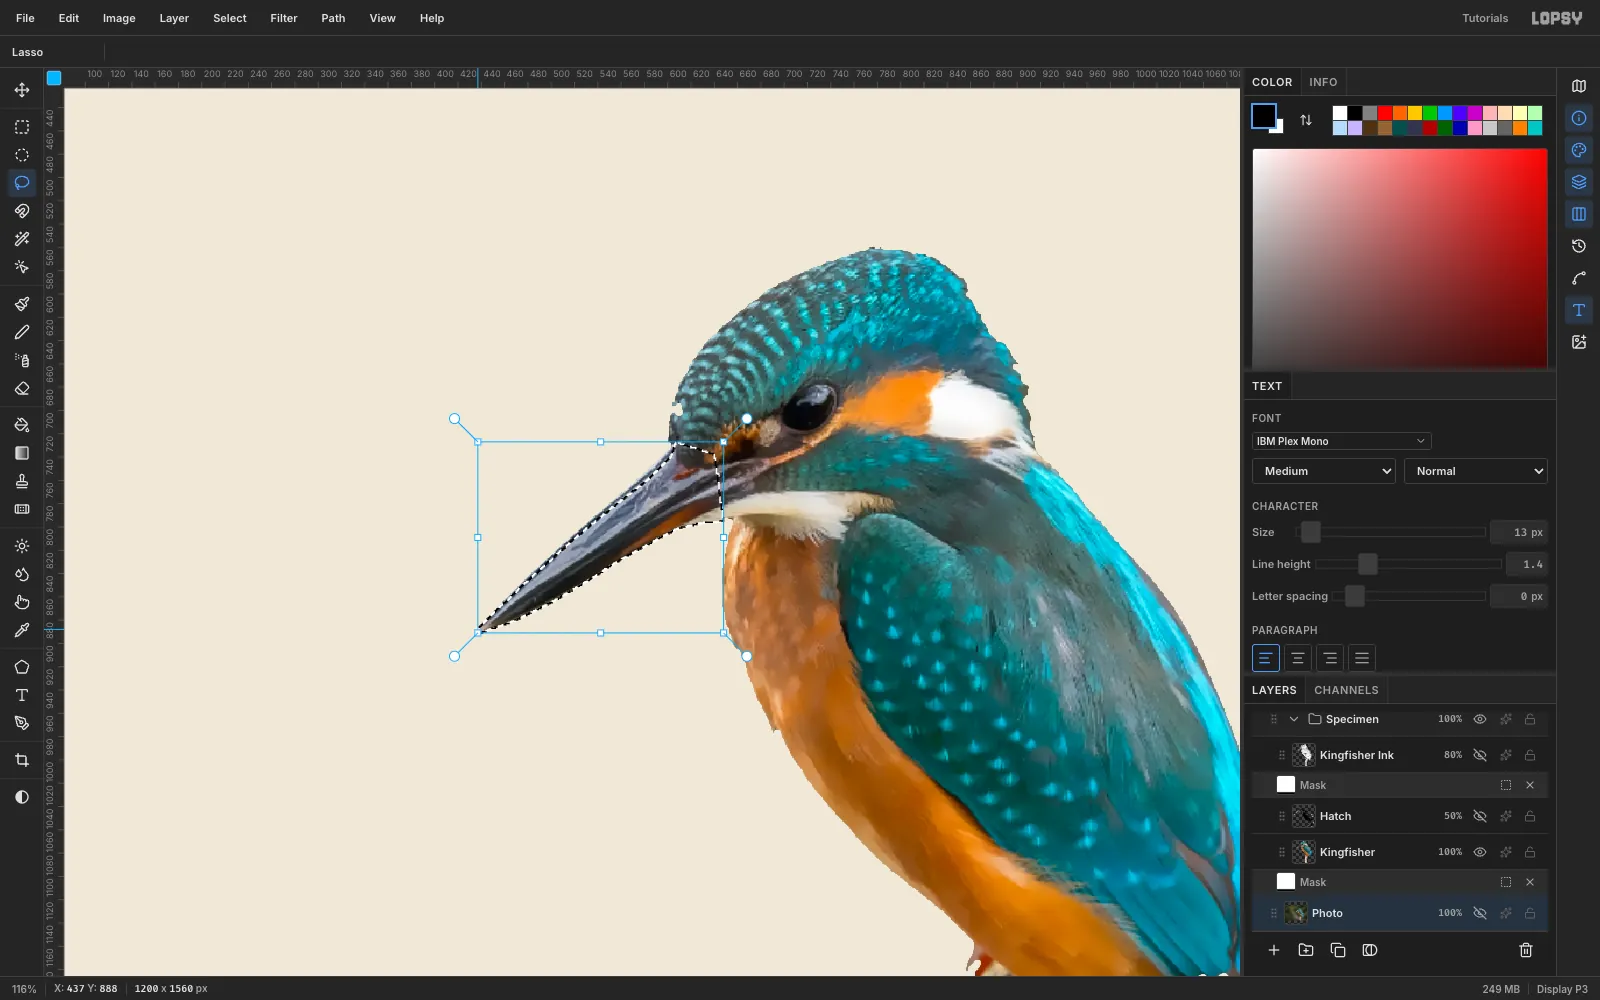
The lower mandible is nearly black, the same as the dark bokeh, so the wand took half of it.
- Click the hidden
Photorow and lasso the whole beak, from the tip back into the face feathers. - Choose Select → Feather… 1 px. Copy, then paste. The patch lands between
PhotoandKingfisher. - Click
Kingfisherand choose Layer → Merge Down. The bird is now whole. Rename the merged layerKingfisher.
Do the same for any other holes, such as the gap under the chin.
- Click the hidden
-
Draw ink linework with Find Edges
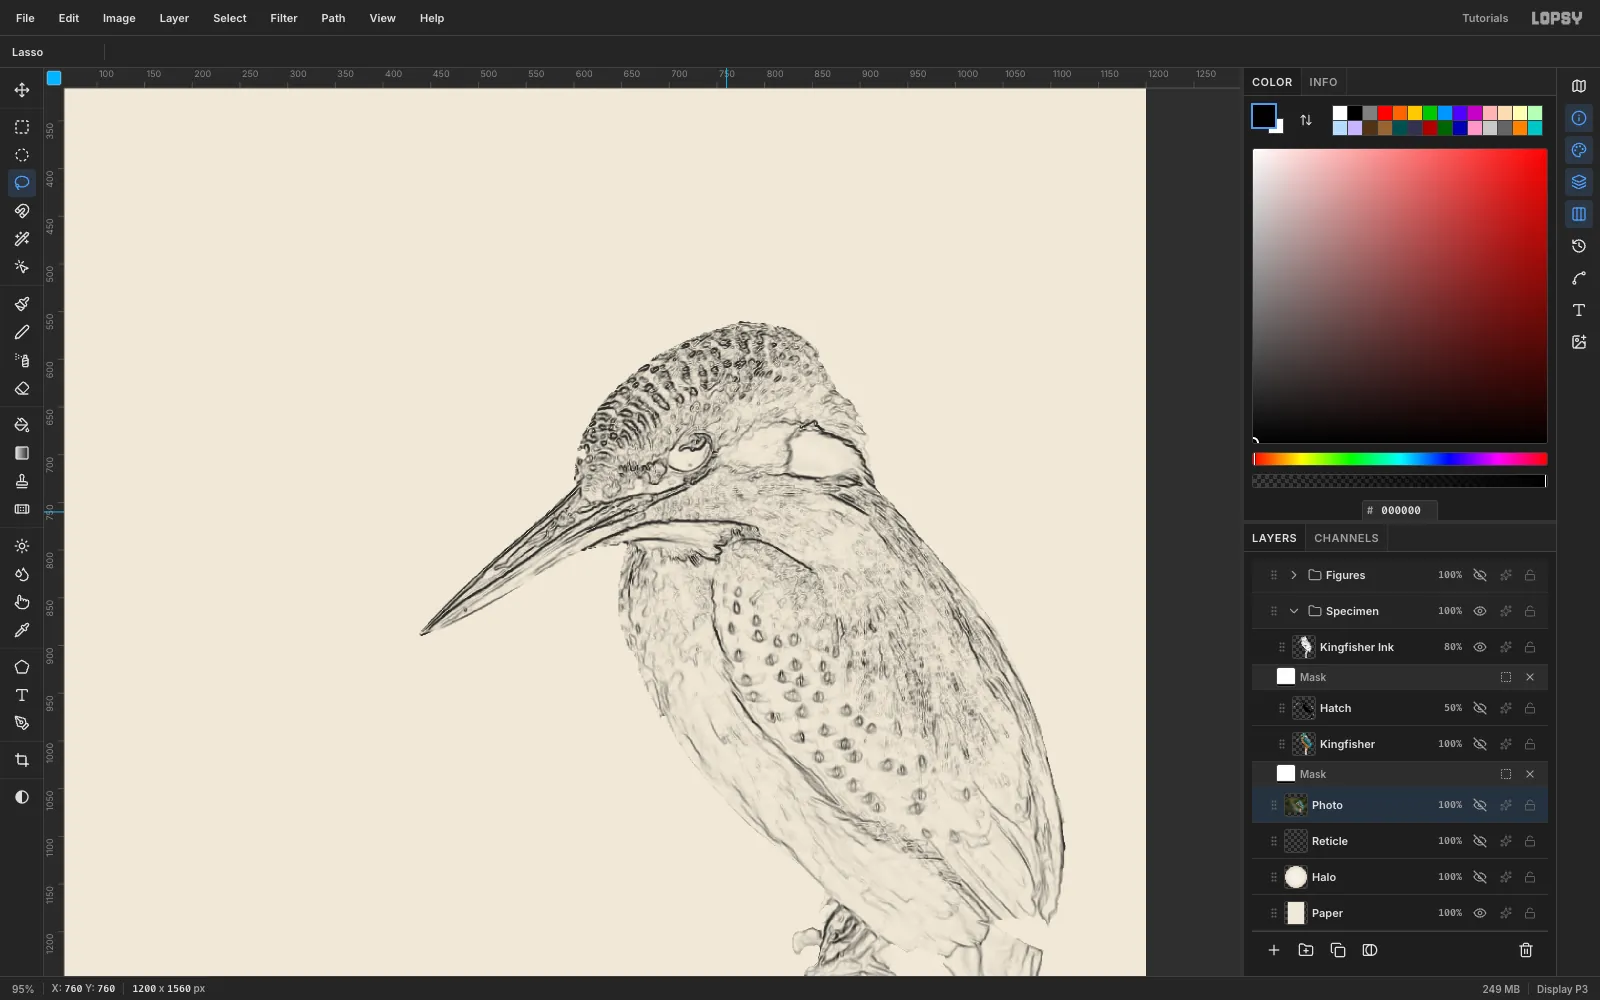
- Lasso the bird again, then copy and paste it in place. Name the copy
Kingfisher Ink. - Run Filter → Surface Blur… at Radius 8, Threshold 28. This removes feather noise but keeps the edges.
- Run Filter → Find Edges, Filter → Invert and Filter → Desaturate. None of these has a dialog. You now have dark pen lines on white.
- Set the layer's Blend to Multiply and its Opacity to 80%. The white disappears and only the linework prints.
- Lasso the bird again, then copy and paste it in place. Name the copy
-
Flatten the colour and add engraved hatching
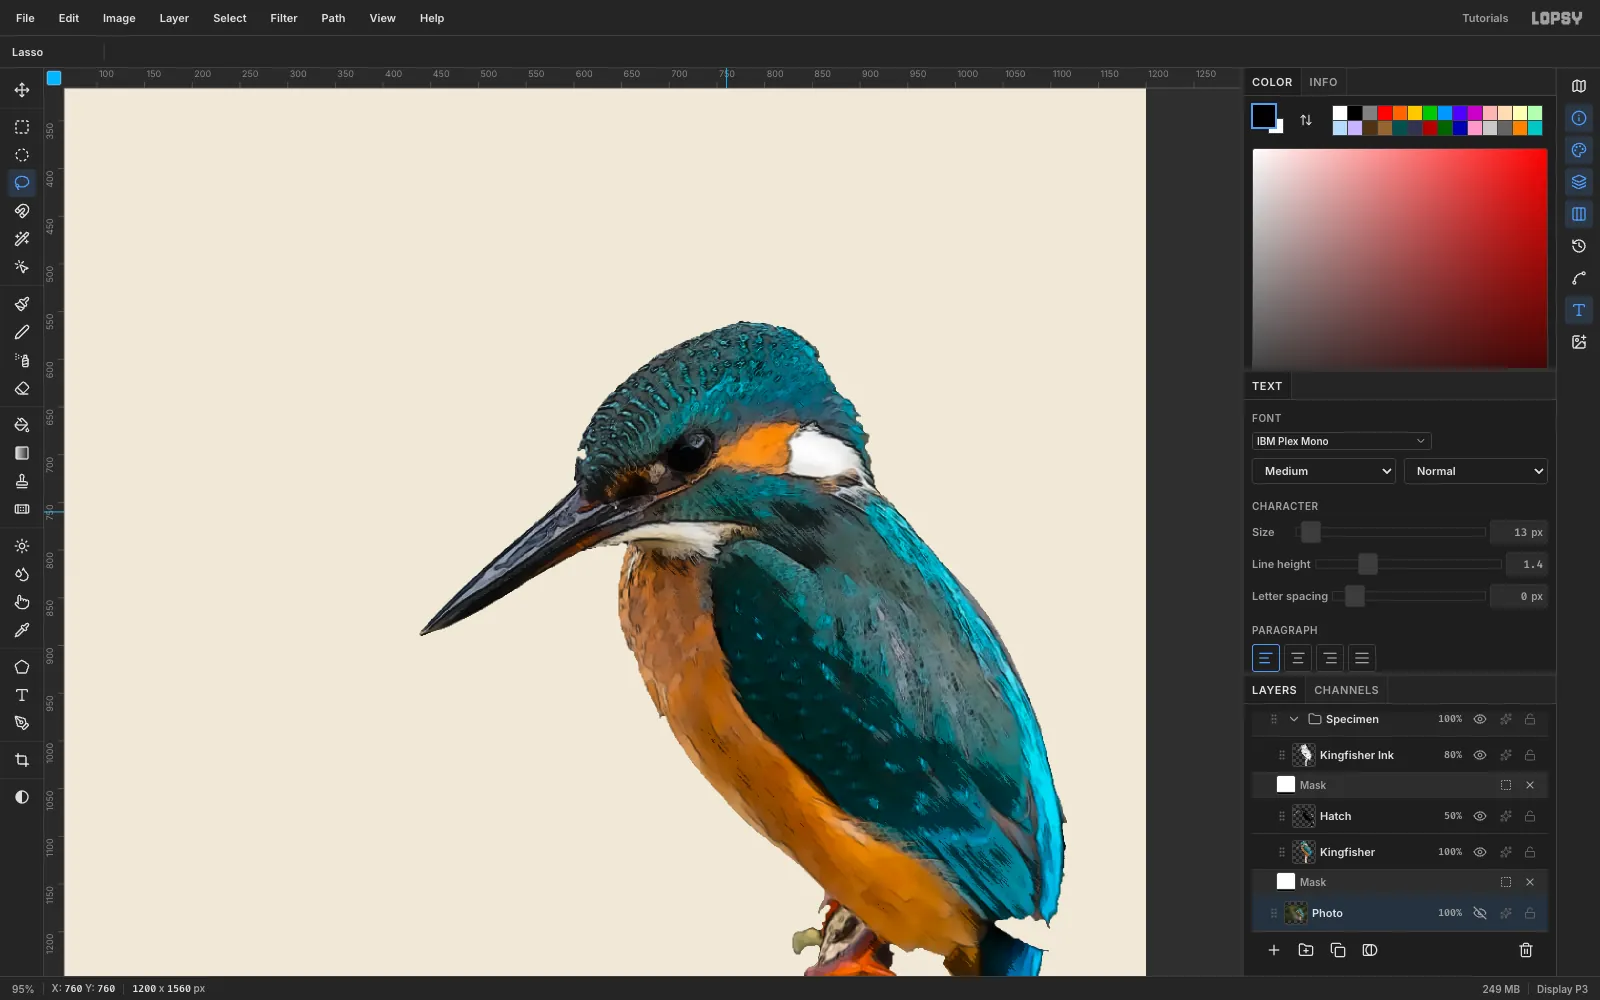
- Select
Kingfisherand run Surface Blur… at Radius 10, Threshold 30. The photo flattens into washes, like a hand-coloured plate. - For hatching, paste another copy of the bird between the two layers and name it
Hatch. Run these filters on it:
- Desaturate
- Add Noise… at Amount 70, Mono, Uniform
- Motion Blur… at Angle 45, Distance 22
- Threshold… at 72
Now the darker the feathers, the more diagonal strokes they get.
- Magic Wand a white area with Contiguous off and Tolerance 20, then press Delete. Marquee everything below y 1300 and delete it too, so no strokes sit where the twig will fade. Set the layer to Multiply at 50%.
- The blur smears strokes past the silhouette. On
Kingfisher, Magic Wand the empty area with Contiguous off, then click theHatchrow and press Delete.
To trim any leftover grey fringe, reuse that same wand selection. Choose Select → Grow… 2 px, then press Delete on each bird layer. Clean up stray wing-tip pixels with a small Eraser.
- Select
-
Fade the twig with a layer mask
- Select
Kingfisherand click Add Mask in the Layers panel, then click the Mask row to edit it. - Pick the Gradient tool. Open Advanced…, set the stops to white then black, and drag from y 1318 down to y 1412. The blue overlay shows the hidden part.
- Repeat on
Kingfisher Ink. TheHatchlayer has nothing that low. - Click the
Kingfisherrow to leave mask editing.
Shift-click to select all three bird layers and choose Layer → Group Layers. Name the group
Specimen.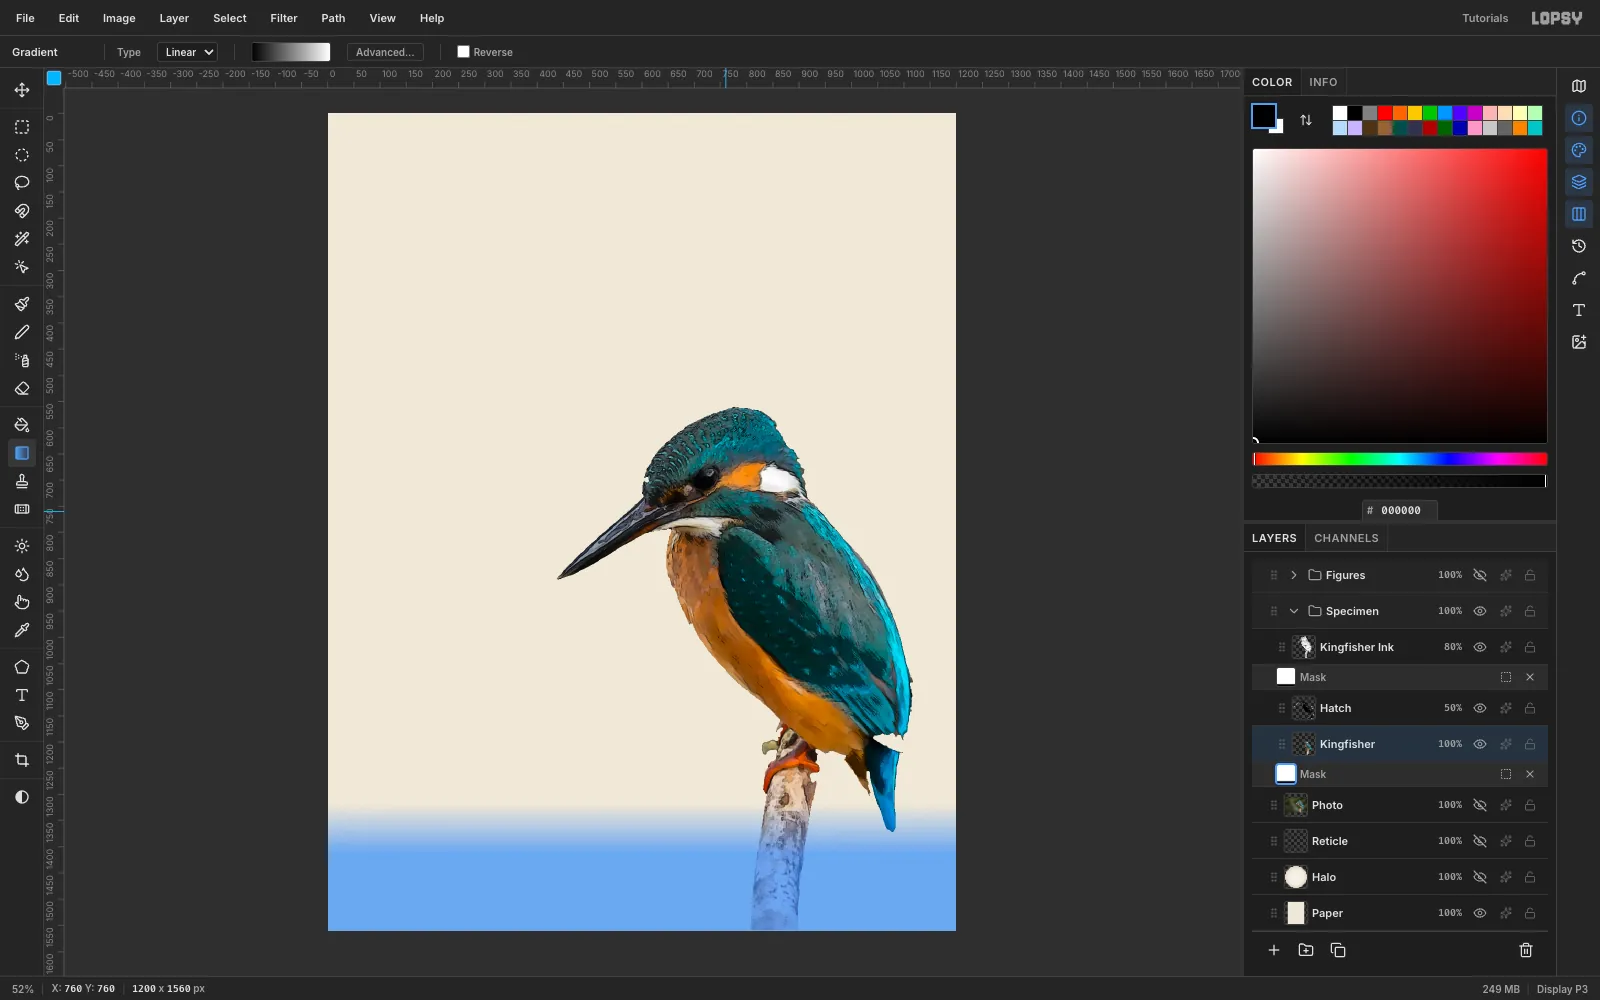
- Select
-
Build the microscope field
- Add a
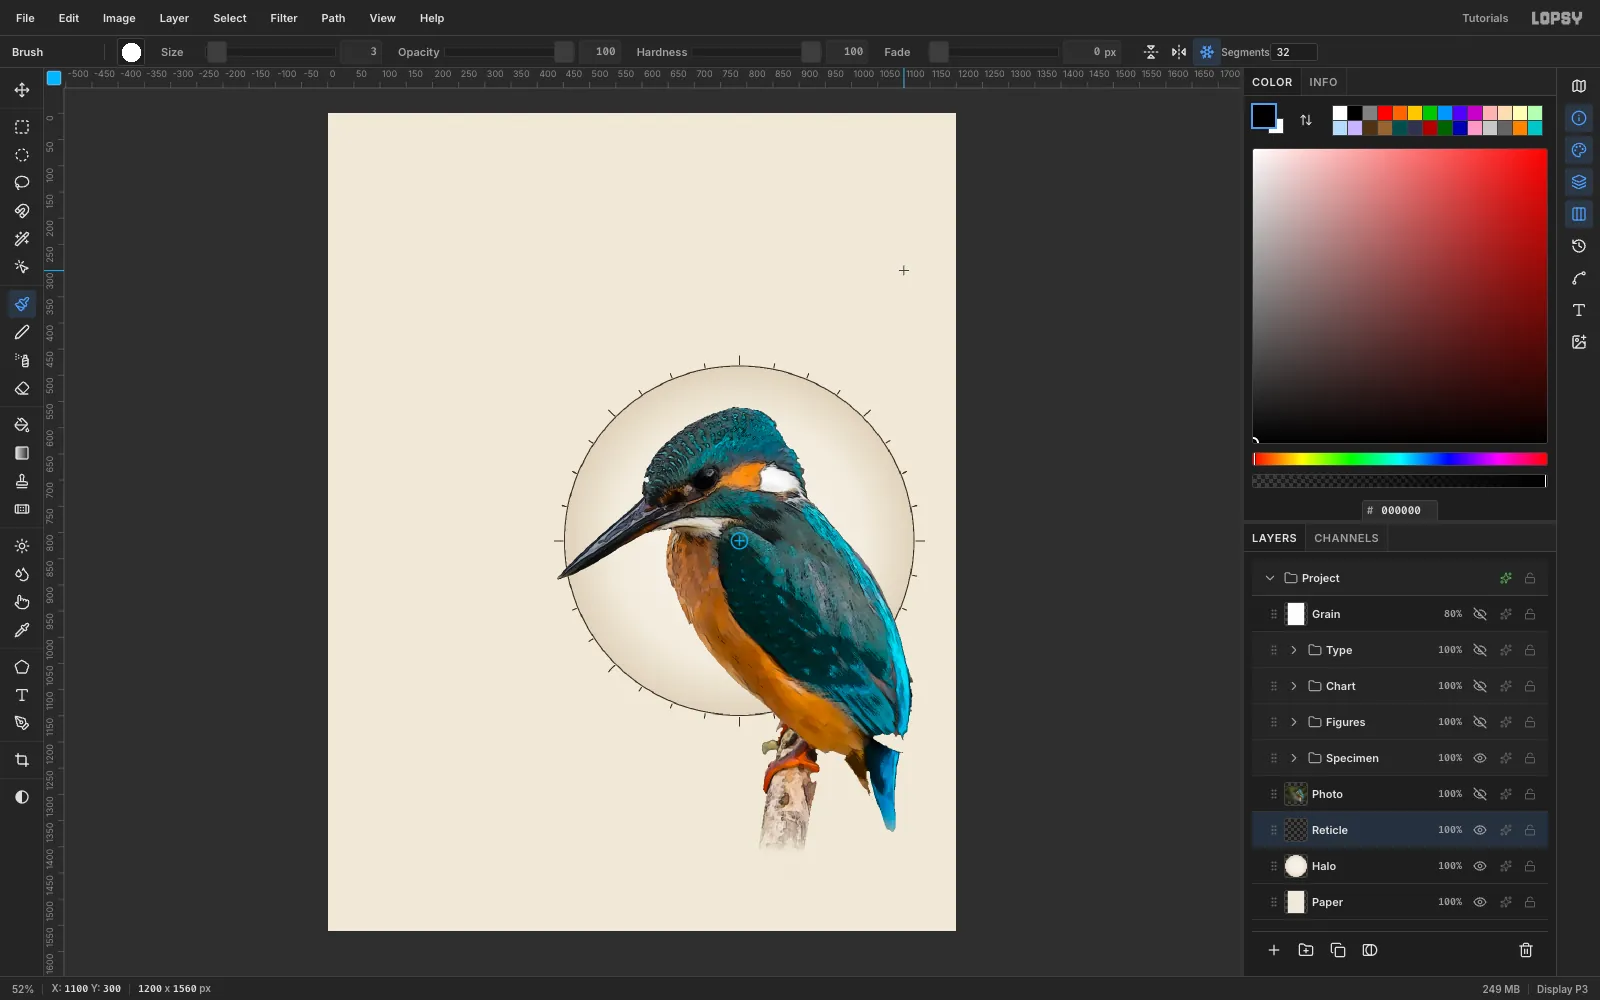
Halolayer belowSpecimen. Draw an Elliptical Marquee 665 px across, centred on (785, 815). - Pick the Gradient tool and set it to Radial. Set the stops to at 0%, at 72% and at 100%. Drag from the centre out to the rim.
Add a
Reticlelayer for the tick marks:- Pick the Brush at Size 3 with ink .
- Click Radial Symmetry, set Segments to 32, and Cmd-click the disc centre to move the symmetry centre there.
- Drag one short tick at 12 o'clock, from 4 px to 12 px outside the rim. You get 32 ticks at once.
- Change Segments to 8 and drag a longer tick, out to 20 px.
- Turn Radial Symmetry off. While it's on, it takes over every Cmd-click.
- Finish with a 2 px rim. Fill a circle 669 px across, choose Select → Shrink… 2, and press Delete.
The beak and tail break out of the field, which keeps the bird from looking pasted into a porthole.
- Add a
-
Draw Fig. 1: a barb in cross-section
- Click a root layer below
Specimenand click New Group. Name the groupFiguresand drag it aboveSpecimen. - Add
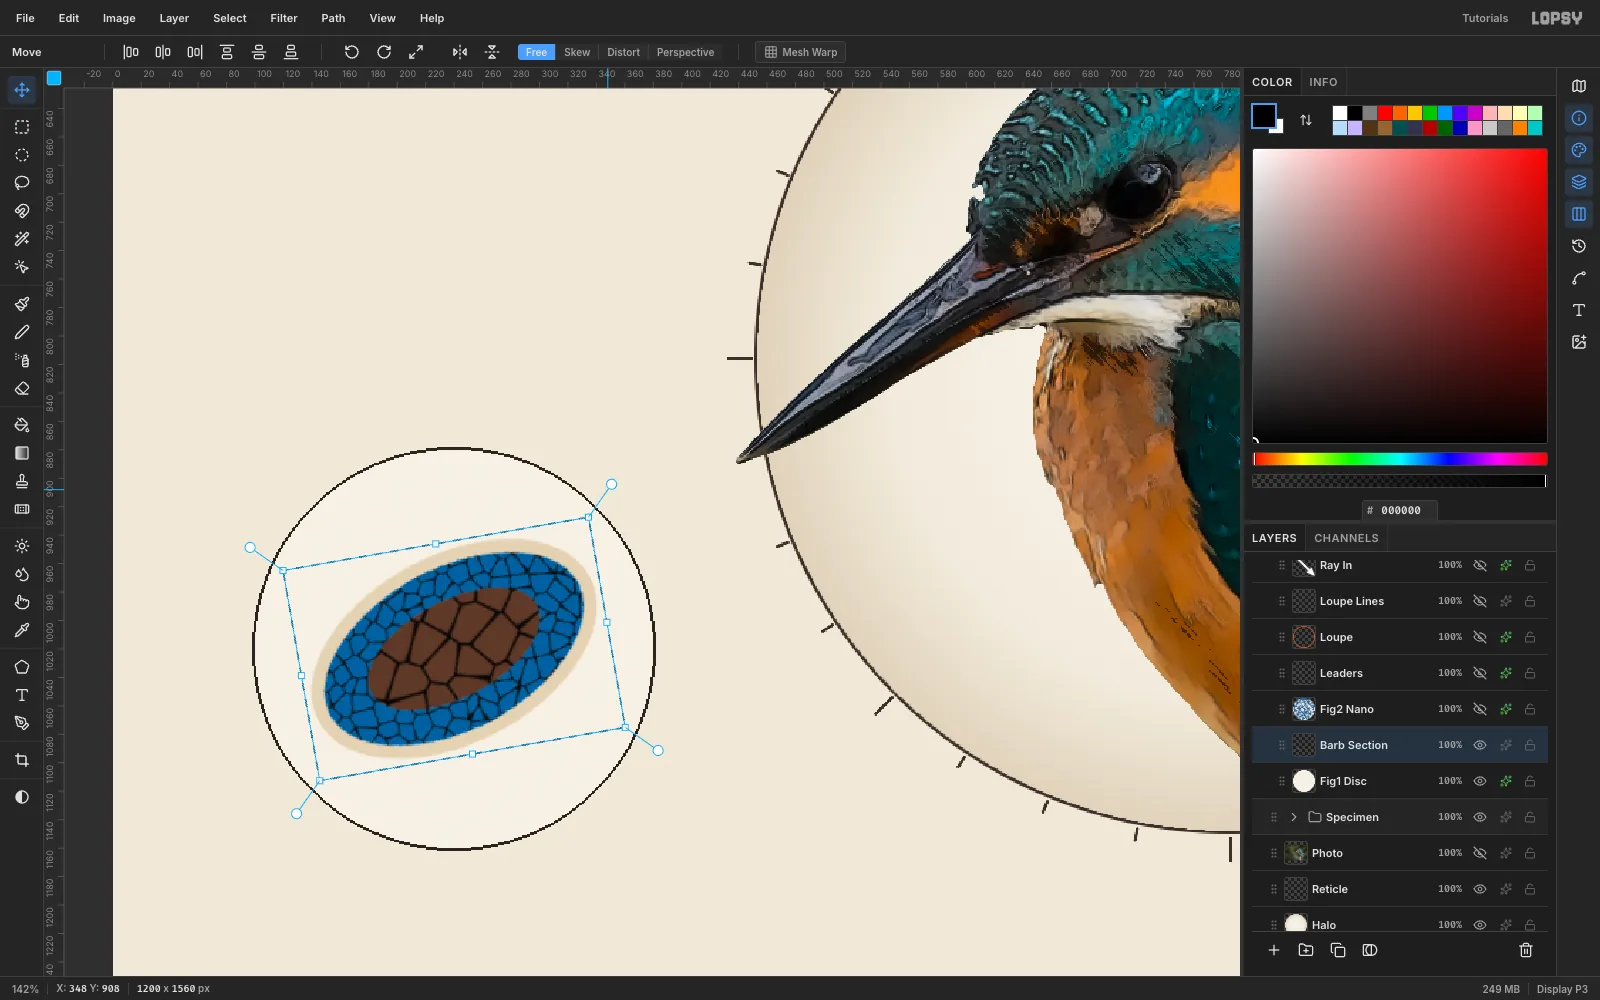
Fig1 Discinside it: a circle of radius 140 at (240, 1020) in , with a 2 px ink Stroke effect.
Draw the barb on three layers, all centred on the disc:
- Cortex: a 216 × 132 ellipse filled .
- Spongy layer: fill a rectangle a little larger than the ellipse with blue. Run Filter → Voronoi… at Cells 130, Edge Width 2. Then select the same ellipse, Shrink… it 9 px, Inverse, and Delete. Filling a block first keeps the edge smooth, because Voronoi gives every cell its own alpha.
- Core: do the same with a block, Voronoi at Cells 70, Edge Width 3, clipped to a 132 × 68 ellipse.
Merge the three layers down into
Barb Section. Then marquee it, drag the rotate handle to about −18°, and press Cmd+D.Finally, recolour the blue cells to the headline cobalt. Magic Wand one cell with Contiguous off, then Edit → Fill with .
- Click a root layer below
-
Grow Fig. 2's nanostructure
- Add
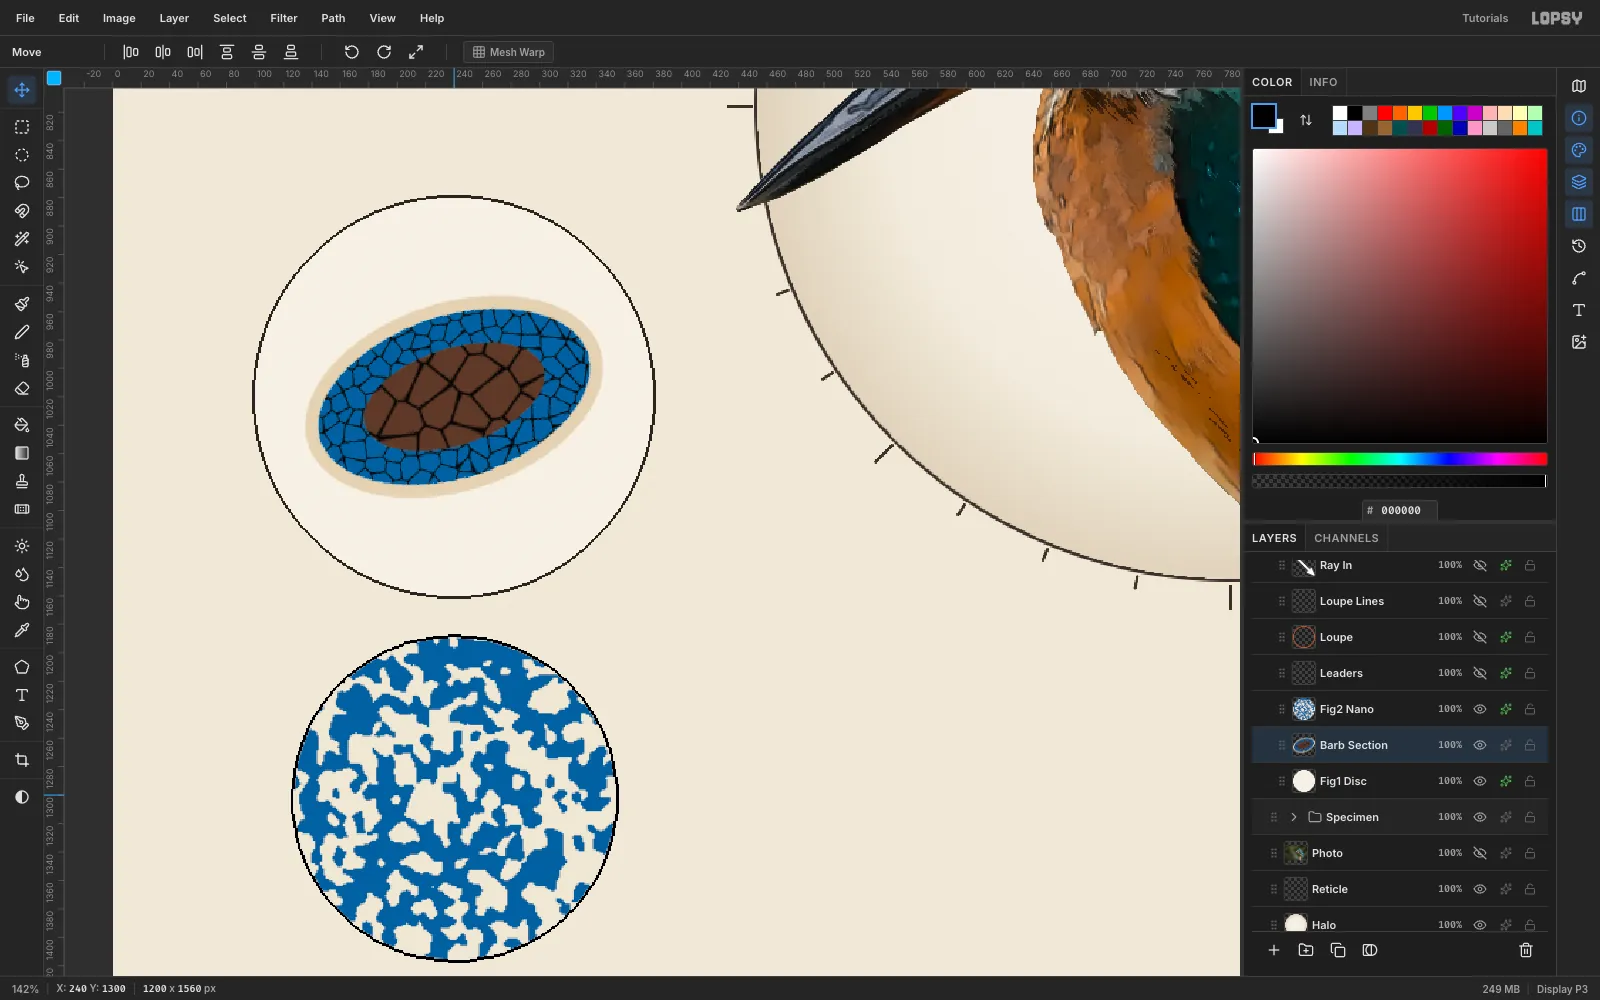
Fig2 Nanoand fill a circle of radius 113 at (240, 1302) with cobalt. - On a second layer, fill a slightly bigger circle with mid-grey. Run these filters on it:
- Add Noise… at 100, Mono, Uniform
- Gaussian Blur… at Radius 10
- Threshold… at 128
The blurred noise splits into a connected labyrinth, which is surprisingly close to real TEM images of the spongy keratin.
- Magic Wand the black with Contiguous off and press Delete. Then Cmd-click the layer's thumbnail and Edit → Fill what's left with .
- Trim it to the disc: select the disc's circle, choose Inverse, and Delete.
- Merge it down onto
Fig2 Nanoand give the layer a 2 px ink Stroke.
- Add
-
Connect the zoom chain
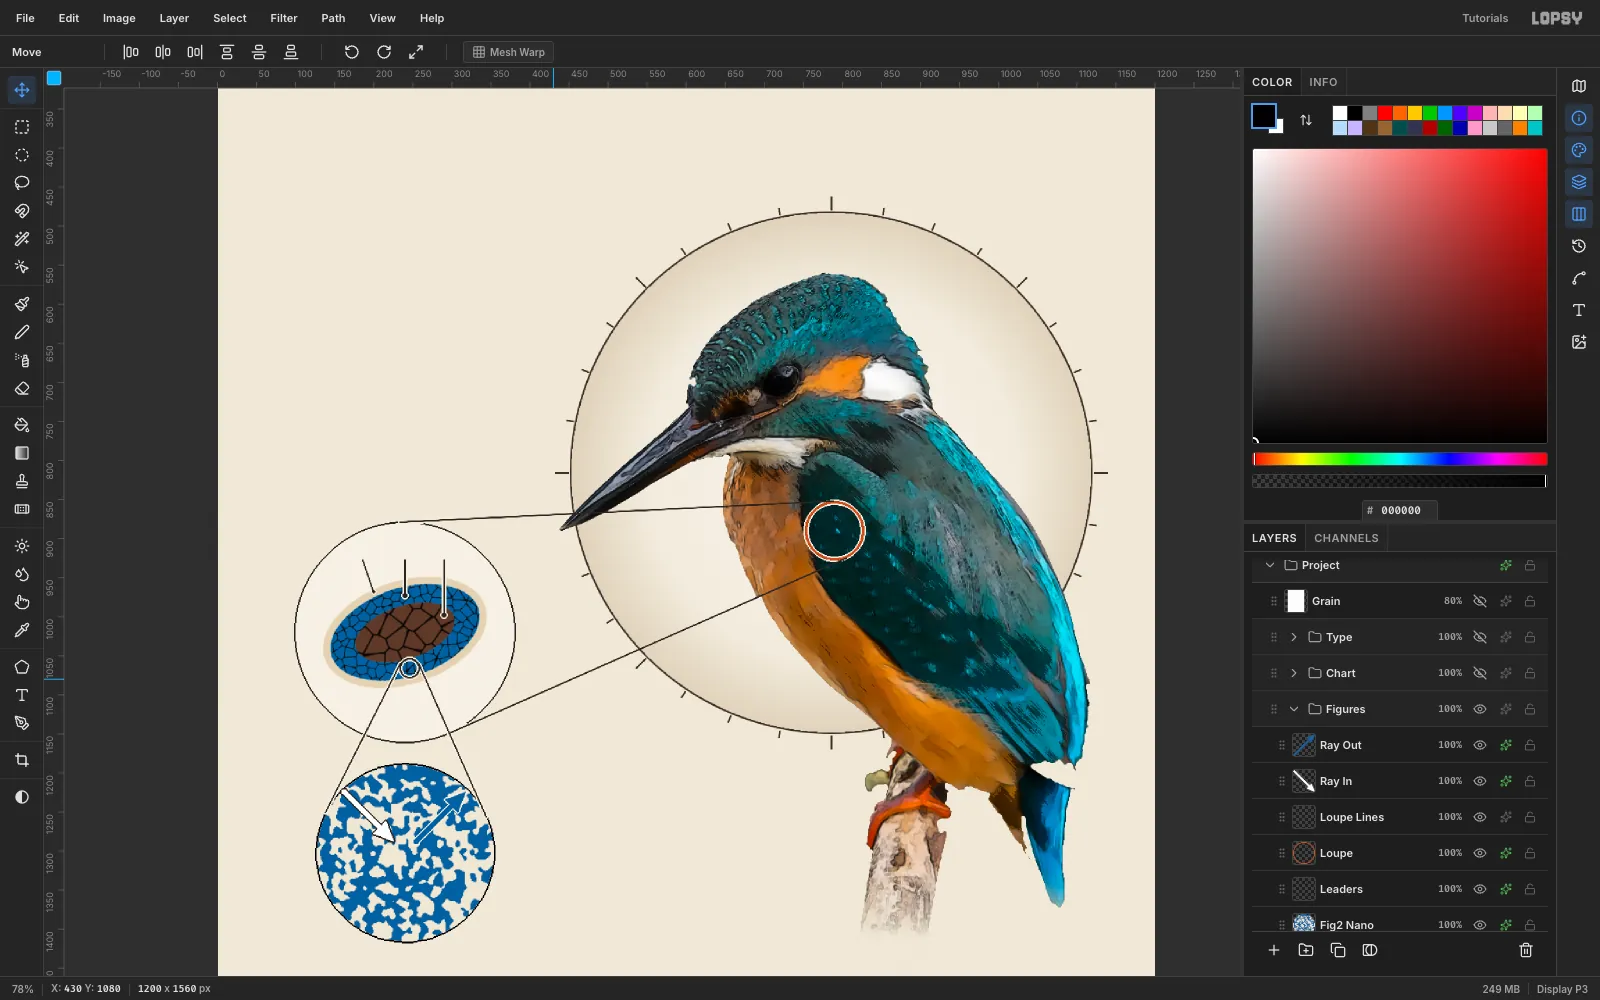
Each magnification needs a visible link to the one before it.
Loupe. On a
Loupelayer, make a 3 px orange ring () of radius 38 at (790, 890), on the spangled wing coverts. Fill the circle, Shrink… 3, then Delete. Give it a 2 px cream Stroke so it reads on the dark wing.Loupe lines. On a plain
Loupe Lineslayer, set the Brush to Size 2.6. Click one end, then Shift-click the other to draw each tangent line:- (788, 852) → (233, 879)
- (805, 925) → (297, 1149)
Leaders. On
Leaders:- Draw a small ring on the barb's lower blue band at (246, 1066).
- Draw its two tangent lines down to Fig. 2's rim.
- Draw three vertical leaders from the numerals 1, 2 and 3 above the barb. End each with a 5–7 px dot inside the cortex, the blue layer and the core.
- Give
Leadersa 2 px cream Stroke so the lines stay crisp where they cross colour.
Arrows. Inside Fig. 2, draw a white arrow pointing in from the upper-left and a cobalt arrow pointing out to the upper-right. Draw each shaft with a Brush Shift-click line, and lasso-fill a triangle for the head. Give the white arrow an ink Stroke and the blue arrow a cream Stroke.
-
Plot the reflectance curve
- Make a
Chartgroup with aSpectrumlayer. - In the Gradient tool's Advanced… editor, set eight stops:
- 0%
- 17%
- 27%
- 33%
- 43%
- 60%
- 73%
- 100%
- Drag across a 388 × 12 marquee at (392, 1466).
- On a
Reflectancelayer, draw 6 px ticks under the bar at 400, 500, 600 and 700 nm. Those are x 392, 521, 651 and 780.
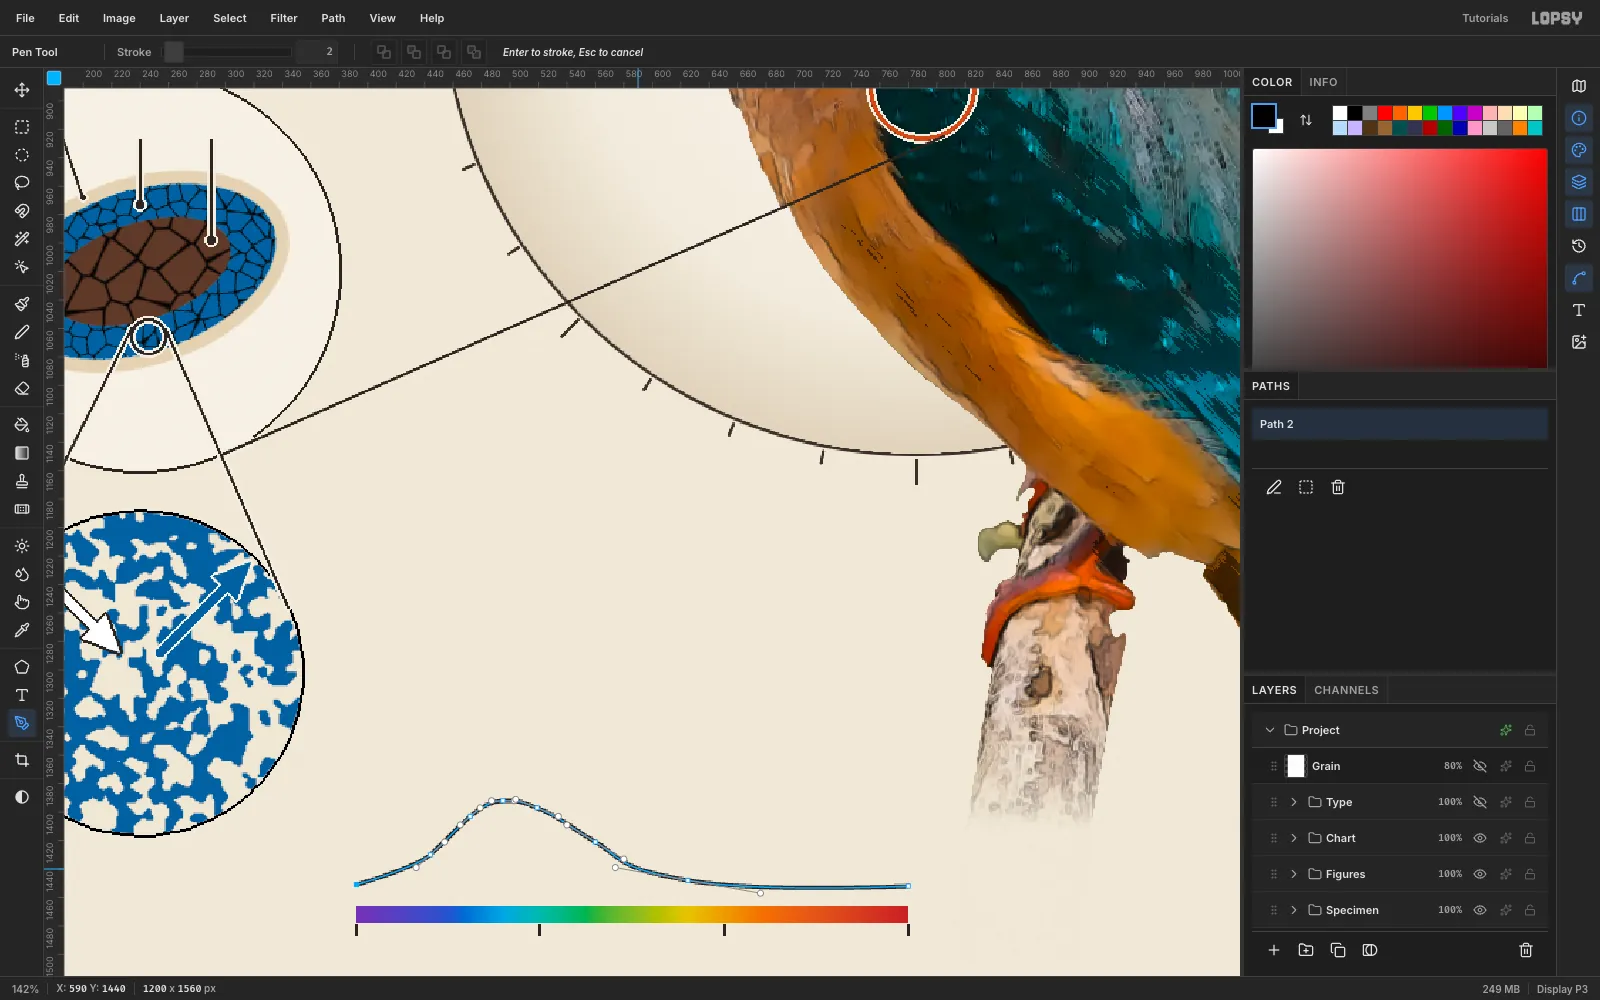
Draw the curve with the Pen tool:
- Set Stroke to 3 and the foreground to ink.
- Click the first anchor at (392, 1451). Then drag each middle anchor along the curve's direction to pull out smooth handles. Peak at (496, 1392), over 480 nm, and fall to a long tail at (780, 1452).
- Press Enter. The path is committed to the Paths panel and stroked onto the active layer in one step.
- Make a
-
Set the type
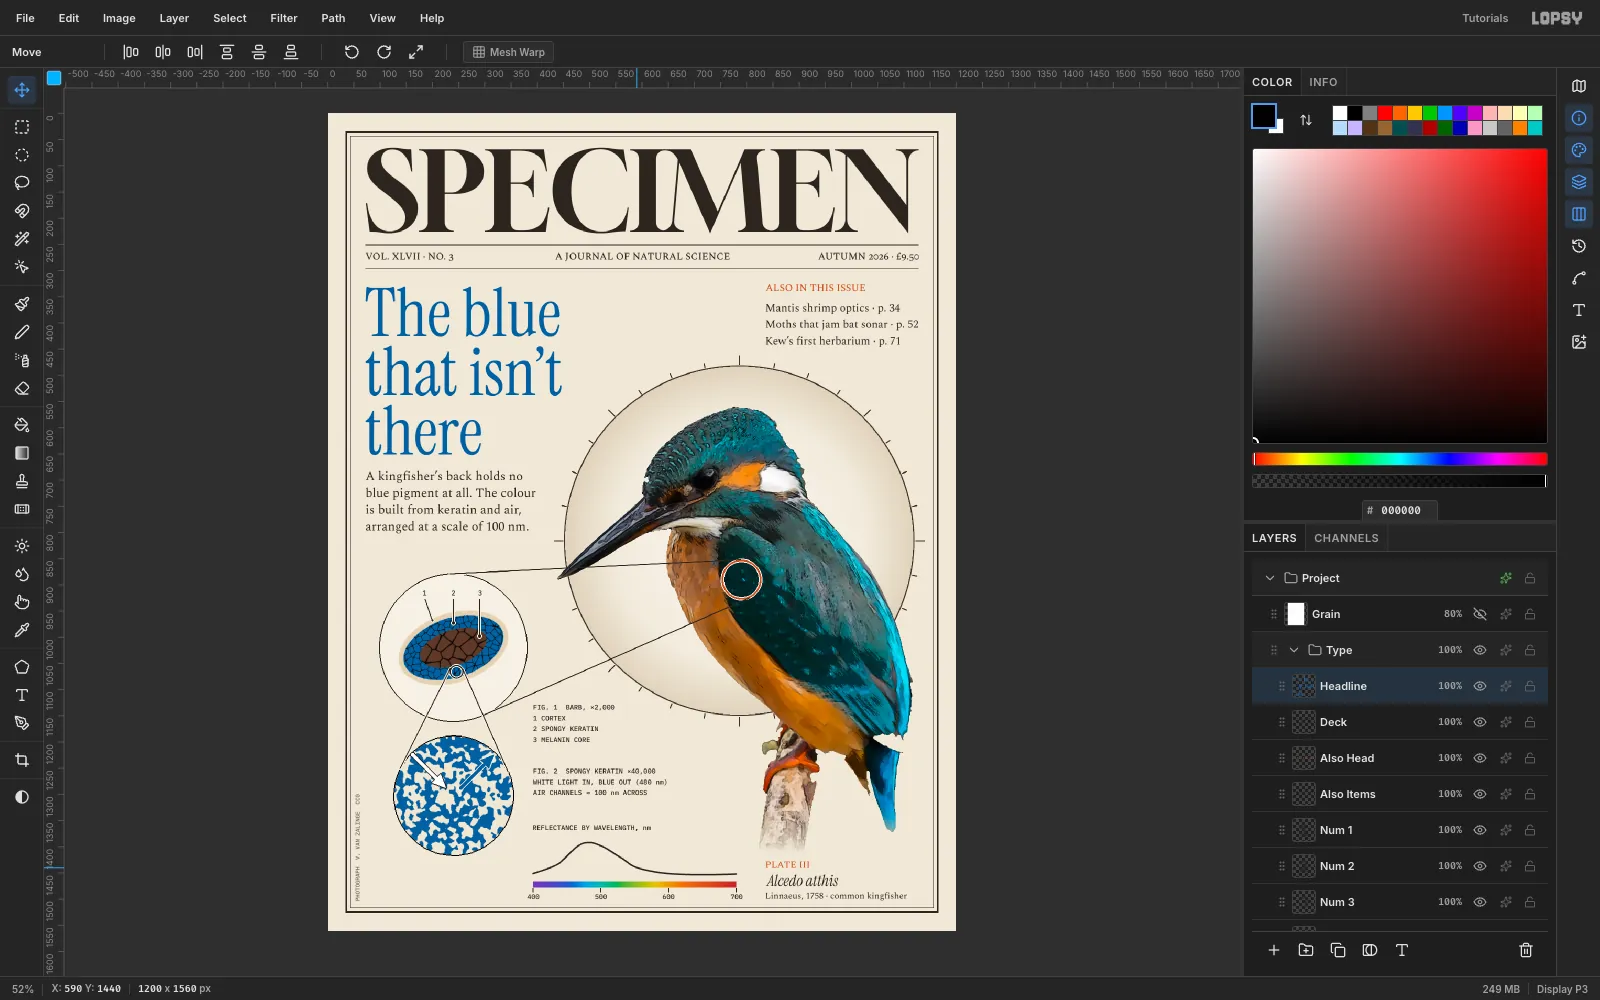
Everything hangs off four edges: x 72 and x 1128 for the full measure, x 392 for the captions, and x 836 for the right column.
- Masthead:
SPECIMENin Gloock at 210 px, ink, spanning x 72 to 1128 and centred between the frame and a 2 px rule at y 250. - Dateline: Spectral SC Medium, 19 px, between that rule and a hairline at y 295. It has three parts:
VOL. XLVII · NO. 3on the leftA JOURNAL OF NATURAL SCIENCE, centred with Align center horizontallyAUTUMN 2026 · £9.50flush right- Headline:
The blue / that isn't / therein Instrument Serif at 128 px, cobalt, with Line height 0.88 in the Text panel. Its top is at y 330. - Deck: Spectral at 24 px with line height 1.32. Put four lines at x 72 with the top at y 682, clear of the field's 9 o'clock tick.
- Contents:
ALSO IN THIS ISSUEin Spectral SC 19 px, , over three lines of Spectral 21 px, all at x 836. - Captions: IBM Plex Mono Medium, 13 px, at x 392:
- Fig. 1's number and key
- Fig. 2's three lines
REFLECTANCE BY WAVELENGTH, nmabove the chart- Axis labels:
400,500,600and700, each centred on its tick. - Plate block:
PLATE IIIin Spectral SC 18 px orange. Below it,Alcedo atthisin Instrument Serif Italic at 30 px, thenLinnaeus, 1758 · common kingfisherin Spectral 17 px. - Frame: two keylines, 3 px at a 34 px inset and 1 px at 43 px. For each, fill a rectangle, Shrink it, and Delete.
- Masthead:
-
Add the credit and paper grain
Credit.
- Type
PHOTOGRAPH V. VAN ZALINGE CC0in Plex Mono 11 px in a warm grey. - Click Rasterize Layer.
- Marquee it, switch to the Move tool, and hold Cmd while you drag the rotate handle. The angle snaps to exactly −90°.
- Press Cmd+D and move it into the left margin at x 53.
Grain.
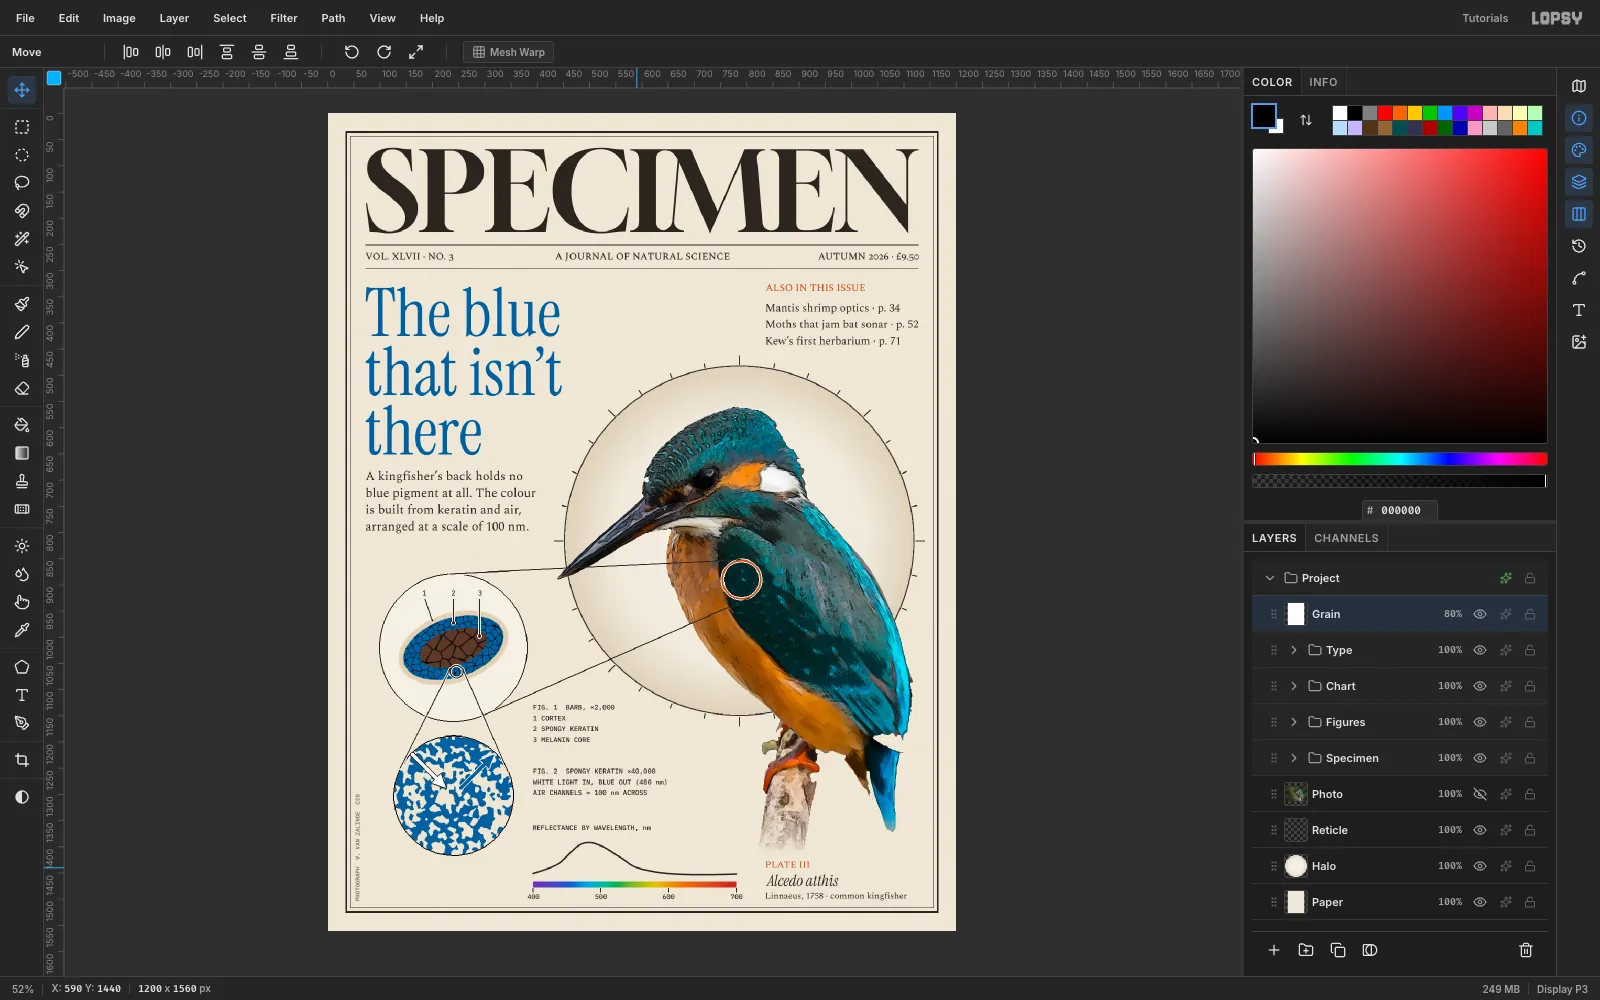
- Add a
Grainlayer at the very top. - Fill it white and run Add Noise… at 30, Mono, Gaussian.
- Set it to Multiply at 80%. The type and diagrams now look printed rather than rendered.
Save with File → Save Project, and export with File → Quick Export PNG.
- Type