Design a Technical Illustration Christmas Card
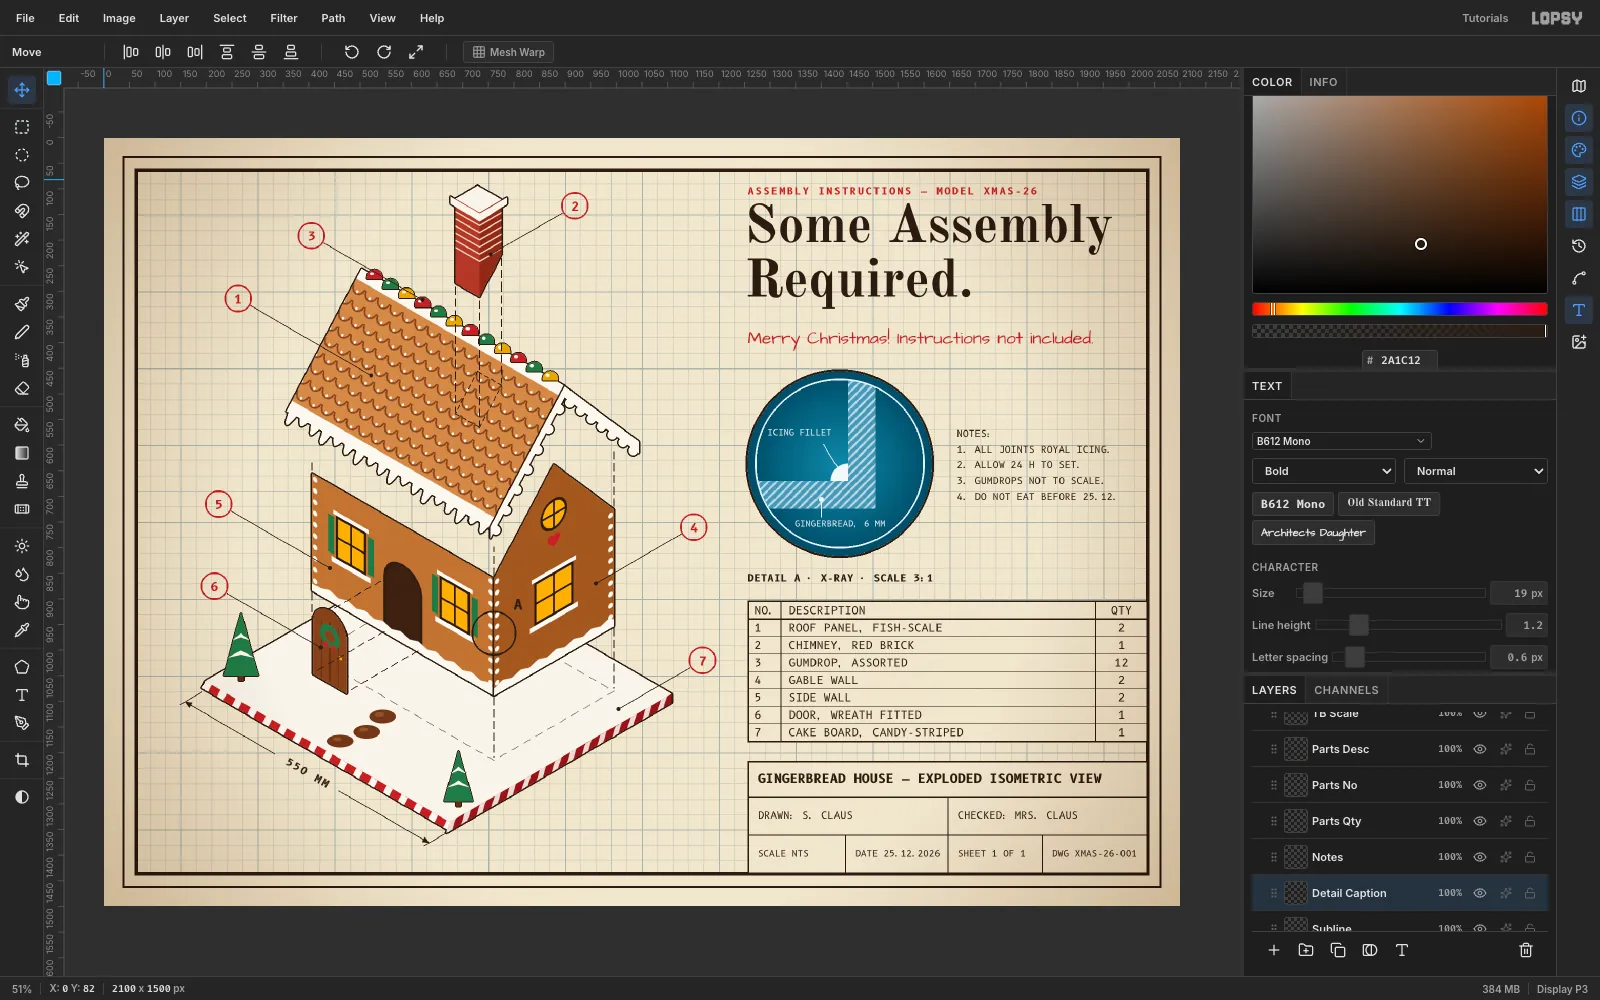
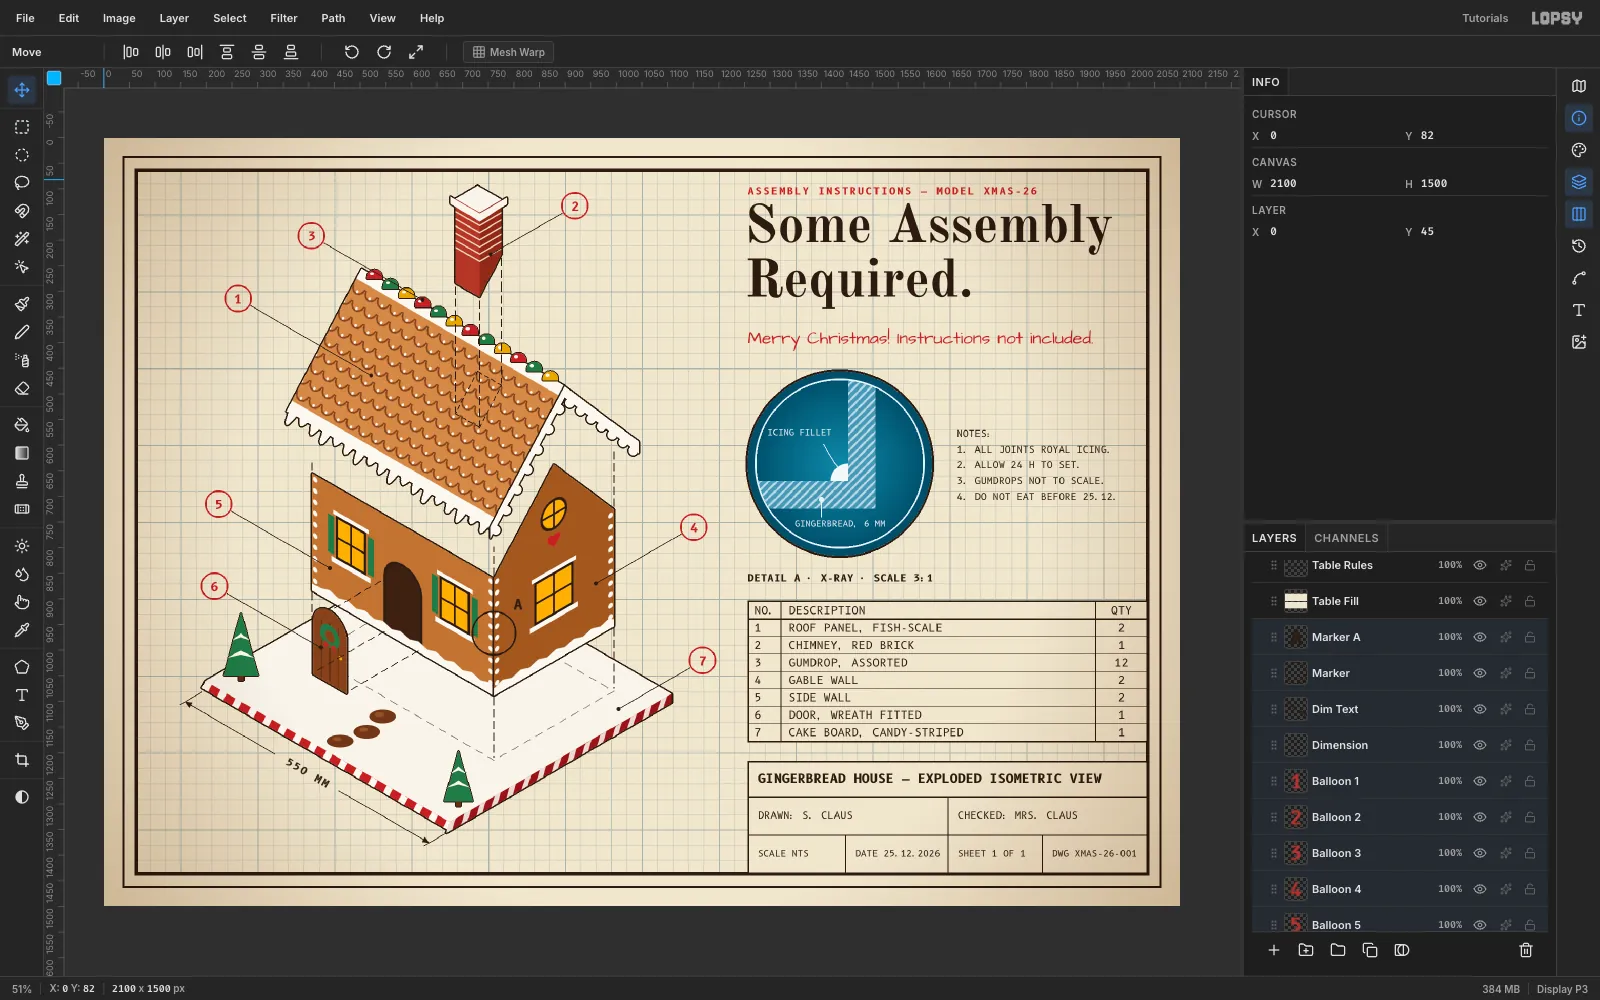
Draw an exploded isometric gingerbread house in Lopsy, as a vintage assembly drawing with balloons, an X-ray detail view, a parts list and a title block.
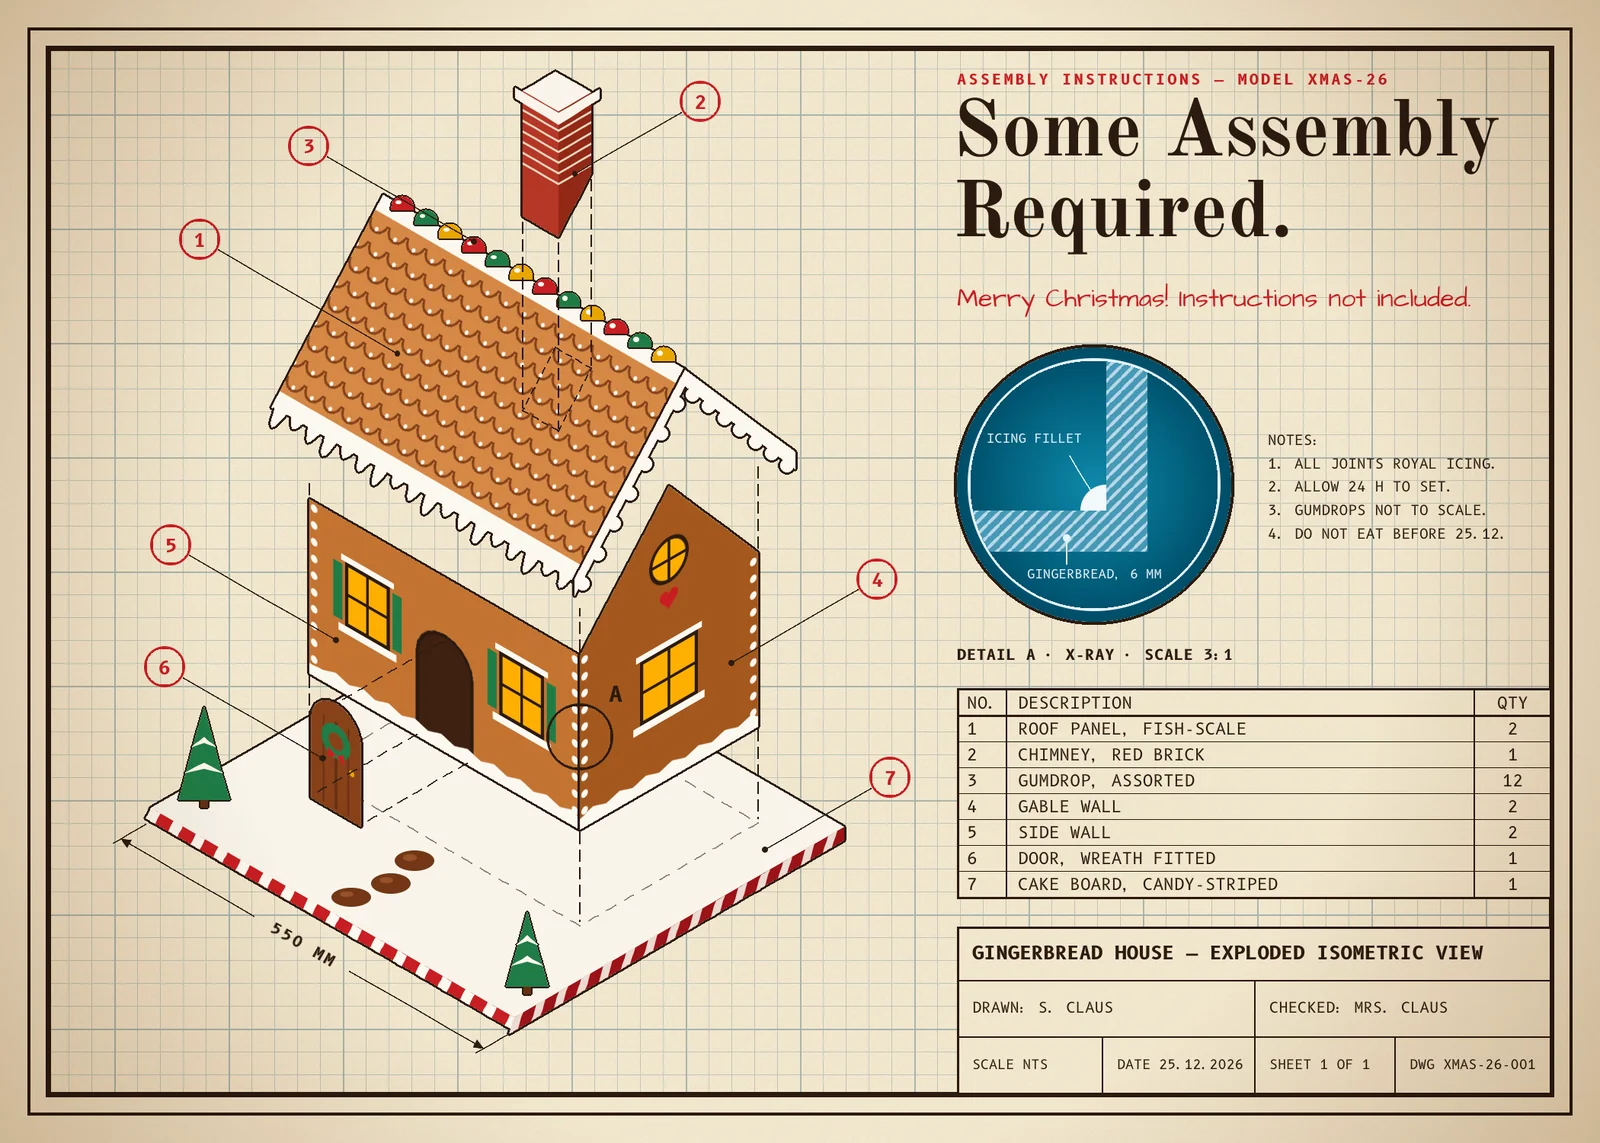
Assembly manuals and patent drawings have a look everyone recognises:
- an exploded isometric view, with parts floating along dashed lines
- numbered balloons that point at each part
- a circled detail view
- a parts list, and a title block in the corner of the sheet
In this tutorial you'll use that look to make a Christmas card. It's a flat-pack gingerbread house with the headline Some Assembly Required.
The trick that makes it fast is the one technical illustrators use. Draw each wall and roof panel flat, as a front-on elevation, then distort it onto its isometric face. You never have to draw a window in perspective.
Along the way you'll use:
- Define Pattern and Fill with Pattern (grid paper, roof shingles and section hatching)
- the Move tool's Distort transform
- the Stroke effect for ink outlines
- nested groups, group moves and a multi-select move
- the Gradient tool
- Google fonts, including a rasterized and rotated label
The palette is small:
- paper
#EFE6D0 - ink
#2A1C12 - gingerbread
#B9773F(lit face) and#9A5C2C(shaded face) - icing
#FBF8F1 - candy red
#B8322C - blueprint teal
#3E86A6→#1D4A63
-
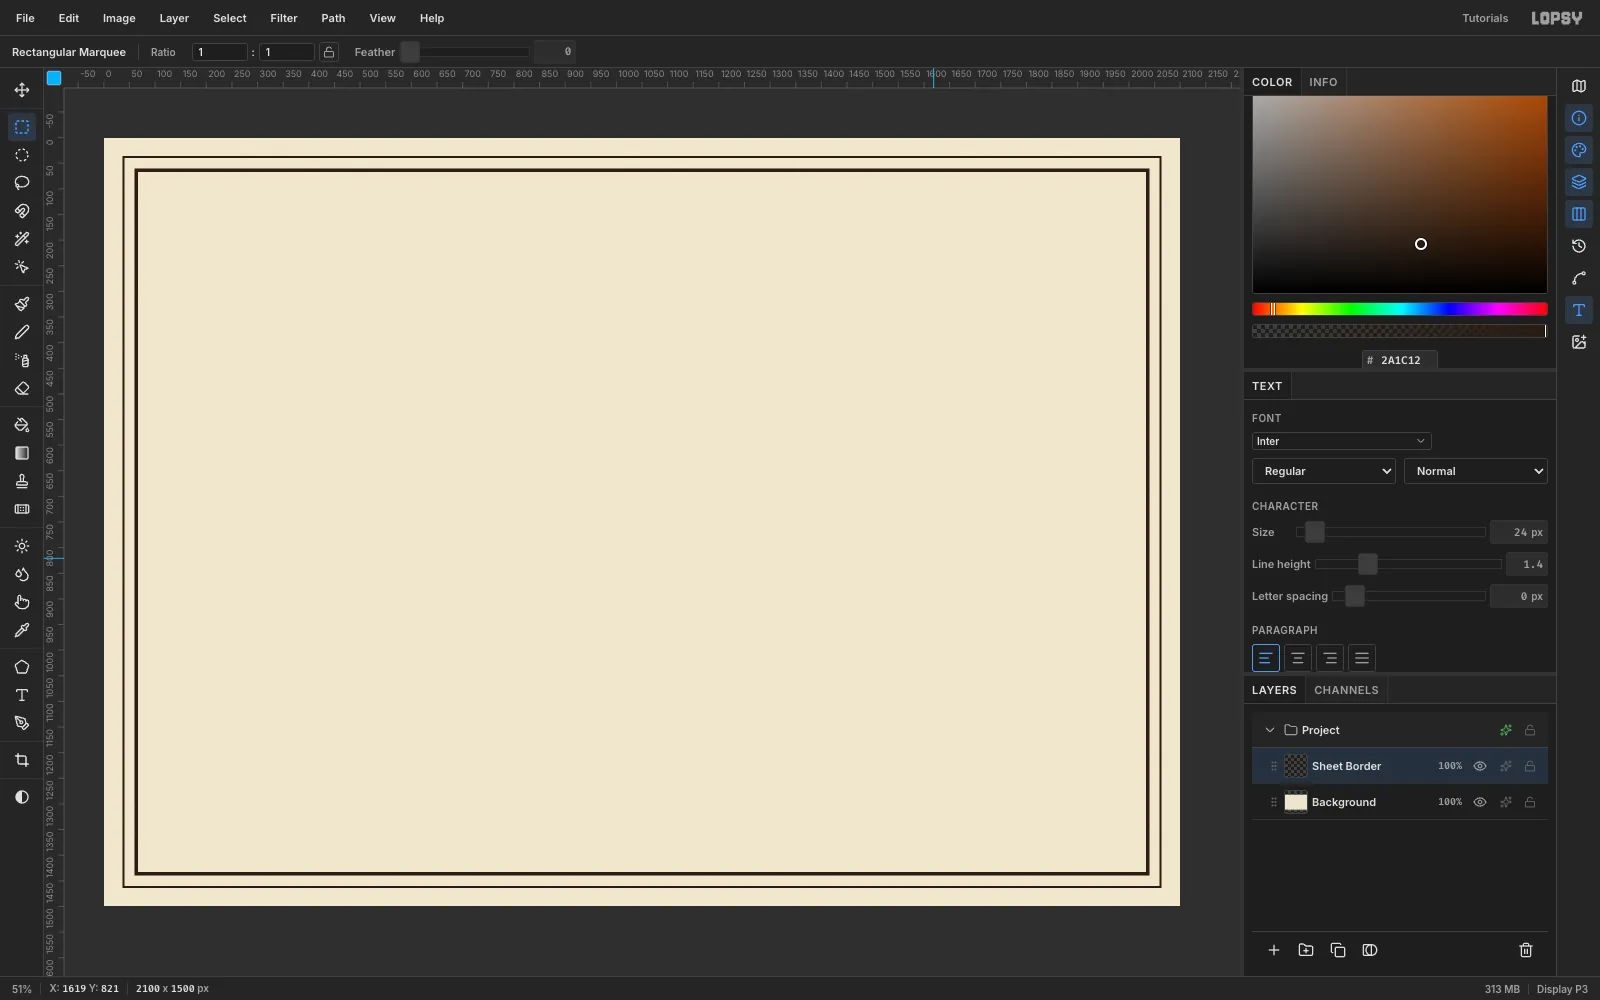
Set up the sheet and its double border
Create a 2100 × 1500 px document with a White background. That's a landscape 7 × 5 card at 300 ppi.
Select Background, set the foreground to
#EFE6D0and choose Edit → Fill. Then run Filter → Add Noise… at Amount 7, Mono, for a little paper tooth.Rename Layer 1 to
Sheet Borderand set the foreground to ink#2A1C12. Each rule is a filled marquee with its middle deleted:- Marquee (36, 36) → (2064, 1464), Edit → Fill, then Select → Shrink… by 3 and press Delete. That leaves a 3 px outer rule.
- Marquee (60, 60) → (2040, 1440), Fill, Shrink… by 6 and Delete. That leaves a 6 px inner frame.
-
Draw one tile of engineering grid
Add a layer called
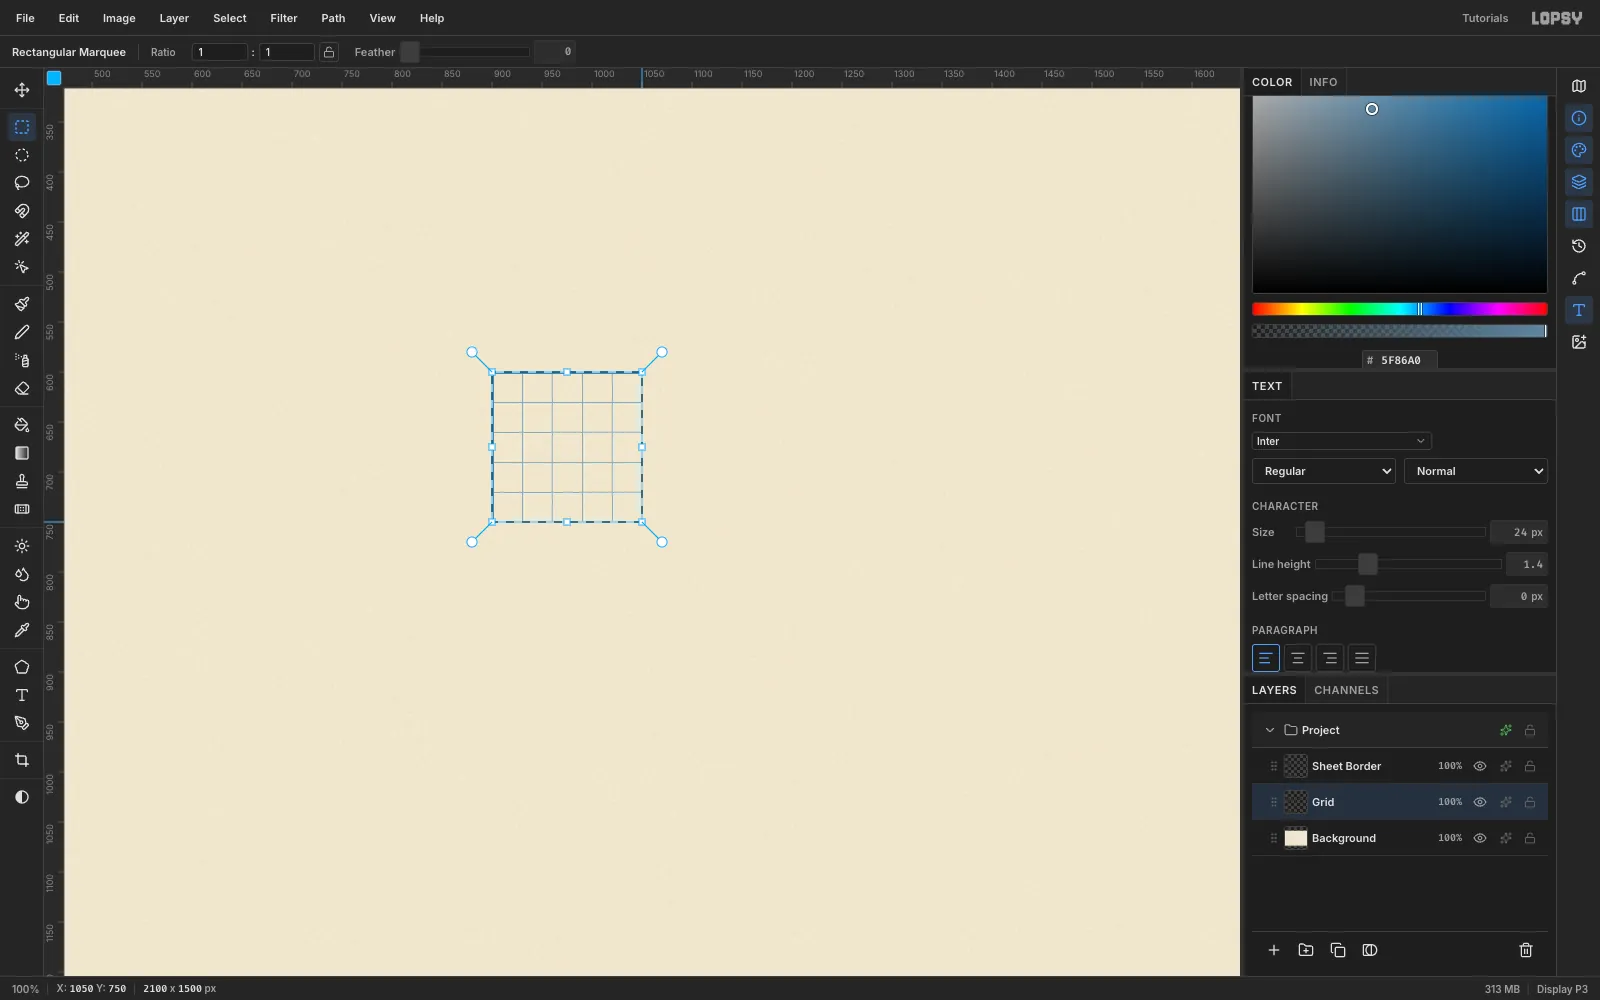
Gridabove Background and press Cmd+1 to zoom to 100%, so you can place 1 px lines. On an empty spot:- Minor lines: with foreground
#8FAFC2, fill 1 px-wide marquees every 30 px inside a 150 × 150 square. - Major lines: with foreground
#5F86A0, fill a 2 px line along the square's top edge and another along its left edge.
Marquee exactly the 150 × 150 square and choose Edit → Define Pattern. Then press Delete to clear the tile.
- Minor lines: with foreground
-
Tile the grid across the sheet
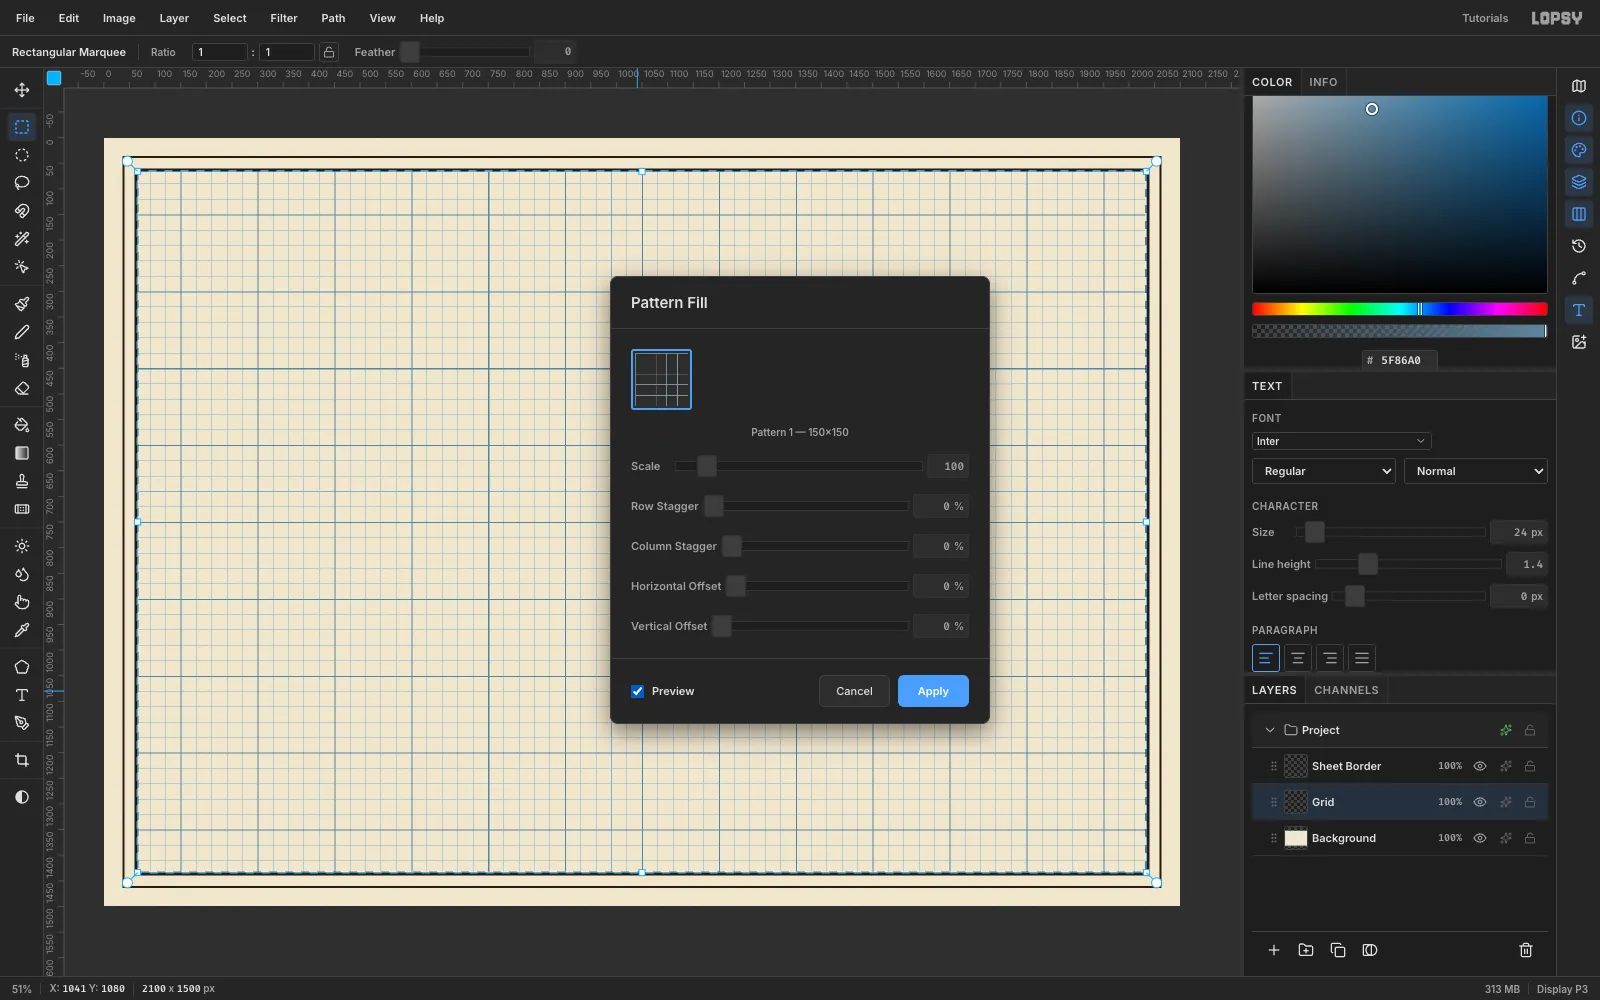
Press Cmd+0 to fit the view. Marquee the inside of the frame, from (66, 66) to (2034, 1434), and choose Edit → Fill with Pattern…. Pick the grid thumbnail and tick Preview to check it, then click Apply.
To finish the grid:
- Press Cmd+D.
- Open the layer's effects drawer (✦) and set Blend to Multiply.
- Drop the layer's opacity to 45% so the grid reads as printed paper, not a cage.
-
Draw the cake board and trees in isometric
Isometric drawing only uses three directions. Verticals stay vertical, and the other two axes slope 30° up to the left and up to the right. The board is a flat slab, so draw it straight in isometric with the Lasso (L) and Edit → Fill:
- The top face is a rhombus whose edges slope at 30°. This board's corners are (631, 635), (1108, 910), (675, 1160) and (198, 885).
- Under the front edges go two thin parallelograms in red
#B8322Cand a darker#8F2320, each 18 px deep. - Short slanted white quads along those edges make the candy stripes.
The trees are three-point triangles in green
#3D7A4Awith white chevrons for snow. The stepping stones are ellipse-marquee fills in chocolate#6B3A1E.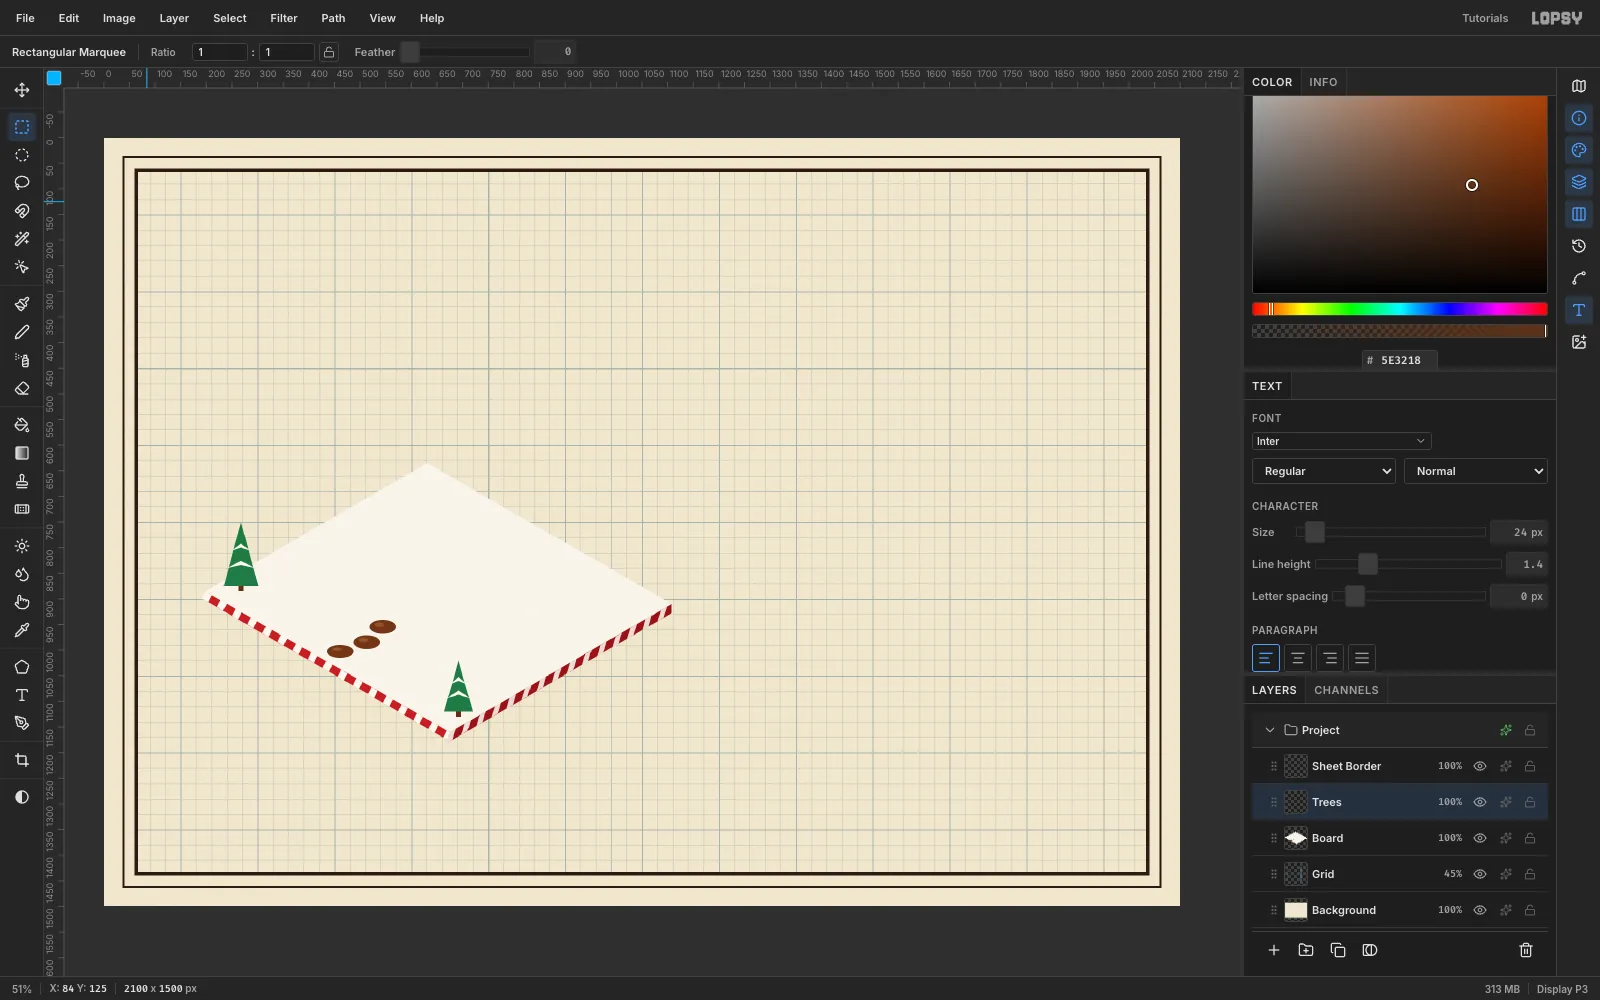
-
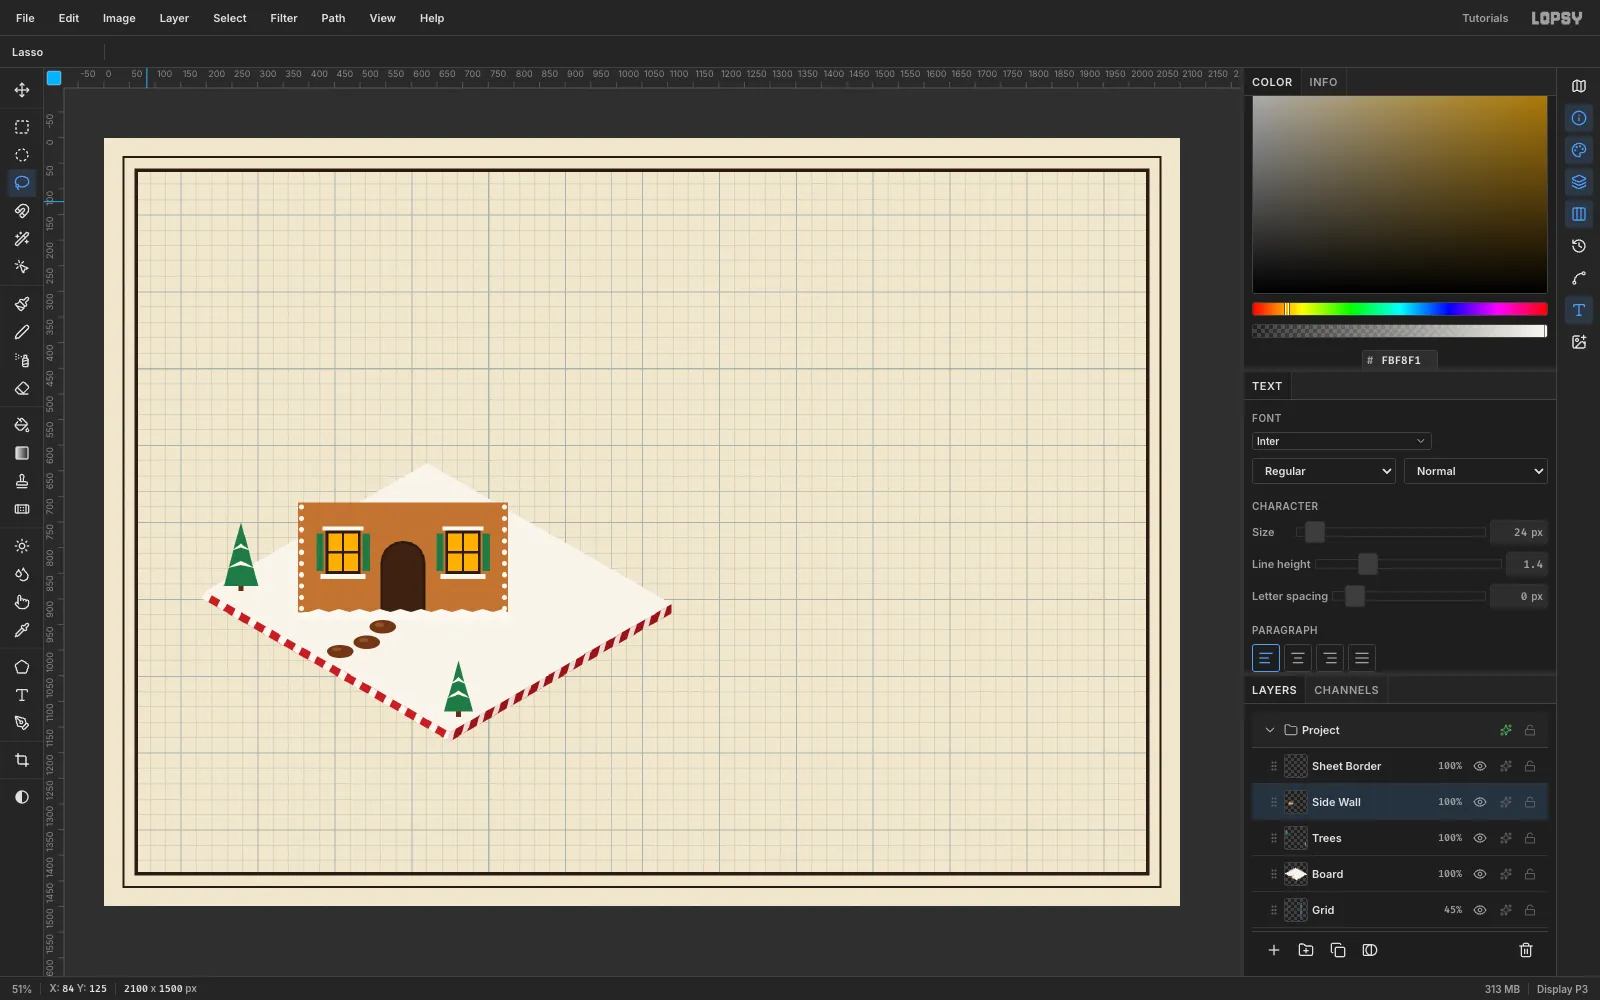
Draw the side wall flat, as an elevation
Add a layer called
Side Wall. Don't draw it in perspective. Draw it straight on, the way it would look on the kitchen counter before assembly:- a 410 × 225 tan
#B9773Frectangle - two windows: an ink frame, a glass fill
#F3B23Eand 4 px muntins - green
#3D7A4Ashutters and white icing sills - a dark arched doorway: an ink arch, then a
#3A2215arch inset 5 px - a row of white piping dots down each edge
- a wavy white snow skirt along the bottom
Everything is marquee, ellipse and lasso fills. This wall sits in the rectangle (373, 706) → (795, 947).
- a 410 × 225 tan
-
Distort the elevation onto its isometric face
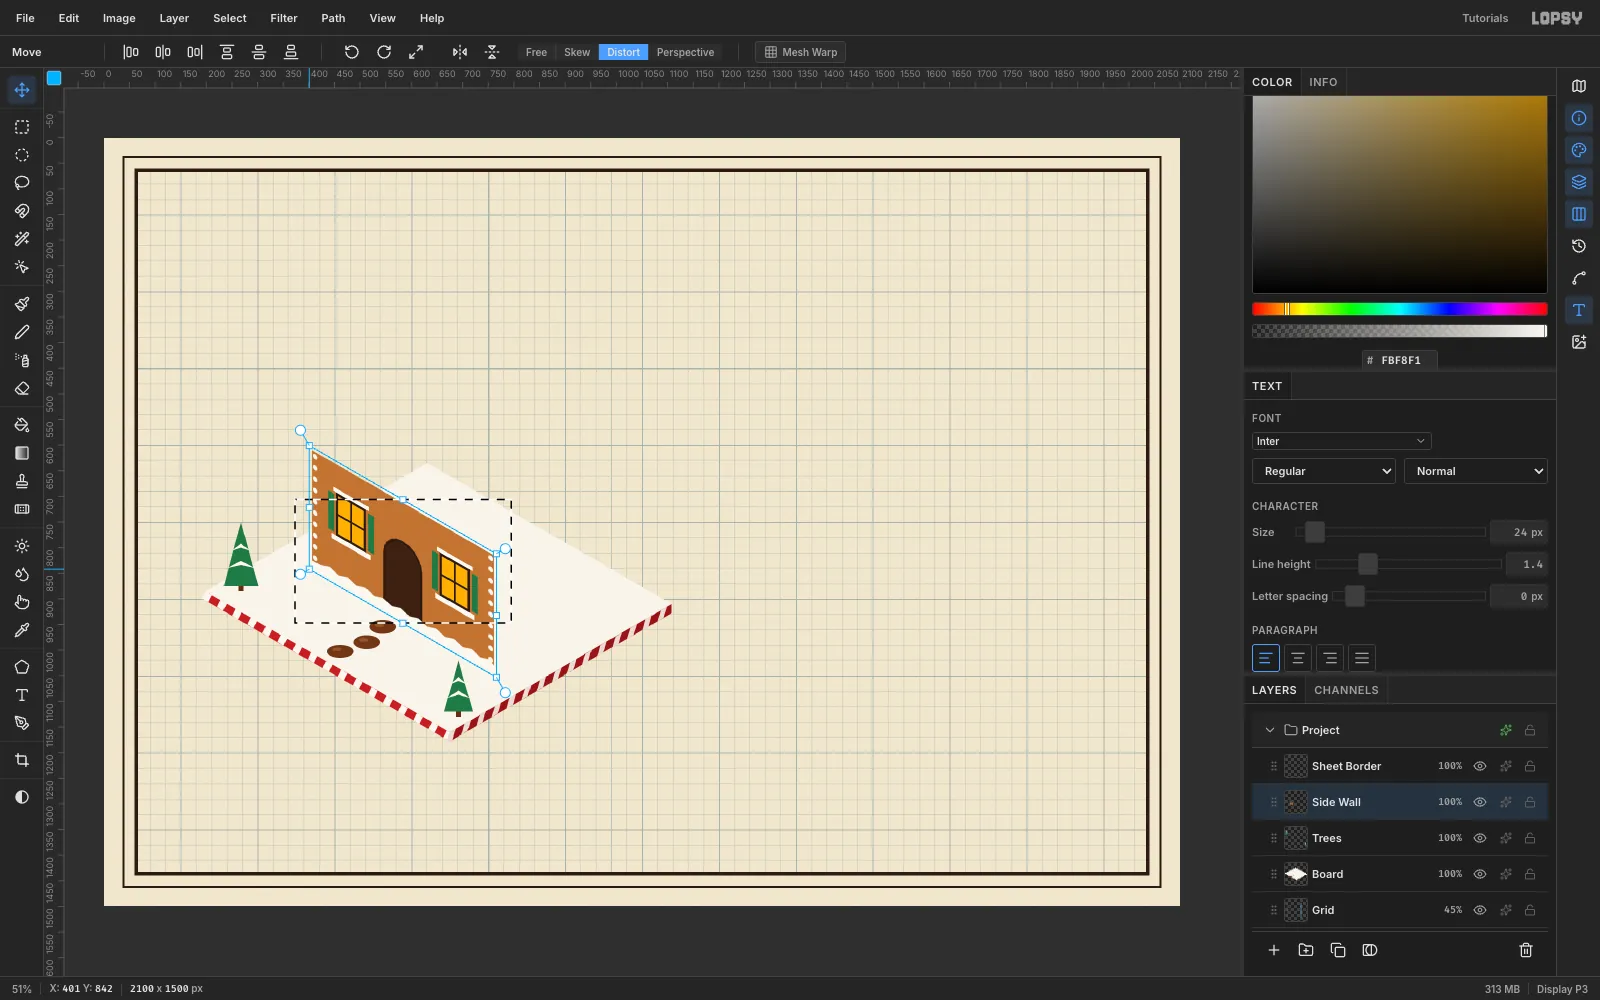
Marquee the whole elevation, switch to the Move tool (V) and click Distort in the options bar. In Distort mode, each corner handle moves on its own, so drag the four corners onto the face:
- top-left (373, 706) → (401, 601)
- top-right (795, 706) → (766, 812)
- bottom-right (795, 947) → (766, 1053)
- bottom-left (373, 947) → (401, 842)
The windows, shutters and doorway all come along in correct isometric. Press Cmd+D to commit.
-
Build the gable wall and door the same way
The gable wall is a pentagon in the darker
#9A5C2C, 270 wide and 380 tall at the peak. It has a round attic window, a piped red heart and one big window. Draw it flat, then Distort it onto the right-hand face:- (737, 586) → (756, 657)
- (1019, 586) → (1000, 516)
- (1019, 982) → (1000, 912)
- (737, 982) → (756, 1053)
The door is its own layer. Draw it as a brown
#7E4523arch with plank lines, a green ring wreath with a red bow, and a gold knob. Distort it into the doorway so it can be pulled out later.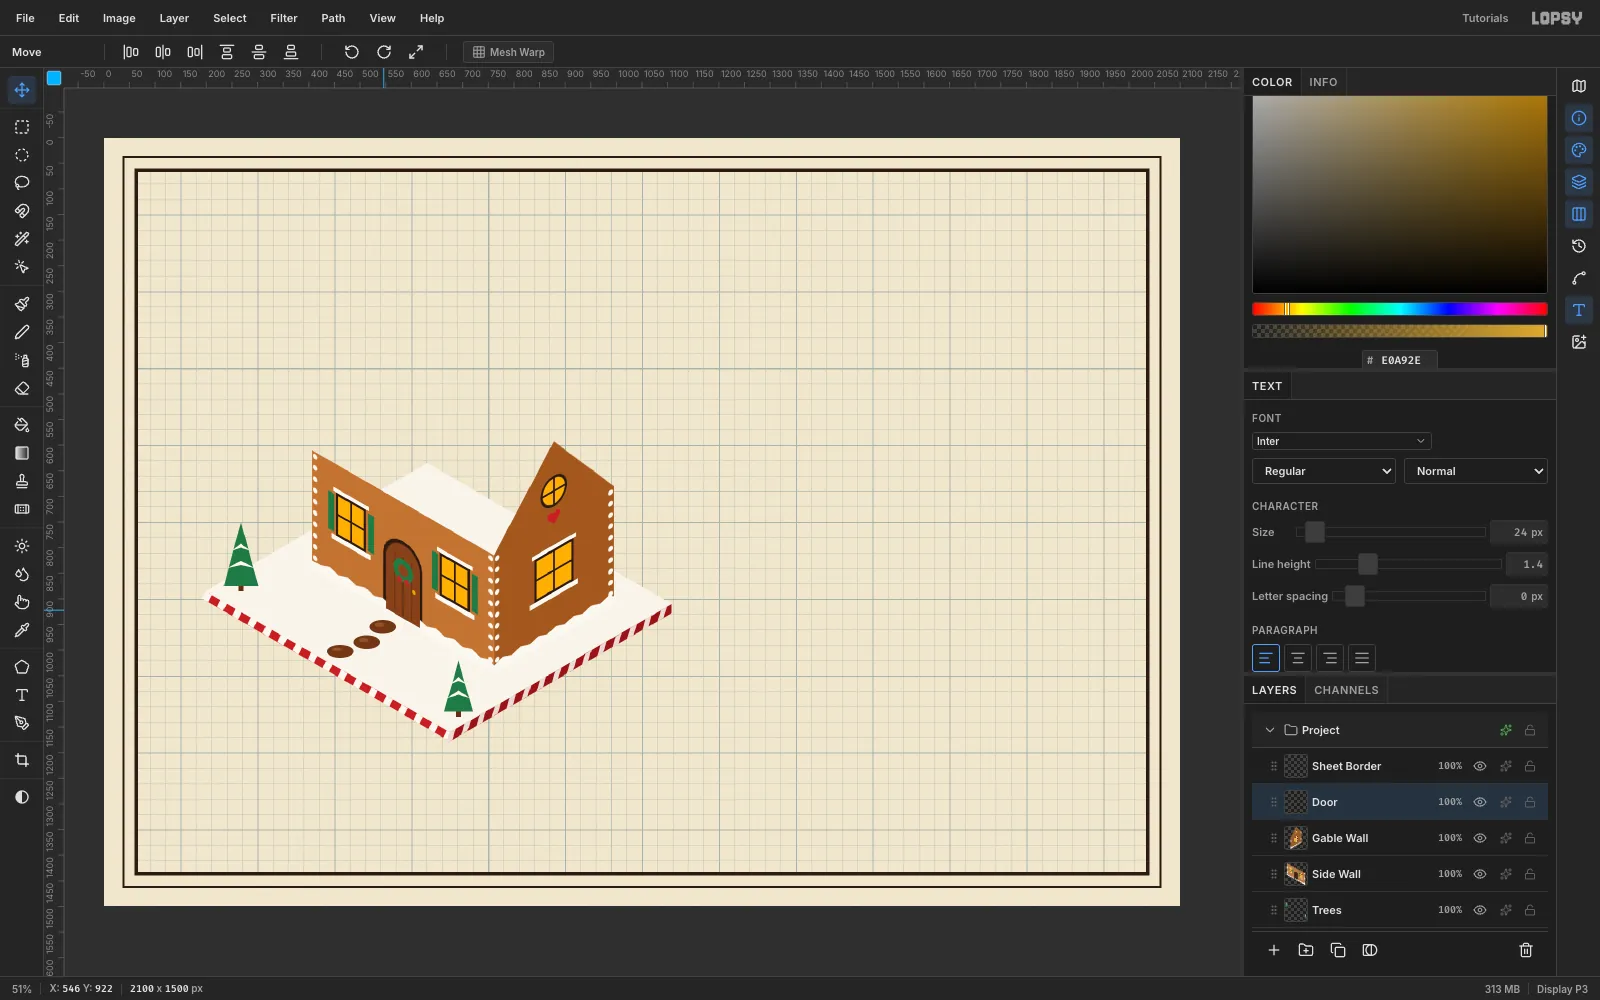
-
Make a fish-scale shingle tile
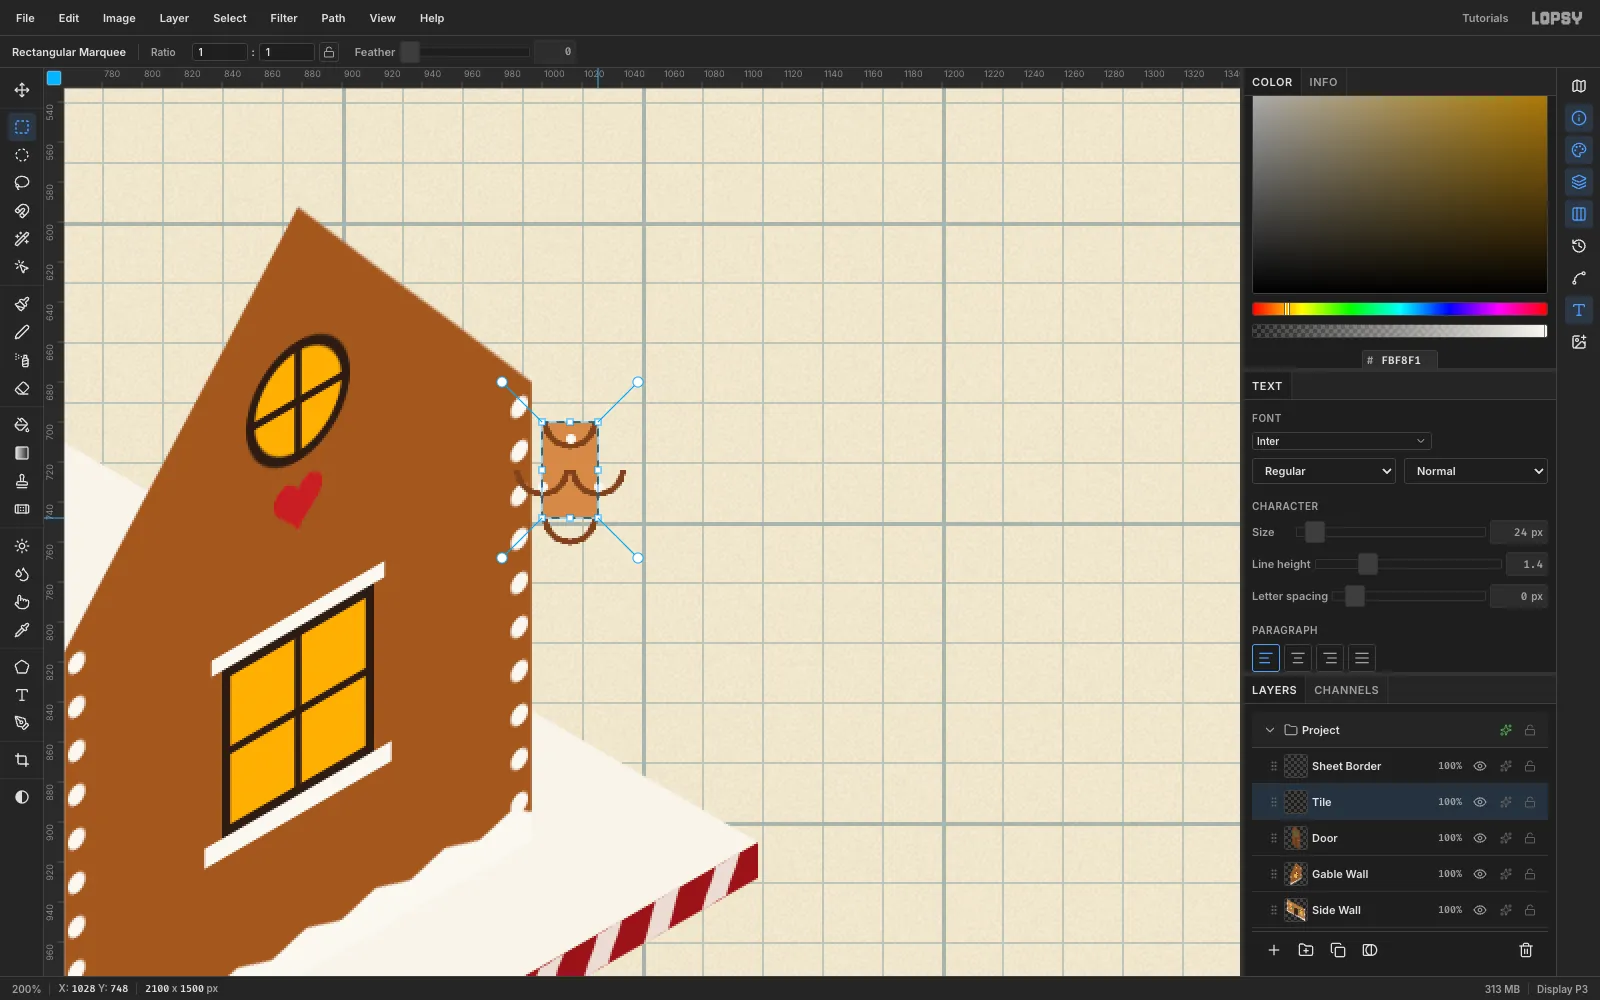
On a temporary layer, zoom in and fill a 28 × 48 rectangle with
#CB8C52. Then:- Lasso half-rings (lower half of a 14 px circle, 3 px thick) in
#7A4524. Put them at the top-centre and at mid-height on both side edges. The side-edge ones are cut in half, so the scallops stagger when the tile repeats. - Add a 2.5 px white icing dot inside each scale.
Marquee exactly the 28 × 48 tile and choose Edit → Define Pattern. Delete the temporary layer.
- Lasso half-rings (lower half of a 14 px circle, 3 px thick) in
-
Pattern-fill the roof panel
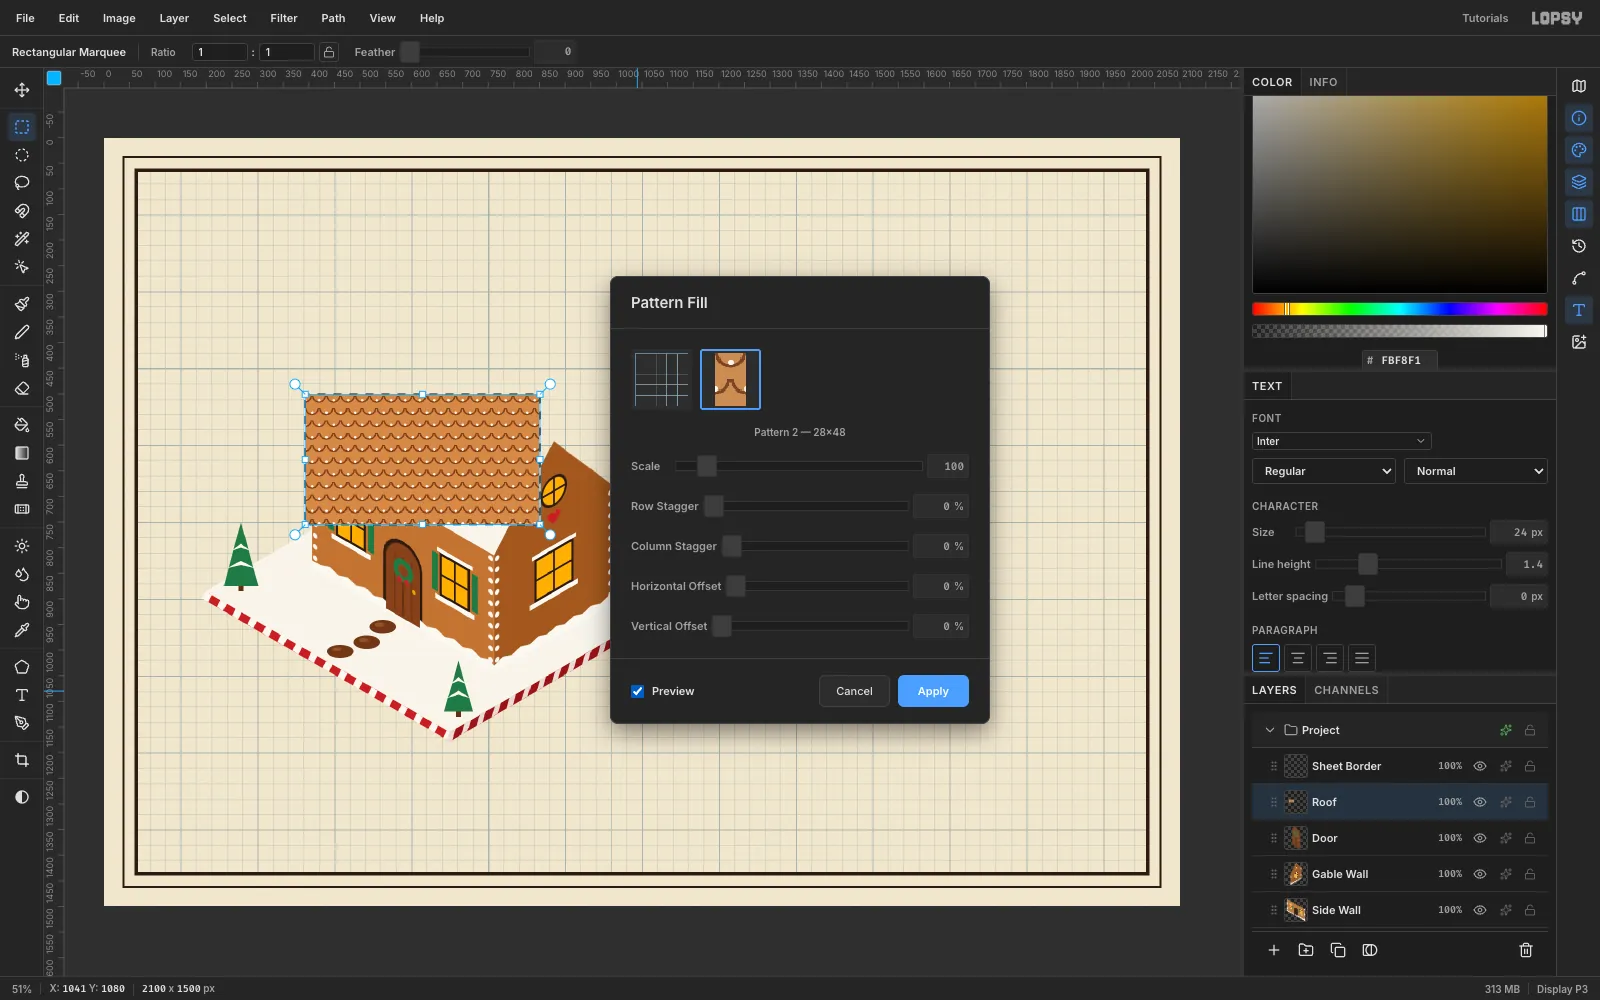
Add a layer called
Roofabove the door. Marquee the flat roof panel, (393, 501) → (851, 755), then choose Edit → Fill with Pattern… and pick the 28×48 thumbnail. Tick Preview, then Apply.Add the icing on top of the shingles:
- an 18 px white band along the ridge (top edge)
- scalloped white drips hanging below the eave (bottom edge), made from one lasso zig-zag
-
Distort the roof onto its slope
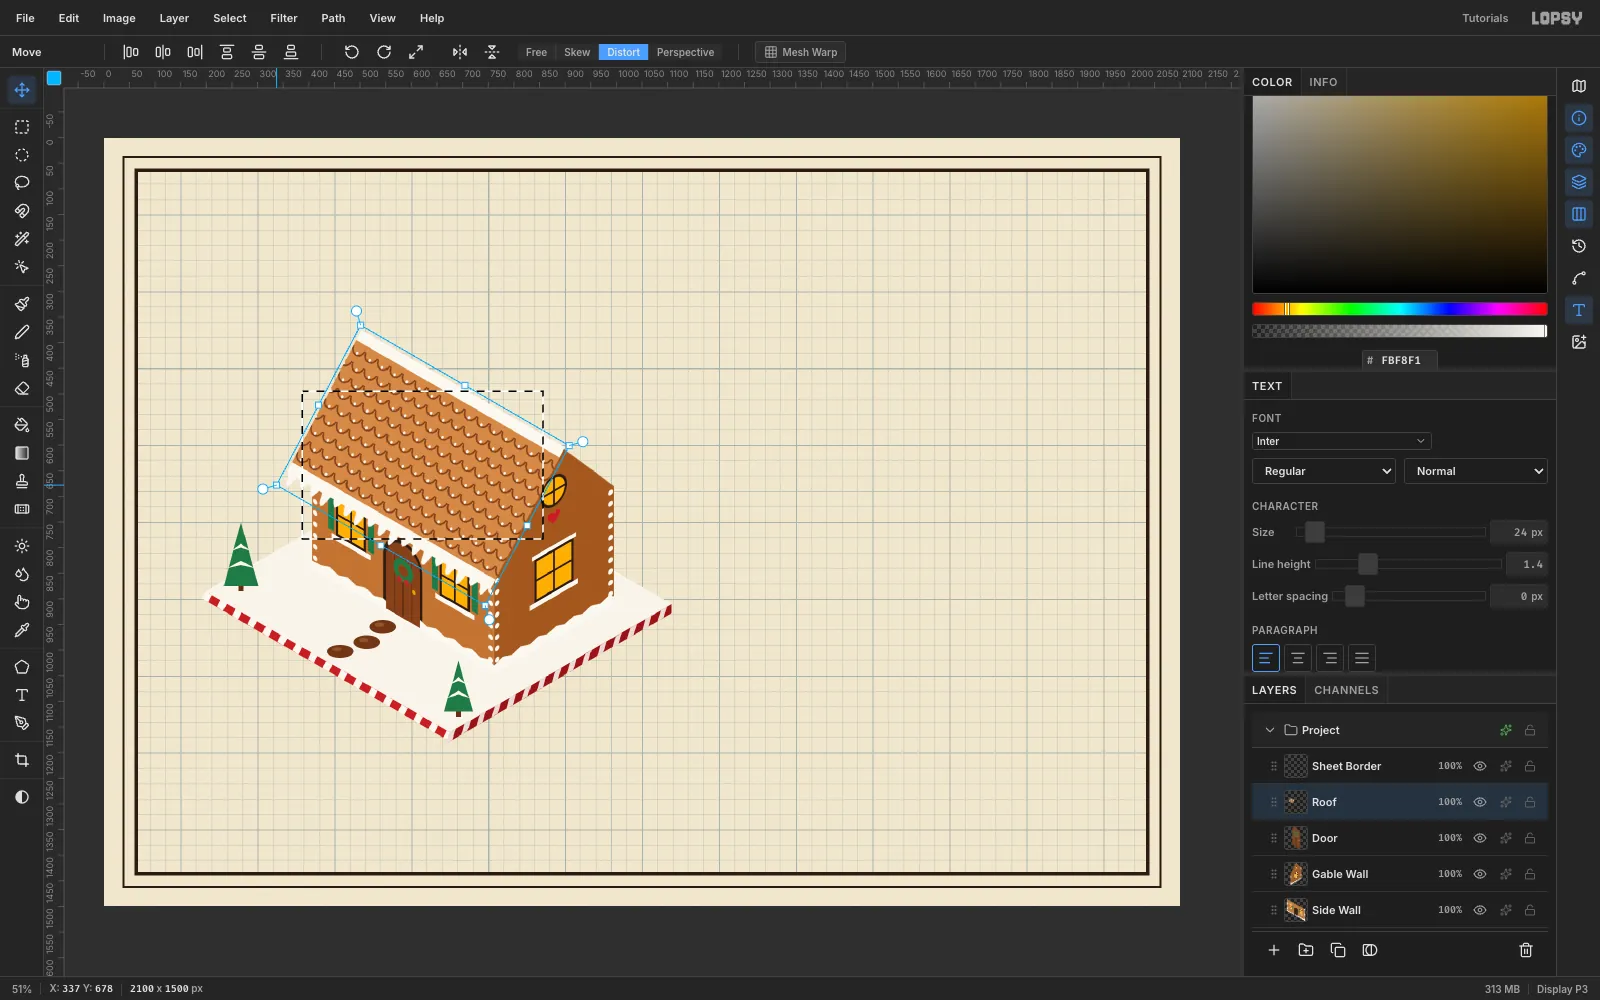
Marquee the roof and use Distort again. The roof slopes back to the ridge, so its face is a steeper parallelogram:
- top-left → (500, 366)
- top-right → (908, 601)
- bottom-right → (744, 913)
- bottom-left → (337, 678)
The shingles shrink toward the ridge automatically, which is exactly what they should do.
-
Add the rake icing, gumdrops and chimney
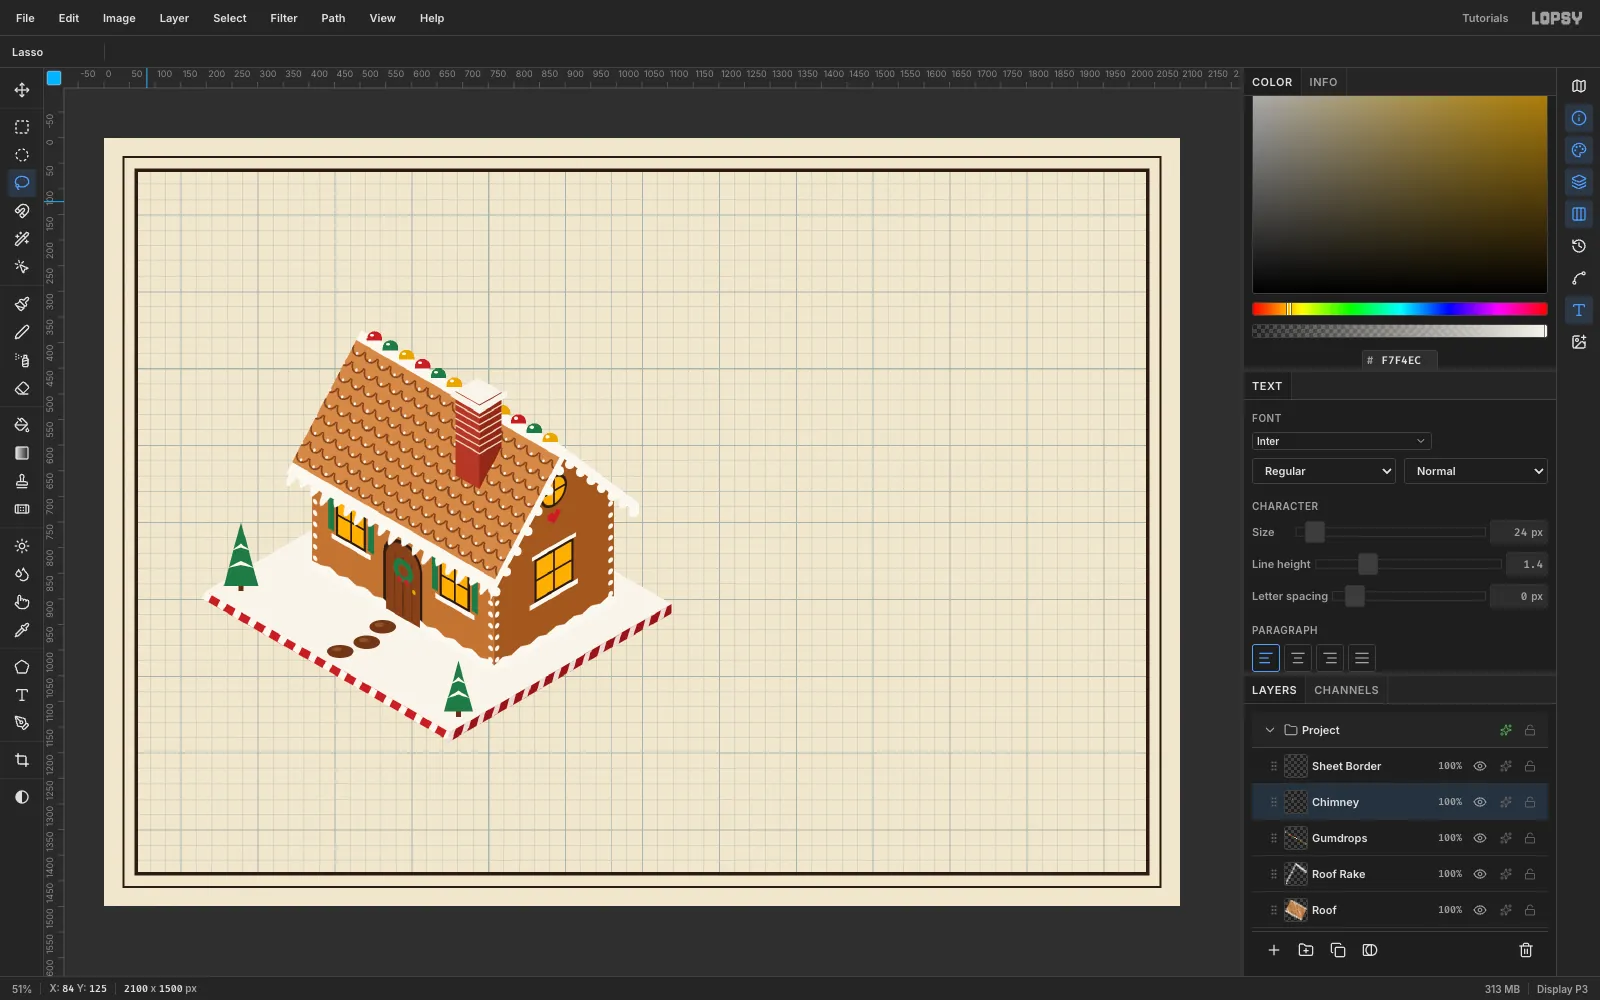
These pieces are small, so draw them straight in isometric with the lasso:
- Roof Rake: a white chevron strip that follows the gable's roof line, with 9 px white scallops underneath.
- Gumdrops: twelve half-domes in red, green and gold, spaced 36 px apart along the ridge, each with a white highlight.
- Chimney: two brick faces (
#A8402Flit,#86301Fshaded) with pale mortar lines, and a white snow cap on top. Its bottom edge follows the roof slope, so it can sit on the roof.
-
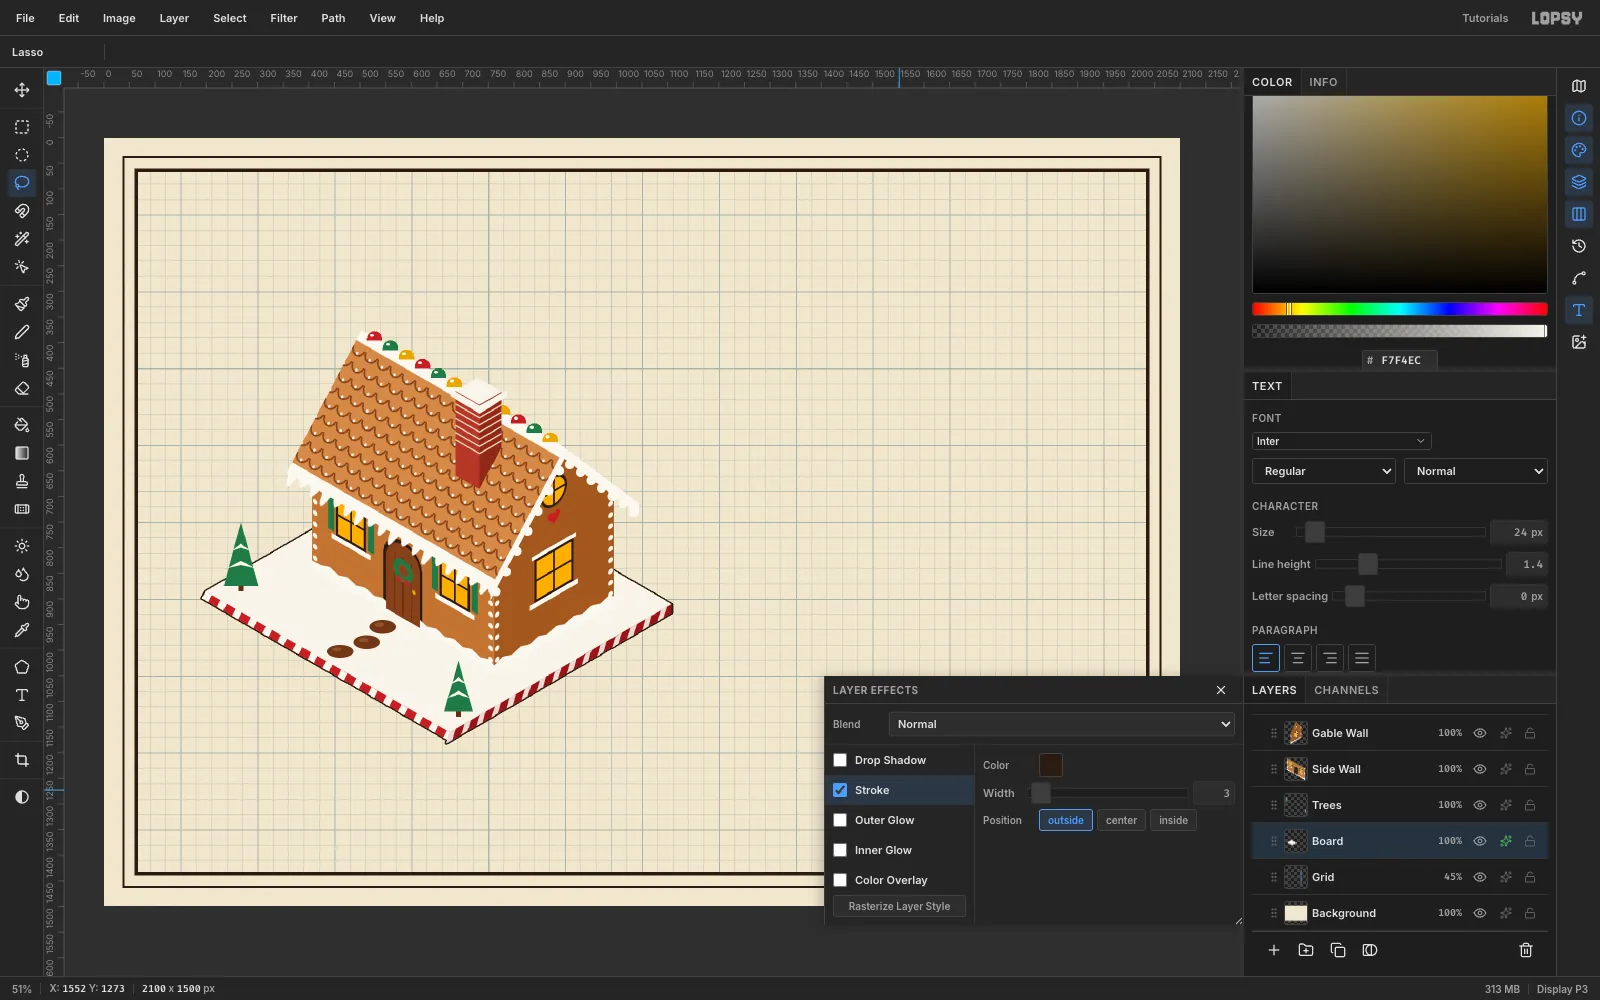
Outline every part with a Stroke effect
Technical illustrations have a crisp outer contour on every part. Select each part layer, open the effects drawer (✦), tick Stroke and set:
- Color
#2A1C12 - Width
3(use2for the gumdrops and trees) - Position outside
Because each part is its own layer, the shared edges get a double-weight line. That's the classic "silhouette heavier than detail" hierarchy, for free.
- Color
-
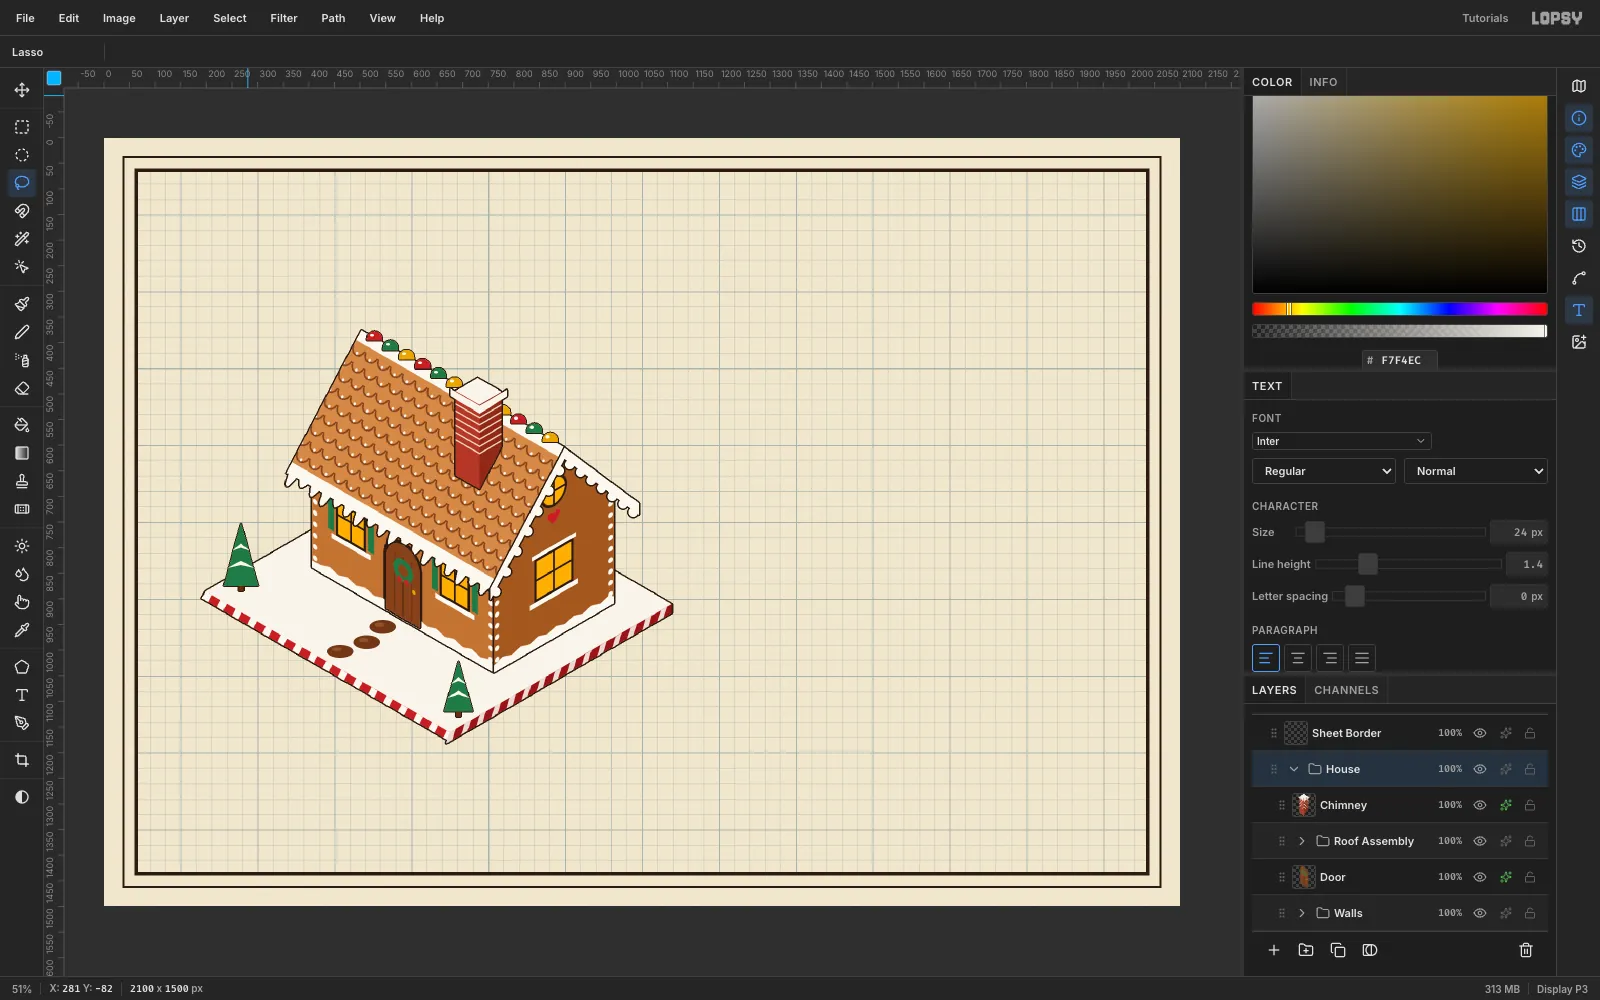
Group the parts
Group the layers into sub-assemblies. For each group, click the first layer, Shift-click the last, and choose Layer → Group Layers:
- Base: Board + Trees
- Walls: Side Wall + Gable Wall
- Roof Assembly: Roof + Roof Rake + Gumdrops
Collapse those three groups. Then click Base, Shift-click Chimney and group everything into House.
-
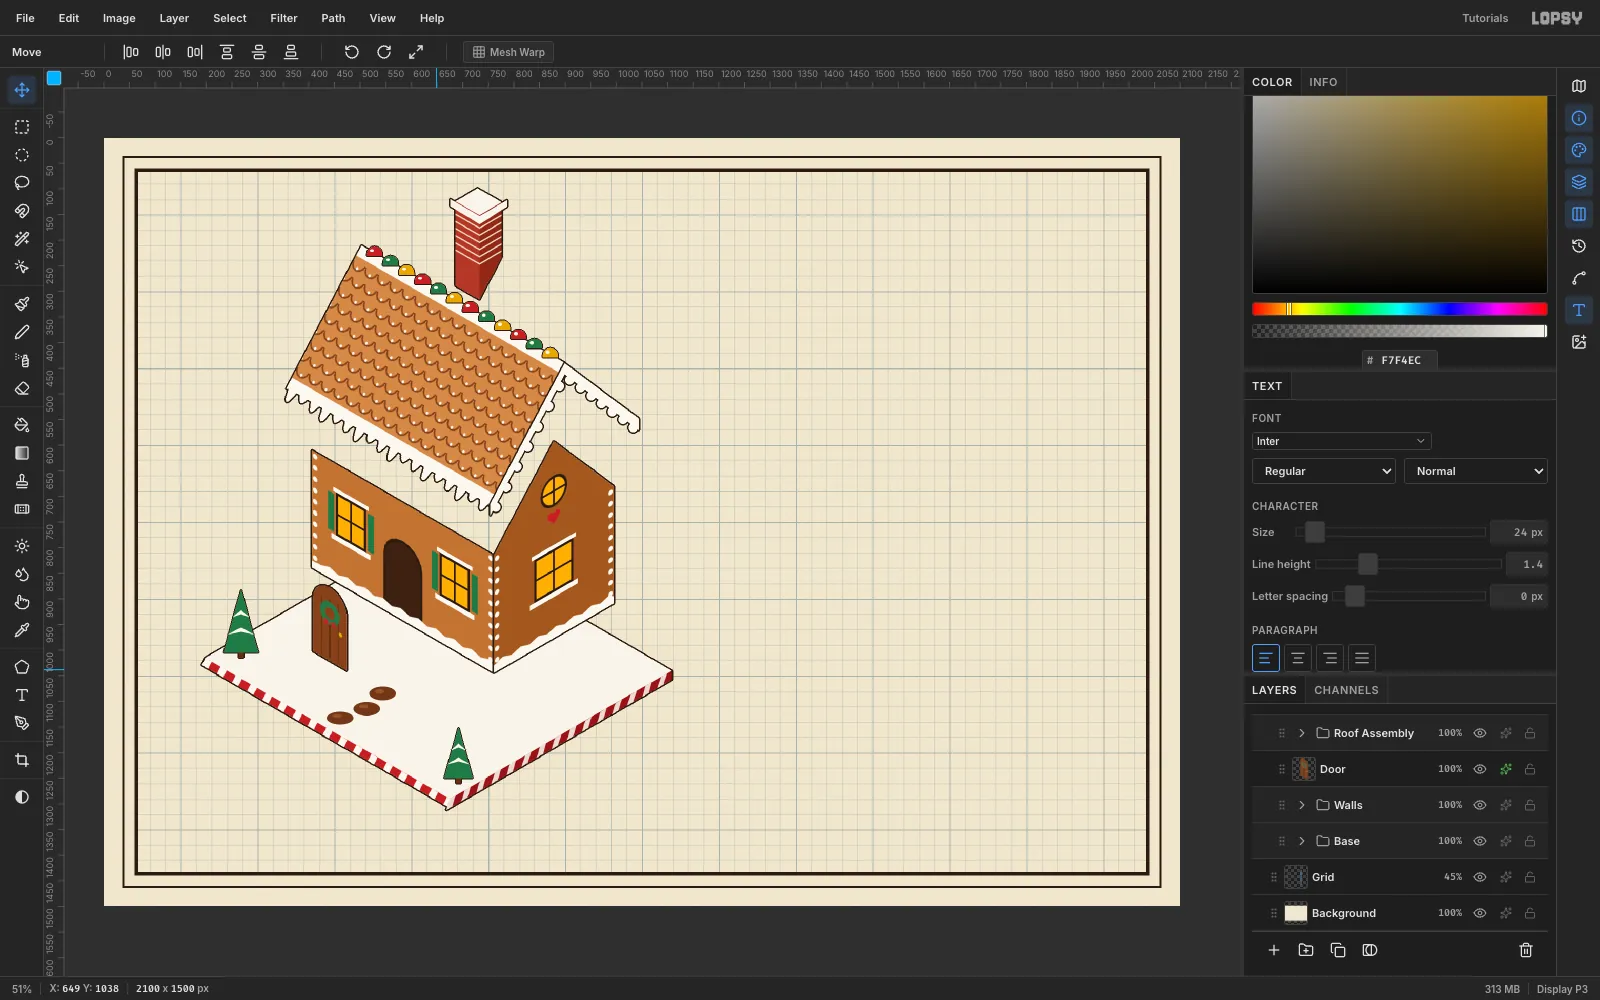
Explode the house with group moves
Now take the kit apart. Select a group or layer, switch to Move and drag. Finish each move with arrow keys (Shift+arrow moves 10 px) for exact distances:
- Roof Assembly: up 165 px
- Chimney: up 370 px (you'll lift it once more later)
- Door: out along the left isometric axis, −143, +83
- Base: down 130 px
Every move of a group carries its children with it. Cmd+Z and Cmd+Shift+Z step through the moves cleanly.
-
Draw dashed assembly lines
Add an
Assembly Lineslayer above House. Use a hard Brush at Size 2 in ink and draw each dash as a short drag, 14 px on and 9 px off:- straight up from each visible wall-top corner to the roof's underside
- straight down from each wall-bottom corner to the board
- three lines guiding the door home
On the Board layer, dash the walls' footprint onto the snow in grey
#8A7F72. That shows where the walls land.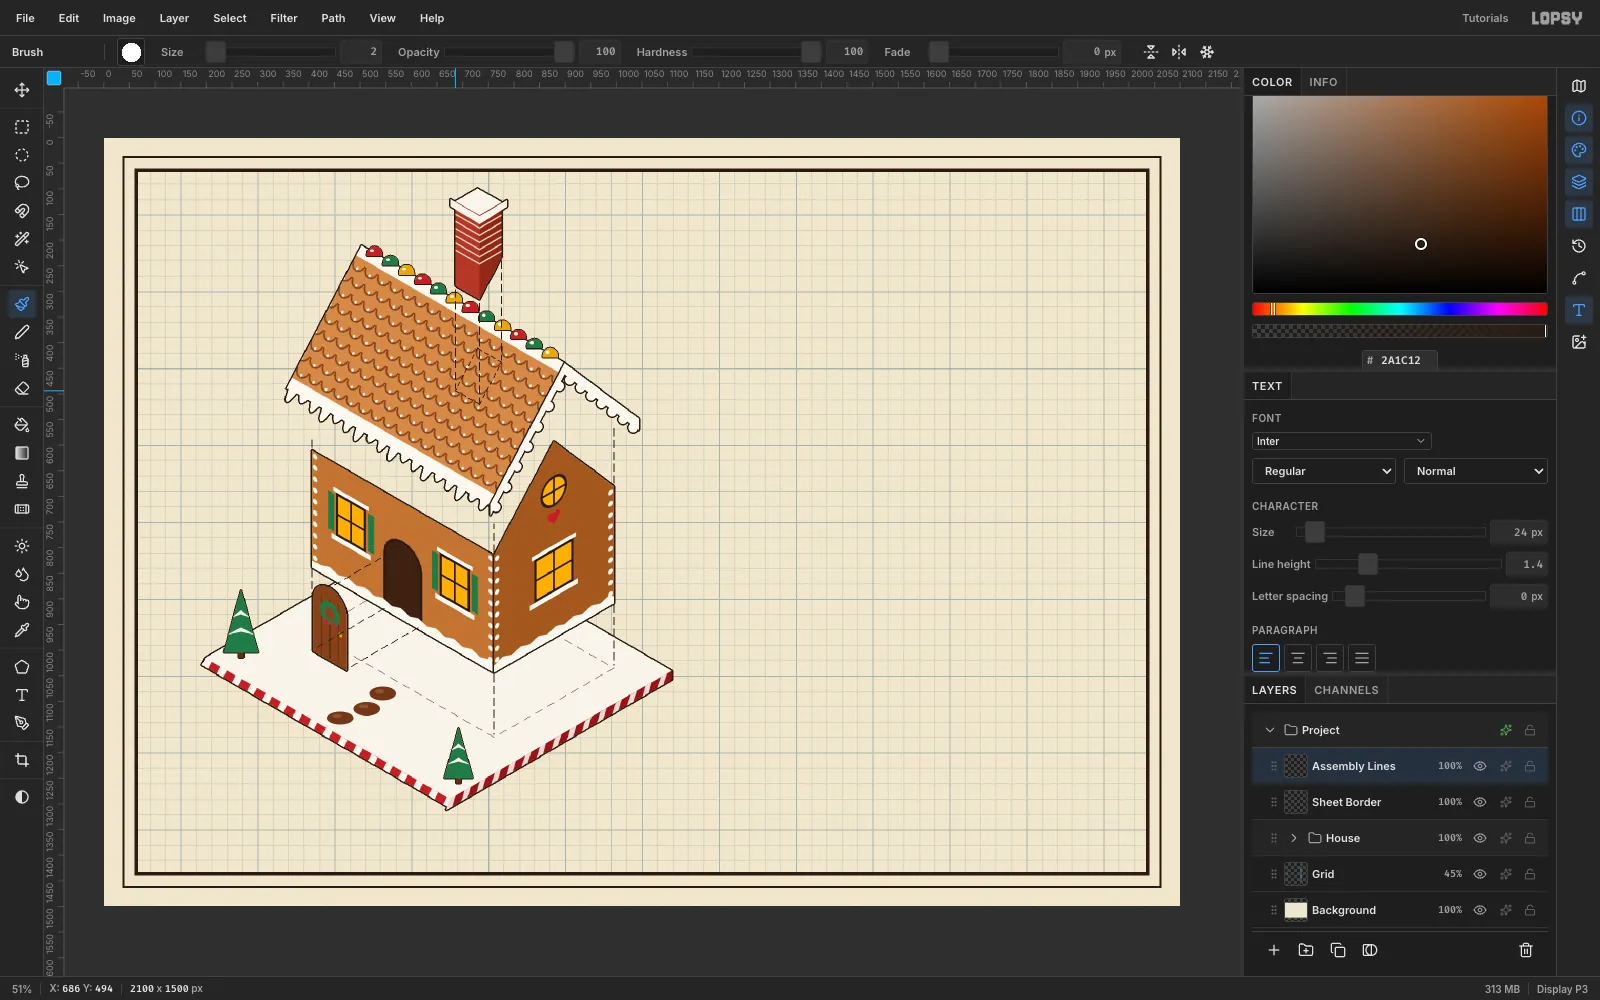
-
Start the X-ray detail view
A detail view blows up one joint in a circle. Here it's an "X-ray" of how the walls are glued.
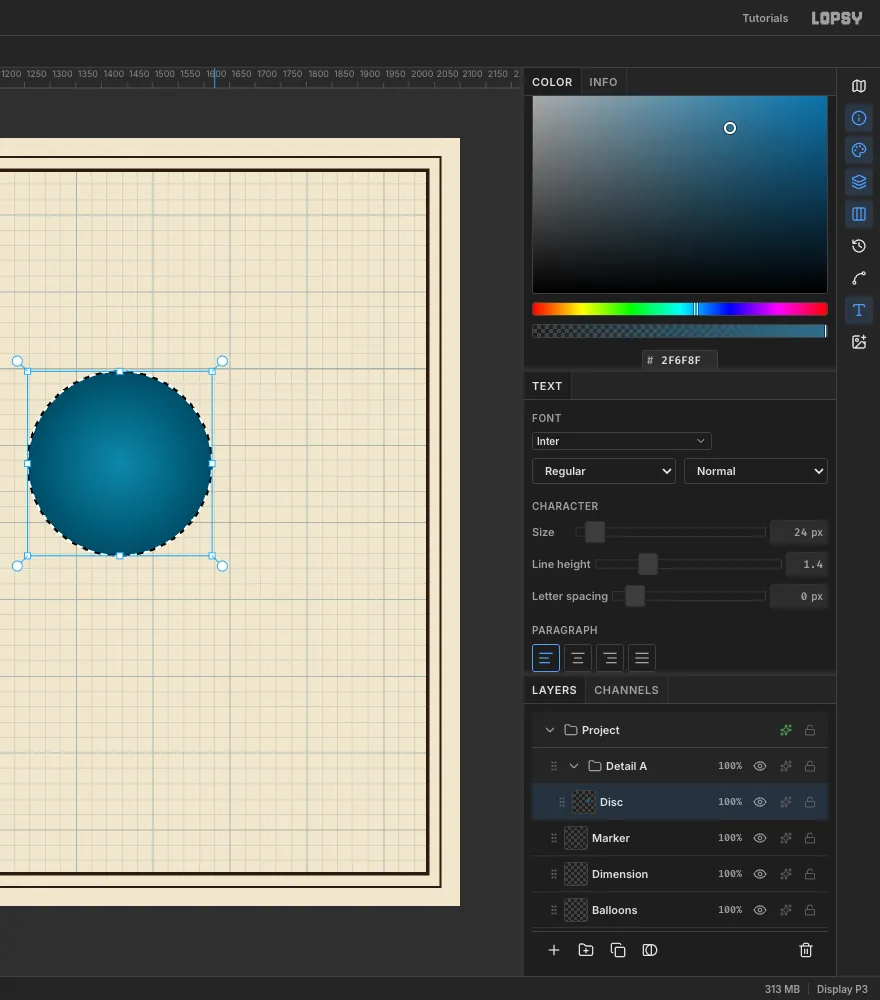
Make a new group called
Detail A, add a layer calledDisc, and draw an elliptical marquee of radius 180 centred at (1436, 636). Then:- Pick the Gradient tool and set Type to Radial. In Advanced…, set the stops to
#3E86A6→#1D4A63. - Drag from the centre to the edge.
- Give the disc a Stroke of 4 px ink.
- Pick the Gradient tool and set Type to Radial. In Advanced…, set the stops to
-
Hatch the section and pipe the icing
Section views mark cut material with 45° hatching:
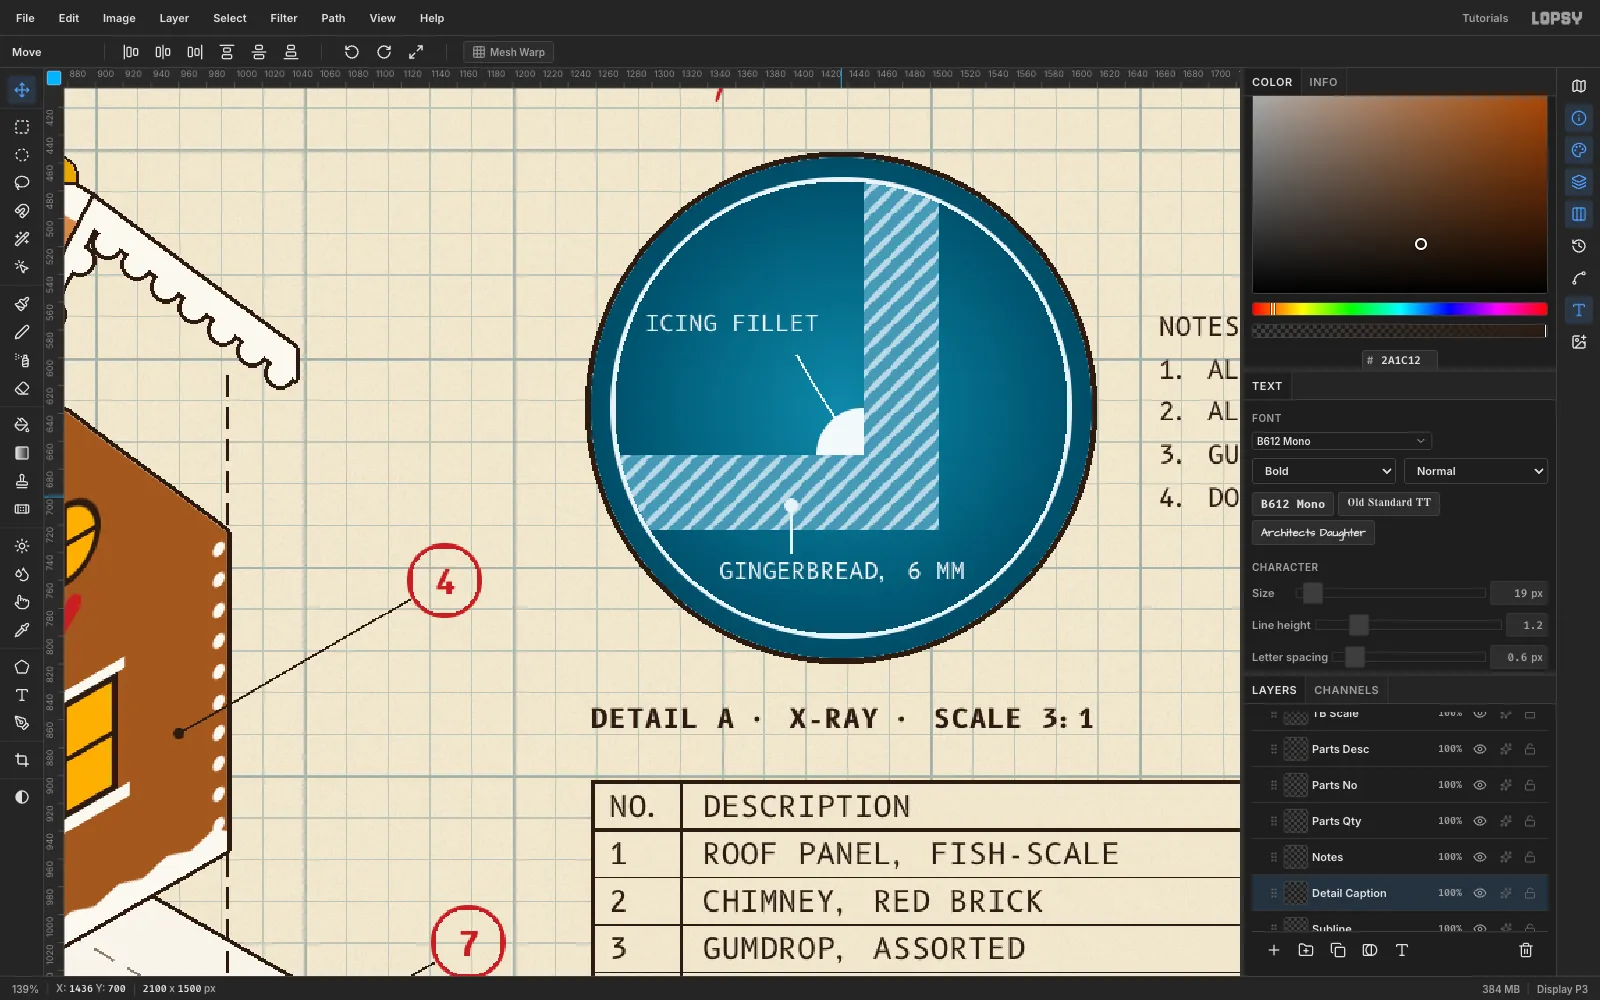
- Section layer: fill an L of two wall slabs in
#5C97B4. Clip it to the circle with an ellipse marquee of radius 163, then Select → Inverse and Delete. - Hatch tile: make a 16 × 16 pattern tile holding three thin white bands along x + y = 0, 16 and 32. Two of them clip the corners, so the lines join seamlessly across tiles.
- Hatch layer: Cmd-click the Section thumbnail to select the slabs. On a new
Hatchlayer, use Fill with Pattern… with the 16 × 16 tile, then set the layer to 70%. - Icing layer: fill a white circle of radius 34 in the inside corner. Cmd-click the Section thumbnail again and press Delete. The walls cut it back to a quarter-round icing bead.
- Ring: add a thin white ring at radius 166.
Label the section in B612 Mono 16 px white, each label with a short leader.
- Section layer: fill an L of two wall slabs in
-
Rule up the parts list and title block
Every engineering sheet ends in a title block in its bottom-right corner:
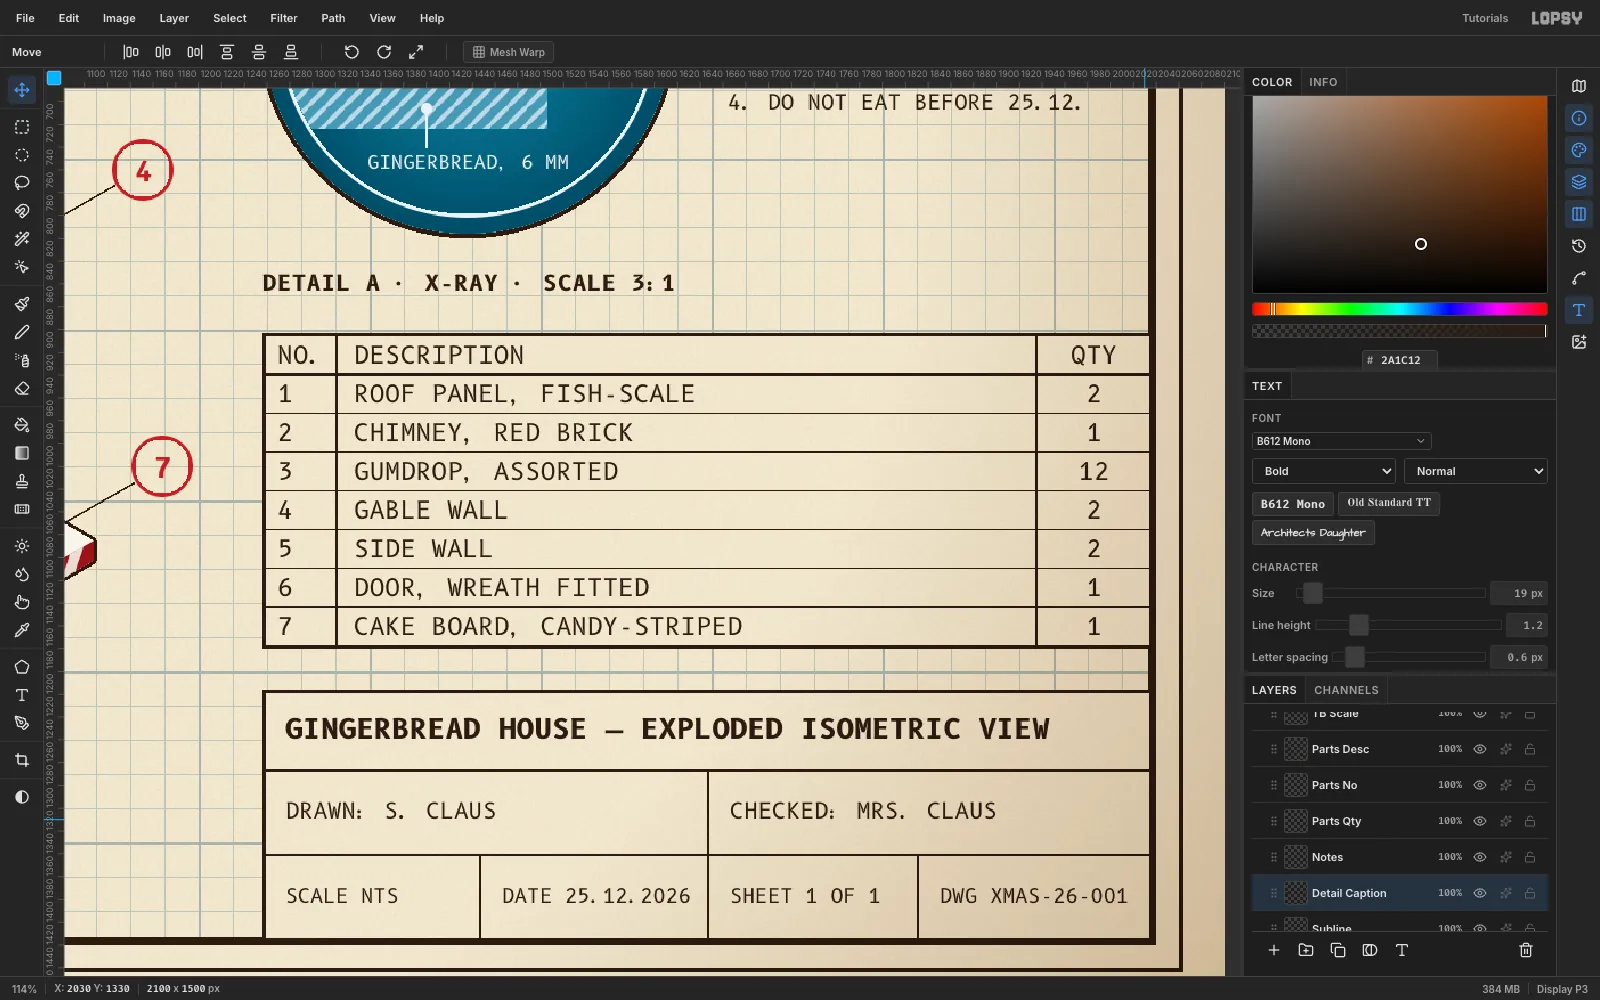
- On a
Table Filllayer, fill paper-coloured rectangles behind the parts list and the title block. Keep them inside the frame, so the thick border still shows. - On a
Table Ruleslayer, draw the rules with filled marquees: 3 px for the outer lines and header, 1 px between rows.
Set the type in B612 Mono:
- Parts list: 21 px with Line height 1.62, so each 34 px row holds one line. Make the QTY column an area text box (drag with the Text tool) set to Align center, so
12and2centre in their cells. - Title block: 24 px bold for the title, and 19 px and 17 px for the cells.
The jokes live here too: DRAWN S. CLAUS, CHECKED MRS. CLAUS, SCALE NTS.
- On a
-
Set the headline and notes
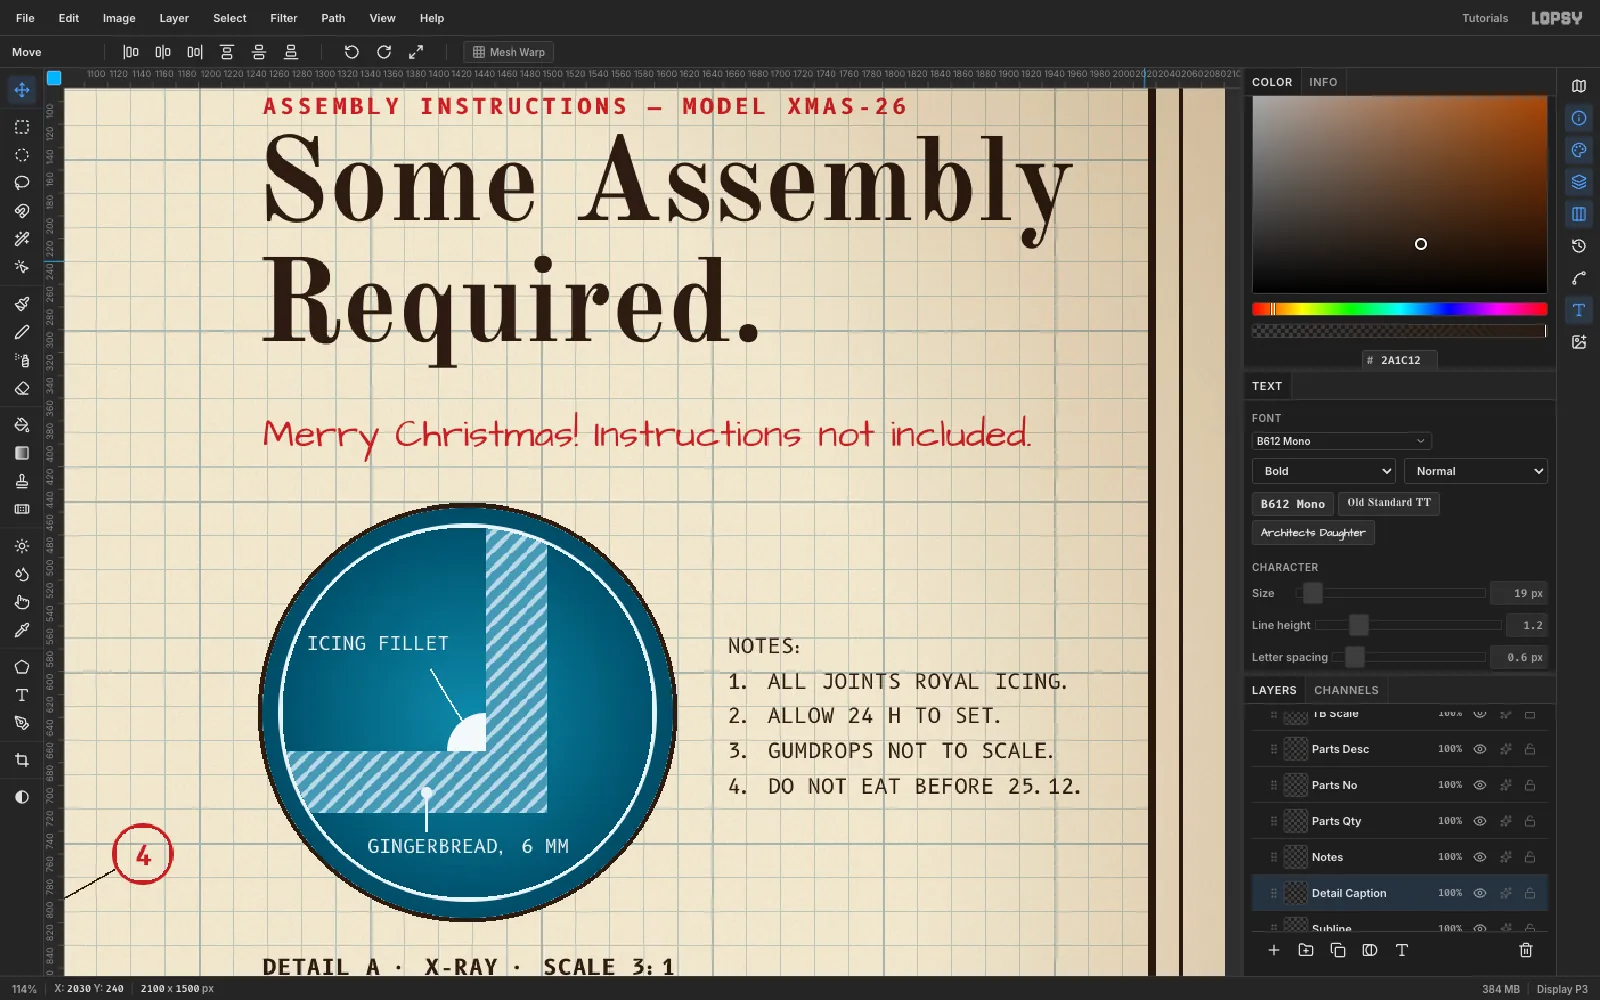
Every block in the right column shares one left edge at x 1256. Nudge each one to it with the arrow keys.
- Kicker:
ASSEMBLY INSTRUCTIONS — MODEL XMAS-26in B612 Mono Bold 19, red, with Letter spacing 3. - Headline:
Some Assembly/Required.in Old Standard TT Bold 104 with Line height 1.02. - Greeting:
Merry Christmas! Instructions not included.in Architects Daughter 34, red. It's the drafter's handwriting. - Notes: B612 Mono 18 at Line height 1.7, beside the detail circle. For example, 4. DO NOT EAT BEFORE 25.12.
- Caption:
DETAIL A · X-RAY · SCALE 3:1under the circle. Add Letter spacing 0.6 so it spans exactly the circle's 360 px width.
- Kicker:
-
Rebalance the drawing with one multi-select move
Step back and check the balance. Here the lifted chimney crowded the ridge, and there was spare room at the bottom of the sheet.
- Click House, then Cmd-click every other layer of the drawing: Assembly Lines, plus any callout layers you've already added (the screenshot has the balloons, Dimension and the detail marker selected too).
- With the Move tool, drag down 45 px. Every selected layer moves together, and one undo reverts them all.
- Expand House and lift Chimney another 50 px, so its base clears the gumdrops.
- Extend its three dashed drop lines to a dashed footprint on the roof.
-
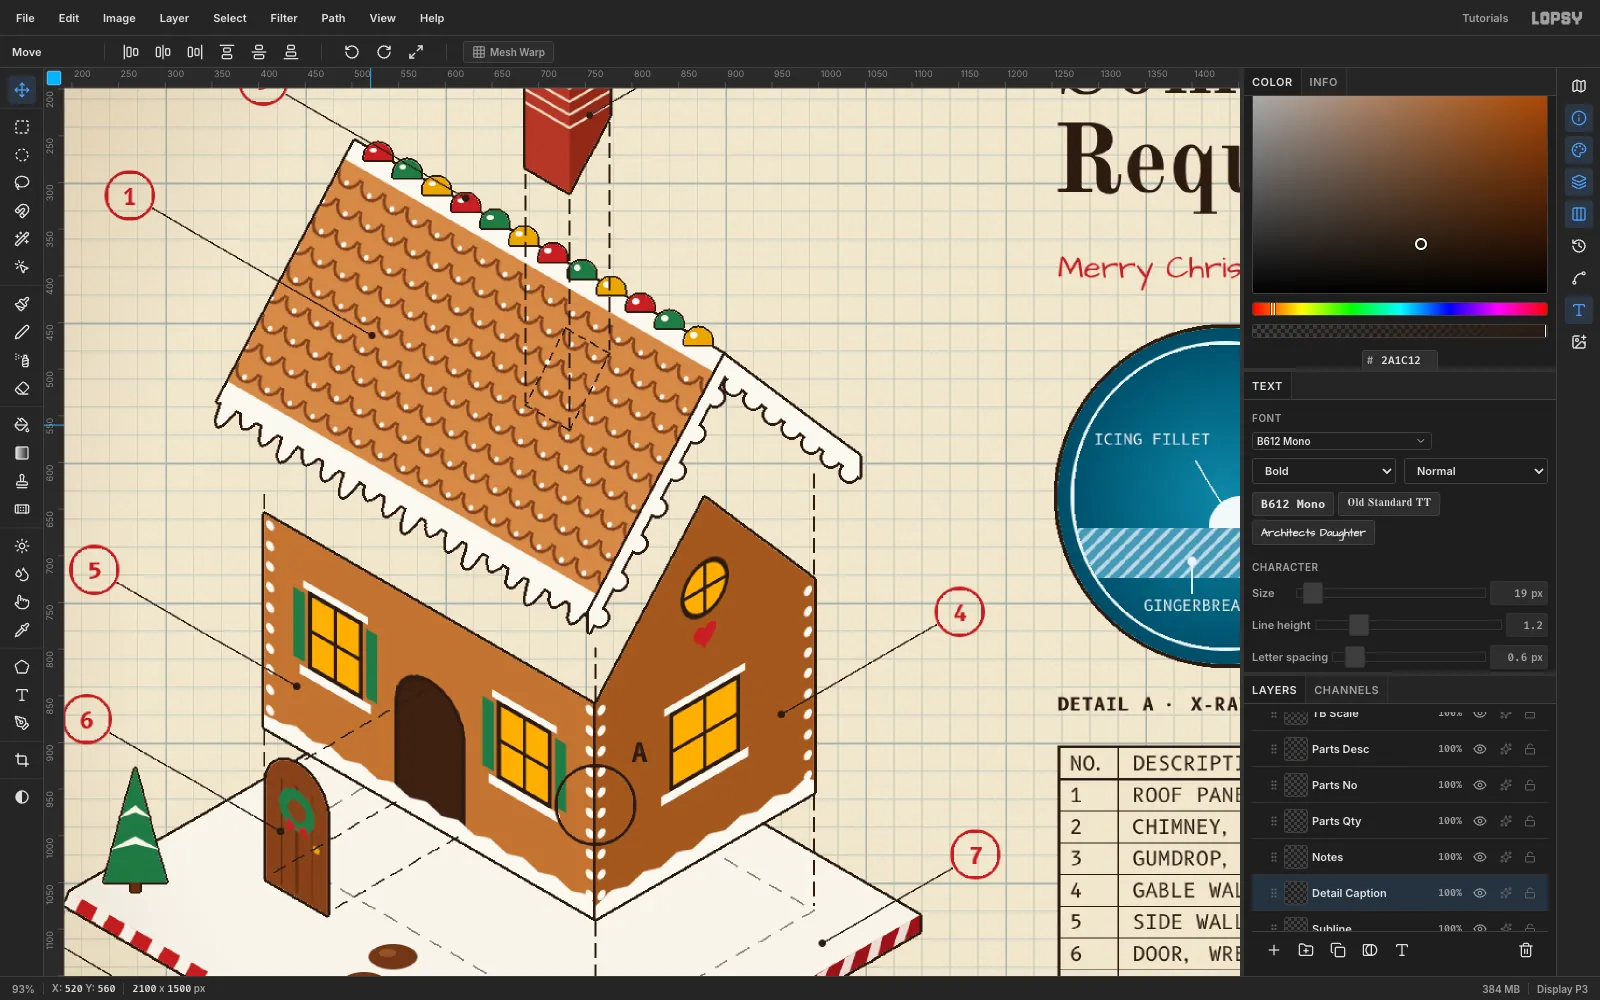
Call out the parts with balloons
Balloons are 27 px red rings, made with an ellipse fill, Shrink by 3 and Delete. The numbers are B612 Mono Bold 24, centred with arrow nudges.
Keep the leaders consistent. Every leader is a 1.8 px ink line at exactly 30°, the isometric angle, and ends in a 4 px dot on the part. Parallel leaders make the sheet look engineered rather than scribbled. Number the balloons in the same order as the parts list.
-
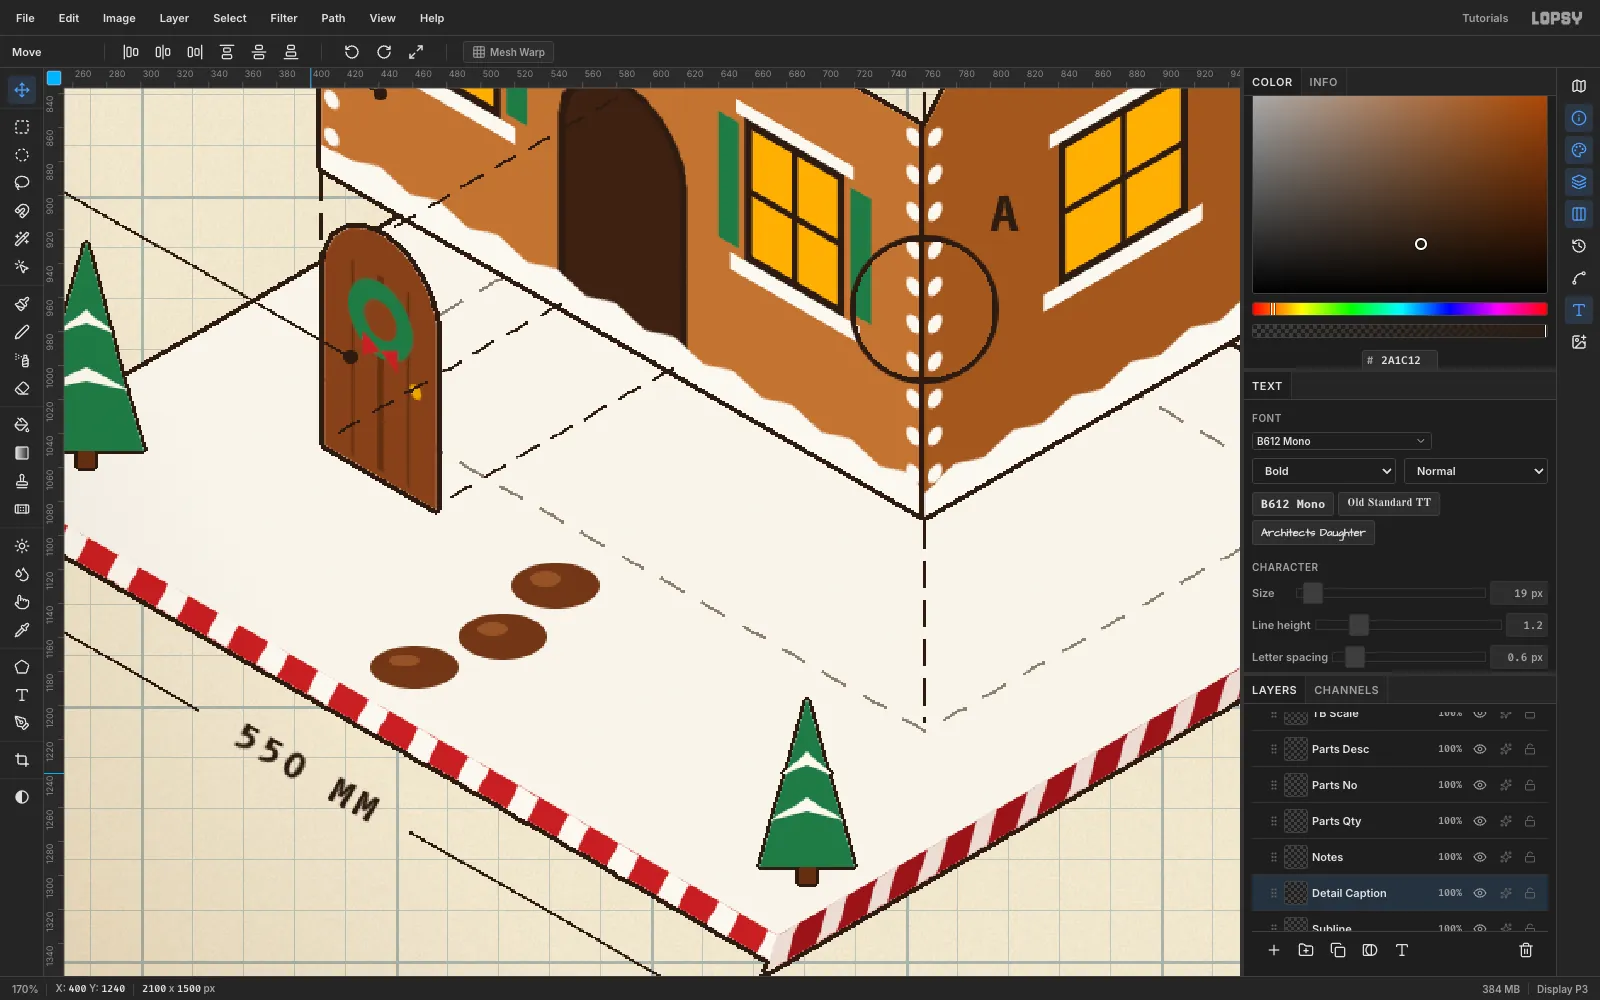
Add a dimension with a rotated label
Run a dimension line parallel to the board's front edge:
- Draw two extension lines that start just clear of the board corners.
- Draw the dimension line with a gap in the middle, and lasso a small ink triangle at each end for the arrowheads.
- Type
550 MMin B612 Mono Bold 20 in empty space, then click Rasterize Layer. - Marquee the label, switch to Move and drag a rotation handle while holding Cmd. That snaps the angle to 15° steps, so it lands on exactly 30°.
- Press Cmd+D and move the label into the gap.
-
Age the paper and finish
Add a top layer called
Vignette. Marquee the whole canvas, then pick the Gradient tool set to Radial. In Advanced…, use three stops of#8A6A3A:- 0% opacity at 0
- 0% opacity at 0.6
- 100% opacity at 1
Drag from the centre to beyond a corner. Set the layer to Multiply at 35%. The edges warm up like an old blueprint.
Export with File → Quick Export PNG and save the project with File → Save Project.