Design a Neubrutalist Christmas Card
Make a neubrutalist holiday card in Lopsy with an upside-down Christmas tree in a retro app window, halftone dots, hard shadows and chunky type.
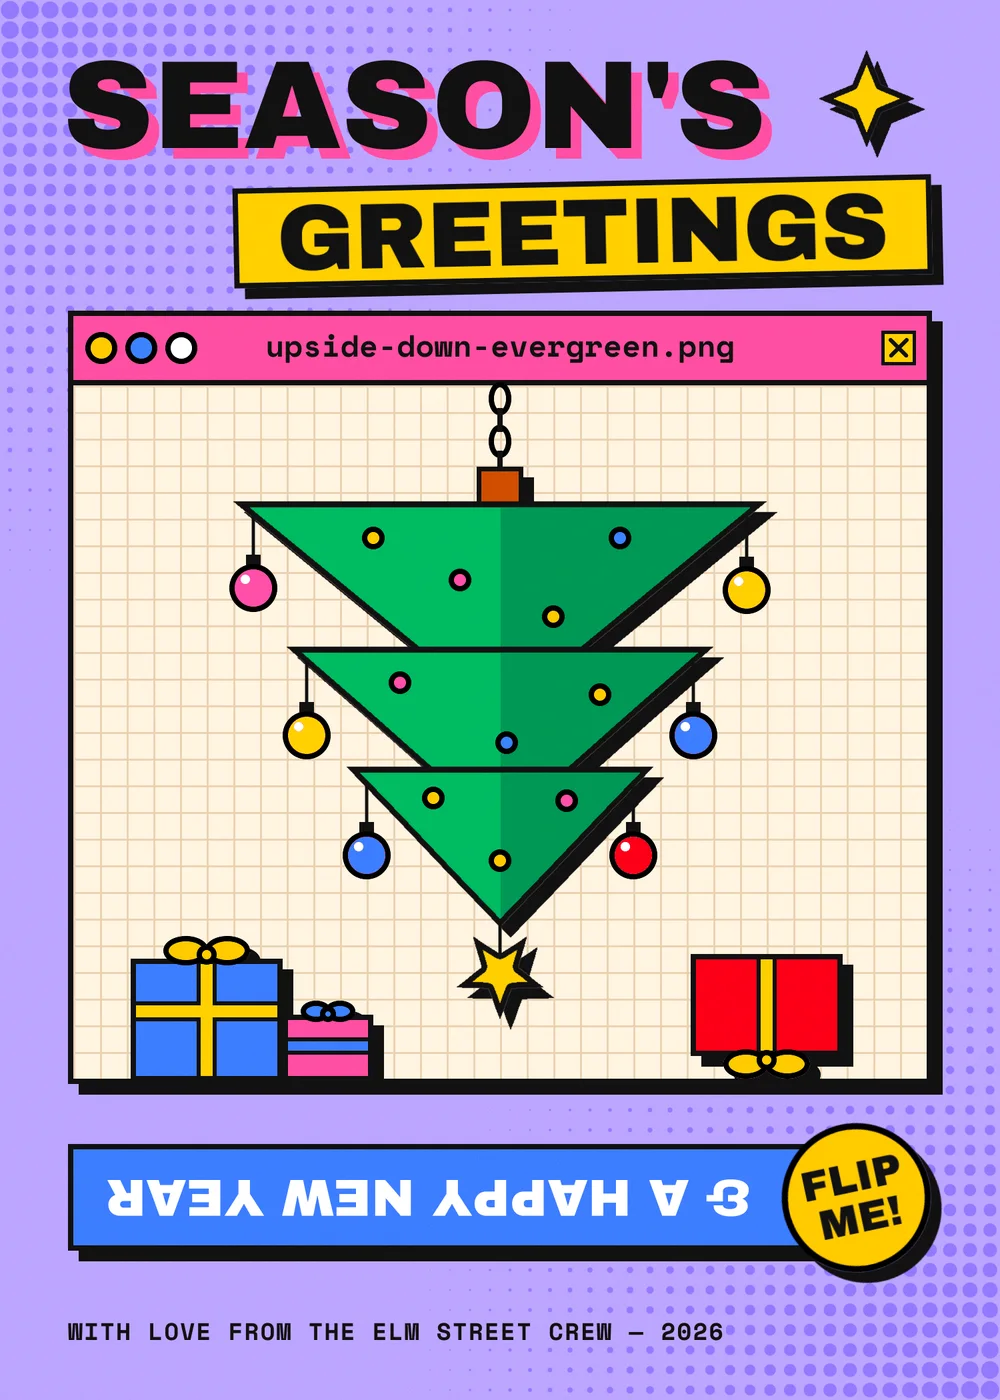
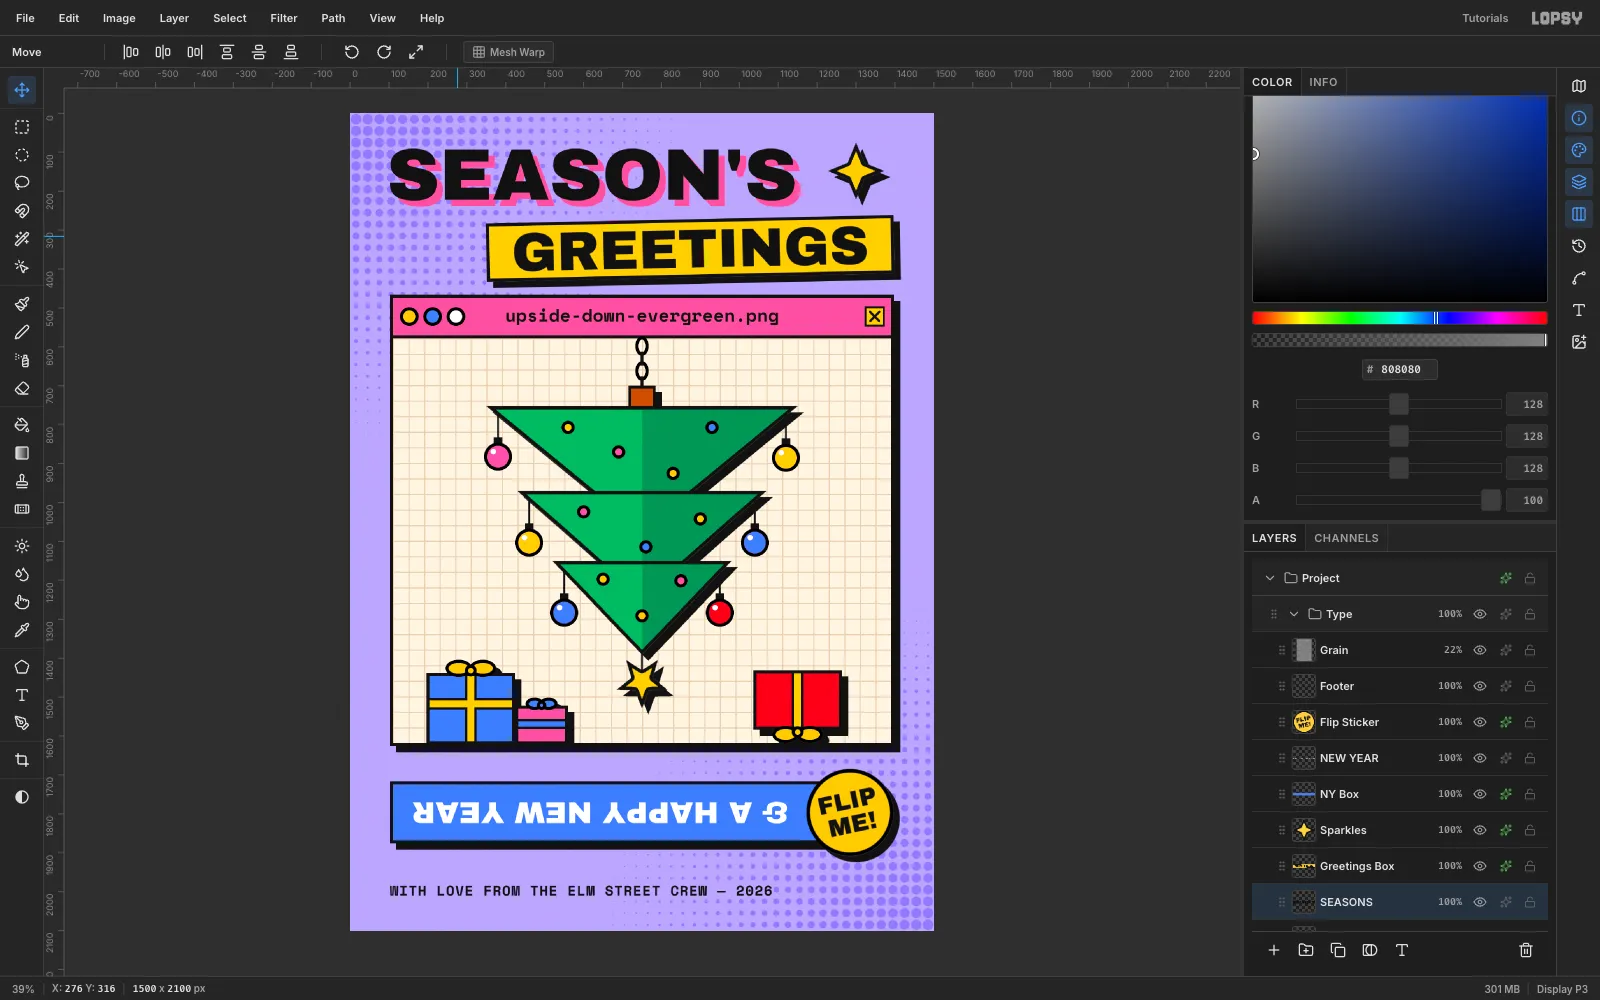
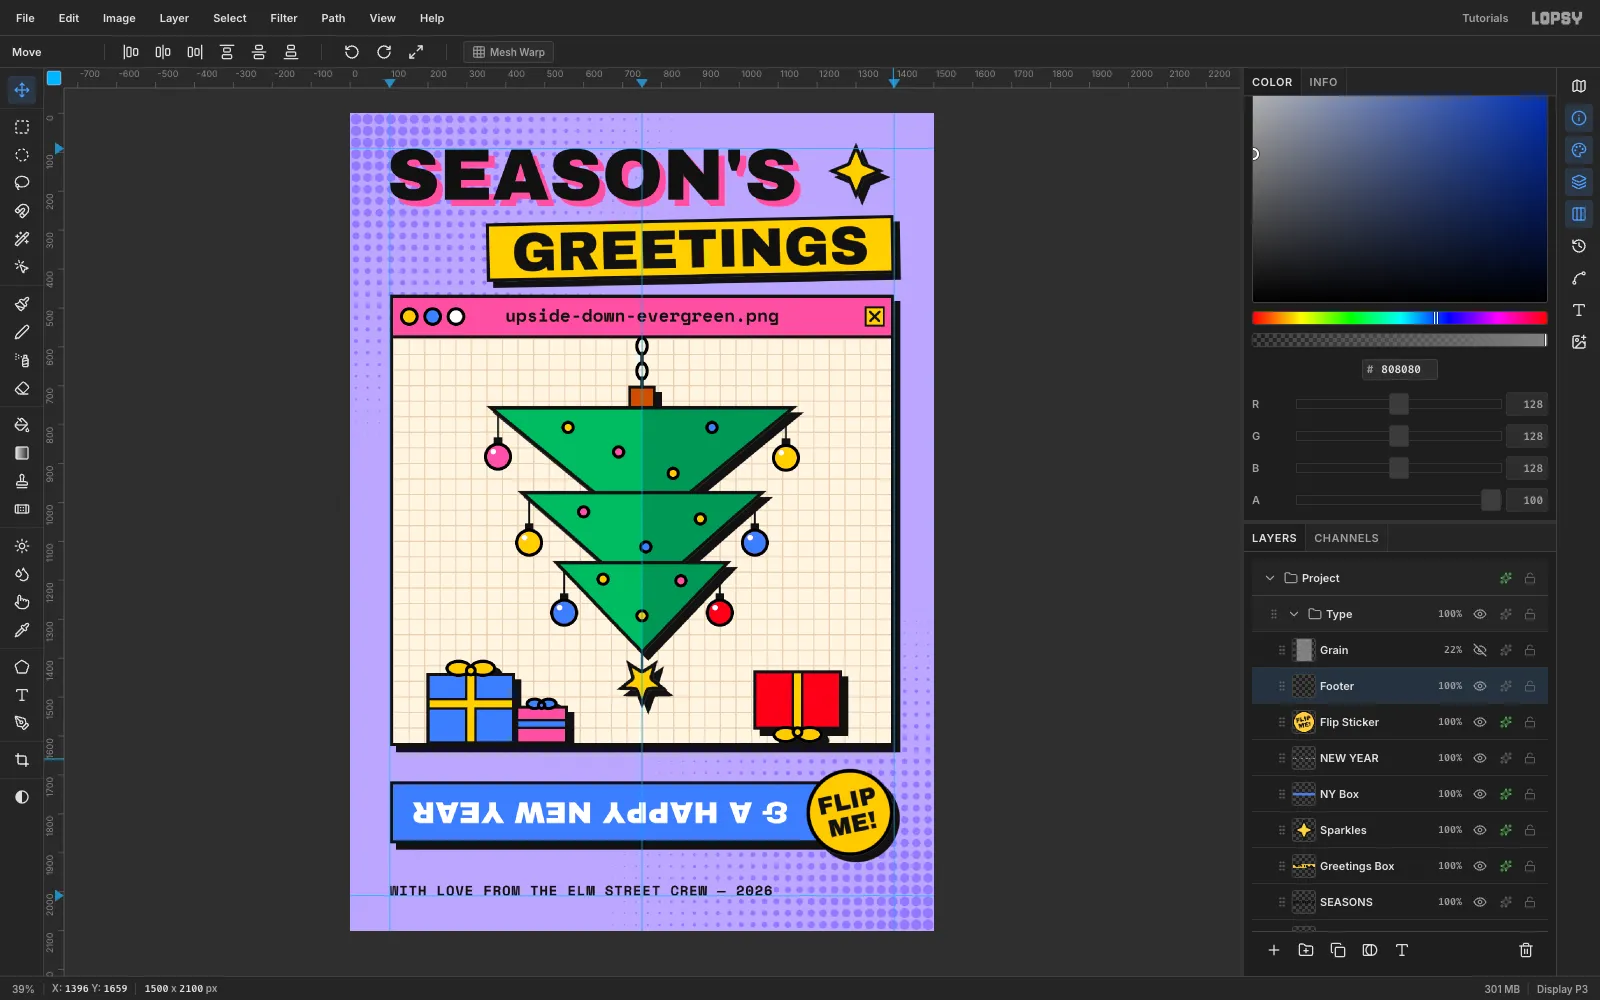
Neubrutalism is the loud cousin of flat design. It uses saturated colour blocks, thick black outlines, hard shadows with no blur, and big plain type. It started on the web, so it works well when a card looks like a piece of software. In this tutorial you'll build a holiday card that pretends to be an app window called upside-down-evergreen.png. Inside the window, a Christmas tree hangs upside down from the ceiling. The New Year greeting is printed upside down too, with a sticker telling the reader to flip the card.
Two rules keep the style consistent. Every outline is 8 px black (#111111). Every shadow is a Drop Shadow with Offset 16 / 16, Blur 0, Opacity 100 in the same black. Set those numbers once and reuse them everywhere.
-
Fill the background and draw two corner gradients
Create a 1500 × 2100 document (a 5 × 7 card) with a white background. Select
Background, set the foreground to lavender#B8A6FF, and choose Edit → Fill.Rename
Layer 1toHalftone. Pick the Gradient tool, set Type to Radial, and use Advanced… to set both stops to black, the first at 100% opacity and the second at 0%. Drag one gradient from the top-left corner out about 900 px. Drag a second from the bottom-right corner.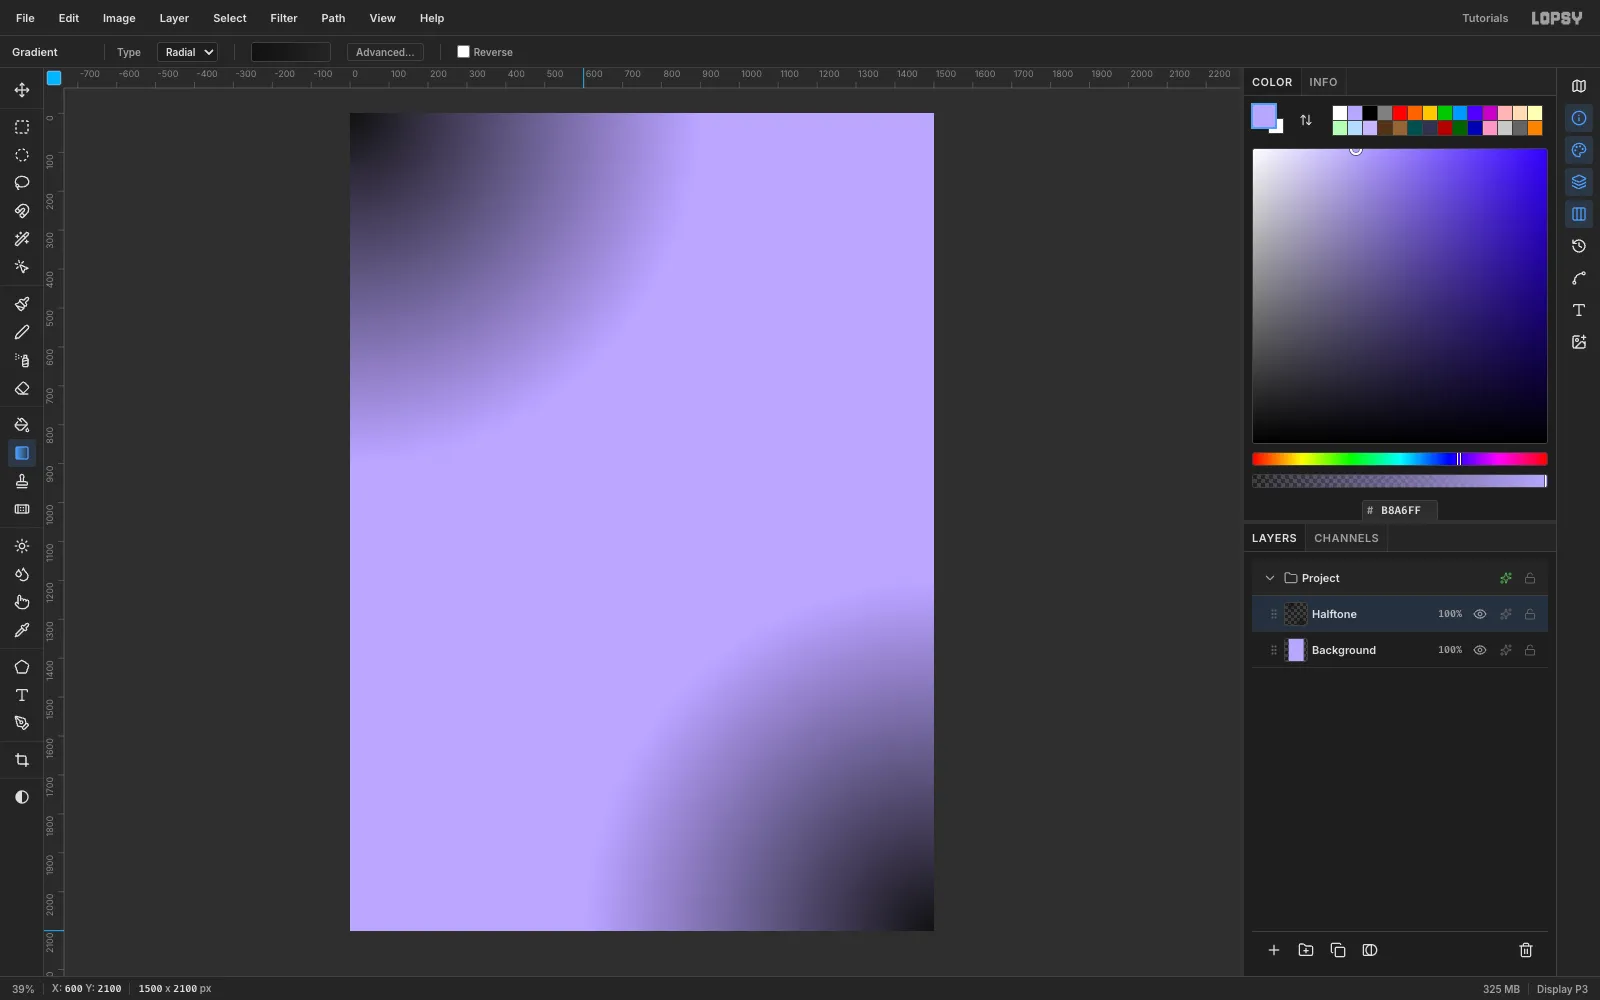
-
Turn the gradients into halftone dots
Halftone sizes each dot by the brightness underneath it, not by its transparency. So the gradients need something white behind them. Add a layer under
Halftone, fill it white, then selectHalftoneand choose Layer → Merge Down.Open Filter → Halftone and set Dot Size 30, Angle 0 and Softness 1. At 0° the dots sit in neat rows, like a newspaper photo. The gaps between the dots come out transparent. Open the layer effects and turn on Color Overlay in
#8F7AF5, so the dots become a darker lavender.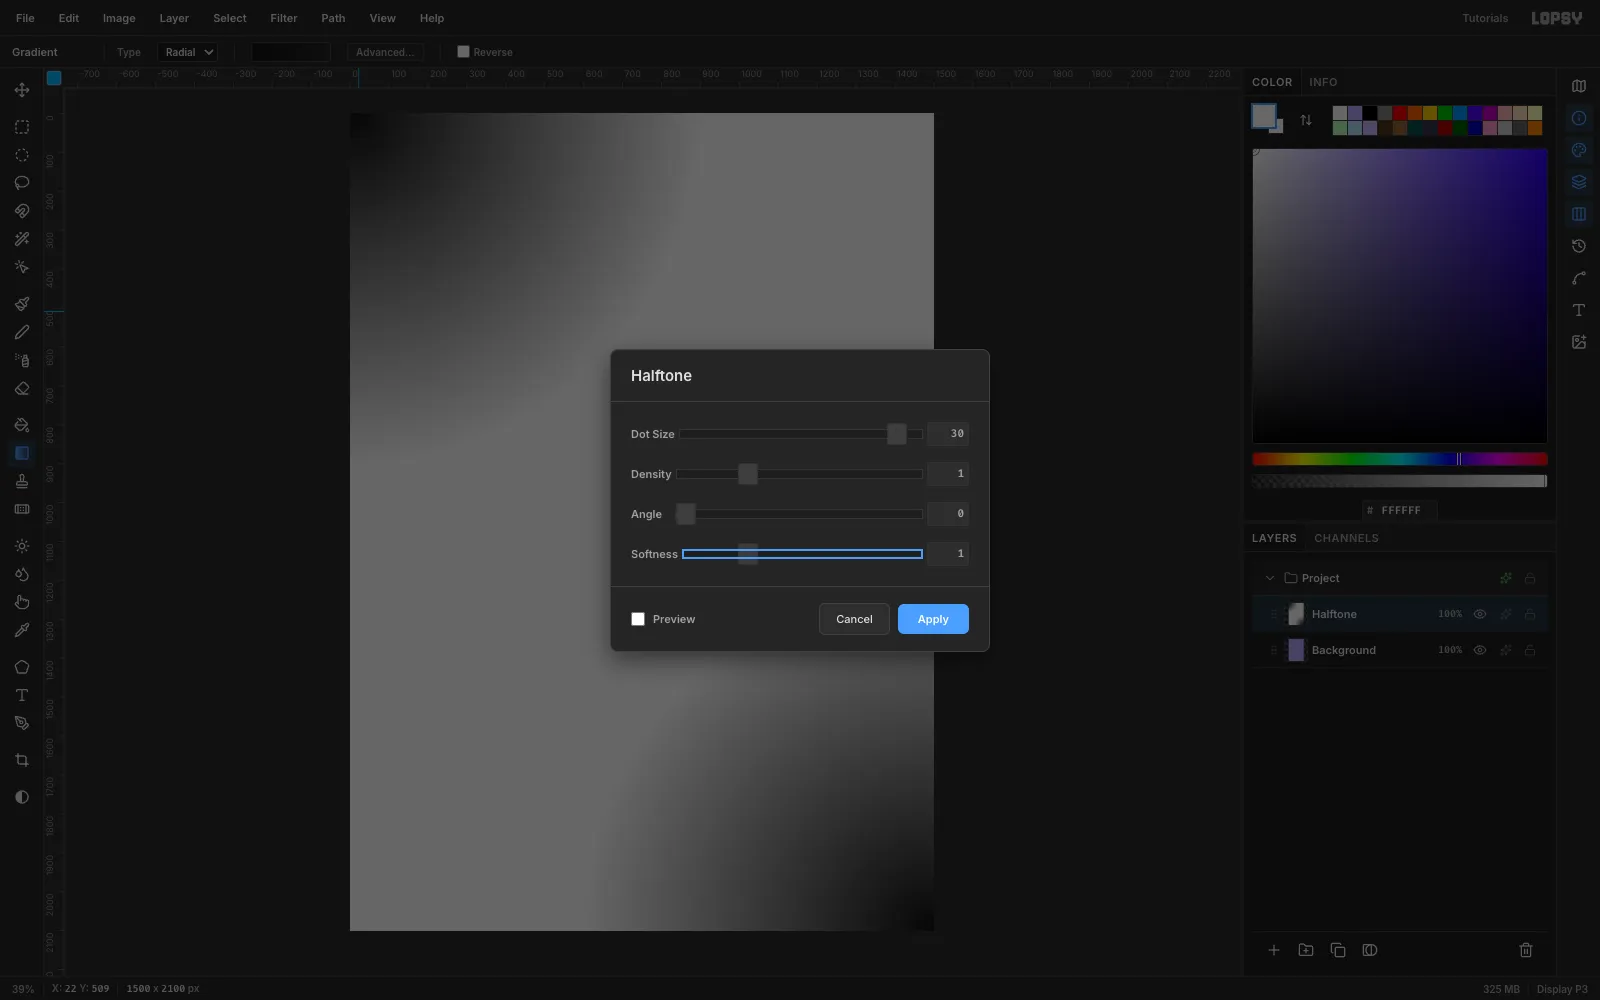
-
Draw the window with grid snapping
Turn on View → Show Grid, set the grid size to 8 px, and tick Snap in the options bar. Click New Group and name it
Window, then add a layer inside it calledWindow Panel.Drag a rectangular marquee roughly from (104, 468) to (1396, 1628). Snap pulls the corners onto the grid, to exactly 102, 466 → 1398, 1626, which is centred on the page. Fill it black. Then untick Snap, draw a marquee 8 px inside the edges (110, 474 → 1390, 1618), and fill it cream
#FFF4E2. That gives the window its 8 px outline. Finish with the standard Drop Shadow.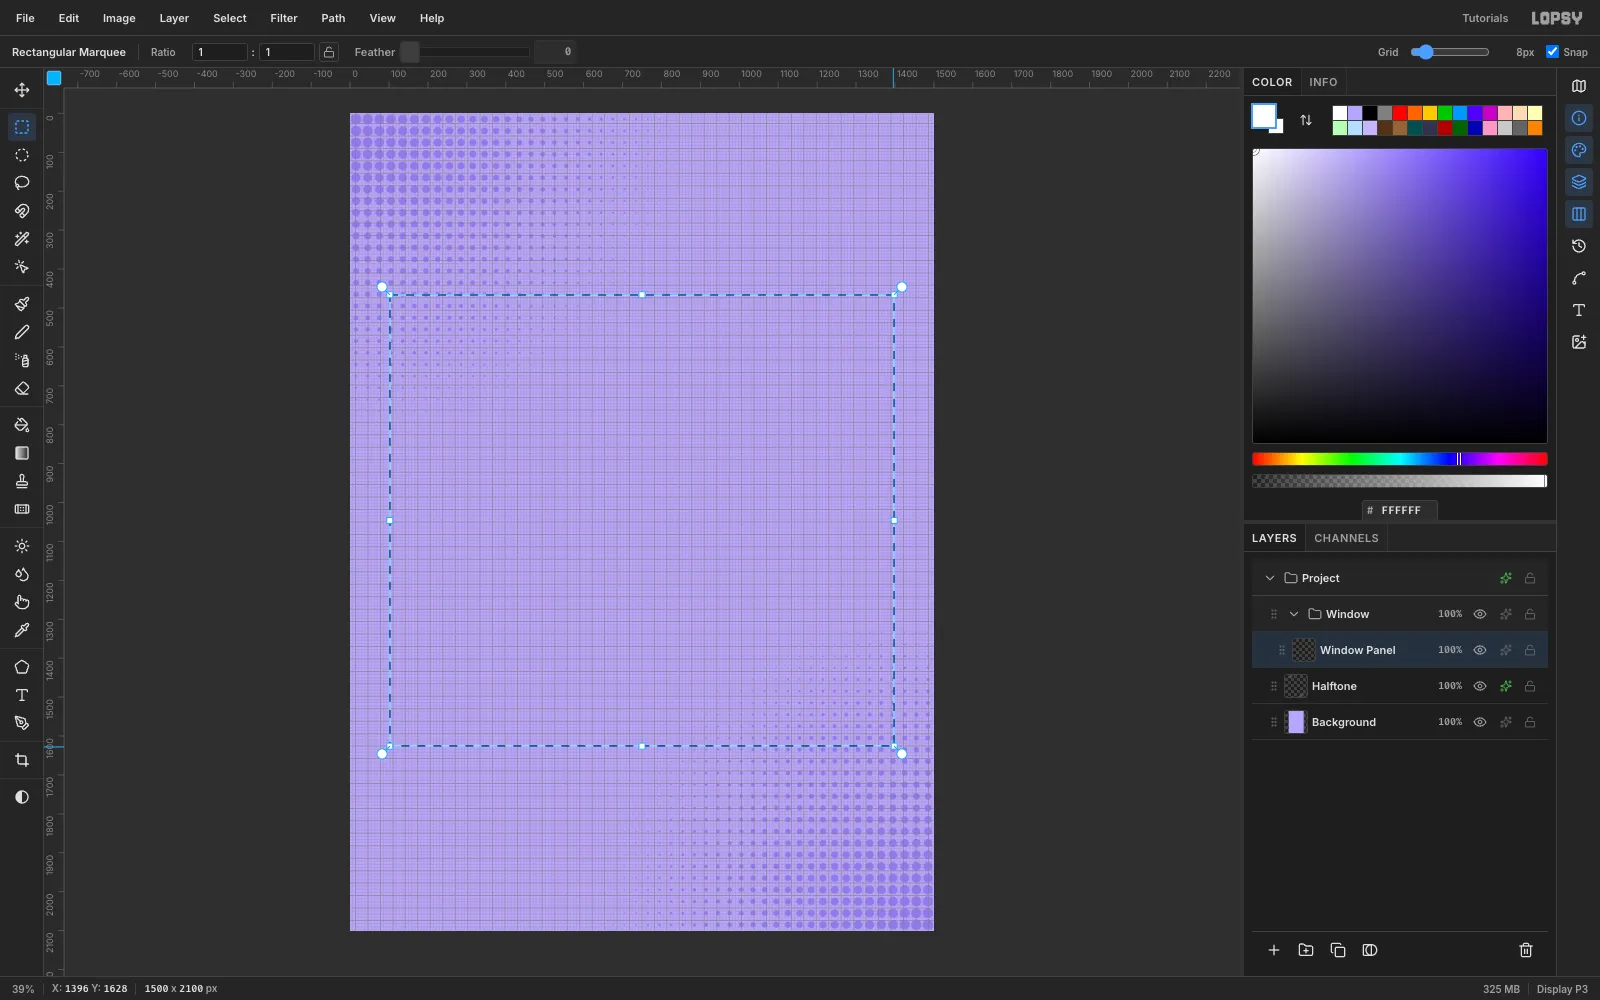
-
Tile graph paper into the window
Make the tile on a temporary layer: a 3 px tan (
#E6D3B6) vertical line at x 30 and a horizontal line at y 18, both inside a 40 × 40 square at the top-left of the canvas. Marquee that square (0, 0 → 40, 40) and choose Edit → Define Pattern, then delete the temporary layer.Add a
Grid Paperlayer, marquee the window's inside (110, 578 → 1390, 1618), and choose Edit → Fill with Pattern…. Patterns tile from the top-left of the document, so those line offsets land a grid line exactly on each inside edge of the window. Full cells from border to border make the paper look deliberate.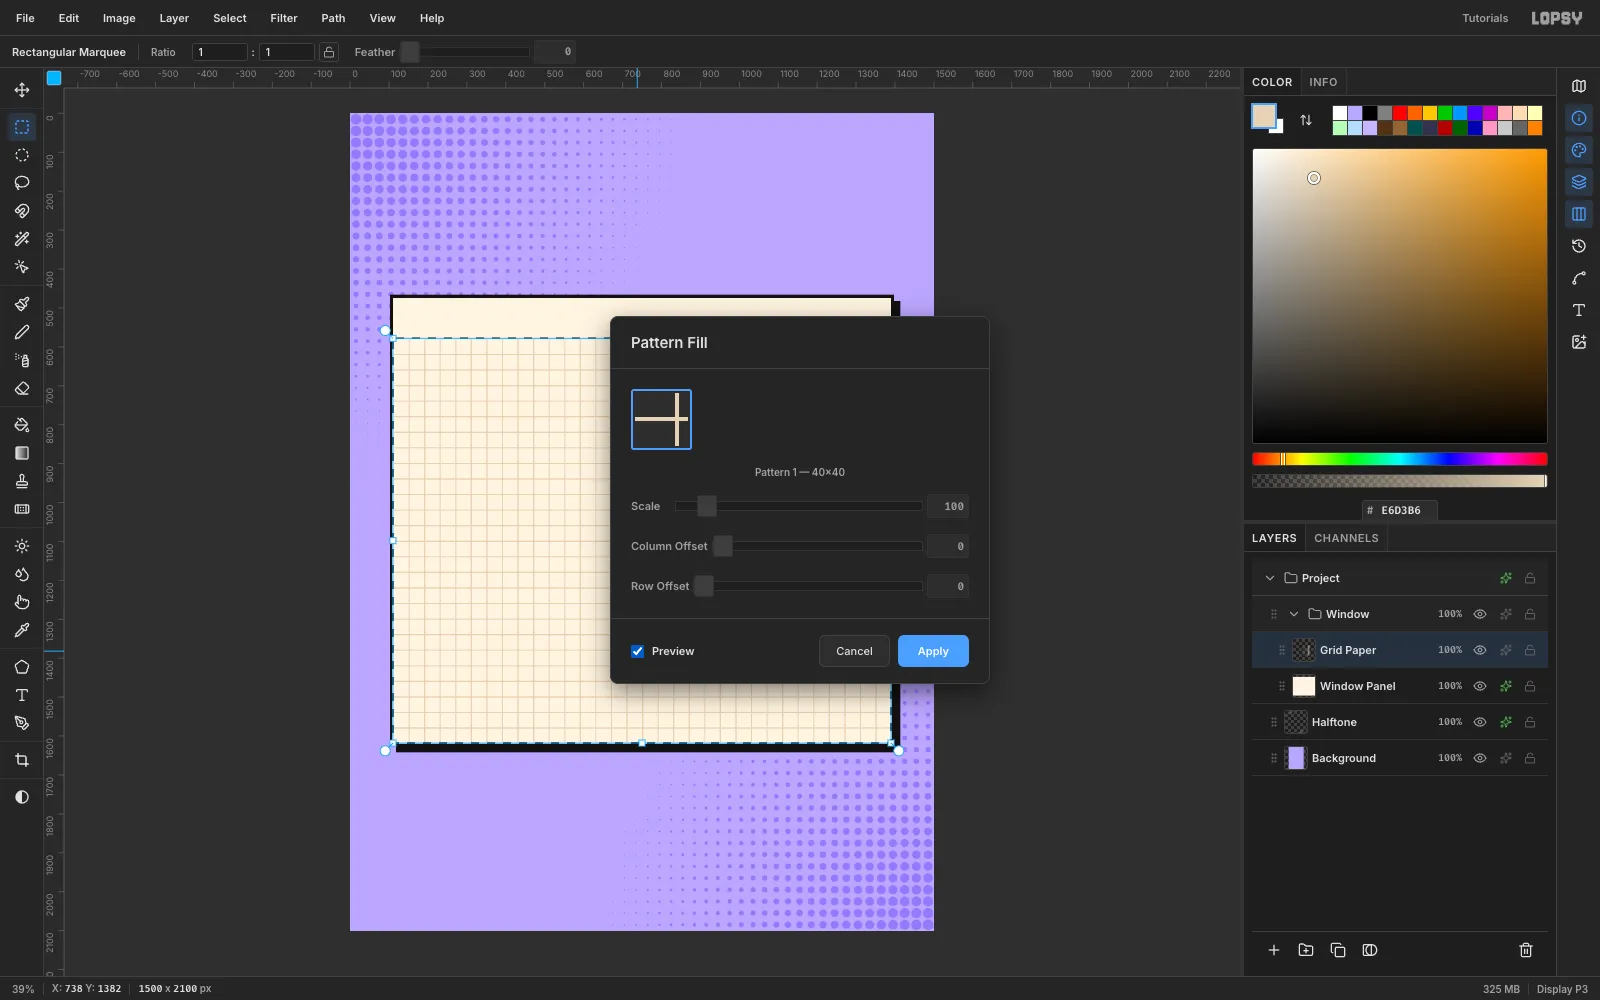
-
Build the title bar
On a
Title Barlayer, fill 110, 474 → 1390, 570 with pink#FF5FA2, and fill a black 8 px strip under it (y 570 → 578).For the window buttons, pick the Shape tool with Ellipse and Pixels. Give it a fill and an 8 px black stroke. Shapes draw from the centre out, so drag 20 px out from (152, 522), (212, 522) and (272, 522), changing the fill to yellow, blue and white in between. Make the close box from a black square and a smaller yellow one, with two 7 px Brush lines for the ×.
Type
upside-down-evergreen.pngin Space Mono Bold at 46 px. Then drag it with the Move tool until its centre sits at (750, 522), the middle of the bar.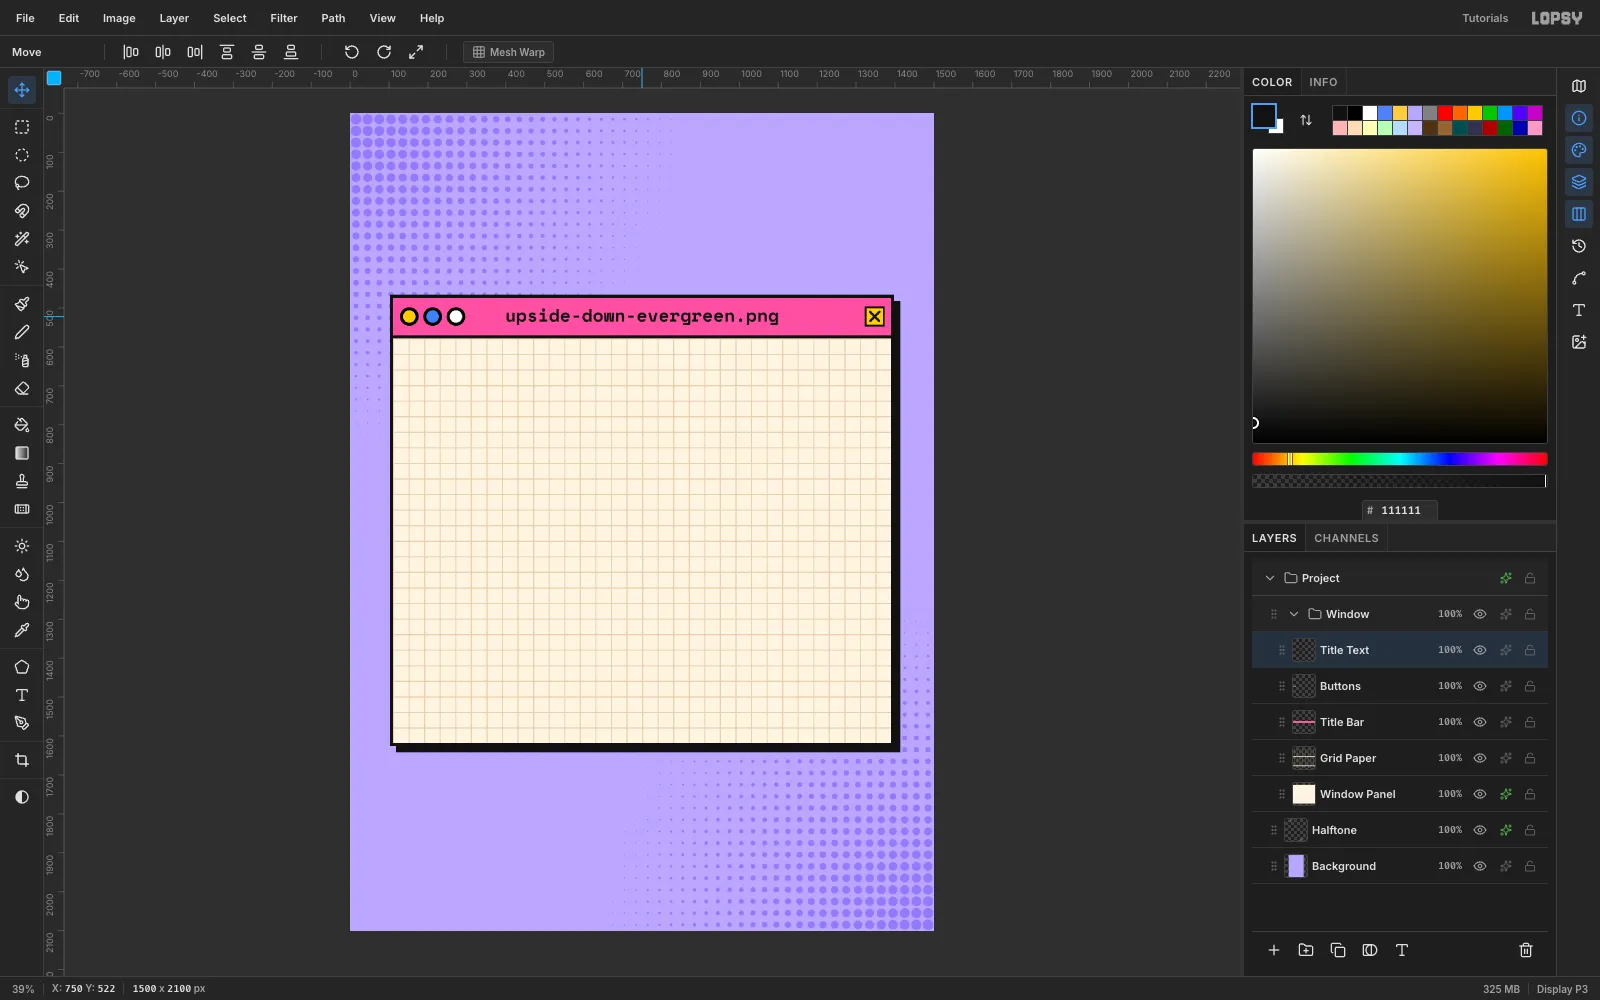
-
Draw the first tier of the tree
Make a
Treegroup insideWindow. On aChainlayer, draw two 13 × 21 px ellipses with the Shape tool (click Remove fill, keep the 8 px stroke), and join them with 8 px black bars. On aTrunklayer, draw a black rectangle with a burnt orange (#C2561B) one inside it.A tree hanging upside down is widest at the top. On a
Tier 1layer, draw the downward triangle (350, 752), (1150, 752), (750, 1080) with the Lasso. Choose Select → Feather… 1 px, so the diagonal edges are smooth, and fill it black. Lasso the same triangle again, then choose Select → Shrink… 8 px, Feather 1 px, and fill it green#1FB86A. For the shaded half, lasso the right half, shrink and feather it the same way, and fill it#14955A. Add the standard Drop Shadow.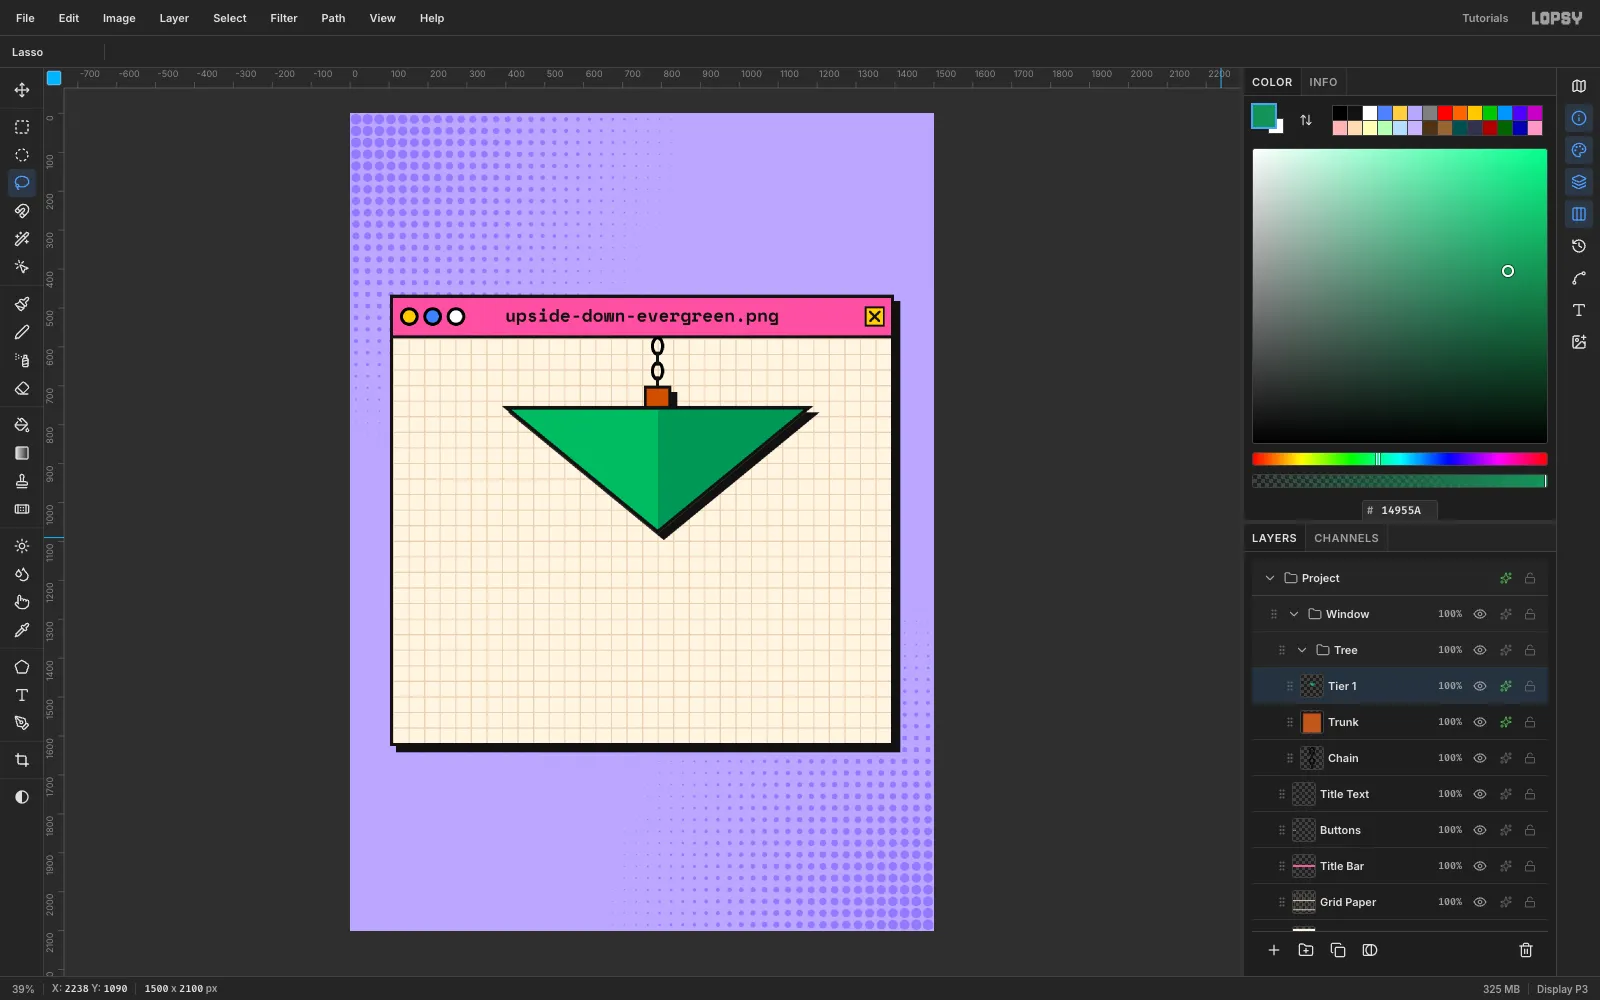
-
Stack three tiers
Repeat the same recipe on
Tier 2(430 → 1070 at y 970, tip at 1250) and onTier 3(520 → 980 at y 1150, tip at 1390). Each new layer goes above the last. The smaller, lower tiers overlap the tip of the tier above, and their hard shadows fall across it. That gives the flat shapes depth without any gradients.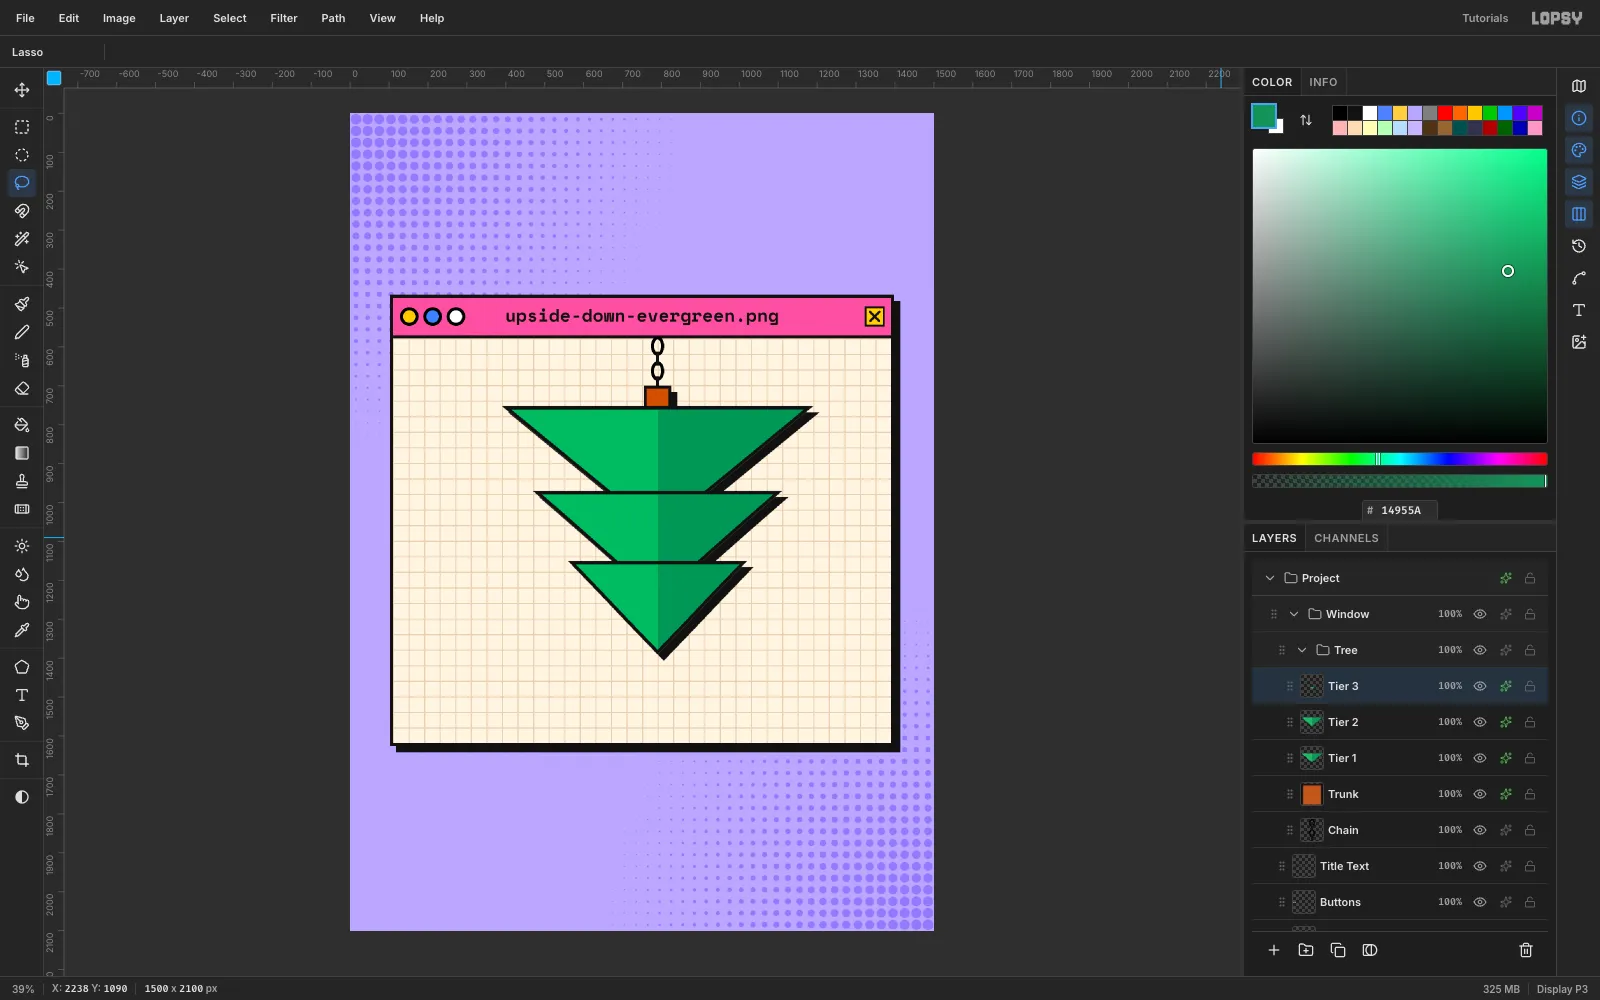
-
Hang one bauble
Add a
Baublelayer aboveTier 3. Draw the string with a 6 px Brush: click the start point on the tier's edge, then Shift-click about 60 px straight down. Add a small black cap rectangle. Then draw a 32 px Shape-tool ellipse in pink with the 8 px black stroke. A single white 15 px brush dab top-left of centre makes the highlight.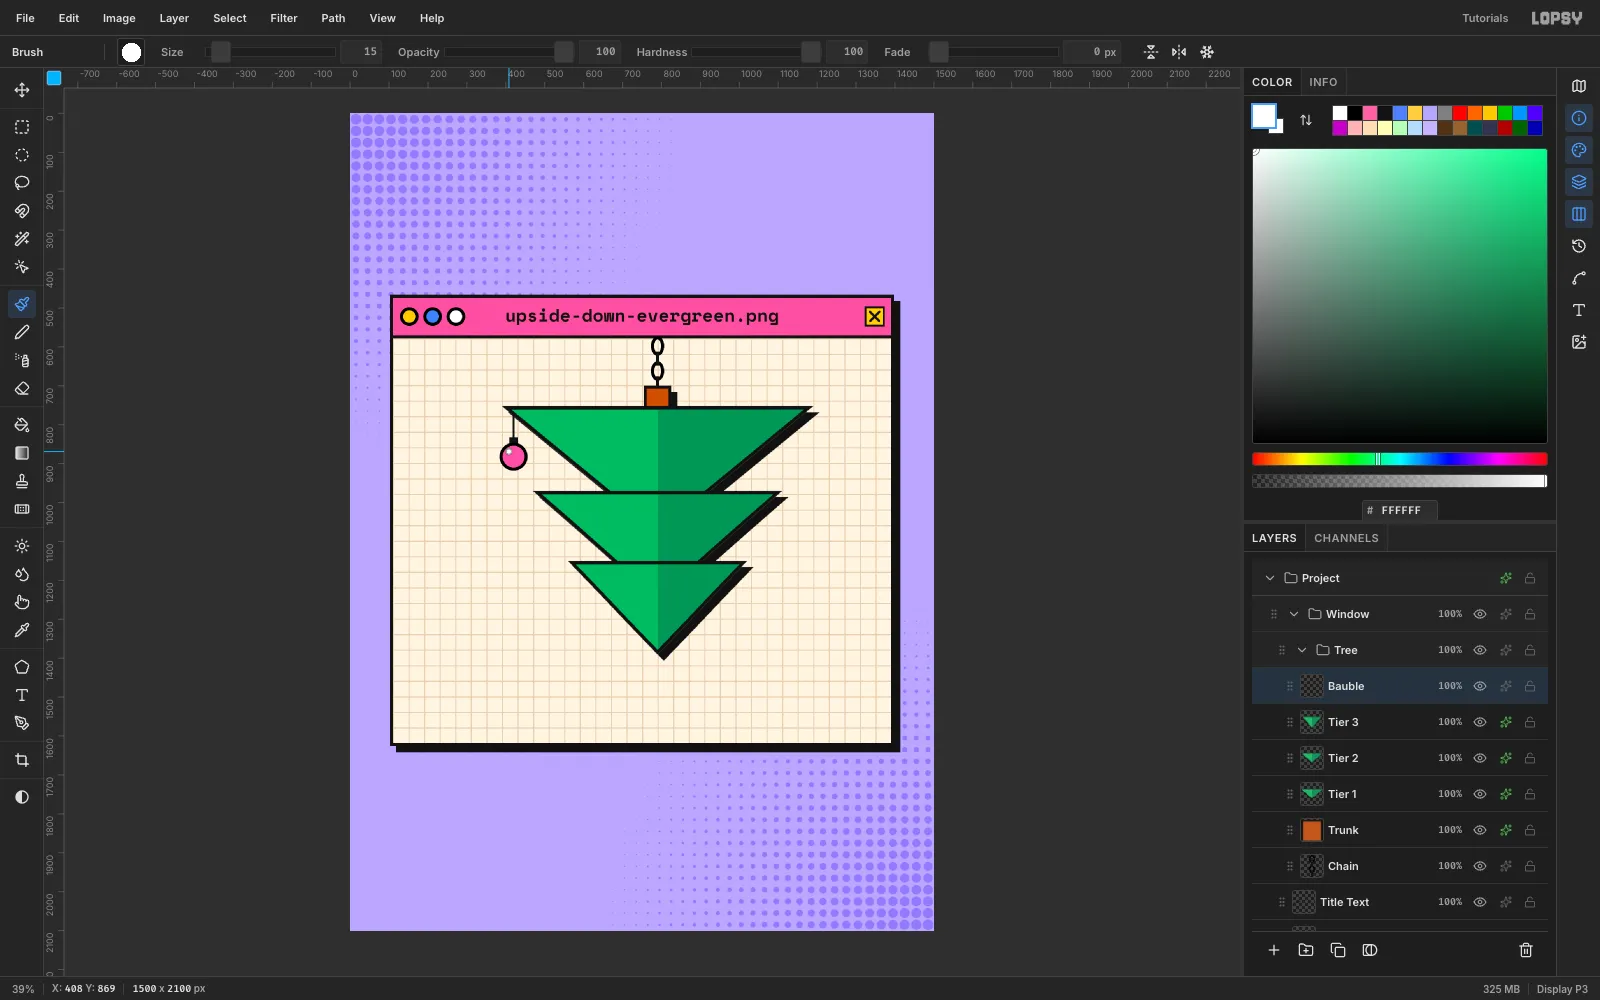
-
Duplicate the bauble with copy and paste
Marquee the bauble, press Cmd+C and then Cmd+V straight away. The copy lands in place on a new
Pasted Layer. Press Cmd+D, then drag it with the Move tool to the next tier corner. Pick a new foreground colour and click the ball with the Paint Bucket: it only floods the flat fill, so the outline and highlight stay.Place six baubles in all, one at each tier corner, in pink, yellow, blue and one holiday red
#E8202A. Then select the topPasted Layerand use Layer → Merge Down five times to fold them into one layer. Rename itOrnaments.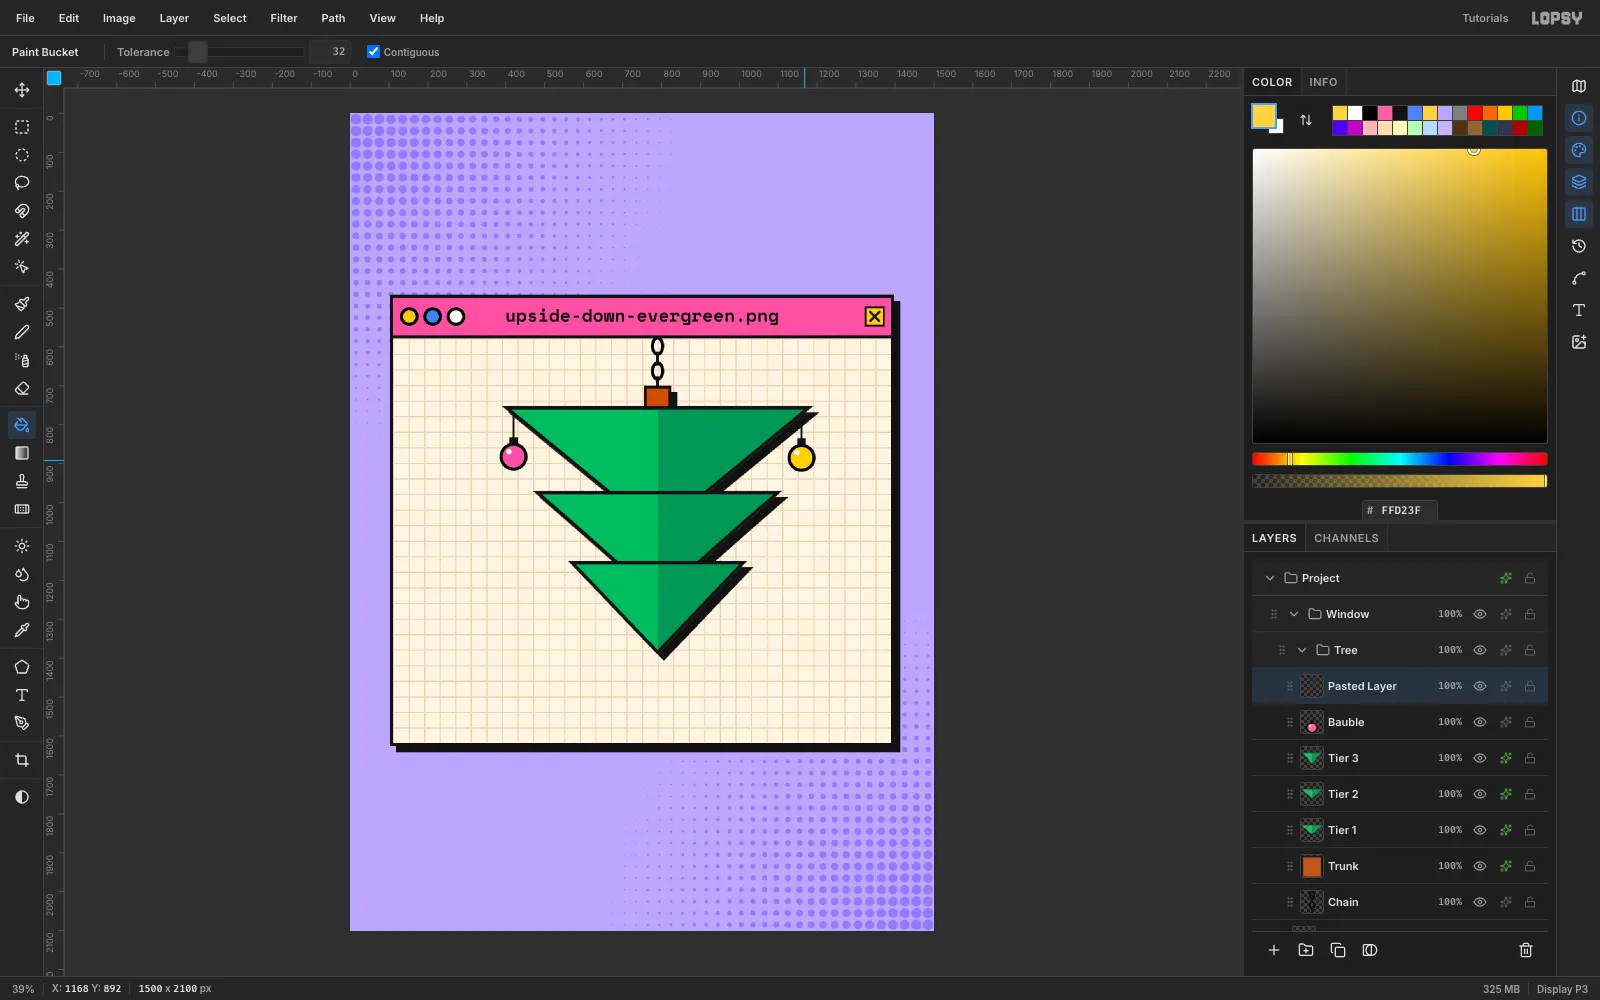
-
Add the little lights
Still on
Ornaments, draw ten small lights with the Shape tool at radius 13, keeping the 8 px stroke. Draw all the yellow ones first, then the pink, then the blue, so you only change the fill colour three times. Keep each light at least 20 px clear of a tier edge, and spread them across both the light and dark halves.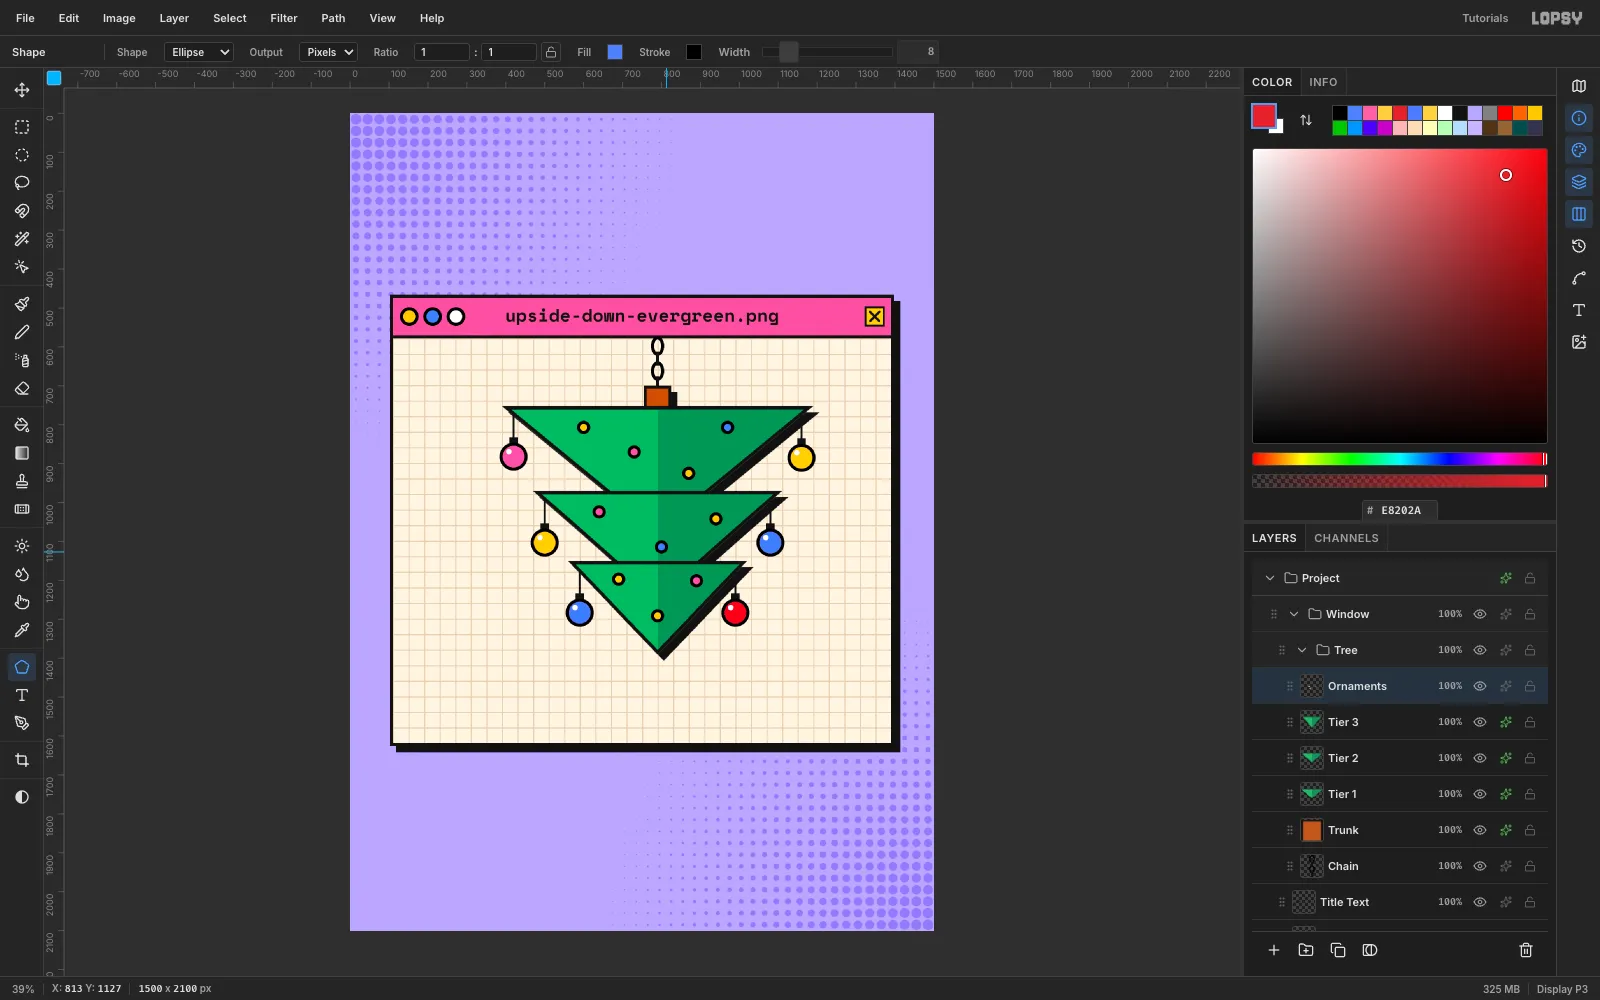
-
Hang the star upside down
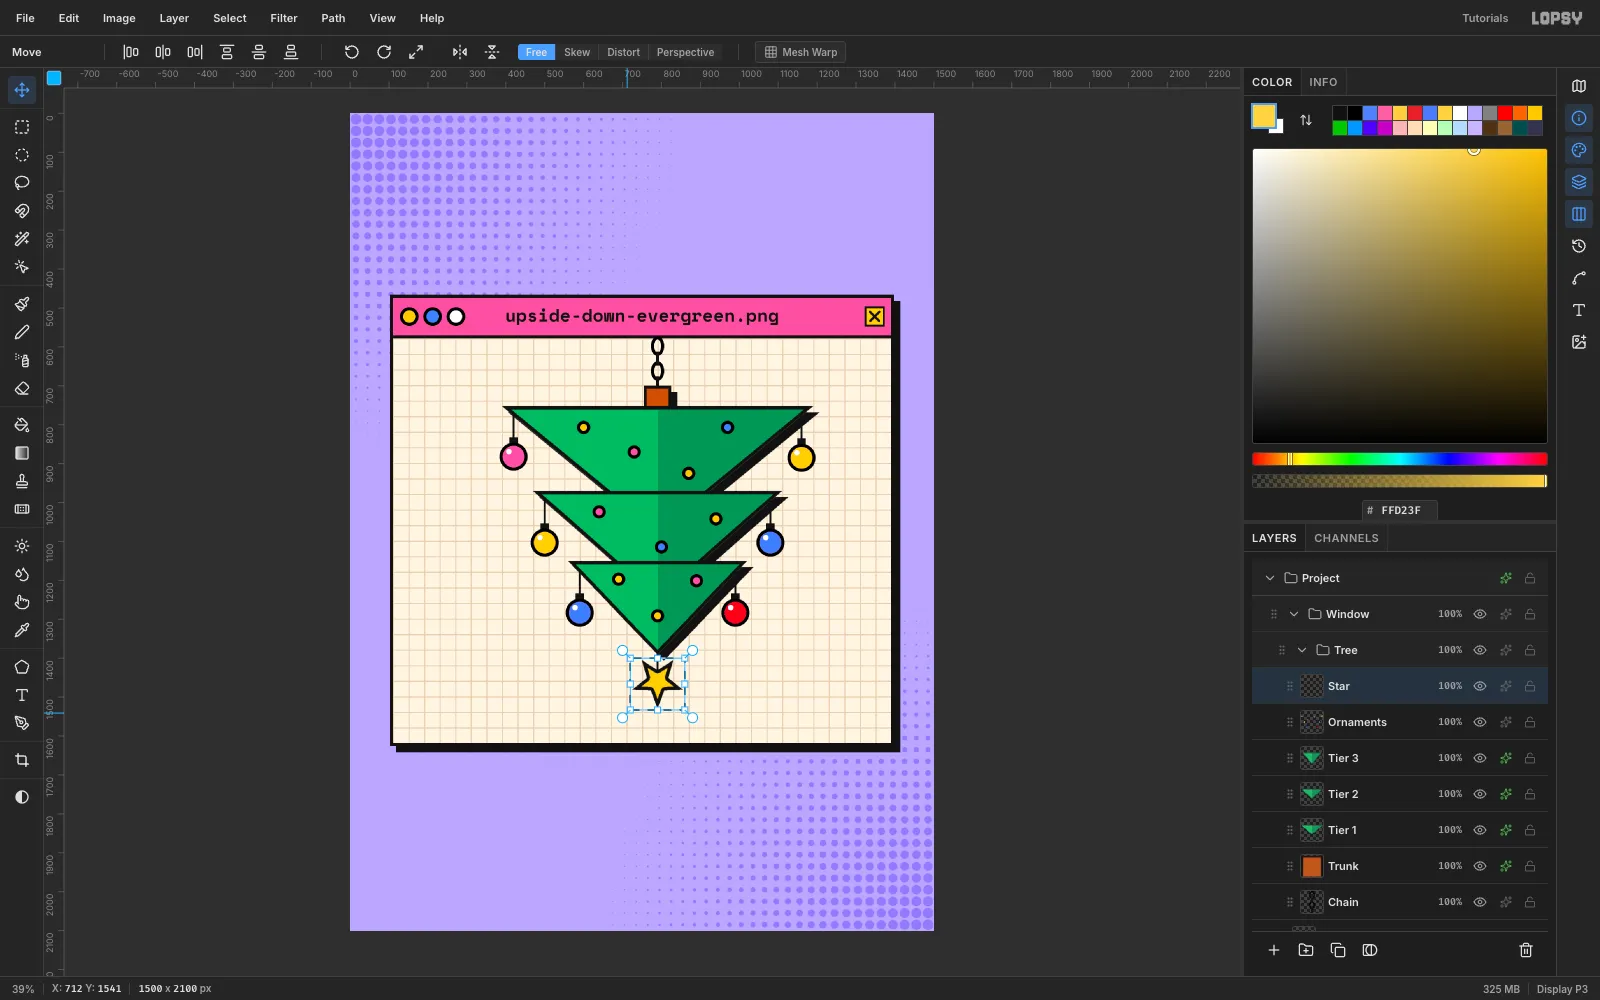
Brush a 6 px string down from the bottom tip of the tree. On a new
Starlayer, lasso an upright five-pointed star, then give it the same outline recipe: fill black, then Shrink 8, Feather 1 and fill yellow.Marquee the star, switch to the Move tool, and drag the rotation handle past the top-right corner while holding Cmd. Cmd snaps the angle in 15° steps, so it's easy to land on exactly 180°. Press Cmd+D to commit. The star now hangs point down from its string, clear of the tier's shadow.
-
Move the whole tree as a group
If the tree is off centre, you don't need to move the layers one at a time. Click the
Treegroup row, press Cmd+D so nothing is selected, and drag anywhere on the tree with the Move tool. The chain, trunk, tiers, ornaments and star all move together. Line the trunk up with x 750. Undo and redo put everything back exactly.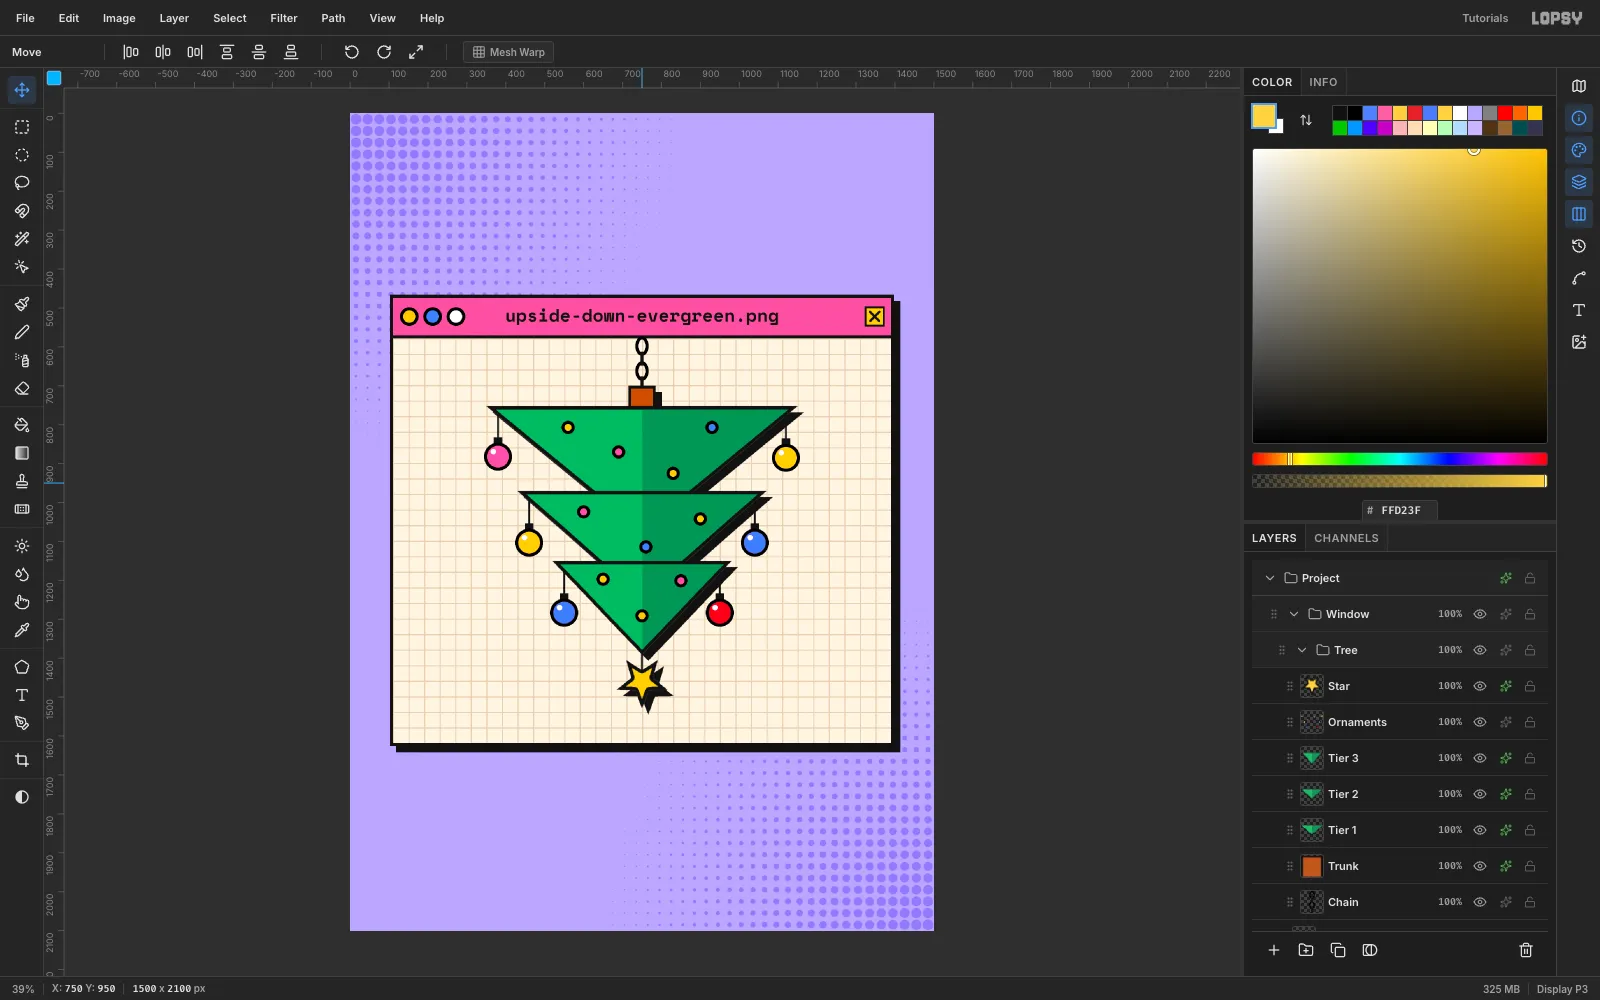
-
Build the gifts and flip one over
Make a
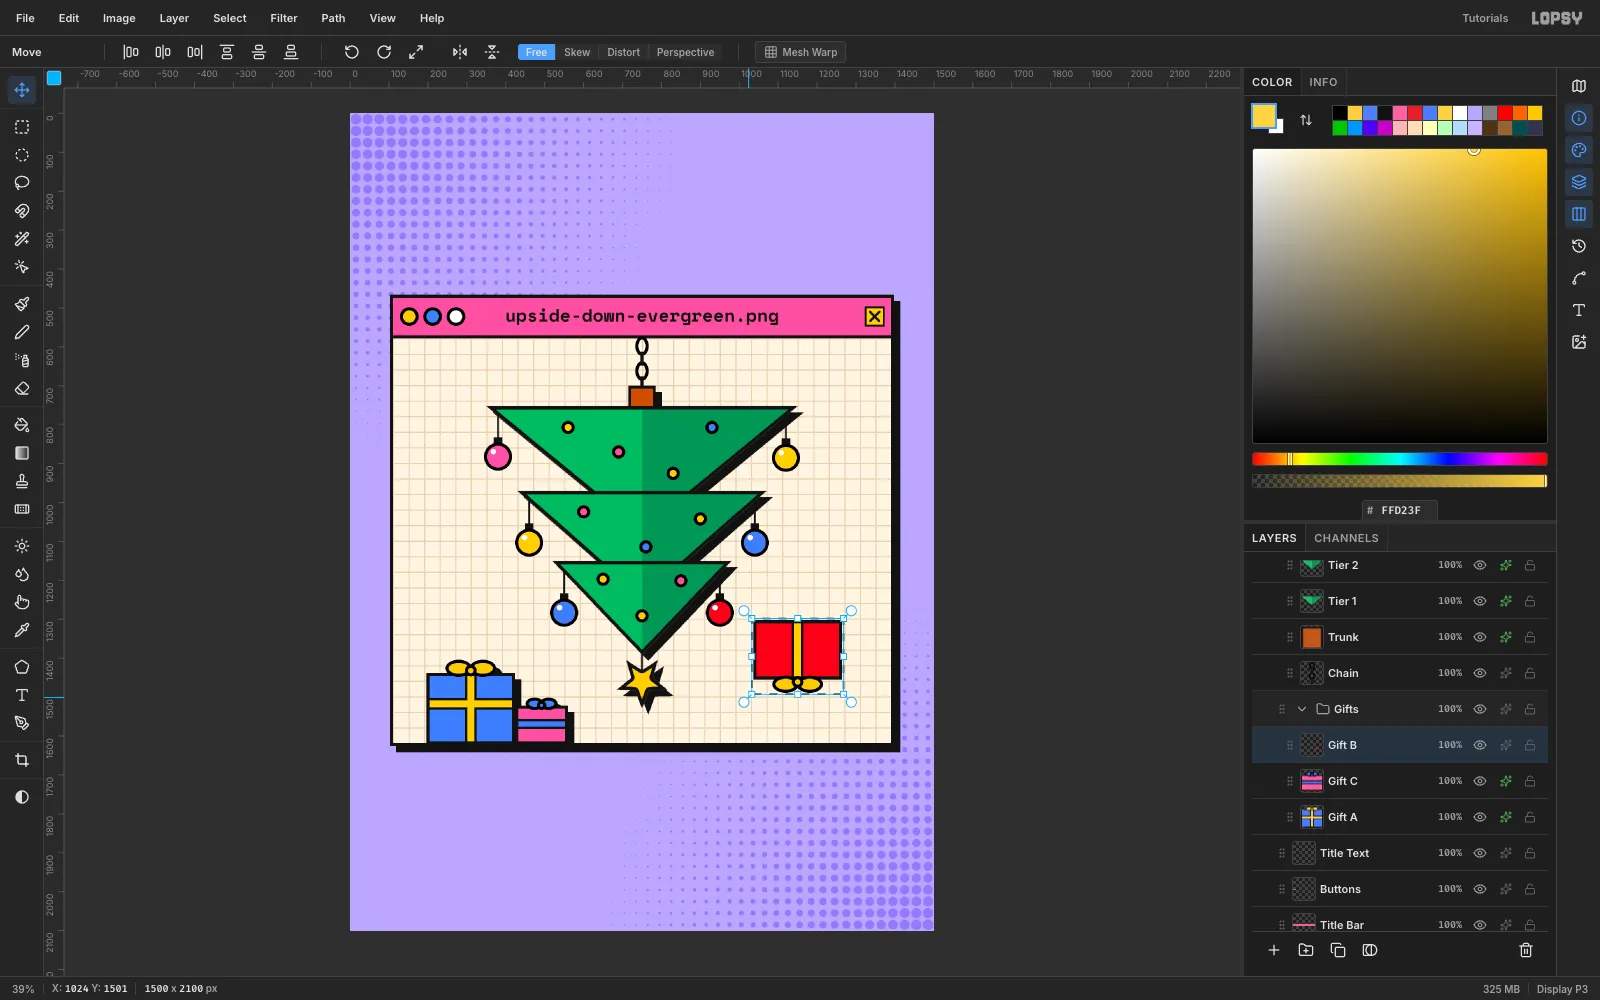
Giftsgroup insideWindow, belowTree. Each gift is a black rectangle with a coloured rectangle 8 px inside it. Add black ribbon bands with coloured centres, and a bow made of two Shape-tool ellipses and a knot.Draw the red gift the right way up, then marquee it and rotate it exactly 180° with Cmd held. Press Cmd+D.
-
Stand the gifts on the floor
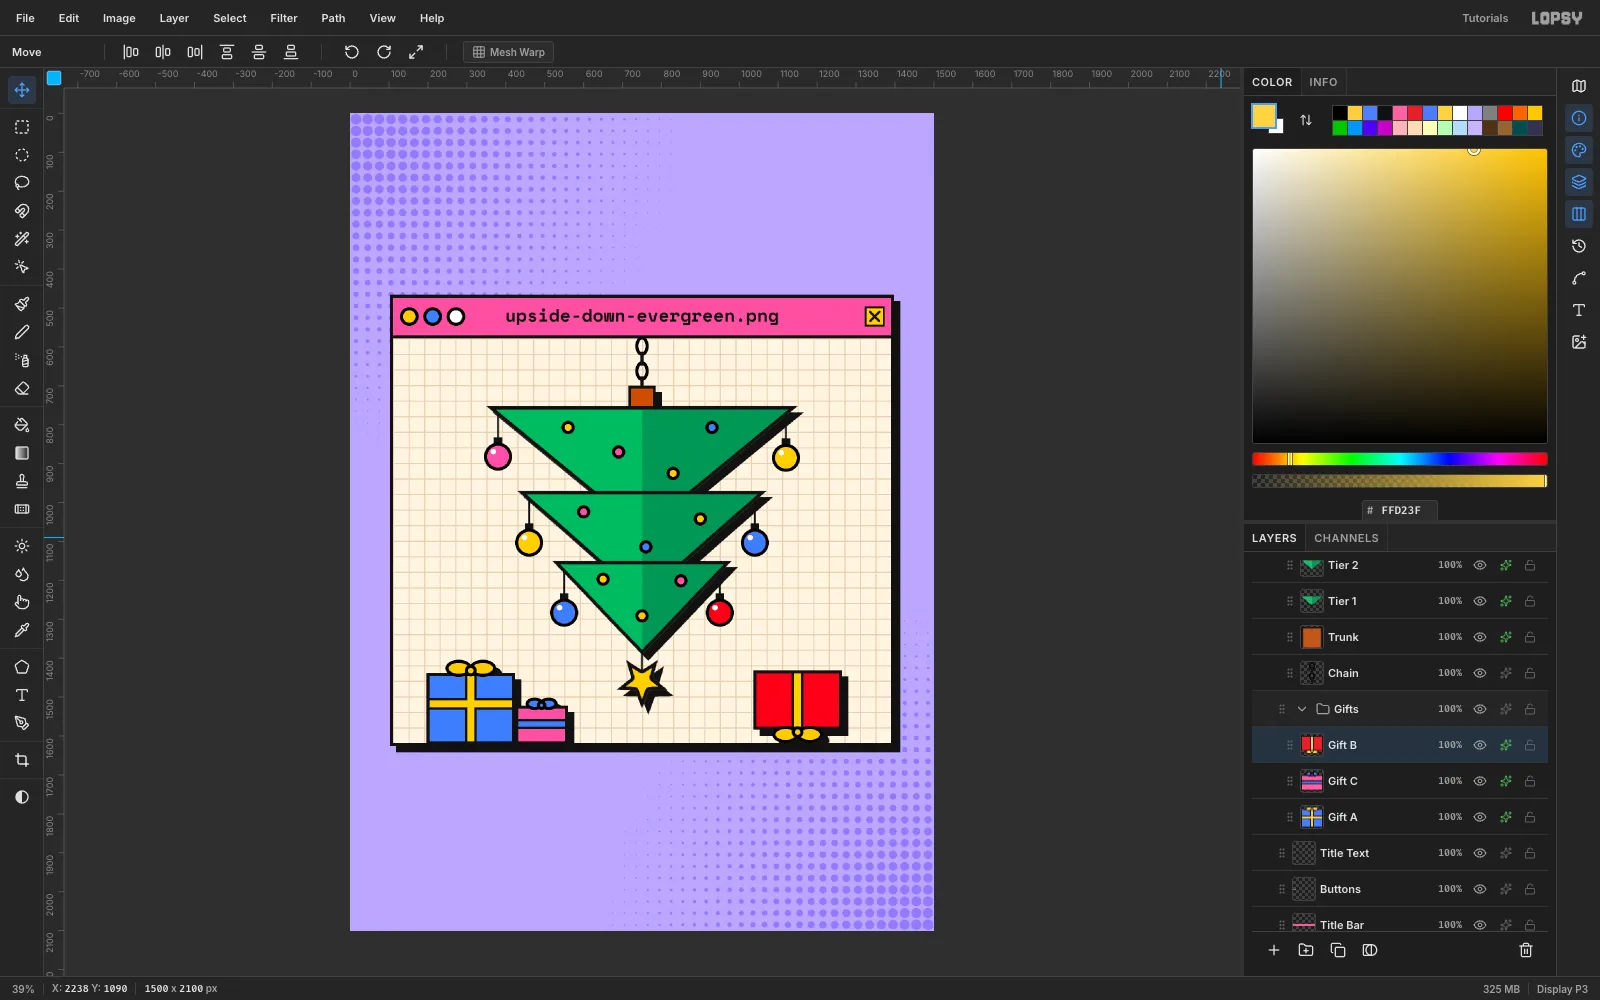
Drag each gift down with the Move tool until its lowest point touches the floor at y 1618. That puts the upside-down gift on its bow. Give every gift the standard Drop Shadow. Next to two normal presents, the upside-down one looks like a deliberate joke rather than a mistake.
-
Set the headline and select its shape
Collapse
Window, selectHalftone, and click New Group. Name the groupTypeand add a layer inside it calledHeadline Shadow. Then drag theTypegroup's grip aboveWindowso all the type sits on top.Type
SEASON'Sin Archivo Black at 188 px. Then move it so the letters start at (102, 90), the same left edge as the window. Cmd-click its thumbnail in the Layers panel: the letters become a selection.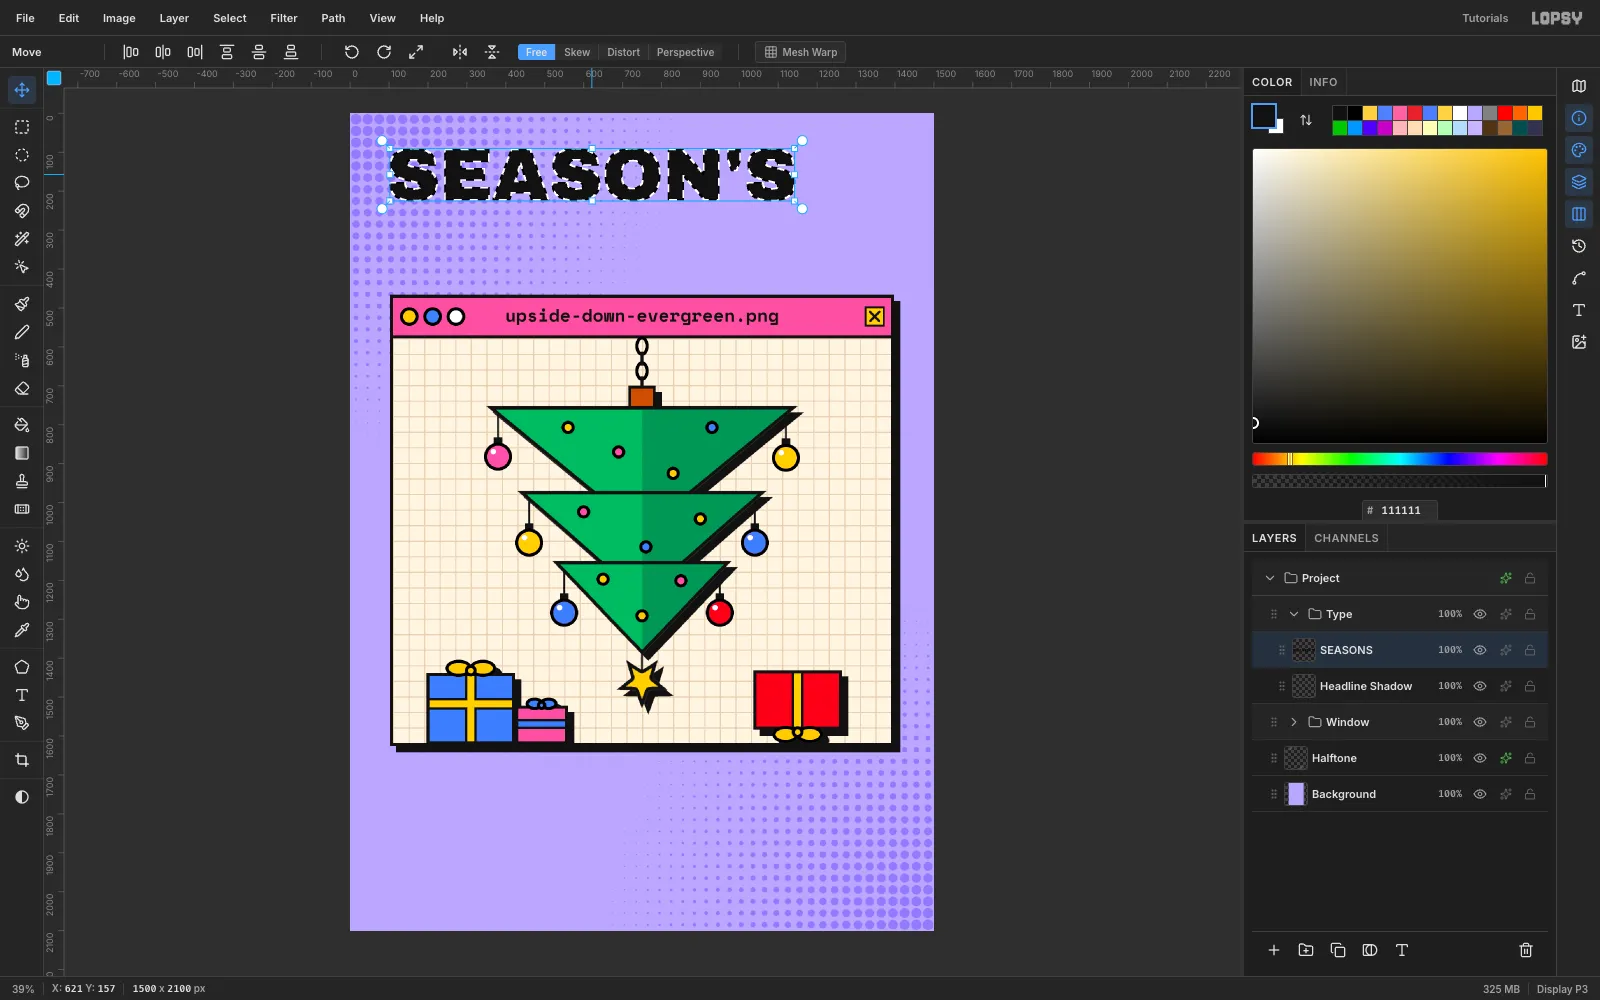
-
Give the headline a pink offset shadow
With the letter selection still active, click
Headline Shadow, set the foreground to pink#FF5FA2, and choose Edit → Fill. Press Cmd+D, then drag the layer 16 px right and 16 px down. A coloured shadow like this is a neubrutalist favourite. It follows the same 16 / 16 rule as the black shadows.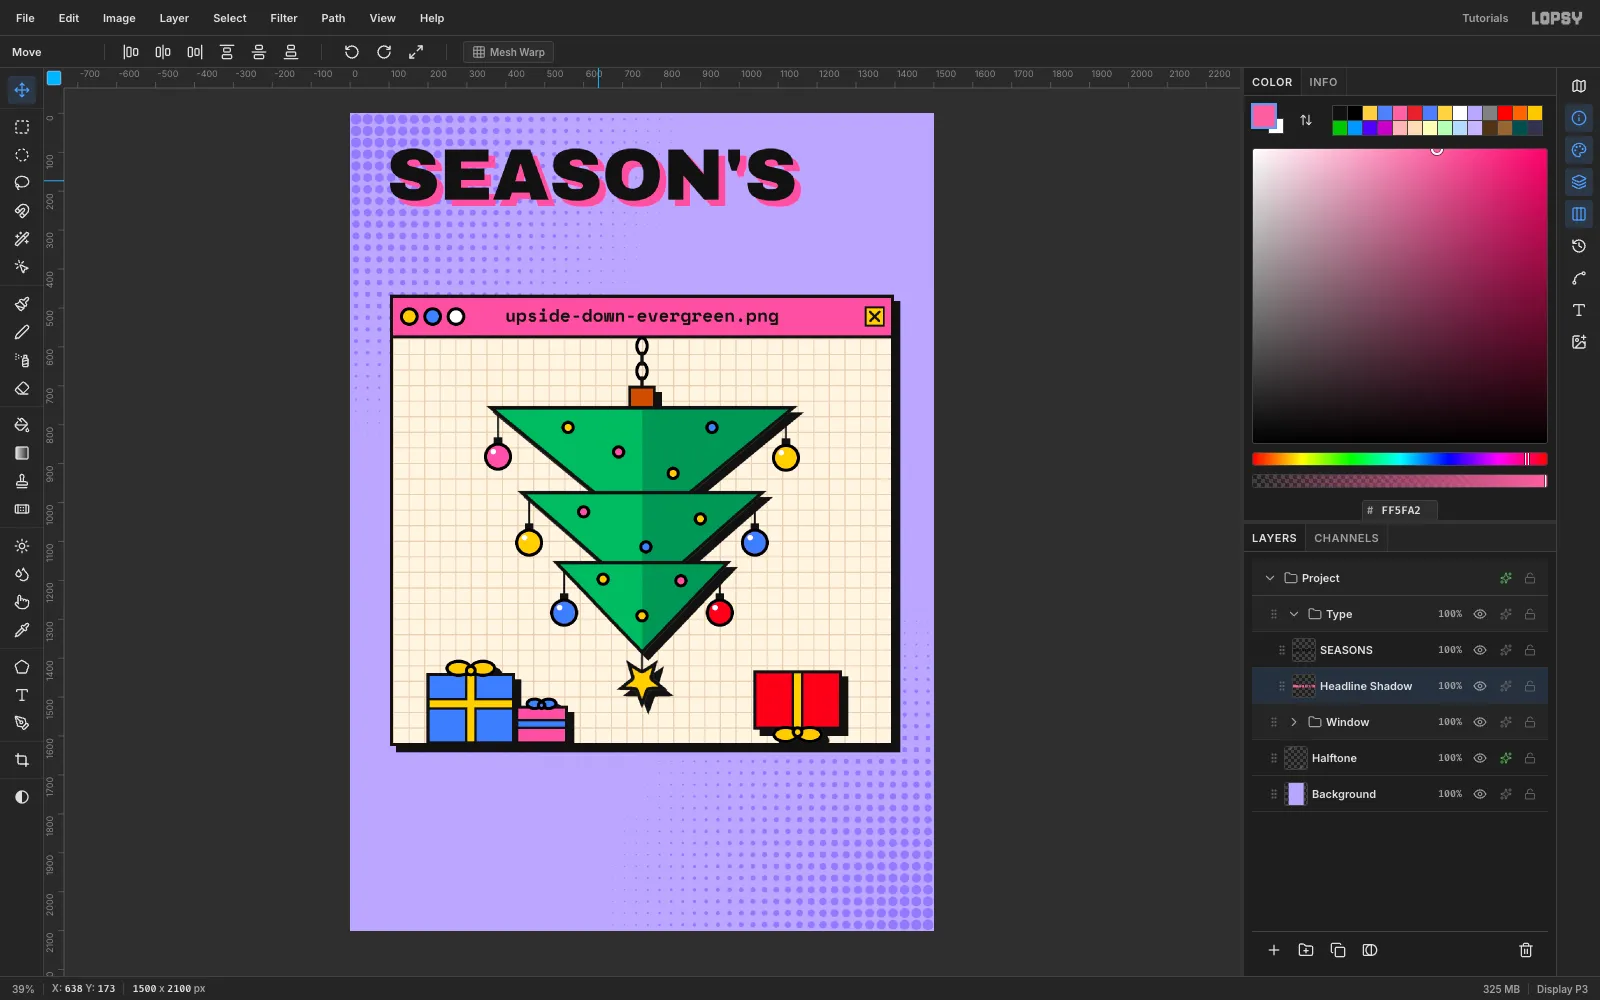
-
Stick GREETINGS on a tilted slab
Add a
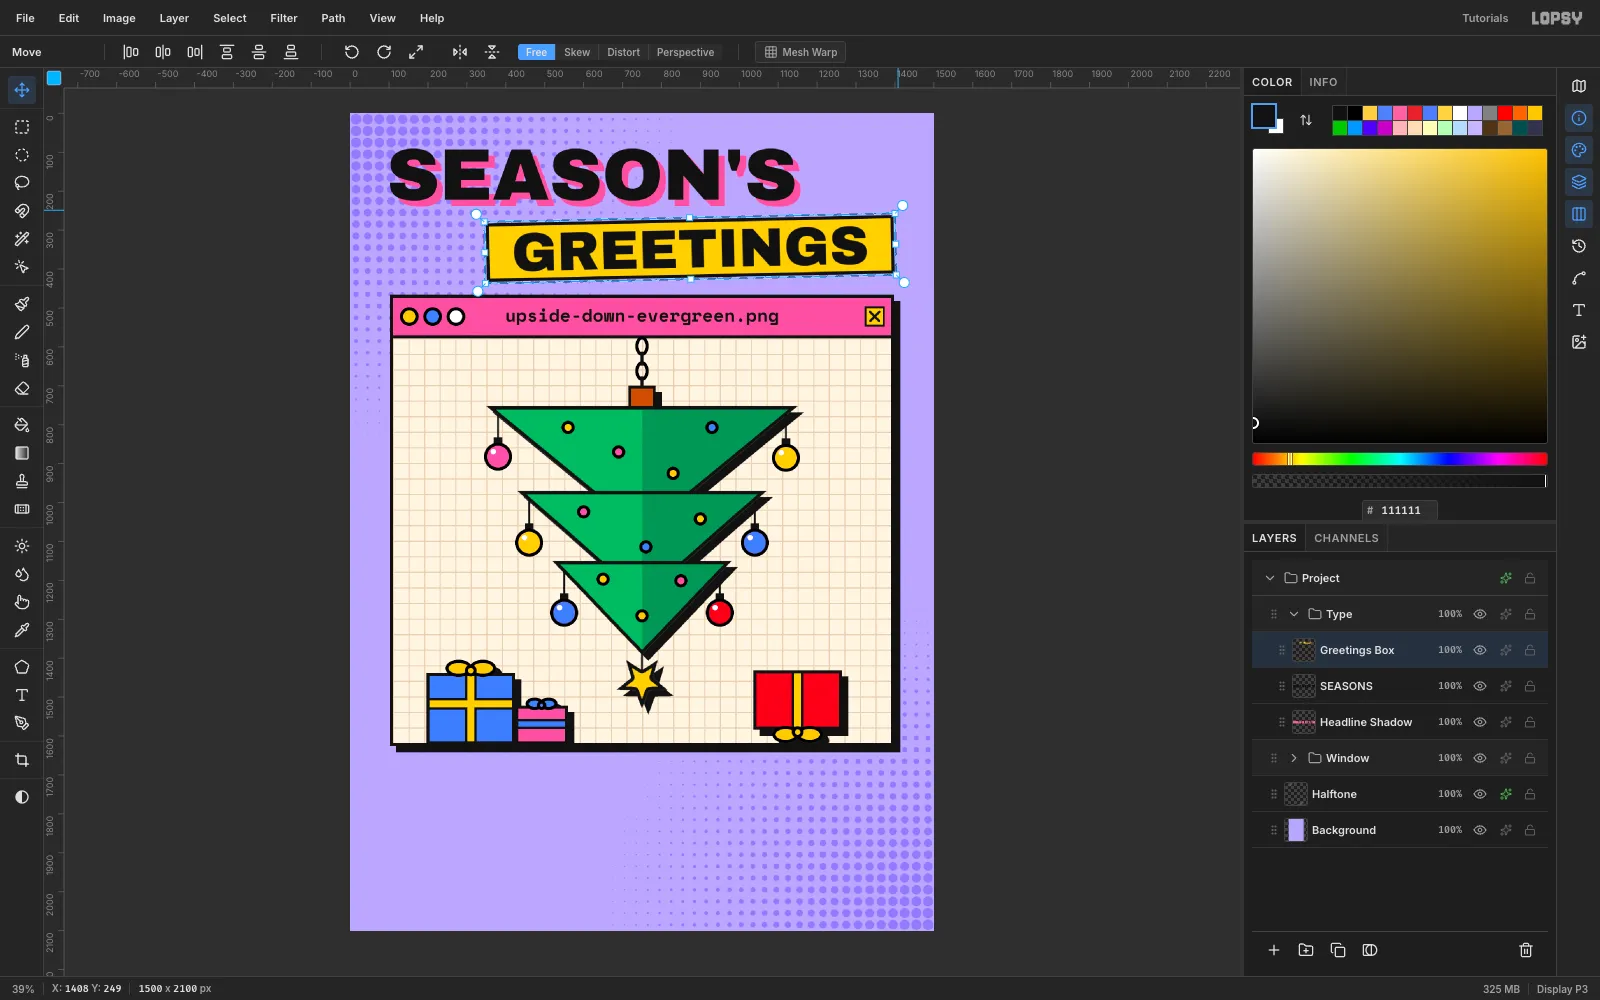
Greetings Boxlayer and fill a black box from 350, 272 to 1398, 422, then a yellow one 8 px inside it. The box starts at x 350, the same x as the tree's widest corner, and ends on the window's right edge.Type
GREETINGSin Archivo Black at 140 px, well below the other text so the click doesn't land inside another text layer. Move it to the centre of the box.Click Rasterize Layer, then Layer → Merge Down onto the box. Marquee the merged slab and drag the rotation handle to −1.2°. A small tilt reads as a sticker slapped on. A bigger one would crowd the window below it. Commit with Cmd+D and add the standard Drop Shadow.
-
Add a sparkle
On a
Sparkleslayer, lasso a four-pointed star centred at (1300, 148) with 72 px long points and a 30 px inner radius. Give it the fill black → Shrink 8 → fill yellow recipe with Feather 1, then the standard shadow. It fills the empty corner next toSEASON'Sand stays inside the 90 px margins.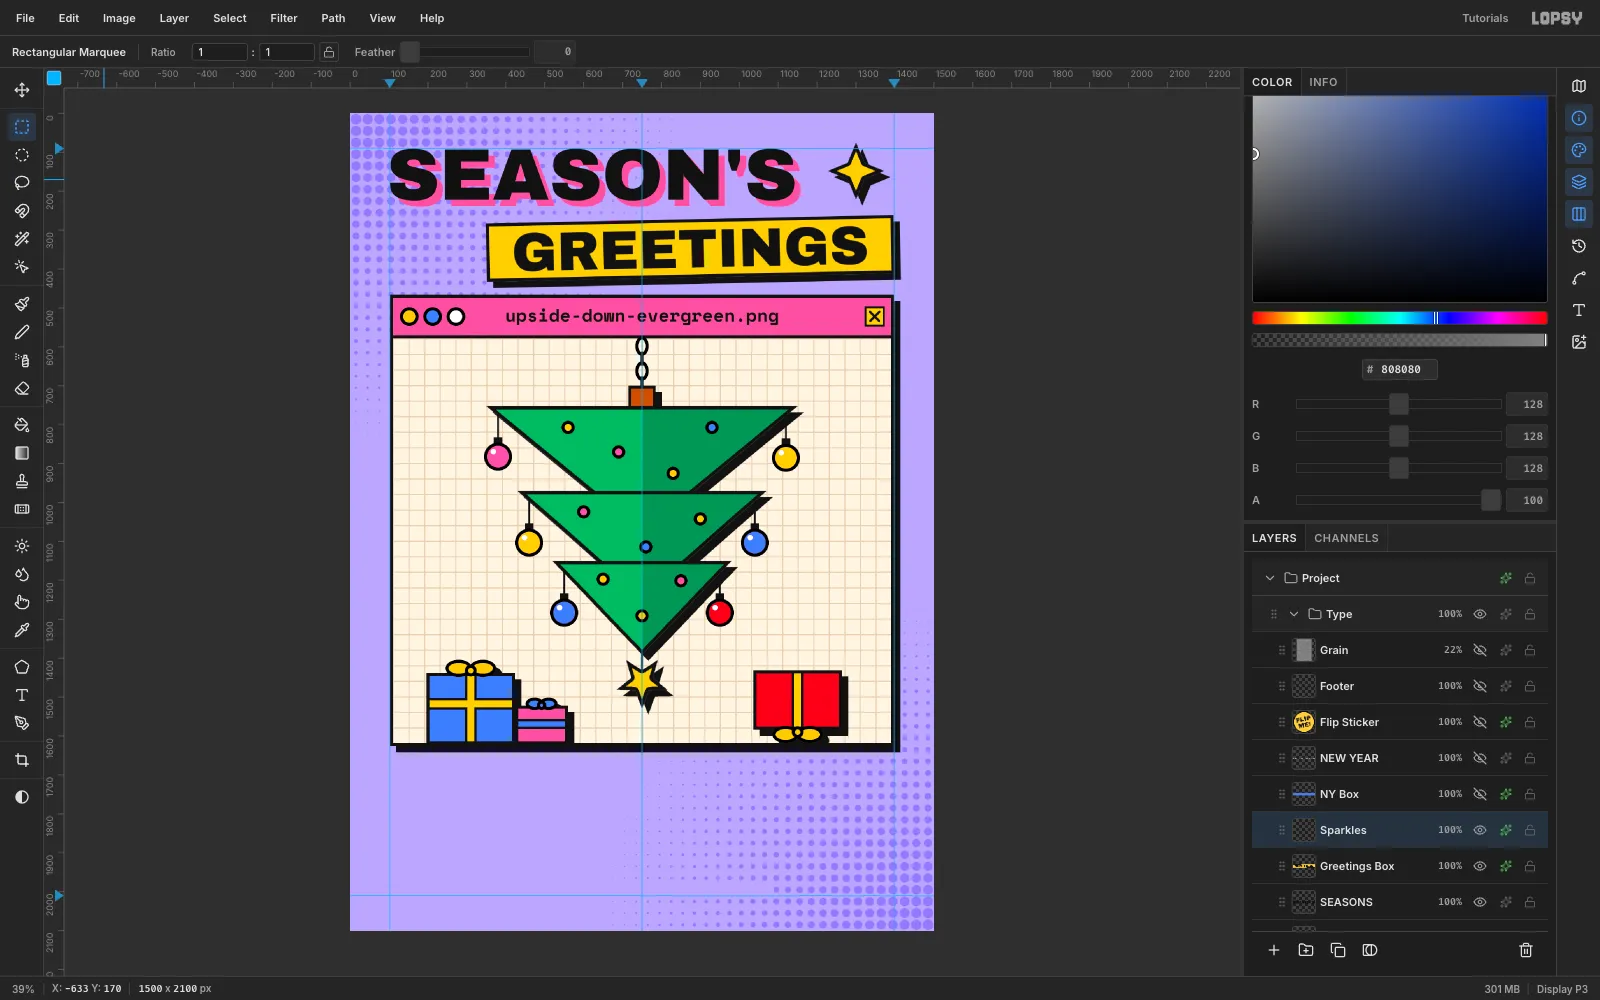
-
Print the New Year greeting upside down
On an
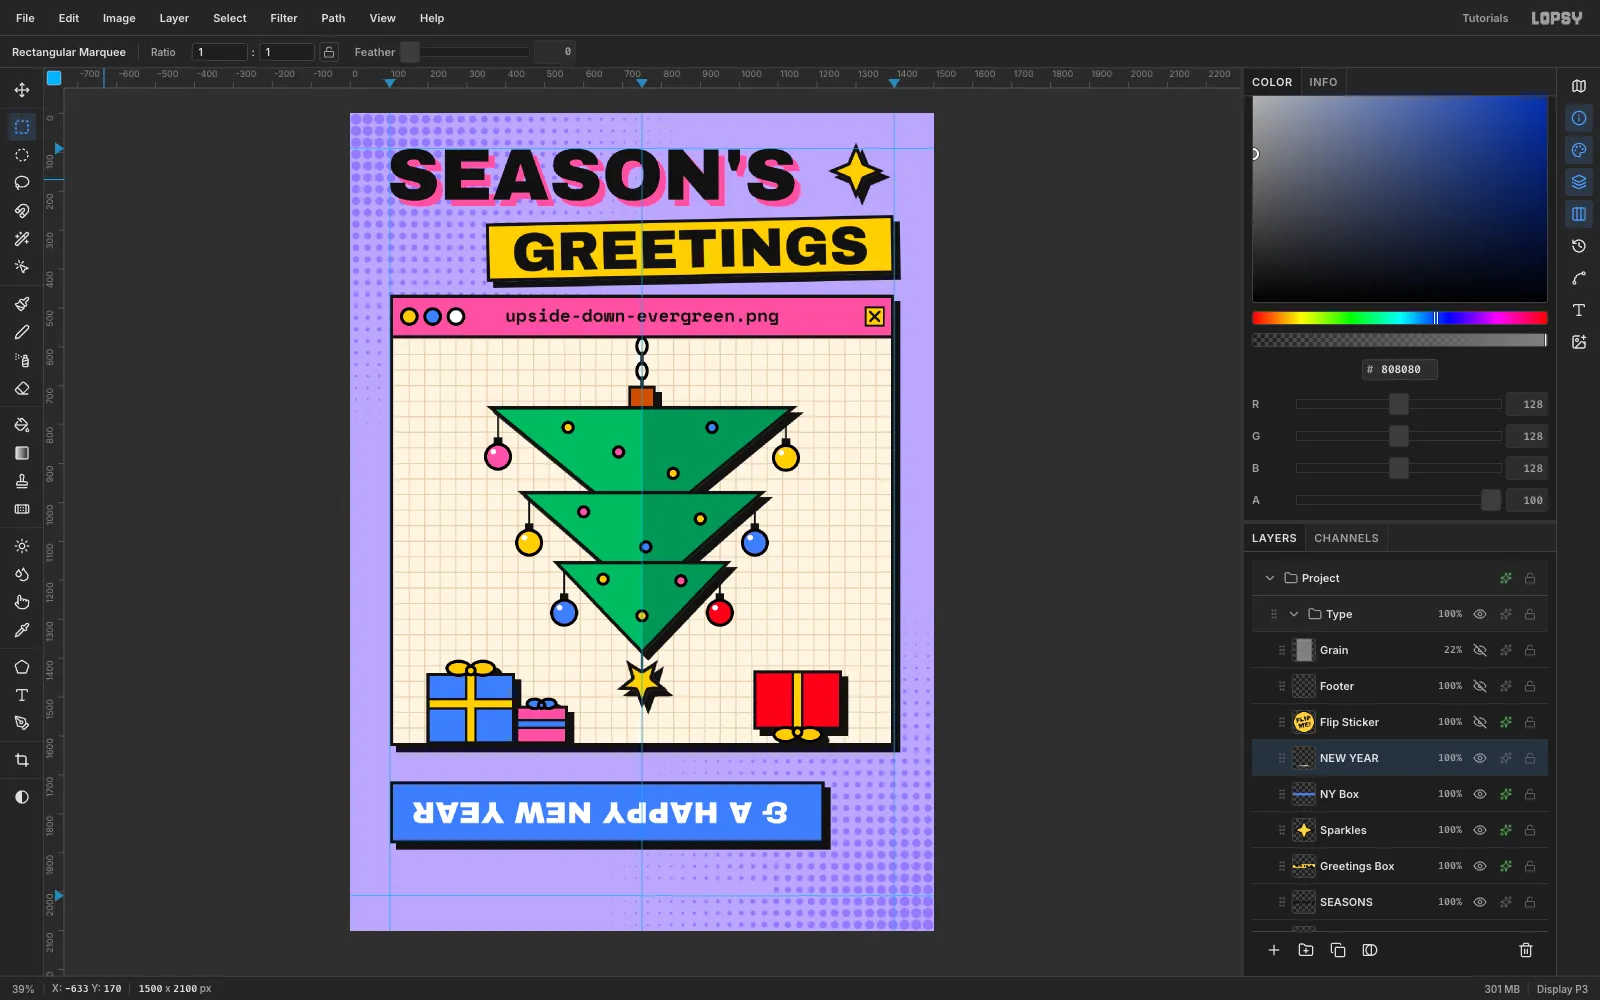
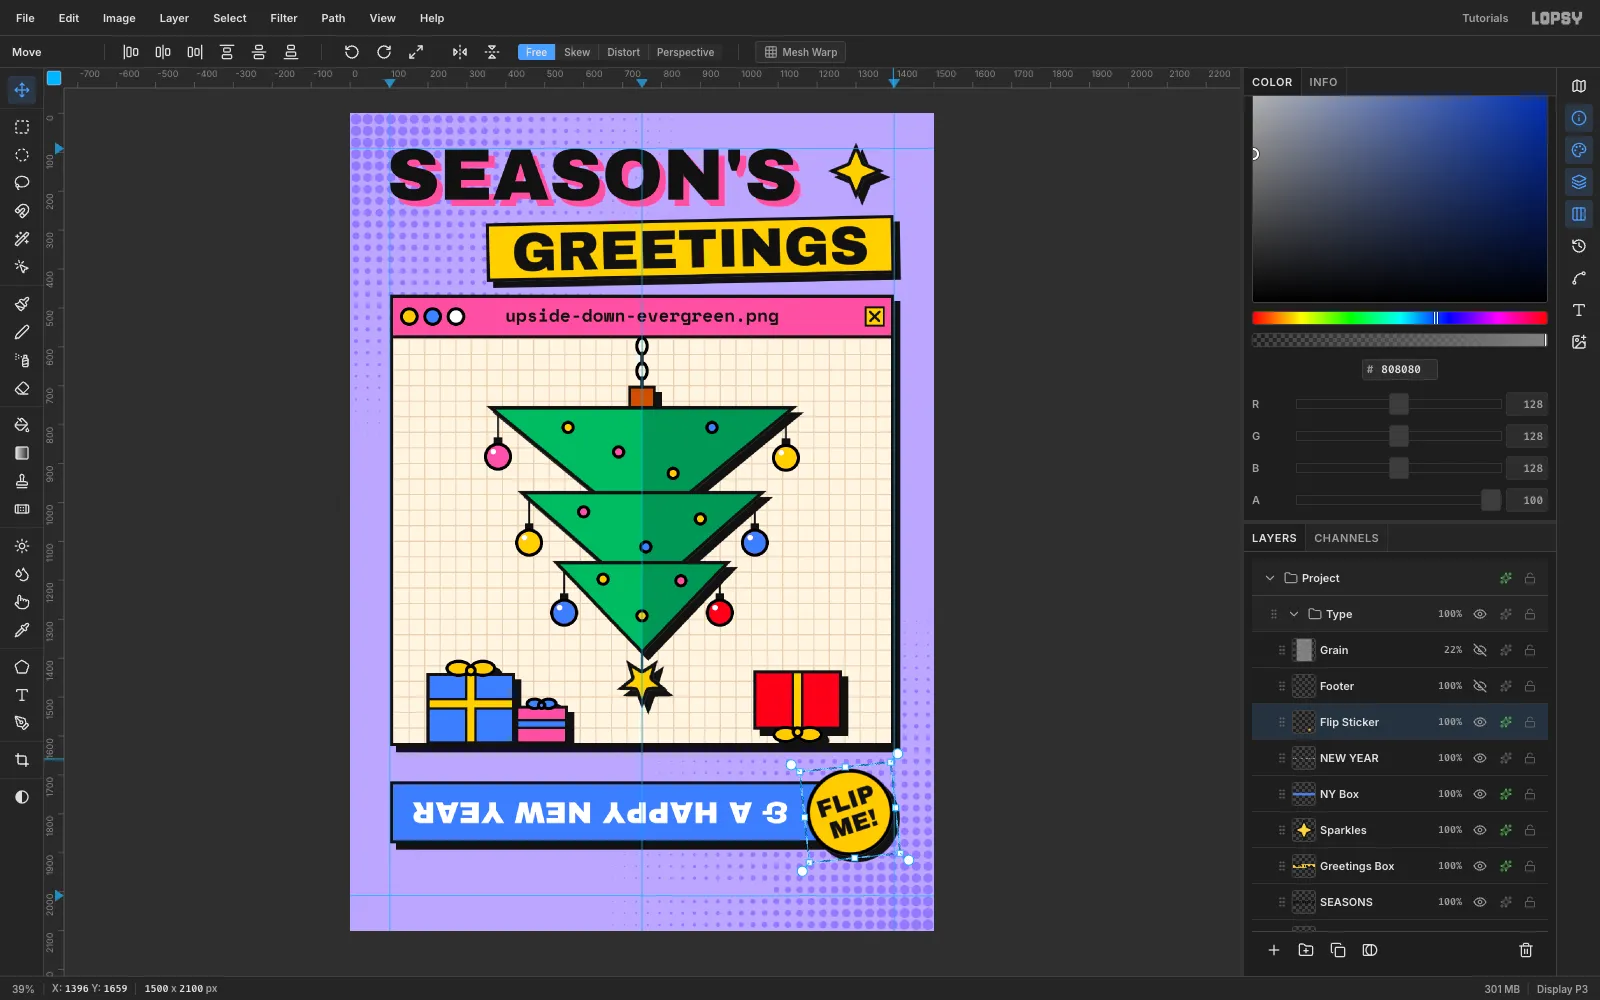
NY Boxlayer, fill a black box from 102, 1716 to 1219, 1876 and a blue (#4D7CFE) one 8 px inside it, then add the Drop Shadow. Type& A HAPPY NEW YEARin white Archivo Black at 78 px in empty space and click Rasterize Layer.Marquee it, then Cmd-drag the rotation handle to 180° and press Cmd+D. Move it to the centre of the part of the box that the sticker won't cover, at (642, 1796). This is the second half of the joke: the reader has to turn the card over to read it.
-
Slap on a FLIP ME! sticker
On a
Flip Stickerlayer, draw a Shape-tool circle with a 92 px radius in yellow, with the 8 px black stroke. TypeFLIPandME!on two lines in Archivo Black at 54 px, then rasterize it. Point text doesn't centre each line, so marquee theME!line and drag it until both lines are centred. Merge it into the circle.Marquee the sticker, hold Cmd, and drag the bottom-right handle out to scale it up about 17%. Then rotate it −12°. Place it at (1284, 1796), so it overlaps the box by about 45 px and its right edge sits on the 1398 margin, then add the standard shadow.
-
Sign the card
Open the Text panel and set Letter spacing to 2. Then type the footer in Space Mono Bold at 36 px. It uses an em dash, so paste the text in rather than typing it. Move it so it starts at x 102 and sits on y 2010, leaving the same 90 px at the bottom as at the top. The halftone corners stay clear of it, so it reads cleanly.
-
Finish with print grain
Add a
Grainlayer at the top of theTypegroup and fill it mid-grey#808080. Open Filter → Add Noise… and set Amount 70, Mono and Gaussian. Set the layer's blend mode to Overlay and its opacity to 22%. Overlay grey is invisible on its own, so what's left is a faint print texture on the flat colours.Finally, click the rulers to drop guides at x 102, 750 and 1398 and at y 90 and 2010, and check everything lines up. Then export with File → Quick Export PNG.