Make a Risograph Magazine Cover from a Photo
Turn a whale photo into a two-colour risograph magazine cover in Lopsy with halftone plates, Multiply overprints, misregistration and ink texture.
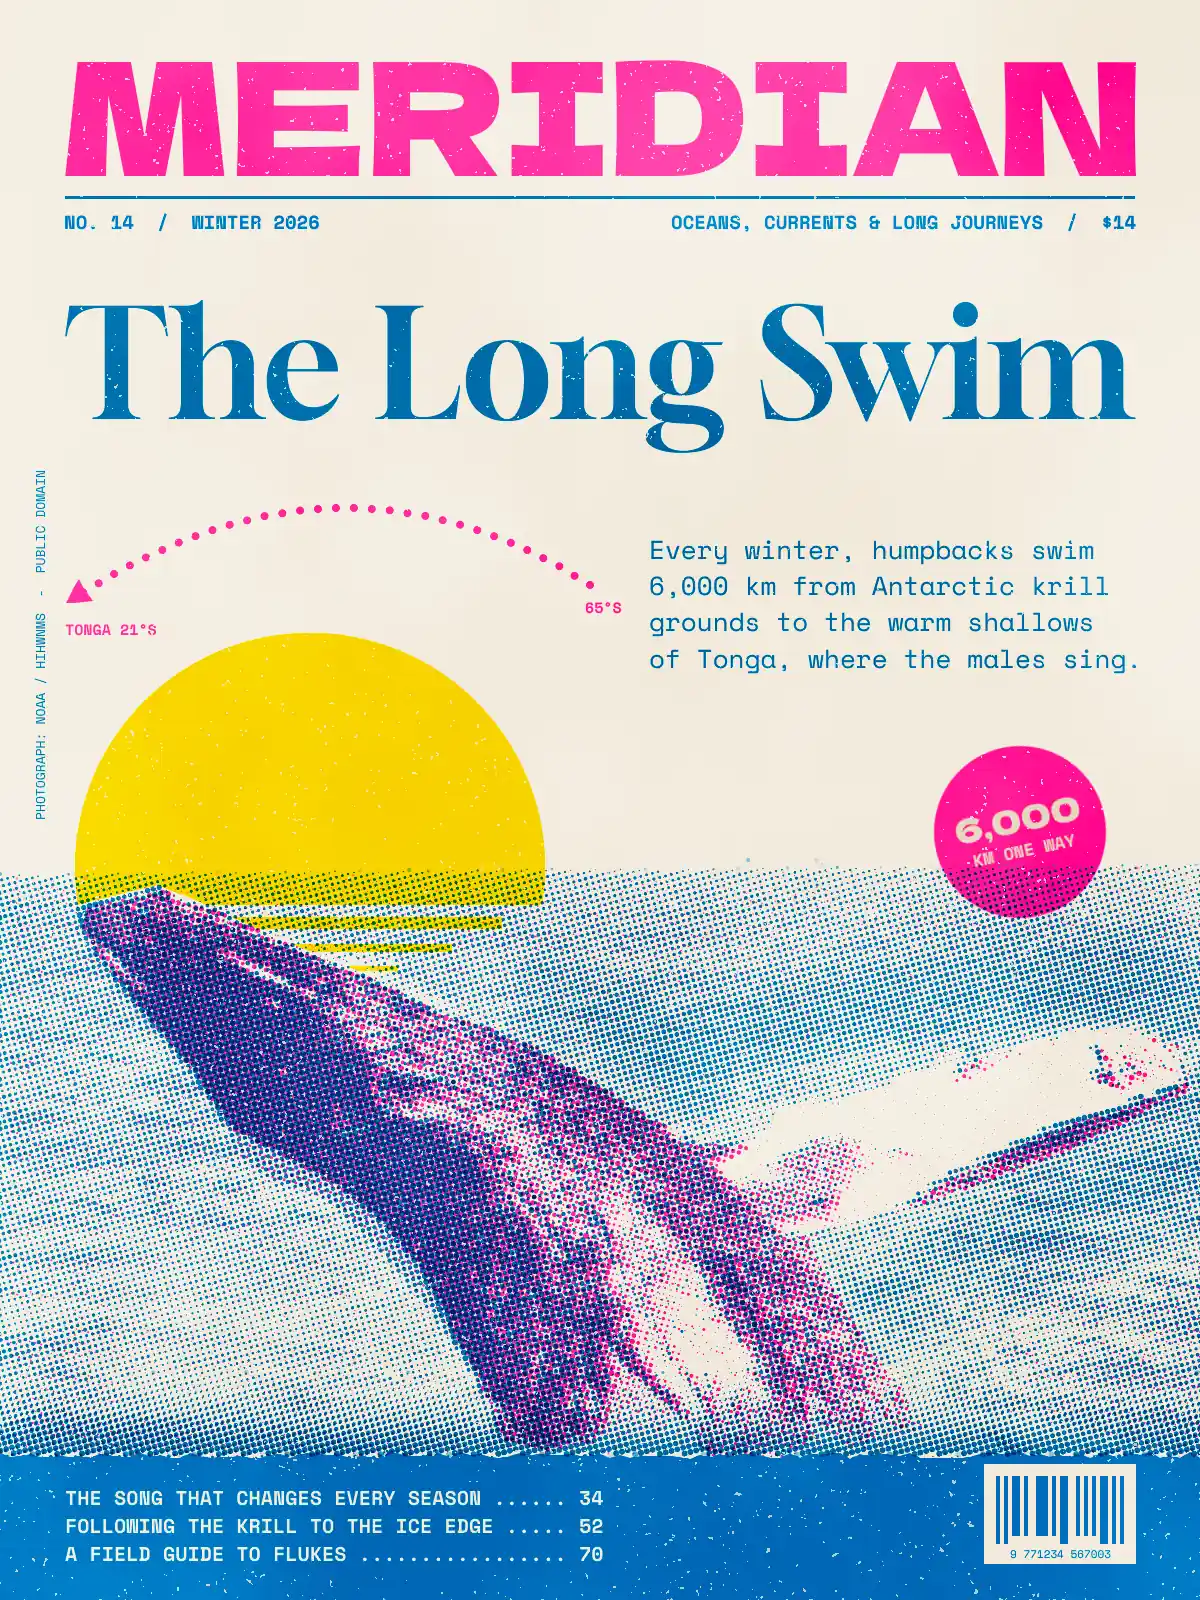
A risograph prints one spot colour at a time through a stencil drum, so riso magazines and zines have a recognisable look:
- A couple of translucent inks overprint each other to make new colours.
- Photos are broken into halftone dots.
- Each colour lands slightly off from the others.
- The ink has specks where it didn't take.
This tutorial fakes that whole process for a made-up ocean-travel quarterly, MERIDIAN. The cover story is "The Long Swim", about humpbacks migrating from Antarctica to Tonga.
The photo is a public-domain NOAA image from Wikimedia Commons: HIHWNMS - humpback whale breaching (31458927013).jpg, from the Hawaiian Islands Humpback Whale National Marine Sanctuary. Download it and scale it to 2400 px wide before you start.
Use three inks and one paper, nothing else:
-
Paper
-
Riso Blue
-
Fluorescent Pink
-
Yellow
Every ink layer is set to Multiply, so wherever two inks overlap they mix the way real riso ink does. Blue over pink gives indigo, and yellow under blue gives green.
-
Paste and scale the photo
- Create a 1200 × 1600 px document with a white background.
- Fill the Background with the paper colour (Edit → Fill).
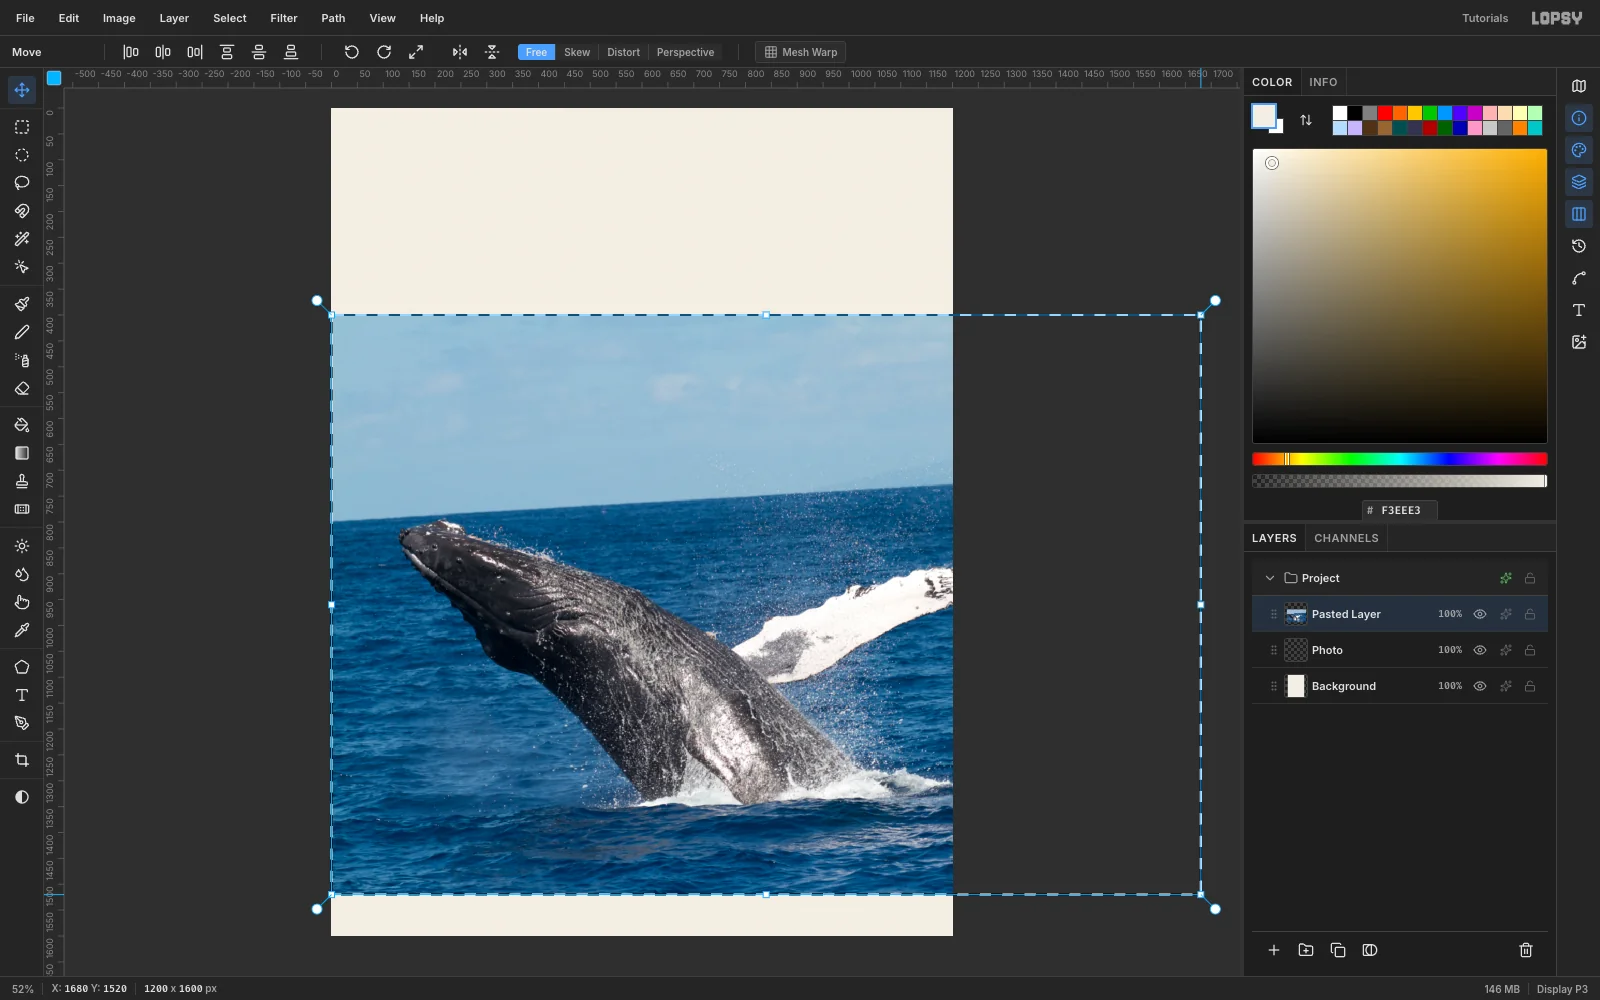
- Copy the whale photo and press Cmd+V. Lopsy fits the paste to the canvas width, centres it, and switches to the Move tool with the transform box live.
- Hold Cmd and drag the bottom-right handle until the photo is 1680 × 1120. The top-left corner stays pinned.
The photo may run off the canvas. That's fine; you'll crop it with the plates later.
-
Straighten the horizon
The horizon in the photo falls about 3° to the left. While the transform is still live:
- Move the pointer just outside the top-right corner until it becomes a rotate cursor.
- Drag clockwise until the horizon is level.
- Press Cmd+D to commit the transform.
- With the Move tool still active, nudge the photo 60 px left and 120 px down. Shift+arrow moves 10 px per press. This leaves the whale in the lower half and fills the bottom edge with sea.
Rename the layer
Photo.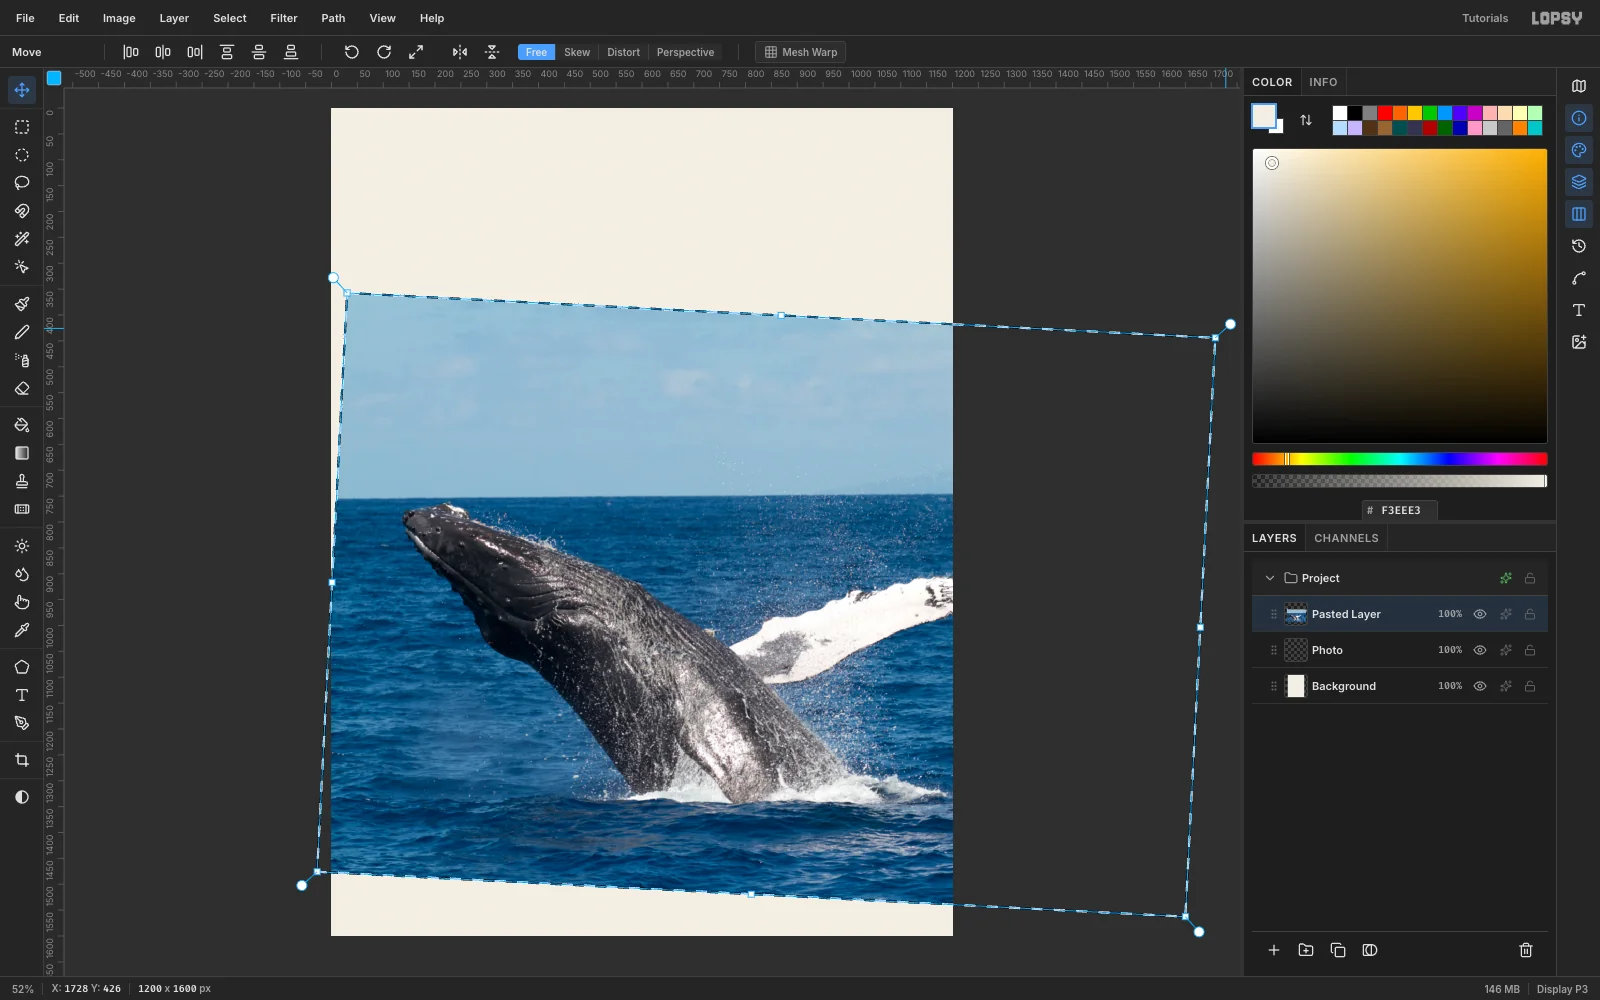
-
Remove the sky with the Magic Wand
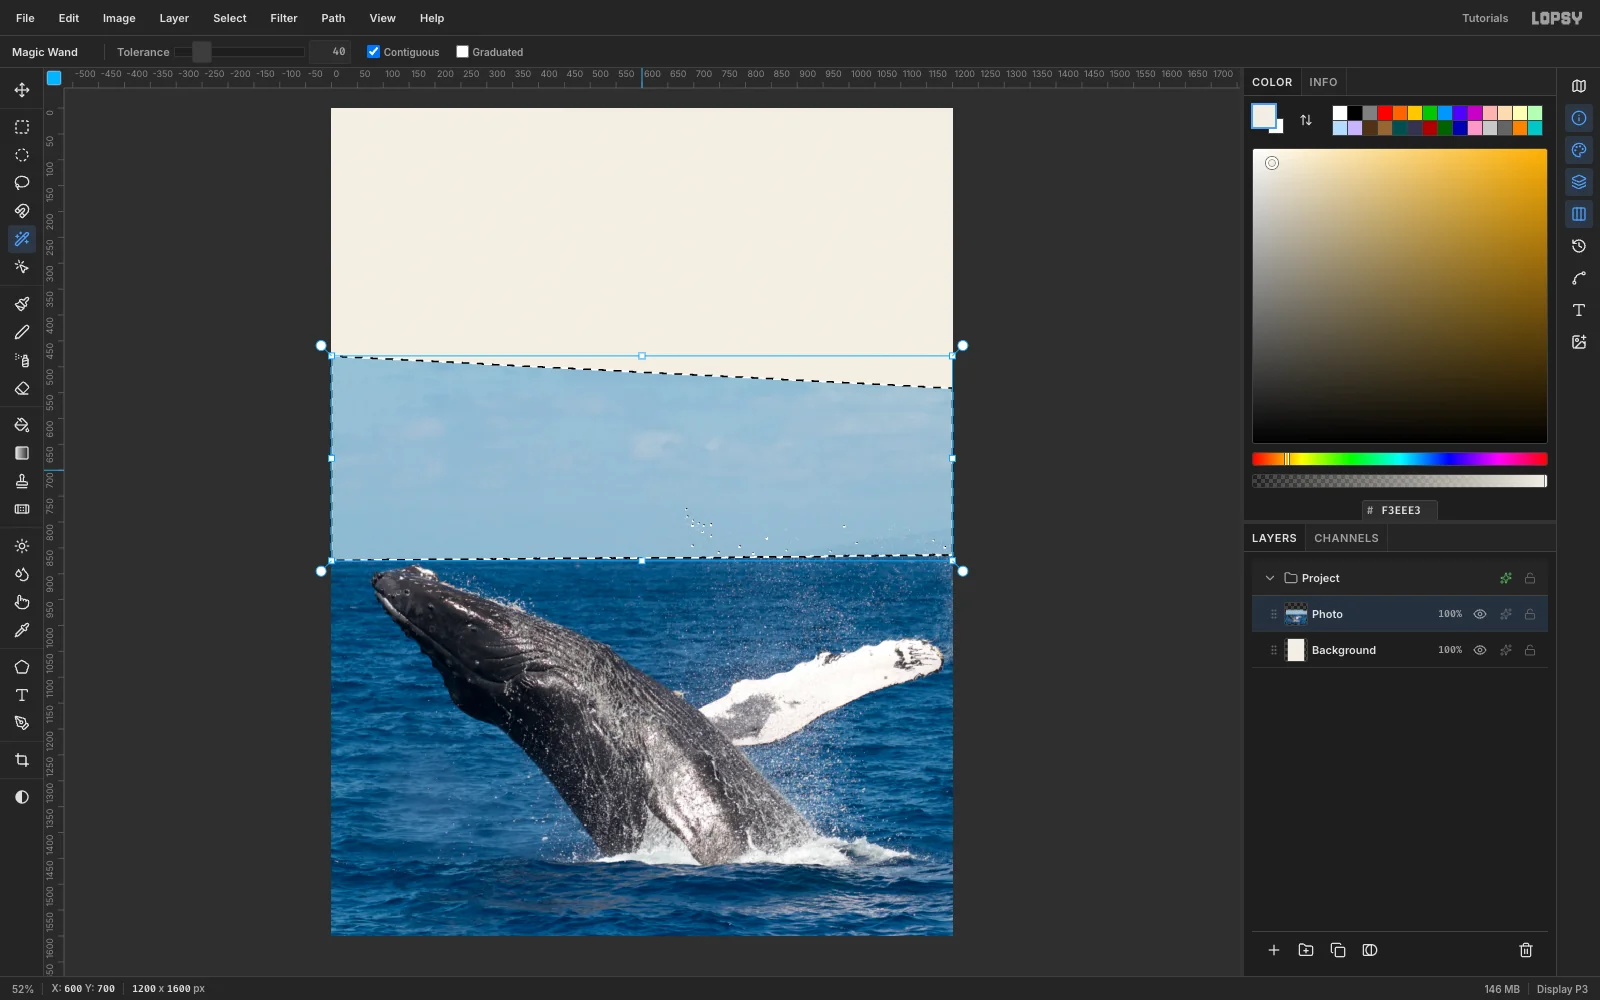
- Pick the Magic Wand and set Tolerance to 40, with Contiguous on.
- Click the sky once. It selects cleanly, because the whale's head sits just below the horizon.
- Press Delete.
The rotated photo's soft top edge can leave a faint line of pixels behind. To clear them, marquee everything above y 856 and delete again. Start the drag on the canvas and release it on the grey pasteboard, not on a ruler.
-
Trace the whale and lighten the sea
Each riso ink needs its own plate. Start with blue:
- Duplicate
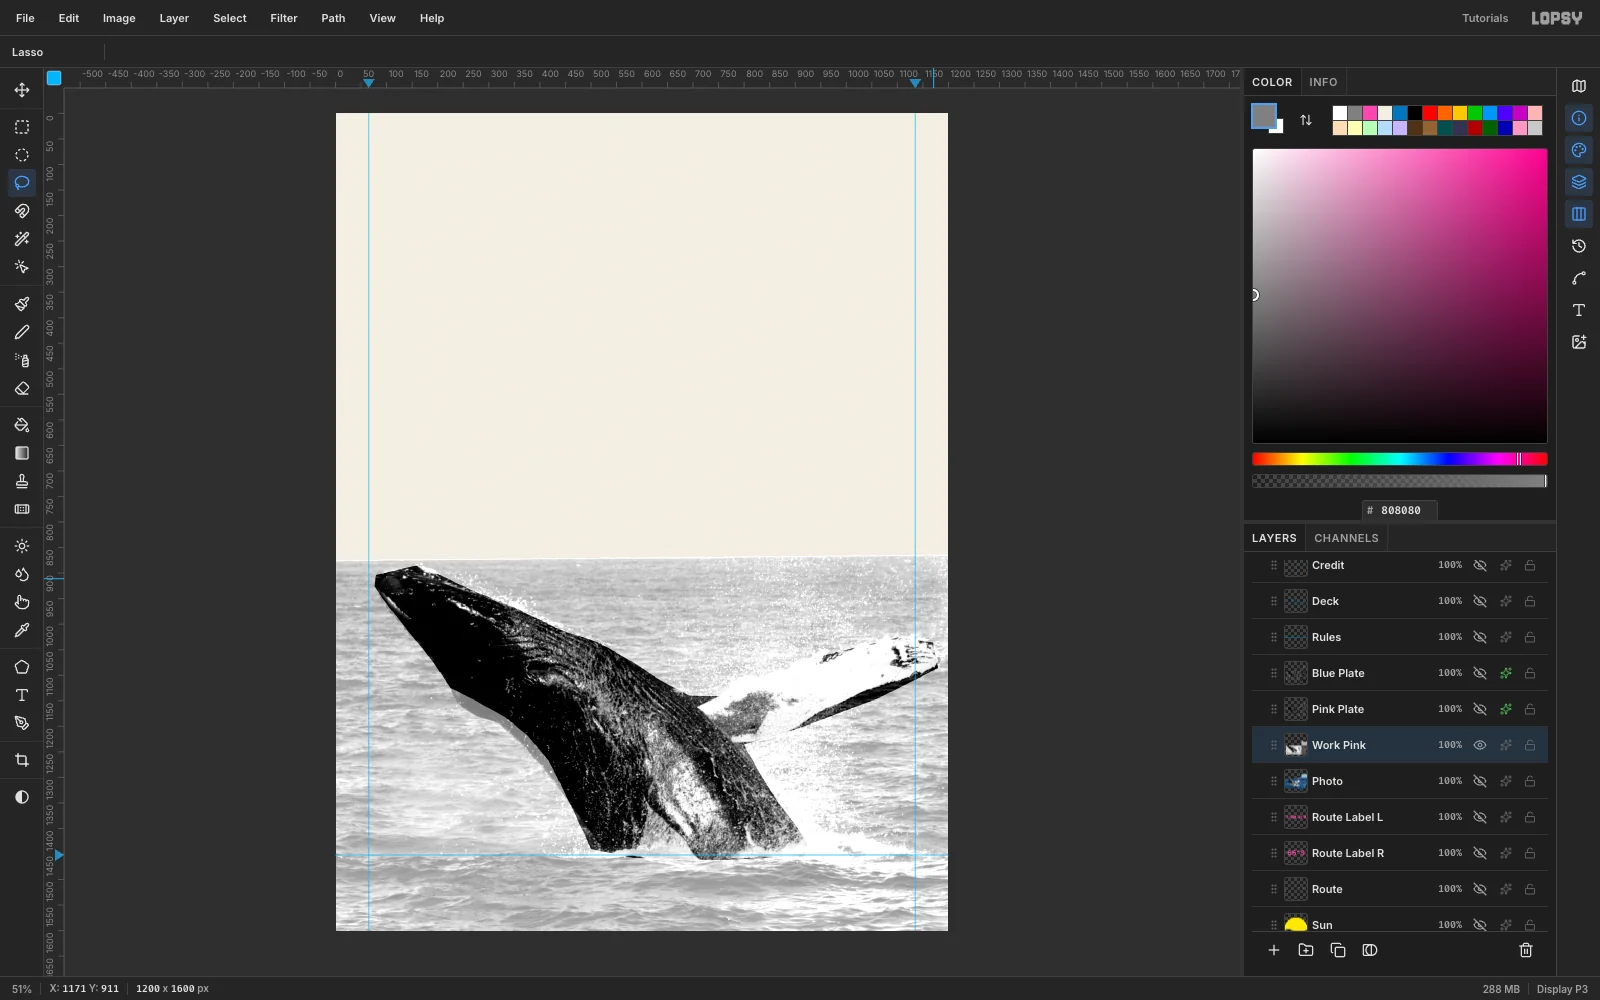
Photo, name the copyBlue Plate, and hidePhoto. - Run Filter → Desaturate.
- Run Filter → Brightness/Contrast… at Brightness −5, Contrast 45.
If you halftoned it now, the dark sea would print as heavily as the whale and the two would merge. So lighten the sea only:
- With the Lasso, trace around the whale's body and its raised pectoral fin in one polygon.
- Choose Select → Inverse.
- Run Brightness/Contrast… at Brightness +30, Contrast 0. Filters only change the selected pixels.
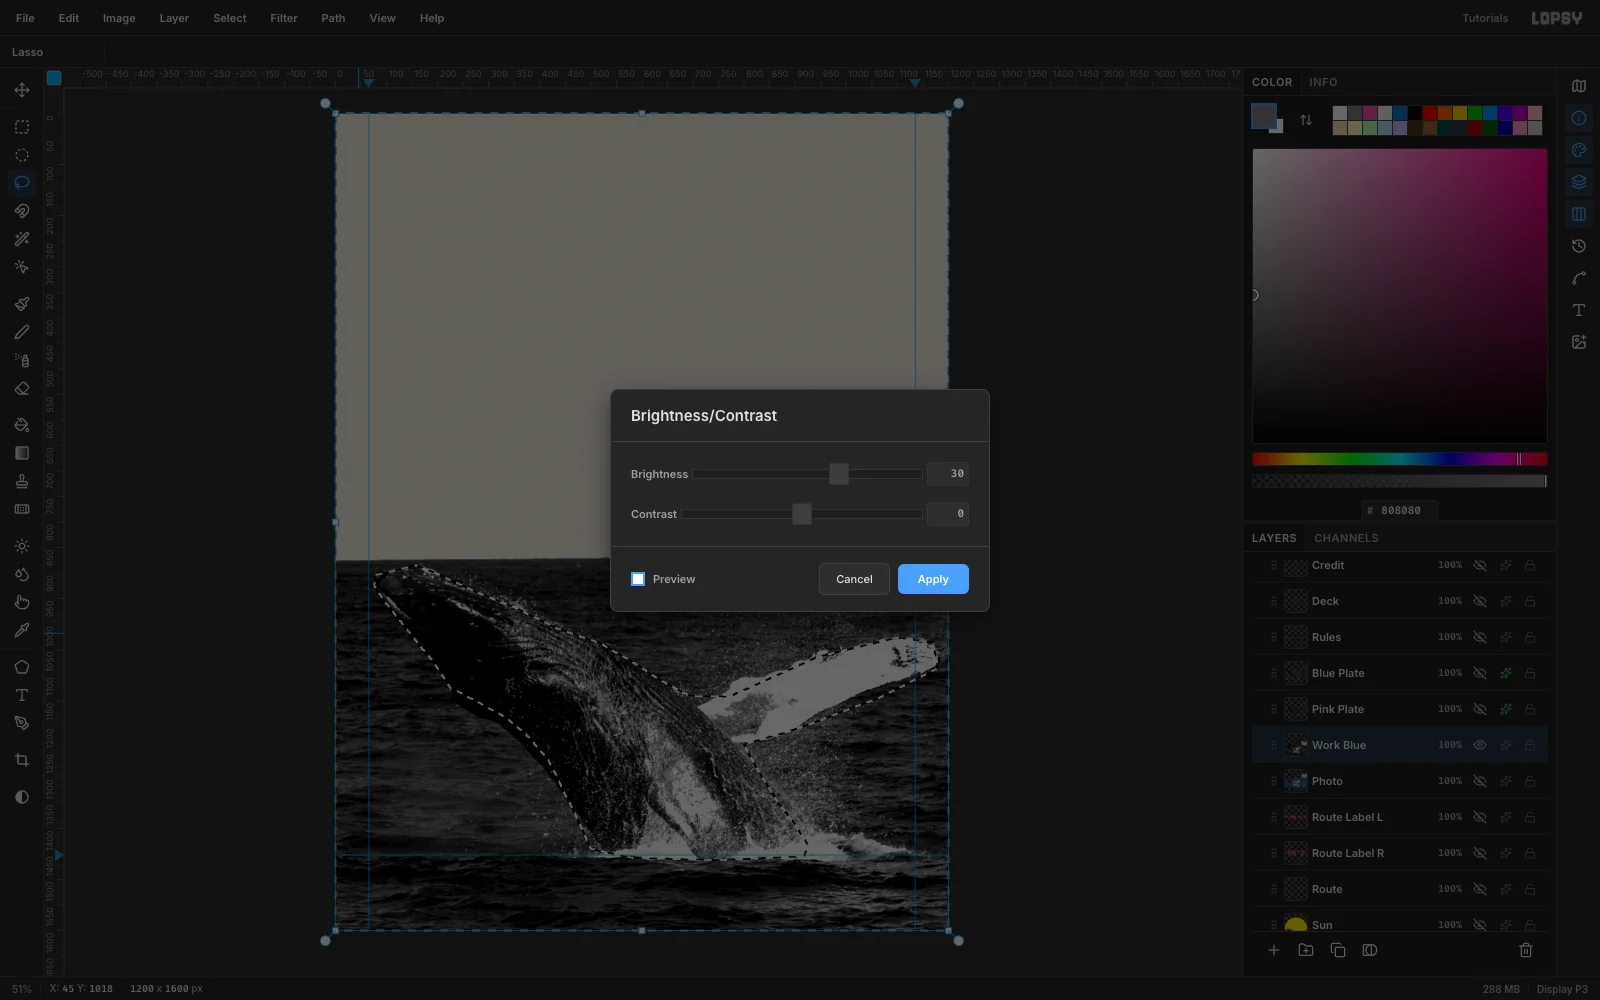
- Duplicate
-
Burn the sea around the fin
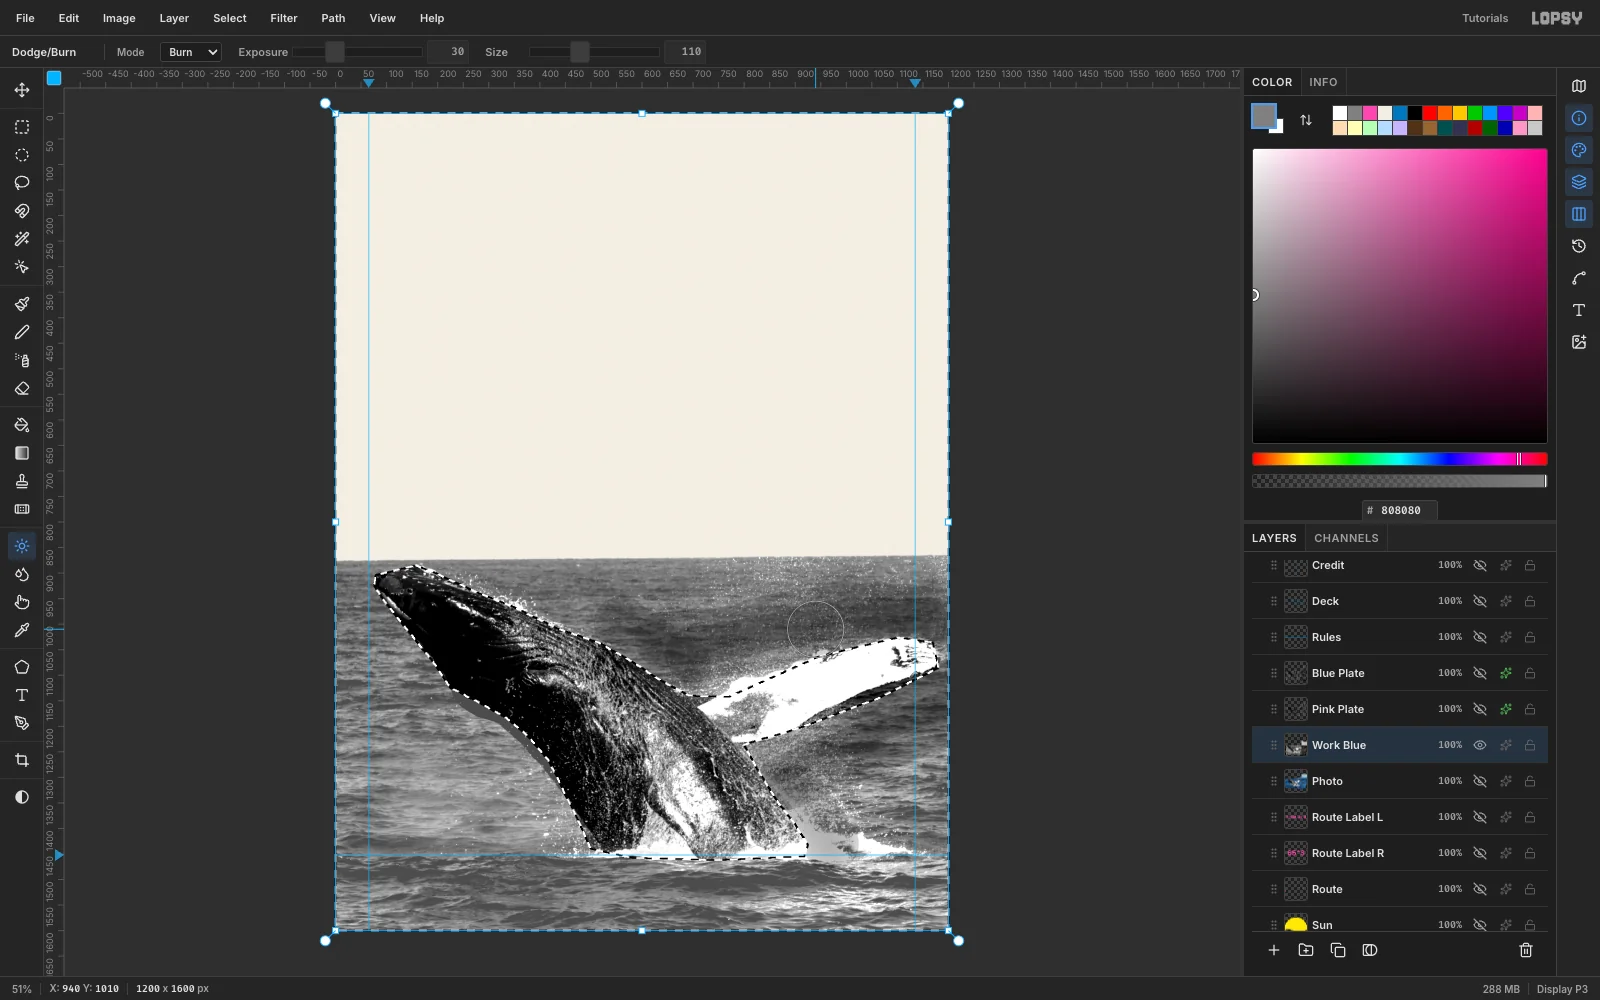
The pectoral fin is white, so against a lighter sea it disappears. Keep the sea selection active and darken the water around it:
- Pick the Dodge/Burn tool.
- Set Mode to Burn, Exposure to 30 and Size to 110.
- Paint two passes above the fin, two below it, and one each along the whale's back and near the splash.
The selection keeps the burn off the whale itself. This is the old darkroom move of burning in the background to lift the subject. Press Cmd+D when you're done.
-
Halftone the blue plate
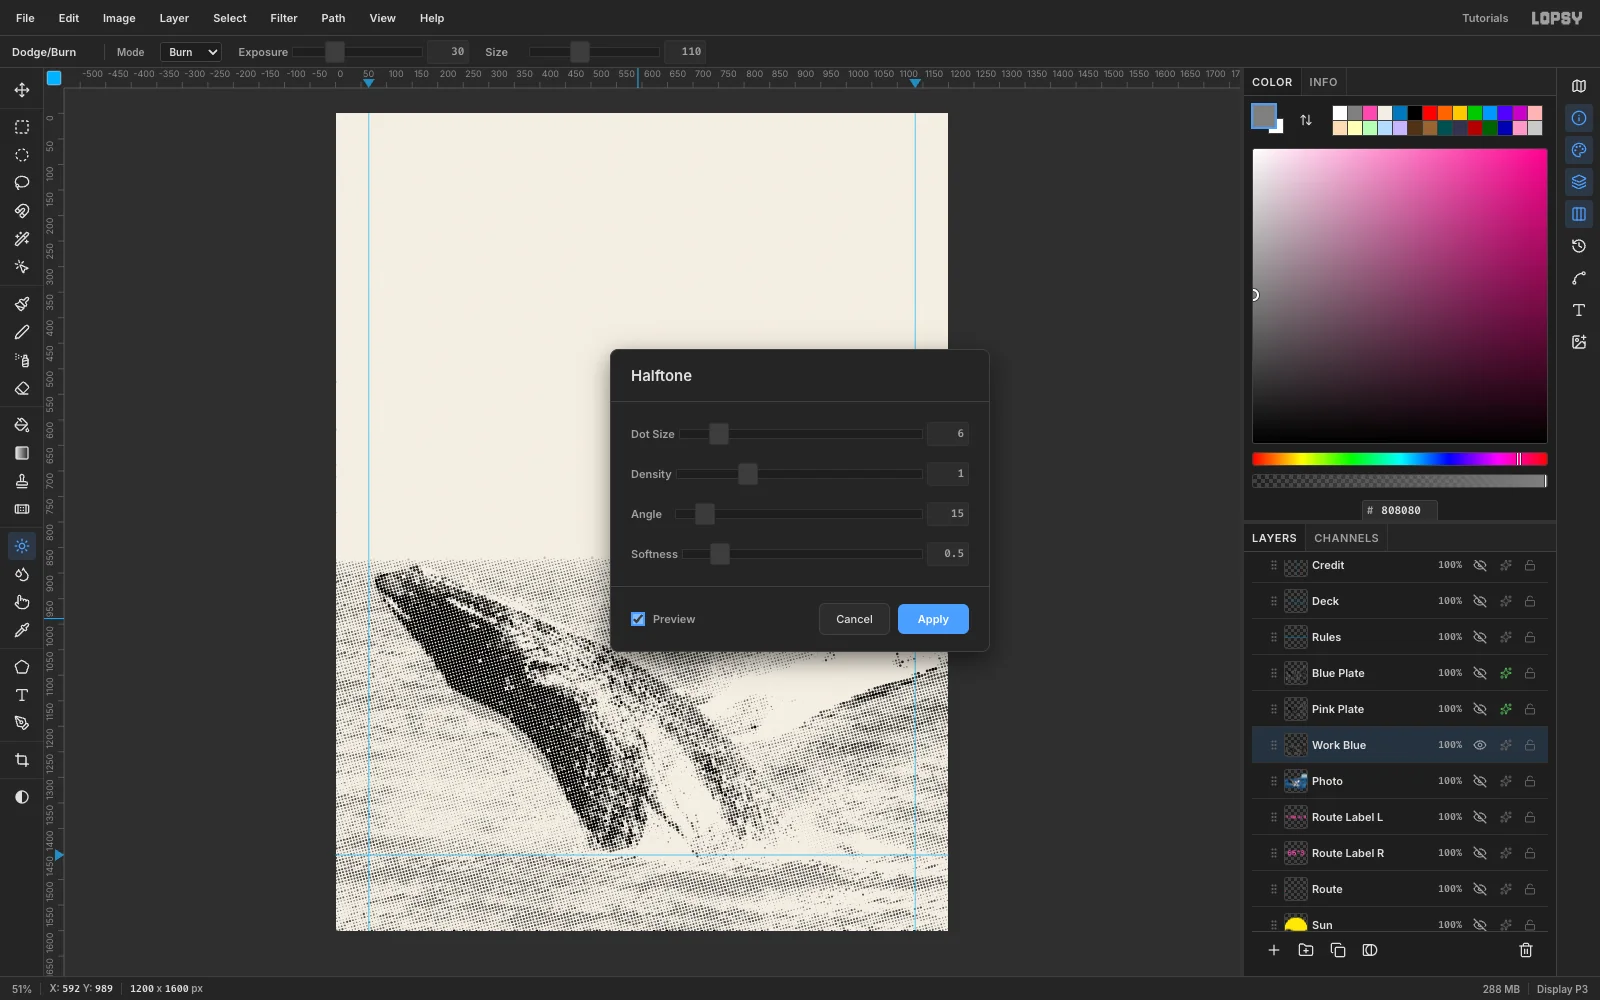
Run Filter → Halftone… with these settings:
- Dot Size 6
- Density 1
- Angle 15
- Softness 0.5
Turn on Preview to check it on the canvas. Dark areas become large dots and light areas become tiny ones.
The gaps come out transparent, which is exactly what a plate needs. The paper will show through them.
-
Ink the blue plate
Open the layer's effects drawer:
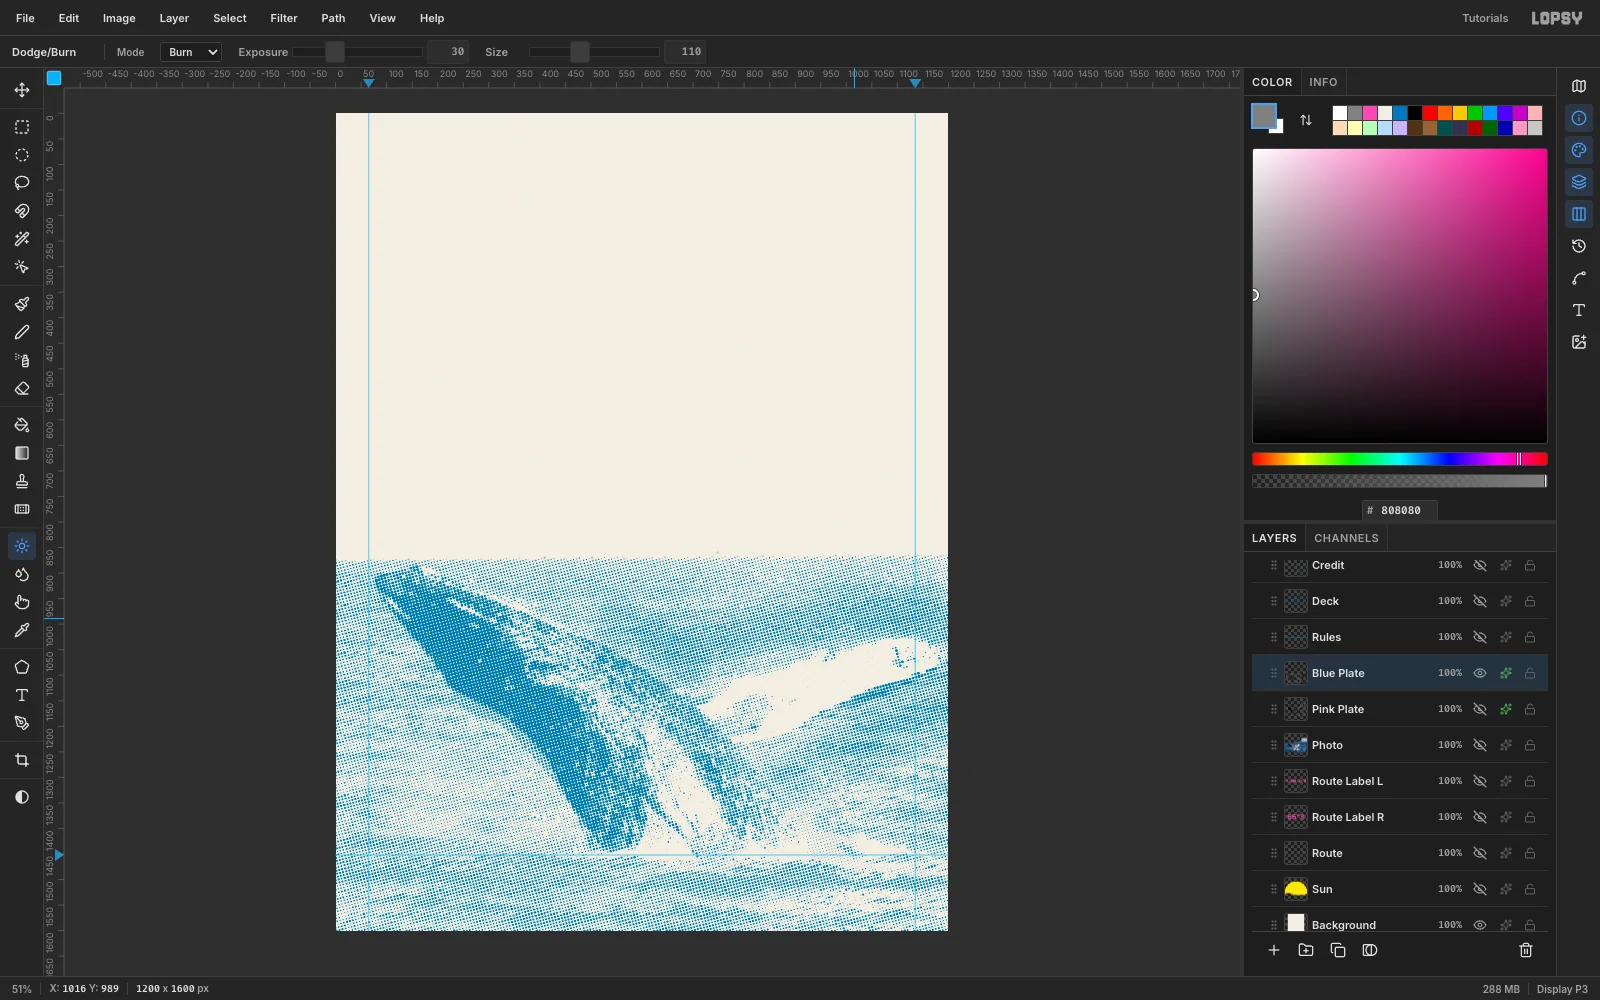
- Enable Color Overlay.
- Click the Color Overlay label to show its settings.
- Set the colour to riso blue .
- Set the layer's Blend to Multiply.
The dots now look like blue ink on paper.
The photo also runs off the canvas, and halftone cells straddling the canvas edge can leave a sliver of dots in the empty sky. Marquee a 10 px strip at each side, above the horizon, and delete it.
-
Separate the pink plate
Pink should print heavily on the whale and only lightly in the sea, like a real colour separation.
- Duplicate
Photoagain and name the copyPink Plate. - Run Filter → Hue/Saturation… at Saturation +100, then Filter → Desaturate. Boosting saturation first pushes the blue sea much lighter than the grey whale when it's desaturated.
- Lasso the whale again and run Brightness/Contrast… at −15 / +40.
- Choose Select → Inverse and run it again at +50 / +10 on the sea.
- Run Halftone… with Dot Size 6, Angle 75 and Softness 0.5.
- Add a Color Overlay of and set the layer to Multiply.
Keep the plates at different screen angles (blue 15°, pink 75°). That's how real separations avoid muddy moiré.
- Duplicate
-
Overprint the plates and misregister them
- Drag
Blue PlateabovePink Platein the Layers panel. - Because both are Multiply, the whale prints indigo where the inks overlap. The sea stays blue with a faint lilac tint.
- Select
Pink Plate, pick the Move tool, and nudge it 7 px right and 4 px down with the arrow keys. That's the slight miss of a hand-fed second pass. Look for the pink fringe along the whale's back.
The nudge pulls off-canvas pixels in from the left edge. Marquee the first 9 px of the sea on
Pink Plateand delete them so the edge doesn't show a dense pink stripe.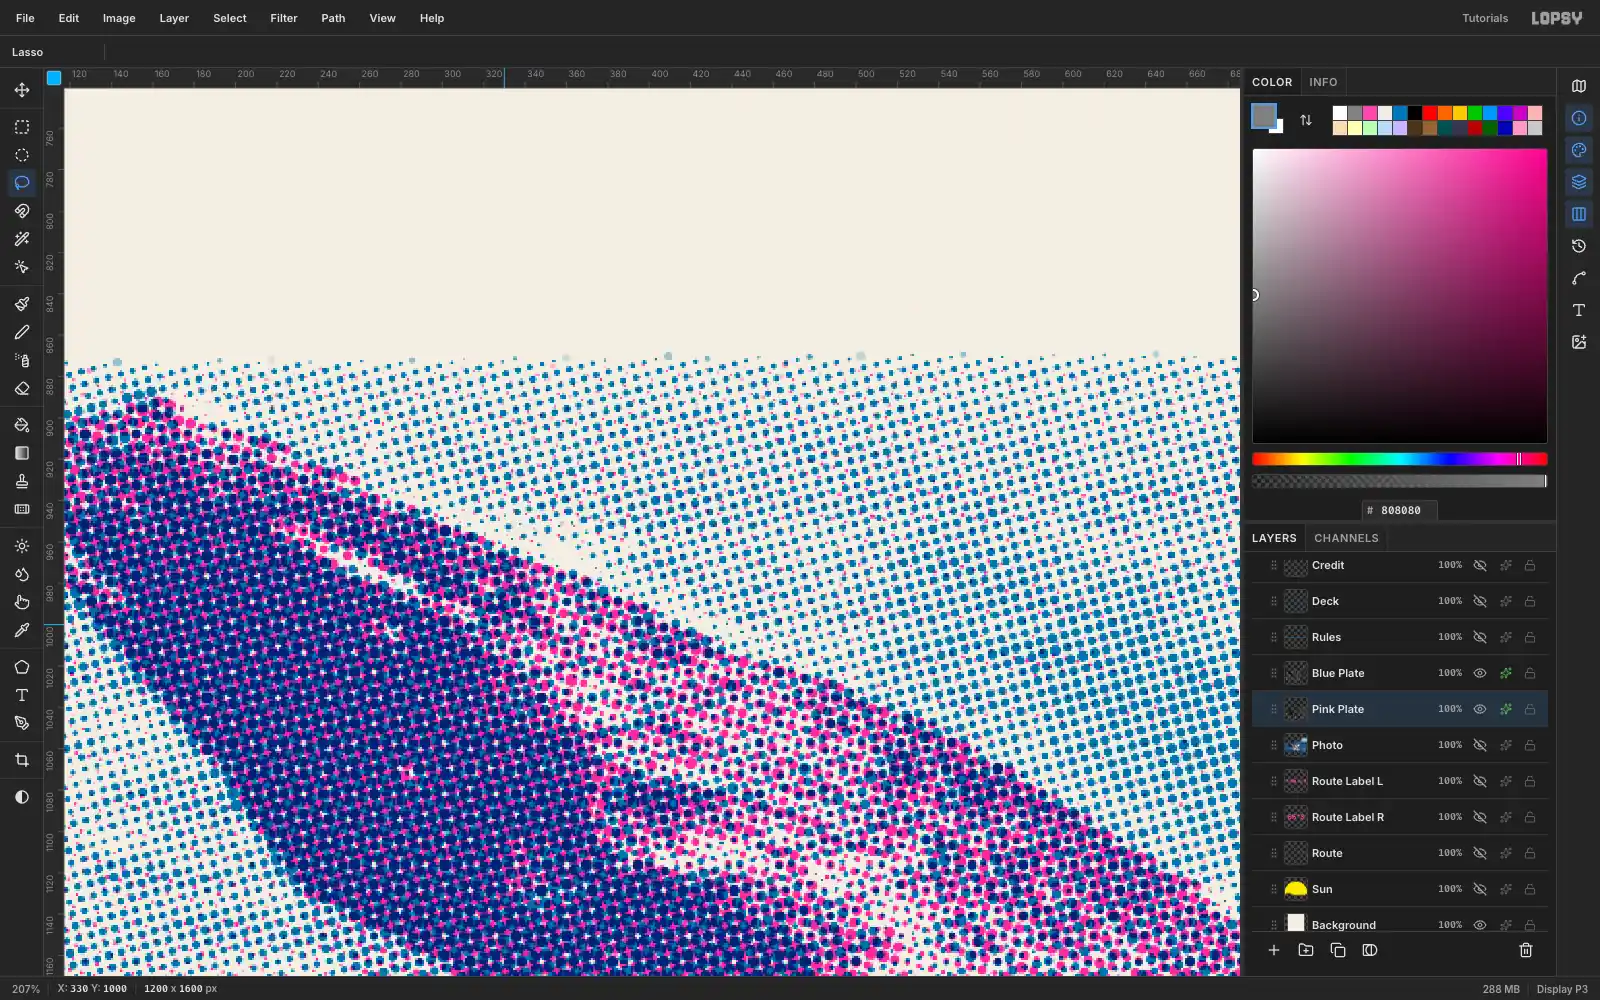
- Drag
-
Set a yellow sun behind the whale
- Add a layer named
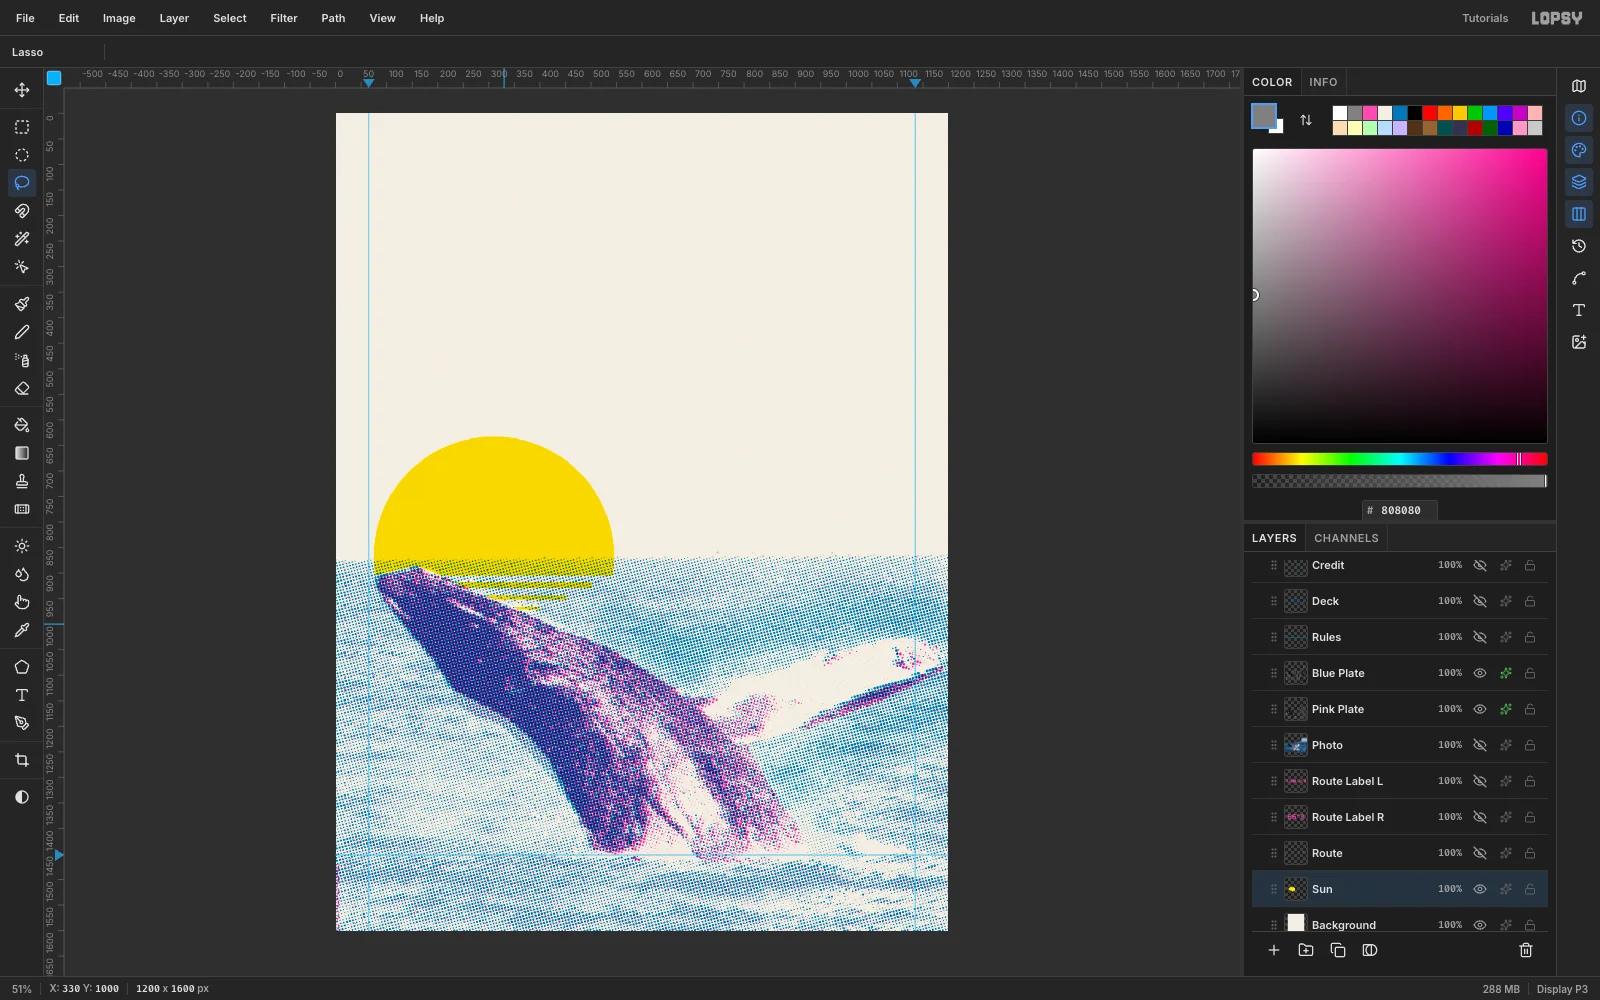
Sunbelow the plates. - Draw an Elliptical Marquee 470 px across, centred on (310, 868), and fill it with .
- Marquee everything below y 905 and delete it. The sun now dips 37 px into the sea, and the blue plate overprints it to make a green band.
- Fill three thin marquees below it as reflection bars: 384 × 12, 284 × 8 and 176 × 5 px.
- Lasso the whale's head again and press Delete, so the sun doesn't print on the whale.
- Set the layer to Multiply.
- Add a layer named
-
Set the masthead, dateline and headline
Keep everything on a 65 / 1135 px margin.
- Masthead:
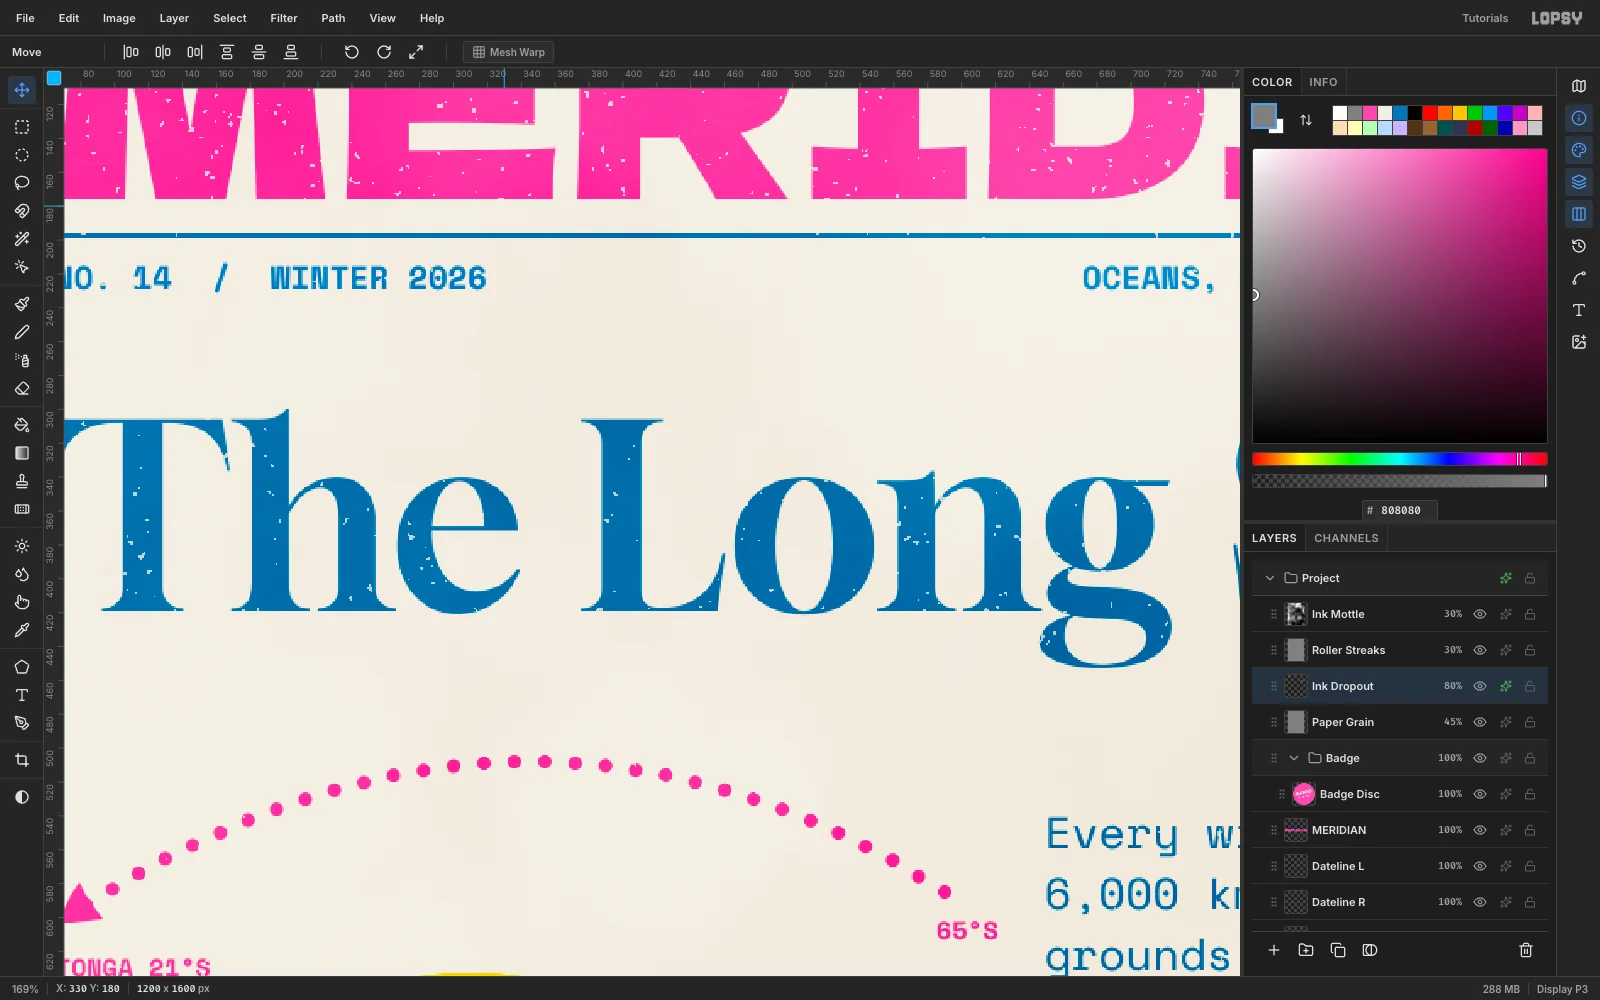
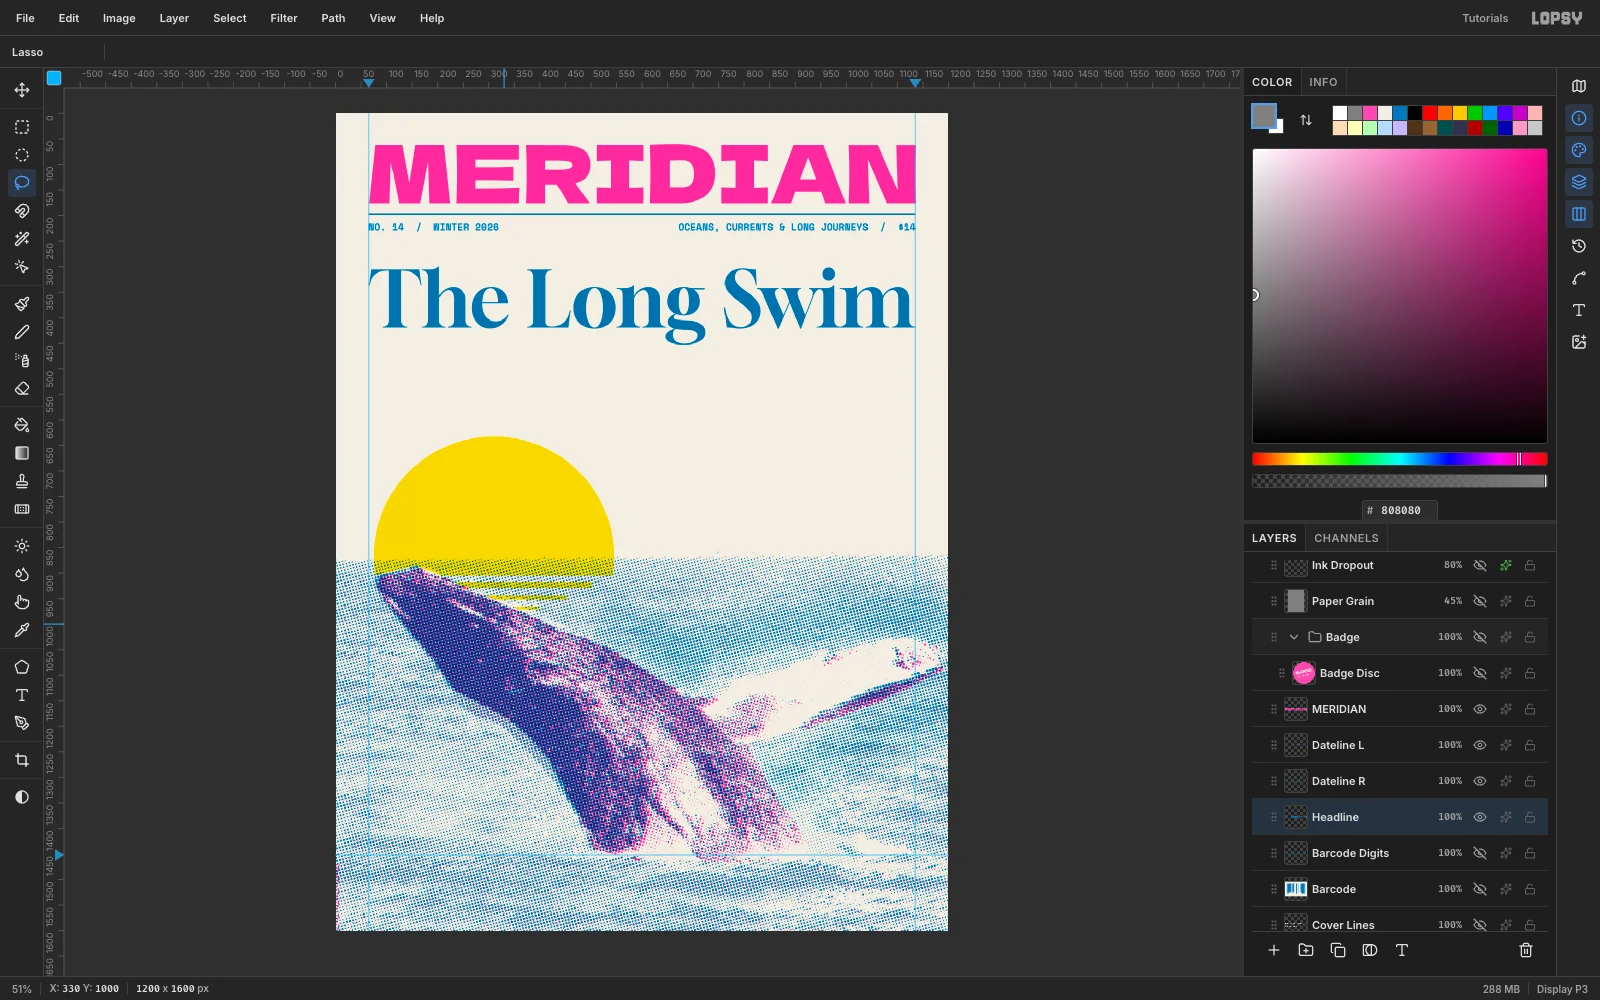
MERIDIANin Dela Gothic One at 157 px, , with its ink box from x 65 to 1135 and its top at y 60. - Rule: on a
Ruleslayer, fill a 3 px marquee from (65, 196) to (1135, 199) with blue. - Dateline: Space Mono Bold at 19 px, blue. Put
NO. 14 / WINTER 2026on the left margin andOCEANS, CURRENTS & LONG JOURNEYS / $14flush right, both with their tops at y 213. - Headline:
The Long Swimin Gloock at 151 px, blue, spanning the full measure with its top at y 300.
Set the masthead, rule and headline to Multiply.
- Masthead:
-
Add the deck, route arc and photo credit
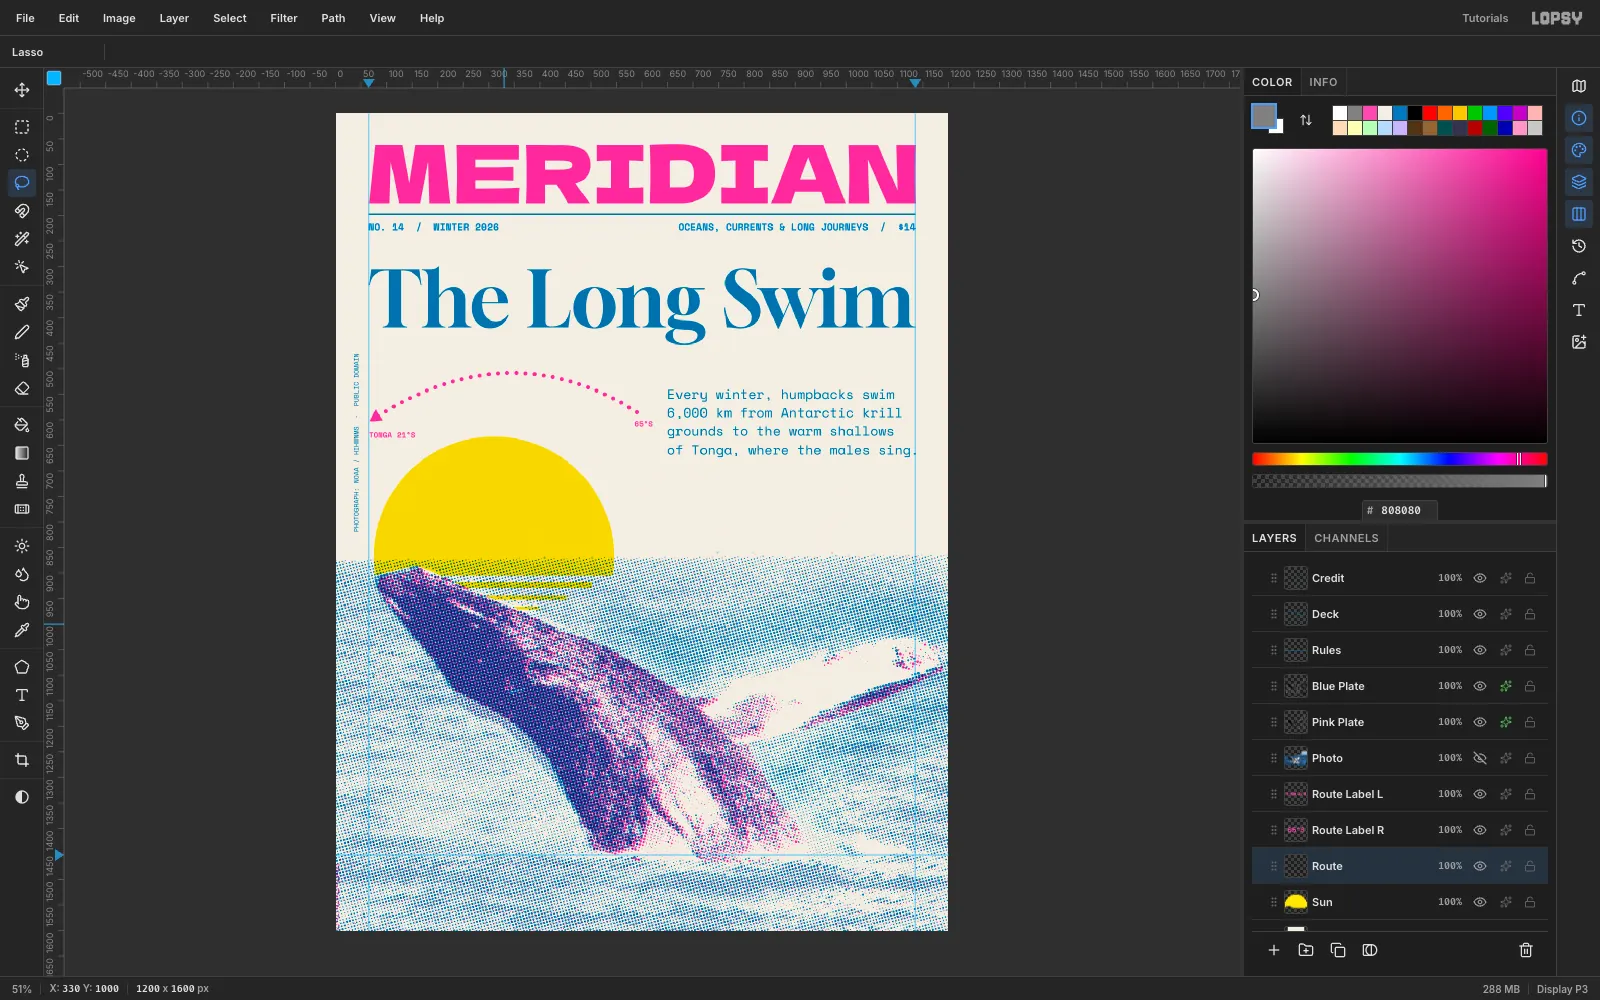
Deck. Type four lines in Space Mono at 26 px, blue, pressing Enter between lines:
Every winter, humpbacks swim6,000 km from Antarctic krillgrounds to the warm shallowsof Tonga, where the males sing.
Align it flush right to 1135, with its top at y 540.
Route arc. On a
Routelayer aboveSun:- Set the Brush to Size 9 and Hardness 100.
- Open Brushes and set Spacing to 200. The stroke now paints separate dots instead of a line.
- Drag one arc from (590, 585), up through about (340, 505), and down to (74, 598).
- Lasso a small triangle at the left end and fill it pink for the arrowhead.
- Label the ends in Space Mono Bold 15 px pink:
TONGA 21°Son the 65 px margin, and65°Sending 30 px short of the deck.
Credit.
- Type
PHOTOGRAPH: NOAA / HIHWNMS - PUBLIC DOMAINin Space Mono 13 px. - Click Rasterize Layer at the bottom of the Layers panel.
- Marquee it and switch to the Move tool.
- Hold Shift while you drag the rotate handle, so the angle snaps to exactly −90°.
- Press Cmd+D, then nudge it into the left margin at x 34.
-
Stick on a rotated badge
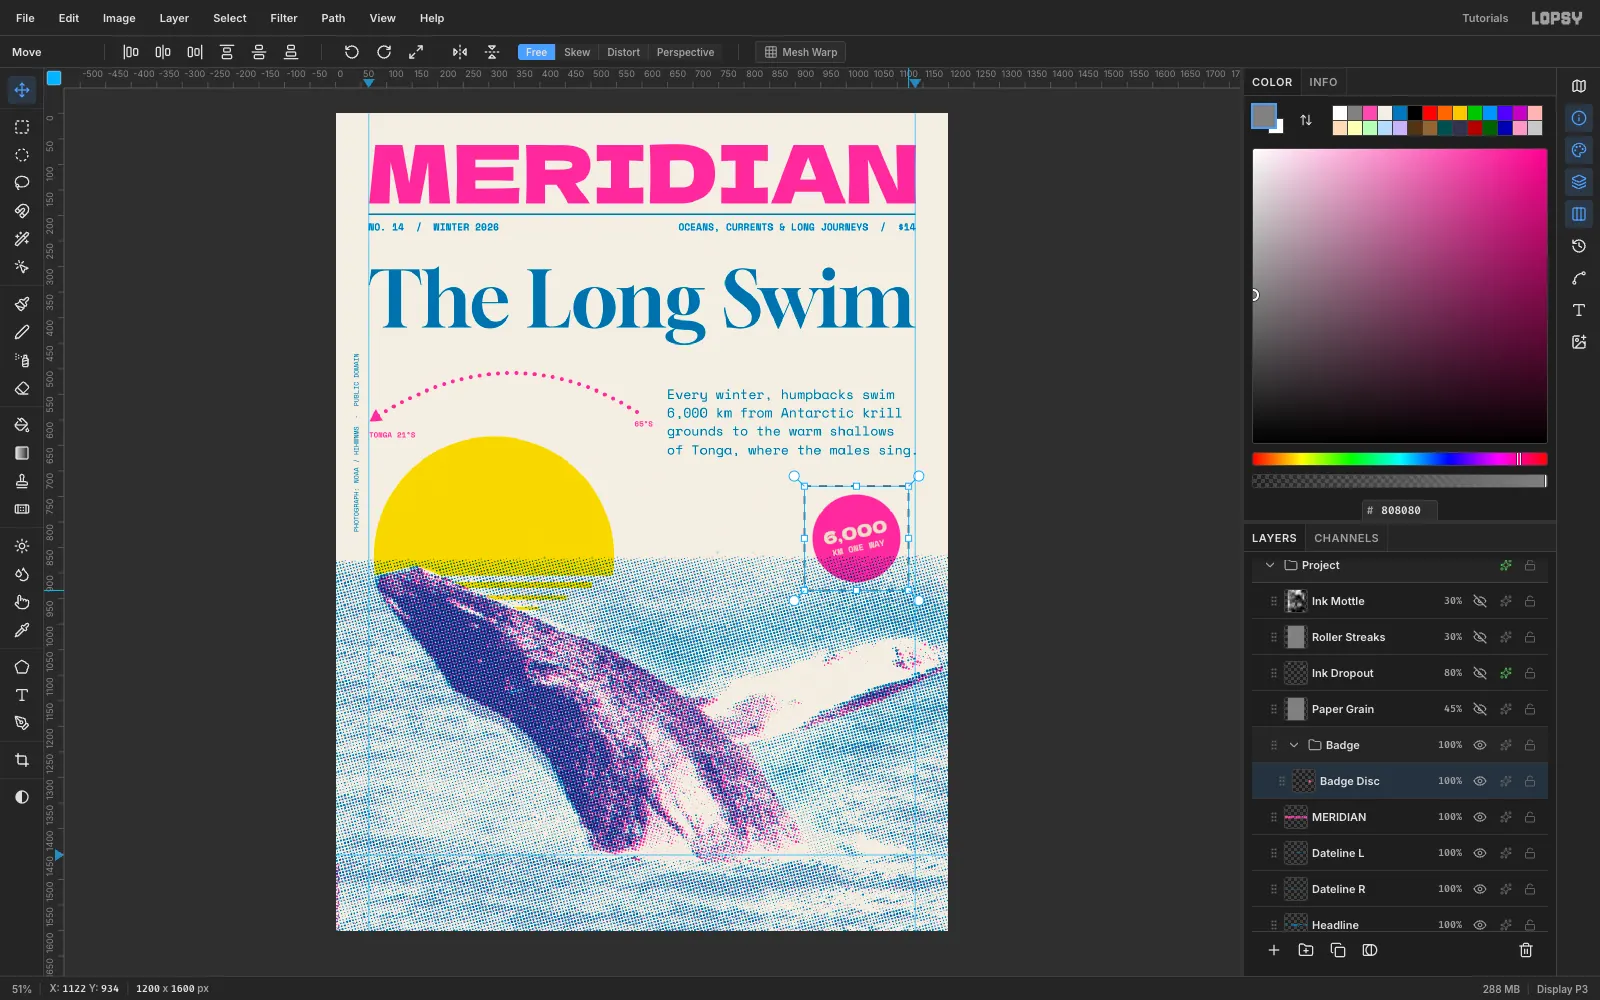
- Click New Group and name it
Badge. Add aBadge Disclayer inside it. - Fill a 172 px circle centred on (1020, 832) with pink. It deliberately overlaps the horizon by about 50 px.
- Type
6,000in Dela Gothic One 33 px andKM ONE WAYin Space Mono Bold 17 px, both in the paper colour. - Centre the two lines as one block on the disc.
- Rasterize both, then use Layer → Merge Down twice so the sticker is a single layer.
- Marquee the disc and rotate it −12° with the Move tool's rotate handle. Press Cmd+D.
- Set the disc to Multiply, so the sea's dots show through its lower edge like real overprinted ink.
- Click New Group and name it
-
Print the footer band and barcode
- Click the top ruler at x 65 and x 1135, and the left ruler at y 1452, to add guides.
- On a
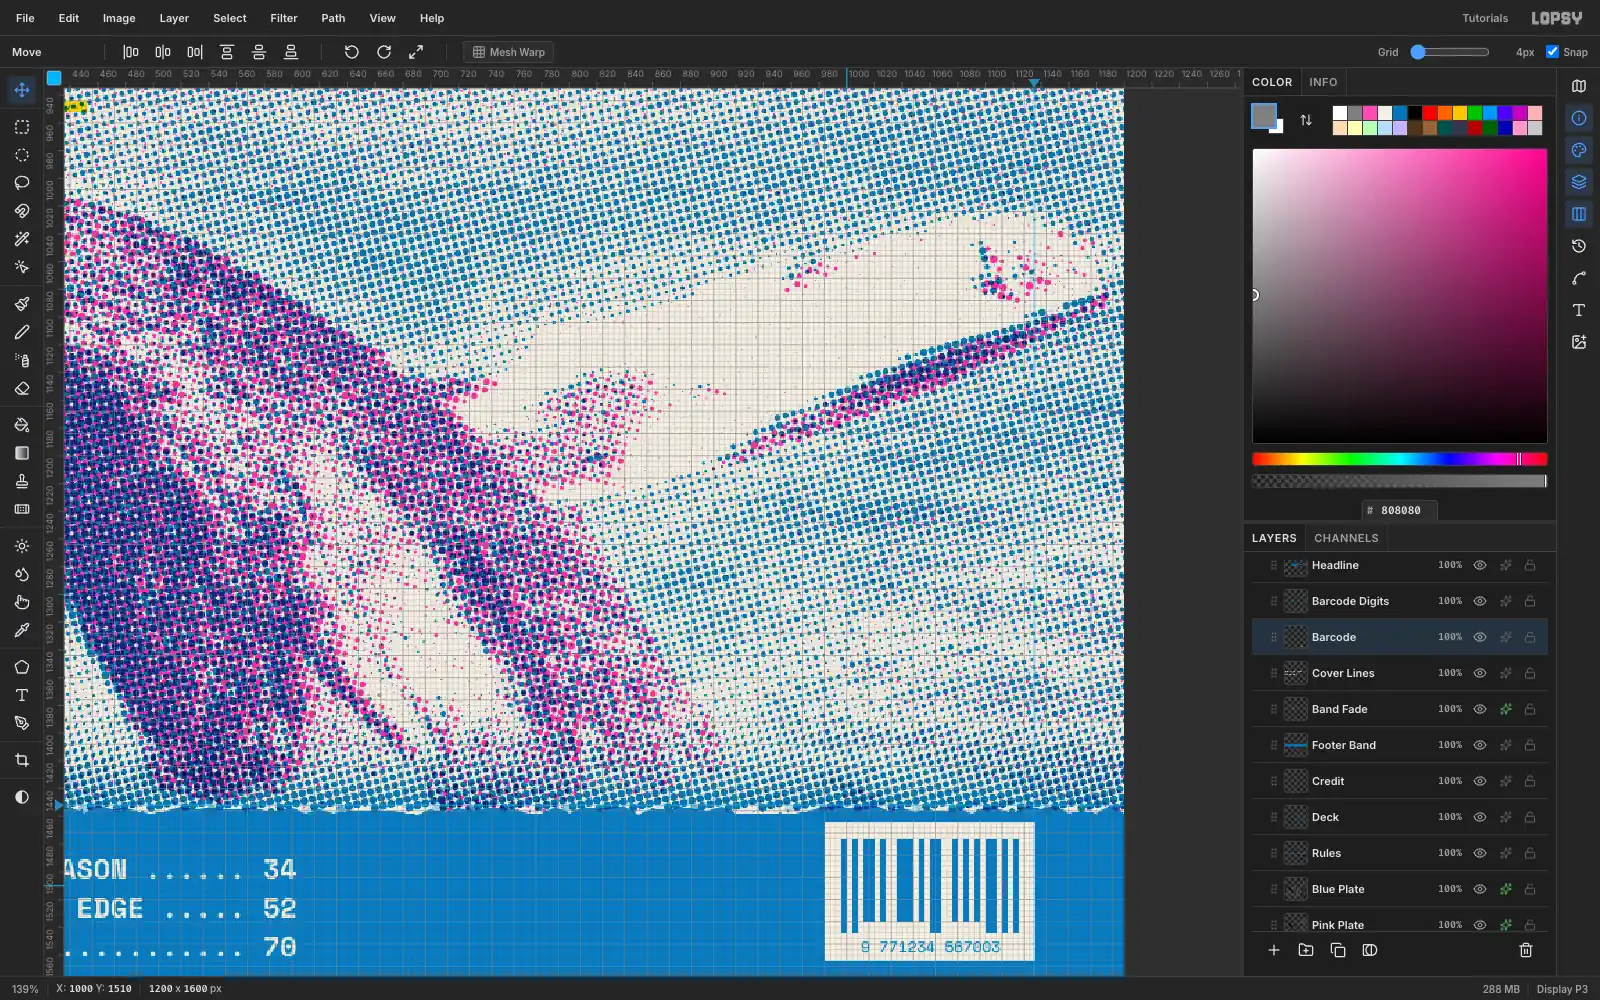
Footer Bandlayer, fill everything below the 1452 guide with flat blue (Normal mode). - Lasso a zig-zag 0–7 px deep along the band's top and delete it, so the edge looks roller-printed rather than ruled.
- For a soft transition above the band, add a
Band Fadelayer:
- Fill an 80 px strip above the band with a black-to-white Gradient, black at the bottom.
- Run Halftone at 6 / 15° and give it the blue overlay. Set it to Multiply.
Cover lines. Type them in Space Mono Bold 20 px, paper-coloured. Because the font is monospace, padding each line with dots to 44 characters lines up the page numbers exactly, as in
THE SONG THAT CHANGES EVERY SEASON ...... 34.Drag the layer above the band in the Layers panel.
Barcode.
- Turn on View → Show Grid, set the Grid to 4 px, and tick Snap.
- Snap a 152 × 100 cream box.
- Snap 4, 8 and 12 px bars into it and fill them blue.
- Add the digits in Space Mono 11 px.
- Turn Snap off before you nudge anything. With snap on, every arrow press moves one full grid cell.
-
Add riso ink texture
Real riso ink never lies perfectly flat. Add four layers at the top of the stack:
- Paper Grain. Fill with , then run Add Noise at 22, Mono, Gaussian. Set it to Overlay at 45%.
- Ink Dropout.
- Fill grey, then run Add Noise at 100, Mono, Uniform.
- Run Gaussian Blur at 3.5, then Threshold at 146. This leaves about 1% round white clumps.
- With the Magic Wand (Contiguous off), click the black and press Delete.
- Give the specks a Color Overlay in the paper colour and set the layer to 80%. The voids are invisible on paper but punch holes in the ink.
- Delete them over the cover lines and barcode.
- Roller Streaks. Fill grey, run Add Noise at 70, Motion Blur at Angle 0, Distance 300, and Brightness/Contrast at Contrast +70. Set it to Soft Light at 30% to get faint horizontal banding in the solids.
- Ink Mottle. Fill grey, run Filter → Clouds… at Scale 3, and set it to Soft Light at 30% for uneven ink density.
Export with File → Quick Export PNG, and save the layered file with File → Save Project.