Liquid Metal Magazine Cover with a Melting Gold Sun
Design a science-magazine cover with a molten gold sun built from Clouds, Solarize and Liquify, plus chrome drip type in Lopsy.
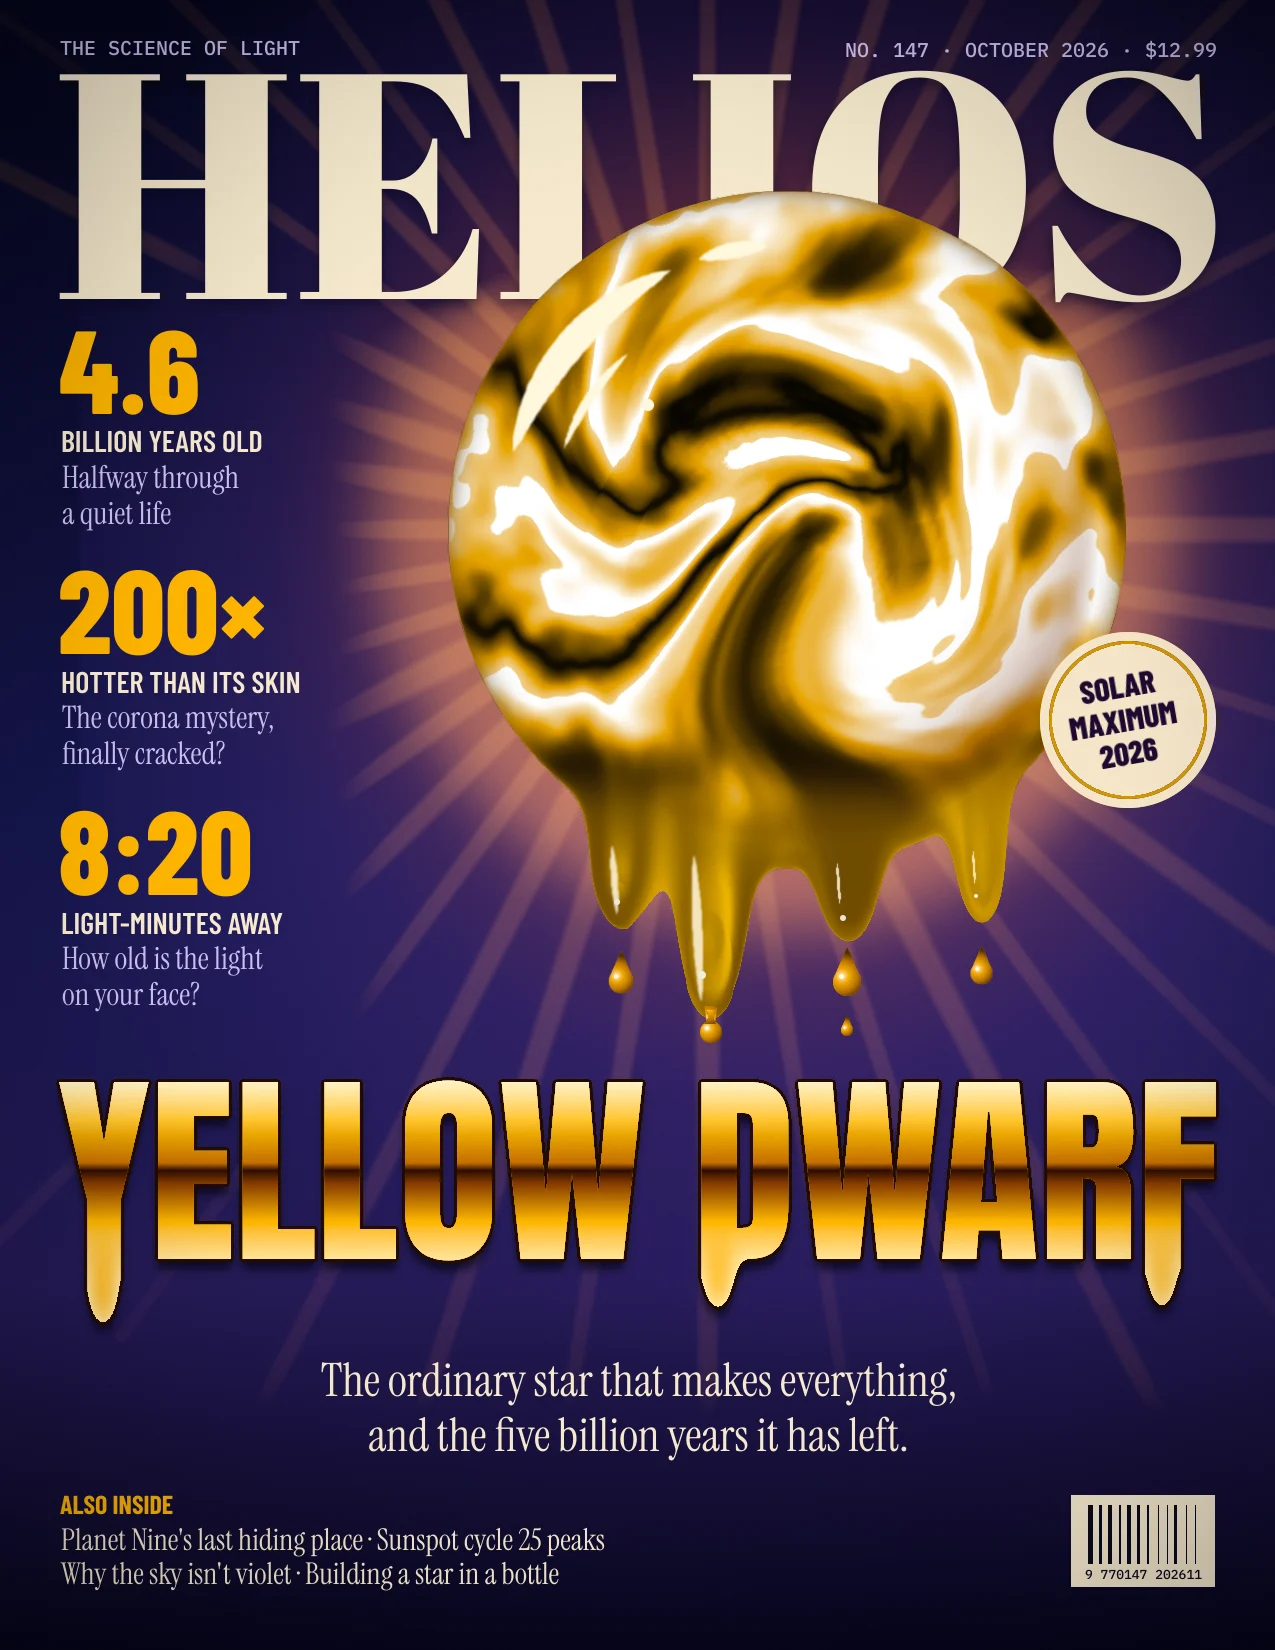
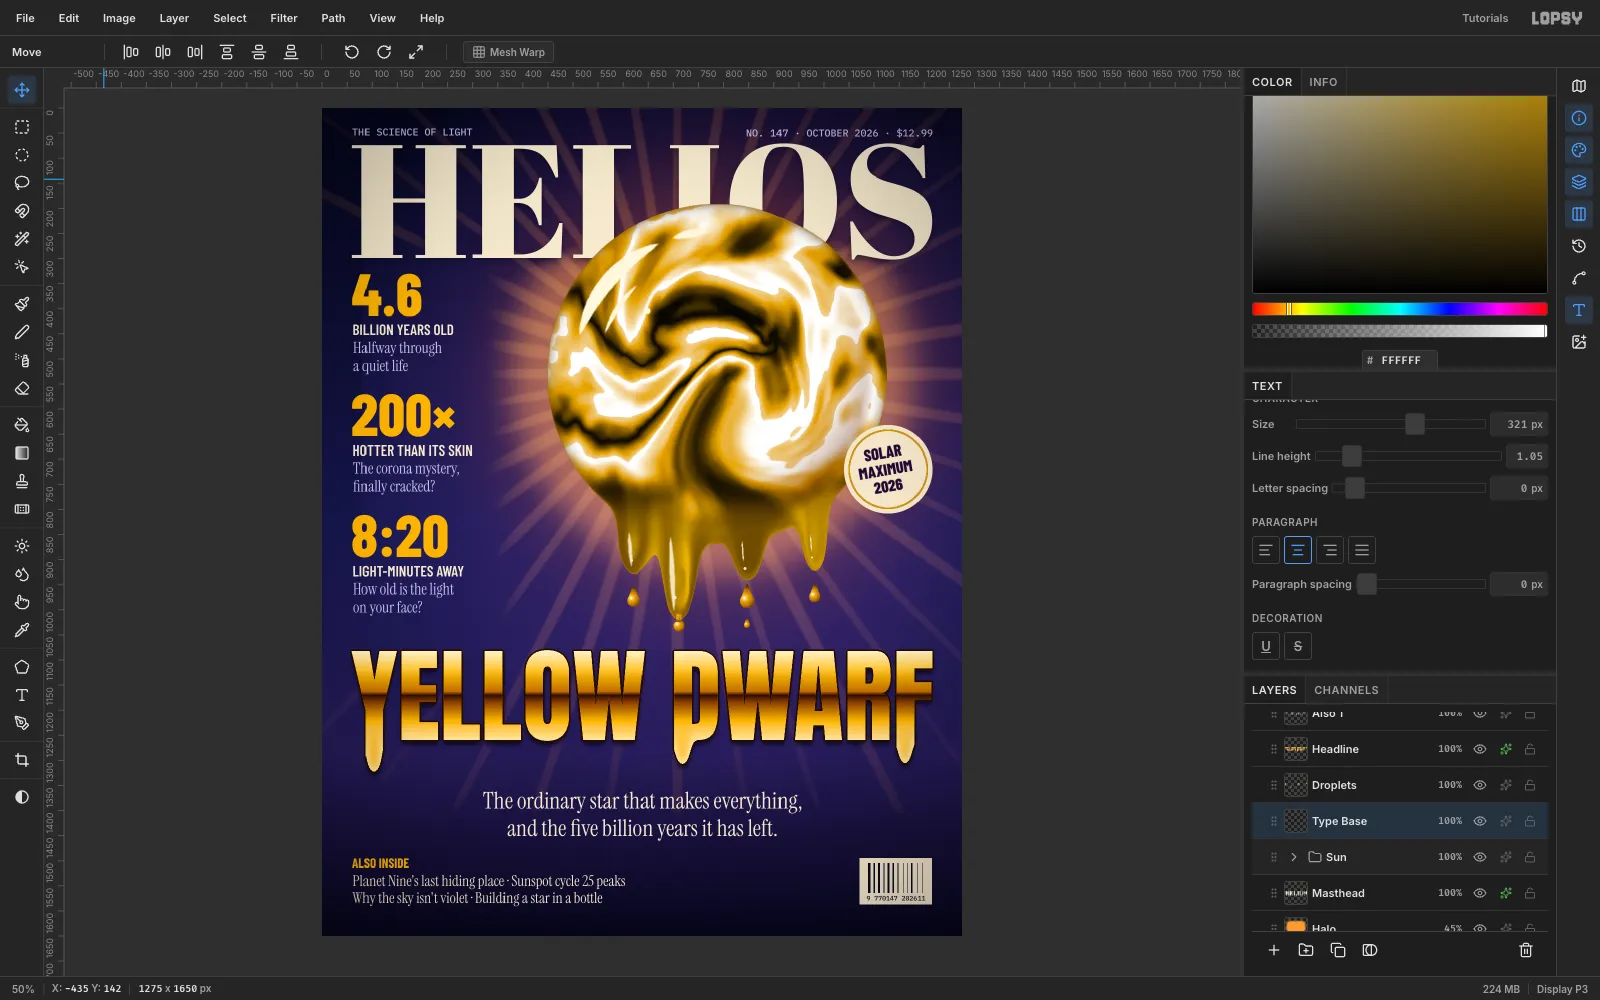
This tutorial builds an editorial cover for a fictional science monthly, HELIOS. The cover story is "Yellow Dwarf", about our Sun, told in a liquid-metal style. Everything is made in Lopsy with no photos:
- The sun is a Clouds texture folded into chrome bands with Solarize, tinted gold with a Hard Light layer, then swirled and melted with Liquify.
- The type uses a Didone masthead, an Anton headline with a chrome gradient and three drips, and a column of condensed cover lines.
The document is 1275 × 1650 px, US Letter at 150 dpi.
-
Paint a night-sky background with a sunburst
- Create a 1275 × 1650 document.
- Pick the Gradient tool. Click Advanced… and set four stops:
- at 50%
- at 78%
- at 100%
- Drag a Linear gradient from the top edge to the bottom edge on the Background layer.
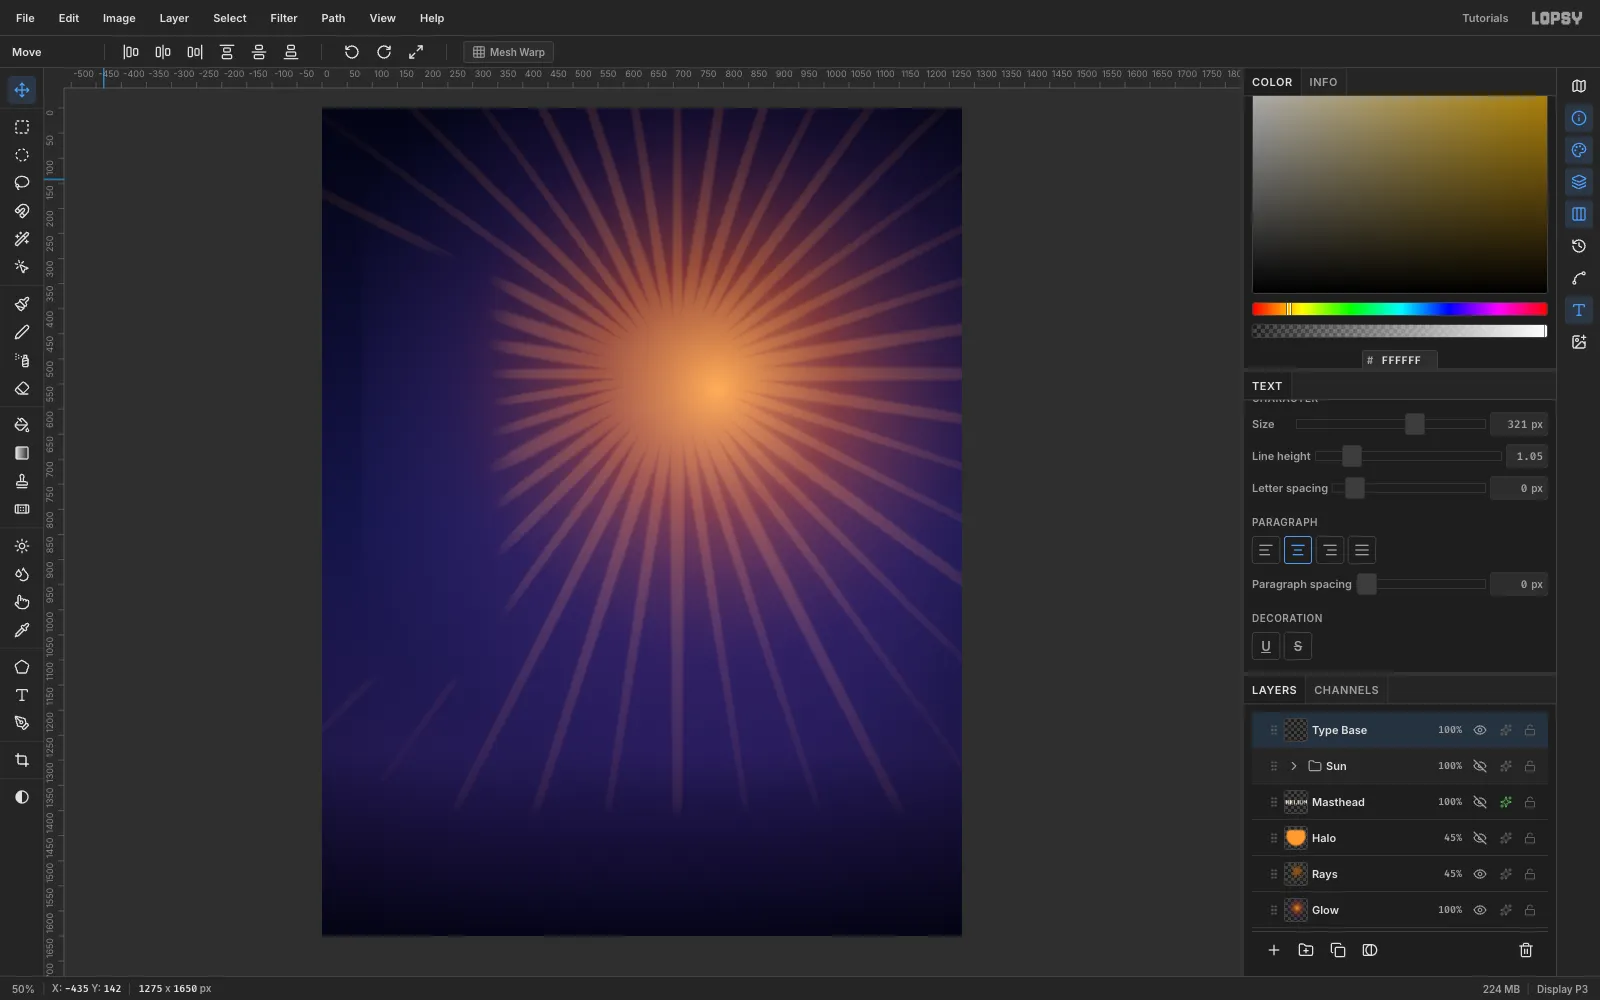
- On a new Glow layer, drag a Radial gradient from the sun's centre, about 820 px out. Use stops fading from orange to fully transparent indigo. Set the layer to Screen.
- Add a Rays layer. Set the foreground to , then run Filter → Sunburst… with these settings:
- Rays 40, Width 22, Taper 70, Fade 85, Softness 40
- Centre X 55.5, Centre Y 32.1
- Jitter 35
- Set the Rays layer to Screen at 45% opacity.
Small type will sit on the left and at the bottom, so clear the rays there. Marquee each area, run Select → Feather (60–70 px) and press Delete. That keeps the rays from buzzing behind the cover lines.
-
Fold clouds into metal bands
- Make a group called Sun and add a Sun Gold layer inside it.
- With the Elliptical Marquee, draw a 720 px circle at the canvas centre and fill it with .
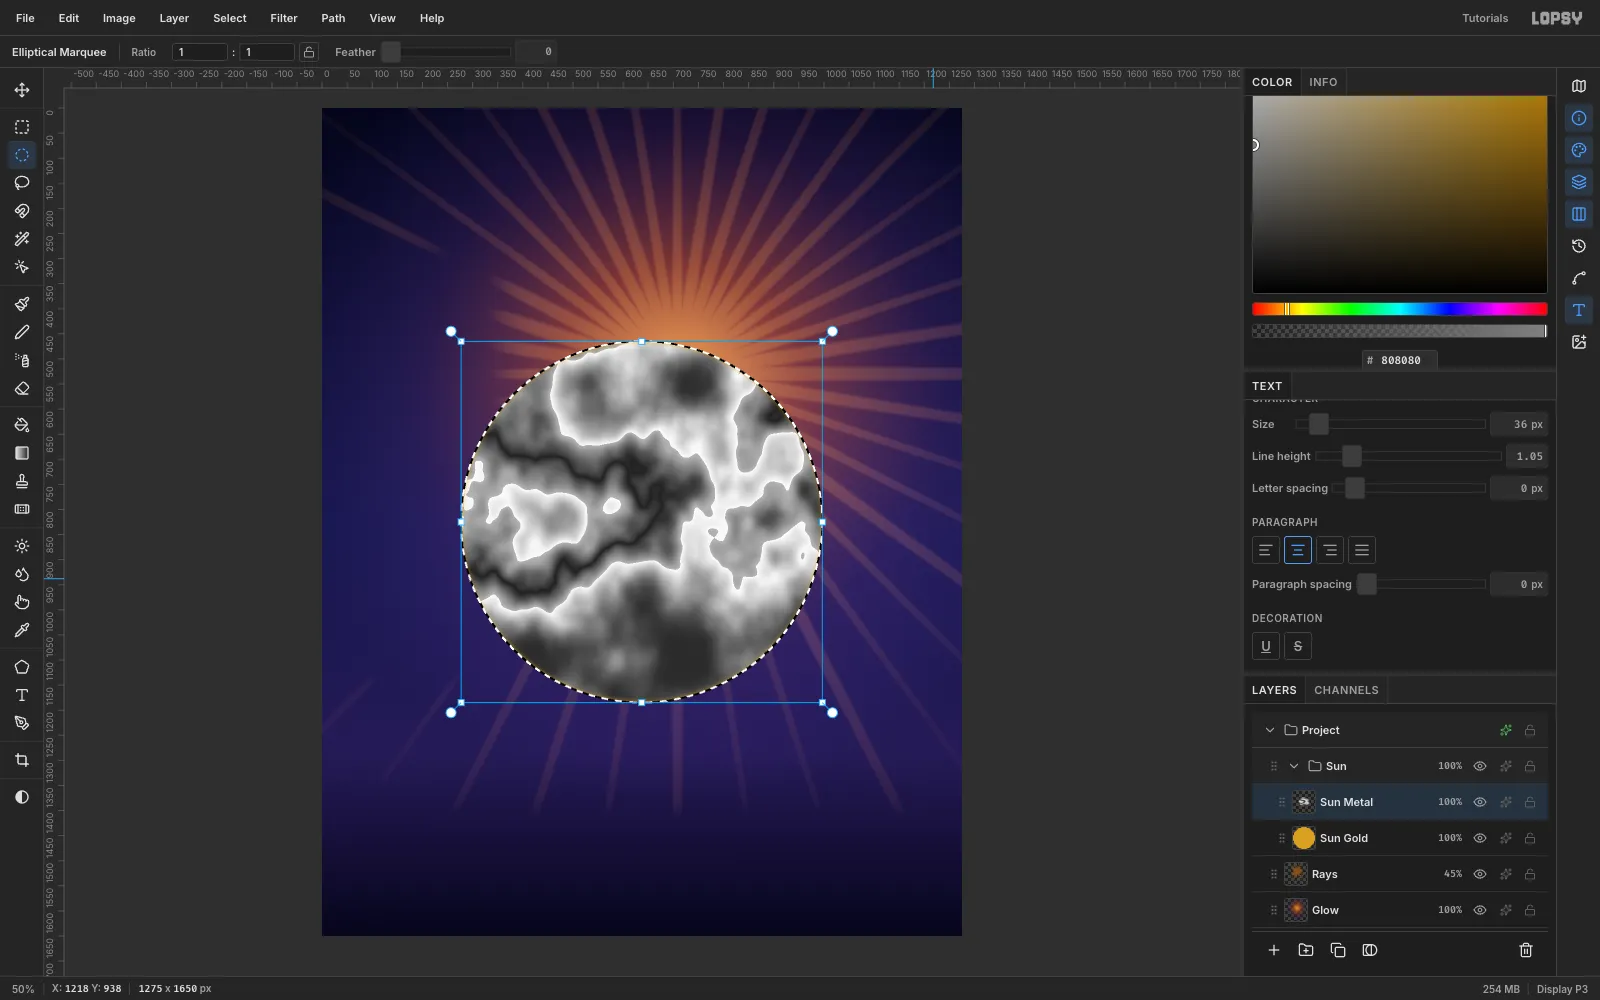
- On a new Sun Metal layer above it, fill the same circle with mid-grey . Keep the selection active and run:
- Clouds (Scale 3), then Gaussian Blur 14.
- If the result looks mostly dark, run Invert.
- Solarize 128, then Brightness/Contrast +45 brightness and +75 contrast.
- Solarize 150, then Brightness/Contrast +35 brightness and +60 contrast.
Each Solarize folds the bright half of the tones back down. Two passes turn soft clouds into the looping bands you see on liquid chrome.
-
Tint the folds gold with Hard Light
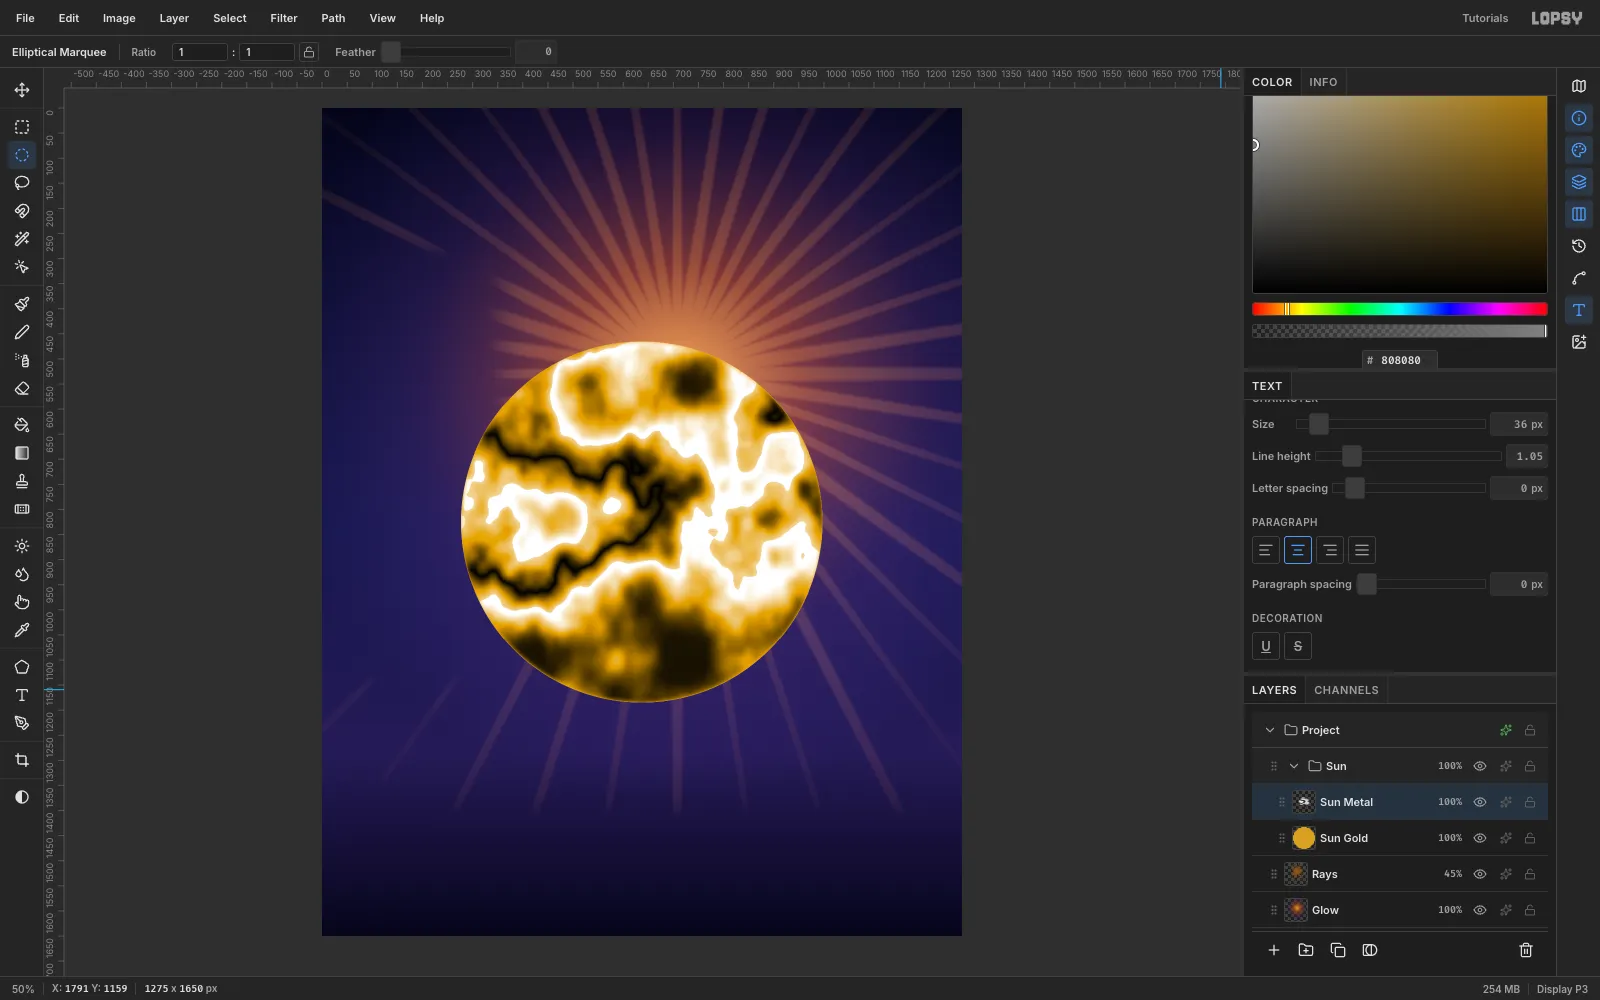
- Run Gaussian Blur 2 and Brightness/Contrast +35 contrast for crisper bands.
- Set Sun Metal to the Hard Light blend mode. The grey bands now multiply and screen the gold disc underneath, giving near-black troughs and near-white crests.
- Select Sun Metal and run Layer → Merge Down to bake it into the gold. Rename the result Sun Core.
- Run Surface Blur (radius 8, threshold 35) to smooth the mottling.
- Run Lens Distortion (strength 65) to bulge the bands toward the centre.
-
Swirl the metal with Liquify
Open Filter → Liquify…:
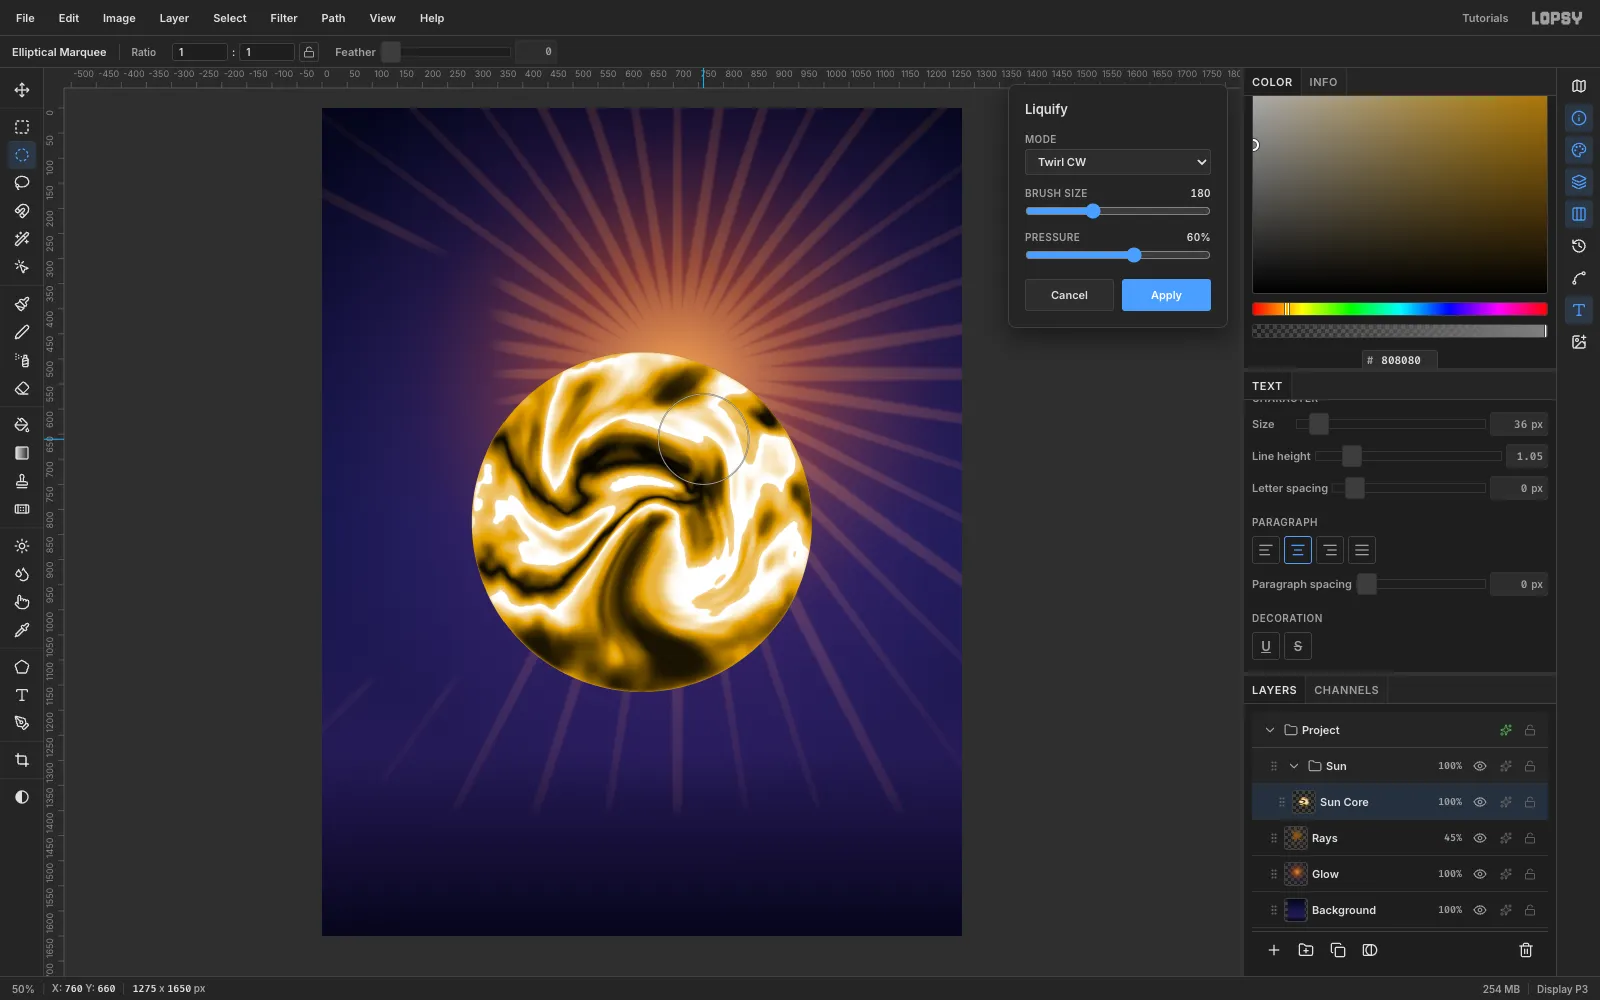
- Choose Twirl CW, set the brush to 260 and the pressure to 60. Circle the mouse twice in small loops left of centre.
- Switch to Twirl CCW with the brush at 240 and loop twice below-right of centre.
- Add one smaller clockwise twirl (brush 180) near the top.
Keep the twirl centres well inside the disc. A twirl that reaches the edge drags the silhouette into a dented blob.
-
Pull drips with Liquify Push
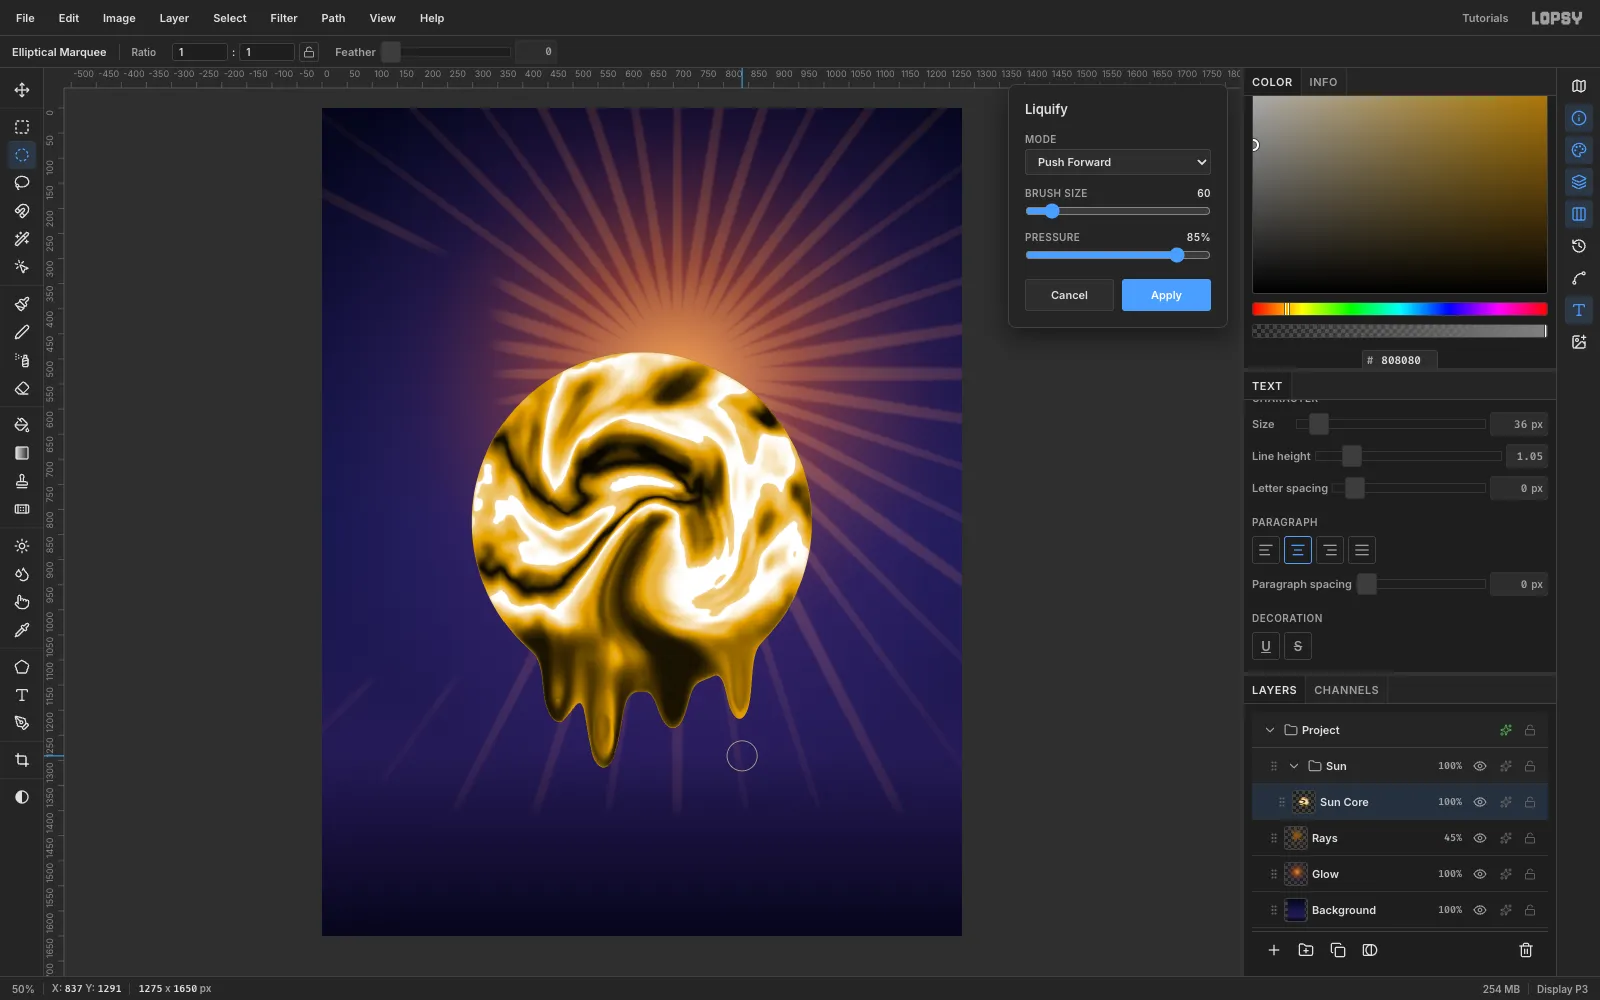
Stay in Liquify and switch to Push Forward at 85% pressure. For each drip, start just inside the bottom edge and drag straight down about 110 px. Repeat, starting each pass about 34 px lower, so the drip keeps growing.
Give the four drips different lengths (2–5 passes) and brush sizes (60–80) so they don't look stamped. Click Apply.
-
Shade the sphere and add window highlights
Add these layers inside the Sun group:
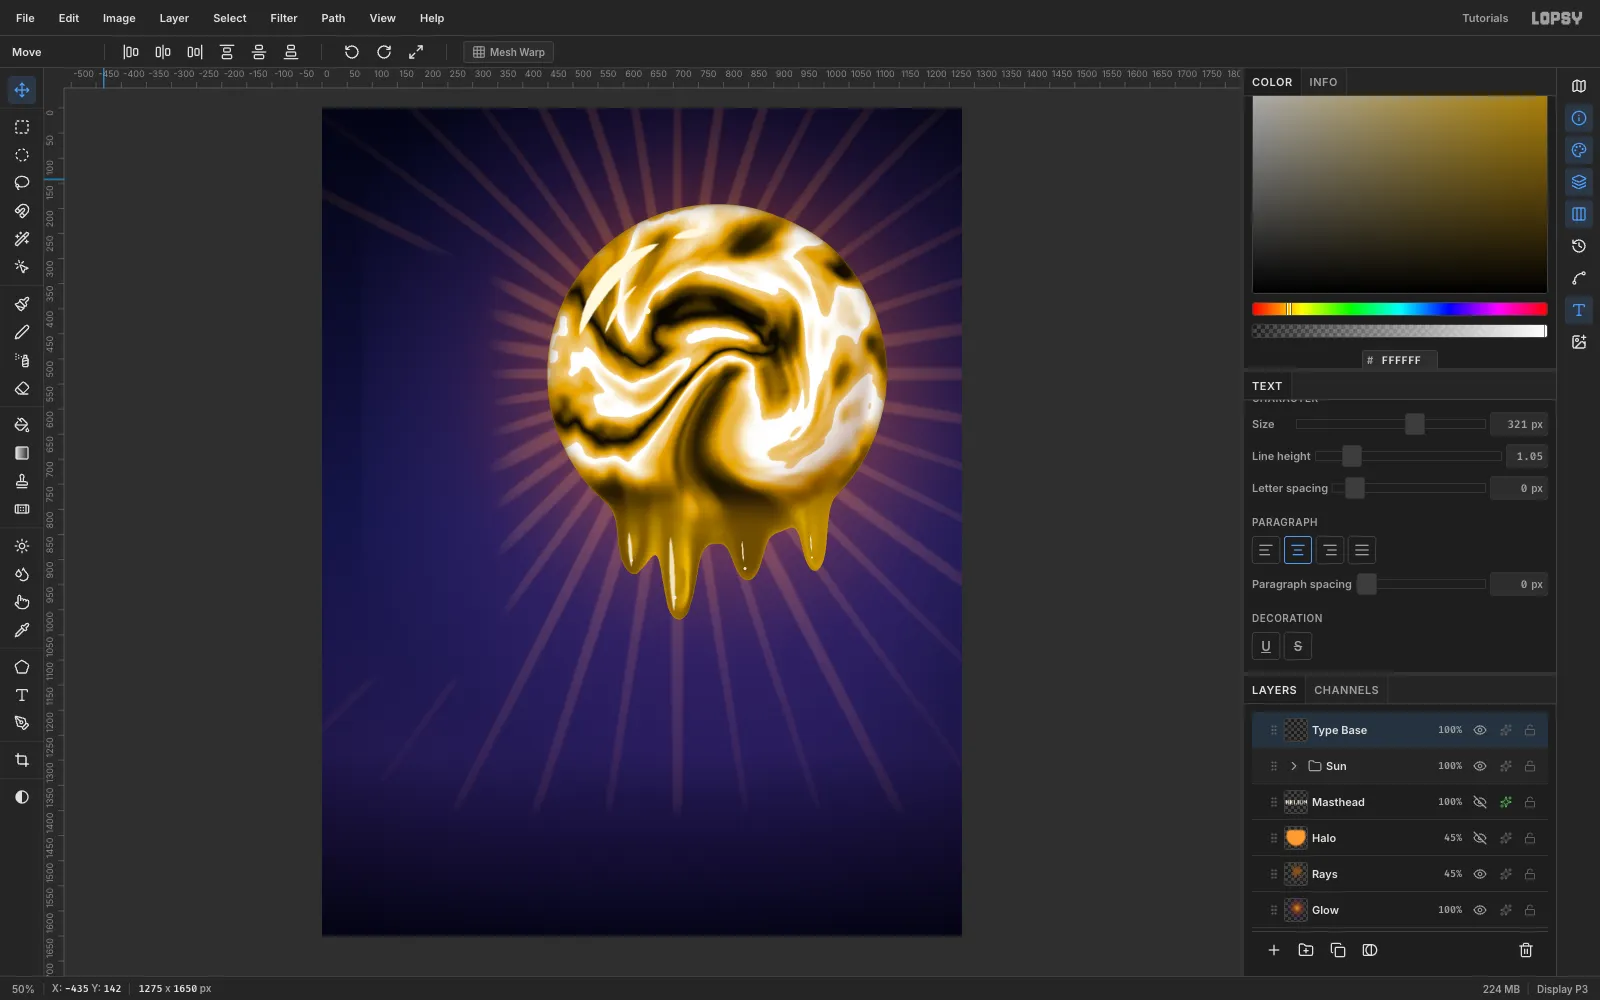
- Sun Shade
- ⌘-click the Sun Core thumbnail to load its shape.
- Drag a radial gradient from the upper left. It stays clear to about 60%, then goes brown and dark at the rim.
- Remove the shading from the drips: select a circle slightly smaller than the sphere, run Select → Inverse, Feather 30 and press Delete.
- Set the layer to Multiply.
- Sun Spec
- Lasso thin crescent bands that follow the curve of the sphere at the upper left.
- Feather each one 2 px and fill it with .
- Add one small dot highlight.
Curved window reflections sell a sphere far better than a blurry oval.
- Drip Light
- Fill the Sun Core shape with .
- Delete everything above the drips through a 45 px feathered selection.
- Set the layer to Screen at 40% so the drips match the bright ball.
- Drip Glints: add tapered vertical streaks down each drip, one bright and the rest thinner, plus a tiny hard white glint near each drip's bulb.
Finally, give Sun Core a dark Inner Glow (, size 40) to deepen the edge.
-
Tuck the sun in front of the masthead
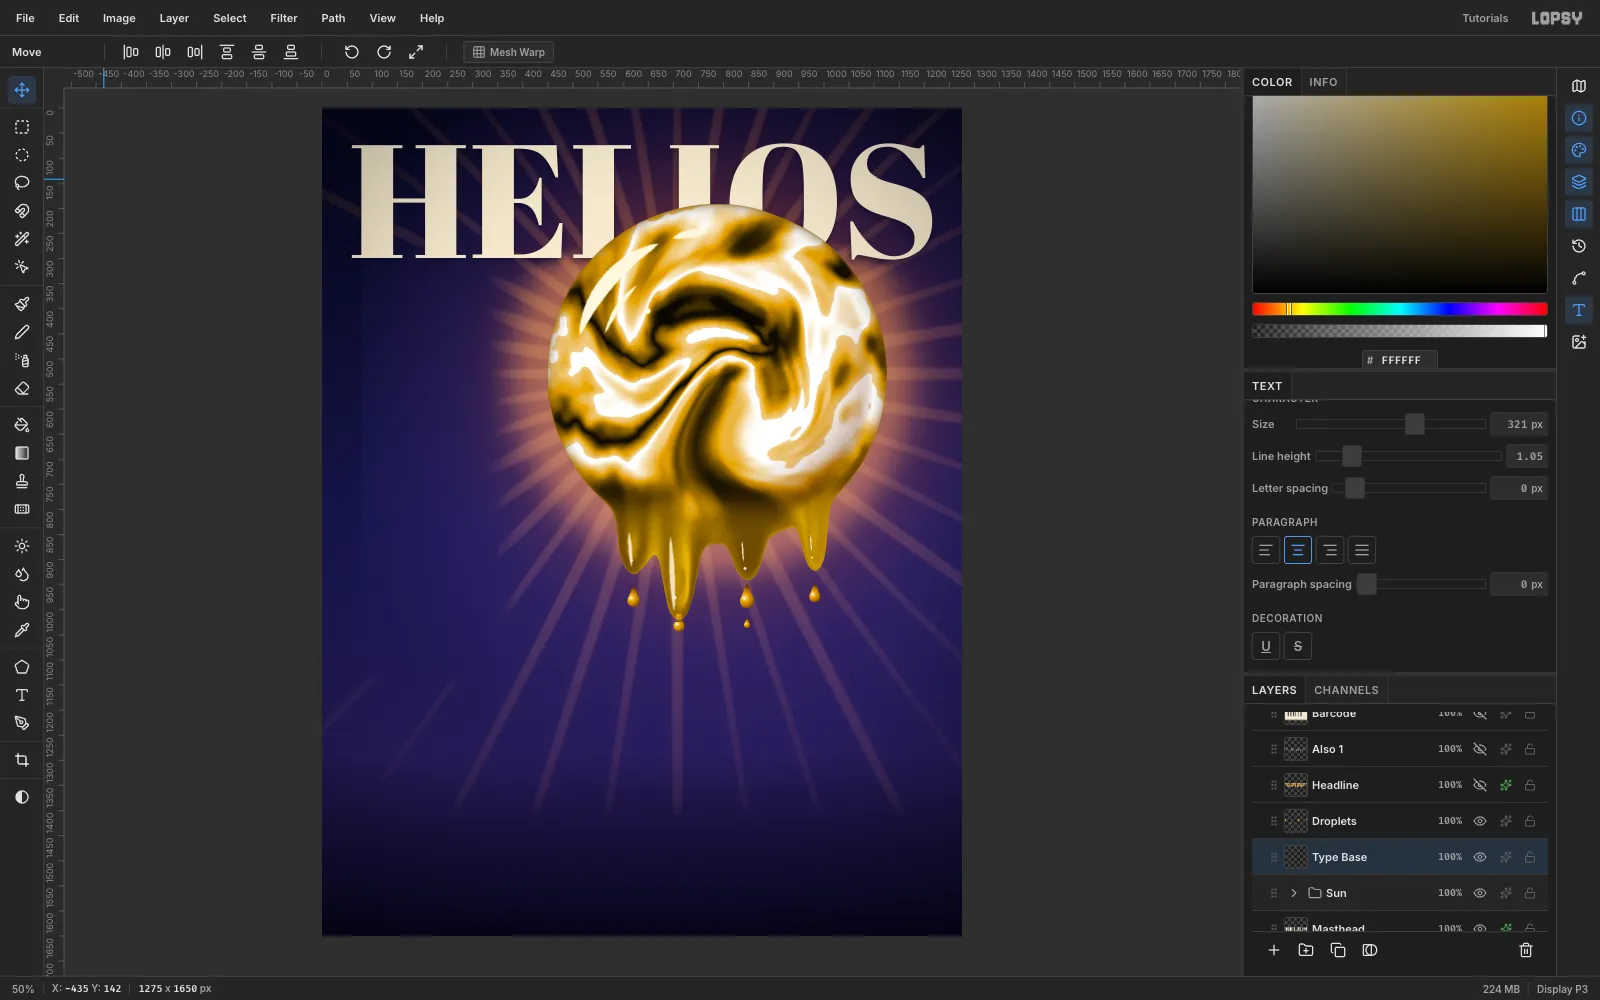
- Type HELIOS in Abril Fatface at 321 px, cream , on a layer below the Sun group. It should span the 60 px margins (x 60–1215, top at y 70).
- Select the Sun group and use the Move tool to drag everything into place. The group moves as one, and undo and redo move it back exactly.
- Position the ball so it covers the lower part of the I and O but leaves the L's foot readable. Otherwise the name reads "HEI IOS".
- Put a separate Halo layer under the masthead: a 60 px-feathered orange disc on Screen at 45%. Delete its top 290 px through a feathered selection so the cream letters keep their contrast.
- A soft dark Drop Shadow on the masthead helps too.
-
Duplicate falling drops with copy, paste and scale
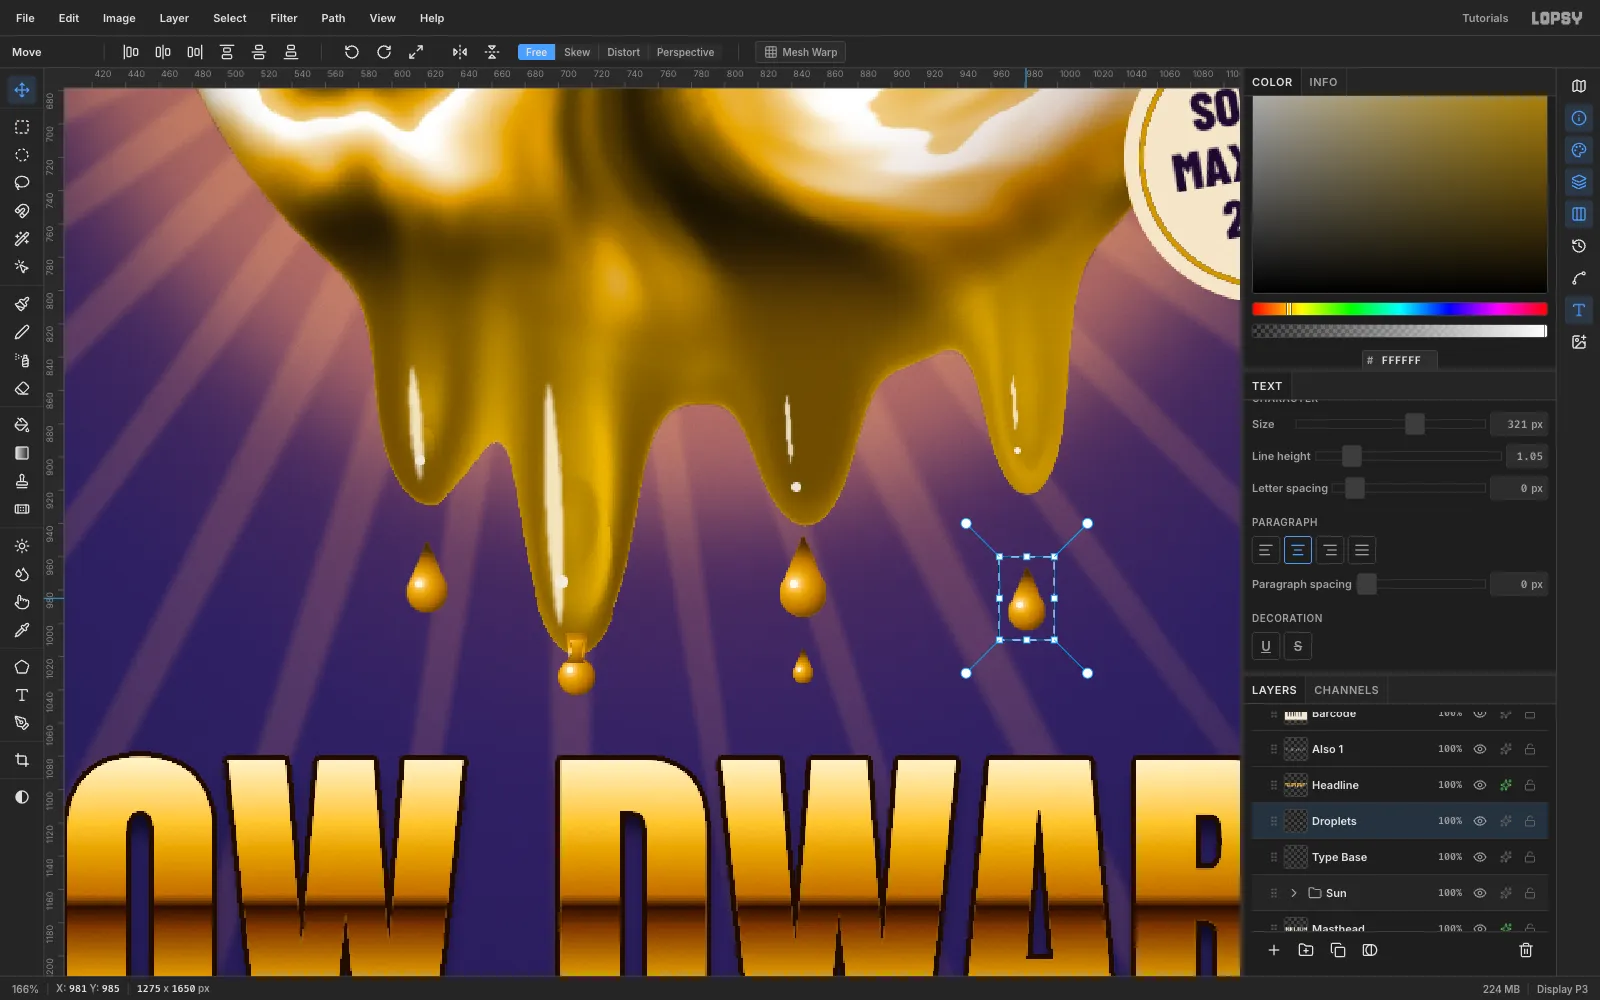
- On a Droplets layer, build one teardrop: a circle plus a small lassoed triangle on top.
- ⌘-click the layer's thumbnail and give it a radial gradient from through gold to , lit from the upper left. Add a white dot highlight.
- Marquee the drop, then press Cmd+C and Cmd+V.
- Marquee the pasted drop and ⌘-drag a corner handle to scale it (70–86%). Press Cmd+D to commit, then nudge it under the next drip tip with the arrow keys.
- Run Layer → Merge Down to fold it back into Droplets.
Leave 20–30 px between each tip and its drop. For one drip, draw a drop still attached by a thin neck.
-
Chrome the headline and drip three letters
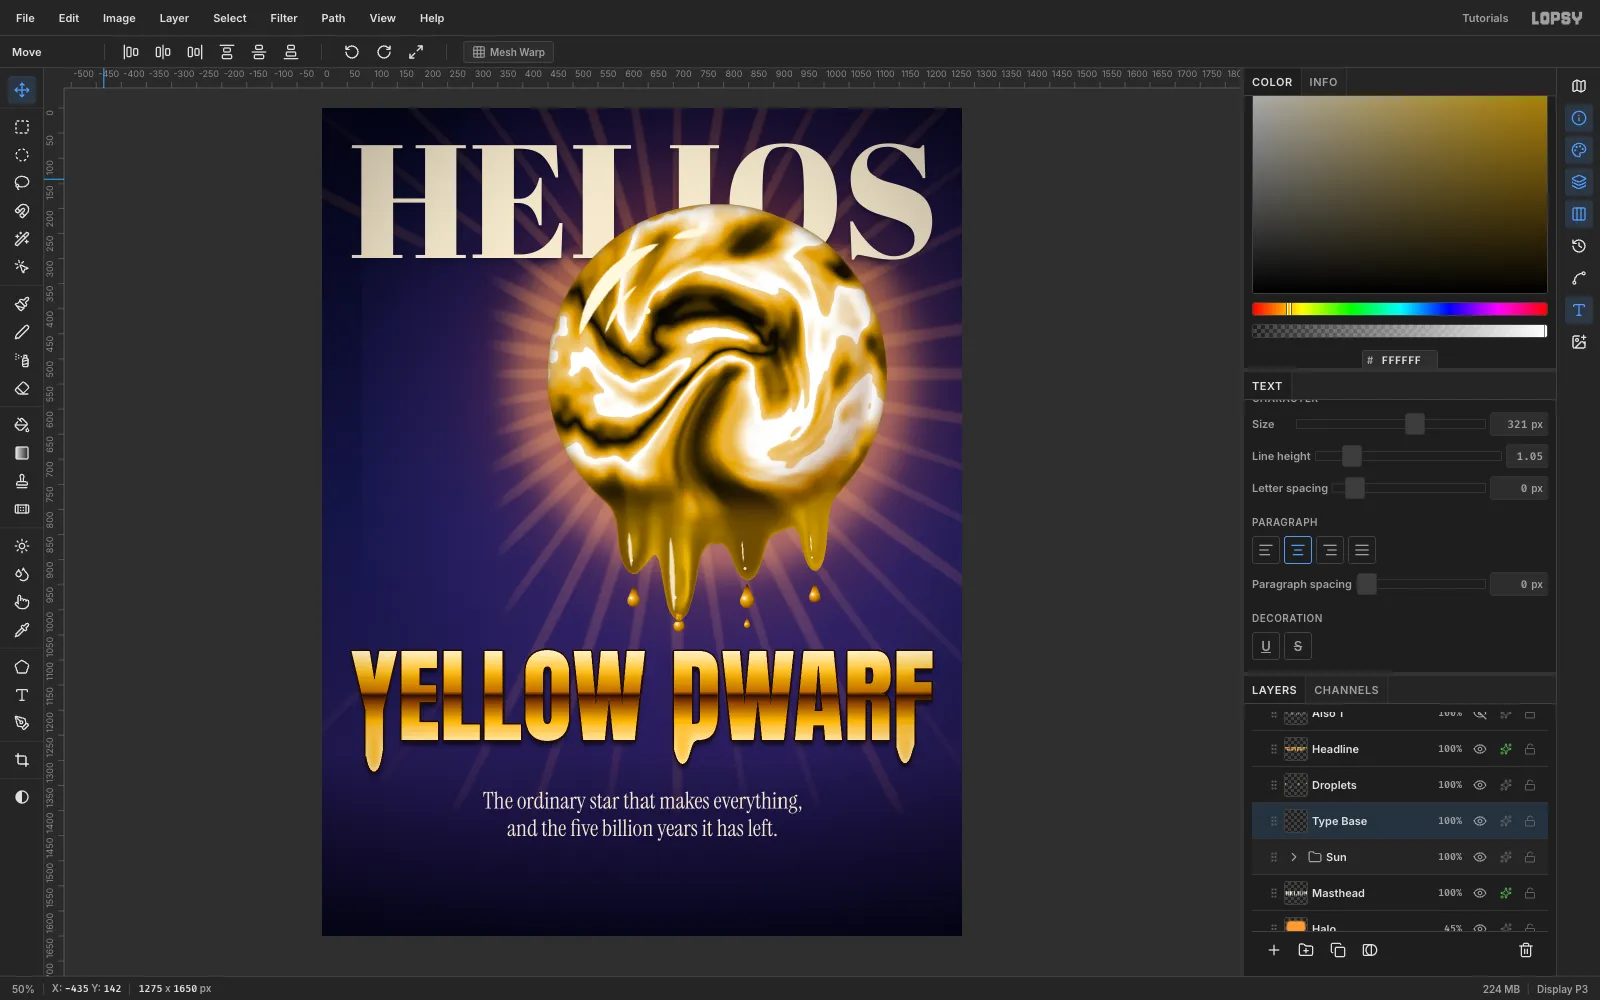
- Type YELLOW DWARF in Anton at 206 px so it spans the margins exactly. Then click Rasterize Layer.
- ⌘-click its thumbnail and drag a vertical linear gradient over the cap height with these stops:
- → at 22% → at 46%
- a dark horizon line at 50%
- at 57% → at 78% → at 100%
- Use Liquify → Push with a 36 px brush to pull drips from the Y, the D's stem and the F only. Keep the L's and W clean so the word stays legible.
- Add a 3 px dark Stroke and a soft Drop Shadow (offset Y 10, blur 14, 75%).
- Set the two-line deck in Instrument Serif at 46 px. Centre each line with Align center horizontally, about 40 px below the drips.
-
Set the cover lines on a strict left edge
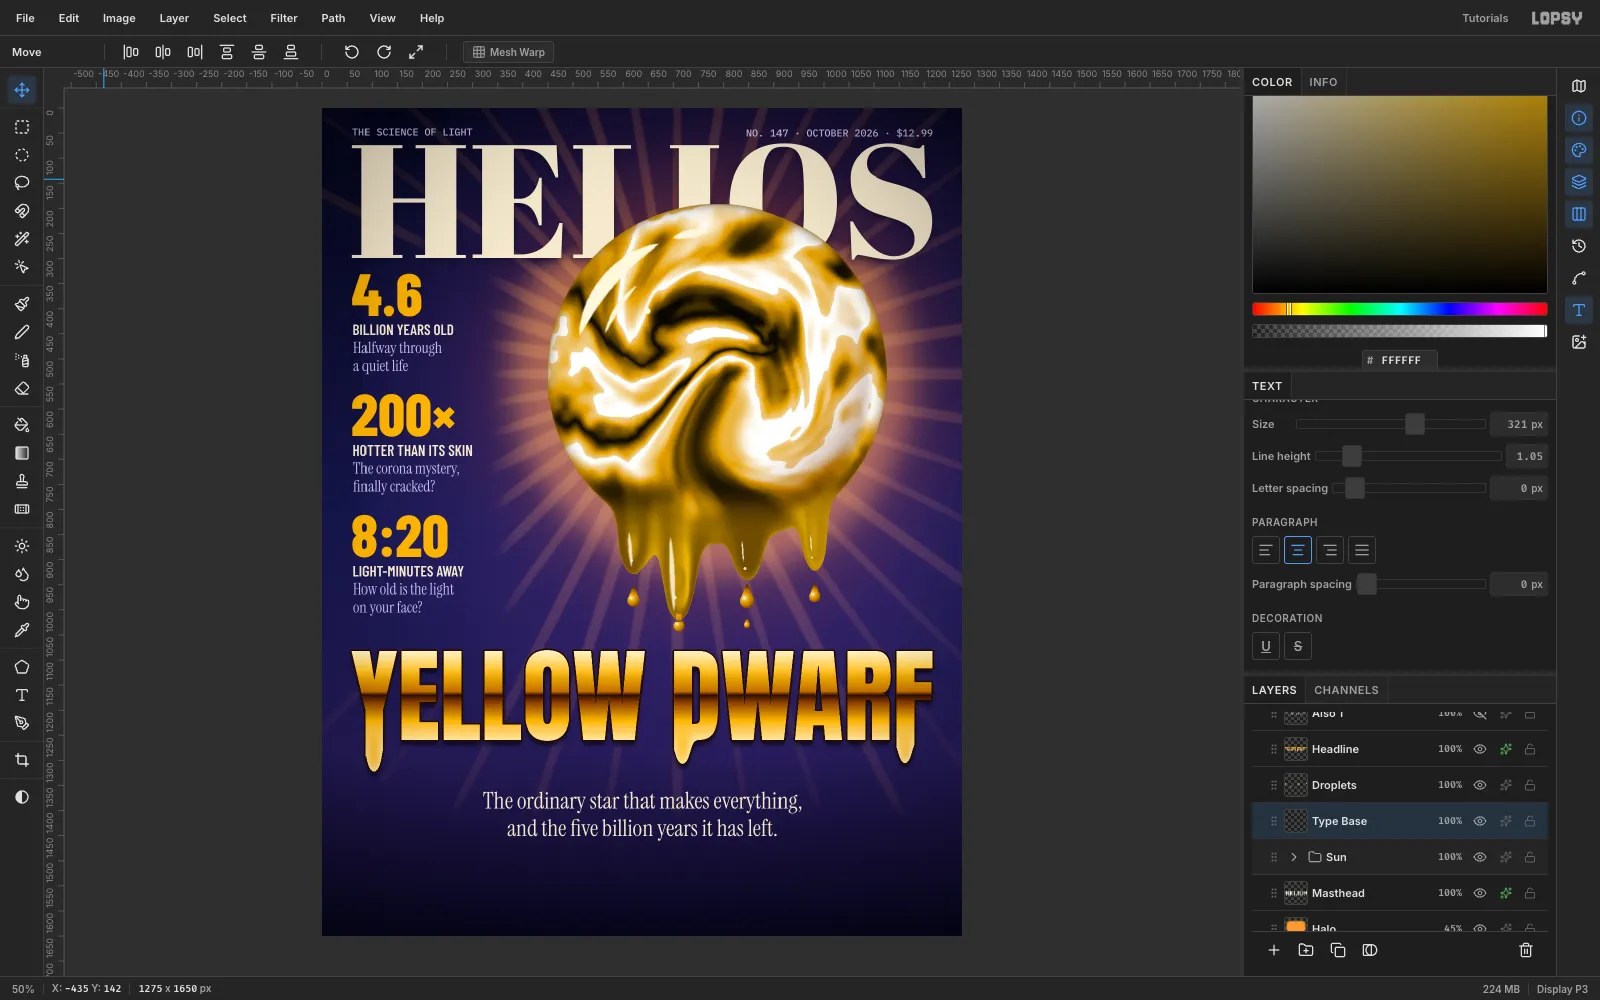
Each cover line is a stack:
- a gold Barlow Condensed ExtraBold number at 118 px
- a cream Barlow Condensed SemiBold label at 30 px
- a two-line Instrument Serif caption at 31 px
Set the caption's Line height to 1.16 in the Text panel before you create it (about 36 px leading). Place every block at x 60, on a 240 px vertical rhythm.
Add the folio line in IBM Plex Mono 20 px at the top margin (y 40). The right-hand line should end exactly on x 1215.
-
Add a rotated Solar Maximum badge
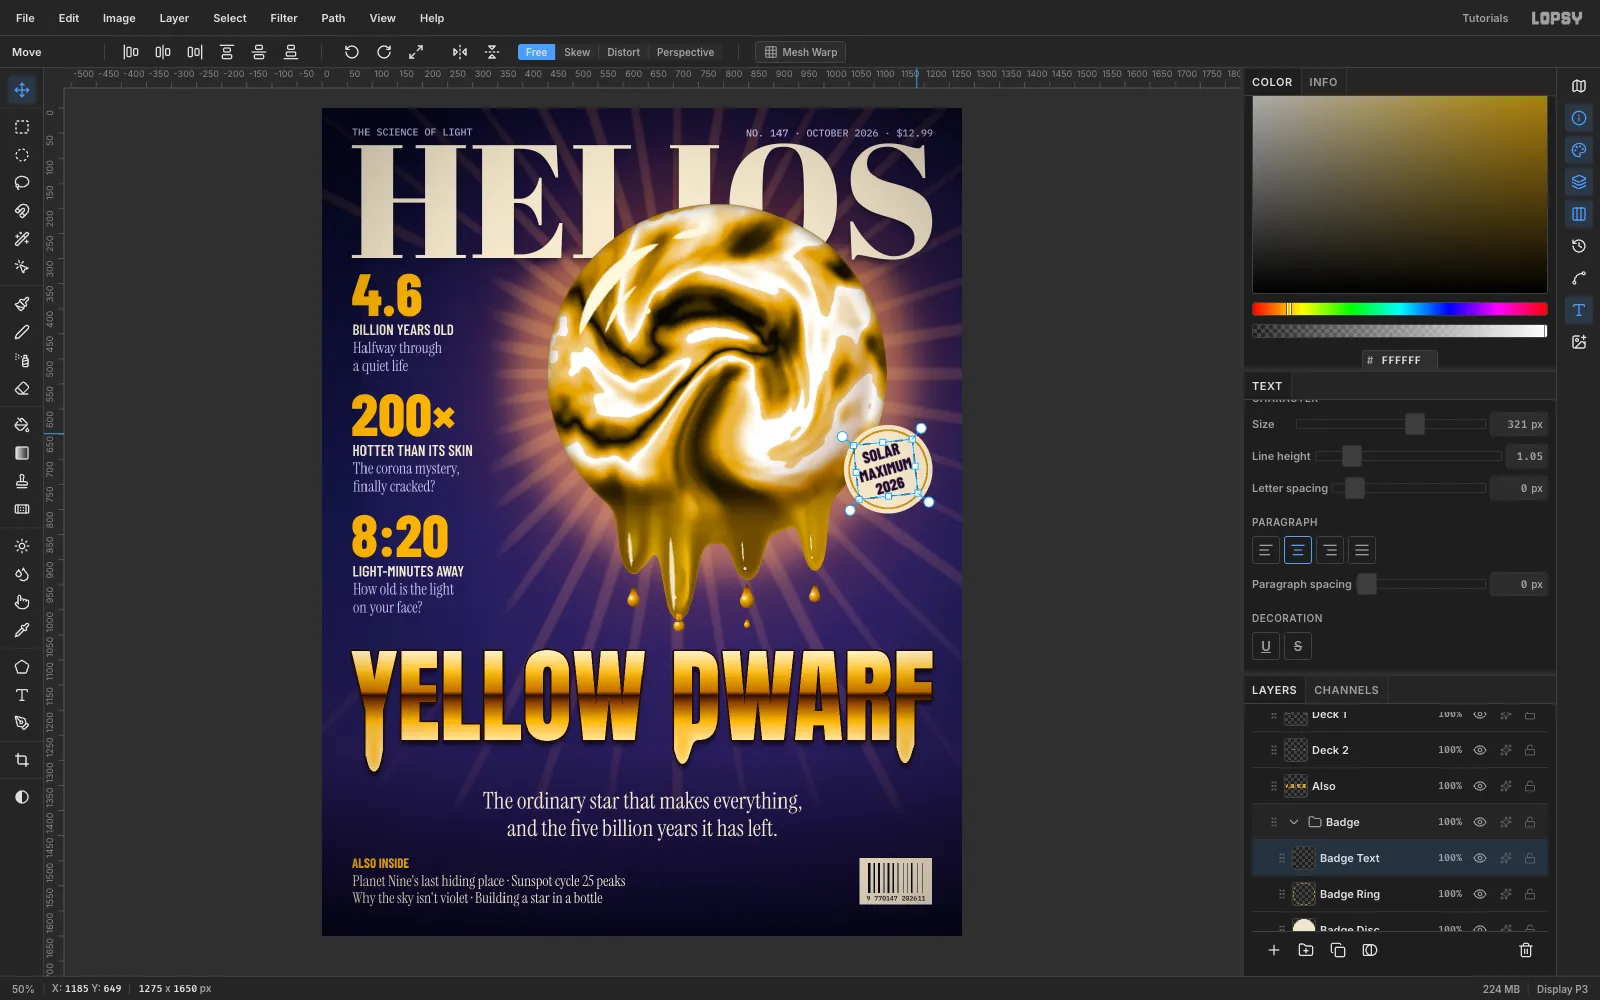
- Make a Badge group:
- a 176 px cream disc
- a gold ring: fill a circle, then Select → Shrink 3 and delete
- Before creating the label, set Align center and Line height 1.05 in the Text panel.
- Drag an area-text box and type SOLAR / MAXIMUM / 2026 in Barlow Condensed ExtraBold at 32 px. Nudge it until the ink is centred in the ring.
- Rasterize the label.
- Marquee it, then drag the Move tool's rotation handle about −10° and press Cmd+D.
Let the badge overlap the sphere's edge, like a sticker on the photo, with its right edge on the 1215 px margin.
-
Finish the bottom band, barcode and grain
- Set ALSO INSIDE in gold Barlow Condensed at 26 px. Under it, add two lines of 30 px Instrument Serif ending on y 1590.
- For the barcode, turn on View → Show Grid at 4 px with Snap. Marquee a cream box whose top lines up with the ALSO INSIDE caps and fill it. Turn Snap off, then fill thin bars of varying widths. Add the digits in IBM Plex Mono 13 px.
- Add a Grain layer on top: fill it grey, run Add Noise (40, Mono, Gaussian), set it to Overlay at 22%.
- Finish with a root Vignette adjustment (35).
Export with File → Quick Export PNG.