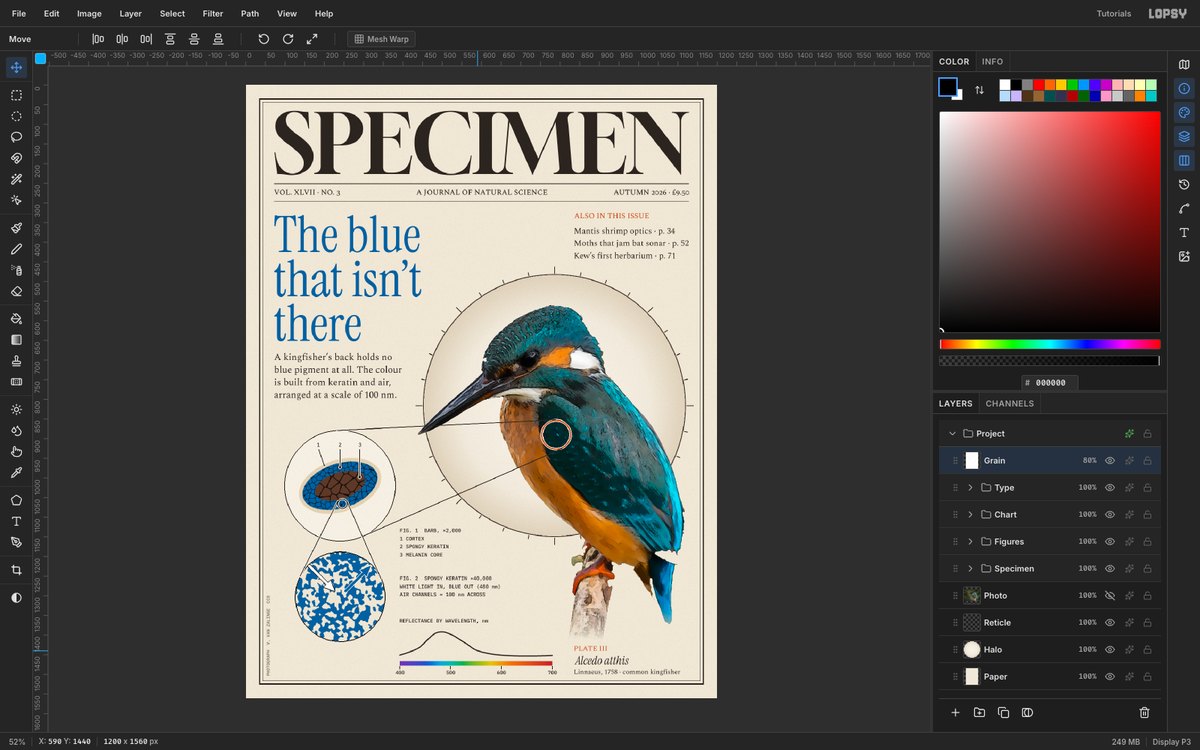
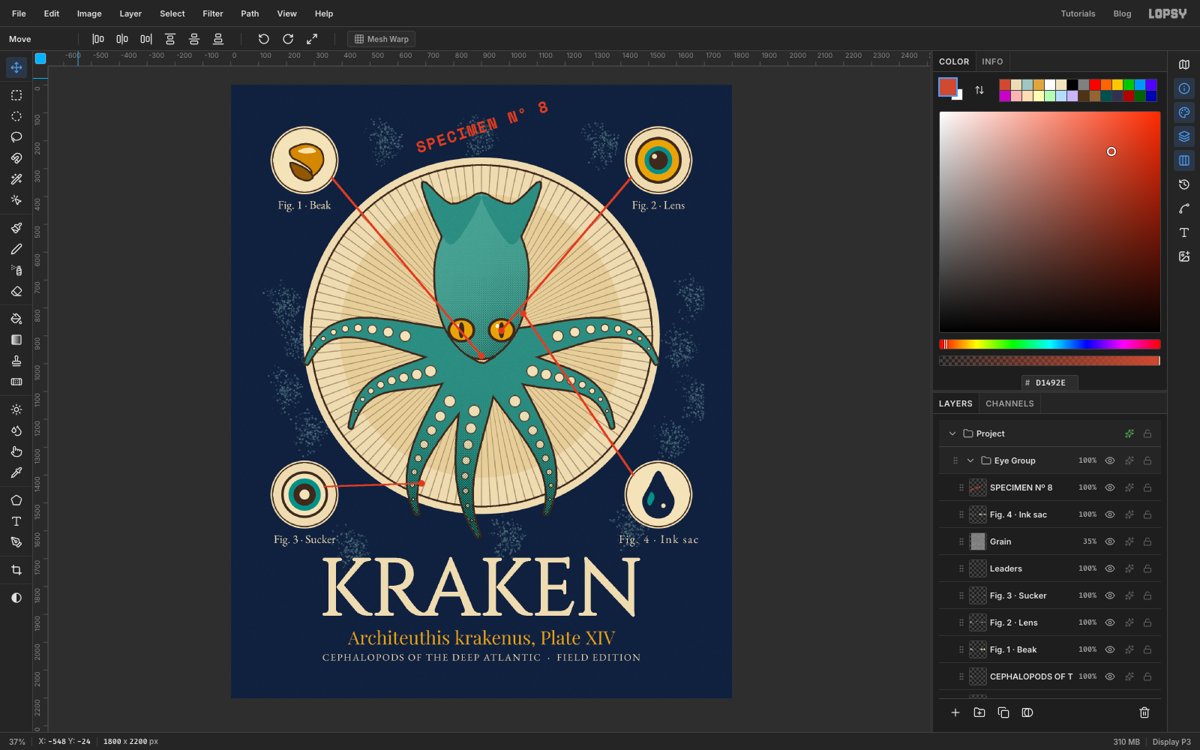
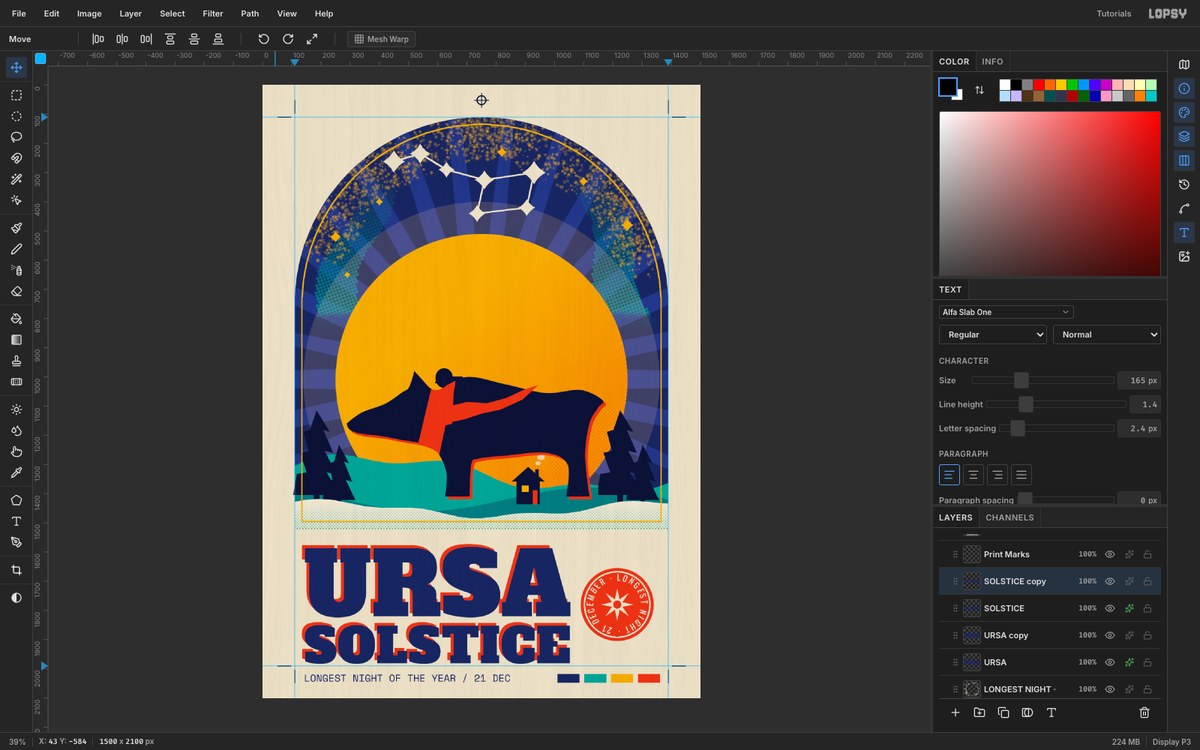
Make a Botanical Plate Holiday Card of a Balsam Fir
Draw a Victorian scientific-plate holiday card in Lopsy. Paint a fruiting fir branch, hatch the cones, and build a snow crystal with the Radial Symmetry brush.
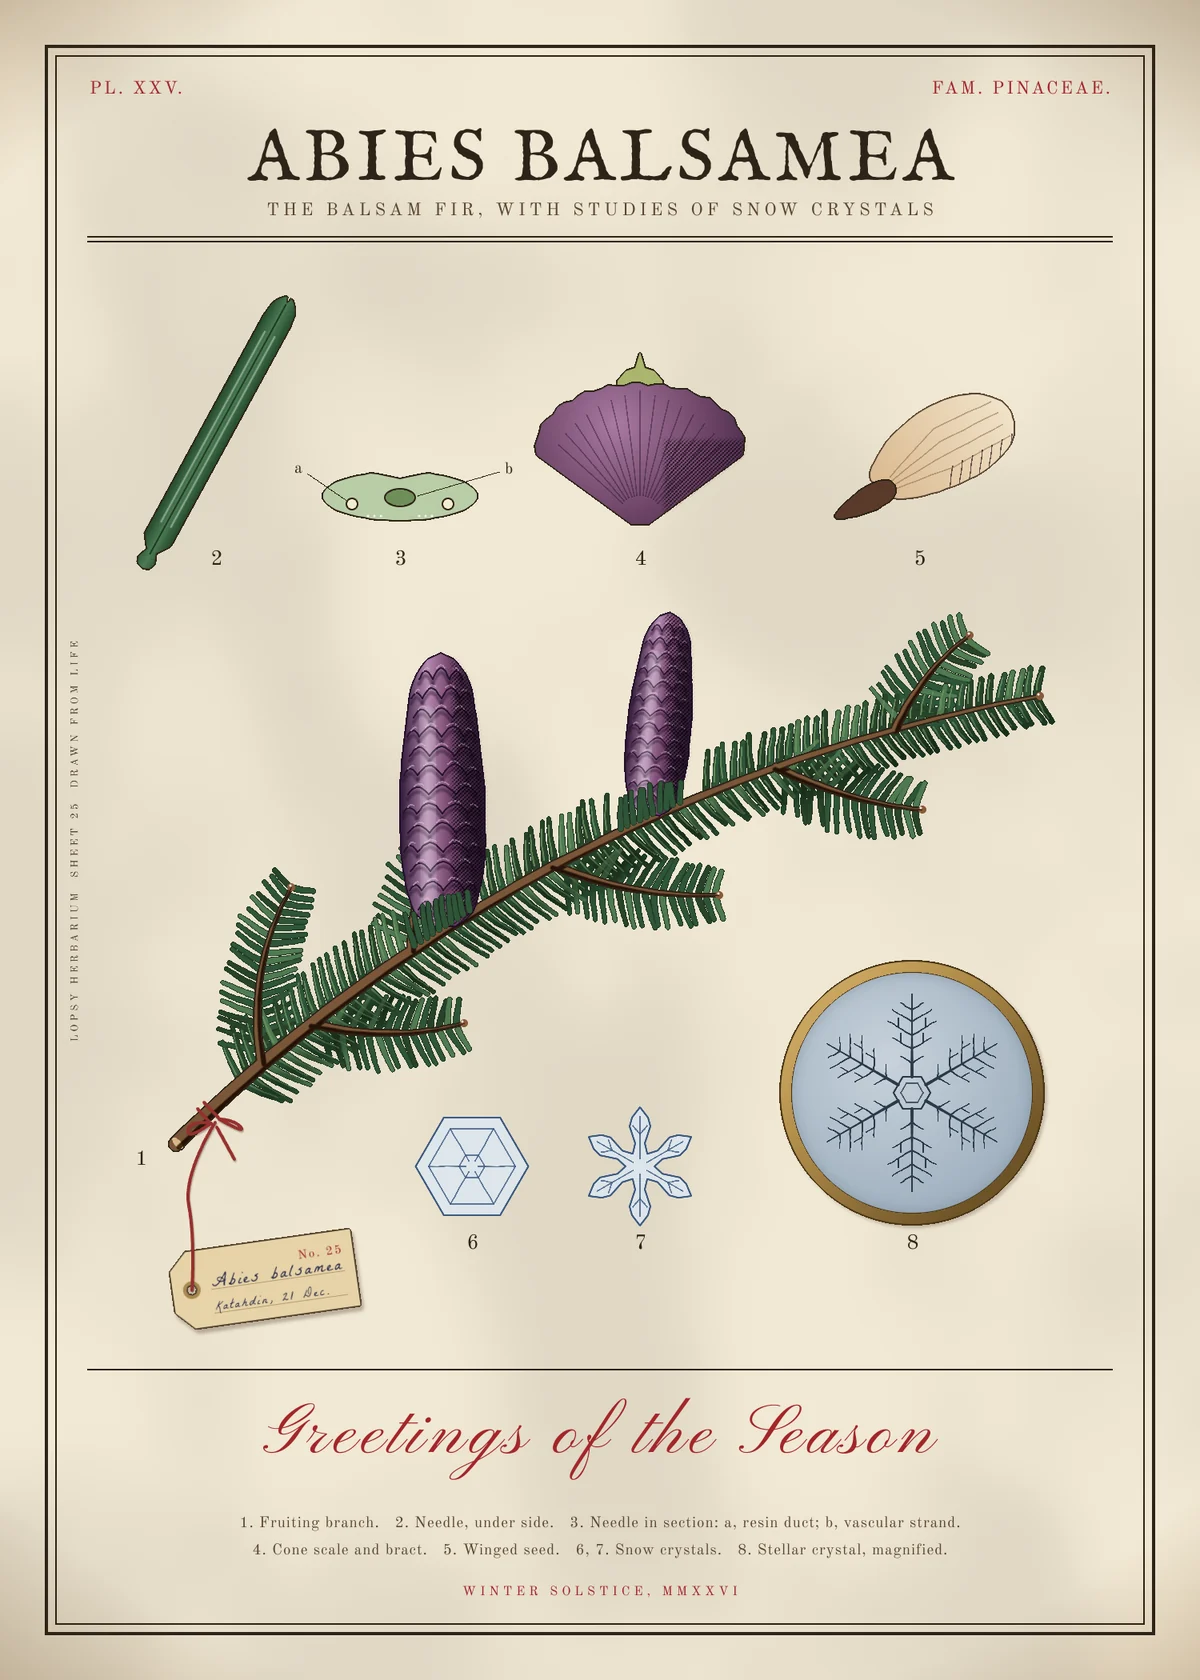
Victorian botanical plates are built like a page of evidence. A large drawing of the plant, called the habit, fills the middle. Small numbered figures around it show the parts up close, and a key at the bottom says what each number is. Put a snow crystal under the glass, add a red greeting, and the same layout makes a quiet, clever holiday card.
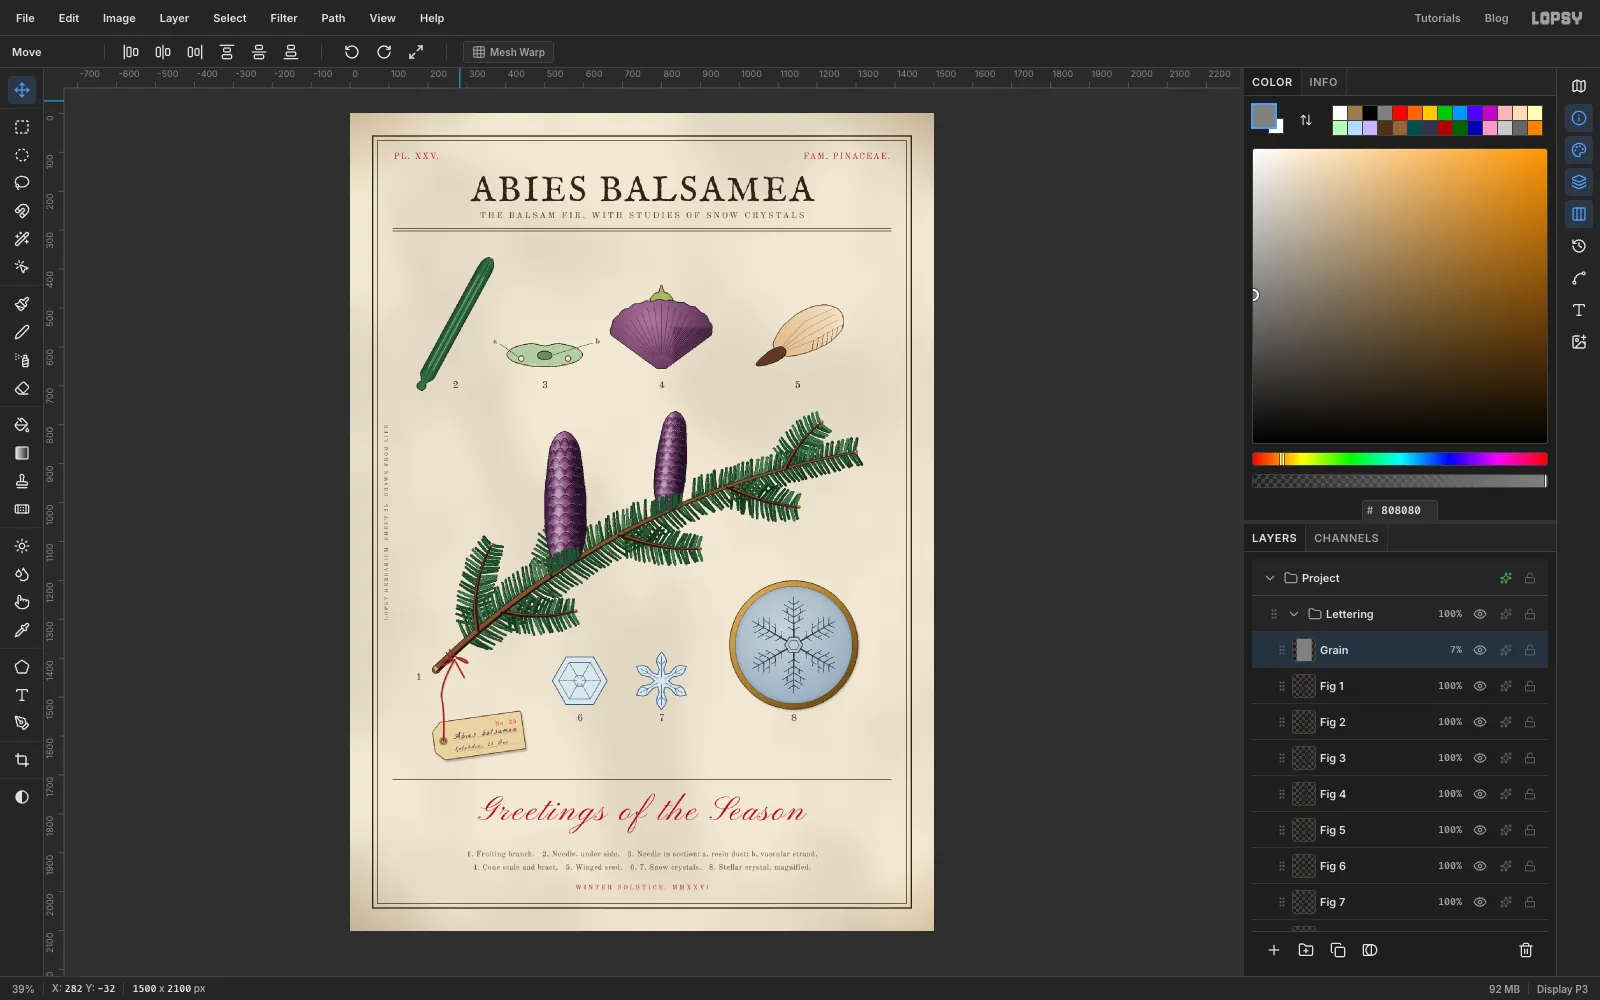
This tutorial makes a winter-solstice card of the balsam fir, Abies balsamea. You'll paint the branch needle by needle with a tapering brush, model two upright cones with gradients, dodge and burn, then add engraver's hatching. A stellar snow crystal comes from a single arm drawn with the Radial Symmetry brush, and a specimen tag hangs off the branch on a string drawn with the Pen tool.
The card is 1500 × 2100 px, a 5 × 7 portrait. Some steps give a rough position in document pixels. Hover the canvas and read X and Y at the bottom left of the window to find it. The main places are:
- Inner frame: 70 px in from every edge. The header rule sits at y 296 and the footer rule at y 1712.
- Twig: from a cut end at about (220, 1430), curving up to a tip at about (1300, 870).
- Detail figures: a row between y 350 and y 660, centred at about x 270, 500, 800 and 1150.
- Snow row: small crystals at (590, 1470) and (800, 1470), and the roundel centred at about (1140, 1378).
Two habits help throughout:
- Name layers as you go. Double-click a layer's name to rename it. Later steps refer to layers by name, text layers included.
- Straight lines: with the Brush or Pencil, click one end, then Shift+click the other.
Palette:
-
Paper
-
ink
-
sepia
-
crimson
-
Needles
-
dark
-
light
-
sheen
-
needle ink
-
Bark
-
buds
-
pale wood
-
Cones
-
scale ink
-
Seed wing
-
seed
-
tag
-
handwriting
-
Crystal ink
-
ice wash
-
lens
-
Brass
-
brass shadow
-
Lay down the paper and guides
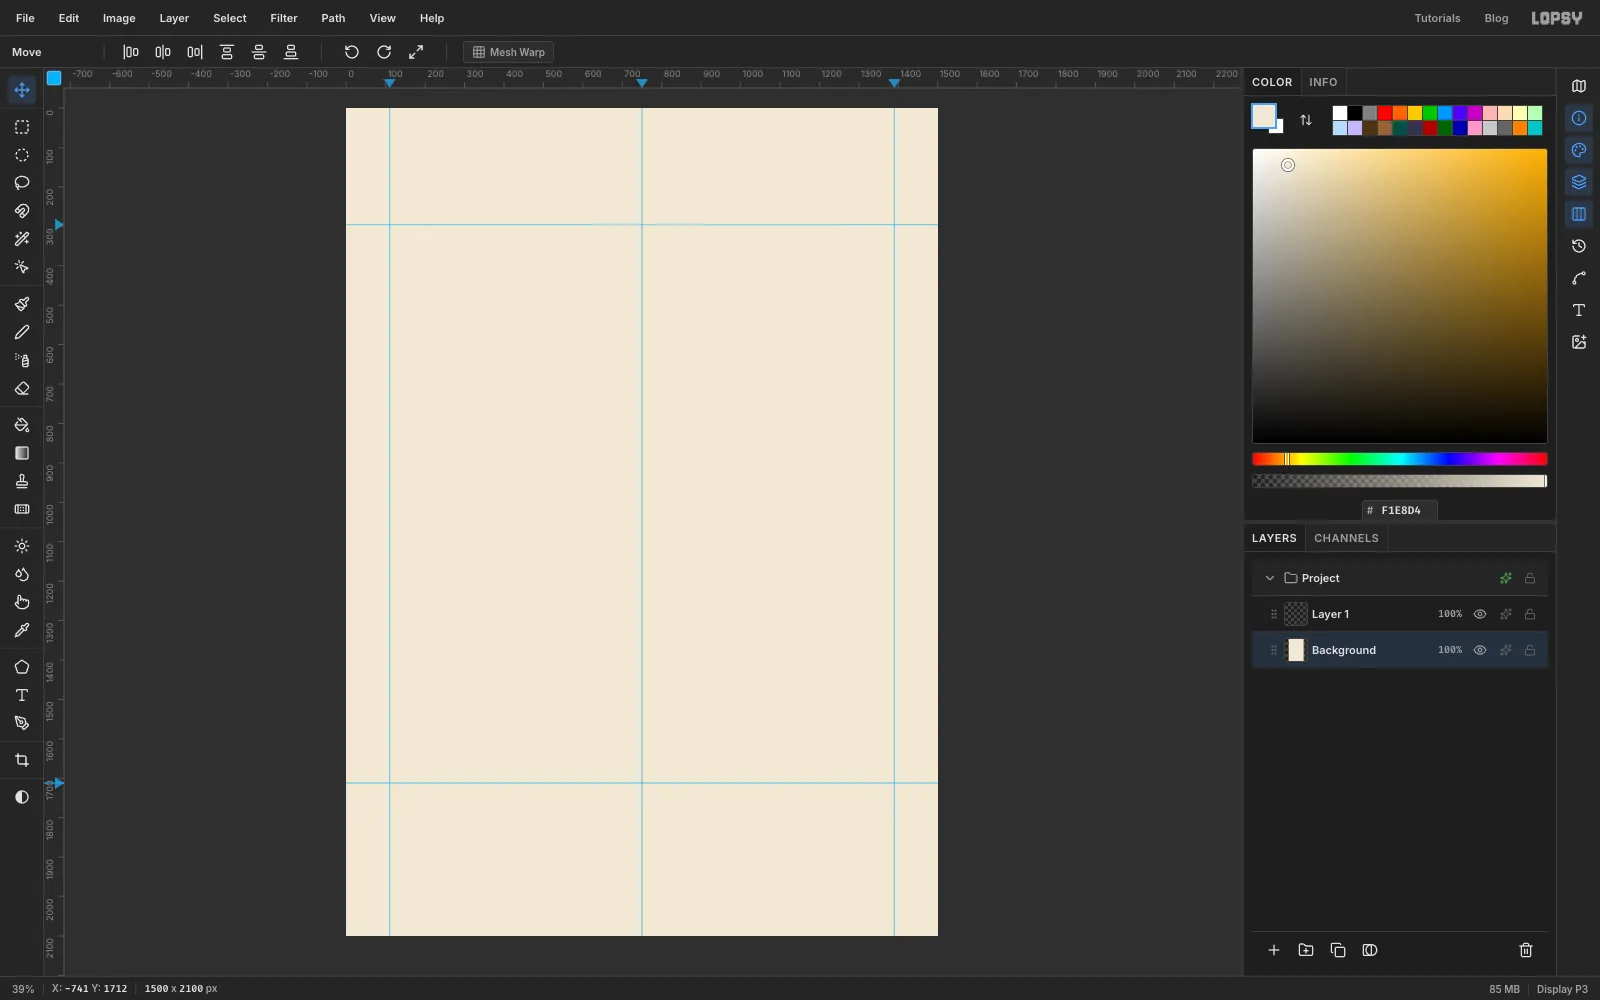
- Create a 1500 × 2100 px document with a white background.
- Select the Background layer, set the foreground colour to and choose Edit → Fill.
- Click the top ruler at x 110, 750 and 1390 to drop vertical guides for the margins and the centre line.
- Click the left ruler at y 296 and 1712 for the header and footer rules.
-
Rule a double plate border
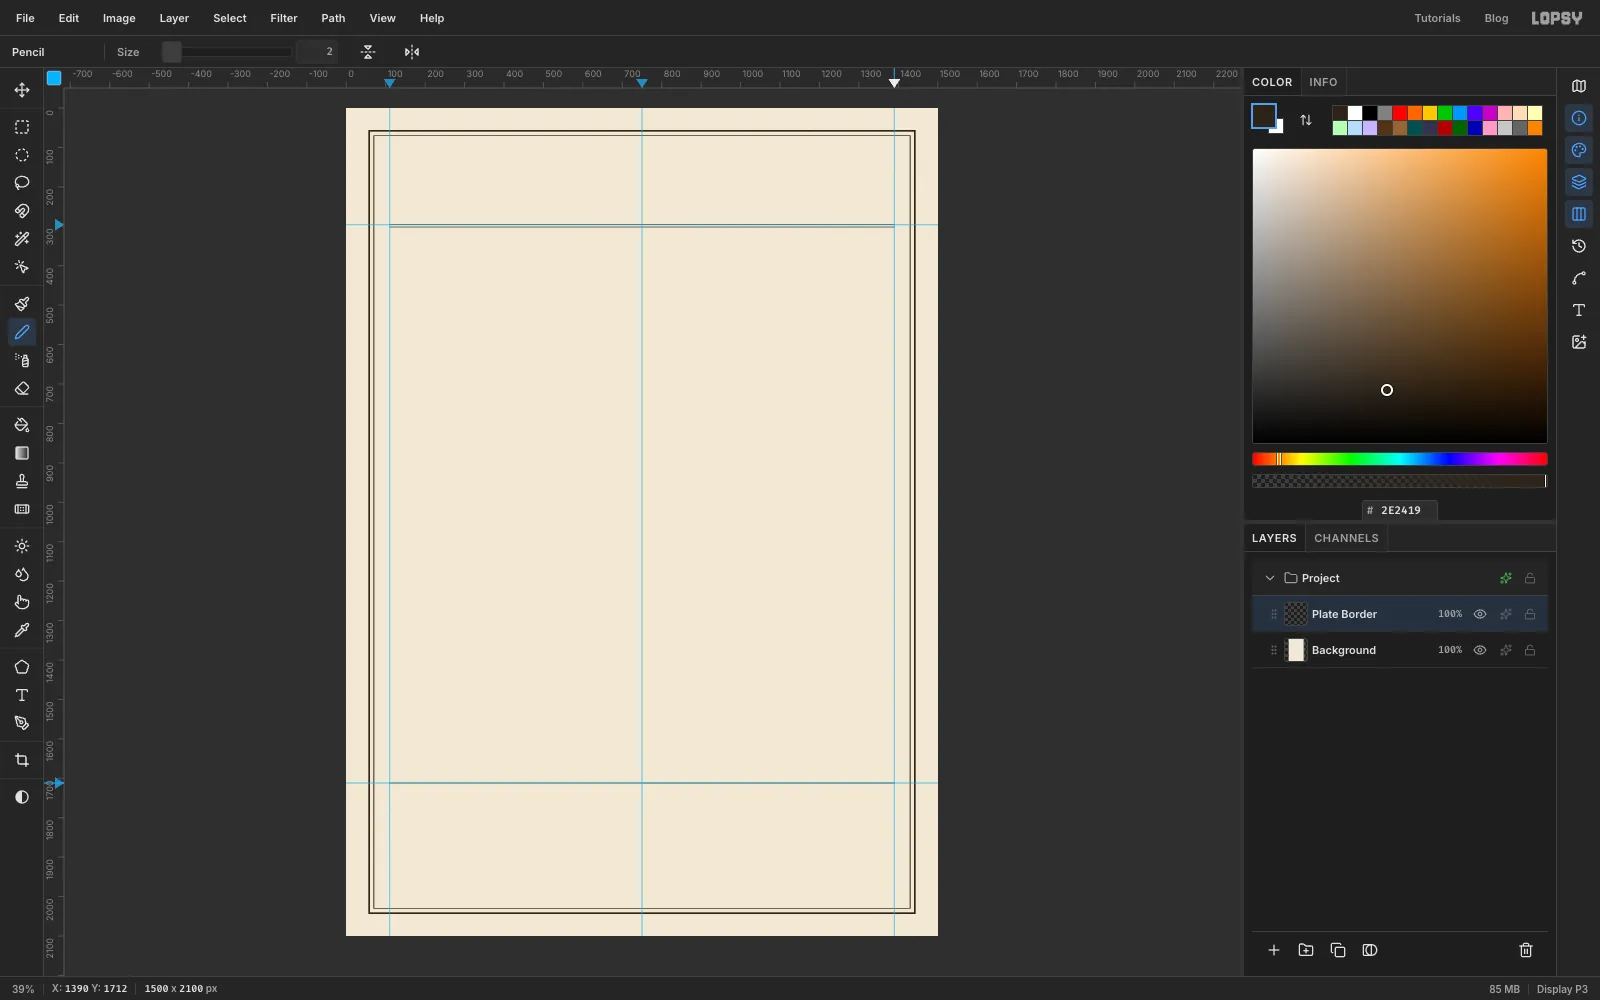
Old plates are framed with a heavy rule and a hairline just inside it.
- Rename
Layer 1toPlate Border. Pick the Pencil and set the colour to ink, . - At Size 4, click the top-left corner 58 px in from both edges. Then Shift+click the other three corners and the first one again.
- At Size 2, draw a second rectangle the same way, 70 px in from the edges.
- Still at Size 2, draw two rules under the header from the left guide to the right guide, at y 296 and y 302. Draw one more along the footer guide at y 1712.
- Rename
-
Set the plate header
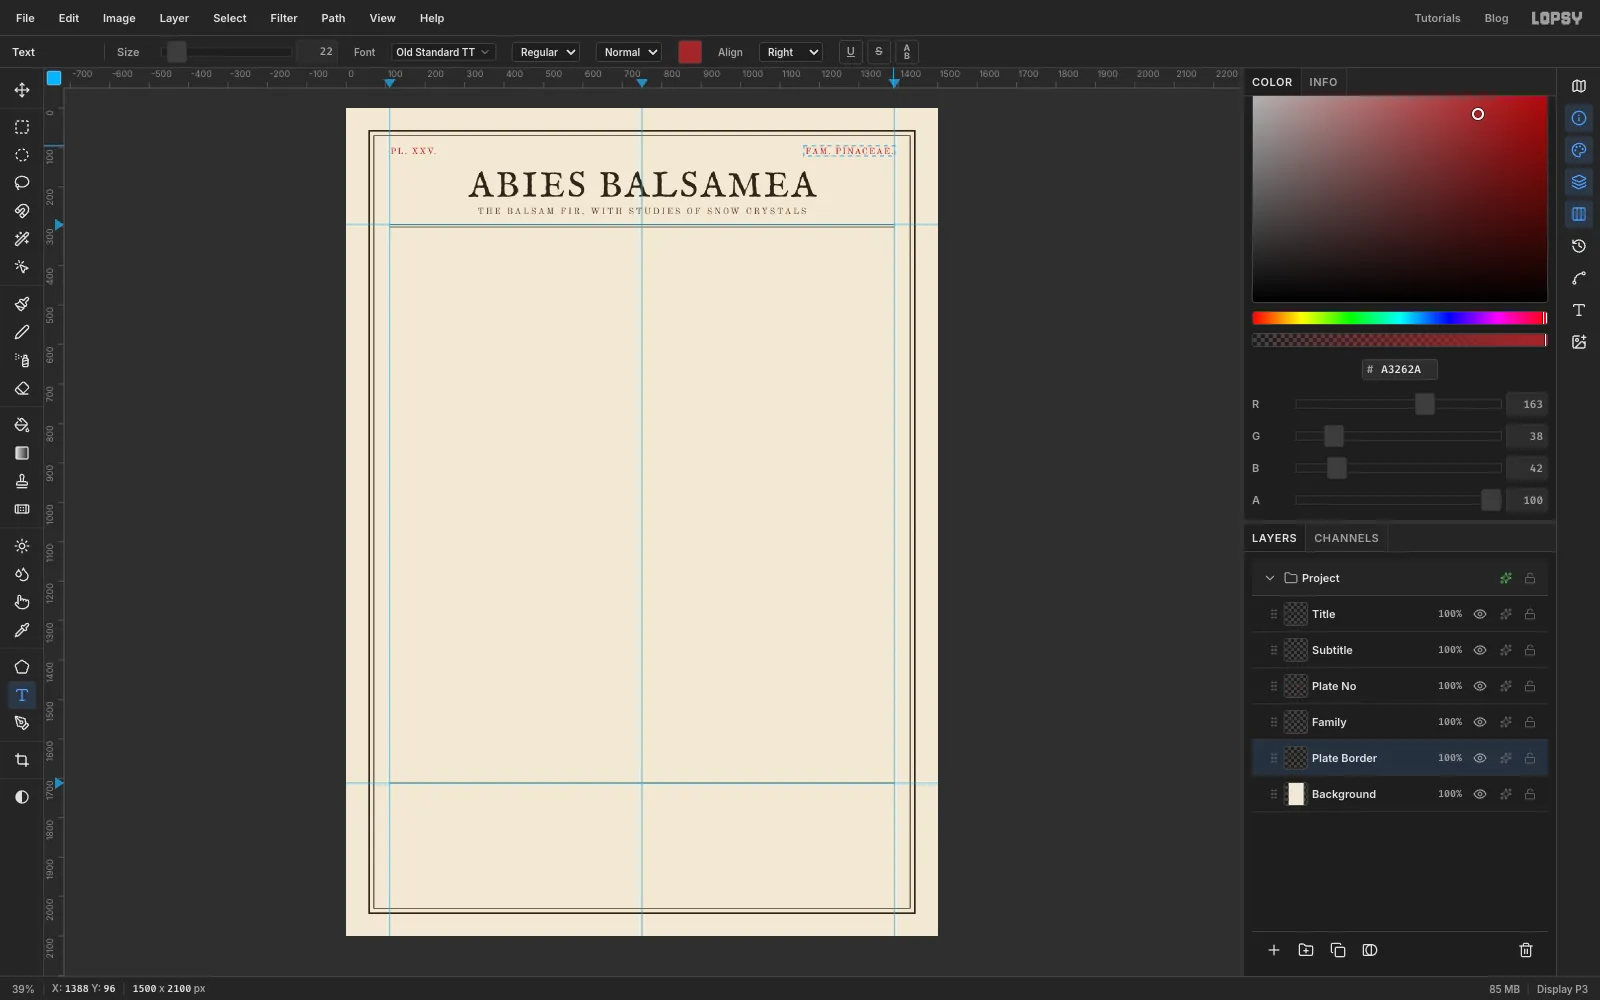
- Pick the Text tool. Set IM Fell English SC at 92 px, Align to Center, and colour . Click on the centre guide near the top and type
ABIES BALSAMEA. Press Tab to commit it, and rename the layerTitle. - In the Text panel, set Letter spacing to 6. Then use the Move tool and the arrow keys to centre the title on the centre guide, about halfway between the top frame and the header rule.
- Click
Plate Border. TypeTHE BALSAM FIR, WITH STUDIES OF SNOW CRYSTALSin Old Standard TT at 22 px, colour , letter spacing 5. Centre it about 30 px under the title and rename itSubtitle. - Click
Plate Borderagain. In crimson , at 22 px with letter spacing 3, addPL. XXV.left-aligned at the left margin, just inside the top frame. ClickPlate Borderonce more and addFAM. PINACEAE.right-aligned at the right margin.
- Pick the Text tool. Set IM Fell English SC at 92 px, Align to Center, and colour . Click on the centre guide near the top and type
-
Paint the twig with a tapering brush
- Add two layers above
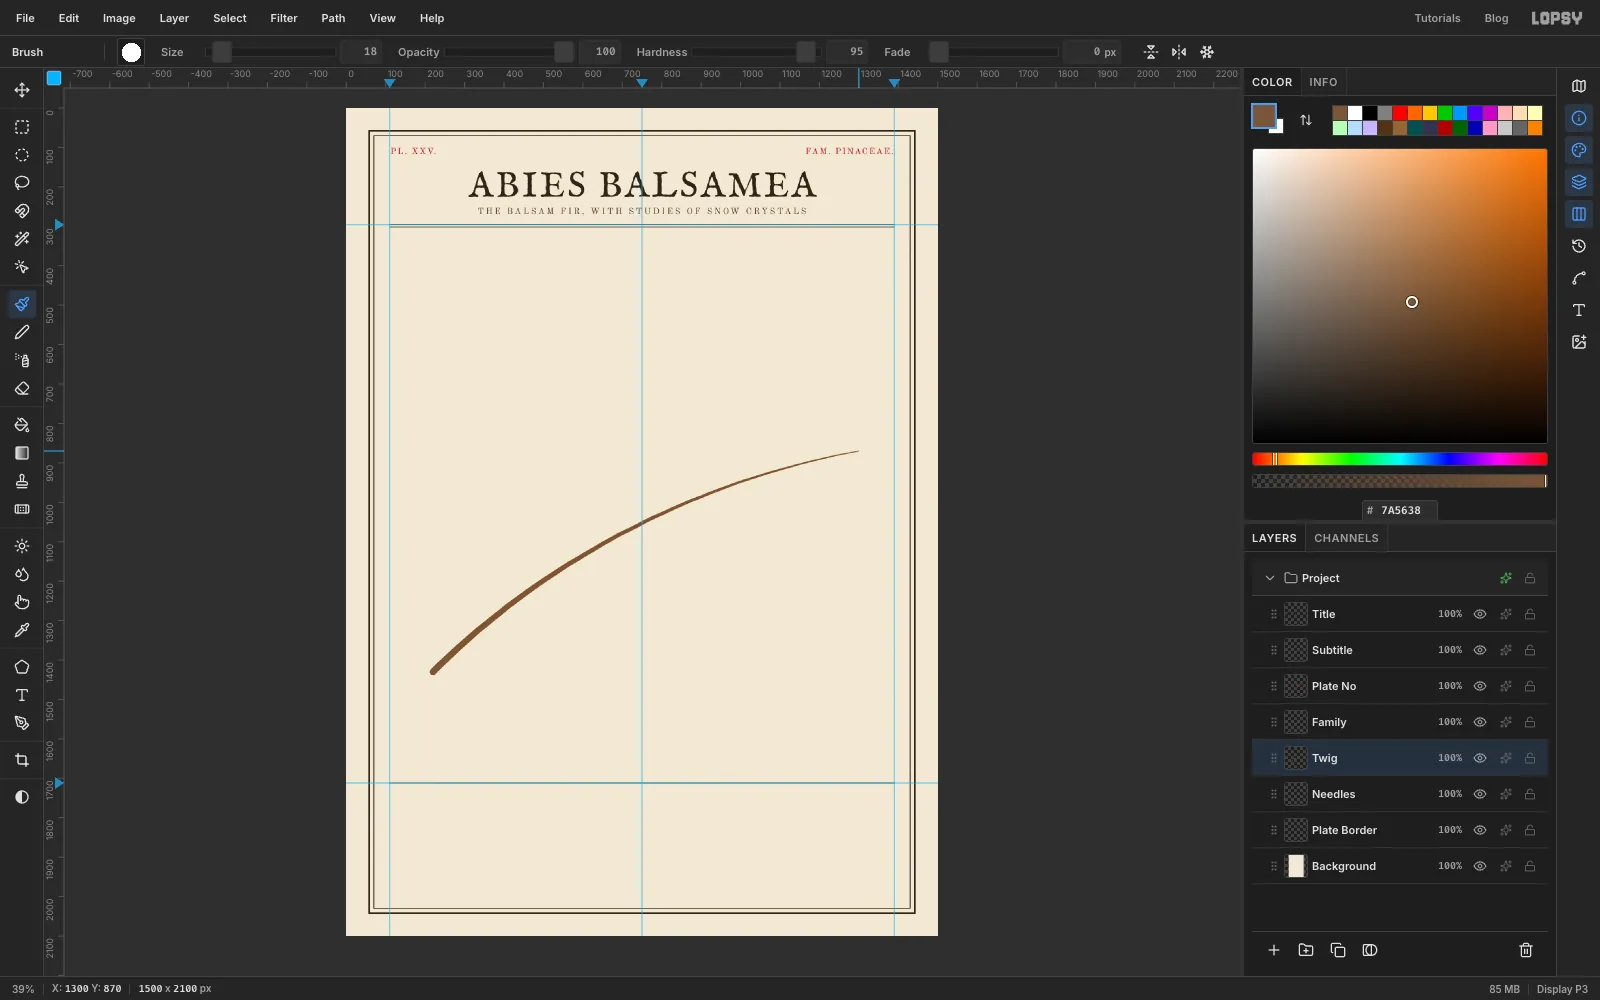
Plate Border:Needlesfirst, thenTwigabove it. The needles go underneath so the bark covers their bases. - Pick the Brush and open the brush settings from the tip thumbnail in the options bar. Set Size 18, Hardness 95, Spacing 2 and Taper 1500.
- Paint the twig in bark brown in one slow stroke. Start at the cut end, about (220, 1430), and curve up to the tip at about (1300, 870), with the steepest part near the start.
Taper is the distance over which the stroke shrinks to nothing, counted from where it starts. Set it a little longer than the stroke, so the twig thins toward the tip but still reaches it.
- Add two layers above
-
Add the side shoots
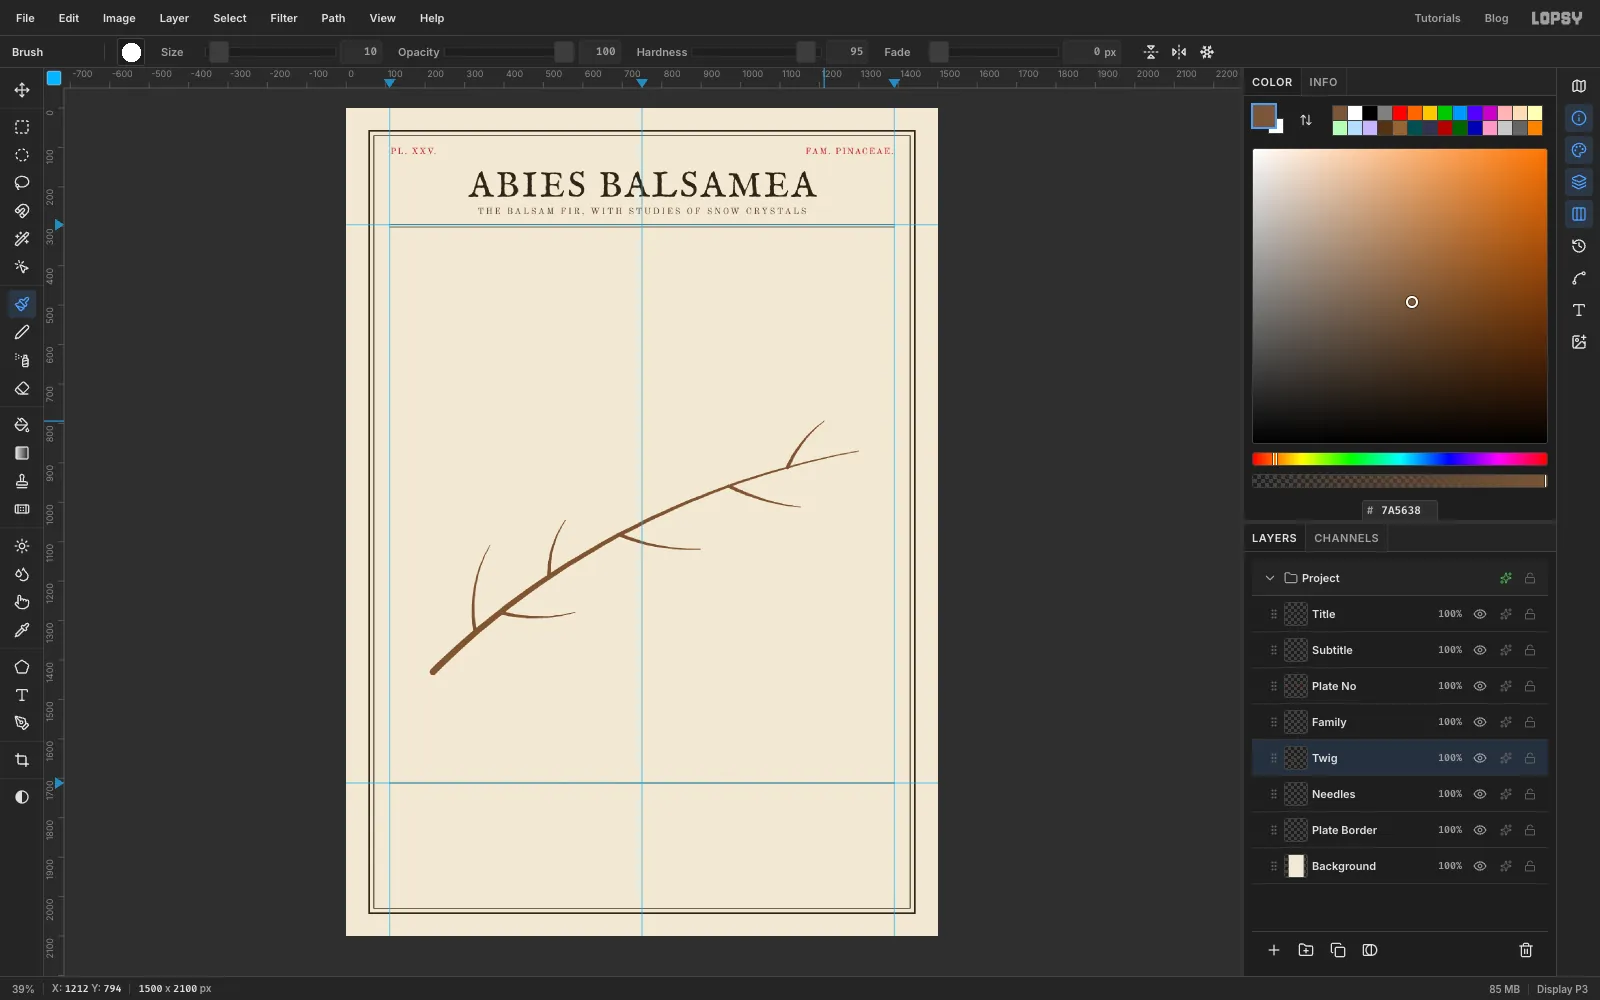
Fir branches grow in a flat spray, with side shoots leaving the twig at about 50–60°.
- Set the brush to Size 10 and Taper 250.
- Paint six side shoots from points along the twig, on both sides. Make each one 150–225 px long, with a slight curve toward the tip.
- Make the lowest upward shoot the longest, rising toward the empty top-left of the page.
-
Shade the bark inside a selection
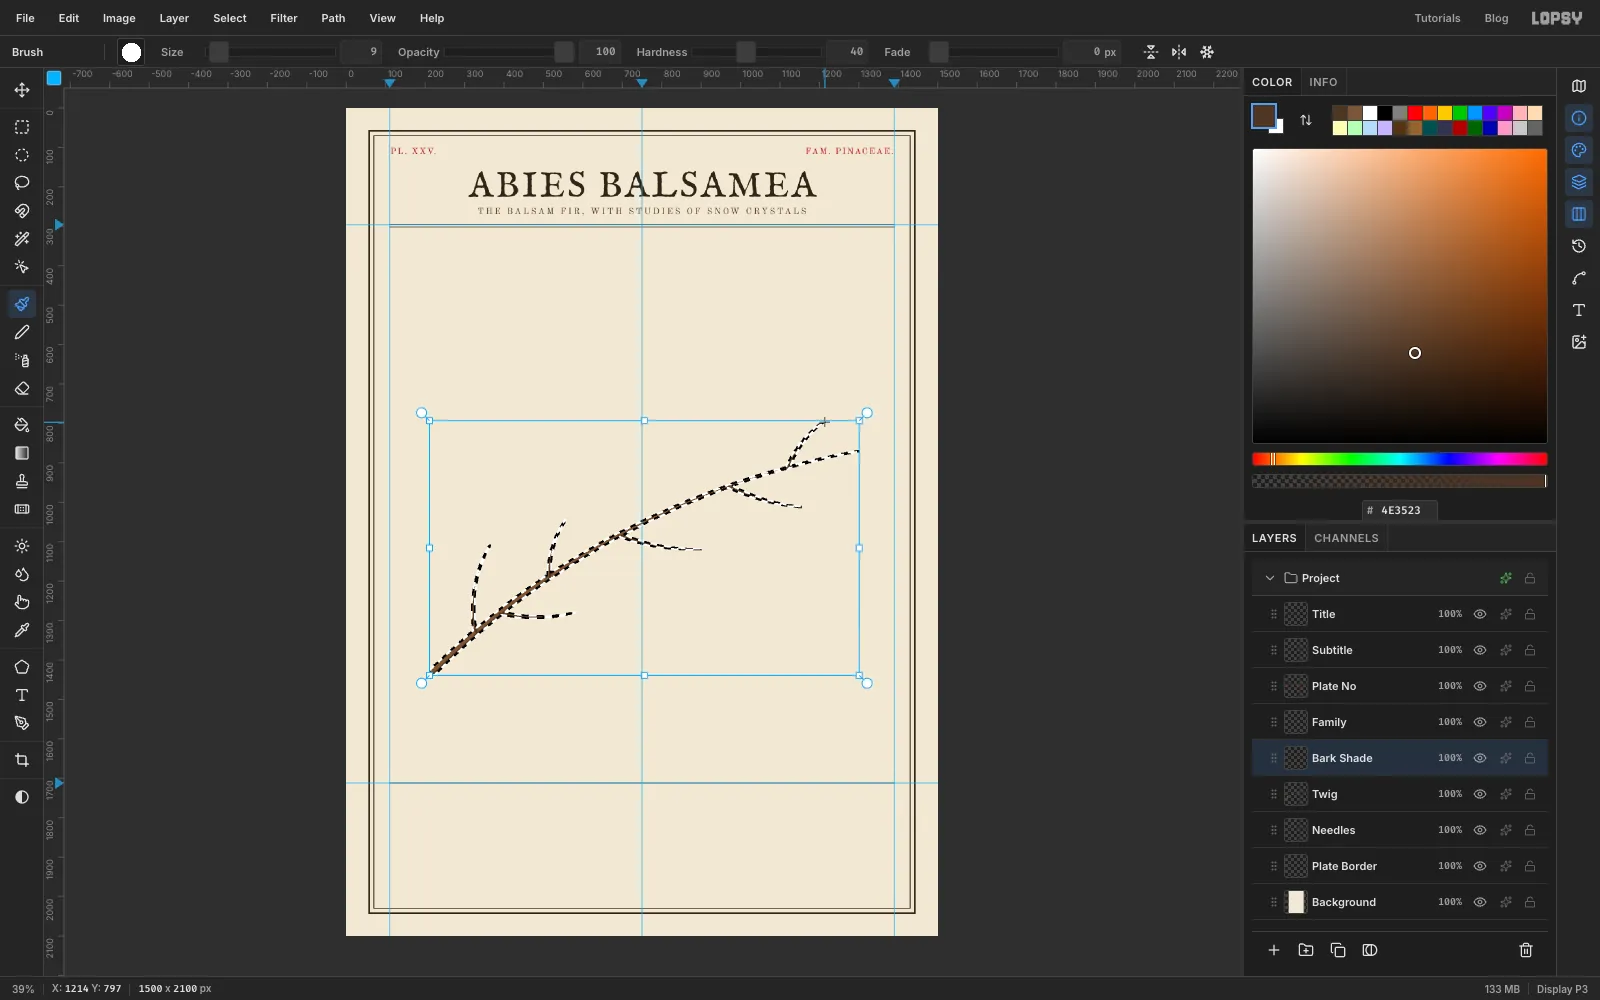
- ⌘-click the
Twigthumbnail in the Layers panel to load its outline as a selection. - Add a layer called
Bark Shade. Set the brush to Size 9, Hardness 40 and Taper 0. - Paint along the underside of the twig and each shoot, just below the centre line. The selection keeps the paint on the wood.
- Press ⌘D to deselect. Open the layer's effects drawer (the ✦ button on its row) and set the blend mode to Multiply.
- ⌘-click the
-
Add the cut end, buds and an ink outline
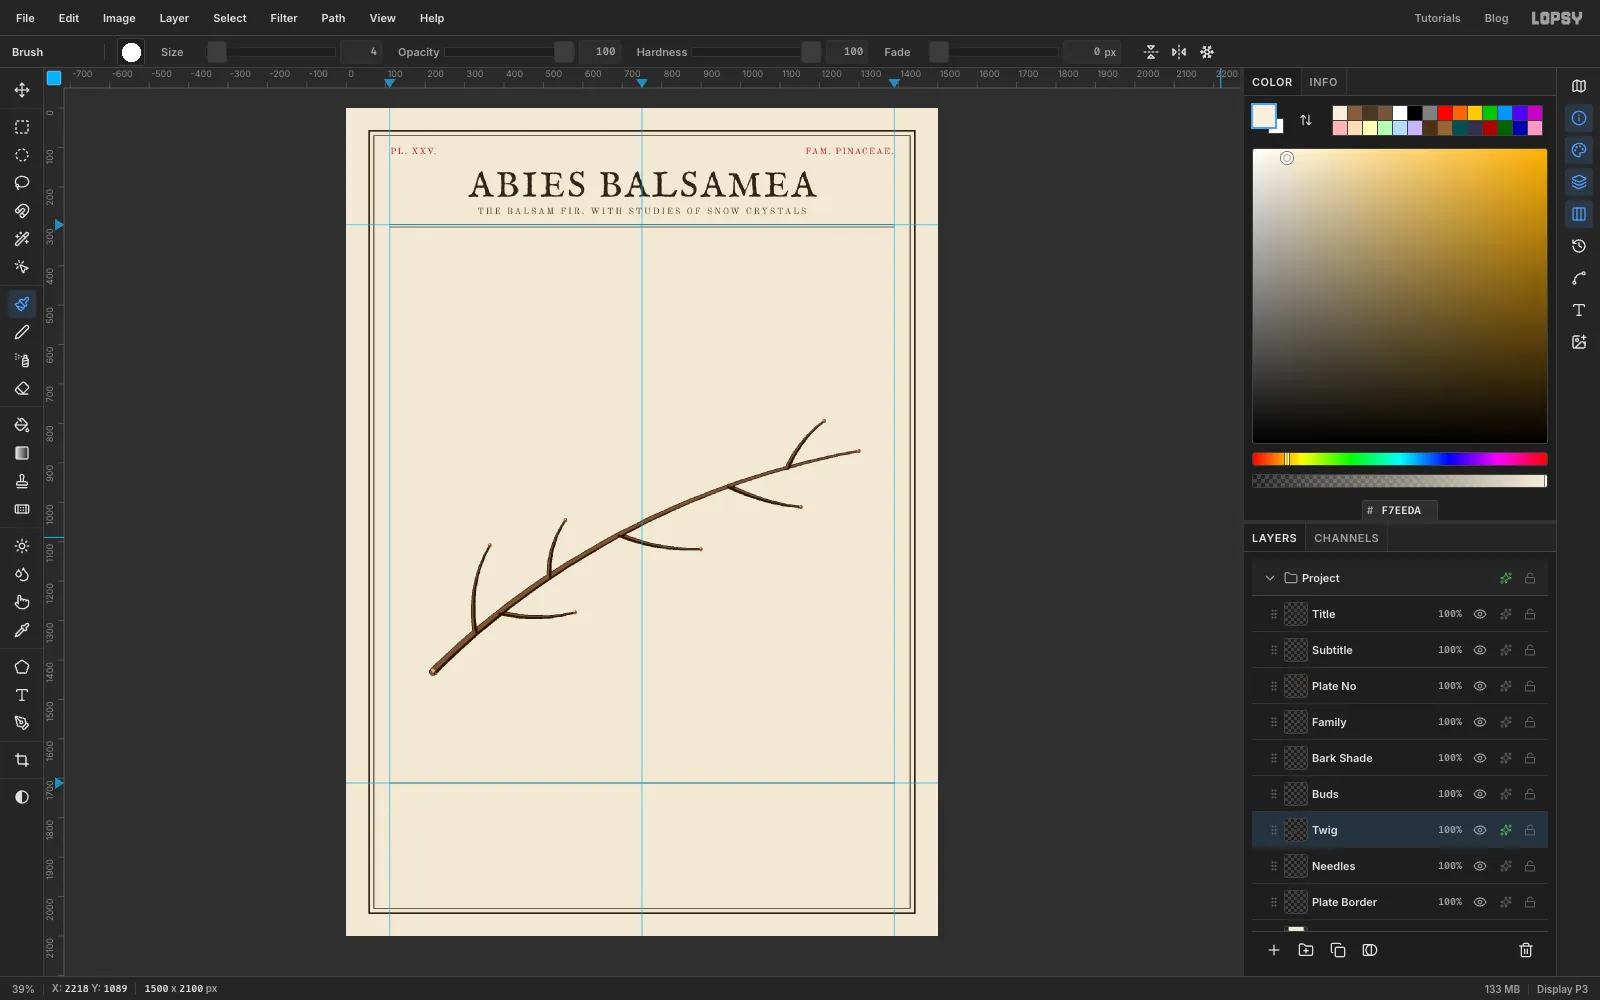
- Select
Twig. Lasso a small oval across the cut end, about 8 × 18 px, and fill it with pale wood . - Add a layer called
Buds. With a Size 11 brush in , click once on every shoot tip. Then click a Size 4 dot of just up and left of each one, for the resin highlight. - Select
Twig, open its effects and turn on Stroke at Width 2 in ink .
- Select
-
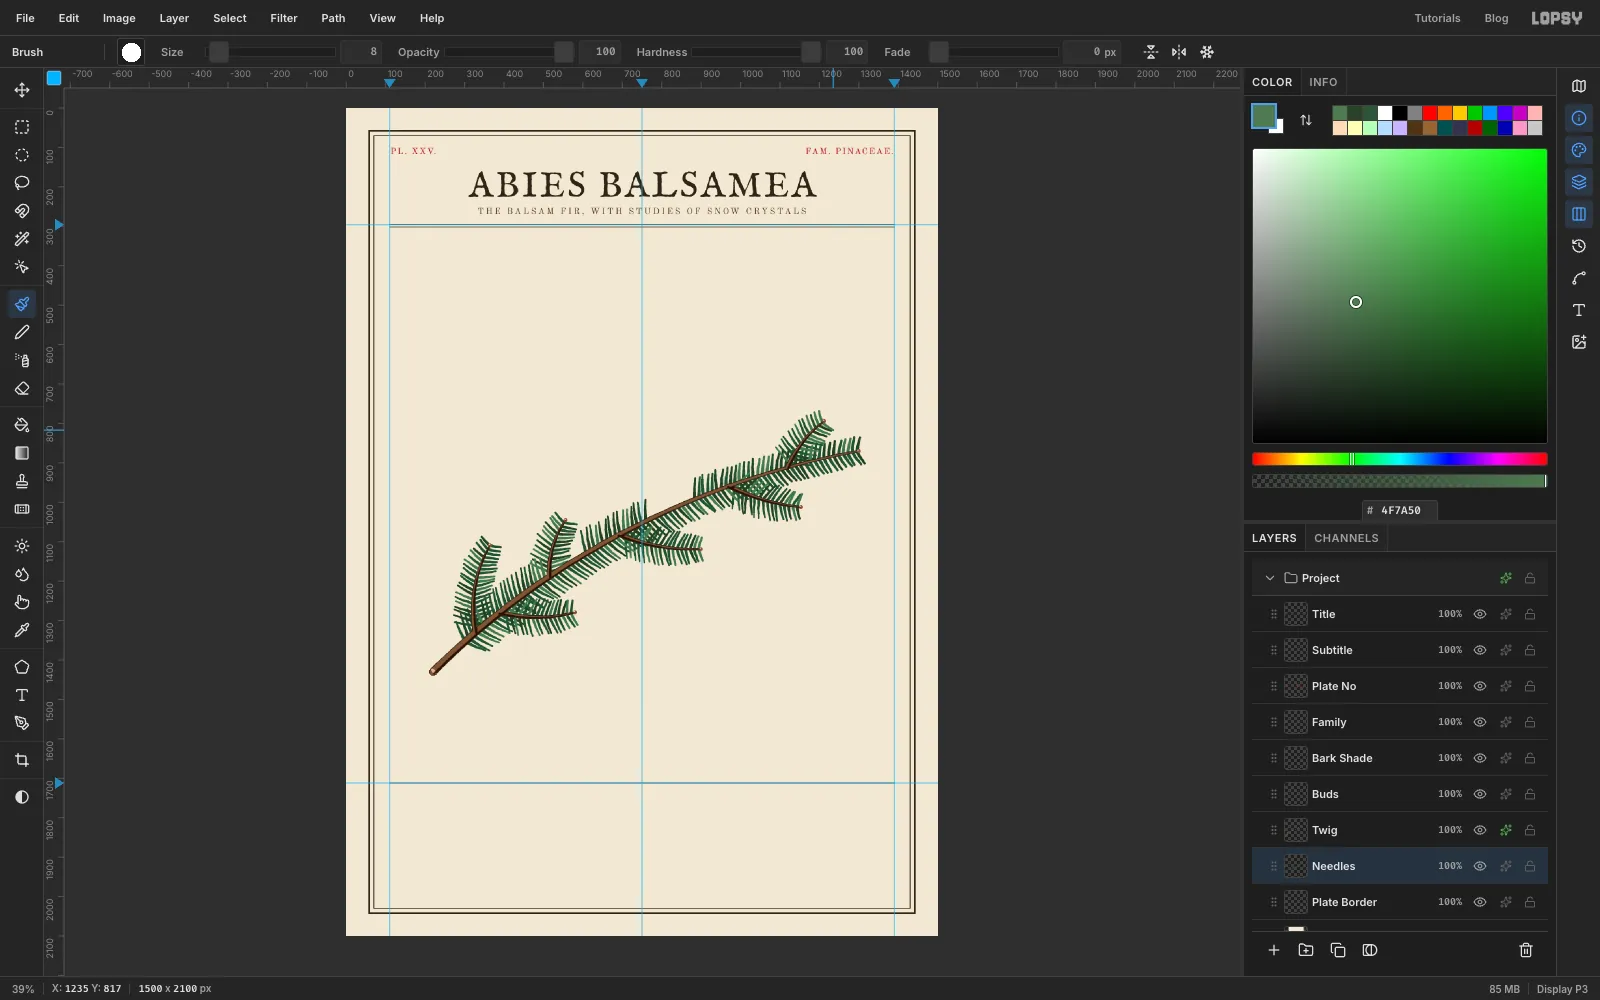
Paint the needles two by two
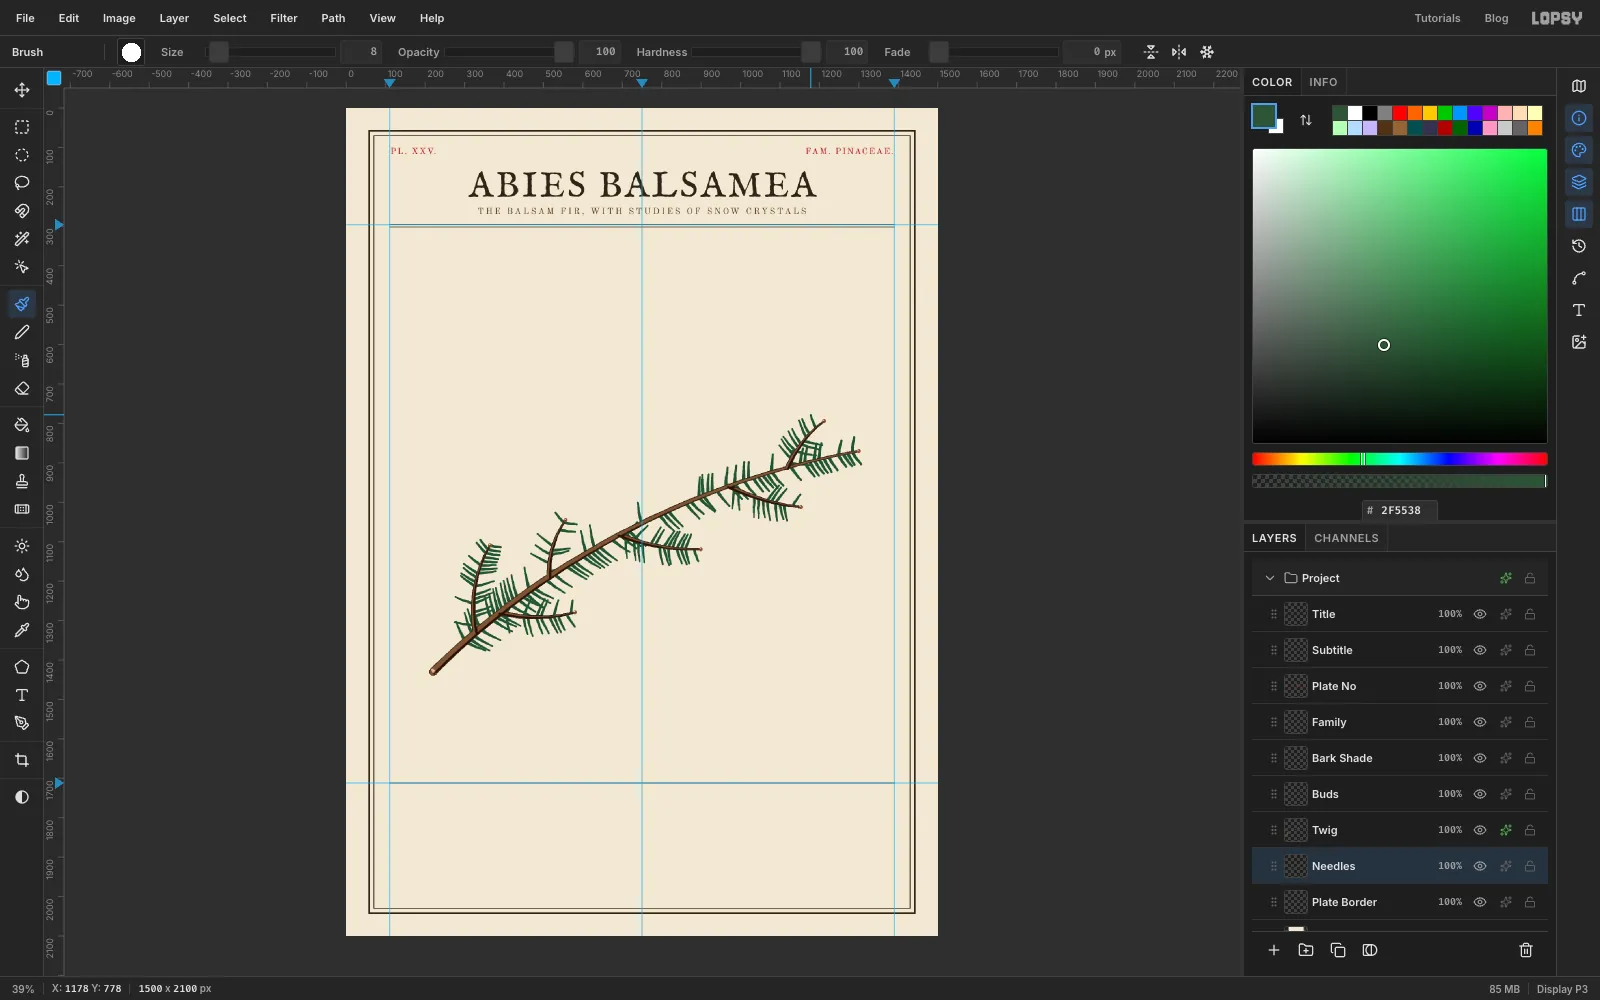
This is the longest step: about 400 needles. Balsam fir needles lie flat in two rows, one each side of the twig, leaning forward toward the tip.
- Select
Needles. Set the brush to Size 9, Hardness 100, Spacing 2 and Taper 110. A short taper rounds the needle tips. - In , work along the main twig from just past the cut end to the tip, painting one needle out from each side every needle's width or so. Each needle is a short, slightly curved stroke 50–60 px long, angled 65–75° forward from the twig.
- Make the needles shorter as you near the tip, and leave two gaps on top of the twig where the cones will sit.
- Paint the side shoots the same way at Size 8, with needles about 48 px long.
- Select
-
Vary the needle tones
Needles that all match look stamped. Go over about a third of them again in darker , then about a fifth in lighter . Scatter the darker and lighter ones over the whole branch, not in clusters.
-
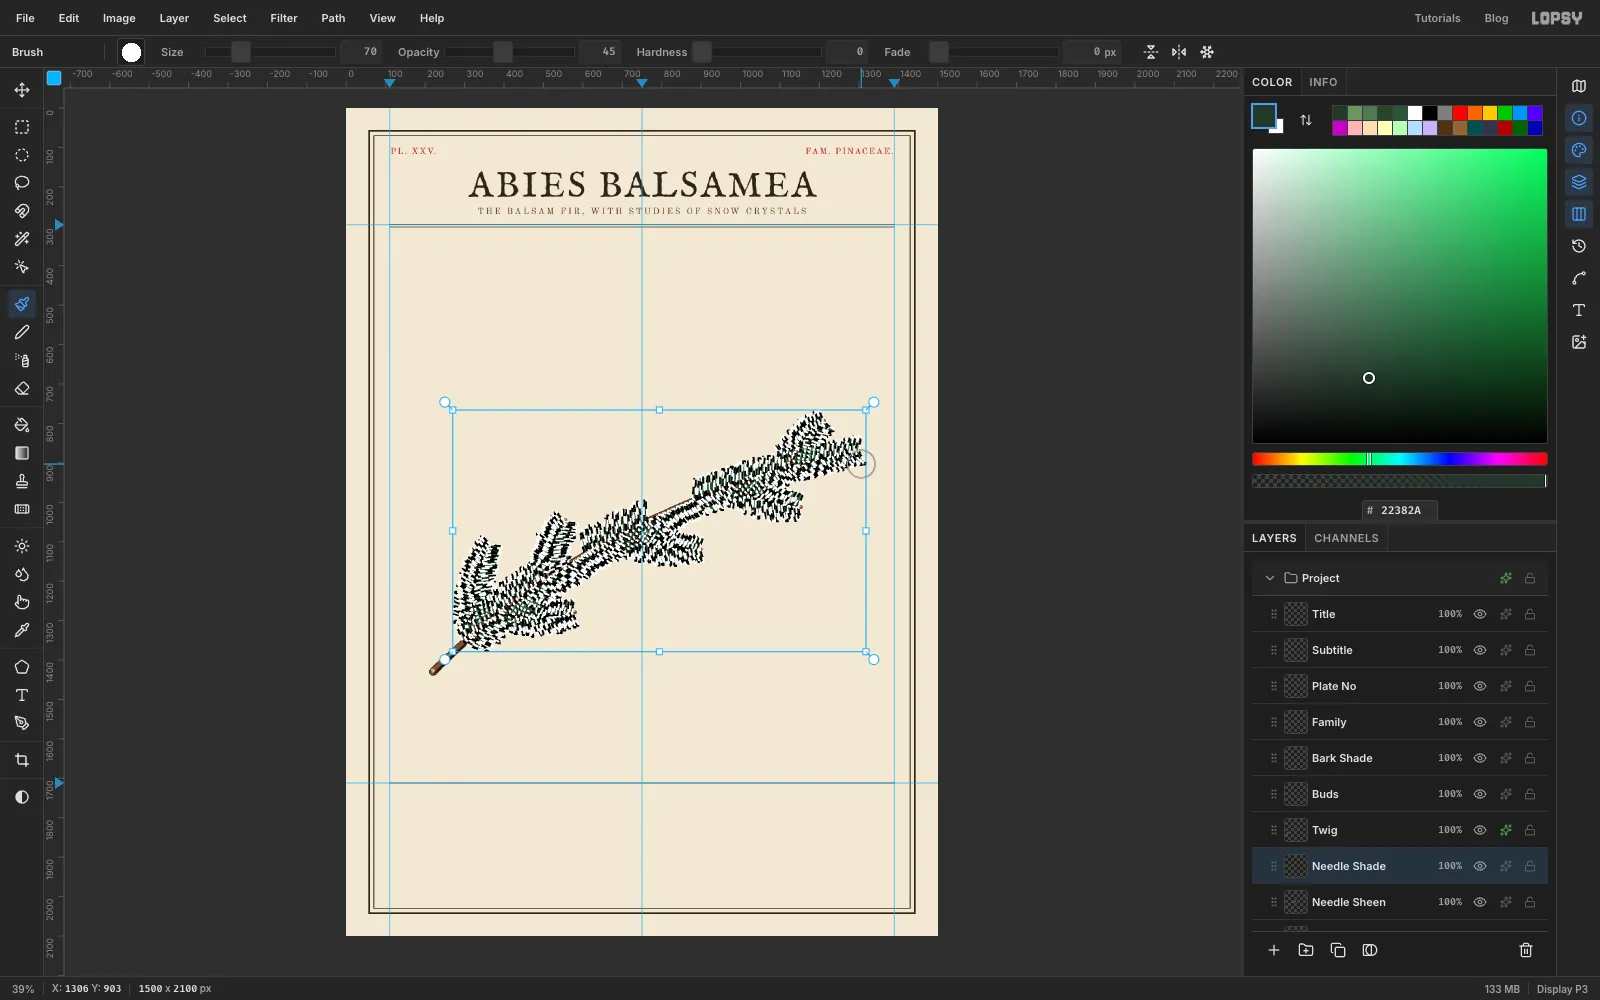
Add sheen and shade to the needles
- Add a layer called
Needle SheenaboveNeedles. With a Size 3 brush at Opacity 80 and Taper 80, paint along the upper edge of each needle on the main twig, stopping short of the tip. - ⌘-click the
Needlesthumbnail to select every needle. Then add a layer calledNeedle Shade. - Set a big soft brush: Size 70, Hardness 0, Opacity 45. Paint one stroke of along the underside of the twig, about 35 px below it. The needles that hang below the twig fall into shadow.
- Deselect, and set
Needle Shadeto Multiply.
- Add a layer called
-
Ink the needles
Give
Needlesa Stroke effect at Width 1 in needle ink . That's a shade darker than the needles rather than black, so the foliage reads as drawn, not cut out.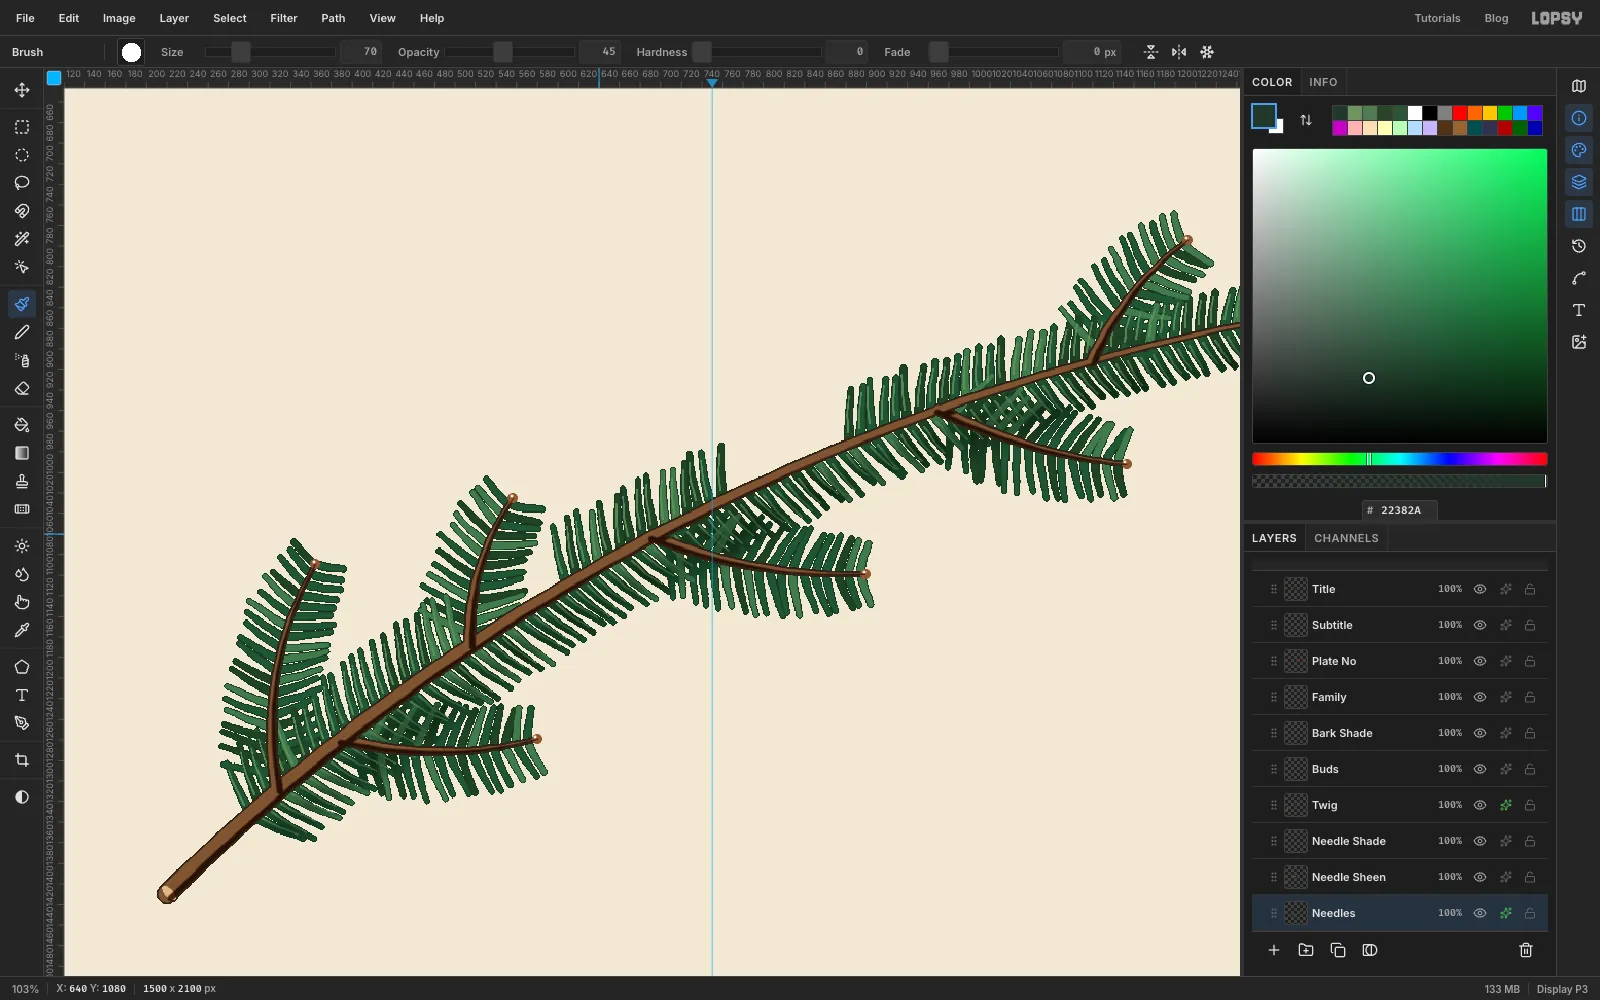
-
Shape the first cone
Fir cones stand upright on top of the branch.
- Select
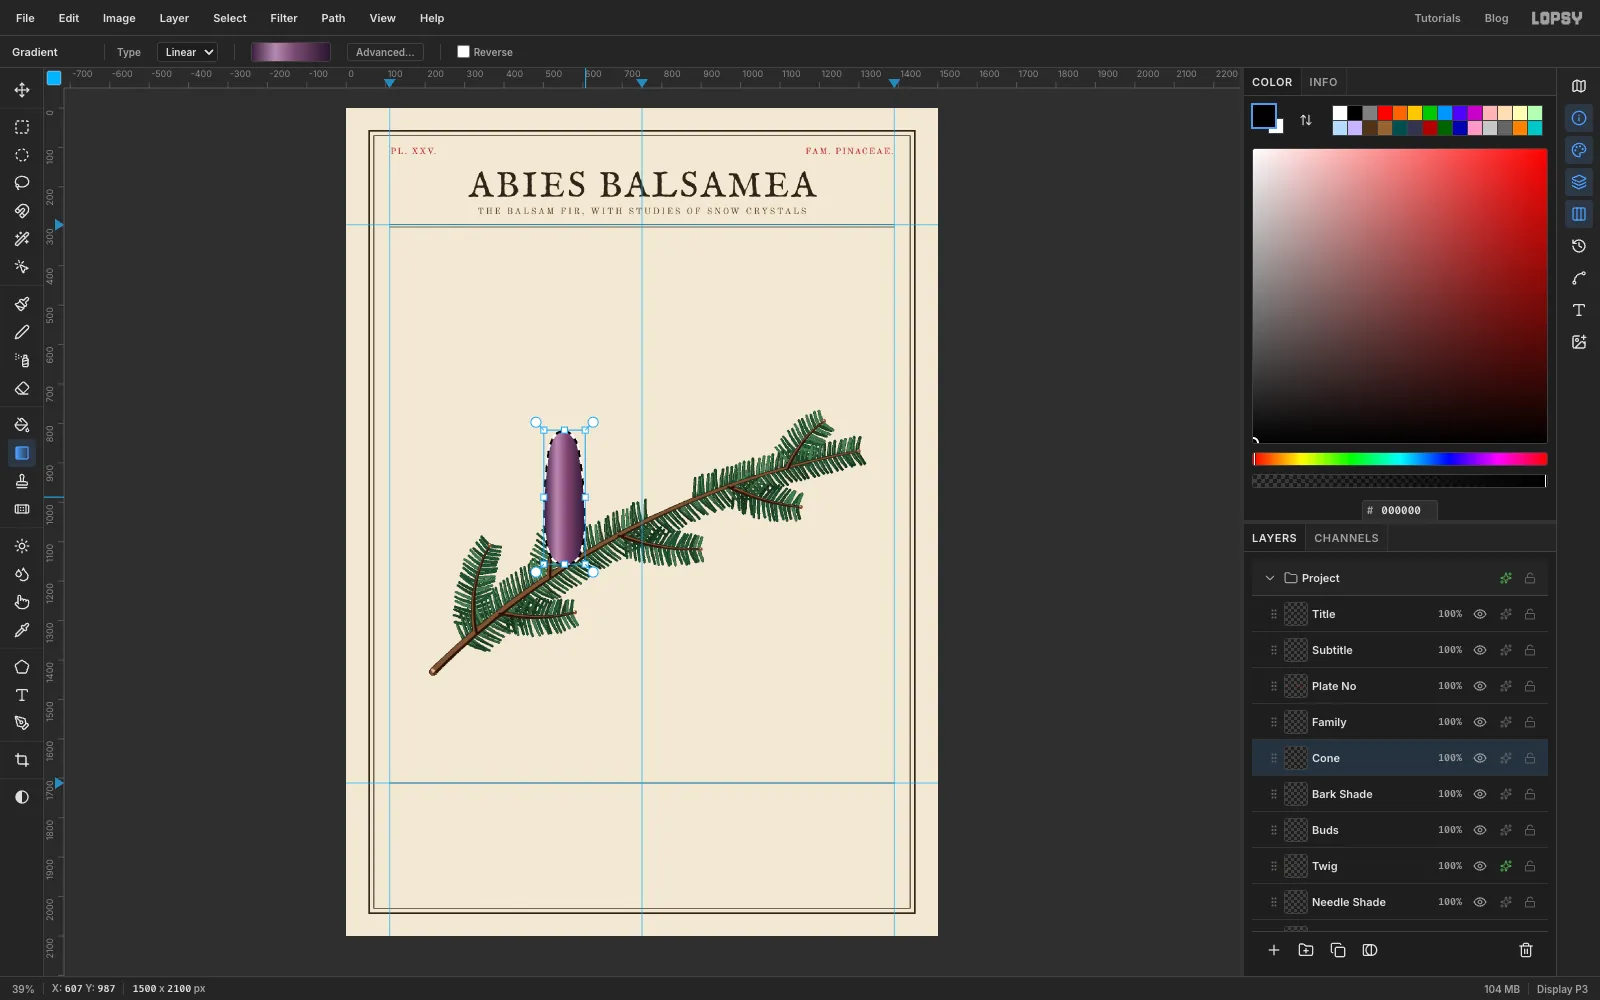
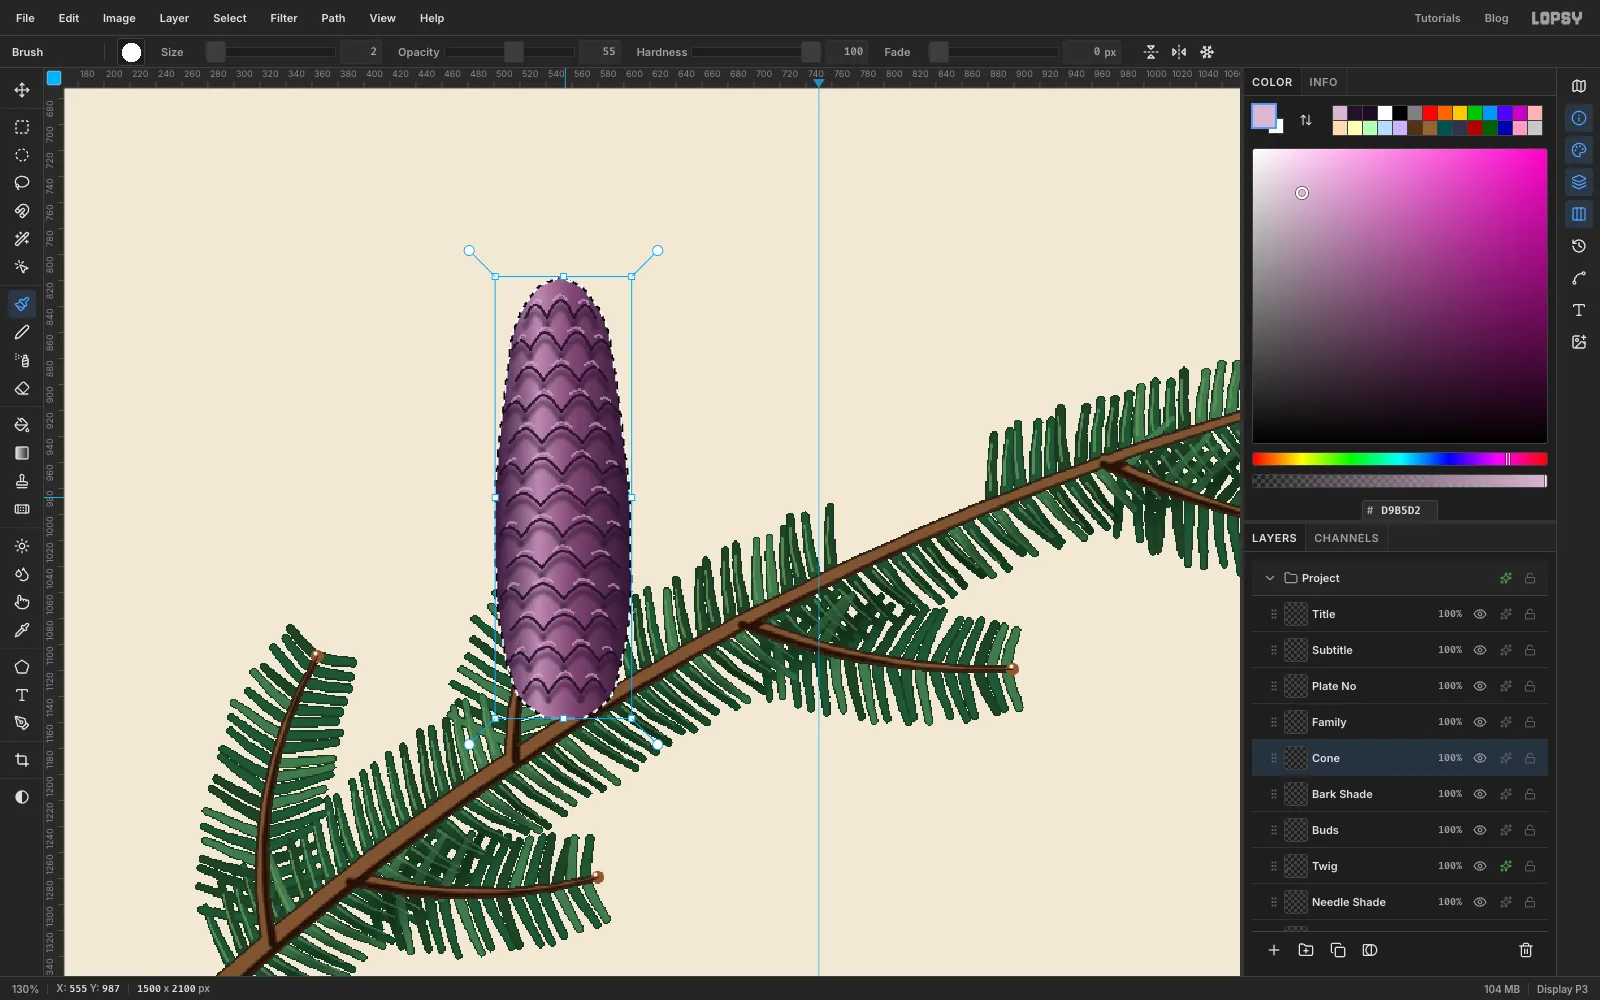
Bark Shadeand add a layer calledCone, so it sits above all the wood. - With the Lasso, draw an upright cone on the first gap in the needles: about 104 px wide, rising 340 px from the twig. Round the foot, keep the sides straight for the lower half, narrow the top to about 60% of the width, and finish with a rounded tip.
- Pick the Gradient tool, open Advanced… and set four stops:
- at the start
- at the 30% point
- at the 55% point
- at the end
- Drag straight across the cone from its left edge to its right edge. The light band a third of the way in turns the flat shape into a cylinder.
- Select
-
Paint the cone scales
Keep the cone selected so nothing spills.
- Shadows: with a soft brush (Size 9, Hardness 0, Opacity 40, Taper 0) in , paint a short arch every 24 px up the cone, five or six across. Stagger each row by half a scale, like brickwork. Narrow the arches toward the sides, where the scales turn away from you.
- Edges: switch to Size 3, Hardness 100, Opacity 90 in scale ink , and trace each arch again just above its shadow.
- Rims: at Size 2, Opacity 55 in , add a short pale line along the top of each edge.
-
Dodge and burn the cone
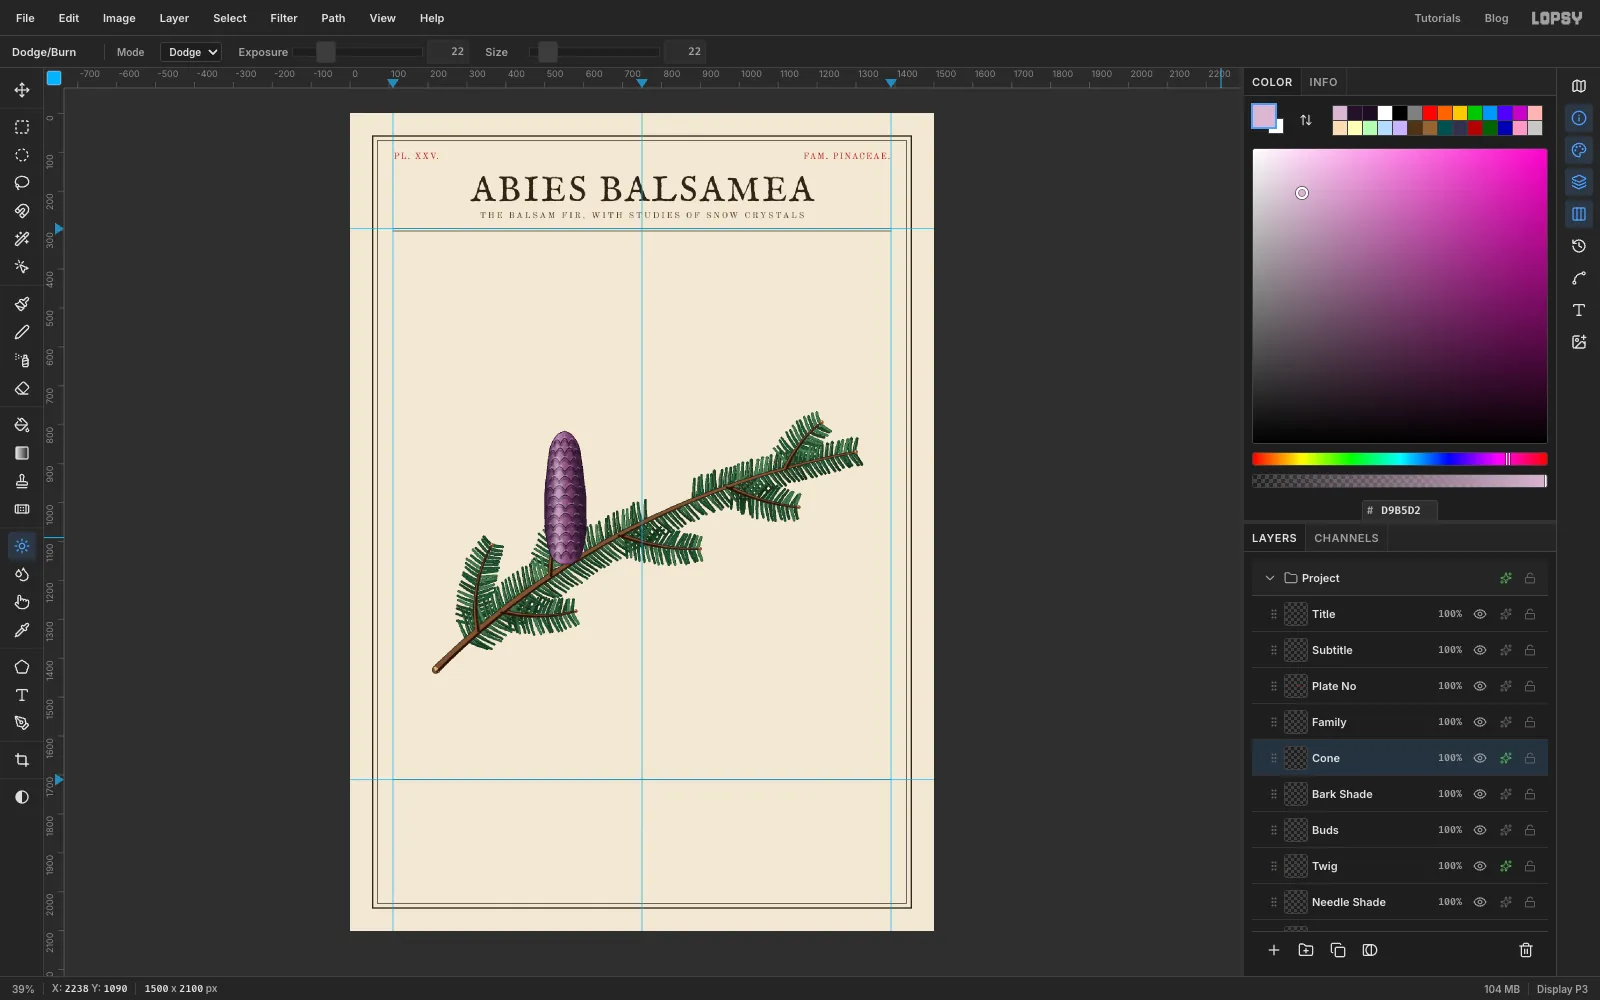
- Pick the Dodge / Burn tool and set Mode to Burn, Exposure 20 and Size 30. Drag once from the foot to near the tip, down the right third of the cone.
- Switch Mode to Dodge at Exposure 22 and Size 22. Drag once down the left third, where the gradient's highlight is.
- Deselect. Give
Conea Stroke effect at Width 2 in .
-
Paste and move the second cone
- ⌘-click the
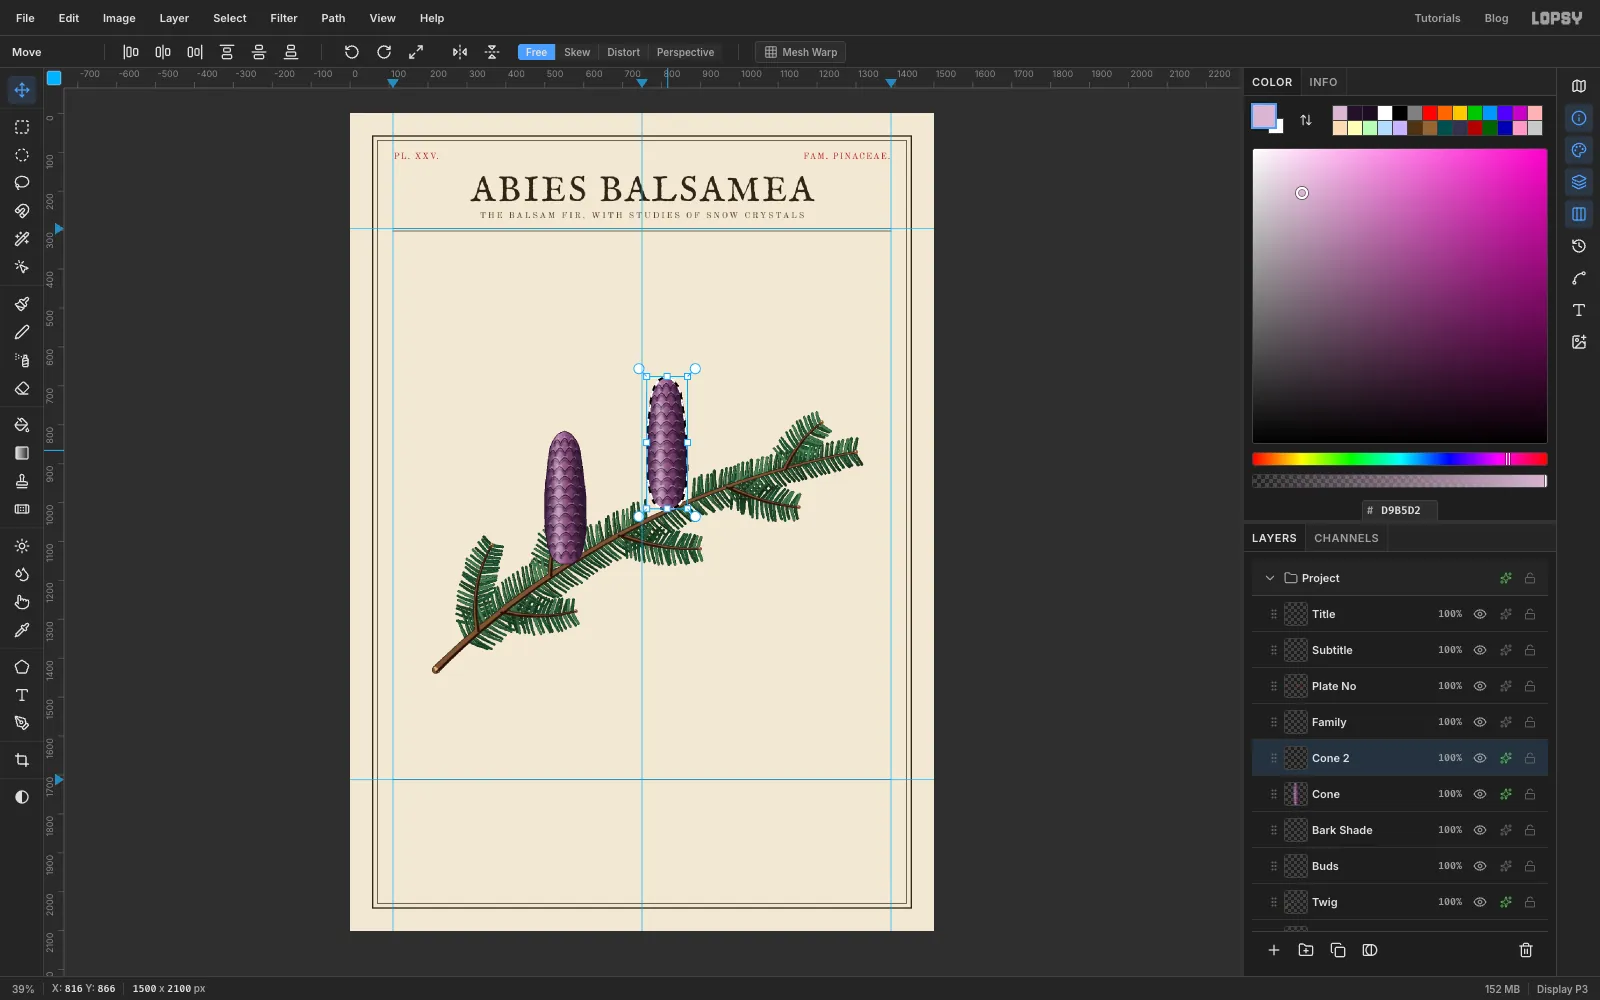
Conethumbnail, then press ⌘C and ⌘V. The copy pastes in place on a new layer, already selected, with the Move tool active. Rename itCone 2and give it the same Stroke effect. - ⌘-click the
Cone 2thumbnail to select it again, then drag it along the twig to the second gap, about 260 px to the right and 140 px up.
- ⌘-click the
-
Scale the second cone down
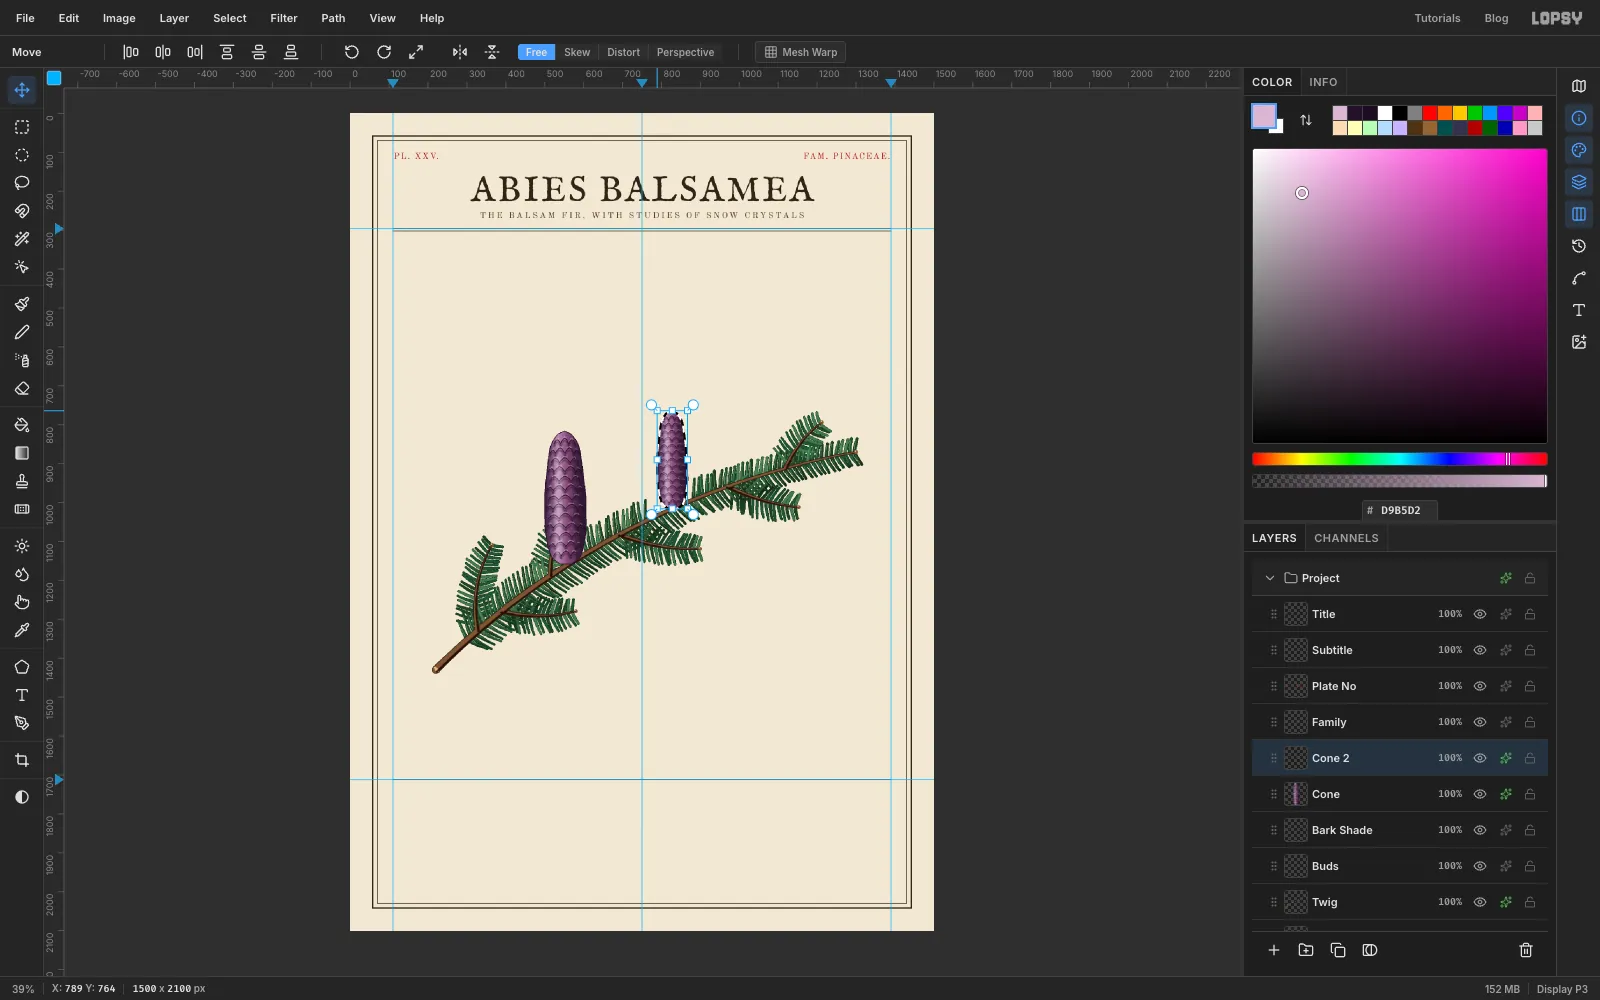
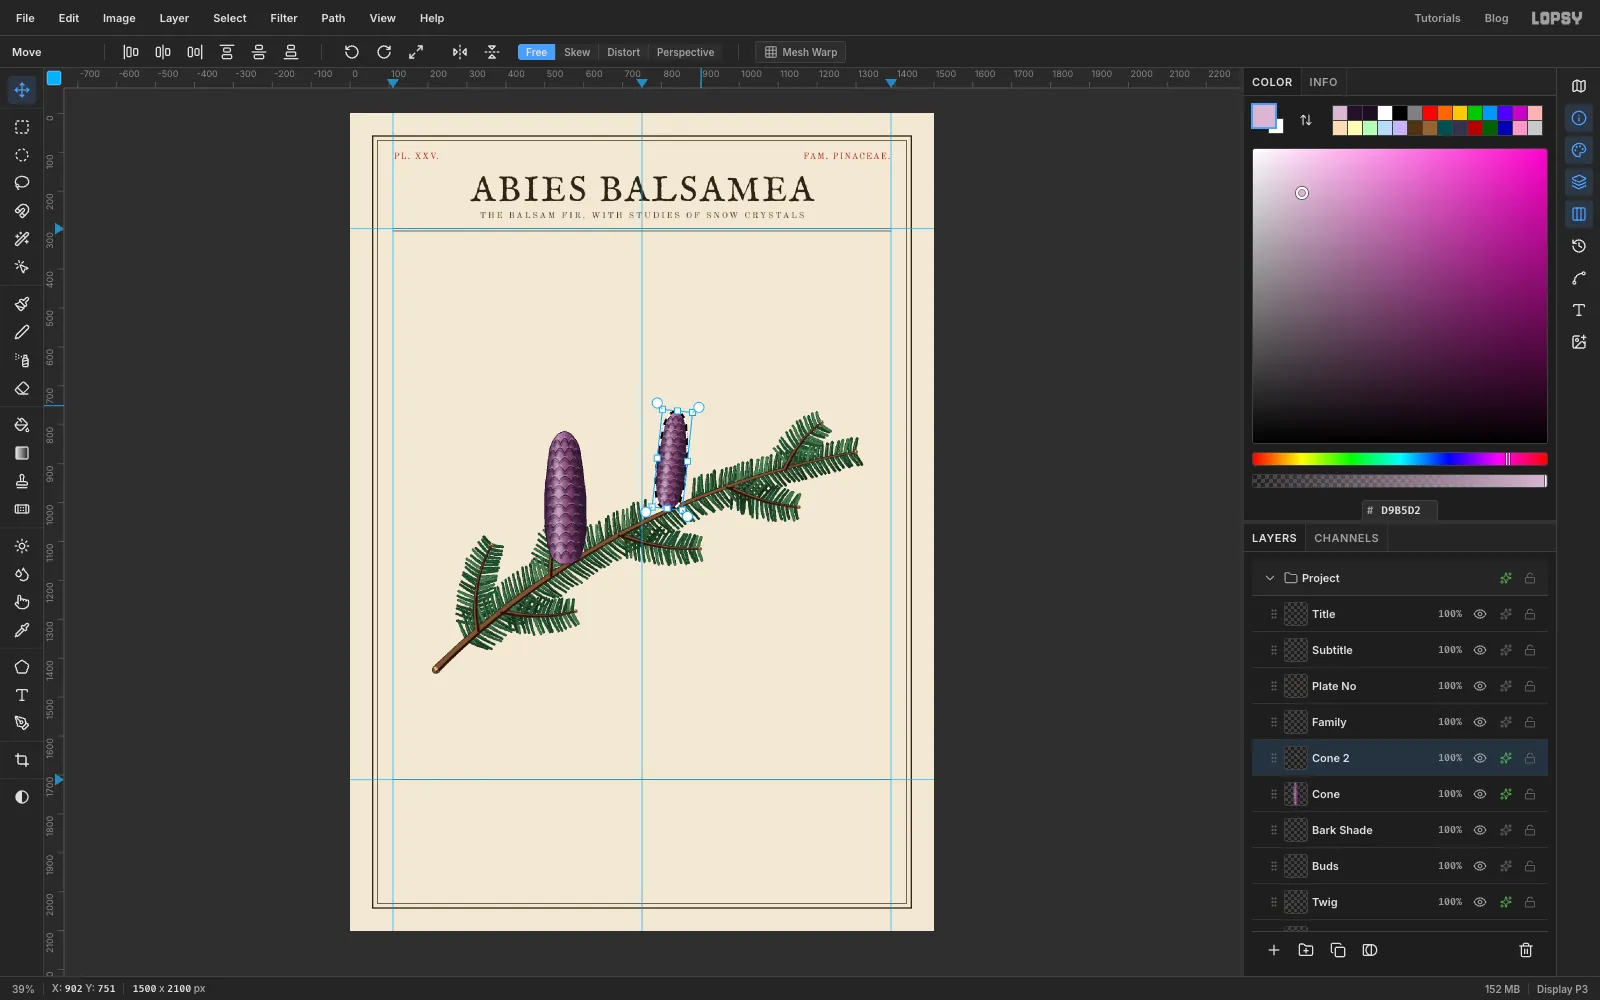
Two identical cones look copied. Hold ⌘ and drag the top-left corner handle in toward the centre until the cone is about three quarters of its size. ⌘ keeps the proportions.
-
Tilt the second cone
- Drag the round rotation handle just outside the top-right corner to tilt the cone about 6° to the right.
- Press ⌘D to apply the transform.
- Nudge the cone with the arrow keys until its foot sits on the twig.
-
Select the shadow side of each cone
Engravers shaded with lines, not soft paint. The hatching should only cover the shadow side, so build that selection first.
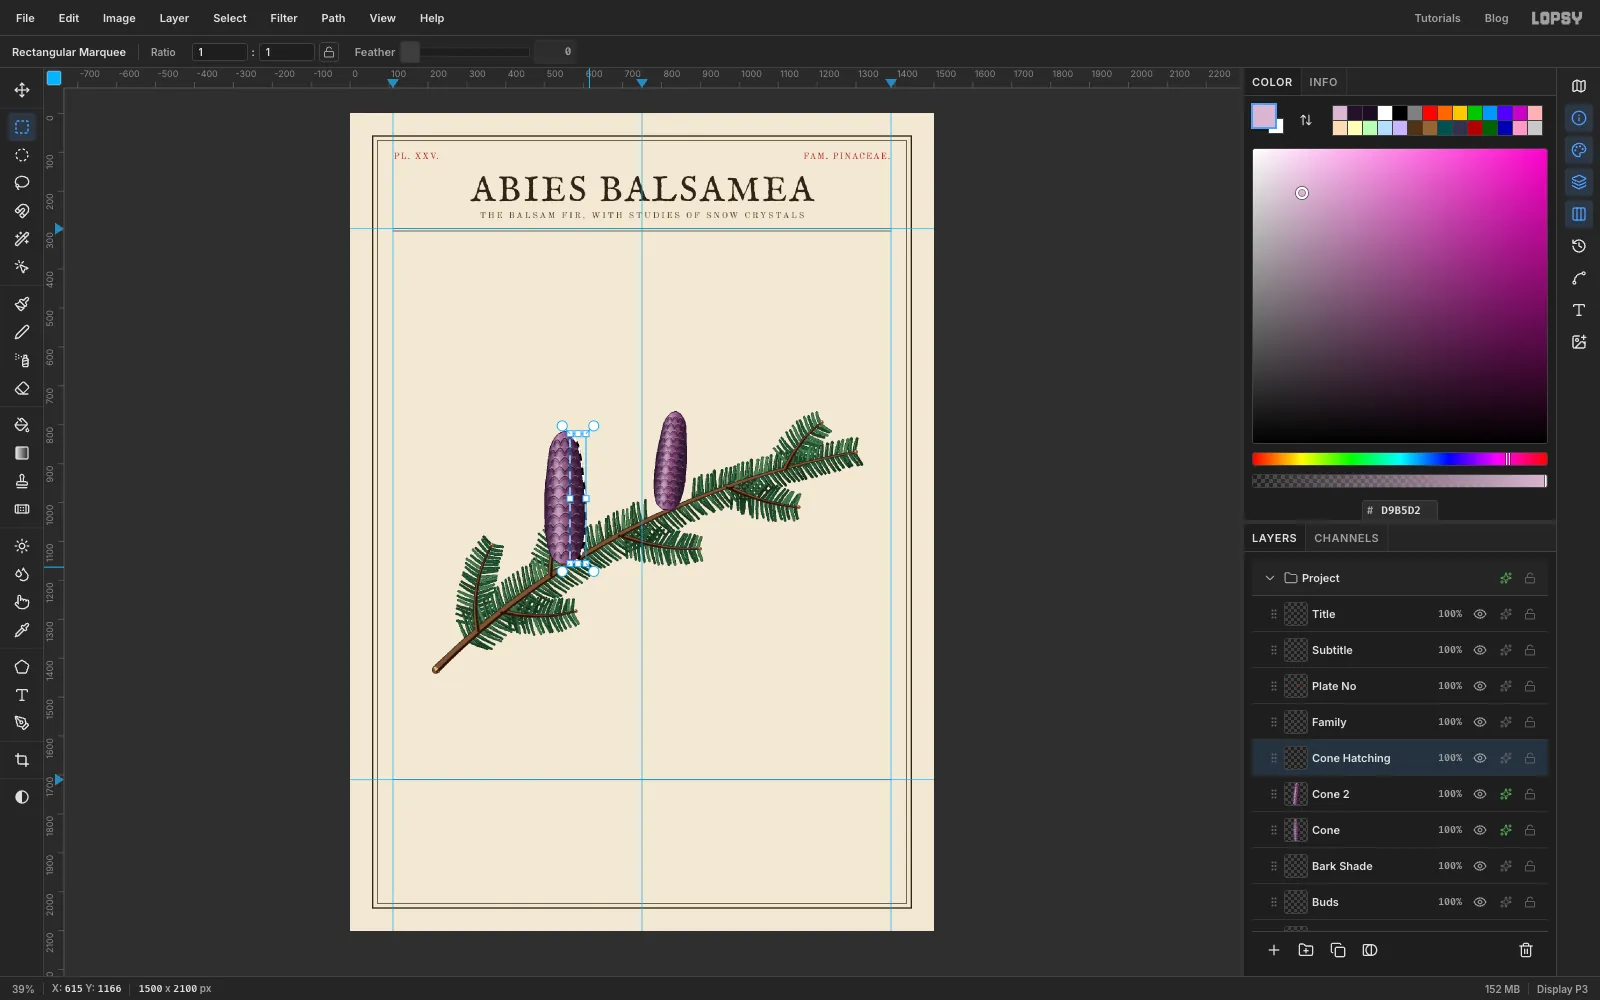
- Add a layer called
Cone Hatching. - ⌘-click the
Conethumbnail. - Pick the Rectangular Marquee, hold Shift+Alt, and drag a box over the right third of the cone. Shift+Alt intersects, leaving only the part of the cone inside your box.
- Choose Select → Feather… and feather by 6 px, so the hatching fades out toward the light.
- Add a layer called
-
Hatch the cones
- Select the
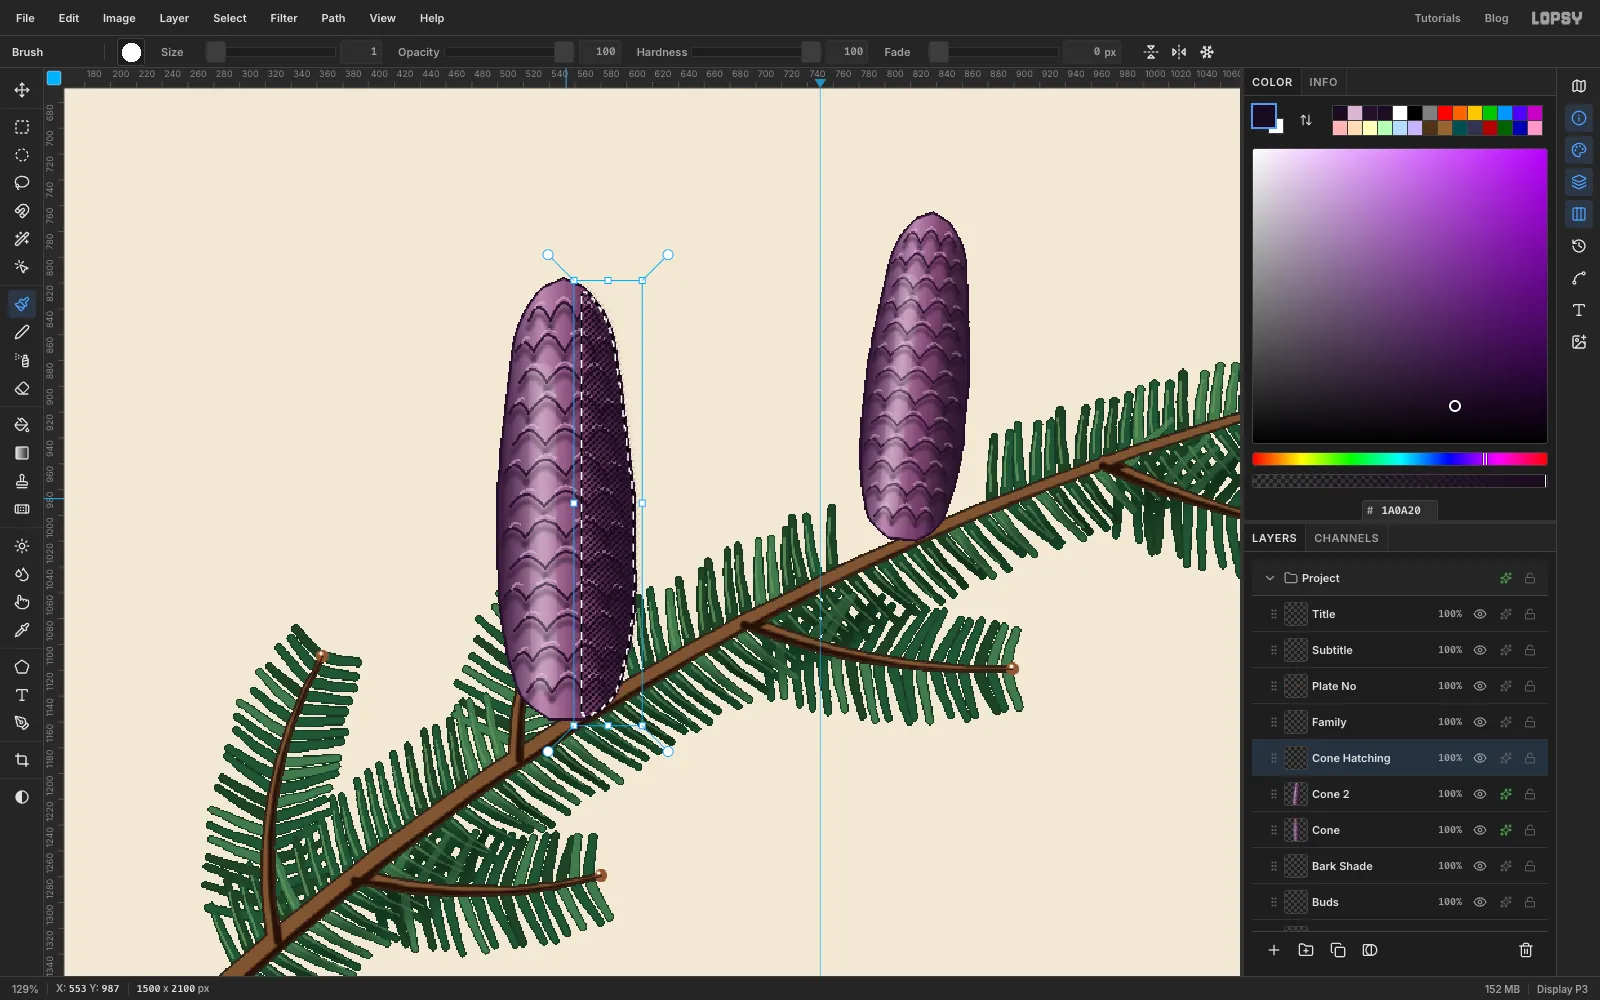
Cone Hatchinglayer. Set the brush to Size 1, Hardness 100, Opacity 100, in . - Draw straight diagonal lines rising to the right, at 45°, every 5 px across the selected area. Overshoot the cone: the selection trims the lines to the shadow side.
- Deselect. Then do the same for
Cone 2: ⌘-click its thumbnail, Shift+Alt-drag a marquee over its right third, feather by 6 px, and hatch it. - Set
Cone Hatchingto Multiply at 70% opacity.
- Select the
-
Tuck the cones into the needles
A cone sitting on top of every needle looks pasted on. Add a layer called
Front Needlesabove the hatching. With the needle brush (Size 8, Taper 110) in , paint about ten short needles (about 40 px) from the twig up across the foot of each cone. Give the layer the same Width 1 Stroke asNeedles.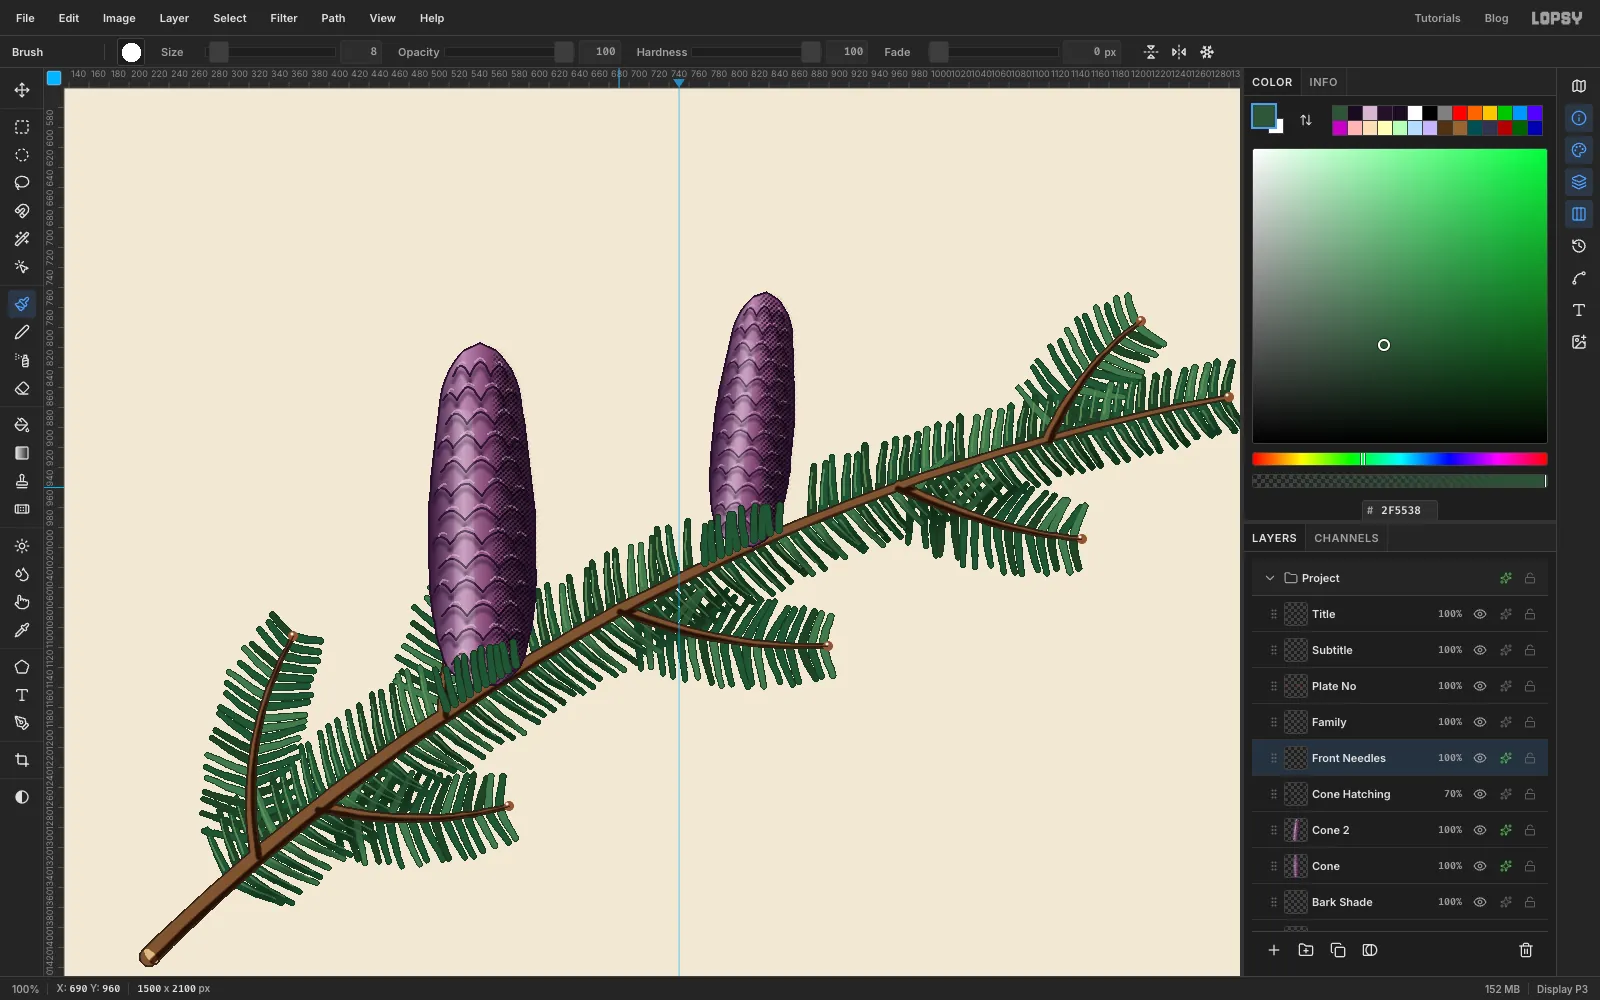
-
Draw the needle figure lying flat
The detail figures go in their own group. Select
Cone 2, click New Group in the Layers panel and rename itDetails. Add a layer calledFig 2 Needleinside it.It's much easier to draw a long thin shape level and turn it afterwards.
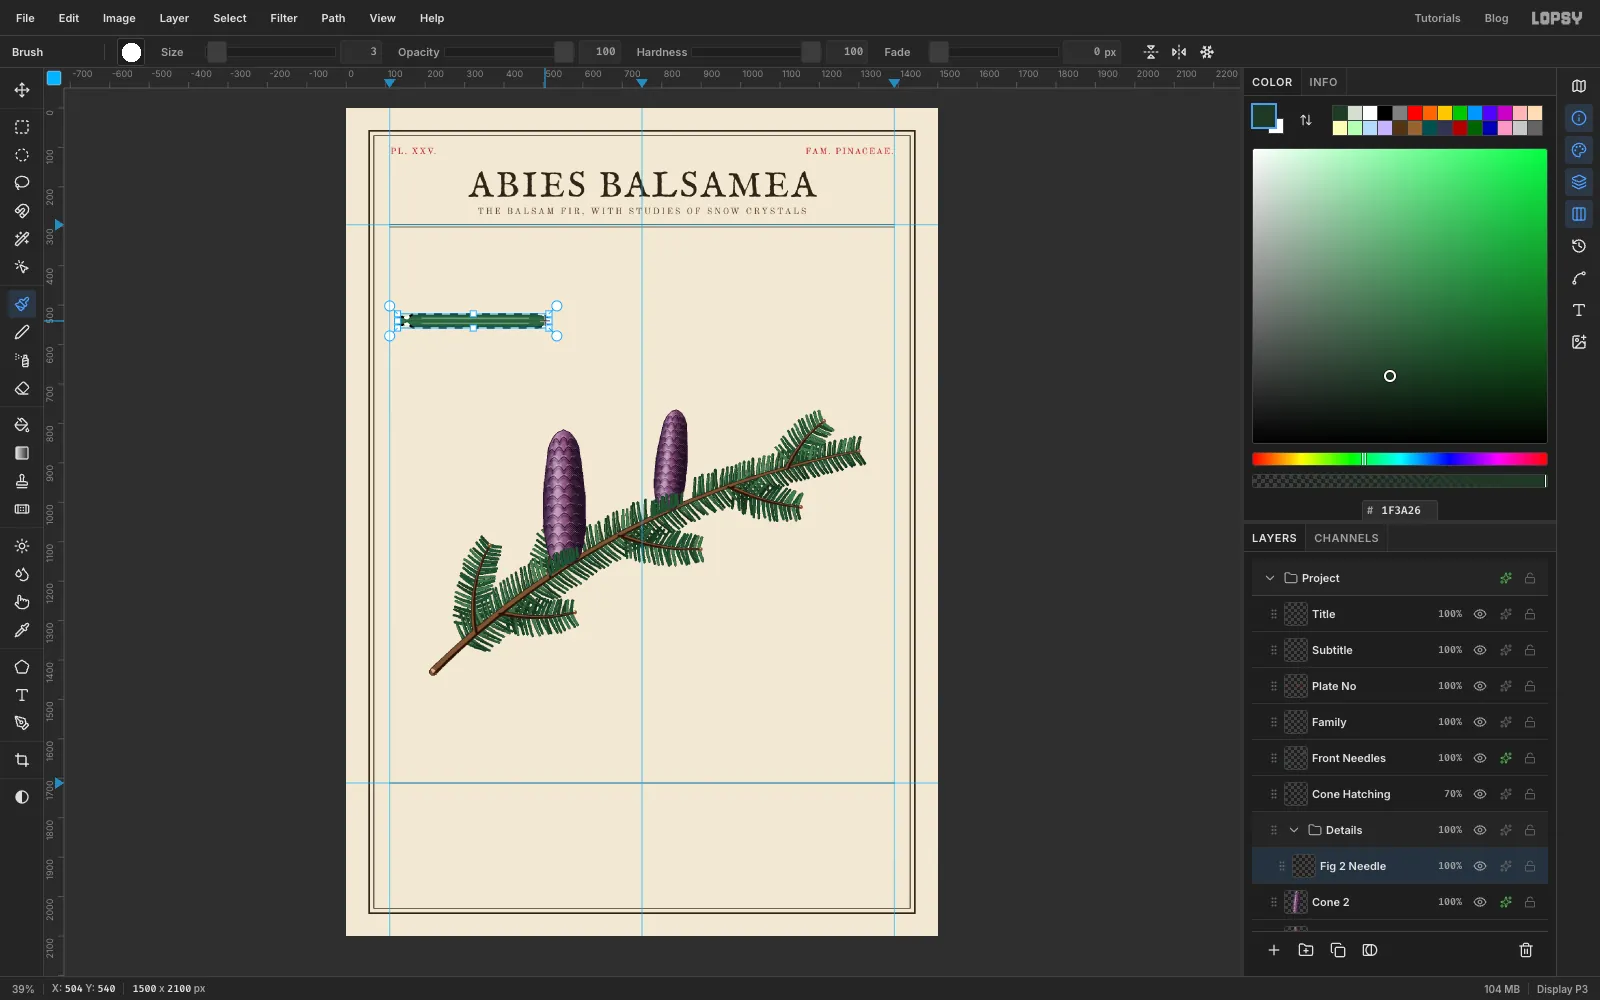
- With the Lasso, draw a needle lying flat across the top-left of the page, about 390 px long and 36 px wide. Give it a narrow stalk ending in a small round disc on the left, and a rounded tip with a tiny notch on the right.
- Fill it with a linear gradient across its width, from at the edges to in the middle.
- Inside the selection, paint two faint pale bands (Size 4, Opacity 50, ) along its length, stopping 60 px short of each end. These are the rows of breathing pores on the underside.
- Paint a dark midrib (, Size 3) down the centre. Deselect, and add a Stroke of Width 2 in ink.
-
Rotate the needle into place
- ⌘-click the
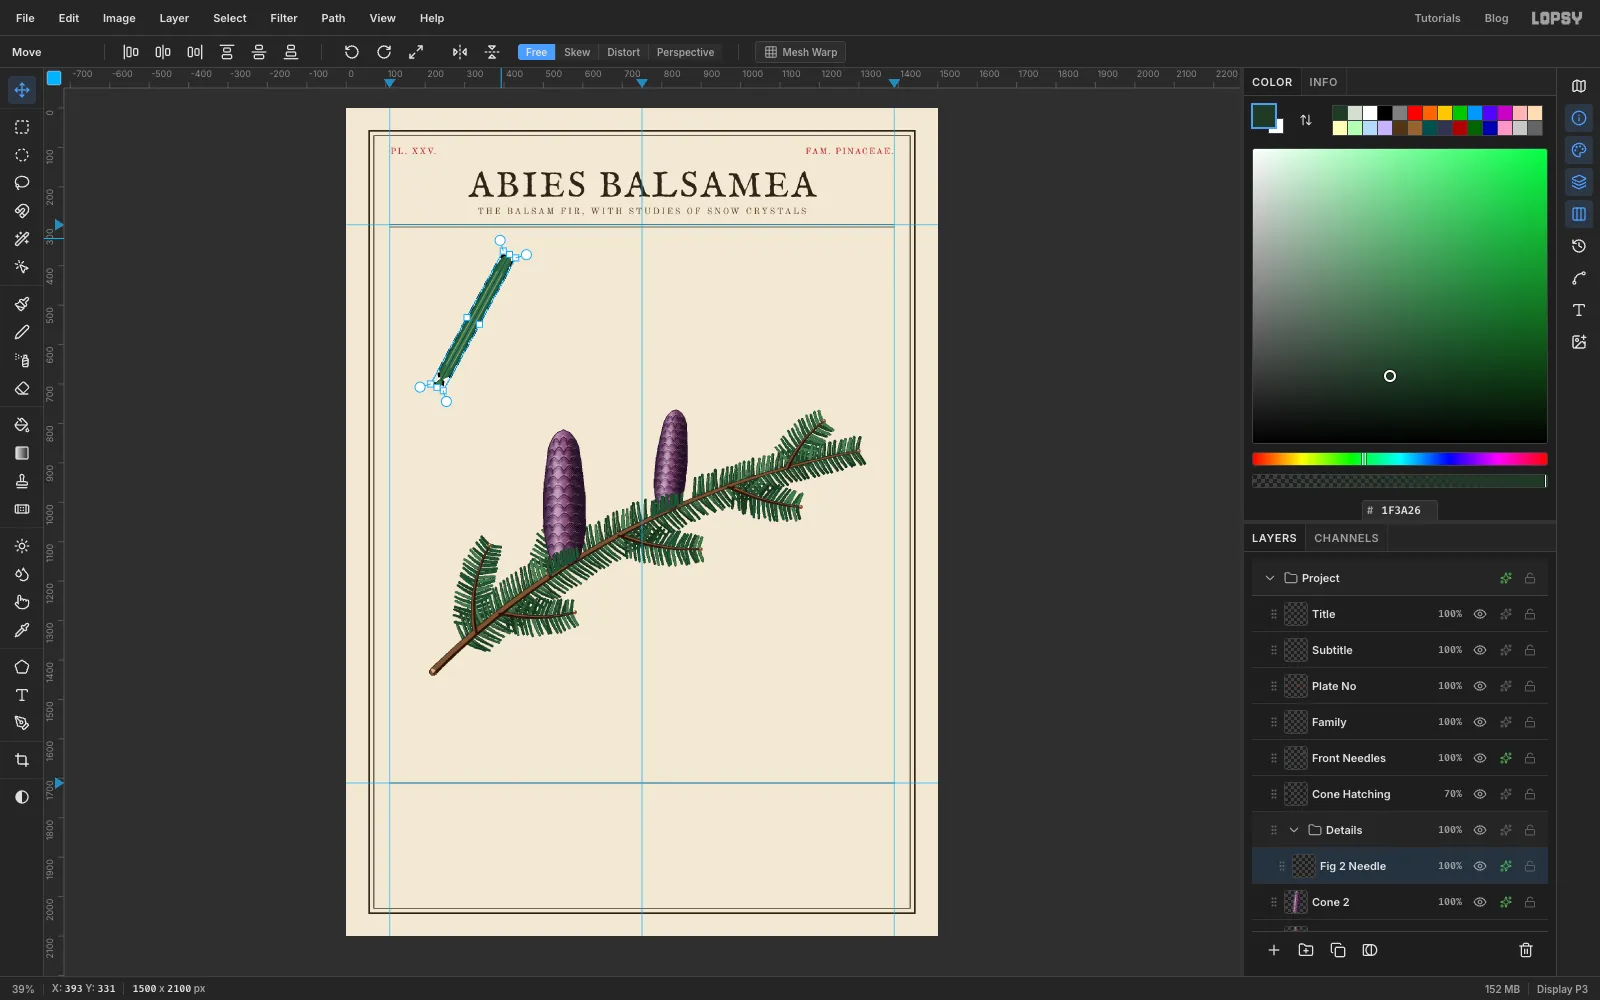
Fig 2 Needlethumbnail to select it, and pick the Move tool. - Drag the top-right rotation handle counter-clockwise until the needle stands diagonally, about 60°.
- Press ⌘D to apply it. Then nudge the needle with the arrow keys until it's centred at about (270, 540).
- ⌘-click the
-
Draw the needle in section
- Add a layer called
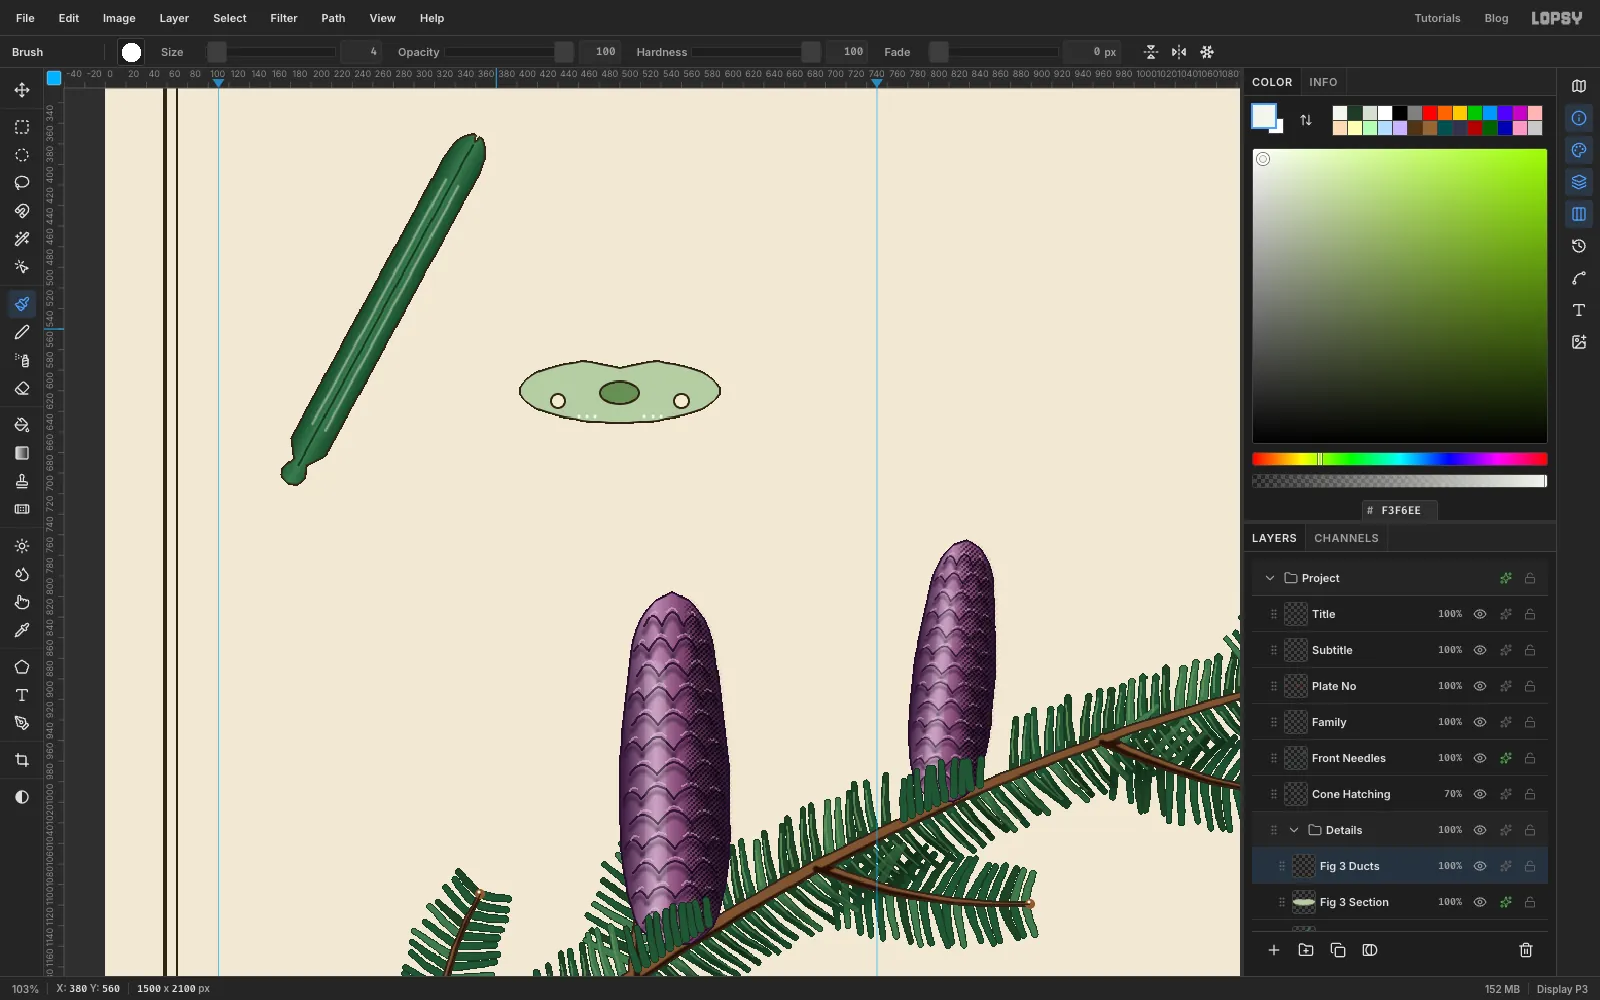
Fig 3 Section. Lasso a flattened lens shape about 192 × 60 px, centred at (500, 620), with a slight bump on top. Fill it with and add a Stroke of Width 2 in ink. - Add a layer called
Fig 3 Ducts. For each ring: drag an Elliptical Marquee, fill it with ink, choose Select → Shrink… by 2 px, and fill again with the inside colour.
- In the middle, a 40 × 24 px vascular strand filled with .
- Near each end, a 16 px resin duct filled with .
- Click a row of Size 4 white dots along the bottom edge for the pores.
- Add a layer called
-
Add the cone scale and bract
- Add a layer called
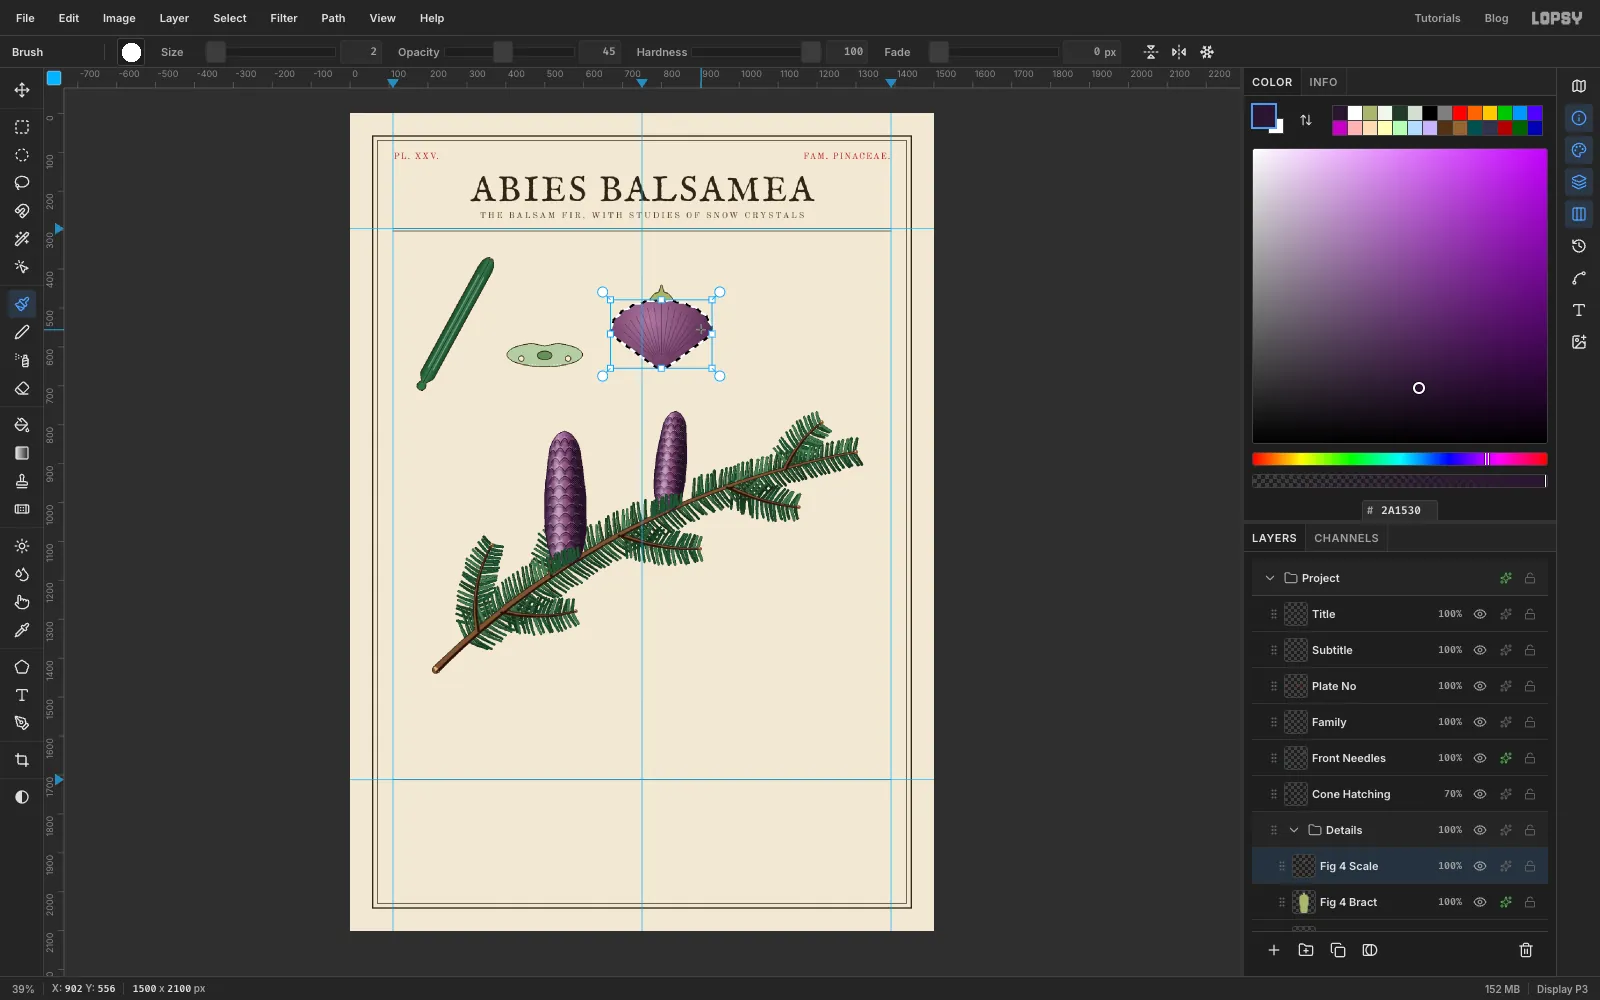
Fig 4 Bract. Lasso a tongue shape centred on x 800, with a sharp point that pokes about 40 px above where the scale's top edge will be. Fill it with and give it an ink Stroke. - Add a layer called
Fig 4 Scale. Lasso a broad fan about 260 px wide and 175 px tall, narrowing to a short stalk at the bottom, centred at (800, 560). - Fill it with a radial gradient: at the start, at the 55% point and at the end. Drag from just above the centre out toward the lower right.
- Still selected, paint fine lines (Size 2, Opacity 45, ) fanning up from the stalk. Deselect, and add an ink Stroke.
- Add a layer called
-
Add the winged seed
- Add a layer called
Fig 5 Wing. Lasso a smooth, rounded paddle shape tilted up to the right, centred at about (1150, 590). Fill it with a linear gradient from at the seed end to at the tip. - Paint four faint veins (, Size 2, Opacity 50) along the wing. Add a Stroke of Width 2 in sepia, and set the layer to 88% opacity so it reads as papery.
- Add a layer called
Fig 5 Seedand lasso a small dark oval () at the wing's lower end. Give it an ink Stroke. - Add a layer called
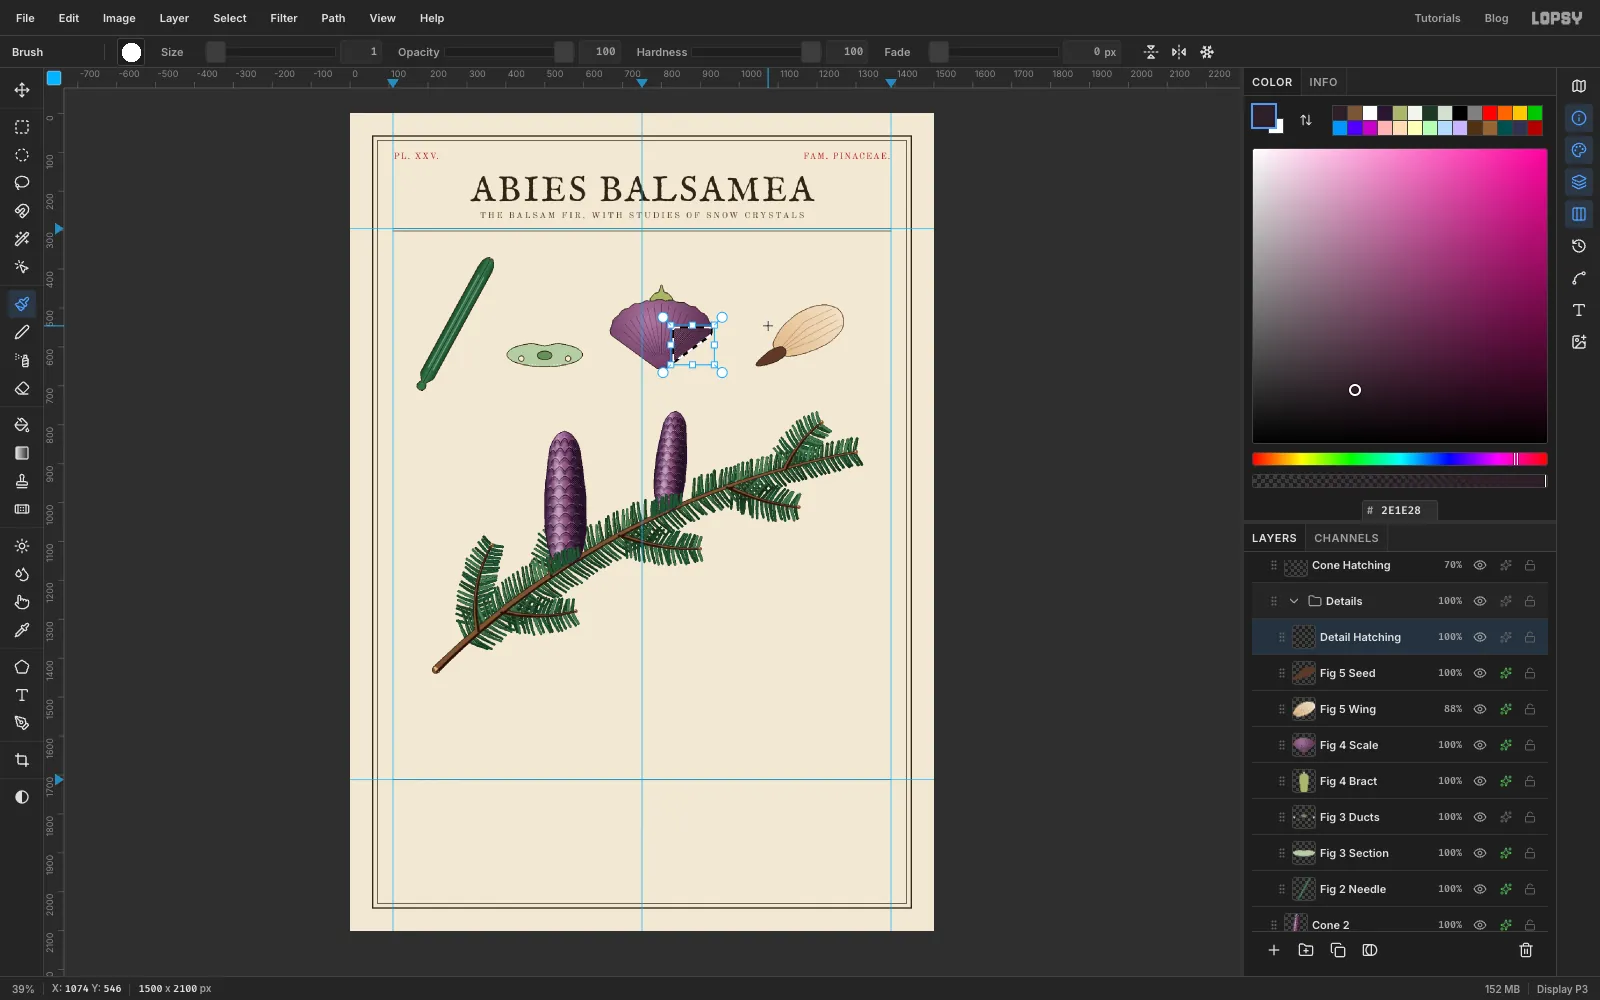
Detail Hatching. ⌘-clickFig 4 Scale, then Shift+Alt-drag a marquee over its lower-right lobe and Feather it by 6 px. That's the shadow side, ready for hatching.
- Add a layer called
-
Hatch the details
- On
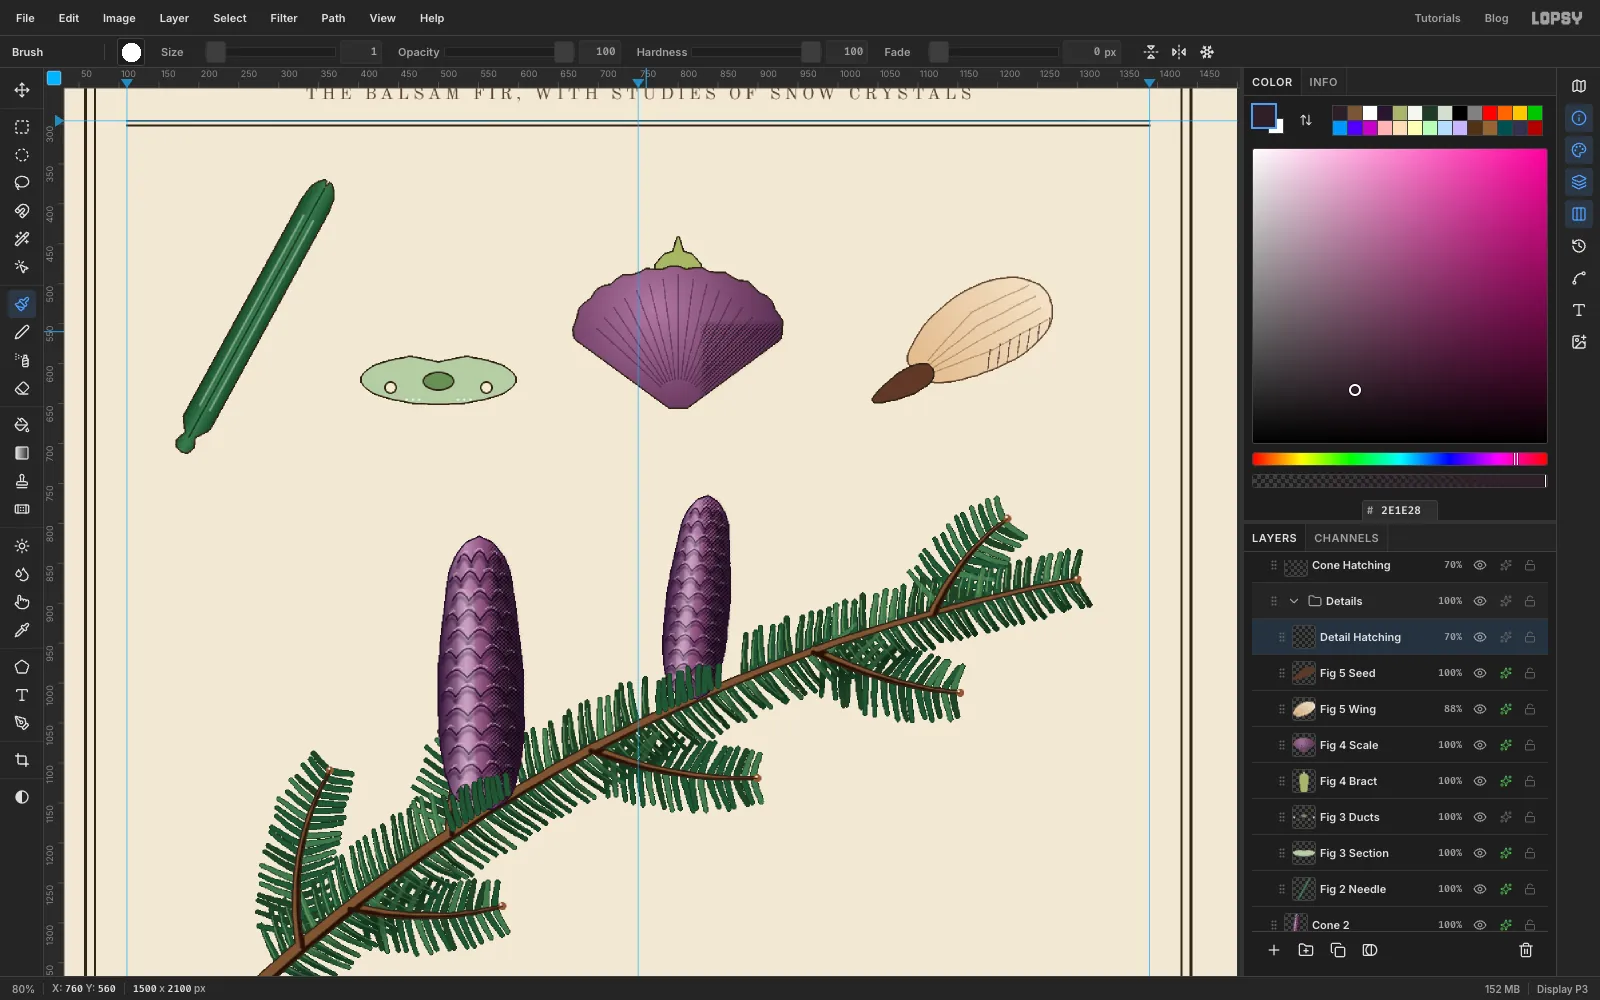
Detail Hatching, hatch the selected lobe at 45° with a Size 1 brush in , 5 px apart, as you did the cones. - ⌘-click
Fig 5 Wingand draw seven short hatch lines across the trailing edge of the wing. - Deselect, and set the layer to Multiply at 70%.
- On
-
Make the microscope field
- Select
Cone 2and add a new group calledSnow. - Inside it, add a layer called
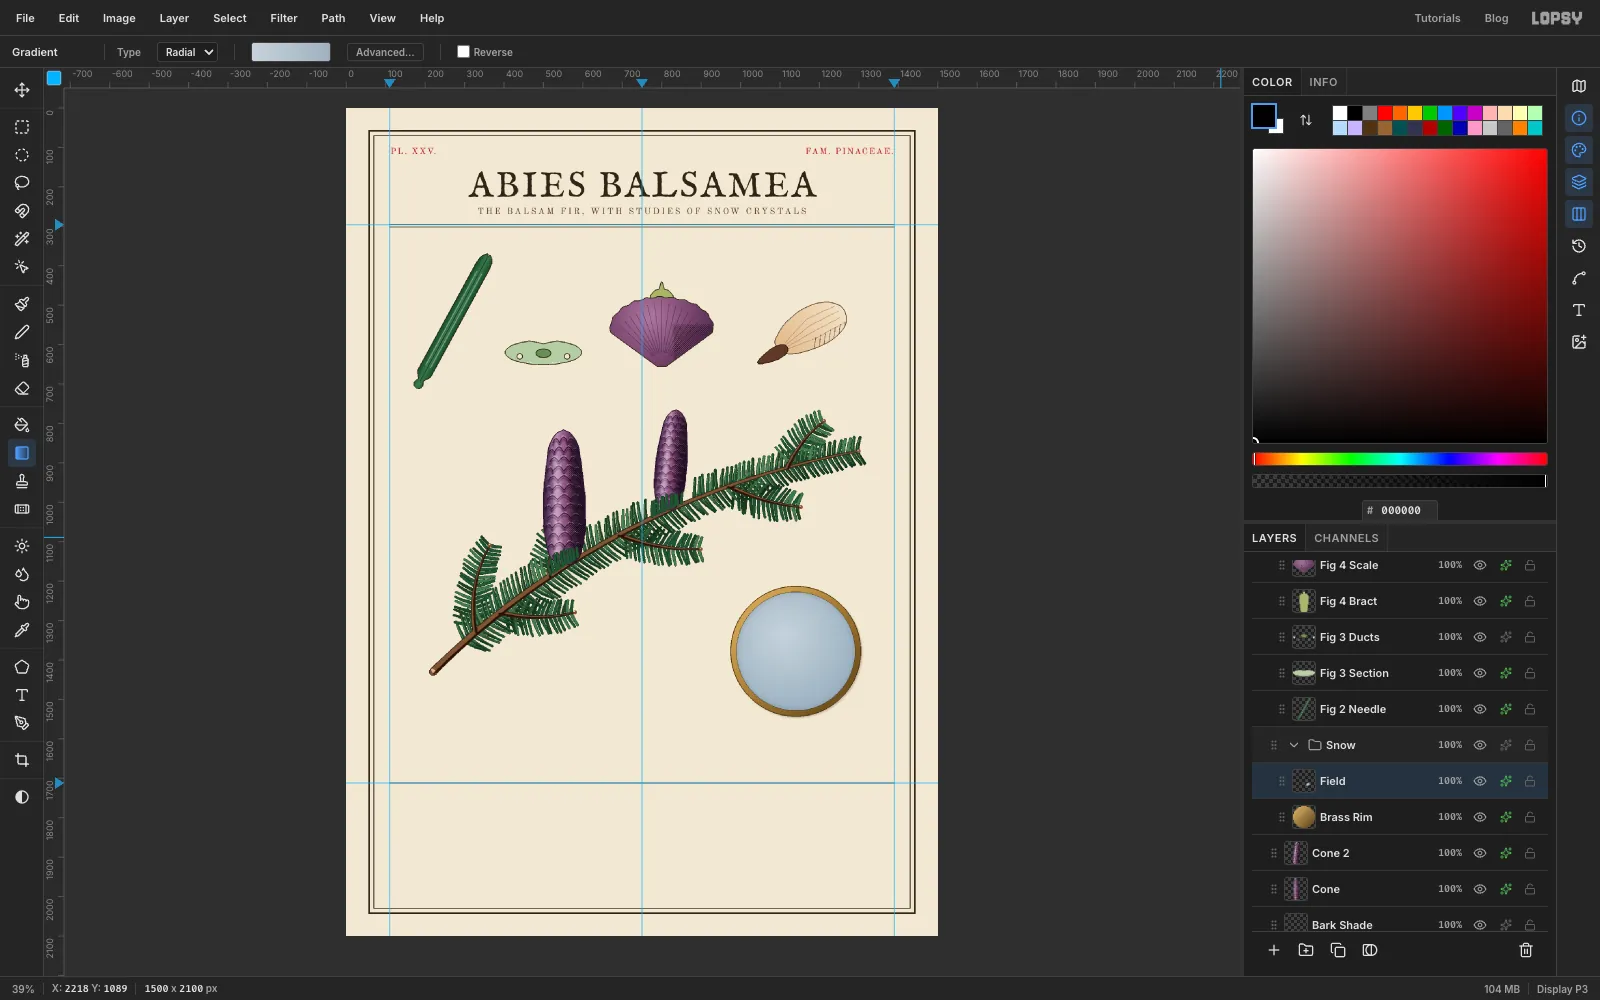
Brass Rim. Drag an Elliptical Marquee 328 px across, centred at about (1140, 1378). Fill it with a linear gradient from (top left) through to (bottom right). - Give the rim a Stroke of Width 2 in brass shadow , and a light Drop Shadow (offset 3, blur 6, opacity 25%).
- Add a layer called
Fieldand select a 300 px circle on the same centre. Fill it with a radial gradient from to , starting a little above and left of the centre. - Add a Width 1 Stroke in , and a faint Inner Glow in at Size 24 and 30% opacity.
- Select
-
Start the crystal with Radial Symmetry
Snow crystals have six-fold symmetry, so draw one sixth and let the brush copy it.
- Add a layer called
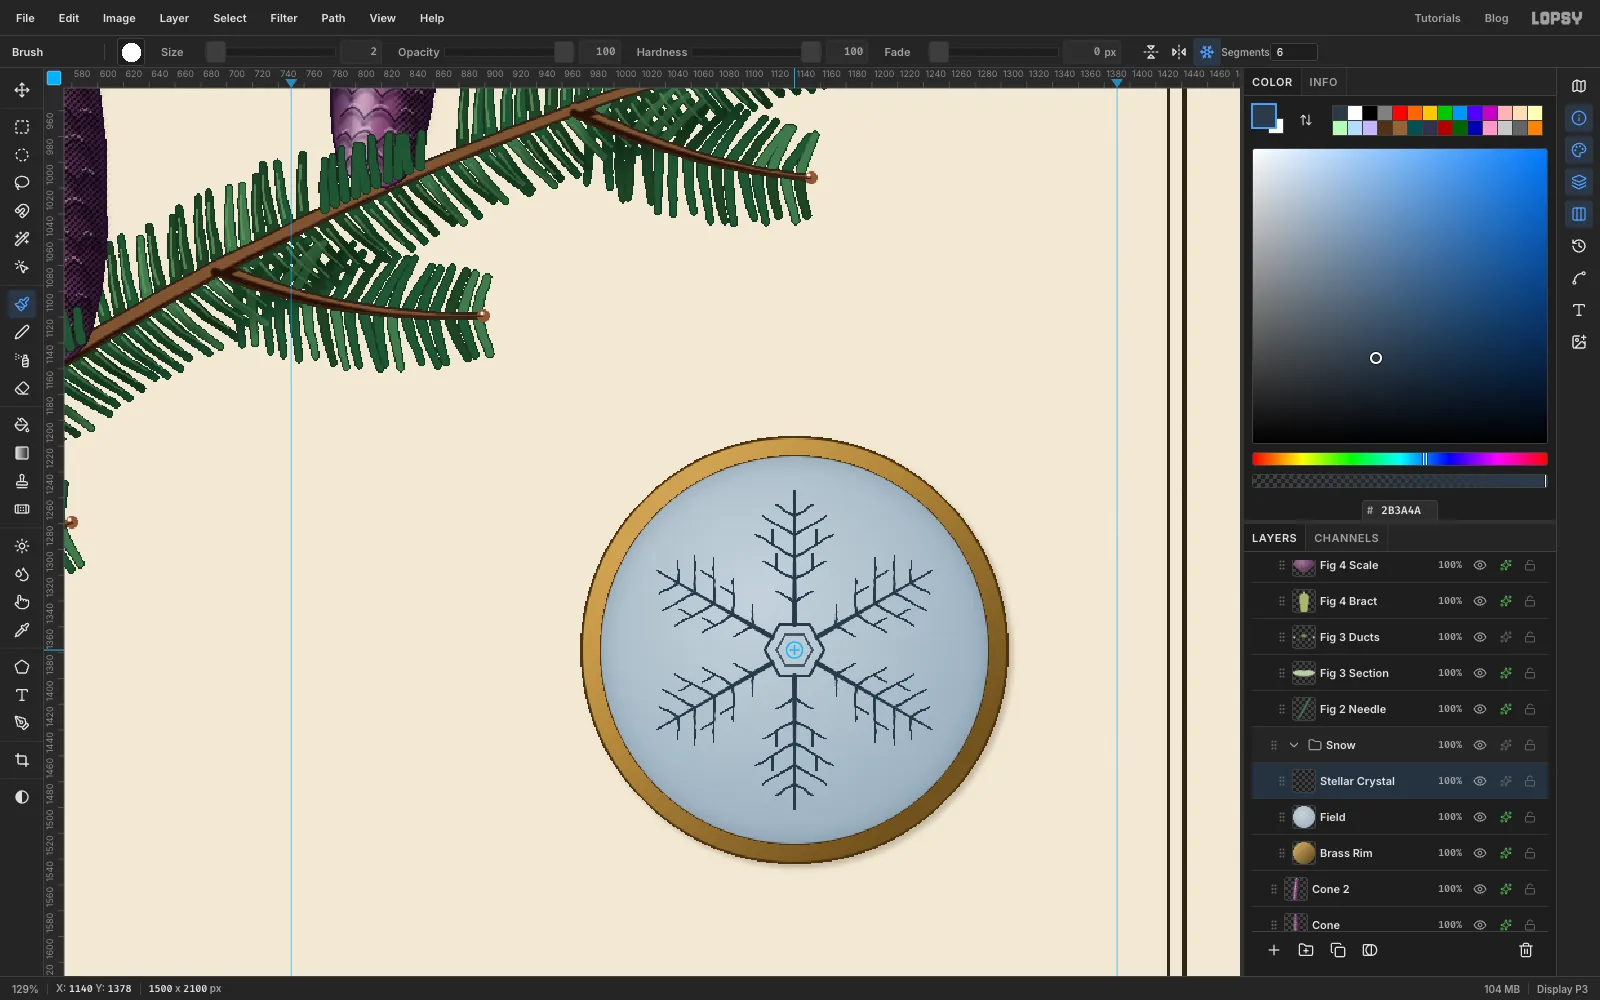
Stellar Crystaland pick the Brush. - Click Radial Symmetry in the options bar and set Segments to 6.
- ⌘-click the centre of the field to move the symmetry centre there.
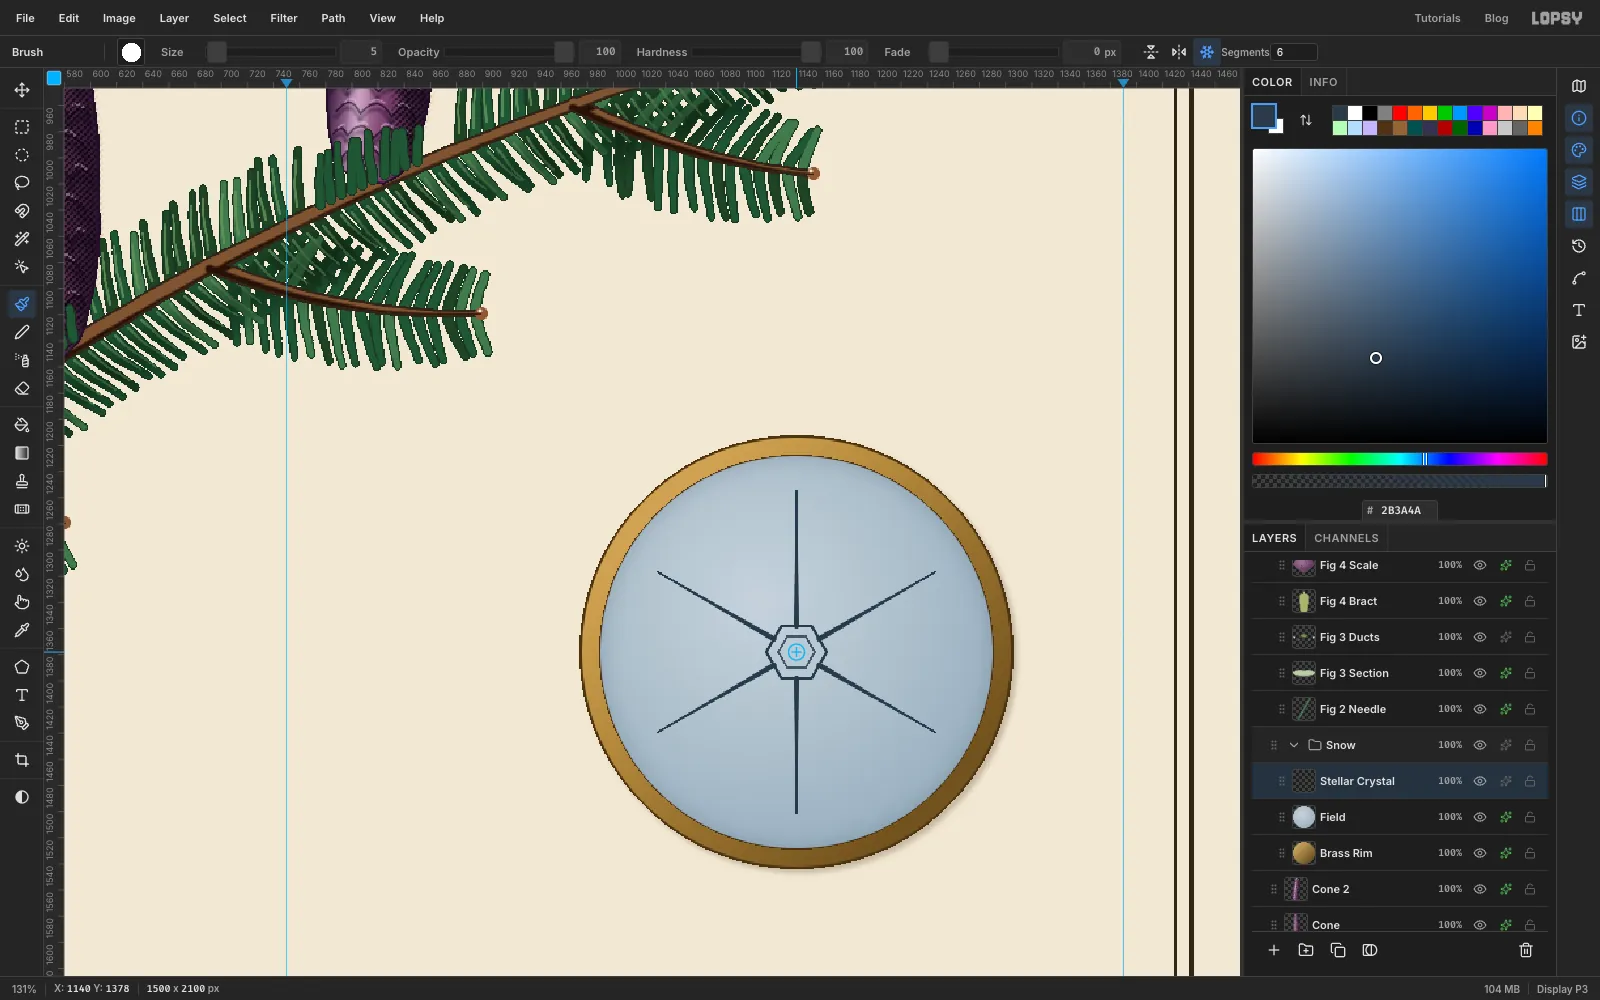
- Set the colour to . With a Size 3 brush, draw one straight edge of a small hexagon about 23 px above the centre. Draw a second, fainter edge inside it at Size 2. The other five edges appear as you draw.
- At Size 5 with Taper 150, draw one arm straight up from the hexagon, about 120 px long. Five copies appear around it.
- Add a layer called
-
Branch the arms
Side branches on a real crystal run parallel to the neighbouring arms, so they leave the arm at 60°.
- Set the brush to Size 3 and Taper 40. Add five pairs of side branches up the arm, at 60° to either side. Make them longest in the middle (about 36 px) and shortest near the centre and the tip (about 17 px).
- At Size 2, add a small twig pointing outward from the middle of each of the two longest branches.
Every stroke you make on one arm lands on all six.
-
Draw the small crystal figures
Symmetry is still on, so these take only a few strokes each.
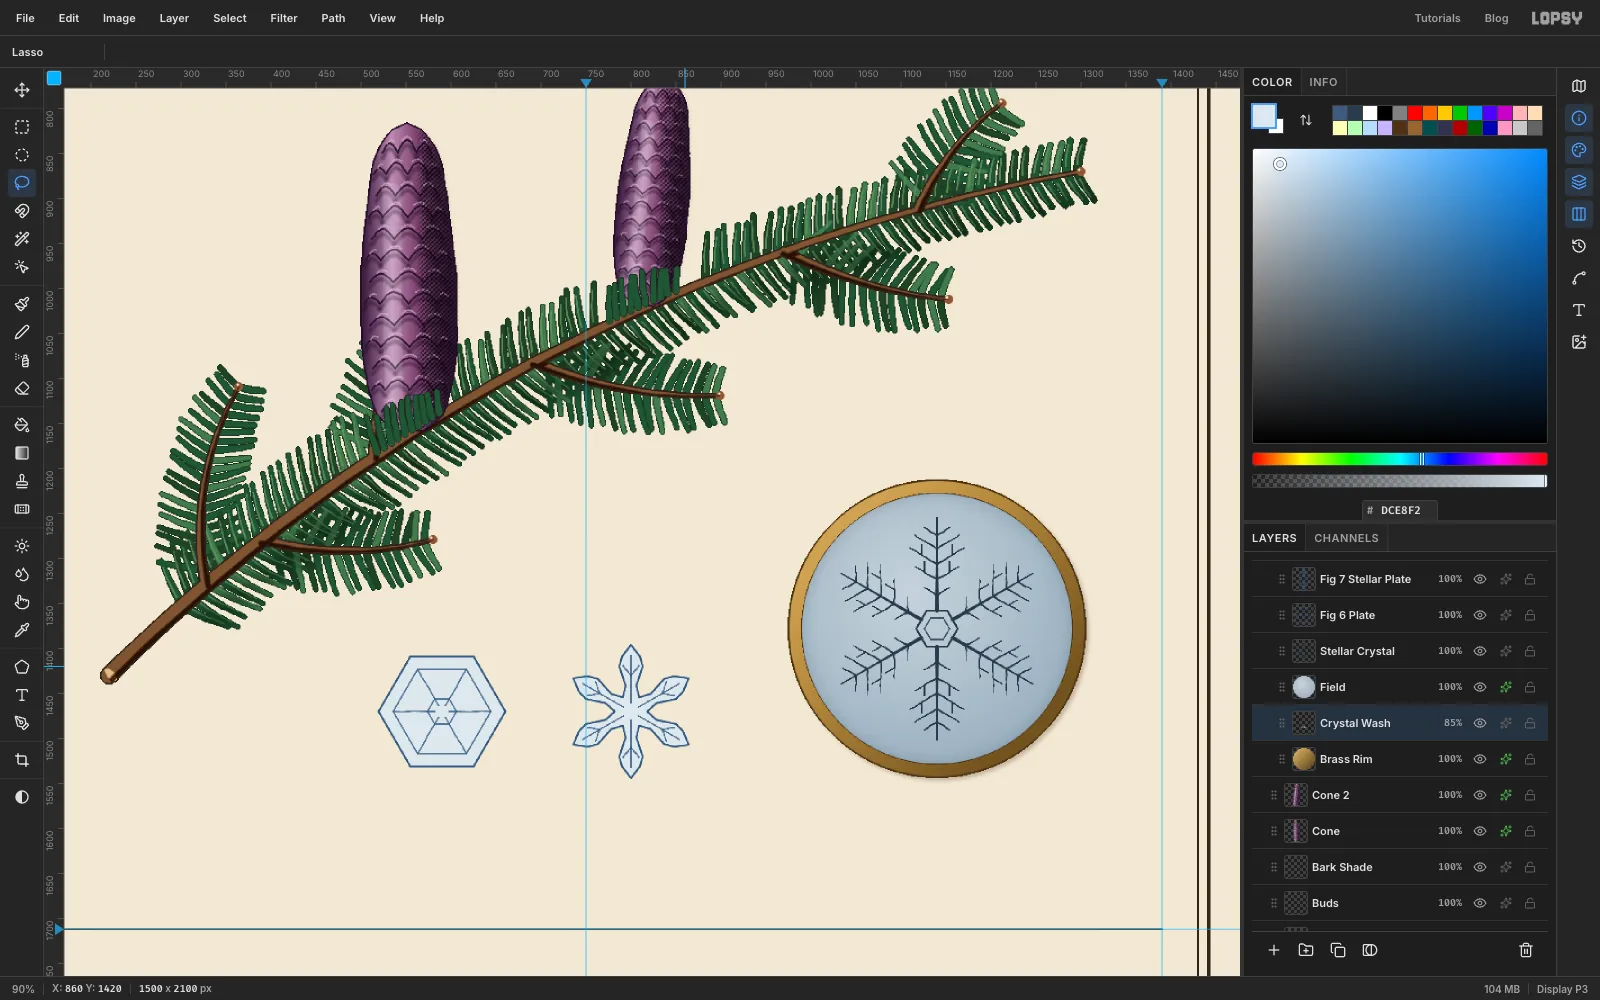
- Fig. 6, a hexagonal plate: add a layer called
Fig 6 Plateand ⌘-click at (590, 1470) to move the symmetry centre there. In at Size 3, draw the top edge of a hexagon about 140 px across. At Size 2, add a smaller inner edge, a spoke from the centre to a corner, and a tiny centre hexagon. - Fig. 7, a stellar plate: add a layer called
Fig 7 Stellar Plateand ⌘-click at (800, 1470). Draw the outline of one broad arm about 74 px long with click and Shift+click lines. Shape it like a leaf on a short stem, joining the next arm near the centre. Add a midrib and two short veins. - Click Radial Symmetry again to turn it off, so ⌘-click goes back to normal.
- Select
Brass Rim, add a layer calledCrystal Wash, and lasso-fill both figures' outlines with . Set the layer to 85% opacity.
- Fig. 6, a hexagonal plate: add a layer called
-
Cut the specimen tag
Draw the tag level first and turn it at the end.
- Select
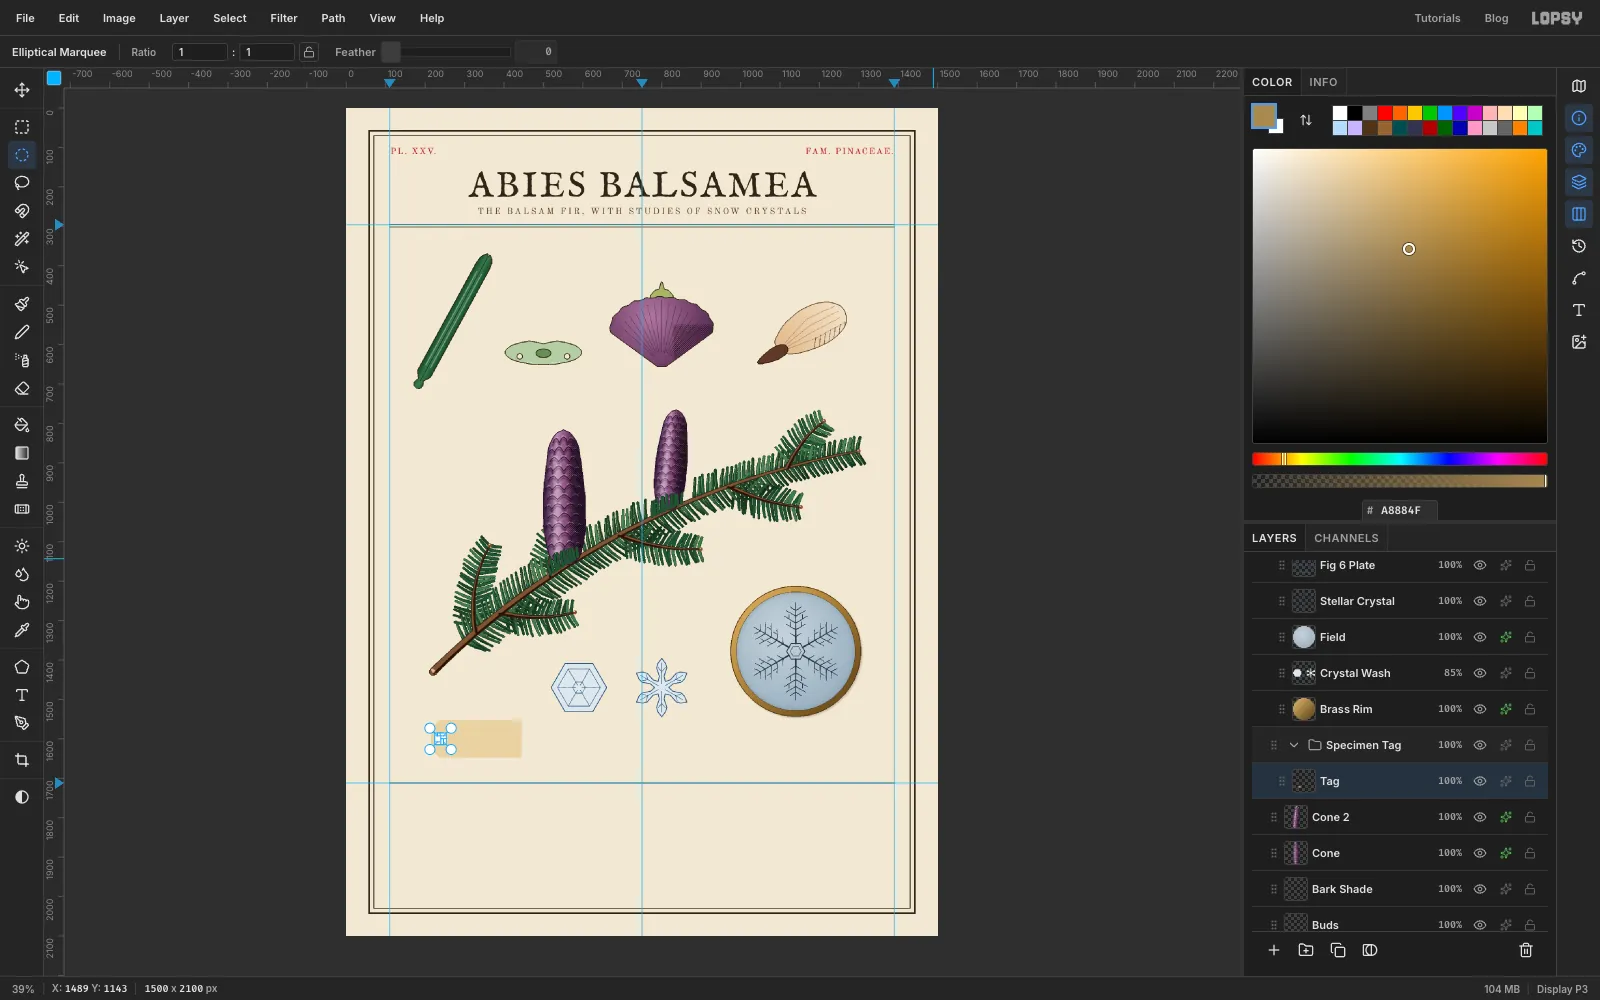
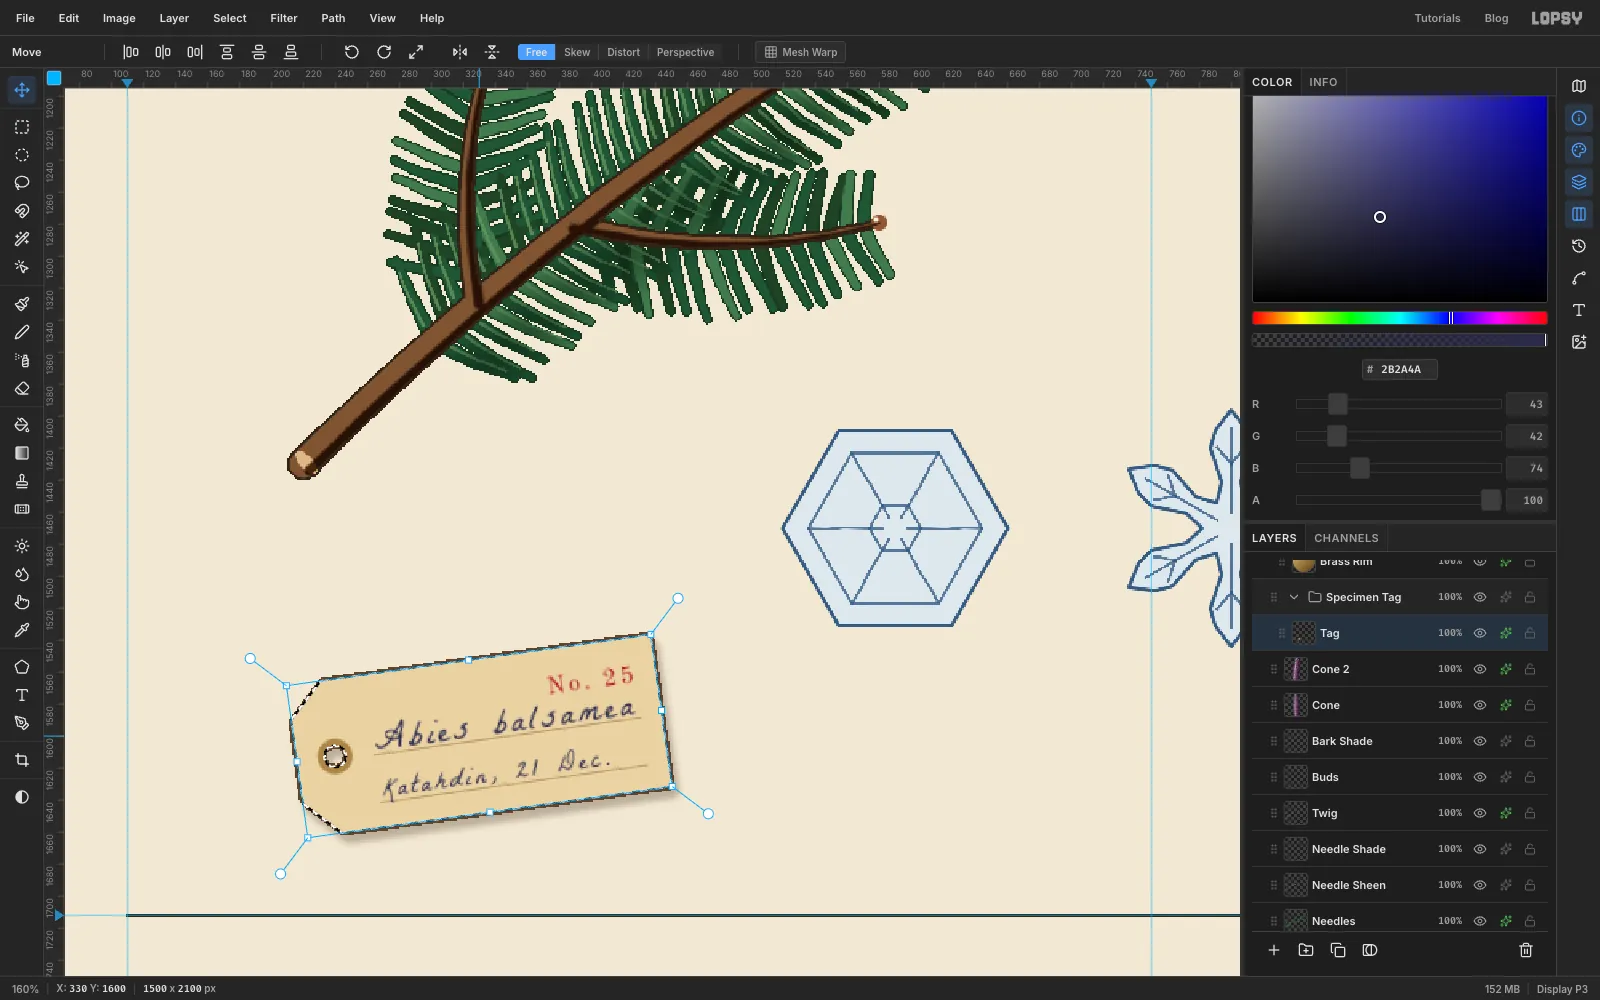
Cone 2, add a group calledSpecimen Tagand a layer calledTaginside it. - Lasso a 230 × 96 px tag with its two left corners clipped, centred at about (330, 1600). Fill it with .
- Eyelet: select a 22 px circle near the left end and fill it with . Choose Select → Shrink… by 4 px and press Delete to punch the hole.
- Select
-
Letter the tag
- With the Pencil at Size 1 in , draw two ruled lines across the tag, 30 px apart.
- Click
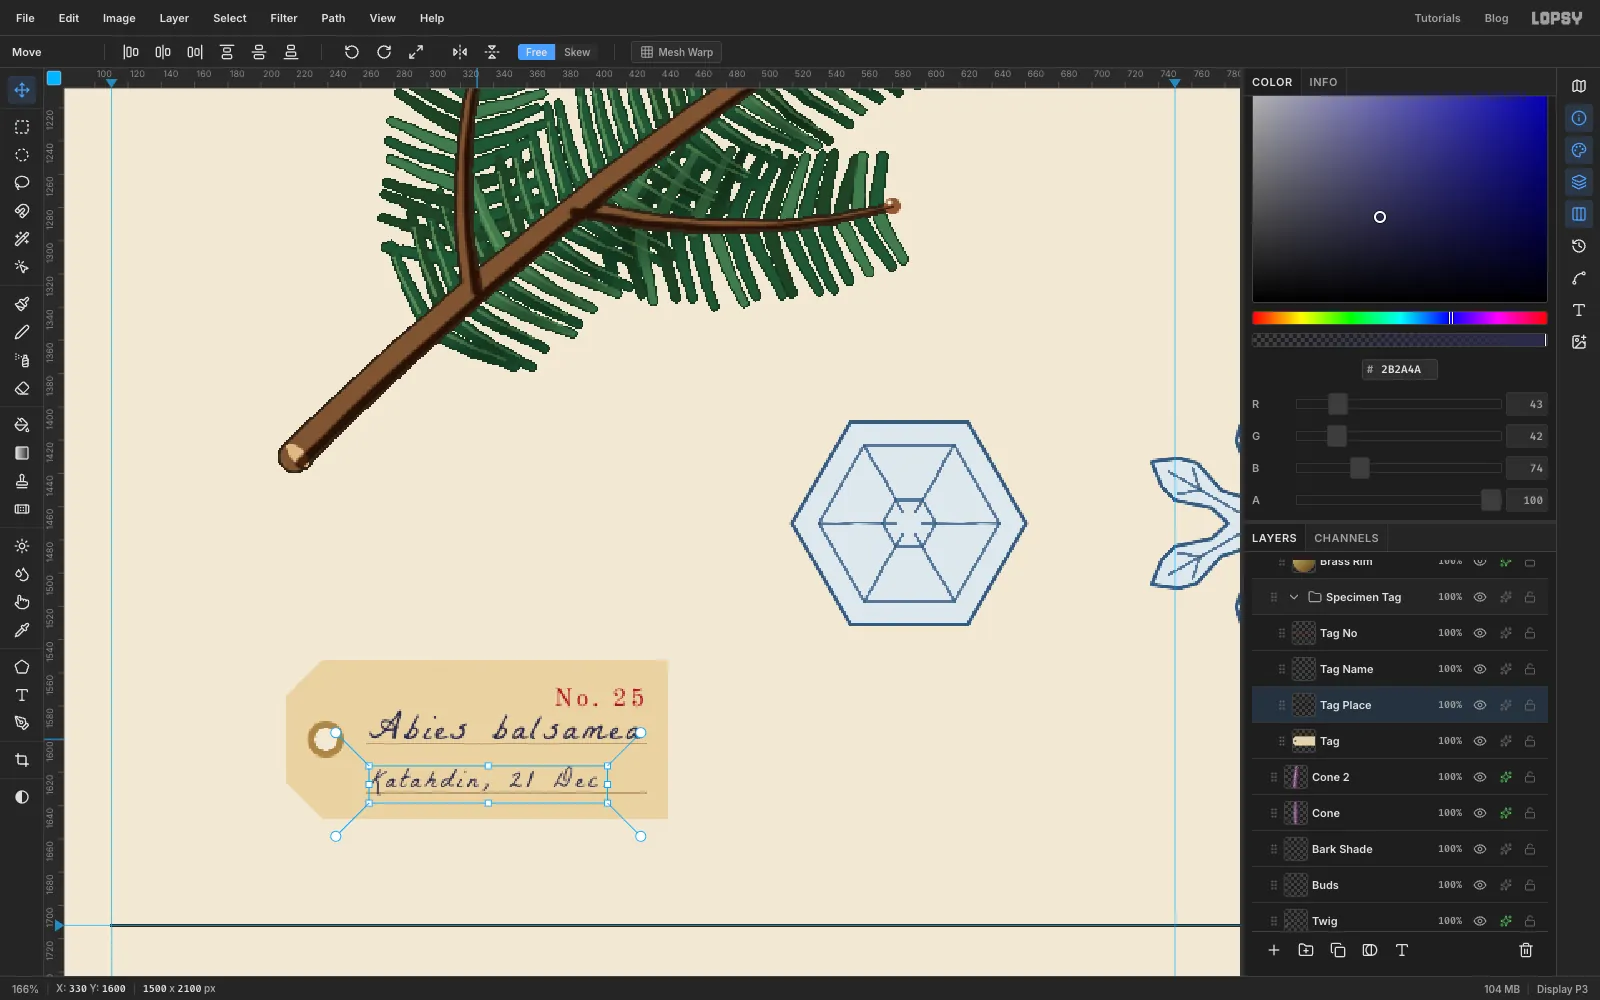
Tag. AddNo. 25in Old Standard TT, 15 px, crimson, right-aligned near the top-right corner, and rename itTag No. - Click
Tagagain. TypeAbies balsameain La Belle Aurore at 22 px, colour , above the first rule. Rename itTag Name. - Click
Tagagain and typeKatahdin, 21 Dec.at 16 px above the second rule. Rename itTag Place. - Now nudge each line until it sits just on its rule. Type both lines before moving either one: a click near an existing line of text edits that line.
-
Turn the tag
- Select
Tag Place, the text layer just aboveTag, and choose Layer → Merge Down. Do the same forTag Nameand thenTag No, until all the lettering is part ofTag. - Give
Taga sepia Stroke at Width 2 and a soft Drop Shadow (offset 3, 5; blur 6; 30%). - ⌘-click the
Tagthumbnail. With the Move tool, drag a rotation handle to turn the tag about 8° counter-clockwise, then press ⌘D.
- Select
-
Wrap the string round the twig
- Add a layer called
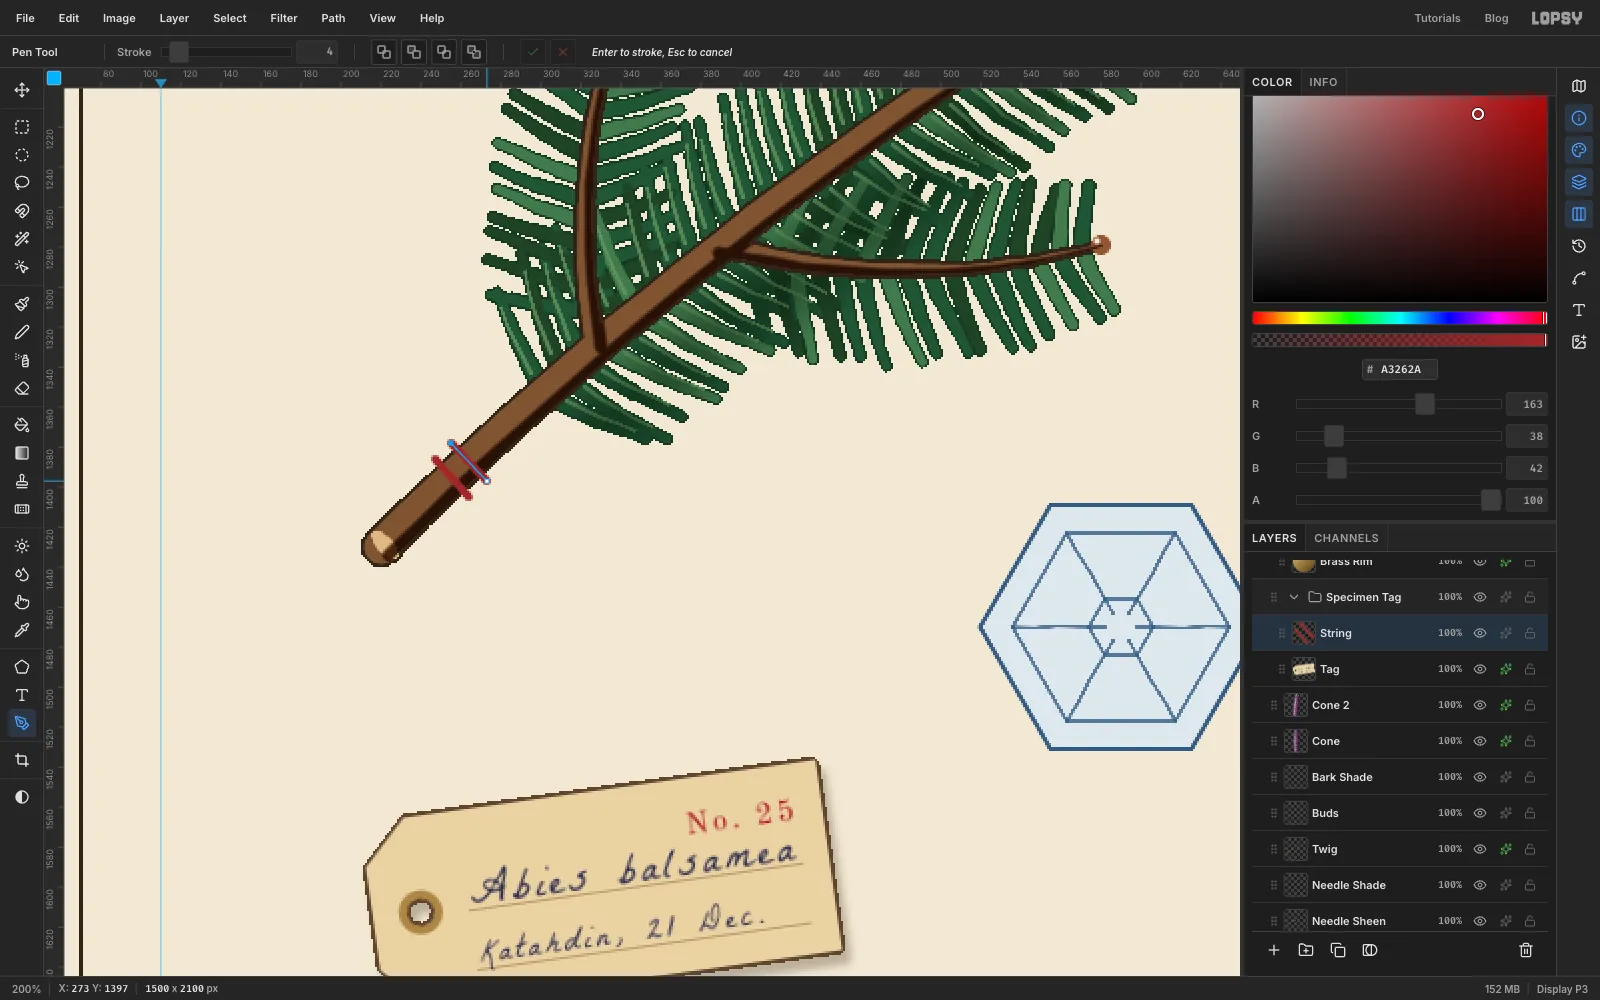
String. Set the colour to crimson , pick the Pen tool and set Stroke to 4 in the options bar. - Zoom in on the cut end with ⌘-scroll. You need to see the anchors clearly.
- Click once on one side of the twig near the cut end, click again on the other side, and press Enter. Enter adds the path and strokes it in the foreground colour.
- Make a second wrap the same way, 12 px further along.
- Add a layer called
-
Tie the bow and hang the tag
The last path you drew stays selected, and a click on one of its anchors edits it. So start each new path a few pixels away from the last one's anchors.
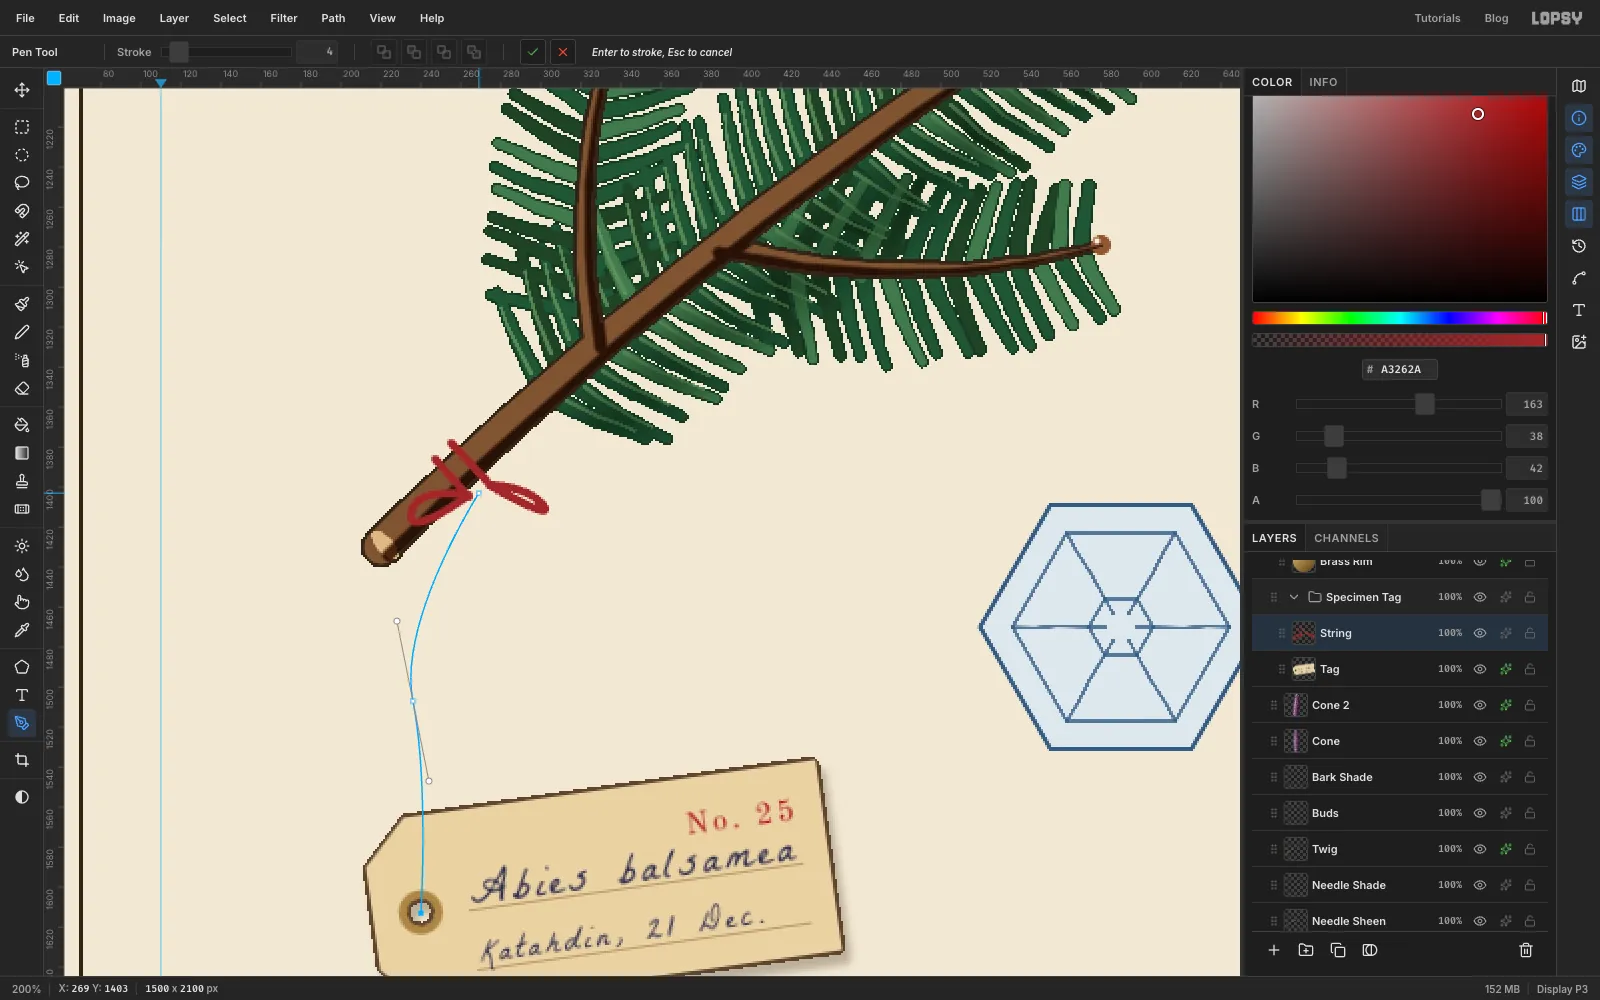
- Bow: for each loop, click just below the twig, drag out a curved anchor about 34 px to one side, then click back on the first anchor to close it. Press Enter.
- Tail: click the eyelet, drag a sagging anchor halfway up, click just under the knot, and press Enter. Add one short loose end the same way.
- Open the Paths panel and click the highlighted path to deselect it, so its outline stops showing.
- Give
Stringa small Drop Shadow and choose View → Fit to Screen.
-
Number the figures
- Select the
Titlelayer, add a group calledLettering, and add a layer calledLeadersinside it. - Click
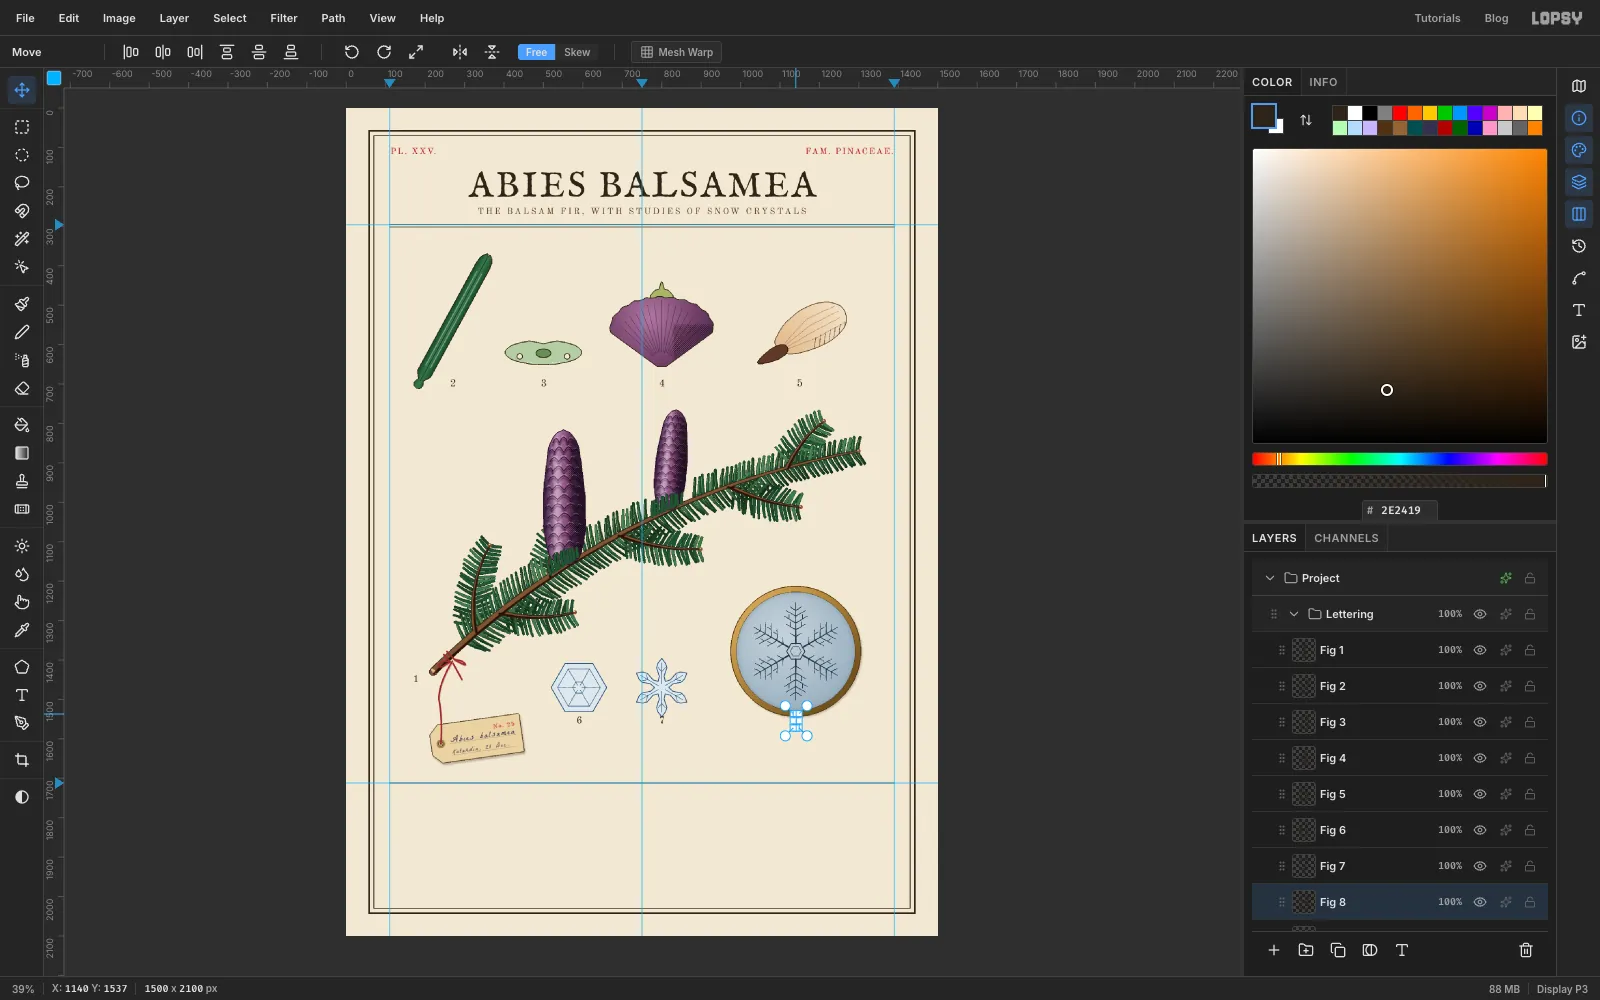
Leadersbefore each numeral. Add1to8in Old Standard TT at 26 px, ink, center-aligned, and rename each one (Fig 1,Fig 2and so on). - Put
2,3,4and5on one shared baseline about 30 px below the lowest figure in the row, each centred under its figure. - Put
1just left of the cut end. Put6,7and8on one baseline under the snow row.
- Select the
-
Key the cross-section
- Click
Leaders, then add a smalla(20 px) to the left of the cross-section. ClickLeadersagain and add abto its right. - Select
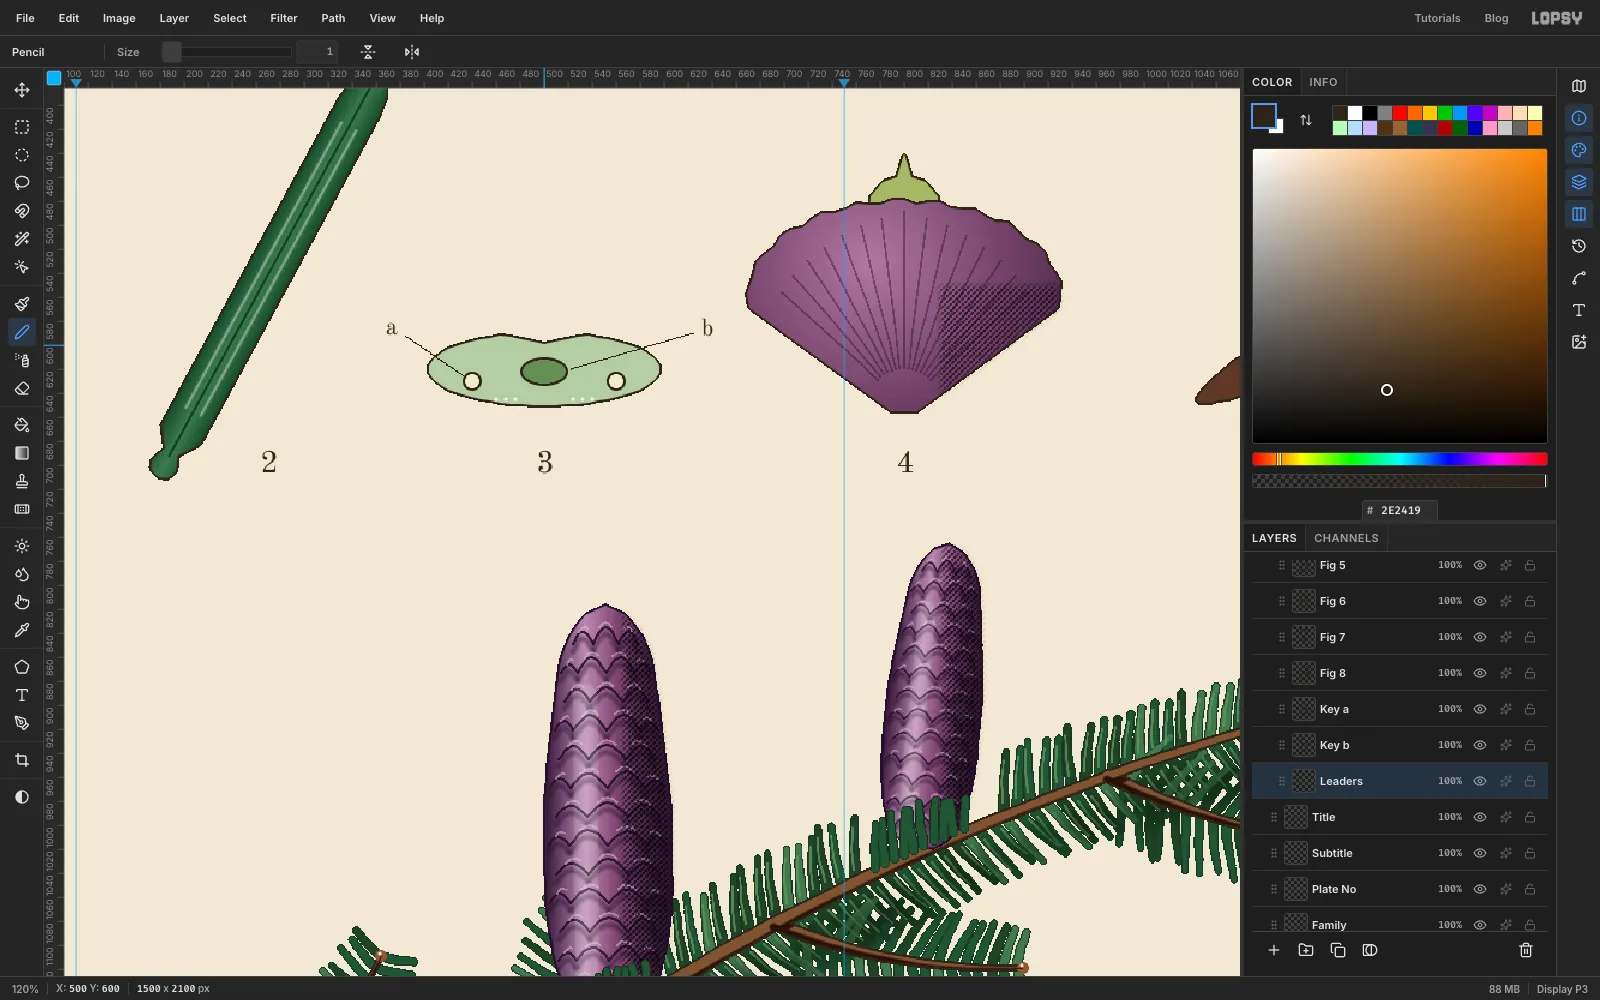
Leaders. With the Pencil at Size 1, click next to each letter and Shift+click on the part it names. Theapoints to a resin duct and thebto the central strand.
- Click
-
Write the greeting
- Click
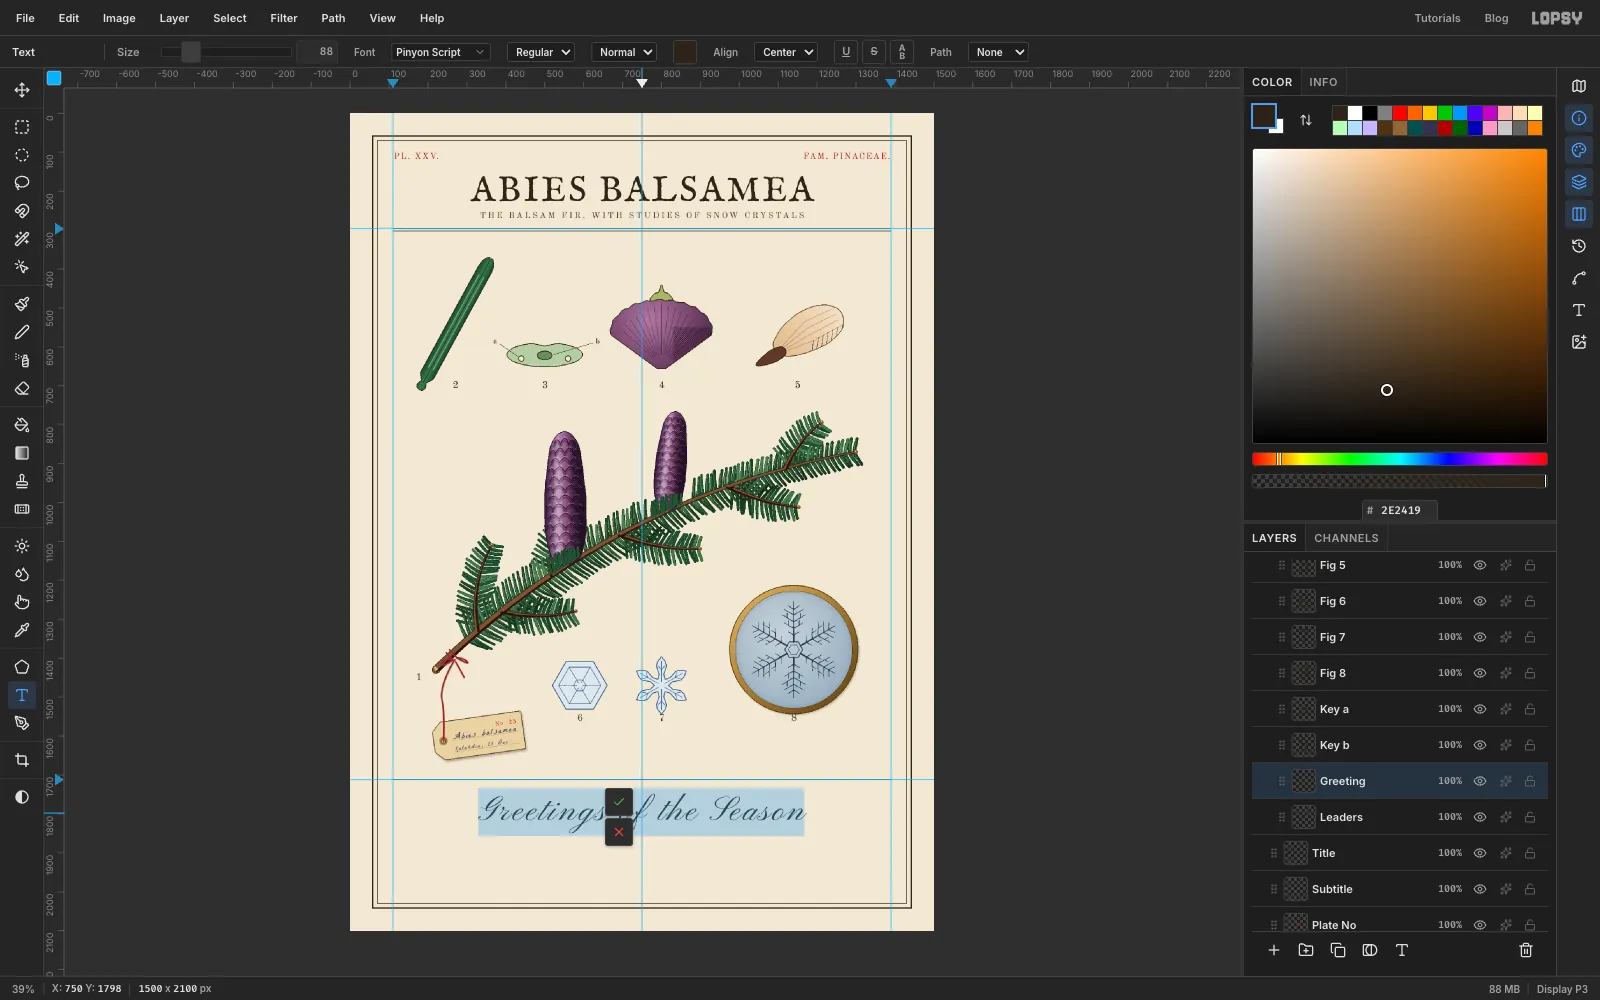
Leaders. Pick Pinyon Script at 88 px, center-aligned, in ink. Click on the centre guide below the footer rule and typeGreetings of the Season, then press Tab. Rename the layerGreeting. - Nudge it so its tallest swash sits 35 px below the footer rule.
- Click into the greeting with the Text tool and press ⌘A to select every letter. Set the colour to crimson and press Tab.
- Click
-
Add the key, footer and margin note
Start each new line well away from any existing text, for example over the empty middle of the branch, then nudge it into place. A click inside the greeting's text box would add to the greeting.
- Key: click
Leaders. In Old Standard TT, 19 px, , center-aligned, type the first line, press Return, and type the second:
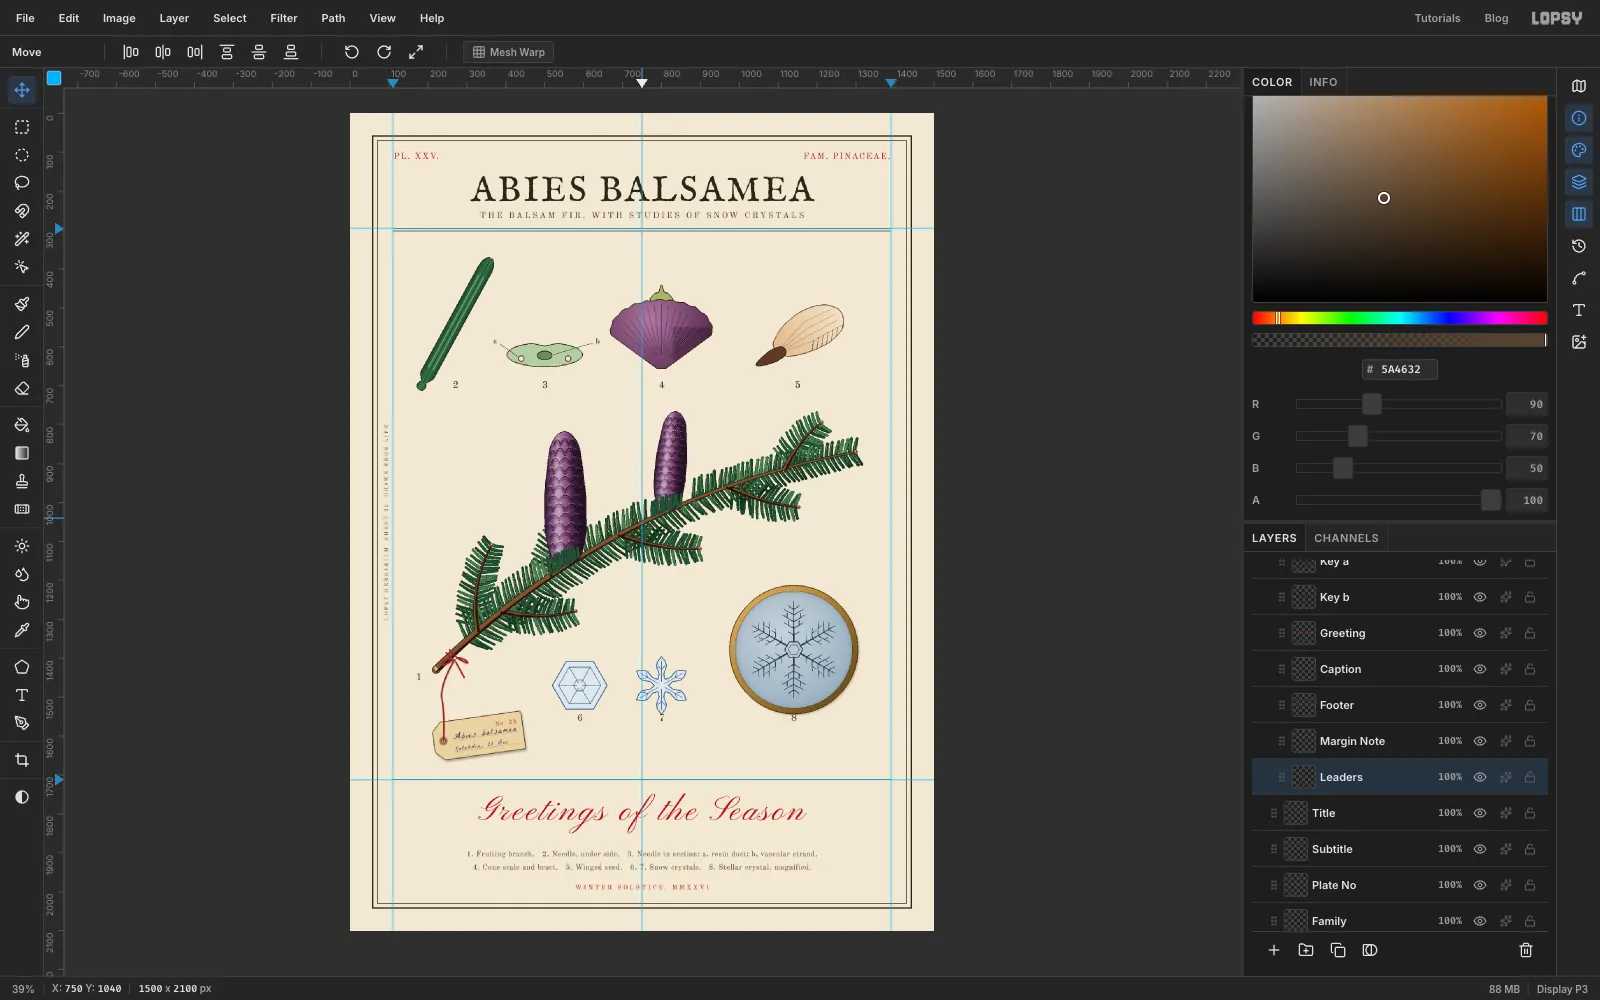
1. Fruiting branch. 2. Needle, under side. 3. Needle in section: a, resin duct; b, vascular strand.4. Cone scale and bract. 5. Winged seed. 6, 7. Snow crystals. 8. Stellar crystal, magnified.
- In the Text panel, set Letter spacing to 1 and Line height to 1.8. The panel keeps the last spacing you used, so check it. Nudge the key so its top sits about 45 px under the greeting.
- Footer: click
Leaders, then typeWINTER SOLSTICE, MMXXVIin Old Standard TT at 16 px, crimson, letter spacing 5. Centre it about 35 px under the key. - Margin note: click
Leaders, then typeLOPSY HERBARIUM SHEET 25 DRAWN FROM LIFEat 13 px in sepia, letter spacing 4. Pick the Move tool and click Rotate 90° CCW in the options bar. The text turns and stays editable. Nudge it into the left margin, centred on the frame's height.
- Key: click
-
Age the paper
- Select
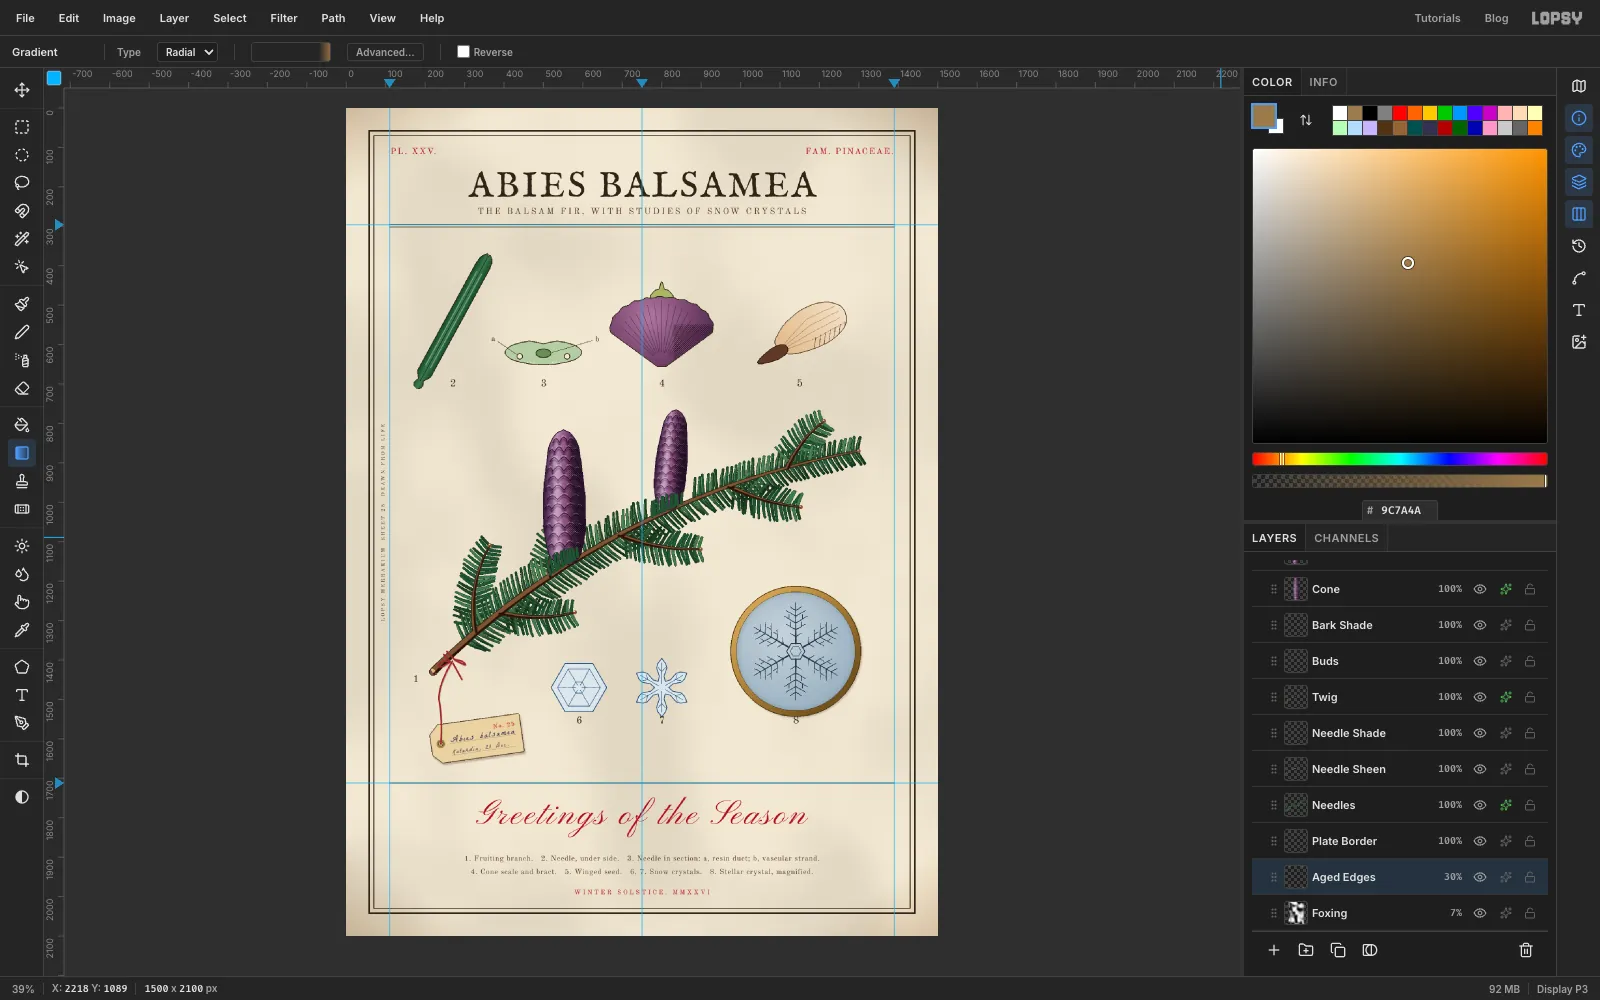
Backgroundand add a layer calledFoxing. Set the colour to and run Filter → Clouds… at Scale 6. - Run Filter → Gaussian Blur… at 60 px to melt the clouds into soft stains, then Filter → Add Noise… at 3, Mono.
- Set the layer to Multiply at 7% opacity. Keep it subtle.
- Add a layer called
Aged Edges. Make a radial gradient that stays transparent until the 86% point and ends in . Drag from the centre of the page to a corner, and set the layer to Multiply at 30%.
- Select
-
Add grain and balance the snow row
- Select the
Letteringgroup and add a layer calledGrain. It lands inside the group, which is fine. Fill it with and run Add Noise… at 14, Mono, Gaussian. Set it to Overlay at 7%, so everything looks printed on the same sheet. - Step back and look at the bottom margin. The roundel's shadow sits a little close to the footer rule. Select the
Snowgroup in the Layers panel, pick the Move tool, and press Shift+↑ once and ↑ twice. The whole group, roundel and crystals together, rises 12 px. - Turn off View → Show Guides and choose File → Quick Export PNG.
- Select the