Design a Calligraphic Album Cover with Broad-Nib Flourishes
Make a calligraphic album cover in Lopsy with a broad-nib brush, pencil ruling, a watercolour sun, a greylag goose photo and script lettering.
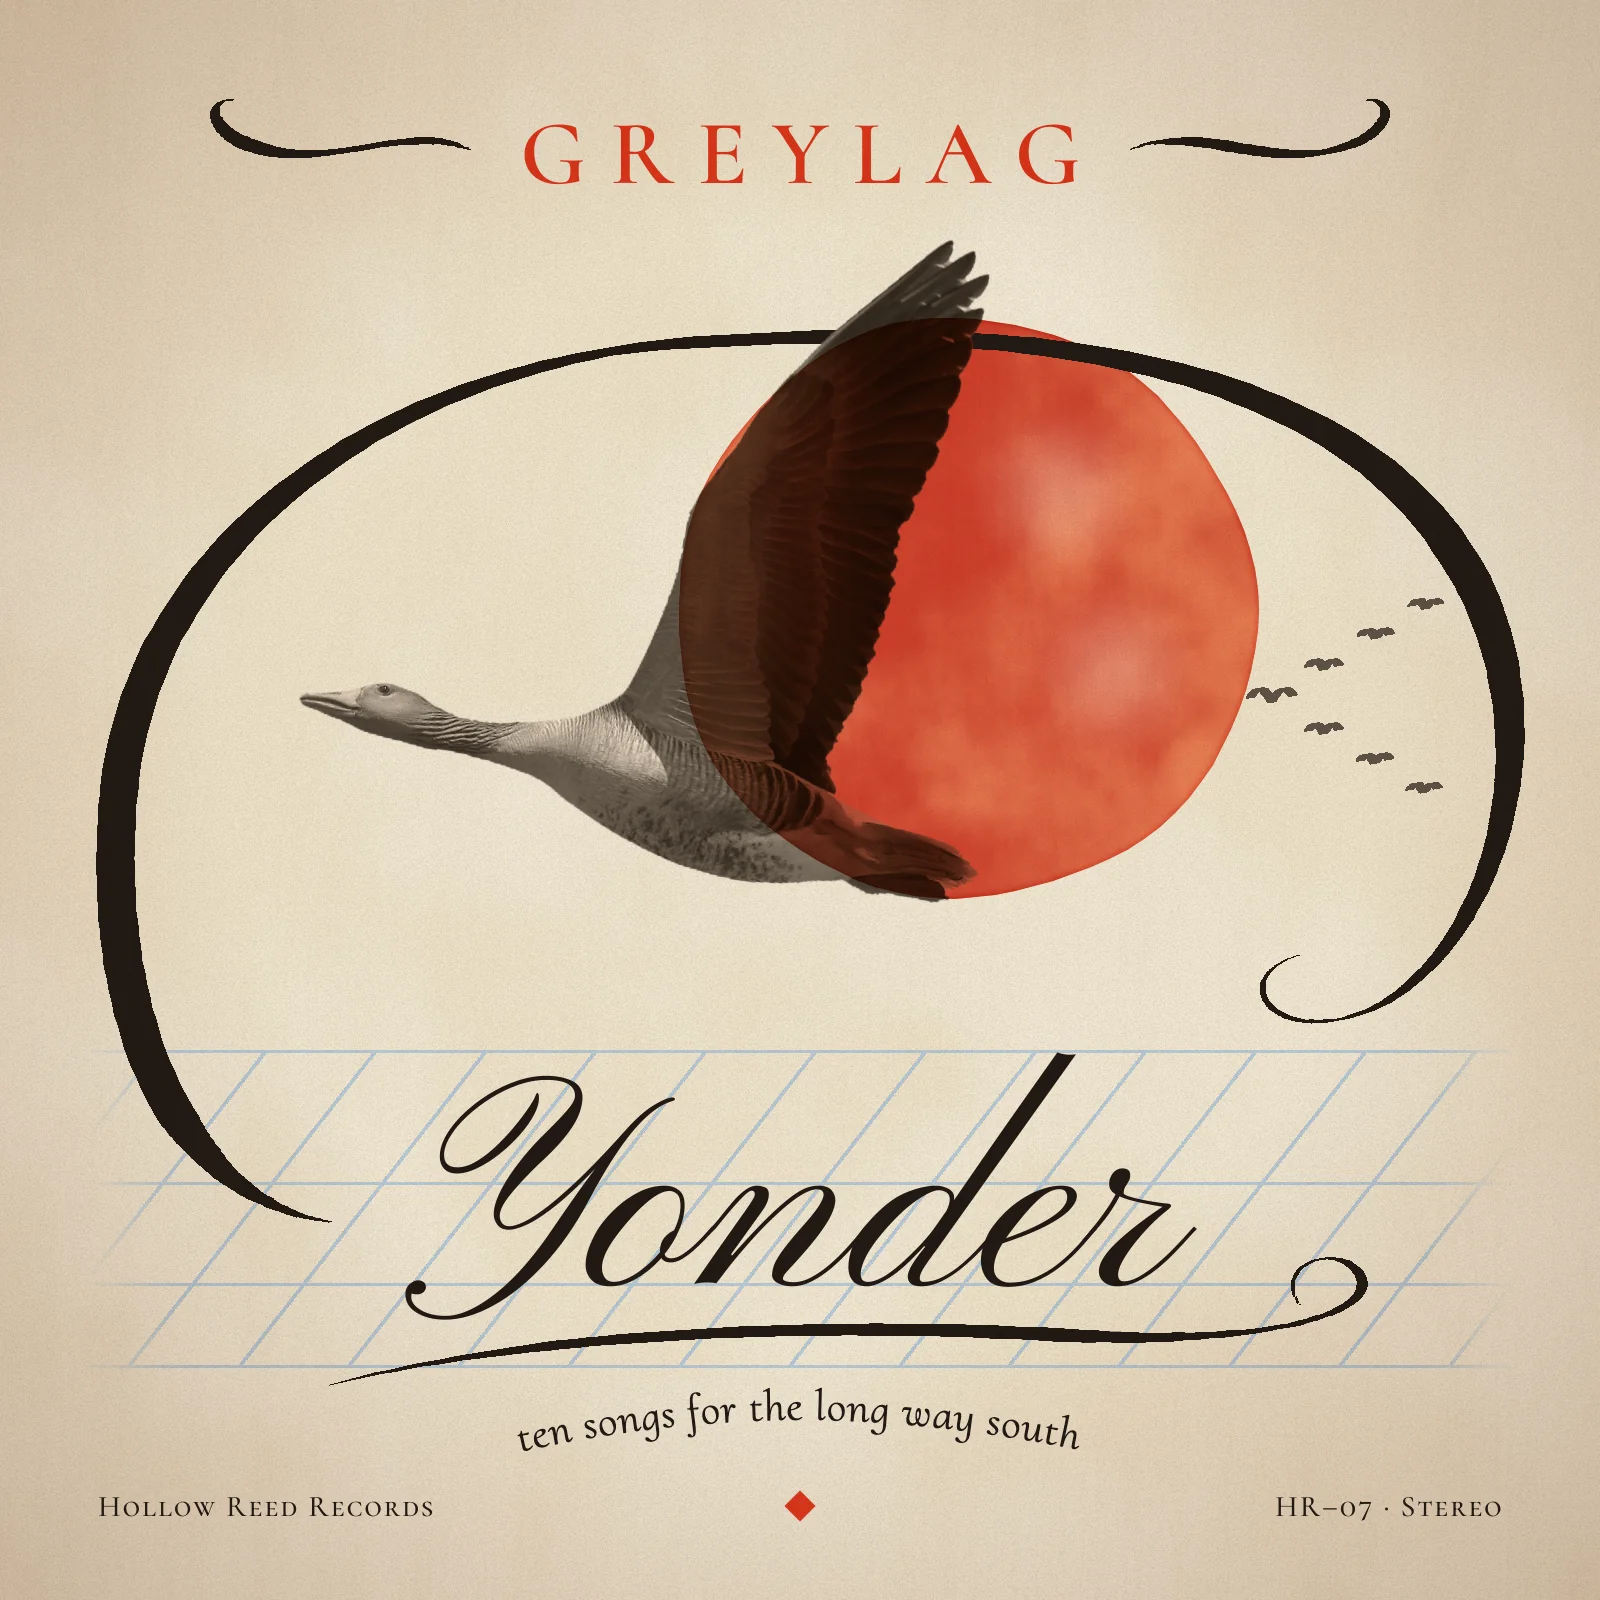
This tutorial makes a 1600 × 1600 px album cover for an imaginary folk band, Greylag, and its record Yonder. It's designed to look like a calligrapher's practice sheet. There's blue pencil ruling on parchment, flourishes drawn with a broad nib, a script title, and a real photo of a greylag goose flying across a watercolour sun.
The calligraphy comes from Lopsy's Caligraphic Rounded brush tip (spelled that way in Lopsy). It's a flat nib, like a chisel-edged pen. Because the tip keeps one angle, the stroke goes thick when you move across the nib's edge and thin when you move along it. You get the thick-and-thin rhythm of real penwork without any pressure tablet. You'll also learn a trick for hairline ends: draw each flourish in three moves, so that both ends taper.
You'll use the Pencil, Lasso, Magic Wand, Brush with Taper, Move tool rotation, the Pen with text on a path, Clouds, Fibers, Add Noise, Desaturate, Brightness/Contrast, a radial Gradient, an Inner Glow effect, blend modes and groups.
The photo is Anser anser in flight, Rust, Burgenland, Austria by Jakubhal on Wikimedia Commons, licensed CC BY-SA 4.0. Download the original-size file. It has a clean, pale sky, which is easy to remove.
The fonts are free Google Fonts in Lopsy's font picker: Pinyon Script for the title, Cormorant SC for the small capitals, and Cormorant Upright for the subtitle.
The palette:
-
Parchment
-
iron-gall ink
-
Pencil ruling
-
Sun
-
pooled rim
-
blooms
-
Vermilion lettering
-
Sepia
-
distant ink
-
Vignette
-
grain
-
Lay out the page
Open Lopsy. In the New Document dialog, set Width and Height to
1600and click Create.- Click the
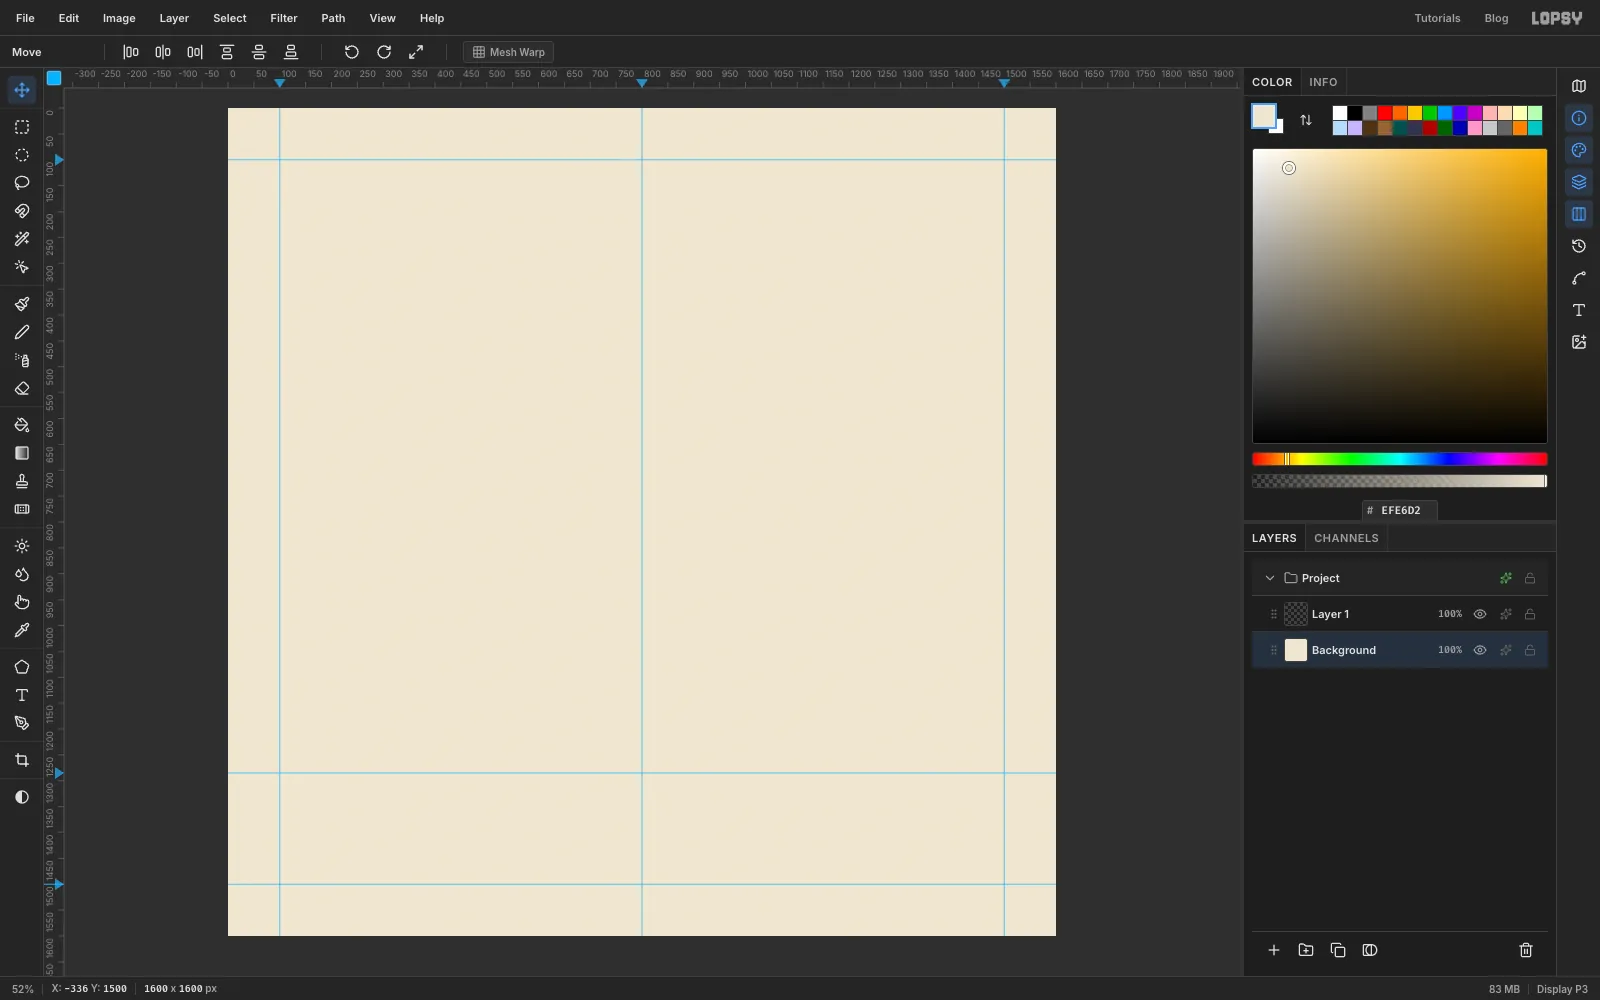
Backgroundlayer. In the Color panel, typeEFE6D2into the hex field and choose Edit → Fill. - Click the ruler along the top of the canvas at
100,800and1500to drop three vertical guides. They mark the side margins and the centre line. - Click the ruler on the left at
100,1285and1500. The guide at1285is where the title will sit.
- Click the
-
Mottle the paper
- Double-click
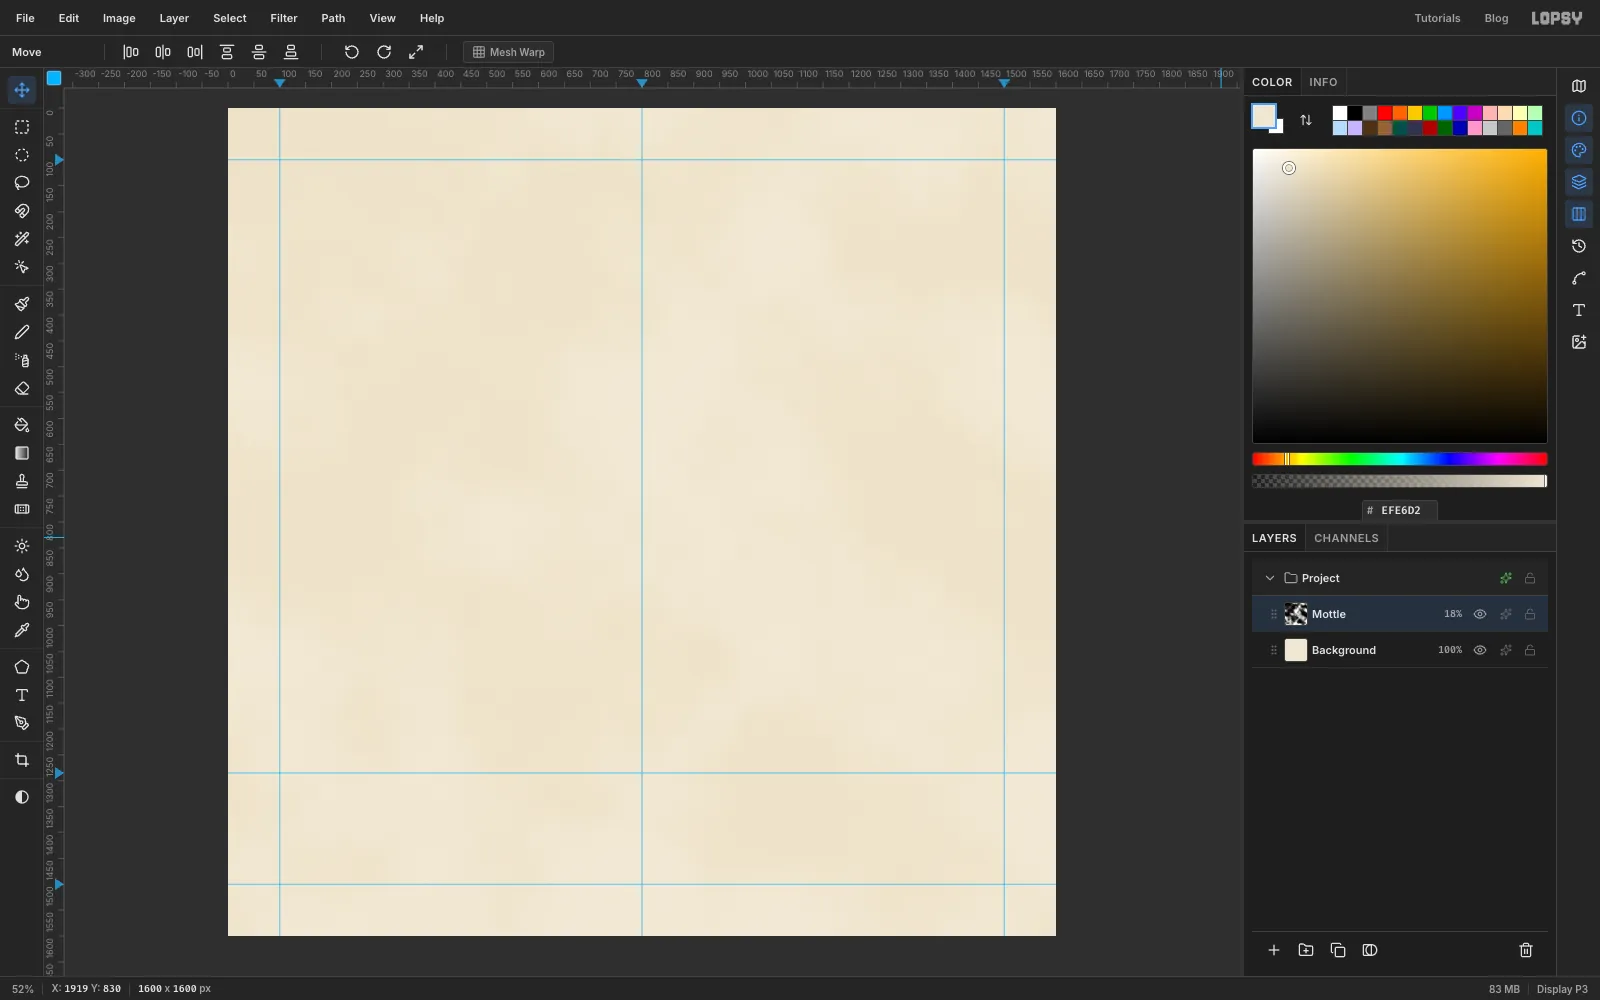
Layer 1and rename itMottle. - Choose Filter → Clouds…, set Scale to
6and click Apply. - Click the layer's effects button (the sparkle icon on its row) and set Blend to Soft Light. Close the drawer.
- Click the
100%on the layer's row and drag the slider to18. Click the number again to close it.
The clouds now read as gentle staining in the paper.
- Double-click
-
Rule the practice lines
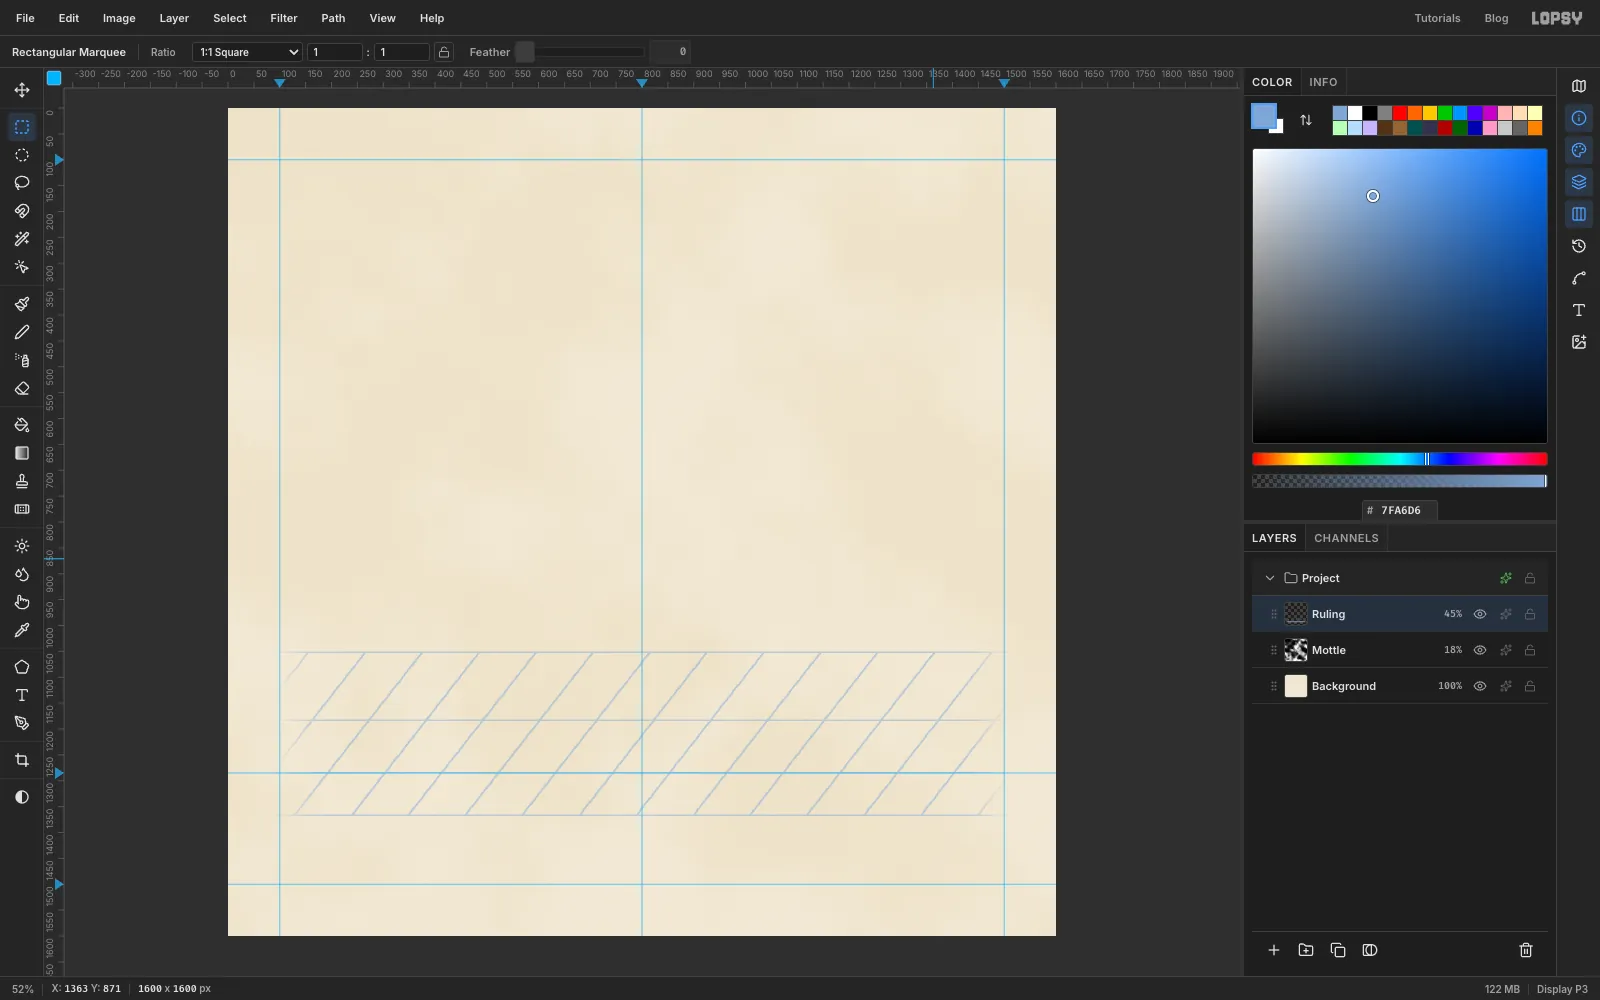
Calligraphers rule their paper before they write. You'll draw the same guidelines the title will sit on: ascender, x-height, baseline and descender lines, plus slant lines.
- Click Add Layer and name the layer
Ruling. - Press N for the Pencil, set Size to
3, and set the foreground to7FA6D6. - Draw four horizontal lines from
x 90tox 1510, aty 1051,1184,1285and1366. For each line, click at the left end, then hold Shift and click at the right end. - Now the slant lines, which run from the bottom line (
1366) up to the top line (1051) at 52°. Each one ends 246 px to the right of where it starts. Click on the bottom line atx 130, then Shift-click on the top line atx 376. Repeat every 110 px along the bottom line, at240,350,460and so on up to1450. Stop any line that would passx 1510at that edge. Fill the empty bottom-left corner with two or three short lines that start onx 90and run parallel to the others. - To fade the band at both ends, press M for the Rectangular Marquee and click once on the canvas without dragging. In the dialog, enter From
0, 1011and To130, 1406and click Select. Choose Select → Feather…, enter80and click Apply, then press Delete. - Press Cmd+D to deselect. You need to do this first: with a selection active, a single marquee click only deselects and doesn't open the dialog. Then repeat the same thing at the right edge, from
1470, 1011to1600, 1406, and press Cmd+D again. - Set the layer's opacity to
45.
- Click Add Layer and name the layer
-
Lasso a hand-drawn sun
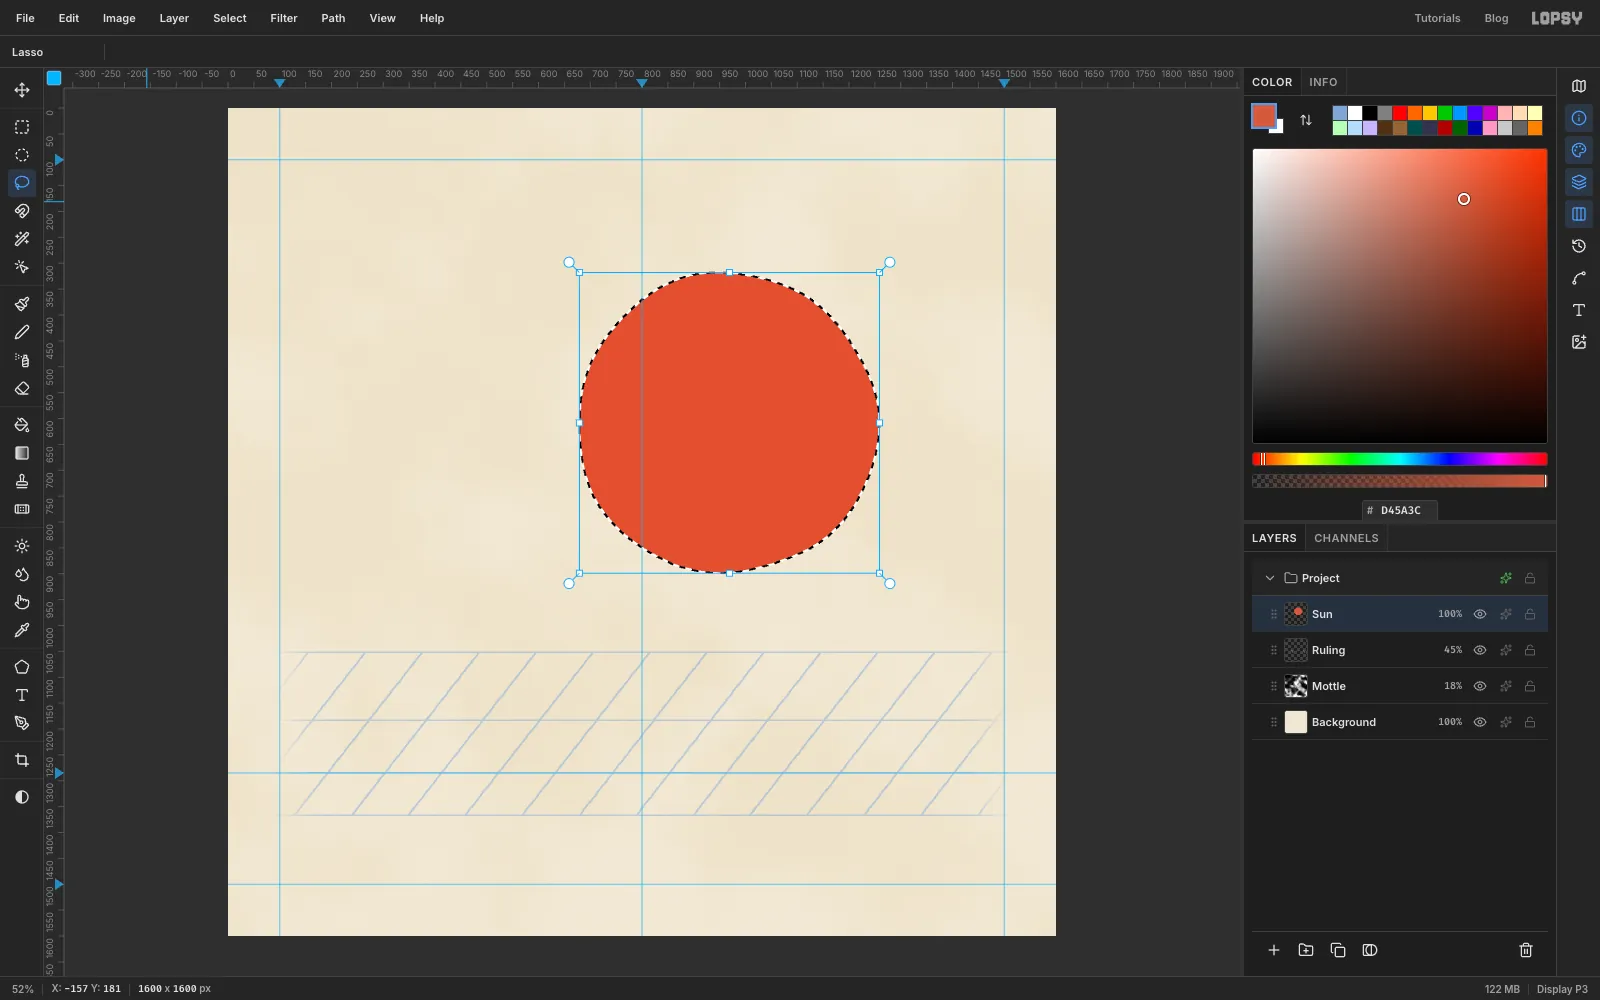
A watercolour sun is never a perfect circle.
- Add a layer named
Sun. - Press L for the Lasso and drag a circle about 580 px across, centred near
965, 610. Let the edge wobble a little. - Set the foreground to
D45A3Cand choose Edit → Fill. Keep the selection.
- Add a layer named
-
Give it a watercolour edge
- Add a layer named
Sun Wash. With the sun's selection still active, choose Filter → Clouds…, set Scale to9and click Apply. The clouds fill only the sun. - Press Cmd+D. Set
Sun Washto Overlay blend mode and28%opacity. - Click the
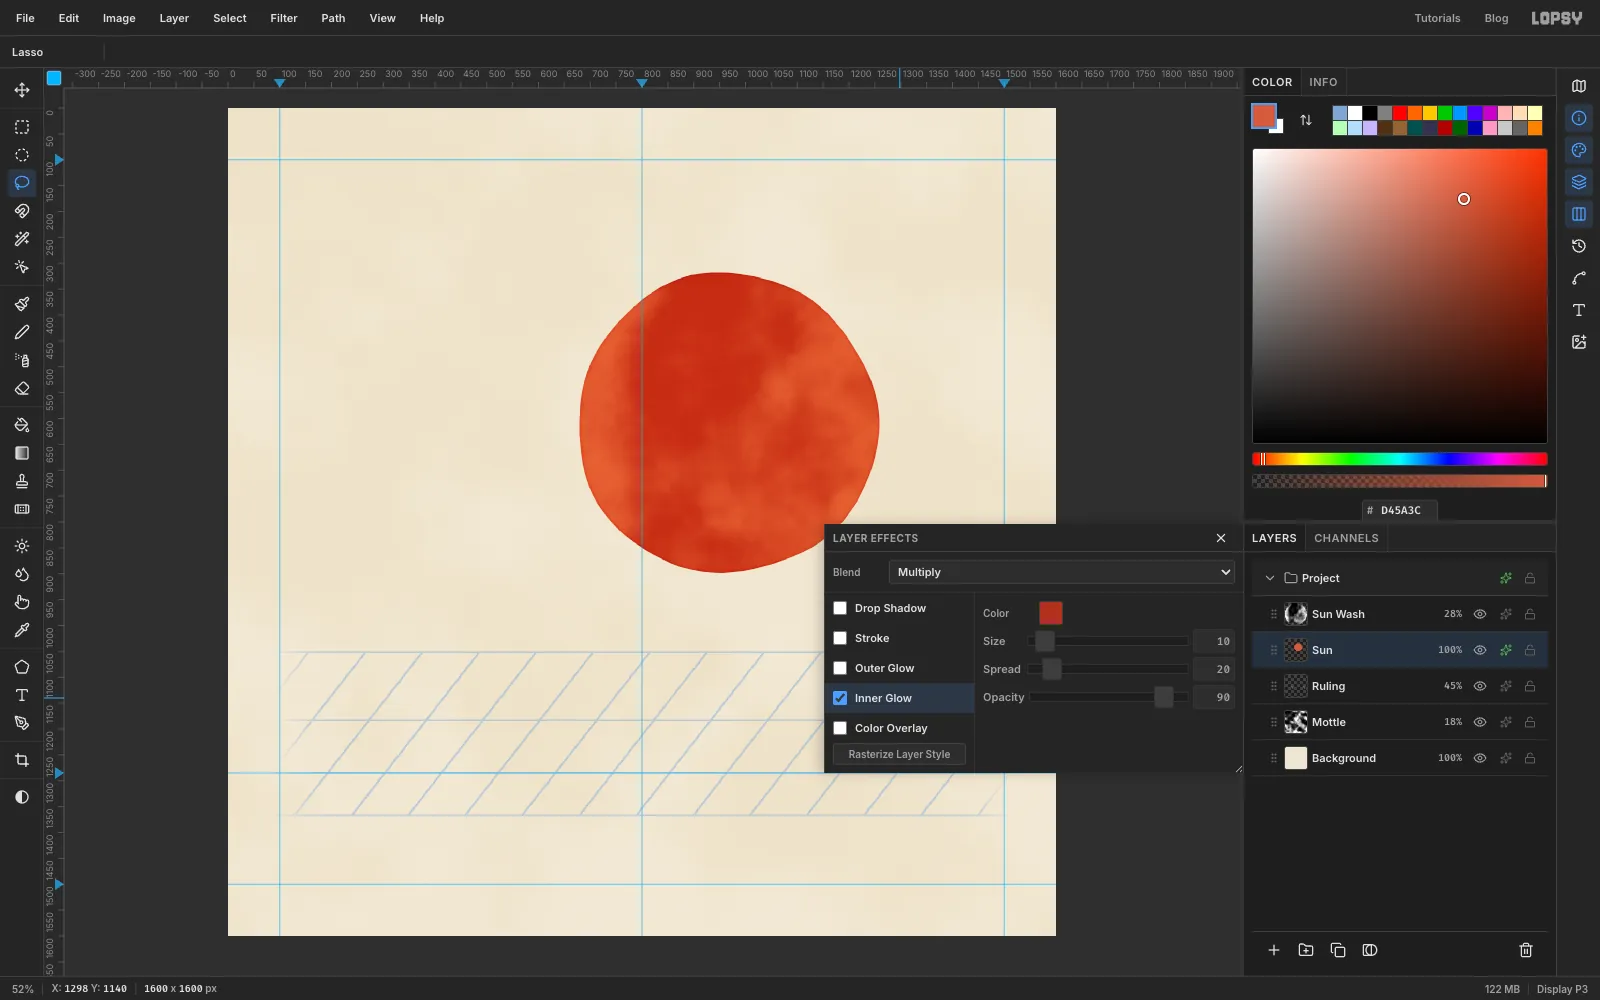
Sunlayer and open its effects drawer. Tick Inner Glow, click its name, and set Color to , Size10, Spread20and Opacity90. Wet watercolour dries darker at its edge, and this is that pooled rim. - In the same drawer, set Blend to Multiply. Close the drawer and set the layer's opacity to
85.
- Add a layer named
-
Add two pale blooms
- Click
Sun Wash, then add a layer namedBlooms. - Hold Cmd and click the
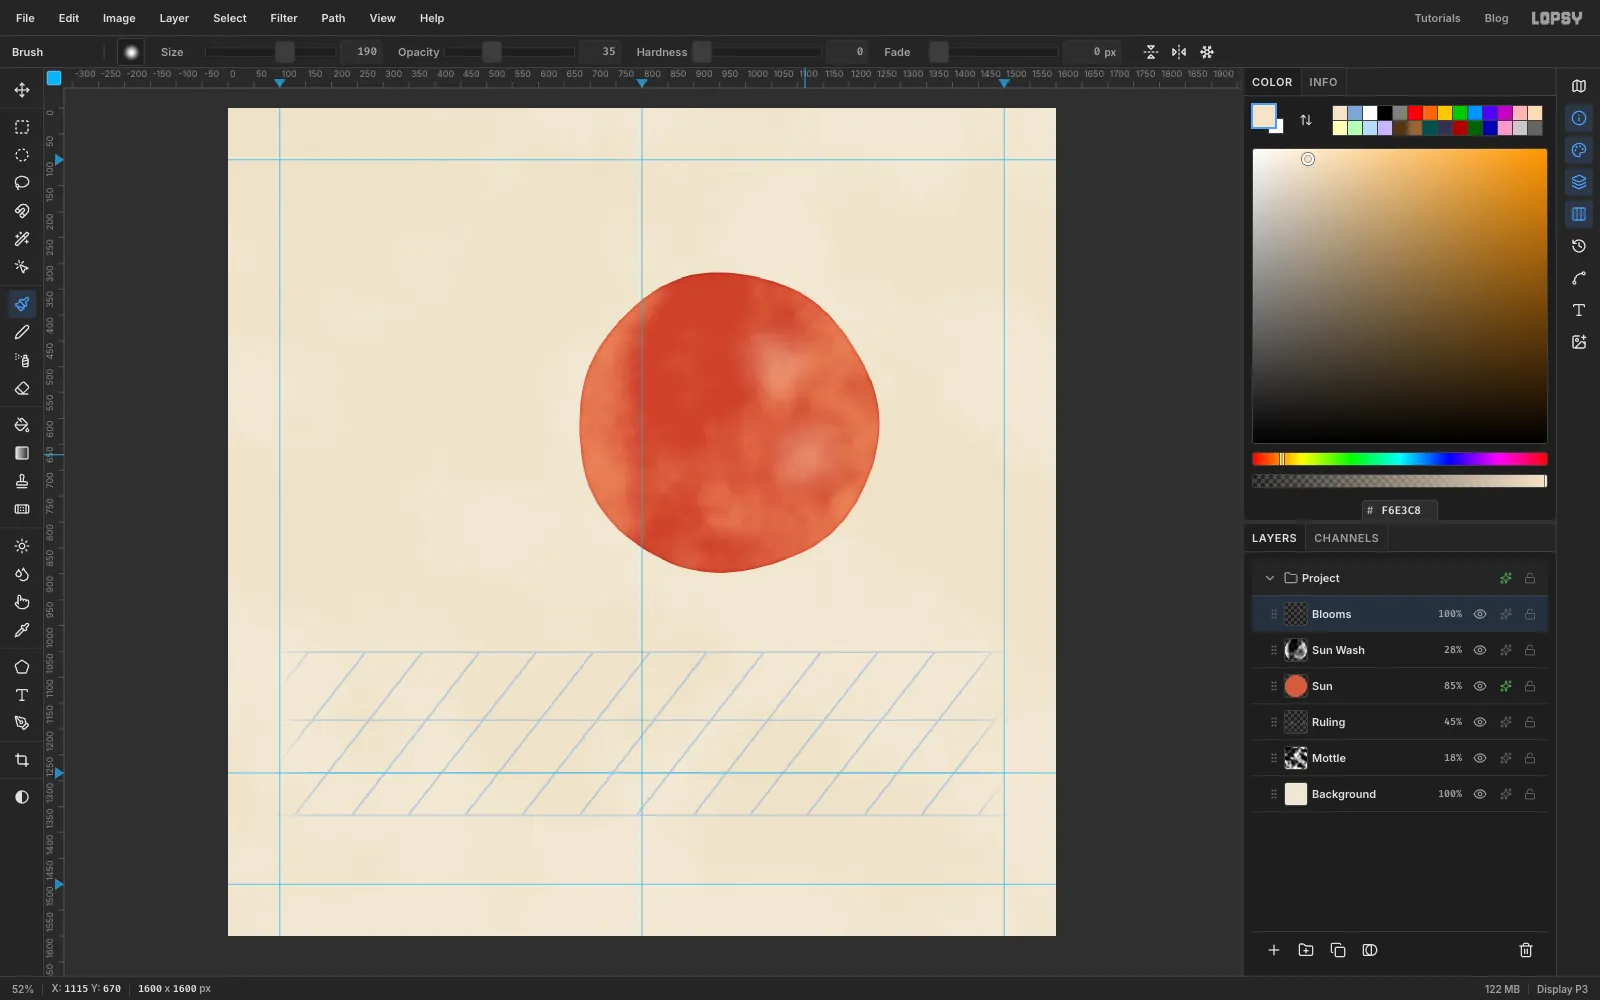
Sunlayer's thumbnail. That loads the sun's shape as a selection, so the blooms can't spill outside it. - Press B for the Brush and click the brush-tip thumbnail at the left of the options bar. Pick Soft Round, then set Size
190, Hardness0and Opacity35. Close the panel. - Set the foreground to
F6E3C8. Click once at about1060, 490and once at about1115, 670. - Press Cmd+D.
- Click
-
Bring in the goose
With
Bloomsselected, drag the downloaded goose photo onto the canvas. It's scaled to fit the document's width and arrives above the selected layer. Rename the new layerGreylag.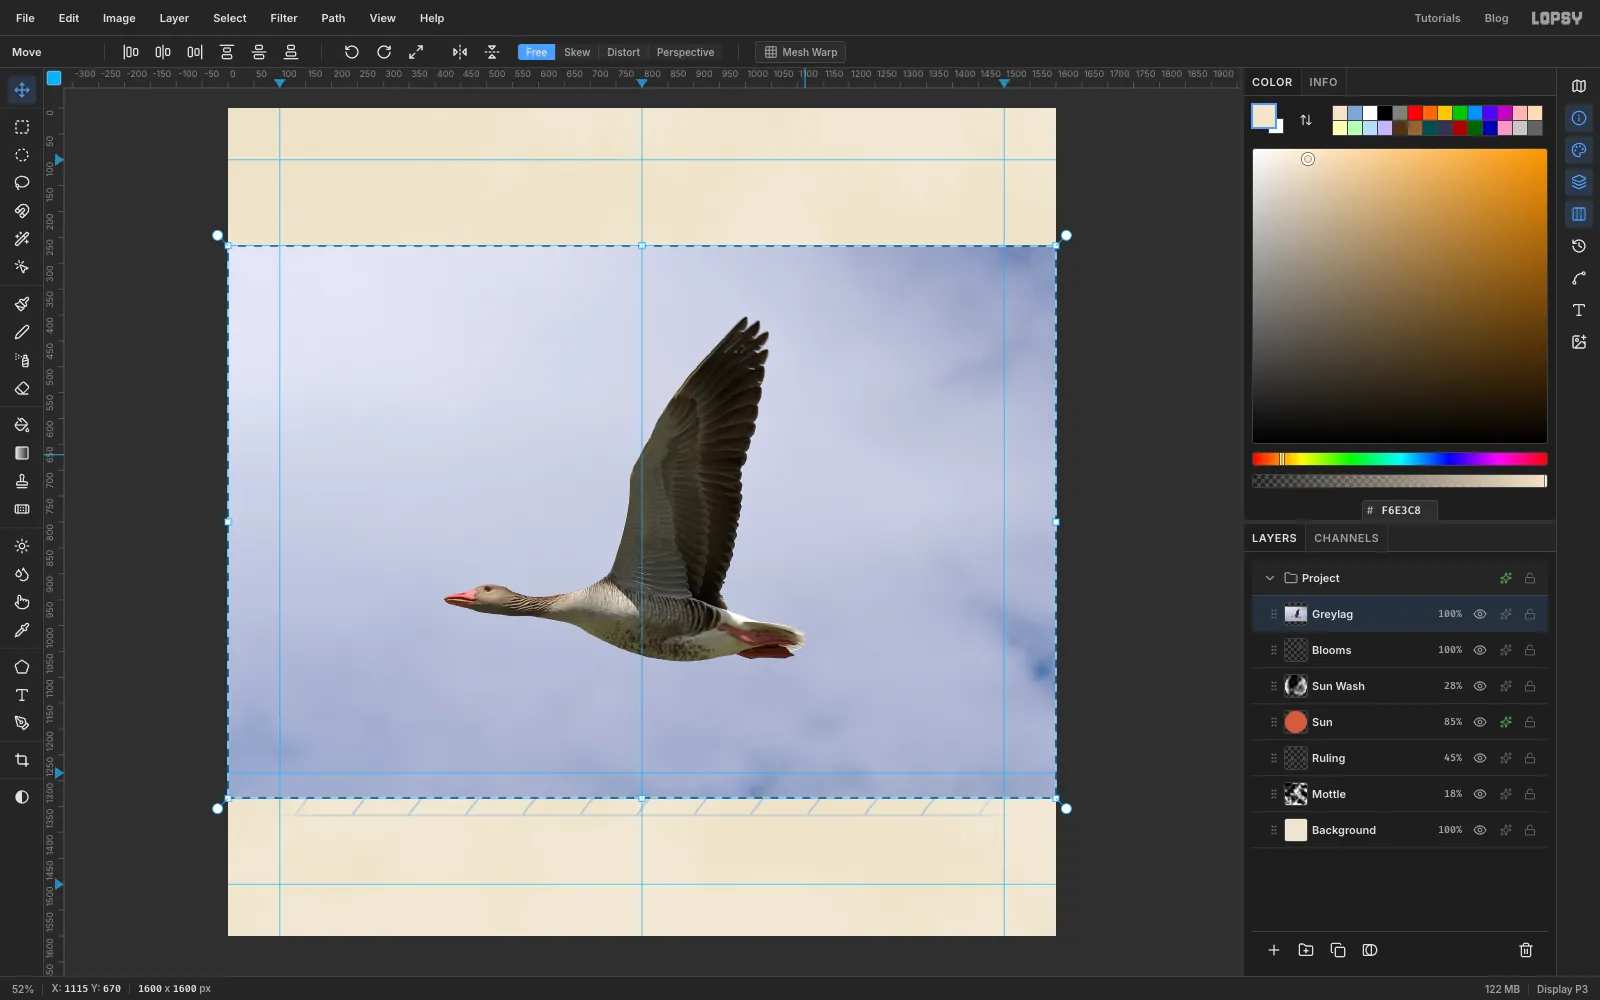
-
Select the sky
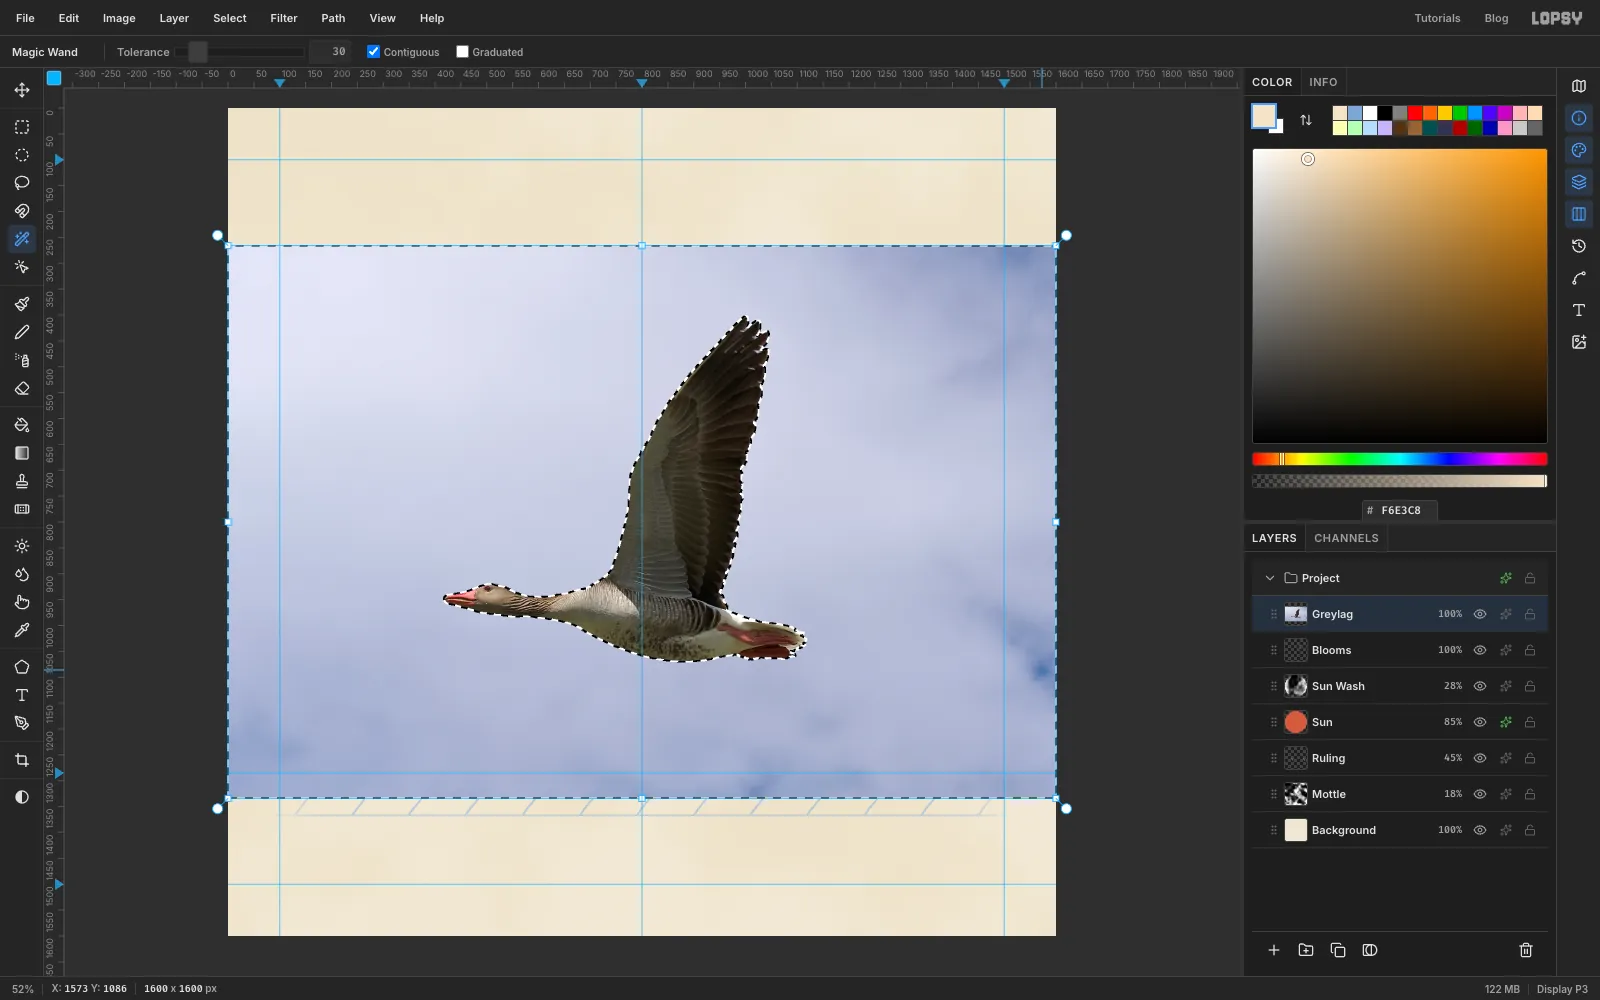
- Press Cmd+D, then press W for the Magic Wand. Set Tolerance to
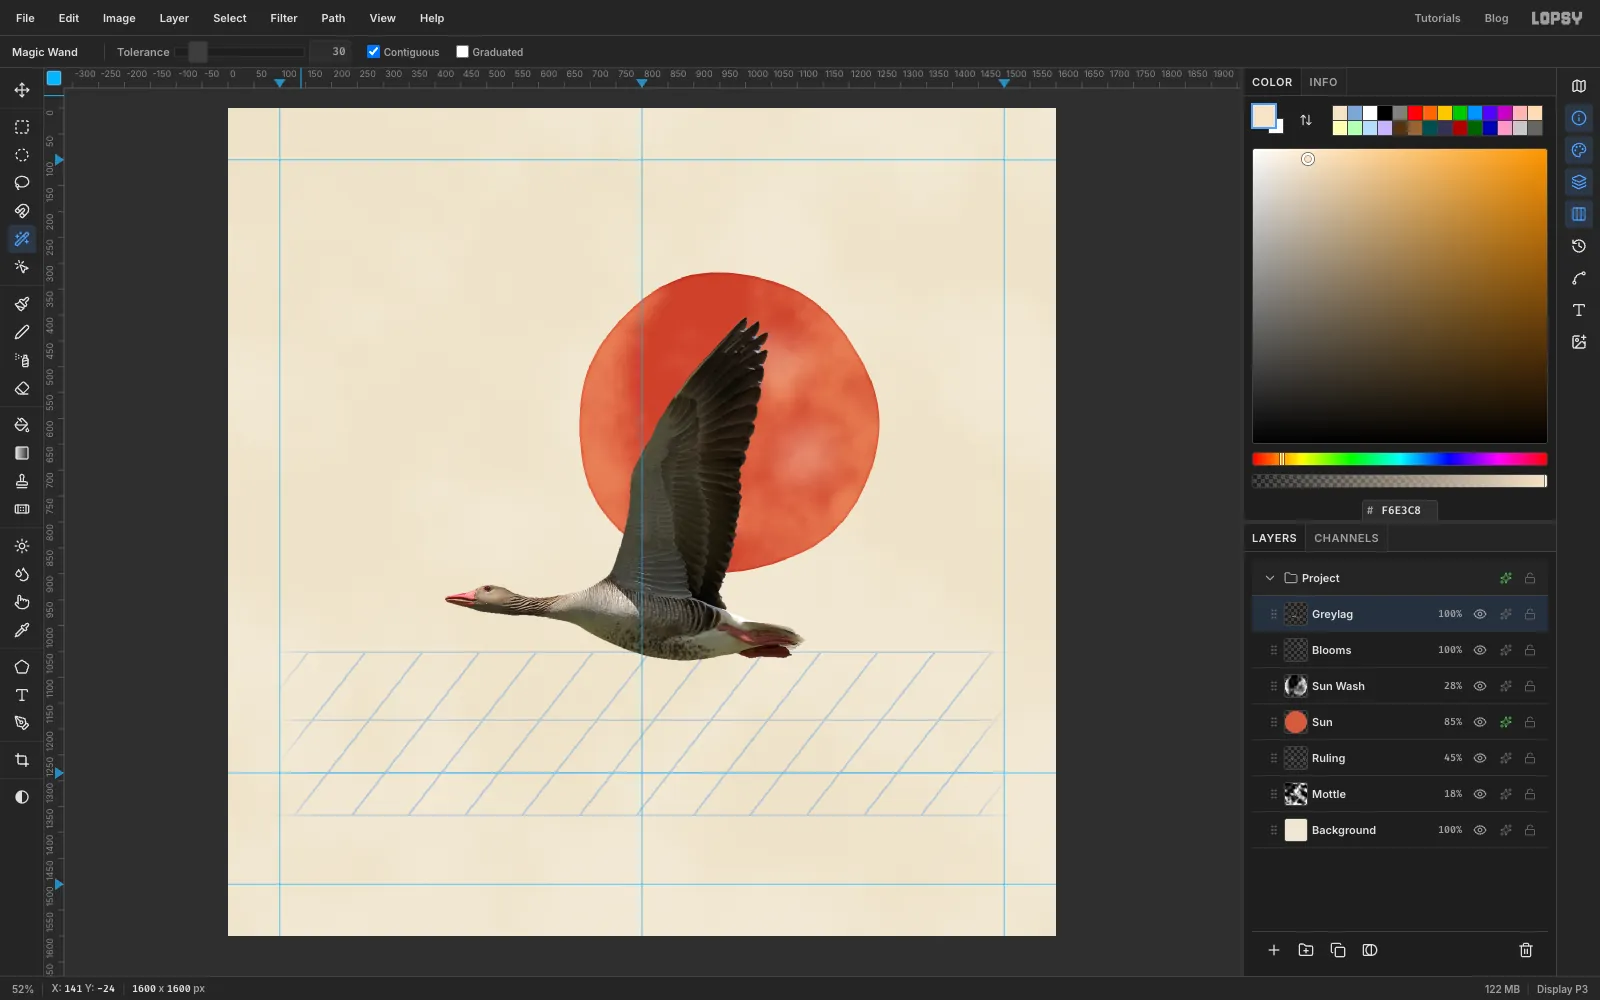
30and leave Contiguous ticked. - Click the sky at the top left. Hold Shift and click the other corners, the middle of the top and bottom edges, and any other patch of sky. The sky is a gradient, so it takes about a dozen clicks. Look out for small leftover patches near the photo's right edge.
- Press Cmd+D, then press W for the Magic Wand. Set Tolerance to
-
Delete the sky and clean the edge
- Press Delete. The sun and paper show through where the sky was.
Now clean the edge so no blue fringe is left:
- Cmd-click the
Greylagthumbnail to select the goose. - Choose Select → Shrink… and enter
2, then Select → Feather… and enter1. - Choose Select → Inverse and press Delete. Press Cmd+D.
-
Turn the photo into ink
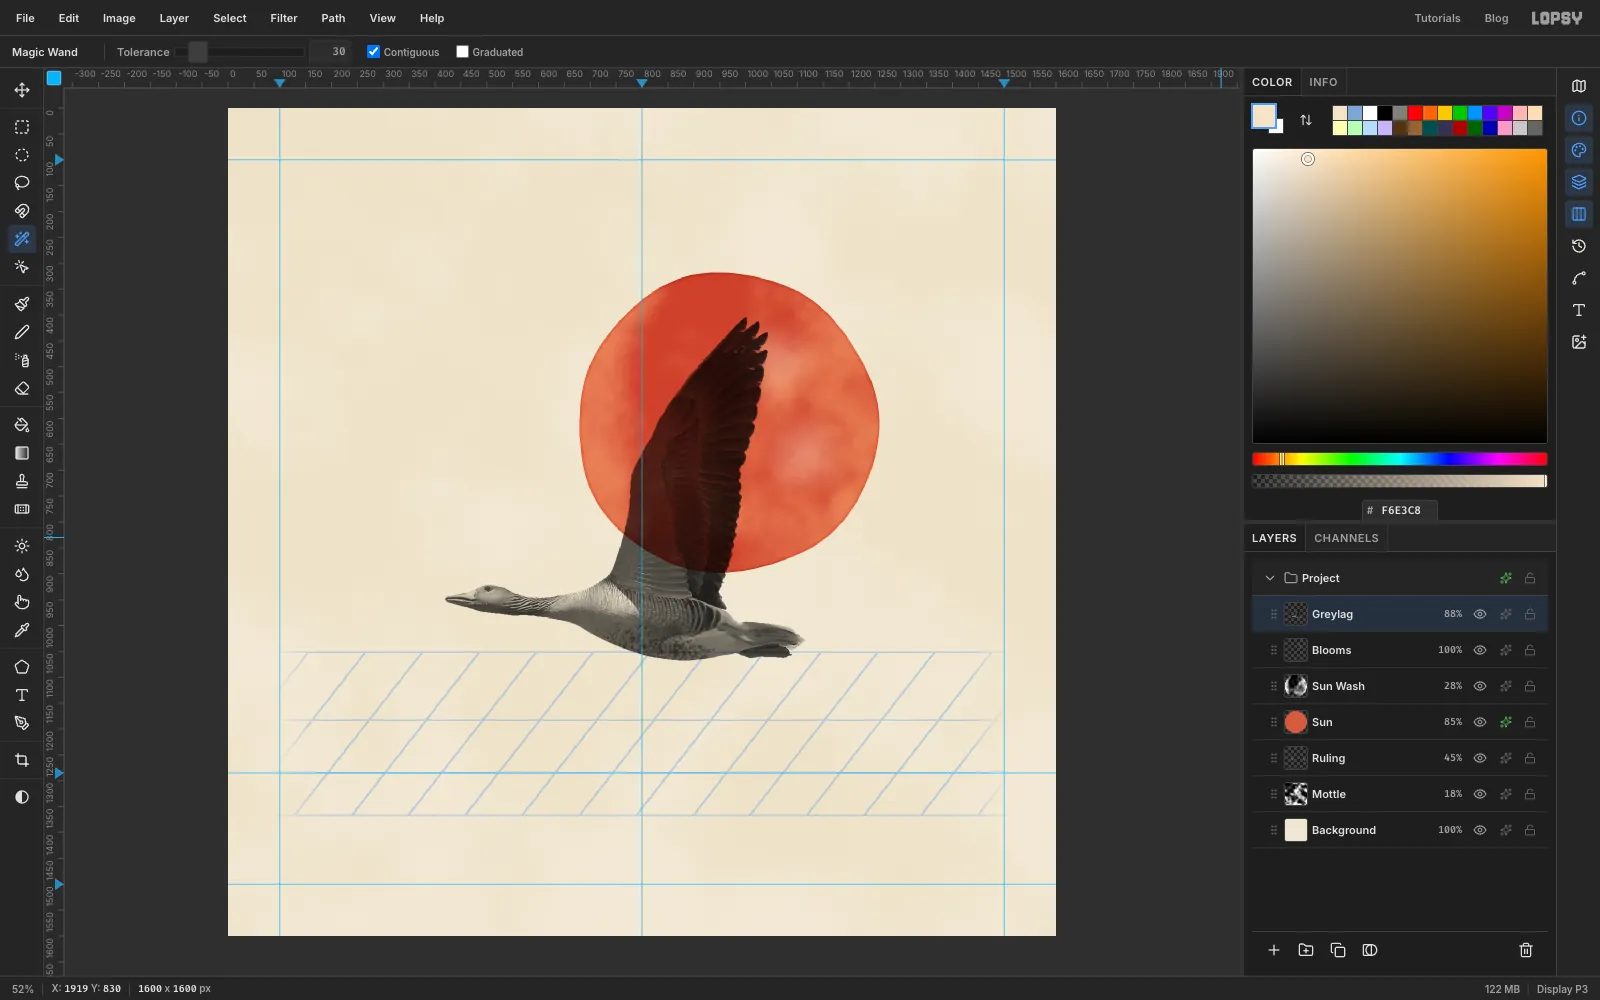
- Choose Filter → Desaturate.
- Choose Filter → Brightness/Contrast… and set Brightness to
4and Contrast to10. Click Apply. - Open the effects drawer and set Blend to Multiply. Close it.
- Set the layer's opacity to
88. At 100% the wing over the sun goes almost black.
The white parts of the goose now take on the colour of the paper, and the wing turns the sun a deep red.
-
Tilt the goose upward
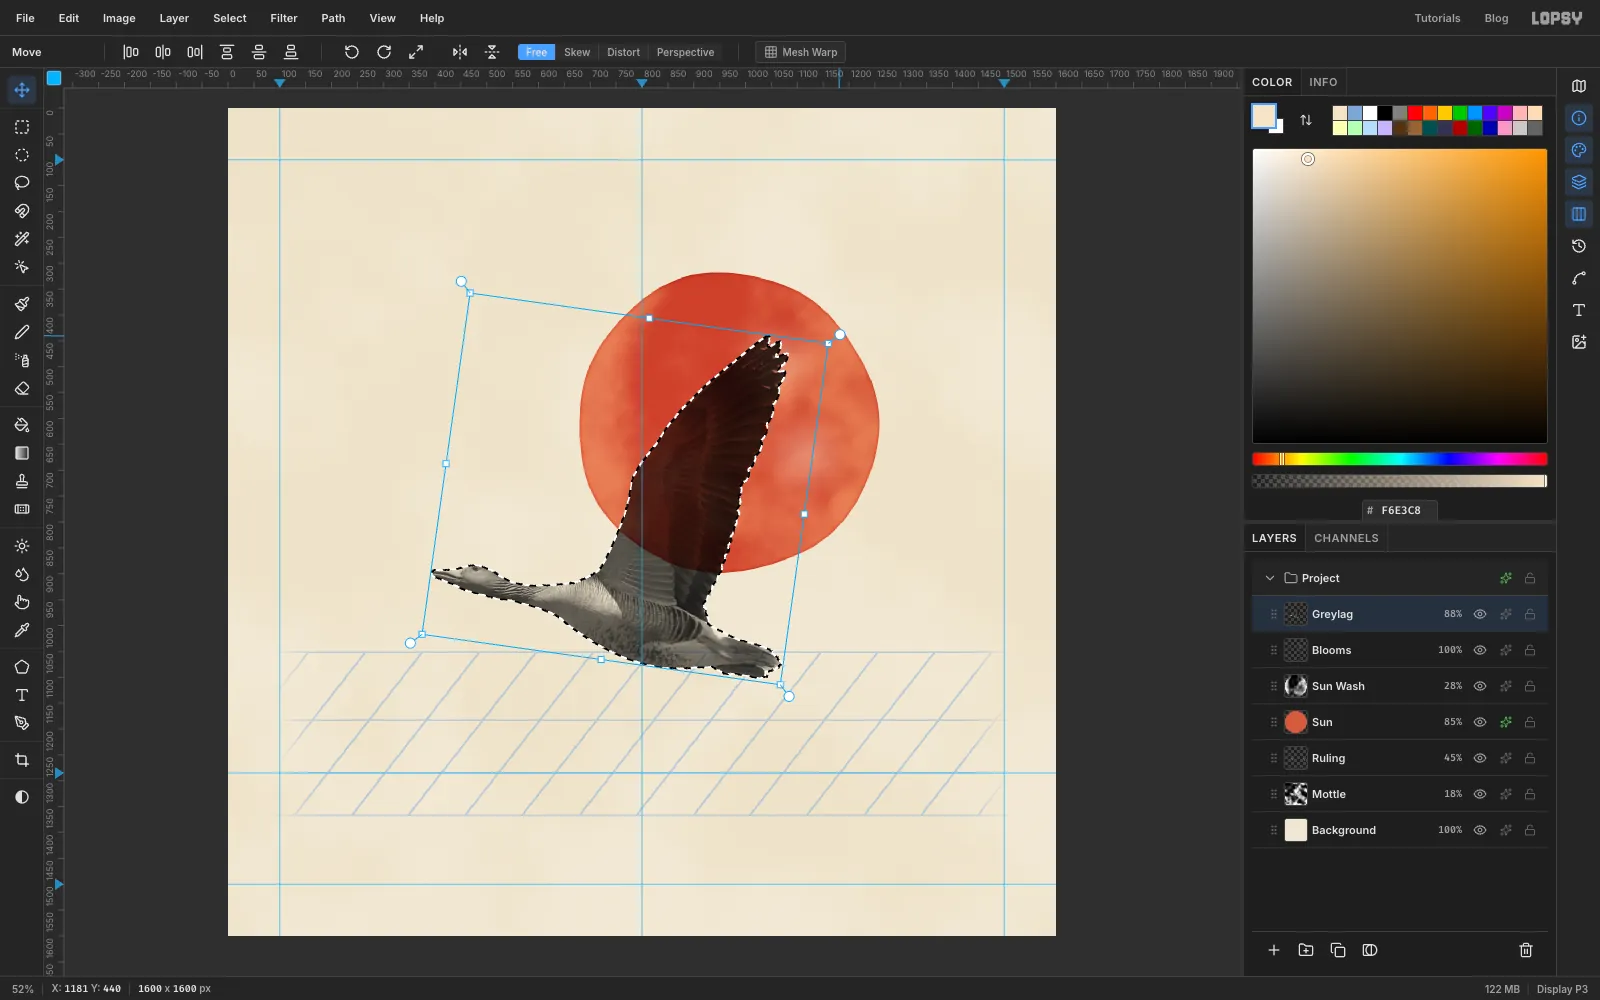
- Cmd-click the
Greylagthumbnail. - Press V for the Move tool. Drag the small circle outside the top-right corner of the box clockwise by about
8°, so the head lifts and the goose climbs. - Press Cmd+D to commit.
- Cmd-click the
-
Place it and warm it
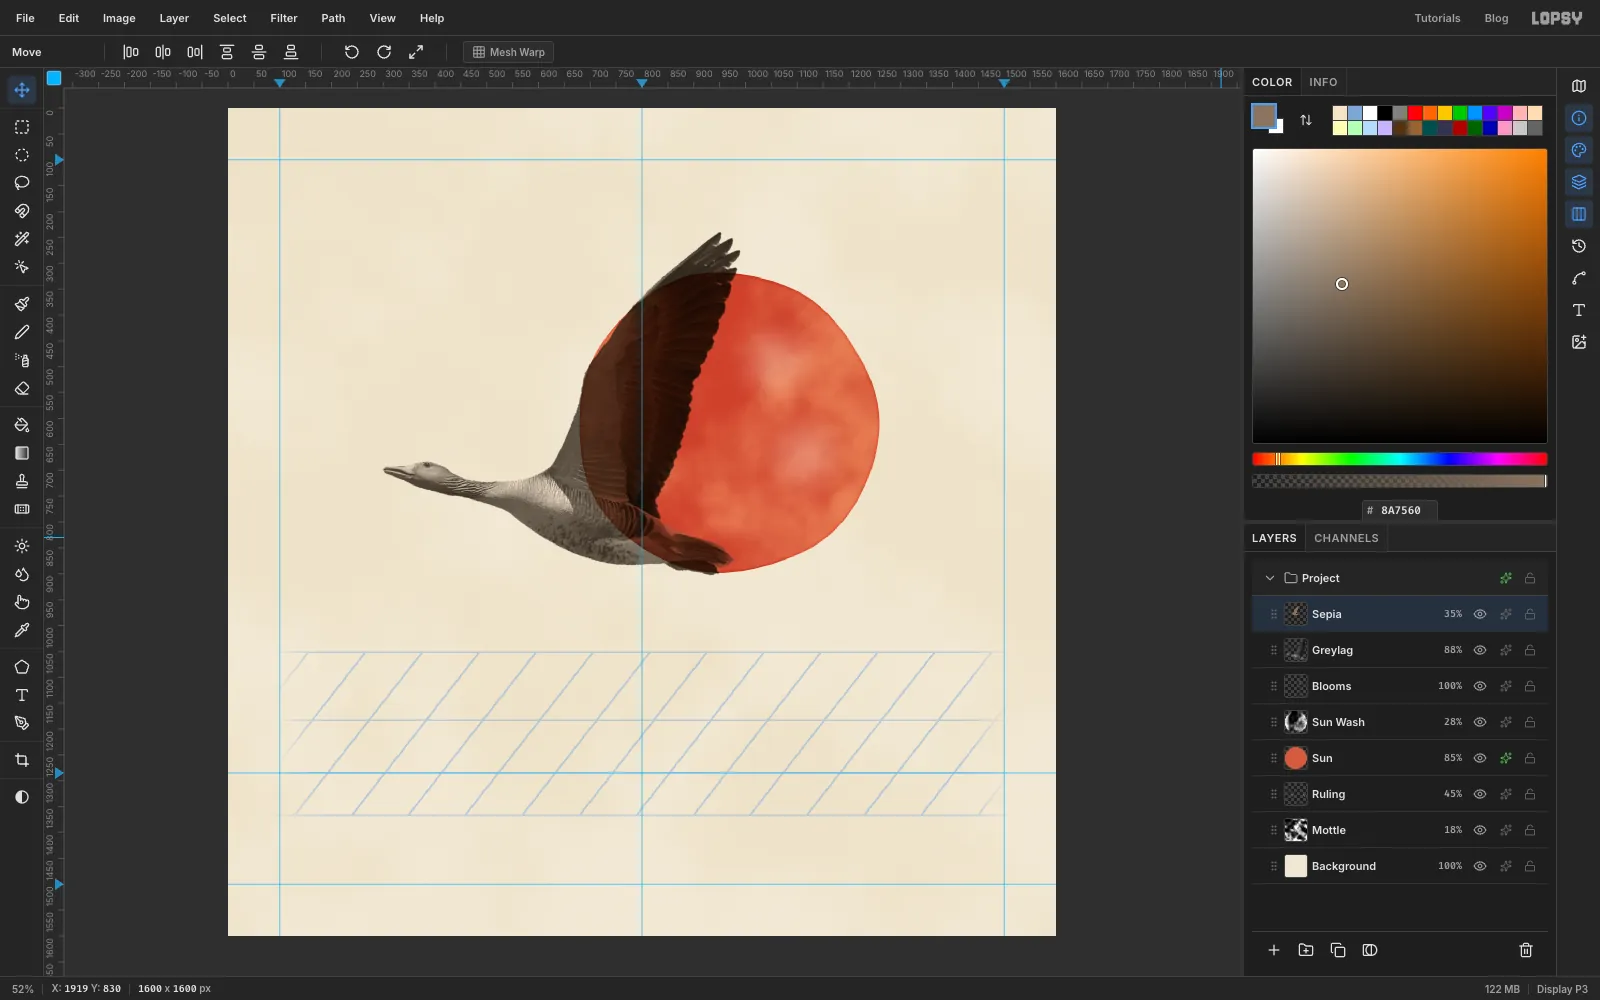
- Drag the goose with the Move tool until the tip of its beak is near
300, 700and its highest wing tip is near950, 240. - Add a layer named
Sepia. Cmd-click theGreylagthumbnail, set the foreground to8A7560and choose Edit → Fill. Press Cmd+D. - Set
Sepiato Color blend mode at35%. The cool grey photo now sits warmly on the paper.
- Drag the goose with the Move tool until the tip of its beak is near
-
Load the broad nib
- With
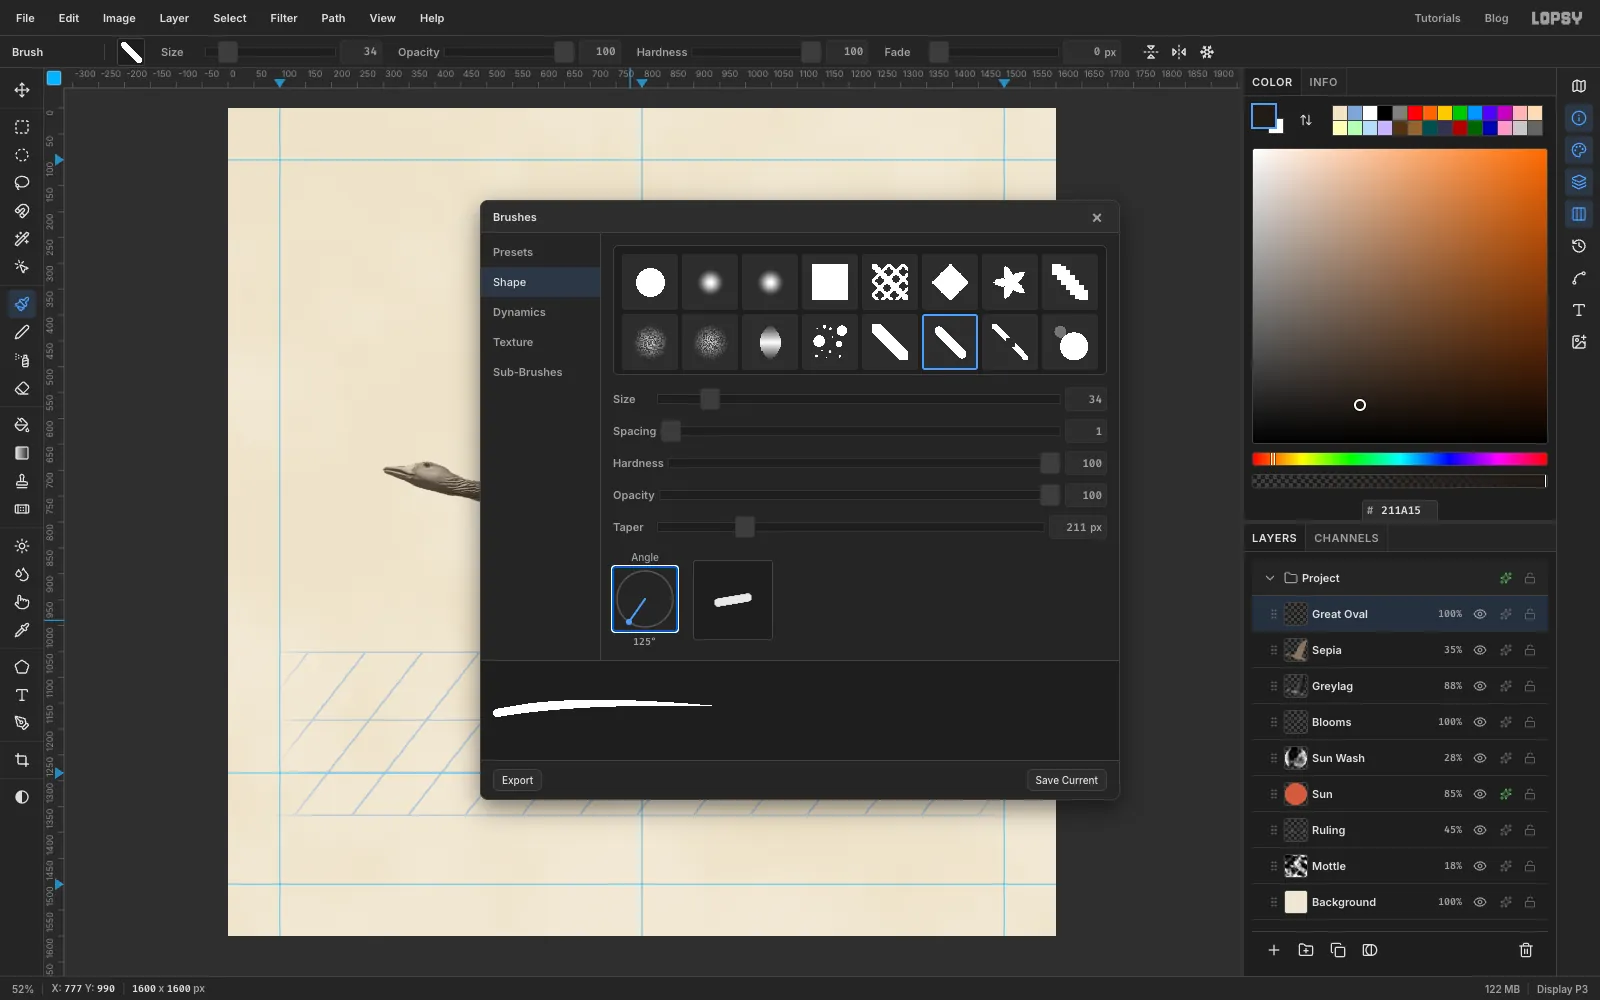
Sepiaselected, add a layer namedGreat Oval. Set the foreground to211A15. - Press B and open the brush presets. Pick Caligraphic Rounded.
- On the Shape tab, set Size
34, Hardness100and Opacity100. You'll set Taper for each stroke below. - Drag the Angle dial until it reads
125°.
At this angle the nib lies almost flat. Strokes that move sideways come out thin, and strokes that move up and down come out thick. That's the classic flourish look: hairlines across the top, heavy downstrokes on the sides.
- With
-
Draw the great oval
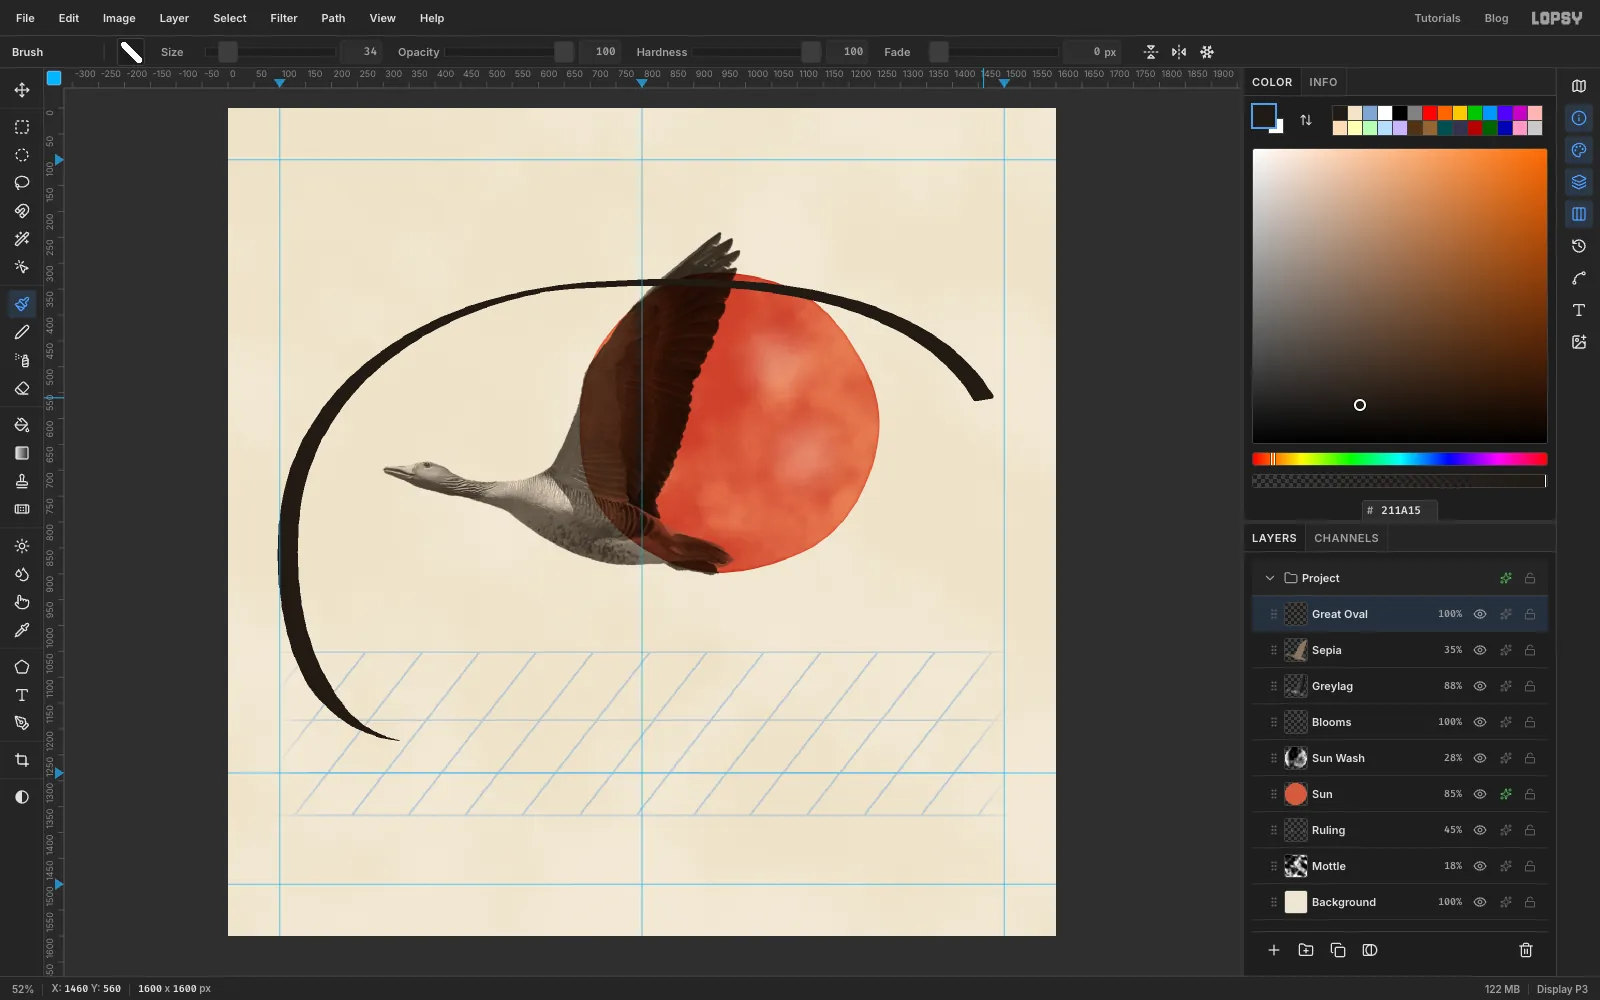
One freehand stroke would start blunt and stop blunt. To get hairlines at both ends, draw the oval in three moves.
Taper is only in the Brushes panel. Reopen it from the brush-tip thumbnail each time you change it, and close it with its ✕ before you draw, because it covers the canvas.
- The tail, drawn backwards. Set Taper to
210. Taper starts at full width where you press and thins to a hairline where you let go, so draw this tail backwards, toward its tip. Press at about175, 1113on the left and drag down and right to330, 1222. - The body. Set Taper back to
0. Press at175, 1113again and draw one big curve. Go up the left side through120, 780, over the top through660, 345and980, 340, and down to1460, 560on the right. Above the goose's wing, the curve is a fine line.
Keep your hand moving. If you pause for more than a second and a half, Lopsy smooths the stroke and drops the taper.
- The tail, drawn backwards. Set Taper to
-
Finish the oval and add the swash
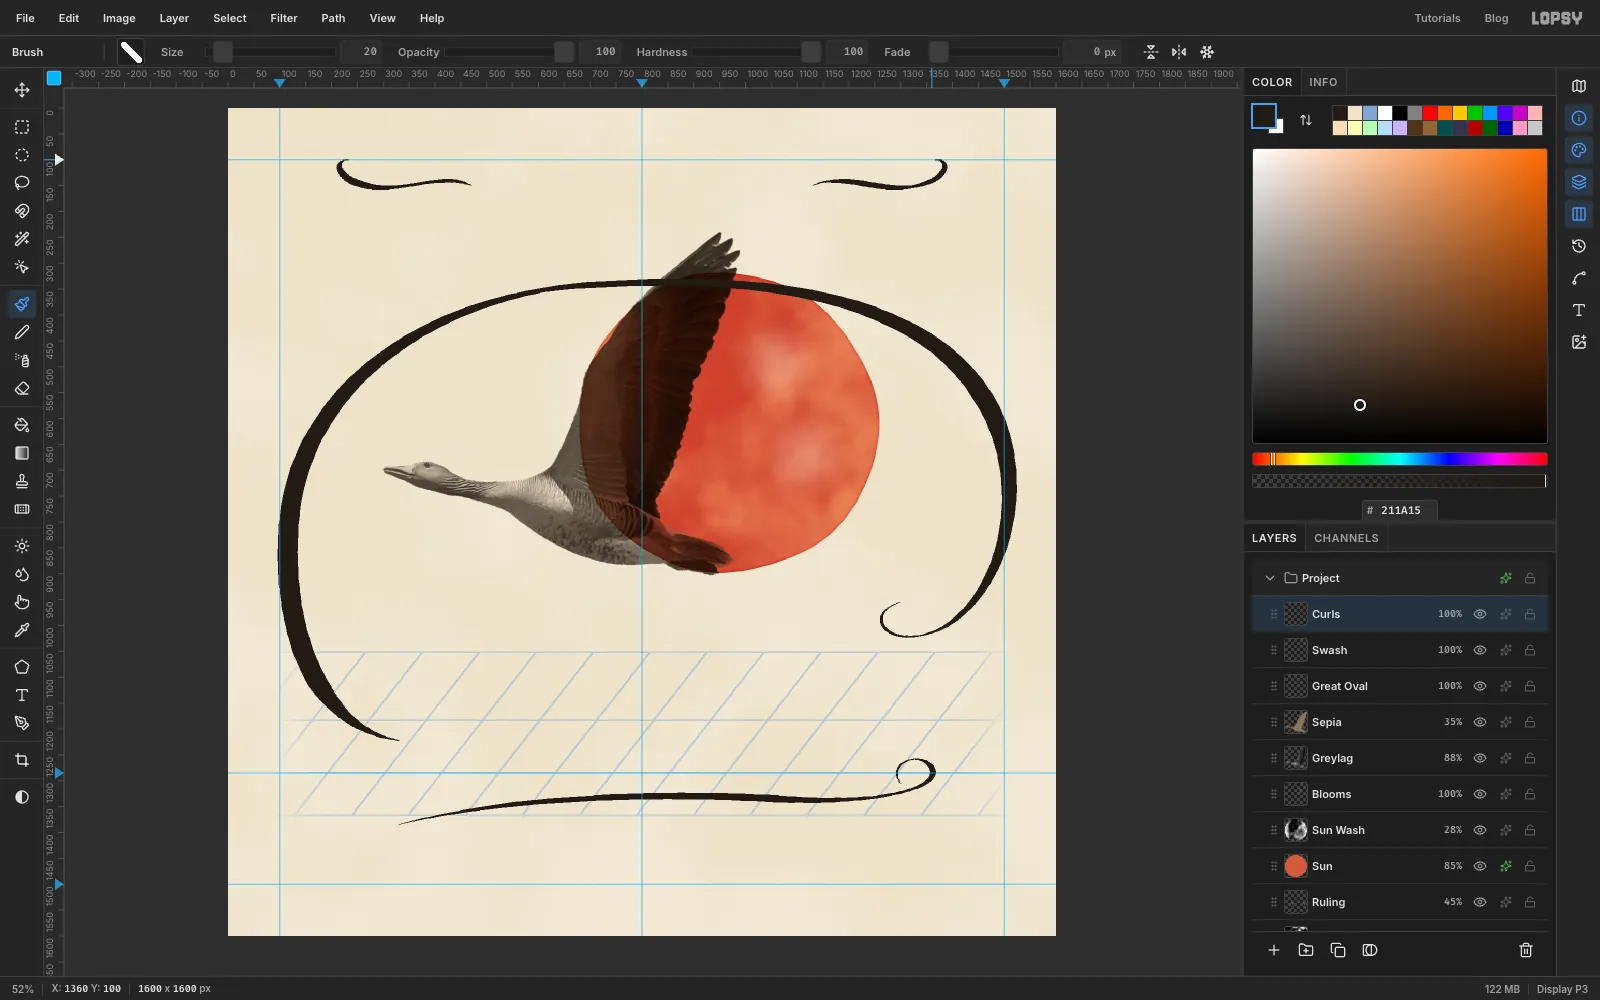
- The oval's exit. Set Taper to
740. Press at1460, 560and carry the curve down the right side through1510, 760and1455, 935. Then curl it in under itself, past1325, 1020, ending around1300, 955. - Add a layer named
Swashand set Size to30. Draw it in the same three moves:
- For the left tail, set Taper
240and drag from546, 1346down to330, 1385. - Set Taper
0and draw the body from546, 1346across to1060, 1335, bowing slightly upward in the middle. - Set Taper
470, press at1060, 1335and finish with a loop: right and up through1362, 1285, over the top at1330, 1258, and down inside the loop to1300, 1305.
- Add a layer named
Curlsand set Size to20. Draw two small curls at the top, mirror images of each other:
- Left tail (Taper
60): press at417, 141and drag right to470, 150. - Left body (Taper
0): from417, 141left to250, 145. - Left hook (Taper
90): from250, 145, curl round and up to240, 100. - For the right curl, mirror it: tail from
1183, 141to1130, 150, body from1183, 141to1350, 145, and hook from1350, 145round to1360, 100.
- The oval's exit. Set Taper to
-
Select the wing where the oval crosses it
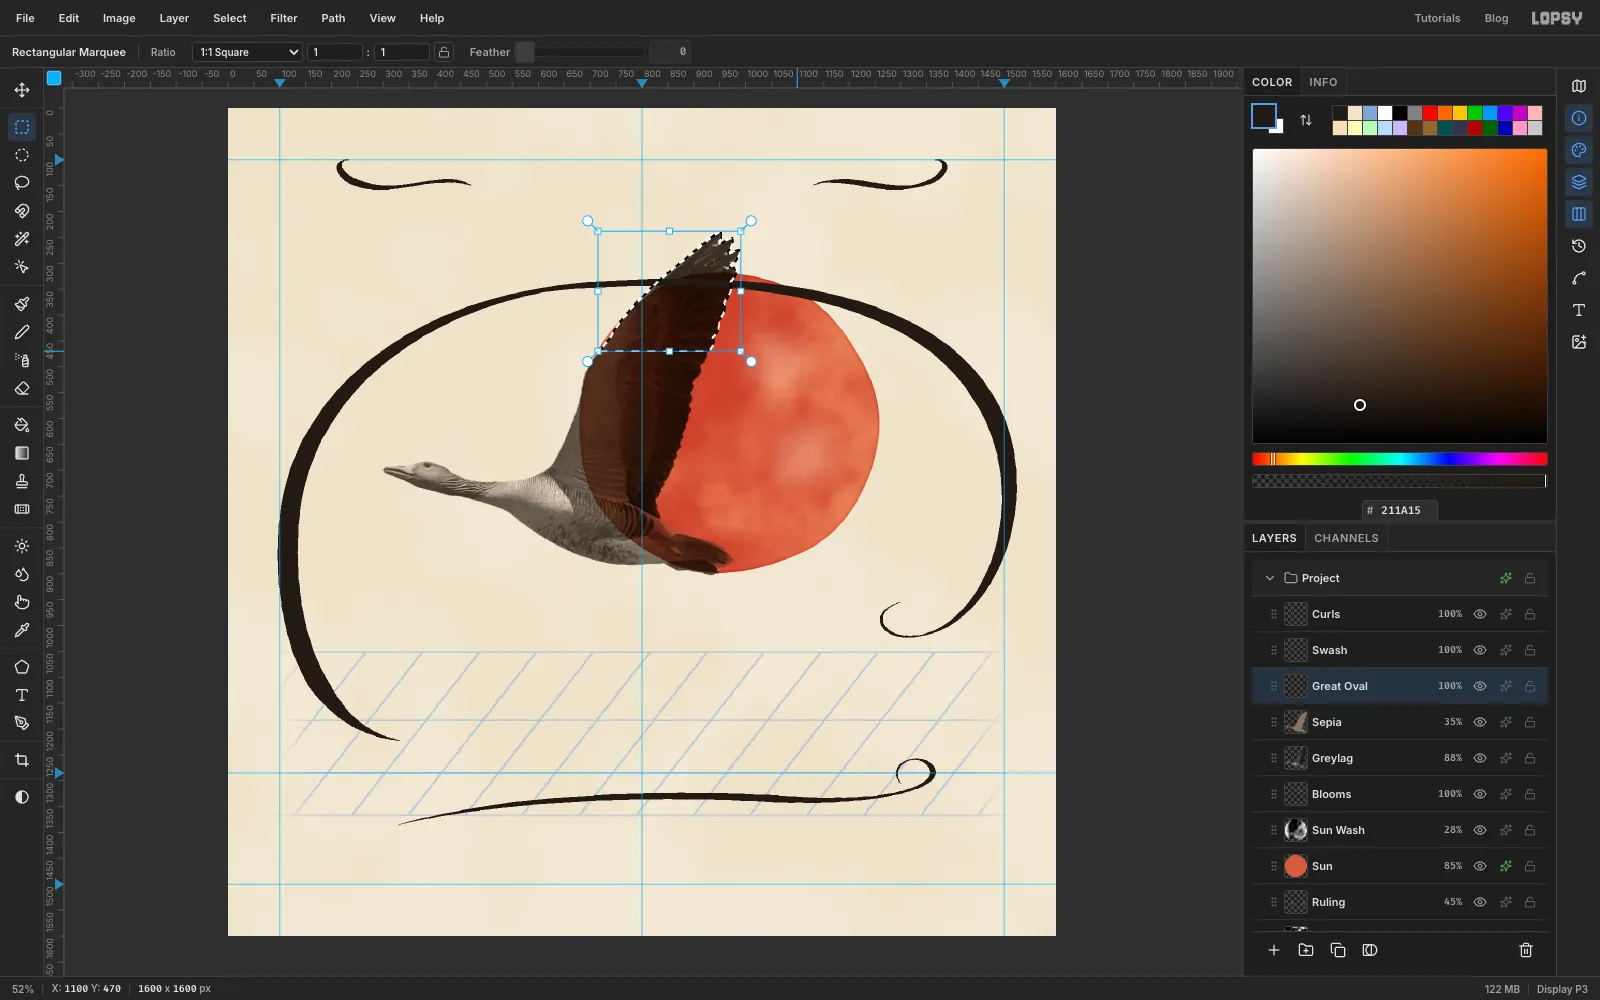
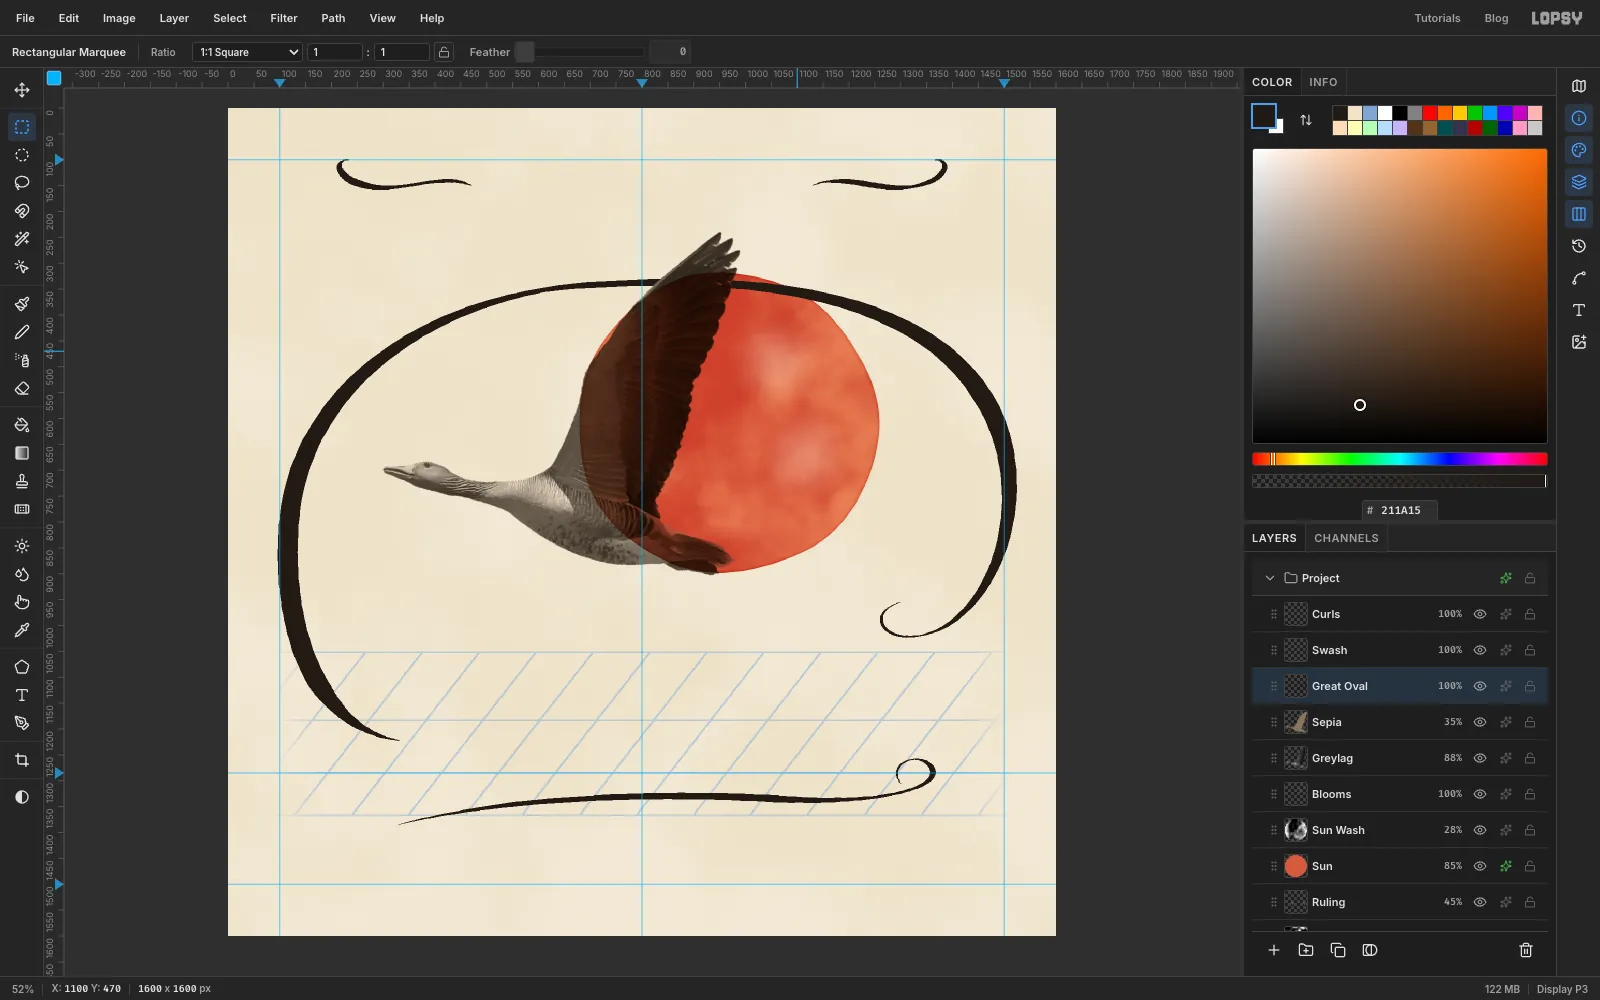
Right now the oval runs over the wing. Passing it behind the wing makes the goose look like it's flying through the flourish.
- Click
Great Oval, then Cmd-click theGreylagthumbnail.Great Ovalstays the active layer. - Press M. Hold Shift and Option and drag a rectangle from
600, 150to1100, 470. Shift+Option keeps only the overlap, so the selection is just the top of the wing.
- Click
-
Cut the oval behind the wing
Press Delete, then Cmd+D. The part of the oval that crossed the wing is gone, so the line now seems to pass behind it and come out the other side.
-
Draw the distant skein
- Click
Curlsand add a layer namedSkein. Set the foreground to433A31. - Keep Caligraphic Rounded at
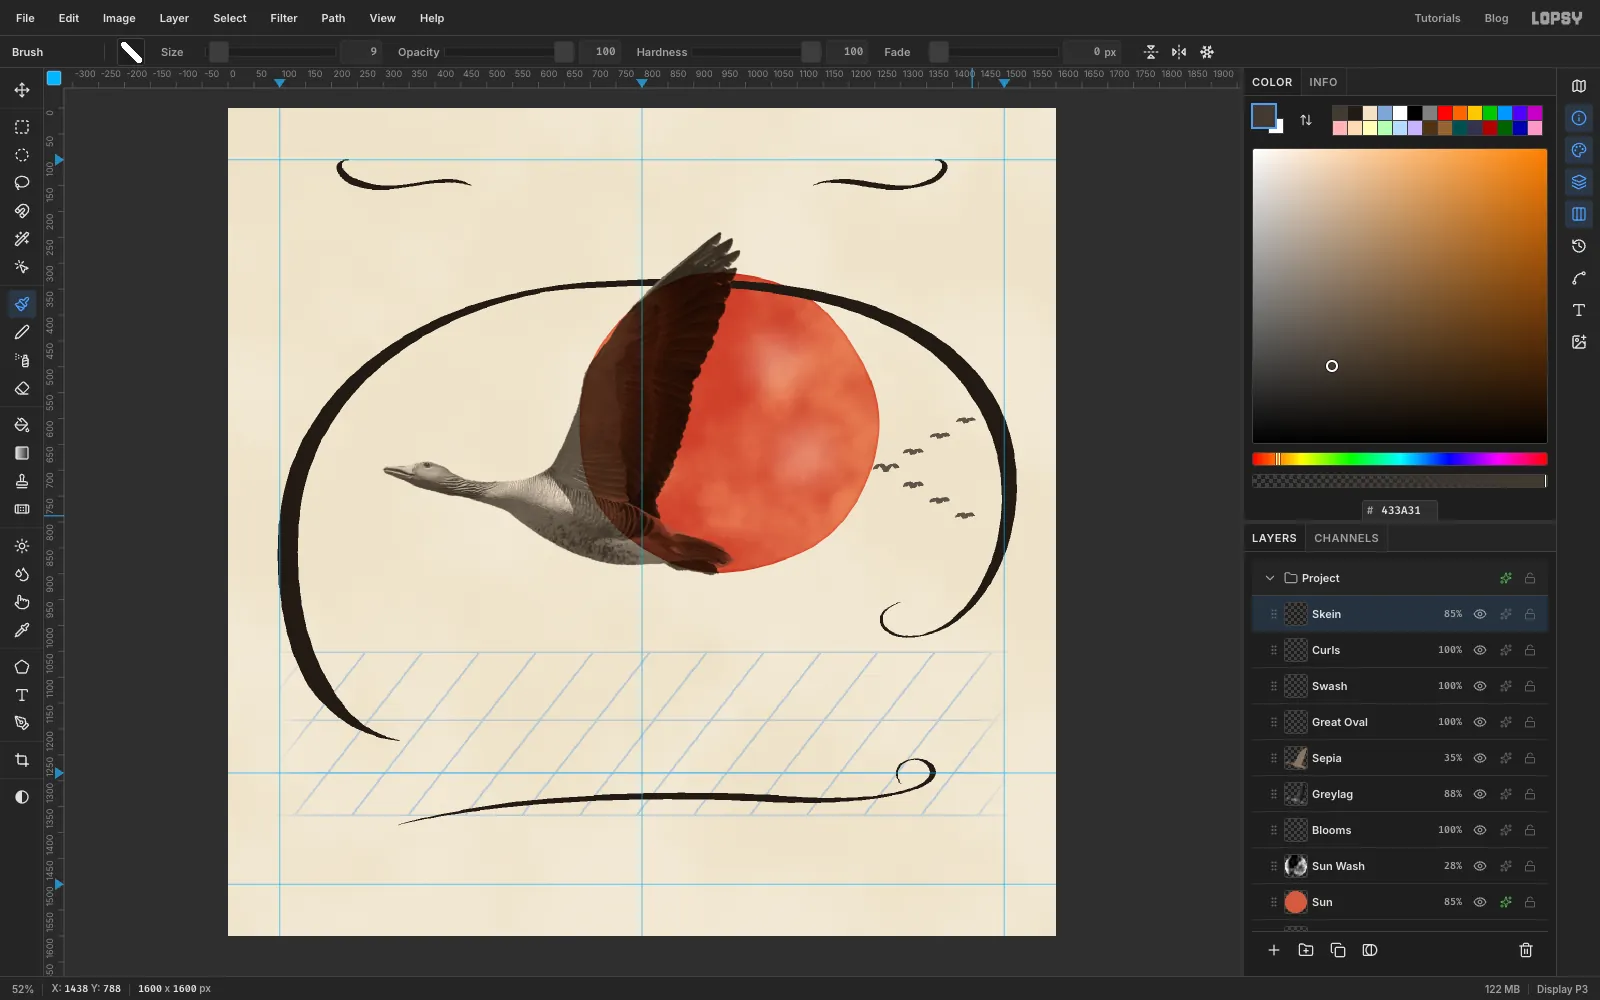
125°. Set Size to9and Taper to0. - Draw seven little gull birds. Each is one stroke: a shallow arch up and down for the left wing, then the same for the right wing. Put the leader at
1272, 700, about 40 px across. Each bird behind it is about 52 px further right and 31 px higher (the upper arm) or lower (the lower arm), with three birds on each arm. Make the trailing birds about 30 px across. The V points left, the way the goose is flying. - Set the layer's opacity to
85.
- Click
-
Write the title
- With
Skeinselected, press T for the Text tool. - In the options bar, set Size to
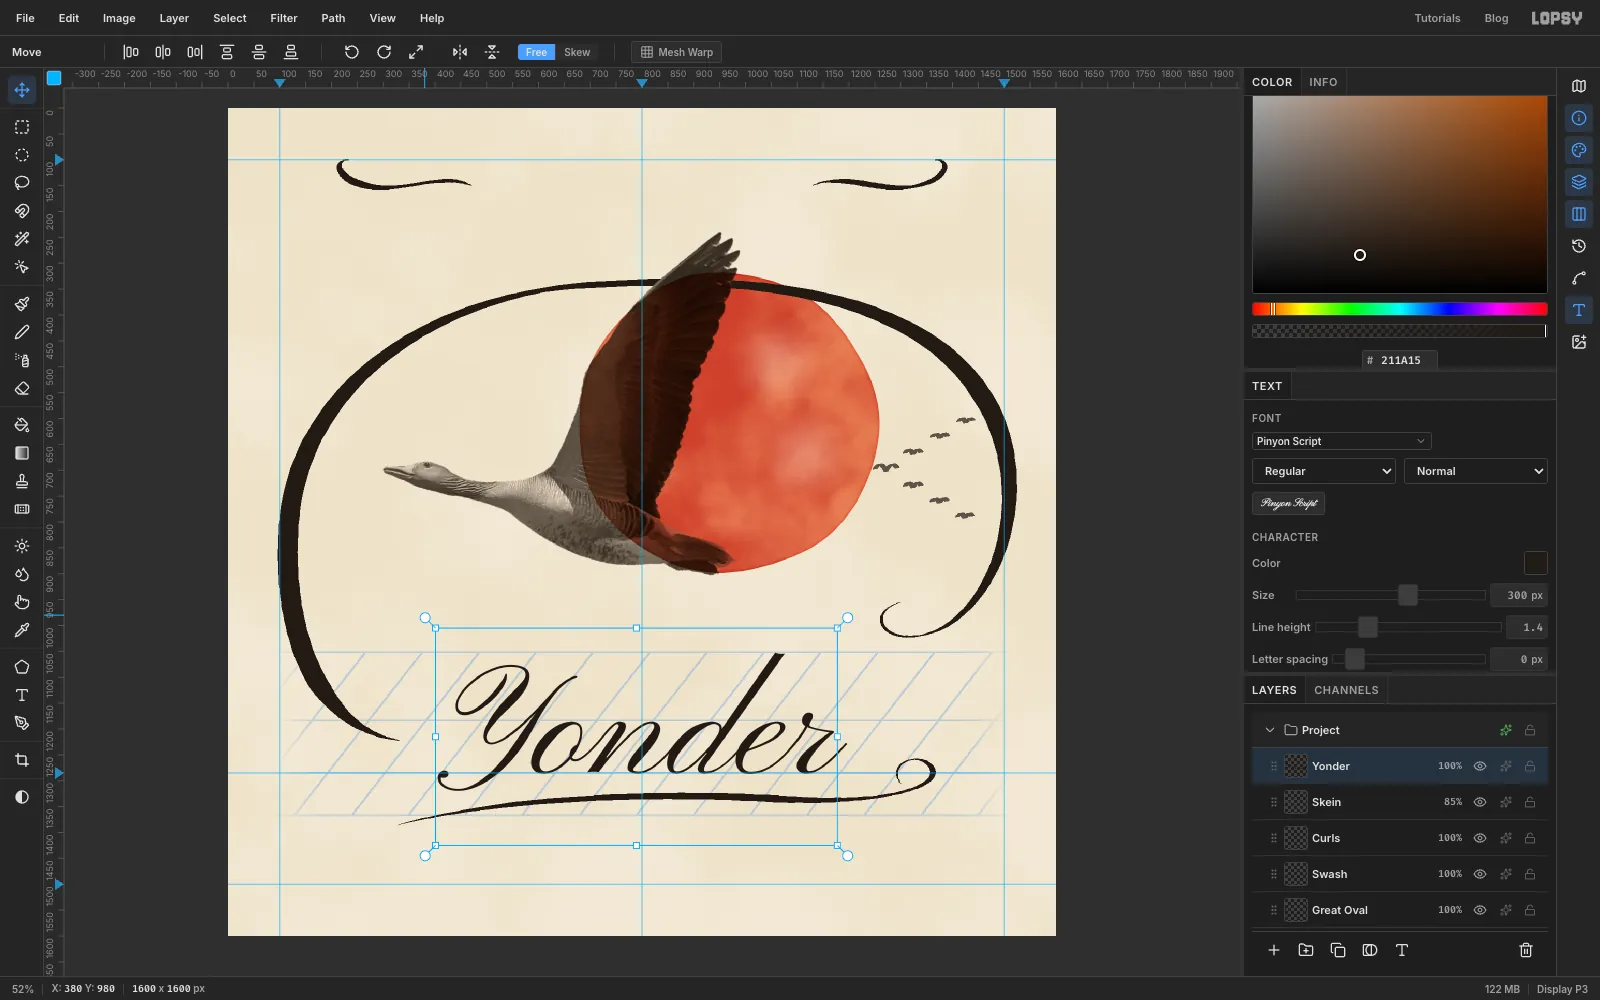
300and pick Pinyon Script in the font picker. Make sure Align is Left. In the Text panel (the T icon in the strip of panel buttons at the far right), set Letter spacing to0. Set the foreground to211A15. - Click in empty space at about
380, 980, typeYonderand press Tab. - Press V. Nudge the text with the arrow keys (Shift moves 10 px at a time) until the bottoms of the letters sit on the
1285guide and the word is centred on the800guide. The tops of the o, n and e should touch the x-height rule at1184.
- With
-
Set the band name
- Click
Skeinso a raster layer is active. Otherwise the next text setting would restyleYonder. - Press T. Set Size
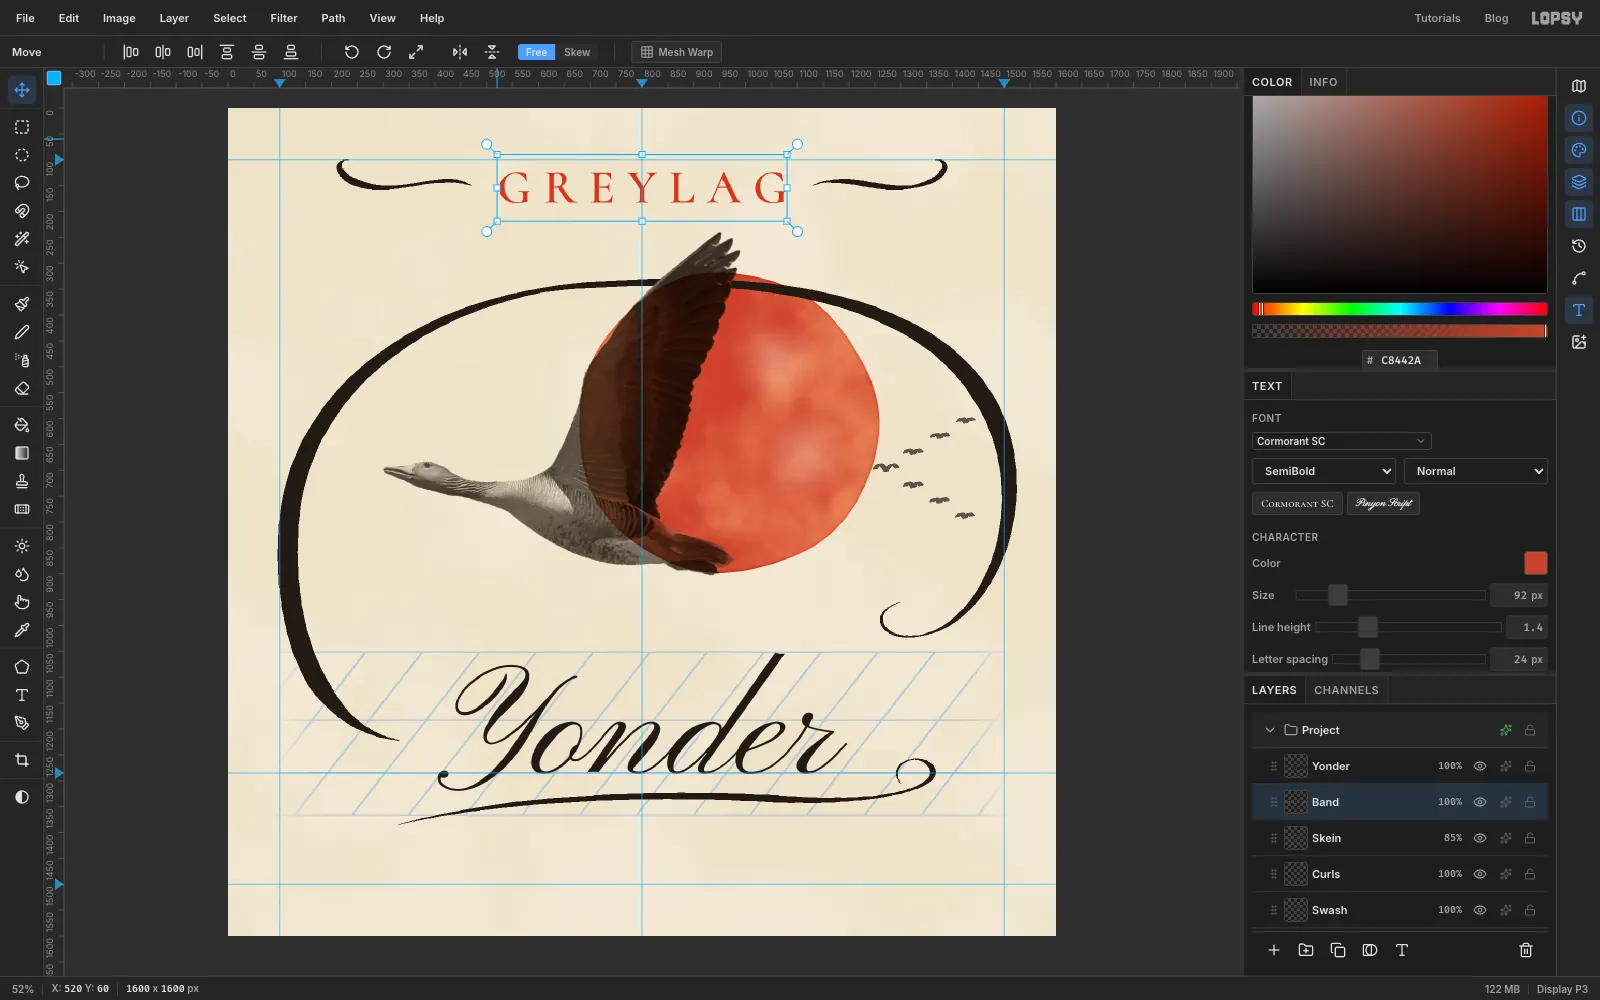
92, font Cormorant SC and weight SemiBold. In the Text panel set Letter spacing to24. Set the foreground toC8442A. - Click at about
520, 60, typeGREYLAGand press Tab. Double-click the new layer's name and rename itBand. - Press V and nudge it so it's centred on the
800guide, with its letters running from abouty 124to183. That leaves the same gap to each curl.
- Click
-
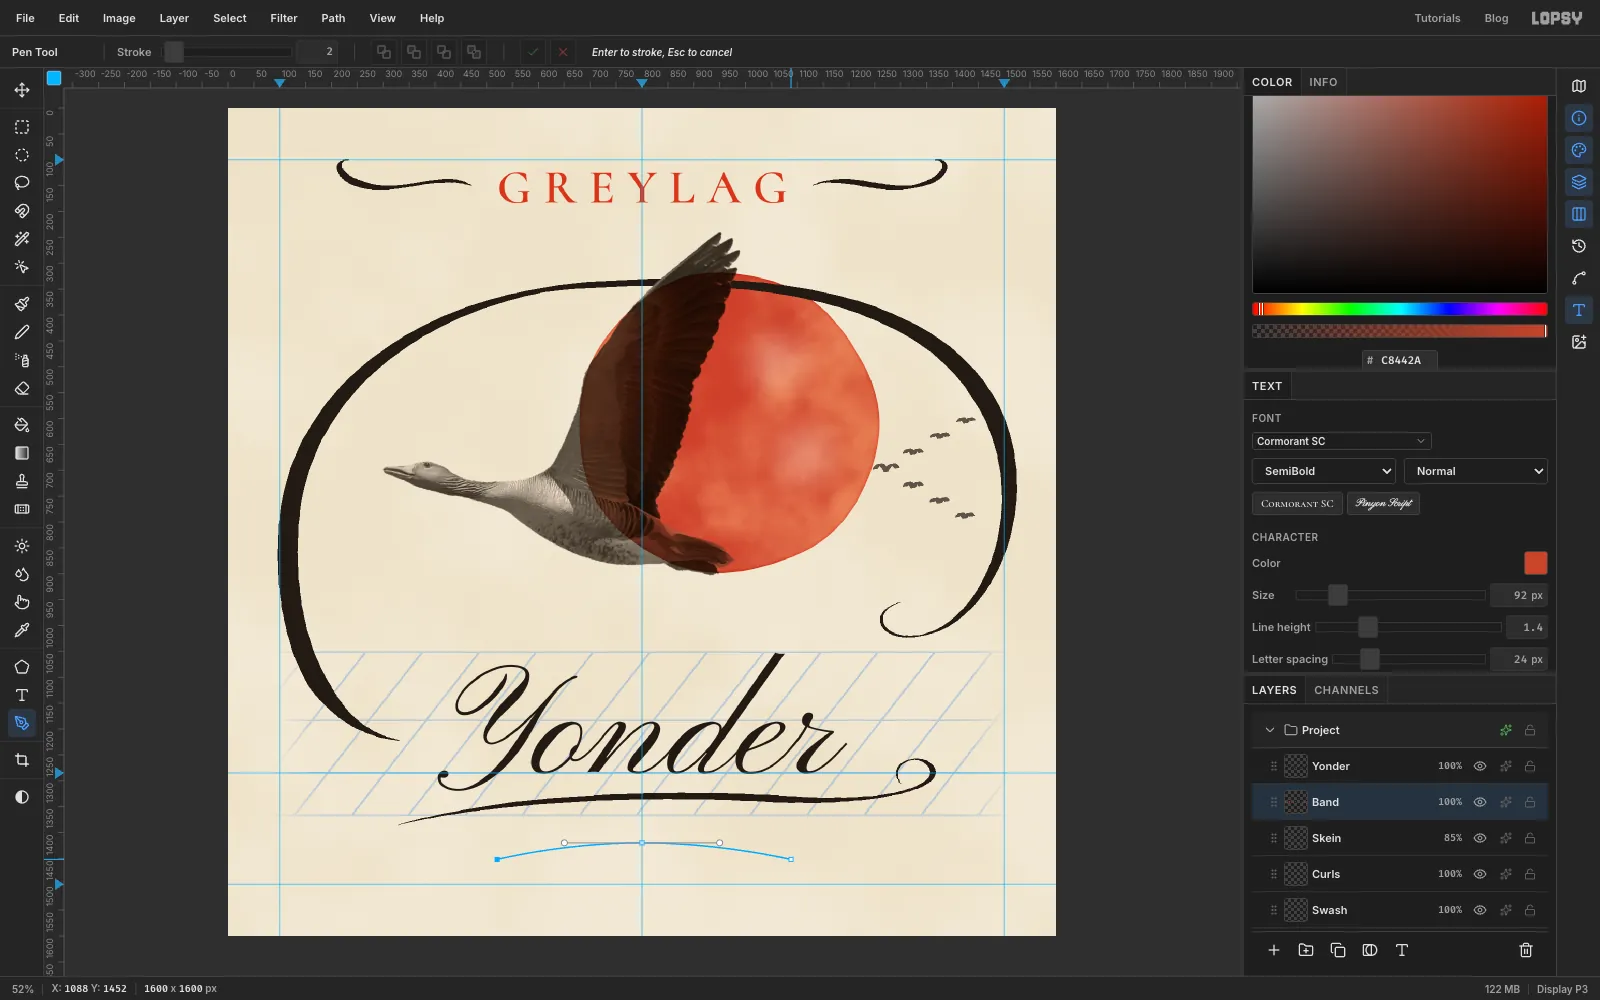
Draw the subtitle's curve
- Press P for the Pen.
- Click at
520, 1452. Press at800, 1420and drag right to950, 1420to make a smooth top. Click at1088, 1452. - Click the ✓ (Commit path) in the options bar. Don't press Enter, because that strokes the path with paint.
-
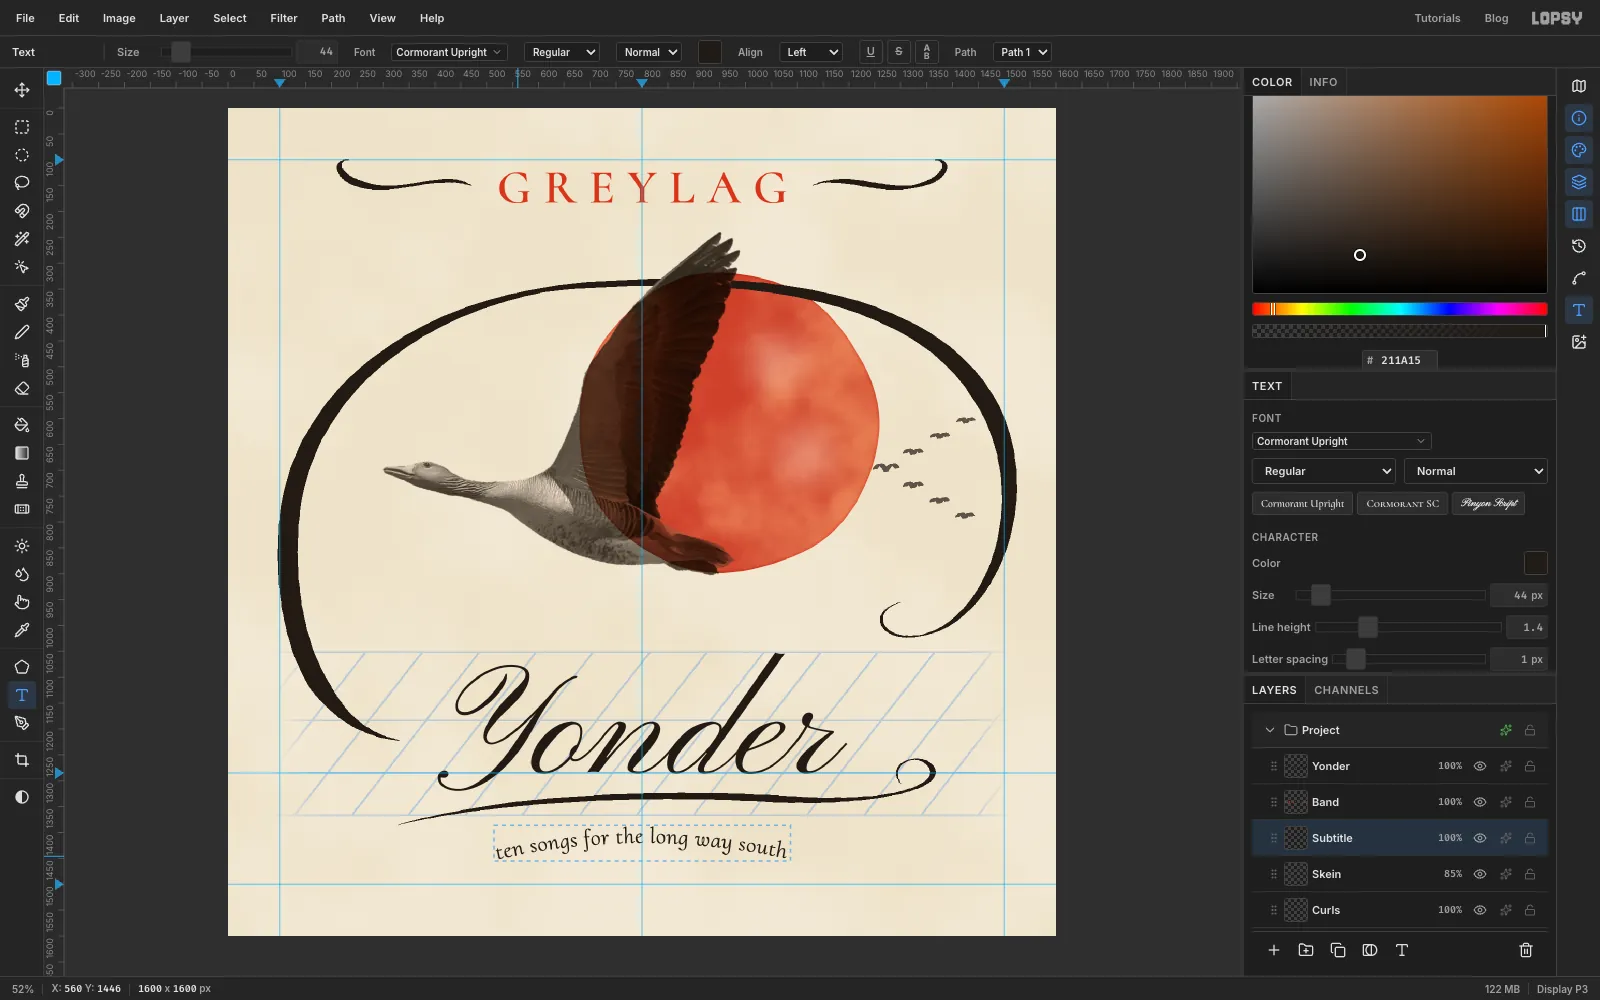
Put the subtitle on the curve
- Click
Skein, then press T. Set Size44, font Cormorant Upright and weight Regular, and set Letter spacing to1. Set the foreground back to211A15. - Click in empty space near the bottom of the canvas, type
ten songs for the long way southand press Tab. Rename the layerSubtitle. - In the options bar, set Path to Path 1. The text starts at the path's first anchor and follows the arch.
- Open the Paths panel (the pen-curve icon in the strip at the far right) and click Path 1's row to hide the blue outline. Don't delete the path, because the text needs it.
- Click
-
Add the footer
- Click
Skein. Press T, set Size30, font Cormorant SC and weight Medium, and set Letter spacing to2. - Click in empty space at about
100, 1440, typeHollow Reed Recordsand press Tab. Rename the layerLabel. Press V and nudge it so it starts on the100guide and its baseline sits aty 1515. - Click
Skeinagain and press T. Click at about1200, 1440and typeHR–07 · Stereowith the same settings. Paste it if your keyboard can't type the dash and the dot. Press Tab and rename the layerCatalogue. Nudge it so it ends on the1500guide and its baseline lines up with the first label's.
Match the baselines, not the bottoms. Cormorant's old-style 7 hangs about 5 px below the line, so this label's lowest pixel is at
1520, not1515.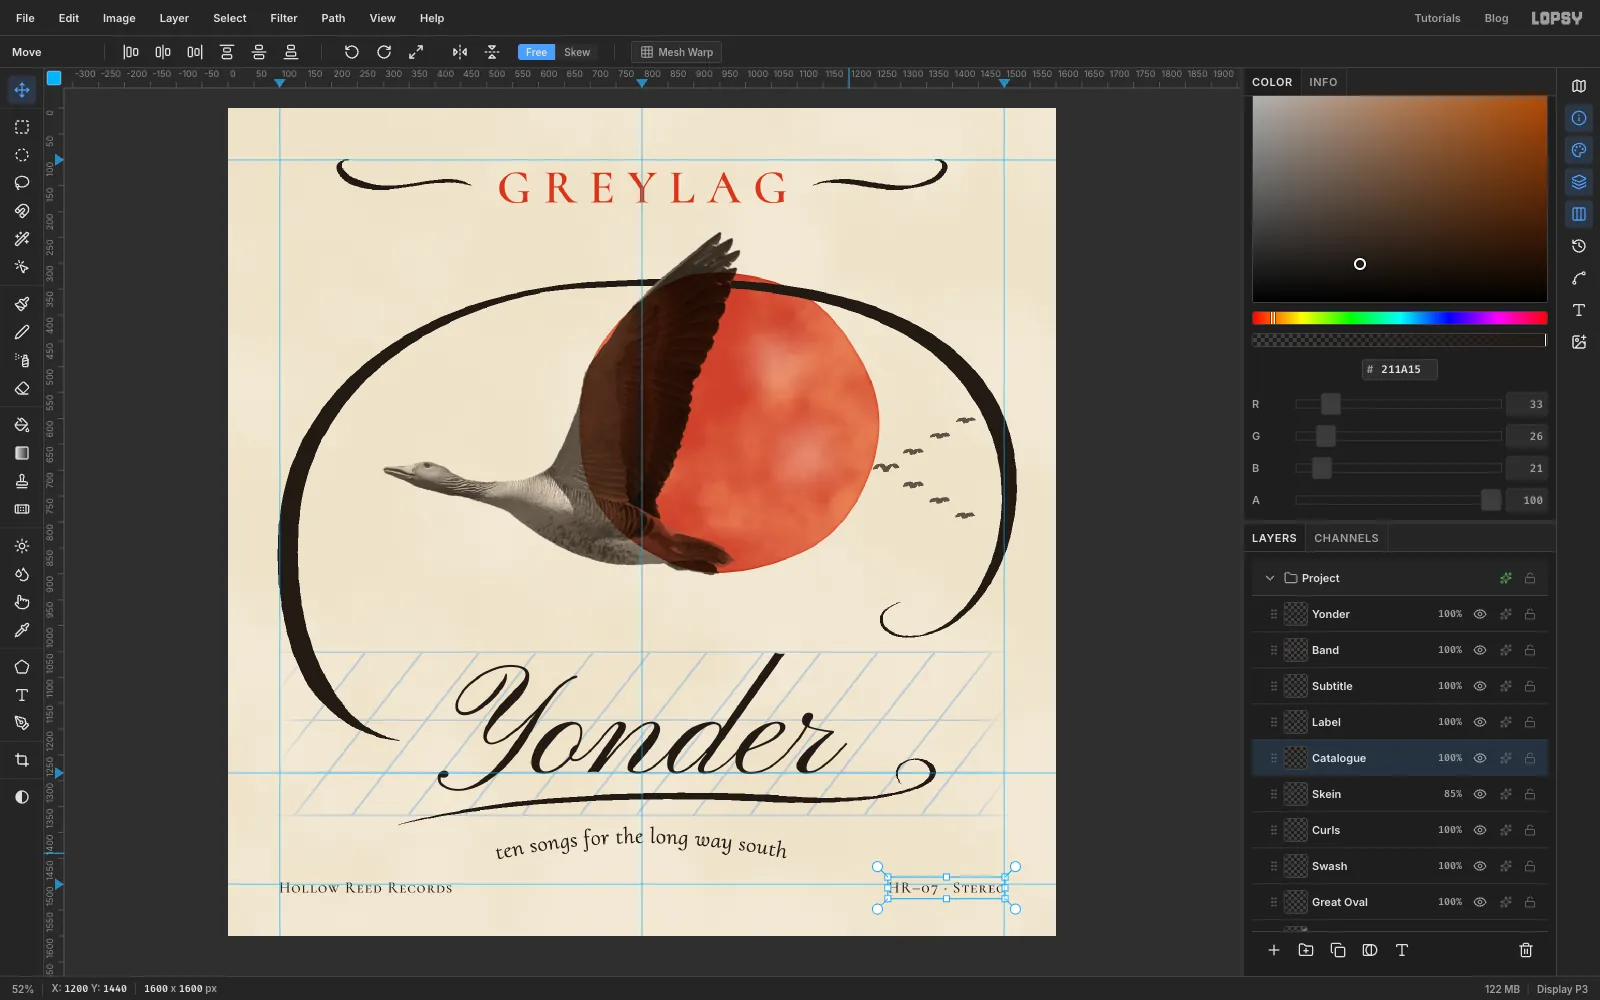
- Click
-
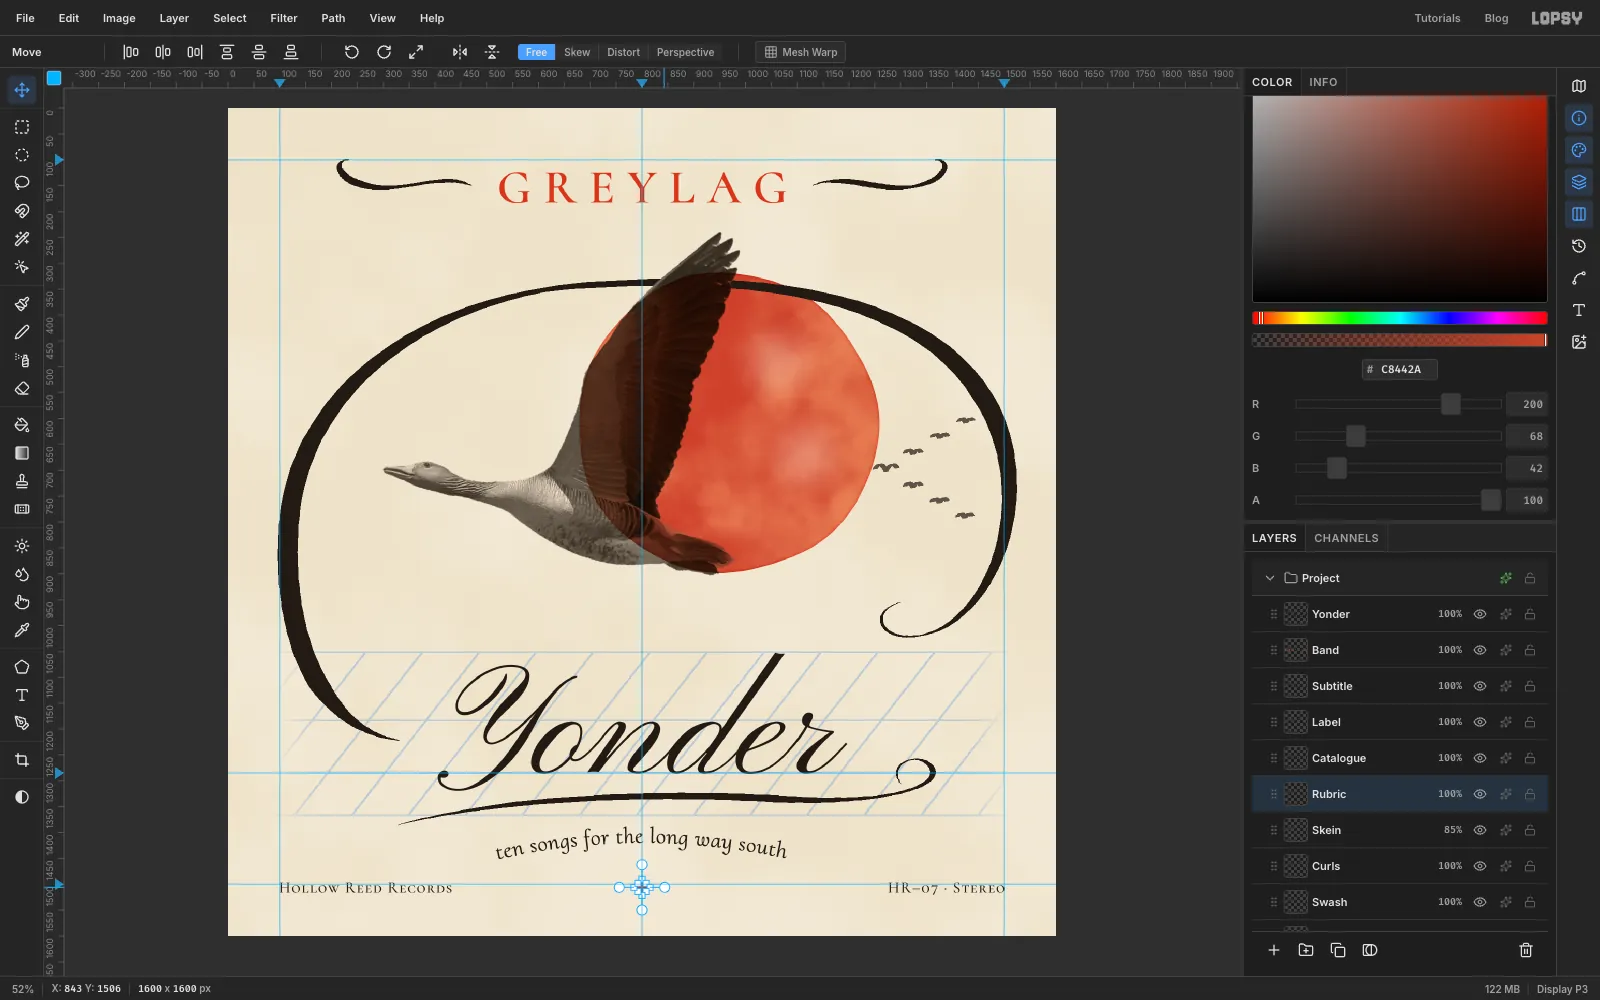
Rotate a rubric diamond
Scribes marked their pages in red, called rubrication.
- Click
Skeinand add a layer namedRubric. - Press M, click once on the canvas, and enter From
789, 1495and To811, 1517. Fill it withC8442A(Edit → Fill). - Press V. Hold Cmd and drag the rotate circle at a corner of the box until it turns
45°. Cmd snaps the angle in 15° steps. On Windows and Linux the snap doesn't work with Ctrl, so turn it to 45° by eye. Press Cmd+D.
- Click
-
Darken the edges
- Click
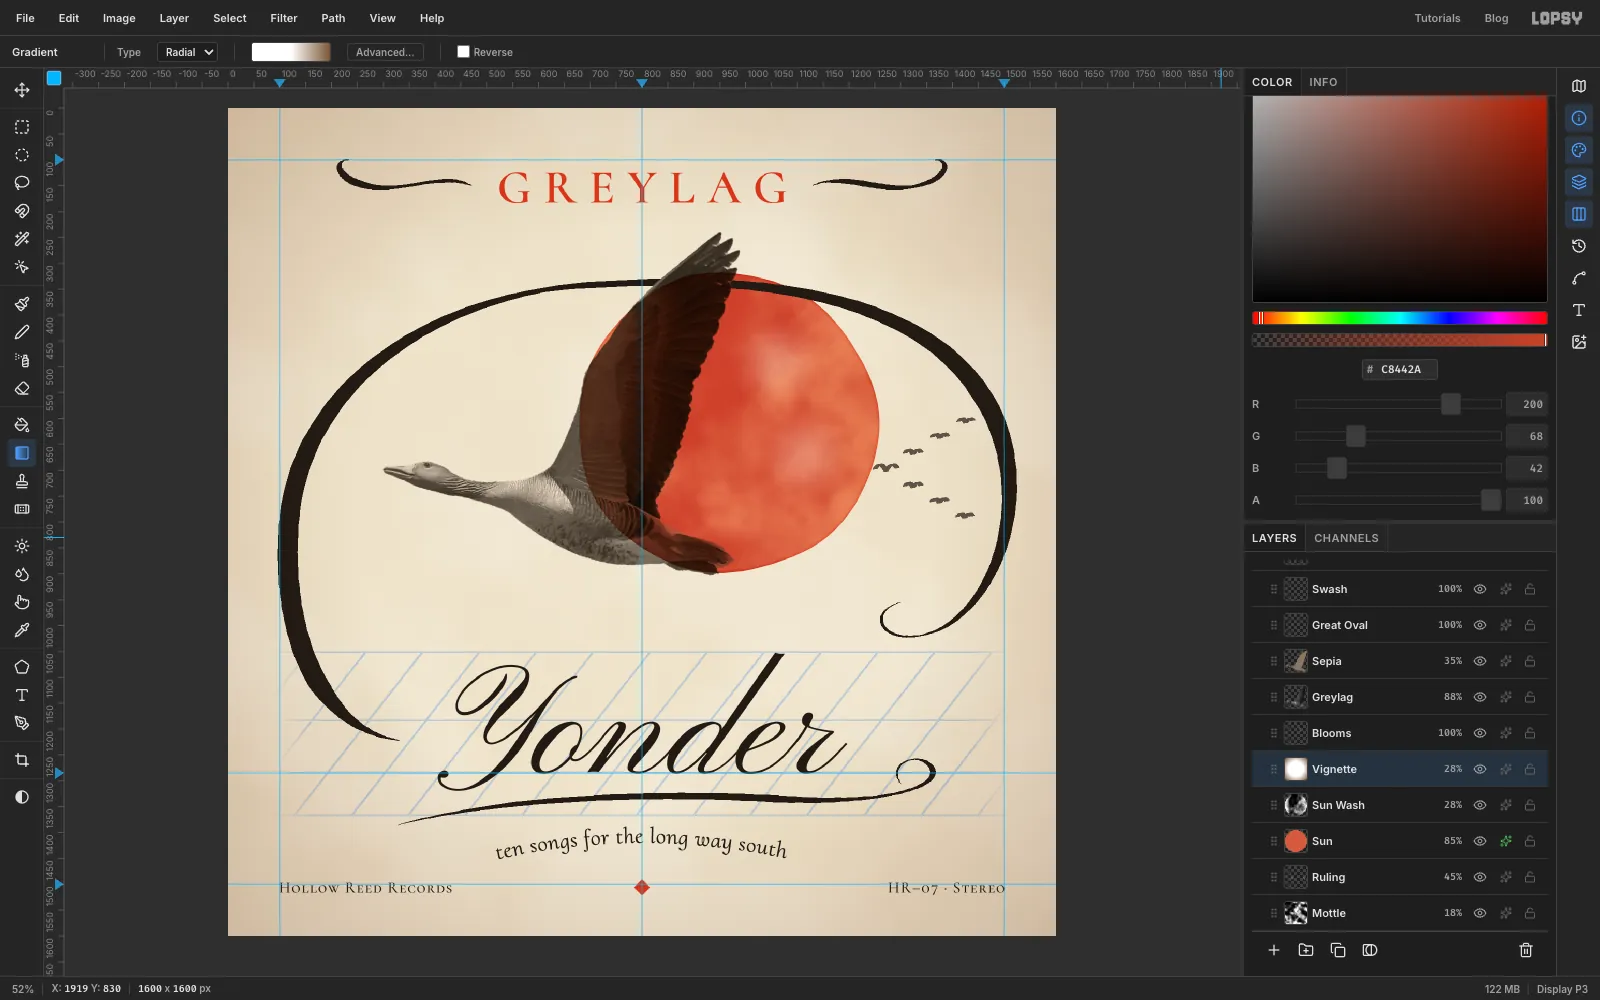
Sun Washand add a layer namedVignette. At this height it darkens the paper and the sun, but not the goose, the ink or the lettering. - Pick the Gradient tool (it has no shortcut). Set Type to Radial and click Advanced…. Click the left stop and type
FFFFFFin Hex. Click the right stop and type7A5636. Click the middle of the bar to add a stop at 50% and typeFFFFFF. Click Done. - Drag from the centre of the canvas (
800, 790) to the bottom-right corner. - Set the layer to Multiply at
28%.
In Multiply, white changes nothing, so only the edges get darker. There's no ring where a feathered selection would end.
- Click
-
Add grain and fibres
- Click
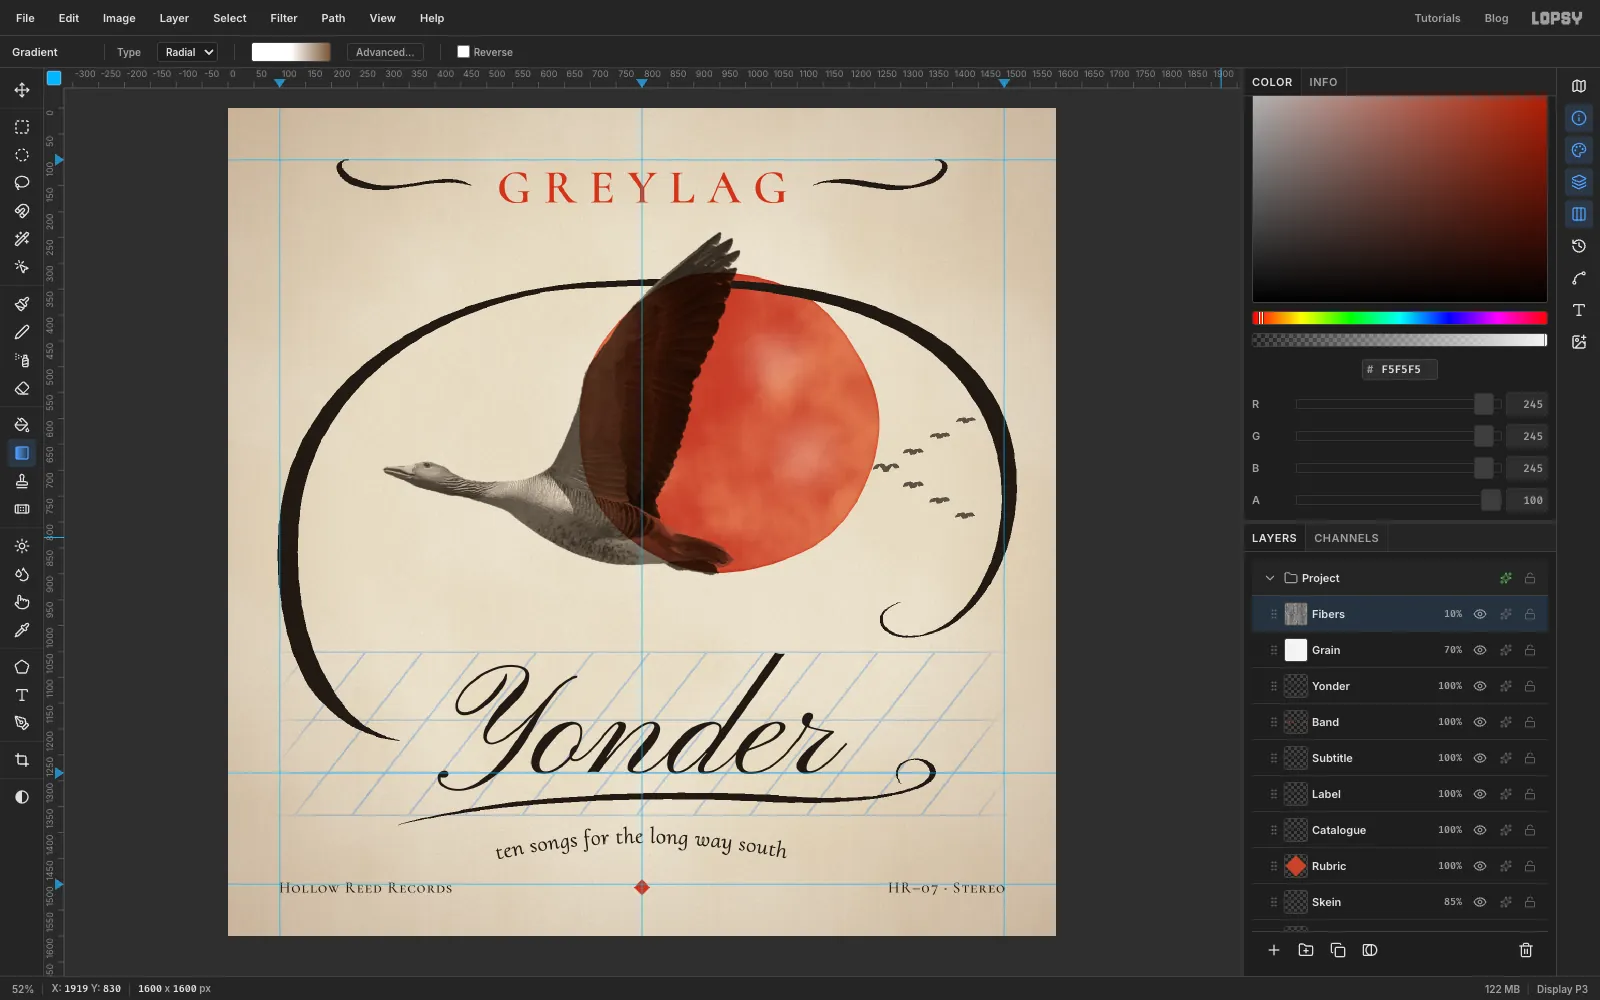
Yonderso the next layer goes on top of everything. Add a layer namedGrain. - Set the foreground to
F5F5F5and choose Edit → Fill. - Choose Filter → Add Noise…. Set Amount
45, click Mono and Gaussian, then click Apply. - Set
Grainto Multiply at70%. Near-white noise in Multiply only darkens, so it shows on light paper. Overlay barely shows there. - Add a layer named
Fibersand choose Filter → Fibers… with its default settings. Set it to Soft Light at10%.
- Click
-
Group the layers
- Click
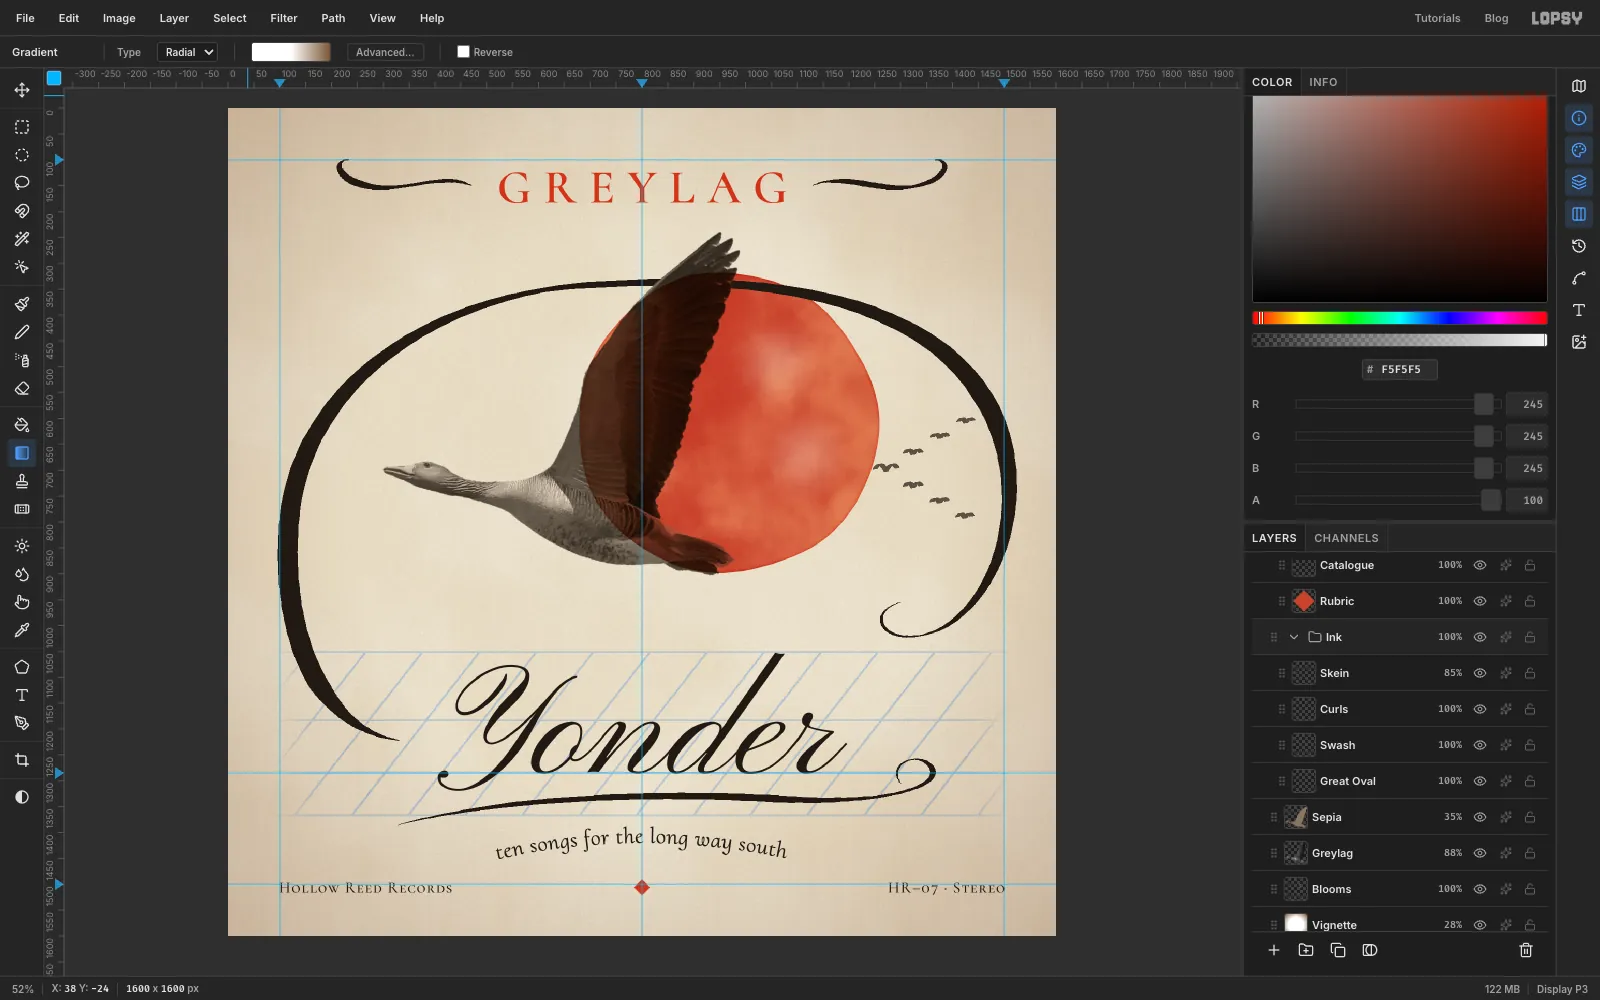
Yonder, then Shift-clickRubricto select the lettering. Choose Layer → Group Layers, then double-click the new group's name and typeLettering. - Click
Skein, Shift-clickGreat Oval, choose Layer → Group Layers, and rename the groupInk.
Now you can move the lettering as one piece. Select
Lettering, press V and use the arrow keys. The subtitle stays on its curve. Press Cmd+Z once for each nudge to put it back.Choose File → Quick Export PNG to save the cover, and File → Save Project to keep the layers.
- Click