Make a Copperplate Calligraphy Birthday Card
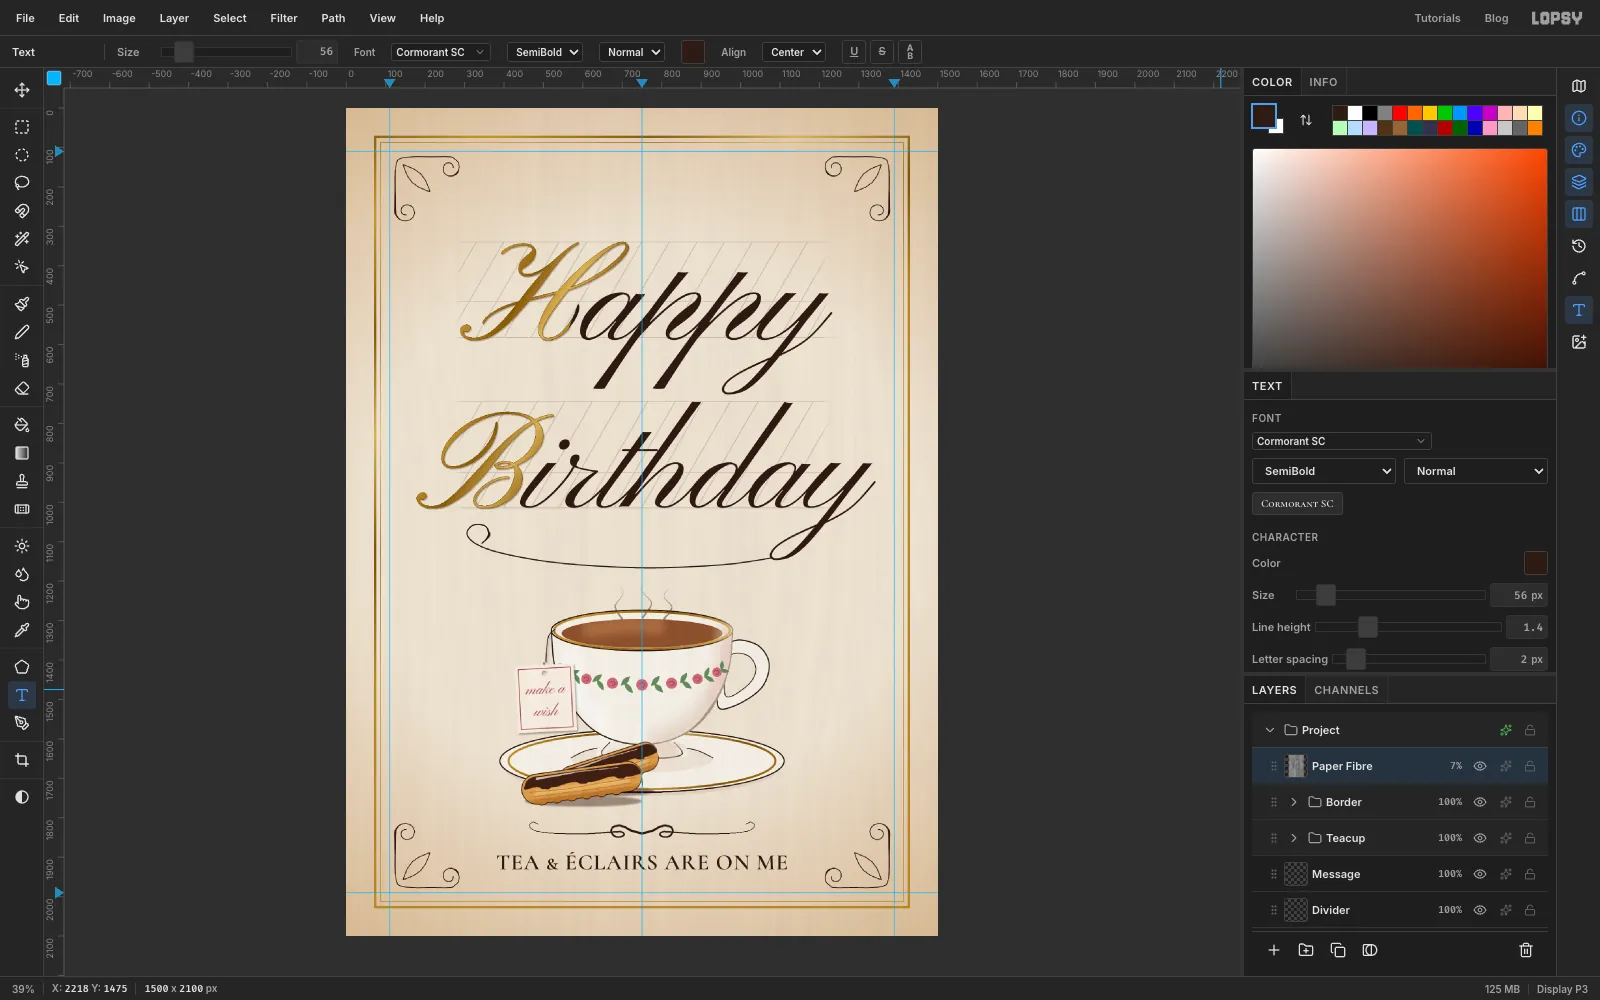
Design a gilded copperplate birthday card in Lopsy, with pencil ruling, gold capitals, pointed-pen flourishes and a pen-and-wash teacup with éclairs.
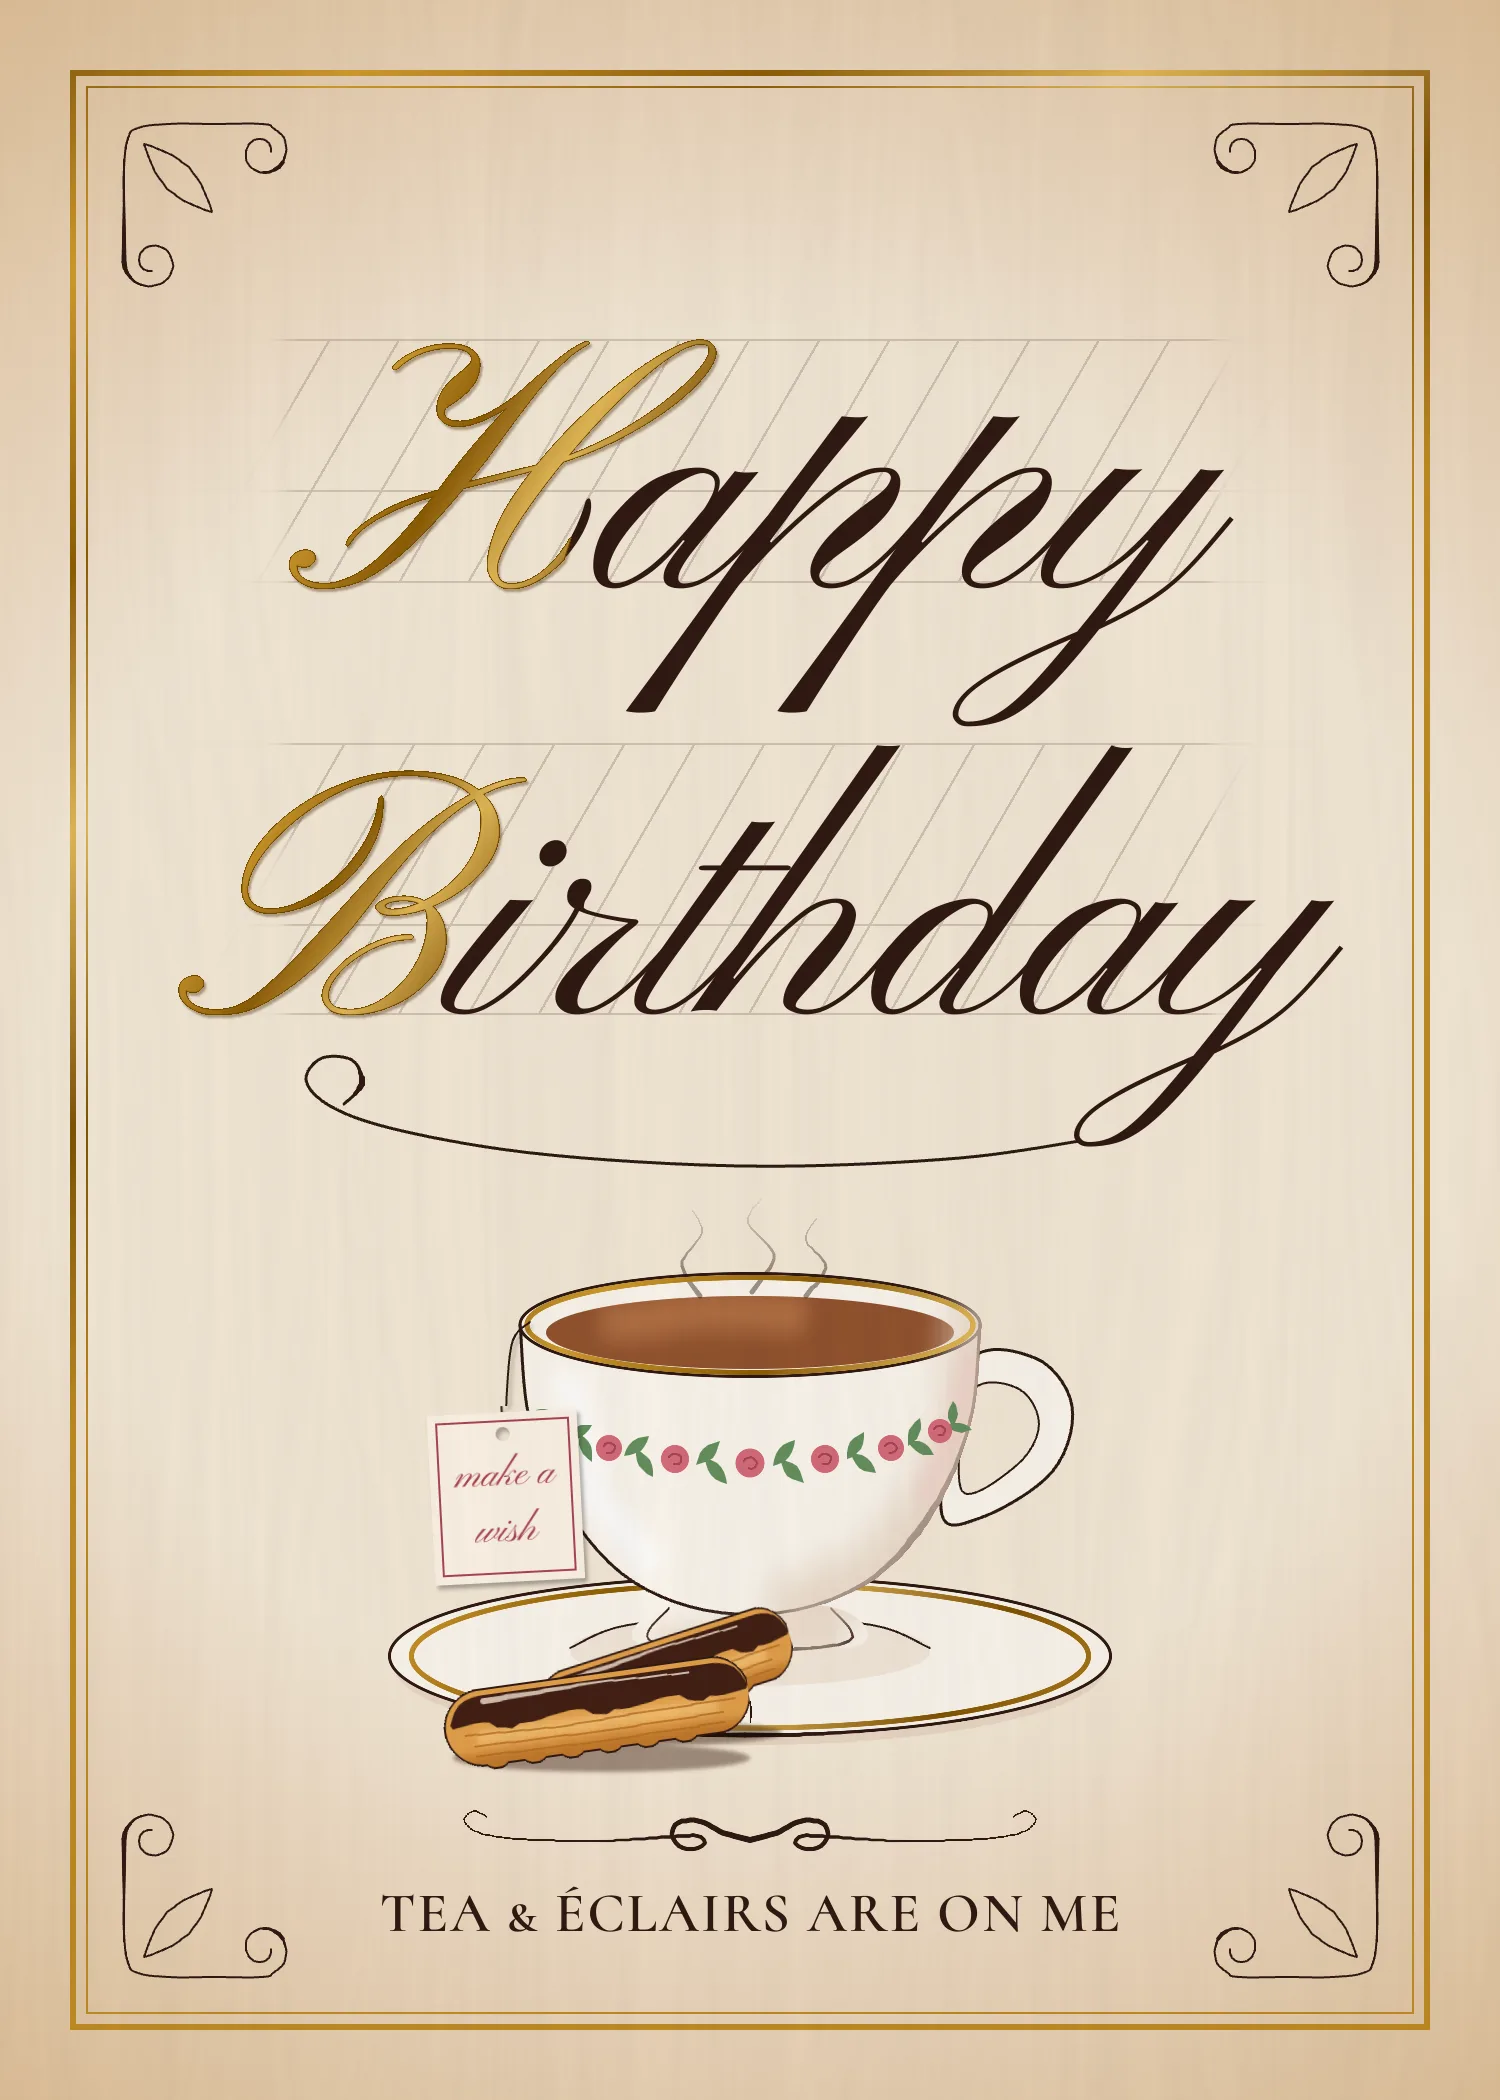
Copperplate is the formal, slanted script of the eighteenth-century English writing masters. It's written with a flexible pointed nib. Every stroke is a hairline until the writer presses on a downstroke, and then the nib opens into a thick, shaded swell. Later penmen added flourishes, which are long oval loops and spirals that spill off the letters, and they gilded the capitals.
In this tutorial you'll make a birthday card in that tradition, for someone you'd like to take out for tea. It's a 5 × 7 inch card (1500 × 2100 px) built like a page from a calligrapher's worksheet:
- faint pencil ruling, with ascender, waist and baseline lines and 60° slant guides
- Happy Birthday in a copperplate face, with gilt capitals
- a pen flourish that carries on from the last letter
- a pen-and-wash teacup with a rose garland, a hanging tea-bag tag and two chocolate éclairs
- a mirrored divider, a small-caps punchline, and a double gilt border with corner flourishes
Along the way you'll learn a pointed-pen trick that works for any hand-drawn ornament. Stroke the whole line as a thin hairline with the Pen tool. Then add the shade with two tapered brush strokes that run outward from the thickest point. Shade only the strokes that travel downward, the way a real nib does.
The tools you'll use:
- guides, the grid, and the Rectangular and Elliptical Marquee's exact-corner dialog
- the Pen tool, Enter-to-stroke, Path to Selection and Stroke Path
- the Brush (Hard Round and Soft Round, with Taper and Symmetry), Pencil, Eraser and Gradient
- the Shape tool's click-to-size dialog
- Cmd-click to load a layer's shape, the Lasso with add and intersect, and Select → Shrink
- Copy, Paste, the Move tool's Flip, rotate and scale handles, and Merge Down
- a layer mask, the Multiply blend mode, and the filters Gaussian Blur, Fibers and Add Noise
- the layer effects Stroke and Drop Shadow
- groups, and live text in Pinyon Script and Cormorant SC
The palette:
-
Card stock
-
edge tone
-
Ink
-
pencil
-
Gilt
-
Flat gold
filled first, then gilded
-
Porcelain
-
porcelain shadow
-
saucer underside
-
saucer well
-
Rose
-
leaf
-
Tea
-
Choux
-
chocolate
-
crumb shadow
-
Tag card
-
Start the card and set the guides
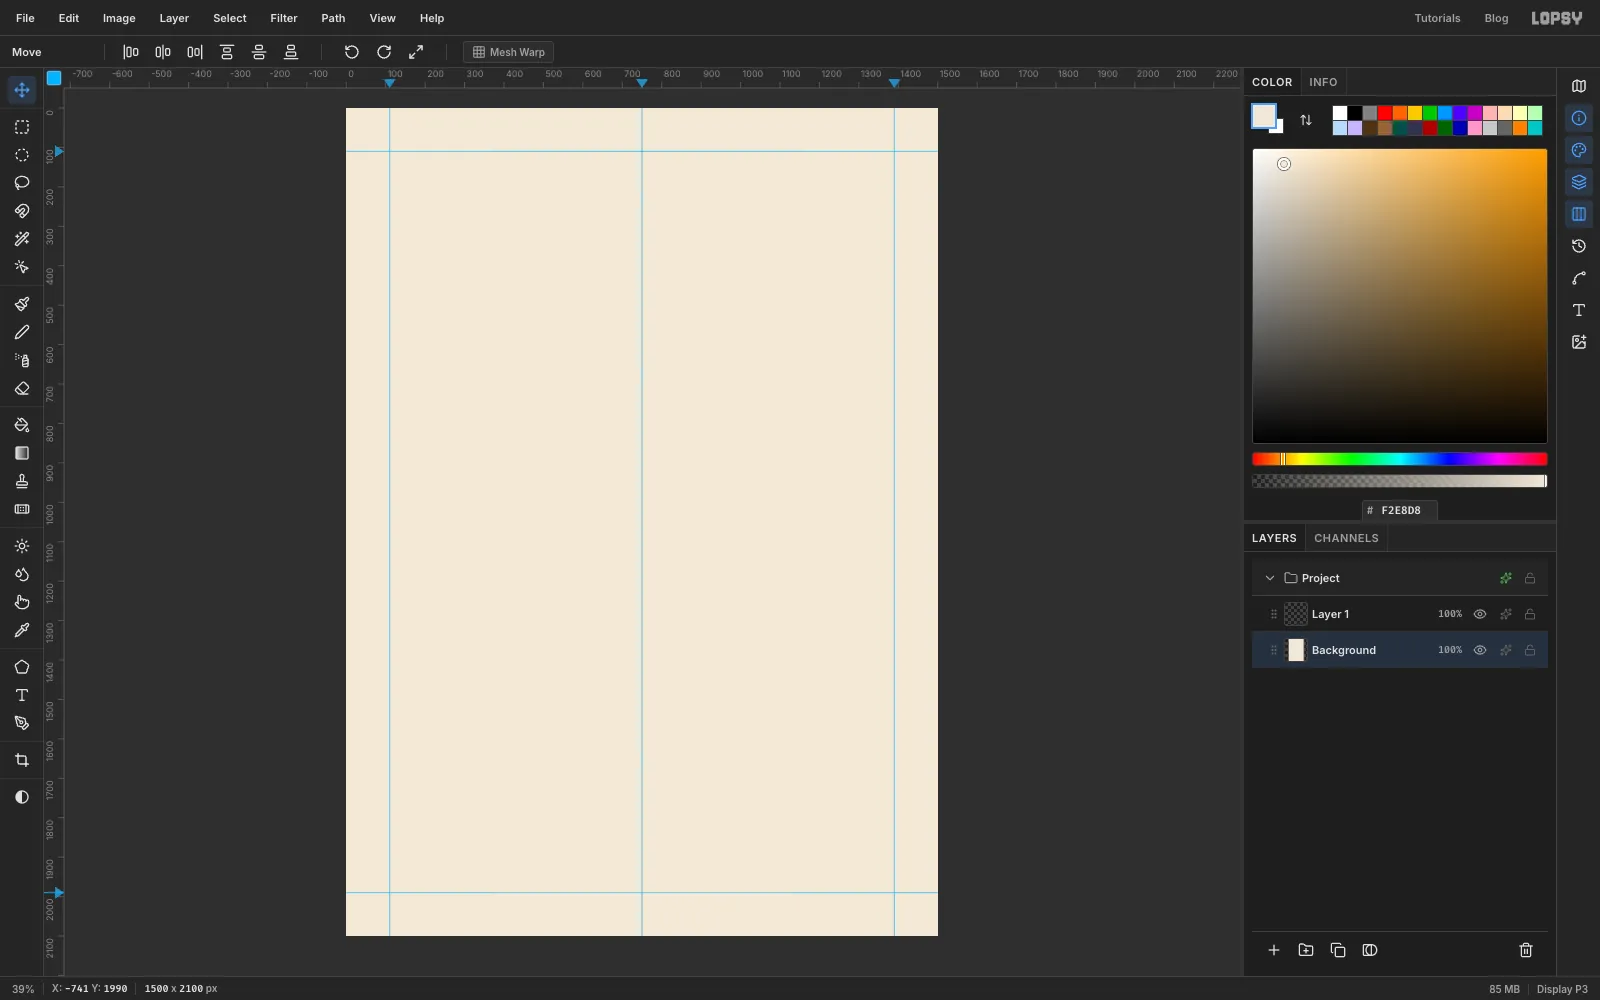
Choose File → New, keep the units on Pixels, and make the document 1500 wide and 2100 high. That's a 5 × 7 inch card at 300 ppi.
Set the foreground colour to card stock , select the Background layer, and choose Edit → Fill.
Click the top ruler at 750, 110 and 1390 to drop three vertical guides. The middle one is the centre line, and the outer two are the margins you'll keep the lettering inside. Click the left ruler at 110 and 1990 for the top and bottom margins.
-
Warm the edges of the card stock
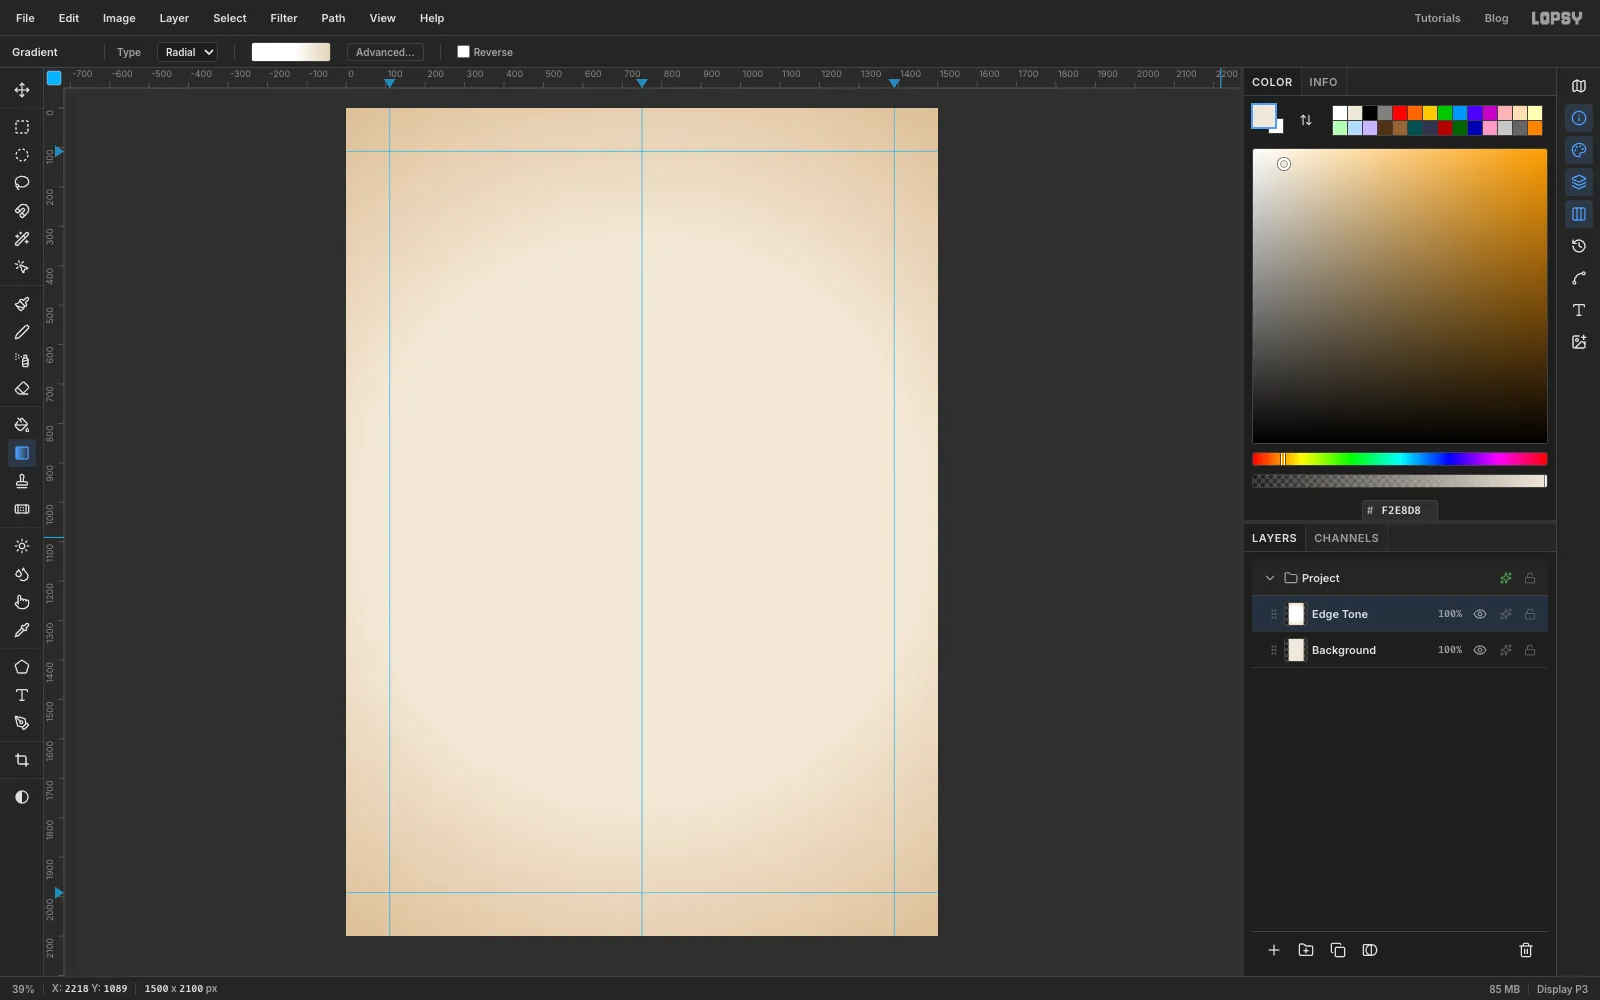
Old card stock is a little darker at the edges, where it's been handled. A new document comes with an empty Layer 1 above the Background. Select it and rename it Edge Tone by double-clicking its name.
Pick the Gradient tool, set the type to Radial, and open Advanced…. Make three stops: white at 0%, white again at 55%, and edge tone at 100%. Drag from the centre of the card (750, 1050) straight out to the right, past the edge, to about x 2040.
Open the layer's effects (the ✦ button on its row) and set the blend mode to Multiply. White disappears in Multiply, so only the tan rim shows.
-
Rule the lines like a calligraphy worksheet
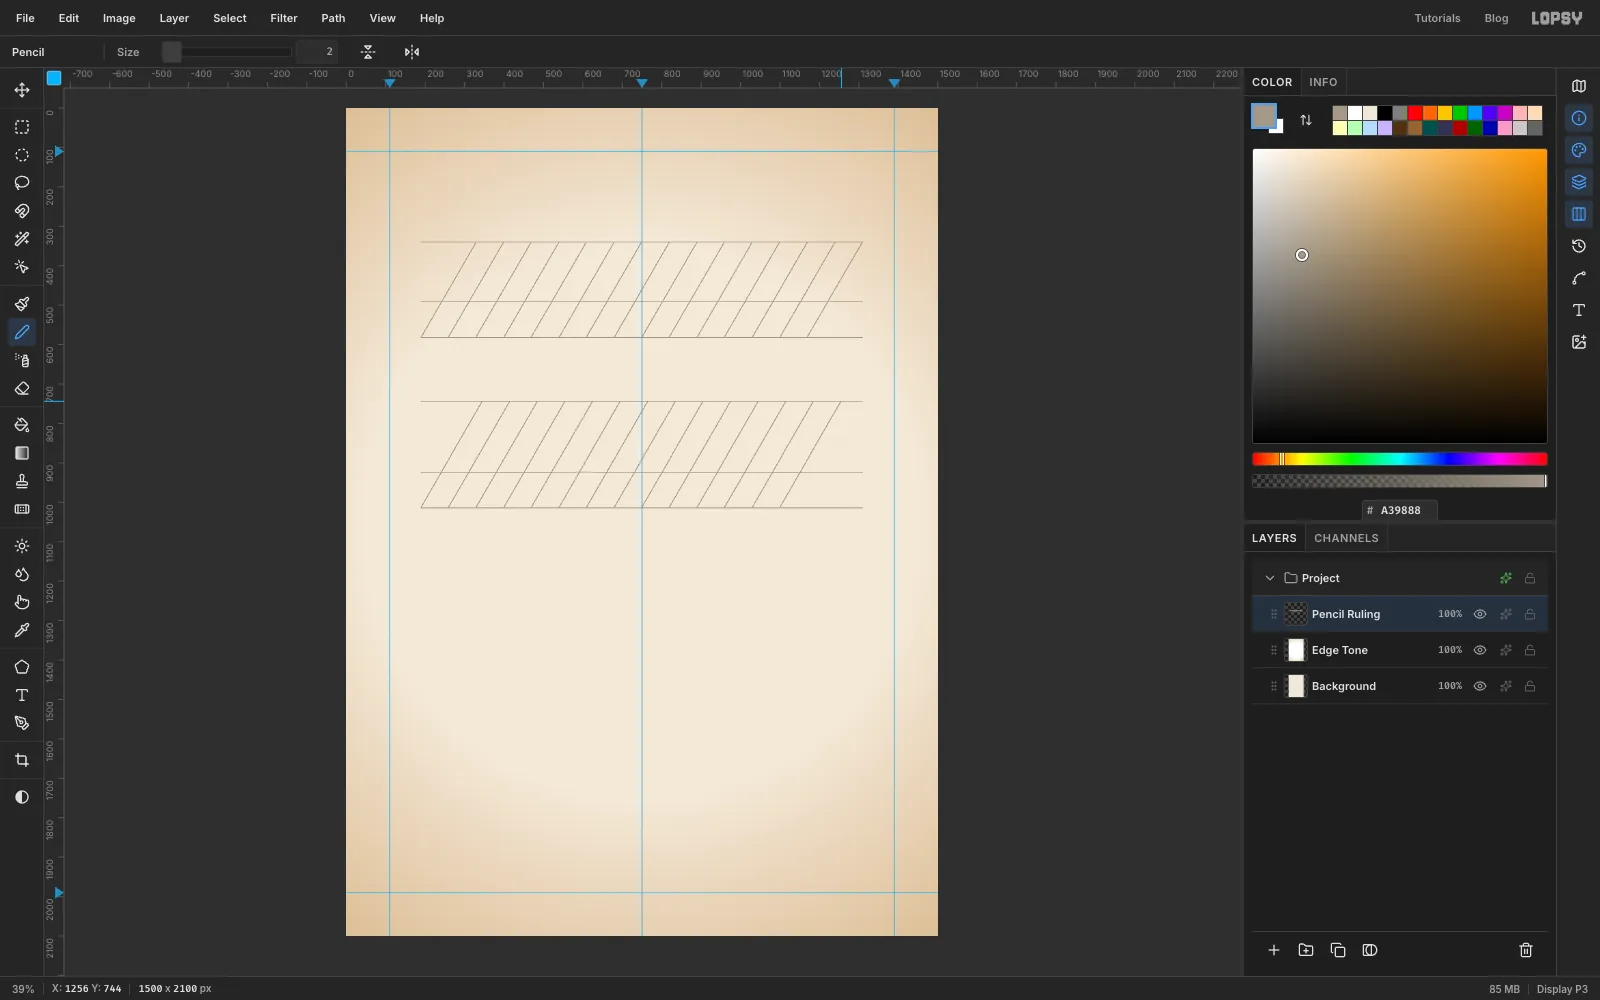
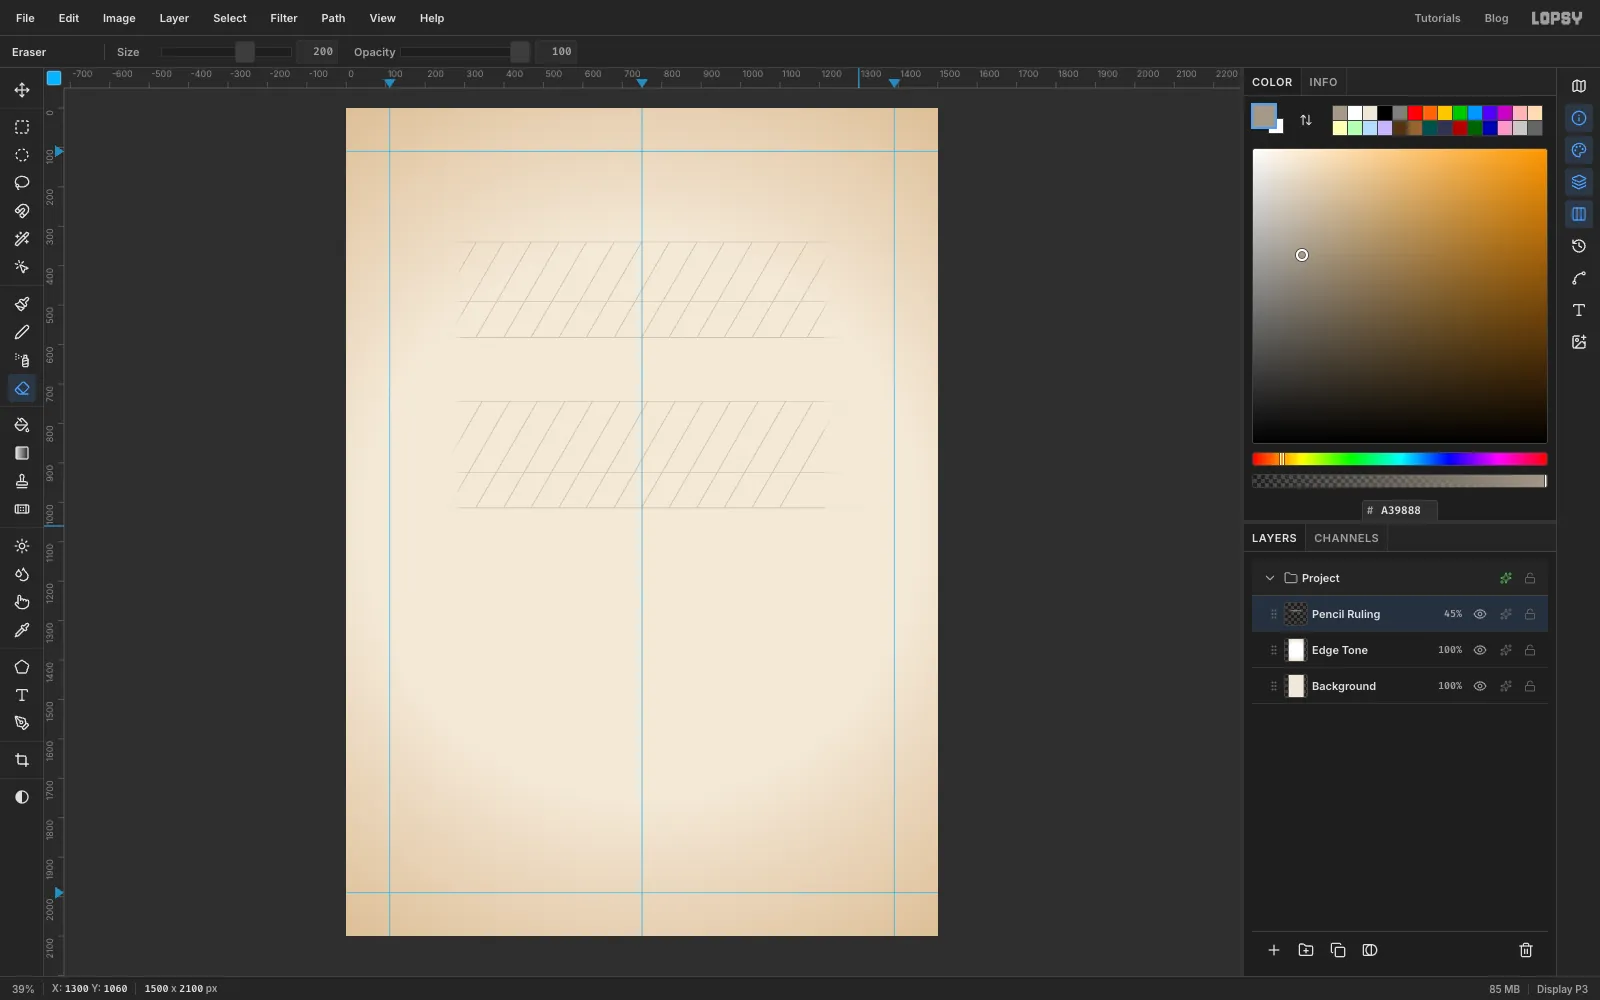
Calligraphers rule their paper before they write. Add a layer called Pencil Ruling, pick the Pencil tool (N), set its Size to 2 and the colour to pencil .
Each line of script gets three horizontal lines: the ascender line where the tall letters stop, the waist line at the top of the small letters, and the baseline the letters sit on. To draw a straight line, click at the left end, hold Shift and click at the right end. All six lines run from x 190 to x 1310:
- for Happy: y 340, 491 and 583
- for Birthday: y 744, 925 and 1014
Now add the slant lines that keep copperplate's lean consistent. Click on a baseline, then hold Cmd+Shift and click up and to the right on the ascender line. Cmd+Shift snaps the line to 15° steps, so you can land it on 60°. Start at x 190 on each baseline and repeat every 70 px to the right, stopping before you pass x 1310. It's the slowest part of the card, about seventeen lines per band, so put some music on. Fewer lines still read as ruling if you'd rather space them wider.
-
Fade the ruling back
The ruling should whisper. Open the Pencil Ruling layer's opacity control on its row and set it to 45%.
Pick the Eraser, set Size to 200 and Opacity to 55%, and drag once straight down over the left ends of the lines and once over the right ends. The lines now fade out instead of stopping dead. Set the Eraser's Opacity back to 100% afterwards.
-
Set "Happy Birthday" in copperplate
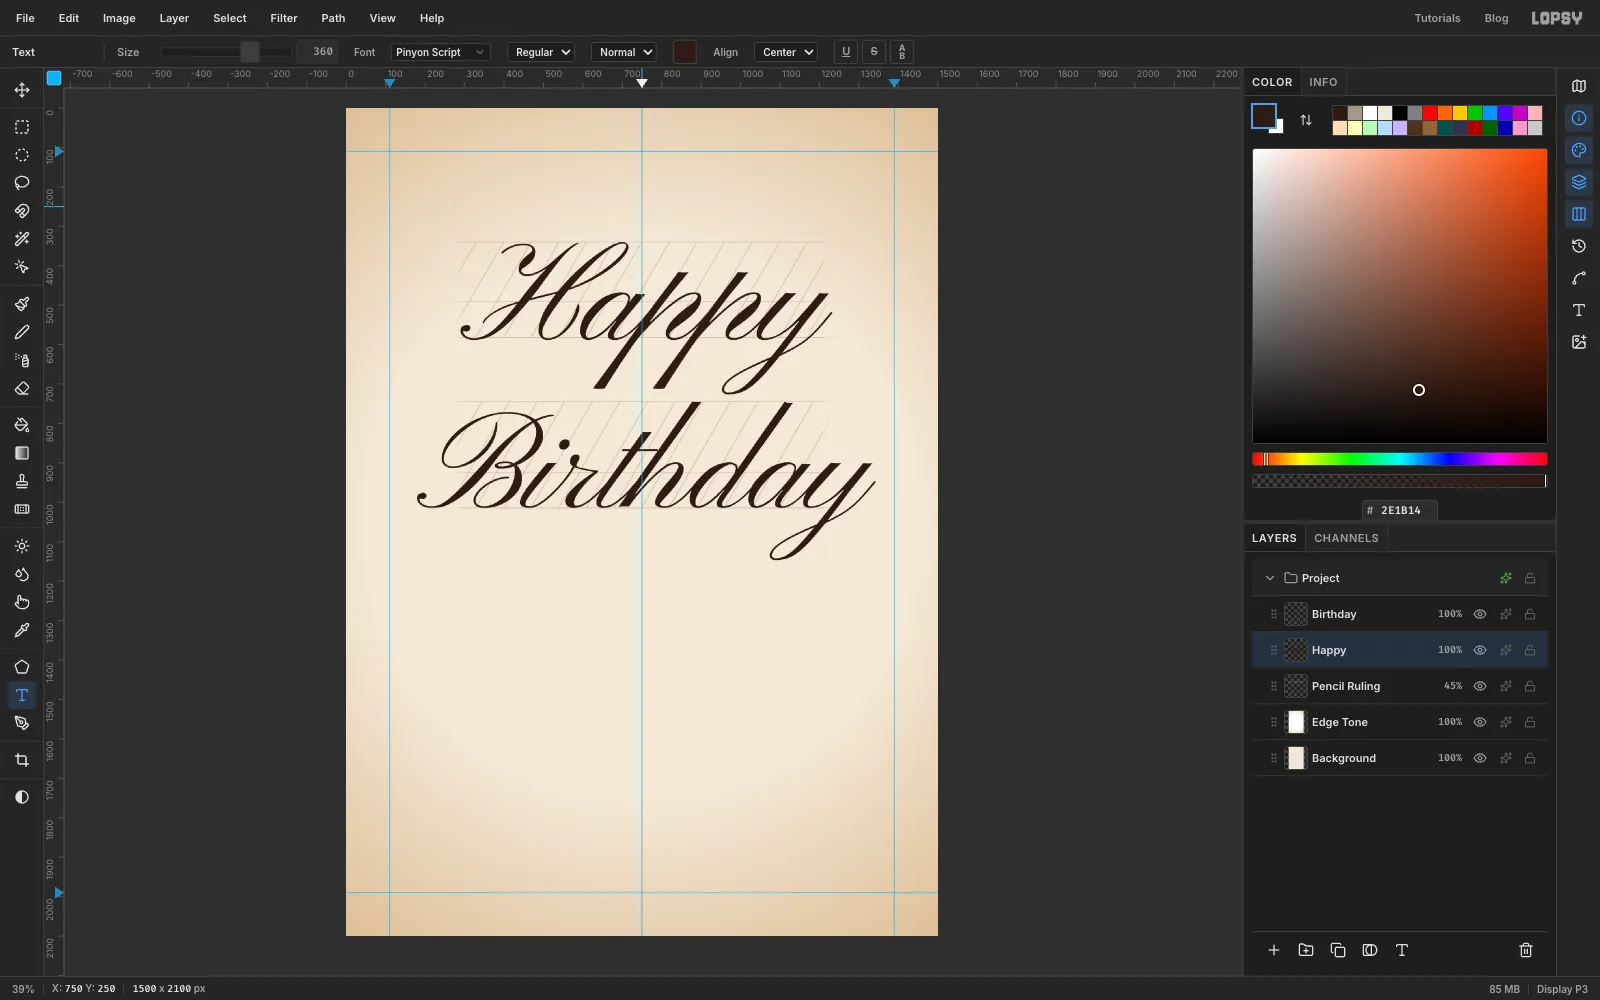
Pick the Text tool (T) and choose Pinyon Script in the font browser. It's a copperplate face with real thick-and-thin contrast. Set the alignment to Center and the colour to ink .
Write Birthday first, because Happy's text box reaches down to where Birthday goes, and a click inside an existing text box edits that layer. Set the size to 345 and click on the centre guide at y 690. Type the word and press Tab to finish.
Click the Pencil Ruling layer in the Layers panel, so the next text settings don't restyle Birthday. Then set the size to 360, click the centre guide at y 250, type Happy and press Tab.
Birthday is set slightly smaller than Happy because it's a wider word, but the two sizes give both words the same x-height. With these positions, both words sit on their pencil baselines and their small letters touch the waist lines.
-
Isolate the H for gilding
Gilded capitals were a mark of the finest penmanship. You'll gild the H and the B.
Select the Happy layer and click Rasterize Layer at the bottom of the Layers panel, so its letters become pixels. Do the same for Birthday.
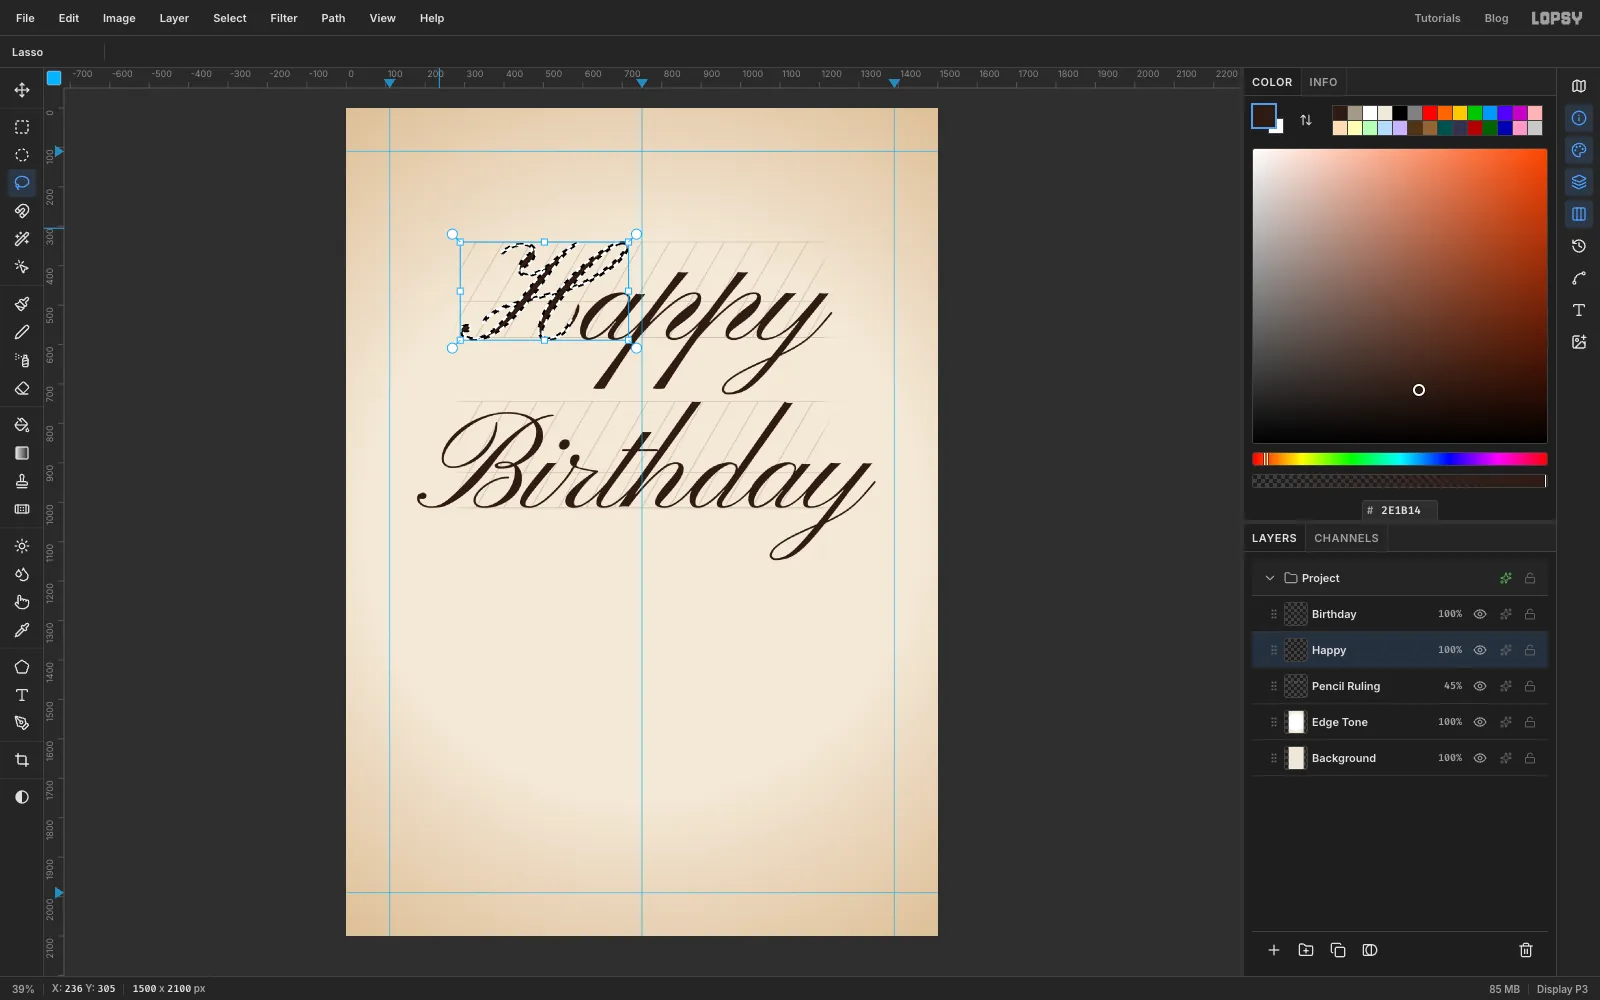
Cmd-click the Happy thumbnail. That loads the shape of the letters as a selection. You only want the H, so pick the Lasso (L), hold Shift+Option and drag a loop around the H. Shift+Option intersects, so the new selection keeps only the parts inside both. Keep your loop to the left of the a, but take in the H's whole top stroke, which reaches over it.
-
Gild the capitals
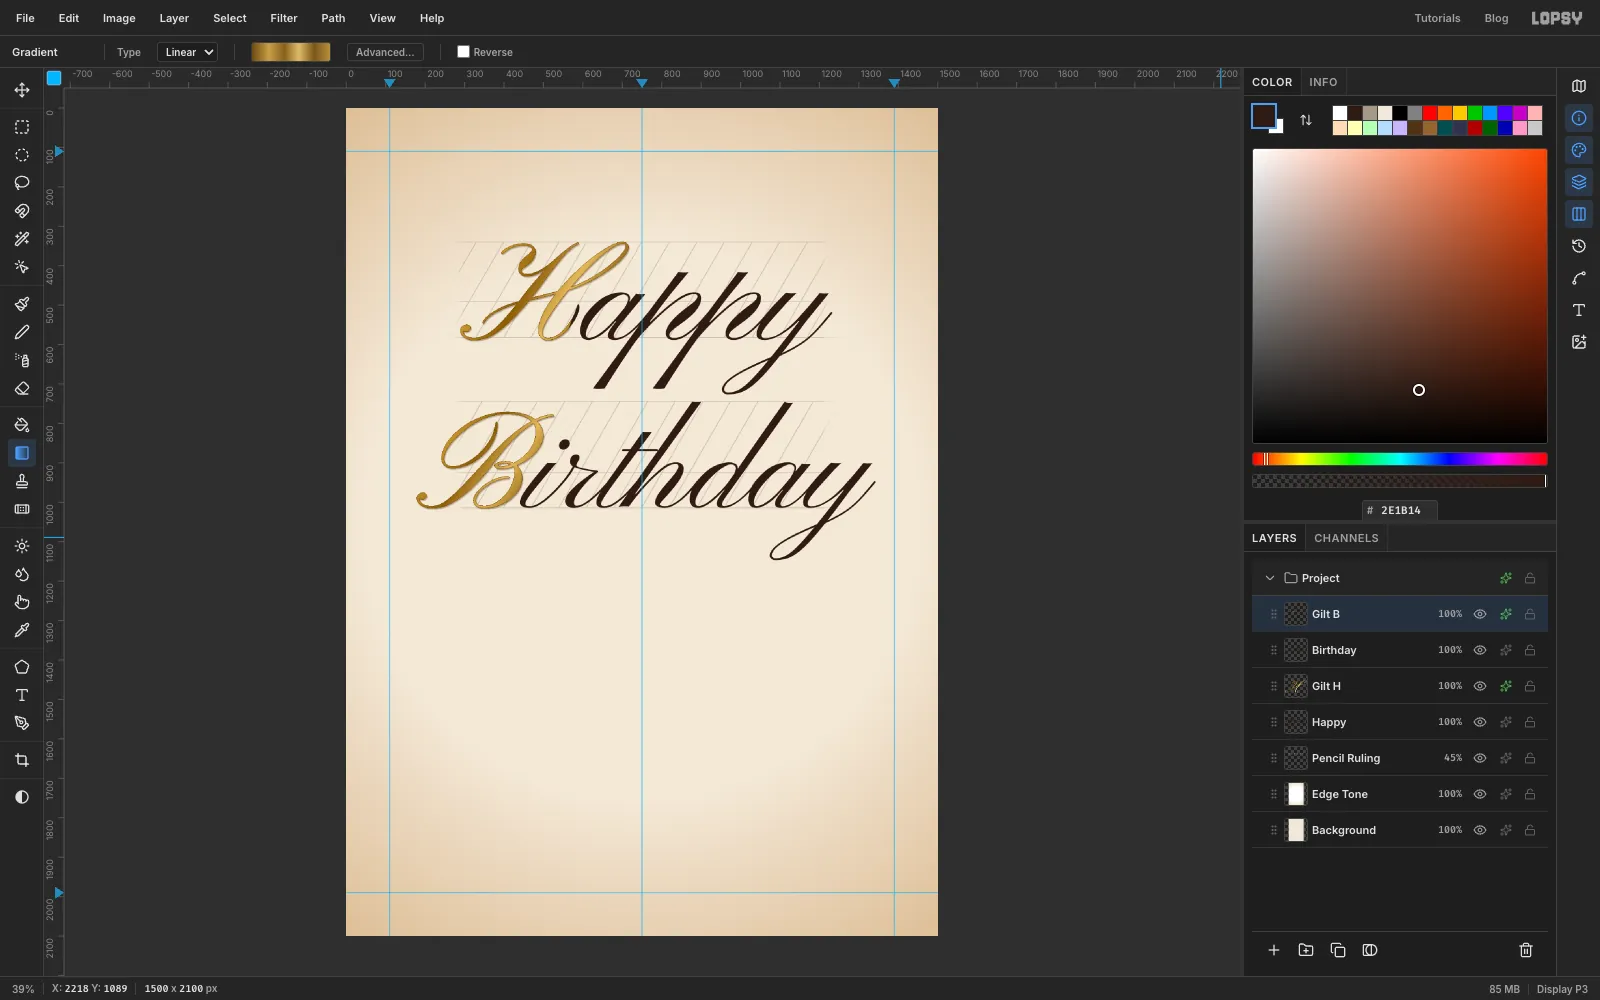
With the H selected, add a new layer called Gilt H. Pick the Gradient tool, set the type to Linear, and in Advanced… make six stops for a burnished gold. They alternate dark and light so the metal catches the light more than once: at 0%, at 22%, at 42%, at 60%, at 80% and at 100%. Drag diagonally across the H from its top-left to its bottom-right.
Now select the Happy layer and press Delete. This takes the brown H out from under the gold, so no dark fringe shows round the edges. Press Cmd+D to deselect.
Repeat for the B of Birthday on a Gilt B layer. Keep your intersect lasso to the left of the i, which touches the B's bowl.
Gold hairlines can vanish against cream, so give each gilt layer two effects:
- Stroke: Width 1, colour
- Drop Shadow: Offset X 2, Offset Y 3, Blur 3, Opacity 40, colour
-
Carry the y on into a swash
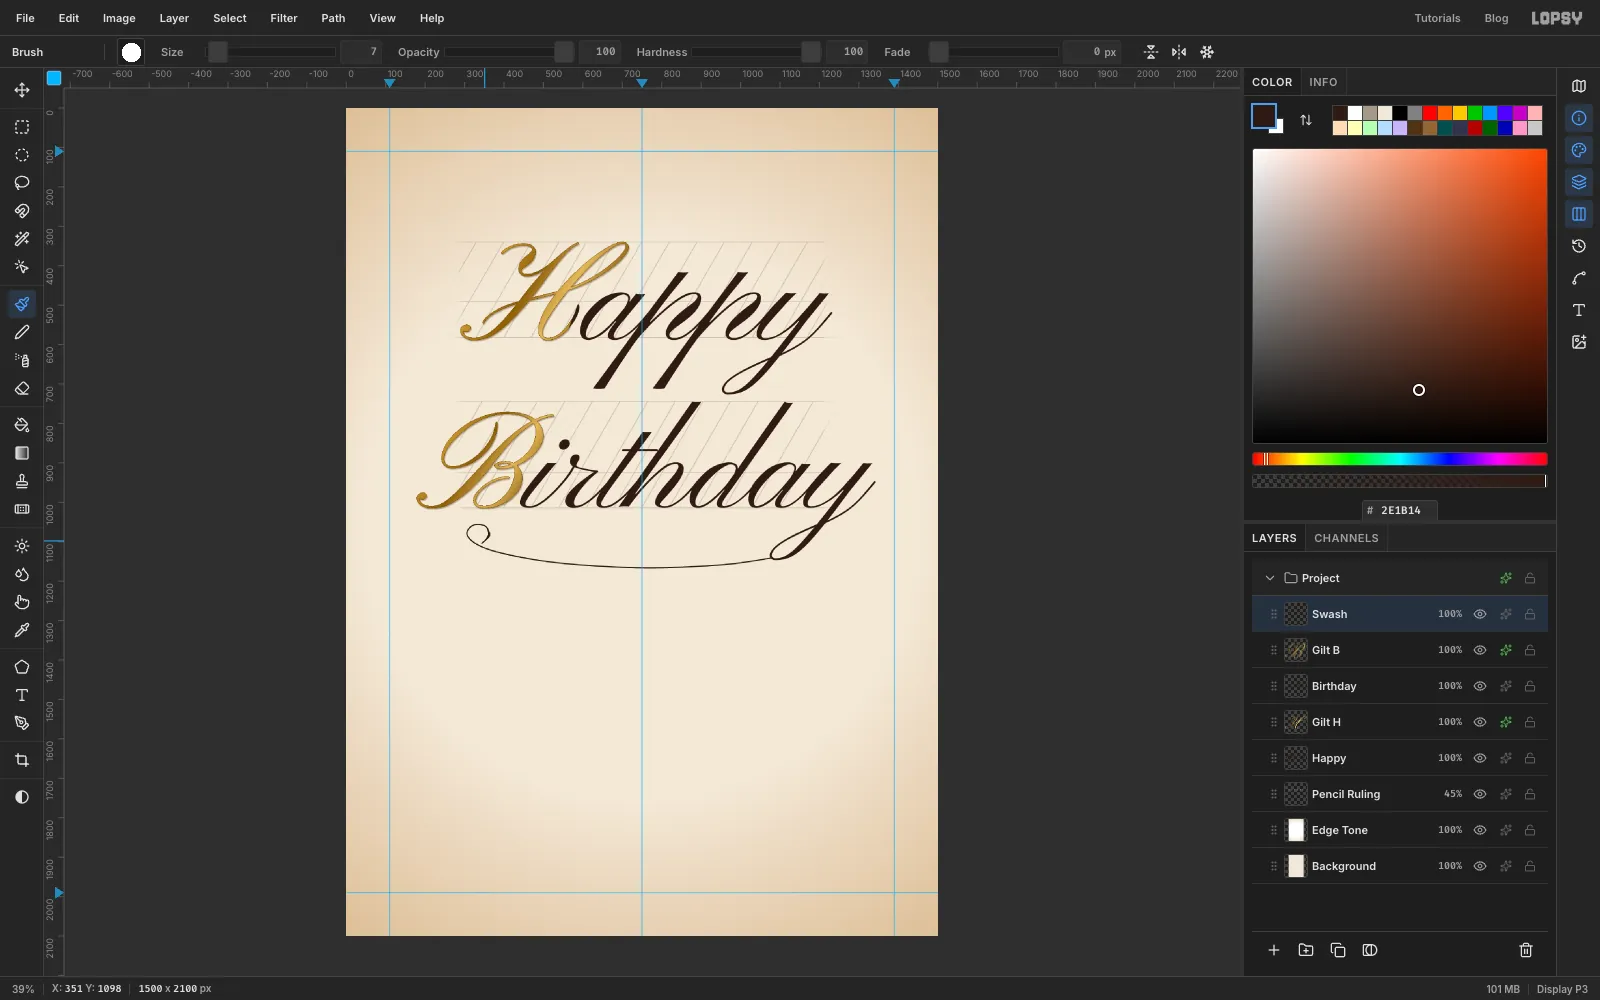
A copperplate flourish grows out of a letter. Add a layer called Swash above Gilt B.
Pick the Pen tool (P) and set its Stroke to 3. Start at the bottom of the y's loop (about 1080, 1141), where the ink is heading left. Click and drag as you place each anchor, so the curve stays smooth. Sweep left in a long, shallow oval under the whole word: the lowest point of the sag is around 800, 1166, and the line rises again under the i. Then curl back up and round into a small loop that closes below the B, at about 330, 1080. That takes about a dozen anchors. Leave a clear gap between the loop and the B's tail. Press Enter to stroke the path in ink.
A pointed nib only swells on downstrokes. The underline runs sideways, so it stays a hairline. Only the right side of the closing loop travels downward, so that's the only part that gets a shade.
Pick the Brush (B) and click the brush-tip thumbnail at the left of its options bar to open the Brushes window. Choose Hard Round on the Presets tab, then on the Shape tab set Size to 7 and Taper to 40, about half the length of the shade. Press in the middle of the loop's right side and drag down along the line to its end. Then press at the same middle point and drag up along the line the other way. Each stroke starts fat and thins to nothing, so together they make a swell.
-
Draw the double gilt border
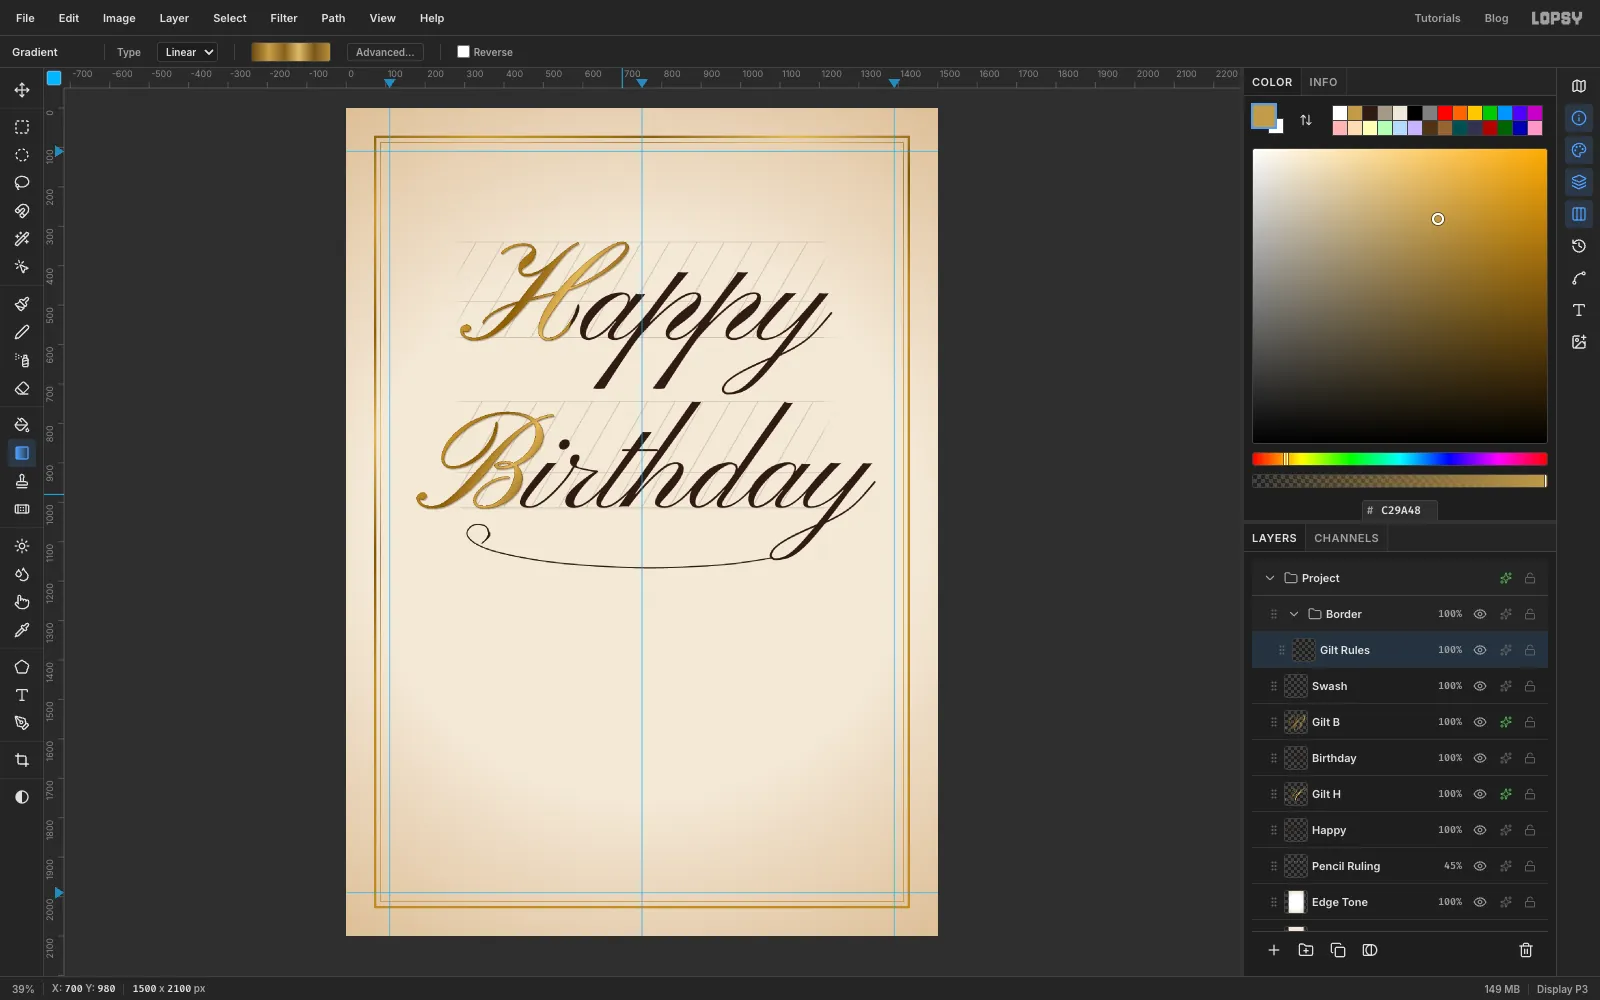
Select Swash and click New Group in the Layers panel. Name the group Border, then add a layer inside it called Gilt Rules.
Pick the Rectangular Marquee (M) and click once on the canvas without dragging. The exact-corner dialog opens. Enter From 70, 70 and To 1430, 2030. Set the foreground to flat gold and choose Edit → Fill. Choose Select → Shrink…, shrink by 6, and press Delete. That leaves a 6 px frame.
Press Cmd+D to deselect (the exact-corner dialog only opens when nothing is selected). Do it again for a hairline just inside: corners 86, 86 to 1414, 2014, Fill, Shrink by 2, Delete.
Cmd-click the Gilt Rules thumbnail to select both rules. Use the Gradient tool with the same six gilt stops, and drag from the top-left corner of the card about halfway down towards the centre, so the bands sweep across the frame. Deselect.
-
Draw a corner ornament
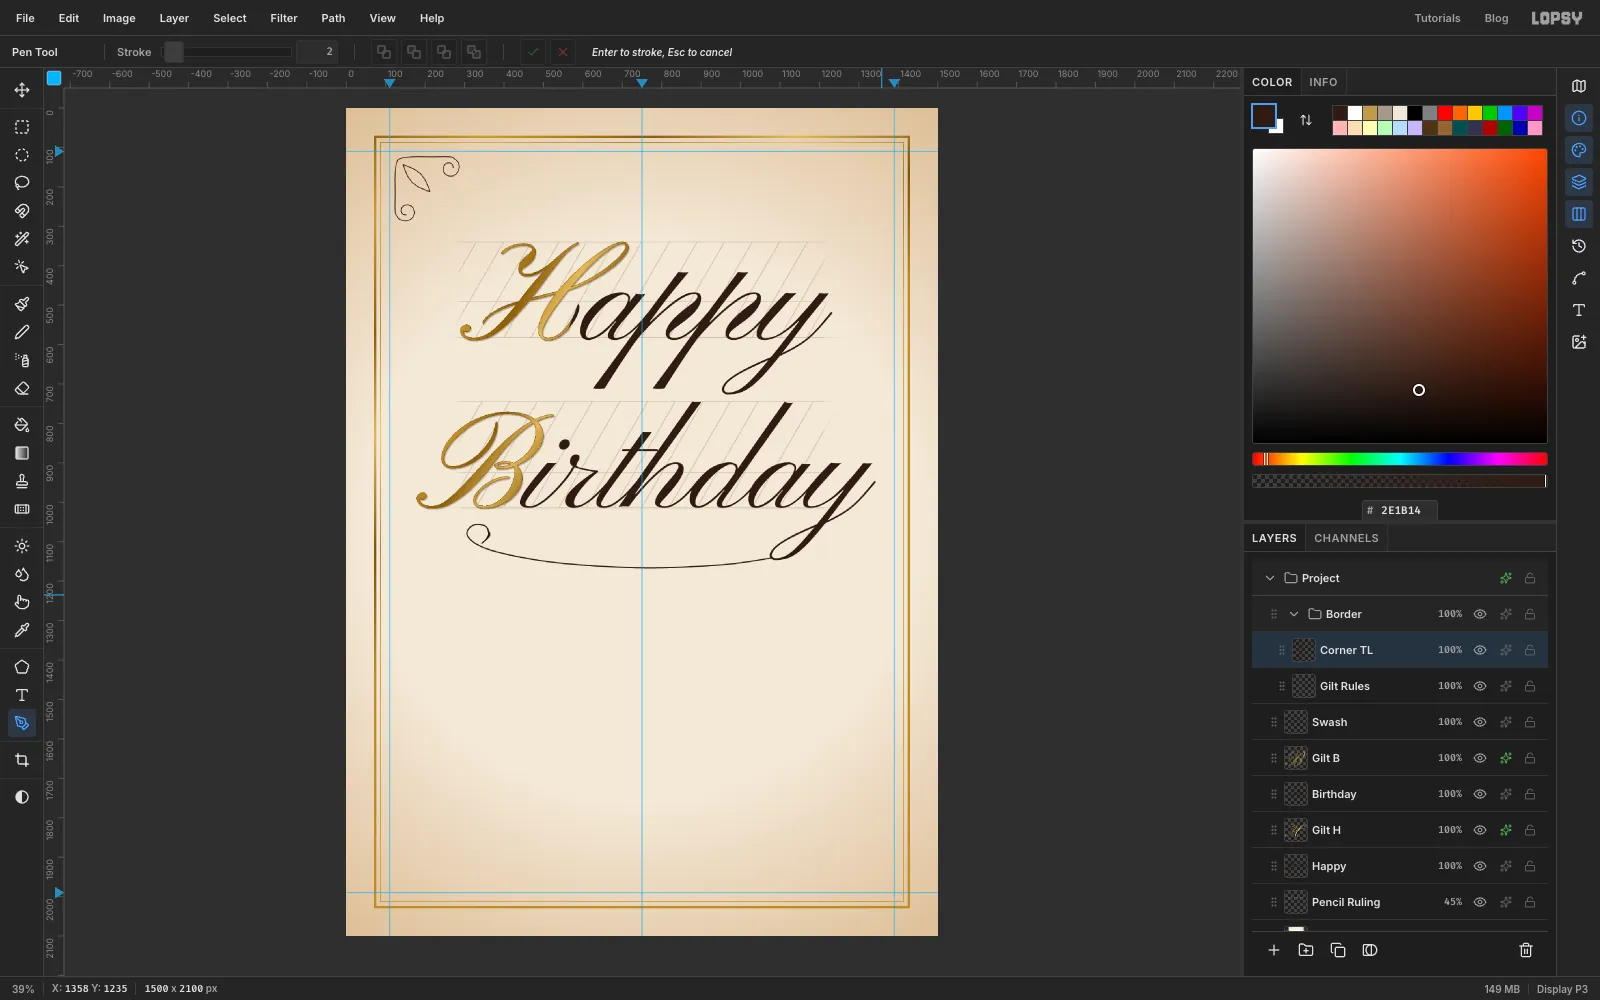
Add a layer called Corner TL in the Border group. Pick the Pen tool and set Stroke to 2.
Draw the ornament as one continuous line, dragging each anchor so the curves stay smooth. Start inside a small spiral centred near 262, 152, about 55 px across. Wind outward in about one and a half turns, with about four anchors per turn, and come out of the top heading left. Run along the top at y 124, about 38 px inside the border. Round the top-left corner in a smooth curve, run down the side at x 124, and wind into a matching spiral centred near 152, 262. Press Enter to stroke it.
For the leaf, draw a pointed oval of six or seven anchors on the diagonal between the two spirals, from about 144, 144 to 212, 212. Close it by clicking the first anchor, then press Enter to stroke it.
-
Shade the downstrokes
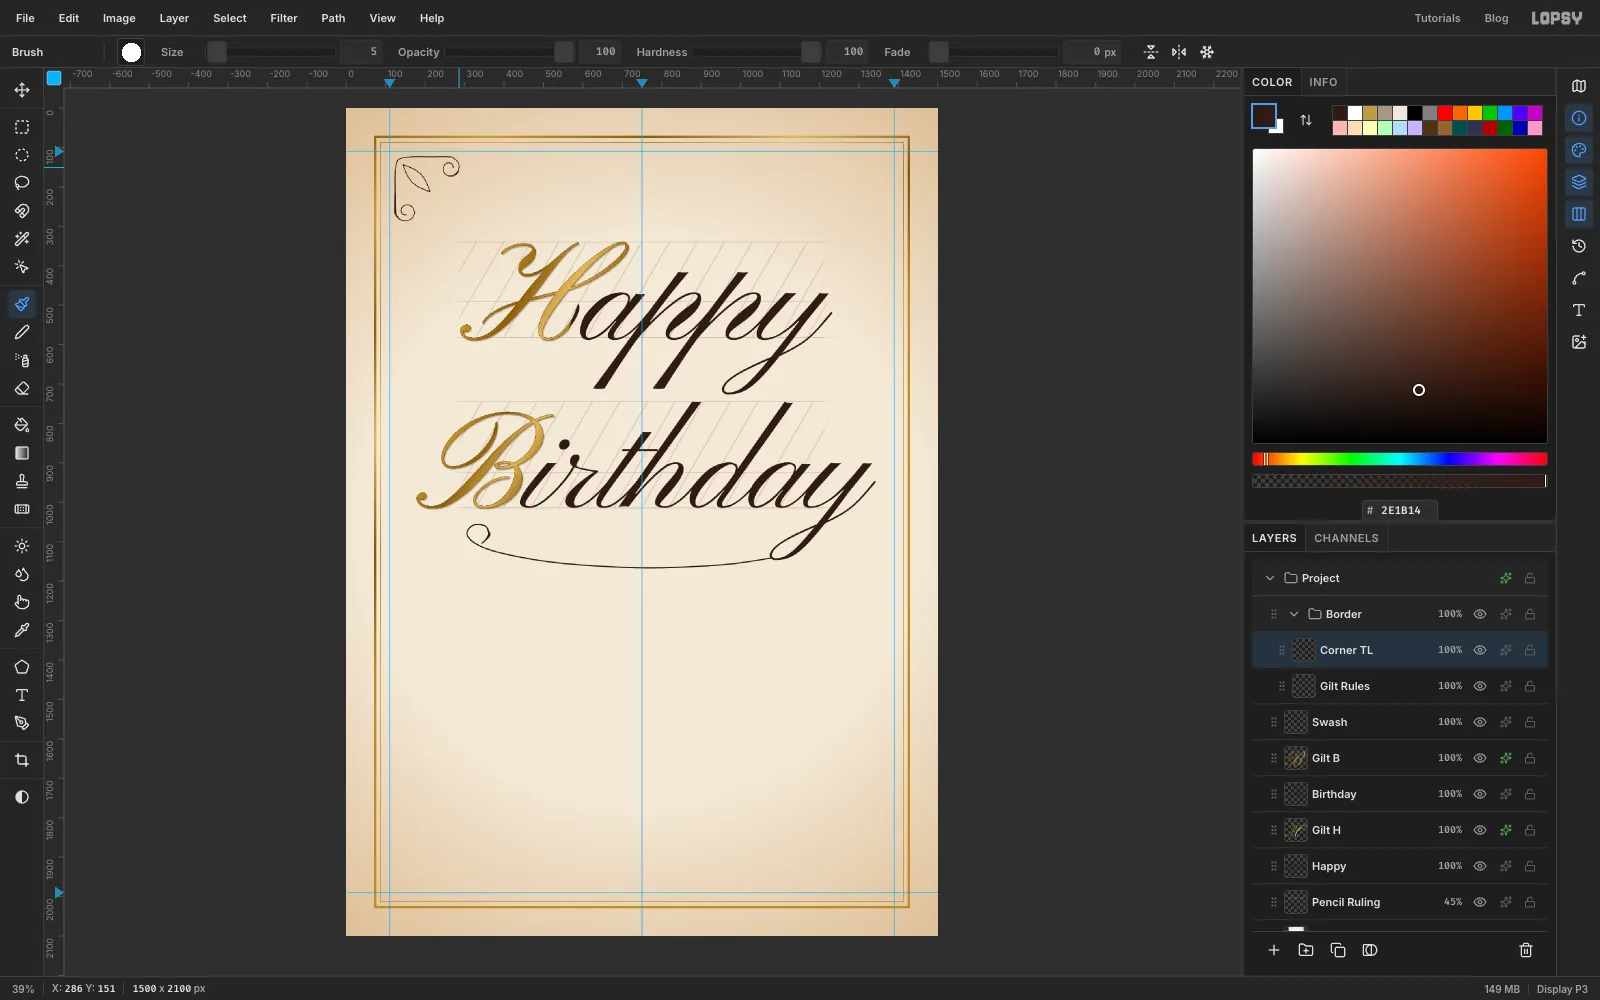
Now the swells. With the Brush on Hard Round:
- The side arm is a downstroke, so give it a swell. Use Size 6 with Taper 55, about half its length. Press halfway down the arm and drag down to the spiral, then press at the same point and drag up to the corner.
- Give the right side of the top spiral, where the line comes down, a smaller swell at Size 5 and Taper 35.
Leave the top arm as a hairline. It runs sideways, and a pointed pen doesn't shade sideways strokes.
-
Copy the corner and flip it
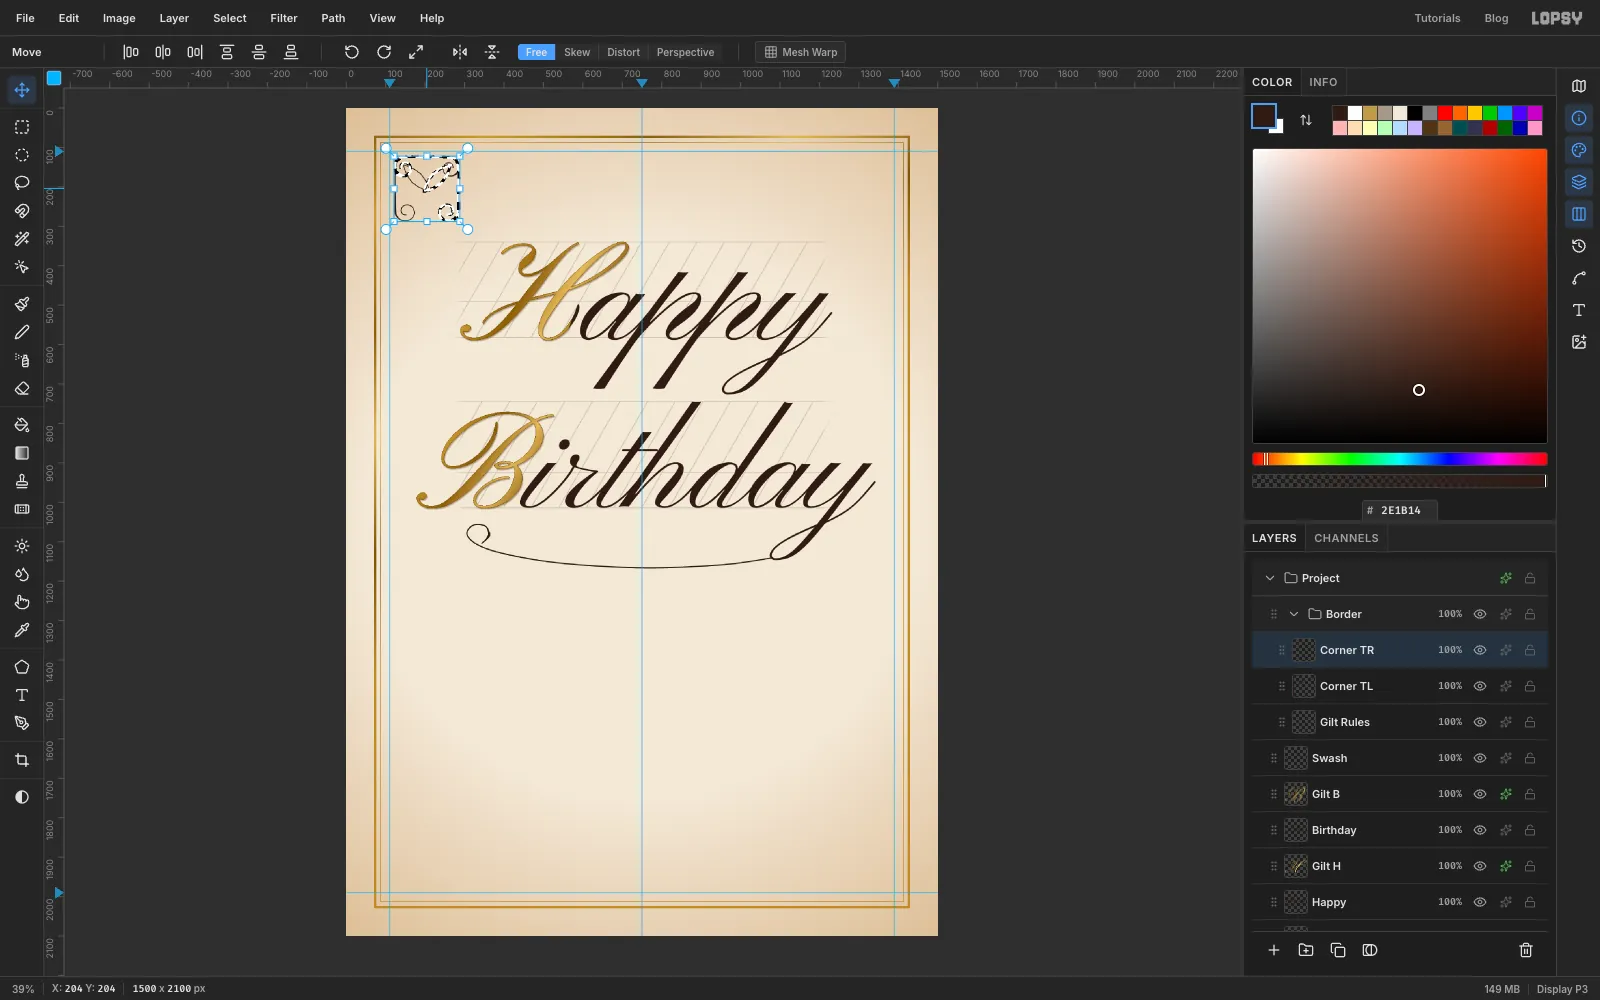
With the Rectangular Marquee, drag a box around the whole ornament. Press Cmd+C and then Cmd+V. The copy pastes in place on its own layer, still selected. Rename it Corner TR.
Pick the Move tool (V) and click Flip Horizontal in the options bar. Use the Move tool's button, not Image → Flip, because it flips the selection together with the pixels.
-
Place all four corners
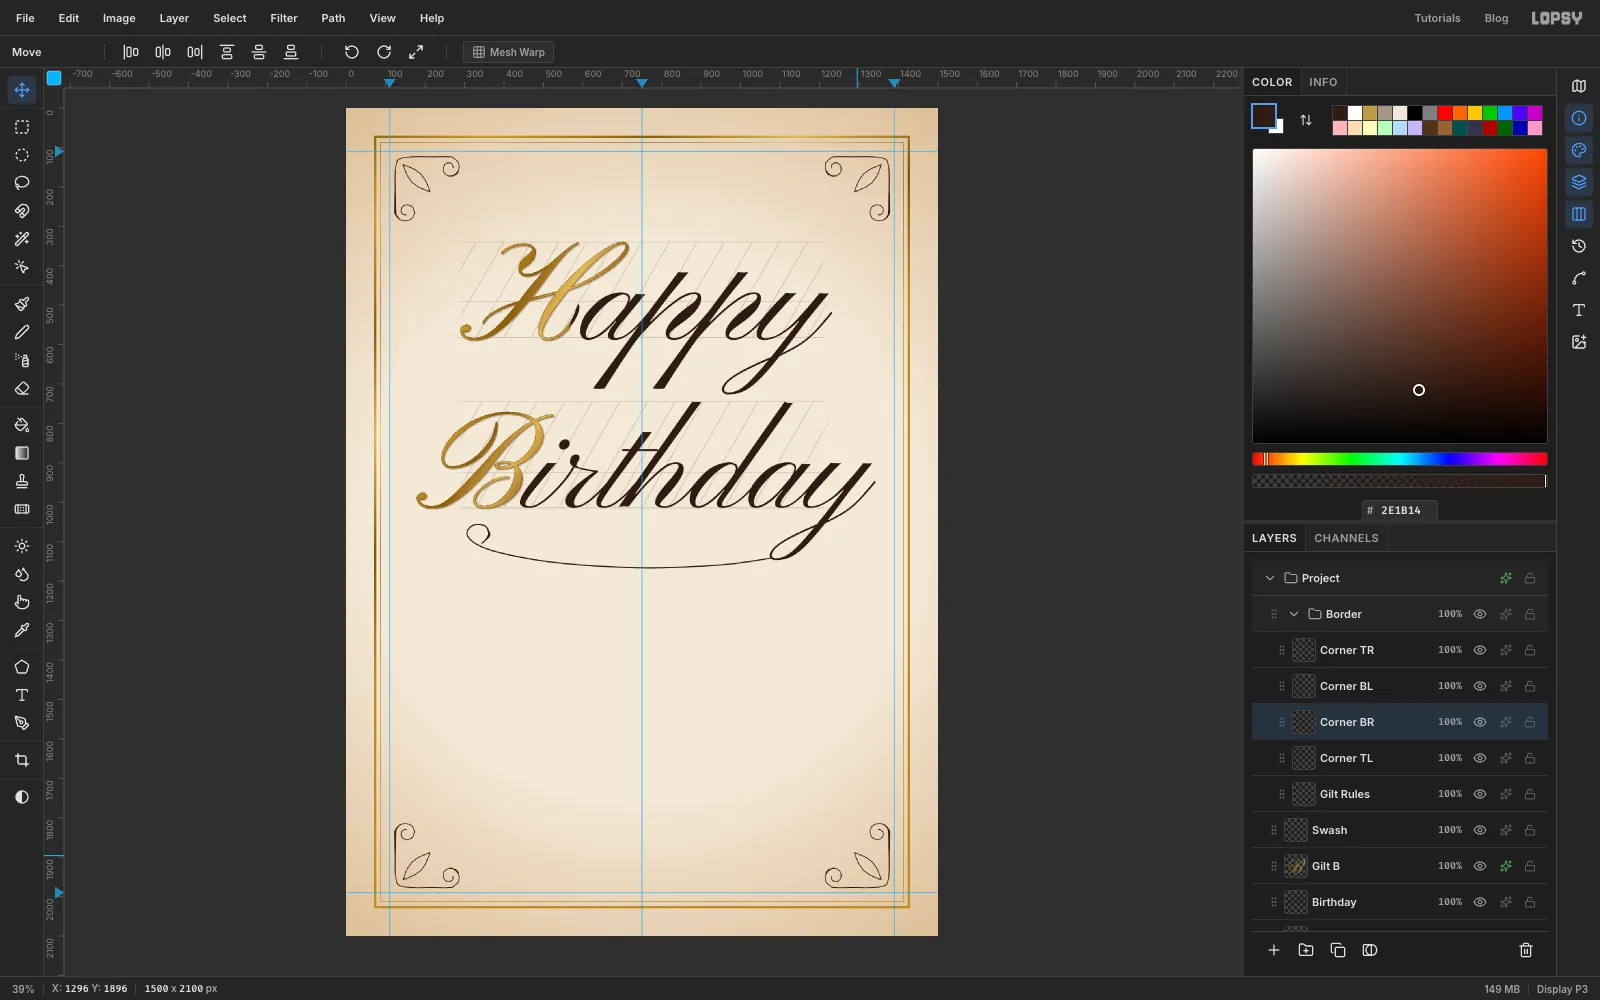
Drag the flipped copy into the top-right corner and press Cmd+D. To line it up exactly, drop two temporary guides on the rulers at x 1379 and y 122, the mirror of the original's outer edges. Then nudge the ornament with the arrow keys (Shift+arrow moves 10 px) until its outer edges touch them.
For the bottom-left: select Corner TL, marquee round it, copy and paste, and rename the paste Corner BL. Click Flip Vertical and drag it into the bottom-left corner, with its outer edges on x 121 and y 1978. For Corner BR, do the same with both flips, lined up on x 1379 and y 1978. When you're done, remove the temporary guides by clicking each one's position on the ruler again.
-
Set up the teacup group and draw the saucer
Collapse the Border group with its arrow. Select Swash and click New Group again, and name it Teacup. Everything for the cup goes in here, so you can move it as one piece later.
Choose View → Show Grid to help you judge the ellipses' proportions. Showing the grid also switches on Snap to Grid. Nothing in this step needs to snap, so turn that off in the View menu.
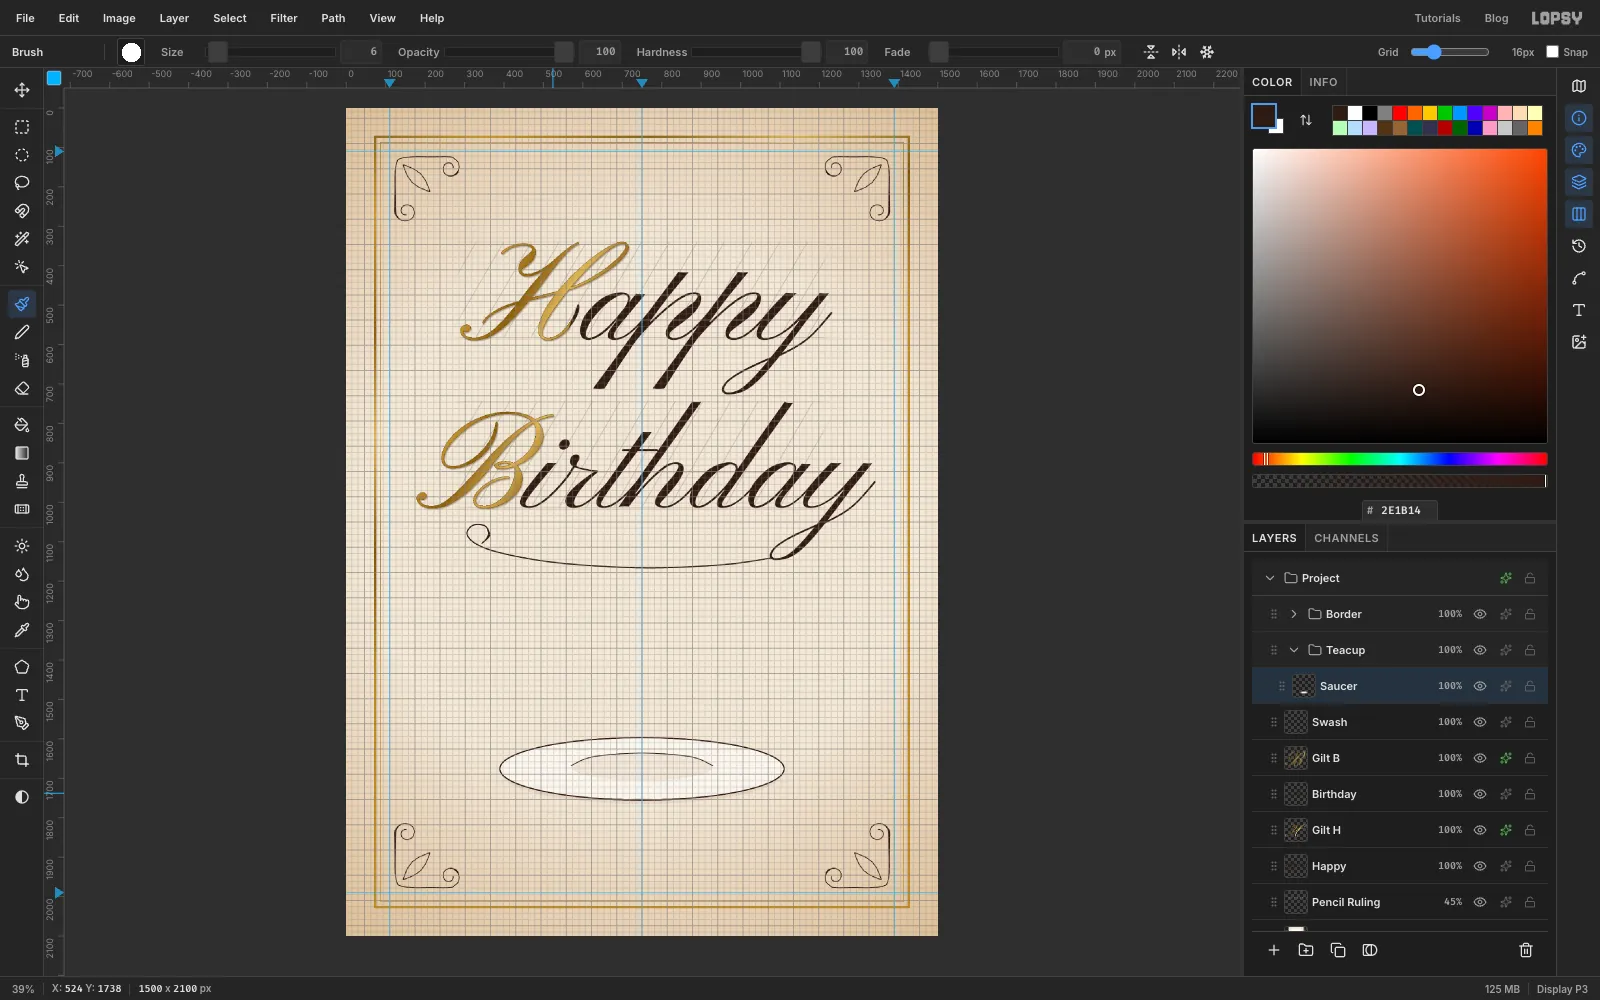
Add a layer called Saucer. Each of the next three fills uses the Elliptical Marquee: click once to open its exact-corner dialog, enter the corners, fill, and deselect.
- the underside: 395, 1610 to 1105, 1765, filled with
- the saucer top: 389, 1597 to 1111, 1755, filled with porcelain
- the well: 570, 1636 to 930, 1706, filled with
The underside peeks out below the top, which gives the saucer its thickness.
To outline the saucer, pick the Shape tool (U). Set Shape to Ellipse and Output to Pixels, remove the fill, and set the stroke to ink with Width 3. Click once at the saucer's centre (750, 1676). In the Shape Size dialog type 721 by 158.
With the Pen tool at Stroke 2, draw a gentle arc along the back of the well. Then add a swell along the saucer's front edge, where the rim curves towards you: Hard Round at Size 6 and Taper 210, two strokes outward from the front-centre. Turn the grid off again with View → Show Grid.
-
Block in the cup
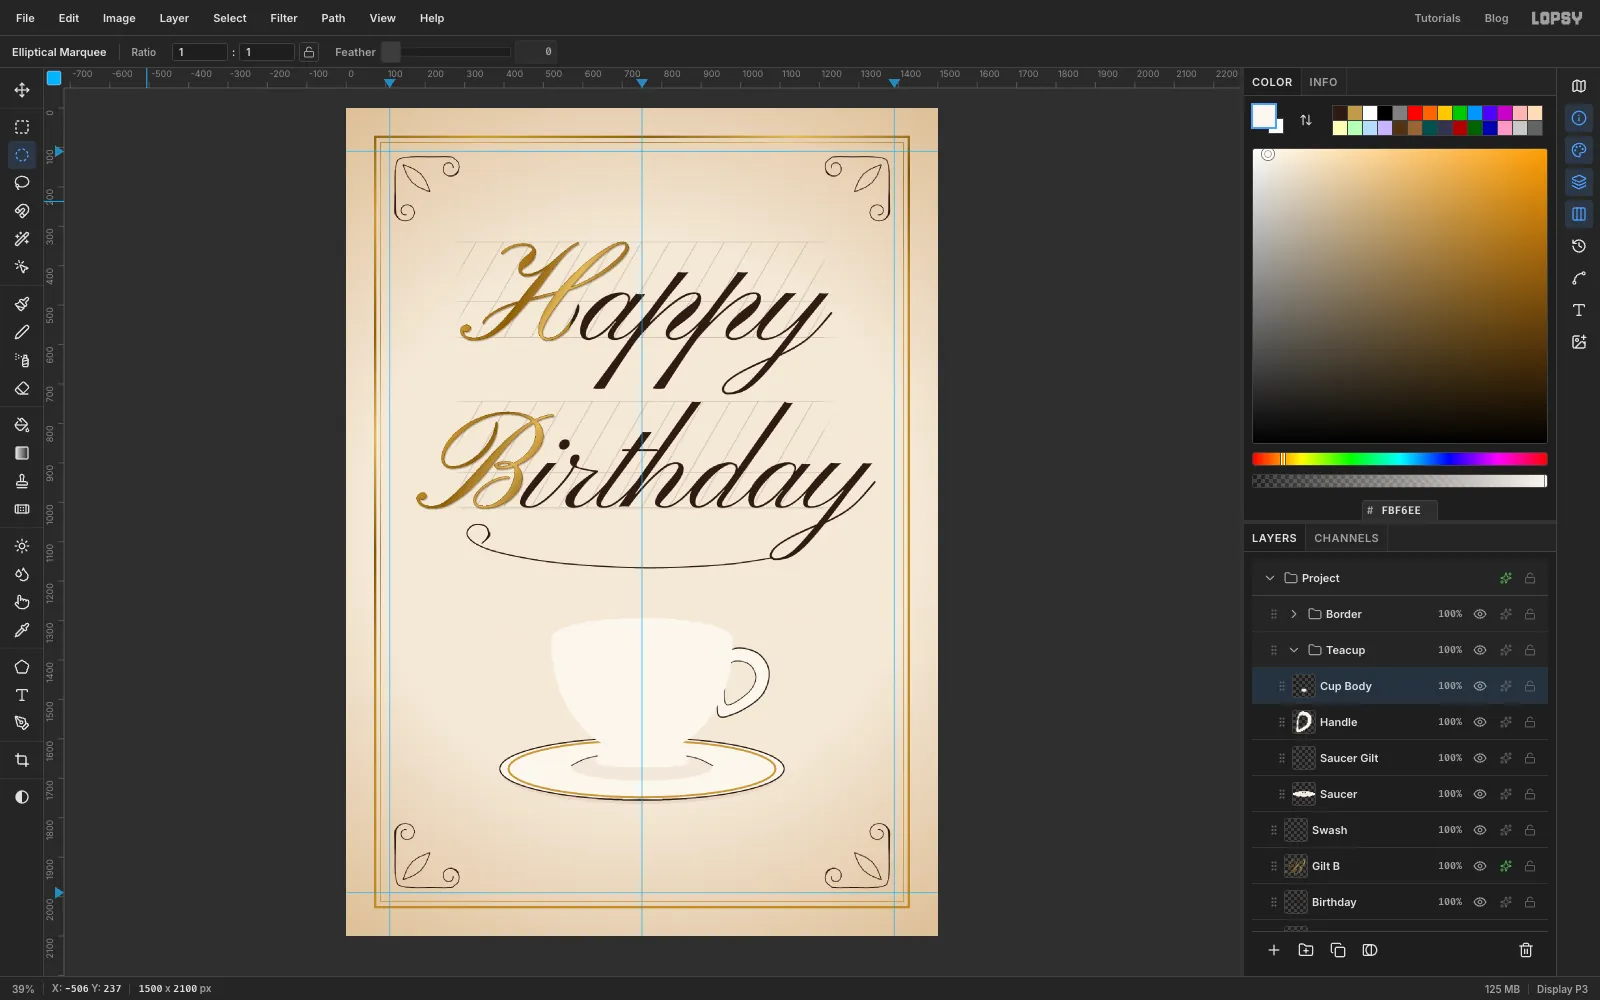
Add a layer called Saucer Gilt. Use the Shape tool again with a gold stroke of Width 5, click the saucer centre, and enter 677 by 144. You'll gild it in a later step.
Add a layer called Handle. With the Pen, drag six anchors round the outside of an ear-shaped loop. It leaves the right side of the cup near 966, 1385, swings out to about x 1072 and comes back in near 980, 1538. Close the path on its first anchor. Open the Paths panel, click Path to Selection, and Fill with porcelain, then deselect. Draw the hole the same way, about 25 px inside the loop, and press Delete after Path to Selection.
To outline the loops, select each path in the Paths panel and click Stroke Path. Use Width 3 for the outside and 2 for the hole.
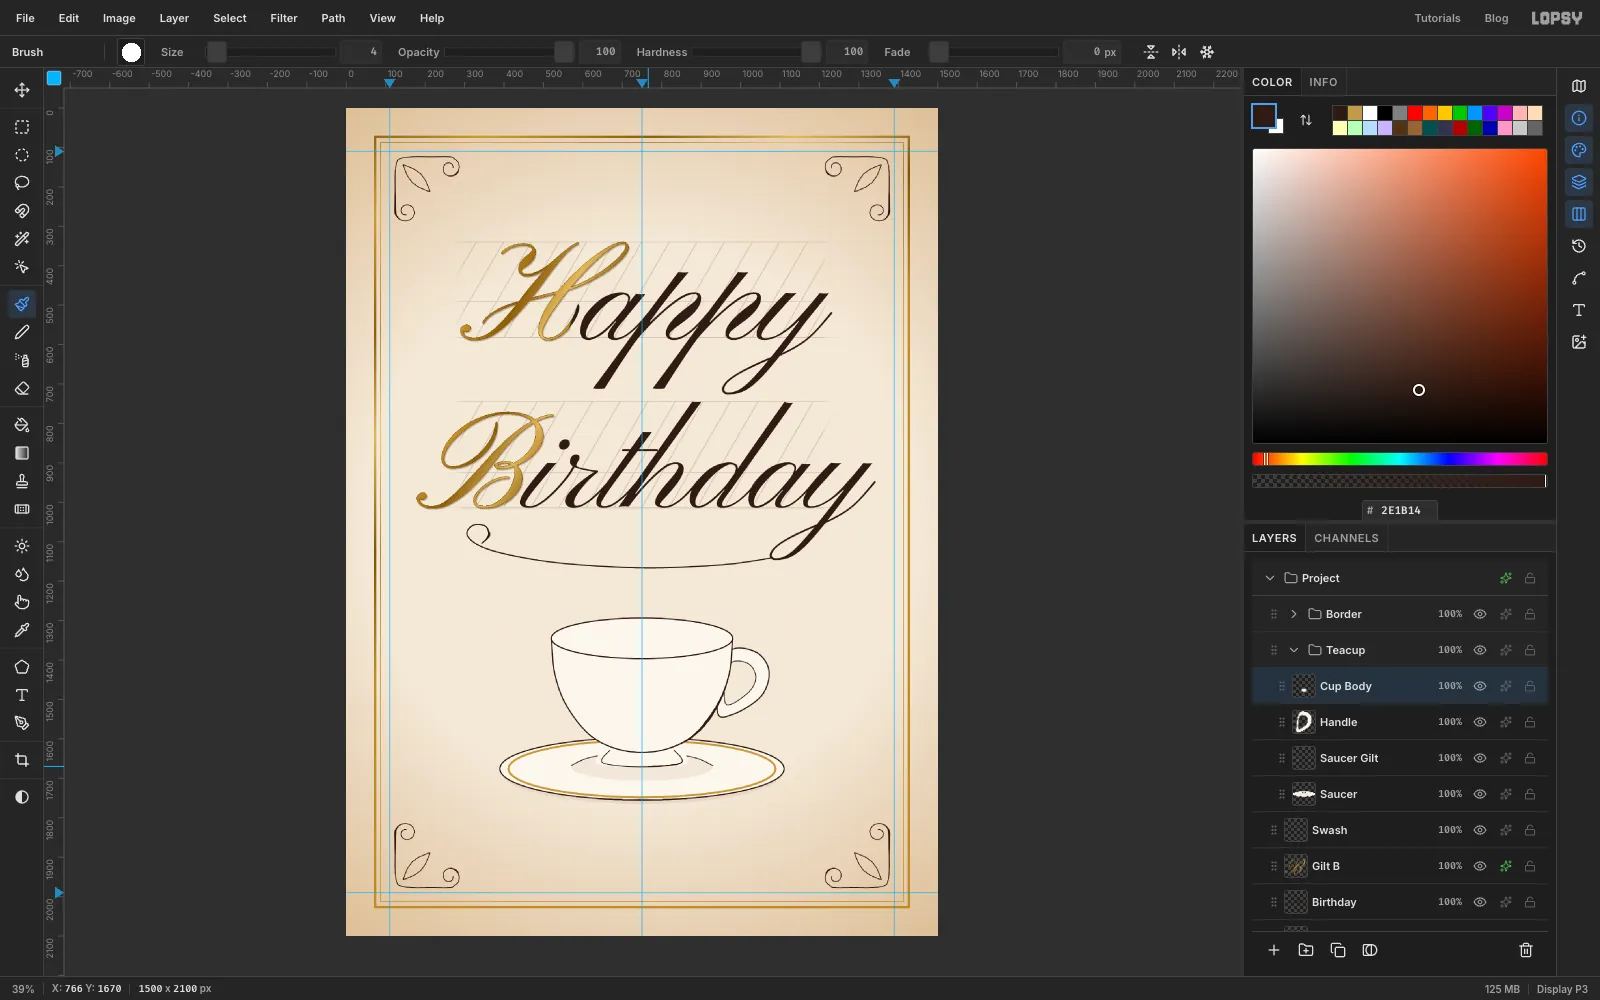
Add a layer called Cup Body, above the handle so the bowl hides the handle's end:
- the foot: a four-anchor Pen path, about x 669–831 at the top (y 1627) and x 647–853 at the bottom (y 1667). Path to Selection, Fill, deselect.
- the bowl: a Pen path with dragged anchors. Start at the left end of the rim (520, 1345), go round the belly to its lowest point near 750, 1632, and up to the right end (980, 1345). Come back along the front of the rim, dipping to about y 1397 in the middle. Path to Selection, Fill, deselect.
- the rim: the Elliptical Marquee dialog from 520, 1293 to 980, 1397, filled with porcelain so the mouth of the cup is closed. Deselect.
-
Ink the cup
On Cup Body, use the Pen with Stroke 3 to trace the bowl from rim to rim along the same anchors as before, and press Enter. Trace the sides and bottom of the foot with Stroke 2.
For the rim, use the Shape tool with an ink stroke of Width 3. Click the rim centre (750, 1345) and enter 460 by 103.
Give the right side of the bowl a long swell with the Brush: Hard Round, Size 8, Taper 170, two strokes out from about halfway down. That's the shadow side, and the extra weight makes the cup feel round. Add a small swell on the right of the foot too, at Size 4 and Taper 30.
-
Pour the tea and shade the porcelain
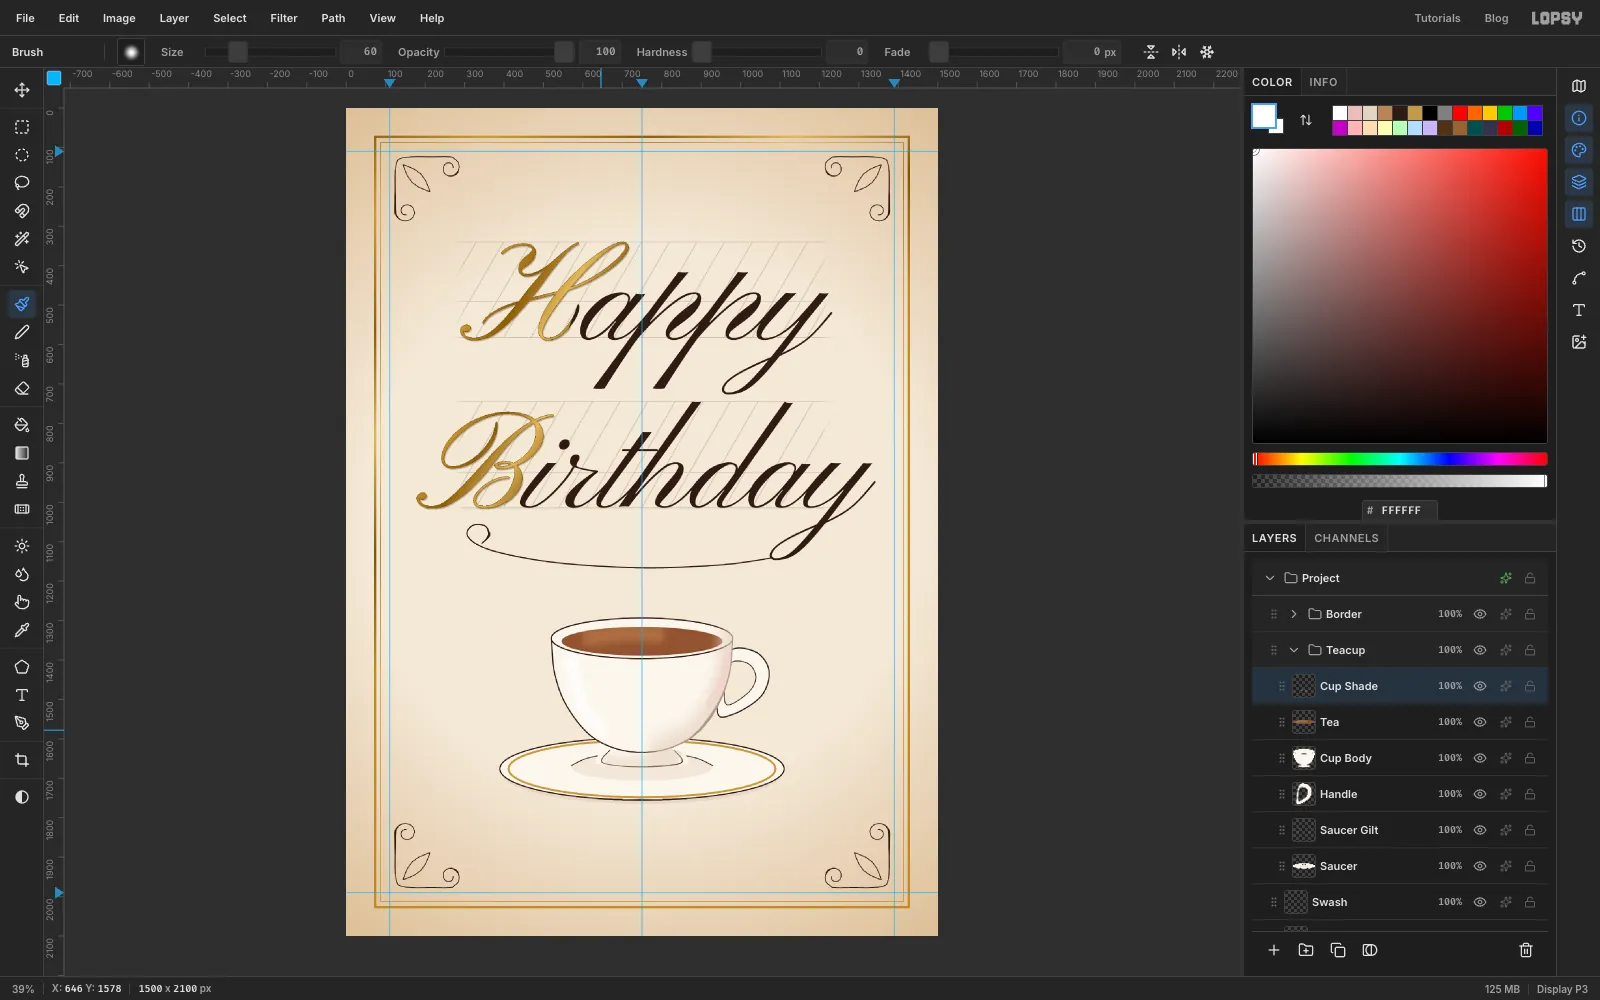
Add a layer called Tea. With the Elliptical Marquee dialog, select 546, 1316 to 954, 1389 and fill it with tea . Keep the selection, pick the Brush with the Soft Round preset at Size 80 and Opacity 60, and brush lighter tea across the back. Deselect.
Add a layer called Cup Shade and Cmd-click the Cup Body thumbnail. The selection keeps your shading inside the cup. With Soft Round:
- Use porcelain shadow at Size 130, Opacity 70, and drag down the right side of the bowl and round under the belly. Do the same at a smaller size along the foot.
- Use a whisper of rose at Size 50, Opacity 25 along the right edge, so the porcelain picks up the pink of the garland.
- Use white at Size 60, Opacity 80, and drag a highlight down the left side of the bowl.
Deselect, and set Opacity back to 100%.
-
Lasso the garland leaves
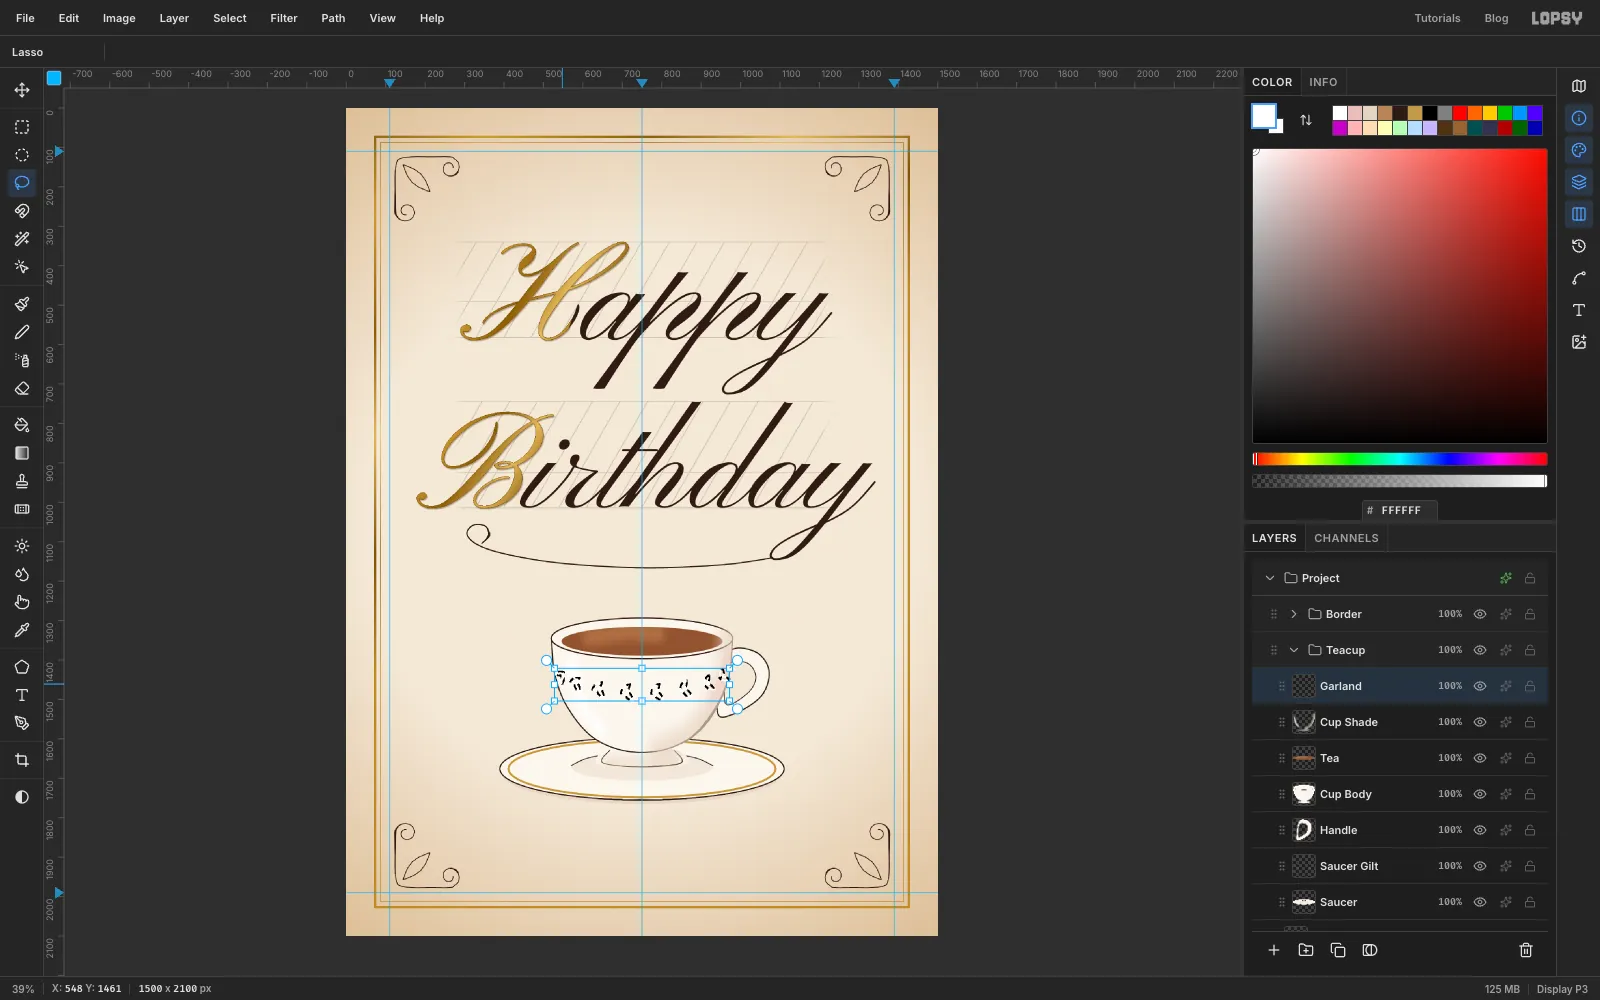
A garland painted on china follows the curve of the cup. It sags towards you in the middle and gets smaller towards the sides. Add a layer called Garland.
With the Lasso, draw a small pointed leaf about 30 px long on the belly, about 60 px below the rim, along y ≈ 1460 at the sides. Hold Shift and draw its partner angled the other way, like a pair of wings. Keep adding pairs with Shift along a curve that dips about 40 px in the middle. Make the pairs nearer the sides smaller and more squashed. That's eight pairs in all.
Fill them with leaf green and deselect.
-
Paint the rosebuds
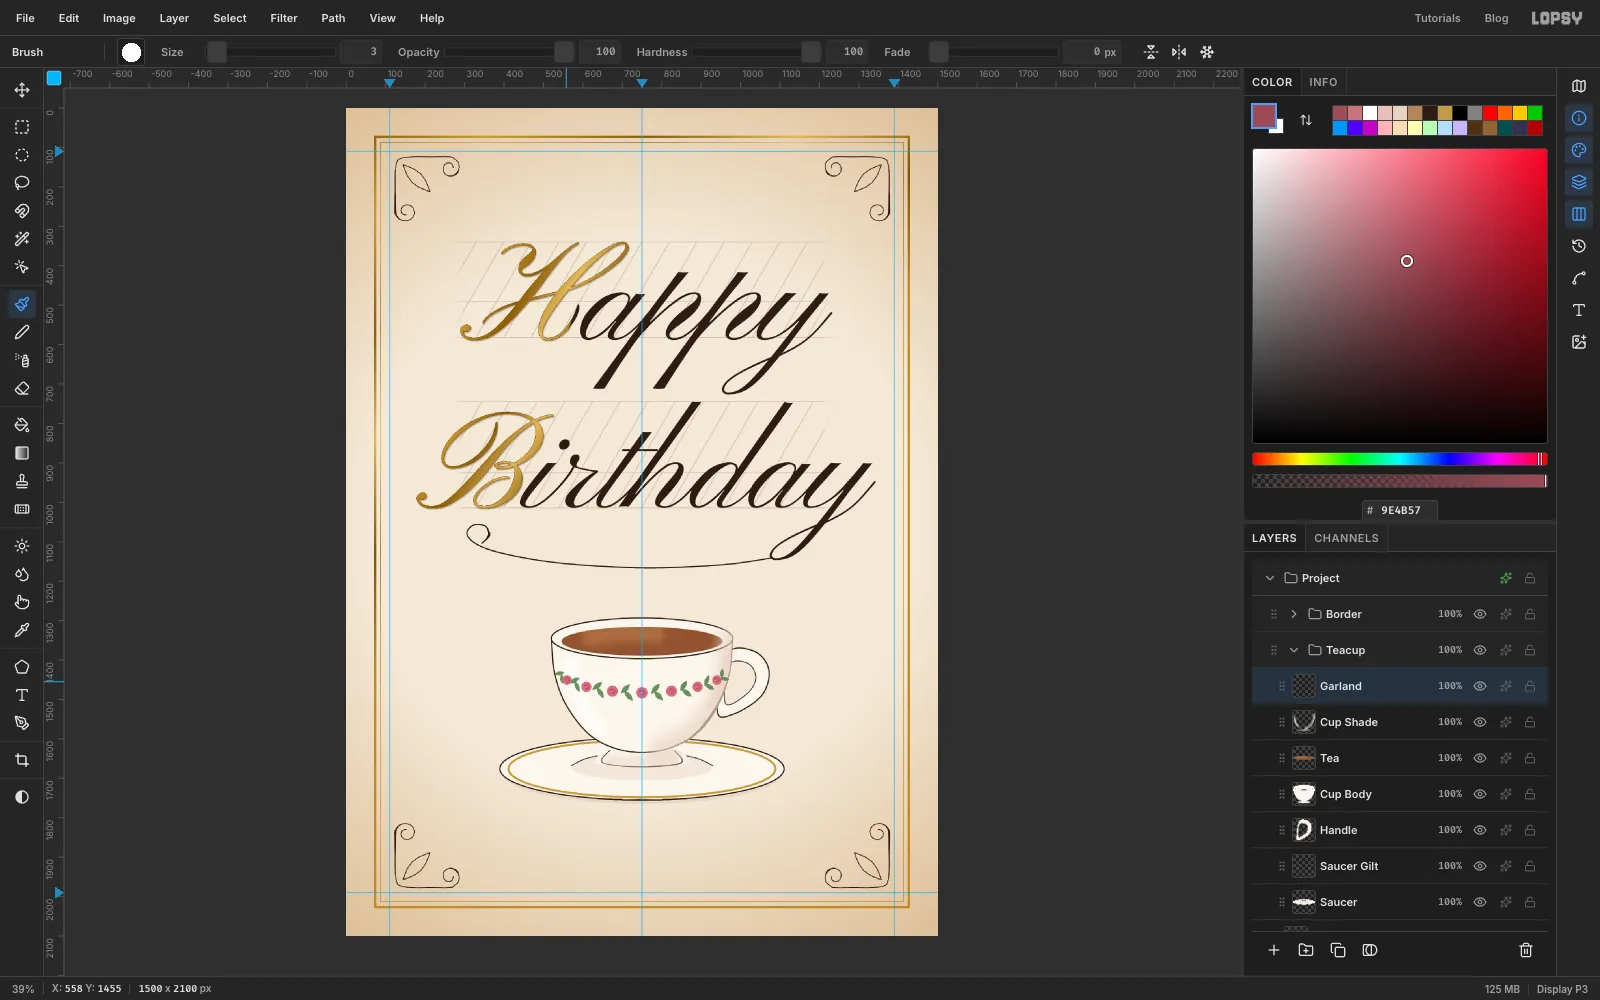
With the Brush on Hard Round and rose , click once between each pair of leaves to drop a rosebud. Use Size 30 for the middle one, stepping down to about 24 for the ones at the sides. The size change sells the curve.
Switch to dark rose at Size 3. On each bud, draw a small C-shaped curl just inside its edge, about three-quarters of a turn. That's the curl of the petals.
-
Gild the rims
Add a layer called Cup Gilt. Use the Shape tool with a gold stroke of Width 5, click the rim centre (750, 1345) and enter 446 by 95.
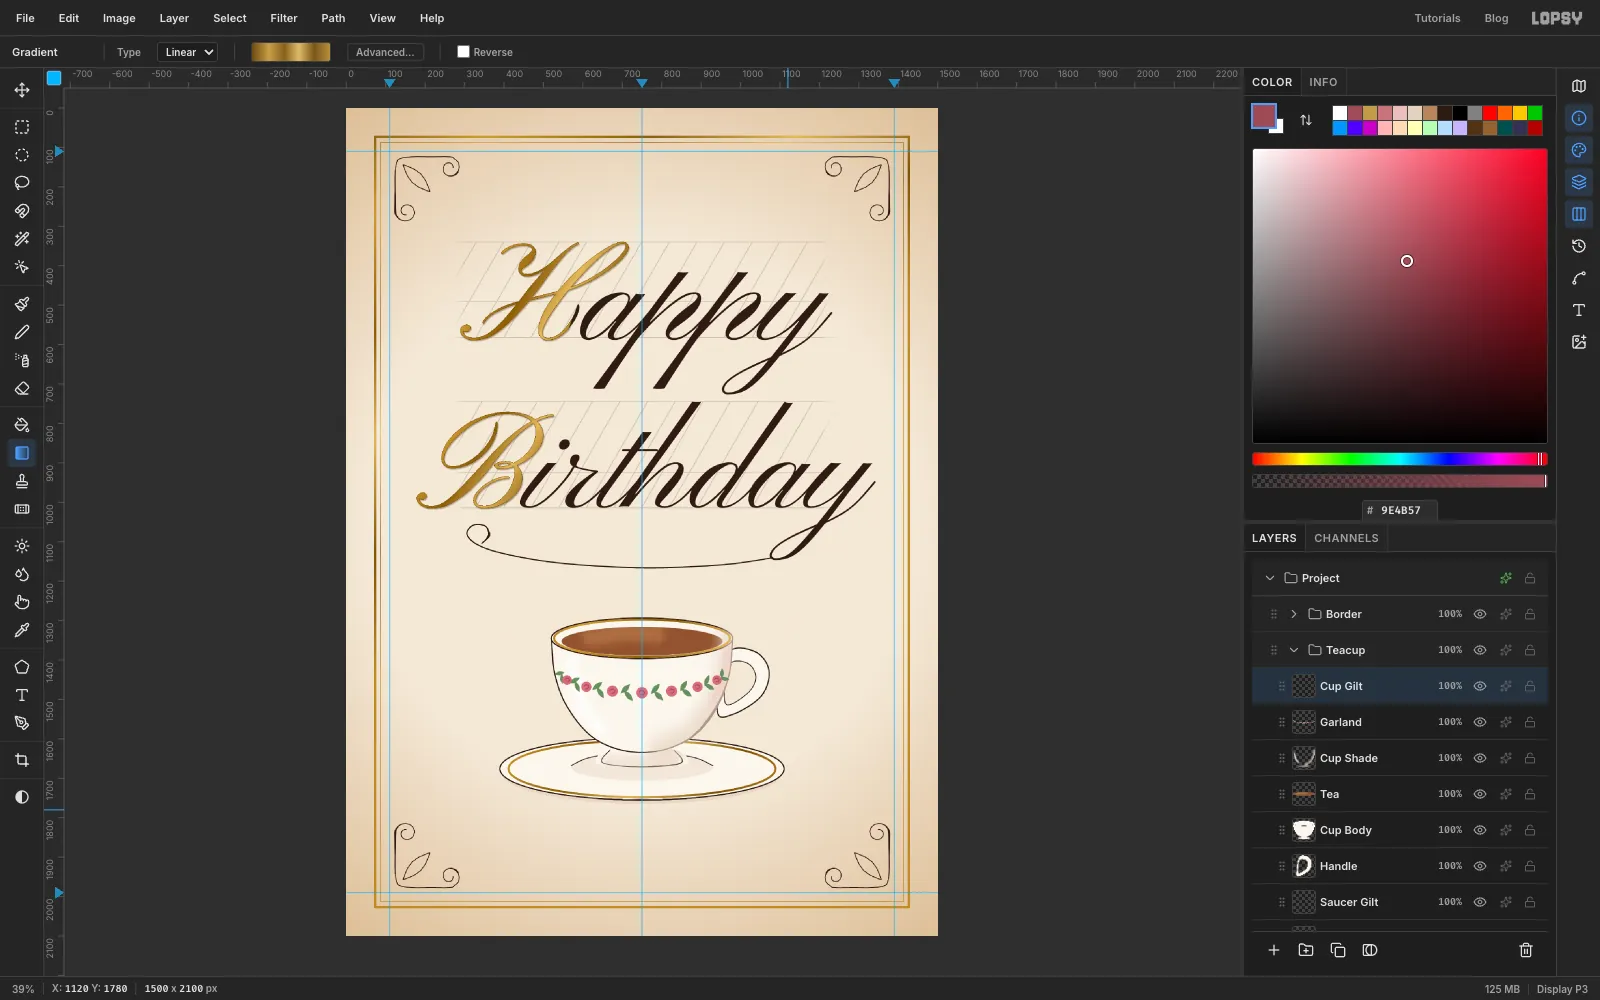
Now gild both gold bands. Select Saucer Gilt, Cmd-click its thumbnail, and drag the six-stop gilt gradient diagonally across the cup and saucer, from upper left to lower right. Do the same on Cup Gilt.
-
Raise the steam and fade it with a mask
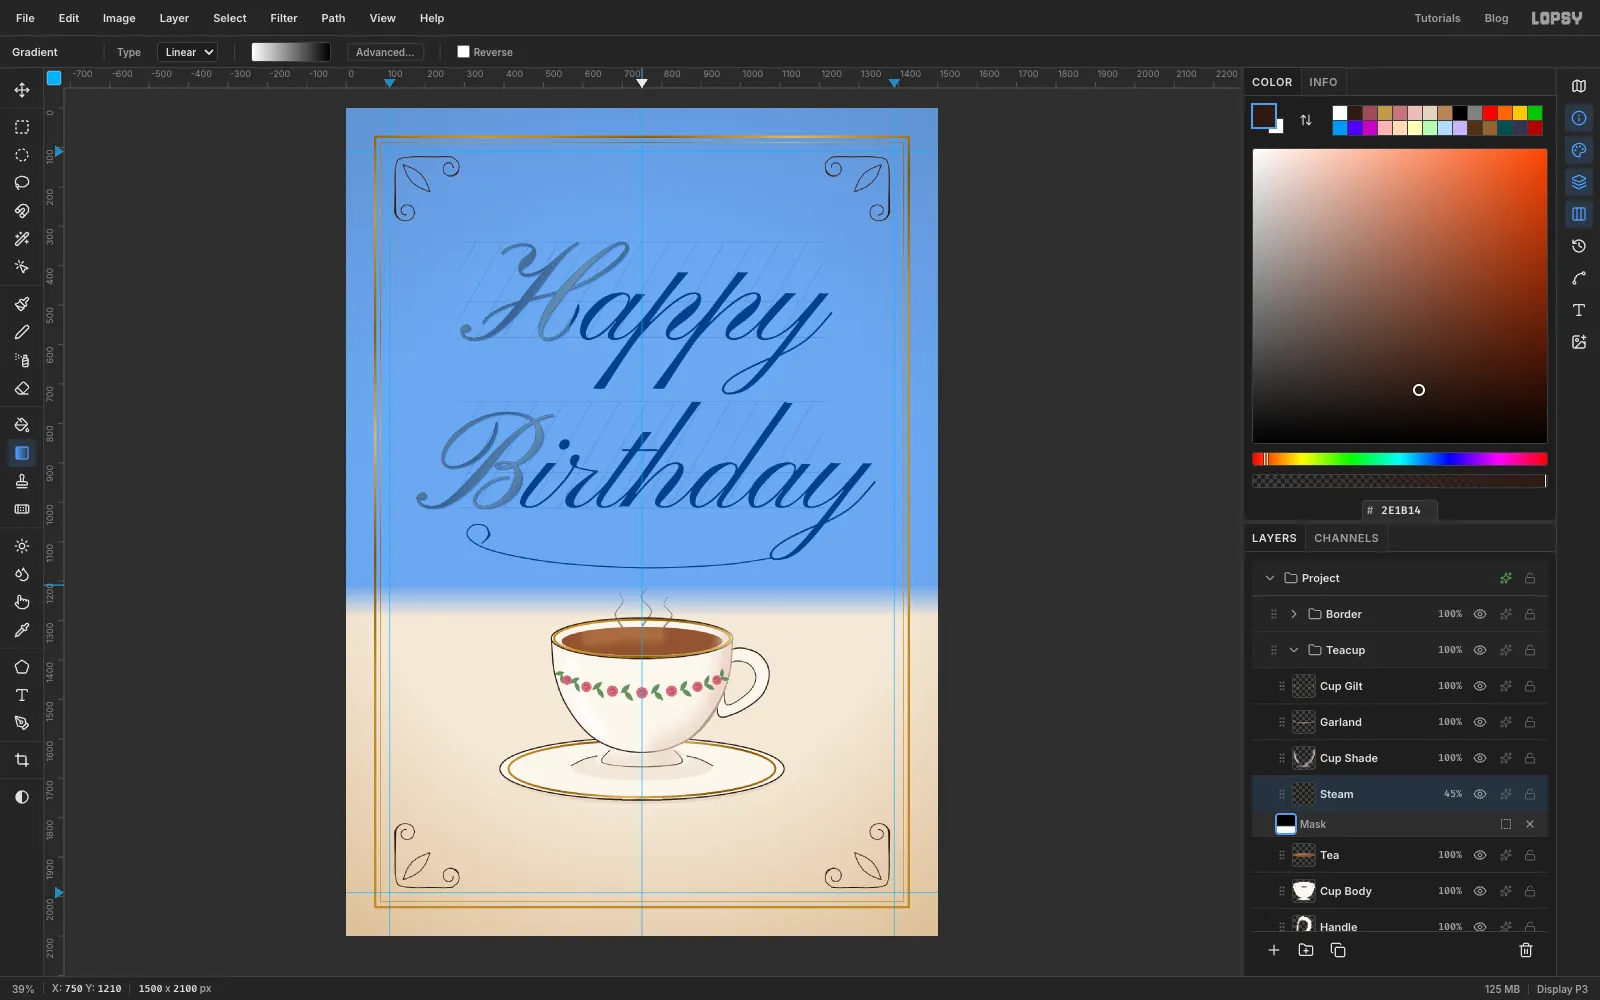
Add a layer called Steam just above Tea. With Hard Round in ink, set Size 6 and a Taper about as long as each wisp (about 100). Drag three gentle S-shaped wisps up out of the tea, from the bottom up. Taper thins a stroke from where it starts, so each wisp is thickest at the cup and thins as it rises. Make the middle one the tallest. Set the layer's opacity to 45%.
To let the wisps melt away, click Add Mask in the Layers panel. A Mask row appears under Steam; click its thumbnail to edit the mask. Pick the Gradient tool, open Advanced…, delete the four middle stops, and set the two ends to white and black . Drag from just above the rim (y 1290) up to y 1210. Where the mask is black the steam disappears. Lopsy shows that part in blue while you're editing the mask.
Click the Steam layer's name to stop editing the mask.
-
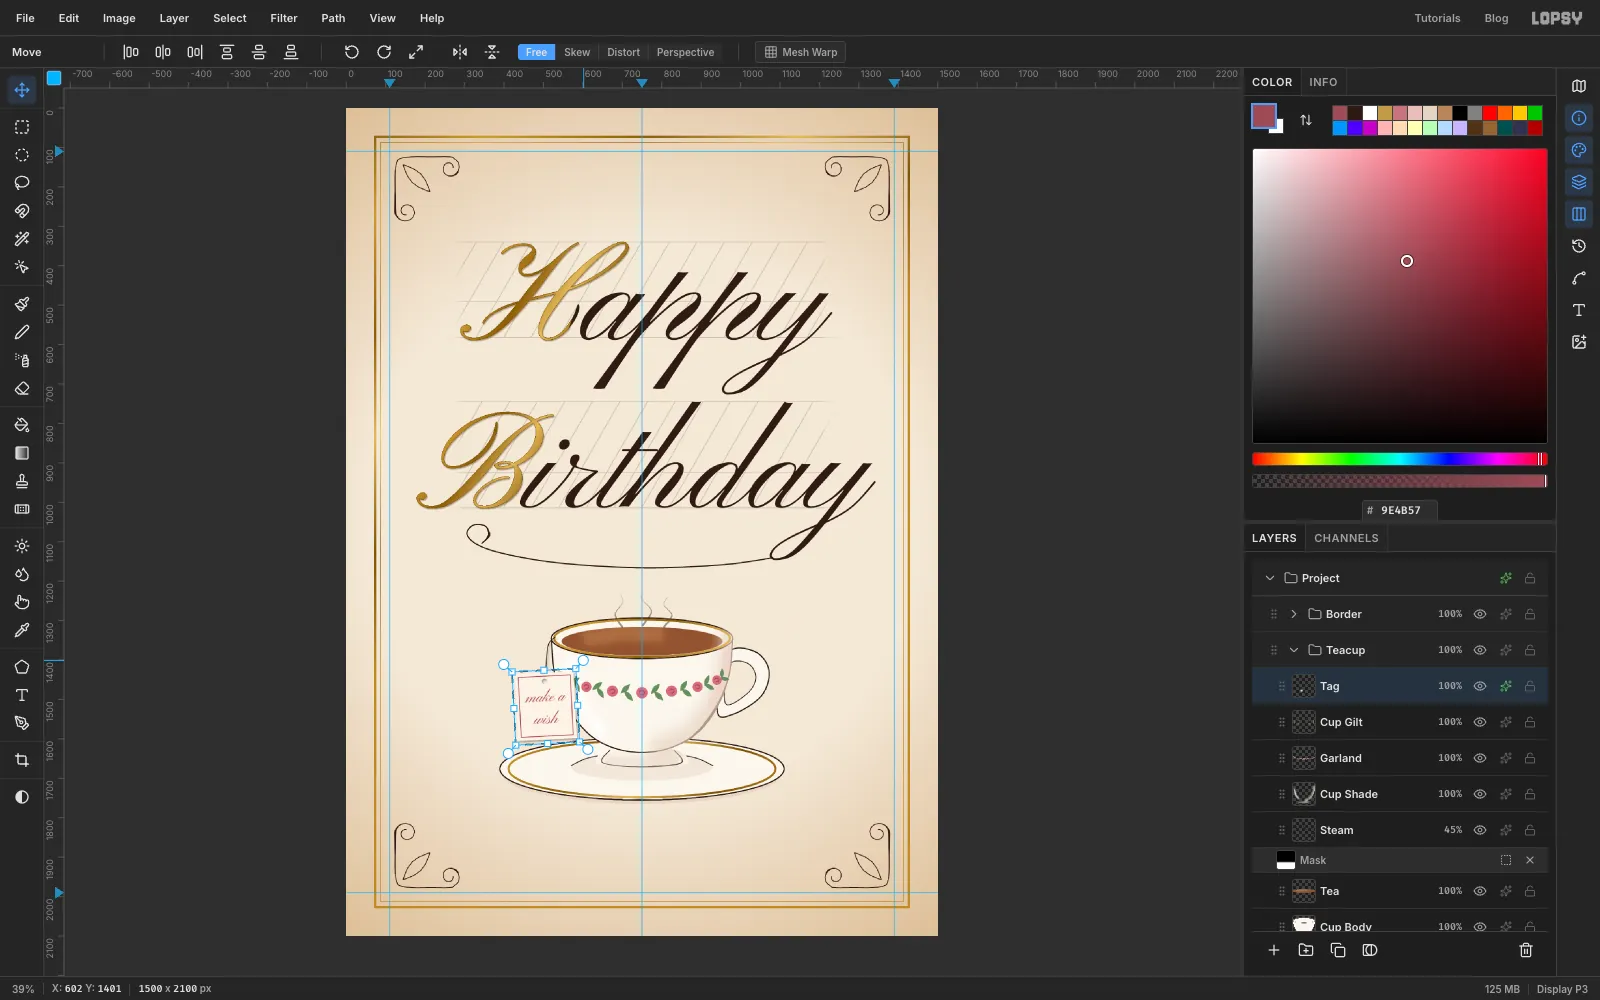
Hang a tea-bag tag
Select Cup Gilt and add a layer called Tag, so the tag hangs in front of the cup.
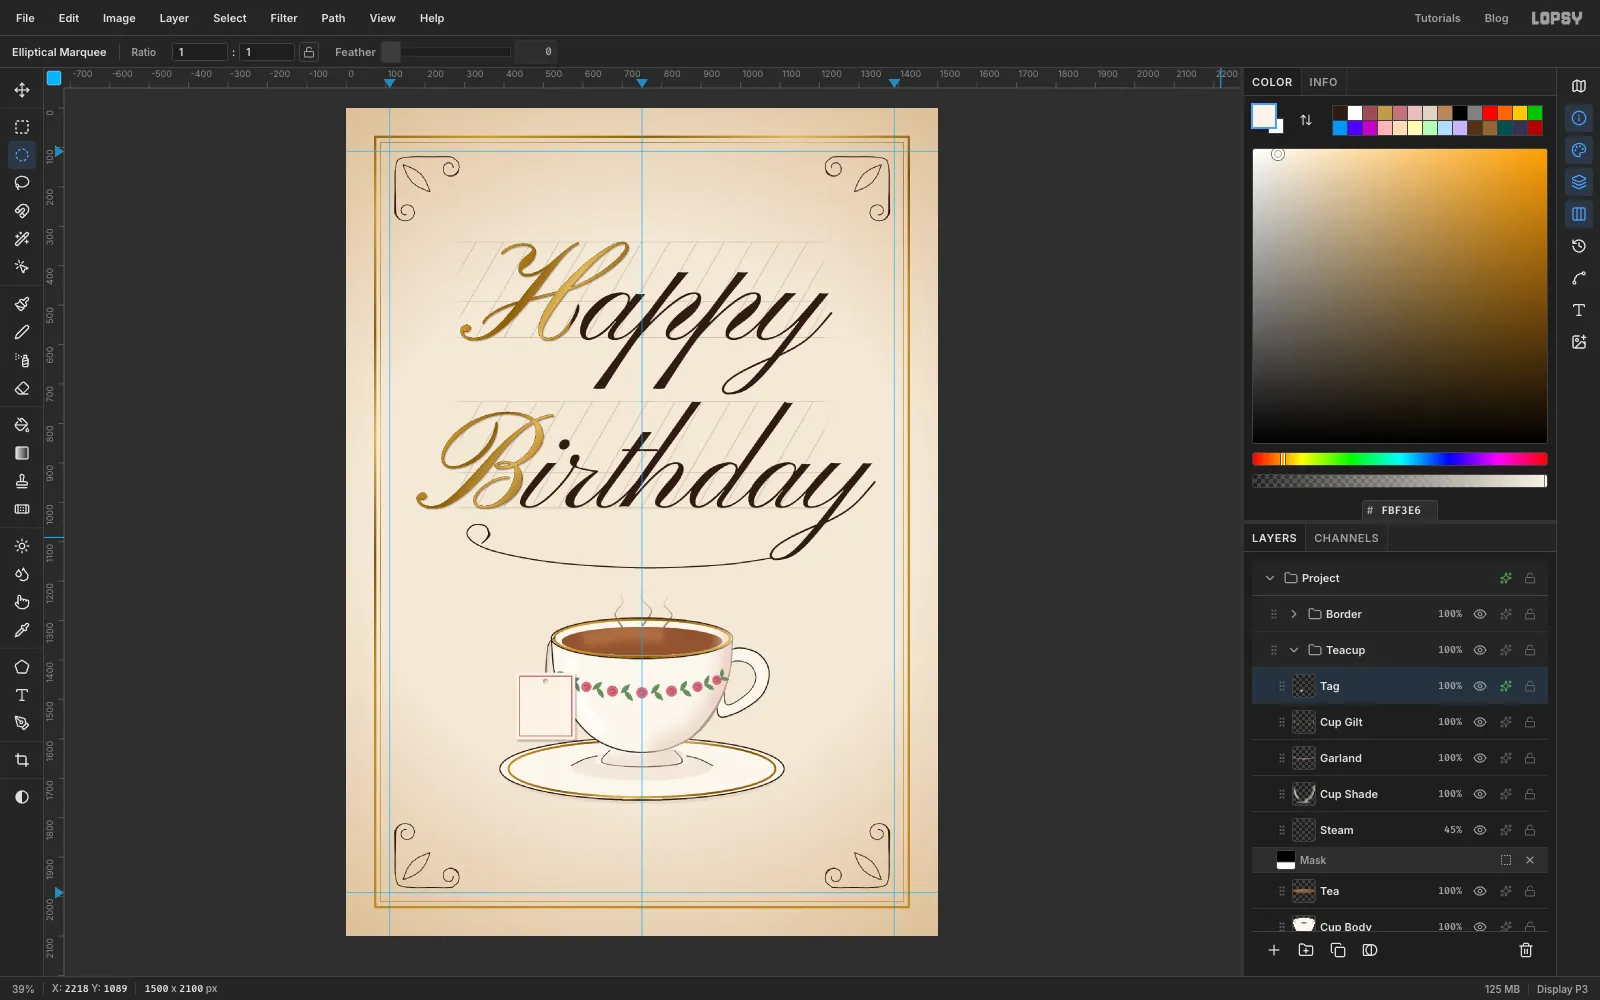
With the Pen at Stroke 2 in ink, draw the string. Start just inside the rim on the left, come over the rim, and drop straight down to about y 1450.
With the Rectangular Marquee dialog, make the tag 150 × 170 px, hanging centred under the end of the string (431, 1432 to 581, 1602). Fill it with tag cream . Shrink the selection by 8, fill with dark rose , shrink by 2 more, and fill with cream again. That leaves a thin border inset from the edge. Deselect.
Punch the hole with the Elliptical Marquee dialog, a 14 px circle centred on the string's end (499, 1447 to 513, 1461), then press Delete and deselect. Give the layer a soft Drop Shadow (Offset 3, 4, Blur 6, Opacity 30), so it stands off the porcelain.
-
Write the tag's message
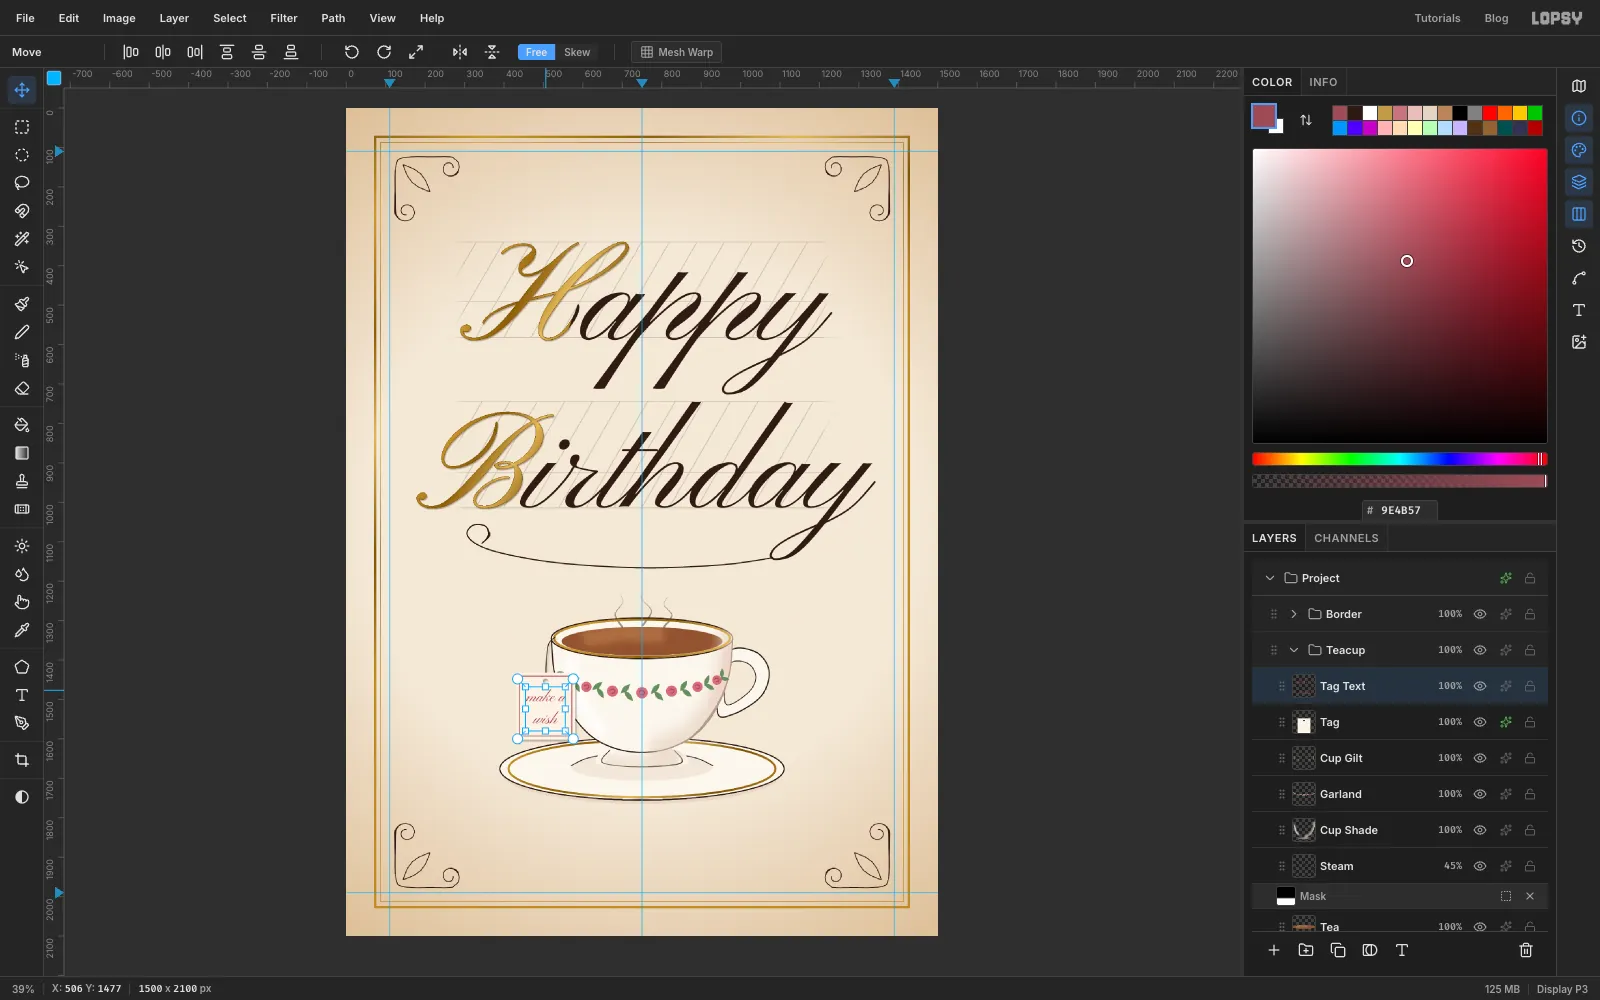
Use the Text tool with Pinyon Script at 40, Center alignment and dark rose . Click in the middle of the tag. Type make a, press Enter for a second line, type wish, and press Tab.
Seat it with the Move tool and the arrow keys. Centre it left to right, and centre it top to bottom in the space between the hole and the bottom of the border. A script's descenders and loops count as part of the word, so judge the gaps by the ink.
Click Rasterize Layer, then choose Layer → Merge Down to merge the words into the tag. The merged layer keeps the name Tag.
-
Let the tag swing a little
Nothing hanging is ever perfectly still. Draw a Rectangular Marquee round the tag, pick the Move tool, and drag a rotation handle just outside a corner. Turn it about 3° anticlockwise. Press Enter and deselect.
-
Shape a choux éclair
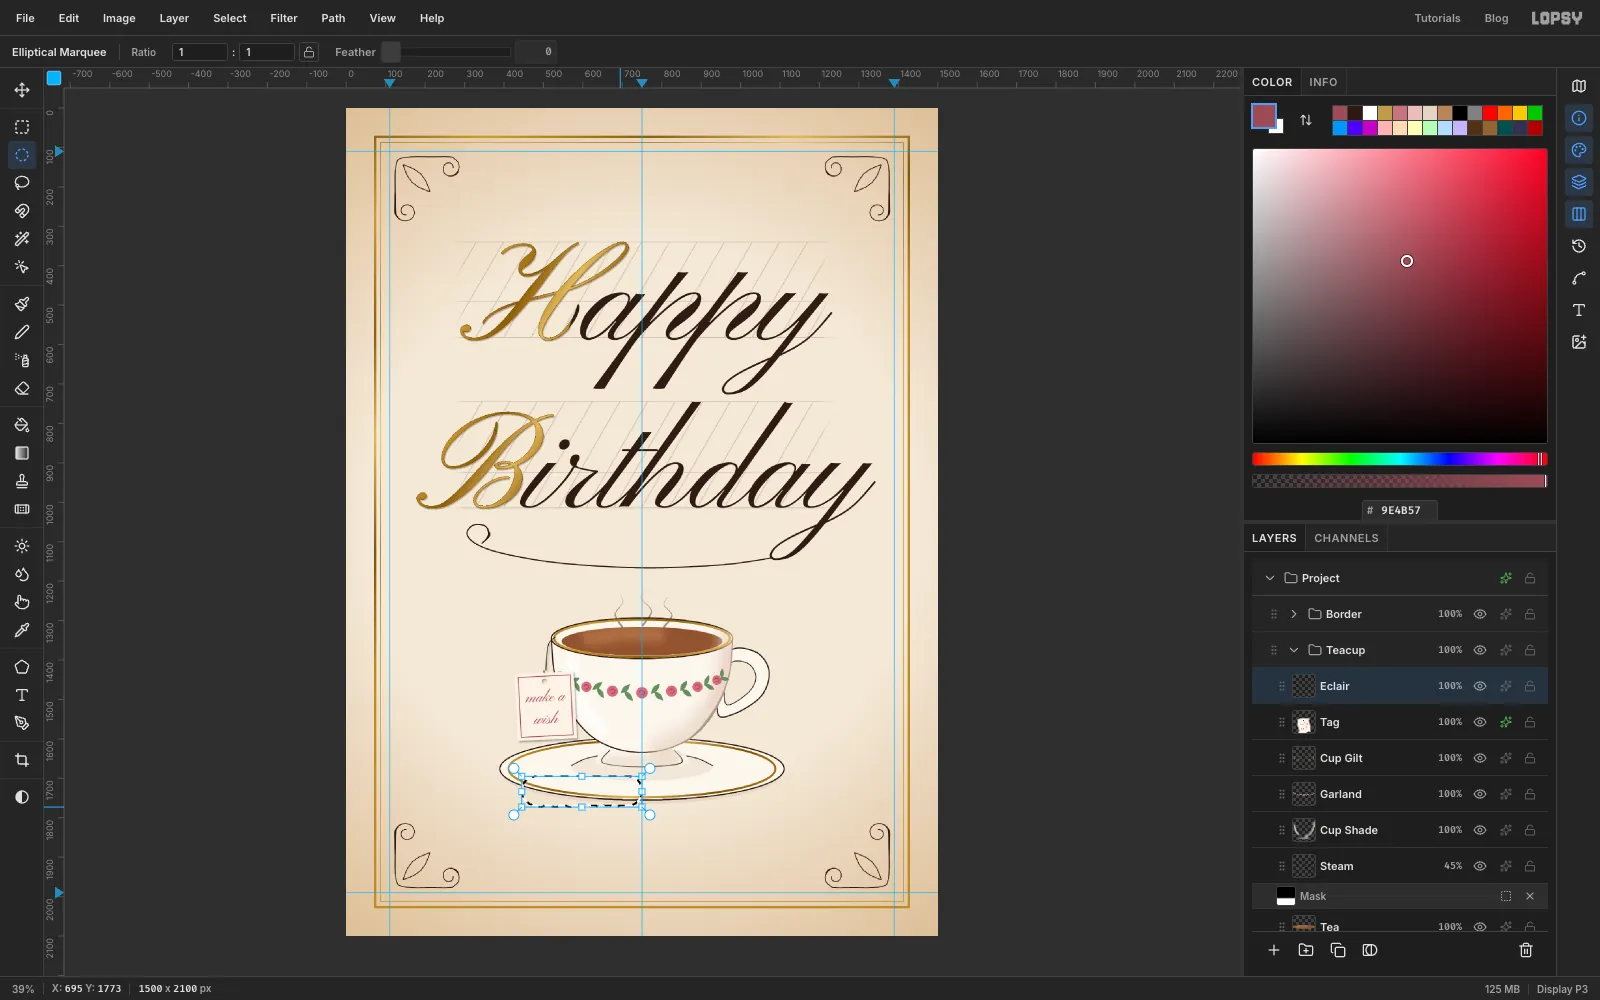
Select Tag and add a layer called Eclair. Build the pastry's outline from simple selections:
- Make a Rectangular Marquee on the front-left of the saucer with the exact-corner dialog: 482, 1695 to 718, 1769.
- With Shift held, add an Elliptical Marquee circle at each end, the same height as the box. That makes a capsule.
- Keep Shift held and add six small ovals along the bottom edge, so it puffs out like piped choux pastry.
Fill it with choux .
-
Bake and glaze it
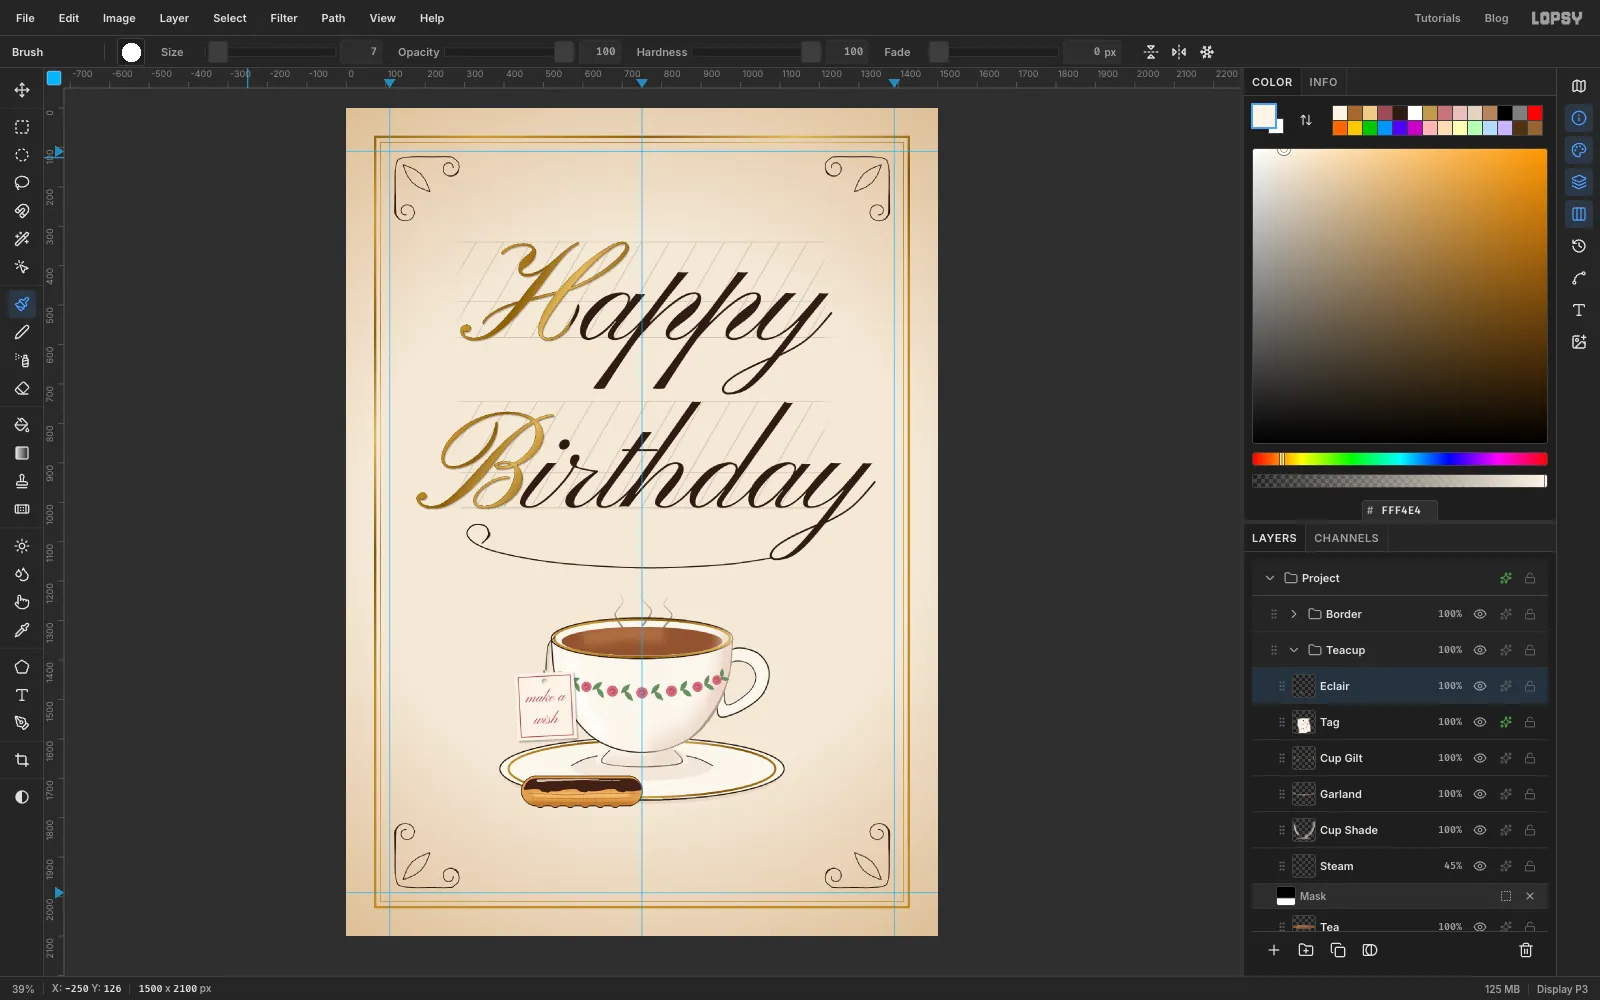
Keep the selection, and with the Soft Round brush:
- drag dark choux along the bottom at Size 40
- drag light choux along the middle at Size 28
Then switch to Hard Round at Size 3 and 70% opacity. Draw a wavy baked crease just under where the glaze will sit, and two faint ridges along the lower half. Deselect. Add a Stroke effect (Width 2, ink), then click Rasterize Layer Style in the effects drawer to bake it in.
Add a layer called Glaze. With the Lasso, trace the top half of the éclair just inside its outline, with a gently wavy bottom edge. Fill it with chocolate . For the shine, use Hard Round at Size 7 with a Taper of about 220, cream at 75% opacity, and draw one stroke along the top of the glaze from left to right. Choose Layer → Merge Down; the result keeps the name Eclair.
Marquee round it, drag a Move-tool rotation handle about 8° anticlockwise, press Enter, and deselect.
-
Make a second éclair from the first
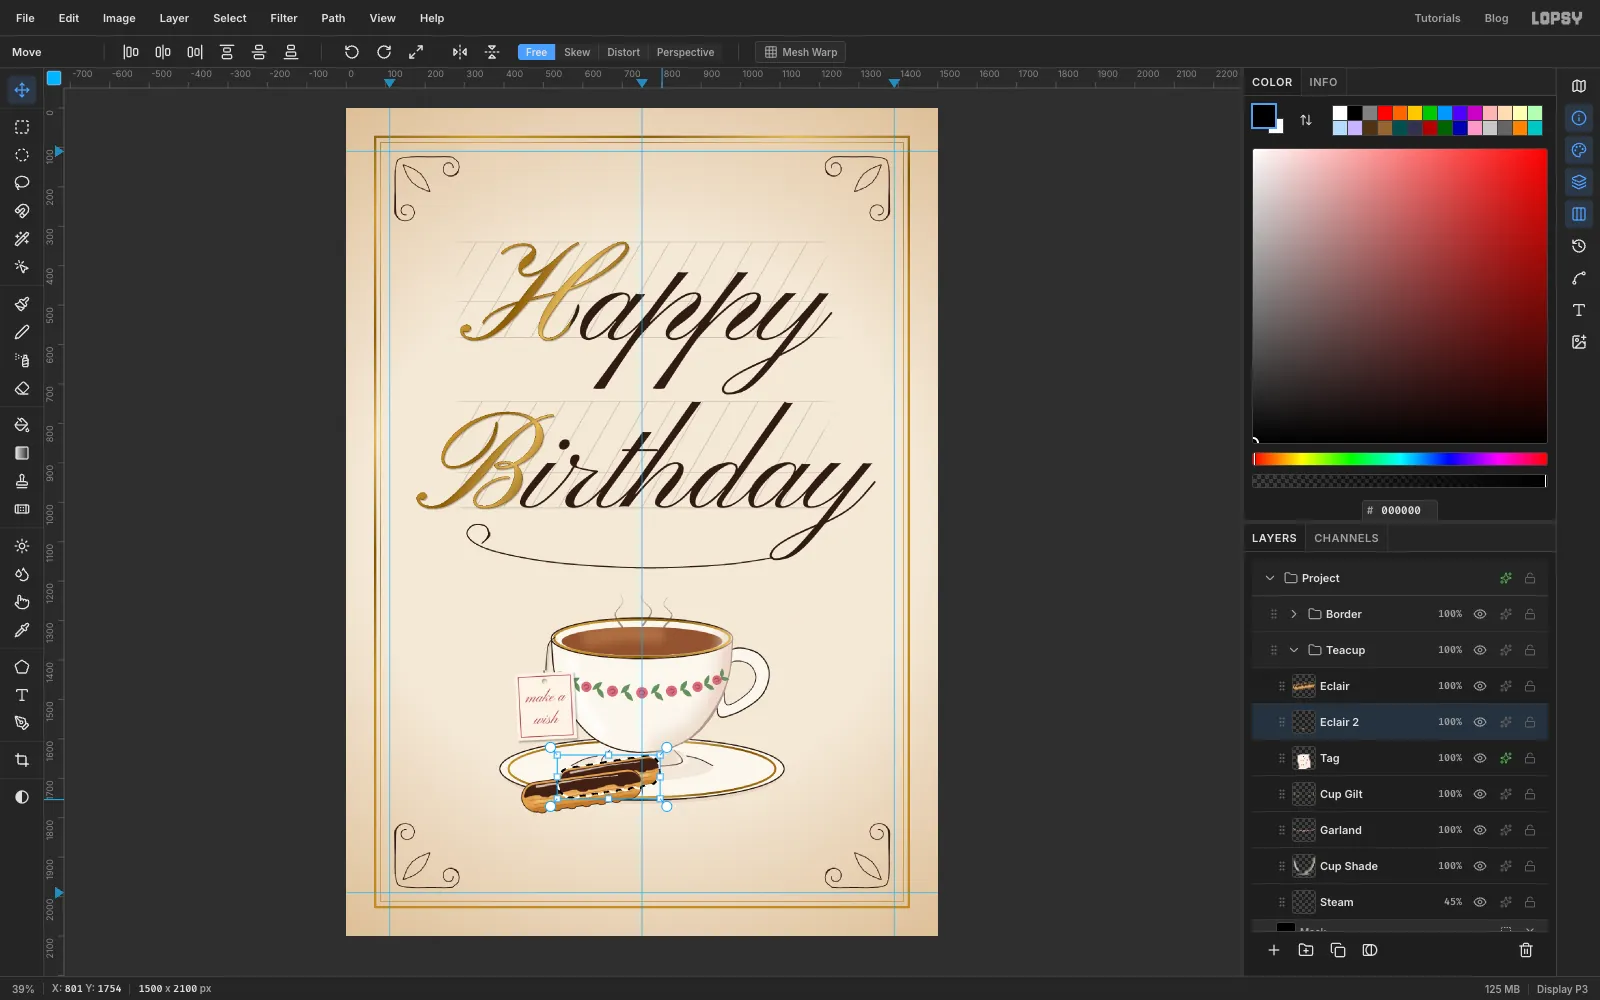
Marquee round the éclair and press Cmd+C. Select the Tag layer, then press Cmd+V. The paste lands just above Tag, so it sits behind the first éclair. Rename it Eclair 2.
With the Move tool, drag it back and to the right, about 90 px right and 35 px up, so it peeks out from behind. Then drag the right-hand edge handle inwards until it's about 15% shorter. Turn it another 9° with a rotation handle, so the two aren't parallel. Press Enter and deselect.
-
Add contact shadows
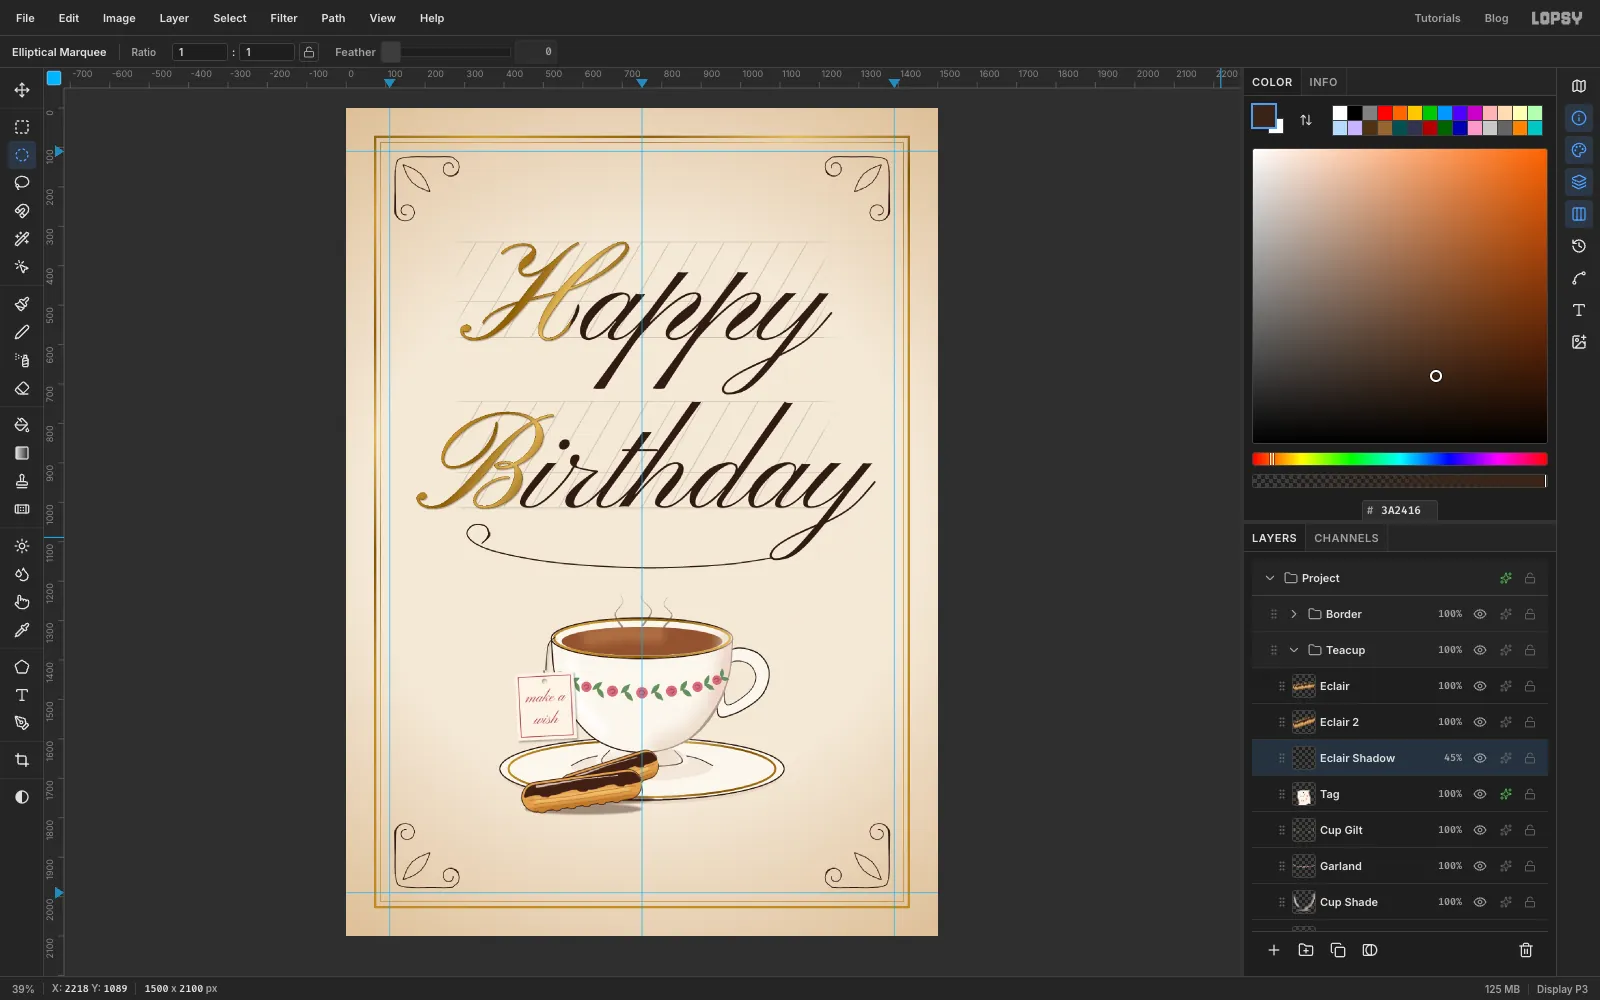
Things look stuck on until they cast a shadow. Select Tag again and add a layer called Eclair Shadow, which sits below both éclairs.
With the Elliptical Marquee, draw a thin oval along the bottom of each éclair, holding Shift for the second. Fill them with and deselect. Run Filter → Gaussian Blur… at 6, set the blend mode to Multiply, and drop the layer to 45% opacity.
-
Lift the whole teacup group
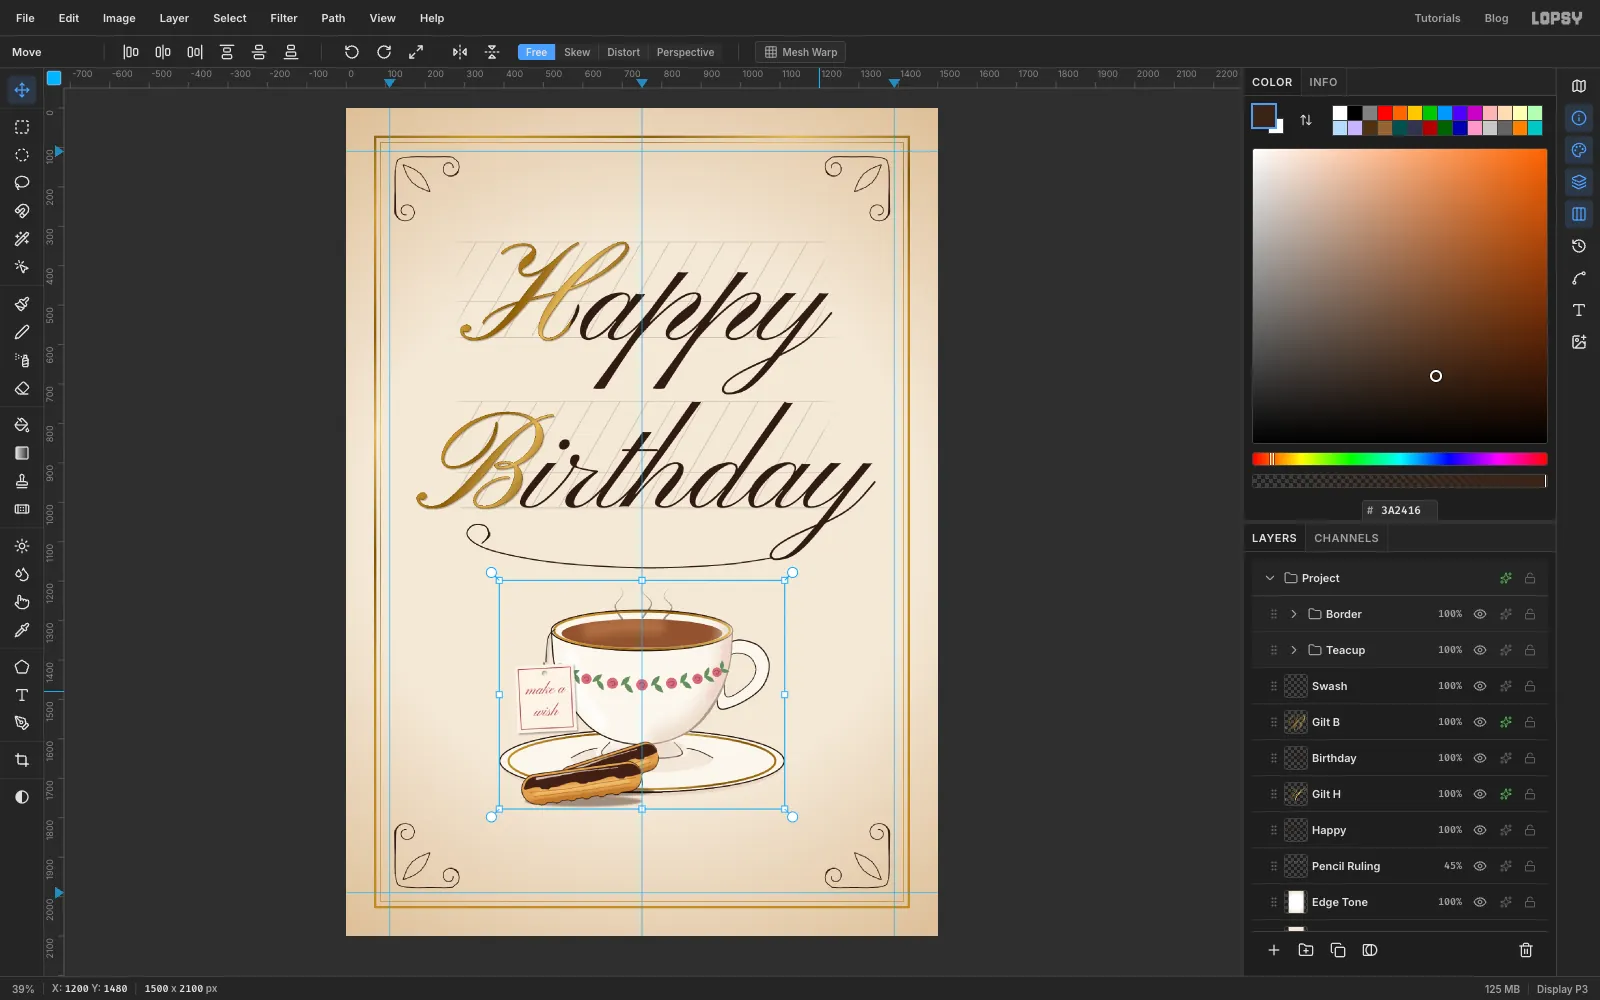
Step back and look at the spacing. The éclairs sit too close to where the divider and message will go. Collapse the Teacup group and click its row to make the whole group active. With the Move tool, press Shift+↑ twice to lift it 20 px. Every layer inside moves together: saucer, cup, garland, steam, tag and éclairs.
-
Draw a mirrored divider
Select Swash and add a layer called Divider.
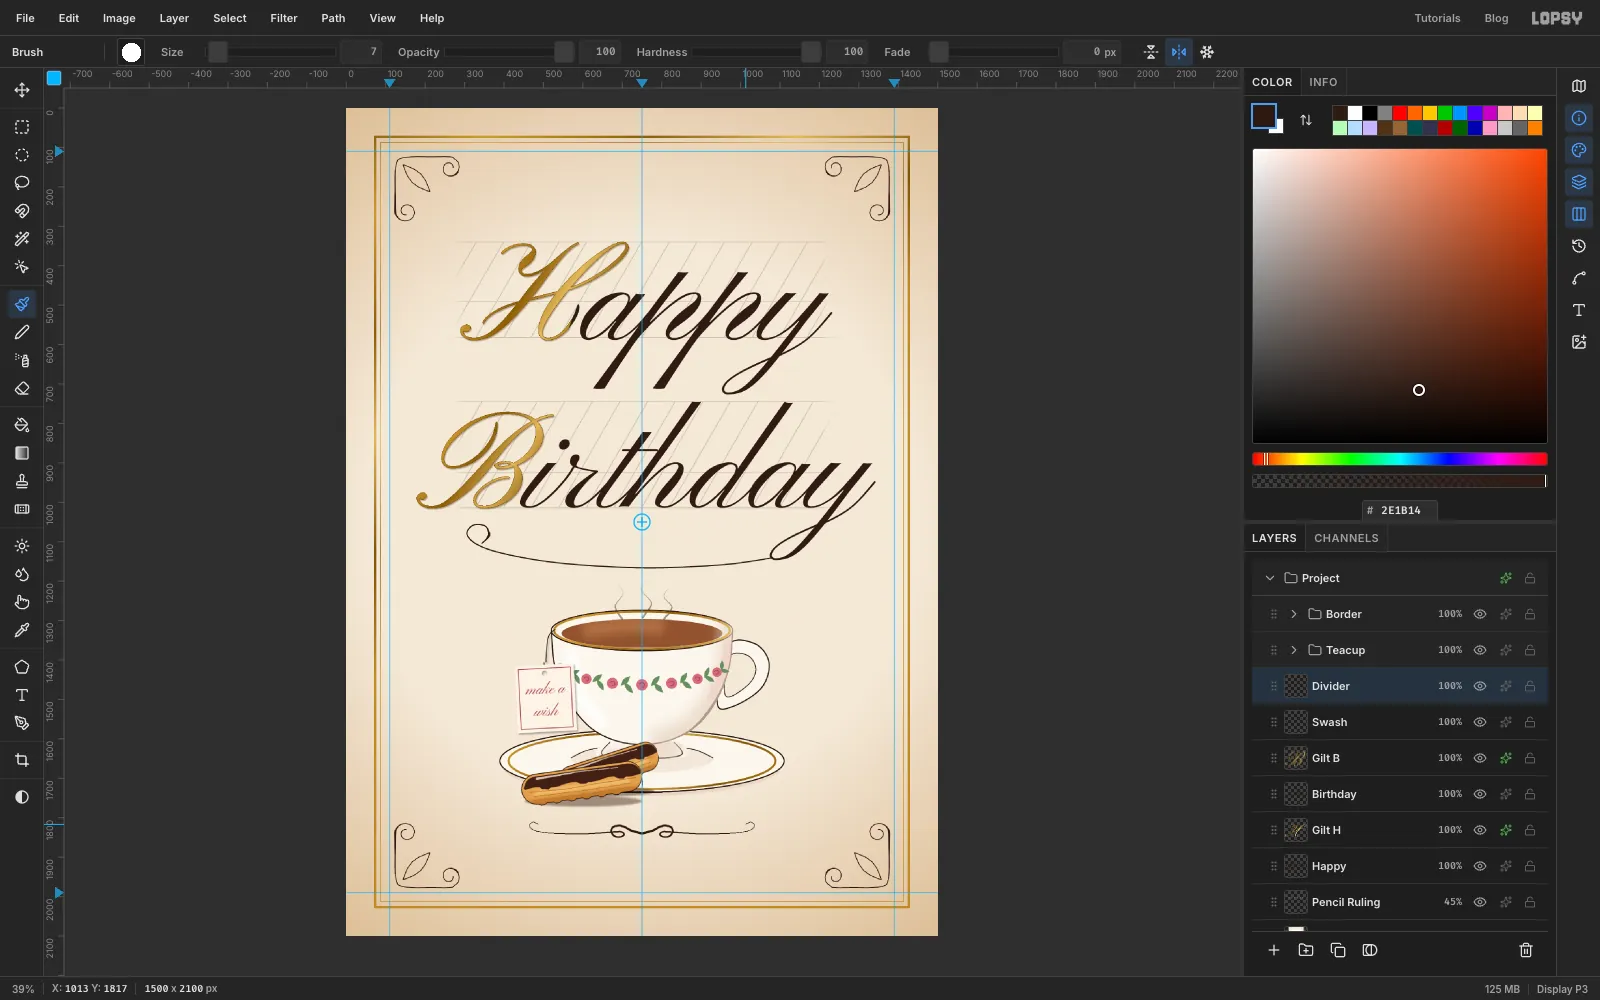
Pick the Brush with Hard Round at Size 7. Set the Taper to about the length of the stroke you're going to draw (about 330). Click Symmetry Vertical in the options bar. That mirrors every stroke across the centre line.
Start on the centre guide at about y 1840. Draw the right half in one stroke: a small loop that crosses itself, then a long, gentle line out to the right, ending in a little curl. The mirror draws the left half as you go. The taper makes the stroke heaviest at the centre and finest at the curls.
Click Symmetry Vertical again to turn it off.
-
Add the punchline
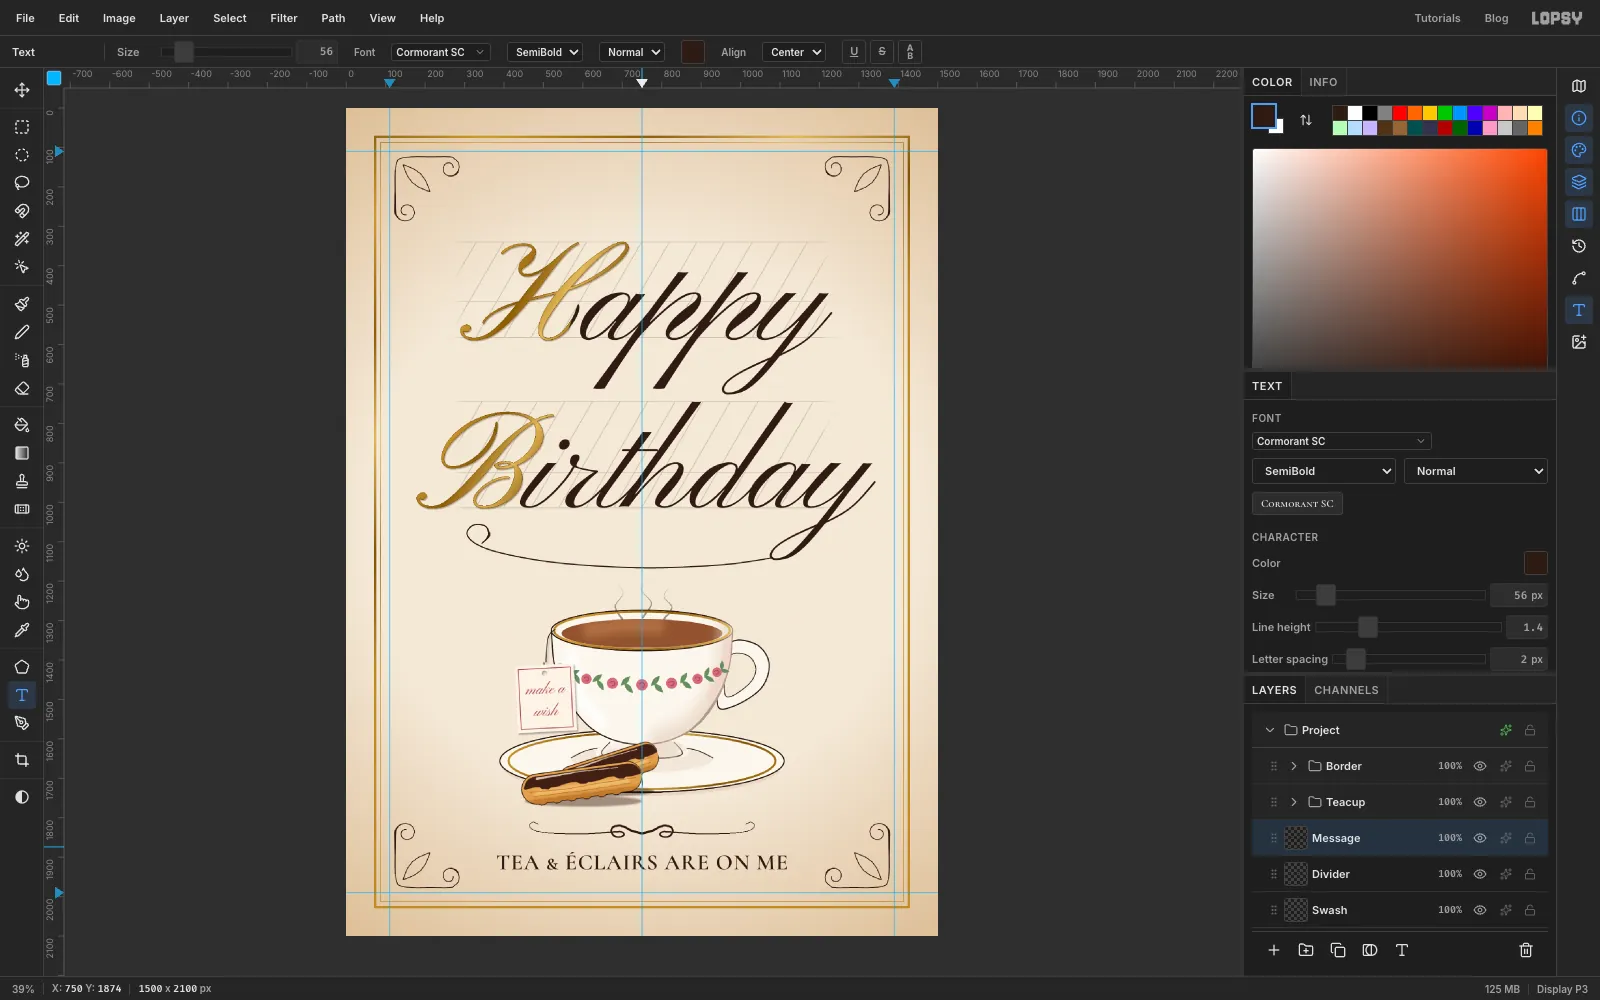
Pick the Text tool. Choose Cormorant SC at weight SemiBold (600), size 56, Center alignment, and ink colour. Click the centre guide at y 1874 and type TEA & ÉCLAIRS ARE ON ME. Press Tab, and in the Text panel set Letter spacing to 2.
Check the gap on either side. The line should stay well clear of the bottom corner ornaments, about 100 px each side. Small capitals keep the joke quiet next to all that script.
-
Lay paper fibre over everything
Collapse both groups and select Border. Collapsed, the new layer lands above the group instead of inside it. Add a layer called Paper Fibre.
Run Filter → Fibers… with Variance 12 and Strength 10. Low strength gives tangled fibres rather than wood grain. Then run Filter → Add Noise… at 14, Mono and Gaussian. Set the blend mode to Multiply and the opacity to 7%. The texture now runs over the ink and gold as well as the card, so it all looks printed on the same stock.
Save the project, and export a PNG with File → Quick Export PNG.