Make a Hand-Tinted Etching Birthday Card from a Photo
Turn a bird photo into a Victorian copperplate etching birthday card in Lopsy with stripe patterns, Threshold, Mesh Warp and hand-tinted washes.
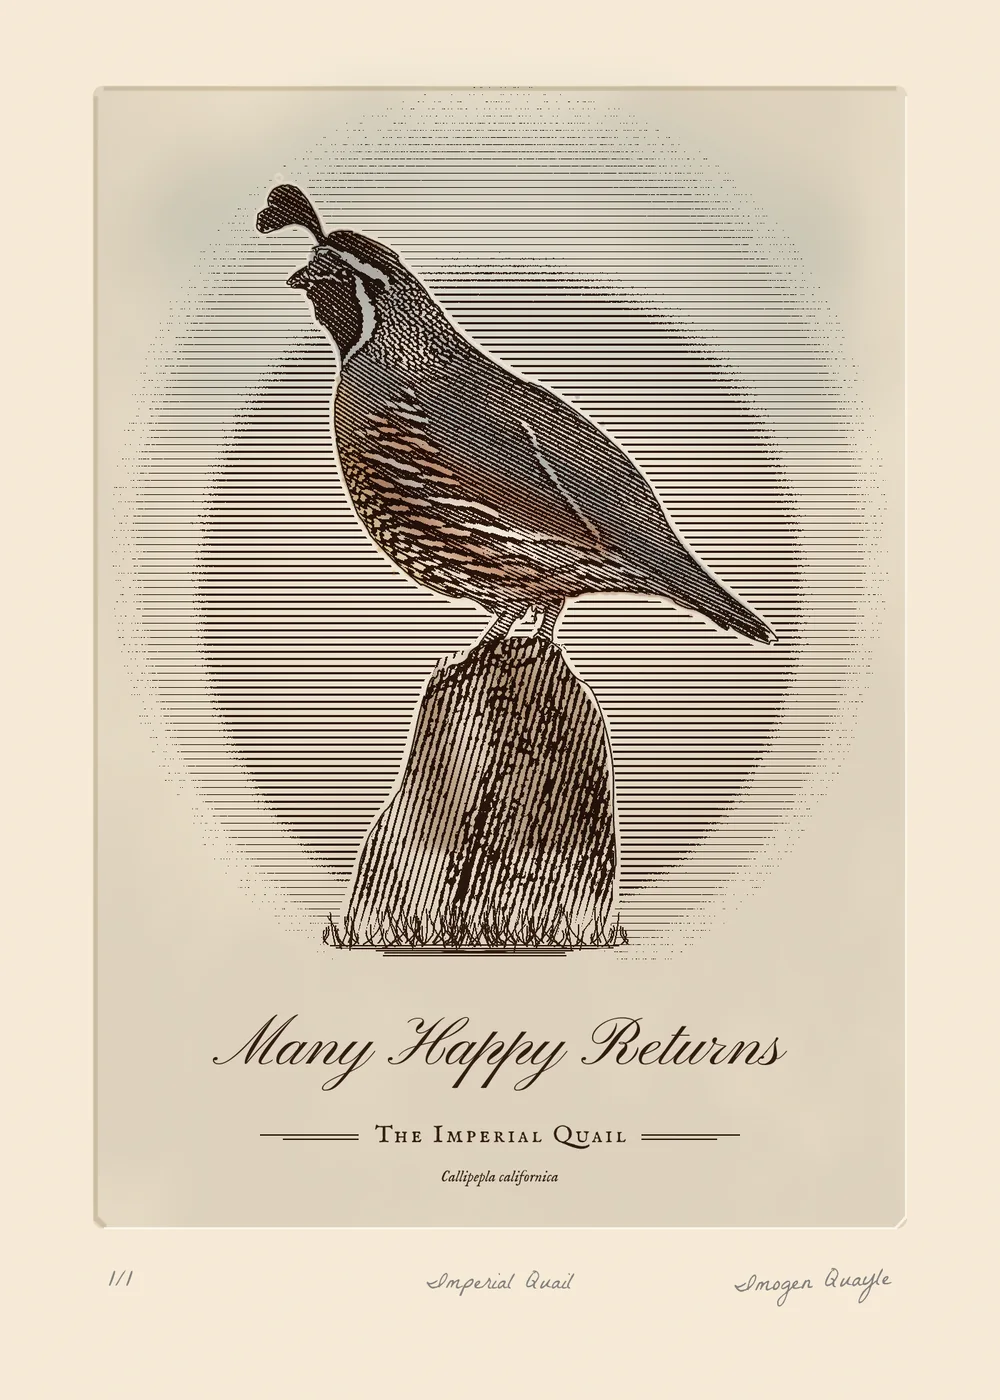
Before photography could be printed, the pictures in bird books were etchings and engravings. An artist cut lines into a copper plate. Ink held in those lines printed the picture, and a colourist then washed watercolour over each copy by hand. The engraver had no grey: every tone was a line. Thick lines sitting close together read as dark, and thin lines far apart read as light.
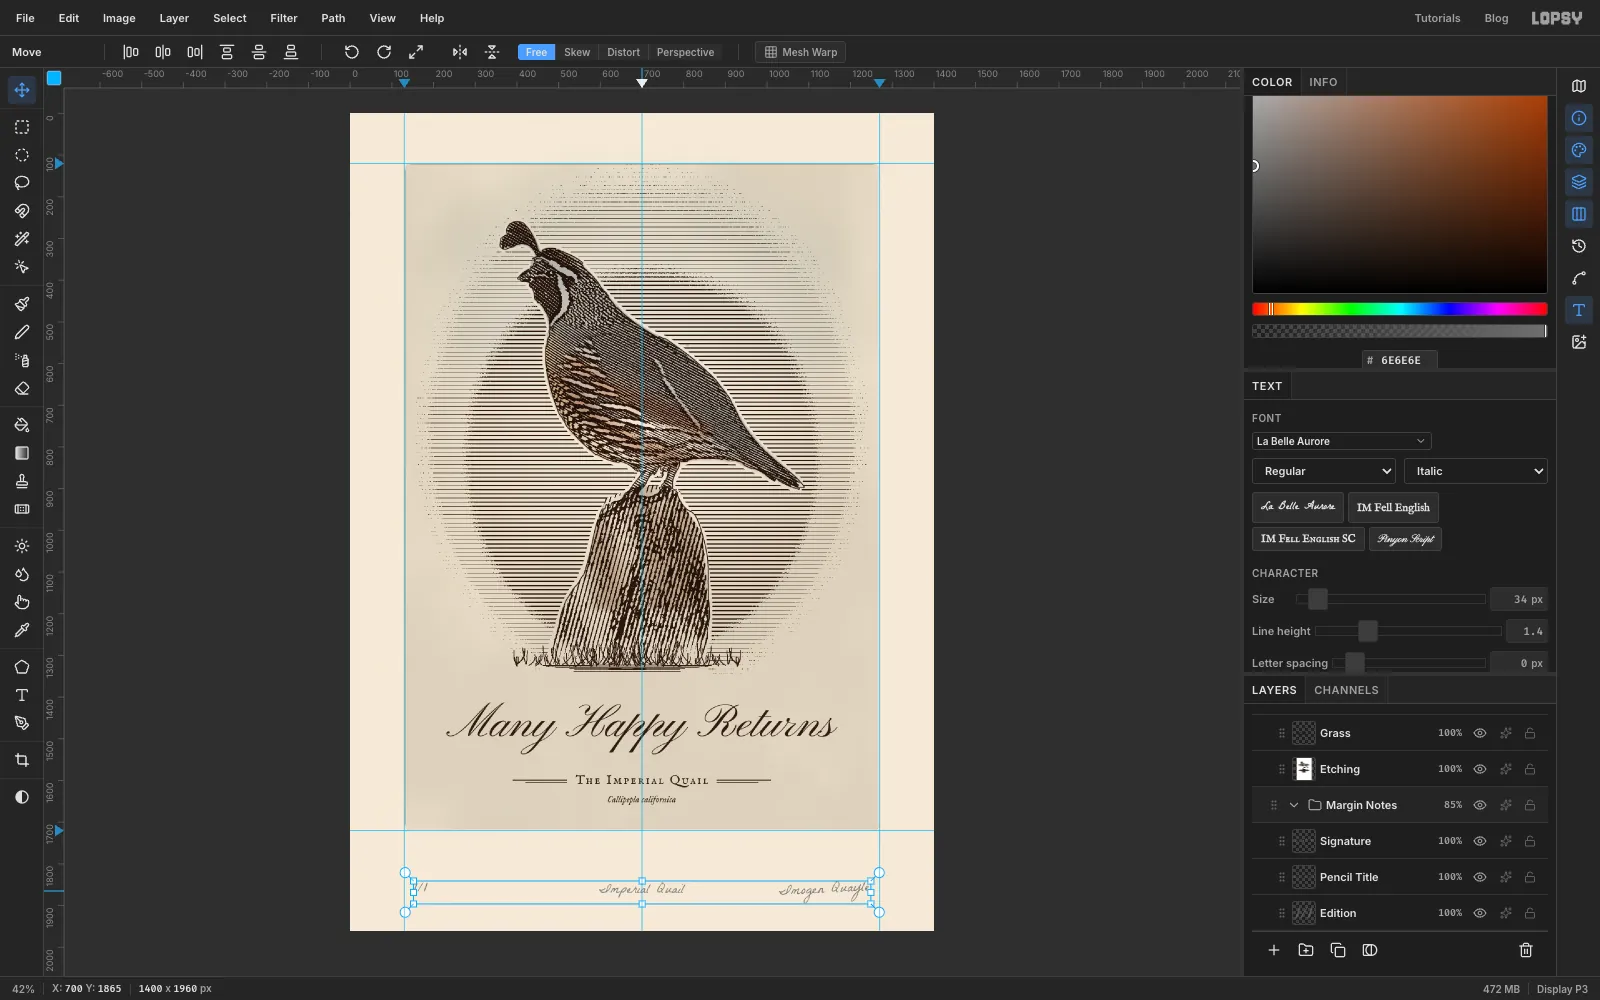
In this tutorial you'll get that look from a photo for a birthday card called The Imperial Quail. The card is 1400 × 1960 px. A California quail stands on a post inside an oval of ruled lines, with "Many Happy Returns" engraved below it. Under the plate are pencil notes, the way a printmaker signs a proof.
The trick behind the line work is simple. Lay a layer of soft stripes over the photo at half opacity and run Threshold. Where the photo is dark, the stripes fatten into heavy lines. Where it's light, they thin to hairlines or vanish. You'll do it three times: flat rules for the sky, a diagonal set for the bird, and an upright set for the post. Then you'll add a second, crossing set in the deepest shadows.
The tools you'll meet along the way:
- Magic Wand with Shift to add and Lasso with Alt to subtract, plus Select → Inverse for a clean cut-out
- Desaturate, Hue/Saturation, Brightness/Contrast and Unsharp Mask to prepare the photo
- linear and radial gradients, and a scaled selection for an oval fade
- Edit → Define Pattern and Fill with Pattern for stripe tiles
- the Move tool's rotate handle and Mesh Warp to bend the hatching
- Threshold, the Multiply and Lighten blend modes, and Merge Down
- Selection → Path and Stroke Path for an engraved outline
- Clouds, Add Noise and Emboss for the paper and the plate
- the Brush with Taper, the Pencil with Shift-click lines, and the Eraser
- Pinyon Script, IM Fell English SC, IM Fell English italic and La Belle Aurore
- groups, copy and paste, Flip Horizontal, and undo / redo
The palette is sepia ink on cream paper, with soft watercolour washes:
-
Paper
-
plate tone
-
wiped highlight
-
Etching ink
-
Slate wash
-
chestnut
-
buff
-
umber
-
Sky wash
-
Plate shadow
-
plate highlight
-
Graphite
the pencil notes
The bird is a public-domain photo from the U.S. Fish and Wildlife Service: California Quail on Wikimedia Commons. Any bird photo shot against a soft, out-of-focus background will work the same way.
-
Create the card and mark out the plate
Choose File → New, set Width to
1400and Height to1960in Pixels, keep the White background and click Create.Now mark where the copper plate will sit. With the rulers showing, click the top ruler at 130, 700 and 1270 to drop vertical guides for the plate's left edge, its centre and its right edge. Then click the left ruler at 120 and 1720 for the top and bottom of the plate. Watch the ruler readout, or zoom in a little, to land close to those numbers; a few pixels either way doesn't matter. The plate is pushed towards the top, which leaves a deep margin underneath for the pencil notes. A real print is matted the same way.

-
Paste the photo
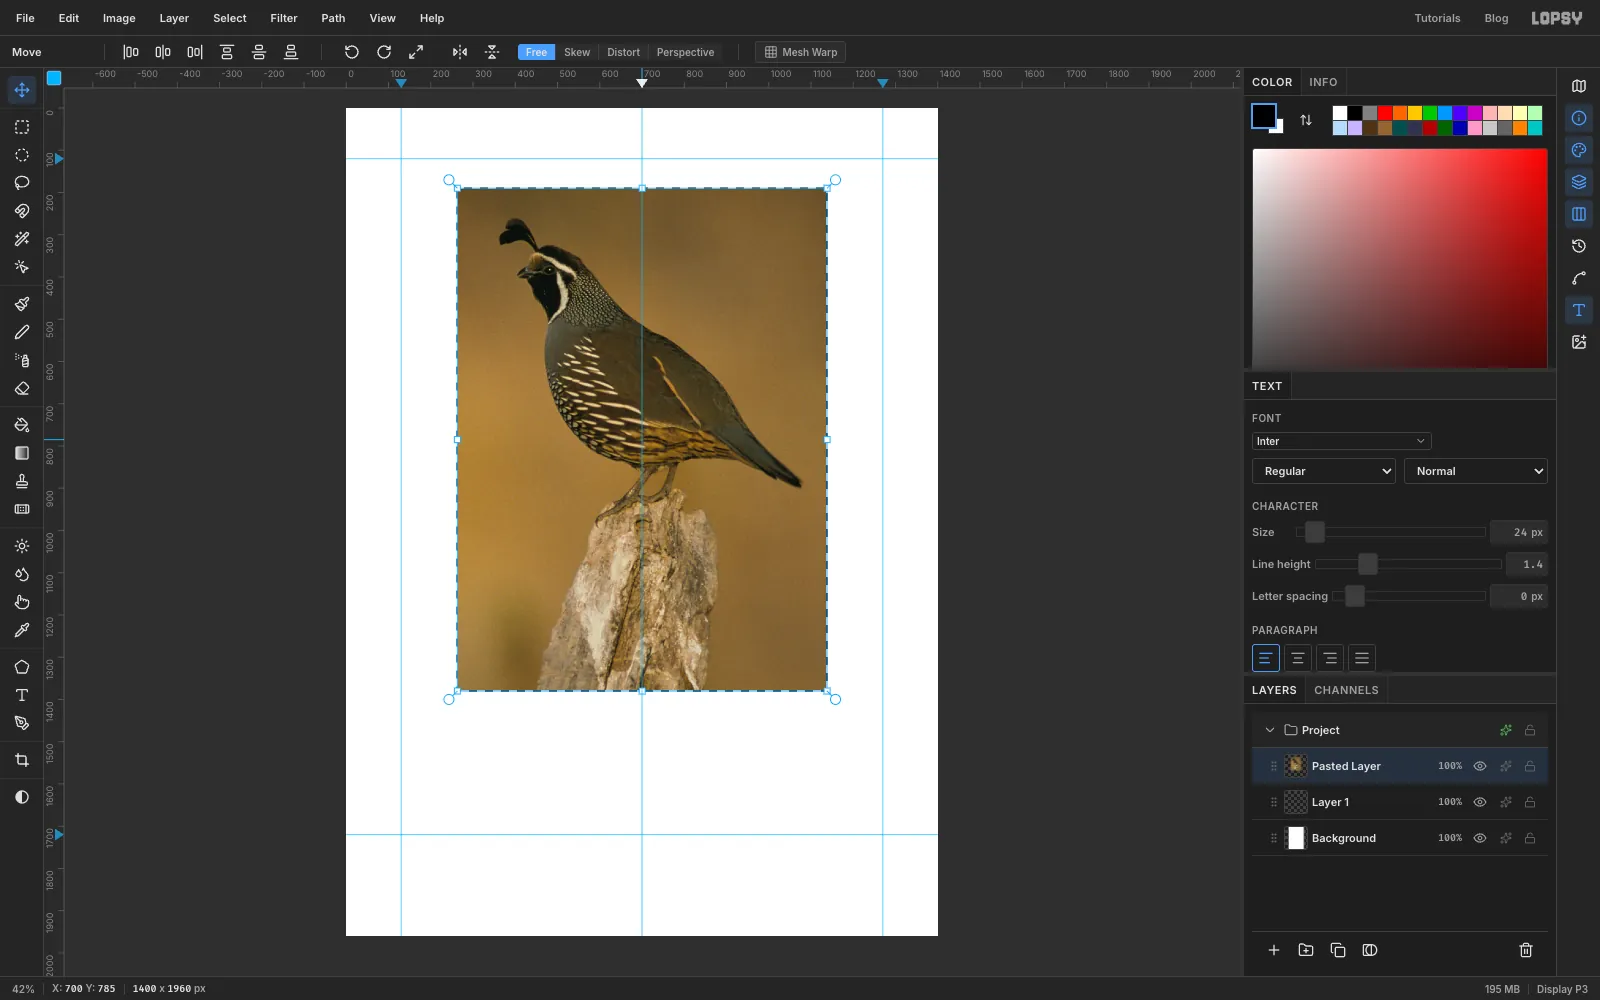
The photo used here is California Quail (9405494428).jpg) from Wikimedia Commons. Crop it to the bird and its perch in any image viewer, about 875 × 1190 px, copy it and press Cmd+V in Lopsy. The photo arrives as a new layer, selected and ready to move. Drag it up so the bird's head sits about a fifth of the way down the plate and the post is roughly centred on the middle guide. Press Cmd+D to drop the selection, then double-click the layer name and rename it Quail Photo.
-
Select the background with the Magic Wand
Pick the Magic Wand. Set Tolerance to
34and turn Contiguous on. Click the ochre background to the left of the bird. Then hold Shift and click each patch the first click missed: behind the tail, on both sides of the post, above the head, and between the legs. Shift adds each new area to the selection.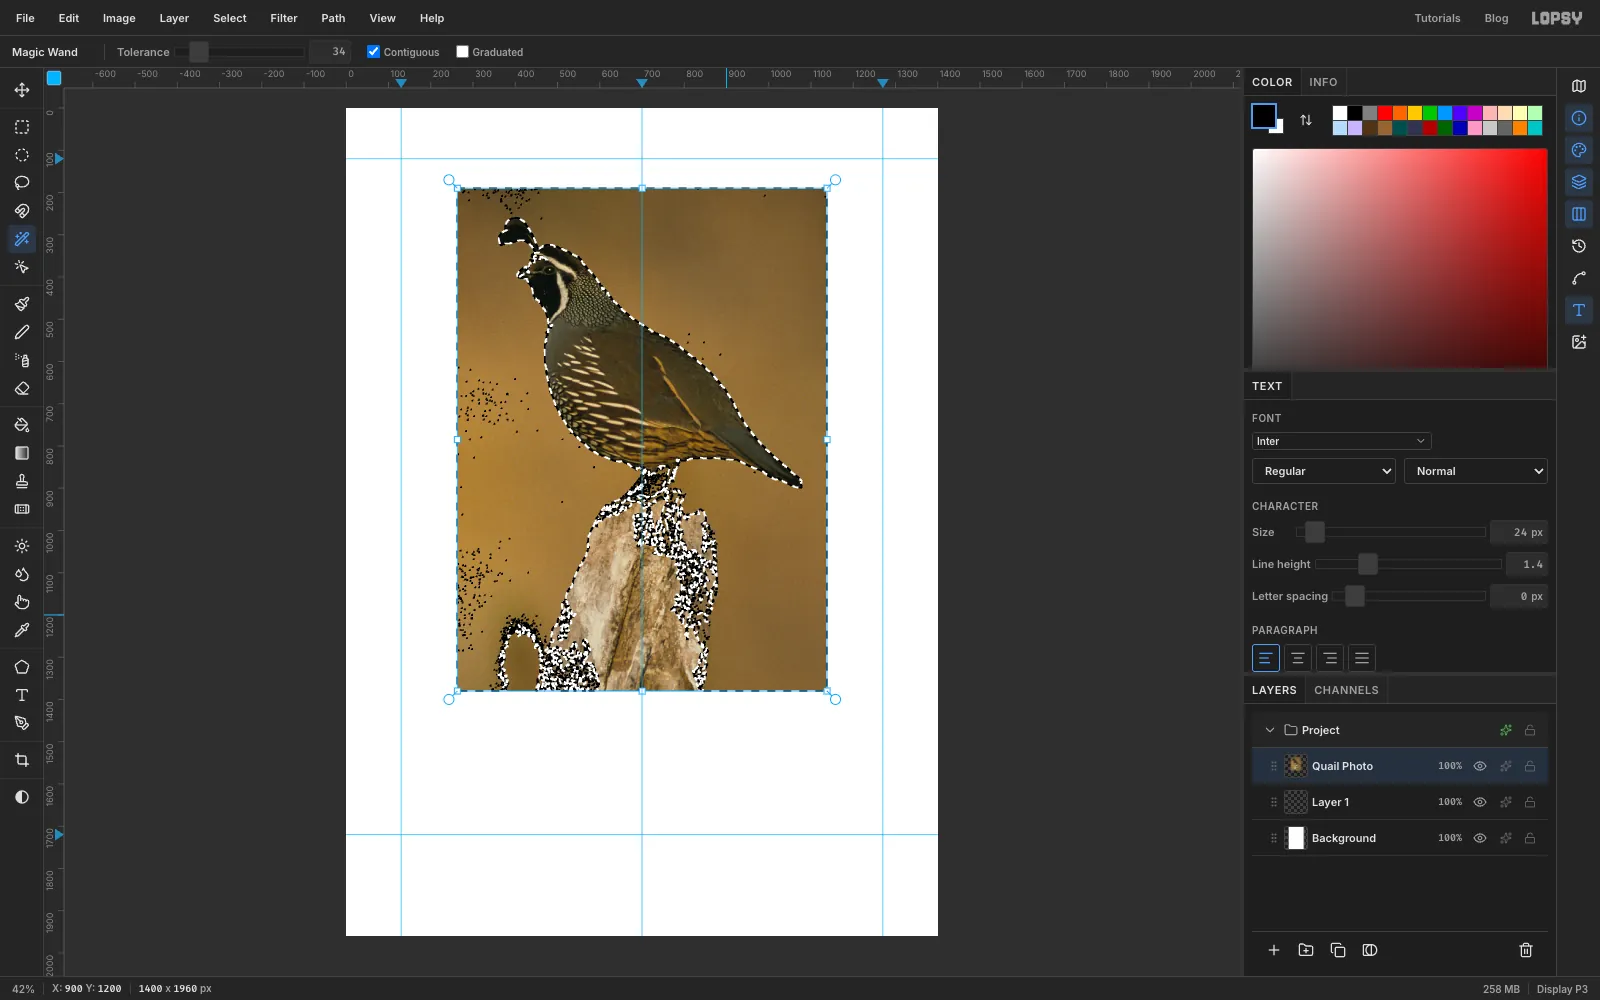
-
Take the post and legs back out
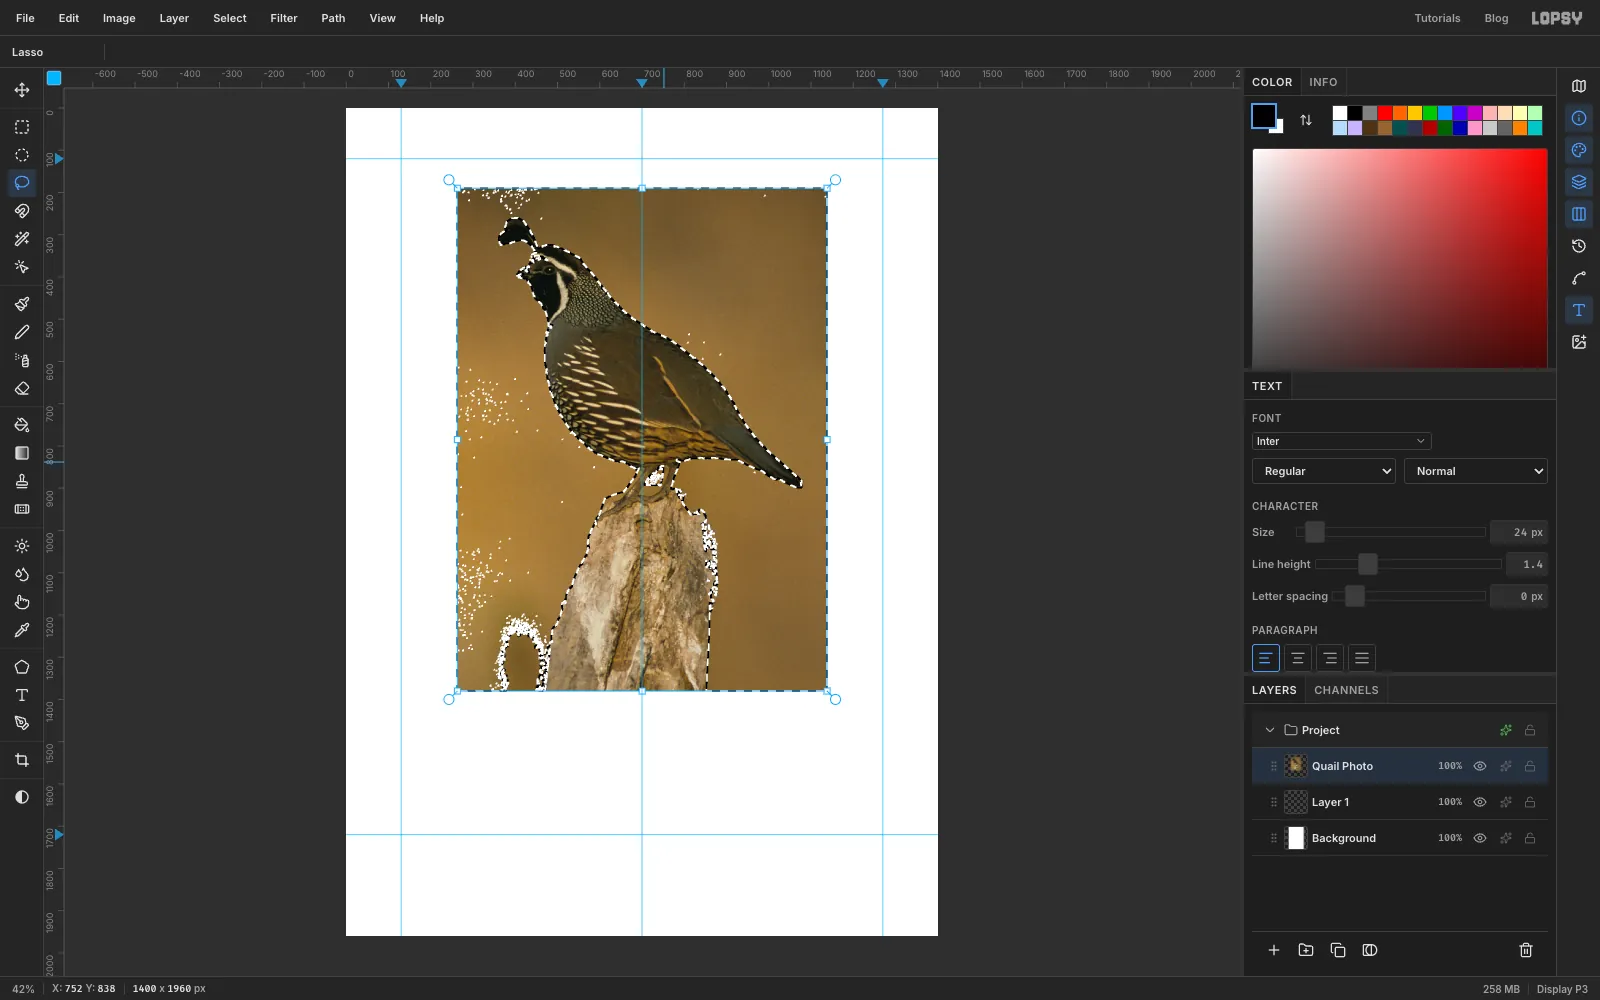
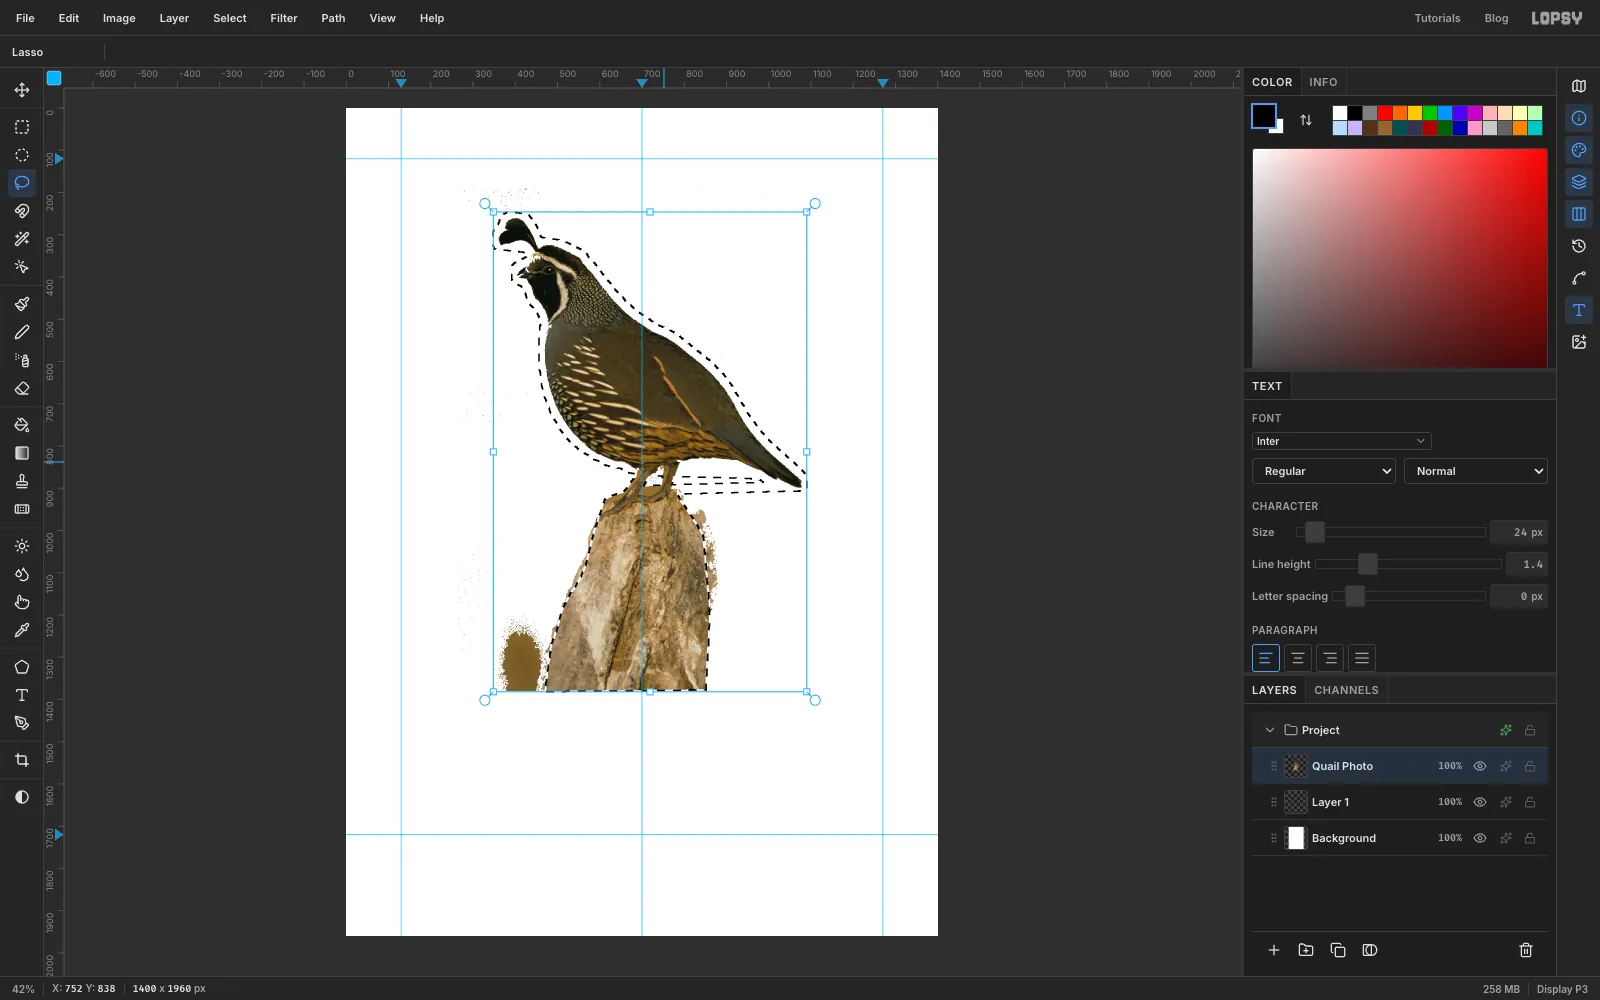
A soft background and a sunlit post are close in colour, so the wand always grabs some of the post as well. Fix that with the Lasso. Hold Alt and draw round the whole post to subtract it from the selection. Do the same round each thin leg. Without the legs the bird would float above its perch.
Press Delete to clear the background, then Cmd+D.
-
Clean up the edges
The wand leaves specks of background in the feathers' fringe. Draw a loose Lasso a little way outside the bird and post, hold Shift and add loops round the legs. Choose Select → Inverse and press Delete again. Everything outside your loose outline goes, and the bird is left clean. Press Cmd+D.
If small patches of background are still caught between the legs, click each one with the Magic Wand and press Delete.
-
Turn the photo into clear grey tones
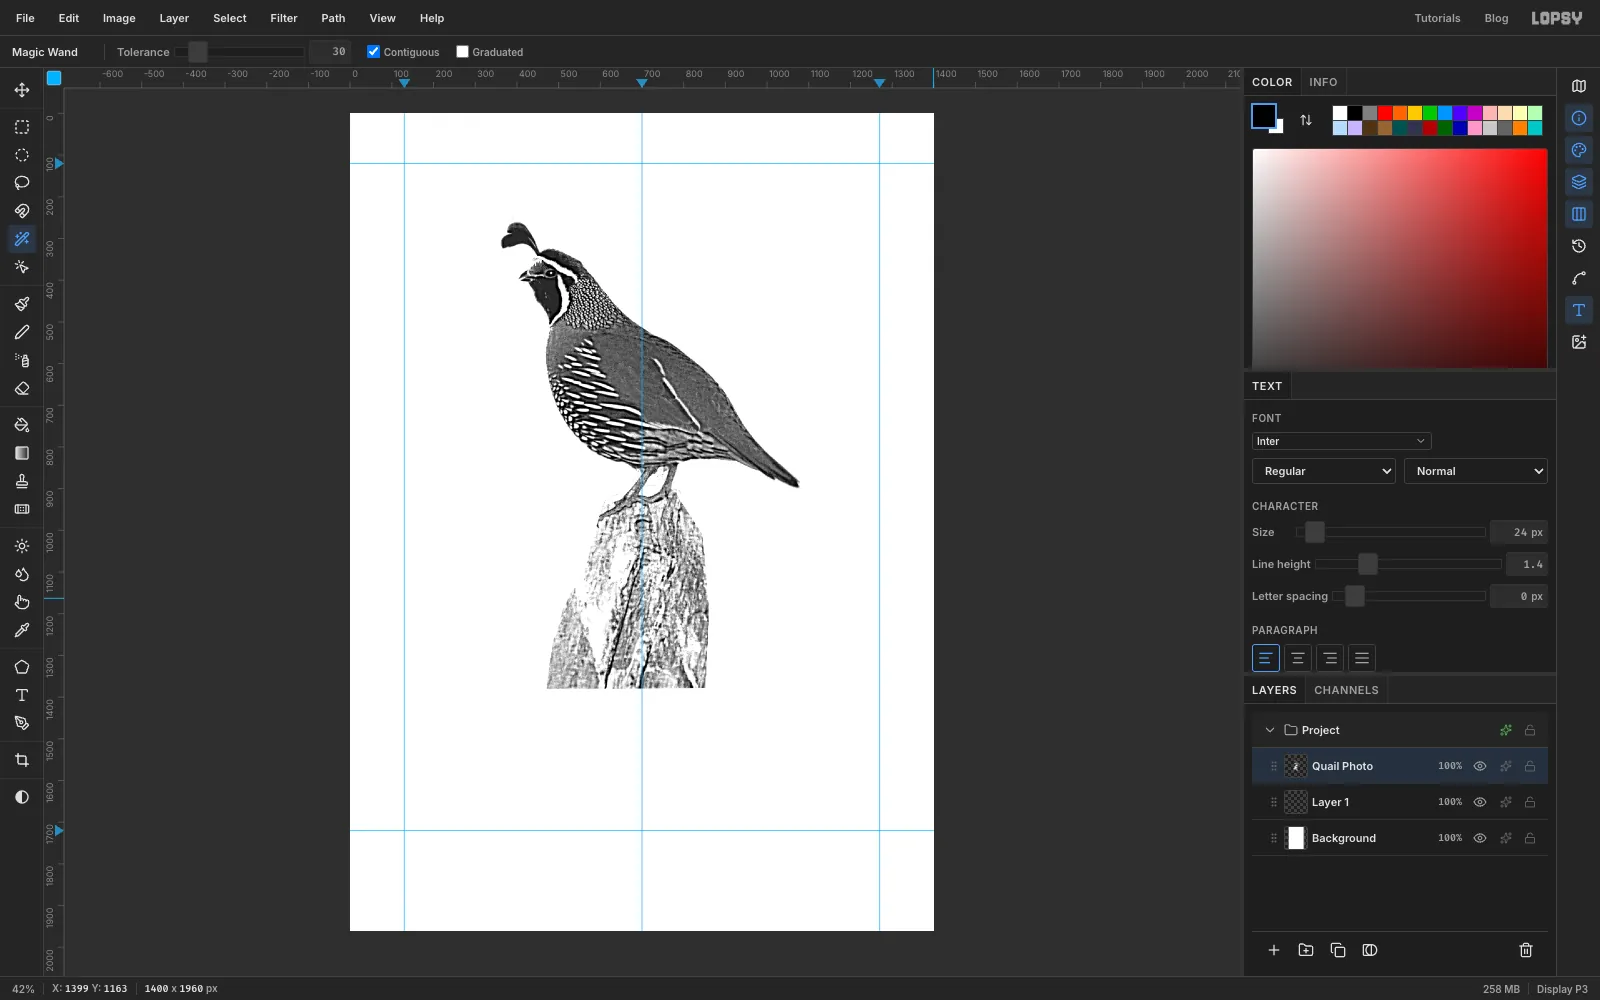
An etching needs a clear range from light to dark, so prepare the photo first:
- Filter → Desaturate removes the colour.
- Filter → Hue/Saturation, Lightness
20, lifts the dark bird. - Filter → Brightness/Contrast, Contrast
35, separates the feather markings. - Filter → Unsharp Mask, Radius
6, Amount1.8, sharpens the scalloped breast and the stripes on the flank.
-
Darken the post
The post is now much paler than the bird and would engrave as almost nothing. Lasso round the post, open Filter → Brightness/Contrast, set Brightness to
-30and Contrast to30, and tick Preview to check it. Click Apply, then Cmd+D.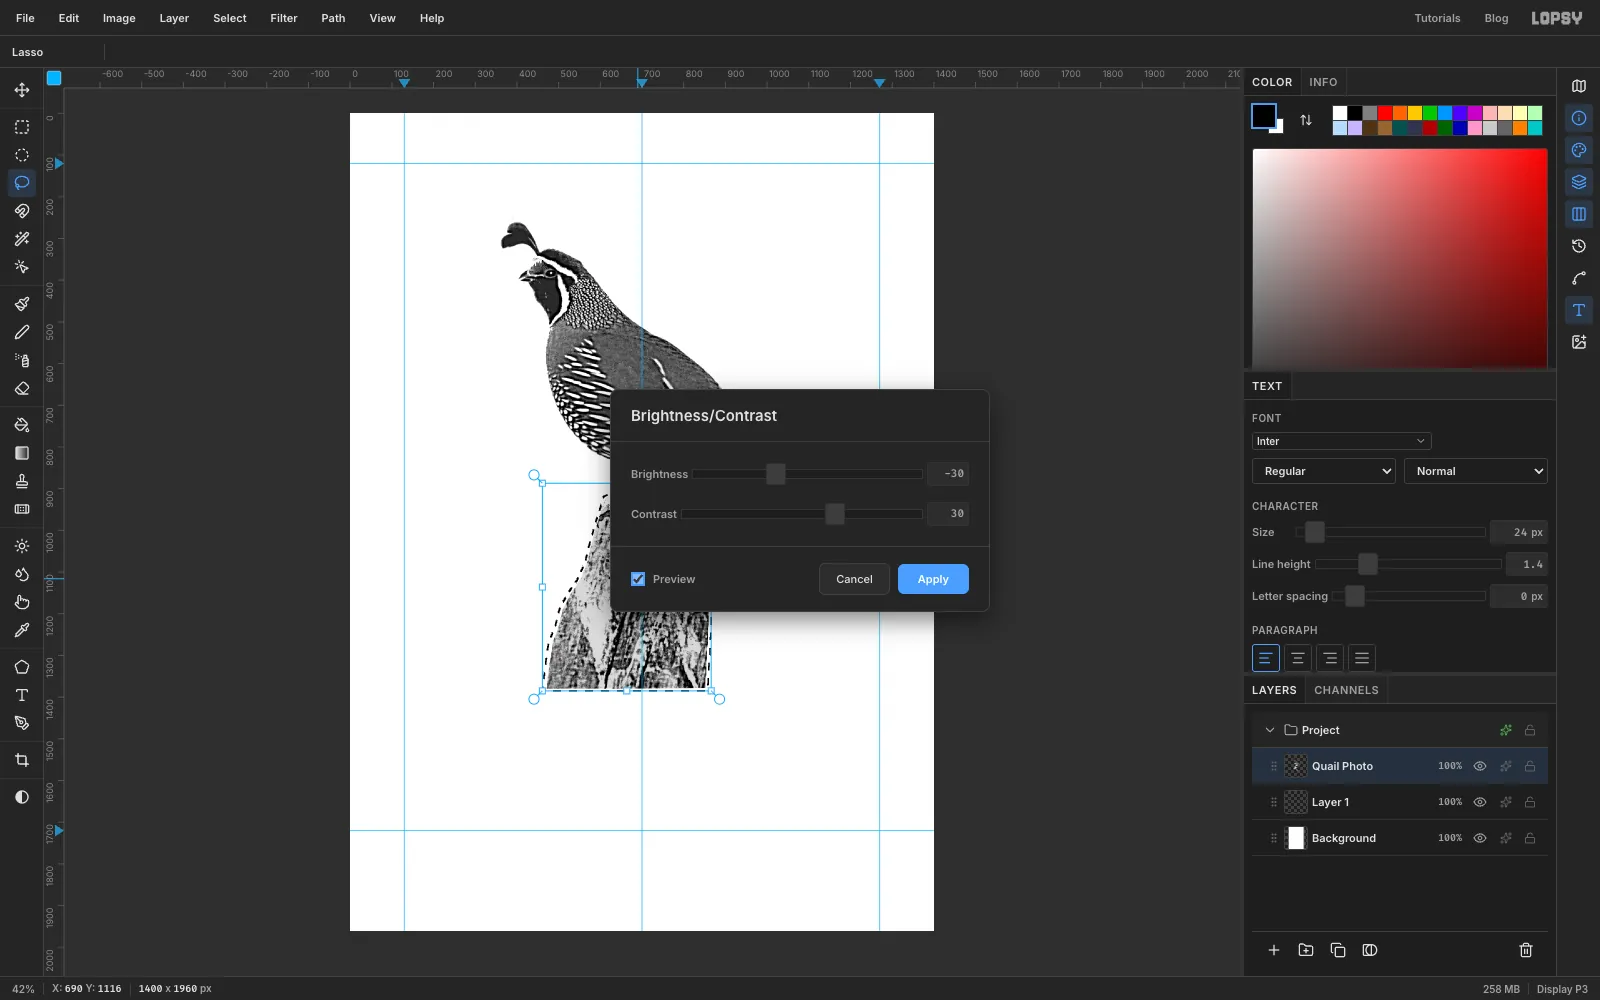
-
Fade out the foot of the post
Pick the Eraser, set Size to
200and Opacity to35, and drag four slow horizontal strokes across the bottom of the post. Each stroke removes a little more, so the post dissolves into the paper instead of ending in a hard cut. Engravings of birds on perches nearly always fade out like this.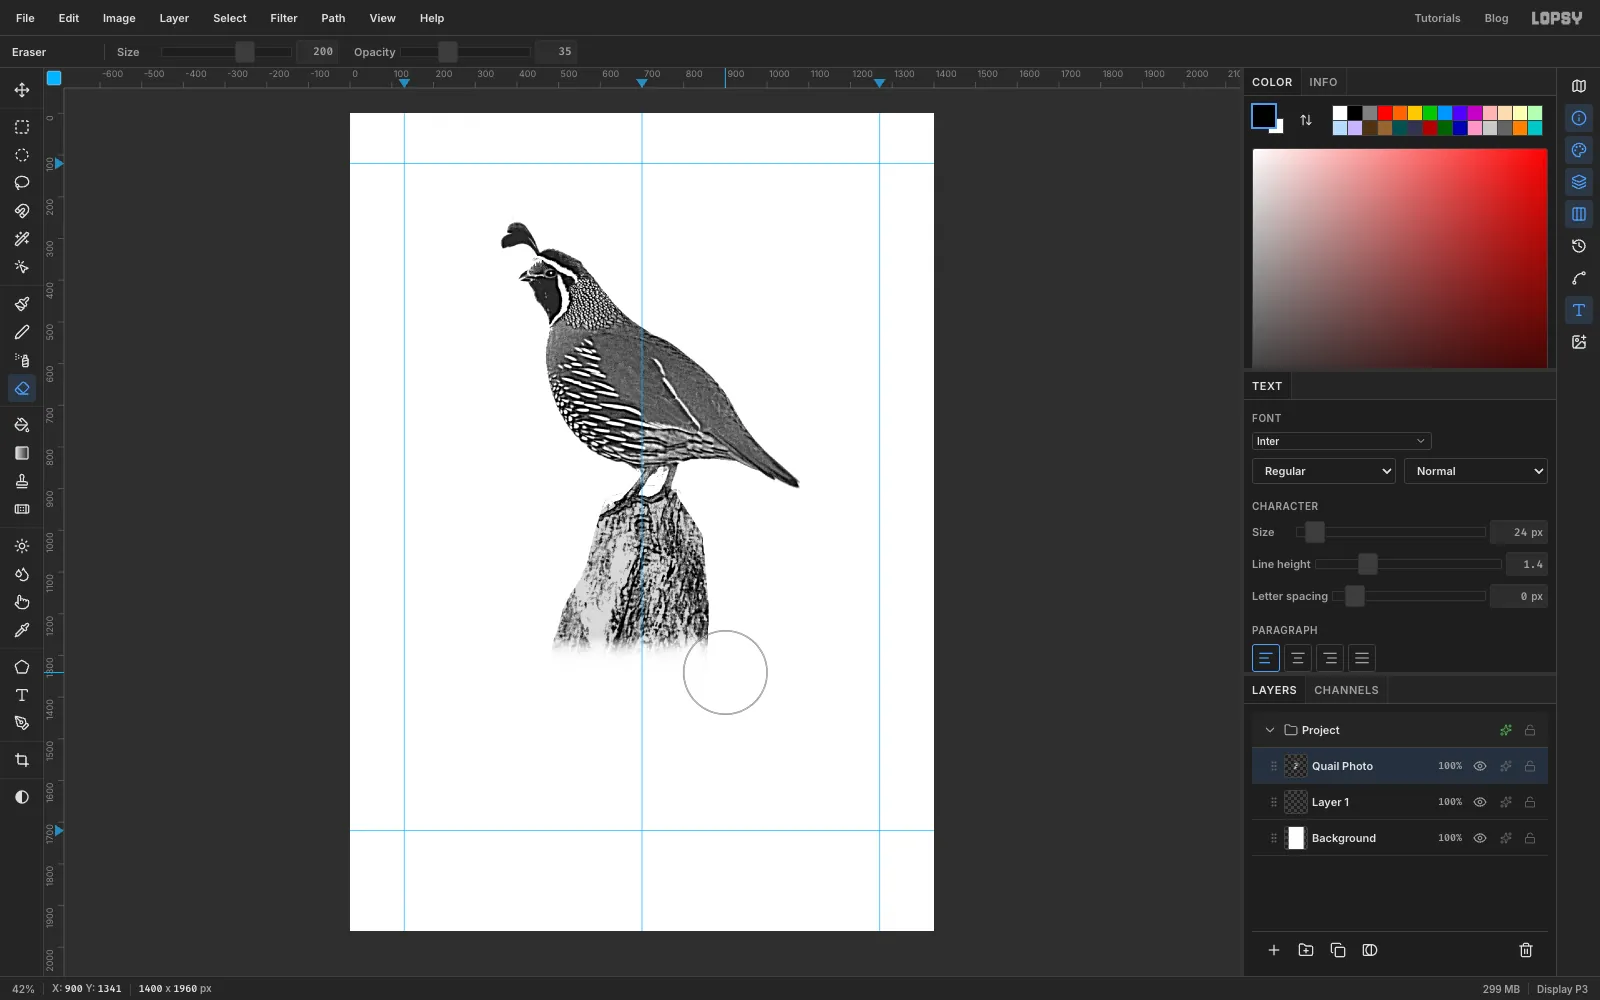
-
Lay in the sky
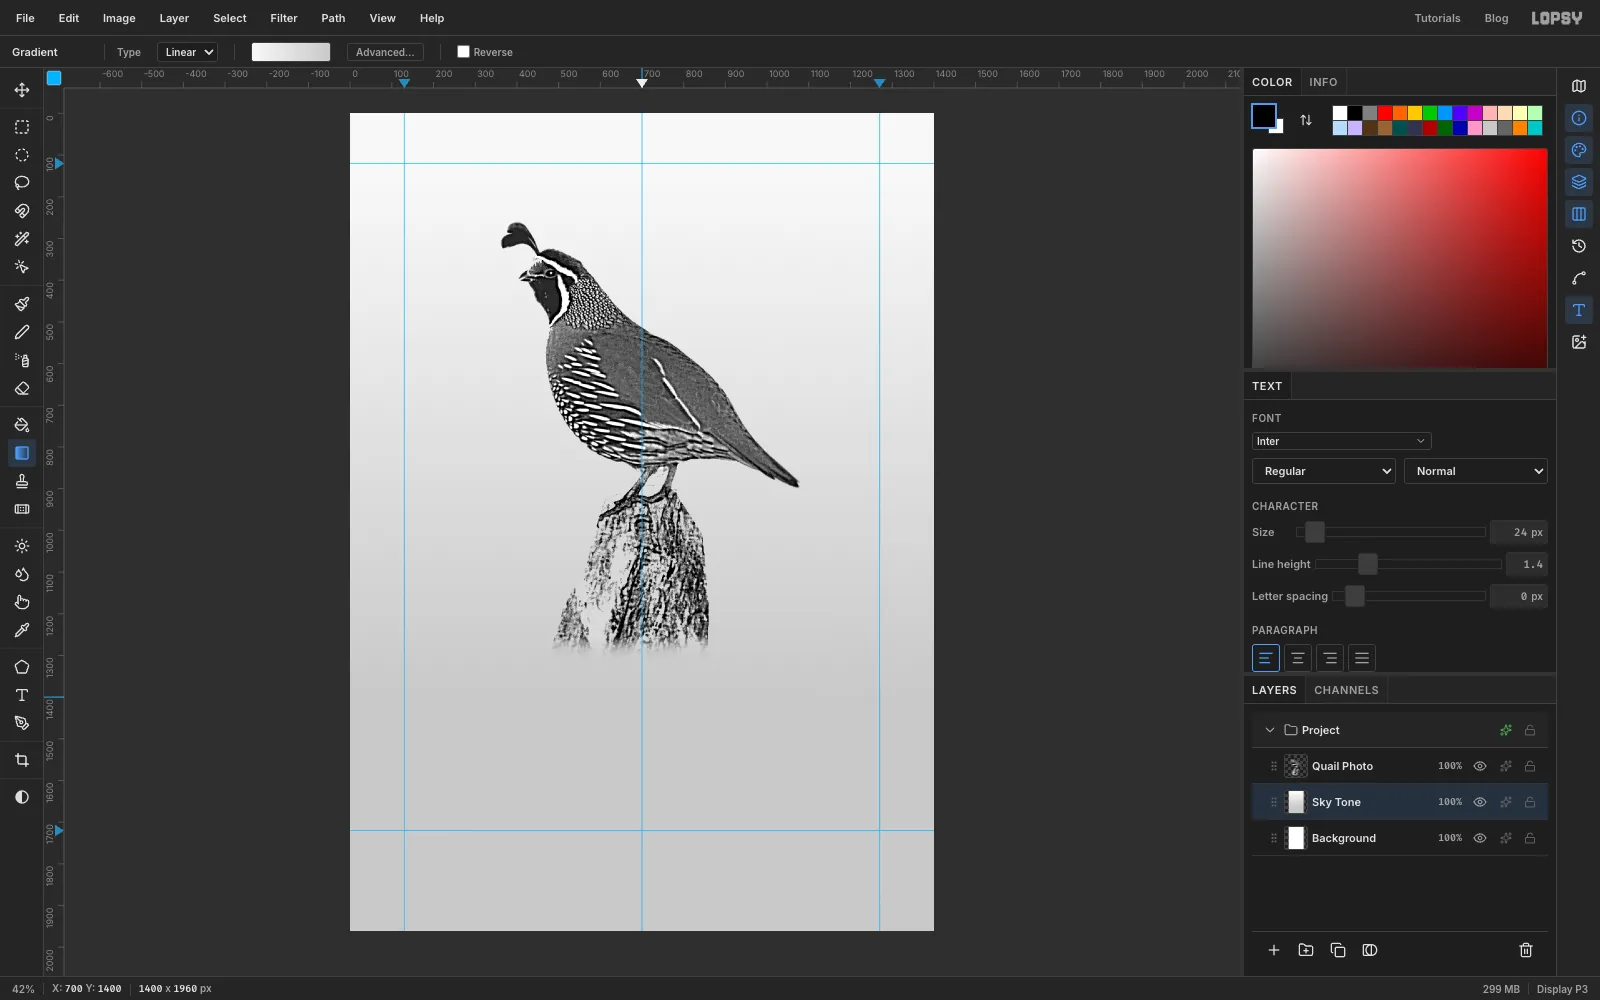
Click the empty Layer 1 that came with the new document (it sits under the photo) and rename it Sky Tone. Pick the Gradient tool, set the type to Linear, and in Advanced… make the stops and . Drag from just below the top of the plate down to the foot of the post. This tone becomes the ruled sky: dark grey turns into thick rules, light grey into hairlines.
-
Fade the sky into an oval
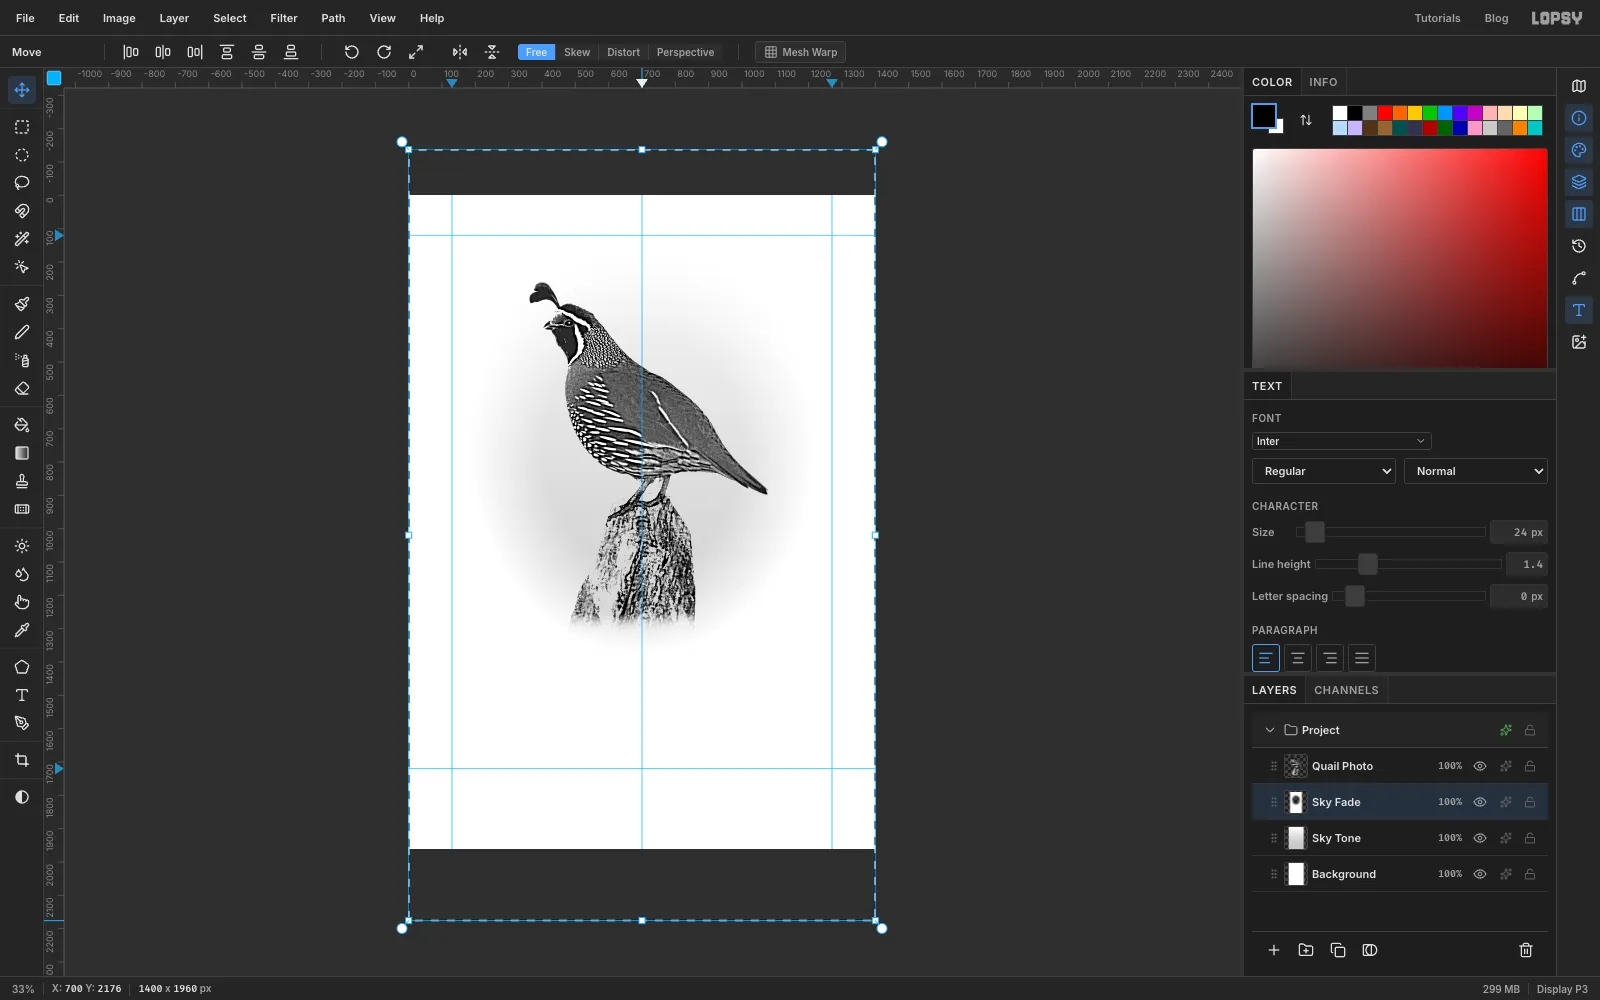
Click Add Layer and name it Sky Fade. In the Gradient tool's Advanced… editor, make three white stops:
0%opacity at the left end,0%opacity at about58%, and100%opacity at the right end. Set the type to Radial and drag from the middle of the bird straight out to the right-hand plate guide. You get a clear circle with white outside it.The picture is taller than it is wide, so stretch the circle. Choose Select → All, switch to the Move tool, and drag the top-middle handle up and the bottom-middle handle down until the white just covers the corners of the plate. Press Cmd+D.
-
Leave a margin of paper round the bird
Engravers stop the background lines just short of the subject so it stands out. Click Add Layer and name it Halo.
You'll select the bird several times from here on, always the same way: click the Quail Photo row, pick the Magic Wand, turn Contiguous off, set Tolerance to
120, click the empty area around the bird and choose Select → Inverse. The wand only looks at the layer you've clicked, but the selection it makes stays put when you click another layer, so you can then switch to the layer you want to work on.Select the bird that way, then click back on Halo. Then choose Select → Shrink
4and Select → Grow13. The shrink gets rid of stray specks before the grow pushes the edge out. On the Halo layer choose Edit → Fill with white and press Cmd+D.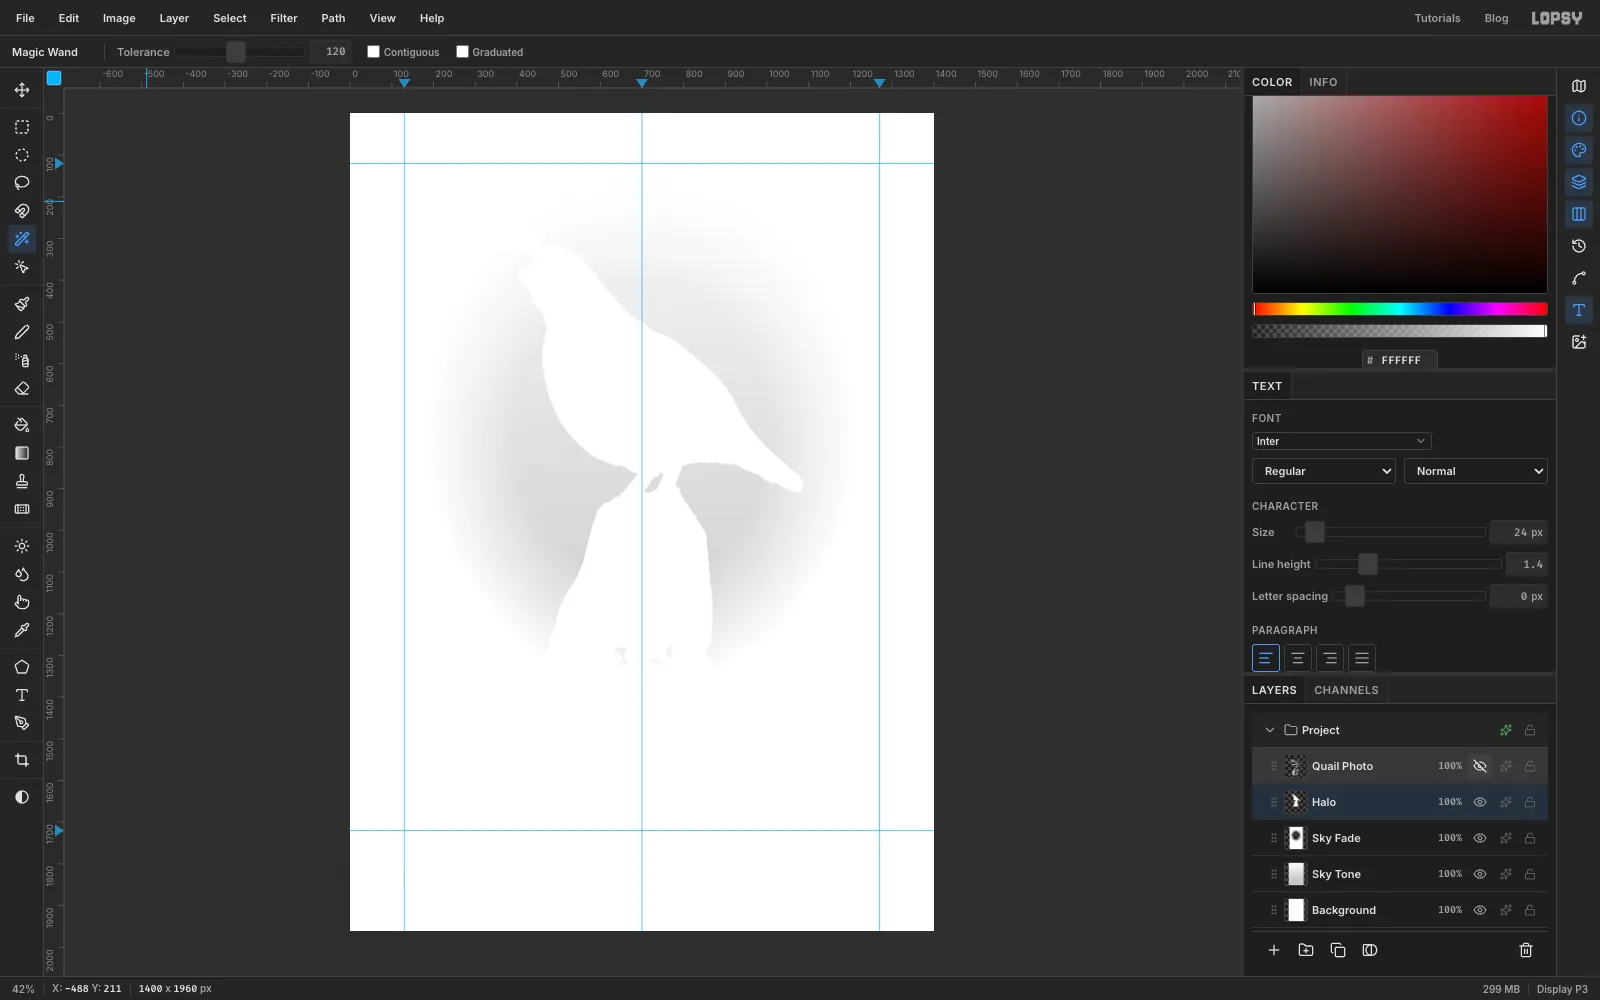
-
Flatten everything into one tone layer
With the Quail Photo row selected, choose Select → All, then Edit → Copy Merged and Cmd+V. Name the new layer Tone. Repeat the paste and name the copy Tone Cross, then hide it with its eye icon. You'll use it later for the cross-hatching.
Select the bird again from Quail Photo, choose Select → Grow
9and then Select → Inverse, and click back on Tone. Run Filter → Add Noise at Amount6with Mono and Gaussian. That slight grain makes the sky rules break up gently as they fade out towards the edge, the way worn plate lines do.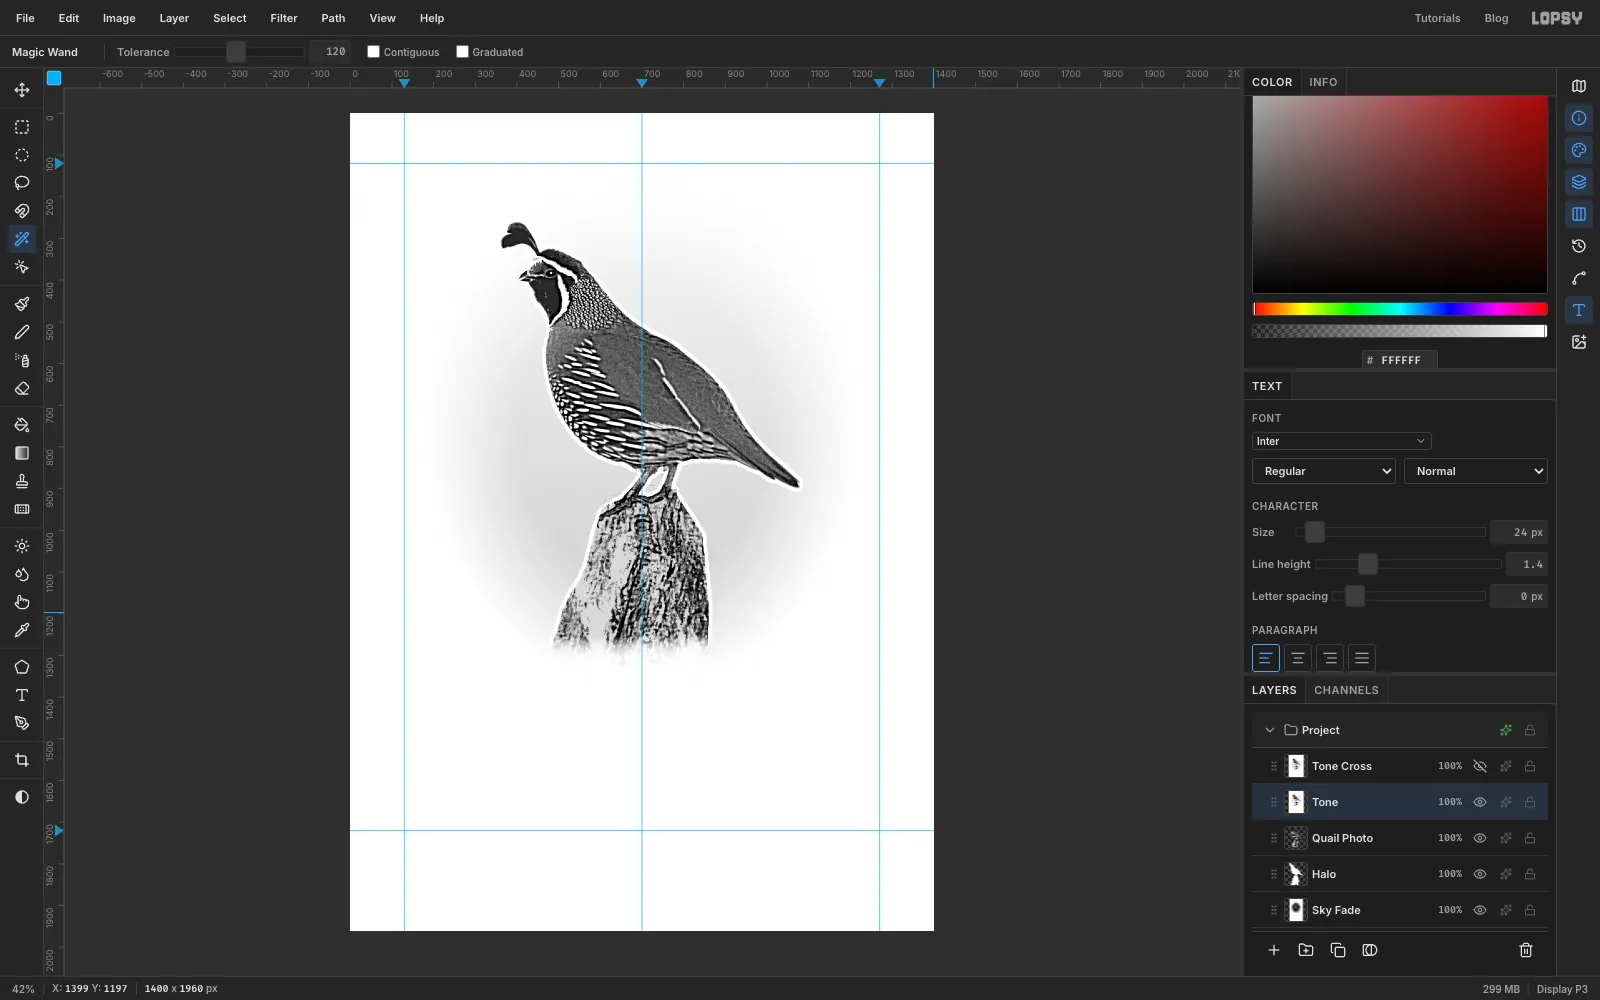
-
Draw the stripe tiles
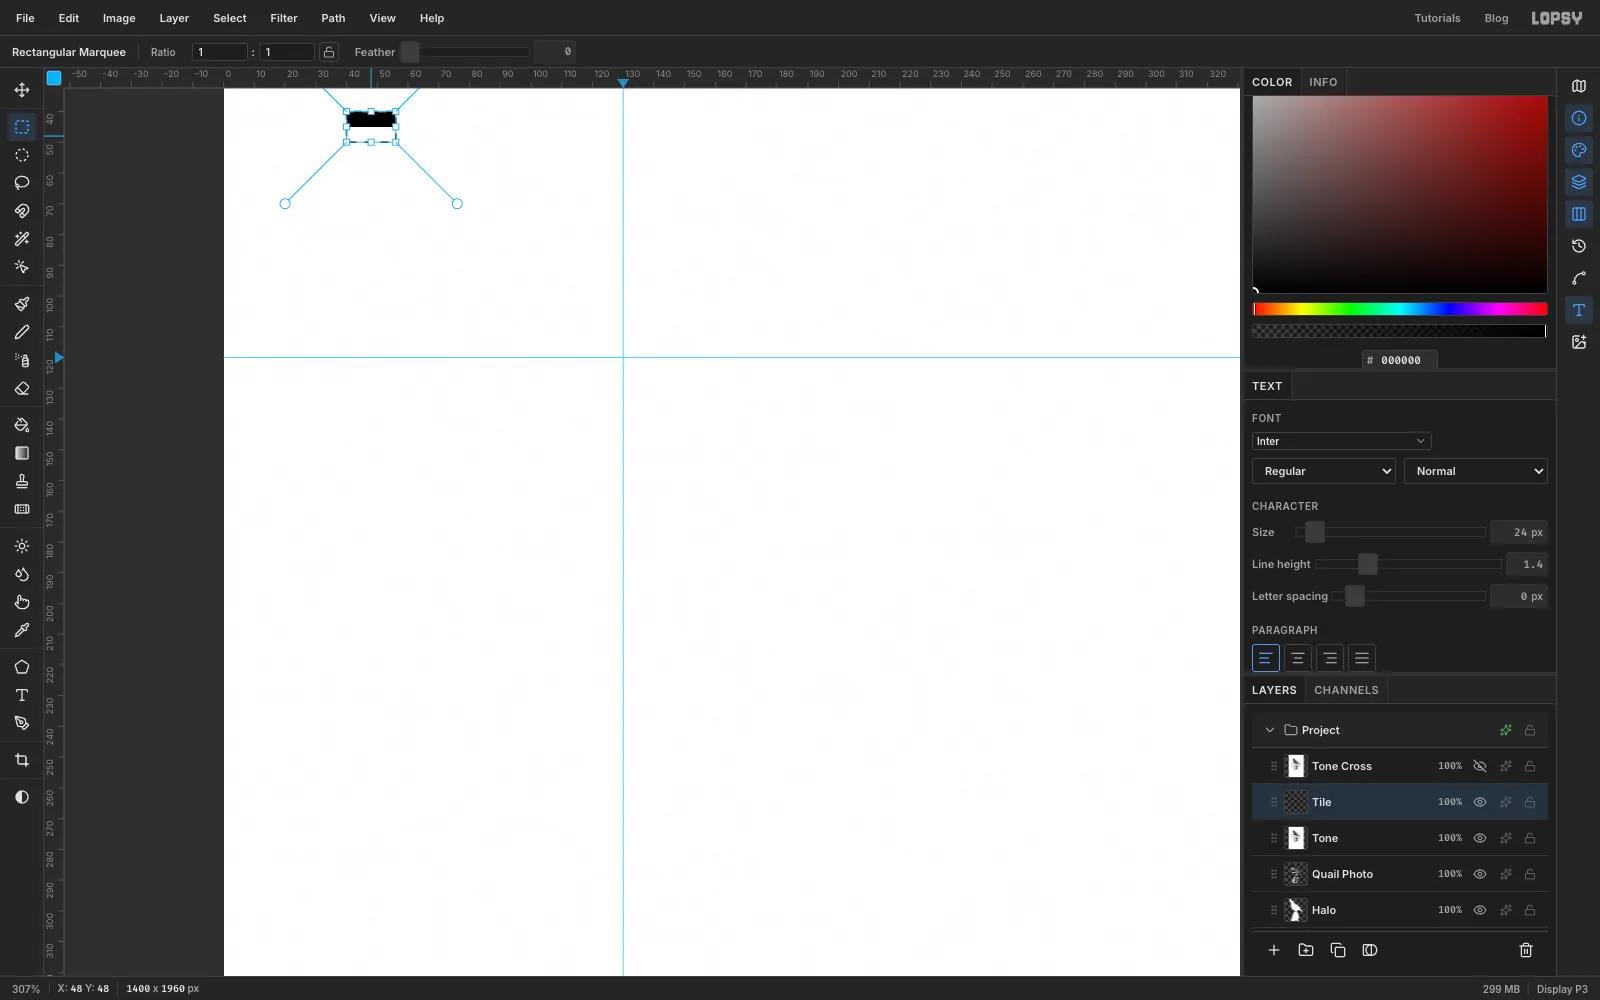
All the hatching comes from two tiny stripe tiles. Click Add Layer and zoom in on the top-left corner.
- With the Rectangular Marquee, select a bar 16 px wide and 5 px tall and Edit → Fill it black.
- Marquee the bar plus 5 px of empty space below it (16 × 10) and choose Edit → Define Pattern. That's a coarse stripe for the sky and the post.
- Beside it, fill a 16 × 3 bar, marquee it with 3 px of space below (16 × 6) and Define Pattern again. That's a fine stripe for the bird.
Delete the tile layer when you're done.
-
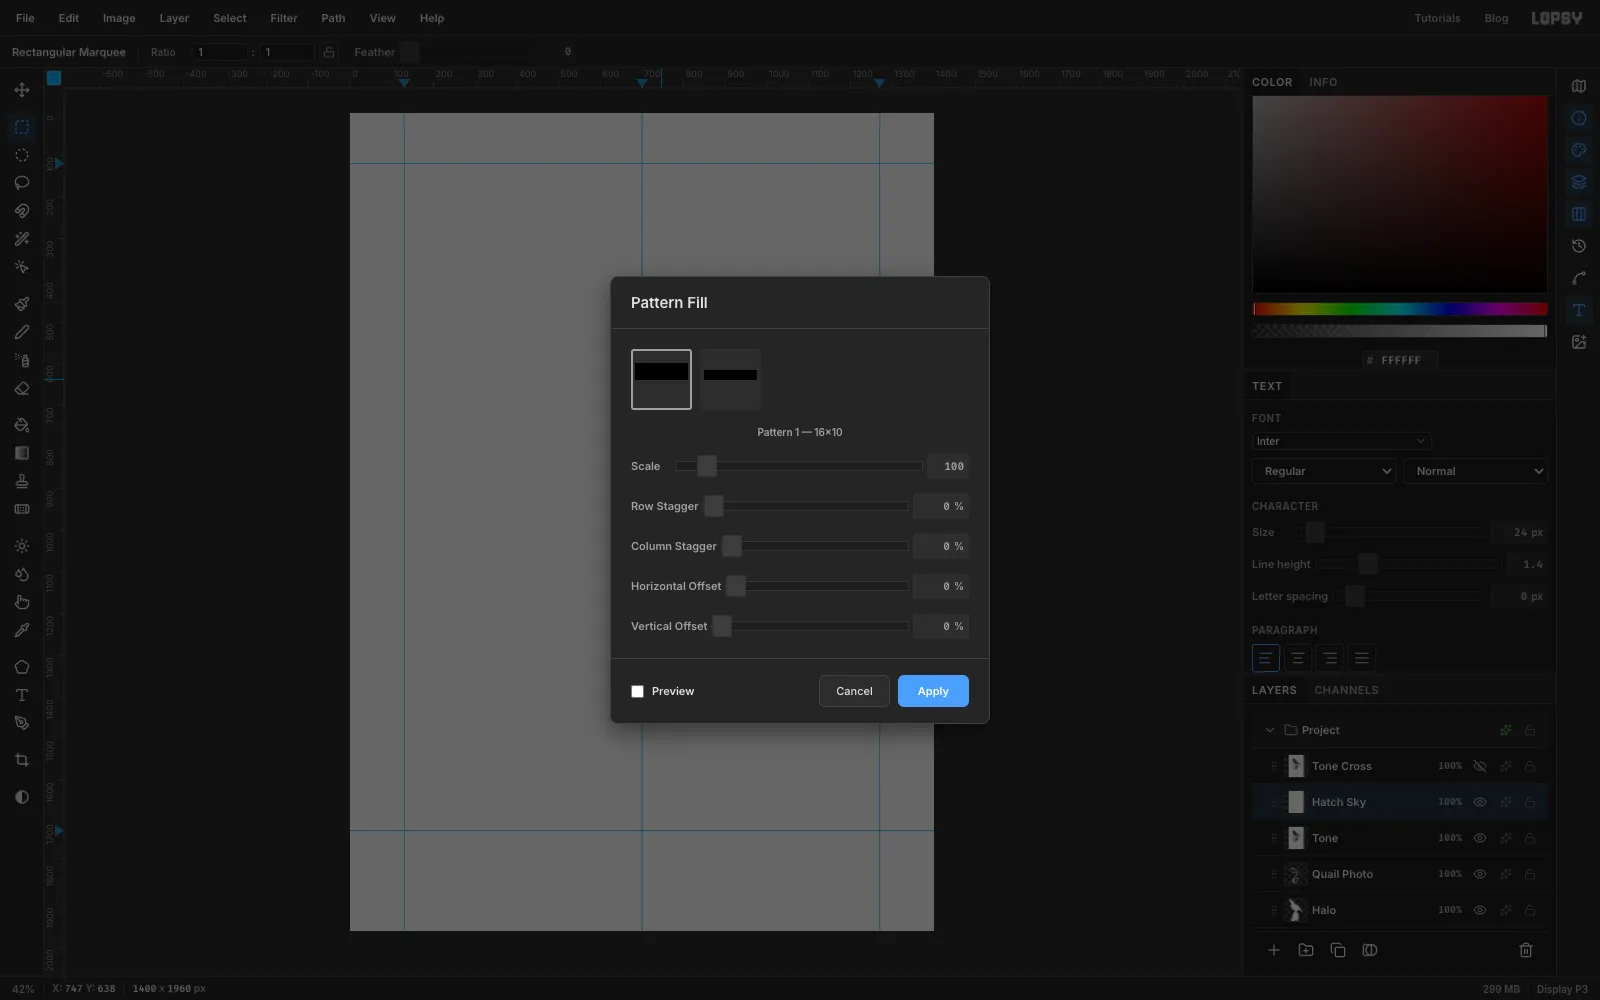
Fill a layer with stripes
Click Add Layer above Tone and name it Hatch Sky. Choose Edit → Fill with white, then Edit → Fill with Pattern…. Pick the 16 × 10 tile and click Apply. Run Filter → Gaussian Blur at Radius
3. The blur turns each hard stripe into a soft ridge, and the soft ridge is what lets Threshold make thick and thin lines later.Add another layer, Hatch Bird, and do the same with the fine 16 × 6 tile and a Gaussian Blur of
2.
-
Turn the bird's hatching
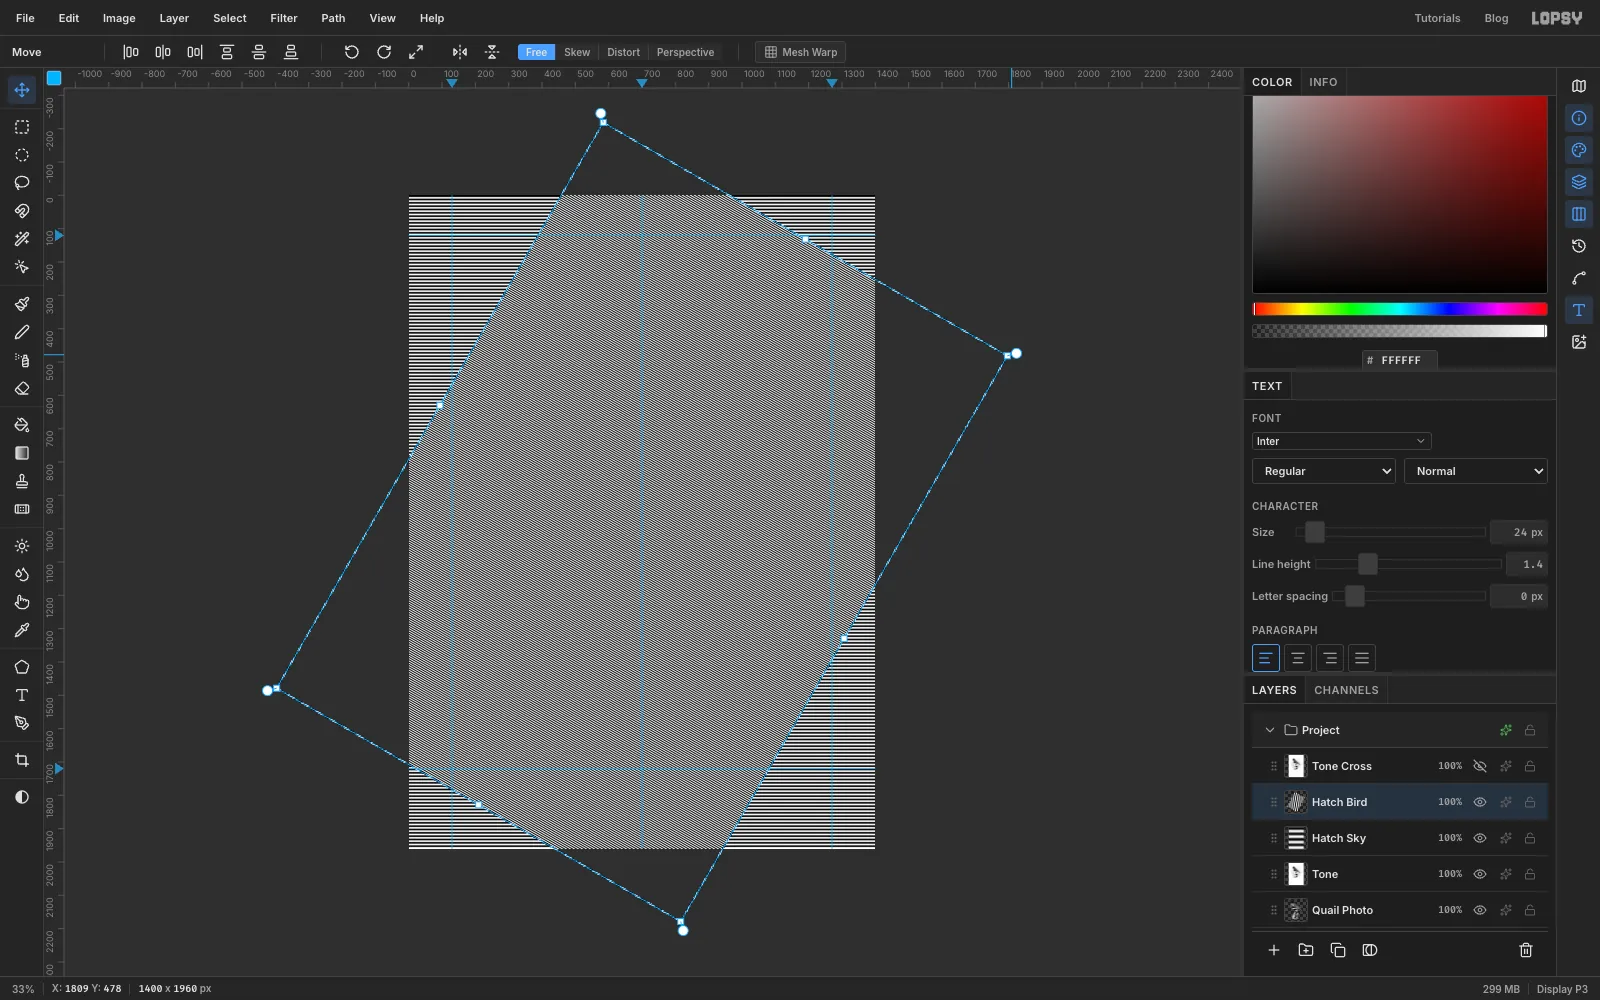
Lines that run with the form make an engraving. Zoom out so the whole page fits with room around it. On Hatch Bird, choose Select → All, switch to the Move tool, hold Cmd and drag the rotate handle just outside a corner. Cmd snaps to 15° steps, so stop at 30°. The lines now slope down along the bird's back. Press Cmd+D to apply. The empty corners don't matter, because you'll only keep the stripes inside the bird.
-
Bend the lines round the body
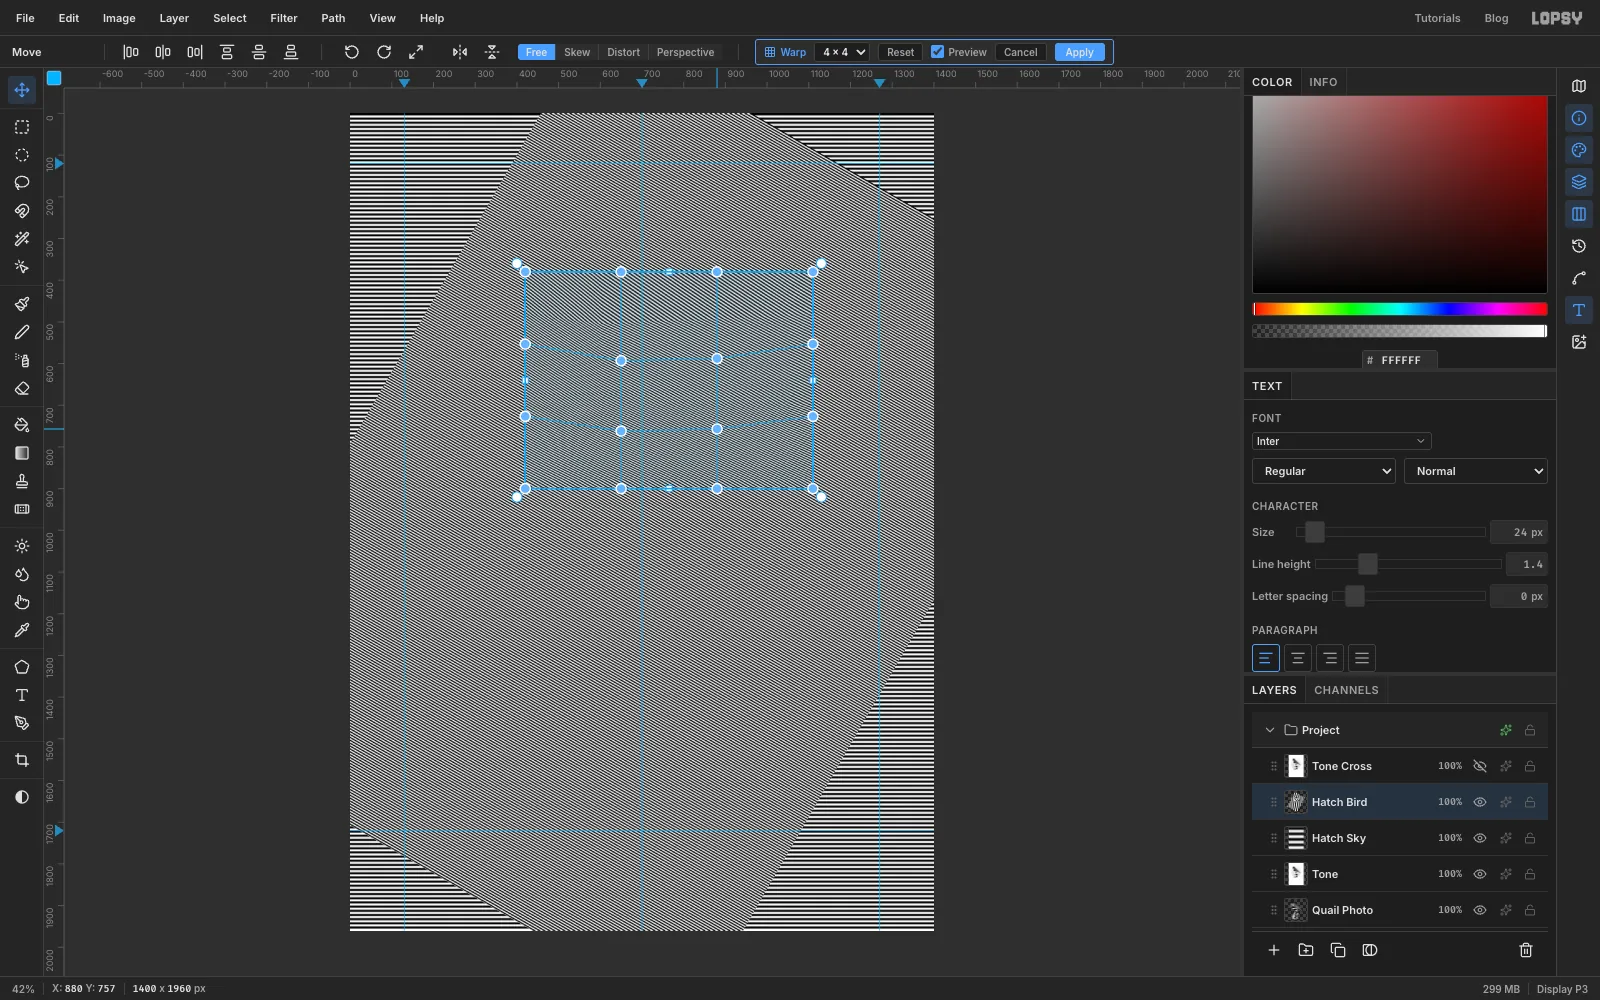
Straight lines make the bird look flat. The stripe layers are opaque, so first hide Hatch Sky and drop Hatch Bird to about 40% so you can see the bird underneath. Marquee the bird's body. On the Move tool's options bar click Mesh Warp, keep the 4 × 4 grid and tick Preview. Drag the four inner points down by about 30–40 px. The stripes bow downward through the middle of the body, so they follow the curve of the breast. Click Apply, set Hatch Bird back to 100% and show Hatch Sky again.
-
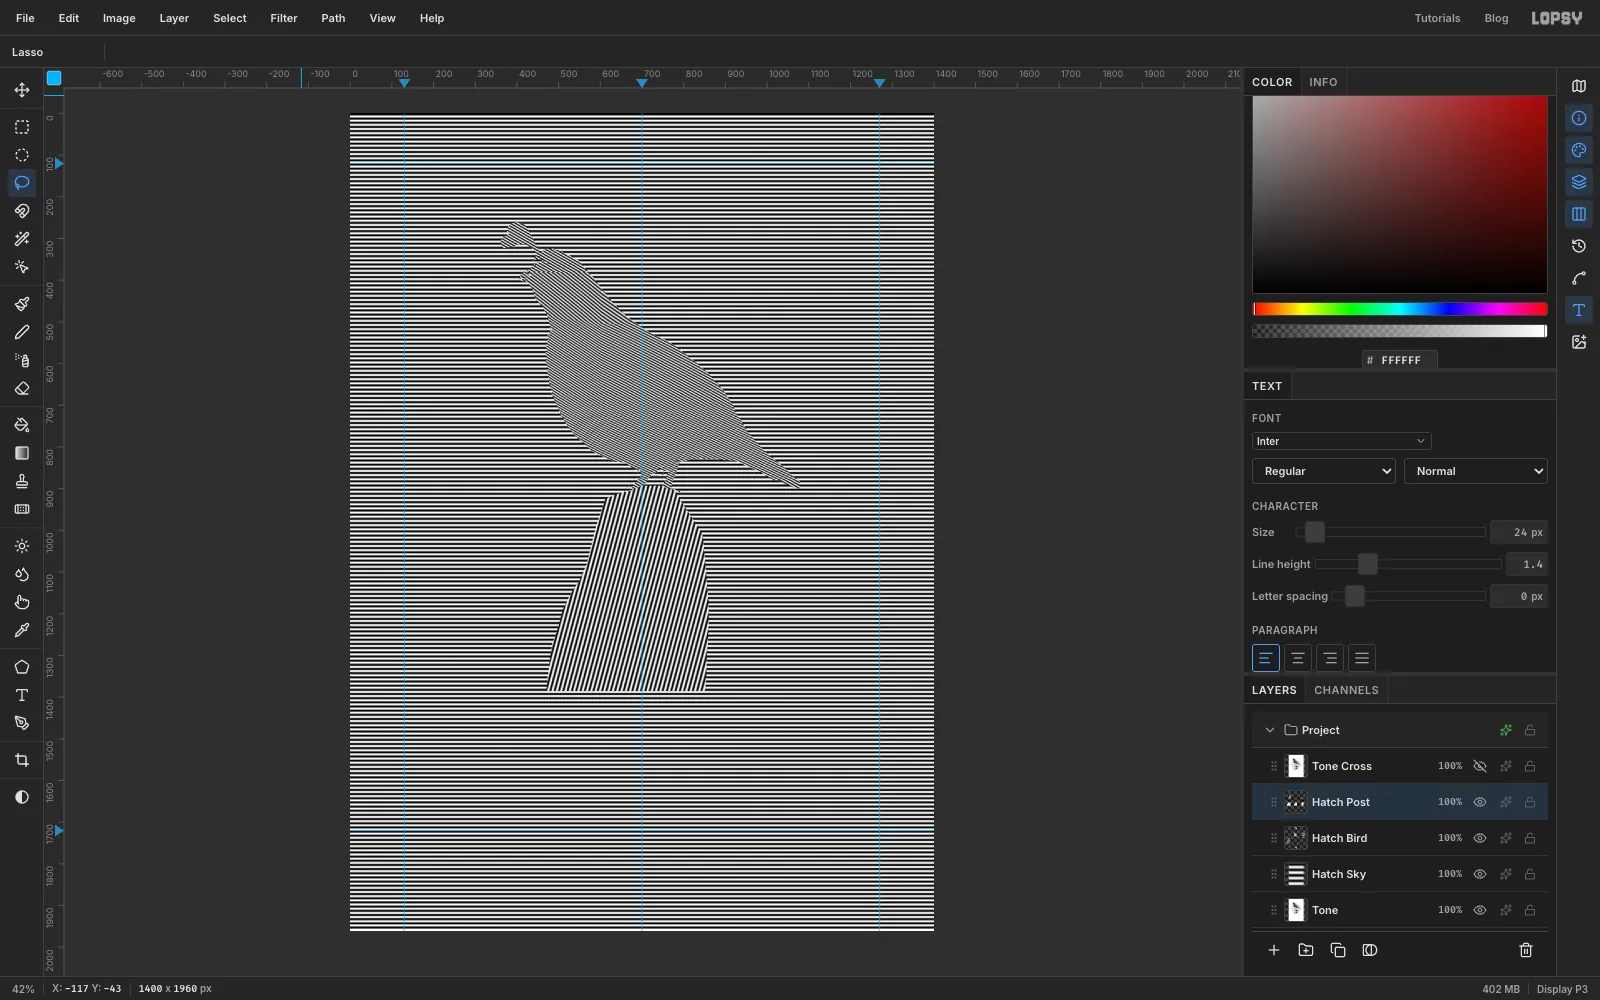
Give the bird and the post their own lines
Now give each part of the picture its own set of lines:
The sky rules can stay as they are; the tone underneath decides where they show. The bird and the post need trimming:
- Click Quail Photo and Magic Wand the empty area around the bird. That selects everything except the bird.
- Hold Shift and lasso round the post to add it, click Hatch Bird and press Delete. Only the bird keeps its diagonals.
- Add a Hatch Post layer. Fill it with the coarse stripes, blur it by
3and rotate it −75° so the lines run almost straight up, like wood grain. - Lasso the post, Select → Inverse, and Delete.
-
Lay the stripes over the tone
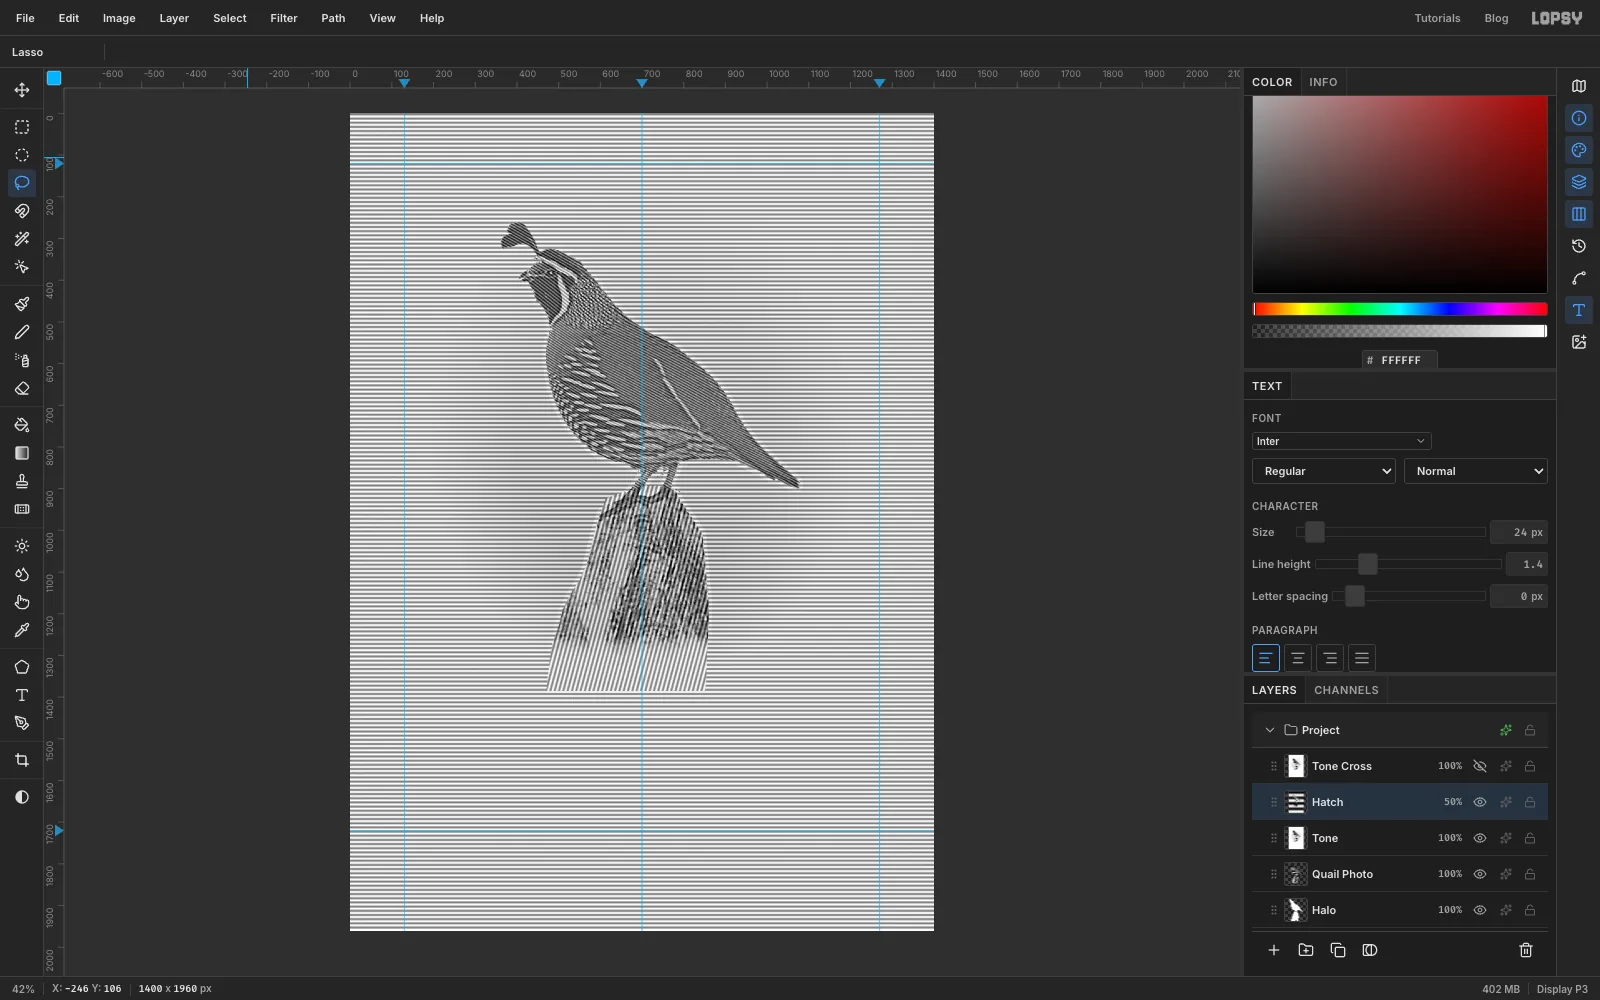
Click Hatch Post and choose Layer → Merge Down. Then click Hatch Bird and Merge Down again, so all three sets of stripes are on one layer. Rename it Hatch and set its opacity to 50% with the opacity button on its row. Through the half-transparent stripes, the photo's darks and lights are still visible.
-
Run Threshold
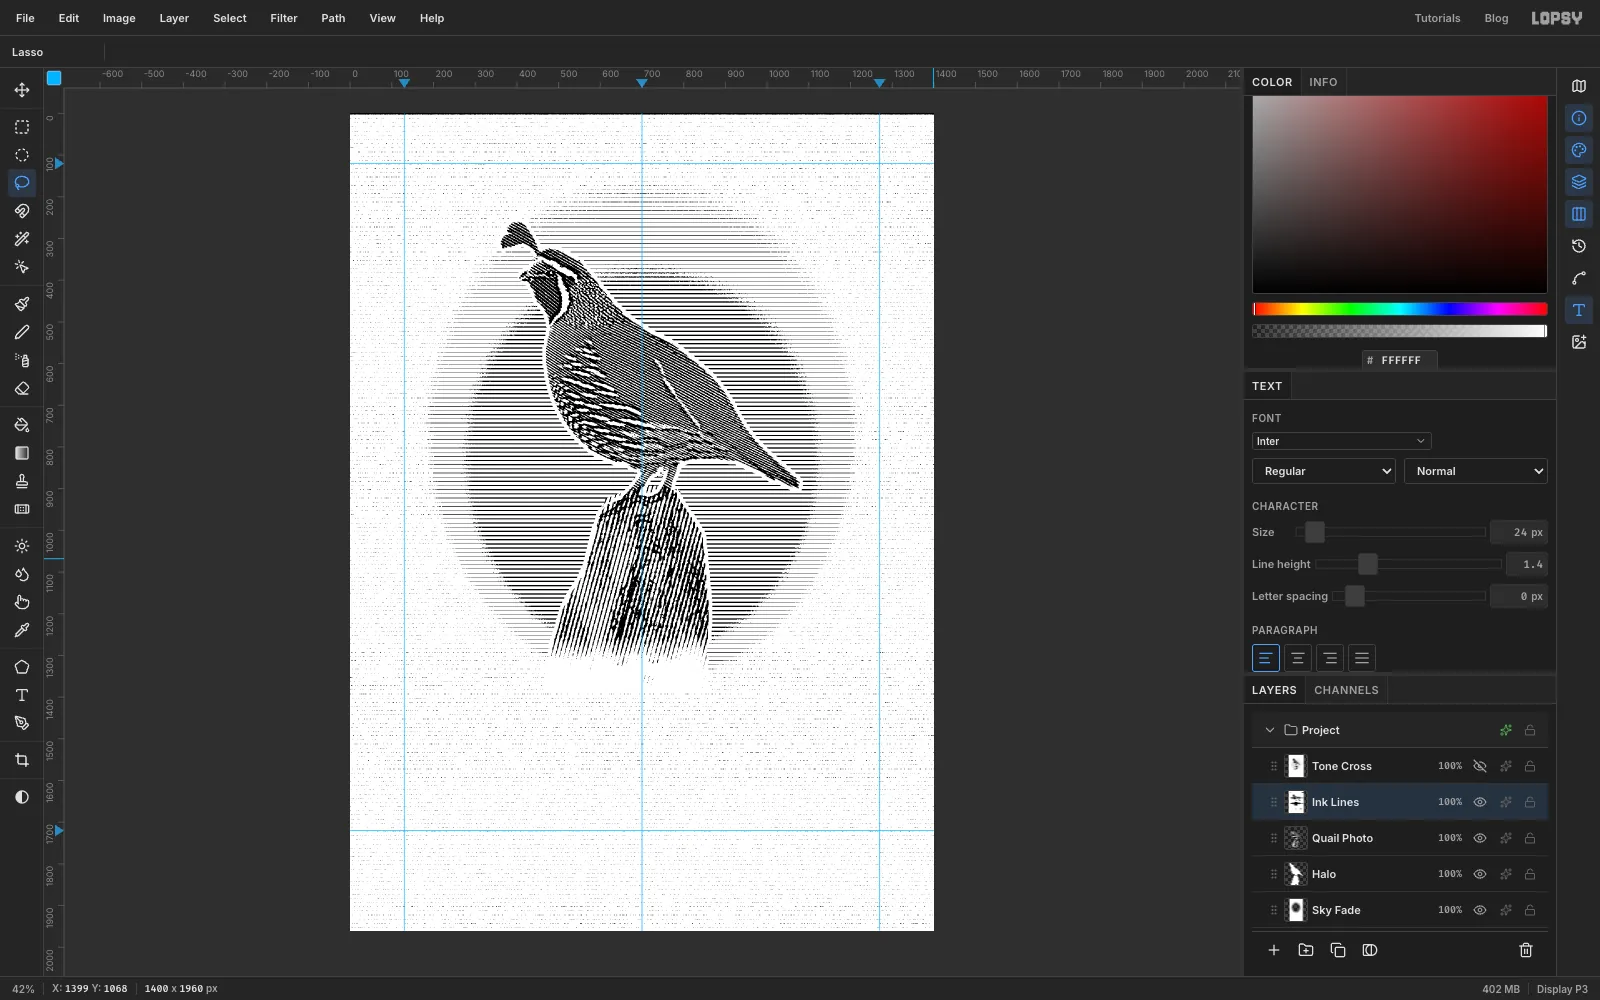
With Hatch selected, choose Layer → Merge Down once more to bake the stripes into Tone. Rename the result Ink Lines and run Filter → Threshold at Level
128. Every pixel becomes black or white. In the dark feathers the soft ridges cross the halfway point early, so the lines swell. In the pale sky they barely cross it, so the rules thin to hairlines. That is the engraving.To tidy the edge of the page, select an ellipse slightly bigger than the sky oval, choose Select → Inverse and Edit → Fill with white to remove any stray specks outside it.
-
Add cross-hatching in the shadows
Show Tone Cross and hide Ink Lines. Brighten it with Filter → Brightness/Contrast, Brightness
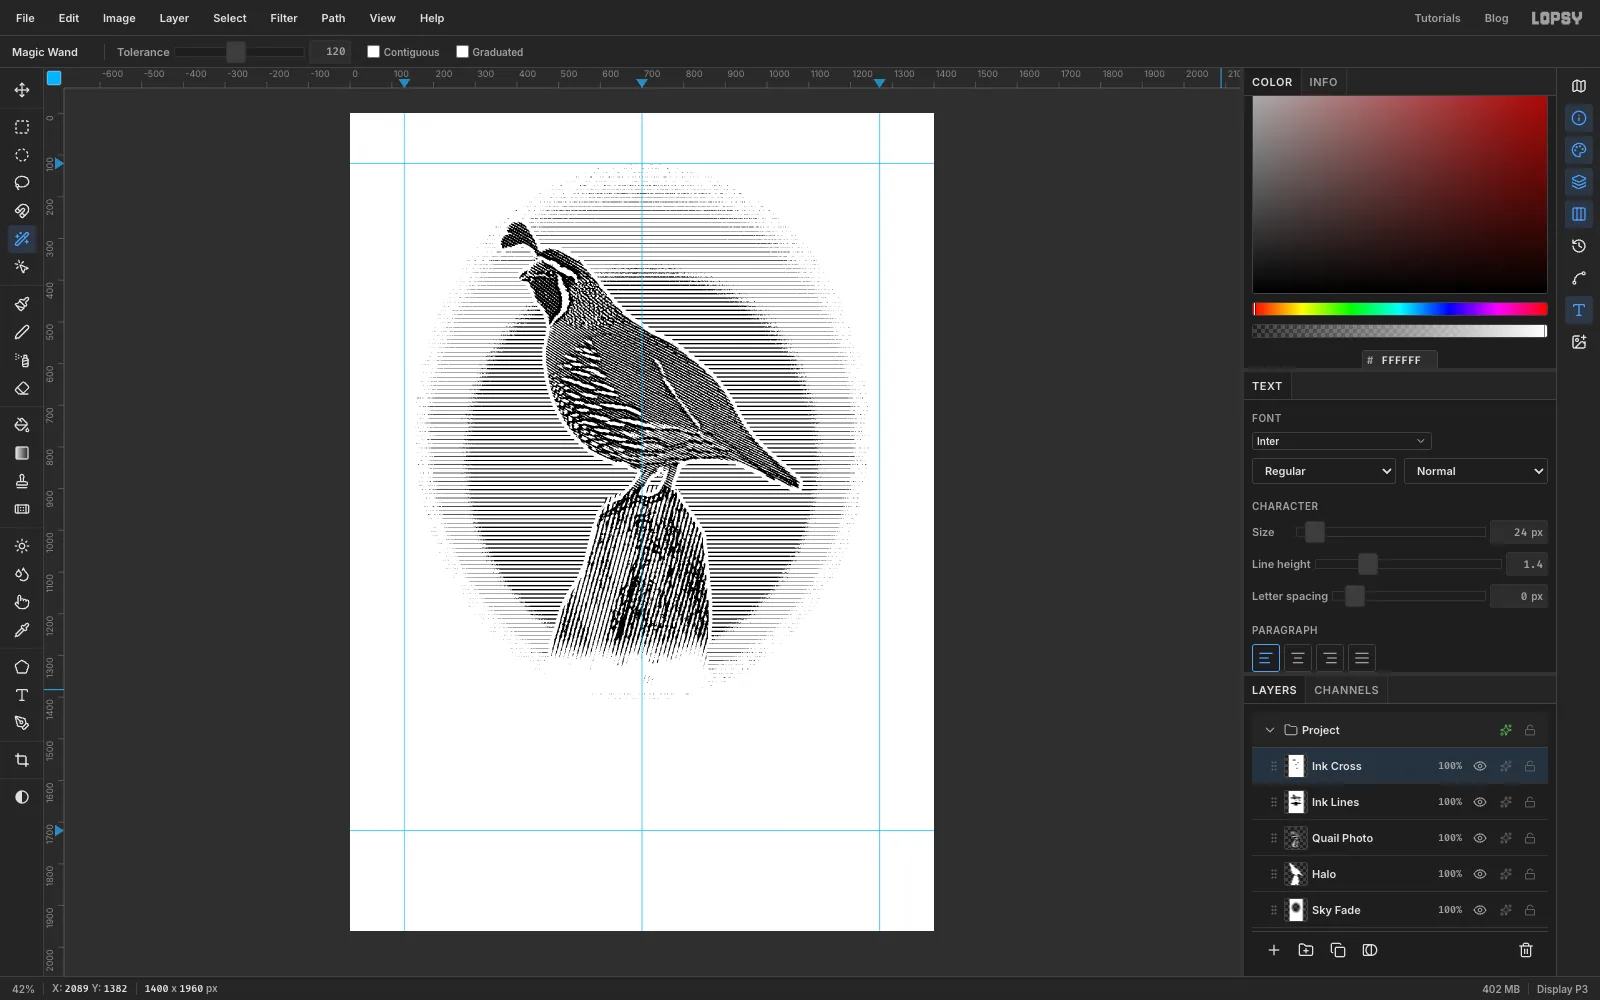
60, so only the deepest shadows are still dark.With Tone Cross selected, click Add Layer so the new layer sits right above it. Make it exactly like Hatch Bird: fill with white, Fill with Pattern using the fine tile, Gaussian Blur
2, then Select → All and rotate it −60° with Cmd held. Select everything outside the bird (Magic Wand the empty area on Quail Photo) and delete it from the new layer. Set it to 50%, Merge Down and run Threshold128, as before. Only the dark mask, throat and flanks get crossing lines.Name the result Ink Cross, show Ink Lines again, set Ink Cross to Multiply in the layer effects drawer's blend menu, and Merge Down. Name the merged layer Etching.
-
Engrave an outline
A crisp outline holds the shape together. Select the bird without the post: Magic Wand the empty area on Quail Photo, Select → Inverse, then hold Alt and lasso out the post. Choose Select → Selection → Path. Then make a selection of just the post and convert that too. Converting the two parts one at a time gives you two clean paths that you can stroke separately.
Add a layer called Contour. In the Paths panel select each path, click Stroke Path, and set Width to
2with black. Marquee the faded bottom of the post and delete the outline there so it fades with the post. Then Merge Down the Contour into Etching.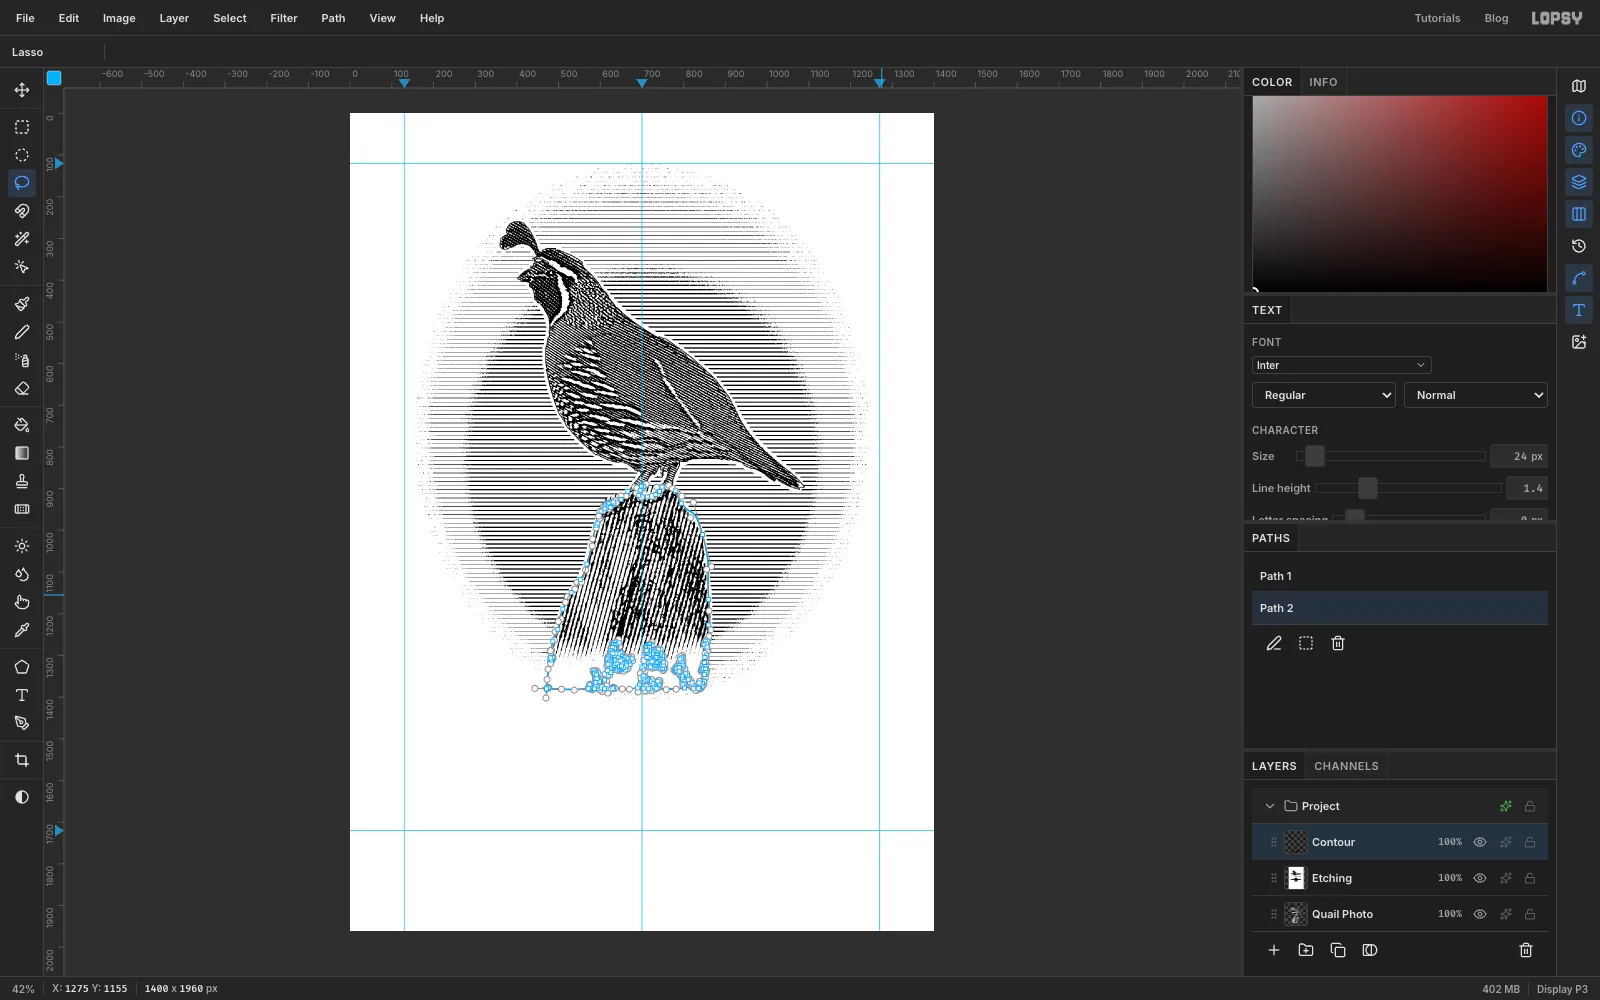
-
Print it in sepia ink on cream paper
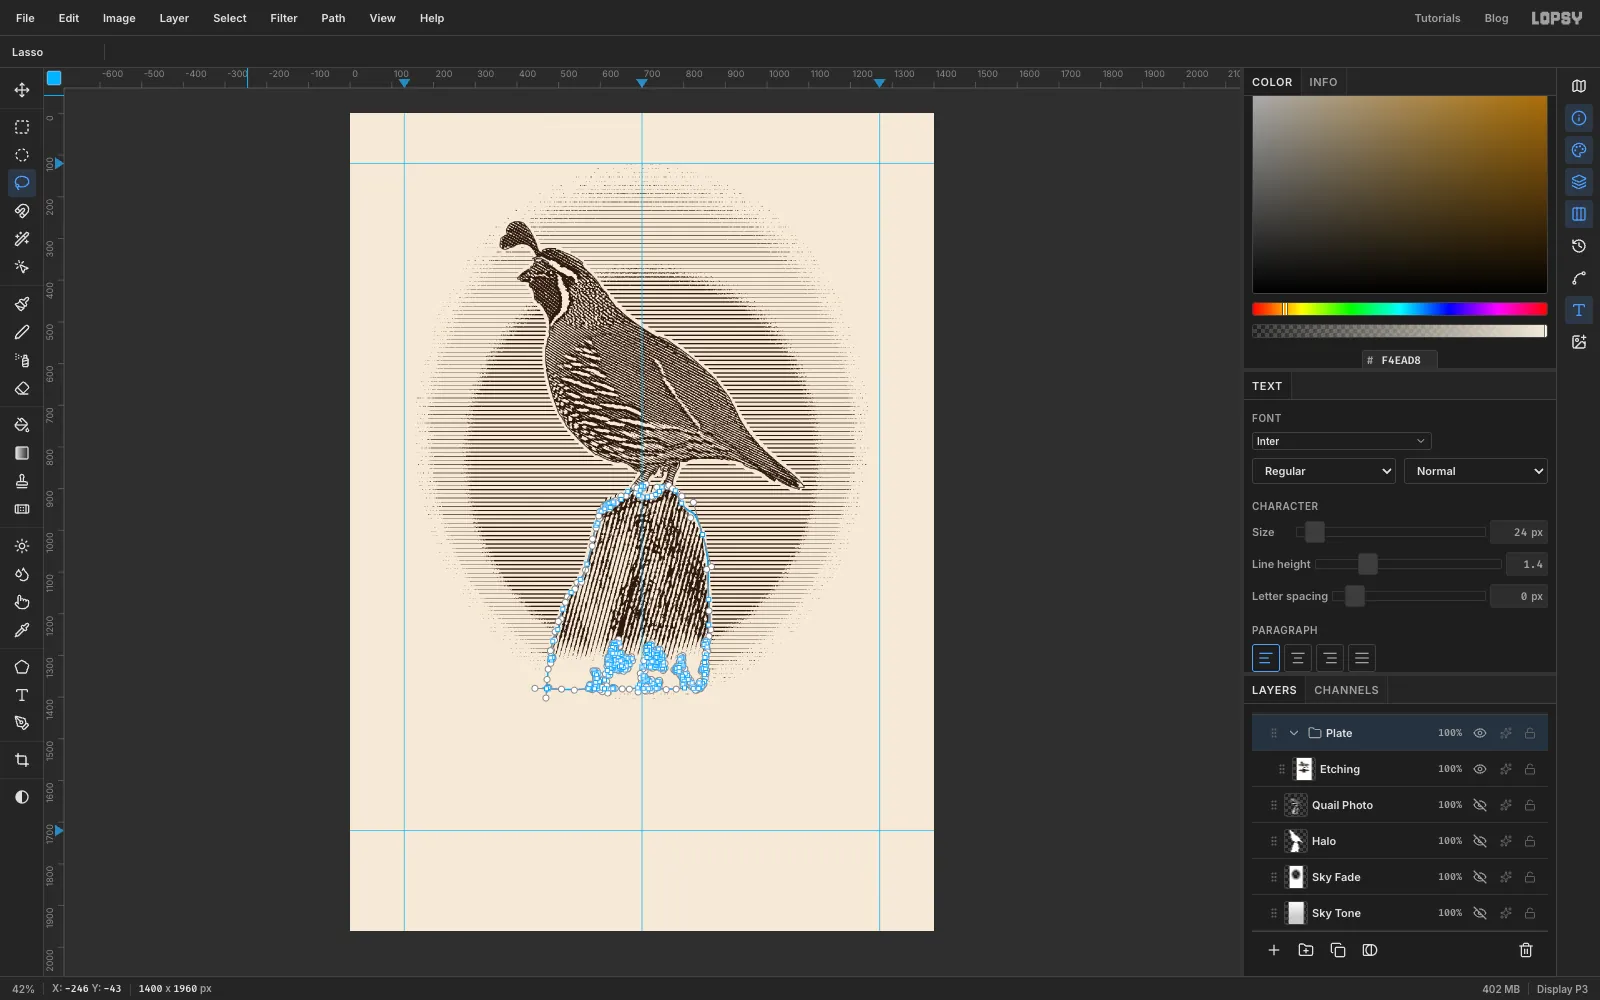
Black ink looks digital. Add a layer above Etching, fill it with and set it to Lighten: black lines turn brown and white stays white. Merge Down, run Gaussian Blur
1to soften the pixel edges the way ink spreads into paper, and set Etching to Multiply.Hide Quail Photo, Halo, Sky Fade and Sky Tone. Fill the Background with the paper colour . With Etching selected, choose Layer → Group Layers and name the group Plate.
-
Give the plate its tone
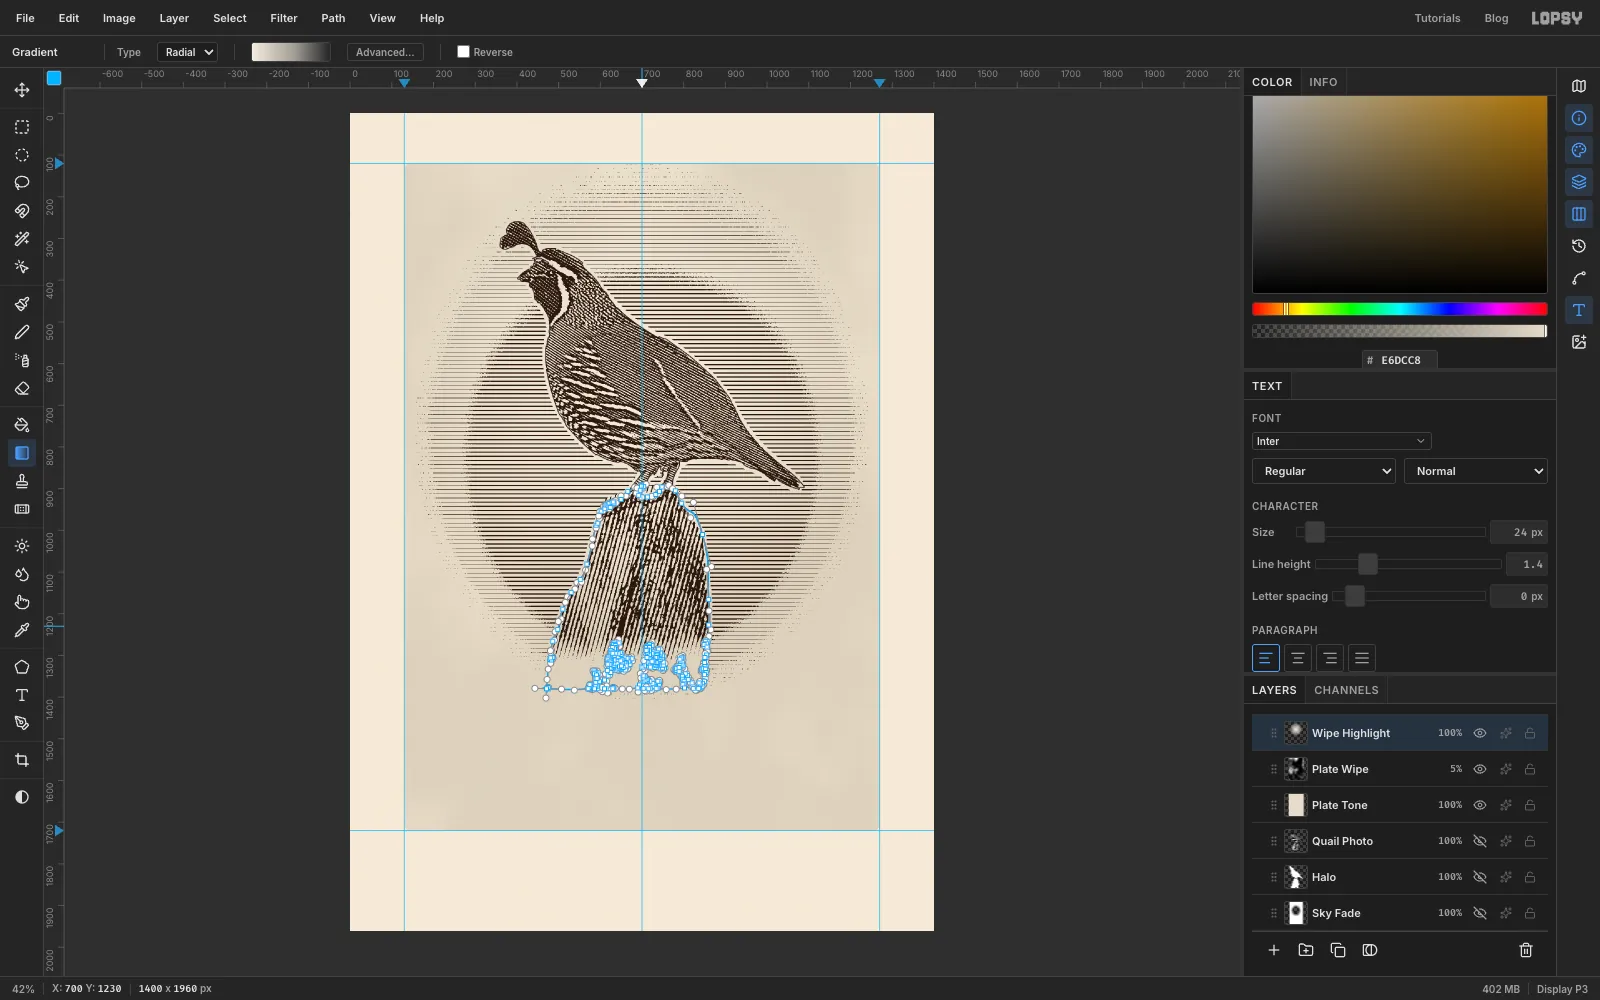
When an etching is printed, a thin film of ink is left on the plate. That makes the plate area a shade darker than the margin, and printers wipe a lighter patch where they want the eye to go.
- Add a Paper Grain layer just above the Background. Fill it with and run Add Noise
30(Mono, Gaussian), Gaussian Blur1and Emboss at135°, Strength30. Set it to Overlay at 35%. - Above the hidden photo, add Plate Tone. Marquee from guide to guide, round the corners with Select → Shrink
14then Grow14, and fill with . - Keep that selection active, add Plate Wipe and run Filter → Clouds. Set the layer to Multiply and turn it down to 5%, then press Cmd+D.
- Add Wipe Highlight. In the gradient's Advanced… editor, make both stops and drag the right stop's opacity to 0, as you did for the oval fade. Drag a Radial gradient from the bird's middle down to the foot of the post.
You may still see the anchor points of the two outline paths on the post, as in the screenshot. Delete both paths in the Paths panel when you're done.
- Add a Paper Grain layer just above the Background. Fill it with and run Add Noise
-
Press in the plate mark
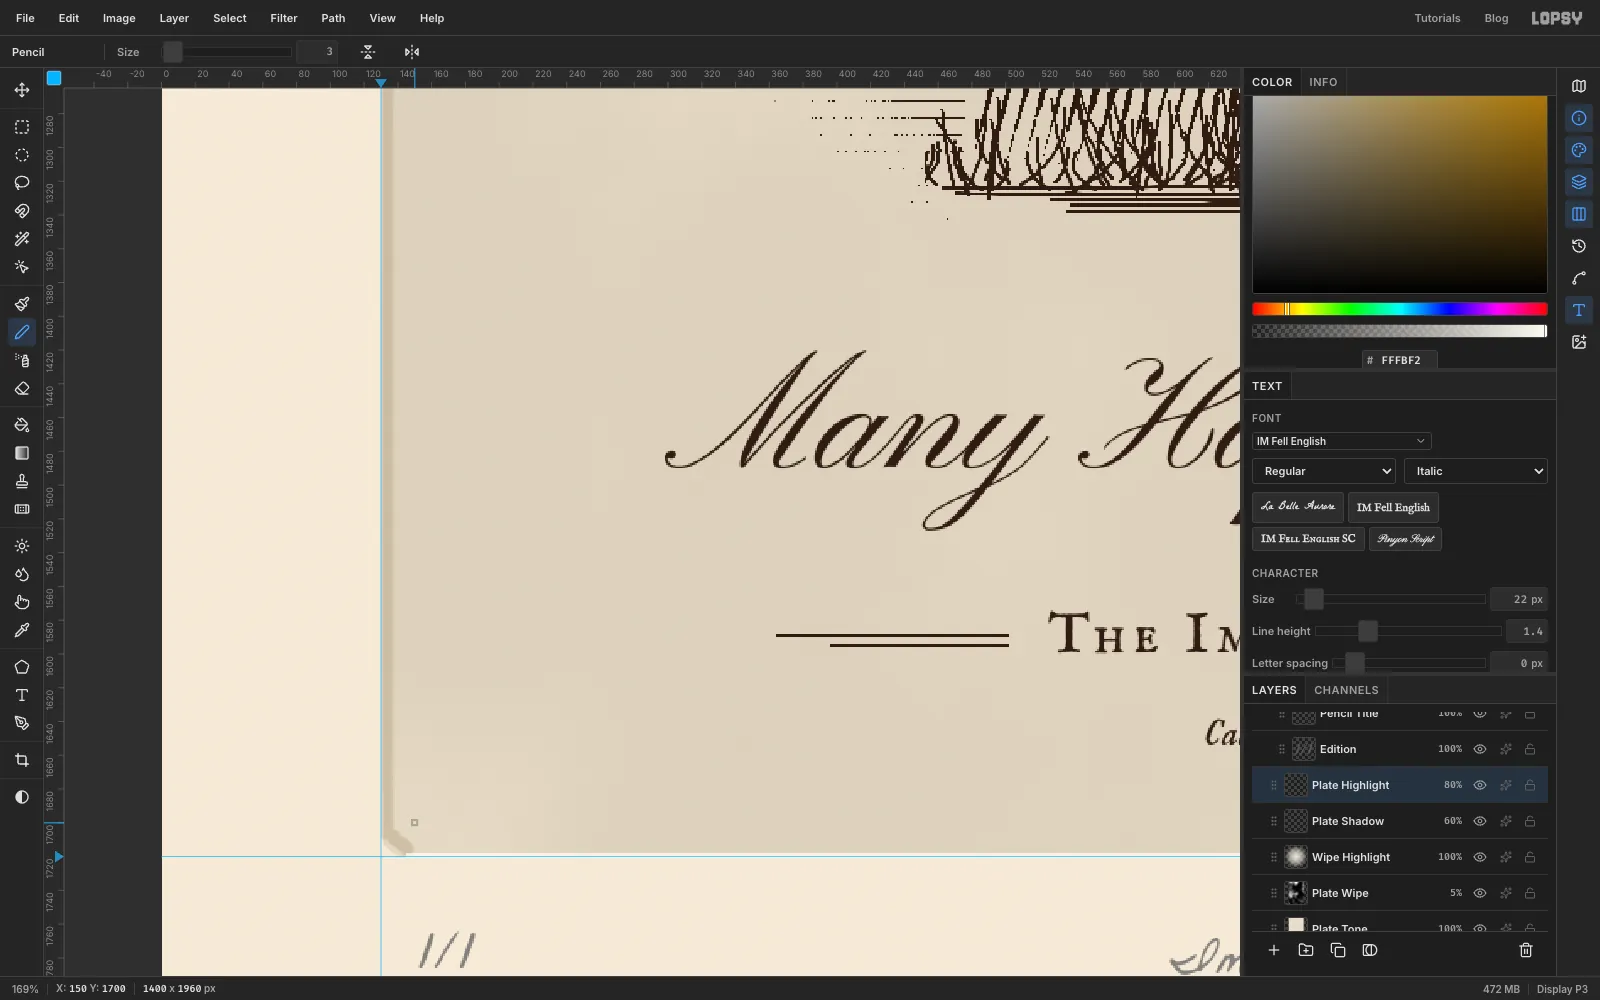
The press squeezes the paper round the edge of the plate and leaves a shallow dent. Fake that with two thin layers:
- Plate Shadow: the Pencil at Size
6in . Click near the top-left corner of the plate, then Shift-click at the top right to draw a straight line. Draw the left edge the same way. Run Gaussian Blur2and set the layer to 60%. - Plate Highlight: the Pencil at Size
3in , along the bottom and right edges, then Gaussian Blur1.
Light falls from the top left, so the top and left walls of the dent are in shadow and the bottom and right catch the light.
- Plate Shadow: the Pencil at Size
-
Hand-tint with watercolour washes
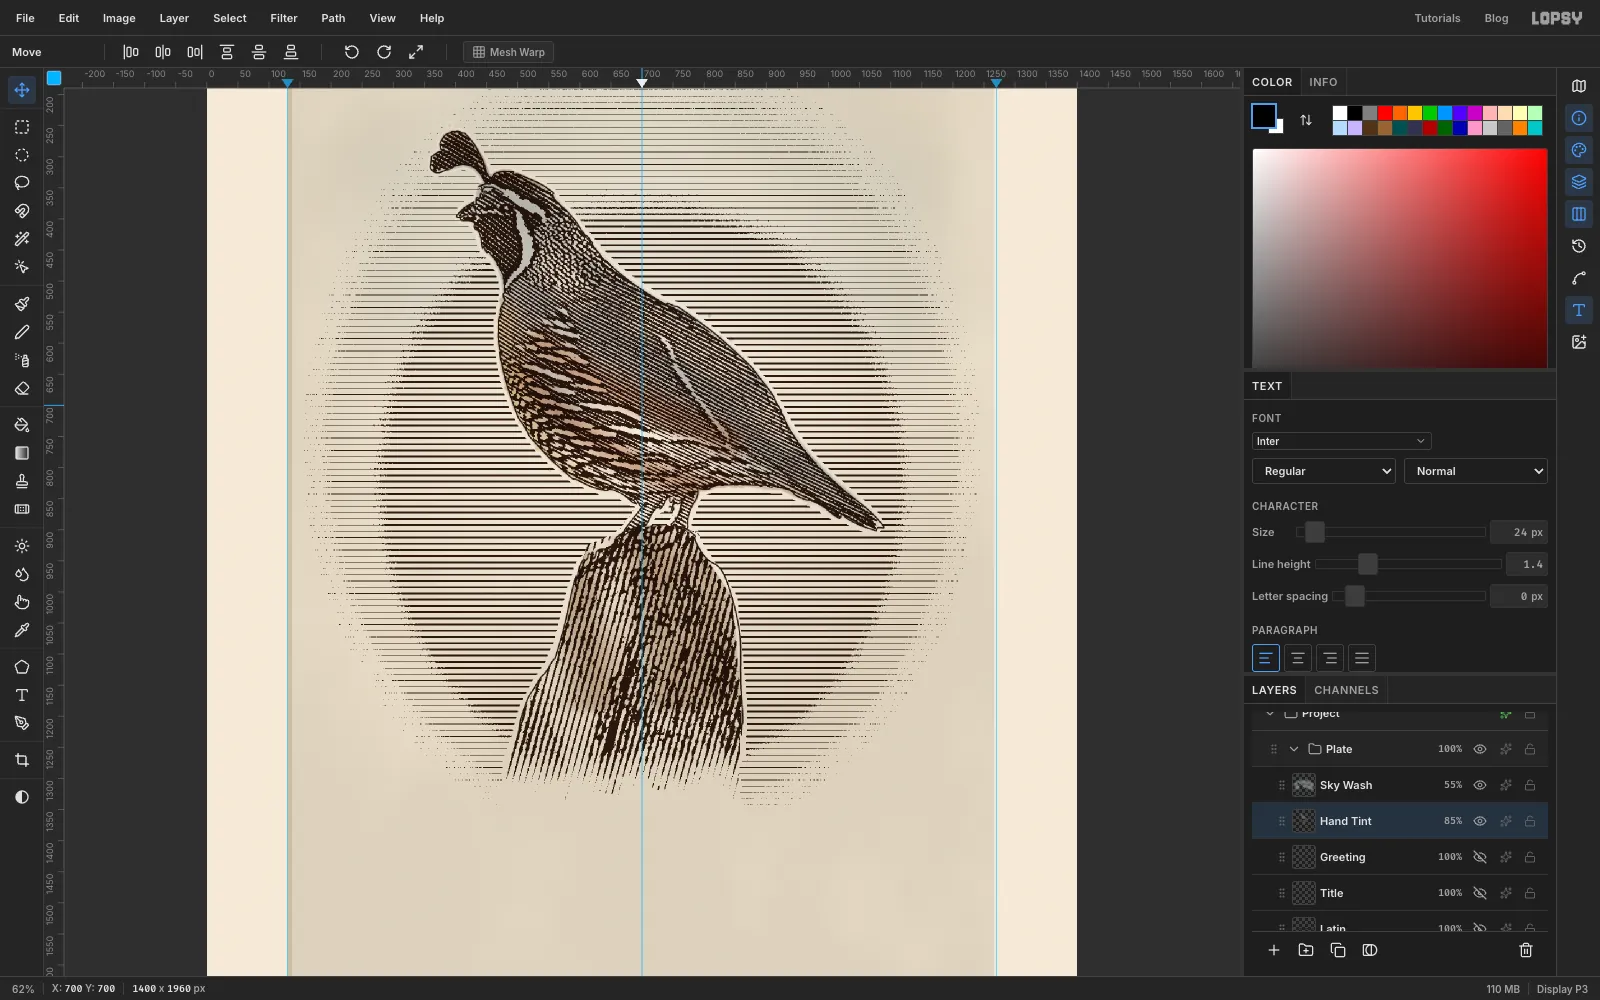
Inside the Plate group, add a Hand Tint layer set to Multiply. Select the bird from Quail Photo, leave out the post with an Alt-lasso, and choose Select → Grow
3so the colour spills just past the lines, as a real colourist's wash does. Click back on Hand Tint before you paint. Use the Brush with Hardness0and soft, loose strokes:- slate at Size
200, Opacity60over the head, breast and back - chestnut at Size
90along the flank stripes - buff down the belly
- a little brown on the crown and plume
Lasso the post and wash it with umber . Run Gaussian Blur
3to melt the strokes together. Then take the Eraser at Opacity30and lift out a few patches of slate so paper shows through. Set the layer to 85%.Add a Sky Wash layer on Multiply. Select everything outside the bird and paint pale blue across the top of the oval, then set the layer to 55%. Both washes are easy to strengthen later, once you can judge them next to the lettering.
- slate at Size
-
Grow some grass
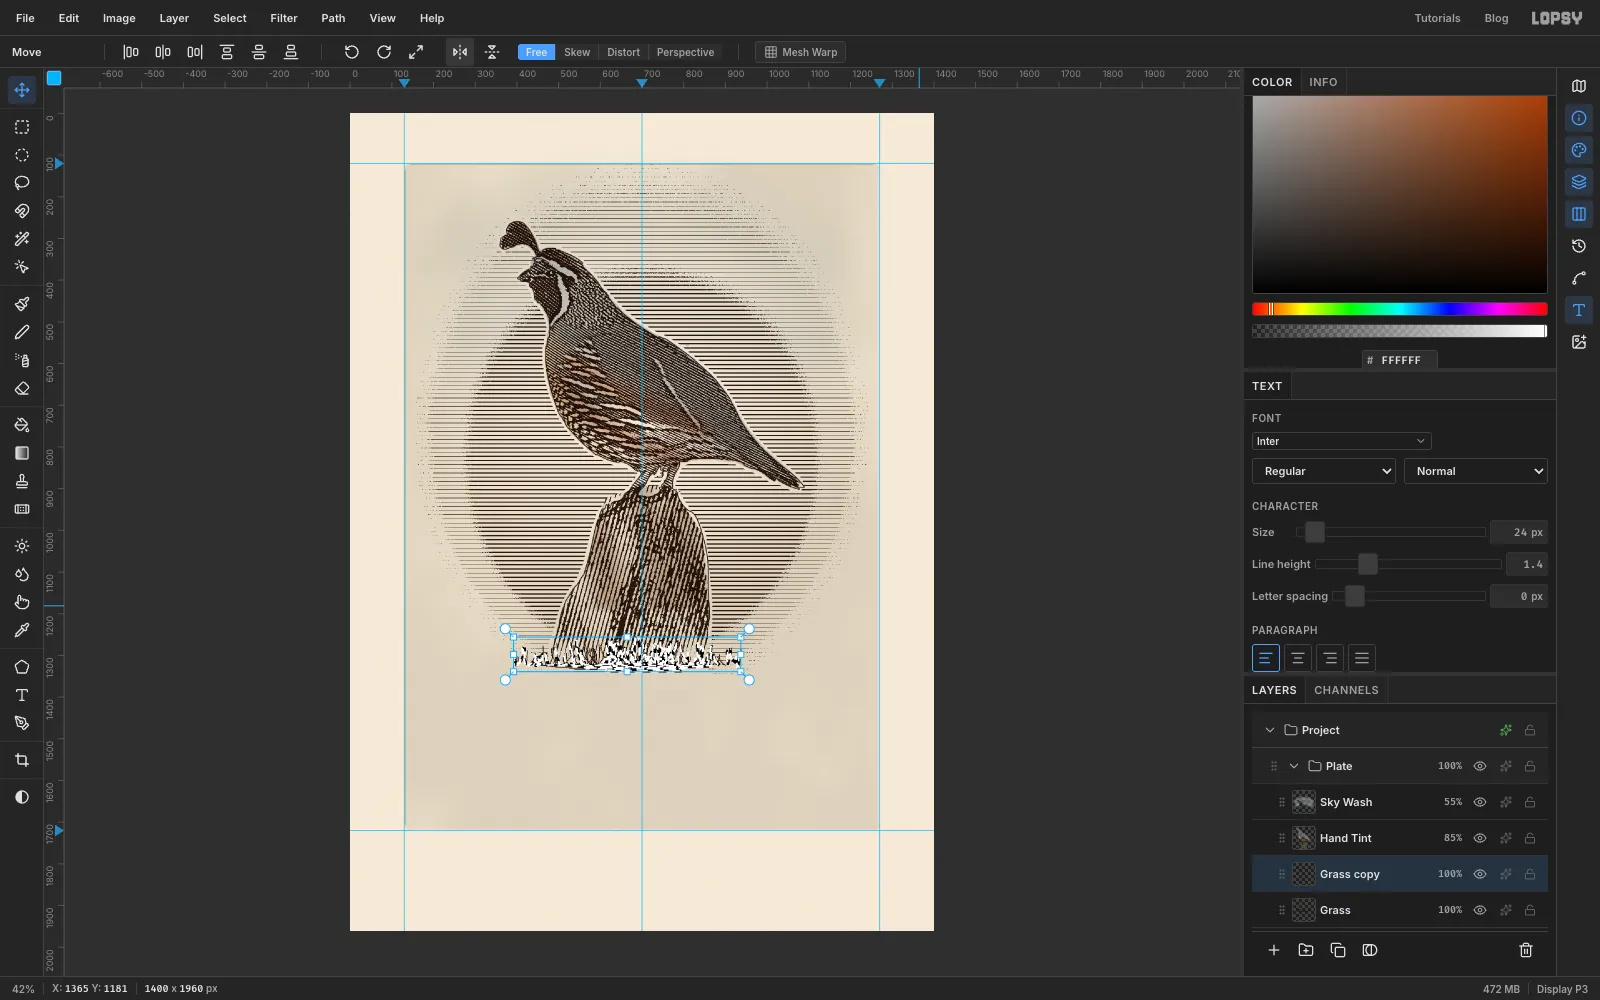
Add a Grass layer above Etching. Open the brush presets from the Brush options bar, go to the Shape tab and set Size
3, Hardness100and Taper110. Taper makes each stroke thin out to a point, like a stroke of the burin. Draw single blades upward from the foot of the post. Vary their height between about 20 and 80 px and lean them in different directions. Set Size to2and Taper to0for a few short horizontal strokes of ground. Drag the layer up if needed so the ground meets the post. Then marquee the strip just below the ground on Etching and fill it with white, so no stray sky specks sit under the grass.For a fuller tuft, choose Layer → Duplicate Layer, click the copy's row, marquee round the grass and click Flip Horizontal in the Move options bar. Name the copy Grass Back. Delete the outermost blades on both layers with a marquee so the clump tapers out, and add a few short blades hugging the post.
-
Patch the gap under the feet
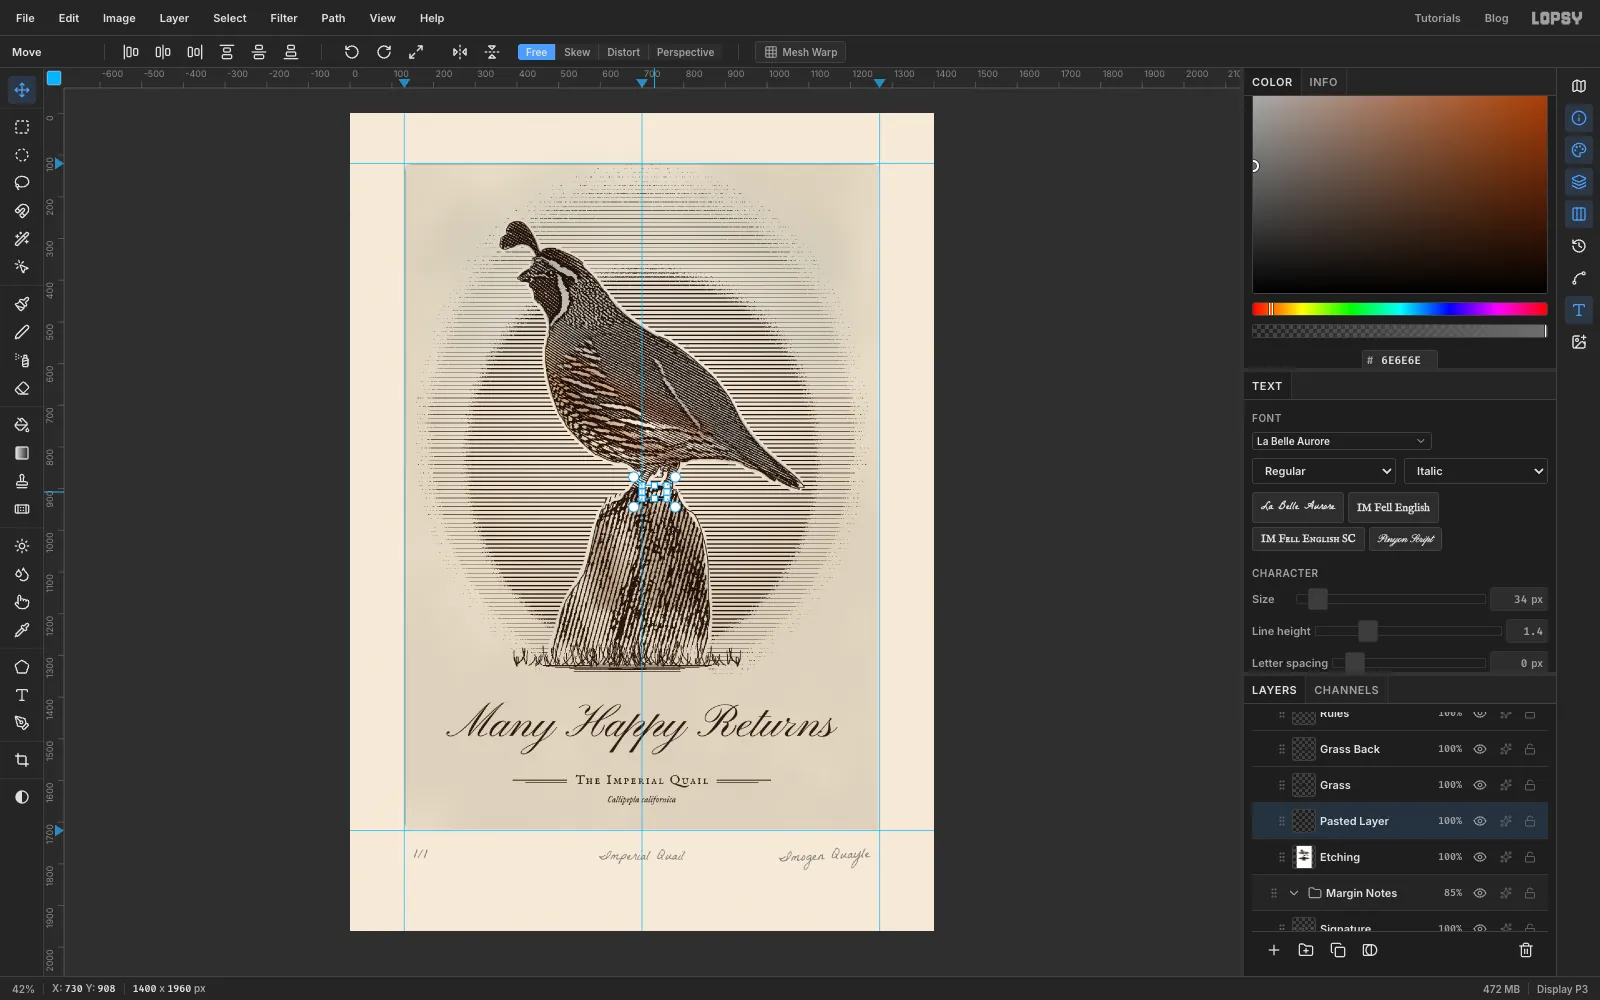
The paper halo leaves a pale gap between the feet where the photo had a patch of background. On Etching, lasso a small piece of the post's engraving just below the gap, press Cmd+C and then Cmd+V. The copy pastes in place on its own layer. Drag it up about 25 px to cover the gap, press Cmd+D, and Merge Down.
-
Engrave the lettering
Click the Grass Back row first, so the lettering lands inside the Plate group, above the grass. Pick the Text tool, choose a dark brown () and set the font. To avoid clicking inside other text, type each line in the empty lower margin and then move it into place:
- Many Happy Returns in Pinyon Script, Size
96. - The Imperial Quail in IM Fell English SC, Size
34, with Letter spacing4in the Text panel. Set Letter spacing back to0before the next line. - Callipepla californica in IM Fell English, Size
22. Set the options bar's style dropdown to Italic before you click to type. That way the italic face loads with the text.
Rename the layers Greeting, Title and Latin. Centre each line with the Move tool's Align center horizontally button, then drag it into place. Leave a generous gap, about 80 px, between the grass and the script. Set the title comfortably below the script's descenders, tuck the Latin name a little under the title, and keep clear paper between the Latin name and the bottom of the plate.
On a new Rules layer, use the Pencil at Size
2with Shift-click lines to draw a double rule on each side of the title. Make the inner line shorter than the outer one.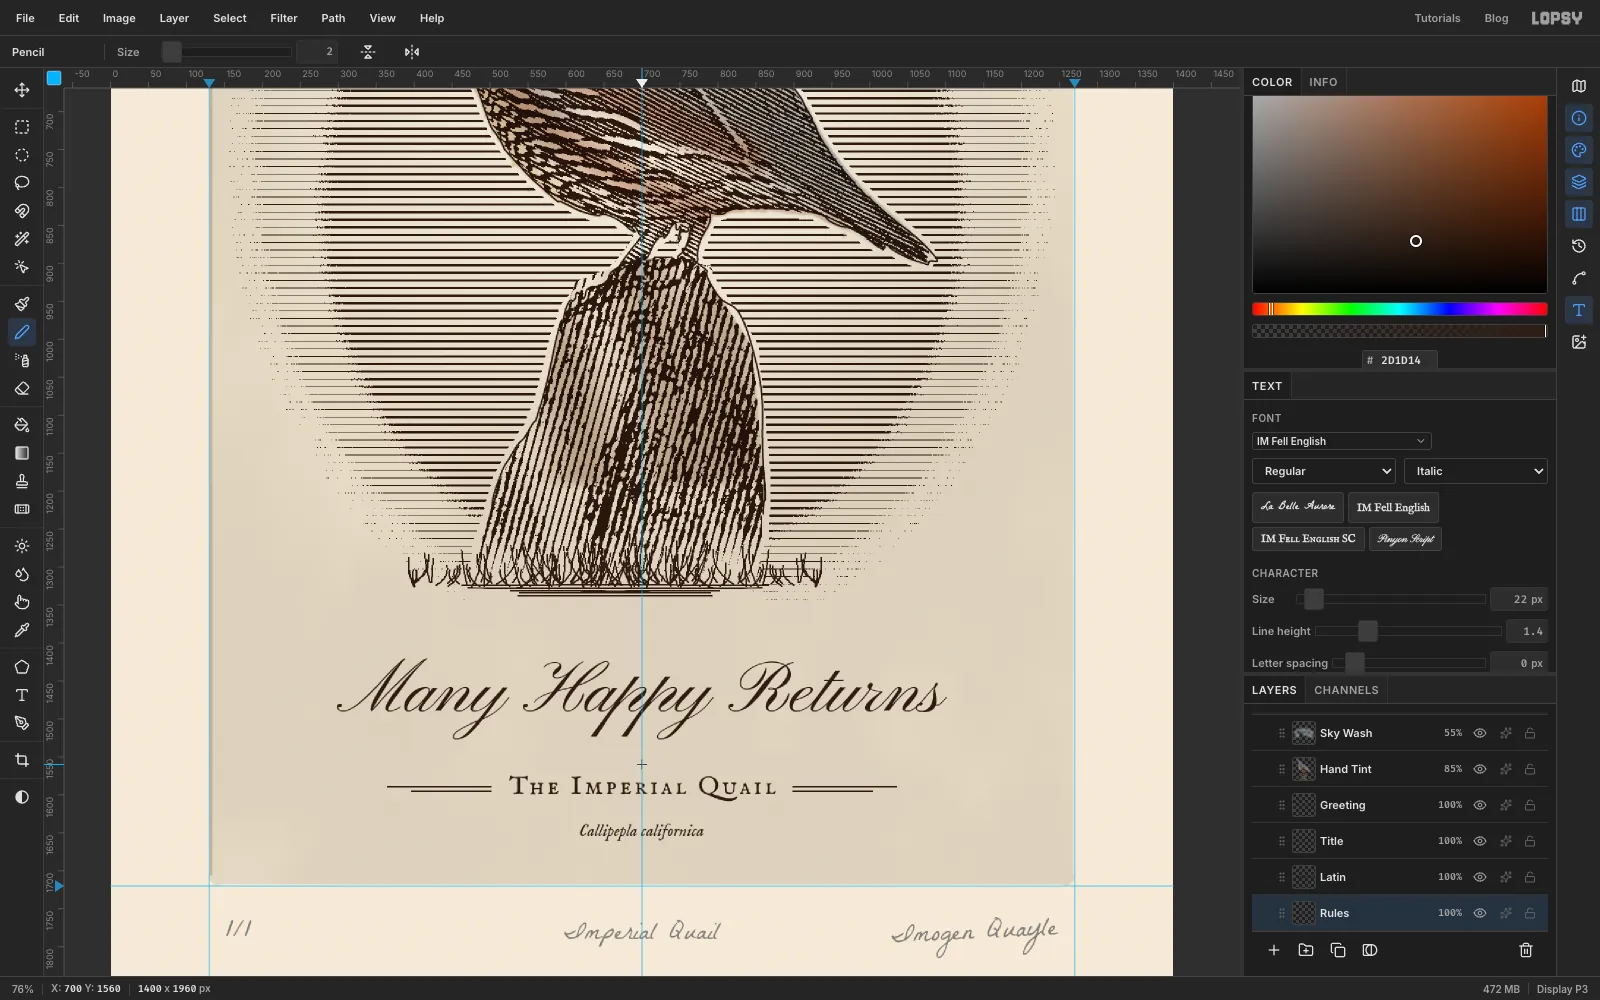
- Many Happy Returns in Pinyon Script, Size
-
Sign it in pencil
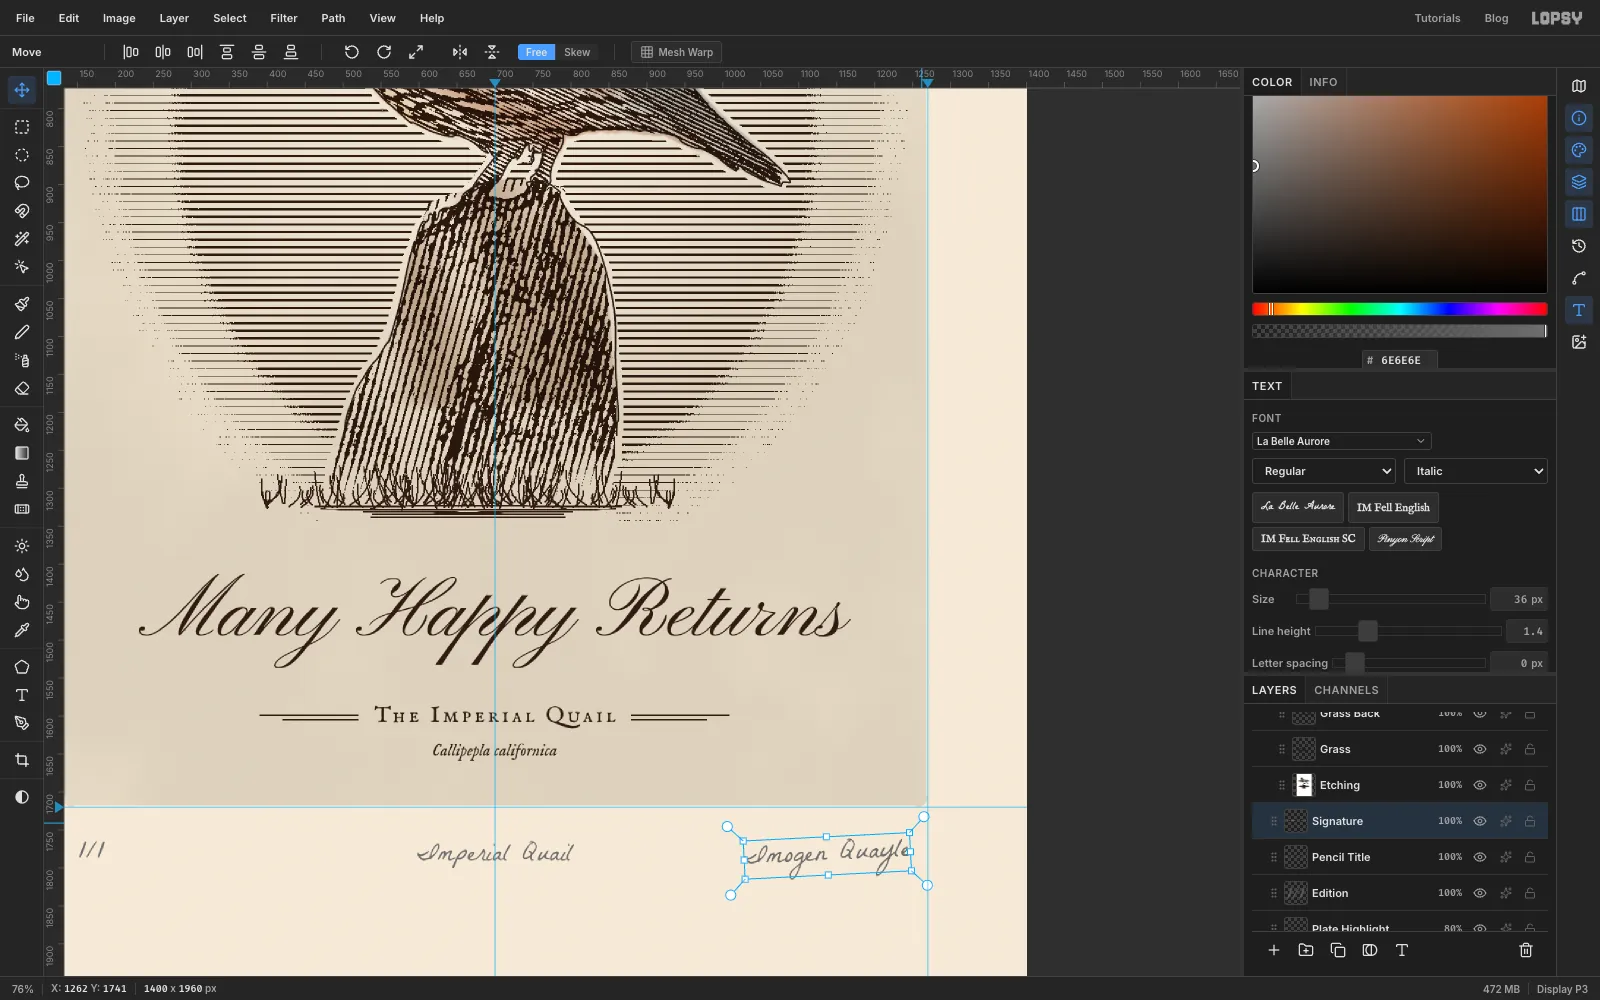
Printmakers number, title and sign each proof in pencil below the plate. Click a layer outside the Plate group (Plate Highlight) so the notes are added outside it, set the colour to graphite , and use La Belle Aurore at about Size
34. Type 1/1 at the left plate edge, the title in the middle, and a signature lined up with the right edge. Set all three on the same baseline, and rename the layers Edition, Pencil Title and Signature.Signatures are never perfectly level. Select the signature with the Move tool, drag its rotate handle up about 3°, and press Escape to commit.
-
Group the pencil notes
Click Signature, Shift-click Edition to select all three notes, and choose Layer → Group Layers. Name the group Margin Notes and set it to 85% so the pencil sits back.
Now the notes move together. Click the group's row, pick the Move tool and drag them down until they sit comfortably under the plate. If you overshoot, Cmd+Z puts them back. Fine-tune with the arrow keys.
Finally, look at the whole card. If the washes feel faint next to the lettering, raise Hand Tint and Sky Wash to 100%.
Save the project with File → Save Project and export the card with File → Quick Export PNG.