Draw a Calligraphic Rose and Dagger Tattoo Flash Sheet
Draw a traditional tattoo flash sheet in Lopsy, with an outlined rose, a dagger through a heart, script lettering on ribbons and calligraphic swashes.
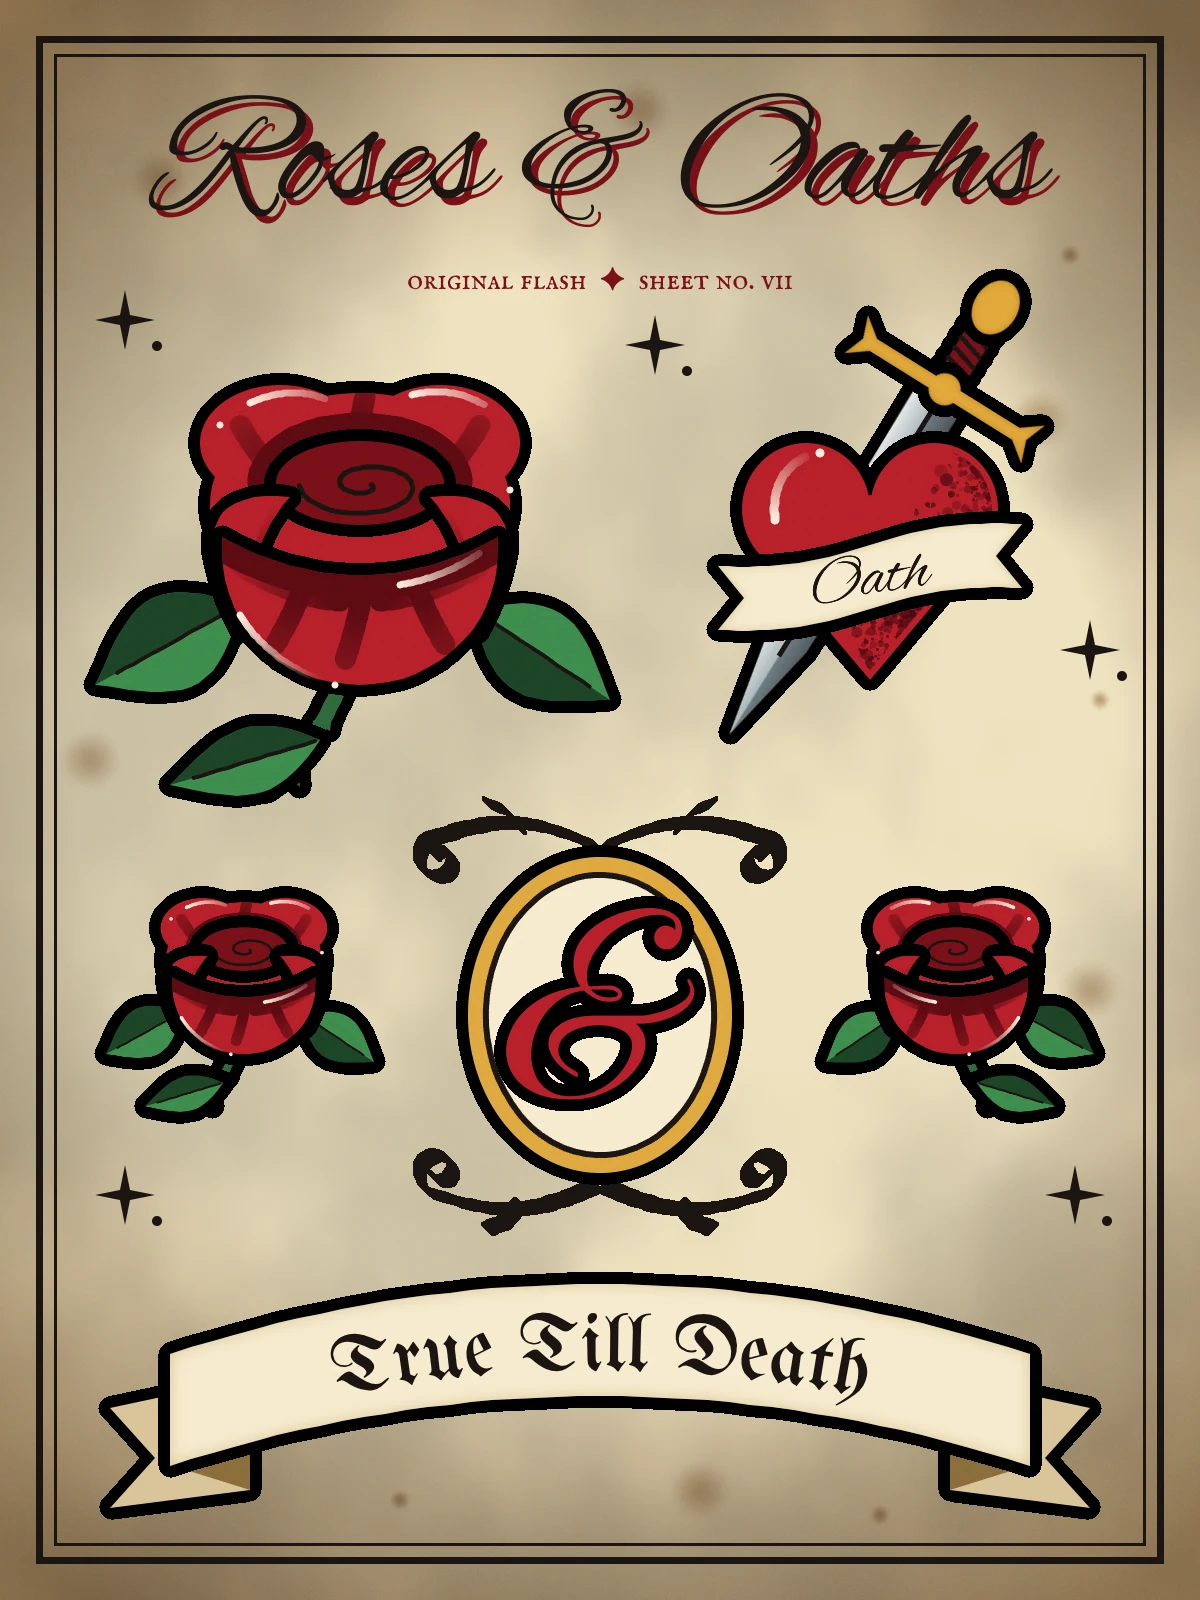
A tattoo flash sheet is a page of ready-to-tattoo designs that hangs on the wall of a shop. In the American traditional style every design has a heavy black outline, a small set of strong colours and a lot of bare skin, so it still reads from across the room. Lettering does as much work as the pictures. Names and mottoes sit on ribbons, set in brush script or blackletter.
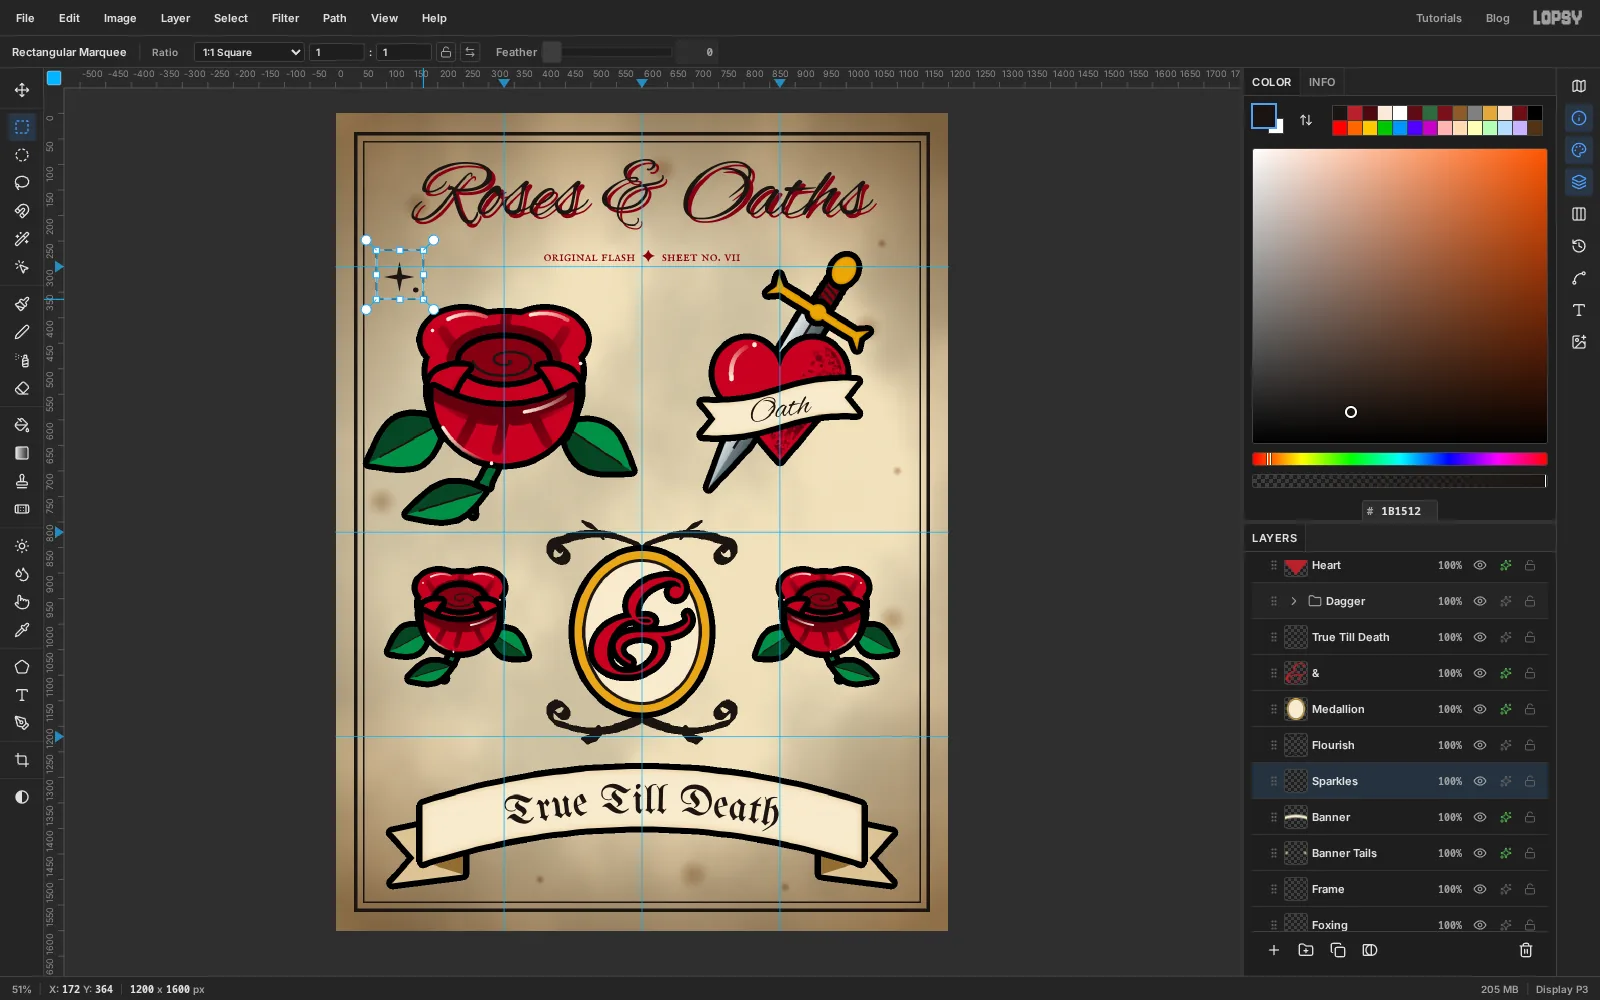
In this tutorial you'll make Roses & Oaths, a 1200 × 1600 px calligraphic flash sheet with five designs: a full rose, a dagger through a heart, a script ampersand in a gold medallion, two small rose buds, and a "True Till Death" banner. Each design is built from simple filled selections. One shared outline effect turns those fills into flash.
Along the way you'll use:
- guides, the marquees with add, subtract and intersect, Edit → Fill and Select → Shrink
- Clouds, Gaussian Blur, Add Noise and a radial Gradient to age the paper
- the Brush with Fade for tapered whip shading, a Caligraphic Angle tip with vertical symmetry, and the Spray tool for dotwork
- the Stroke, Inner Glow and Drop Shadow layer effects
- the Pen tool, Select → Selection → Path and Stroke Path
- text in Alex Brush, UnifrakturMaguntia, Great Vibes and IM Fell English SC, set on a path and rotated
- groups, duplicating a group, flipping it, scaling with Cmd-drag and rotating with the Move tool, plus copy and paste
The palette:
-
Paper
-
foxing
-
edge burn
-
Ink
-
oxblood
-
shadow red
-
Rose red
-
highlight
-
Leaf green
-
stem
-
Stipple
-
Gold
-
ribbon cream
-
ribbon shade
-
tail tan
-
Steel
-
Age the paper
Choose File → New, set the size to 1200 × 1600 px and click Create. Rename
Layer 1toPaper(double-click its name), set the foreground to and choose Edit → Fill.Click Add Layer and name it
Stains. Choose Filter → Clouds… and click Apply. Clouds always paints grey mottling, whatever your colours are. Then run Filter → Gaussian Blur… with Radius20. Open the layer's effects drawer (the ✦ button on its row), set the blend mode to Multiply, and drop the layer's opacity to15%.Add a layer called
Foxingfor the little rust spots old paper gets. Open the brush presets (the tip thumbnail at the left of the Brush options bar) and pick Soft Round. Set Size70, Opacity35and the foreground to , then click eight or so times around the edges of the sheet. Drop to Size24, Opacity45and add a few smaller specks.Add a layer called
Grain, fill it with mid grey , run Filter → Add Noise… at Amount30, and set it to Overlay at35%. LeaveGrainat the top of the stack all the way through: it lays the same fine paper texture over the artwork too, which helps the inks look printed on the sheet.Last, add
Edge Burn. Pick the Gradient tool, choose Radial, and click Advanced… to open the Gradient Editor. Click under the bar to add a stop, drag stops to move them, and type a hex into the colour picker to set each one. Set the stops: fully transparent at the left and at about 55%, and fully opaque at the right. Drag from the centre of the page down past the bottom edge. Set it to Multiply at65%. Later you'll dragEdge Burndown so it sits just aboveFoxing, below the artwork.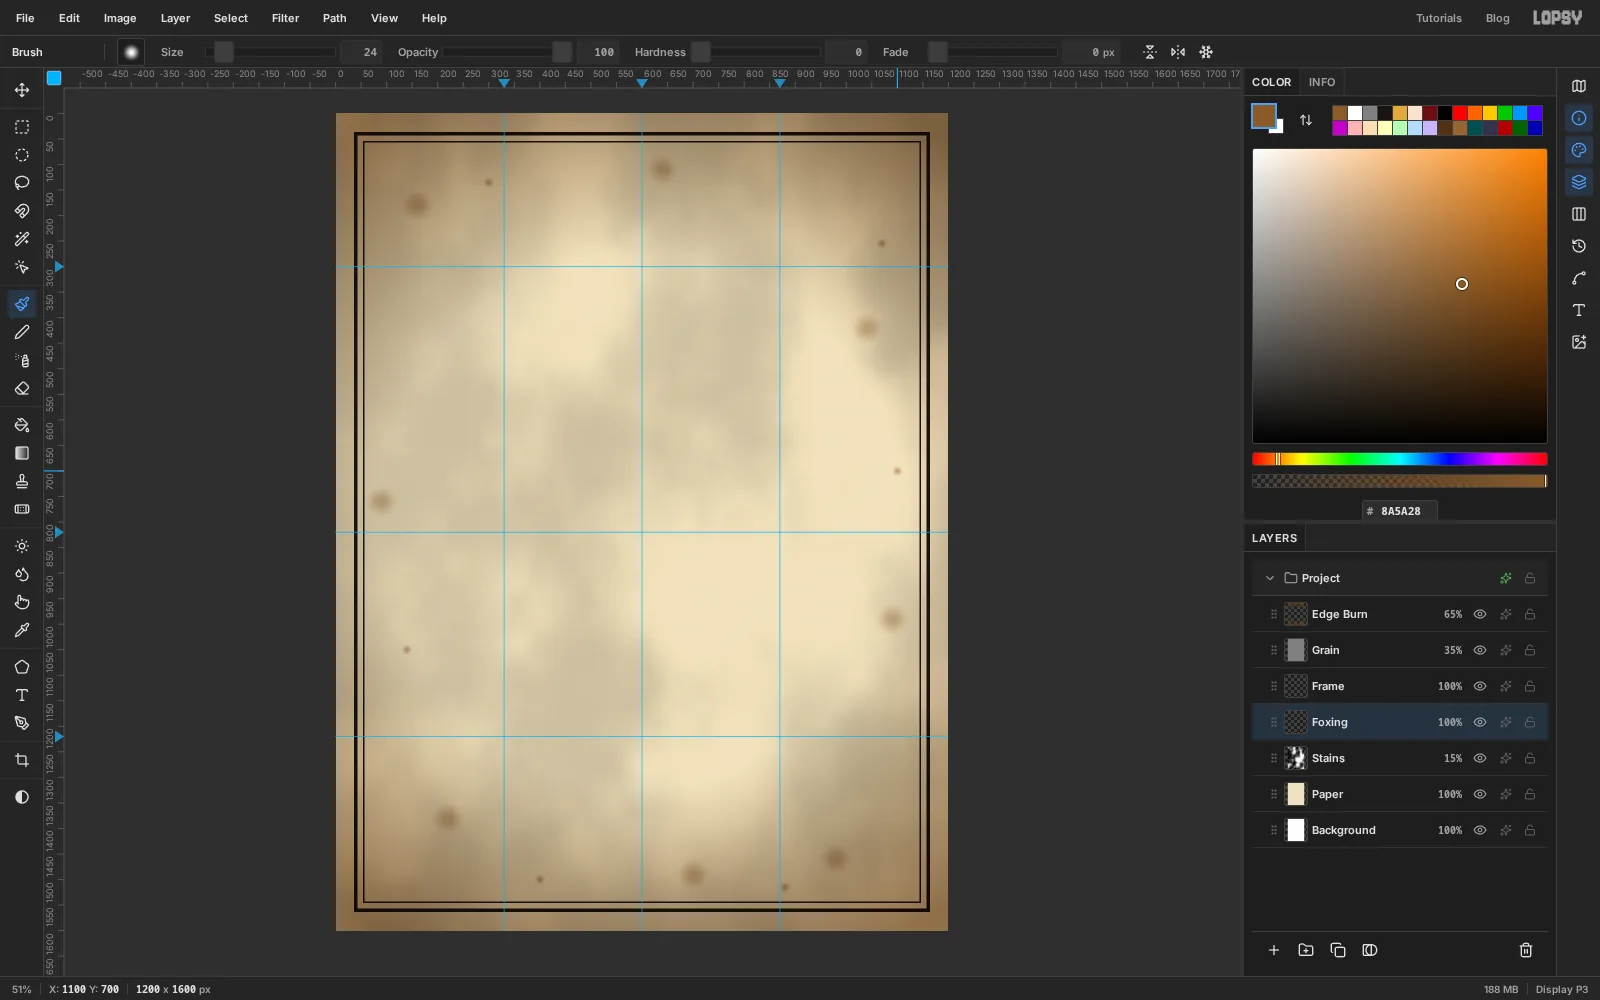
-
Rule the guides and the double frame
Cmd-click the top ruler near the middle to drop a guide exactly on the centre line (600). Then click the top ruler at 330 and 870, the centre lines of the two columns. Click the left ruler at 300, 820 and 1220 to mark the tops of the three rows.
Add a layer called
Frame. Pick the Rectangular Marquee (M) and drag from 36, 36 to 1164, 1564, leaving an even margin of paper all round. Fill it with ink . Choose Select → Shrink…, shrink by7and press Delete to hollow out a 7 px line.Do the same for an inner hairline: drag from 54, 54 to 1146, 1546, fill, shrink by
3, press Delete and then Cmd+D.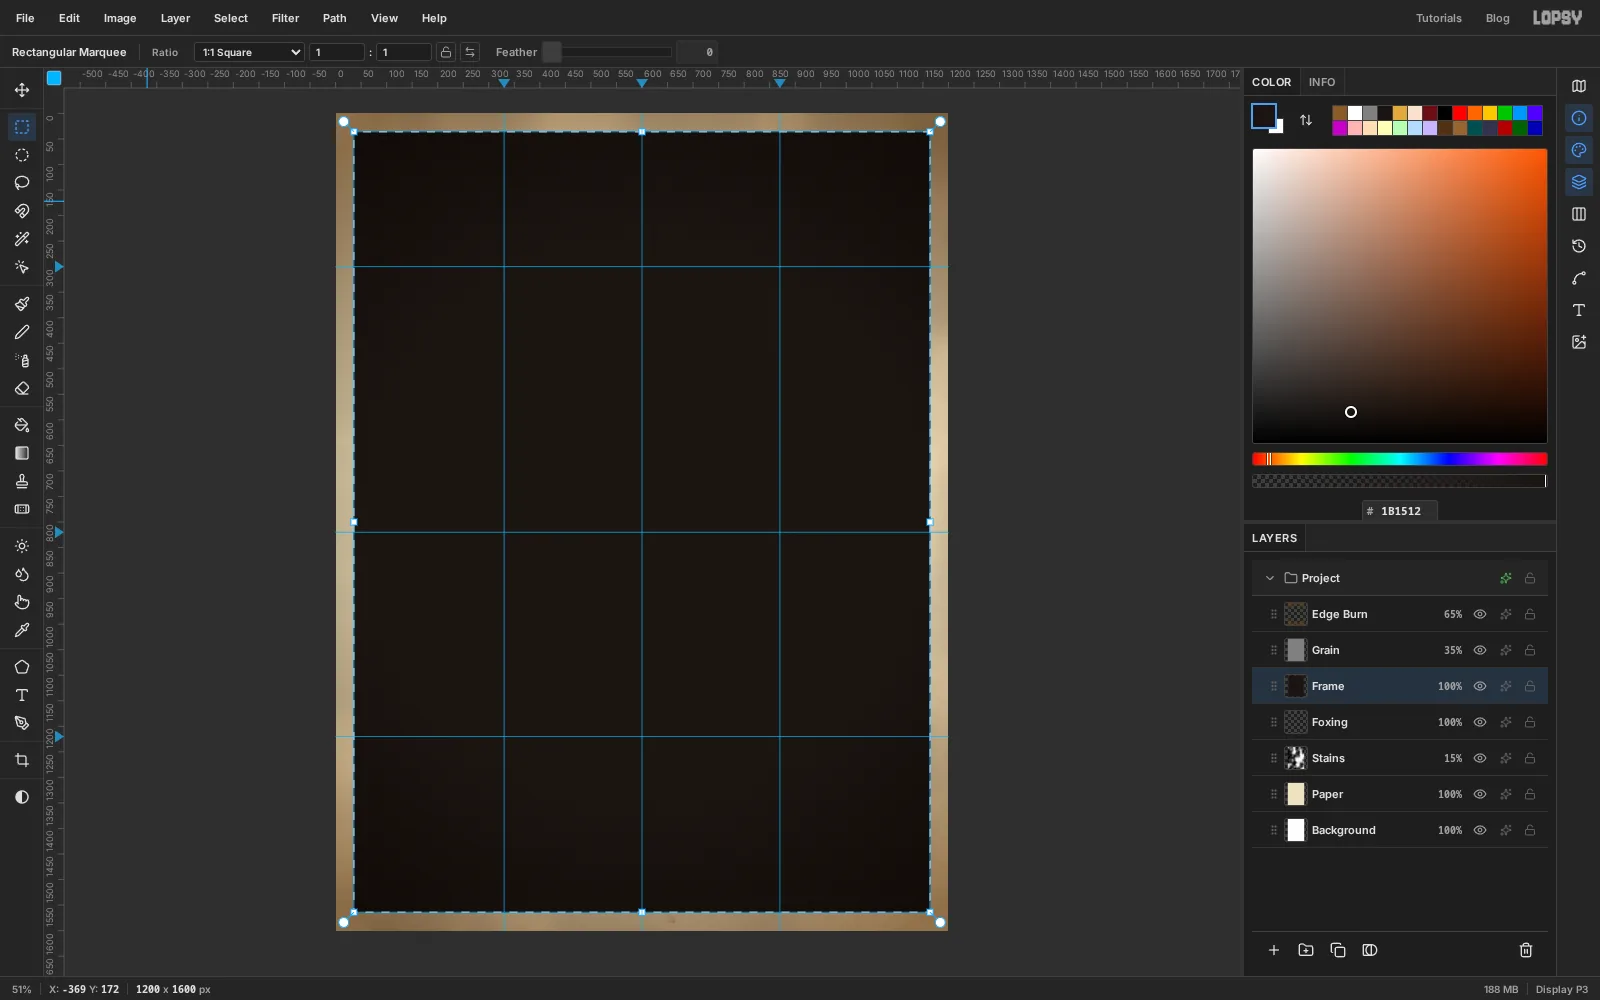
-
Write the title in brush script
Pick the Text tool (T). In the options bar set the font to Alex Brush, the size to
165and the foreground to ink. Click in the empty space near the top left, typeRoses & Oathsand press Tab to commit. Switch to the Move tool (V) and click Align center horizontally in the options bar.Open the title's effects drawer, tick Drop Shadow, and set Offset X
7, Offset Y7, Blur0, Opacity100and the colour to oxblood . A hard, offset shadow is how sign painters and tattooers make script pop without a second outline.For the subtitle, click the
Framerow first so the next font change doesn't restyle the title. Set the Text tool to IM Fell English SC at size30and the foreground to oxblood. Click below the title and typeoriginal flash ✦ sheet no. vii. You can copy the ✦ from this page and paste it with Cmd+V while typing, or use a plain•instead. This font draws lowercase letters as small capitals. Commit with Tab and centre it the same way.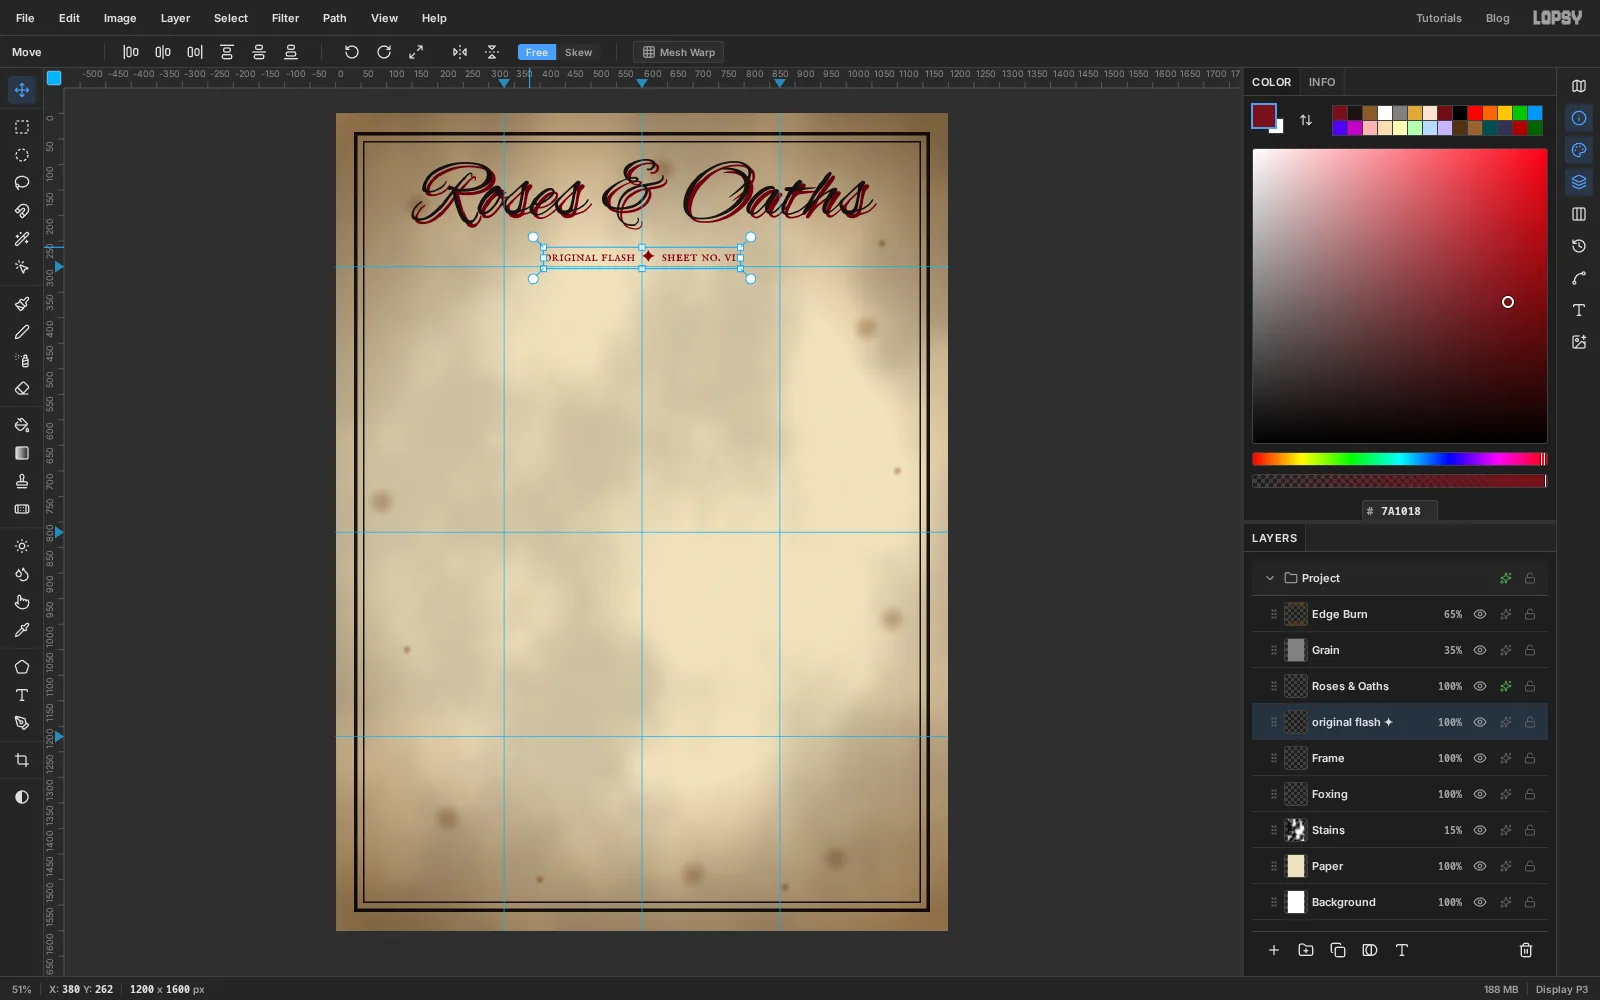
-
Start the rose with its stem and leaves
The rose sits in the left column, centred near 330, 535. Build it back to front.
Click the
Framerow, then add a layer calledStemso it sits under the text. Pick the Brush (B), choose the Hard Round preset, set Size16and the foreground to , and draw a short curve down and to the left from under the flower (about 320, 655) to 235, 785. Add two small thorns with the Lasso (L): drag a little triangle on each side of the stem and Edit → Fill it. Give the layer the standard Stroke (Width12, ink).Add a layer called
Leaves. With the Lasso, draw three pointed leaves, each about 150 px long: one off the left of the flower, one off the right, and a smaller one on the stem. Fill all three with .Now shade one half of each leaf. Cmd-click the
Leavesthumbnail to load the leaves as a selection. Hold Shift+Alt and lasso around the upper half of the first leaf, so the selection becomes only the part inside both. Fill it with . Repeat for the other two leaves. Draw a centre vein in each with the Brush at Size5in ink, and give the layer the standard Stroke.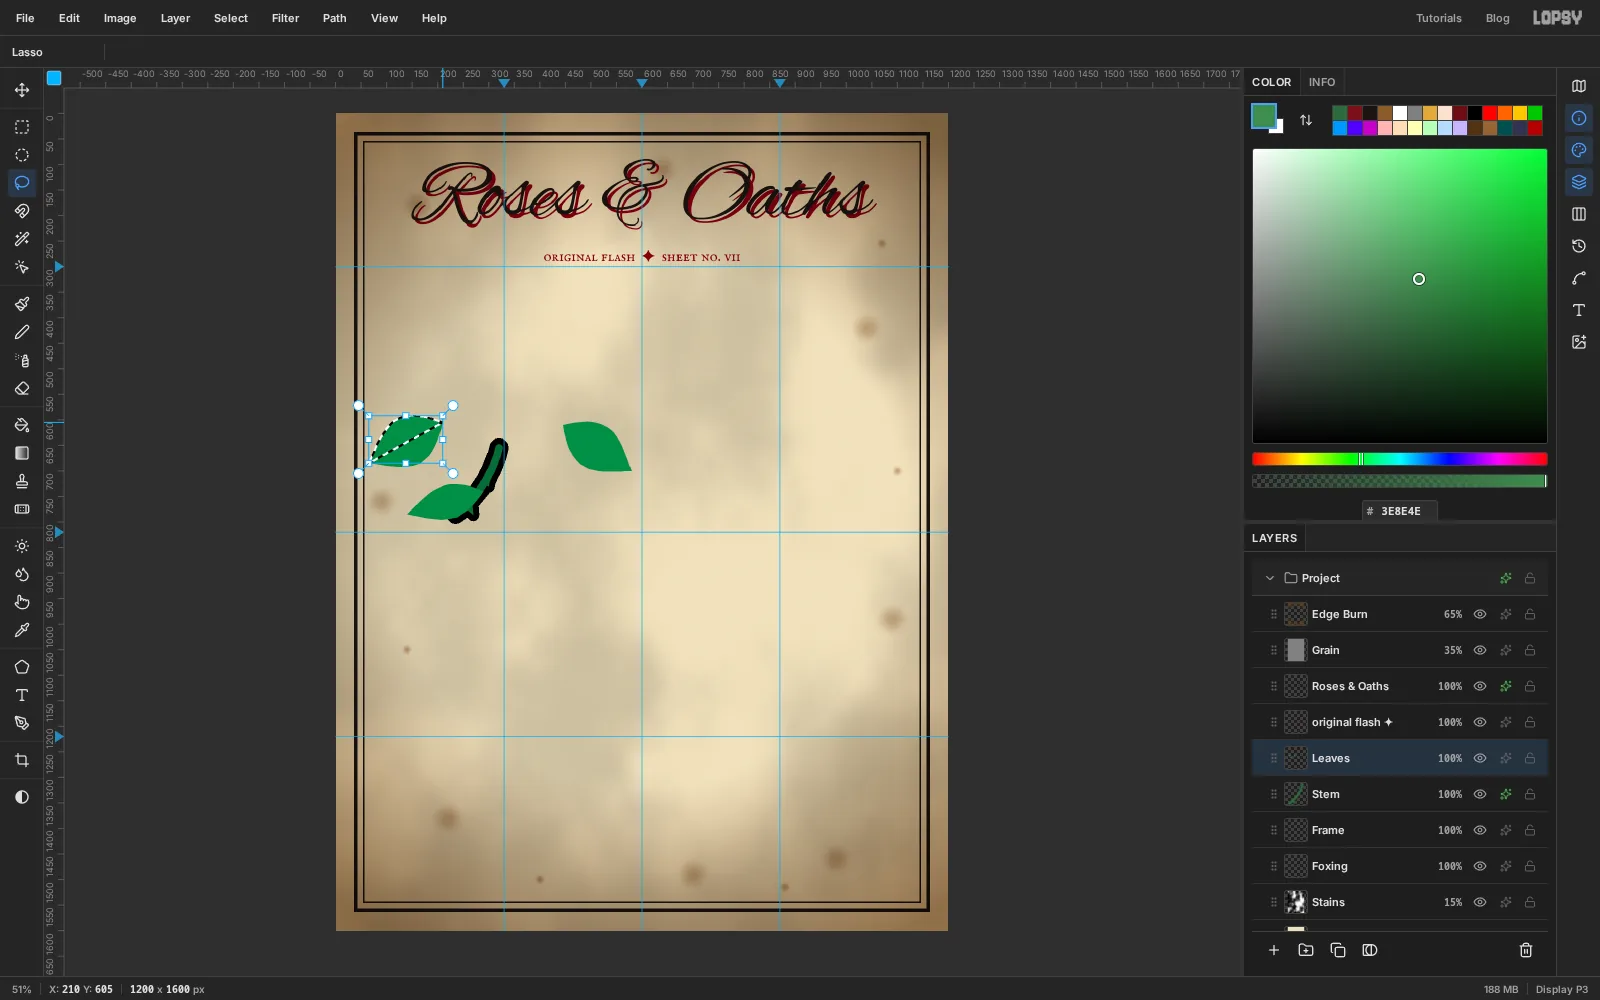
-
Block in the back petals
Add a layer called
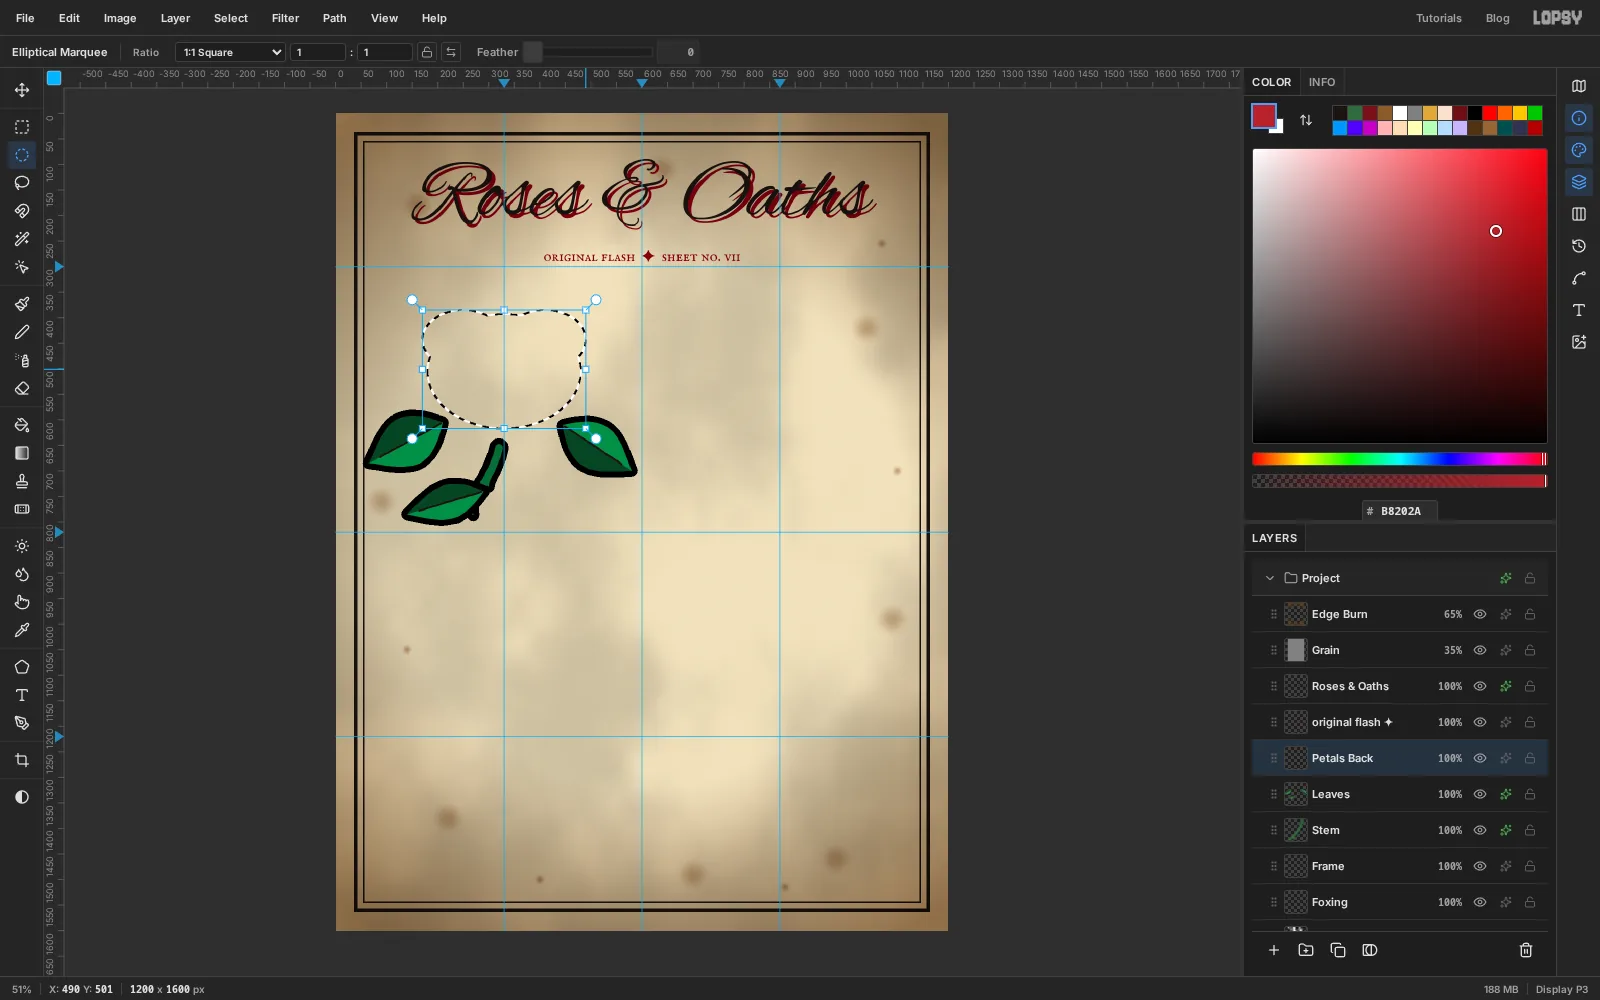
Petals Back. Pick the Elliptical Marquee. In its options bar, make sure the lock button next to Ratio is off, or every drag will come out as a circle. Drag an oval about 300 px wide and 225 px tall, centred just above the rose's centre. Hold Shift and drag two smaller ovals, about 160 × 115 each, over its top left and top right, so the outline gets two rounded lobes like the back petals of an open rose.Fill it with rose red , deselect, and add the standard Stroke.
-
Add the bud, side petals and front petal
Each petal gets its own layer so its outline overlaps the petal behind it. That overlap is what makes a flash rose read as layered.
- Bud: add a layer called
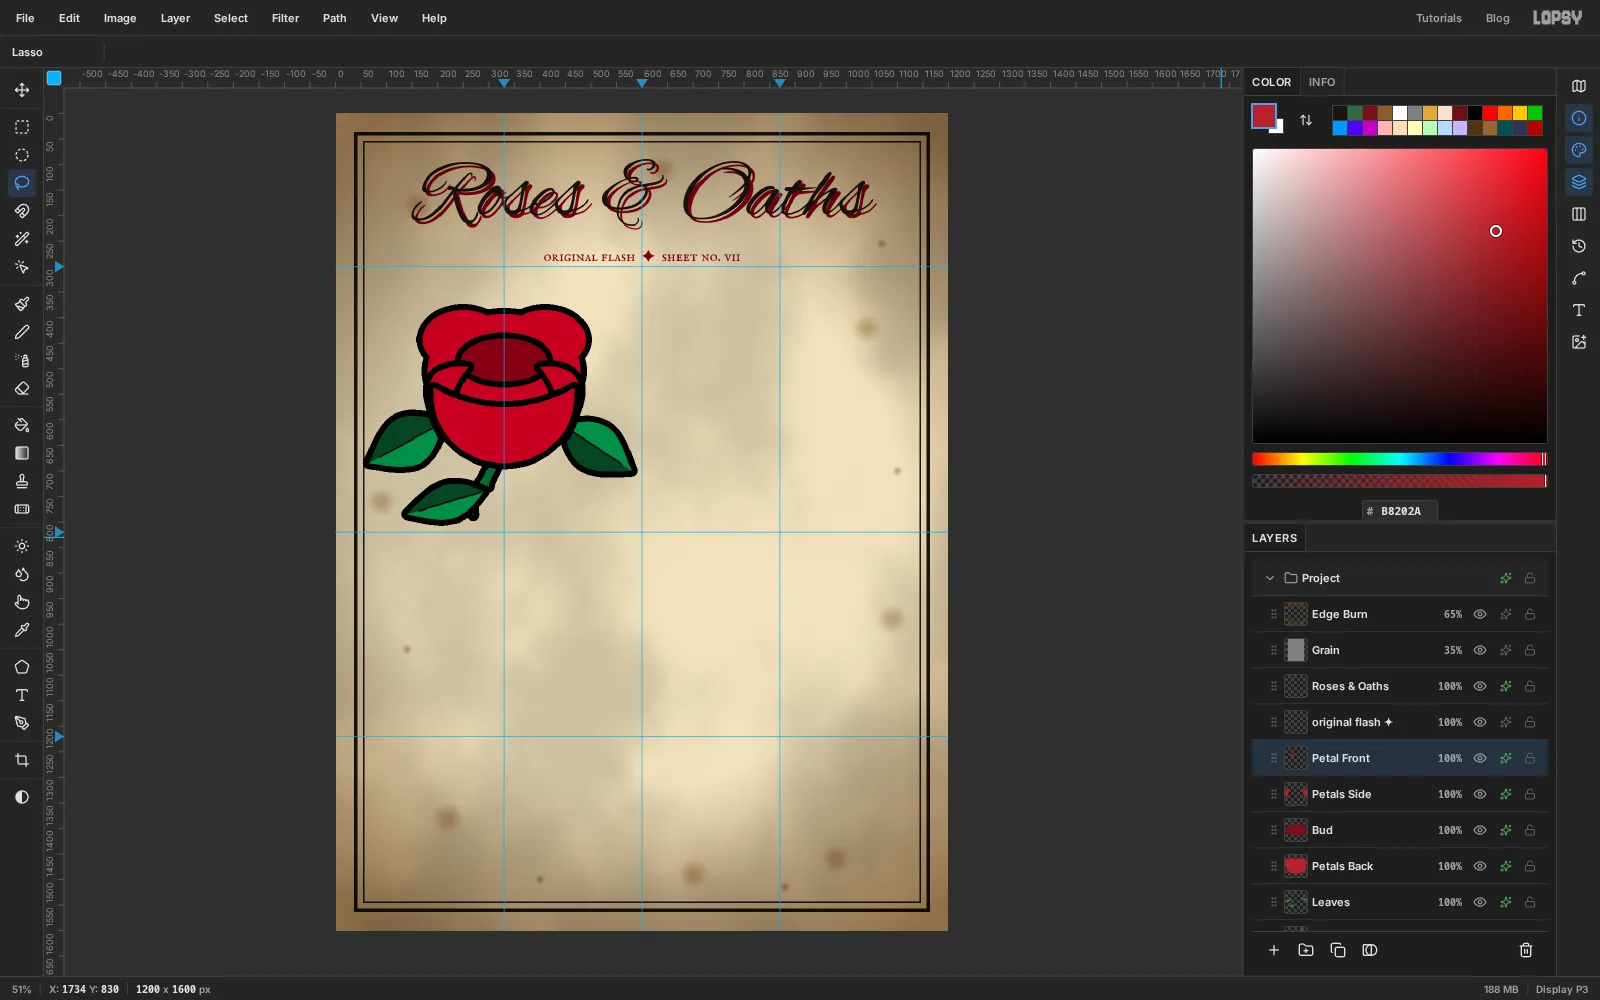
Bud. Drag an elliptical marquee about 170 × 85 px across the top of the back petals and fill it with oxblood . Add the Stroke. - Side petals: add
Petals Side. With the Lasso, draw a curved petal that starts under the left of the bud, swings out past the back petals and curls back in near the bottom. Shift-drag its mirror image on the right. Fill both with rose red and add the Stroke. - Front petal: add
Petal Front. Lasso a deep bowl shape. Its top edge is a shallow smile across the middle of the flower, and its bottom is a half circle about 275 px wide. Fill it with rose red and add the Stroke.
- Bud: add a layer called
-
Shade the petals with whip strokes
Whip shading is short strokes that start dark and flick out to nothing. The Brush's Fade setting does that for you.
Cmd-click the
Petal Frontthumbnail so the strokes stay inside the petal, and click its row so you paint on it. Set the Brush to Size22, Fade110and the foreground to . Paint five short strokes down from the lip: one in the centre, two either side, each starting at the lip and flicking down. Then set Fade back to0, raise the size to34, and paint one solid band along the whole lip so the strokes grow out of a shadow. Press Cmd+D.Do the same on
Petals Back(strokes running up into the lobes, and a band around the bud) and onPetals Side(one stroke along each inner edge).To finish the flower, click the
Budrow, Cmd-click its thumbnail, and draw a loose spiral in ink with a Size6brush. Then clickPetal Frontand add a layer calledHighlights, so it lands above all the petals. Paint thin cream arcs along the rims of the back petals and the front petal with Size8and Fade90, and click a few single dots. If an arc spills outside a petal, wipe it off with the Eraser (E).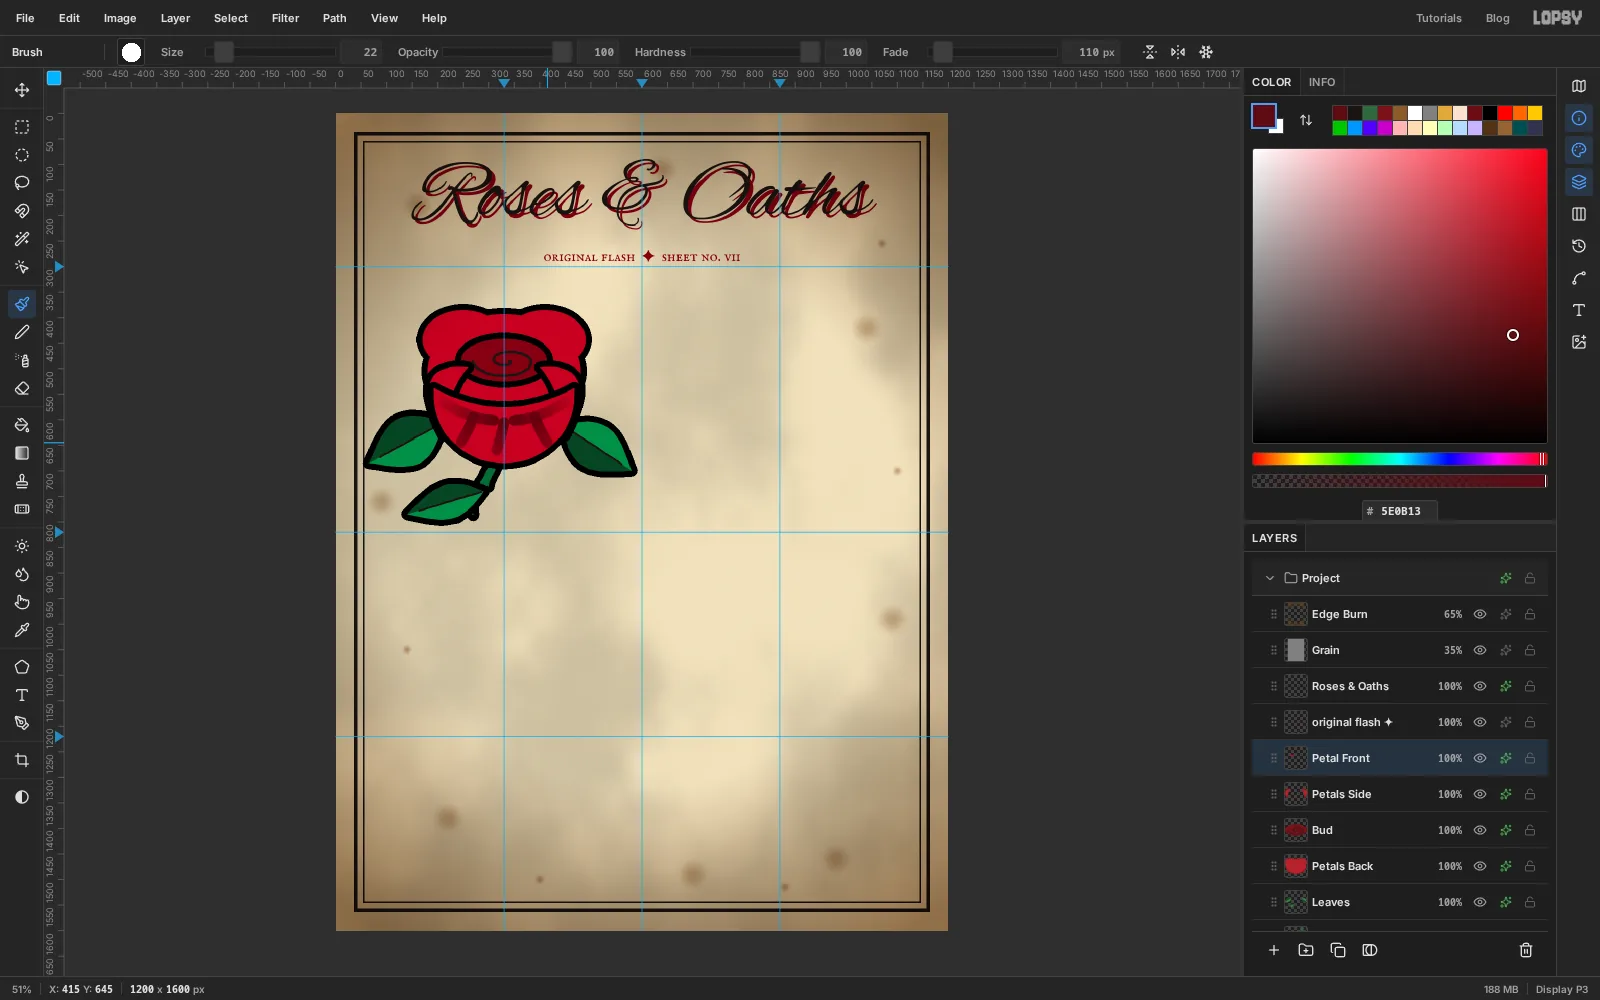
-
Group the rose
Click
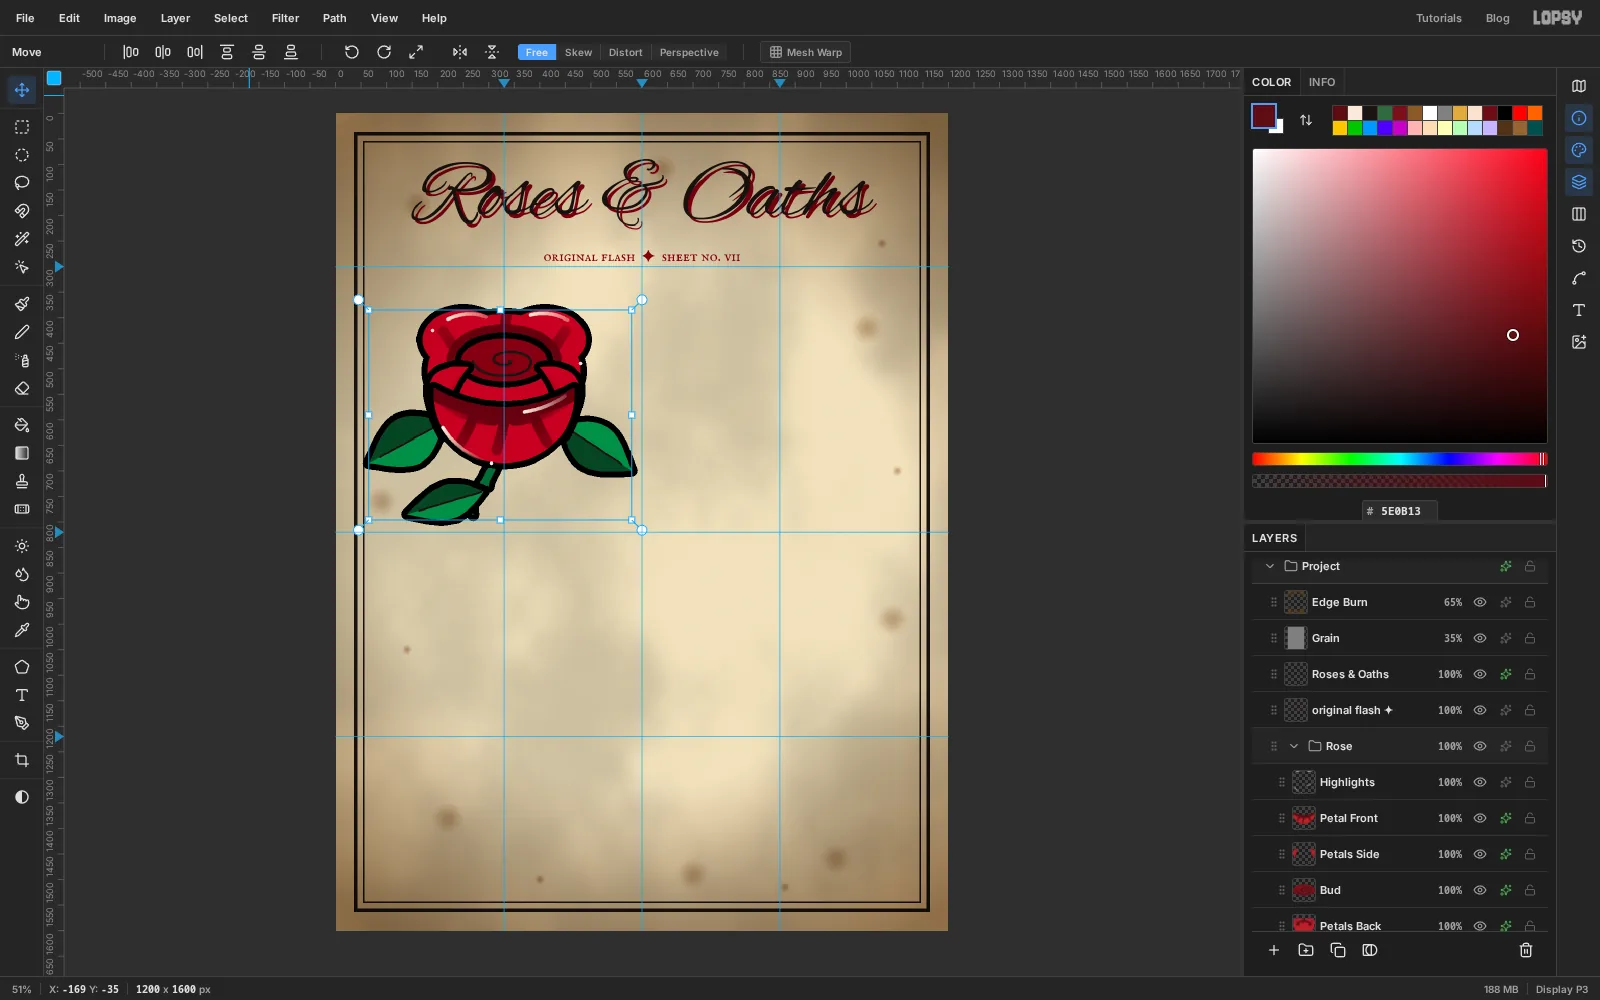
Highlights, Shift-clickStem, and choose Layer → Group Layers. Rename the groupRose. Check the order inside the group: from the bottom it should be Stem, Leaves, Petals Back, Bud, Petals Side, Petal Front, Highlights. If a layer ended up outside the group, drag it into place by the dotted grip (⠿) at the left of its row.With the group selected, the Move tool's handles frame the whole flower, so you can move or scale it as one piece later.
-
Build the dagger blade
The dagger is built upright, then rotated as a group.
Click the
Framerow and add a layer calledBlade. With the Lasso, draw a tall blade centred on the 870 guide: about 52 px wide at the top (y 370), narrowing slightly to y 665, then coming to a point at about y 775.Pick the Gradient tool, choose Linear, and open Advanced…. In the Gradient Editor, set four stops: at the left, at the middle, just right of the middle, and at the right. Placing two stops so close together gives the hard edge of a sharpened bevel. Drag across the blade from its left edge to its right edge and deselect.
Pick the Pencil (N) at Size
5in ink. Click near the top of the blade and Shift-click near the tip to draw the centre ridge. Add the standard Stroke.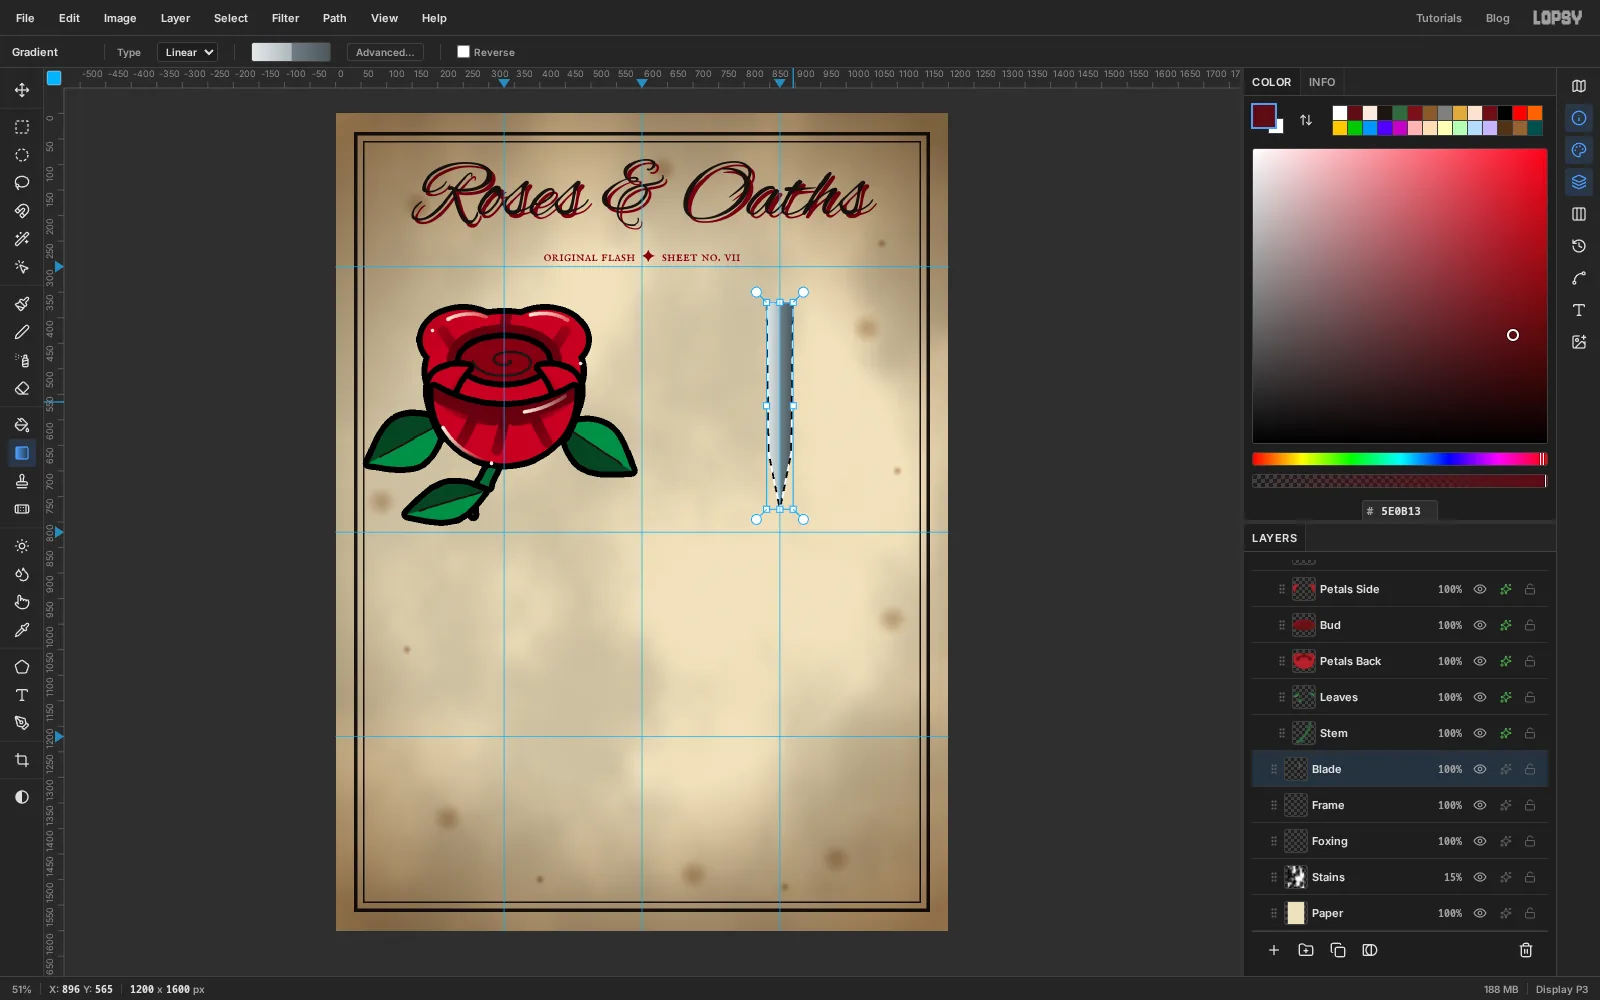
-
Add the grip and the flared crossguard
Add a layer called
Grip. Drag a rectangular marquee about 28 × 80 px above the blade and fill it with oxblood. Wrap it with the Pencil at Size4: click the left edge and Shift-click a little lower on the right edge, every 12 px or so. Add the Stroke.Add a layer called
Guard. With the Lasso, draw a crossbar about 210 px wide where the grip meets the blade, flaring into fishtail points at each end. Then switch to the Elliptical Marquee and Shift-drag a round pommel on top of the grip and a small round boss in the middle of the bar. Fill everything with gold .Add the Stroke, and an Inner Glow with Size
10, Opacity70and colour to give the gold some weight. ClickGuard, Shift-clickBladeand choose Layer → Group Layers. Name the groupDagger.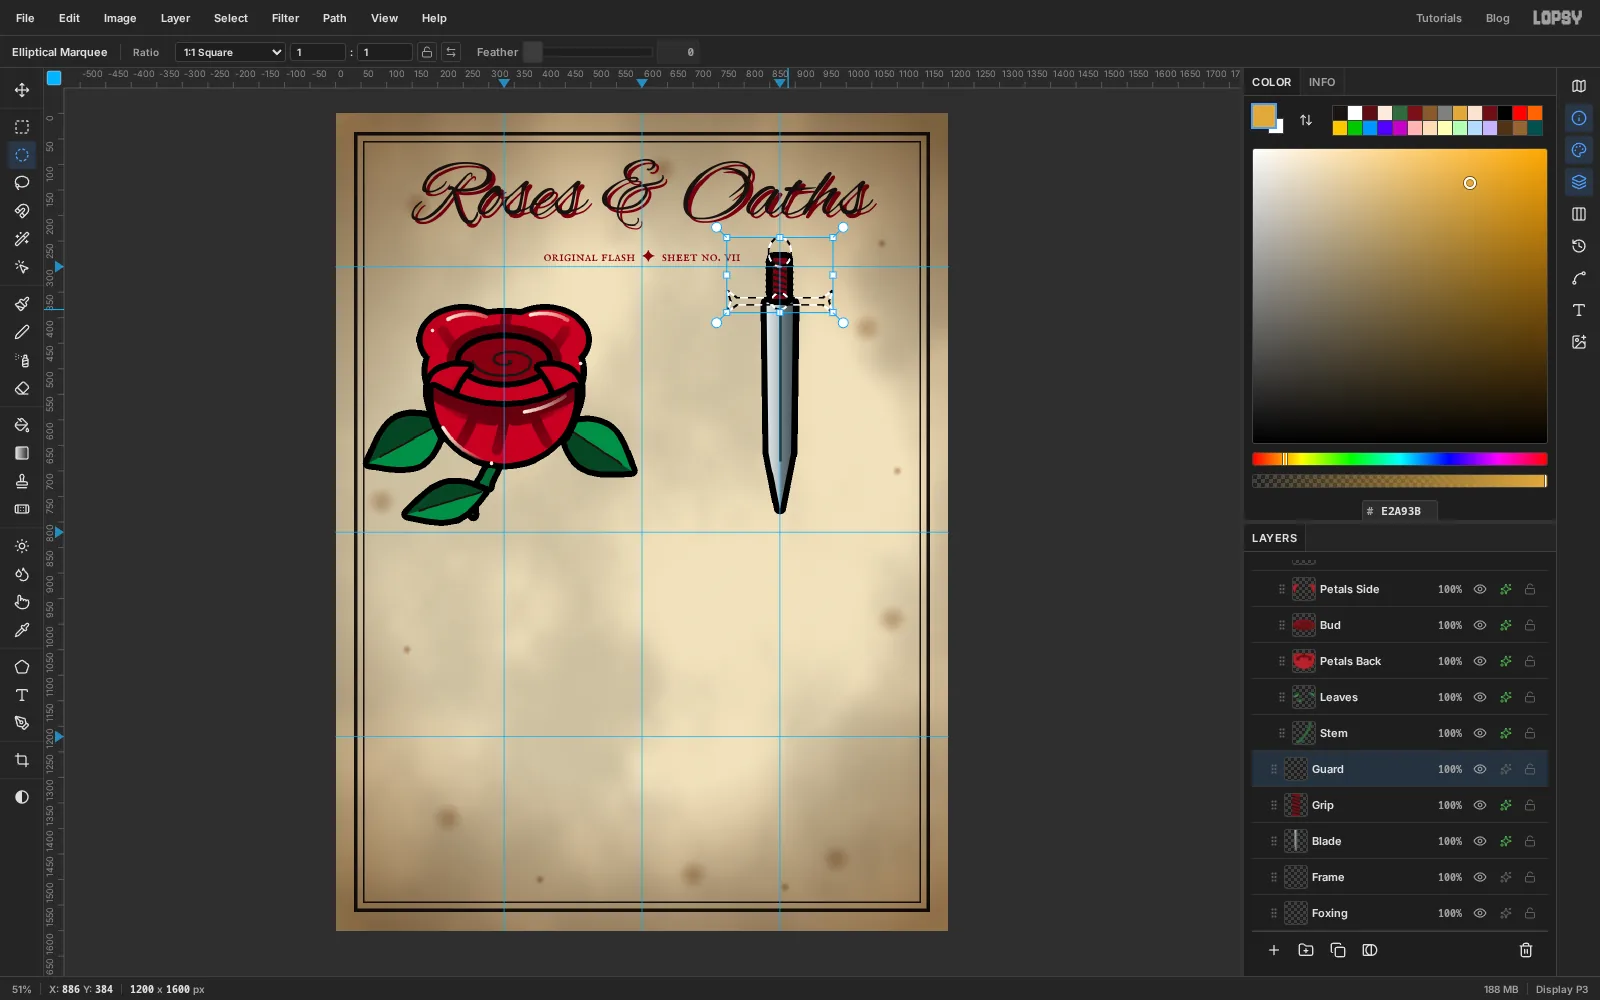
-
Rotate the dagger
With the
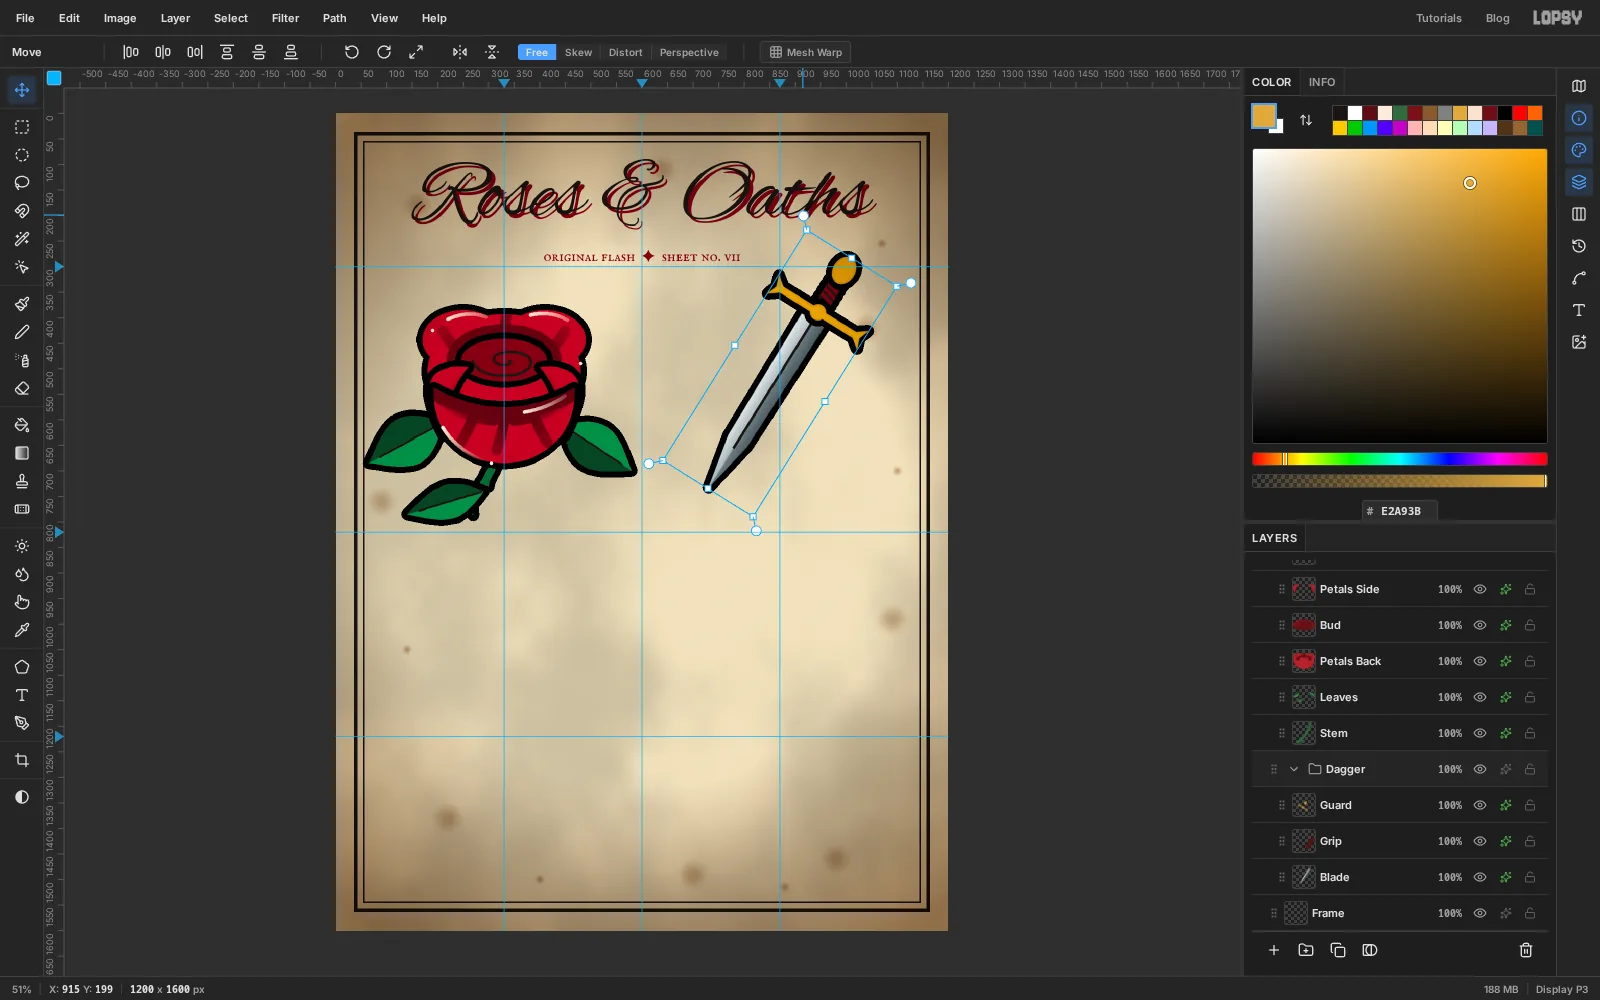
Daggergroup selected and no selection on the canvas, pick the Move tool. Handles appear around the whole dagger. Grab the round rotate handle just outside the top-left corner and drag clockwise until the dagger leans about 32° to the right, pommel up and to the right, point down and to the left. Press Cmd+D to apply the rotation. With the Move tool, Cmd+D applies a transform as well as clearing the selection.All three layers turn together around the group's centre, and the outlines keep the same weight as on the rose.
-
Draw the heart on top of the dagger
Click the
Framerow and add a layer calledHeart. Pick the Elliptical Marquee. Drag a circle about 130 px across centred at 805, 510, then Shift-drag a matching circle beside it centred at 935, 510. Switch to the Lasso and Shift-drag a triangle that joins the outer sides of both circles to a point at 870, 680.Fill it with rose red, deselect, and add the Stroke. In the Layers panel, drag the
Heartrow up by its grip until it sits above theDaggergroup. Now the blade looks like it passes through the heart: the grip shows above it and the point below.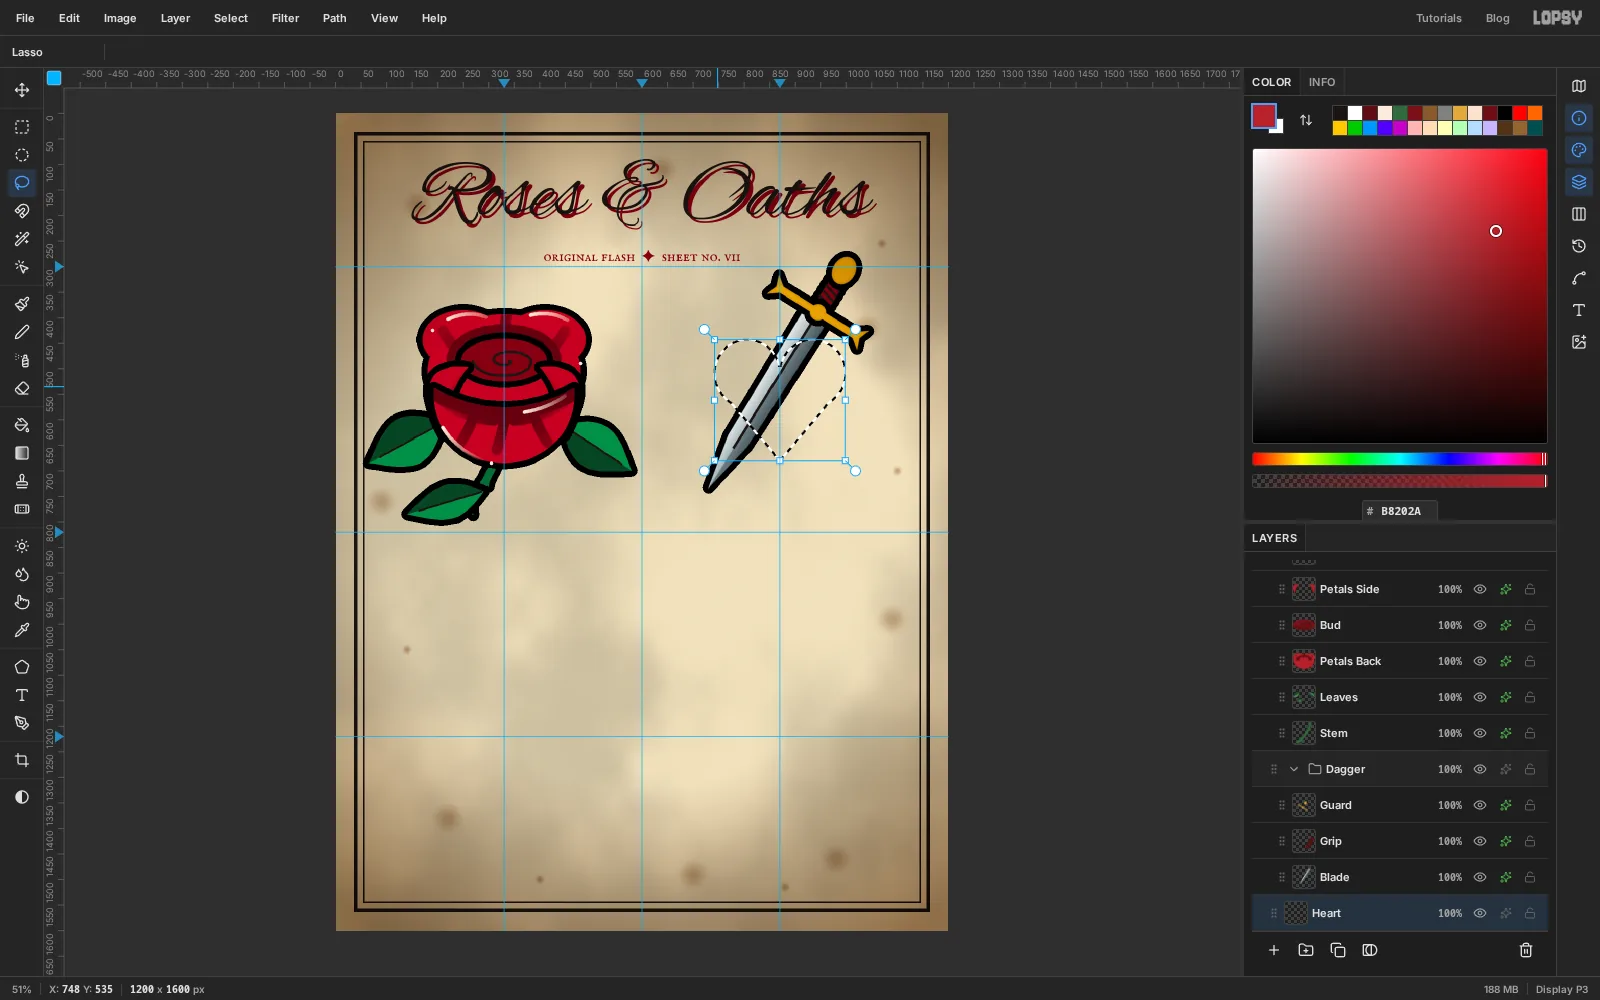
-
Stipple the heart's shadow
Flash artists shade hearts with dotwork, so use the Spray tool (J) for this rather than a gradient.
Add a layer called
Heart StippleaboveHeart. Cmd-click the heart's thumbnail, then Select → Shrink… by6so the dots stay inside the outline. Pick the Spray tool and set Size60, Density35, Opacity100, Softness0, with the foreground . Drag along the right lobe and down the lower right edge to the point. Then switch to Size120and Density45and make one more pass along the same path for some bigger dots. Above about 100 px the spray switches to larger dots, which gives the dotwork some variety. Deselect.Add a layer called
Heart Shine. Pick the Brush at Size10with Fade70and paint one cream arc on the left lobe, with a single dot just past its end.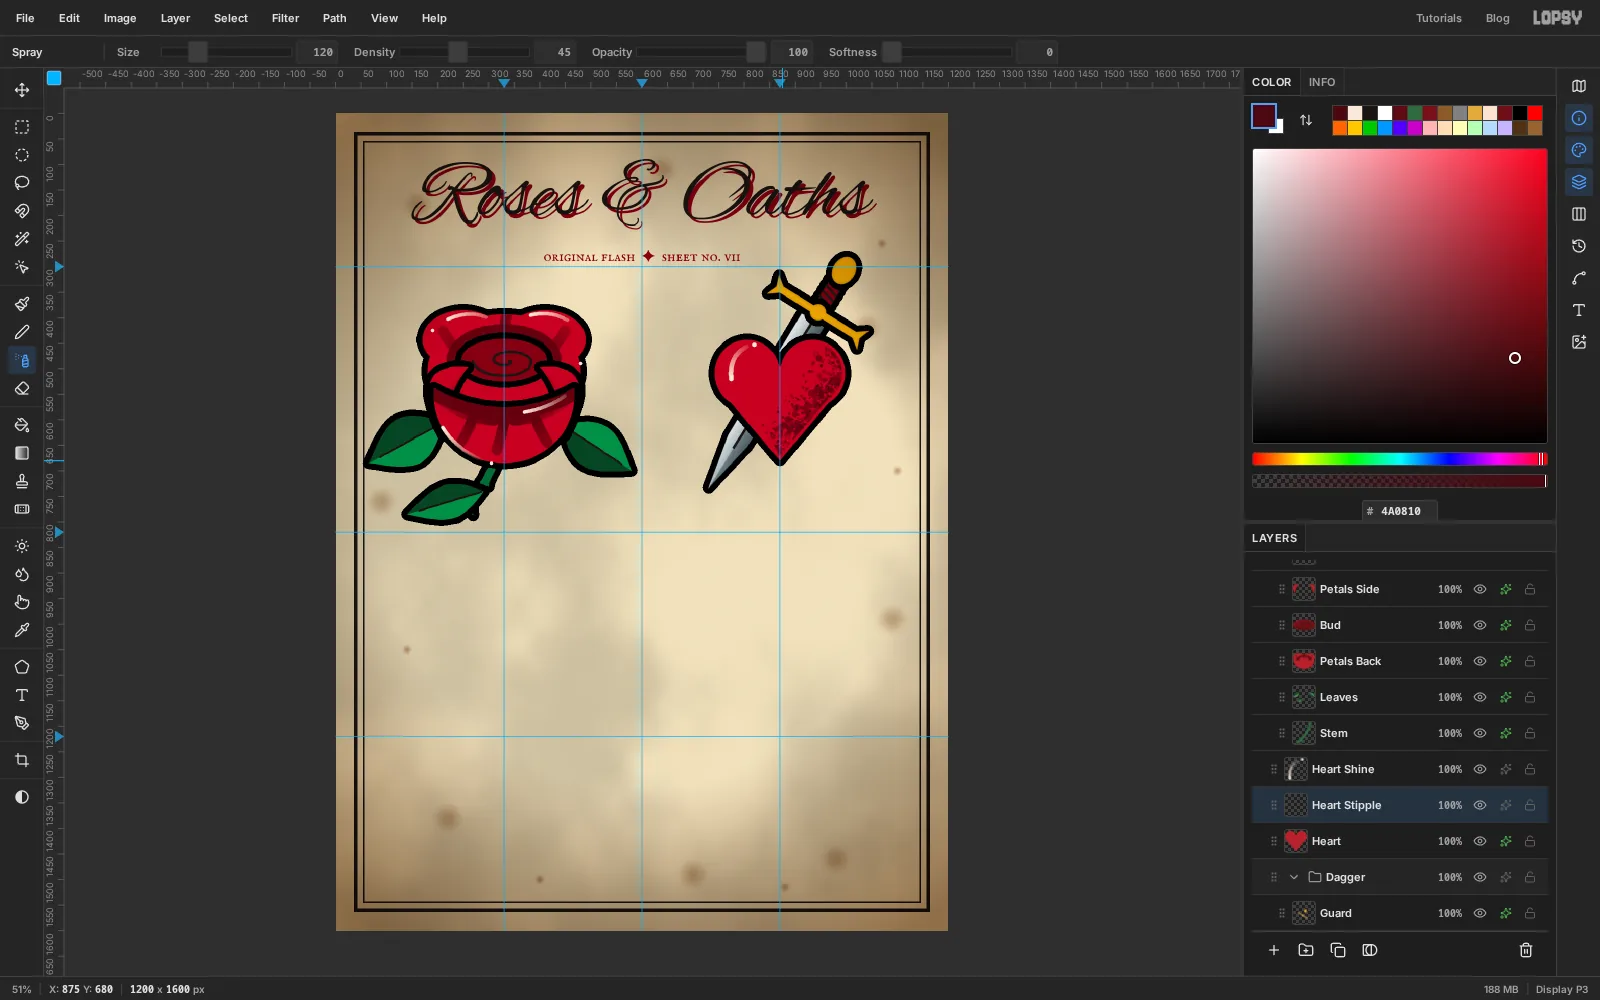
-
Wrap the heart in an "Oath" ribbon
Add a layer called
Heart Ribbon. With the Lasso, draw a gently waving band about 64 px tall that crosses the heart from 720 to 1020, rising slightly to the right (about 8°), with a V-notch cut into each end. Fill it with cream , add the Stroke, and add an Inner Glow of Size14, Opacity55in so the ribbon looks slightly curled.Pick the Text tool, set Alex Brush at
64in ink, and click on empty paper, for example low on the left side. Clicking inside an existing text layer edits that layer instead of starting a new one. TypeOathand press Tab. Switch to the Move tool and drag the word onto the centre of the ribbon. Drag its rotate handle about 8° anticlockwise to match the ribbon's tilt. You can still edit the word afterwards.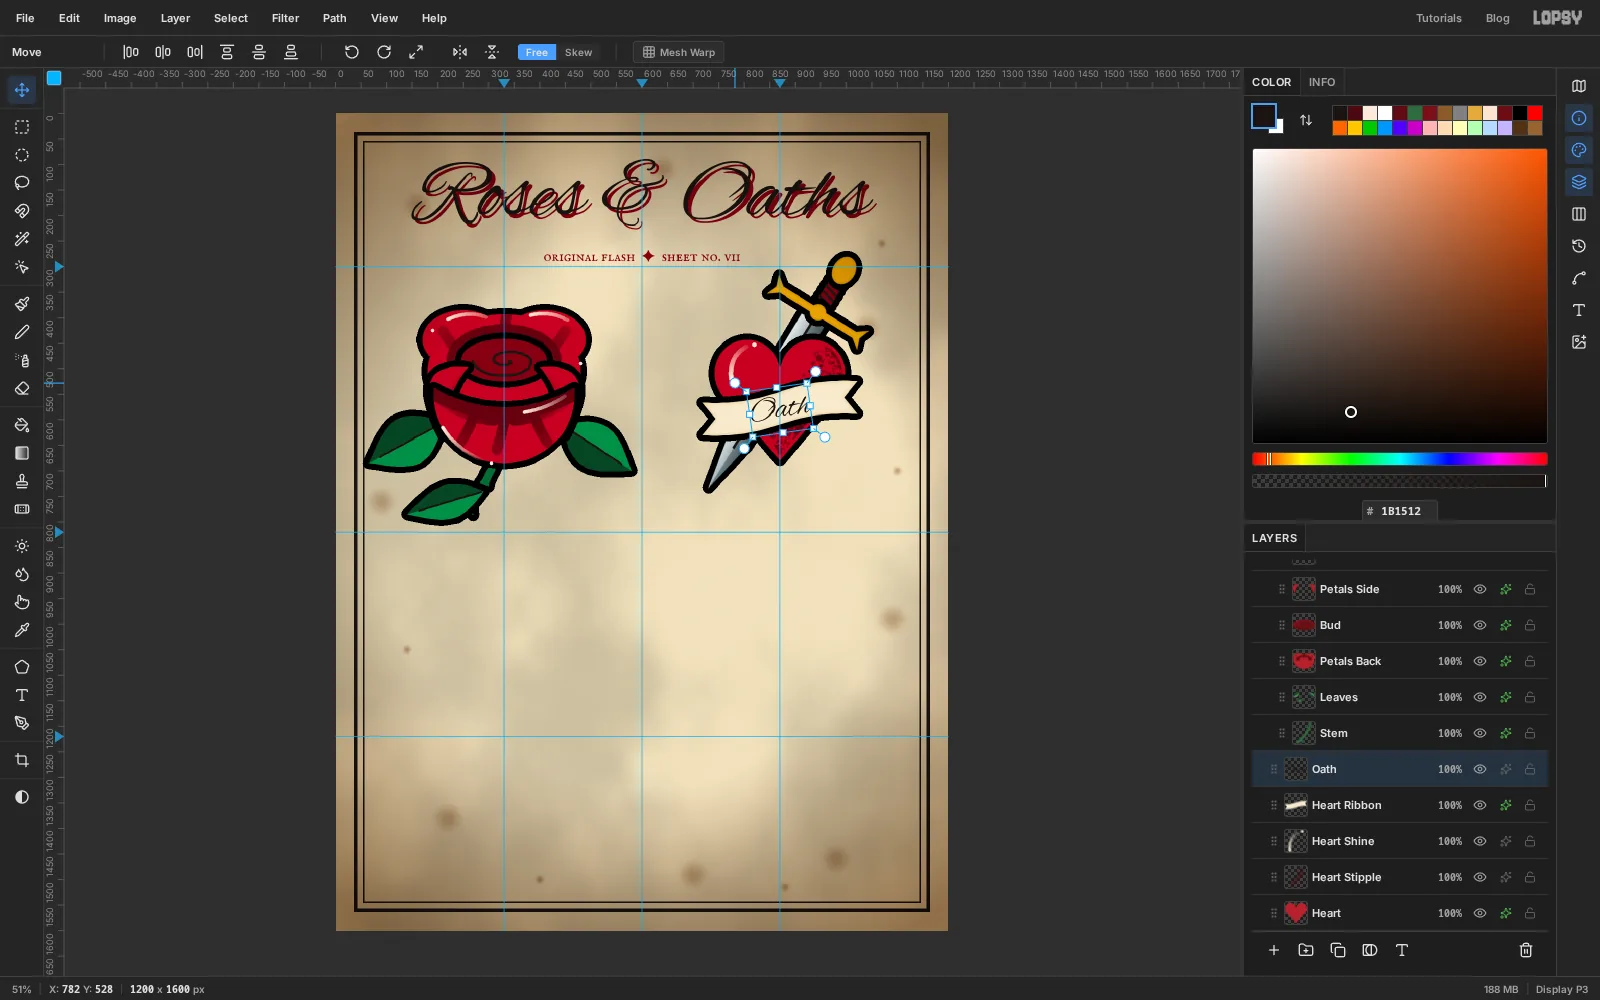
-
Shape the bottom banner and draw its pen path
Click the
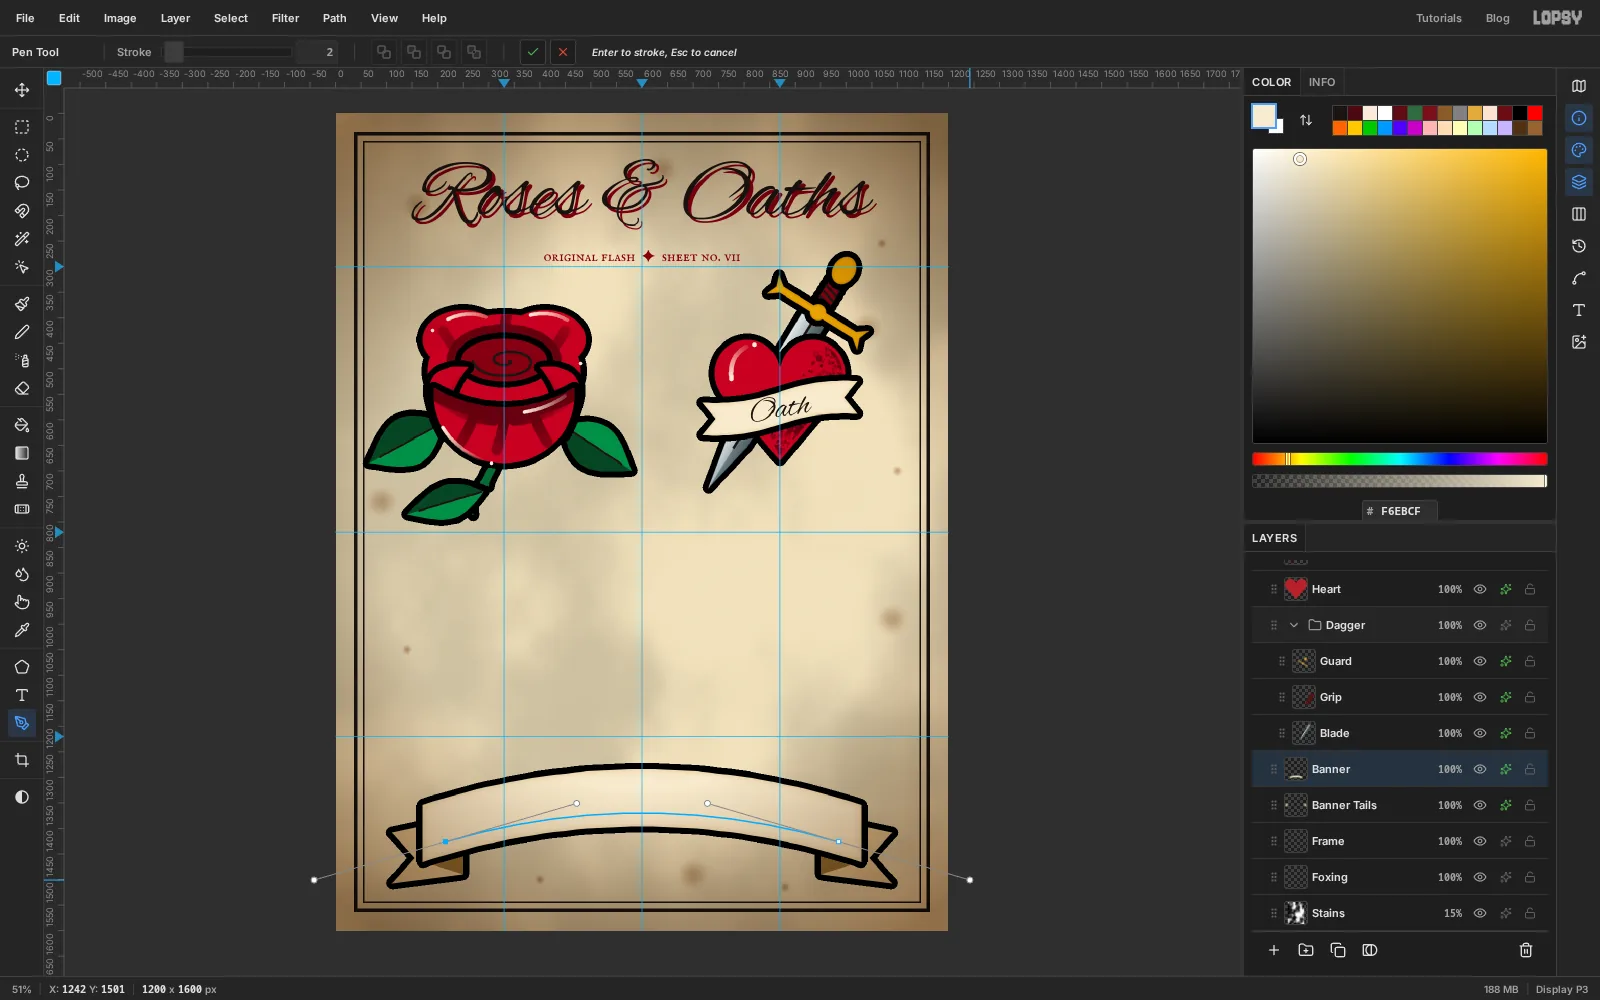
Framerow and add a layer calledBanner Tails. With the Lasso, draw a forked tail at each end of where the banner will go, low on the sheet: a five-point shape that sticks out past the band's ends with a V cut into it. Shift-drag the second tail so both are in one selection. Fill with . Then lasso a small triangle where each tail folds under the band and fill it with . Add the Stroke.Add a layer called
Banner. Lasso a band about 112 px tall that arches gently, highest in the middle (about y 1285–1395) and dropping about 70 px at each end, running from x 170 to 1030 so it overlaps the tails. Fill it with cream, add the Stroke, and add an Inner Glow of Size22, Opacity55in .Now draw the line the lettering will follow. Pick the Pen tool (P). Press near the left end of the band, a little below its middle (about 215, 1418), and drag to the right and slightly up to pull out a handle. Then press near the right end (985, 1418) and drag further right and down. You get one smooth arc that follows the band. Check that it runs parallel to the banner's edges, then click the ✓ Commit path button in the options bar.
-
Set "True Till Death" on the path
Click the
Bannerrow. Set the Text tool to UnifrakturMaguntia at82in ink. Click on empty paper and typeTrue Till Death, then press Tab.With the new text layer selected, set the alignment dropdown in the options bar to Center, then open the Text path dropdown and choose Path 1. The letters jump onto the arc and turn to follow it. Look at the gaps above the capitals and below the baseline. They should be about equal, with every letter inside the band. If the text sits too high or low, move the pen path's two anchors up or down a few pixels and the text follows.
This is also a good time to fix the paper. In the Layers panel, drag
Edge Burndown until it sits just aboveFoxing. The burn then darkens only the paper, not the cream ribbons.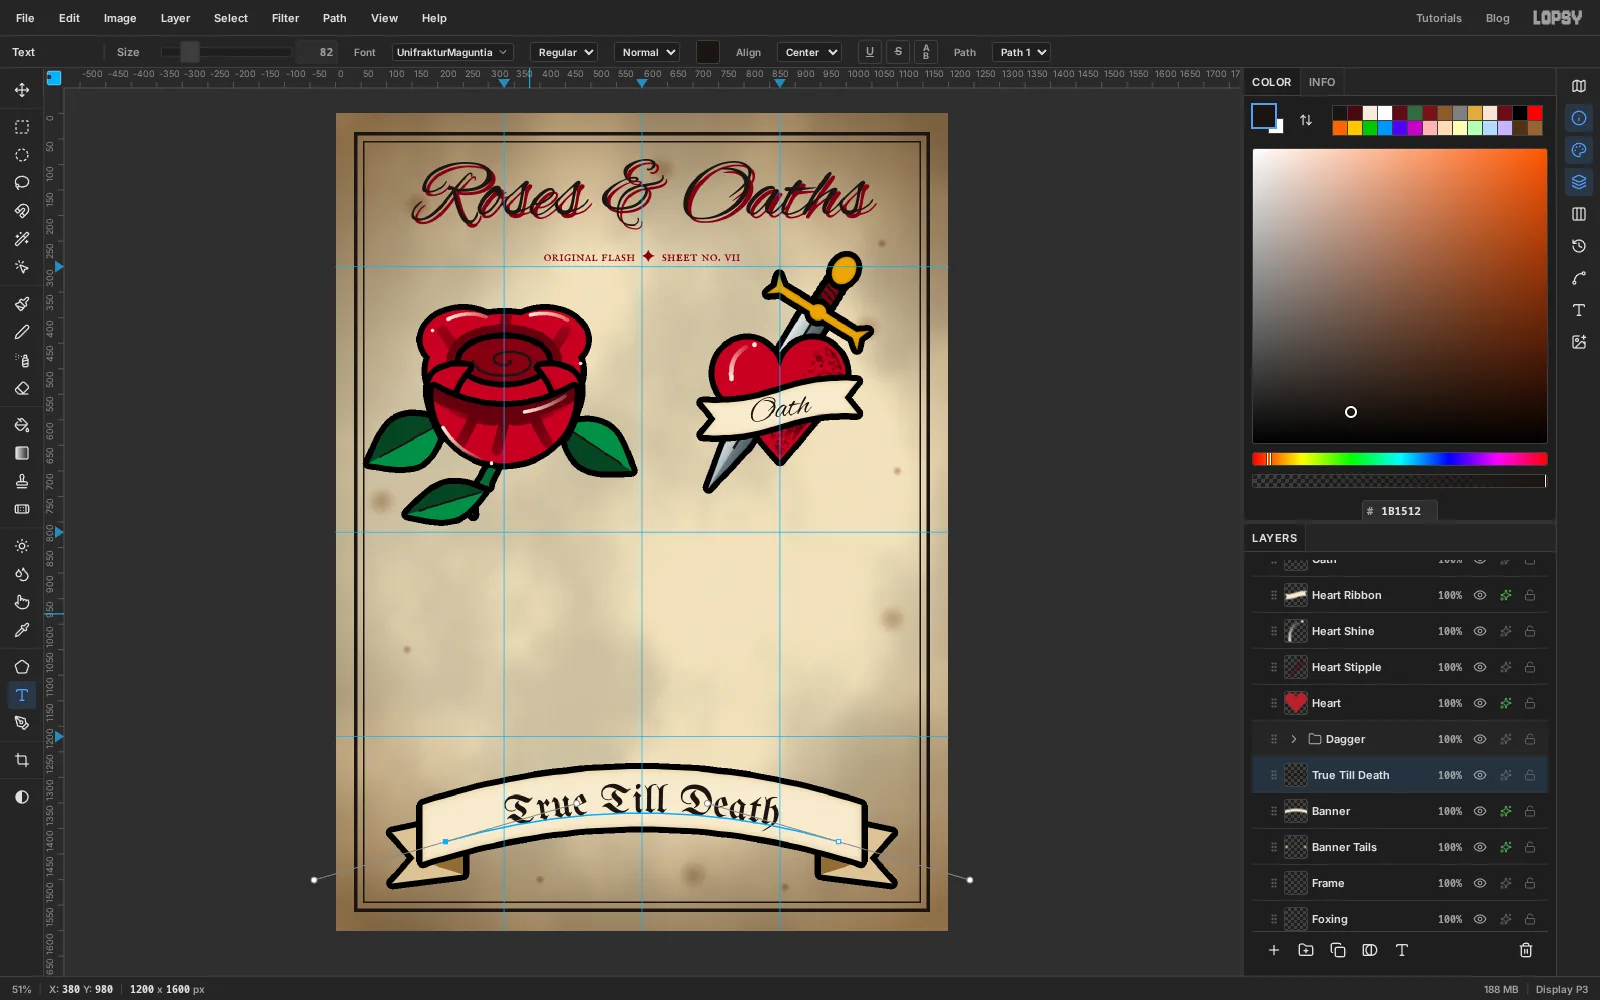
-
Build the gold medallion
Click
Bannerand add a layer calledMedallion. Drag an elliptical marquee about 264 × 316 px centred on 600, 1015, in the middle of the sheet's second row. Fill it with gold. Keep the selection, choose Select → Shrink… by18, and fill the smaller oval with cream. You now have a gold rim.For a thin ink line inside the rim, choose Select → Selection → Path. This adds the oval to the Paths panel as
Path 2and selects it. Press Cmd+D to drop the marquee. Pick the Pen tool, set Stroke to6in the options bar and make sure the foreground is ink. Press Enter to stroke the selected path,Path 2, onto the medallion layer. (If you clicked something else in between, open the Paths panel with the curved-path icon in the right-hand toolbar and clickPath 2first.) Once it's stroked you don't need the path any more: select it in the Paths panel and click Delete Path.Add the standard Stroke and an Inner Glow of Size
26, Opacity45in .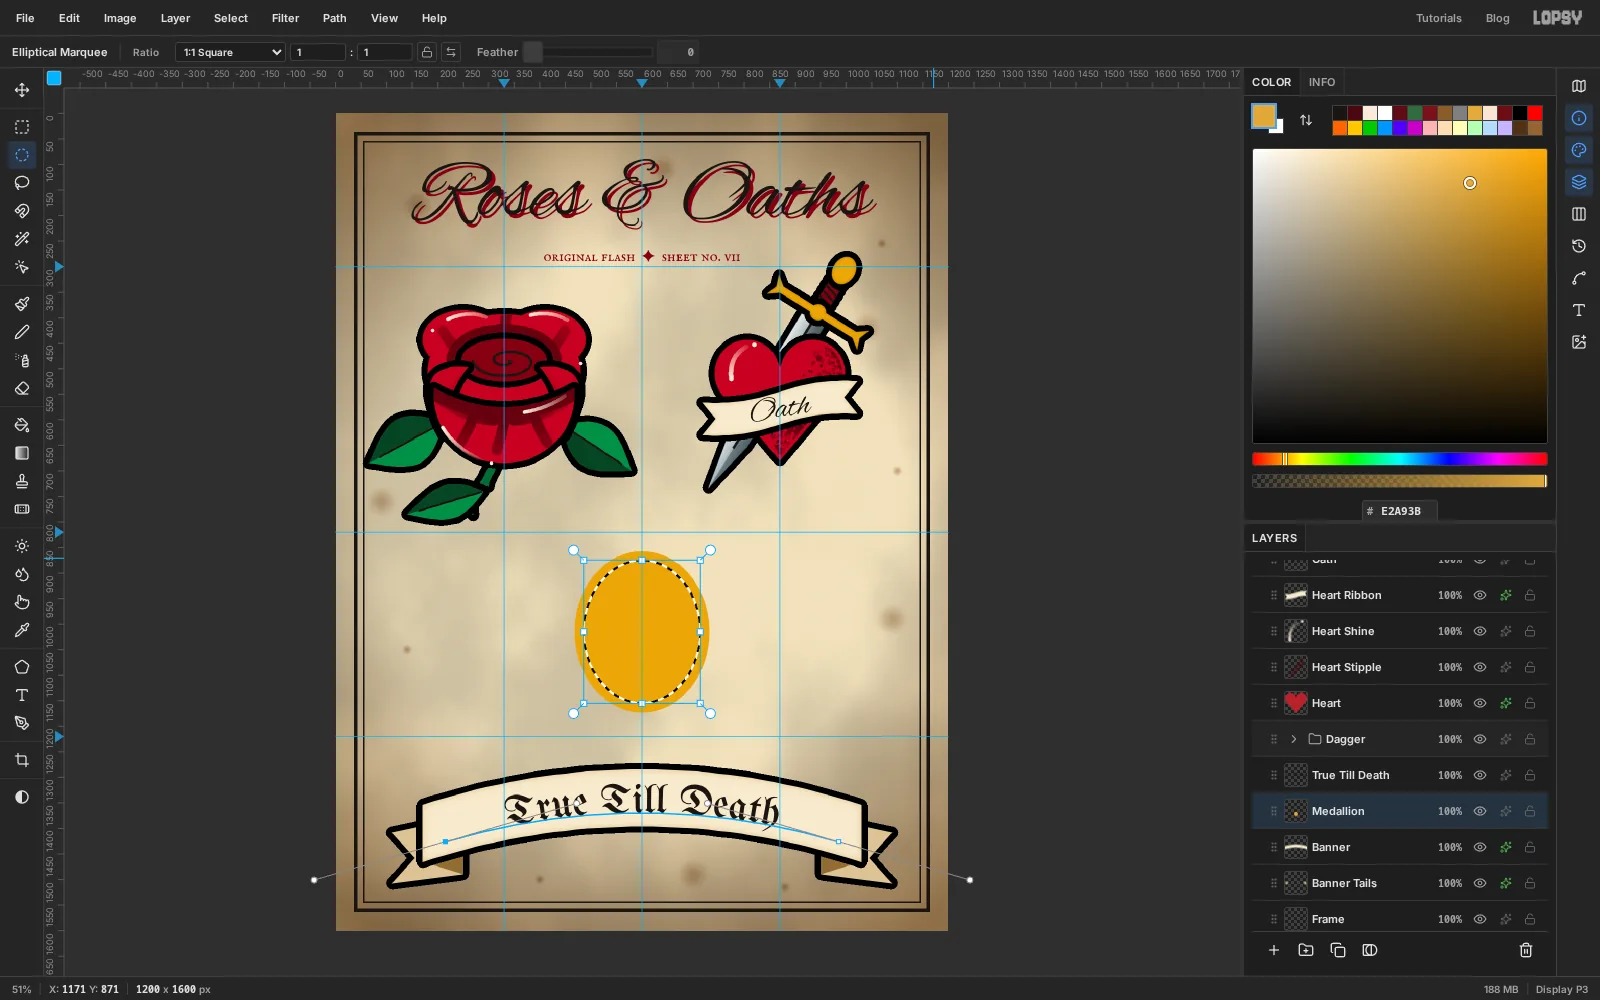
-
Drop a script ampersand into the medallion
Set the Text tool to Great Vibes at
255with the foreground rose red, click on empty paper, type&and press Tab. With the Move tool, click Align center horizontally, then drag the ampersand down into the medallion. Its weight should sit slightly below the oval's middle, which looks centred to the eye. Add the standard Stroke so it matches the rest of the sheet.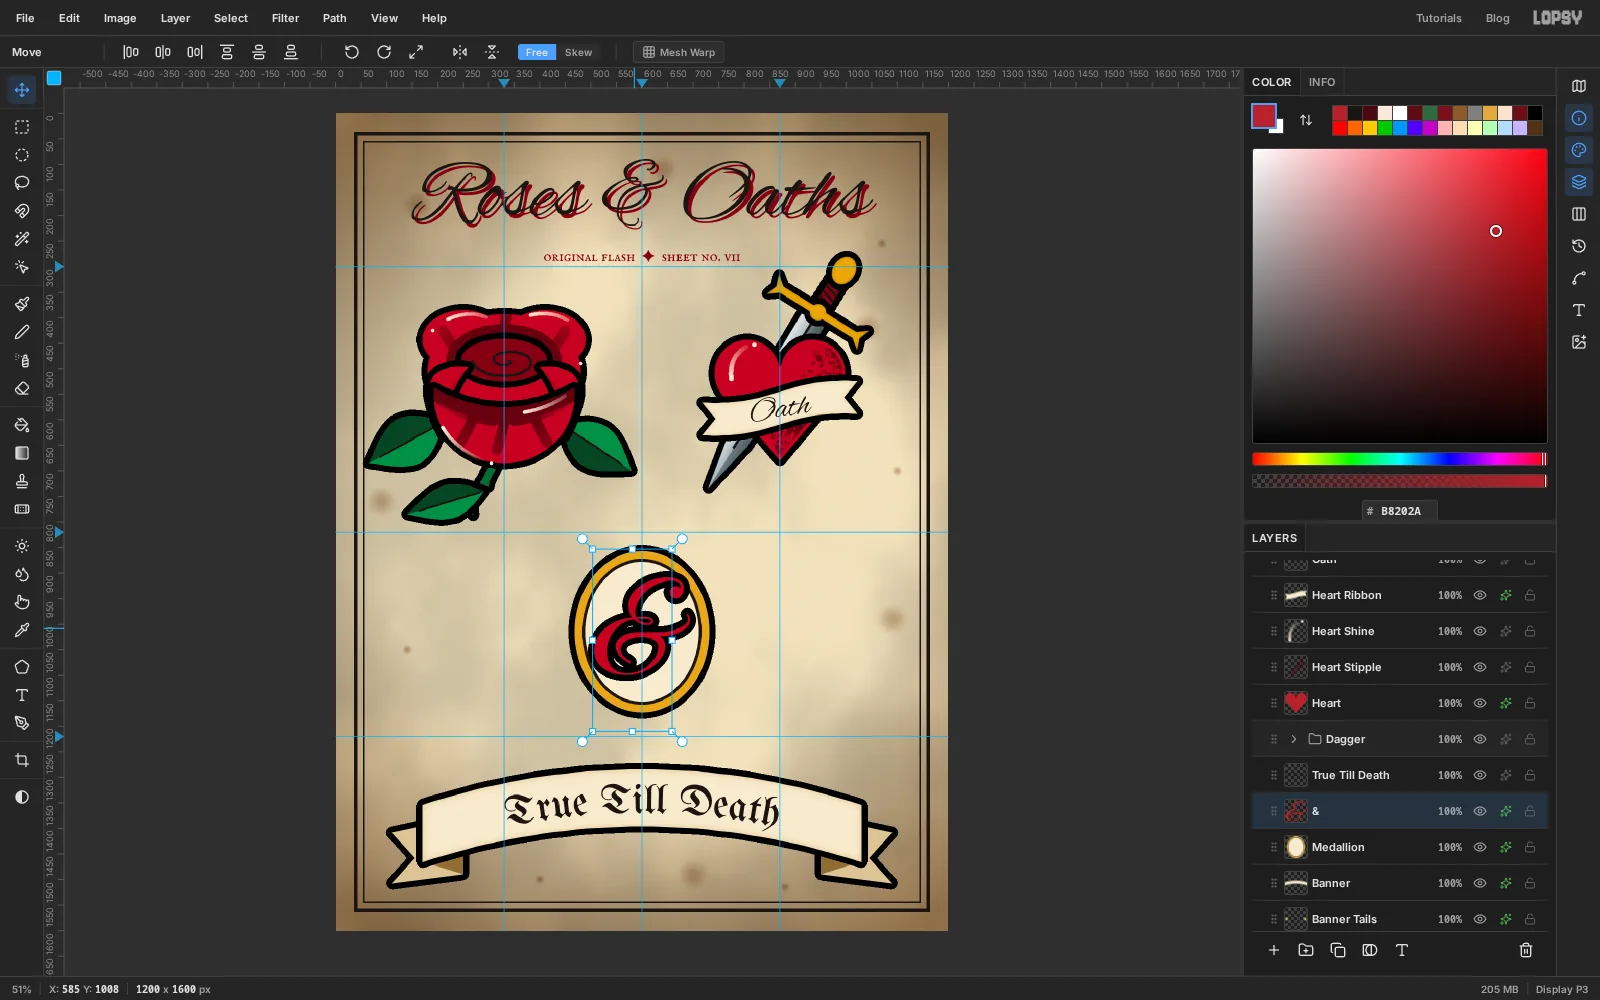
-
Duplicate the rose and scale it down
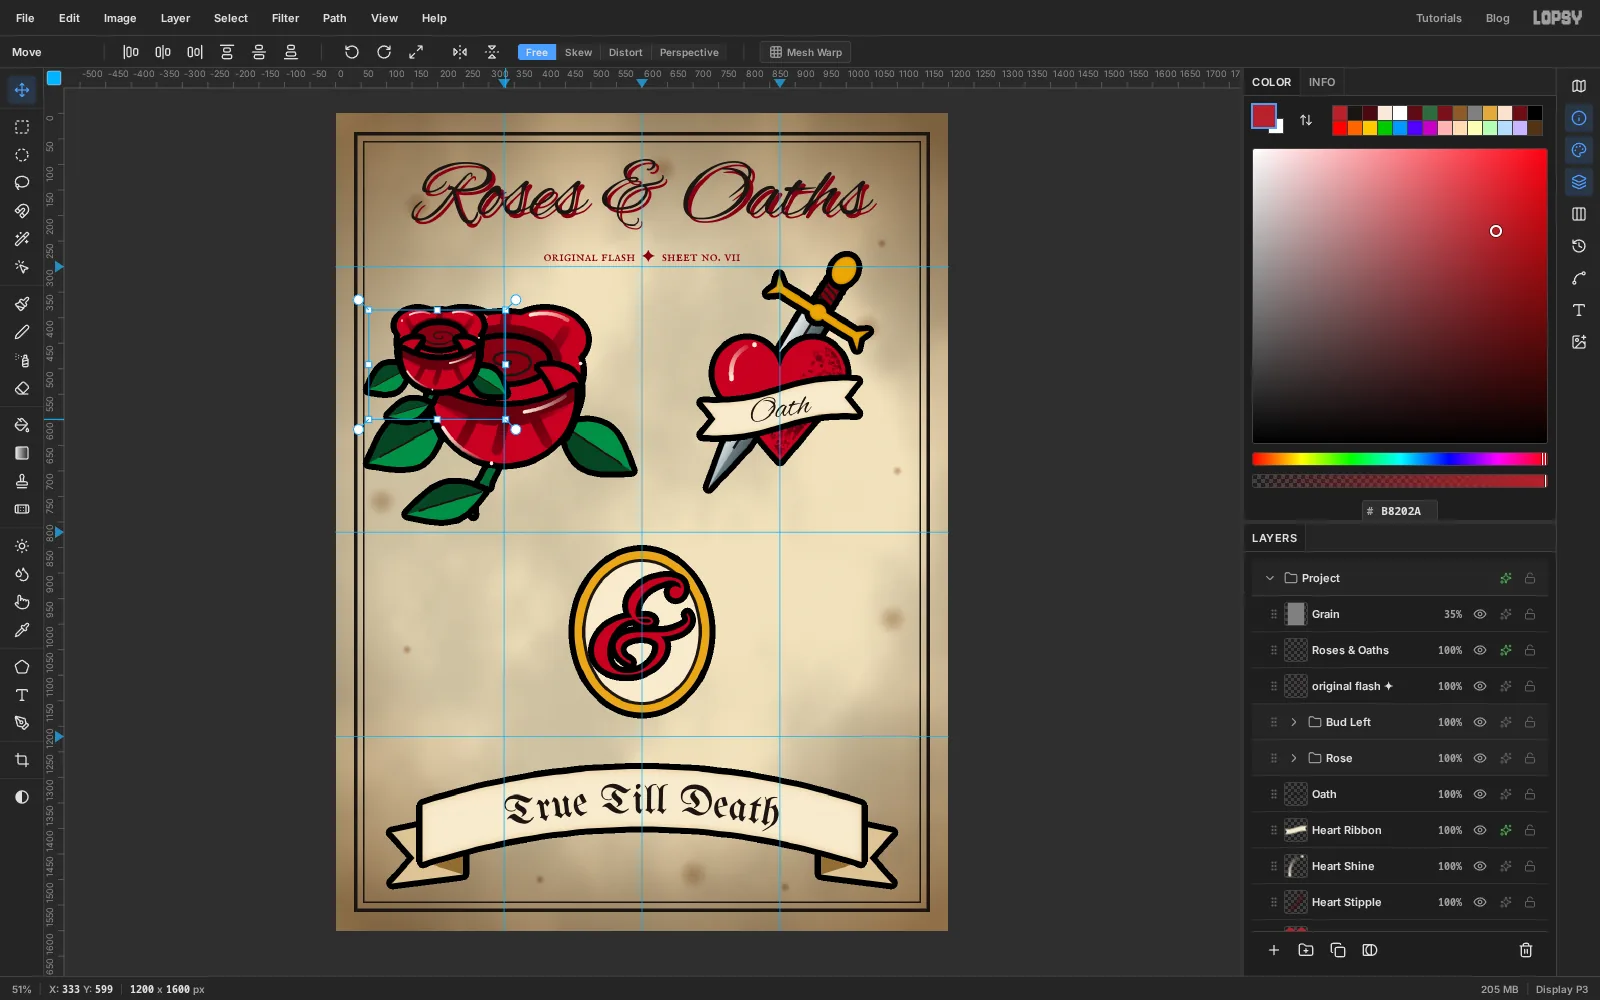
Click the
Rosegroup and choose Layer → Duplicate Layer. The copy lands directly on top of the original. Rename itBud Left.Pick the Move tool. Hold Cmd (to keep the proportions) and drag the bottom-right corner handle up and to the left until the copy is a bit over half its size. Press Cmd+D to apply it. Every layer in the group scales together, and the outlines keep the same weight as on the big rose.
-
Place a mirrored pair of buds
Drag
Bud Leftdown into the middle row so it sits left of the medallion, centred near 240, 1005. Leave clear paper between its leaves and the frame.Choose Layer → Duplicate Layer again and rename the copy
Bud Right. In the Move tool's options bar click Flip Horizontal, then drag the copy across to 960, 1005. The two buds now face each other and frame the medallion.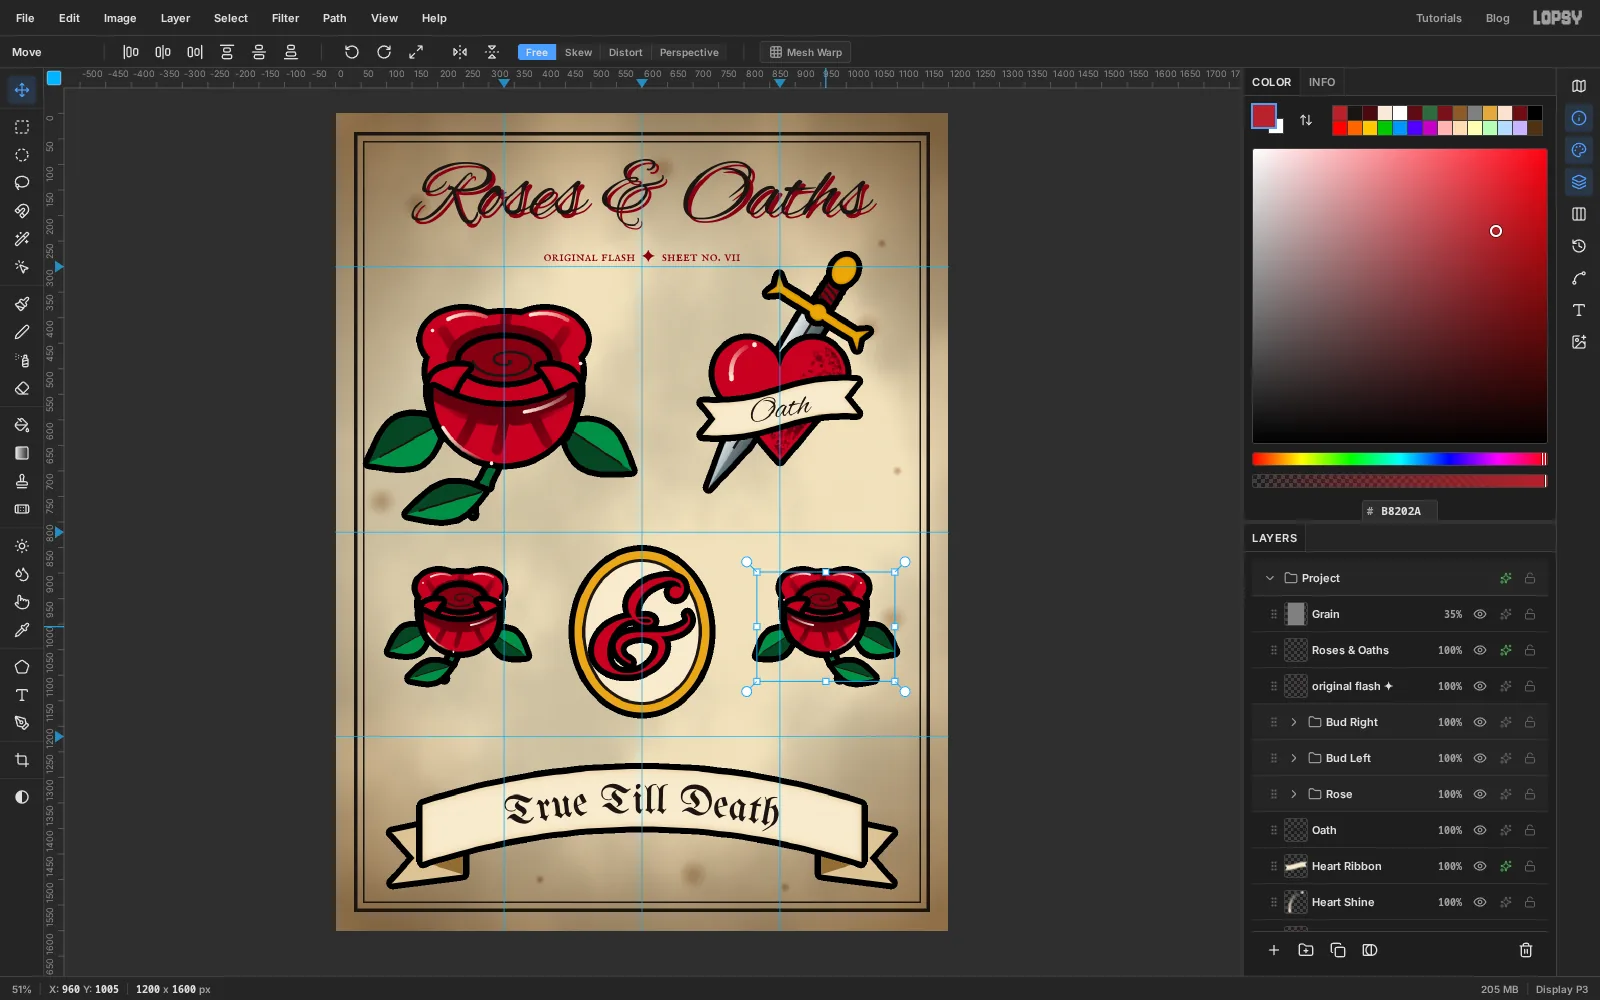
-
Paint calligraphic swashes with symmetry
Click
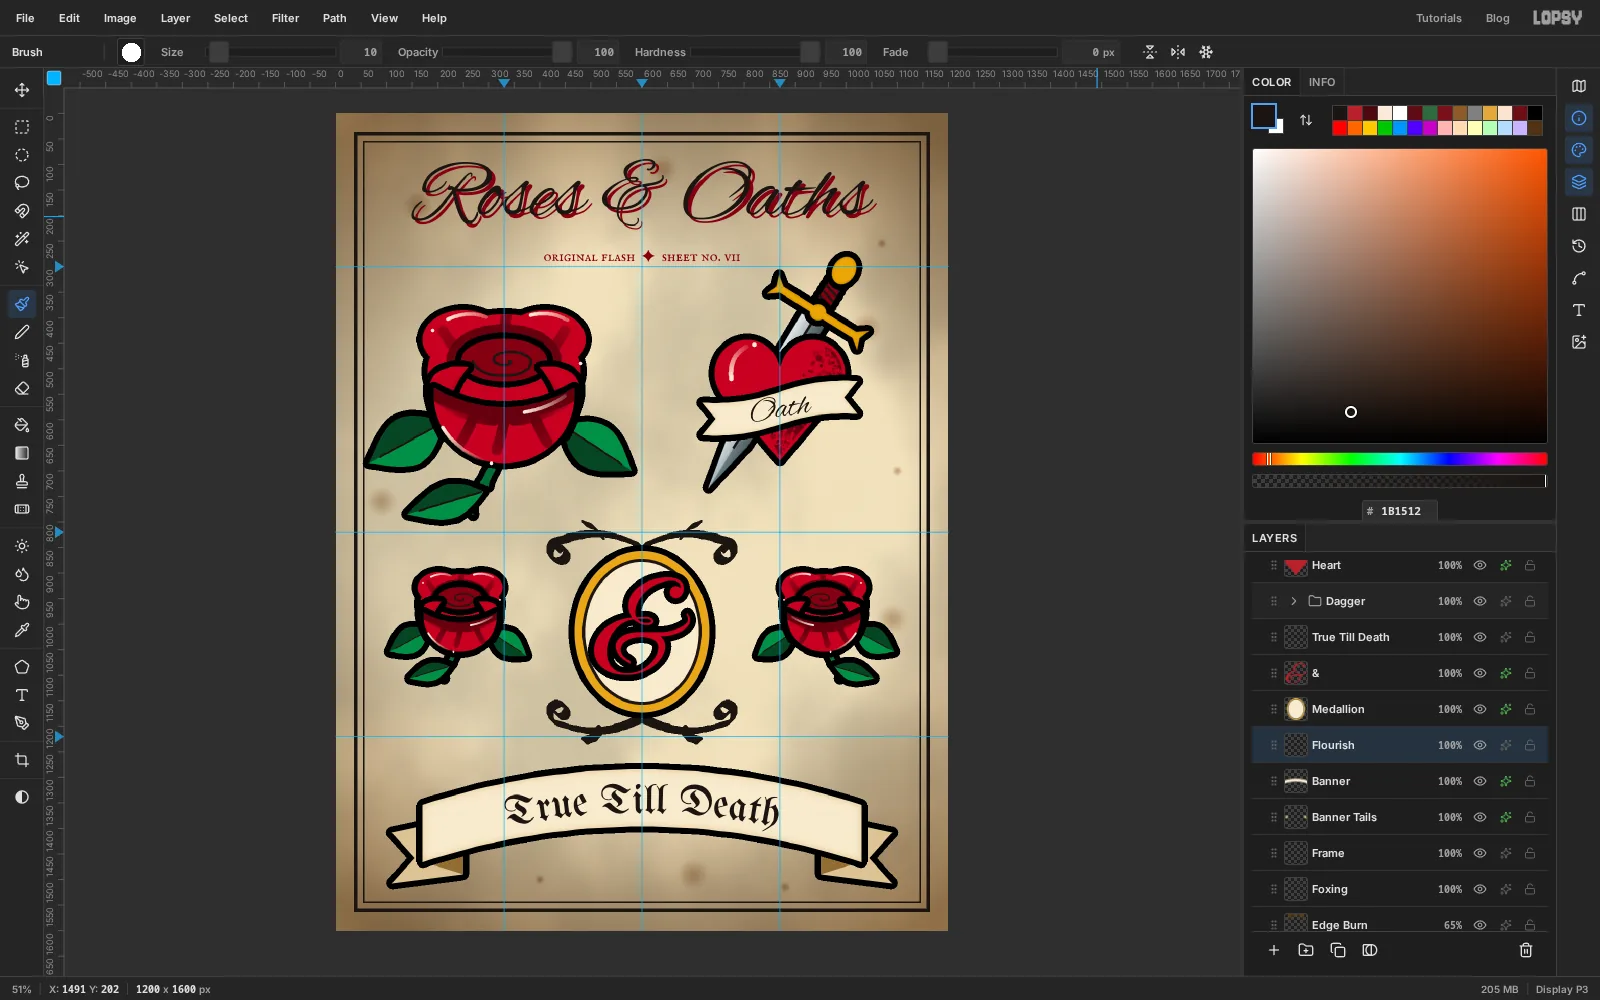
Bannerand add a layer calledFlourish. In the Brush presets pick Caligraphic Angle (that is how the app spells it), a slanted nib, so the stroke goes thick and thin as it changes direction. Set Size14and ink. Then turn on Symmetry Vertical, the middle of the three symmetry icons at the right end of the Brush options bar (hover to see the names). It mirrors everything you paint from left to right across the canvas centre.Starting at the top of the medallion, paint one swash out to the left in a long, shallow arc and finish with a tight inward curl at about x 440. The mirror paints the right half for you. Paint a matching swash under the medallion, curling the other way. Add a small flick off each swash for a leaf. Because
Flourishis belowMedallion, the swashes look like they pass behind it, like a scroll the medallion hangs on.Turn symmetry off when you're done. (The screenshot was taken after switching back to the Hard Round brush, which is why its options bar shows a different size.)
-
Sparkle the corners with copy and paste
Add a layer called
SparklesaboveBanner. With the Lasso, draw a slim four-point star about 60 px tall near 125, 320 and fill it with ink. Drag a small circle just below and to the right of it with the Elliptical Marquee and fill it too.Drag a marquee around the sparkle and press Cmd+C. Press Cmd+V: the copy is pasted in place as a new layer, already selected, with the Move tool active. Drag it to the gap between the title and the heart. Paste and drag three more times: beside the heart's ribbon, and into the bottom two corners above the banner tails. Press Cmd+D after each one.
Each paste makes its own layer. To tidy up, click the top pasted layer and press Cmd+E (Merge Down) four times to fold the copies back into
Sparkles.Finally, look over the spacing. Every design should have clear paper around it and a gap from the frame. If the big rose's leaf comes too close to the left edge, click the
Rosegroup and nudge it right with the Move tool. Choose File → Save Project, then File → Quick Export PNG.