Make a Folk Art Hummingbird Tattoo Flash Sheet
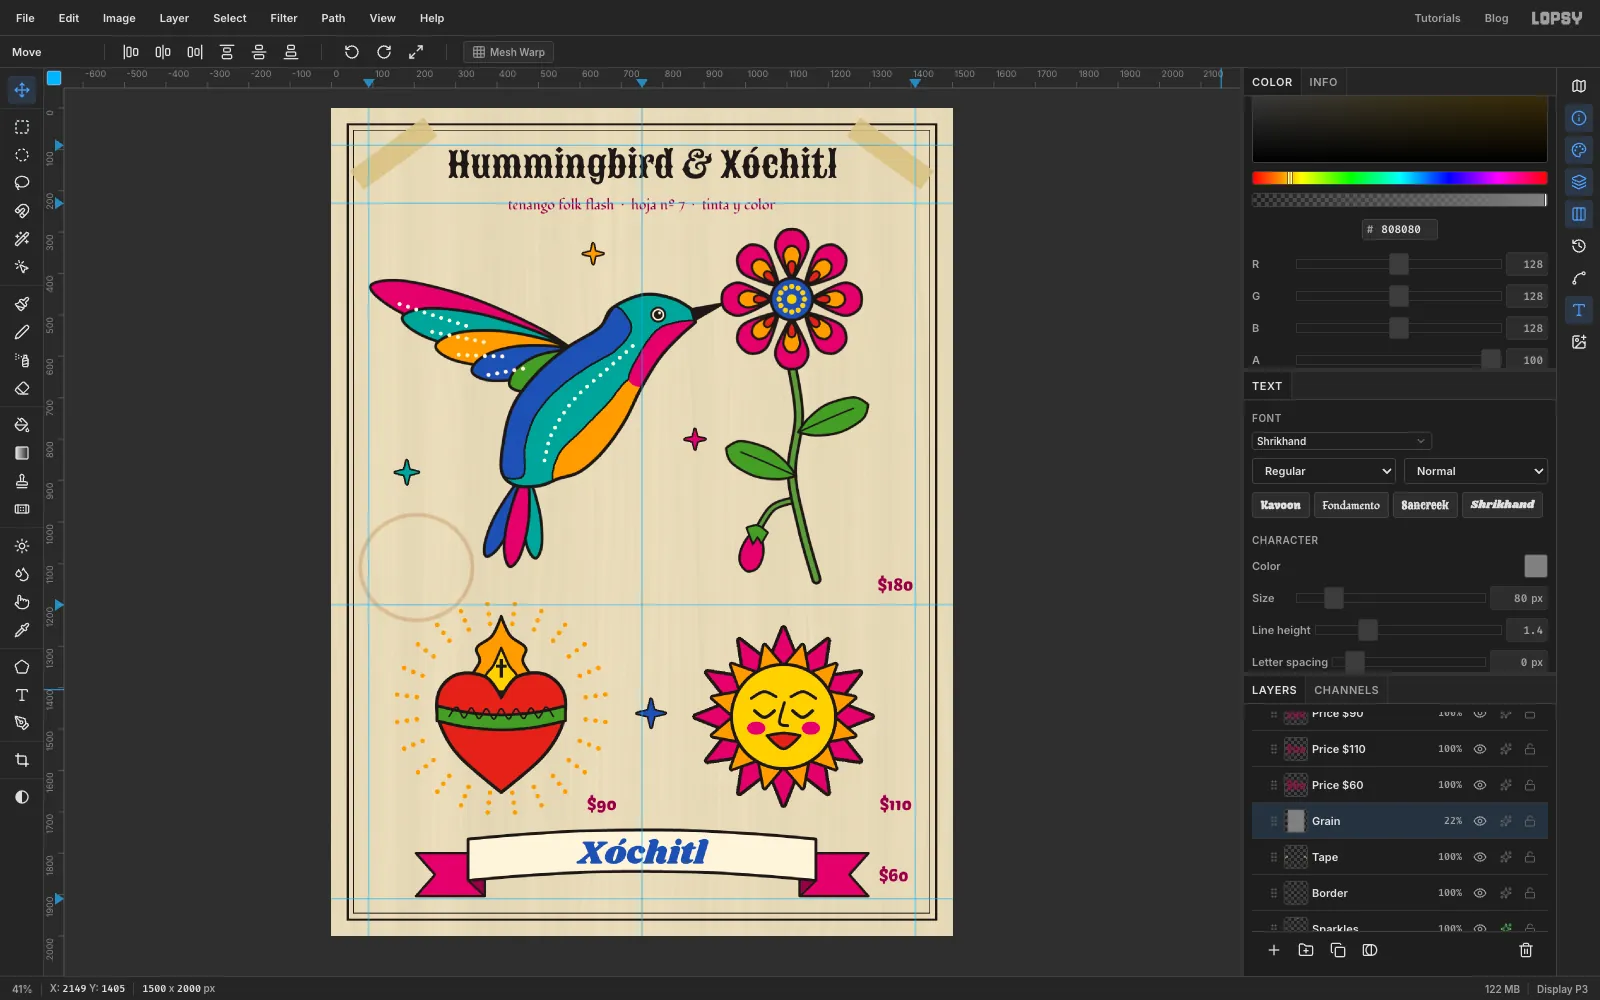
Draw a Mexican folk art tattoo flash sheet in Lopsy with a traced hummingbird, a Kaleidoscope flower, a sacred heart, a sun face and a ribbon banner.
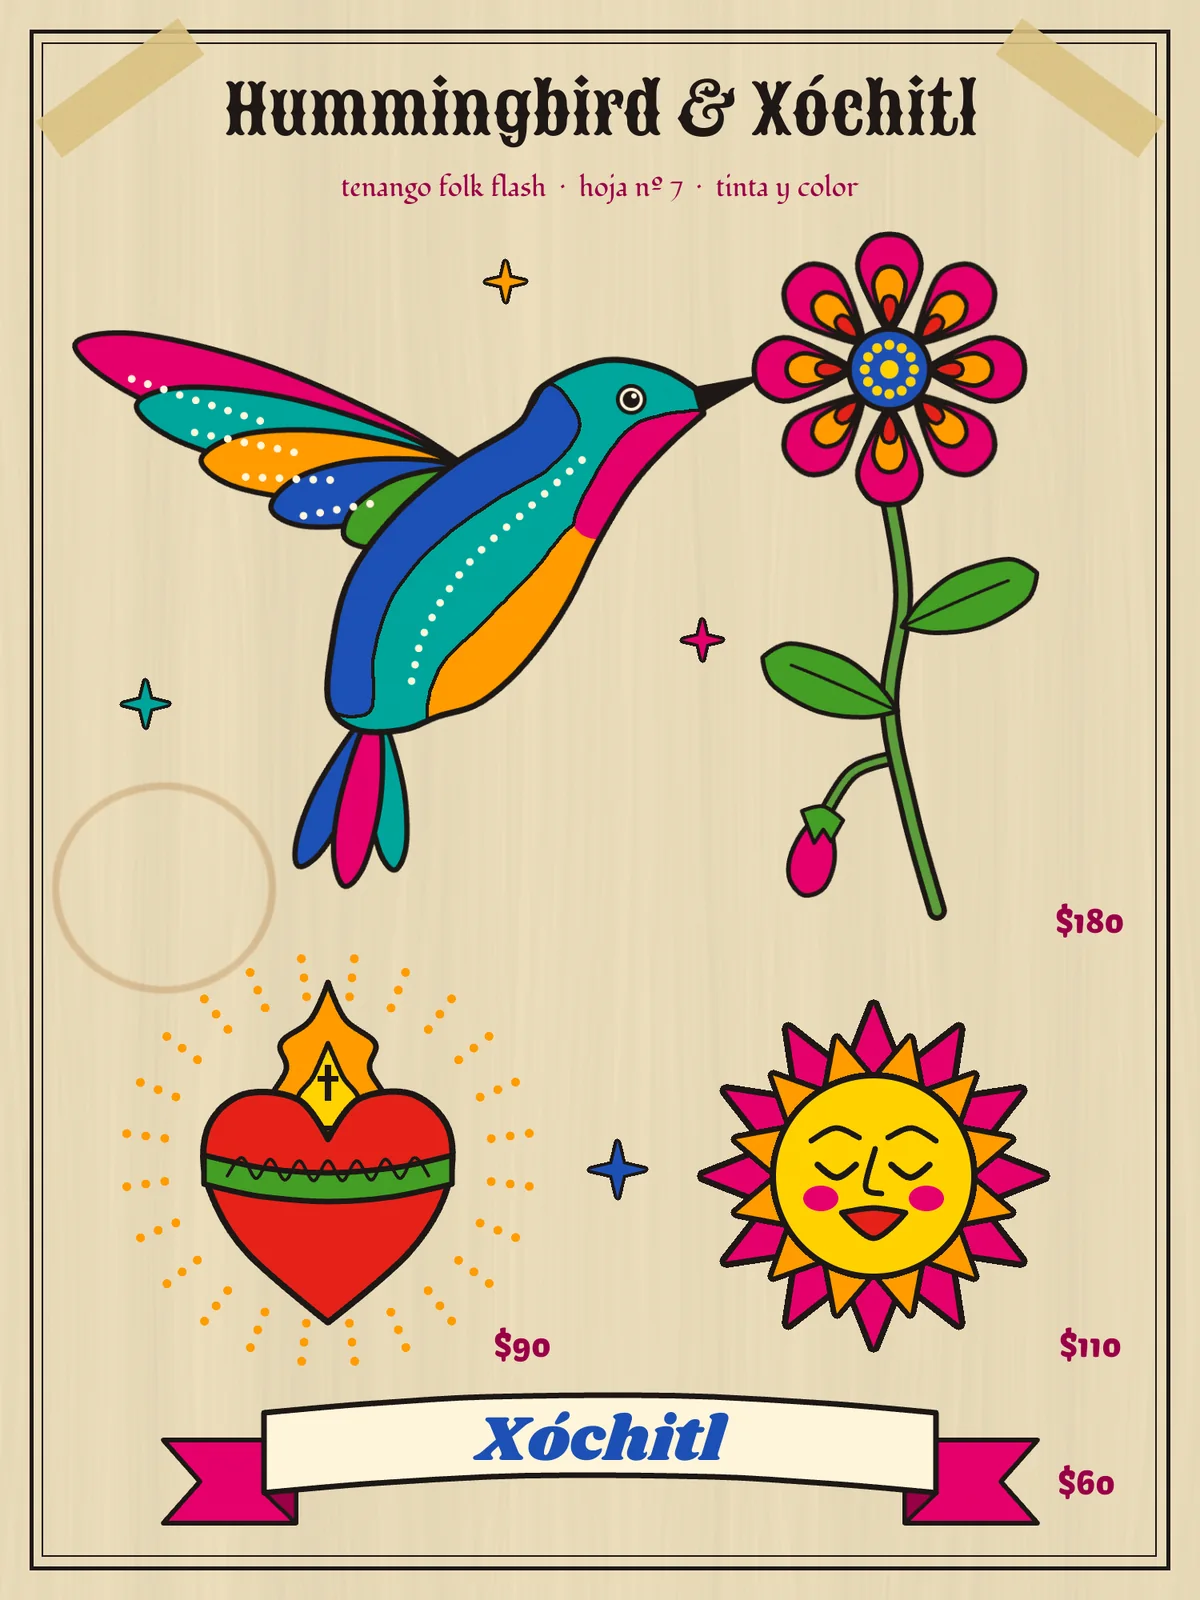
A tattoo flash sheet is a menu: a sheet of ready-to-tattoo designs, each with a price, that clients pick off the wall. This one borrows from Mexican folk art, especially Tenango embroidery from Hidalgo and Oaxacan painted crafts. That means flat, saturated colour, bold ink outlines, rows of dots and shapes simple enough to stitch.
Xōchitl is the Nahuatl word for "flower". The centrepiece is a hummingbird drinking from one, traced from a photo so the pose is right, then simplified into folk shapes. Around it go three smaller designs: a sacred heart, a sun face and a name banner. You'll work on a 1500 × 2000 px sheet and build nearly everything the way a tattoo artist inks: draw a shape, fill the colour, then outline it in ink.
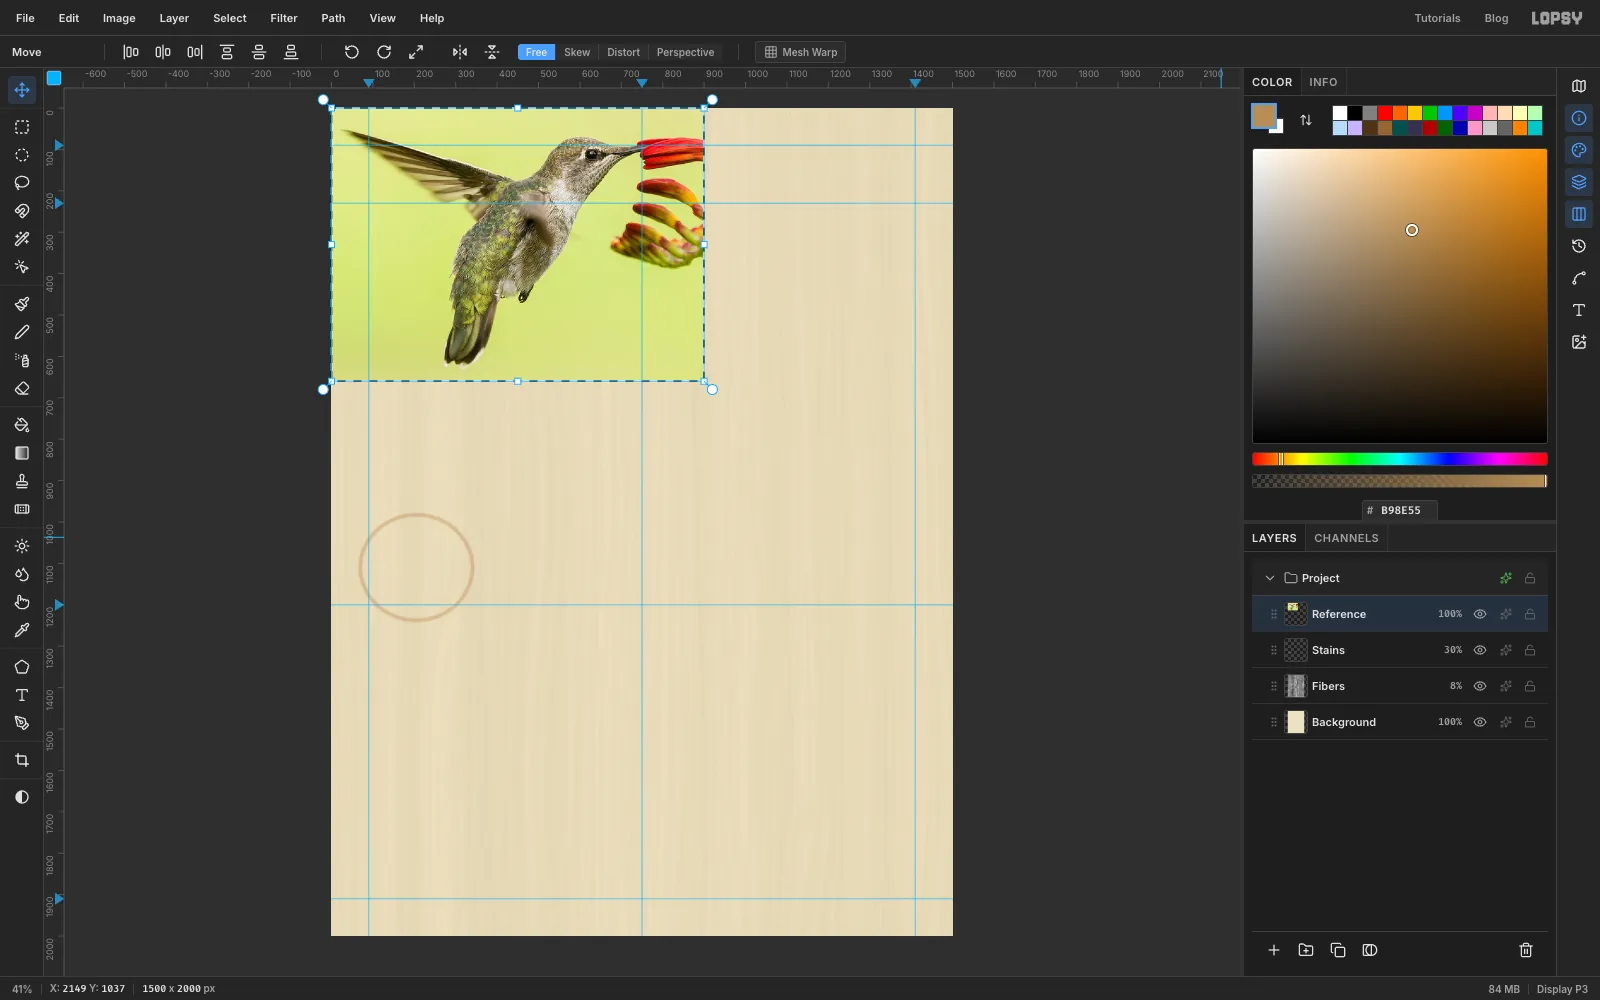
You'll need a reference photo of a hummingbird in profile. This tutorial uses the public-domain Anna's hummingbird in Washington by the U.S. Fish and Wildlife Service, from Wikimedia Commons. Crop it to roughly 900 × 660 px around the bird and the flower it's feeding from before you start, so it drops into the sheet at a workable size.
The palette:
-
Manila paper
-
ink
-
cream
-
Magenta
ribbon folds and prices
-
Turquoise
-
cobalt
-
Marigold
-
yellow
-
Leaf green
-
heart red
-
Stain tan
-
tape
Fonts: Sancreek for the title, Fondamento for the subtitle, Shrikhand for the banner name and Kavoon for the prices.
Almost every shape in this tutorial uses the same four moves, so learn them once:
- Draw the outline with the Pen (P). Click for a sharp corner, drag for a curve, and click the first anchor again to close the shape.
- In the Paths panel, click Path to Selection, then Edit → Fill with the colour as the foreground.
- Press Cmd+D to deselect, set the foreground to ink , and click Stroke Path in the Paths panel. Type the width and press Enter.
- Click Delete Path so the path doesn't clutter the panel.
We'll call this fill and ink. Most of the circles are made with the Elliptical Marquee's exact-size dialog: press Cmd+D so nothing is selected, then click once (without dragging) and type the From and To corners. Deselecting first matters: a press inside a live selection drags that outline instead of starting a new one.
-
Fill the flash paper
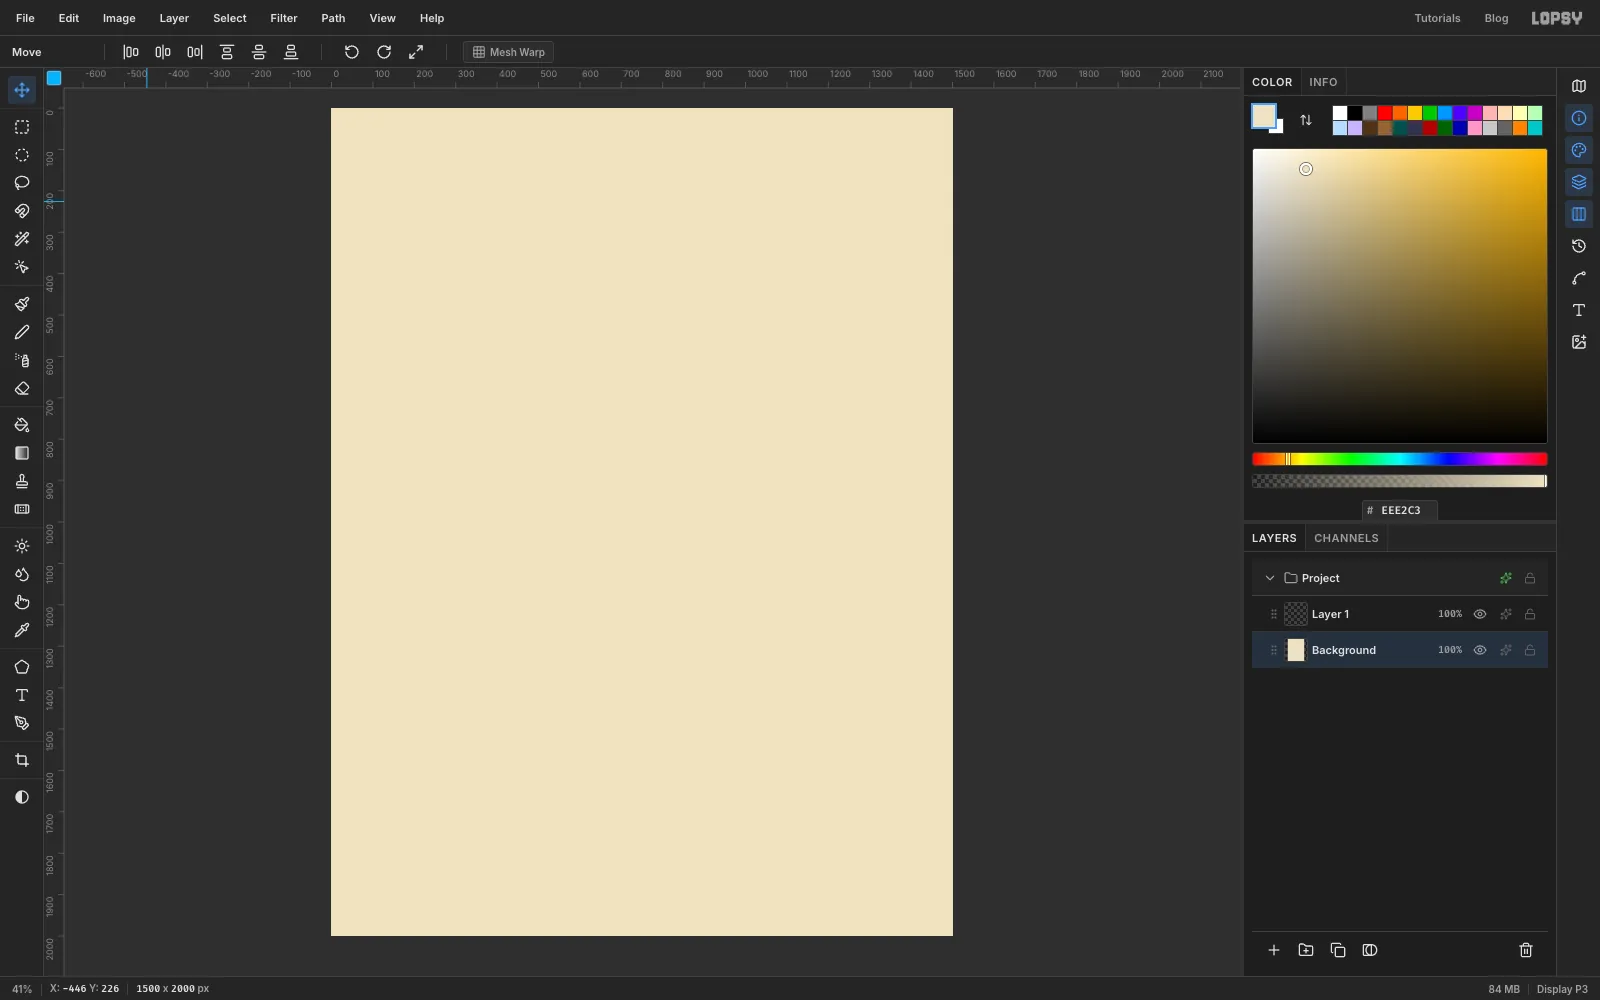
Choose File → New, keep the unit on Pixels and create a 1500 × 2000 document. Select the Background layer, set the foreground to and choose Edit → Fill. With no selection, Fill covers the whole layer.
-
Drop layout guides
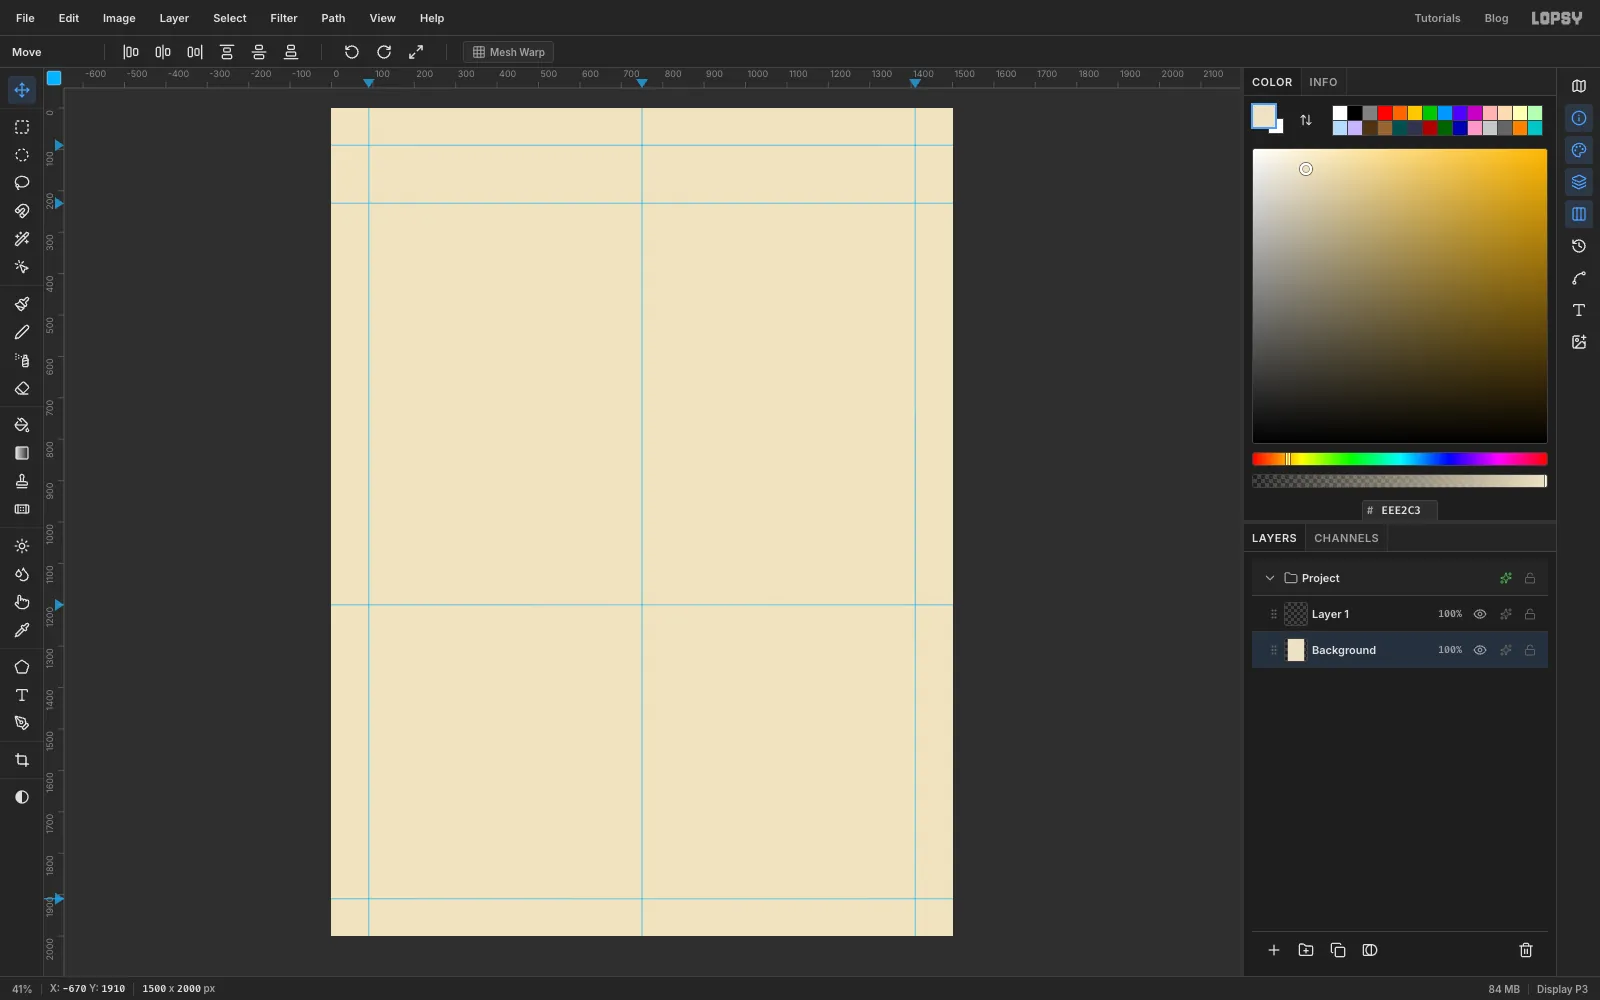
Click the rulers to drop guides; a click on the top ruler makes a vertical guide. Add vertical guides at 90, 750 (the centre) and 1410, and horizontal guides at 90, 230 (under the title), 1200 (between the two rows of designs) and 1910. The hover readout on the ruler shows the position before you click.
-
Add paper fibres
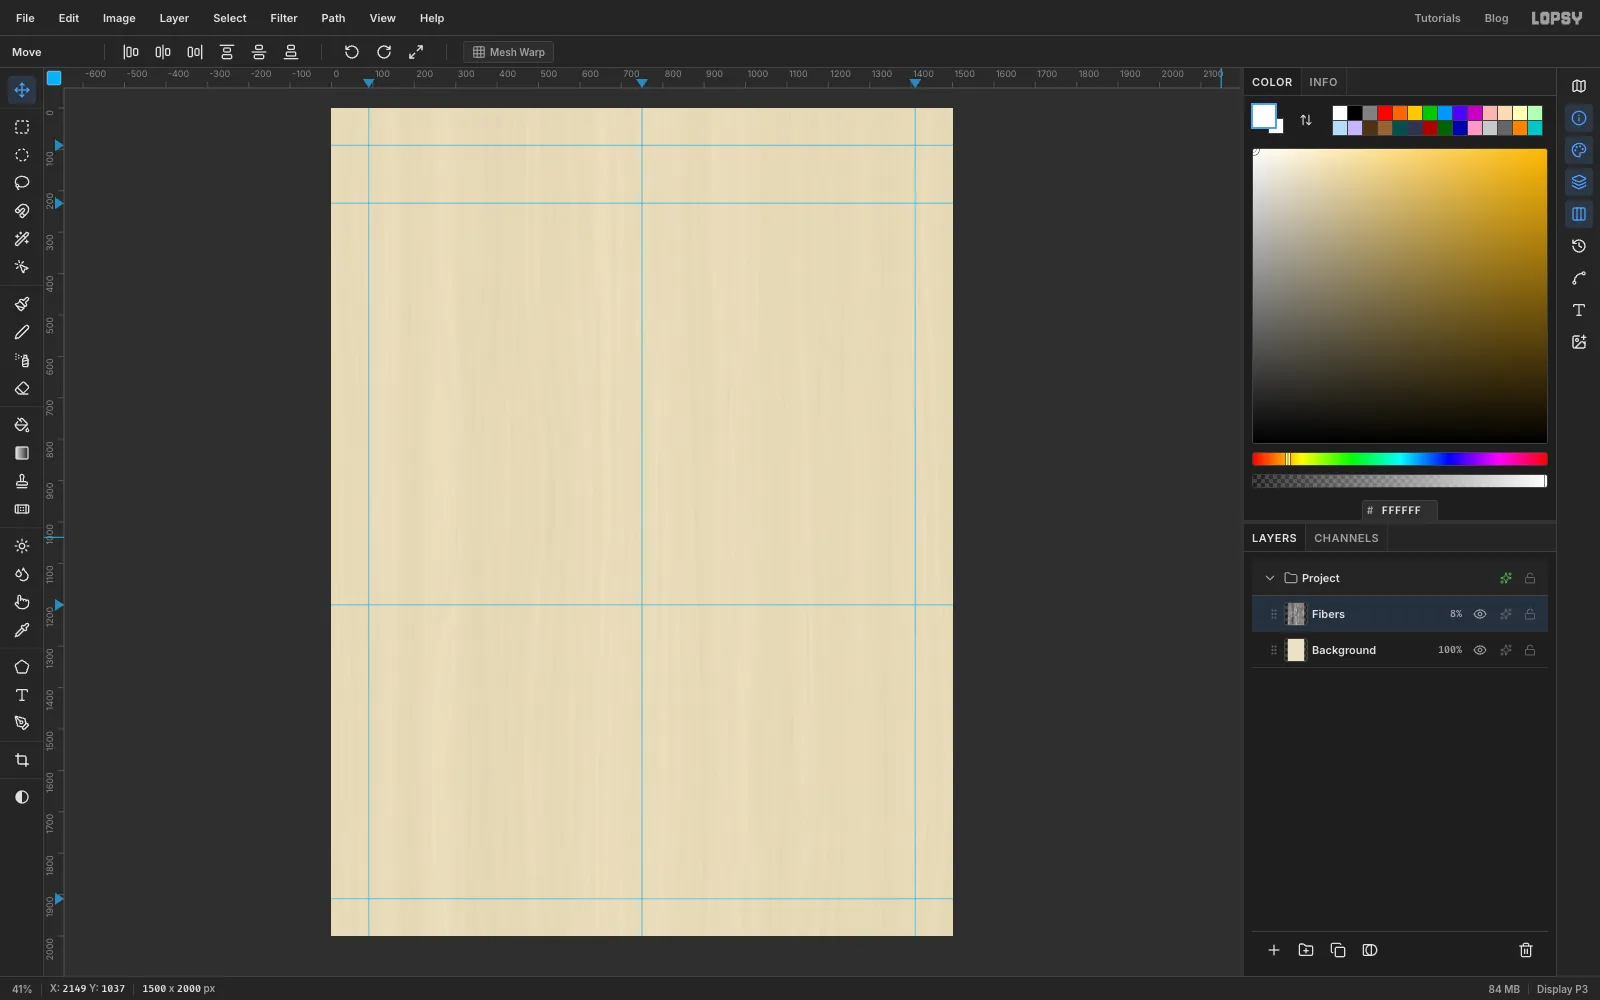
Rename Layer 1 to Fibers, set the foreground to white and fill it with Edit → Fill. Choose Filter → Fibers…, set Variance to 24 and Strength to 40, and click Apply. Then run Filter → Gaussian Blur… at 1.5 to soften the streaks.
Open the layer's effects drawer (the ✦ button on its row), set the blend mode to Multiply, and drag the layer's opacity down to 8%. The fibres should be barely there. Any stronger and the paper reads as wood.
-
Set down a coffee ring
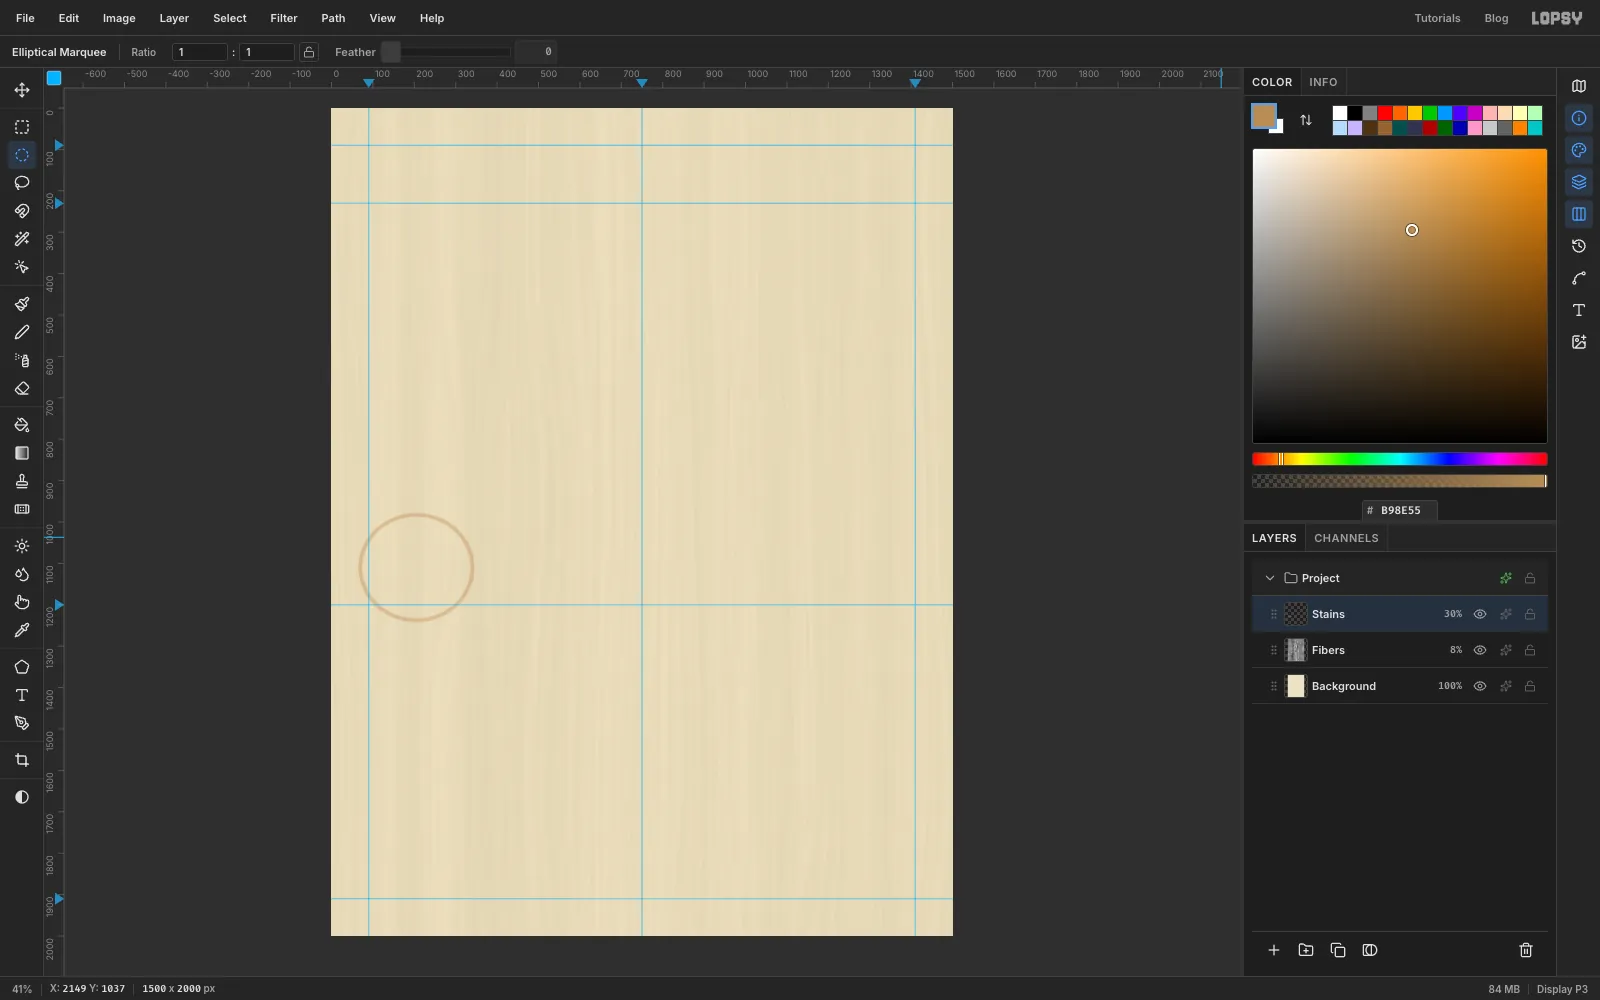
Add a layer named Stains. With the Elliptical Marquee, drag an oval about 280 × 264 px on the left side of the sheet, its left edge just inside the 90 guide and its centre a little above the 1200 guide. Fill it with tan .
Choose Select → Shrink…, set it to 9 and click Apply. Then press Delete to clear the middle, which leaves a ring. Press Cmd+D, run Filter → Gaussian Blur… at 3, and set the layer to Multiply at 30%.
-
Drop in the reference photo
Select the Stains layer, then drag the hummingbird photo from your computer onto the canvas. It lands at the top-left corner as a new layer, already selected, with the Move tool active and transform handles around it. Rename it Reference.
-
Scale and place the reference
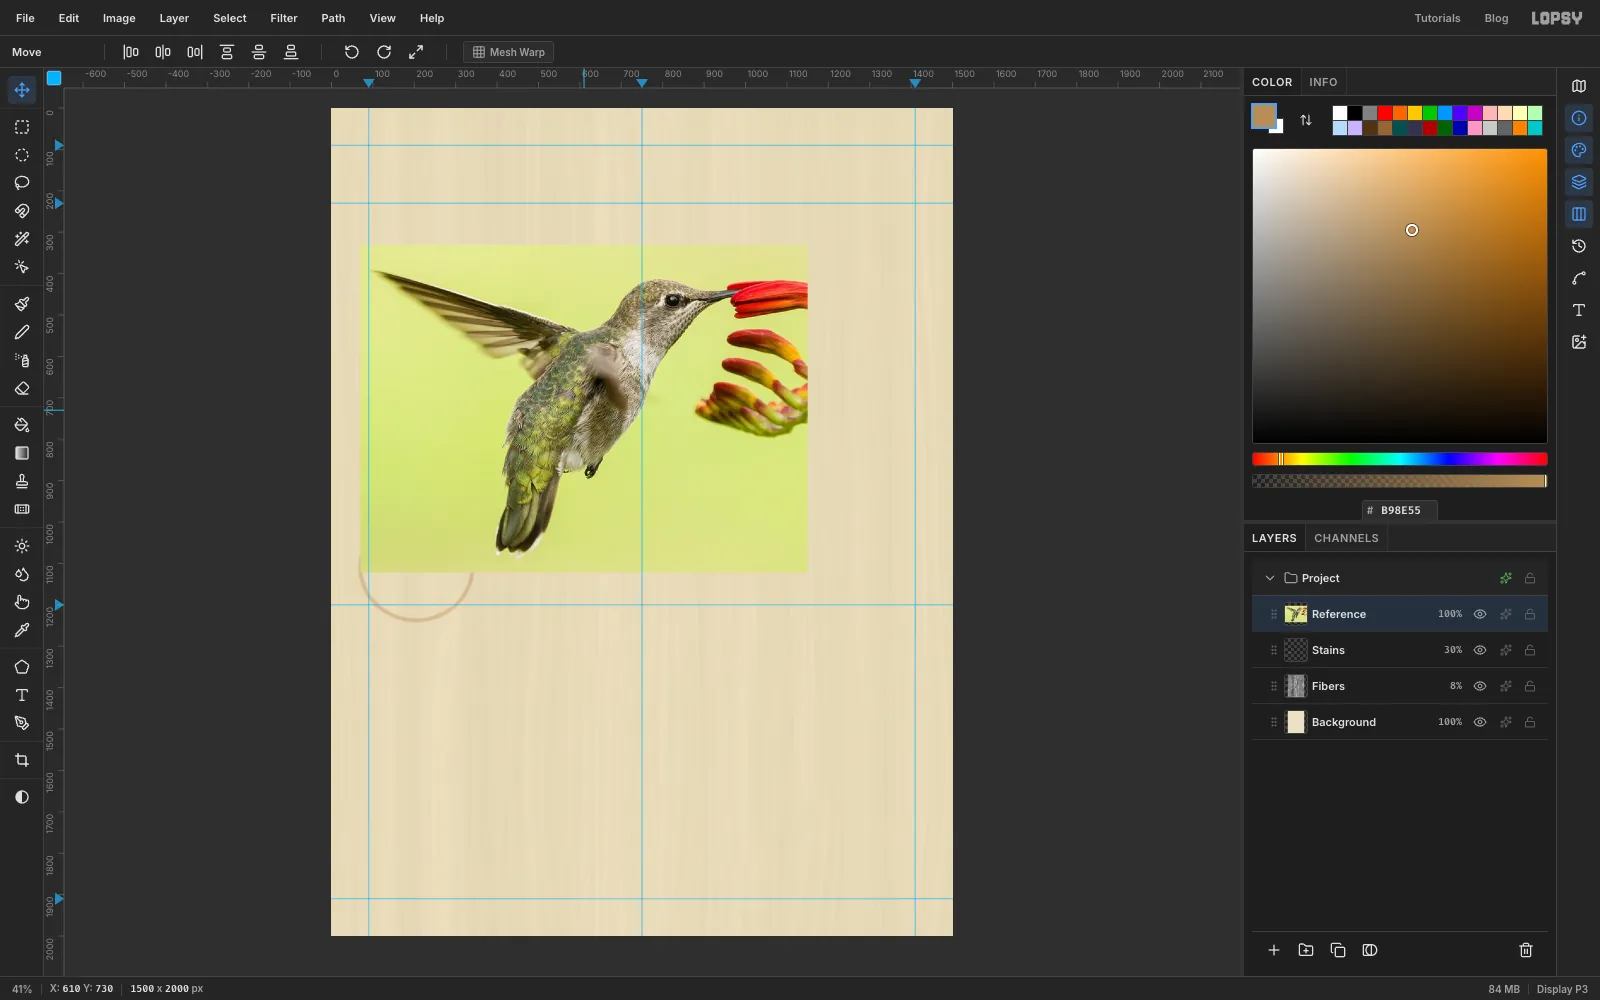
Hold Cmd (which keeps the proportions) and drag the photo's bottom-right handle down and to the right until the photo is about a fifth bigger, about 1080 px wide. Press Enter to commit and Cmd+D to deselect.
With the Move tool (V), drag the photo down so its top-left corner sits near (70, 330). That leaves the beak pointing at the right-hand third of the sheet, where the flower will go. Then lower the layer's opacity to 45% so your ink shows clearly over it.
-
Ink the tail feathers
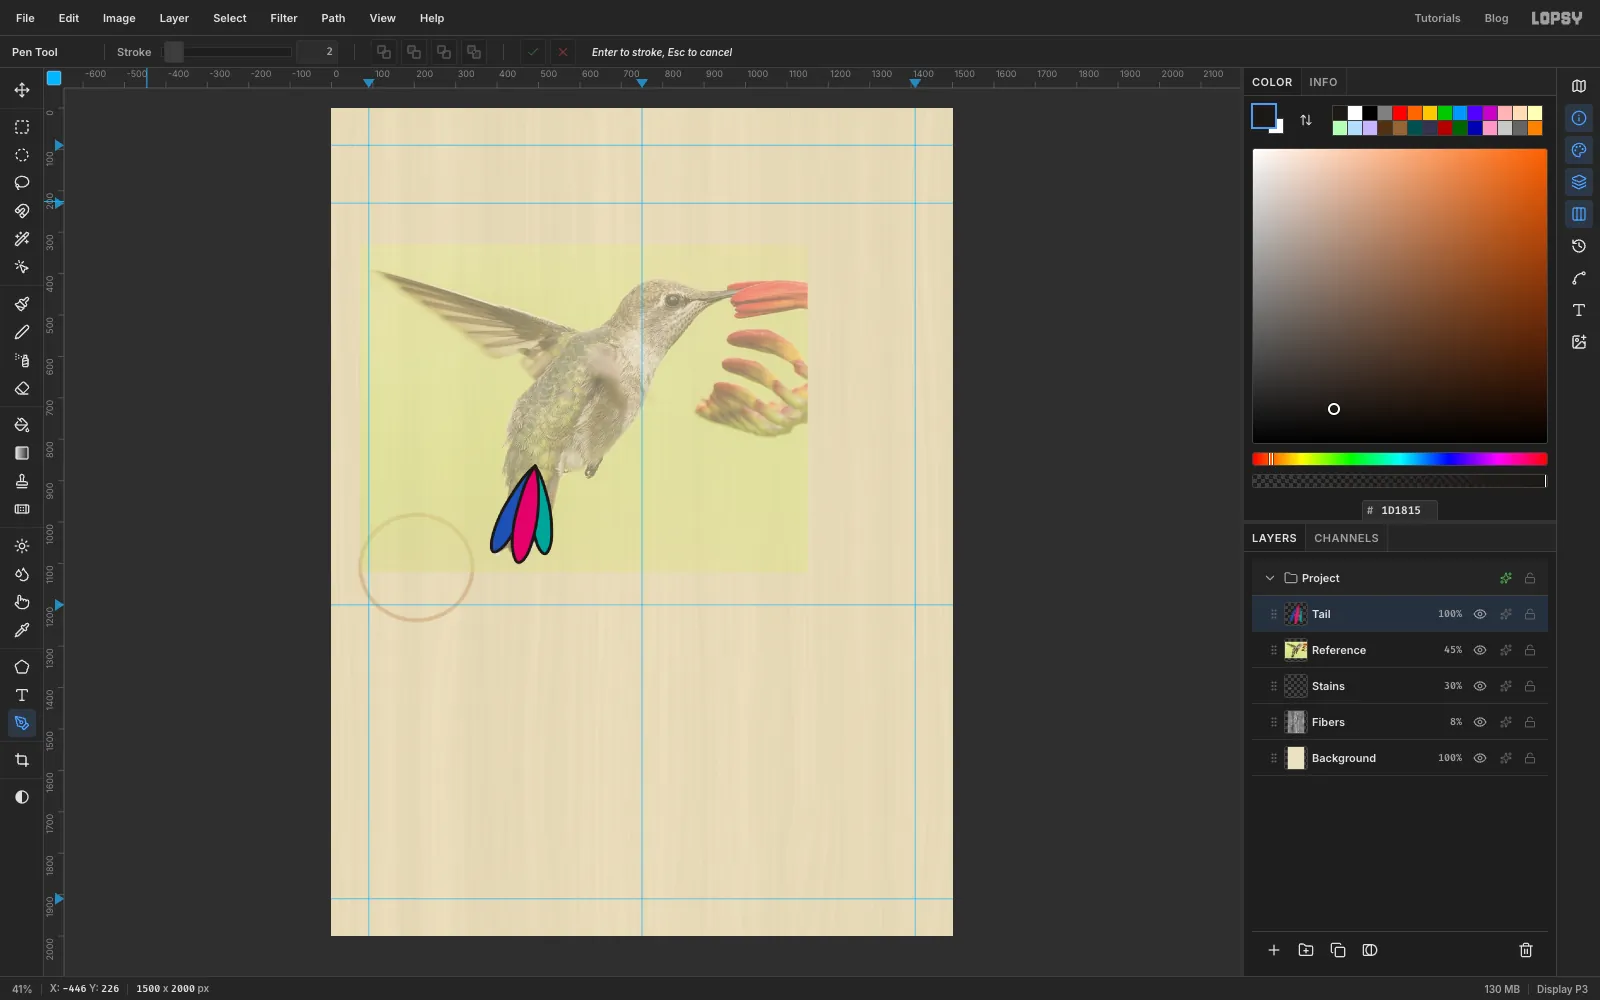
Add a layer named Tail. Each tail feather is a teardrop: pointed where it joins the body, widest just past halfway and rounded at the tip. Trace three of them fanning down from the base of the photo's tail. Drag the middle one a little longer than the other two.
Fill and ink each one, using a 7 px stroke: cobalt on the left, turquoise on the right and magenta in the middle. Draw the middle feather last so it sits on top.
-
Fan out the wing
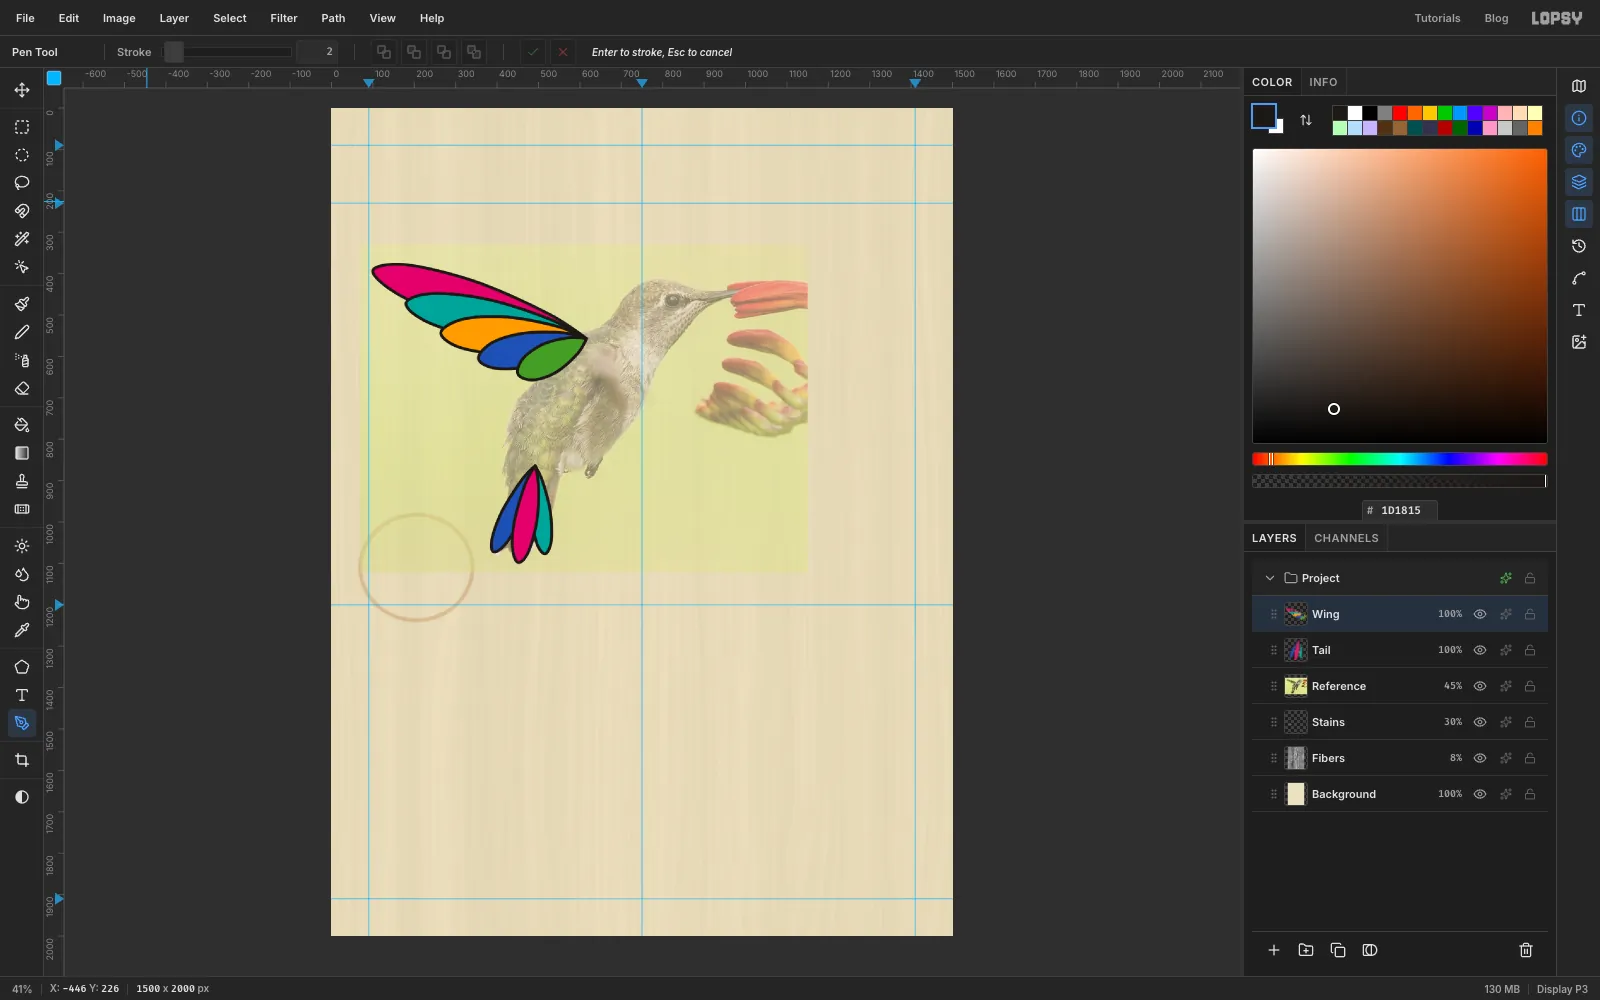
Add a layer named Wing above Tail. The wing is five long feathers fanning out from one point on the bird's back. Make the top one reach the photo's wingtip, and step each one below it shorter and a little lower.
Draw them longest first, so each shorter feather overlaps the one before it. Fill and ink each with a 7 px stroke, in this order:
- Magenta , the longest, to the wingtip
- Turquoise
- Marigold
- Cobalt
- Leaf green , the shortest, on top
You end up with stacked bands of colour, like satin-stitched embroidery.
-
Dot the feathers
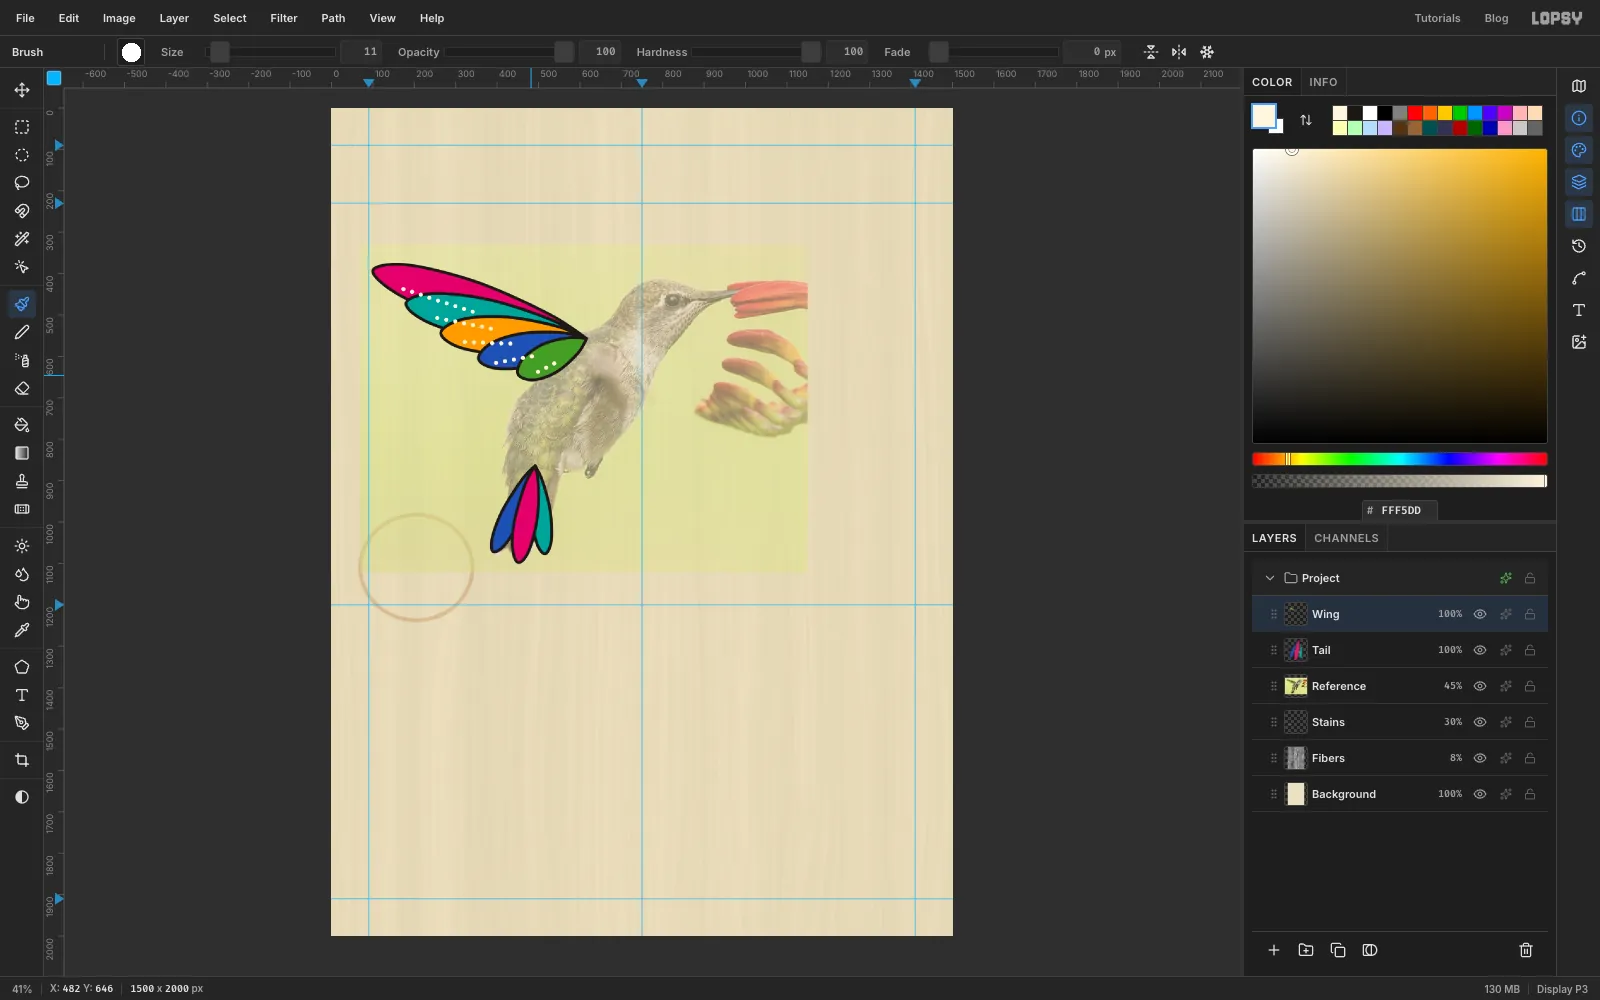
Stay on the Wing layer and pick the Brush (B). Click the brush preview at the left of the options bar to open the Brushes panel, and on the Shape tab set Size to 11, Hardness 100, Opacity 100 and Spacing 200%, the maximum. At that spacing a stroke lays down separate dots instead of a line.
Set the foreground to cream . On each feather, click about halfway along it, a little above its centre line, then Shift-click near the tip. Shift-click paints a straight row of dots between the two points. Stop short of the tip so no dot touches the outline.
-
Fill the body
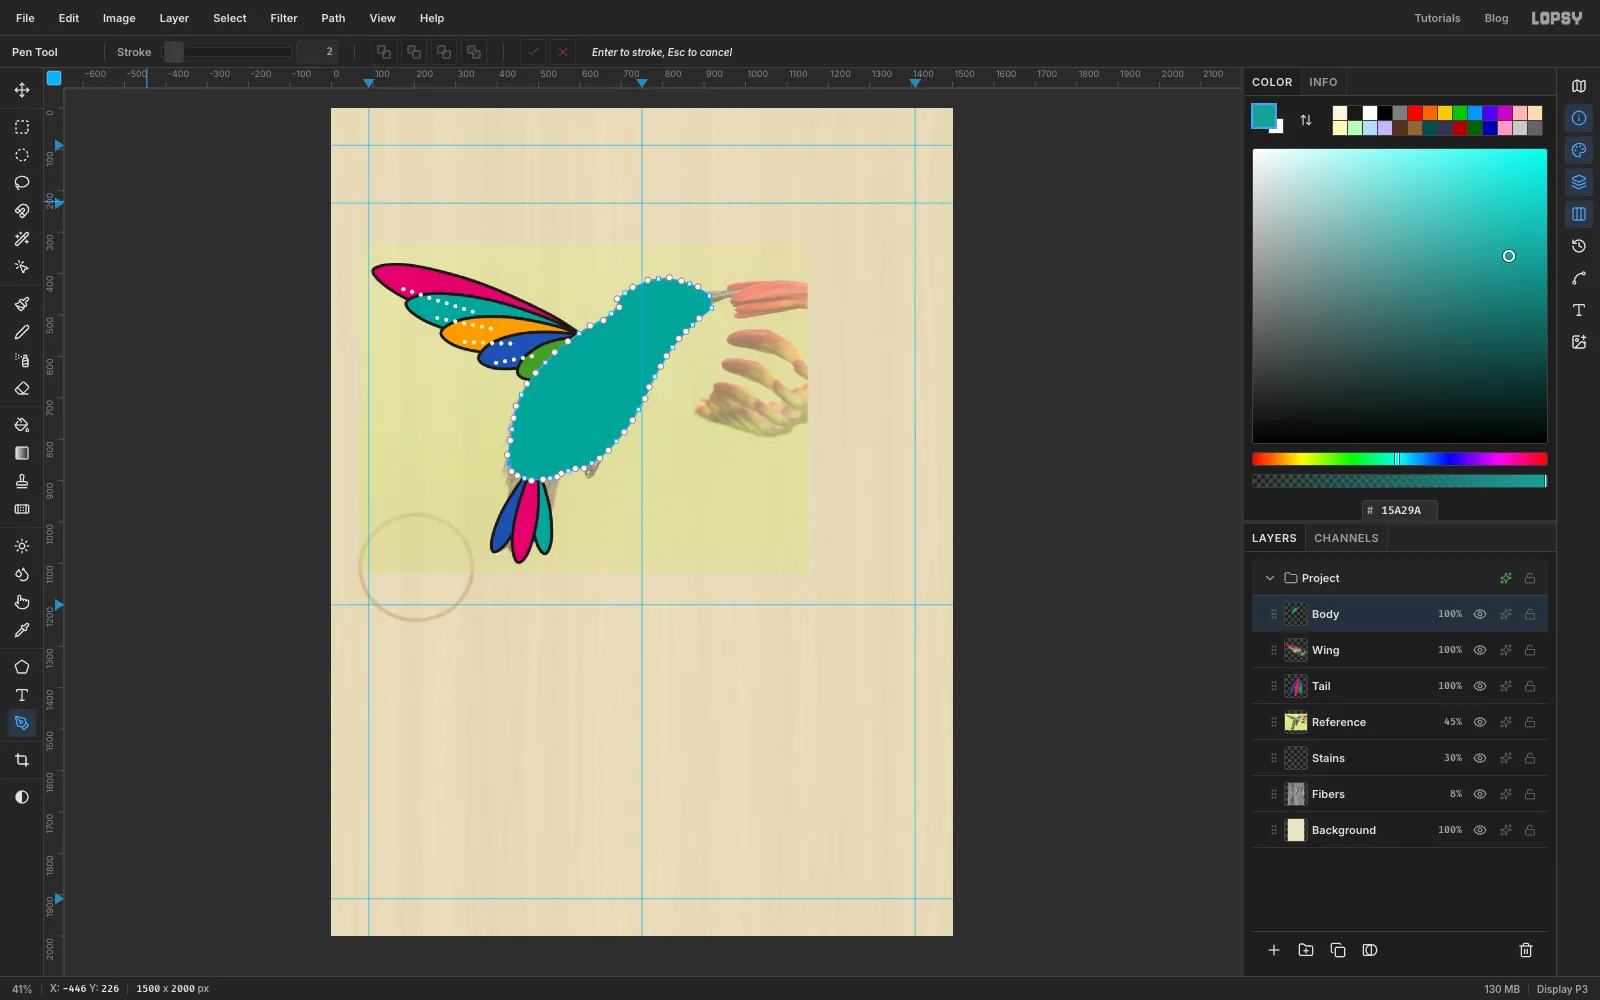
Add a layer named Body above Wing. With the Pen, trace the body as one closed outline. Start at the crown and go over the forehead to the base of the beak, using two sharp corner clicks there. Continue down the throat and belly to the tail base, then back up the spine to the crown.
Click Path to Selection and fill with turquoise , but don't stroke or delete the path yet: you'll ink it later on its own layer.
-
Block in the colour bands
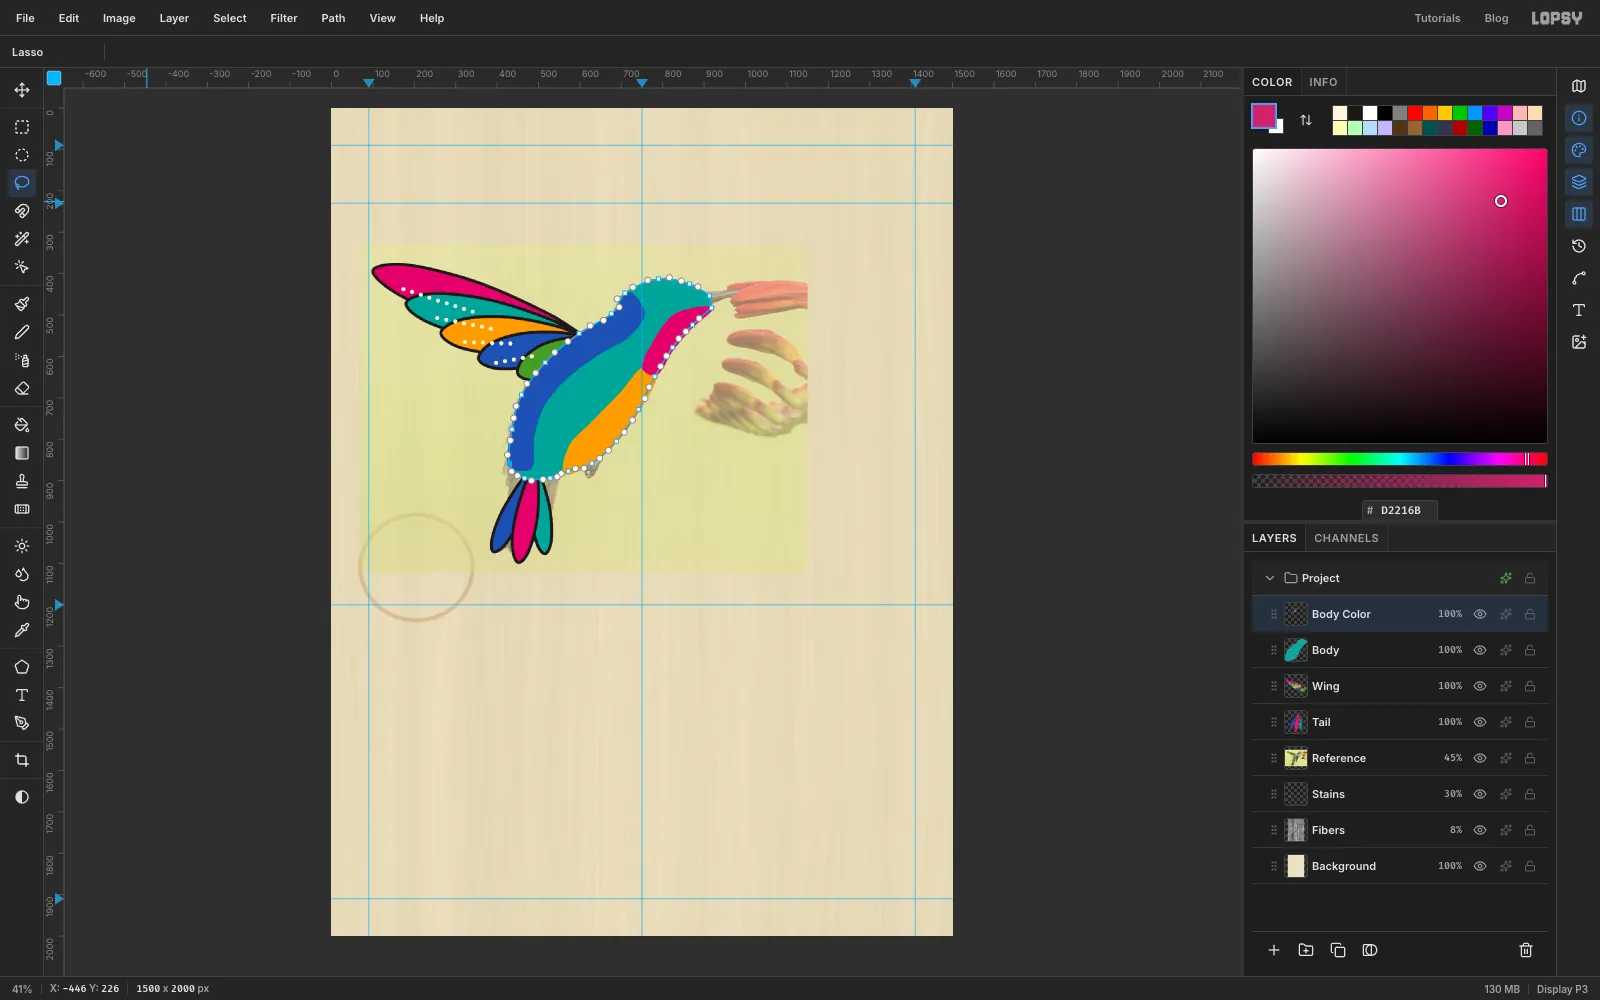
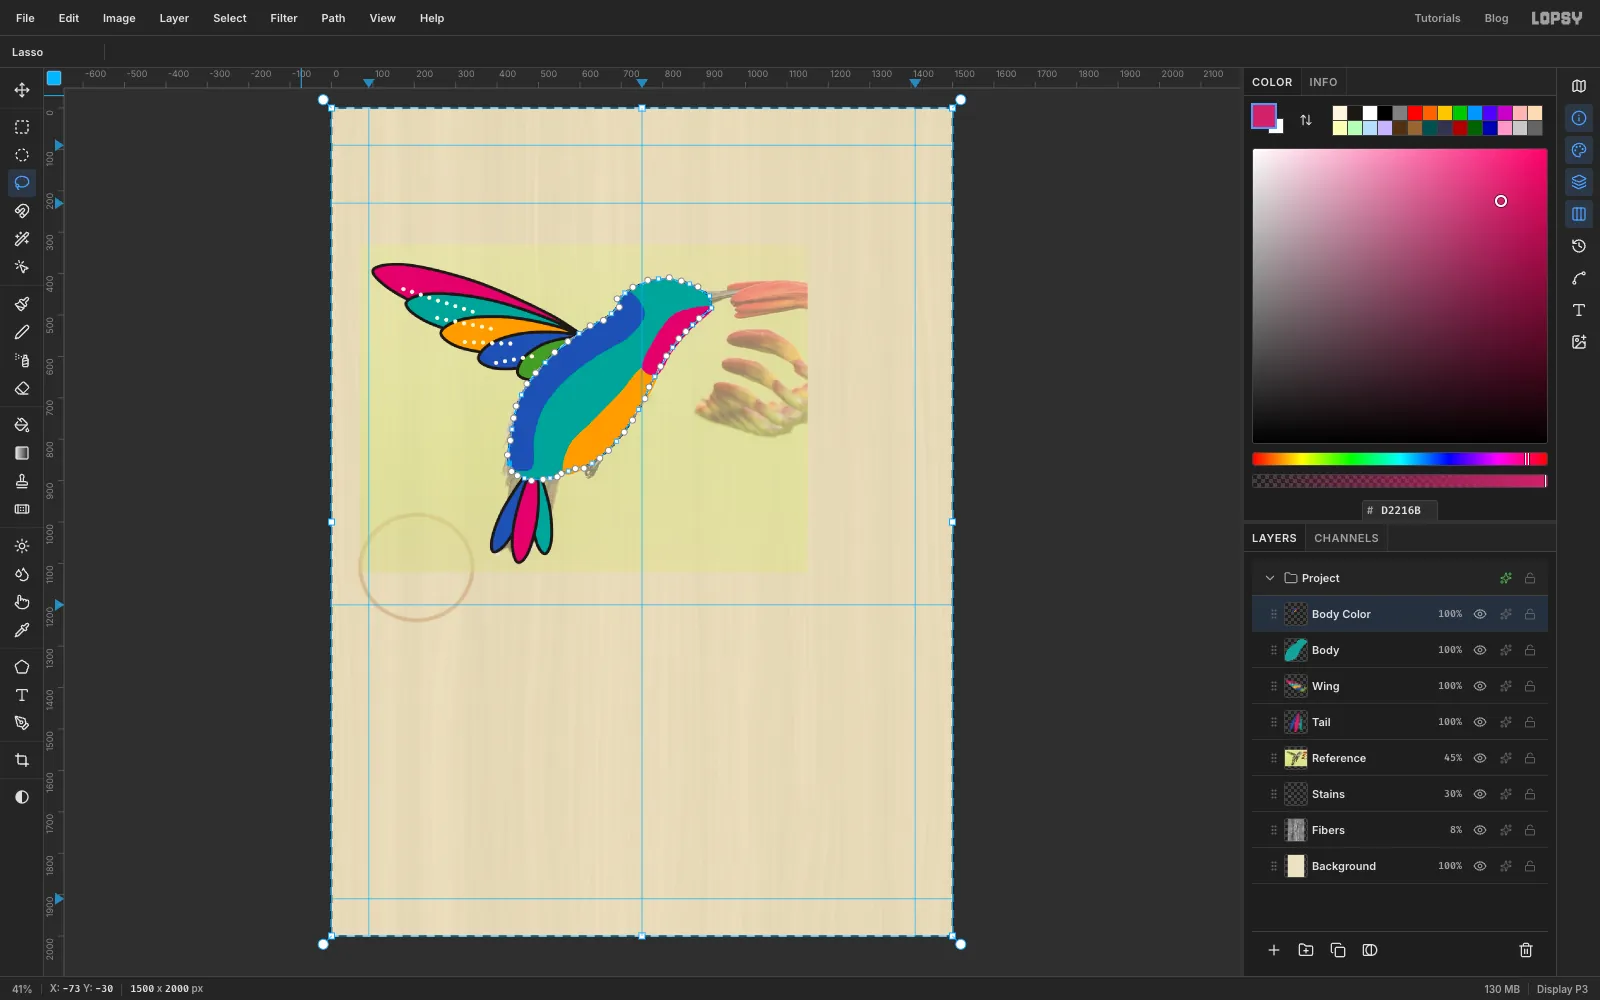
Add a layer named Body Color. With the Lasso (L), draw three bands and fill each one:
- A cobalt stripe down the back, from the nape to the tail.
- A marigold belly, from the throat to the vent.
- A magenta gorget, the throat patch under the beak.
Let them spill over the body's outline. You'll trim them next.
-
Trim the bands to the body
Cmd-click the Body layer's thumbnail to load its shape as a selection, then choose Select → Inverse. With Body Color still active, press Delete to clear everything outside the body, then Cmd+D.
-
Add stitch seams and back dots
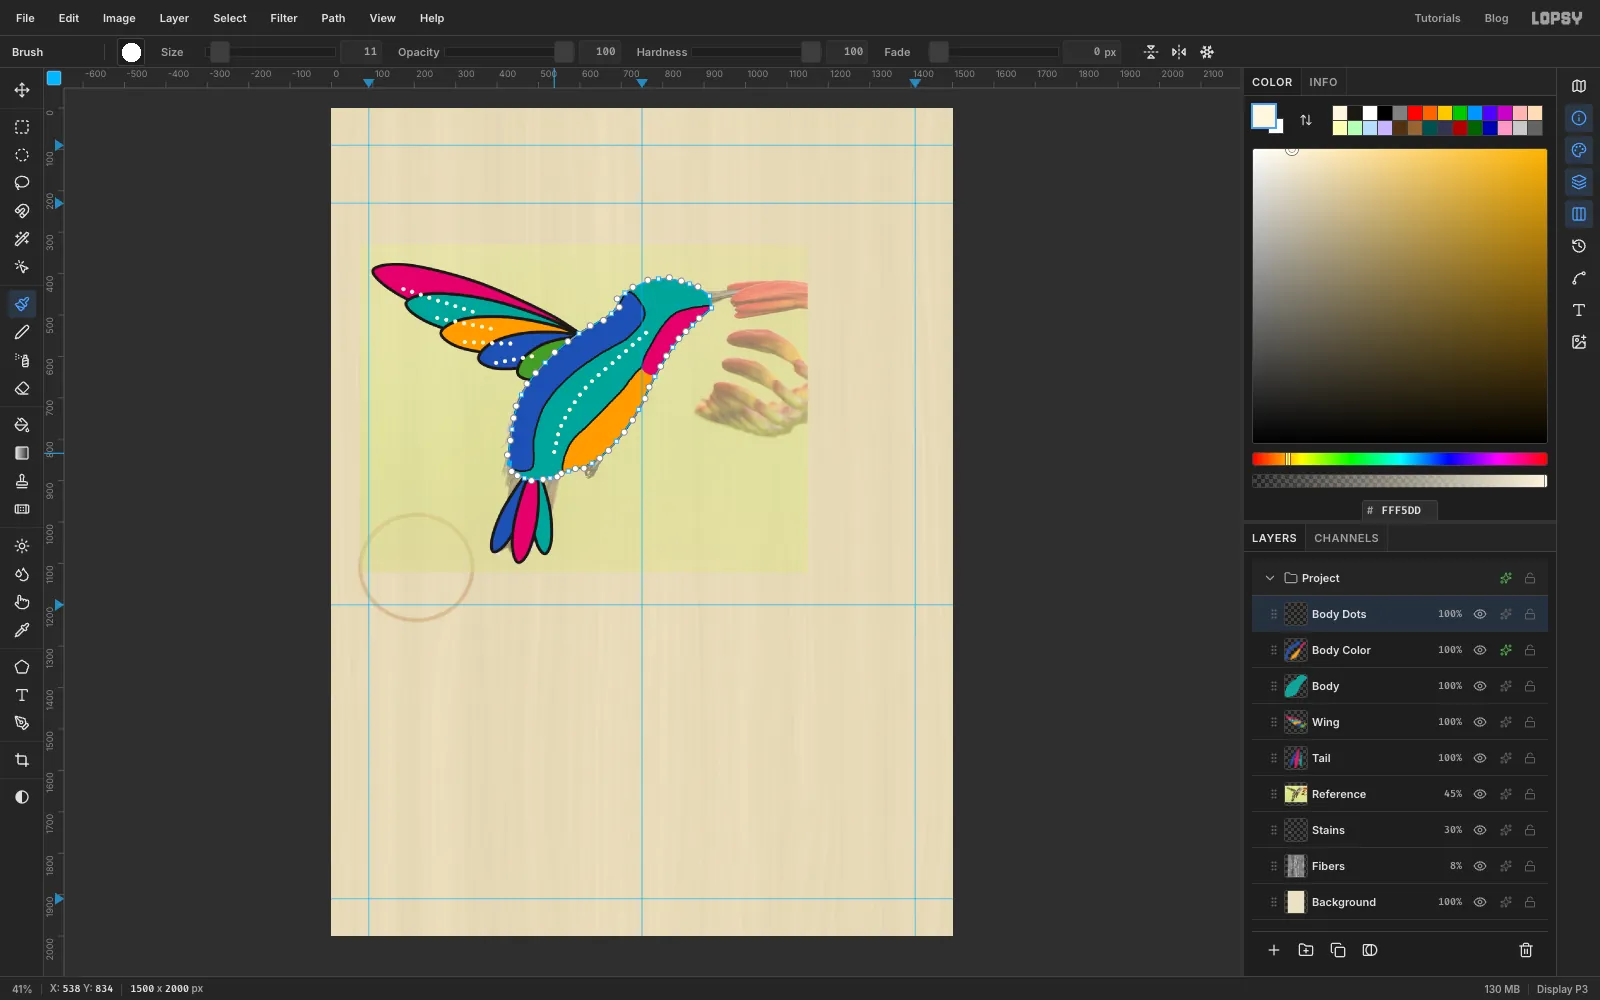
Open the Body Color effects drawer and turn on Stroke. Set Width to 5, colour ink and position Center. A Stroke effect traces the edge of everything on the layer, so each band gets a thin ink seam where it meets the turquoise, like a line of stitching. That's why the bands sit on their own layer with turquoise showing between them.
Add a layer named Body Dots. The brush still has the dotted settings from the wing, so with cream drag one gentle curve down the middle of the back. On its own layer, the dots don't pick up the seam outline.
-
Ink the outline, beak and eye
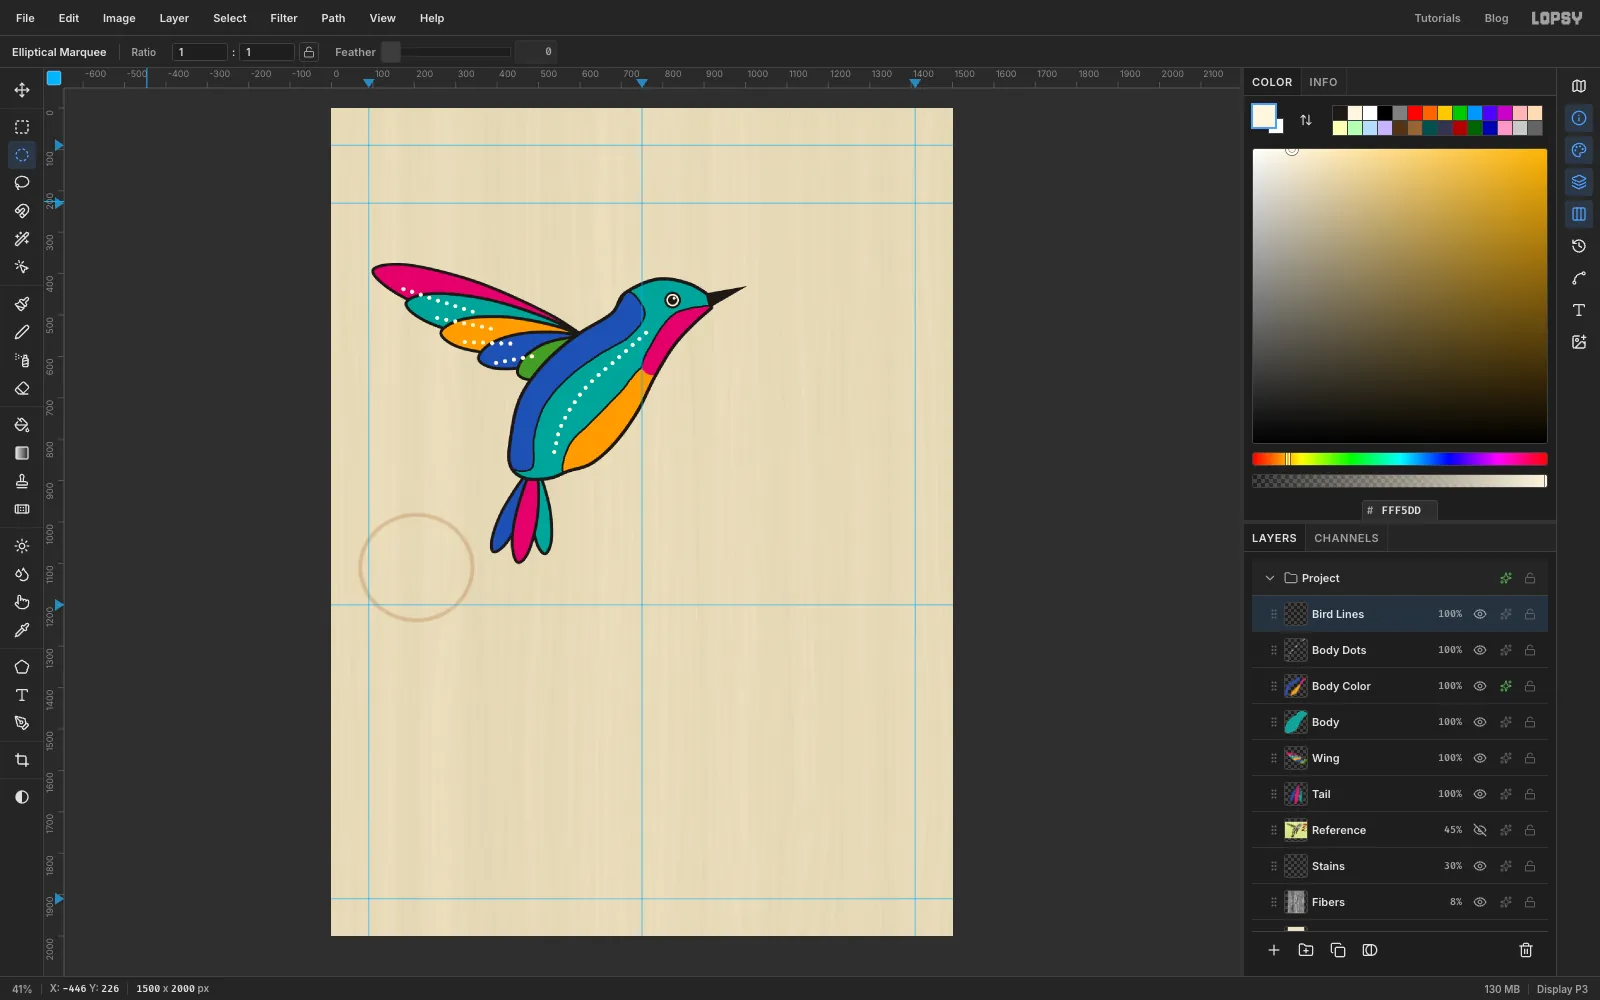
Add a layer named Bird Lines. The body path is still in the Paths panel. Select it, set the foreground to ink and click Stroke Path with a width of 8. Then delete the path.
Pen a long thin triangle for the beak, from the two corners at its base out to the photo's beak tip. Click Path to Selection and fill it with ink.
For the eye, centre four circles on the photo's eye with the Elliptical Marquee's exact-size dialog, filling each in turn:
- Ink, 40 px across
- Cream, 30 px
- Ink, 22 px
- A tiny cream highlight, 7 px, a few pixels up and to the right
Finally, click the eye icon on Reference to hide it. The bird stands on its own.
-
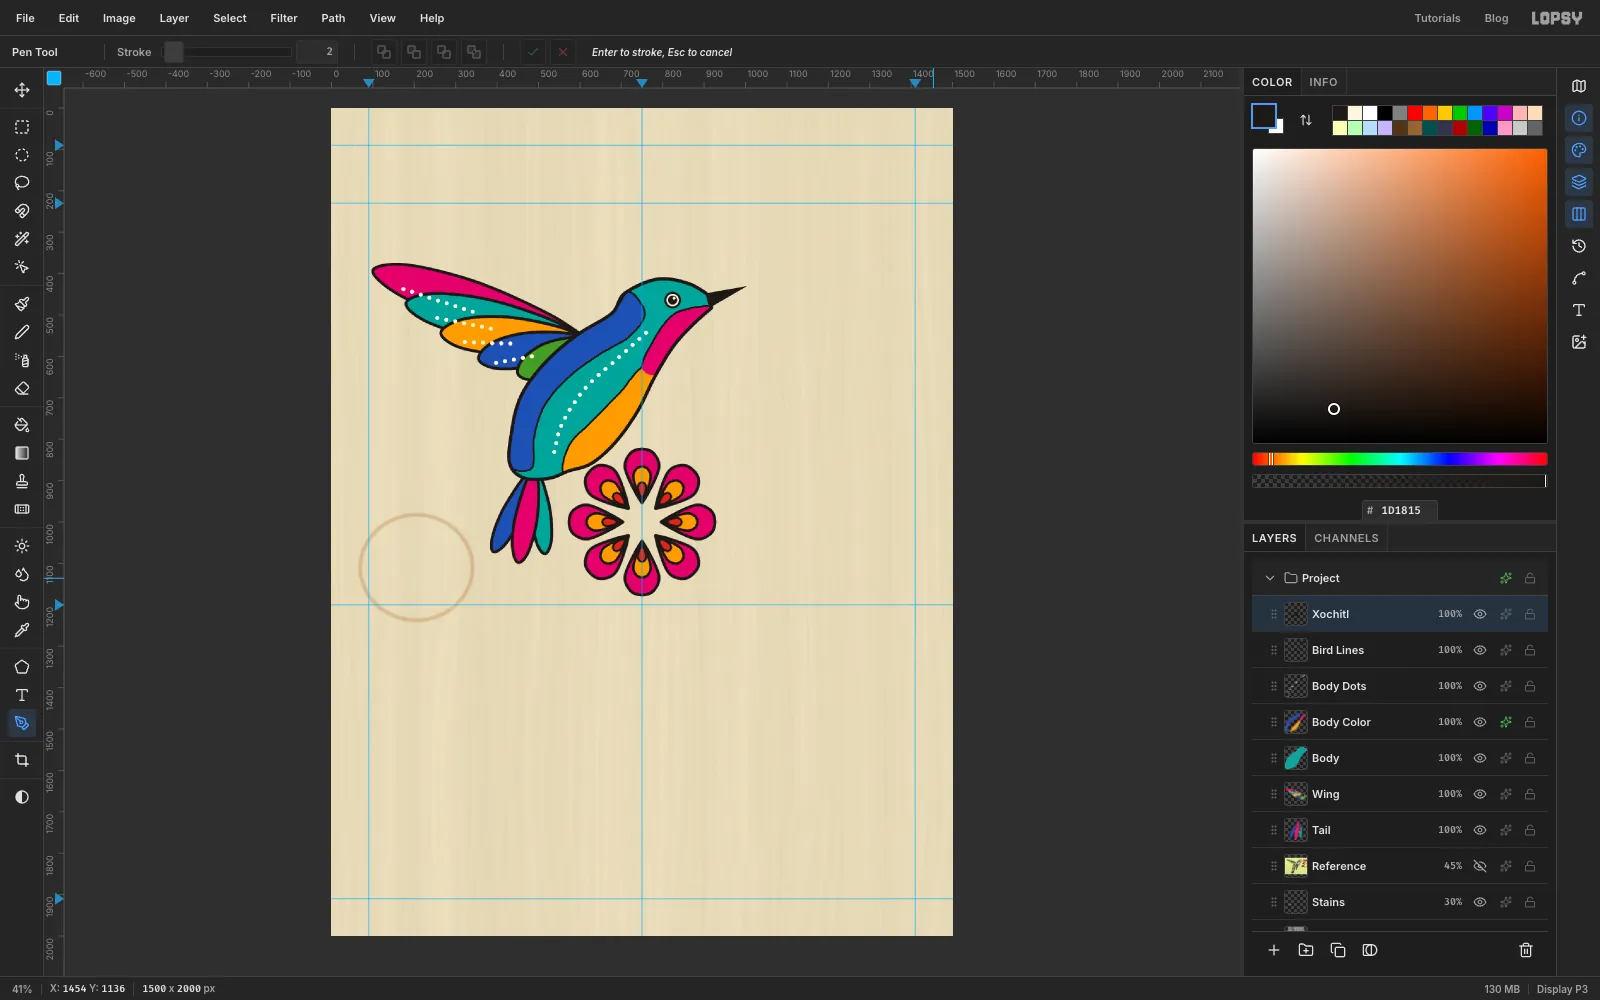
Draw one petal stack
The flower is built with Kaleidoscope, which repeats one wedge around the centre of the canvas. Select Bird Lines and add a layer named Xochitl above it.
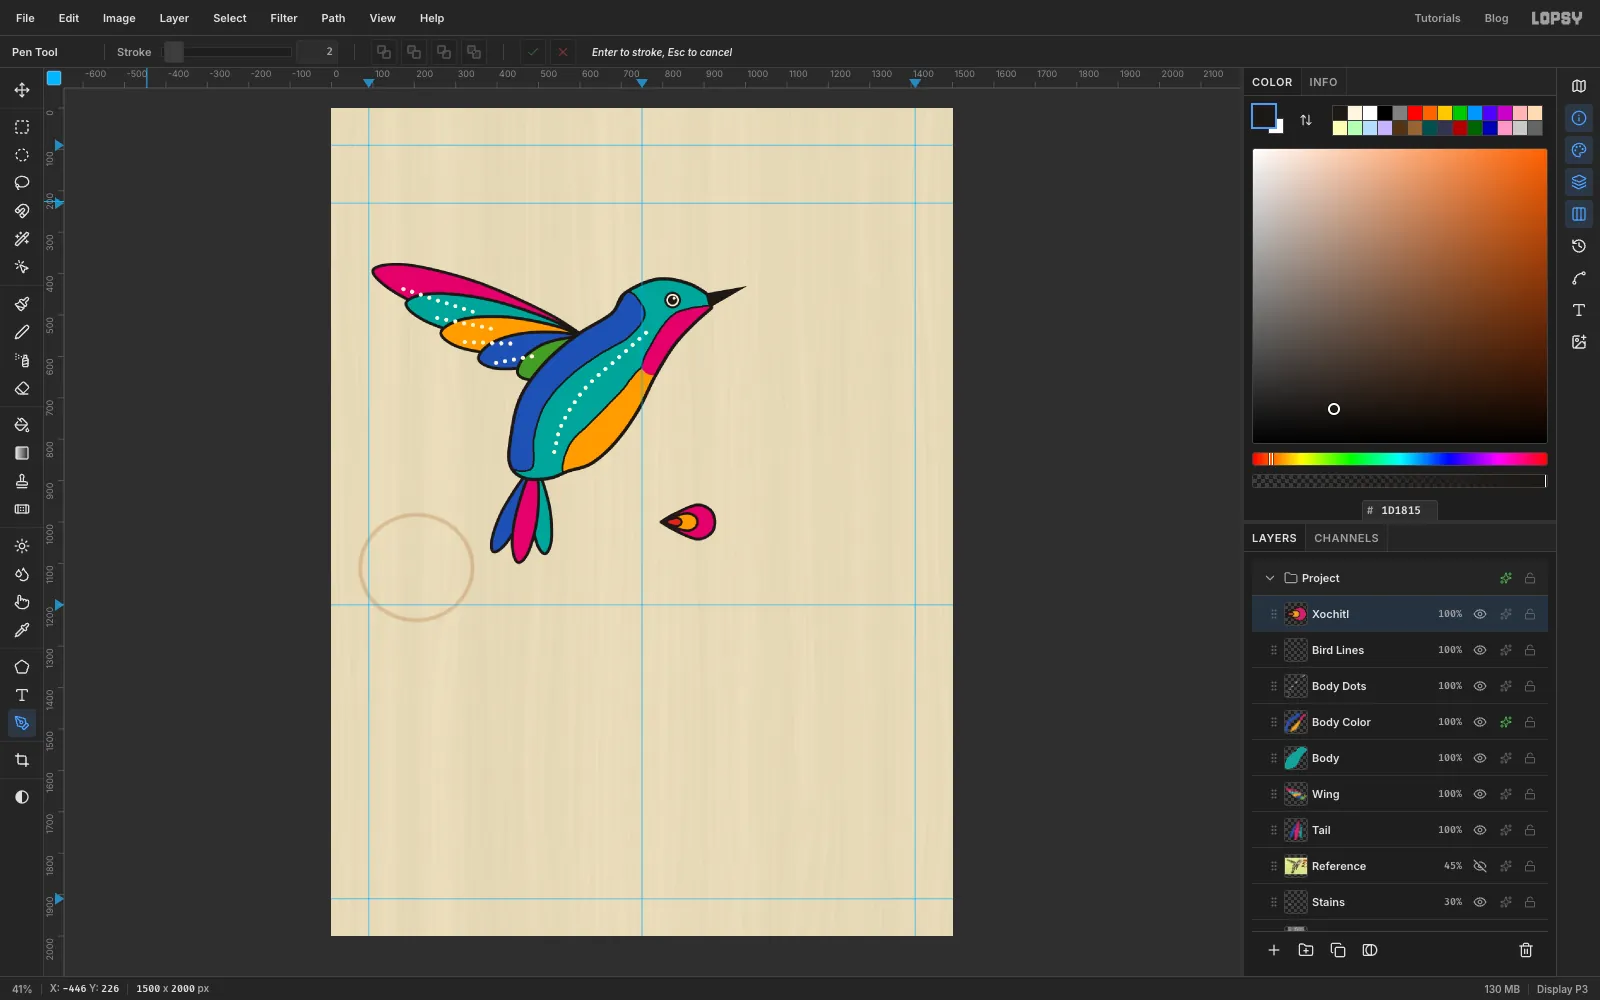
Starting about 46 px to the right of the canvas centre (750, 1000), draw one petal pointing straight right with the Pen, symmetrical about the horizontal line through the centre. Make it a rounded almond about 130 px long and about 70 px across at its widest. Fill and ink it magenta with a 7 px line.
Inside it, draw a shorter, narrower marigold petal (6 px line). Inside that, draw a small red one (5 px line).
Kaleidoscope keeps only the slice from three o'clock down to 22.5° below it and mirrors it, so a petal that's symmetrical about the horizontal comes out whole. Keep its widest point inside that slice.
-
Repeat it with Kaleidoscope
Choose Filter → Kaleidoscope…, set Segments to 8 and Rotation to 0, and click Apply. One petal becomes a full eight-petal flower, outlines and all.
-
Add the flower's centre
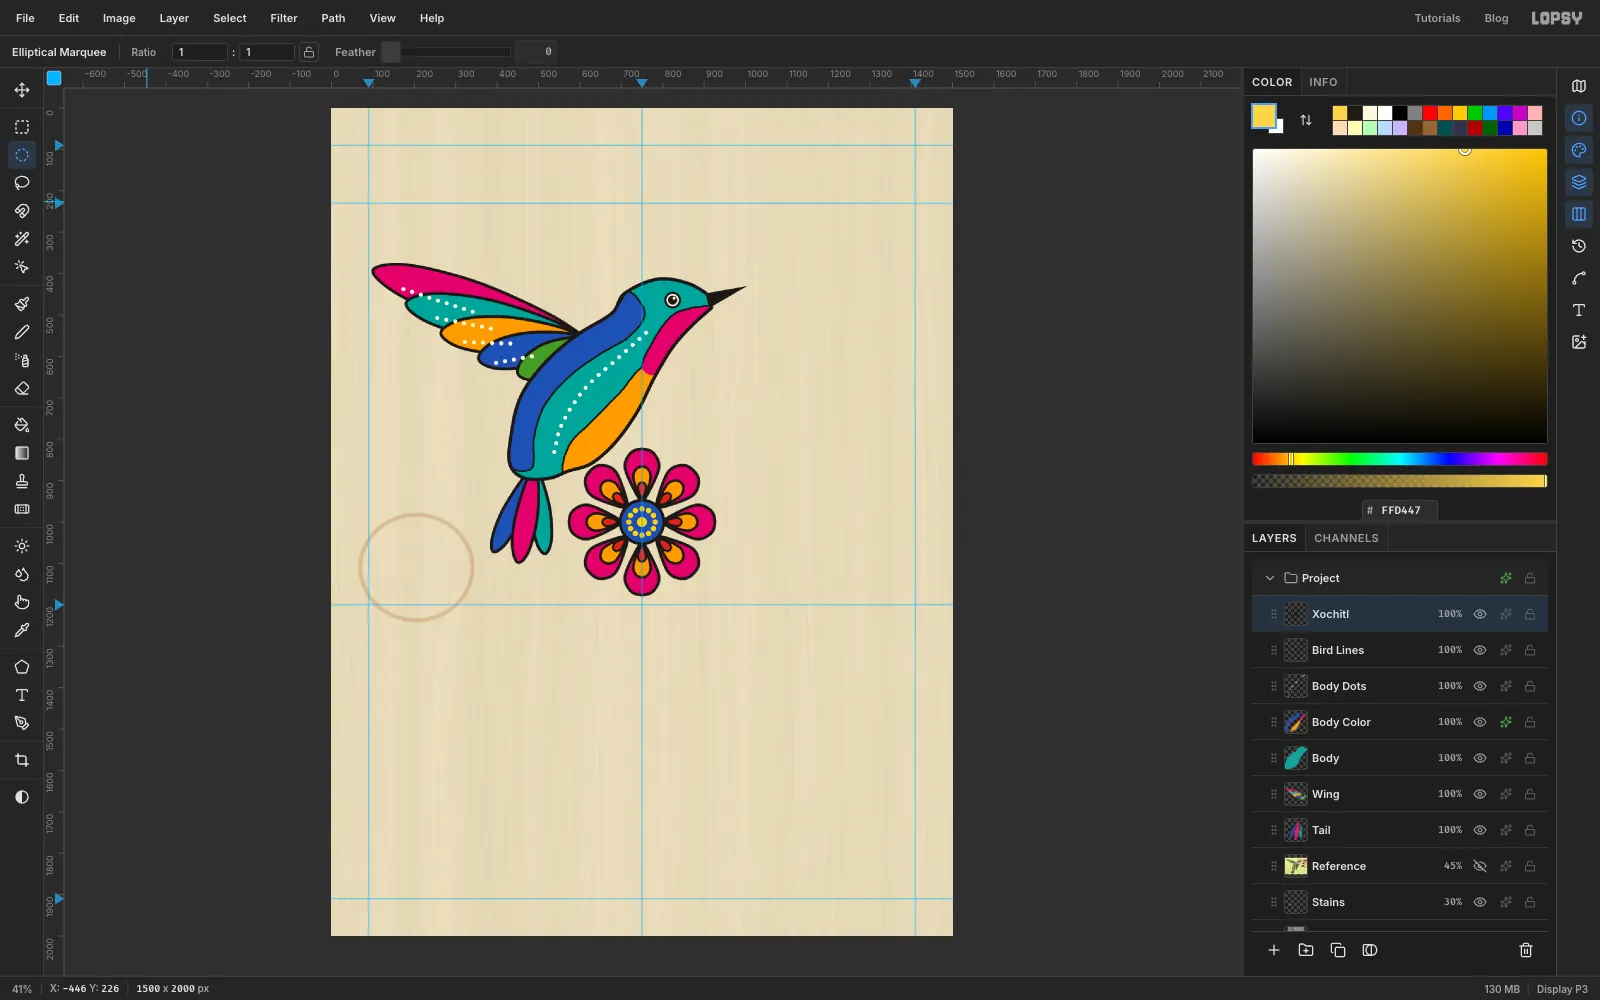
Make two circles on the canvas centre with the exact-size dialog and fill them: ink, From 694, 944 To 806, 1056 (112 px), then cobalt, From 701, 951 To 799, 1049 (98 px).
For the ring of dots, pick the Brush, reset Spacing to 10%, set Size to 14 and click Radial Symmetry in the options bar. Set Segments to 12. Cmd-click the exact centre of the flower to move the symmetry centre there. Set the foreground to yellow and click once about 32 px right of the centre, which stamps twelve dots.
Click Radial Symmetry again to switch it off, then add a 24 px yellow dot in the middle.
-
Move the flower to the beak
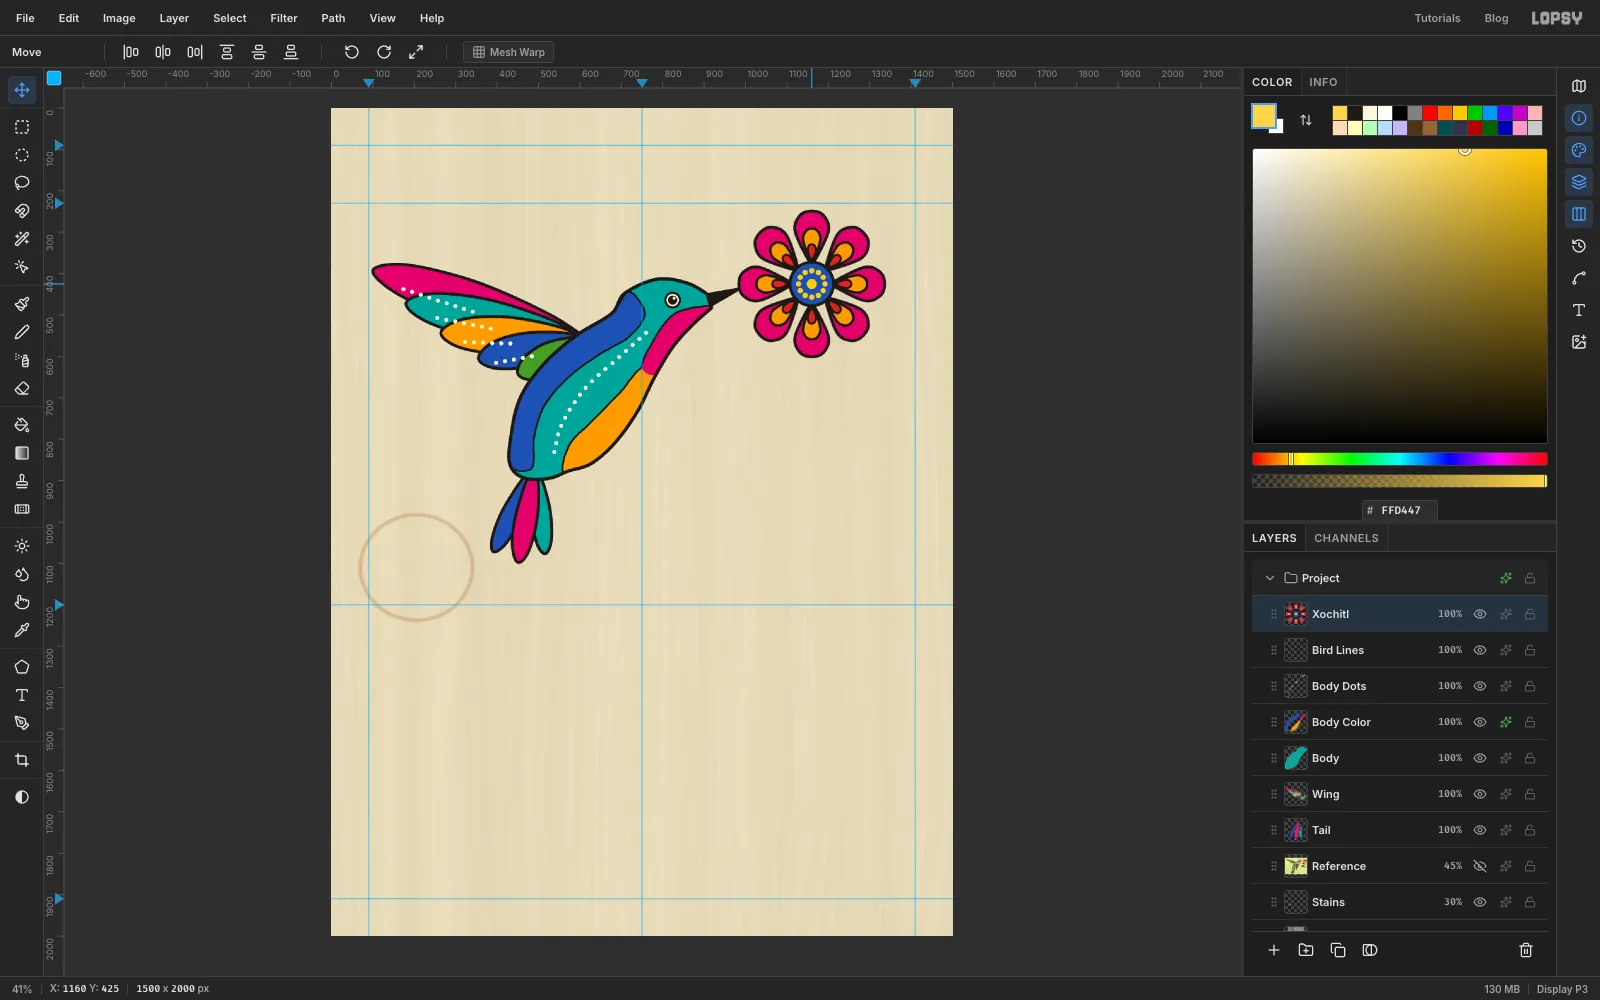
Press Cmd+D, pick the Move tool and drag the flower up and to the right until its centre is at about (1160, 425). The beak tip should just slip behind the left-hand petal, as if the bird is drinking.
-
Ink the stem and bud
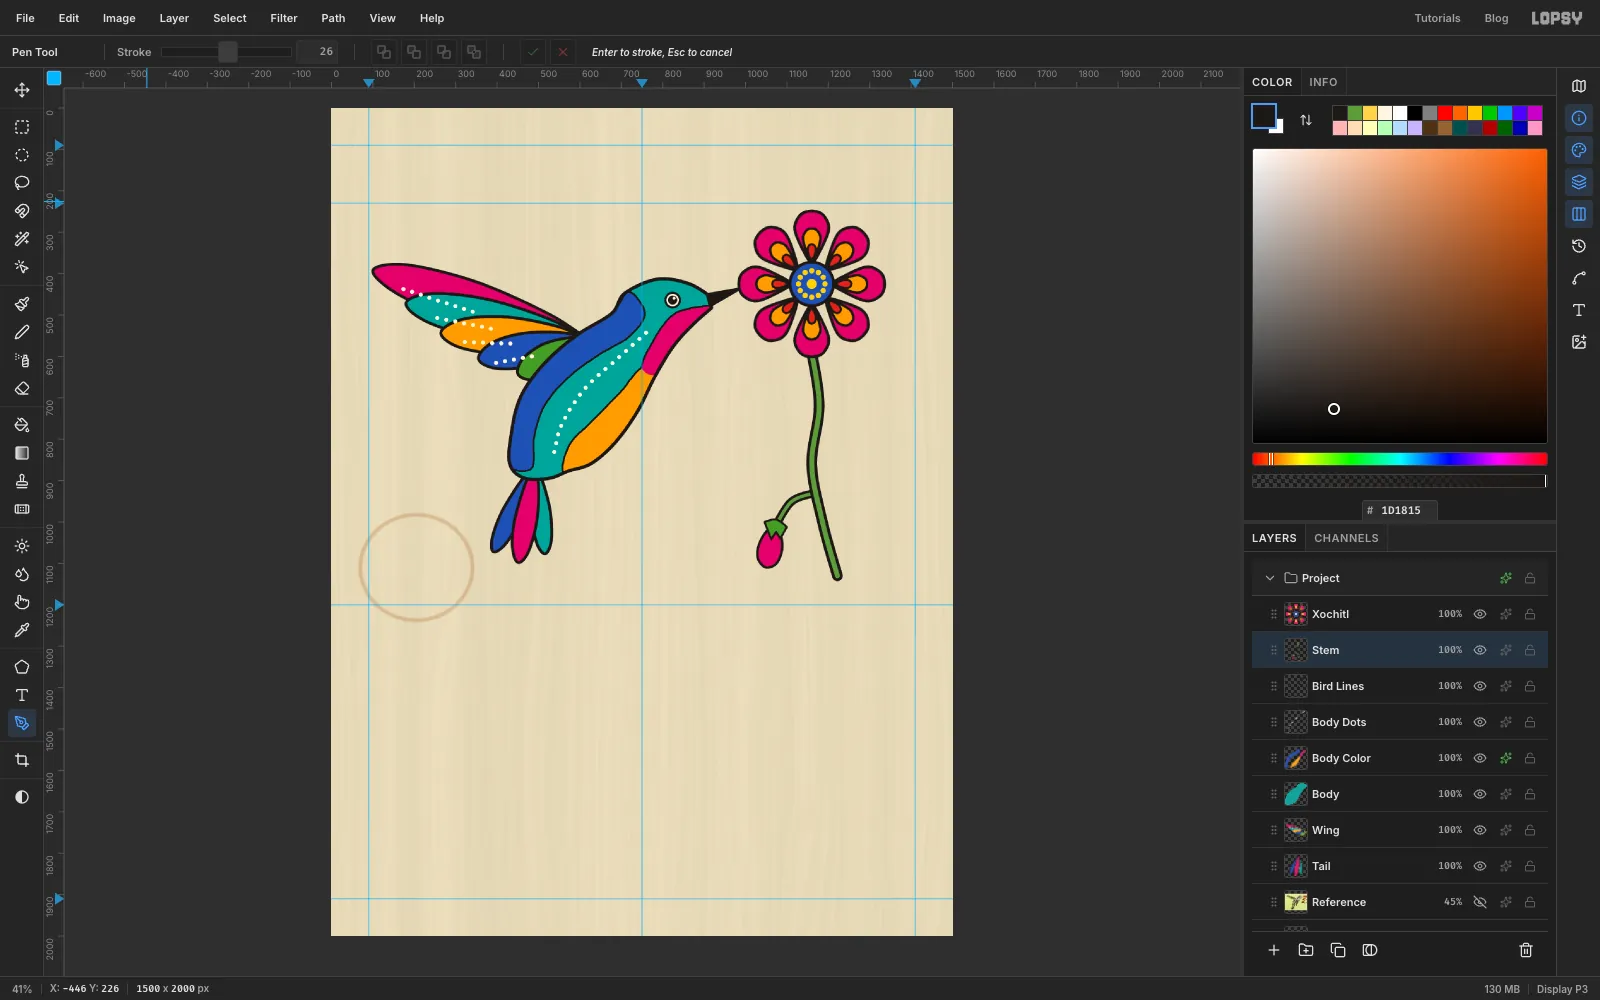
Select Bird Lines and add a layer named Stem. It lands under the flower. Stems are two strokes on one path: a wide ink stroke, then a narrower green stroke down the middle.
- Draw the bud stalk first, curving down and left from the middle of where the stem will be. In the Pen options bar set Stroke to 20, use ink, and press Enter to stroke the open path. Then switch to green , click Stroke Path with width 8, and delete the path.
- Draw the main stem from under the flower down to about y 1130 with a gentle S-curve. It runs over the end of the bud stalk, which hides the join. Stroke it 26 in ink, then 12 in green.
Hang a magenta teardrop bud from the stalk (fill and ink, 6 px line) and cap it with a small green calyx (5 px line).
-
Copy and flip the leaf
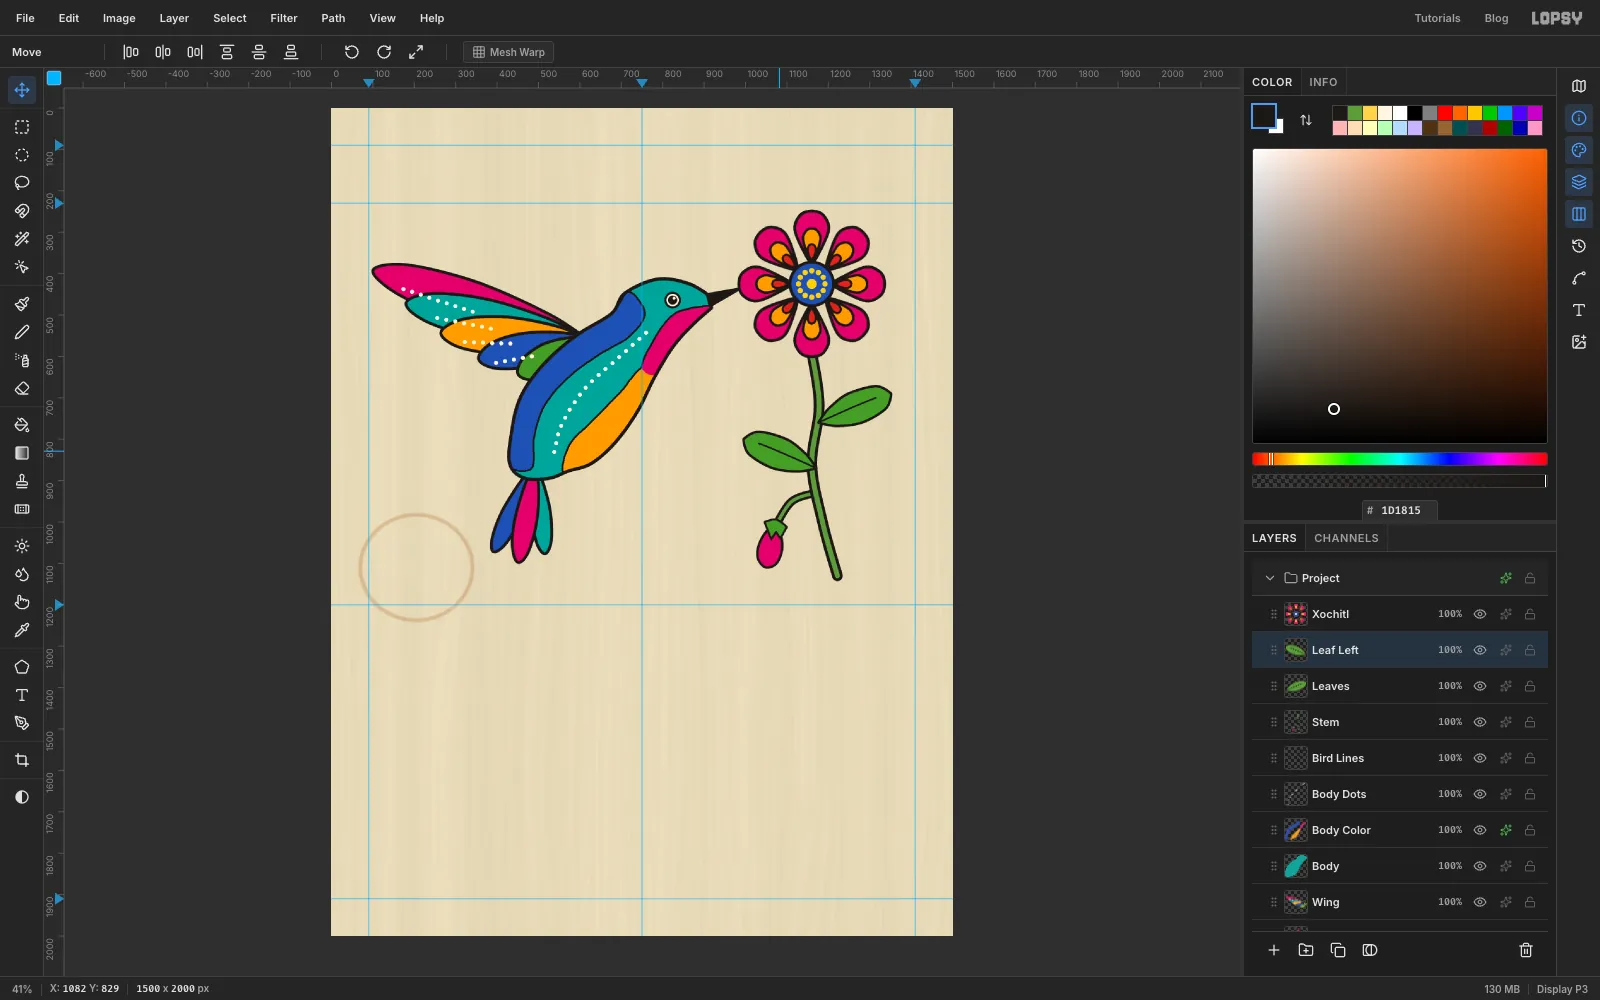
Add a layer named Leaves. Pen a leaf about 180 × 90 px growing up and right from the stem, fill and ink it green, then draw an open path down its middle and stroke it 4 px in ink for the vein.
Now duplicate it. Draw a rectangular marquee around the leaf, press Cmd+C and Cmd+V. The paste lands in place with the transform handles showing. Click Flip Horizontal in the options bar, press Enter and rename the new layer Leaf Left. With the Move tool, drag it left and about 110 px down until its stalk end touches the stem.
-
Ring the heart with dots
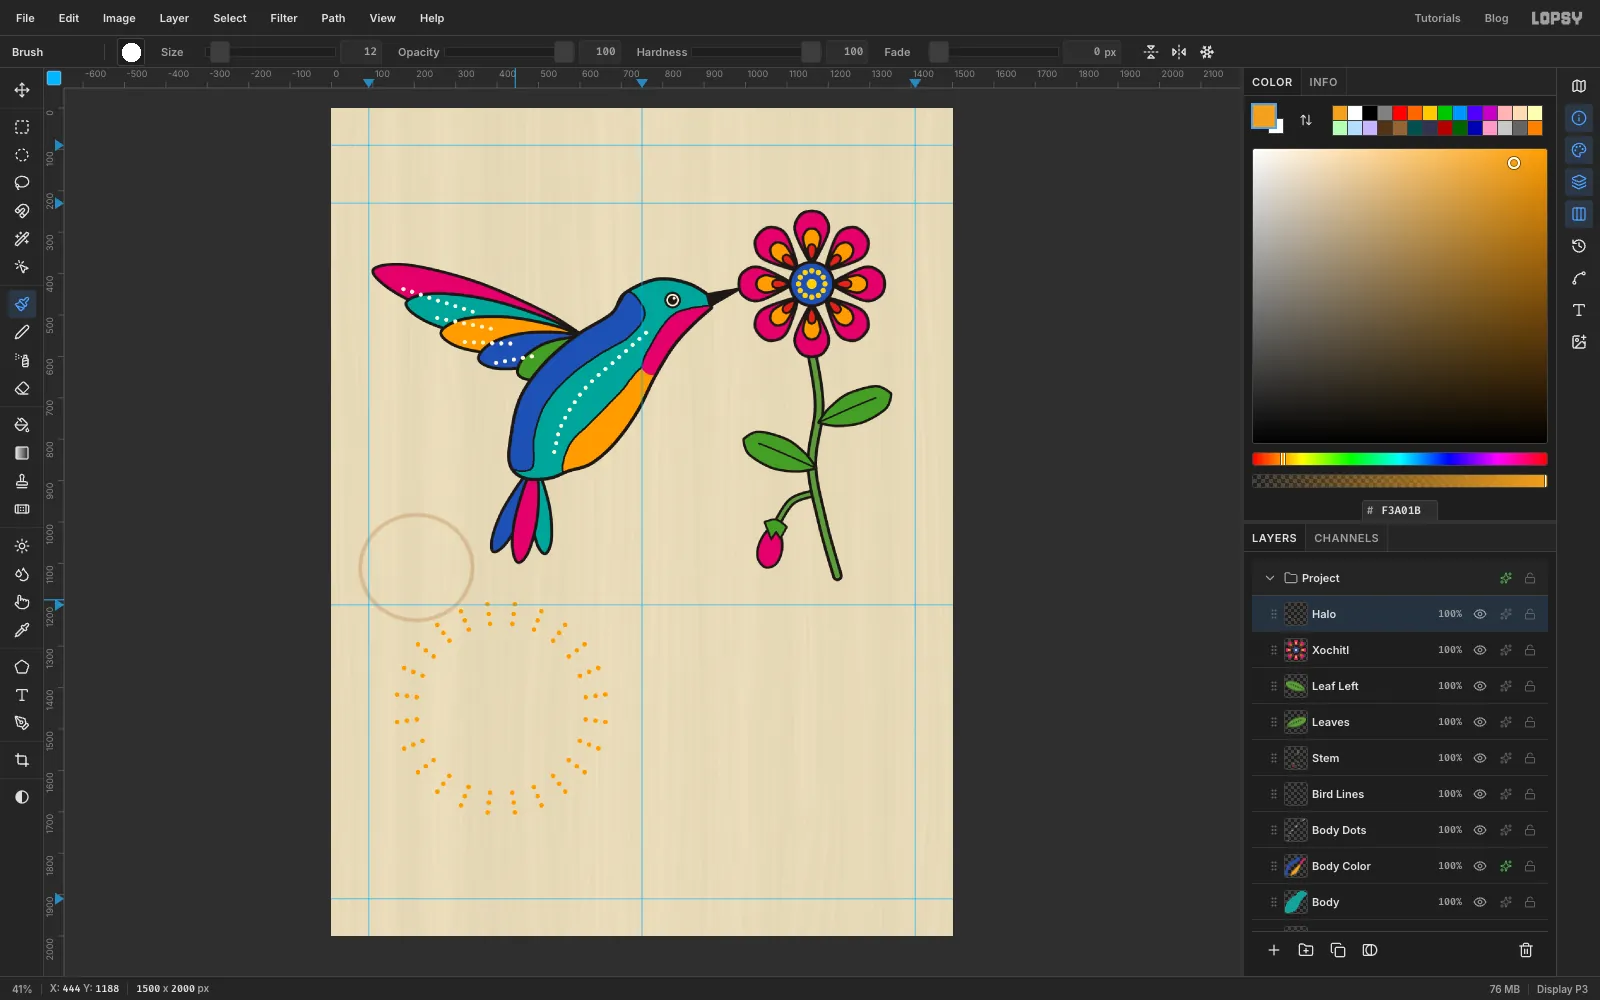
Select Xochitl and add a layer named Halo. The sacred heart sits in the lower left, centred near (410, 1450).
Pick the Brush: Size 12, Hardness 100, Spacing 200%. Turn on Radial Symmetry with 24 segments and Cmd-click the heart's centre. With marigold , click about 206 px above the centre and Shift-click about 264 px above it, leaning the line a few degrees right of vertical so no ray runs straight up into the flame. You get 24 dotted rays at once. Switch Radial Symmetry off.
-
Draw the flames and heart
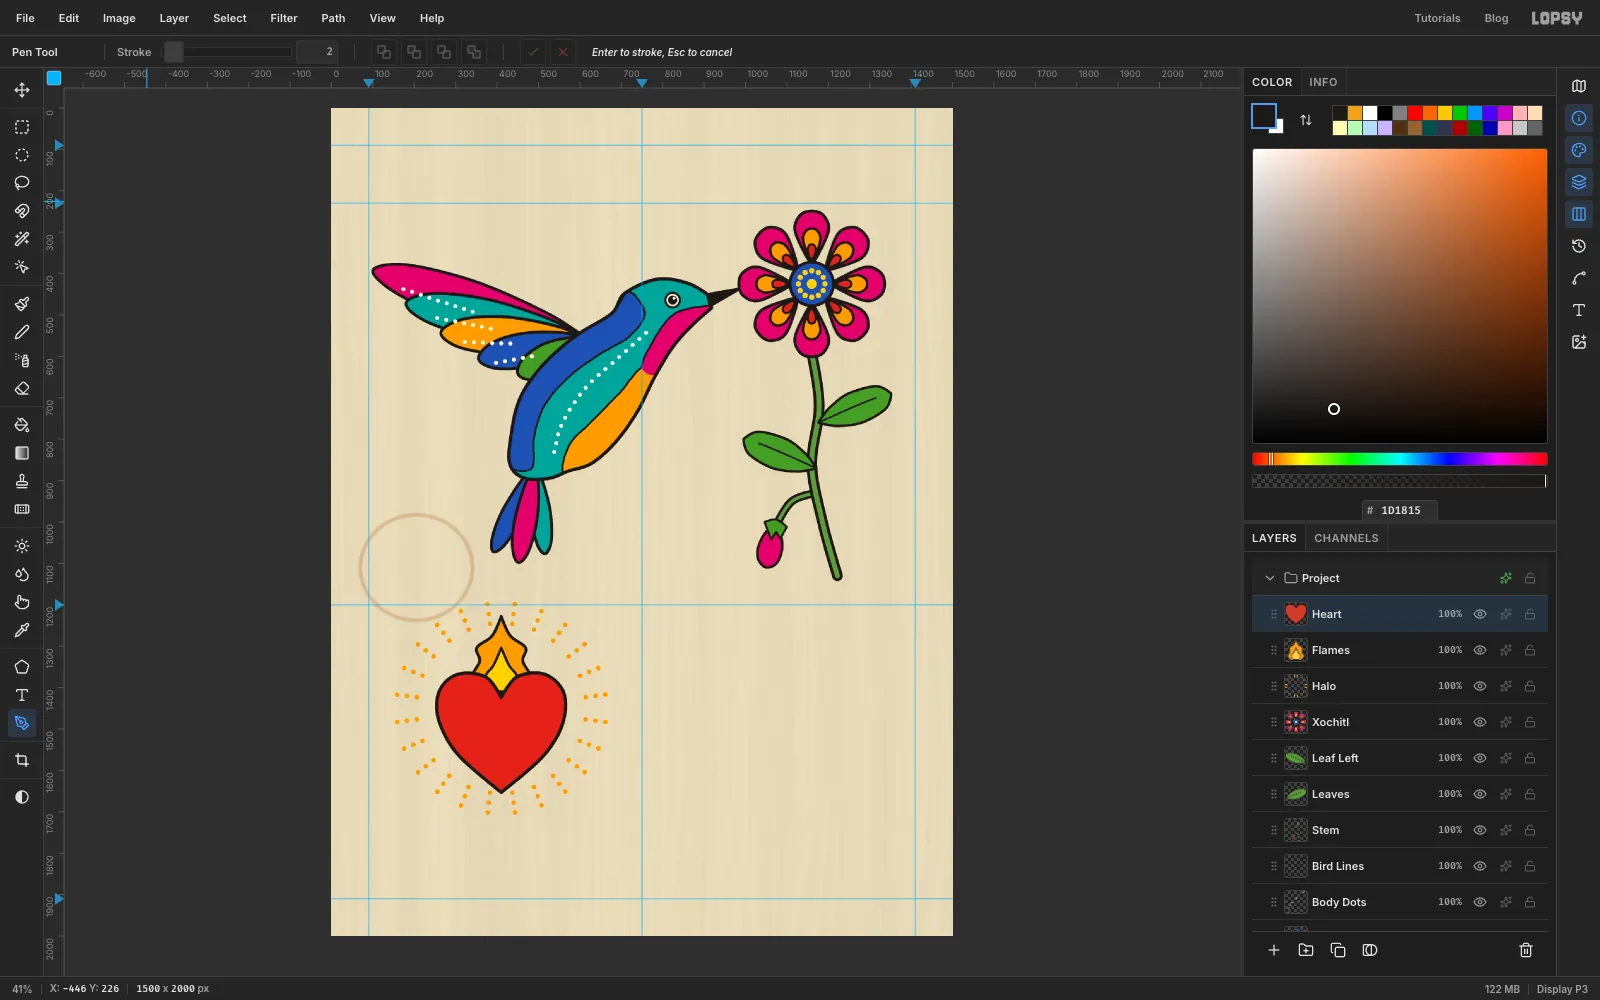
Add a layer named Flames. Pen a three-tongued flame about 145 × 190 px, rising from just below the top centre of where the heart will be (around x 410, y 1400). Give it sharp corners at the base and the tip, then fill and ink it marigold (7 px). Draw a smaller yellow flame, about 75 × 105 px, inside it (6 px).
Add a layer named Heart and pen a heart about 300 px wide and 285 px tall, its top dip meeting the base of the flame. Use sharp corners at the top dip and the bottom point. Fill and ink it heart red with an 8 px line, so it covers the flames' base.
-
Add the thorn band and cross
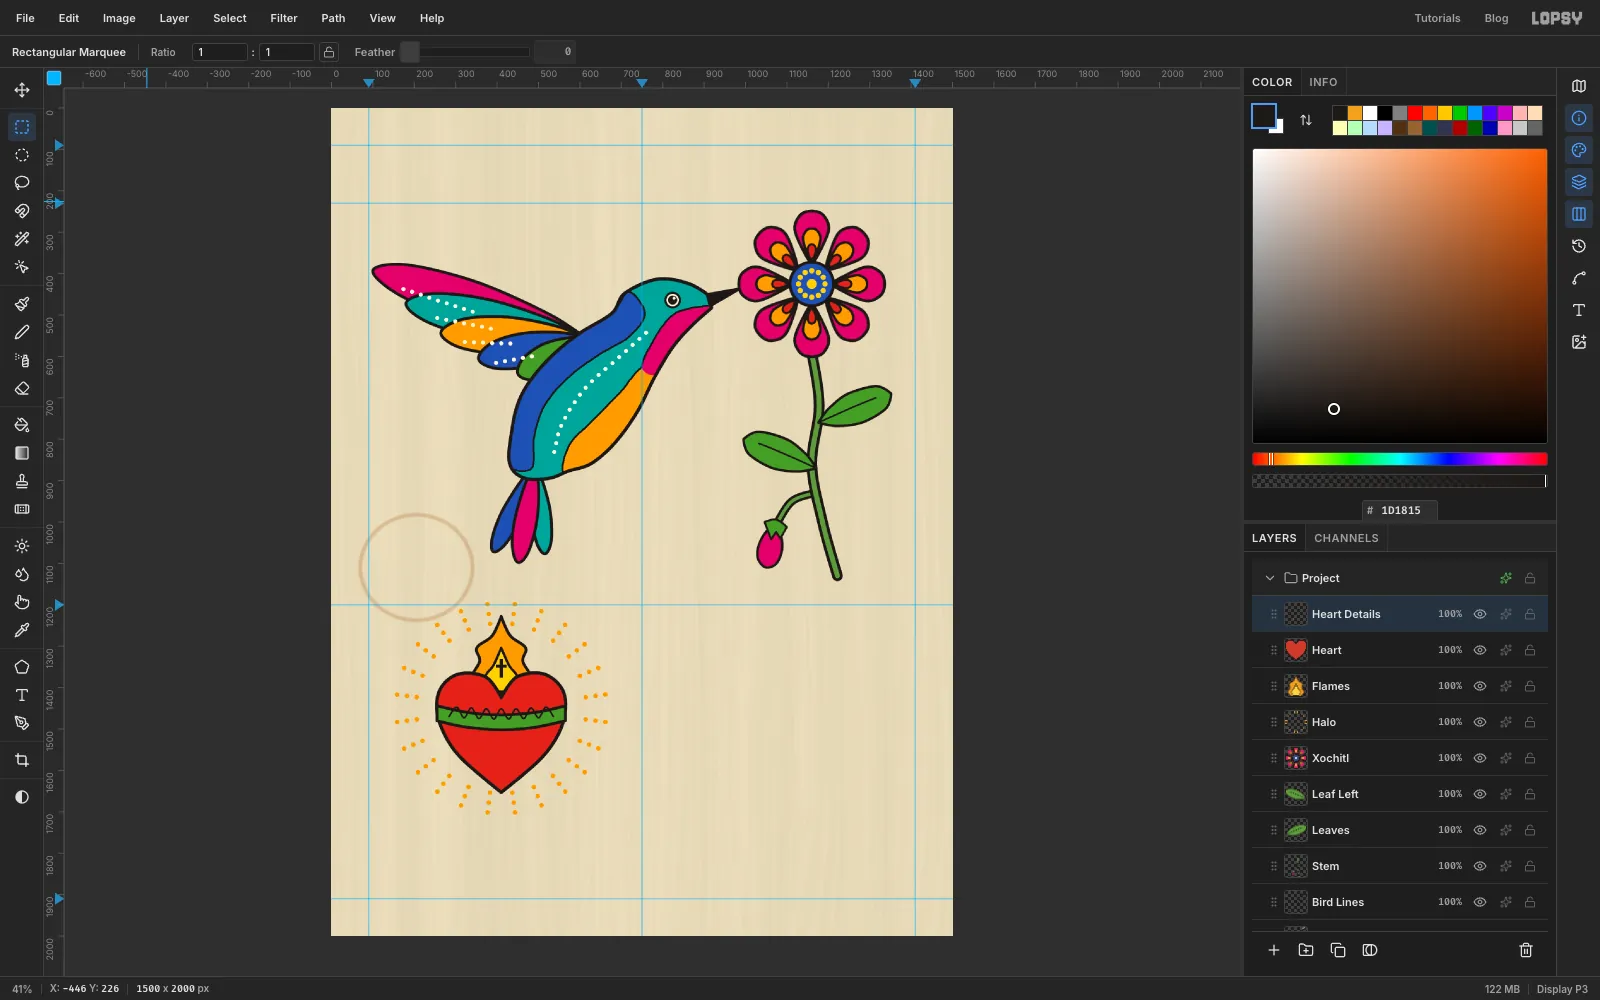
Add a layer named Heart Details. Pen a gently curved band across the heart's upper third and fill and ink it leaf green (7 px). Draw an open zig-zag path along the band, keeping it inside the band's ends. Stroke it 4 px in ink for the thorns.
For the cross, use two thin rectangular marquees filled with ink, sitting wholly inside the yellow flame: a 7 × 45 px upright and a 25 × 7 px crossbar.
-
Cut the sun's rays
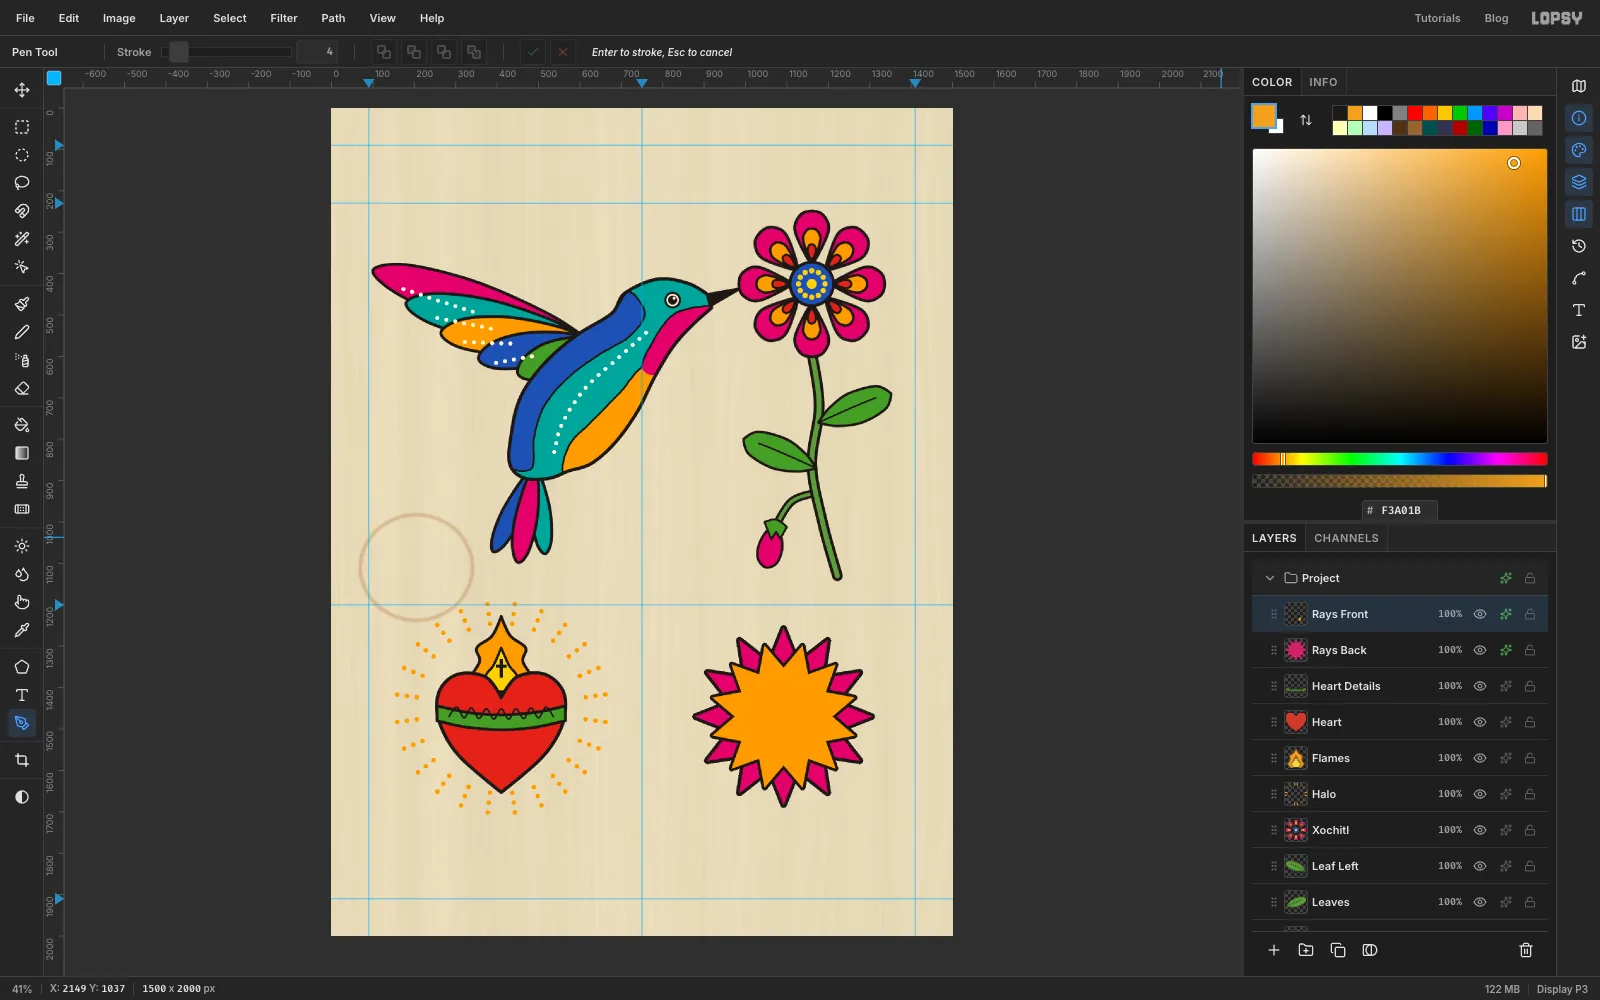
Add a layer named Rays Back. The sun is centred near (1092, 1470); drop a temporary vertical and horizontal guide through that point to help. With the Pen, click the 24 corners of a twelve-point star and click the first one again to close it. Plain clicks keep every corner sharp. Put a point every 30° around the centre, about 214 px out, starting straight up. Put a valley halfway between each pair of points, about 132 px out. The pointer position in the status bar shows where you are.
Click Path to Selection, then Delete Path, and fill it magenta. In its effects drawer turn on Stroke: Width 8, ink, position Outside.
Add Rays Front and do the same with a smaller star, points at 178 px and valleys at 118 px, turned half a step so its points fall between the magenta ones. Fill it marigold and give it a Stroke of Width 7, ink, Outside.
-
Paint the sun's face
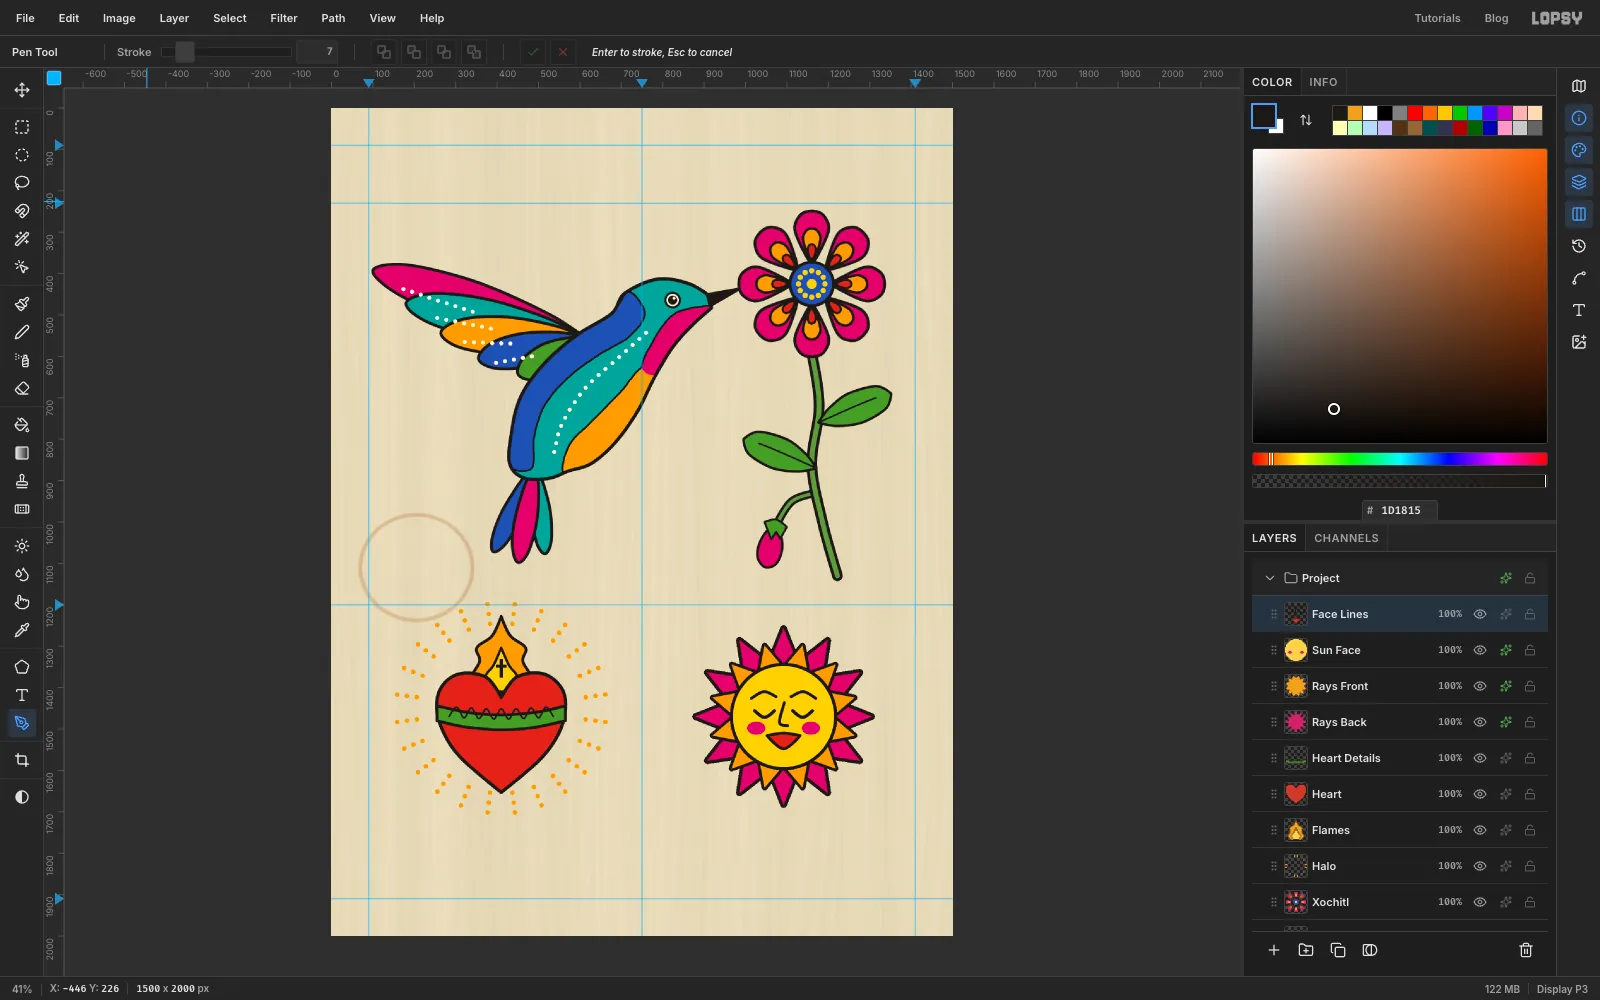
Press Cmd+D and add a layer named Sun Face. With the exact-size dialog, make a circle From 970, 1348 To 1214, 1592 (244 px on the sun's centre). Fill it with yellow and give the layer a Stroke effect: Width 8, ink, Outside. Then add two magenta oval cheeks, about 44 × 32 px, centred 66 px either side of the middle and 28 px below it, with the Elliptical Marquee and Fill.
Add a layer named Face Lines. With the Pen, draw each feature as a three-anchor open path and press Enter to stroke it in ink:
- Closed eyes: two shallow U shapes, Stroke 8.
- Eyebrows: two arches above them, Stroke 7.
- Nose: a hooked line, Stroke 7.
For the mouth, pen a closed shape that's flat on top and rounded below. Fill and ink it red with a 7 px line.
-
Make the ribbon tails
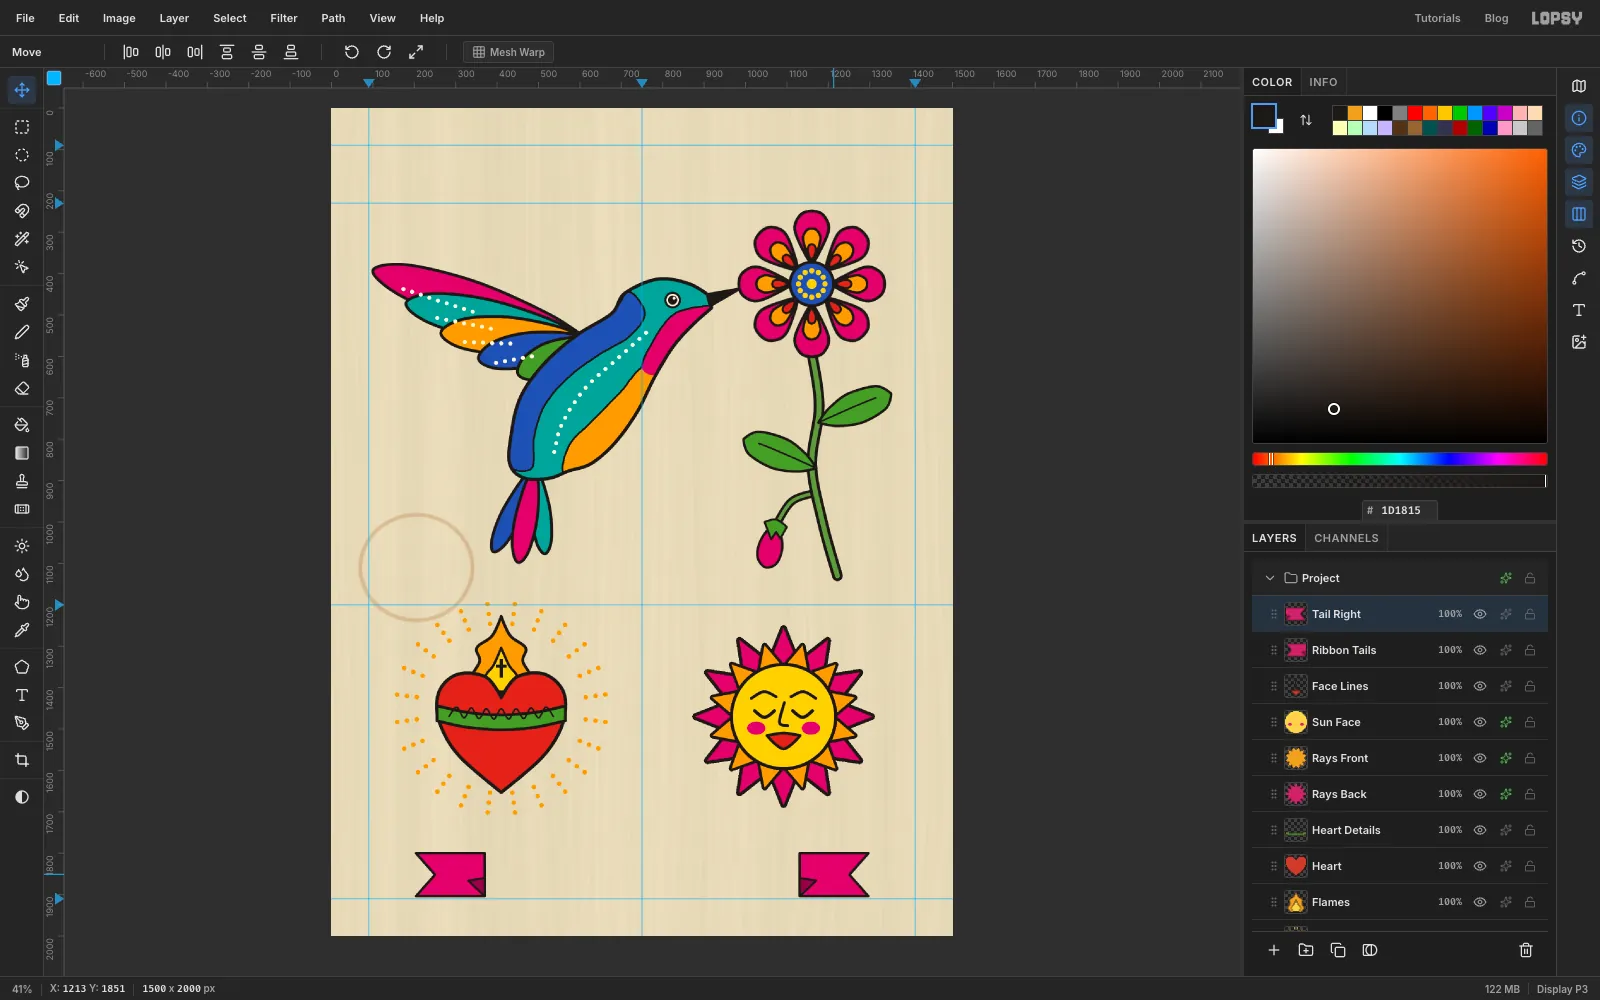
Select Face Lines and add a layer named Ribbon Tails. On the left, pen a swallowtail end about 165 × 105 px: a box with a V notch cut into its outer side, its top edge at about y 1800, its notched end about 205 px from the left edge of the sheet. Fill and ink it magenta (6 px). The band will cover the tail's inner end later, so at that end pen a small triangle along its top-inner corner, about 40 px wide, for the fold where the ribbon tucks under. Fill and ink it dark magenta (5 px).
To make the right tail, marquee the left tail and fold, then press Cmd+C and Cmd+V. Click Flip Horizontal, press Enter, and drag the copy across to the right side, mirrored about the centre guide. Choose Layer → Merge Down to merge it into Ribbon Tails.
-
Letter the banner
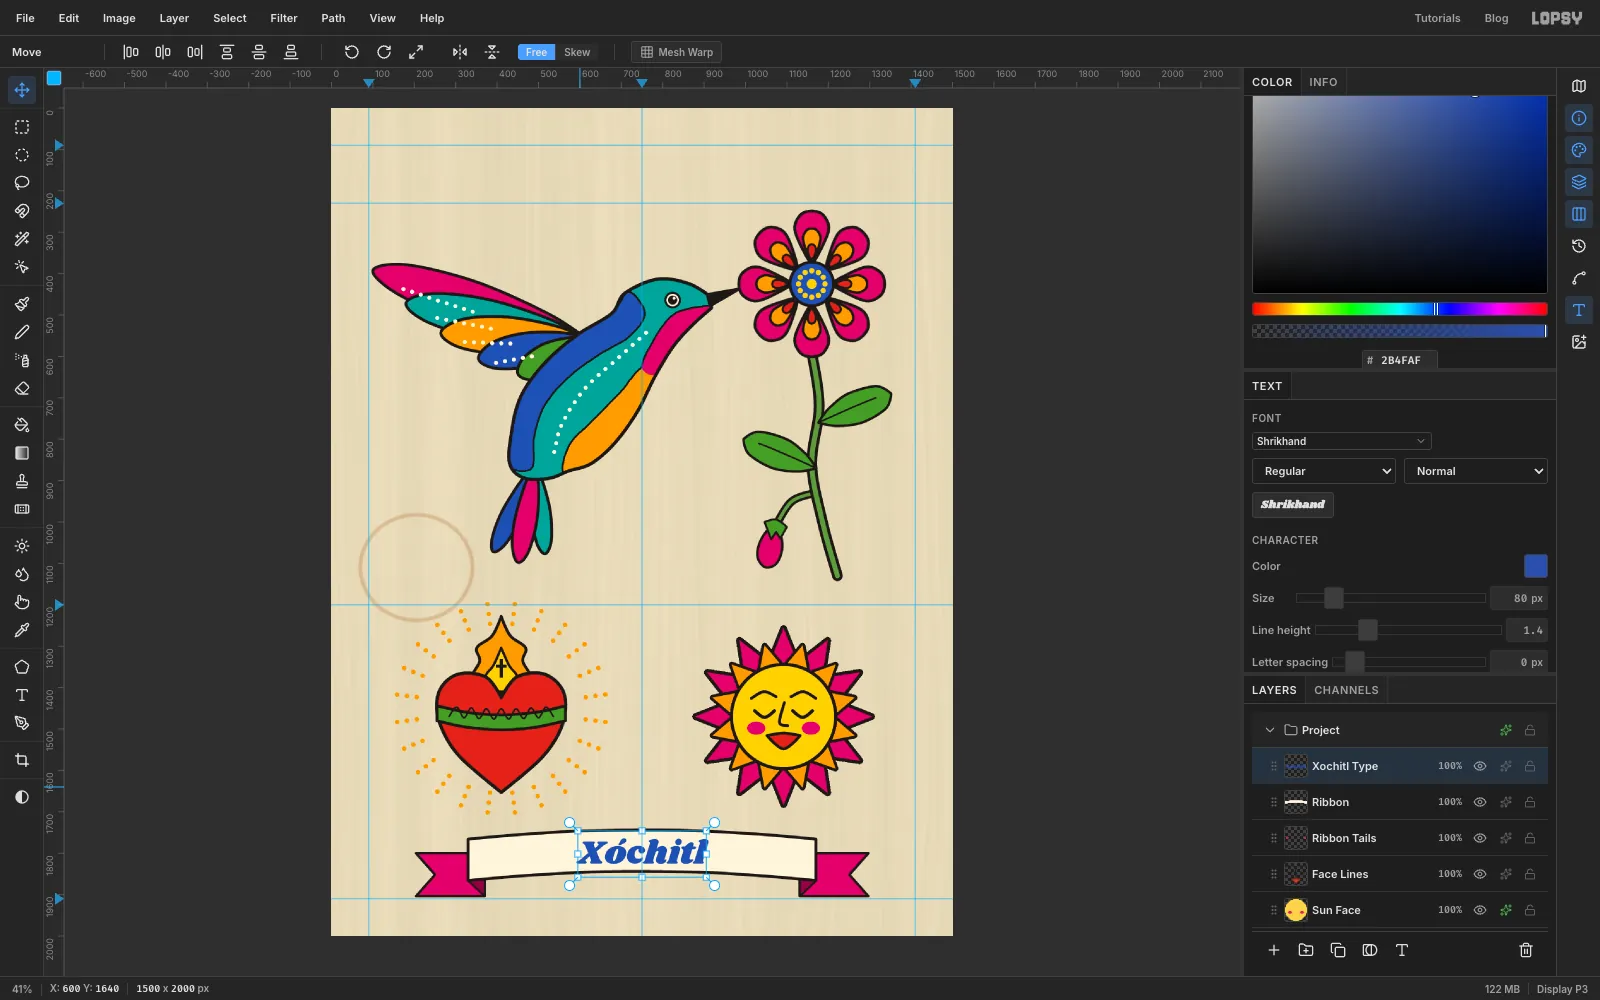
Add a layer named Ribbon. Pen the band across both tails, centred on the 750 guide: about 840 × 100 px, from x 330 to 1170, with its middle at y 1794 and its ends dipping about 20 px lower so it arches gently. Corner-click its four corners and drag the anchors in between for the curve. Fill and ink it cream (7 px).
Pick the Text tool (T). Choose Shrikhand at 80 px, set Letter spacing to 0 and set the foreground to cobalt . Click in an empty patch of paper and type
Xóchitl, then press Tab to commit.With the Move tool, drag the word into the band and centre it on the 750 guide, with equal space above the accent and below the baseline.
-
Scatter four sparkles
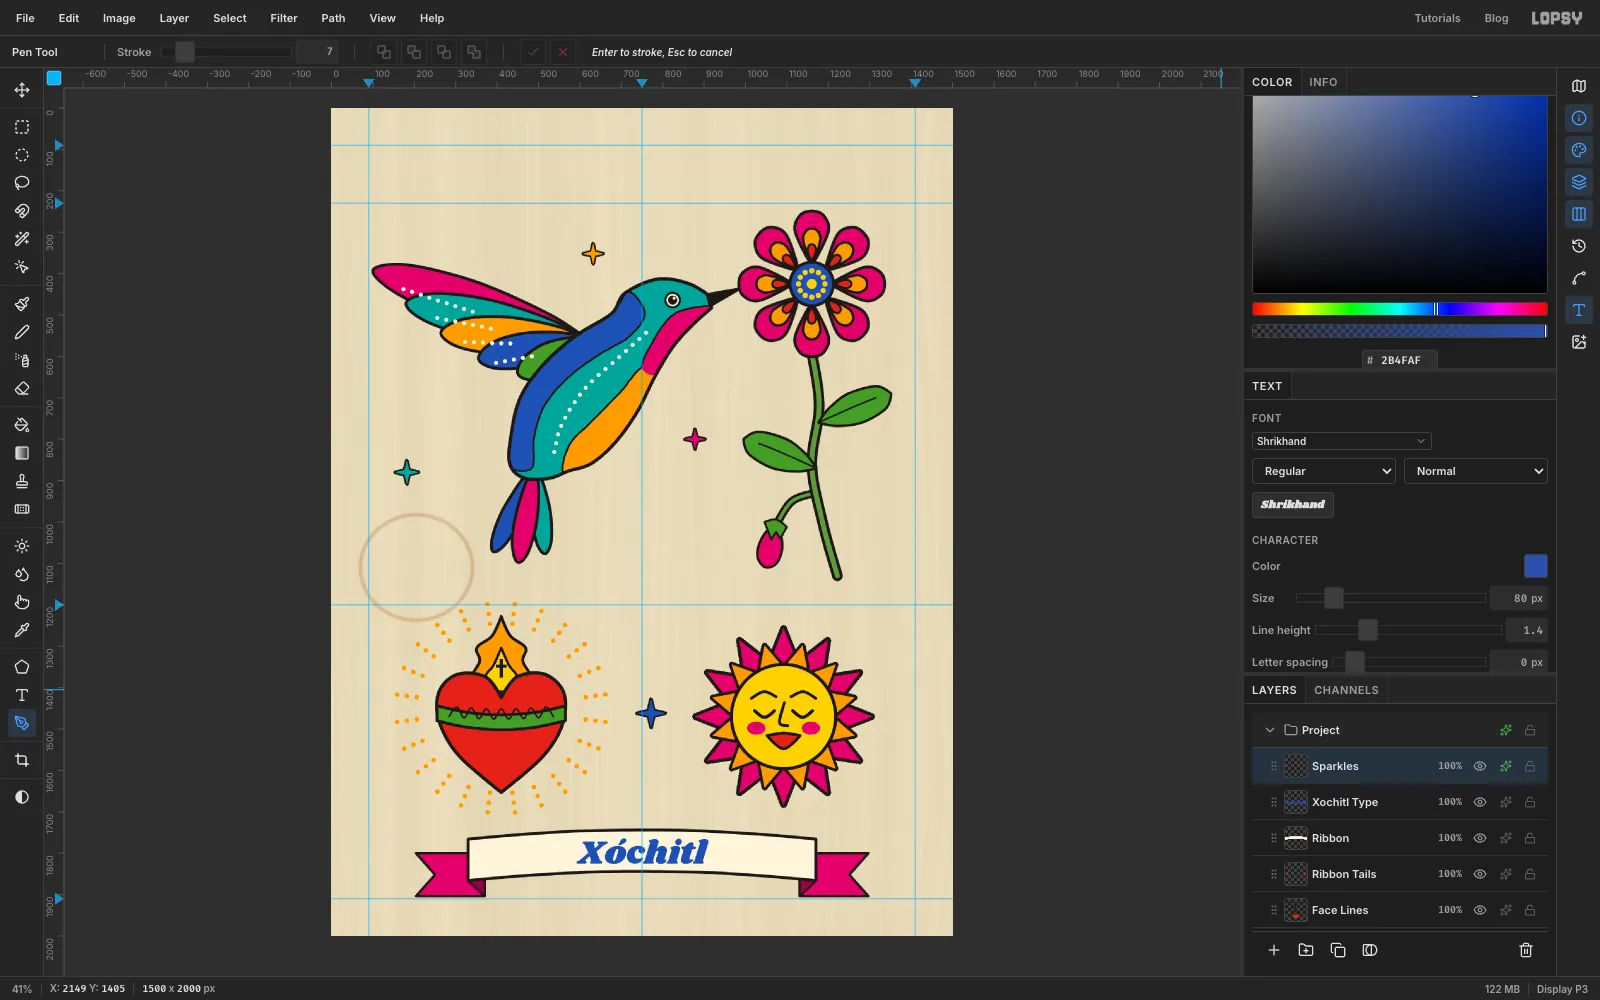
Select Xochitl Type and add a layer named Sparkles. That puts it above the banner text. Put four four-point sparkles, each about 50 px across with the cobalt one about 70 px, in the empty bays:
- Turquoise under the wing
- Marigold above the bird's back
- Magenta between the belly and the leaves
- A larger cobalt one between the heart and the sun
Click each one's 8 corners with the Pen: four long points and four short valleys about a quarter of the way out. Then Path to Selection, Delete Path and Edit → Fill. When all four are done, give the layer a Stroke effect: Width 4, ink, Outside.
-
Set the title and prices
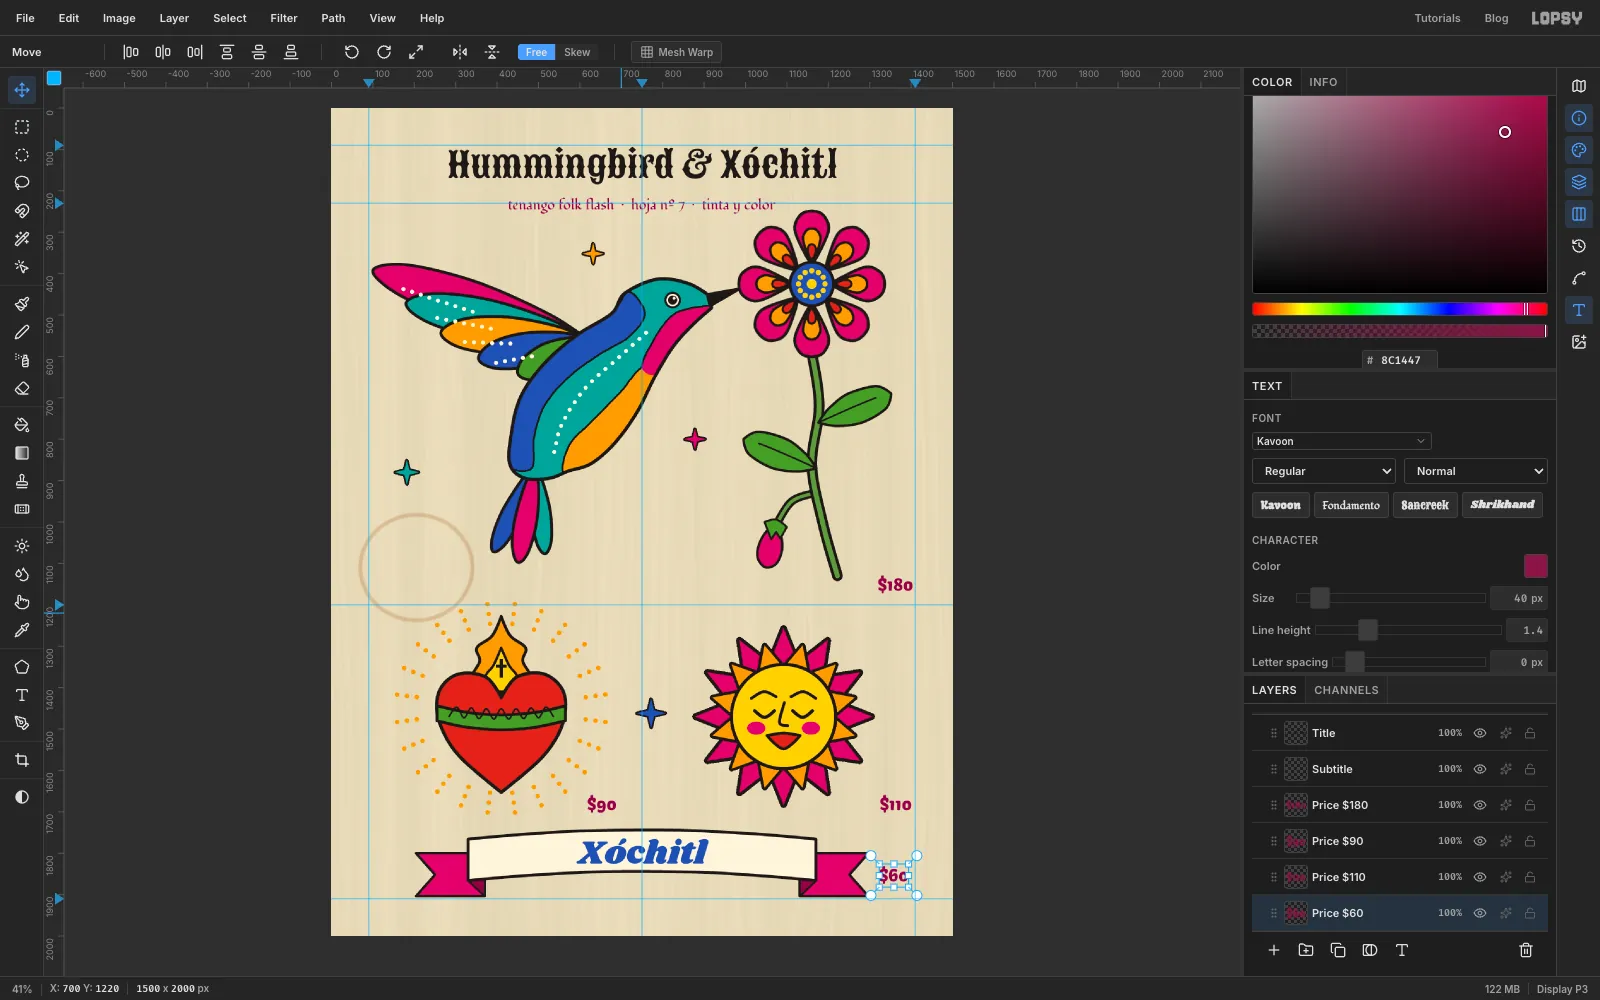
With the Sparkles layer selected, pick the Text tool. Before you start, check that Letter spacing in the Text panel is still 0, since Lopsy keeps the last value you used. Make each text layer in an empty spot and press Tab to commit it, then drag it into place with the Move tool:
- Title: Hummingbird & Xóchitl in Sancreek, 86 px, ink, centred on the 750 guide with its cap tops about 105 px from the top.
- Subtitle: tenango folk flash · hoja nº 7 · tinta y color in Fondamento, 34 px, dark magenta , centred about 35 px under the title.
- Prices in Kavoon, 40 px, dark magenta: $180 at the bottom right of the bird's bay, $90 right of the heart's lower edge, $110 level with it beside the sun, and $60 just past the right ribbon tail.
-
Rule the border
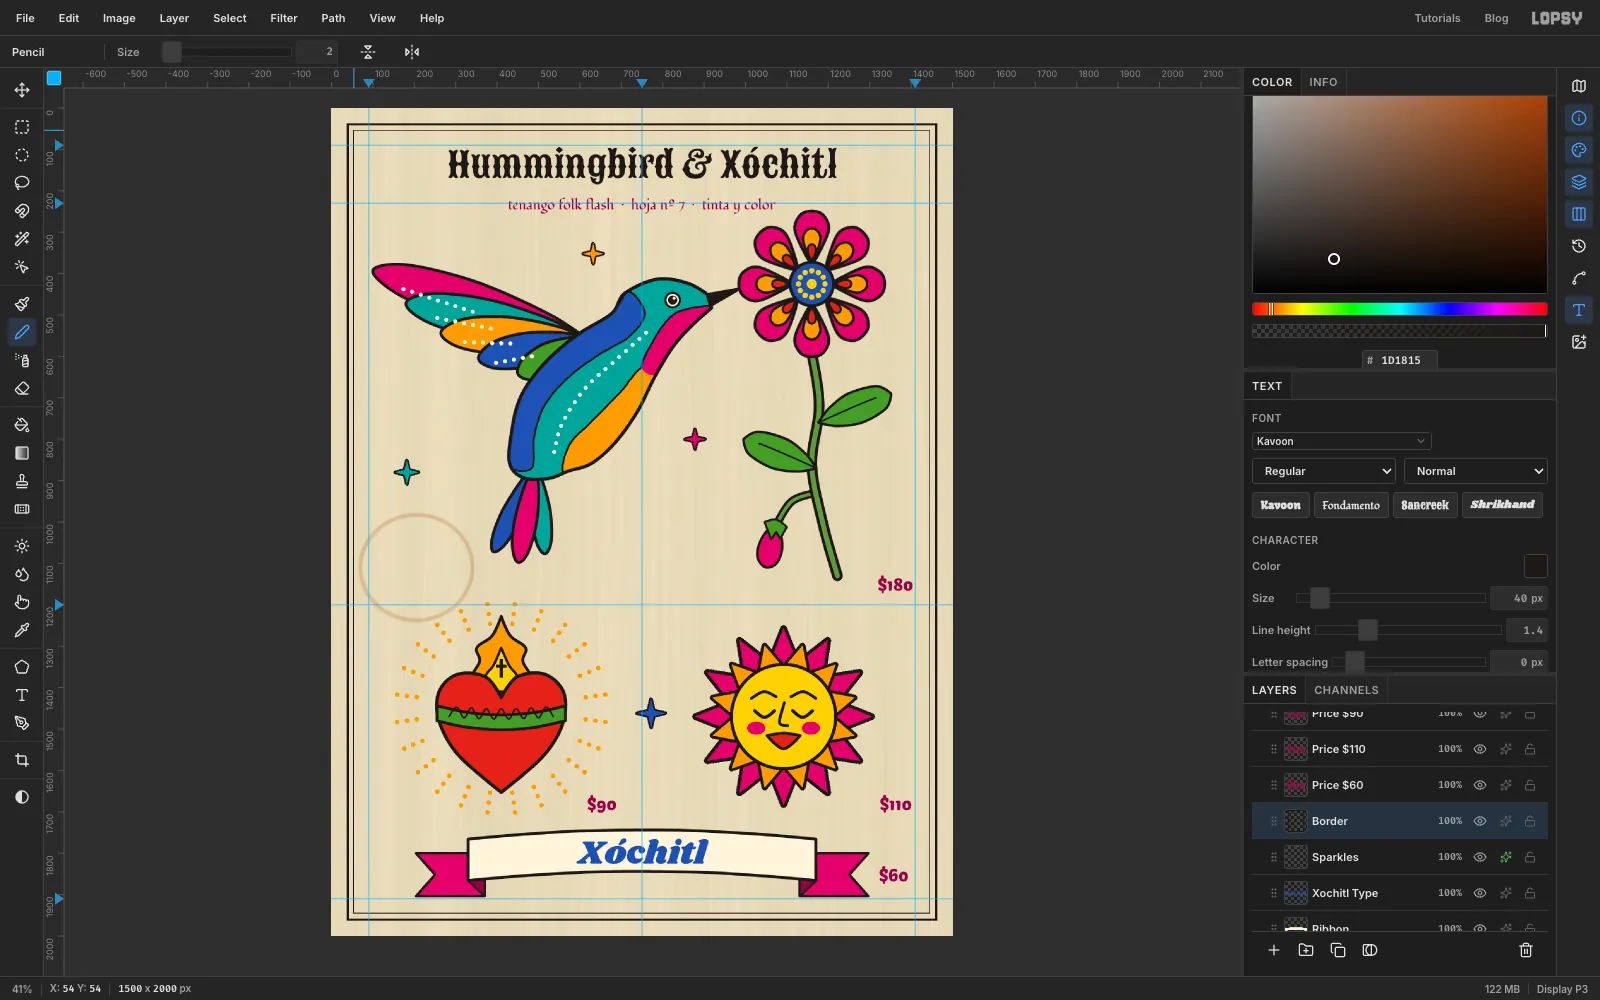
Select Sparkles and add a layer named Border. Pick the Pencil (N), set Size to 5 and use ink. Click near the top-left corner, about 40 px in from each edge. Then hold Shift and click the other three corners in turn, and finish back on the first one. Each Shift-click draws a straight line from the last point.
Set Size to 2 and draw a second rectangle the same way, 54 px in from the edges.
-
Tape down the corners
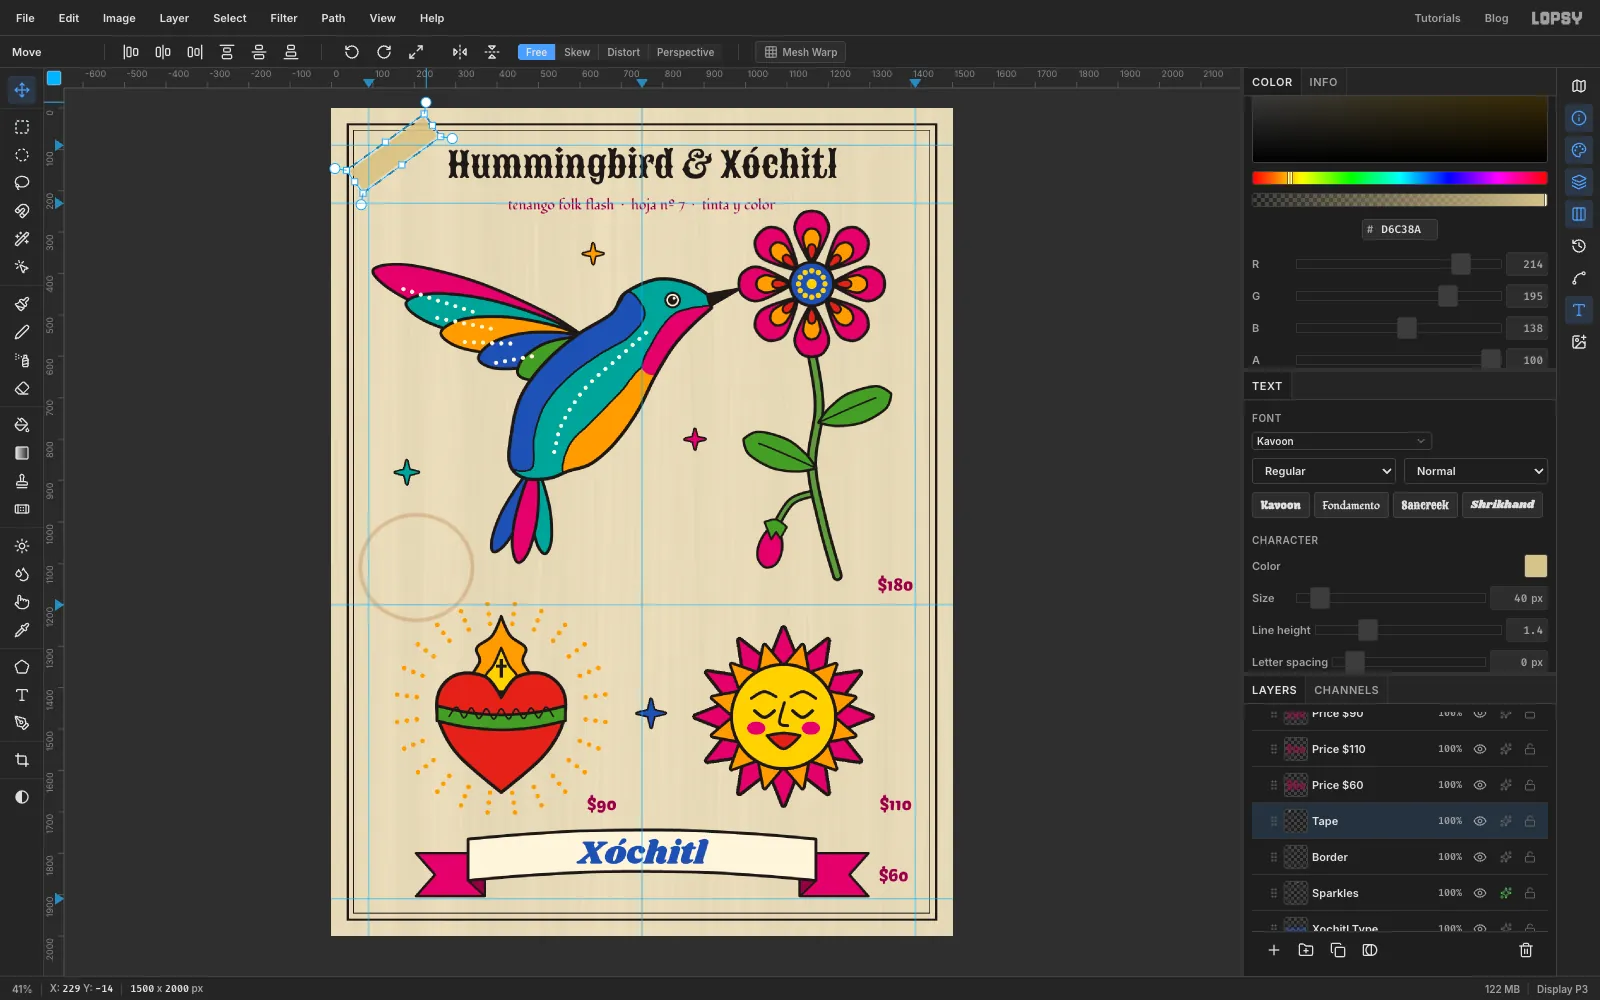
Add a layer named Tape. Drag a rectangular marquee about 220 × 56 px near the top-left corner and fill it with tape at 90% alpha (set A to 90 in the Color panel). Then set A back to 100. With the selection still active, run Filter → Add Noise…: Amount 10, Mono.
Press Cmd+D, draw a marquee around the strip and, with the Move tool, drag just outside the top-right corner handle to rotate it about −36° across the corner. Press Enter and Cmd+D. Then marquee the rotated strip again, press Cmd+C and Cmd+V, click Flip Horizontal and drag the copy to the top-right corner, the same way you made the ribbon tail. Choose Layer → Merge Down to merge it into Tape.
-
Group the designs and adjust the layout
Group each design so it moves as one. Click its top layer, Shift-click its bottom layer and choose Layer → Group Layers. Then double-click the new group's name and rename it:
- Colibri: Xochitl down to Tail
- Corazon: Heart Details down to Halo
- Sol: Face Lines down to Rays Back
- Liston: Xochitl Type down to Ribbon Tails
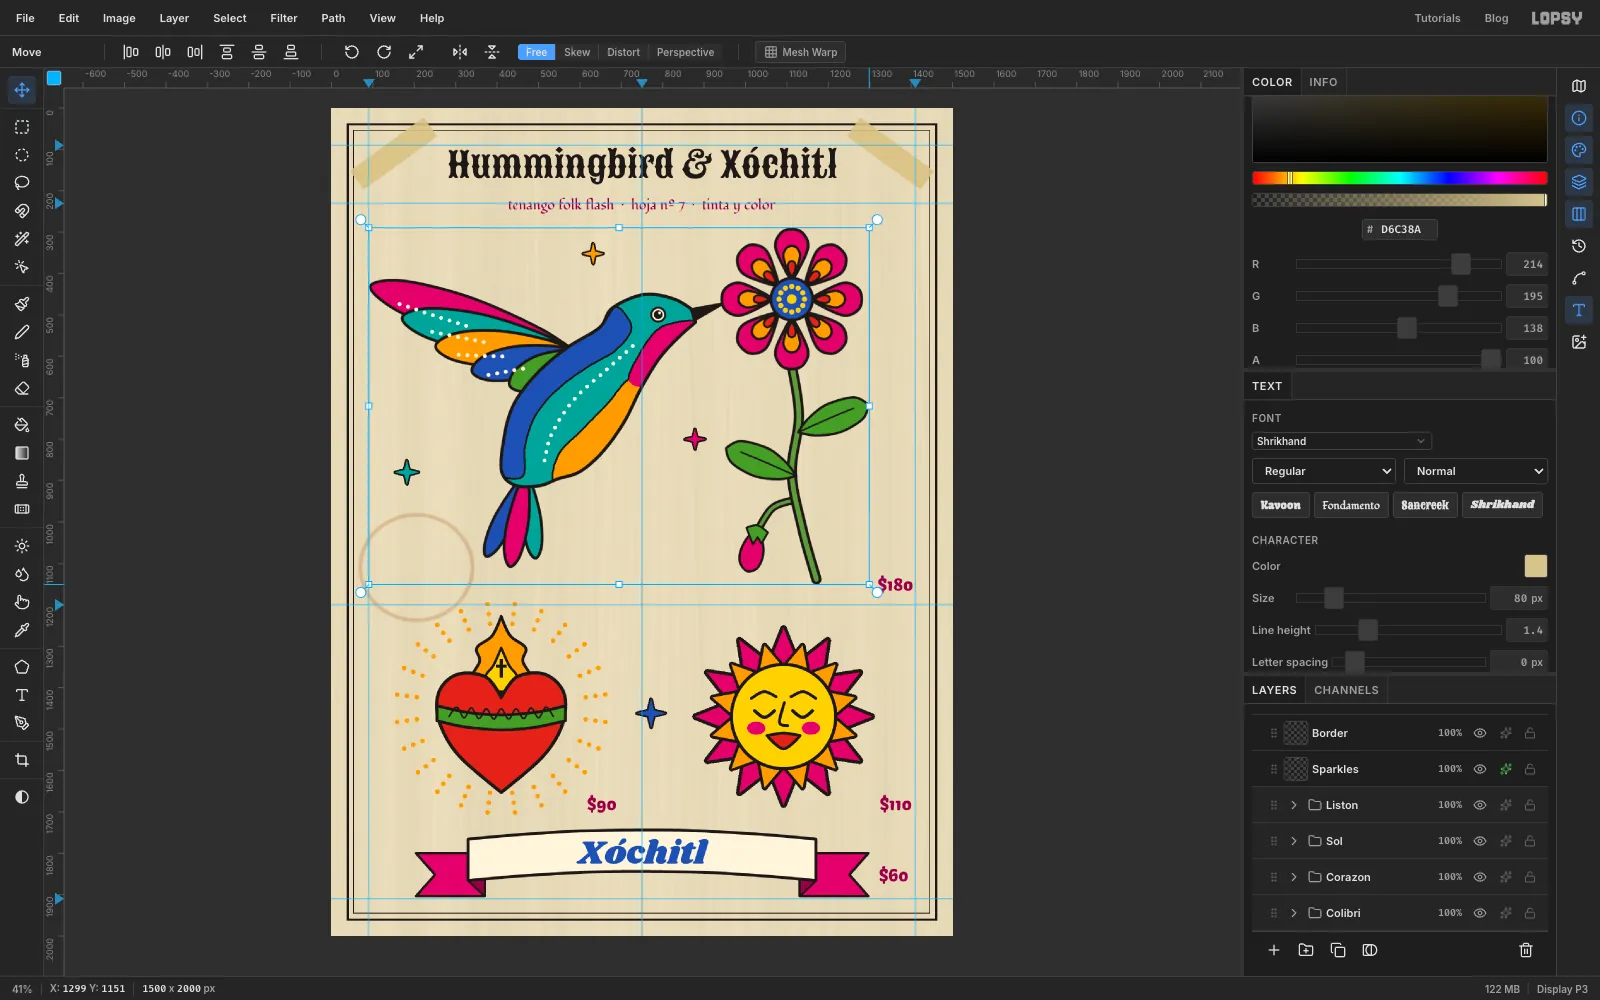
Then select the Colibri group row, press Cmd+D and, with the Move tool, drag the whole bird and flower down about 44 px. That opens up room under the subtitle. Next, hold Cmd and drag the group's bottom-right handle up and left a little to shrink it to about 96%. The top-left corner stays put, and a clear gap opens above the heart's halo. Press Enter.
-
Add print grain
Select Tape and add a layer named Grain above it. It sits over all the artwork but under the type, so the lettering stays crisp. Fill it with mid-grey , run Filter → Add Noise… at 28, Mono, then set it to Overlay at 22%. It gives the flat colour the slightly speckled look of ink on paper.
Hide the guides with Cmd+; to check the sheet, then choose File → Save Project and File → Export… to save a PNG.