Make a Claymorphism Tattoo Flash Sheet
Build a puffy clay-style tattoo flash sheet in Lopsy with Grow and Shrink outlines, feathered crescent shading and a plasticine grain.
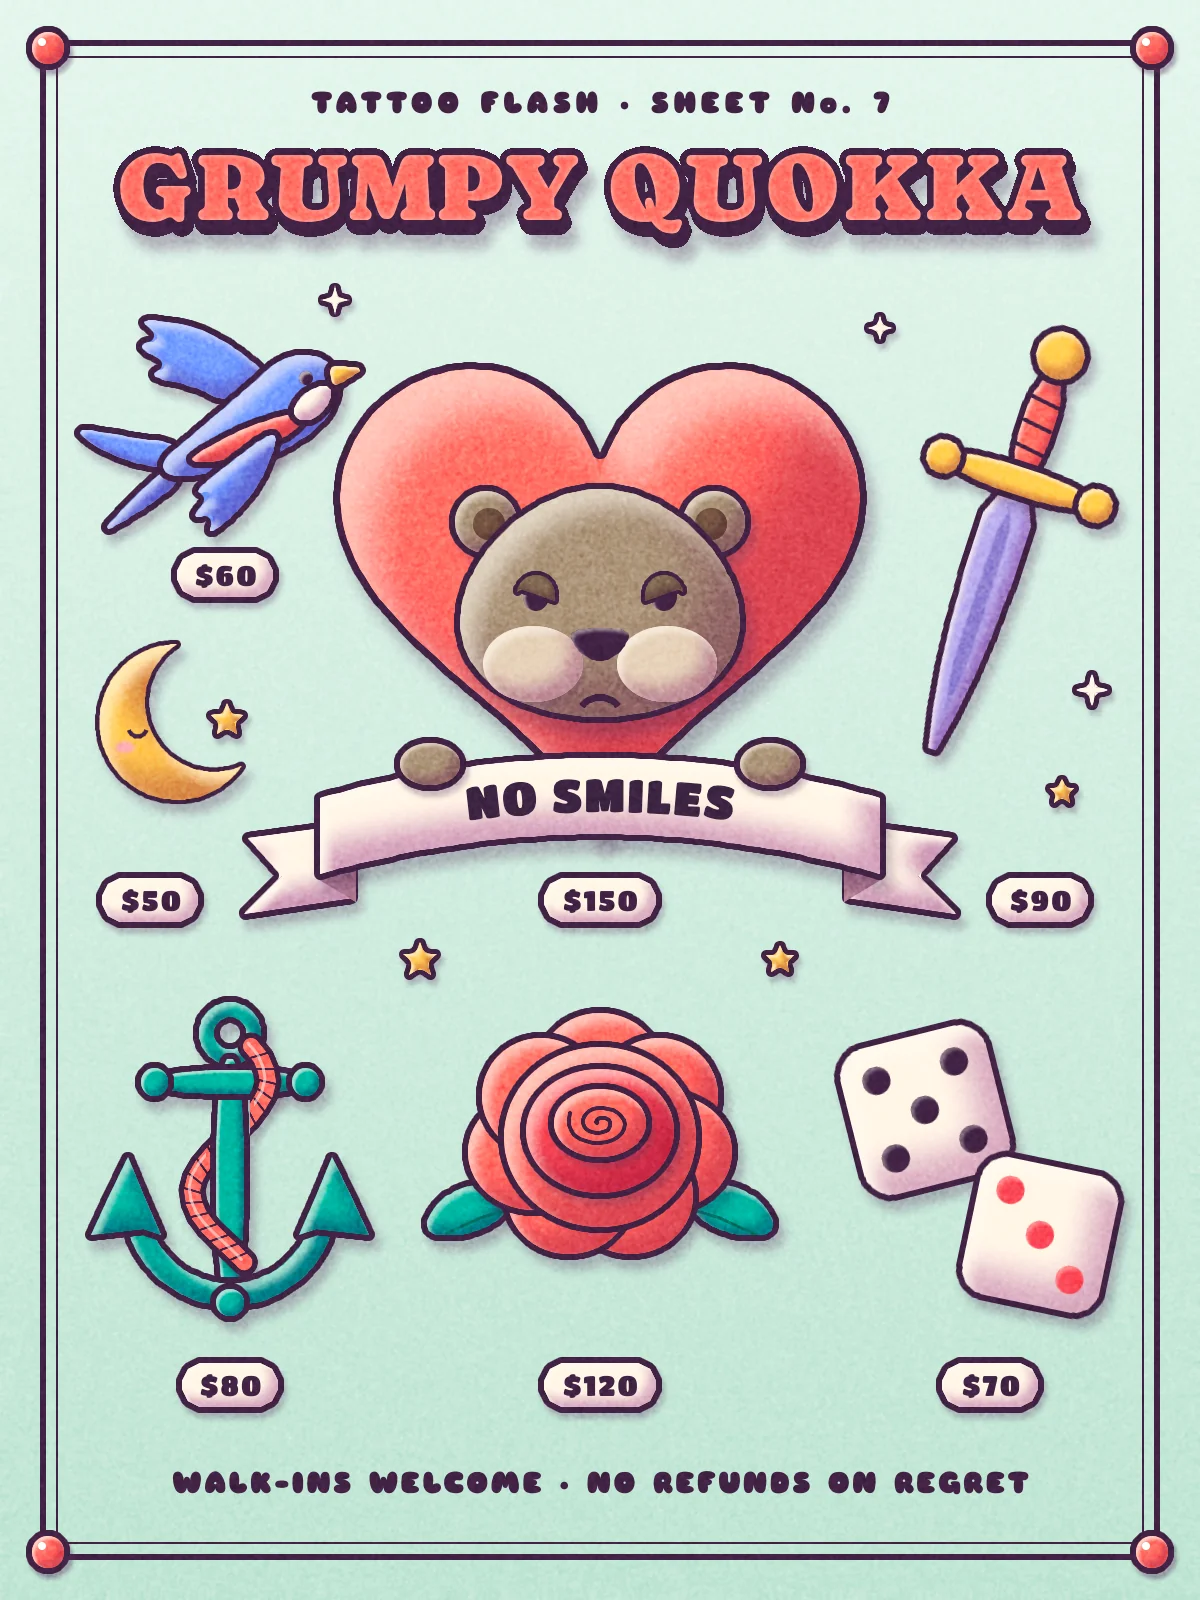
Claymorphism makes flat shapes look like soft, rounded objects modelled from plasticine. You see pastel colours, a darker crescent where each shape curves away from the light, a pale rim where it catches the light, and a soft shadow underneath. A tattoo flash sheet is the page of ready-made designs that hangs on a tattoo shop wall. It shows classic motifs, a bold dark outline round every shape, and a price under each design.
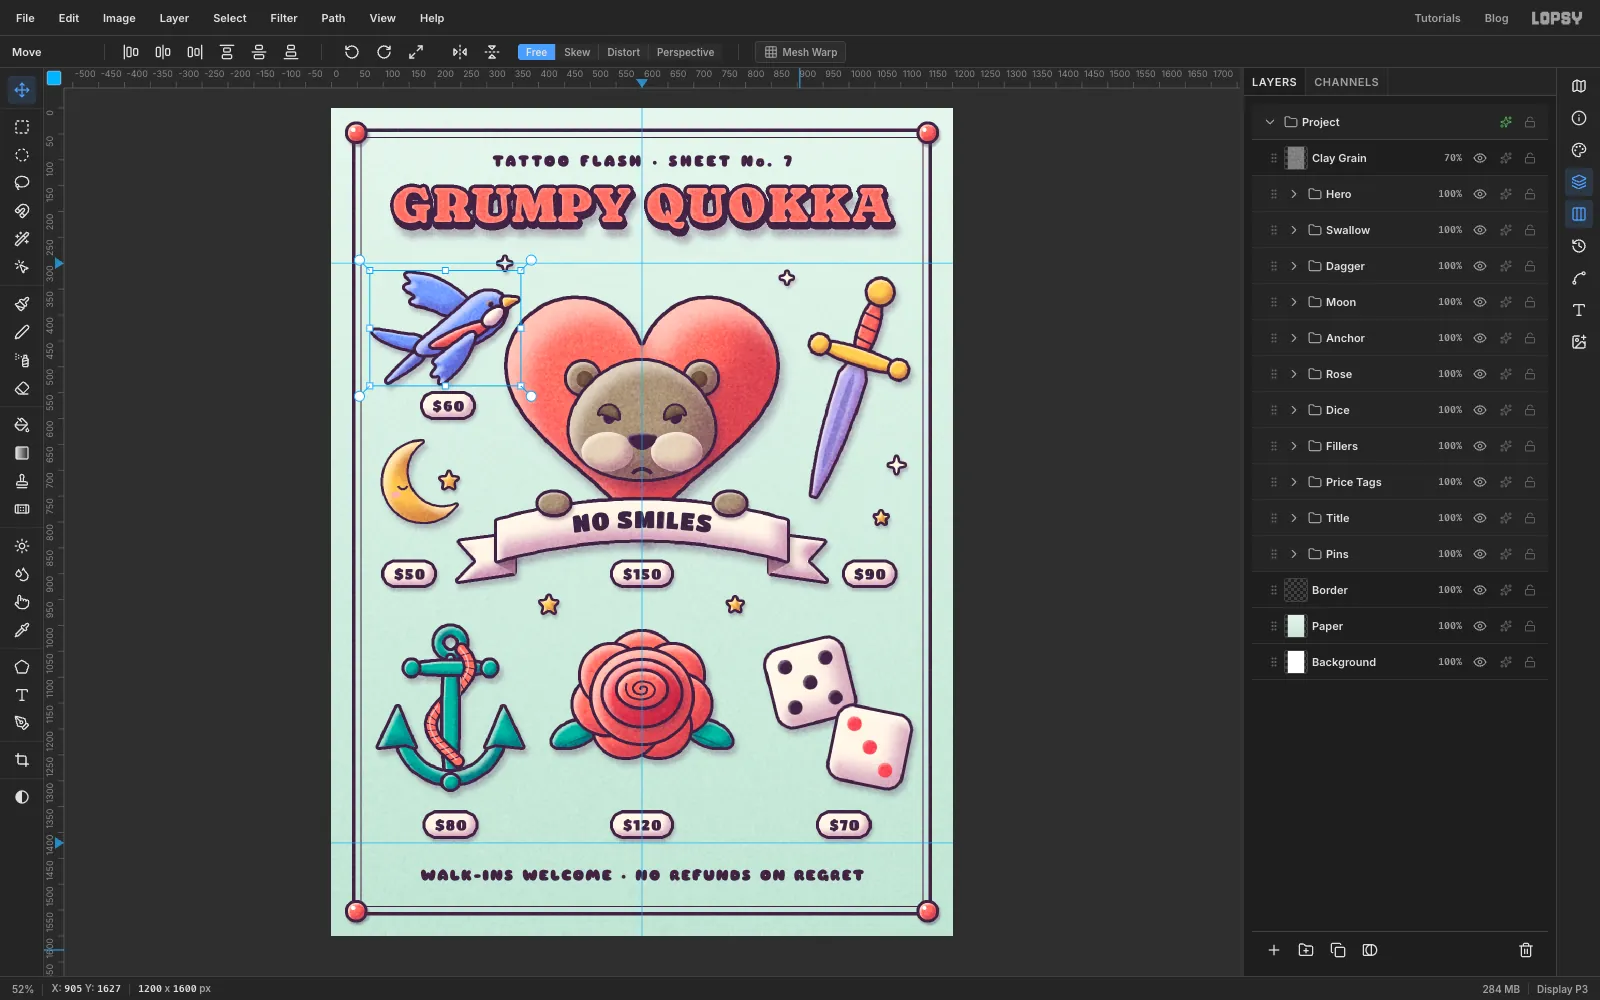
In this tutorial you'll put the two together in Grumpy Quokka, a 1200 × 1600 flash sheet. The quokka is famous for looking like it's always smiling, so the joke is a quokka that refuses to: it frowns out of a heart above a banner that says NO SMILES. Around it go six classic flash designs, a swallow, a dagger, a moon, an anchor, a rose and a pair of dice, all as puffy clay.
Every clay shape on the sheet gets the same four moves:
- Outline: select the shape, Grow the selection and fill it plum, then Shrink it back and fill the colour. That leaves a soft, even outline.
- Shade: fill the shape with a darker tint on a new layer, then slide the selection up and to the left, feather it and delete. What's left is a soft crescent on the lower right. Merge it down.
- Highlight: the same with a lighter tint and a small slide down and to the right. That leaves a bright rim on the top-left edge.
- Shadow: add a soft plum Drop Shadow to the layer.
You'll learn all four on the heart, then repeat them for every other piece.
The fonts are free Google Fonts: Caprasimo for the title, Titan One for the banner and prices, and Sniglet (ExtraBold) for the small type.
The palette:
-
Paper
-
Ink
outlines, type, eyes
-
Coral
-
shade
-
highlight
-
Quokka fur
-
shade
-
highlight
-
Cheeks
-
inner ears
-
eyelids
-
Cream
banner, tags, dice
-
shade
-
fold
-
Swallow blue
-
shade
-
Teal
-
shade
-
leaf veins
-
Butter
-
shade
-
Blade lilac
-
fuller
-
Deep coral
rose cup, dice pips
-
Drop shadow
-
Create a portrait canvas
Open Lopsy. In the New Document dialog, set Width to
1200and Height to1600pixels, keep the White background and click Create.Double-click Layer 1 and rename it
Paper. Lopsy puts everything inside a top-level Project group, and new layers land above whichever layer you have selected.
-
Paint the mint paper
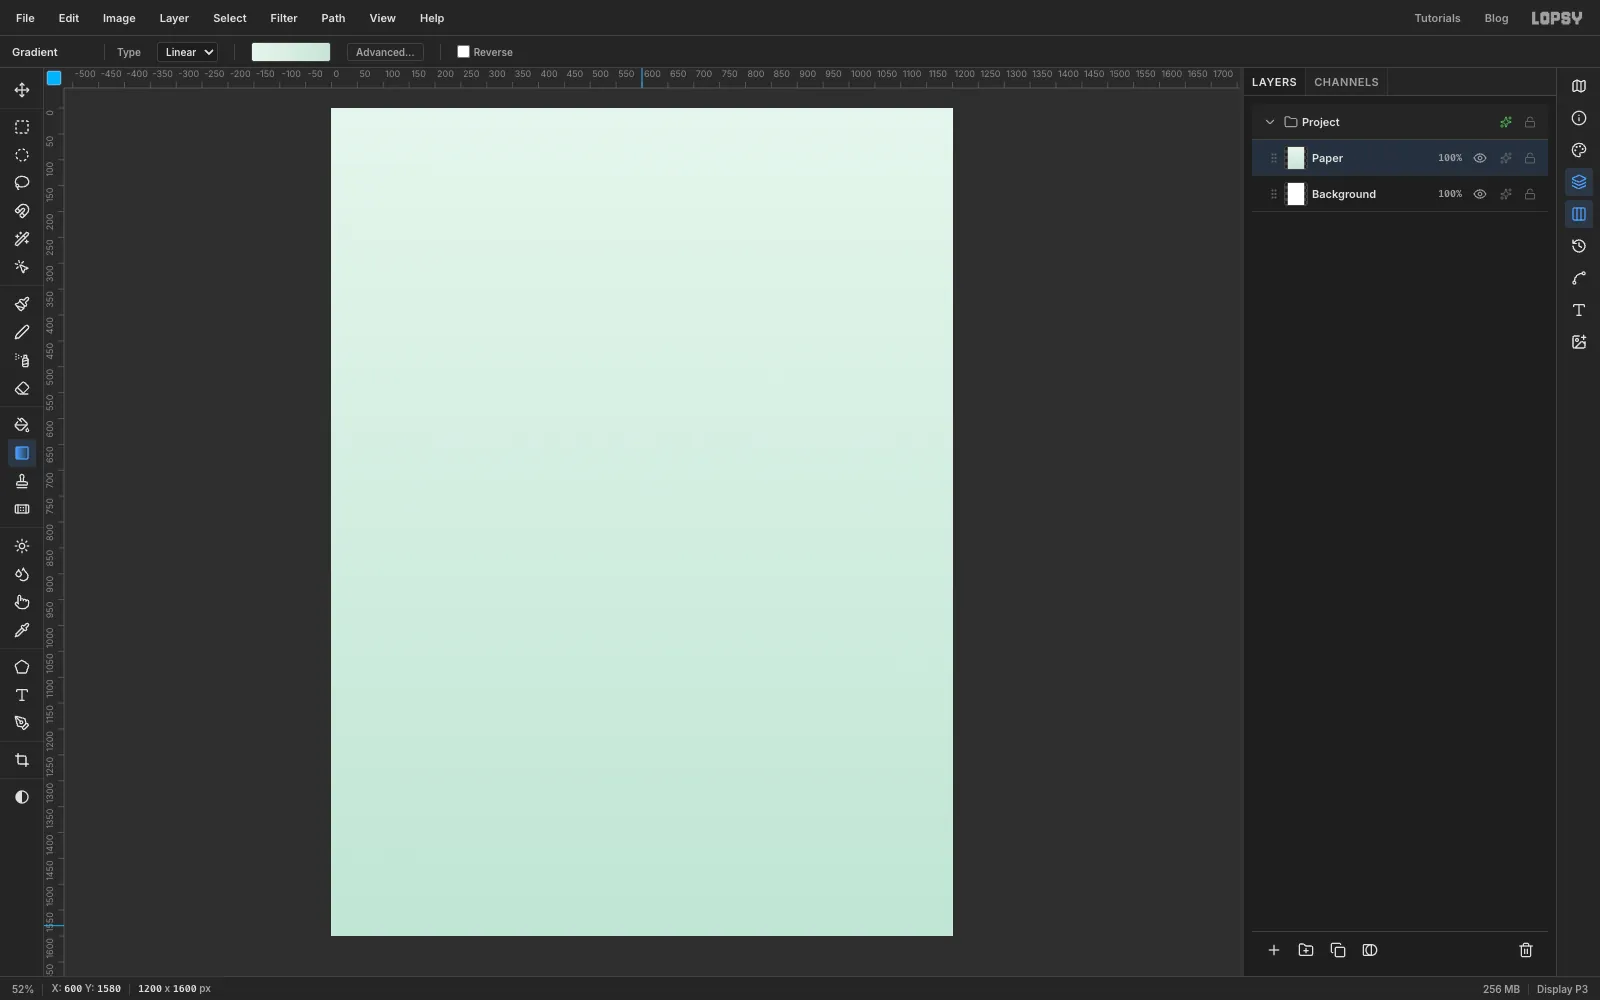
Pick the Gradient tool, click Advanced… and set two stops: at the start and at the end. Click Done. With nothing selected, drag from the top of the canvas straight down to the bottom.
Keep the paper pale and calm. The clay pieces will carry all the colour.
-
Add a double border and guides
Add a layer named
Border. Pick the Rectangular Marquee and click once on the canvas without dragging. A dialog asks for exact corners: enter From40,40and To1160,1560. Set the foreground to and choose Edit → Fill. Then choose Select → Shrink…, enter6, and press Delete. That leaves a 6 px frame.Make a second rectangle the same way, 16 px further in (
56,56to1144,1544). Fill it, Shrink by2and delete again. Now you have the classic flash-sheet double line.Add three guides by clicking on the rulers: one on the top ruler at
600for the centre line, and two on the left ruler at300and1420. Those mark the top and bottom of the design area.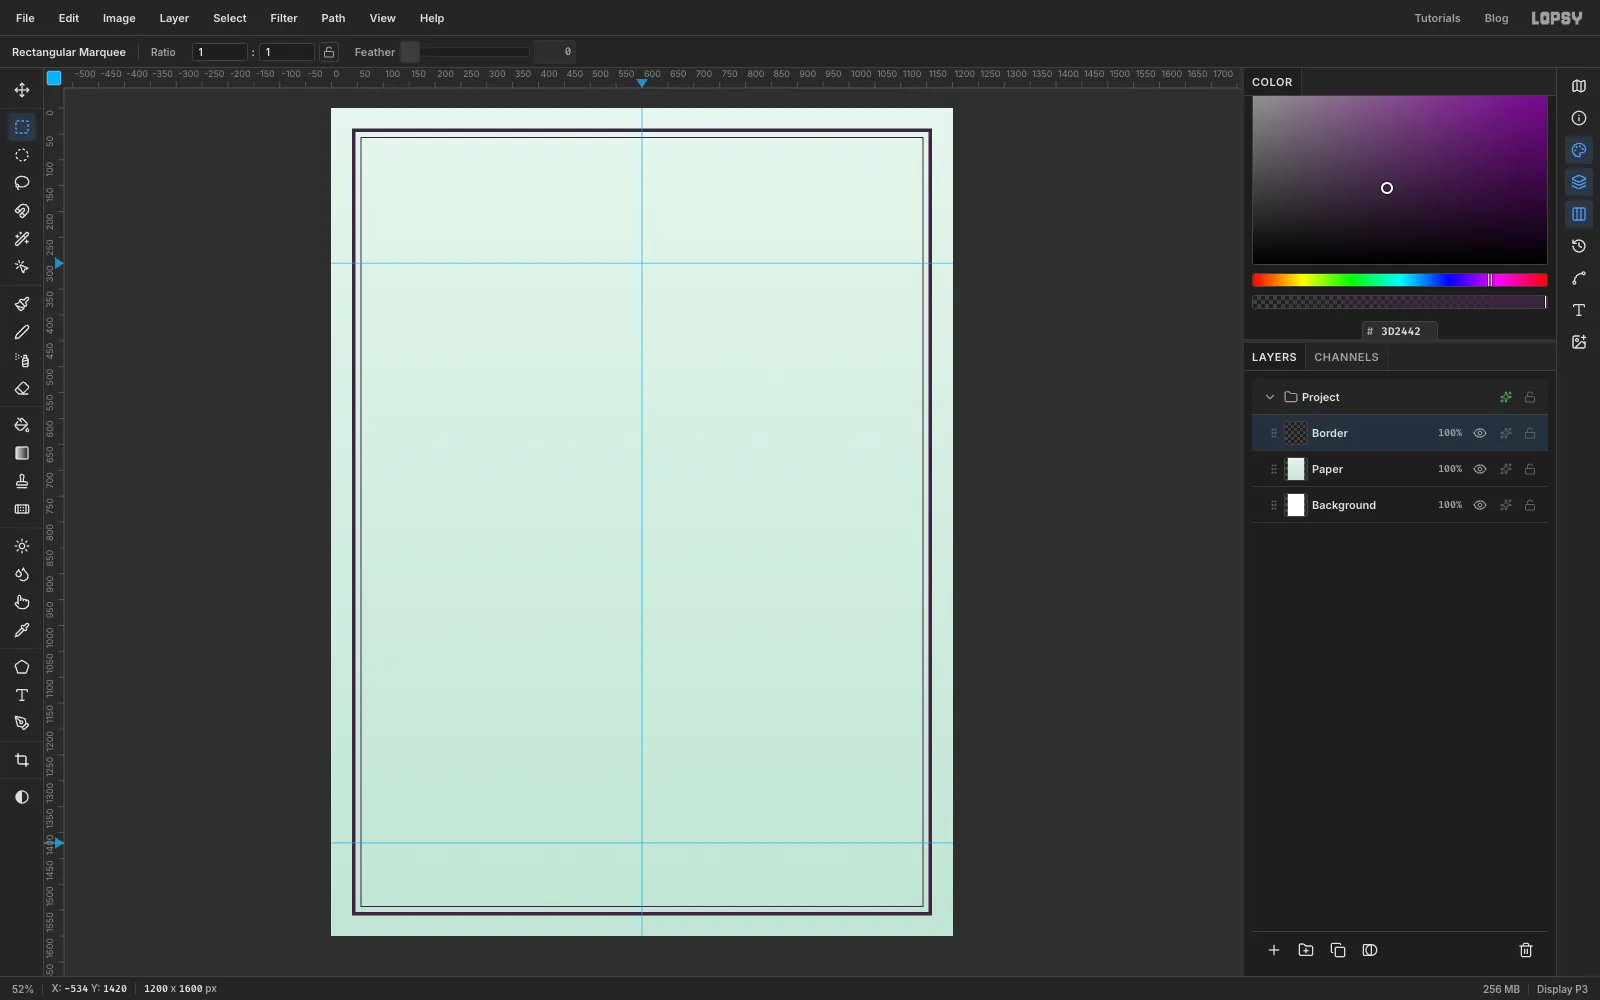
-
Draw the heart with a clay outline
Select Border and click New Group at the bottom of the Layers panel. Name the group
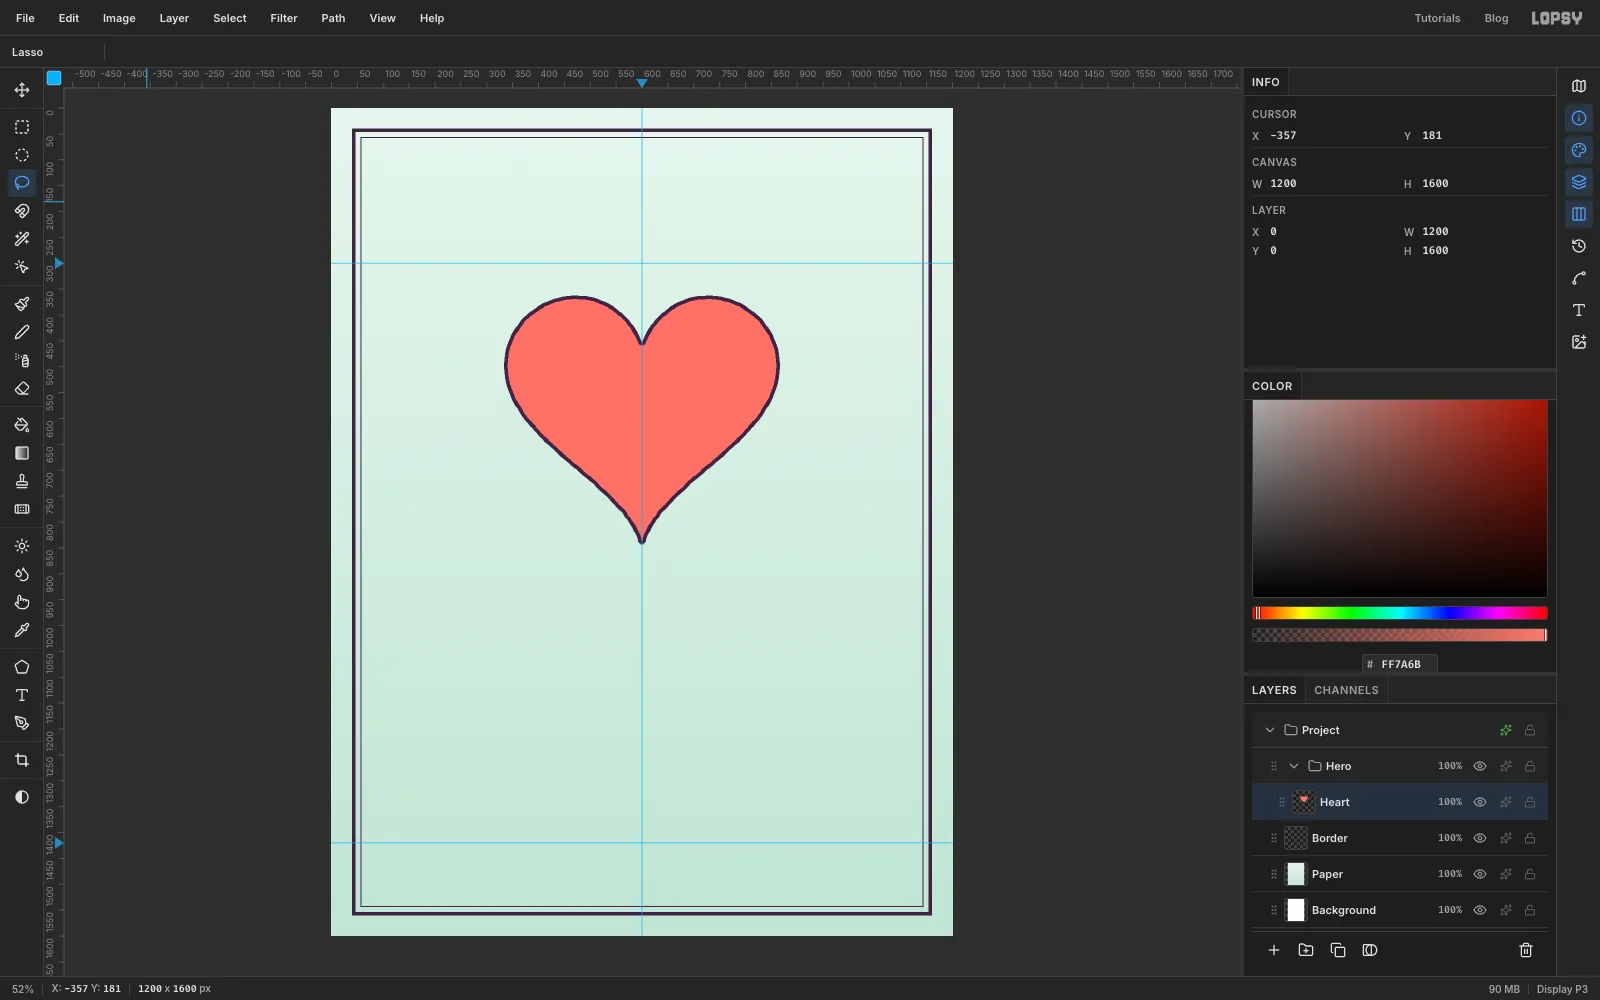
Hero, then click Add Layer and name itHeart. The new layer lands inside the group.Pick the Lasso and drag round a big heart, centred on the middle guide. Its top should sit a little below the top guide and its point a little above the middle of the sheet (it's about 520 px wide). Then make the outline:
- Select → Grow… by
7px, set the foreground to the plum and Edit → Fill. - Select → Shrink… by
7px, set the foreground to coral and fill again.
Deselect with Ctrl+D. Growing and shrinking measure true distances from the edge, so the outline comes out even all the way round and the corners stay soft.
- Select → Grow… by
-
Shade the heart with a shifted selection
This is the trick that turns a flat shape into clay.
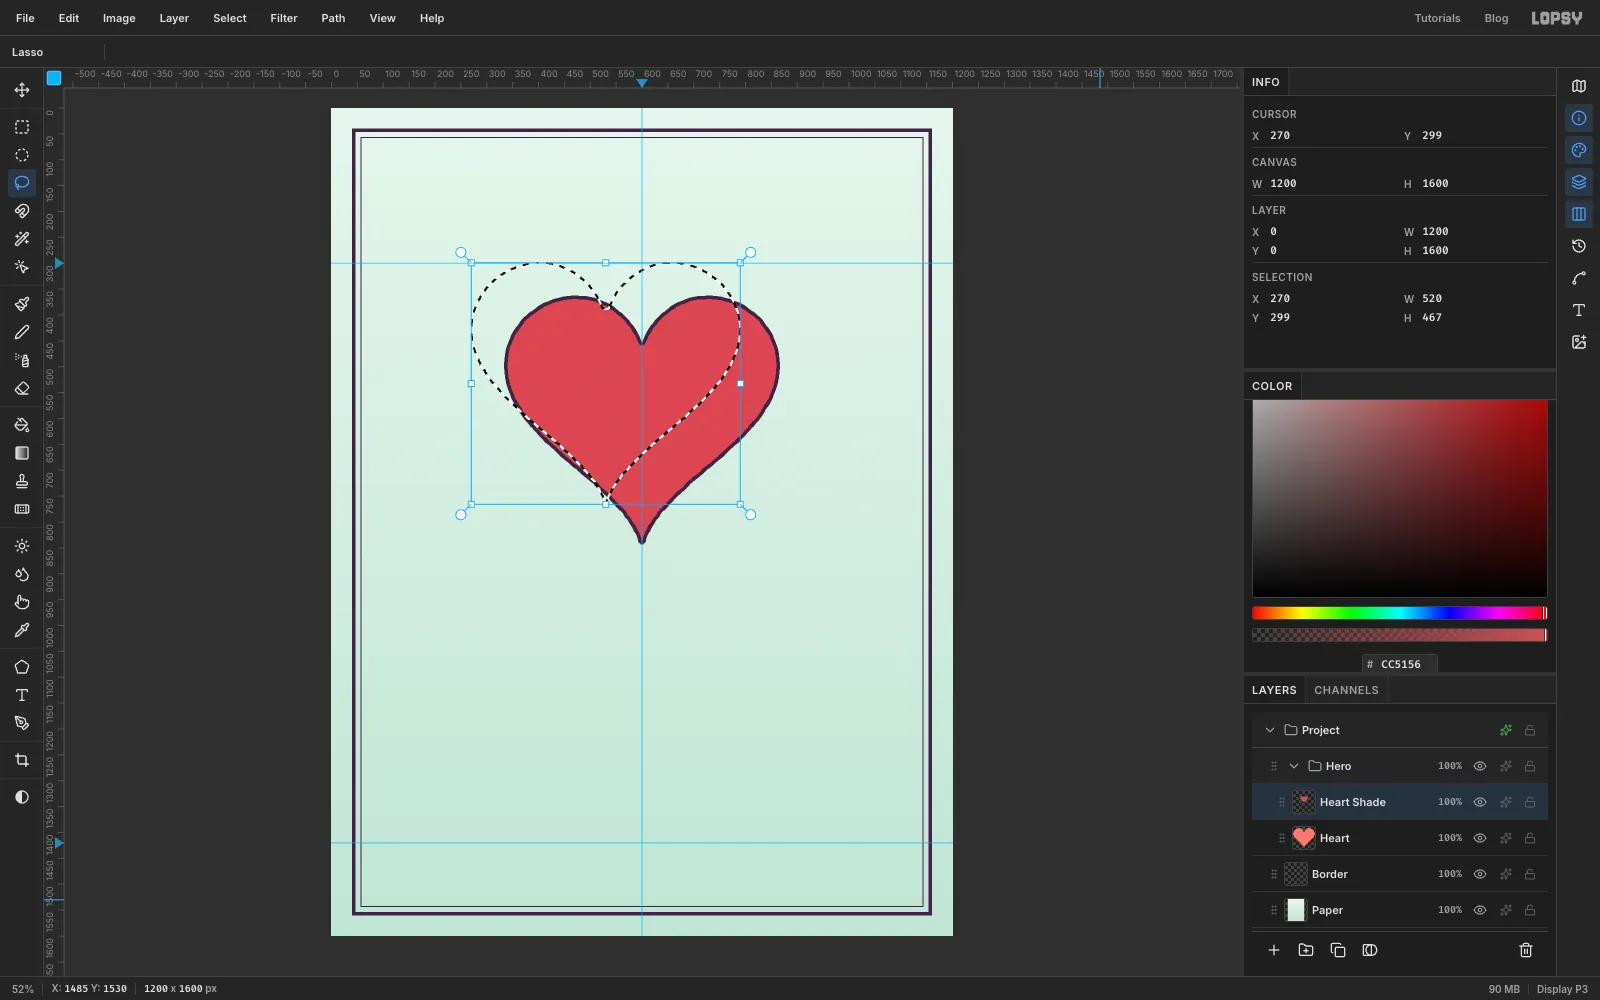
- Hold Ctrl (Cmd on a Mac) and click the Heart layer's thumbnail. That selects everything on the layer. Choose Select → Shrink… by
7, so the selection is the coral area without its outline. - Click Add Layer, name it
Heart Shade, set the foreground to the darker coral and choose Edit → Fill. - Pick the Lasso. With a selection tool active, the arrow keys move the selection outline and leave the pixels alone. Press Shift+↑ and Shift+← seven times each to slide the outline 70 px up and to the left.
- Choose Select → Feather… and enter
60, then press Delete and deselect.
The delete removes most of the dark copy and fades it out across the feathered edge. What's left is a soft crescent along the lower right of the heart. Choose Layer → Merge Down to fold it into Heart.
- Hold Ctrl (Cmd on a Mac) and click the Heart layer's thumbnail. That selects everything on the layer. Choose Select → Shrink… by
-
Add the highlight and the shadow
The highlight is the same move the other way round:
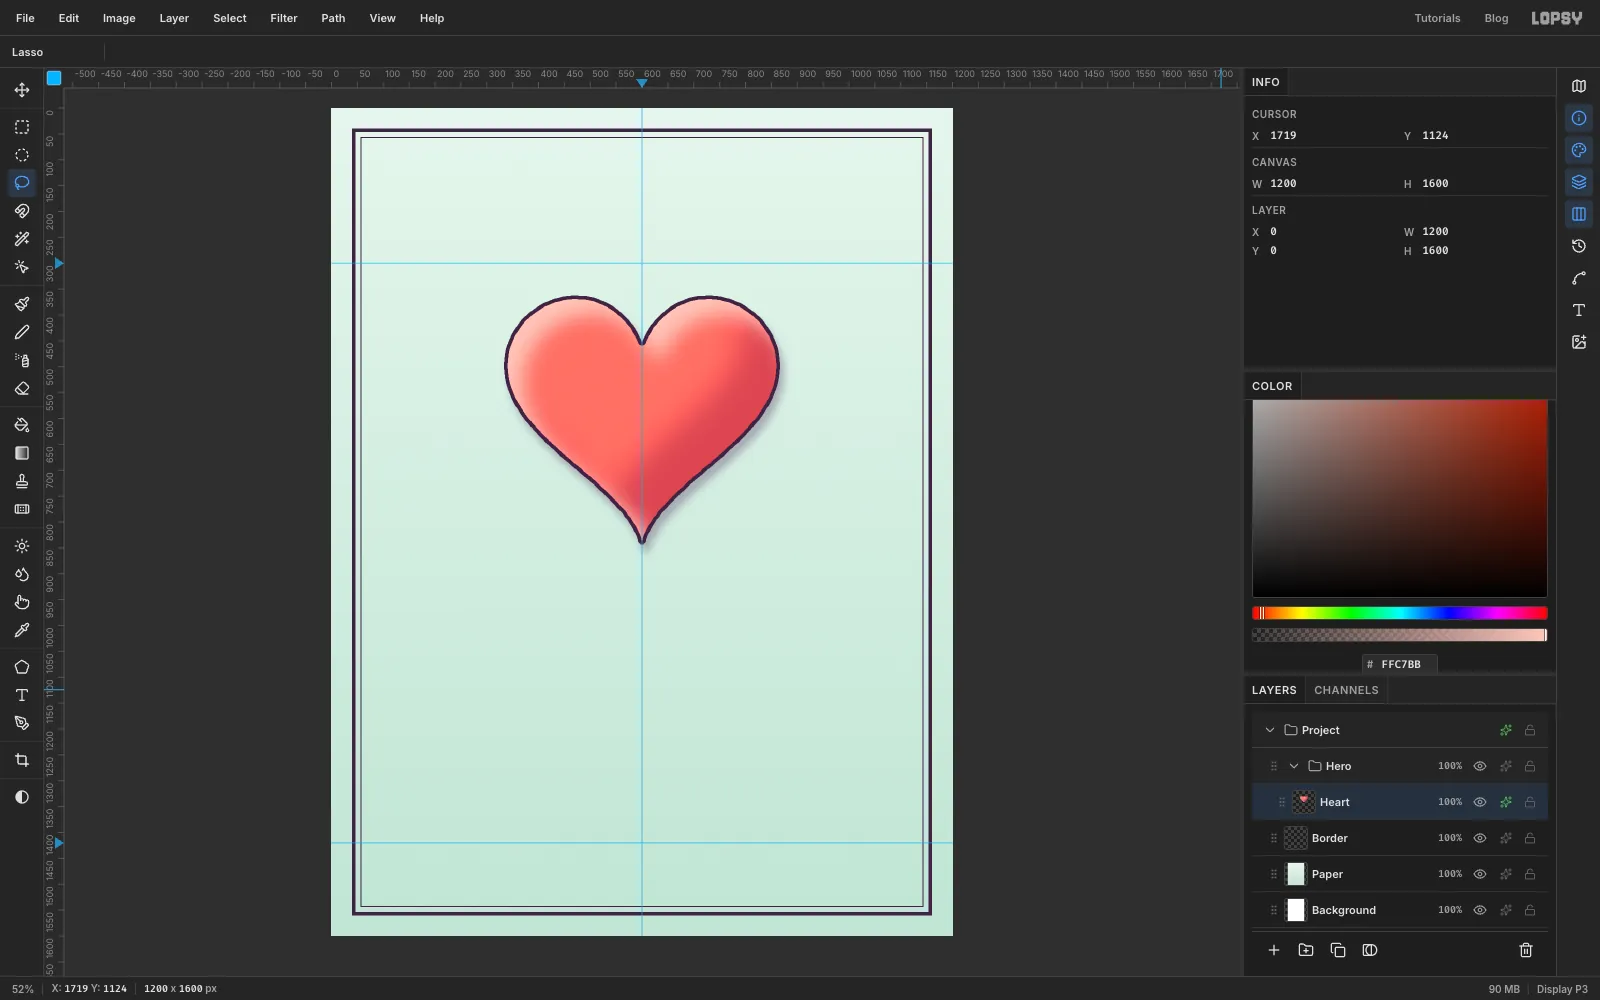
- Ctrl/Cmd-click the Heart thumbnail and Shrink by
7again. - Add a
Heart Shinelayer and fill it with the pale coral . - With the Lasso active, slide the outline 30 px down and right (Shift+↓ and Shift+→ three times each).
- Feather by
40, press Delete, deselect and Merge Down.
That leaves a thin bright rim on the top-left edge.
Finally, click the heart's effects button (the sparkle icon on its row) and turn on Drop Shadow: colour , Blur
22, Offset X8, Offset Y16, Opacity34.From here on, "give it the clay treatment" means all four moves: outline, shade, highlight, shadow. Scale the slide and the feather to the size of the piece. For a 60 px eye, slide about 10 px and feather about 12.
- Ctrl/Cmd-click the Heart thumbnail and Shrink by
-
Model the quokka's head
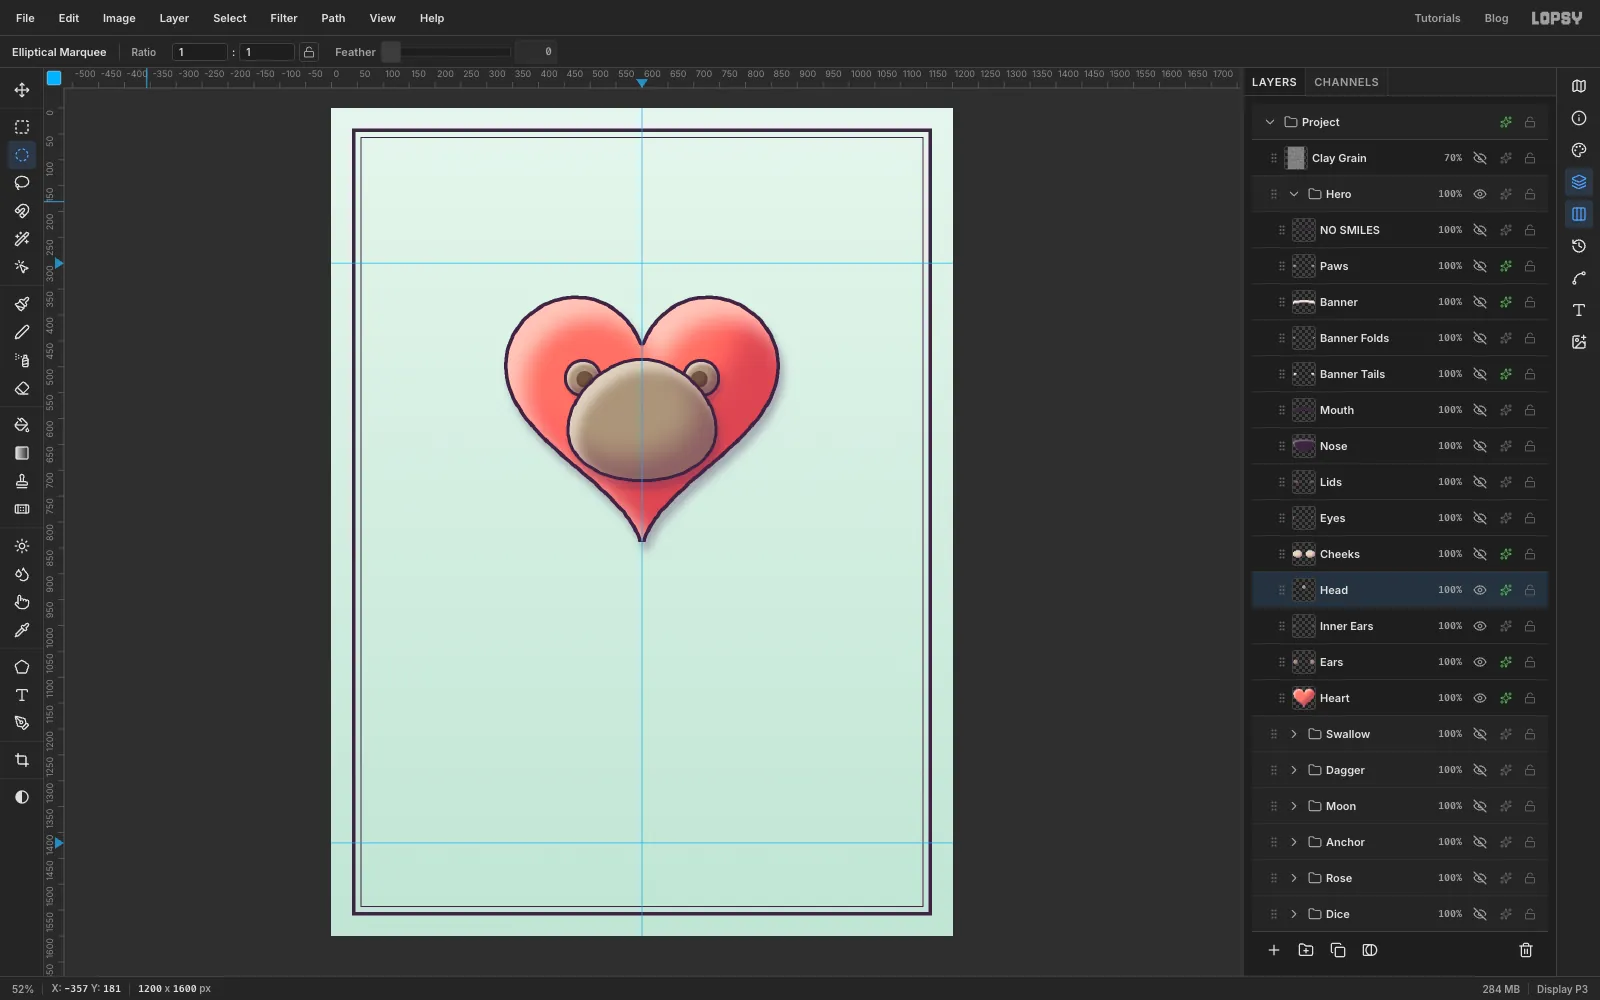
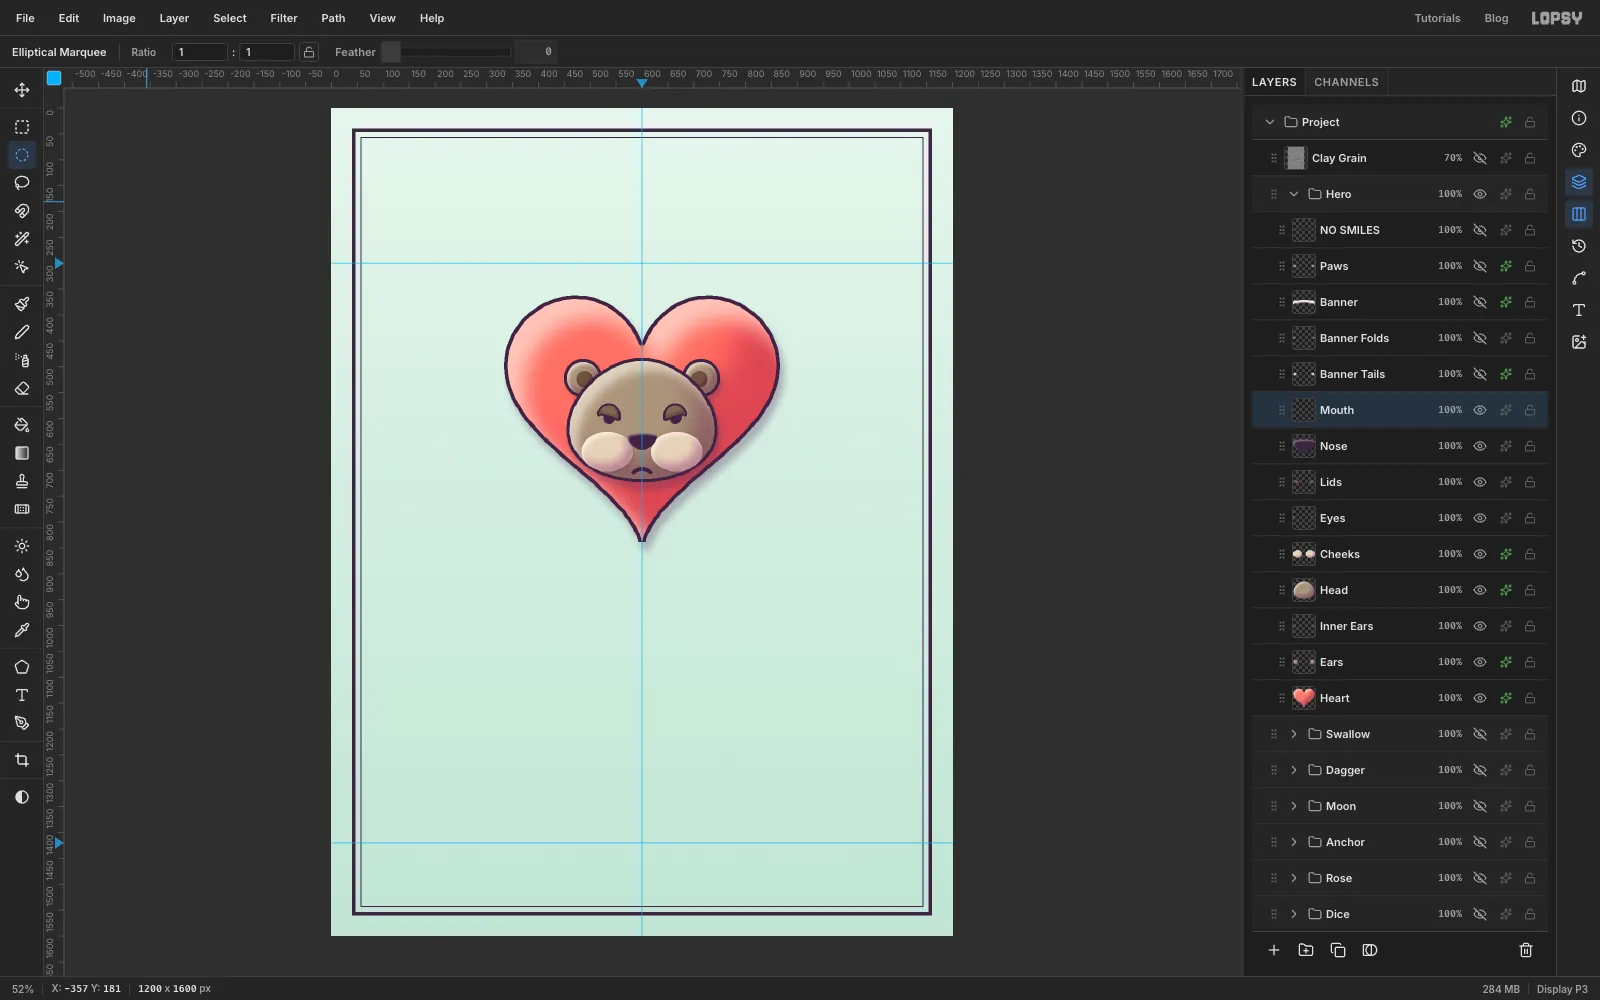
This screenshot and the next were retaken from the finished project, so the Layers panel already shows the later layers, hidden.
Click Heart, then add these layers one at a time, so each lands above the last:
Ears: two small circles where the upper corners of the head will be, so the head will hide about half of each. Give them the clay treatment in fur .Inner Ears: a smaller circle inside each ear in . Skip the outline, and just shade the lower right.Head: an egg shape about 280 px wide, filling the middle of the heart. Make it a little wider at the bottom so the cheeks look full. Give it the clay treatment in fur, with a slightly bigger Drop Shadow (Blur20, Offset7/14, Opacity34).
Keep the ears small. Big round ears high on the head turn a quokka into a teddy bear.
-
Give it a grumpy face
Add these layers above Head:
Cheeks: two wide ovals in , low on each side of the face and almost touching in the middle. No outline, but do shade and highlight them so they puff out. These are the quokka's famous smiling cheeks.Eyes: two small dark ovals in , set wide apart, with a tiny highlight.Lids: over the top half of each eye, lasso a half-oval whose bottom edge slopes down towards the nose. Grow by4and fill plum, then Shrink by4and fill , the same outline move with a thinner line. The slope is what makes the face grumpy.Nose: a big rounded triangle in plum between the cheeks.Mouth: a short, thick downward arc under the nose.
-
Add the banner and the paws
Click Mouth and add:
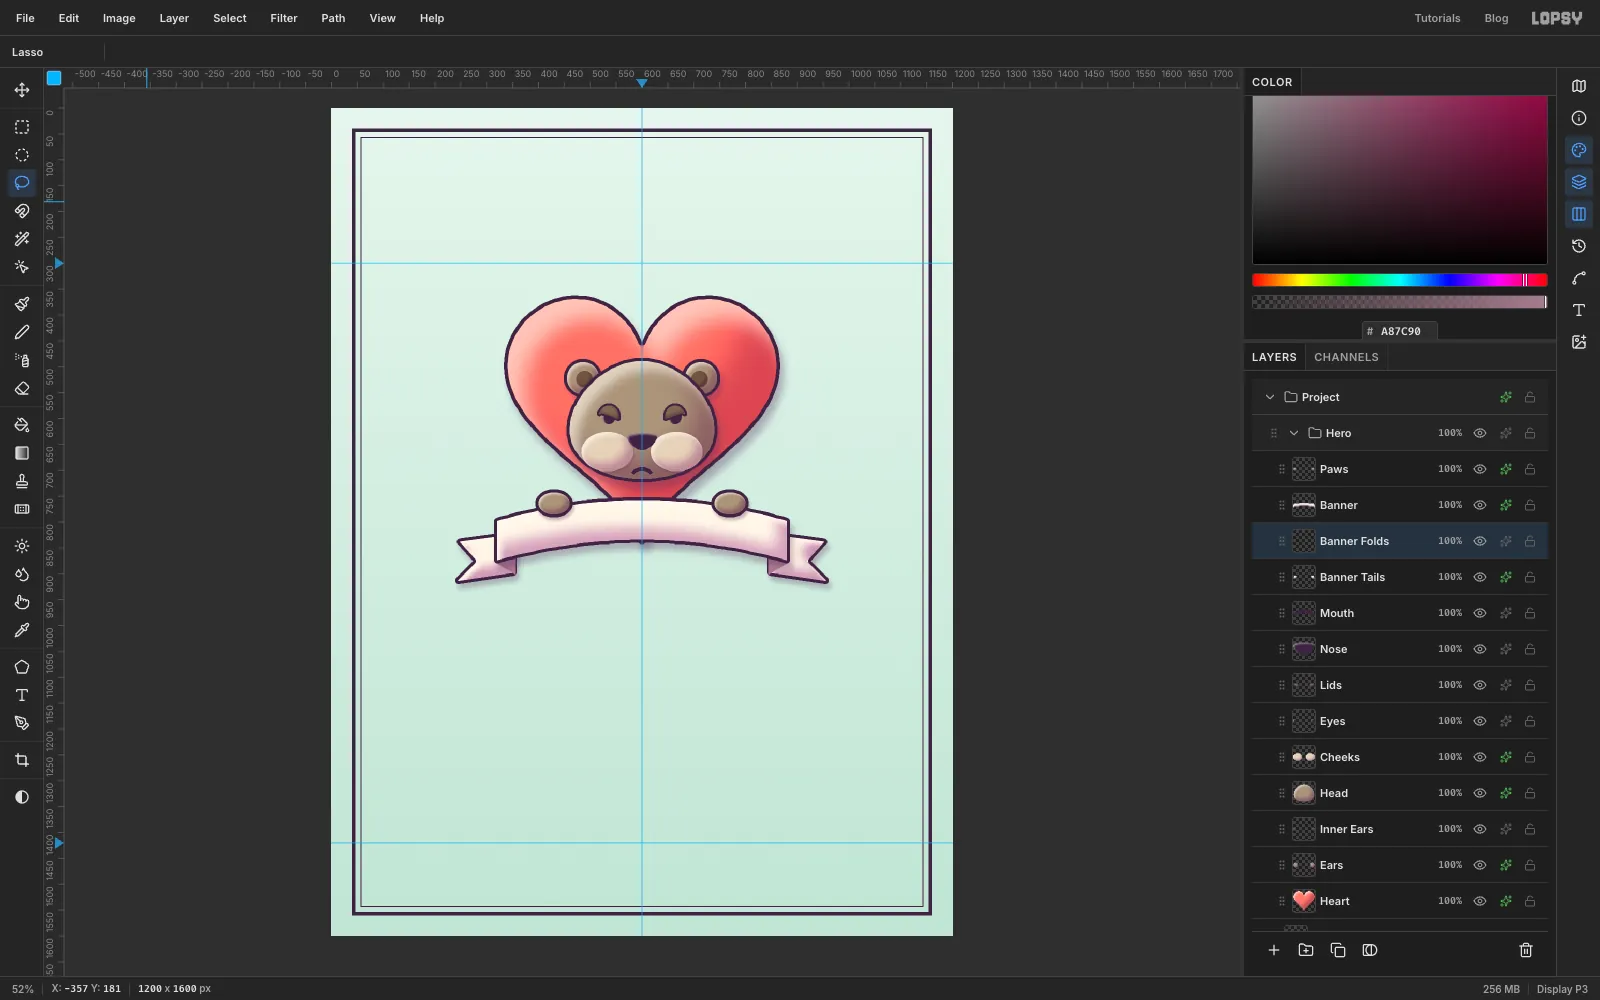
Banner Tails: two ribbon ends sticking out a little lower than both ends of the banner, each with a V-shaped notch cut into its outer end. Lasso them in cream and give them the clay treatment.Banner Folds: a small dark triangle in at the inner end of each tail, just under where the banner will sit. It reads as the fold where the ribbon tucks behind itself.Banner: a gently arched band about 560 px long and 76 px tall, centred on the guide, low enough to cover the tip of the heart. With the Lasso, drag the top edge as a shallow upward curve, come down the right end, drag the bottom edge back parallel to the top, and close it at the left end.Paws: two small fur ovals resting on the banner's top edge, near its ends.
Keep the paws near the ends of the banner. The lettering goes in the middle.
-
Draw an arch with the Pen tool
Select Paws and pick the Text tool. Choose Titan One, size
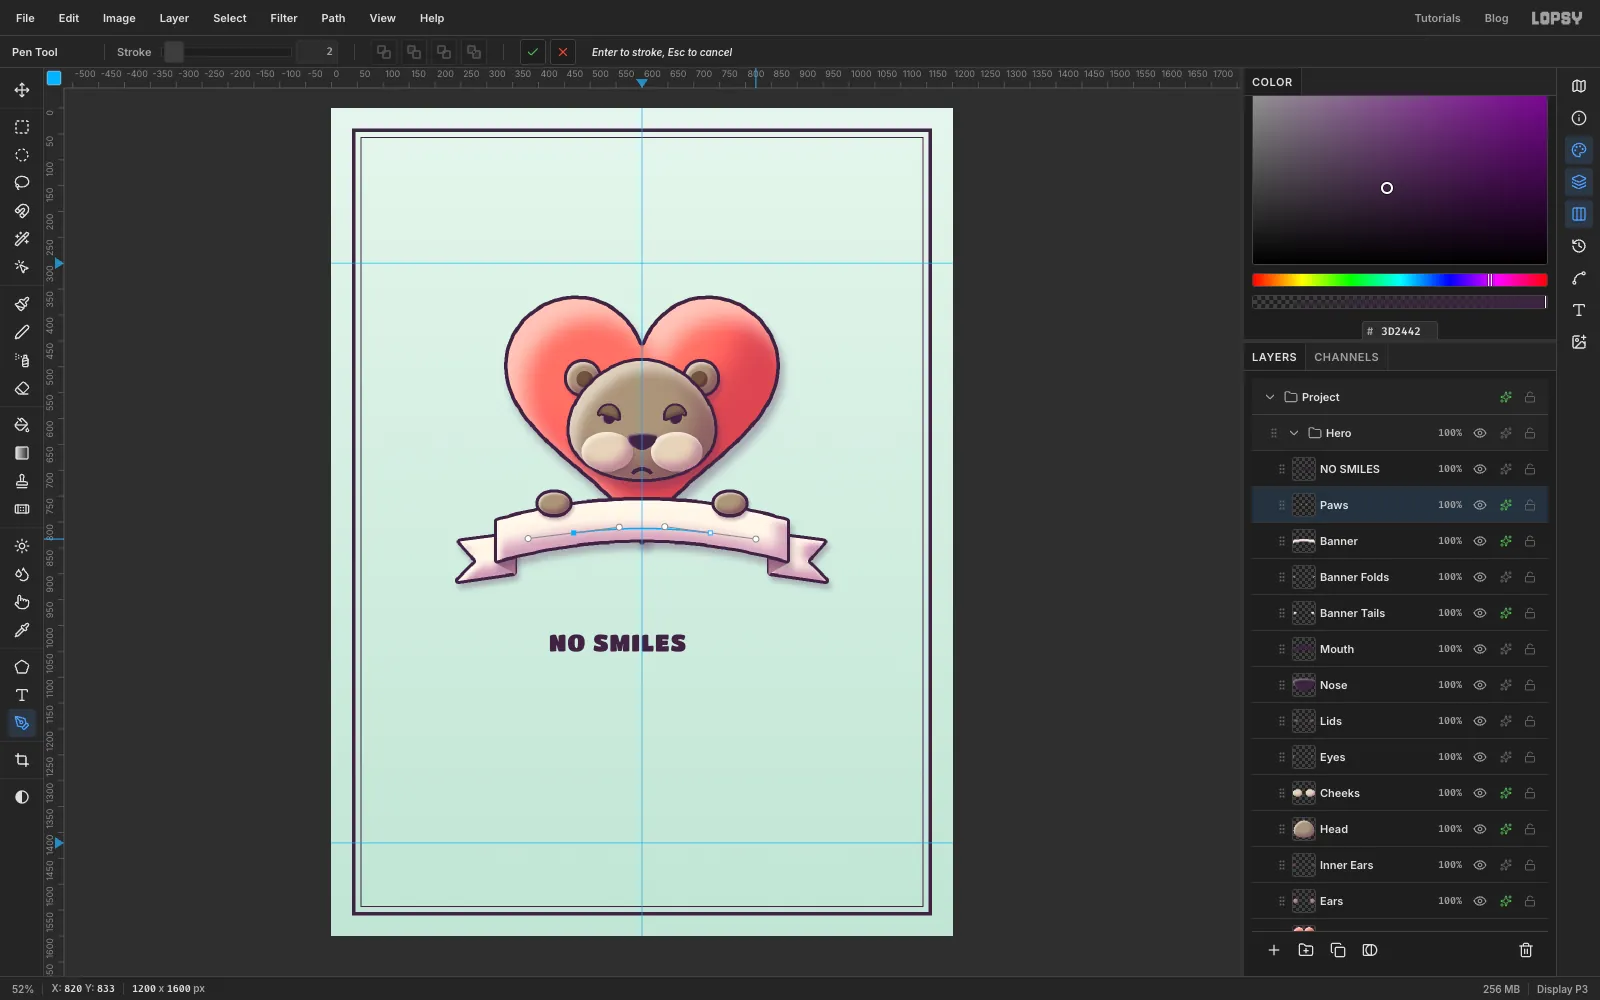
46, colour plum. Click in an empty part of the canvas and typeNO SMILES, then press Tab to commit.Now pick the Pen tool. Press a little in from the left paw, slightly below the middle of the banner, and drag a little up and to the right to pull out a handle. Then press the same distance in from the right paw and drag down and to the right. That draws a gentle arch that follows the banner. Click ✓ Commit path in the options bar.
Make the arch about as wide as the text: the type starts at the path's first anchor.
-
Put the text on the arch
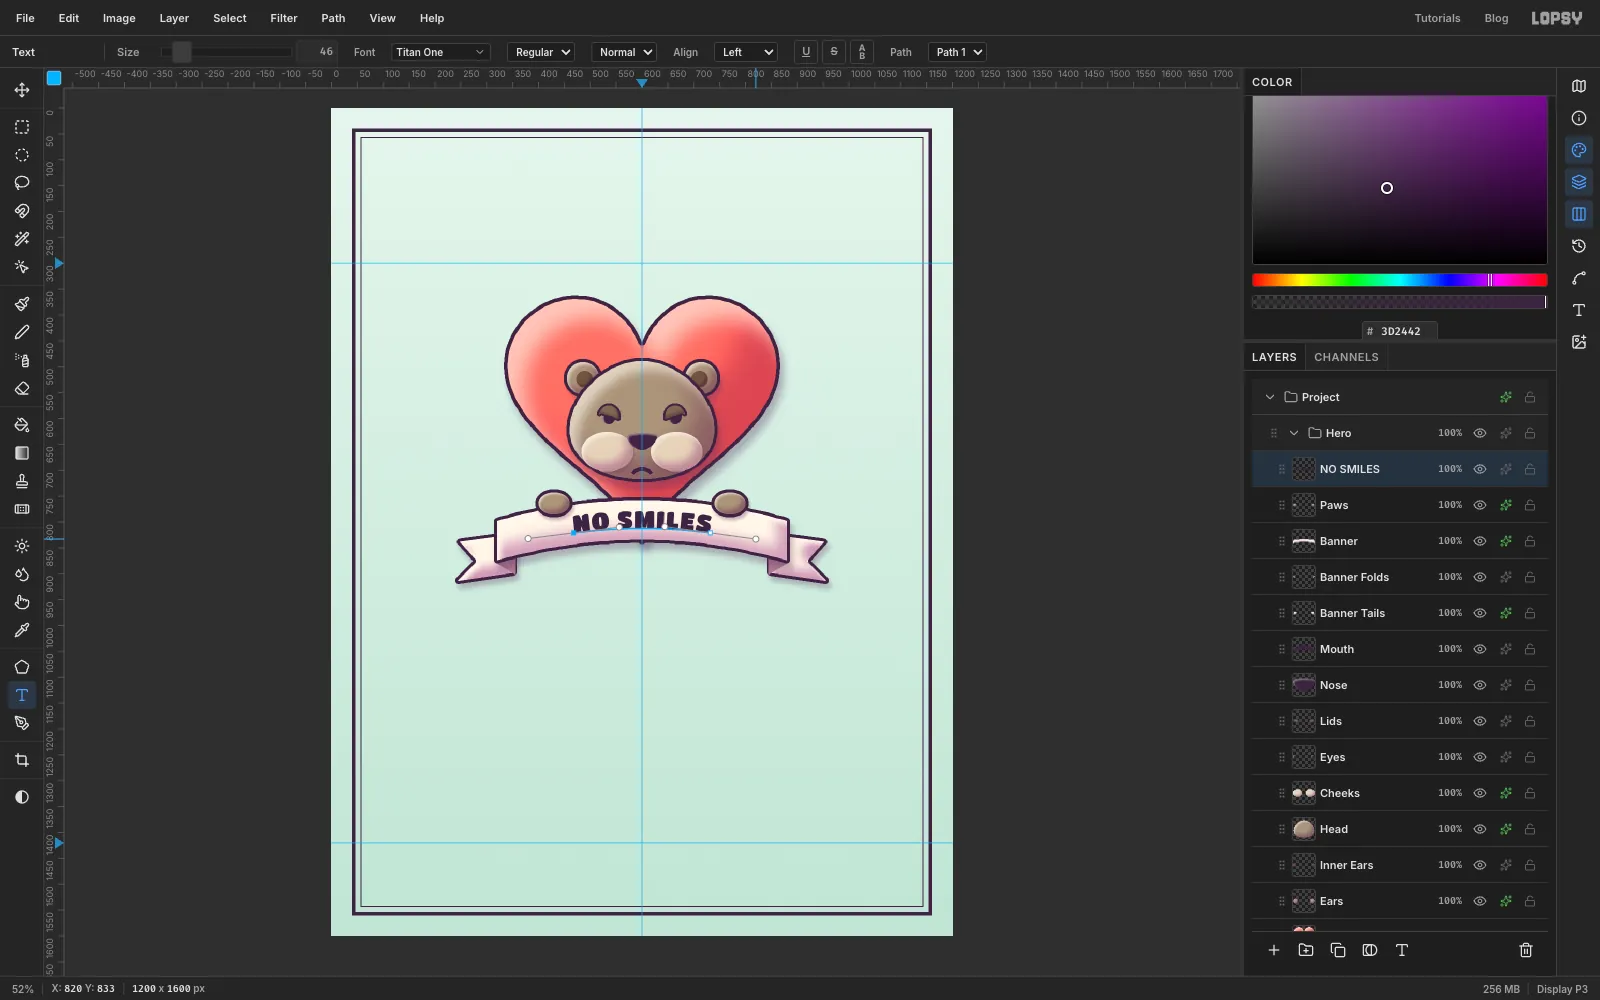
Click the NO SMILES layer, pick the Text tool, and choose Path 1 in the Text path dropdown in the options bar. The letters jump onto the arch and tilt to follow it.
Check that the lettering sits in the middle of the banner, with the same gap above and below, and that it doesn't touch the paws. If it doesn't, drag the path's anchors or handles with the Pen tool, and the text follows.
-
Build the swallow
Select Border, click New Group and name it
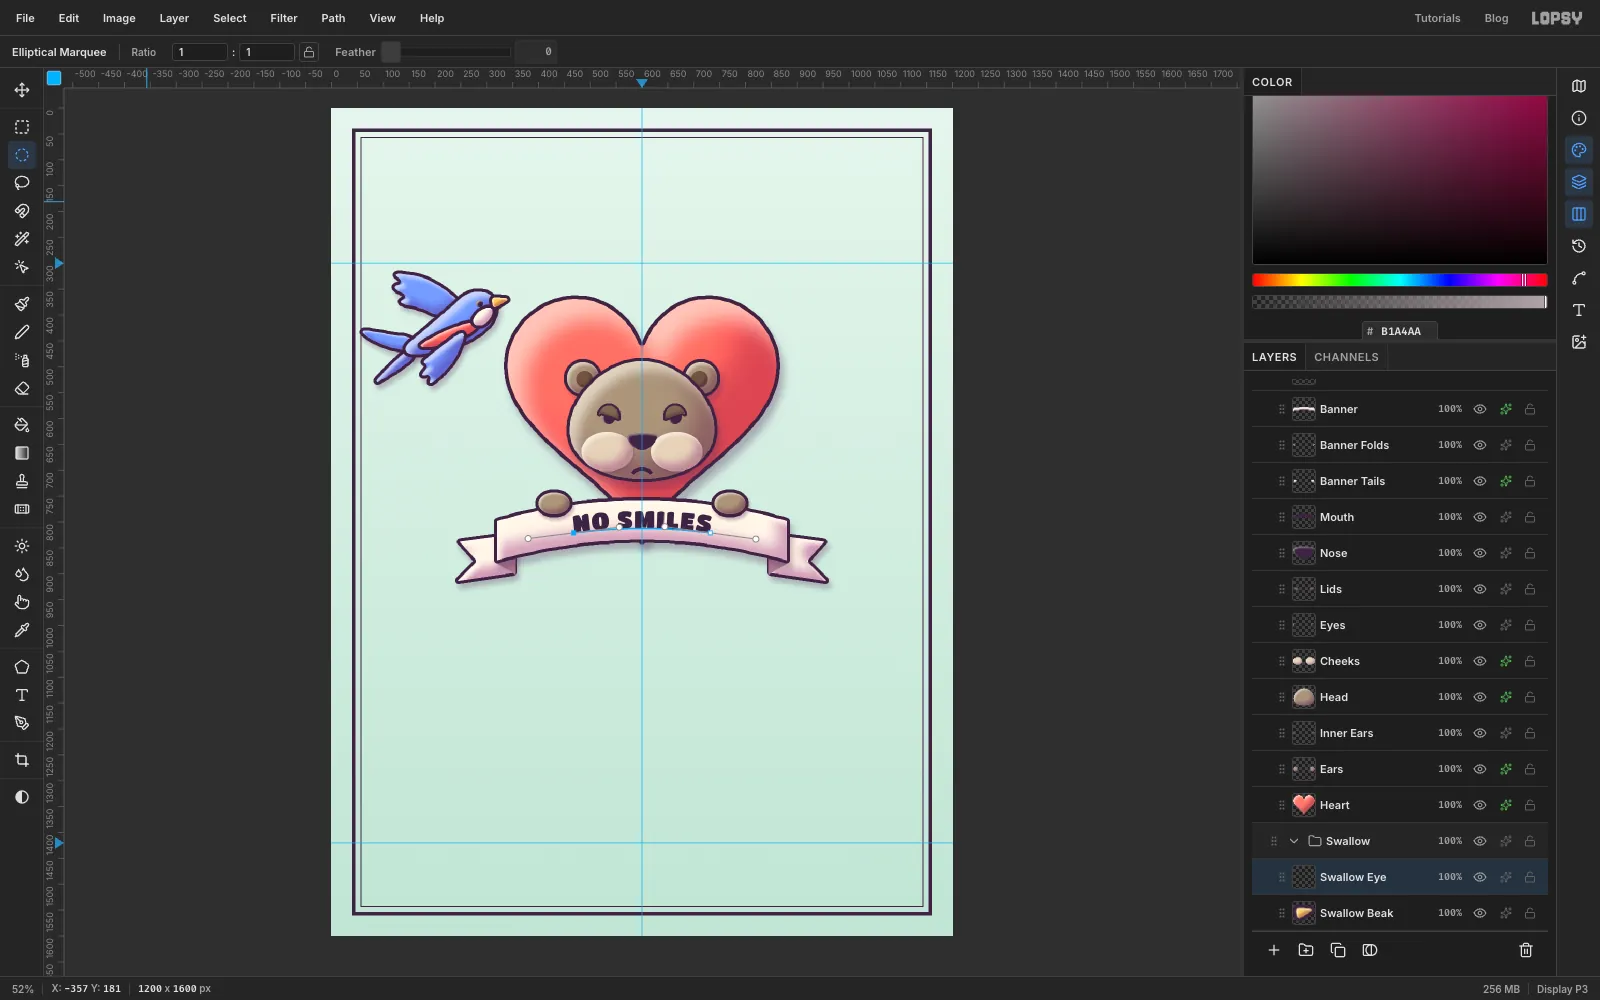
Swallow. It's the most fiddly design on the sheet, so take it piece by piece. Lasso each part on its own layer, from the back to the front:Swallow Wings: the back wing, swept up and back, with three rounded feather notches.Swallow Tail: two long streamers forking out behind.Swallow Body: a plump teardrop with the head at the front.Swallow Belly: a coral stripe along the underside.Swallow Throat: a cream patch under the beak.Swallow Front Wing: the near wing, swept down and back.Swallow Beakin butter , andSwallow Eye, a small plum dot.
Give every piece the clay treatment and a small Drop Shadow (Blur
12, Offset5/9, Opacity28). Overlapping shadows make each piece look pressed onto the one below.Keep your lasso strokes round and smooth. Clay doesn't have sharp corners.
-
Build the dagger upright
Make a
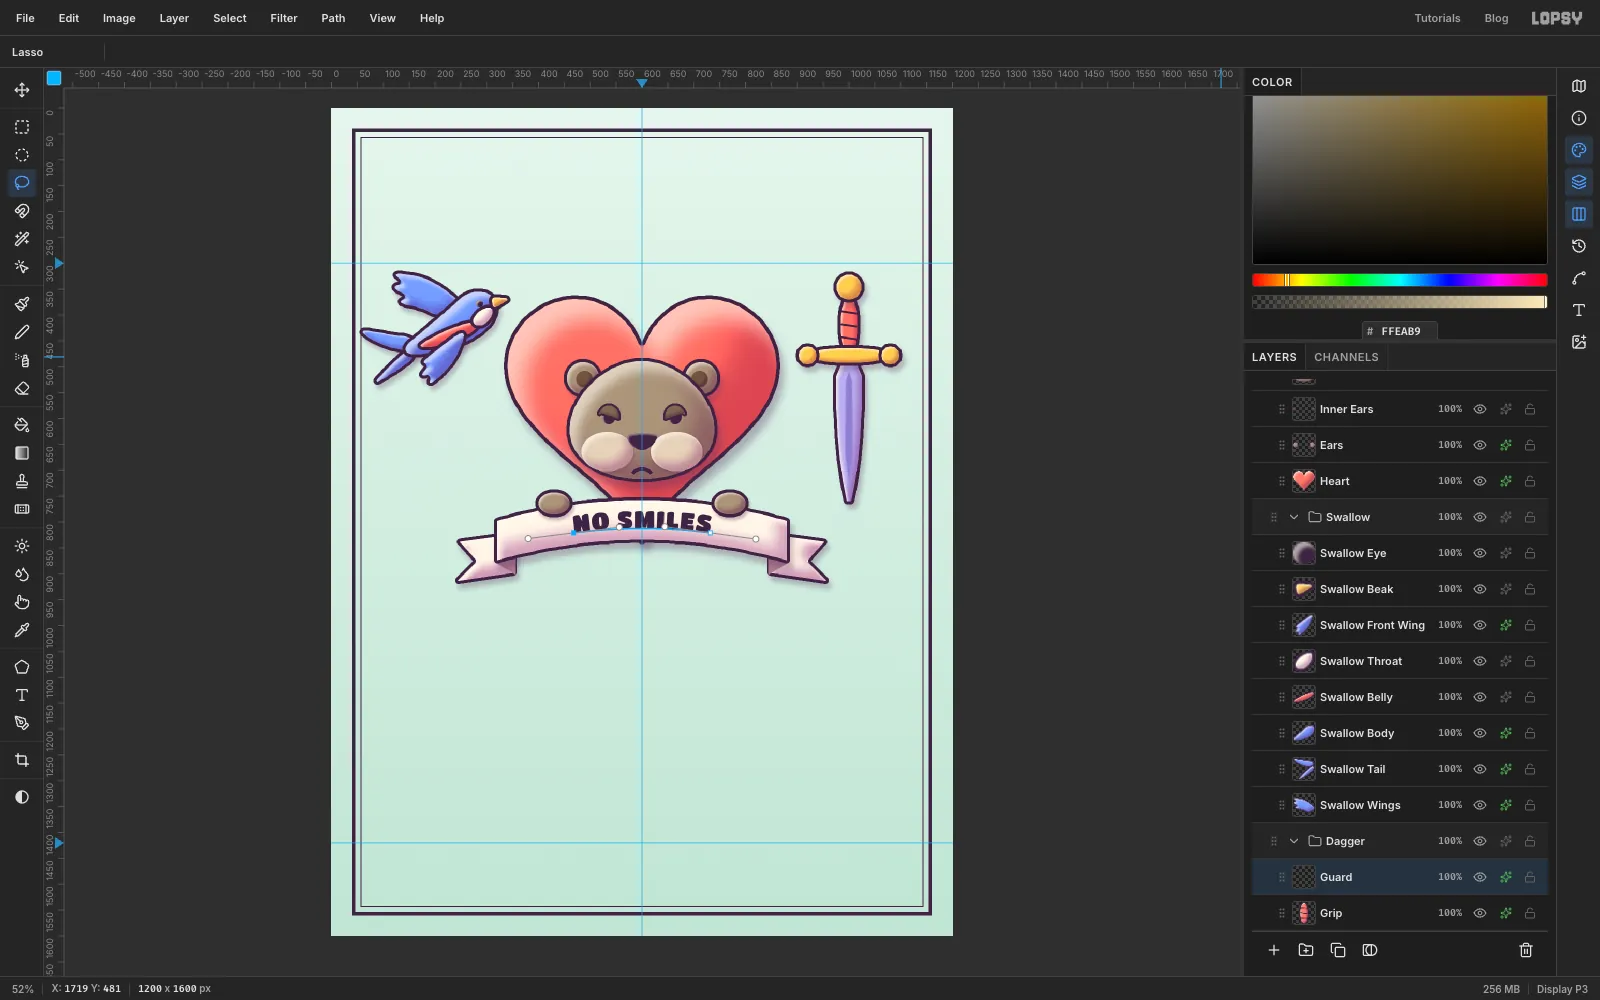
Daggergroup the same way, above Border. It's easier to build the dagger straight and tilt it afterwards.Blade: a long tapering point in . Then lasso a thin strip down its middle, feather it by2and fill it with for the fuller.Grip: a rounded bar in coral. Pick the Brush at size5in plum, click on one side of the grip and Shift-click on the other to draw a straight wrap line. Draw three.Guard: a rounded crossbar with a ball at each end, and a ball pommel on top, all in butter on one layer.
-
Rotate the whole dagger
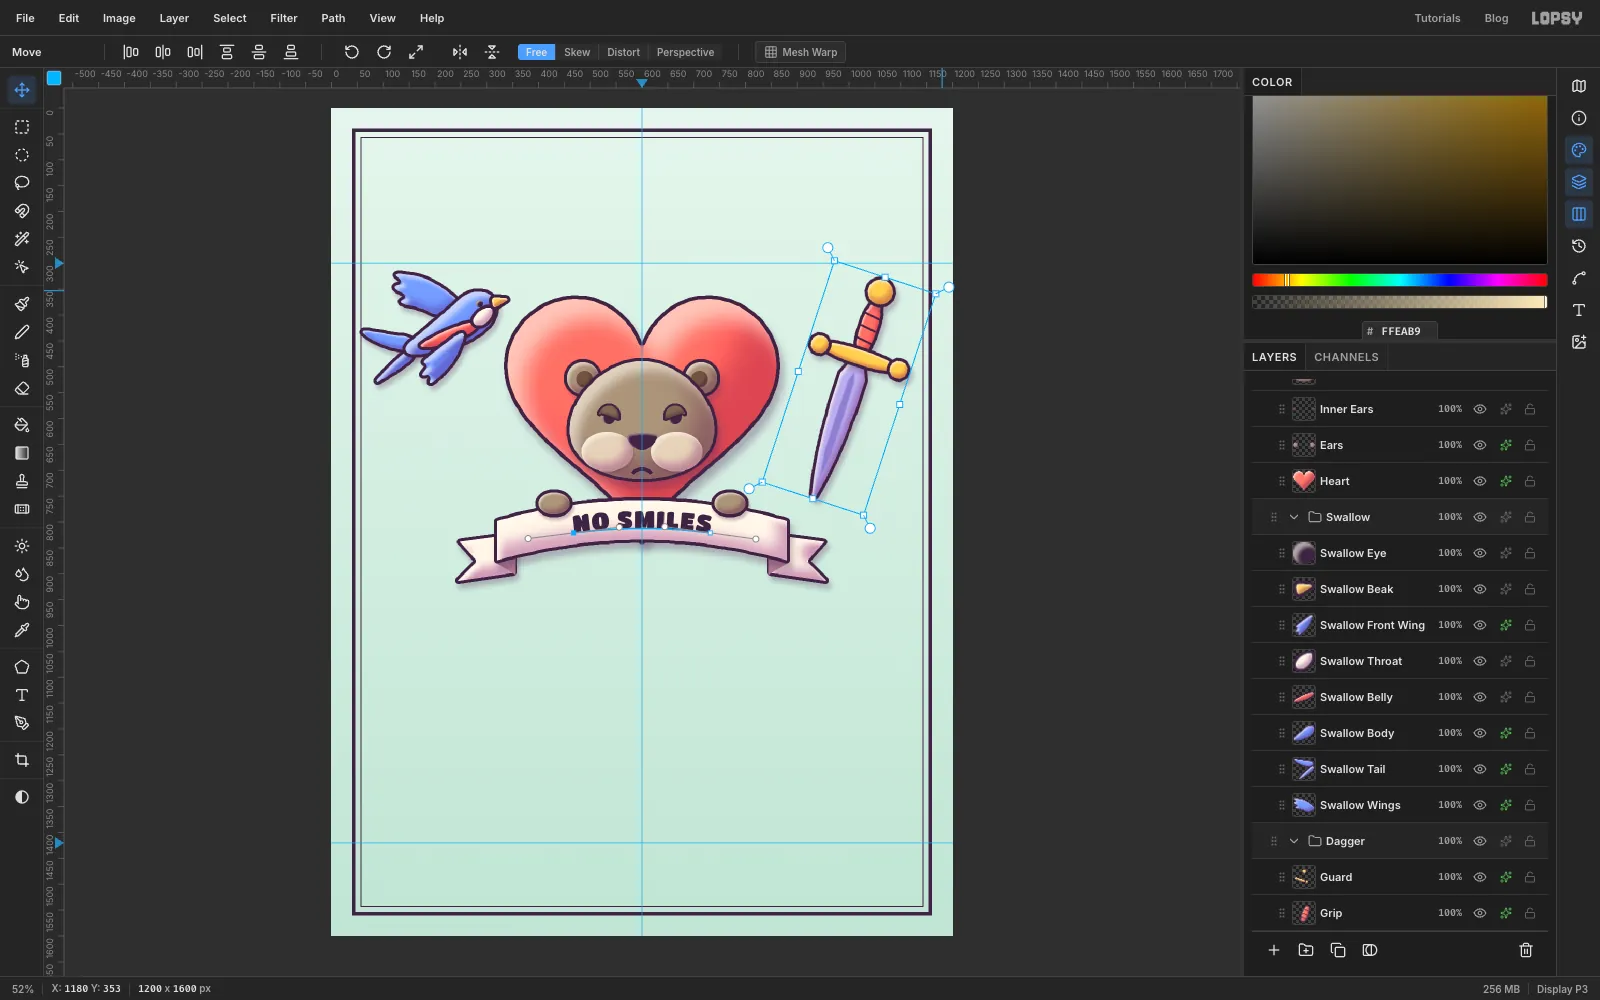
Select the Dagger group row and pick the Move tool. A box appears around the whole dagger, with a round rotate handle just outside each corner. Drag the top-right one down in a slow arc until the dagger leans about 18° to the right.
Press Ctrl+D to commit. Rotating the group turns the blade, grip and guard together. The drop shadows are worked out again after the rotation, so they still fall down and to the right.
-
Make the moon
Add a
Moongroup with aCrescentlayer. Draw a circle about 215 px across with the Elliptical Marquee, then hold Alt (Option) and drag a slightly smaller circle offset up and to the right. Holding Alt subtracts it, leaving a crescent. Give it the clay treatment in butter .On a
Moon Facelayer, draw a small closed eye as a plum arc and a soft pink cheek: an oval feathered by4and filled with .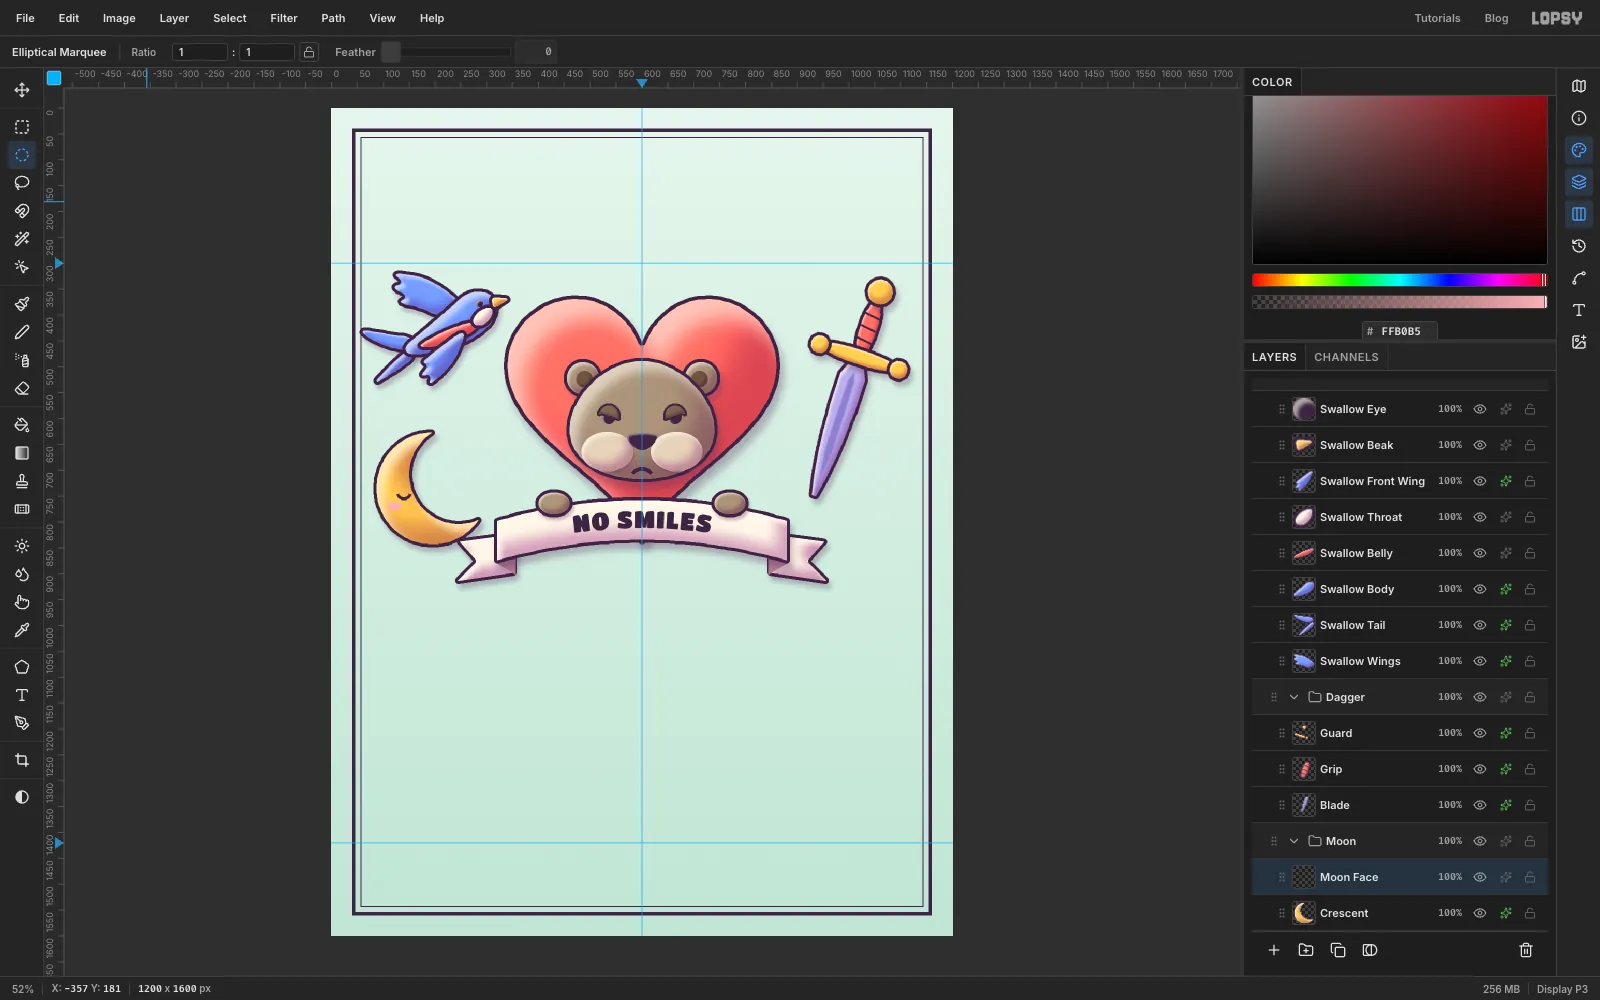
-
Scale the moon down
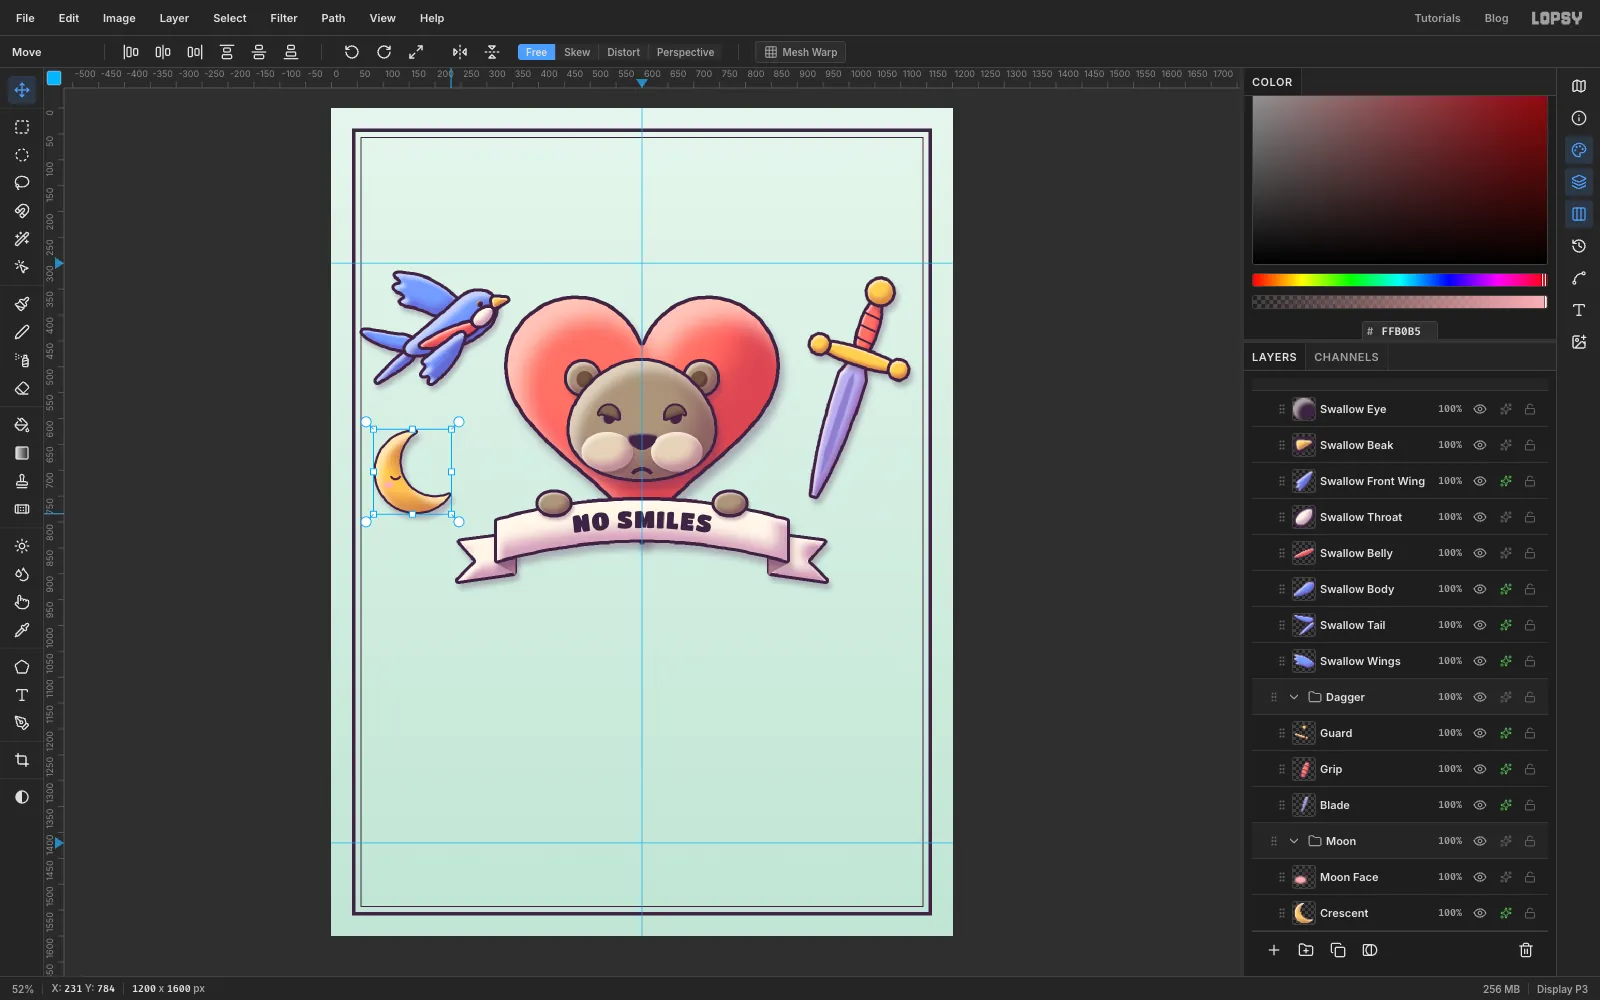
The moon is a bit big for the space under the swallow. Select the Moon group, pick the Move tool, and hold Cmd (the Windows key on a PC) while you drag the bottom-right corner handle up and in to about 72% of the size. Holding the key keeps the proportions.
Press Ctrl+D to commit, then nudge the group with the arrow keys until it sits under the swallow, clear of the banner tail.
-
Build the anchor
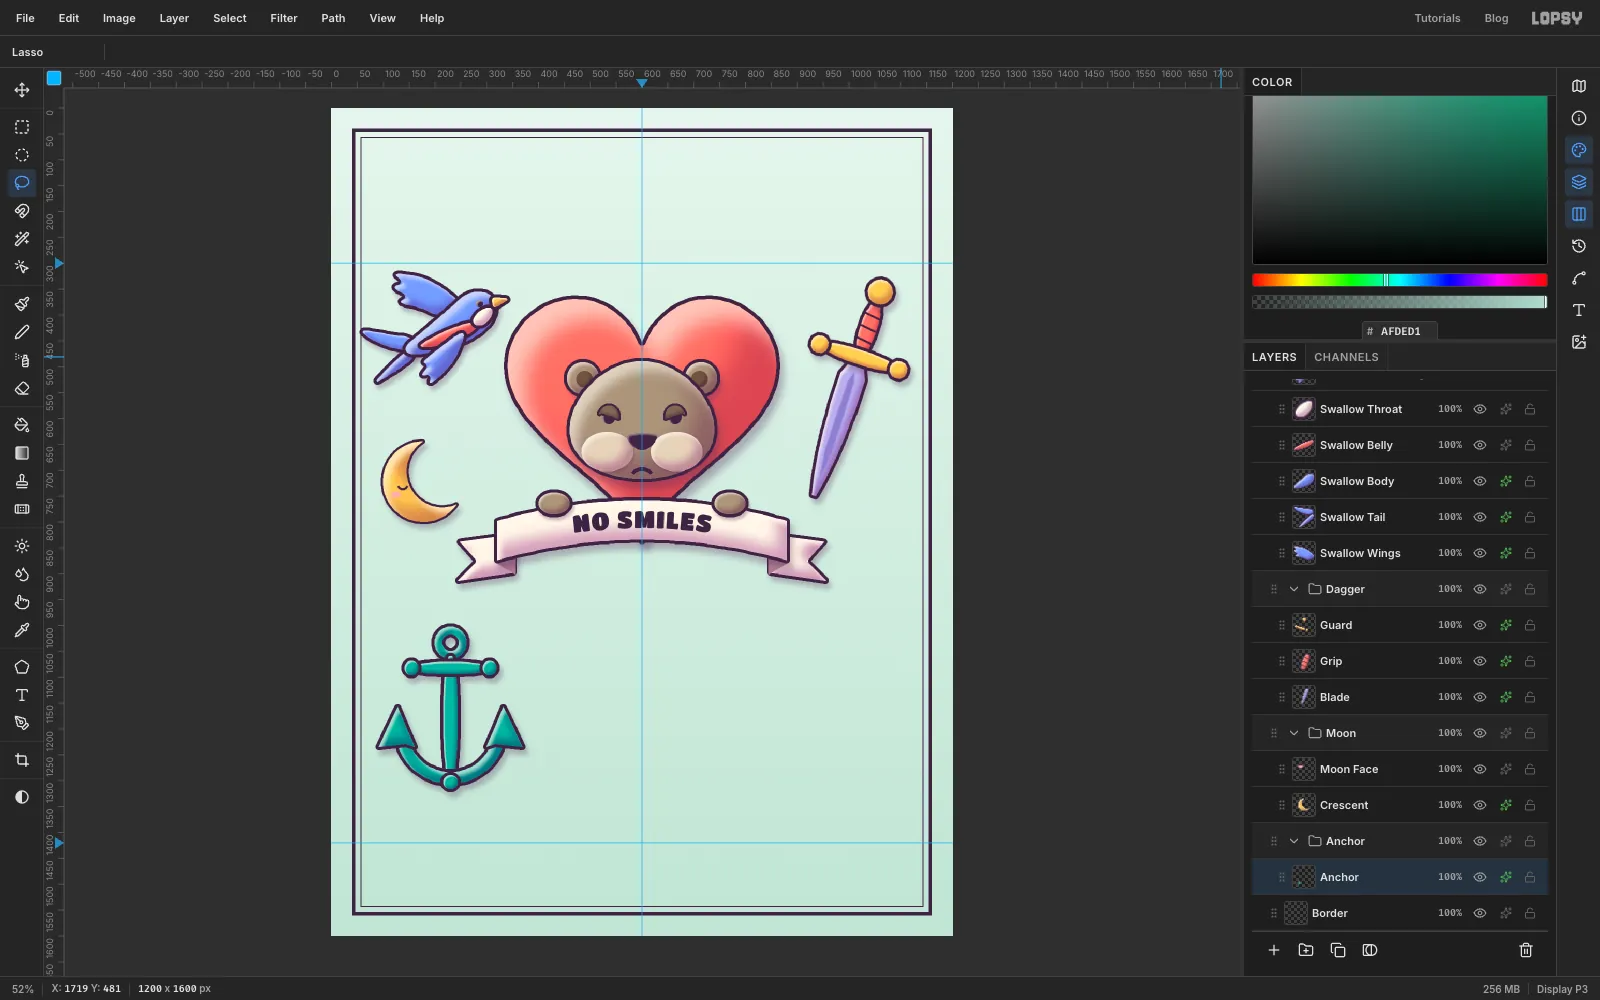
Add an
Anchorgroup with anAnchorlayer and build it from separate pieces in teal :- the ring at the top (a circle with a smaller circle subtracted)
- the long shank
- the crossbar, with a ball at each end
- the curved arms (a thick arc)
- two arrowhead flukes and a ball at the bottom
Outline and shade each piece separately. Where pieces overlap, the outline of the newer piece runs across the older one, so it looks like clay parts pressed together.
-
Paint the rope
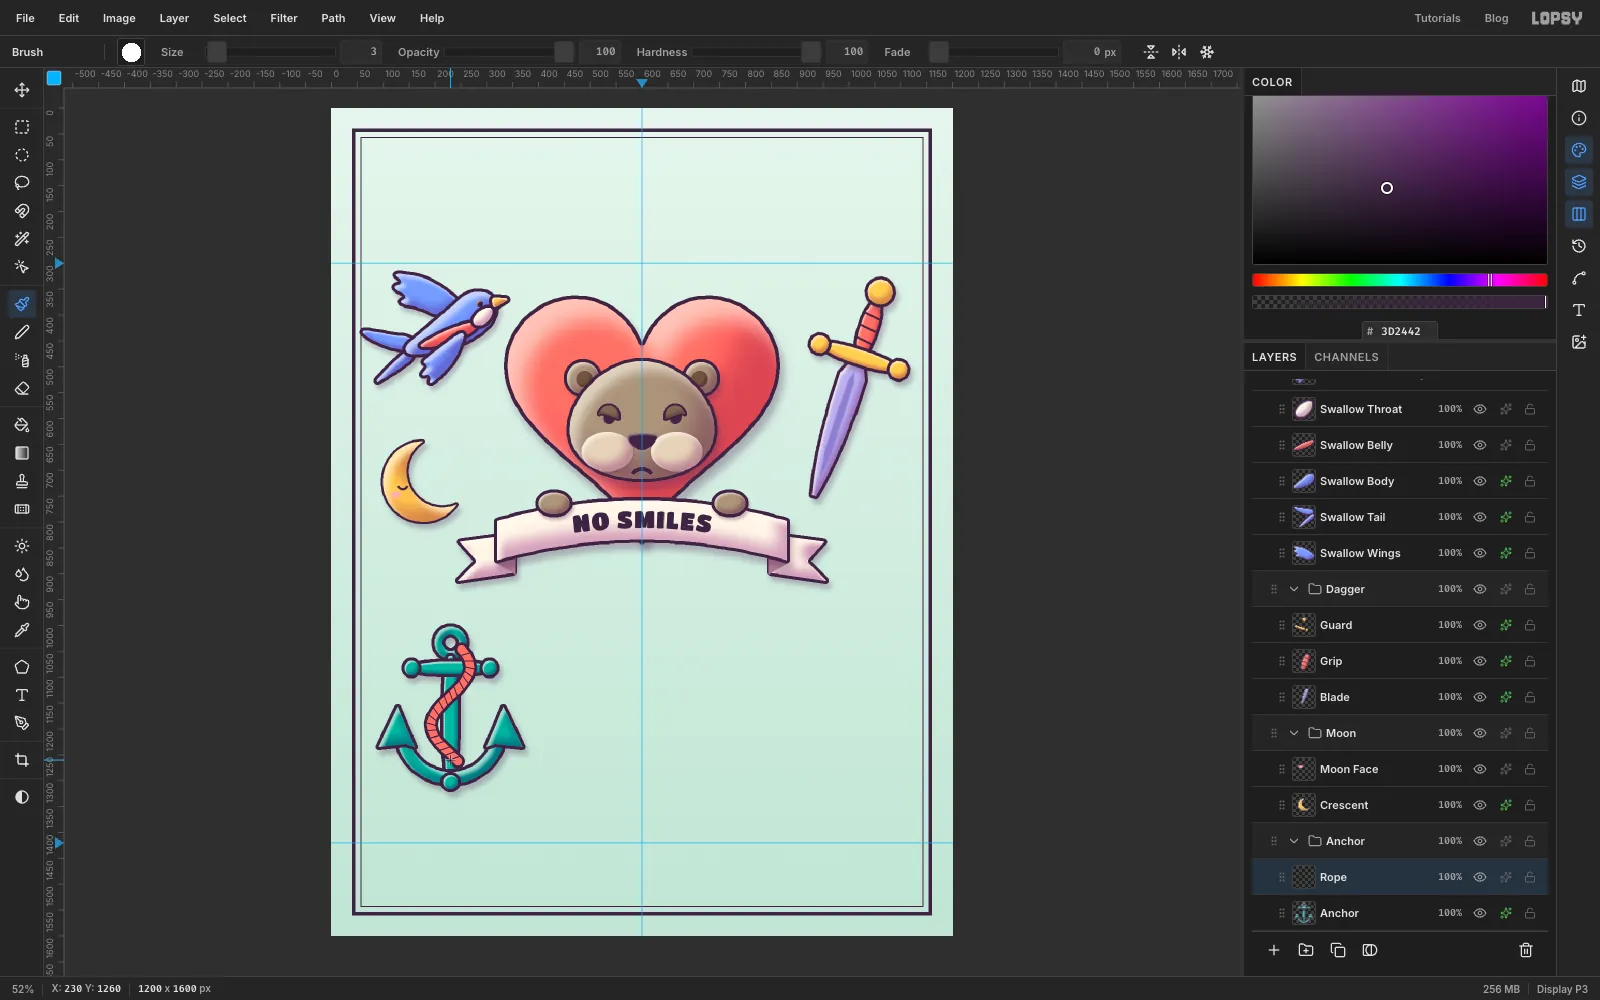
Add a
Ropelayer above Anchor. Pick the Brush with Hardness100:- At size
28in plum, click where the rope comes out of the ring, then Shift-click a chain of points down the anchor in a loose S shape. Each Shift-click draws a straight segment from the last point. - Switch to size
17and coral , and repeat the same chain of points on top. The plum shows round the edge as an outline. - At size
3in plum, Shift-click short diagonal strokes across the rope about every 16 px for the twist.
- At size
-
Wrap the rope behind the shank
For the rope to wrap round the anchor, it has to disappear behind the shank once. With the Rectangular Marquee, select a narrow box exactly as wide as the shank and its outline, over the middle crossing. Start and end the box where the rope is clear of the shank. Press Delete.
Add a
Rope Shinelayer, brush a thin line along the upper-left side of the rope at size4, delete the same box, and set the layer to 60% opacity. Give Rope a small Drop Shadow.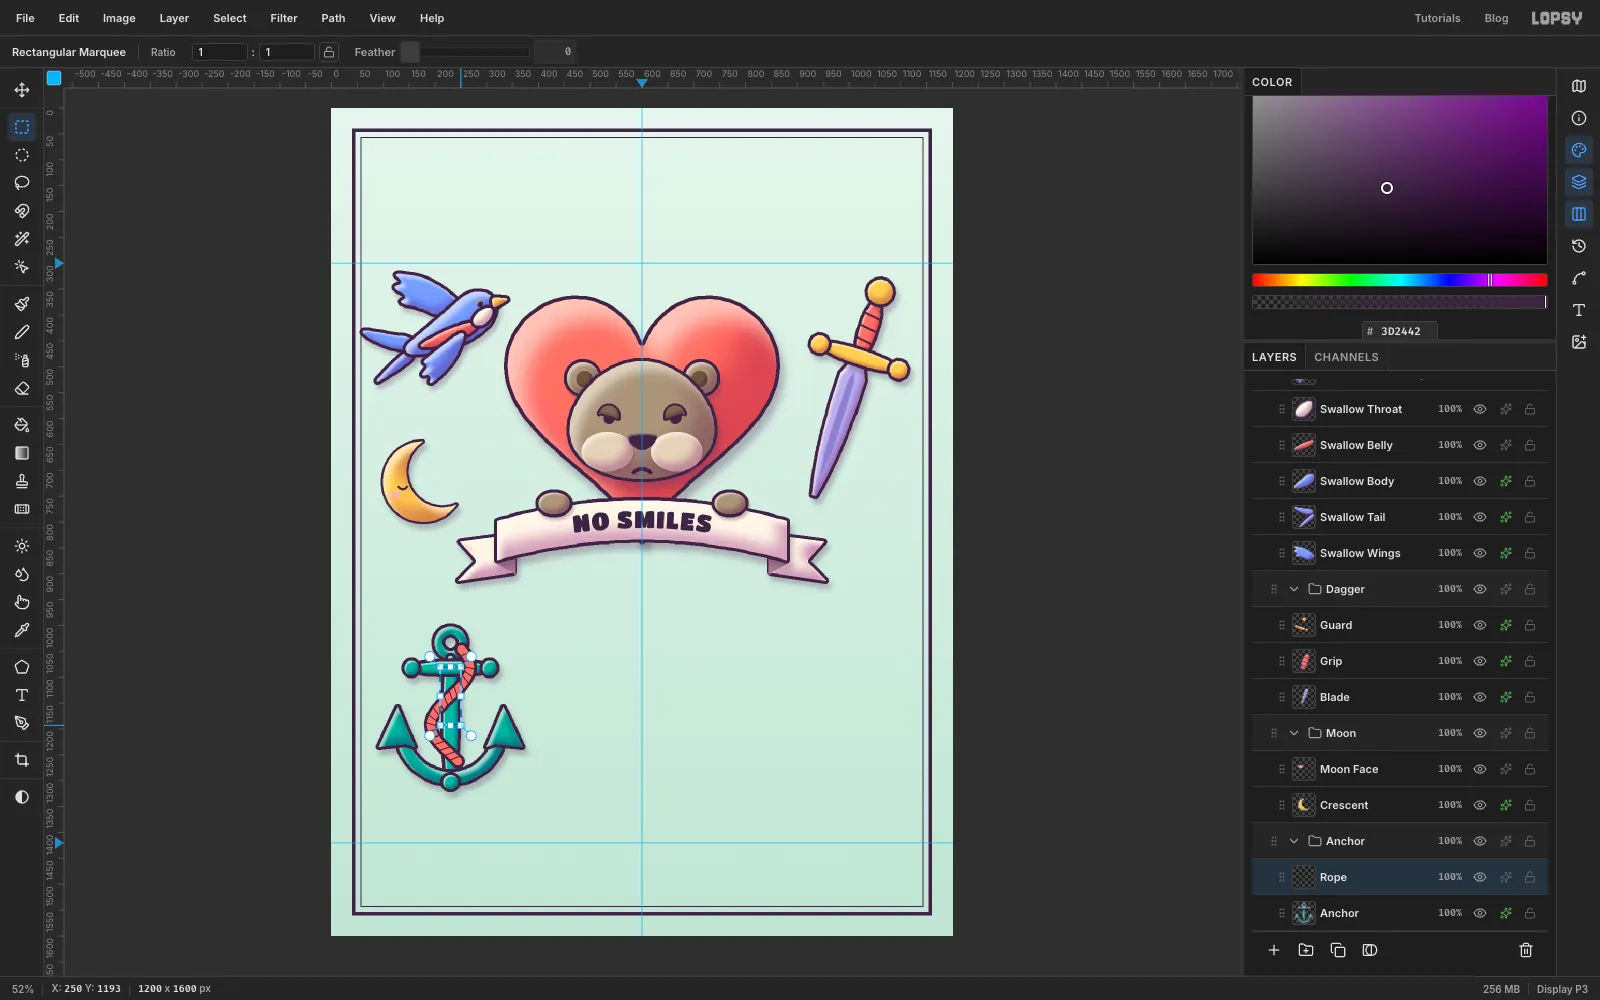
-
Make the rose
Add a
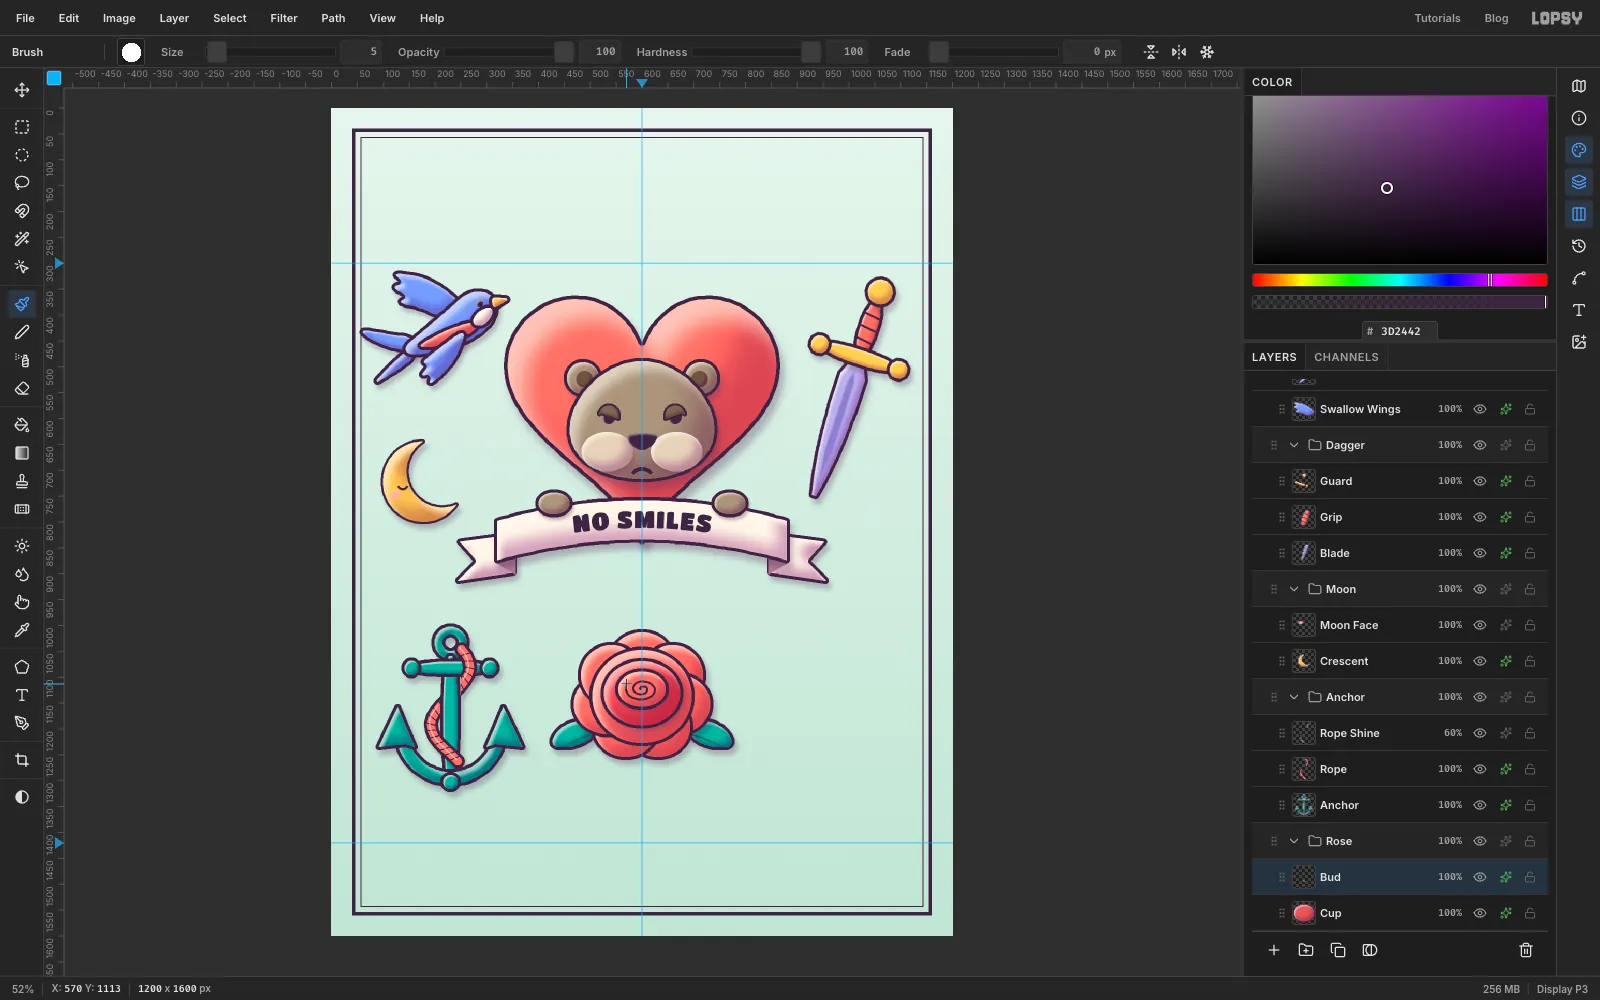
Rosegroup with these layers:Leaves: two short teal leaves at the lower left and right. Brush a darker vein along each one.Petals: seven overlapping coral circles in a ring, then a large circle in the middle. Outline and shade each one as you go, so every petal overlaps the one before.Cup: a deeper oval in the middle.Bud: a smaller coral oval. Then brush a plum spiral on it at size5, Shift-clicking round and round from the centre outwards.
The spiral is a classic tattoo rose centre, and it keeps the rose from looking like a target.
-
Make the dice and merge their pips
Add a
Dicegroup. On aDie Alayer, make a rounded square about 150 px wide in cream: draw a square marquee, then Select → Shrink by 30 and Grow by 30 to round the corners. Give it the outline, shade and highlight, but leave the Drop Shadow until the die is tilted.Add a
Pips Alayer and fill five small plum circles in the five pattern. Then choose Layer → Merge Down, so the pips become part of the die and turn with it.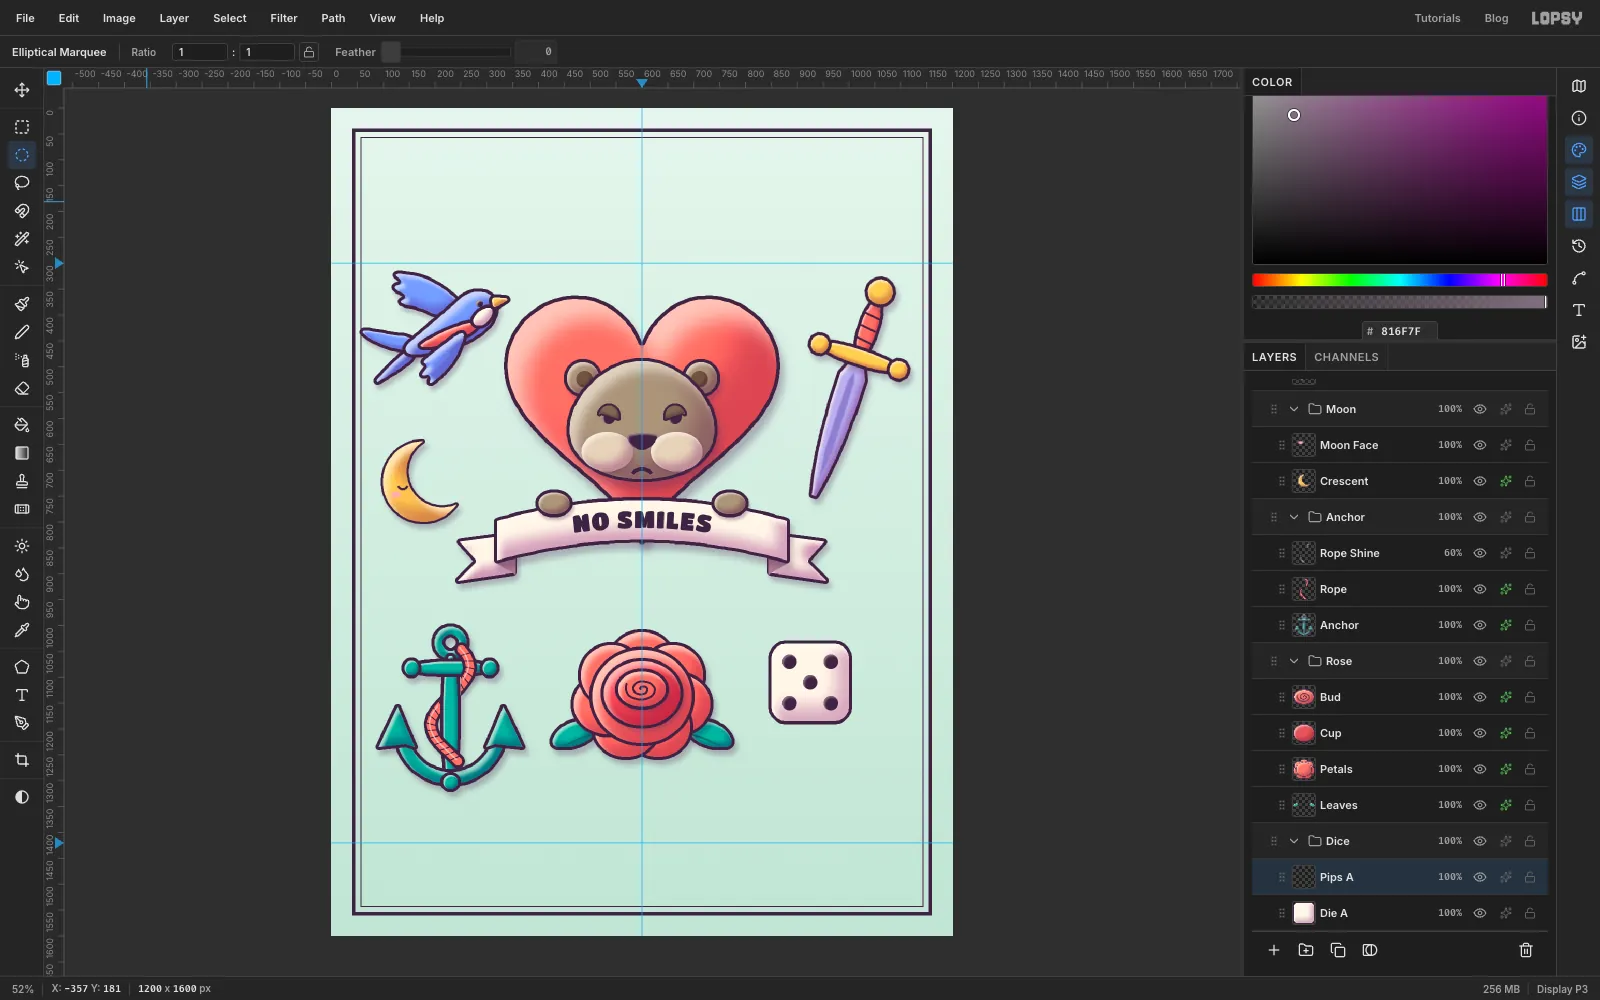
-
Tilt the dice
A single layer needs a selection before the Move tool shows its handles. Draw a rectangular marquee round the die, pick the Move tool, and drag just outside a corner to tilt it about 14° anticlockwise. Press Ctrl+D to commit, then add the Drop Shadow. Adding it after the tilt means it still falls straight down and to the right.
Make
Die Bthe same way, a little smaller, overlapping the first die's lower right corner, with three coral pips. Tilt it about 12° the other way.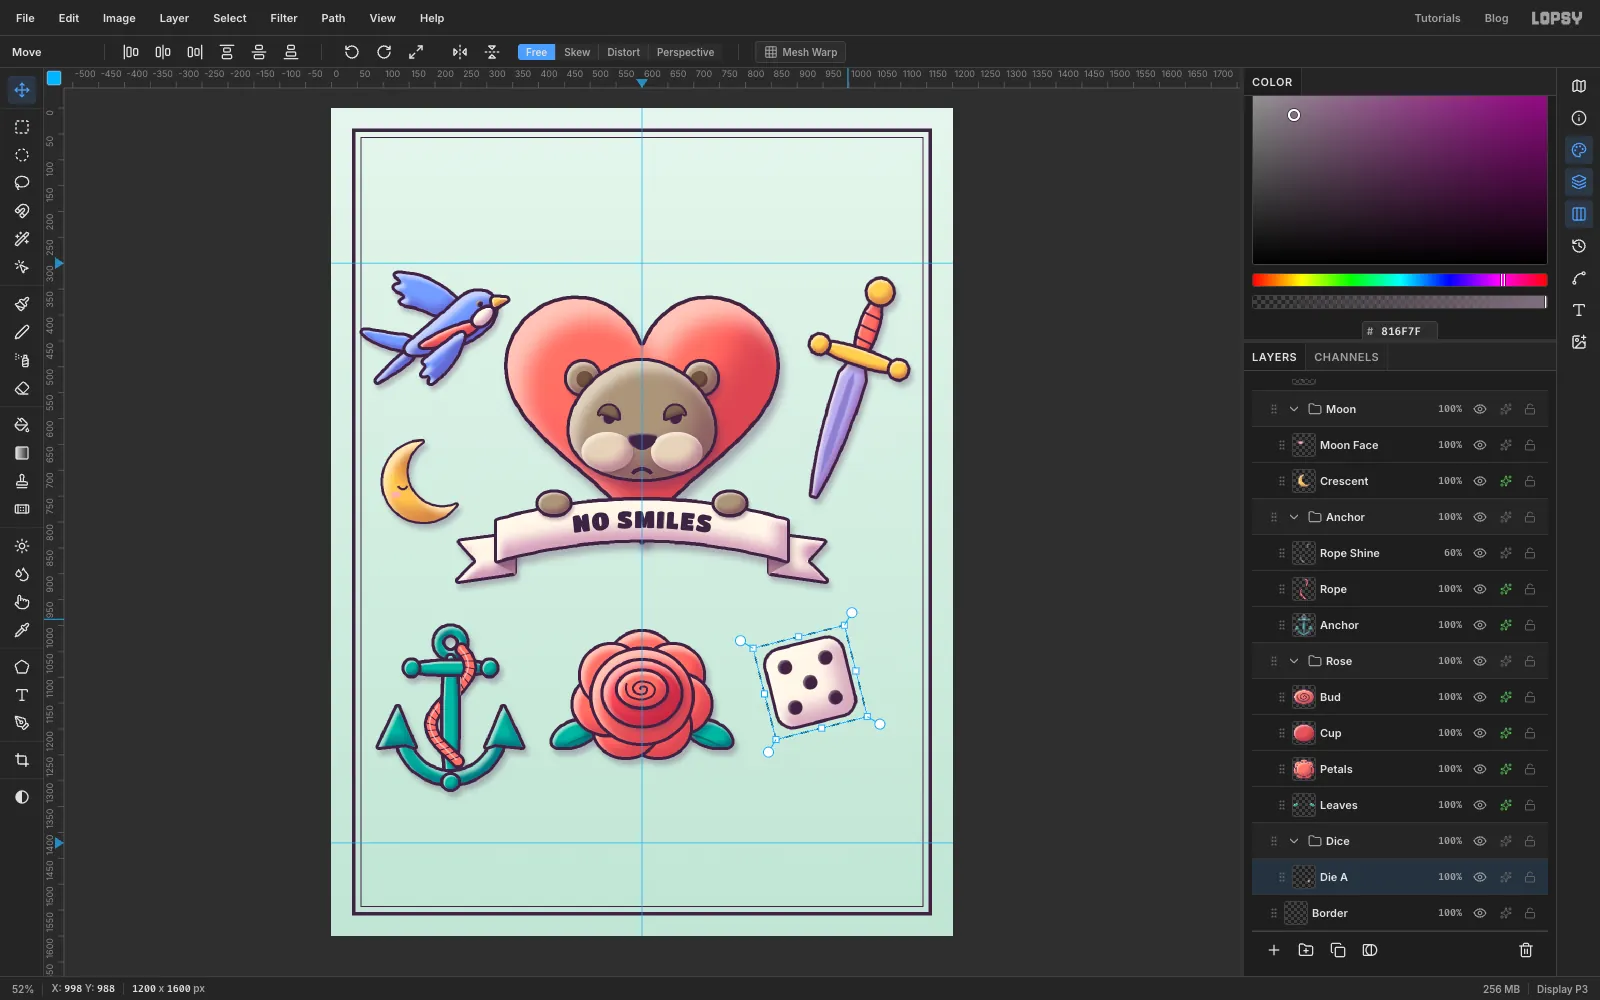
-
Scatter stars and sparkles
Make a
Fillersgroup with aStarslayer. Lasso small five-point stars in butter and four-point sparkles in cream: drag slowly from point to point and the little wobbles disappear under the outline. Give them a 5 px outline. Put them only in real gaps: inside the moon's curve, between the two rows of designs, beside the dagger blade and above the swallow.Space them out. Flash sheets look crowded enough without stars touching the designs.
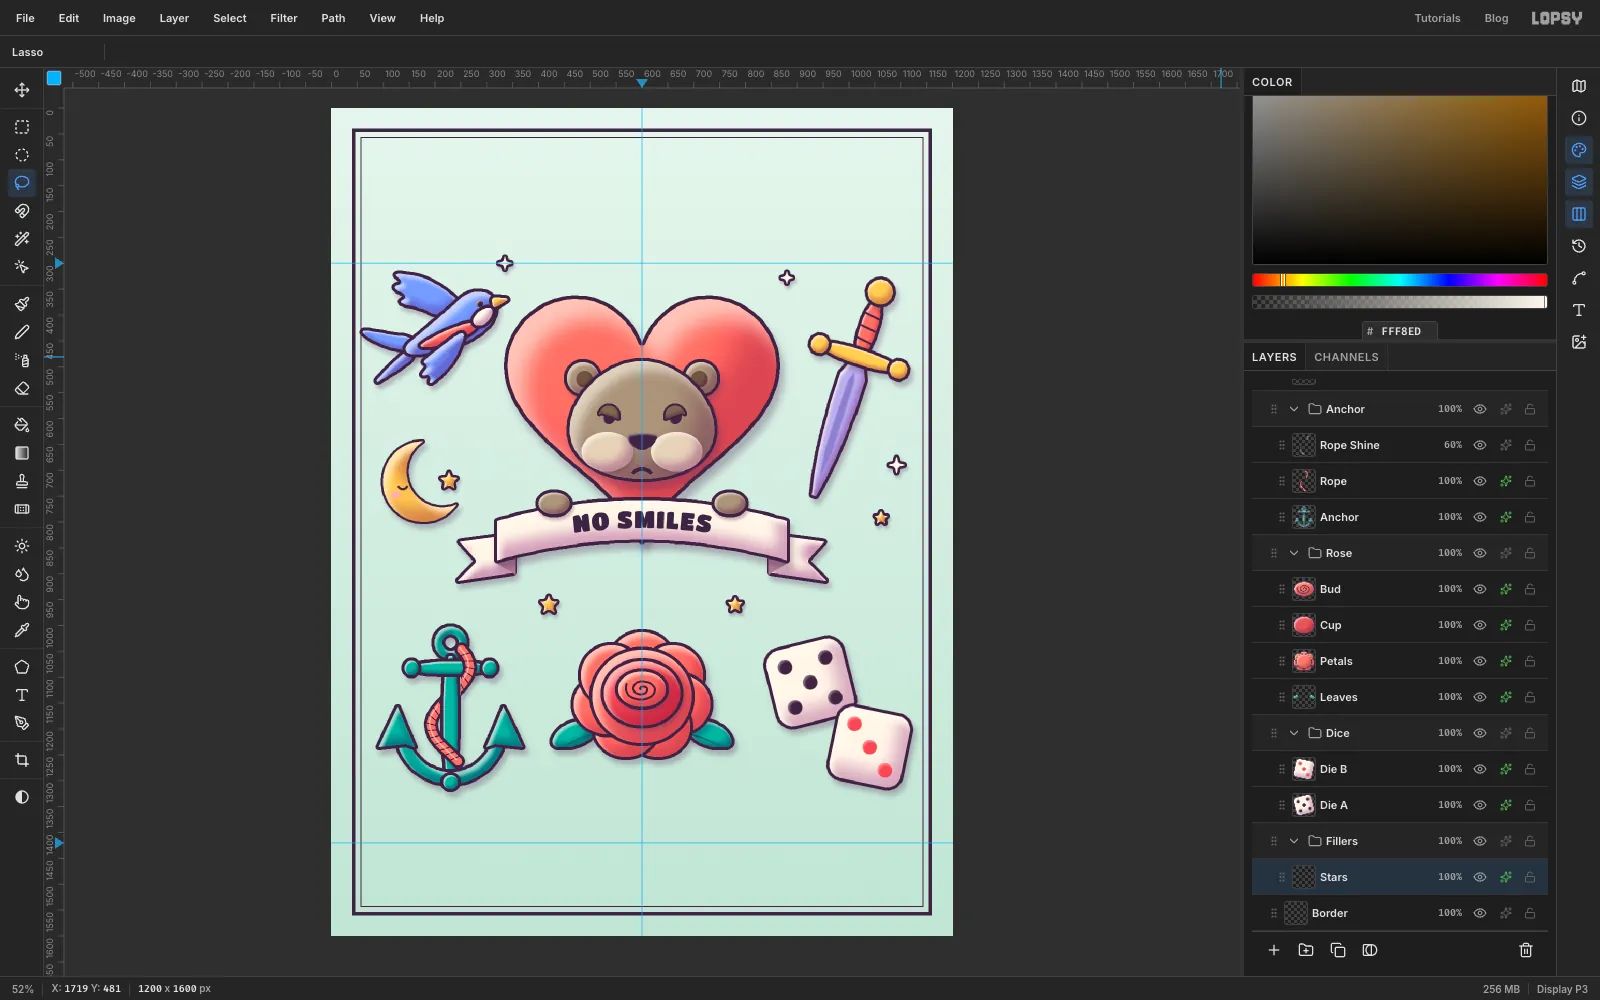
-
Add the price tags
Make a
Price Tagsgroup with aTagslayer. Under each design, drag a rectangle about 96 × 44 px (112 px wide for three-digit prices). Then Shrink it by21and Grow it by21: shrinking that far squashes it to a thin line, and growing it back gives perfectly round ends. Give it the clay treatment in cream. Line the tags up: the three in the middle row share one baseline, and so do the three at the bottom.For each price, select Tags, pick the Text tool with Titan One at
28in plum, click just above the tag and type the price. Press Tab, then switch to the Move tool and nudge the text with the arrow keys until it's centred in its pill.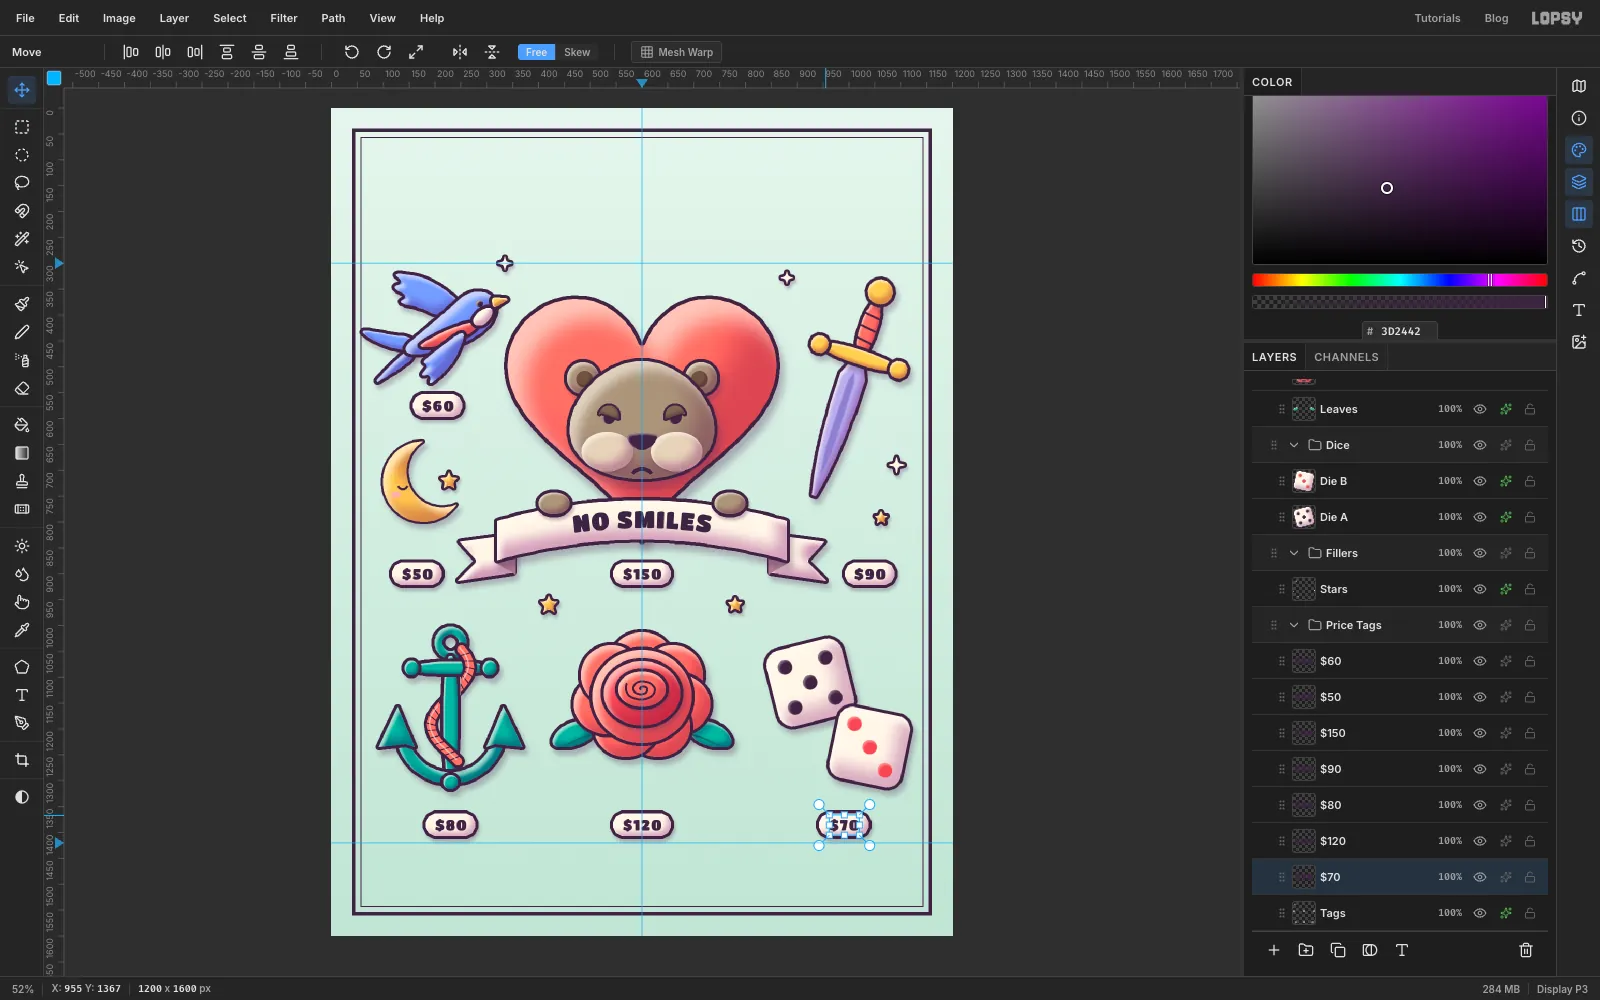
-
Set the clay title
Select Border and make a
Titlegroup. With the Text tool, choose Caprasimo, size96, coral , and typeGRUMPY QUOKKAin the empty space at the top. Commit, then use the Move tool's Align center horizontally button, or the arrow keys, to centre it about 40 px below the top border.In its effects, turn on Stroke (, Width
7) and Inner Glow (, Size9, Opacity75). The pale inner glow puffs the letters up like the clay pieces.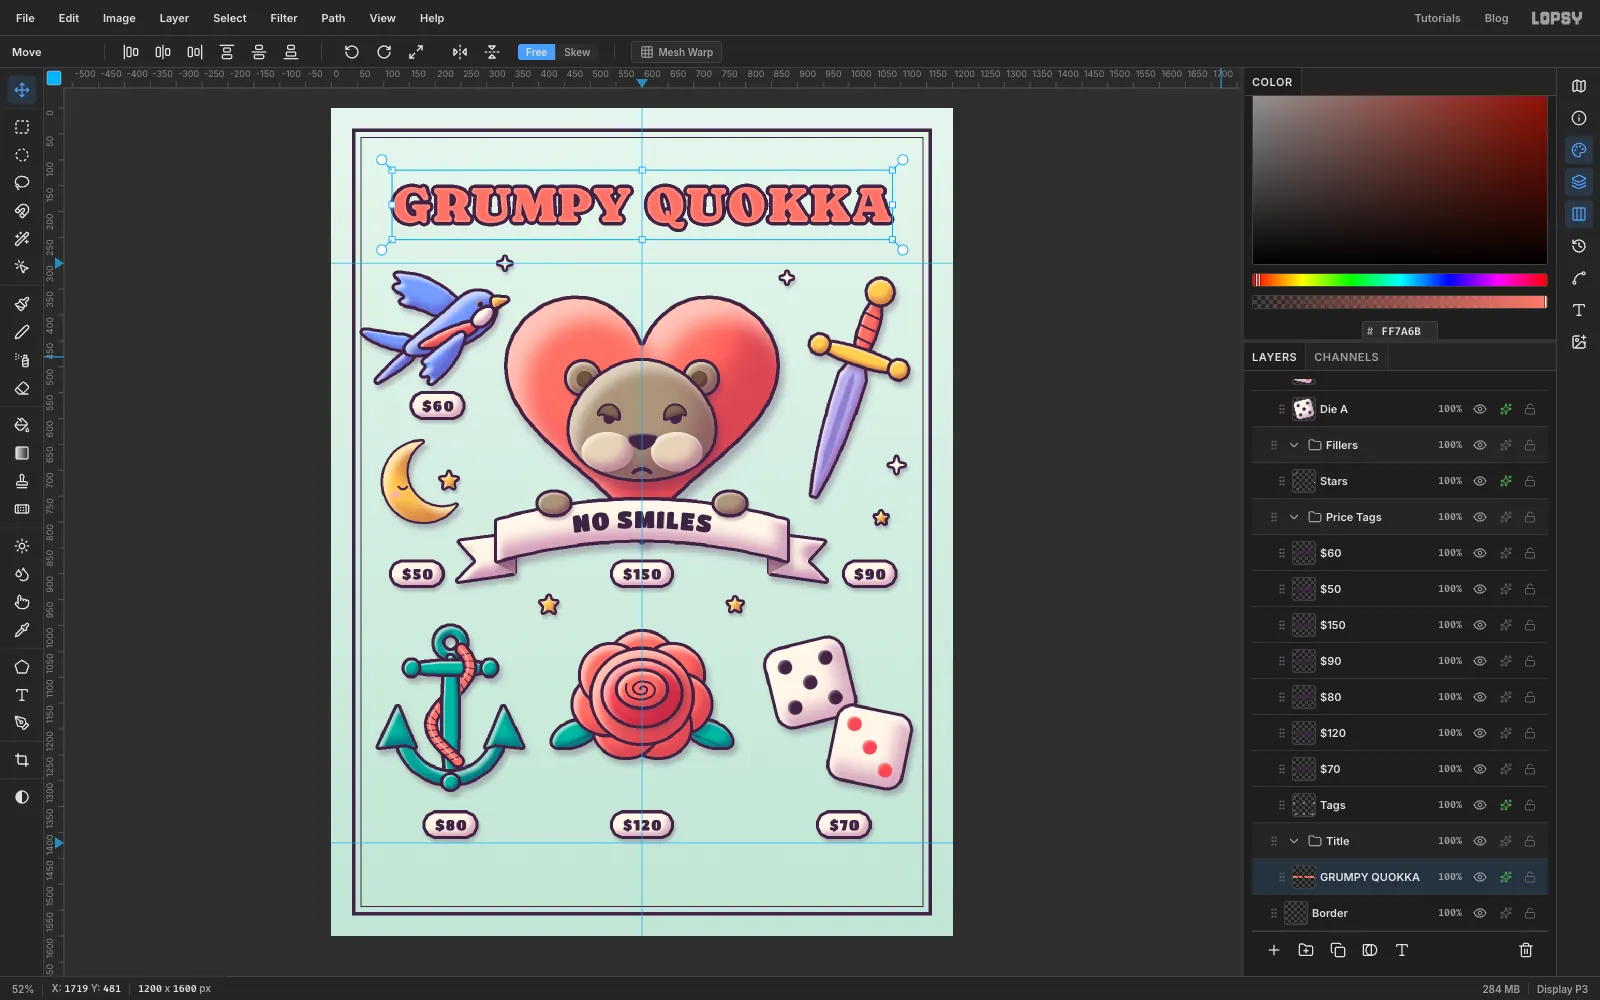
-
Give the title some thickness
Click Duplicate Layer. The copy lands on top and stays as the coral face. The original, now underneath, becomes the extrusion:
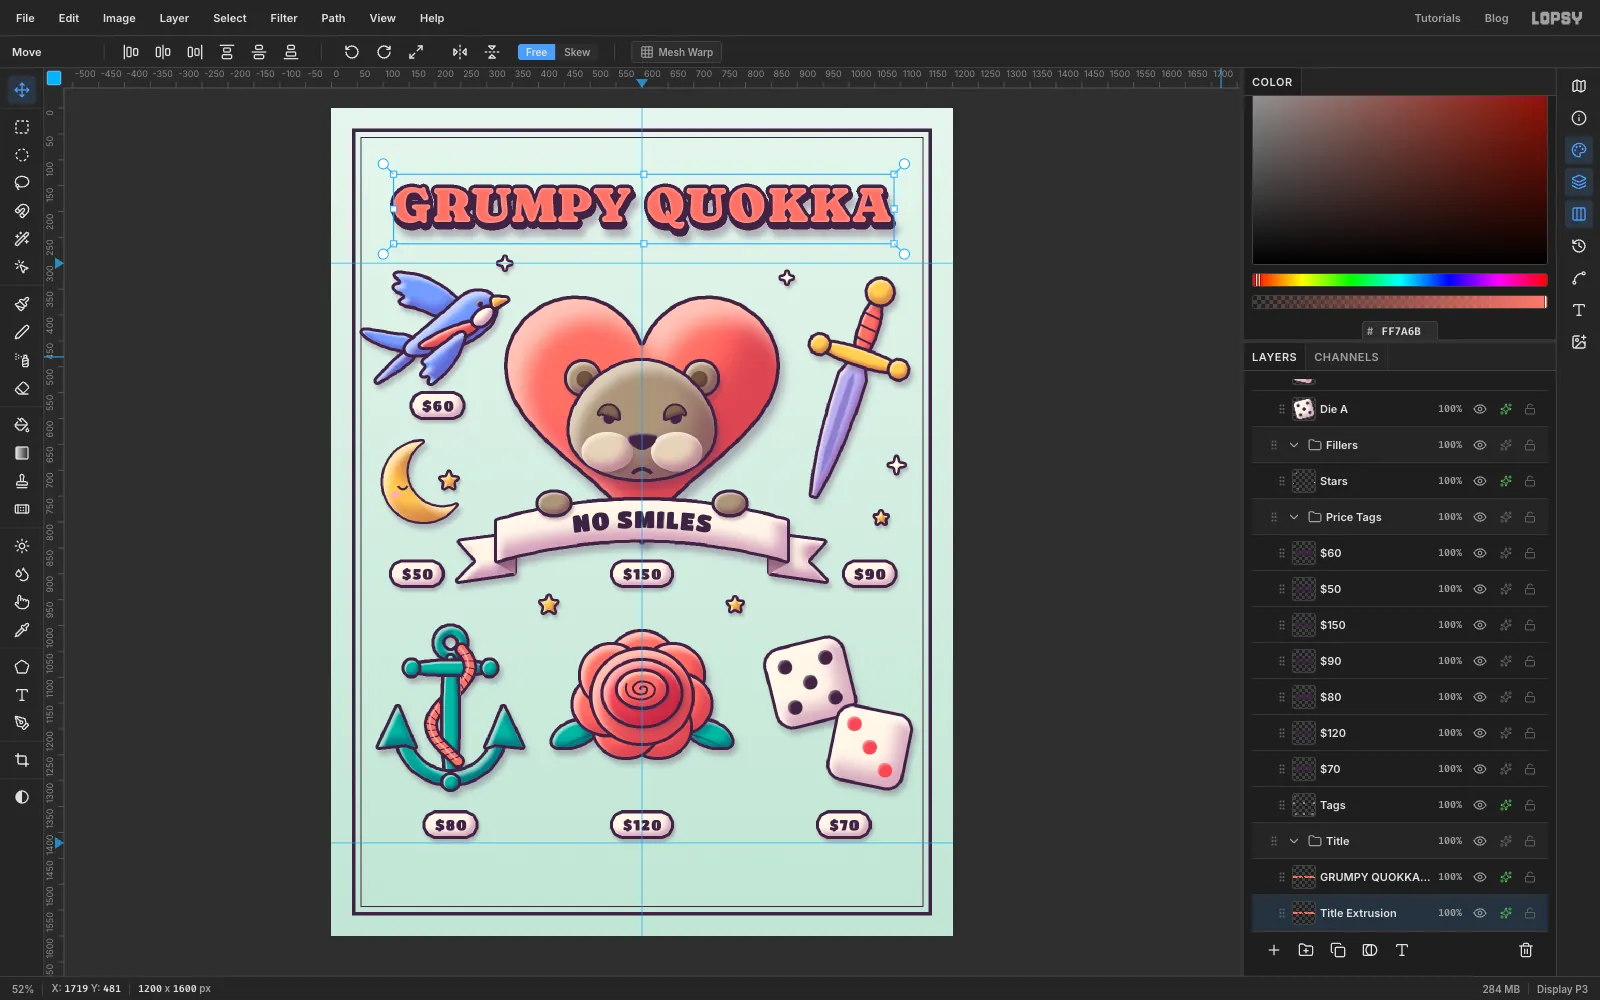
- Click the lower GRUMPY QUOKKA row and rename it
Title Extrusion. - In its effects, turn off Inner Glow, turn on Color Overlay in plum, and add a Drop Shadow (, Blur
18, Offset7/14, Opacity34). - With the Move tool, nudge it 3 px right and 8 px down with the arrow keys.
The plum copy now shows below each letter as a solid edge, so the type looks like it was rolled out of clay.
- Click the lower GRUMPY QUOKKA row and rename it
-
Add the small type
Select a raster layer first, so changing the font doesn't restyle the title. Then set Sniglet at
30, plum, weight ExtraBold, and typeTATTOO FLASH · SHEET No. 7above the title. In the Text panel, set Letter spacing to4. Centre it between the border and the title.Make the footer the same way, with letter spacing
2:WALK-INS WELCOME · NO REFUNDS ON REGRET, centred below the bottom row of tags. Keep it at least 50 px above the inner border line.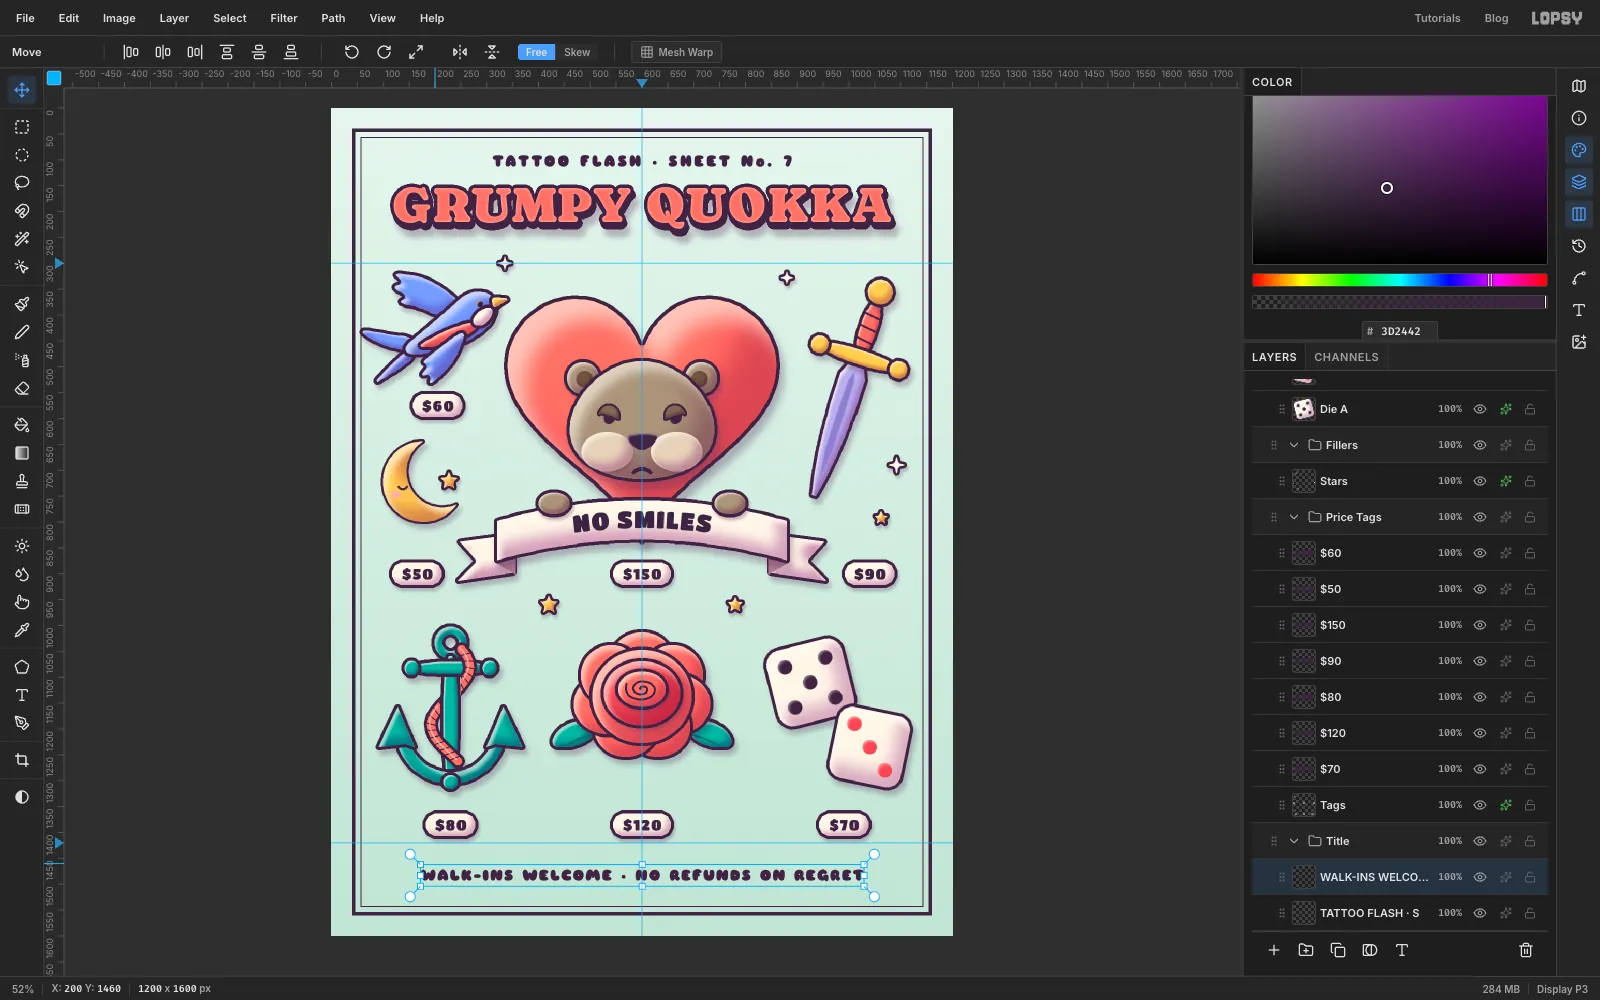
-
Pin the corners using the grid
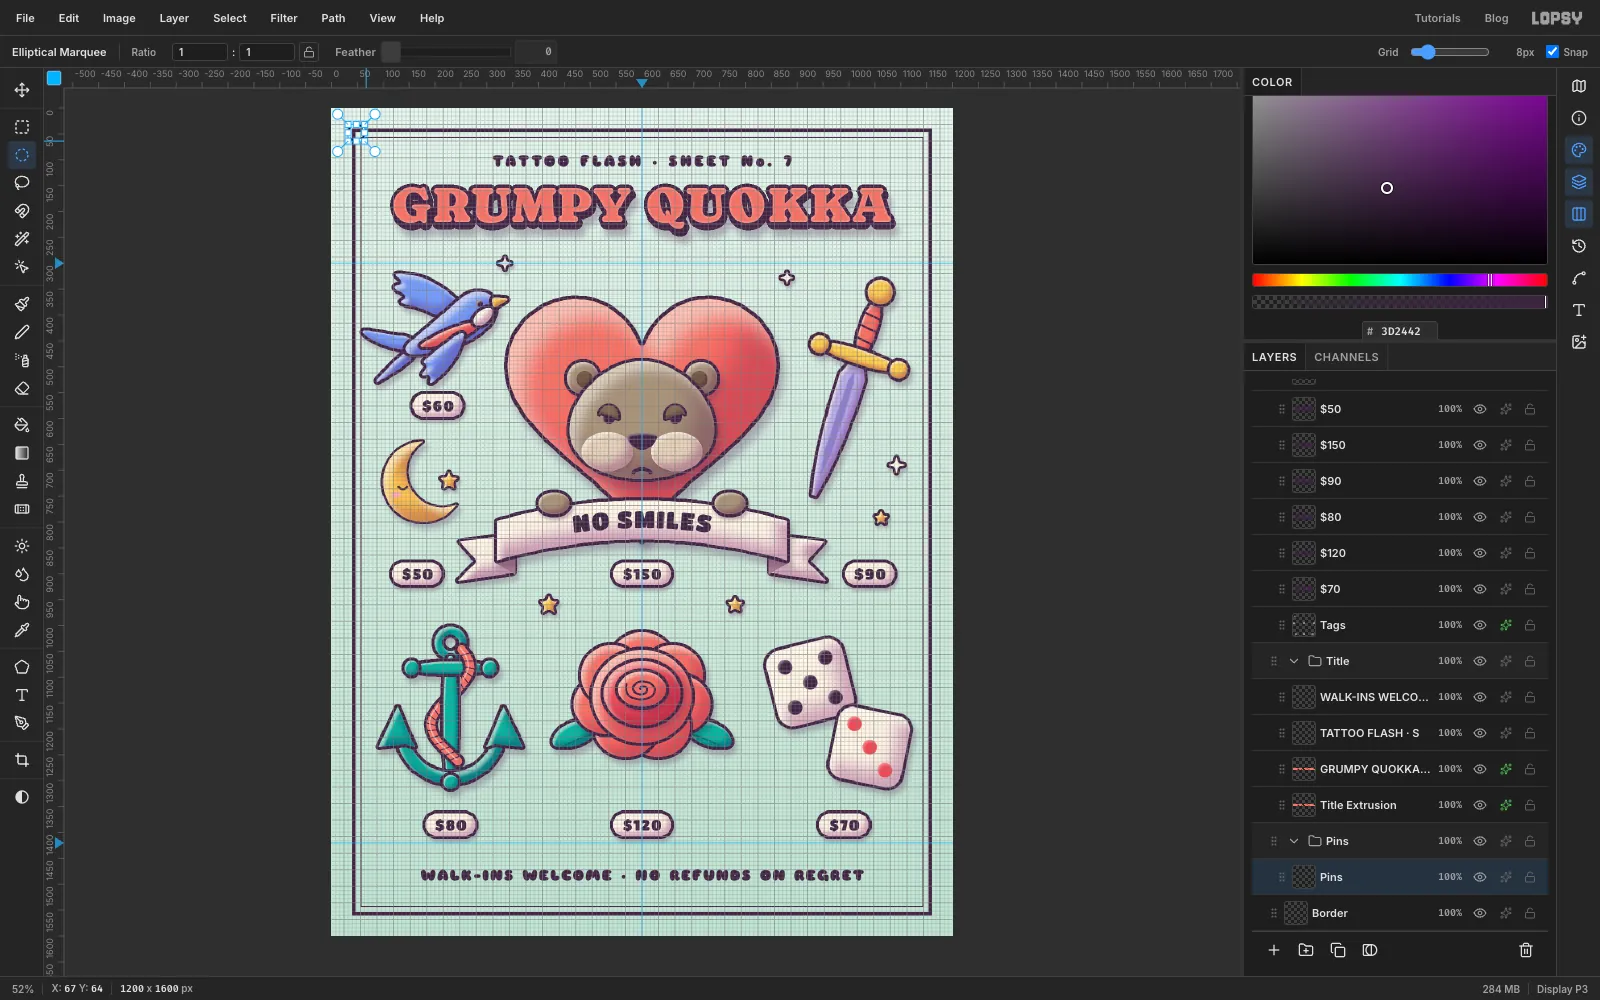
Flash sheets are pinned to the wall. Choose View → Show Grid. A Grid size slider and a Snap checkbox appear at the right end of the options bar. Set the grid to 8 px and make sure Snap is ticked. Make a
Pinsgroup and layer. Then drag a 32 px circle with the Elliptical Marquee over each corner of the border. Snap pulls each circle exactly onto the grid, so all four sit at the same spot on their corners.Fill them with the outline and coral steps. Then untick Snap and hide the grid before you shade them, otherwise the shifted selections snap too. Add a small white dot to each pin for a glossy highlight.
-
Make a plasticine grain
Add a layer named
Clay Grainand drag it to the very top of the Layers panel, above the Hero group. Set the foreground to mid grey and Edit → Fill the whole layer.Choose Filter → Add Noise… and set Amount
100, Mono and Gaussian. Then run Filter → Gaussian Blur… at radius3to clump the noise into soft lumps.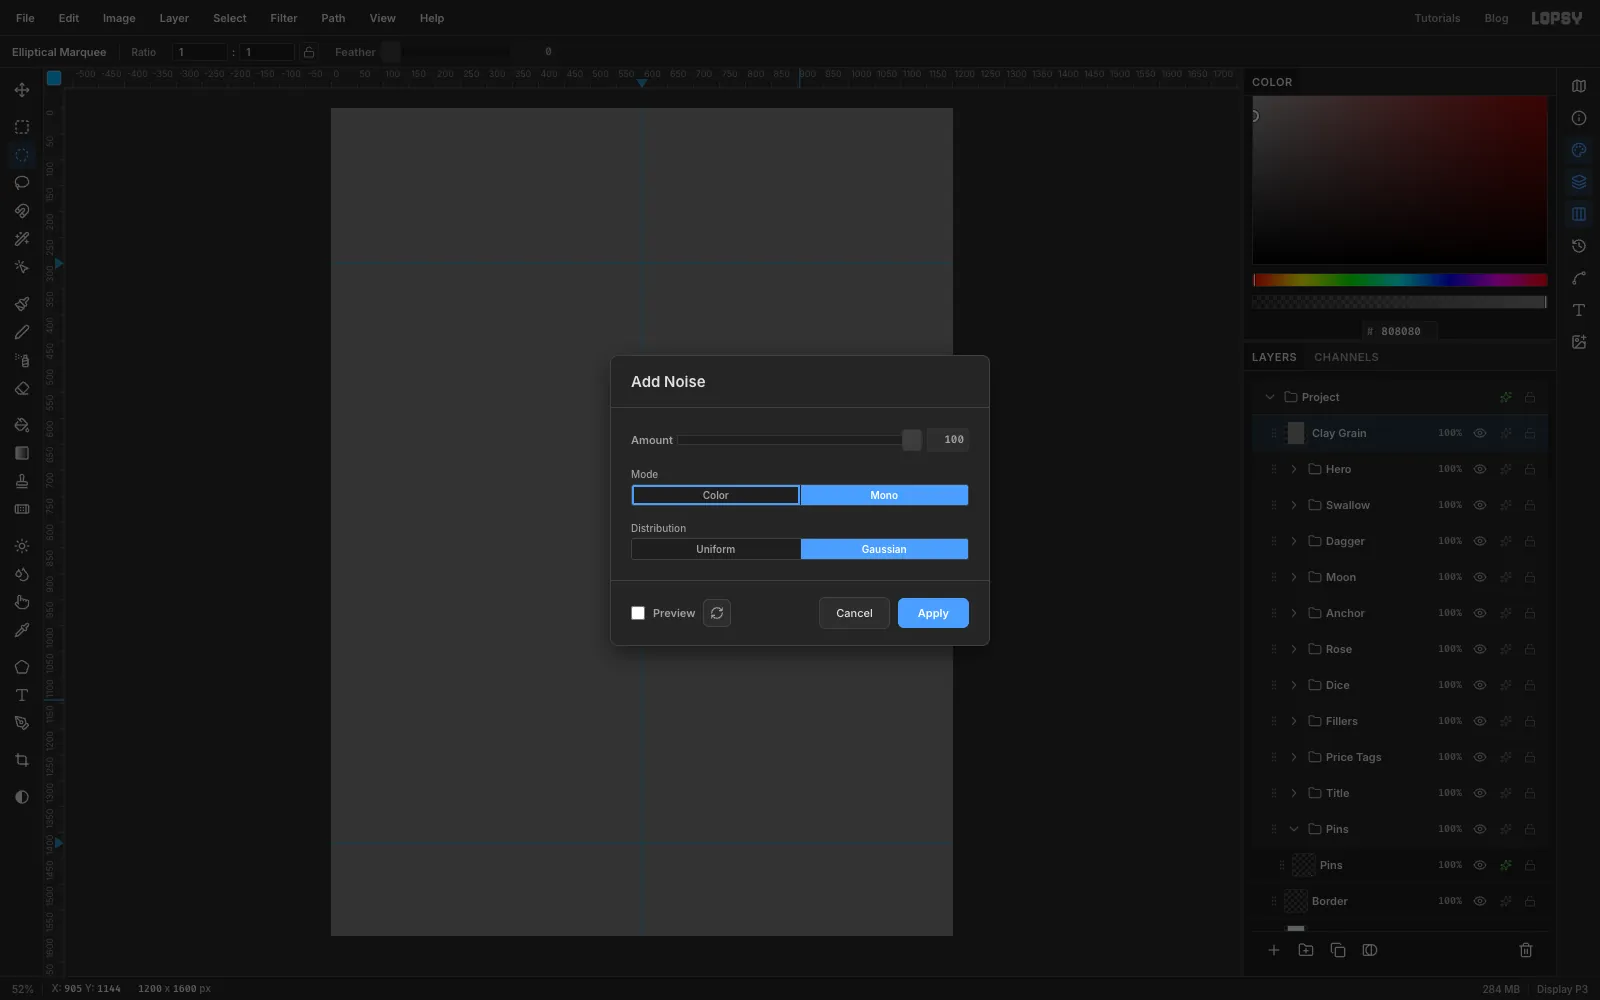
-
Emboss the grain
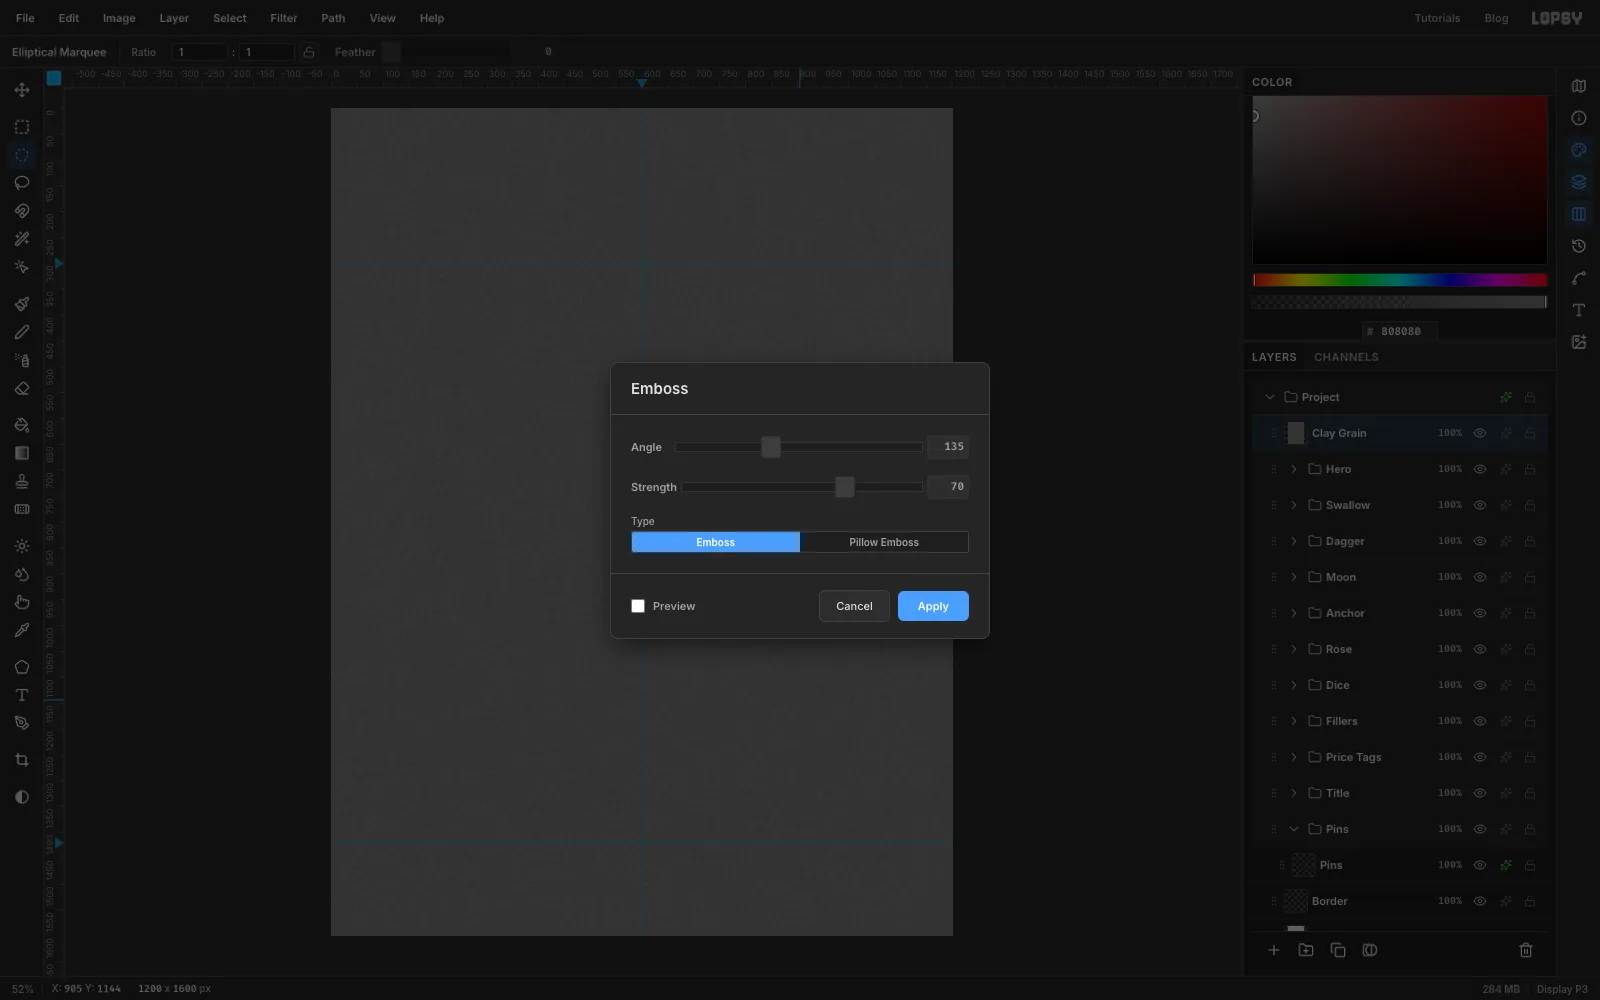
Choose Filter → Emboss… with Angle
135and Strength70, and apply it. Emboss shades each lump from one side, so the noise looks like a pressed, slightly bumpy surface instead of static.Then boost it with Filter → Brightness/Contrast…, Contrast
70.
-
Blend the grain over the clay
Open the Clay Grain layer's effects, set the Blend dropdown to Overlay, and lower the layer's opacity to
70%. Grey disappears in Overlay mode and only the bumps stay, so the whole sheet takes on the slightly lumpy surface of real plasticine.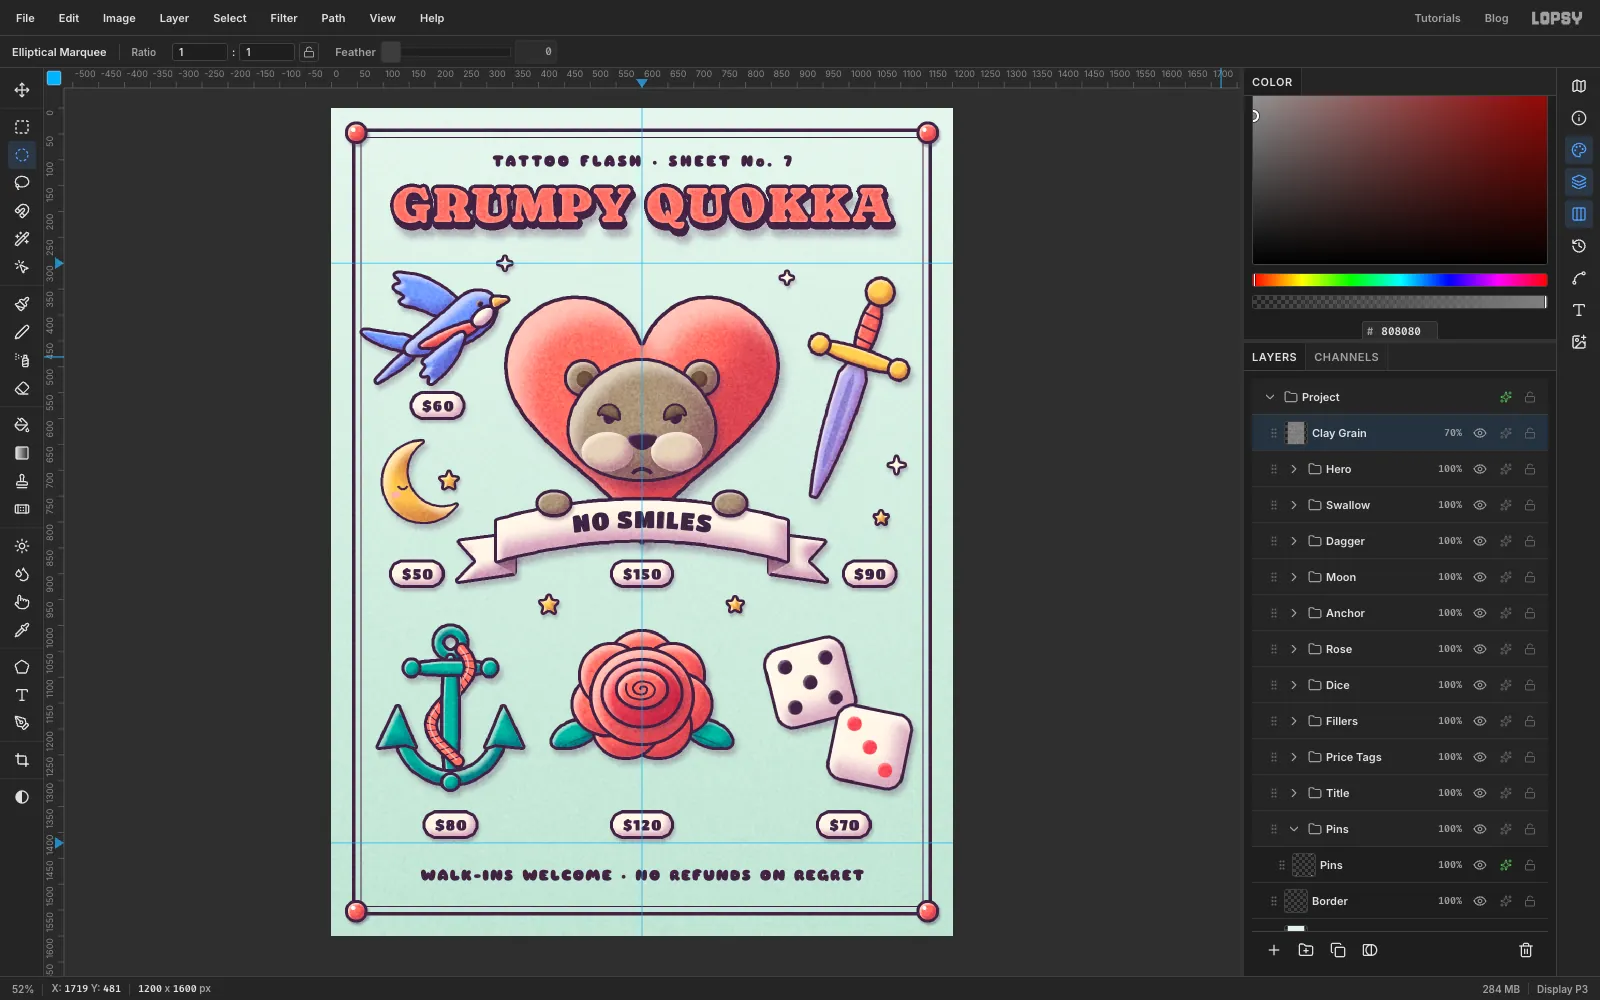
-
Polish the spacing
Step back and look for anything crowding something else. On this sheet three things needed fixing:
- The swallow's tail touched the inner border line. Select the Swallow group, pick the Move tool and press Shift+Right twice to move it 20 px right.
- The $60 tag then sat off-centre under the swallow, and $50 was too close to the banner's left tail. On the Tags layer, draw a marquee round the tag, switch to the Move tool and nudge it with the arrow keys (20 px right for $60, 15 px left for $50). Press Ctrl+D, then nudge each price text by the same amount.
- A tiny point of the heart's outline showed under the middle of the banner. Select Heart, draw a small marquee just under the banner's bottom edge, and press Delete.
Last checks before you export:
- Every design has a price tag directly under it, and the tags line up in rows.
- Nothing touches the border. Keep at least 20 px between any design and the inner line.
- The banner text has the same space above and below.
- All shadows fall the same way, down and to the right.
Finish with File → Quick Export PNG, and save the layers with File → Save Project.