Make a Claymorphism Poster with Layer Effects
Build a soft claymorphism poster. Fill flat shapes, then use Inner Glow, Drop Shadow, a Multiply shade and grouped rotation to make them look like clay.
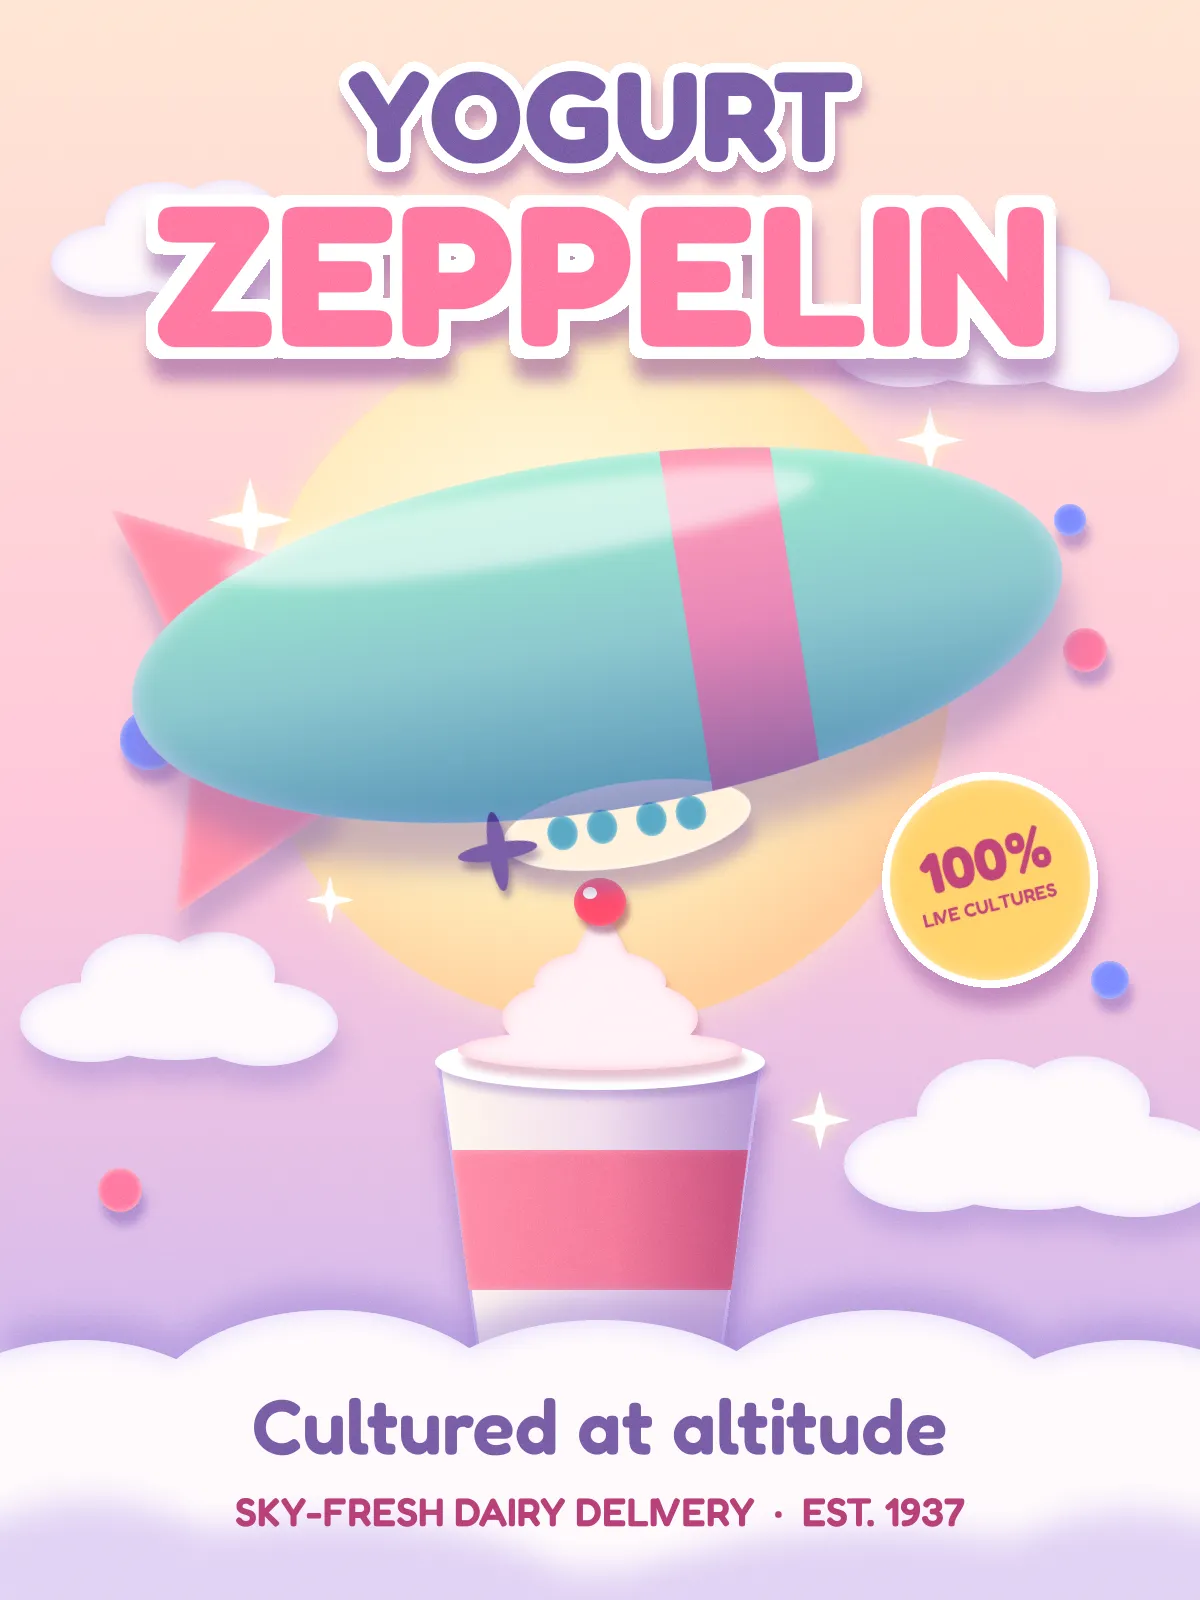
Claymorphism is the look of soft, inflated 3D objects: rounded shapes, pastel colours, a bright edge where the light hits, and a gentle shadow underneath. You don't need a 3D program for it. In this tutorial you'll make Yogurt Zeppelin, a 1200 × 1600 poster for an imaginary dairy that delivers by blimp. Every object starts as a flat fill. Layer effects and a few Multiply layers do the "clay" work. It's about 35 layers in all, so name them as you go and take it one object at a time.
The palette:
-
Sky
-
Sun
-
Sun glow
-
Hull
-
hull shade
-
Pink
hull band, fins and cup band, headline
-
Cream
gondola, cup, yogurt
-
Cloud
-
cloud shadow
-
cloud edge
-
Purple
YOGURT and the propeller
-
headline shadow
-
Badge
-
badge text
-
Berries
-
cherry
-
Start a portrait canvas
Open Lopsy. In the New Document dialog, choose Pixels and type
1200×1600. Click Create.Double-click the empty layer's name and call it
Sky. Every layer name in this tutorial is a suggestion, but matching them makes the steps easier to follow.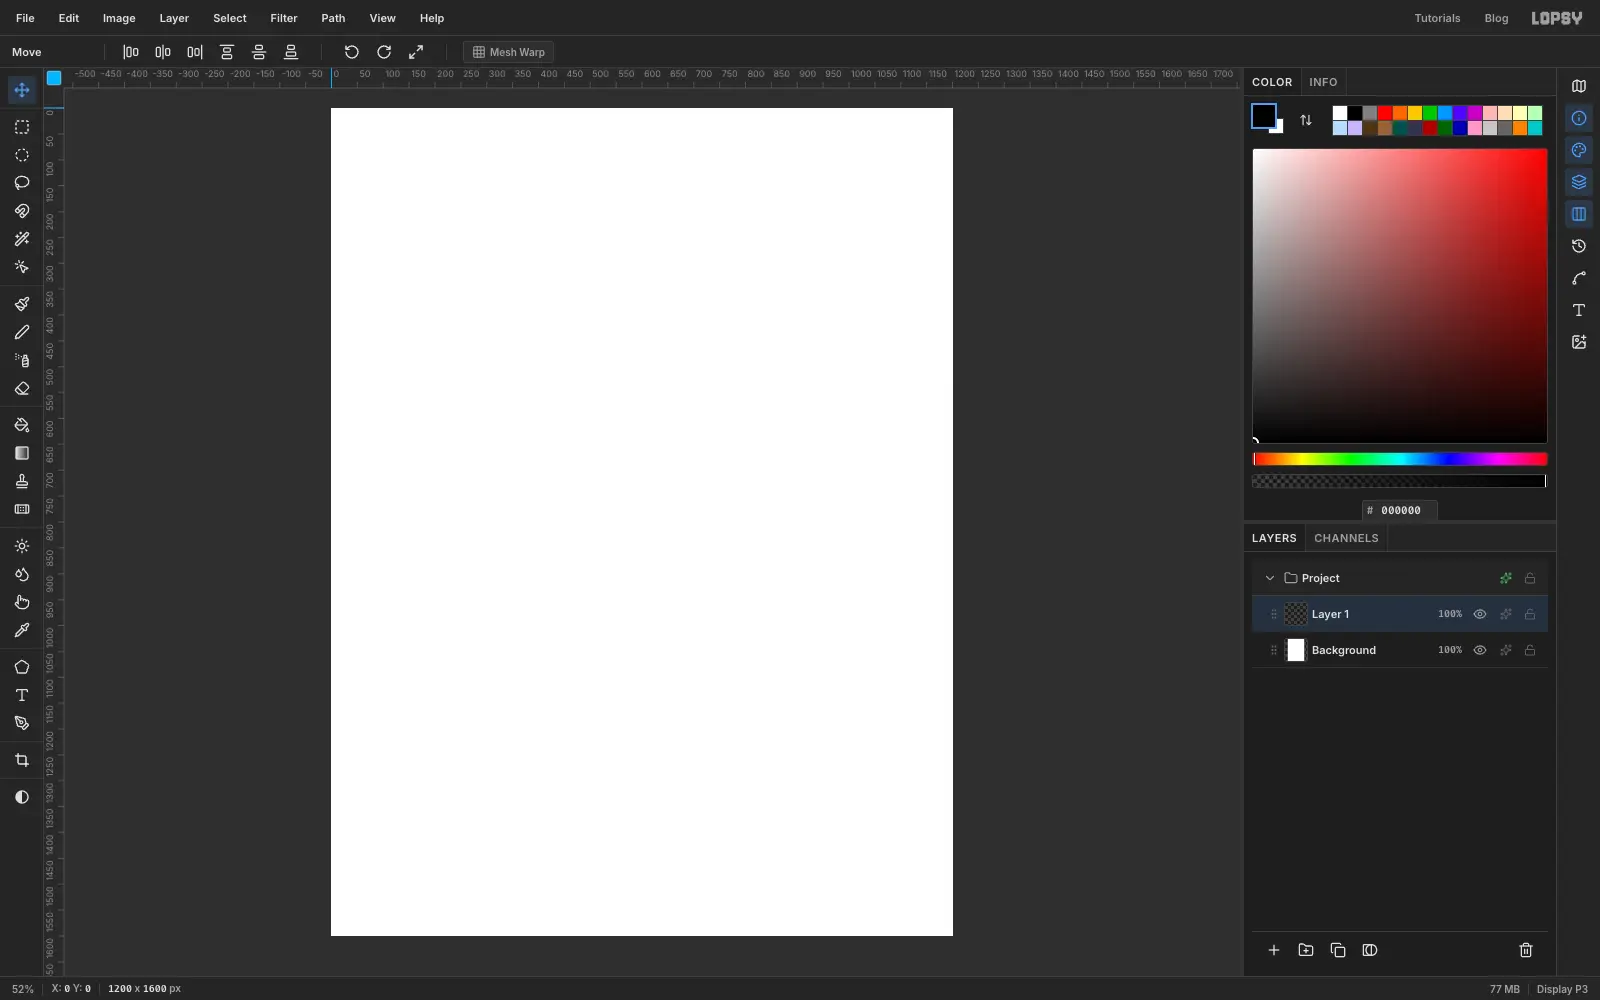
-
Paint the pastel sky
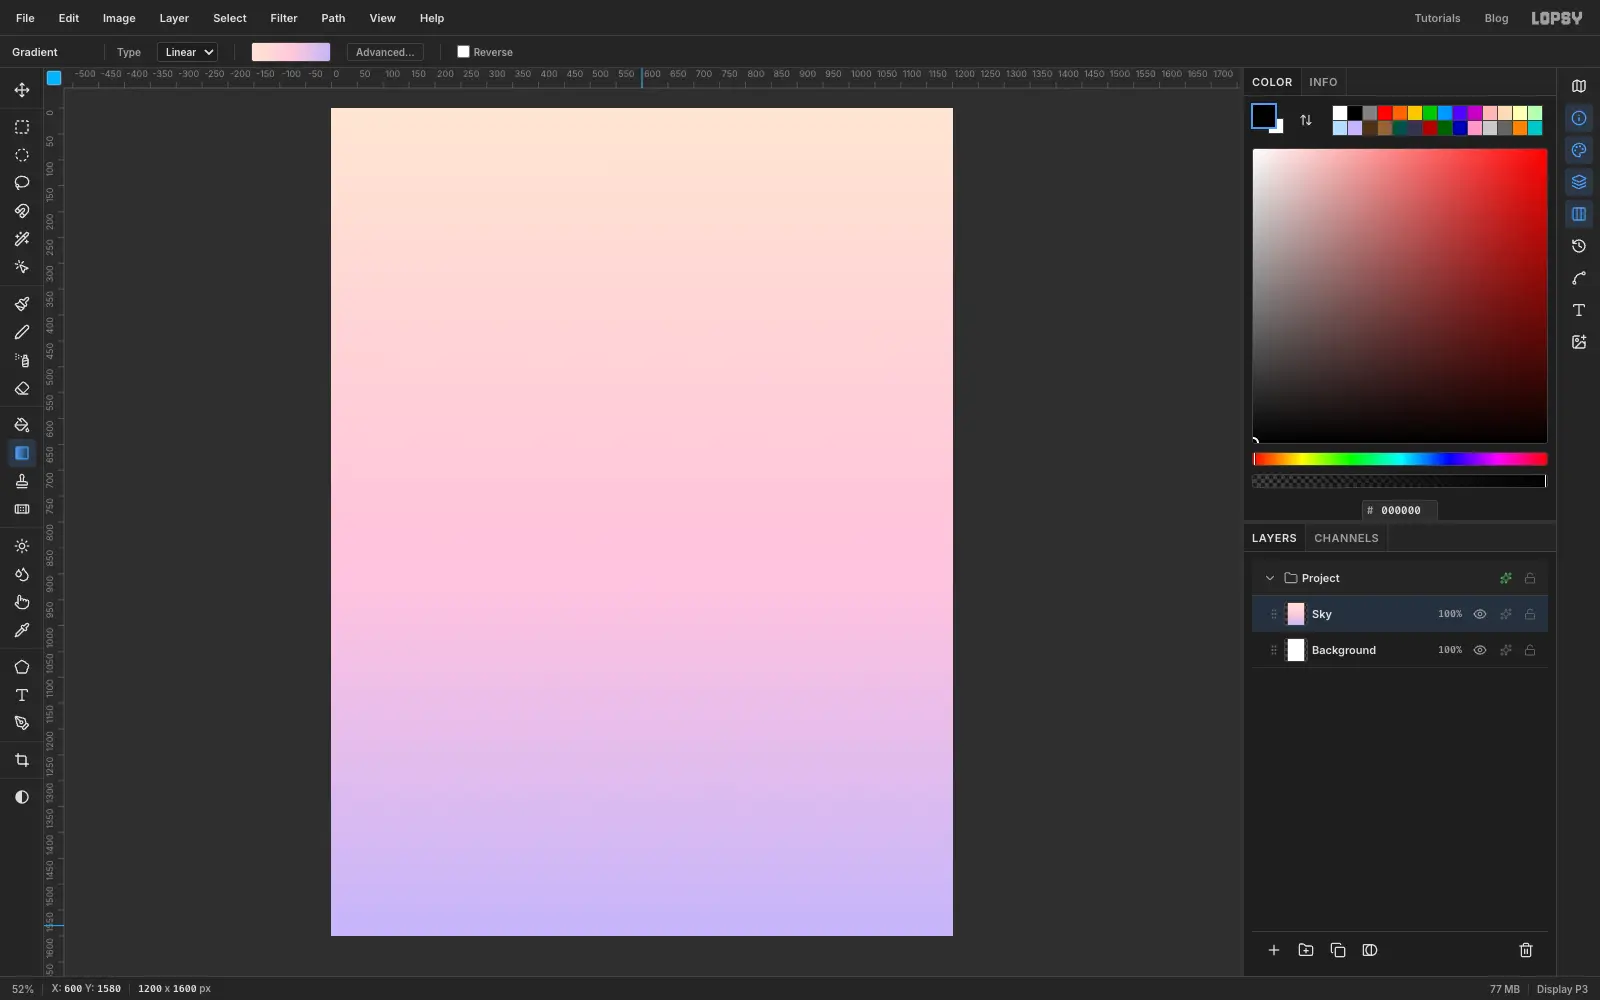
Pick the Gradient tool and click Advanced…. Set three stops: at the start, at 50% and at the end. Click Done, make sure nothing is selected, and drag from near the top of the canvas straight down to near the bottom.
Keep the sky soft. Claymorphism works because everything is low-contrast and the objects are the brightest things on the page.
-
Add a glowing sun
Add a layer named
Sun. Pick the Elliptical Marquee and drag out a circle about 700 px wide, a little above the middle of the canvas.Choose the Gradient tool again, set the type to Radial and use the stops , at 70% and . Drag from just up-and-left of the circle's centre out to its edge, so the bright spot sits off-centre like a lit ball.
Open the layer's effects (the sparkle icon on its row), switch on Outer Glow, and set the colour to , Size to
60and Opacity to70.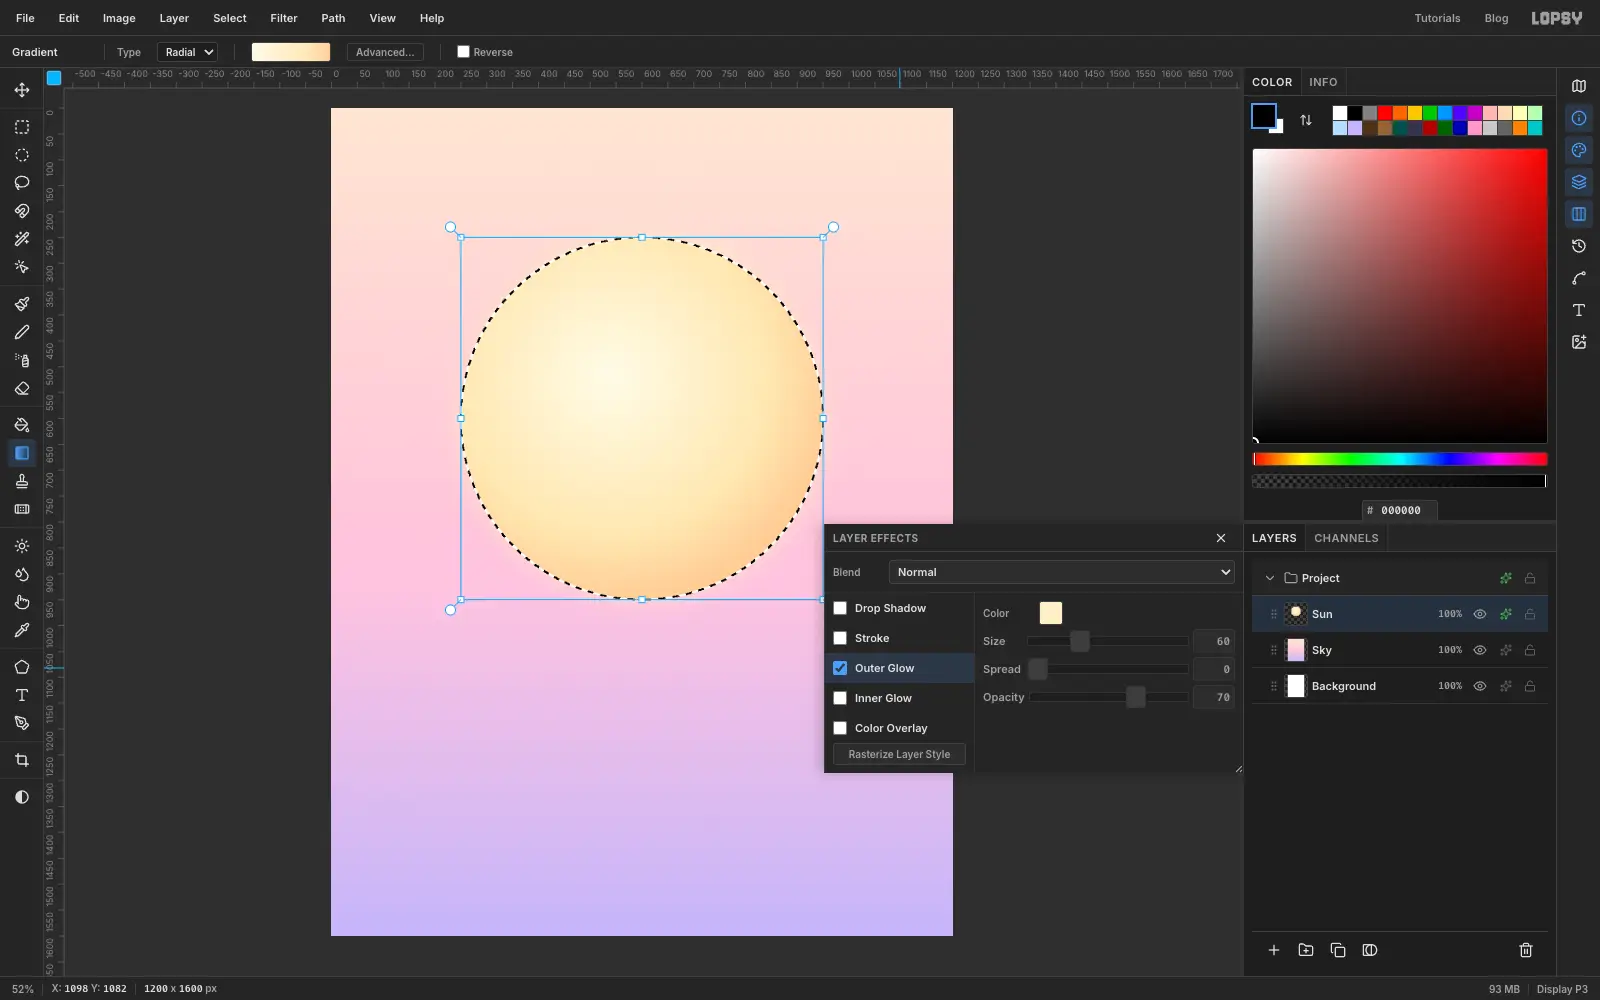
-
Fill the hull and give it clay edges
Add a layer named
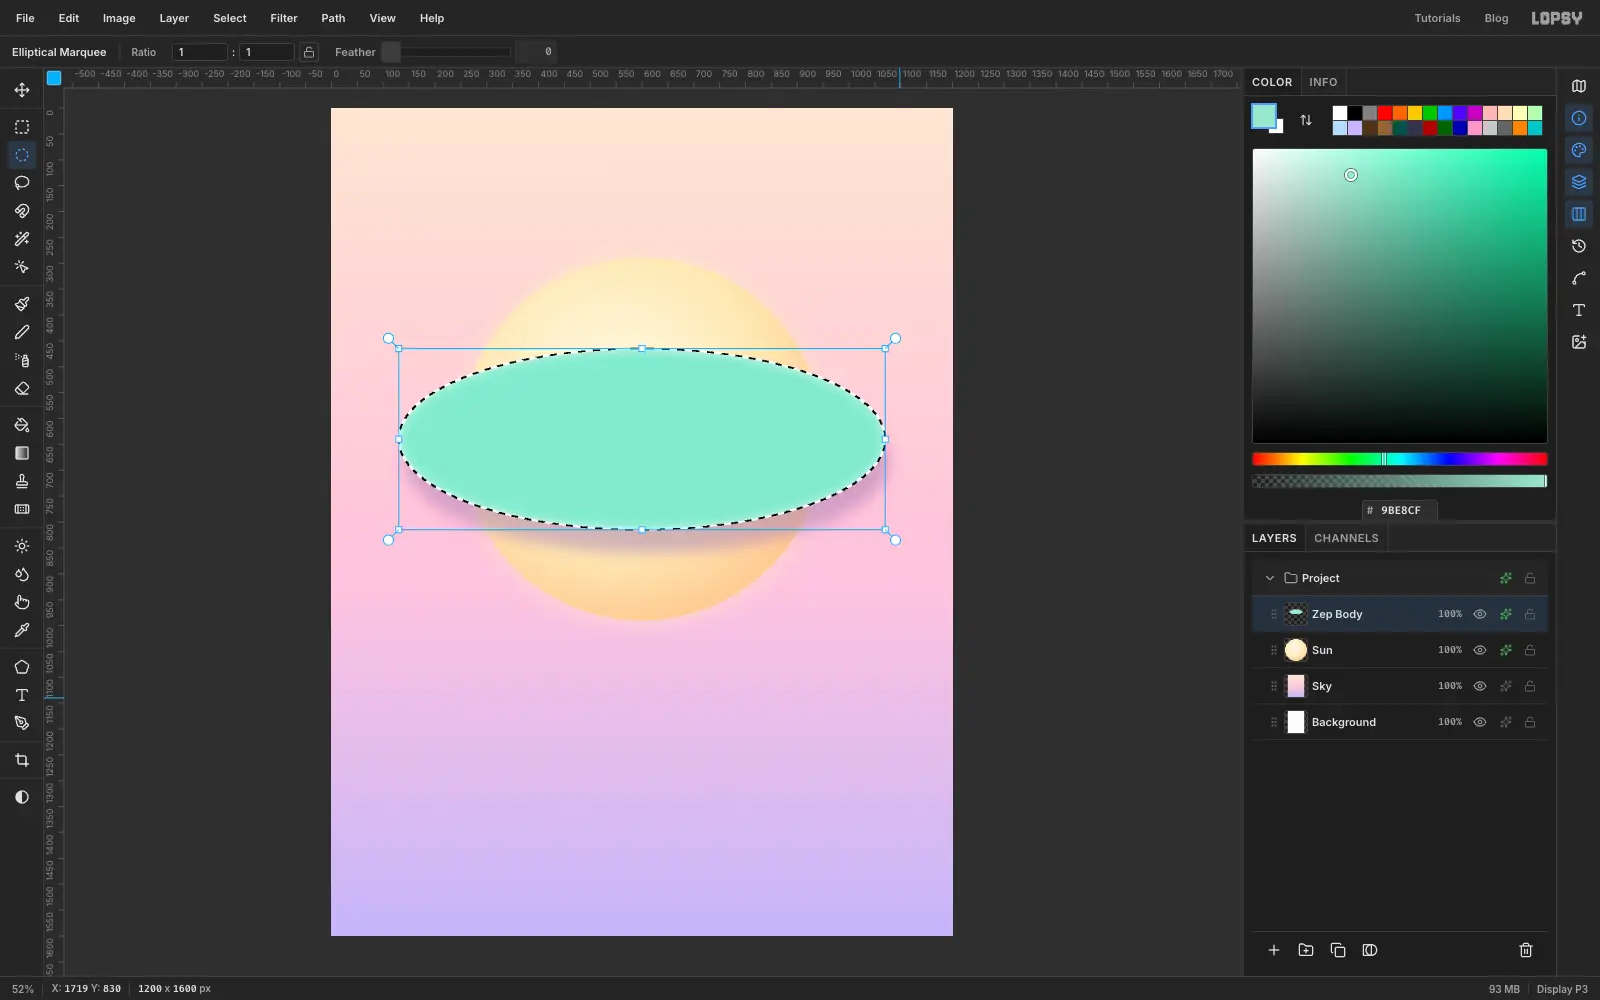
Zep Body. Set the foreground colour to . With the Elliptical Marquee, drag a wide, flat ellipse across the sun, roughly 940 px wide and 350 px tall. Fill it with Edit → Fill.These two effects are the heart of the clay look:
- Drop Shadow in : Blur
45, Offset Y45, Offset X10, Opacity45. - Inner Glow in : Size
30, Opacity80. This brightens the rim, which makes the shape look inflated.
- Drop Shadow in : Blur
-
Shade the hull with a Multiply layer
Leave the ellipse selected. Add a layer named
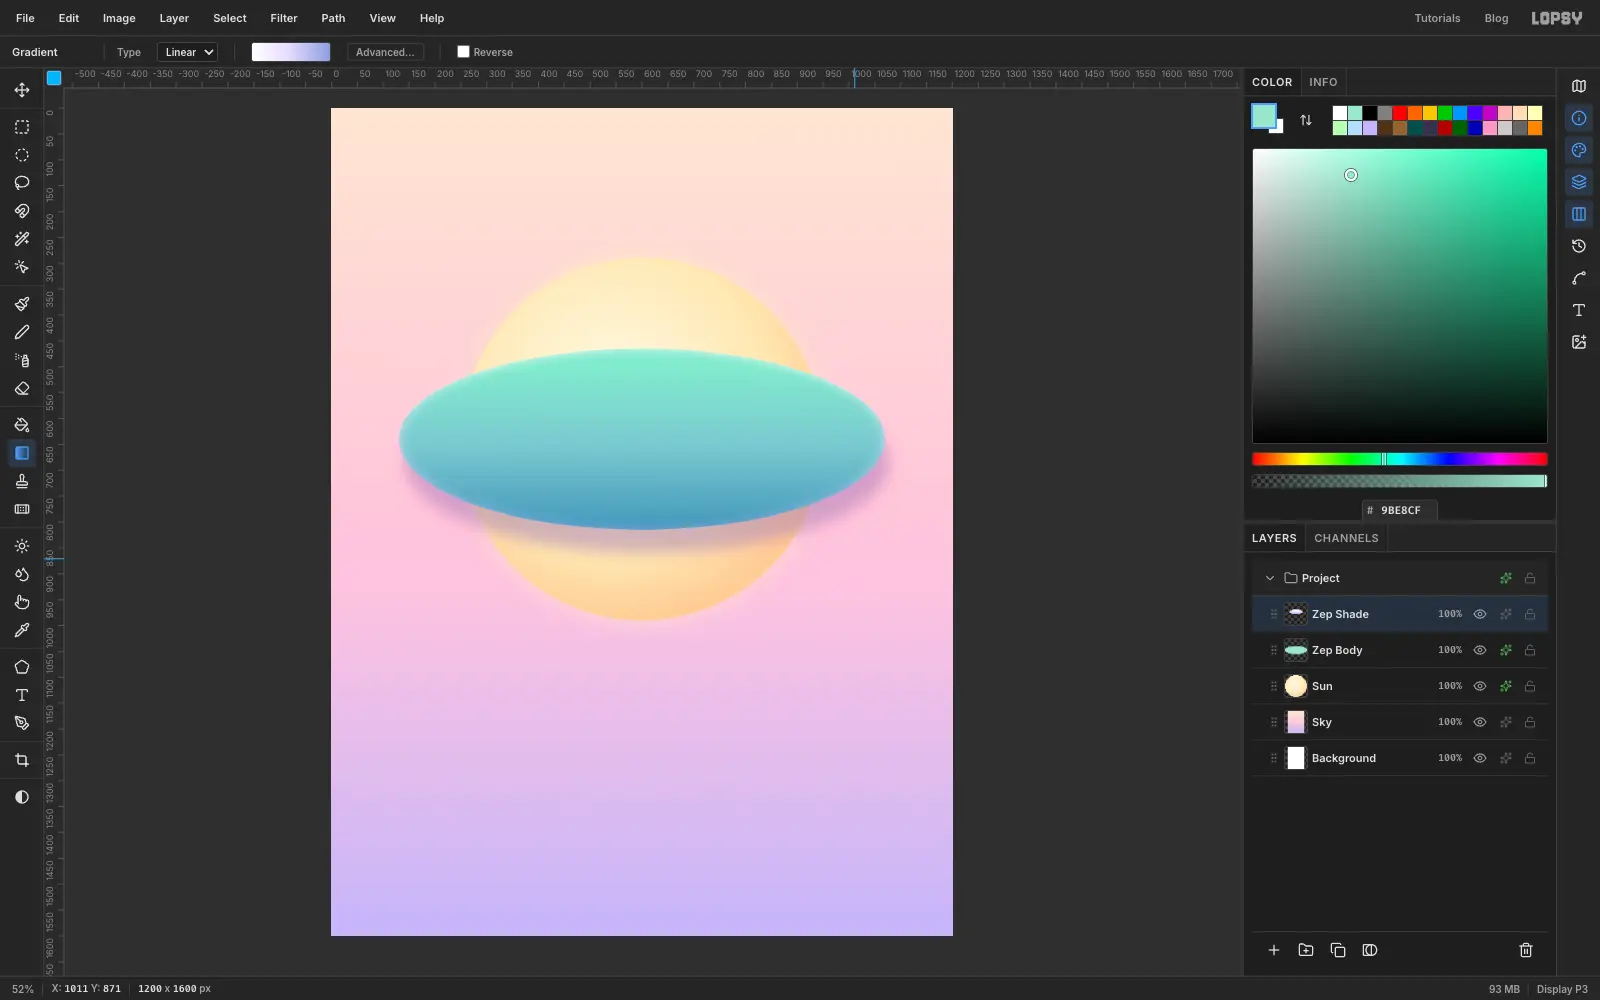
Zep Shade, open its effects, and pick Multiply from the Blend dropdown at the top of the panel.With the Gradient tool, use three stops: , at 45% and . Make sure the type is back on Linear, then drag from the top of the ellipse down to its bottom edge. Because the selection is still active, the shading stays inside the hull. Multiply only ever darkens, so the white end leaves the mint untouched.
-
Add a highlight and a stripe
For the highlight, add a layer named
Zep Highlight, set the foreground to white, and drag a thin ellipse near the top-left of the hull. Choose Select → Feather…, enter14and apply it. Fill, deselect with Ctrl+D, and lower the layer's opacity to 55%.For the stripe, click the
Zep Bodyrow and add a layer calledZep Stripe, so it sits just above the hull. Redraw the same hull ellipse and fill it with . Now draw a tall, narrow rectangle with the Rectangular Marquee across the part you want to keep. Use Select → Inverse, press Delete, and deselect. Only the band remains, with its ends neatly following the hull.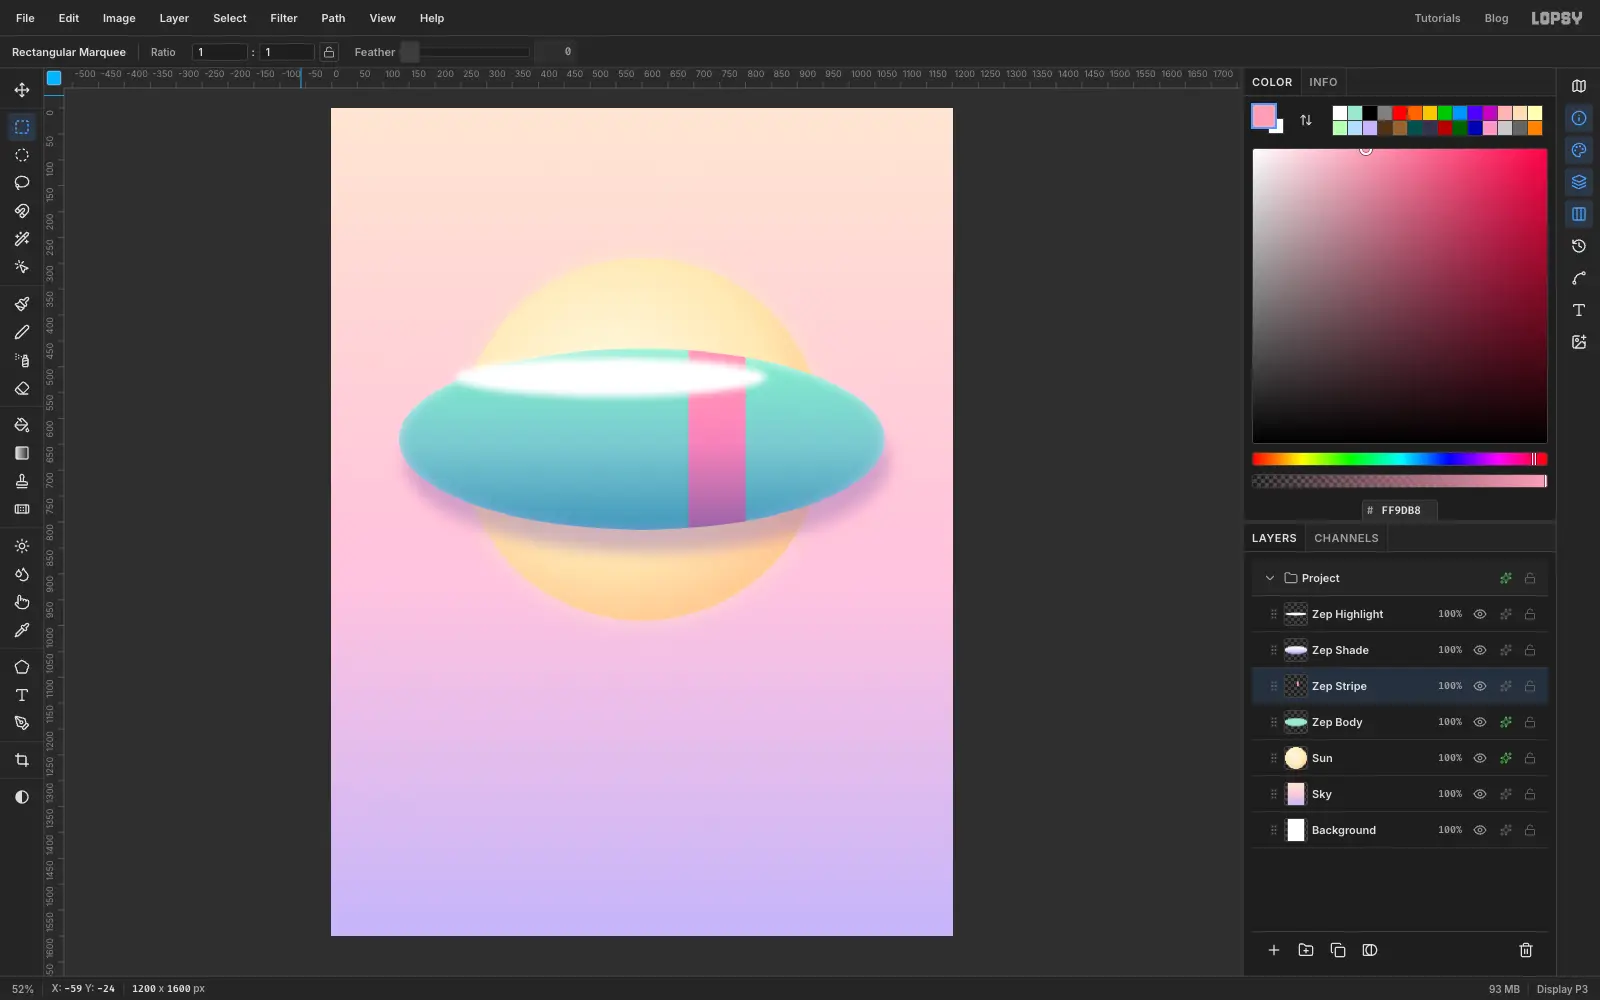
-
Draw the tail fins
Click the Sun row, then add a layer named
Fins. It lands above the sun but below the hull, which is where fins belong.Set the foreground to . With the Lasso, drag a rough triangle for each fin: an upper one pointing up and to the left, and a lower one pointing down and to the left. Both should start well inside the hull, since the hull will cover their roots. Fill each. Give the layer a Drop Shadow (, Blur
30, Offset Y30, Opacity40) and an Inner Glow (, Size22, Opacity75).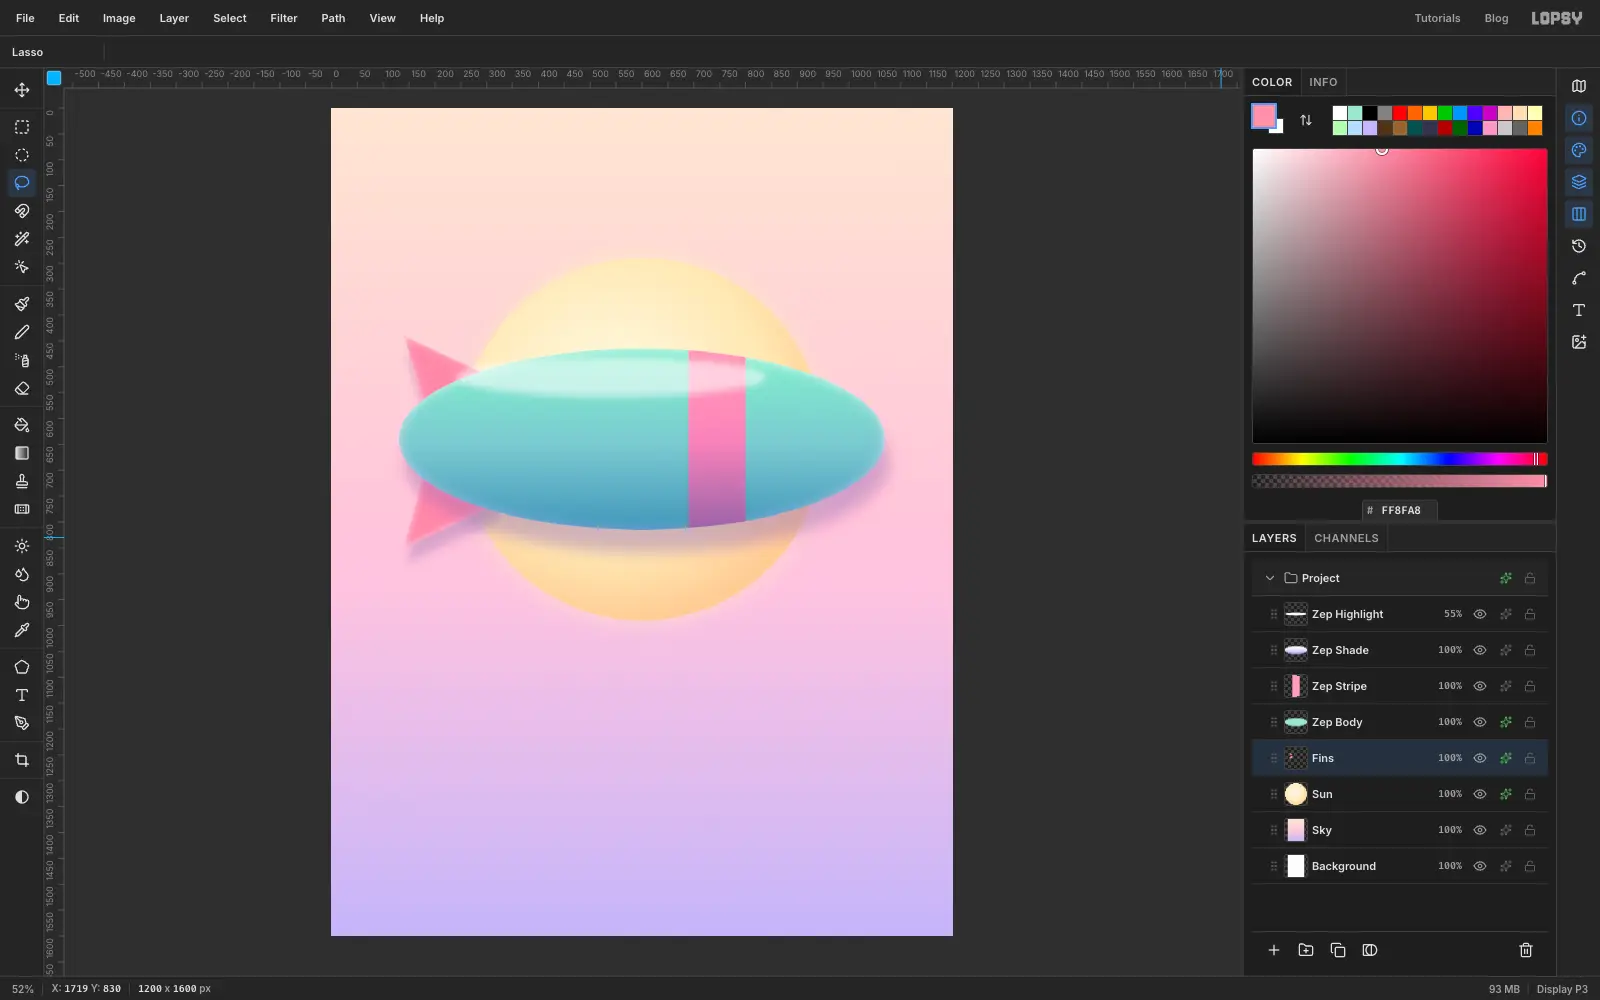
-
Build the gondola, windows and propeller
Click
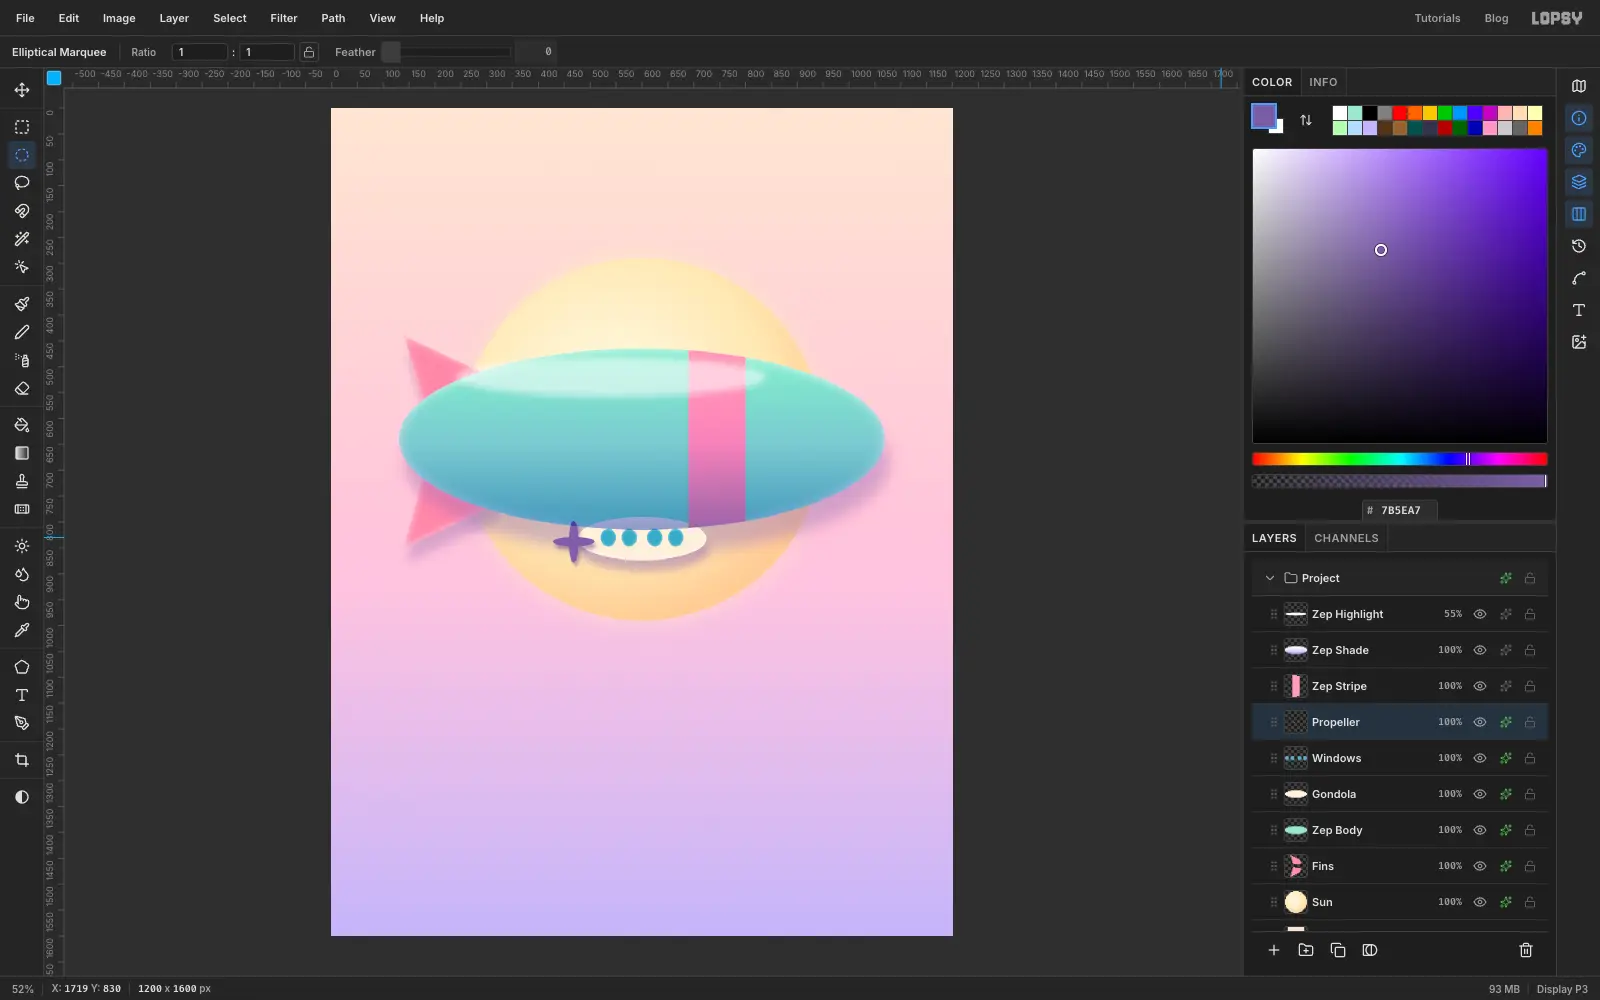
Zep Bodyand add three layers, one at a time:Gondola— a small flat ellipse under the hull in , with the same Drop Shadow and an Inner Glow.Windows— four small ellipses in , spaced evenly along the gondola and filled one at a time, with a pale Inner Glow.Propeller— two thin crossed ellipses (one tall, one wide) in , with a small Drop Shadow.
-
Group the airship and tilt it
Click the
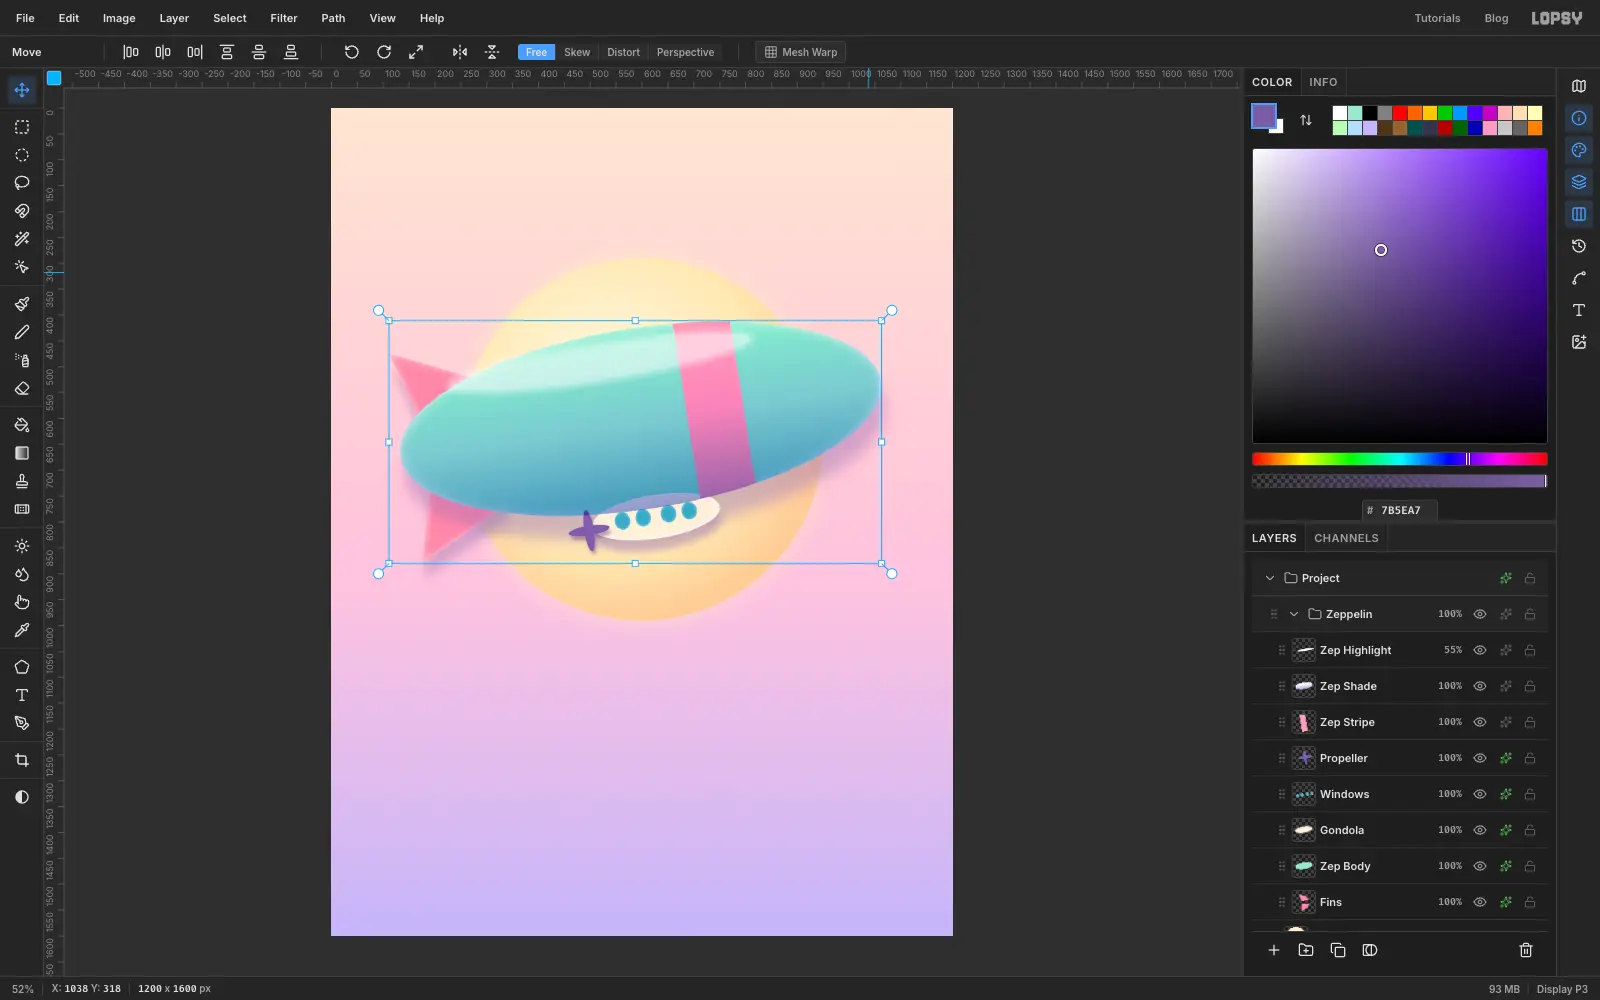
Finsrow, then Shift-clickZep Highlightto select the whole run of airship layers. Choose Layer → Group Layers (Ctrl+G) and rename the groupZeppelin.Pick the Move tool with the group selected and leave the transform mode on Free. Dragging inside the canvas moves the whole airship at once, so slide it until it sits across the sun. To tilt it, move the pointer just outside a corner handle until the cursor changes, then drag in a slow arc so the nose (the right end, away from the fins) rises about 9°. Press Ctrl+D to commit the transform. In the Move tool, that commits rather than deselects.
-
Make the yogurt cup
Click
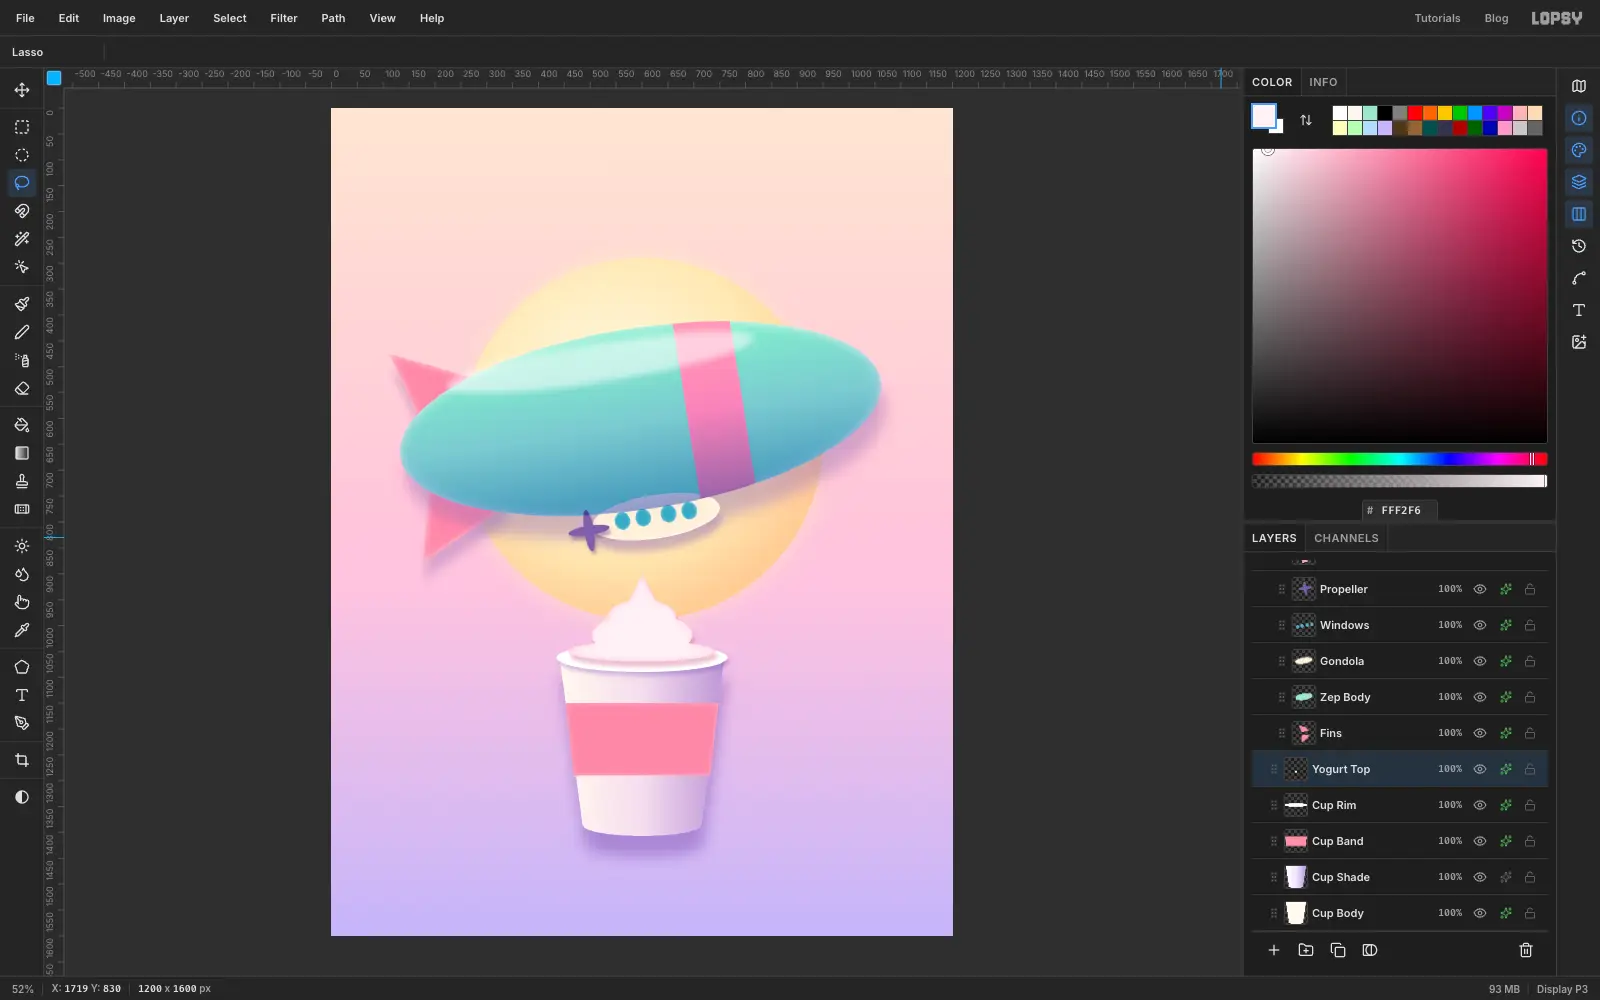
Sunbefore you add layers, so the cup doesn't land inside the airship group. Work from the bottom up:Cup Body— with the Lasso, drag around a wide-top, narrow-bottom cup shape with a curved base. Fill with , then add a lilac Drop Shadow (, Blur40, Offset Y40, Opacity50) and a white Inner Glow.Cup Shade— set to Multiply. Re-select the cup and drag a horizontal gradient from through to , so the right side turns slightly lilac.Cup Band— a trapezoid across the middle in , with a soft pink Inner Glow.Cup Rim— a flat white ellipse across the top, with a small Drop Shadow.Yogurt Top— build the swirl on one layer in : a flat ellipse sitting inside the rim, a smaller taller ellipse on that, a smaller one again on top, then a little Lasso triangle for the curled tip. Add a Drop Shadow and a pink Inner Glow.
-
Add a cherry and puffy clay clouds
Make a
Cherrylayer aboveYogurt Top: a circle with a tiny white dot for the shine, a small Drop Shadow, and a pink Inner Glow.For the clouds, add one layer per cloud and place them around the page: one behind the left of the headline, one behind its right, one lower-left beside the cup and one lower-right. In each, fill five overlapping ellipses of different sizes in , with the biggest in the middle. Put a Drop Shadow (, Blur
34, Offset Y22, Opacity40) and an Inner Glow (, Size26, Opacity70) on every layer. The Inner Glow gives each cloud its pillowy edge.For the cloud bank across the bottom (
Cloud Bank), fill two staggered rows of big ellipses that overflow the page on both sides, and flip the Drop Shadow's Offset Y to-24so the shadow falls up onto the cup. Then add aBank Shadelayer set to Multiply at about 55% opacity. Use a soft lavender , feather your ellipse selections by 35 px, and fill a few shapes in the dips of the bank. That gives it the lavender fade at the bottom.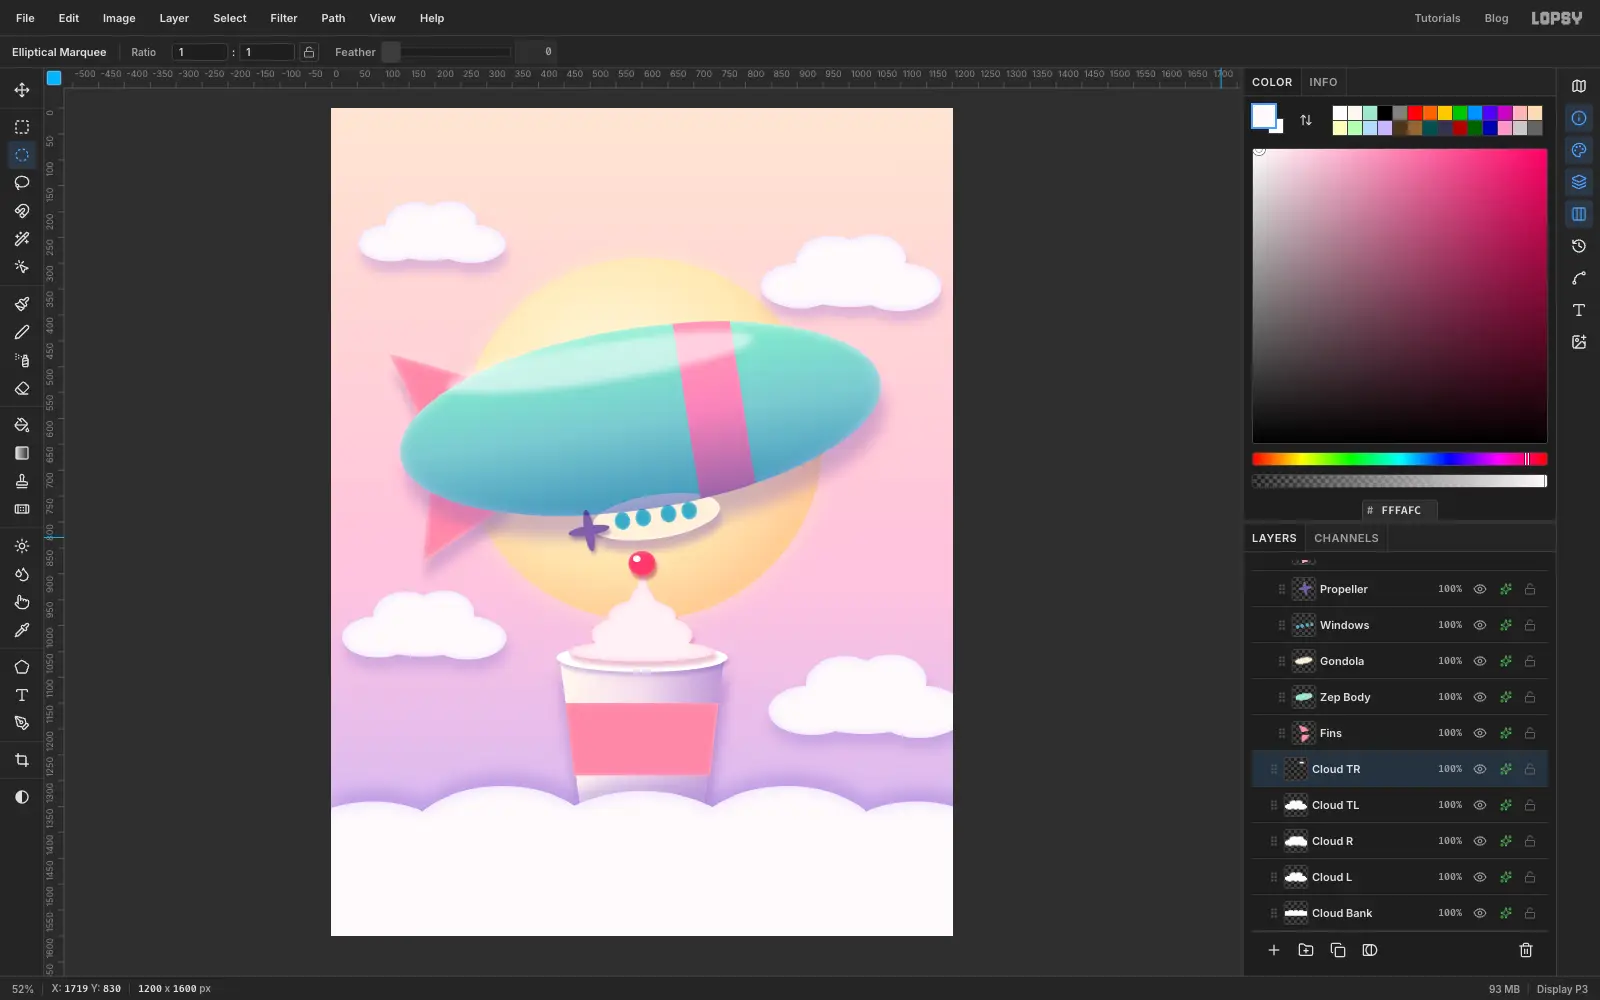
-
Set the headline
Click a layer that isn't text first, otherwise changing the font and size will restyle that text layer. Pick the Text tool, choose Fredoka, set the weight to Bold, size
200and a pink fill of , and click near the top to typeZEPPELIN. Press Tab to commit.Add a white Stroke (Width
12) and a purple Drop Shadow (, Blur24, Offset Y22, Opacity55). Use the Move tool's Align center horizontally button to centre it.Click a non-text layer again, then make
YOGURTthe same way at size128in with a Width10stroke. Centre it and nudge it up with the arrow keys until its white outline clears the big word, leaving a comfortable margin above it.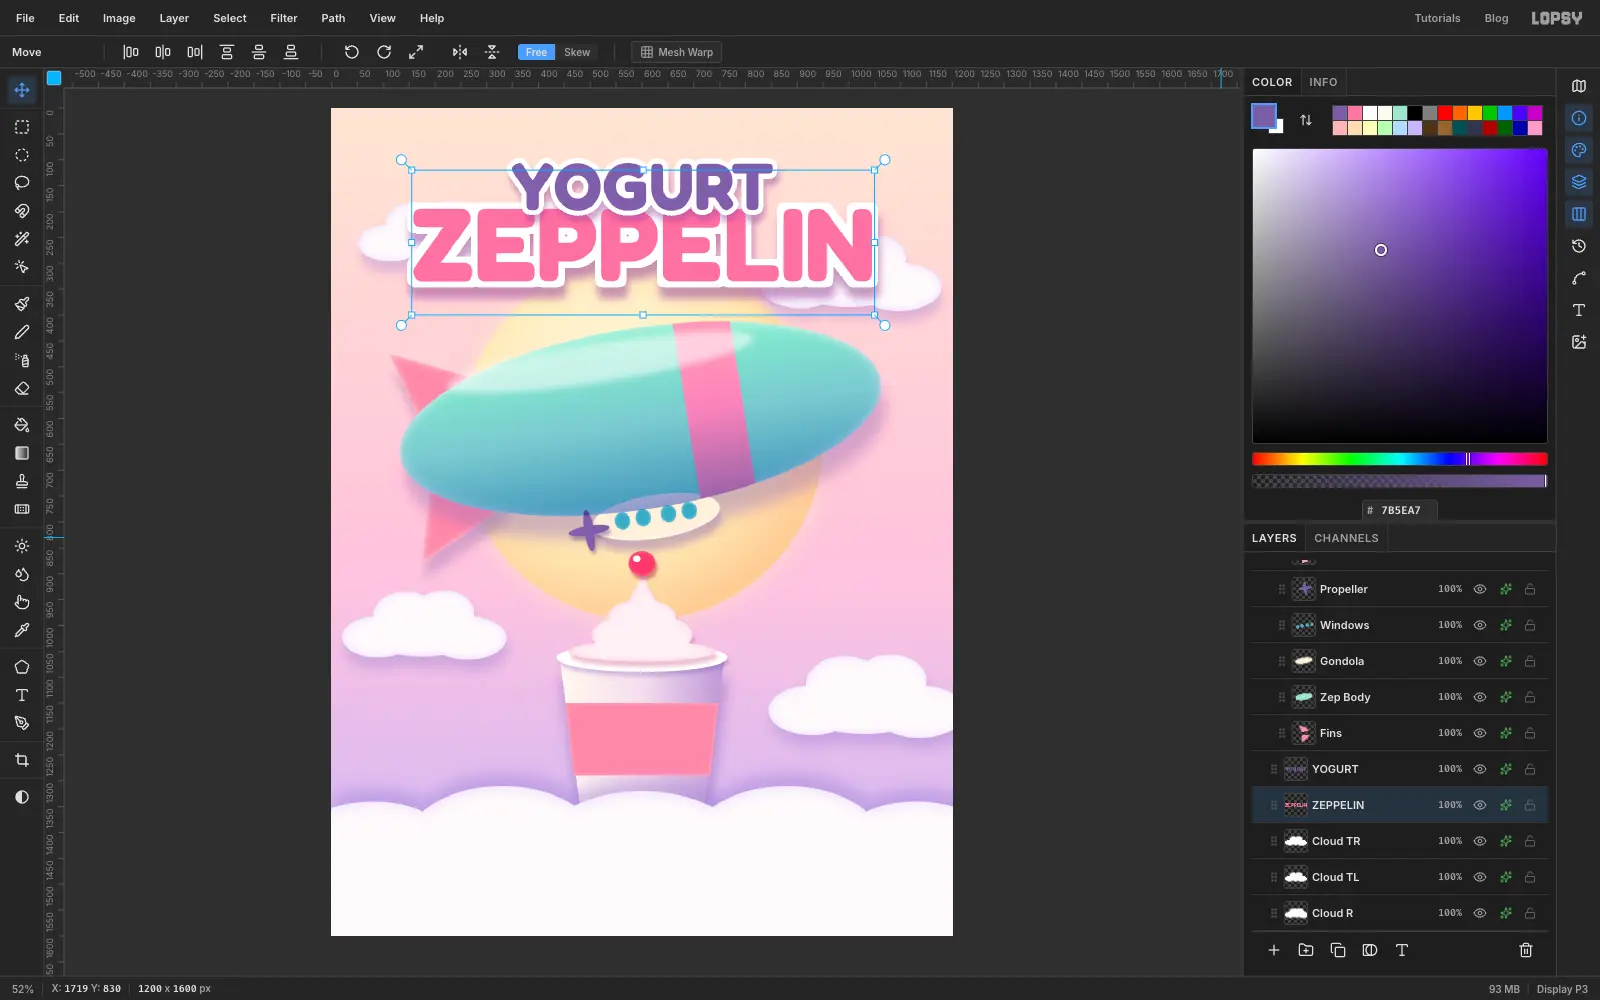
-
Add the tagline, berries and sparkles
On the cloud bank, add
Cultured at altitudein Fredoka SemiBold at78in , and the lineSKY-FRESH DAIRY DELIVERY · EST. 1937at34. Centre both and keep them well inside the bottom margin.Add a
Berrieslayer and fill a few small circles in and , scattered around the airship and the left cloud. One tucked partly behind the hull is fine. Use the same Drop Shadow and white Inner Glow so they match the other clay objects.For the sparkles, make a
Sparkleslayer. Use the Lasso to drag a thin four-pointed star, like a long diamond pulled out in four directions, fill it with white, and repeat at a few sizes. Add an Outer Glow in .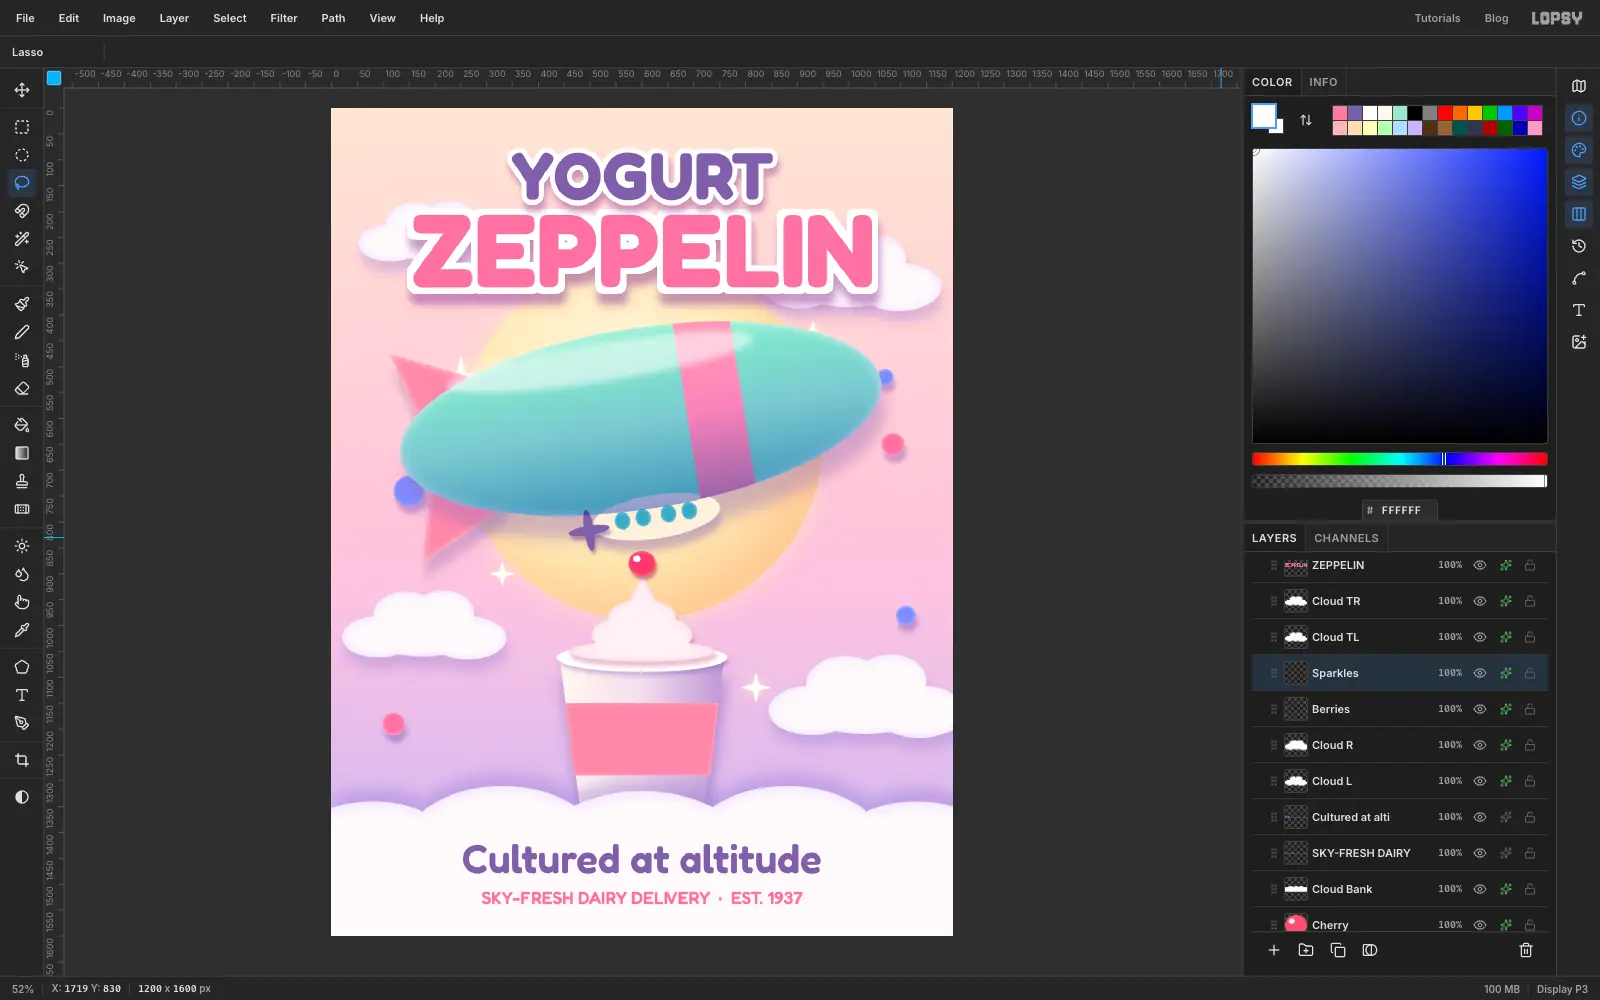
-
Rotate a price-style badge
Make a
Badgelayer with a circle about 200 px wide. Add a white Stroke (Width8), a purple Drop Shadow and a Inner Glow.Type
100%(Fredoka Bold,58, ) andLIVE CULTURES(SemiBold,19). Move them onto the badge. Keep the small line well inside the circle: it must clear the edge on both sides.Group the three layers as
Badge Group. With the Move tool, rotate the group about 14° counter-clockwise, the same way you tilted the airship, and commit with Ctrl+D. Rotating the group means the numbers and the circle turn together, so you don't have to rotate three layers by hand.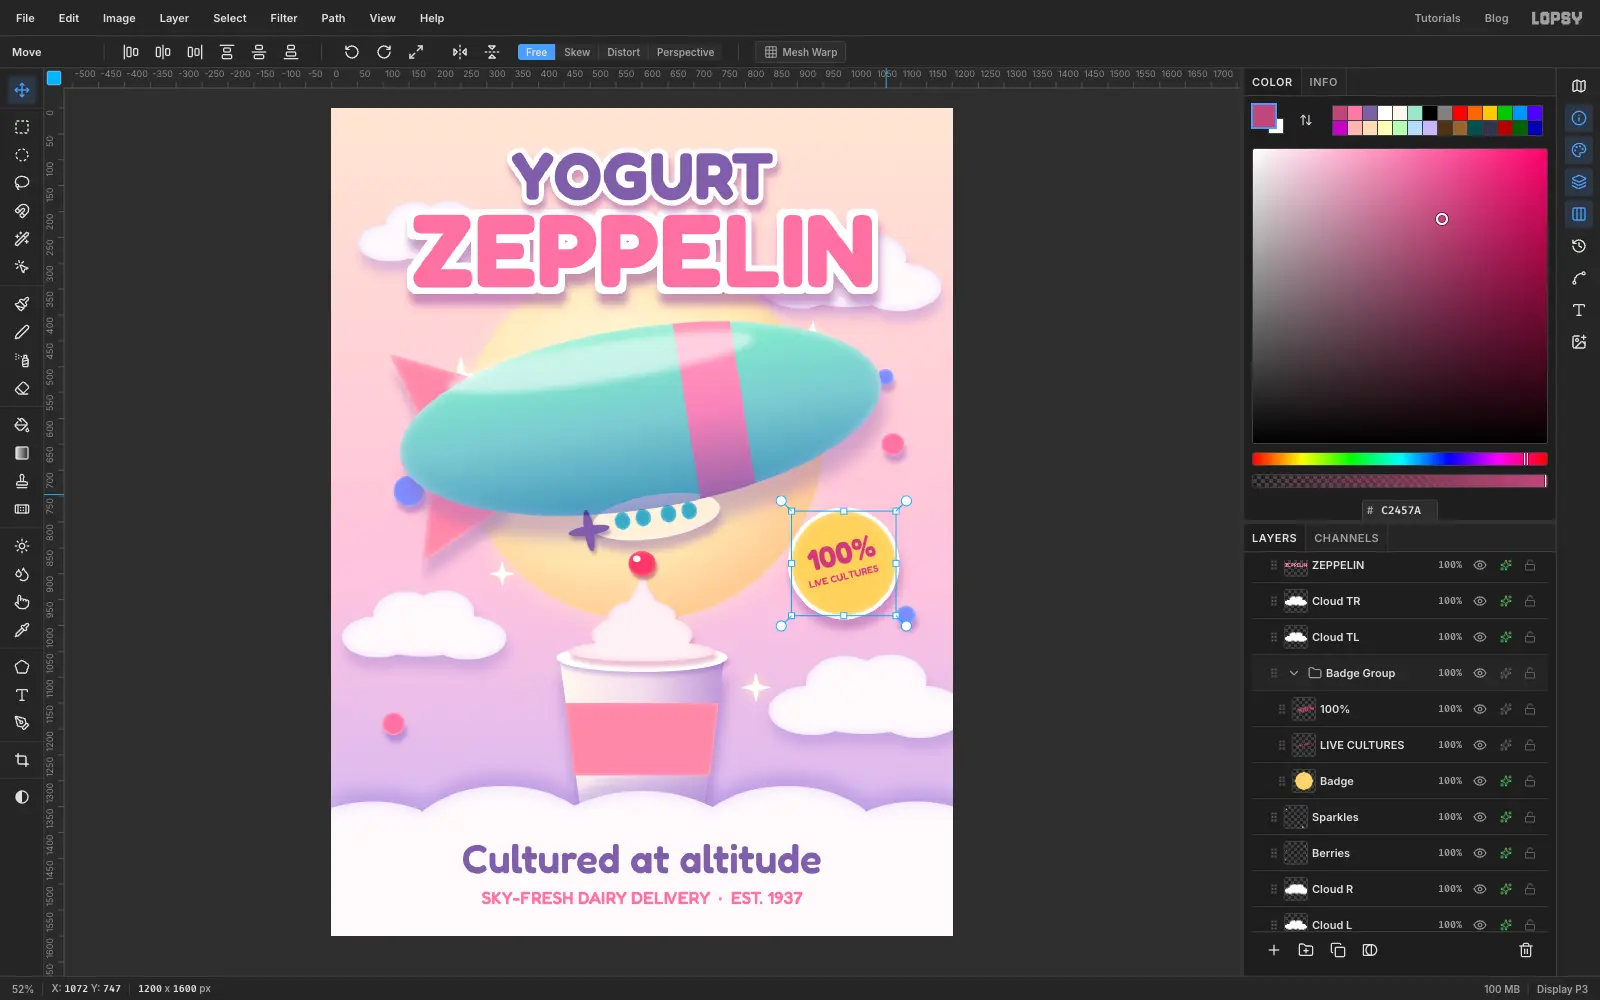
-
Add film grain
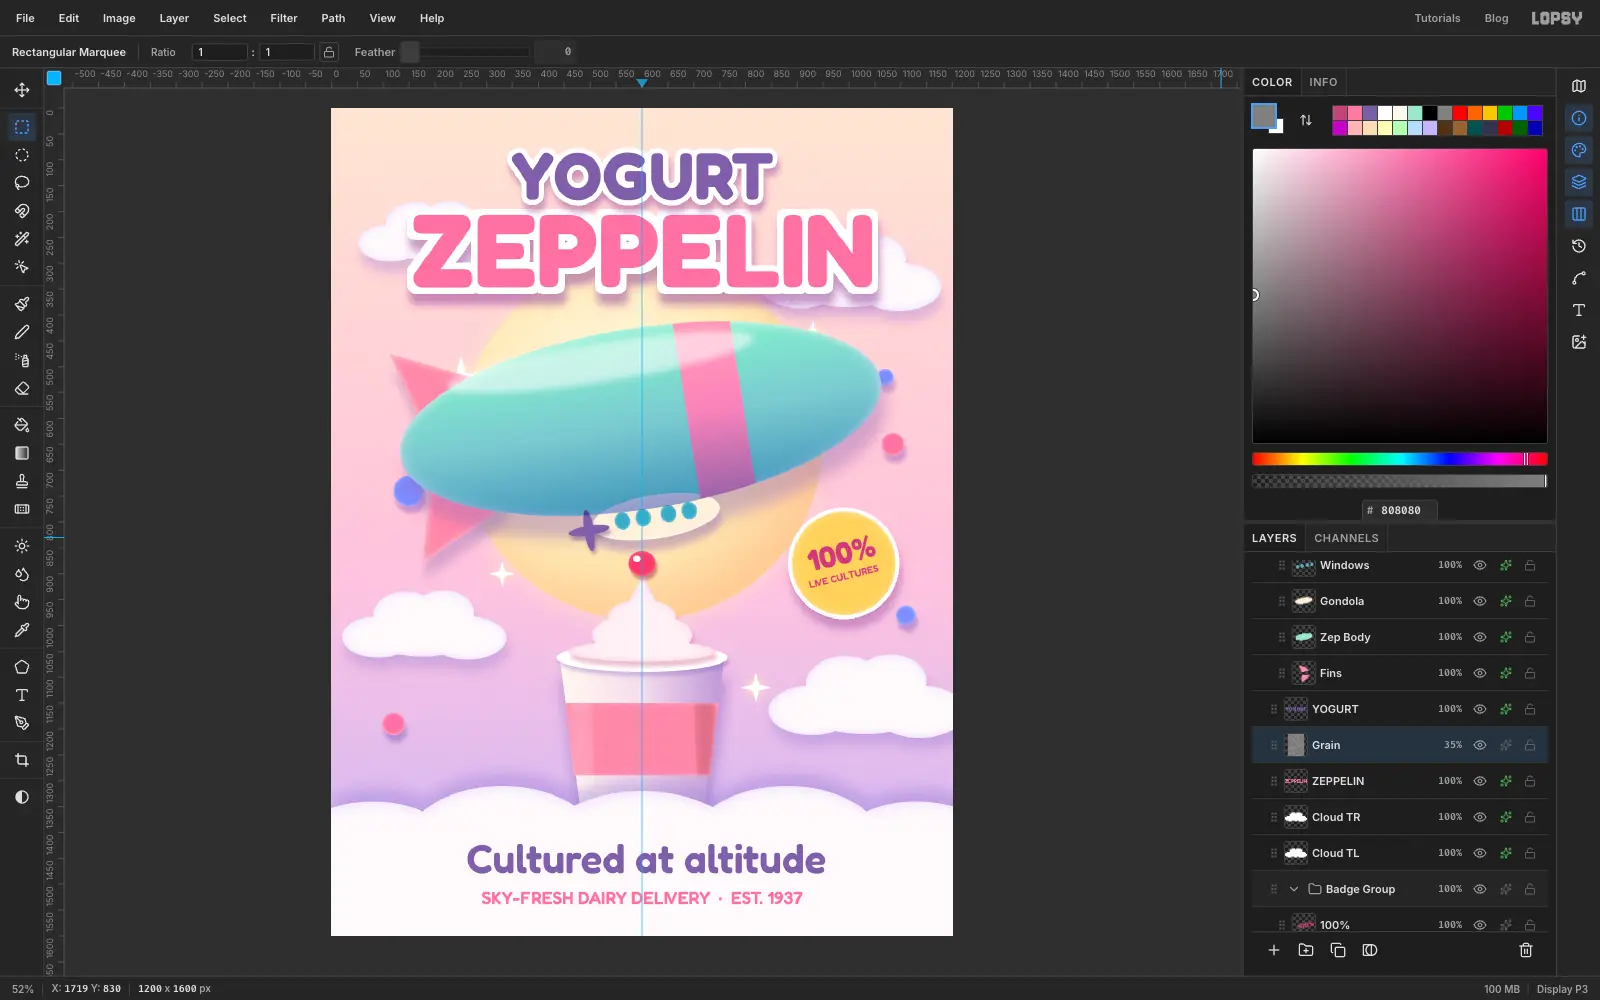
Click the top layer and add a layer named
Grain. Set the foreground to and fill the whole layer with Edit → Fill. Choose Filter → Add Noise…, turn on Mono, set Amount to60and apply it.Set the layer's blend mode to Overlay and its opacity to about 22%. Grain stops the gradients from looking plastic, and it hides any banding.
-
Final checks
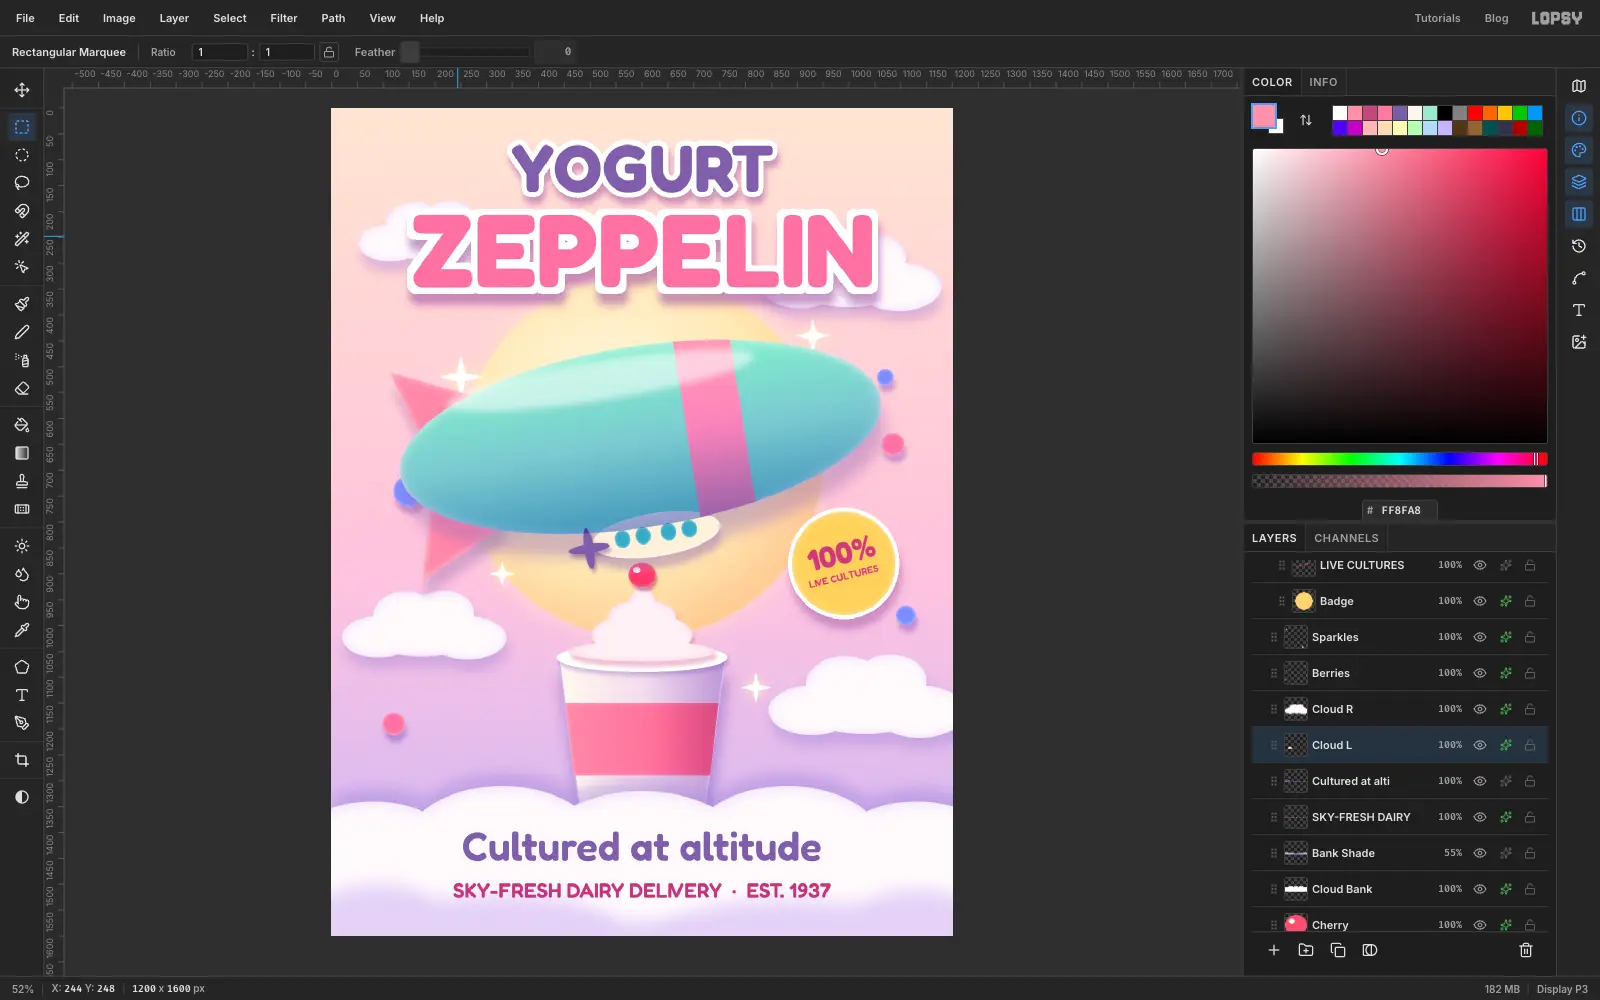
Step back and look at the whole poster. A few things are worth fixing before you export:
- The two headline lines need a clear gap between their white outlines. If they merge, nudge
YOGURTup. - Keep the text away from the edges. Only the cloud bank and the side clouds should run off the page.
- If the small tagline is hard to read in light pink, give it a Color Overlay in and raise its size to about
40. - Make sure the airship has some breathing room under the headline. Nudge the
Zeppelingroup and theSundown together if it feels cramped, and drop the cherry so it sits on the tip of the swirl. - Fix a blotchy spot by re-filling the shape and adding a gentle Multiply gradient over it, instead of stacking more strokes.
Finish with File → Quick Export PNG, and save the project with File → Save Project so you can reopen it later.
- The two headline lines need a clear gap between their white outlines. If they merge, nudge