Design a Neubrutalist Mascot T-Shirt Graphic
Build a neubrutalist bike-courier tee in Lopsy with thick black outlines, hard offset shadows, a jackalope mascot, chunky type and sticker badges.
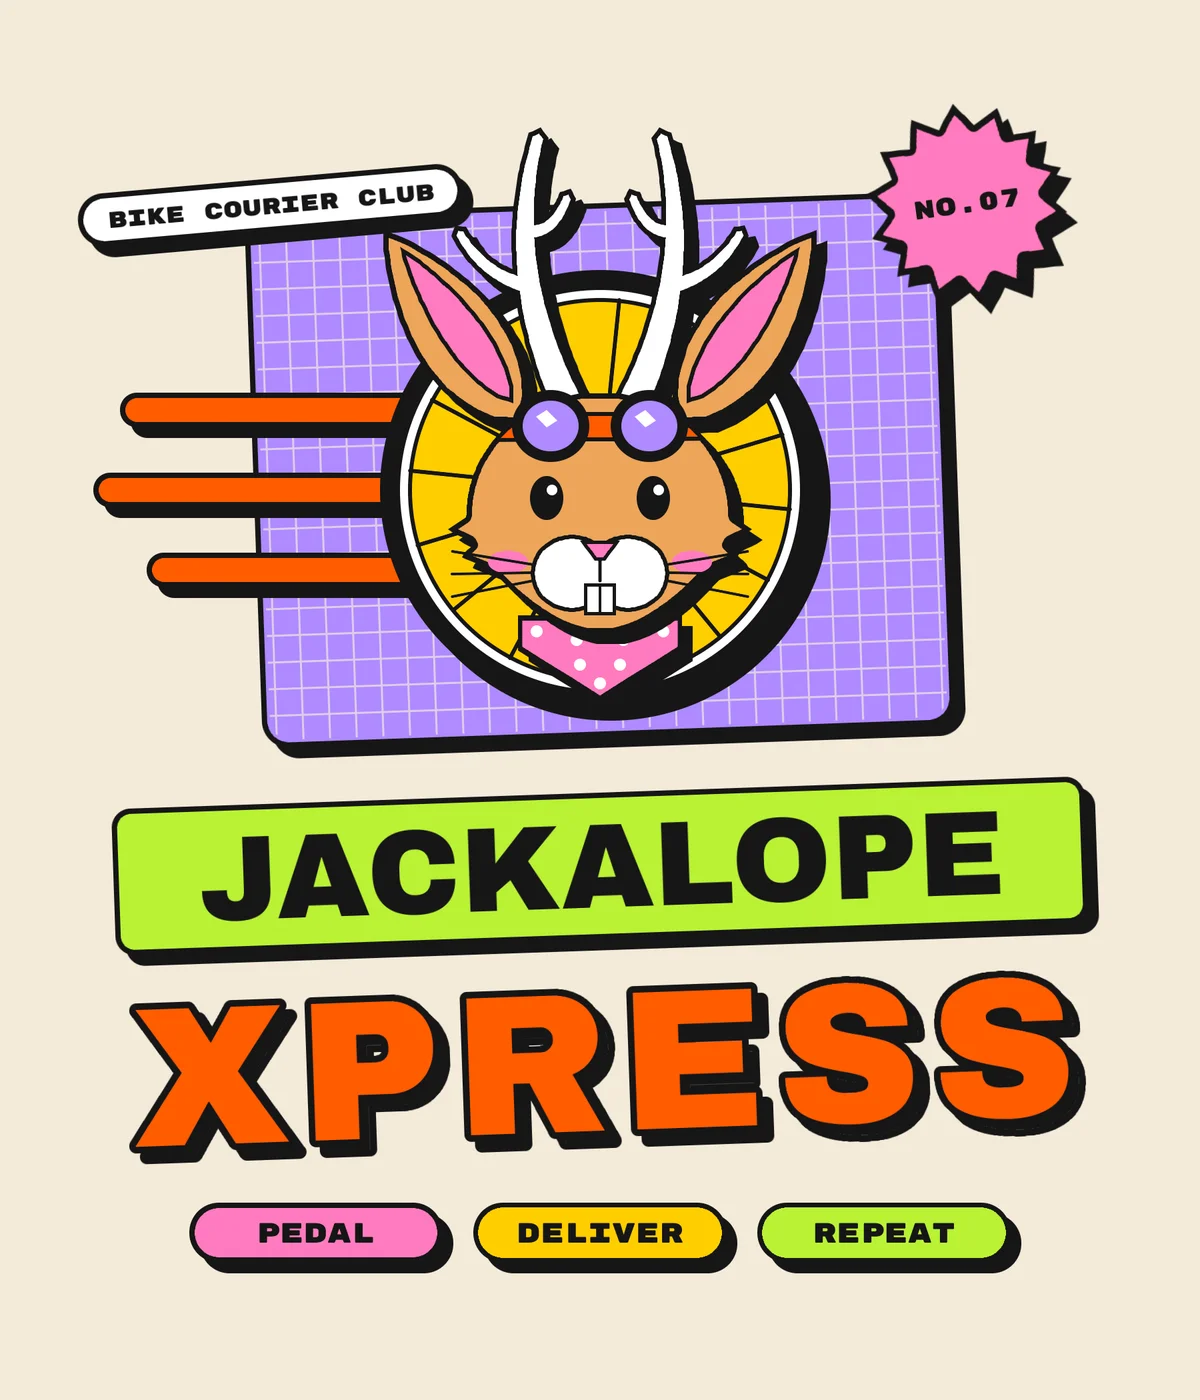
Neubrutalism takes the flat colour of a web UI and gives it a body. Everything gets a thick black outline and a solid black shadow pushed down and to the right with no blur, so each element looks like a sticker stuck onto the page. It suits a t-shirt really well, because flat, outlined shapes are exactly what screen printing likes.
This tutorial builds the chest print for Jackalope Xpress, a made-up bike-courier club. It has:
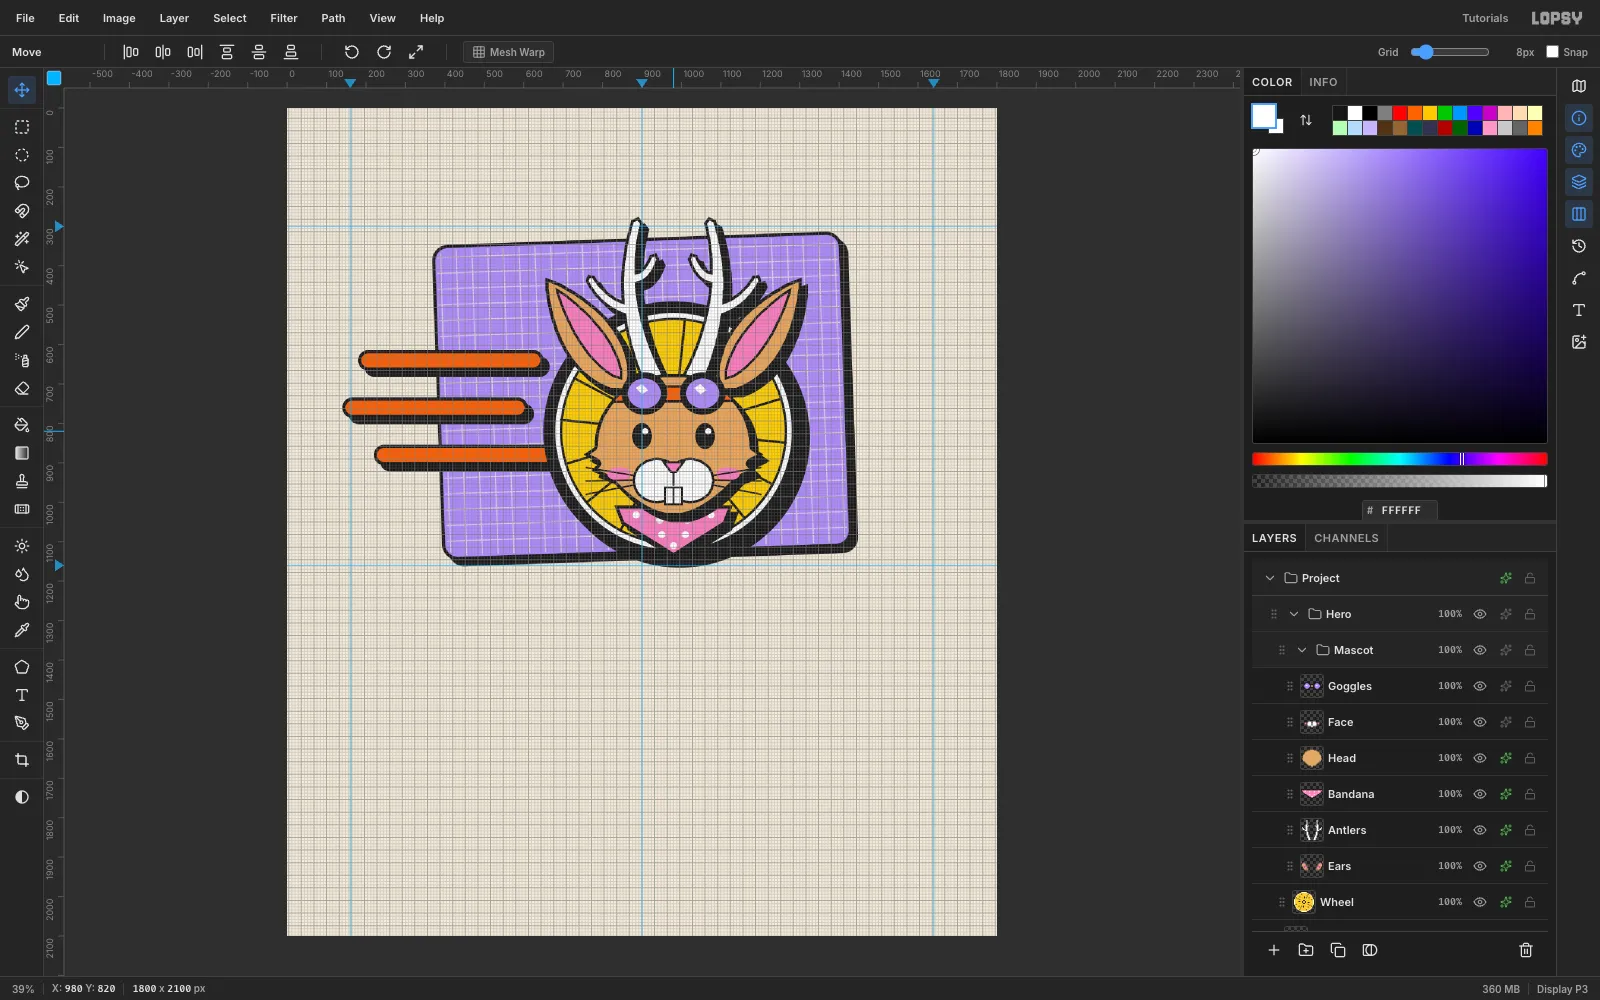
- a jackalope mascot in courier goggles bursting out of a bicycle wheel
- a tilted graph-paper card, with speed lines streaking out behind the mascot
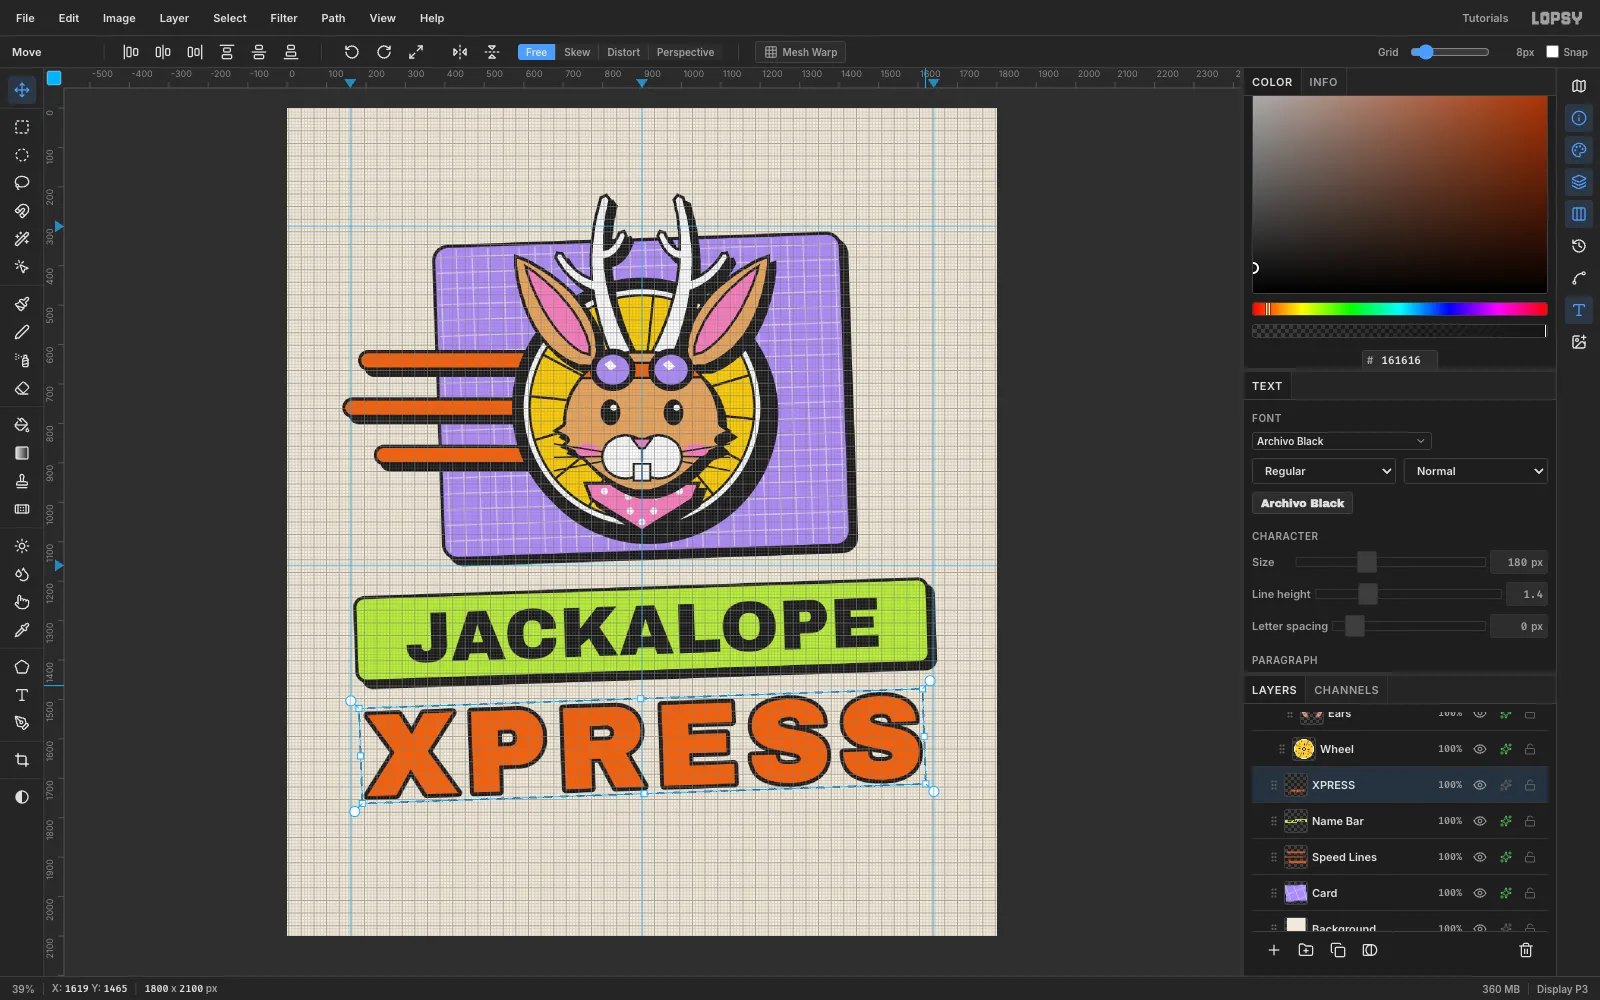
- a two-line logotype with a hand-built keyline
- pill buttons and sticker badges, all sharing one tilt and one shadow
Every shape gets the same 8 px black outline. The rounded rectangles and pills come straight from the Shape tool with an 8 px ink stroke. Everything you lasso uses one outline recipe: fill the shape black, Shrink the selection 8 px, fill the colour.
The palette is eight inks on a sand shirt:
-
Shirt
the background, not an ink
-
Ink
-
white
-
Lavender
-
lime
-
tangerine
-
Yellow
-
pink
-
tan
-
Set up the shirt, guides and grid
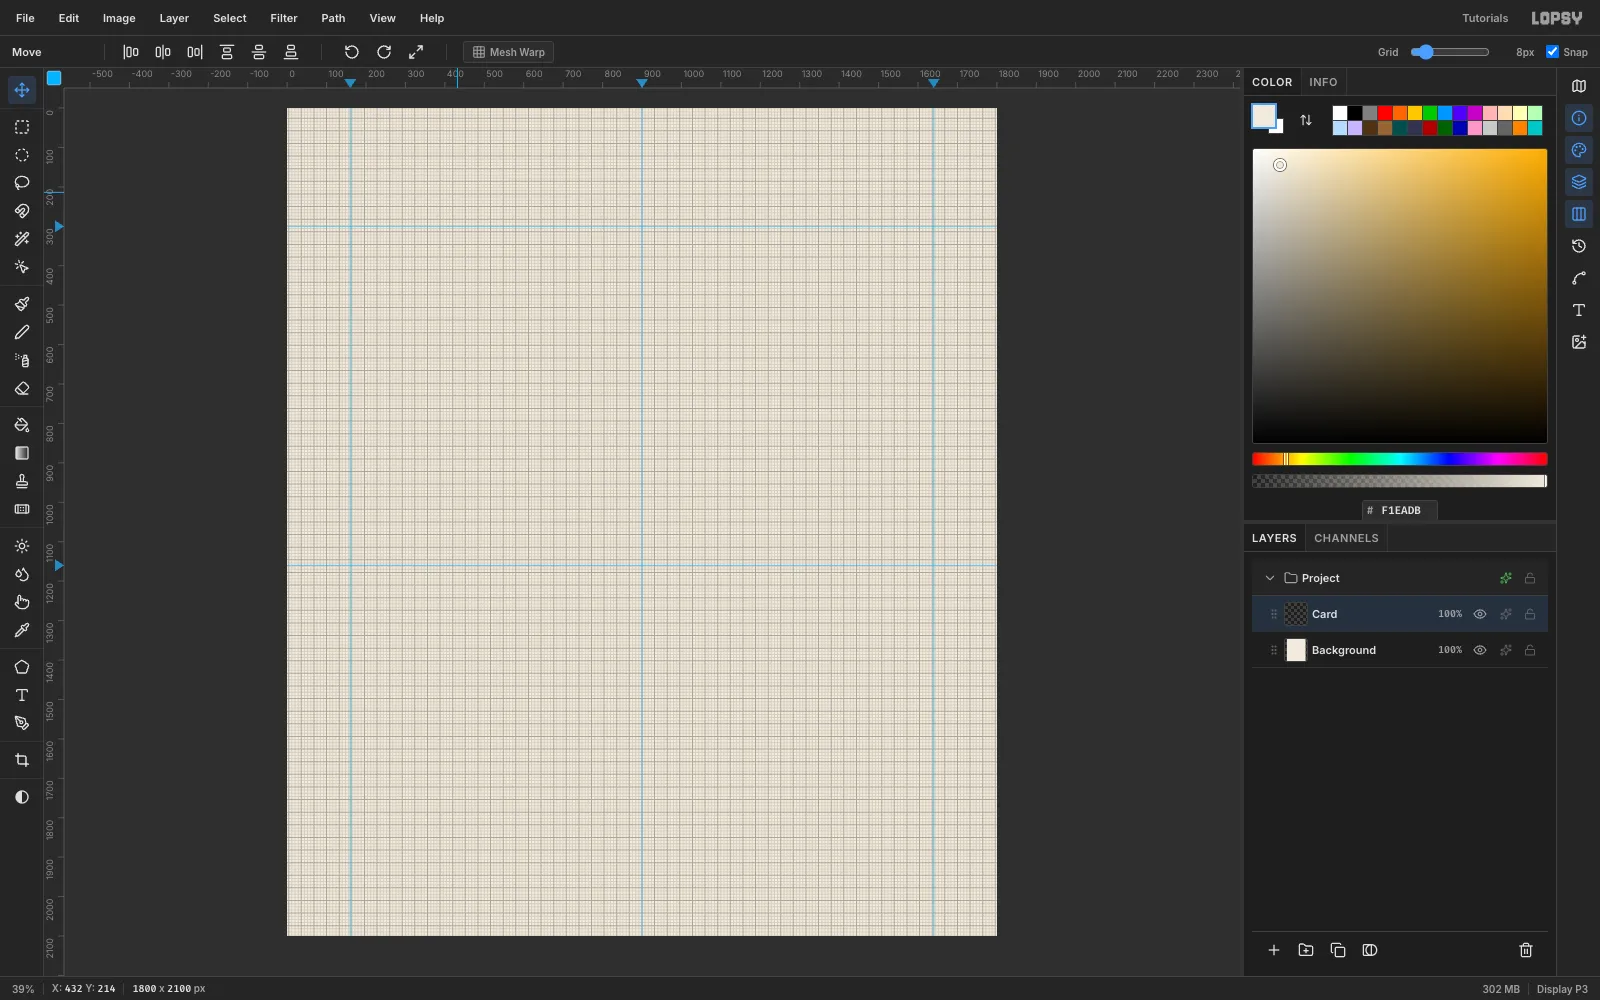
- Create an 1800 × 2100 px document (File → New, Unit = Pixels). Set the foreground to and run Edit → Fill on Background with nothing selected. That's the shirt colour. Hide it when you export for print.
- Click the top ruler at x 160, 900 and 1640 for the margins and centre line. Click the left ruler at y 300 and 1160 for the top and bottom of the hero card.
- Turn on View → Show Grid and set the options-bar Grid slider to 8 px. Snap comes on with the grid, so marquees land on whole grid steps.
-
Draw a rounded card
Rename Layer 1 to
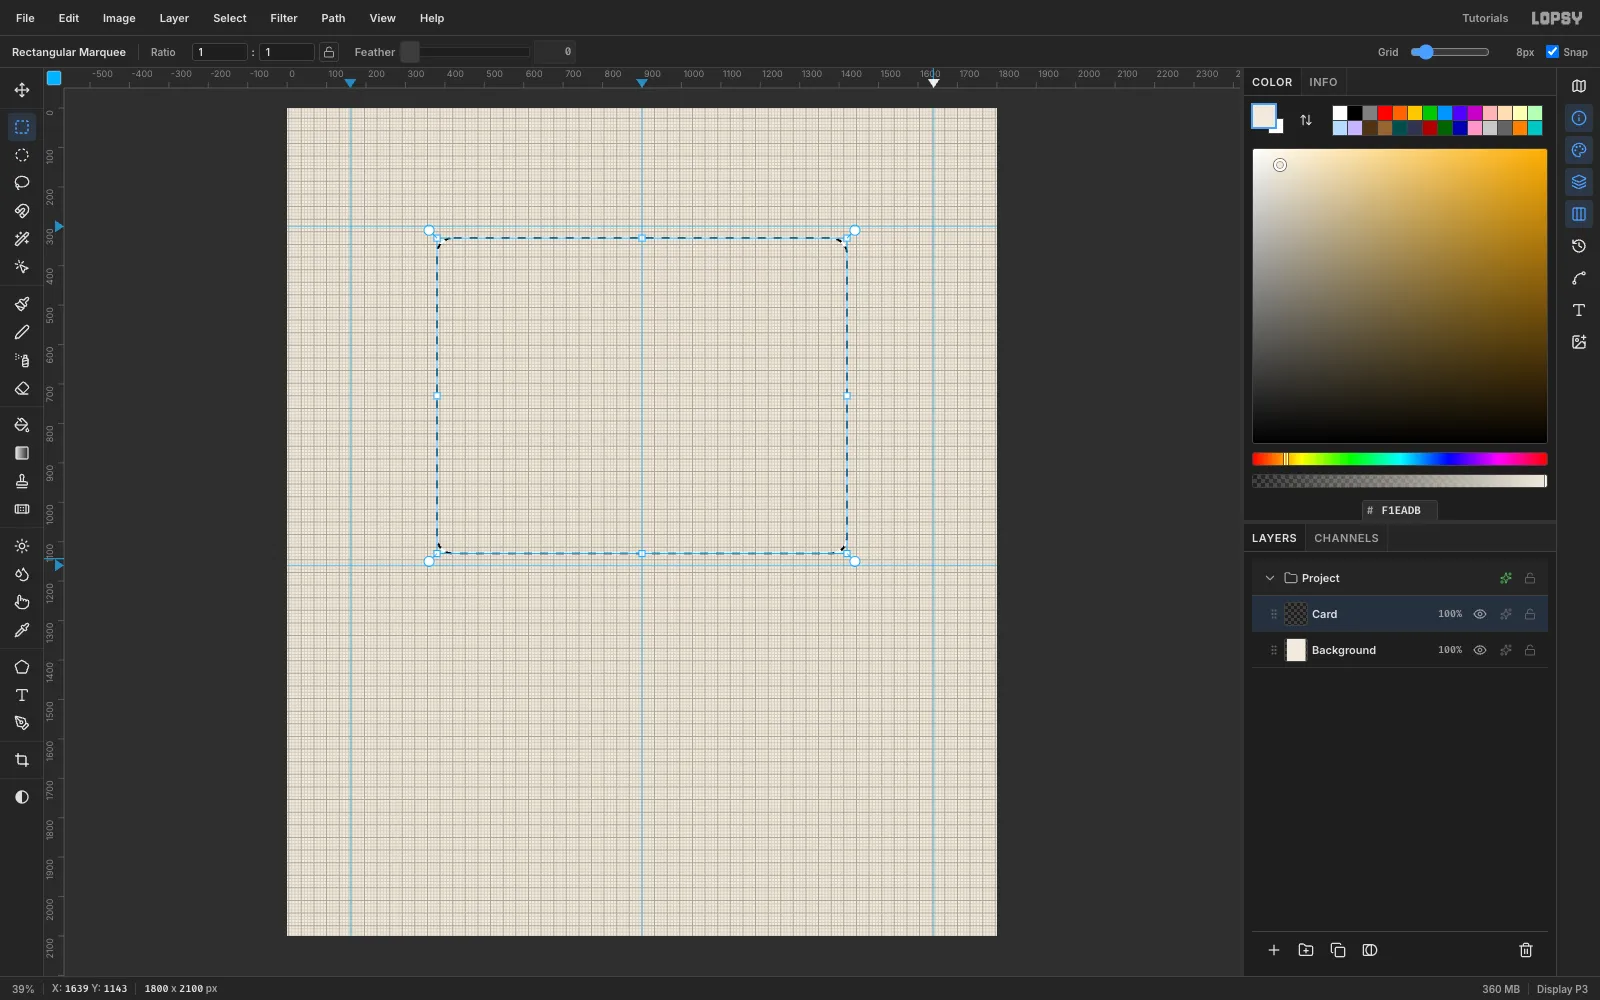
Card. Pick the Shape tool (U) and set Shape to Rectangle, Output to Pixels and Corner Radius to 36. Click the Fill swatch and type lavenderA98BFFinto its hex field. Add a Stroke, type ink161616into its hex field and set its Width to 8. Click (don't drag) at the card's centre, (900, 730), and enter 1032 × 792.The Shape tool draws from the centre, and the stroke is centred on the rectangle's edge. So the card's outside edge runs from (380, 330) to (1420, 1130) with 40 px corners, and the lavender inside is 8 px in all round, with 32 px corners.
That 8 px ink rim is the outline. Use the same 8 px on every shape in the design.
-
Fill the card with graph paper
- Add a temporary layer
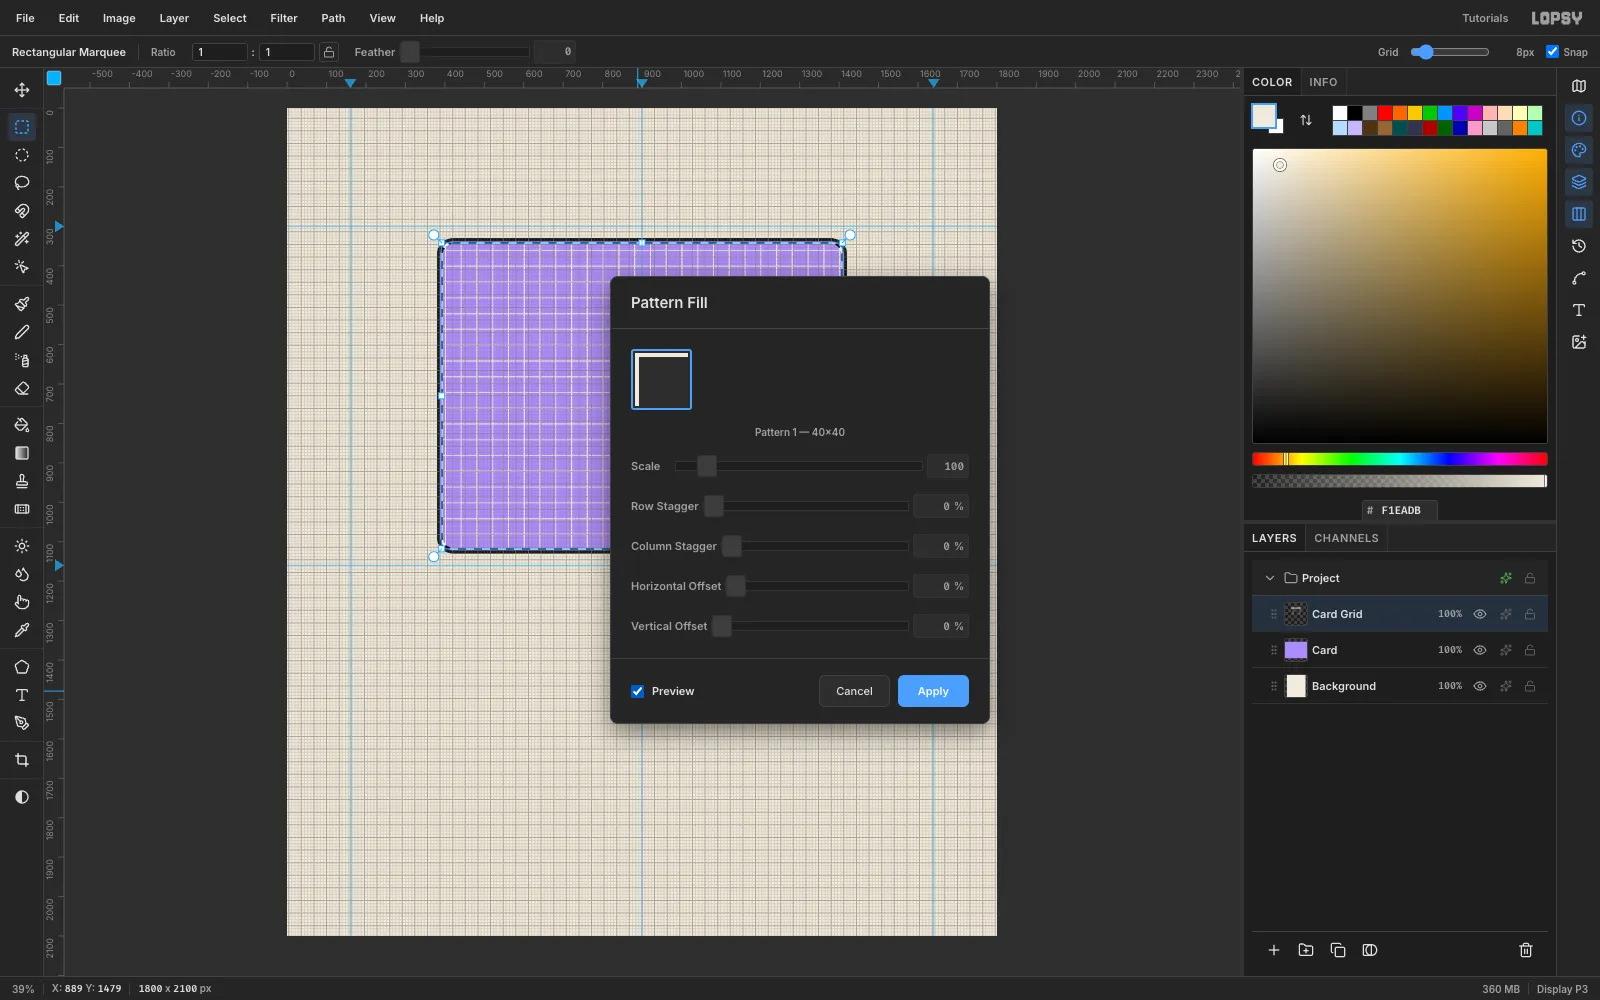
Tile. Fill two thin strips with : (0, 0)–(40, 3) and (0, 0)–(3, 40). Click once with the Rectangular Marquee and nothing selected to type exact corners. - Select (0, 0)–(40, 40) and run Edit → Define Pattern. Then delete the
Tilelayer. - Add a layer
Card Grid. Cmd-click theCardthumbnail to select the card, then Select → Shrink… 12 so the grid stays off the outline. - Run Edit → Fill with Pattern…, pick the 40 × 40 tile, tick Preview and Apply.
- Drop
Card Gridto 70% with the row's opacity slider and Layer → Merge Down intoCard.
The lines are the shirt colour, so on a print they're simply bare shirt. That costs no extra ink.
- Add a temporary layer
-
Tilt the card
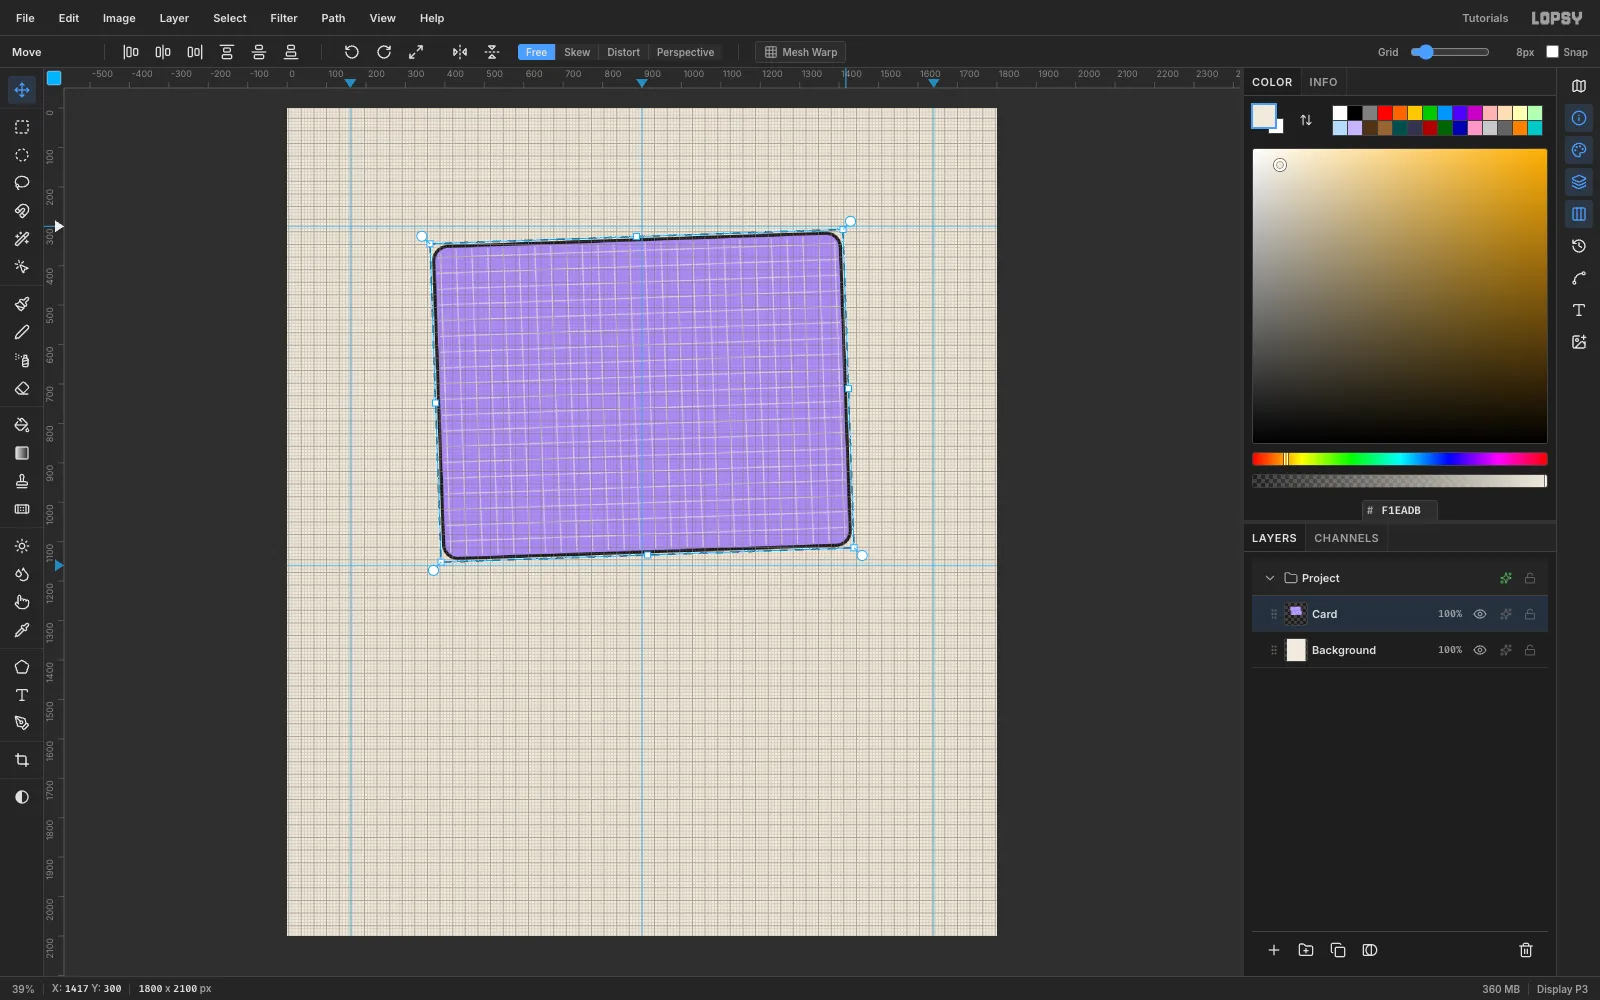
Untick Snap in the options bar first. With the grid showing, the rotate handle snaps in 15° steps.
Marquee a little outside the card, (376, 326)–(1424, 1134). Switch to the Move tool and drag the round rotate handle beside the top-right corner until the card has turned −2°, rising to the right. Press Cmd+D to commit.
Every tilted piece in this design uses the same direction. That's what makes the layout read as one bold system and not a scatter.
-
Give it a hard offset shadow
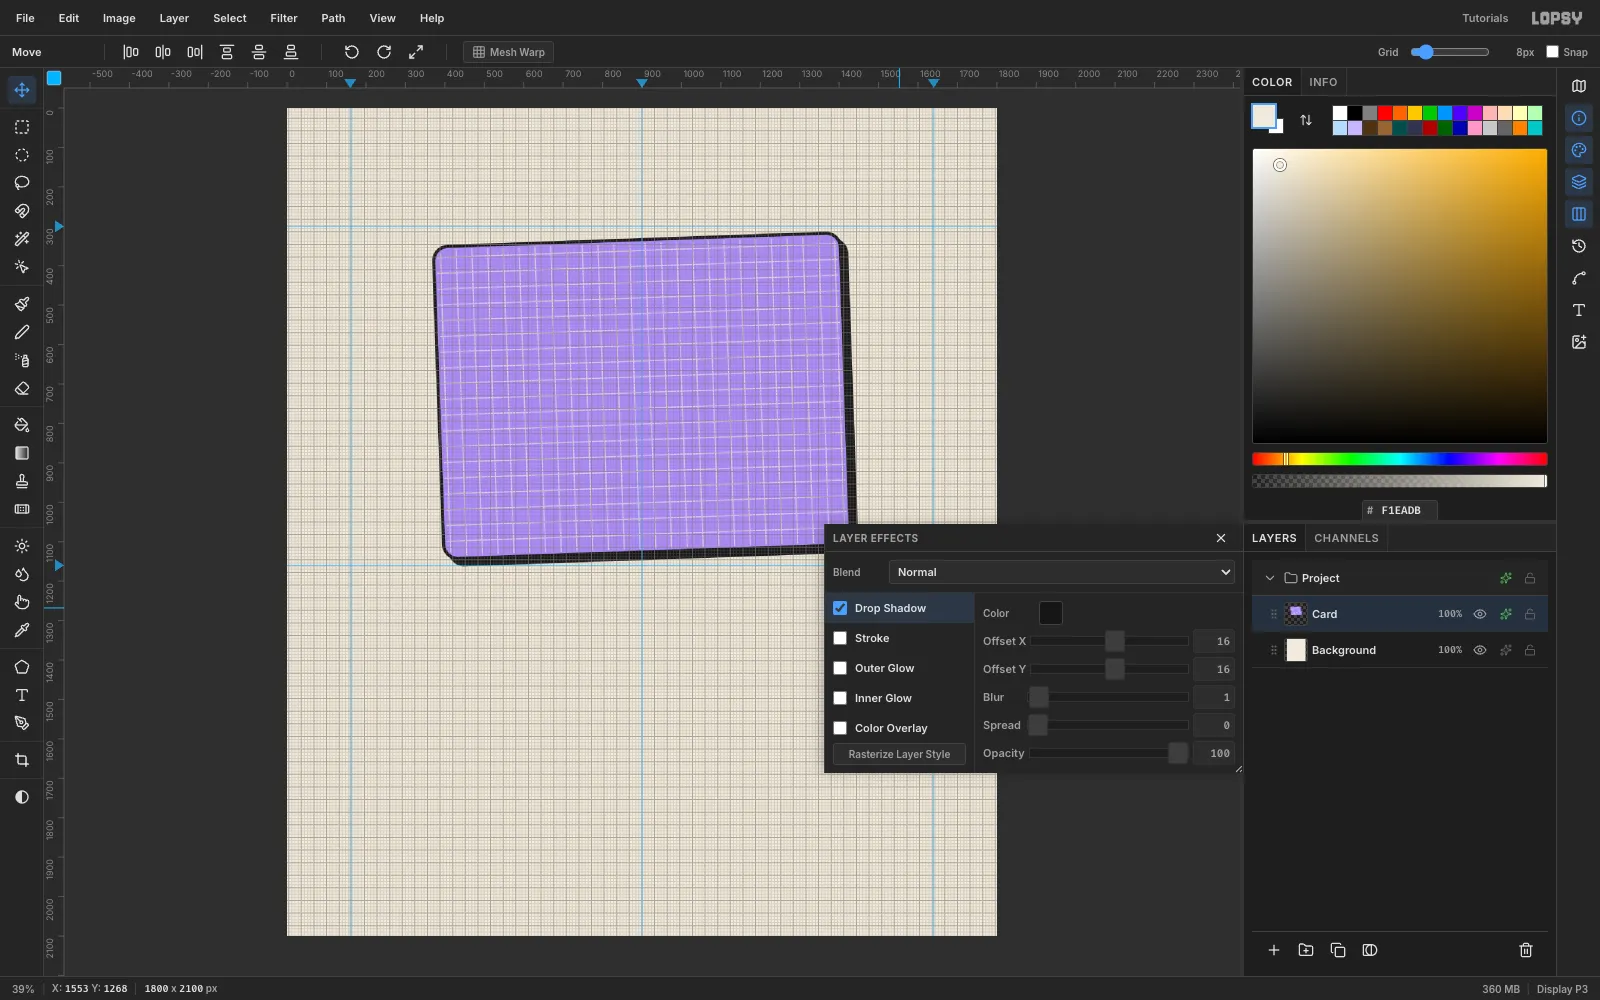
Open the layer effects drawer from the
Cardrow, enable Drop Shadow and click its name to edit it:- Colour
- Offset X 16, Offset Y 16
- Blur 1, Spread 0, Opacity 100
Every shadow in the design is 16 / 16 / 1.
-
Paste a speed line in place
- Add
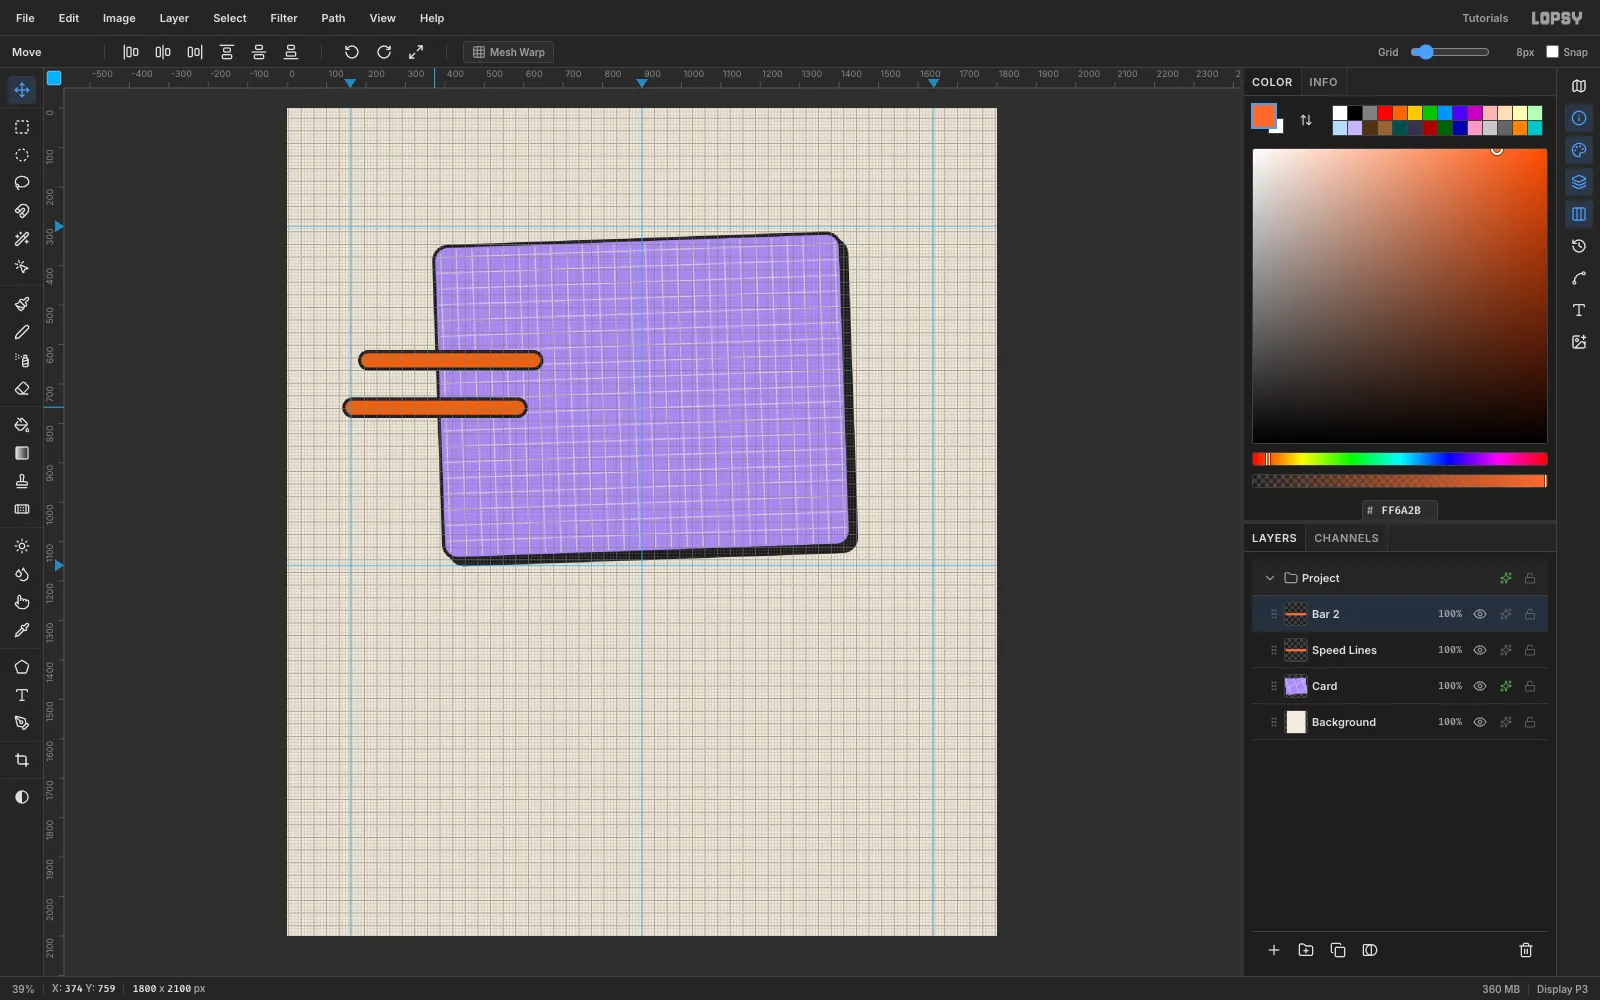
Speed Lines. With the Shape tool still set up the same way, change the Fill to tangerineFF6A2Band Corner Radius to 22 (half the height, for a fully rounded pill). Click at (415, 640) and enter 462 × 44. With the stroke, the pill is 470 × 52 overall. - Marquee around the pill, press Cmd+C, then Cmd+V. The paste lands in place on a new layer, selected, with the Move tool active. Rename it
Bar 2and drag it so it starts at (140, 734). - Click
Speed Linesand paste again. Name itBar 3and move it to (220, 854).
- Add
-
Merge the speed lines and add the shadow
Click
Bar 2and Merge Down twice, so all three pills end up onSpeed Lines. Give the layer the same 16 / 16 / 1 shadow. The staggered ends read as motion. The right ends get tucked under the wheel next.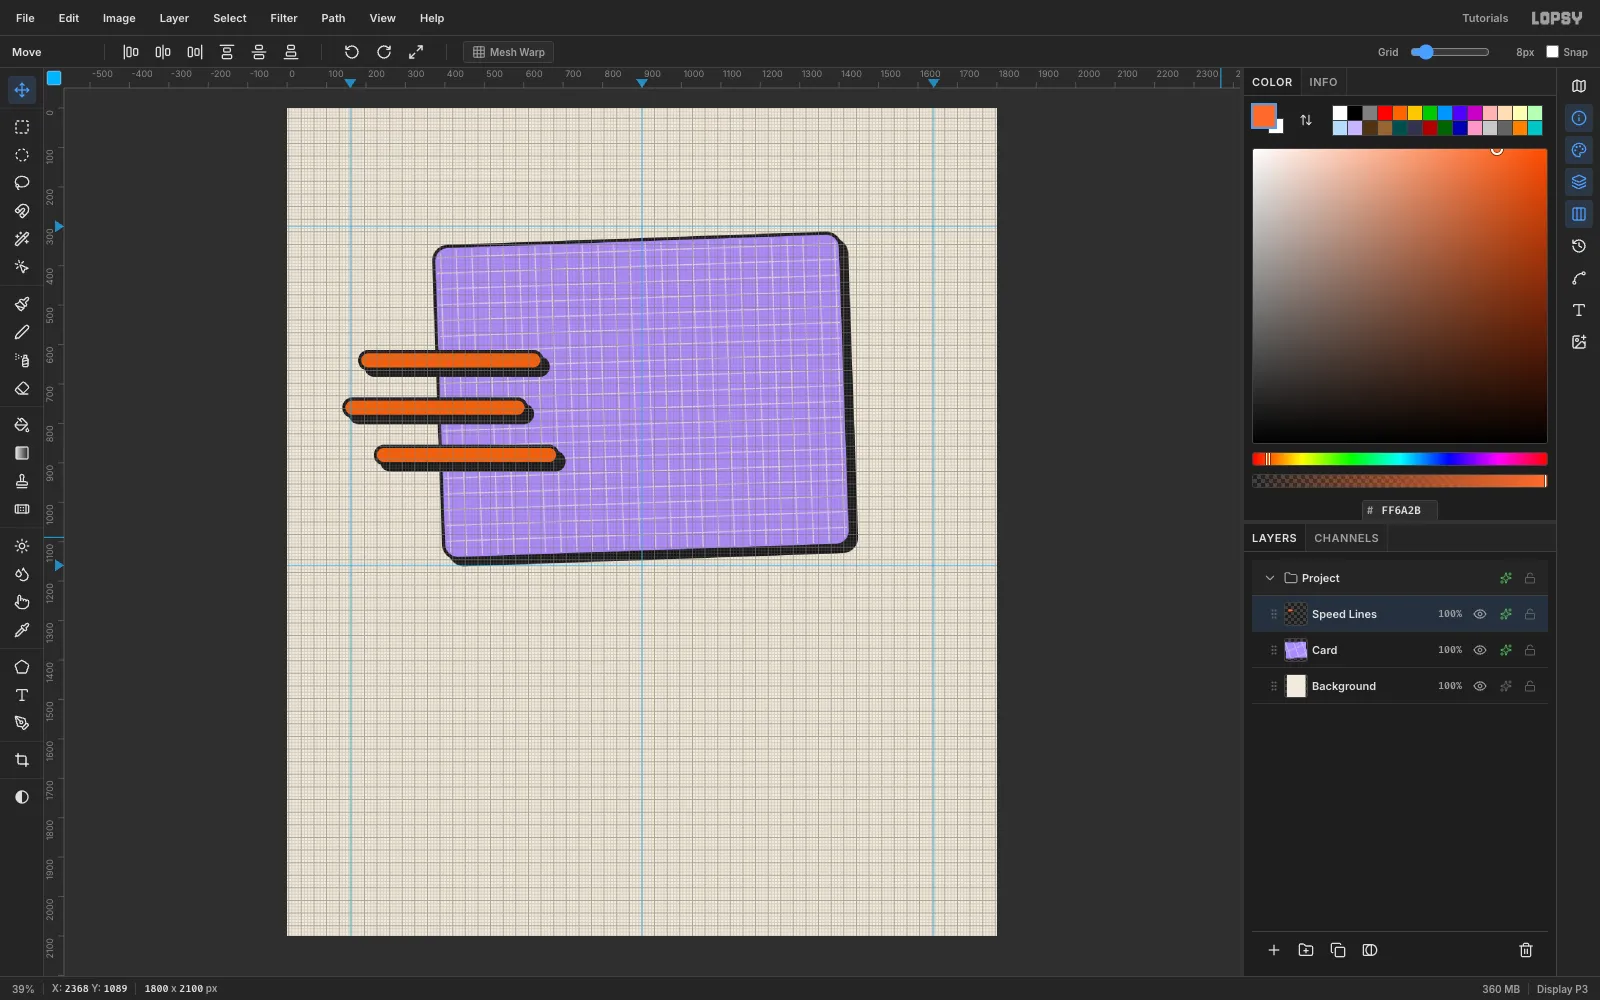
-
Draw the wheel rings
Click
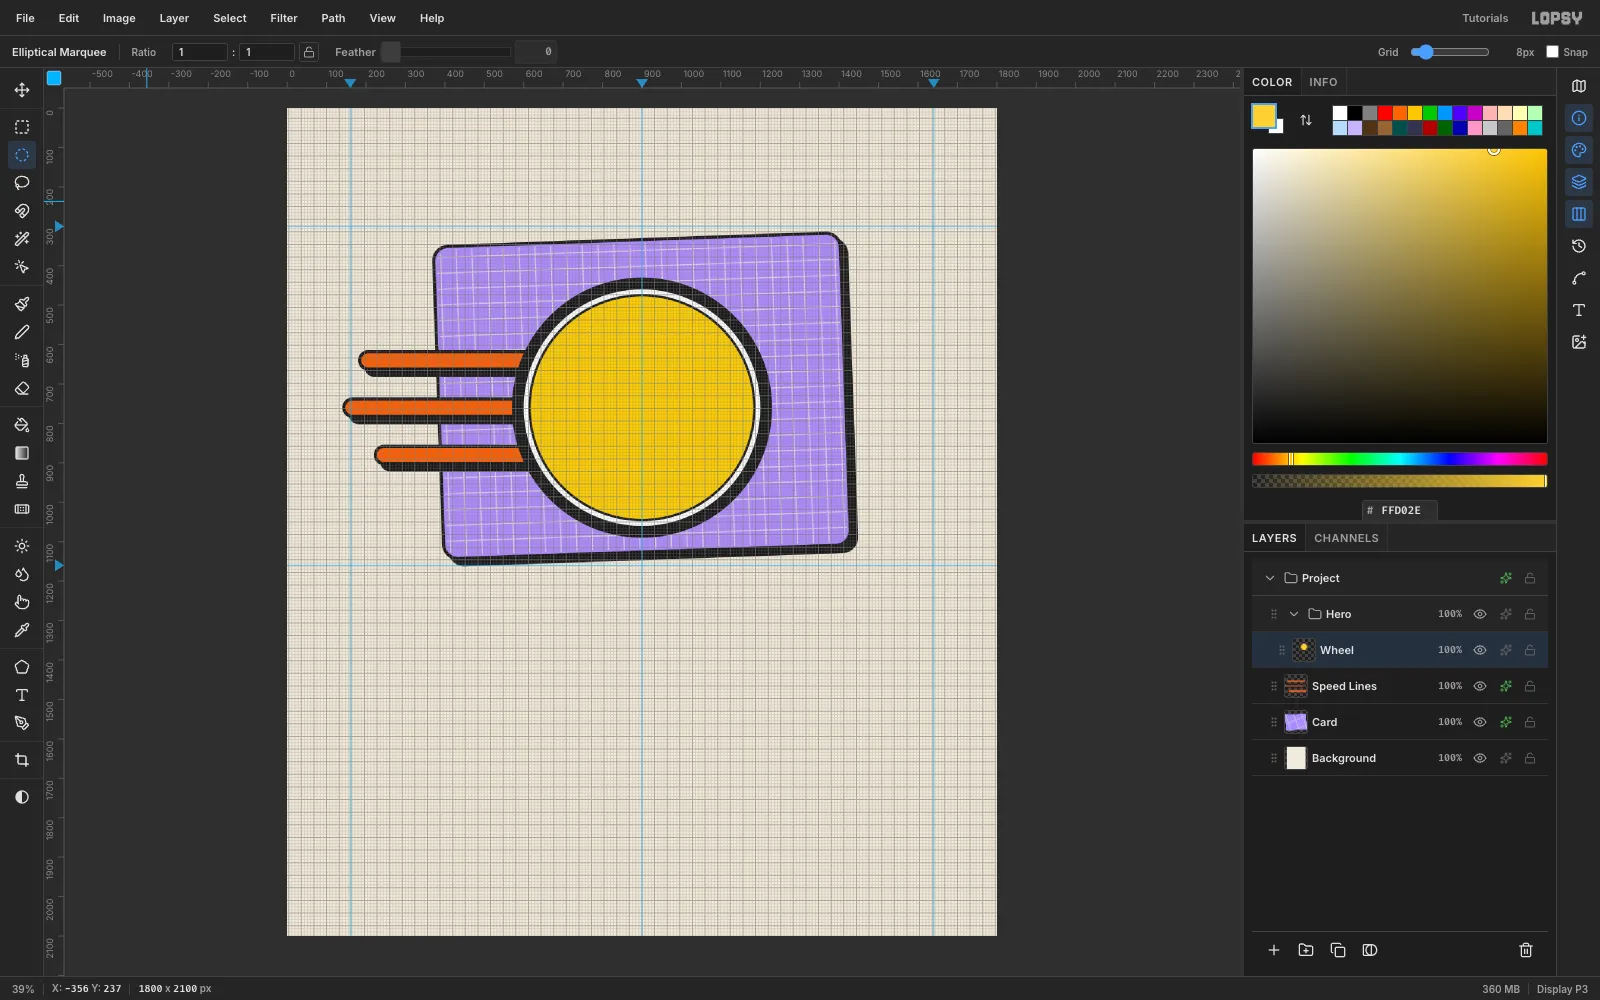
Speed Linesand press New Group in the Layers footer. Name the groupHeroand add a layerWheelinside it.A click with the Elliptical Marquee opens an exact-corners dialog. Fill four circles centred on (900, 760):
- radius 330 with ink, for the tyre
- radius 300 with white
- radius 288 with ink
- radius 282 with yellow
Each circle covers the one before, which leaves the tyre, a white rim line and a thin black ring.
-
Add the spokes and hub
Pick the Brush at Size 7, Hardness 100, in ink. For each spoke, click a point 40 px out from the centre, then Shift-click the point 286 px out at the same angle. That's sixteen spokes, 22.5° apart.
Fill an ink circle of radius 50 and a yellow one of radius 26 for the hub, and give
Wheelthe 16 / 16 / 1 shadow.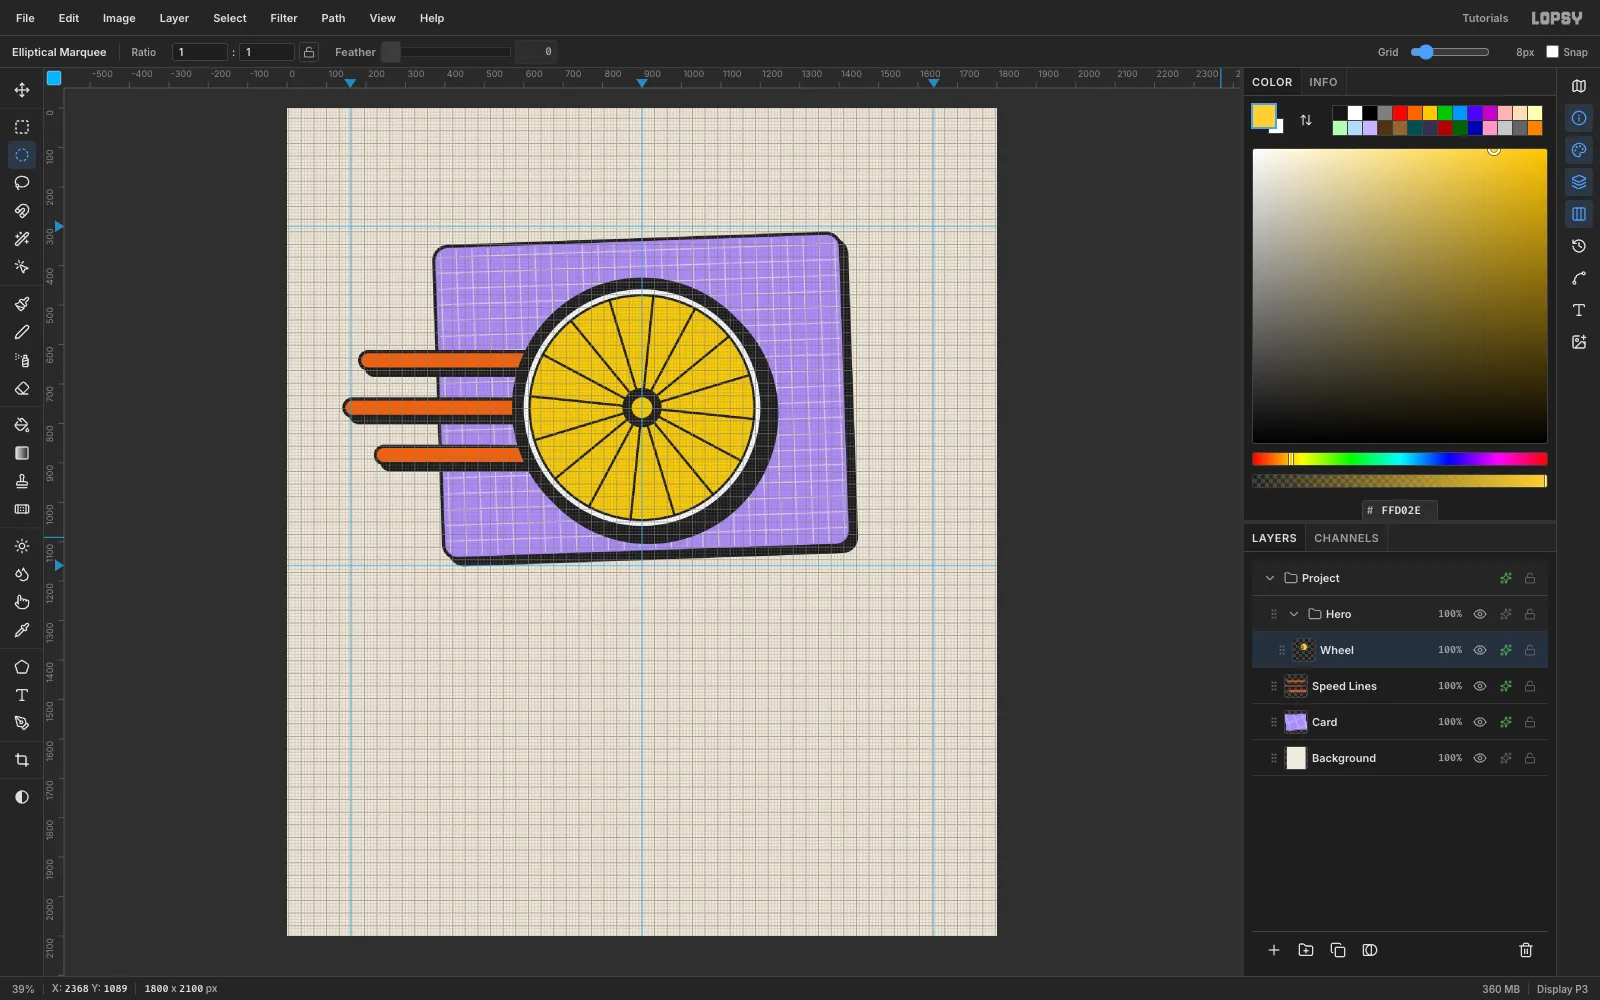
-
Draw the ears
Click
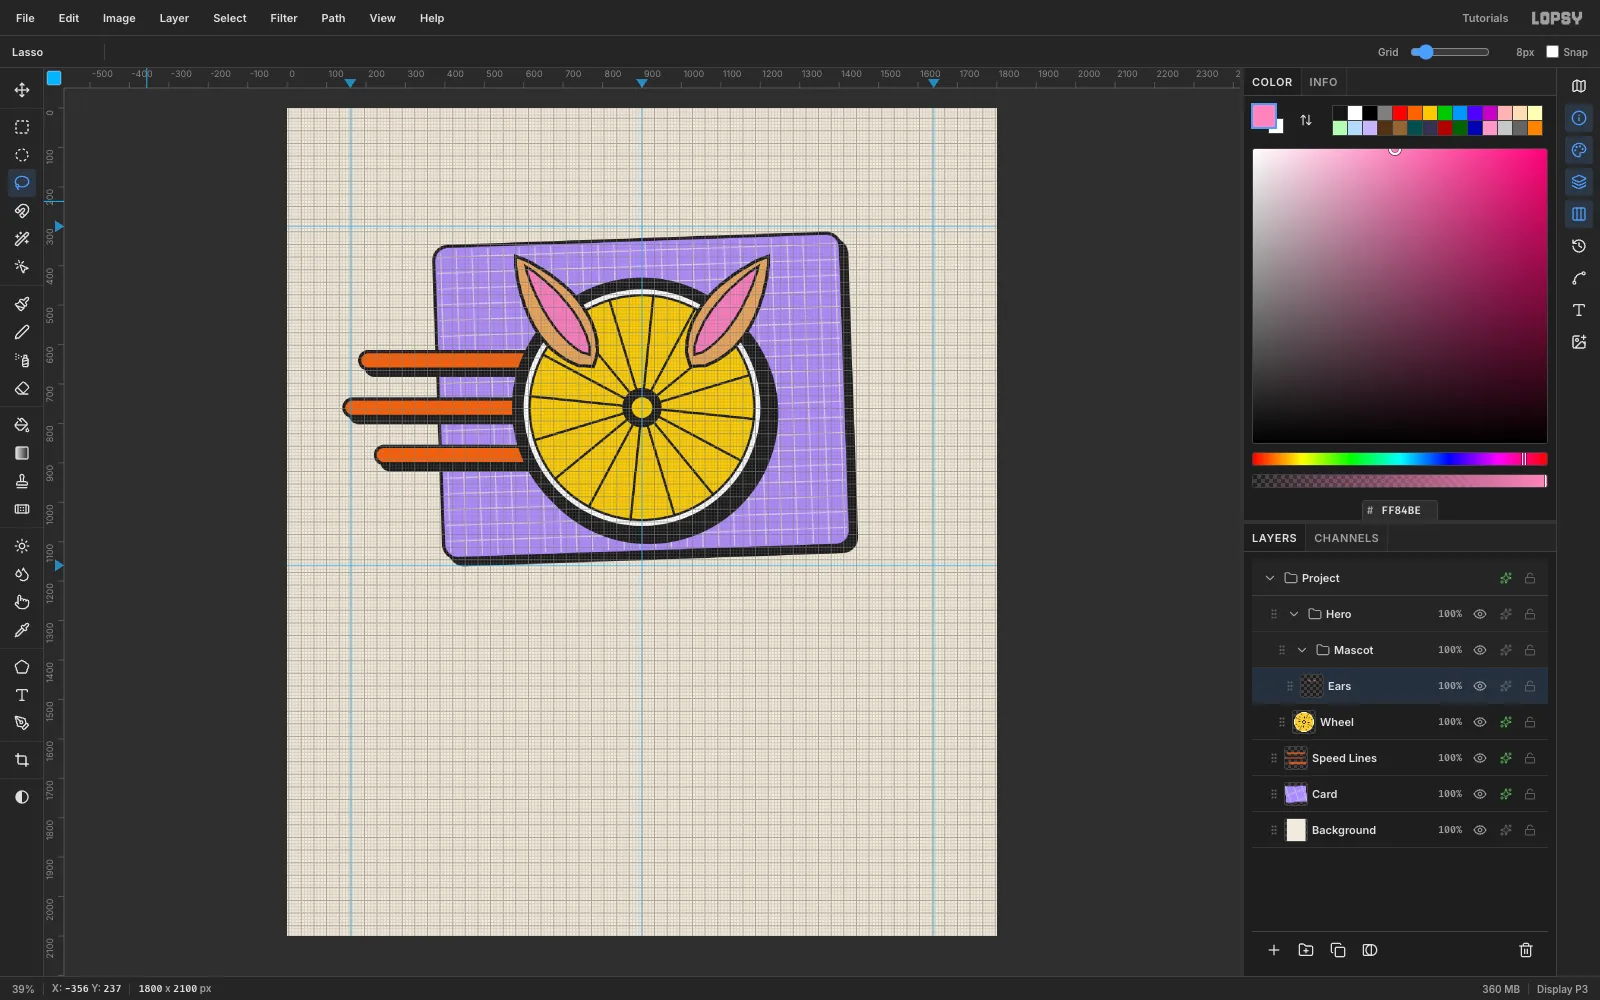
Wheeland press New Group again. The newMascotgroup nests insideHero. Add a layerEars.Each ear is a leaf shape:
- Lasso from the base at (780, 660) to the tip at (575, 370), about 140 px wide at its fattest.
- Apply the outline recipe with tan .
- For the inner ear, lasso a narrower leaf from (770, 630) to (600, 395). Fill it ink, then Shrink 6 and fill pink.
- Mirror both shapes across x 900 for the right ear.
-
Add the antlers
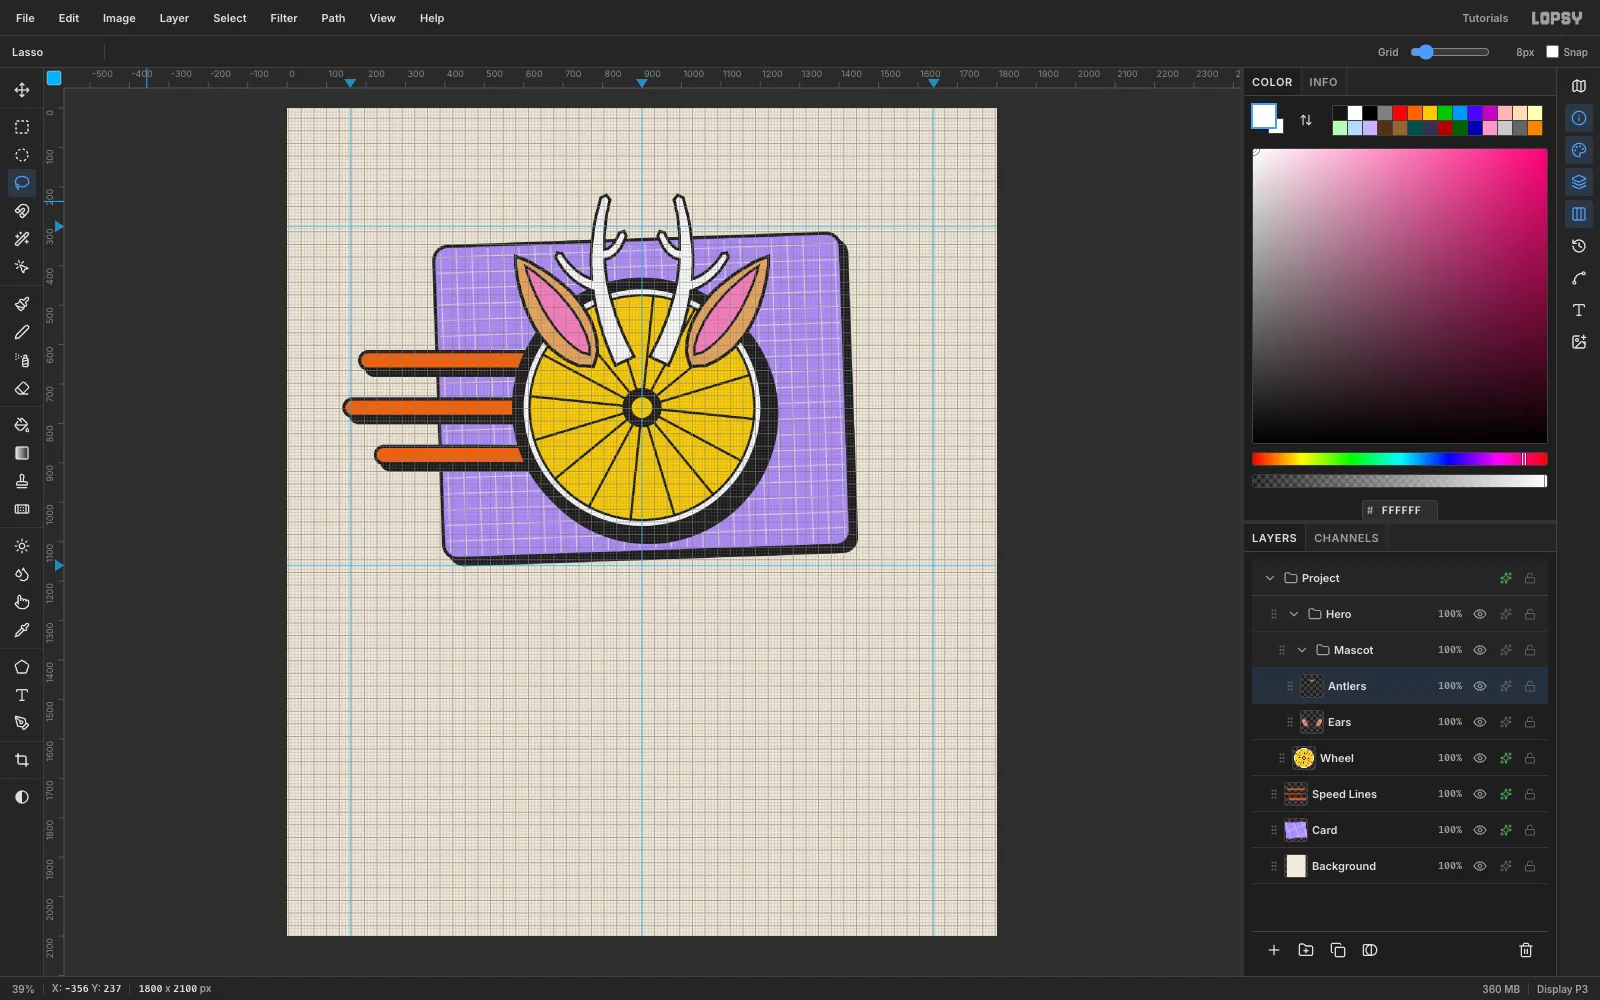
On a new
Antlerslayer, each antler is three tapered ribbons:- Main beam: from (858, 645), bowing outwards through about (770, 440), to a tip at (808, 228). It's 60 px wide at the base and 30 px at the tip.
- Outward tine: branching from about halfway up towards (688, 372).
- Inward tine: branching higher up towards (852, 318).
Lasso every ribbon and fill them all ink first. Then lasso each one again, Shrink 7 and fill white. Fill the black on every ribbon before any white, so the white never covers an outline where the ribbons cross. Mirror the set for the right antler.
The ears and antlers break out of the wheel. That edge-breaking is what makes the mascot pop off the badge.
-
Shape the head and bandana
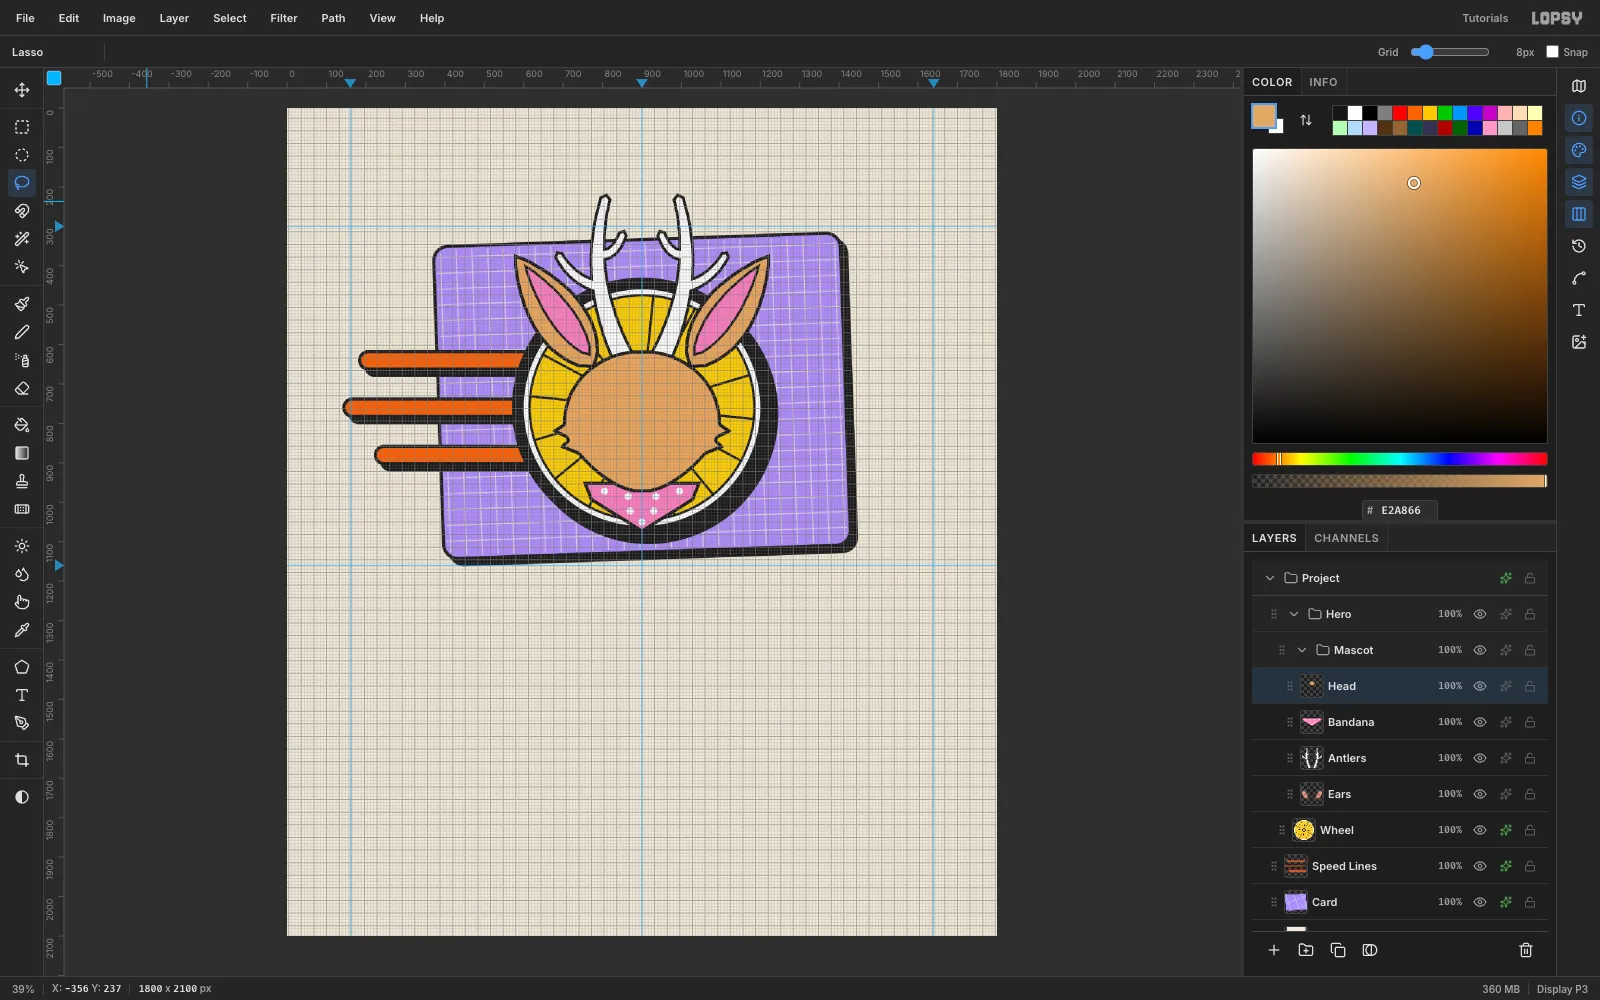
- Bandana layer: lasso the band (750, 948)–(1050, 948)–(1032, 995)–(900, 1078)–(768, 995). Apply the outline recipe in pink. With the selection still active, click white polka dots with the Brush at Size 18, Hardness 100.
- Head layer (above
Bandana): lasso a rounded head centred on (900, 795), 400 px wide and 364 px tall. Narrow the chin, and zig-zag the outline at the cheeks between y 800 and 880 for fur tufts. Apply the outline recipe in tan.
The head covers the base of the antlers and the top of the bandana, so both seem to grow out from behind it.
-
Build the muzzle
Add a
Facelayer. Fill two outlined white ellipses, 124 × 116 px, centred at (858, 885) and (942, 885), using a 6 px Shrink for the finer face details. Then fill a plain white rectangle (860, 850)–(940, 925) across the middle. It erases the inner outlines, so the two lobes read as one muzzle with a soft dip on top.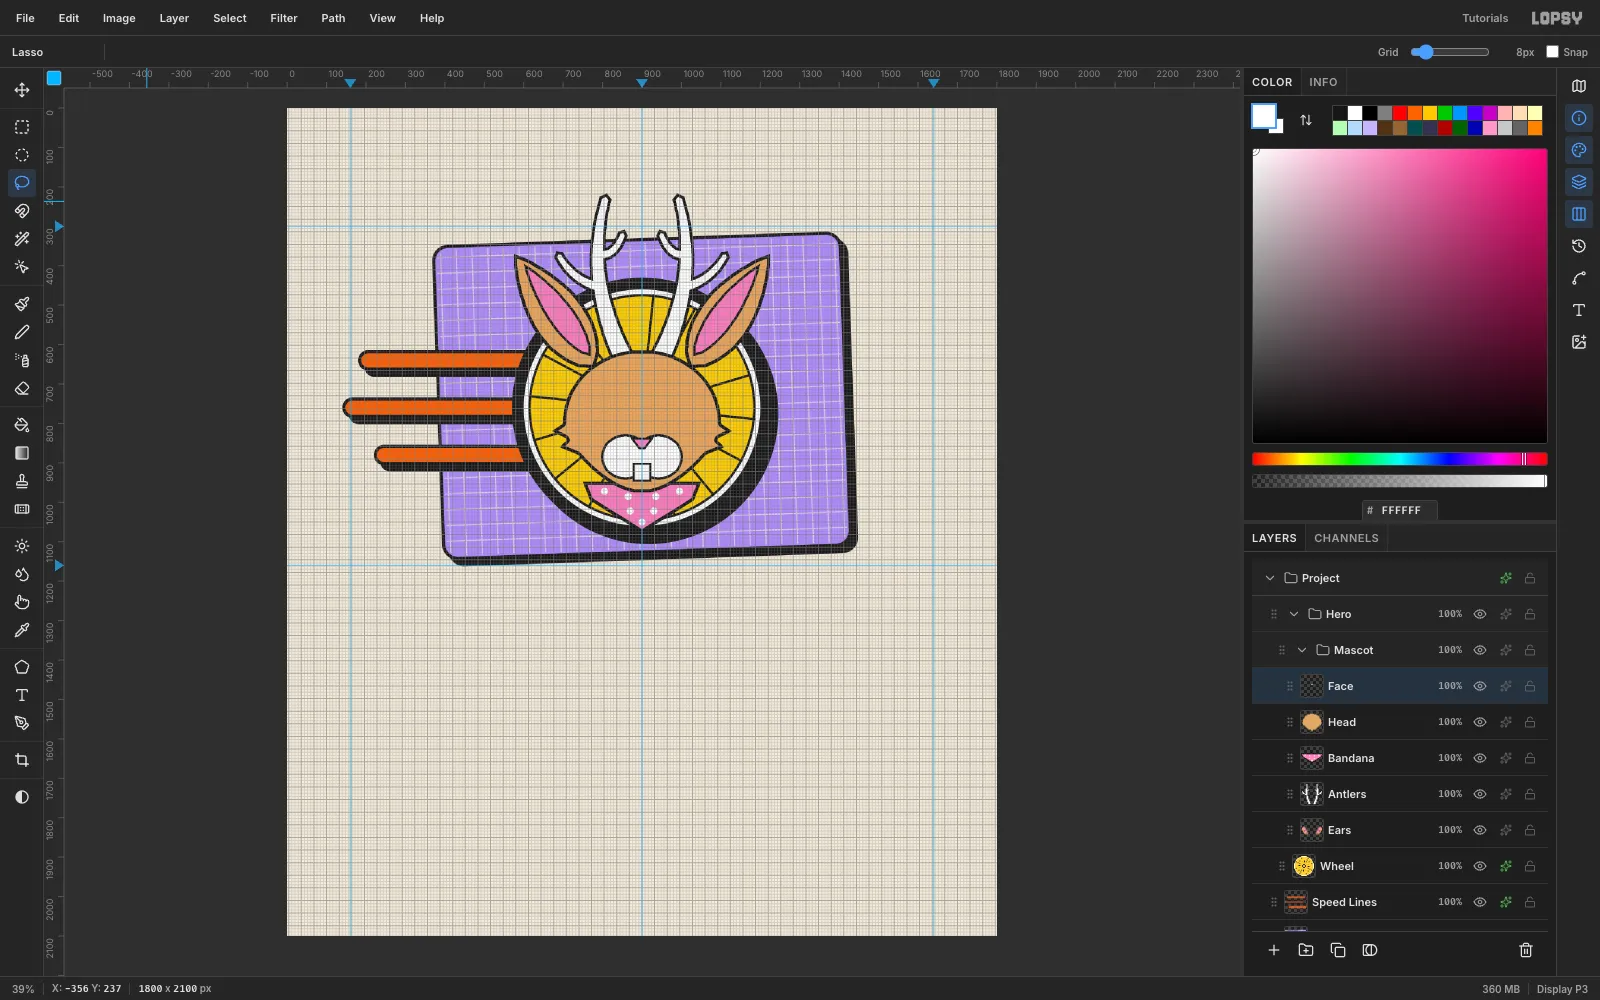
-
Finish the face
Still on
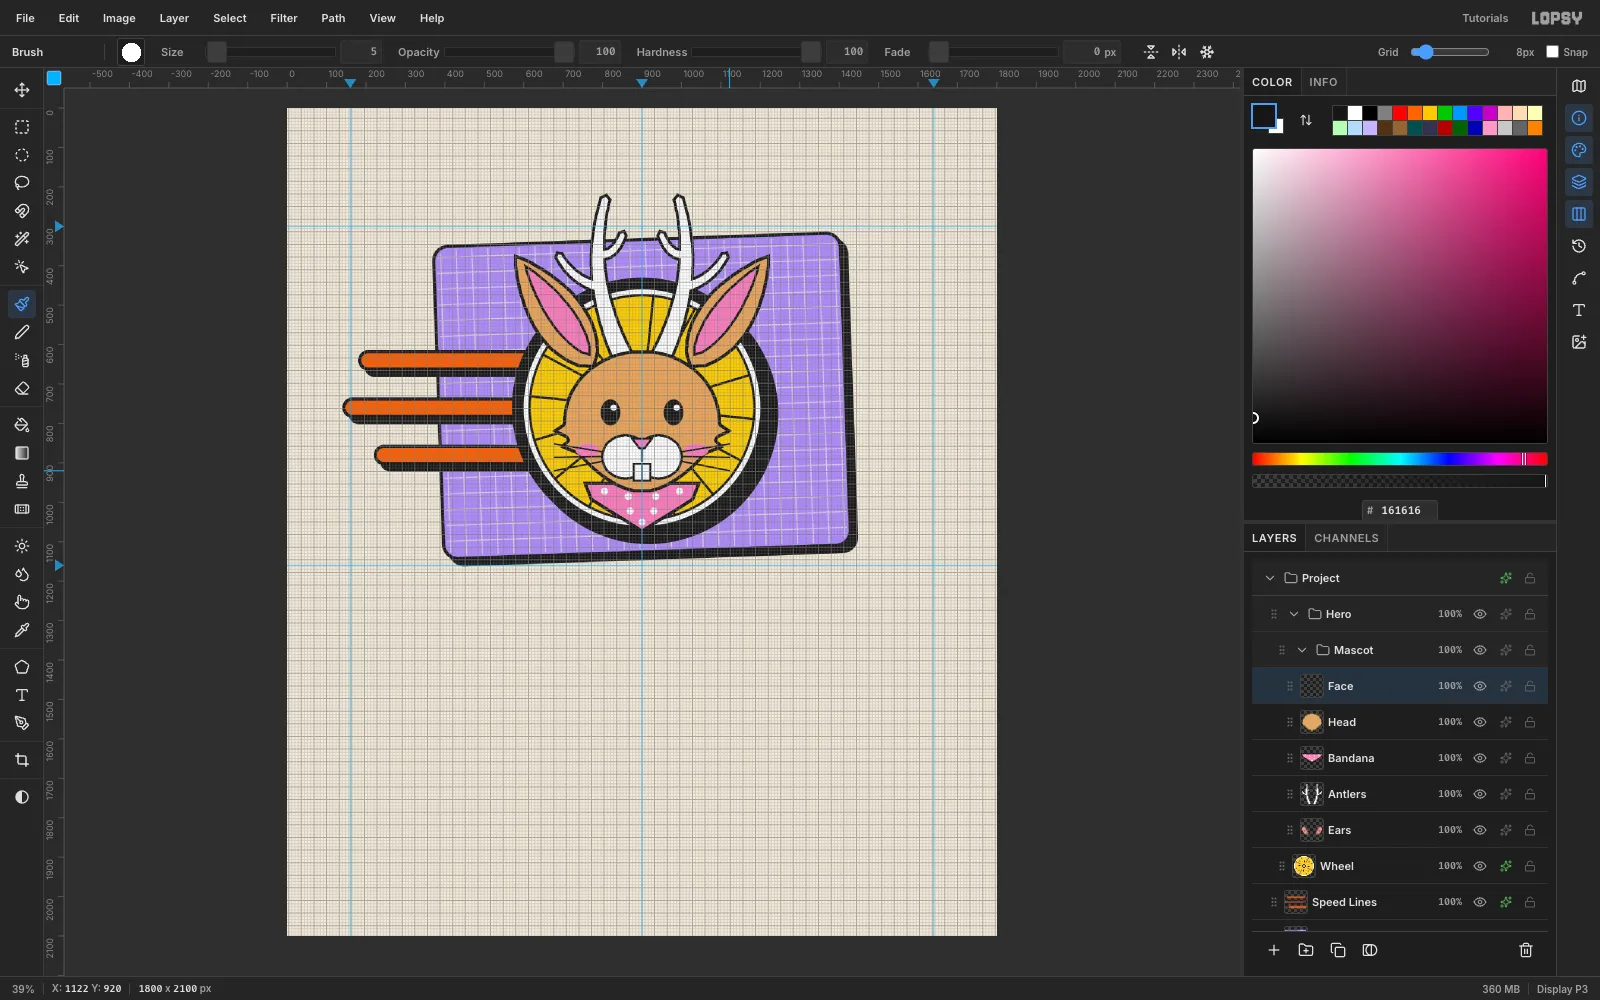
Face:- Nose: a trapezoid (870, 836)–(930, 836)–(908, 866)–(892, 866), outlined with a 5 px Shrink and filled pink.
- Teeth: an outlined white rectangle (876, 900)–(924, 948), with a 5 px brush line down the middle.
- Mouth: a 6 px line from the nose to the teeth.
- Blush: pink ellipses 60 × 34 at (762, 868) and (1038, 868), with no outline.
- Eyes: ink ellipses 50 × 66 at (820, 772) and (980, 772). Click a white glint up and to the right of each with a hard Brush at Size 16.
- Whiskers: three 5 px brush lines a side, fanning out from the muzzle edge to about 220 px from centre.
-
Strap on the courier goggles
On a
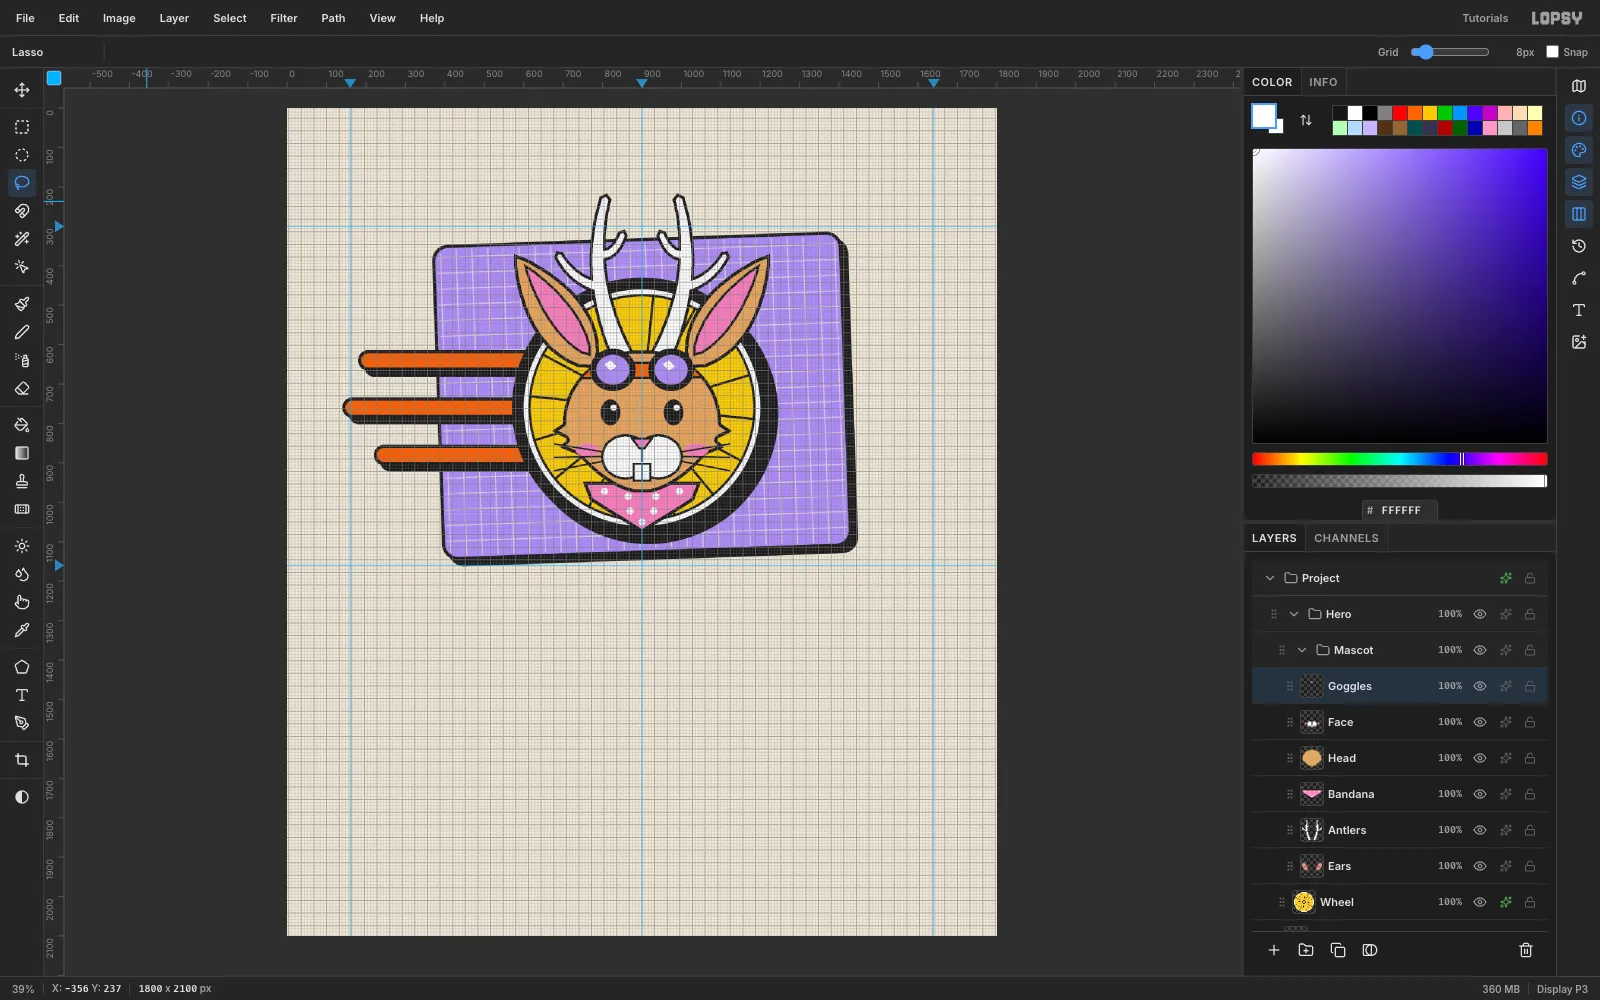
Goggleslayer:- Lasso the strap as a band from y 642 to 688 that follows the edge of the head. Apply the outline recipe in tangerine, with a 6 px Shrink.
- Fill ink ellipses 116 × 108 at (826, 664) and (974, 664) for the rims, then lavender 84 × 76 lenses inside them.
- Lasso a small white diamond glint at the upper left of each lens.
-
Shadow the mascot parts
Give
Ears,Antlers,BandanaandHeadthe same 16 / 16 / 1 shadow. LeaveFaceandGogglesflat: they're details inside the head, and shadows there would just make clutter.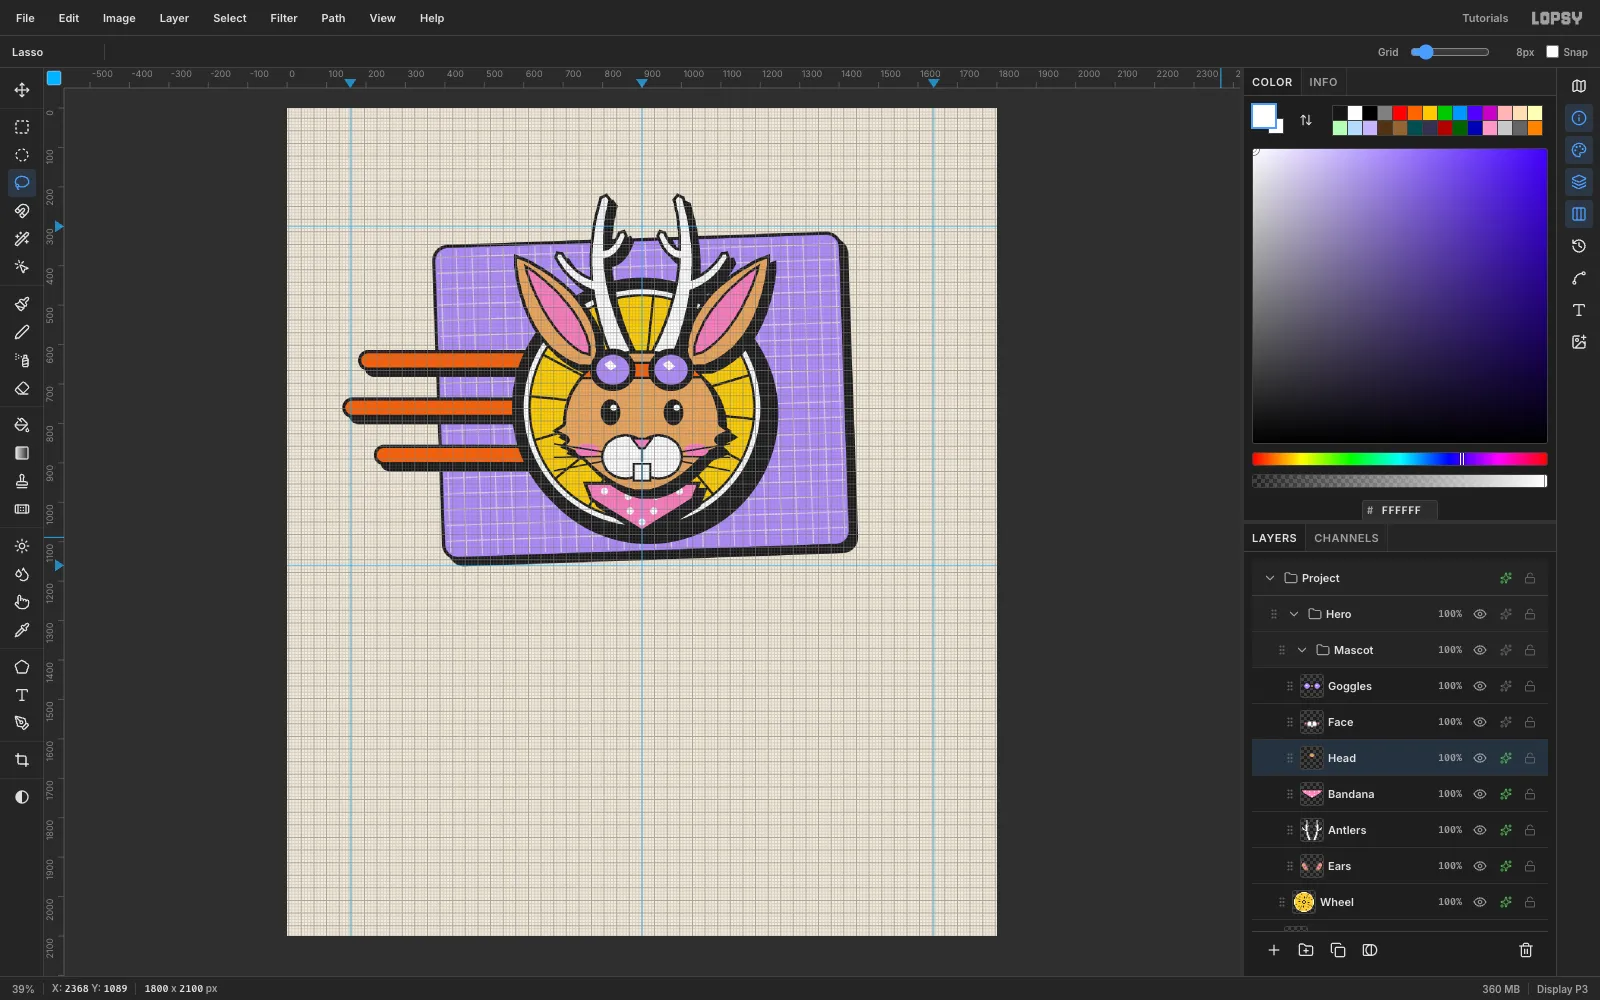
-
Move the whole hero as one group
Click the
Herogroup row and drag on the canvas with the Move tool. The wheel and every mascot layer travel together. That's handy for nudging the composition later.The hero is already where it belongs, so press Cmd+Z to put it back.
-
Set JACKALOPE on a lime bar
- Click
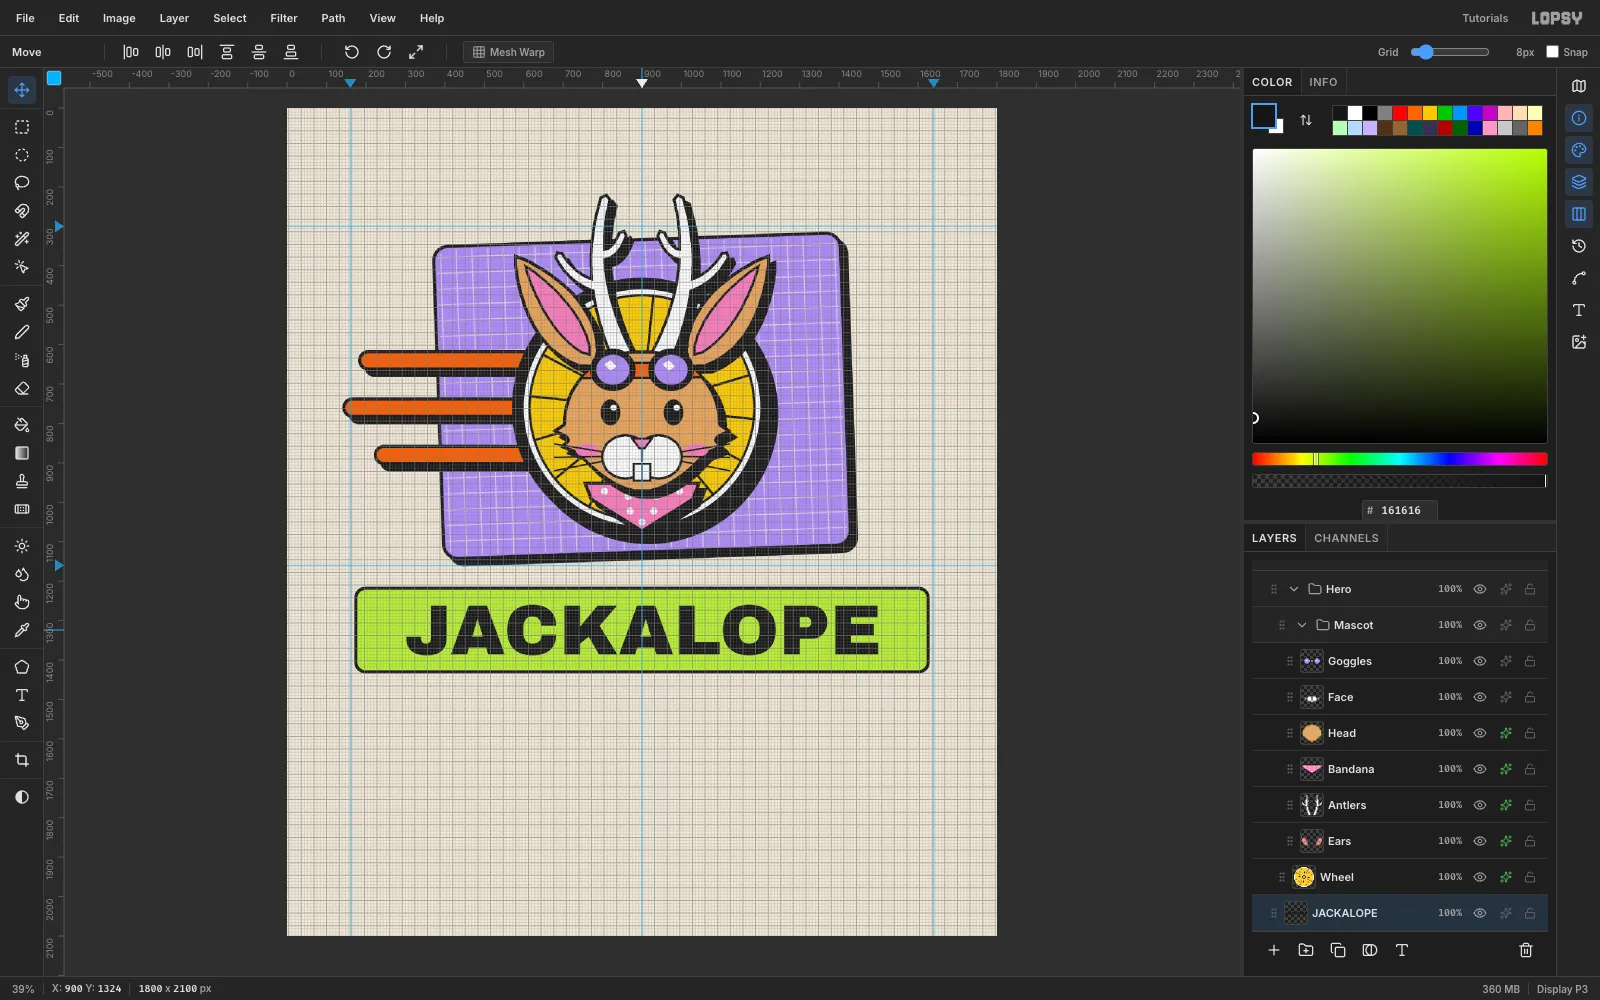
Speed Linesand addName Bar. With the Shape tool, set the Fill to limeC5F05Aand Corner Radius to 24, click at (900, 1324) and enter 1452 × 212. With the stroke, the bar is 1460 × 220 overall. - Pick the Text tool, choose Archivo Black, Size 180 and ink colour. Click in an empty area near the bottom of the canvas and type
JACKALOPE, then press Tab. - Move it so its letters are centred on (900, 1324). That leaves about 35 px of lime above and below and 120 px at each end.
- Click
-
Space out XPRESS
Select
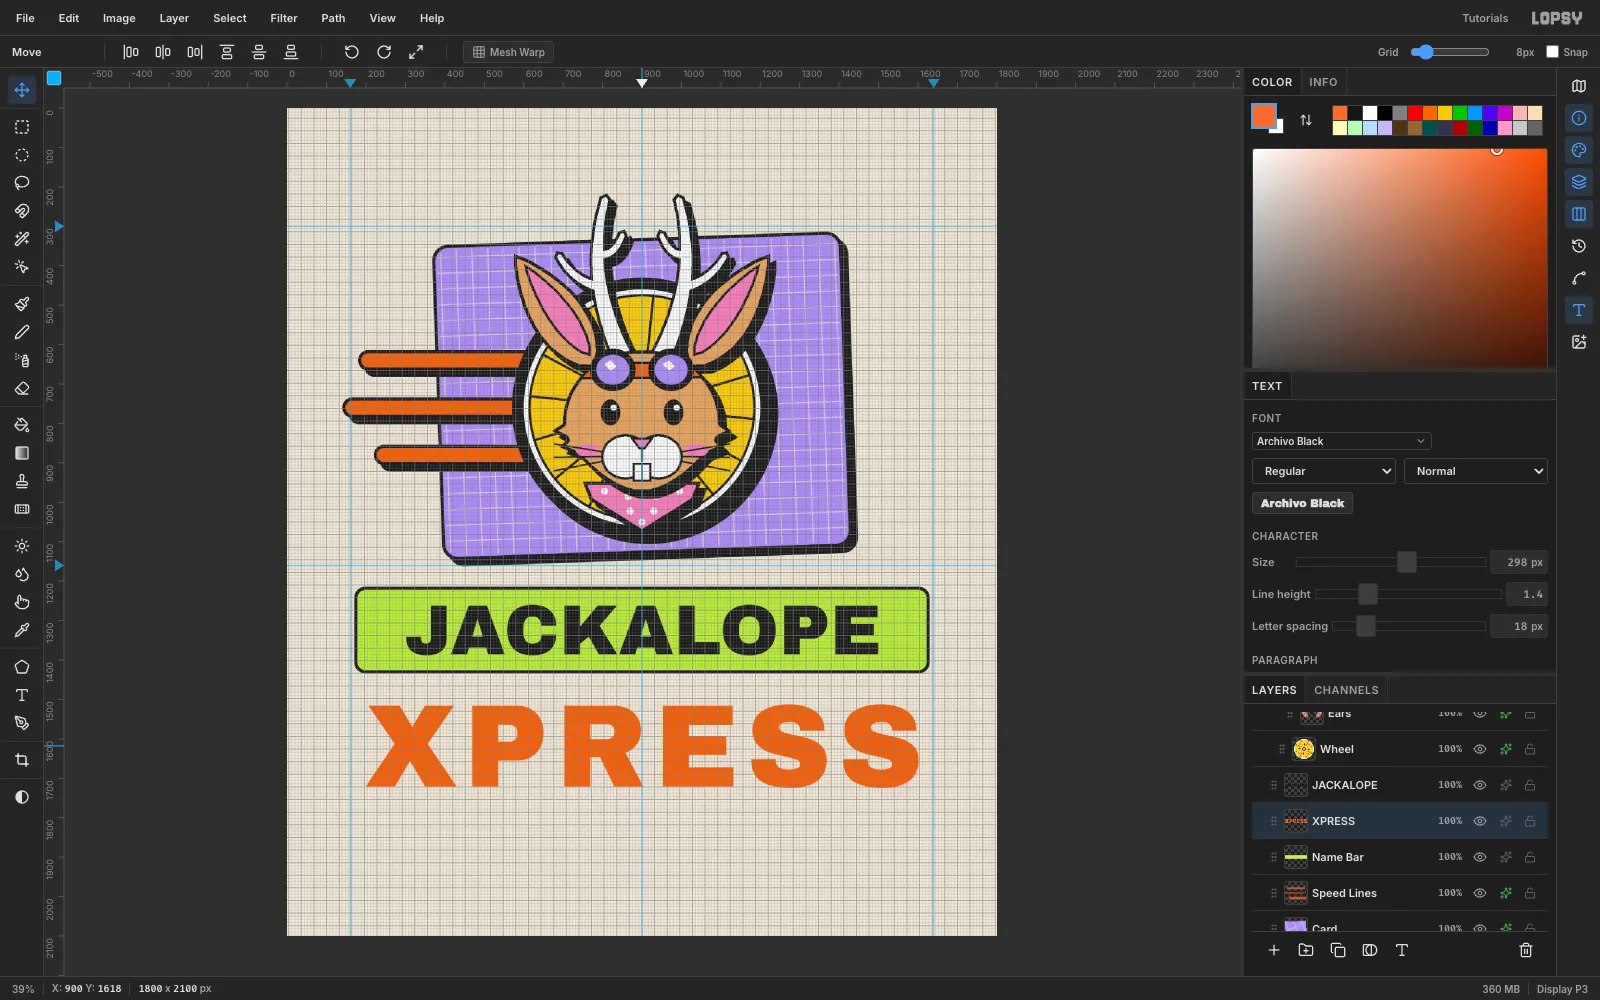
Name Bar, then set up the text: Archivo Black 300 in tangerine. Click in empty canvas and typeXPRESS. With the new layer active, set Letter spacing to 18 in the Text panel, then bring the Size down to 298 so it spans 1400 px. Move it so it's centred on x 900, with its top at y 1512.The extra spacing matters for the next step. Without it, the 10 px keylines of neighbouring letters run together into muddy black joins.
-
Build the keyline with Grow
- Click Rasterize Layer in the Layers footer, so XPRESS becomes pixels.
- Click
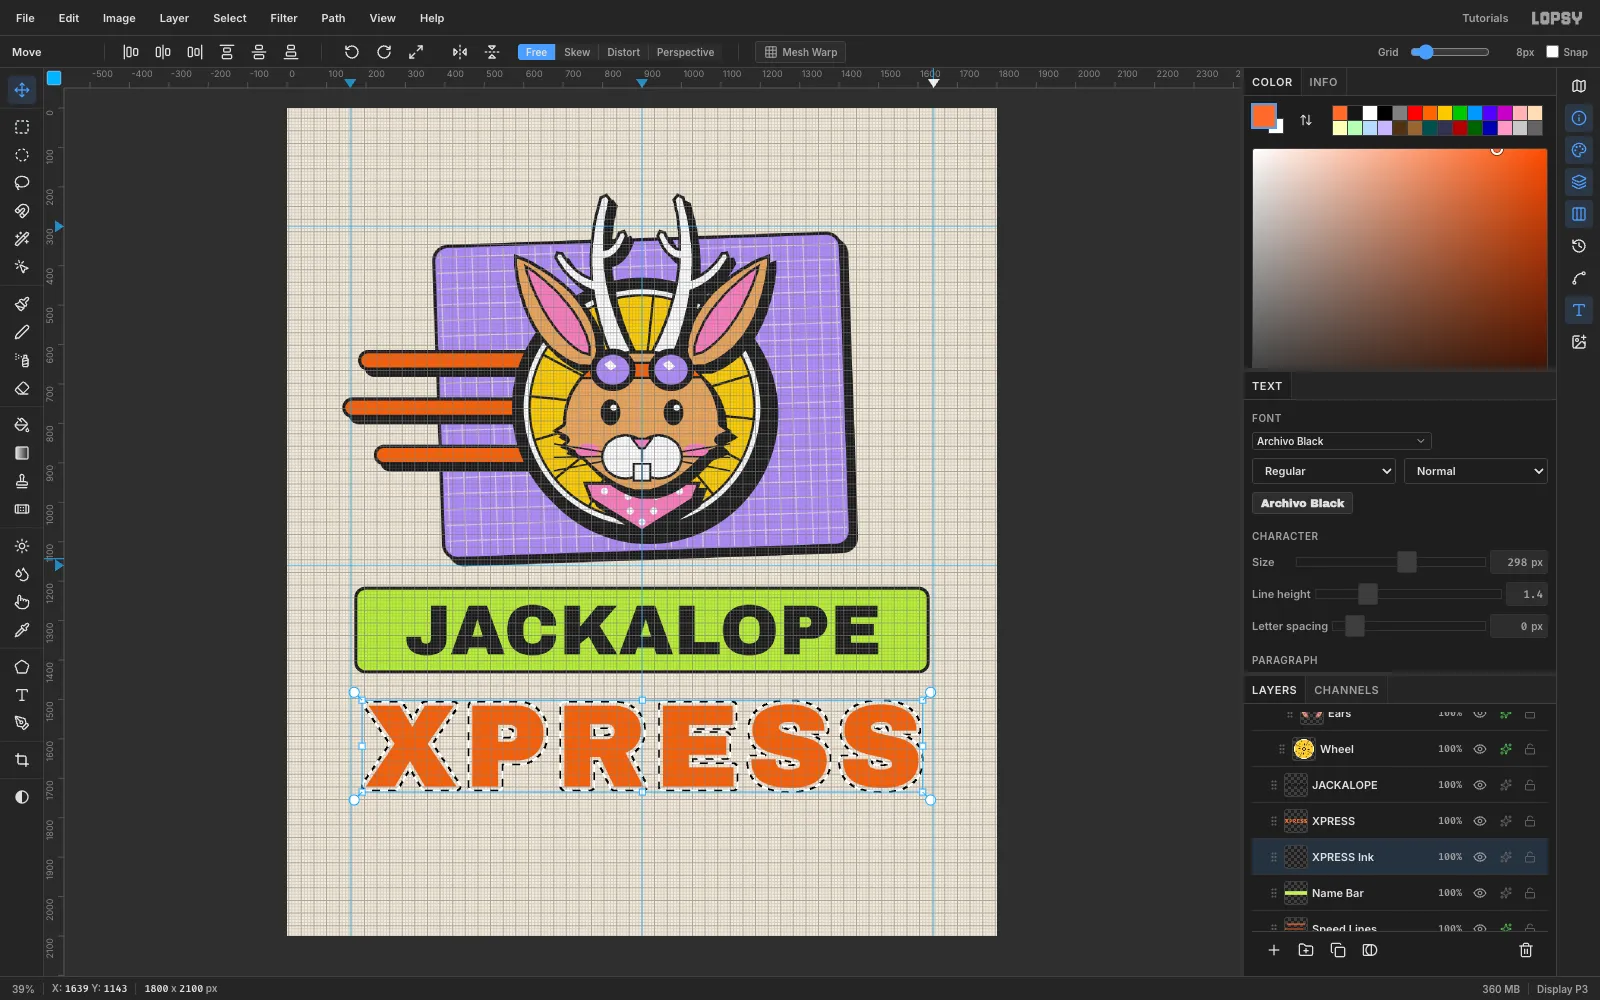
Name Barand add a layerXPRESS Ink. It lands under XPRESS. - Cmd-click the XPRESS thumbnail and run Select → Grow… 10. Grow measures true distance from the edge, so the keyline is anti-aliased and even all the way round.
- Fill with ink and deselect.
- Merge XPRESS down into
XPRESS Inkand rename the resultXPRESS.
-
Tilt the type to match the card
- Drag
JACKALOPE's row down so it sits directly aboveName Bar, and Merge Down. - For
Name Bar, and thenXPRESS: marquee just outside it, drag the rotate handle to −2°, and press Cmd+D. - Give both layers the 16 / 16 / 1 shadow.
Card, bar and logotype now share one angle, so the gaps between them stay even.
- Drag
-
Recolour pasted buttons with the Magic Wand
- Add
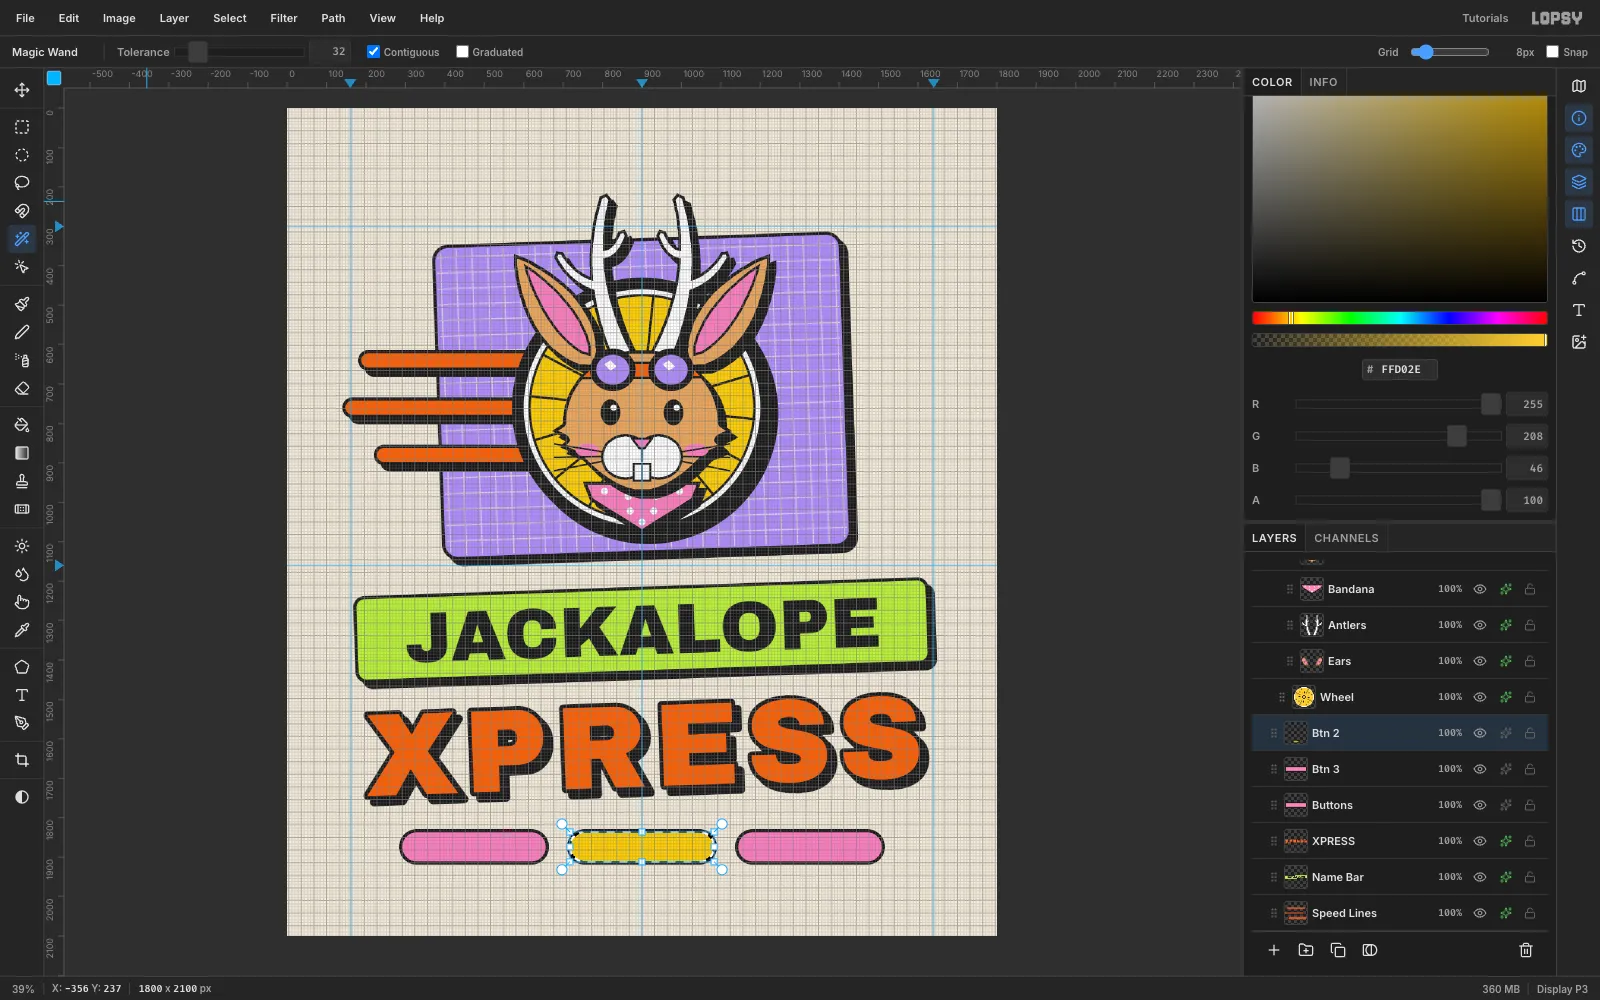
ButtonsaboveXPRESS. With the Shape tool, set the Fill to pinkFF84BEand Corner Radius to 41, click at (474, 1874) and enter 372 × 82. With the stroke, the pill is 380 × 90 overall. - Copy it and paste it twice as
Btn 2andBtn 3, and move them to x 710 and x 1136. - Click
Btn 2and take the Magic Wand (Tolerance 32, Contiguous on). Click the pink, run Select → Grow… 1 so the anti-aliased rim is caught too, and fill yellow. - Do the same on
Btn 3with lime. - Merge both copies down into
Buttonsand add the shadow.
- Add
-
Label the buttons
Select
Buttons, then set up the text: Rubik Mono One 42 in ink, Letter spacing 0. SetPEDAL,DELIVERandREPEAT, creating each one in empty canvas, then move it so its letters are centred on its pill: x 474, 900 and 1326, all at y 1874.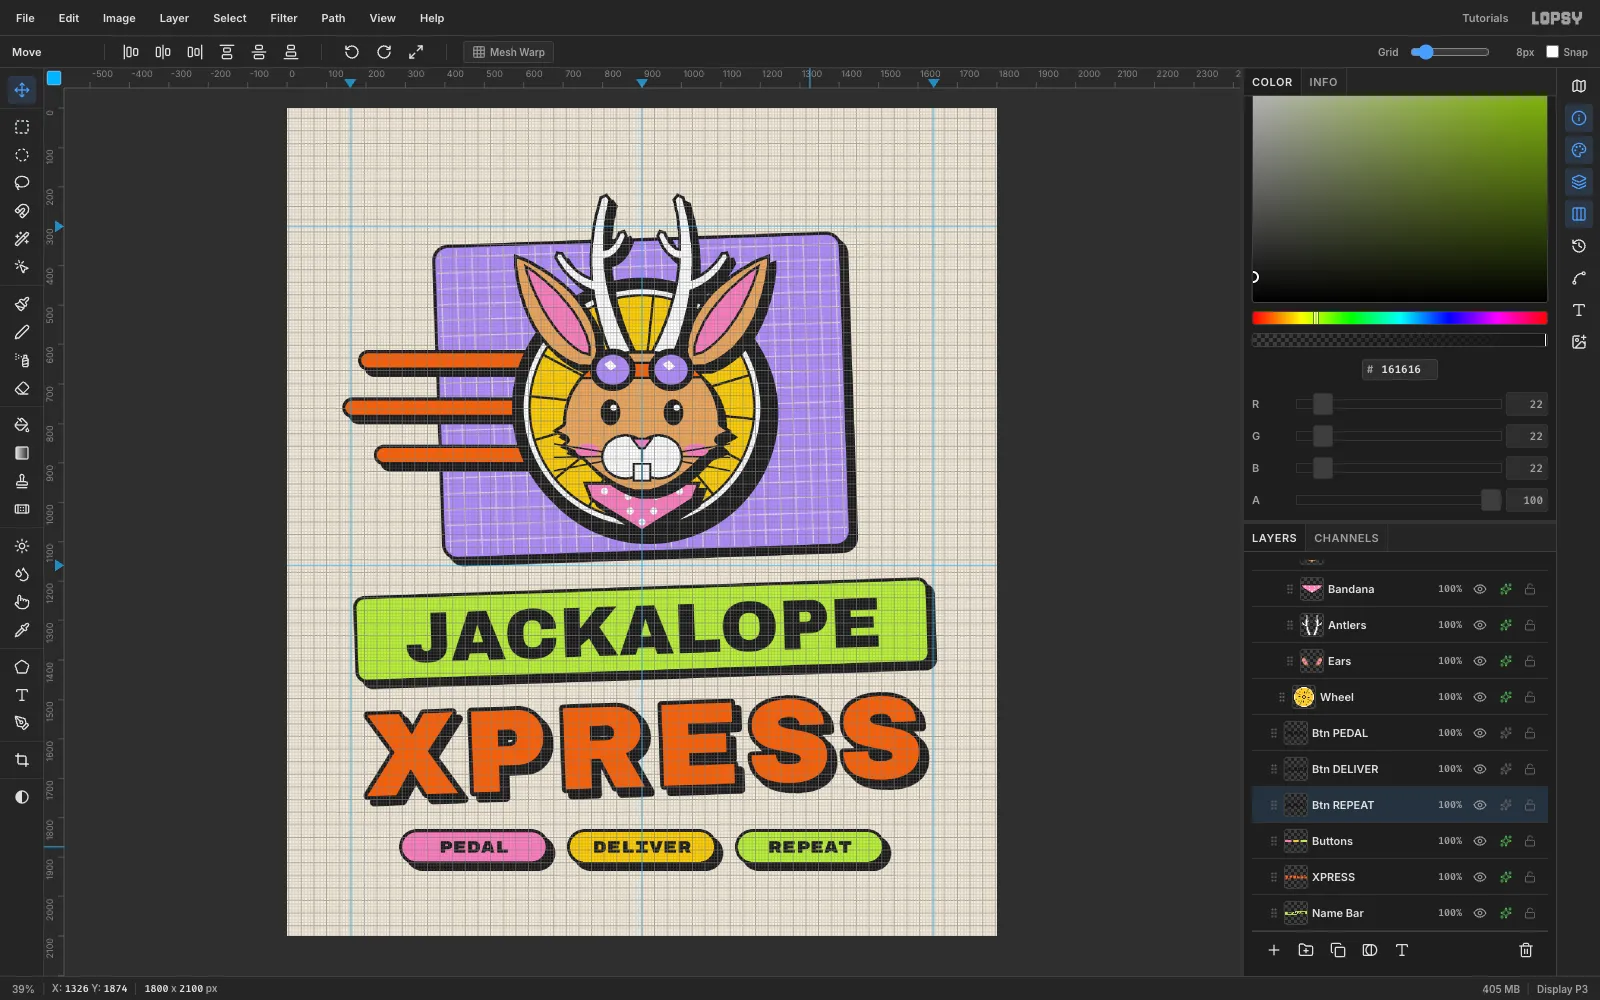
-
Add the club tab
- Select
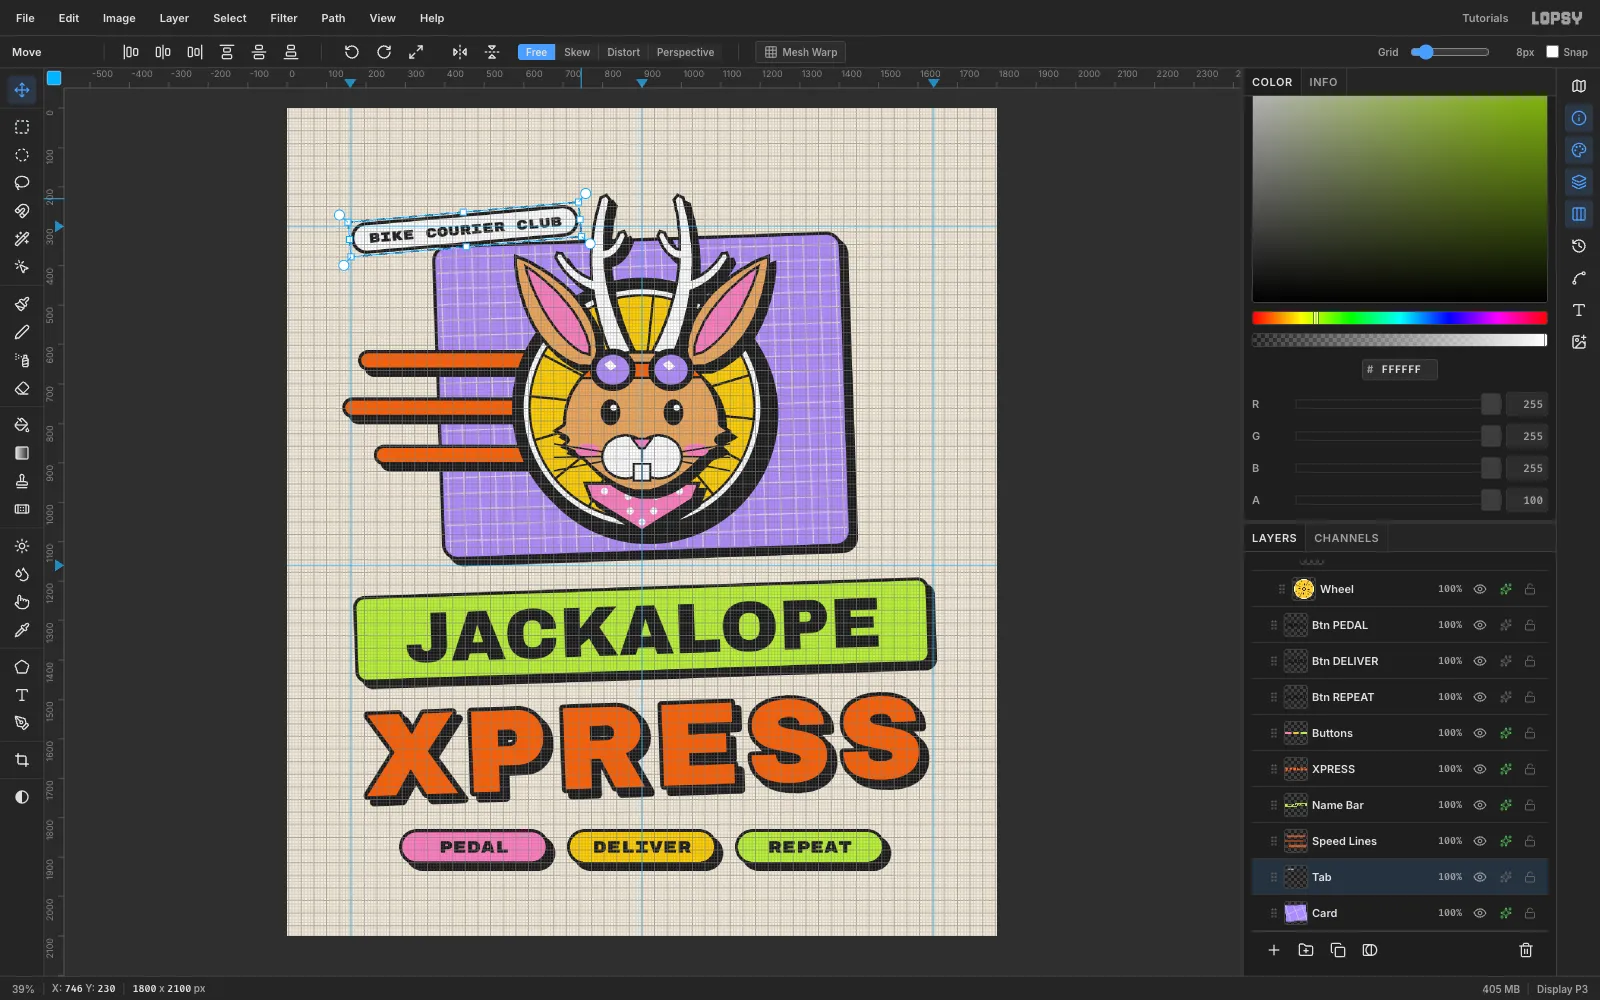
Buttons, set the Size to 34 and typeBIKE COURIER CLUBin empty canvas. It's about 490 px wide. - Click
Cardand add aTablayer. With the Shape tool, set the Fill to whiteFFFFFFand Corner Radius to 36, click at (450, 308) and enter 571 × 72. With the stroke, the tab is 579 × 80 overall. - Centre the text on (450, 308), drag its row directly above
Taband Merge Down. - Rotate the tab −5° and give it the shadow.
It's tilted a little more than the card, in the same direction, so it reads as a sticker slapped on top.
- Select
-
Lasso a starburst
Add
StickeraboveTab. Lasso a 14-point star centred on (1450, 330), with its points alternating between radius 128 and radius 100. Apply the outline recipe in pink.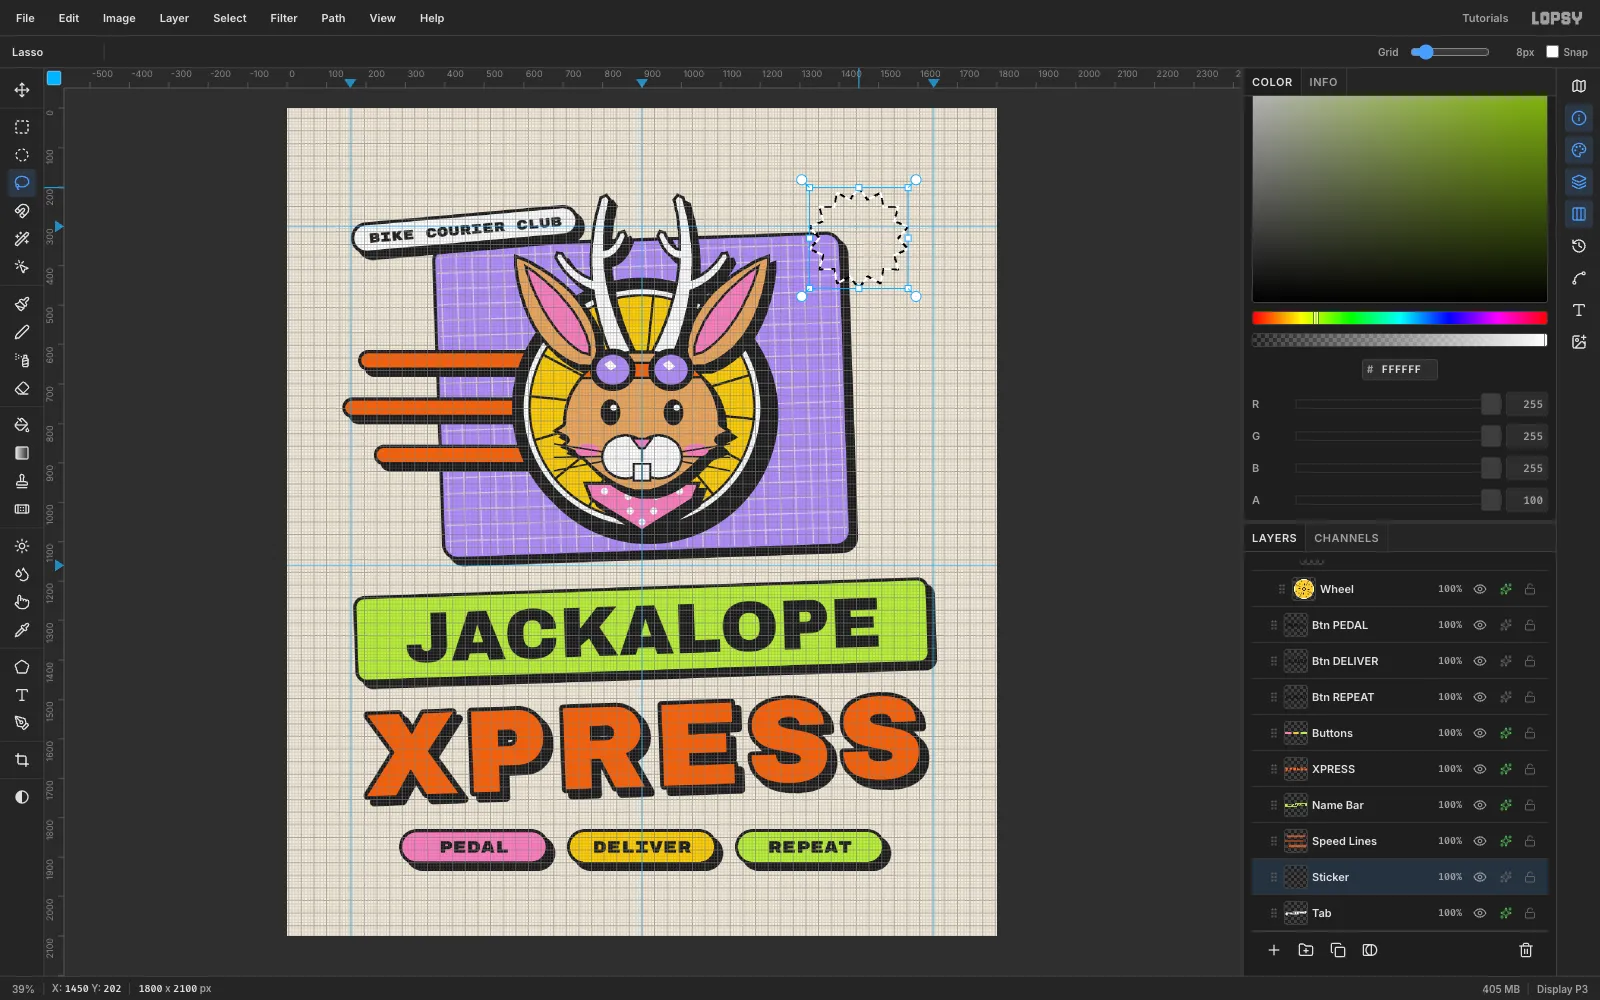
-
Scale the star up
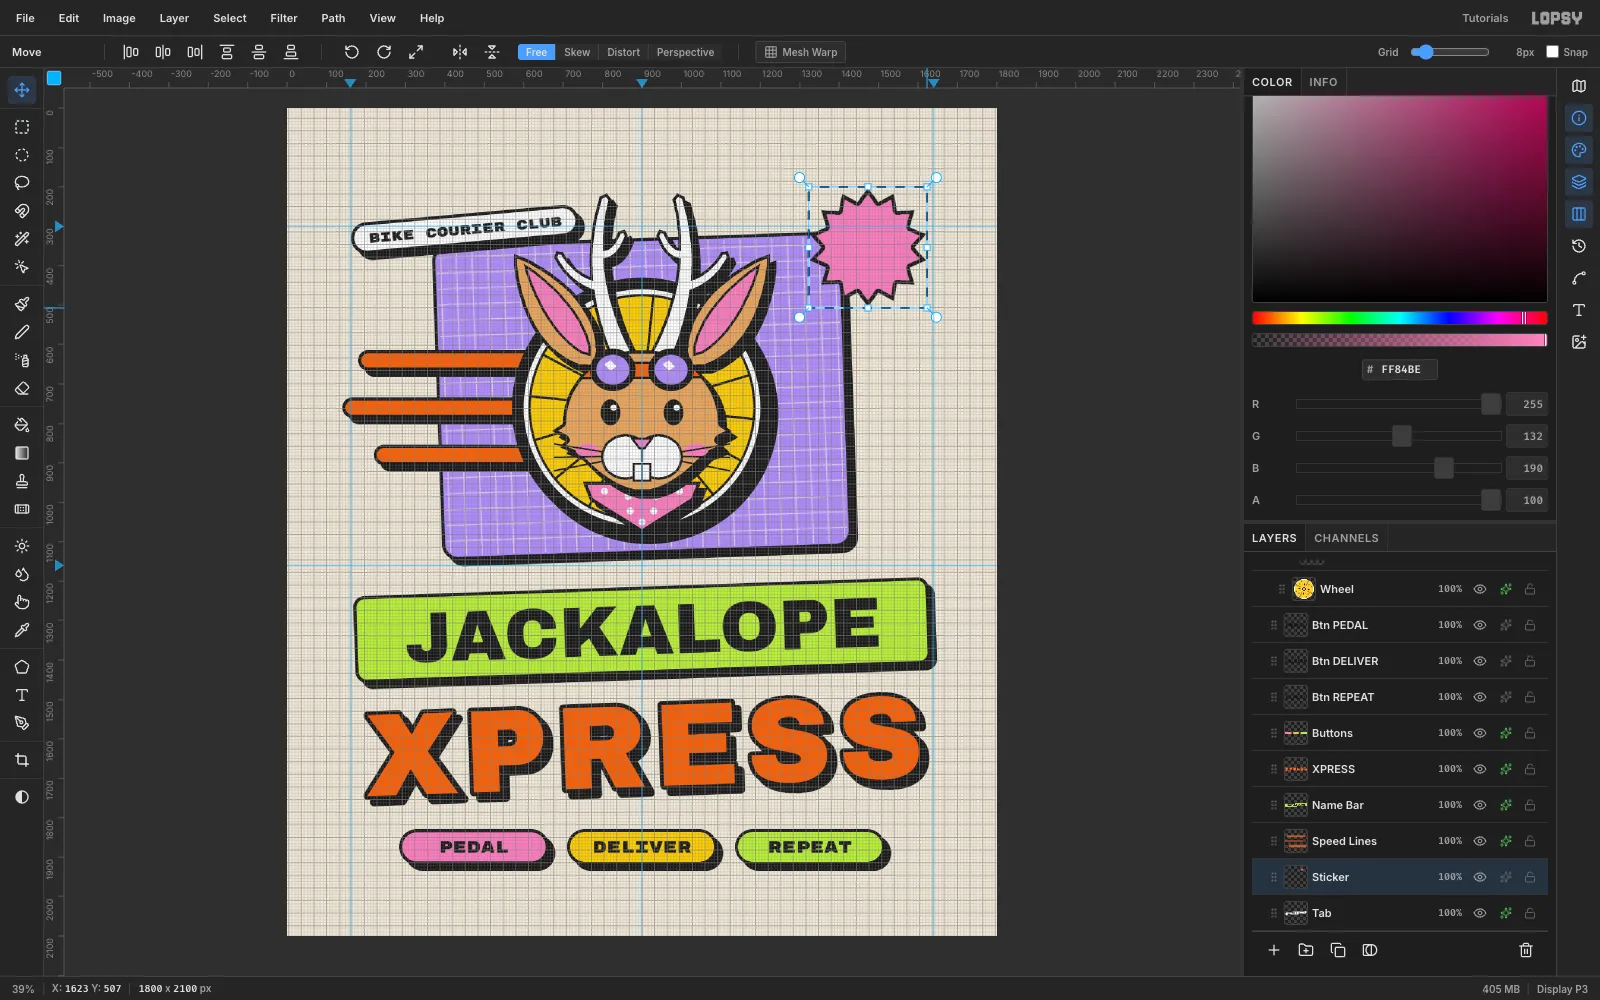
The label will need more room. Marquee the star, switch to Move, and hold Cmd while dragging the bottom-right handle out. Cmd keeps the scale uniform. Stop at about 118%, drag the star so it's centred on (1450, 330) again, and press Cmd+D.
-
Label and rotate the sticker
- Type
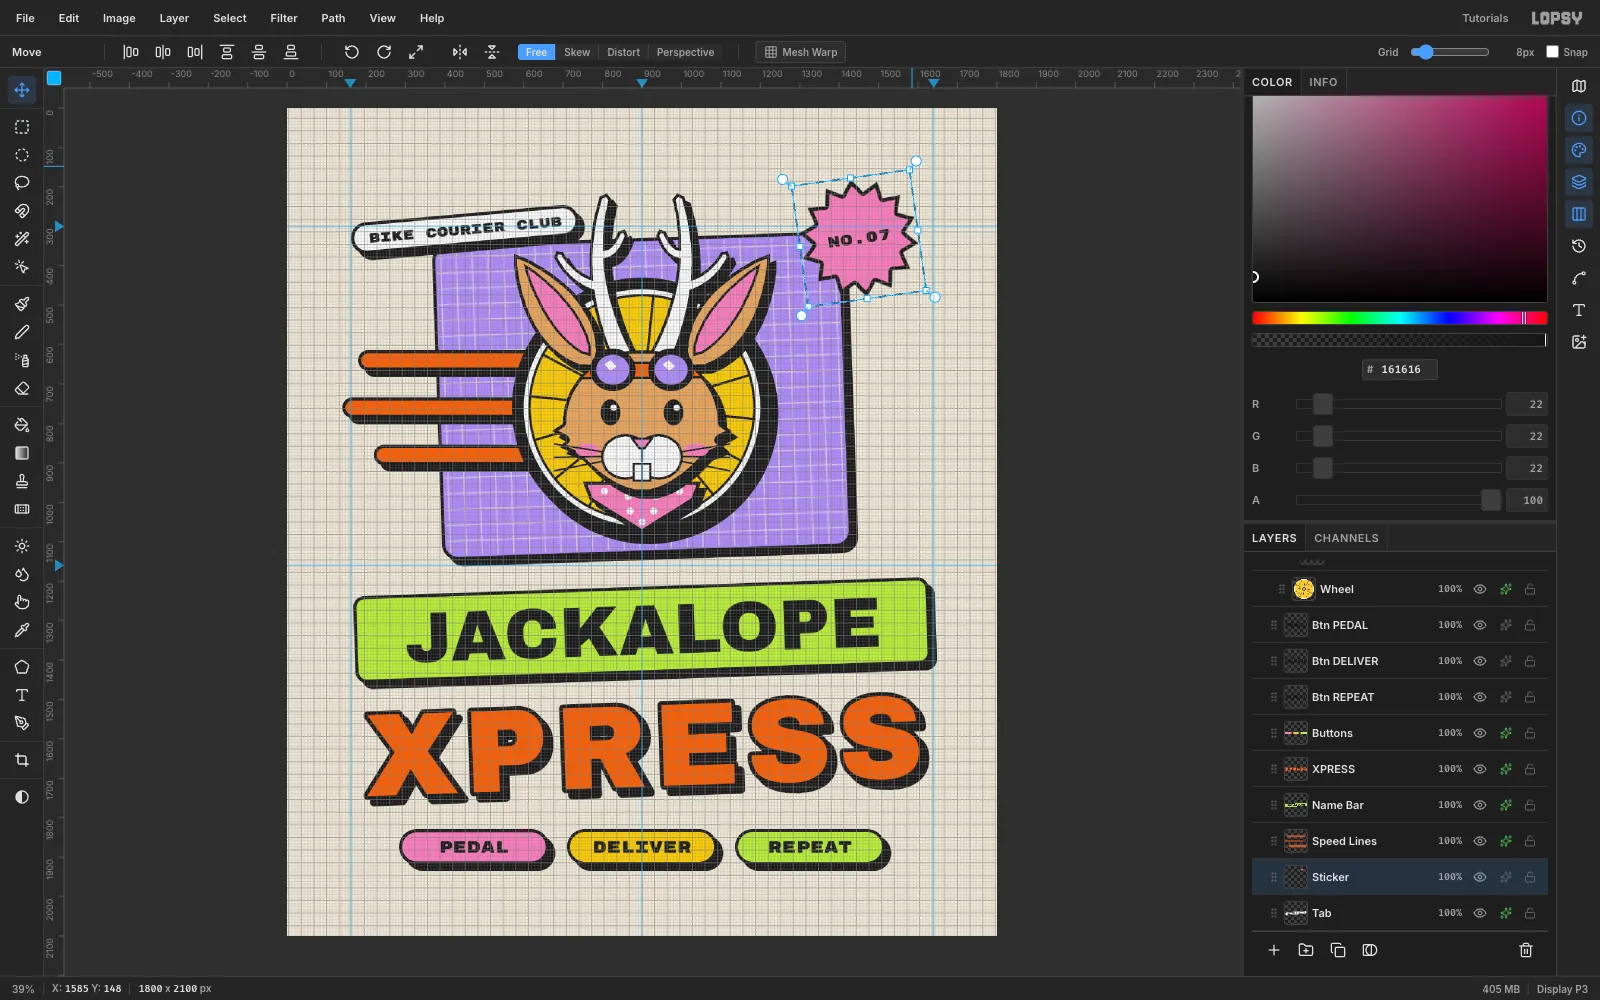
No.07in Rubik Mono One 38 (the font draws it in capitals), centre it on the star and Merge Down. - Rotate the sticker −8° and add the shadow.
- Type
-
Trim the bandana corners with the Eraser
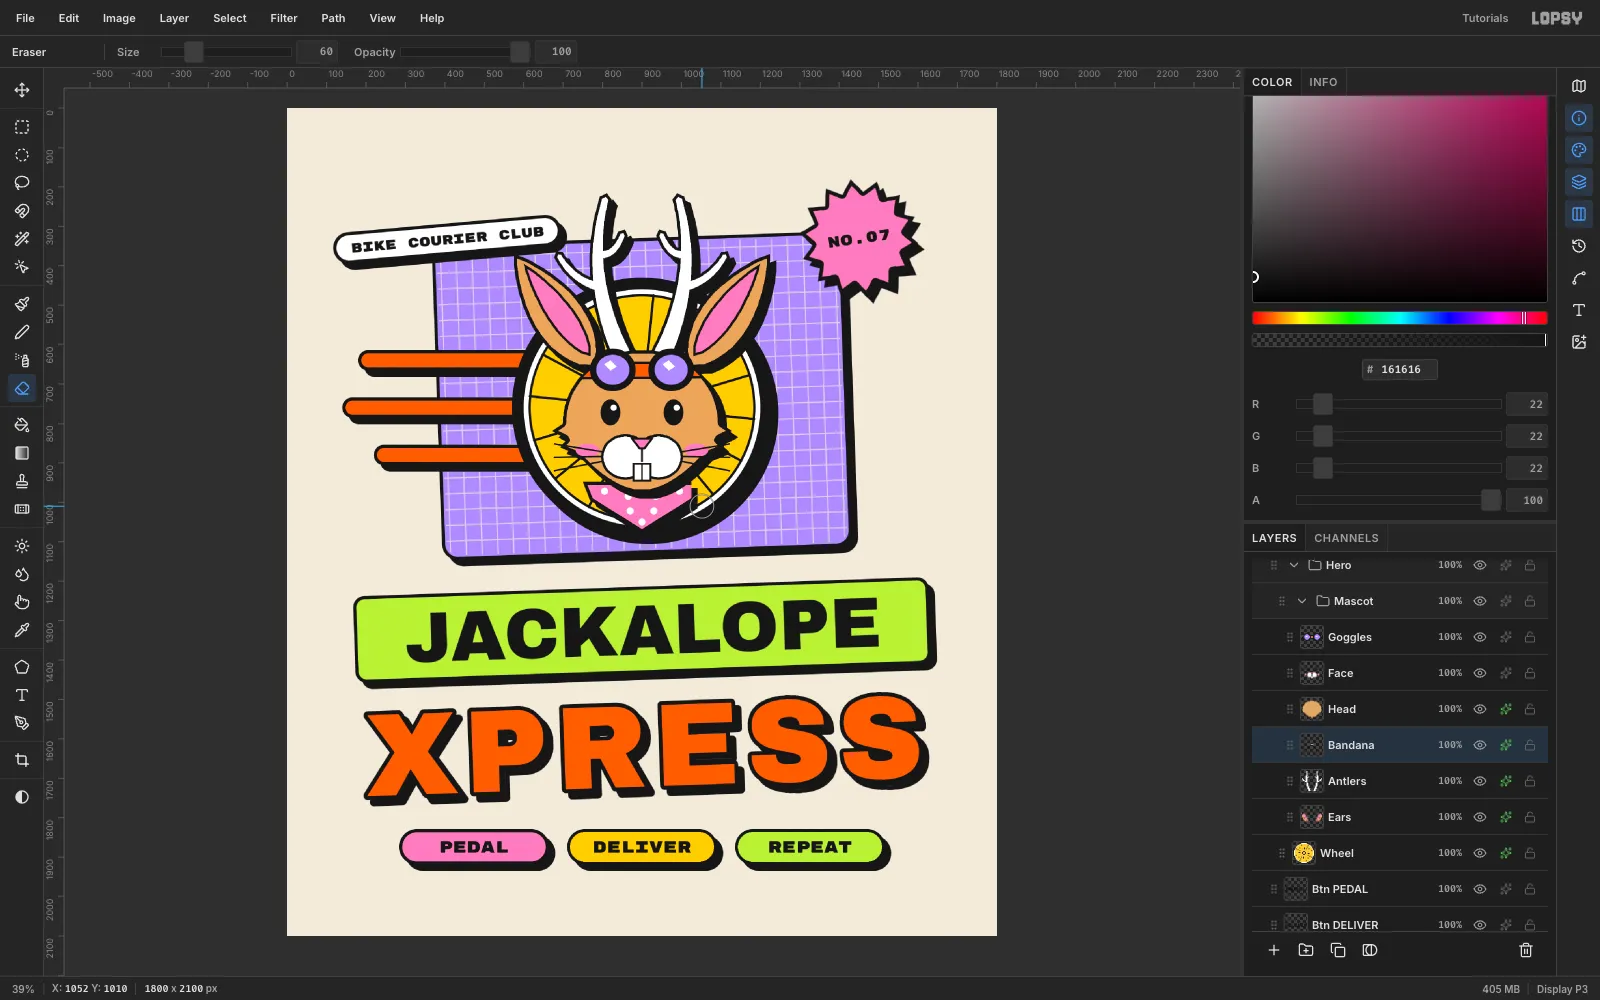
The bandana's top corners stuck out past the jaw, and their shadows read as little hooks.
- On
Bandana, pick the Eraser at Size 60. Click at (1052, 925) and Shift-click (1052, 1010) to cut the right corner off with a straight edge. Do the same at x 748 on the left. - Re-ink each cut edge with an 8 px brush line: (1020, 953) to (1020, 996), and (780, 953) to (780, 996).
- The Eraser's soft edge leaves a faint pink fade outside the new line. Marquee a thin box just outside each line, (1023, 930)–(1070, 1015) and its mirror, and press Delete for a crisp edge.
- On
-
Nudge everything up together
- Move the
Tab45 px left and 25 px down, so it overlaps the card's corner clearly and clears the antler tip. - The bottom margin is a little short, so even it out. Click
Card, then Shift-click theHerogroup row. That selects every layer except Background. - With the Move tool, nudge them up 25 px with the arrow keys (Shift + arrow moves 10 px). The whole design rises together.
Hide the grid and guides (View → Show Grid, View → Show Guides) and export. For a print file, hide
Backgroundfirst, so the sand stays bare shirt.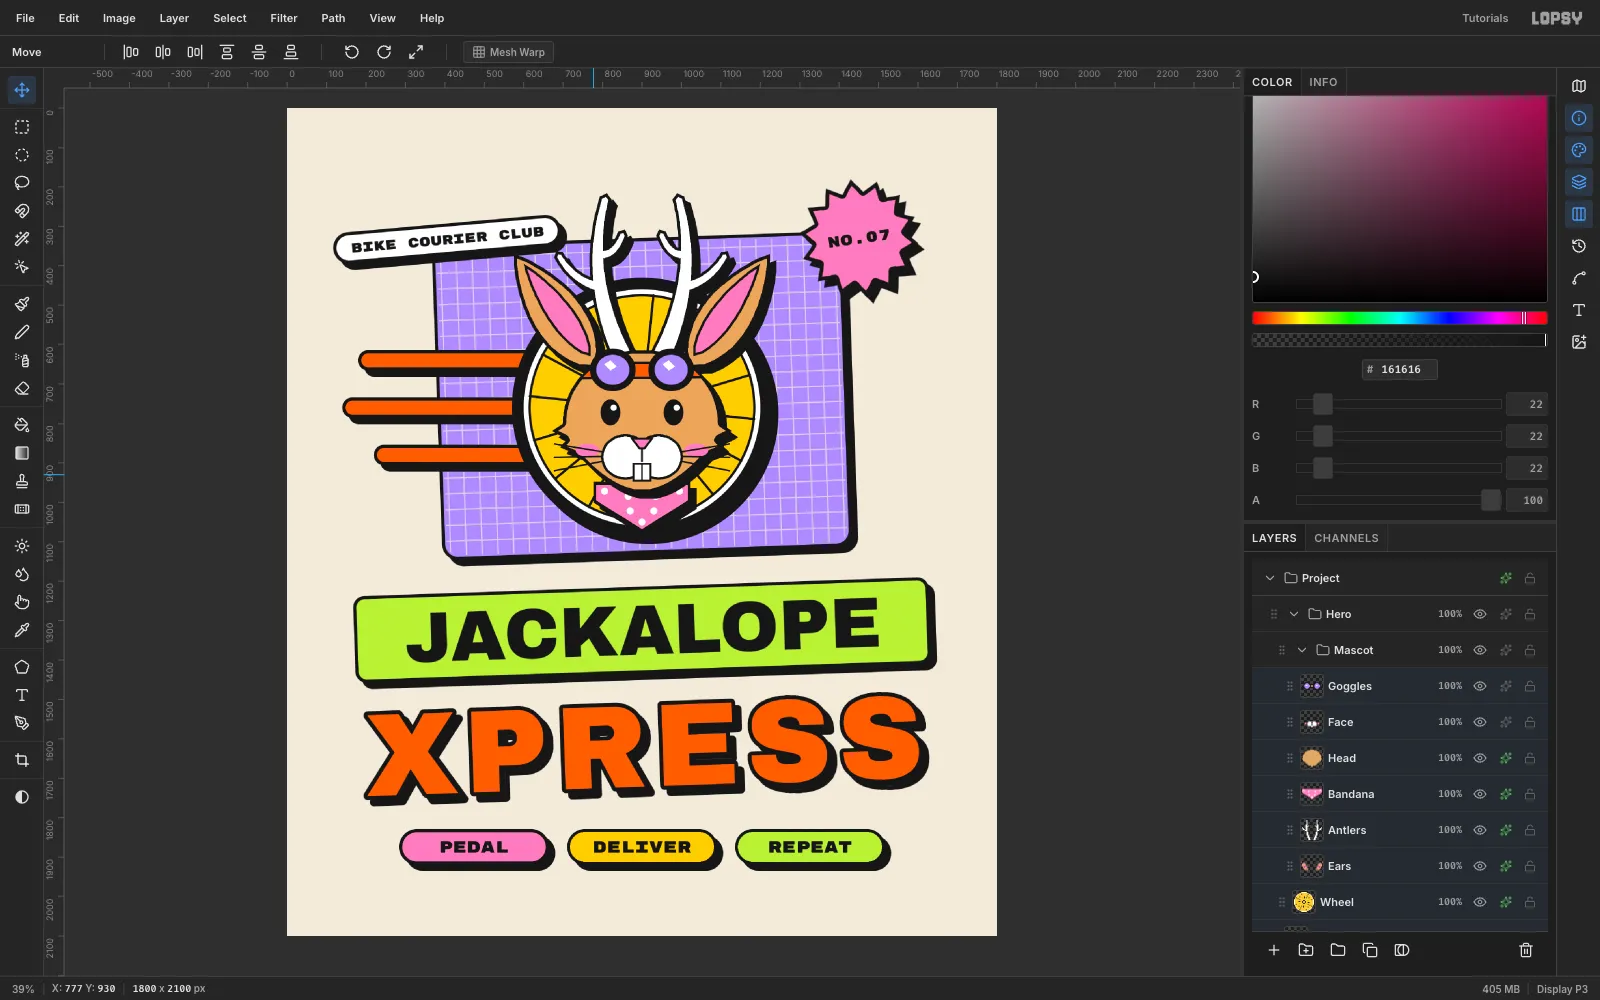
- Move the