Design a De Stijl Tattoo Flash Sheet
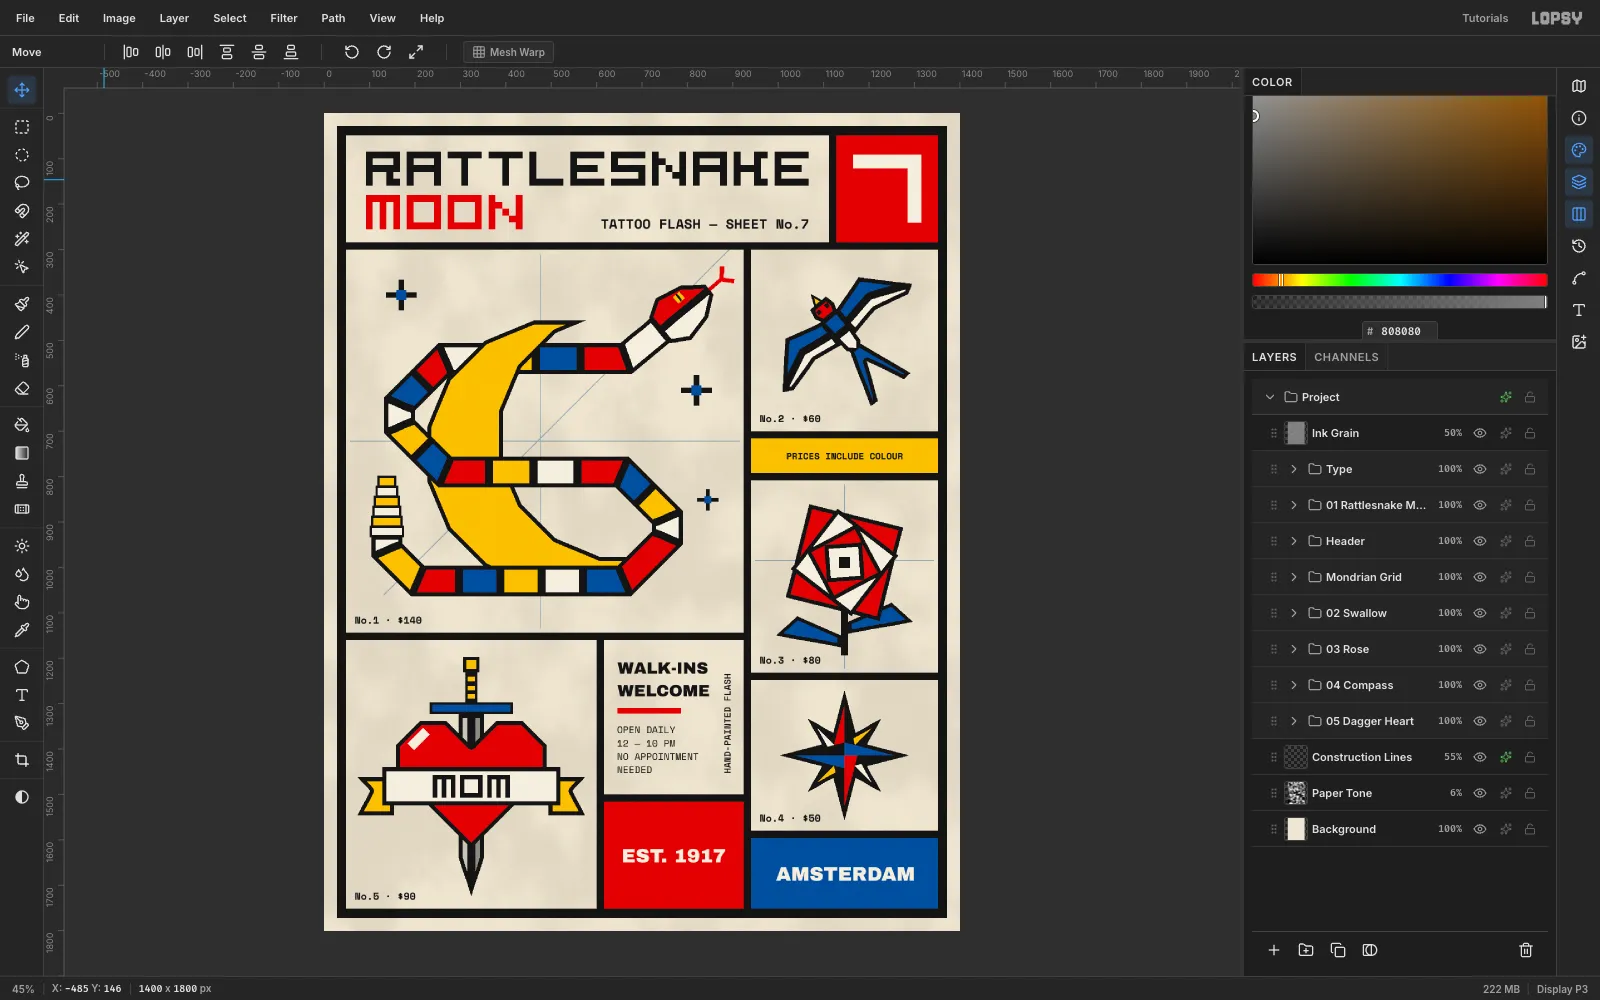
Build a Mondrian-grid tattoo flash sheet in Lopsy with a snake coiled through a moon, a swallow, rose, compass and MOM heart, all from flat geometric planes.
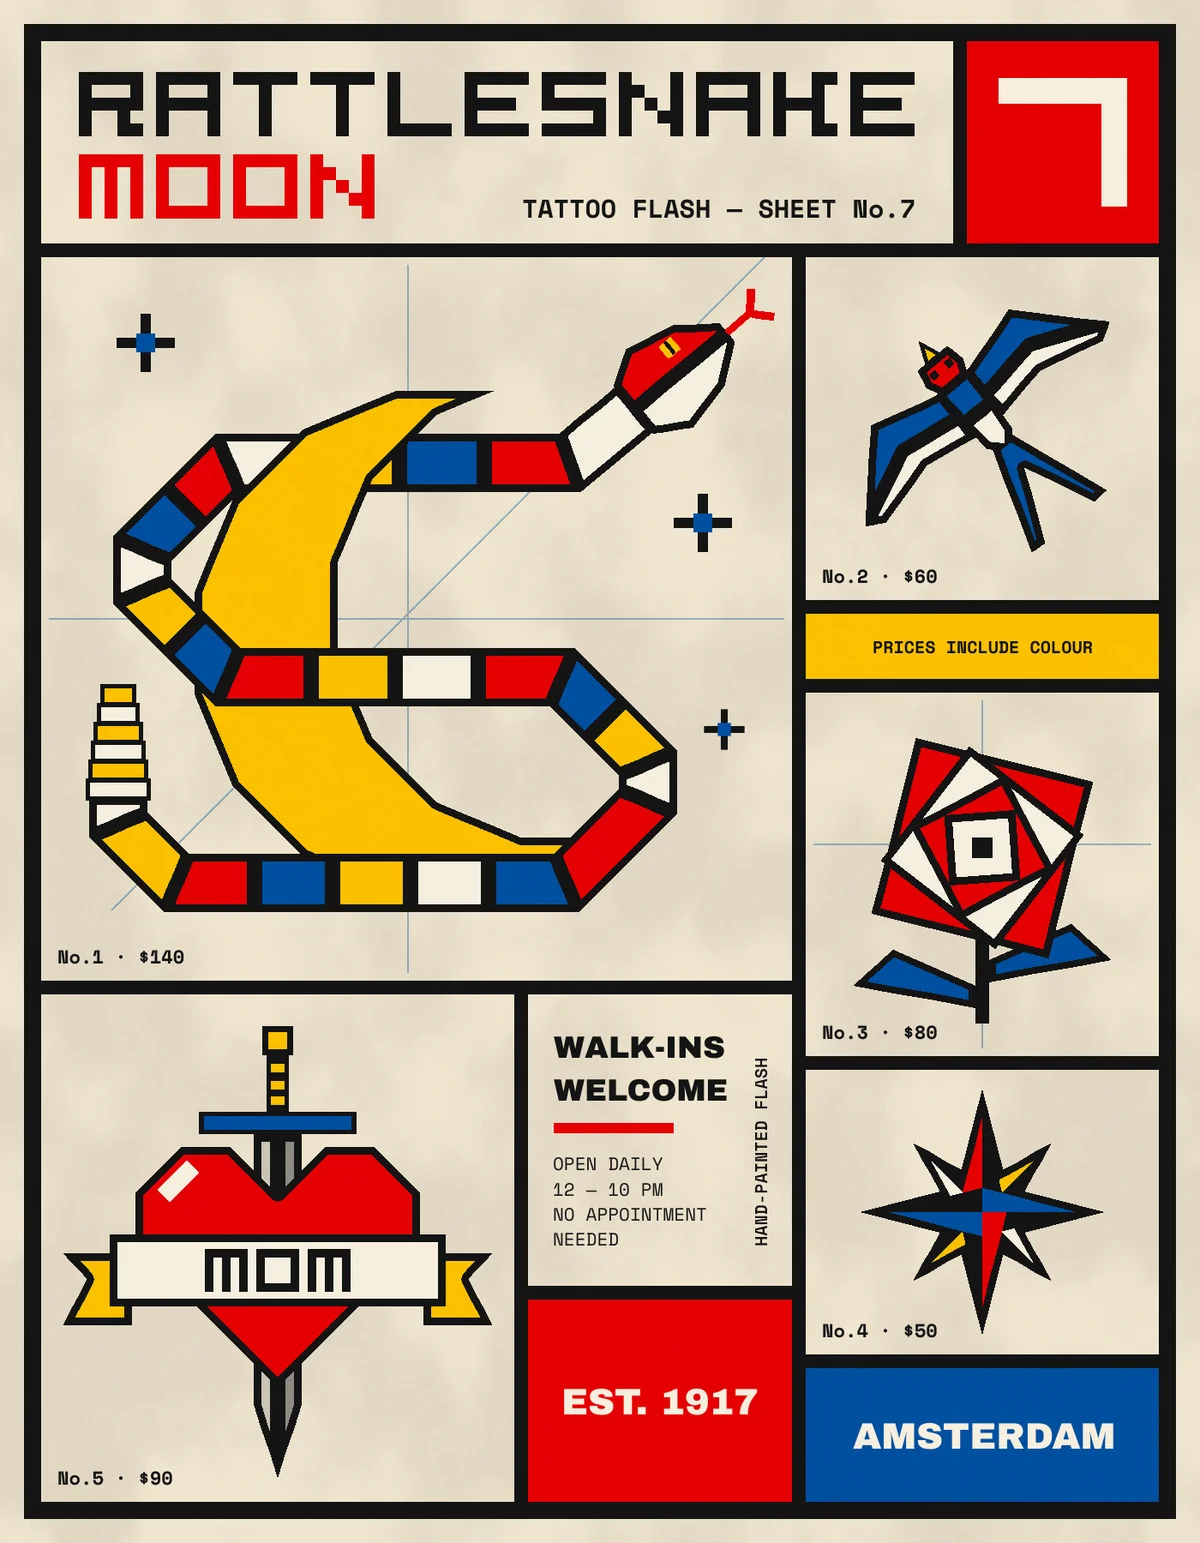
A tattoo flash sheet is a menu. It's a sheet of ready-to-tattoo designs, each with a number and a price, and clients pick one off the wall. Classic flash uses bold black outlines around flat colour. De Stijl, the 1917 Dutch movement of Mondrian and Theo van Doesburg, uses black lines between flat planes of red, yellow and blue. The two fit together surprisingly well.
In this tutorial you'll make a 1400 × 1800 px flash sheet called Rattlesnake Moon. Every design is built from straight-edged planes: lasso a shape, fill it black, then fill each colour plane inset by 8 px so a black line is left between them. The grid is snapped, the title is built from rectangles on a 5 × 5 raster like van Doesburg's 1919 alphabet, and nothing is imported.
The palette:
- Paper
#EDE5D1, white planes#F4EEDF, ink#141414 - Red
#D1291F, yellow#F2C230, blue#1F4E9A - Two steel greys for the dagger:
#C9C4B8and#8E8B84
Fonts: Space Mono Bold (labels) and Archivo Black (credits). The title is drawn, not typed.
-
Make the paper
Choose File → New, keep the unit on Pixels, and create a 1400 × 1800 document with a white background.
- Set the foreground to
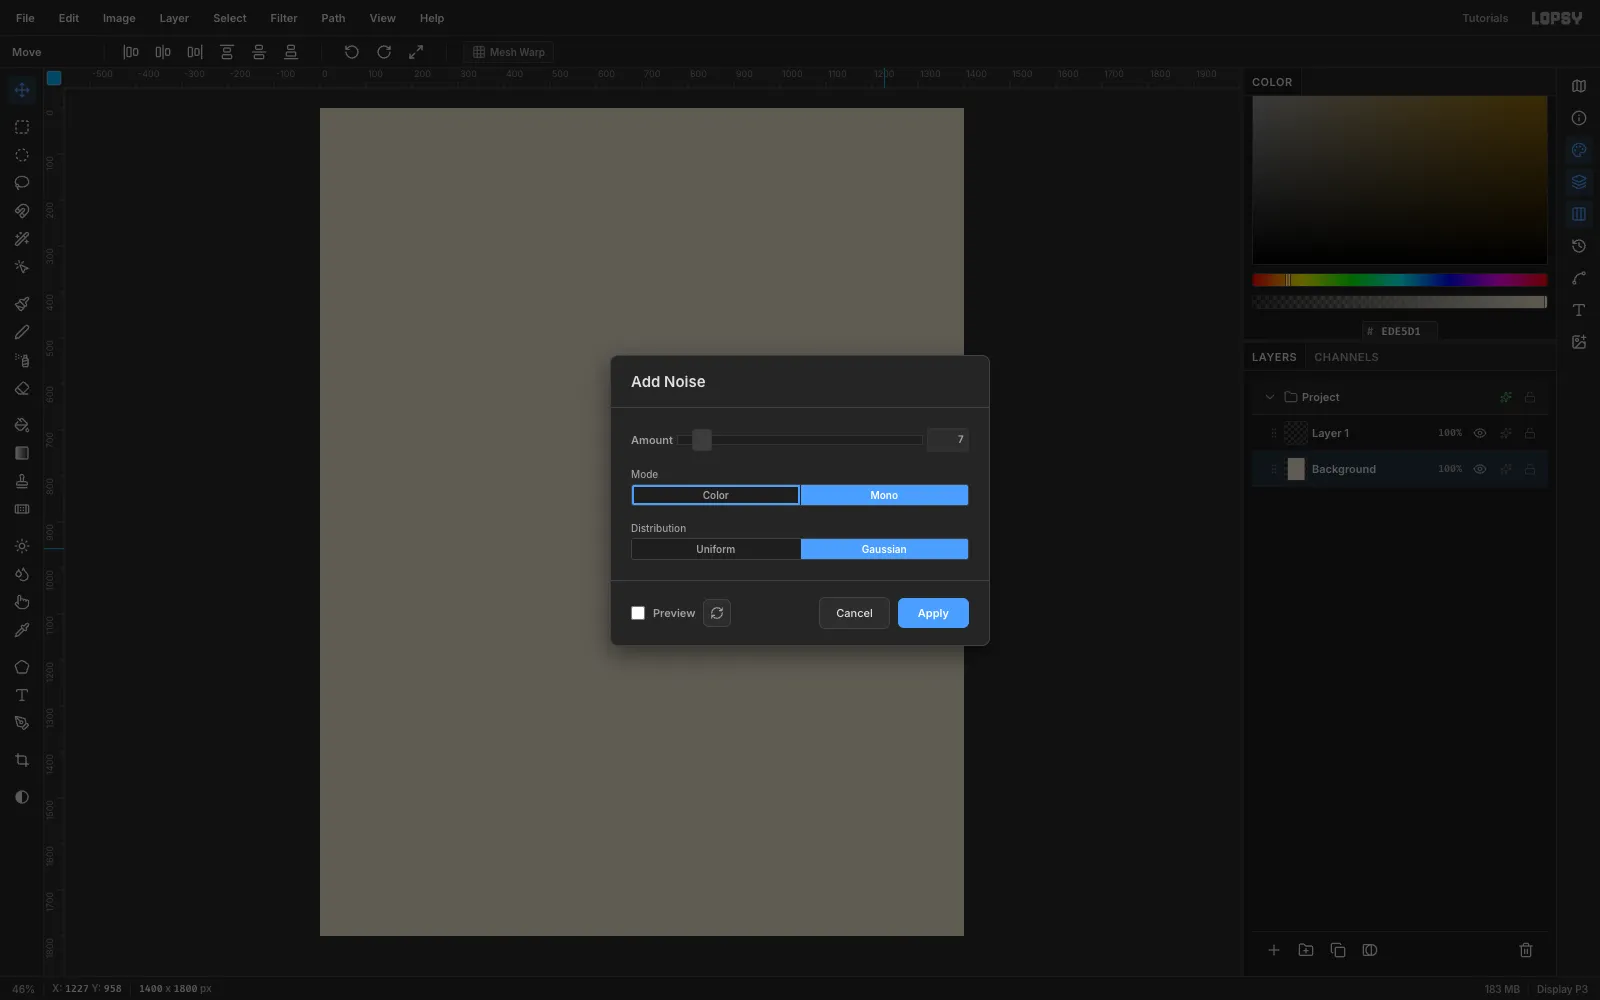
#EDE5D1, select Background and choose Edit → Fill with no selection, which fills the whole layer. - Choose Filter → Add Noise. Pick Mono and Gaussian, set the Amount to 7 and click Apply. This gives the sheet a faint paper tooth.
- Rename Layer 1 to Color Planes.
- Set the foreground to
-
Snap the Mondrian colour blocks
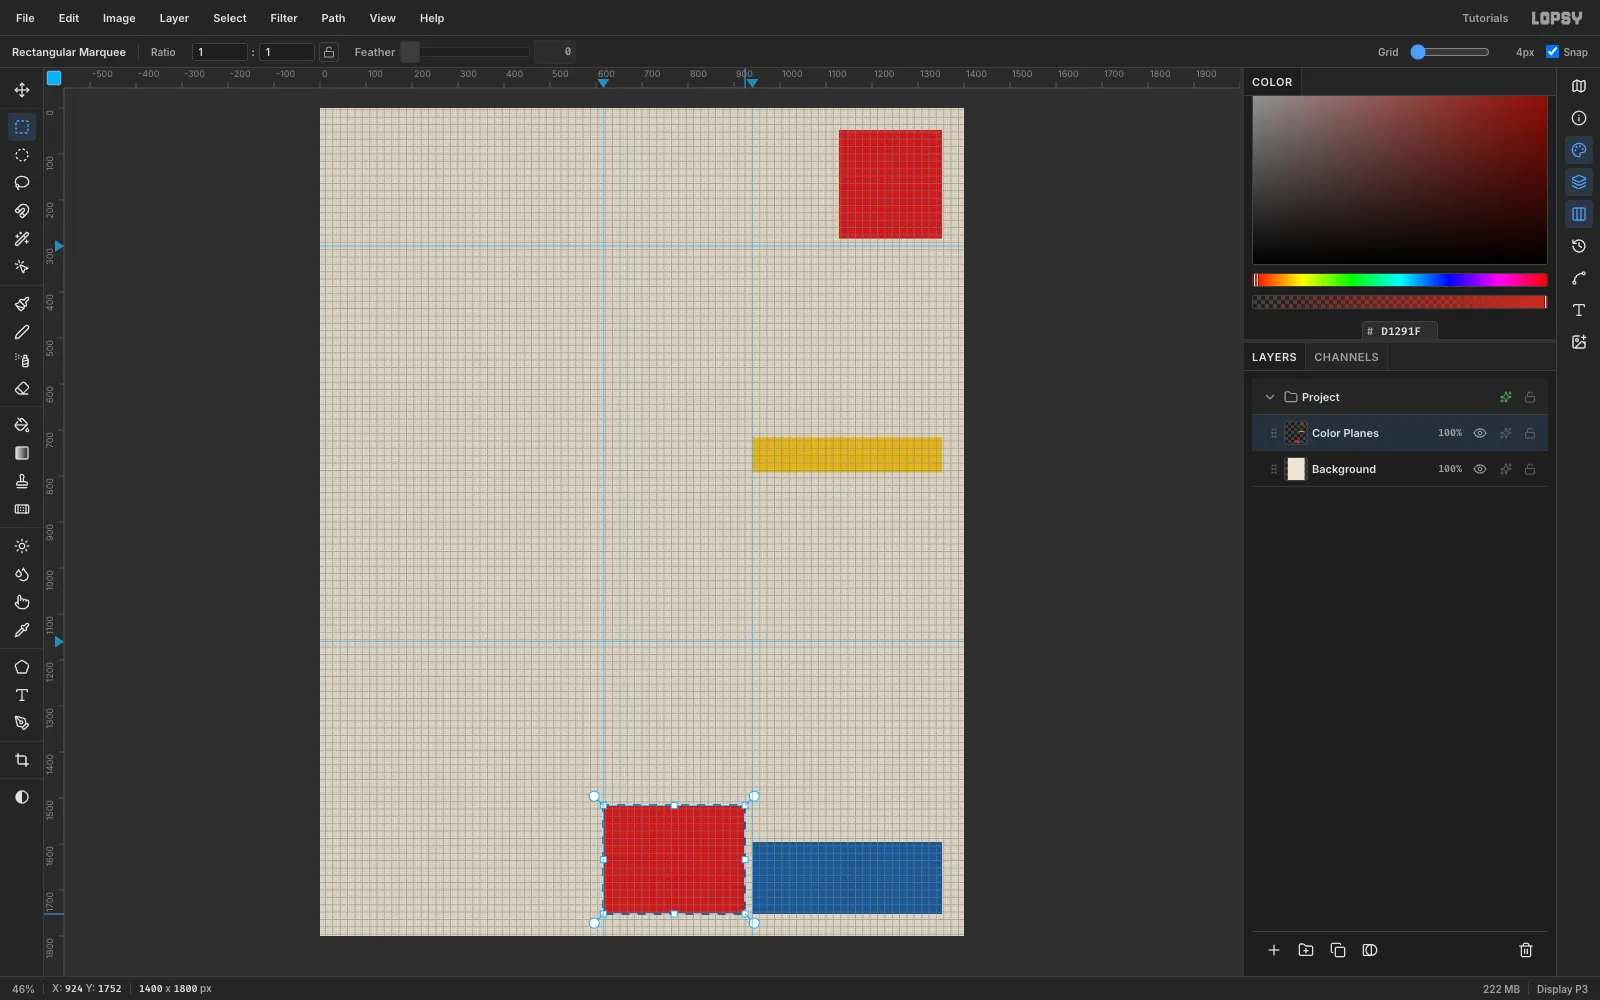
Choose View → Show Grid. In the options bar, drag the Grid slider to 4px and tick Snap. Every coordinate on this sheet is a multiple of 4, so each marquee lands exactly. Click the top ruler at 616 and 940, and the left ruler at 300 and 1160, to drop guides at the main rules.
On Color Planes, draw each block with the Rectangular Marquee and fill it with Edit → Fill:
- Red
#D1291F: 1128,48 → 1352,284 (the sheet number) and 616,1516 → 924,1752 - Yellow
#F2C230: 940,716 → 1352,792 - Blue
#1F4E9A: 940,1596 → 1352,1752
- Red
-
Cut the black rules
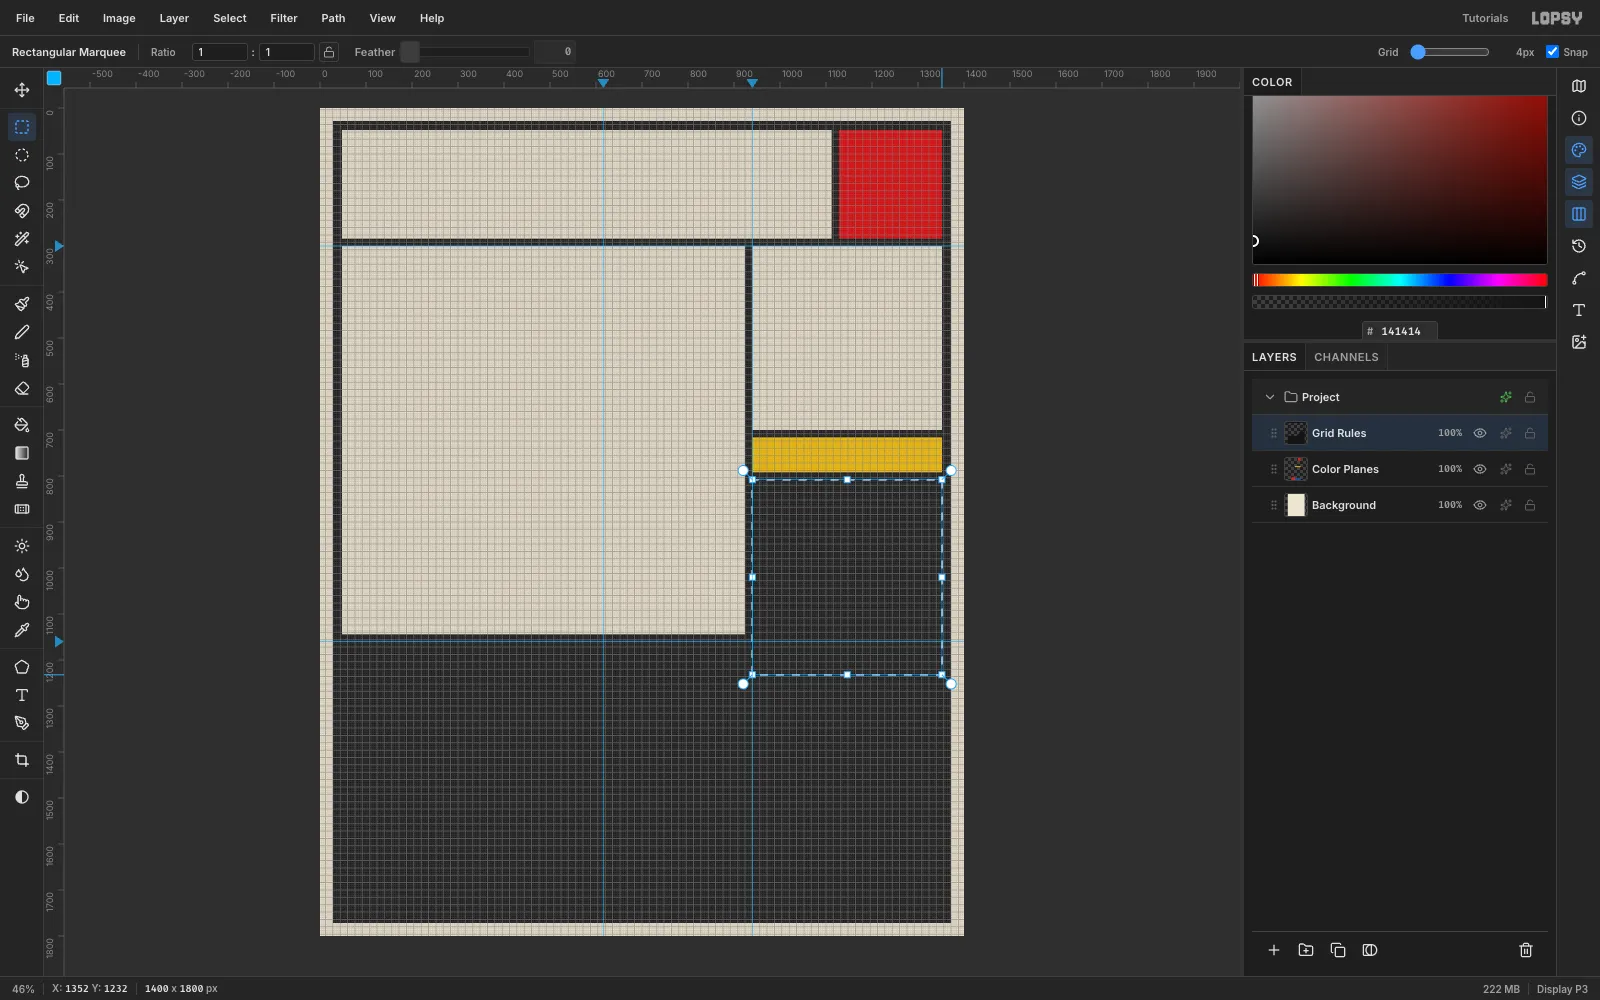
Add a layer named Grid Rules. Fill a marquee from 28,28 to 1372,1772 with
#141414. Then marquee each cell and press Delete. What's left is a 20 px outer frame and 16 px rules. Cut these cells:- Header: 48,48 → 1112,284 and 1128,48 → 1352,284
- Hero: 48,300 → 924,1144
- Right column: 940,300 → 1352,700, 940,716 → 1352,792, 940,808 → 1352,1232, 940,1248 → 1352,1580 and 940,1596 → 1352,1752
- Bottom: 48,1160 → 600,1752, 616,1160 → 924,1500 and 616,1516 → 924,1752
Notice the credits cell ends at 1500 while the right column's rule sits at 1580. An 80 px stagger reads as deliberate; a 20 px one reads as a mistake. Select both layers and choose Layer → Group Layers, and name the group Mondrian Grid.
-
Build the title from rectangles
Van Doesburg drew his alphabet on a square split into a 5 × 5 raster. Each letter here uses 15 px cells, and letters are one cell apart. Untick Snap first, because 15 isn't a multiple of 4.
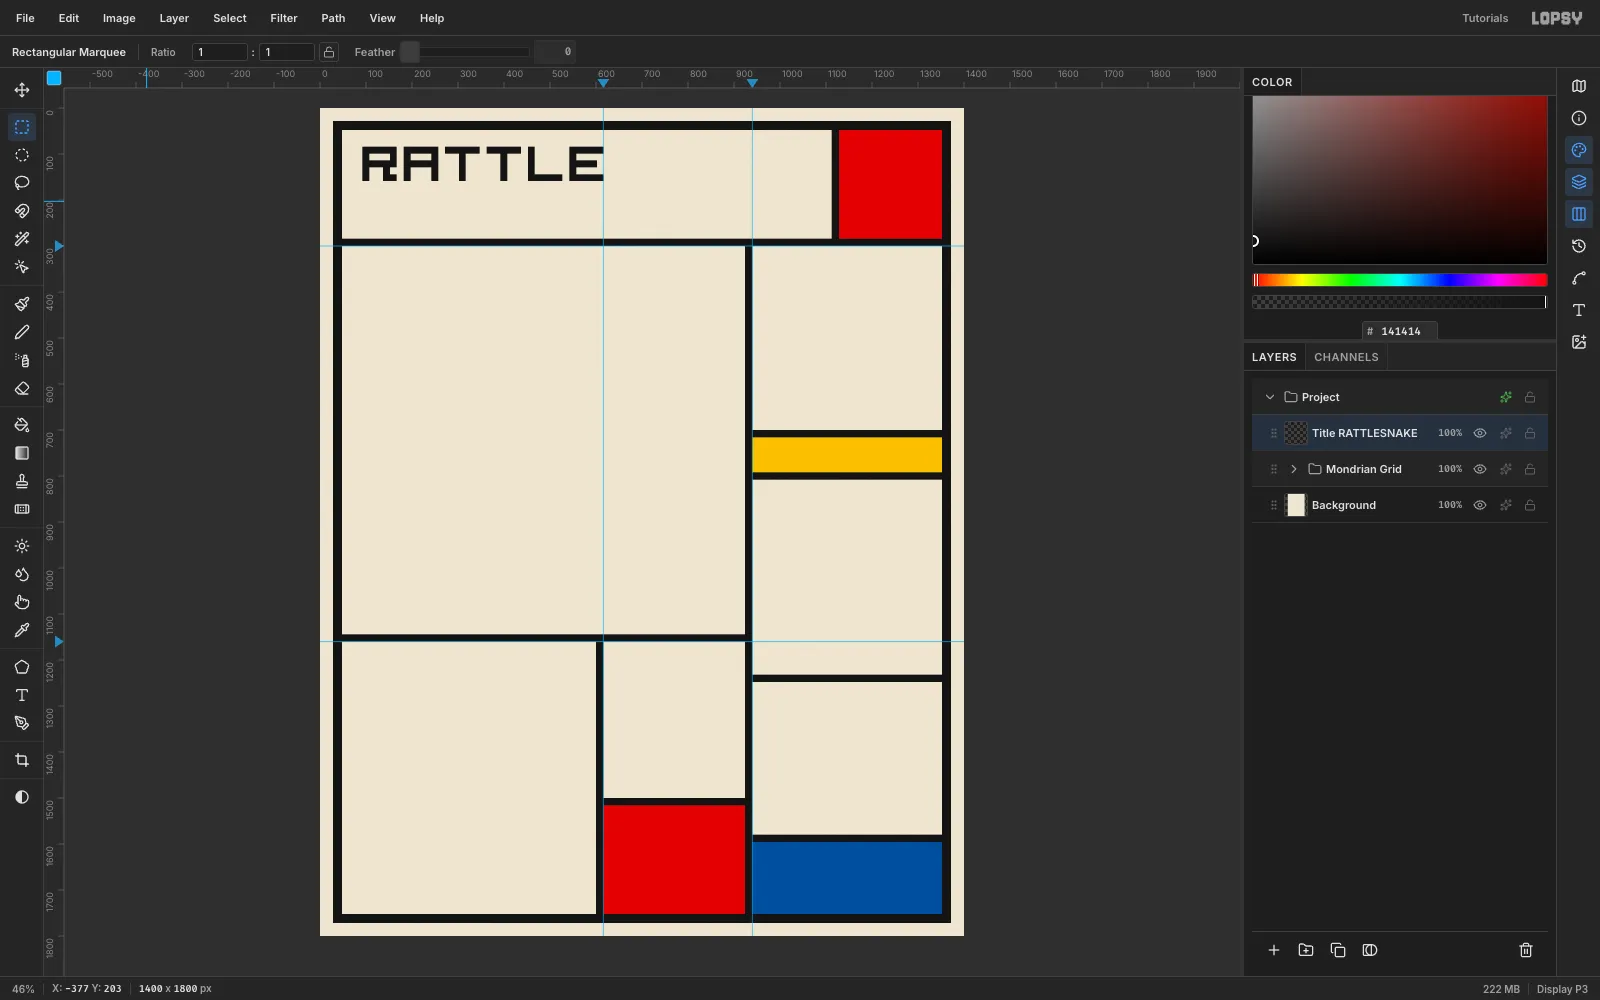
On a new layer Title RATTLESNAKE, starting at x 92, y 84, draw each letter as rectangles (one per run of filled cells) and fill them black. For example, R is a full top bar, the two sides, a full middle bar, then a stepped leg. N and K use single-cell steps for their diagonals.
Repeat on Title MOON in red, one line lower at y 180. On Sheet Seven, draw a large cream 7 with 30 px cells in the red block. Group the three layers as Header, and turn the grid off.
-
Lasso the moon
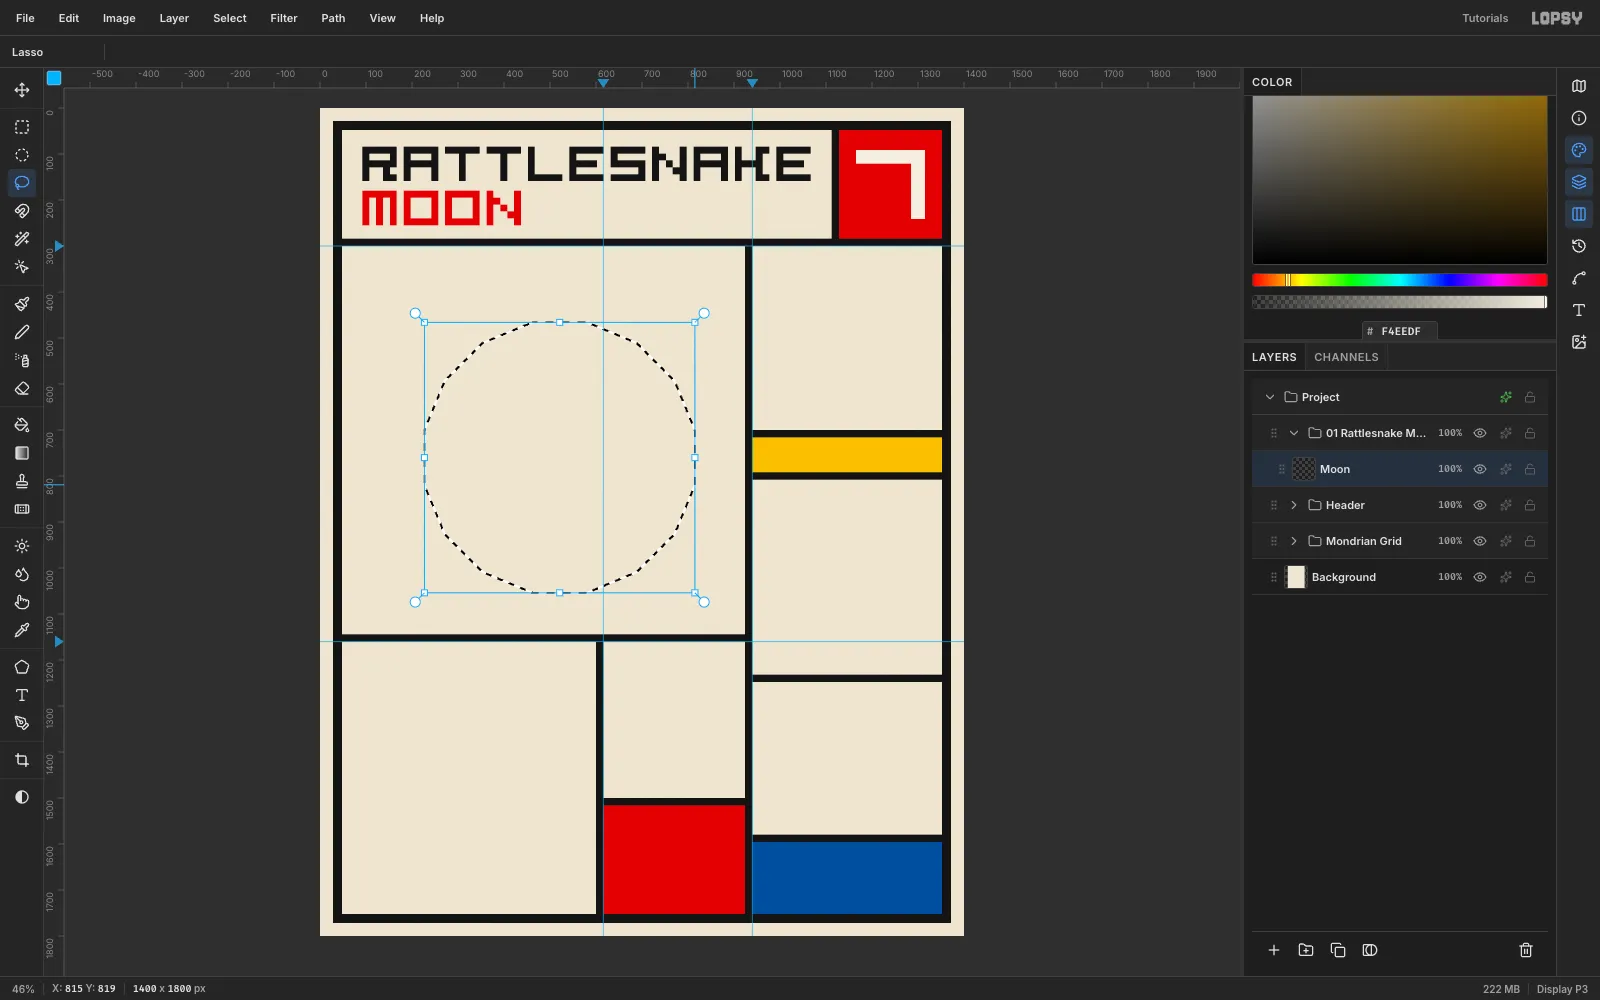
Make a new group 01 Rattlesnake Moon and a layer Moon inside it.
The moon is faceted rather than round. Click a 16-sided polygon with the Lasso tool around centre 521, 760 with a radius of 300, then fill it black. Straight facets keep the crescent in the same language as the grid.
-
Cut the crescent
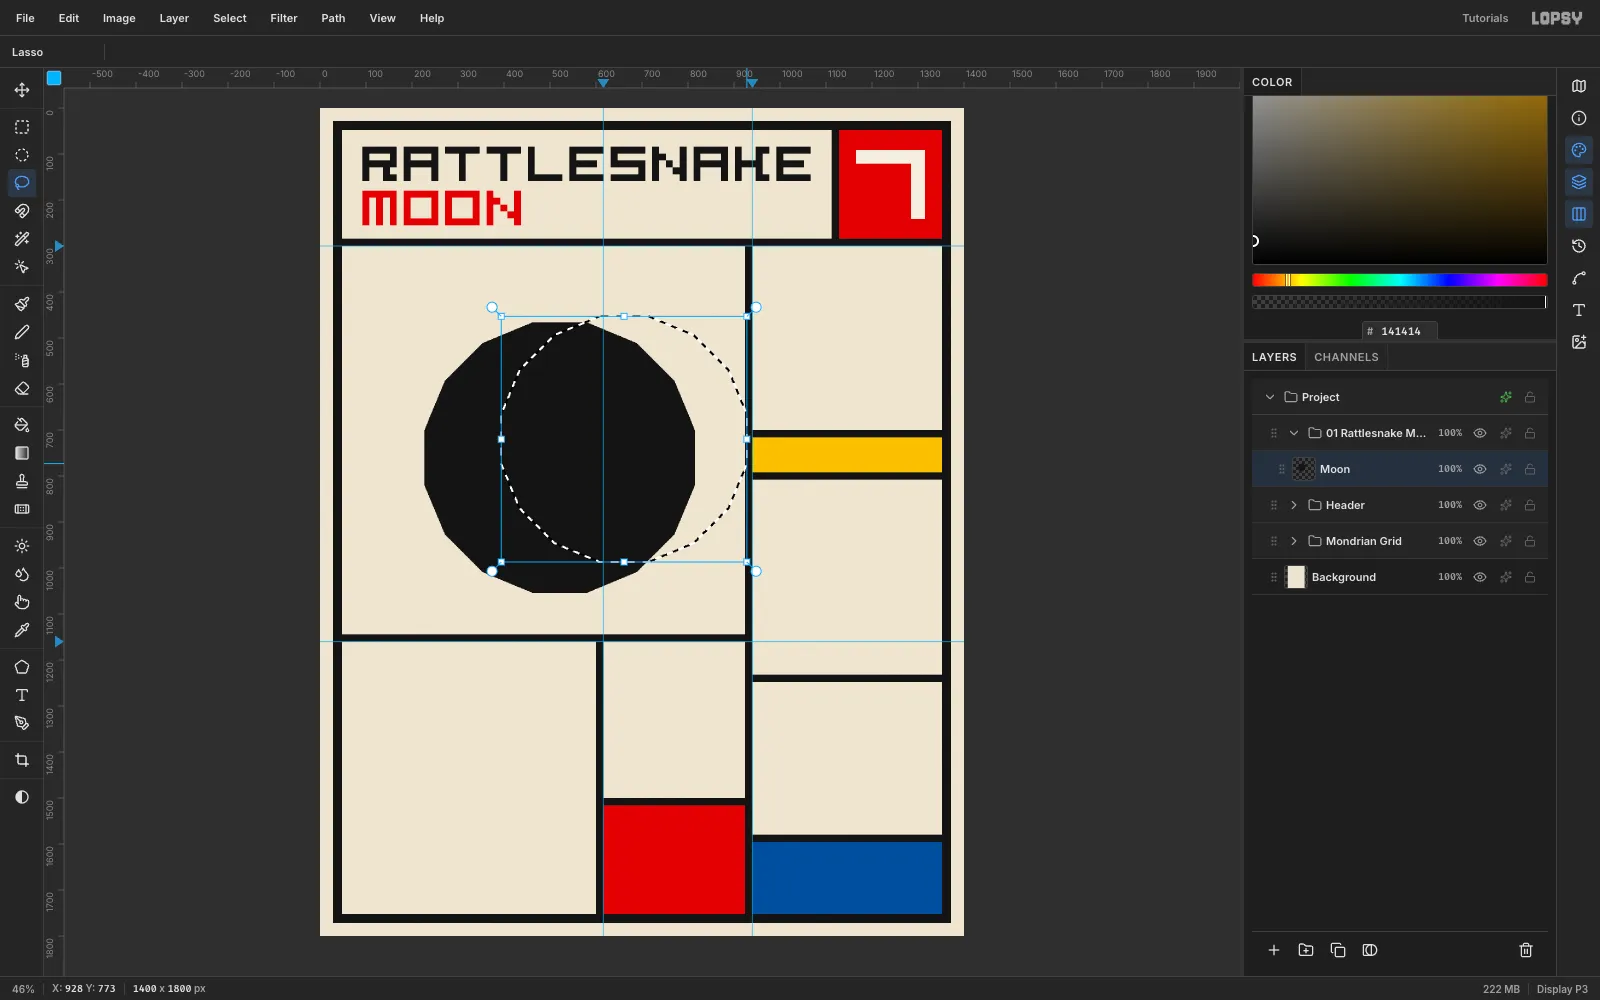
Lasso a second 16-gon, centred on 661, 720 with a radius of 272, and press Delete. Offsetting the cut up and to the right tilts the horns slightly, like a tattoo moon.
-
Inset the colour with Magic Wand and Shrink
This is the core technique of the whole sheet:
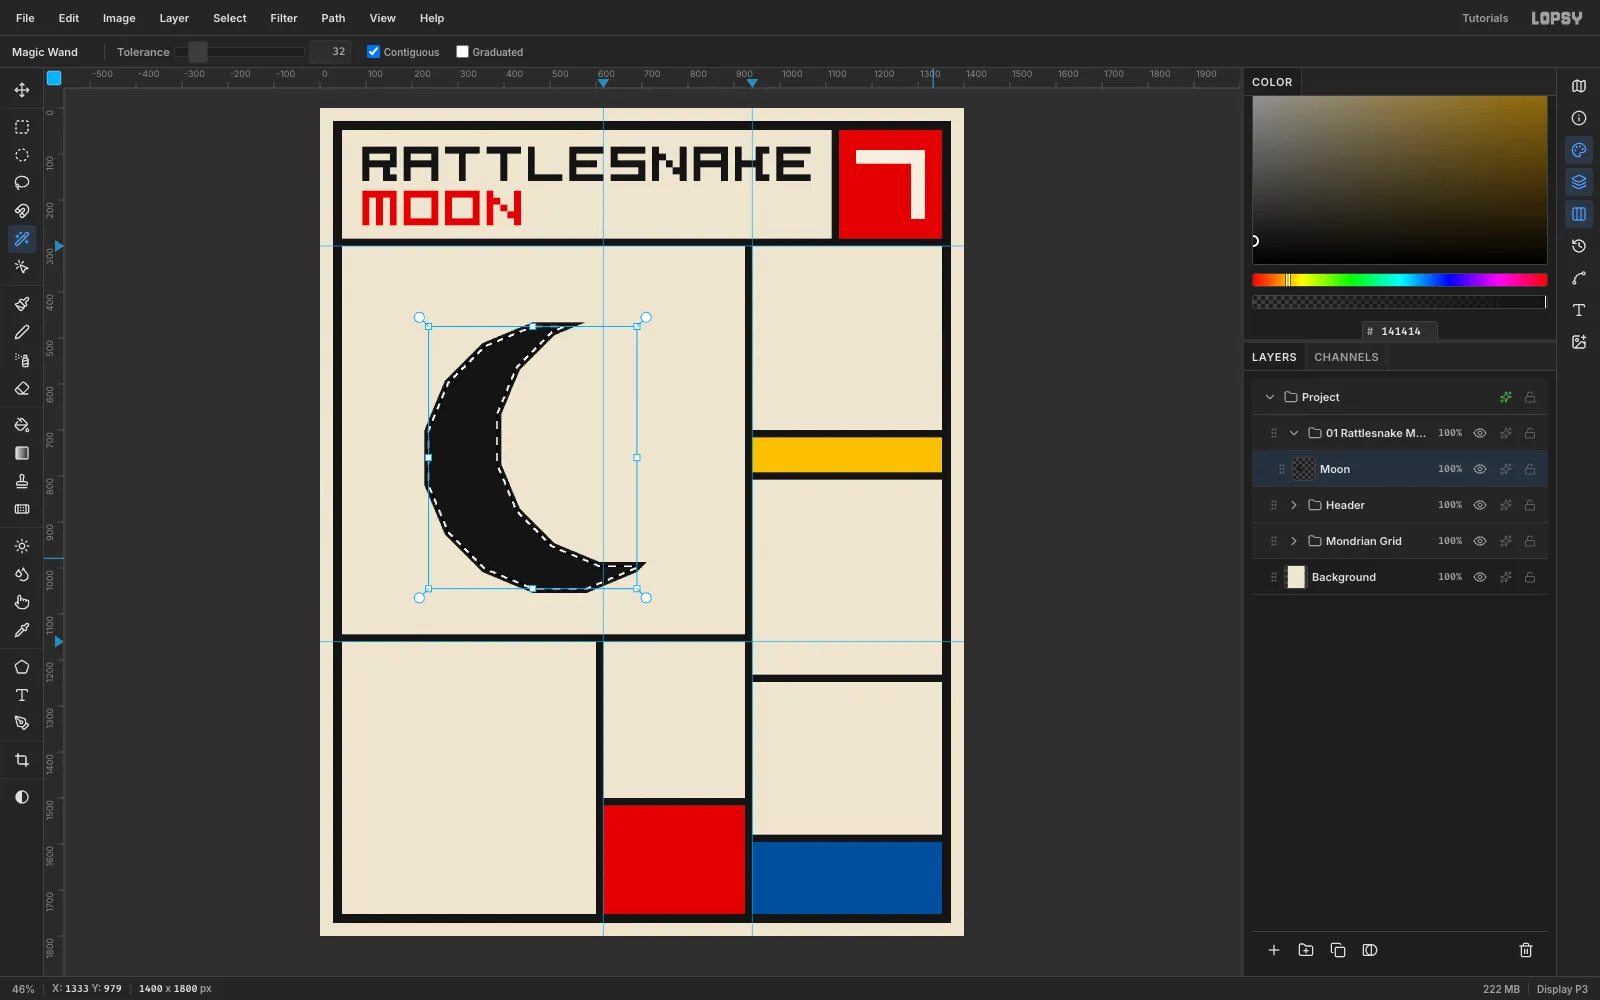
- Click the black crescent with the Magic Wand to select it exactly.
- Choose Select → Shrink and enter 8.
- Edit → Fill with yellow
#F2C230.
The 8 px of black left all around becomes the outline. Every plane on the sheet uses the same 8 px, so the line weight stays consistent.
-
Lay down the snake silhouette
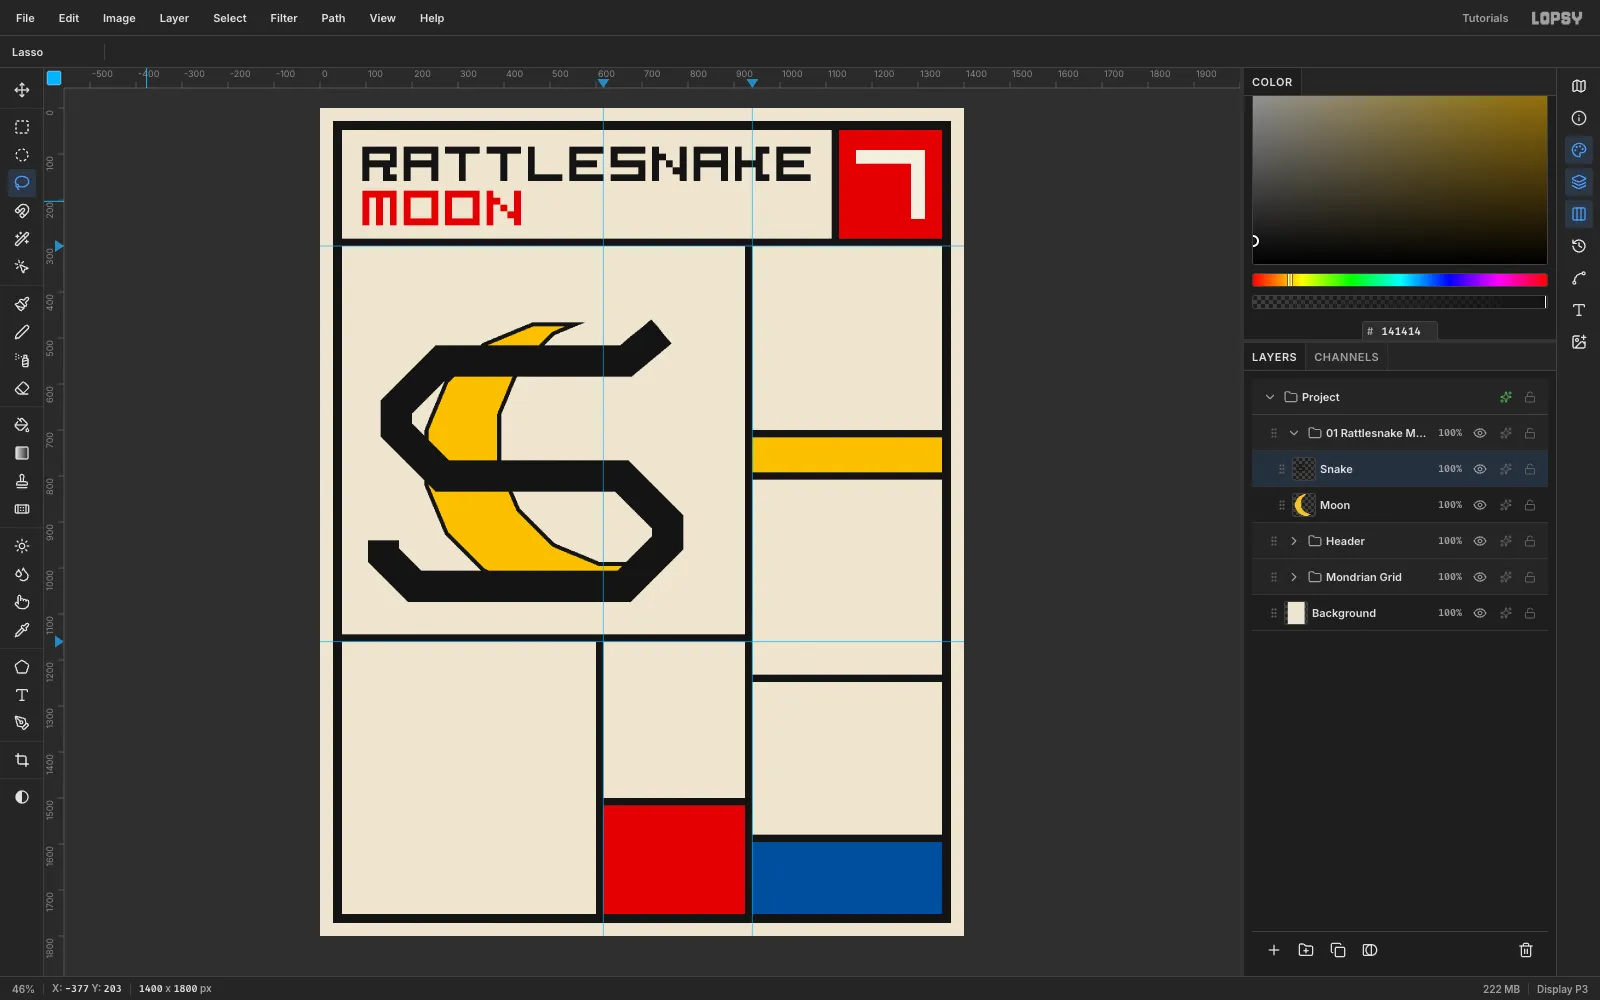
Add a layer Snake above Moon. The body is one 68 px band with mitred corners that follows a 13-point path: from the neck at 758,486 down to 665,550, left along the top bar to 266,550, down the left side, right along the middle bar at y 800, down the right side, left along the bottom bar at y 1040, and up into a short tail at 138,940.
Lasso the whole outline in one pass and fill it black. Only 45° and 90° turns are used, so the S stays geometric but still reads as coiling.
-
Fill the body plane by plane
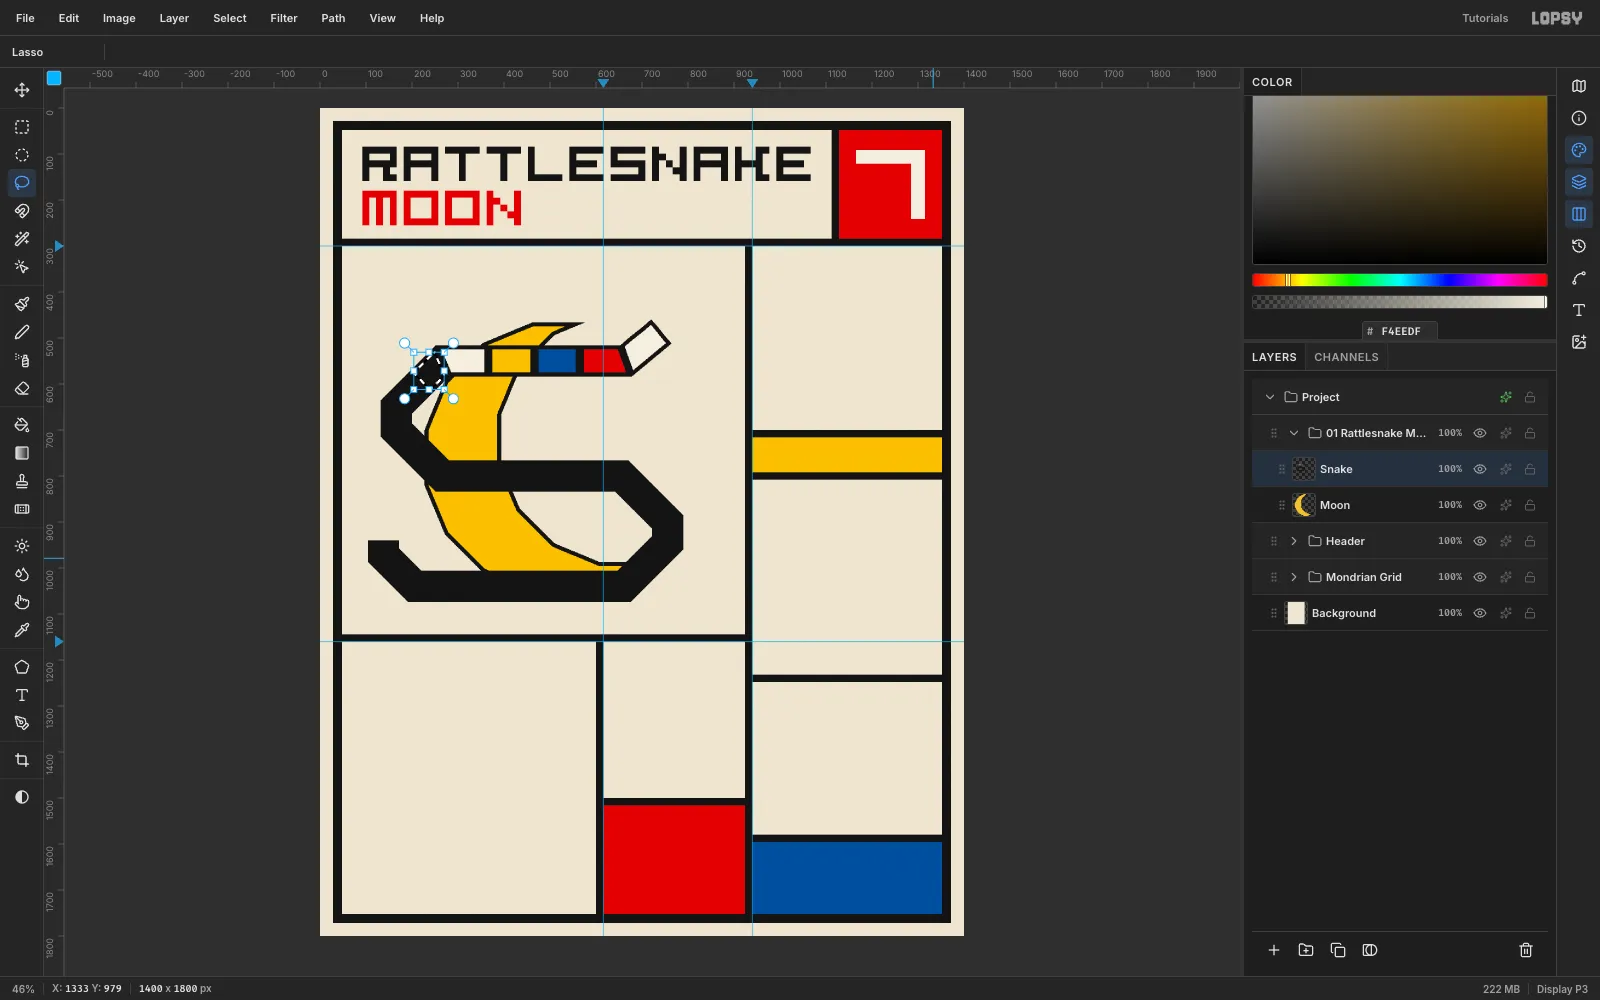
Split each straight run into segments of about 90 px. For each segment:
- Lasso the segment (the corner pieces are trapezoids that meet the miter).
- Choose Select → Shrink 8.
- Fill it with the next colour in the cycle: cream, red, blue, yellow.
-
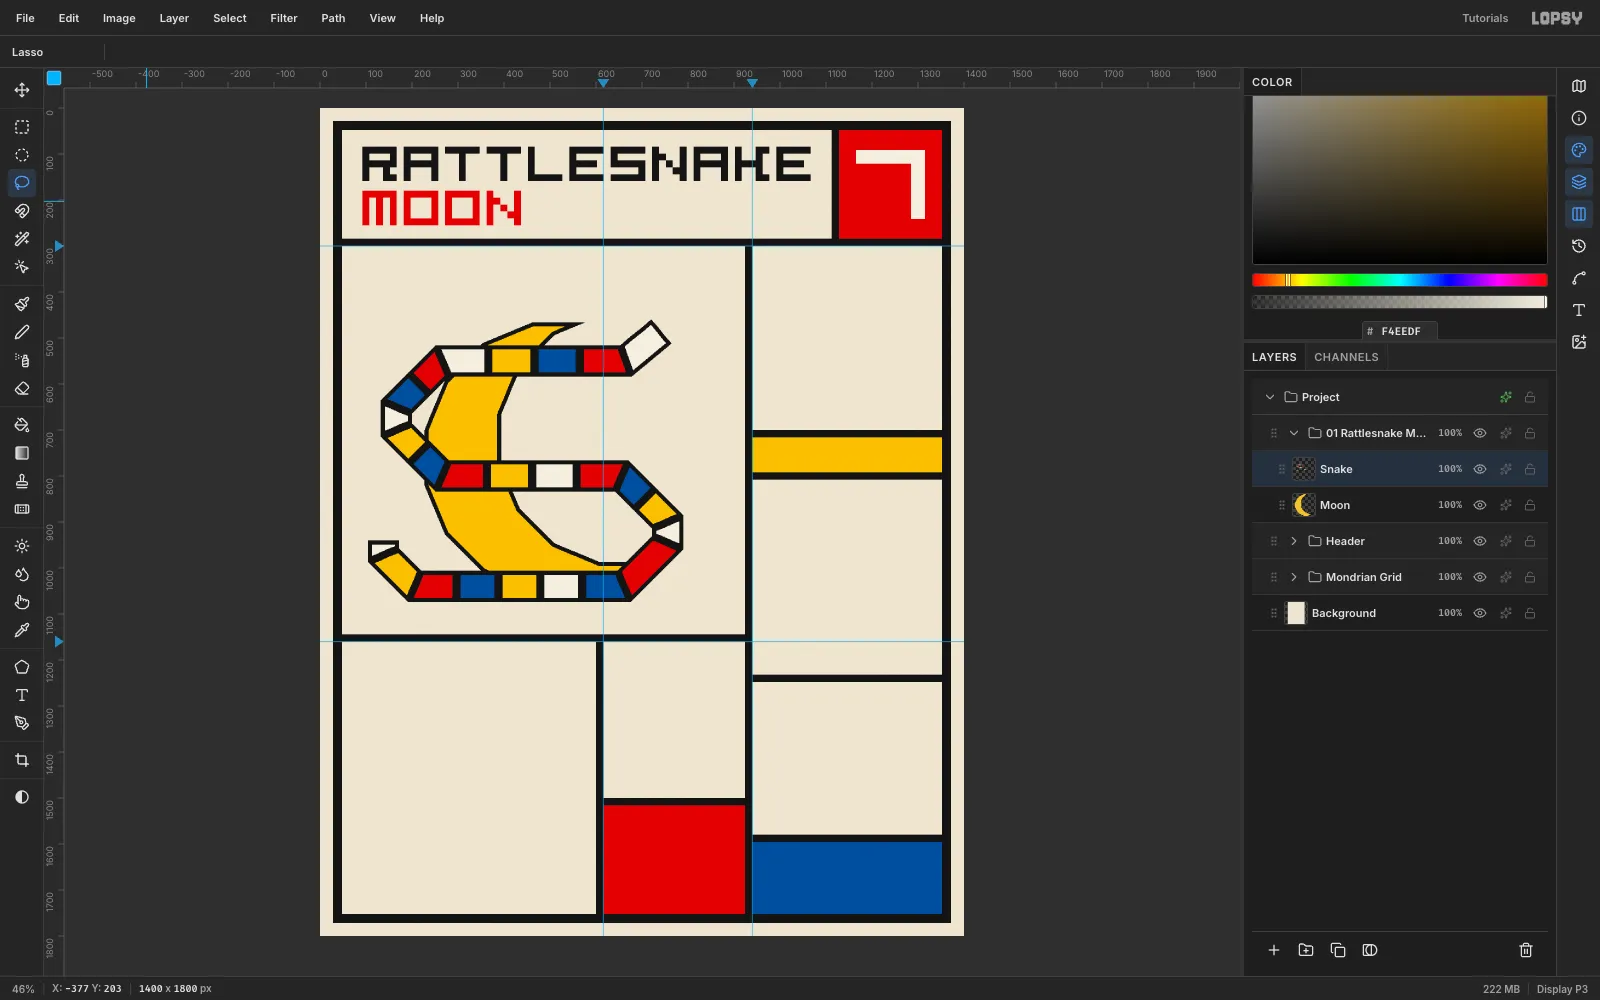
Check the rhythm
The colours should never repeat side by side. The black seams are 16 px between planes (8 + 8) and 8 px along the outer edge, the same as the moon.
-
Copy the upper horn
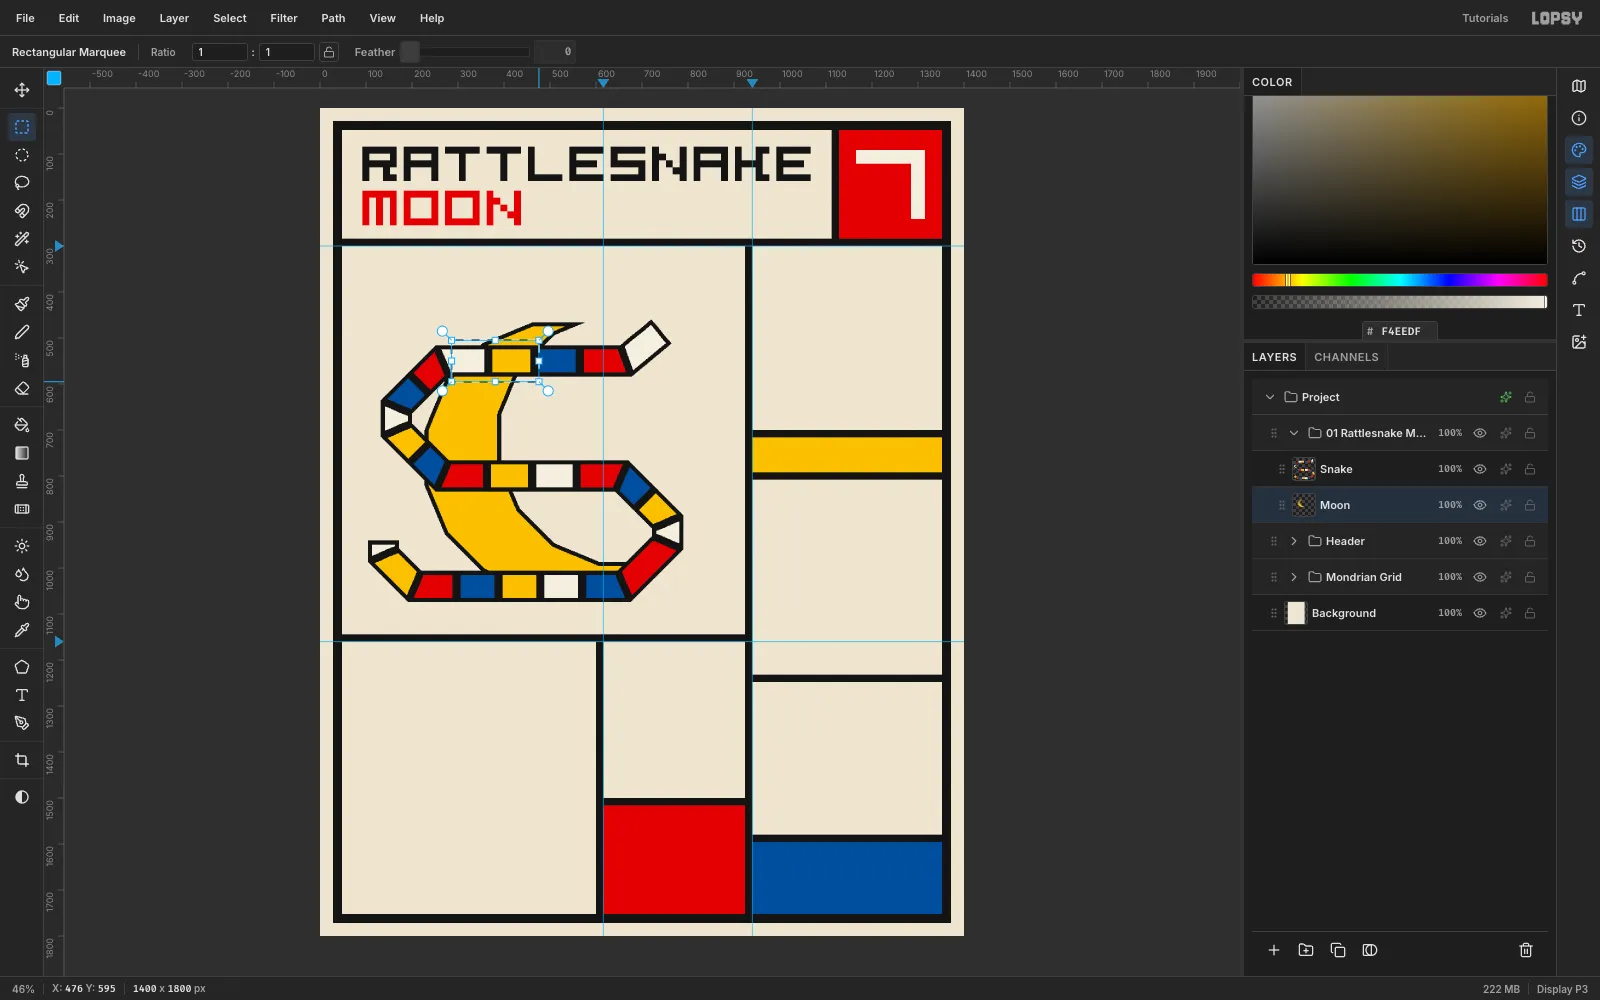
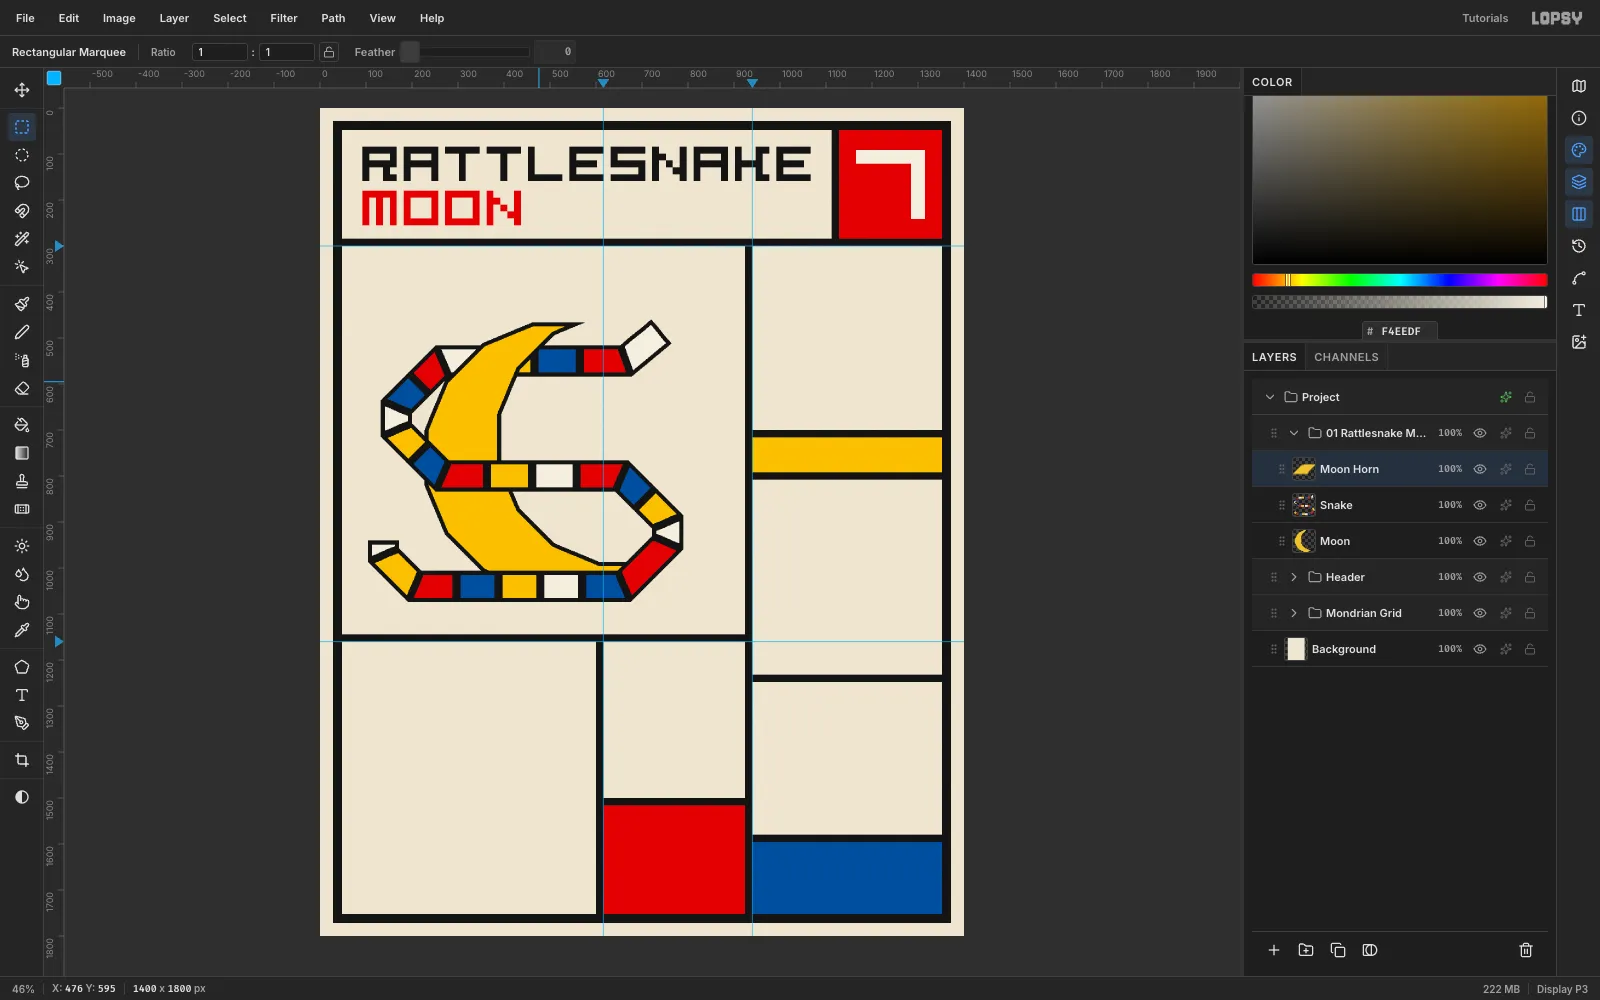
The snake has to weave: in front of the moon at the middle and bottom bars, behind it at the top bar. Select Moon, marquee 286,505 → 476,595 where the top bar crosses the upper horn, and press Cmd+C.
-
Paste the horn over the snake
Wait a second or two, then press Cmd+V right away. Don't click another layer first. The paste lands in place, directly above Moon. Rename it Moon Horn and drag its row above Snake in the Layers panel. The horn now covers the top bar, so the snake appears to loop behind the moon.
-
Add the head and the rattle
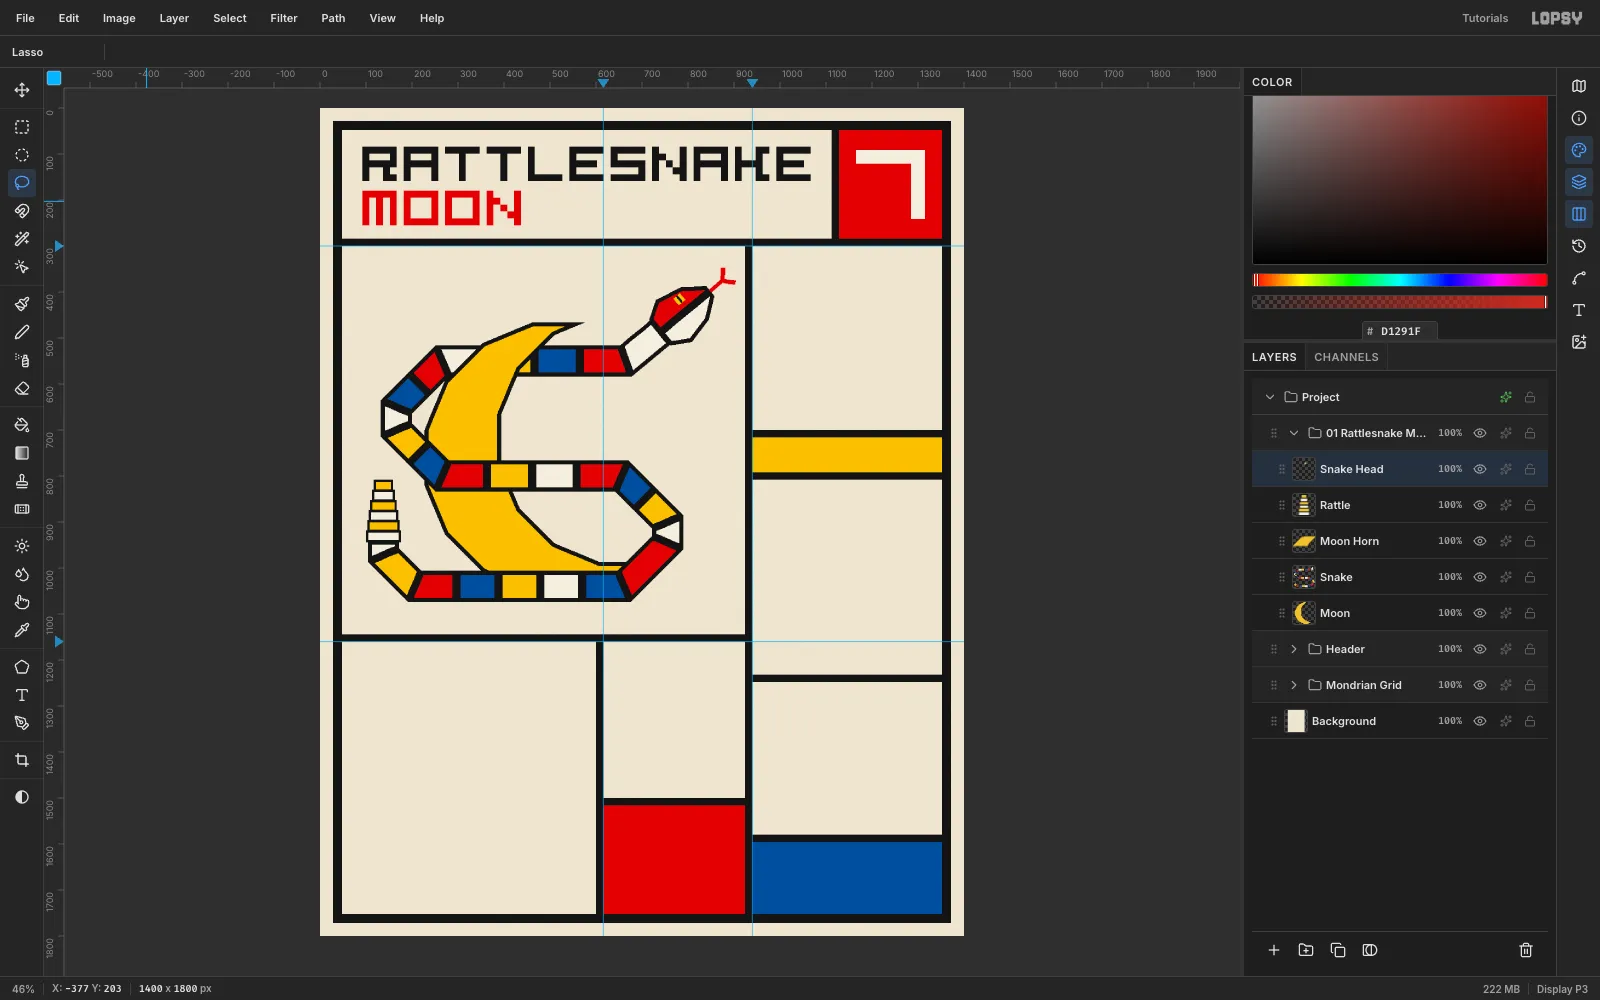
On a layer Snake Head, lasso a wedge-shaped viper head pointing up and to the right, 40° above horizontal. Fill it black, then fill two inset planes: a red crown and a cream jaw, with the 8 px black line between them reading as the mouth. Add an 18 px yellow eye with a black vertical slit and a forked red tongue.
On Rattle, stack six mitred rectangles up from the tail tip. They are 26 px tall and narrow from 76 to 42 px wide. Fill each one black, shrink it by 4 and fill it cream or yellow in turn. Keep them square so they match the rest of the sheet.
-
Scatter and scale the sparkles
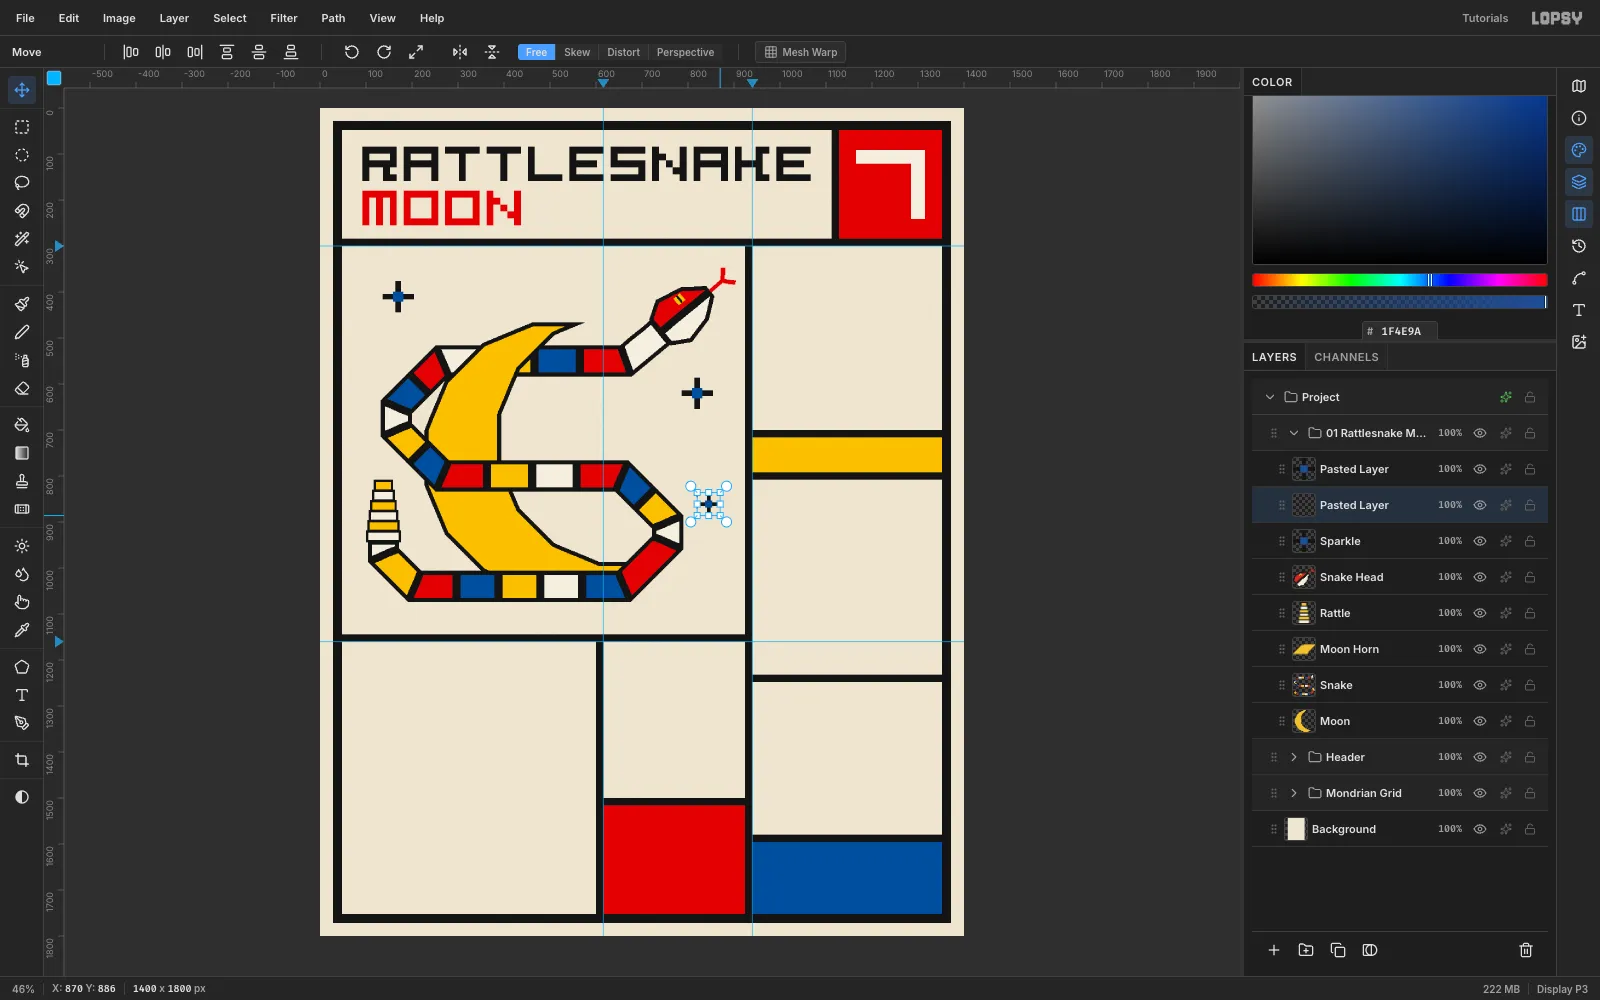
On Sparkle, draw a black plus about 68 px across with a blue square in the middle. To duplicate it:
- Marquee it and press Cmd+C, then Cmd+V.
- Use the Move tool to drag each copy into place. Put one in the empty top-left corner and one to the right of the lower bend.
- On the second copy, marquee it and hold Cmd while you drag a corner handle inward. That scales it uniformly to about two-thirds.
- Press Cmd+D to commit.
Then click the top pasted layer and choose Layer → Merge Down twice.
-
Nudge the whole group
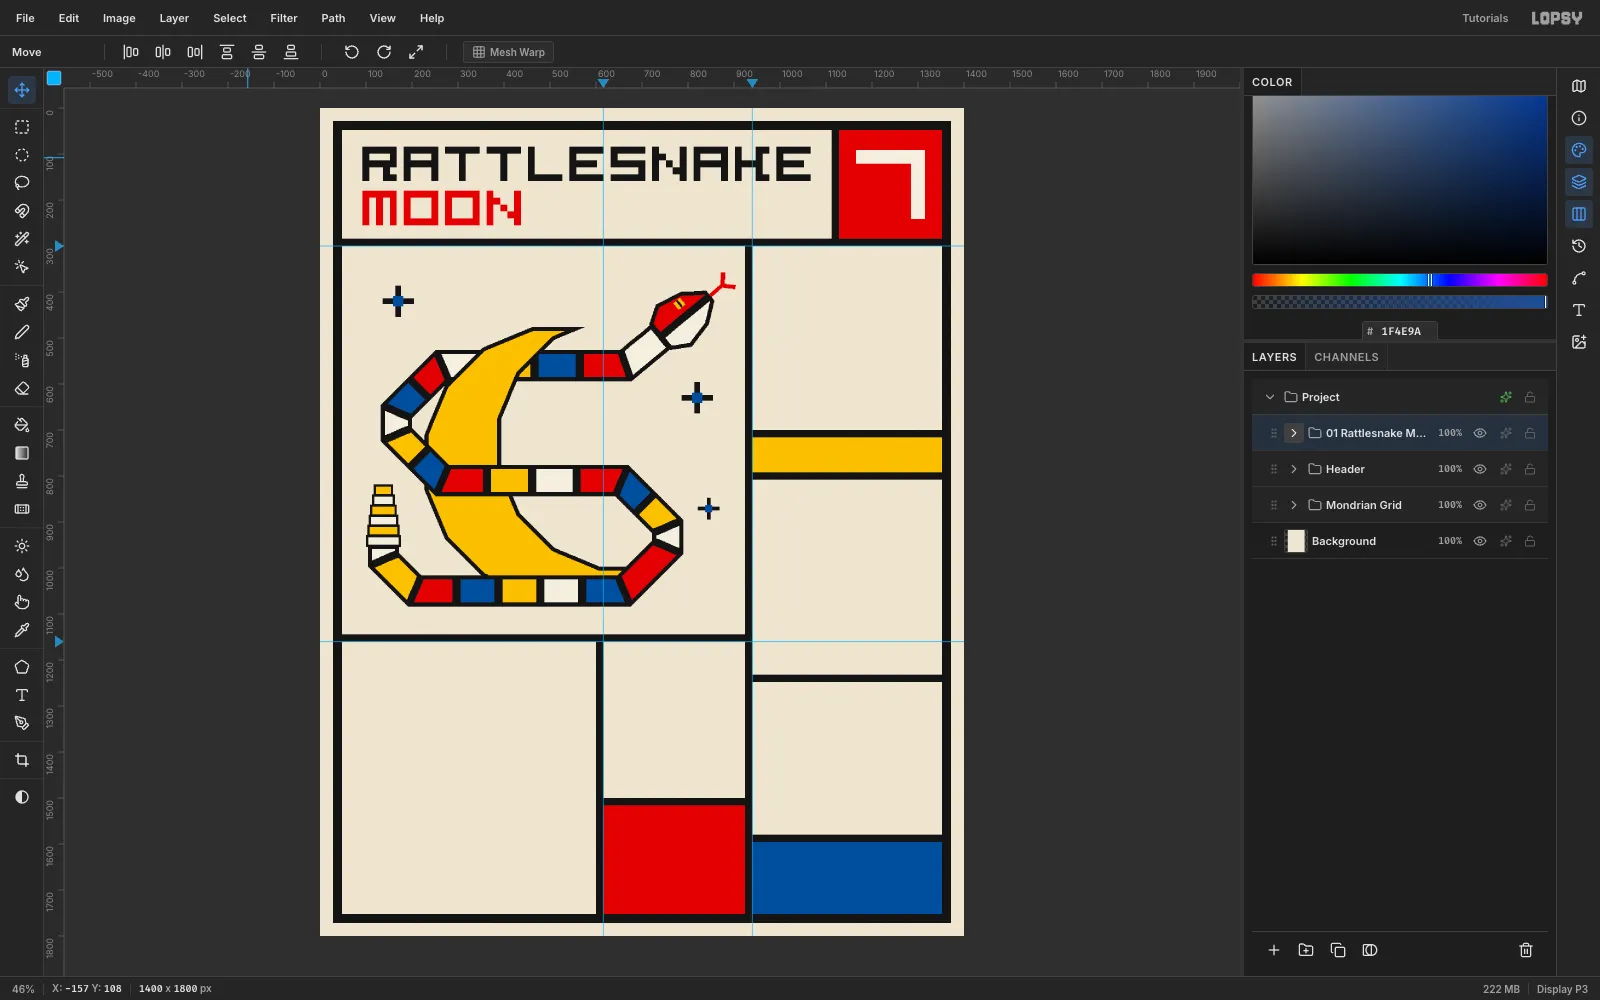
Select the 01 Rattlesnake Moon group row and switch to the Move tool. Press Shift+Down to nudge the whole group 10 px down, so it sits optically centred in its cell. Moving the group moves every layer inside it together.
-
Draw the swallow
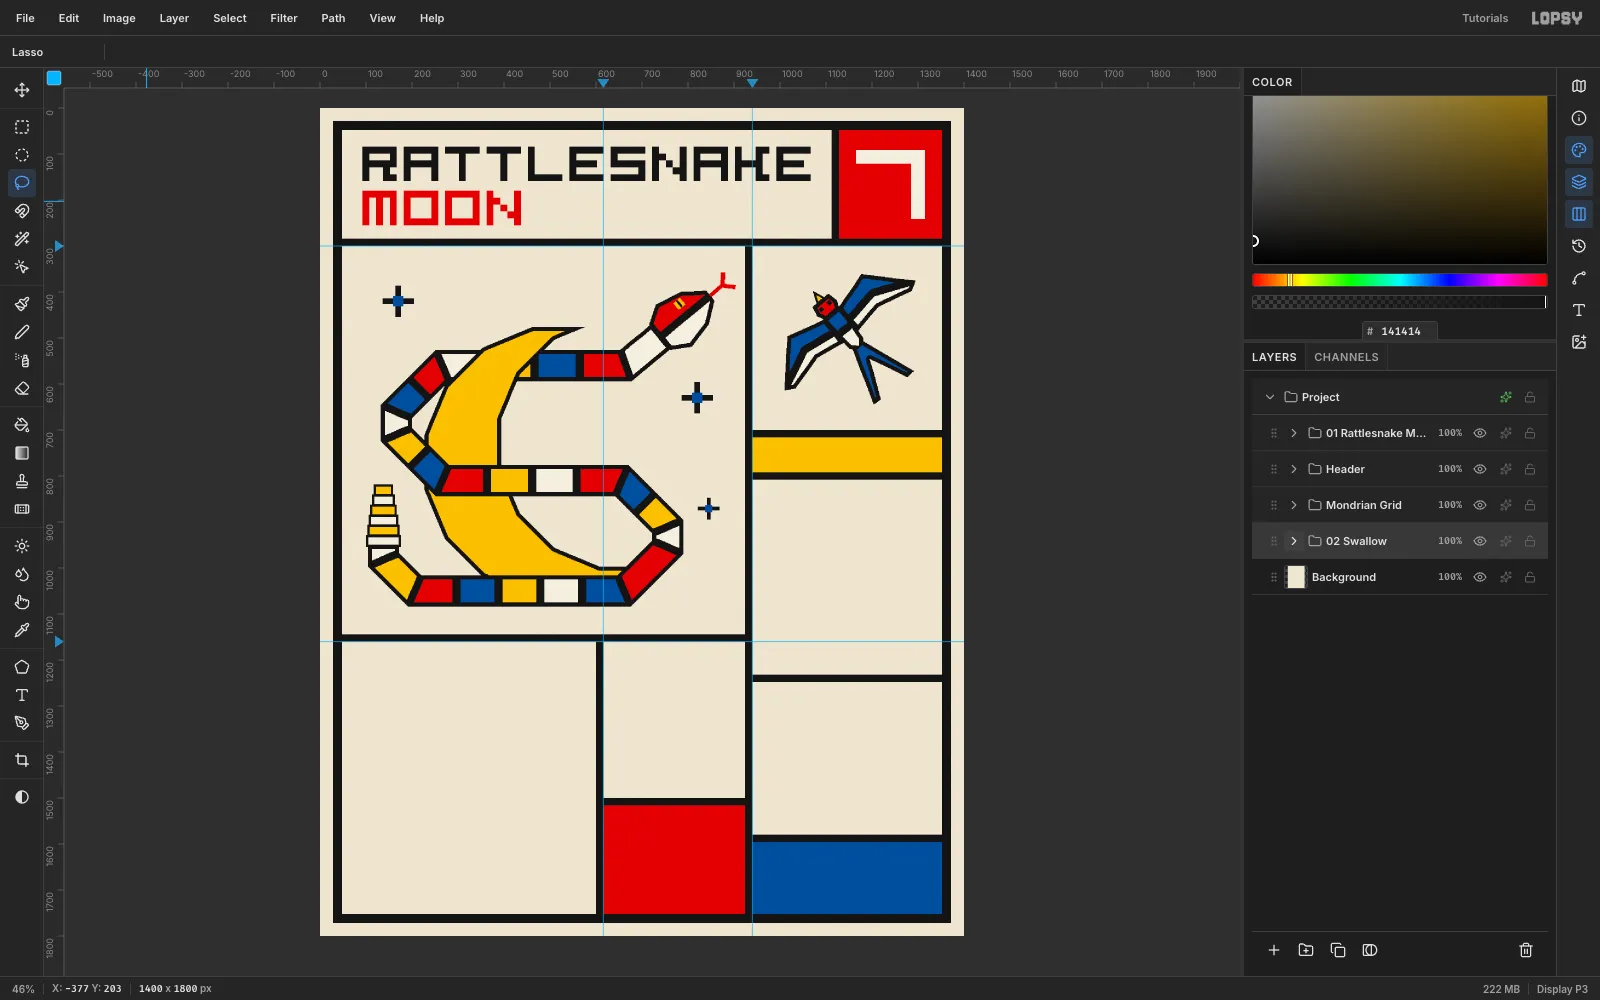
Make a group 02 Swallow with a layer Swallow. The bird is seen from above, flying up and to the left at 40°. Lasso each part at its final angle: a hexagonal red head, a pointed yellow beak, a blue back, a cream belly, swept wings with blue leading and cream trailing planes, and a forked blue tail.
As before, fill each part black, then fill each plane with Shrink 8. Draw it at the final angle instead of rotating it afterwards. A rotated hard-edged selection comes out with stair-stepped edges.
-
Layer the spiral rose
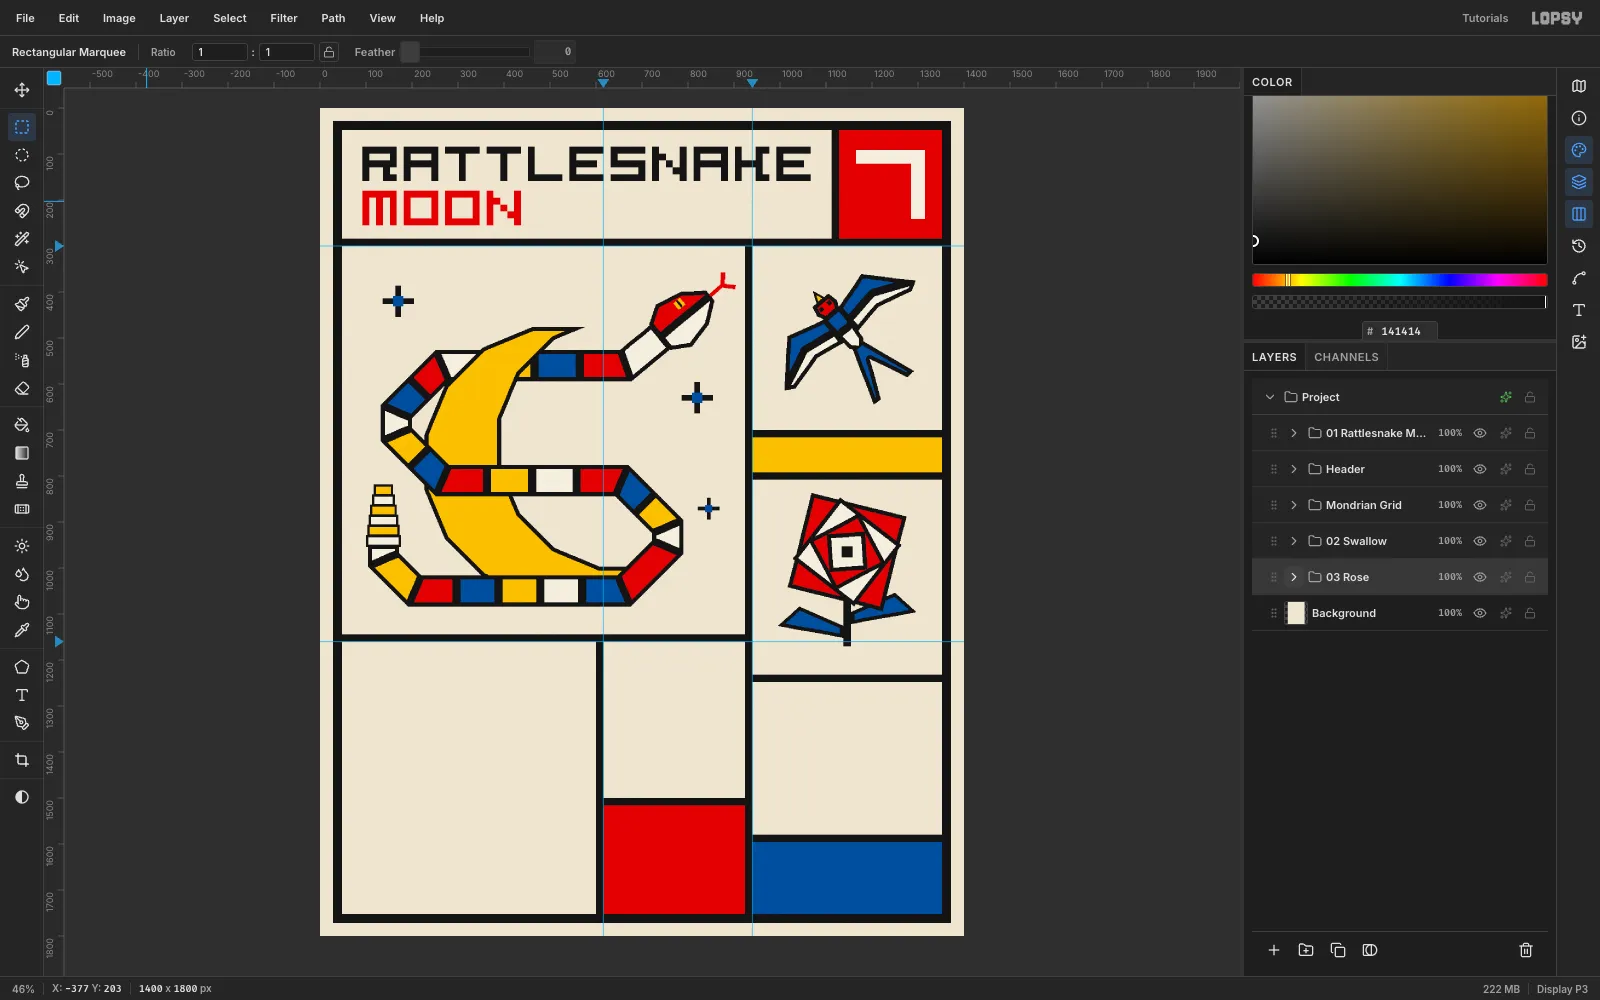
In a group 03 Rose, draw the stem and two blue leaves first. Then add four nested squares centred on 1146, 965, each turned 24° further than the last:
- 212 px at 14°, red
- 168 px at 38°, cream
- 124 px at 62°, red
- 82 px at 86°, cream
Fill each square black, then fill it with Shrink 8. Finish with a black centre square. The corners that poke past the square below read as layered petals. Keep the planes large, because slivers under about 15 px look like noise.
-
Lasso the compass outline
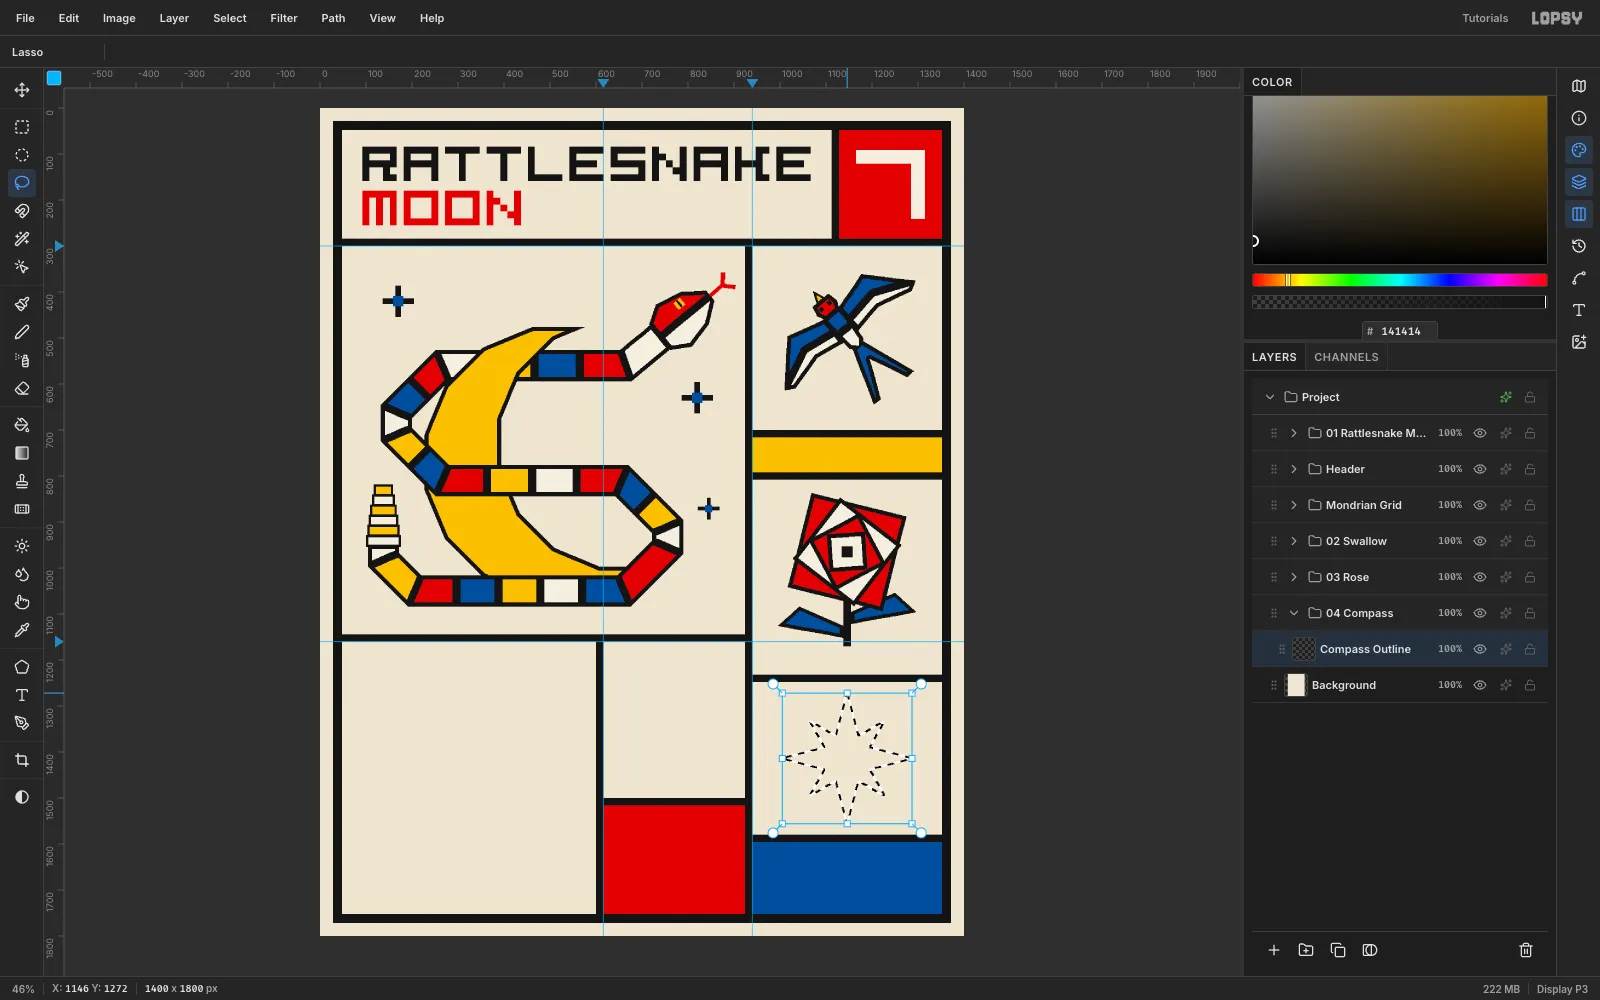
In a group 04 Compass, make a layer Compass Outline. Lasso an eight-pointed star whose outline sits 8 px outside the points, with sharp mitred tips. Fill it black.
This is the same 8 px outline you get from Shrink, grown outward instead. The Stroke layer effect would also outline the star, but it rounds the tips, and every other corner on this sheet is sharp.
-
Split the compass points
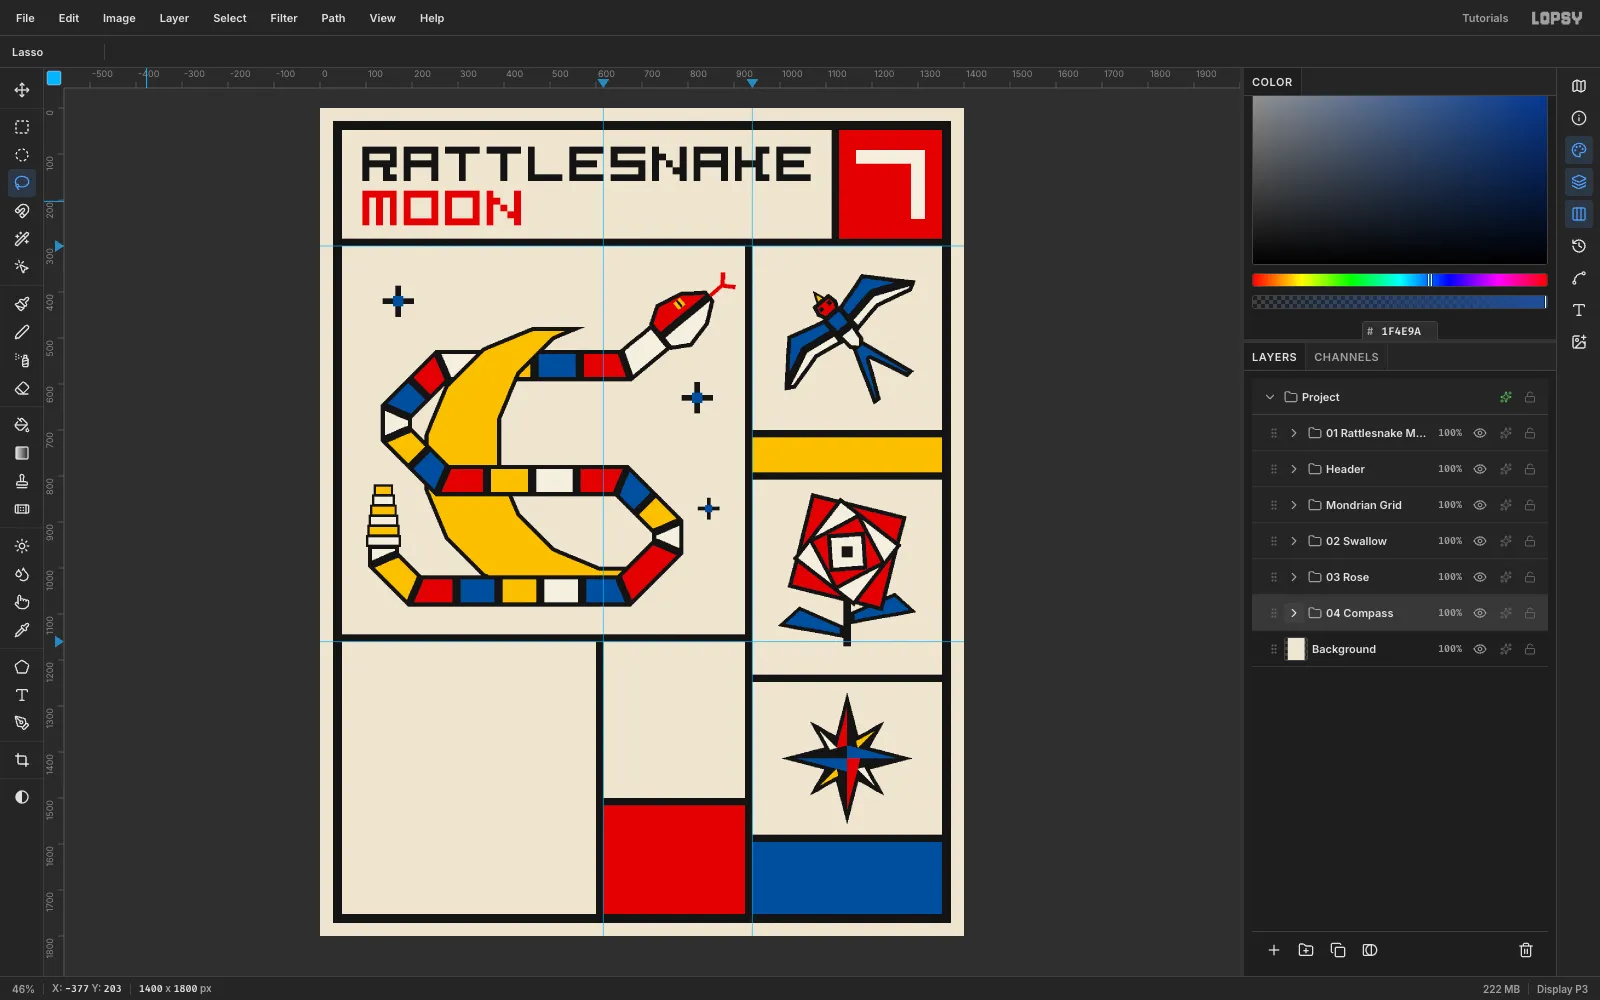
On a layer Compass above the outline, fill each point as two triangles from the centre, one half black and one half coloured:
- The four long points (110 px) take red and blue.
- The four short points (84 px) take yellow and cream.
The light and dark halves give the classic nautical-star bevel with no shading at all.
-
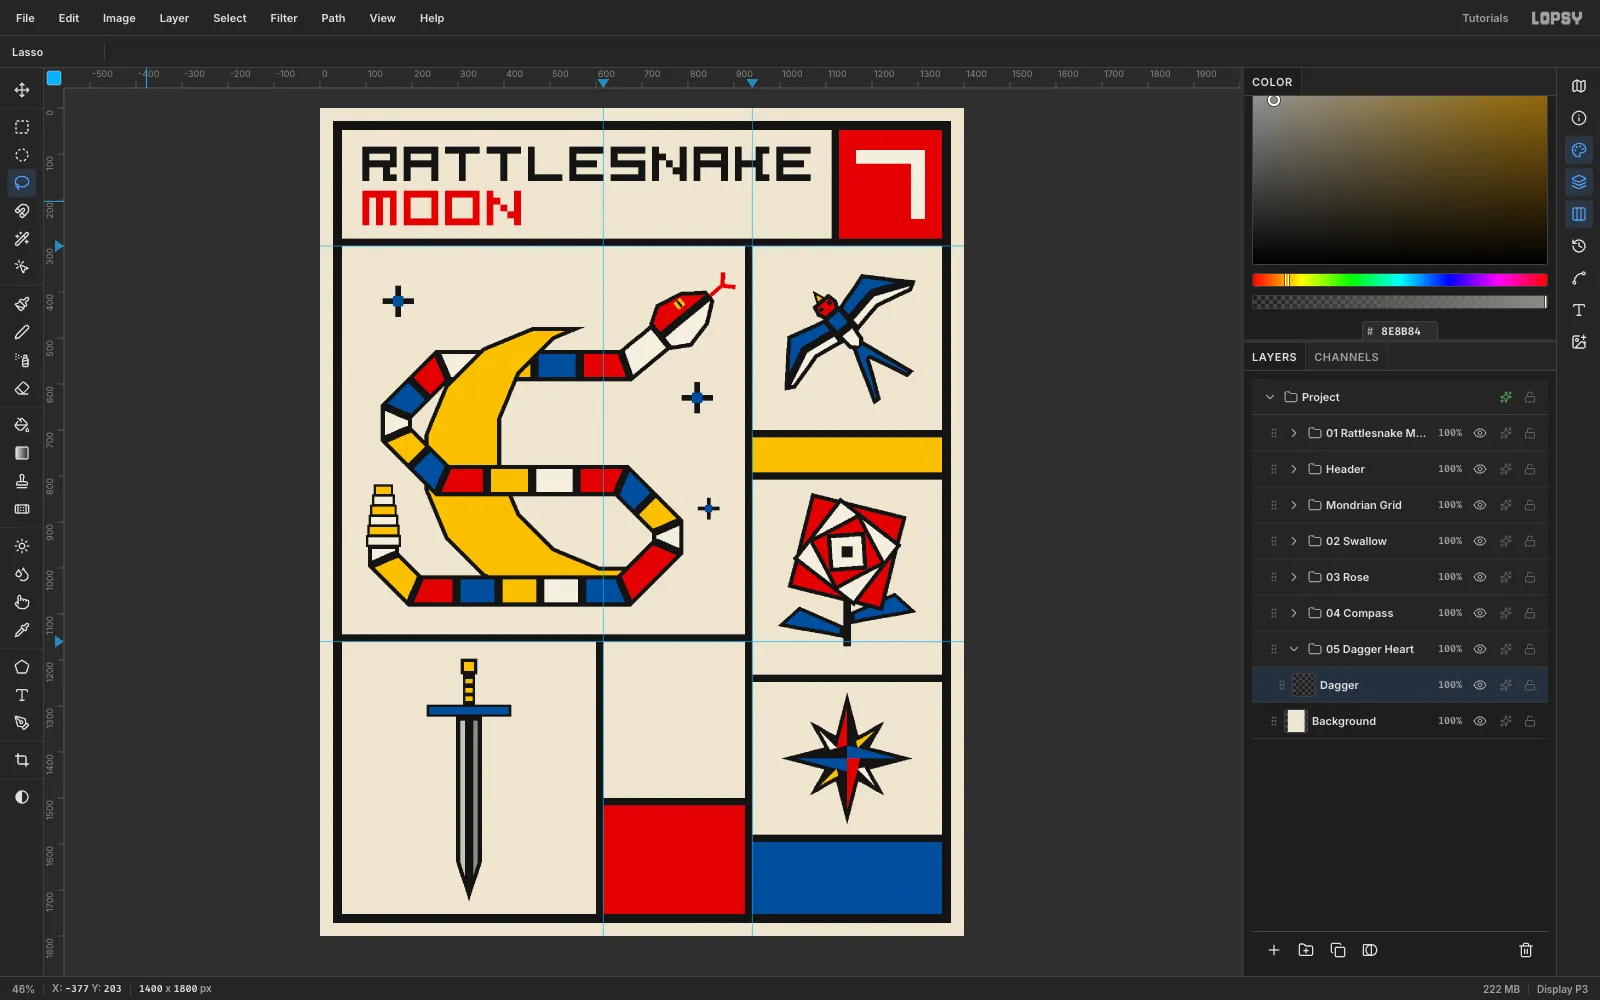
Build the dagger
In a group 05 Dagger Heart, make a layer Dagger at x 324. Build it from rectangles and a lasso:
- A yellow square pommel, and a black grip with three yellow bands
- A blue crossguard
- A long blade split down the middle into light
#C9C4B8and dark#8E8B84halves with Shrink 8
-
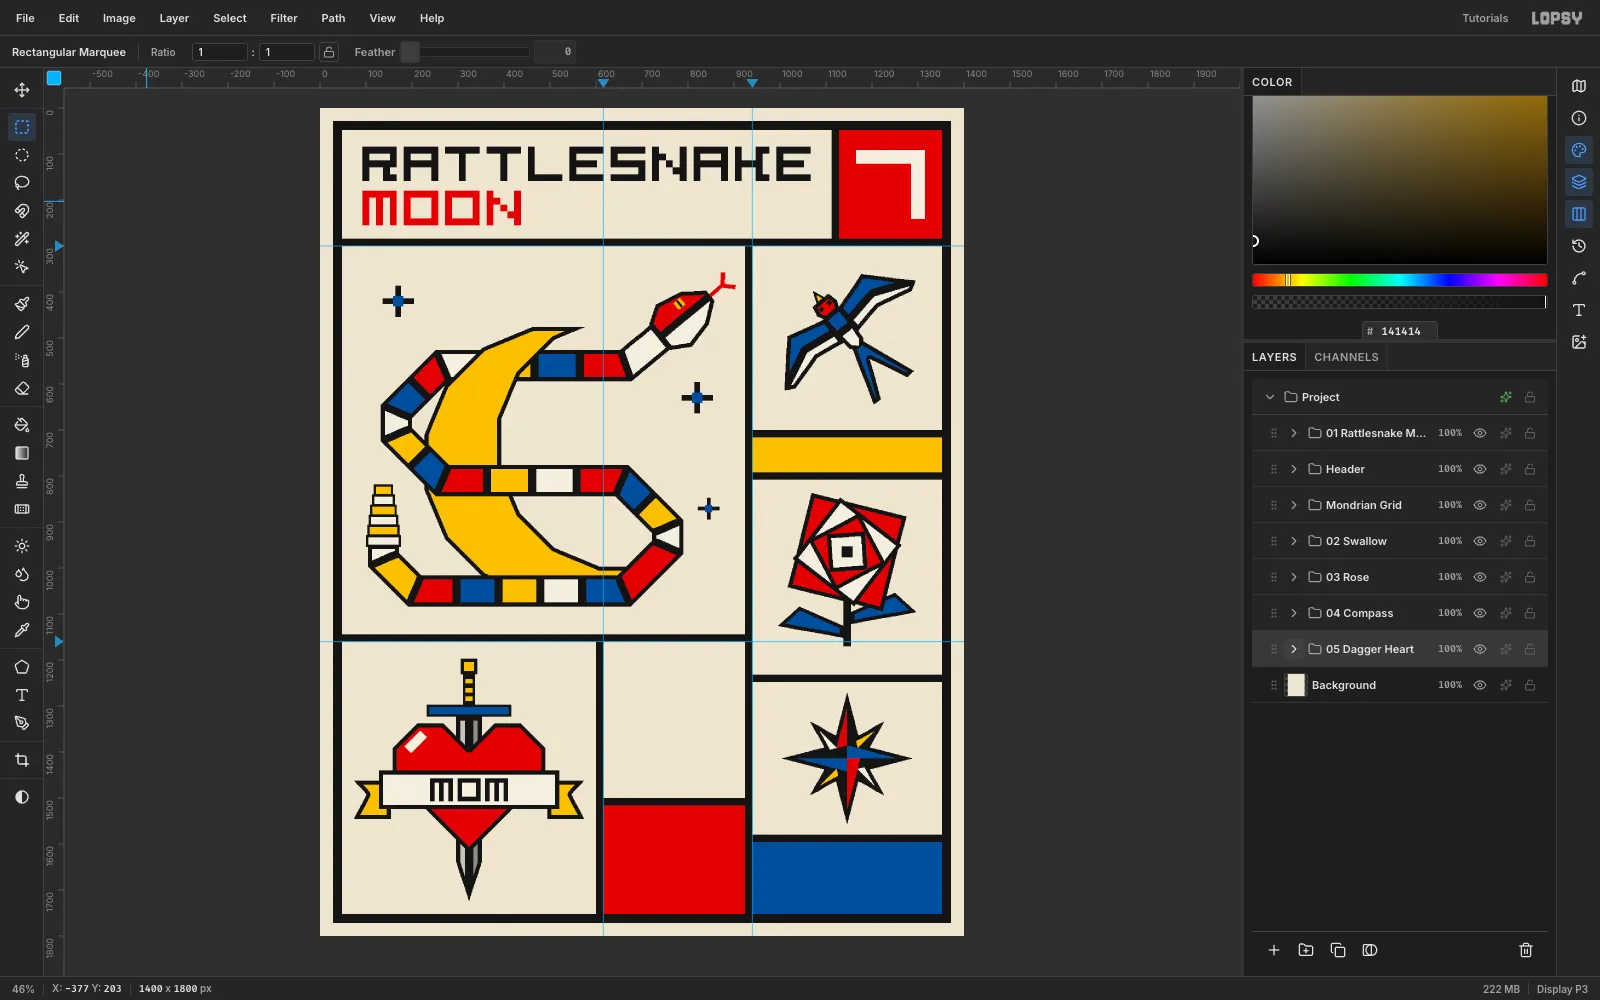
Add the heart, banner and MOM
On Heart, above the dagger, lasso a chamfered heart and fill it black, then red with Shrink 8. Add a cream highlight on the upper-left lobe. The dagger now appears to pass through it.
On Banner, fill a 392 × 84 px rectangle across the heart and cream-inset it by 8 px. Add folded yellow tails behind each end.
On Banner MOM, draw MOM in the same raster as the title, with 10 px cells, centred on 324, 1482. Using the raster face here ties the flash to the title.
-
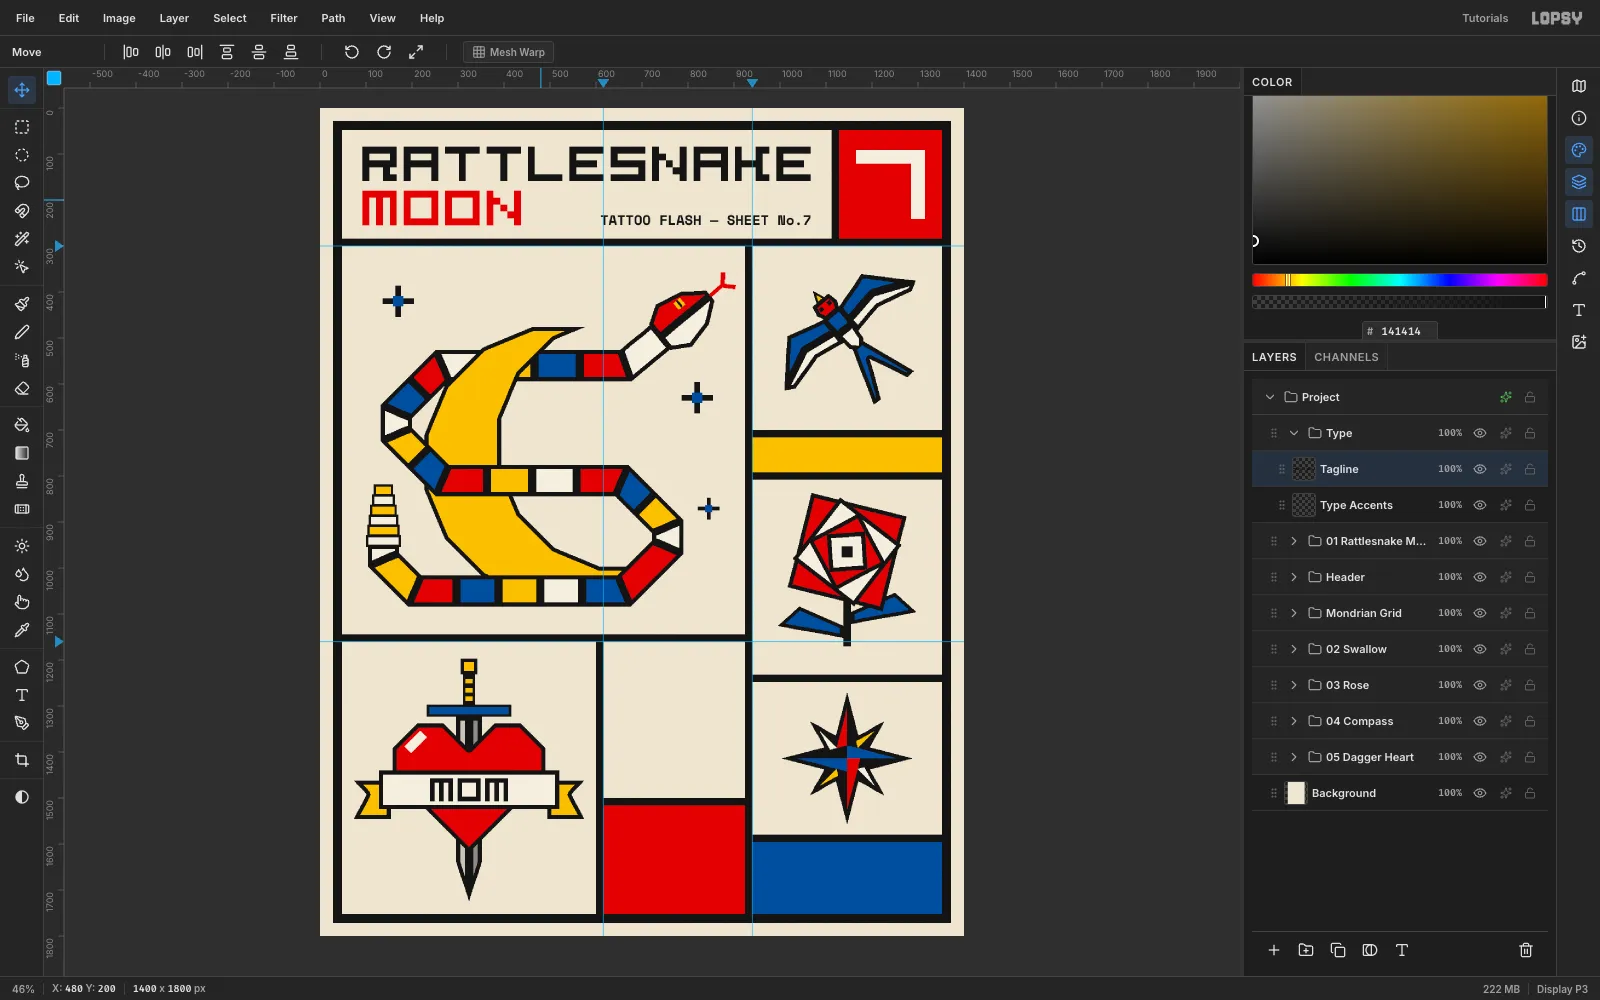
Set the tagline
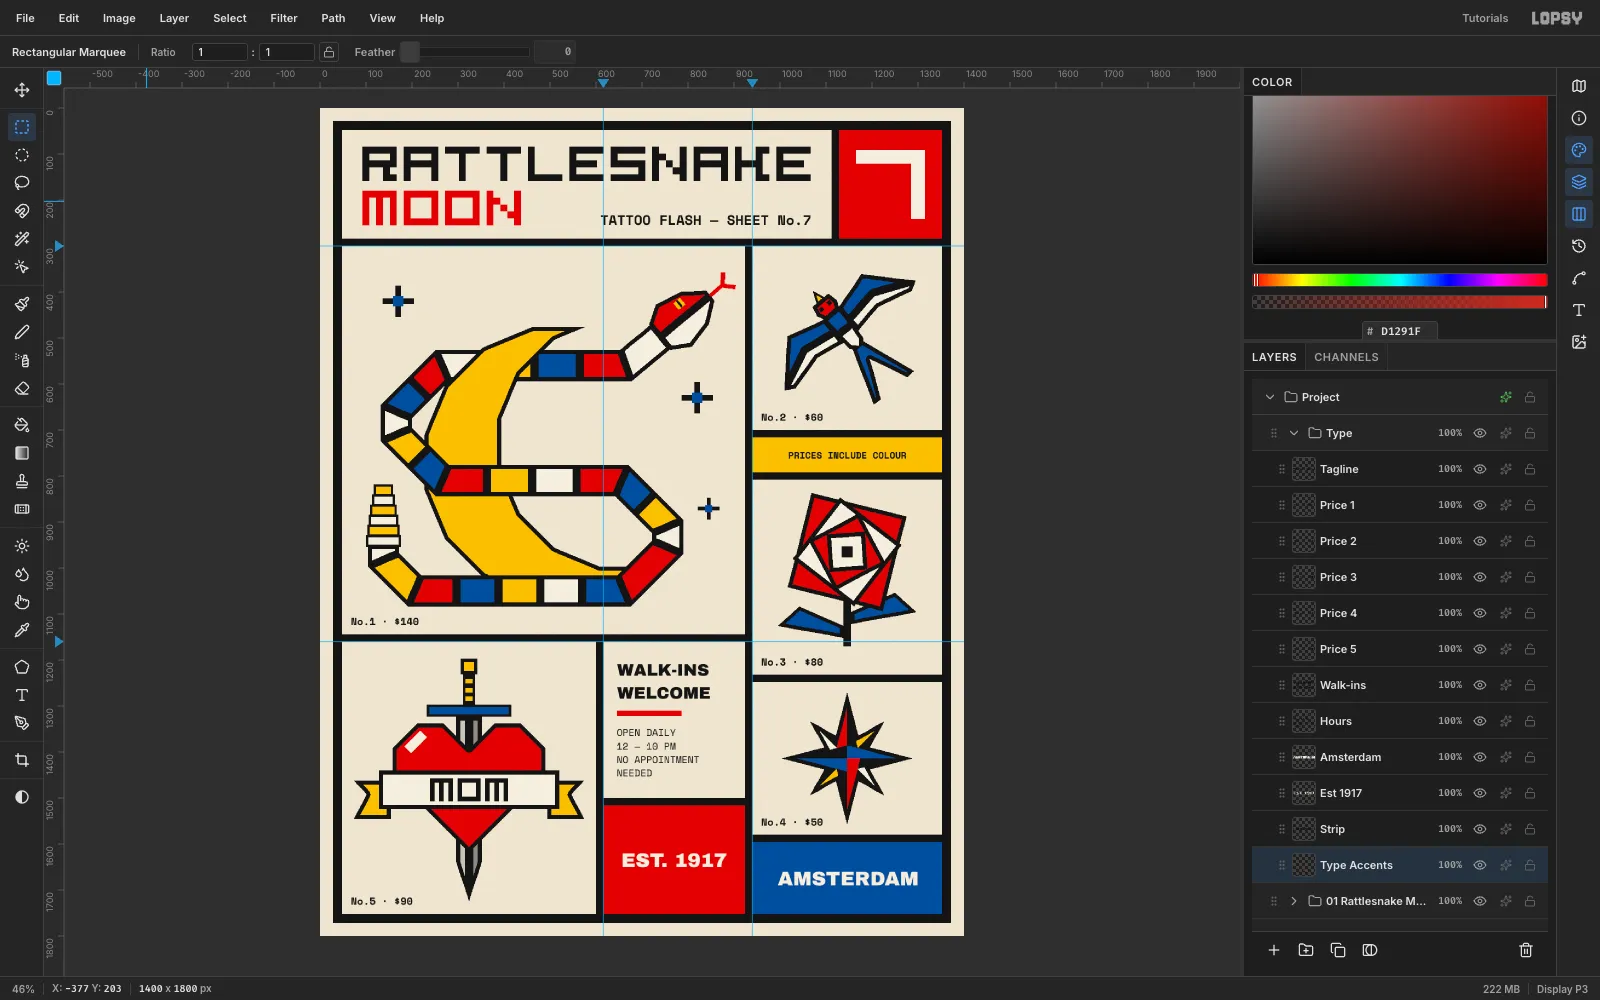
Make a group Type at the top of the stack with a raster layer Type Accents inside it. Click Type Accents so new text lands in the group.
With the Text tool, choose Space Mono, weight Bold (700), size 30. Click in the empty header cell and type TATTOO FLASH — SHEET No.7, then press Tab to commit. With the Move tool, arrow-nudge it until its right edge lines up with the E of RATTLESNAKE (x 1066) and its baseline sits on the bottom of MOON (y 254).
-
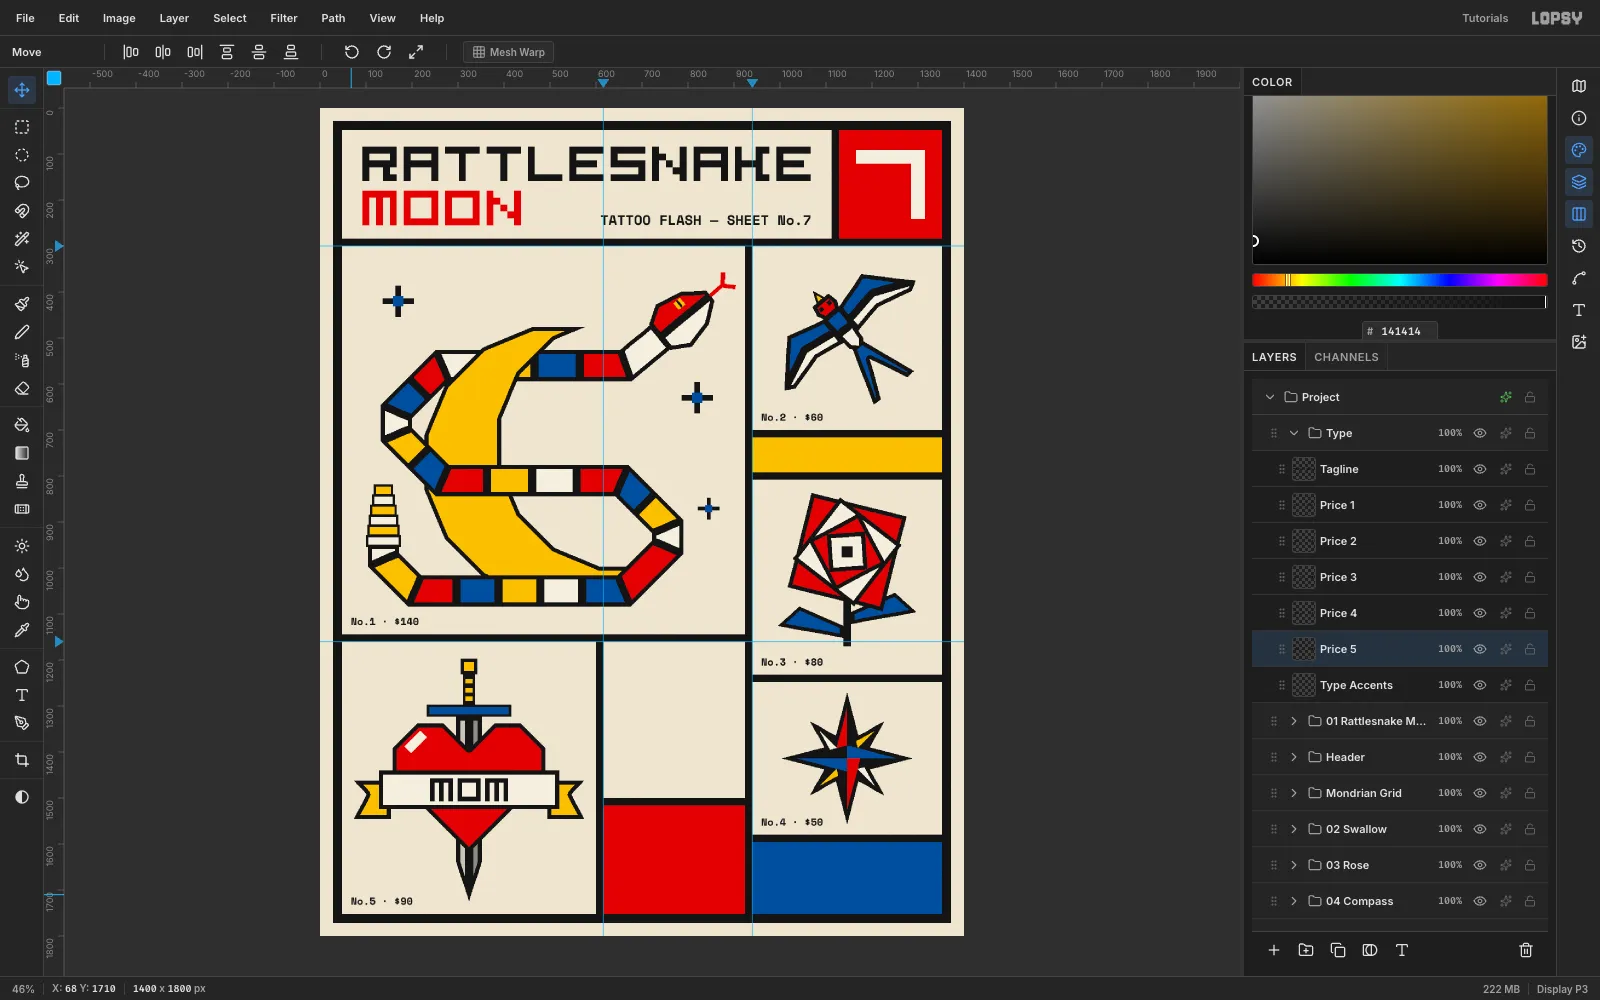
Number and price each design
Flash needs a number and a price for each design. Type each label in Space Mono Bold 22:
- No.1 · $140, No.2 · $60, No.3 · $80, No.4 · $50, No.5 · $90
Put each one 20 px in from the cell's left edge and about 20 px above its bottom rule. Give them all the same inset so they line up down the sheet.
-
Fill the credits and colour blocks
In the credits cell, type WALK-INS / WELCOME in Archivo Black 36. Add a 140 × 12 px red bar on Type Accents, then OPEN DAILY / 12 — 10 PM / NO APPOINTMENT / NEEDED in Space Mono 21. Stack the three with 26–28 px gaps and centre the block vertically.
Type EST. 1917 and AMSTERDAM in Archivo Black 43 in cream and centre each in its block. Use the same size for both so the cap heights match. Add PRICES INCLUDE COLOUR (Space Mono Bold 20) in the yellow strip.
-
Rotate the vertical credit
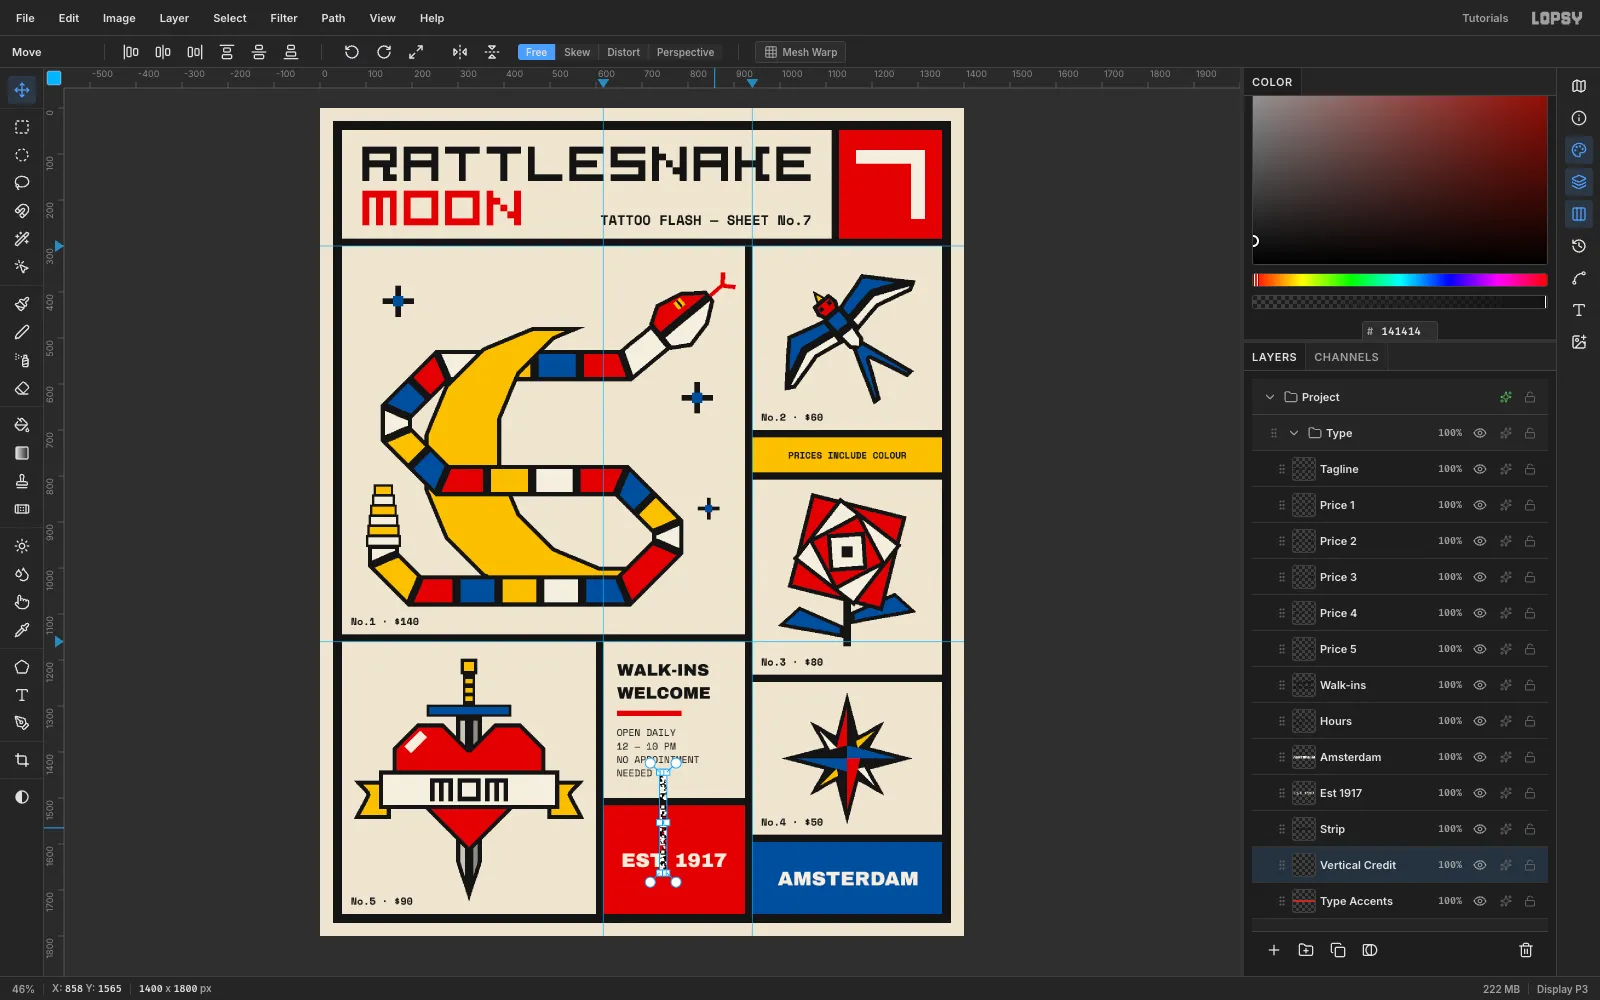
Type HAND-PAINTED FLASH in Space Mono Bold 20 somewhere empty. Then:
- Click Rasterize Layer in the Layers panel. Rotating live text is unreliable, and a raster rotates cleanly.
- Marquee the text and switch to the Move tool.
- Click Rotate 90° CCW in the options bar, then press Cmd+D.
Arrow-nudge it to x 880, with its bottom level with the last line of the hours.
-
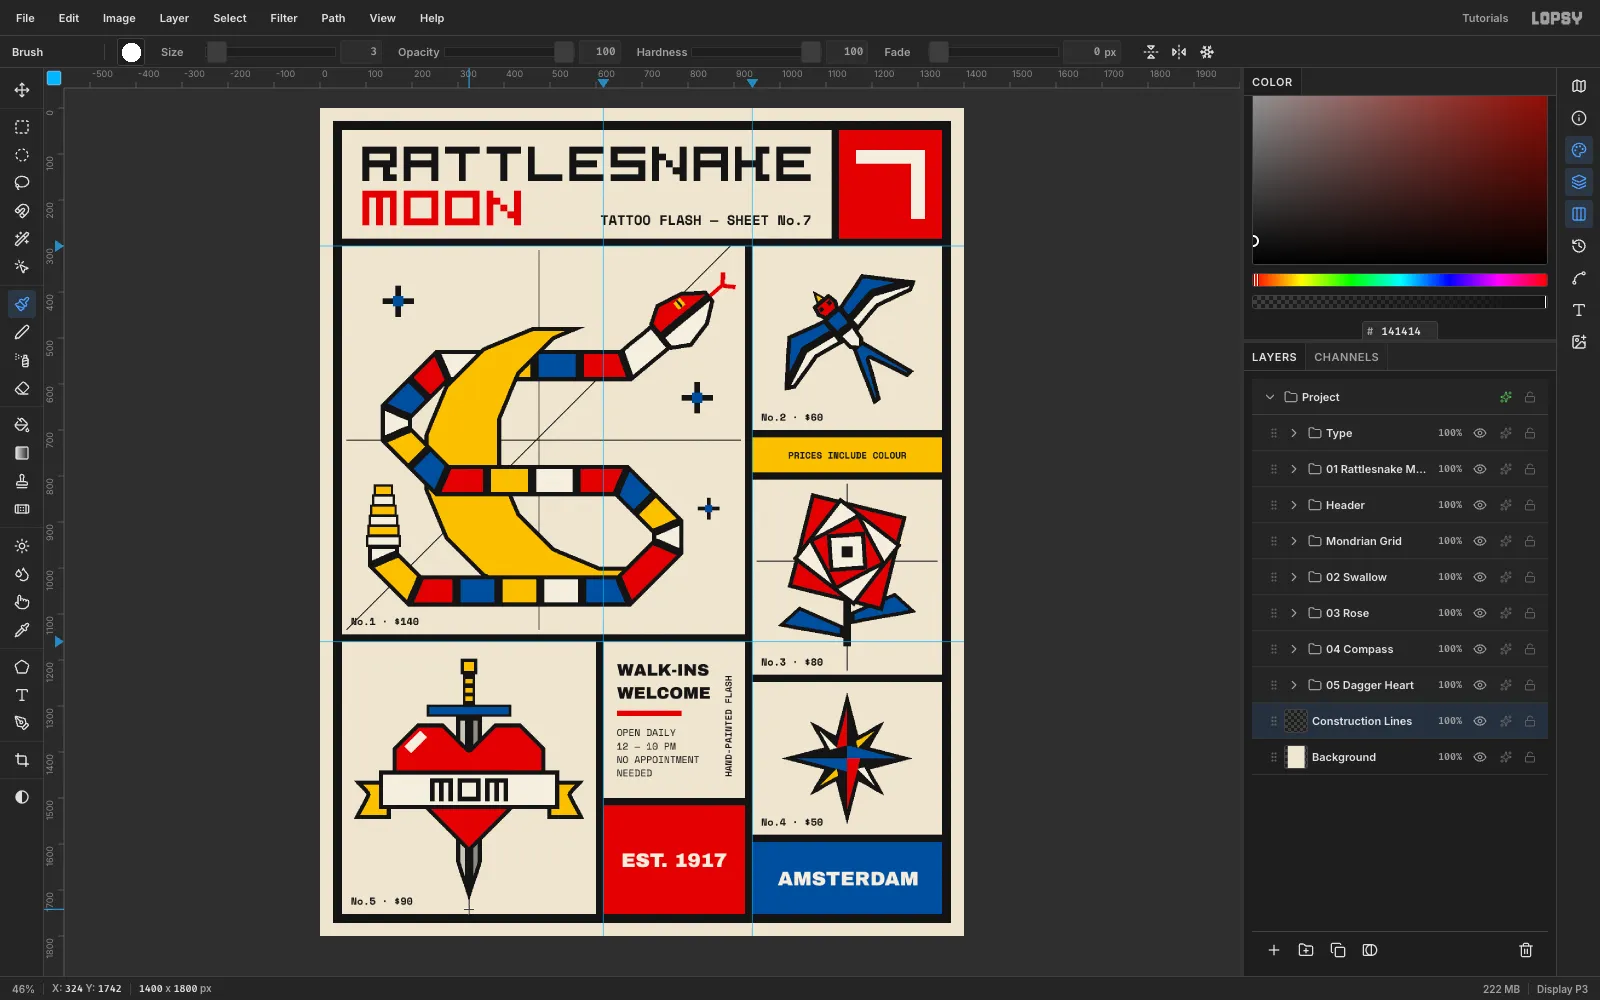
Draw the construction lines
Add a layer Construction Lines just above Background, under everything. Use the Brush at size 3, hardness 100, in black. Click once, then Shift-click the far end to draw a straight line. Draw:
- A vertical, a horizontal and a 45° diagonal through the hero
- A cross through the rose
- A vertical through the dagger
Then use the Eraser at size 40 to clear any line that crosses a price label. Leave lines out of the swallow and compass cells, where they would read as extra wings or compass points.
-
Recolour them with Color Overlay
Open the layer's Layer effects, enable Color Overlay and set it to
#5E8FD0. Designers' non-photo blue can now change without redrawing anything. Set the blend mode to Multiply and the opacity to 55%, so the lines sit quietly on the paper like pencil guides.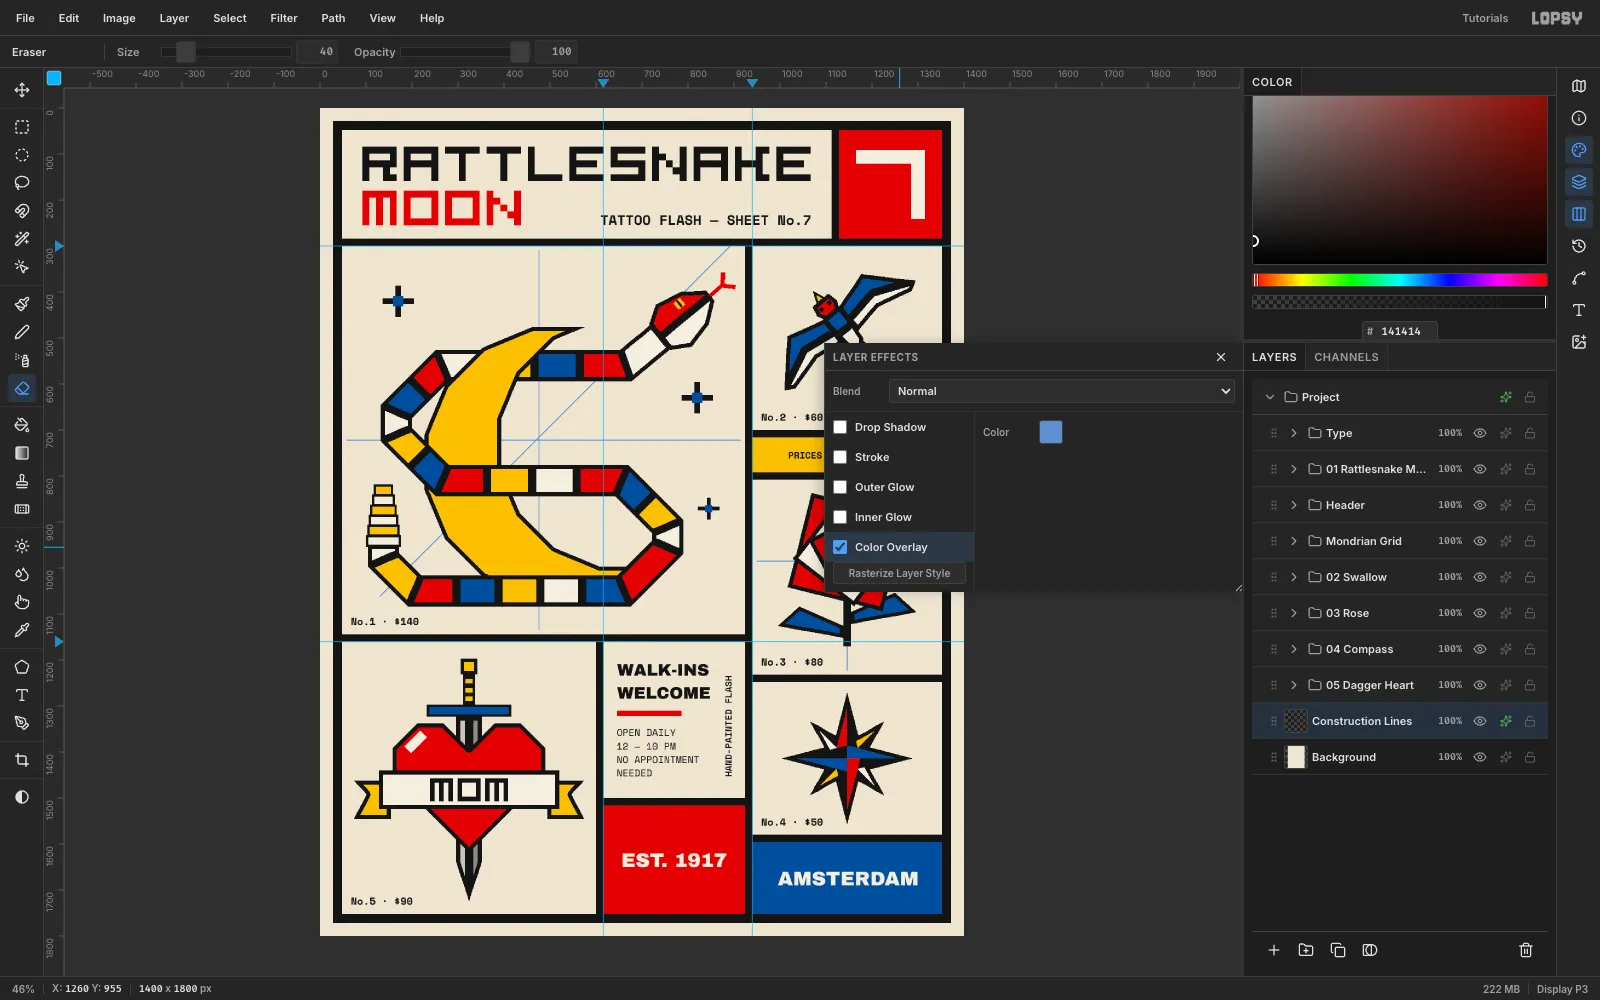
-
Tone the paper and add grain
Add a layer Paper Tone just above Background and run Filter → Clouds at Scale 14, then Gaussian Blur 6. Set it to Multiply at 6%. Because it sits under the colour planes, it tints only the paper, and the red, yellow and blue stay flat.
For the print texture, add a top-level layer Ink Grain above the Type group. Fill it with
#808080, run Add Noise 50 (Mono, Gaussian), and set it to Overlay at 50%.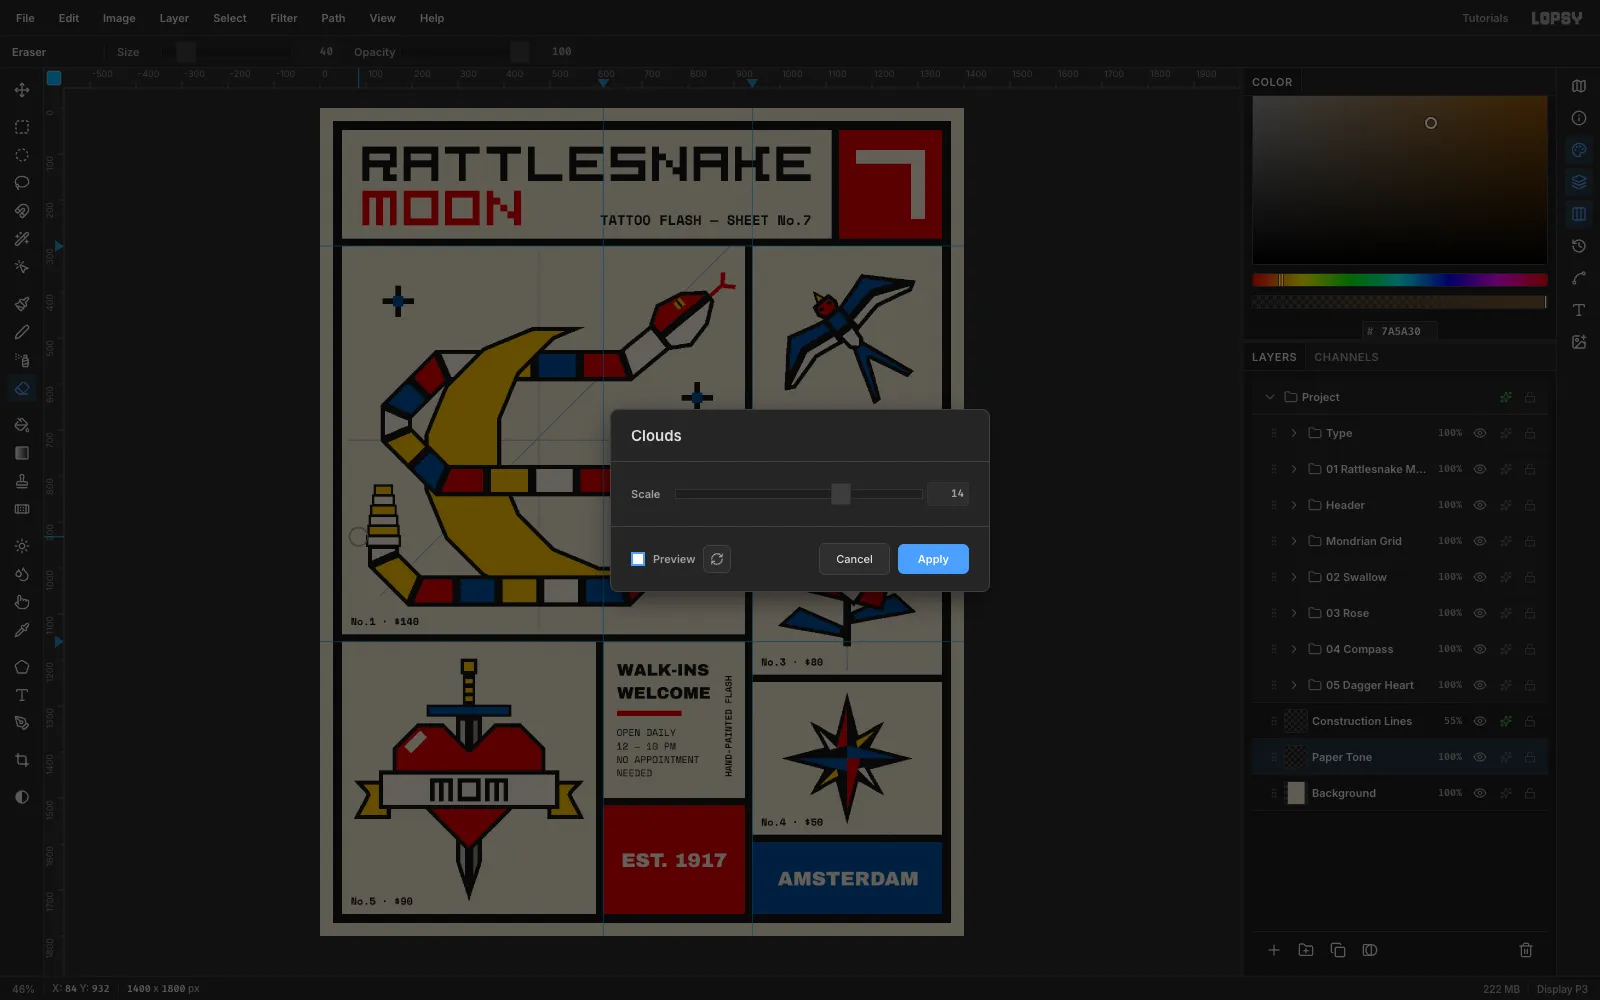
-
Final polish
Check each design against its cell's edges before you export. Here the rose was 13 px from the rule above it, so select the Rose layer and press Shift+Down twice and Down four times (24 px). The snake's bottom bar crowded its price label, so nudge the whole 01 Rattlesnake Moon group up 20 px.
Choose File → Quick Export PNG, and File → Save Project to keep the layered
.lopsyfile.