Draw a Technical Illustration Candle Cutaway Holiday Card
Draw a sectioned beeswax candle in Lopsy as a vintage technical plate, with a glowing Pen-tool flame, numbered callouts, a photo plan view and a title block.
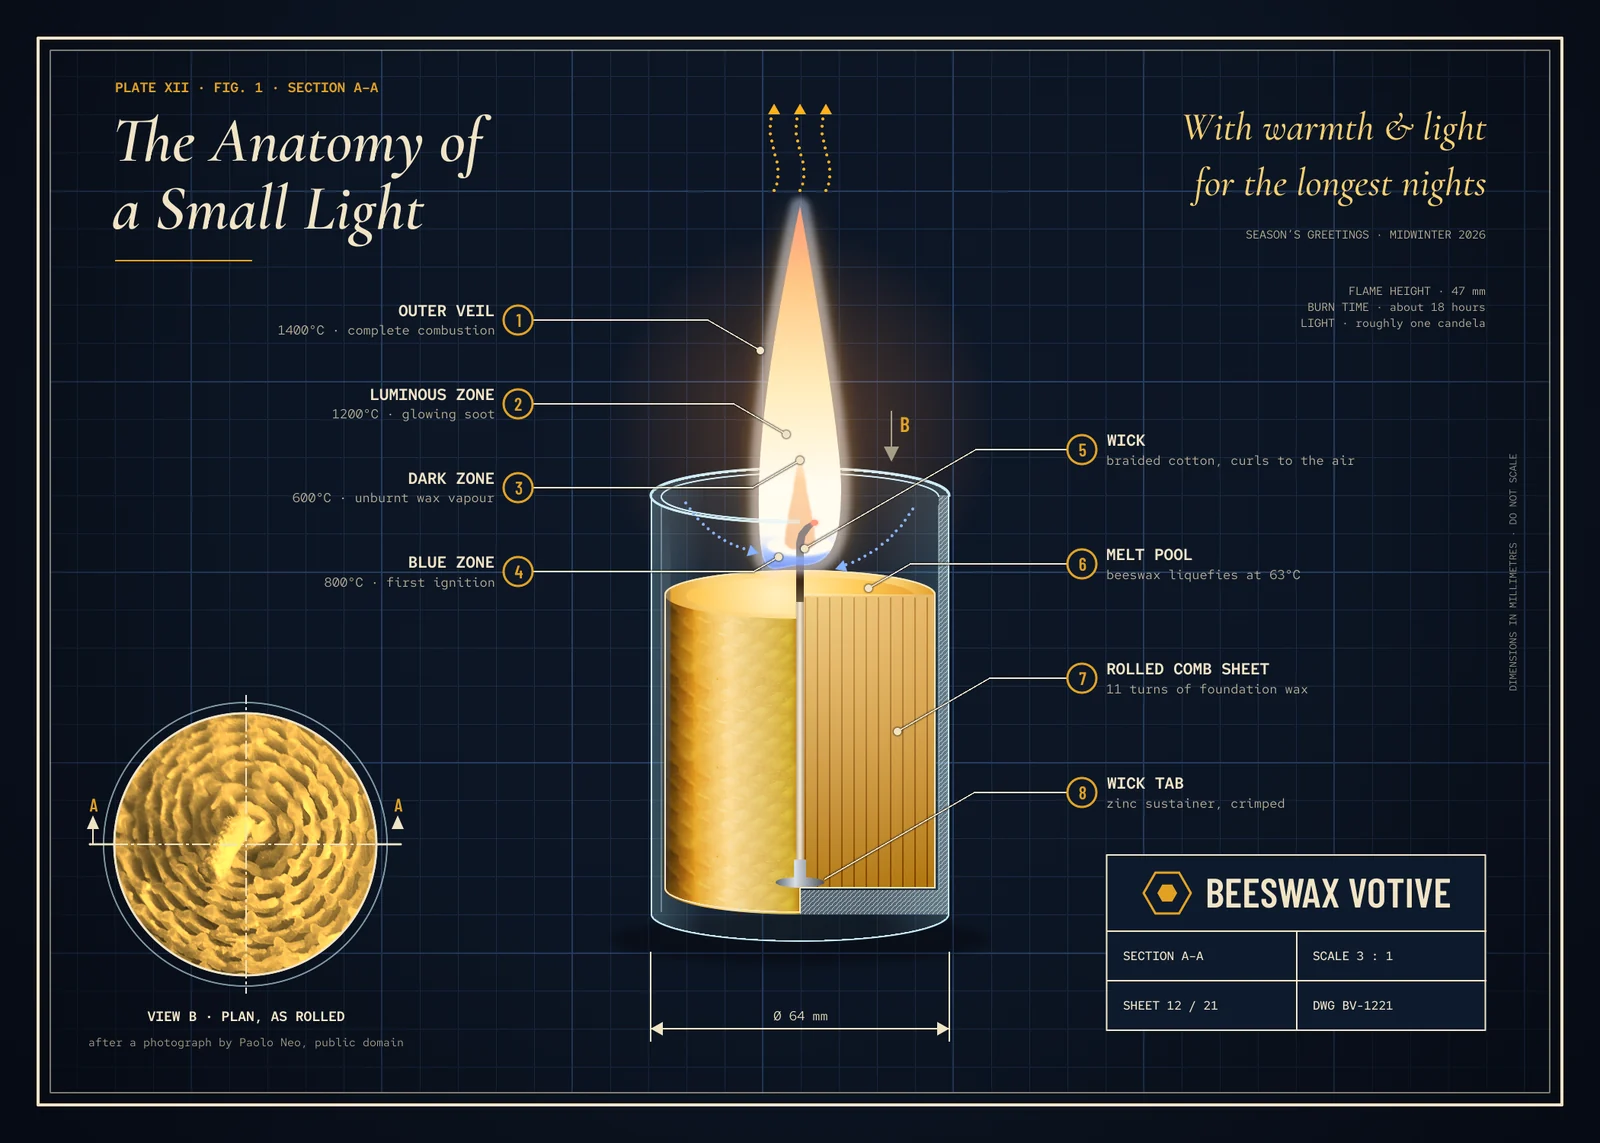
Old encyclopaedias and service manuals explained machines with cutaway plates: the object drawn whole on one side and sliced open on the other, every part pointed at by a numbered callout. The same treatment makes a charming holiday card when the "machine" is something small and warm.
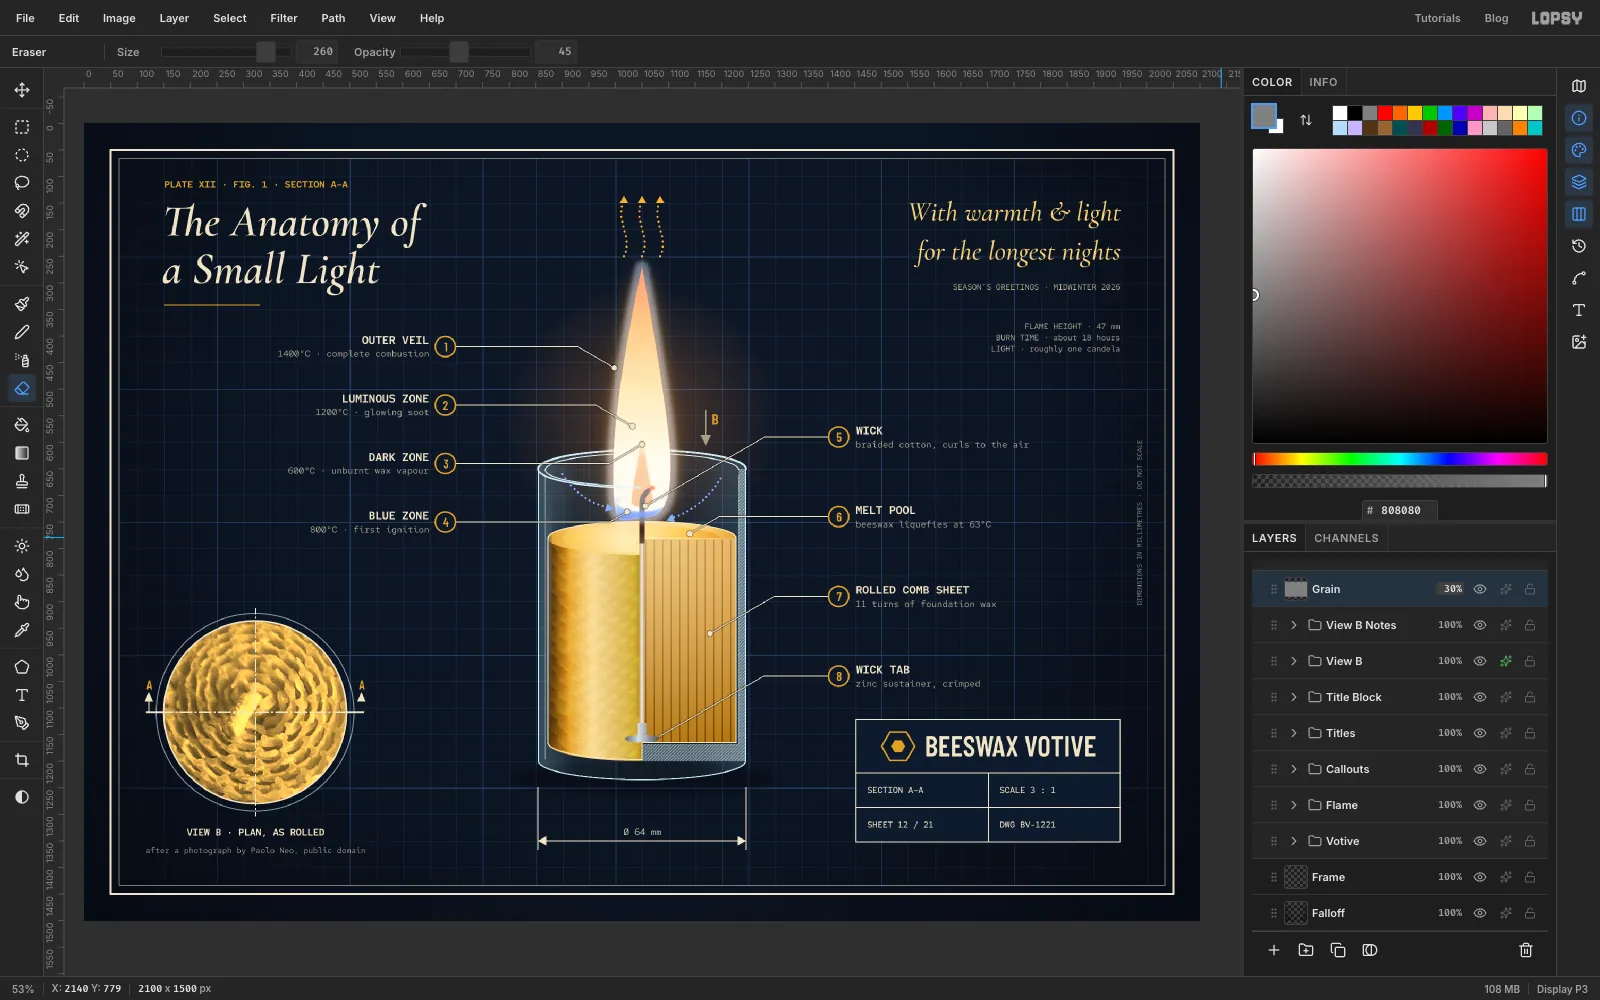
In this tutorial you'll draw Beeswax Votive, a plate titled The Anatomy of a Small Light. A rolled beeswax candle stands in a glass votive. Its front-right quarter is cut away so you can see the rolled sheets of wax, the wick and the zinc tab. Above it a flame glows, with labels for each zone of the flame. A photo of the candle's spiral top becomes a plan view in the corner, and a title block and a greeting finish the sheet. You'll build it at 2100 × 1500 px, a 7 × 5 card at 300 dpi.
The plan view and the honeycomb texture come from Wax candle detail by Paolo Neo on Wikimedia Commons, which is in the public domain. Download the full 2048 px version. Any close photo of a rolled beeswax candle will do.
Along the way you'll use:
- ruler guides, Define Pattern and Fill with Pattern for a drafting grid, section stripes, glass hatching and chain lines
- the Rectangular and Elliptical Marquee with Shift to add, Alt to subtract and Shift+Alt to intersect
- linear and radial Gradients with transparent stops
- the Pen tool, the Paths panel's Path to Selection, Grow, Shrink and Feather
- the Shape tool's click-to-size dialog, Brush and Pencil lines drawn with Shift-clicks
- pasting a photo, scaling and stretching it with the Move tool, Merge Down and a group Photo Filter adjustment
- Outer Glow and Drop Shadow effects, the Screen, Multiply and Overlay blend modes
- text in Cormorant Garamond, Red Hat Mono and Barlow Condensed, the Text panel's line height and a rotated line of live text
A few habits that the steps rely on:
- Exact sizes. When a step gives a marquee a size, watch the Selection W and H in the Info panel as you drag. Or, with nothing selected, click once without dragging to type the exact corners.
- The drawer. Each layer row has an effects (fx) button that opens a drawer with that layer's blend mode, opacity and effects. On a group row, the same drawer holds adjustments instead.
- Type settings. Click a non-text layer before you change the font, size or colour. Otherwise you'll restyle the last text you typed.
The palette:
-
Drafting board
-
grid
-
Linework
-
label grey
-
Beeswax
-
Flame
-
flame glow
-
Cut face
-
Dark zone
-
blue zone
-
cool air
-
Glass
-
rim
-
lamp glow
-
Set up the canvas and guides
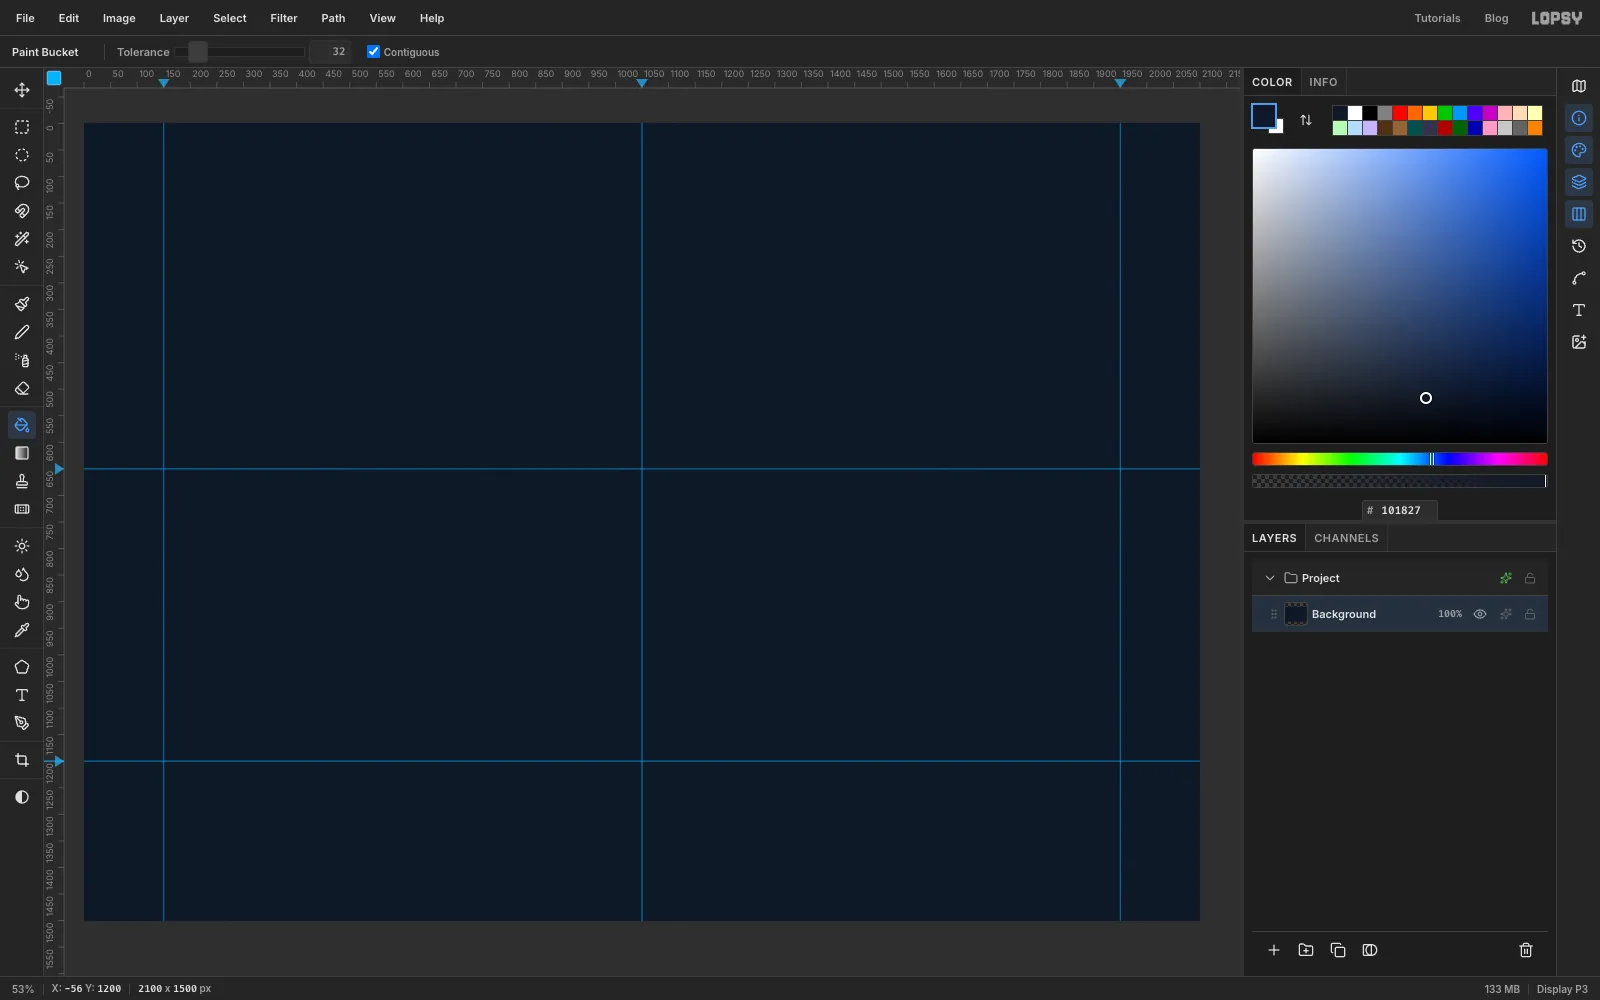
Choose File → New, enter 2100 × 1500 pixels and click Create. Click the Background row, set the foreground to , pick the Fill tool and click the canvas. Then select Layer 1 and delete it with the trash button at the bottom of the Layers panel.
Click the top ruler at 150, 1050 and 1950 to drop three vertical guides: the left margin, the centre line and the right margin. The candle will stand on the centre line. Click the left ruler at 650 and 1200 for the top of the glass and its base.
-
Fill a drafting grid with two patterns
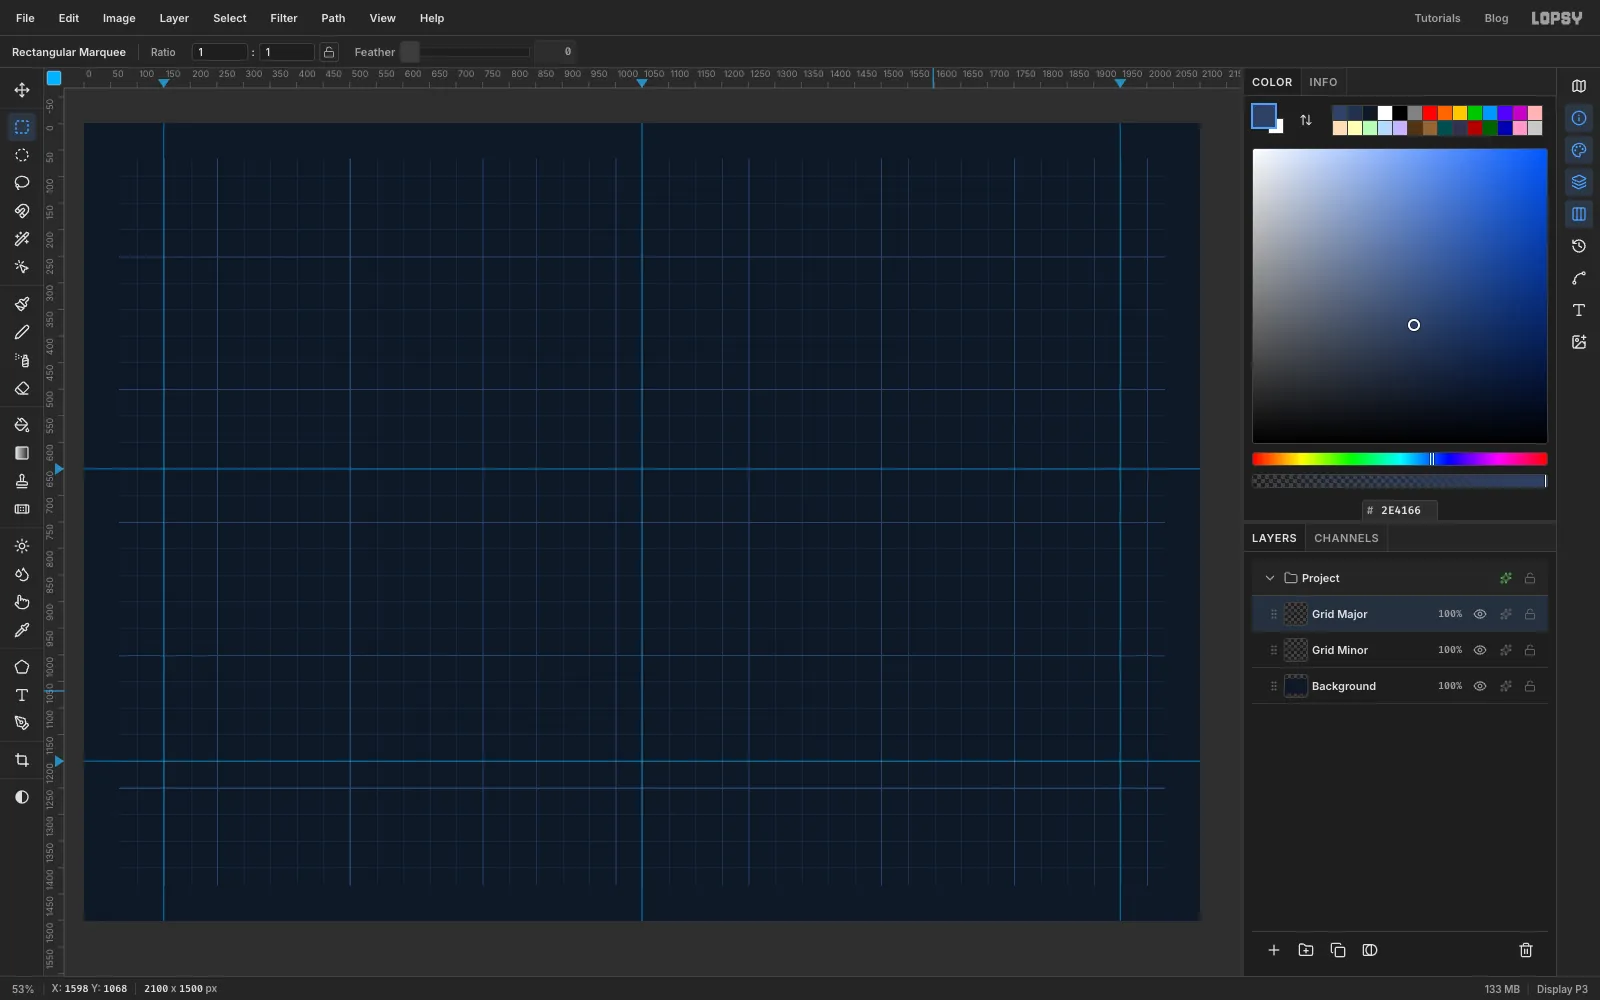
Add a layer called Tile. Pick the Pencil, set Size to 1 and the foreground to . Zoom in on the top-left corner. Click at the very corner, then Shift-click 50 px to the right, and do the same 50 px down, so you have an L along the top and left edges of a 50 px square. Switch to and Size 2 and draw a second, bigger L for a 250 px square just to the right of the first.
Draw a Rectangular Marquee exactly over the small square and choose Edit → Define Pattern. Marquee the big square and define it too. Then delete Tile.
Add a layer called Grid Minor. Marquee the board 66 px in from every edge, which is where the inner border will sit, and choose Edit → Fill with Pattern…, pick the small pattern and click Apply. Add Grid Major and fill the same marquee with the big pattern. Patterns tile from the canvas corner, so both grids line up with each other.
-
Darken the edges and draw the border
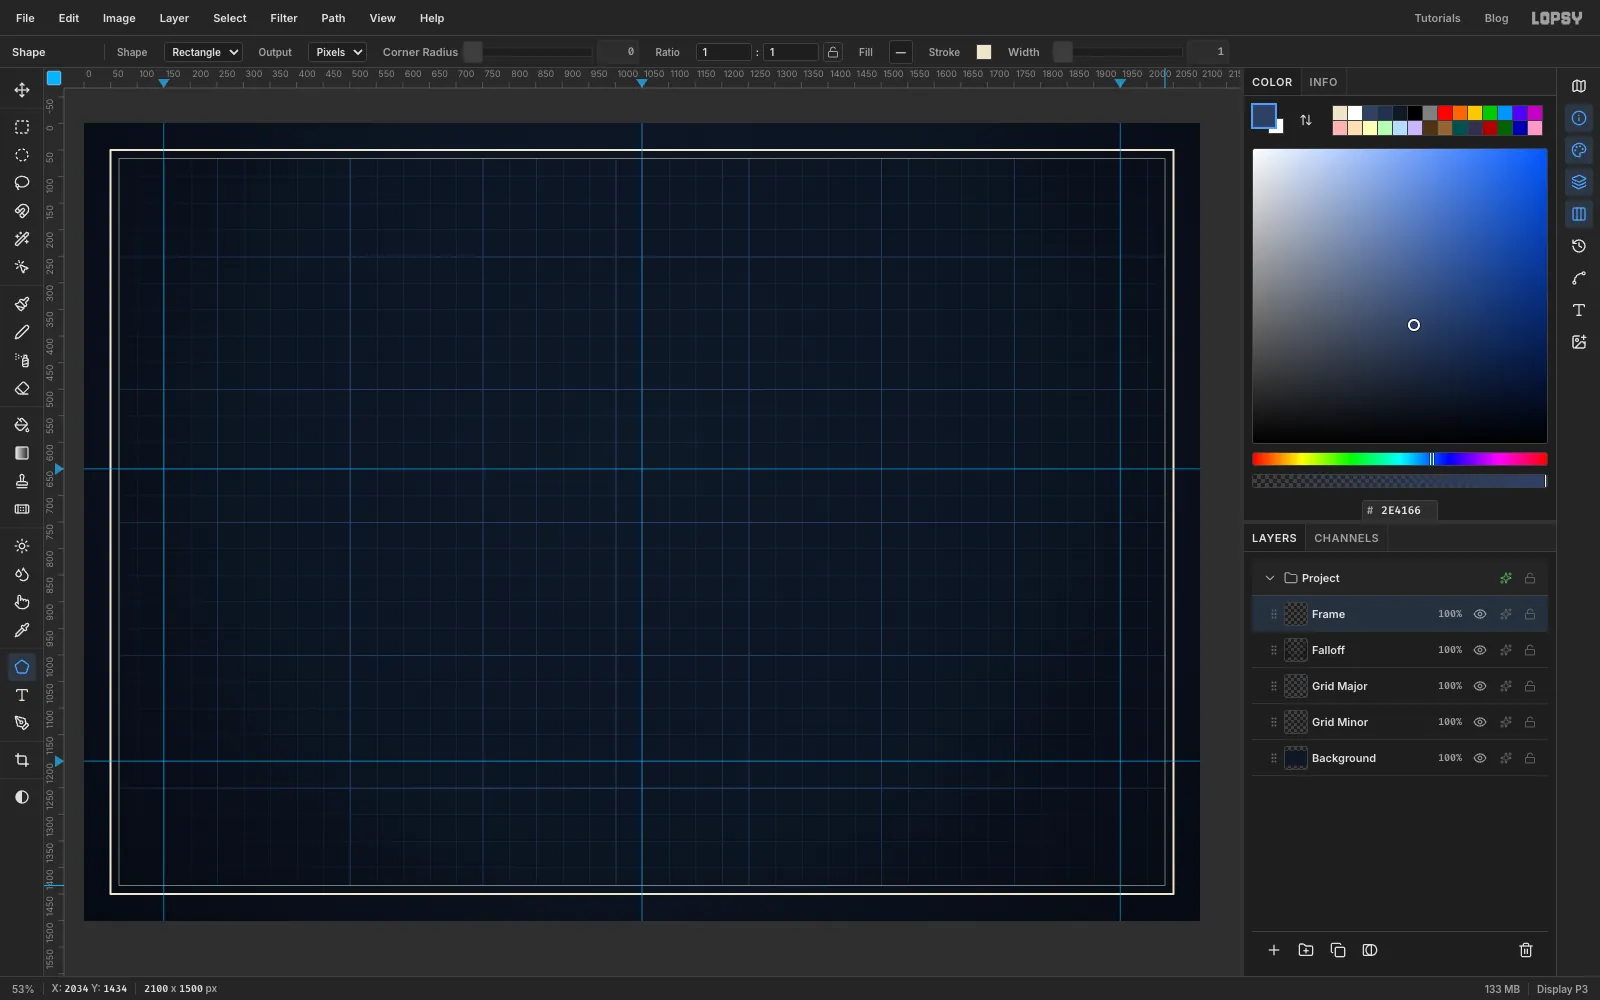
Add a layer called Falloff. Pick the Gradient tool, set Type to Radial and open Advanced…. Give it three stops: black at 0% opacity on the left, black at 15% opacity a little past the middle, and at 85% opacity on the right. Drag from the middle of the board out to the bottom-right corner. The edges darken like a lamp-lit desk.
Add a layer called Frame. Pick the Shape tool, set Shape to Rectangle and Output to Pixels. Click the Fill swatch and Remove fill, then set the Stroke to and Width 4. Shapes grow from where you press, so press on the centre of the canvas and drag out until the box sits 50 px in from every edge. Set the width to 1 and drag a second box 16 px inside the first.
-
Build the glass outline from three marquees
Click New Group and name it Votive. Inside it, add a layer called Contact Shadow. Draw an Elliptical Marquee 500 × 68 px centred 32 px below the base guide, fill it with black, then run Filter → Gaussian Blur with a Radius of 16 and set the layer's opacity to 30%.
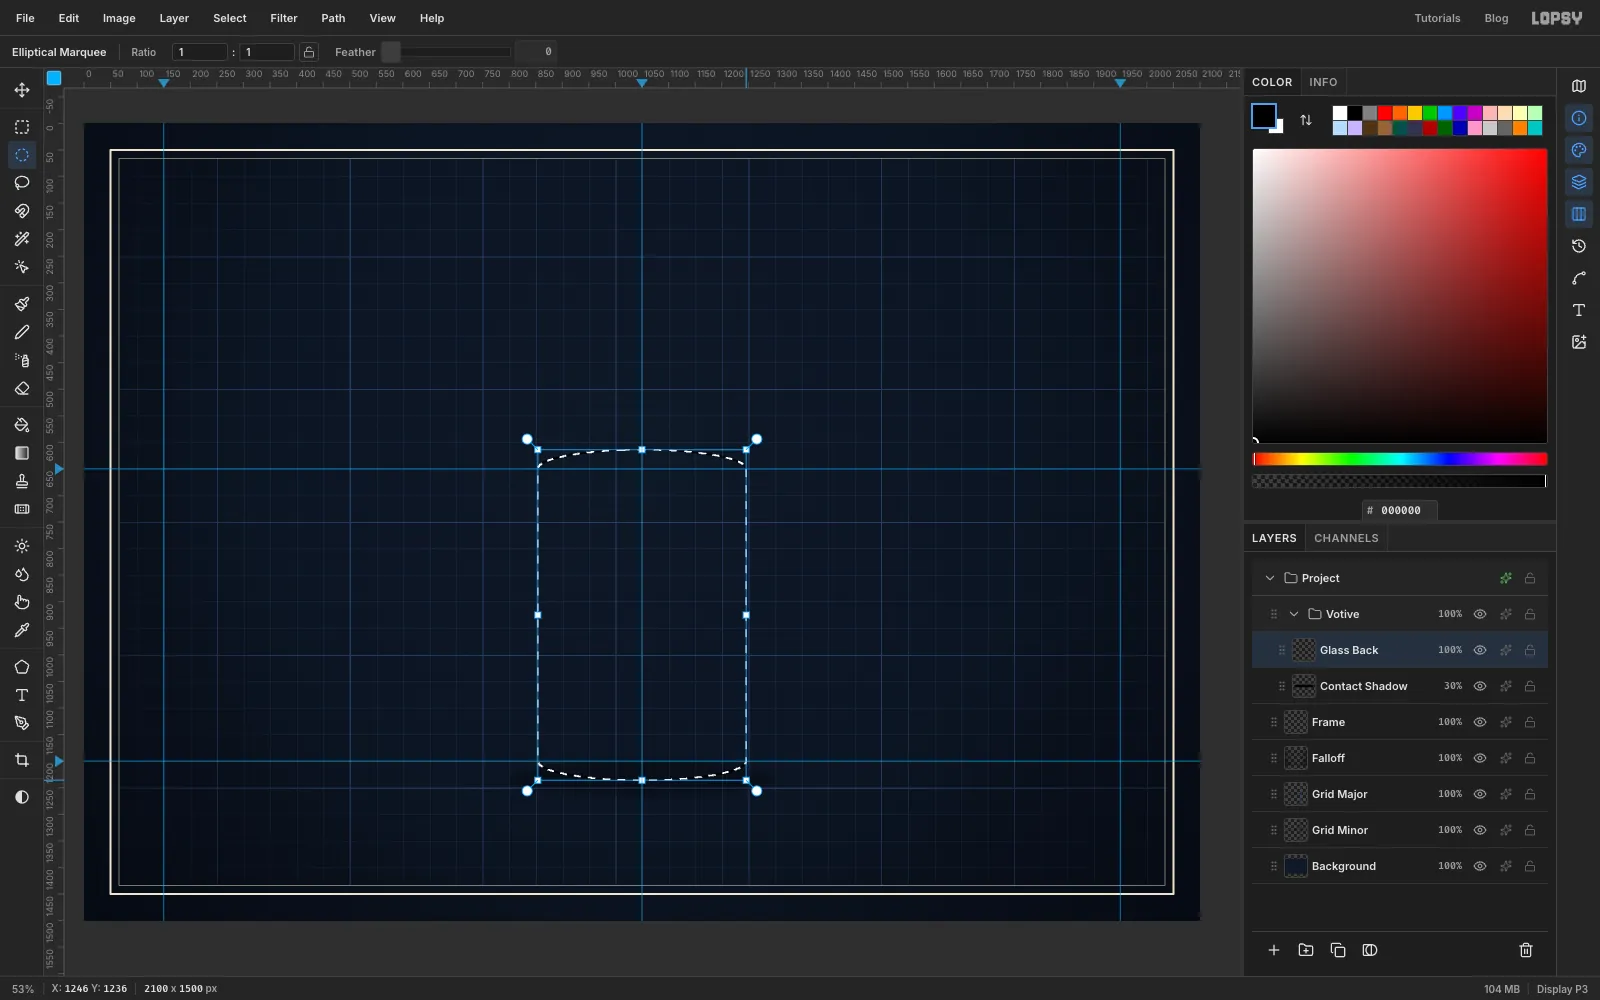
Add a layer called Glass Back. With the Rectangular Marquee, drag a box from the rim guide to the base guide, 392 px wide and centred on the centre line. Pick the Elliptical Marquee, hold Shift and drag a 392 × 72 ellipse centred on the rim guide. Shift adds it to the selection. Add another 392 × 72 ellipse centred on the base guide. The three shapes merge into a tumbler.
-
Ghost the glass with a transparent gradient
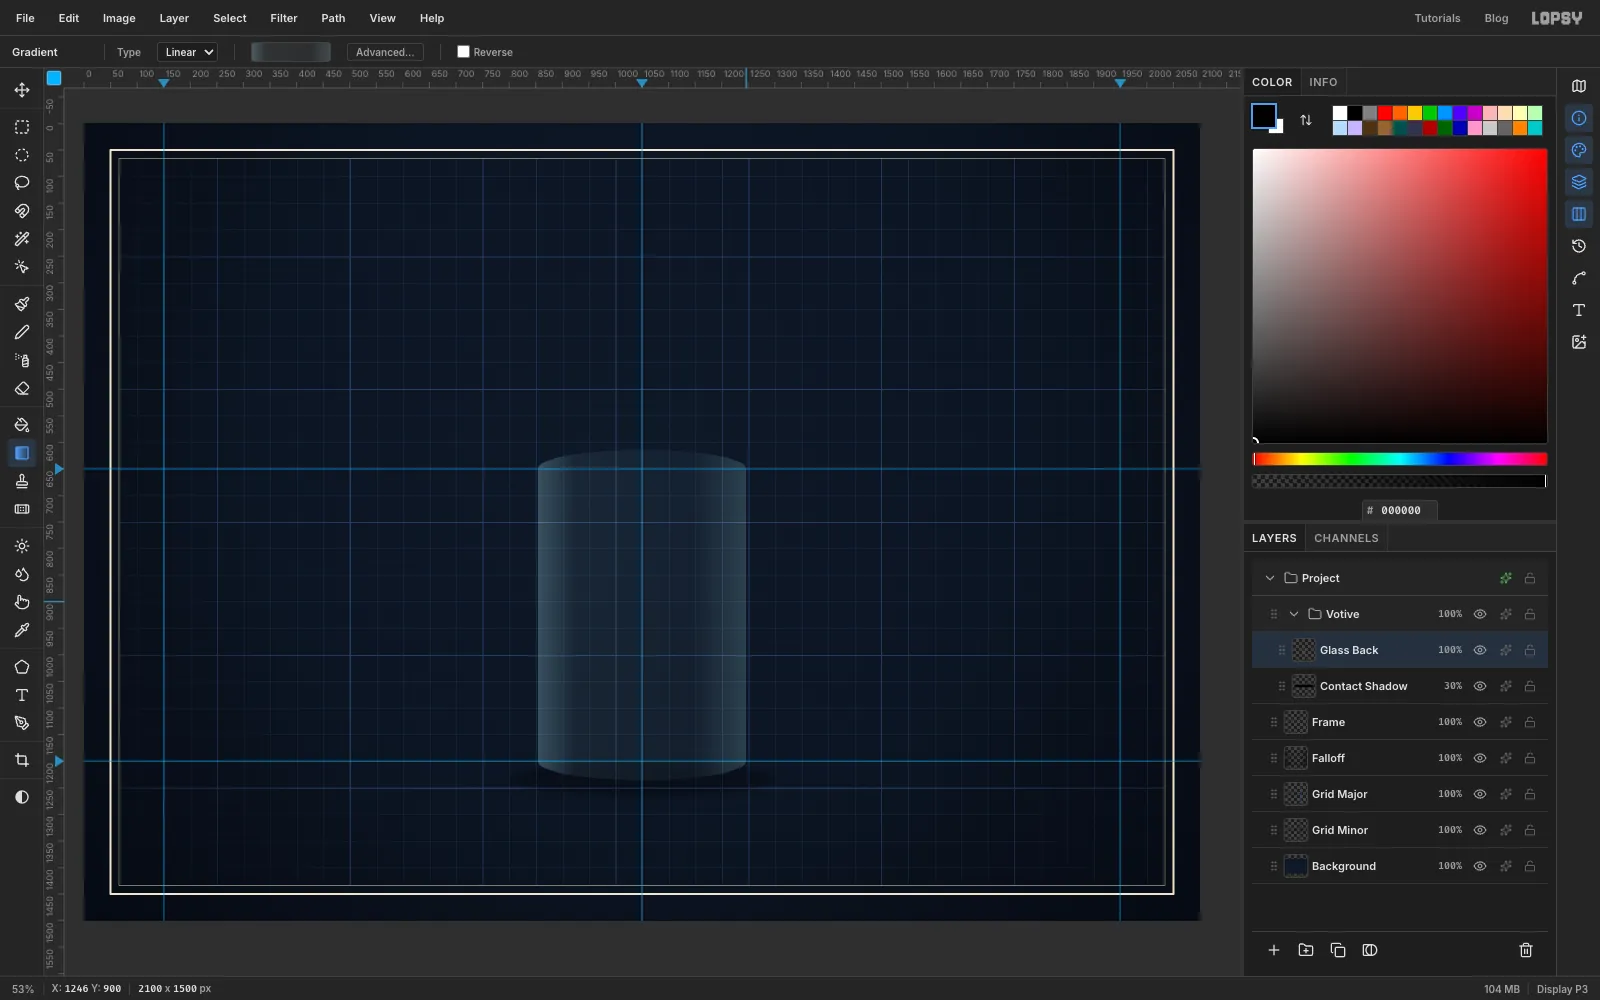
Glass in technical drawings is "ghosted": you see through it, and only the edges catch the light. Keep the tumbler selected, pick the Gradient tool and click Advanced… to open the editor. Set four stops, all , at 30%, 8%, 5% and 22% opacity from left to right. Put the second stop at about 18% along and the third at about 75%. Set Type to Linear and drag from the left edge of the glass to the right edge. Press Cmd+D.
-
Shade the outside of the wax
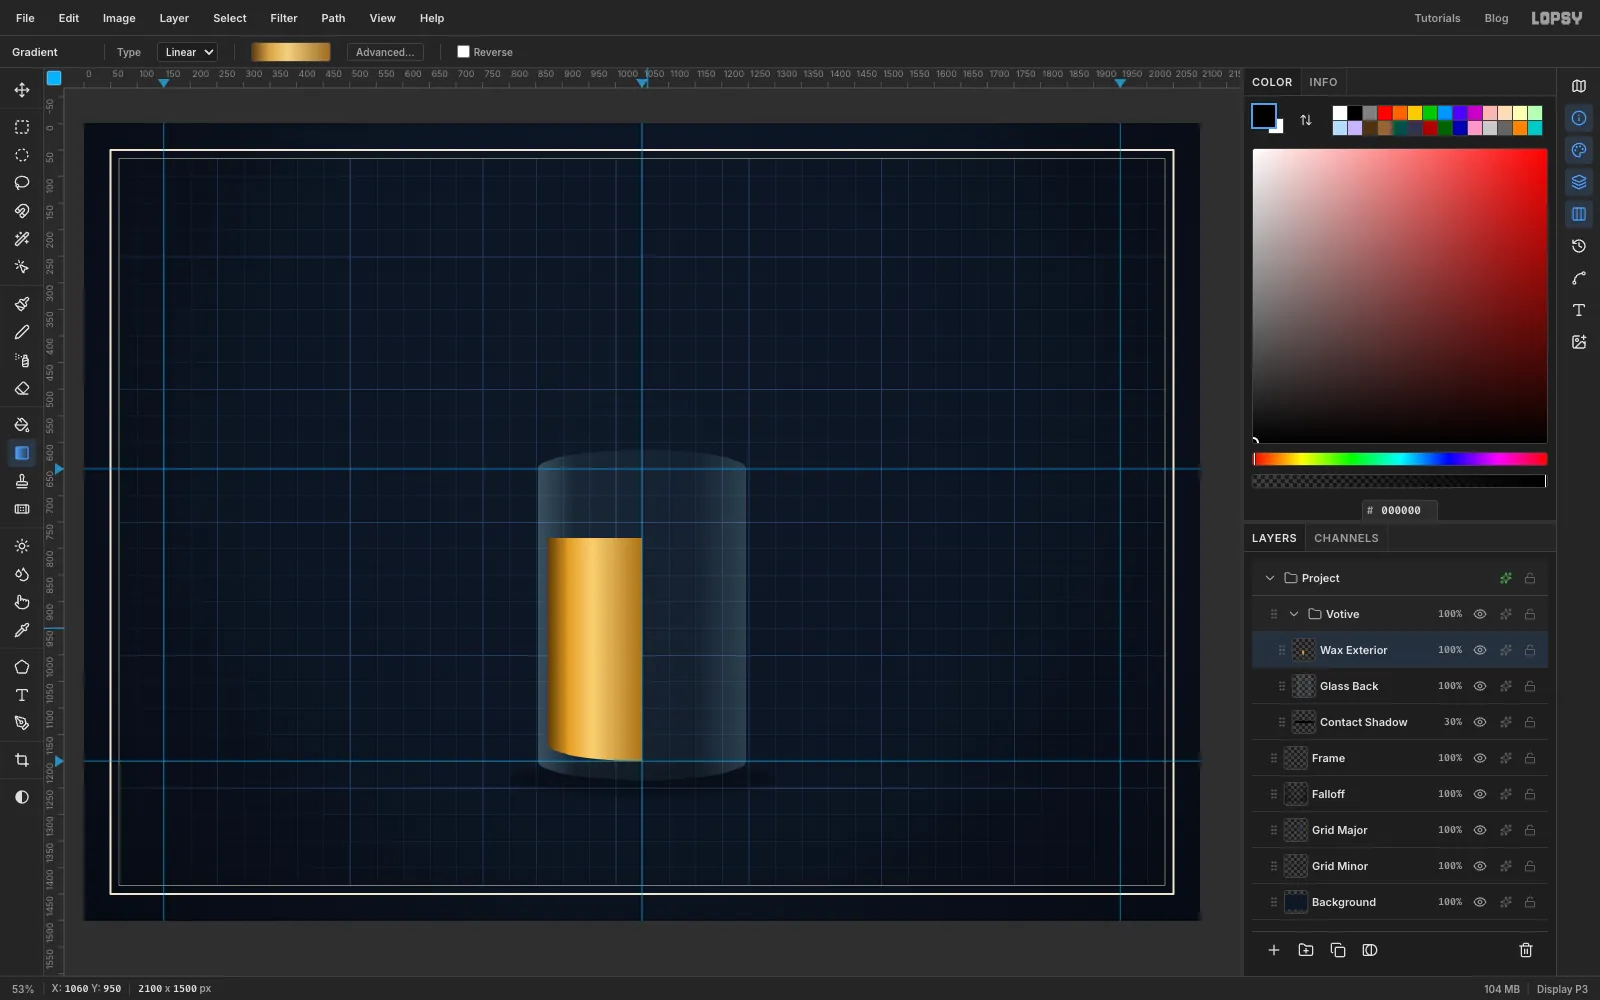
The wax is 356 px wide, just a few pixels narrower than the inside of the glass. Add a layer called Wax Exterior. Marquee the left half of the candle from y 780 to y 1166. That's a box from the candle's left edge to the centre line. Then Shift-drag a 356 × 64 ellipse centred on the bottom of that box. Hold Alt and drag a box over everything right of the centre line to subtract the right half of the ellipse.
Fill it with a linear gradient: at 0%, at 22%, at 45% and at 100%. Drag from the left edge to just past the centre line. The bright band a third of the way across makes the cylinder look round.
-
Draw the top and the cut face
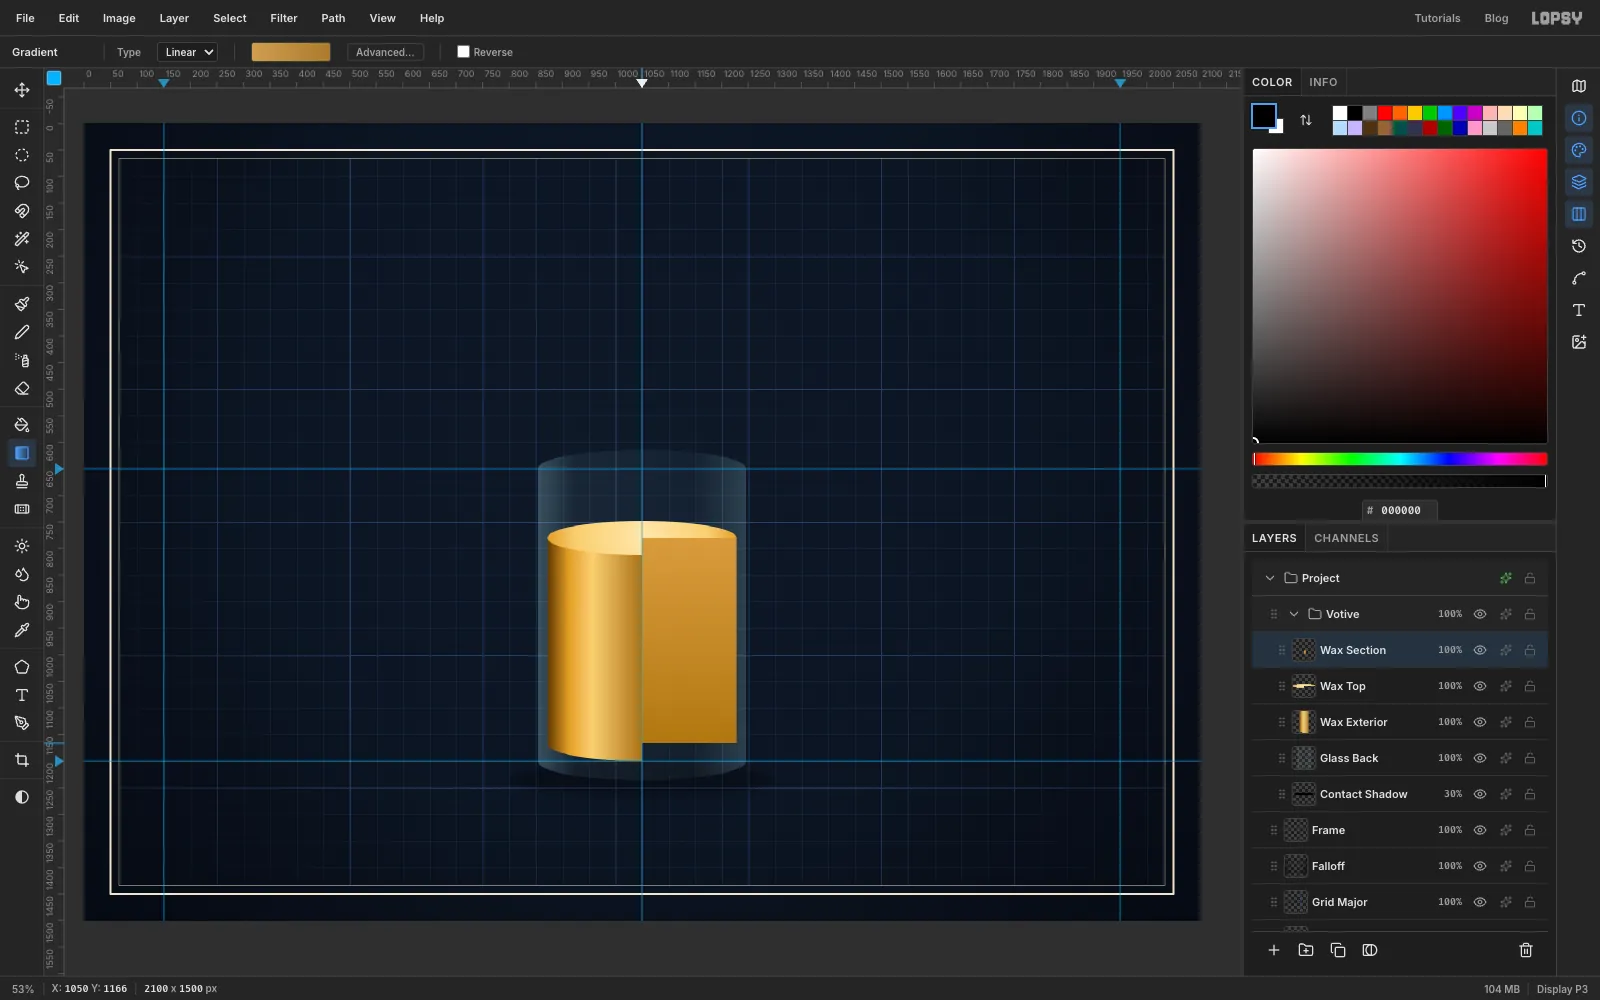
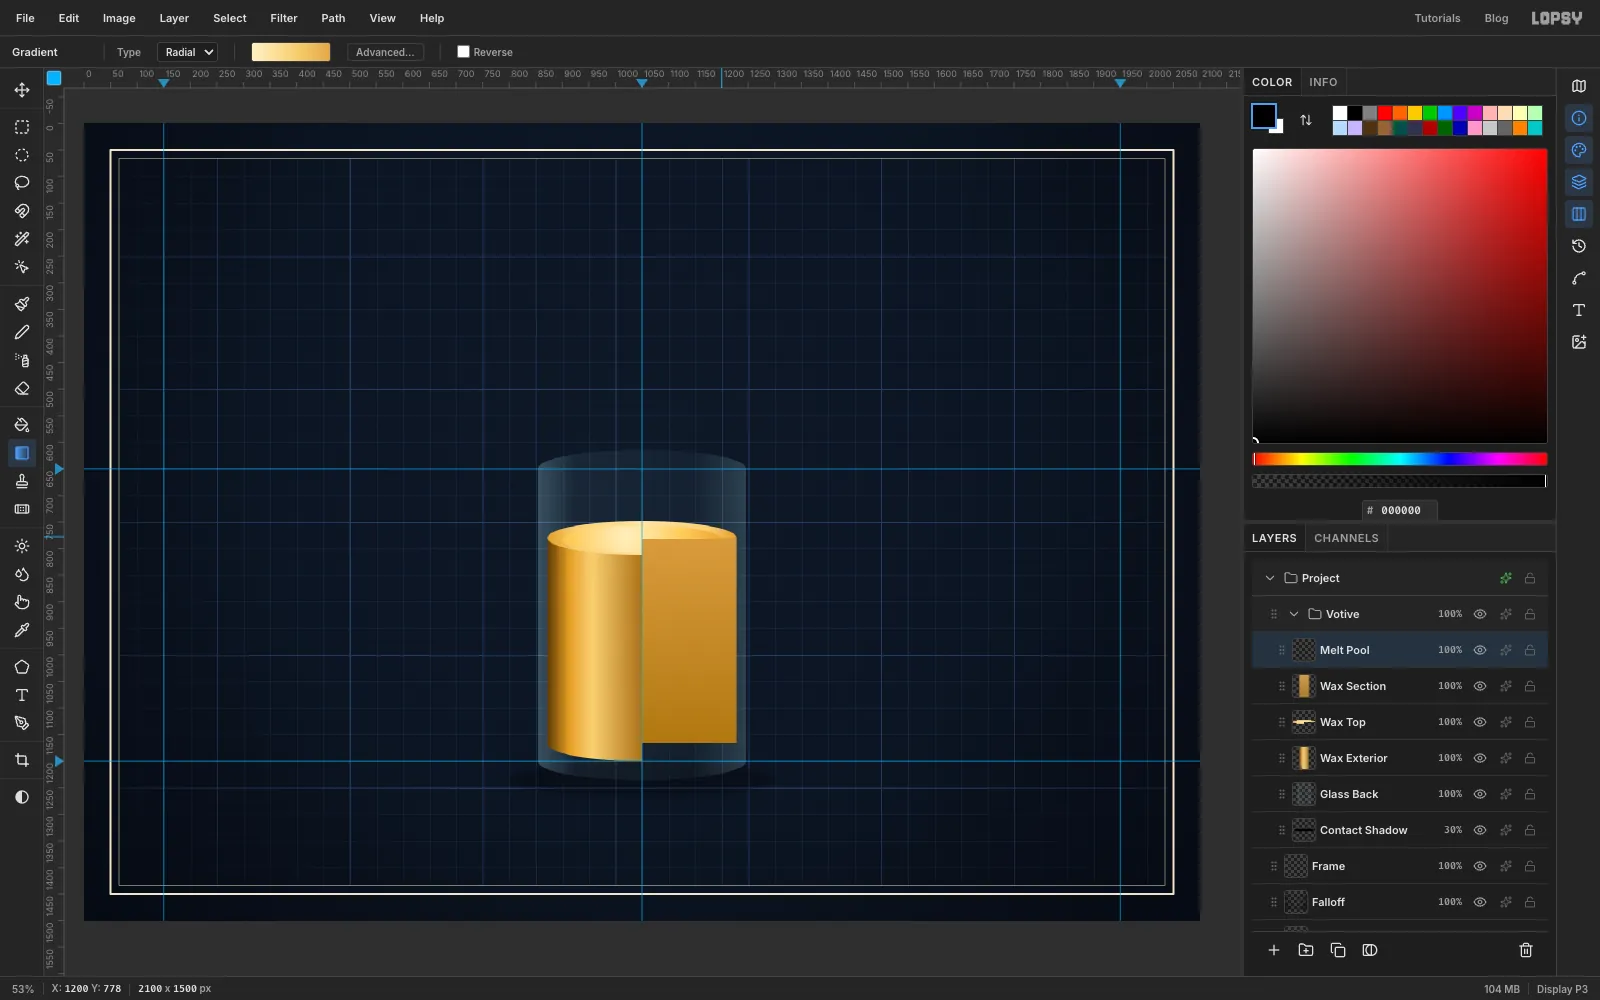
Add a layer called Wax Top. Draw a 356 × 64 ellipse centred on the top of the wax at y 780. Hold Alt and drag a box from the centre of the ellipse down and to the right, to subtract the front-right quarter. That quarter has been cut away. Fill it with a radial gradient from to to , dragging from the centre of the top to its right edge.
Add a layer called Wax Section. Marquee the right half of the candle from the centre line to its right edge, from y 780 to the bottom. This is the flat face the saw left. Fill it with a vertical linear gradient from at the top to at the bottom.
-
Add the melt pool
Add a layer called Melt Pool. Draw a 300 × 50 ellipse just inside the top, centred at y 782, and Alt-subtract the front-right quarter again. Fill it with a radial gradient from through to , dragging from a little left of the centre out to its right end.
-
Stripe the cut face with rolled sheets
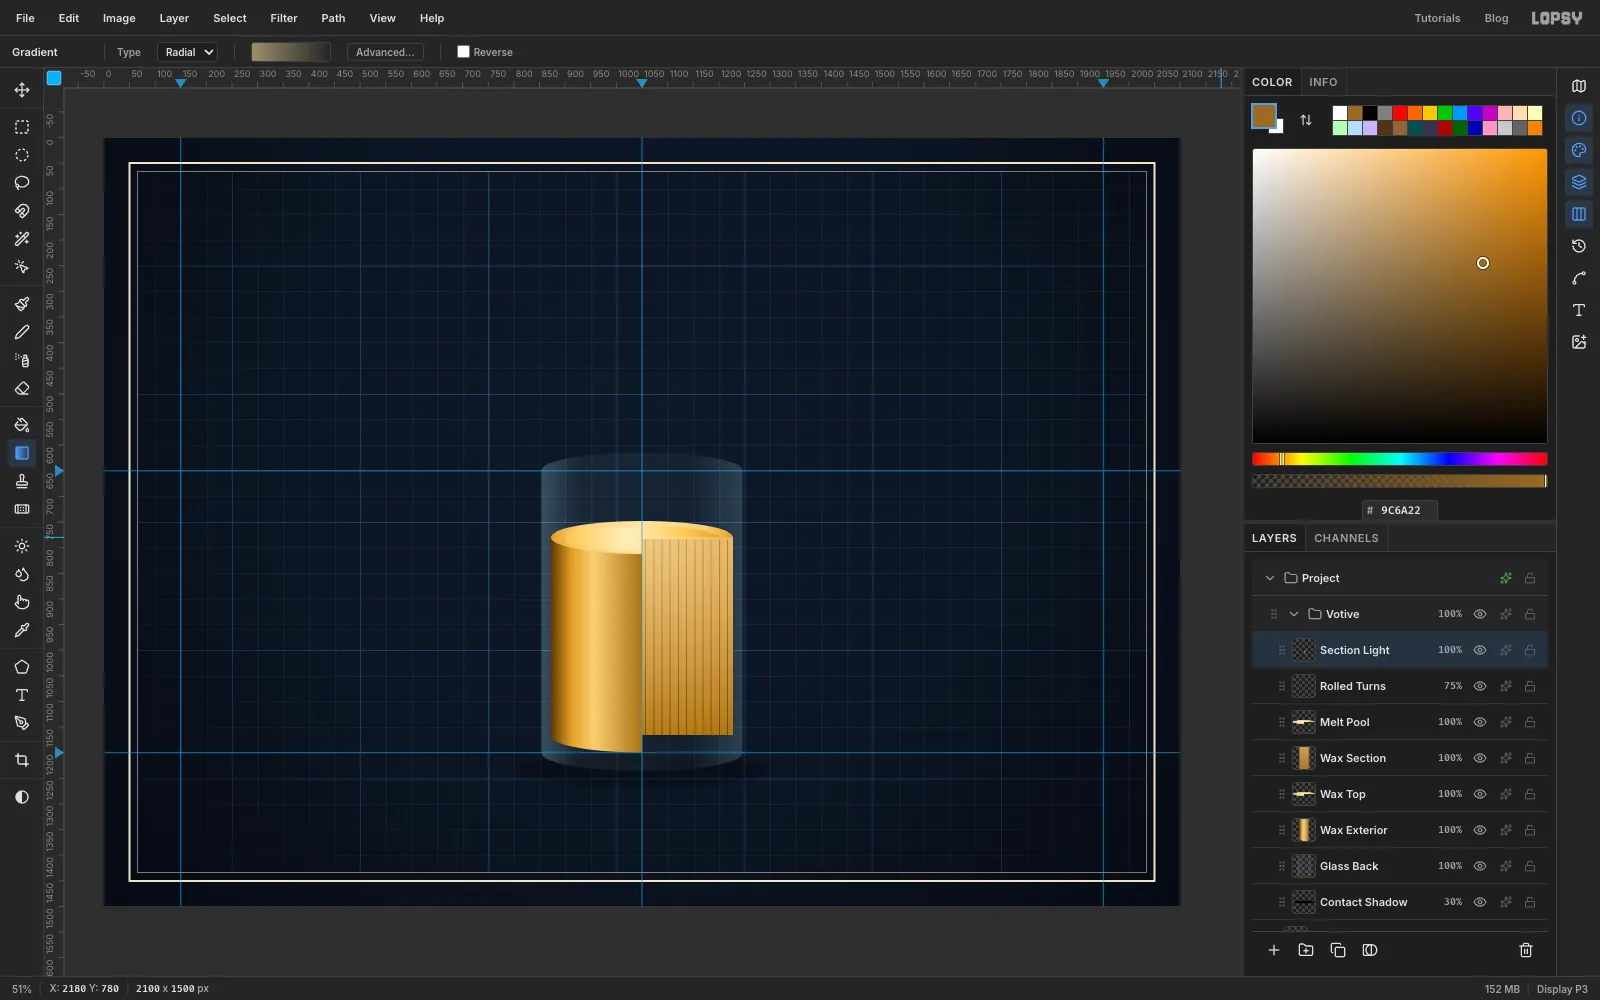
A rolled candle is a sheet of honeycomb wax wound round the wick, so the cut face shows a stripe for every turn. Add a layer called Tile, set the foreground to and zoom in on an empty part of the canvas. Marquee a strip 2 px wide and 16 px tall and fill it. Then marquee a 16 × 16 square with its left edge on the strip and choose Edit → Define Pattern. Delete Tile.
Click Melt Pool and add a layer called Rolled Turns. Marquee the cut face, from 6 px right of the centre line to its right edge. Choose Edit → Fill with Pattern…, pick the stripes and click Apply. Set the layer to Multiply at 75%. You should see 11 stripes, one for each turn of the sheet.
Add a layer called Section Light. Cmd-click the Wax Section thumbnail to select the cut face. Fill it with a radial gradient from at 55% opacity to fully transparent, dragging from the top of the cut down to the bottom. Set the layer to Screen. The cut face now catches the light near the flame.
-
Draw the wick and the wick tab
The wick sits exactly on the centre guide, and guide snapping would pull a narrow marquee onto the guide. Turn off View → Snap to Guides before you draw it. Zoom to about 150% with Cmd+scroll over the candle.
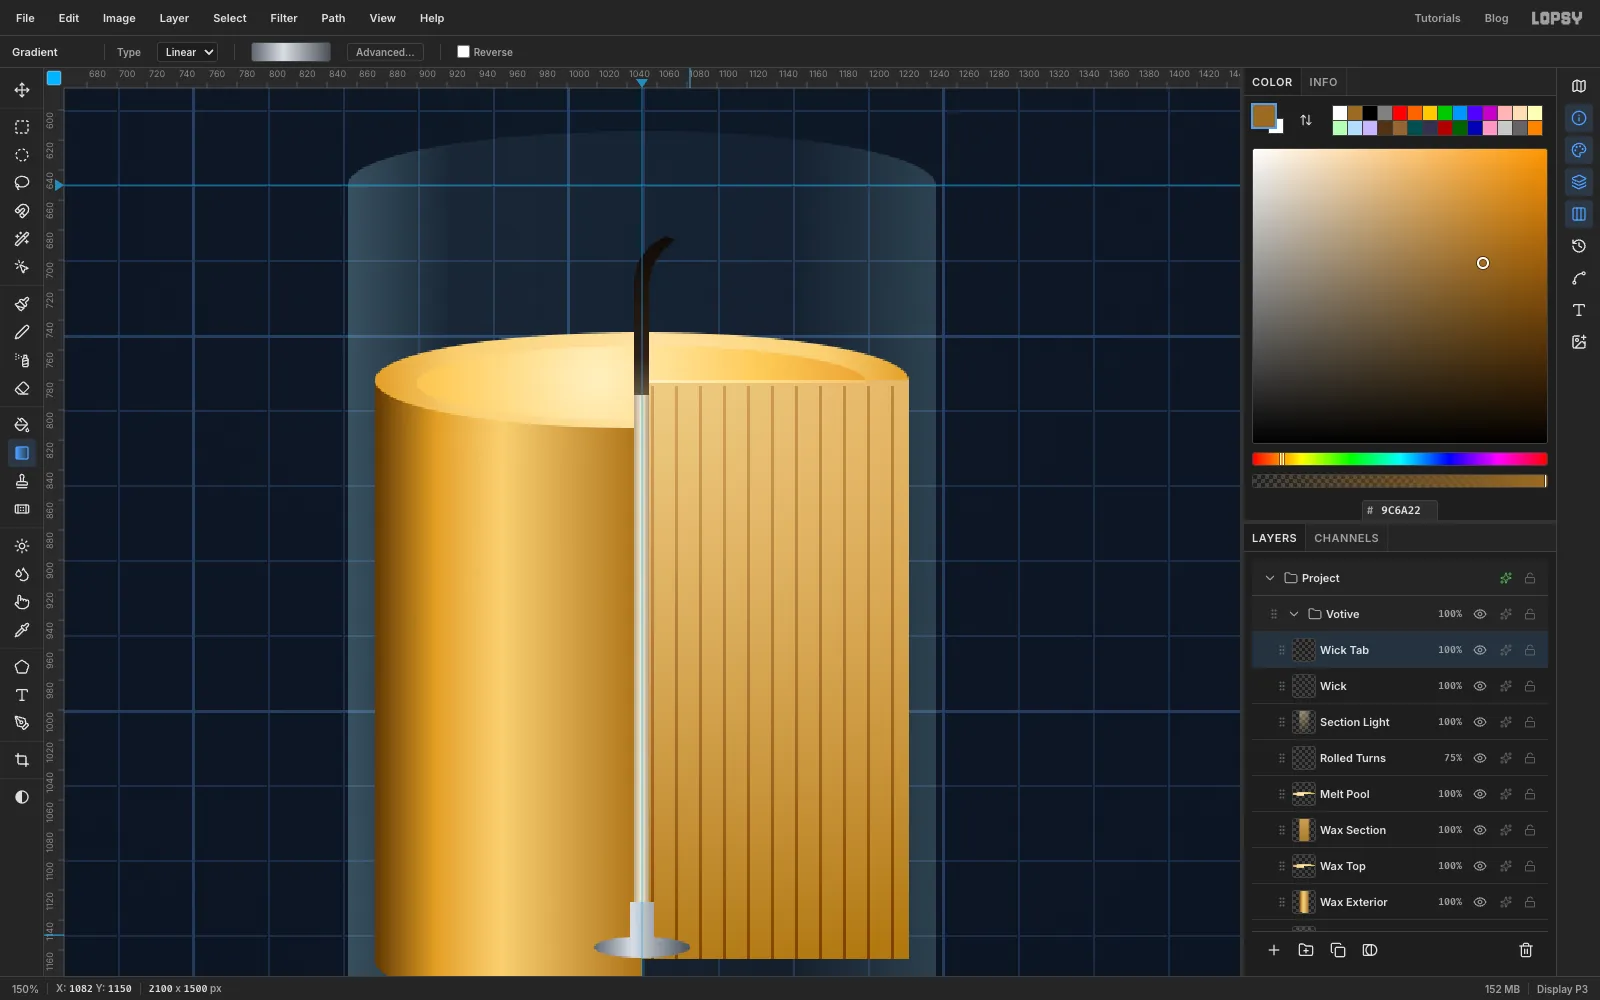
Add a layer called Wick. Marquee a strip 10 px wide centred on the guide, from y 760 down to y 1152. Fill it with a linear gradient from through to , dragged across the strip, so it looks round. Then use the Lasso to draw the charred top: up the wick from the wax to about 90 px above it, curling over to the right in a little hook. Fill it with a gradient from at the tip to where it meets the wax.
Add a layer called Wick Tab. Draw a 64 × 14 ellipse at the bottom of the wick and Shift-add a 16 × 30 box above it for the crimped neck. Fill it with a grey metal gradient: , , , dragged across it.
-
Hatch the cut glass
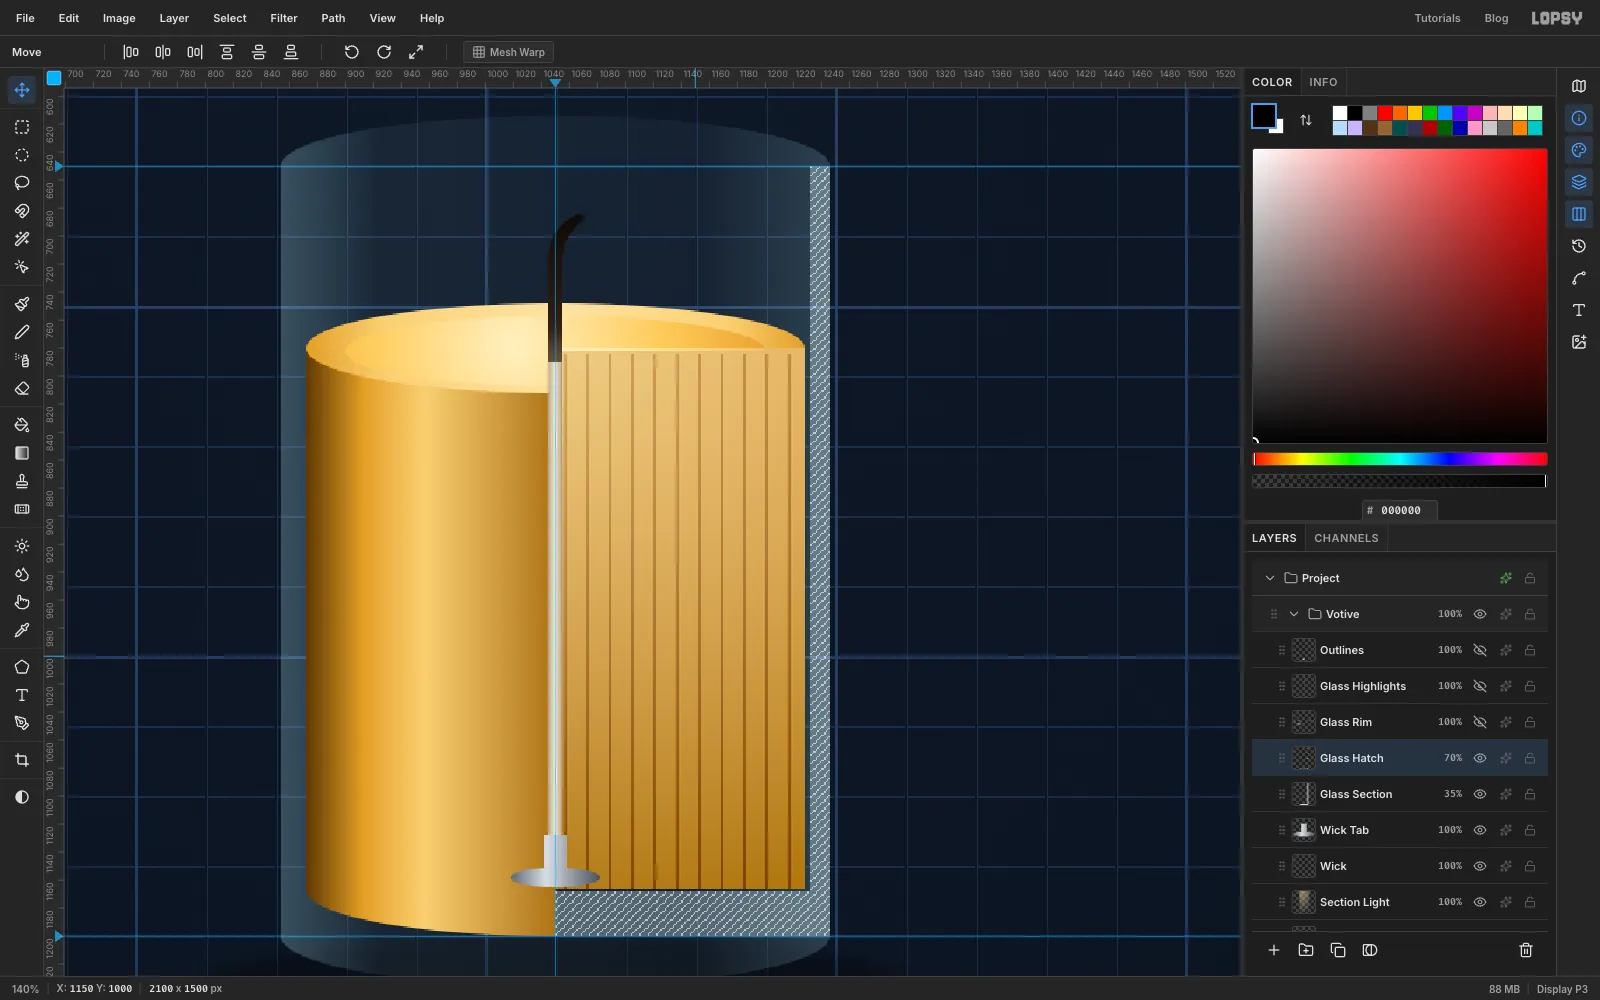
The saw also cut through the glass: its right wall and the right half of its base. Add a layer called Glass Section. Marquee the right wall, a 14 px strip down the outside edge of the glass, and Shift-add the right half of the base, the bottom 32 px. Fill it with and set the layer to 35%.
Cut materials in drawings get 45° hatching. Add a layer called Tile, zoom in to 1600% on an empty spot and pick the Pencil at Size 1 with . Click one corner of a 6 × 6 px square and Shift-click the opposite corner to draw a diagonal. Marquee the 6 × 6 square, Define Pattern, and delete Tile. Cmd-click the Glass Section thumbnail, add a layer called Glass Hatch and Fill with Pattern with the diagonal. Set it to 70%.
-
Draw the glass rim
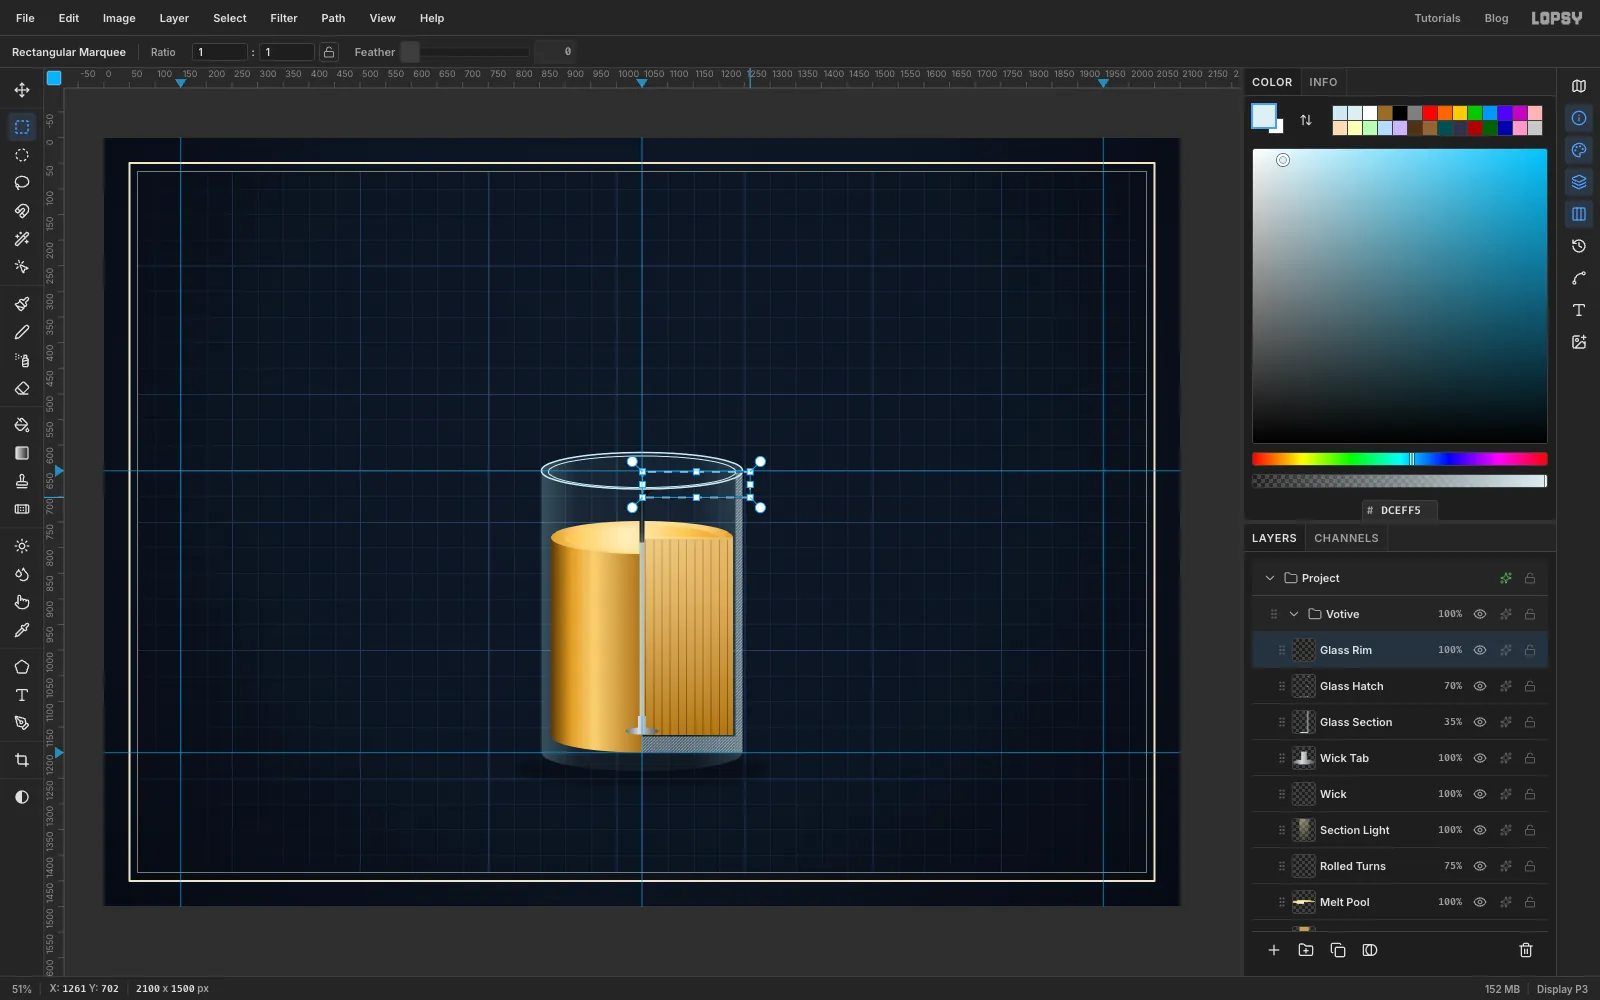
Add a layer called Glass Rim. Pick the Shape tool with Ellipse, no fill, a stroke and Width 3. Press on the rim guide at the centre line and drag out a 392 × 72 ellipse. Set the width to 2 and drag a slightly smaller one inside it, 364 × 62, for the inner edge of the lip.
The front-right quarter of the rim was cut away with the rest. Marquee from the centre of the rim down and to the right, past the edge of the glass, and press Delete.
-
Add highlights and the inner walls
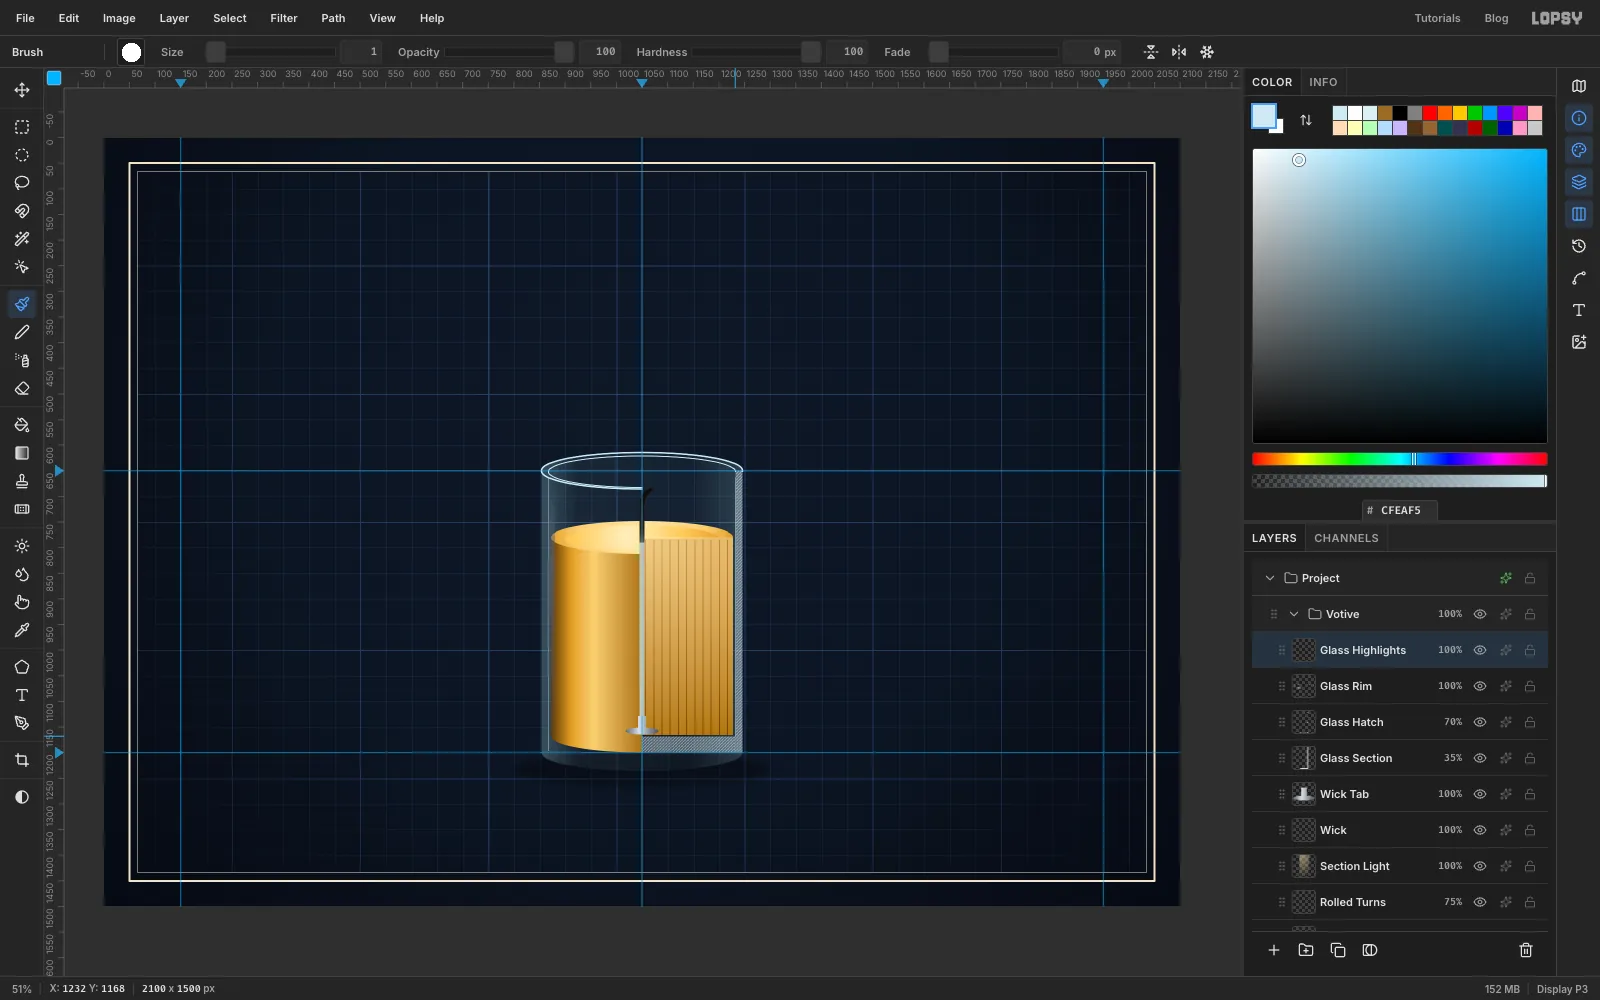
Add a layer called Glass Highlights. Marquee a strip 12 px wide just inside the left edge of the glass, from just under the rim to just above the base. Fill it with a vertical white gradient: 0% at the top, 75% a third of the way down, 5% at the bottom. Run Gaussian Blur at 2.
Click Glass Back and add a layer called Glass Inner Wall. Because it sits under the wax, the lines you draw show only where the glass is empty. Pick the Brush at Size 1, Hardness 100, with . Click 14 px inside the left edge of the glass, just under the rim, and Shift-click straight down to the base. Do the same 14 px inside the right edge. Set the layer to 40%.
-
Keyline the glass and the wax
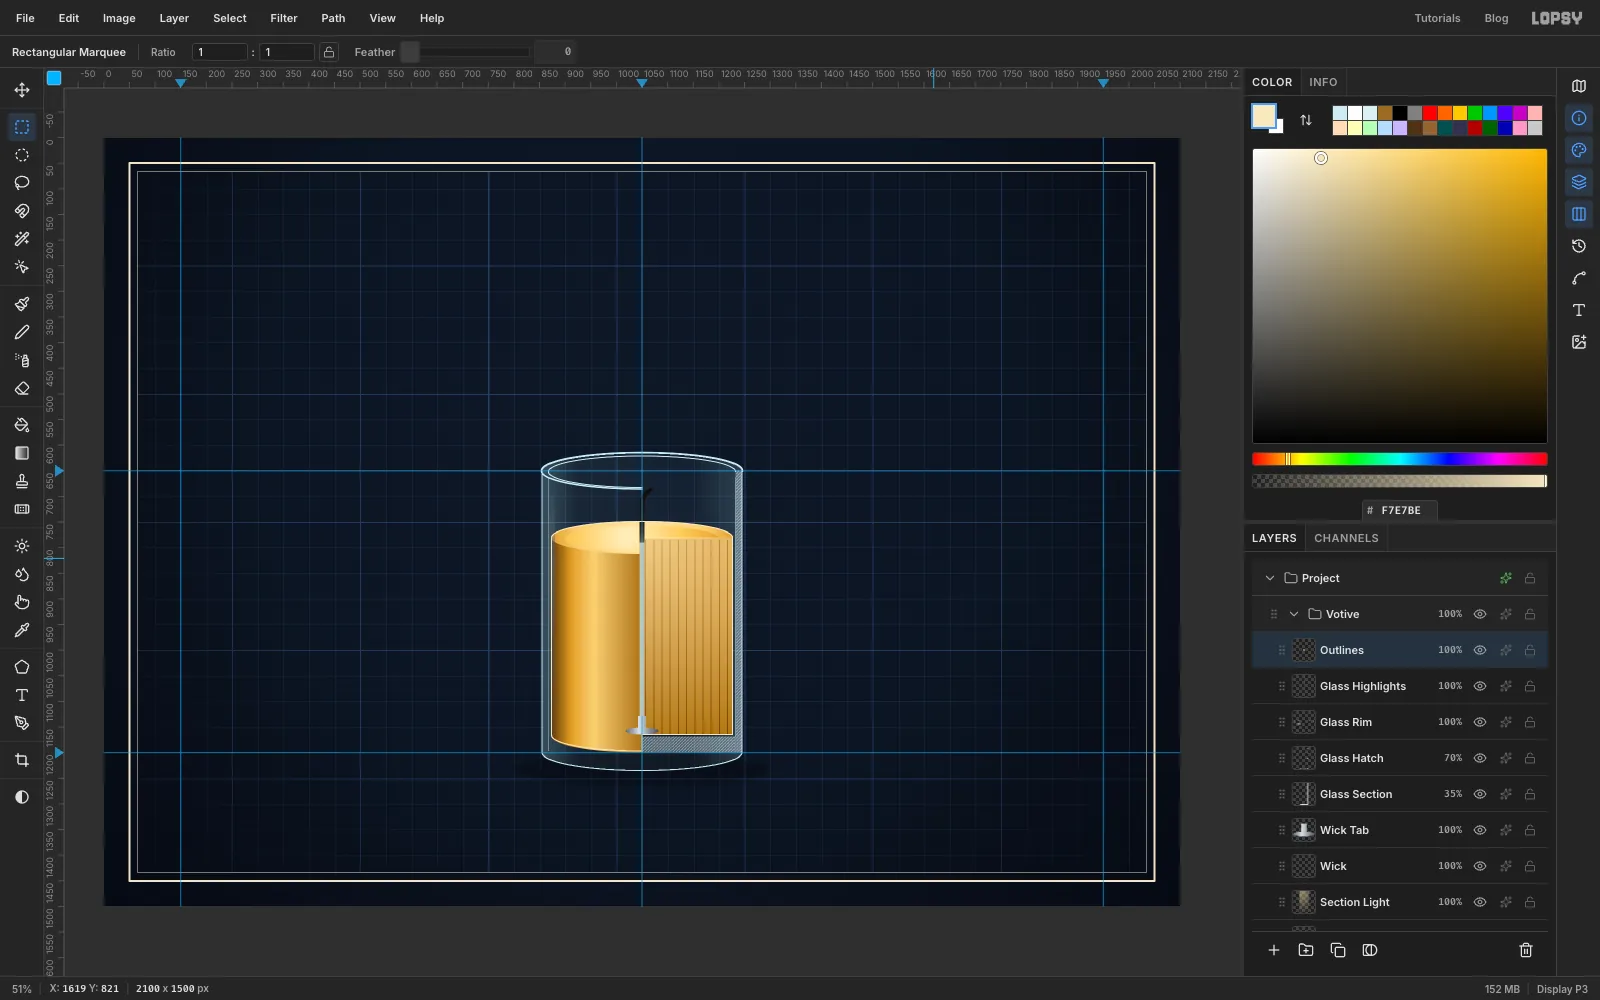
Click Glass Highlights and add a layer called Outlines. Rebuild the glass selection from step 4: the box plus the two Shift-added ellipses. Set the foreground to , choose Edit → Fill, then Select → Shrink… by 2 px and press Delete. That leaves a clean 2 px outline. It's anti-aliased, unlike the hard Stroke effect.
Do the same for the wax in . Use the box from the top of the wax to the bottom, Shift-add the top and bottom ellipses, and Alt-subtract a box under the cut face so the bottom-right corner stays square.
-
Paste the reference photo
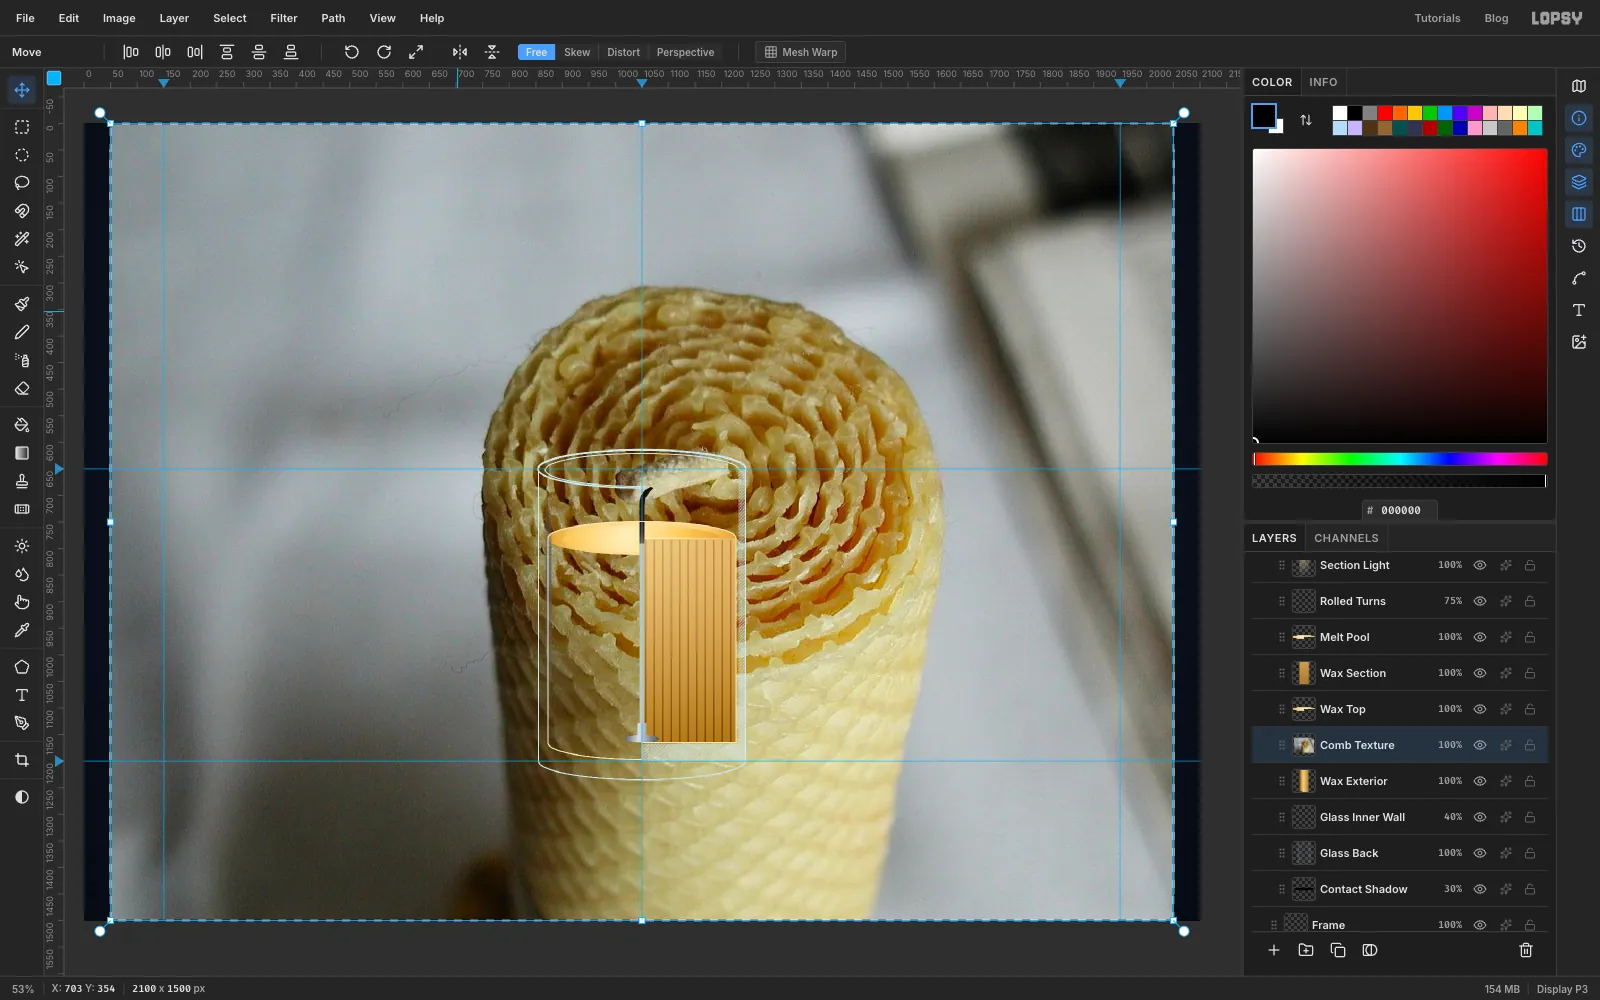
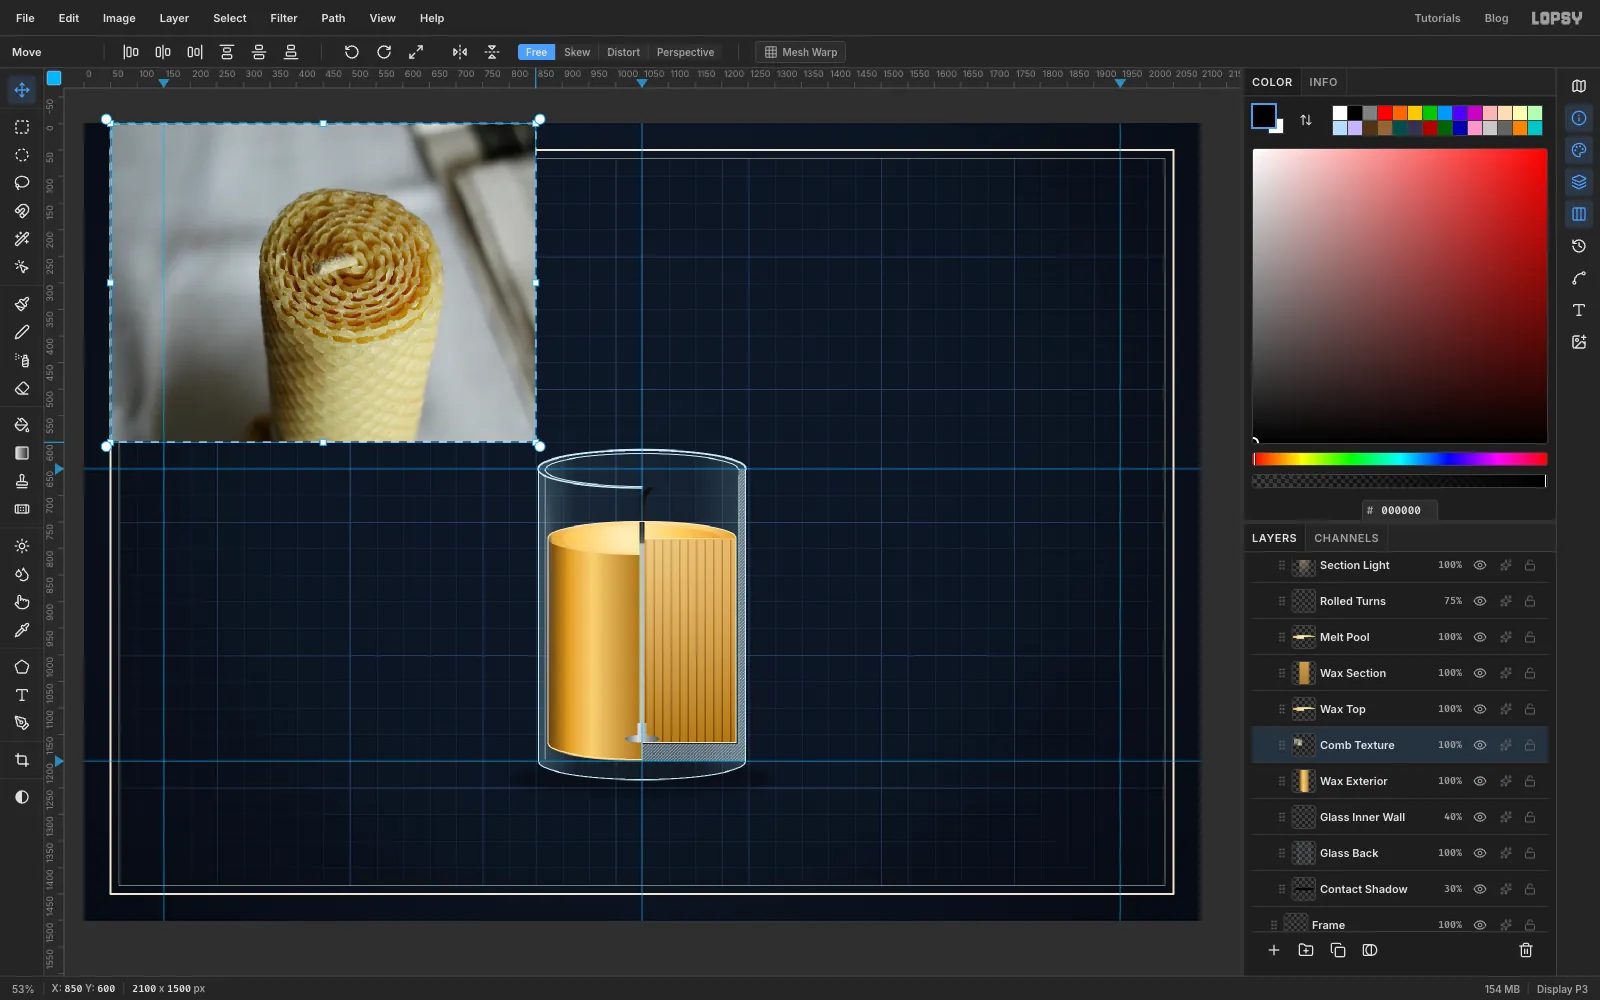
Click Wax Exterior, so the paste lands just above it. Open the downloaded photo in another app, copy it, and press Cmd+V in Lopsy. The photo is bigger than the canvas, so Lopsy shrinks it to fit, selects it and switches to the Move tool. Rename the layer Comb Texture.
-
Scale the photo down
Hold Cmd and drag the bottom-right corner handle up and to the left until the photo is about 40% of its size, roughly 800 px wide. Cmd keeps the proportions. Press Cmd+D to commit. At this size the honeycomb cells are about the right scale for the candle.
-
Cut out a band of honeycomb
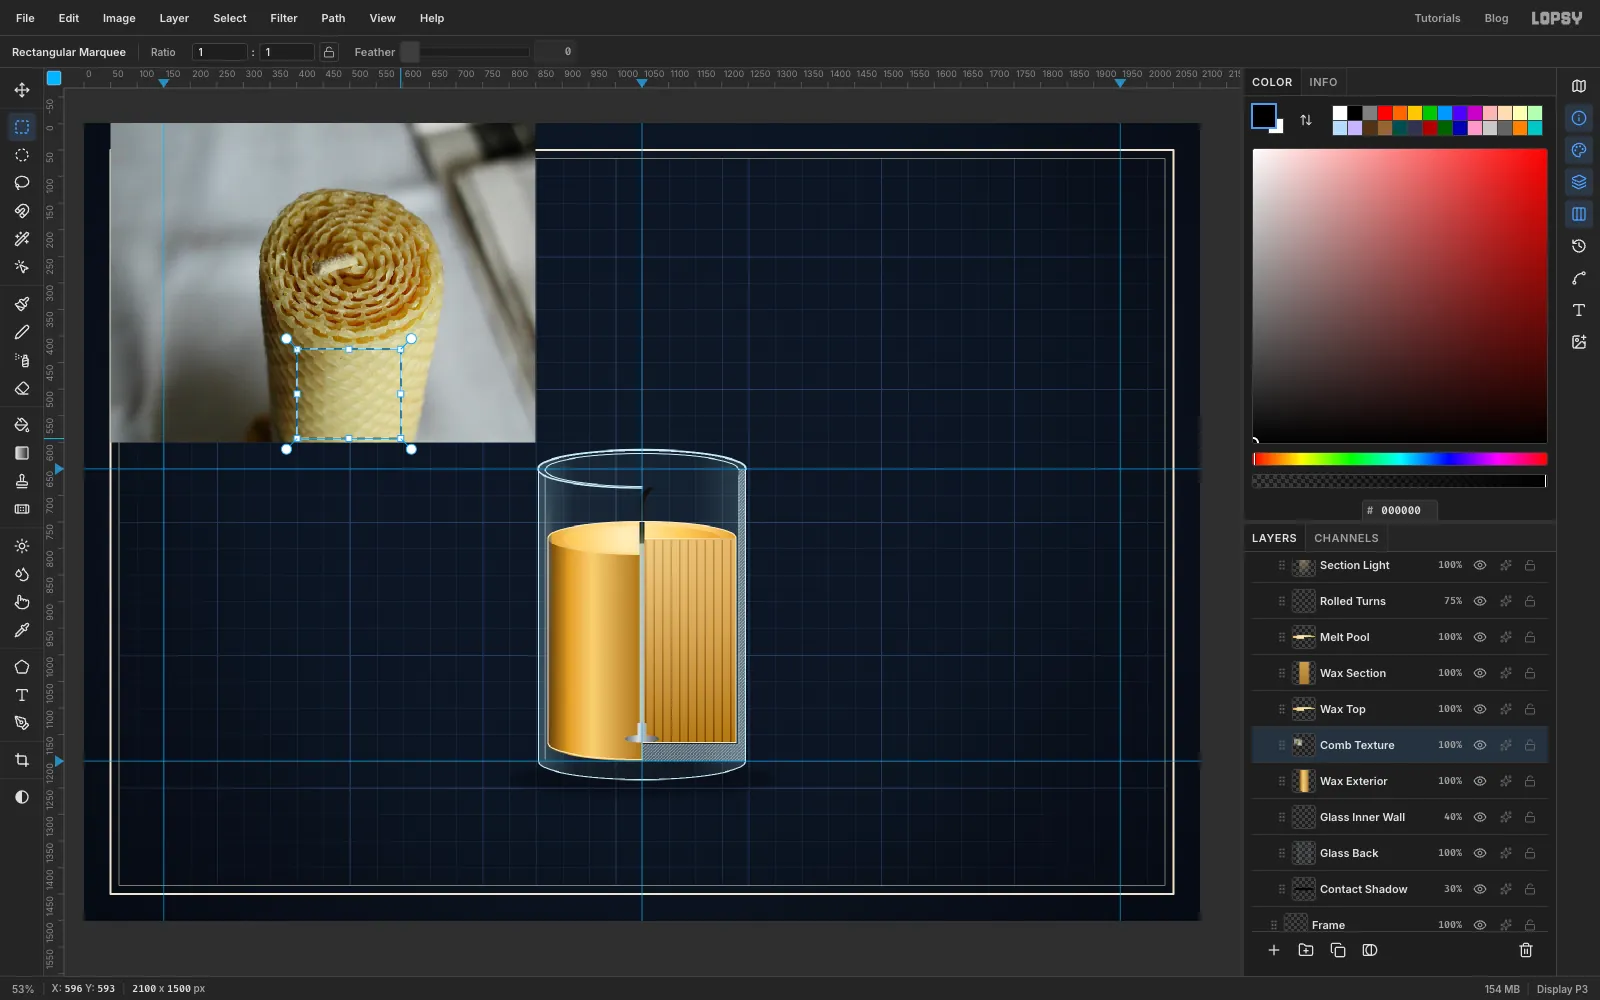
With the Rectangular Marquee, select a band of the photo's honeycomb side, below the spiral top and away from the curved edges. Choose Select → Inverse and press Delete, then Cmd+D.
Soften its edges so copies will blend: Cmd-click the layer thumbnail, choose Select → Shrink… by 10, Select → Feather… by 10, Select → Inverse and press Delete. Cmd-click the thumbnail again and drag the band onto the top-left of the wax.
-
Stack copies down the candle
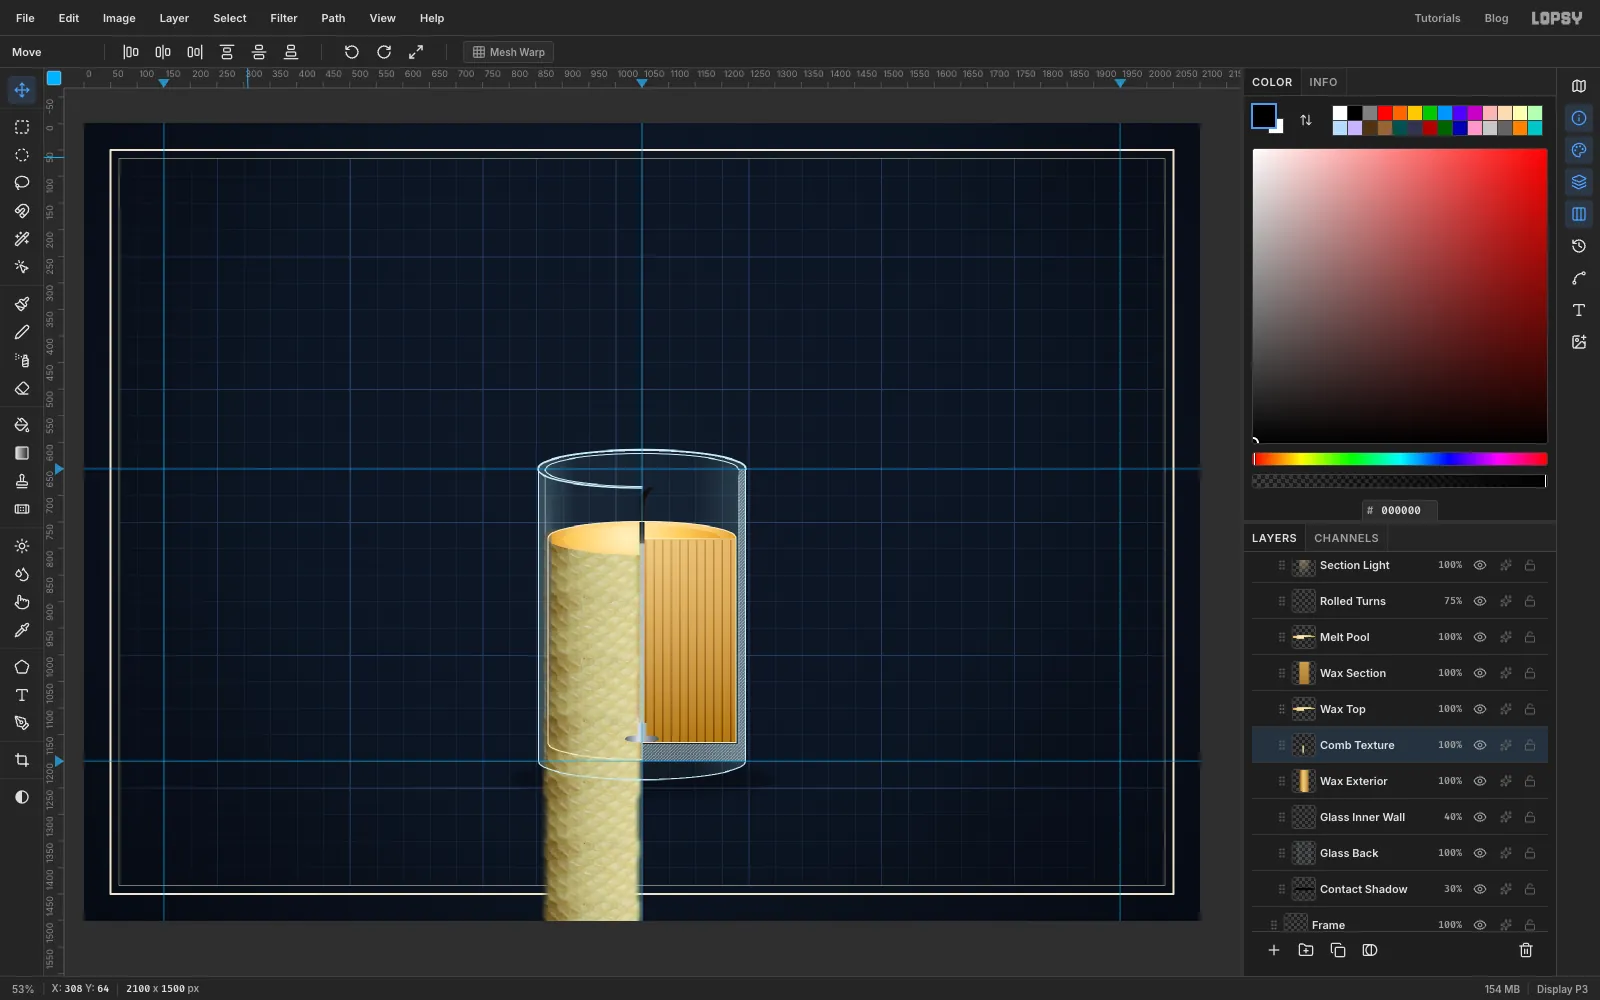
Cmd-click the thumbnail, press Cmd+C and then Cmd+V. A copy made inside Lopsy pastes in place, on a new layer, already selected. Drag it straight down so it overlaps the band above by about 35 px, press Cmd+D and choose Layer → Merge Down. Repeat until the column of honeycomb runs past the bottom of the candle. The soft edges hide the joins.
-
Clip the texture to the wax
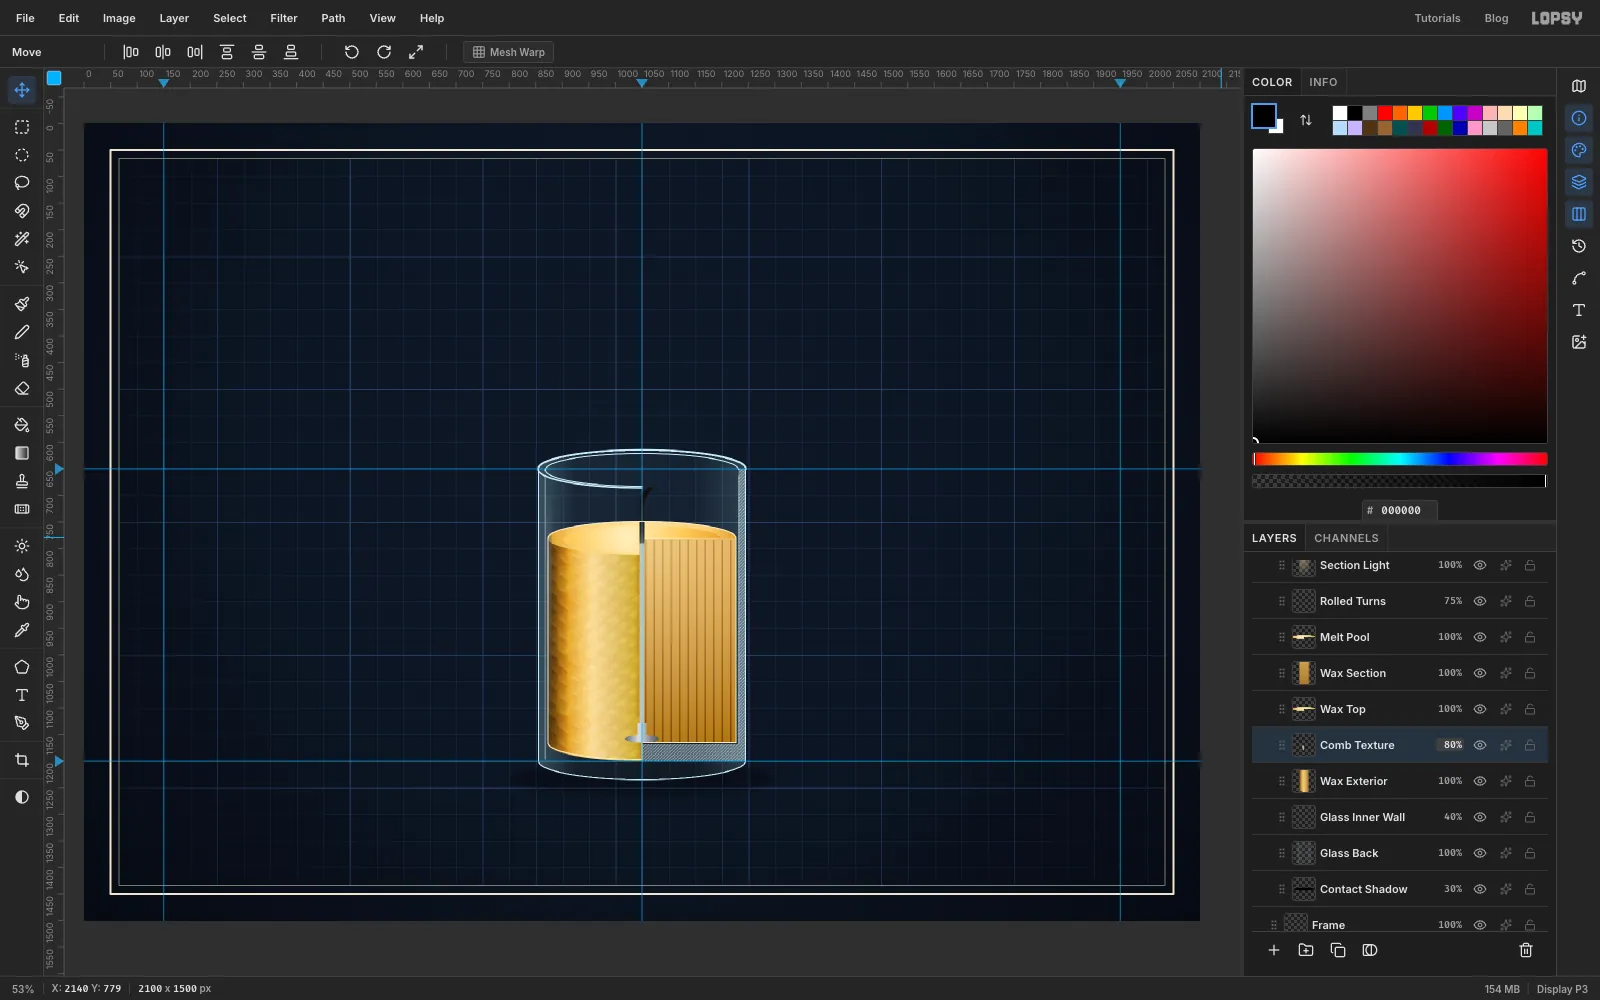
Cmd-click the Wax Exterior thumbnail to select the outside of the candle. Click the Comb Texture row, choose Select → Inverse and press Delete. Deselect, then choose Filter → Desaturate. In the layer's drawer, set the blend mode to Overlay and the opacity to 80%. The cells now press into the gradient underneath.
-
Draw the flame with the Pen tool
Collapse Votive and click New Group for a group called Flame. Add a layer called Luminous Zone.
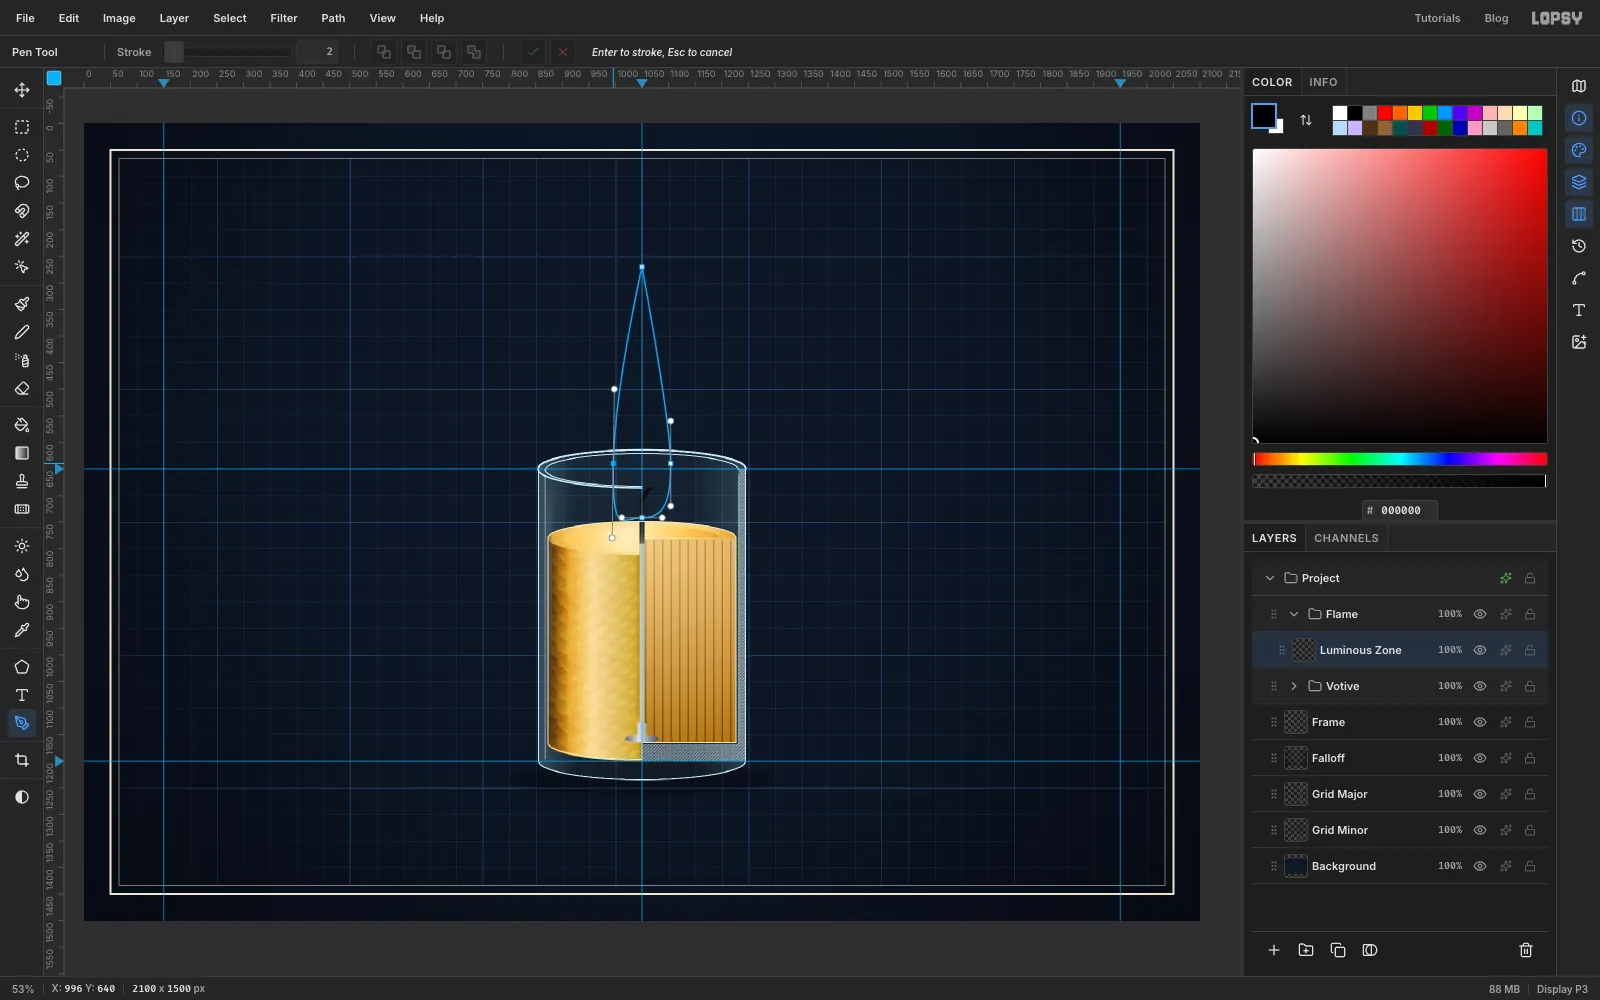
Pick the Pen tool. Start at the left side of the flame, 54 px left of the centre line at y 640. Press there and drag straight up about 140 px to pull out a handle. Click once at the tip on the centre line, at y 270, for a sharp point. Press at the matching spot on the right and drag down about 80 px. Press at the bottom of the flame, at y 742 on the centre line, and drag 38 px to the left. Finally, click the first anchor to close the path. It appears in the Paths panel as Path 1. While it's selected there, its anchors stay on screen. Click the row again to deselect it when you want a clean view.
-
Fill the luminous zone
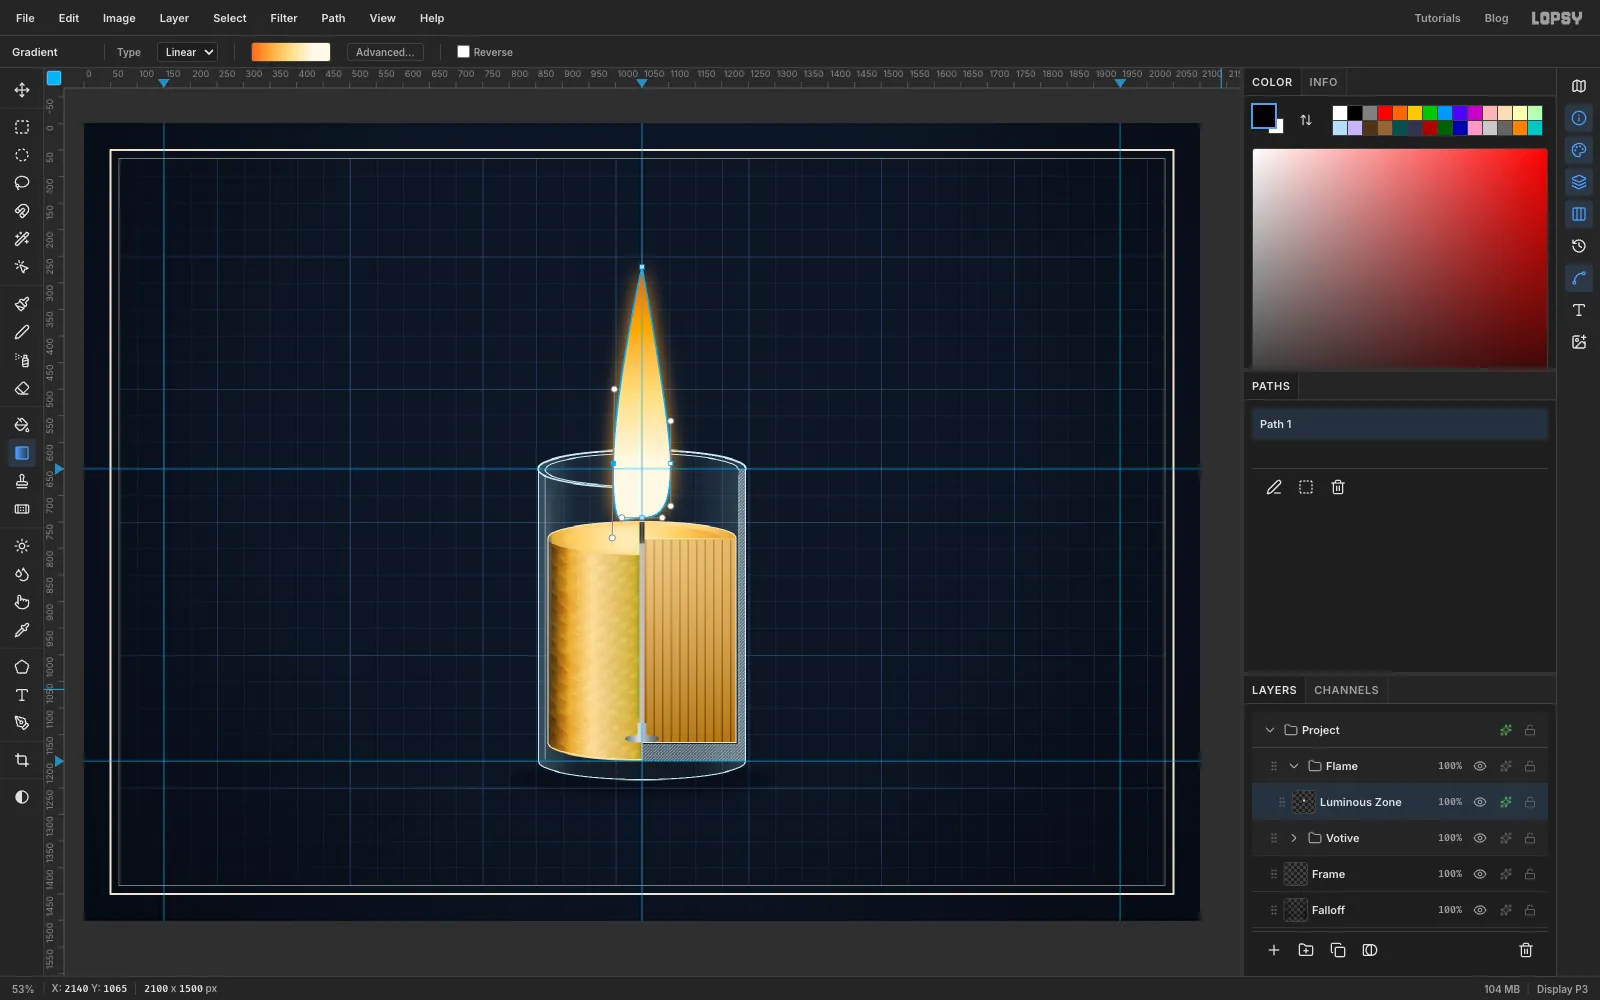
In the Paths panel, select Path 1 and click Path to Selection. Fill it with a linear gradient: at the tip, at 22%, at 50% and from 78% to the bottom. Drag from the tip to the base. Deselect.
Open the layer's effects drawer, turn on Outer Glow and set its colour to , Size 48, Spread 10, Opacity 80.
-
Add the veil, dark zone and blue zone
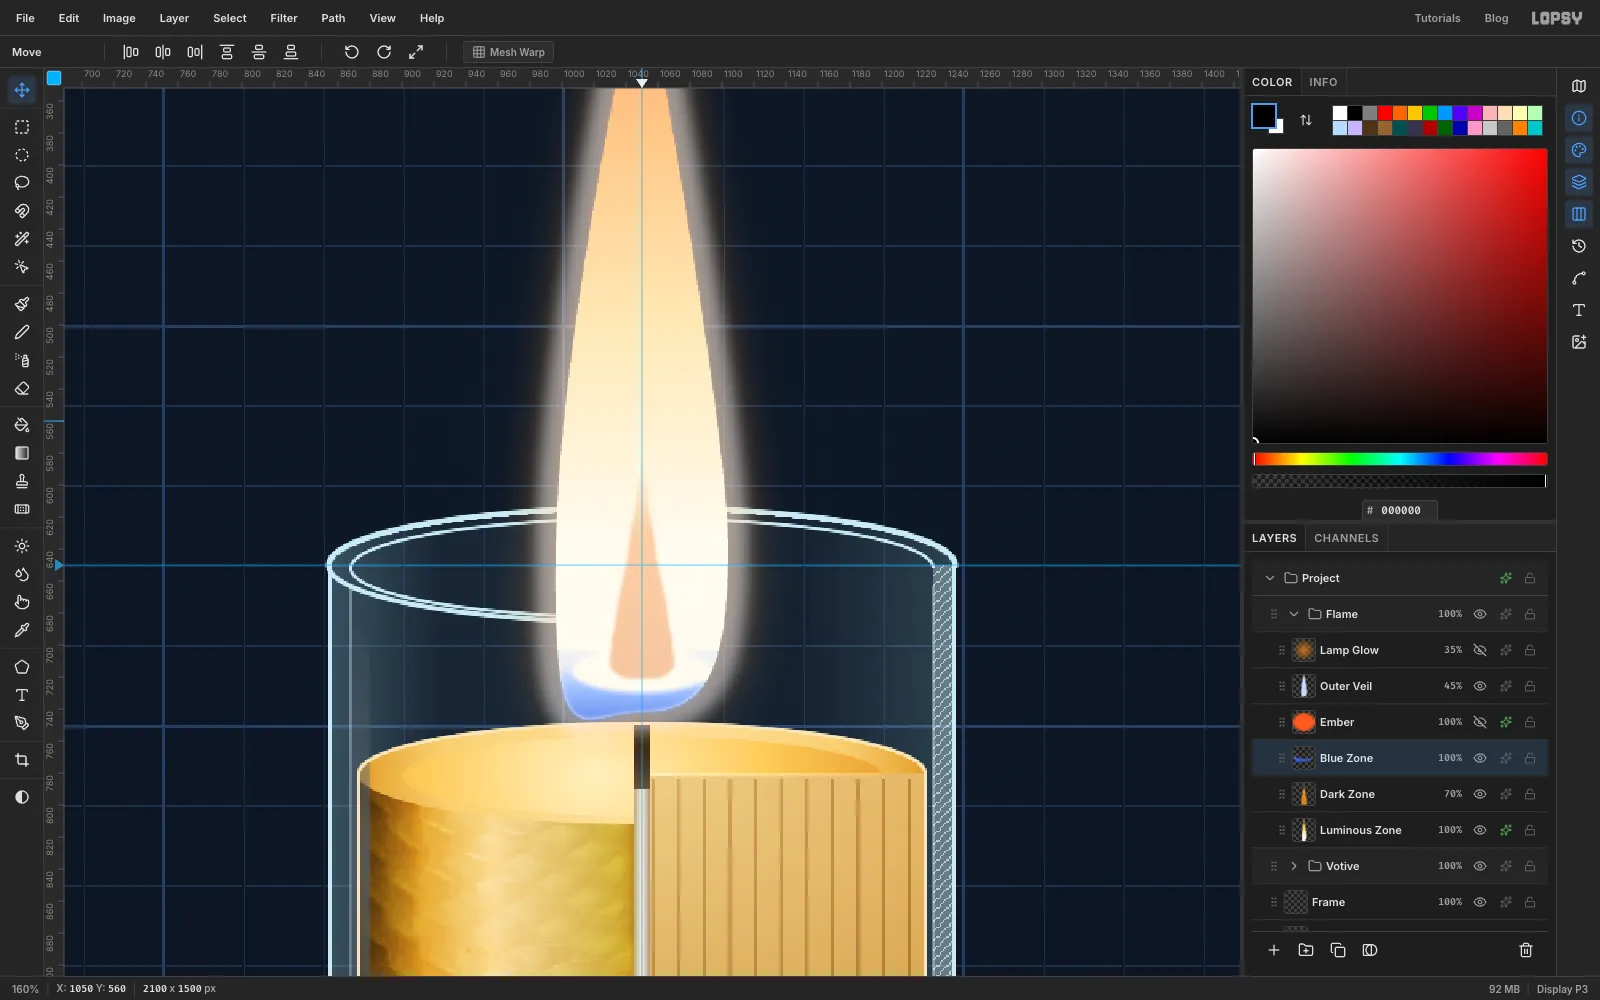
A candle flame has distinct zones, and the callouts will point at each one.
- Outer veil: add a layer called Outer Veil, load Path 1 as a selection again, Grow it by 12 and Feather by 8. Fill it with , set the layer to Screen at 45%.
- Dark zone: click Luminous Zone and add Dark Zone above it. With the Lasso, draw a narrow cone around the wick, from y 580 down to y 724 and about 40 px wide at the bottom. Feather by 2 and fill it with a gradient of that starts transparent at the top and is solid a third of the way down. Set the layer to 70%.
- Blue zone: add Blue Zone. Load Path 1 as a selection. Hold Shift+Alt and drag a marquee across the bottom 40 px of the flame to intersect. Then Alt-drag an 88 × 28 ellipse just above the flame's base to subtract it. A thin crescent is left. Feather by 3 and fill it with , transparent at the top and solid at the bottom.
-
Light the ember and the lamp glow
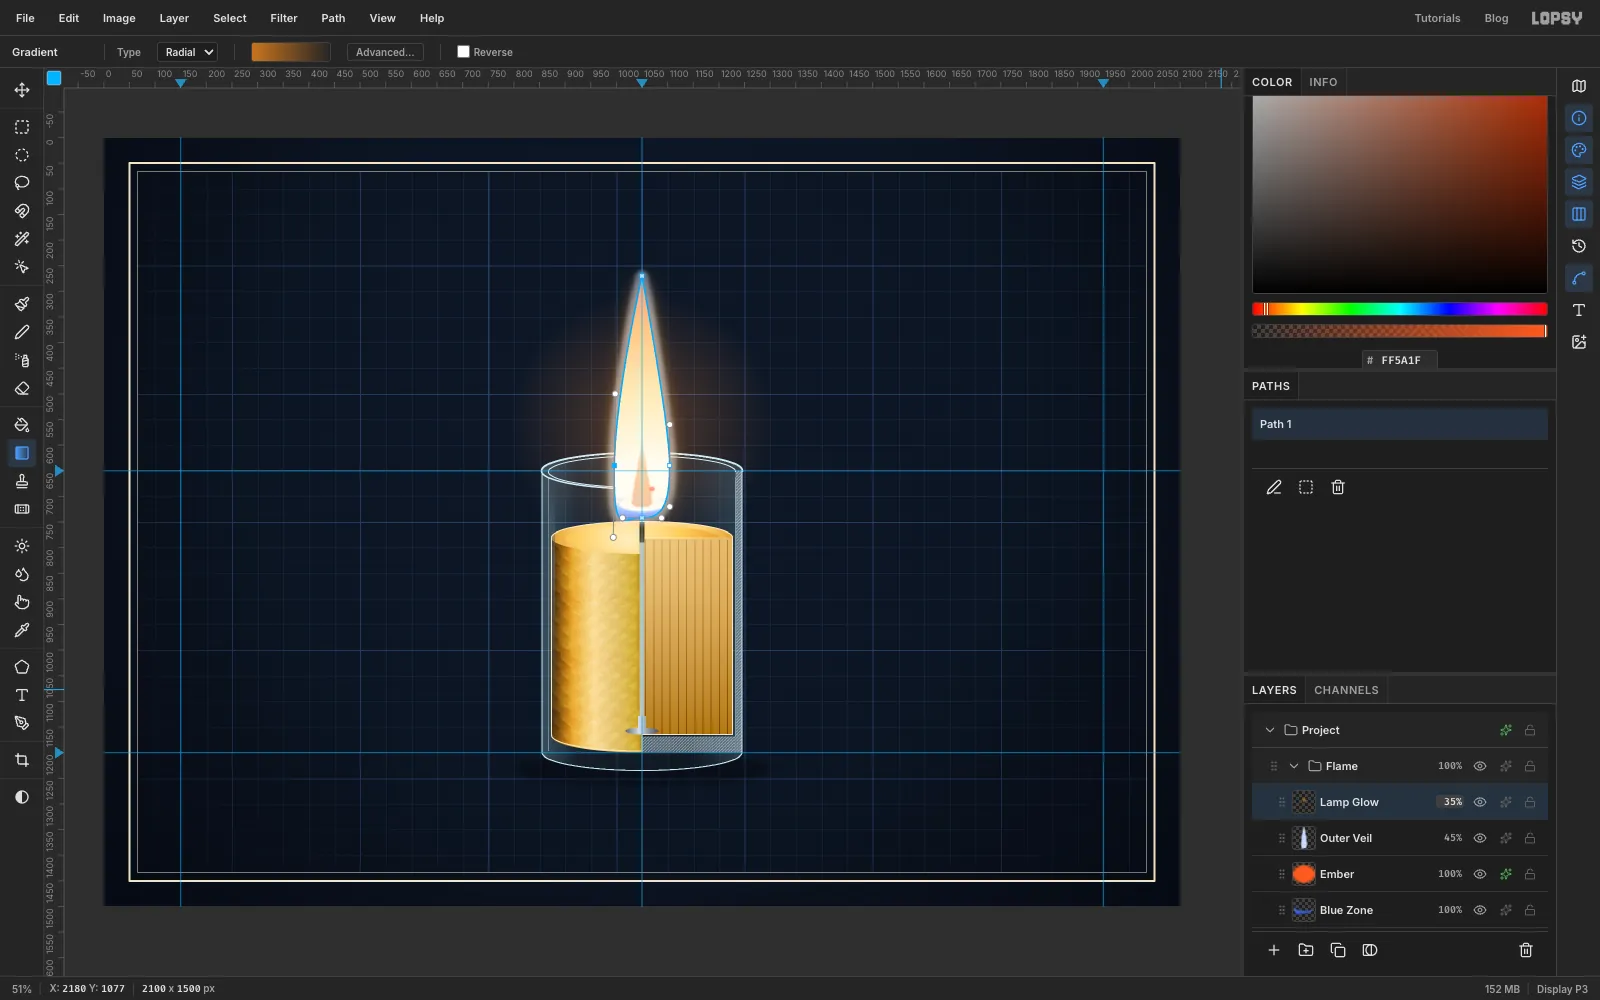
With Blue Zone selected, add a layer called Ember. Zoom in on the curled wick tip, draw a 10 × 8 ellipse over it and fill it with . Give it an Outer Glow in , Size 8, Opacity 90.
Click Outer Veil and add a layer called Lamp Glow above it. Fill it with a radial gradient of : full opacity at the centre, 50% opacity halfway out and transparent at the edge, dragged from the middle of the flame about 260 px out. Set it to Screen at 35%. Keep the glow small. A big one turns the navy board muddy.
-
Draw the leader lines
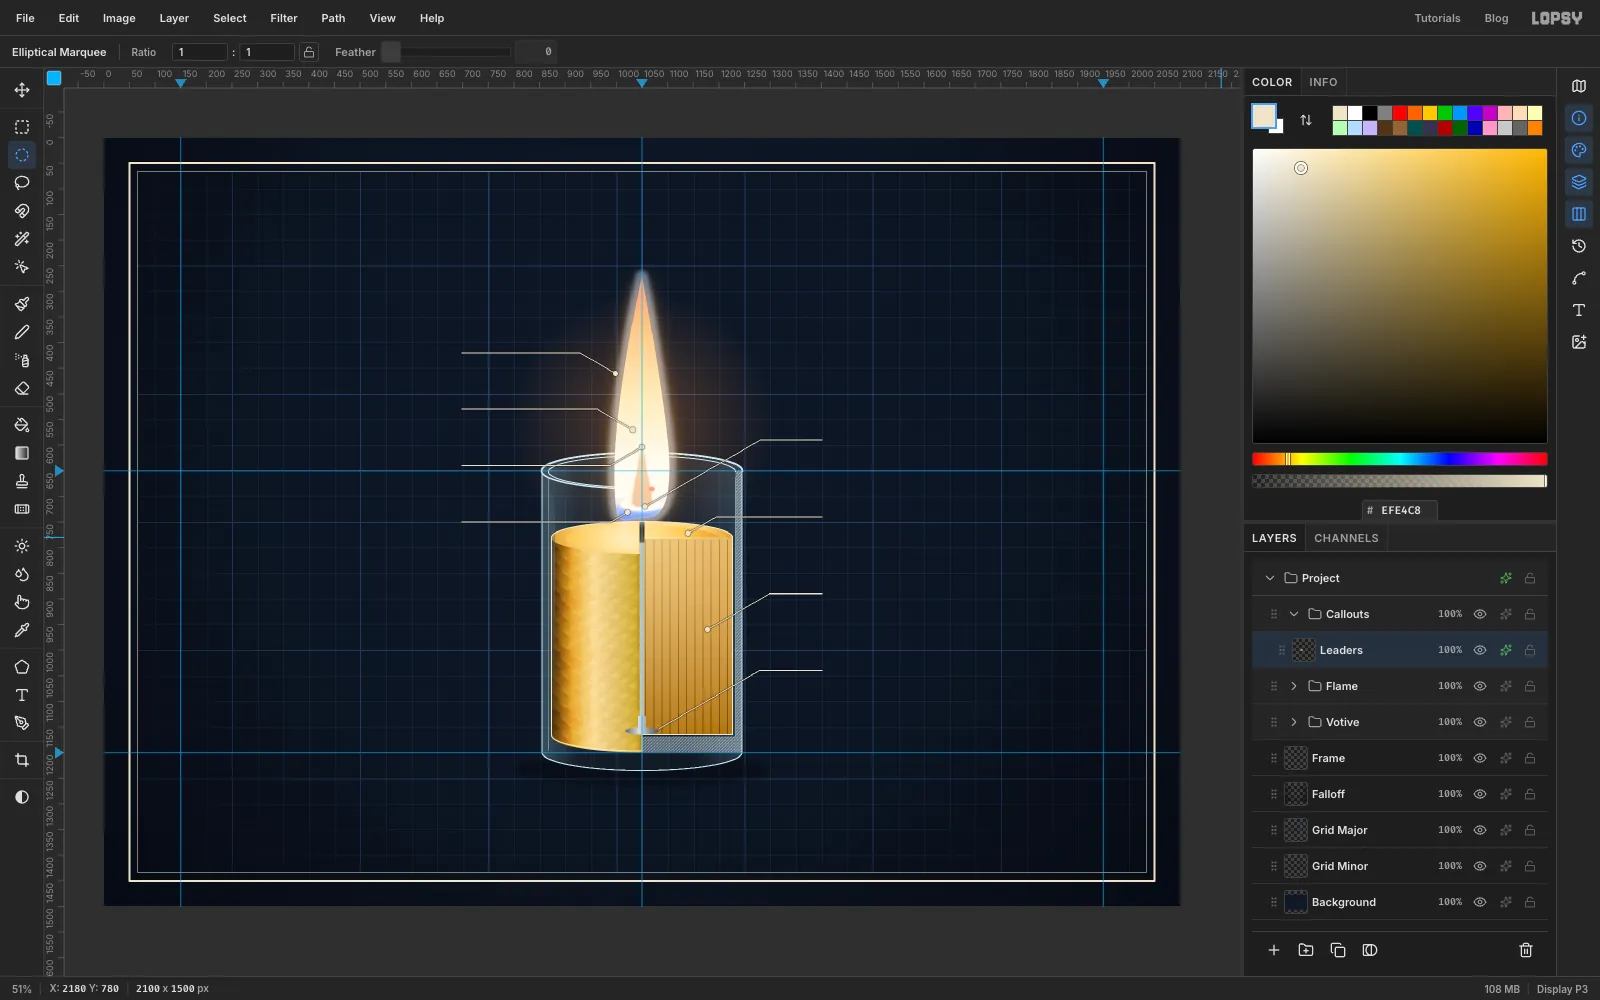
Collapse Flame, click New Group and call it Callouts. Add a layer called Leaders. Pick the Brush with Size 2, Hardness 100 and Spacing 10 (percent of the brush size), in .
Each leader starts beside a bubble, runs level, then turns at 30° to its target. Put the left bubbles at x 680, 110 px apart starting at y 420. Put the right bubbles at x 1420, 150 px apart starting at y 590. For each leader, click 19 px from the bubble's centre, then Shift-click the elbow, then Shift-click the target. To keep every diagonal at 30°, put the elbow 1.73 times as far sideways from the target as it is up or down.
Add a 10 px dot at each target by Shift-adding small elliptical marquees and filling them. Then give the layer a Drop Shadow in with Offset 0 / 0, Blur 3, Spread 40, Opacity 90. That dark halo keeps the lines readable where they cross the bright flame.
-
Add the number bubbles
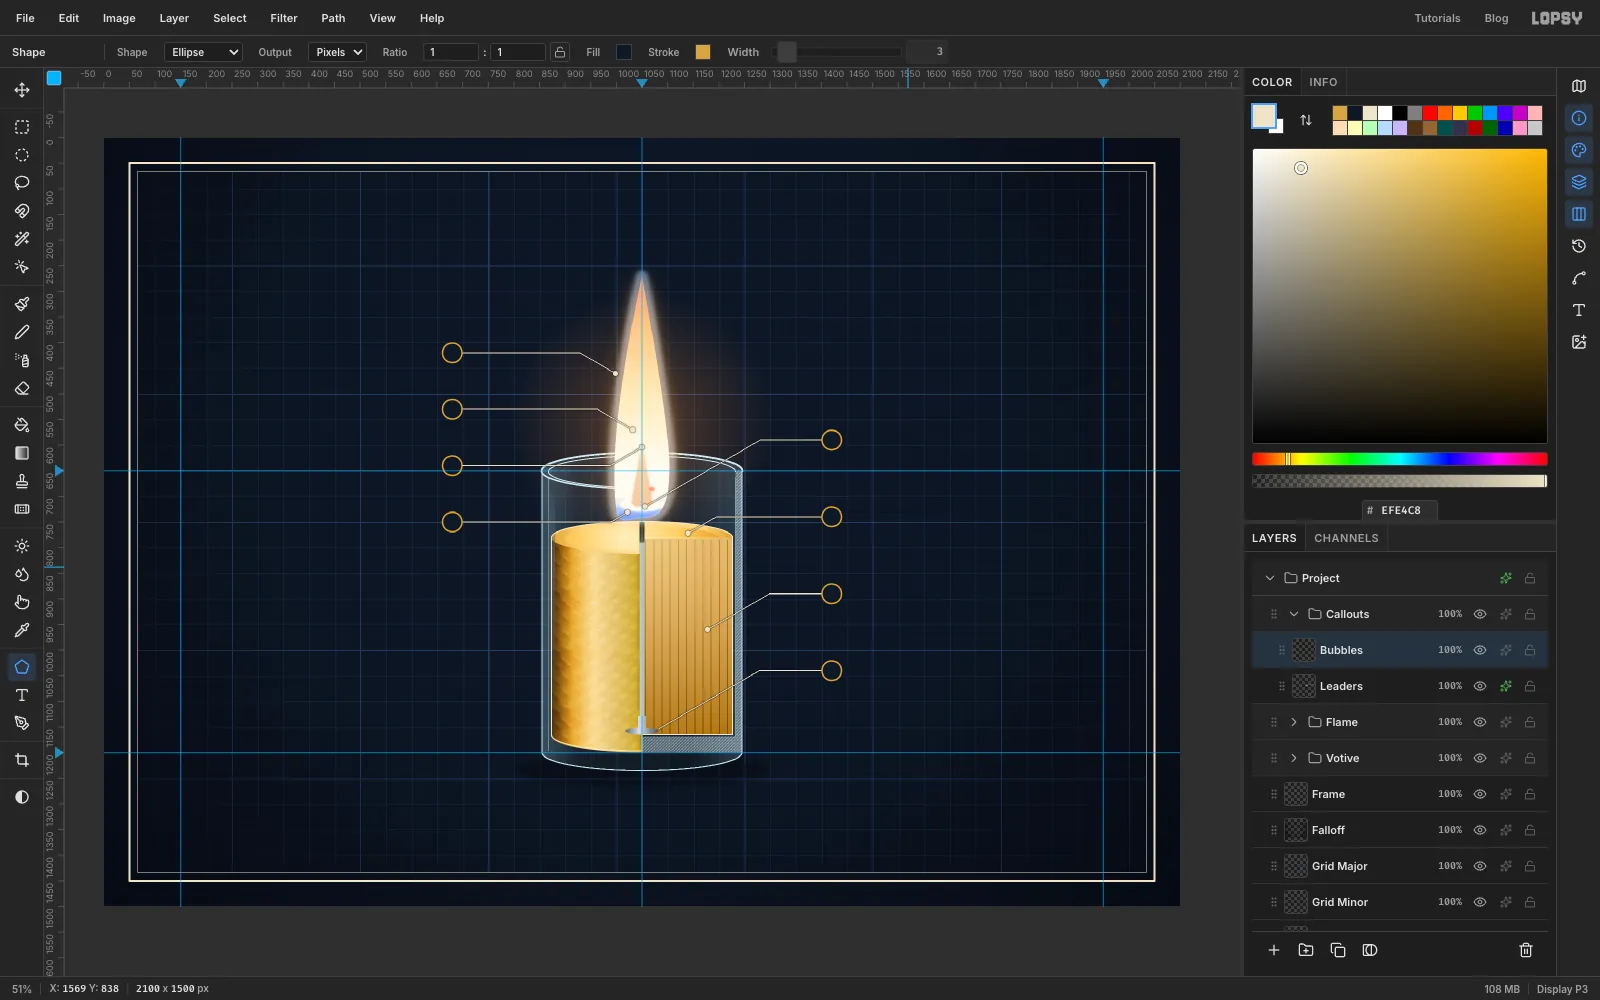
Add a layer called Bubbles. Pick the Shape tool with Ellipse, fill , stroke , Width 3. Click, don't drag, on each bubble position. Each click opens the Shape Size dialog. Enter 38 × 38 and click Create.
-
Show the airflow
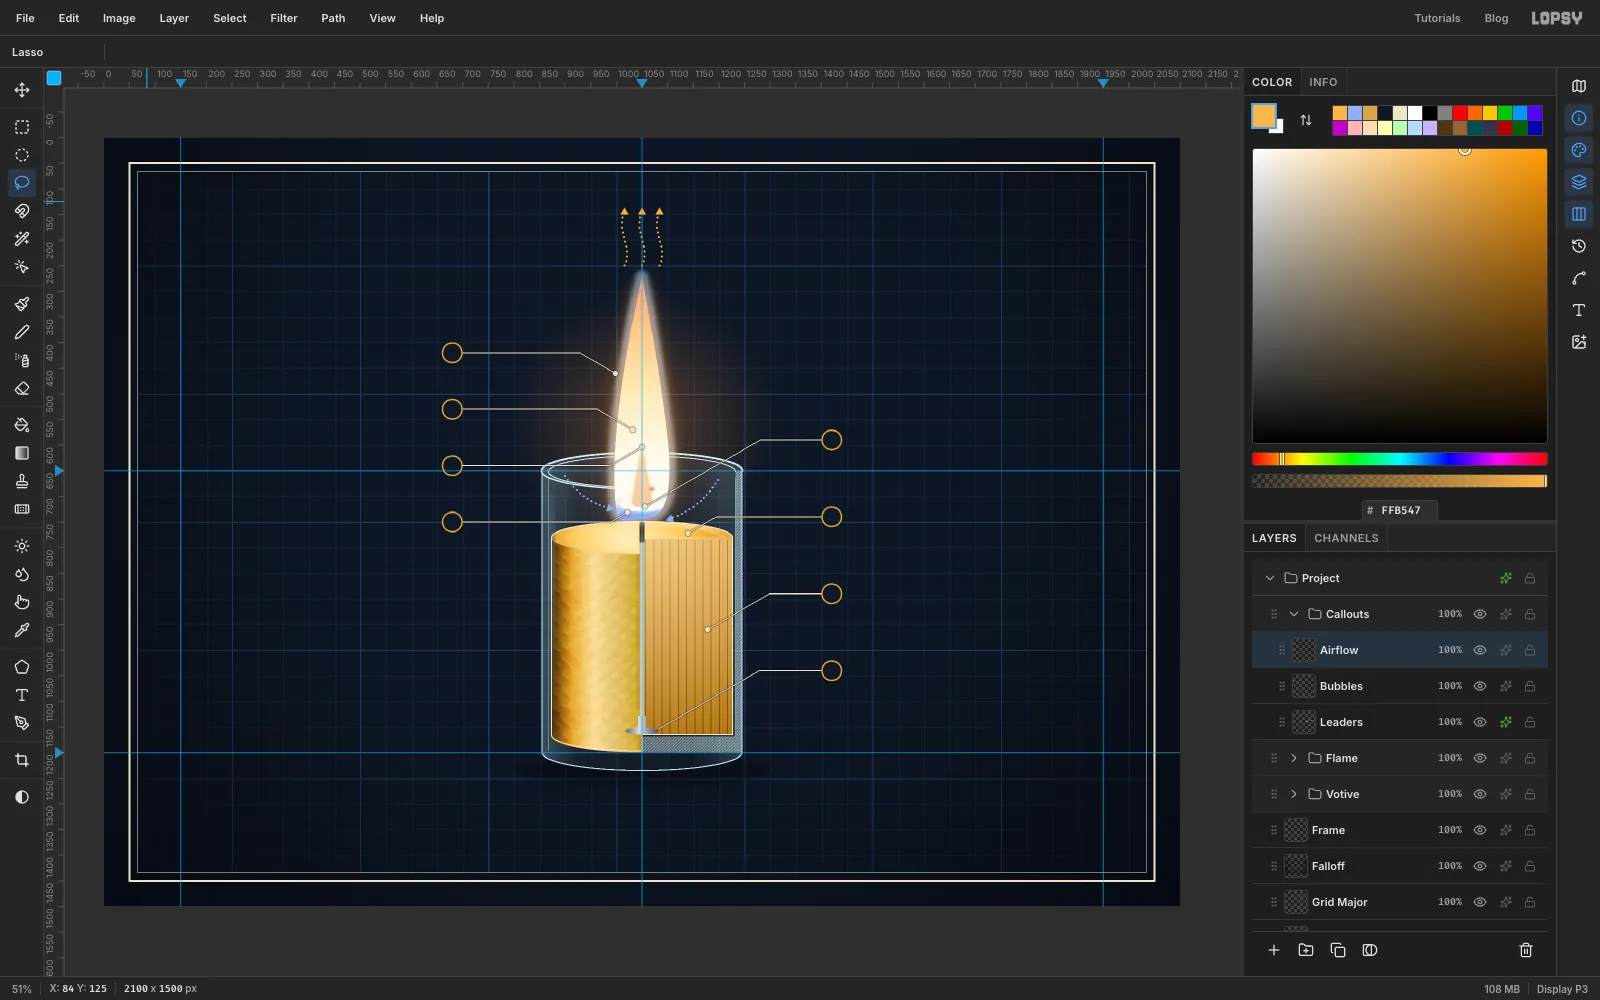
Add a layer called Airflow. Set the Brush to Size 5, Spacing 260 (percent) and Hardness 100. The high spacing turns a stroke into a row of dots. In , drag a curve from just outside the rim on each side, sweeping down into the base of the flame. Cool air feeds the flame from below. In , drag three short wavy strokes rising straight up from above the tip for the hot gas.
Add arrowheads: Lasso a small triangle at the end of each stroke, Shift-adding the others, and fill them in the matching colours.
-
Dimension the glass
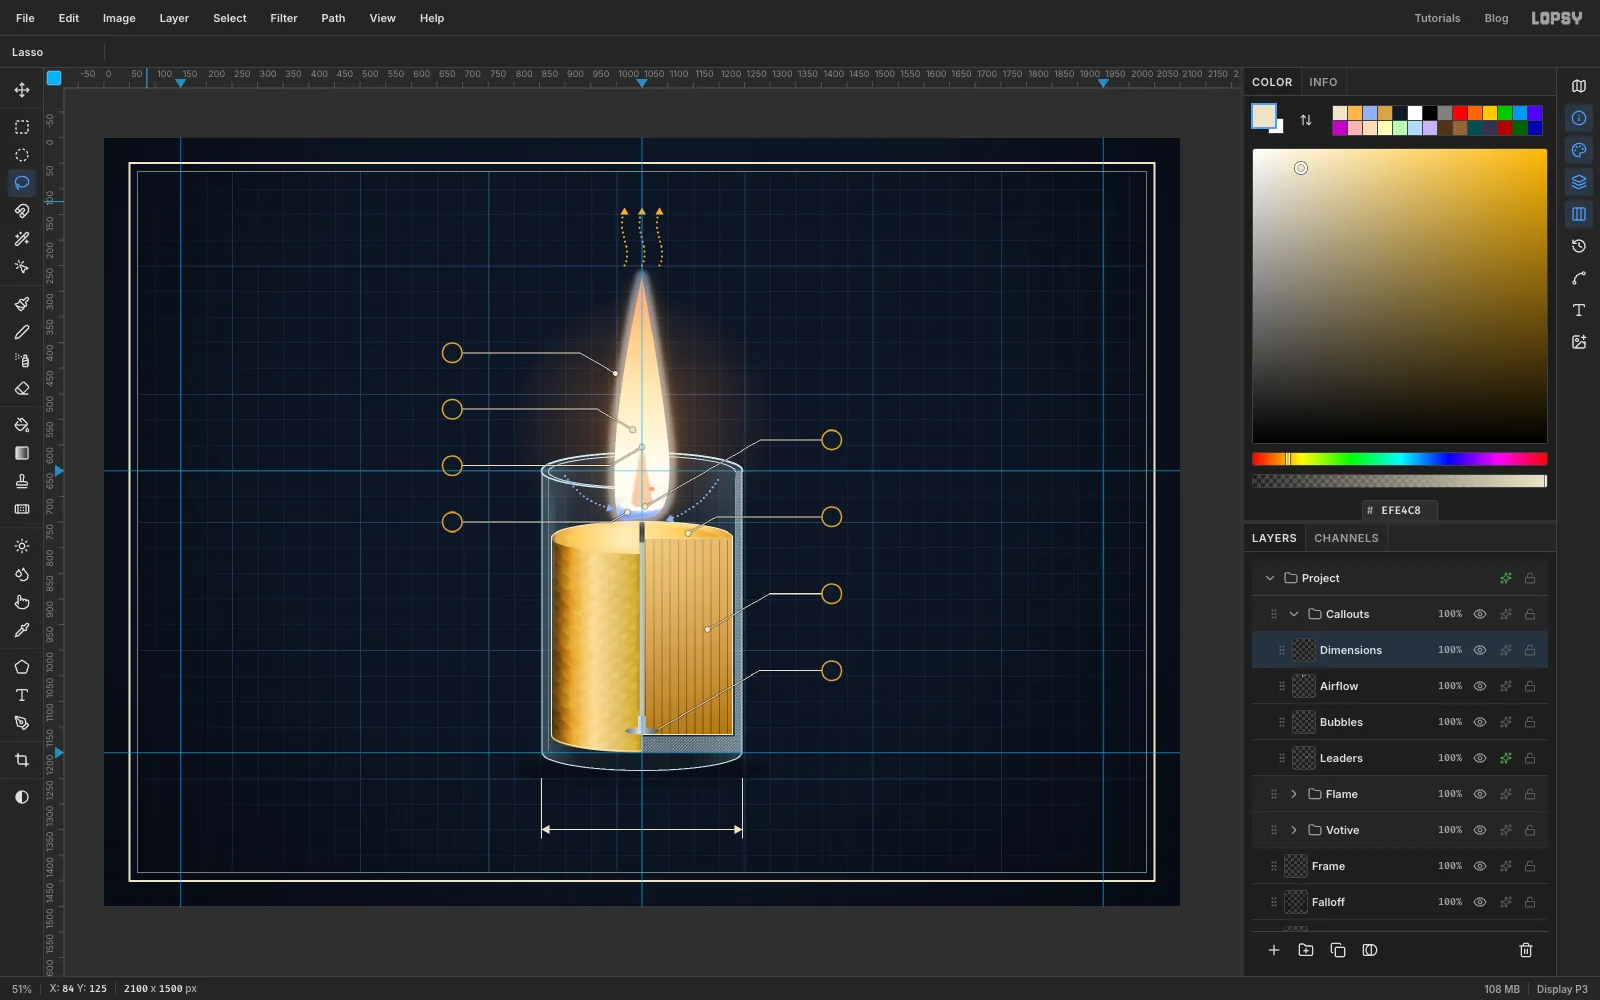
Add a layer called Dimensions. With the Brush at Size 1 and normal spacing in , Shift-click a line straight down from each side of the glass, from just under the base shadow to about y 1366. At Size 2, draw the dimension line between them at y 1350, and Lasso and fill an arrowhead at each end.
-
Label the callouts
Hide the guides with View → Show Guides for now, so no click lands on one. Click the Bubbles layer before you set up the type.
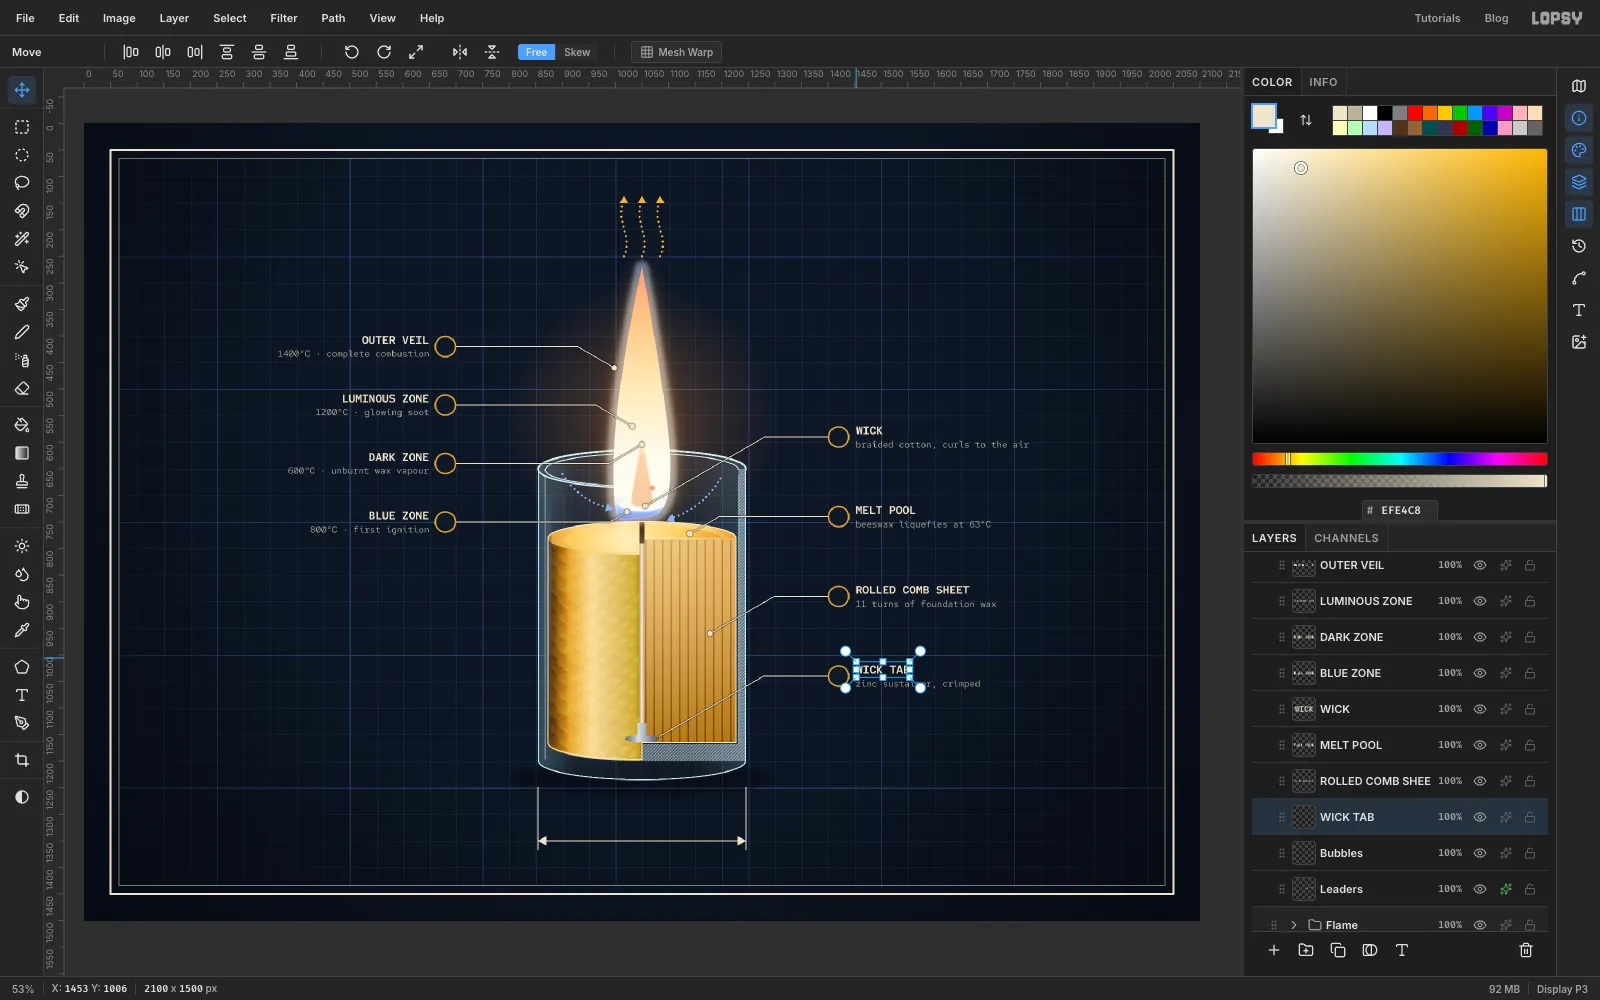
Pick the Text tool. Choose Red Hat Mono, Regular, Size 17, colour and Align Right. Click 14 px left of each left-hand bubble and type its detail line:
1400°C · complete combustion,1200°C · glowing soot,600°C · unburnt wax vapourand800°C · first ignition. Press Tab to commit each one. Switch to Align Left and type the right-hand lines 14 px right of their bubbles:braided cotton, curls to the air,beeswax liquefies at 63°C,11 turns of foundation waxandzinc sustainer, crimped.Then set SemiBold, Size 21, and type the names above: OUTER VEIL, LUMINOUS ZONE, DARK ZONE, BLUE ZONE on the left and WICK, MELT POOL, ROLLED COMB SHEET, WICK TAB on the right. Type the lower lines first: a click inside an existing line edits it.
With the Move tool and the arrow keys, nudge each pair so the bubble sits halfway between the two lines: the name just above its centre, the detail line just below.
-
Number the bubbles
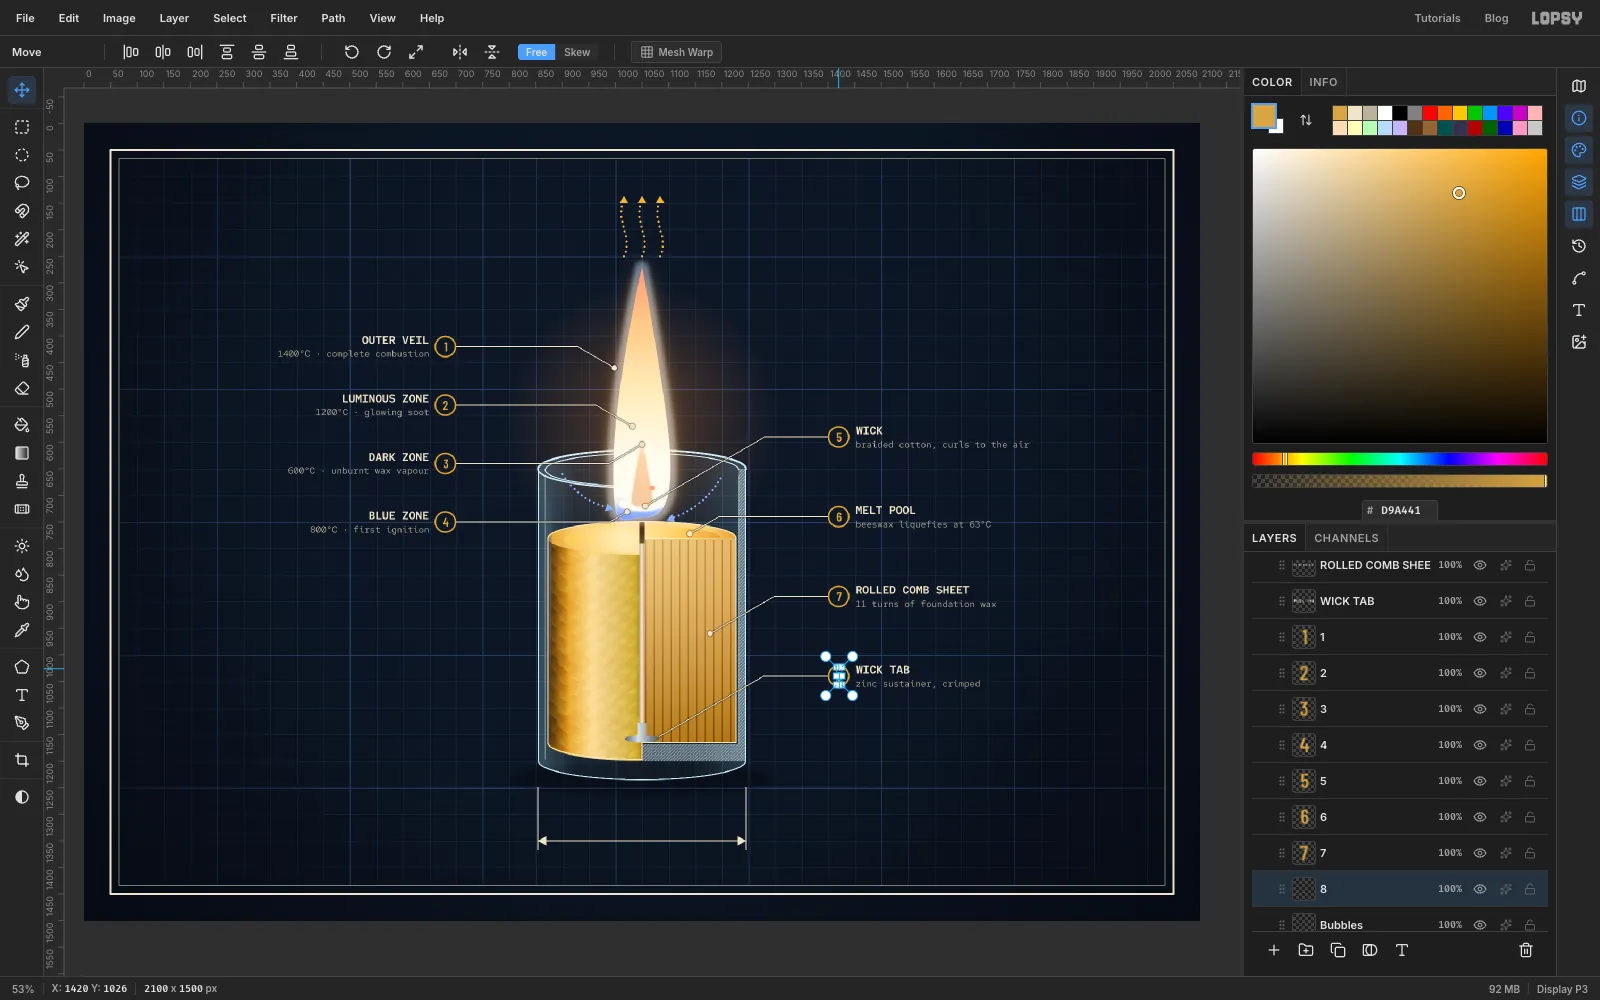
Click Bubbles again. Set the Text tool to Barlow Condensed, SemiBold, Size 24, , Align Center. Click in each bubble, type its number and press Tab. Nudge each numeral so it sits in the middle of its ring. Then turn the guides back on with View → Show Guides.
-
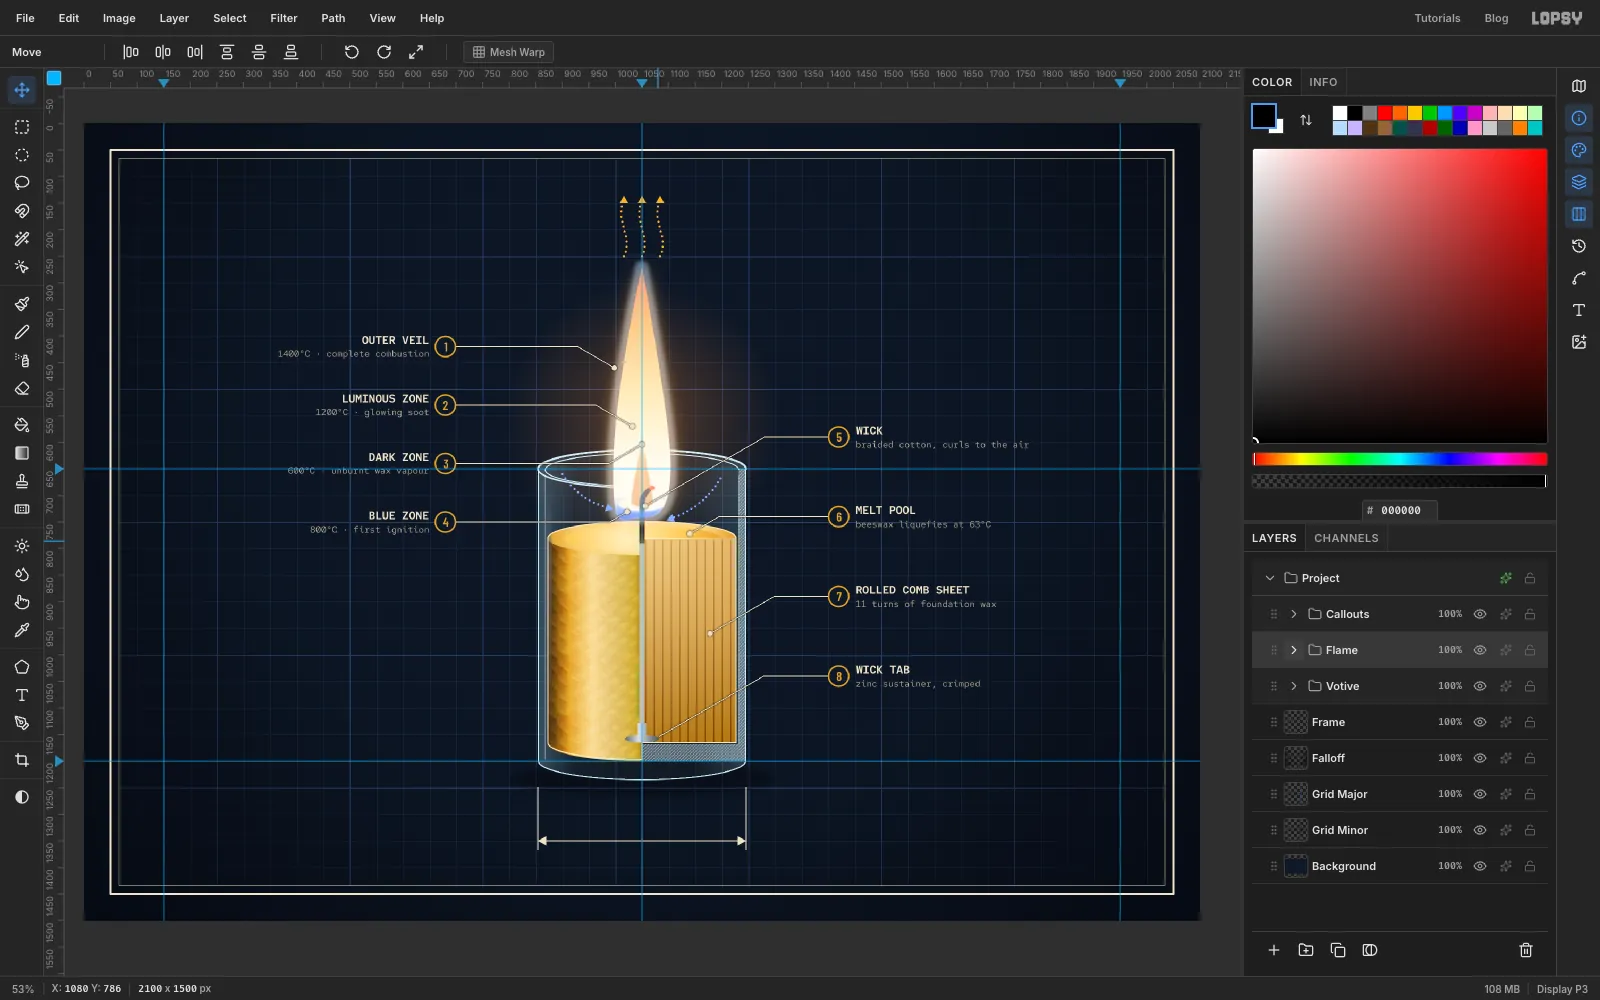
Put the wick inside the flame
The flame is painted over the wick, but a real wick shows through the dark zone. Expand Votive, click Wick and marquee its charred top. Press Cmd+C and deselect. Collapse Votive, expand Flame and click Dark Zone. Press Cmd+V: the copy pastes in place right above it. Rename it Wick In Flame and set it to 85%.
-
Set the title
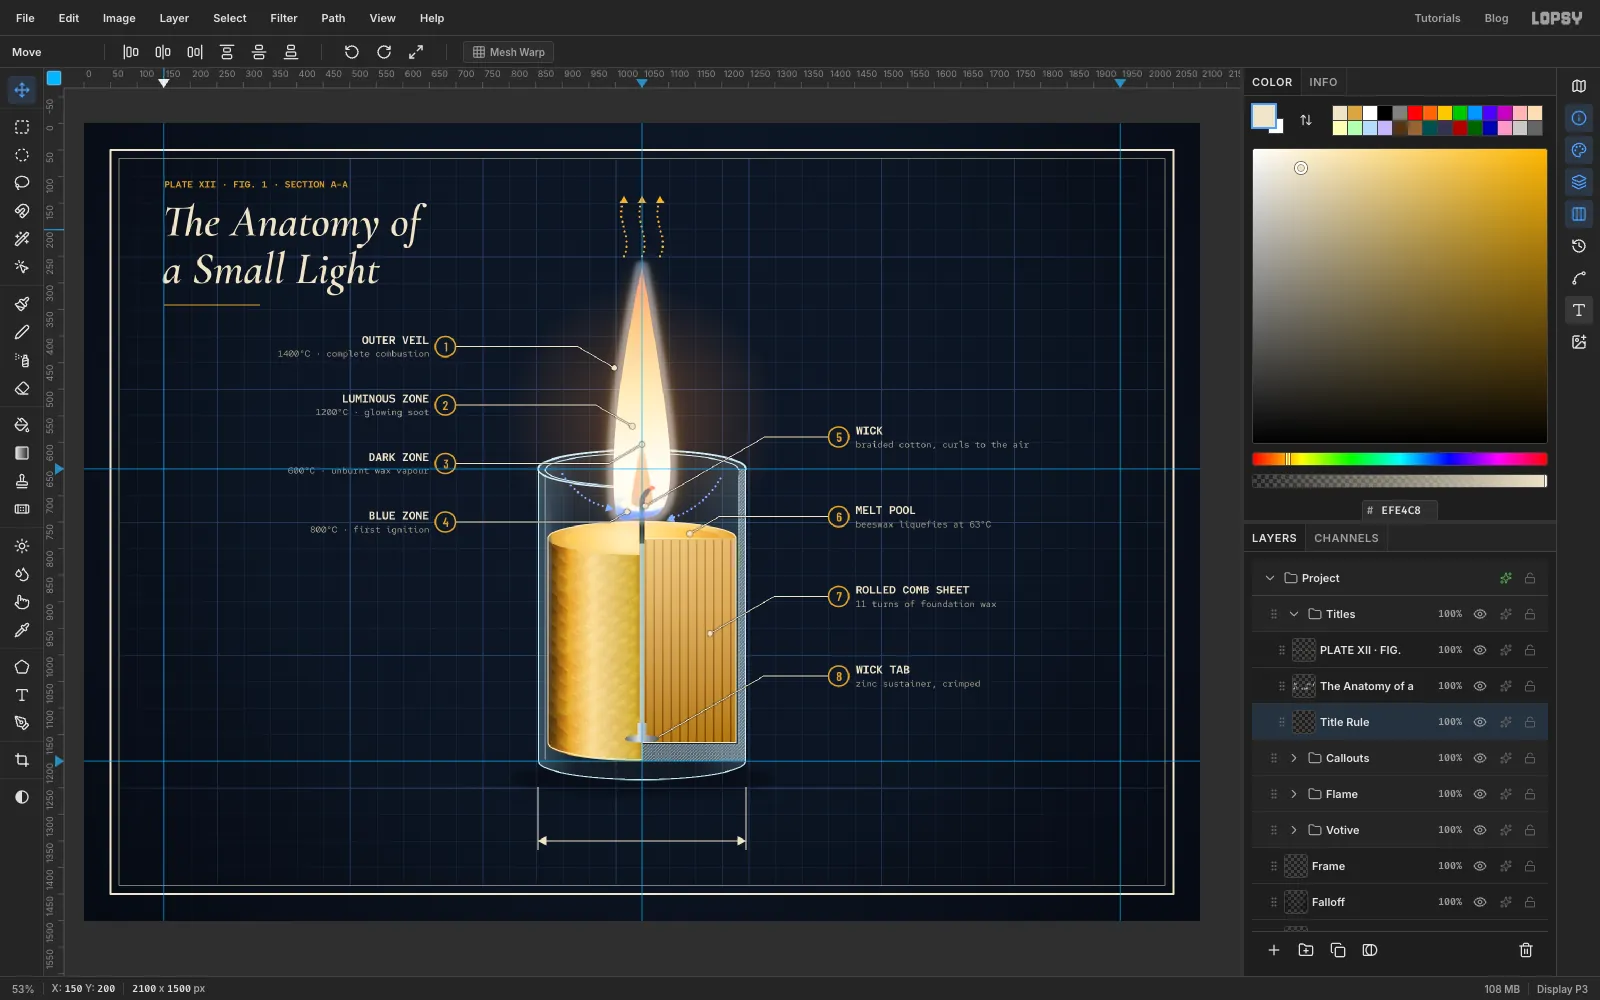
Collapse Flame, click Callouts and make a New Group called Titles. Add a layer called Title Rule and draw a short honey line with the Brush at Size 3 under where the title will go, from the left margin about 180 px across.
With Title Rule selected, set the Text tool to Red Hat Mono, SemiBold, 18, , Align Left. Type the kicker
PLATE XII · FIG. 1 · SECTION A–Aon the left margin near the top. Click Title Rule again and switch to Cormorant Garamond, SemiBold, Italic, 84, . Click below the kicker and typeThe Anatomy of, press Enter and typea Small Light, then Tab.The default leading is loose for a display title. Open the Text panel and set Line height to 1.05, then nudge the title so it sits between the kicker and the rule. The Text panel also sets the default for new type, so click Title Rule and set Line height back to 1.4.
-
Add the greeting and a spec list
With Title Rule selected, set Red Hat Mono, Regular, 15, , Align Right. Click on the right margin guide and type
SEASON’S GREETINGS · MIDWINTER 2026. Then switch to Cormorant Garamond, Medium, Italic, 52, and type the greeting above it in two lines:With warmth & lightandfor the longest nights. With Align Right, each line ends where you clicked, so both blocks finish exactly on the margin.Below them, in the small mono style, type three lines of specs:
FLAME HEIGHT · 47 mm,BURN TIME · about 18 hoursandLIGHT · roughly one candela. The candela, the unit of light, started out as the brightness of a candle.Finally, set Align Center, Size 17, and type
Ø 64 mmcentred just above the dimension line.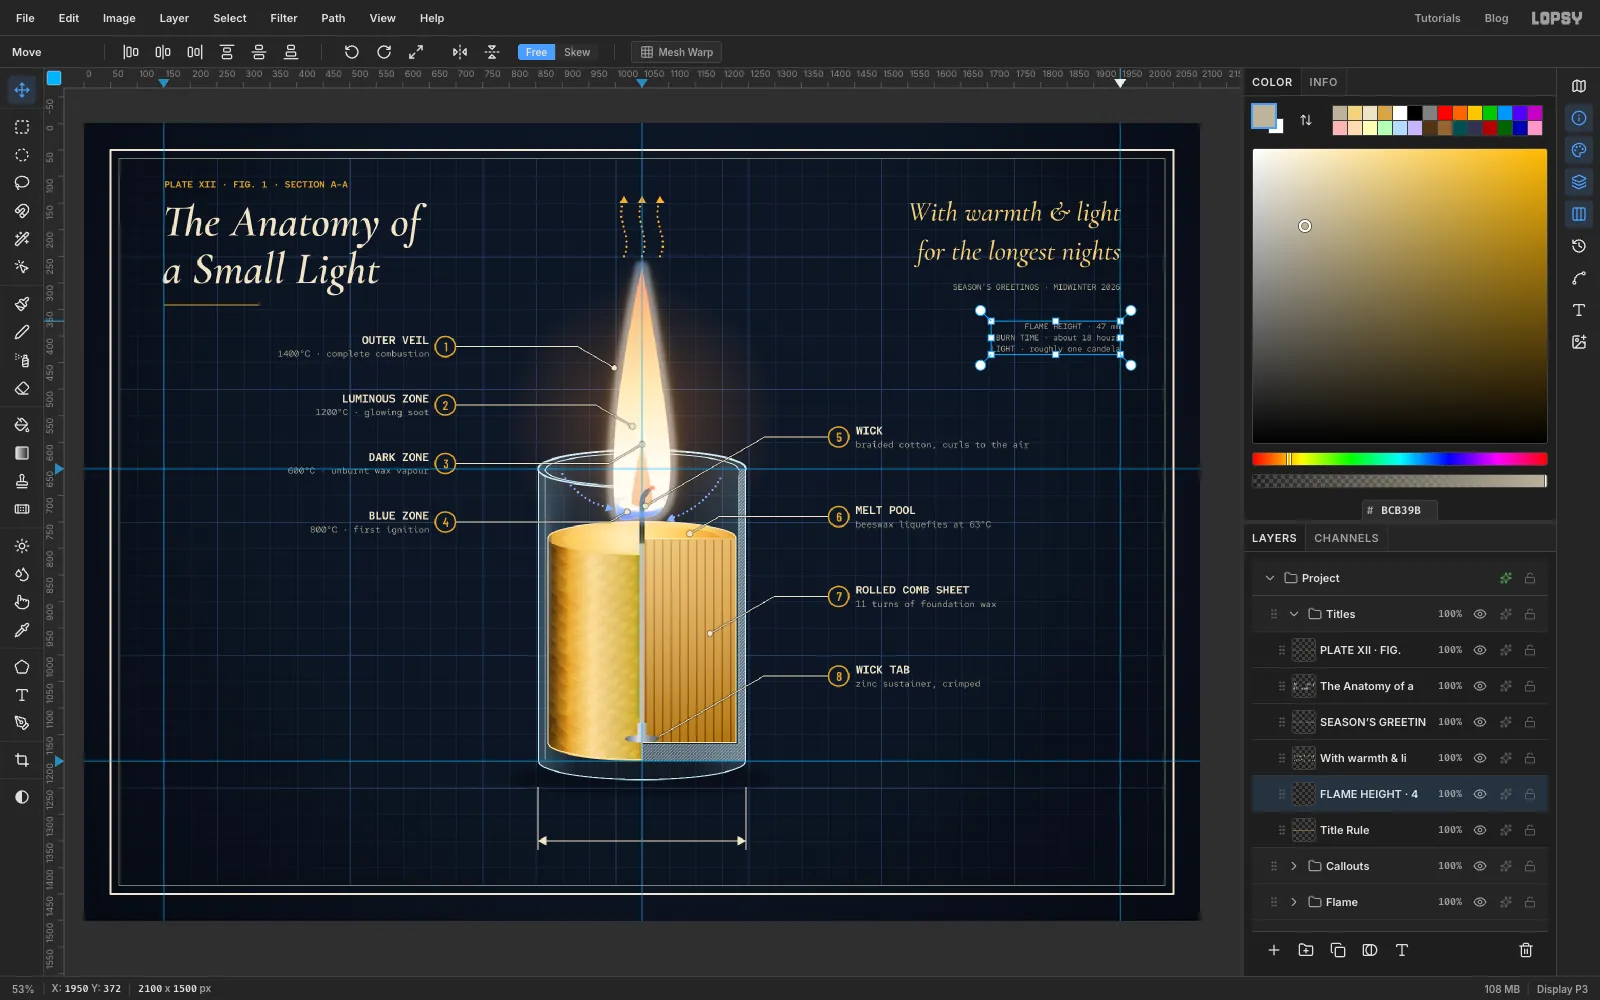
-
Rotate a margin note
Set the Text tool to Size 13, , Align Left, click in an empty area and type
DIMENSIONS IN MILLIMETRES · DO NOT SCALE. Pick the Move tool. The text gets transform handles without a selection. Hold Cmd and drag the round rotation handle off the top-right corner a quarter turn anticlockwise. Cmd snaps the angle to 15° steps, so it lands on exactly 90°. The text stays editable.Nudge it into the gap between the right-hand labels and the border, centred top to bottom, and set the layer to 60%.
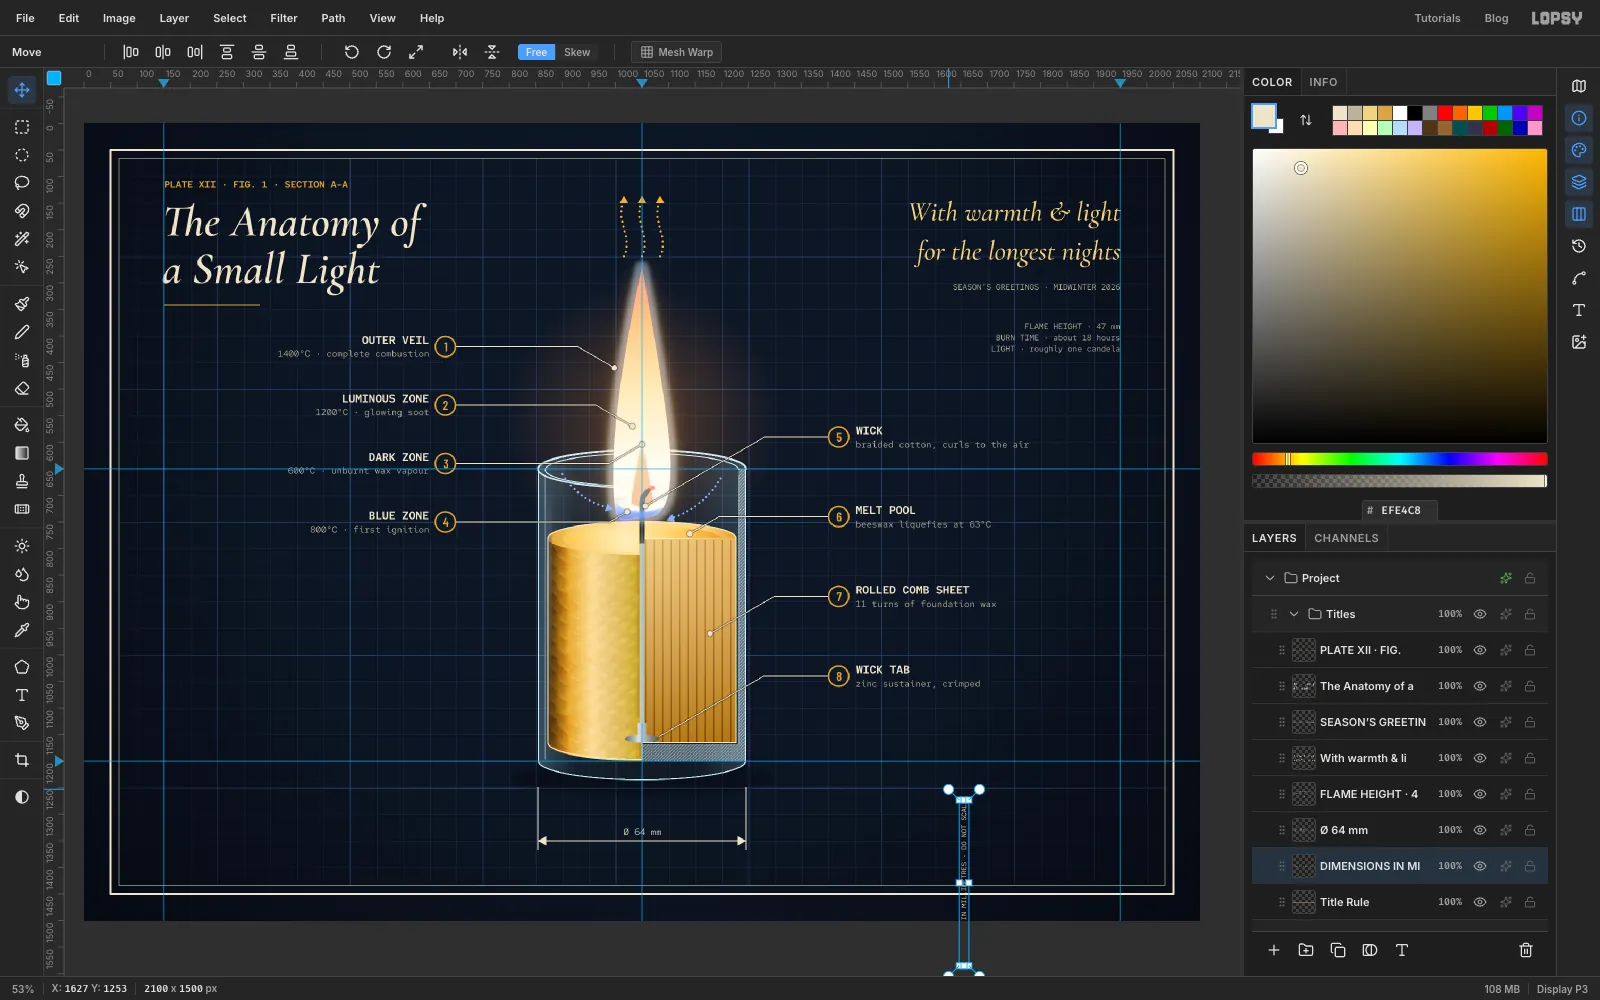
-
Build the title block
Collapse Titles, click it and make a New Group called Title Block. Add a layer called Block Frame. With the Shape tool on Rectangle, fill , stroke at Width 2, click in the bottom-right corner and create a 497 × 230 box. Its left edge should line up with the right-hand labels and its right edge with the margin guide. Draw three 1 px Brush lines inside it: one across 100 px below the top, one 65 px below that, and one down the middle of the two lower rows.
Add a layer called Hex Mark. Set the Shape tool to Polygon, type 6 in Sides, remove the fill and use a honey Width 3 stroke. Click near the left of the top row and make a 62 × 62 hexagon. Then switch to a honey fill with no stroke and click-create a 26 × 26 hexagon in its centre.
Type
BEESWAX VOTIVEin Barlow Condensed, SemiBold, 54, to the right of the hexagon. Then nudge the hexagon and the wordmark together until the space on their left equals the space on their right. In the four cells, typeSECTION A–A,SCALE 3 : 1,SHEET 12 / 21andDWG BV-1221in Red Hat Mono Medium 16, 22 px from each cell's left rule.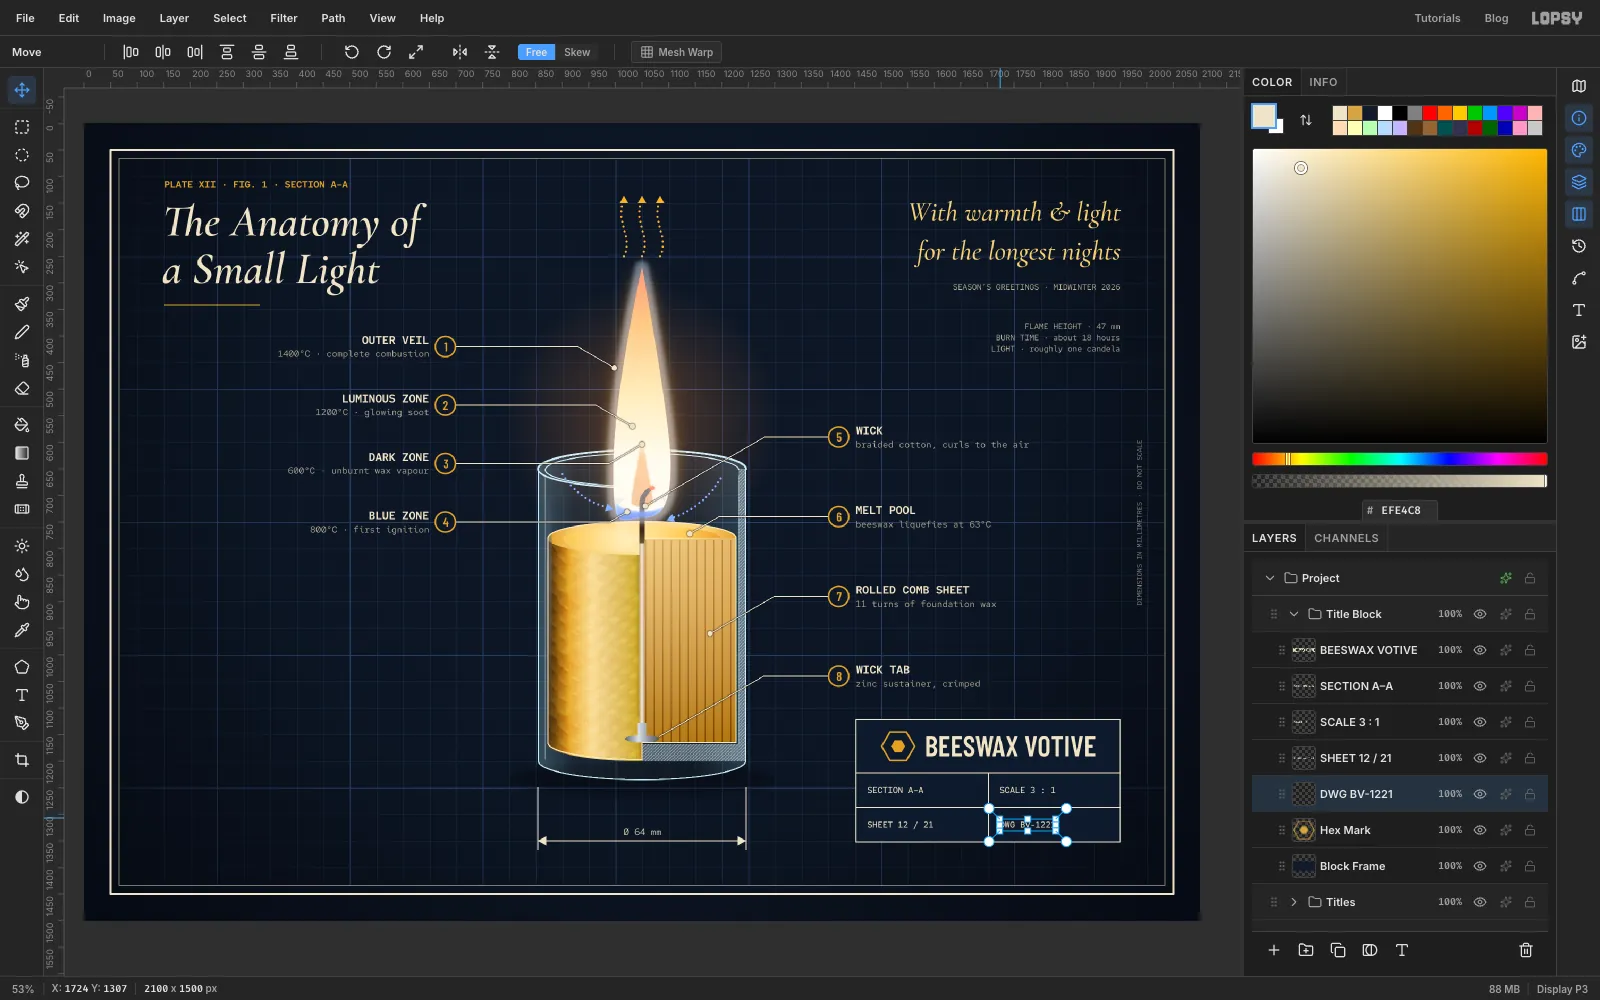
-
Cut the spiral top out of the photo
Collapse Title Block and make a New Group called View B. You've copied other things since the last paste, so go back to the photo in your other app and copy it again. Then press Cmd+V and rename the layer Plan Photo. Deselect.
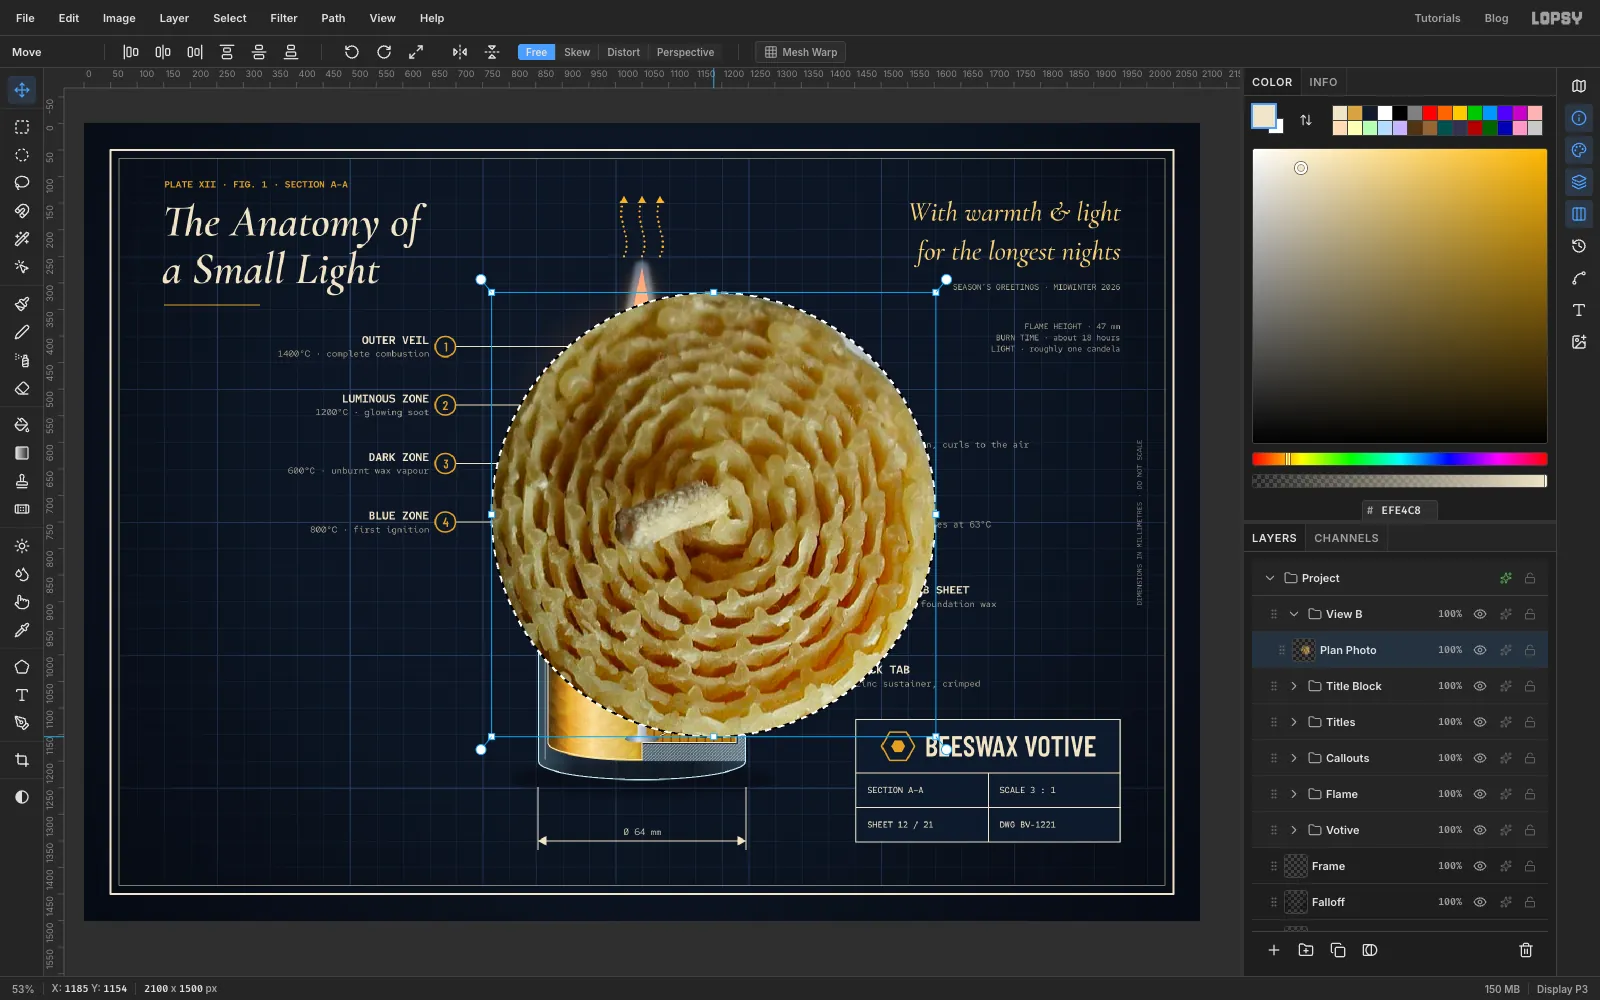
Drag an Elliptical Marquee around the spiral top of the candle, just inside its outer turn. In the photo the top is seen at an angle, so the ellipse is wider than it is tall. Choose Select → Inverse, press Delete and deselect.
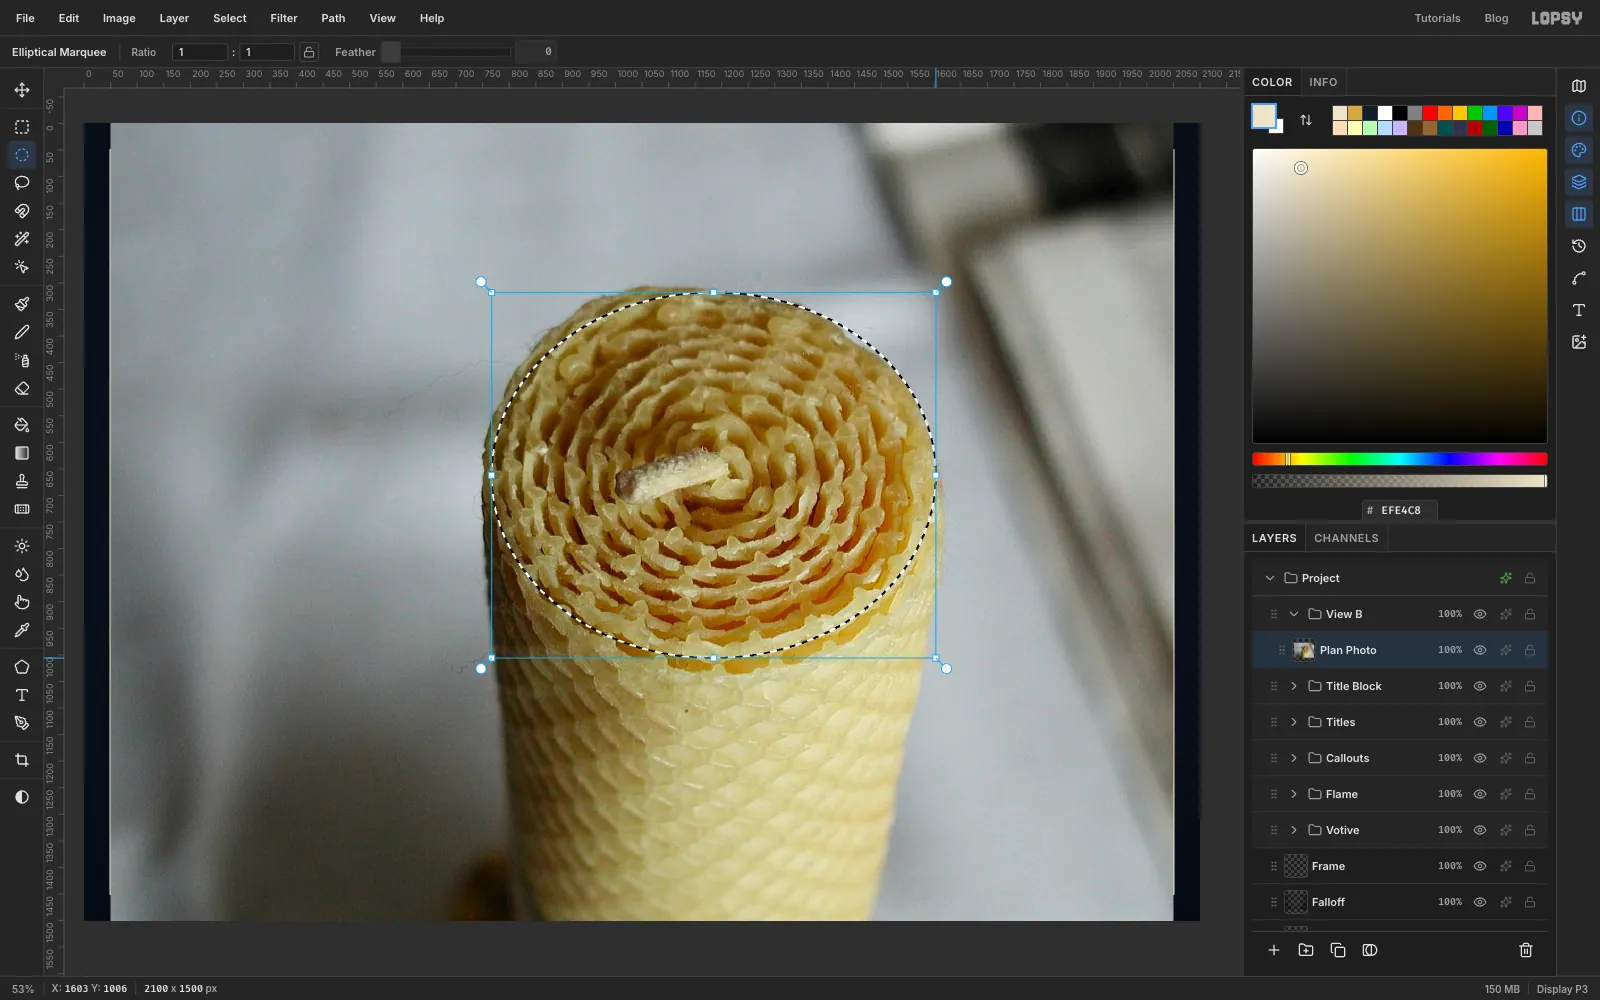
-
Stretch it into a circle
A plan view looks straight down, so the ellipse should be a circle. Cmd-click the Plan Photo thumbnail, then drag the bottom-middle handle down until the transform box is square. Without Cmd, an edge handle stretches one way only. Press Cmd+D.
Cmd-click the thumbnail again and Cmd-drag a corner to shrink it to about 388 px across, then press Cmd+D. Drag it into the bottom-left corner. The spiral's centre sits a little off the photo's centre, so nudge it until the wick sits about 170 px right of the left margin guide and level with the middle of the gap between the labels and the bottom border. Draw a 344 px circle marquee centred on the wick, choose Select → Inverse and press Delete. That trims a clean round edge whose left side sits on the margin guide.
-
Tone the photo with a Photo Filter
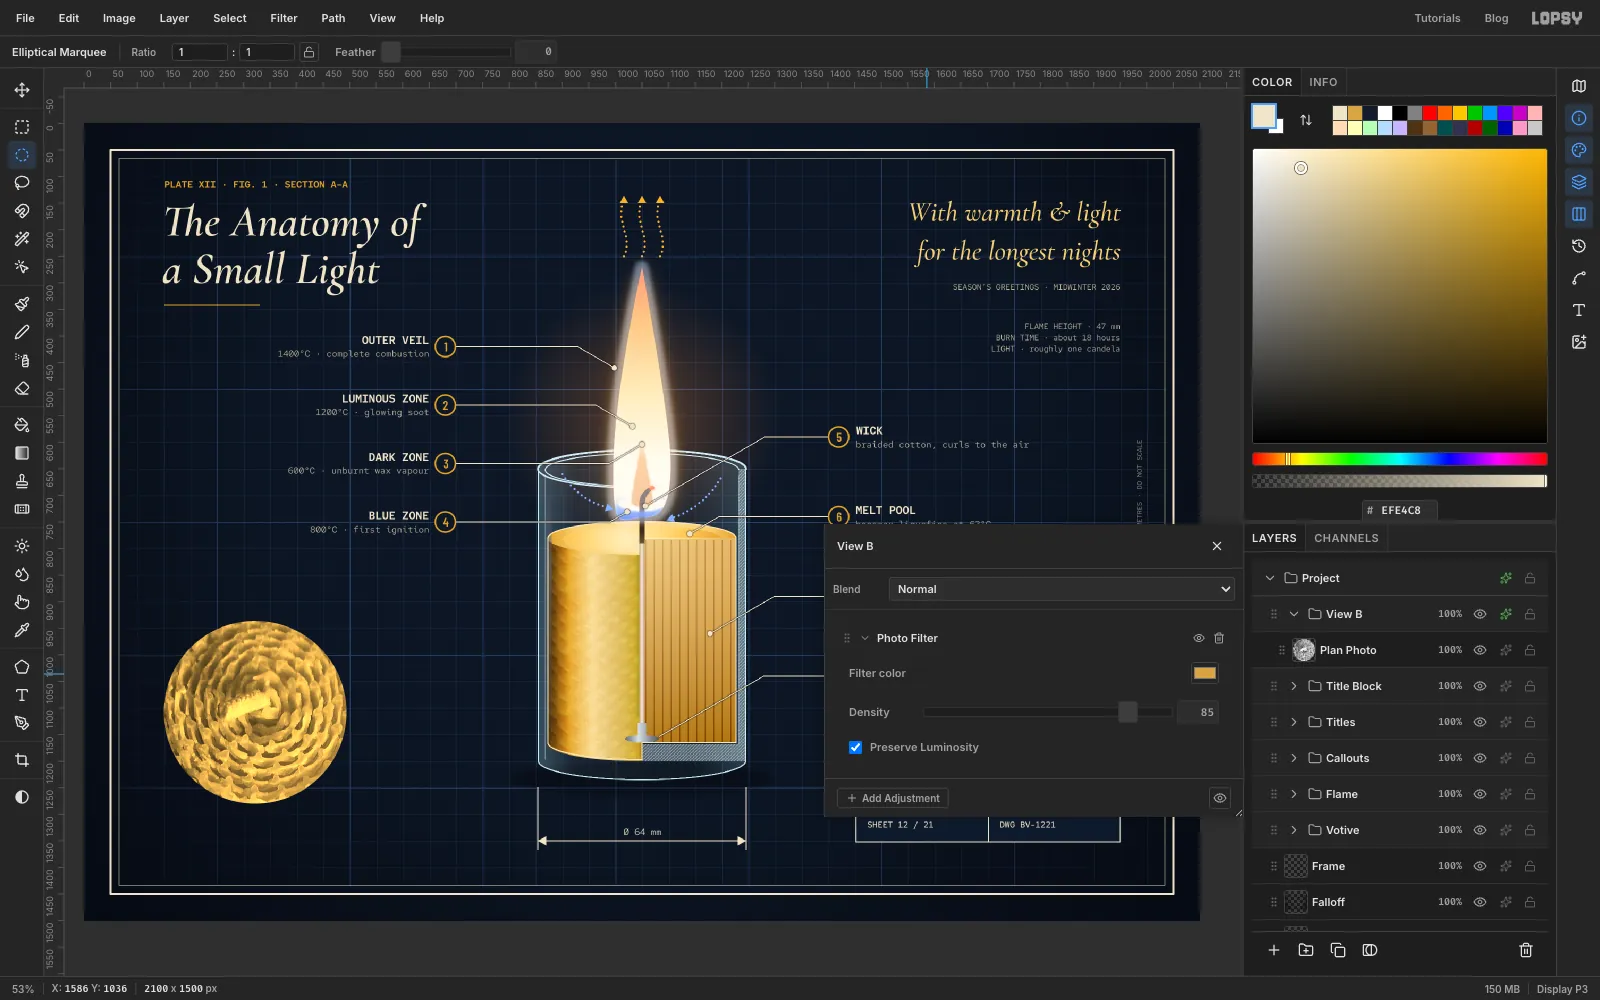
Run Filter → Brightness/Contrast… with Brightness 25 and Contrast 30, then Filter → Desaturate. Click the View B group row and open its drawer. Groups get adjustments instead of effects. Click Add Adjustment → Photo Filter, set Filter color to and Density to 85. Everything inside View B is toned to the wax's honey. That's why the next step puts the annotations in a group of their own.
-
Mark the section line on the plan
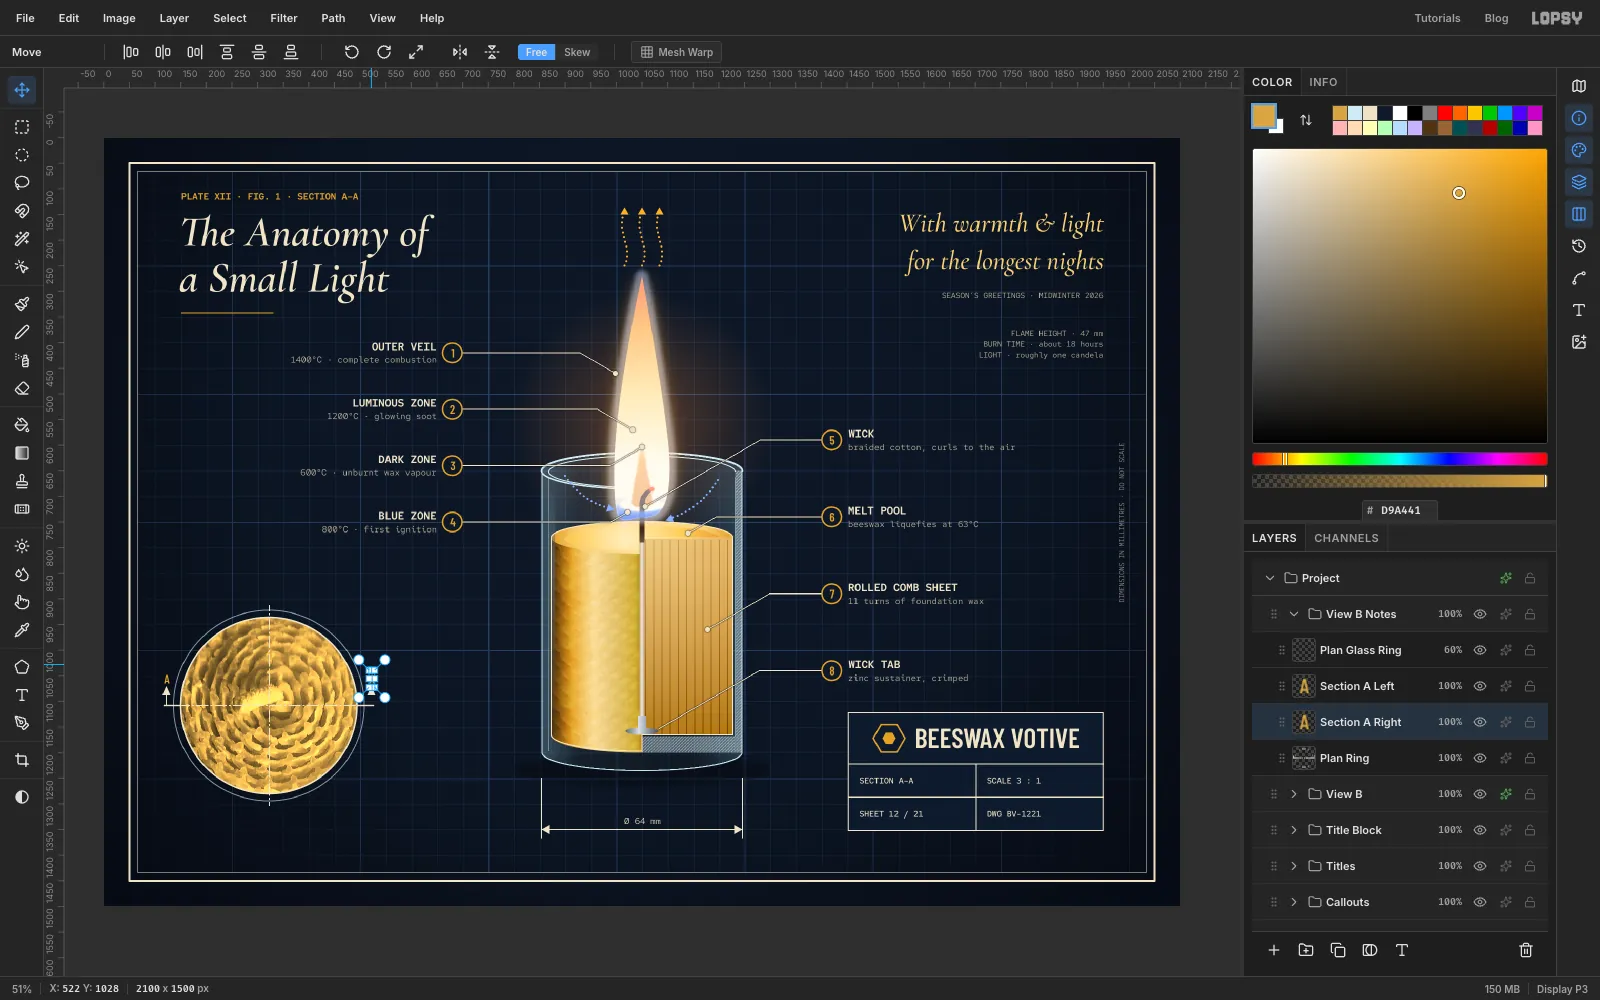
Collapse View B and make a New Group called View B Notes above it. Add a layer called Plan Ring and click-create a 344 × 344 ellipse with a cream Width 3 stroke and no fill, centred on the plan.
Drafting centre lines are chain lines: long dash, gap, short dash, gap. You'll make them as patterns. Patterns repeat from the top-left corner of the canvas, so plan the tile first. It will be 24 px tall, and the dash has to fall on the plan's centre line. Divide the centre line's distance from the top by 24 and look at the remainder. That's how many pixels down the tile the dash goes (3 for this layout). Do the same with 24 and the distance from the left for the upright tile (10 here).
Add a Tile layer and zoom right in on an empty spot. Fill a 24 × 2 px dash, then a 4 px gap, a 4 × 2 px dash and another 4 px gap, and define a 36 × 24 pattern around them with the dashes at that height. Make the matching upright tile, 24 × 36, and define that too. Delete Tile.
Click Plan Ring. Marquee a 24 px tall band across the plan's centre, reaching 24 px past the ring on each side, and Fill with Pattern with the flat tile. Then marquee a 24 px wide band down through the centre and fill it with the upright tile.
Still on Plan Ring, mark the cutting plane A–A along the horizontal line. With the Brush at Size 4, draw a 30 px heavy stroke at each end of that line. At Size 2, draw a short arrow pointing up from each end and fill Lasso arrowheads. Type an
Aabove each arrow in Barlow Condensed SemiBold 24 honey, and rename the two layers Section A Left and Section A Right so you can tell them apart.Add a layer called Plan Glass Ring with a 372 × 372 pale-blue ellipse stroke at Width 2 and 60% opacity. It shows the glass wall around the wax.
-
Caption View B and add its arrow
Under the plan, type
VIEW B · PLAN, AS ROLLEDin Red Hat Mono SemiBold 18 cream, centred, sitting on the same baseline as theØ 64 mmlabel. Below it, in 15 px , type the creditafter a photograph by Paolo Neo, public domain.The main drawing needs to show where View B is seen from. Add a layer called View Arrow and draw a short downward arrow just above the right-hand rim, with the Brush at Size 3 and a Lasso head. Type a honey
Bbeside it.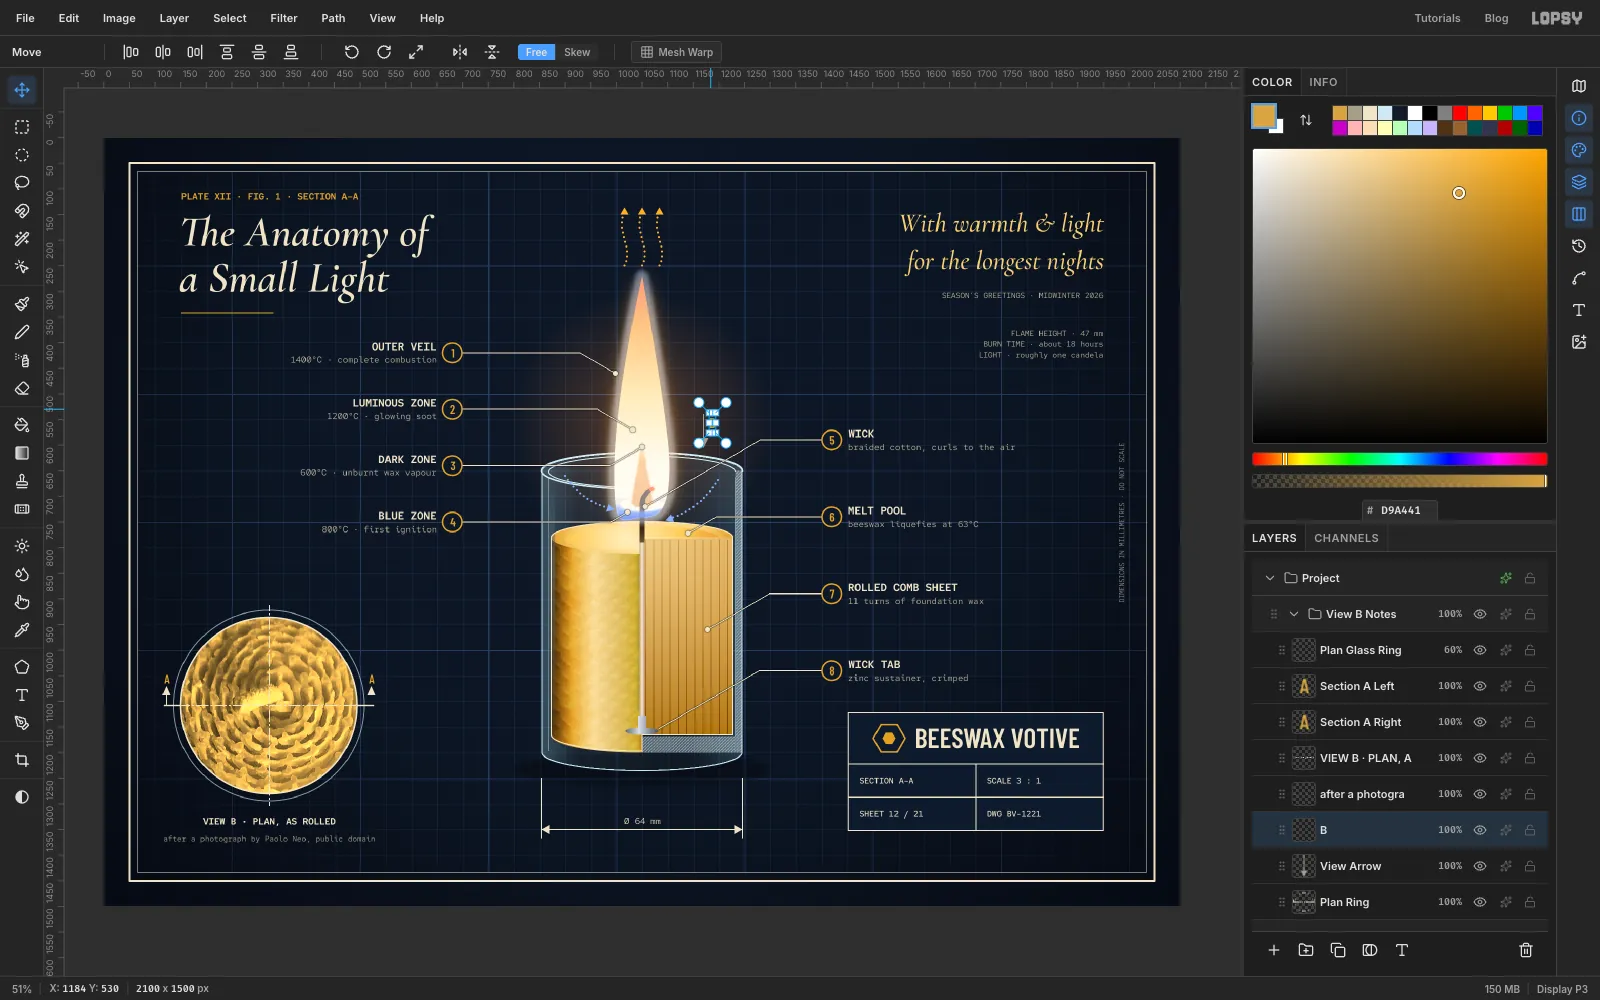
-
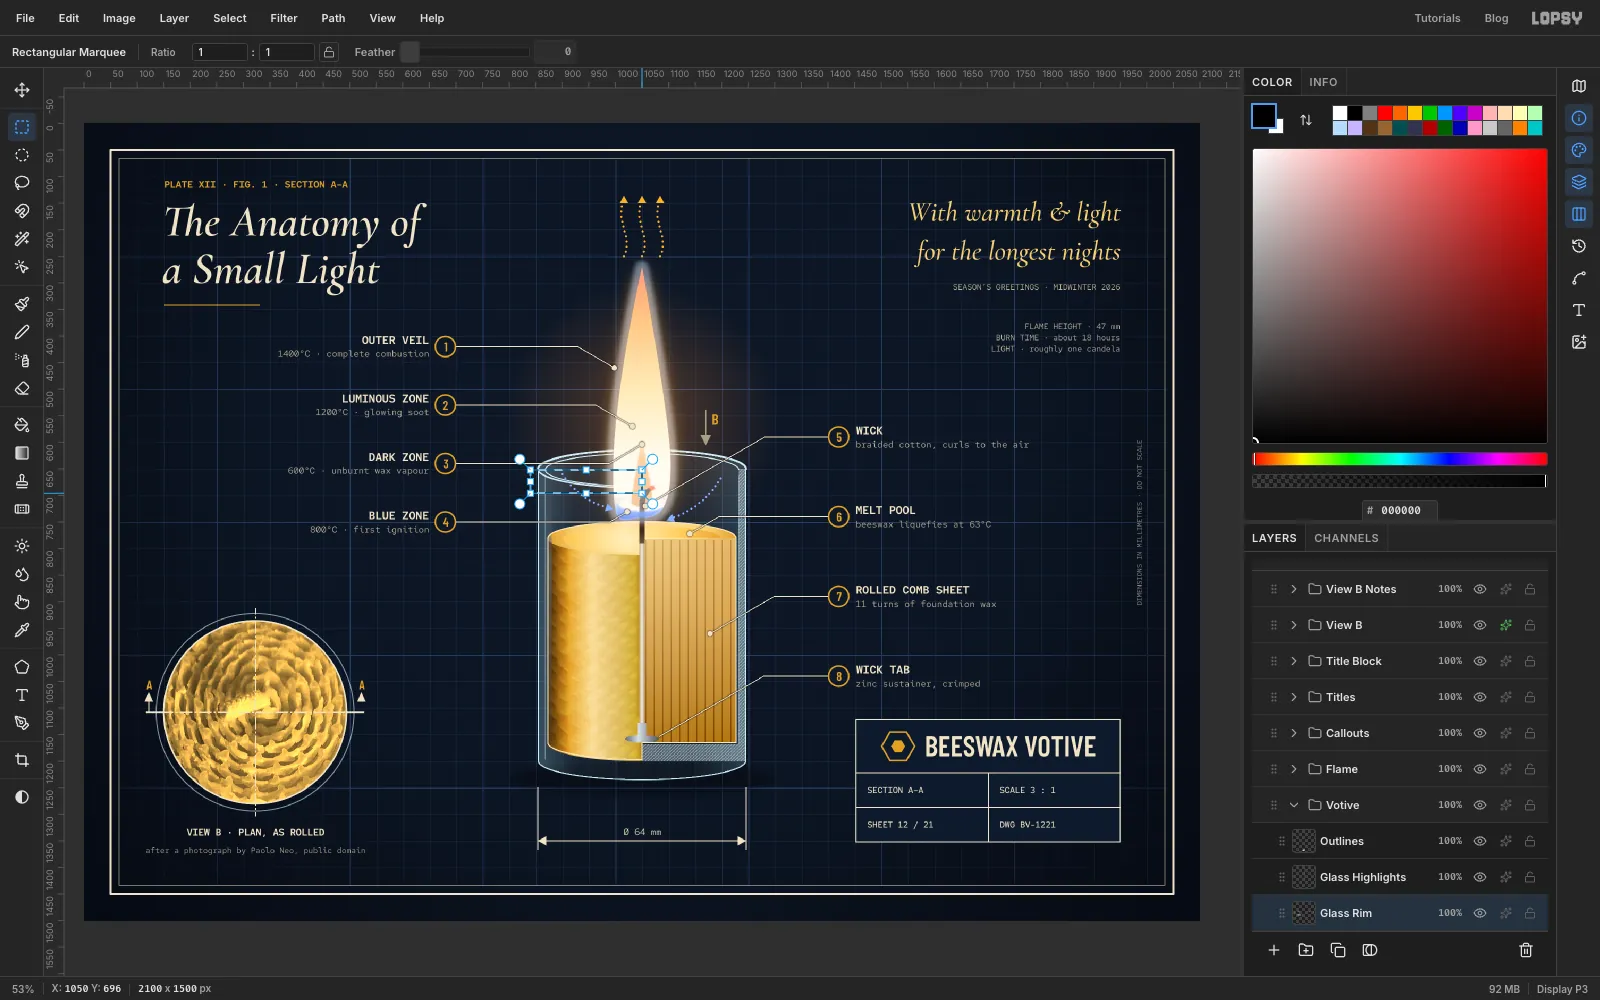
Bring the front lip in front of the flame
The flame's base sits inside the glass, so the front of the rim should cross in front of it. Expand Votive, click Glass Rim and marquee its front-left arc, from the left edge of the glass to the centre line, just under the rim guide. Press Cmd+C and deselect. Collapse Votive, expand Flame, click its top layer and press Cmd+V. Rename it Rim Front and set it to 65%.
-
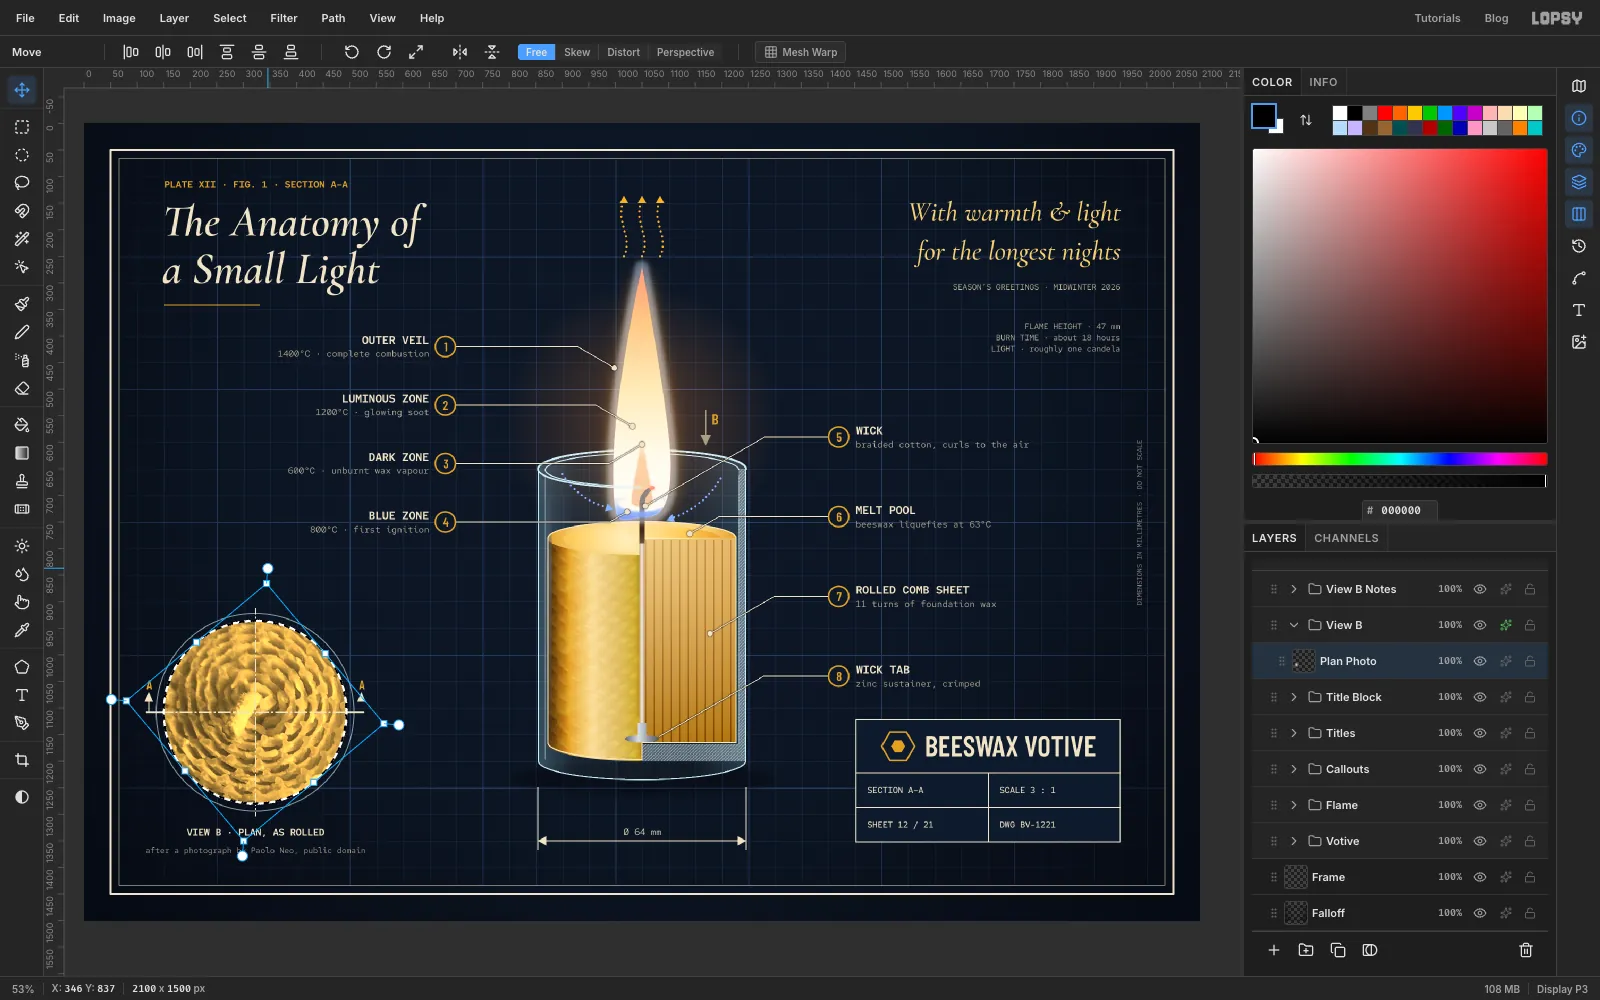
Turn the plan photo
Expand View B, click Plan Photo and Cmd-click its thumbnail. With the Move tool, drag one of the round rotation handles off a corner about 40° anticlockwise, so the wick's tail points up and to the left and stays clear of the crosshair. A circle stays a circle when it turns, so the clean edge isn't affected. Press Cmd+D.
-
Finish with grain
Collapse every group, click View B Notes and add a layer called Grain. It lands above everything. Set the foreground to , choose Edit → Fill, then run Filter → Add Noise… with Amount 16, Mono and Gaussian. Set the layer to Overlay at 30%. Mid grey vanishes in Overlay and leaves only a fine printed texture.
Save with File → Save Project and export with File → Quick Export PNG.