Paint Claymorphism Movie Concept Art of a Fishbowl Town
Build a claymation-style key frame in Lopsy with puffy clay shapes, a goldfish sculpted from a reference photo, glass highlights and a tilt-shift miniature look.
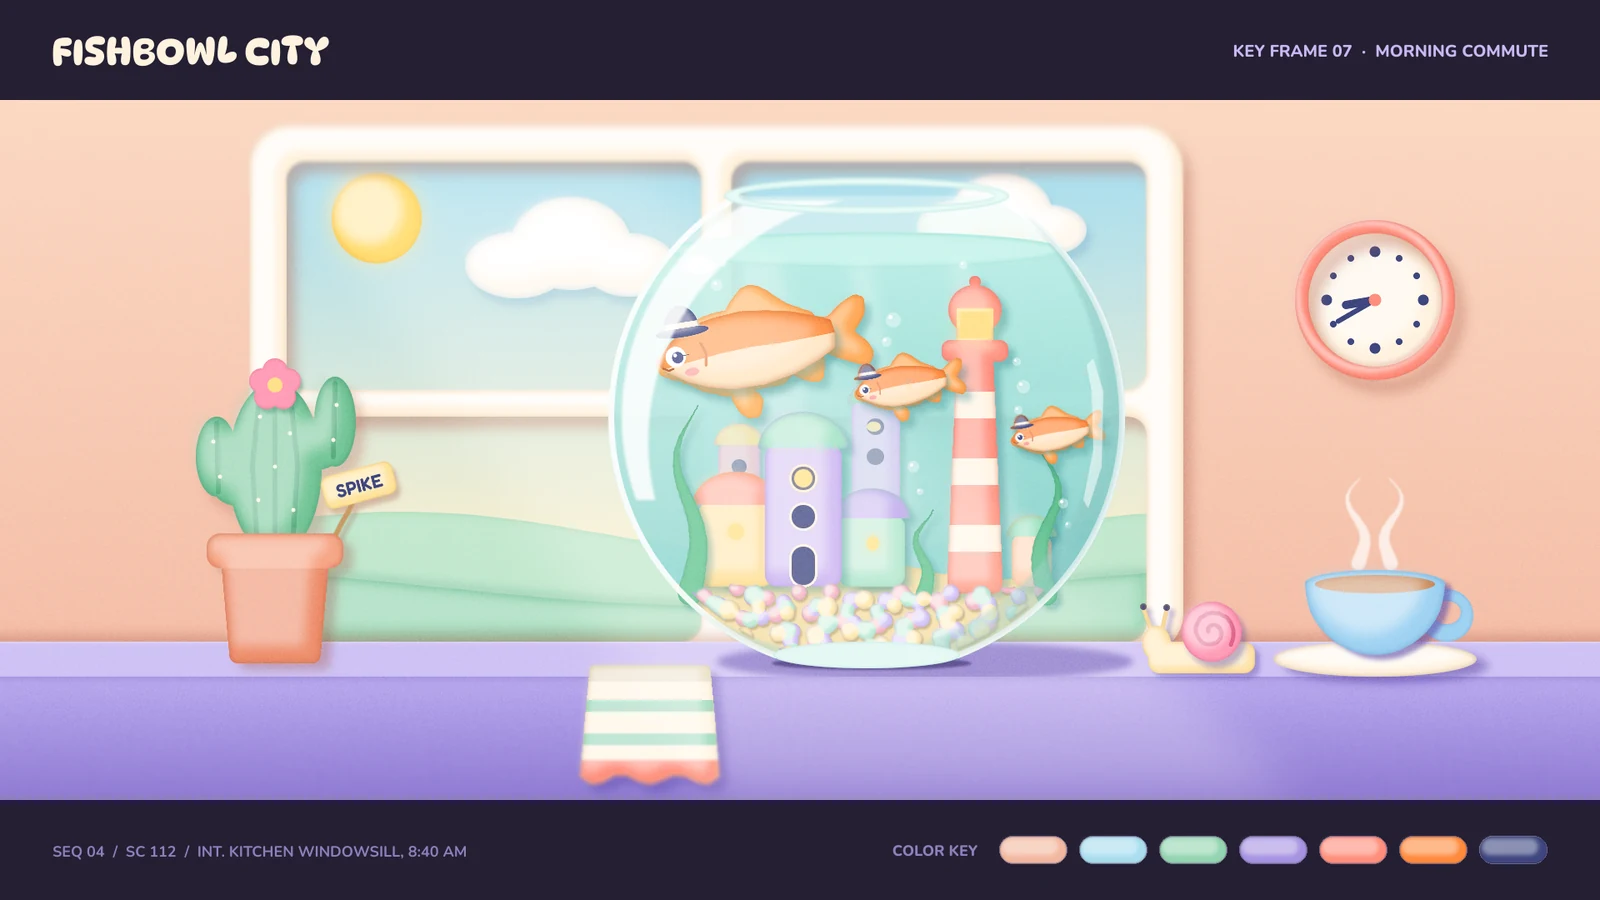
Stop-motion studios plan their films with painted key frames: one still per moment that fixes the set, the light and the palette before anyone sculpts a puppet. They're presented letterboxed, with a slate line and a strip of colour chips, so the whole crew paints from the same key.
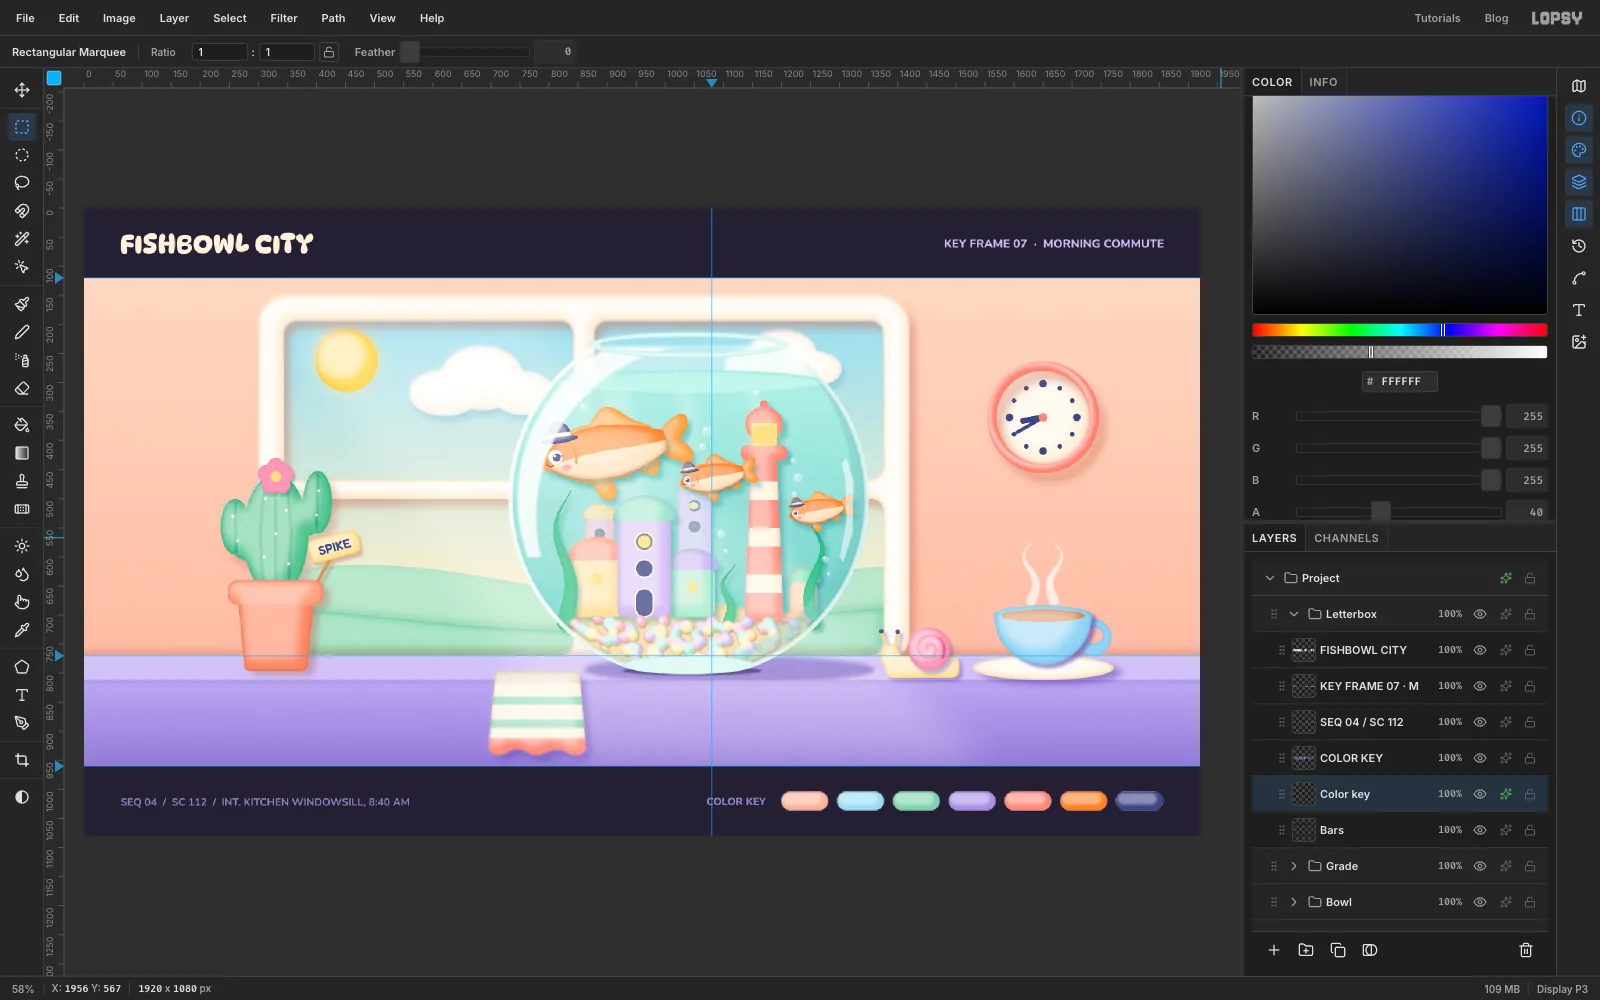
In this tutorial you'll paint Fishbowl City, key frame 07 of an imaginary claymation film. A tiny clay town sits inside a goldfish bowl on a kitchen windowsill at 8:40 in the morning, and goldfish in bowler hats queue up for their commute. The canvas is 1920 × 1080. Everything is built from flat selection fills and given volume with one repeatable clay recipe: a feathered highlight, an Inner Glow and a soft Drop Shadow. You'll sculpt the goldfish by tracing a reference photo, then scale and rotate it into the bowl. You'll finish with glass highlights, a tilt-shift blur that makes the set look like a miniature, and the letterbox slate.
The goldfish reference is Goldfish carassius auratus, a public-domain painting on Wikimedia Commons. Any clear side-on photo of a goldfish will do. The project has around 60 layers in six groups, so name each layer as you make it.
The palette:
-
Wall
-
Sky
-
clouds
-
sun
-
Hills
-
Cream clay
-
Sill top
-
sill front
-
Water
-
sand
-
Pebbles
-
Houses
-
Coral
-
mint roofs
-
lamp light
-
Goldfish
-
belly
-
fins
-
Navy
-
Letterbox
-
slate type
-
Set up the canvas, guides and wall
Choose File → New, make a 1920 × 1080 document and click Create.
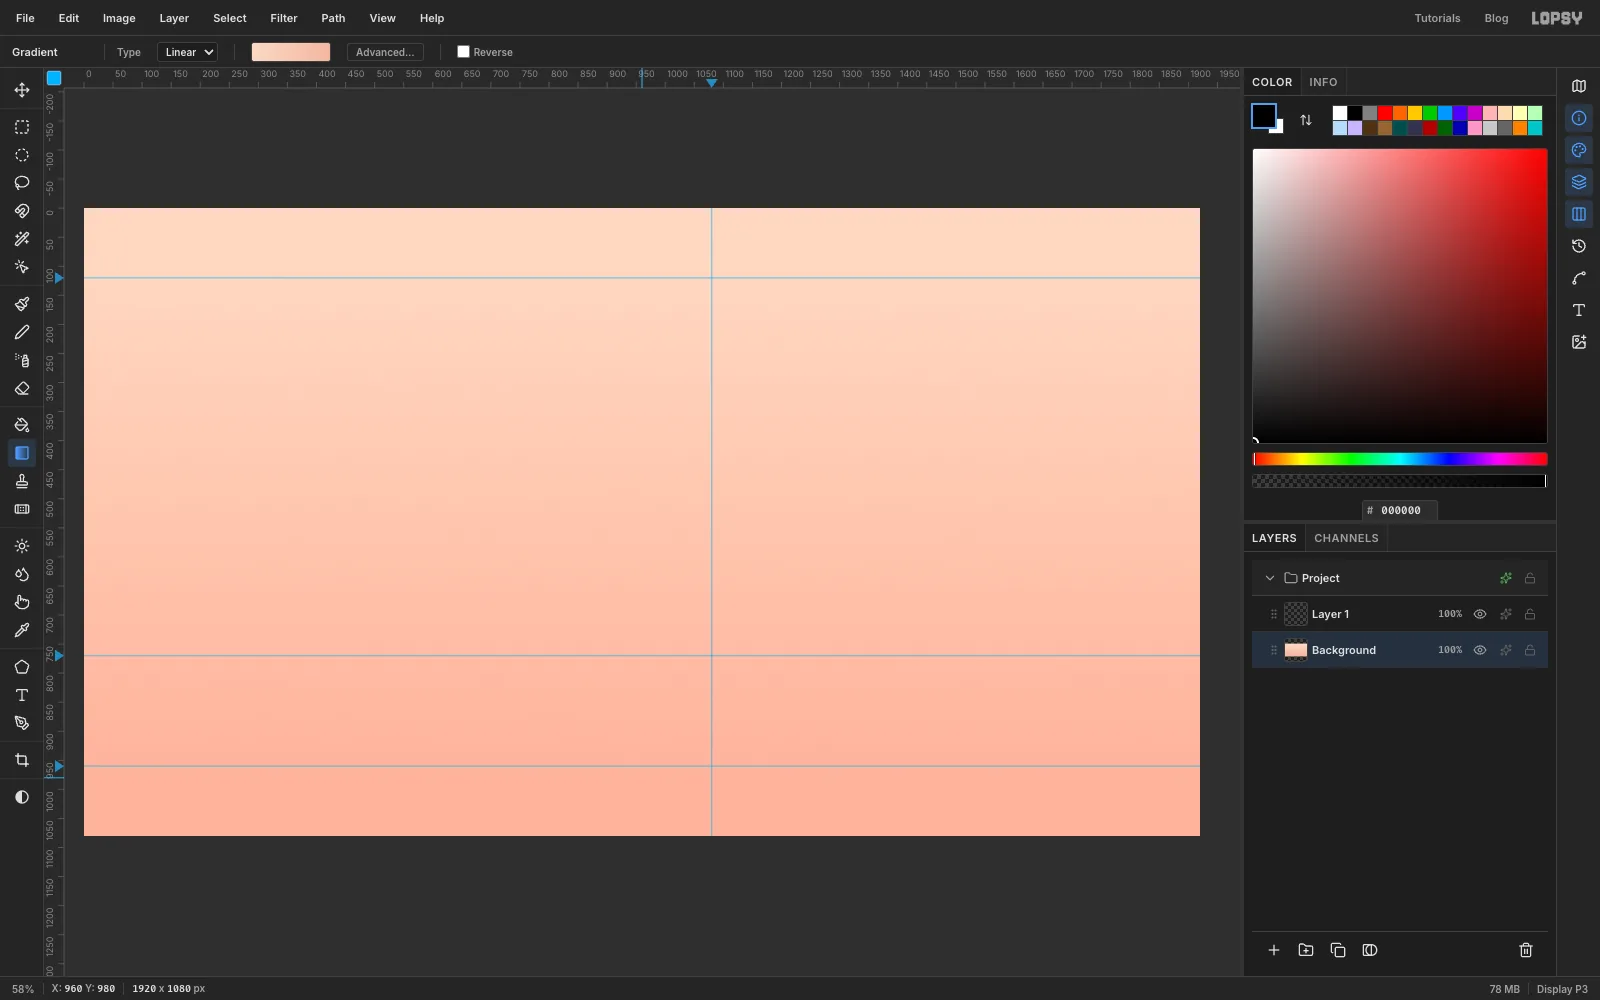
The frame will be letterboxed like a widescreen film. Click the left ruler at 120 and 960 for horizontal guides that mark the top and bottom of the picture. Click it again at 770 for the top of the windowsill. Then click the top ruler at 1080 for a vertical guide through the centre of the fishbowl.
Select the Background layer and pick the Gradient tool from the toolbox (it has no keyboard shortcut). Open the gradient editor with Advanced…, set two stops, at the left and at the right, and click Done. Drag from just above the canvas straight down to just below it. That's the plaster wall.
-
Paint the sky and select the clouds
Rename Layer 1 to Sky. Pick the Rectangular Marquee (M) and, with nothing selected, click once on the canvas without dragging. That opens the Rectangular Selection dialog, where you can type exact corners: From 330, 180, To 1390, 776. This is the window opening. Set a gradient from to and drag it from the top of the selection to about two-thirds of the way down. Press Cmd+D to deselect.
Add a layer called Sun. With the Elliptical Marquee, hold Cmd (for a perfect circle) and drag a circle about 108 px across in the upper-left pane, fill it with (Edit → Fill), and give it an Outer Glow (Size 40, Opacity 70, colour ) from the layer's effects button.
Add Far hills and Near hills layers. On each, use the Lasso (L) to draw a gentle rolling line across the window, from the left edge to the right edge, then down and back along the bottom. Fill the far one with and the near one, lower down, with .
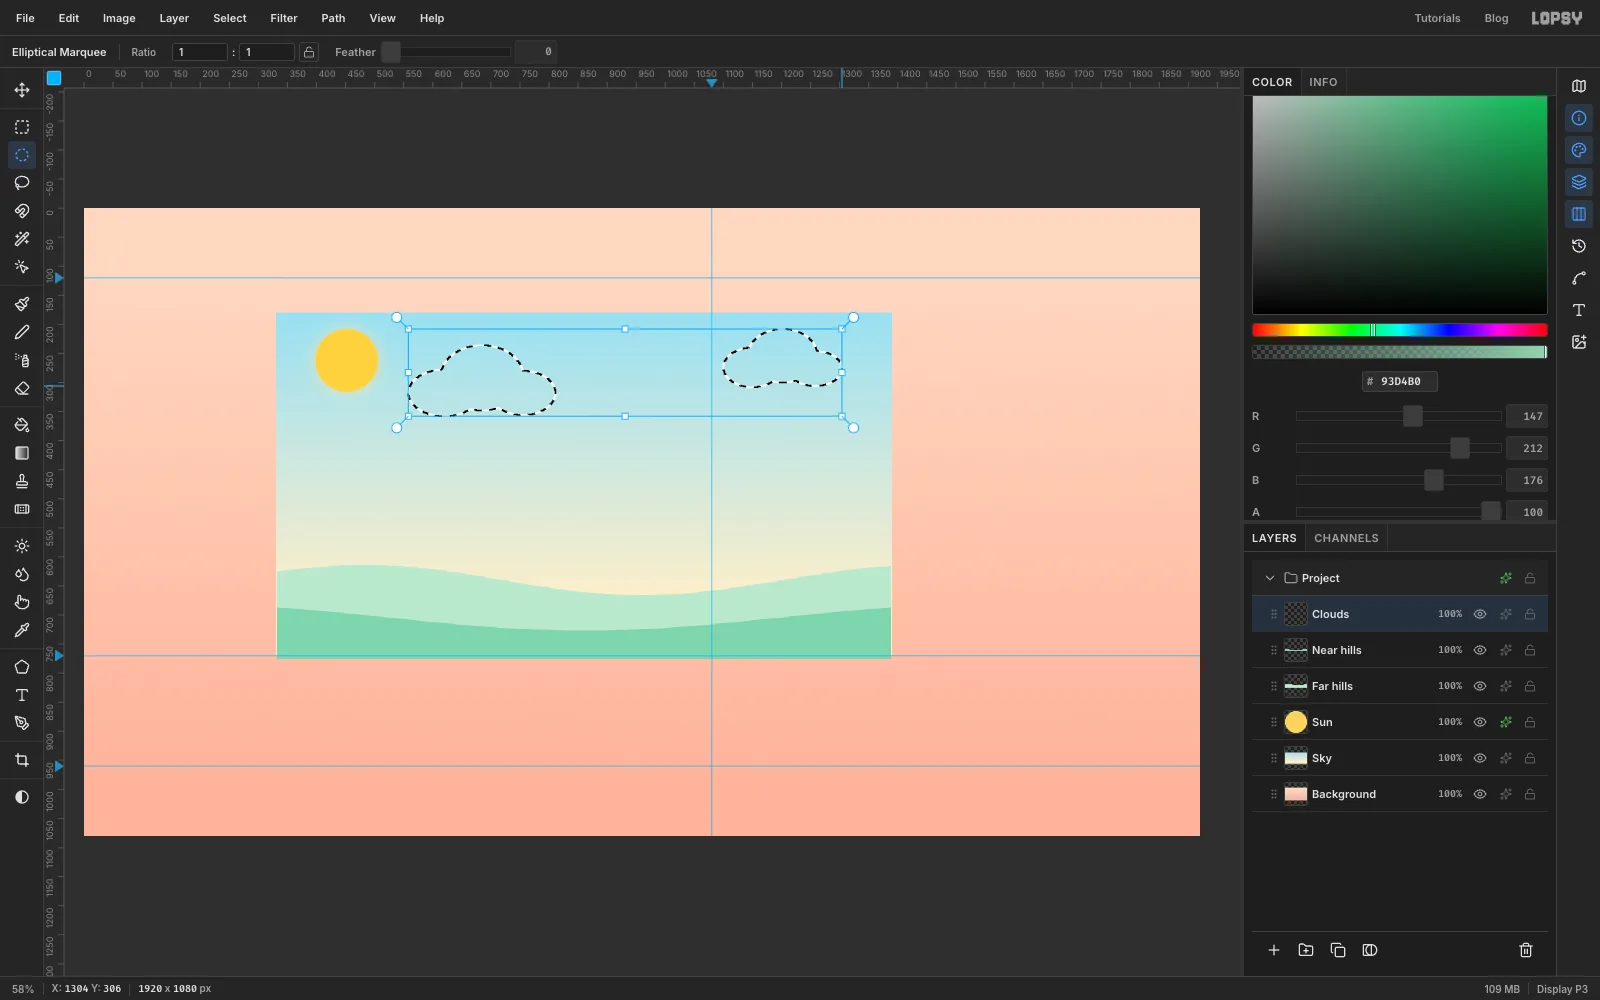
Add a Clouds layer. Drag one ellipse, then hold Shift and drag two more that overlap it. Shift adds to the selection, so three ellipses become one puffy cloud. Build a second, smaller cloud in the right pane the same way, then fill both with .
-
Learn the clay recipe
Every object in this picture gets the same treatment, so learn it on the clouds:
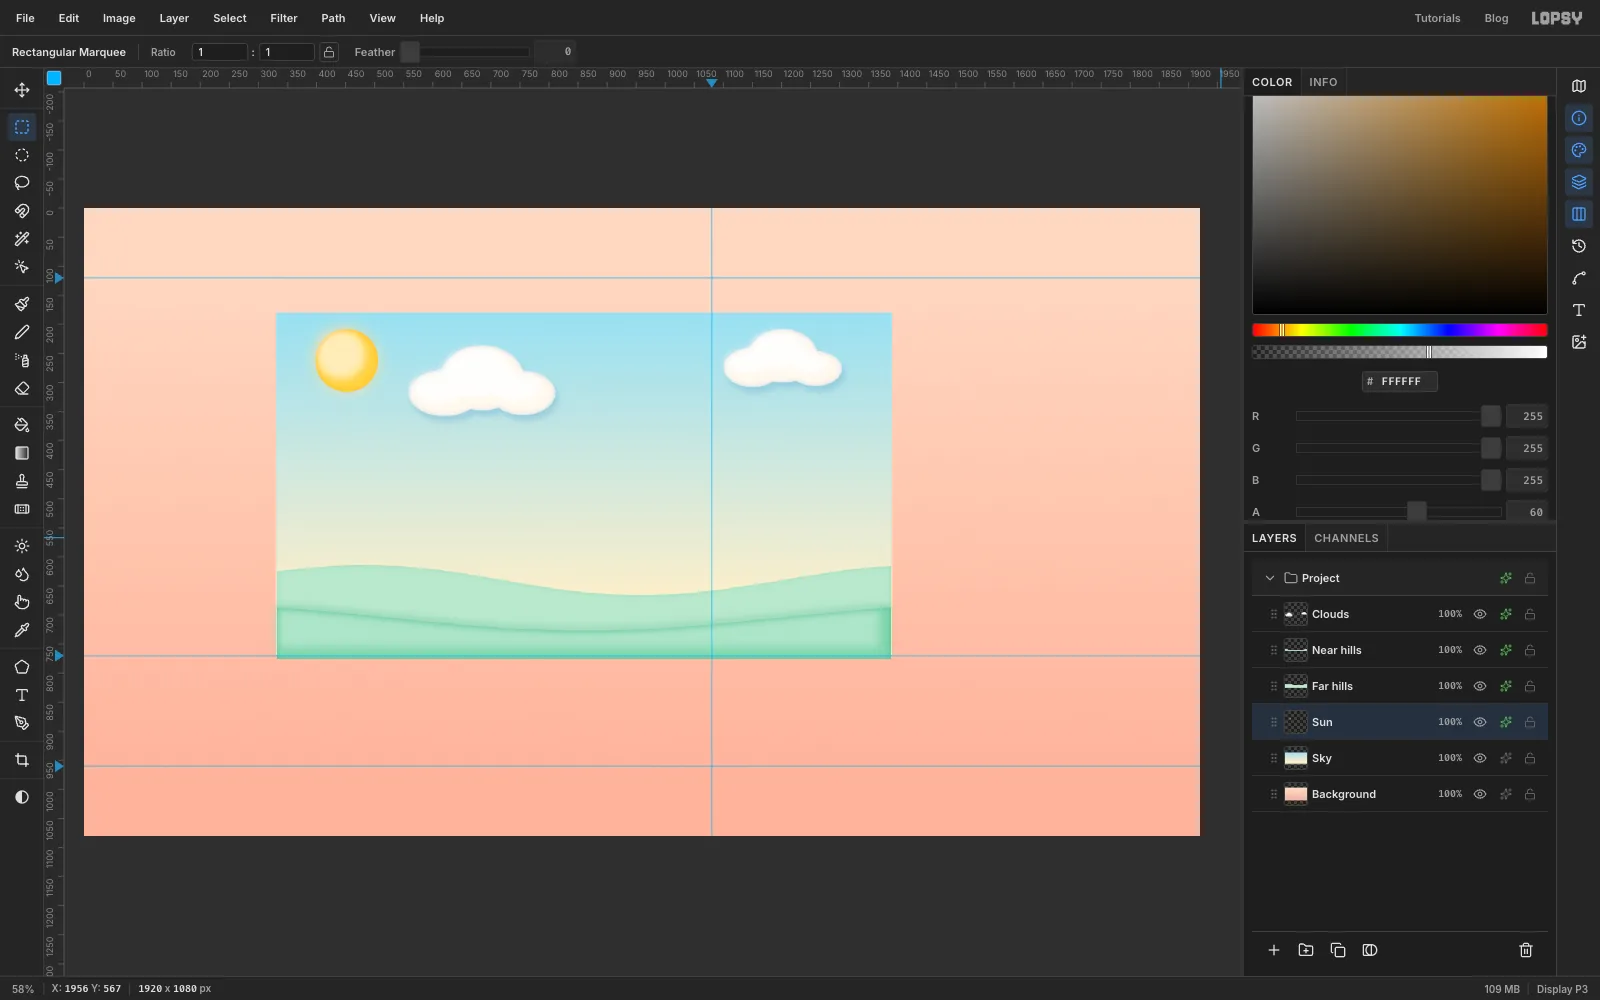
- Cmd-click the Clouds thumbnail in the Layers panel to select the layer's shape, then click Add Layer.
- Choose Select → Shrink… and enter about a fifth of the shape's height. For the clouds, use 14.
- With a marquee tool active, press Shift+Up and Shift+Left once each to nudge the selection 10 px toward the light.
- Select → Feather… by about the same amount (14).
- In the Color panel, set the colour to white and drag the A (alpha) slider down. Use 90 for the clouds and 30–60 for darker colours. Then Edit → Fill, and Cmd+D. Set A back to 100 straight away, or your next fills will come out see-through.
- Choose Layer → Merge Down so the highlight becomes part of the clouds.
- Open the effects drawer. Add an Inner Glow in a darker shade of the base colour (here , Size 14, Opacity 80). This is the shading where the clay rolls under. Then add a Drop Shadow in a soft coloured shadow, not black: , Offset 6 / 10, Blur 14, Opacity 40.
Repeat it on Near hills, with a green glow and the shadow pointing slightly up (Offset Y −6) so the far hill darkens behind it. Do it on the Sun too, with a warm glow and no shadow. Far hills only needs an Inner Glow in .
-
Cut rounded window panes
Select Clouds and add a layer called Frame. Click (without dragging) to open the Rectangular Selection dialog again and enter From 300, 150, To 1420, 786. To round its corners, choose Select → Shrink… 50, then Select → Grow… 50. Shrinking cuts the corners off, and growing back adds them as curves. Fill it with .
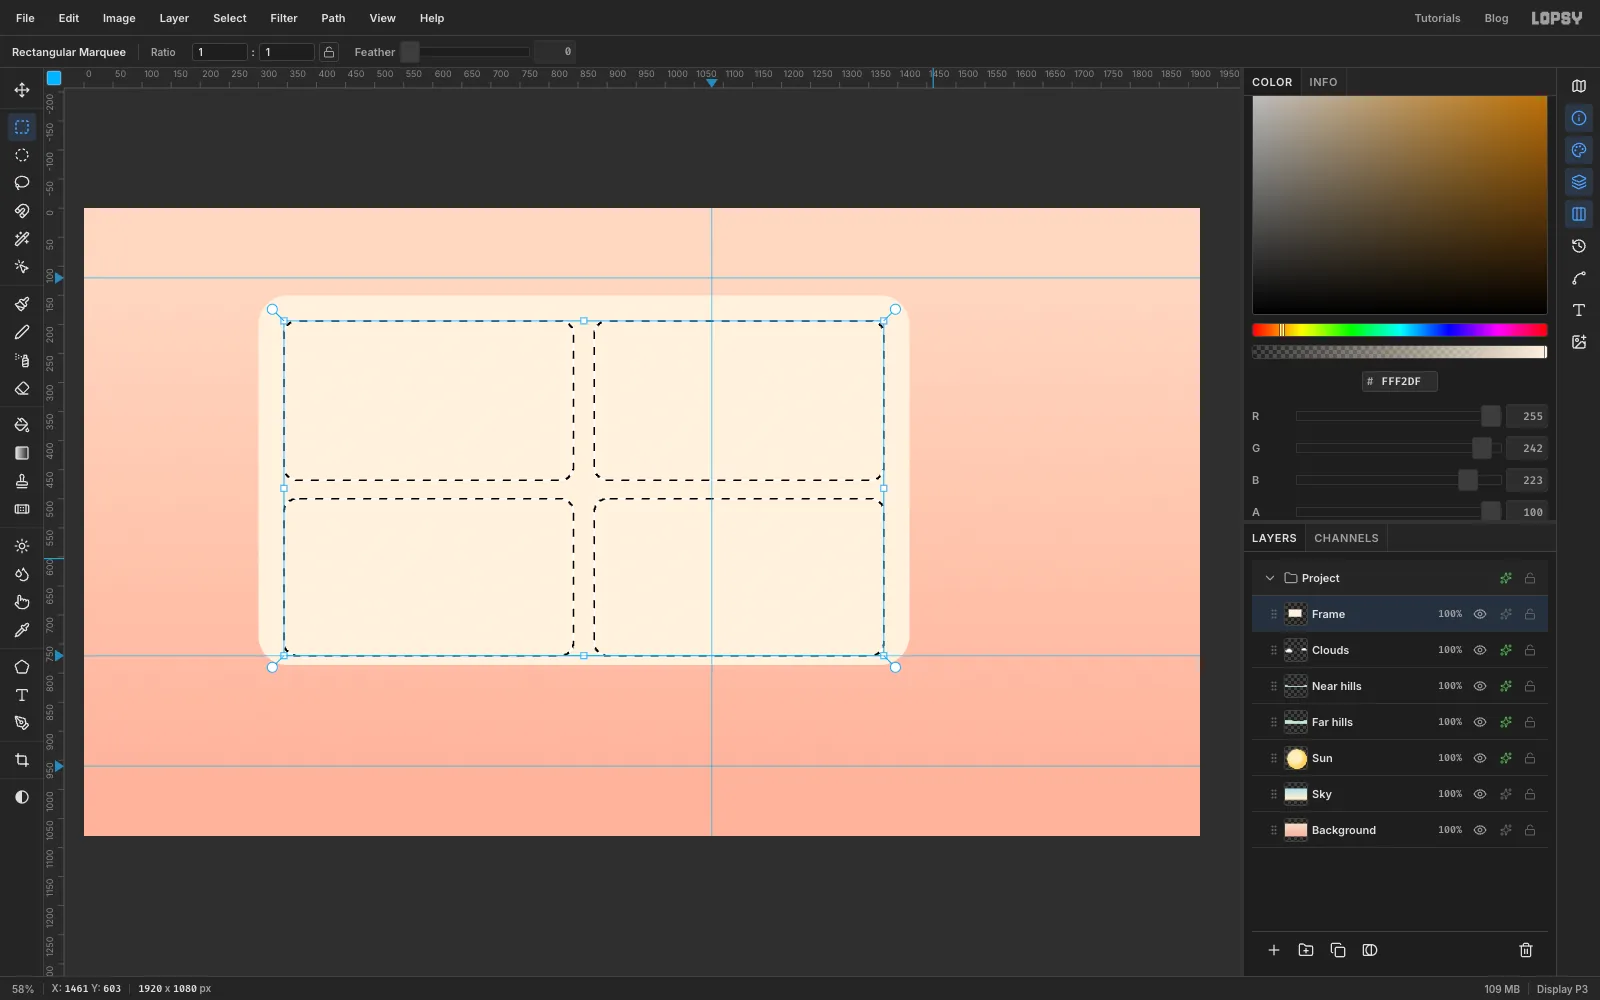
Now the panes. Click the top ruler at 842 and 878, and the left ruler at 468 and 500, for guides along both sides of a 36 px cross-shaped mullion. Drag the top-left pane from the inside corner of the frame to where those guides cross; with View → Snap to Guides on, the marquee snaps to them. Hold Shift and drag the other three panes the same way. Then use Shrink 22 and Grow 22 to round all four pane corners at once.
-
Puff up the window frame
Press Delete to cut the panes out of the frame, and deselect.
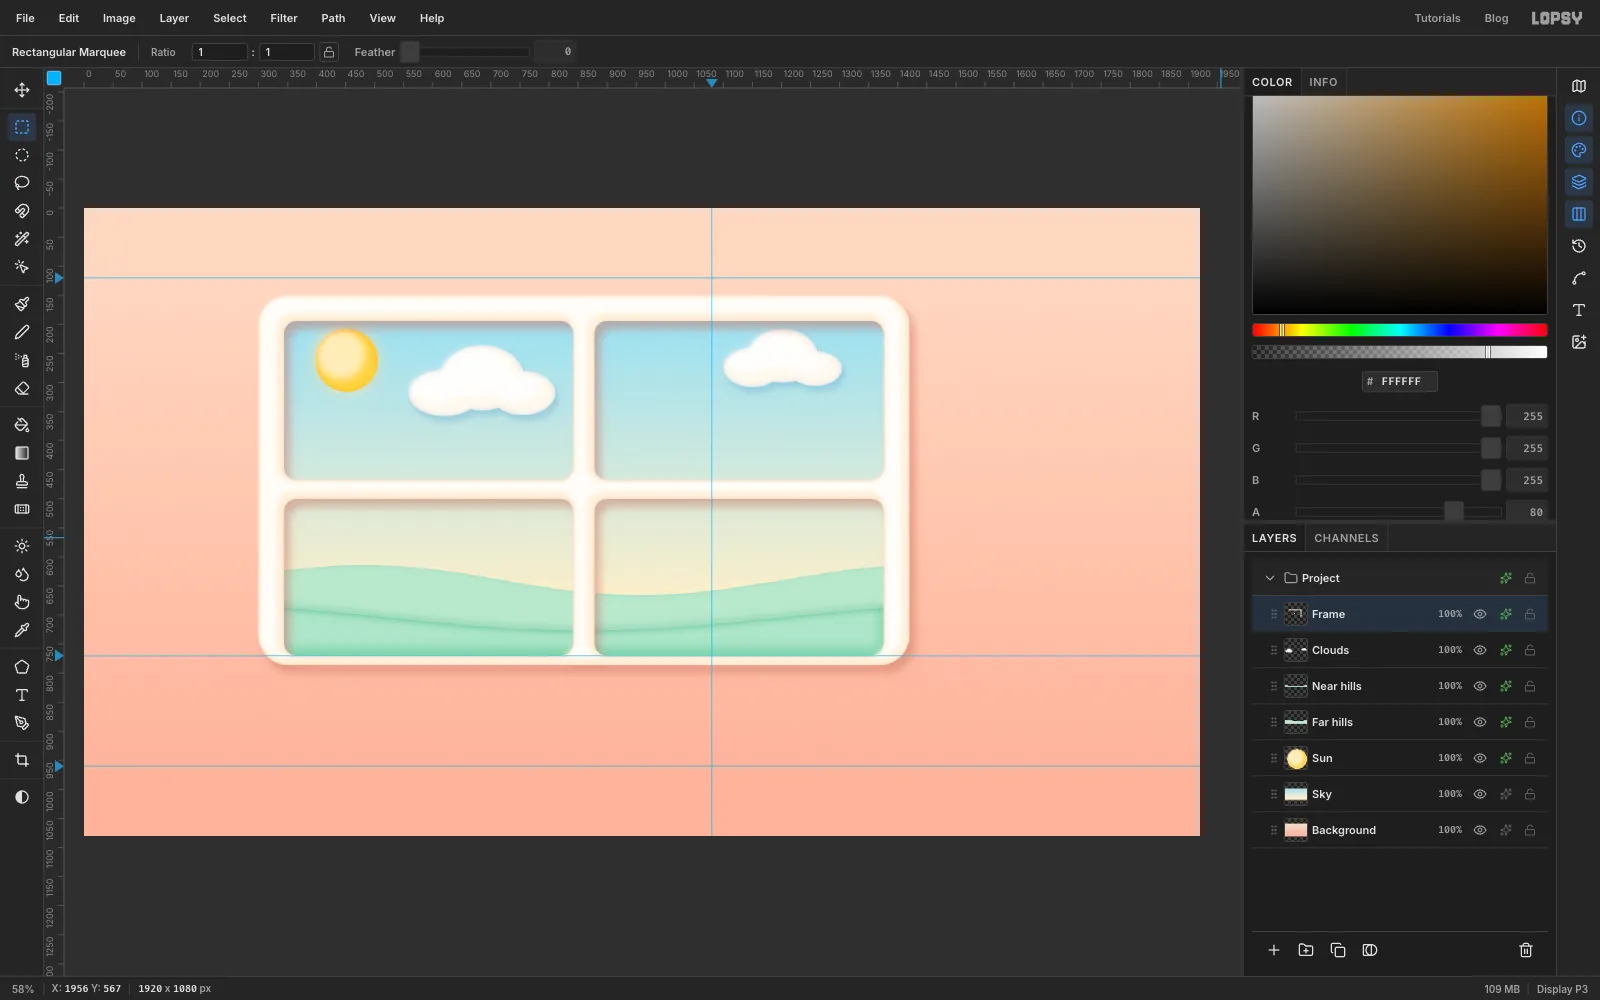
Run the clay recipe on Frame. Use Shrink 8, a 6 px nudge (six single Up / Left presses), Feather 8 and white at 80%. Add an Inner Glow (Size 10, Opacity 85) and a Drop Shadow (Offset 10 / 14, Blur 22, Opacity 45). The shadow is a warm terracotta because it falls on a peach wall.
-
Group the window and build the sill
Click Sky, Shift-click Frame, and choose Layer → Group Layers. Rename the group Window and collapse it with its arrow.
With Window still selected, click New Group at the bottom of the Layers panel and name it Sill. Because the selected group is collapsed, the new one appears above it rather than inside it.
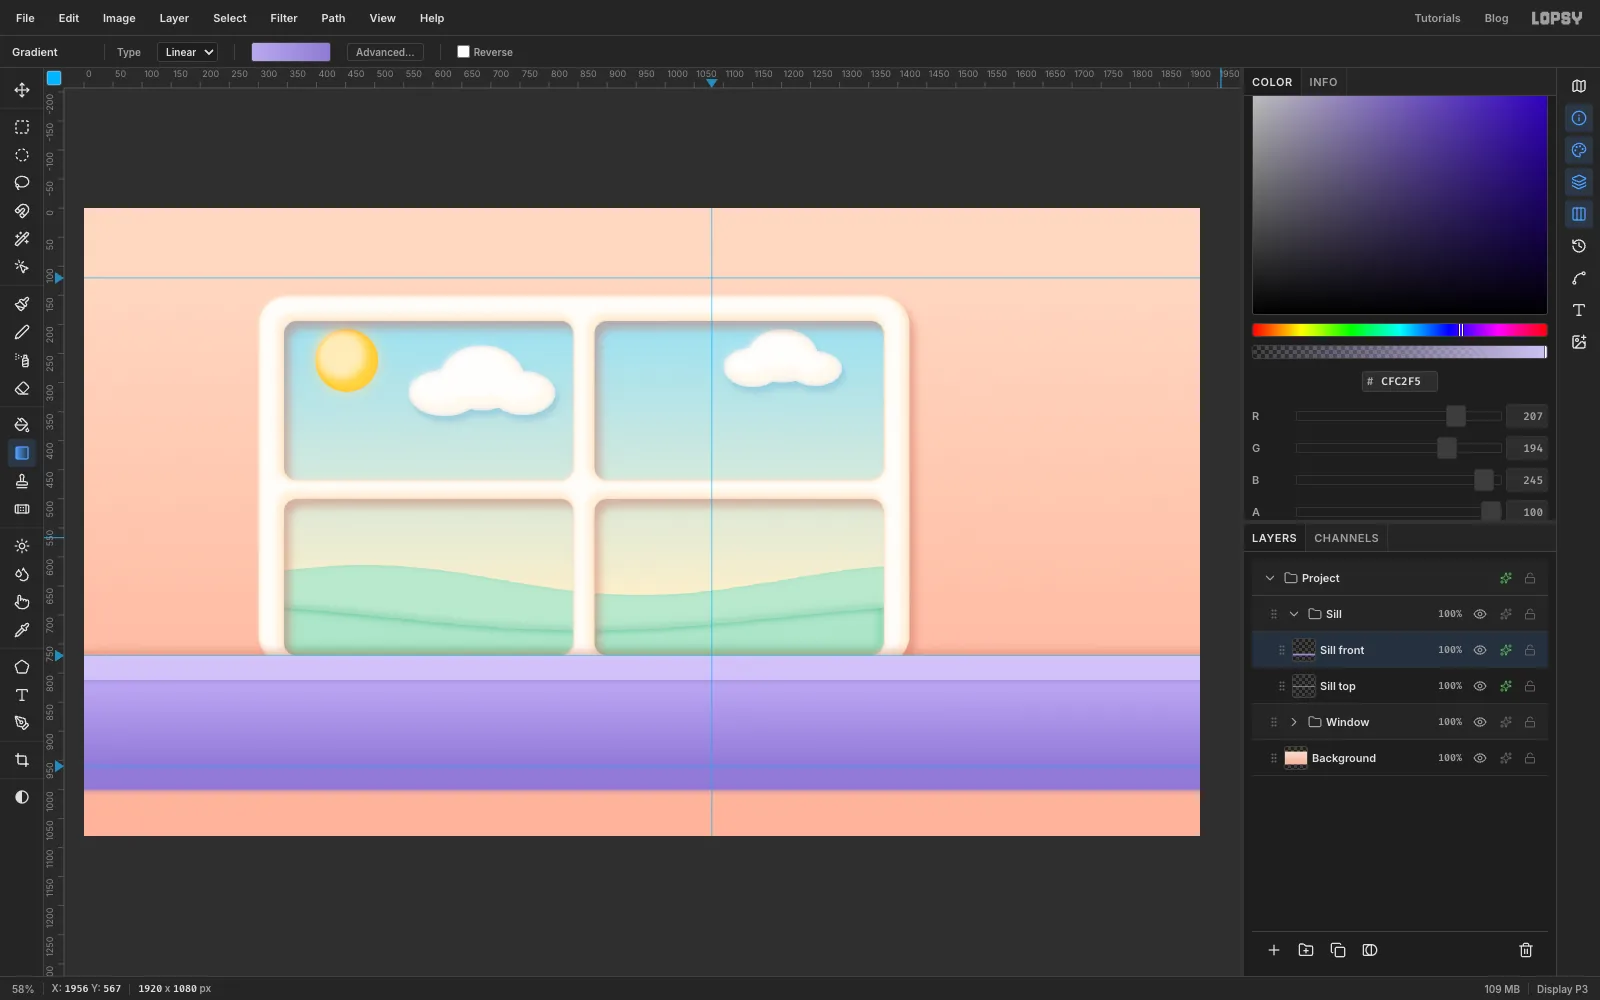
Inside Sill, add a Sill top layer. Drag a band from just off the left edge at the 770 guide to just off the right edge at about 818, and fill it with . Add Sill front and drag a band from 812 to below the bottom of the canvas. Fill it with a gradient from to , dragging from the top of the band straight down to the 960 guide.
Give Sill top a white Inner Glow (Size 8, Opacity 60) for a bright lip, and a Drop Shadow with Offset Y −8 so it darkens the wall just above it. Give Sill front an Inner Glow (Size 18).
-
Sculpt the cactus and its pot
Collapse Sill, select it, and make a new group called Props above it.
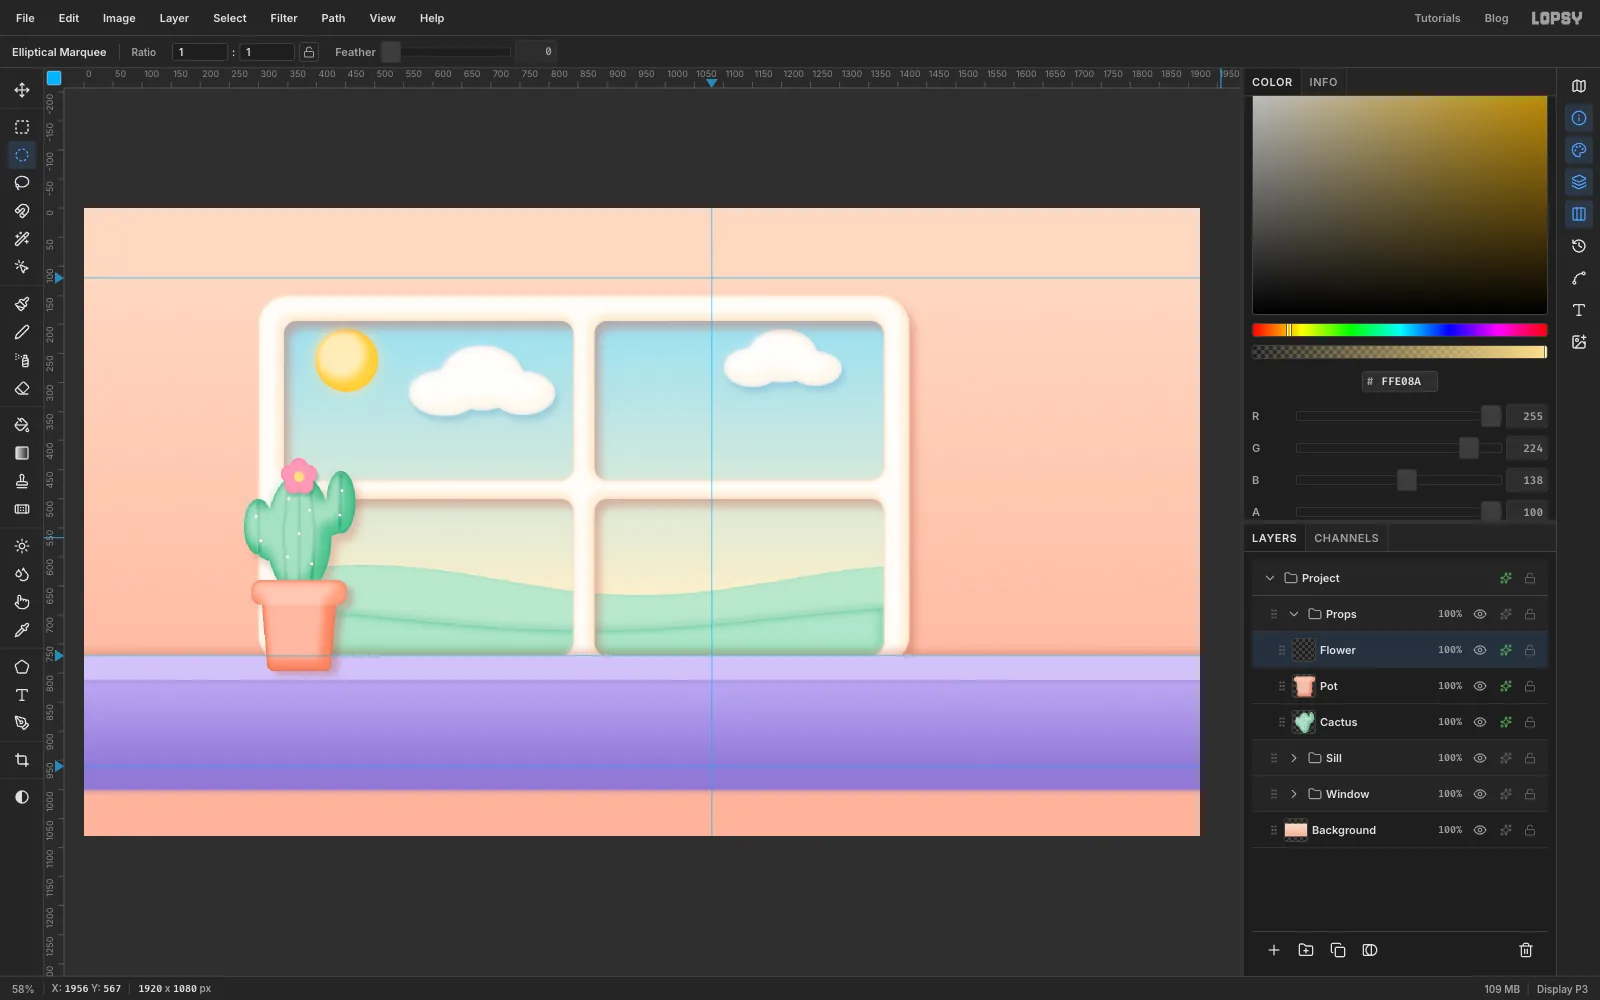
Add a Cactus layer. Build the cactus from ellipses with Shift: a tall body about 112 × 208 px standing on the sill at the left, two narrow arms and two small sideways ellipses that join the arms to the body. Fill it with .
Cmd-click the thumbnail so the next strokes stay inside the cactus. Pick the Brush (B) at Size 7, Hardness 100, colour , and drag three slightly curved ribs down the body and one down each arm. Switch to at Size 6 and click a scatter of spines. Deselect, then run the clay recipe (Inner Glow , Drop Shadow ).
Add a Pot layer. Lasso a slightly tapering pot under the cactus, round it with Shrink 10 / Grow 10 and fill it with . Then drag a wider rounded rim across the top (Shrink 16 / Grow 16) and fill it with . Clay it with an Inner Glow .
Finally, make a Flower layer: five overlapping 30 px circles in a ring on top of the cactus, filled , with a small centre.
-
Move the whole plant at once
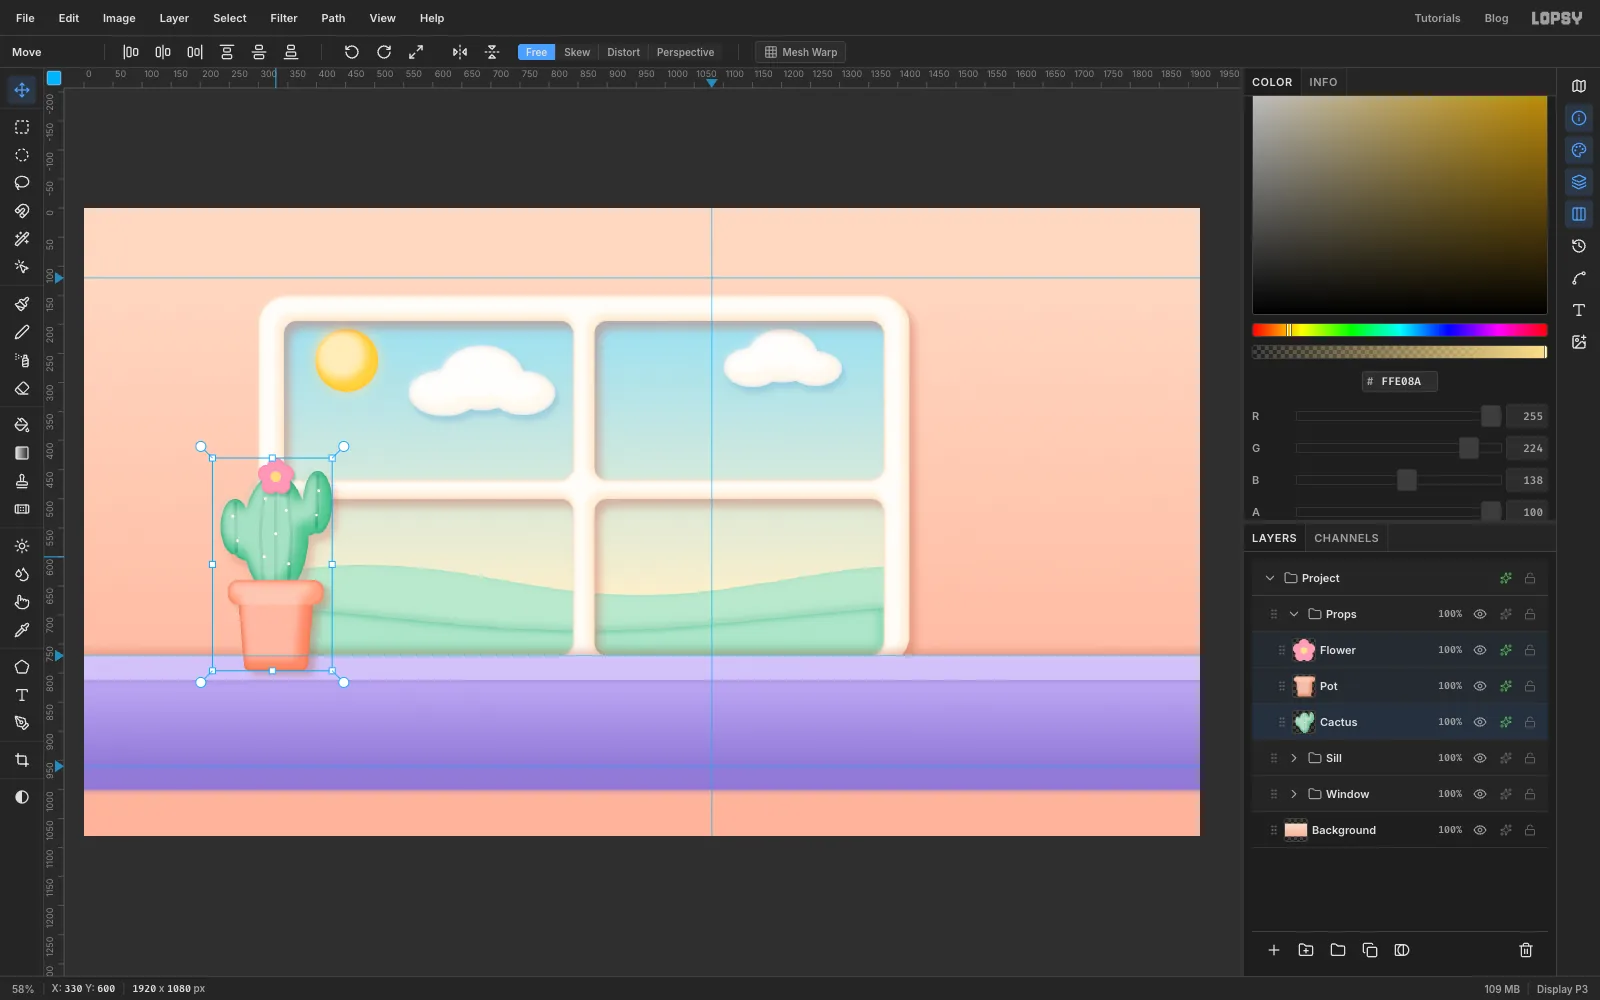
The pot's left edge lined up exactly with the window frame's edge. A tangent like that pulls the eye, so move the plant.
Click Cactus, then Shift-click Flower to select all three layers. With the Move tool (V), drag the plant about 40 px to the left. Every selected layer moves by the same amount.
-
Add a teacup with mirrored steam
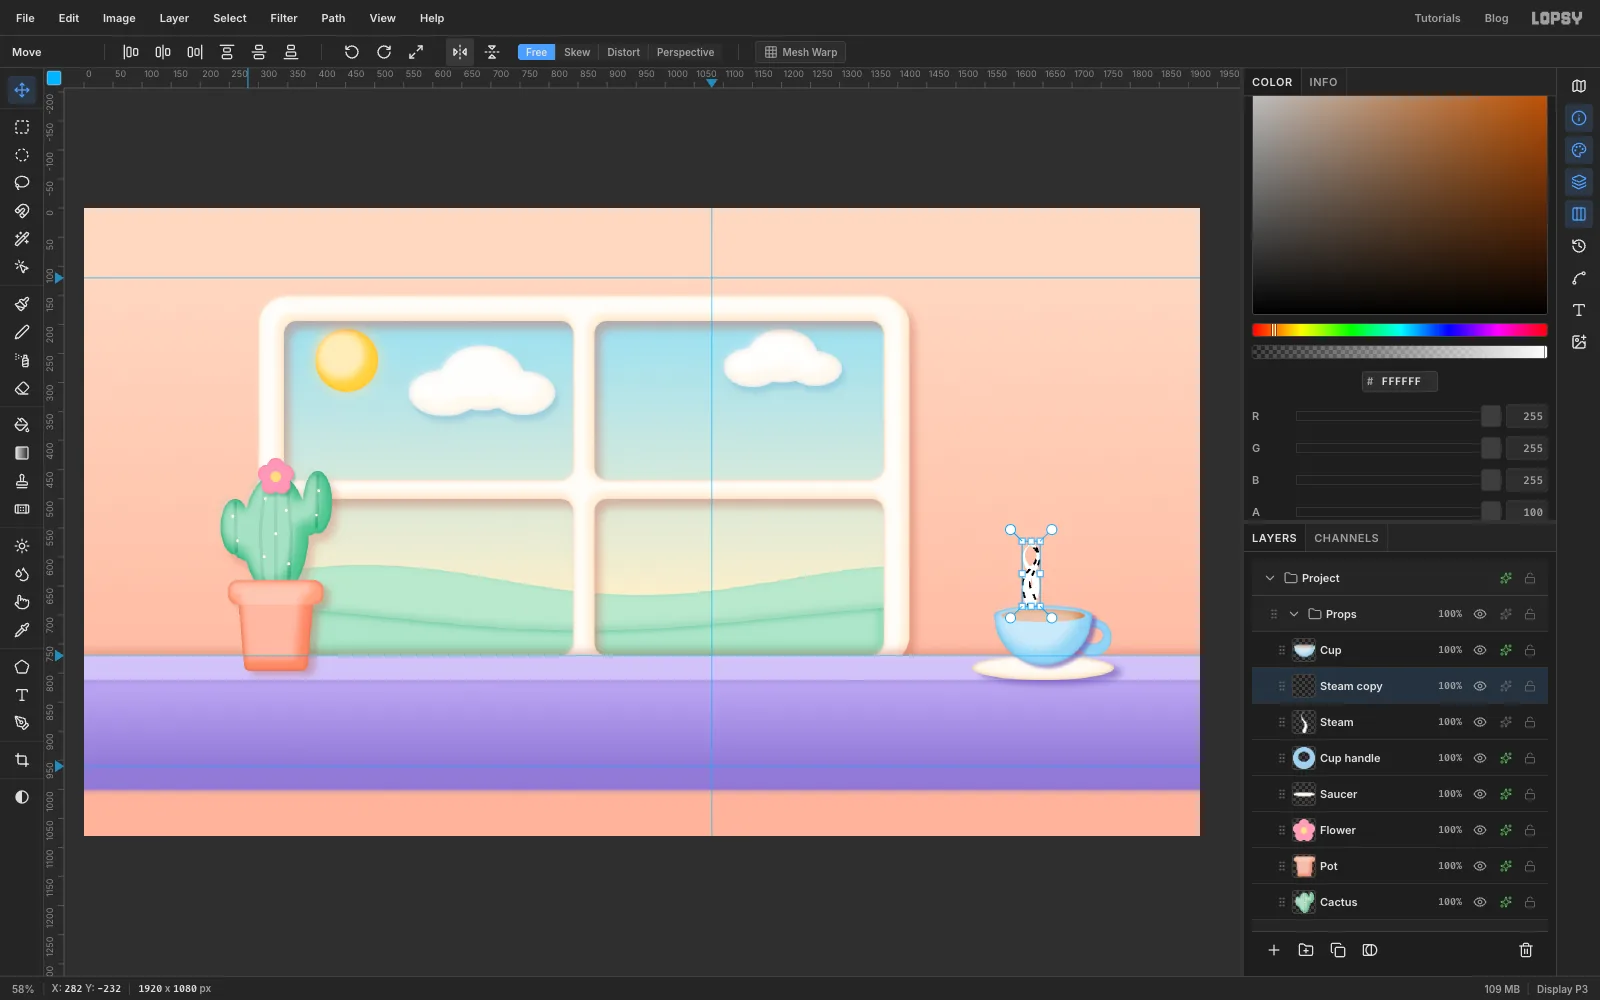
At the right end of the sill, make a Saucer layer: a 244 × 40 px ellipse filled with . Clay it with a stronger shadow (, Offset 14 / 8, Blur 16, Opacity 55) so it sits down firmly.
Make a Cup handle layer: drag a circle about 64 px across to the right of where the cup will be, then Alt-drag a smaller circle inside it to subtract the hole. Fill it with .
Make a Cup layer above it. Lasso a half-circle bowl about 170 px wide, Shift-add a flat ellipse across its top for the rim, and fill it with . Drop a slightly smaller ellipse into the rim and fill it with tea . Clay the cup, giving it a tight dark shadow (, Blur 8, Opacity 60) so it presses into the saucer.
For steam, add a Steam layer. Set the Brush to white, Size 18. Click the brush-tip thumbnail at the left of the options bar to open the Brushes dialog, and on its Shape tab set Taper to 120. Taper thins the stroke over that many pixels from where it starts, so start at the cup and drag a wavy wisp upward. To get a matching second wisp, choose Layer → Duplicate Layer, Cmd-click the copy's thumbnail, and click Flip Horizontal in the Move tool's options bar. Deselect, press Shift+Right four times, and Merge Down. Set the layer to 70% opacity and give it a 3 px Gaussian Blur. Set Taper back to 0 before you paint anything else.
-
Hang a clock at 8:40
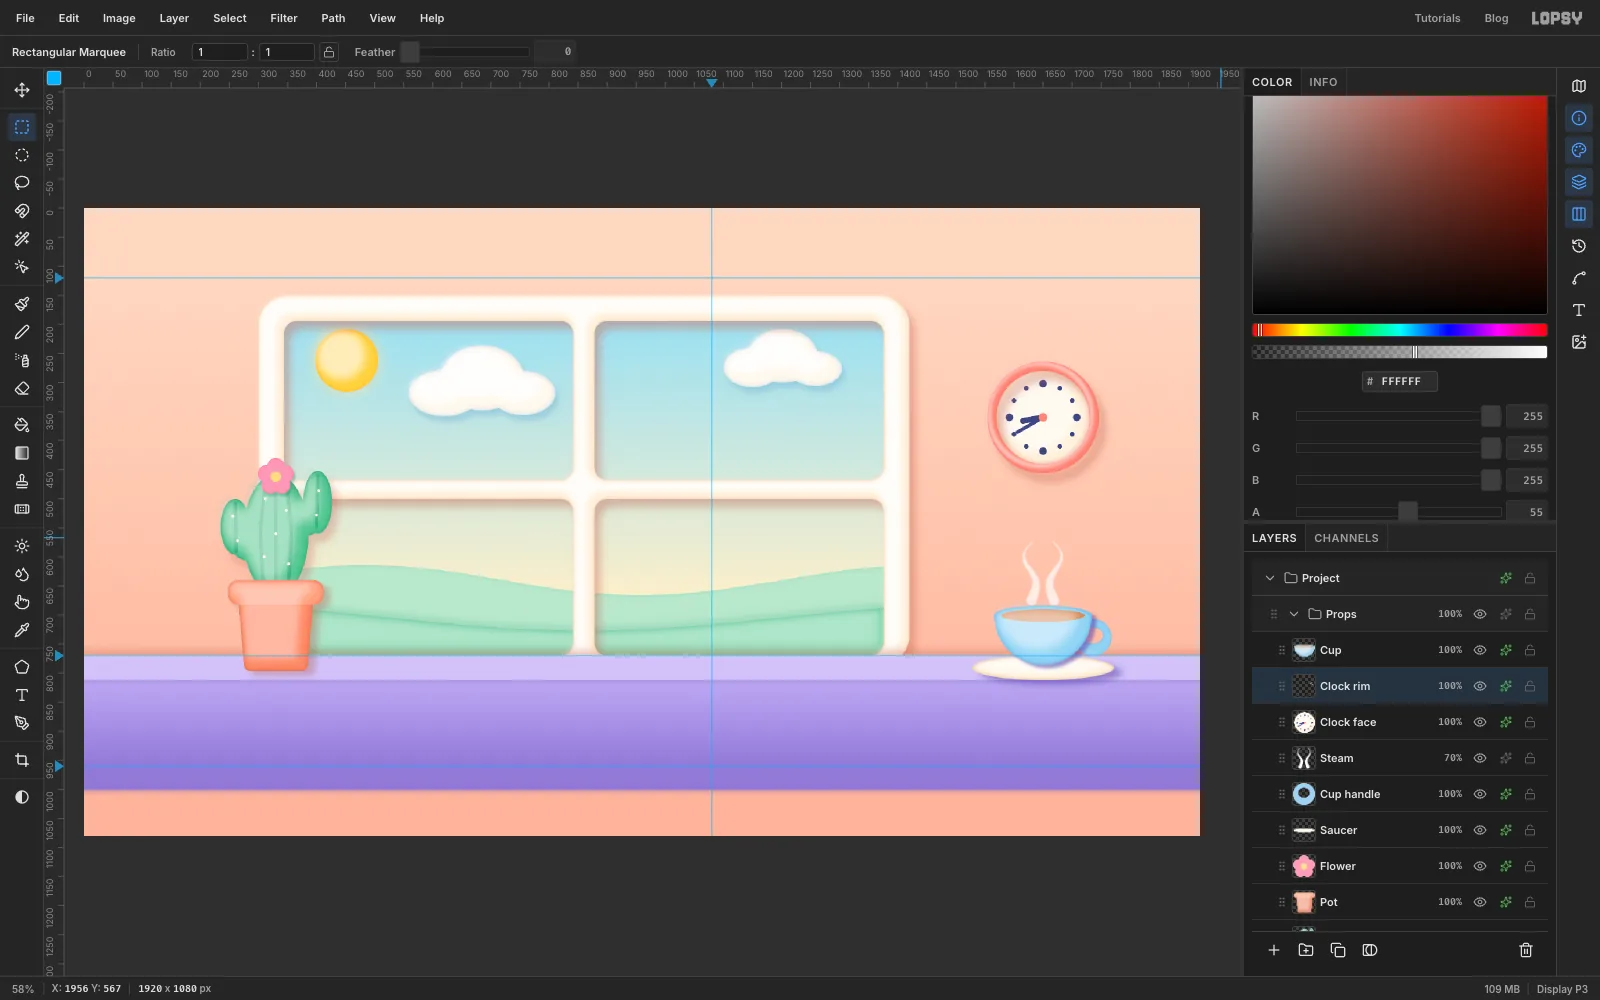
The frame is set at 8:40 am, so let a clock say it. Make a Clock face layer: a 160 px circle on the wall above the cup, filled , and clay it.
Paint the face after the clay highlight so the marks stay crisp. With the Brush in navy , click twelve hour marks in a ring: Size 14 at 12, 3, 6 and 9, and Size 9 for the rest. For the hands, click the centre and Shift-click to draw straight lines. The hour hand is short (Size 11) and points most of the way from the 8 to the 9. The minute hand is longer (Size 7) and points at the 8. Finish with a coral dot in the middle.
Add a Clock rim layer. Cmd-drag a 192 px circle centred on the clock, then Cmd+Alt-click the Clock face thumbnail to subtract the face, which leaves a ring. Fill it with . Clay it, and give it a big wall shadow (Offset 12 / 16, Blur 22).
-
Add a snail and a tea towel
The front of the sill is a big empty band, and props give it scale and story.
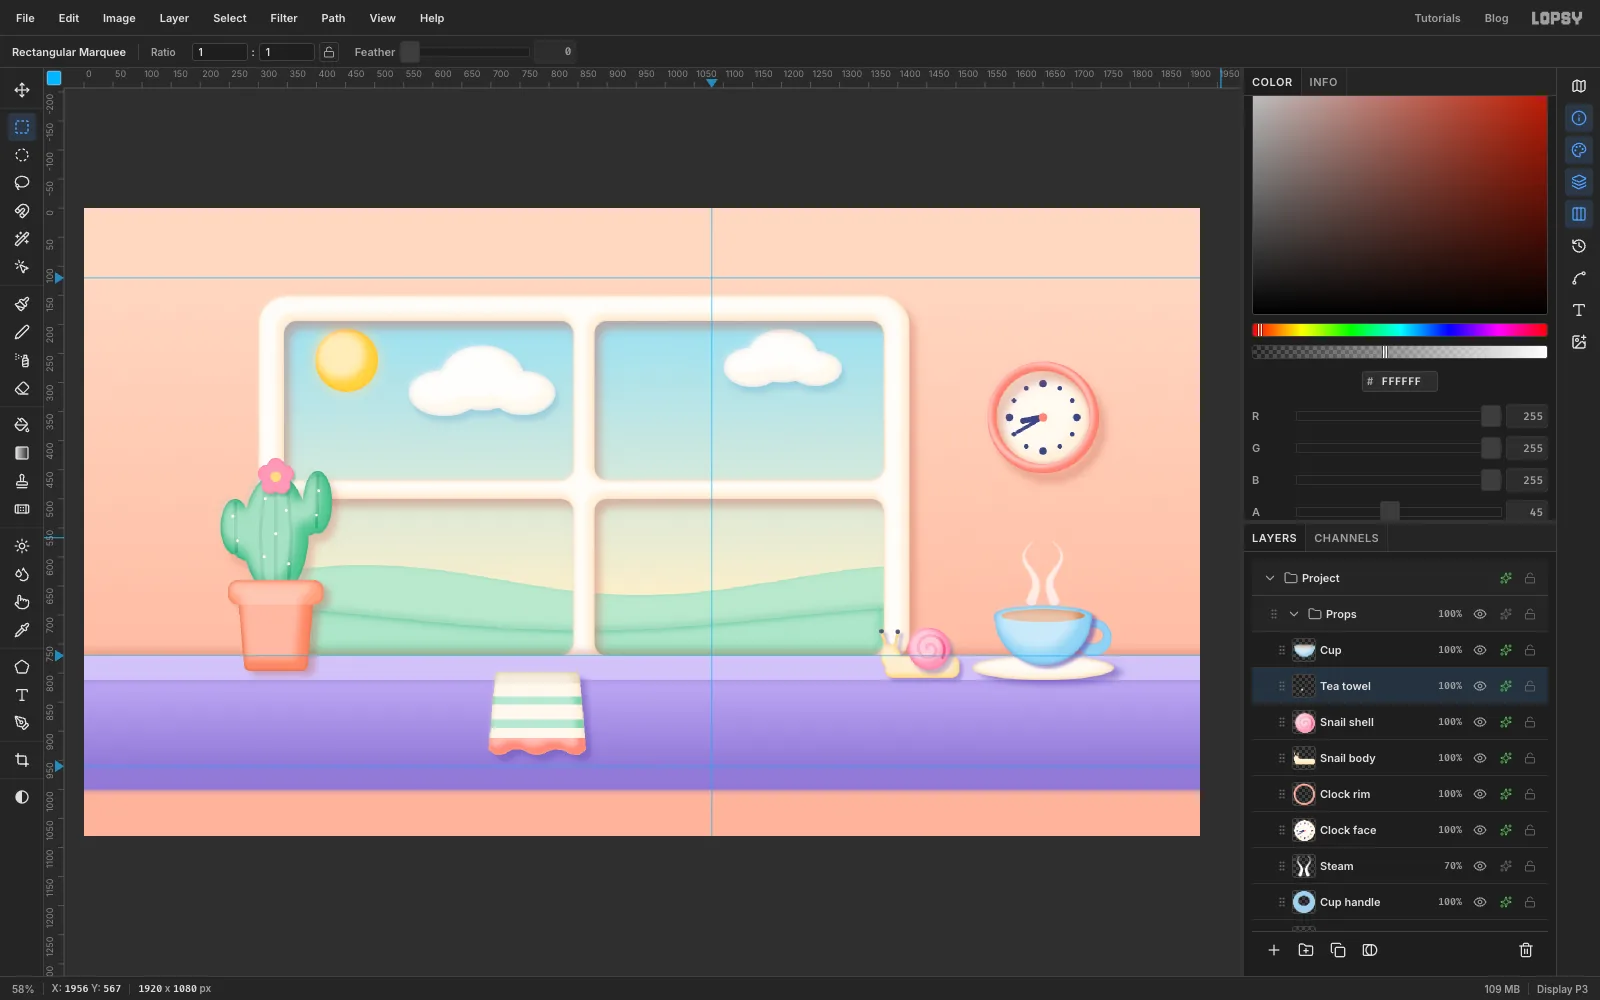
For the snail, make a Snail body layer and work just left of the saucer, around x 1380–1500, sitting on the sill top. Use a long rounded rectangle (about 128 × 27, Shrink/Grow 13) with a head ellipse Shift-added at the left, filled . Draw two eye stalks with Shift-click lines at Brush Size 6, and click navy eyes on the ends. On a Snail shell layer, fill a 72 px circle with and drag a spiral in with the Brush. Clay both.
For the Tea towel, lasso a cloth shape that hangs from the sill's top edge down the front, with a wavy hem. Soften it with Shrink 4 / Grow 4 and fill it with cream. For each stripe, drag a thin marquee band across it. Then Cmd+Shift+Alt-click the towel's thumbnail to intersect, so the band stays inside the towel. Fill two mint stripes, a beige fold at the top and a coral hem at the bottom, then clay it.
-
Shape the goldfish bowl
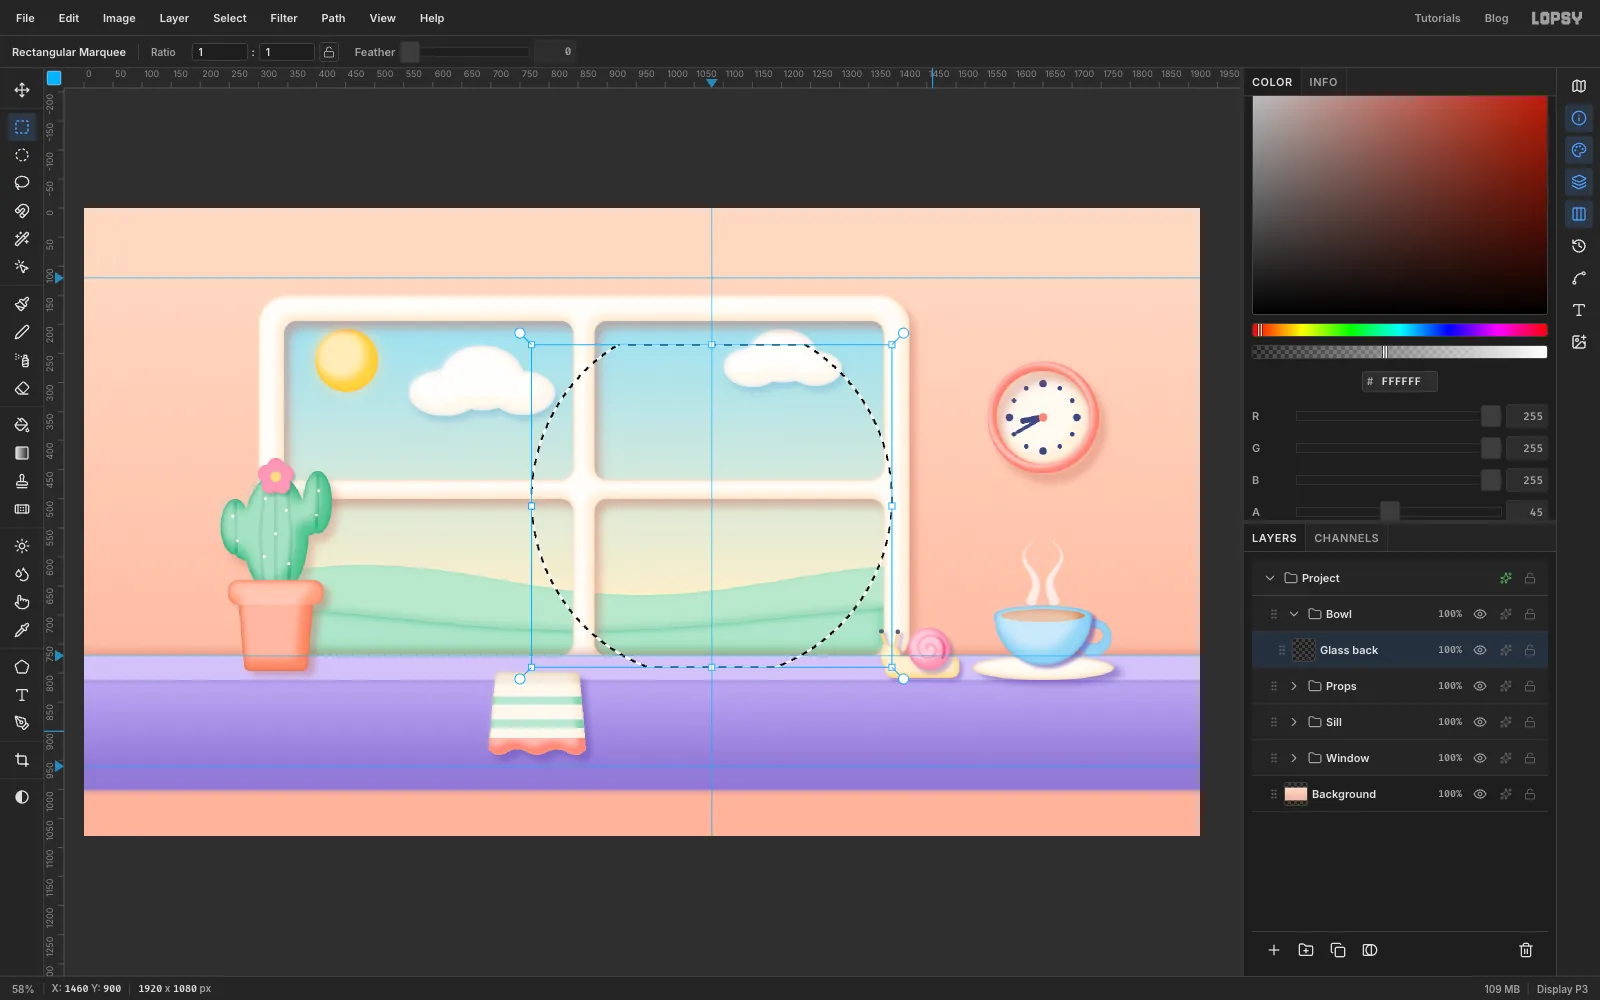
Collapse Props, select it, and make a new group above it called Bowl. Add a Glass back layer.
With the Elliptical Marquee, click without dragging to open the Elliptical Selection dialog and enter From 770, 190, To 1390, 810: a 620 px circle centred on the vertical guide. A fishbowl is a sphere with the top and bottom sliced off, so hold Alt and drag a rectangle over everything above y 235 to subtract it. Then do the same for everything below y 790. Fill the shape with and set the layer to 40% opacity. That's the faint tint of empty glass.
-
Fill it with water
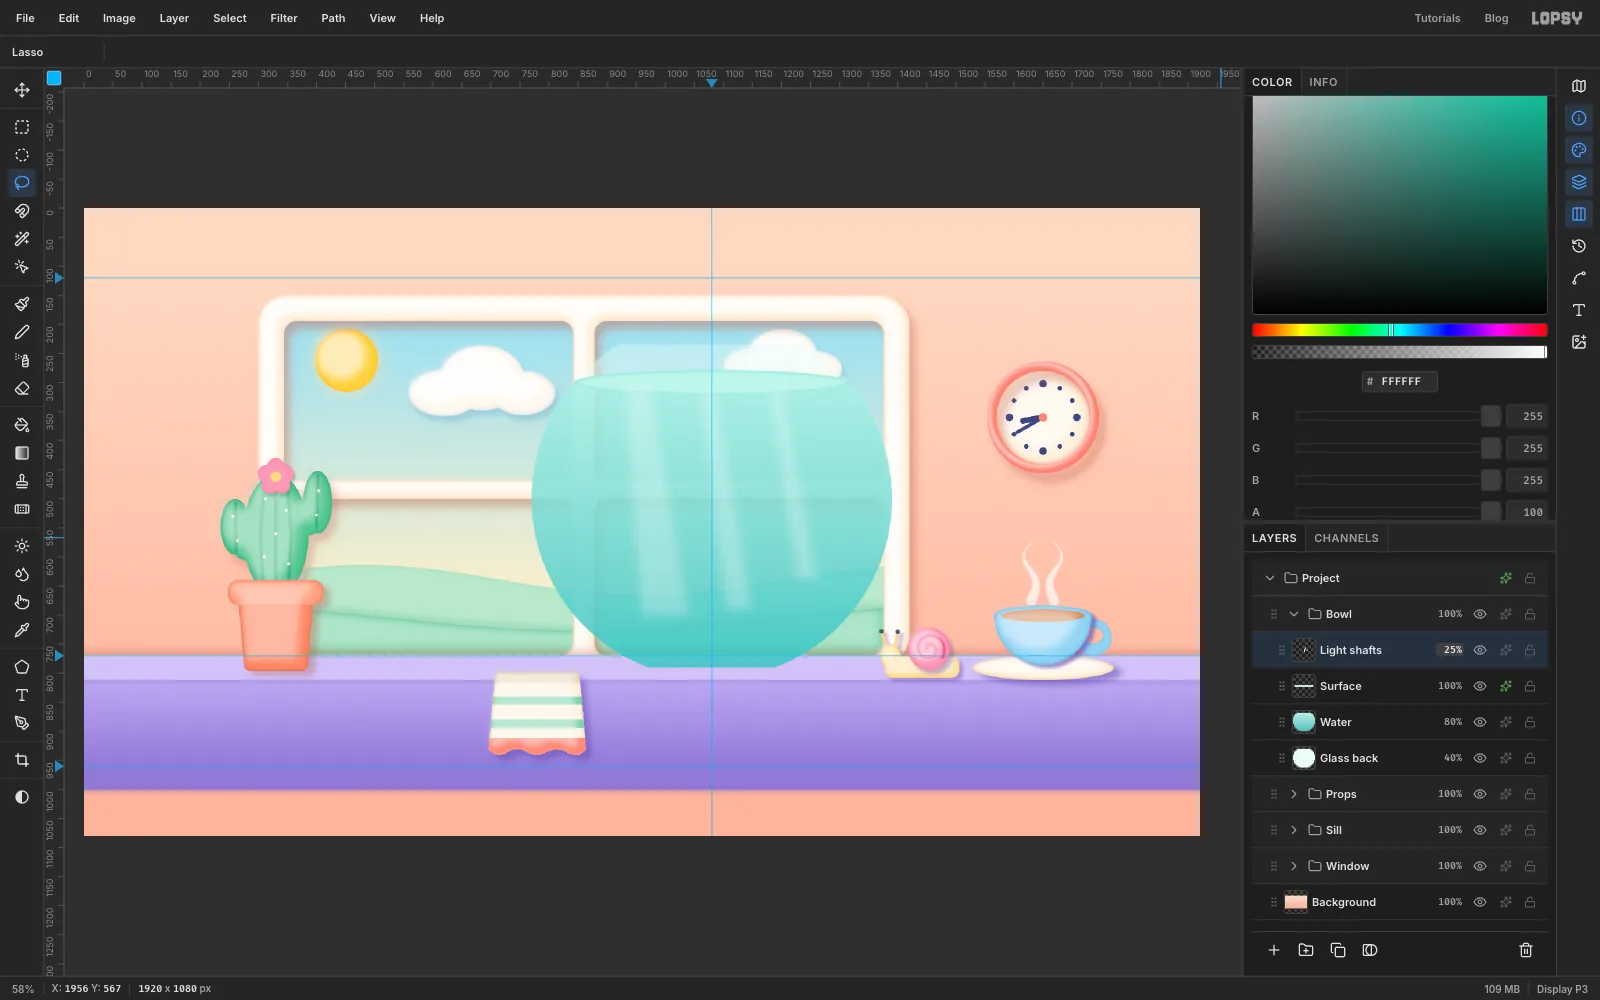
Add a Water layer. Make the same trimmed circle, but cut it off at y 300, the waterline. Then Shift-drag a flat ellipse across the waterline, as wide as the bowl there and 44 px tall. It rounds off the top of the water so you see its surface in perspective. Fill it with a gradient from at the surface to at the base, and set the layer to 80%.
Add a Surface layer with just that ellipse, filled with an Inner Glow .
Add Light shafts: three long thin lasso wedges slanting down from the surface, held together with Shift. Feather 16, fill white, then set the blend mode to Screen (the blend-mode dropdown at the top of the effects drawer) and the layer opacity to 25%.
-
Pile up the gravel mound
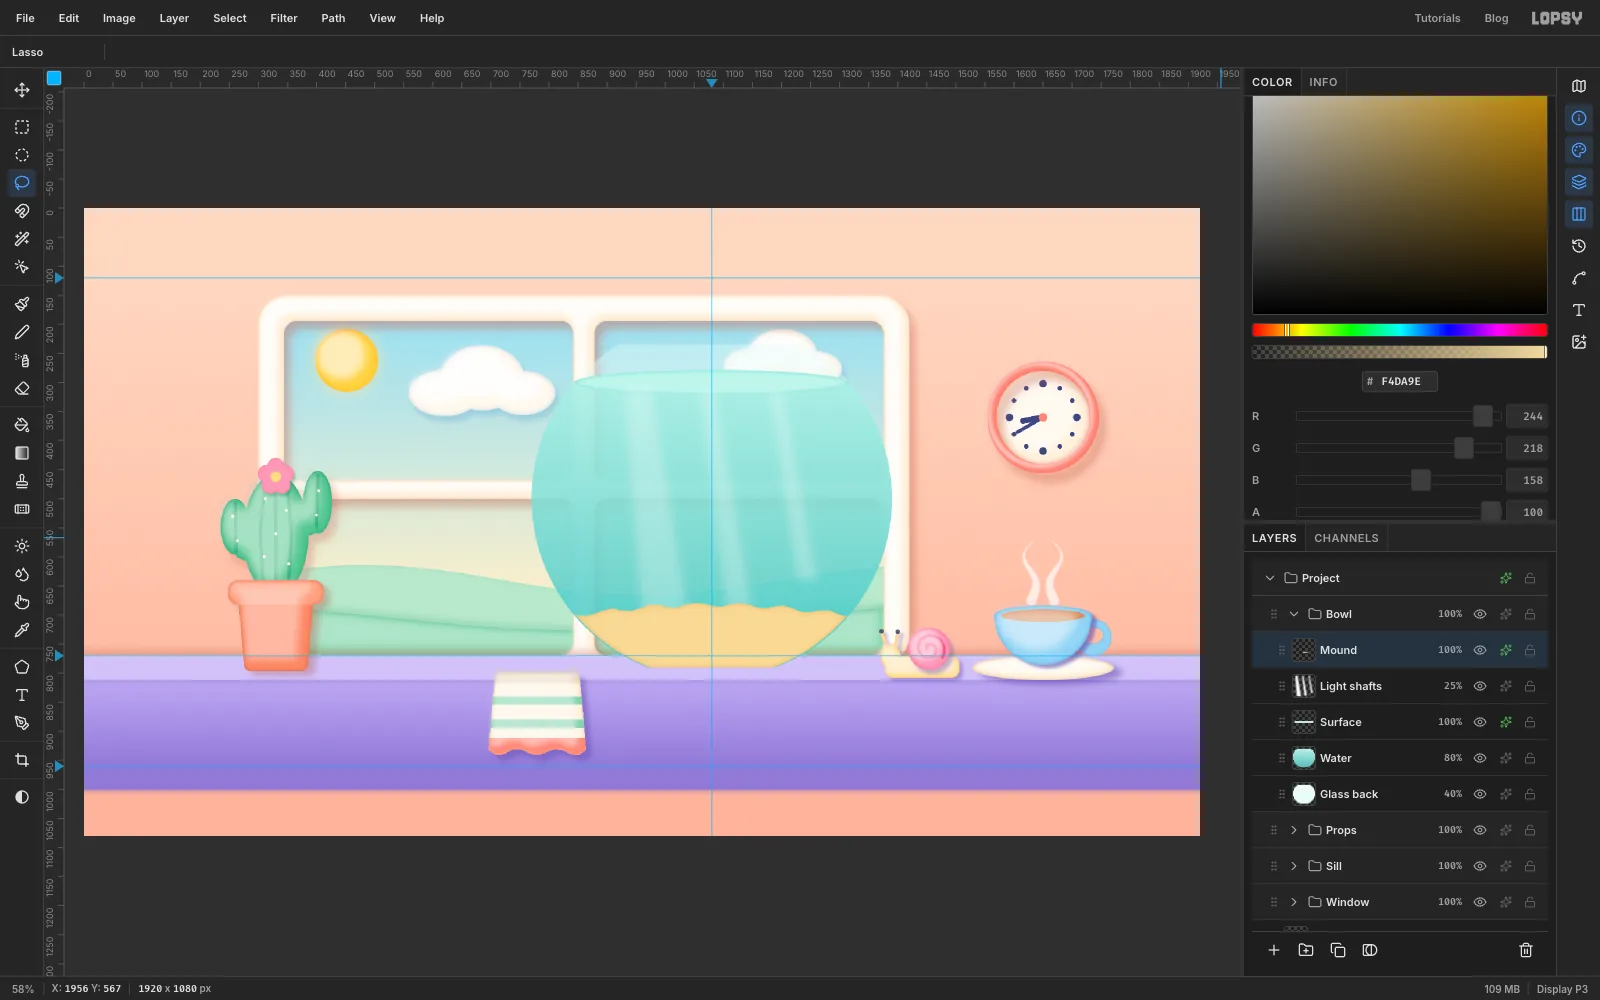
Add a Mound layer. With the Lasso, draw a gently rolling line across the bowl at about y 690. Then follow the inside of the glass down to the base and back up the other side. Fill it with and give it an Inner Glow (Size 14).
-
Build the town
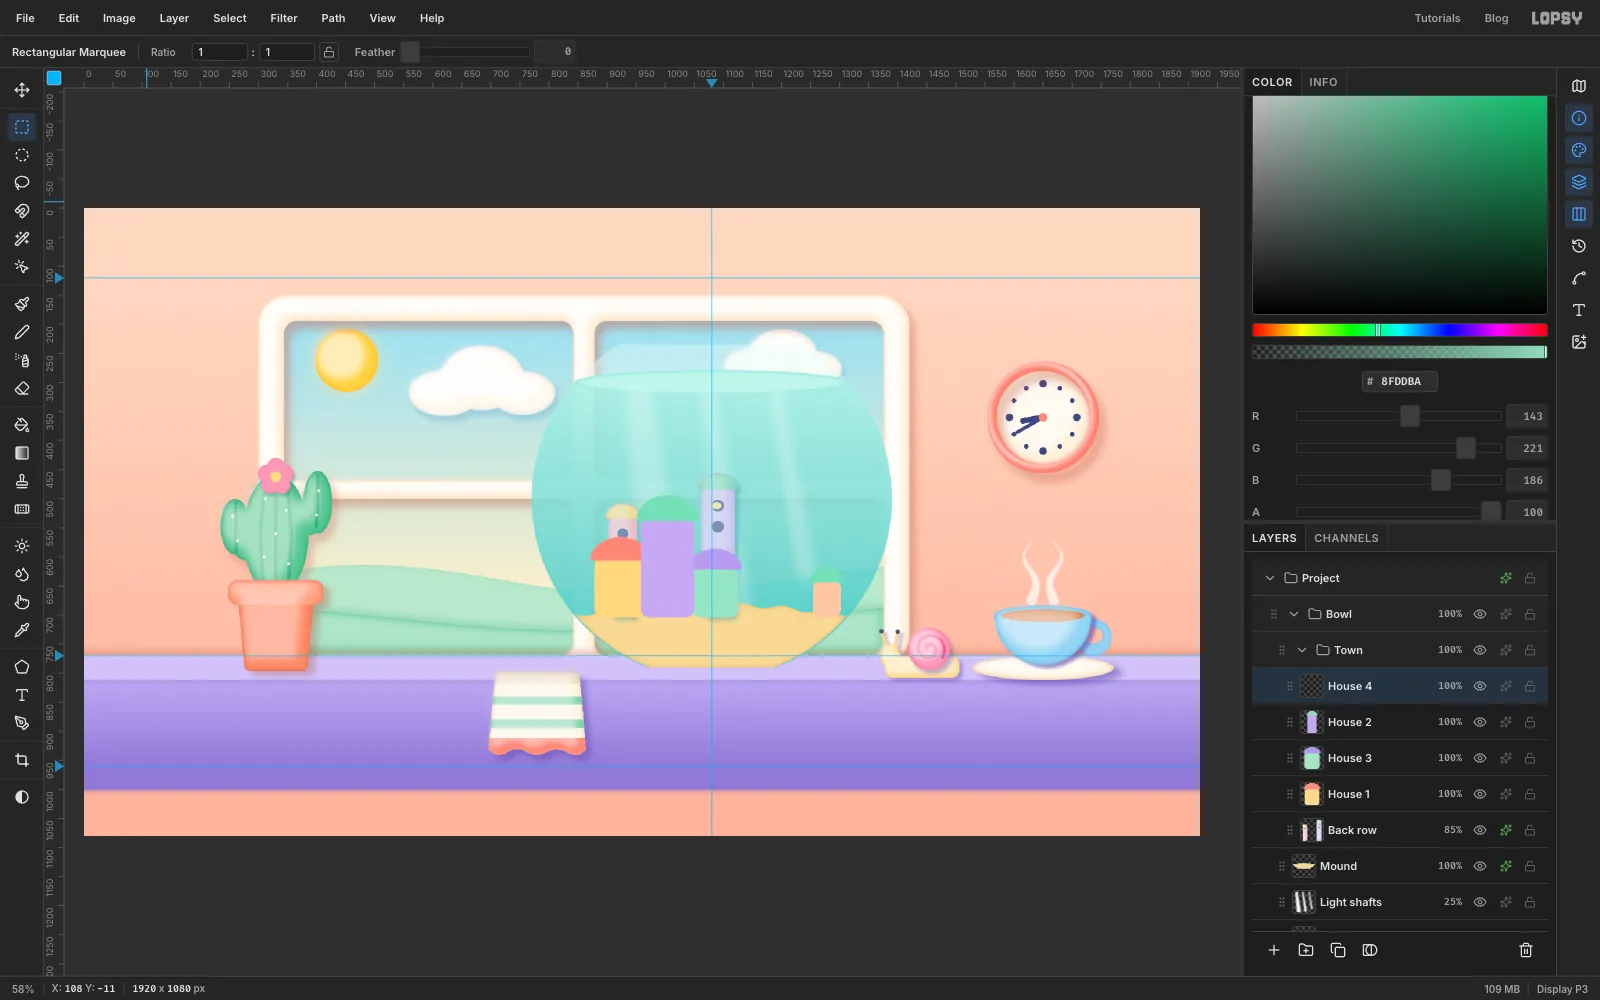
With Mound selected, make a group called Town. Every building is the same two parts, a rounded body and a dome roof, so learn the dome once: drag an ellipse over the top edge of the body, then Alt-drag a rectangle over the ellipse's lower half so only the dome is left, and fill.
- Back row. Add a Back row layer for two pale towers that peek over the others. Make two tall rounded rectangles (Shrink/Grow 12) about 50 and 58 px wide, with tops at about y 530 and 480. Place the first a little left of centre in the bowl and the second just right of centre. Fill them and , and give them domes in and . Add a few small navy windows, clay the layer and set it to 85% opacity so it falls back.
- House 1. A butter body about 90 px wide with its top at y 600, left of centre, with a coral dome.
- House 3. A small mint house about 80 px wide, top at y 620, right of centre, with a lilac dome.
- House 2. A tall lilac house about 90 px wide between those two, top at y 535, with a mint dome. Build it after House 3 so it overlaps both neighbours.
- House 4. A little peach house about 50 px wide, top at y 640, tucked into the right of the bowl where the lighthouse will stand beside it, with a mint dome.
Run every body down into the mound to about y 704, so the pebbles can bury their feet later.
-
Clay the houses and light the windows
Run the clay recipe on each house, with an Inner Glow a shade darker than the house's own colour. Use a teal Drop Shadow, , because shadows underwater pick up the water's colour.
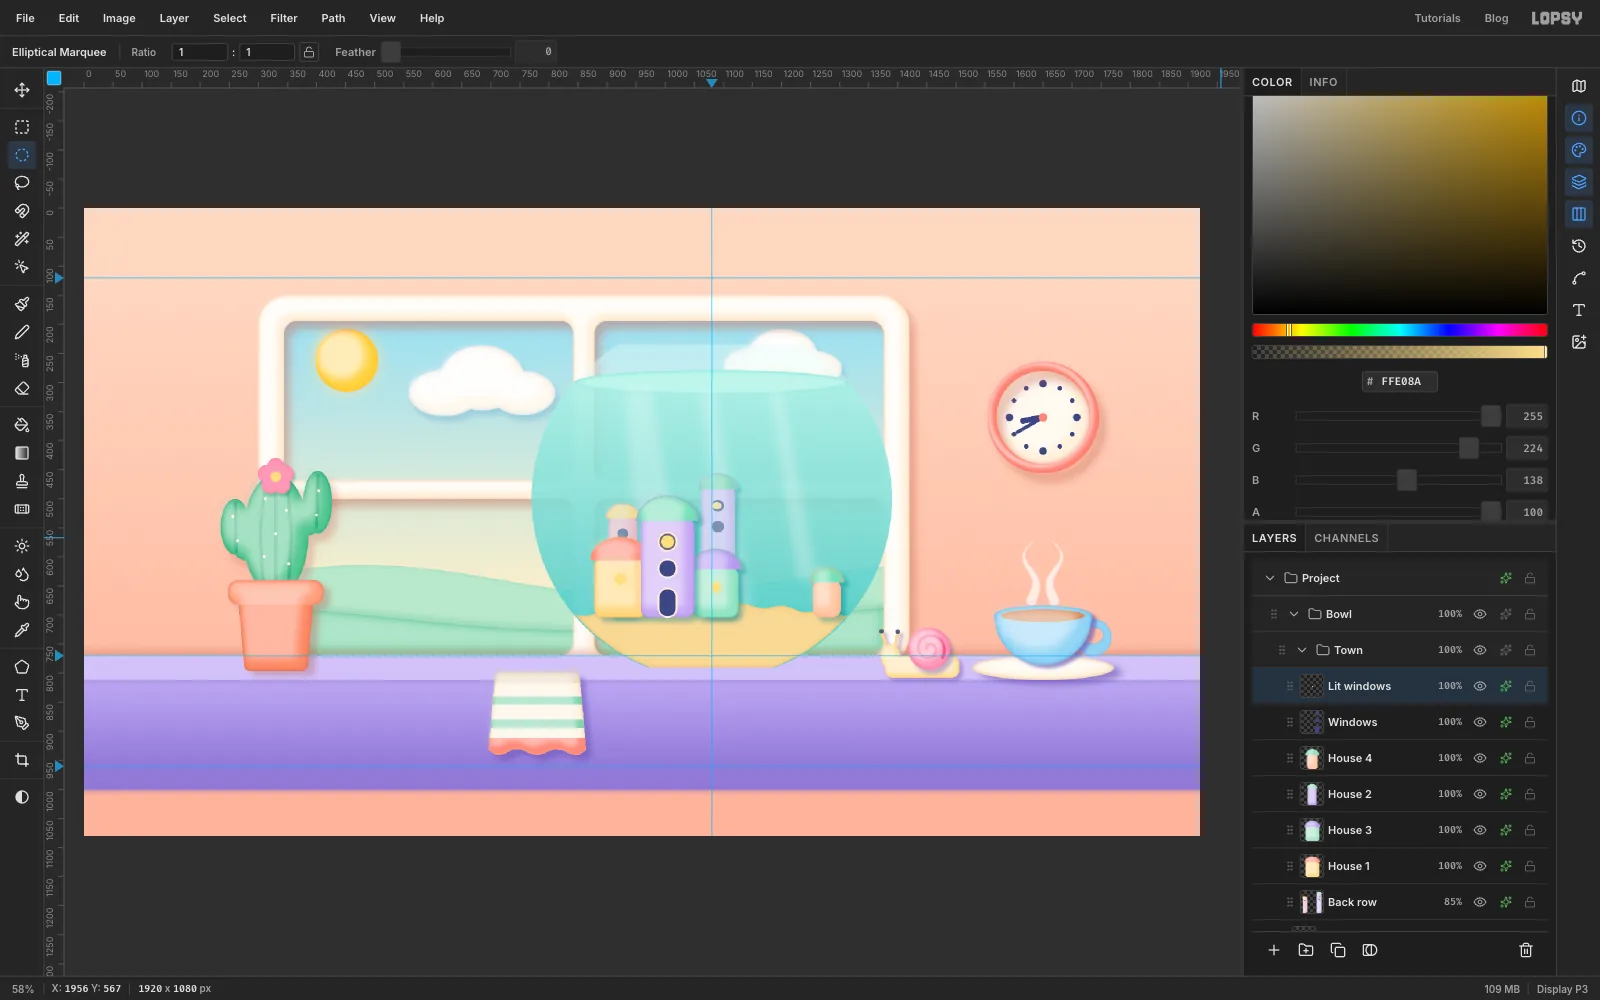
Add a Windows layer: round porthole windows and two rounded-top doors, all Shift-added and filled navy. Give the layer a 3 px cream Stroke effect for window frames.
Add Lit windows above it. Fill smaller circles inside three of the windows with and give the layer an Outer Glow in the same colour. Somebody's already up making coffee.
-
Stripe the lighthouse
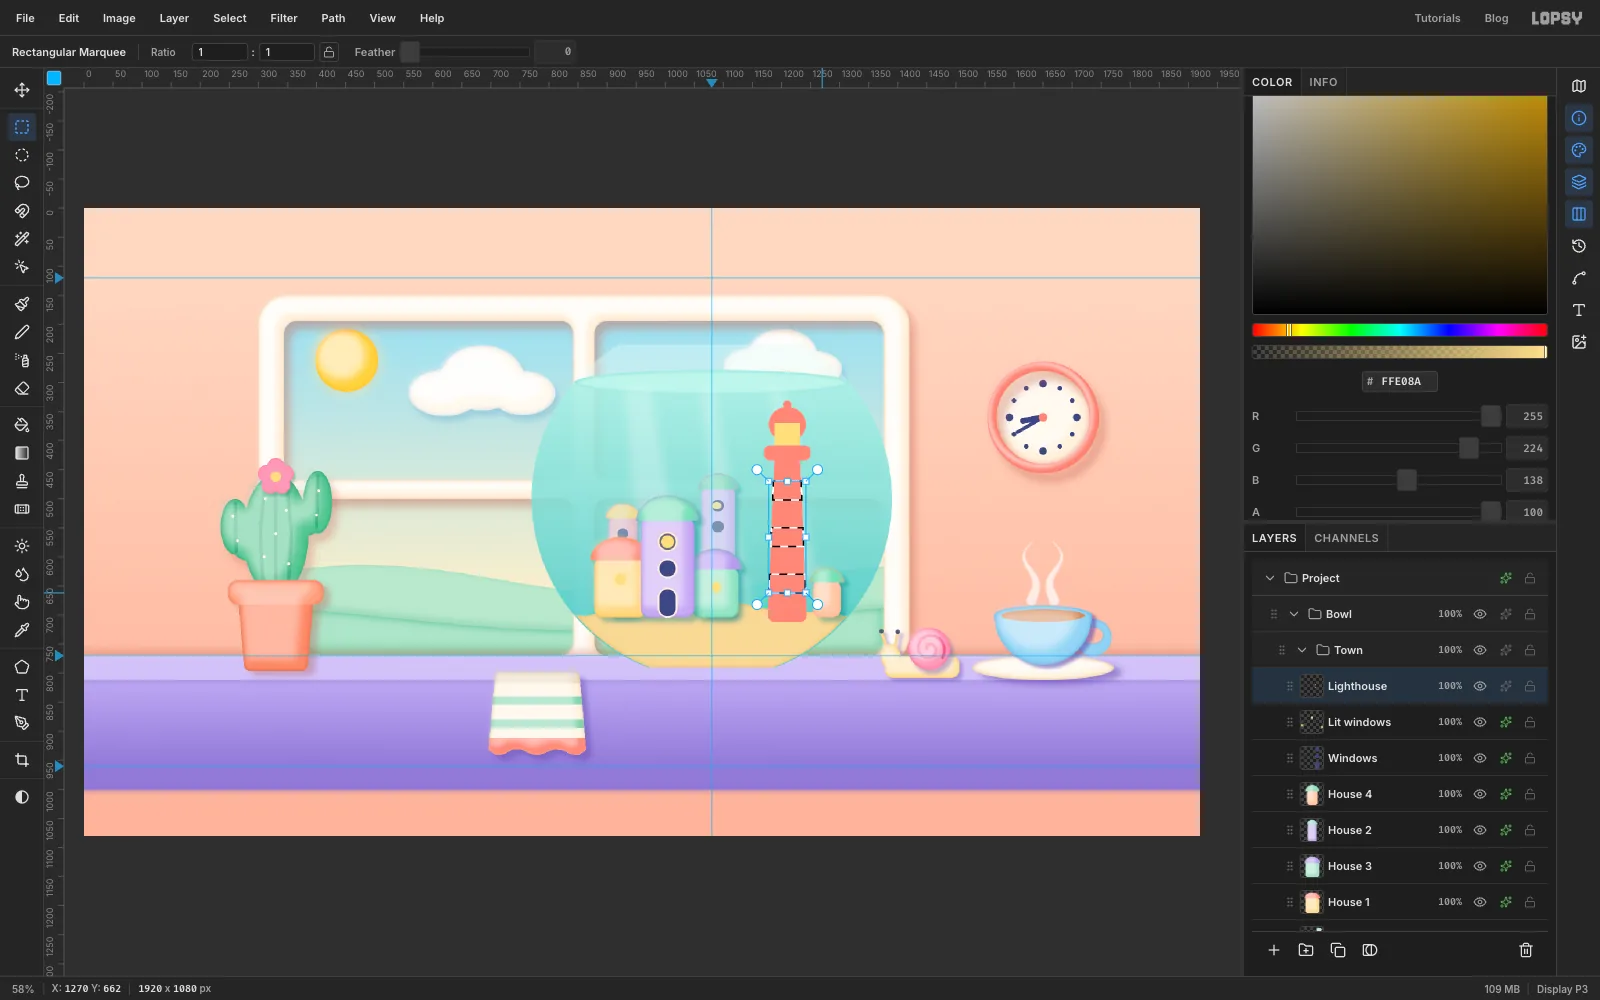
Add a Lighthouse layer. Lasso a tapering tower, then Shift-add a rounded gallery (Shrink/Grow 10), a dome on top and a small finial circle. Fill it with coral . Marquee a small rectangle for the lamp room and fill it with .
For the stripes, drag three marquee bands across the tower, holding Shift for the second and third. Then Cmd+Shift+Alt-click the Lighthouse thumbnail to intersect, and the bands are trimmed to the tower's tapering sides. Fill with cream.
-
Light the lamp
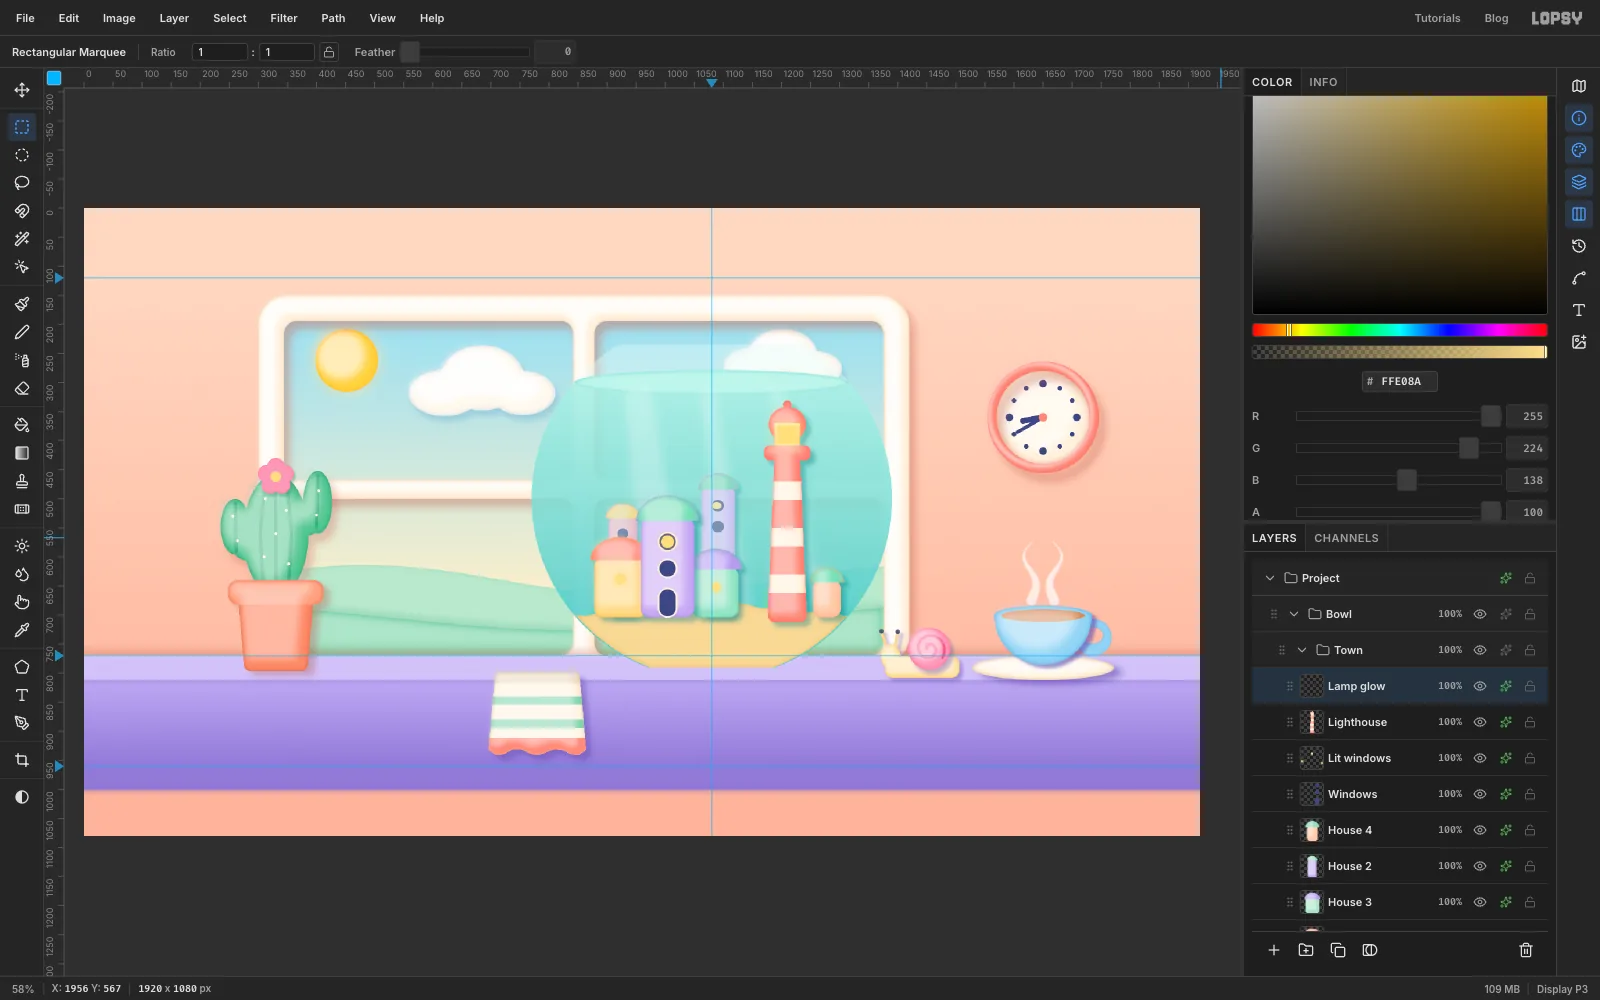
Deselect and clay the lighthouse (Inner Glow , teal shadow).
Add a Lamp glow layer, fill the lamp-room rectangle again with , and give it an Outer Glow in at Size 40, Opacity 90.
-
Add seaweed and pebbles
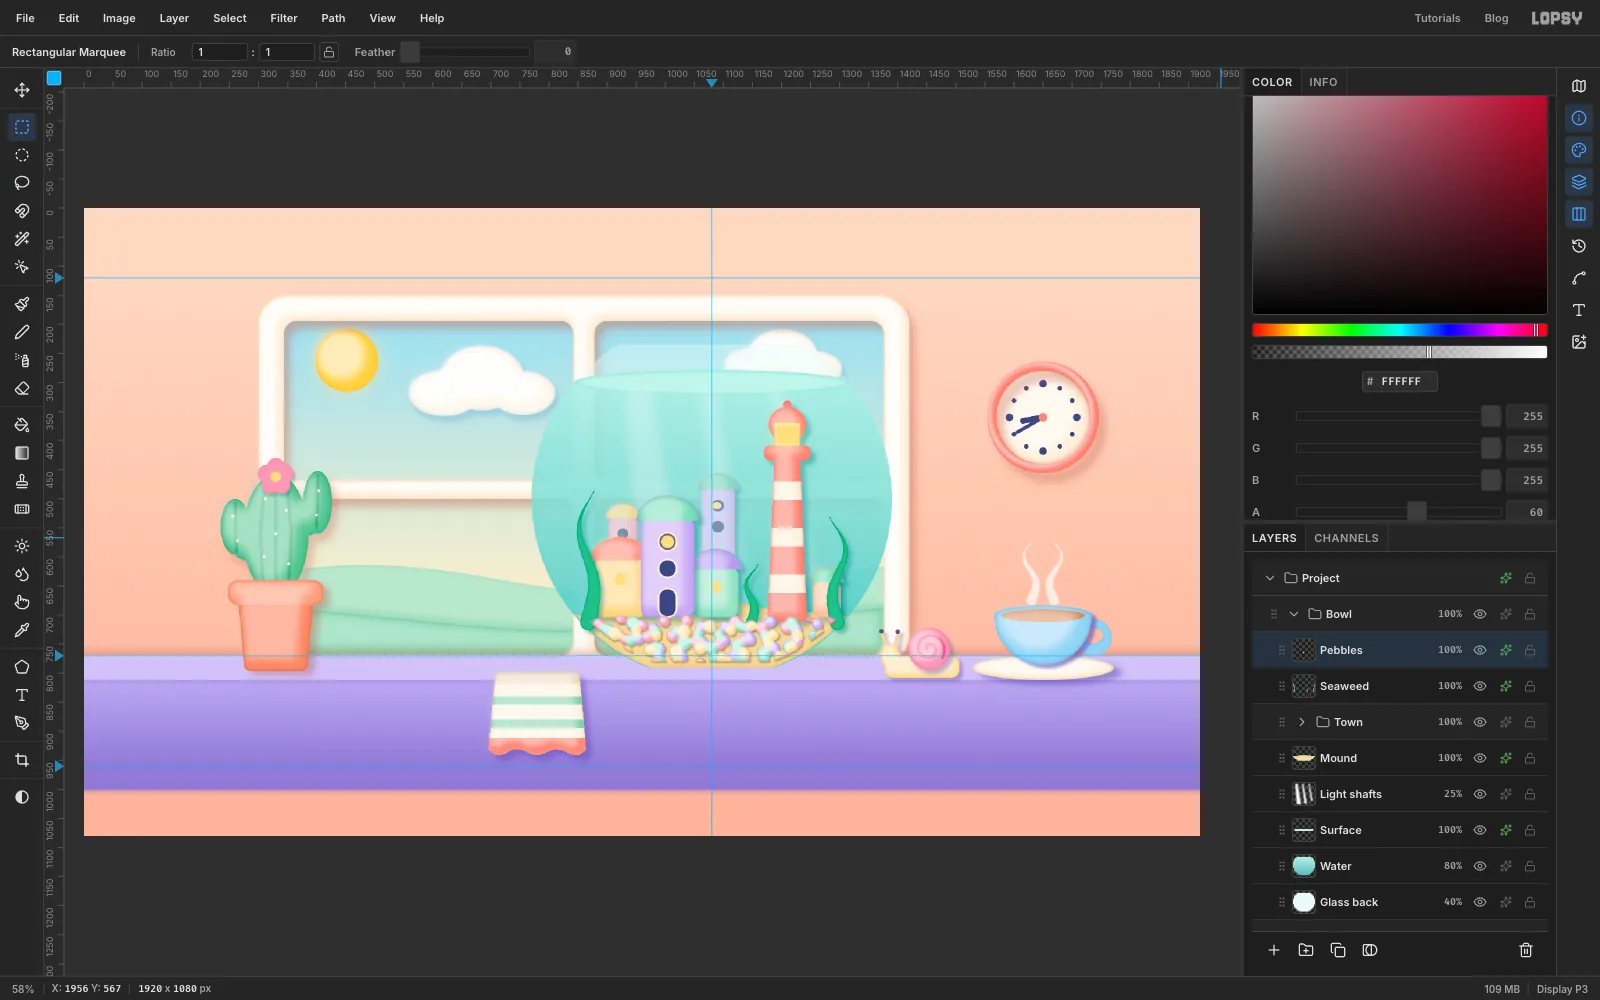
Collapse Town, select it and add a Seaweed layer. Set the Brush to , Size 30, Hardness 100 and Taper 240. Starting at the mound, drag a wavy frond upward. Because the taper runs from the start of the stroke, start at the root. Paint a second frond on the right (Size 26) and a short one between the houses (Size 20, Taper 120). Give the layer an Inner Glow and a teal shadow.
Add a Pebbles layer. Cmd-click the Mound thumbnail and Shrink the selection by 10 so no pebble crosses the glass. In the Brushes dialog, set Size 26 and Taper back to 0 on the Shape tab, Spacing 190, then Scatter 35 and Size Jitter 30 on the Dynamics tab. Spacing over 100 leaves gaps between dabs, so every dab is its own pebble. Sweep three rows across the mound in each of the four pebble colours, then deselect. Afterwards, put Spacing back to 10 and Scatter and Size Jitter back to 0, so later brush strokes come out as smooth lines again.
Run the clay recipe with tiny numbers: Shrink 3, a 3 px nudge and Feather 3. The highlight is cut from the whole layer's shape, so every pebble gets its own glint.
-
Bring in a goldfish reference
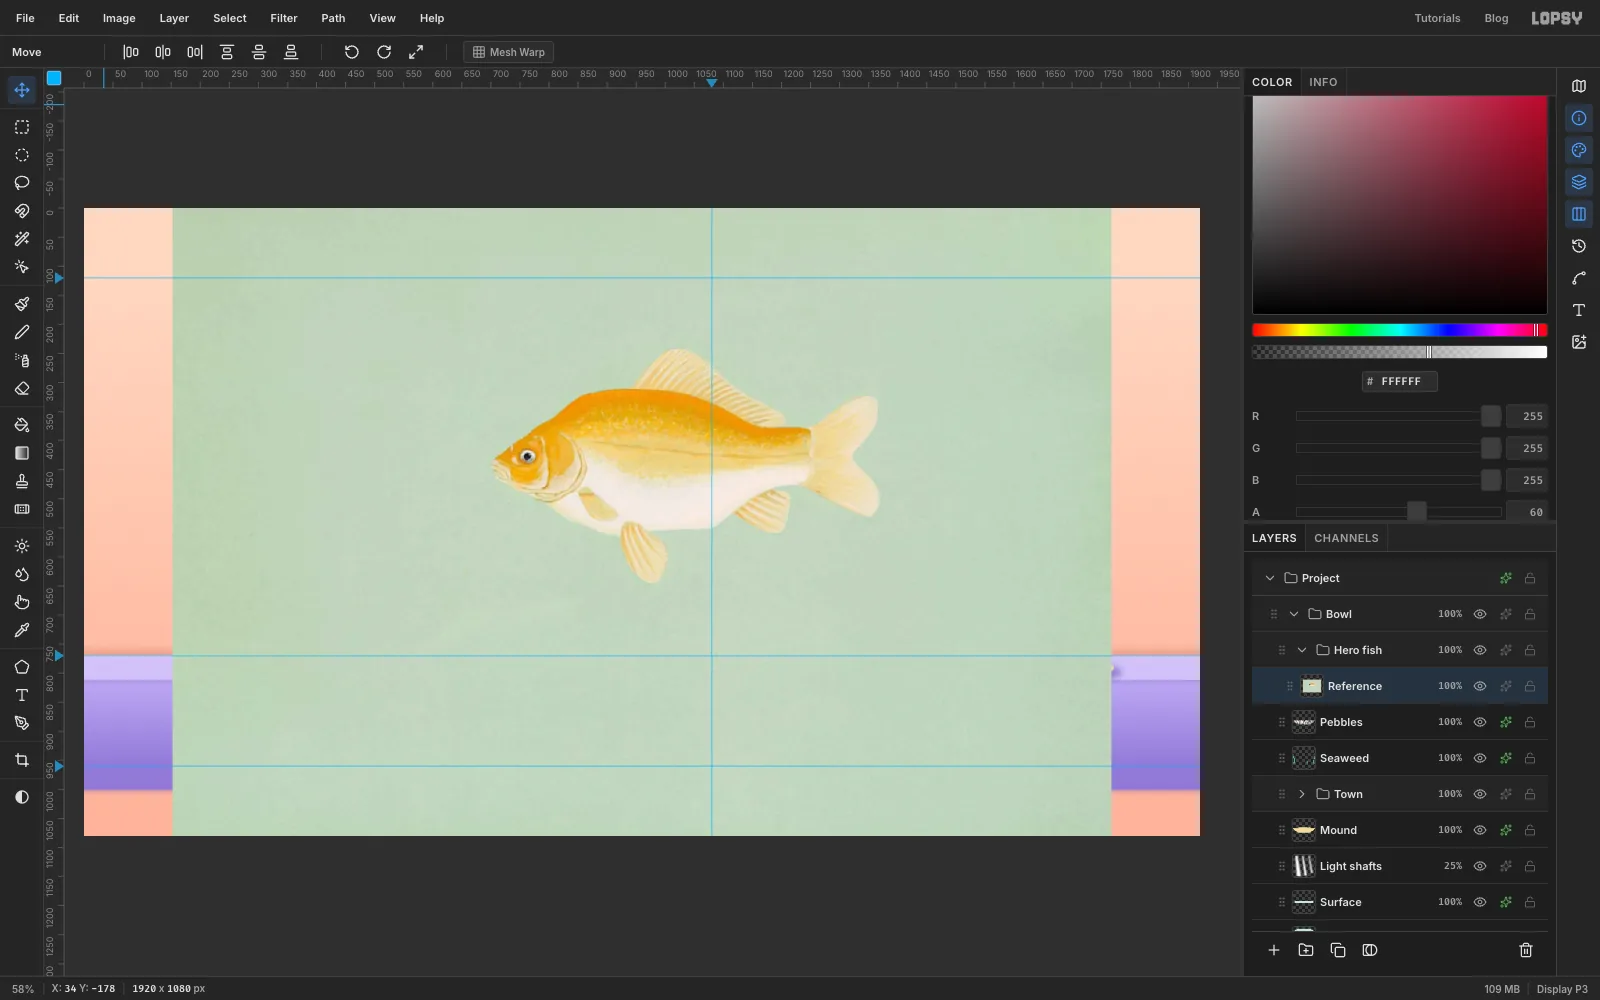
With Pebbles selected, make a group called Hero fish. Drag your goldfish photo from your desktop onto the canvas. It arrives as a new layer fitted to the canvas, so rename it Reference.
Sculpt the fish big, where it's easy to see, and scale it down into the bowl later.
-
Select the silhouette with the Magic Wand
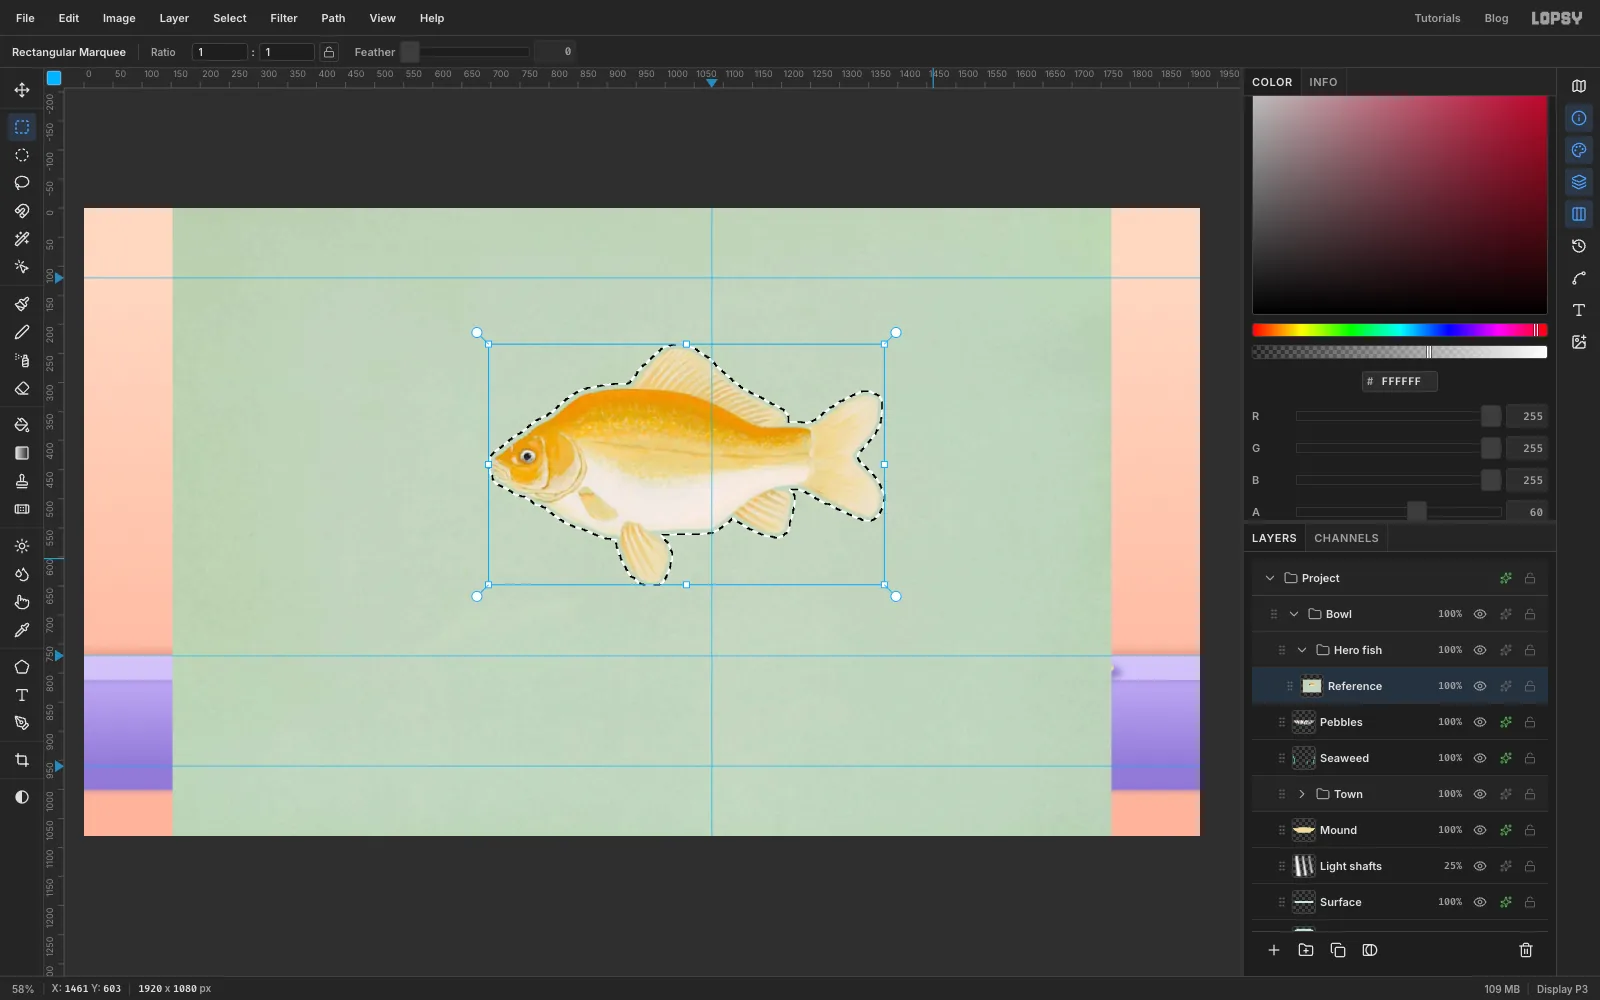
Pick the Magic Wand (W), set Tolerance to 28, and click the plain background beside the fish. Choose Select → Inverse to flip the selection onto the fish.
The empty strips beside the photo were selected too. To drop them, hold Shift+Alt and drag a rectangle around the fish, which keeps only the overlap. Then Shrink 4 and Grow 12. Shrinking first removes thin wisps, and growing further than you shrank swells the fins into plump clay shapes.
-
Fill the fins, body and belly
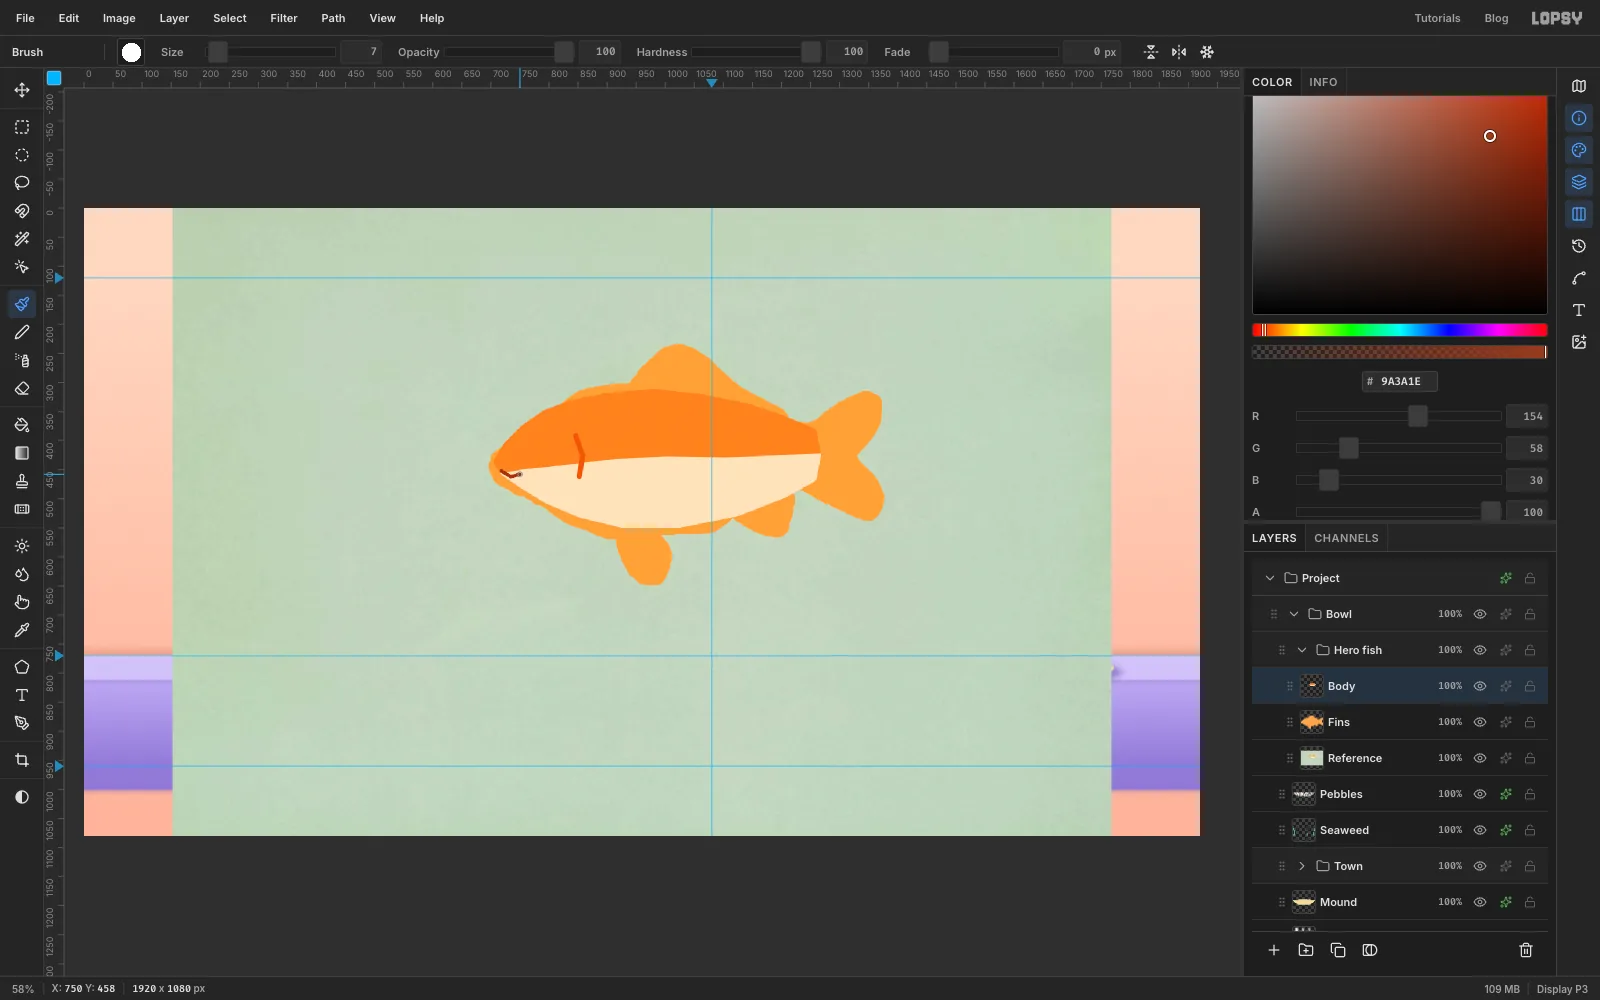
Click Add Layer, name it Fins, and fill the selection with .
Add a Body layer above it. With the Lasso, trace the body itself, following the photo from the nose along the back to the base of the tail and back along the belly, but leave the fins and tail out. Smooth it with Shrink 6 / Grow 6 and fill it with .
For the belly, lasso a smooth, slightly curving line from below the nose to the tail, running about a third of the way up the body. Close the shape well below the fish. Then Cmd+Shift+Alt-click the Body thumbnail to intersect, and fill with . Press Cmd+D. Drawing this line by hand gives a cleaner edge than wand-selecting the white belly in the photo.
Paint a short gill curve behind the head with the Brush in (Size 10), and a little smile at the mouth in (Size 7).
-
Give it a face and a bowler hat
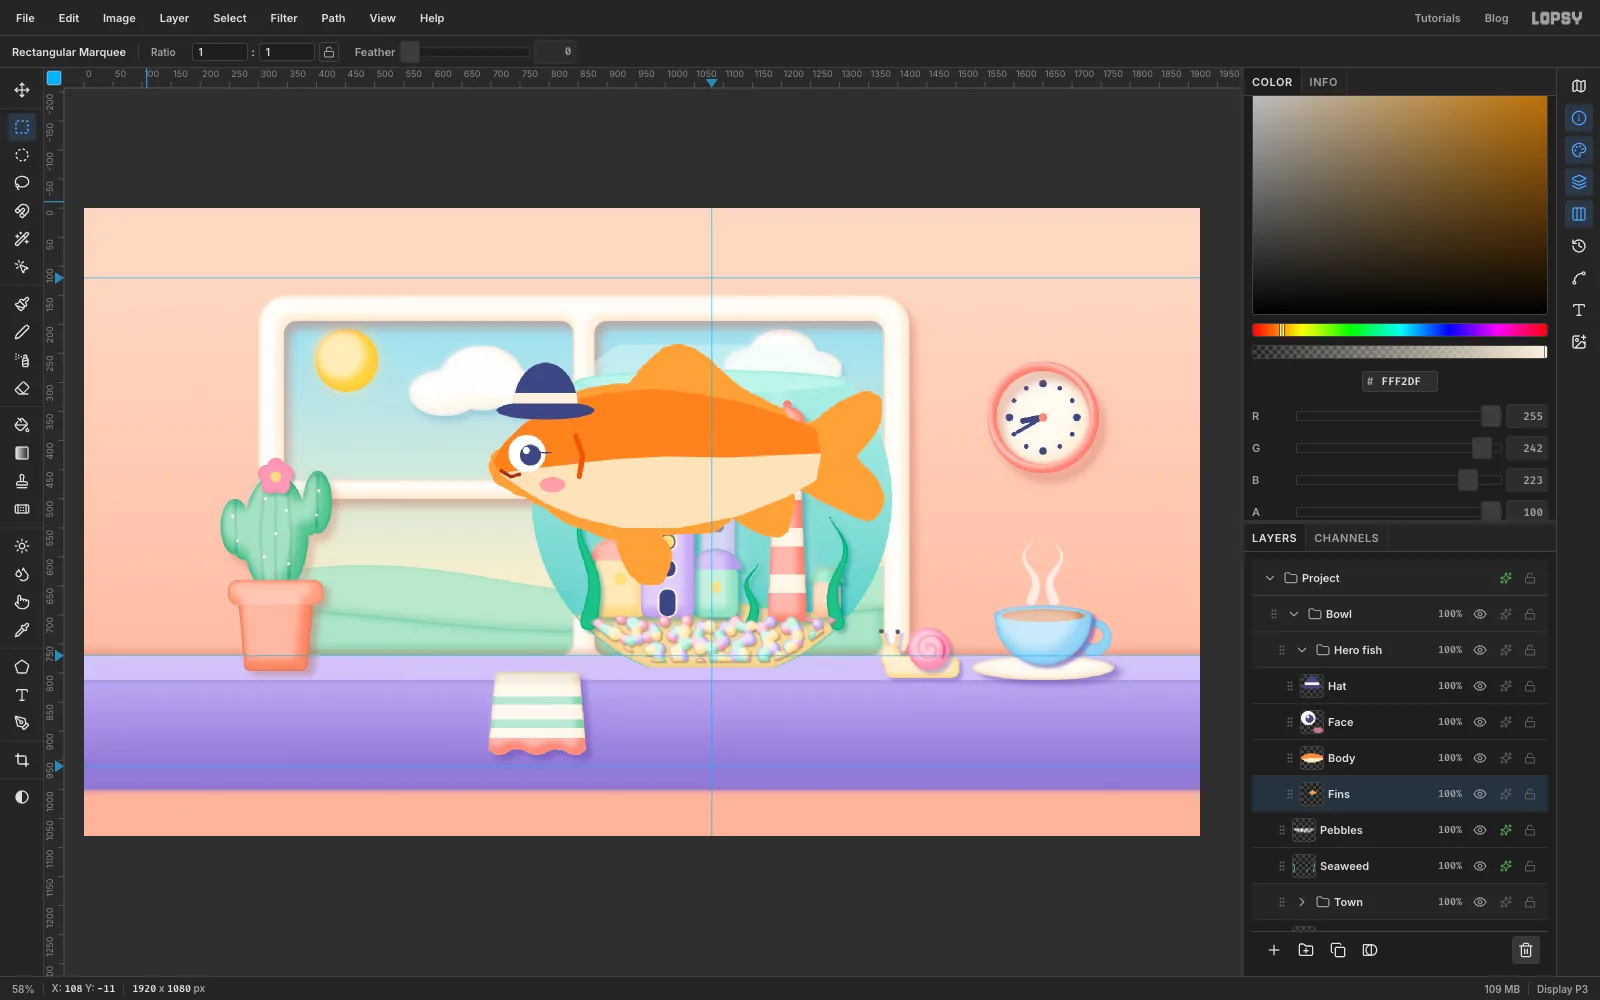
- Add a Face layer. Cmd-drag a 64 px circle on the head and fill it white for the eye.
- Drag a smaller circle set slightly forward in the eye and fill it navy for the pupil. Add a small white glint at its top left.
- Drag a flat ellipse below and behind the eye and fill it pink at 75% alpha for a cheek. Set A back to 100.
- Add a Hat layer. Drag a tall ellipse sitting on the forehead, then Alt-drag a rectangle over its lower half to leave a domed crown.
- Shift-drag a wide, flat ellipse across the bottom of the crown for the brim, and fill the hat navy.
- Drag a marquee strip across the bottom of the crown, Cmd+Shift+Alt-click the Hat thumbnail to keep only the part inside the hat, and fill it cream for the hatband. Deselect.
You don't need the photo any more, so select Reference and click Delete Layer.
-
Clay the fish
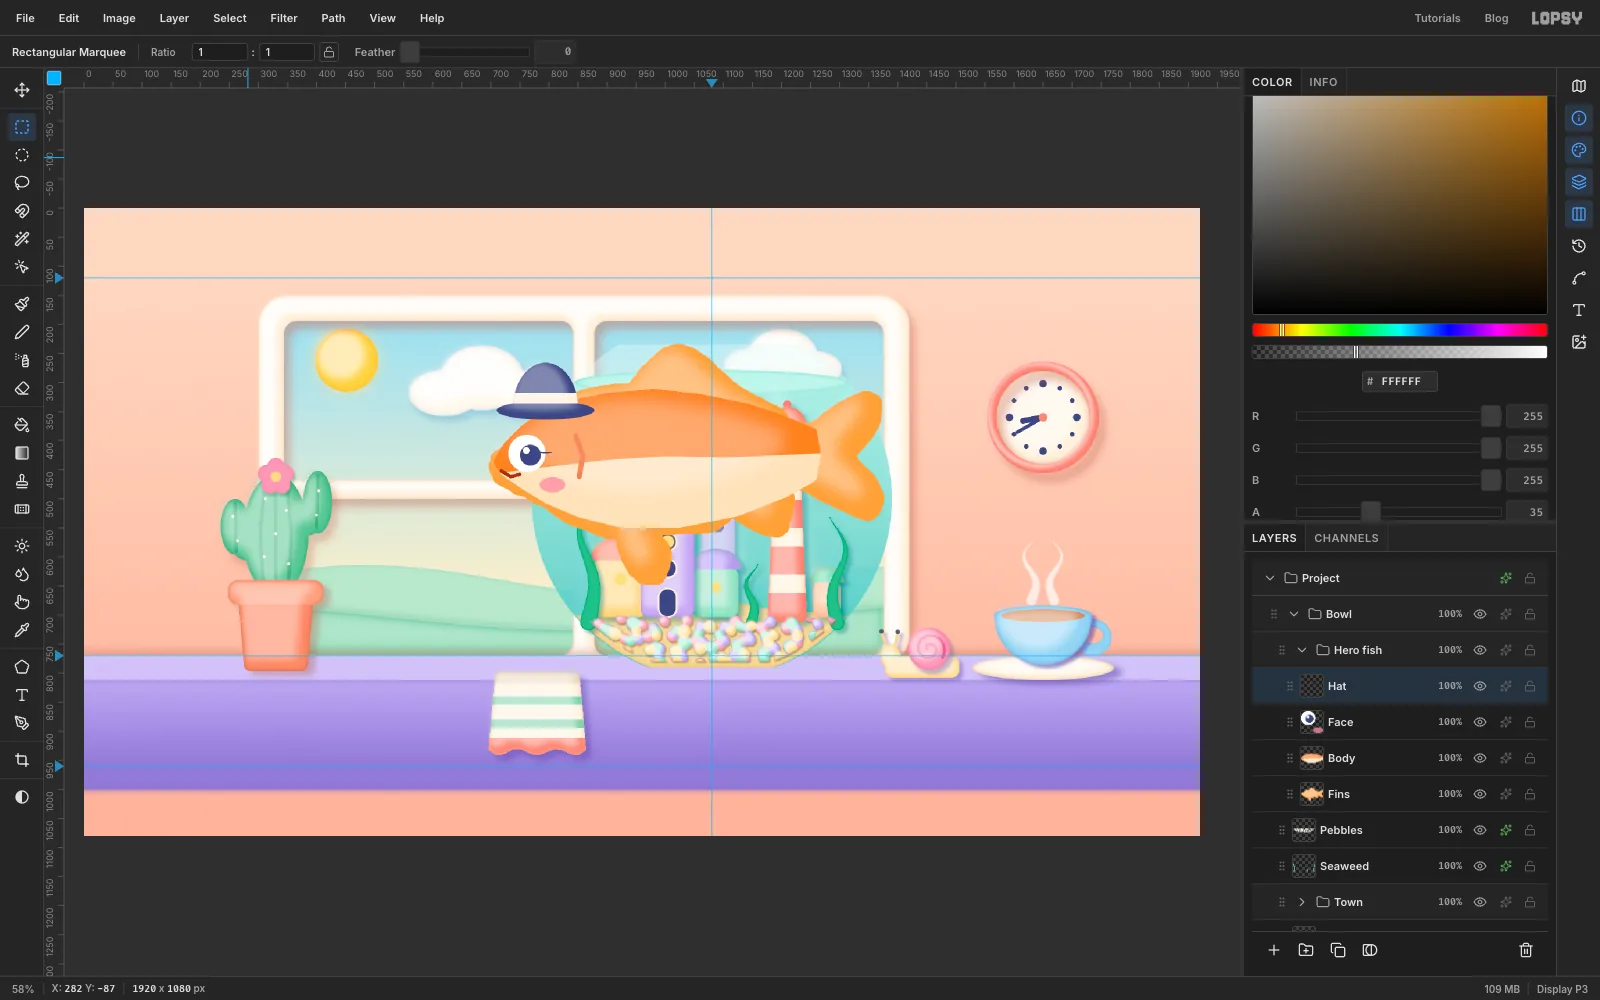
Run the first half of the clay recipe (the highlight only) on Body, Fins and Hat at this large size:
- Body: Shrink 40, a 24 px nudge, Feather 30, white at 30%.
- Fins: Shrink 22, a 14 px nudge, Feather 22, white at 35%.
- Hat: Shrink 8, an 8 px nudge, Feather 10, white at 35%.
Leave the effects until the fish is at its final size, because effect sizes don't scale with the layer.
-
Scale the fish into the bowl
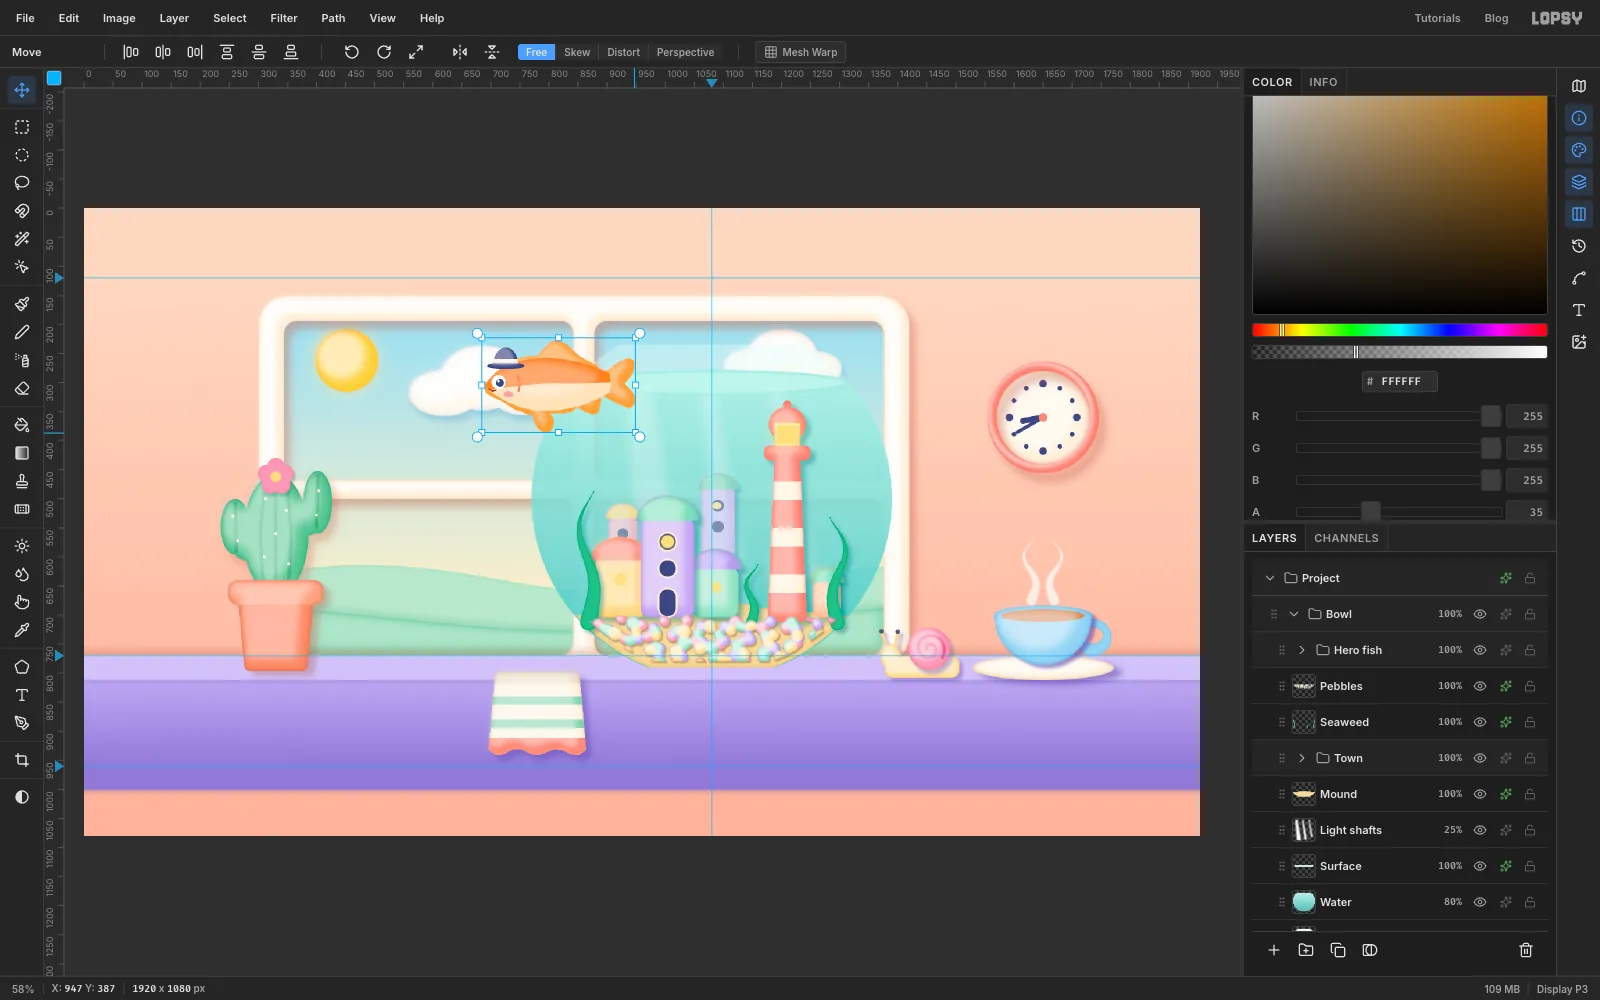
Collapse Hero fish and select the group. Pick the Move tool and drag the bottom-right corner handle up and to the left, holding Cmd so the fish keeps its proportions, until it's about 250 px long. Everything in the group scales together.
-
Tilt the hero
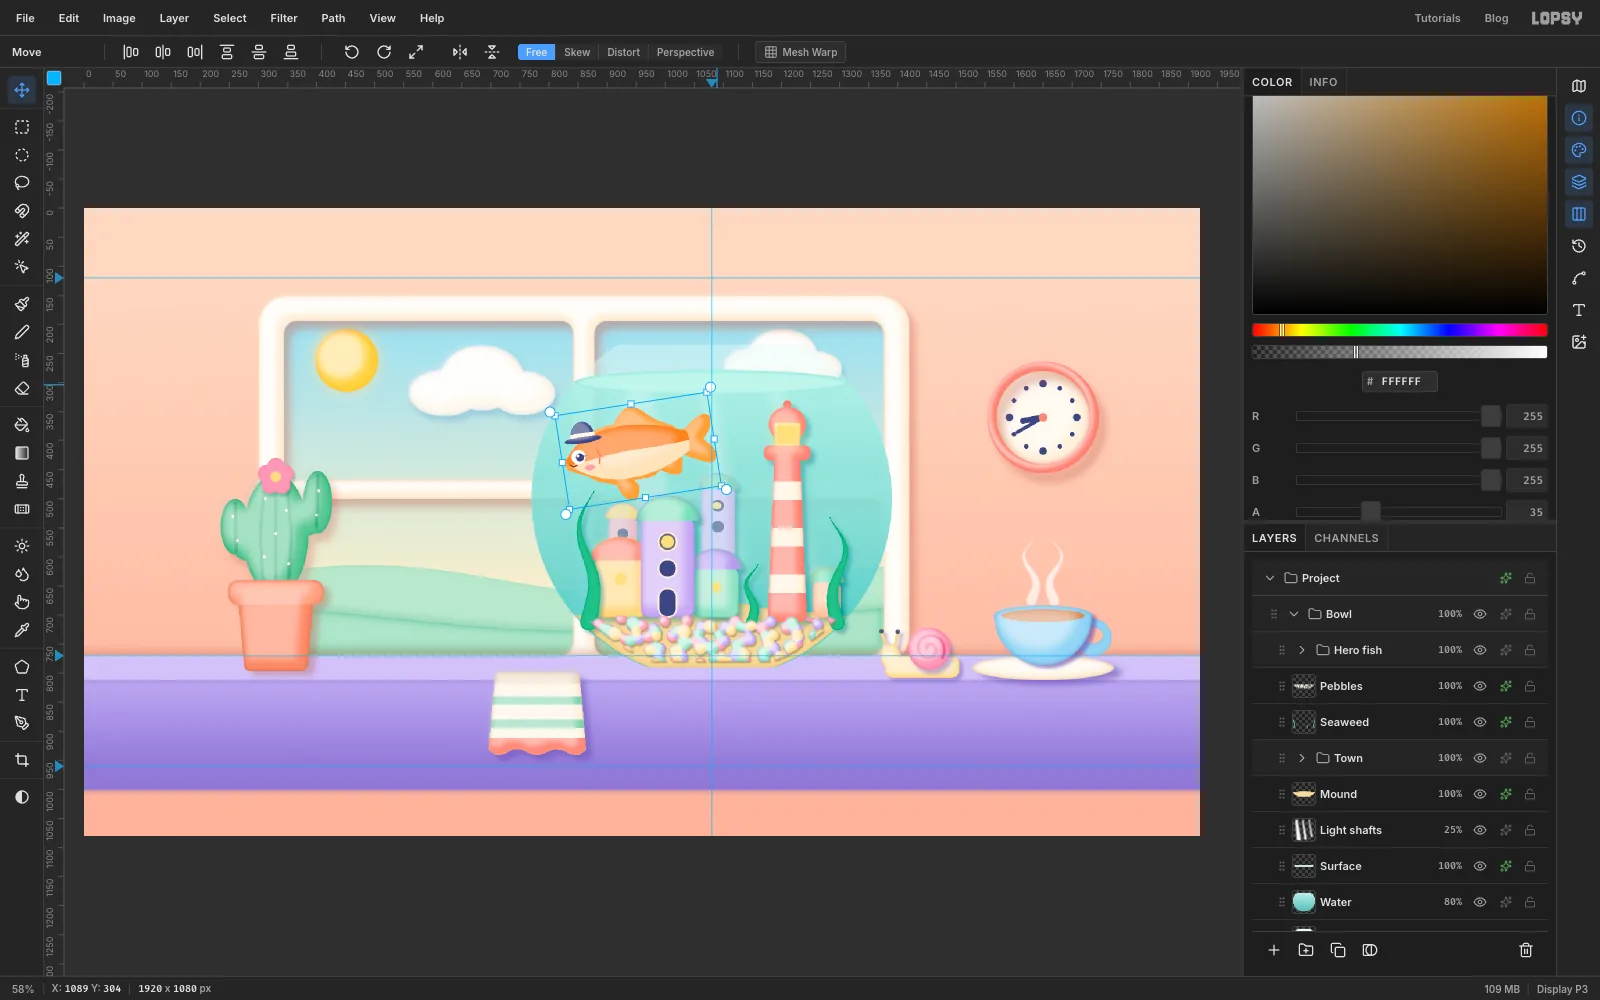
Drag the fish into the upper left of the bowl. Then move the pointer just outside the box's top-right corner until it becomes a crosshair, and drag counter-clockwise about 9° so the fish dips toward the glass as if it's swimming. Press Cmd+D to commit.
Expand the group and add the effects you skipped:
- Body: Inner Glow (Size 14, Opacity 80) and a teal Drop Shadow.
- Fins: Inner Glow (Size 8).
- Hat: a 3 px cream Outer Glow so it doesn't disappear against the water.
-
Add the commuters
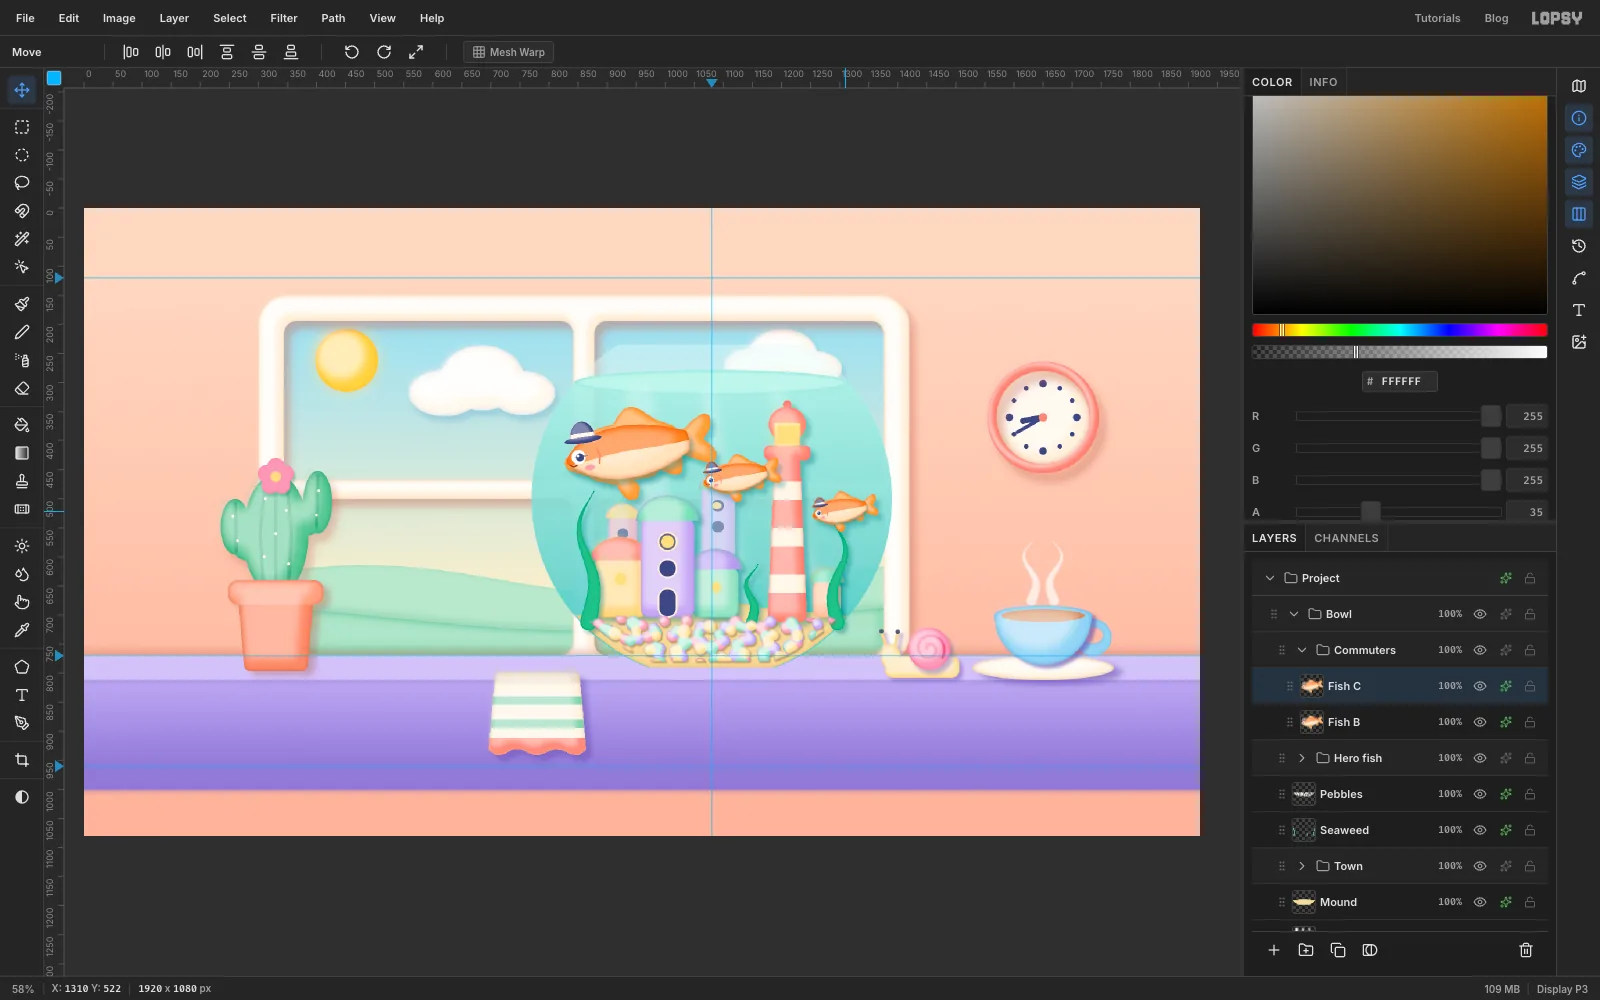
Collapse Hero fish, select it, and choose Layer → Duplicate Layer. Rename the copy Commuters and expand it. Select its top layer (Hat copy) and choose Layer → Merge Down three times, until one layer is left. Rename it Fish B. Merge Down keeps the bottom layer's effects live, so the merged fish keeps its clay edge.
Cmd-click the Fish B thumbnail and Cmd-drag a corner handle to halve its size. Deselect and drag it down and to the right, in front of the lighthouse. Duplicate it, name the copy Fish C, Cmd-click its thumbnail and Cmd-drag a corner in to shrink it a little more, deselect, and drag it to the right of the lighthouse, lower again. The three fish now form a rising queue all heading the same way, like a commute.
-
Blow bubbles
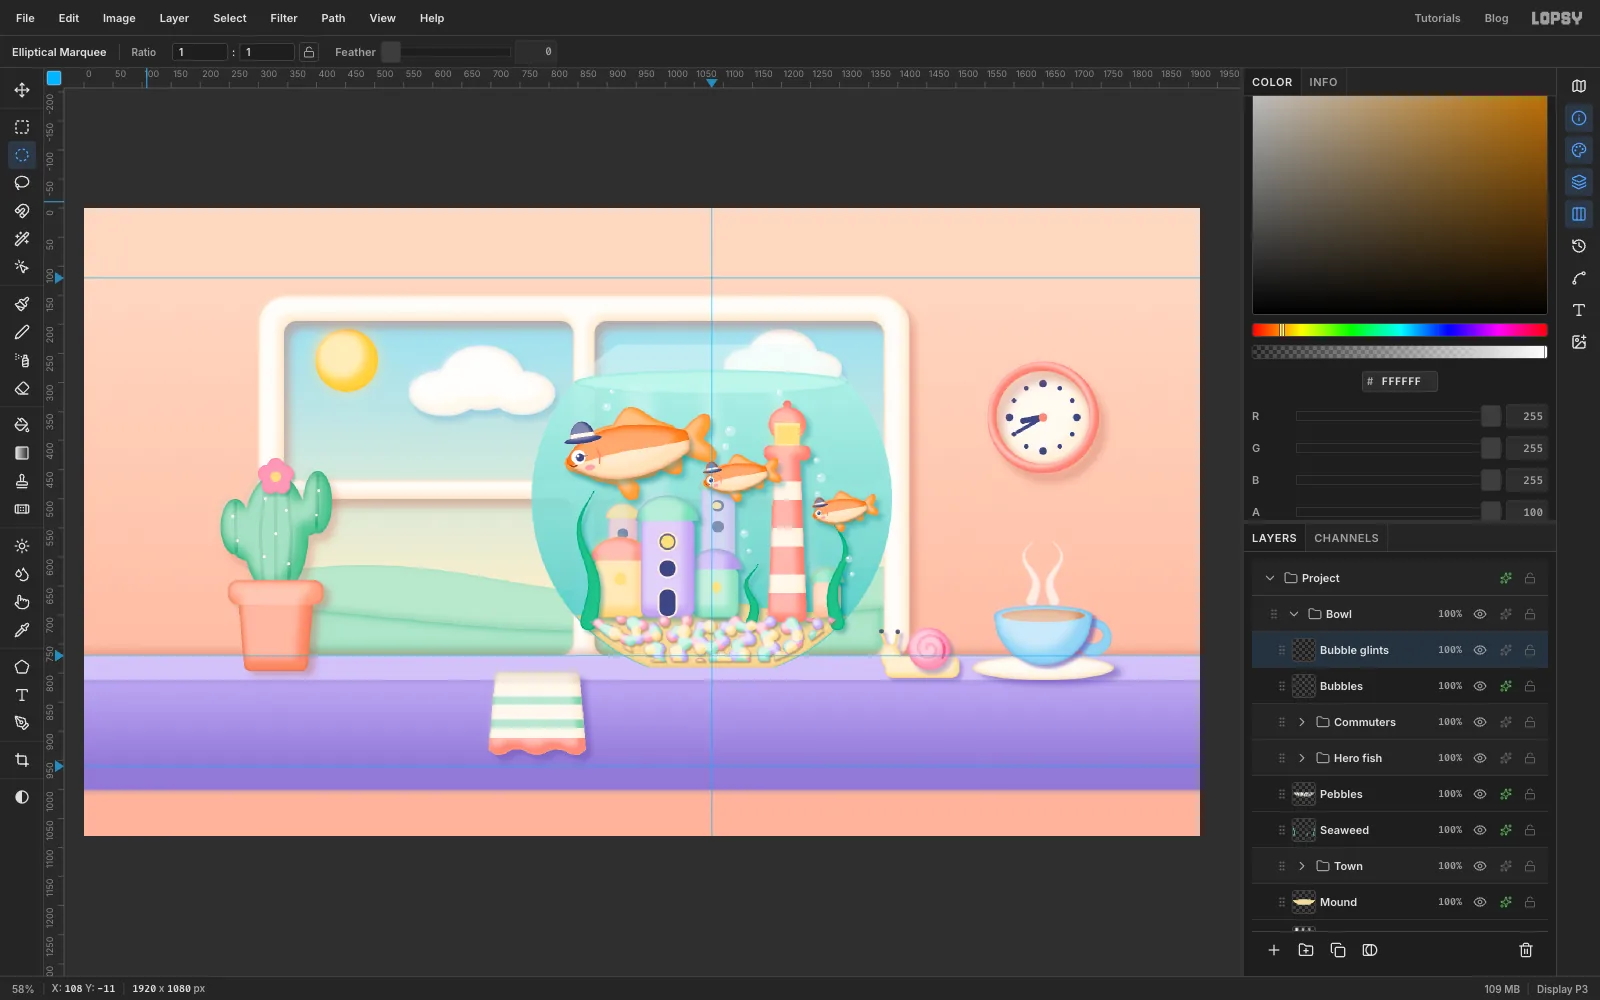
Collapse Commuters, select it and add a Bubbles layer. Shift-add a dozen small circles, 8–22 px across, in little rising columns: above the smallest fish's mouth, beside the lighthouse and between the houses. Fill them white at 25% alpha, then add a white Inner Glow (Size 4, Opacity 100). The faint fill plus the bright rim reads as a bubble.
Add a Bubble glints layer with a tiny white dot at the top left of each bubble.
-
Make the glass shine
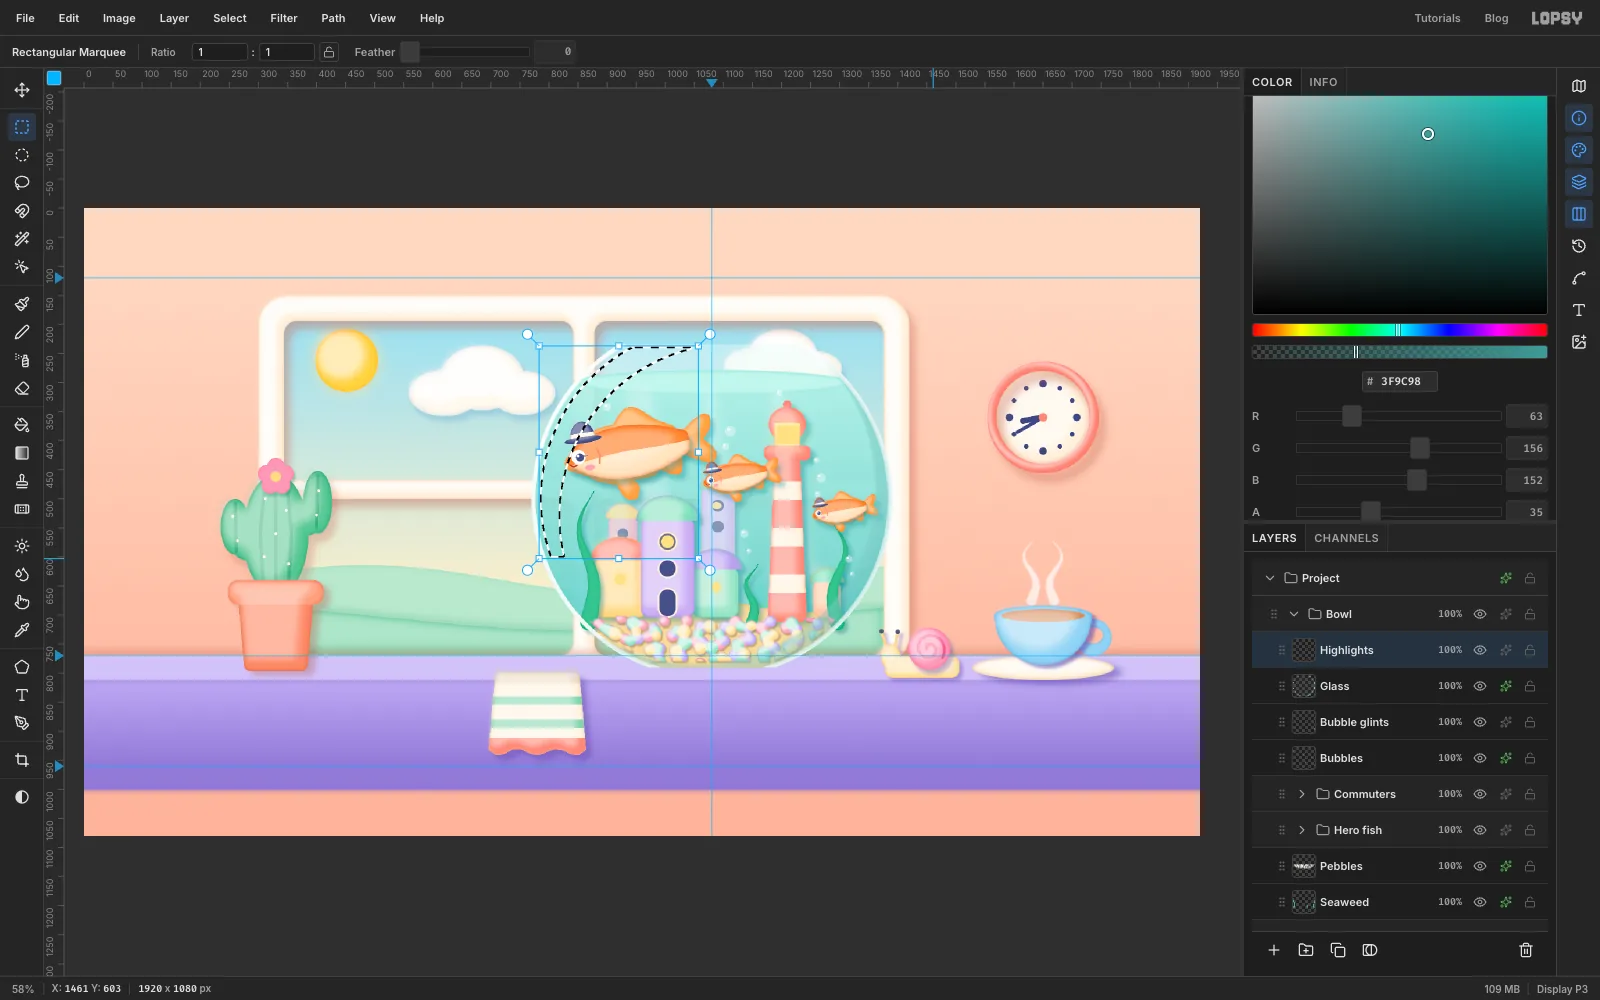
Add a Glass layer at the top of the Bowl group:
- Make the trimmed bowl shape again (the 620 px circle with the top and base cut off) and fill it with white at 3%.
- Hold Alt and drag a circle from (777, 197) to (1383, 803). That is 14 px smaller and leaves a thin ring. Fill the ring white at 80%. Now the shoulders of the glass above the water show.
- For shading, select the bowl circle again and Alt-subtract the same circle shifted about 25 px up and to the left. That leaves a crescent on the lower right. Alt-drag a rectangle over the base to trim it, Feather 4, and fill it with at 35%.
- Set A back to 100, deselect, and give the layer a white Inner Glow (Size 34, Opacity 75).
Add a Highlights layer:
- Select a circle 16 px inside the bowl's edge, then Alt-subtract the same circle shifted about 32 px down and to the right. That leaves a thin crescent along the upper left.
- Shift+Alt-drag a rectangle over the upper-left quarter of the bowl to keep just that part of the crescent.
- Feather 3 and fill white at 85%.
- Add a small white oval glint near the top left, and lasso a thin streak down the right edge filled white at 55%. Deselect.
-
Add the lip and the foot
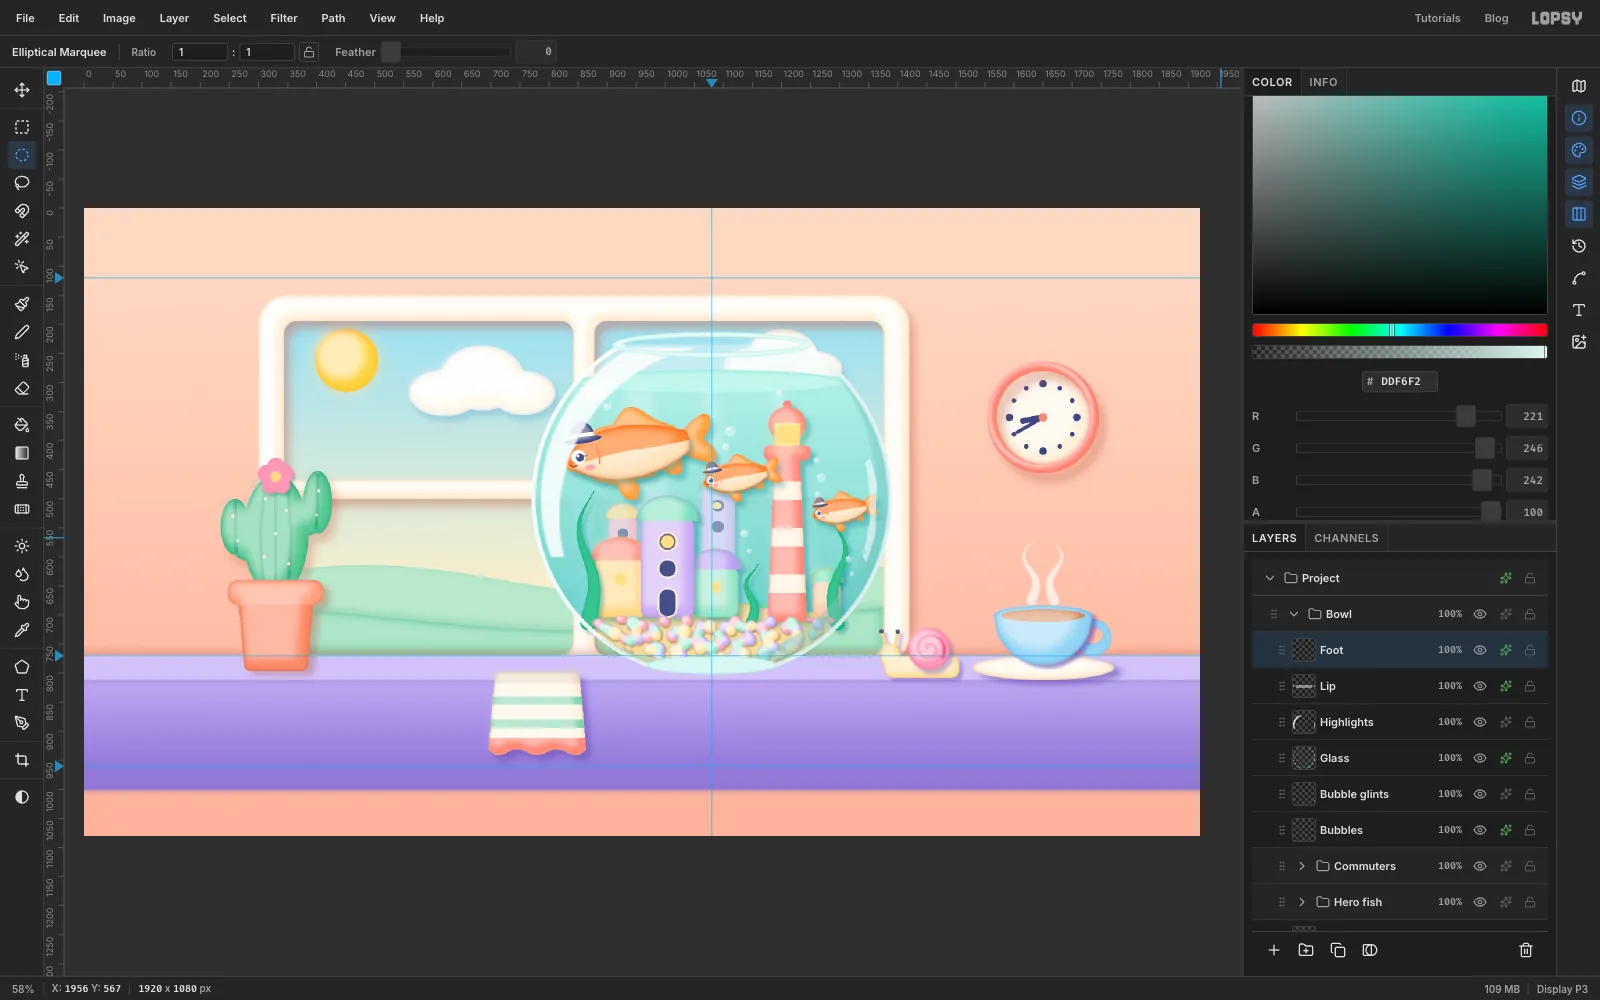
Add a Lip layer at the opening: a wide flat ellipse with a slightly smaller one Alt-subtracted, filled , with an Inner Glow . Add a Foot layer with a flat 224 × 24 ellipse at the base, styled the same way.
-
Slide the bowl clear of the frame
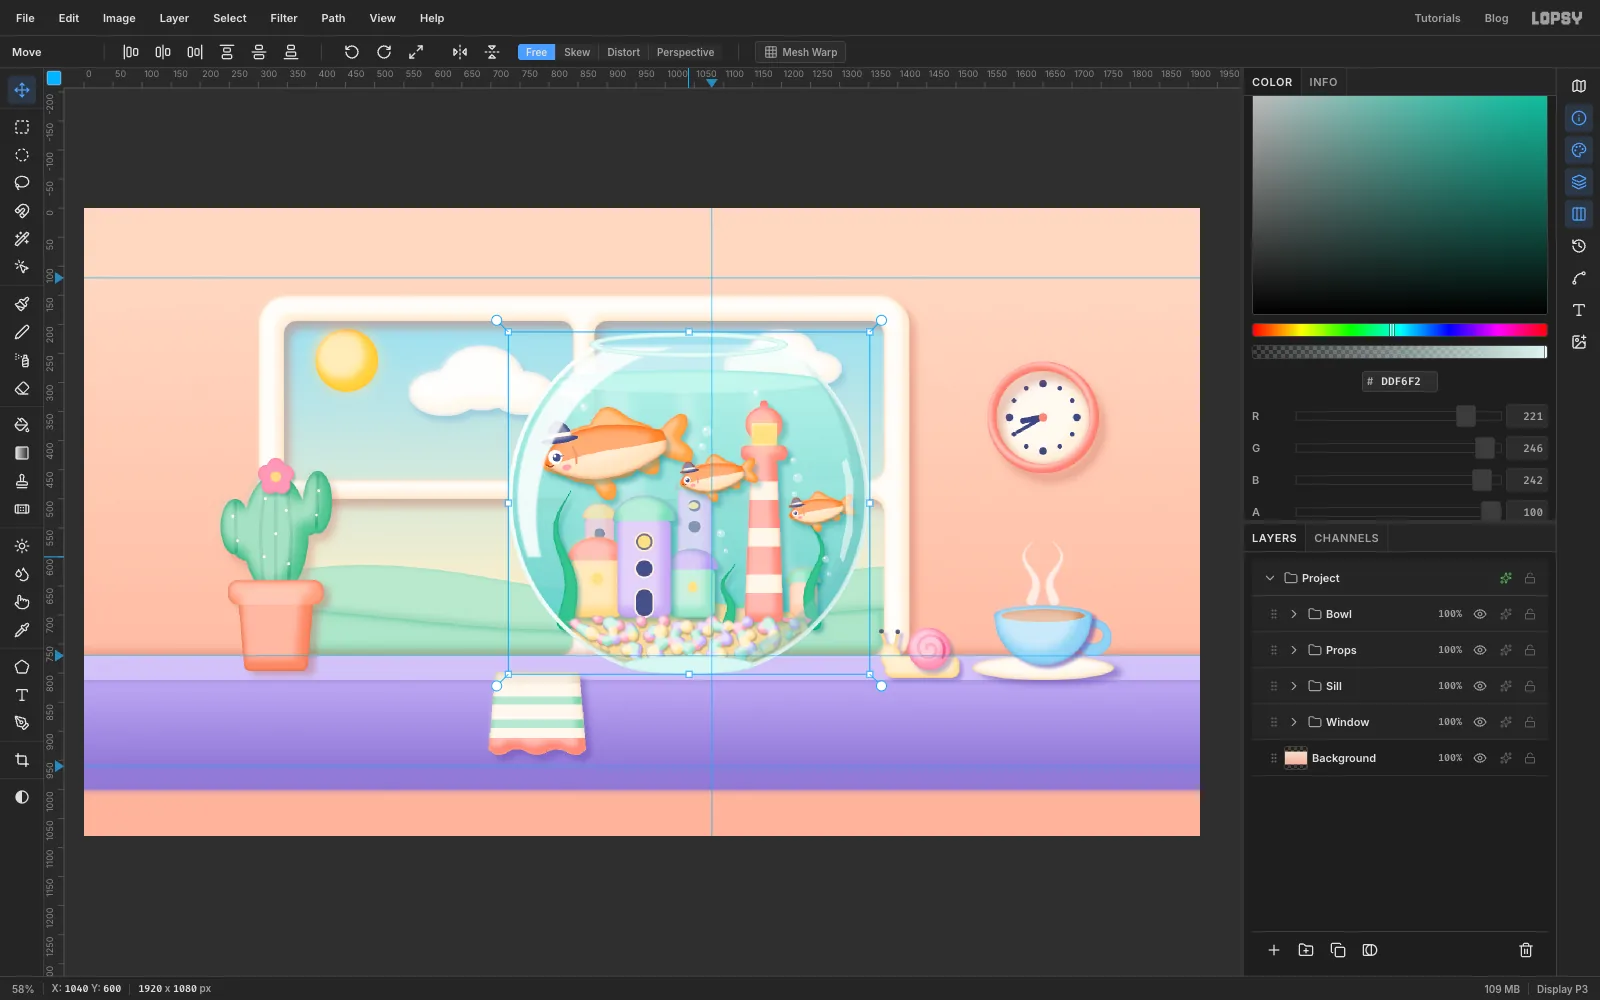
The bowl's right edge touched the right side of the window frame. Collapse Bowl, select the group, and drag it about 40 px to the left with the Move tool. The water, town, fish and glass all move together, effects and all.
-
Ground the bowl with shadows
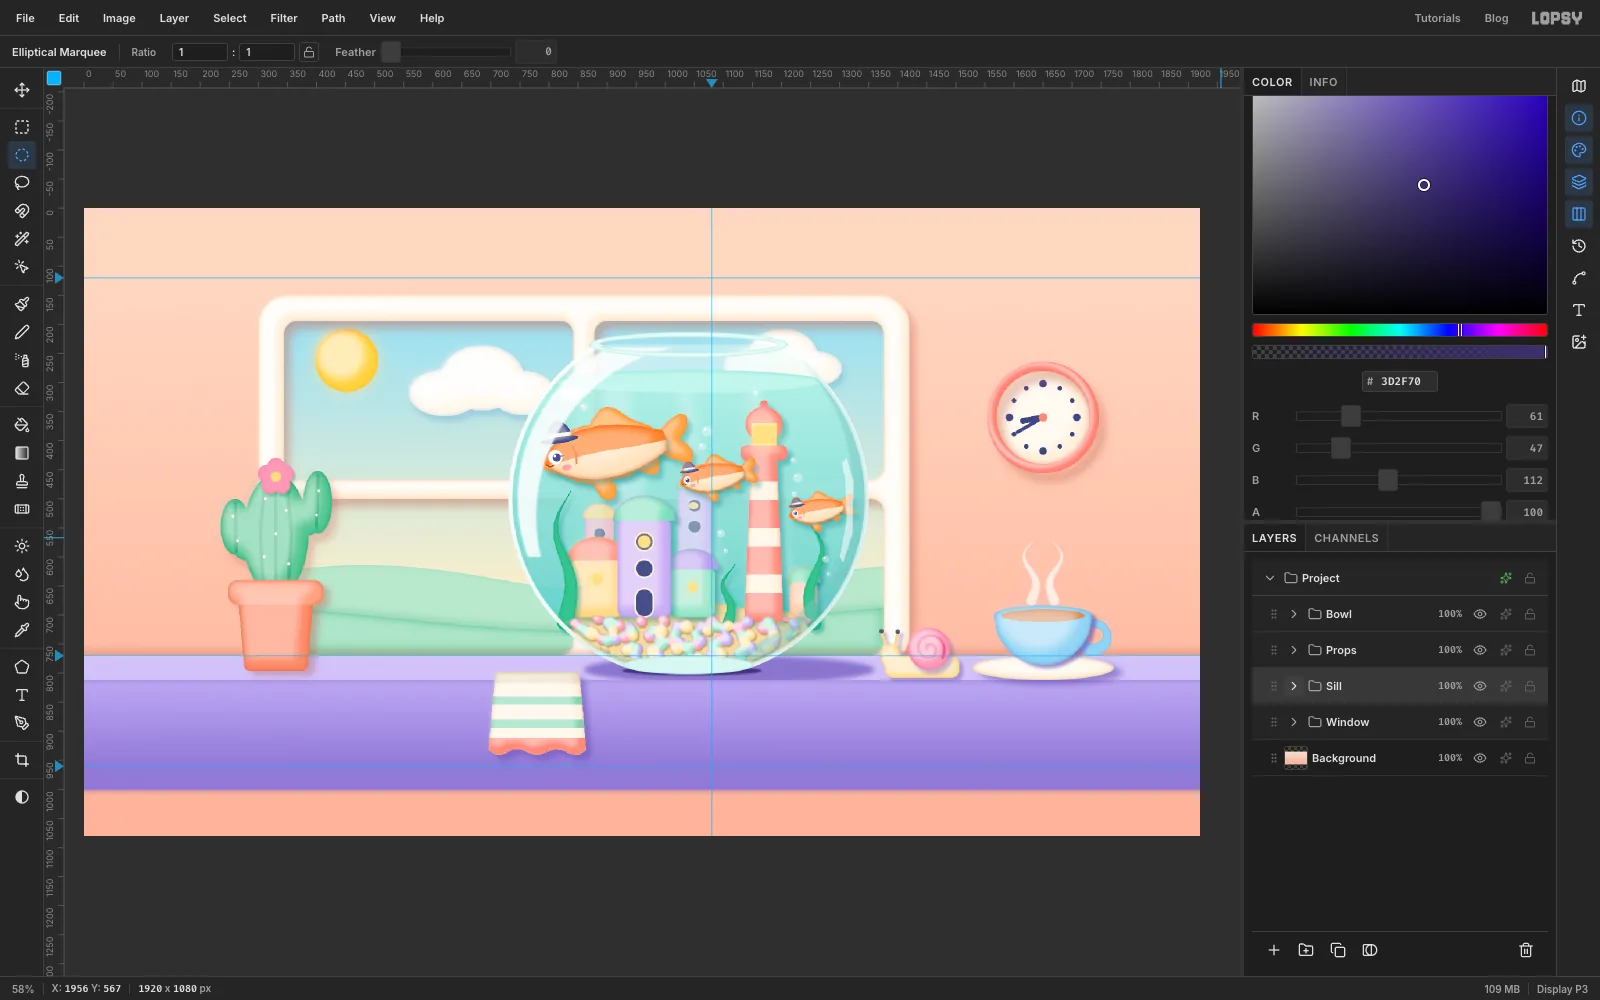
Expand Sill, select Sill top, and add a Bowl shadow layer: a wide flat ellipse under the bowl, offset a little to the right, filled . Deselect, apply Gaussian Blur 12, then set it to Multiply (in the effects drawer's blend-mode dropdown) at 60% opacity.
Add a Contact shadow: a small ellipse right under the foot, filled , Gaussian Blur 4, Multiply at 70%. That tight dark line is what makes the bowl feel heavy.
-
Add window light and clay grain
Collapse Sill and Bowl, select Bowl and make a Grade group above it.
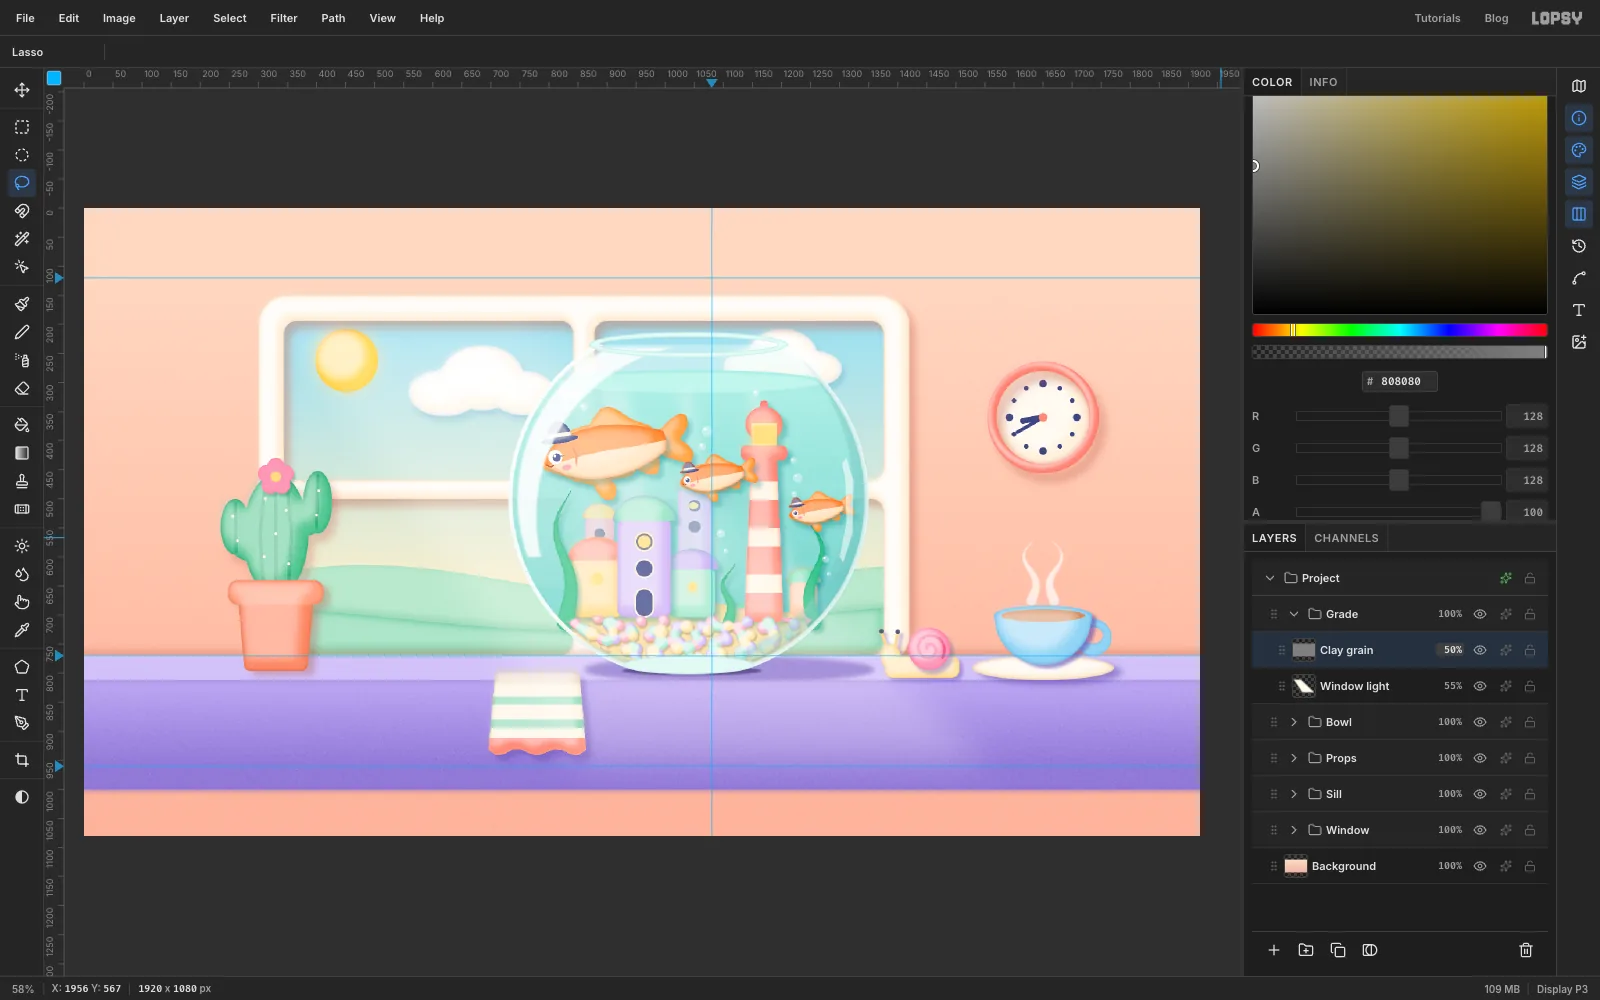
Add Window light. Lasso a wide band that starts across the top of the left pane and widens as it falls diagonally down to the right across the sill. Feather 60, fill , and set the layer to Soft Light at 55%.
Add Clay grain. Fill the whole layer with , then run Filter → Add Noise… (Amount 40, Mono, Gaussian), Gaussian Blur… (Radius 1) and Emboss… (Strength 40). Set it to Overlay at 50%. The embossed noise reads as the tiny dents and fingerprints of real modelling clay.
-
Stake a name tag in the pot
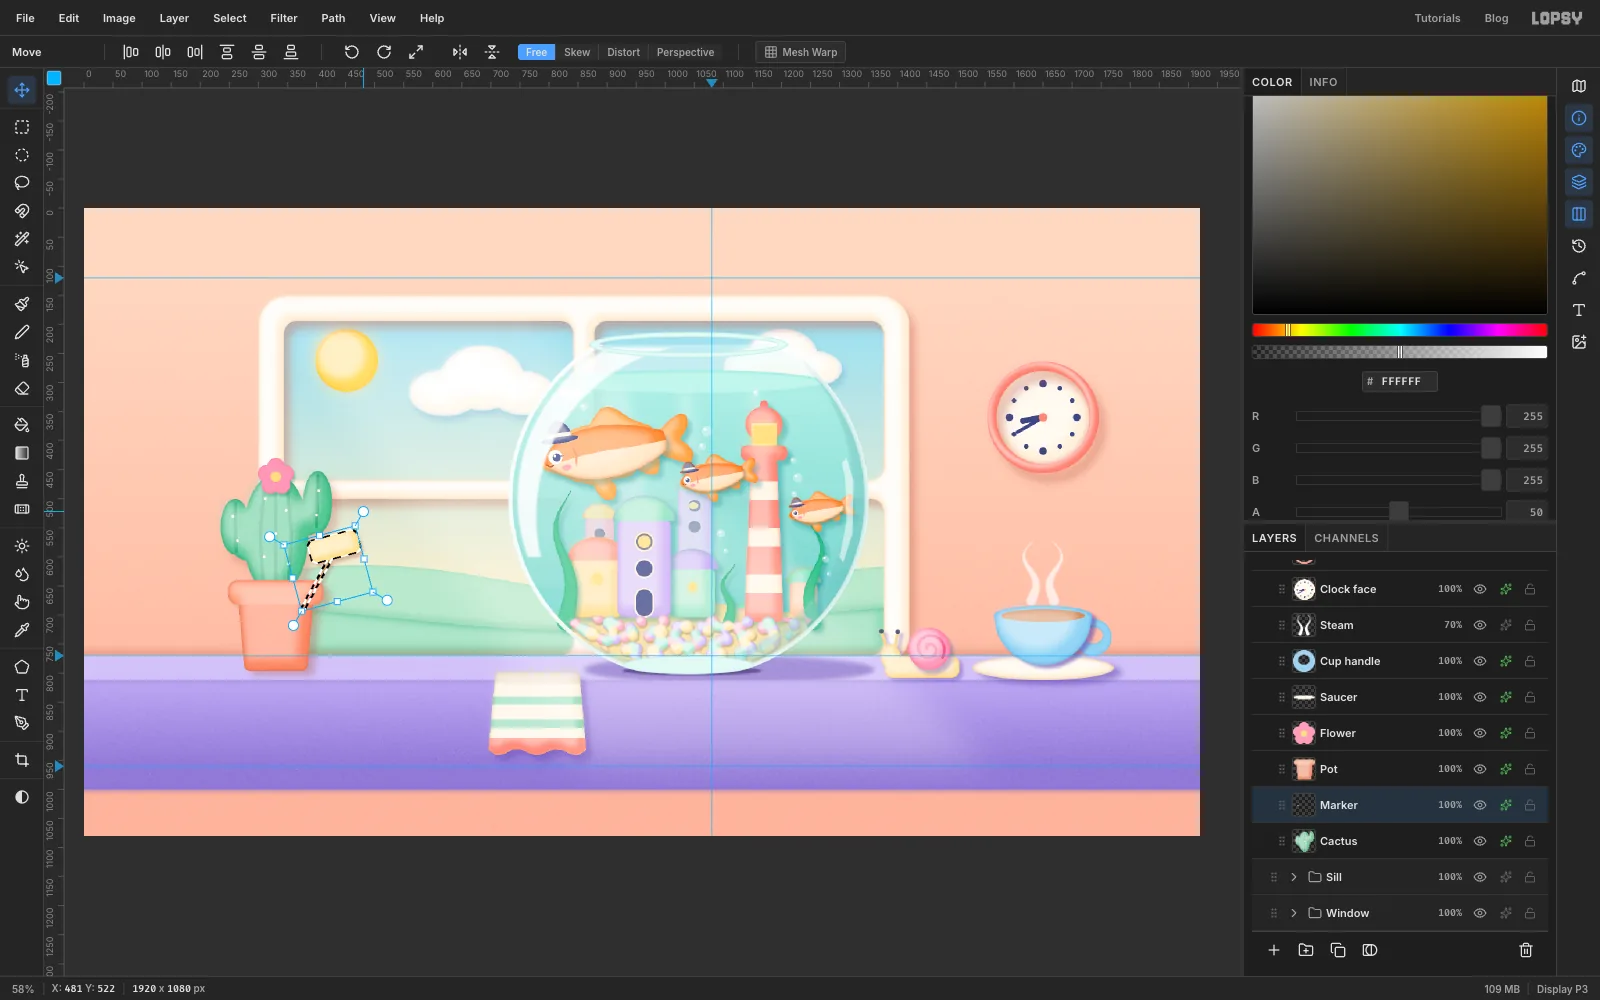
Expand Props and select Cactus, so the next layer goes between the cactus and the pot. Add a Marker layer.
Draw a wooden stick with the Brush (, Size 7), starting inside the pot and angling up to the right. The pot hides its base, so it looks pushed into the soil. Make a rounded rectangle plate at the top (88 × 40, Shrink/Grow 10), fill it with and clay it.
Cmd-click the thumbnail, switch to the Move tool, hold Cmd and drag the rotation handle counter-clockwise. With Cmd held, it snaps to 15° steps, so stop at 15°. Press Cmd+D.
-
Letter the marker
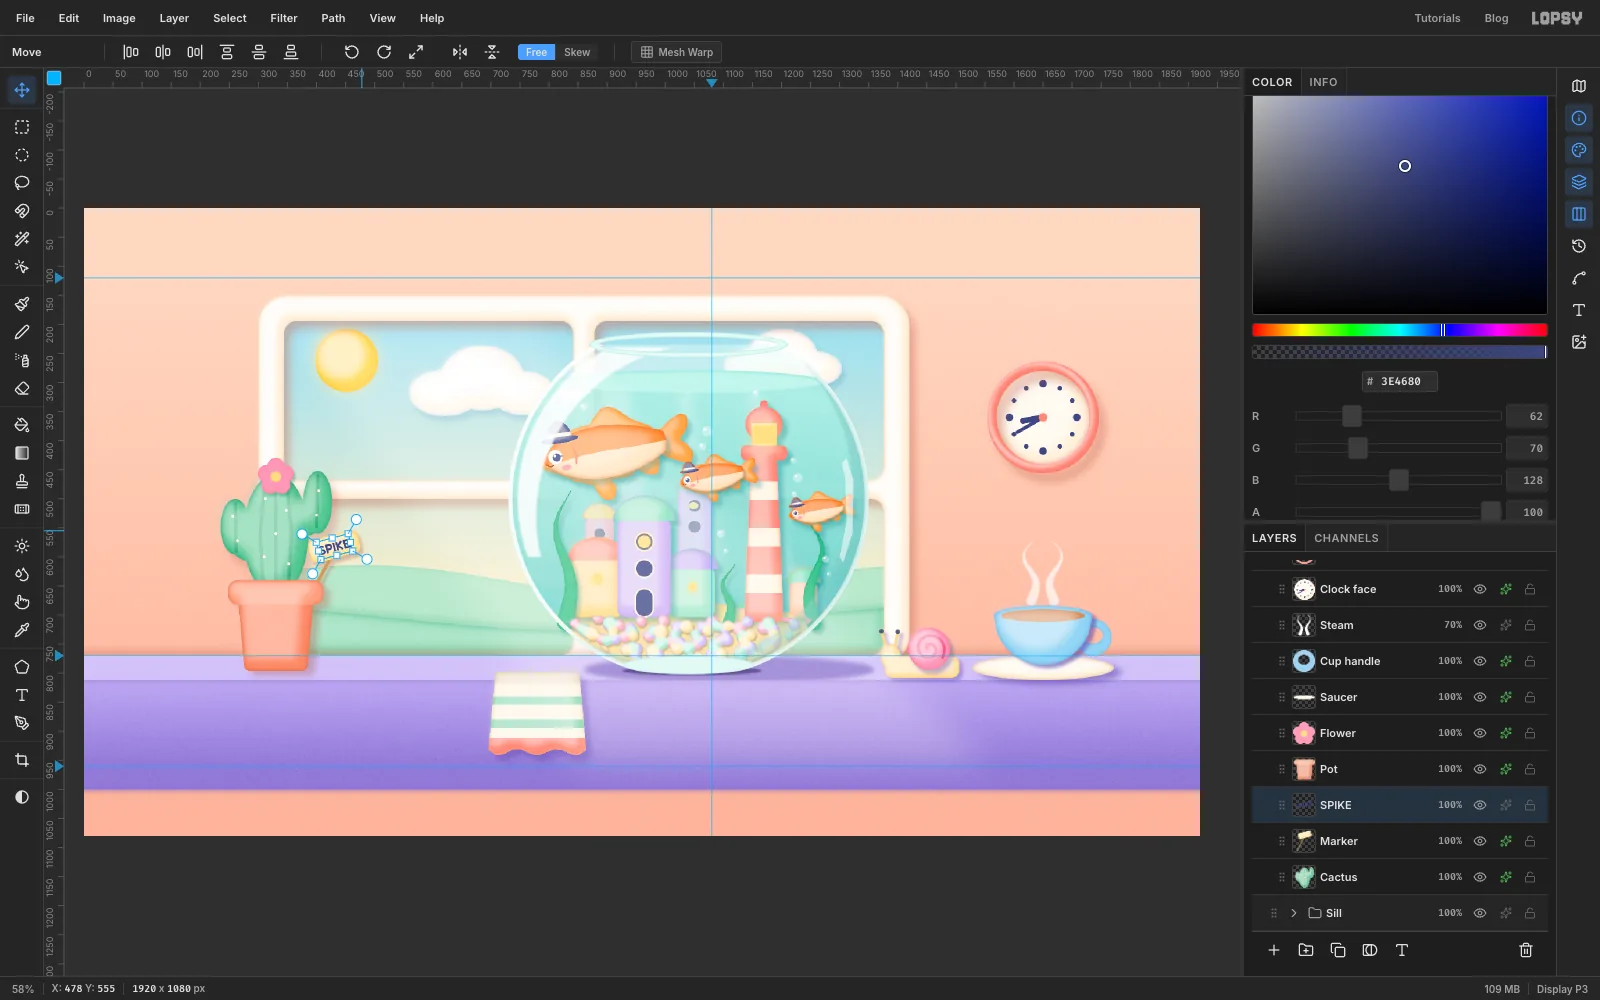
With Marker still selected, pick the Text tool (T). Set Fredoka, SemiBold, Size 22, Align Center, and the colour to navy . Click on the plate, type SPIKE, and press Tab to commit.
With the Move tool, Cmd-drag the text's rotation handle 15° counter-clockwise so it snaps to exactly the plate's angle. Then nudge it with the arrow keys until the margins left and right of the word match and it sits centred top to bottom.
-
Give it a tilt-shift miniature focus
Real stop-motion sets are tiny, and the camera's shallow focus gives them away. Fake it with a tilt-shift blur.
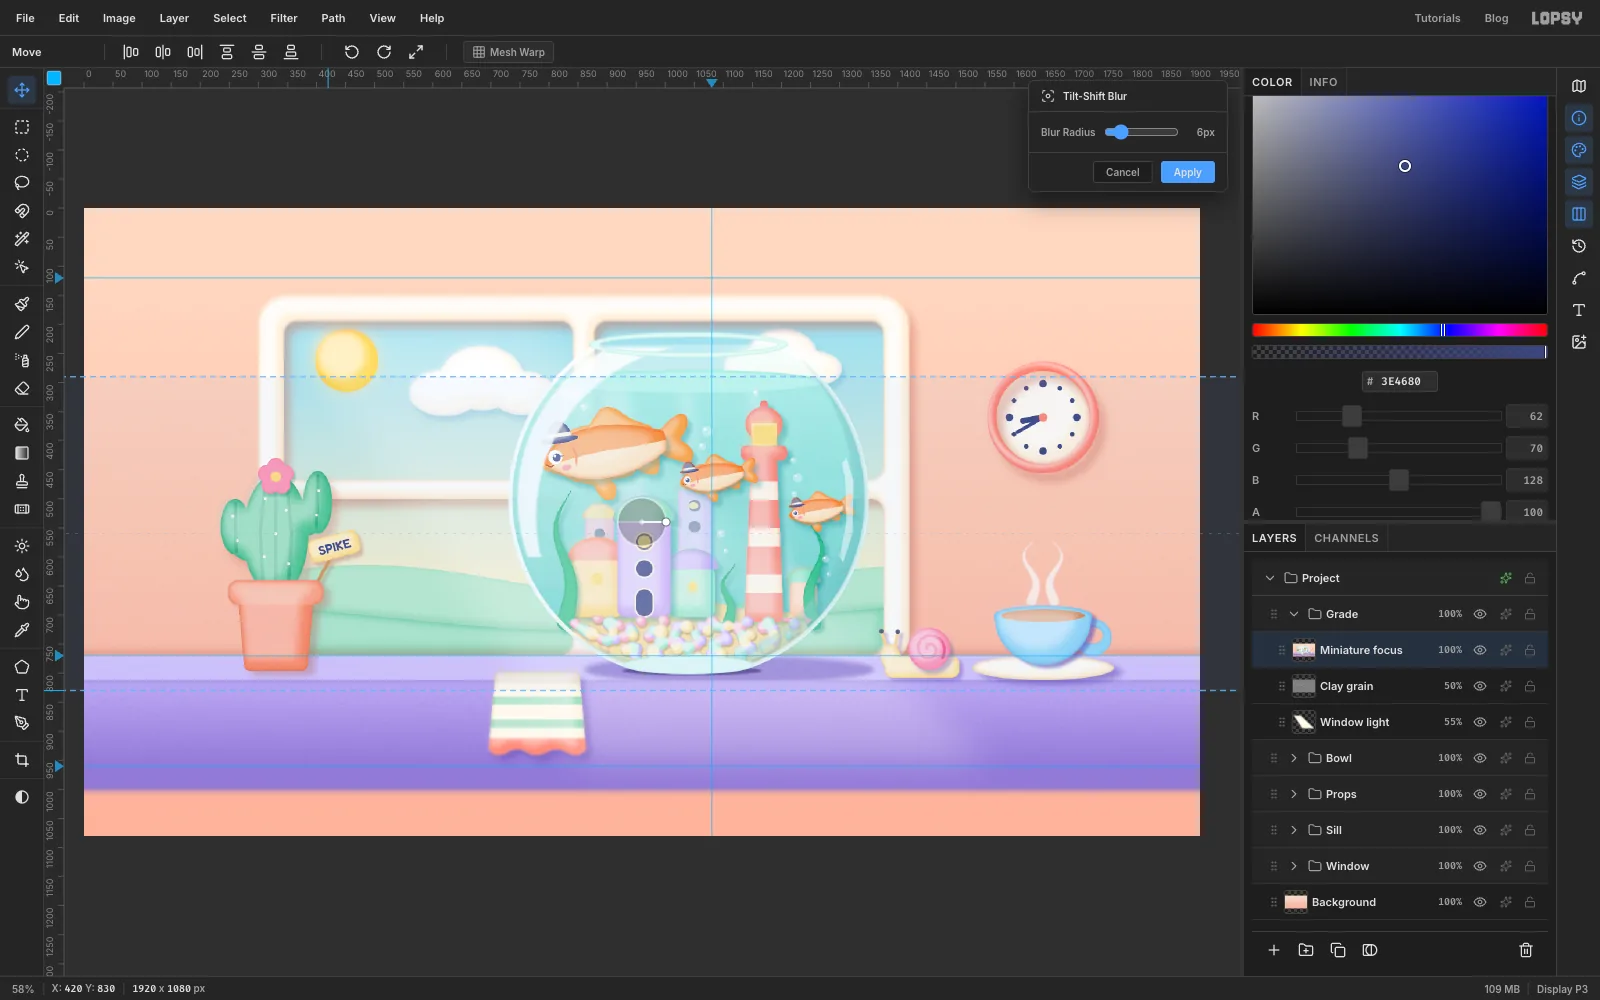
Collapse Props, expand Grade and select Clay grain. Choose Edit → Copy Merged and then Edit → Paste. Name the new layer Miniature focus. It's a flattened copy of the whole scene, so do it after all the scene painting: anything you change underneath later won't show through it.
Choose Filter → Tilt-Shift Blur…. Drag the upper dashed line up to the water's surface, and the lower one down to the front of the sill. Set Blur Radius to 6 and click Apply. The wall and the sky soften, while the town and the fish stay pin sharp.
-
Add the letterbox and the slate
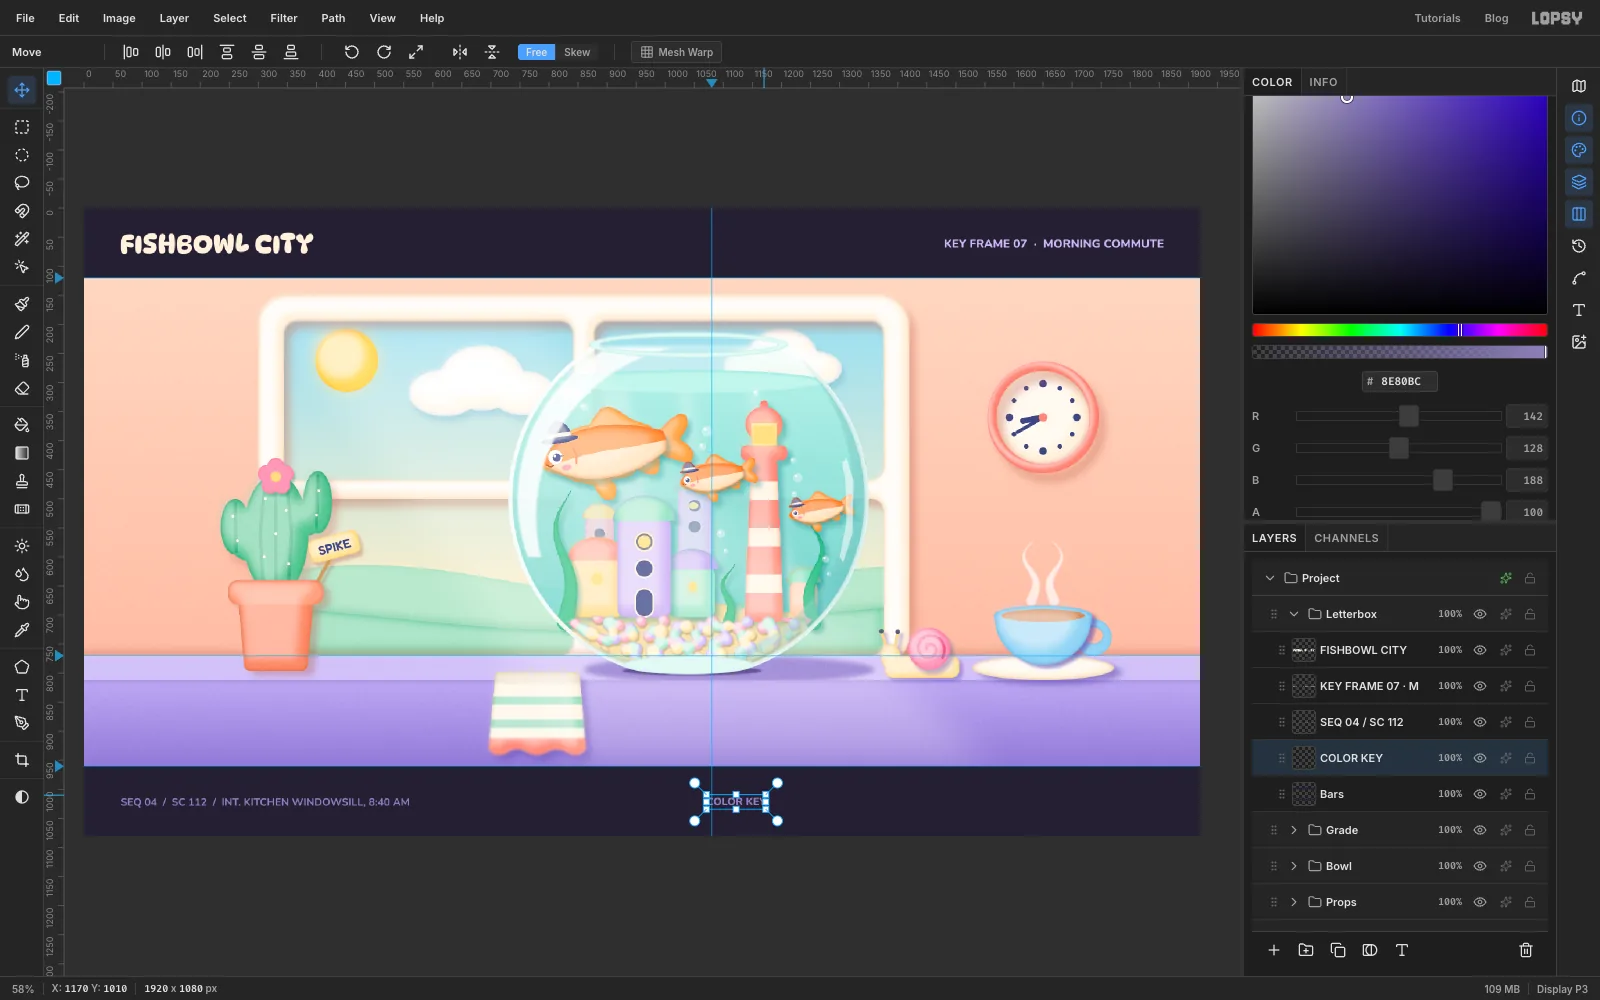
Collapse Grade, select it and make a Letterbox group. Add a Bars layer. Drag a marquee from just off the top-left corner to just past the right edge at the 120 guide, where it snaps. Then Shift-drag another from the 960 guide to below the bottom-right corner. Fill both with .
Click the top ruler at 64 and 1856 for margin guides.
Select Bars before each new piece of type, so the Text tool's settings don't restyle the text you just made.
- FISHBOWL CITY: DynaPuff SemiBold, Size 46, , Align Left.
- KEY FRAME 07 · MORNING COMMUTE: Nunito ExtraBold, Size 20, , Align Right. Put two spaces either side of the middle dot (on a Mac, type it with Alt+Shift+9), and the same around the slashes on the next line.
- SEQ 04 / SC 112 / INT. KITCHEN WINDOWSILL, 8:40 AM: Nunito Bold, Size 18, , Align Left.
- COLOR KEY: Nunito ExtraBold, Size 18, , Align Right.
Line each one up on its margin guide and centre it vertically in its bar, so the caps sit halfway down. Nudge with the arrow keys to get there. The COLOR KEY label goes in the bottom bar, just left of where the chips will start.
-
Lay out the colour key
Add a Color key layer. Turn on View → Show Grid, leave the grid at 16 px and tick Snap in the options bar. The marquee now locks to the grid, so every chip comes out the same size.
Drag seven chips, each 5 cells wide and 2 cells tall (80 × 32), with one cell between them, ending at the right margin. Round each one with Shrink 15 / Grow 15 to make a pill, and fill it with one of the key colours: wall , sky , hills , lilac , coral , goldfish and navy .
Turn the grid off and run the clay recipe on the layer with small numbers: Shrink 6, a 4 px nudge, Feather 5, white at 40%, and an Inner Glow at Size 3, Opacity 50. Finally, add a 1 px Stroke in so even the navy chip stands out from the dark bar. Save the project with File → Save Project, and export the frame with File → Quick Export PNG.