Make a CMYK Halftone Poster from a Bird Photo
Separate a parrot photo into cyan, magenta, yellow and black plates in Lopsy, screen each at its own angle and overprint them into real rosettes.
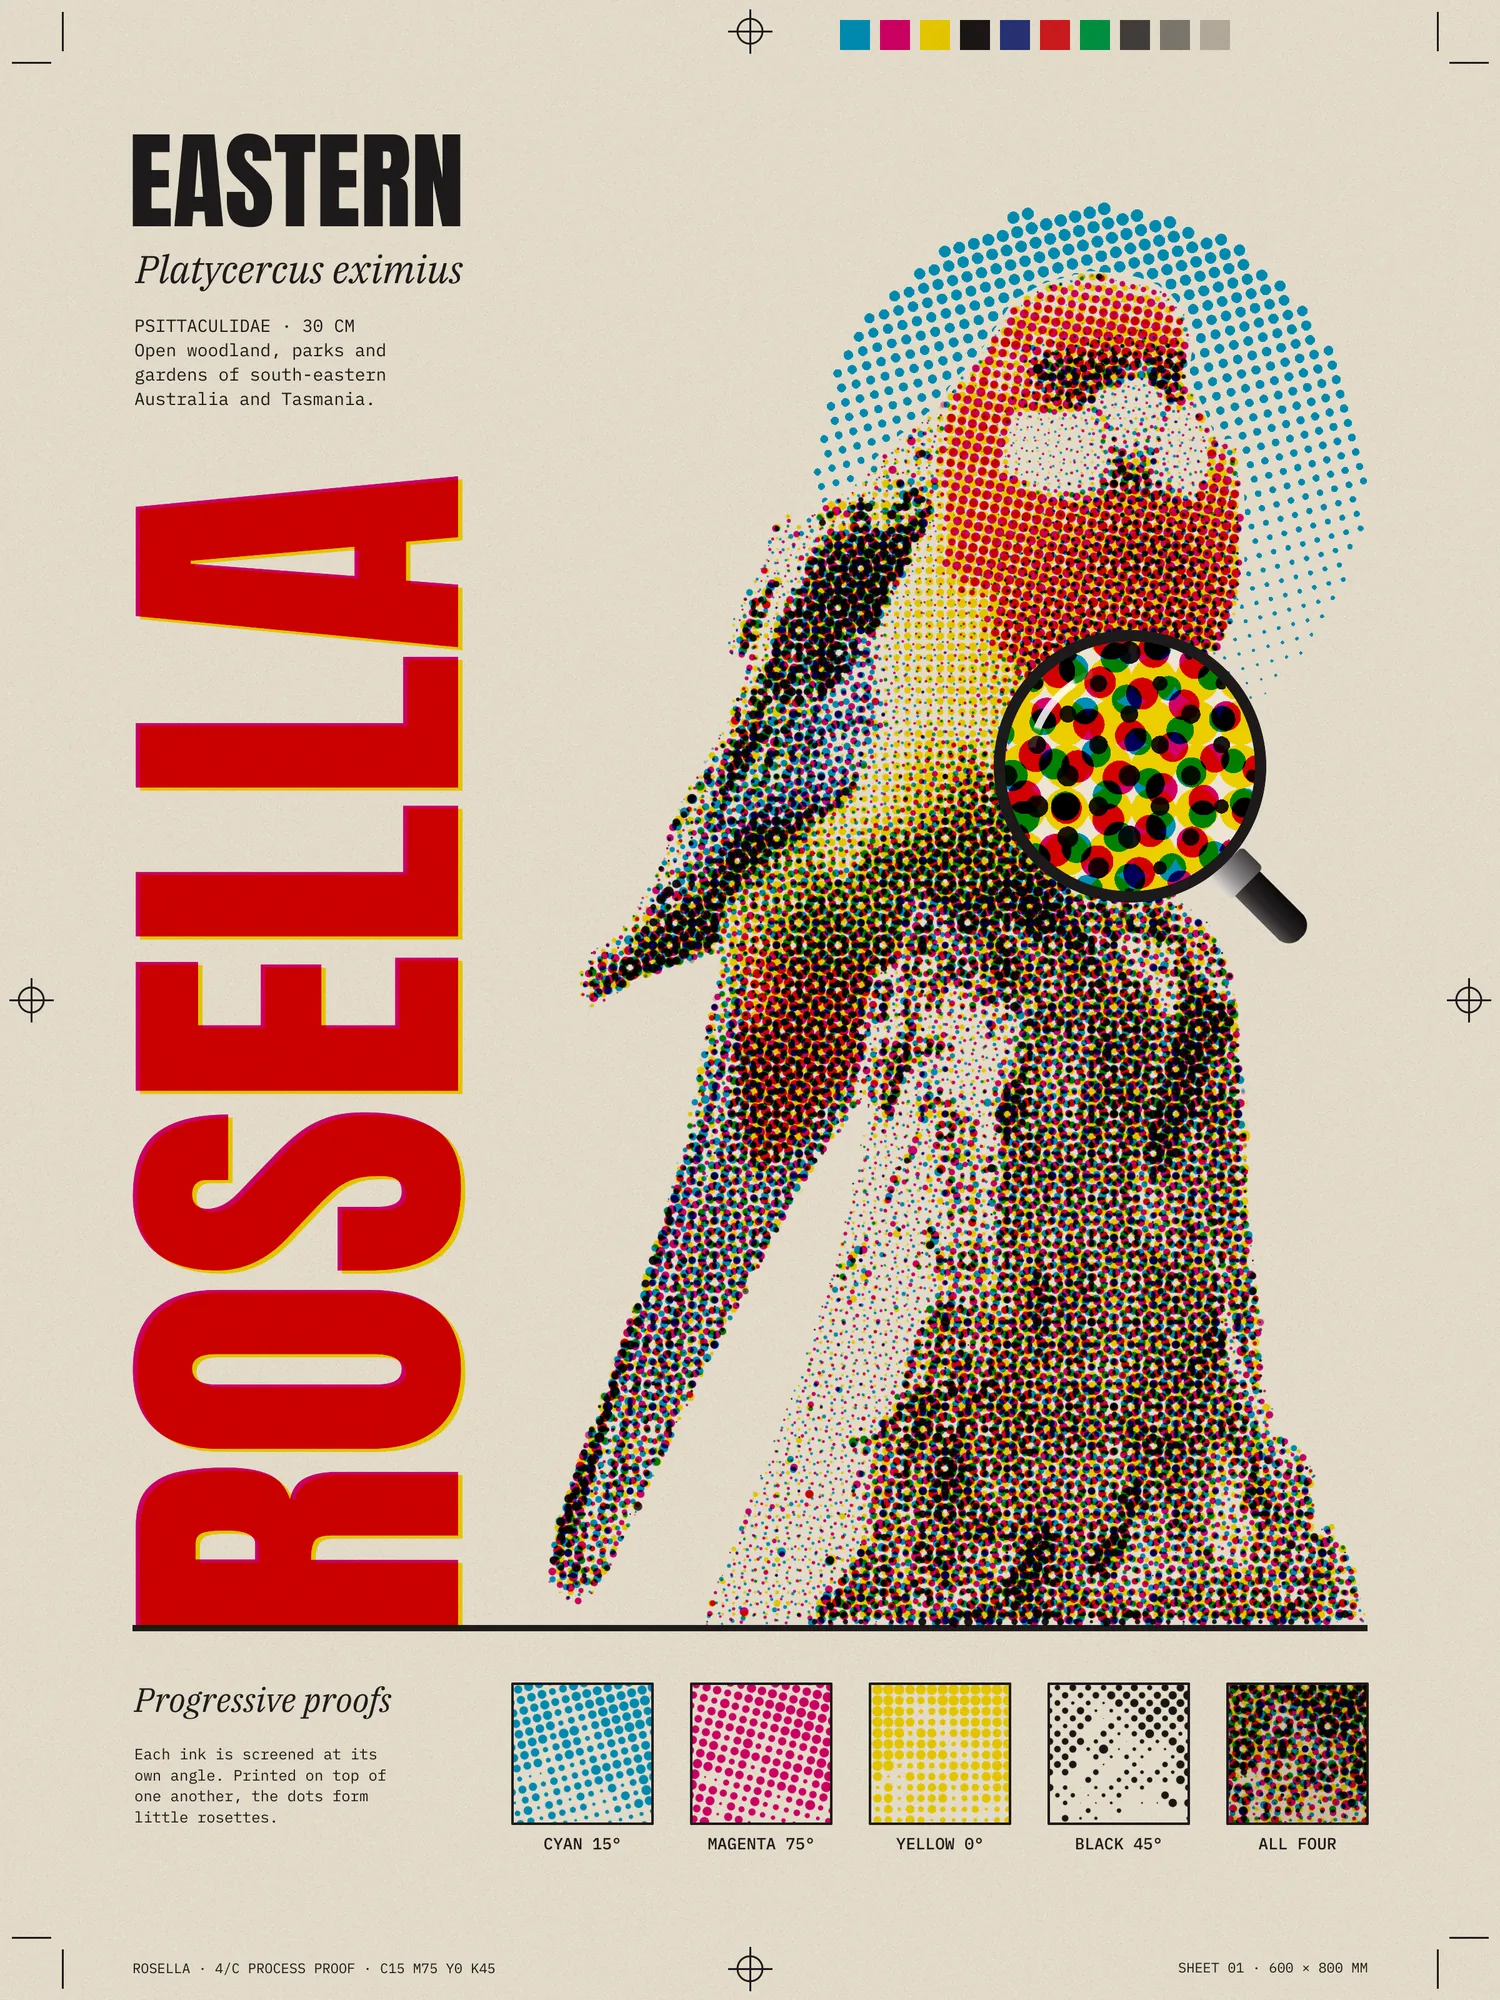
Every colour magazine photo you have ever seen is made of four inks: cyan, magenta, yellow and black. Each ink is printed as its own grid of dots, and each grid is turned to a different angle, usually 15°, 75°, 0° and 45°. Up close, the overlapping dots form little flower shapes called rosettes. From arm's length, they blend back into a photo.
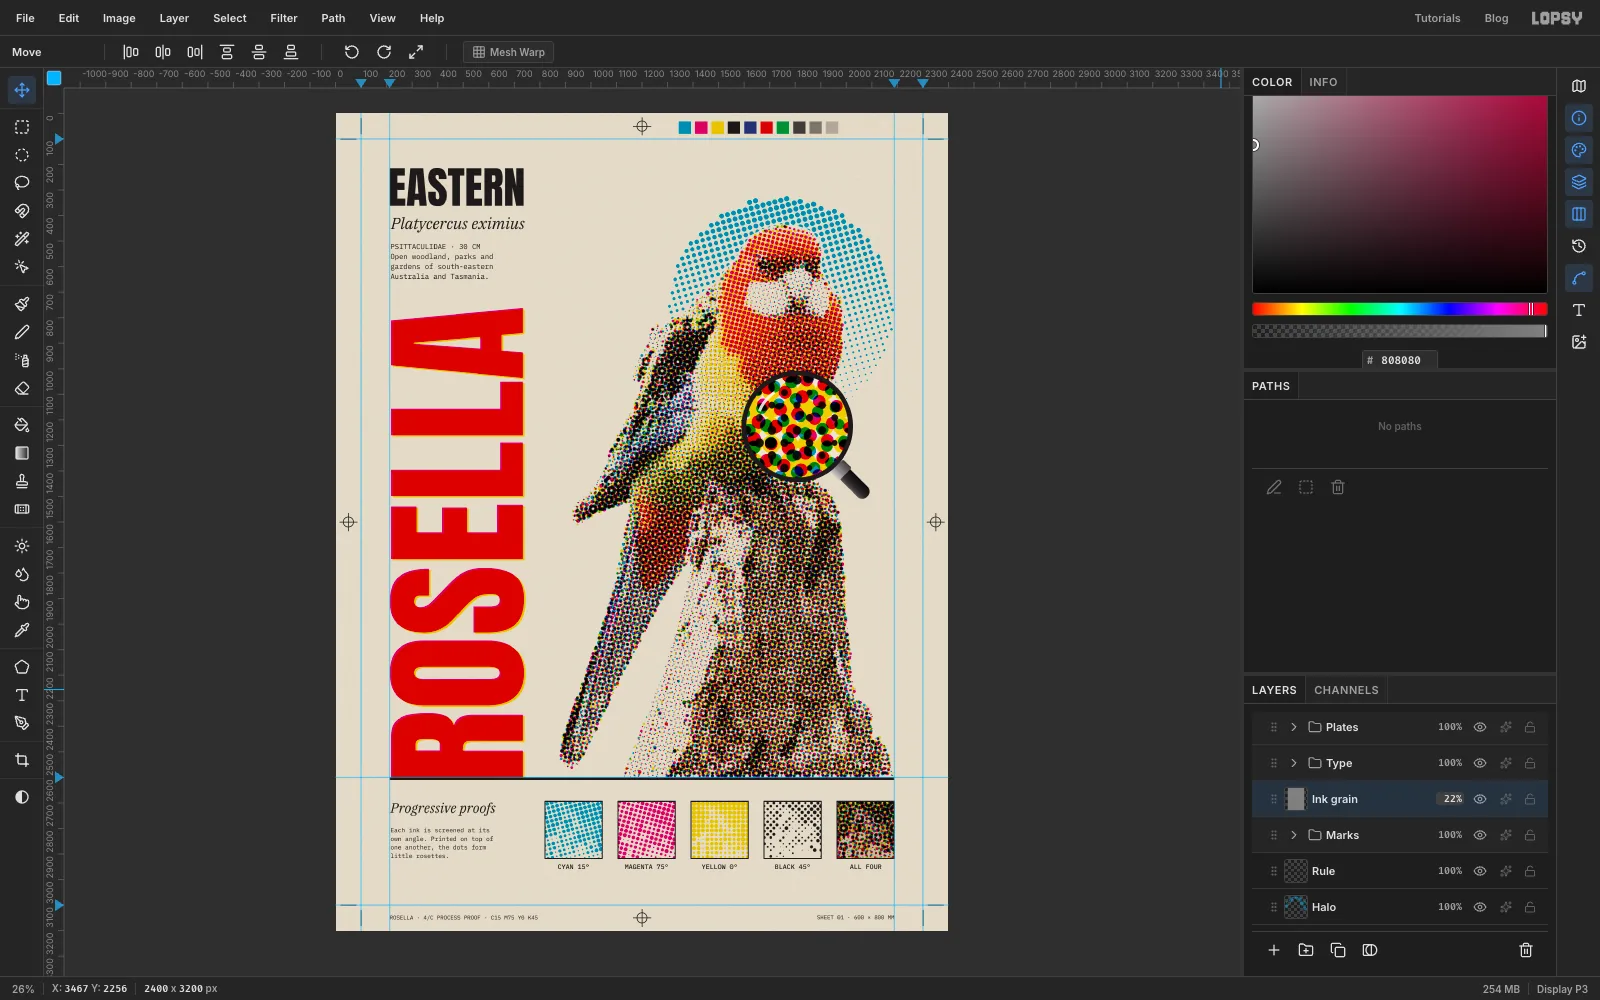
This tutorial makes that process the subject of the poster. You'll take a photo of an Eastern Rosella, Australia's most colourful parrot, and split it into four plates yourself. Then you'll screen each plate at its own angle and print them on top of one another with the Multiply blend mode. The poster is laid out like a printer's proof sheet. It has a magnifying glass over the dots, a row of progressive proofs showing each ink on its own, and crop marks, registration targets and a colour bar in the margin. The poster is 2400 × 3200 px.
The photo is Platycercus eximius, The Briars by Frankzed, cropped by Tony Wills, on Wikimedia Commons. It's licensed CC BY 2.0, so credit the photographer if you share your poster. To follow along, download the original (1047 × 1396 px) from its Commons page. Any sharp photo of a bird against a plain, out-of-focus background works the same way.
Along the way you'll use:
- the Pen tool and Path to Selection to cut out the bird
- the transform handles to scale the bird and the lens, and to tilt the magnifier's handle by 45°
- Channel Mixer and Highlights & Shadows adjustments on a group to make the separations
- Copy Merged, paste in place, and Halftone at four screen angles
- Color Overlay, Rasterize Layer Style and the Multiply blend mode for overprinting
- Grow to re-cut soft edges crisp, and Select → Inverse
- the Gradient tool, a knockout, Merge Down and the Eraser
- Anton, IBM Plex Serif and IBM Plex Mono type, with Rotate 90° and a misregistered duplicate
- guides, the grid with snapping, the Pencil for straight lines, and groups
The palette is four process inks on newsprint:
-
Paper
-
grain
with noise
-
Cyan
-
magenta
-
yellow
-
black
-
Halo
before screening
-
Handle
-
Ferrule
-
Overprint patches
-
Black tints
-
Make the newsprint
Choose File → New, enter 2400 × 3200 pixels and click Create. Double-click the Background layer's name and rename it Paper. Set the foreground to and choose Edit → Fill.
Rename Layer 1 to Grain and fill it with . Choose Filter → Add Noise…, set Amount to 32, pick Mono and Gaussian, and click Apply. In the layer's effects drawer, set Blend to Multiply. The paper now has a faint newsprint tooth.
-
Mark the trim and margins
A proof sheet is bigger than the finished poster. The poster is trimmed out of the middle, and the margin holds the printer's marks. Click the top ruler at
100,212,2188and2300to drop vertical guides. Click the left ruler at100,2600and3100.The outer guides are the trim. The
212and2188guides are the margins that all the type and the bird will line up on. The2600guide is where the rule under the picture will go.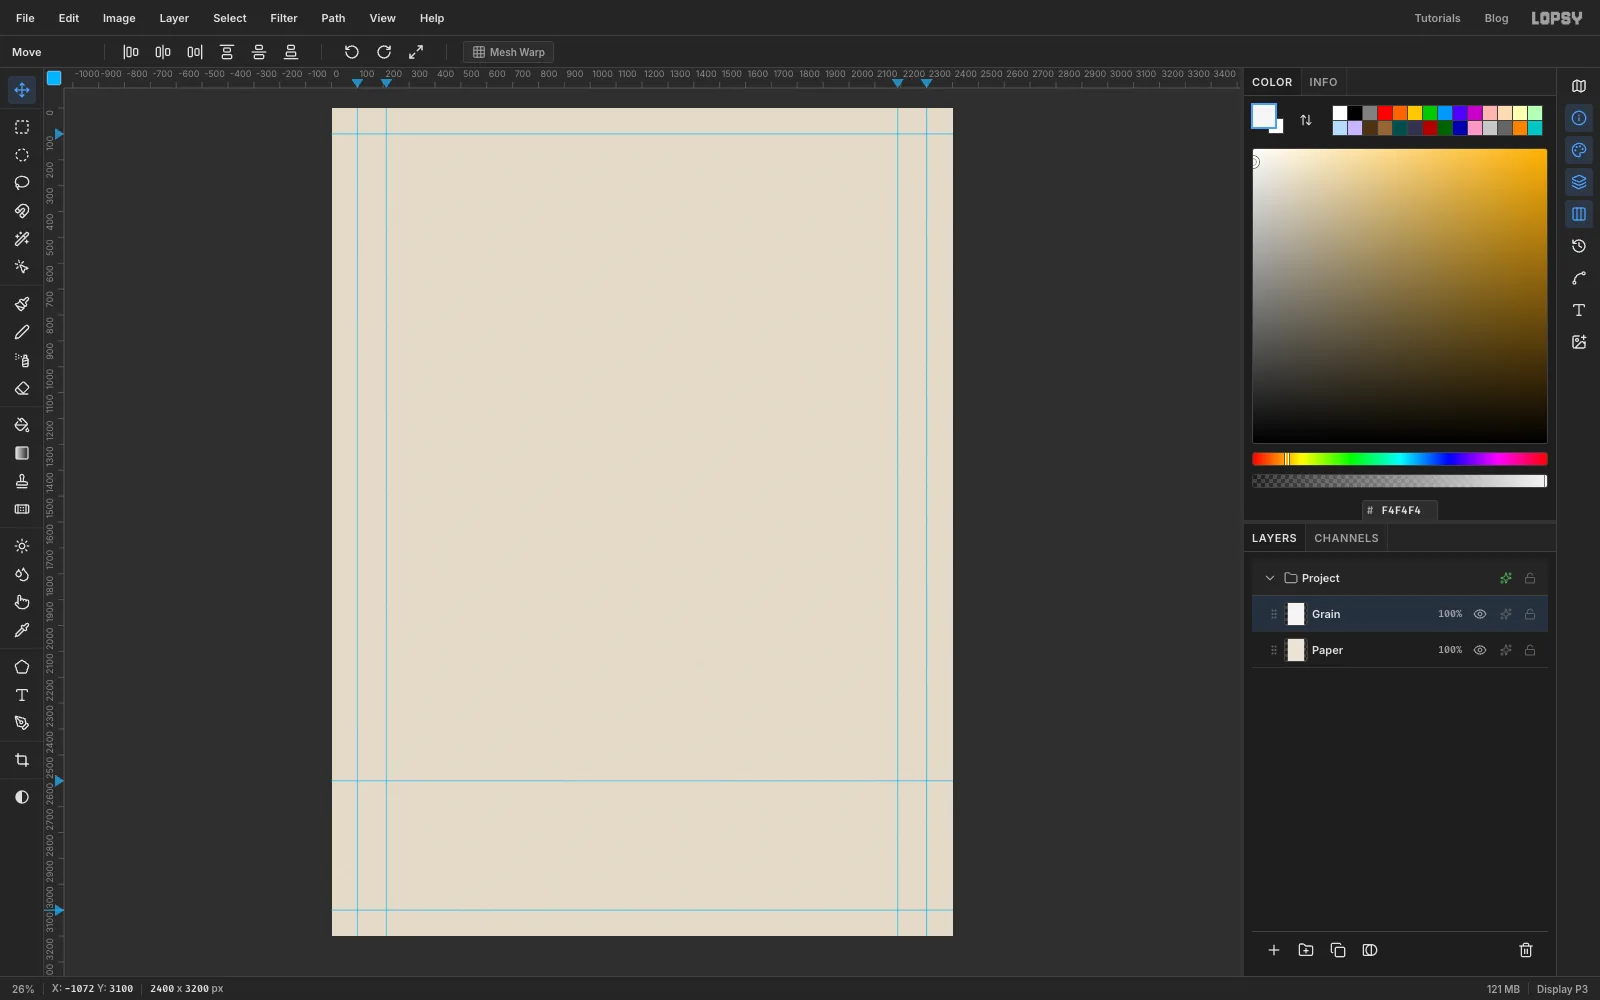
-
Bring in the photo
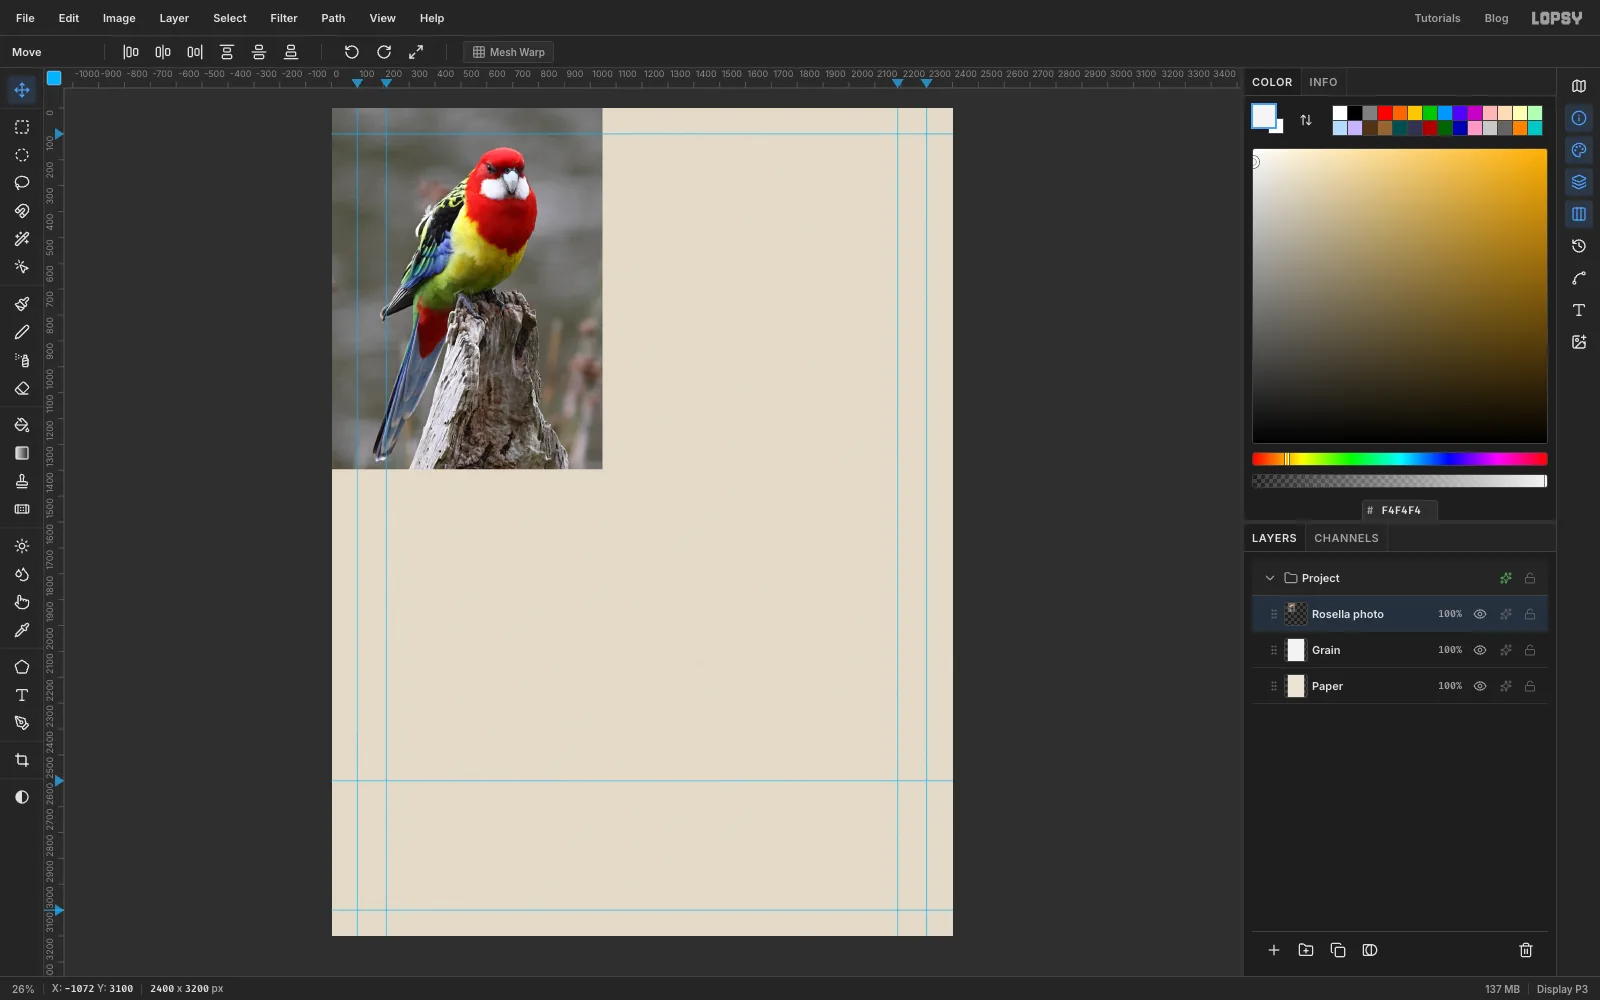
Click the Grain row, then drag the downloaded JPEG from your desktop onto the canvas. It lands in the top-left corner at its full size. Rename the new layer Rosella photo.
-
Trace the bird with the Pen
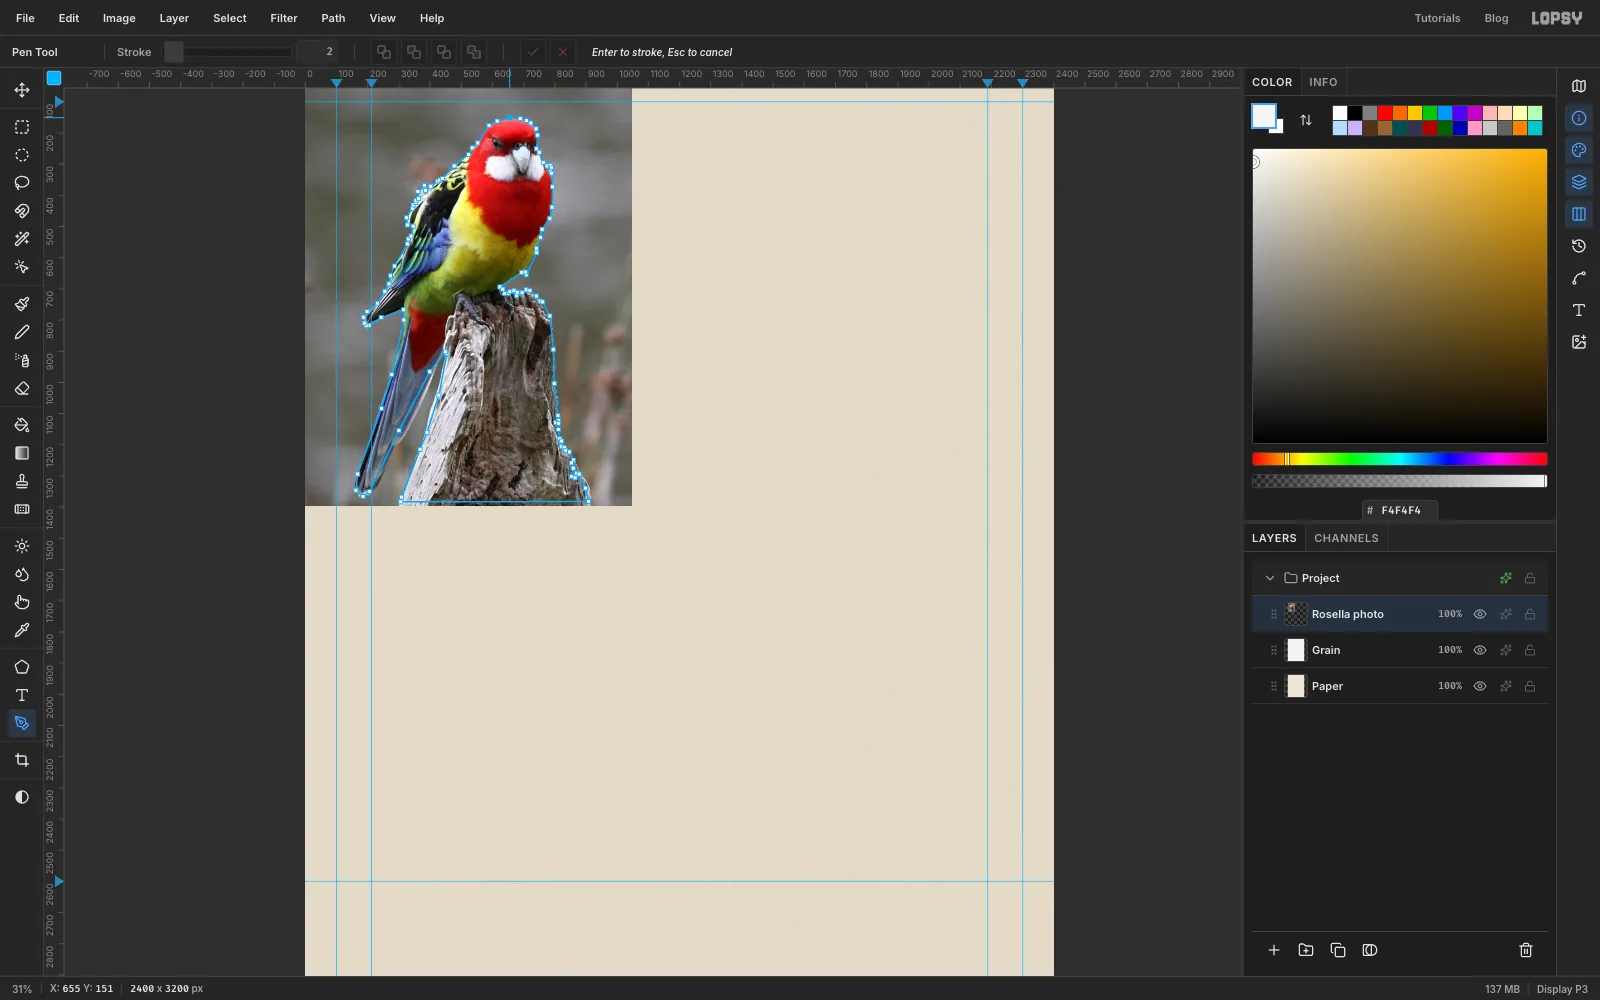
Zoom in with Cmd and the scroll wheel until the photo fills most of the window. Pick the Pen tool (
P) and click your way around the bird, one anchor every 20–40 px. Start at the top of the head and go down the back, around the wing tip and the long tail, back up the tail's inner edge, and down the left side of the stump. Then cross the bottom of the photo and go up the stump's right side to the chest.Keep the anchors on the bird, not on the blurred background, and cut straight across the bottom of the stump. Click the first anchor again to close the path.
-
Cut the bird out
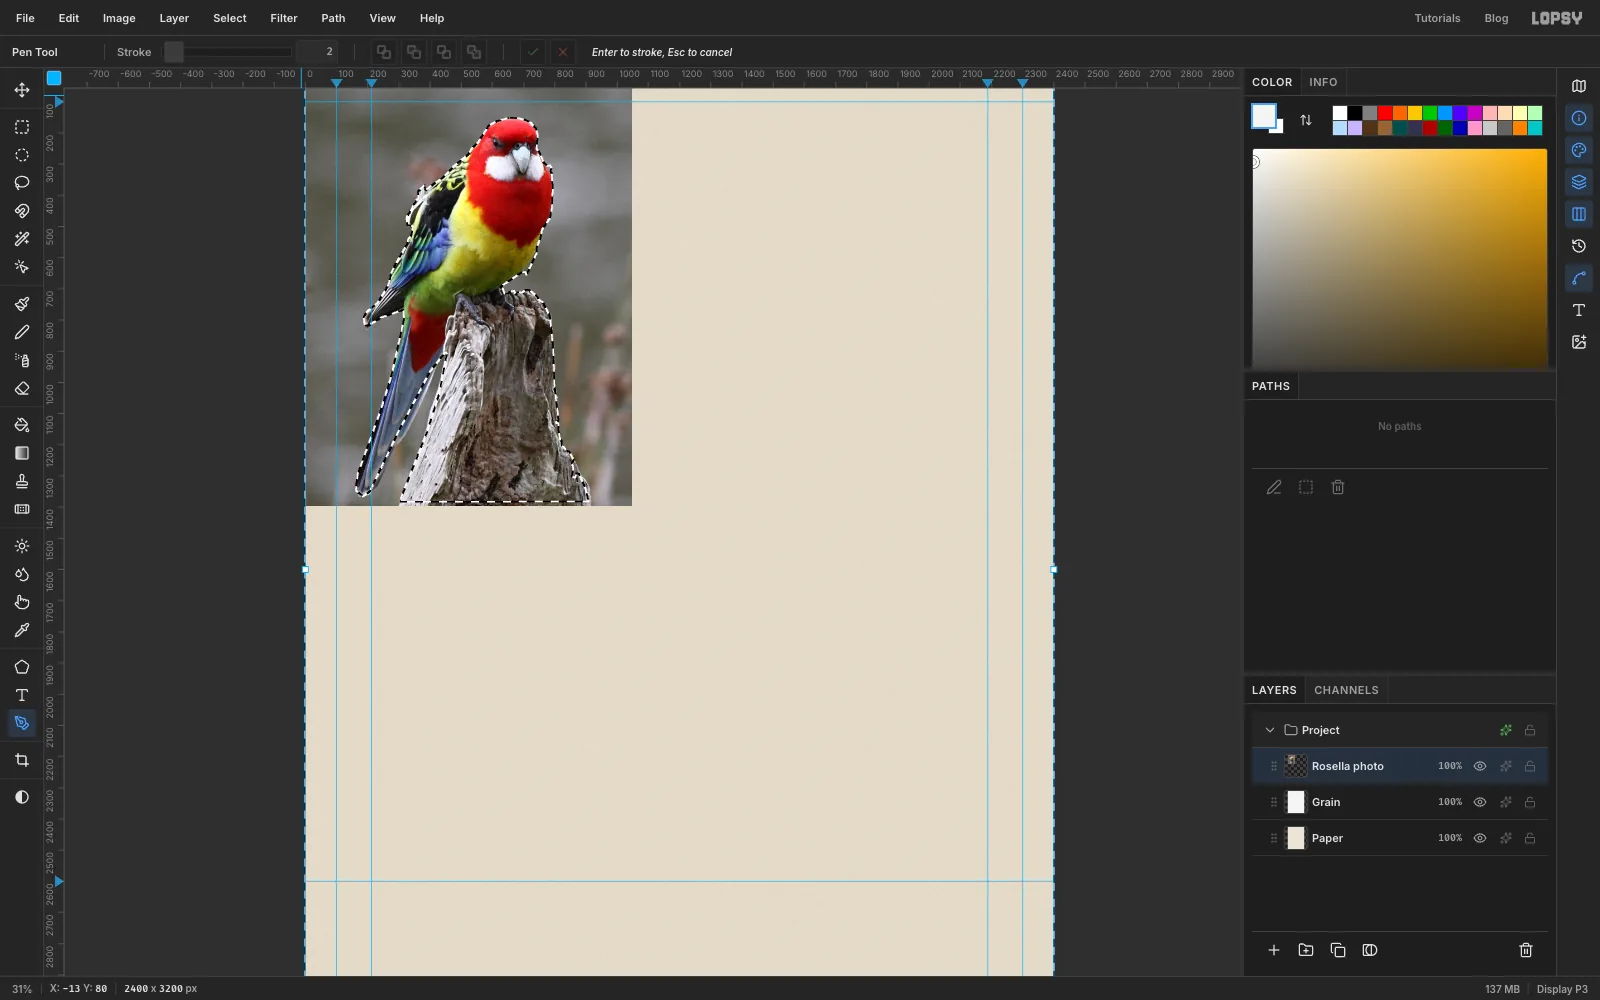
Open the Paths panel, select the new path and click Path to Selection (the dashed-square button), then click Delete Path (the bin). Choose Select → Inverse, so everything except the bird is selected, and press Delete. Press Cmd+D to deselect.
-
Scale the bird up
Cmd-click the Rosella photo thumbnail to select the bird, and press
Vfor the Move tool. Hold Cmd, so the bird scales evenly, and drag the bottom-right white square handle down and to the right. Watch Selection W in the Info panel and stop when it reads about 1305 px, which is 175% of the original. Grab the square slightly inside its corner. The blue circle just outside it is the rotate handle.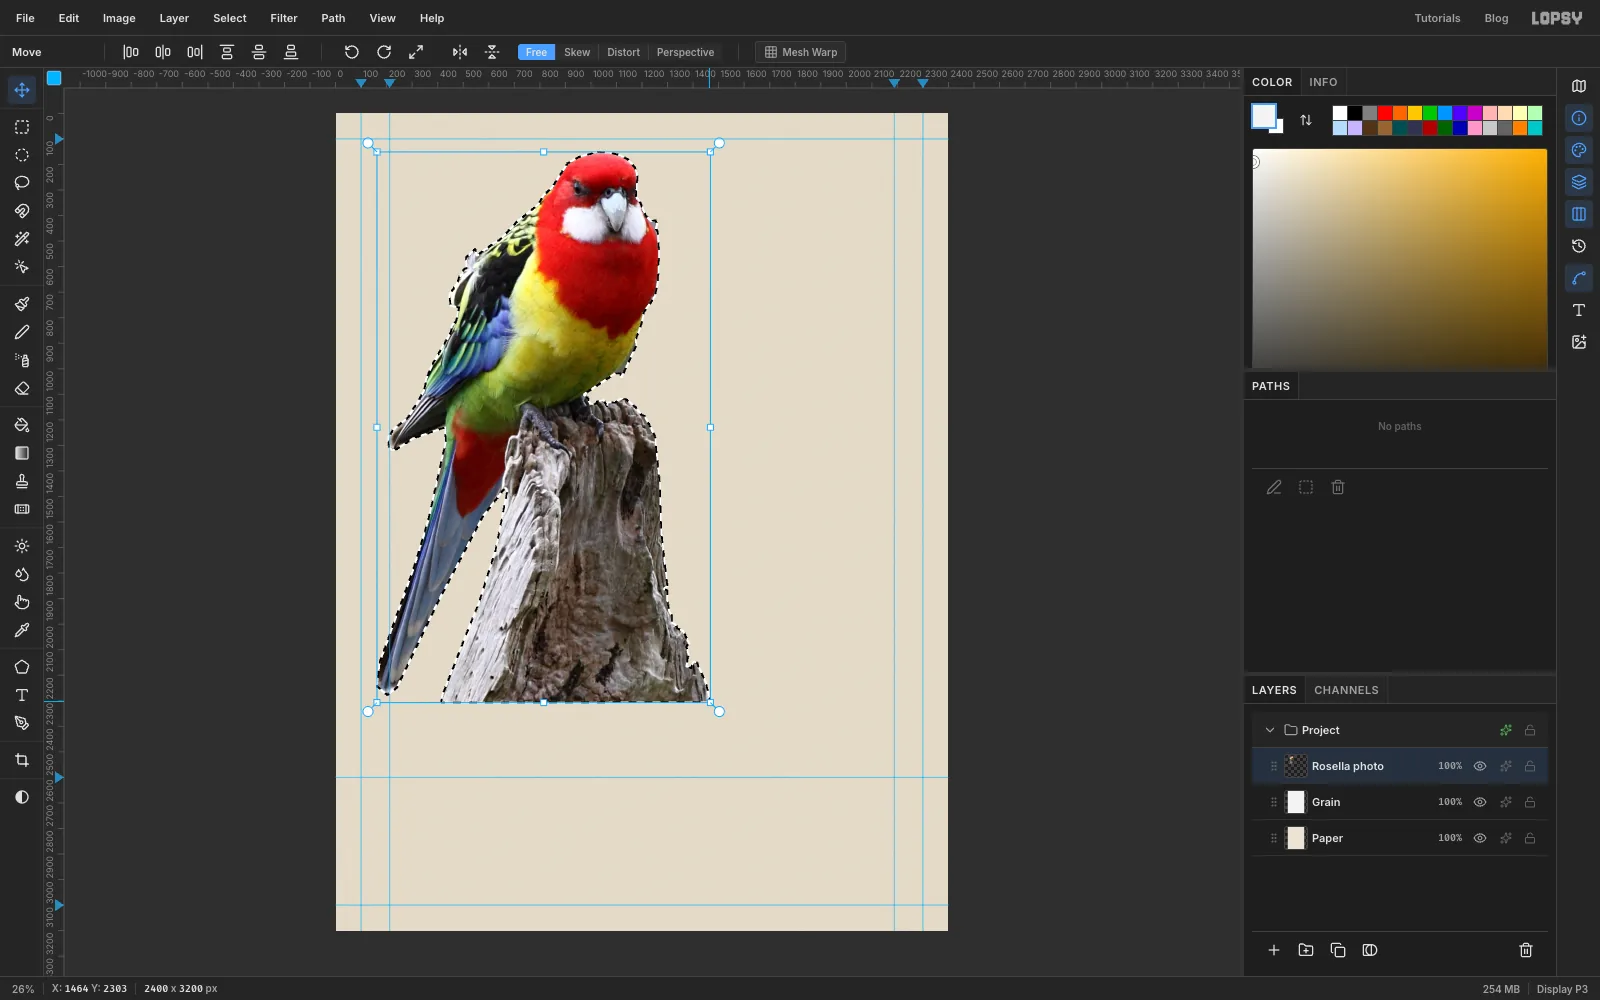
-
Move it into place
Drag from inside the selection to move the bird. Put the tip of its tail at about
x 880, and the flat bottom of the stump on the2600guide. Press Cmd+D to finish the transform.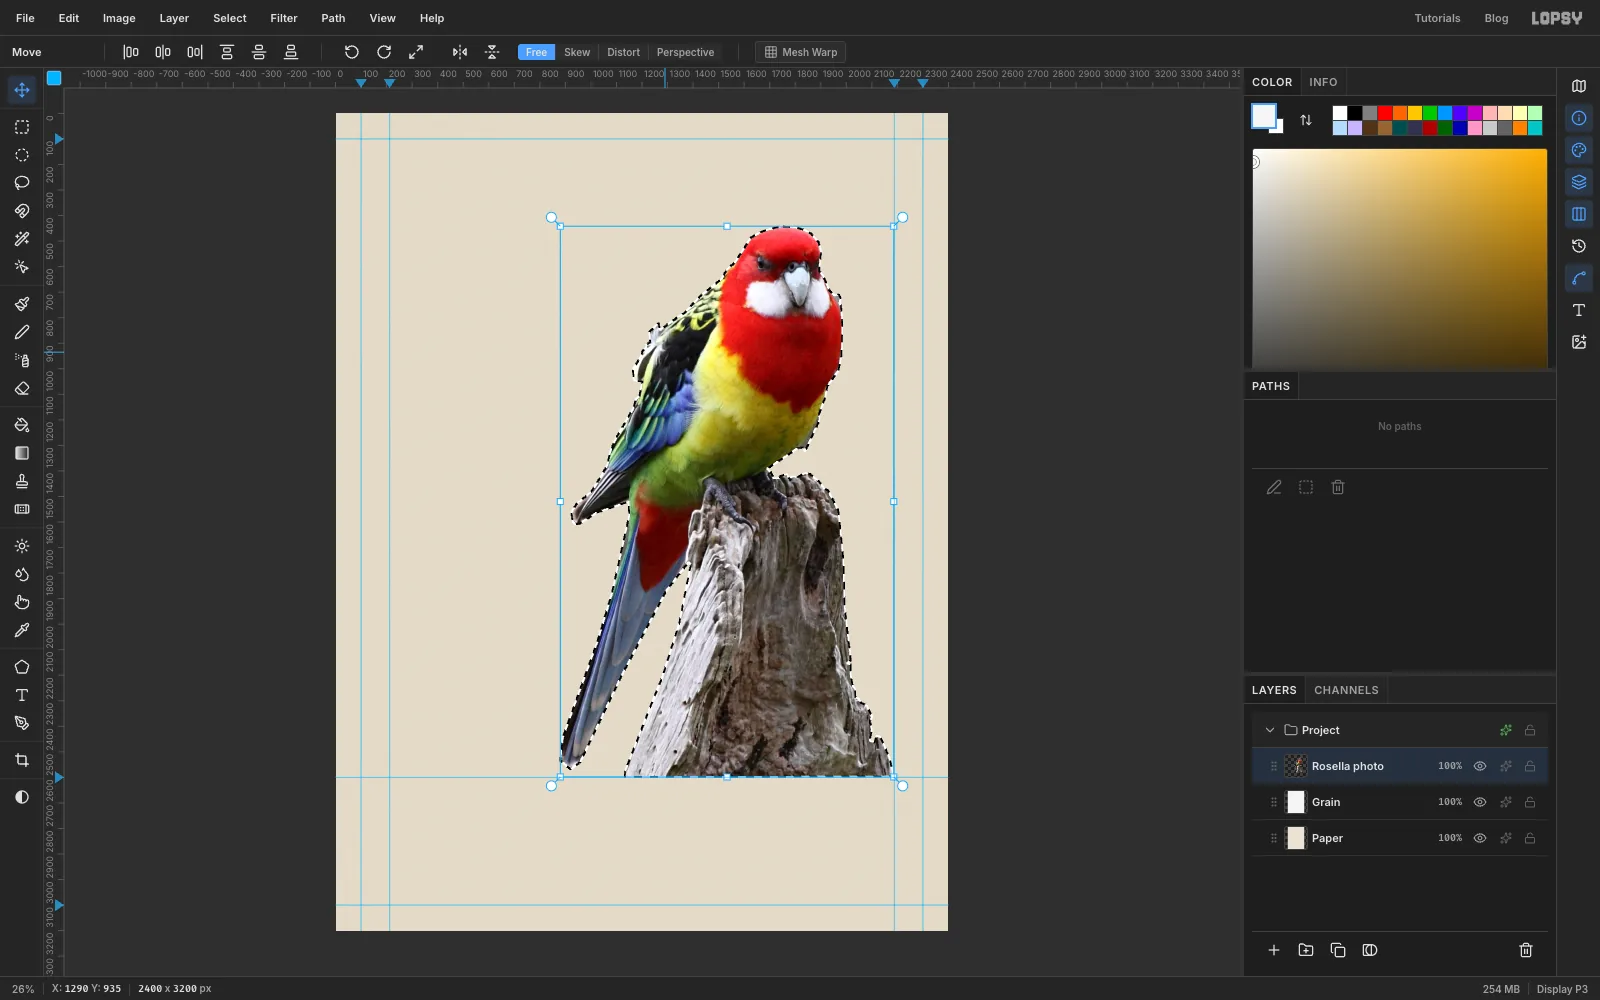
-
Put the photo in a Separation group
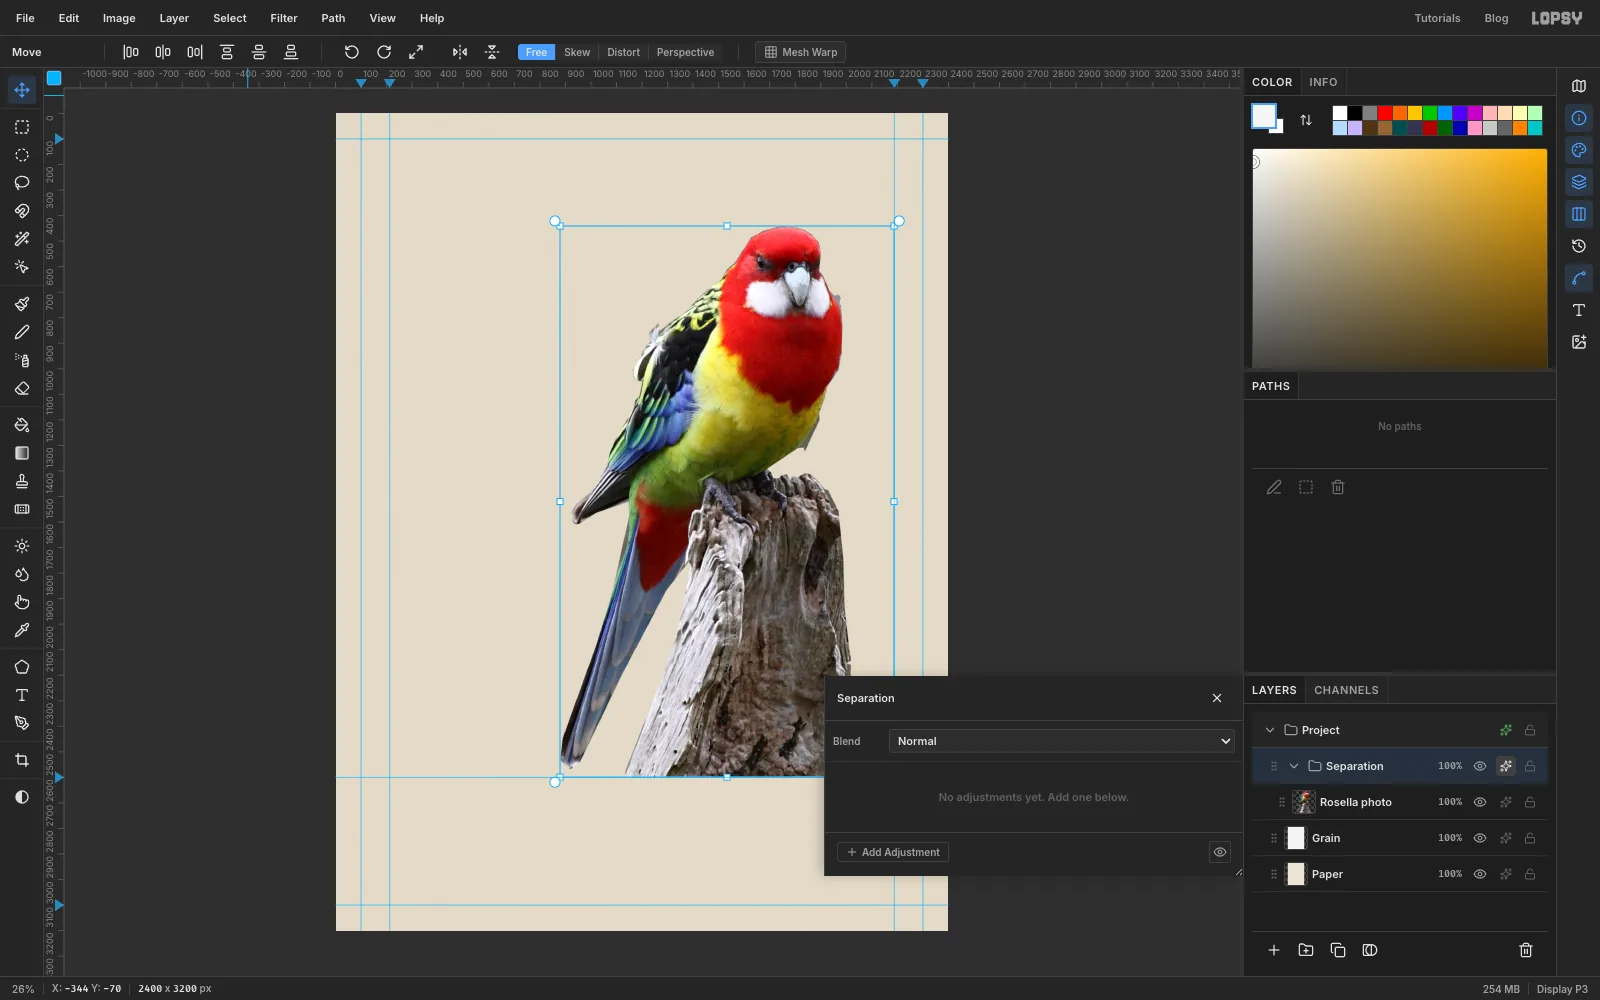
With Rosella photo selected, choose Layer → Group Layers and rename the group Separation. Click the sparkle icon on the group's row. For a group, the drawer holds adjustments instead of layer effects.
A plate is just a greyscale picture of how much of one ink the photo needs. Cyan ink absorbs red light, so wherever a pixel has little red, the cyan plate needs a lot of ink. So a grey copy of the red channel is dark wherever cyan ink is needed. The halftone filter prints dark greys as big dots and white as nothing, so that grey copy screens straight into a cyan plate.
-
Add three Channel Mixers
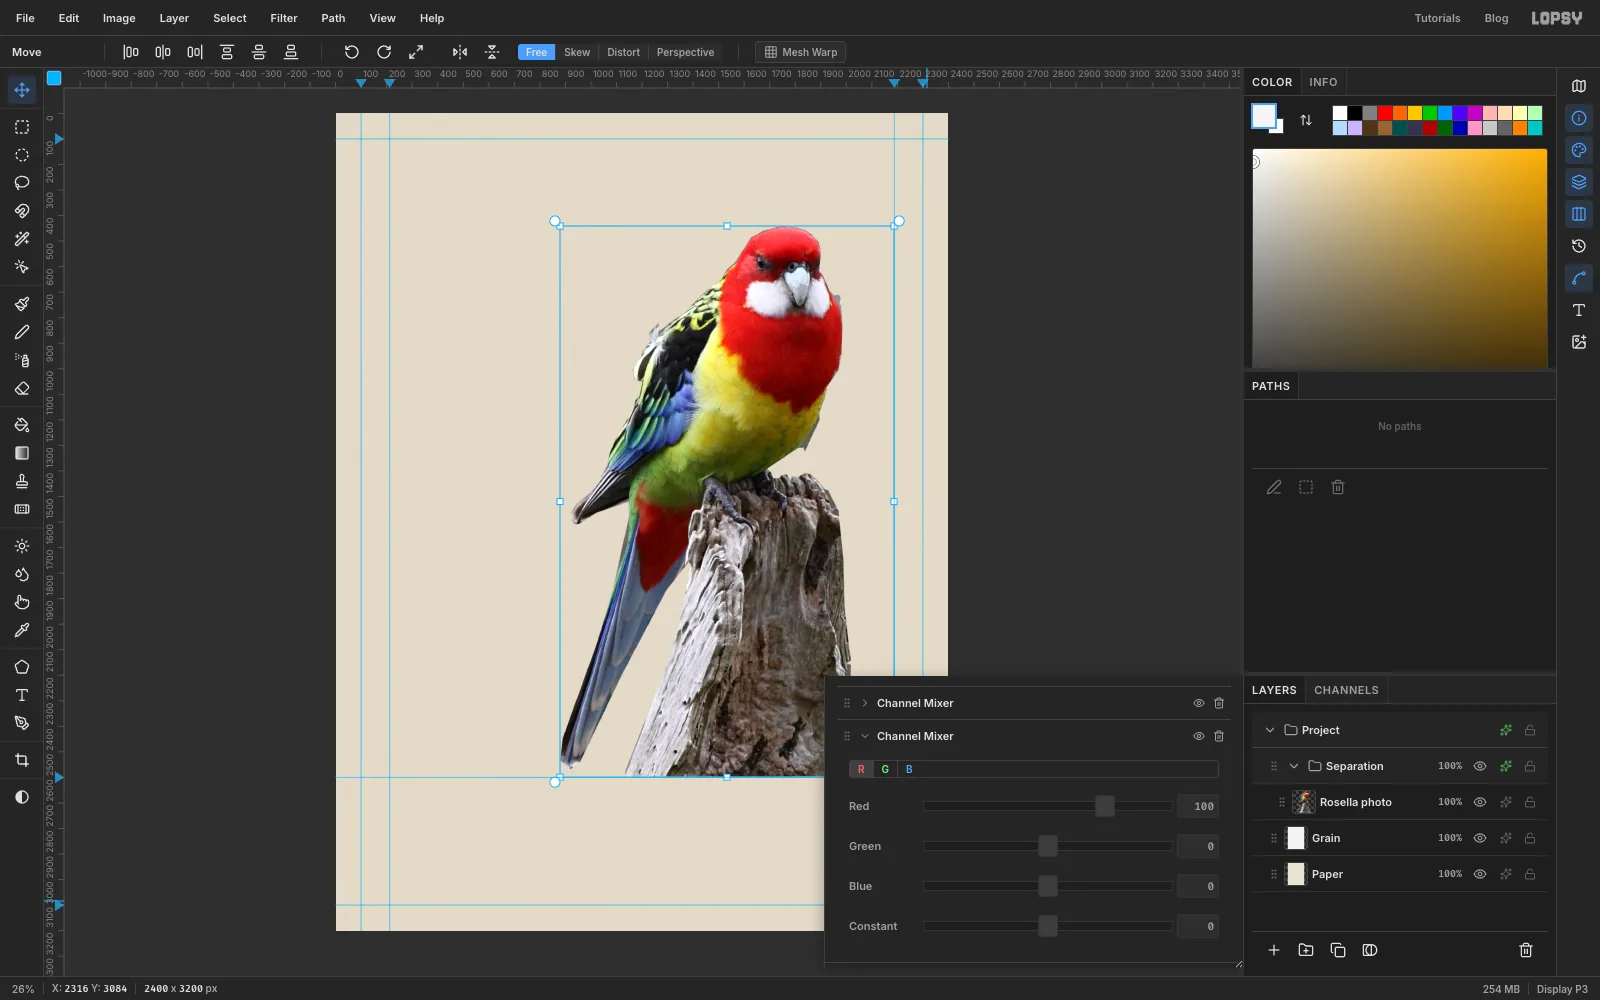
Click Add Adjustment → Channel Mixer three times. Each mixer controls one output channel, chosen with the R, G and B tabs. Expand the first mixer and leave it on R. Switch the second mixer to G and the third to B. A mixer only writes the channel whose tab is showing, so once a mixer is on its tab, leave it there.
-
Lift the shadows
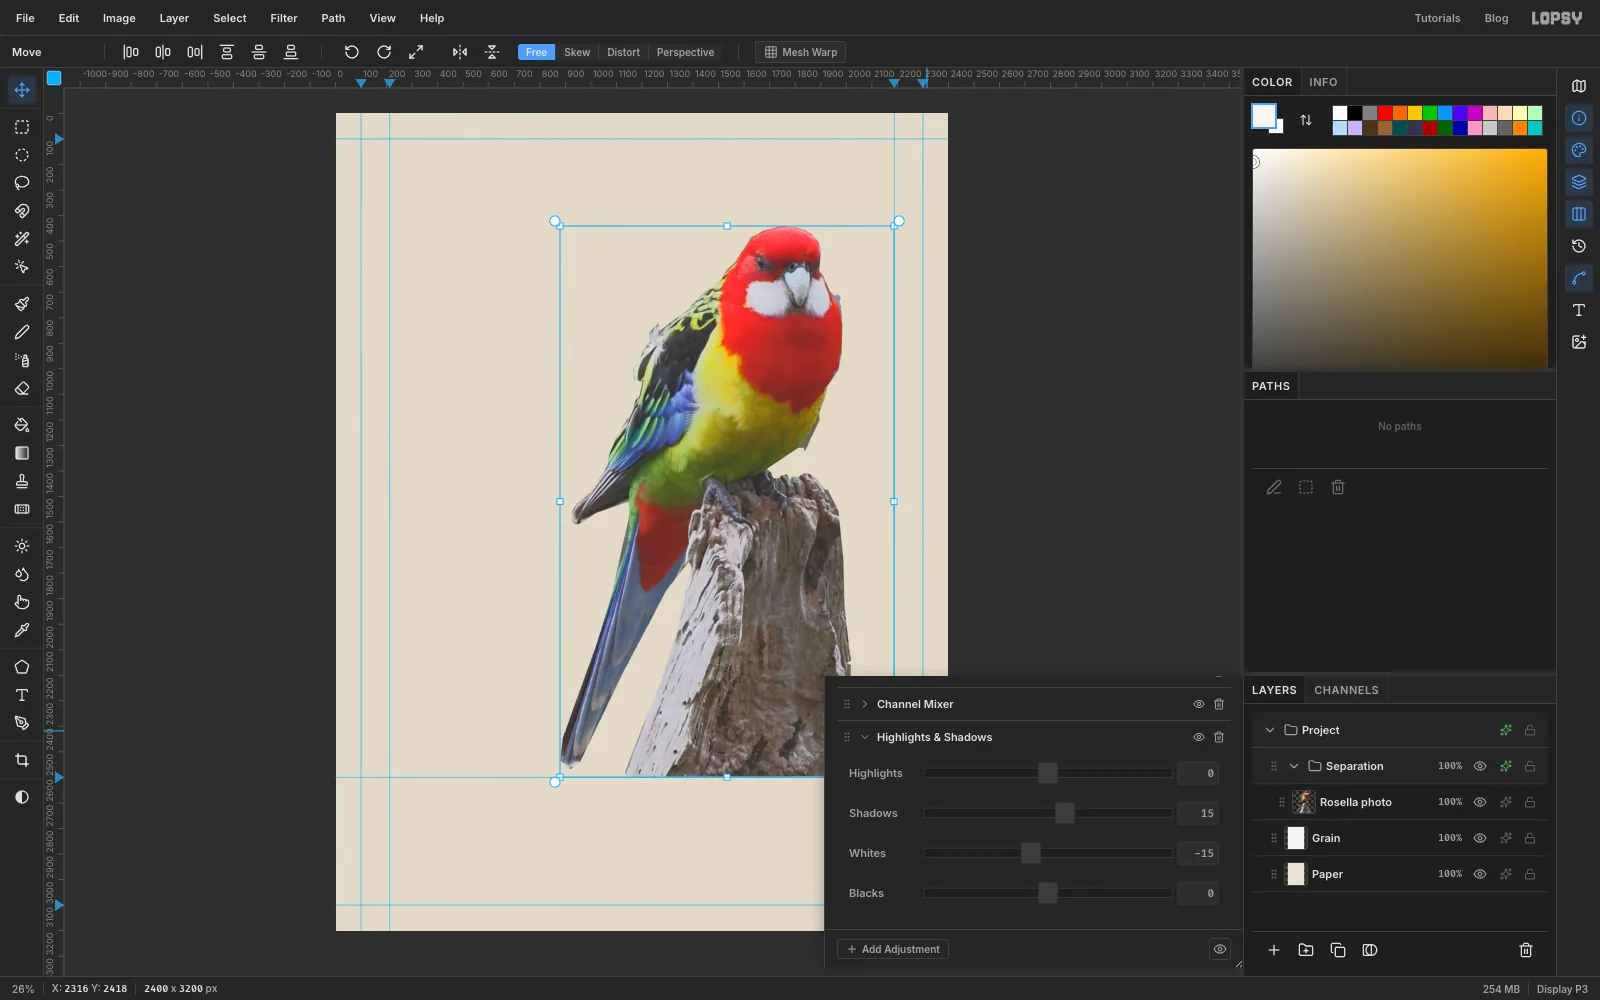
Click Add Adjustment → Highlights & Shadows. Set Shadows to 15 and Whites to −15. This opens up the darkest feathers a little, so they don't fill in solid. It also gives the white cheeks a faint tint, so they print as a light speckle instead of a bare hole.
-
Make the cyan separation
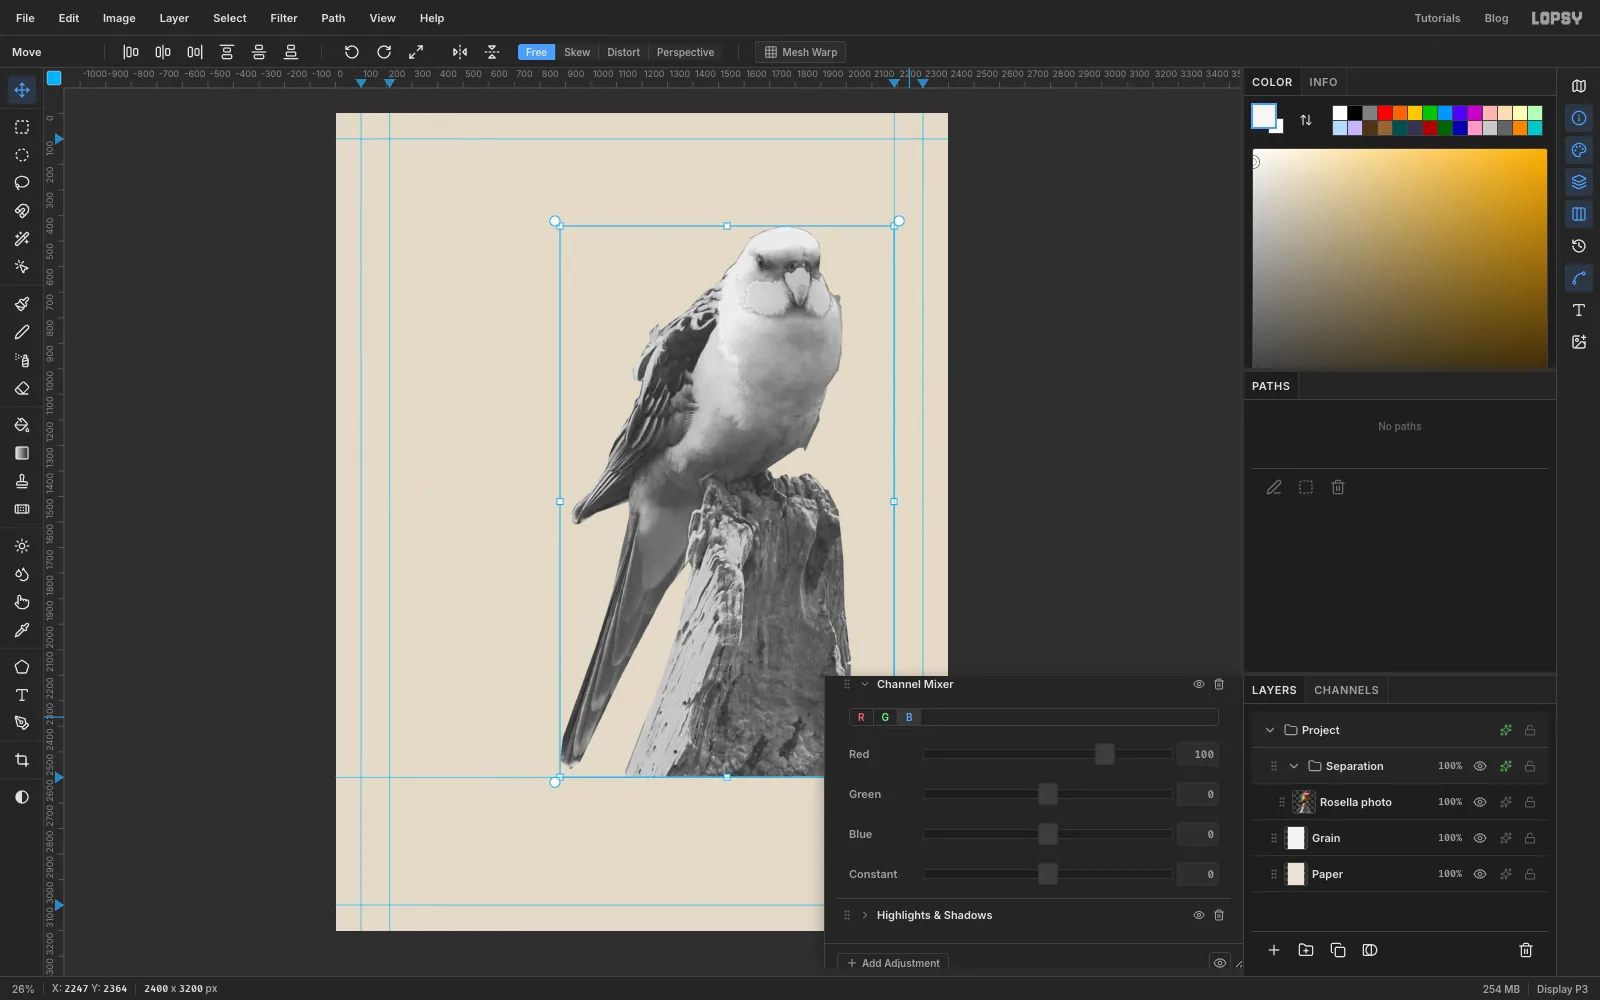
Set all three mixers to the same recipe: Red 100, Green 0, Blue 0, Constant 0. Every output channel now copies the red channel, so the bird turns grey. The red head goes almost white because it needs no cyan at all.
Cmd-click the Rosella photo thumbnail, choose Edit → Copy Merged, click the Grain row and choose Edit → Paste. The grey bird is pasted in place on a new layer under the group. Rename it Cyan plate and press Cmd+D.
-
Screen and ink the cyan plate
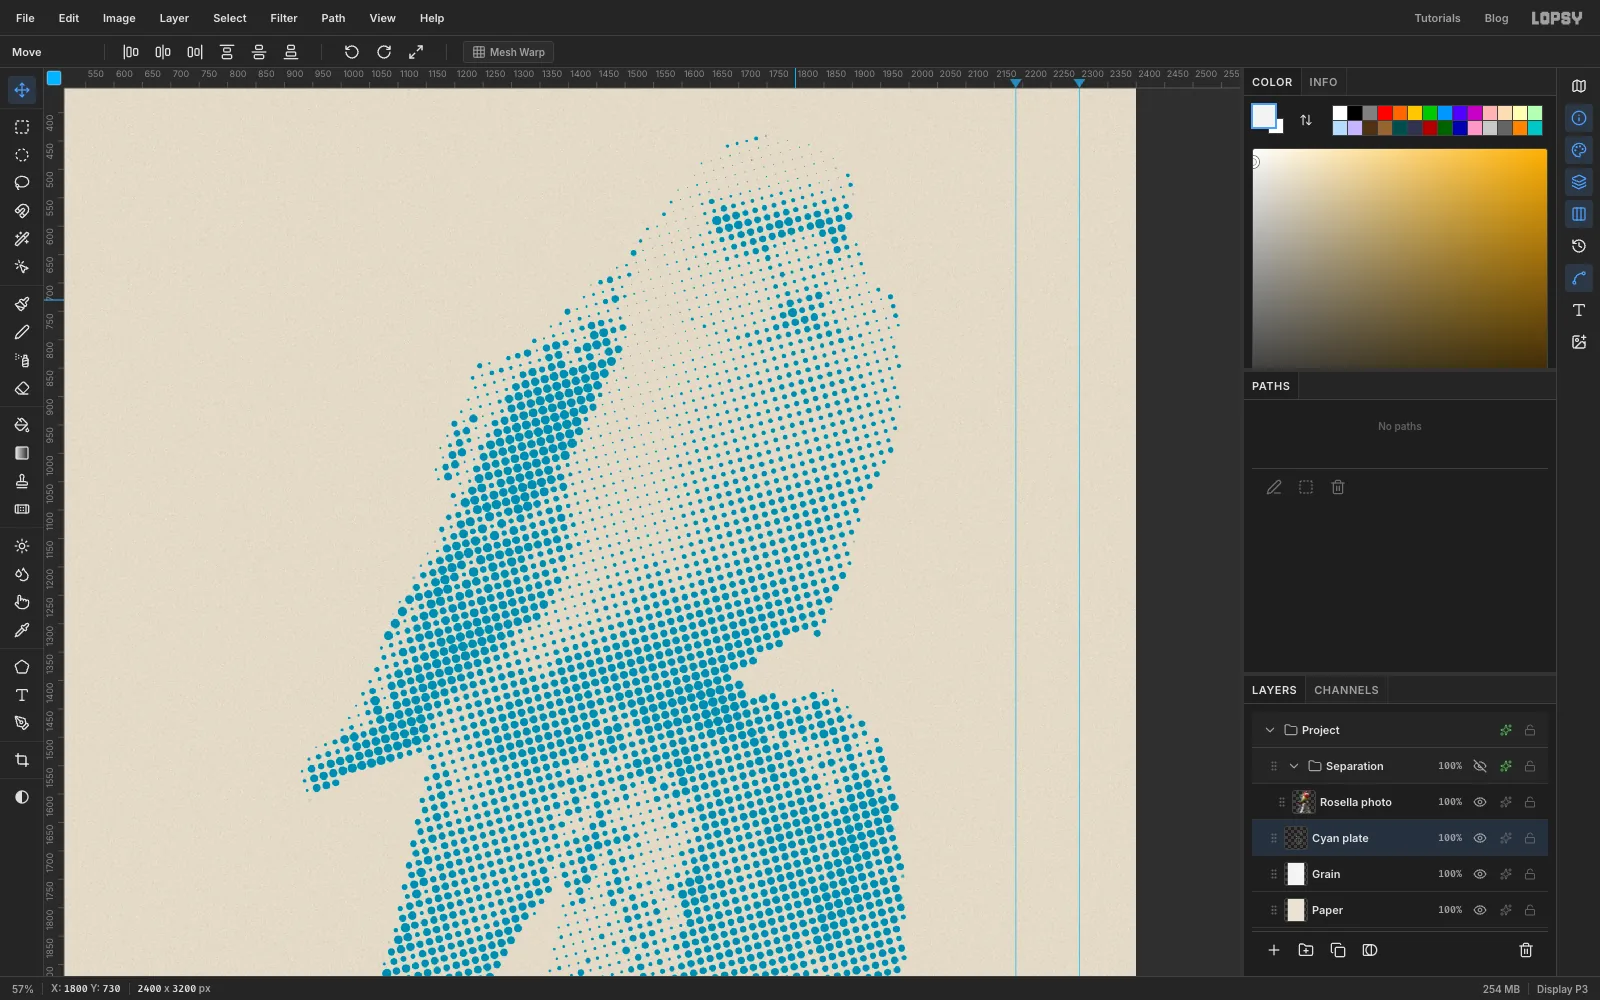
Choose Filter → Halftone… and set Dot Size 20, Density 1.15, Angle 15 and Softness 1. A density above 1 lets the darkest dots just touch, so solid areas print solid.
The dots are still grey. In the layer's effects drawer, turn on Color Overlay and set it to cyan . Set Blend to Multiply and click Rasterize Layer Style to bake the colour in. Hide the Separation group to check the cyan plate on its own, then turn it back on. The next three plates are copied from it.
-
Make the magenta, yellow and black plates
Repeat the last two steps three more times. Change the three mixers each time, then Copy Merged, paste above Grain, screen and ink the new plate:
- Magenta: mixers set to Green 100 (Red 0, Blue 0). Halftone Angle 75. Overlay .
- Yellow: mixers set to Blue 100 (Red 0, Green 0). Halftone Angle 0. Overlay .
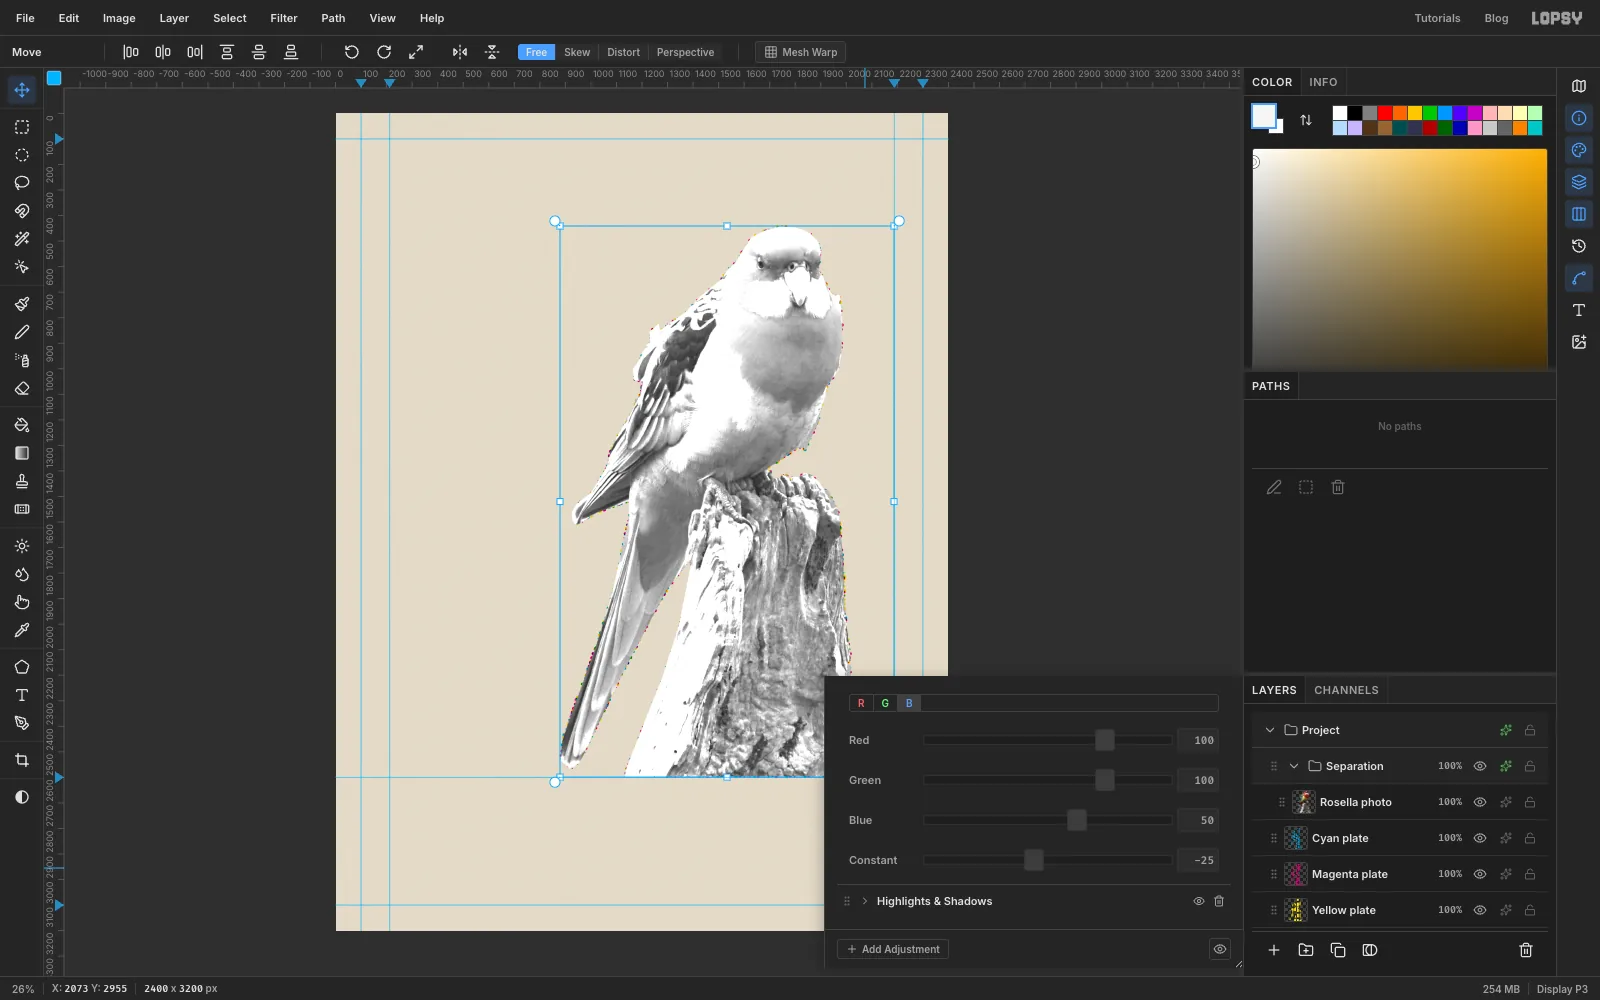
- Black: mixers set to Red 100, Green 100, Blue 50 and Constant −25. Halftone Angle 45. Overlay .
The black recipe adds red, green and half the blue, then subtracts a quarter. Red, yellow and green feathers are bright in at least one channel, so they stay white and get no black. Only the truly dark feathers and the cracks in the stump turn grey. Use the same Dot Size 20, Density 1.15 and Softness 1 for every plate, set each to Multiply, and rasterize each style.
-
Hide the photo and look at the rosettes
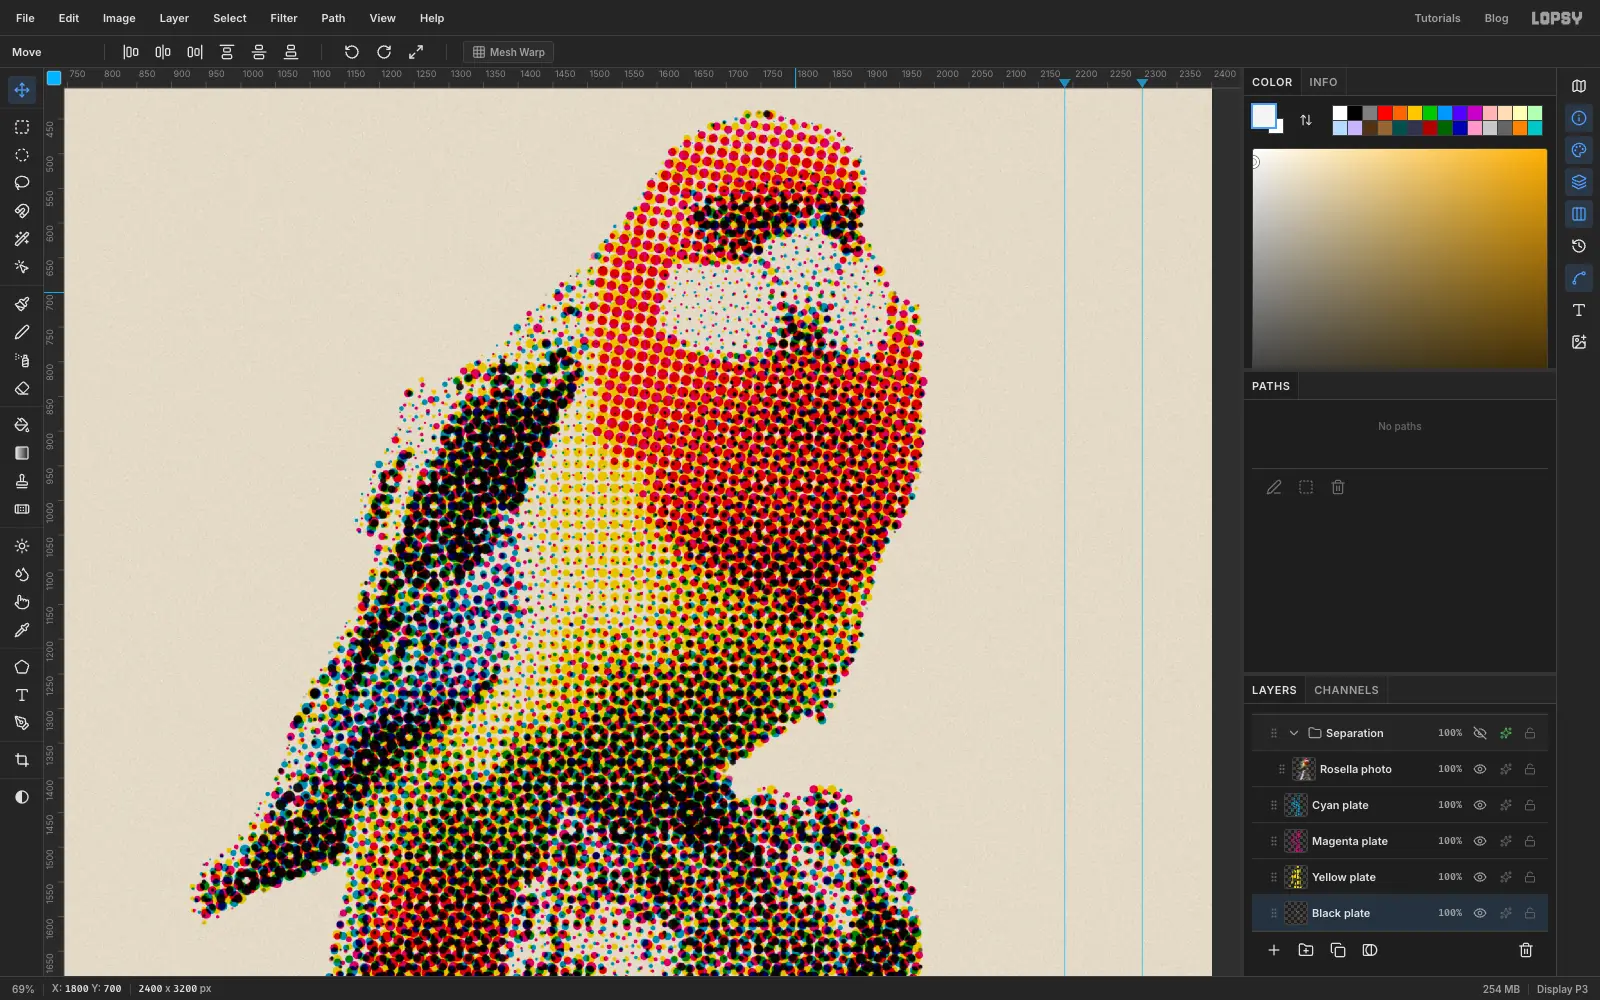
Click the eye on the Separation group to hide the photo. The four plates show through, multiplied over one another, and the parrot comes back in full colour. Zoom in on the head: magenta and yellow dots overlap into red, cyan and yellow make green, and the dots cluster into rosettes because every plate sits at a different angle.
-
Start the halo with a gradient
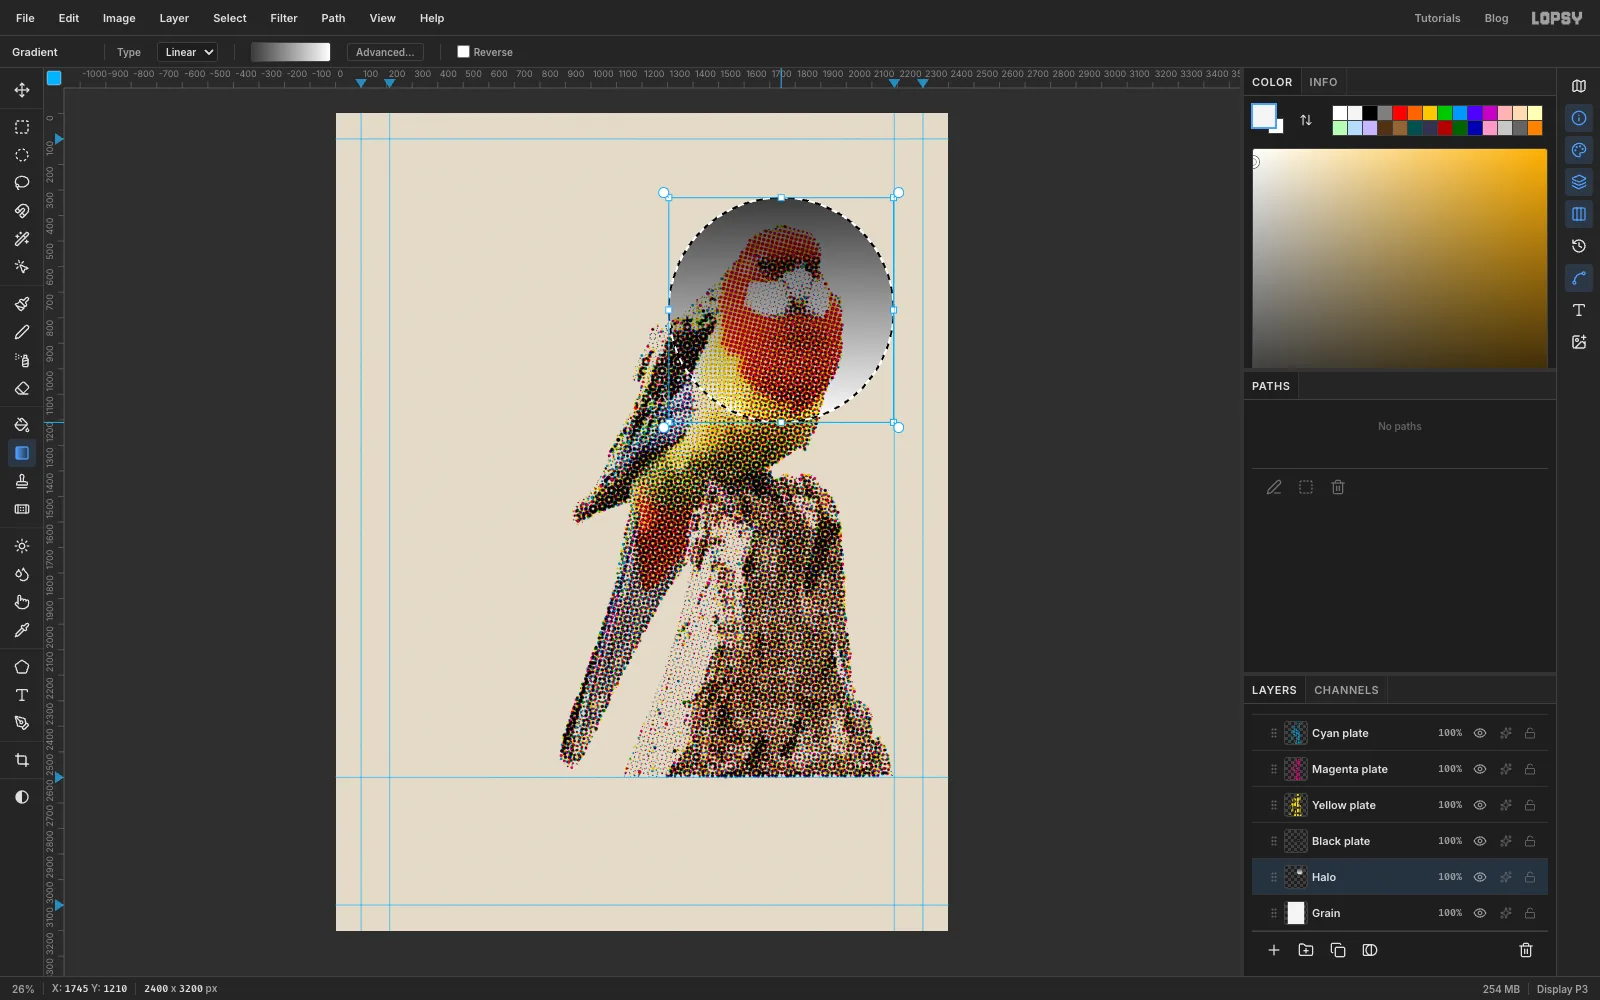
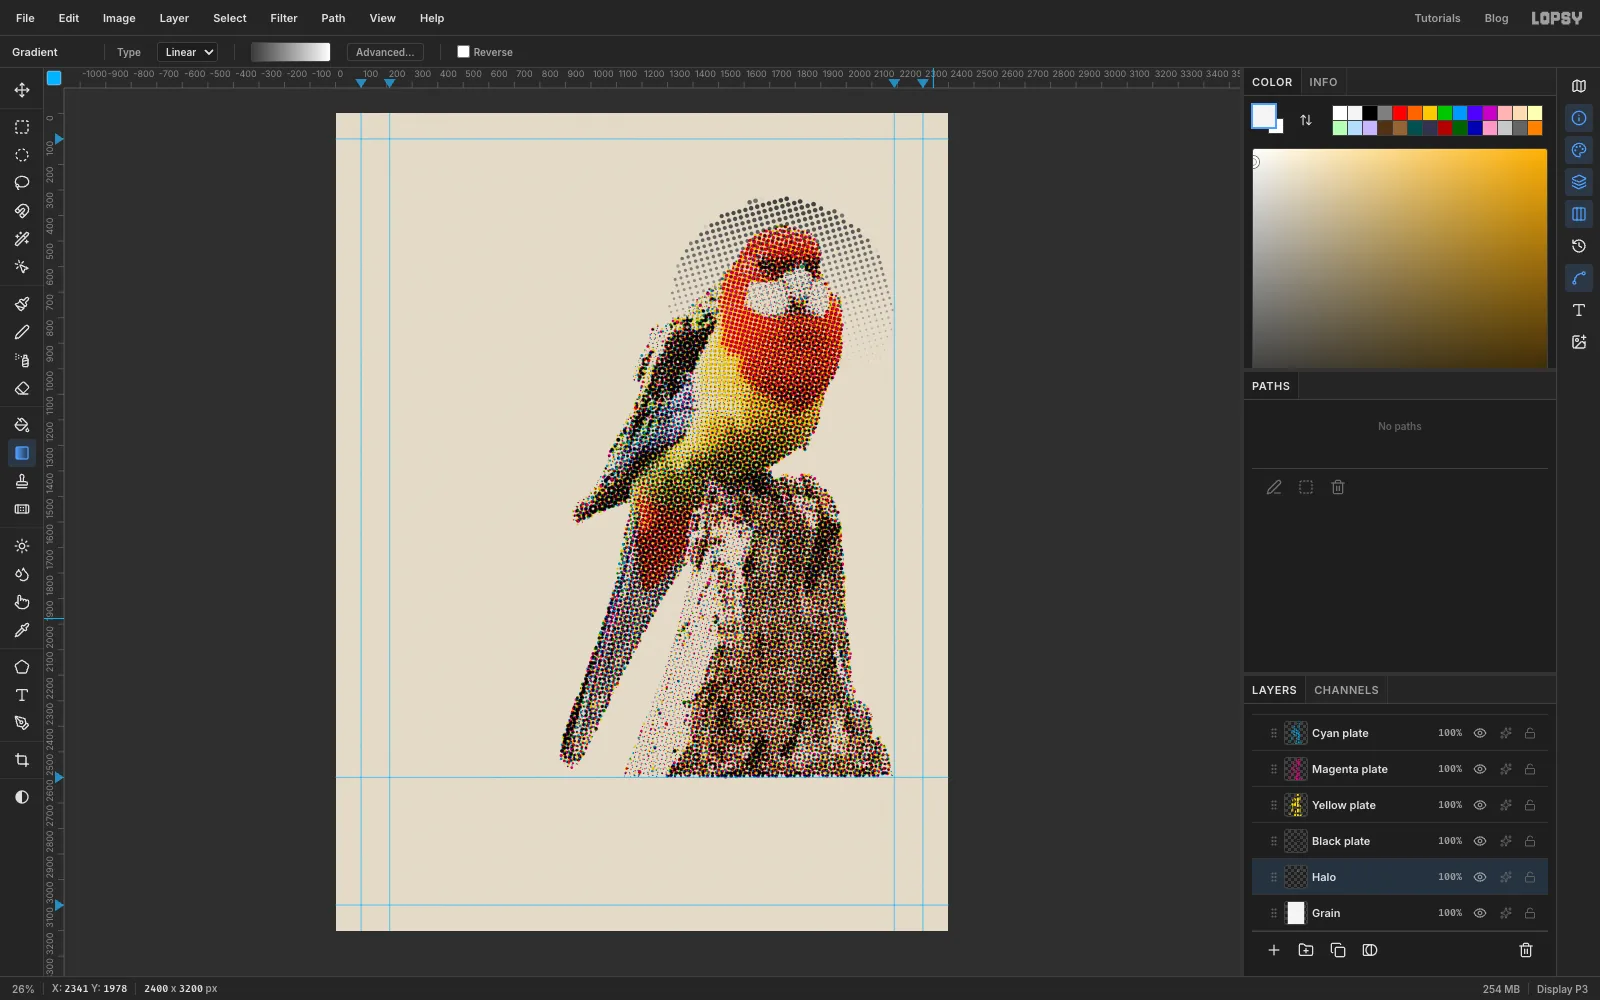
Click the Grain row and add a layer called Halo. With the Elliptical Marquee, click once and enter From
1305, 330To2185, 1210.Pick the Gradient tool, set Linear, and open Advanced…. Make two stops: on the left and white on the right. Drag from the top of the circle straight down to its bottom.
-
Screen the halo
Press Cmd+D, then choose Filter → Halftone… with Dot Size 24, Density 1, Angle 15 and Softness 1. The dark top becomes big dots, and the white bottom prints nothing at all.
-
Ink the halo cyan
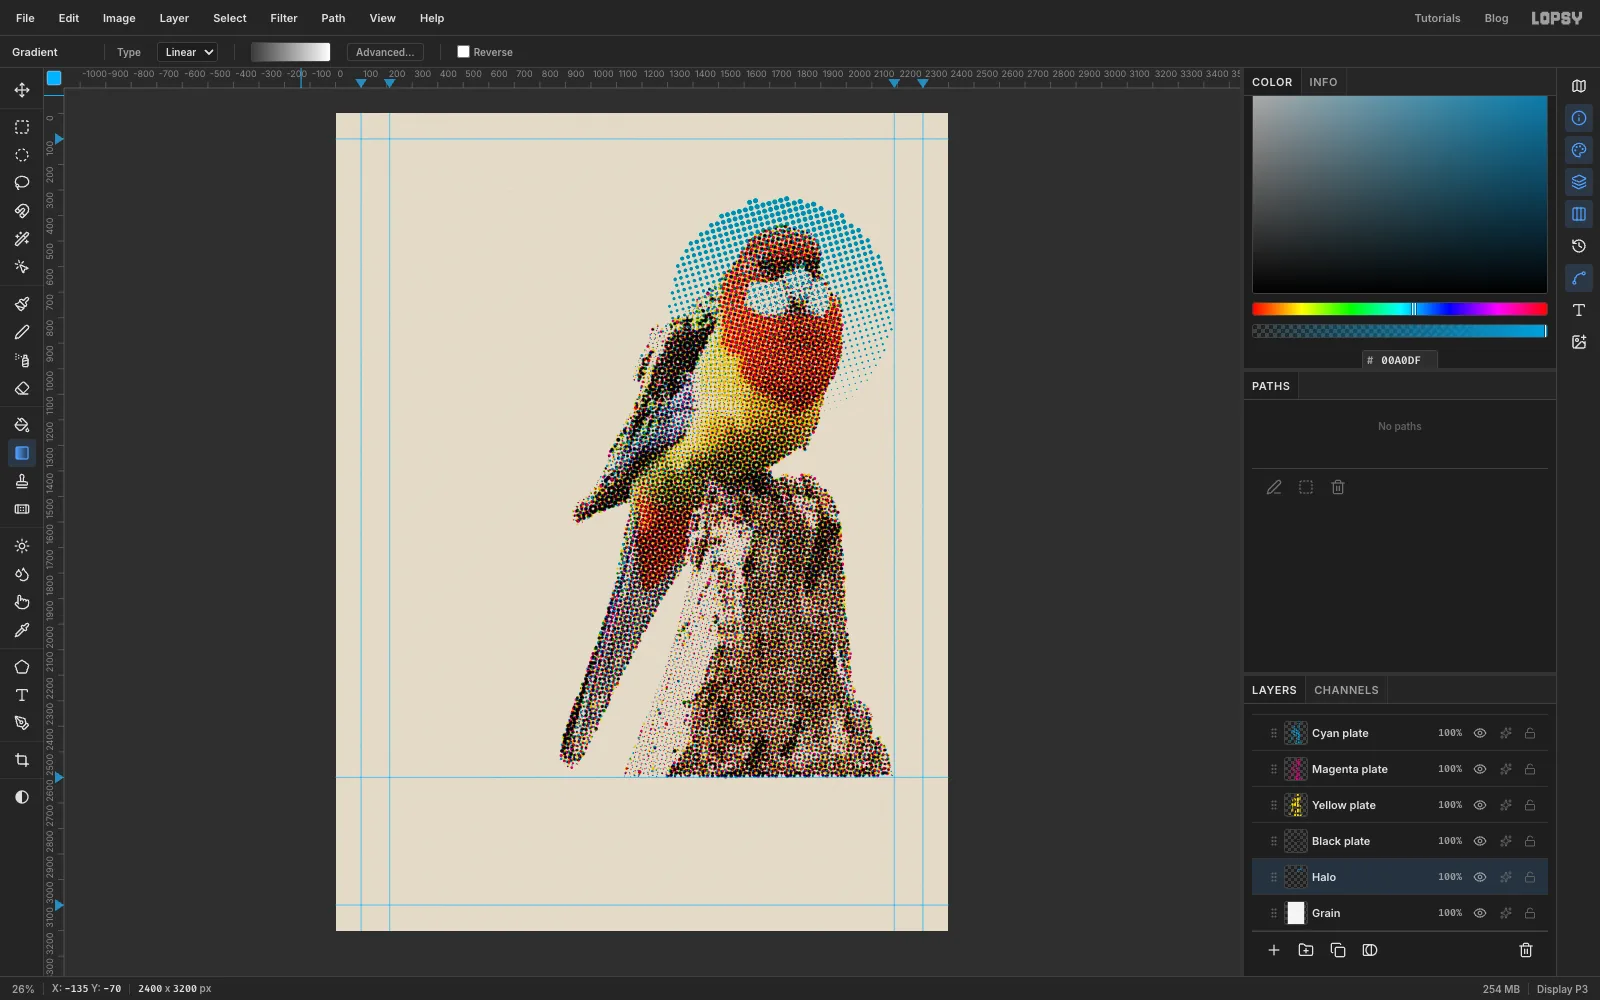
Add a Color Overlay in cyan , set Blend to Multiply and click Rasterize Layer Style. The smallest dots at the faded edge are only partly opaque, which looks like a pale tint. To make every dot full-strength ink, Cmd-click the Halo thumbnail, choose Select → Grow… with 1 px and fill with cyan . Then choose Select → Inverse, press Delete to clear the soft fringe, and deselect.
-
Knock the halo out behind the bird
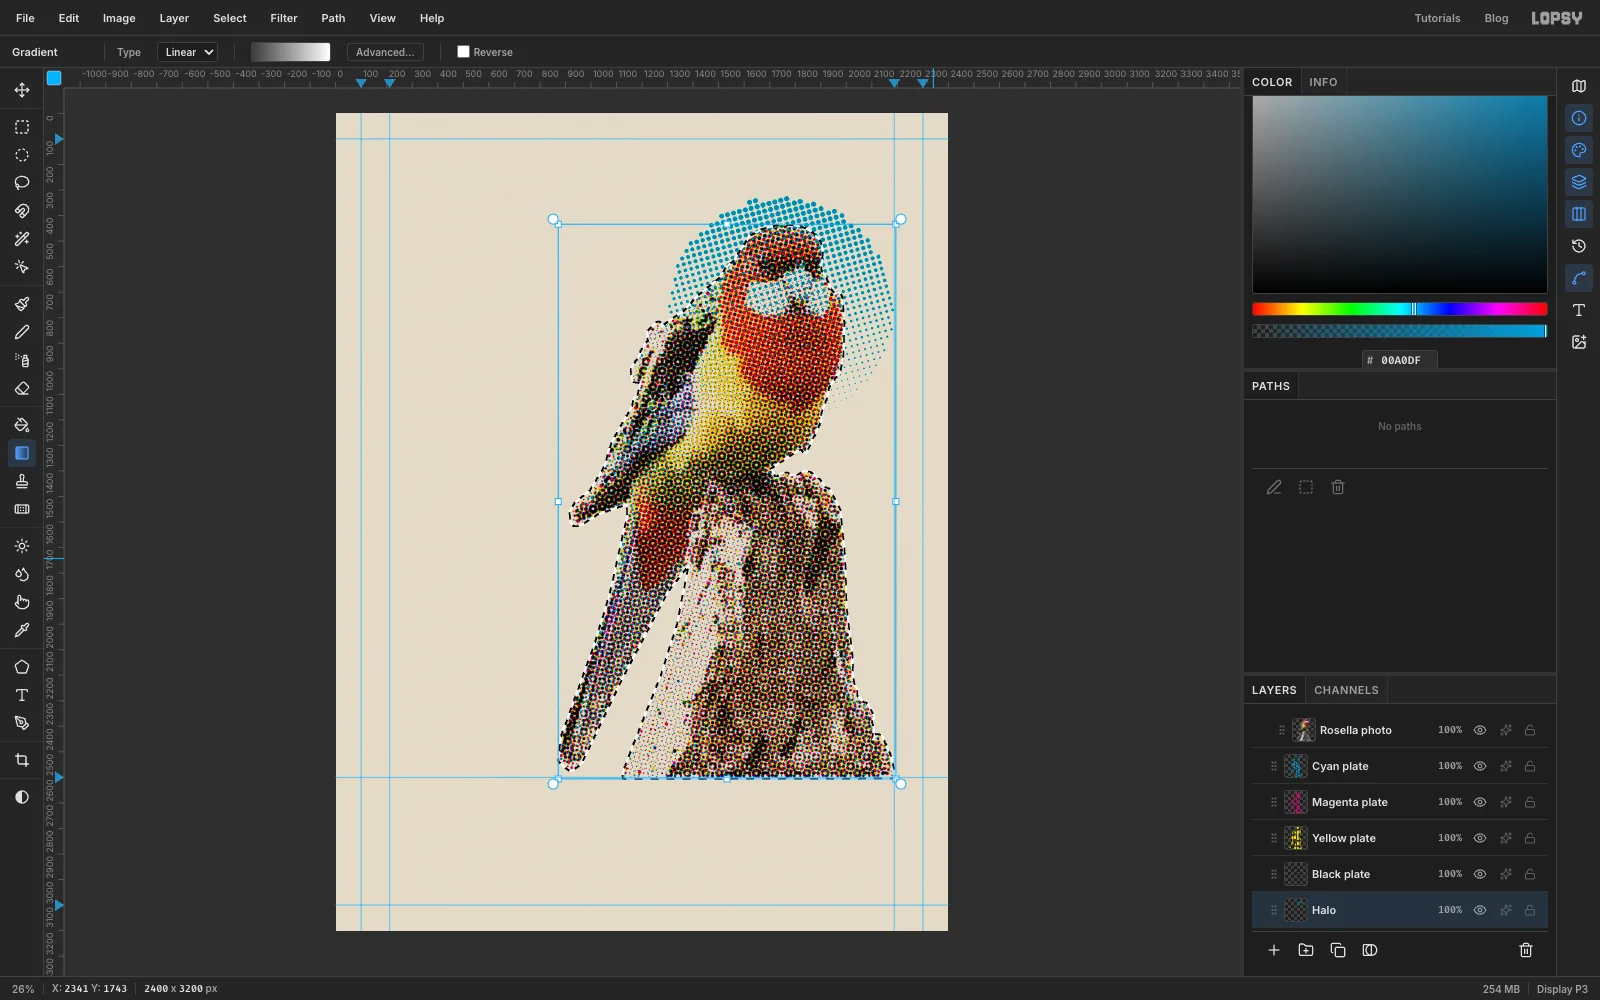
The cyan dots shouldn't print under the bird, or they would muddy the red head. Cmd-click the thumbnail of the hidden Rosella photo to load the bird's outline, choose Select → Grow… with 8 px, and press Delete with Halo still selected. Printers call this a knockout. The thin gap of bare paper around the bird is the trap.
-
Draw the rule
Click Halo and add a layer called Rule. Pick the Pencil (
N), set Size to 10 and the foreground to black . Click at217, 2605, then Shift-click at2183, 2605to draw a straight line from margin to margin.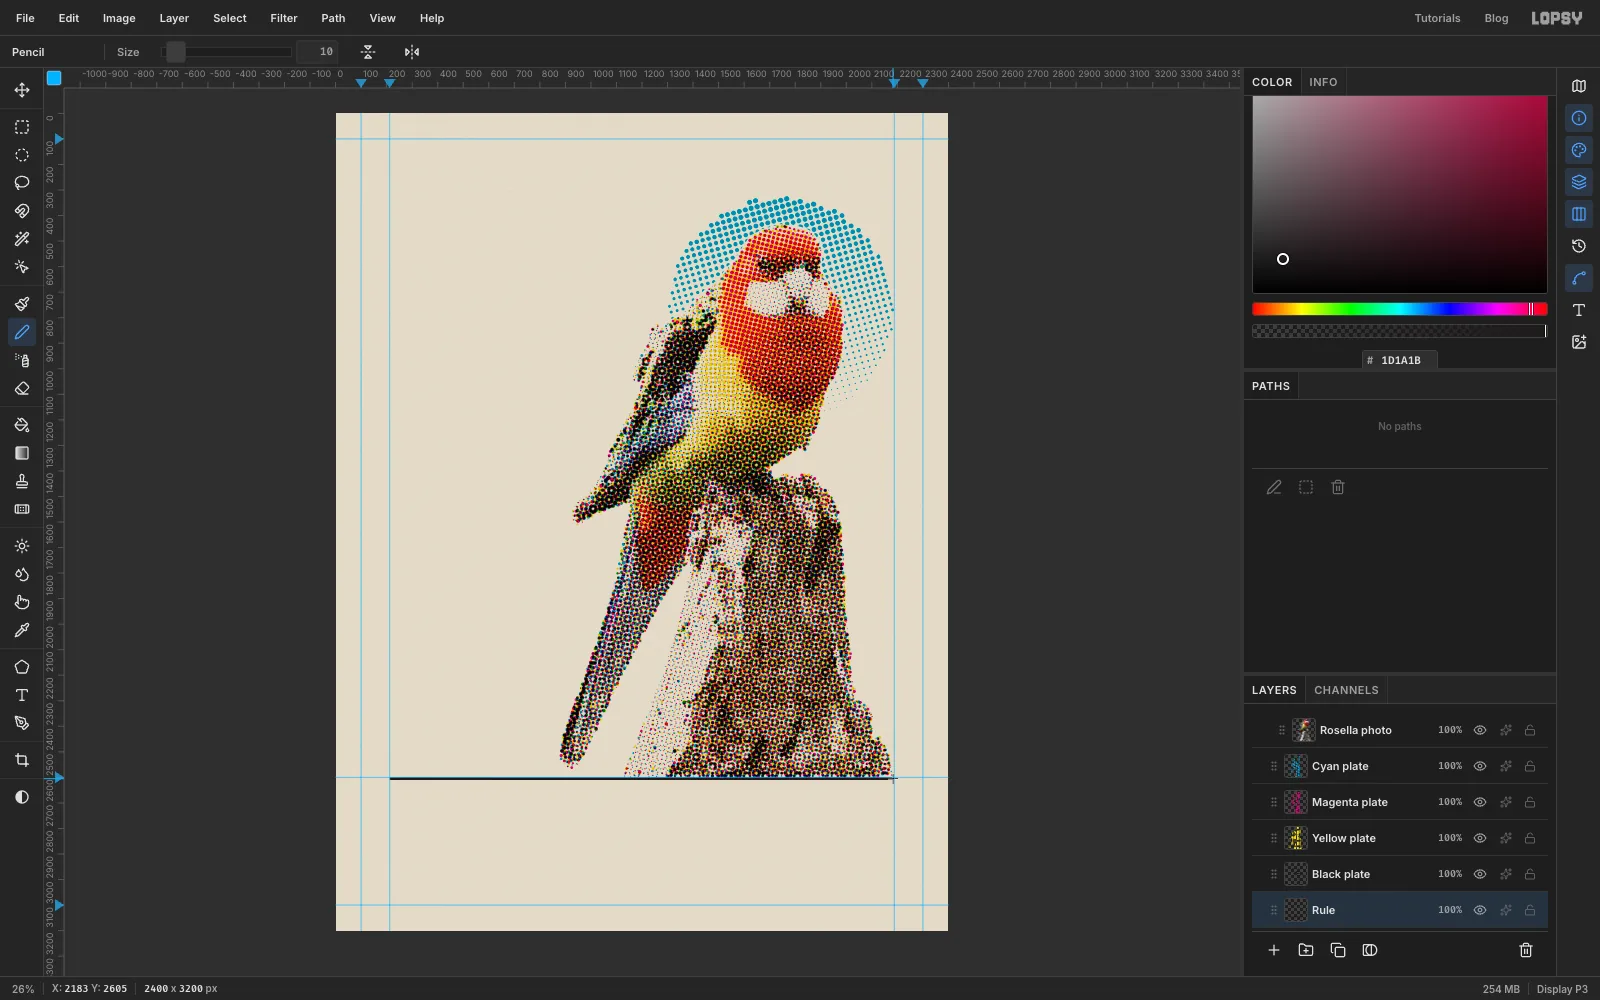
-
Set the title
The Text tool's options restyle whichever text layer is selected, so before you set up each new piece of type, click a pixel layer such as Rule. Click Rule now, pick the Text tool (
T) and set the font to Anton, Size 600 and the colour to magenta . Click on the left side of the canvas, typeROSELLA, and press the ✓ button to commit. Rename the layer Title magenta.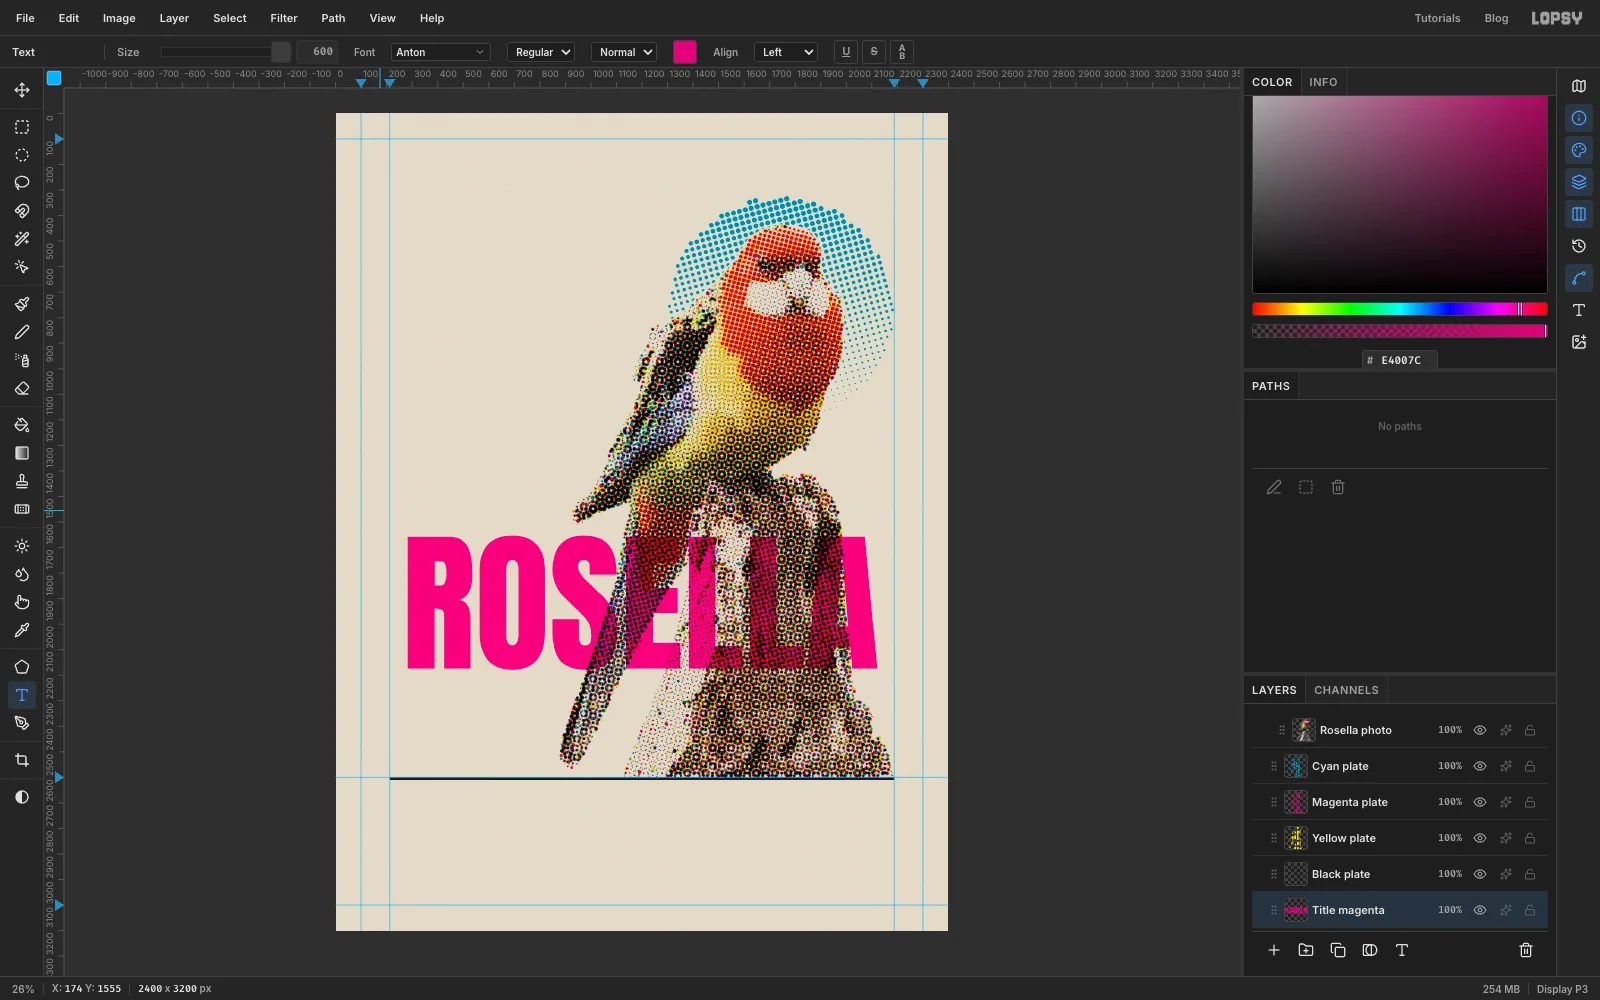
-
Turn the title on its side
Press
Vfor the Move tool and click Rotate 90° CCW in the options bar. The word now reads upwards. Drag it so its left edge sits on the212guide and the bottom of the R sits on the rule. Use the arrow keys for the last few pixels. In the effects drawer, set Blend to Multiply.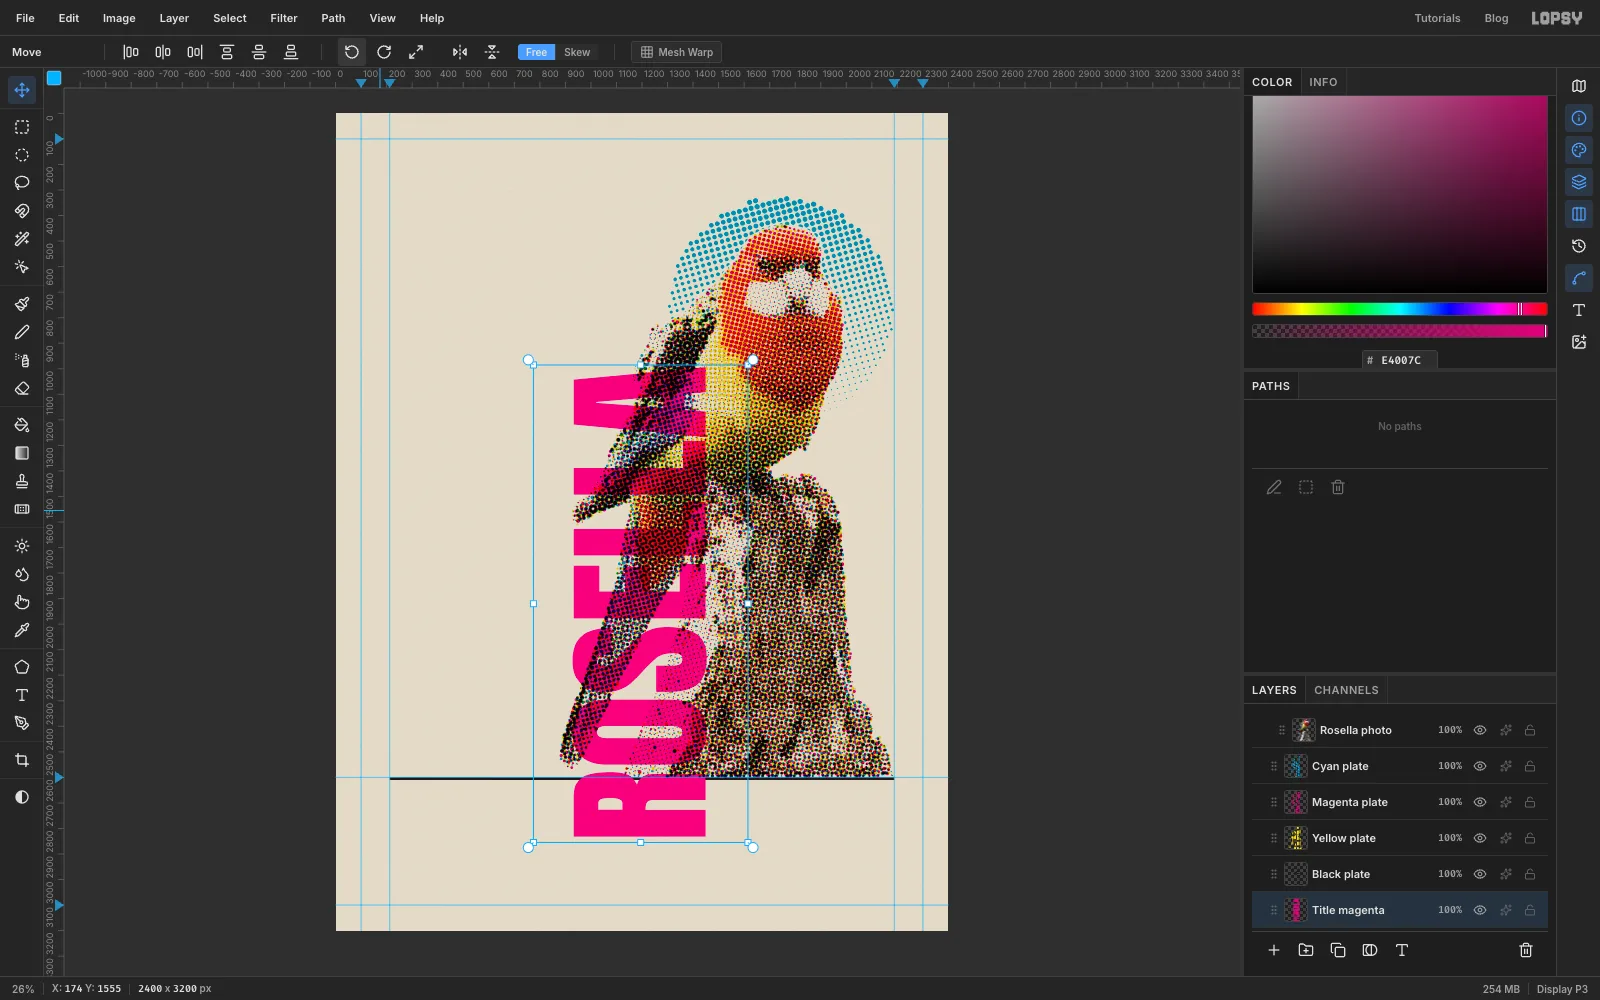
-
Print the yellow slightly out of register
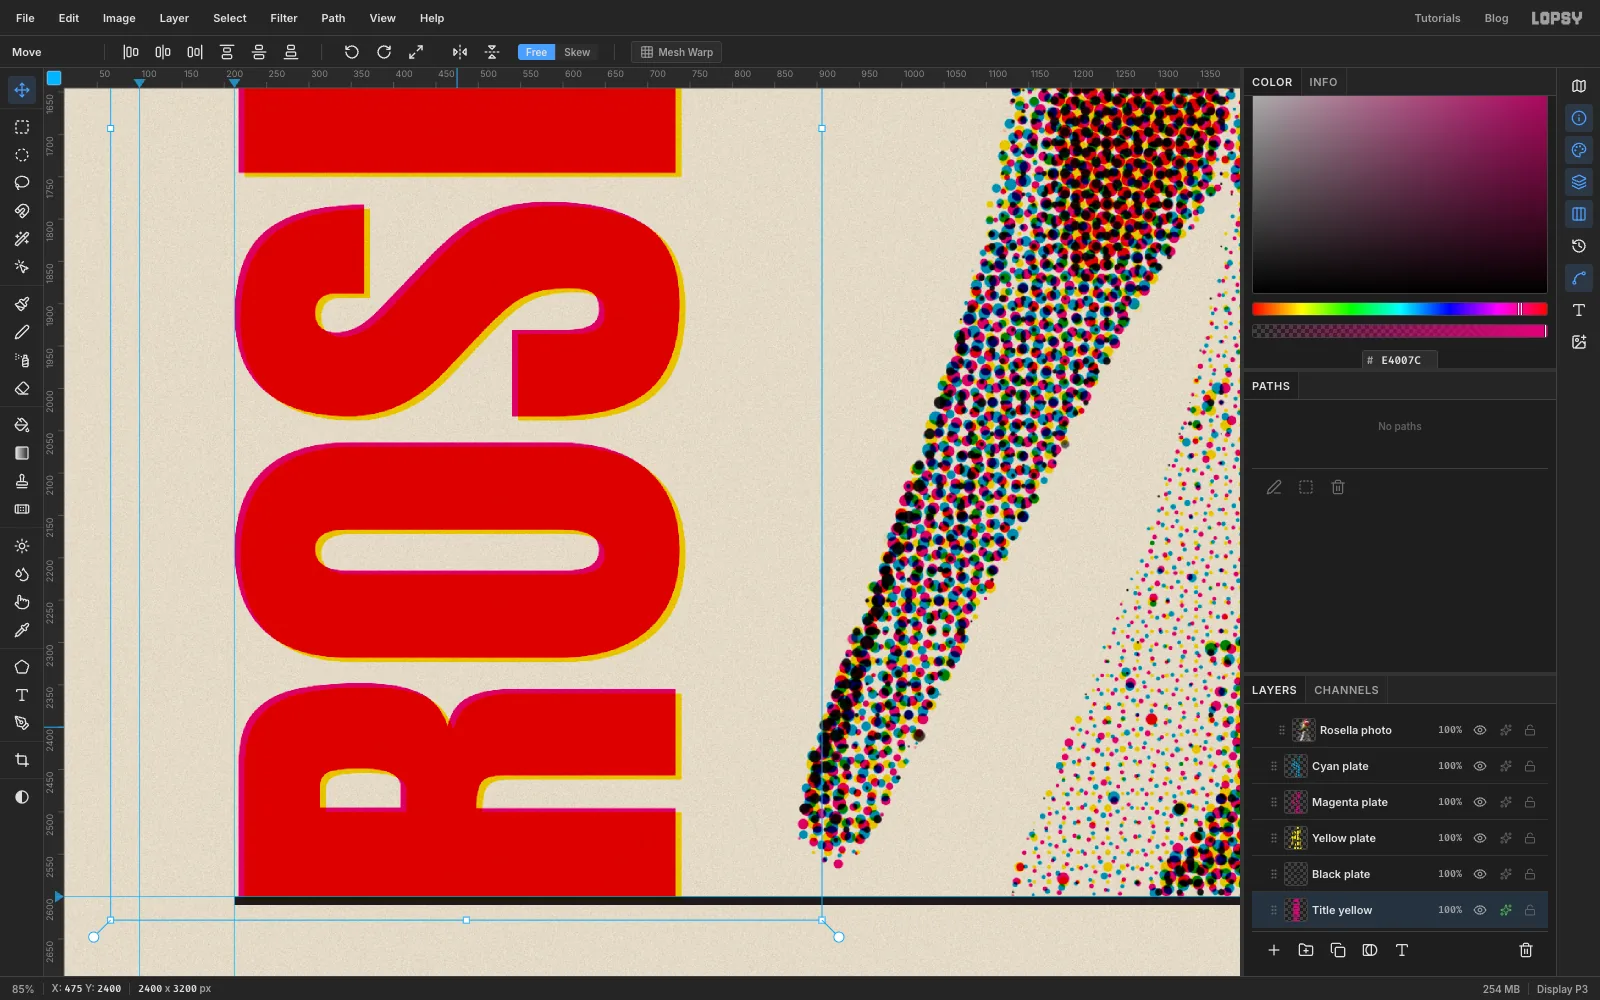
A red title in process printing is magenta plus yellow, and on a real press the two plates never line up perfectly. Click Duplicate Layer in the Layers panel and rename the copy Title yellow. Give it a Color Overlay in yellow . Then nudge it with the arrow keys until it sits 7 px to the right of and 5 px below the magenta layer.
Both layers multiply, so the overlap prints red. Thin magenta and yellow edges peek out where the plates missed.
-
Add the kicker and caption
Click Rule, set the Text tool to Anton, Size 171, black , and type
EASTERNnear the top-left corner. At that size it's exactly as wide as the ROSELLA column. Nudge it so its left edge is on the212guide and its top is aty 214, and rename it Kicker.Click Rule and add the Latin name,
Platycercus eximius, in IBM Plex Serif, Italic, Size 62, about 44 px below EASTERN, and rename it Latin name. Click Rule and add a caption in IBM Plex Mono, Regular, Size 28, named Caption. Press Return between the lines:PSITTACULIDAE · 30 CM/Open woodland, parks and/gardens of south-eastern/Australia and Tasmania.Line all three up on the
212guide.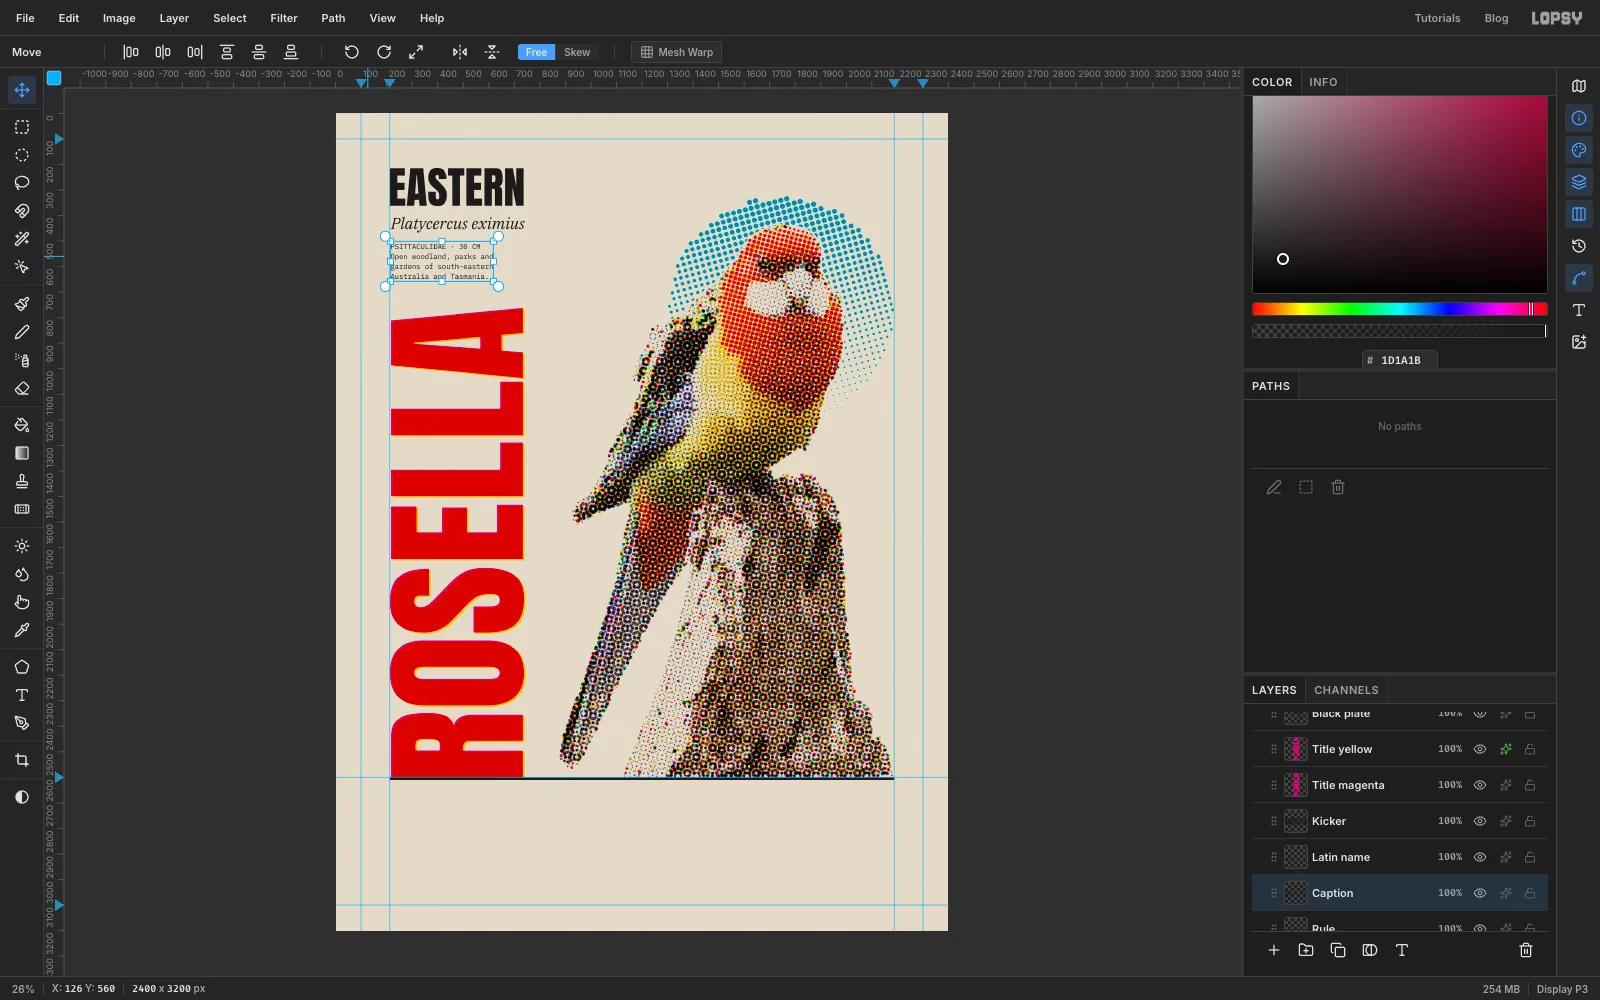
-
Lay a paper disc and sample the first plate
The magnifying glass shows the dots on the chest four times larger. Click Cyan plate and add a layer called Lens paper. Select the circle From
1608, 1026To2008, 1426, fill it with the paper colour , and deselect.Click Cyan plate again and select a small circle in the middle of that disc, From
1758, 1176To1858, 1276. Choose Edit → Copy, click Lens paper, and choose Edit → Paste. Rename the pasted layer Lens cyan.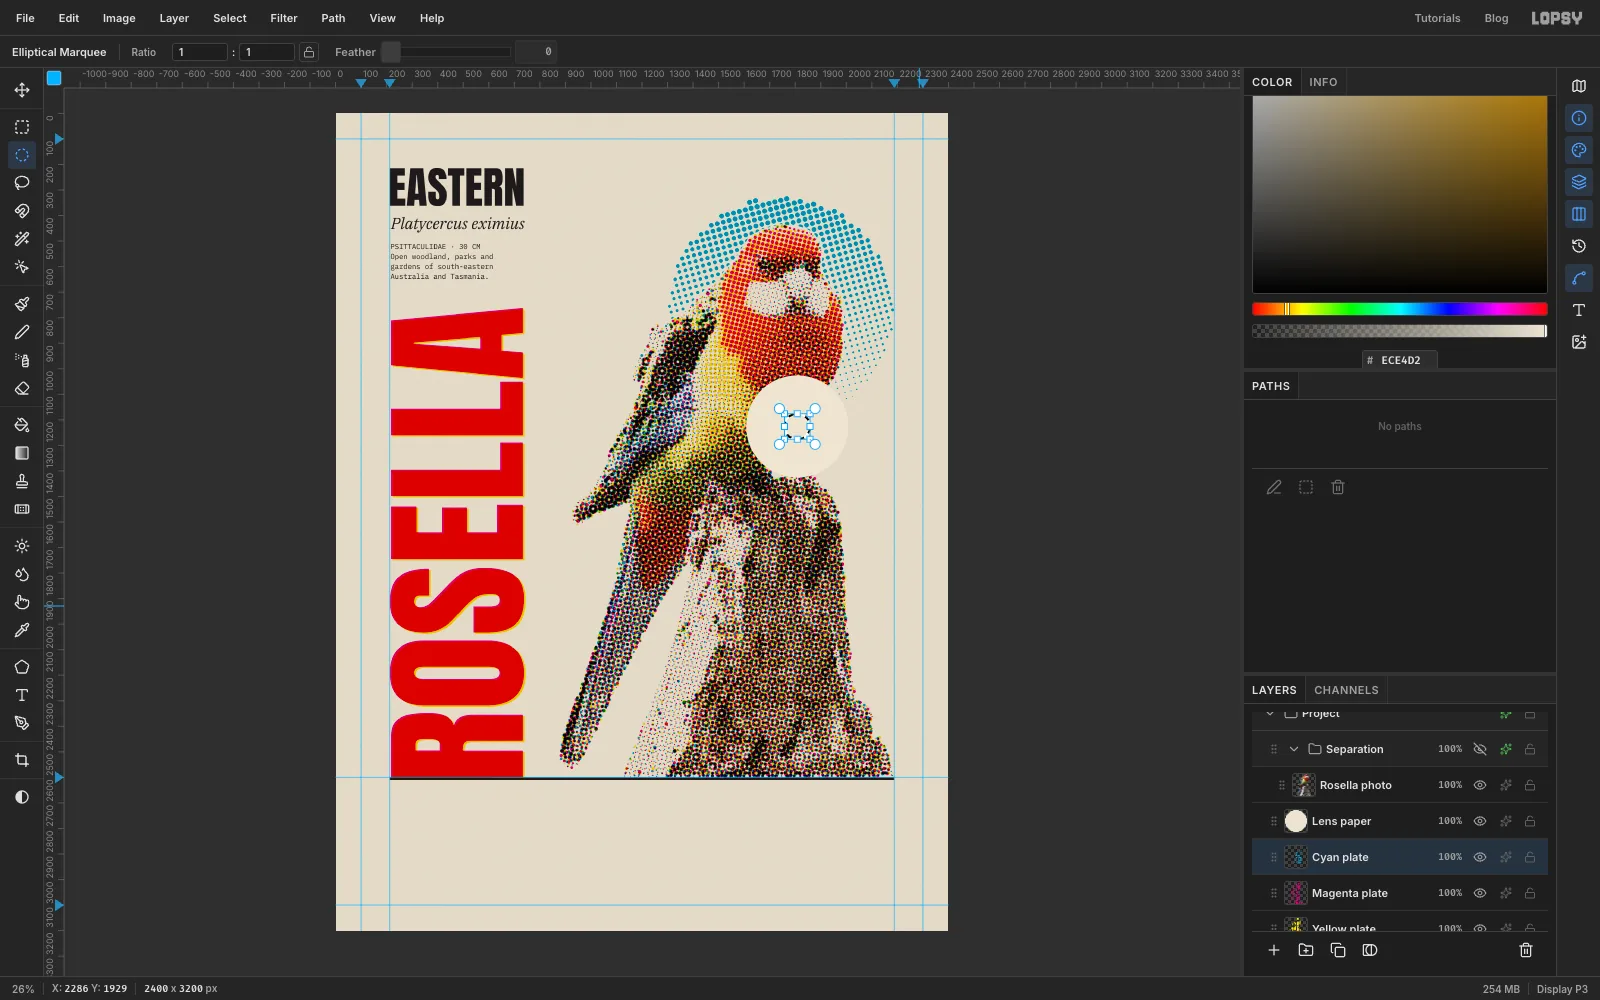
-
Magnify it four times
With the Move tool, hold Cmd and drag the bottom-right handle out until the selection is four times its width, about 400 px. Then drag the enlarged piece so its centre sits on the centre of the paper disc,
1808, 1226, and press Cmd+D.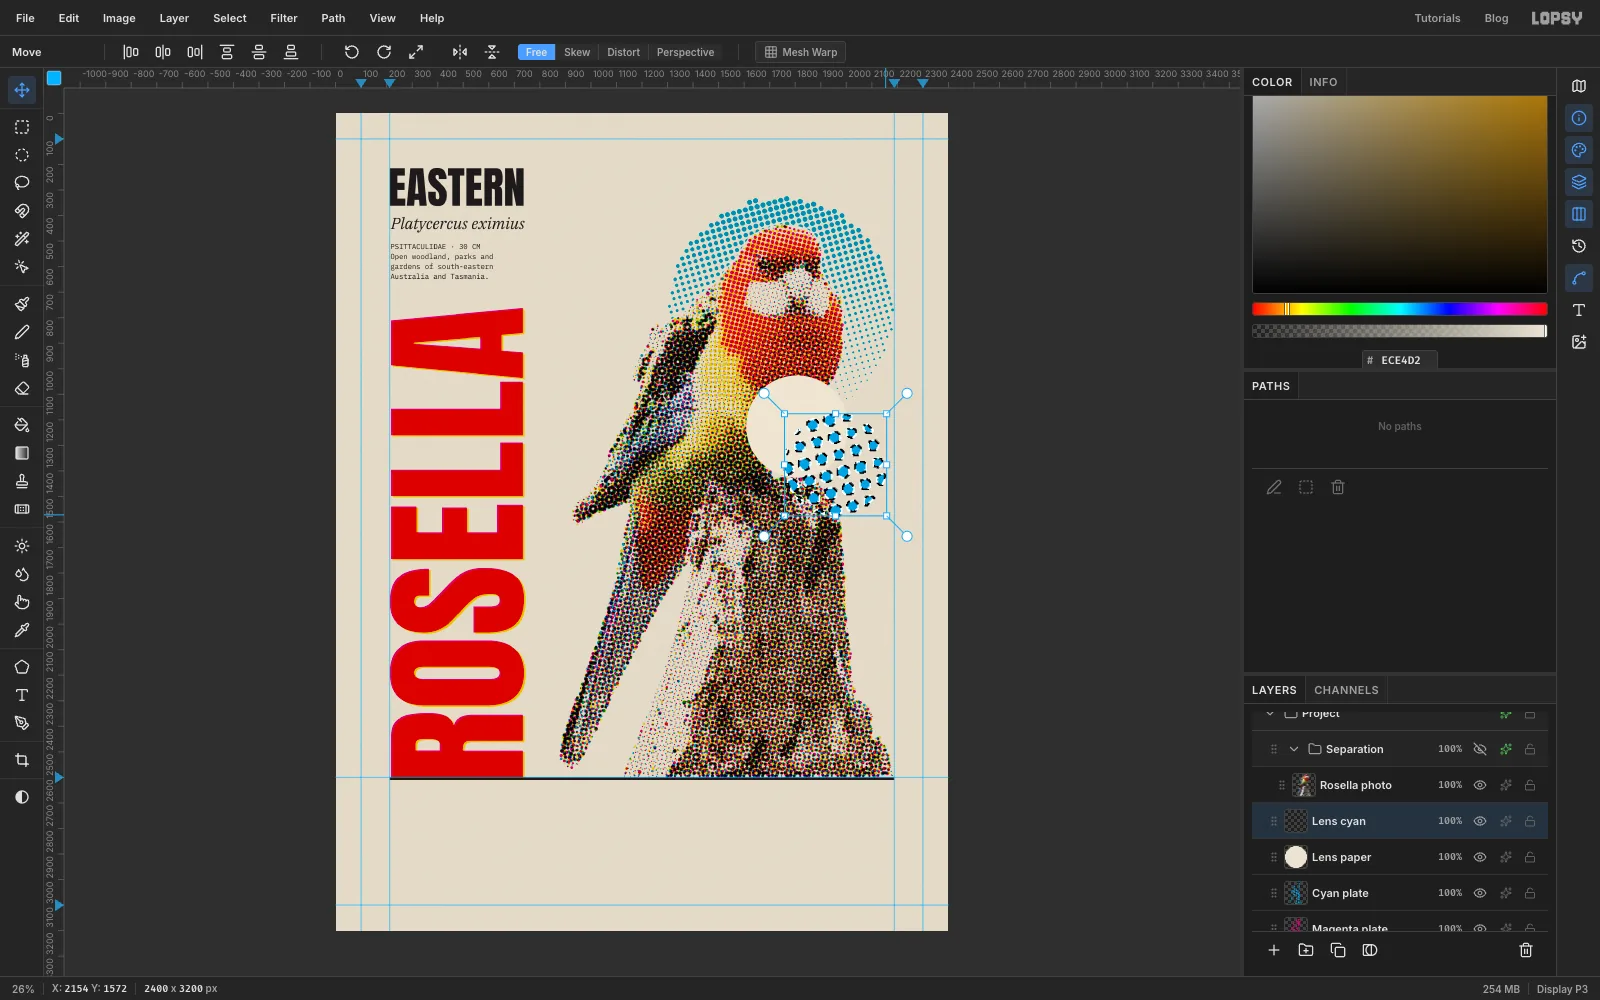
-
Re-cut the dot edges crisp
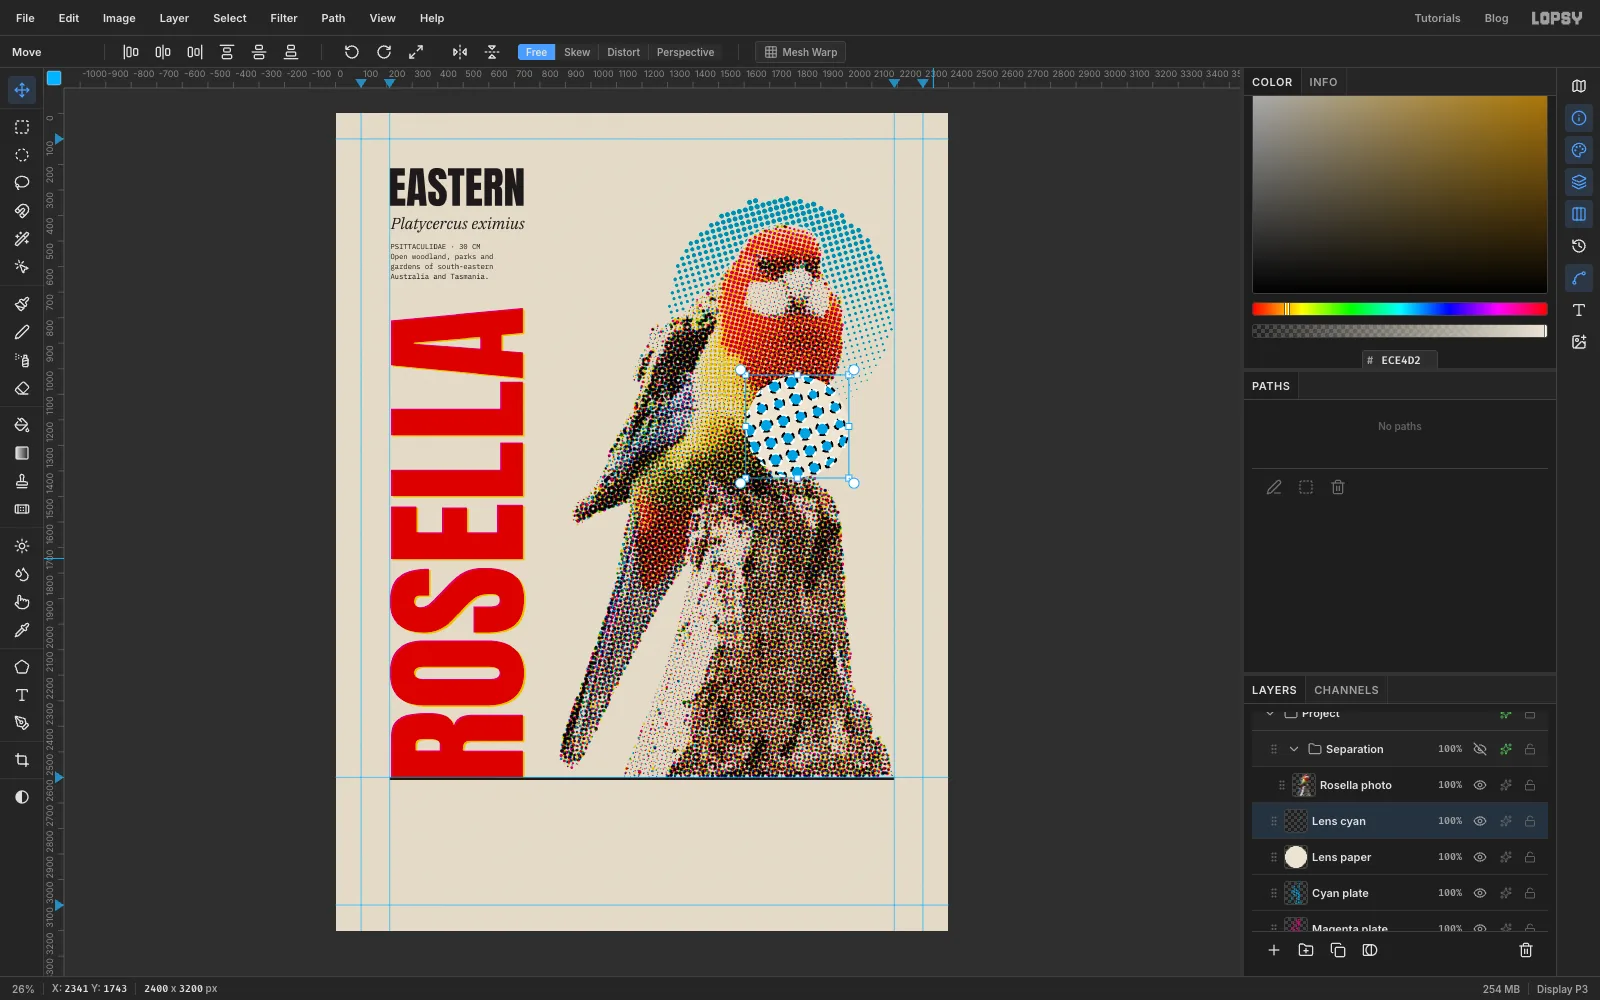
Scaling up blurred the dots' edges, and a magnifier should look sharper, not softer. Cmd-click the Lens cyan thumbnail and choose Select → Grow… with 1 px. Grow redraws the selection's edge crisply at the halfway point of the blur. Fill it with cyan , choose Select → Inverse, press Delete to clear the soft fringe, deselect, and set the layer to Multiply.
-
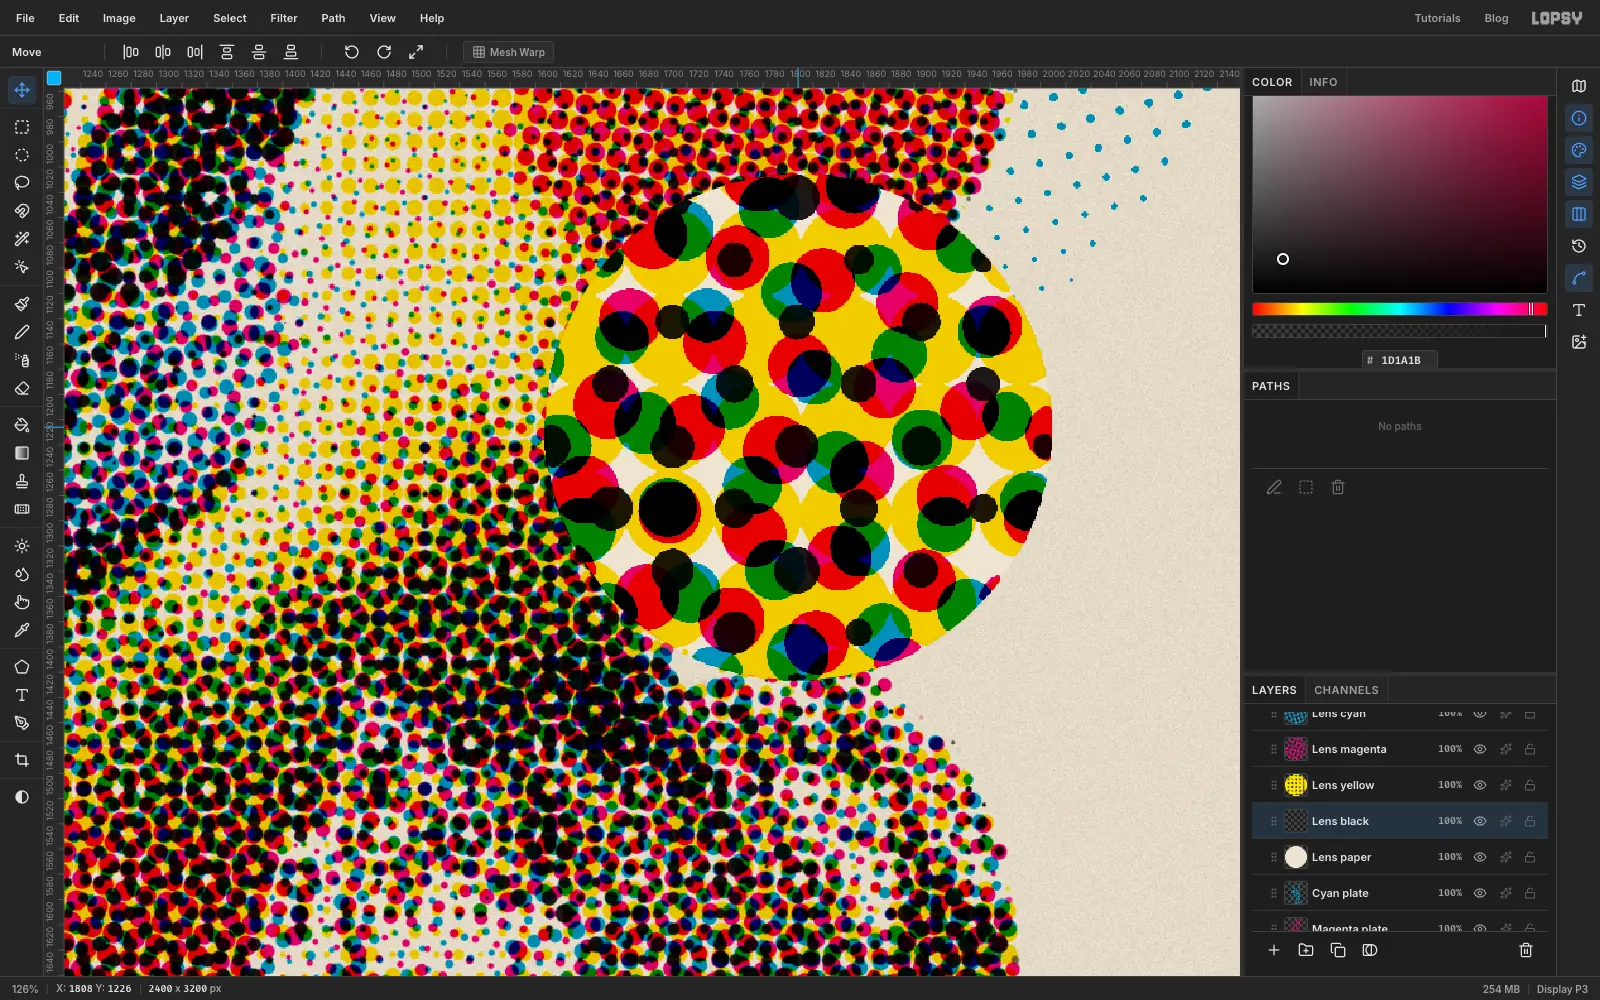
Magnify the other three plates
Repeat the last three steps for the Magenta plate, Yellow plate and Black plate. Use the same small circle each time, and paste above Lens paper as Lens magenta, Lens yellow and Lens black. Scale each 4× onto the same centre, re-cut it with Grow 1 and its own ink, and set it to Multiply. Because every copy comes from the same spot and lands on the same centre, the big dots overprint into rosettes just like the small ones.
-
Build the handle
Click Lens cyan and add a layer called Lens handle. Pick the Shape tool (
U): Rectangle, fill black , no stroke, Corner Radius 26. Click once where the centre should go,2022, 1440, and enter 56 × 170 in the size dialog. Cmd-click the thumbnail. Pick the Gradient tool and open Advanced…: set the end stops to and , click the stop row to add a middle stop, drag it to 35% and make it . Drag across the bar from its left edge to its right edge, so it looks round.Add a layer called Ferrule and draw a 72 × 48 rectangle at
2022, 1379with Corner Radius 8. Select its pixels and give it a grey metal gradient across ( → at 40% → ). Choose Layer → Merge Down to merge it into the handle.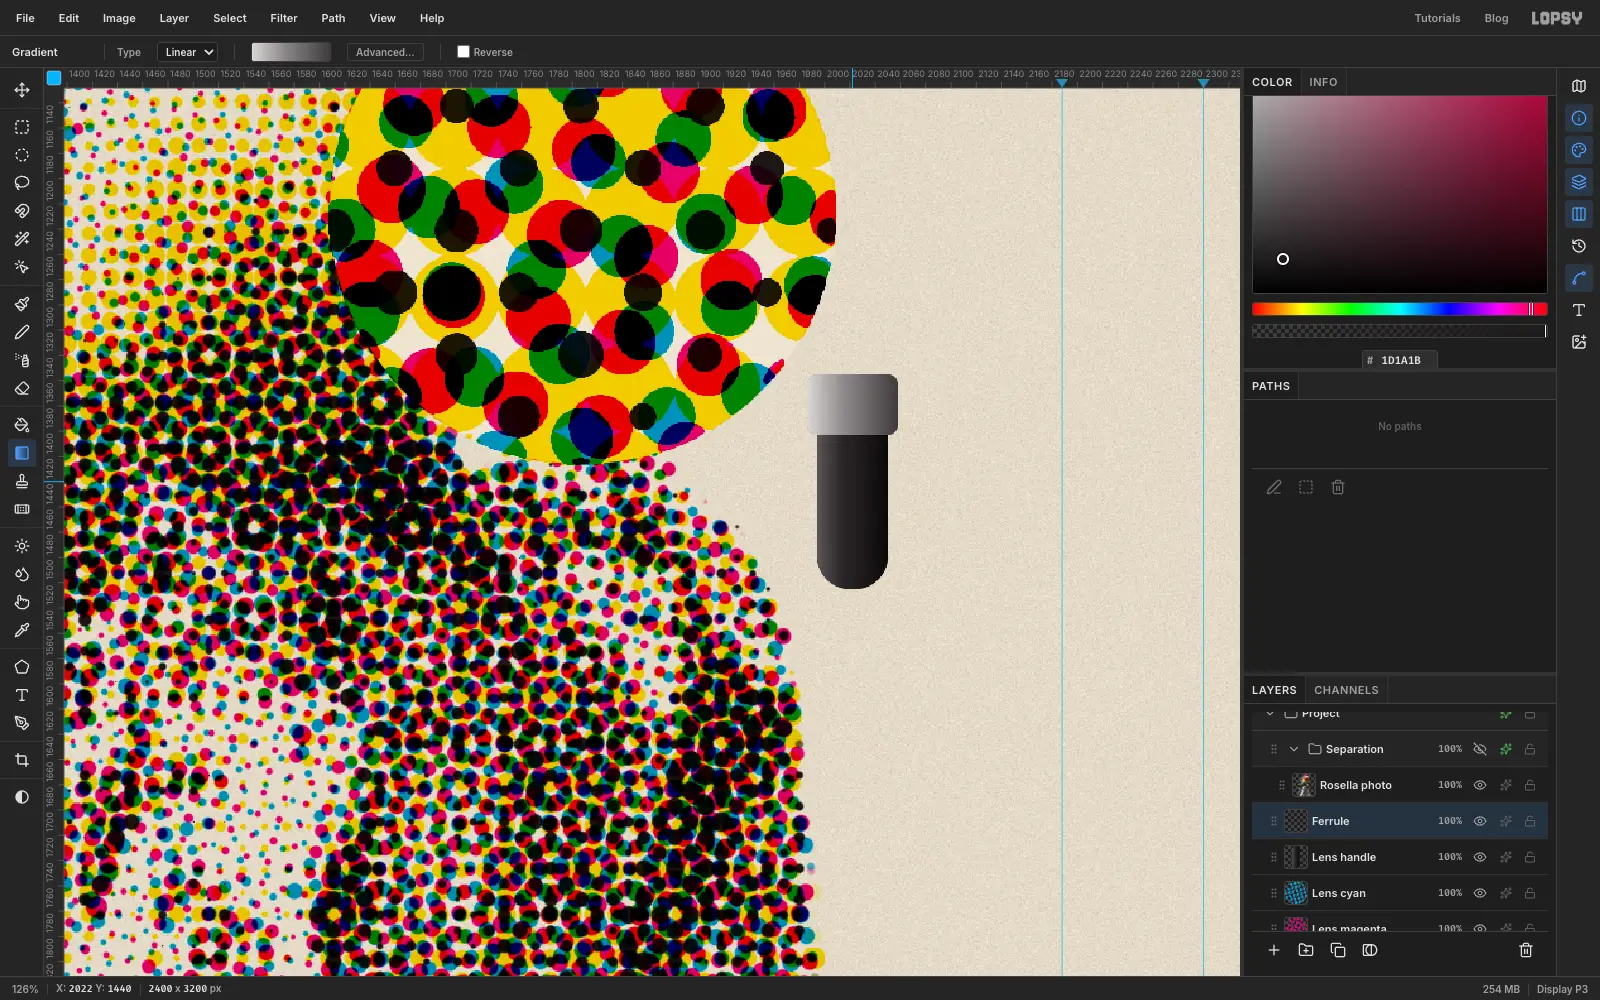
-
Tilt the handle
Cmd-click the Lens handle thumbnail and press
V. Zoom in, then drag the blue rotate circle beside the top-right corner with Cmd held, which snaps to 15° steps. Turn it 45° anticlockwise, so the ferrule end points up at the lens. Press Cmd+D.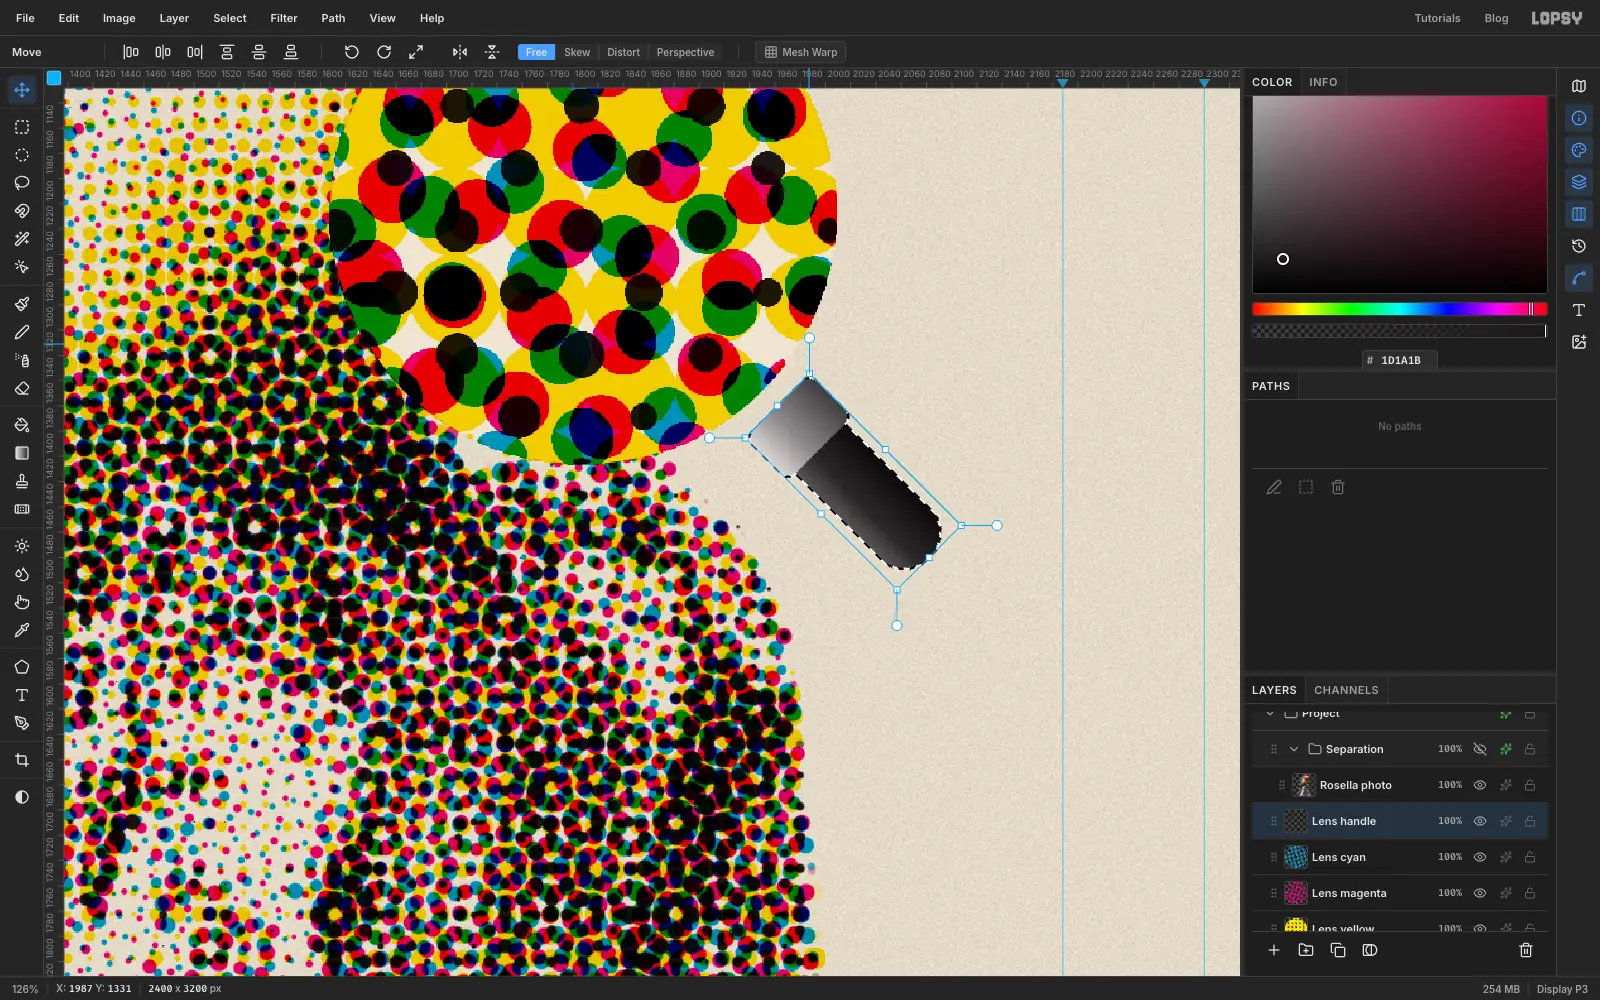
-
Add the rim
Add a layer called Lens ring. Set the Shape tool to Ellipse with no fill and a black stroke, Width 18. Click at
1808, 1226and enter 418 × 418. The ring sits exactly over the edge of the magnified dots.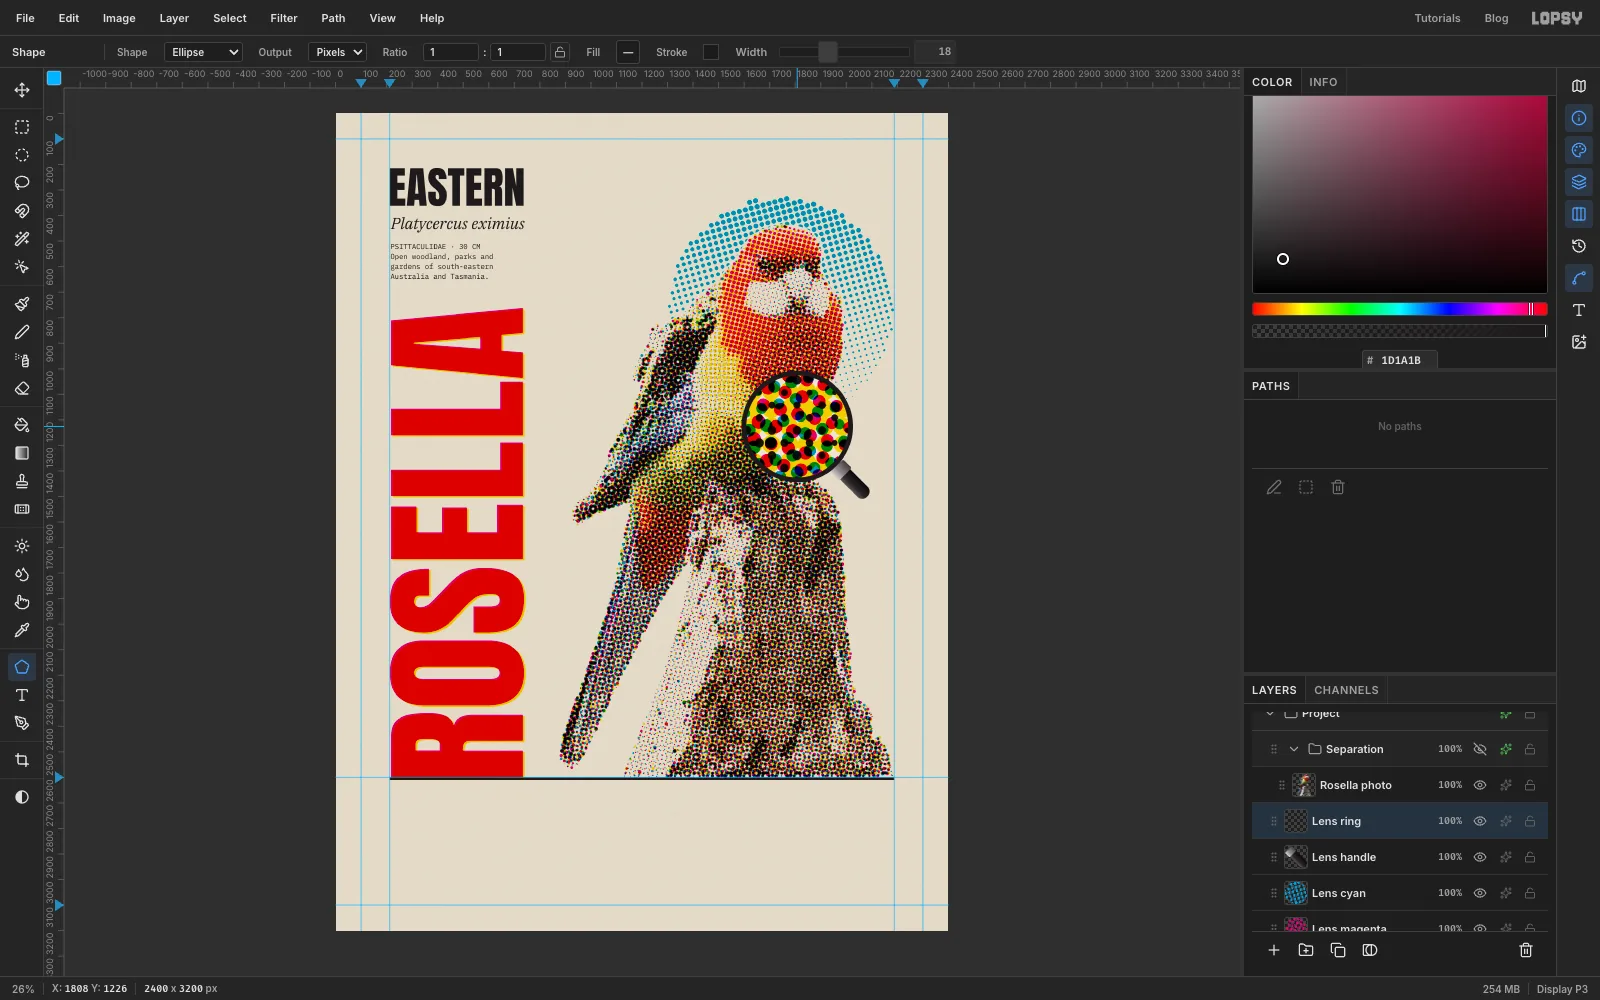
-
Add a glint to the glass
Add a layer called Lens glint. Draw an Ellipse with a white stroke, Width 12, 320 × 320, at the same centre. Keep only its upper-left arc. With the Rectangular Marquee, click once and enter From
1748, 1026To2008, 1426, and press Delete. Then select From1608, 1196To2008, 1426and press Delete again.Pick the Eraser (
E), set Size 70 and Opacity 60, and click twice on each end of the arc to fade it out. Set the Eraser's opacity back to 100, and set the layer's opacity to 85%.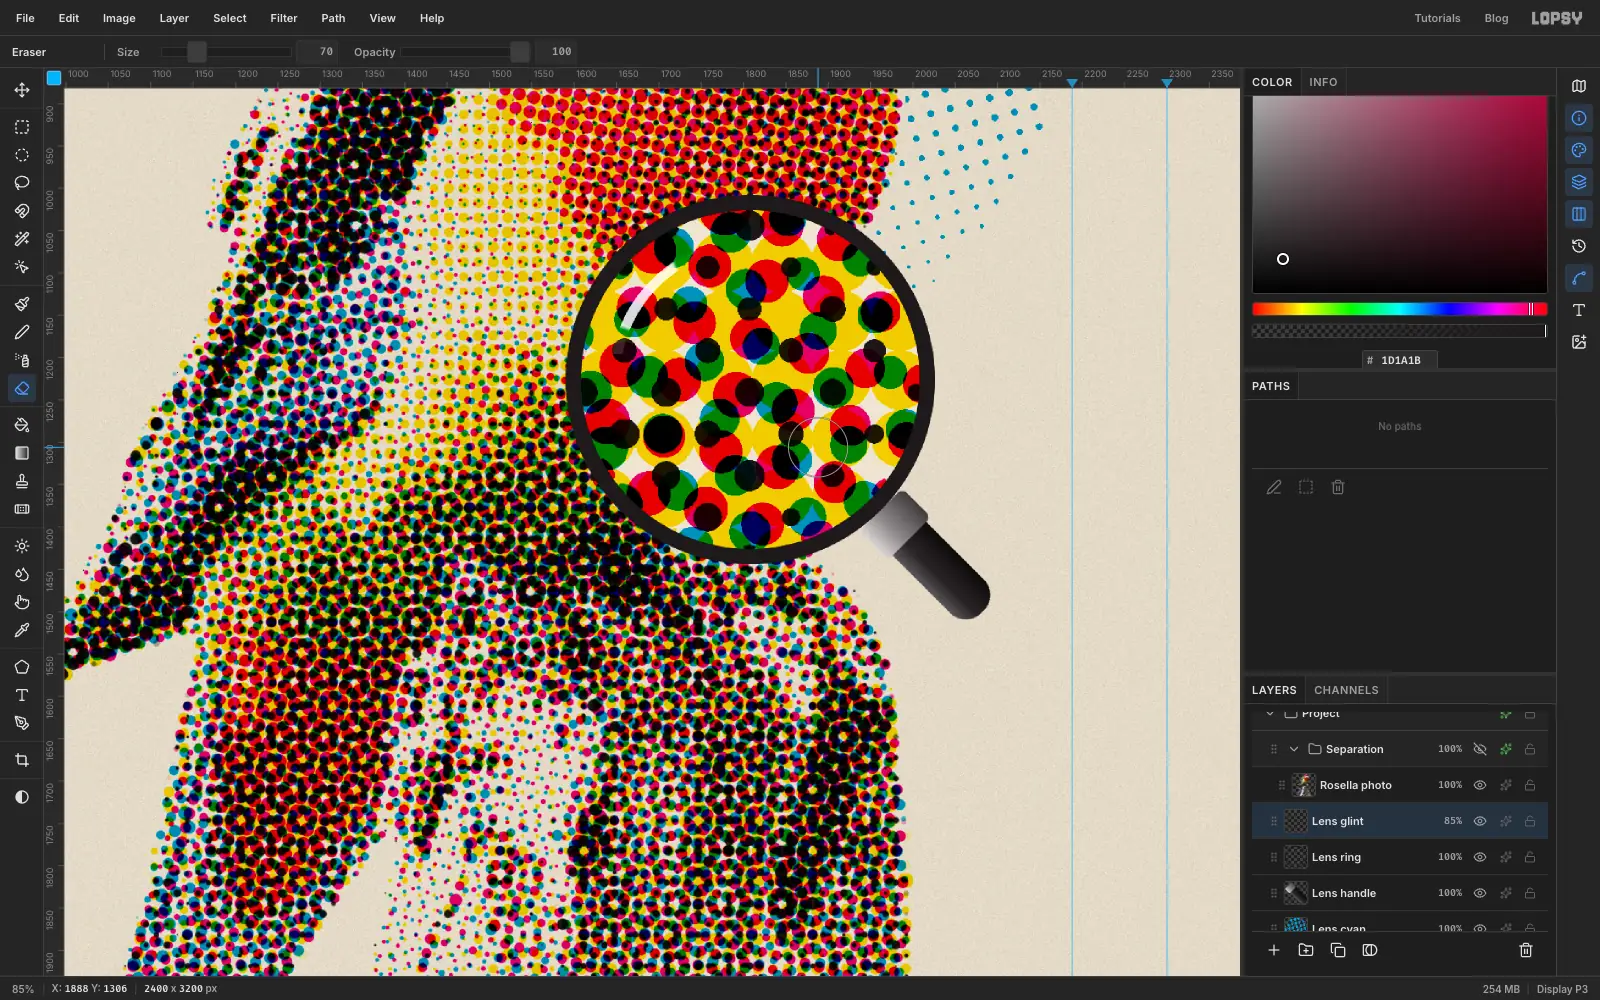
-
Copy a patch of each plate for the proofs
Printers check each ink on its own before printing the full colour sheet. These checks are called progressive proofs. Select the square From
1390, 1410To1610, 1630, which takes in the belly, the feet and the dark stump. Click Cyan plate, choose Edit → Copy, then Edit → Paste. Rename the copy Proof cyan and set it to Multiply.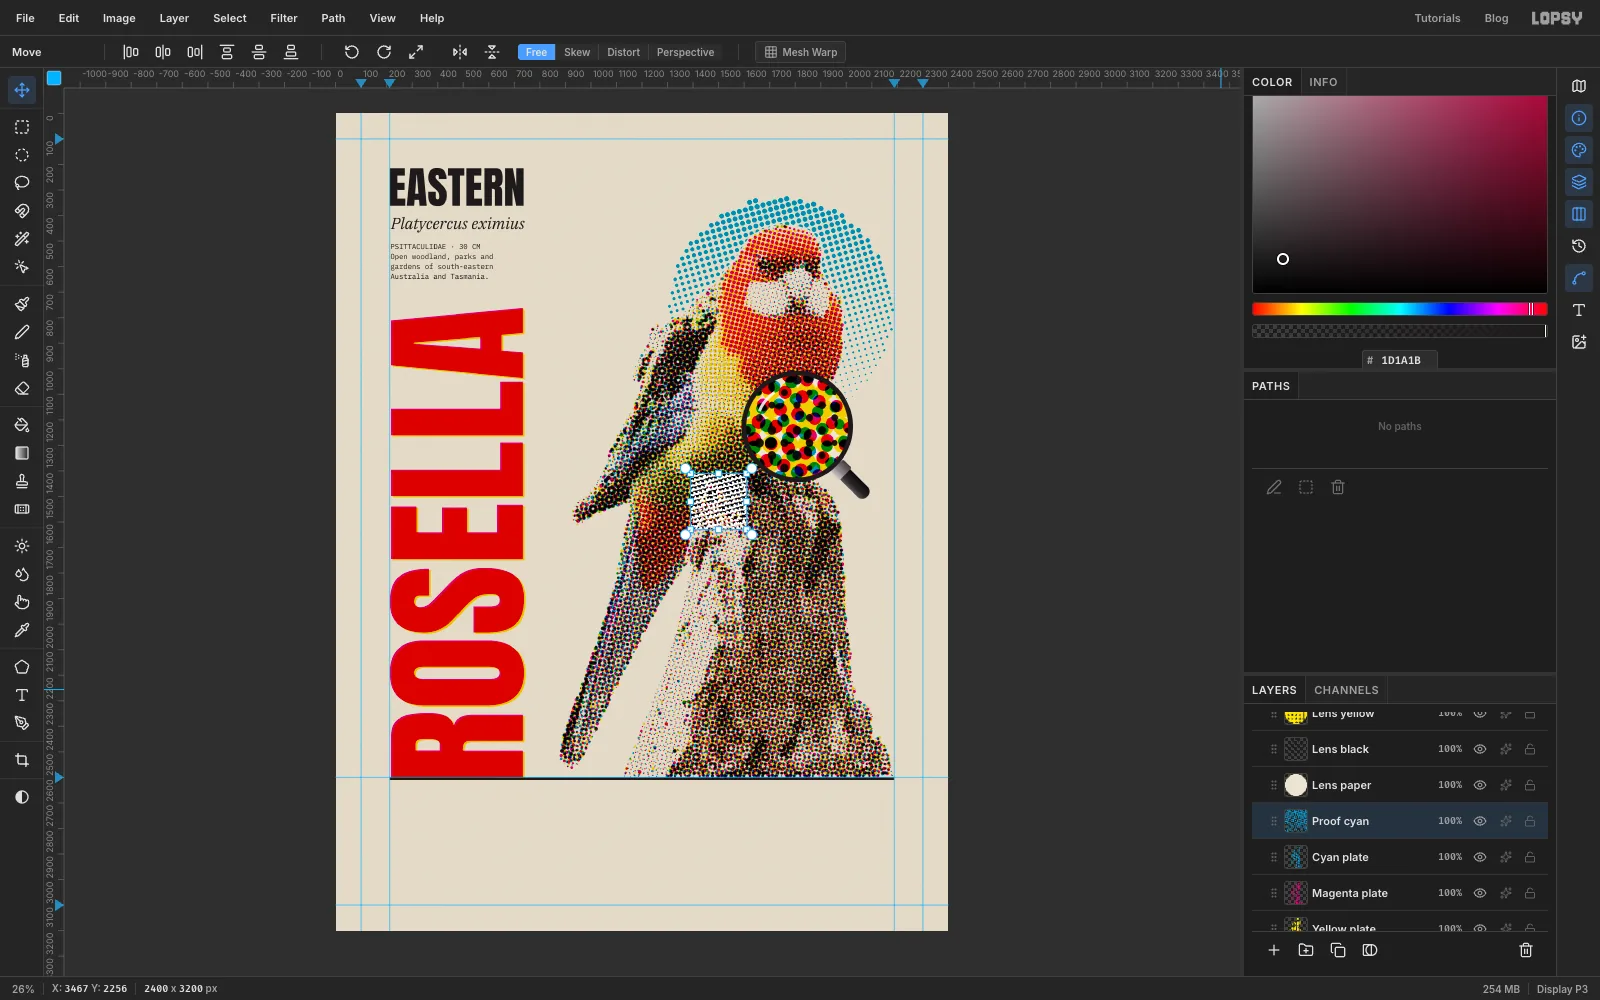
-
Line the proofs up under the rule
With the Move tool, drag Proof cyan down so its top-left corner sits at
822, 2696, and press Cmd+D.Now do the magenta plate the same way. Make the same square selection, click Magenta plate, Copy and Paste, rename the copy Proof magenta, set it to Multiply, and drag it to its slot. Then do yellow and black:
- Proof magenta goes to
1108, 2696 - Proof yellow goes to
1394, 2696 - Proof black goes to
1680, 2696
For the last tile, select the square again and use Edit → Copy Merged instead, so you get all four inks together. Name it Proof all and move it to
1966, 2696.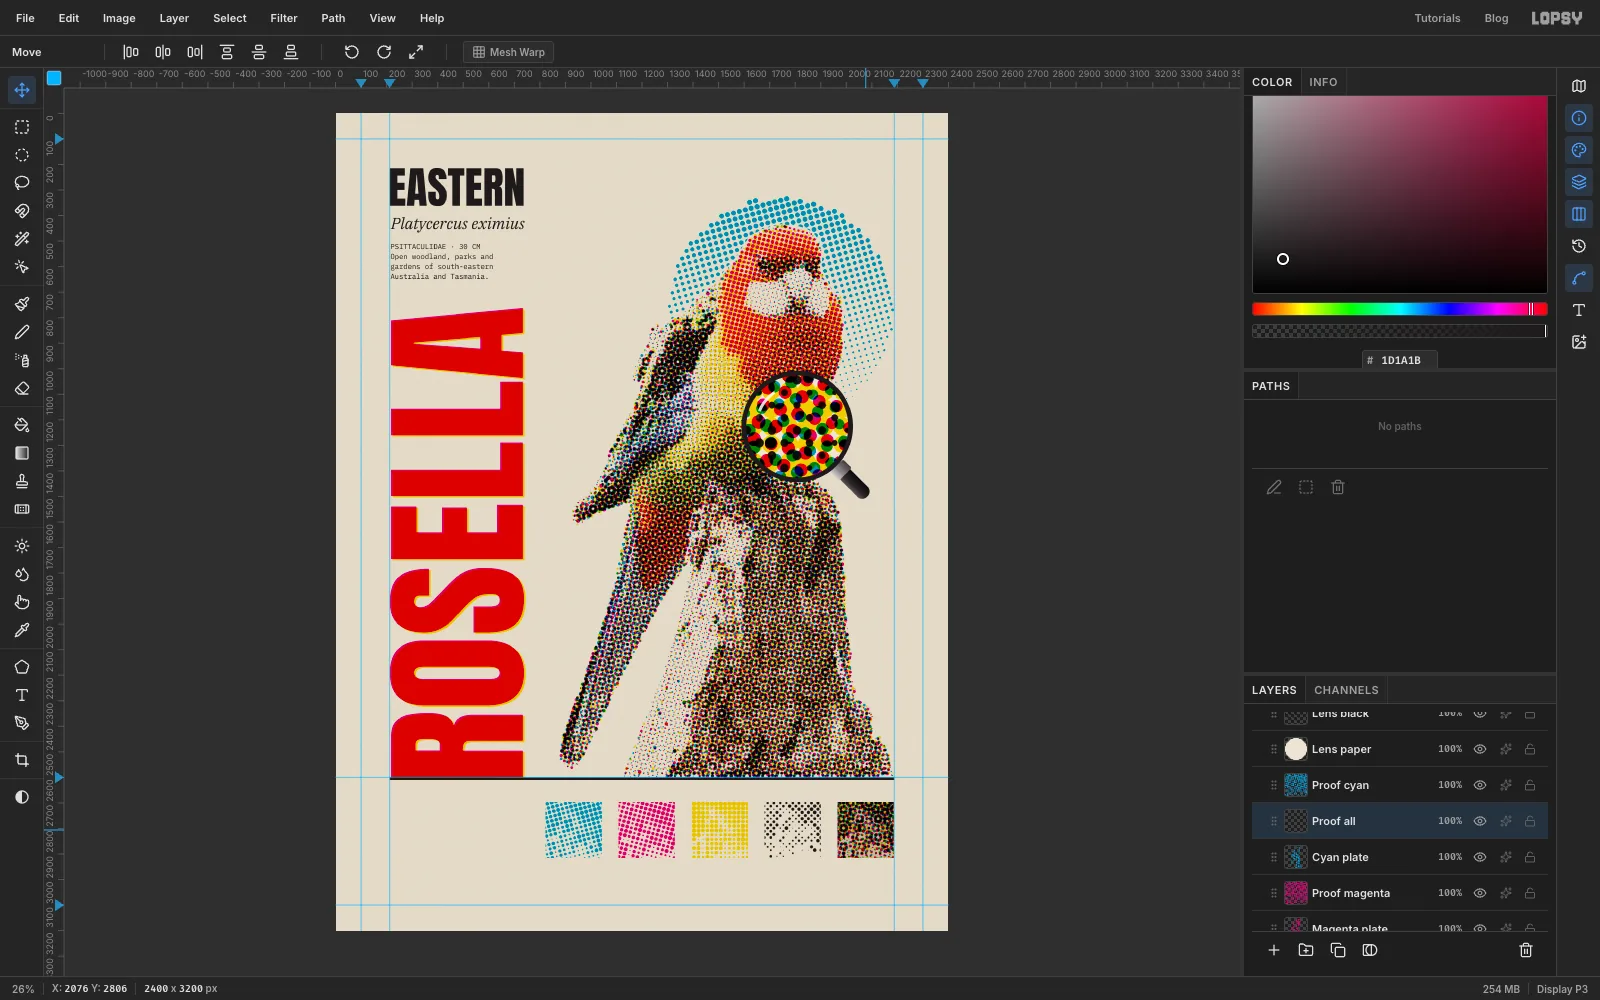
- Proof magenta goes to
-
Frame the tiles
Click Rule and add a layer called Proof frames. Set the Shape tool to Rectangle, no fill, black stroke, Width 4, Corner Radius 0. Click the centre of each tile and enter 224 × 224. The centres are at
y 2806andx 932,1218,1504,1790and2076.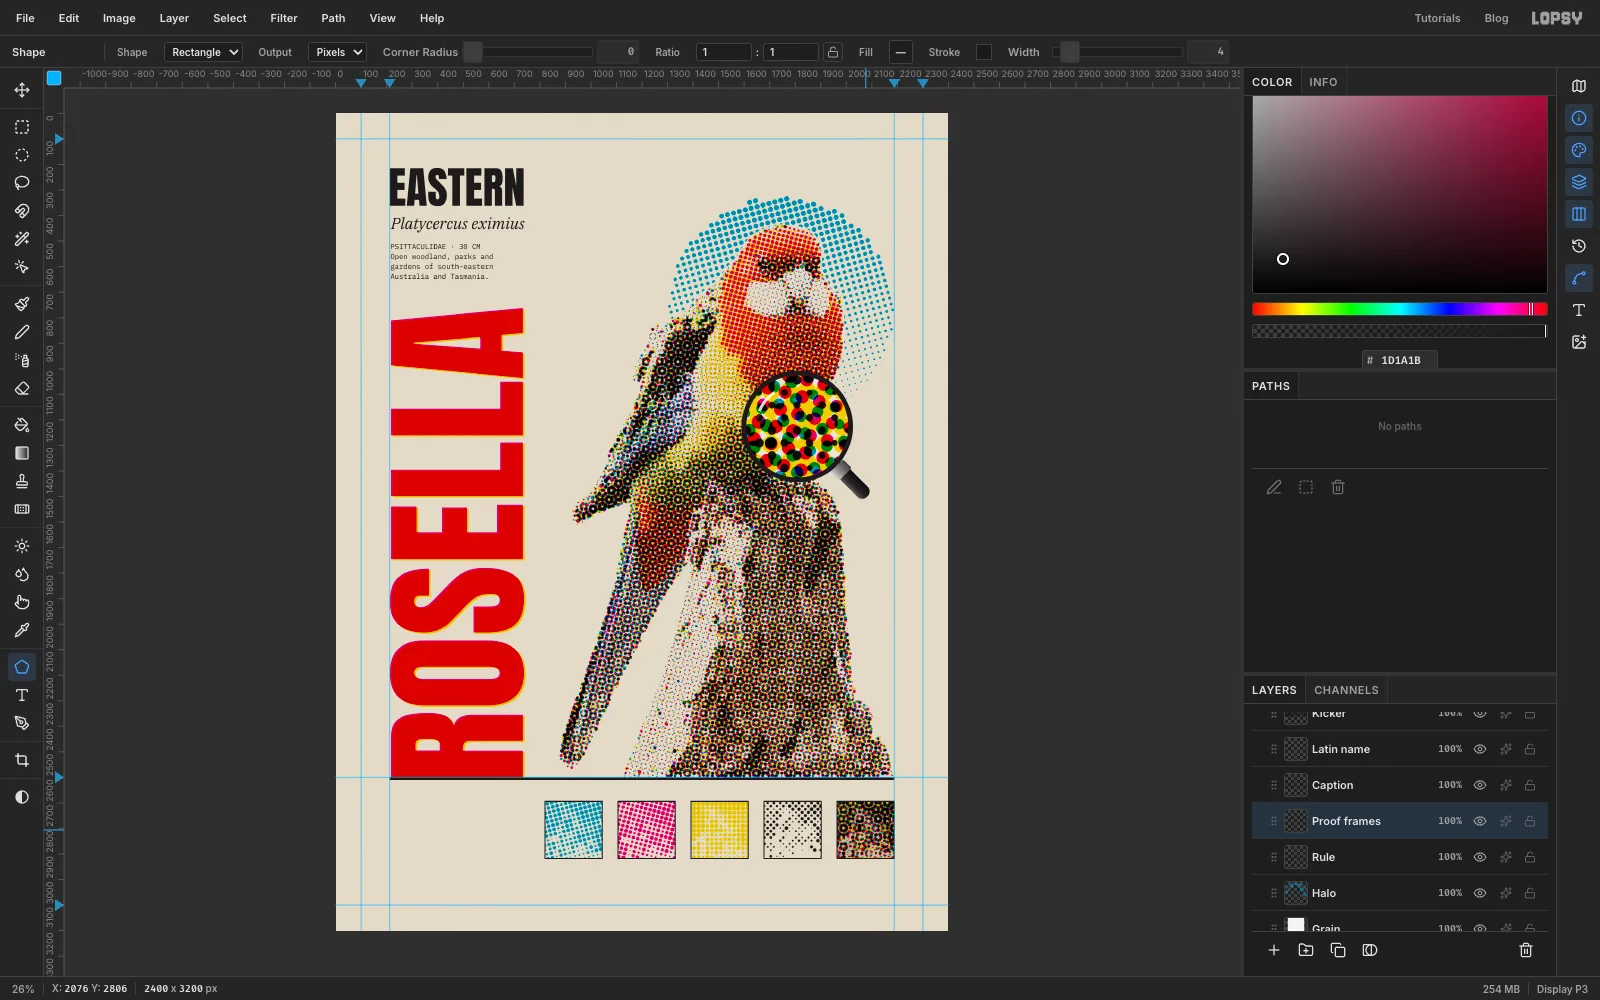
-
Label the proofs
Click Rule, set the Text tool to IBM Plex Mono, Medium, Size 26, Align Center, and click under the middle of each tile to type its label:
CYAN 15°,MAGENTA 75°,YELLOW 0°,BLACK 45°andALL FOUR. Name them Label 1 to Label 5, click Rule before each new one, and line them up about 20 px below the frames.On the left, set Align Left and add
Progressive proofsin IBM Plex Serif Italic, Size 54, with its top level with the tiles, and name it Proofs title. Under it, add a four-line note named Proofs note in IBM Plex Mono, Size 24:Each ink is screened at its/own angle. Printed on top of/one another, the dots form/little rosettes.Line the bottom of the note up with the bottom of the tiles.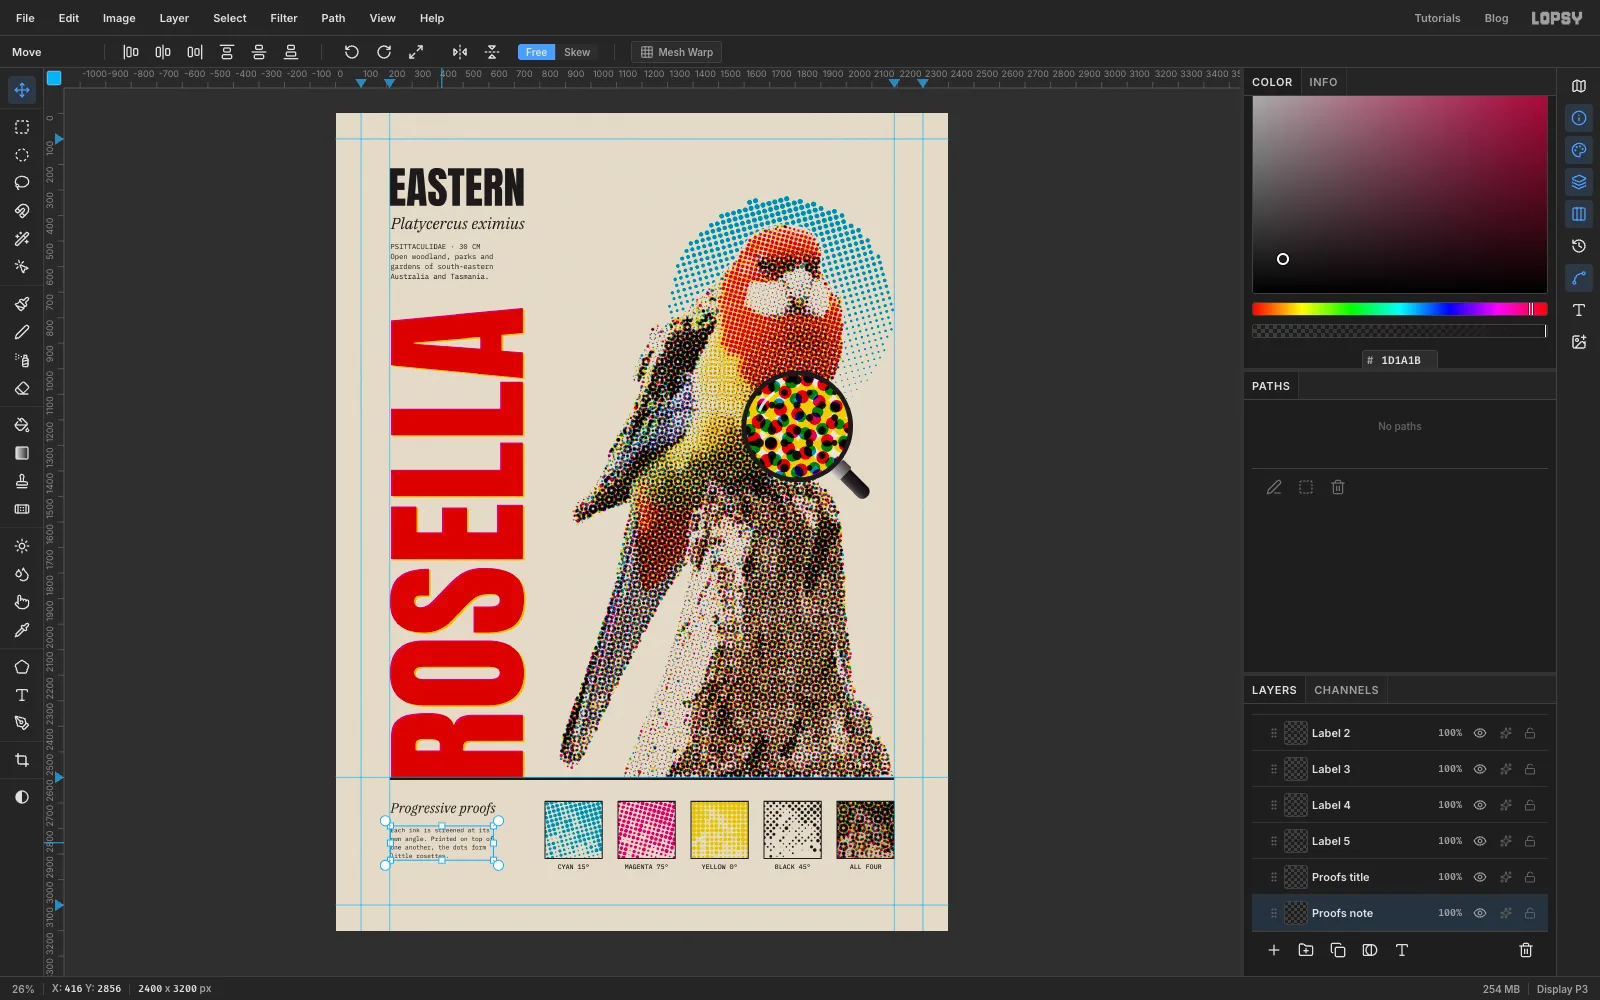
-
Draw the crop marks
Crop marks show the printer where to cut, so they sit outside the trim. Click Rule and add a layer called Crop marks. Pick the Pencil, Size 3, black. For each corner, draw two short lines that point at the trim line but stop 20 px short of it.
Top-left: click
20, 100and Shift-click80, 100, then click100, 20and Shift-click100, 80. Top-right:2320, 100to2380, 100, and2300, 20to2300, 80. Mirror the same pairs at the bottom corners,100, 3100and2300, 3100.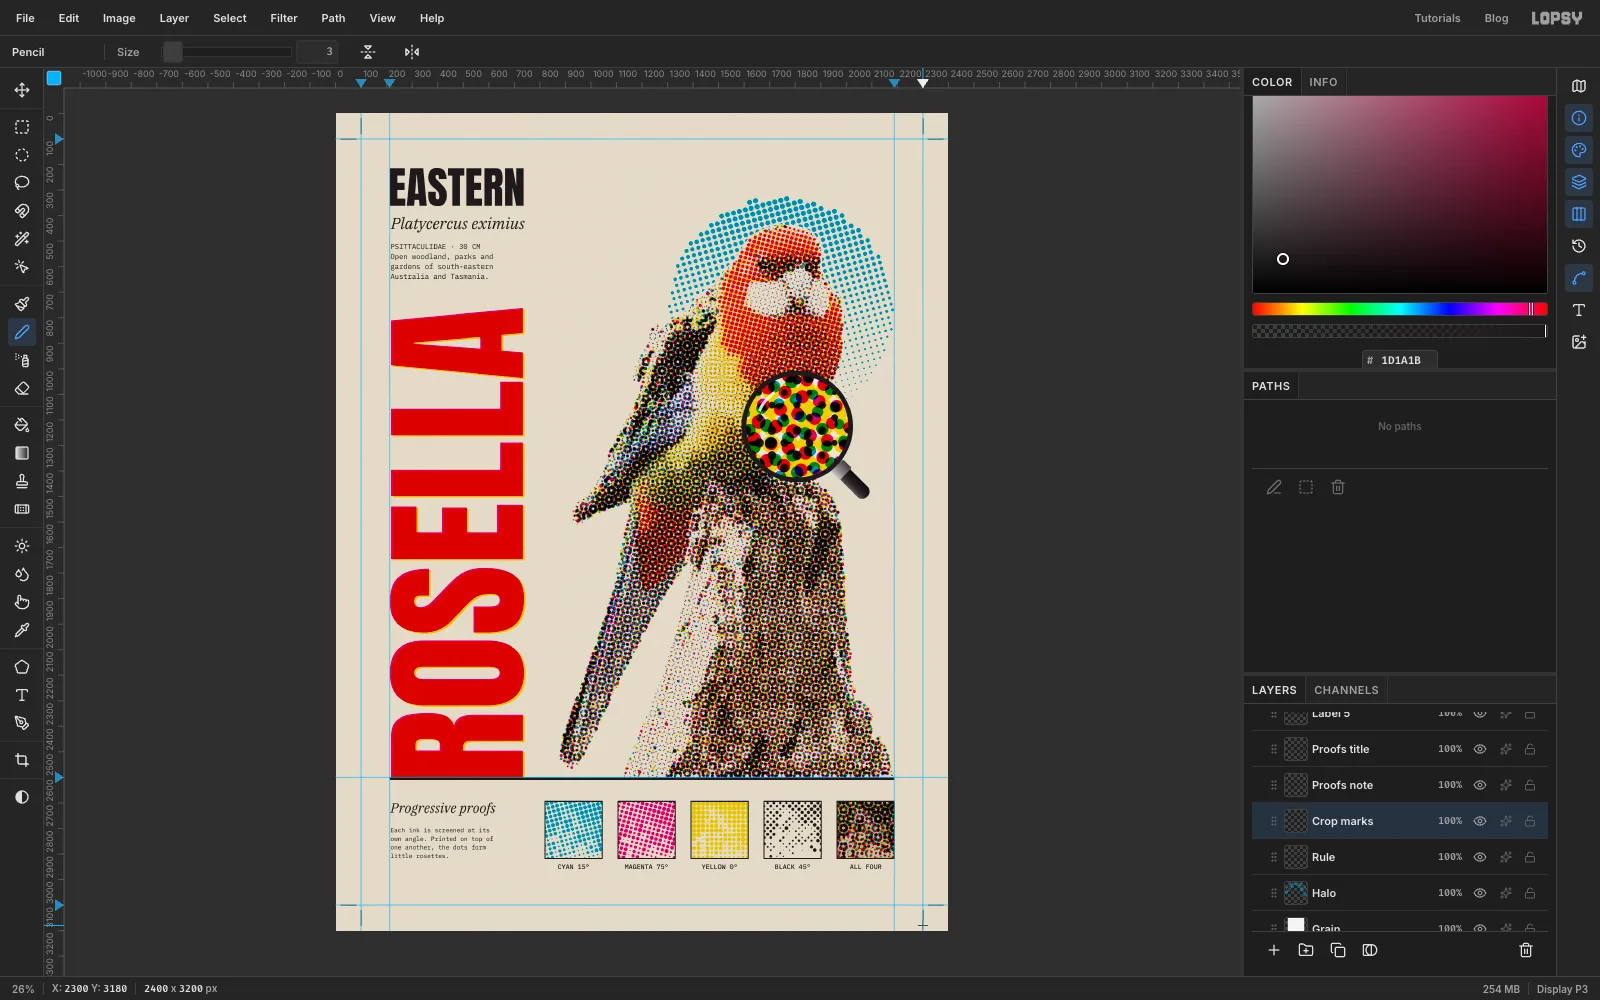
-
Add registration targets
Add a layer called Registration. With the Shape tool set to Ellipse, no fill, black stroke, Width 3, click each centre and enter 40 × 40. The centres are
1200, 50,1200, 3150,50, 1600and2350, 1600. Then use the Pencil (Size 3) to Shift-click a 68 px cross through the centre of each circle. On press, these targets are printed in every ink, so they show whether the plates line up.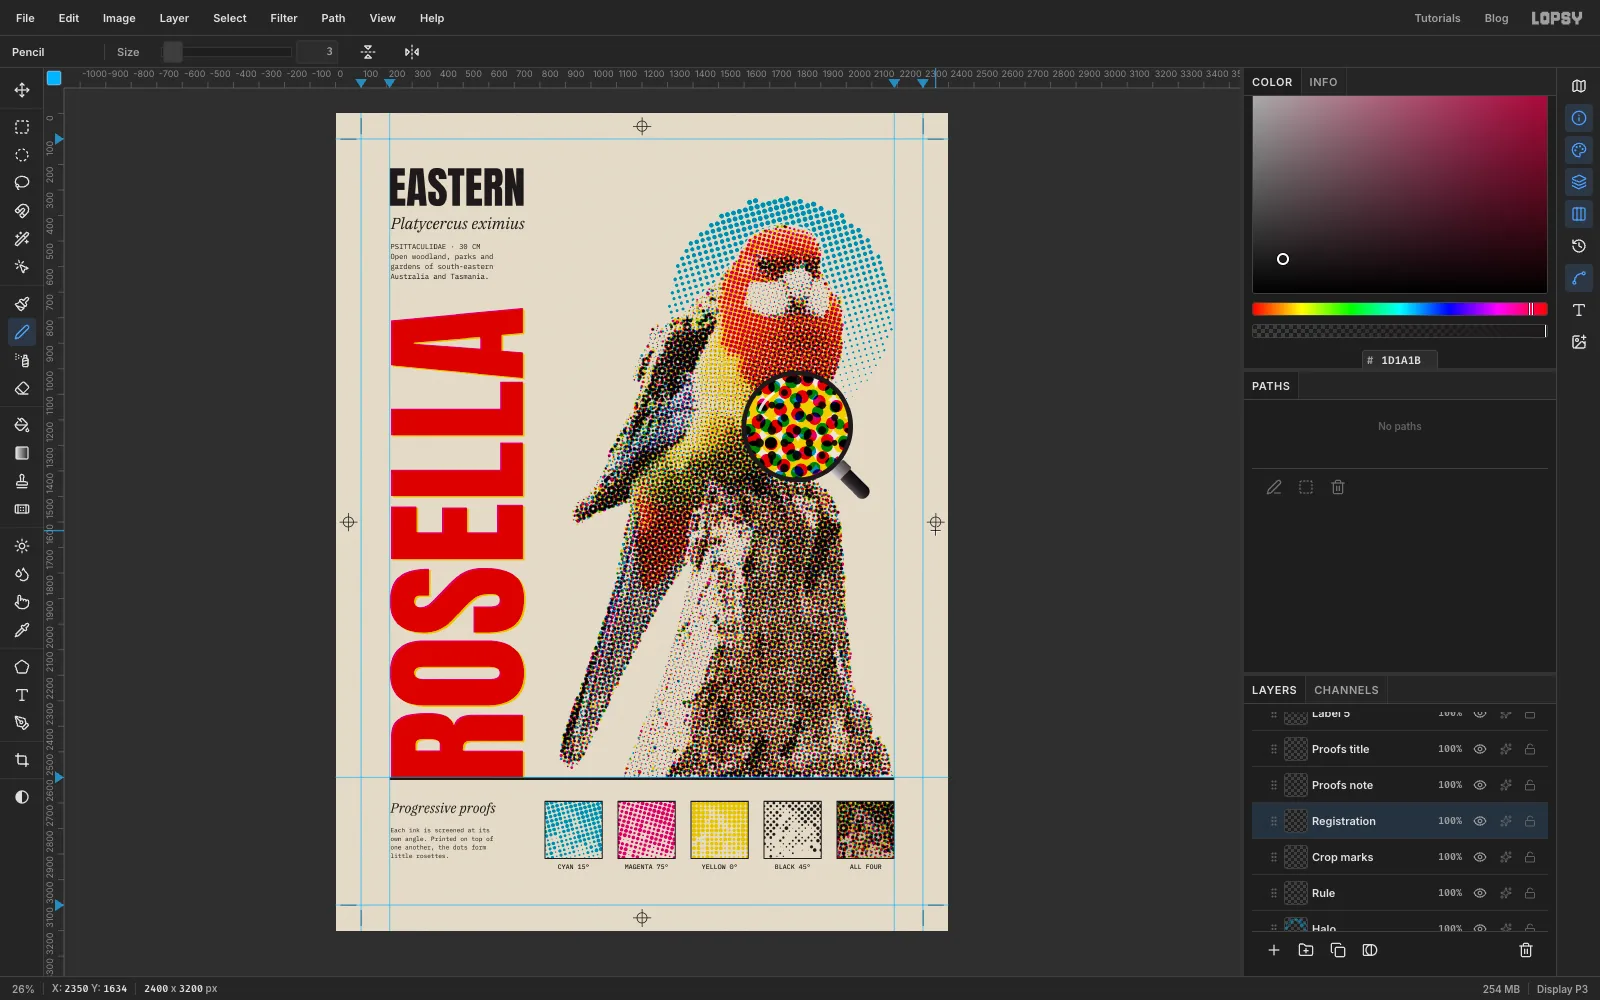
-
Snap a colour bar to the grid
Add a layer called Colour bar and set it to Multiply. Press Cmd+' to show the grid. It's 16 px by default, and marquee drags snap to it. Zoom in on the top margin.
Drag a three-cell square from
1344, 32to1392, 80and fill it with cyan. Skip one cell, drag the next square, and fill it with the next colour. Repeat for all ten: cyan , magenta , yellow , black , the overprints , and , and the black tints , and . Press Cmd+' again to hide the grid.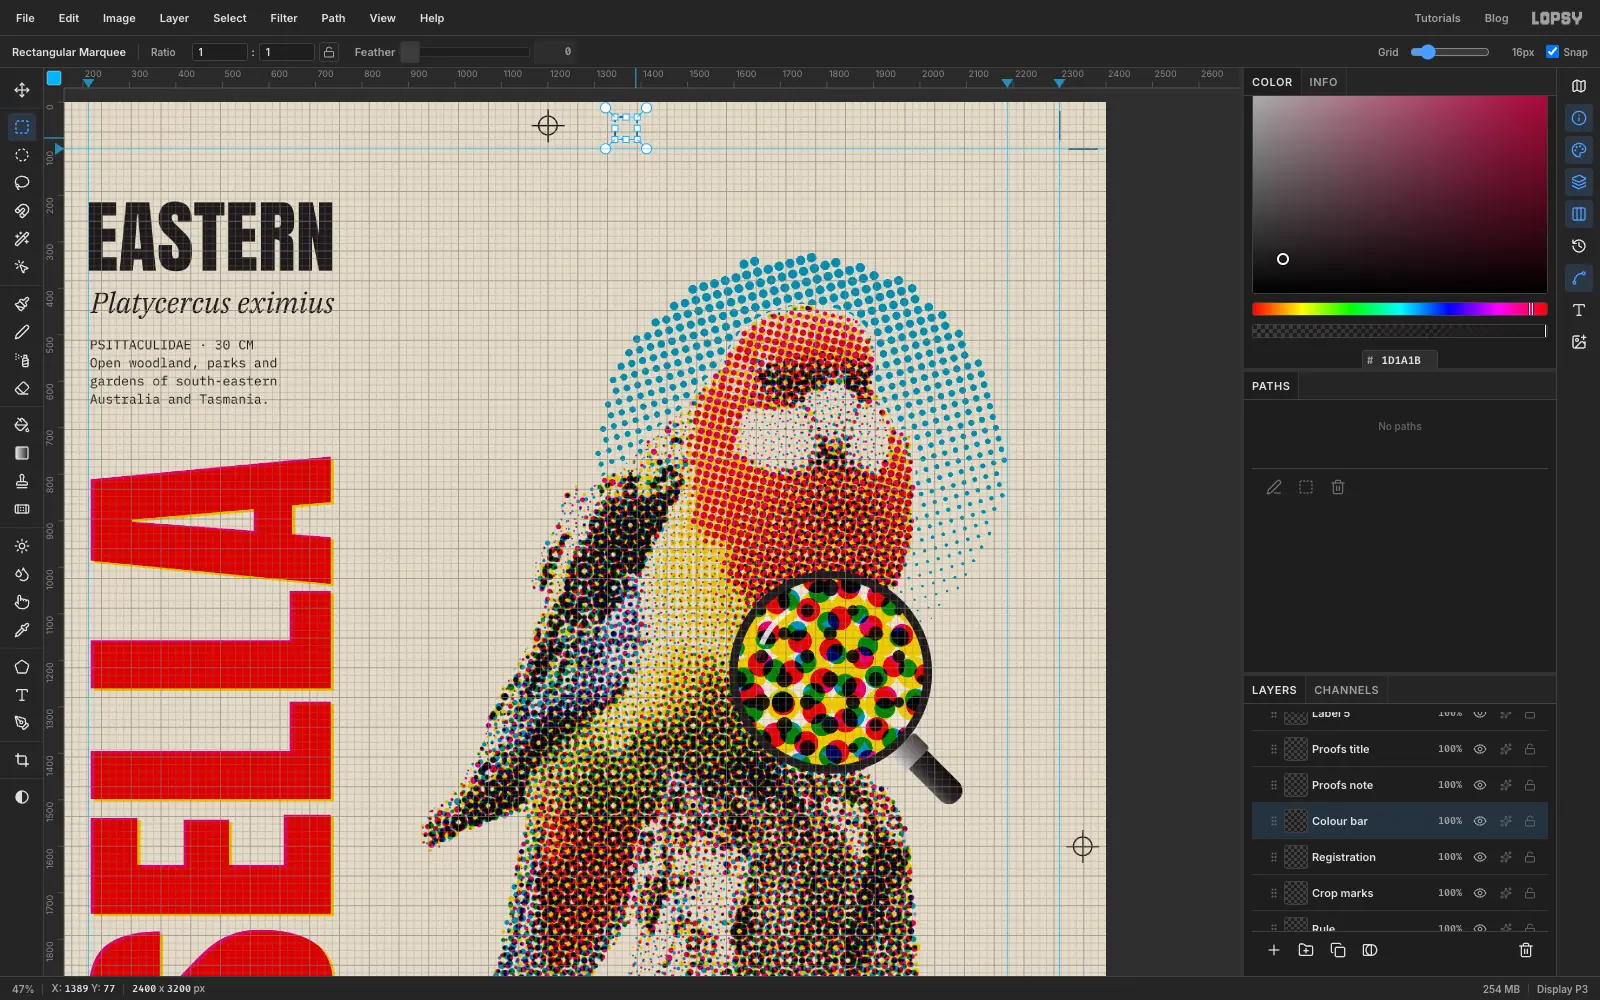
-
Add the slug lines
A slug line is the job information printed outside the trim. Click Rule, and in IBM Plex Mono, Size 22, type
ROSELLA · 4/C PROCESS PROOF · C15 M75 Y0 K45and name it Slug left. Line its left edge up with the212guide, with its top aty 3140.For the right-hand slug, set Align Right, click near the right margin and type
SHEET 01 · 600 × 800 MM, named Slug right. Move it so it ends on the2188margin, level with the first.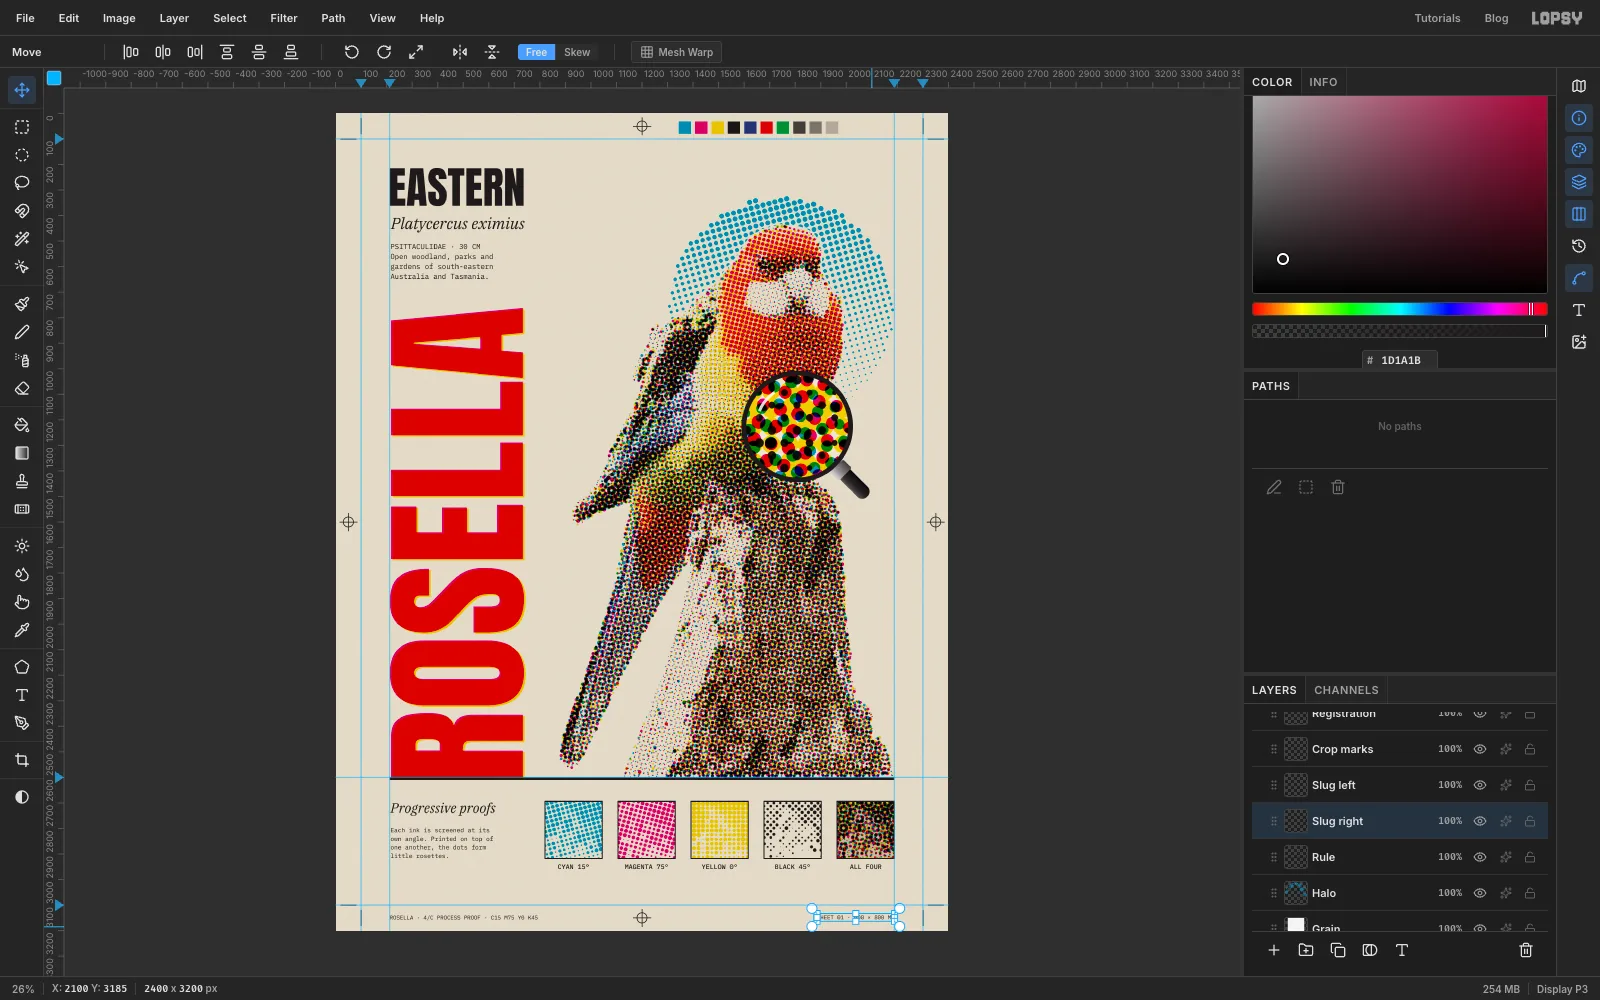
-
Group everything
Cmd-click rows to select them, then click Group Layers to put each set in its own group. Rename each group and collapse it:
- Plates: the four plate layers
- Loupe: the lens paper, the four lens plates, handle, ring and glint
- Type: the two title layers, the kicker, the Latin name and the caption
- Proofs: the proof tiles, frames, labels, title and note
- Marks: the crop marks, registration targets, colour bar and slugs
With a group selected, the Move tool frames everything in it, so you can drag the whole footer or margin set as one.
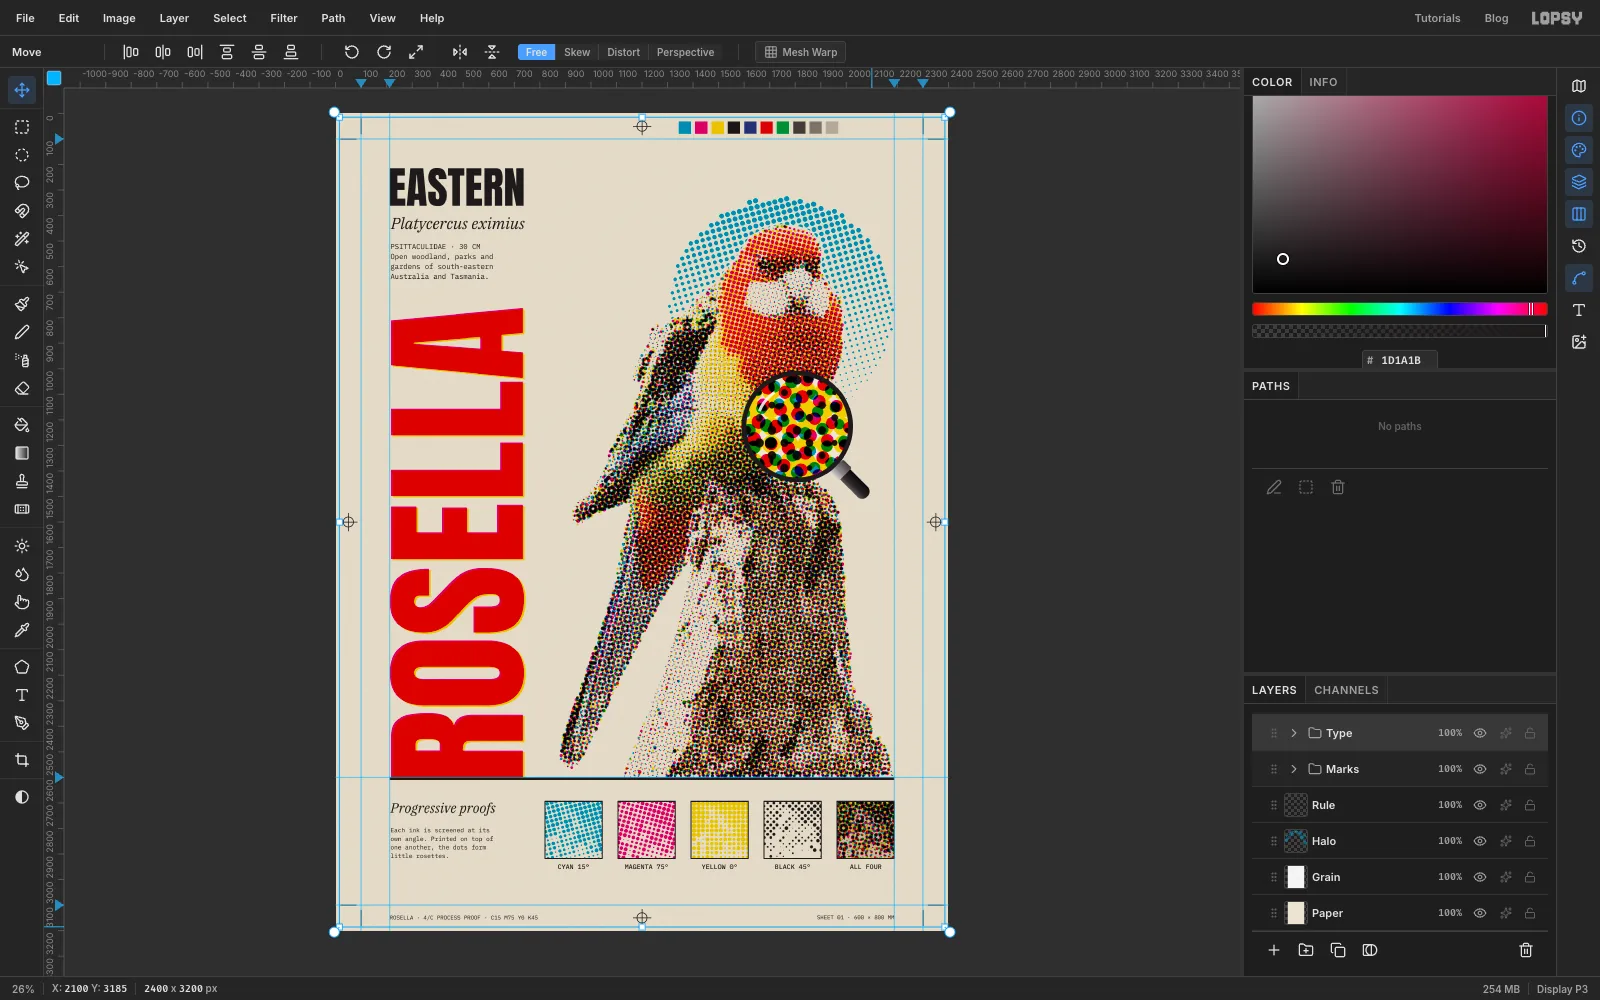
-
Add ink grain
Ink on newsprint is never perfectly flat. Click the Marks group, add a layer called Ink grain, and fill it with . Run Filter → Add Noise… with Amount 40, Mono and Gaussian. Set Blend to Overlay and the layer opacity to 22%. The grey disappears under Overlay, and only a fine speckle is left. Because the inks multiply over everything beneath them, the speckle shows through the dots too.
Export with File → Export… and save the project with File → Save Project.