Make a Cut-Paper Collage Movie Poster with Photos
Build a 1950s creature-feature collage poster in Lopsy from torn paper, a halftone sun, cut-out photos, a custom-brush swarm and torn title strips.
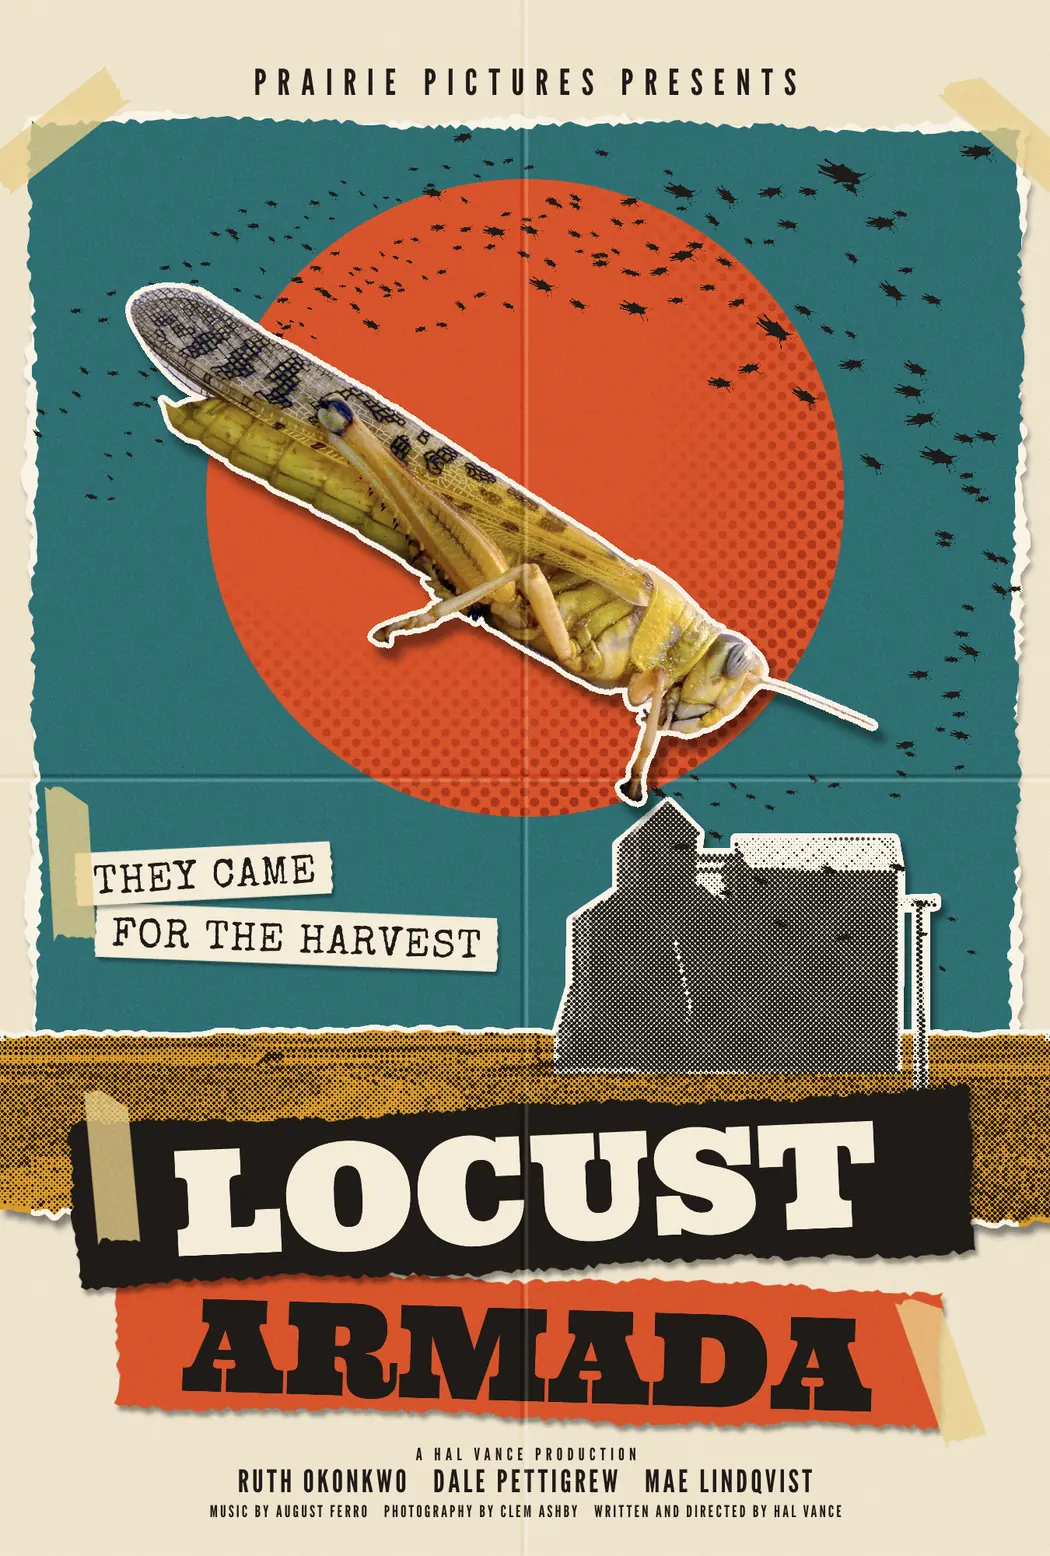
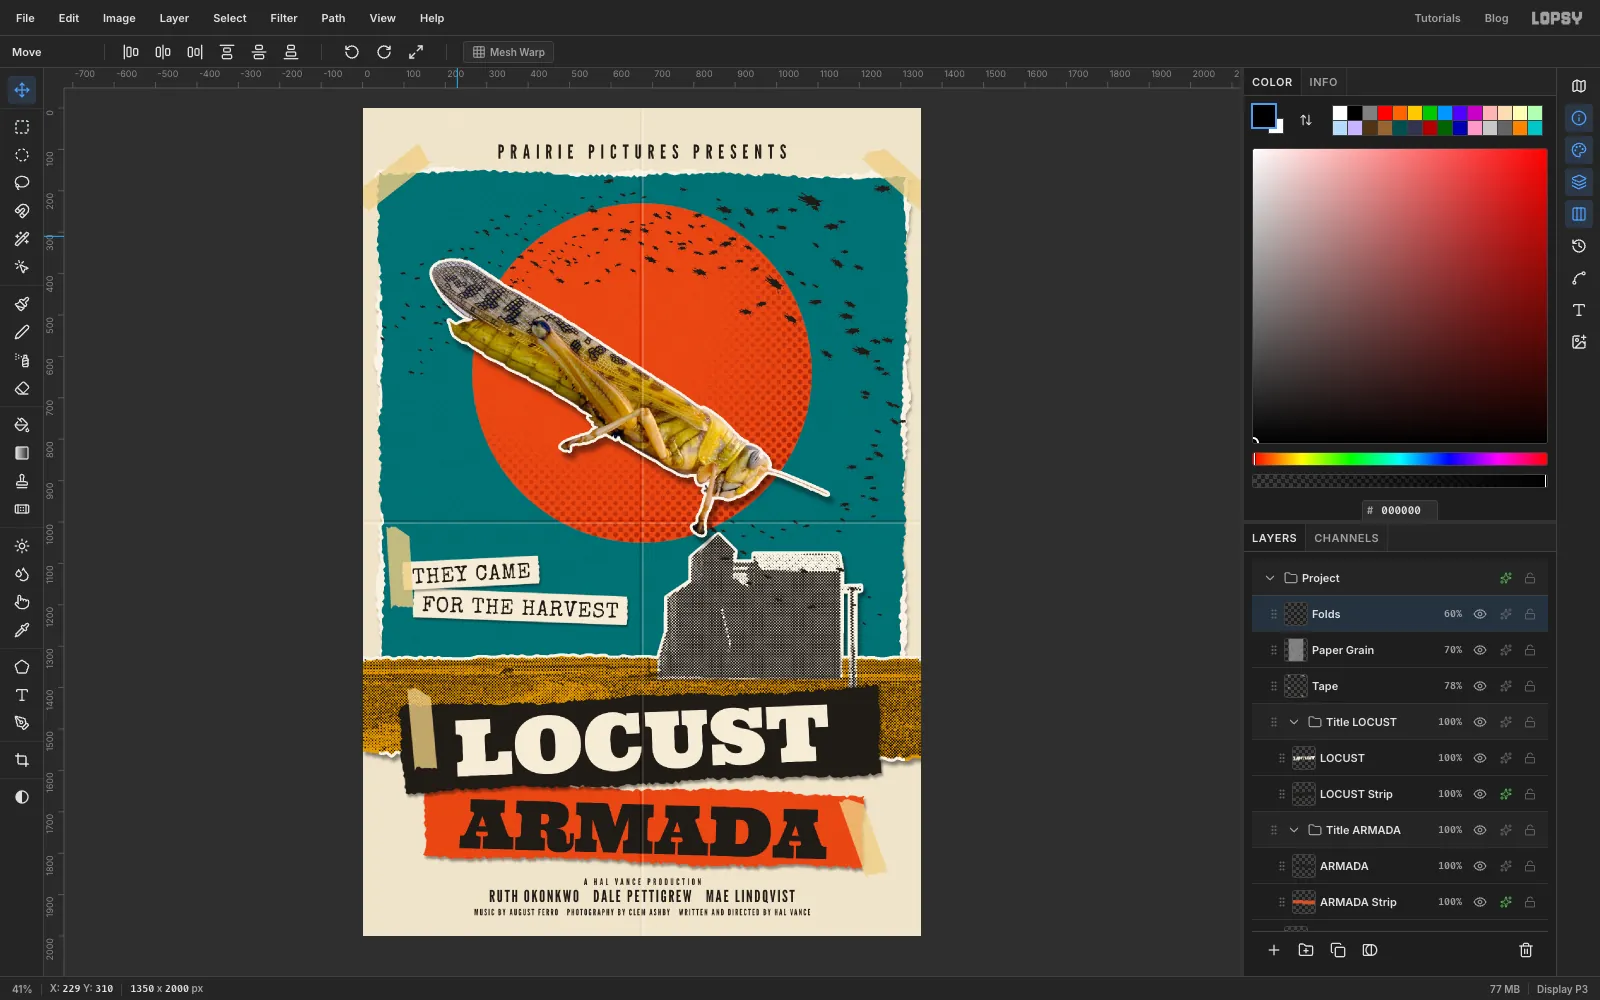
This tutorial builds a 1350 × 2000 px poster for an imaginary 1950s creature feature, Locust Armada. It's made the way a collage artist works on a table: torn sheets of coloured paper, a sun cut from a disc, and photos clipped out with scissors and glued down with a little lift. A giant locust dives at a lonely prairie grain elevator while its swarm pours in behind it.
You'll learn how to tear paper edges with the Lasso, turn a photo into newsprint with Halftone, cut photos off a white background with the Magic Wand, and make a custom brush from a photo so you can paint a whole swarm in a few strokes. You'll also group each title word with its paper strip, so you can rotate them together while the type stays editable.
Along the way you'll scale and rotate with the Move tool, grow and shrink selections, copy and paste tape, and lift every scrap of paper off the page with a Drop Shadow.
You need three photos from Wikimedia Commons:
- Schistocerca gregaria - 0061.jpg by Amada44, licensed CC BY-SA 3.0. It's a desert locust photographed side-on against pure white. Download the 1280 px wide version.
- Obscure bird grasshopper on white.jpg by SwimSusan, licensed CC BY-SA 4.0. It's a grasshopper seen from above, which makes the swarm brush. Download the 1280 px wide version.
- Grain elevators on Henry Sheffels' 6,000 acre wheat ranch, Cascade County, Montana.jpg). It's a Farm Security Administration photo from the Library of Congress, with no known restrictions. Download the original (1024 × 776).
The fonts are free Google Fonts in Lopsy's font picker: Ultra for the title, League Gothic for the billing, and Special Elite for the typewriter labels.
The palette:
-
Newsprint
-
paper white
-
ink
-
Sky paper
-
Sun
-
Field mustard
-
Label paper
-
masking tape
-
Lay out the newsprint
Open Lopsy. In the New Document dialog, set Width to
1350and Height to2000, then click Create.- Click the
Backgroundlayer. In the Color panel, typeEEE4CDinto the hex field and choose Edit → Fill. - Choose Filter → Add Noise…. Set Amount to
6, click Mono and click Apply. This adds a faint tooth to the newsprint. - Click the ruler along the top at
60,675and1290to drop three vertical guides: the margins and the centre line. - Click the ruler on the left at
60and1940for the top and bottom margins.
Leave the empty
Layer 1where it is, at the top of the stack. It becomes the masking tape at the end.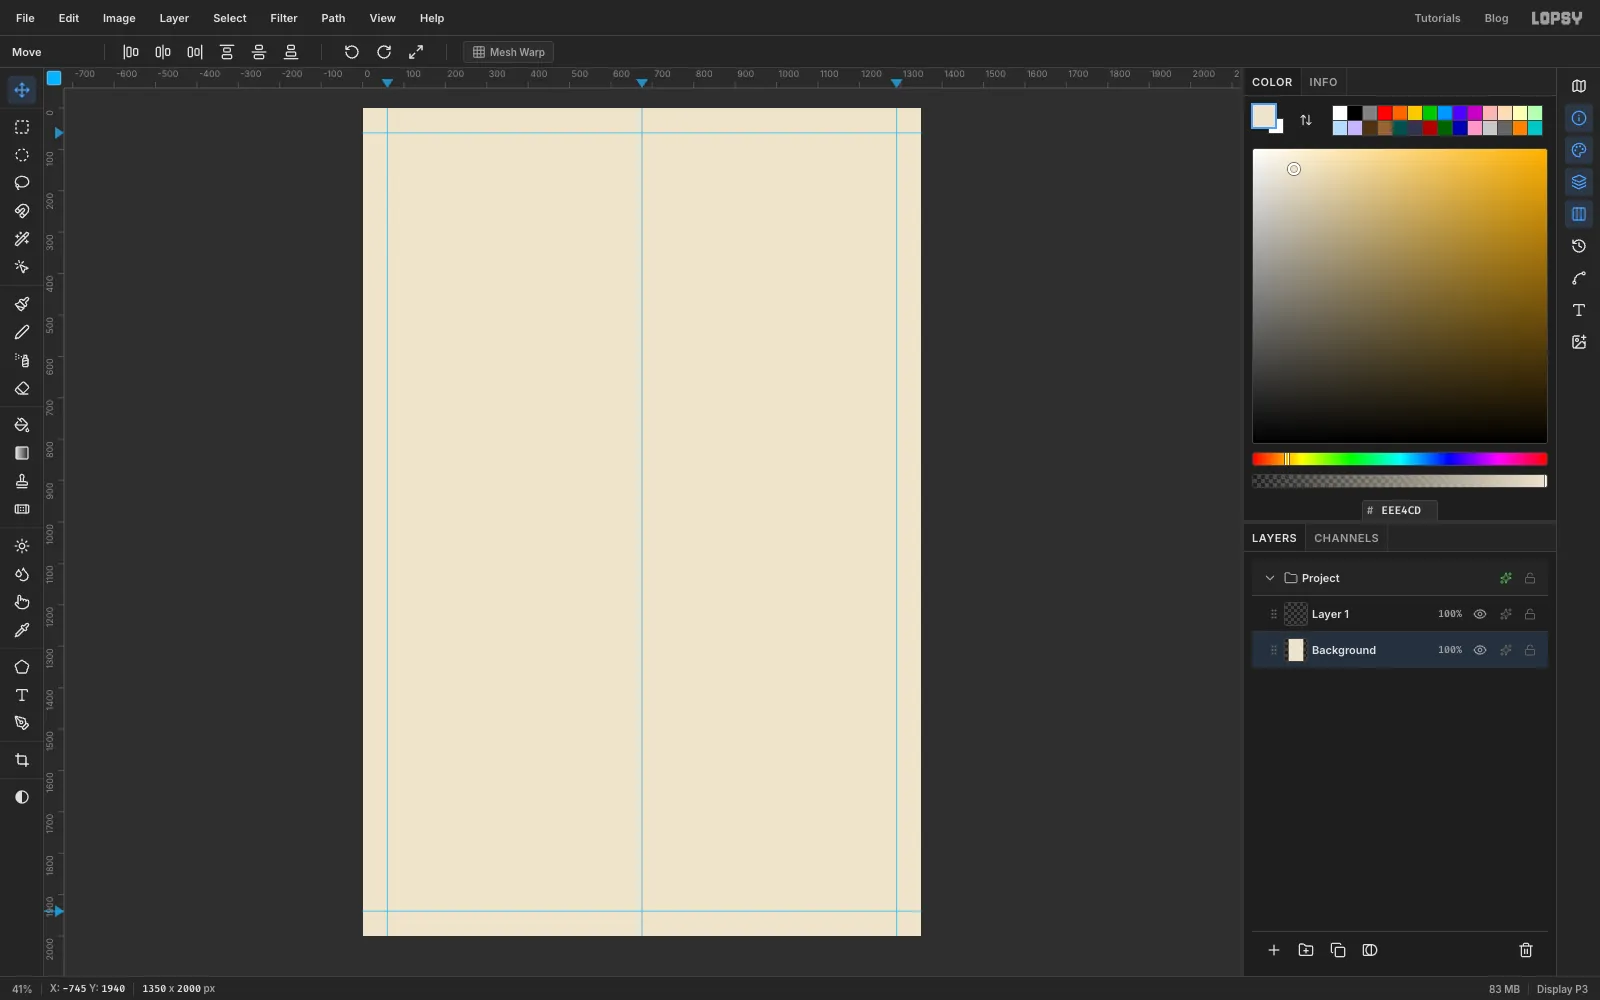
- Click the
-
Tear a sheet of sky paper
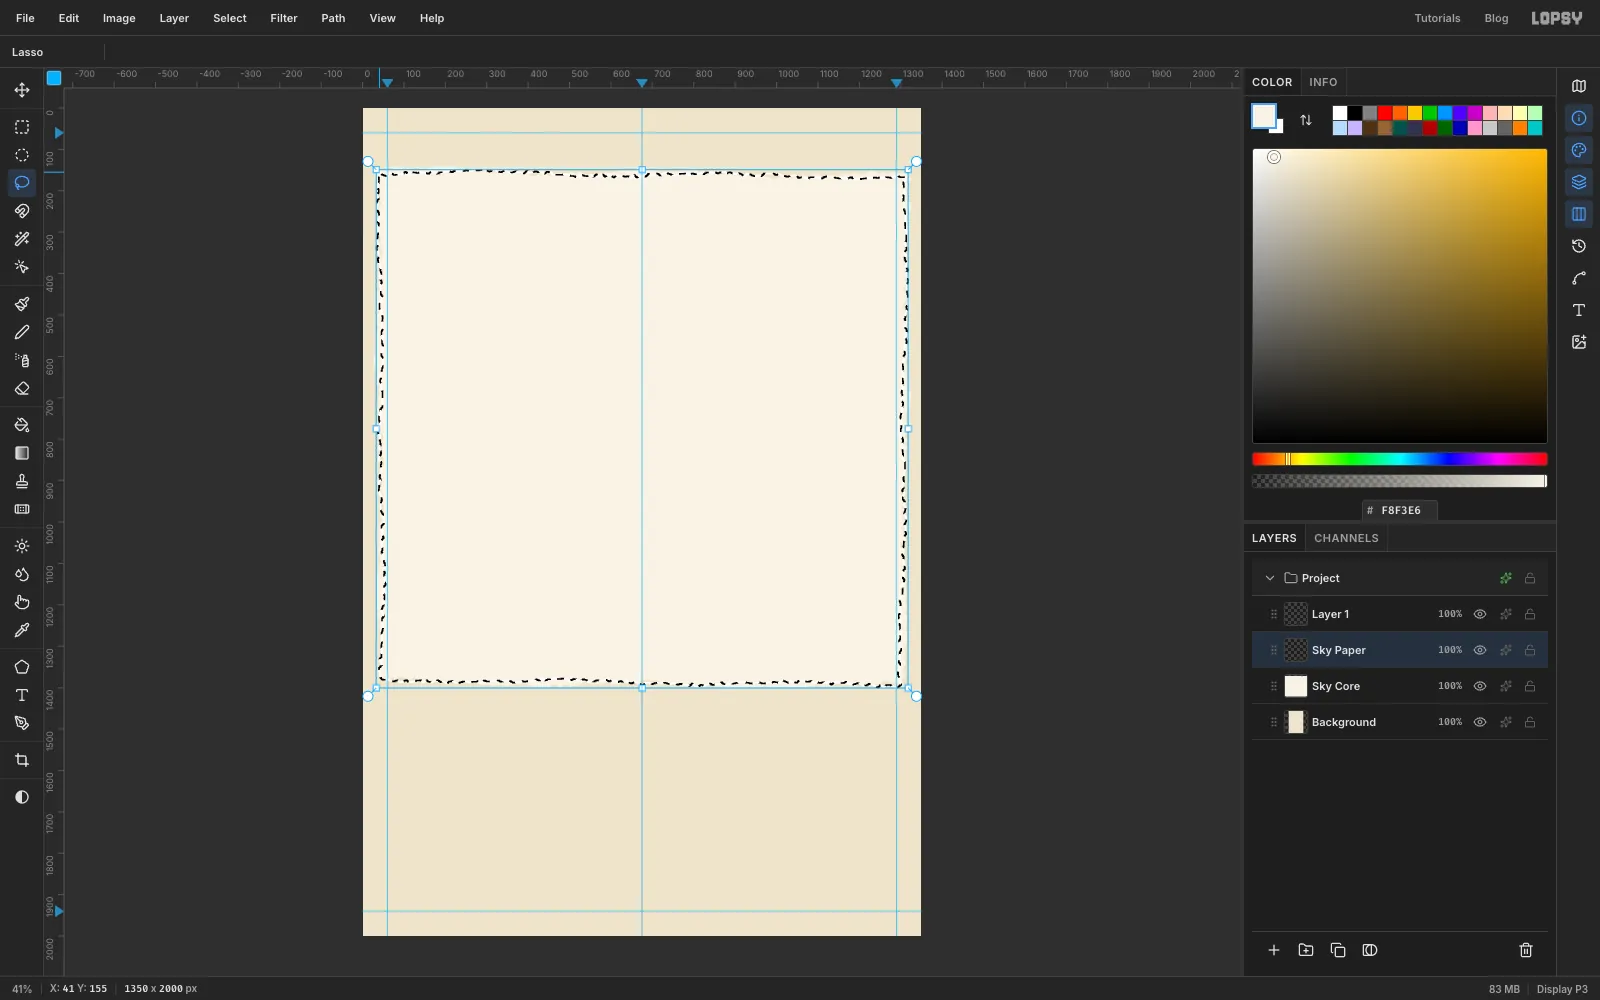
Real torn paper shows a thin white edge where the fibres pull apart. You get that by tearing two shapes: a white one, then a coloured one just inside it.
- Click Add Layer at the bottom of the Layers panel. Double-click the new layer's name and call it
Sky Core. - Press L for the Lasso. Drag a rough rectangle about 40 px in from each side, with its top near
y 150and its bottom neary 1390. Tilt it very slightly: let the top-right corner sit about 10 px lower than the top-left. Don't drag straight lines. Jiggle the mouse every few pixels so the edges come out ragged, like torn paper. - Set the foreground to
F8F3E6and choose Edit → Fill. Press Cmd+D to deselect. - Add another layer named
Sky Paper. Zoom in to 100% (Cmd+1) and lasso a second ragged rectangle about 7 px inside the first, tearing it differently. Scroll around the edges as you go. The white sheet should peep out unevenly along every edge. Press Cmd+0 to fit the canvas again. - Fill it with
2F6F73and press Cmd+D.
- Click Add Layer at the bottom of the Layers panel. Double-click the new layer's name and call it
-
Cut out the sun
- Add a layer named
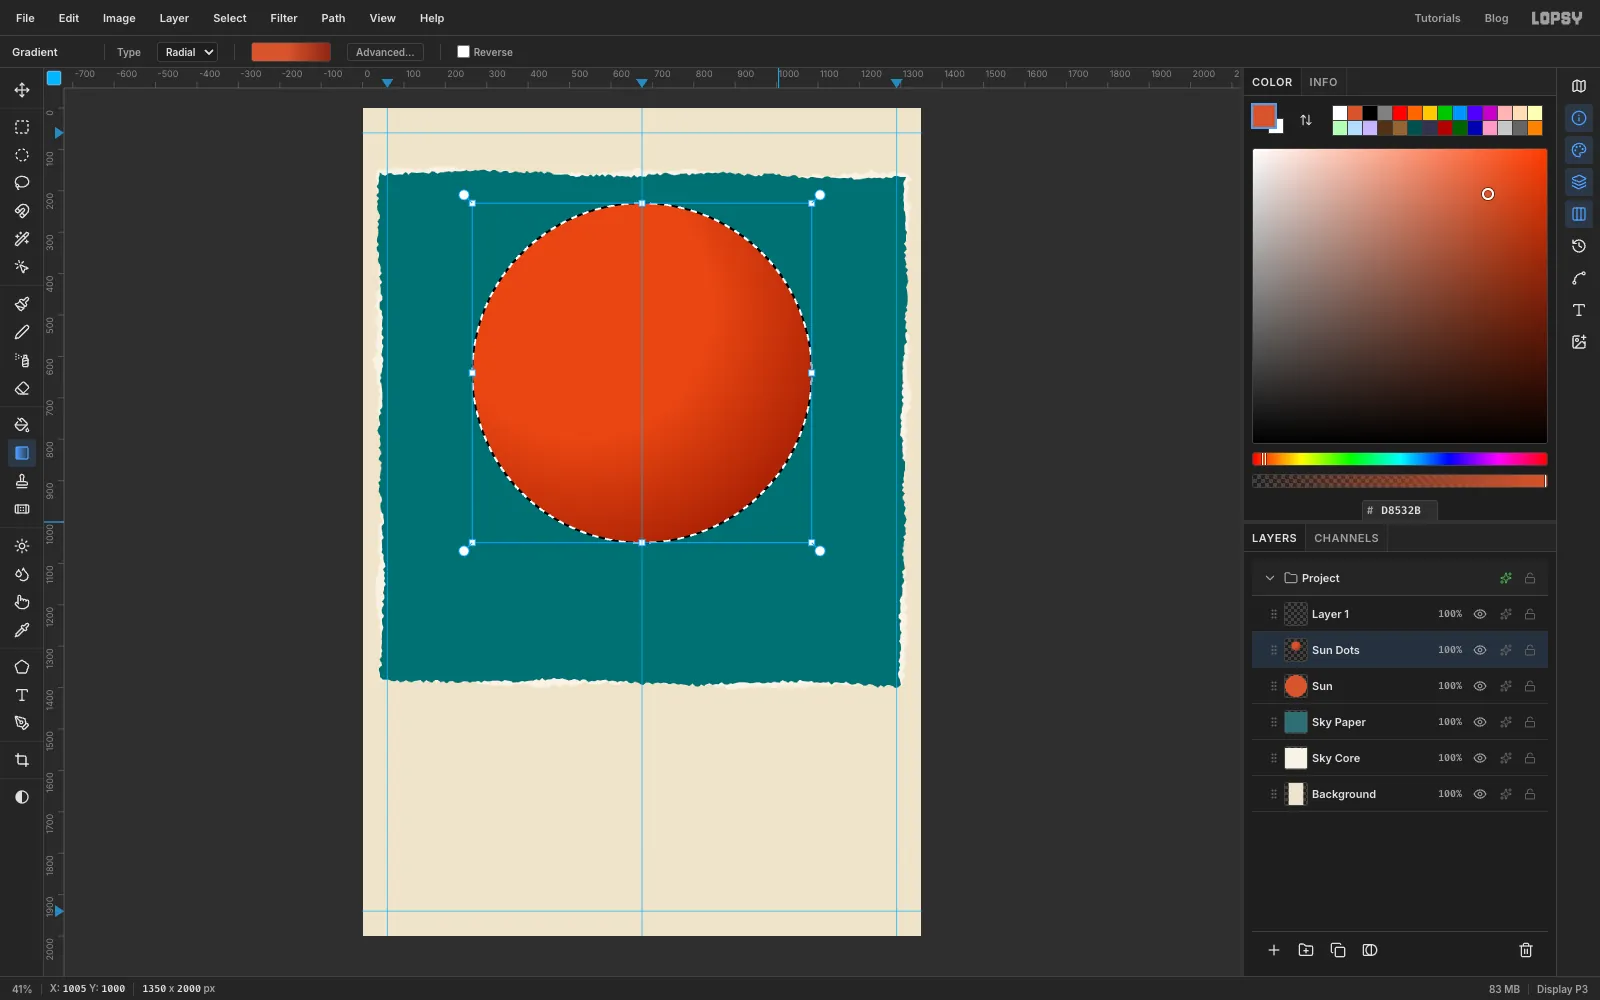
Sun. - Press M for the marquee, then pick the Elliptical Marquee from the toolbox. Drag from
265, 230to1085, 1050. That square box makes a circle 820 px across, centred on the centre guide. - Set the foreground to
D8532Band choose Edit → Fill. - Keep the selection and add a layer named
Sun Dots. - Pick the Gradient tool (it has no shortcut) and set Type to Radial. Click Advanced…. Click the left stop and type
D8532Bin Hex. Click the right stop and type8F2614. Click the bar at about 45% to add a stop and typeD8532Bagain. Click Done. - Drag from
525, 480, up and left of the sun's centre, to1005, 1000, near its lower-right rim. The sun now darkens toward the lower right, like a ball lit from the upper left.
- Add a layer named
-
Turn the shading into halftone dots
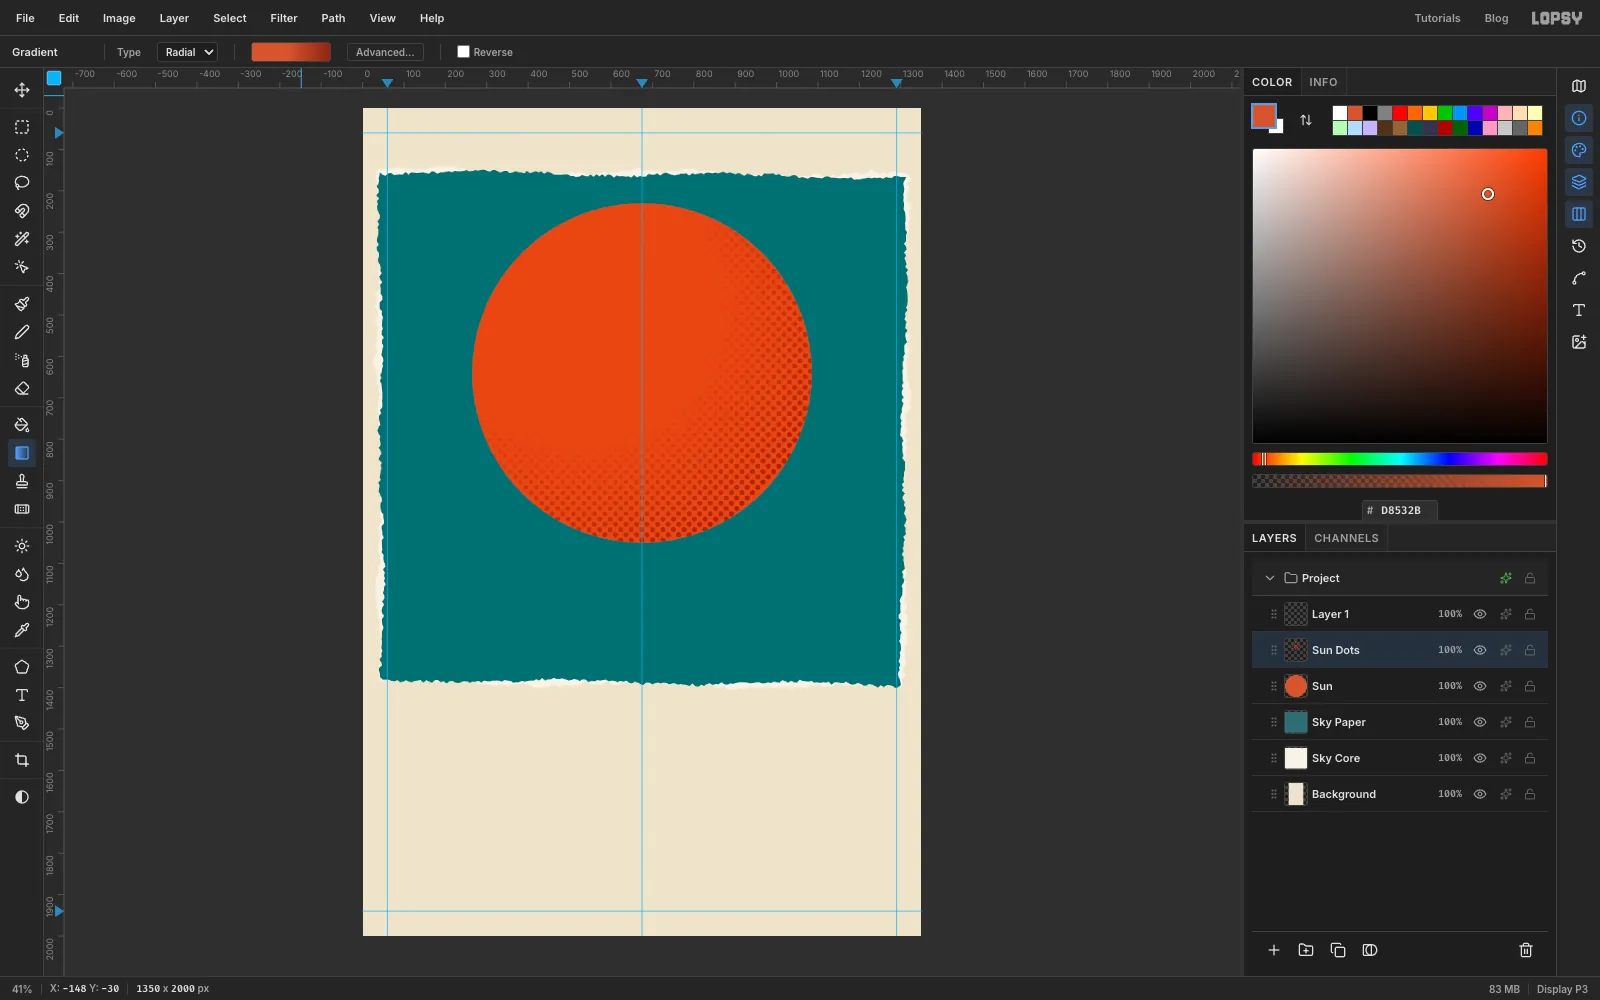
- Press Cmd+D, then choose Filter → Halftone…. Set Dot Size to
18, Angle to45and Softness to0.6, leave Density at1, and click Apply.
Halftone draws each dot in its cell's own colour and sizes it by how dark the cell is. The centre colour matches the sun underneath, so those dots disappear. Only the darker rim prints, as a classic comic-book shading.
- A few dots on the rim stick out past the circle. Cmd-click the
Sunlayer's thumbnail to select the disc. Choose Select → Inverse, click theSun Dotsrow and press Delete. Press Cmd+D.
- Press Cmd+D, then choose Filter → Halftone…. Set Dot Size to
-
Drop in the grain-elevator photo
- Click
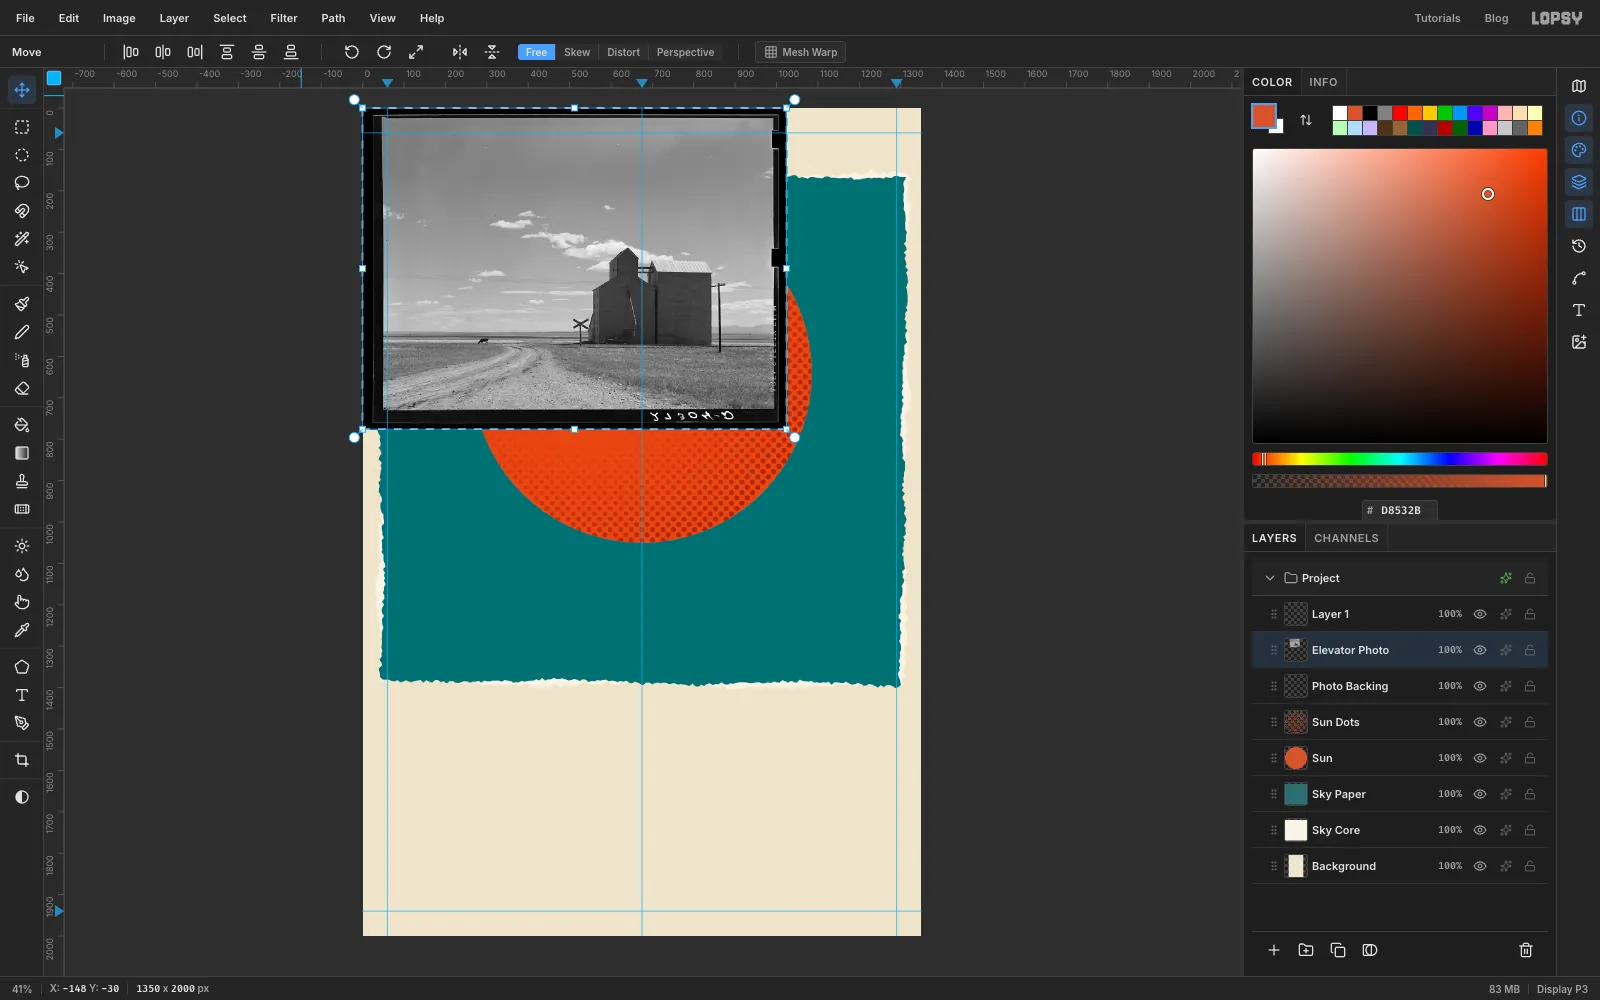
Sun Dotsand add a layer namedPhoto Backing. Leave it empty for now. It will become the white paper the photo is glued to. - Drag the grain-elevator JPEG from your desktop onto the canvas. It lands in the top-left corner at its own size, selected, on a new layer above
Photo Backing. Rename that layerElevator Photo. - Press Enter, then Cmd+D.
- Click
-
Scissor-cut the elevator and the land
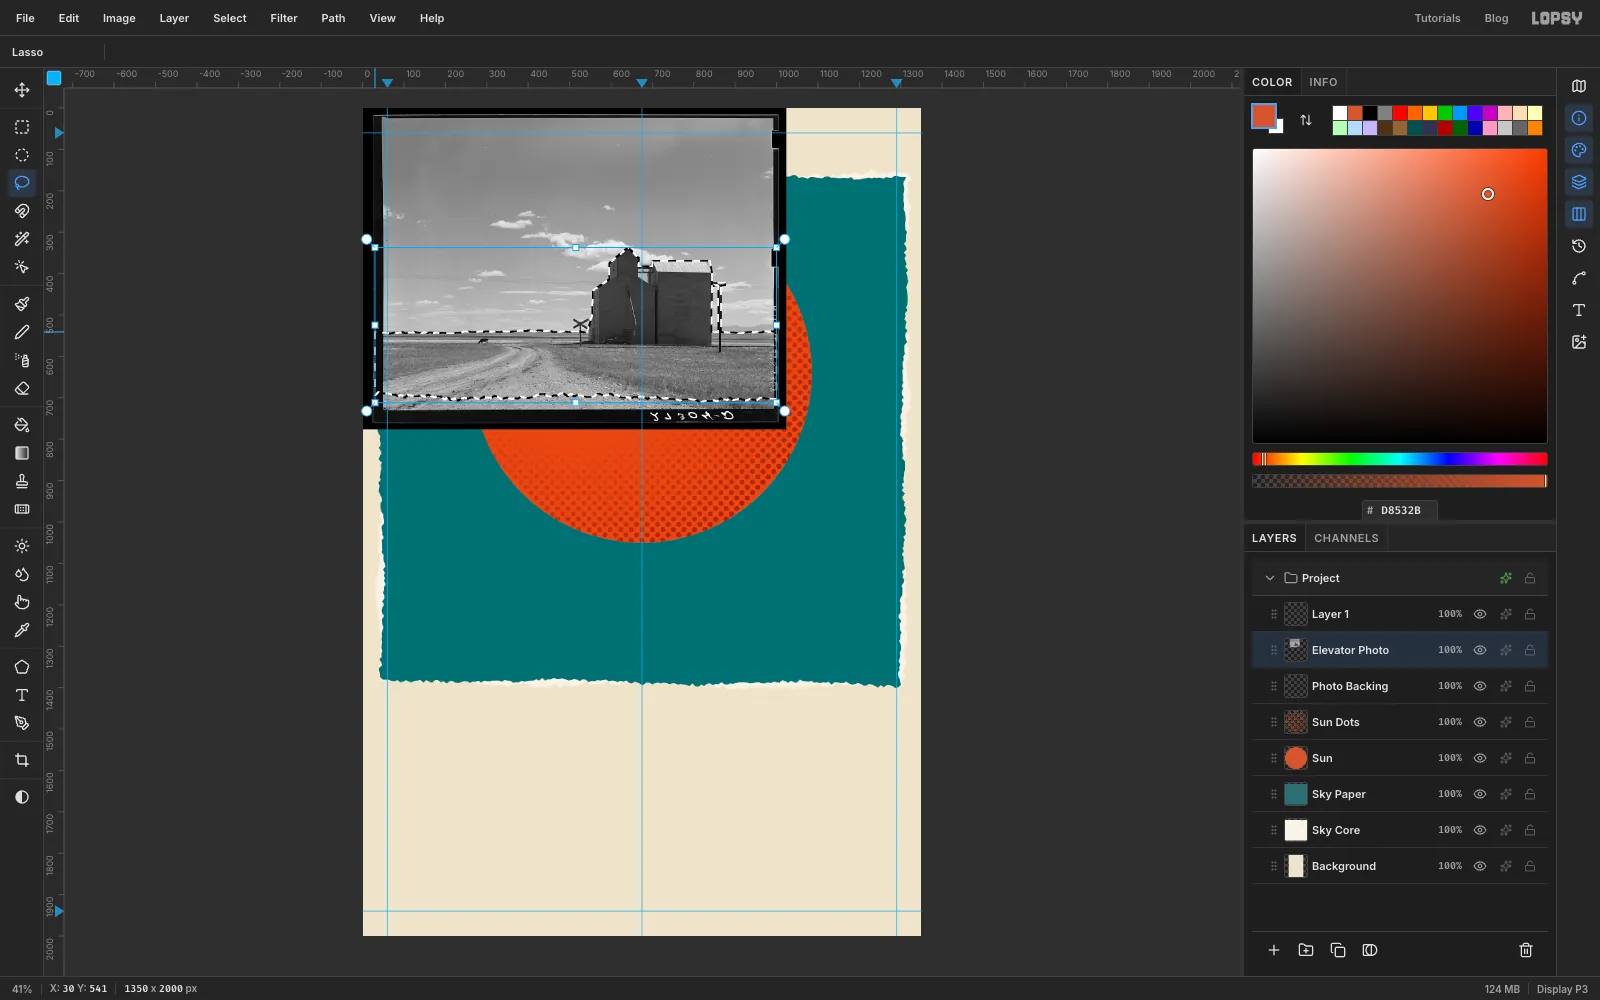
You'll keep the land below the horizon, the elevator and the telephone pole, and throw away the sky and the film border.
- Press L for the Lasso. Start on the horizon at the photo's left edge, just inside the dark film border (about
30, 541). Drag right along the horizon, letting it wobble a little. - At the elevator's left wall, go up and trace around the building with straight runs: up the low lean-to, along the roof slopes, over the peaked head-house, across the little bridge and along the big building's roof, then down its right wall to the horizon.
- Trace up one side of the telephone pole, around its crossarm and down the other side. Then carry on along the horizon to the right edge of the photo (about
x 1000). - Go down the right side to about
y 700and tear a ragged line back to the left. Stay above the scratched lettering at the bottom of the film. Go up the left side to where you started. - Choose Select → Inverse and press Delete. Press Cmd+D.
- Press L for the Lasso. Start on the horizon at the photo's left edge, just inside the dark film border (about
-
Scale the photo and set it on the horizon
- Cmd-click the
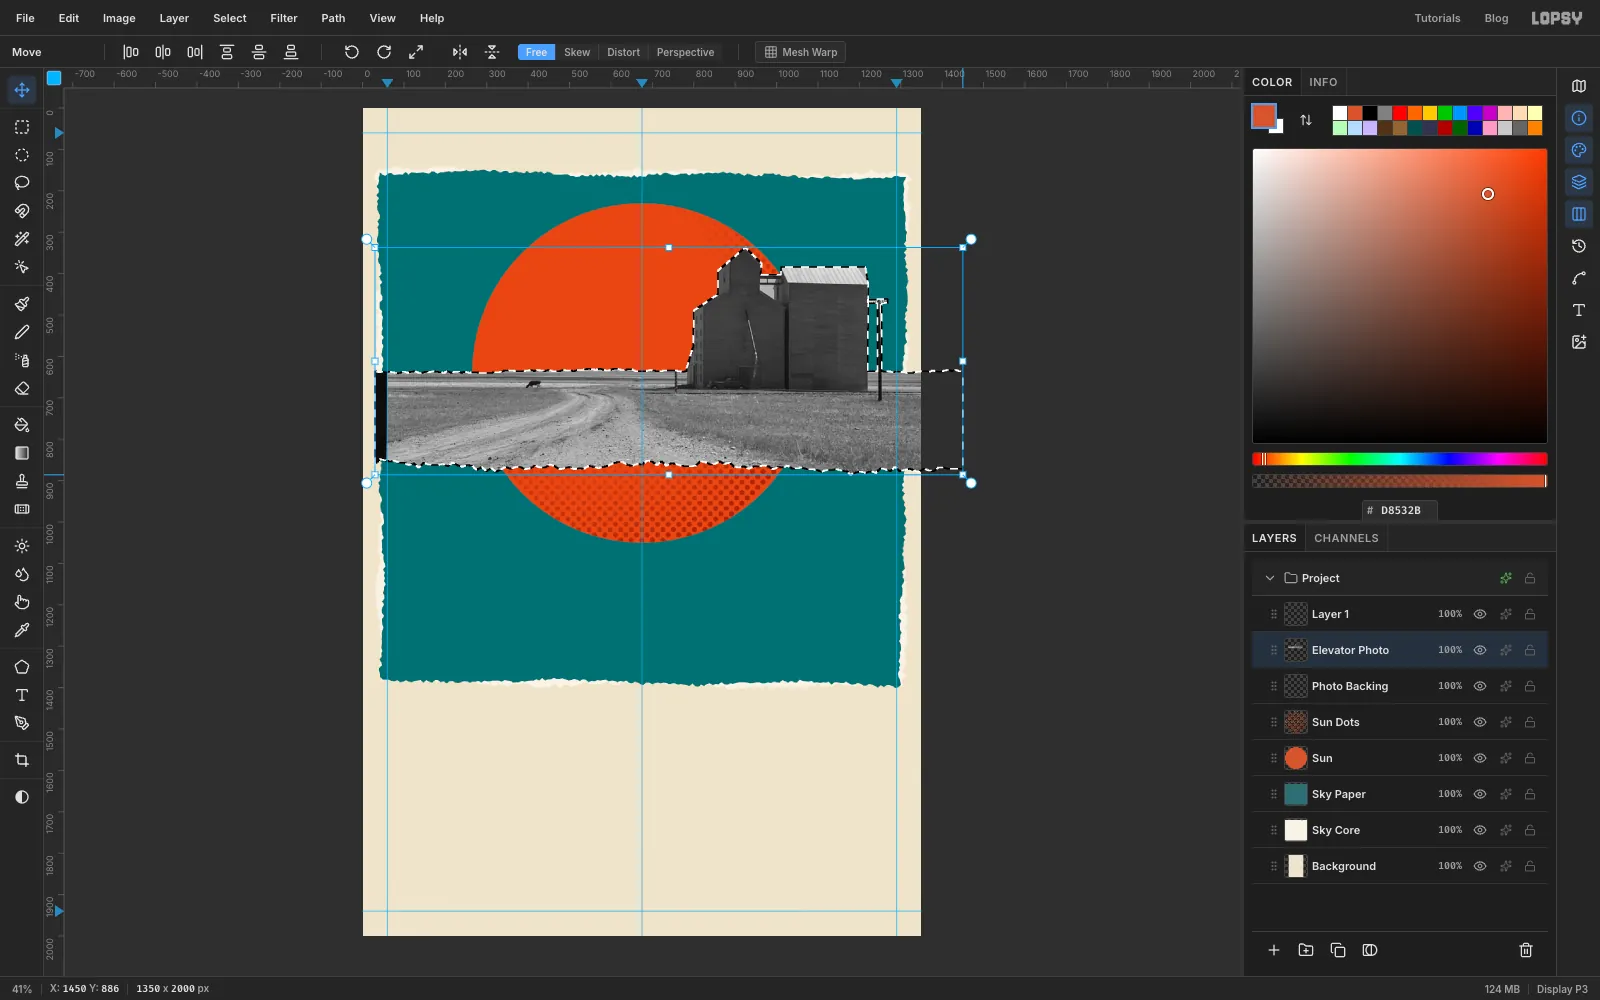
Elevator Photothumbnail. Press V for the Move tool, and handles appear around the cut-out. - Hold Cmd and drag the bottom-right handle down and to the right until the right edge of the cut-out reaches about
x 1450on the top ruler. That makes it about 1420 px wide. Cmd keeps the proportions. Press Enter, then Cmd+D. - With nothing selected, drag the photo down and slightly left so the horizon sits at
y 1330and the peak of the elevator's head-house is nearx 860. The field overhangs both sides of the canvas, which is what you want. Use the arrow keys for the last few pixels.
- Cmd-click the
-
Back the photo with white paper
A clipped photo has a sliver of white paper around it. You'll make it on the empty layer below.
- Cmd-click the
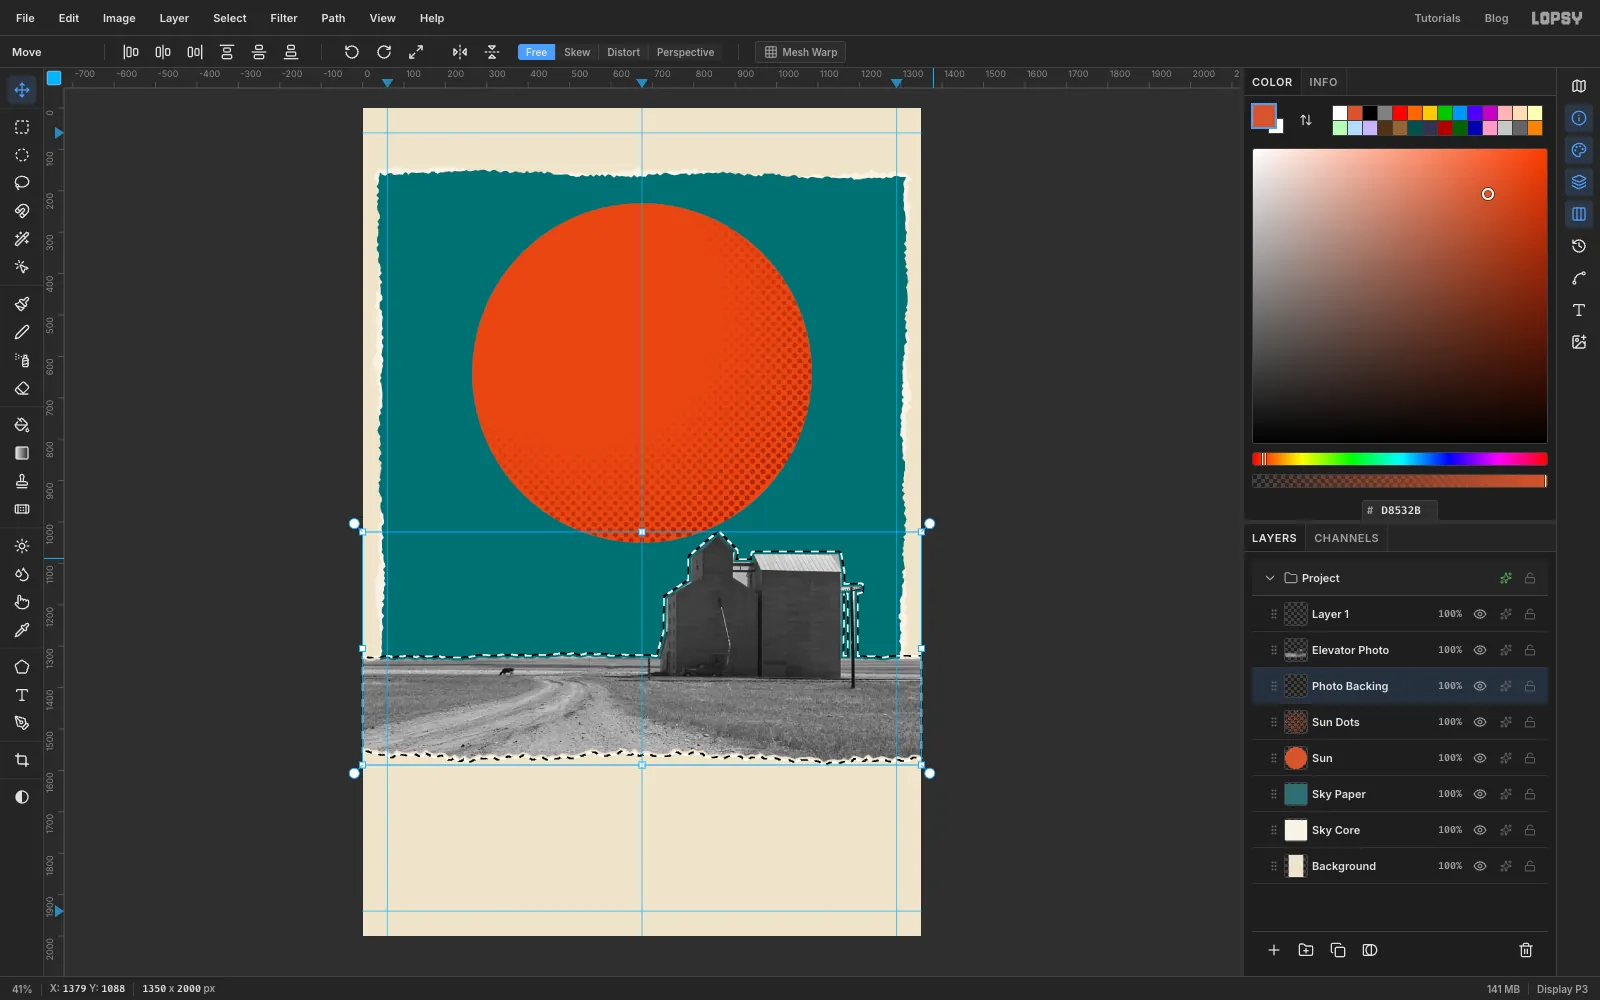
Elevator Photothumbnail, then click thePhoto Backingrow. - Choose Select → Grow…, enter
7and click Apply. - Fill with
F8F3E6and press Cmd+D. The elevator and the torn edges now have a white margin.
- Cmd-click the
-
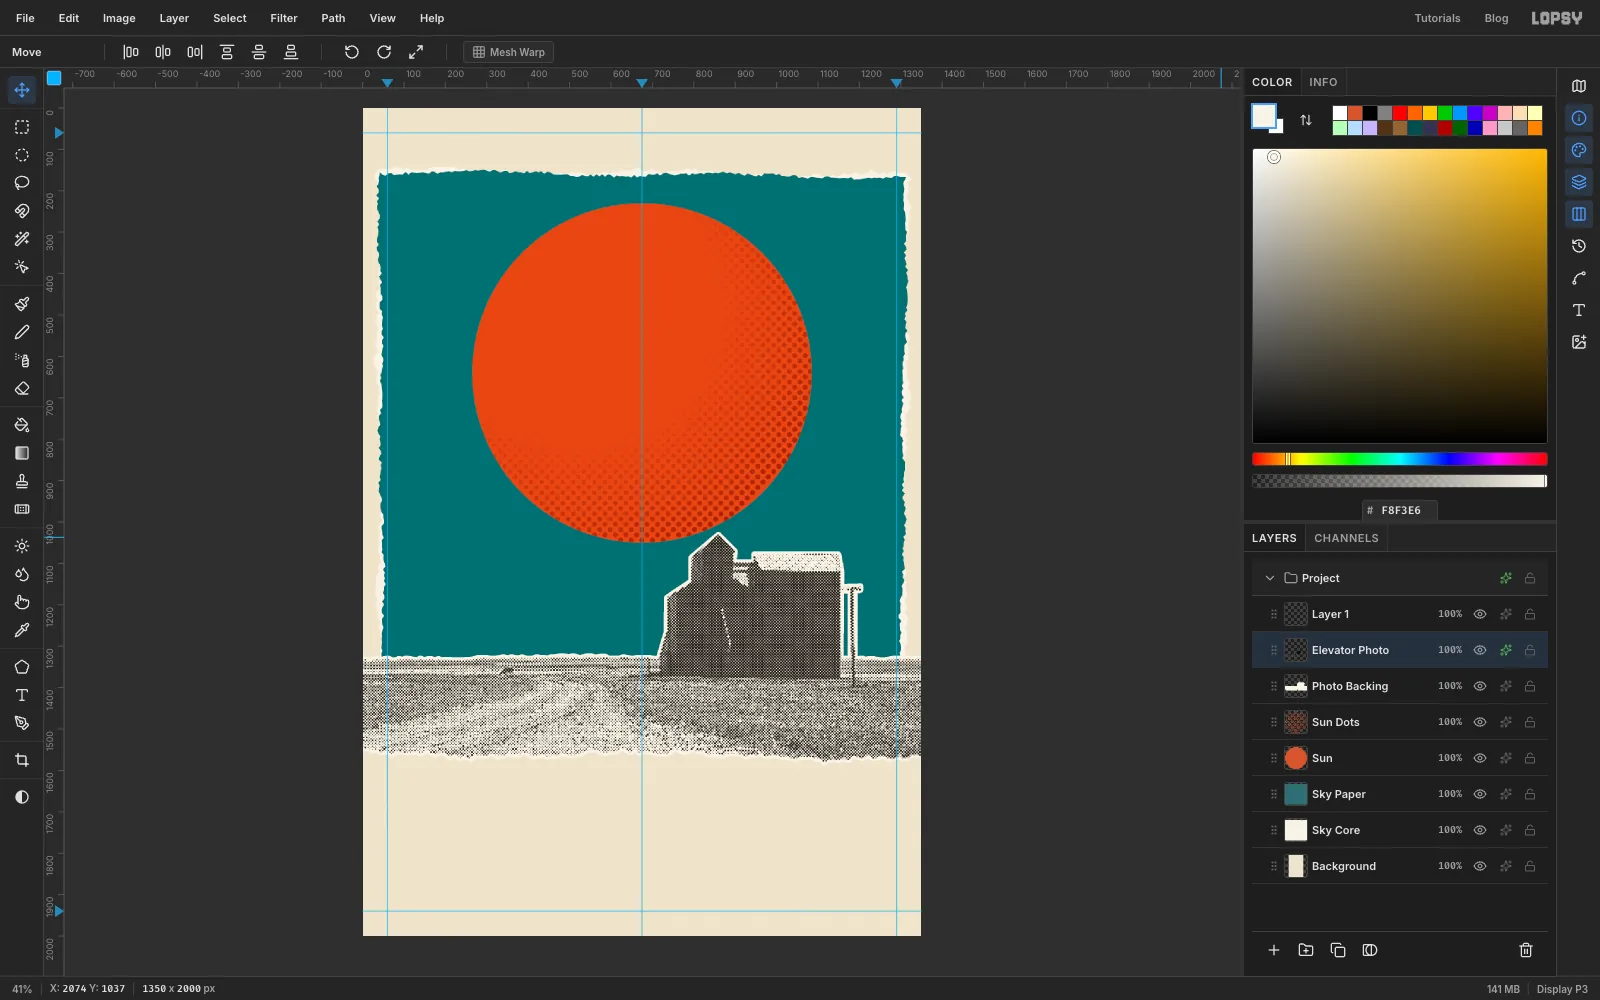
Print the photo as newsprint
- Click
Elevator Photo. Choose Filter → Brightness/Contrast…, set Brightness to-20and Contrast to32, and click Apply. Darkening it keeps dots on the pale roofs. - Choose Filter → Unsharp Mask…, set Radius to
3and Amount to1.4, and click Apply. This brings the siding and windows forward. - Choose Filter → Halftone…, set Dot Size to
5, Angle to45and Softness to0.4, and click Apply. - The dots are still grey. Click the layer's effects button (the sparkle icon on its row), tick Color Overlay and set its colour to
1F1B17. Every dot now prints in the same ink, like a real newspaper picture. Close the drawer.
- Click
-
Tint the field mustard
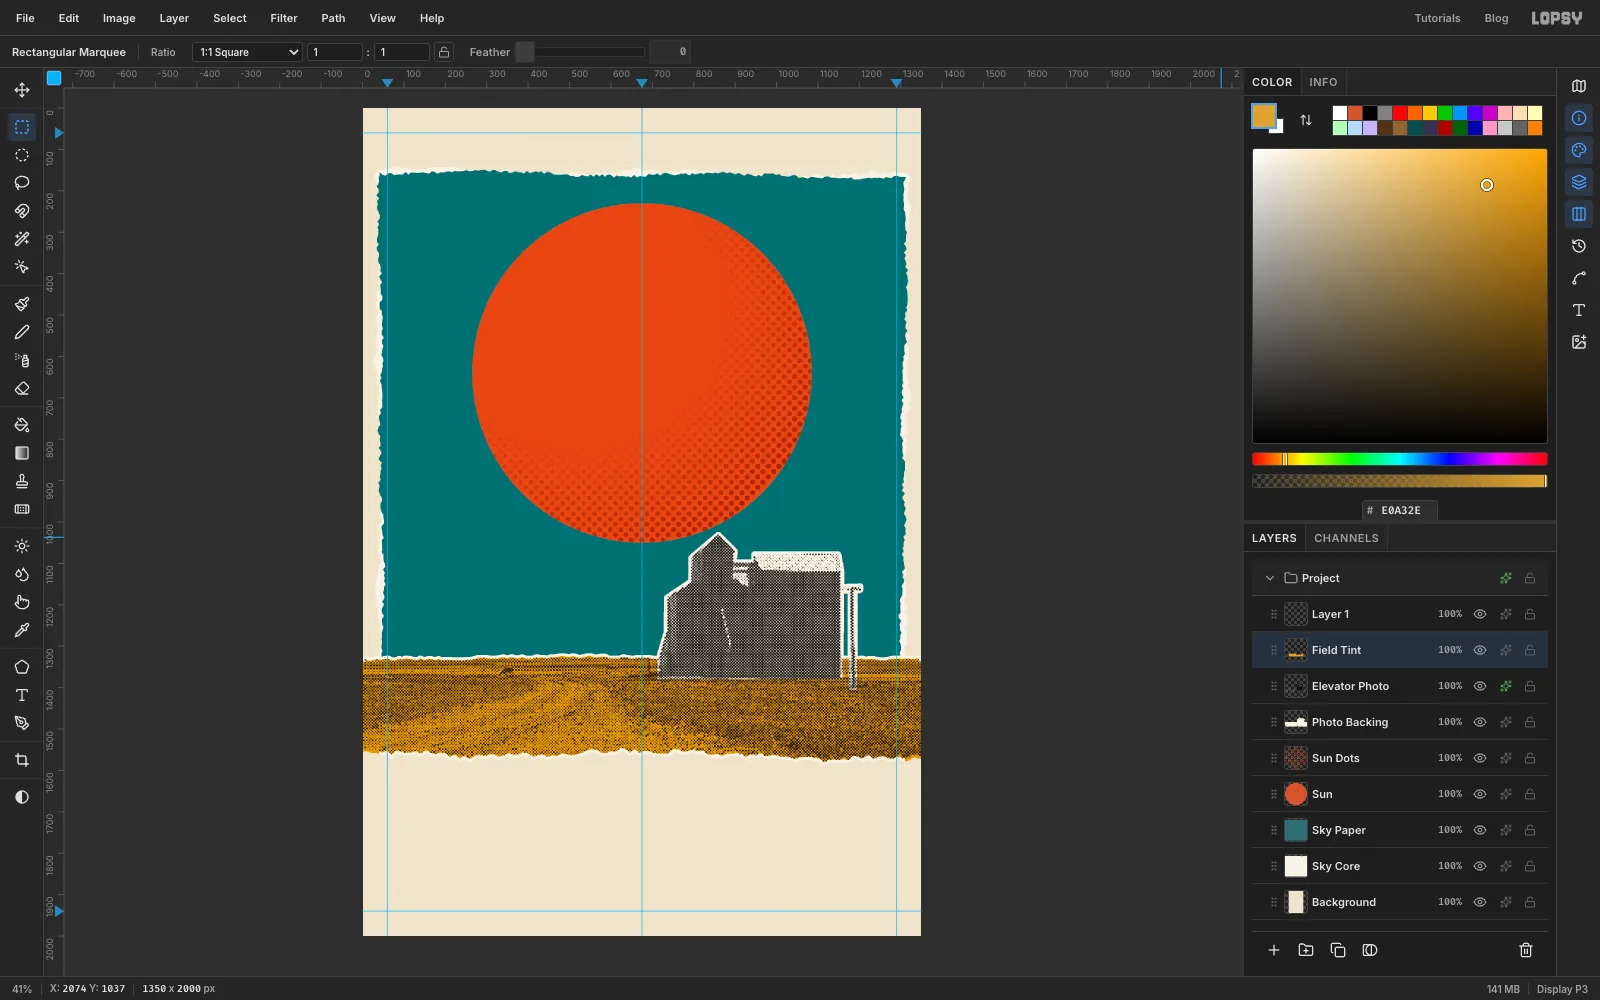
- Add a layer named
Field TintaboveElevator Photo. - You need the photo's outline, but the halftone has filled
Elevator Photowith see-through gaps, so its thumbnail would only select dots. Use the backing instead: Cmd-click thePhoto Backingthumbnail, choose Select → Shrink…, enter7and click Apply. That's the photo's own outline again, torn horizon included. - Press M for the Rectangular Marquee. Hold Alt and drag from above the top-left corner of the canvas across to the right edge, stopping just above the horizon (about
y 1318). That takes away the elevator and the sky. The building's base and the foot of the pole still dip below the horizon, so Alt-drag a box over each, from just above the horizon down to where they meet the ground (abouty 1380for the elevator and1406for the pole). The mustard now stops at the building. - Fill with
E0A32E. - Shrink also pulls in from the canvas edges, so a 7 px strip of field is missing at each side. Drag a narrow marquee down the left edge of the field, from just below the horizon to below the torn bottom edge, starting off the canvas. Hold Shift and drag a matching one down the right edge, then choose Edit → Fill again.
- Trim the spill: Cmd-click the
Photo Backingthumbnail, choose Select → Inverse, clickField Tintand press Delete. Press Cmd+D. - Open the effects drawer and set Blend to Multiply. The ink dots stay dark and the paper between them turns to wheat.
- Add a layer named
-
Cut out the locust with the Magic Wand
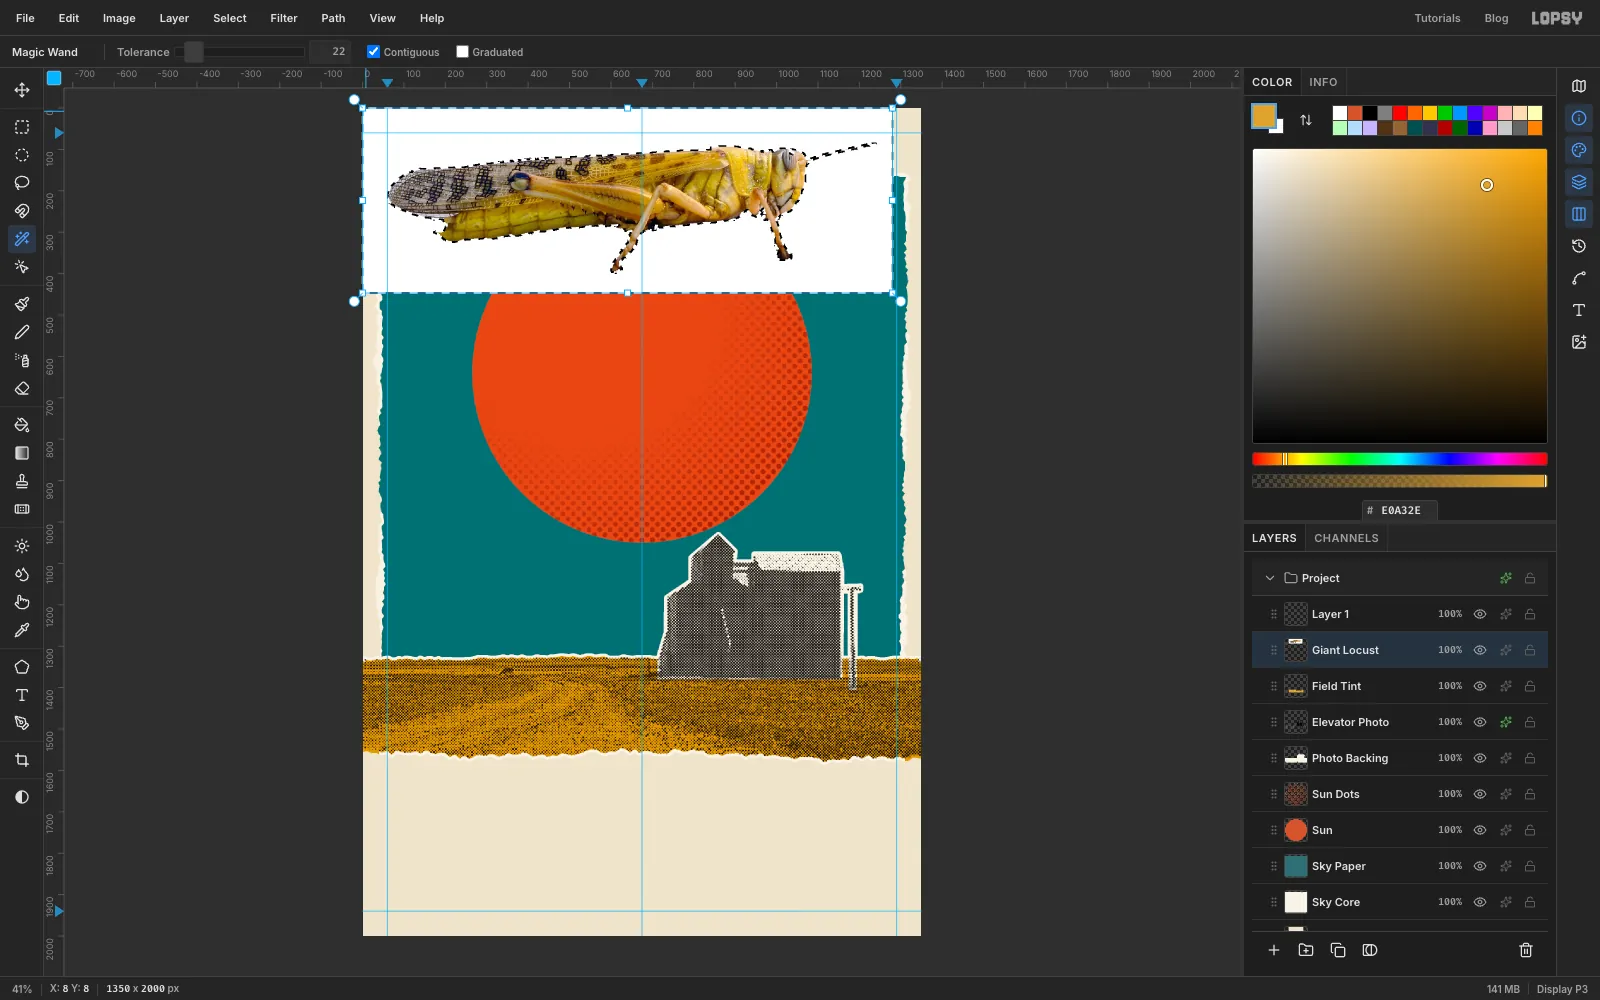
- Click
Field Tint, then drag the desert-locust JPEG onto the canvas. Rename the new layerGiant Locust, press Enter, then Cmd+D. - Press W for the Magic Wand. Set Tolerance to
22and leave Contiguous on. Click the white background near the top-left corner of the photo. - Choose Select → Grow… and enter
1. This takes the pale fringe along the edge with the background. Press Delete and Cmd+D. - The tip of the abdomen, at the far left under the wing, has a notch that looks like a broken cut once the photo is enlarged. Lasso around the notch and the small lobe above it, so the line runs smoothly from the underside of the wing down to the pointed tip. Press Delete, then Cmd+D.
- Click
-
Tilt the locust into a dive
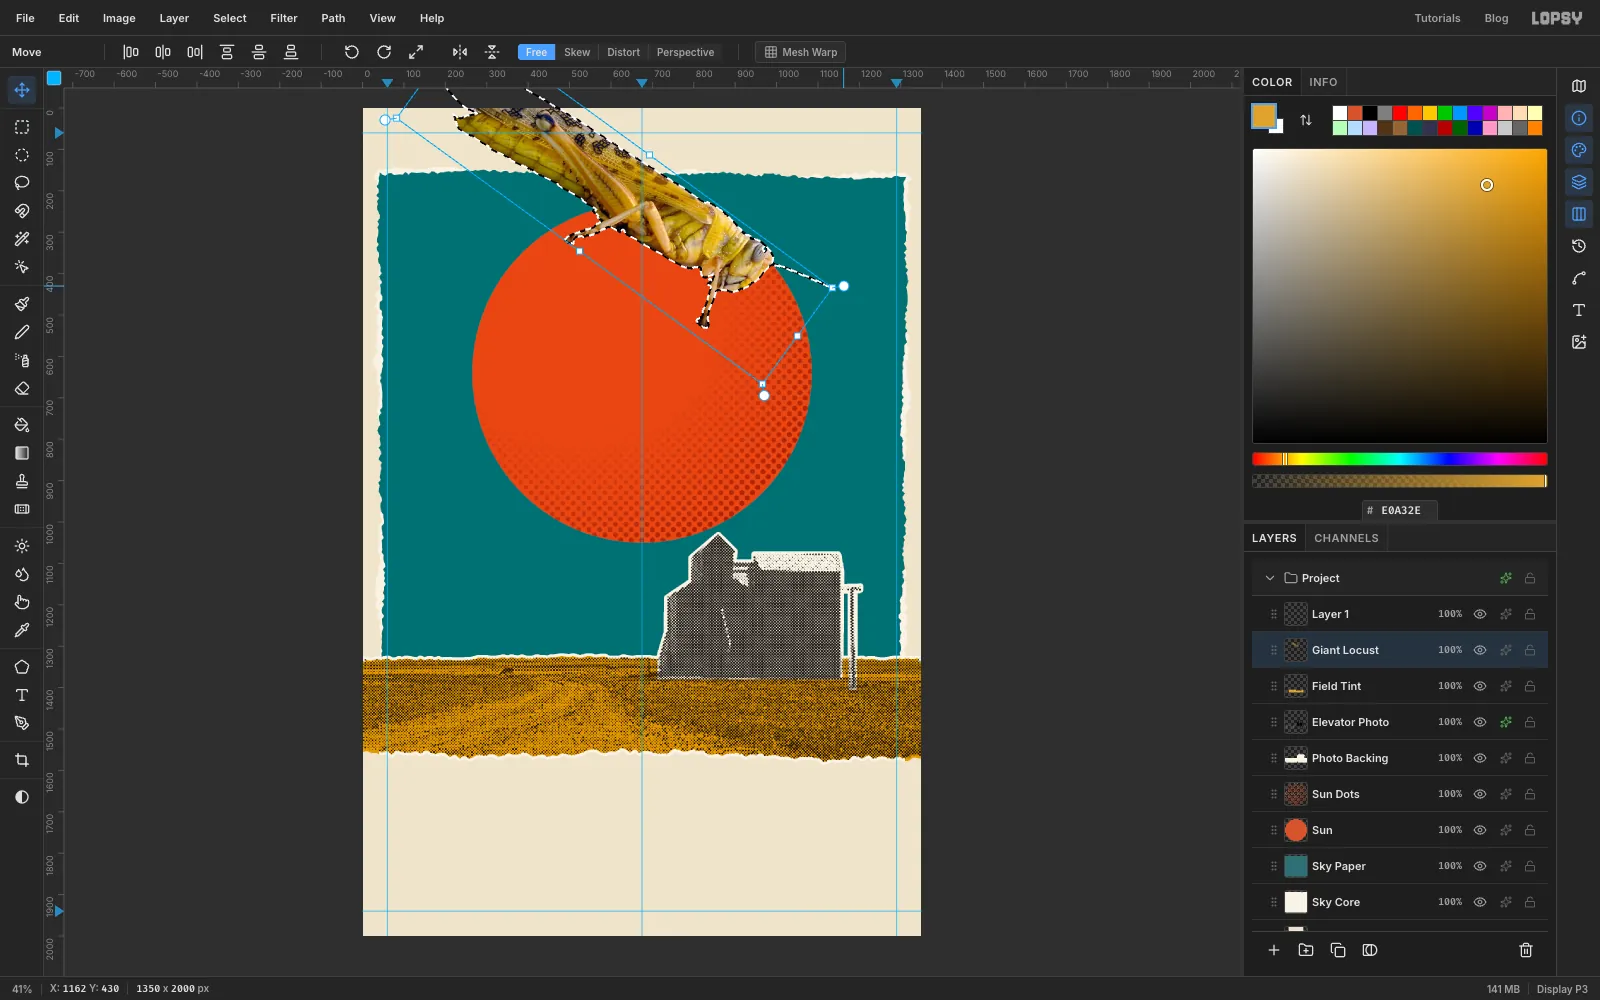
- Cmd-click the
Giant Locustthumbnail and press V. - Hold Cmd and drag the bottom-right handle in a little, about 80 px to the left, to make it slightly smaller.
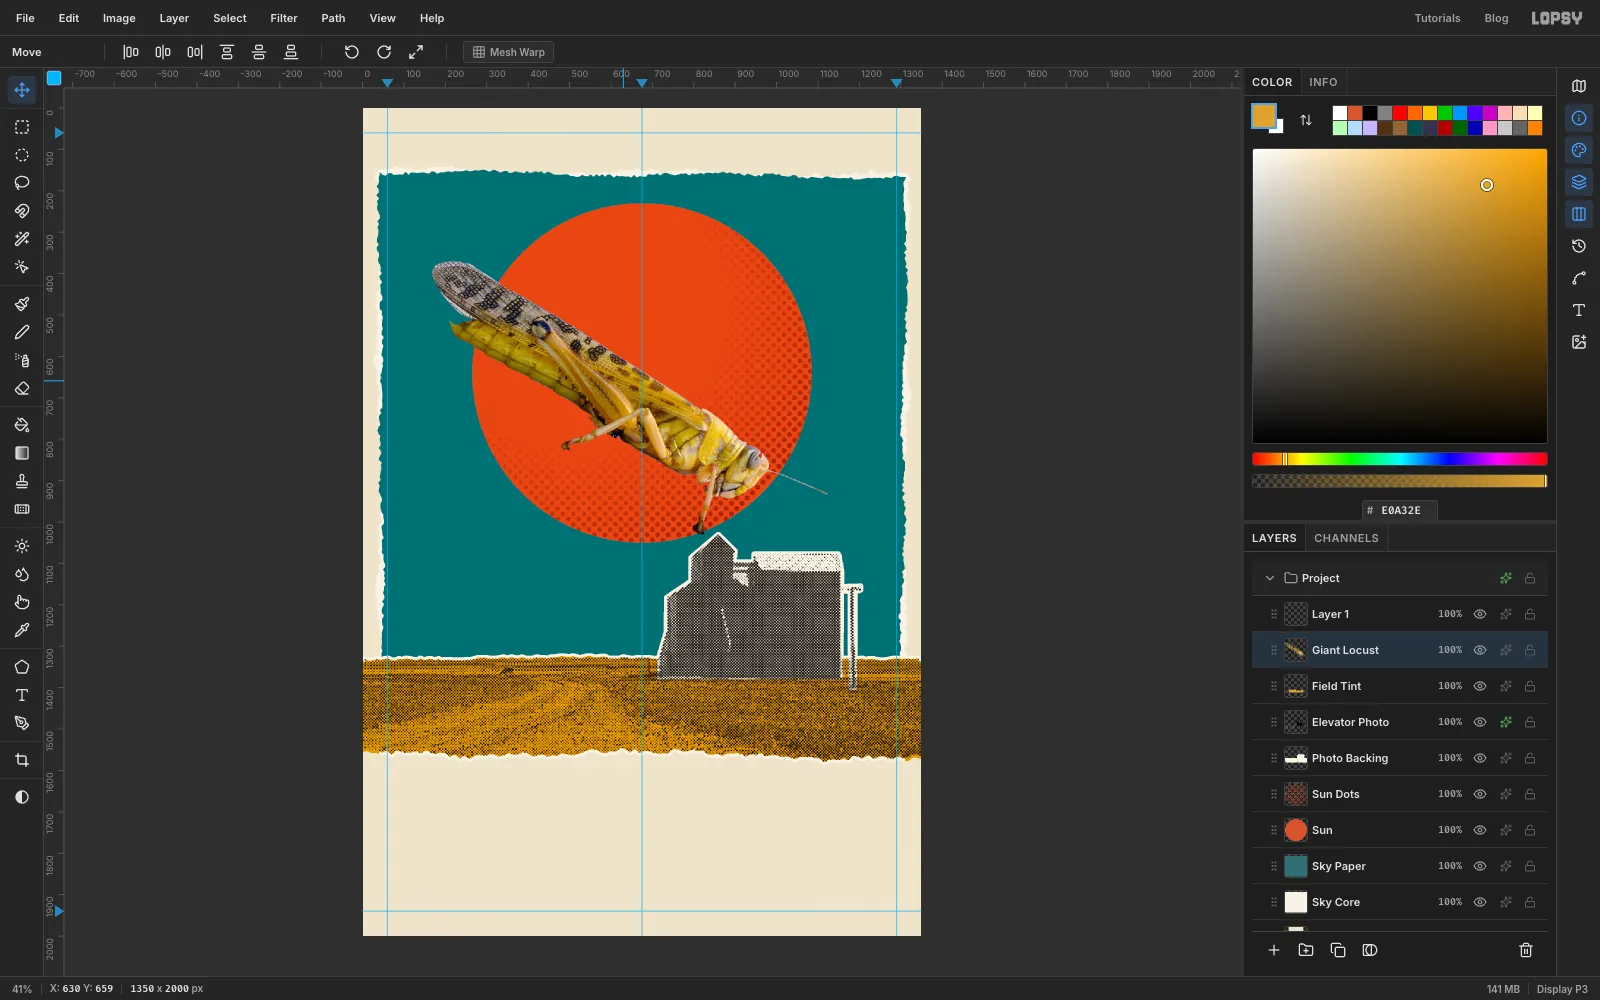
- Move the pointer just outside the top-right corner until it turns into the rotate cursor. Drag clockwise until the locust is diving steeply, about 36°: its head points down to the right and the wing tip rises above the top of the canvas. Press Enter.
The wing tip now sticks out above the top of the canvas. That's fine: Lopsy keeps pixels that go past the edge.
- Cmd-click the
-
Place the locust over the sun
- Press Cmd+D so that nothing is selected.
- With the Move tool, drag the locust down until its body is centred on about
645, 700. Its front foot should hang just above the elevator's head-house.
-
Make a grasshopper brush
A swarm painted one silhouette at a time would take all day. Make the silhouette a brush tip instead.
- With
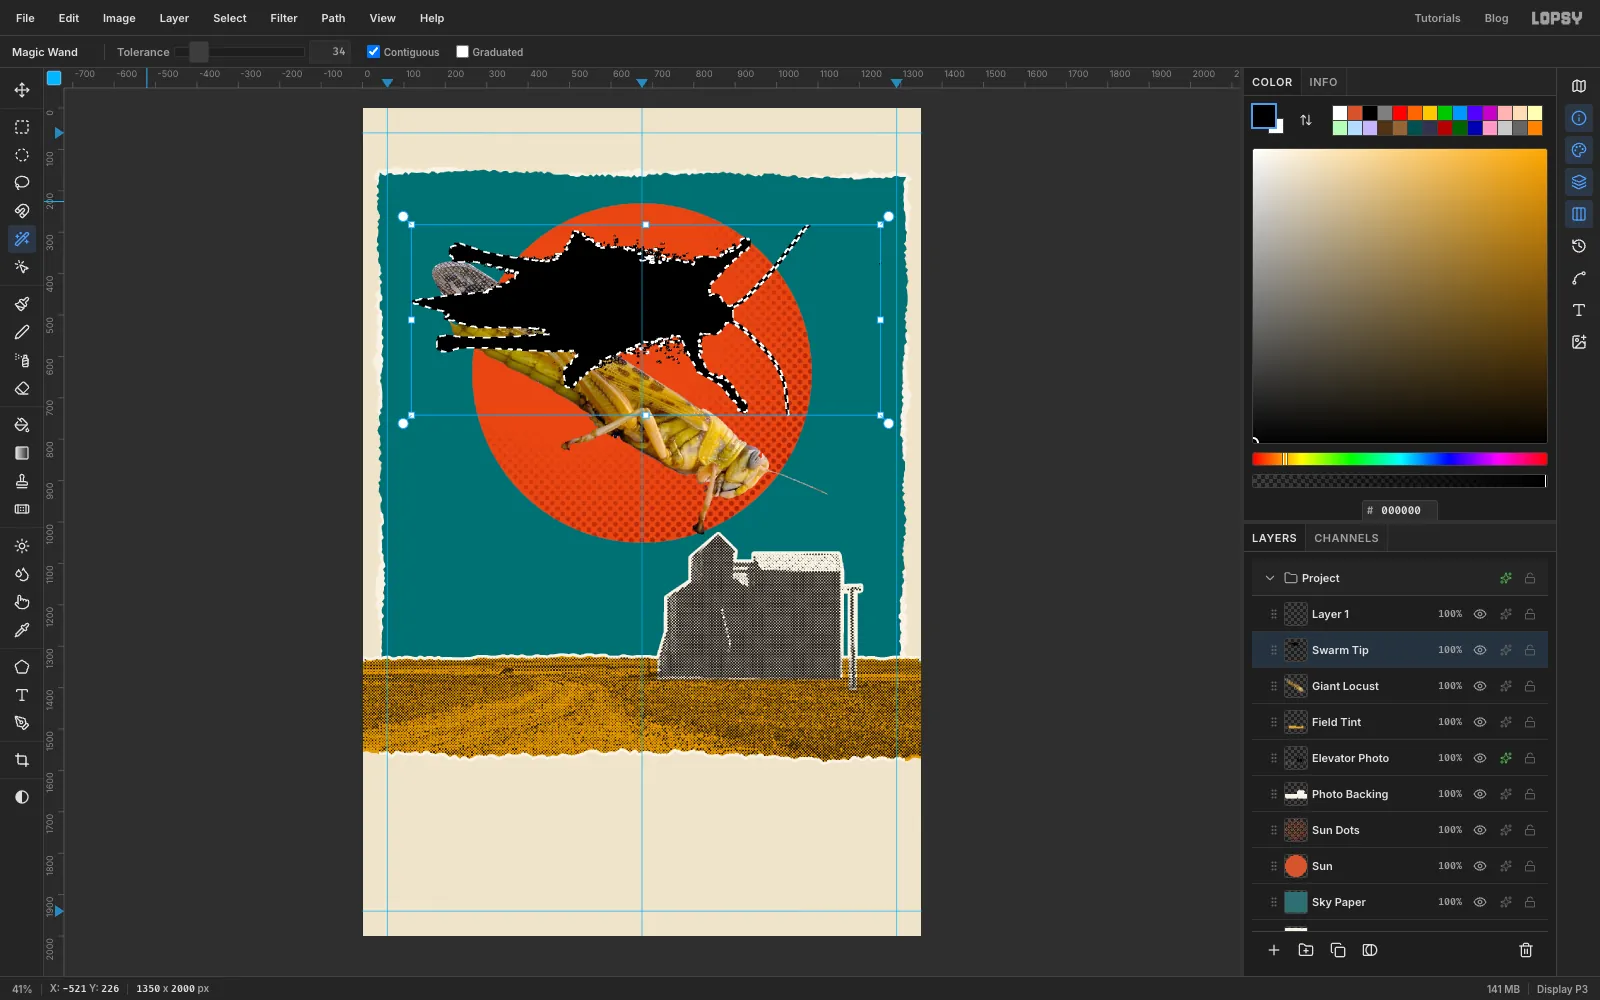
Giant Locustselected, drag the top-view grasshopper photo onto the canvas. Rename itSwarm Tip, press Enter and Cmd+D. - Press W, set Tolerance to
34, click the white background near a corner and press Delete. Press Cmd+D. - Cmd-click the
Swarm Tipthumbnail, set the foreground to000000and choose Edit → Fill. Define Brush makes dark pixels solid and light ones see-through, so a black silhouette gives a solid tip. - Keep the selection and choose Edit → Define Brush…. Name it
Locust Swarmand click OK. It becomes the active brush. - Press Cmd+D, then click the trash icon at the bottom of the Layers panel to delete
Swarm Tip. You only needed its shape.
- With
-
Set up the swarm brush
- Click
Field Tintand add a layer namedSwarm. It sits under the locust, so the giant flies in front of its swarm. - Press B for the Brush and set the foreground to
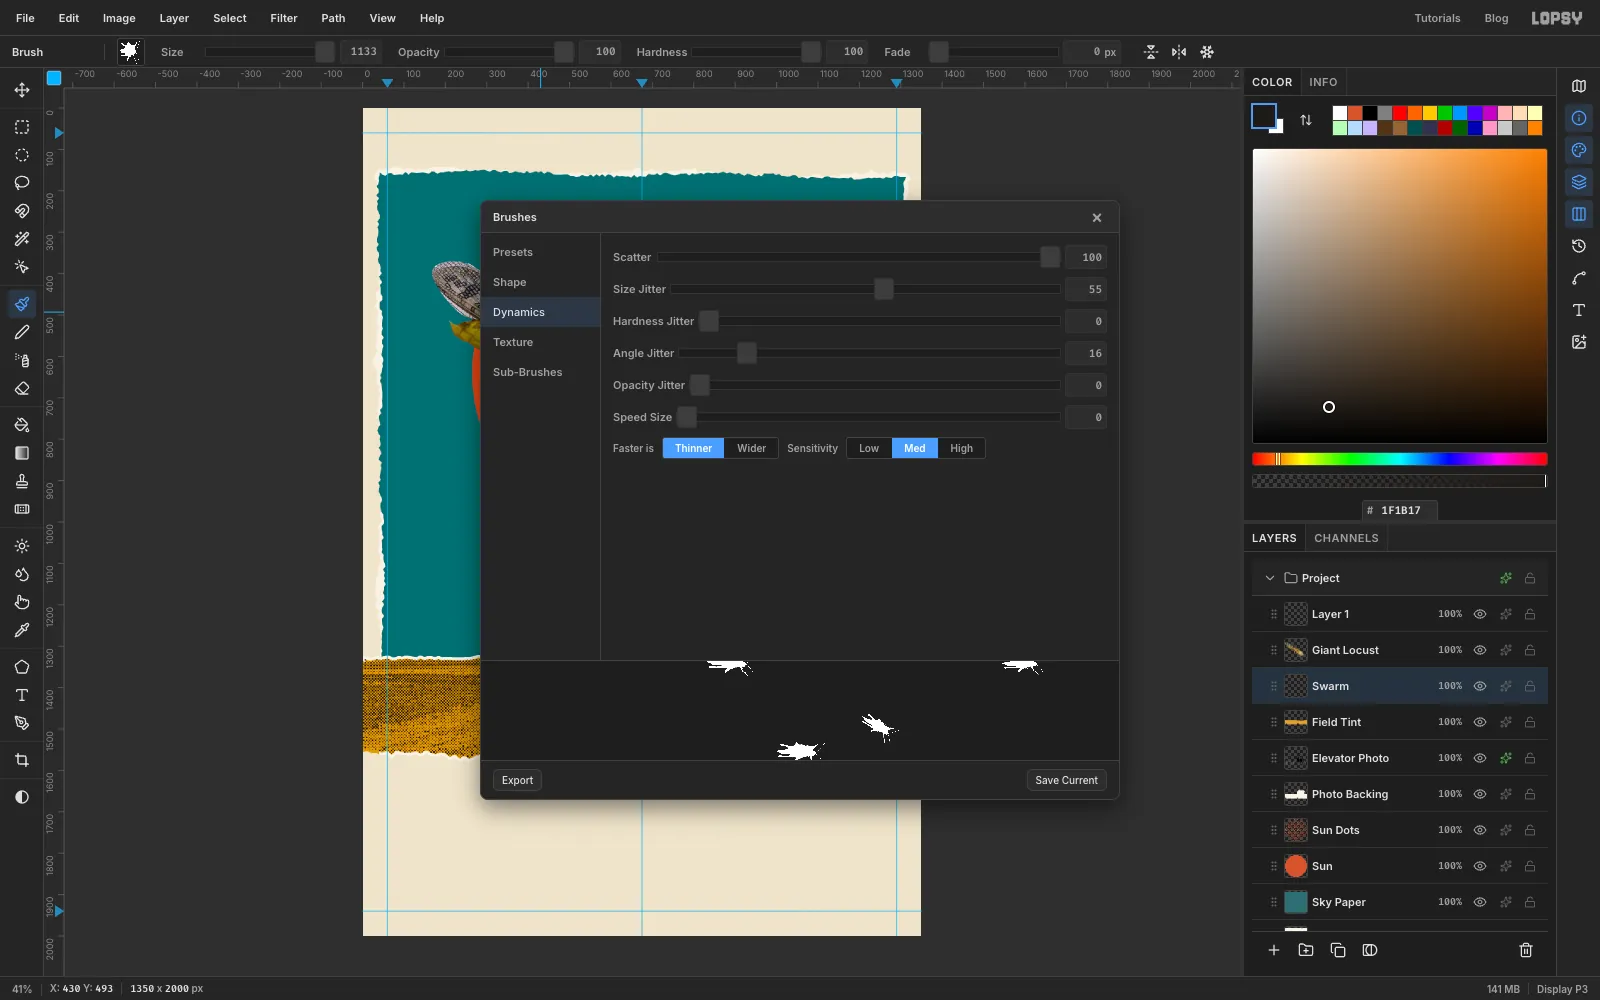
1F1B17. - Click the brush-tip thumbnail at the left of the options bar to open Brushes. On the Shape tab, set Spacing to
125and click the Angle dial at about14°, just below its right-hand side. The insects now fly right and slightly down. - On the Dynamics tab, set Scatter to
100, Size Jitter to55and Angle Jitter to16. Close the window.
Scatter throws each insect sideways off the stroke, Size Jitter varies their size, and Angle Jitter turns each one a little, so they don't all point the same way.
- Click
-
Paint the swarm
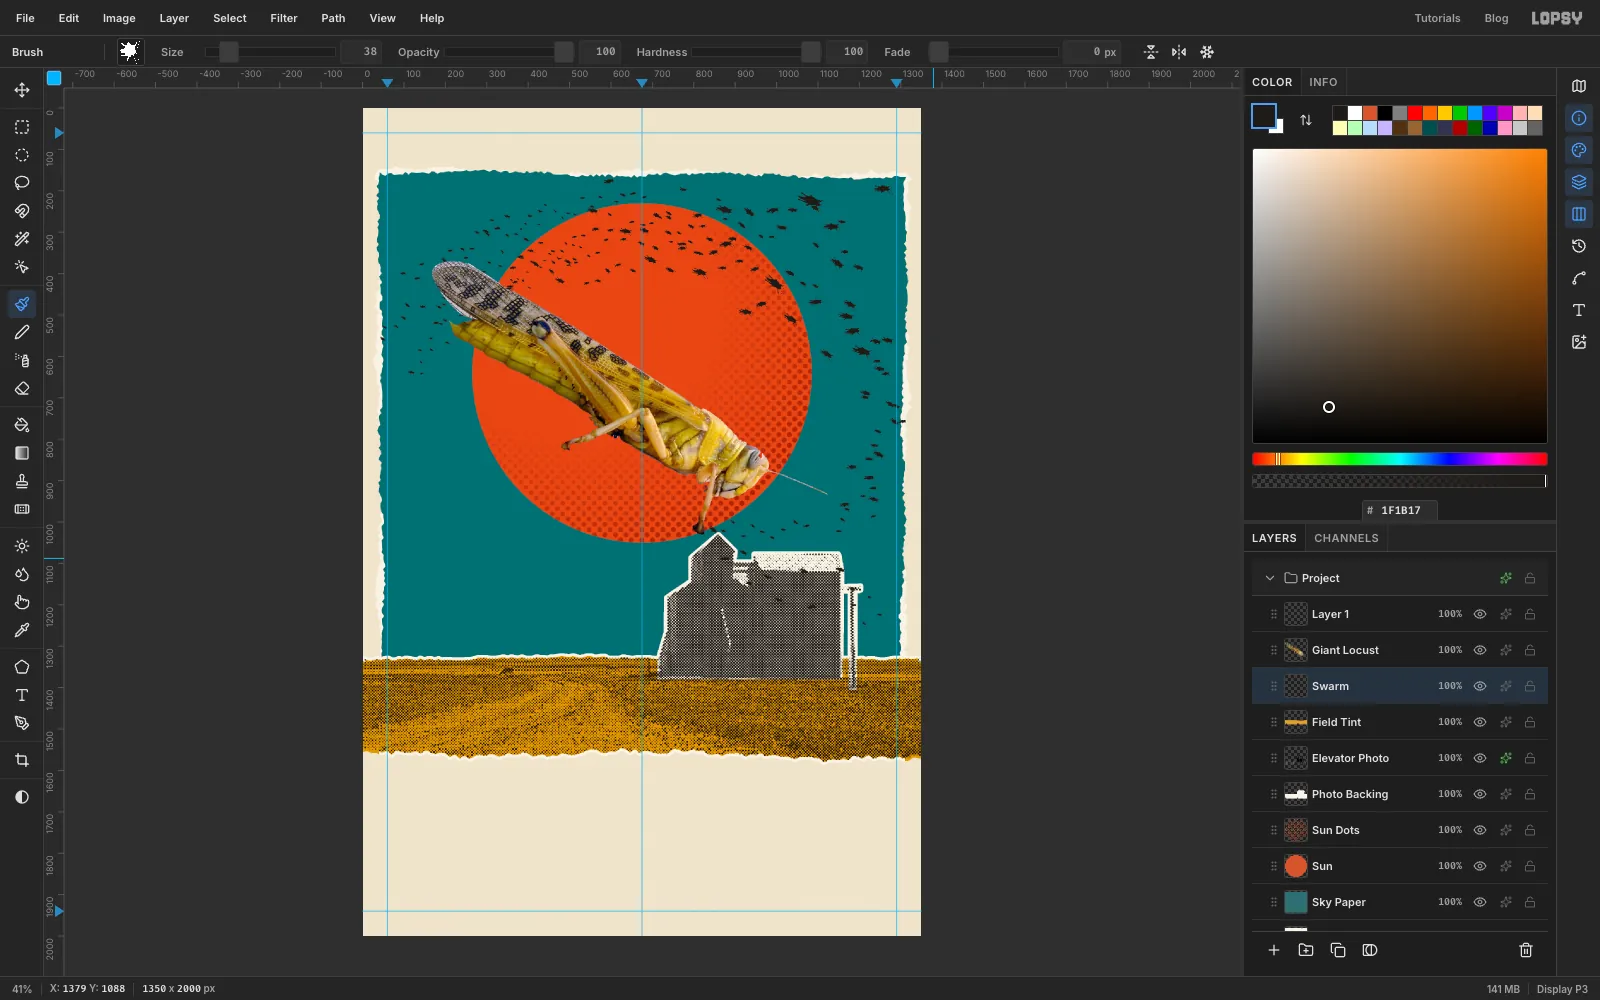
Paint from the distance toward the viewer. Use small sizes on the left and bigger ones as the swarm comes forward.
- Start small and far away. At Size
22, drag three or four gentle arcs from the left edge of the sky (aroundy 400–640) up toward the top of the sun. - Make each next stroke a little bigger and further right: about
26,30,38,46, then around60as the swarm crosses the top of the sun toward the upper-right corner. Overlap the strokes so the river looks thick in the middle and thin at its edges. - Add one stroke at Size
88near the top-right corner. These are the insects closest to the viewer. - Bring the swarm down onto its target. At Size about
50, drag two strokes down the right side of the sky, curving in toward the elevator's roof. Finish with two short strokes at about36along the roofline and across the elevator's wall. - Choose Filter → Gaussian Blur…, set Radius to
1and click Apply. This softens the stamped edges a touch, like printed ink.
- Start small and far away. At Size
-
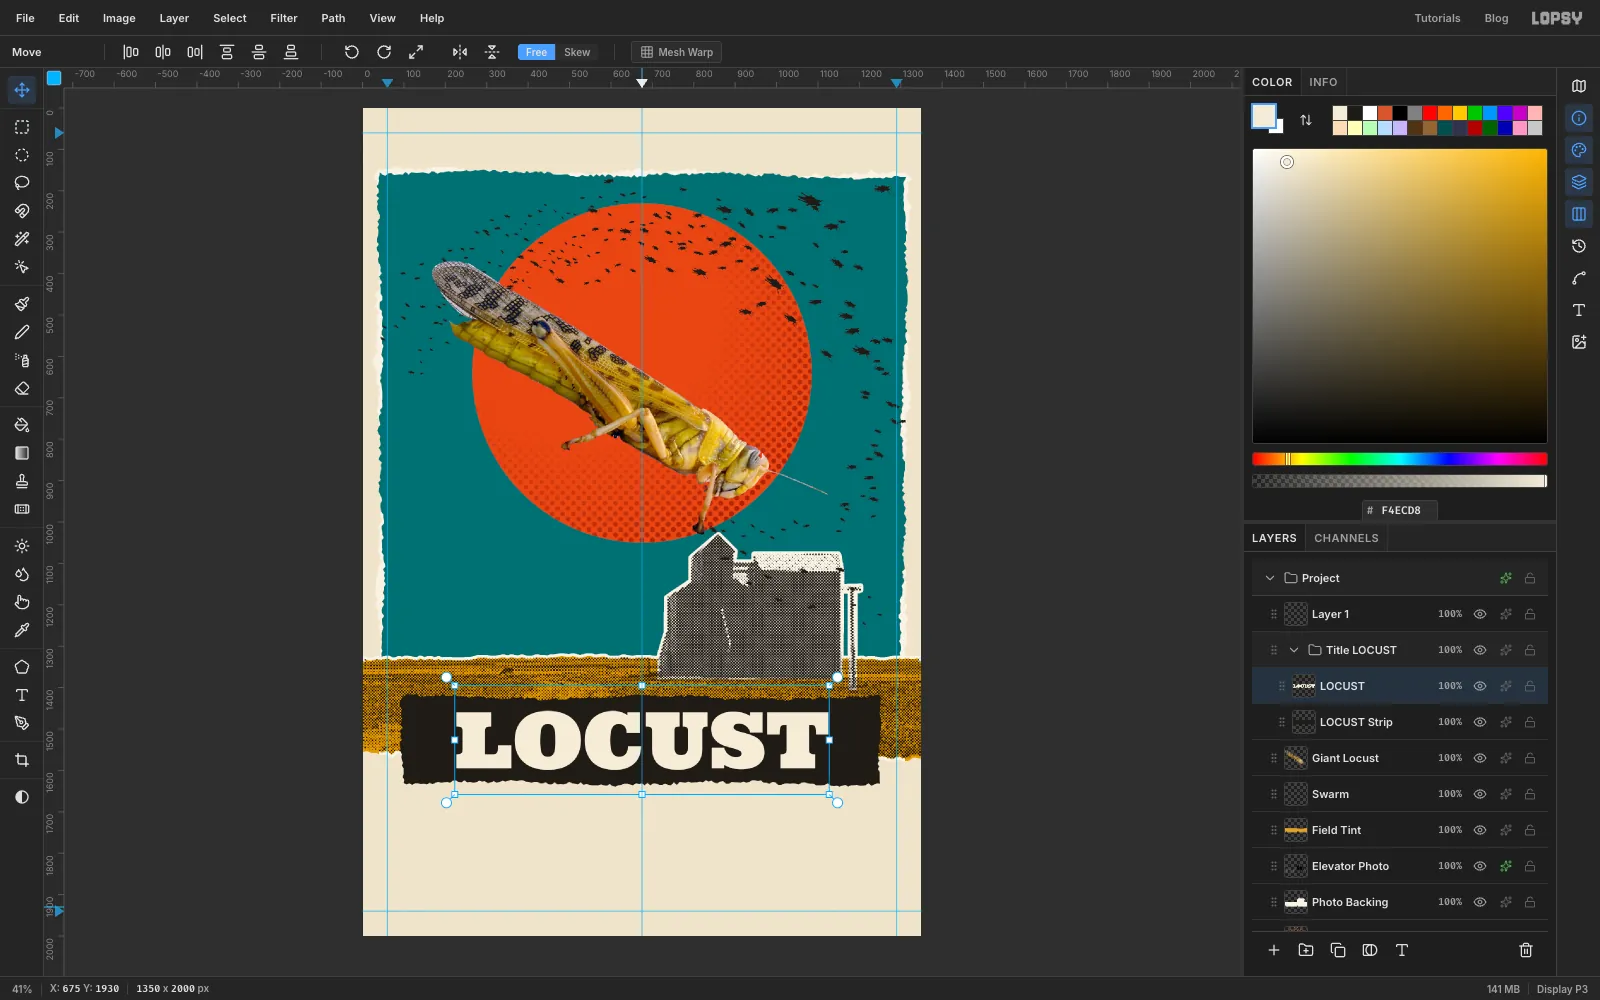
Tear the LOCUST strip and set the word
Each title word gets its own torn strip, and each strip and word share a group so they can be turned together.
- Click
Giant Locust, then click New Group at the bottom of the Layers panel. Name the groupTitle LOCUST. - With the group selected, add a layer named
LOCUST Strip. It goes inside the group. - Lasso a torn strip from about
96, 1422to1254, 1632. Make the long sides gently ragged and the ends more torn. Fill it with1F1B17and press Cmd+D. - Press T for the Text tool. In the options bar, choose Ultra, set Size to
188and Align to Center, and set the foreground toF4ECD8. - Click an empty spot of sky that has no other text on it, such as
675, 1300, and typeLOCUST. Press Tab to finish, then double-click the new layer's name and call itLOCUST. - Press V and drag the word down onto the strip. Then use the arrow keys (Shift moves 10 px) to centre it. Leave the same gap on the left and right (about 130 px) and on the top and bottom (about 40 px).
- Click
-
Rotate the strip and word together
- Click the
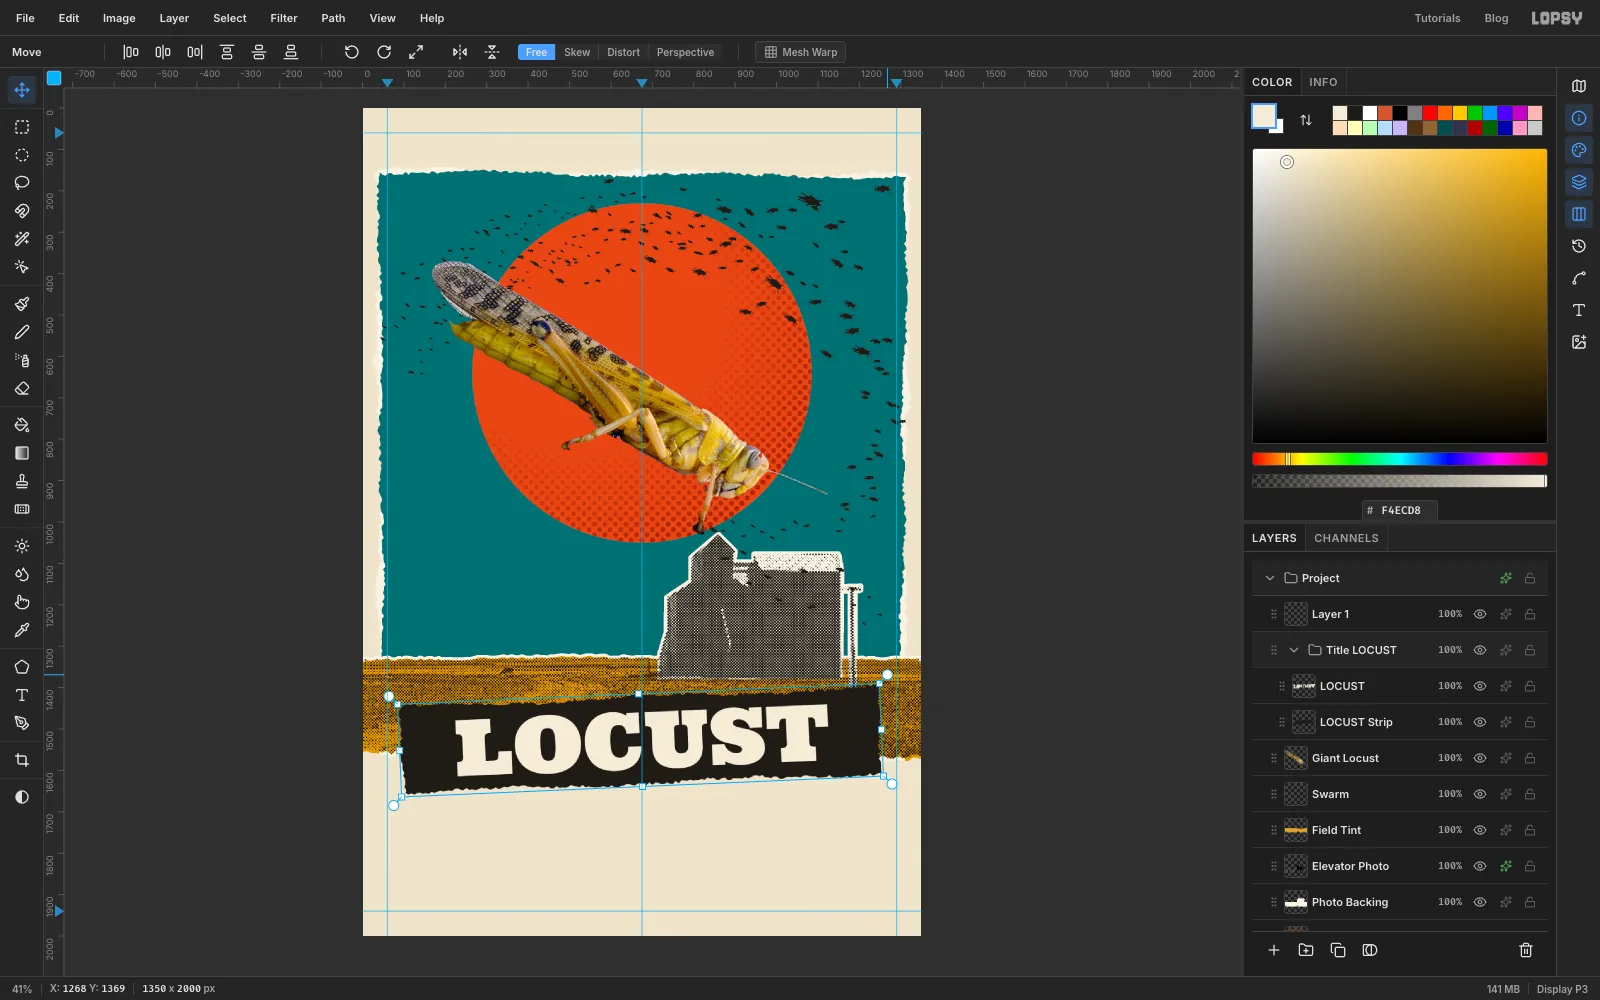
Title LOCUSTgroup row and press V. Handles appear around everything in the group. - Drag from just outside the top-right corner a short way upward, counterclockwise, until the strip's right end sits about 50 px higher than its left end (about 2.5°). Check the heights in the status bar. Press Enter.
The word is still live text. You can double-click to retype it and it stays tilted with its strip.
- Click the
-
Add the ARMADA strip
- Click
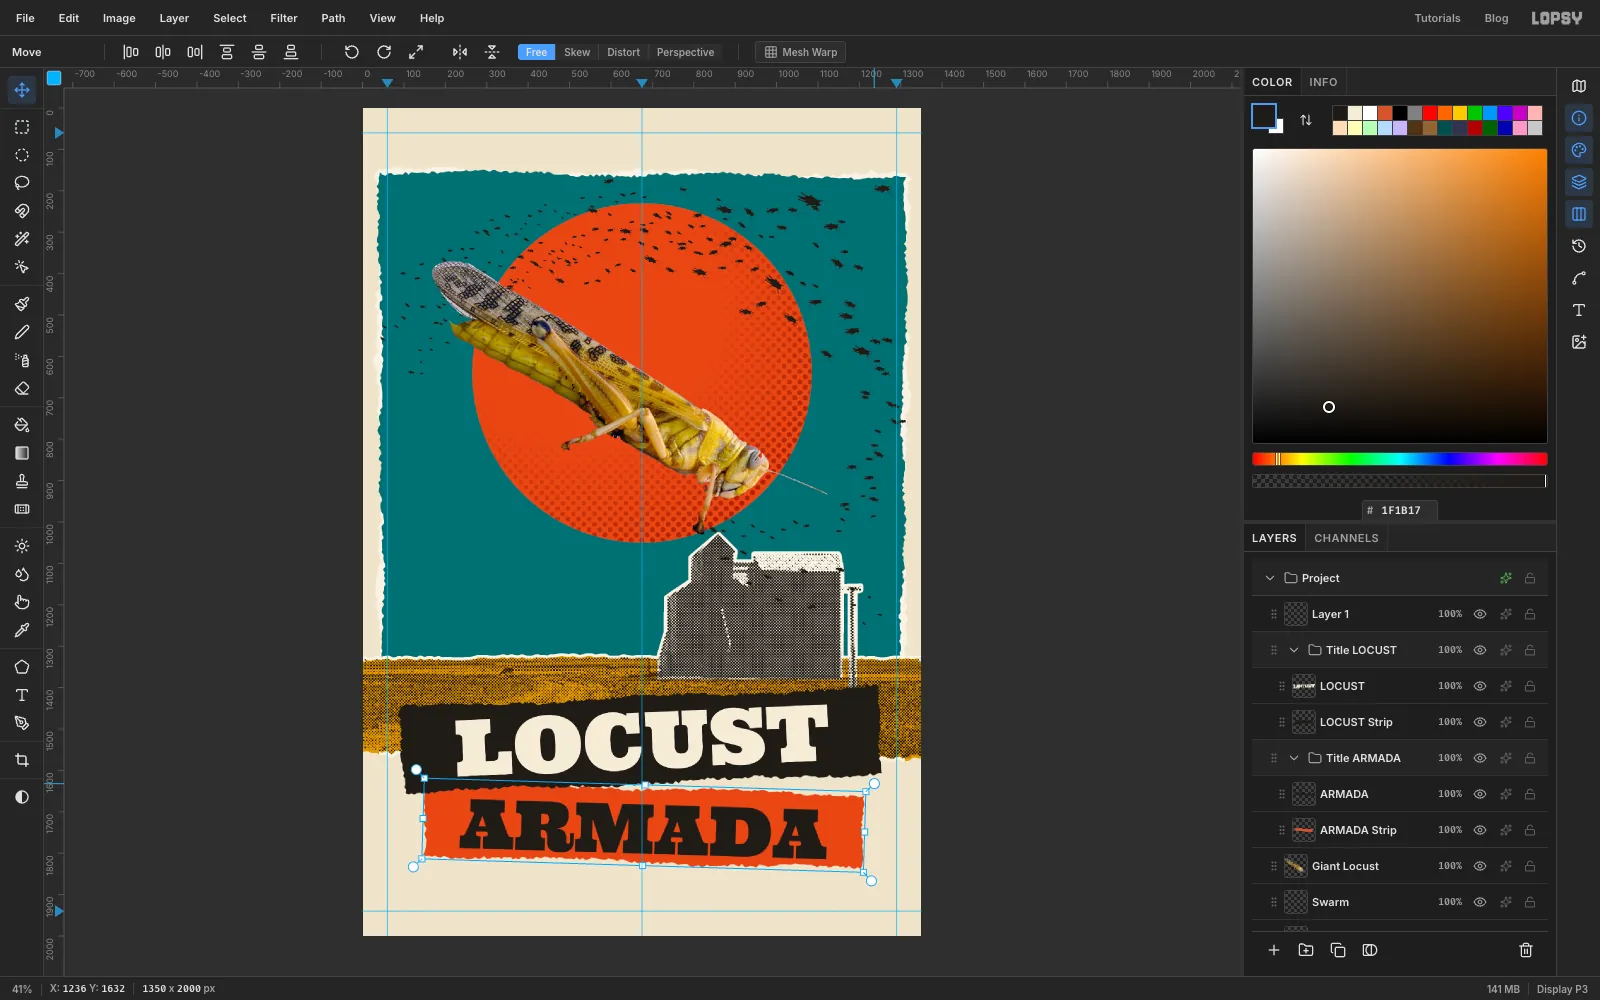
Giant Locustagain and click New Group. Name itTitle ARMADA. It sits below the LOCUST group, so the black strip overlaps the red one. - Add a layer named
ARMADA Strip. Lasso a torn strip from146, 1642to1210, 1822, fill it withD8532Band press Cmd+D. - Make a text layer with Ultra at Size
165in1F1B17, starting on the empty sky again, typeARMADAand name the layerARMADA. - Drag it onto the strip and centre it, then nudge it about 10 px lower. The black strip covers the top of the red one, so the word needs to sit lower to look centred in the red that shows.
- Select the
Title ARMADAgroup and rotate it clockwise, the opposite way to LOCUST, until the right end sits about 35 px lower than the left (about 1.8°). Press Enter.
- Click
-
Set the top line and billing block
Make each line of type by clicking
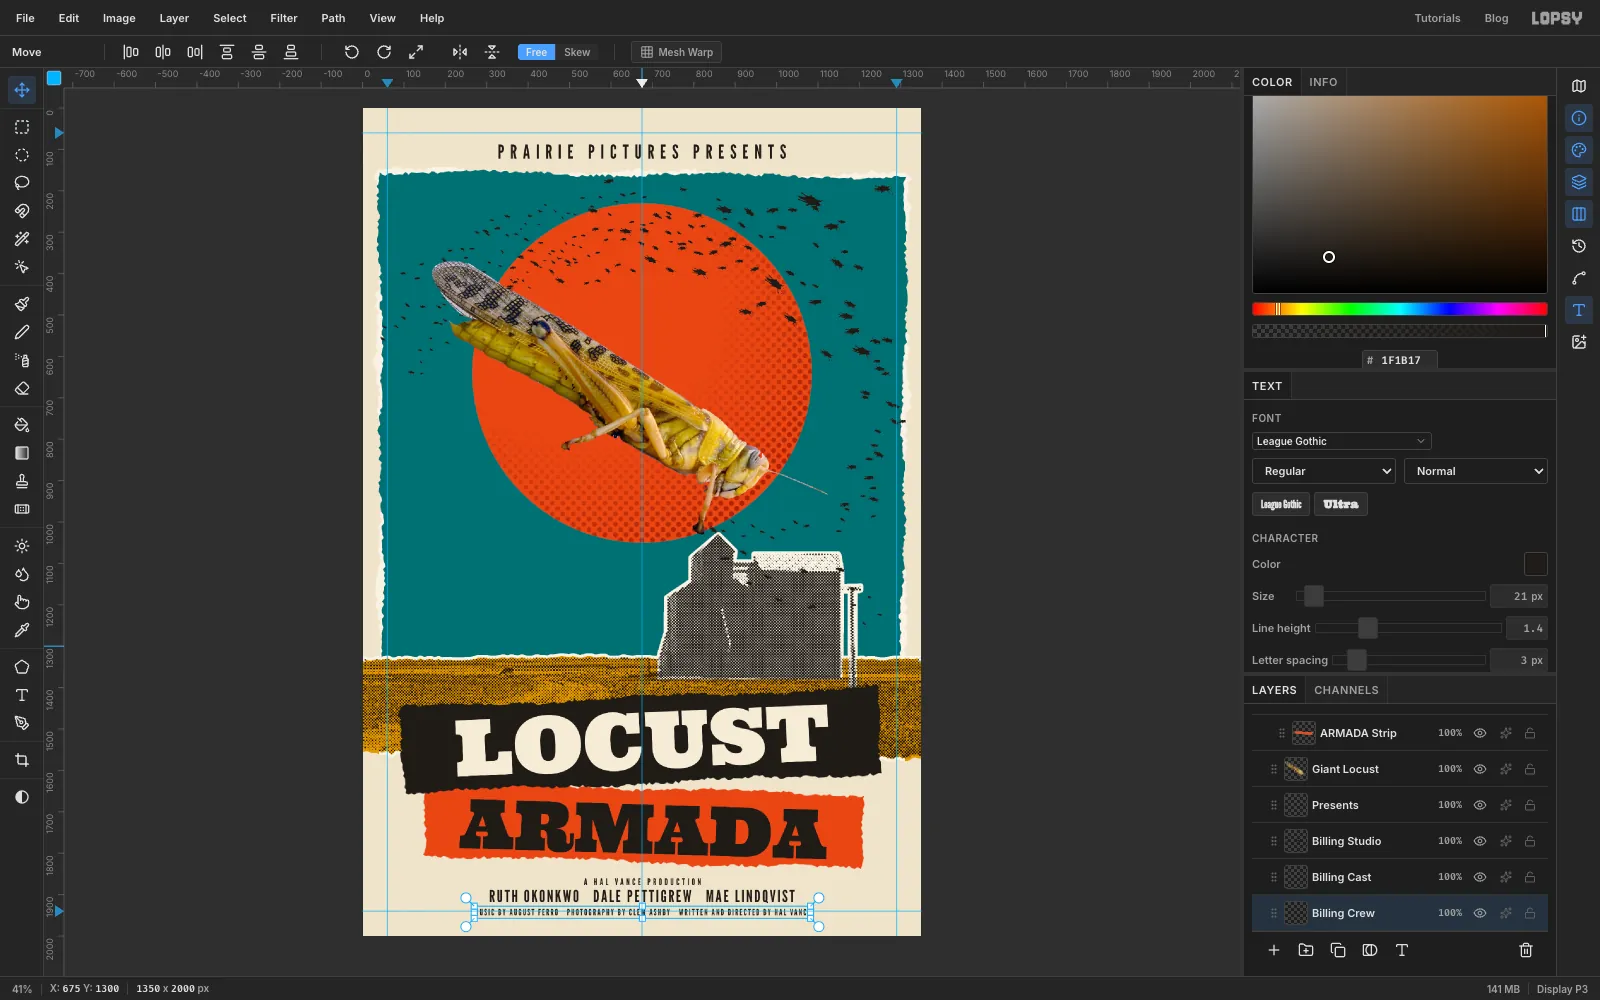
Swarmfirst and then clicking an empty spot of sky with the Text tool. That way every text layer stacks aboveSwarmand none of them ends up inside a title group. Use League Gothic, set Align to Center and the colour to1F1B17for all of them. After each one, name the layer (Presents,Billing Studio,Billing Cast,Billing Crew), then press V and drag it into place so its centre is on the centre guide atx 675.PRAIRIE PICTURES PRESENTSat Size46. In the Text panel, set Letter spacing to14. Centre it aty 104, halfway between the top guide and the sky sheet.A HAL VANCE PRODUCTIONat Size22, letter spacing6, centred aty 1868.RUTH OKONKWO DALE PETTIGREW MAE LINDQVIST(three spaces between names) at Size40, letter spacing4, centred aty 1903. The stars get the biggest line in the billing block.MUSIC BY AUGUST FERRO PHOTOGRAPHY BY CLEM ASHBY WRITTEN AND DIRECTED BY HAL VANCEat Size21, letter spacing3, centred aty 1941.
-
Type the tagline on label strips
- Click
Swarm, click New Group and name itTagline 1. Add a layer namedTagline 1 Paperinside it. - With
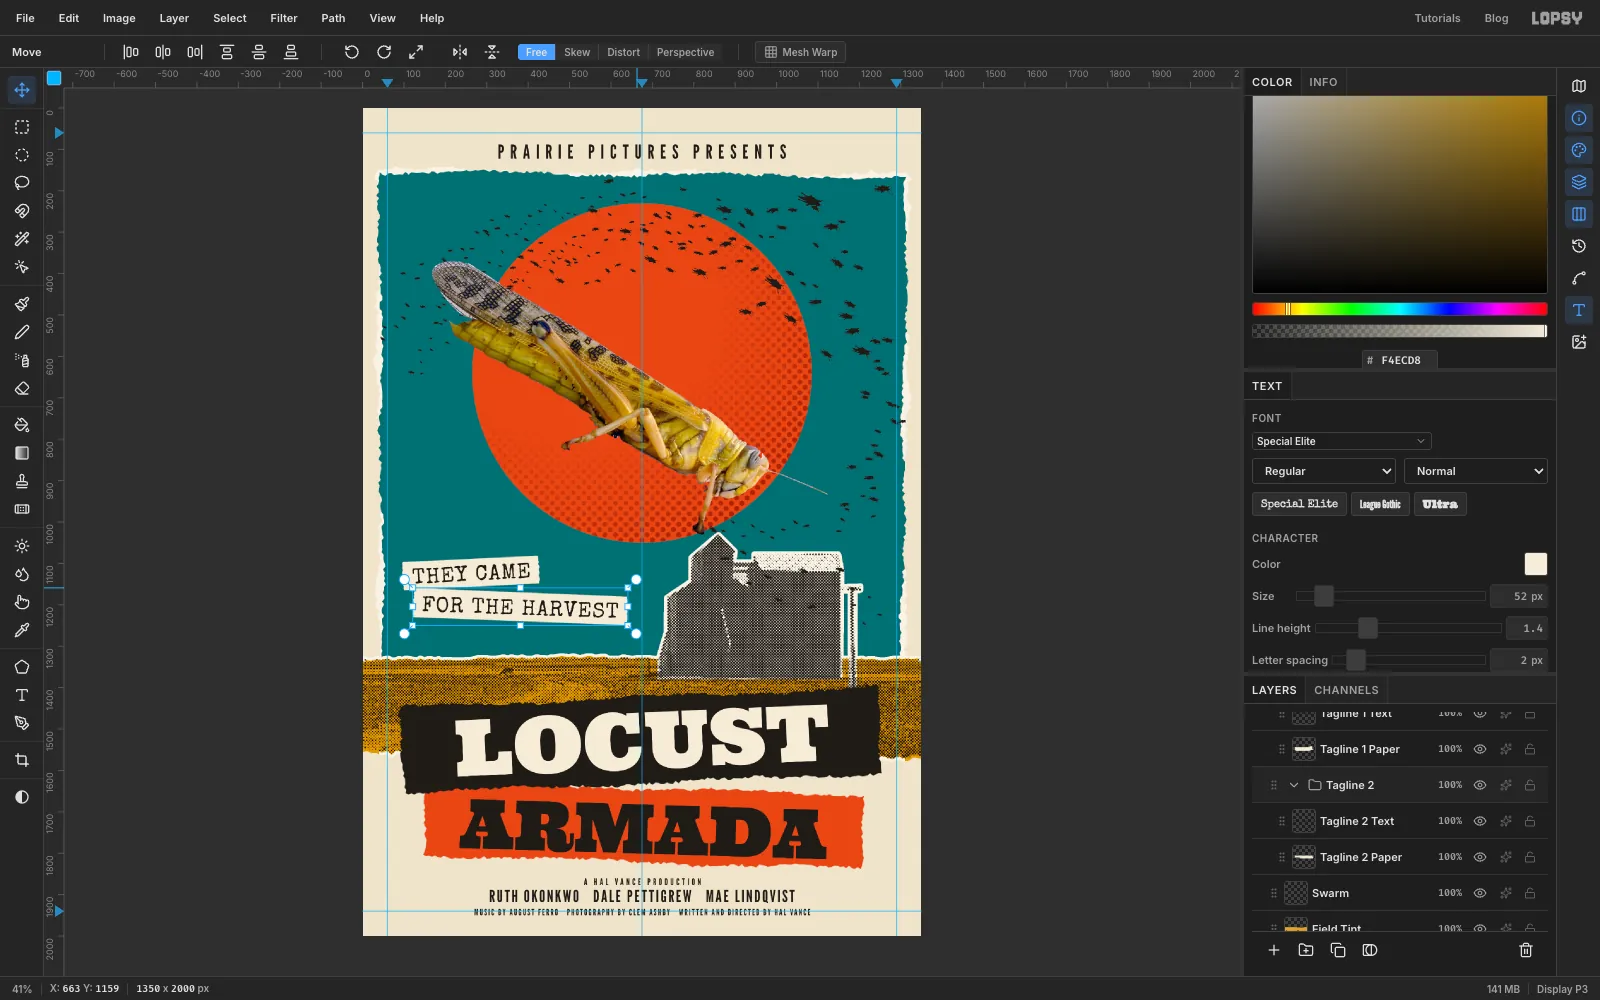
Tagline 1 Paperstill selected, make a text layer in Special Elite at Size52, colour1F1B17, Letter spacing2. Click an empty spot such as262, 1300, typeTHEY CAME, press Tab and name the layerTagline 1 Text. Then move it so it's centred on262, 1122. - Click
Tagline 1 Paperand lasso a strip that leaves about 22 px either side of the words and 16 px above and below. Keep the long edges straight and tear the short ends. Fill it withF4ECD8and press Cmd+D. - Select the
Tagline 1group and rotate it about 3° counterclockwise. Press Enter. - Repeat for
FOR THE HARVEST, in a group namedTagline 2, centred on380, 1204and rotated about 2° clockwise.
- Click
-
Stick down masking tape
Draw one piece of tape, then copy and paste it for the rest.
- Double-click the empty
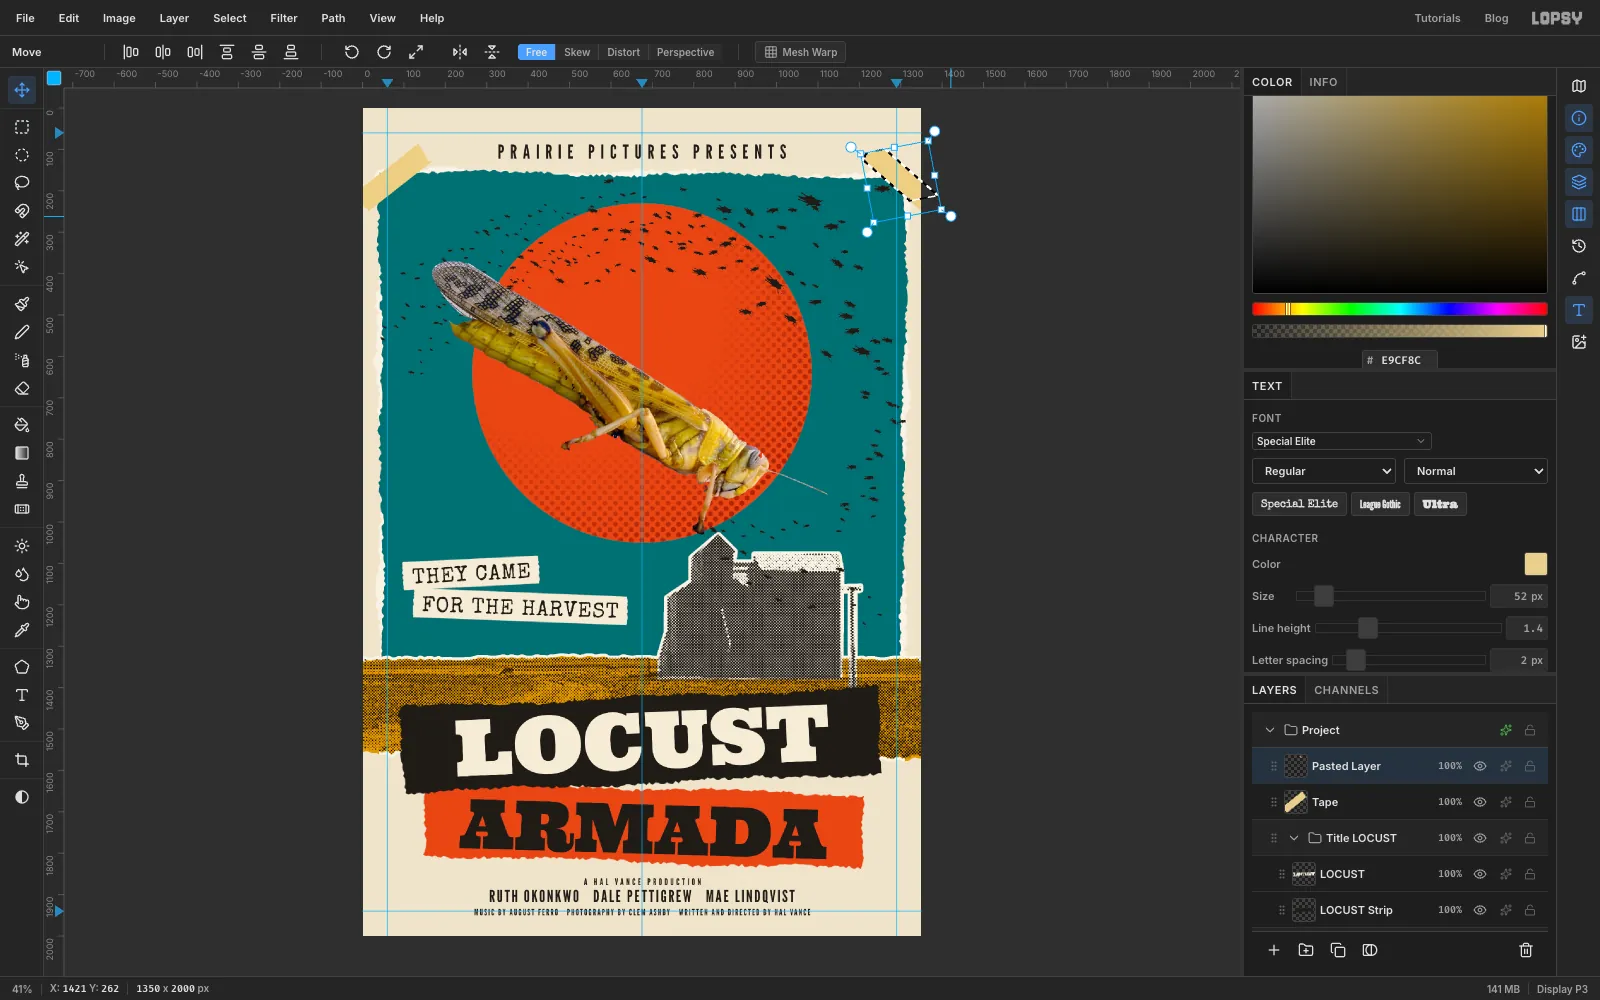
Layer 1at the top of the stack and rename itTape. - Lasso a strip about 200 × 54 px across the sky sheet's top-left corner, tilted about 38° counterclockwise. Keep the long sides straight and give the short ends small zigzags, like tape torn off a roll. Fill it with
E9CF8C. - Press Cmd+C, then Cmd+V. The copy is pasted in place on a new layer, selected, with the Move tool ready. Drag it from its middle (dragging an edge would scale it) to the sky sheet's top-right corner. Drag just outside a corner to turn it until it leans the other way, mirroring the first piece. Press Enter, then choose Layer → Merge Down.
- Paste three more the same way: over the left end of the LOCUST strip, nearly upright; over the right end of the ARMADA strip; and over the left end of the THEY CAME label, clear of the T. Merge each one down.
- Press Cmd+D. Choose Filter → Add Noise…, set Amount to
8, click Mono and click Apply. Set the layer's opacity to78%. Click the100%on its row to get the slider.
- Double-click the empty
-
Lift the paper with shadows and a scissor edge
Pasted-down paper casts a small shadow. Keep every shadow falling down and to the right, so the light comes from one place.
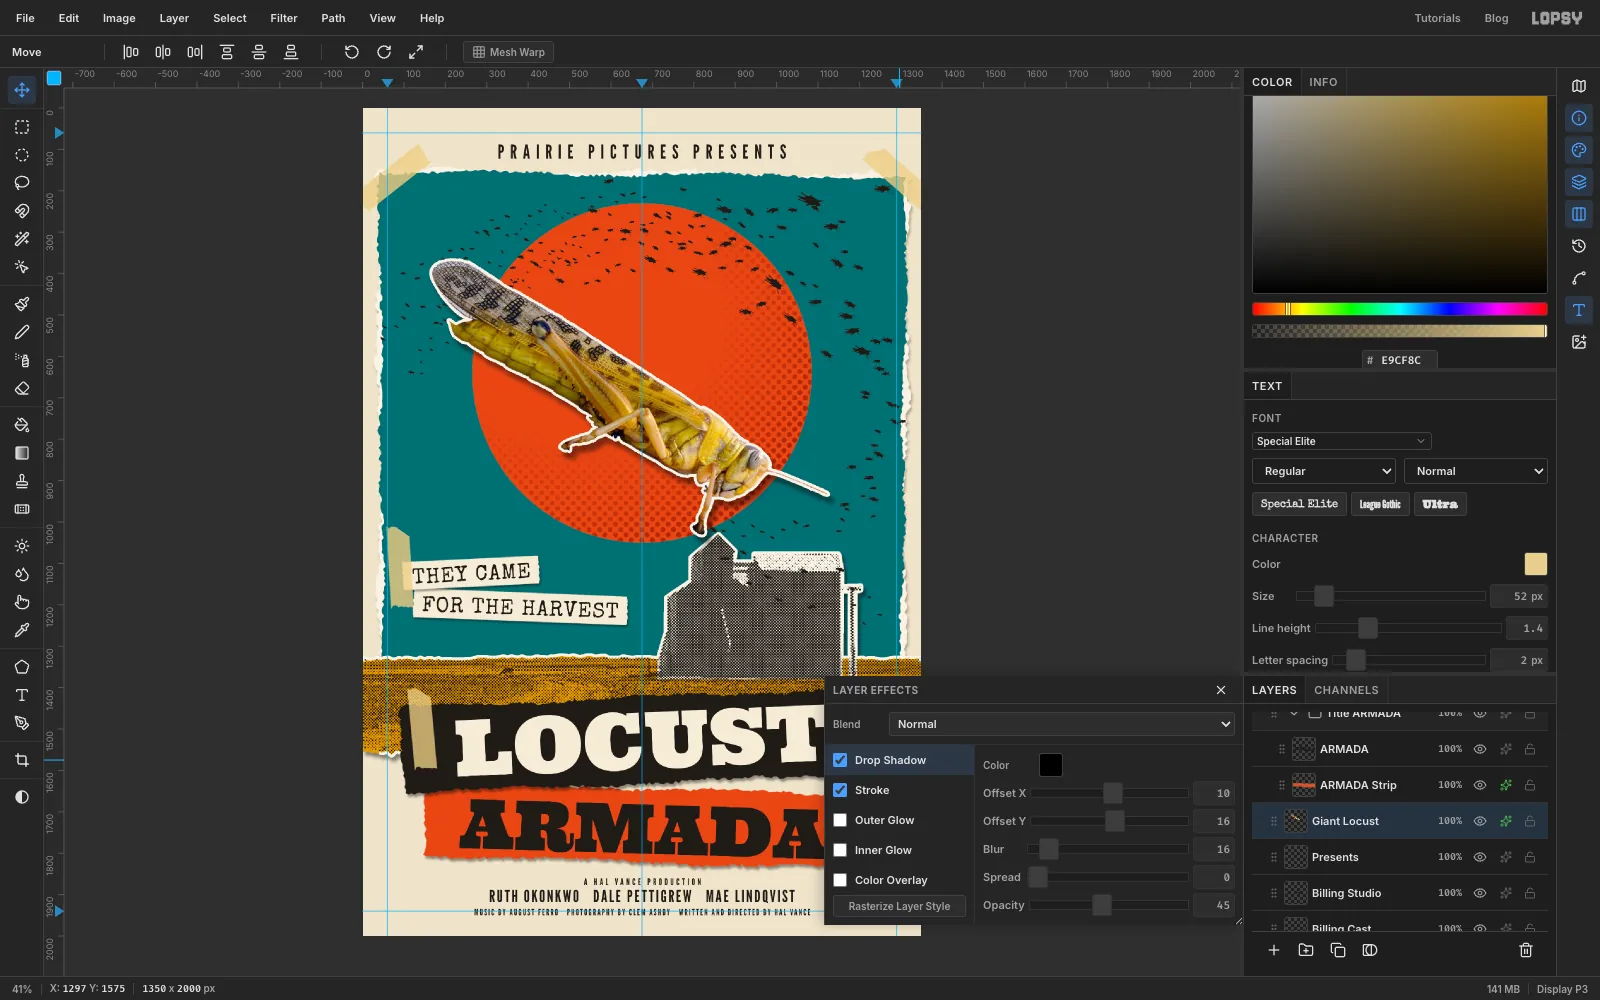
- Open the effects drawer for each layer below, tick Drop Shadow, and set Offset X, Offset Y, Blur and Opacity:
Sky Core:3,6,10,30Photo Backing:6,10,12,45LOCUST StripandARMADA Strip:4,7,8,40Tagline 1 PaperandTagline 2 Paper:3,5,6,35
- For
Giant Locust, tick Stroke. Set Width to7, the colour toF8F3E6and the position to Outside. That's the white margin scissors leave. - Still on
Giant Locust, tick Drop Shadow with10,16,16,45. The giant is the closest piece of paper, so it gets the biggest lift.
Add effects last. Painting and filtering are slower on layers that already carry effects.
-
Add newsprint grain
- Click
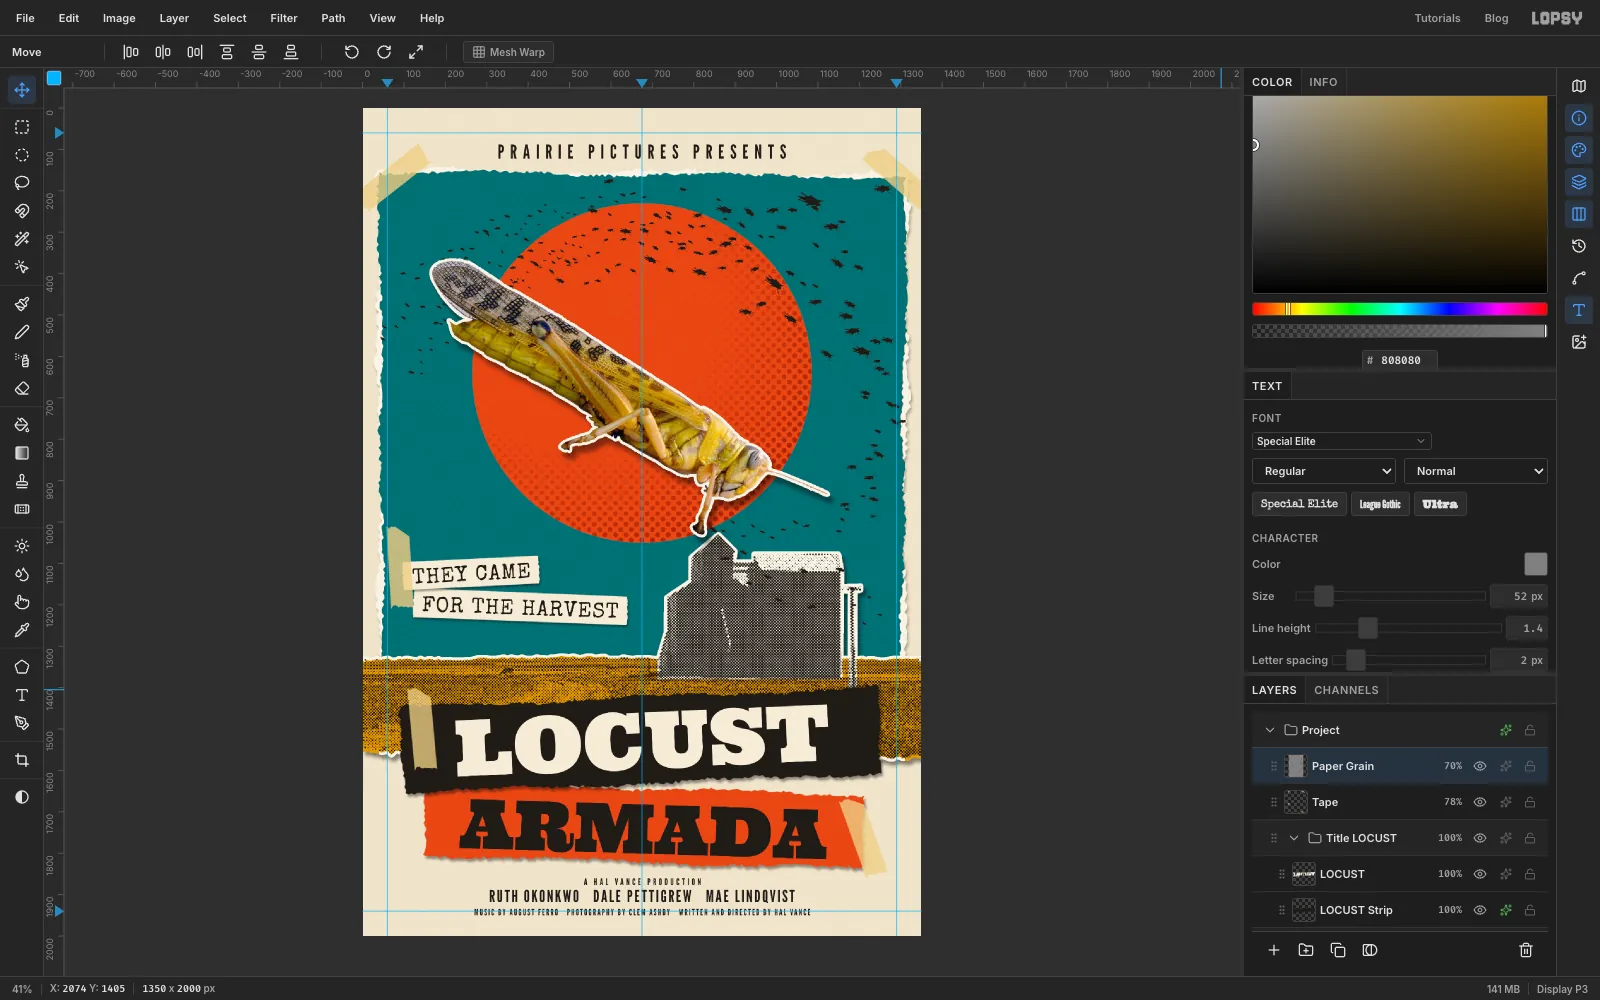
Tapeand add a layer namedPaper Grain. - Press Cmd+A, fill with
808080and press Cmd+D. - Choose Filter → Add Noise…, set Amount to
40, click Mono and Gaussian, and click Apply. Then choose Filter → Emboss…, set Strength to30and click Apply. - Set the layer to Overlay at
70%. Mid-grey disappears in Overlay, so only the tiny embossed bumps show, on every colour at once.
- Click
-
Fold the poster
Posters were mailed folded, so give it two creases.
- Add a layer named
Folds. - Press N for the Pencil and set Size to
4. Set the foreground toFFFFFF. Click at677, 2, then hold Shift and click at677, 1998. Draw a horizontal line the same way alongy 1003. - Set the foreground to
2A2A2Aand draw a second pair of lines 5 px away, atx 672andy 998. - Choose Filter → Gaussian Blur…, type
2.5into Radius and click Apply. Set the layer to Soft Light at60%. - Press Cmd+; to hide the guides so you can see the creases.
Each crease is now a soft highlight beside a soft shadow, like a real fold.
Choose File → Quick Export PNG to save the poster and File → Save Project to keep the layers. Credit the three photographers if you share it.
- Add a layer named