Make a Cut-Paper Collage Flier for a Zucchini Potluck
Build a collage flier in Lopsy with torn paper, photo cut-outs, a ransom-note headline, a gingham pattern, masking tape and marker doodles.
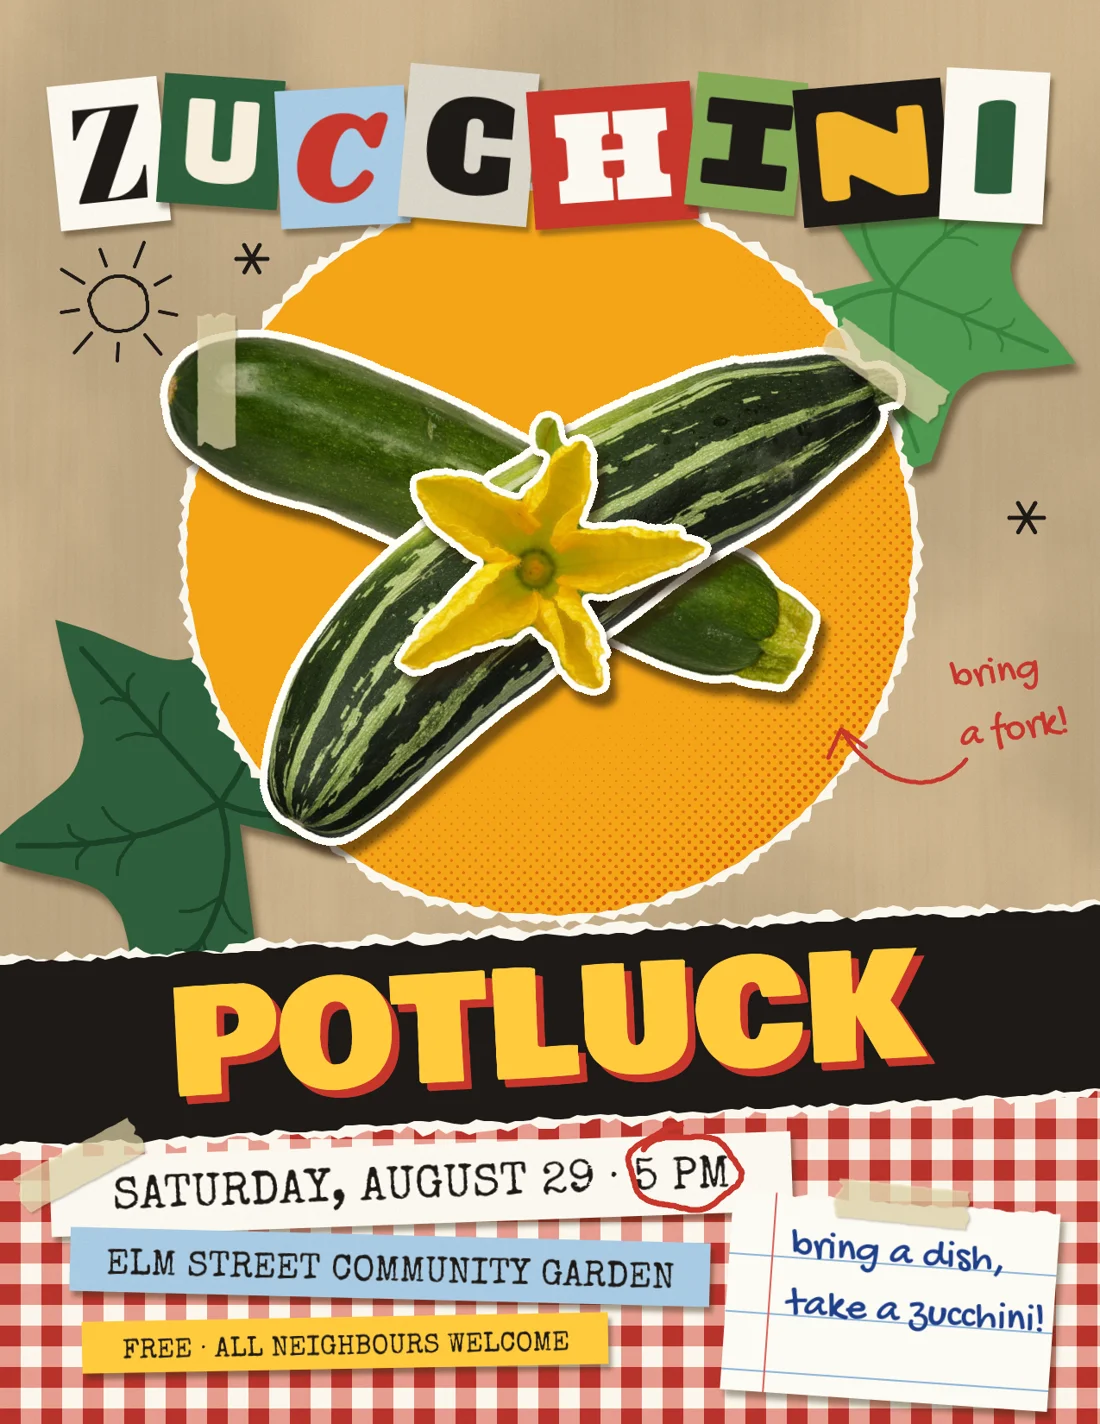
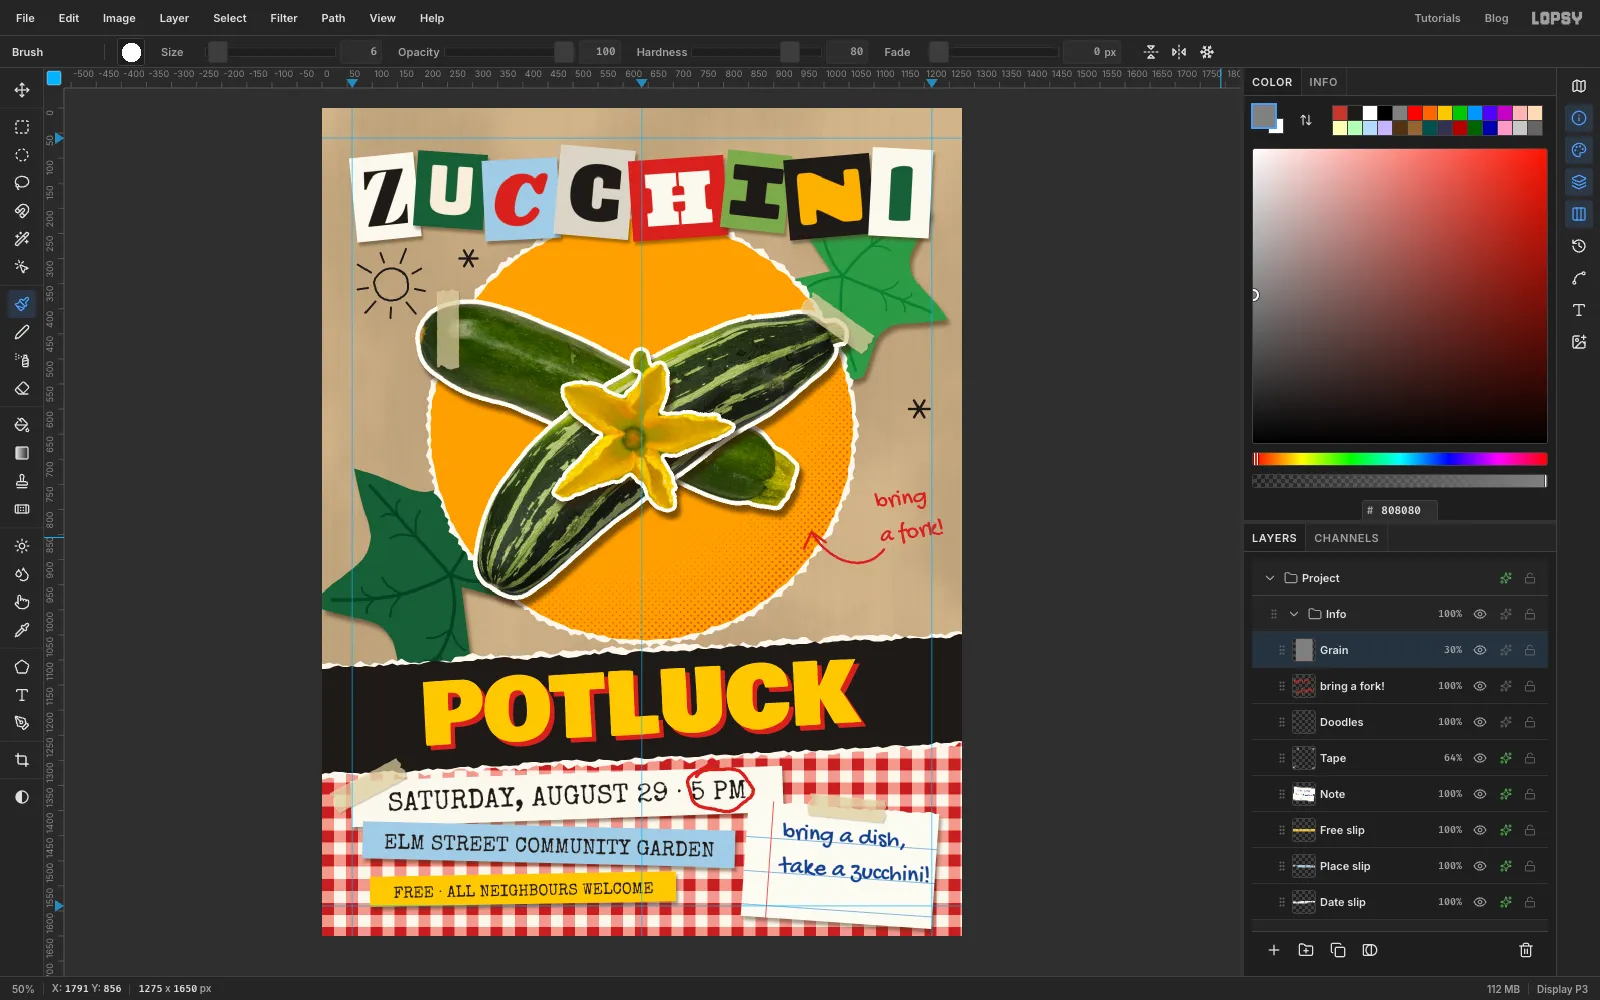
Every August, someone on the street has more zucchini than they know what to do with. This flier invites the neighbours to a potluck to deal with it, and it's made the way you'd make one at the kitchen table: cut and torn paper, photos snipped out of a magazine, letters clipped from different headlines, a bit of masking tape and a marker.
Collage looks good when it looks like real material. In this tutorial you'll fake each material in Lopsy. Torn edges show a white fibre core, cut-outs get a white scissor border and a shadow, scraps get a little grain, and nothing sits perfectly straight. The flier is a US-letter page at 1275 × 1650 px.
Along the way you'll use:
- Add Noise, Fibers and Clouds for kraft paper
- Define Pattern and Fill with Pattern for a gingham tablecloth
- the Lasso for torn paper, and a radial Gradient plus Halftone for printed dots
- the Magic Wand, Grow, Shrink and Select Inverse to cut photos out
- the Move tool's Flip, scale and rotation handles
- Stroke and Drop Shadow effects for cut-out borders
- Hue/Saturation, Merge Down, copy and paste, groups and blend modes
- live text in eleven Google fonts, rotated with the Move tool
You'll need three photos. Any zucchini photographed on white will do. I used two public-domain photos by Evan-Amos on Wikimedia Commons (Zucchini-Whole and CSA-Striped-Zucchini) and a courgette flower by Ruth Hartnup (Courgette flower, CC BY 2.0), cropped and scaled to about 900, 860 and 600 px wide.
The palette:
-
Kraft paper
-
paper core
-
notebook paper
-
scissor border
-
Gingham
-
Disc orange
-
halftone
-
Leaf green
-
vein green
-
Ink black
-
POTLUCK yellow
-
tomato red
-
Scraps sky
-
newsprint
-
sage
-
cream
-
Letter yellow
-
letter cream
-
Tape
-
ballpoint blue
-
rule blue
-
margin red
-
Shadow brown
-
Grain grey
disappears in Overlay, so only the speckle shows
-
Set up the canvas and guides
Choose File → New, set Width
1275and Height1650, pick a White background and click Create.Click the top ruler at
60,637and1215to drop three vertical guides, and the left ruler at60and1590for two horizontal ones. They mark the margins and the centre line, so you can see when something is crowding an edge.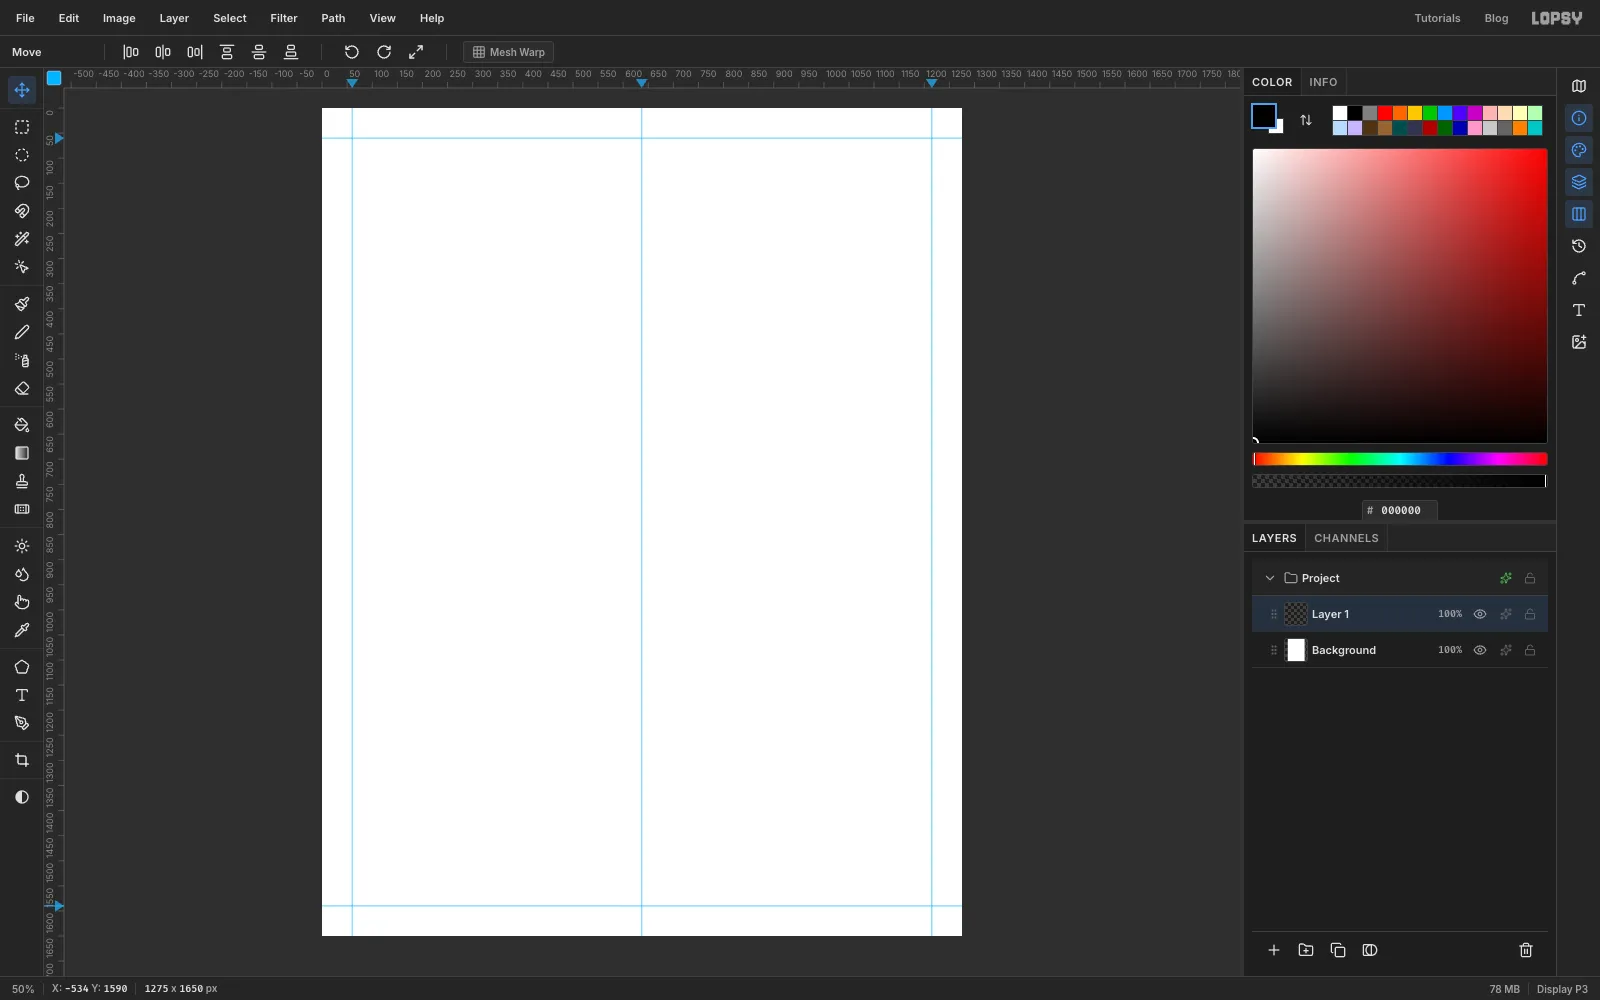
-
Make the kraft paper
Double-click Layer 1 and rename it Paper. Set the foreground to , press Cmd+A and choose Edit → Fill. Deselect, then choose Filter → Add Noise… with Amount
10, Mono and Gaussian.Add a layer named Fibres, fill it with any colour and run Filter → Fibers… with Variance
4and Strength48. The filter replaces the layer with grey strands. Set its blend mode to Soft Light and its opacity to 20%.Add one more layer, Mottle, fill it and run Filter → Clouds… at Scale
6. Set it to Multiply at 9%. Real paper is never one flat colour, and these two layers give it fibre and blotchiness.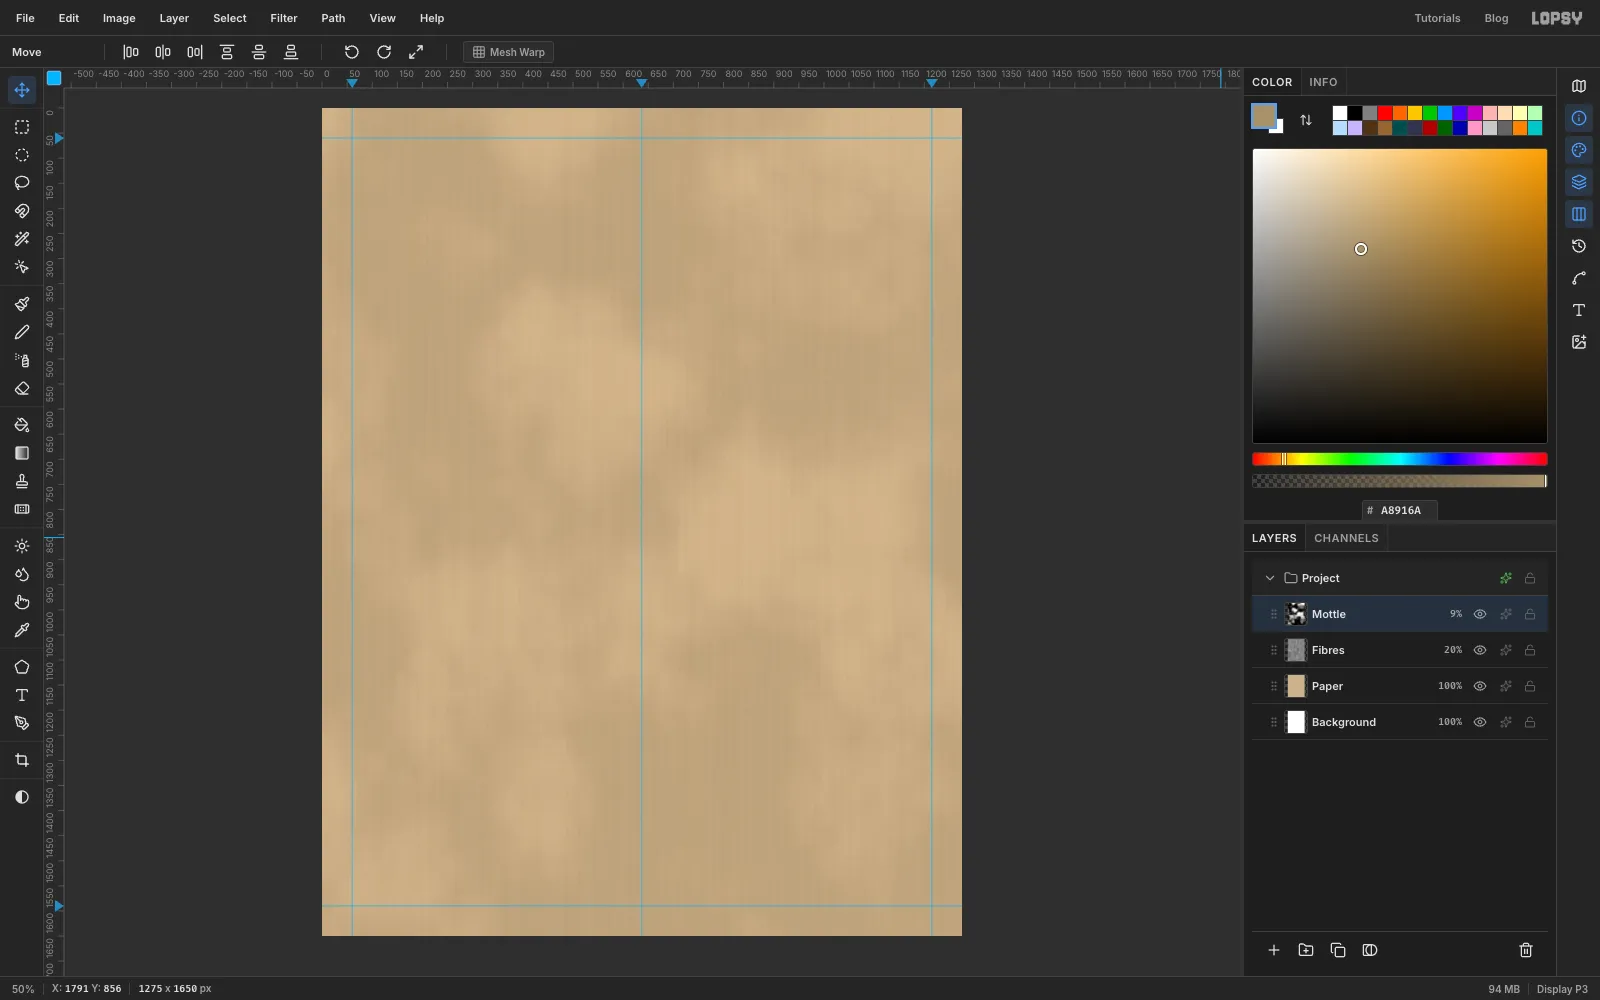
-
Draw a gingham tile
Gingham is two sets of see-through red stripes crossing. Where they cross the red is dark, where only one stripe runs it's pink, and between them it's cream. One 48 px tile captures that.
Add a layer named Tile. Use the exact-corners dialog to fill four 24 px squares in the top-left corner:
0, 0to24, 24in dark red24, 0to48, 24and0, 24to24, 48in pink24, 24to48, 48in cream
Select
0, 0to48, 48and choose Edit → Define Pattern. Name it Gingham. Deselect and delete the Tile layer with the bin button at the bottom of the Layers panel. The pattern stays defined.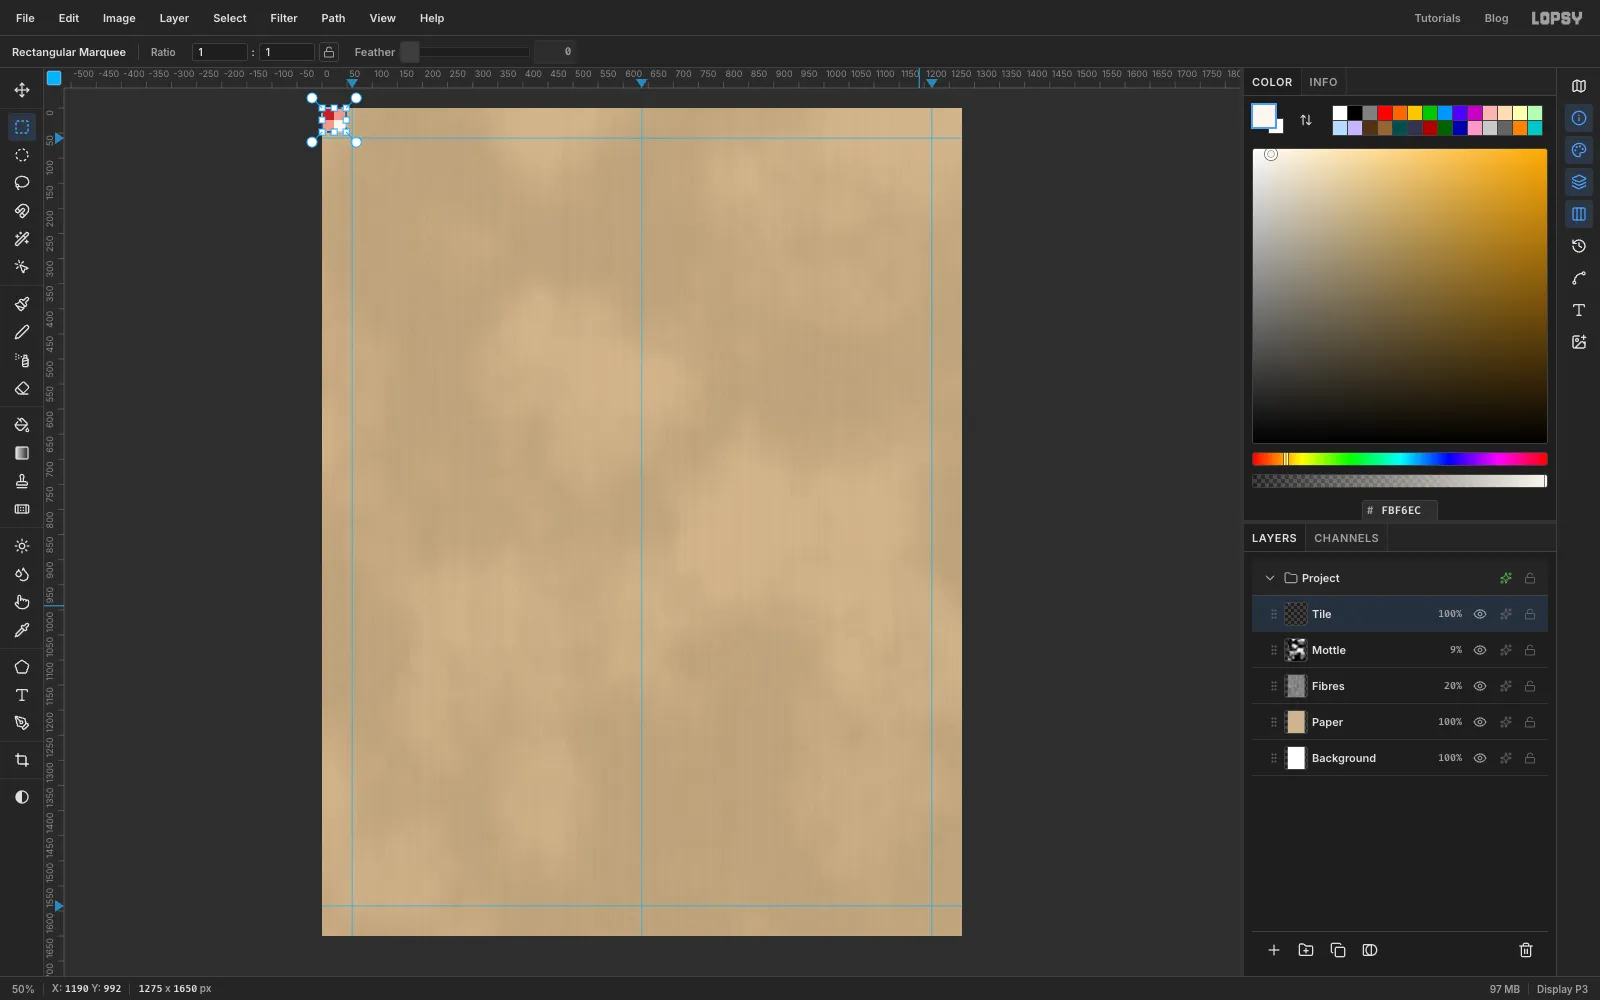
-
Tear the tablecloth edge
Torn paper has a white core that shows along the rip. So every torn piece in this flier is two layers: a slightly bigger off-white one underneath and the coloured one on top.
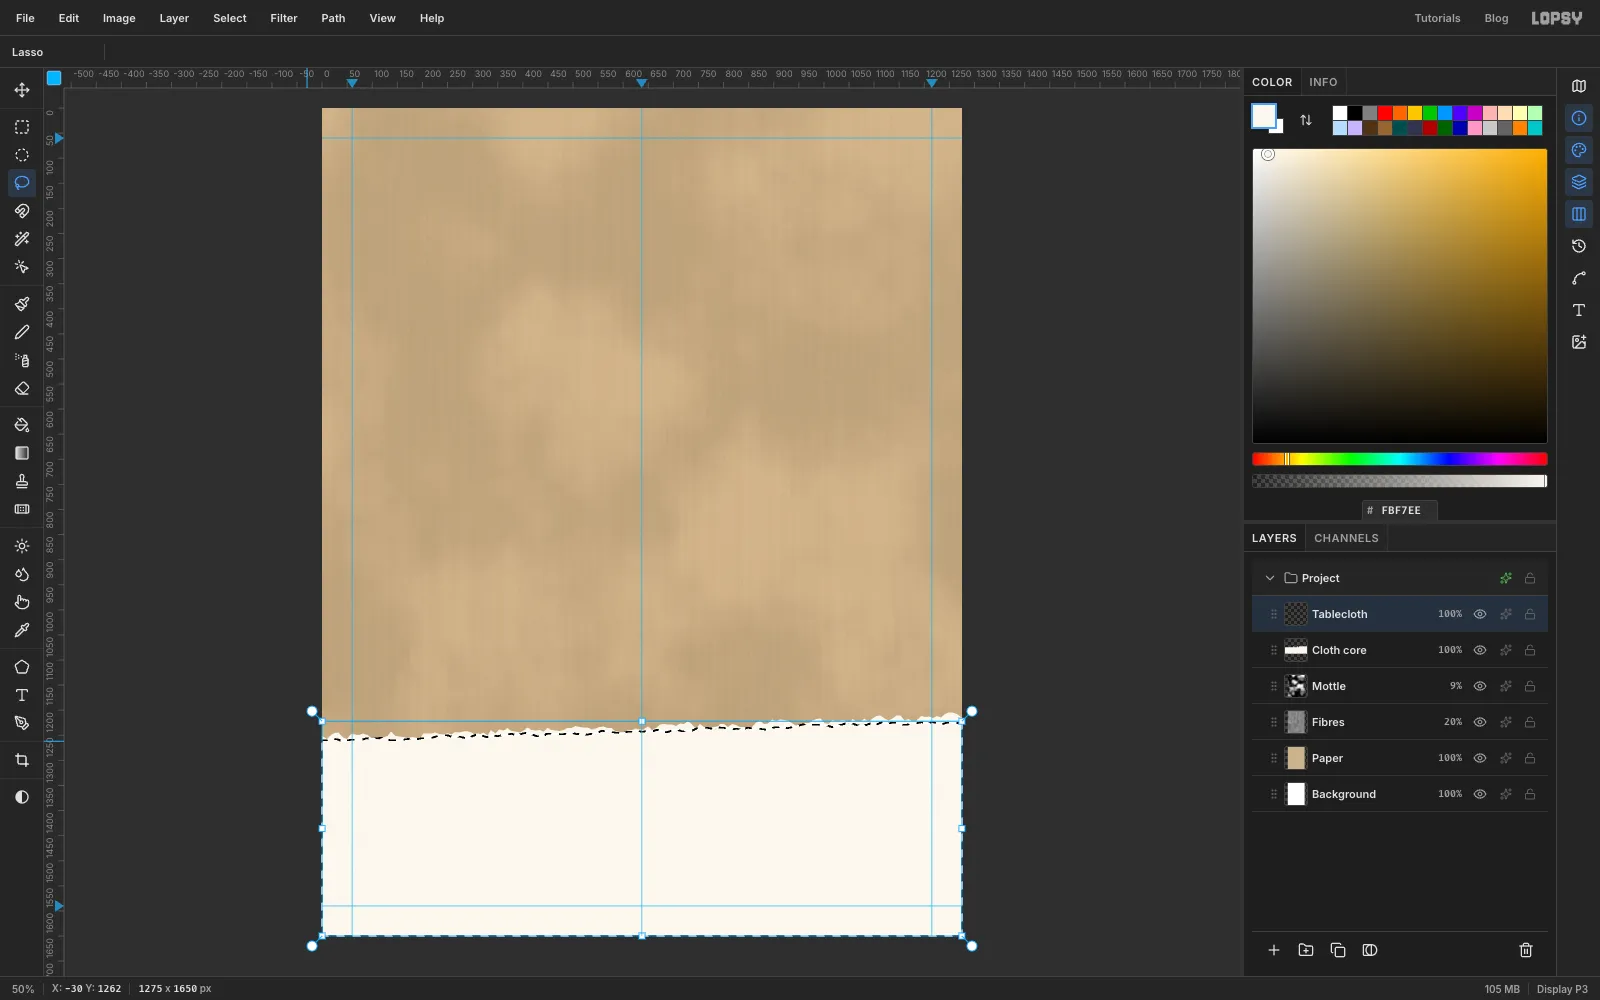
Add a layer named Cloth core. With the Lasso, drag a loop that starts off the left edge at about
y 1260, runs across to the right edge at abouty 1222, then goes down past the bottom of the canvas and back. Keep your hand jittery along the top so the edge wobbles; the sides and bottom can be rough because they're off the canvas. Fill it with and deselect.Add a layer named Tablecloth and lasso the same shape again, a few pixels lower along the top. Your hand won't follow exactly the same path, and that's what makes the white core show in uneven slivers.
-
Fill the tablecloth with gingham
With the selection still active, choose Edit → Fill with Pattern…. Click the gingham swatch, leave Scale at
100and click Apply. Deselect, then run Filter → Add Noise… at Amount6, Mono, Gaussian, so the checks look printed rather than perfect.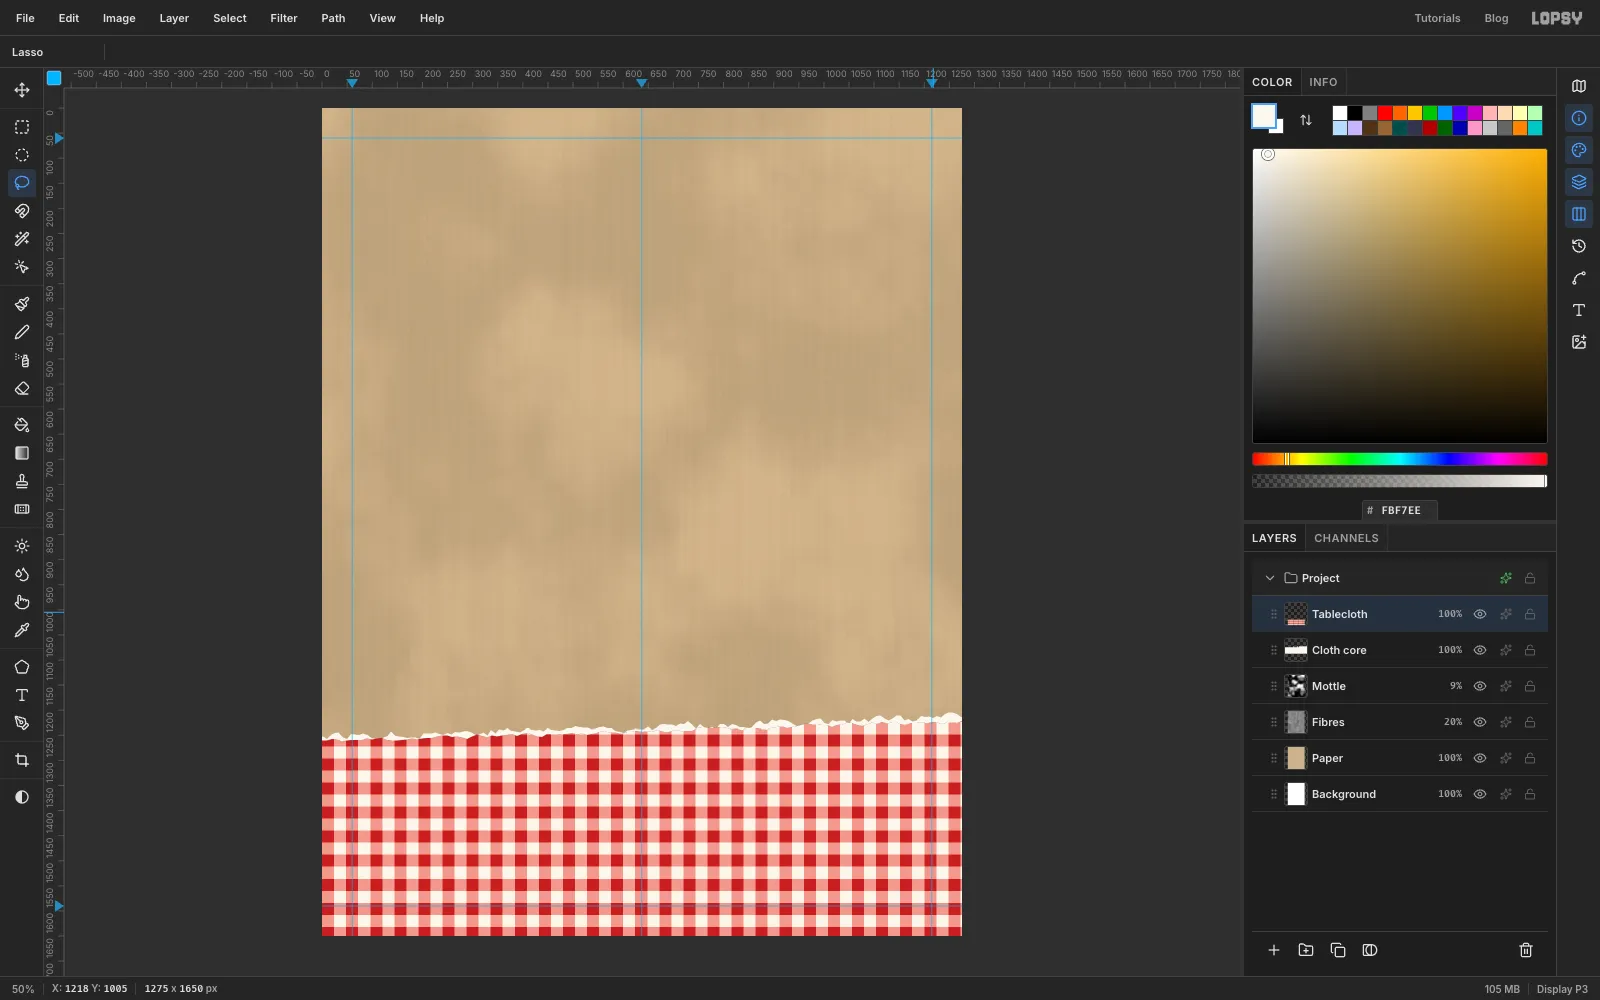
-
Tear a big orange disc
The disc is the stage for the zucchini. Click the Mottle row so the new layers go under the tablecloth, and add a layer named Disc core. Lasso a circle about
430px in radius centred on637, 640, with a shaky edge. Fill it with and deselect.Add a layer named Disc. Lasso a second circle, about
420px in radius, inside the first, and fill it with orange . Keep the selection.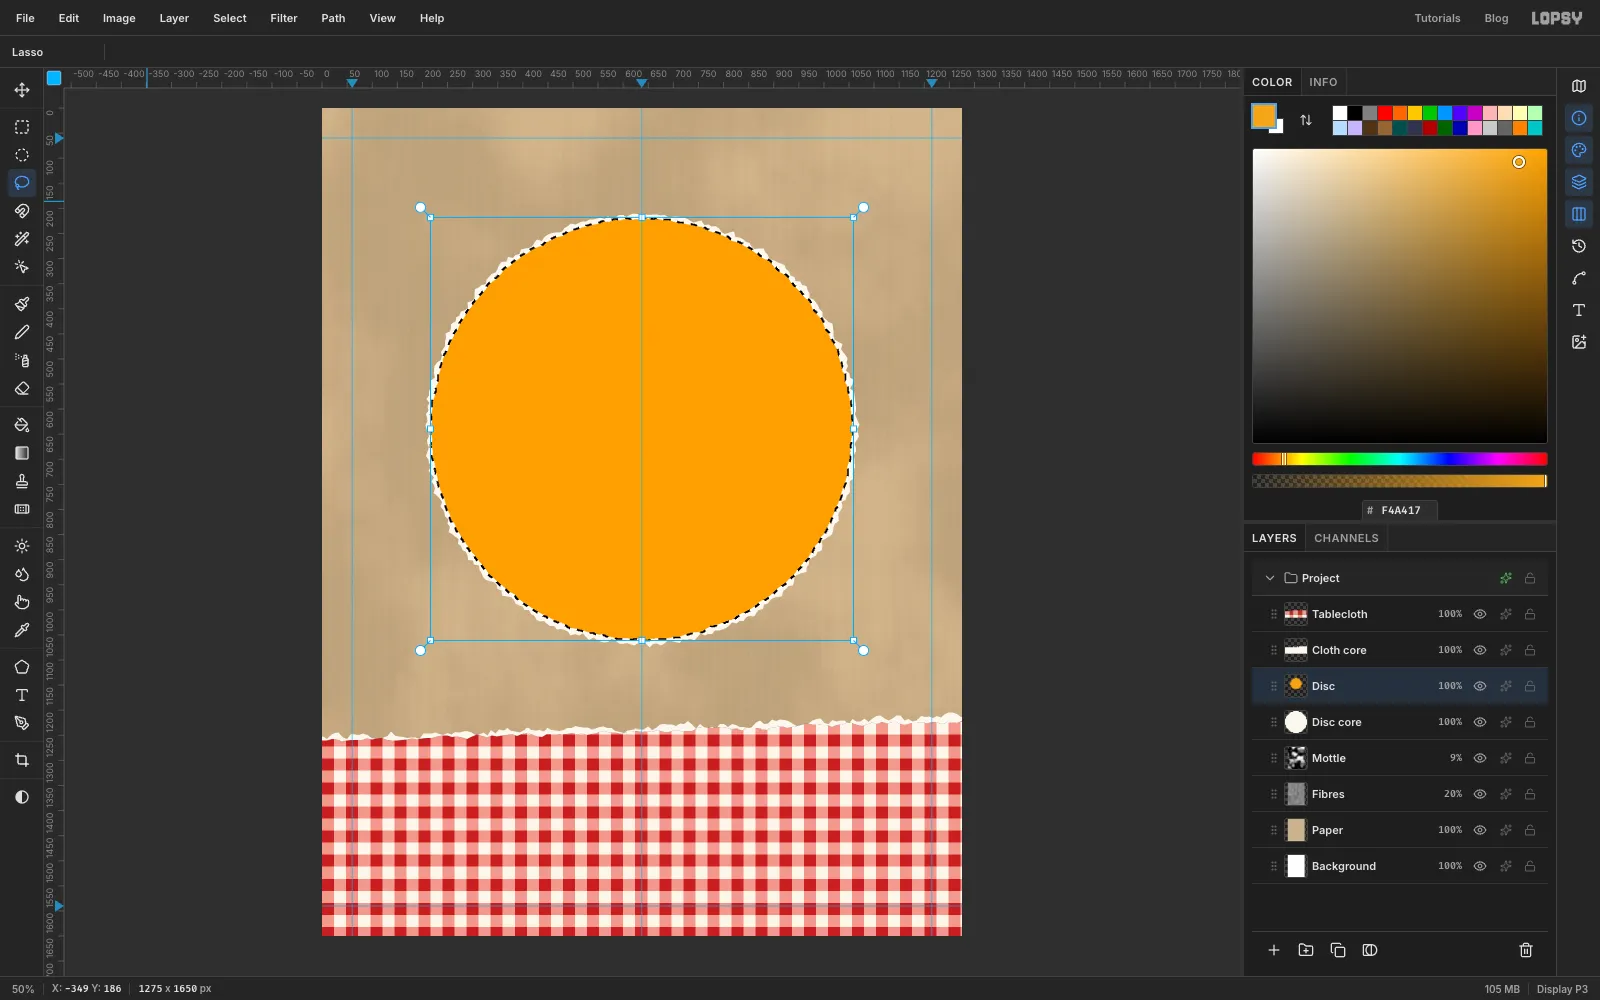
-
Shade the disc with halftone dots
Add a layer named Disc dots; the disc selection is still active. Pick the Gradient tool, set the type to Radial and click Advanced…. Make three stops: at 0%, again at about 45%, and burnt orange at 100%. Drag from
520, 500, up and left of centre, down to1010, 1010.Choose Filter → Halftone… with Dot Size
14, Density1.4, Angle45and Softness0.4. White prints no dots, so only the lower right edge gets them. Deselect and set the layer's blend mode to Multiply. The dots then darken the orange like ink on paper.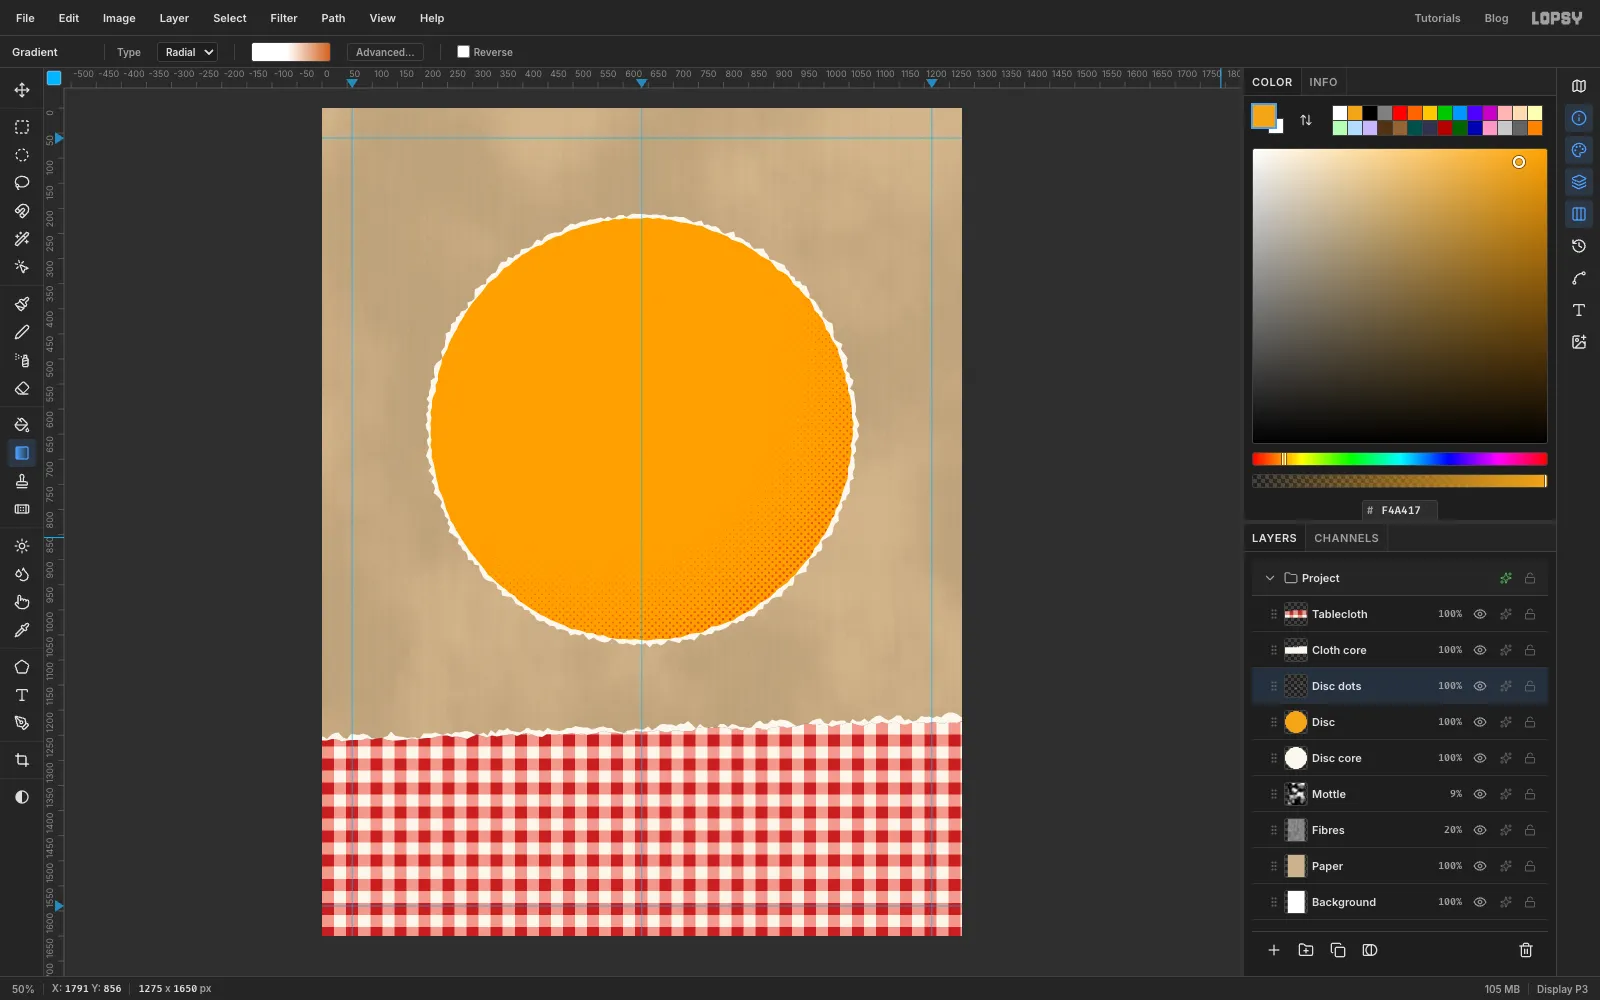
-
Cut out a squash leaf
Click the Mottle row again so the leaves go behind the disc, and add a layer named Leaf. A squash leaf has five broad, pointed lobes, a bit like a maple leaf with softer corners. Lasso one centred on about
255, 930, roughly 570 px across, with its middle lobe pointing up and to the left. It can run off the left edge of the canvas. Fill it with and deselect.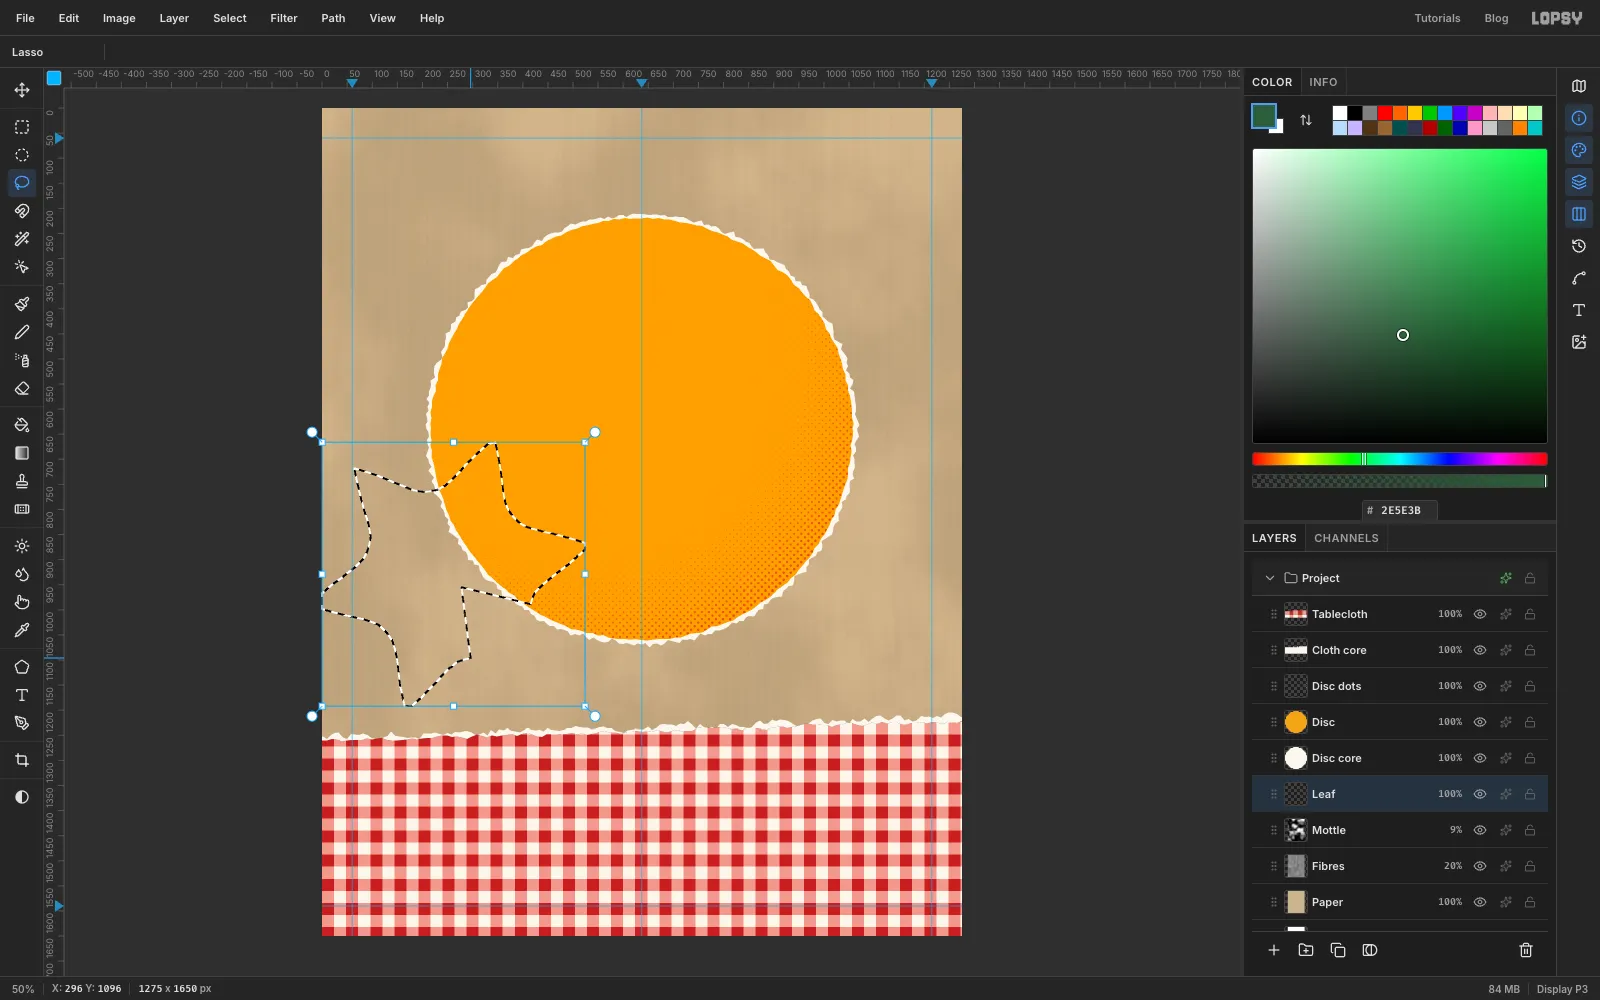
-
Paint the veins
Pick the Brush, set the foreground to and Size to
8. From the stem at the leaf's base, paint a gently curving midrib out to each of the five lobe tips. Then set Size to5and paint two short side veins on each side of every midrib, angled towards the tip.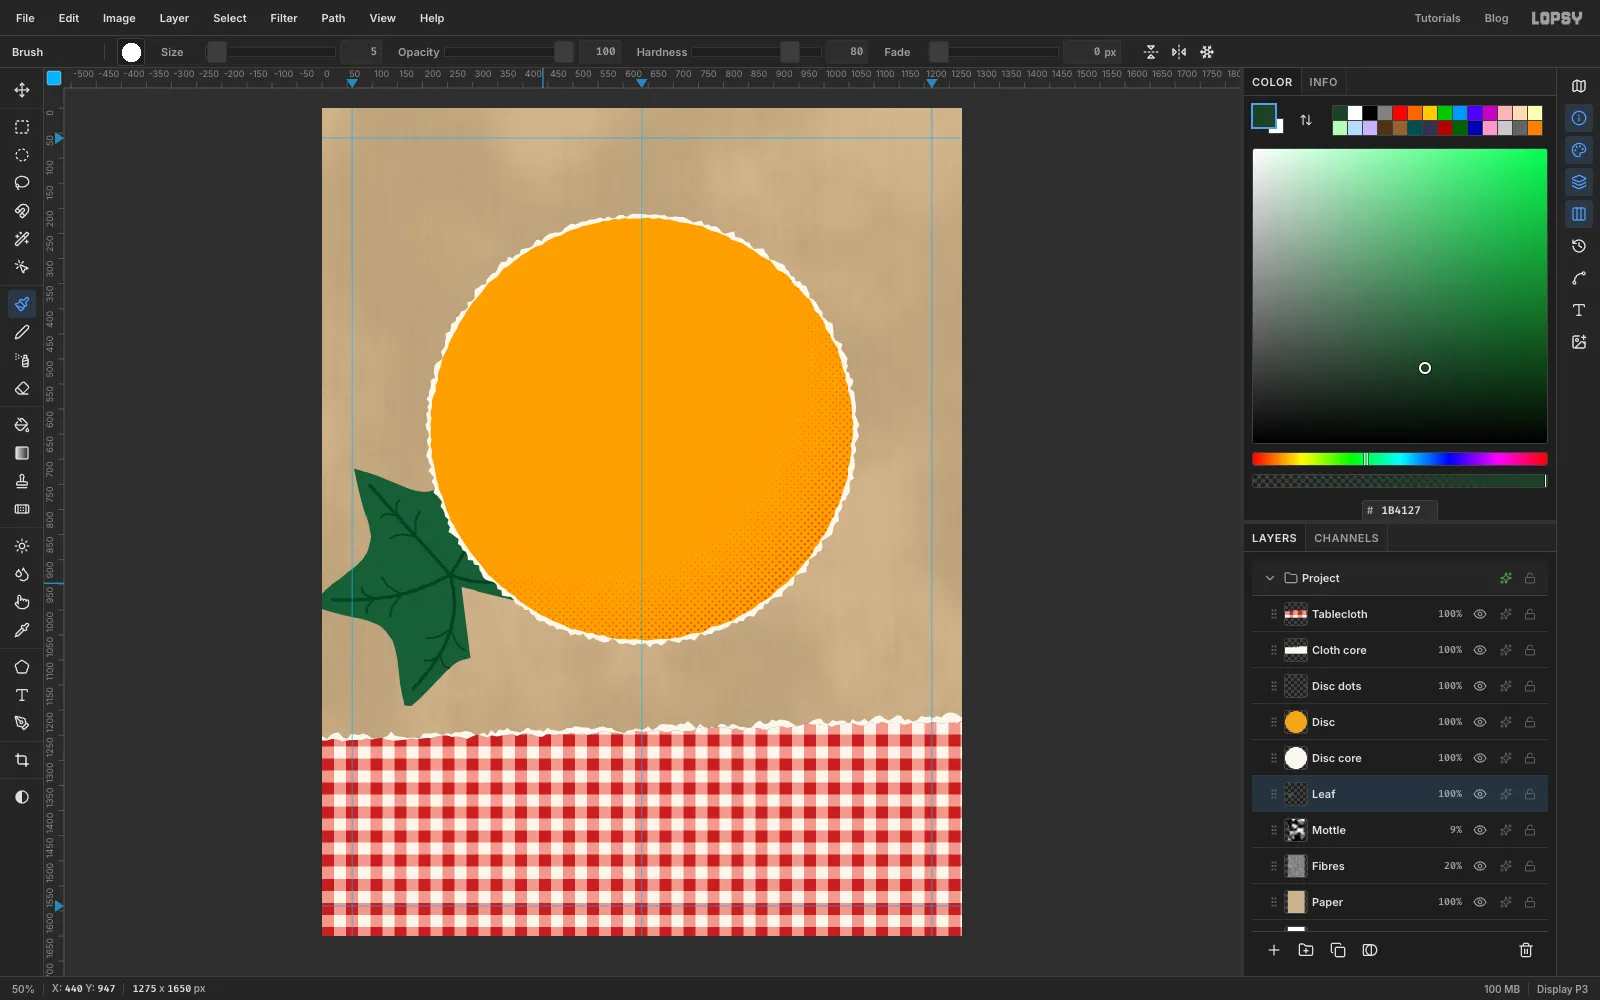
-
Copy the leaf and flip it
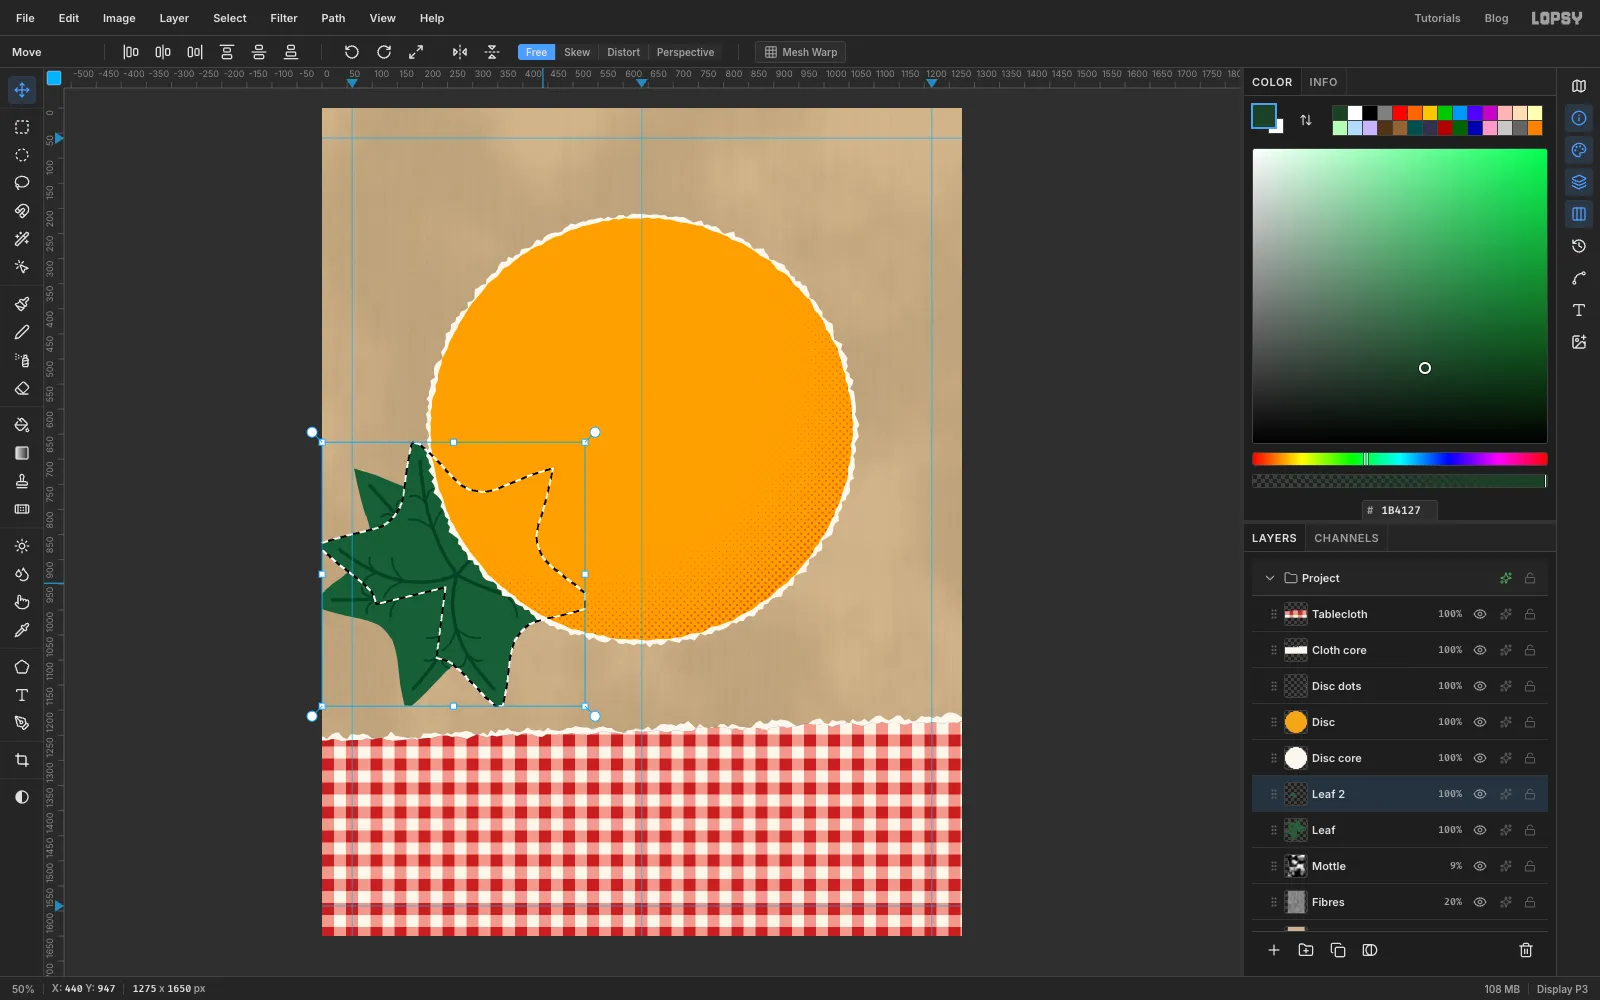
Cmd-click the Leaf thumbnail to select the leaf, then press Cmd+C and Cmd+V. The copy is pasted in place as a new layer; rename it Leaf 2. Cmd-click its thumbnail so it's selected, pick the Move tool and click Flip Horizontal in the options bar.
-
Scale the copy down
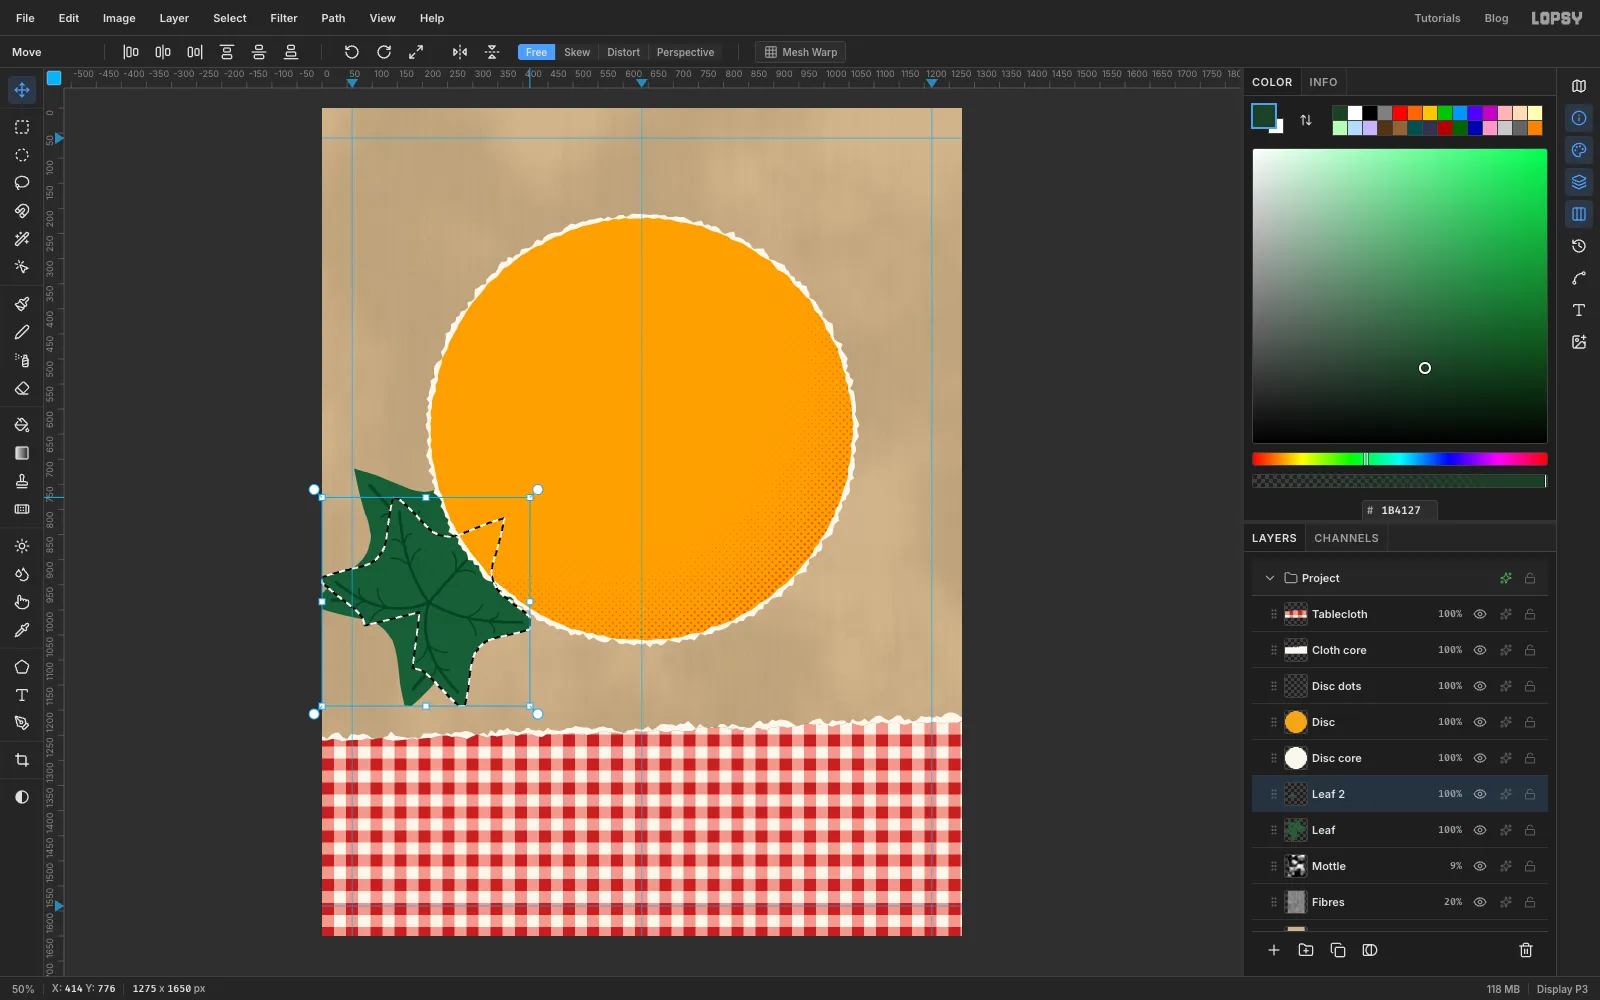
Hold Cmd and drag the top-right corner handle about 110 px down and to the left. Cmd keeps the proportions.
-
Rotate the copy
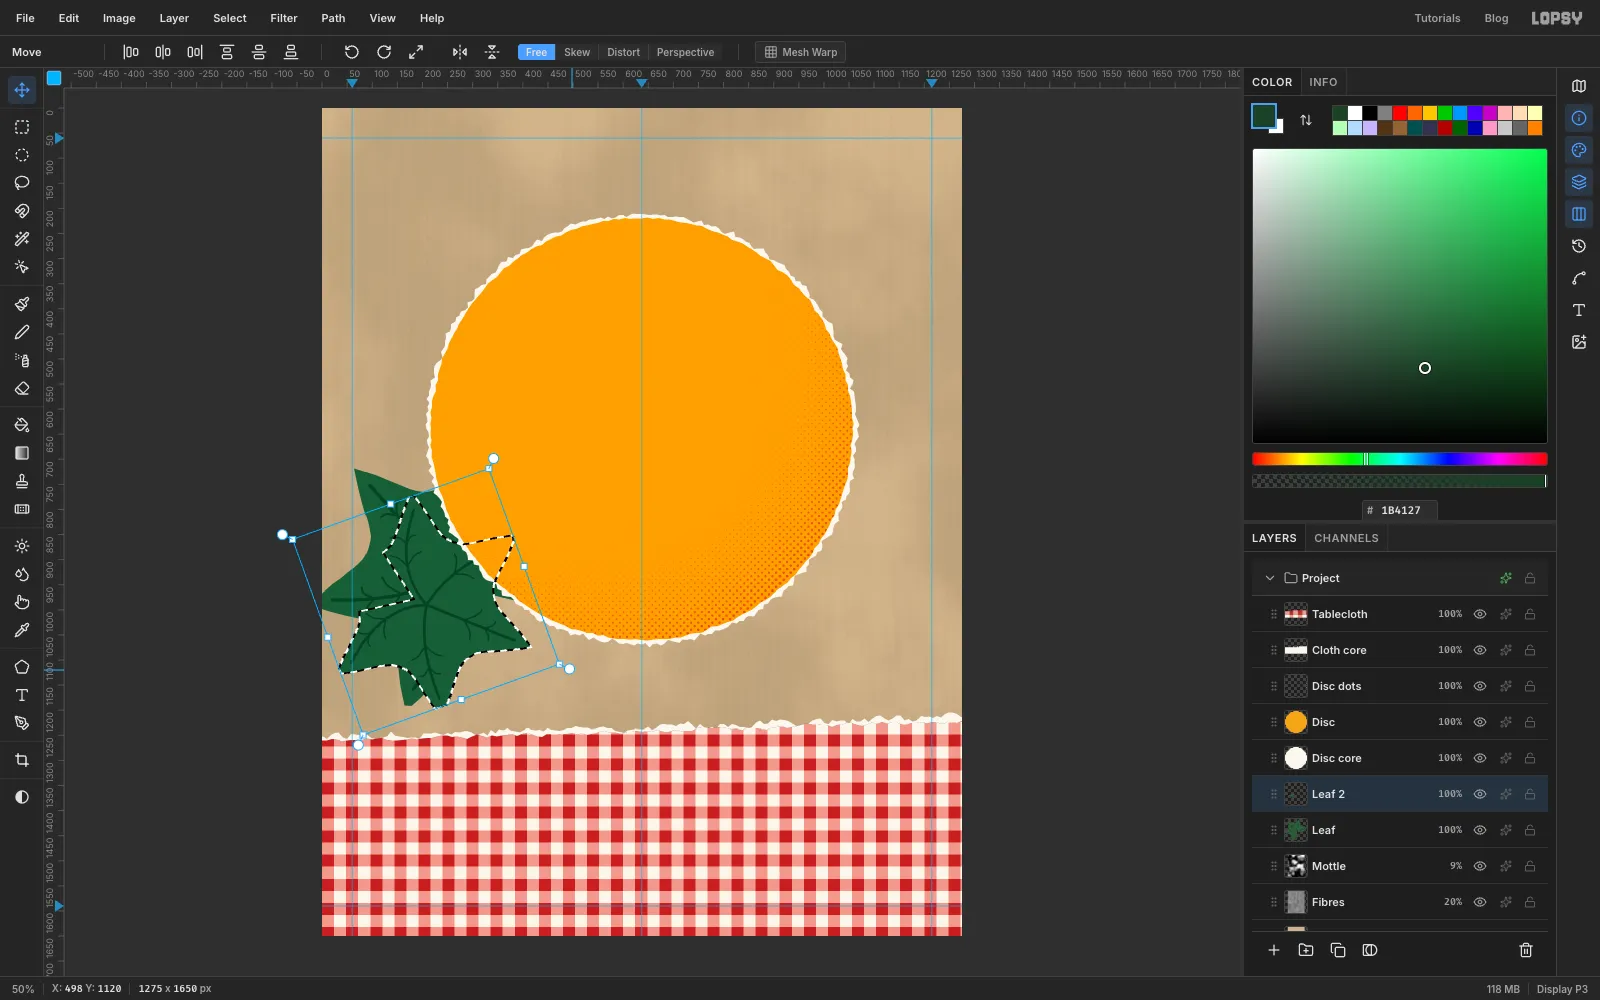
Hover just outside the top-right corner until the round rotation handle lights up, then drag it about 70° clockwise. Press Enter to apply and Cmd+D to deselect.
-
Place and recolour the second leaf
With the Move tool, drag the copy up to the top right so it peeks out from behind the disc, centred around
1055, 330.Choose Filter → Hue/Saturation… with Hue
-16, Saturation-8and Lightness18. That gives a lighter, yellower green, and the veins stay darker than the leaf. Open the effects drawer and turn on Drop Shadow: Offset X6, Offset Y10, Blur12, Opacity55, colour . Give the Leaf layer the same shadow. Every piece in the flier casts its shadow down and to the right, as if one lamp is shining on the table.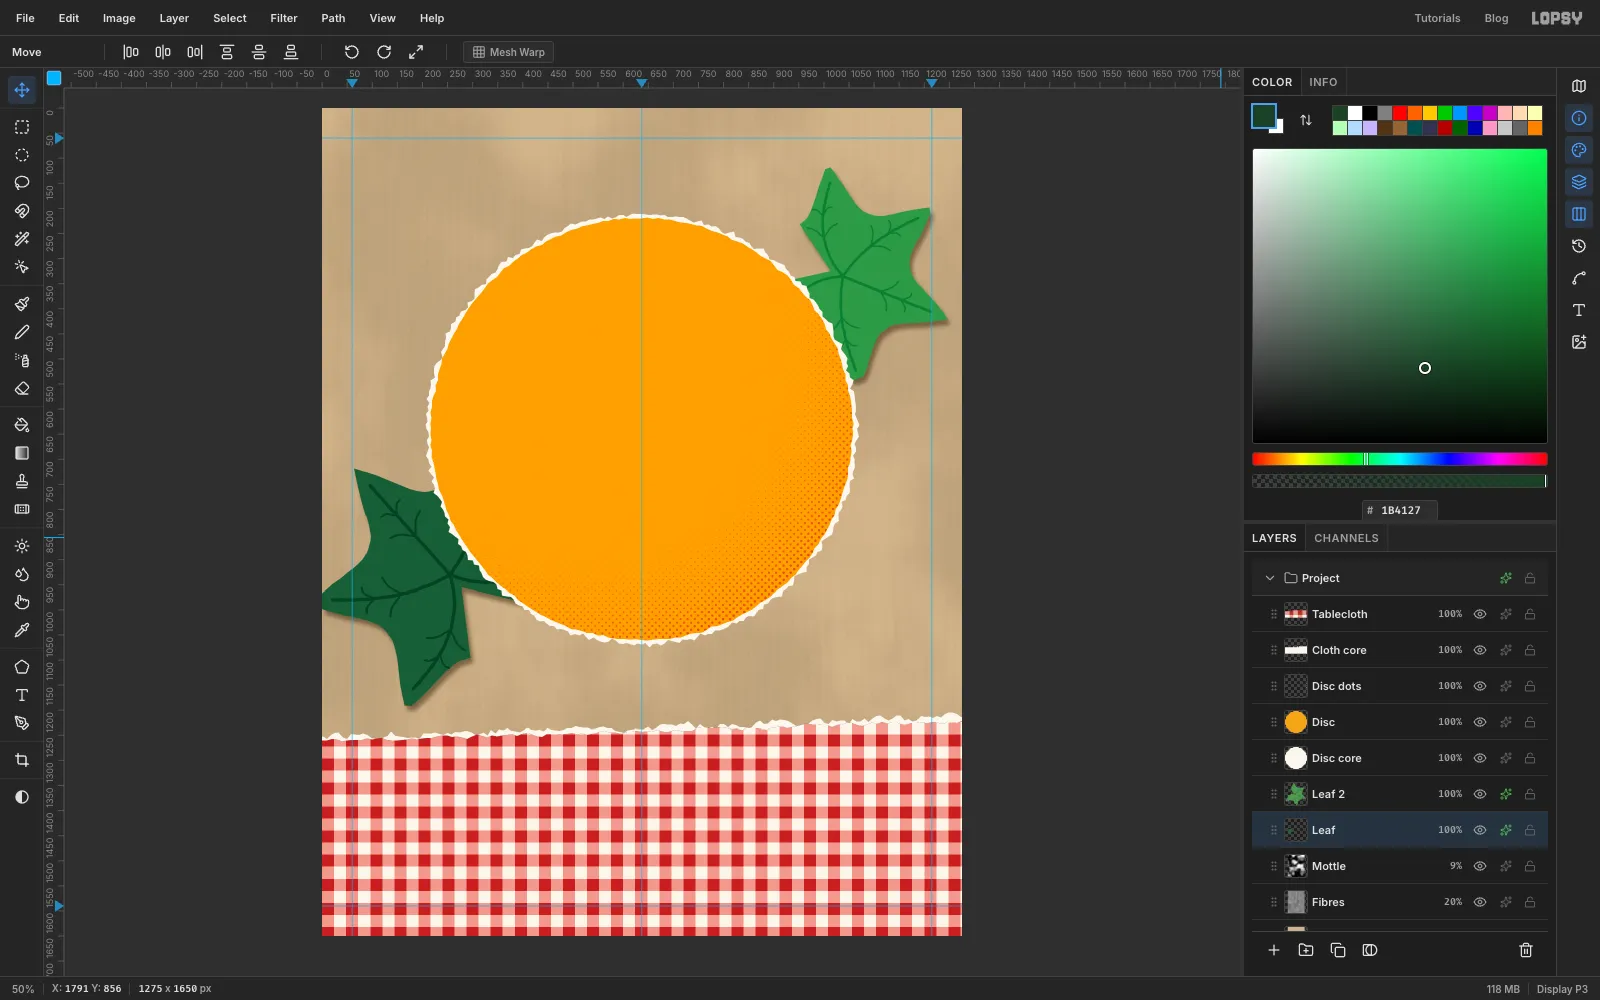
-
Drop in the first zucchini photo
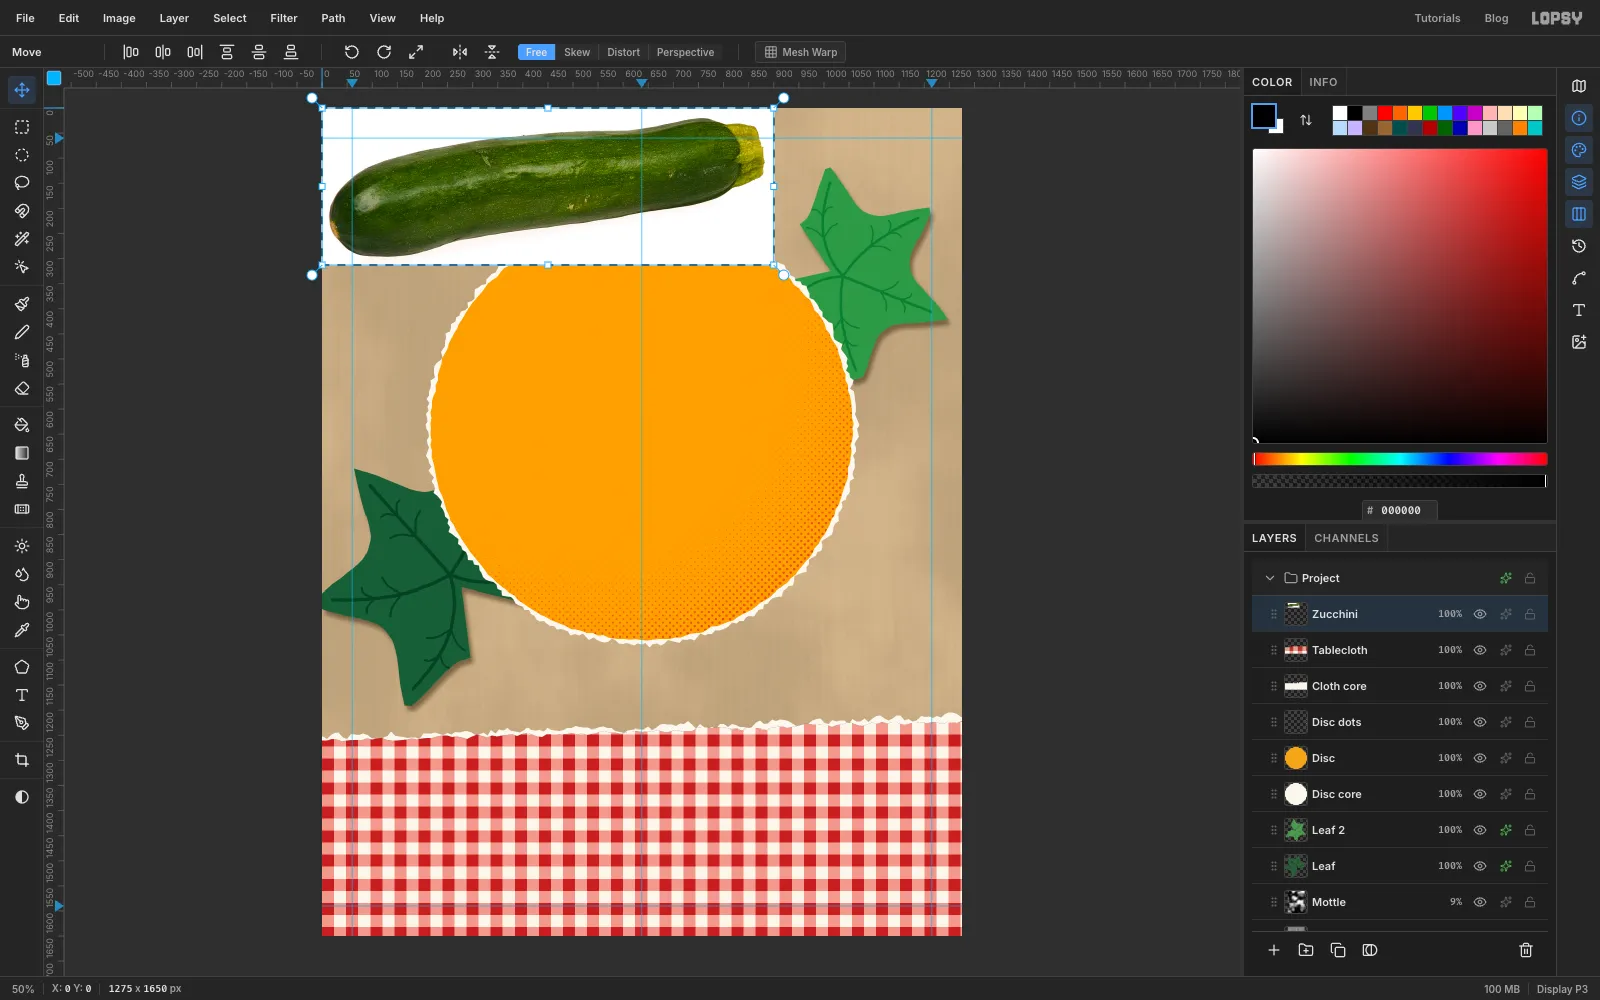
Click the Tablecloth row so the photos go above everything so far. Drag the dark green zucchini photo from your desktop onto the canvas. It lands in the top-left corner on a new layer; rename it Zucchini.
-
Select the white background
Pick the Magic Wand, set Tolerance to
42and leave Contiguous on. Click the white in the photo's top-left corner, then Shift-click the white in the bottom-right corner to add the rest. Press Delete and deselect.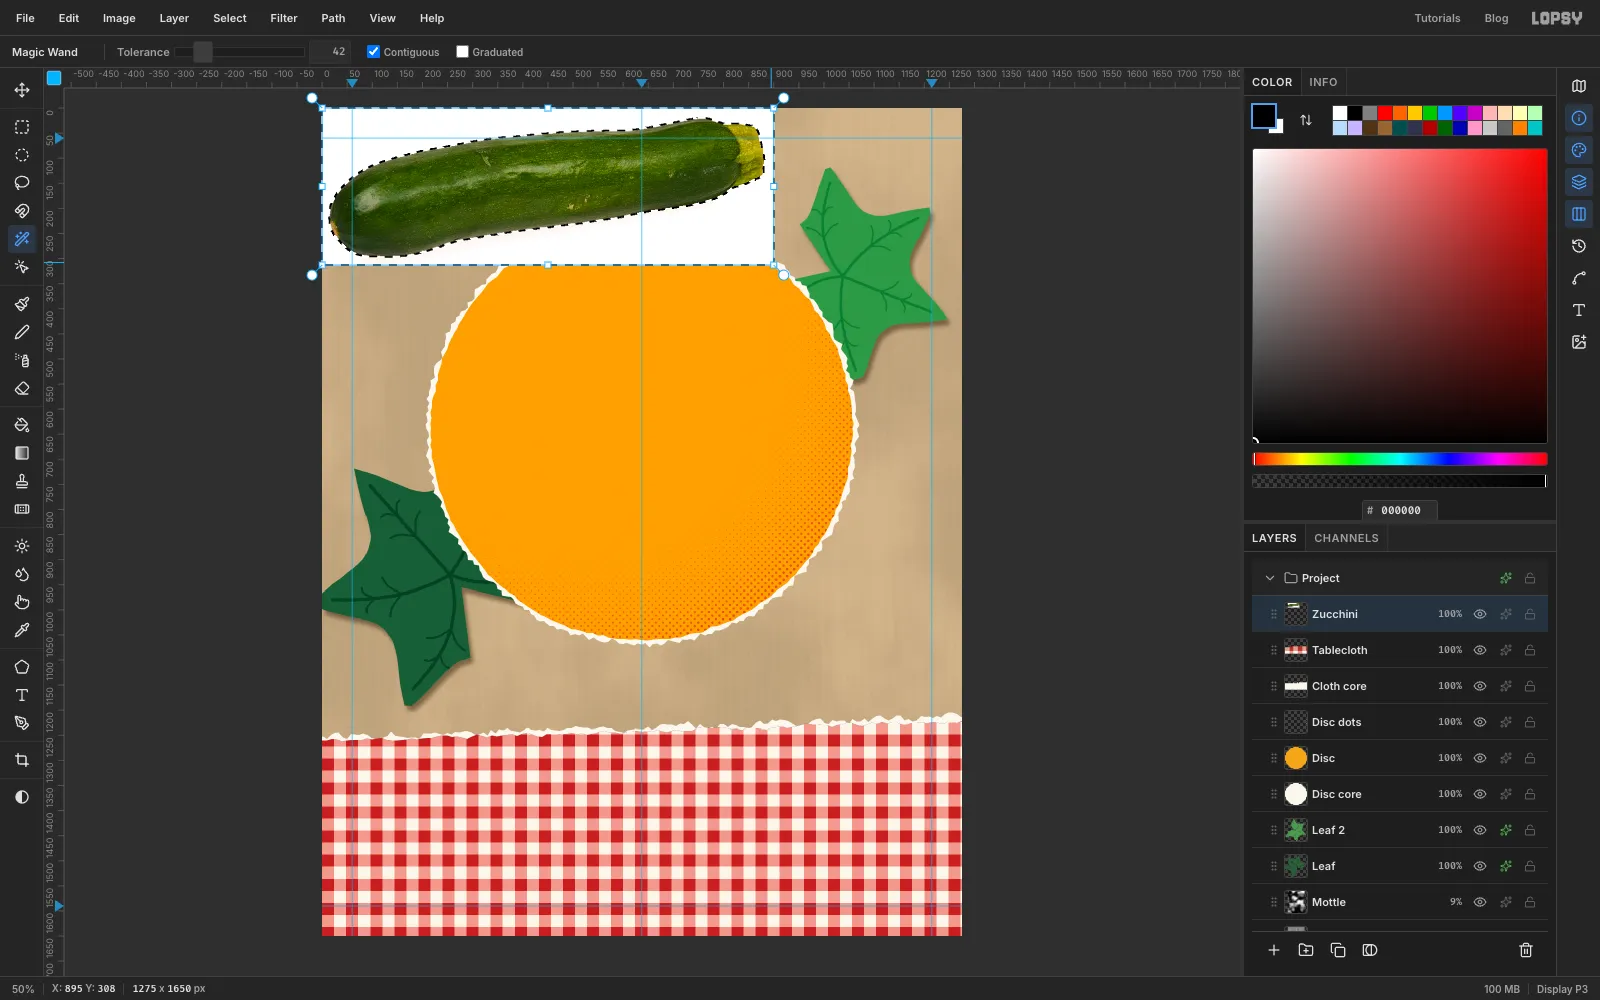
-
Trim the grey fringe
The photo's soft grey shadow leaves a faint rim. Cmd-click the Zucchini thumbnail, choose Select → Shrink… with
2, then Select → Inverse (Cmd+Shift+I) and press Delete. Deselect.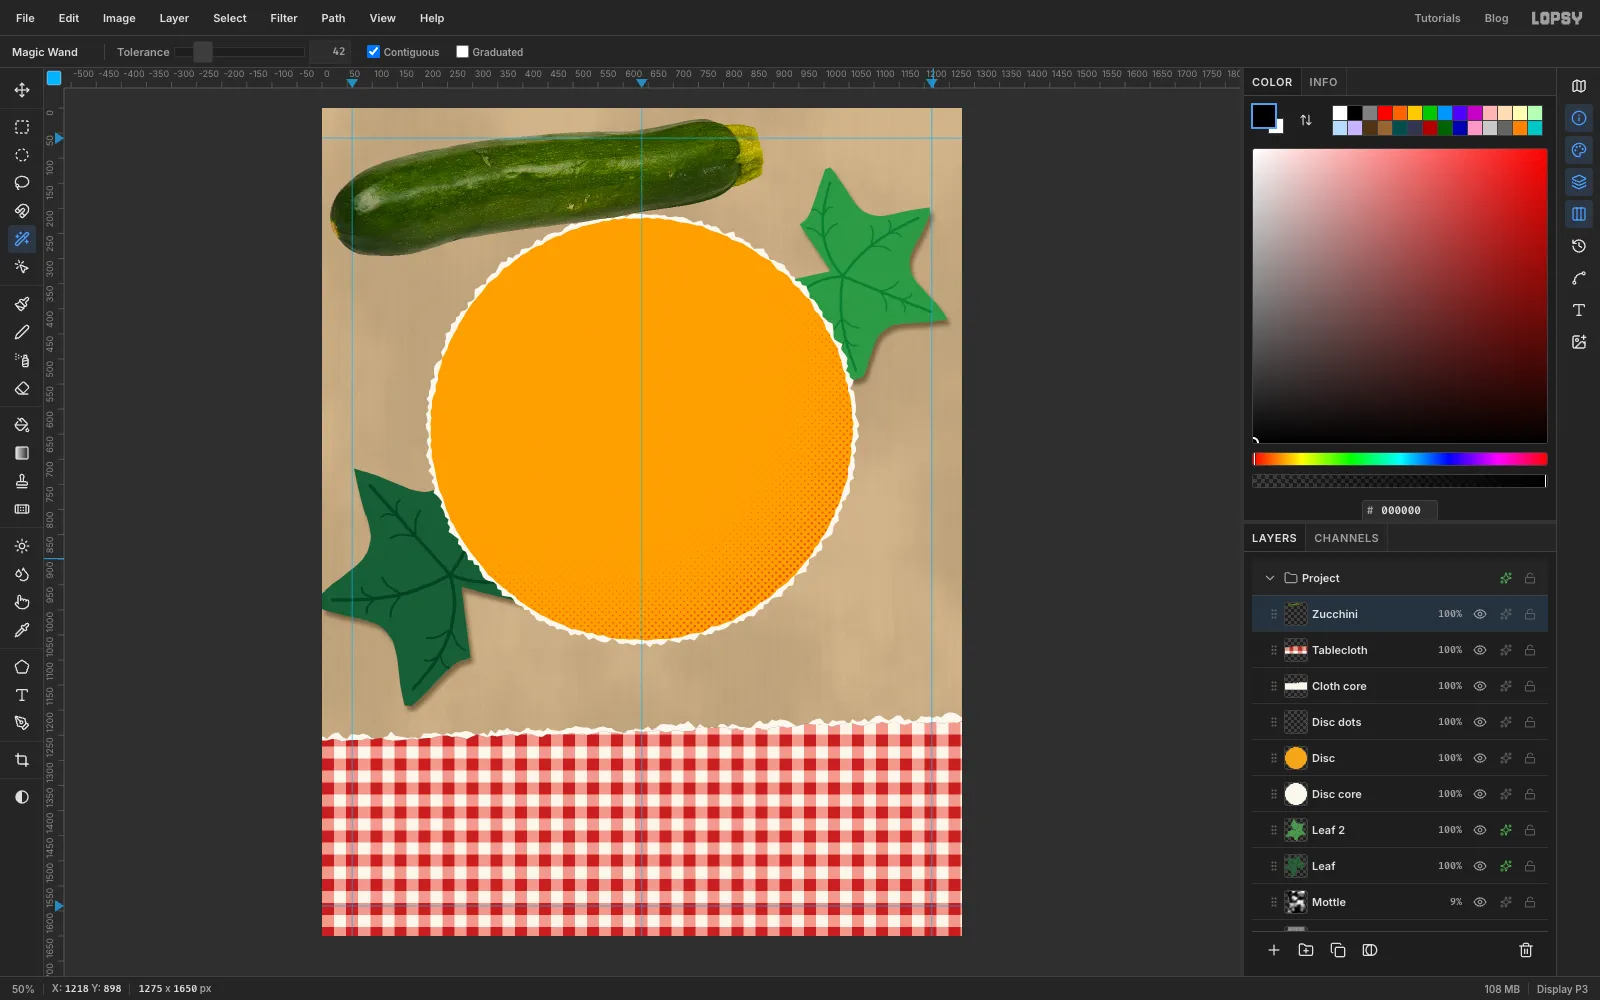
-
Scale the zucchini
With the Move tool, drag the zucchini onto the disc, centred around
600, 610. Cmd-click its thumbnail, then Cmd-drag the bottom-right corner handle about 70 px in to make it a little smaller. Press Enter and deselect.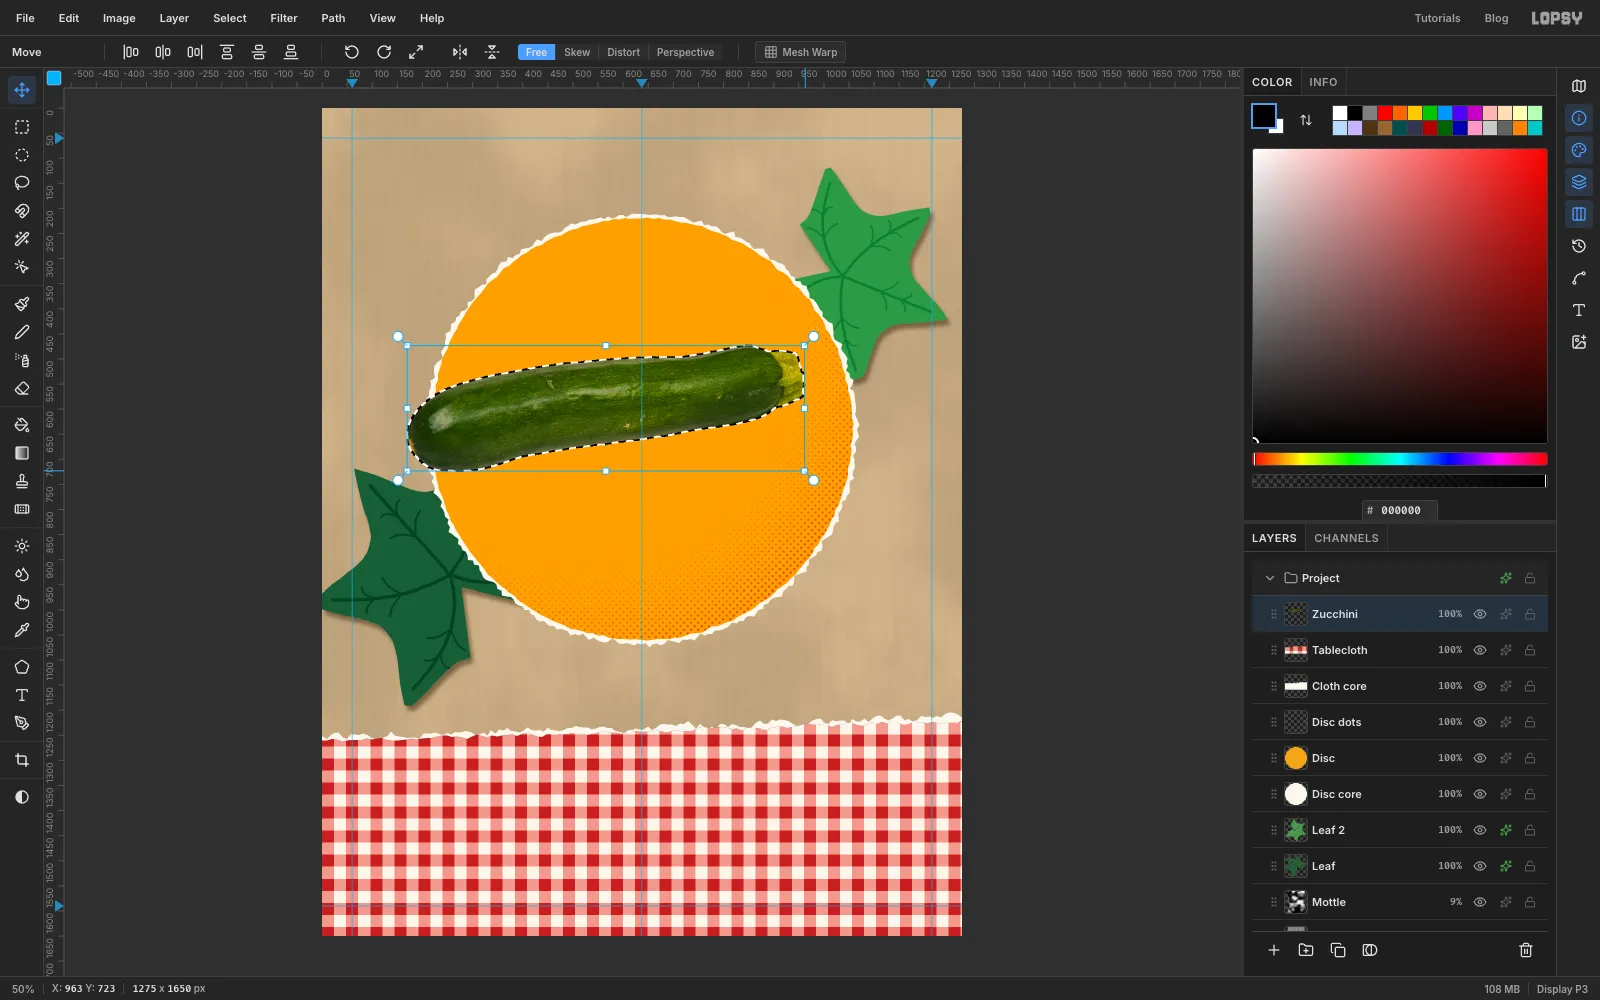
-
Rotate it on the diagonal
Cmd-click the thumbnail again and drag the rotation handle at the top-right corner about 33° clockwise, so the zucchini runs from the upper left of the disc towards the lower right. Press Enter and deselect.
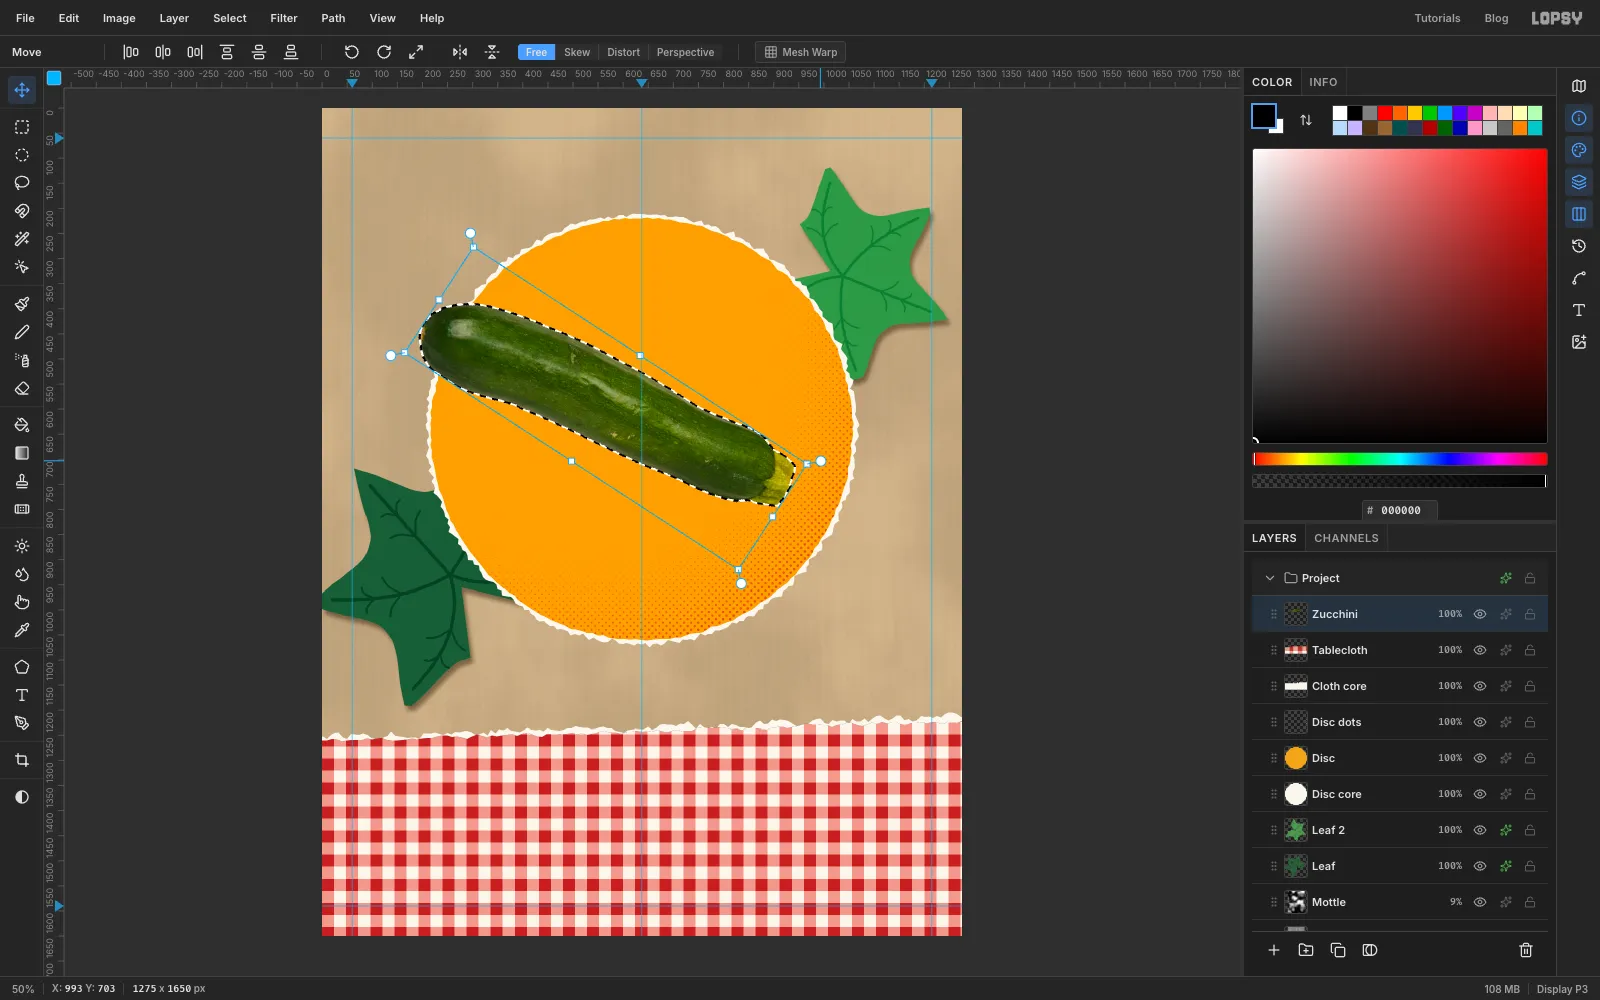
-
Give it a scissor border
Open the effects drawer. Turn on Stroke with Width
9, position outside, colour . That's the white margin you get when you cut a photo out with scissors. Turn on Drop Shadow with Offset X8, Offset Y14, Blur12, Opacity60, colour . The photos sit higher off the page than the paper scraps, so their shadows are deeper.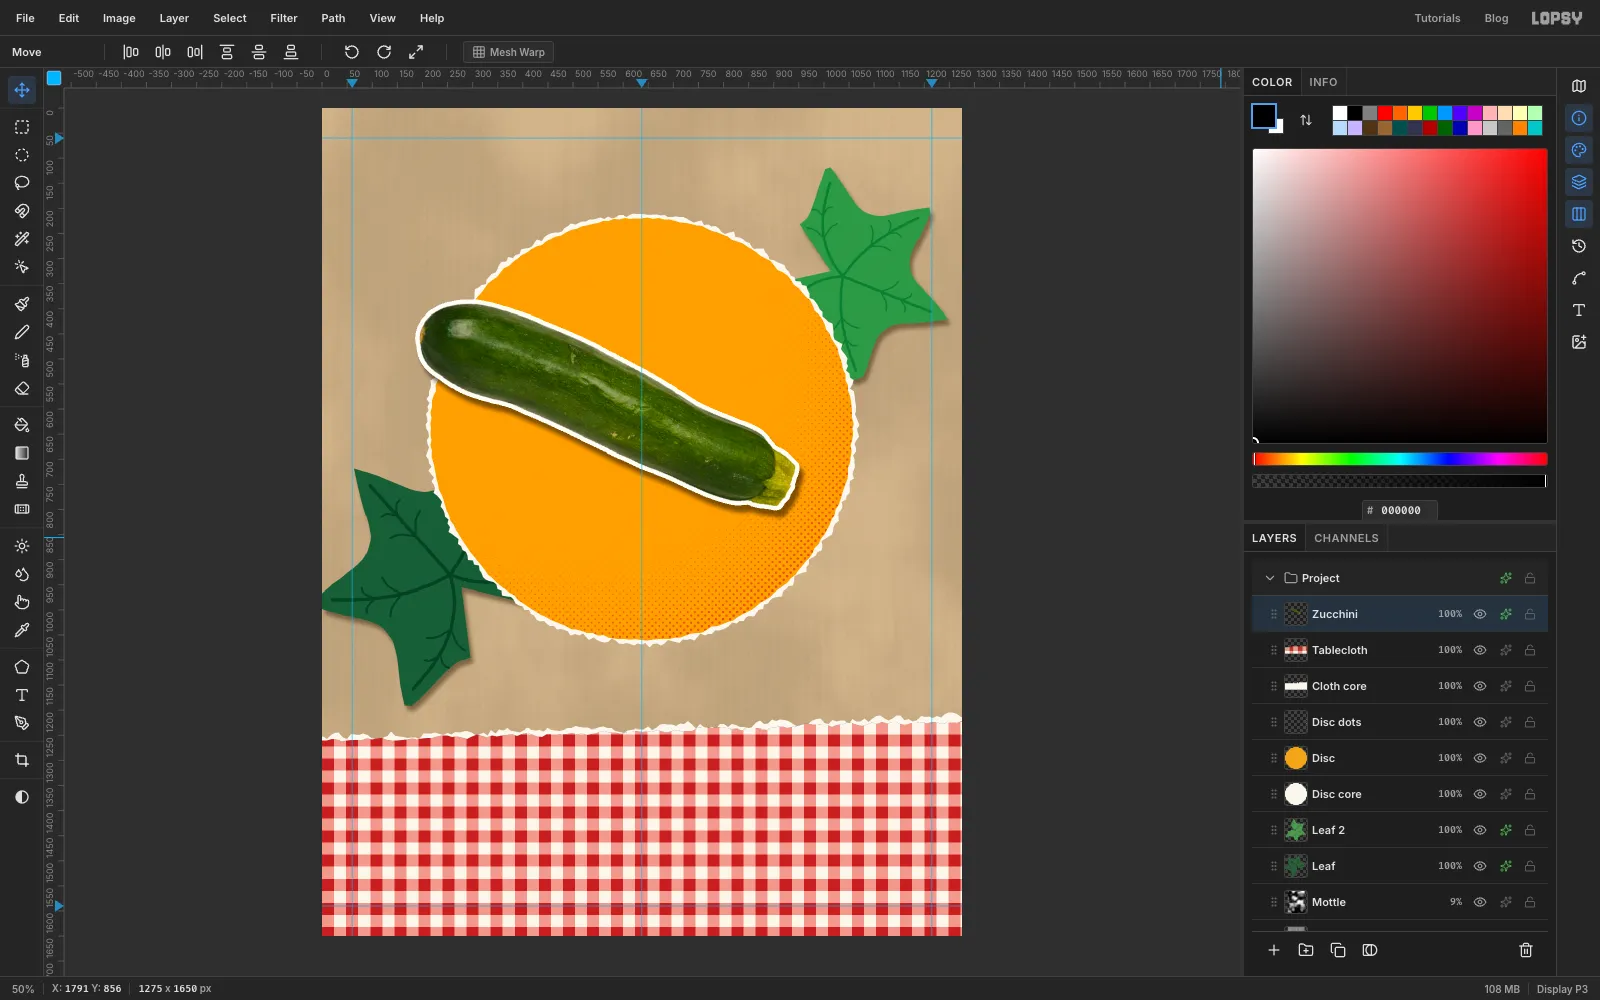
-
Cut out the striped zucchini
Drag in the striped zucchini photo and rename it Striped zucchini. Cut it out the same way as the first. Click the white in one corner with the Magic Wand (still at
42), then Shift-click the white in the other corners until the ants run all around the zucchini. Press Delete and deselect. Then trim the fringe: Cmd-click the thumbnail, Shrink2, Cmd+Shift+I, Delete, deselect.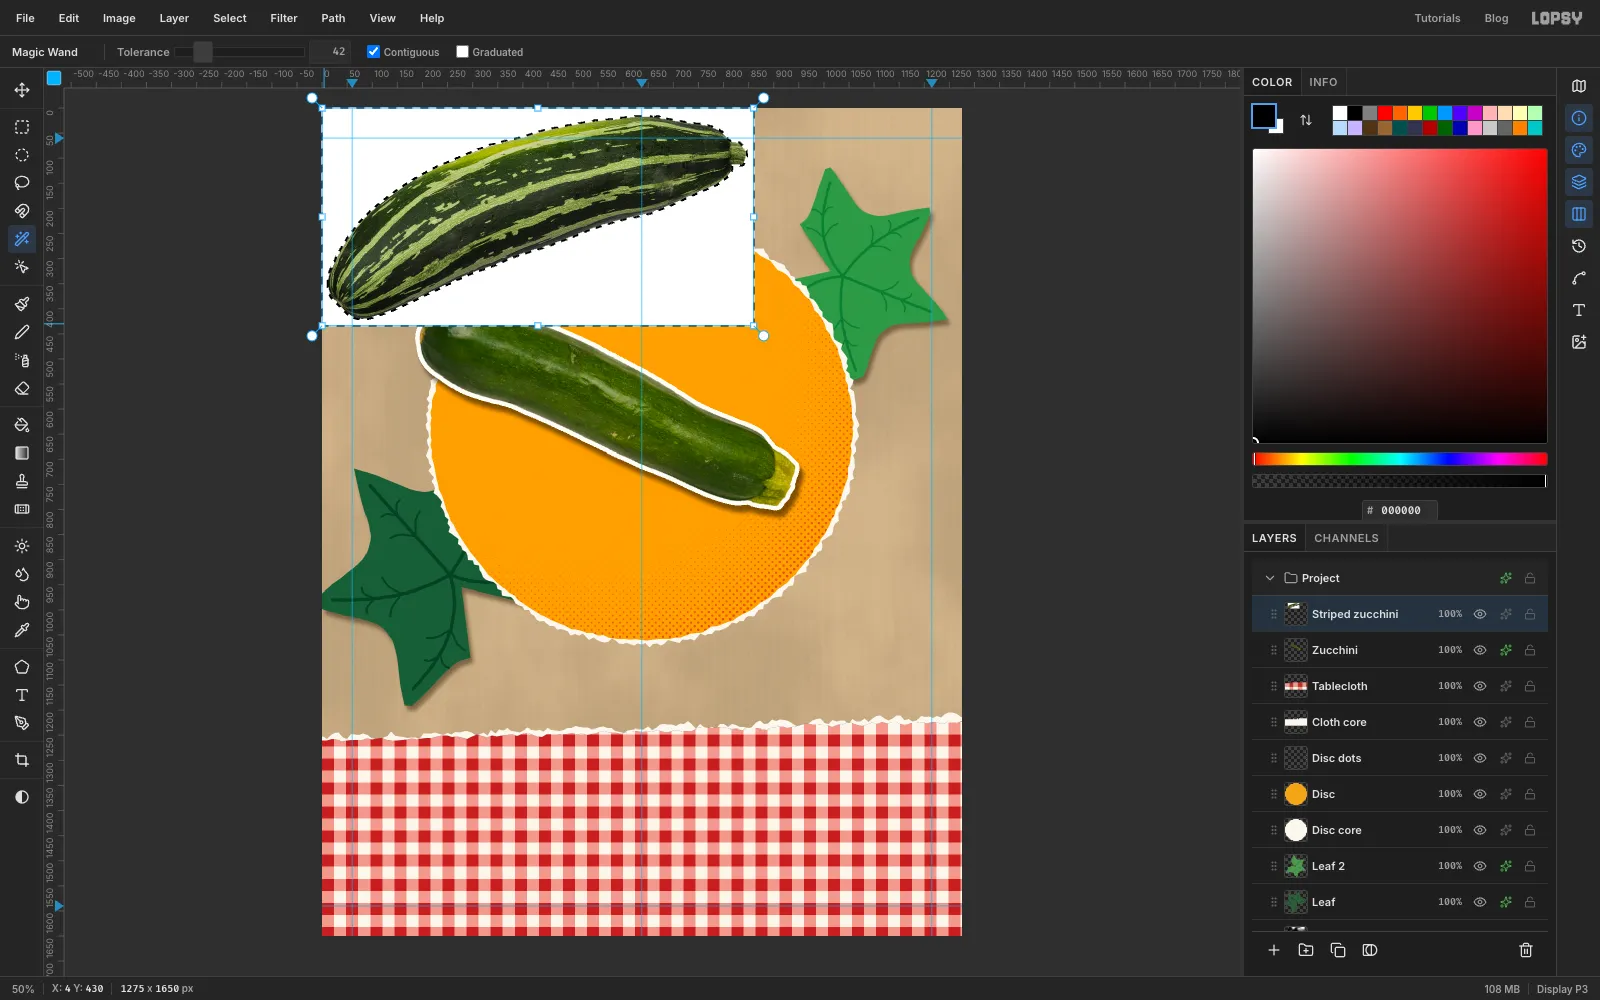
-
Cross it over the first one
Drag it with the Move tool onto the disc, centred around
675, 680. The photo already lies on a slant, rising to the right, so it only needs a small turn: Cmd-click its thumbnail and rotate it about 16° anticlockwise until it crosses the first zucchini in a steep X. Press Enter, deselect, and give it the same Stroke and Drop Shadow as the first.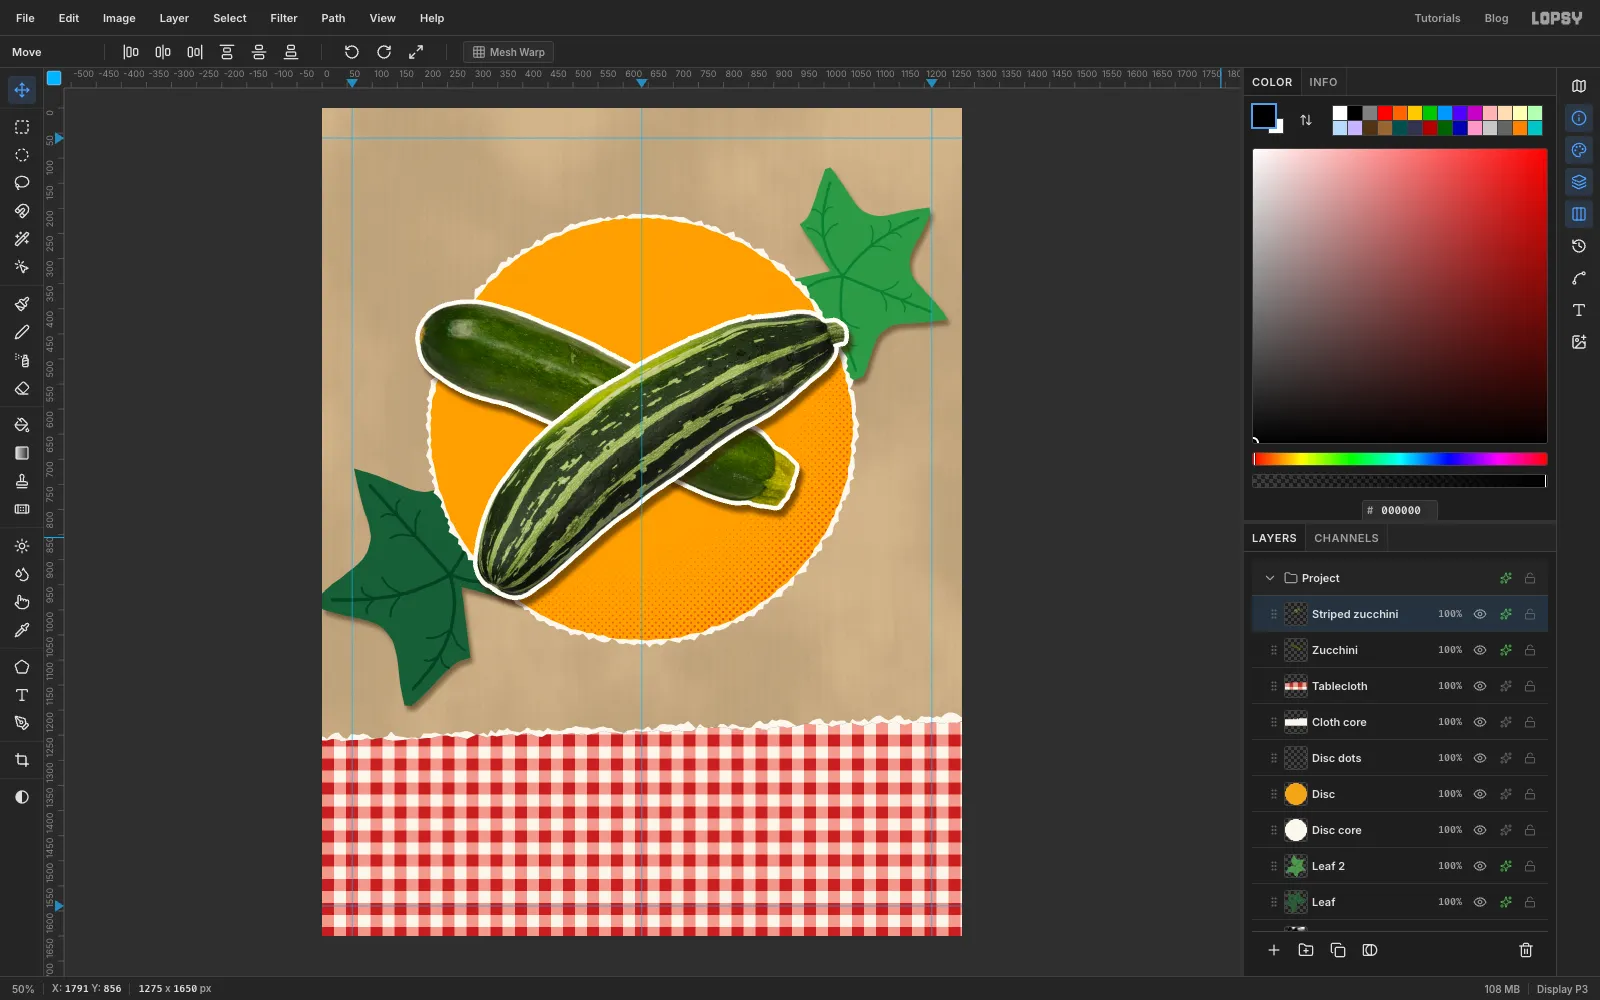
-
Select the blossom's petals
Drag in the courgette flower and rename it Blossom. This photo has leaves behind it rather than white, so select the flower instead of the background. Set the Magic Wand Tolerance to
70, click one petal, then Shift-click each of the other four petals and the green centre.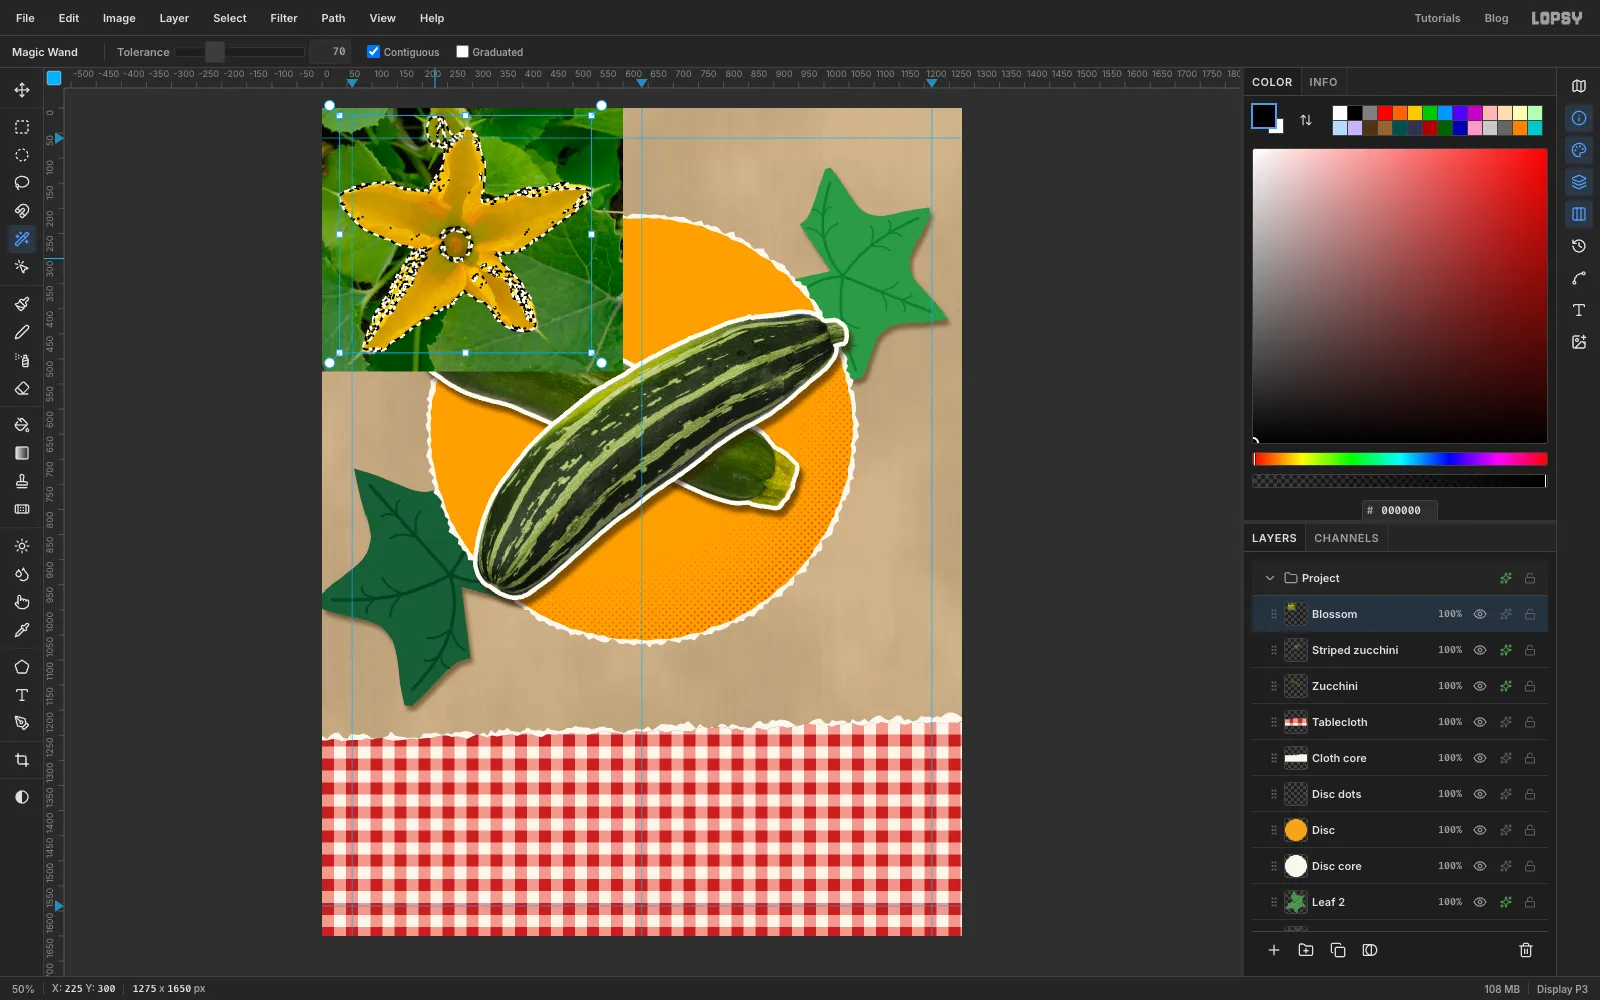
-
Close the holes and cut it out
The bright, hairy petal edges leave little gaps in the selection. Choose Select → Grow…
8, then Select → Shrink…10. Growing closes the gaps, and shrinking by a little more than you grew pulls the edge just inside the green fringe. Press Cmd+Shift+I, Delete, and deselect.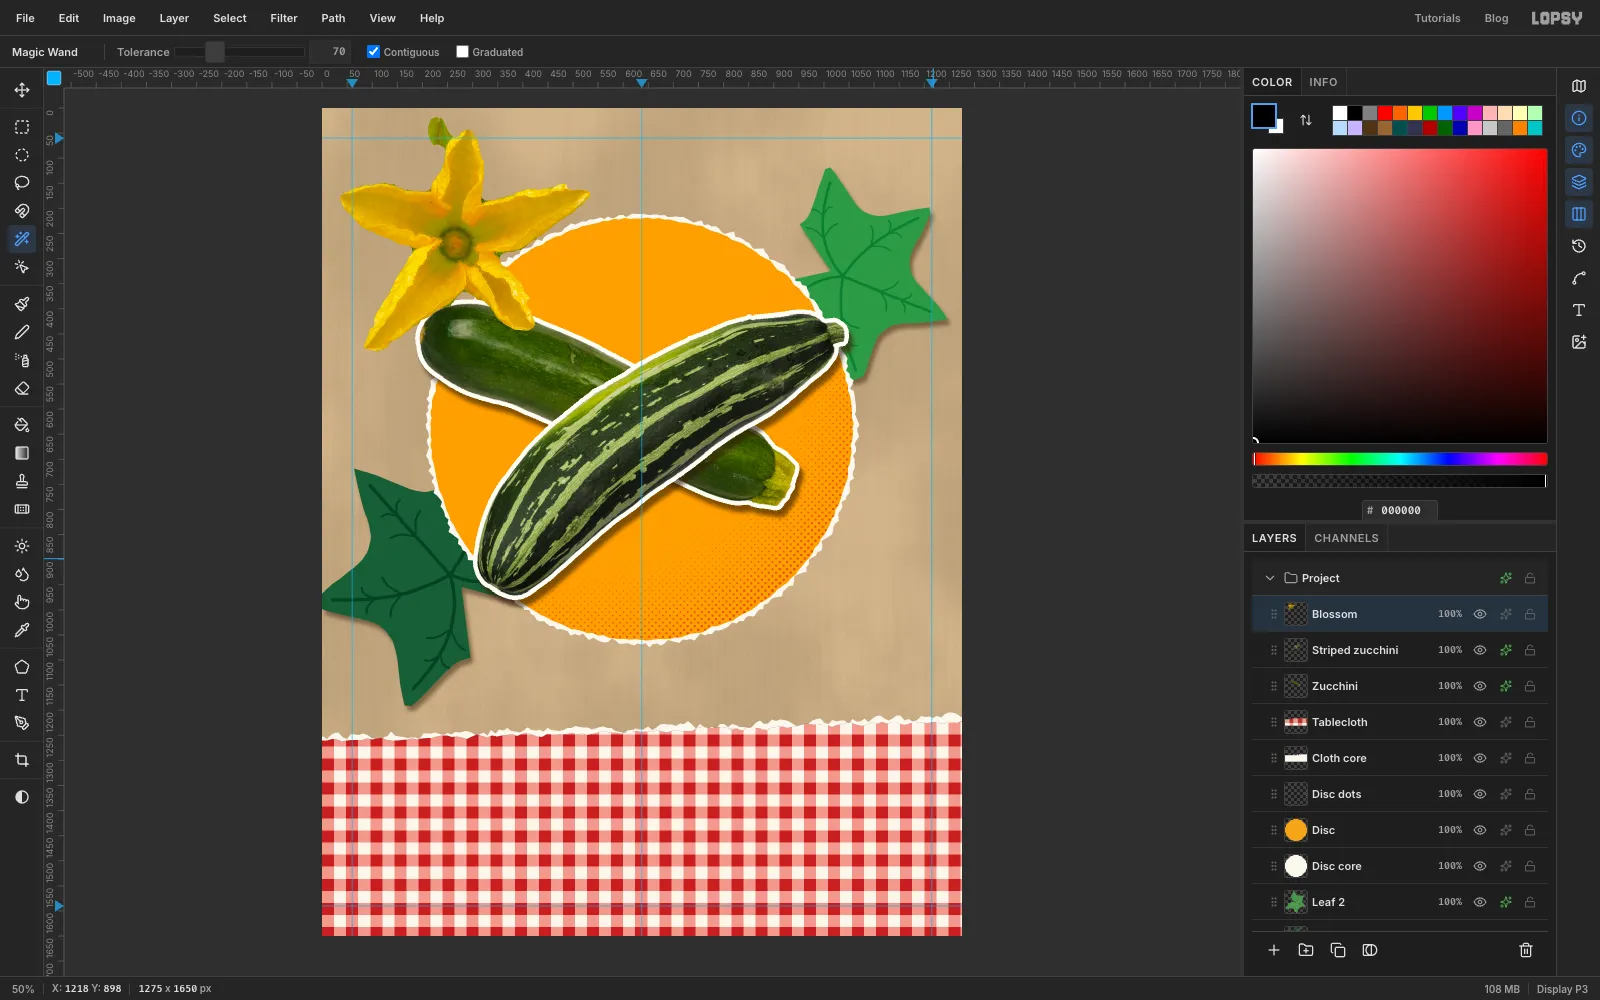
-
Pin the blossom where the zucchini cross
Move the blossom to the disc, then Cmd-click its thumbnail and Cmd-drag a corner about 150 px inwards. Press Enter, select it again and rotate it about 14° clockwise. Move it so its centre sits right where the zucchini cross, at about
640, 640. Give it a Stroke of Width8in and the same deep Drop Shadow as the photos.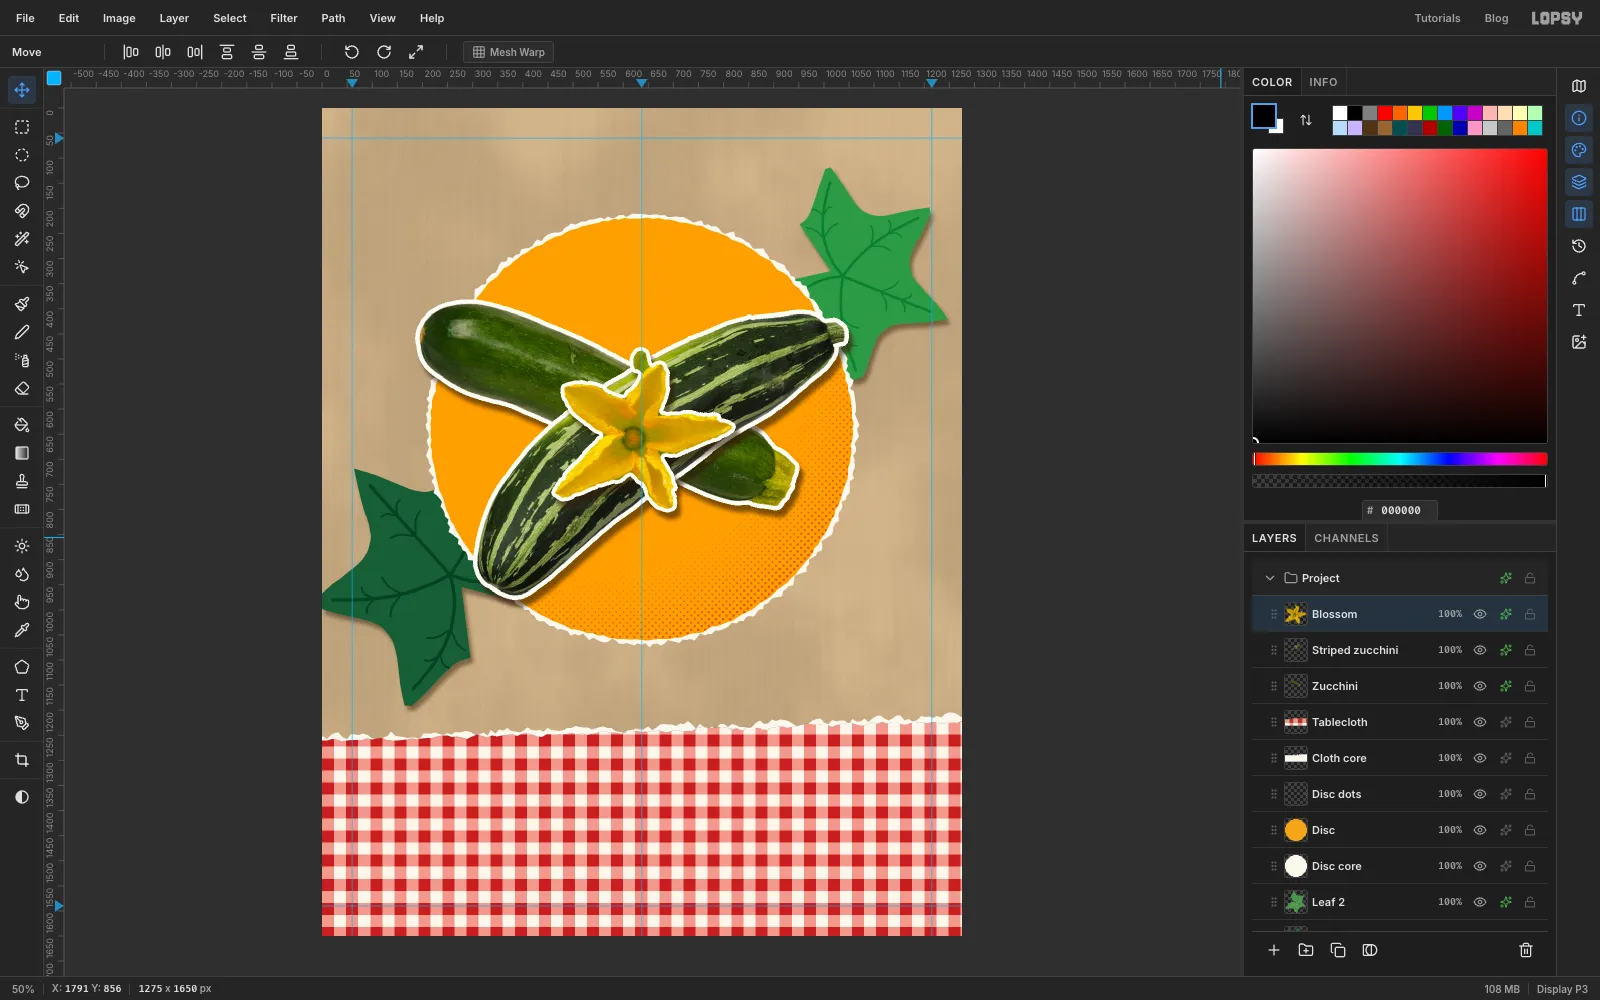
-
Tear a black strip for POTLUCK
Click the Blossom row. As with the tablecloth, make an off-white Strip core layer and a Strip layer on top of it. On Strip core, lasso a band that runs slightly uphill, from about
y 1118to1330at the left edge up toy 1050to1262at the right. Wobble the top and bottom edges; the ends run off the canvas. Fill it with and deselect. On Strip, lasso the same band again a little inside the first, fill it with and deselect.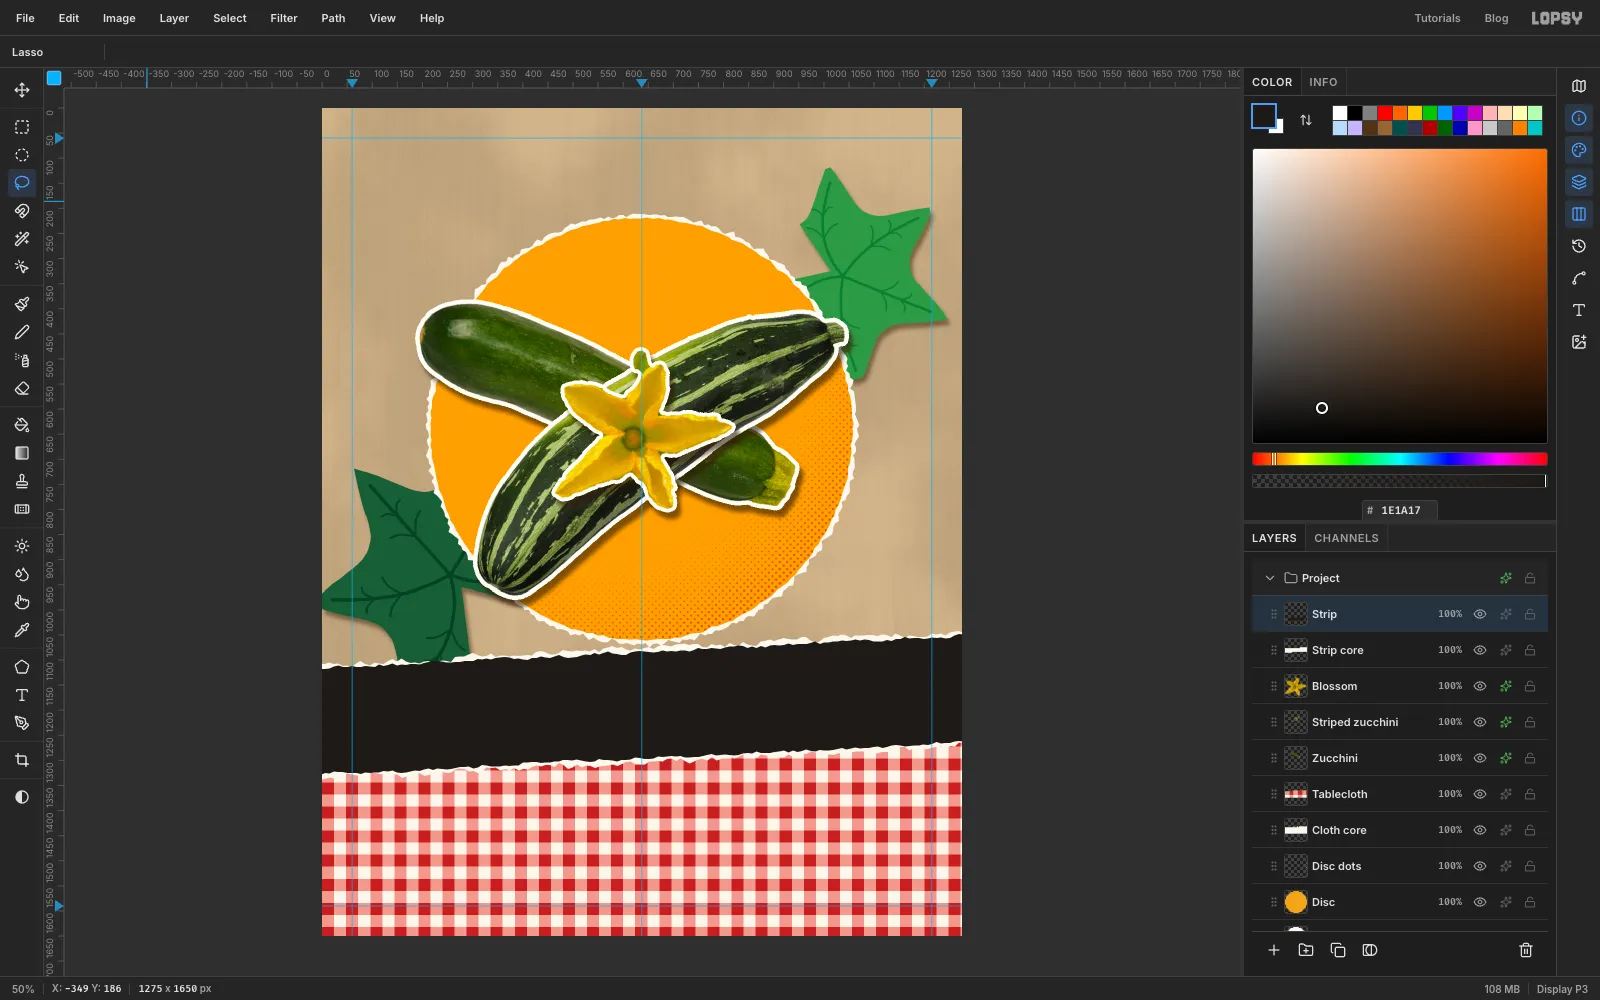
-
Set POTLUCK
With Strip selected, pick the Text tool. Choose Bowlby One in the font menu, set Size to
170and the foreground to . Click on the strip, typePOTLUCKand click the ✓ to commit.With the Move tool, nudge it with the arrow keys (Shift + arrow moves 10 px) until the word is centred on
637, 1184.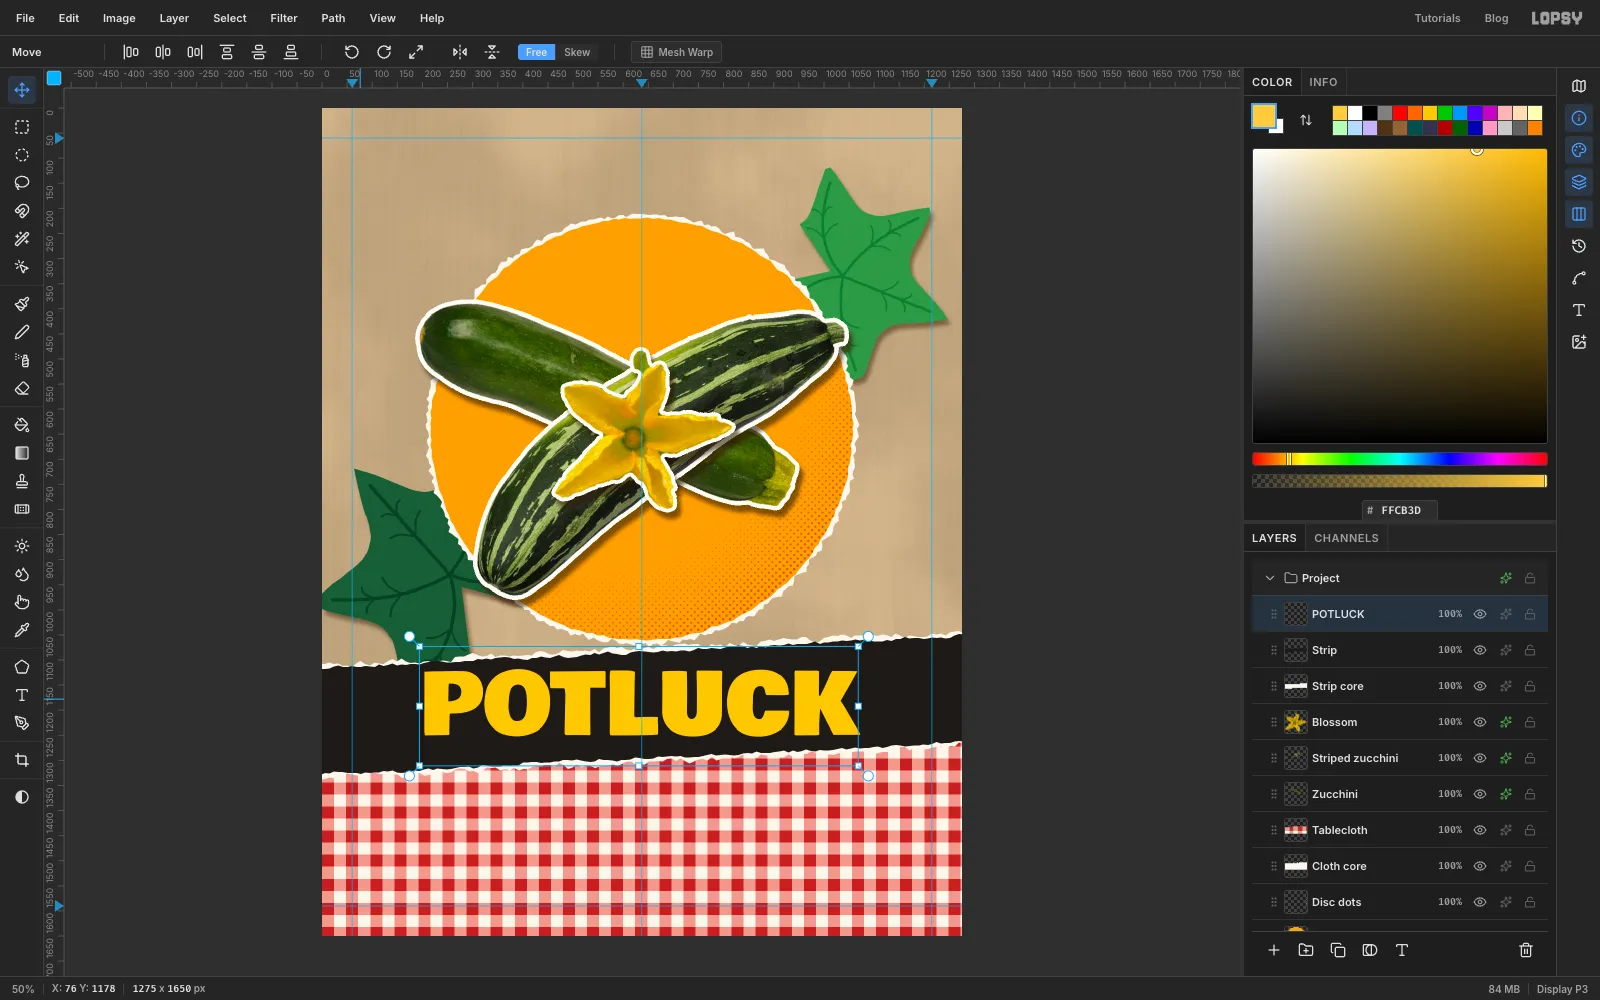
-
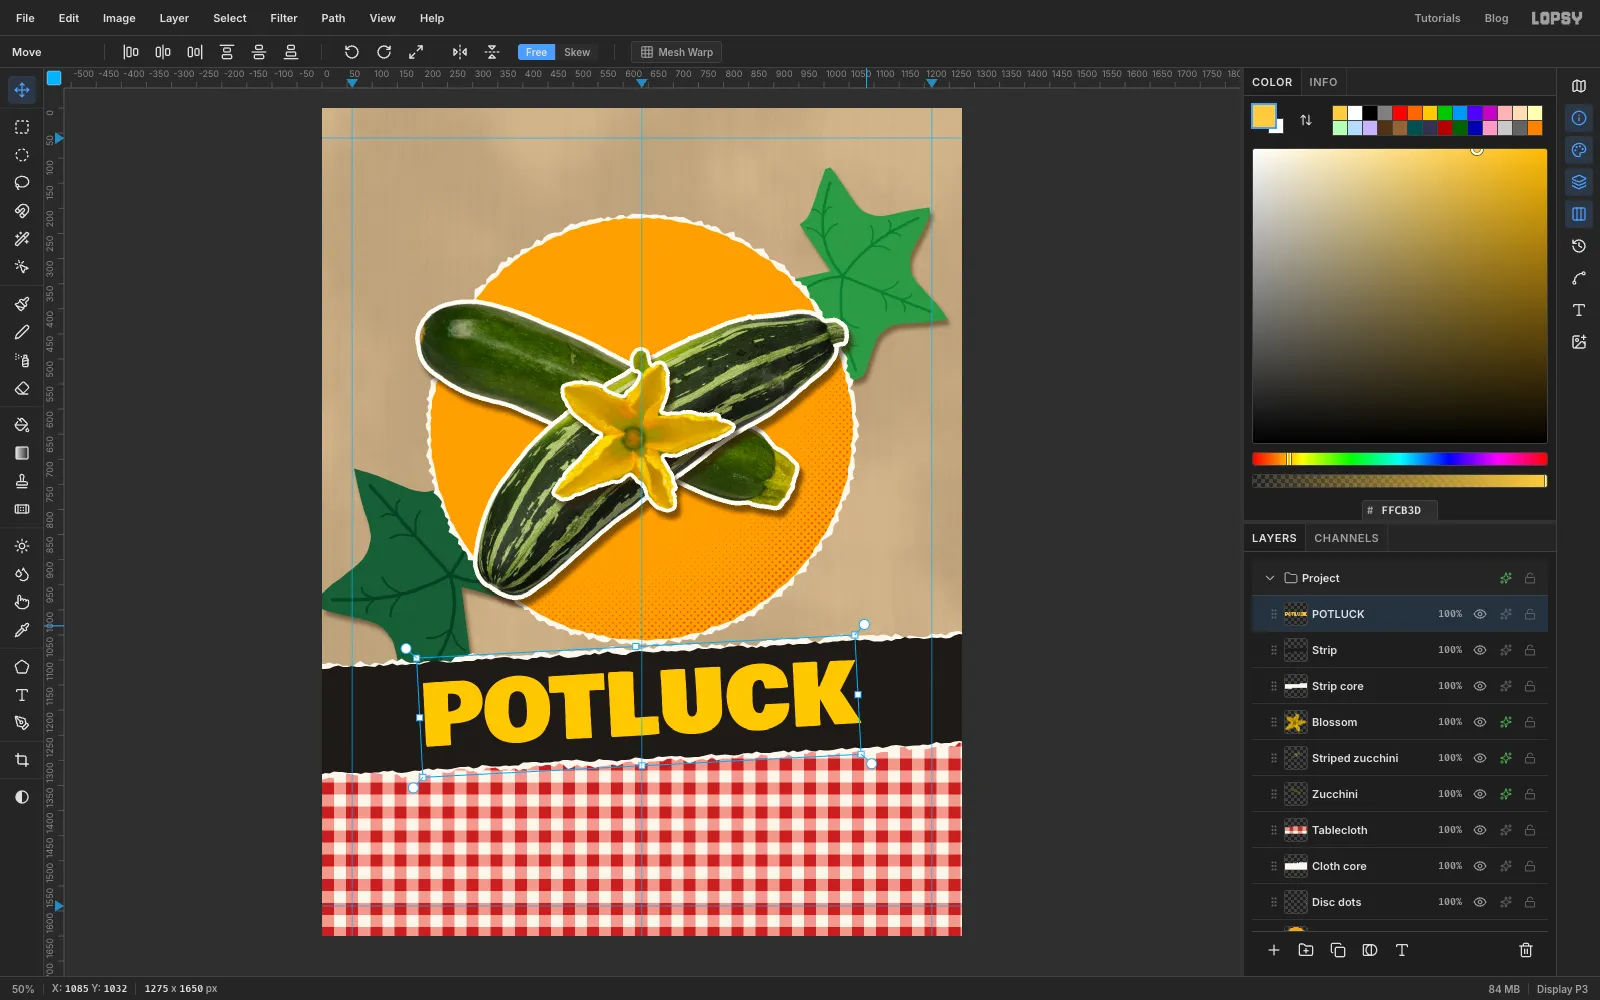
Tilt POTLUCK to match the strip
The strip climbs about 3°, so the word should too. With the text layer selected and the Move tool active, drag the rotation handle at the top right of its box about 3° anticlockwise. The text stays live and editable. Press Enter, then nudge it back to centre if it drifted.
-
Start the ransom-note headline
Each letter of ZUCCHINI gets its own scrap of paper and its own font, like letters clipped from different magazines. Click New Group in the Layers panel and name it Headline. With the group selected, click Add Layer to start the first scrap inside it. I named the scraps Z0 scrap, U1 scrap and so on, so the two Cs and two Is stay apart.
Select
62, 94to190, 262with the exact-corners dialog and fill it with cream . Run Filter → Add Noise… at9, Mono, Gaussian so it looks like paper. Then, with the scrap still selected in the Layers panel, pick the Text tool, choose Abril Fatface at155in black , click on the scrap, typeZand commit. Nudge the letter with the arrow keys until it sits in the middle of the scrap.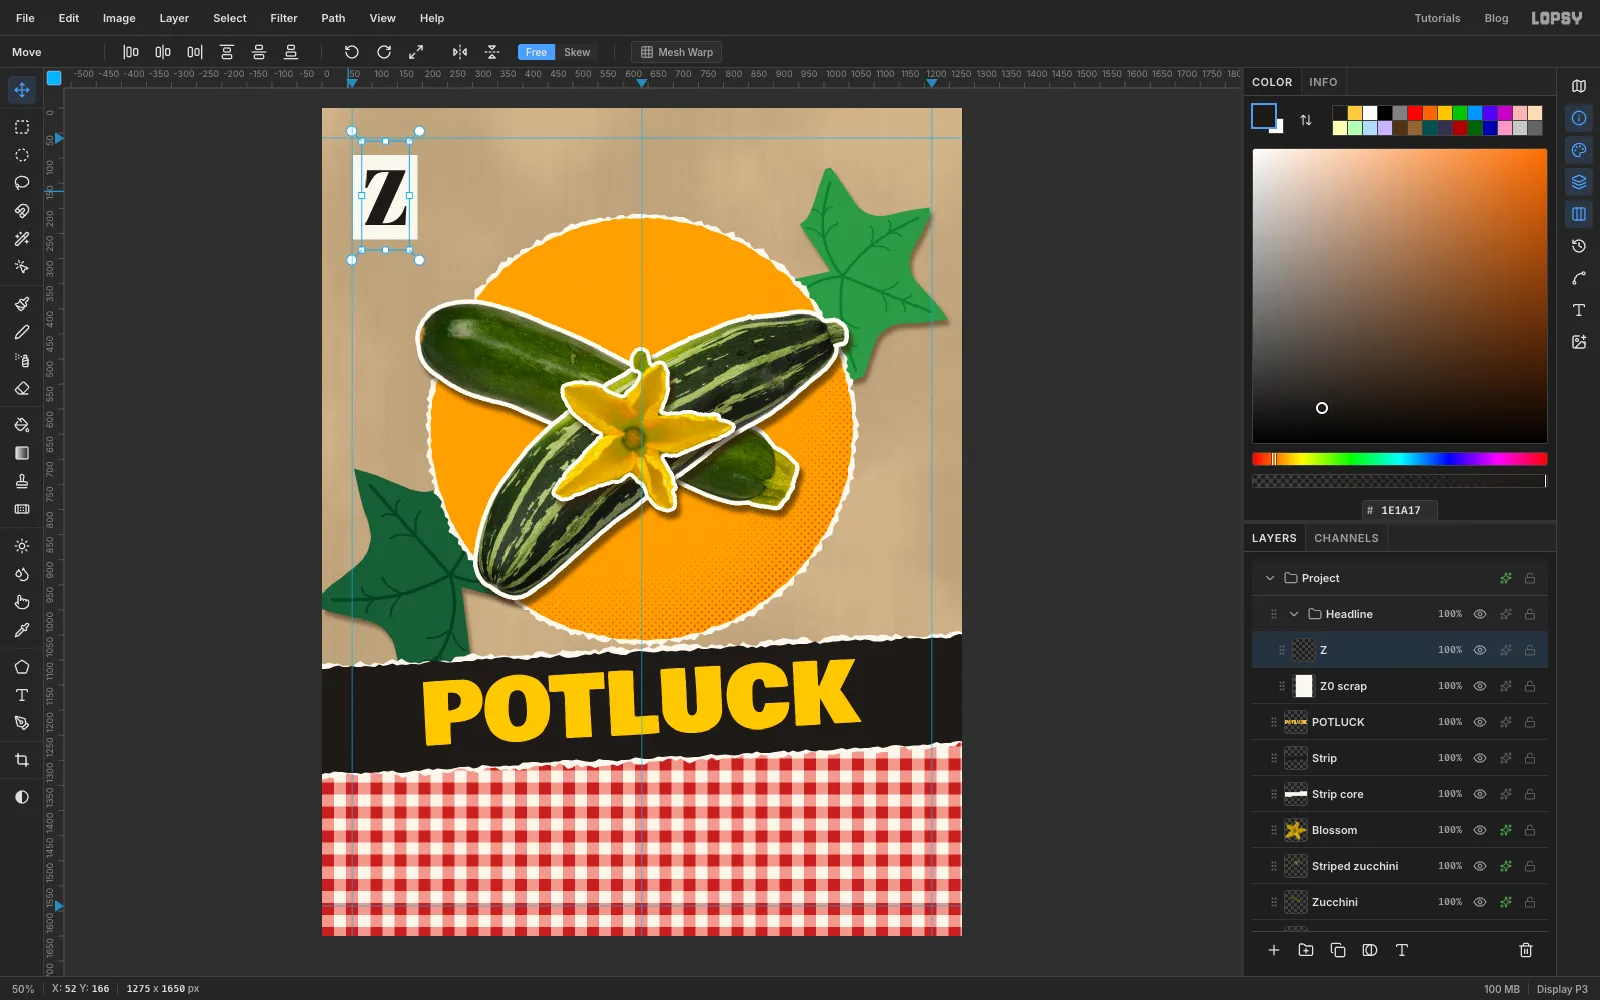
-
Merge each letter and tilt its scrap
Once the letter sits on its scrap, choose Layer → Merge Down. The letter is now printed on that piece of paper. Cmd-click the scrap's thumbnail and drag a rotation handle a few degrees, about 6° anticlockwise for the Z. Press Enter and deselect.
Give the scrap a small Drop Shadow: Offset X
4, Offset Y7, Blur8, Opacity45, colour . The screenshot shows this a few letters later, with the H being tilted.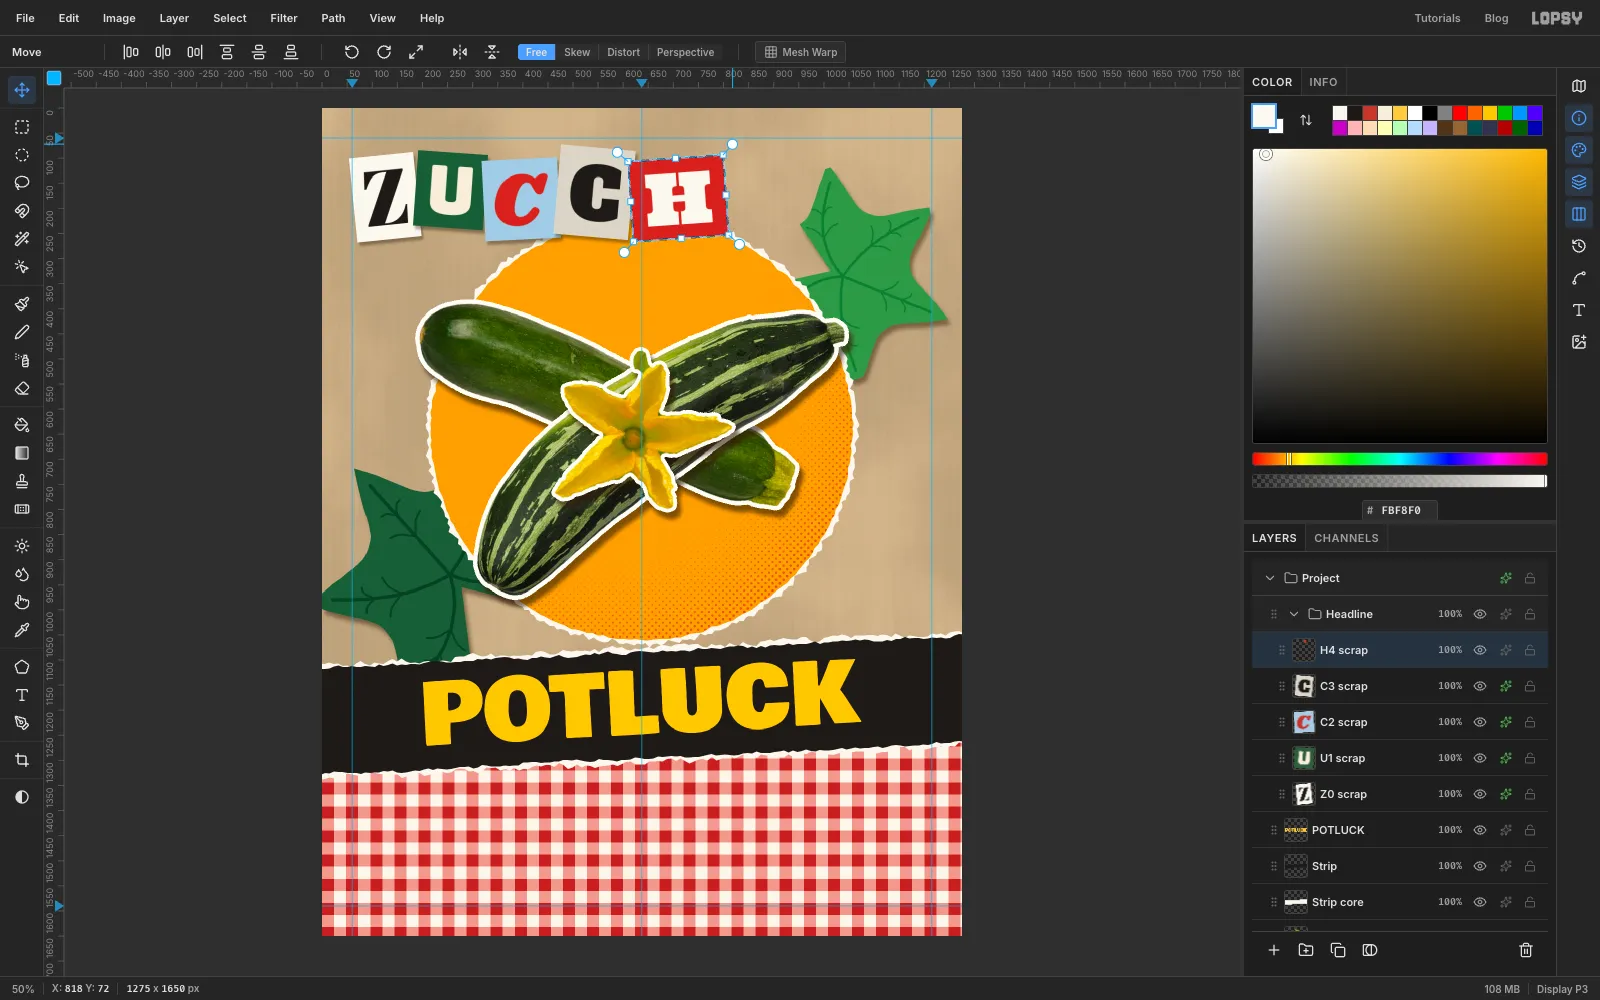
-
Finish the headline
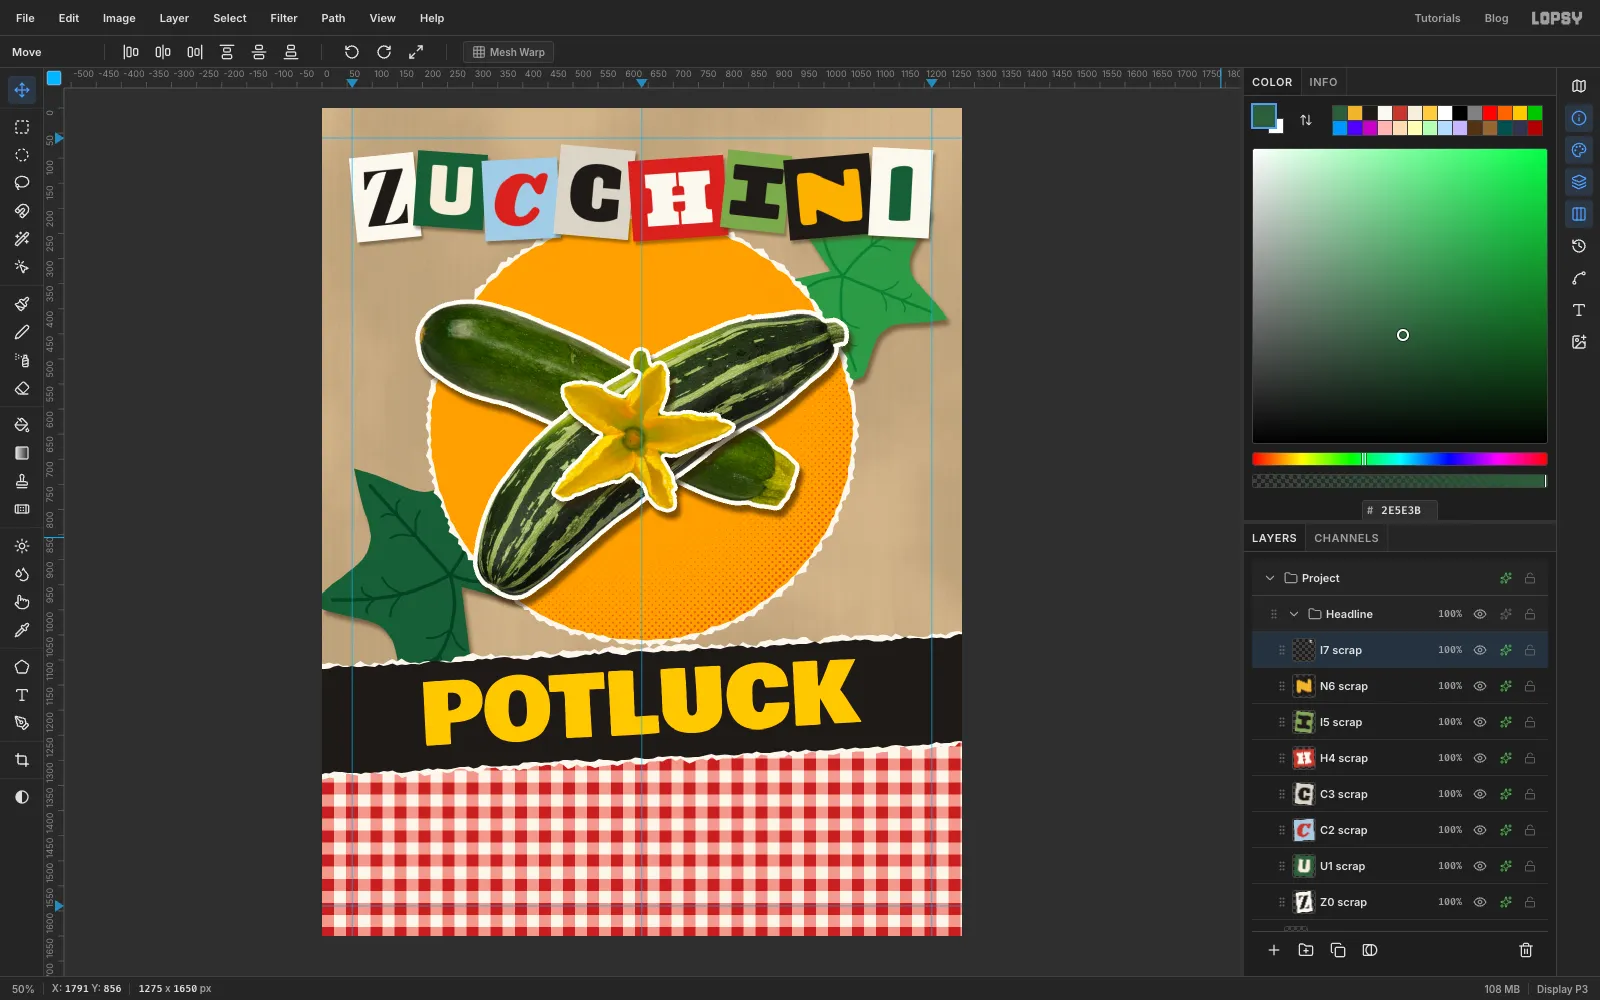
Do the other seven the same way. Before each one, click the previous scrap's row and click Add Layer, so the new scrap lands on top. Each scrap overlaps the one before by a few pixels. Alternate the tilt so the word bounces:
- U:
186, 89to326, 239in green , Bungee132in cream , a little clockwise - C:
322, 102to472, 262in sky , Shrikhand152in red , a little anticlockwise - C:
468, 79to618, 257in newsprint (Add Noise14here), Alfa Slab One142in black, clockwise - H:
615, 100to805, 260in red , Ultra143in cream , anticlockwise - I:
801, 89to929, 244in sage , Rubik Mono One143in black, clockwise - N:
925, 97to1097, 257in black , Chango147in yellow , anticlockwise - I:
1093, 81to1213, 257in cream , Titan One154in green , a little clockwise
Step back and check that each letter sits in the middle of its scrap with an even margin. If one looks low, nudge it before you merge.
- U:
-
Select the POTLUCK letters
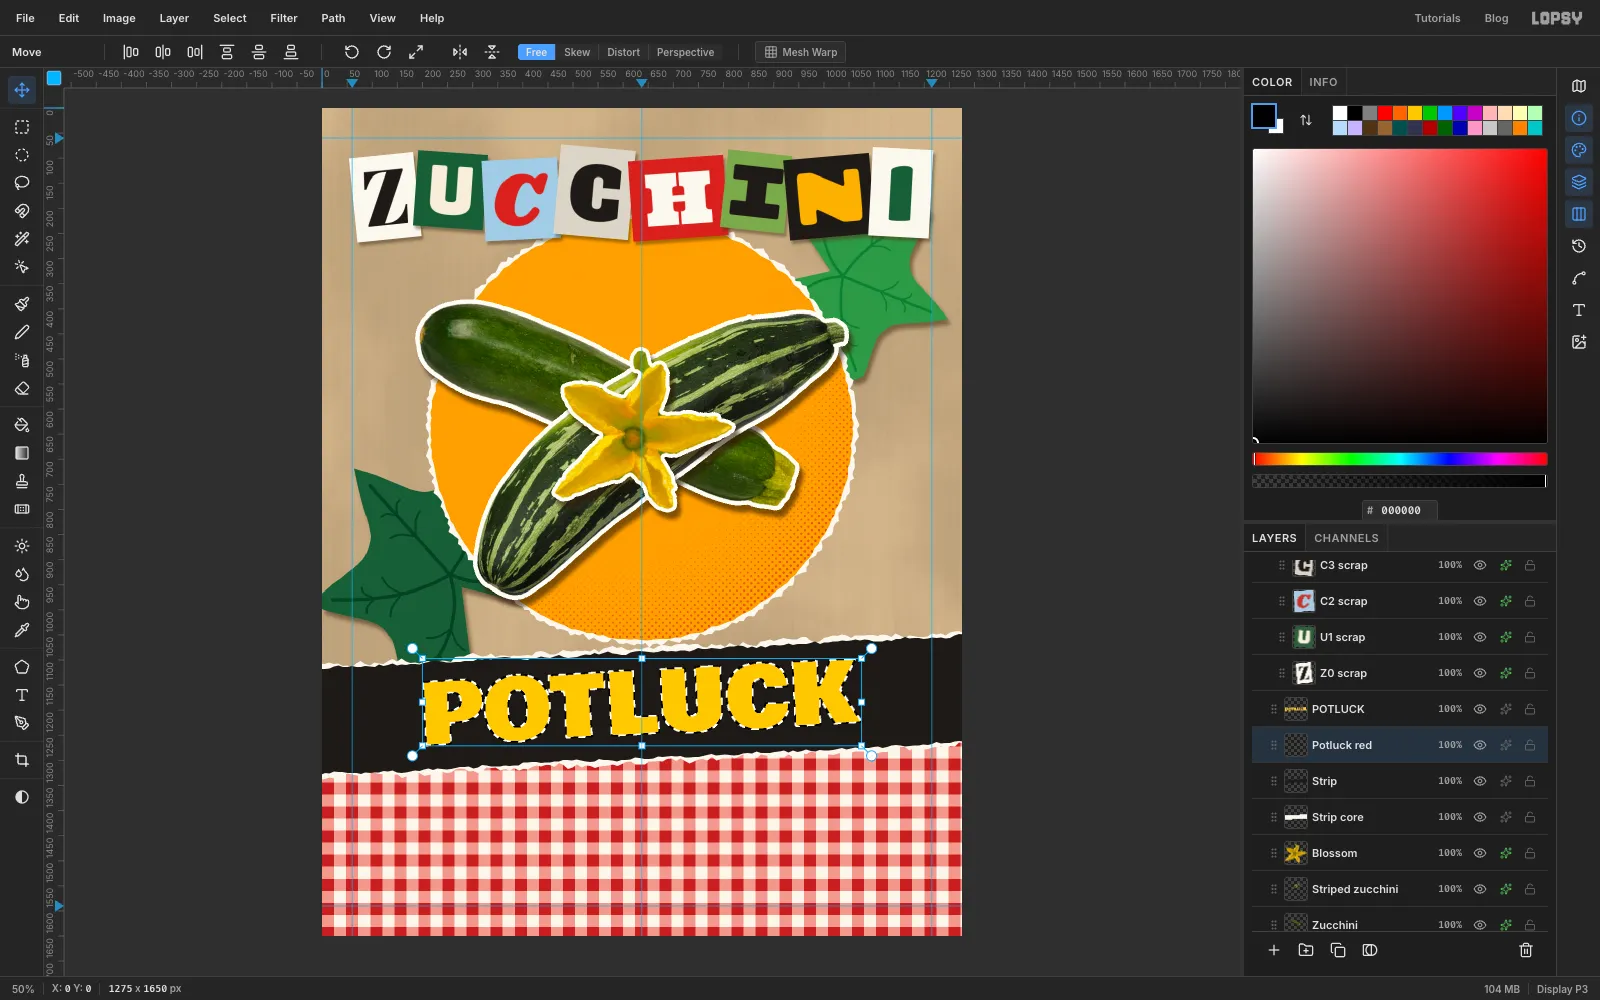
A cheap print job often has a second ink that doesn't quite line up. Click the Strip row and add a layer named Potluck red, which sits between the strip and the word. Cmd-click the POTLUCK thumbnail to select the letters.
-
Offset a red under-print
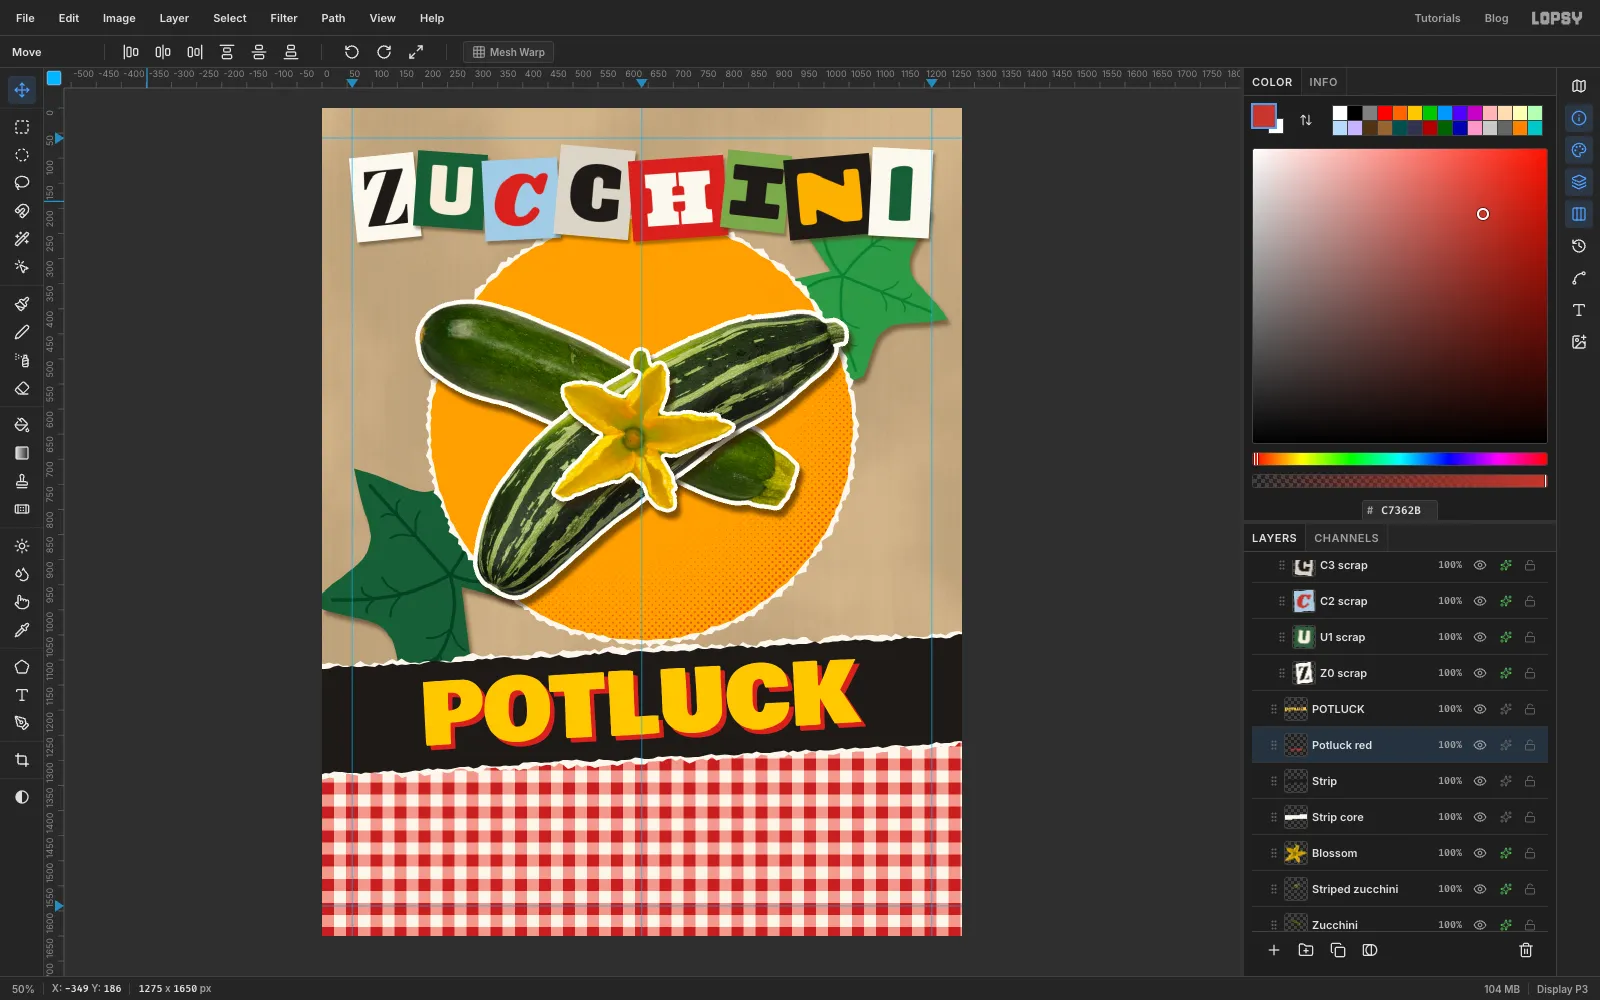
Fill the selection with tomato red and deselect. Pick the Move tool and press the right arrow and the down arrow 9 times each. The red now peeks out from under the yellow like a misregistered second colour.
-
Type the details on paper slips
Click the arrow on the Headline group to collapse it, click its row, and click New Group. Name the new group Info. The details go on slips that look typed on a typewriter, in Special Elite:
- Date slip:
58, 1326to918, 1418in cream ,SATURDAY, AUGUST 29 · 5 PMat size54, tilted a couple of degrees anticlockwise - Place slip:
81, 1431to823, 1505in sky ,ELM STREET COMMUNITY GARDENat42, tilted a degree or two clockwise - Free slip:
95, 1526to705, 1586in yellow ,FREE · ALL NEIGHBOURS WELCOMEat32, tilted about a degree anticlockwise
Build each one like a headline scrap: add a layer, fill the rectangle, run Add Noise at
9, type in black , centre the text, Merge Down, rotate, and give it the small scrap shadow. The middle dot is Option+Shift+9 on a Mac (or paste it in).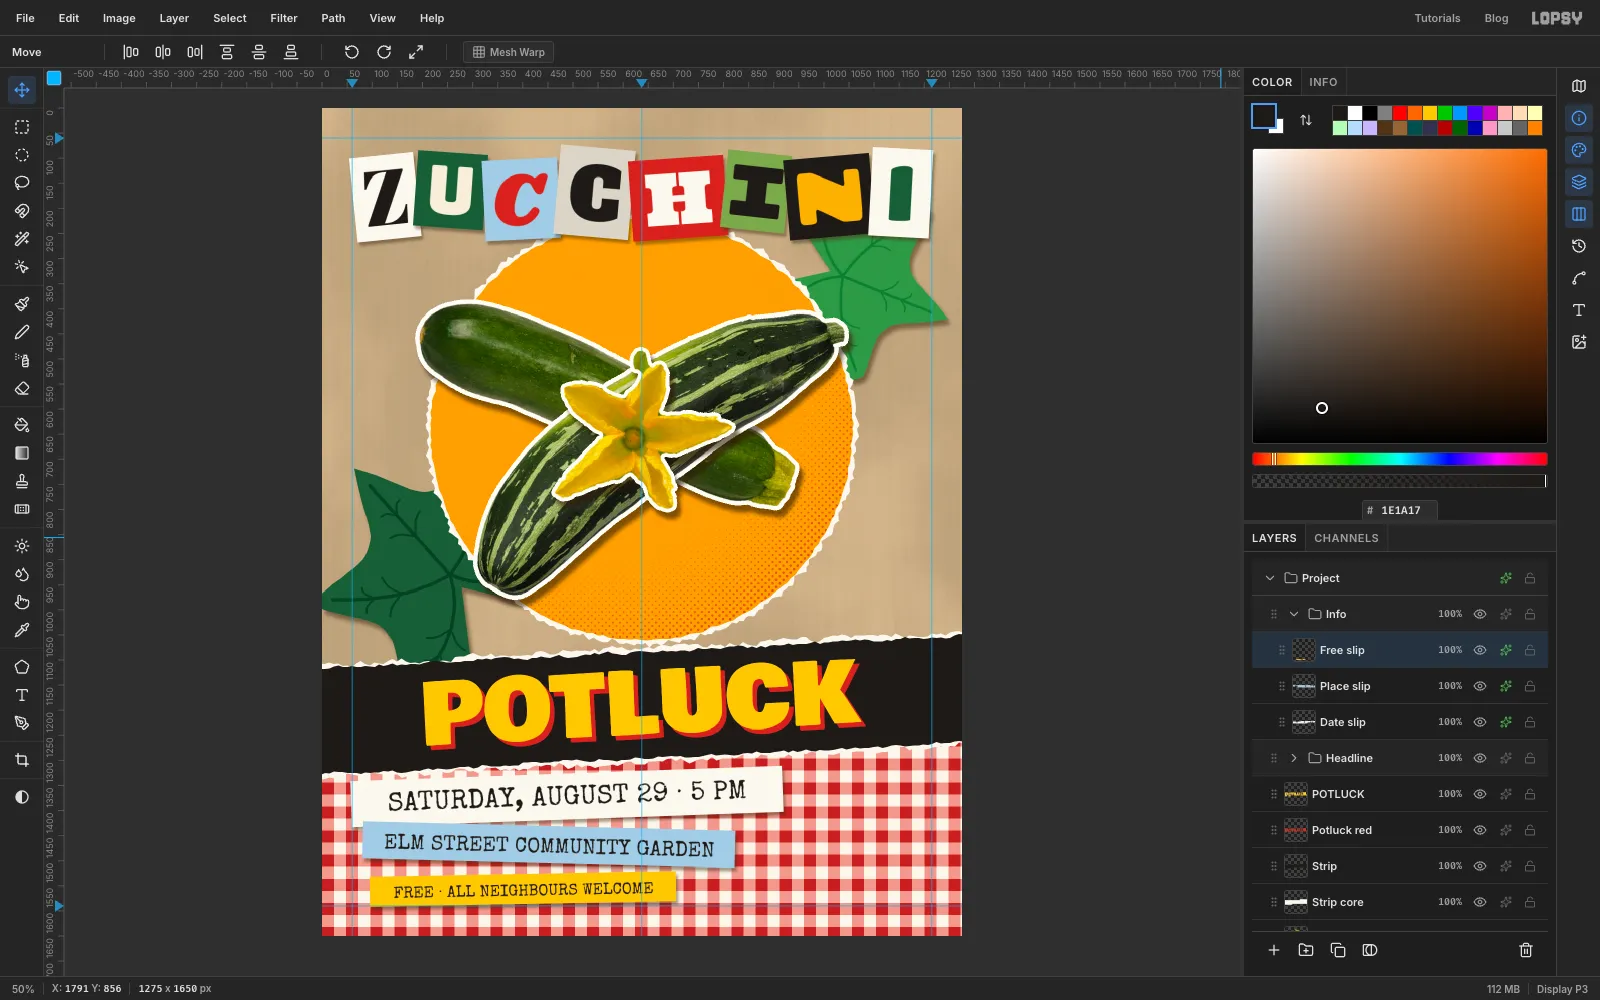
- Date slip:
-
Rule a notebook page
Click the Free slip row and add a layer named Note. Build it flat first and tilt it at the end, so the lines and the handwriting tilt together. Lasso a rectangle from about
842, 1393to1222, 1623, wobbly along the top where it was torn out of the pad. Keep the other sides as straight as you can. Fill it with and deselect.Cmd-click the Note thumbnail so the lines stay on the paper. Pick the Pencil, set Size to
2and the foreground to . For each rule, click at the left edge and Shift-click at the right edge: one aty 1465, one aty 1532and one aty 1599. Then draw the margin in : click at892, 1380and Shift-click at892, 1640. Deselect.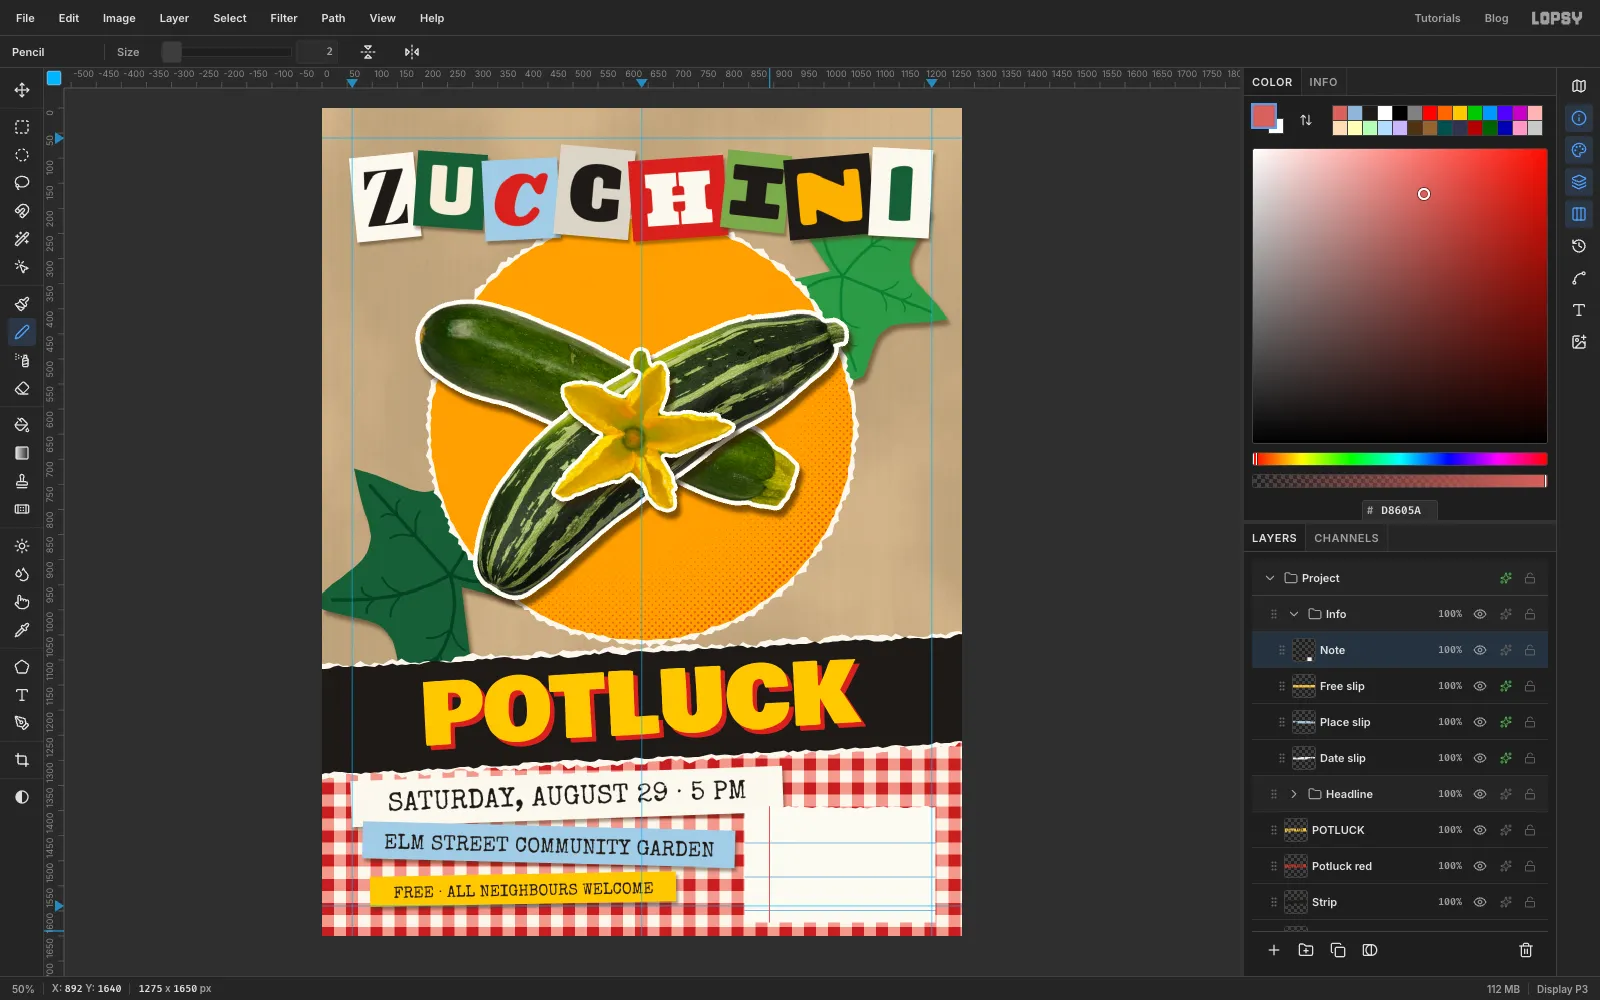
-
Write the note by hand
With the Text tool, choose Gochi Hand at size
48and colour . Click inside the note, typebring a dish,, press Enter, typetake a zucchini!and commit.Gochi Hand at 48 has about the same line spacing as the rules, so both lines can sit on them. Nudge the text until the bottom of the
!rests on the middle rule and the text starts just right of the margin, at aboutx 910. Don't line up the bottom of thez. Gochi Hand's z has a tail that drops below the line.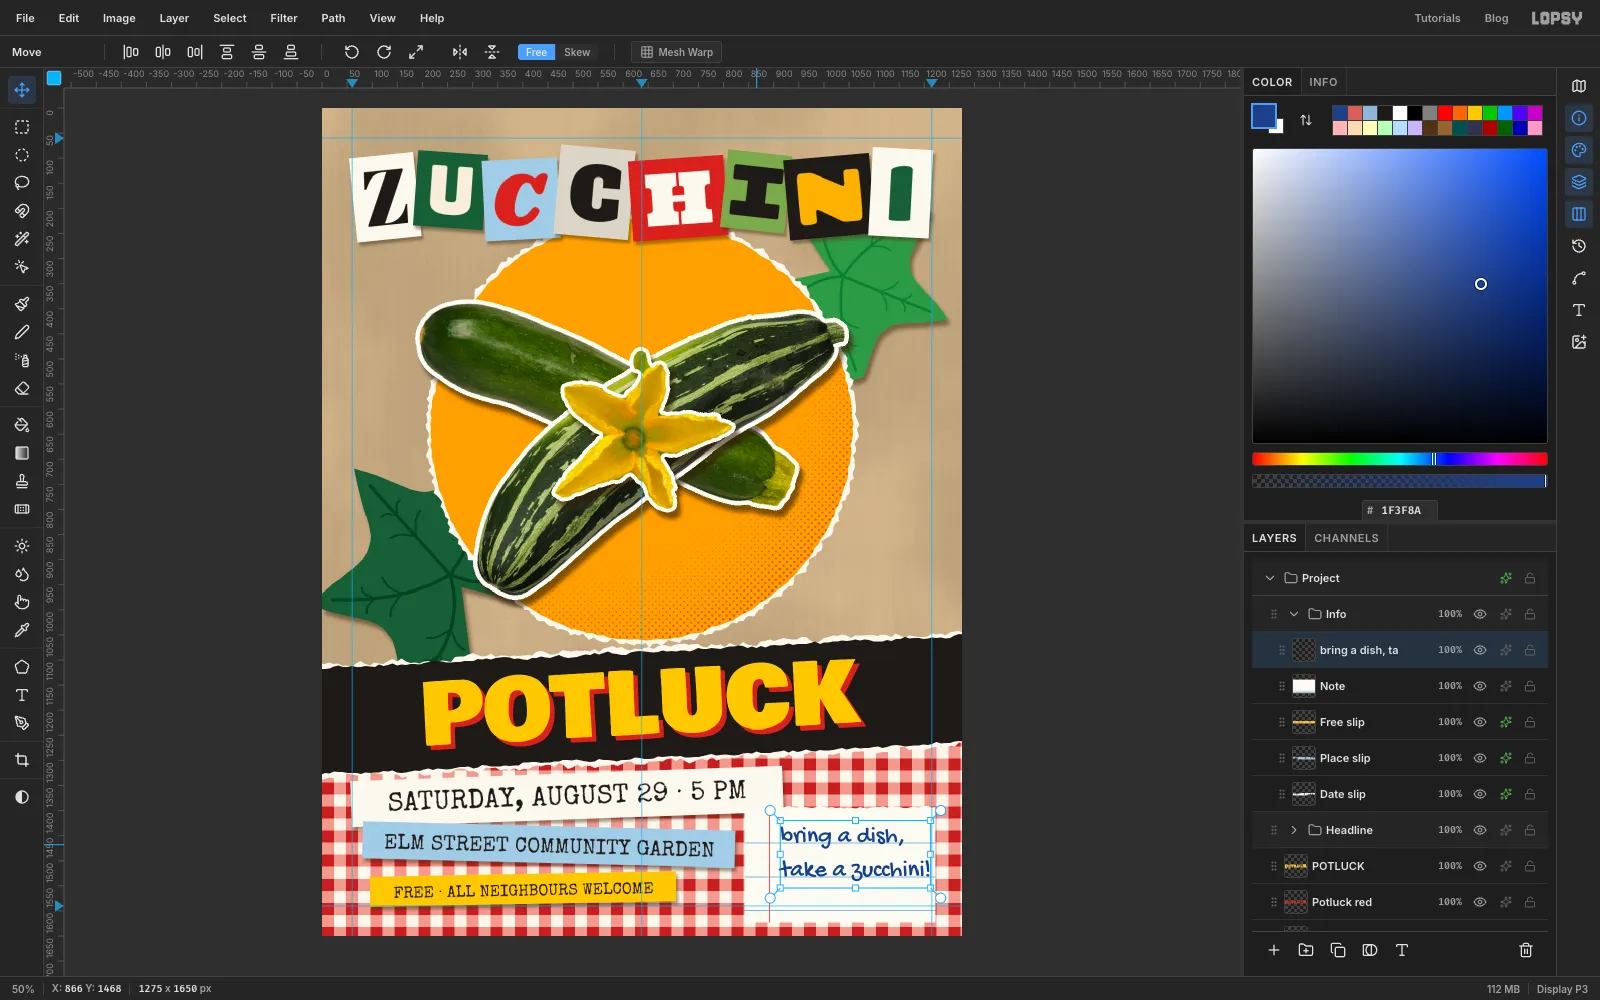
-
Tilt the note
Choose Layer → Merge Down to put the writing on the paper. Cmd-click the Note thumbnail and rotate it about 4° clockwise with a rotation handle, then press Enter and deselect. Give it a Drop Shadow with Offset X
5, Offset Y8, Blur10, Opacity45in .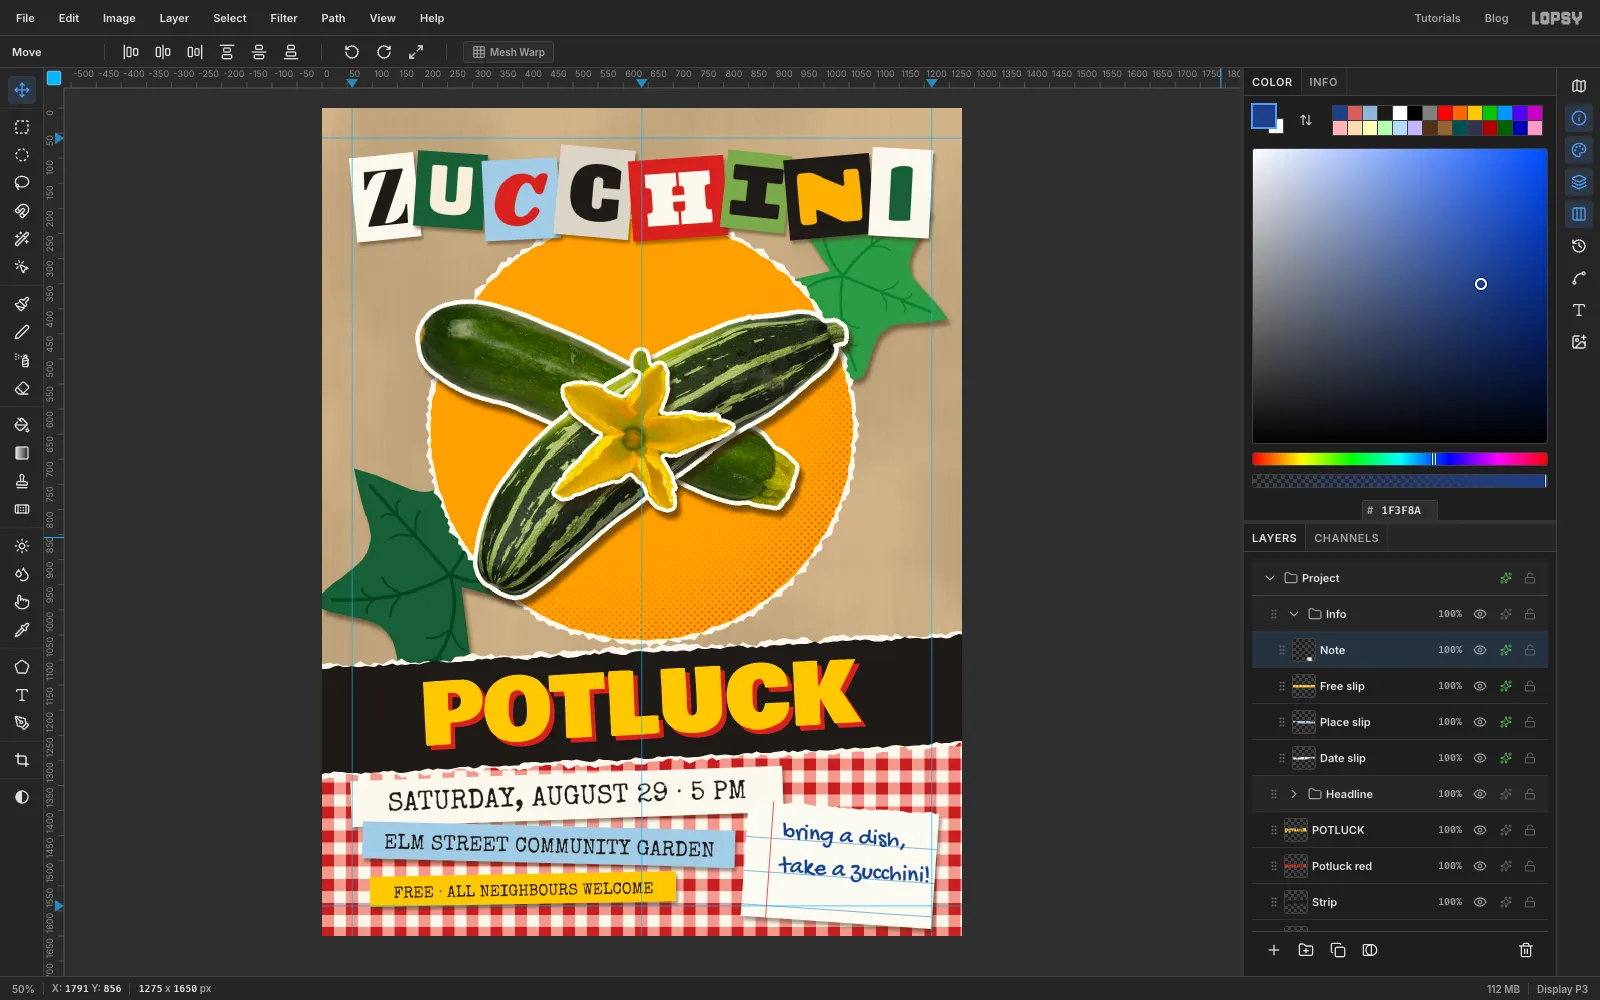
-
Tear a strip of masking tape
Add a layer named Tape above the note. Lasso a strip about 150 × 44 px across the left end of the date slip, around
92, 1350, tilted about 28° uphill. Keep the long sides straight and make the short ends zigzag, the way tape tears off the roll. Fill it with , deselect, and run Filter → Add Noise… at10, Mono, Gaussian.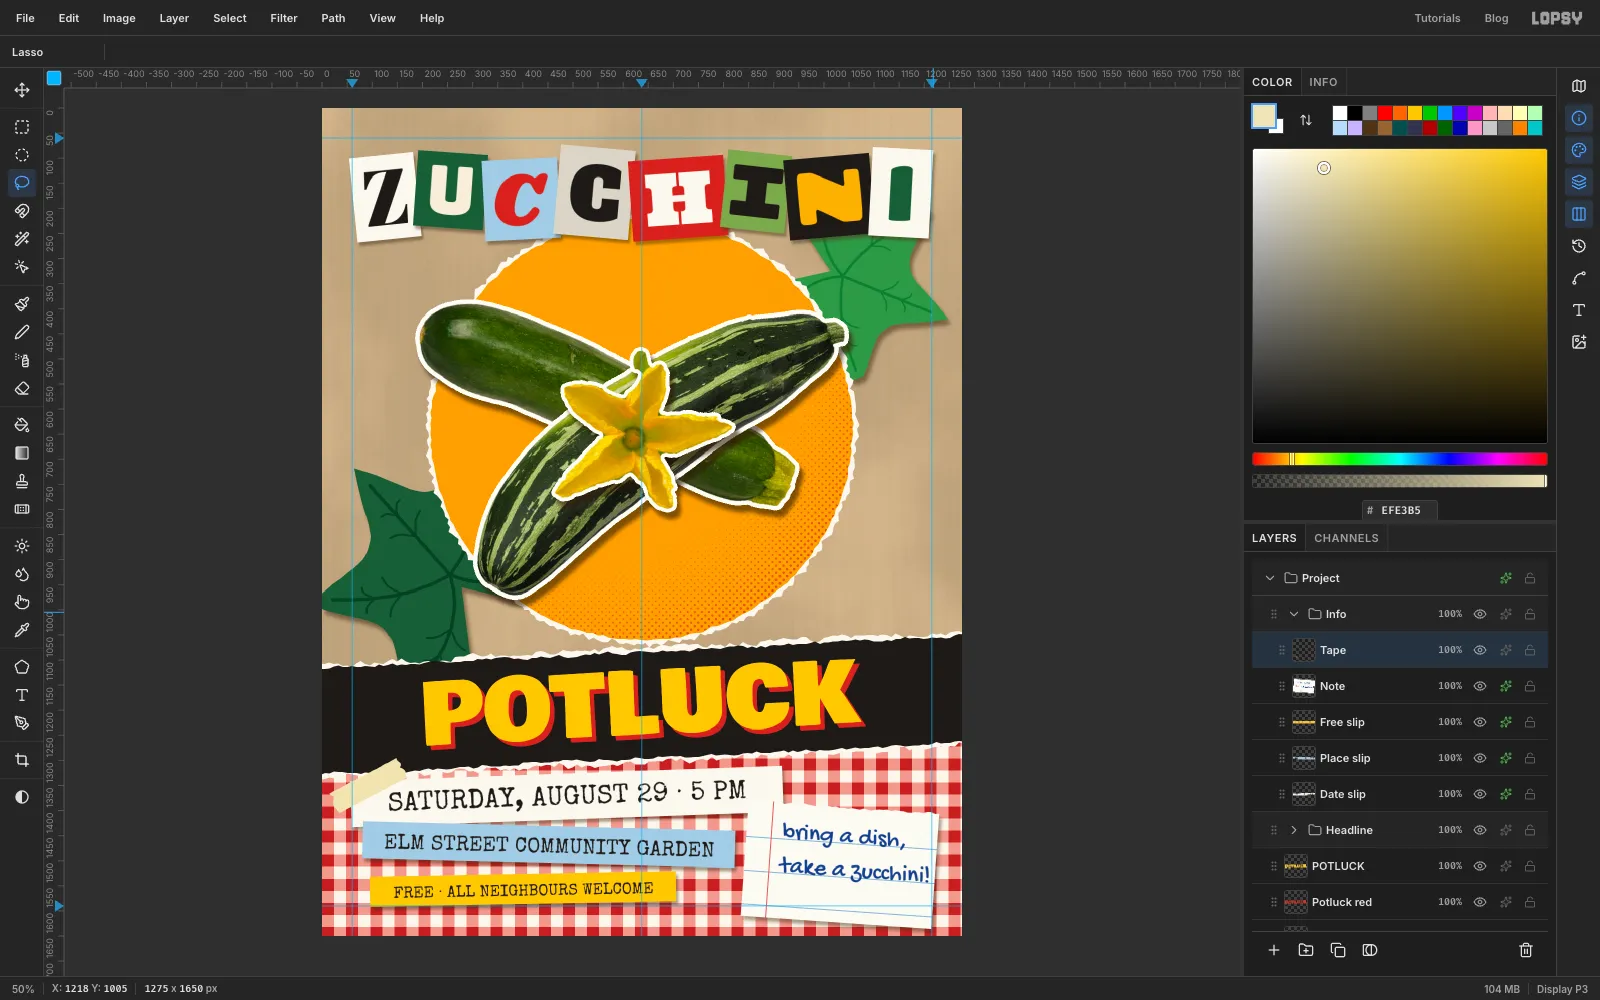
-
Copy the tape to the other corners
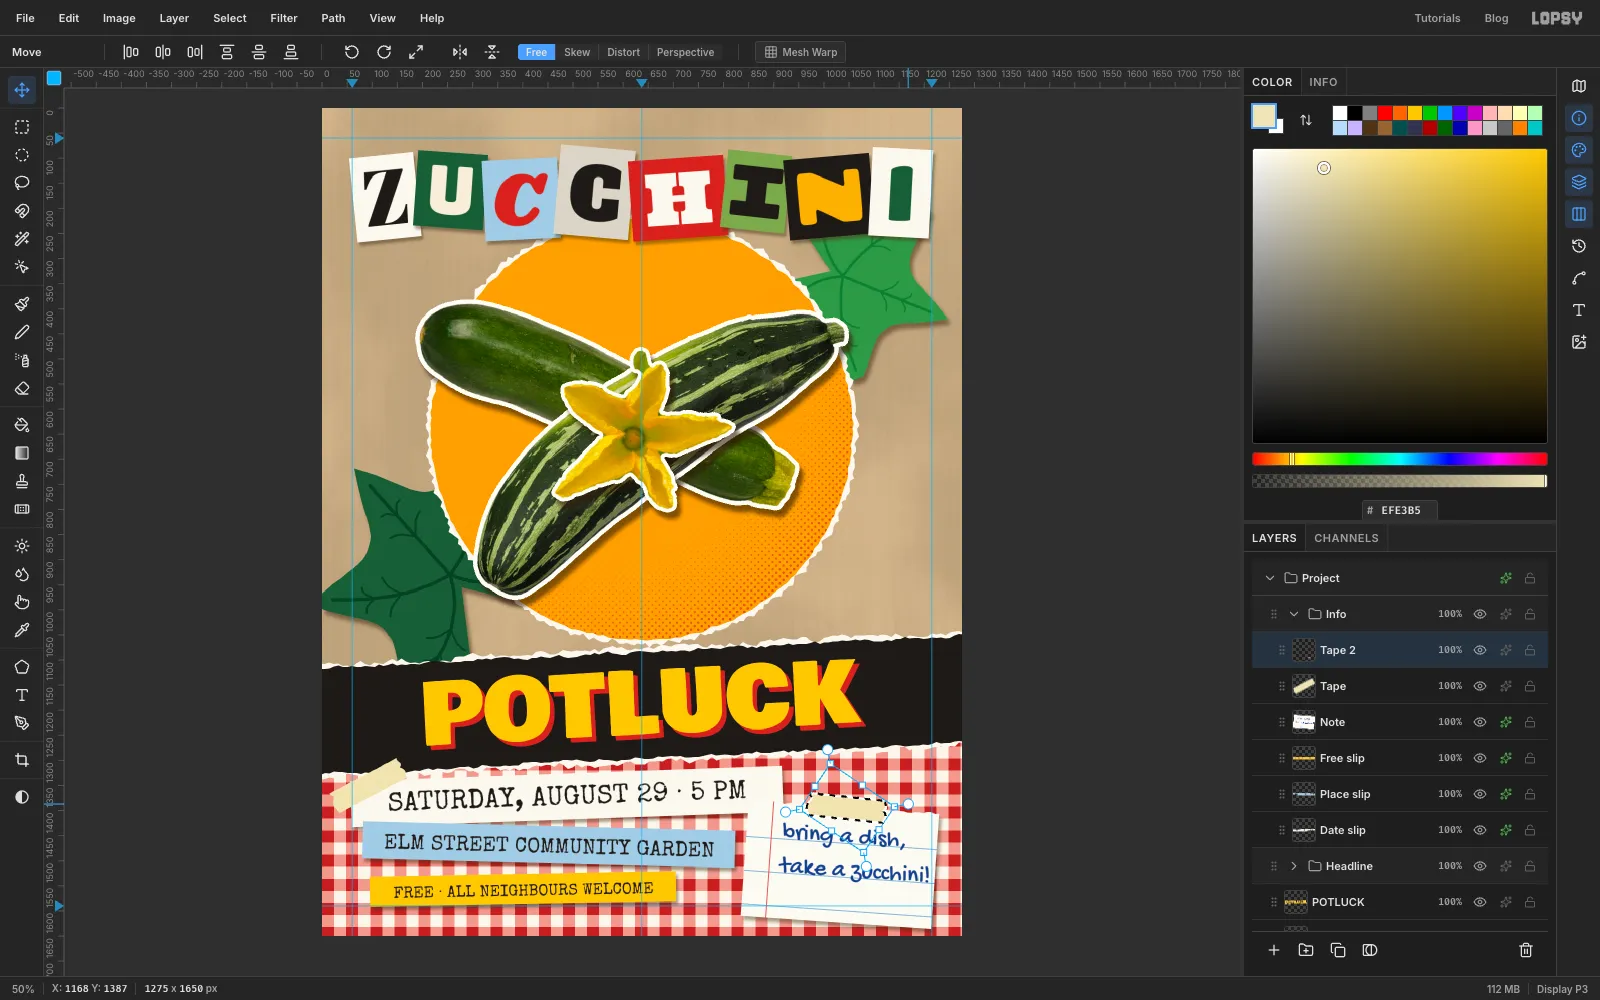
Click the Tape row, Cmd-click its thumbnail, then press Cmd+C and Cmd+V. Copy takes pixels from the selected layer inside the selection, which is why you click the row first. Rename the paste Tape 2, deselect, and drag it with the Move tool to the top of the note. Cmd-click its thumbnail and rotate it until it lies across the note's top edge. Press Enter and deselect.
Do the same twice more, clicking the Tape row each time before you copy. The pastes appear as Tape 3 and Tape 4, under Tape 2. Put one piece across the striped zucchini's top-right tip and one, standing almost upright, across the green zucchini's left tip.
-
Make the tape see-through
Click Tape 2, which is the top piece, and choose Layer → Merge Down three times to collect all four pieces on Tape. Set its opacity to 64% so what's under it shows through. Then give it a tiny Drop Shadow: Offset X
2, Offset Y2, Blur3, Opacity25.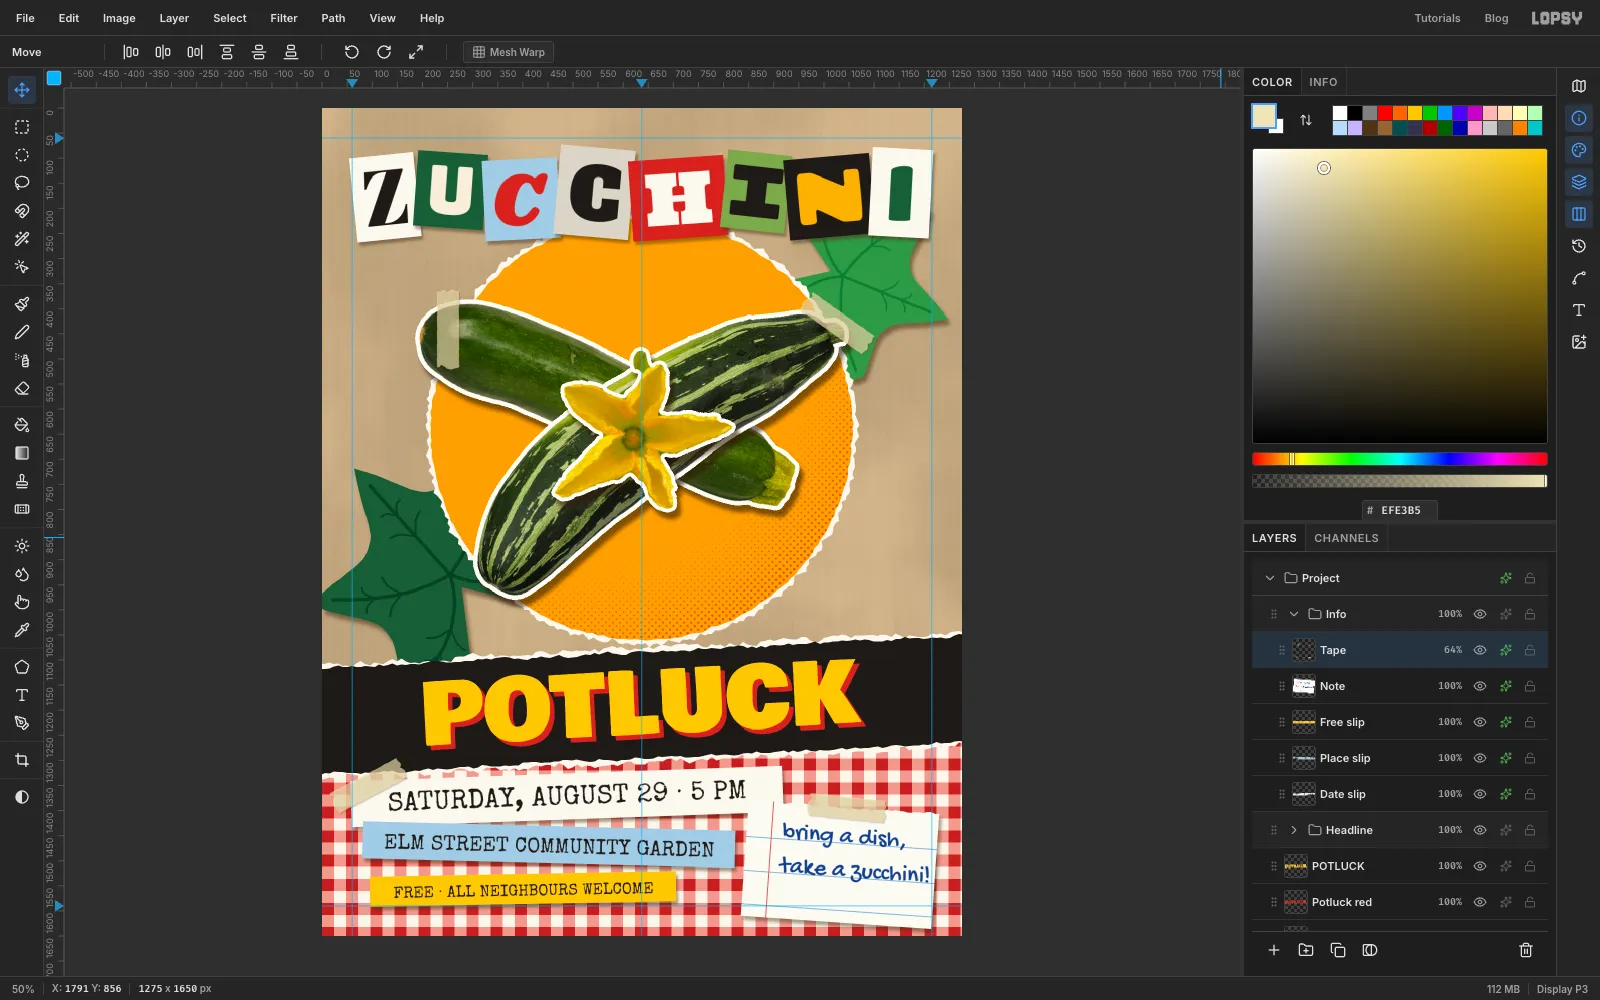
-
Add marker doodles
Add a layer named Doodles. Pick the Brush:
- In red at Size
8, draw one quick loop around 5 PM, overshooting where it closes, like someone circled it with a marker. - In black at Size
5, draw a small circle at about138, 352and nine short rays around it with click and Shift-click. - At Size
6, draw asterisks at292, 300and1190, 600: three short crossing lines each.
With the Text tool, write
bring, Enter,a fork!in Gochi Hand48, red, in the empty space right of the disc, centred near1168, 815. Tilt it about 8° anticlockwise with the Move tool's rotation handle. Click the Doodles row and, with the Brush at Size6in red, draw a curved arrow from undera fork!to the green zucchini's tip. Add two short strokes for the arrowhead.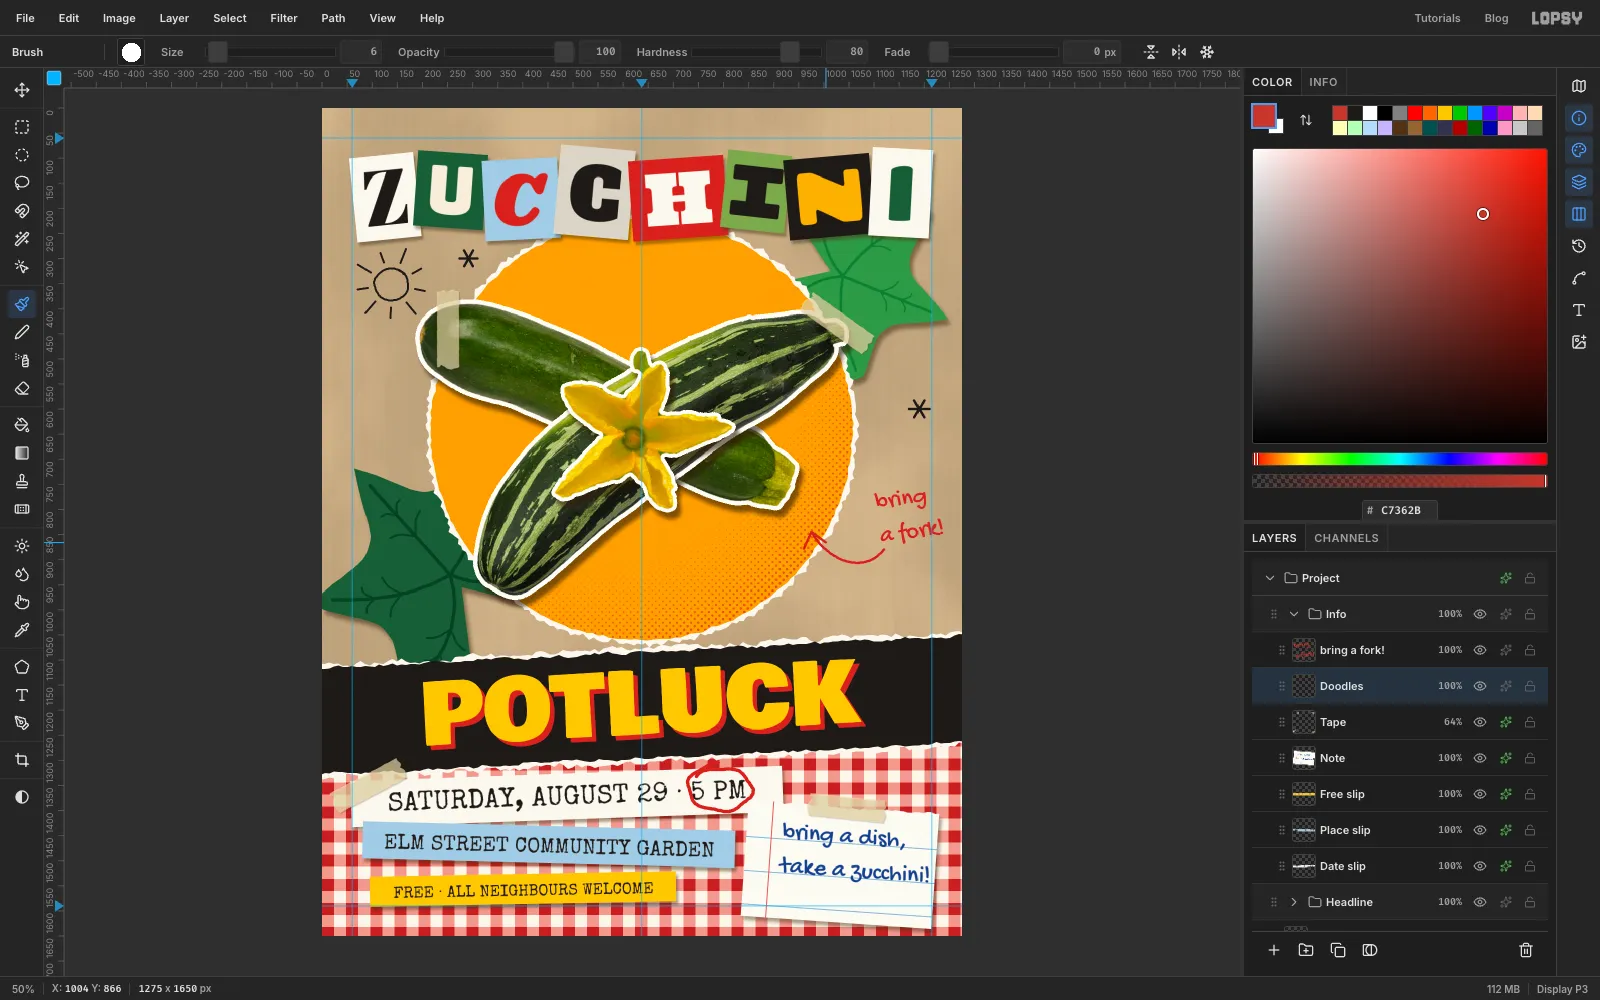
- In red at Size
-
Add photocopy grain
Click the bring a fork! row, the top row in the Info group, and add a layer named Grain. Because Info sits at the top of the stack, the grain covers everything below it too. Fill it with grey and choose Add Noise… at Amount
28, Mono, Gaussian. Set it to Overlay at 30%. Mid-grey disappears in Overlay, so only the speckle remains, over the photos, the paper and the type.Turn off the guides with View → Show Guides. Export with File → Quick Export PNG and keep the layered file with File → Save Project.