Make a Constructivist Photomontage Zine Cover
Turn a public-domain 1920s photo into a two-colour constructivist zine cover in Lopsy, with a sunburst, halftone plates, diagonal bands and rotated type.
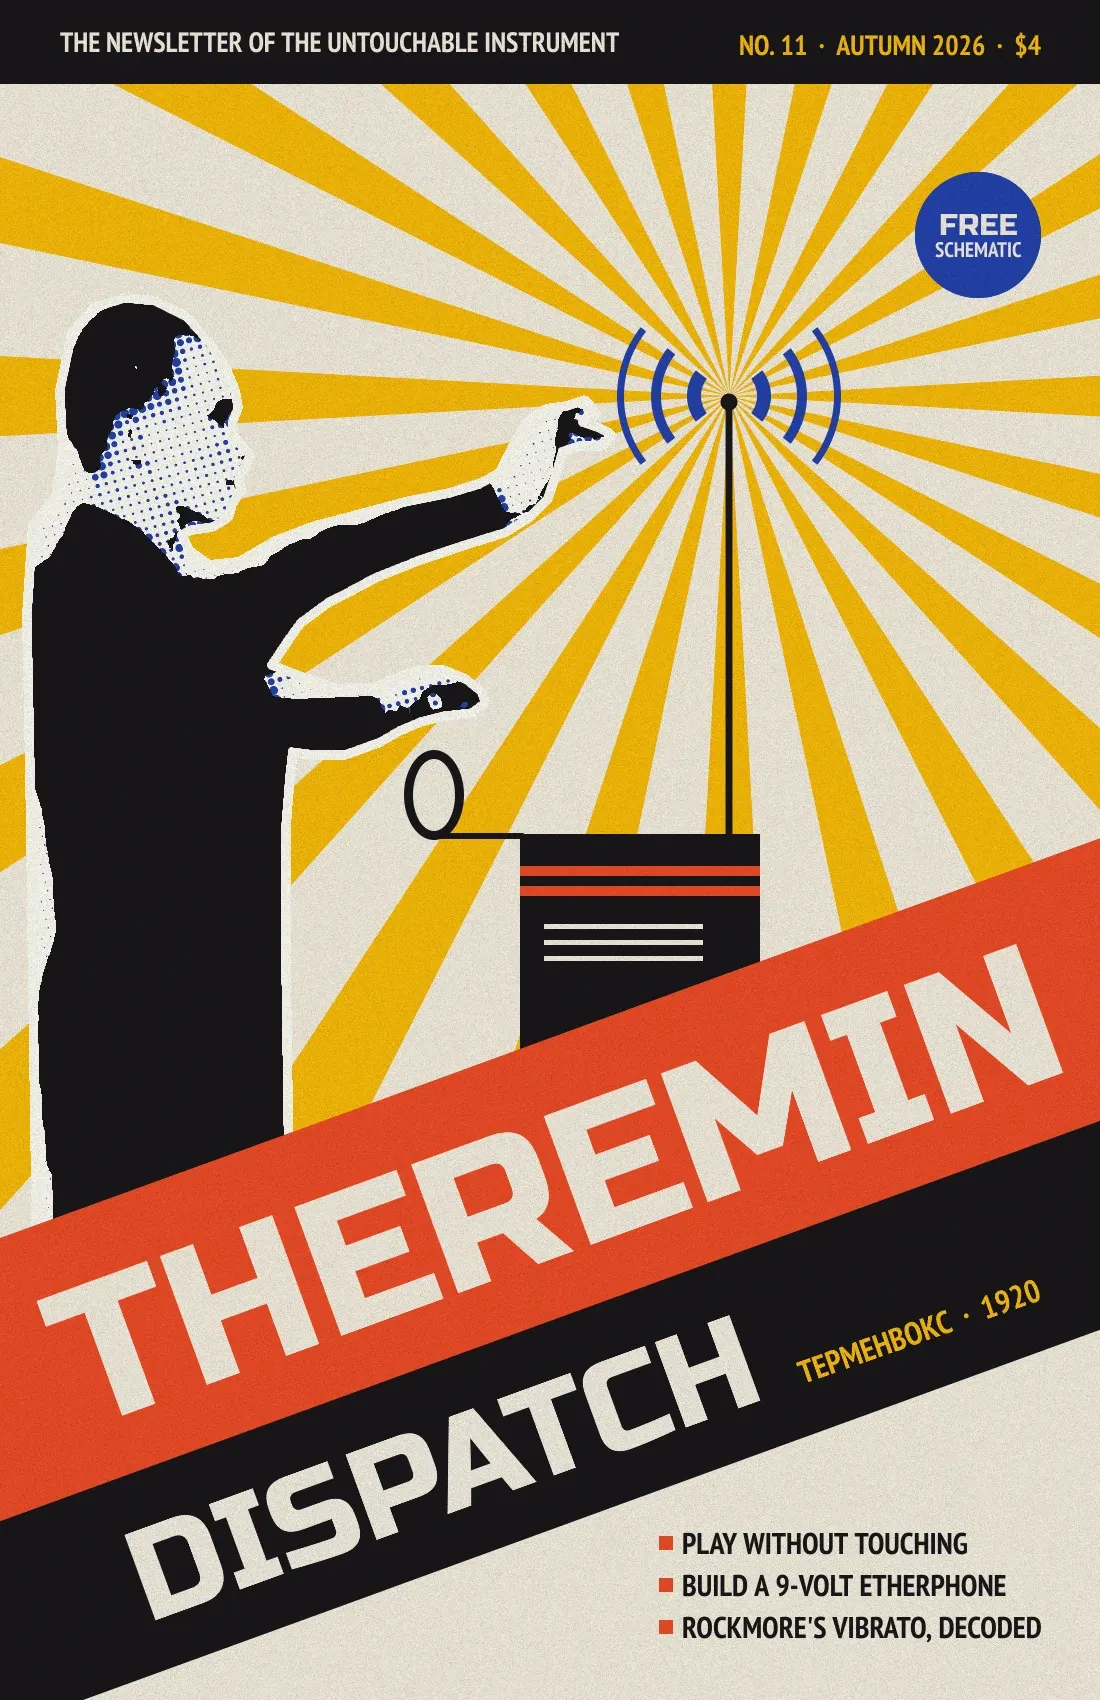
In 1920 a young physicist in Petrograd, Lev Termen, built an instrument you play without touching it. One hand moves near an upright antenna to change the pitch. The other hovers over a loop to change the volume. The West called him Léon Theremin, and the instrument took his name.
That makes him a good cover star in the style of his own time. Soviet constructivists like Gustav Klutsis and Alexander Rodchenko built posters from photomontage: a cut-out photo, flat geometric shapes, steep diagonals and heavy sans-serif type. Two-colour printing, black plus one flat colour, was common, and this cover borrows that look for the photo.
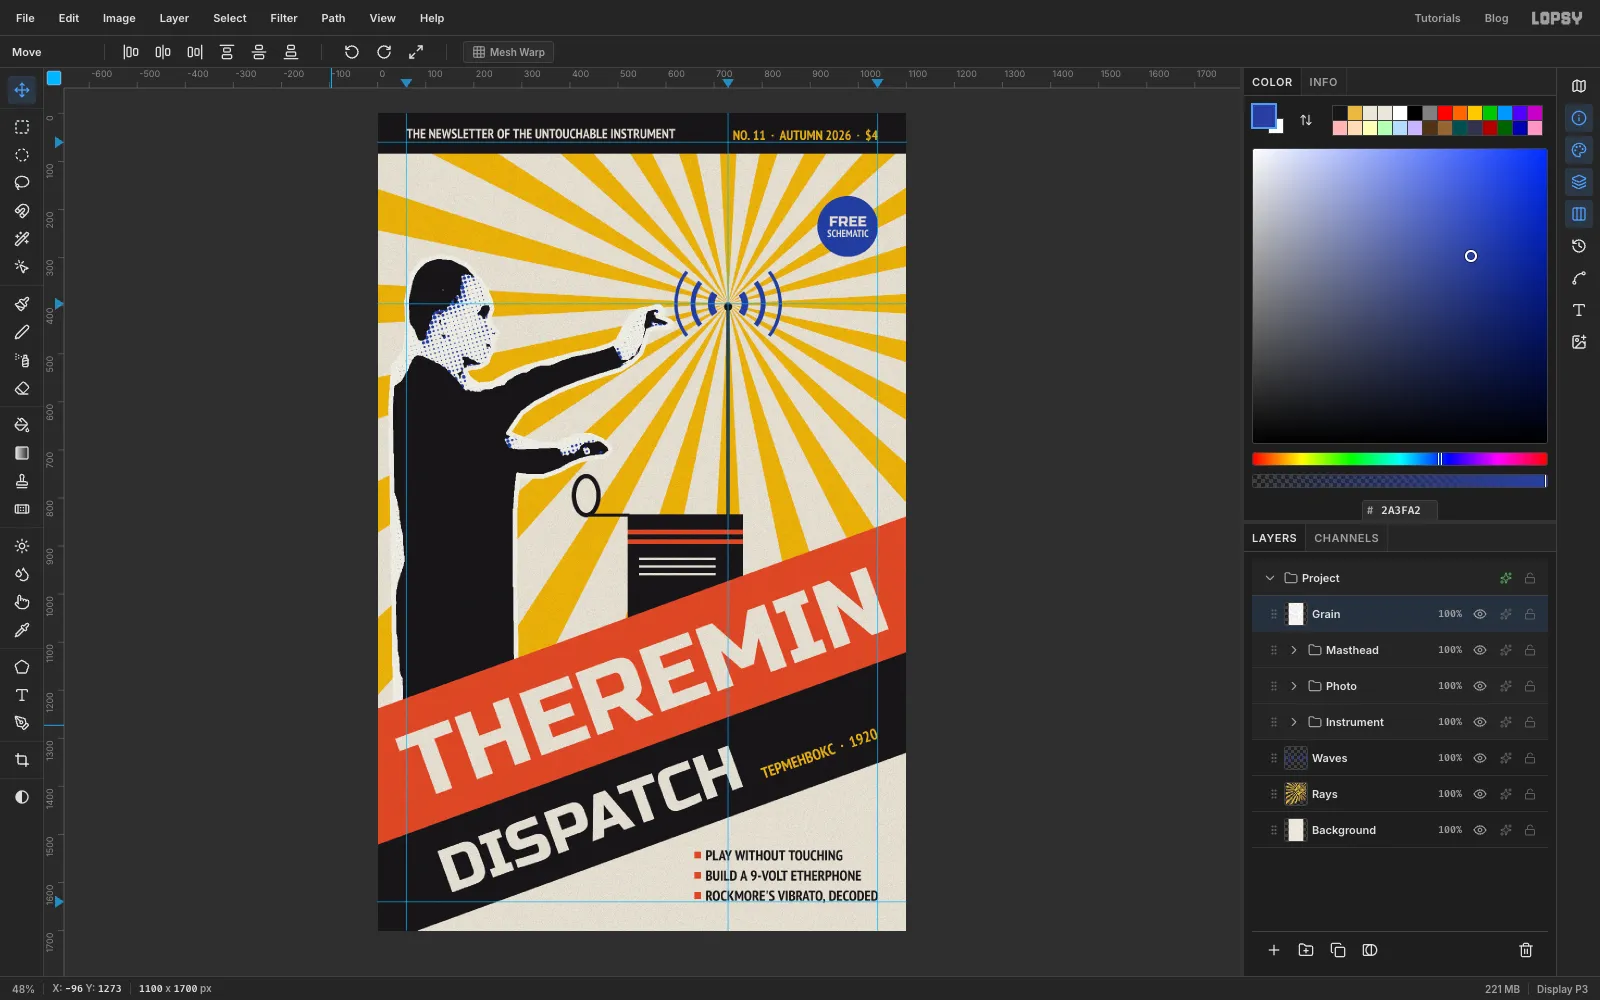
In this tutorial you'll make the cover of an imaginary zine, Theremin Dispatch, issue 11. The page is 1100 × 1700 px, the proportions of an 11 × 17 inch tabloid sheet. You'll start from a real photo of Theremin playing, cut him out with the Lasso, and print him as two plates. Around him you'll build a ray burst, radio waves and a cabinet, then finish with two slanted bands of type.
You'll need the photo Termen playing his invention.jpg from Wikimedia Commons (commons.wikimedia.org/wiki/File:Termen_playing_his_invention.jpg). It's an old press photo that Commons marks as public domain, so you can use it freely. It's small (430 × 595 px), but the threshold and halftone steps hide that.
The tools you'll use along the way:
- Filter → Sunburst through a Lasso selection
- the Elliptical Marquee's exact-size dialog, plus Alt-drag to cut a ring and Shift-drag to add to a selection
- Paste, Free Transform scaling and the Move tool's rotate handle
- Desaturate, Gaussian Blur, Threshold, Brightness/Contrast and Halftone
- the Magic Wand with Contiguous off, and Select → Grow
- the layer effects Color Overlay and Stroke
- Russo One and PT Sans Narrow text, rotated while it's still live text
- guides, the grid, and layer groups
The palette is paper, ink and three colours:
-
Paper
-
photo white
-
Ink black
-
Vermilion
-
Ray yellow
-
Ultramarine
-
Grain grey
only for the texture layer
-
Create the page
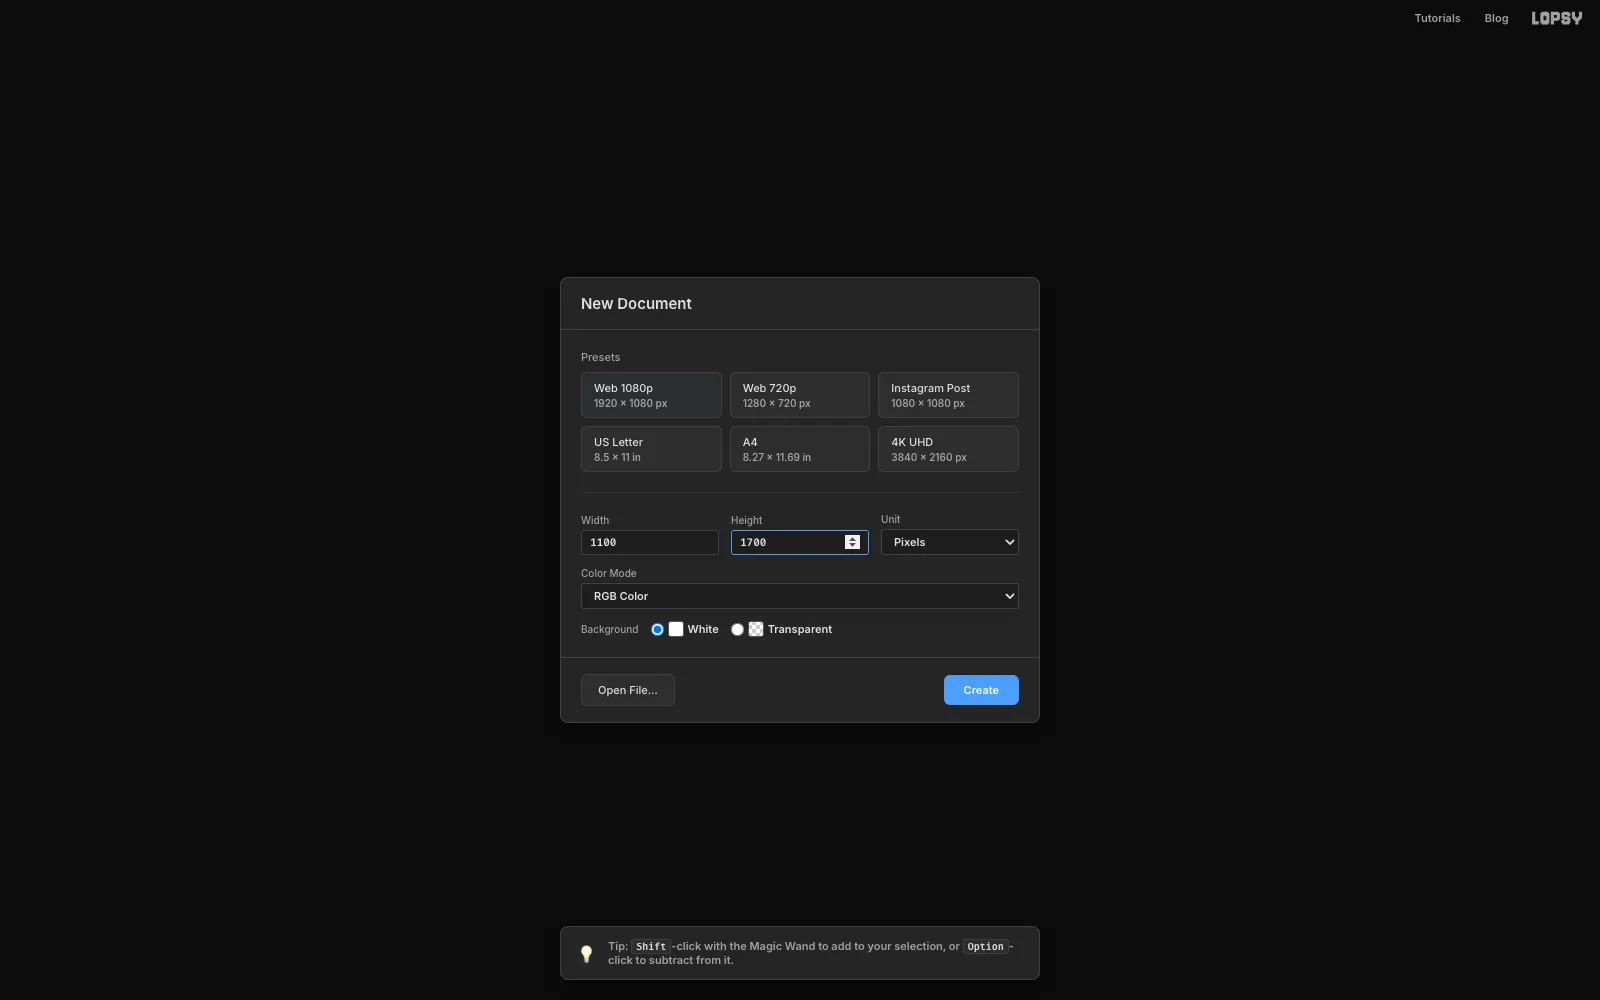
Choose File → New. Keep the units on Pixels, type 1100 for the width and 1700 for the height, and click Create. That's a tall zine page with the proportions of a tabloid sheet.
-
Paint the paper and add guides
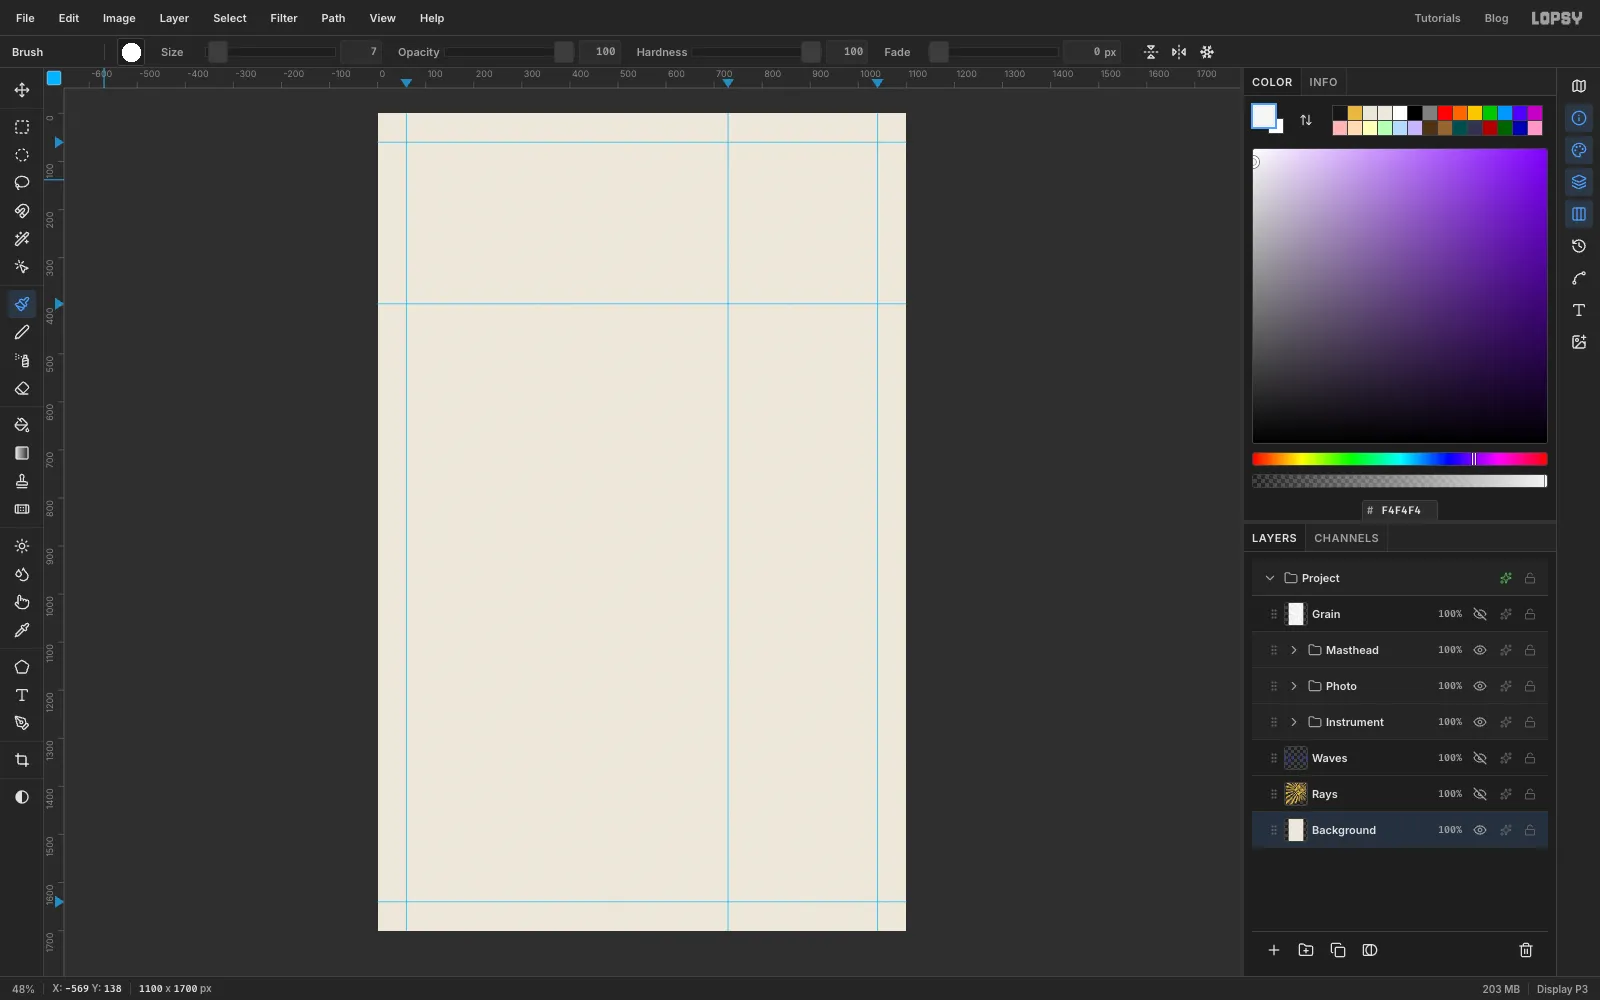
Click the Background row, set the foreground colour to paper and choose Edit → Fill. Then choose Filter → Add Noise, pick Mono and Gaussian, set Amount to 8 and click Apply. It adds a faint newsprint speckle.
Now add guides by clicking the rulers. A click on the top ruler makes a vertical guide, and a click on the left ruler makes a horizontal one.
- Margins: vertical guides at 60 and 1040, horizontal guides at 60 and 1640.
- The antenna tip: a vertical guide at 729 and a horizontal guide at 396.
Everything radiates from the point where the last two guides cross.
-
Select the area above the bands
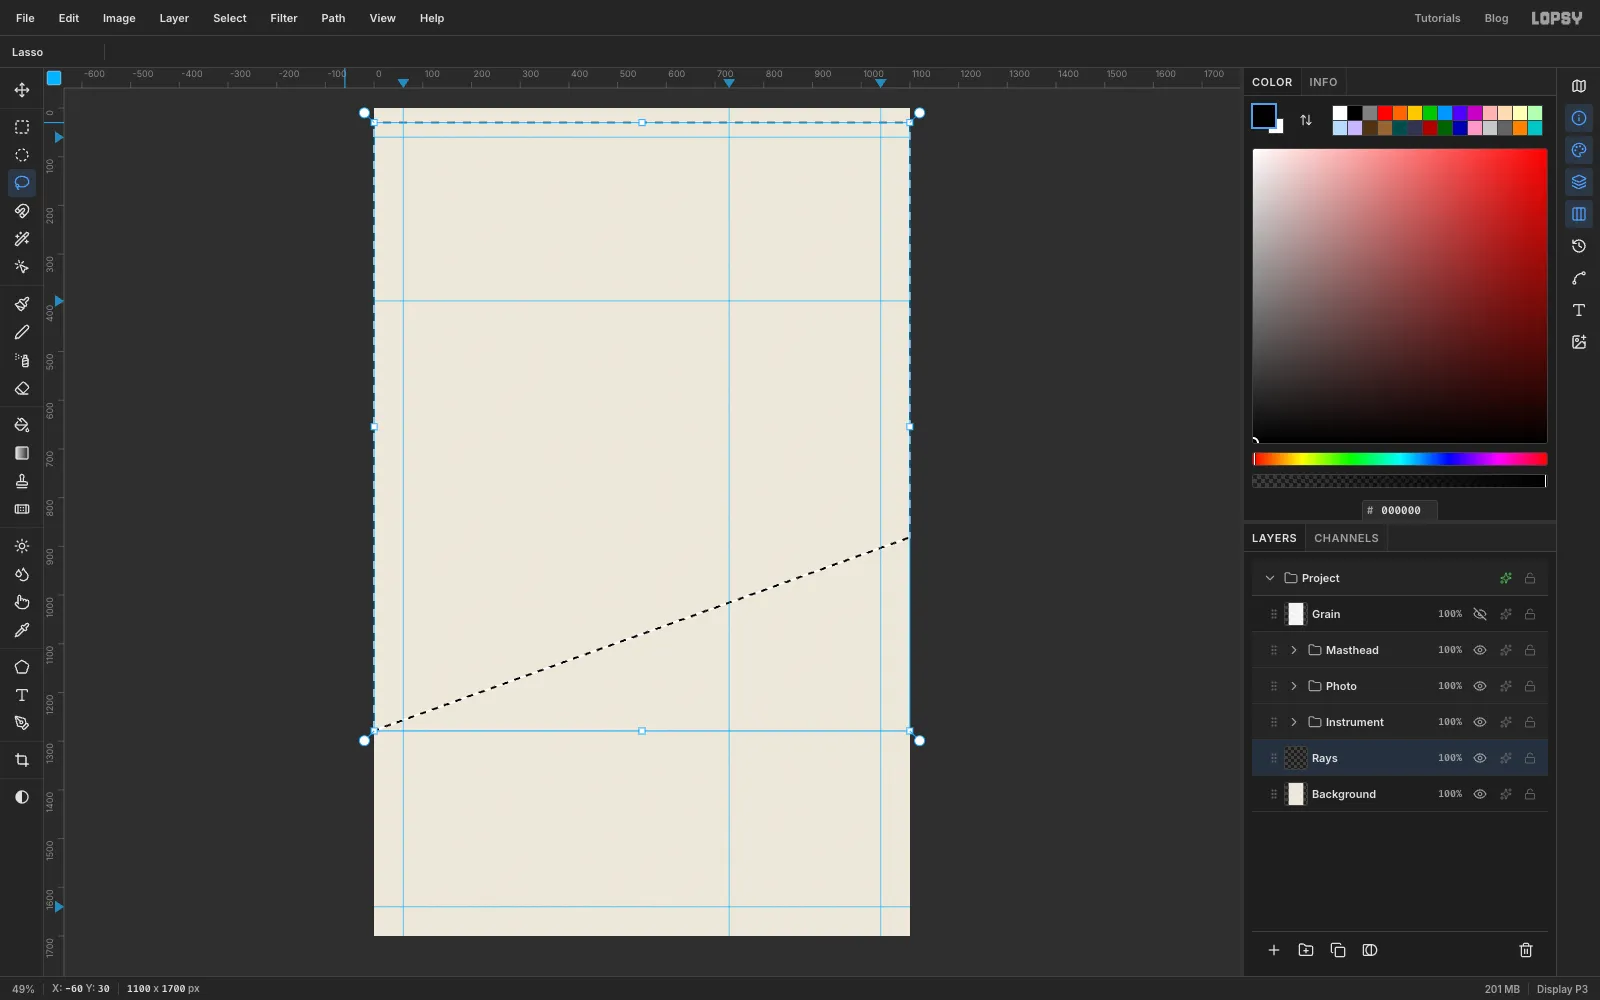
Click Add Layer and name the new layer Rays. The rays should stop under the slanted bands you'll add later, so select only the area above them.
Pick the Lasso. Start just off the left edge of the canvas near the top, drag across past the right edge, go down the right side to about 860, and then come back diagonally to the left edge at about 1300. Close the shape where you started. The bands will cover that slanted edge, so it doesn't have to be precise.
-
Burst the rays from the antenna point
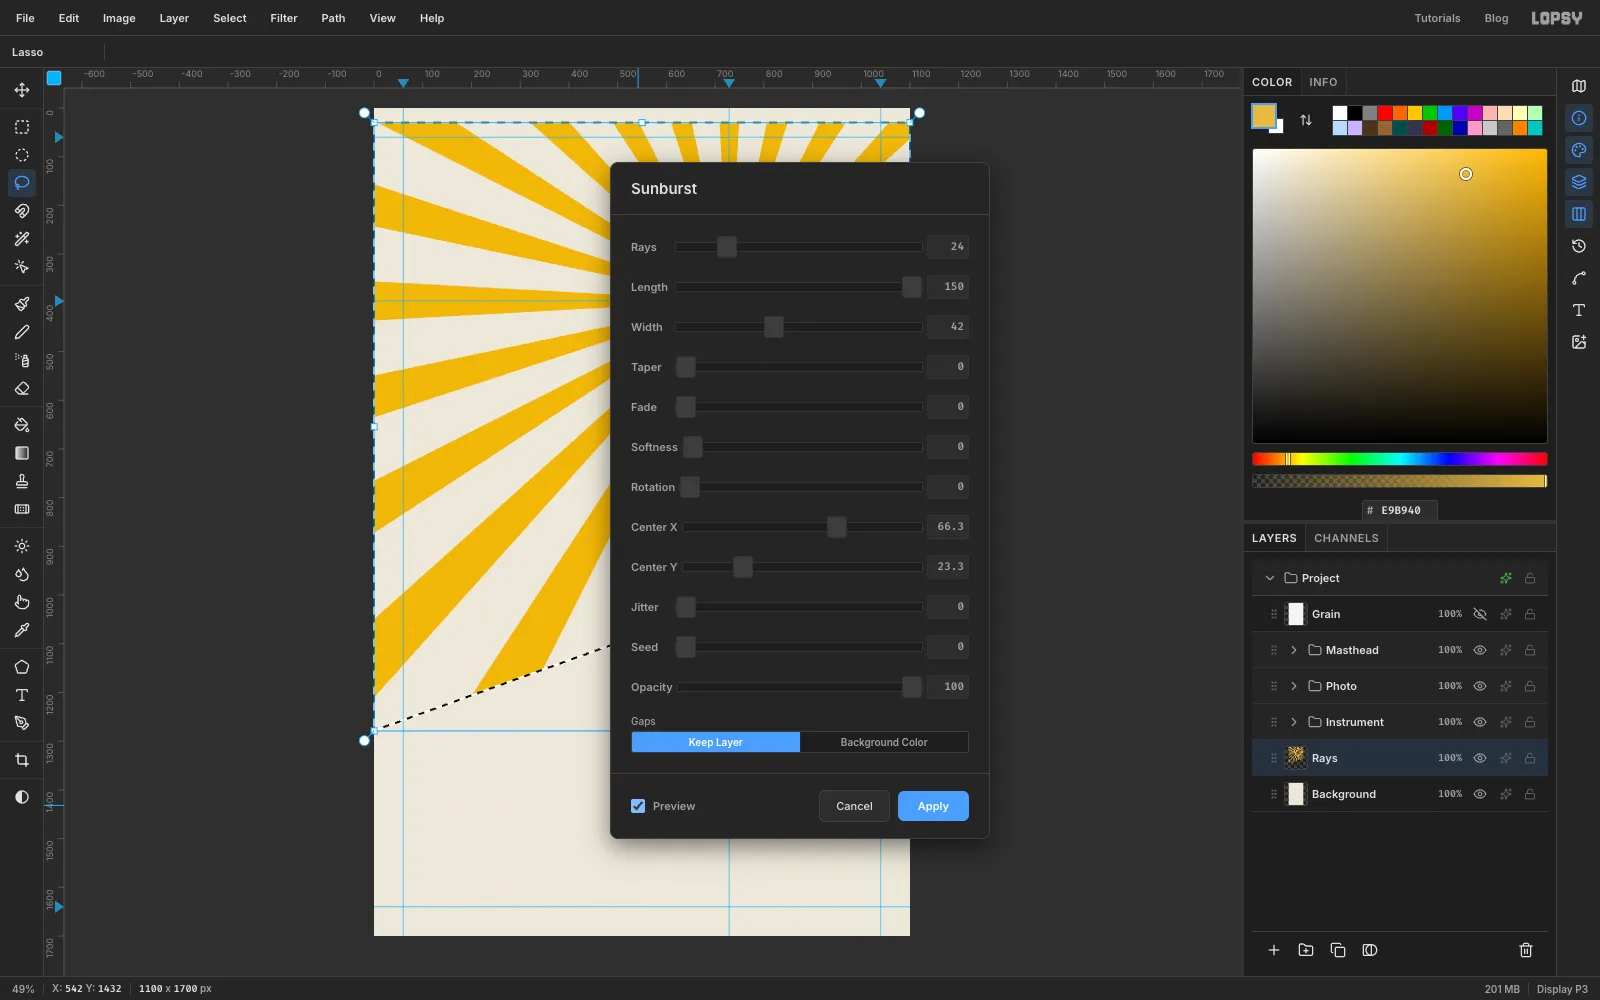
Set the foreground to ray yellow and choose Filter → Sunburst. Set:
- Rays 24, Length 150, Width 42, Taper 0
- Center X 66.3 and Center Y 23.3
The centre values are percentages of the page, and they put the burst exactly on the crossed guides (729 ÷ 1100 and 396 ÷ 1700). Leave Gaps on Keep Layer and click Apply.
-
Check the burst
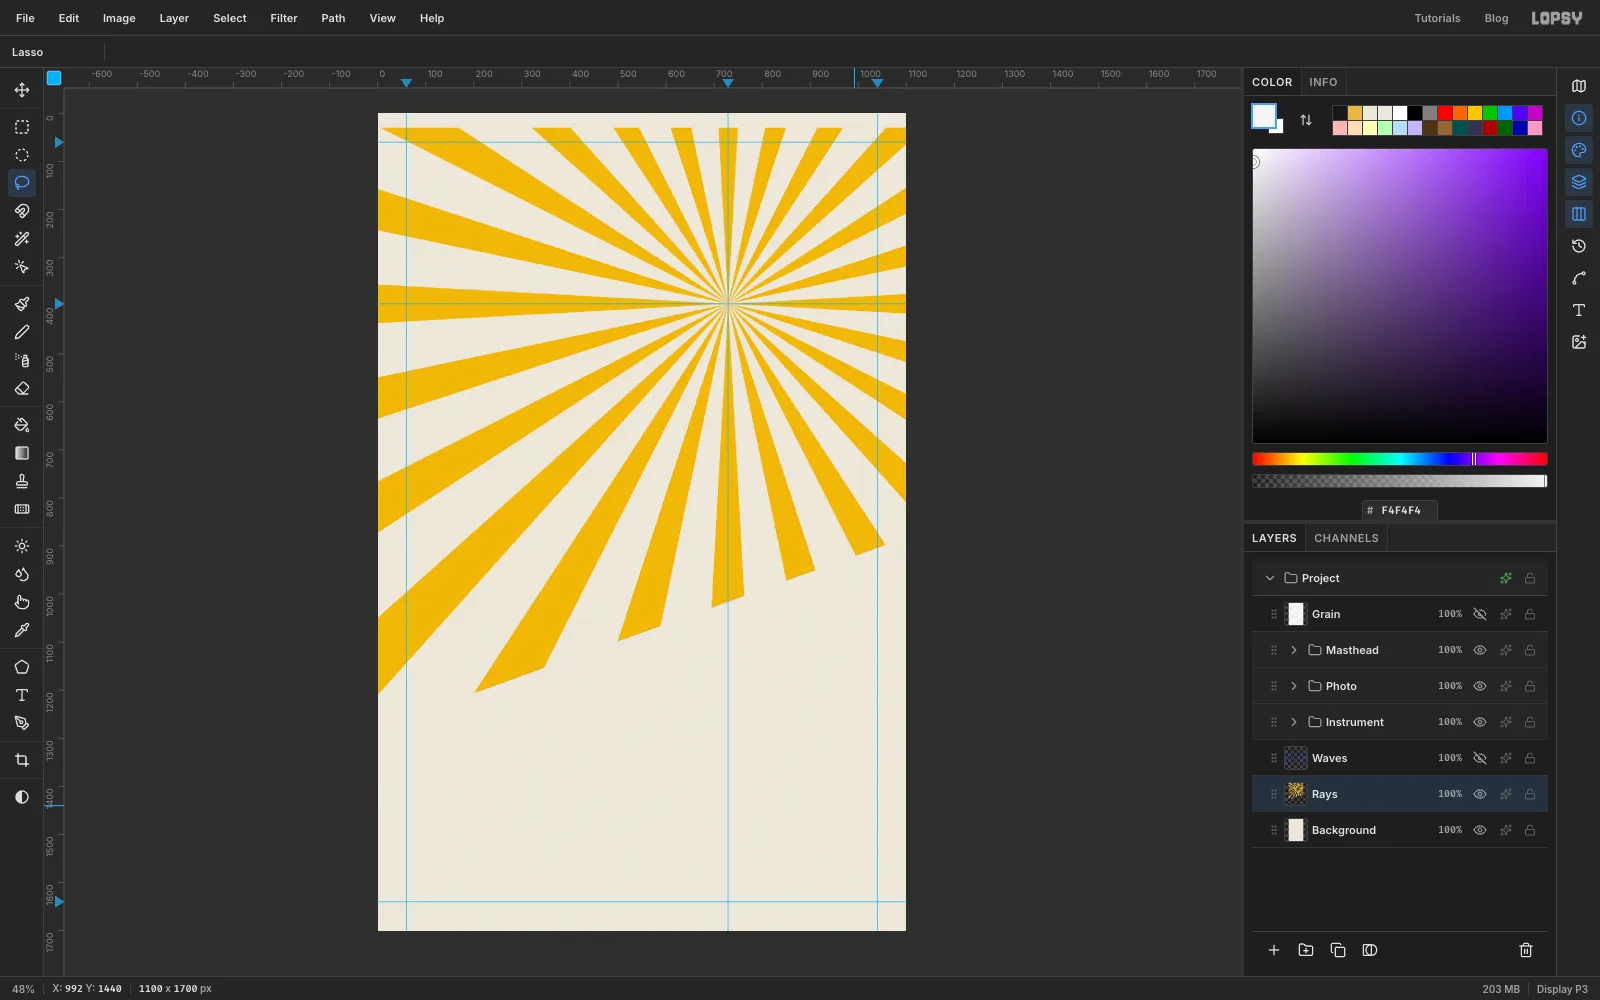
Press Cmd+D to deselect. The rays bleed off the top and right edges and end in a straight slant at the bottom, which the bands will hide.
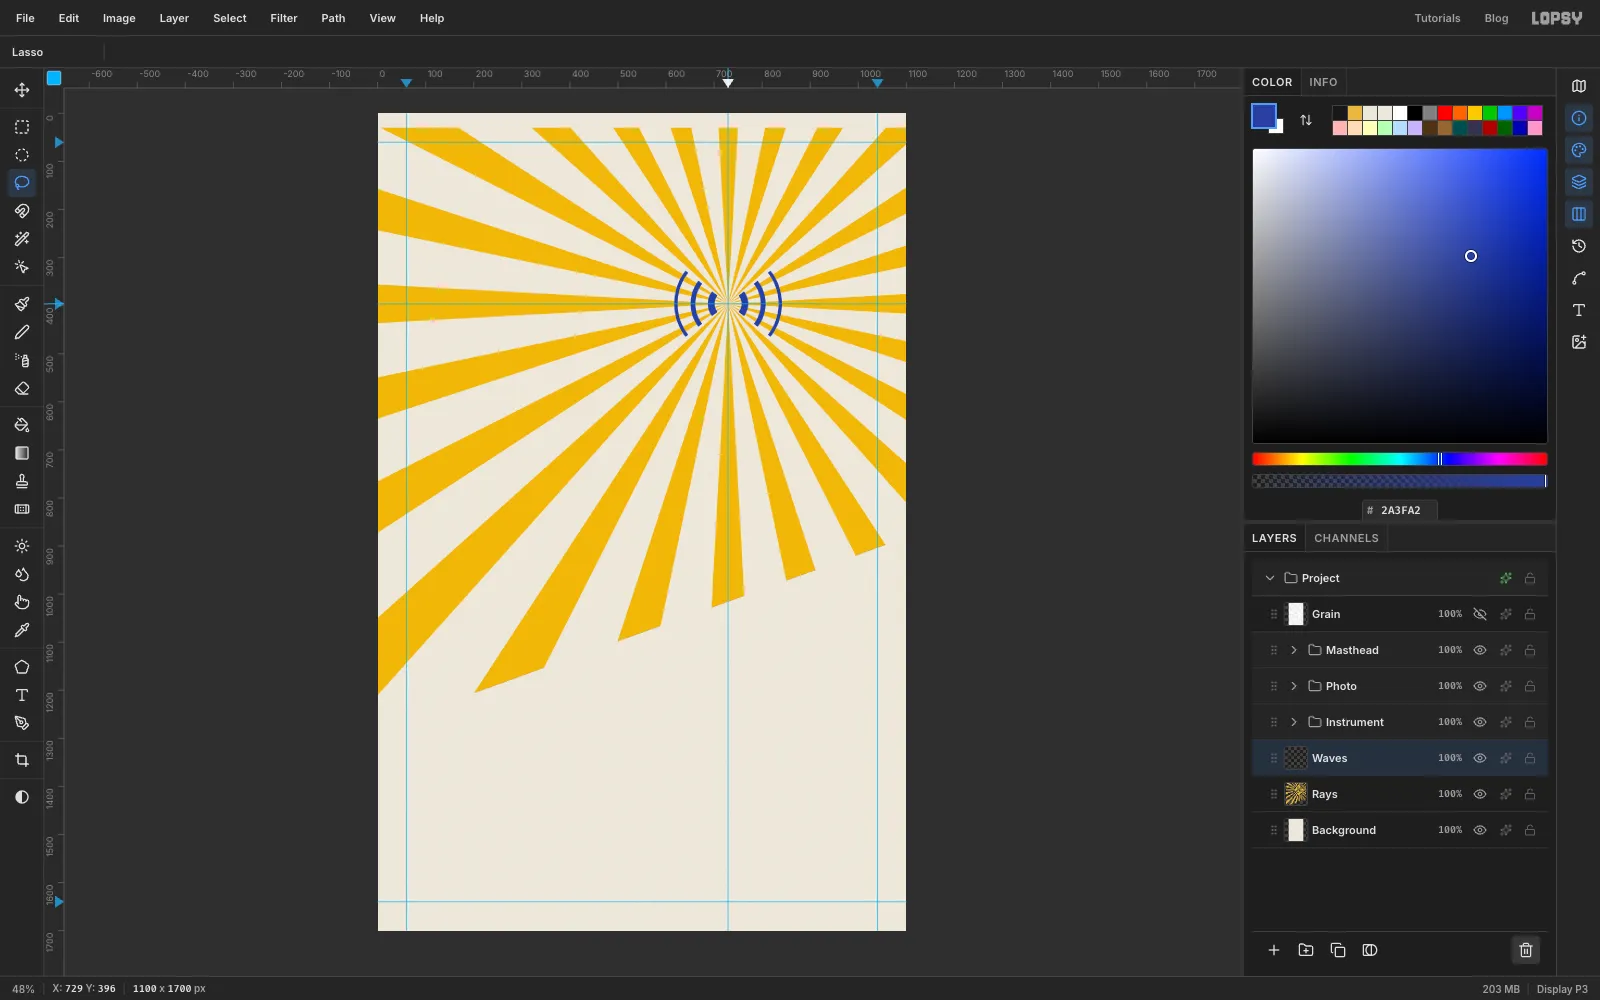
Klutsis's electrification posters use radiating lines like these. Here they stand for the electric field round the antenna.
-
Cut a ring for the radio waves
Add a layer called Waves and set the foreground to ultramarine .
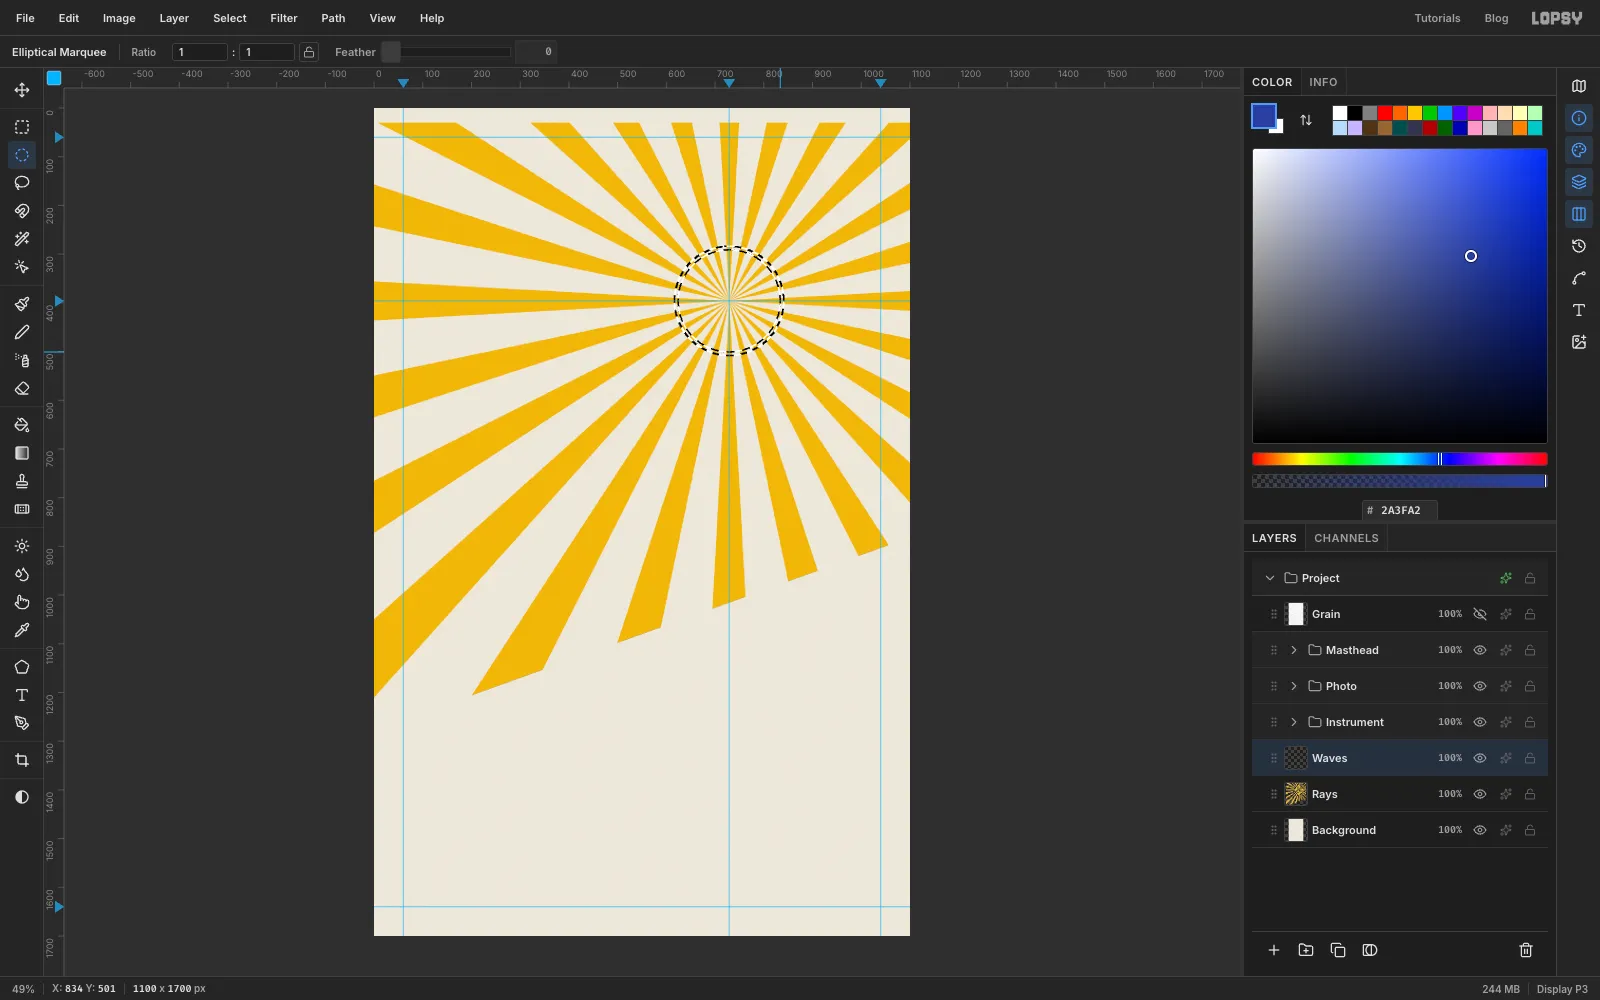
Pick the Elliptical Marquee and click once on the canvas without dragging. The Elliptical Selection dialog opens. Enter From 617, 284 and To 841, 508, and click Select. That gives a 224 px circle centred on the antenna point.
Now hold Alt and drag a slightly smaller circle inside it, from about (624, 291) to (834, 501), so it sits 7 px in from the edge all round. The pointer position is shown at the bottom left of the window as you drag. Alt subtracts from the selection, so a thin ring is left. Choose Edit → Fill.
Make two more rings the same way, each one thicker than the last:
- From 651, 318 to 807, 474, cut about 10 px in
- From 687, 354 to 771, 438, cut about 14 px in
-
Keep only the side arcs
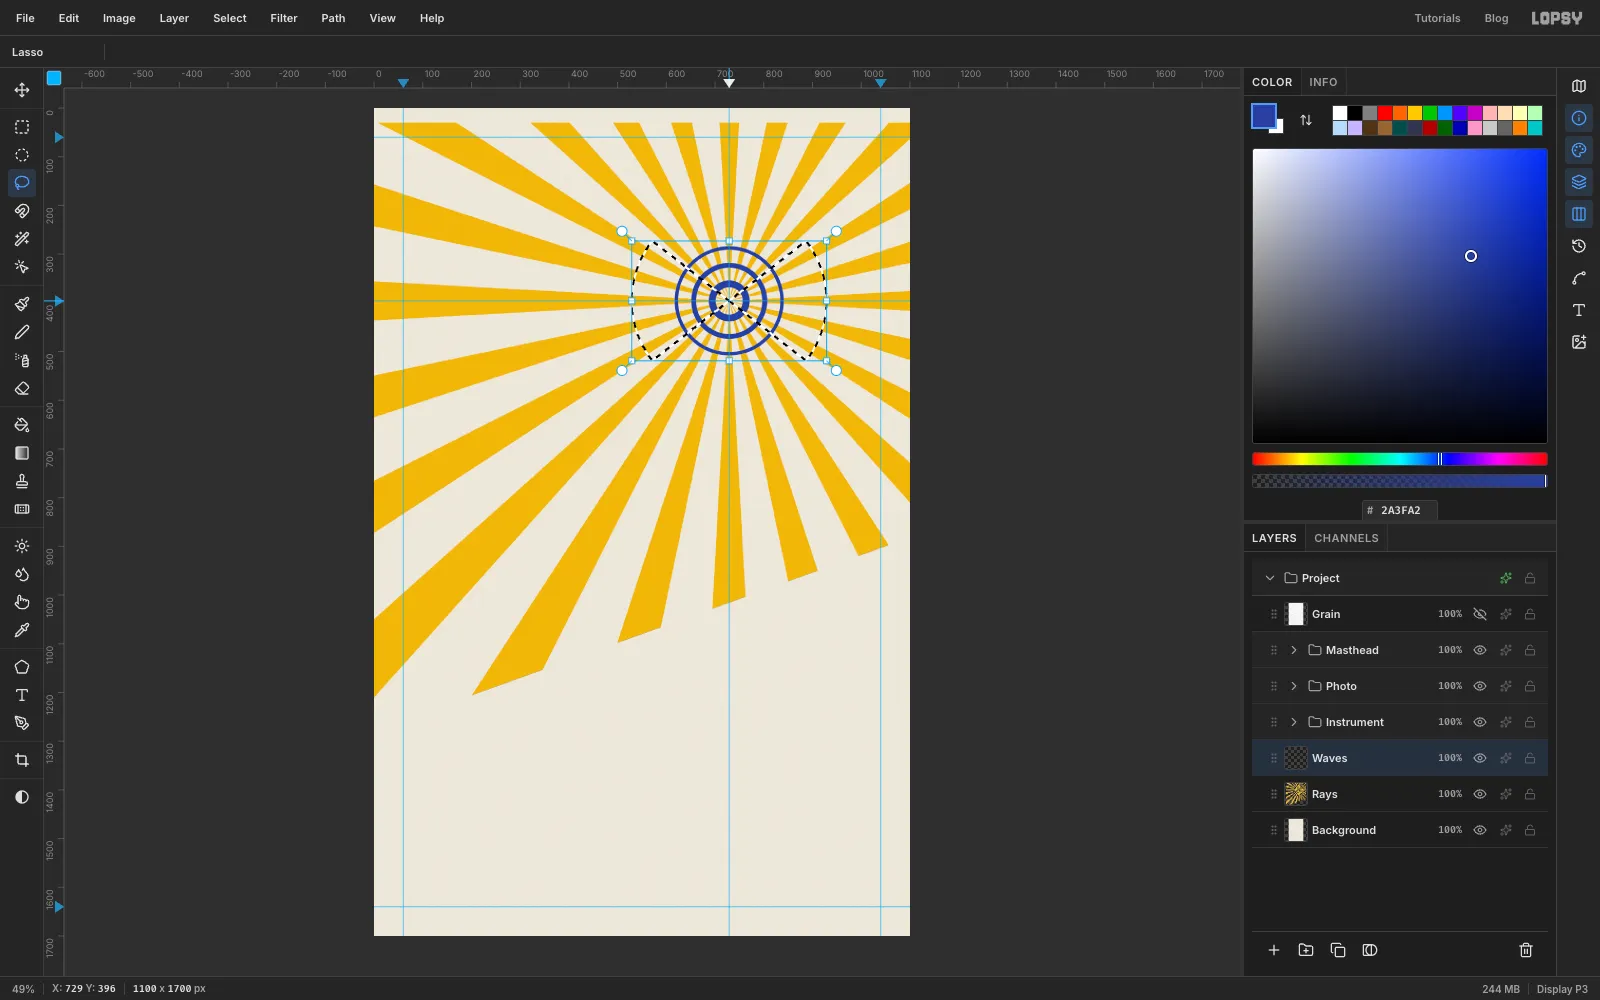
Pick the Lasso. Draw a wedge that starts at the antenna point and opens to the left, about 40° above and below horizontal, and reaches past the biggest ring. Then hold Shift and draw the mirror wedge on the right. Shift adds the second wedge to the first.
Choose Select → Inverse and press Delete. Only the arcs inside the two wedges are left.
-
Look at the waves
Deselect. The arcs get thinner as they move outward, like a signal fading. Paired arcs on both sides read as a broadcasting mast. Arcs on one side only look like a Wi-Fi icon.
-
Draw the cabinet
Click New Group in the Layers panel and name the group Instrument. Then click Add Layer with the group row selected, so the new layer goes inside it, and name it Cabinet.
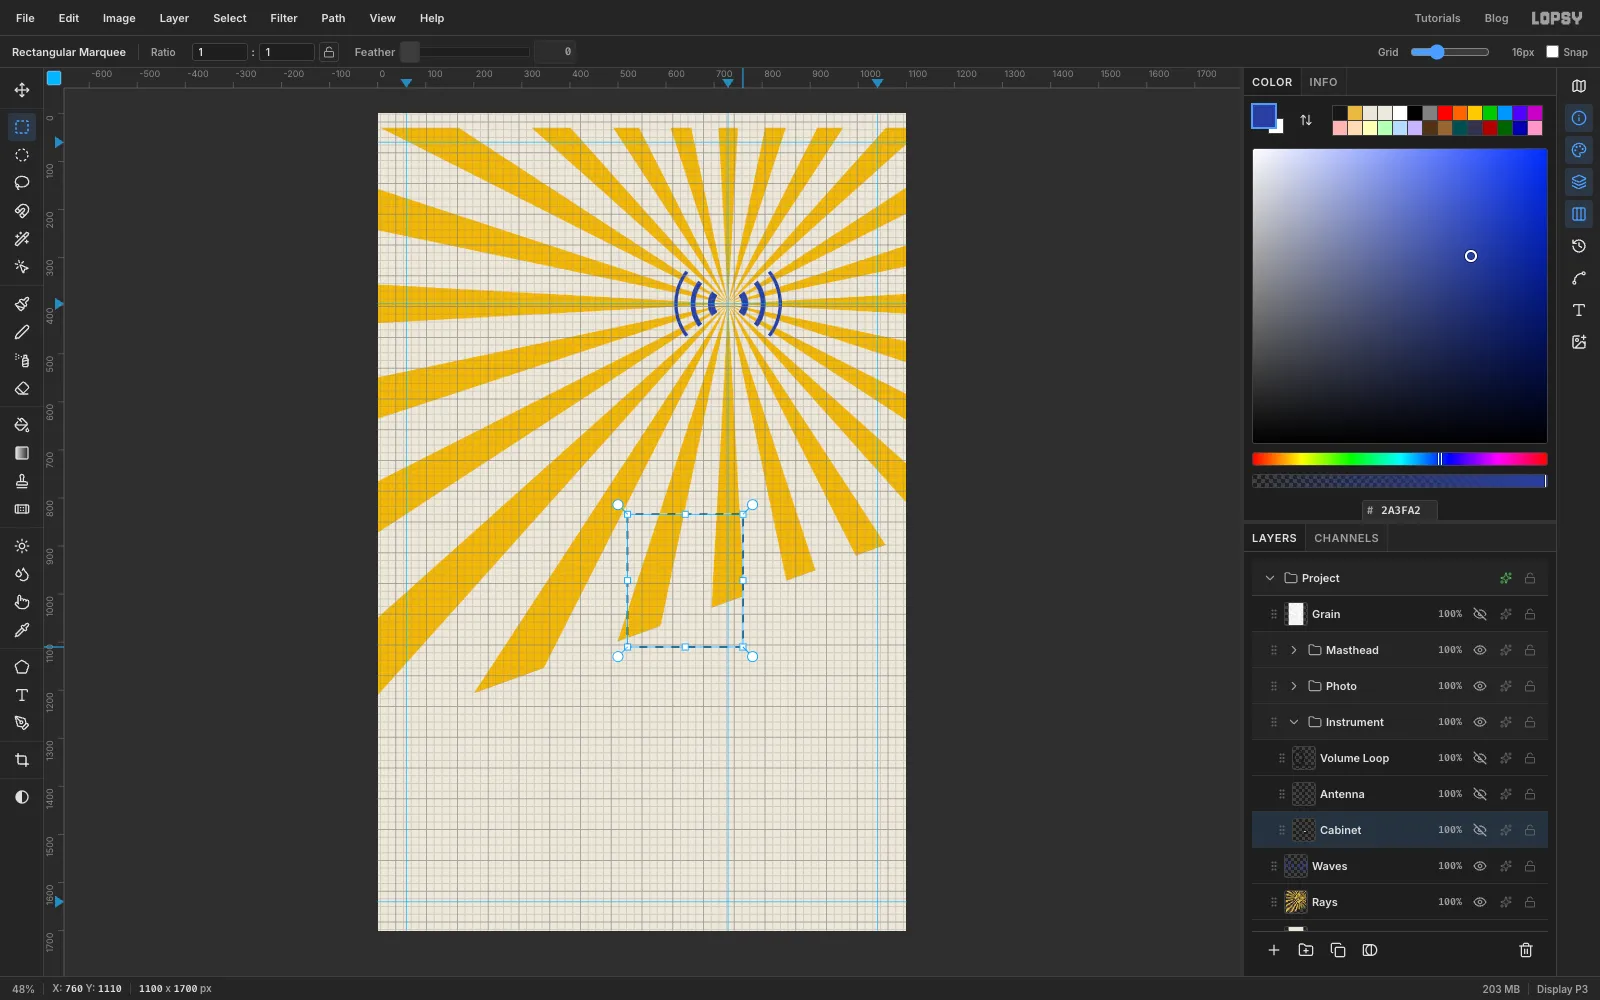
Turn on View → Show Grid to help you line up the box. With the Rectangular Marquee, drag from (520, 834) to (760, 1110) and fill it with ink black . The bottom of the box will go under the band, so it can run long.
Add the details on the same layer:
- Two thin vermilion stripes right across the box, each 10 px tall and 10 px apart, starting about 30 px below its top edge. Drag a marquee for each and fill it.
- A grille: pick the Pencil at Size 5 and set the foreground to paper . Click about 26 px in from the box's left edge, then hold Shift and click about 150 px further right, to draw a straight line. Draw three of these lines 16 px apart, starting about 90 px below the top of the box. Keep the grille on the left, clear of the antenna, which rises from the right-hand end of the box.
Turn the grid off again when you're done.
-
Add the antenna and volume loop
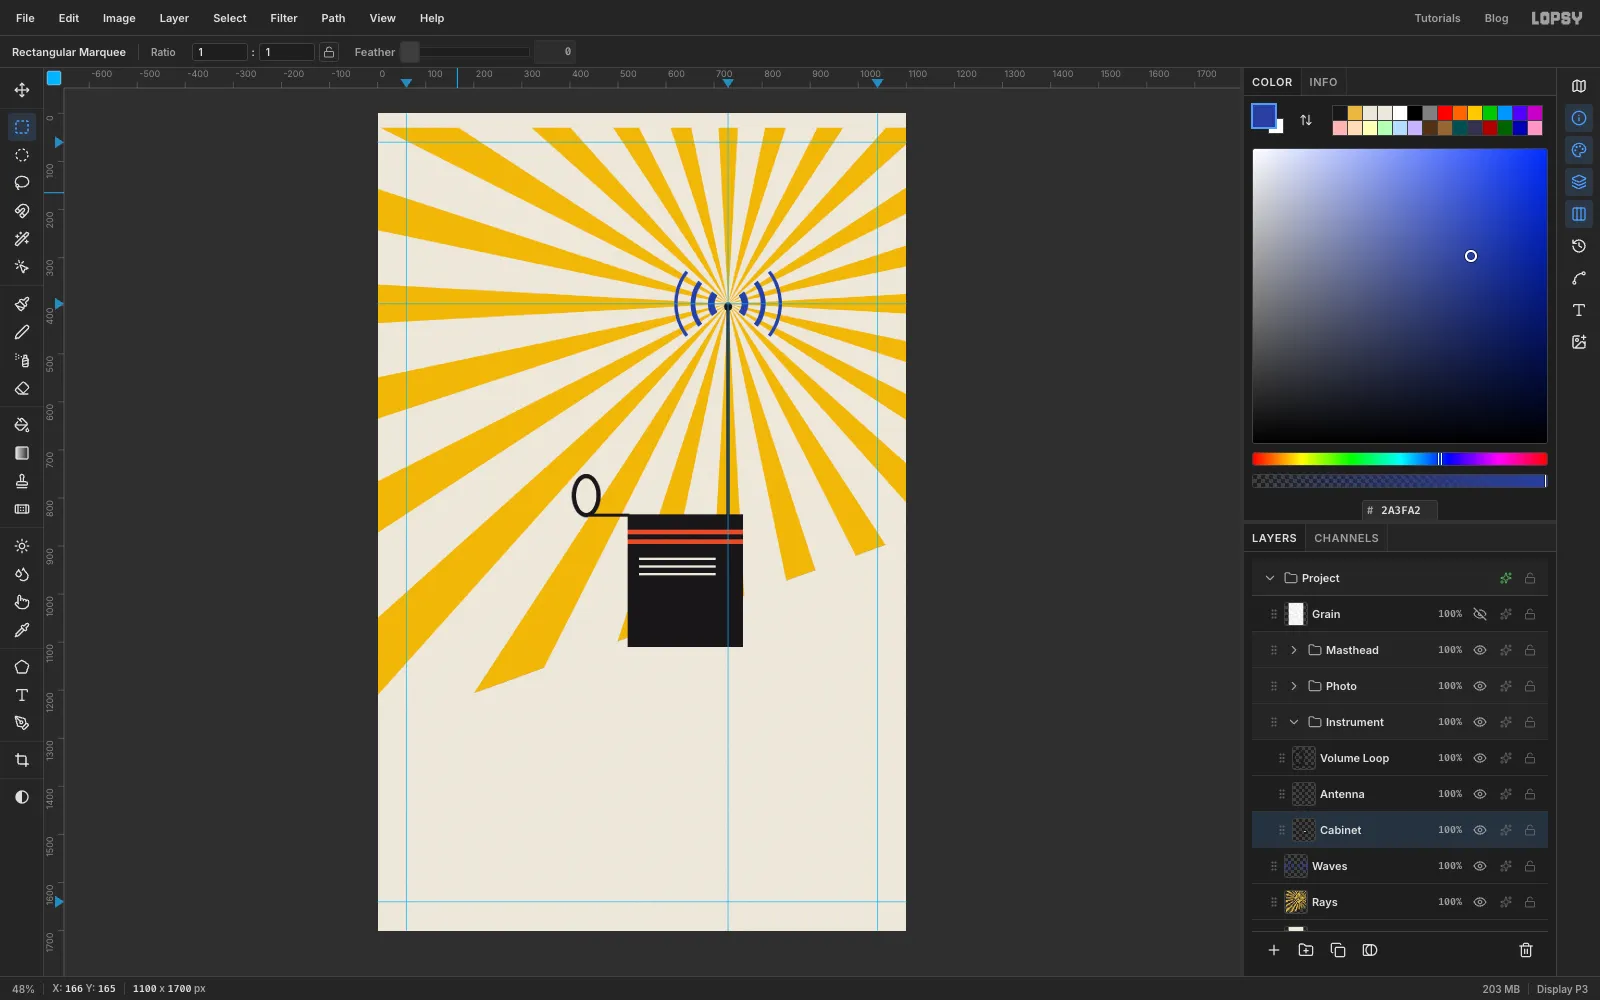
Add a layer called Antenna inside the group. Pick the Brush with Size 8 and Hardness 100. Click at (729, 400), then hold Shift and click at (729, 836), so the rod runs straight up the guide into the cabinet. Set the size to 18 and click once on the tip for a small ball.
Add a layer called Volume Loop. Click with the Elliptical Marquee to open the dialog again and enter From 404, 750 and To 464, 840. That gives a tall oval. Alt-drag a smaller oval about 9 px inside it, fill it with ink, and deselect. Then use the Brush at Size 7 to Shift-click a rod from (434, 836) to (522, 836). The rod runs from the bottom of the loop into the cabinet. A real theremin's volume loop lies flat, but drawn flat it looks like a frying pan; upright, it reads as a loop at a glance.
-
Paste the photo
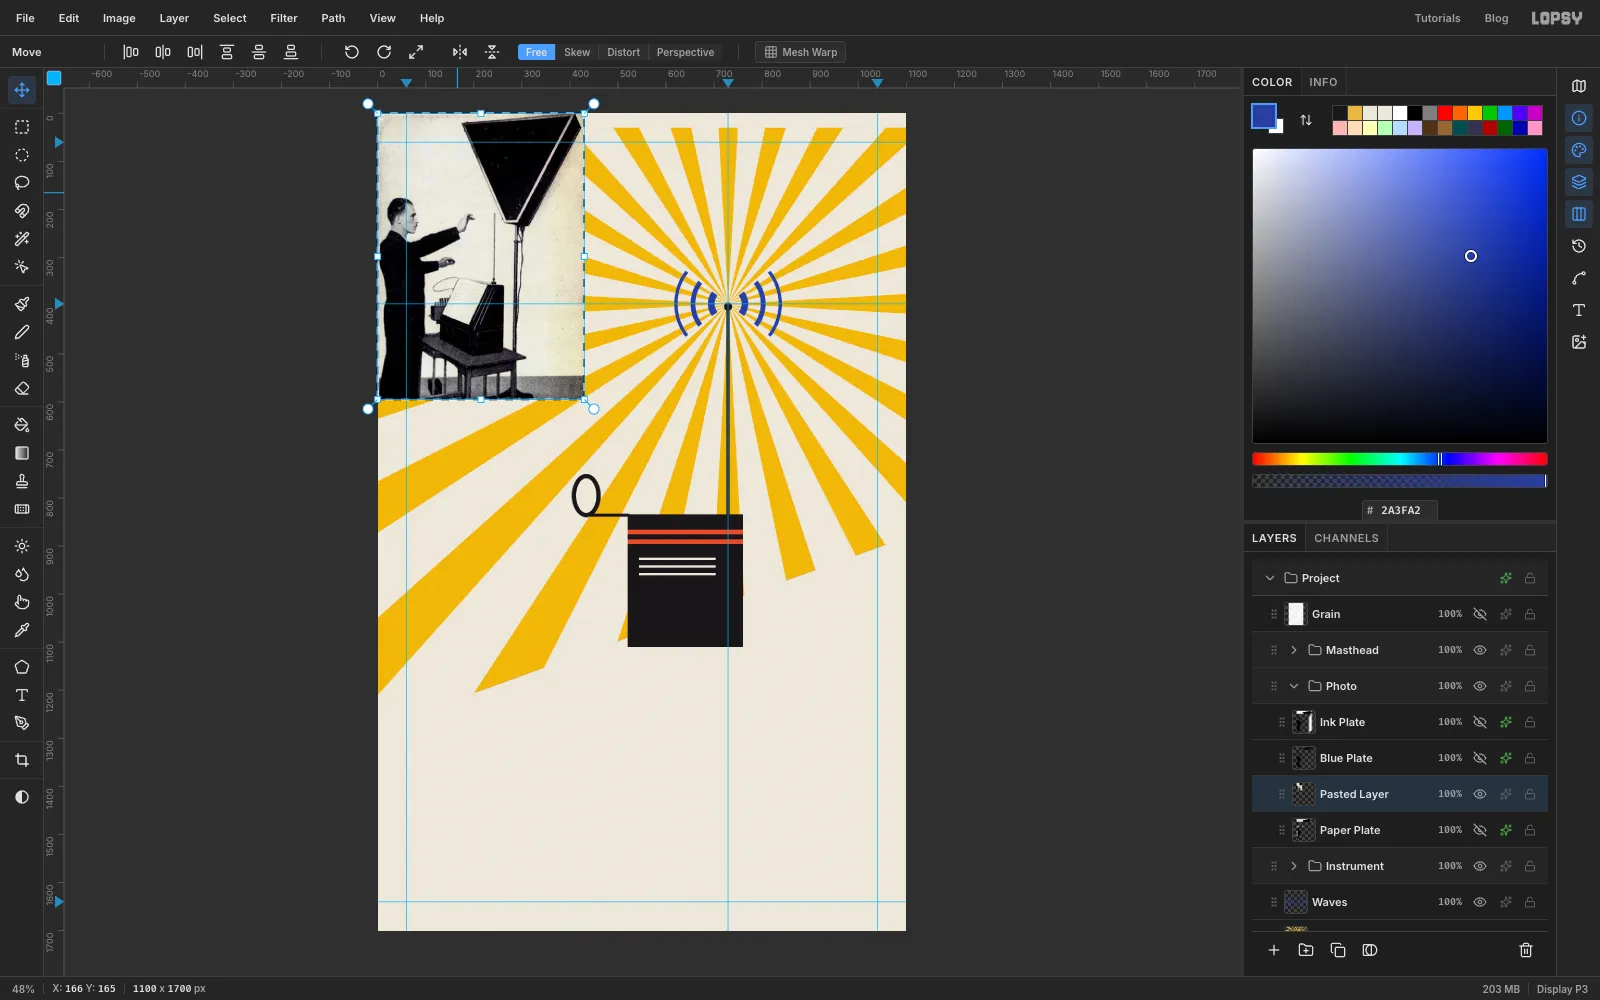
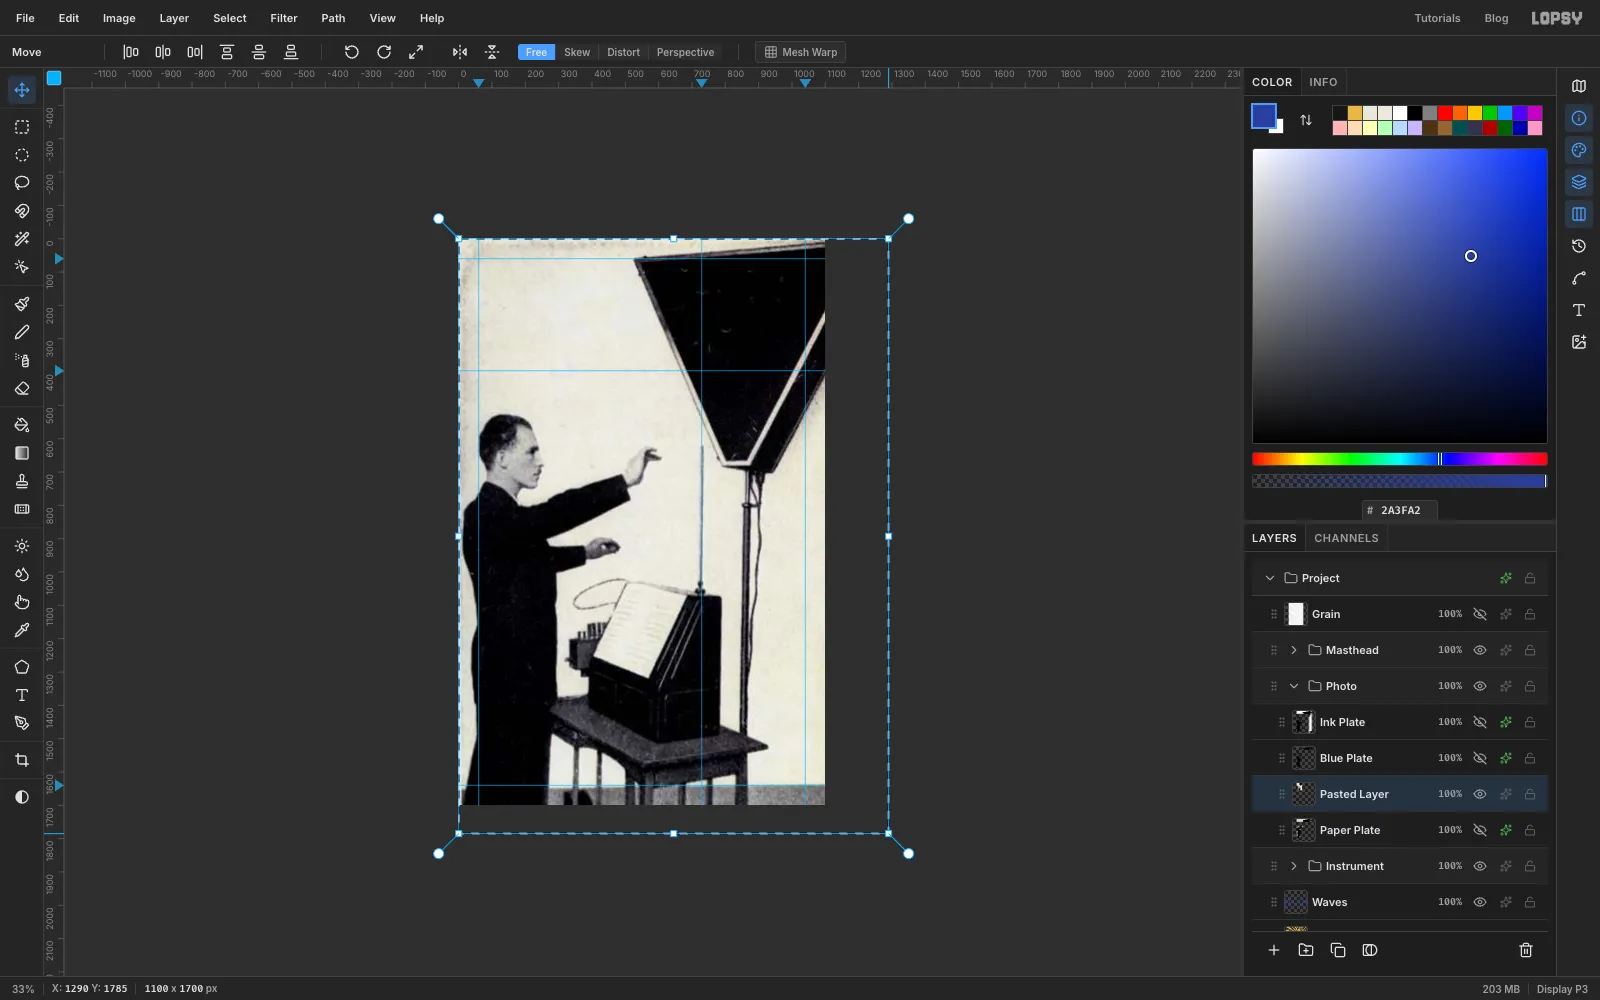
Click the Project row at the top of the Layers panel, click New Group and name the group Photo. Open the photo in your browser or an image viewer, copy it, and press Cmd+V in Lopsy. The photo arrives at its real size in the top-left corner, inside a transform box, and the Move tool is selected.
-
Scale the photo up three times
Press Cmd+- to zoom out so you can reach the corner. Hold Cmd (to keep the proportions) and drag the bottom-right handle down and right until the pointer readout at the bottom left of the window shows about X 1290, Y 1785. That's three times the original size. Press Cmd+D to apply the transform.
Press Cmd+0 to fit the page again. With the Move tool, drag the photo straight up. Watch the Y readout and move it 225 px, so the top of his head sits about 300 px from the top of the page and his raised hand stops just short of the waves.
-
Trace around Theremin
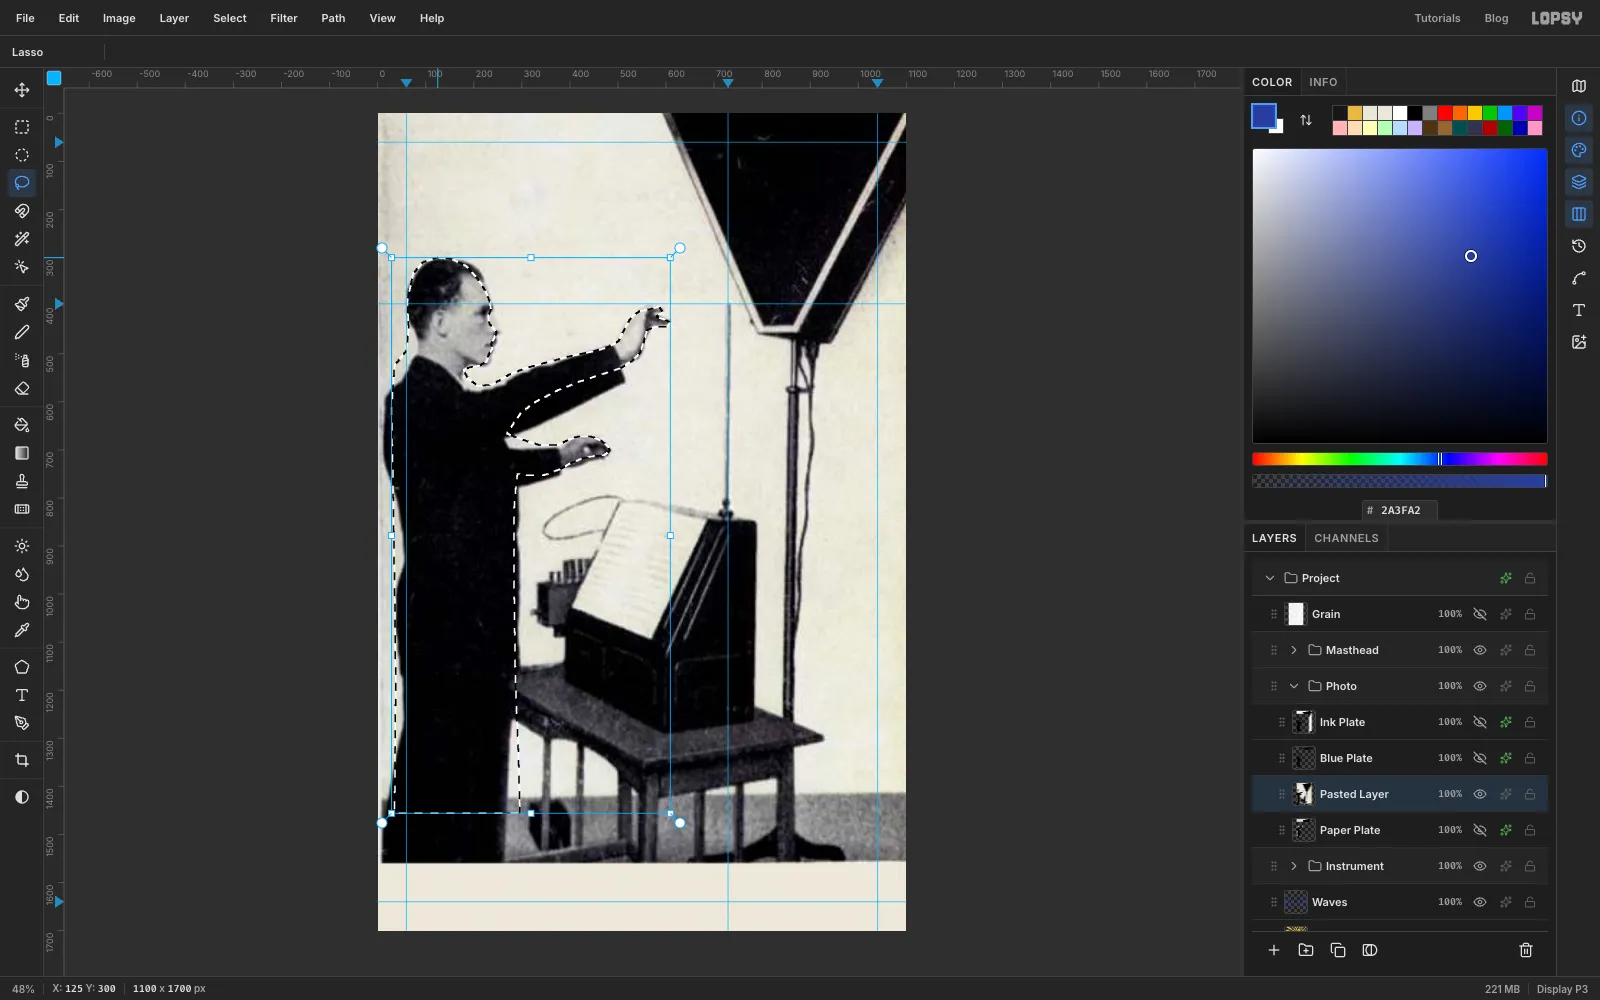
Pick the Lasso and trace slowly around him:
- Start at the back of his neck and go over the top of his hair.
- Come down his forehead, nose and chin.
- Go out along the top of his raised arm, round the fingers, and back under the arm.
- Go round the lower hand the same way.
- Go down the front of his body.
- Cross straight over below his waist and come back up his back.
Leave out the triangle loudspeaker, the table and the instrument. You've already drawn your own instrument.
Take your time round the face and fingers. A clean edge here is what makes the cutout look like a cutout and not a smudge.
-
Cut him out and remove the colour
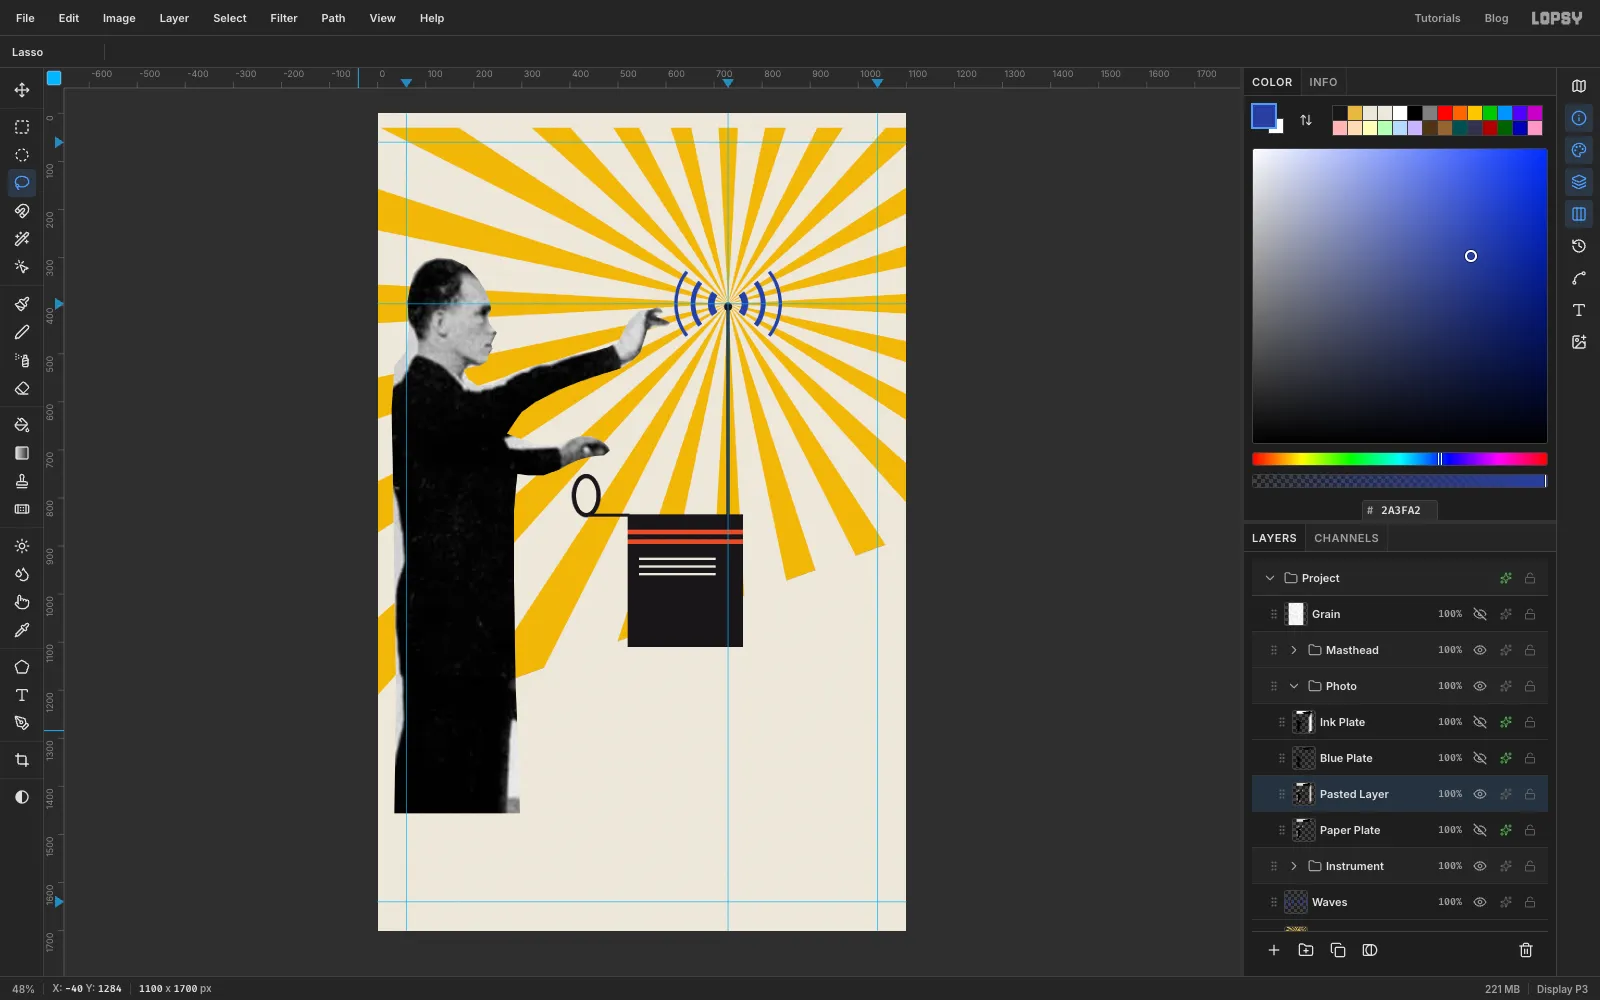
Choose Select → Inverse, press Delete and deselect. Then choose Filter → Desaturate. Double-click the layer name and rename it Paper Plate.
Click Duplicate Layer twice. Rename the copies: the middle one is Blue Plate and the top one is Ink Plate. You now have three identical grey cutouts stacked on top of each other.
-
Make the black plate
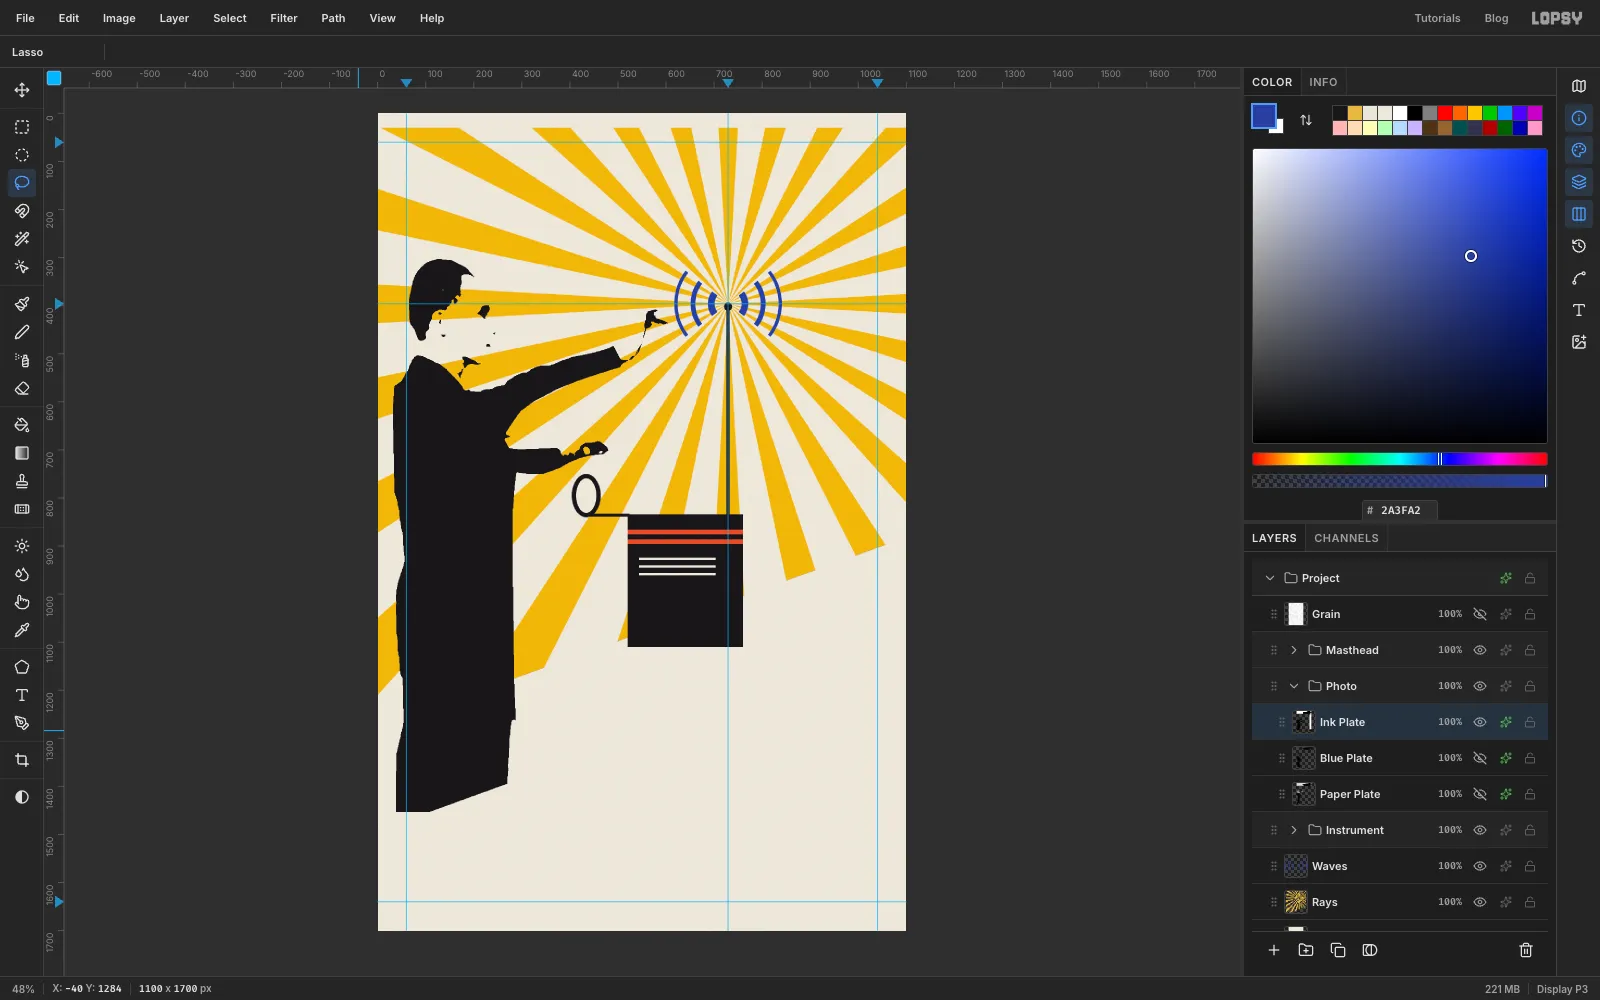
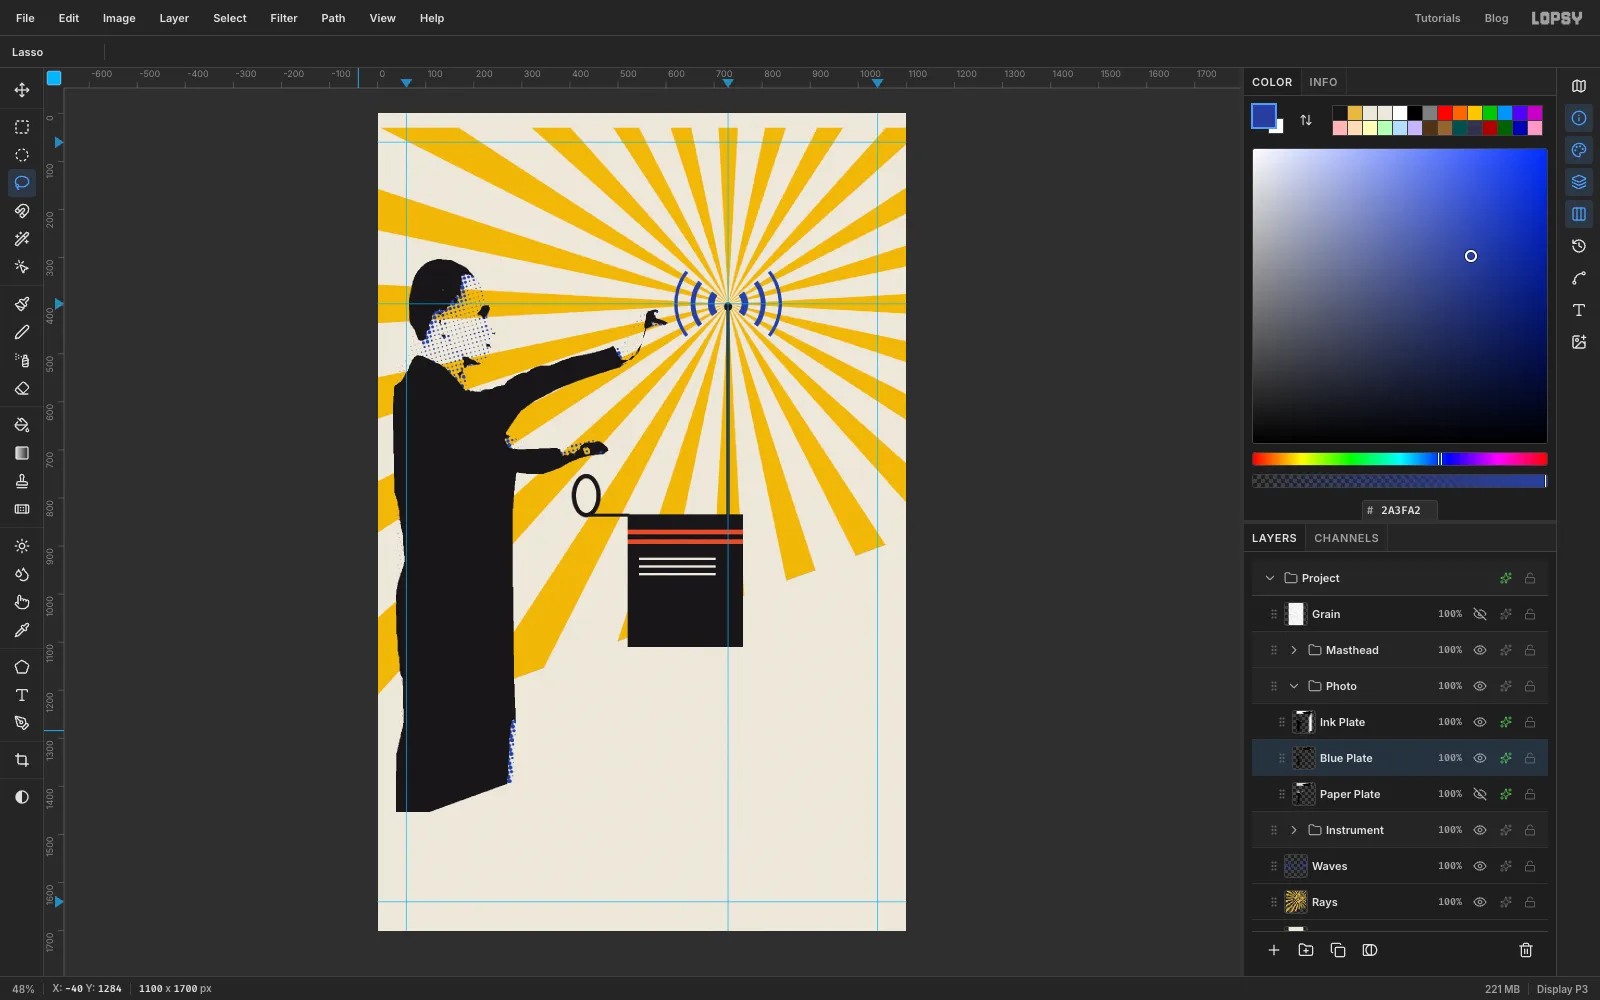
Click the Ink Plate row. Choose Filter → Gaussian Blur, set Radius to 1.5 and apply it. The blur smooths the edges of the enlarged photo before the next step. Then choose Filter → Threshold, set Level to 110 and apply it. His suit and hair go solid black, and the face keeps the eye, the nostril and the line of the mouth.
The light parts are now solid white, not transparent. Pick the Magic Wand, untick Contiguous, click on his white cheek and press Delete. Every white area on the layer goes at once. Deselect, open the layer's effects drawer, and switch on Color Overlay with ink black . The overlay turns the threshold's pure black into the same soft ink black as the rest of the cover.
-
Add the blue halftone plate
Click the Blue Plate row. Choose Filter → Brightness/Contrast with Brightness −10 and Contrast 45, and apply. That gives the mid-tones more weight. Then choose Filter → Halftone with Dot Size 9, Angle 15 and Softness 0.5. Switch on Color Overlay in ultramarine .
With the Move tool, nudge the plate 7 px right and 5 px down with the arrow keys. On a real press the two plates never line up exactly.
Now trim both plates to the silhouette:
- Click the Paper Plate row and pick the Magic Wand (Contiguous still off).
- Click an empty part of the page, so everything outside Theremin is selected.
- Choose Select → Grow, enter 3 and apply.
- Click the Ink Plate row and press Delete.
- Click the Blue Plate row and press Delete.
The selection stays when you click other rows. This removes the thin dark outline the blur and threshold leave round the edge, plus any loose dots.
-
Give him a cut-out border
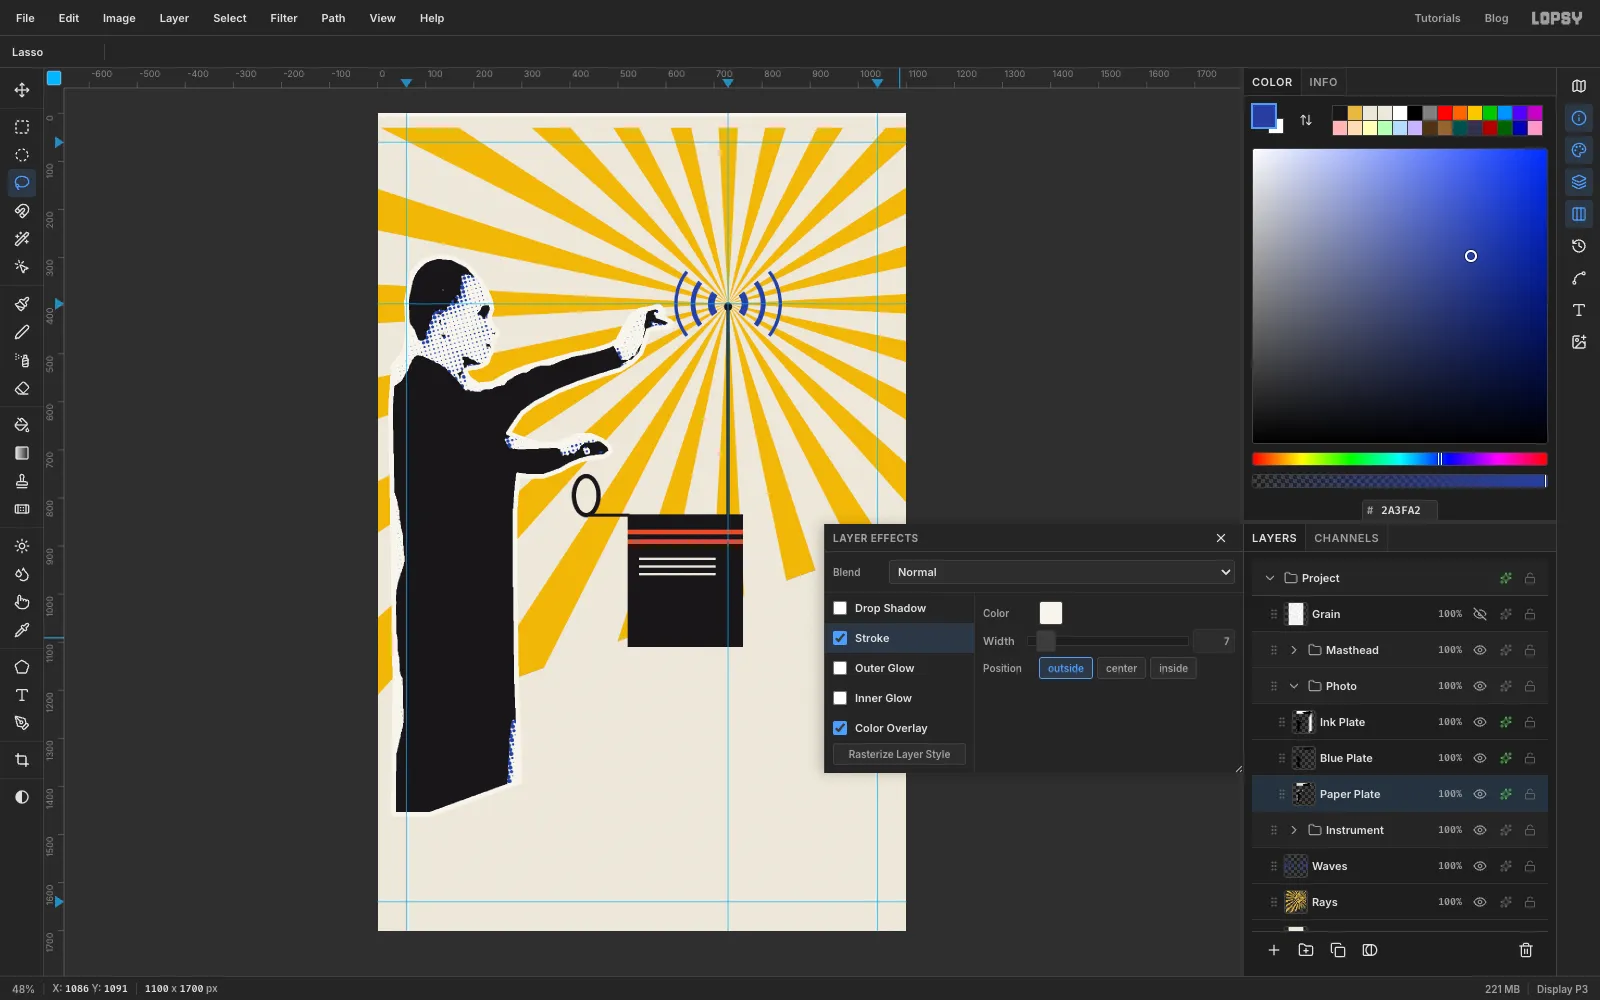
Deselect and click the Paper Plate row. Open the effects drawer and switch on Color Overlay with photo white , a little brighter than the page. Then switch on Stroke: the same white, Width 7, position Outside.
He now looks like a photo cut out with scissors and glued down, which is exactly what photomontage was.
-
Draw the vermilion band
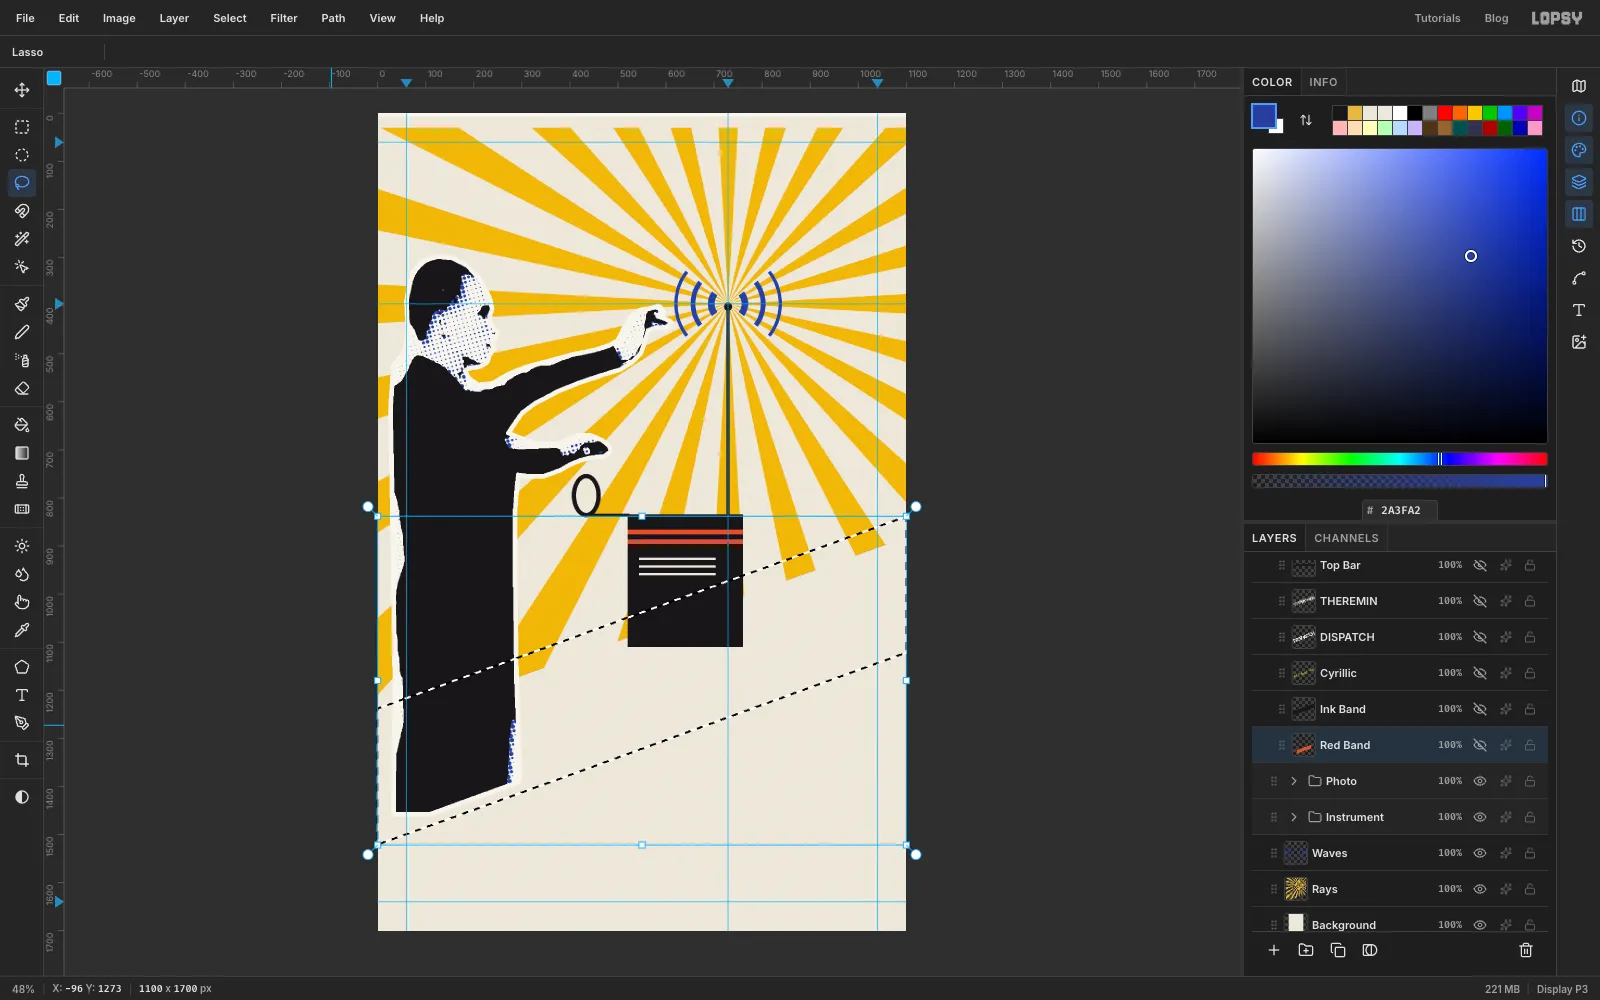
Click the Project row and click New Group. Name the group Masthead and add a layer inside it called Red Band.
With the Lasso, draw a long slanted band that rises 20° from left to right:
- Start off the left edge at about y 1273.
- Go off the right edge at about y 837.
- Go down 250 px on the right.
- Come back off the left edge at about y 1523.
Fill it with vermilion .
-
Hide his legs behind the band
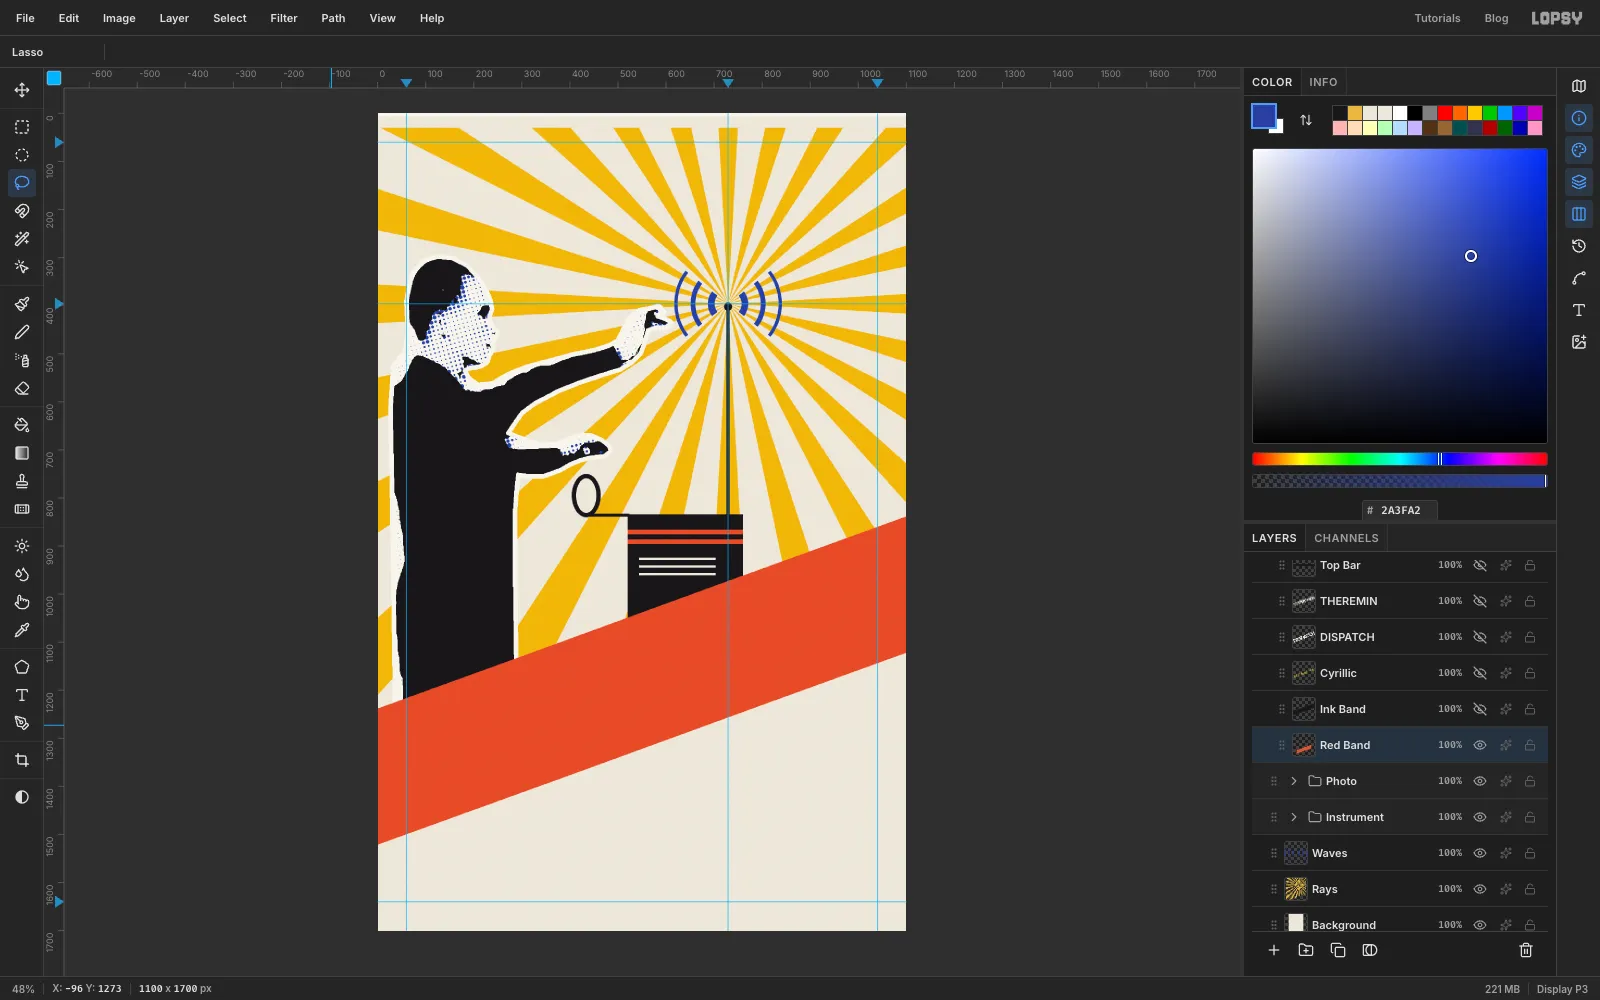
Deselect. The band covers the bottom of the cabinet and Theremin from the waist down. If any of his legs shows below the band, Lasso the area under the band's lower edge. Then click each of the three plate rows in turn and press Delete.
-
Set and rotate the headline
Click the Red Band row first. If a text layer is selected when you change the text settings, Lopsy restyles that layer instead.
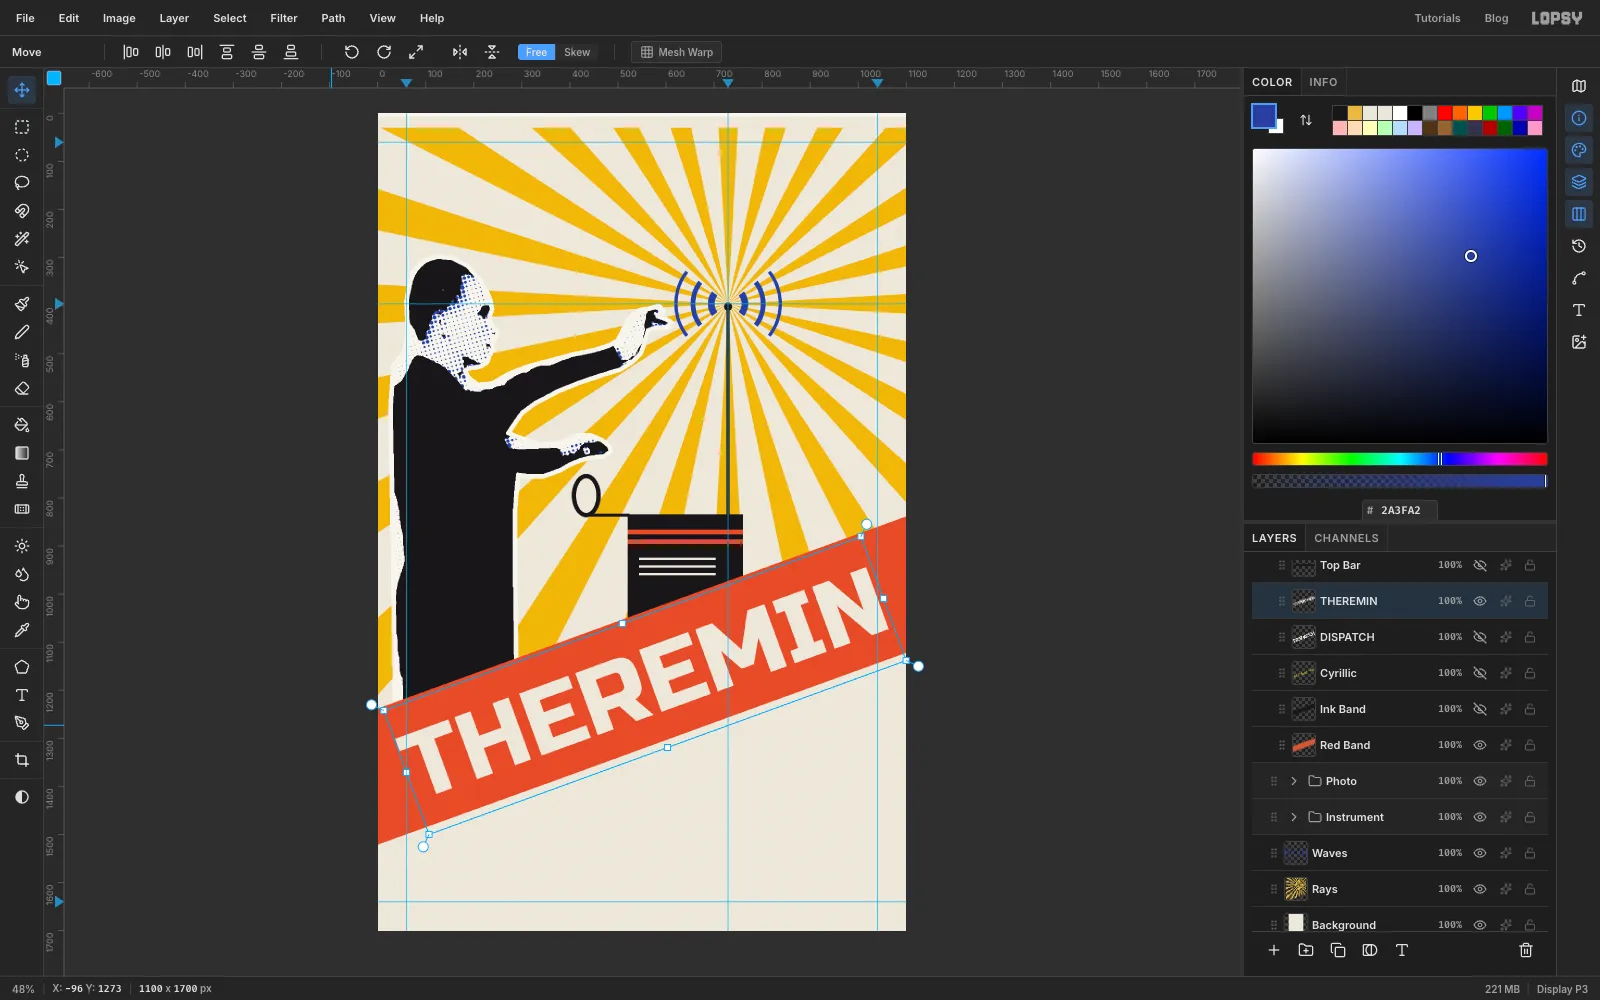
Pick the Text tool. Choose Russo One in the font menu, set Size to 196 and the foreground to paper . Click in the empty area near the top of the page, type THEREMIN and press Tab to finish.
Switch to the Move tool. Drag the round rotate handle off the top-right corner about 20° anticlockwise, until the words match the slope of the band. Press Cmd+D. Then drag the text down onto the band so it sits in the middle, with the same red margin above and below the capitals. The middle of the band is at about (550, 1180).
-
Add the black band and DISPATCH
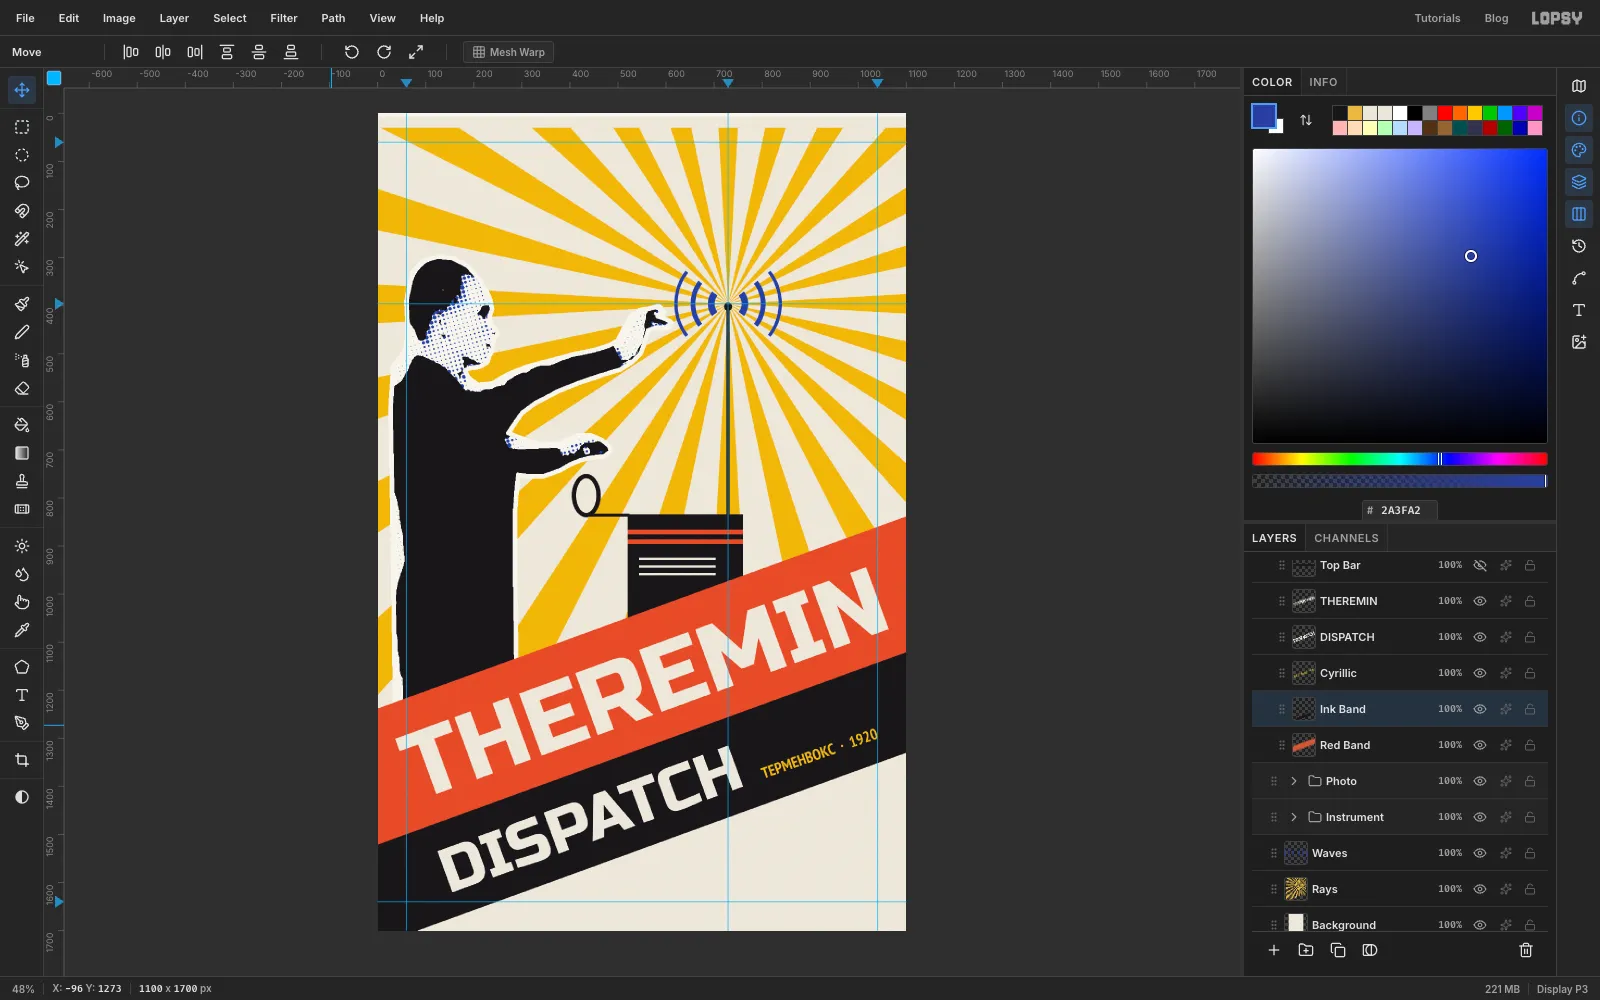
Click Red Band and add a layer called Ink Band. Lasso a second slanted band directly below the red one, touching it, about 200 px thick:
- Start off the left edge at about y 1520, along the red band's lower edge.
- Go off the right edge at about y 1085.
- Go down 200 px on the right.
- Come back off the left edge at about y 1720, below the page.
Fill it with ink black. Its lower edge should leave through the bottom edge of the page, not exactly at the corner. A band that ends right in the corner looks like a mistake.
With Ink Band selected, make a second text layer: Russo One, Size 130, paper colour, DISPATCH. Rotate it 20° the same way. Move it into the middle of the black band, then slide it along the slant until its D sits directly under the T of THEREMIN, measured across the band.
Then click Ink Band again and make one more text layer: PT Sans Narrow, weight Bold, Size 32, ray yellow . The text is ТЕРМЕНВОКС · 1920, the Russian name of the instrument and the year it was invented. If you don't have a Cyrillic keyboard, copy the text and paste it with Cmd+V. Rotate it 20°, rest it on the same baseline as DISPATCH, at least 40 px after the H, and end it at the right margin guide.
-
Add the top bar
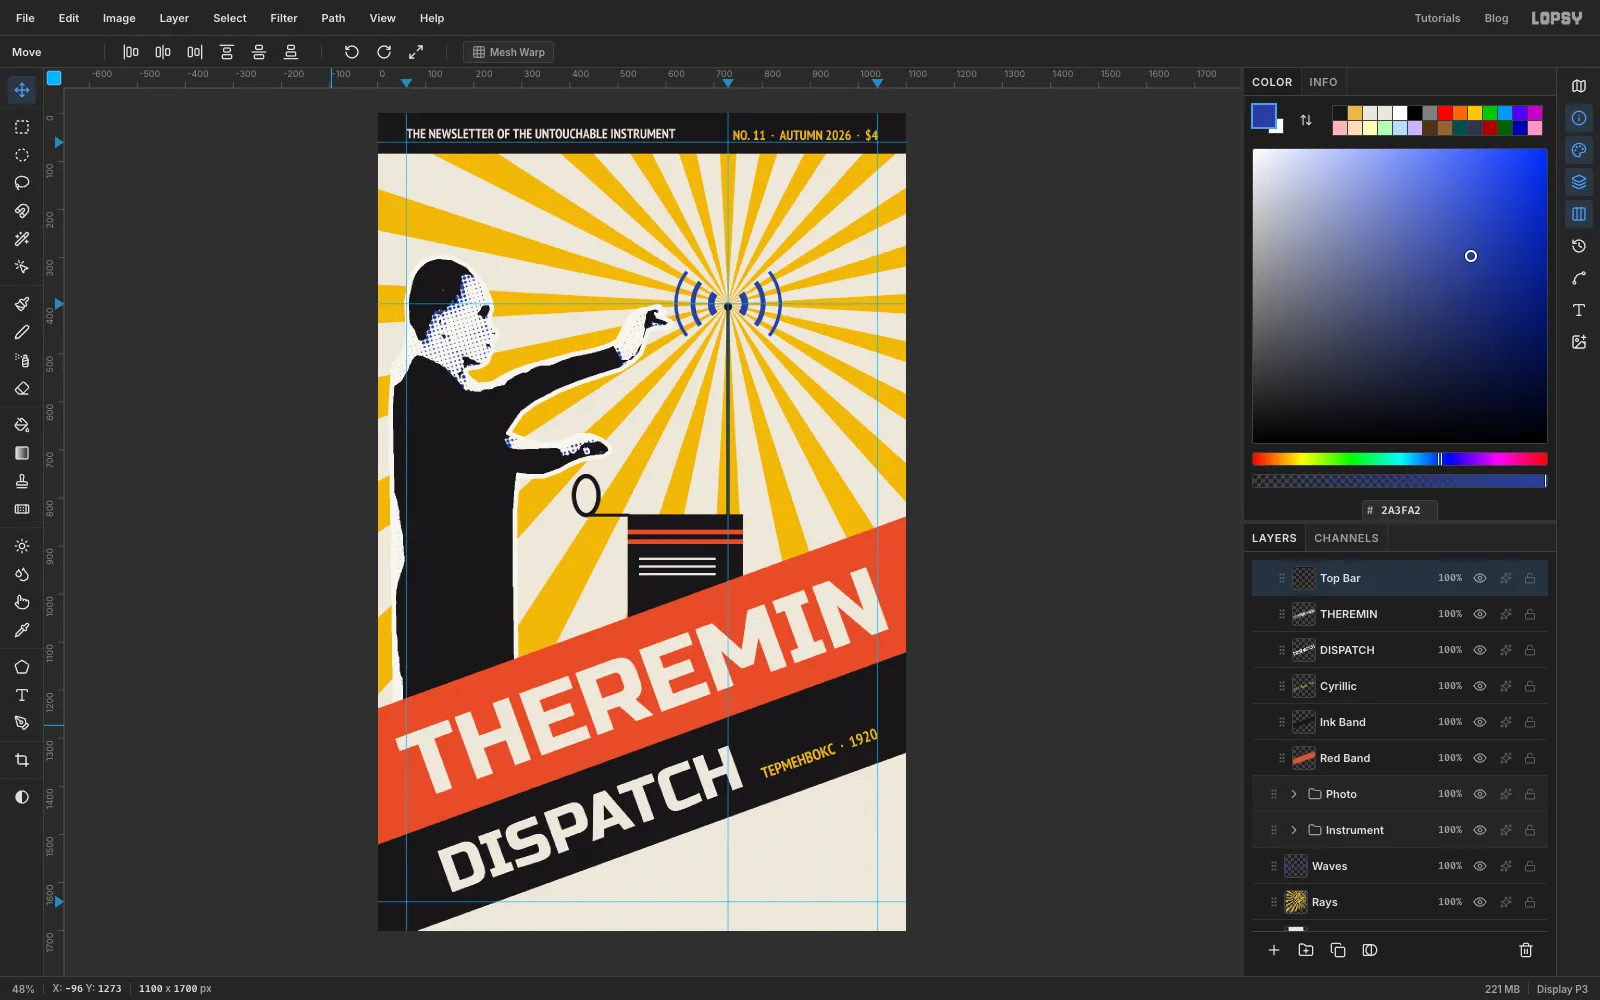
Add a layer called Top Bar. Drag a rectangular marquee across the full width from the top edge down to 84 and fill it with ink black.
Set two lines of PT Sans Narrow Bold at Size 28. Remember to click the Top Bar row before each one.
- THE NEWSLETTER OF THE UNTOUCHABLE INSTRUMENT in paper colour, starting on the 60 px margin.
- NO. 11 · AUTUMN 2026 · $4 in ray yellow , ending on the 1040 margin. The colour makes the issue details stand out from the tagline. (If you already set it in cream, a Color Overlay in yellow does the same job.)
Move both so their capitals sit in the vertical centre of the bar.
-
Add the coverlines and badge
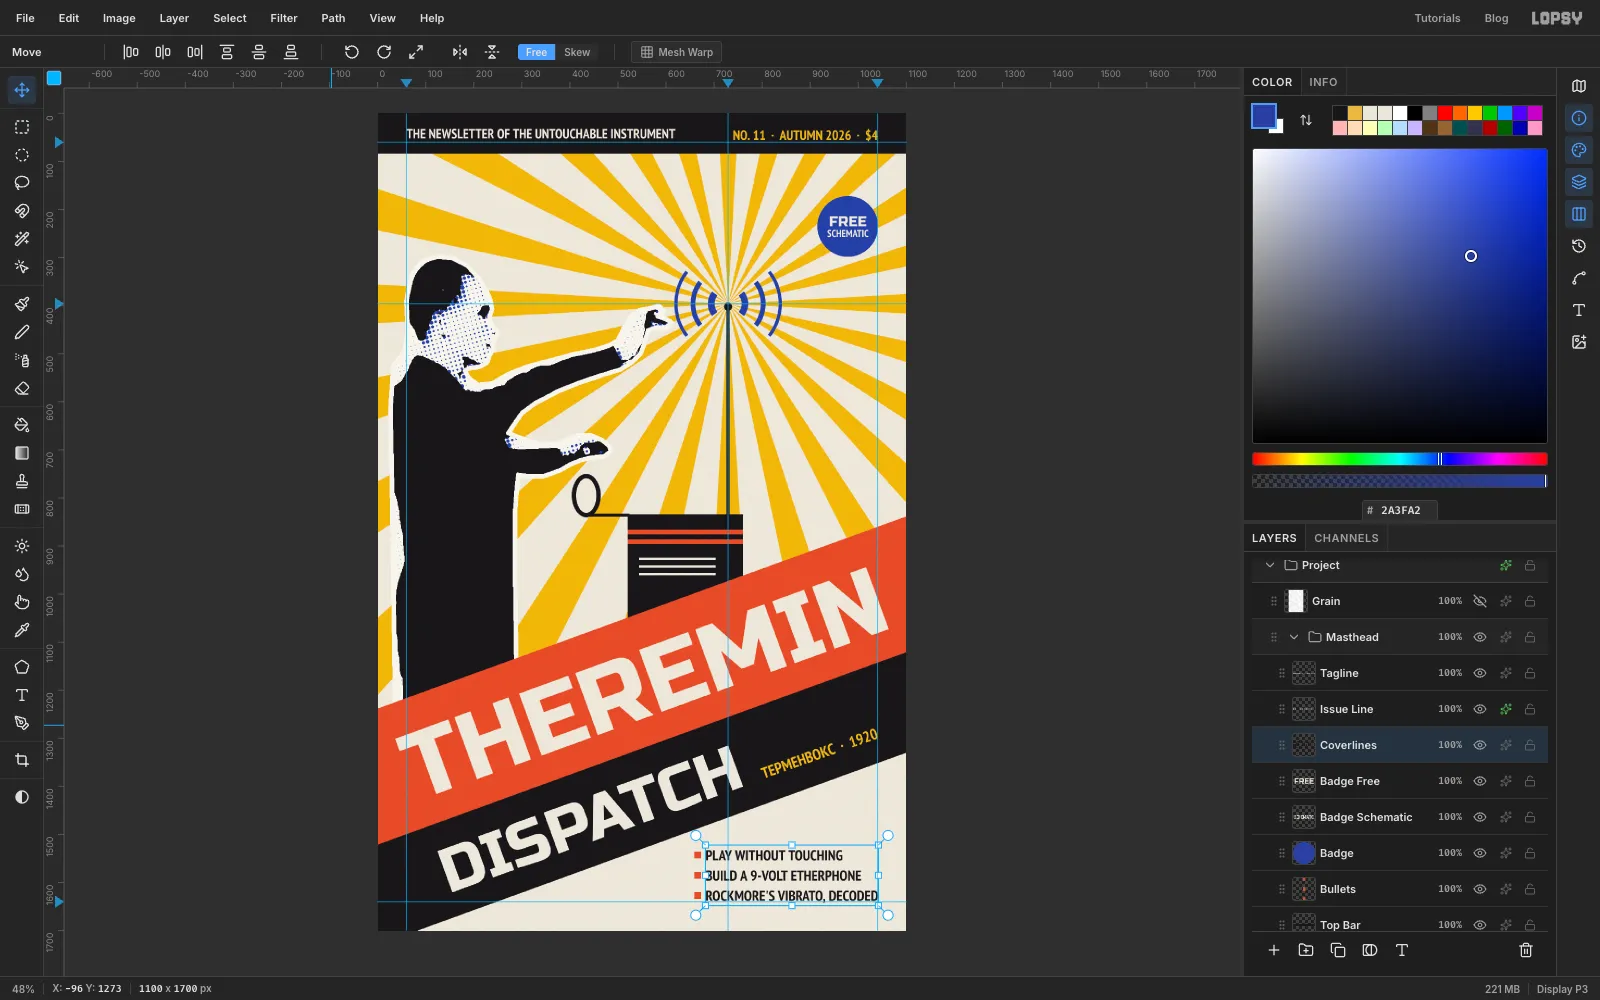
Click the Top Bar row first, so you don't restyle the issue line. Then make a three-line text layer in PT Sans Narrow Bold, Size 30, ink black. Press Enter between the lines:
- PLAY WITHOUT TOUCHING
- BUILD A 9-VOLT ETHERPHONE
- ROCKMORE'S VIBRATO, DECODED
The Text panel's Line height should be 1.4. Move the block so its right edge sits on the 1040 guide and its top is at least 40 px below the black band.
On a new Bullets layer, add a 14 px square to the left of each line, centred on the capitals. Click once with the Rectangular Marquee to open its size dialog, and enter a box 14 px wide and tall, 10 px left of the text. Fill each square with vermilion. Snap to Guides can stretch a small square that's near a guide, so turn off View → Snap to Guides while you draw them.
For the badge, add a layer called Badge. Click once with the Elliptical Marquee and enter From 914, 172 and To 1040, 298 for a 126 px circle whose right edge sits on the margin. Fill it with ultramarine.
Add FREE in Russo One 30 and paper colour. Then click the Badge row again, so you don't restyle FREE, and add SCHEMATIC in PT Sans Narrow Bold 21. Move the two words by eye until they're stacked in the middle of the circle, with FREE just above the centre and SCHEMATIC just below.
If you built the badge somewhere else first, click the Badge row and Shift-click the two text rows, so all three layers are selected, then drag them together into the top-right corner. Moving them as one keeps the words centred.
-
Print it with grain
Click the Project row and click Add Layer. The new layer goes on top of everything. Name it Grain. Set the foreground to grain grey and choose Edit → Fill, then choose Filter → Add Noise with Mono, Gaussian and Amount 45. Open its effects drawer and set the Blend mode to Multiply.
The noise darkens every flat colour by a different few levels, pixel by pixel. The paper, the rays and the bands now look printed rather than digital. Save the project with File → Save Project and export the cover with File → Quick Export PNG.