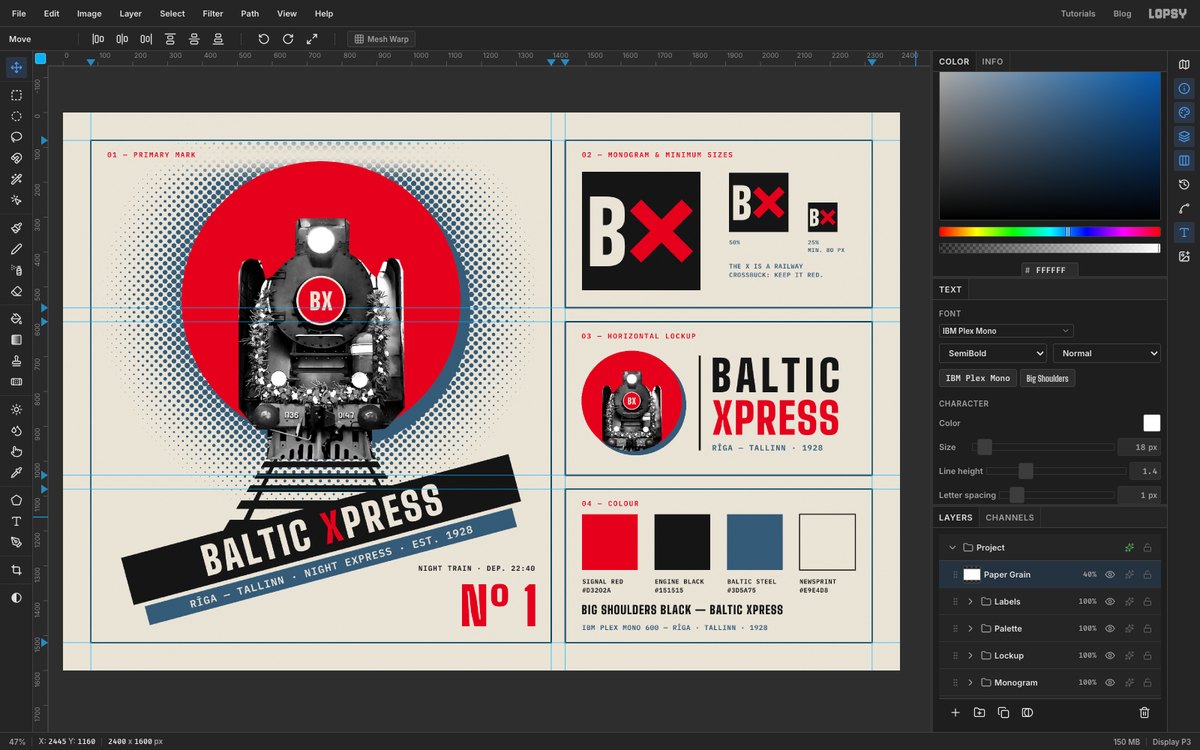
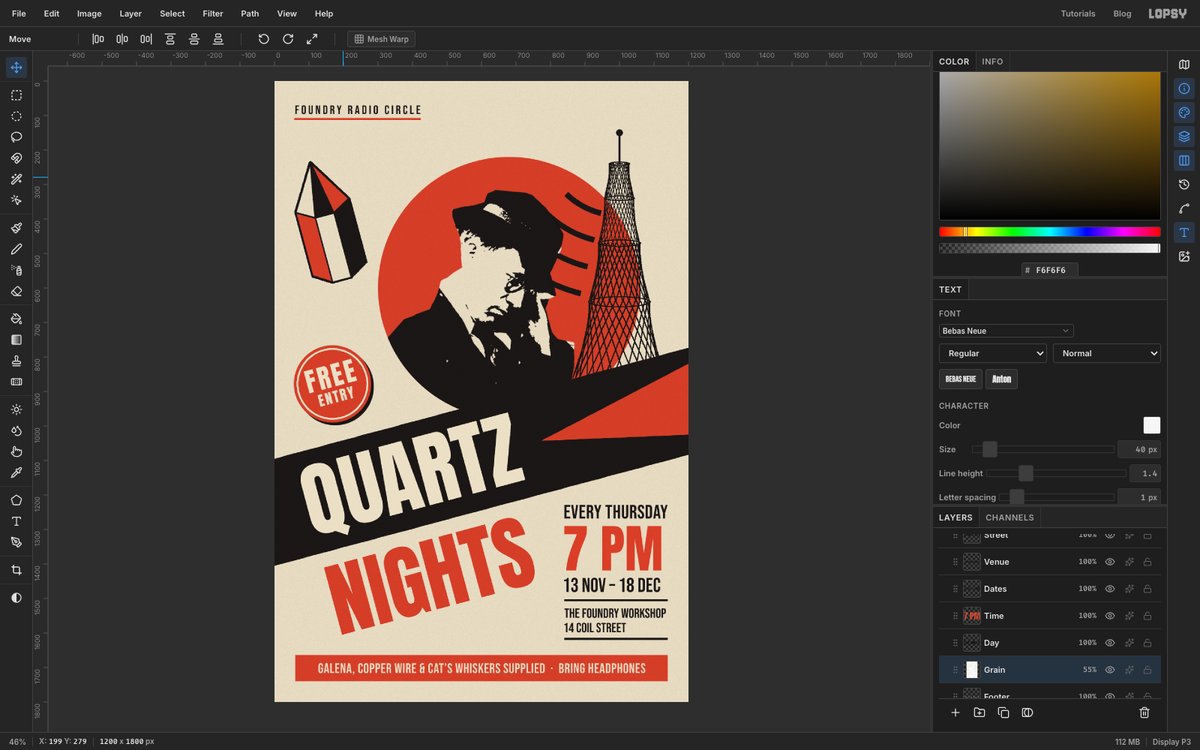
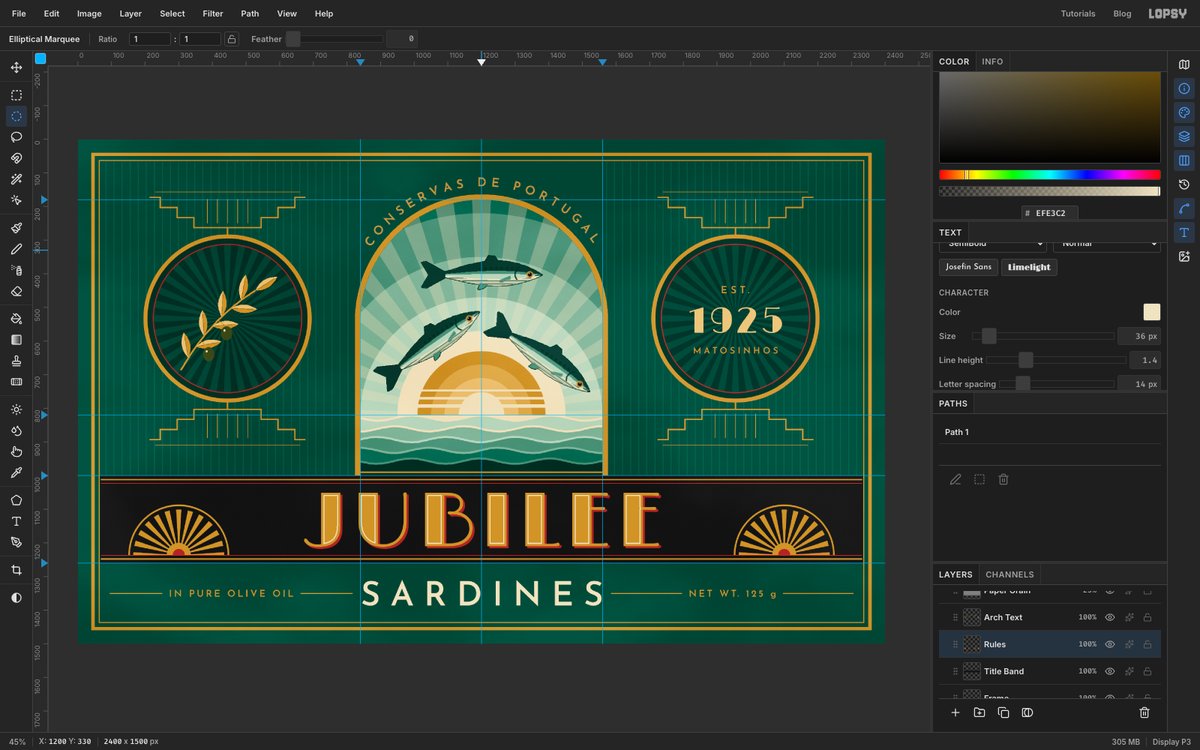
Design a Constructivist Ginger Beer Bottle Label
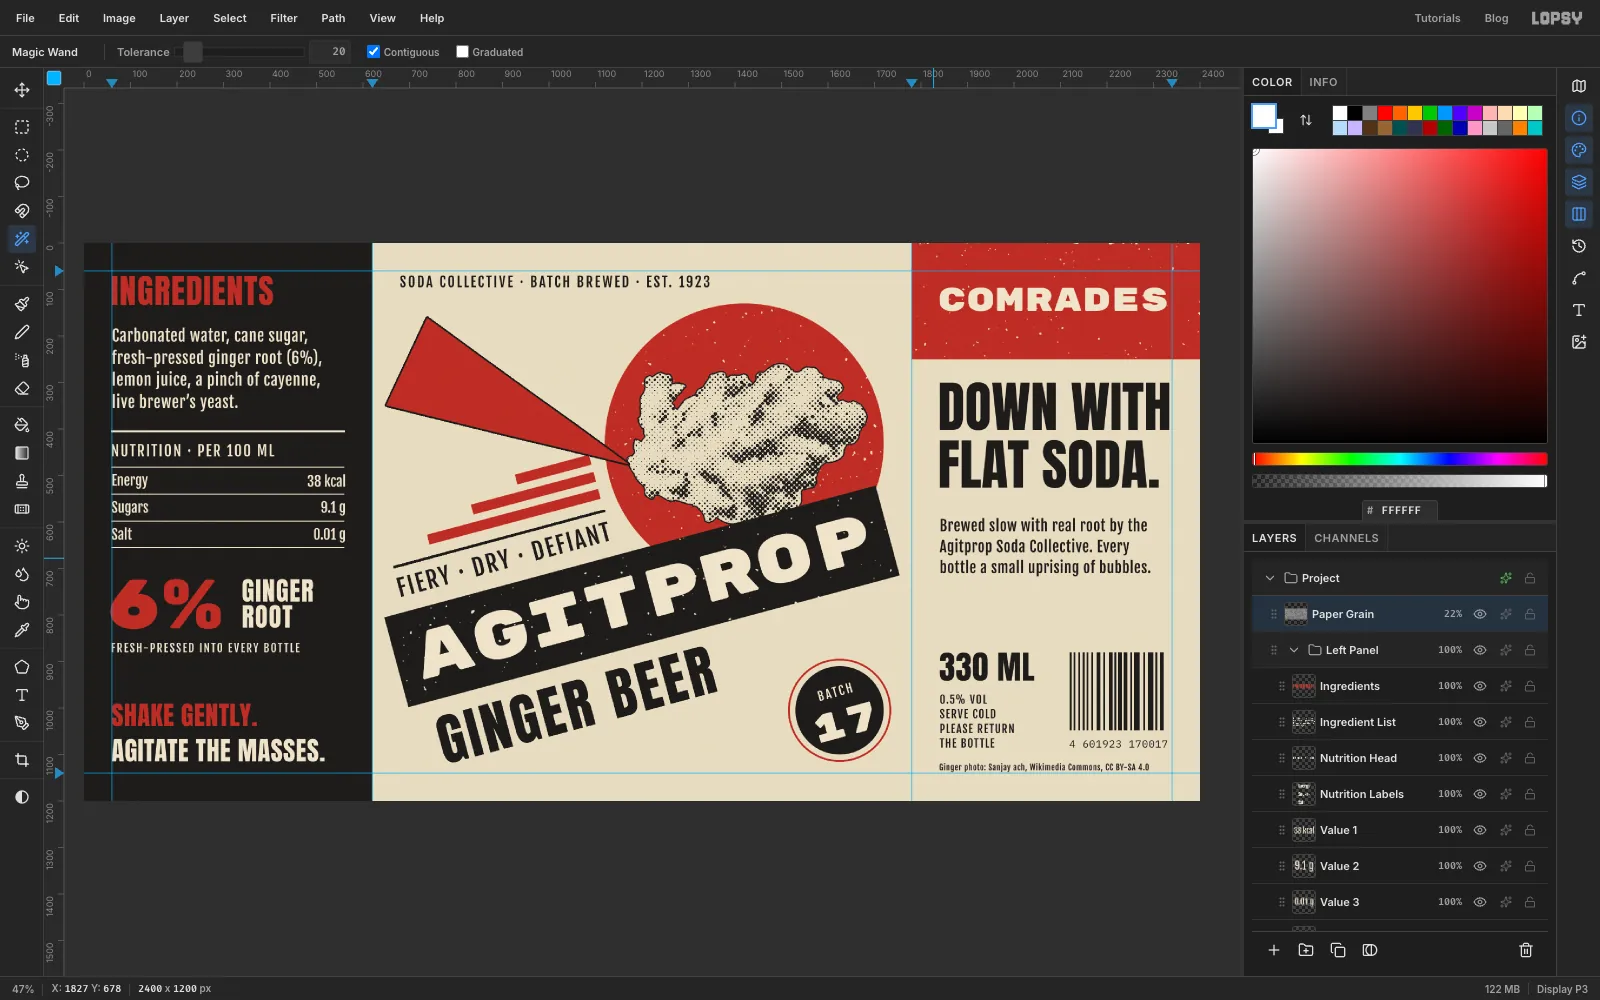
Build a Rodchenko-style wrap-around label for "Agitprop" ginger beer in Lopsy, with a halftone photo cut-out, a red wedge, a 15° title band and worn ink.
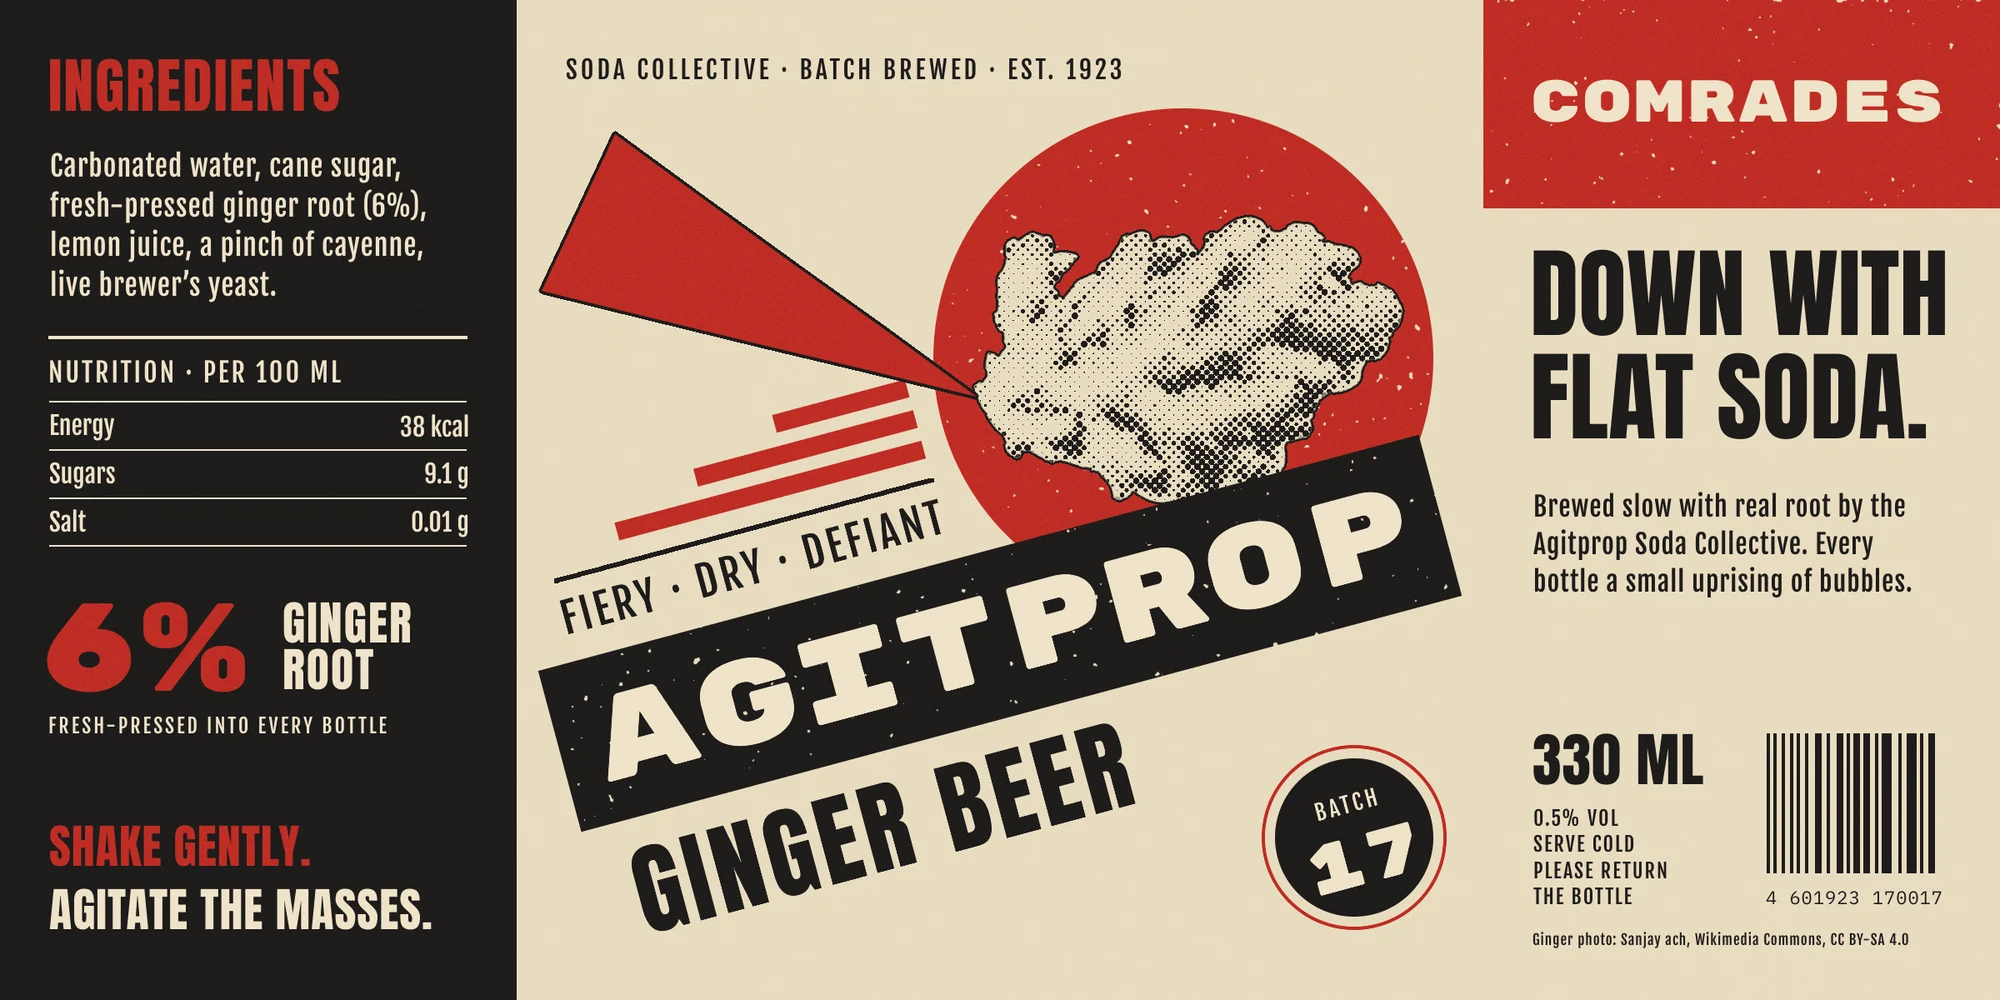
This tutorial makes a wrap-around bottle label for an imaginary ginger beer, Agitprop, in the style of Russian Constructivism. In 1923 the poet Vladimir Mayakovsky and the artist Alexander Rodchenko called themselves "advertising constructors". They sold biscuits, beer and cooking oil with flat red and black, photos cut out with scissors, heavy capitals and one big diagonal. That's the look here, at 2400 × 1200 px.
A wrap label has three panels. The front sits in the middle and is what you see on the shelf. The back is split in two, so you see one half when you turn the bottle left and the other half when you turn it right. Here the left back panel holds the ingredients and the right one holds a small manifesto and the barcode.
The front is a direct nod to El Lissitzky's 1919 poster Beat the Whites with the Red Wedge: a red wedge driving into a circle. Keep the wedge red. A black wedge into a red circle turns the slogan around.
The ginger is a real photograph, Ginger Root.jpg by Sanjay ach on Wikimedia Commons, licensed CC BY-SA 4.0. Download the 1280 px wide version (1280 × 851). It's shot on a white sweep, so the background comes away cleanly with the Magic Wand. The licence asks for a credit, so the label carries one in small type on the right panel.
Along the way you'll use:
- ruler guides, New Group and moving a whole group with the arrow keys
- the Rectangular and Elliptical Marquee, the Lasso, and Shift-drag to add to a selection
- the Magic Wand with and without Contiguous, Select → Shrink, Feather and Inverse
- Desaturate, Brightness/Contrast, Halftone, Add Noise, Gaussian Blur and Threshold
- the Move tool's scale and rotate handles, with Cmd to keep proportions and snap the angle to 15°
- the Stroke and Color Overlay layer effects, and the Overlay blend mode
- the Shape tool for an outlined ring, and the Pencil for straight rules
- Text in Rubik Mono One, Anton, Fjalla One and IBM Plex Mono, turned to an angle
The palette:
-
Paper
-
cream type
-
Ink black
-
Agitprop red
-
Set up the label and its folds
Open Lopsy. In the New Document dialog, set Width to
2400and Height to1200and click Create. You get a whiteBackgroundand an emptyLayer 1. LeaveLayer 1alone. It becomes the paper grain at the very end.- Click the
Backgroundrow, set the foreground colour to and choose Edit → Fill. - Make guides by clicking the rulers. Click the top ruler at x
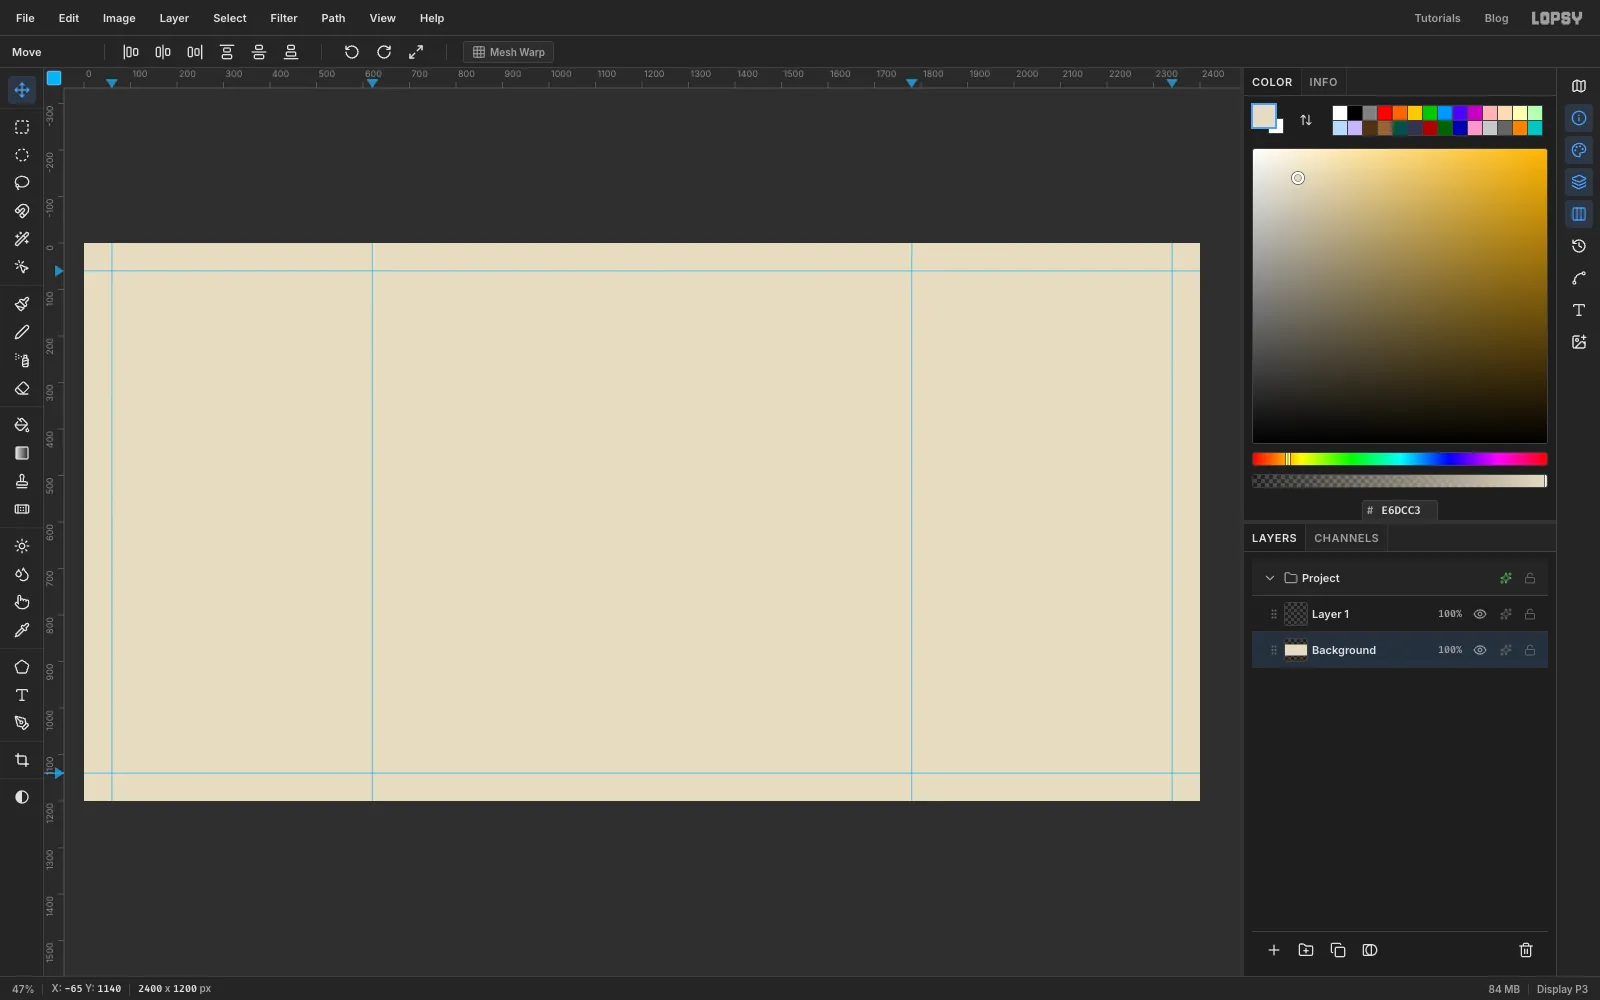
60,620,1780and2340for four vertical guides. Then click the left ruler at y60and1140for two horizontal ones.
The guides at 620 and 1780 are the folds. Everything left of 620 is the left back panel, everything right of 1780 is the right back panel, and the front sits between them. The others are a 60 px margin.
- Click the
-
Paint the black back panel
Each panel gets its own group, so you can move or hide a whole panel at once.
- Click the
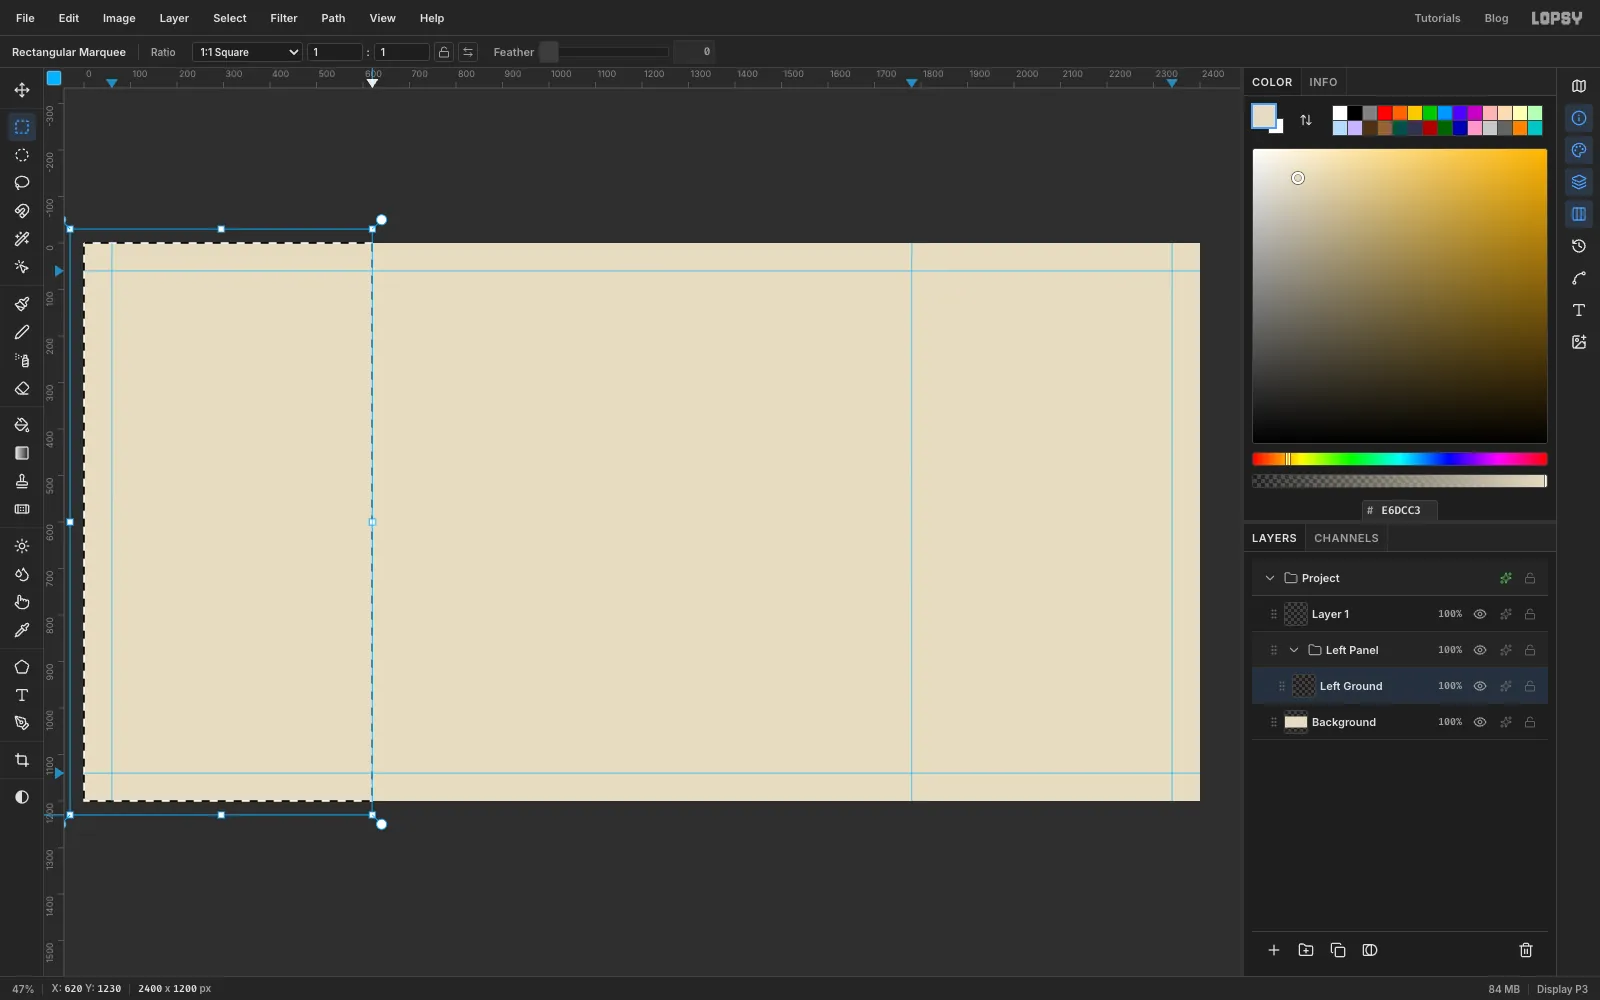
Backgroundrow and click New Group at the bottom of the Layers panel. Rename the groupLeft Panel. - With the group selected, click Add Layer. The new layer goes inside the group. Rename it
Left Ground. - Pick the Rectangular Marquee (M). Start the drag just outside the top-left corner of the canvas and drag down to the 620 guide, past the bottom edge. The marquee snaps onto the guide.
- Fill it with and press Cmd+D.
- Click the
-
Add the red header and the right group
The red header on the right panel is a plain layer under that panel's group. Later you'll move the right panel's group to straighten its type, and the red block shouldn't move with it.
- Click the
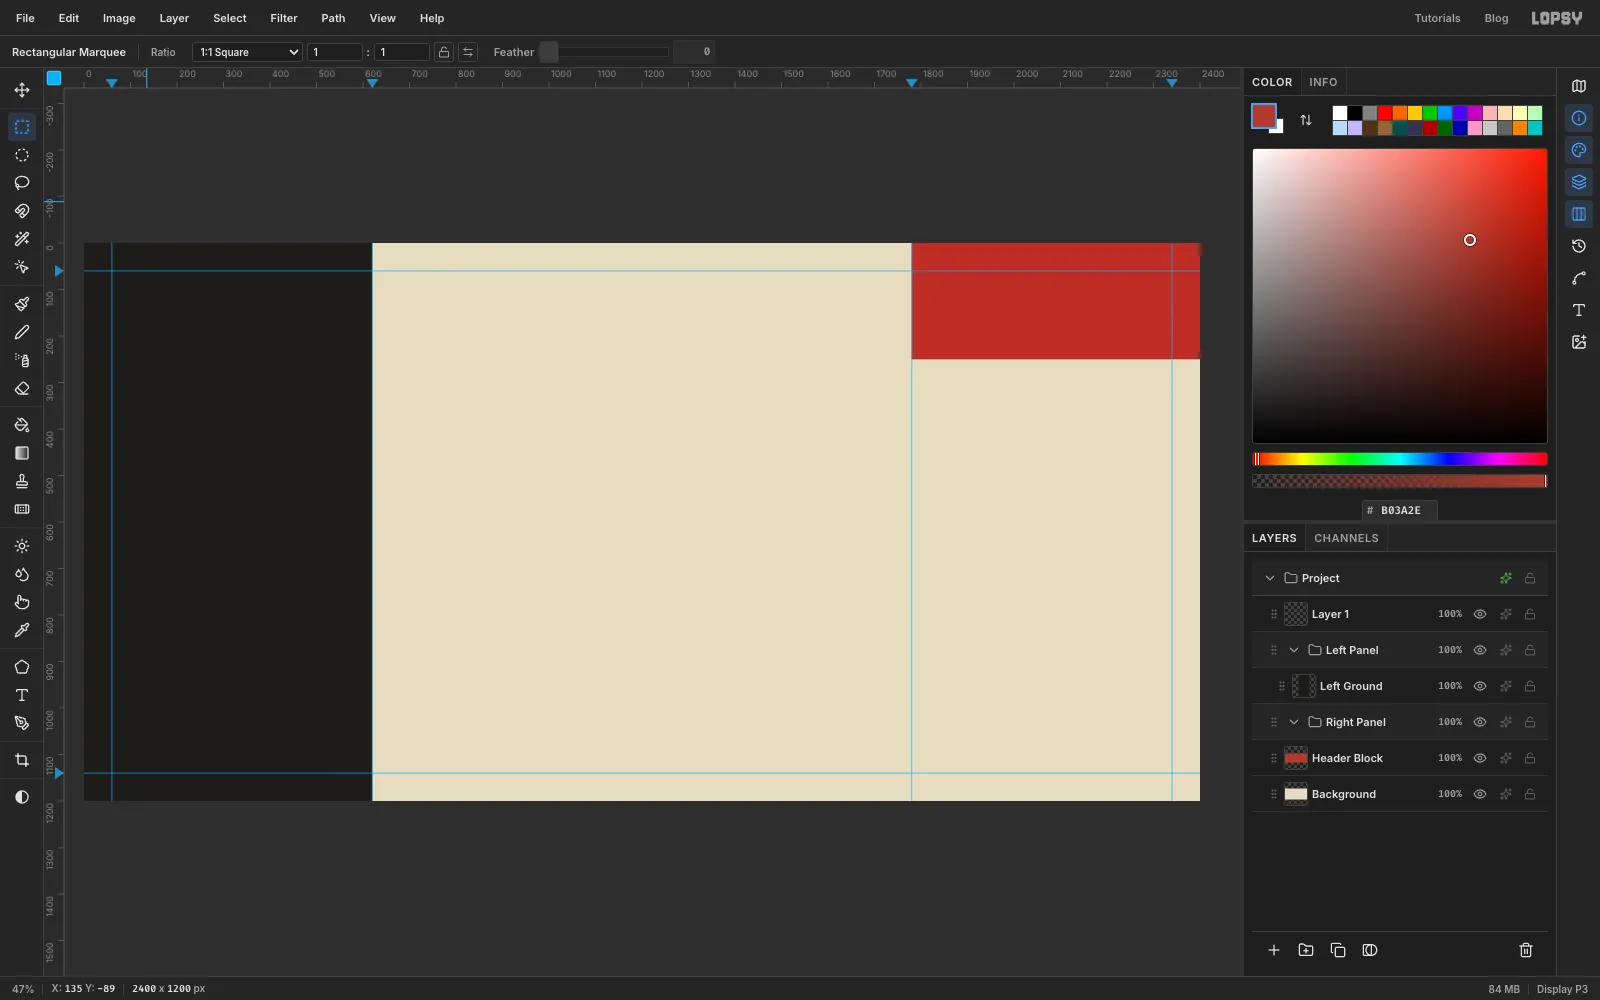
Backgroundrow, click Add Layer and rename itHeader Block. - Drag a marquee from the 1780 guide at the top of the canvas to just past the right edge, and down to y
250. Fill it with and press Cmd+D. - With
Header Blockstill active, click New Group and name itRight Panel. It sits above the red, so the type you put in it later shows on top.
- Click the
-
Draw the red sun
- Click the
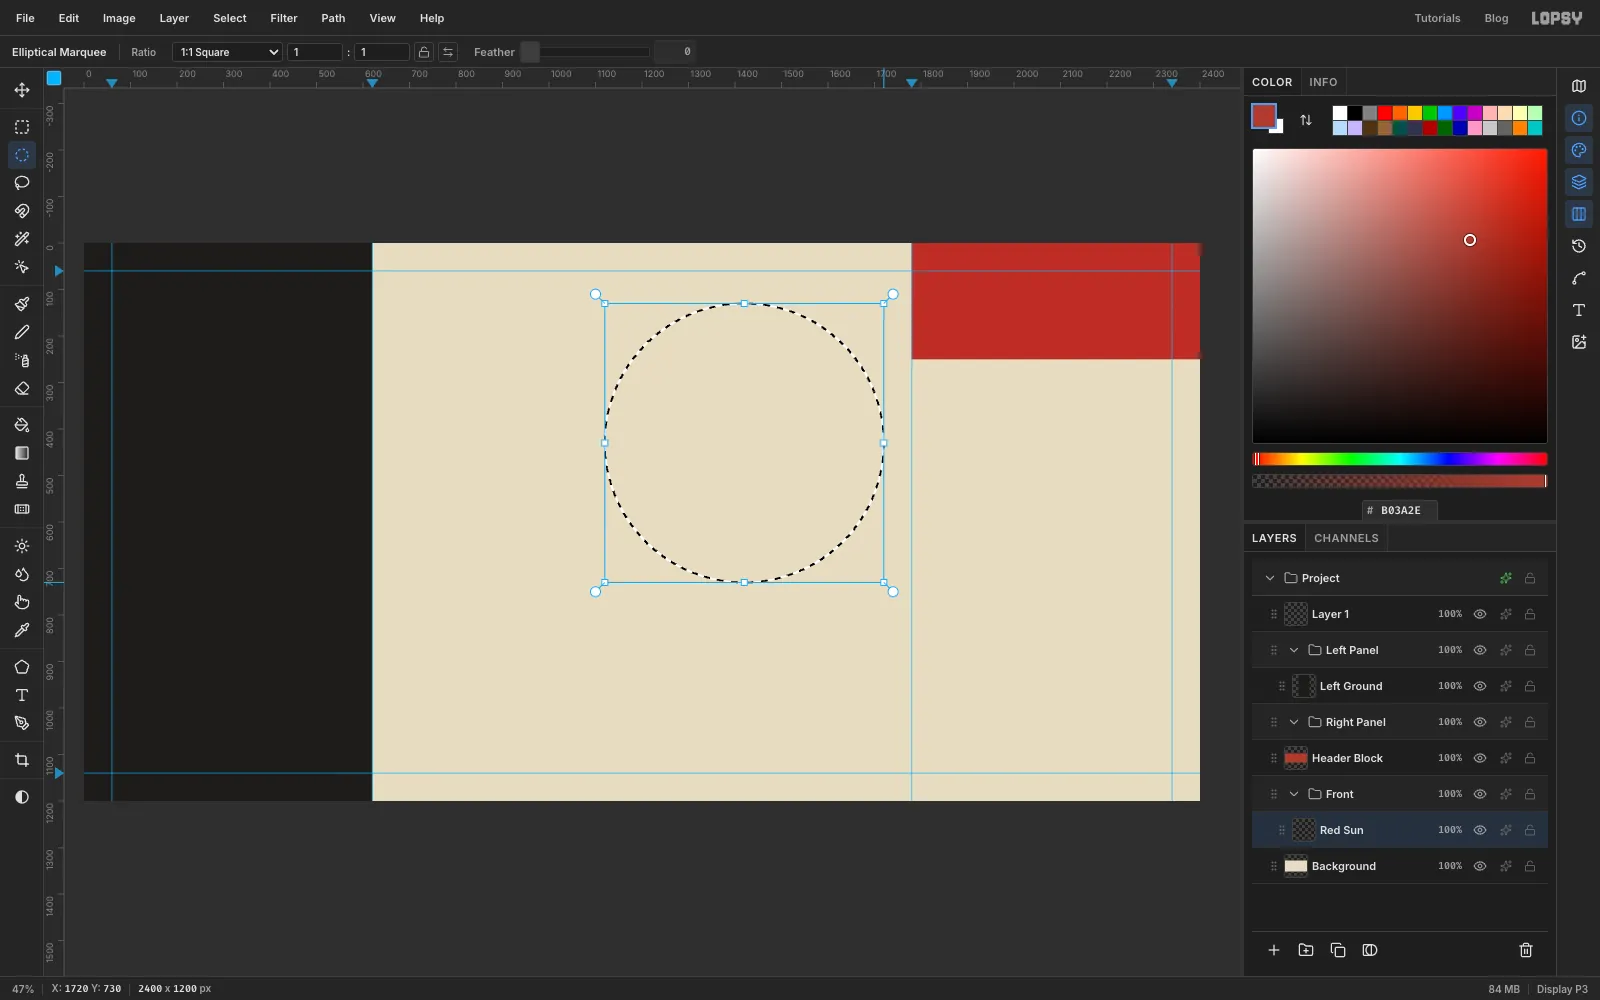
Backgroundrow, click New Group and name itFront. Click Add Layer and rename itRed Sun. - Pick the Elliptical Marquee. Hold Cmd to keep it a perfect circle and drag from
1120, 130to1720, 730. That gives a 600 px circle centred on1420, 430, with its top 130 px below the edge of the label. - Fill it with and press Cmd+D.
- Click the
-
Draw the wedge
- Click Add Layer and rename it
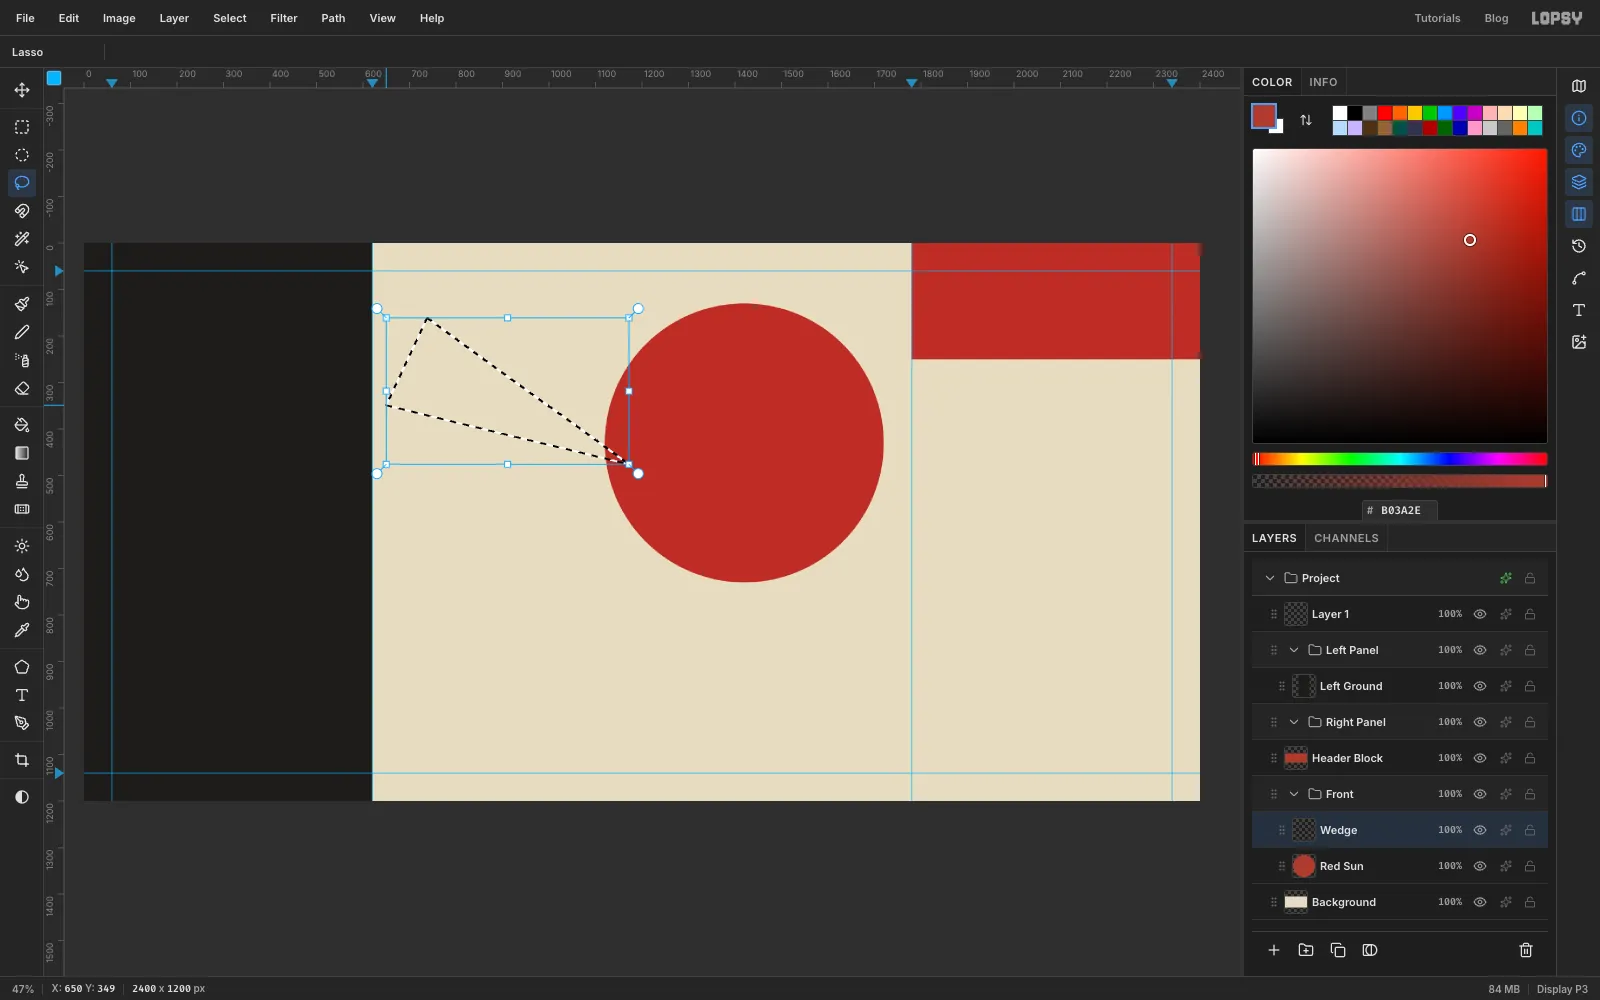
Wedge. - Pick the Lasso (L). Drag it in straight lines around a long thin triangle: start at
738, 161, go straight to the tip at1172, 476, then to650, 349, and back to the start. - Fill it with and press Cmd+D.
The Lasso is freehand, so drag slowly in three straight runs. It doesn't have to be exact, just aim for those corners. The short side of the triangle isn't upright. It runs square across the wedge, so the wedge looks like a solid block that's been tipped over. A wedge cut off straight up and down would look clipped by the fold.
- Click Add Layer and rename it
-
Outline the wedge in ink
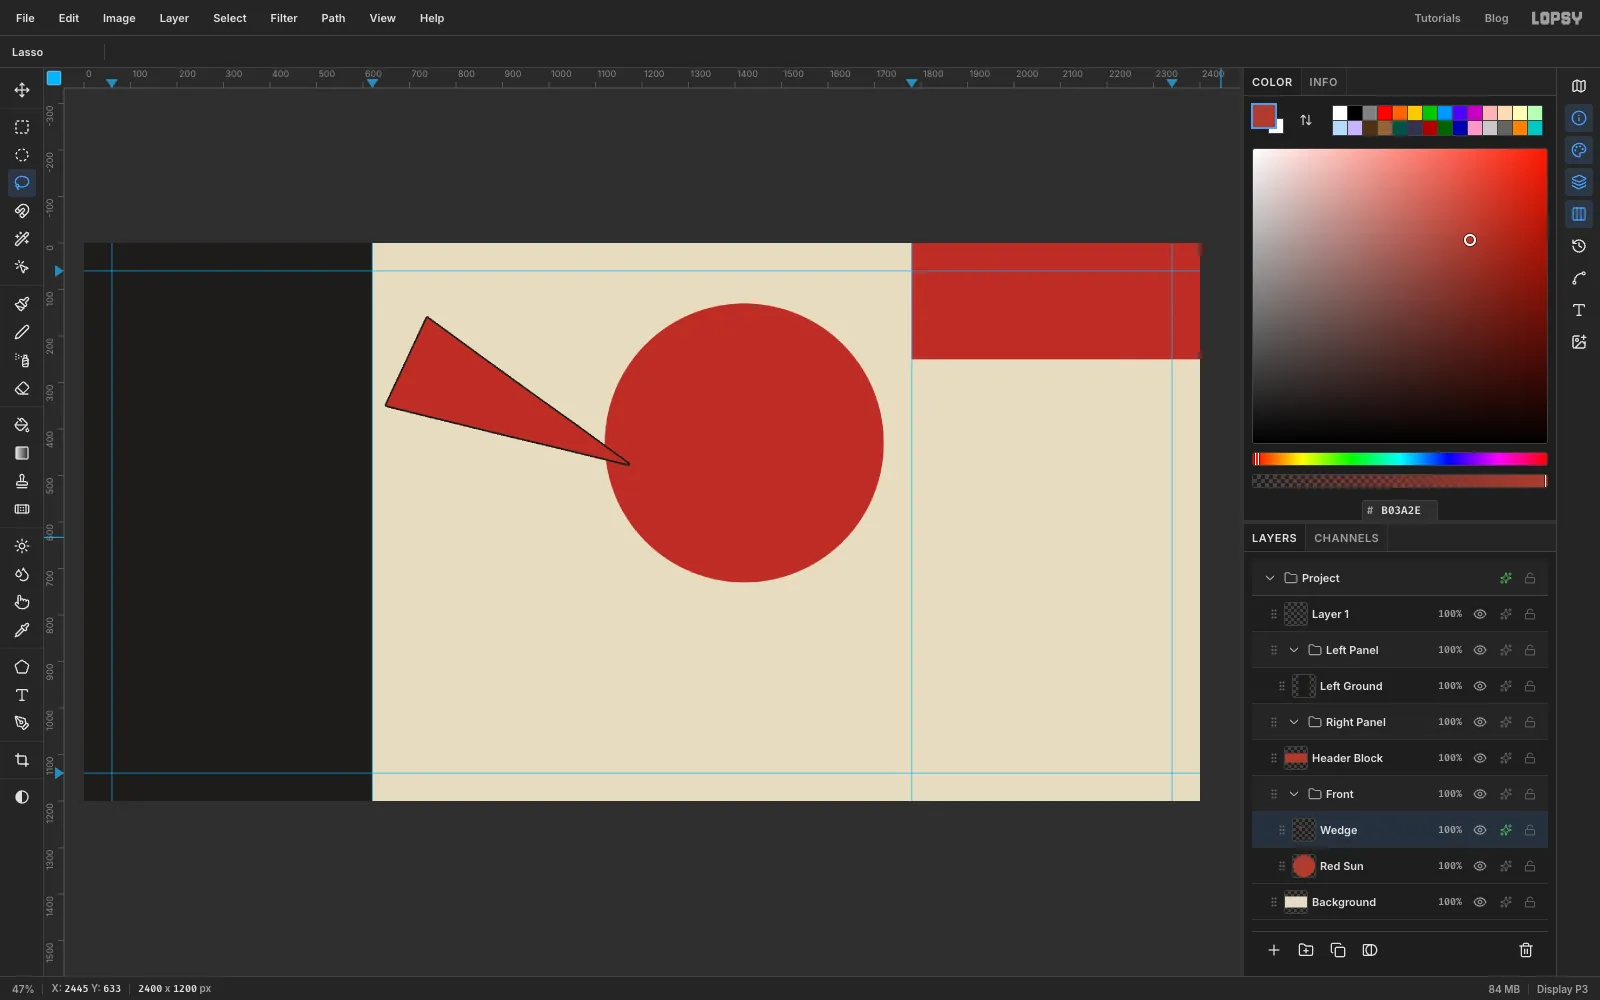
Red on red would make the wedge vanish where it crosses the sun, so it gets a keyline.
- Click the Layer effects button (✦) on the
Wedgerow. - Turn on Stroke, set Width to
4and the colour to , then close the drawer.
The tip ends just inside the sun's left edge. That's where the ginger root will start, so the wedge looks like it's stabbing the root.
- Click the Layer effects button (✦) on the
-
Drop in the ginger photo
Click the
Red Sunrow, then drag the downloadedGinger Root.jpgfrom your desktop onto the canvas. It lands at the top-left corner as a new layer just aboveRed Sun, with its pixels selected. Rename the layerGinger Photo.Part of it is hidden behind the black panel, because the
Left Panelgroup sits higher in the stack. That doesn't matter. The pixels are still there, and you'll move the root to the sun once it's cut out. If you'd rather see the whole photo while you work on it, click the eye on theLeft Panelrow to hide the group, and turn it back on when the root is on the sun.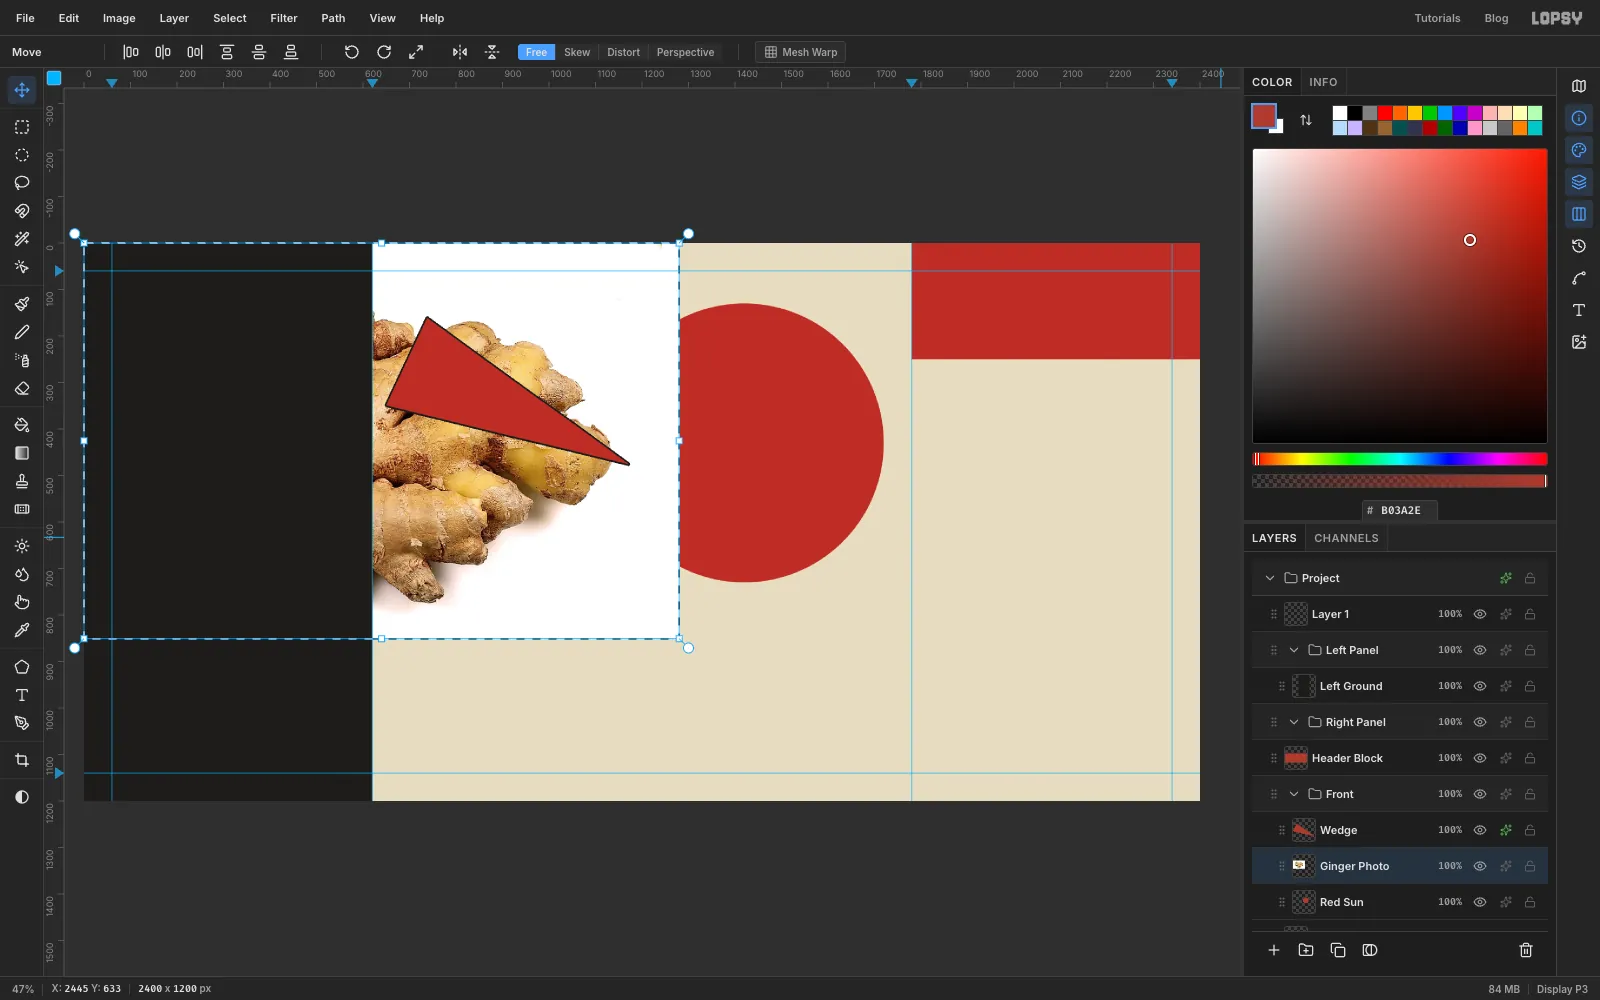
-
Select the white background
- Press Cmd+D to clear the paste selection, then pick the Magic Wand (W).
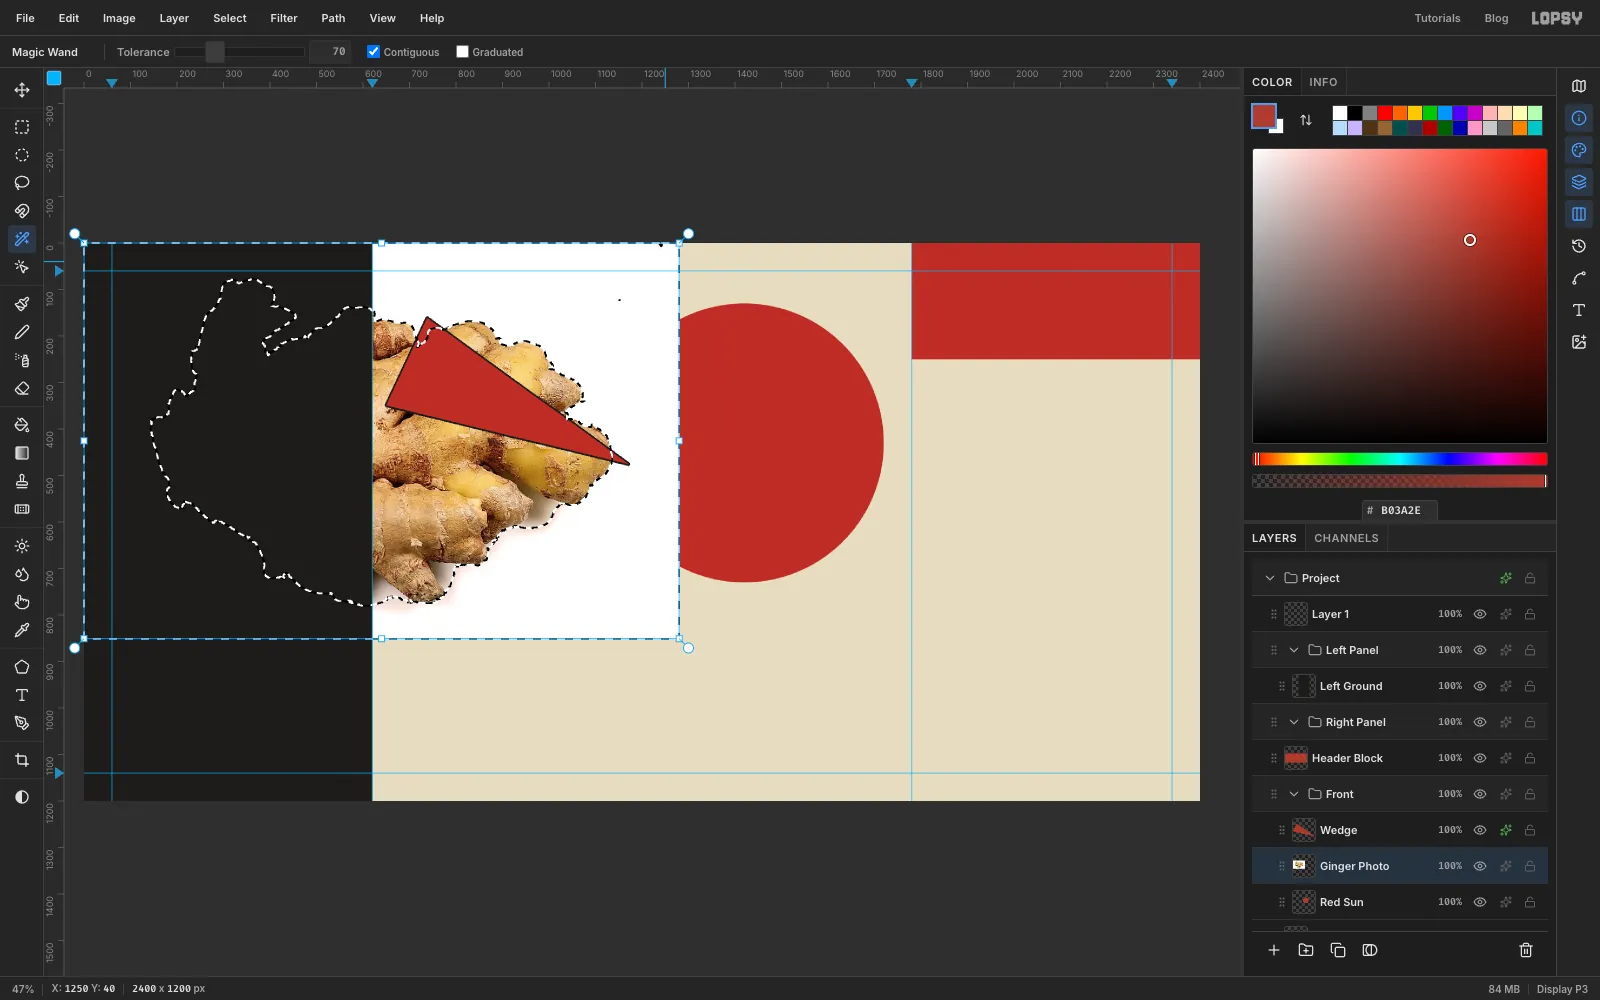
- In the options bar set Tolerance to
70and leave Contiguous ticked. Tolerance 70 is high enough to grab the soft grey shadow under the root as well as the white. The root itself is yellow-brown, so it stays out. - Click the white in the photo's top-right corner. Then hold Shift and click the white at its bottom-right, and any other white patch the first click missed. The wand reads the whole layer, so white hidden under the black panel is picked up too.
- Press Delete, then Cmd+D.
-
Clean up the cut-out edge
- Zoom into the photo's top-right corner. A small green speck from the original photo survives the wand. Drag a Rectangular Marquee around it, press Delete and Cmd+D.
- The edge of the root still carries a pale rim from the white backdrop. Cmd-click the
Ginger Photothumbnail to select the root, choose Select → Shrink… and enter3. - Choose Select → Inverse, press Delete to clear the 3 px rim, then Cmd+D.
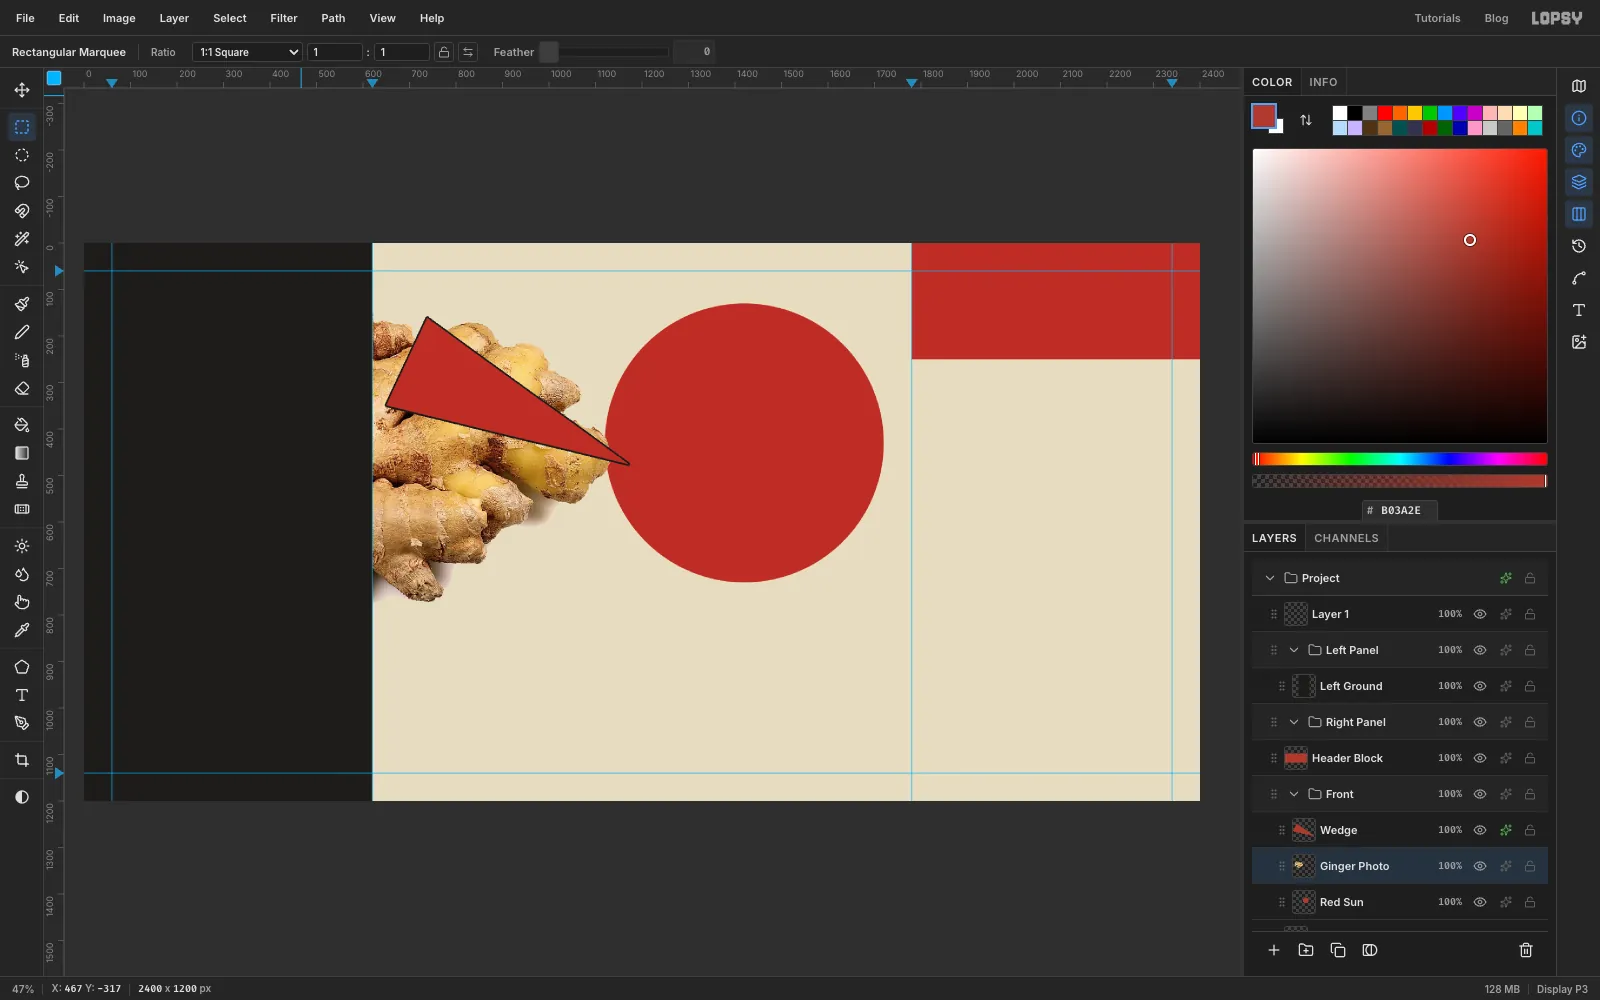
-
Turn the root black and white
With
Ginger Photoactive:- Choose Filter → Desaturate.
- Choose Filter → Brightness/Contrast…, set Contrast to
70and click Apply.
Constructivist photomontage almost always uses black-and-white photos against flat colour. The extra contrast gives the halftone something to bite on later.
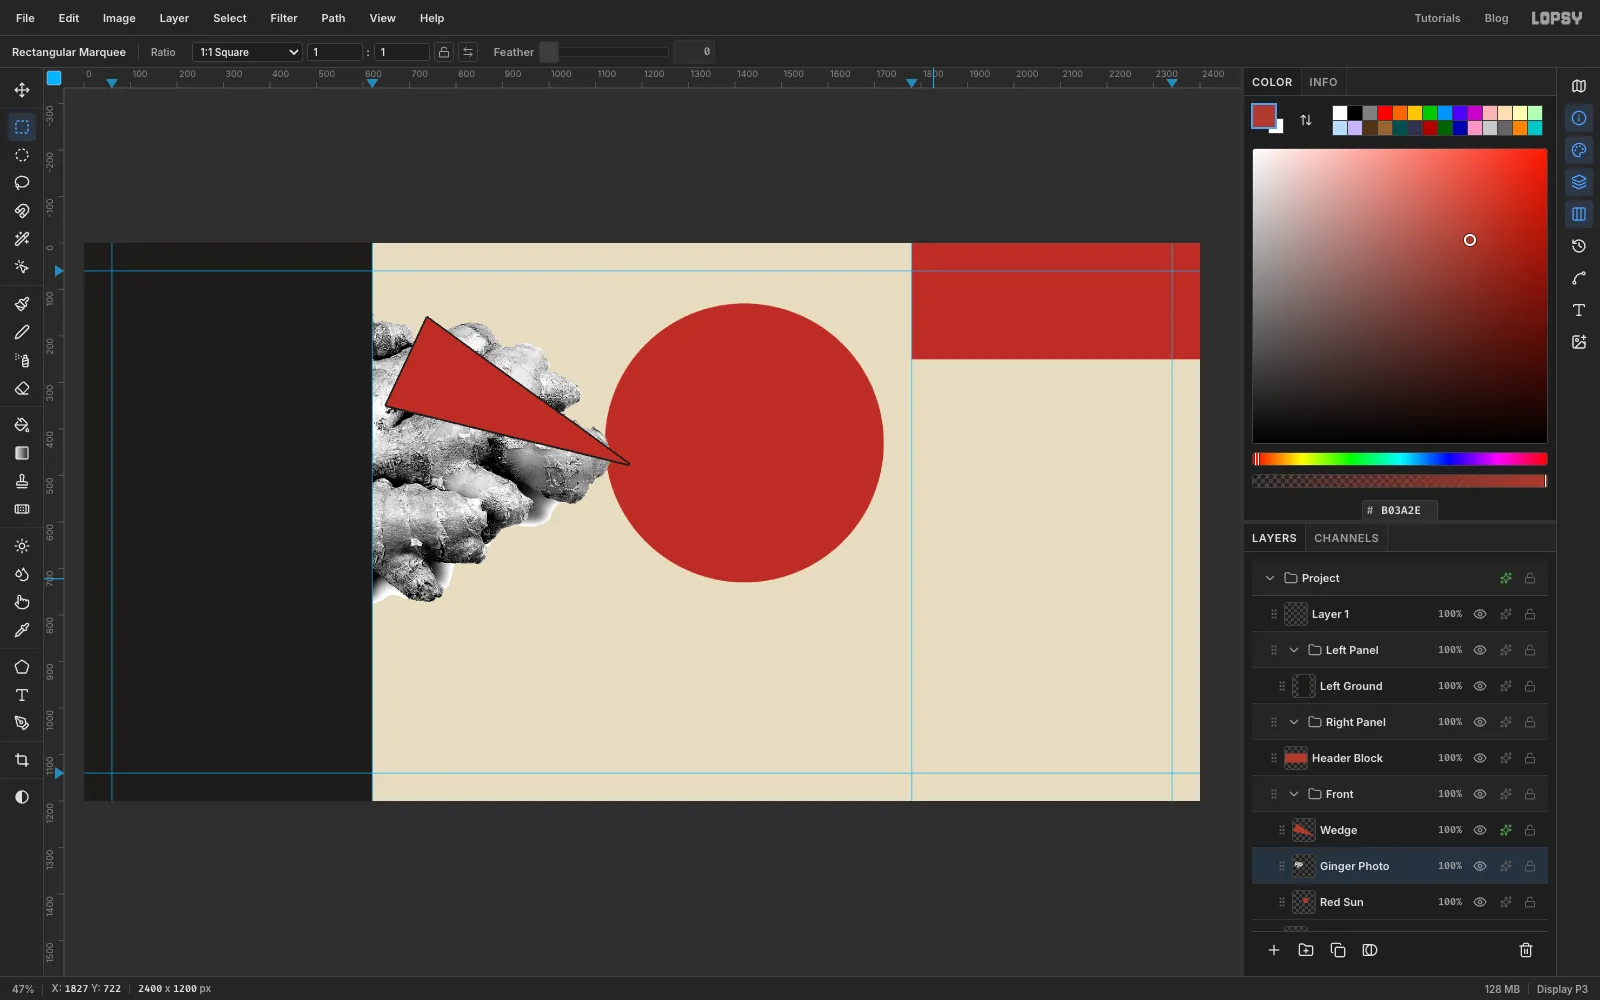
-
Scale the root down
- Pick the Move tool (V).
- Cmd-click the
Ginger Photothumbnail. The root's outline becomes the selection and the Move tool's handles frame it. - Hold Cmd so the proportions stay locked, and drag the bottom-right corner handle up and left until the root spans about
520px on the top ruler. - Press Enter to apply, then Cmd+D.
At 520 px the root sits inside the 600 px sun with red showing all round it. Any bigger and the sun just reads as a red rim behind a photo.
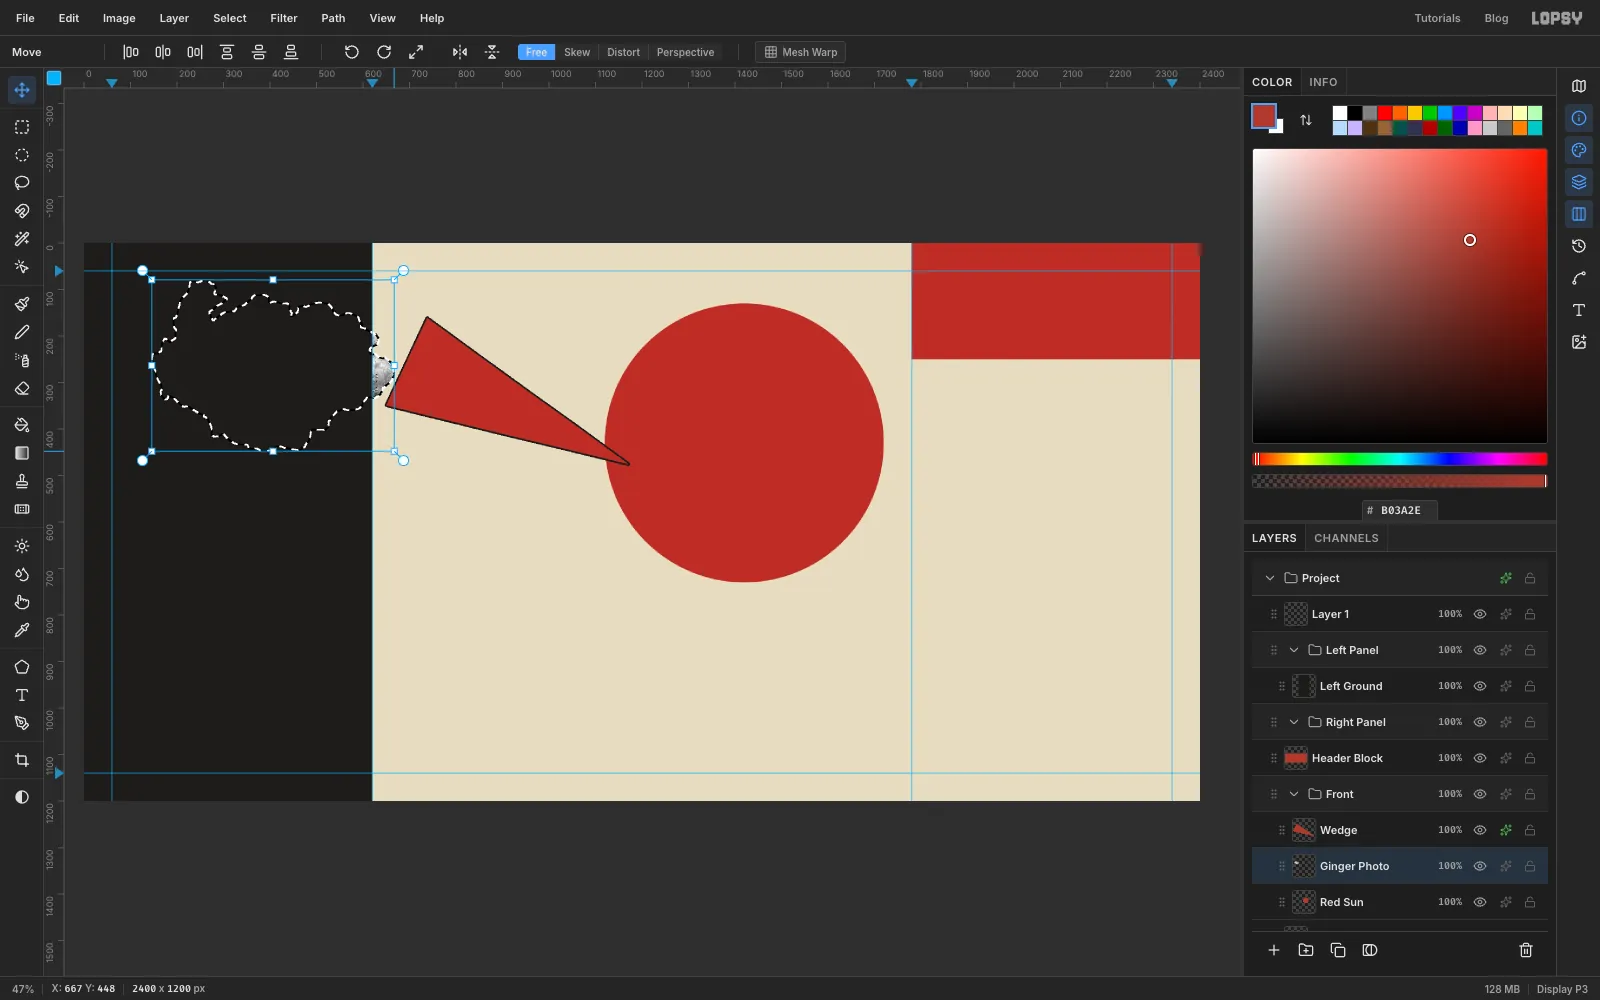
-
Tilt the root
- Cmd-click the
Ginger Photothumbnail again. - With the Move tool, hover just outside the top-right corner handle until you see the round rotation handle. Hold Cmd and drag it upwards. The angle snaps in 15° steps. Stop at the first step, so the root tilts 15° anticlockwise.
- Press Enter, then Cmd+D.
Every tilted element on this label uses that same 15°. One shared angle is what makes a diagonal layout look planned.
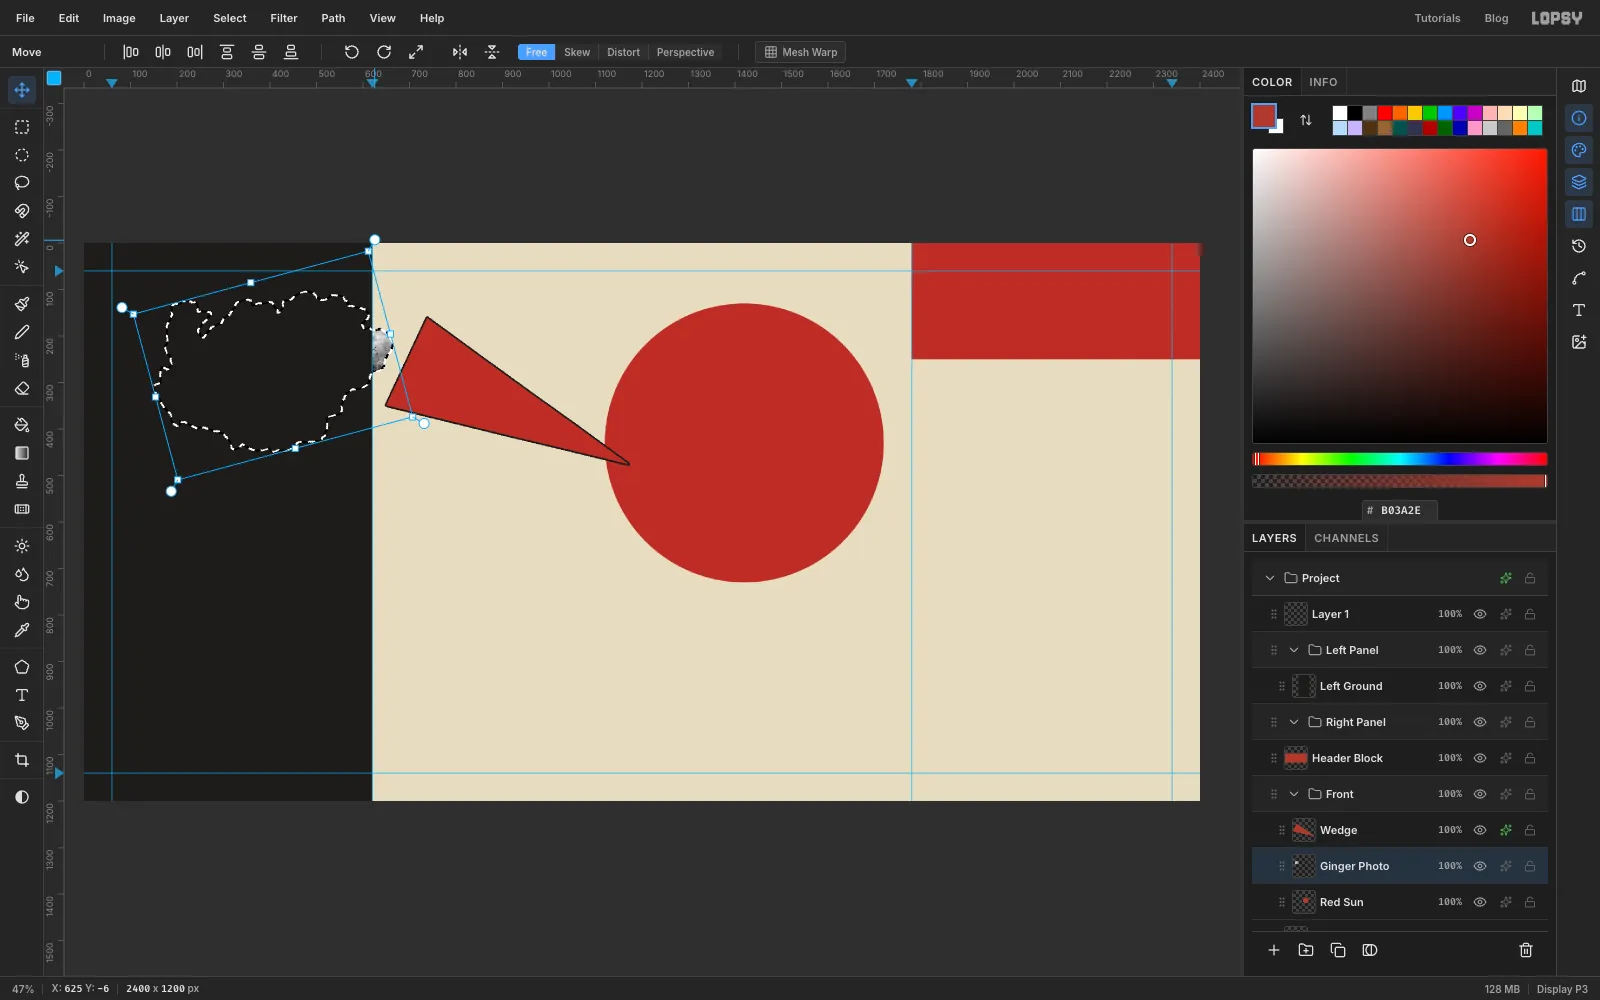
- Cmd-click the
-
Move the root onto the sun
With the Move tool, drag the root onto the red circle so it's centred on the sun. Its left edge should just meet the tip of the wedge. The wedge sits above the root in the stack, so its tip overlaps the root's edge as if it's stabbing in. If you hid the
Left Panelgroup, turn it back on now.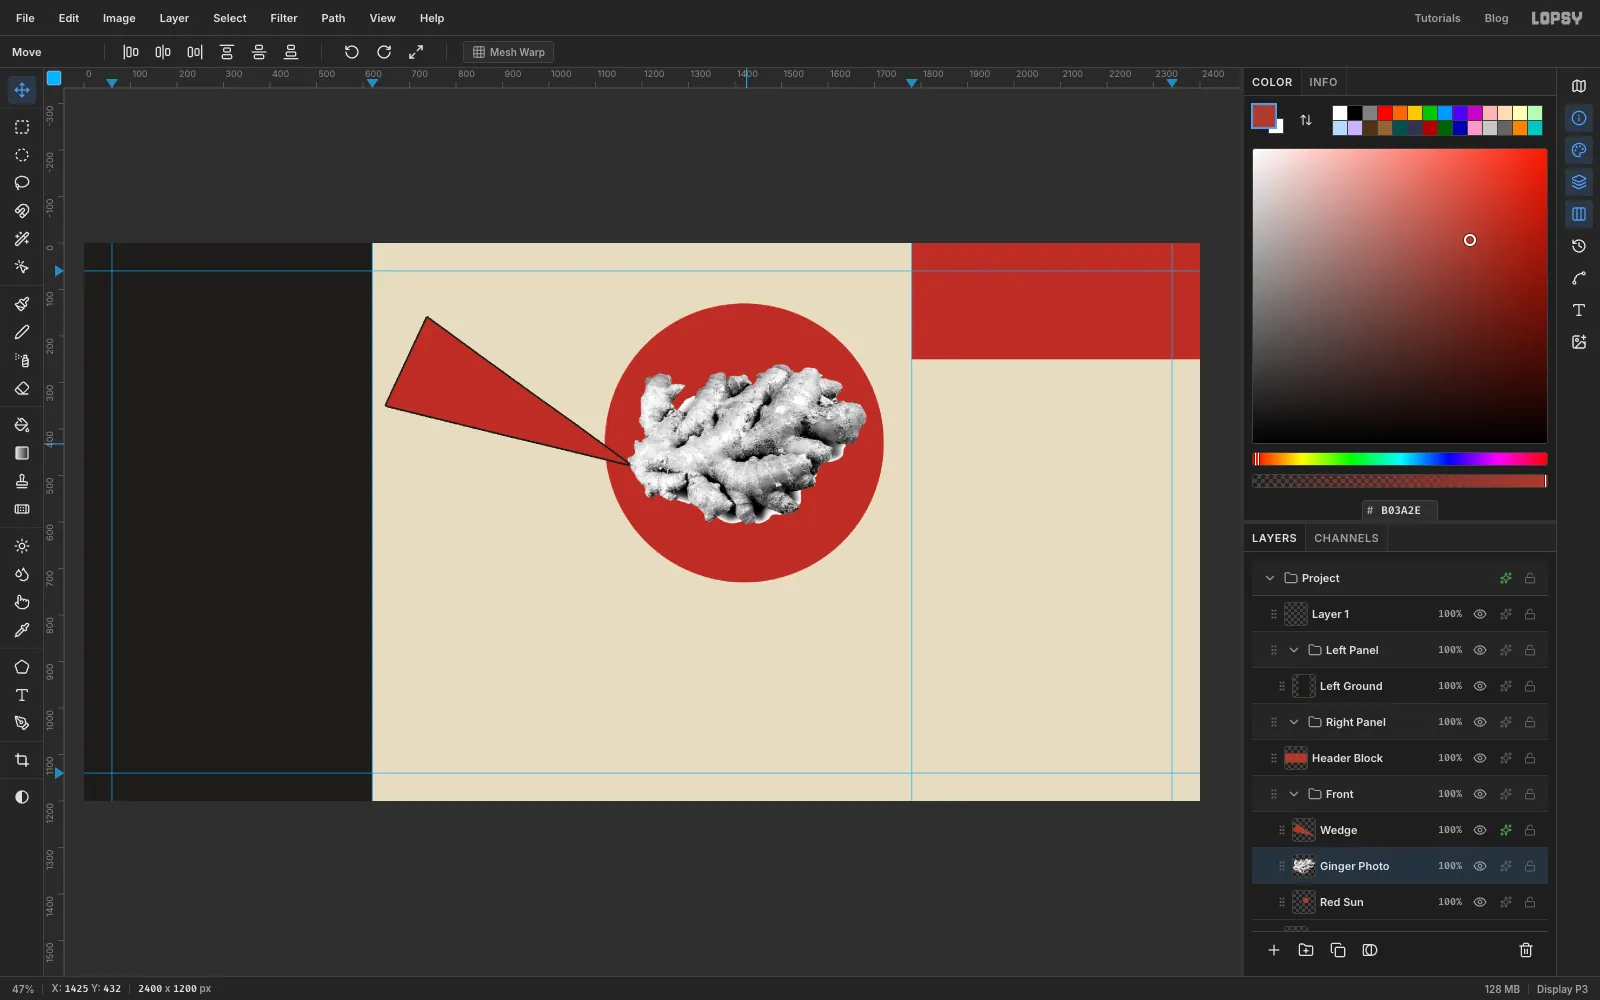
-
Give the root a paper cut-out
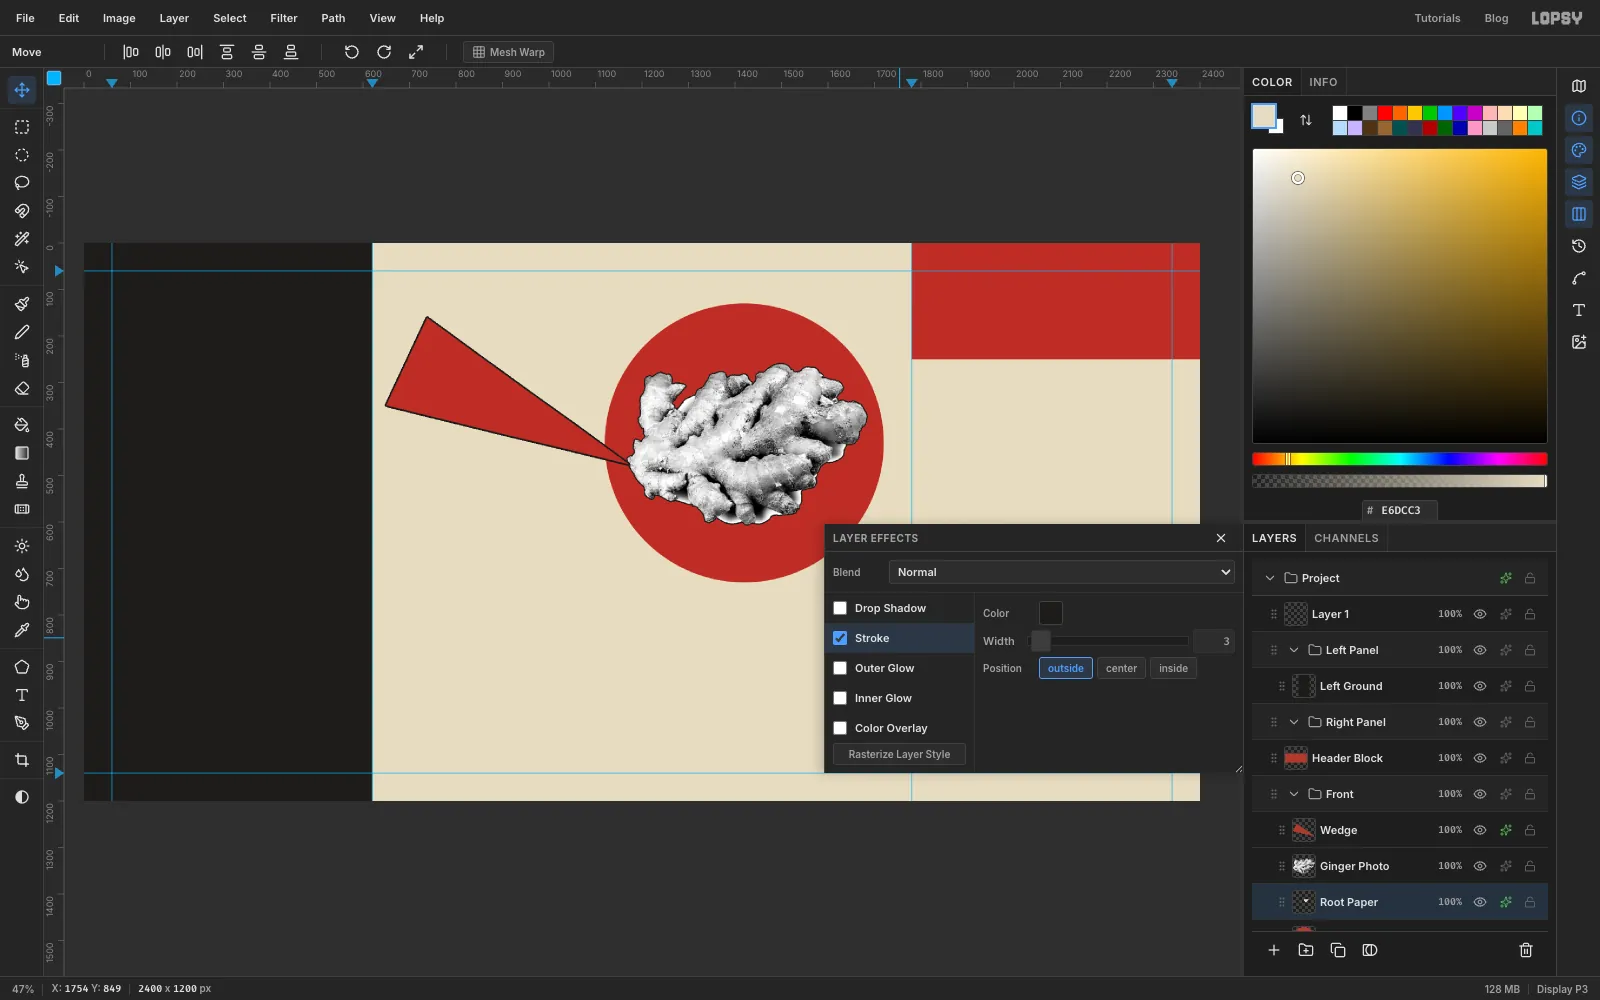
In a real print the dots land on paper, not on red. So the root gets a paper-coloured silhouette underneath.
- Click the
Red Sunrow and click Add Layer. Rename itRoot Paper. It lands betweenRed SunandGinger Photo. - Cmd-click the
Ginger Photothumbnail to load the root's shape (the active layer staysRoot Paper). Fill it with and press Cmd+D. - Open Layer effects on
Root Paper, turn on Stroke with Width3in , and close the drawer.
The keyline makes the silhouette read like it was cut out with scissors and pasted down.
- Click the
-
Halftone the photo
- Click
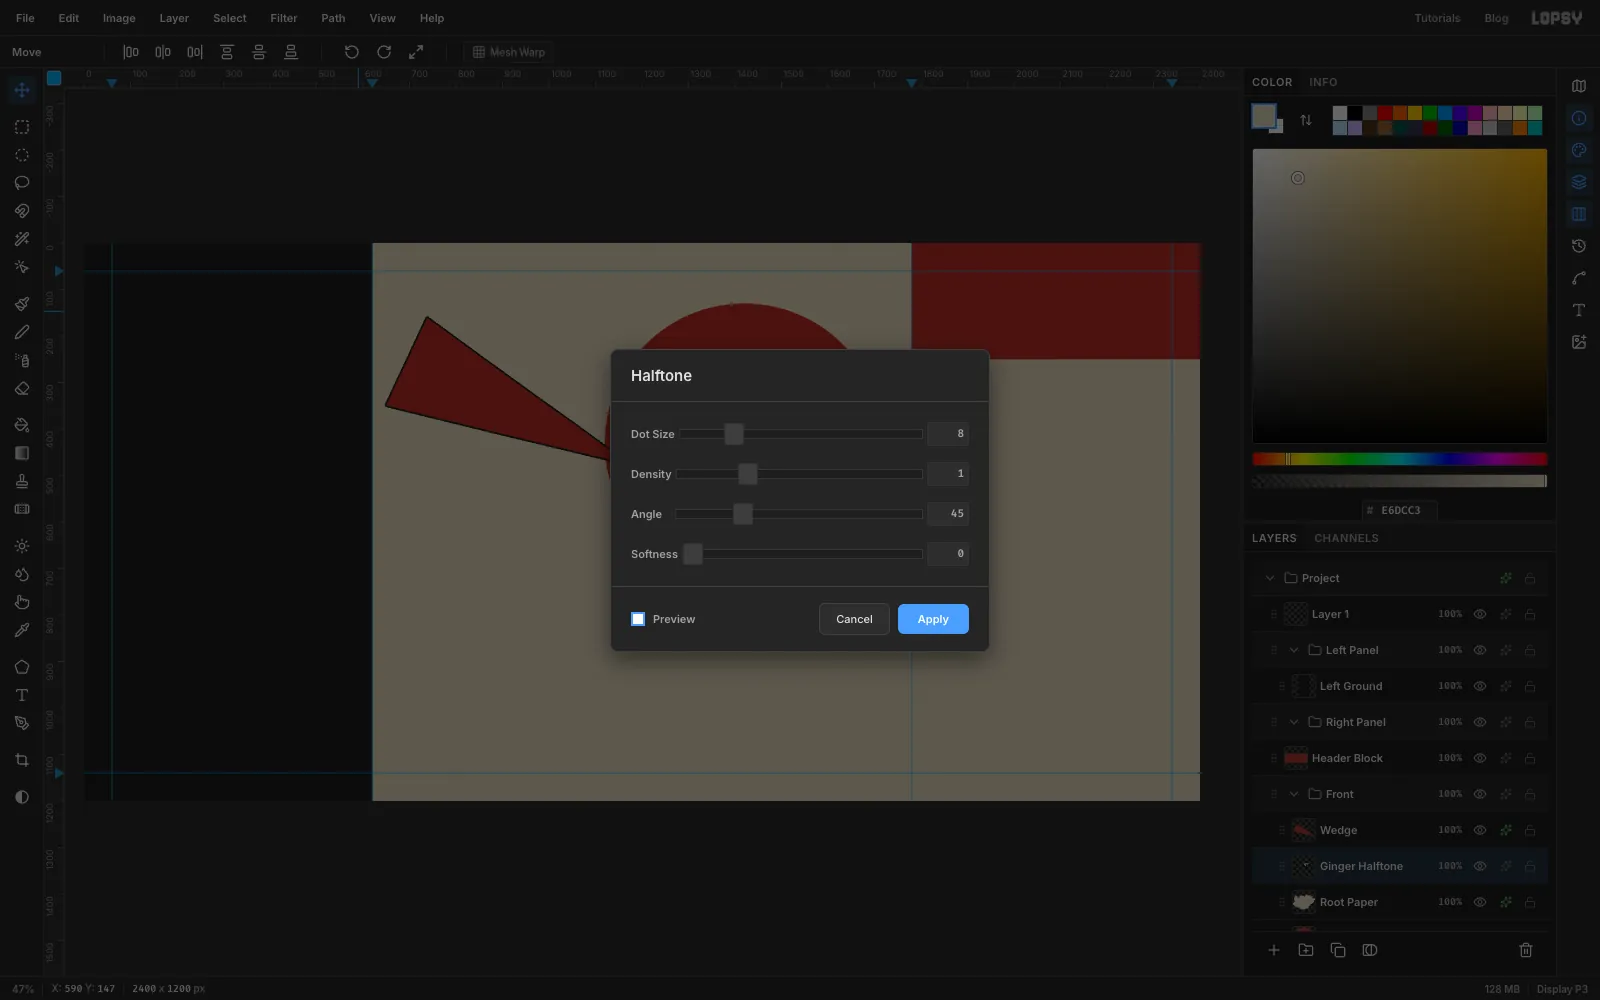
Ginger Photoand rename itGinger Halftone. - Choose Filter → Brightness/Contrast… and set Brightness to
-25and Contrast to35. Darkening first makes every tone print as a dot, so the highlights don't wash out into blank paper. - Choose Filter → Halftone… and set Dot Size
8, Density1, Angle45and Softness0. Click Apply.
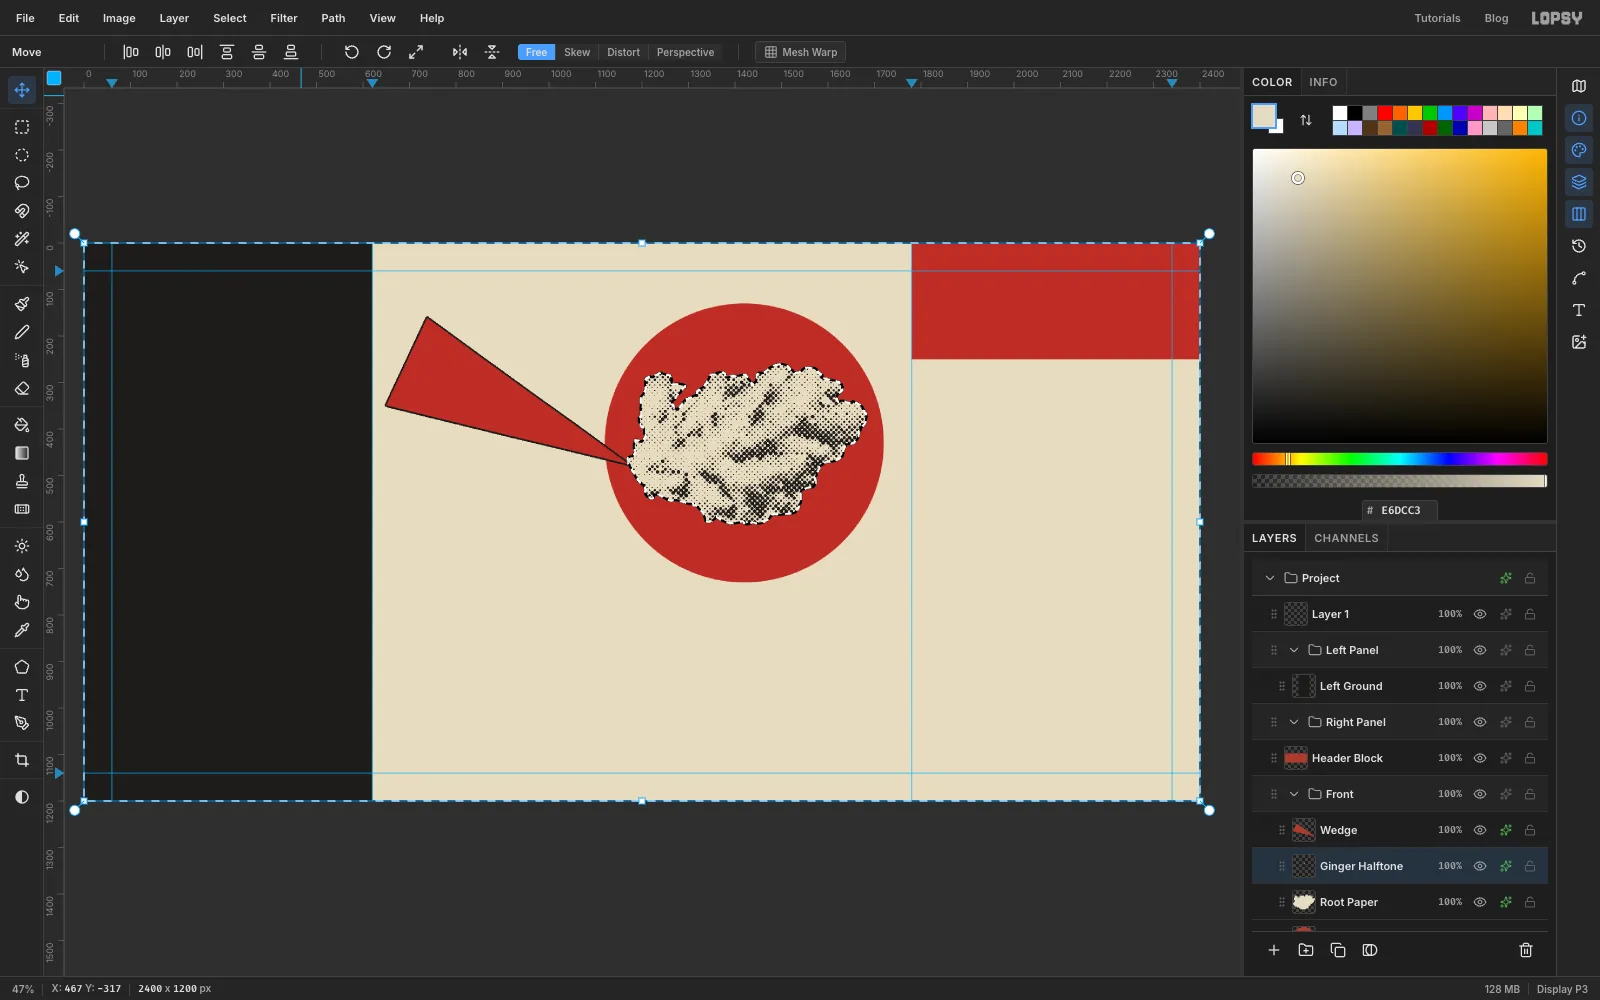
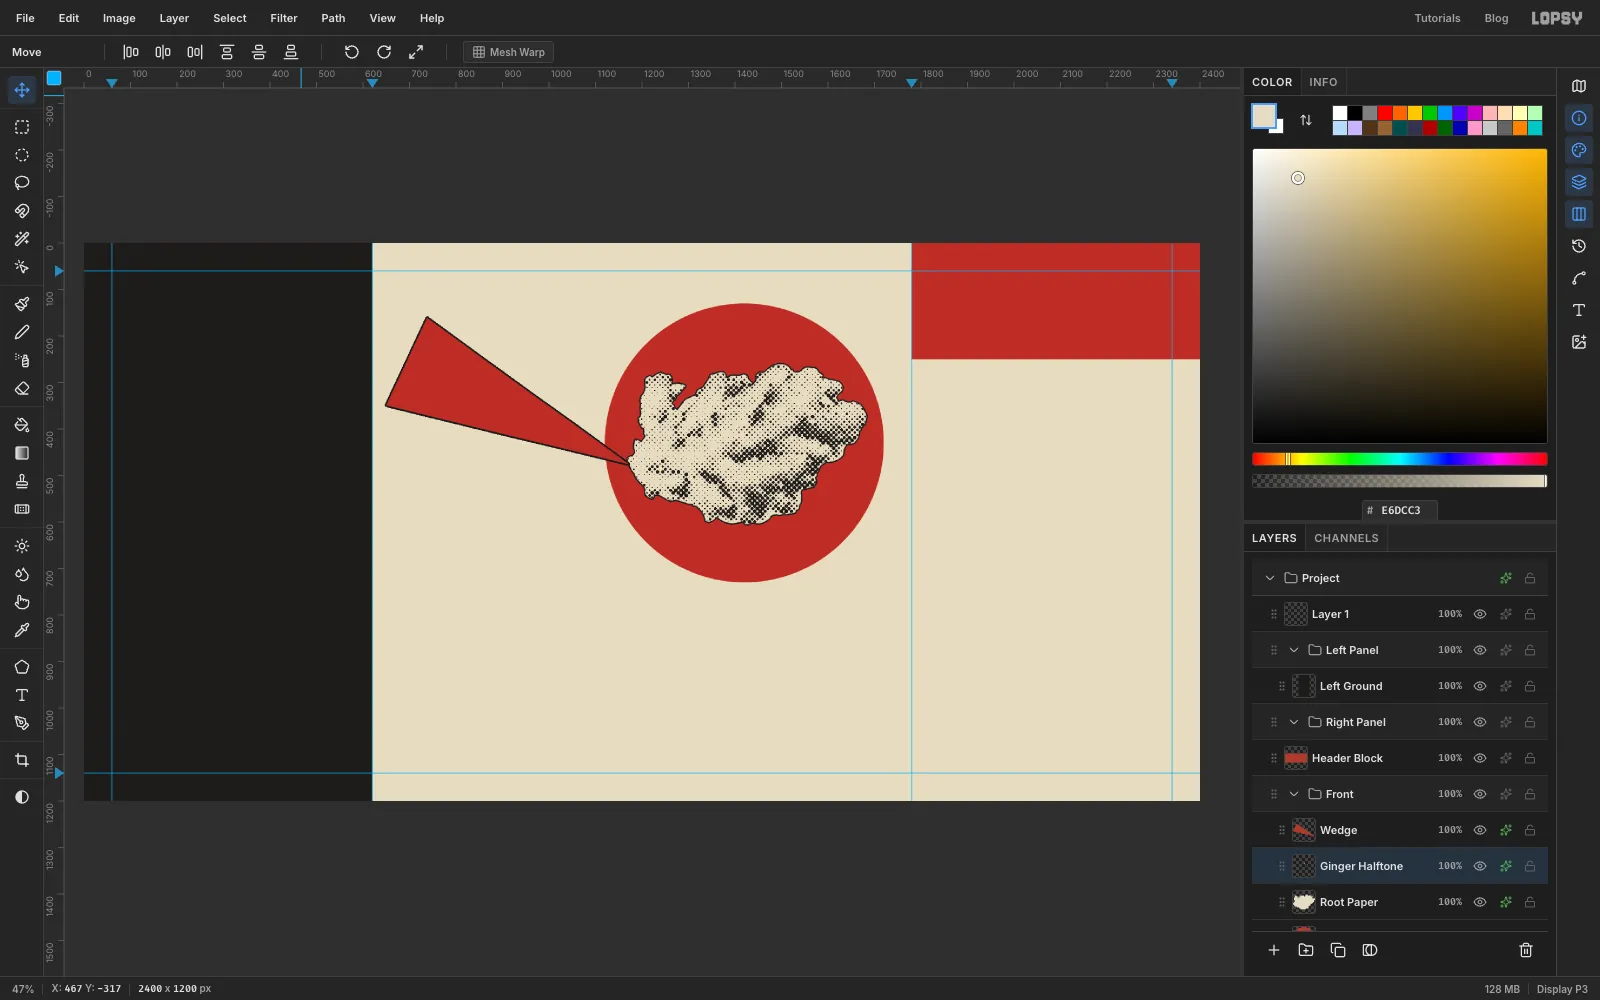
Halftone draws a dot per cell, big where the photo is dark and small where it's light. The gaps between the dots are transparent, so the paper silhouette shows through.
- Click
-
Print the dots in ink
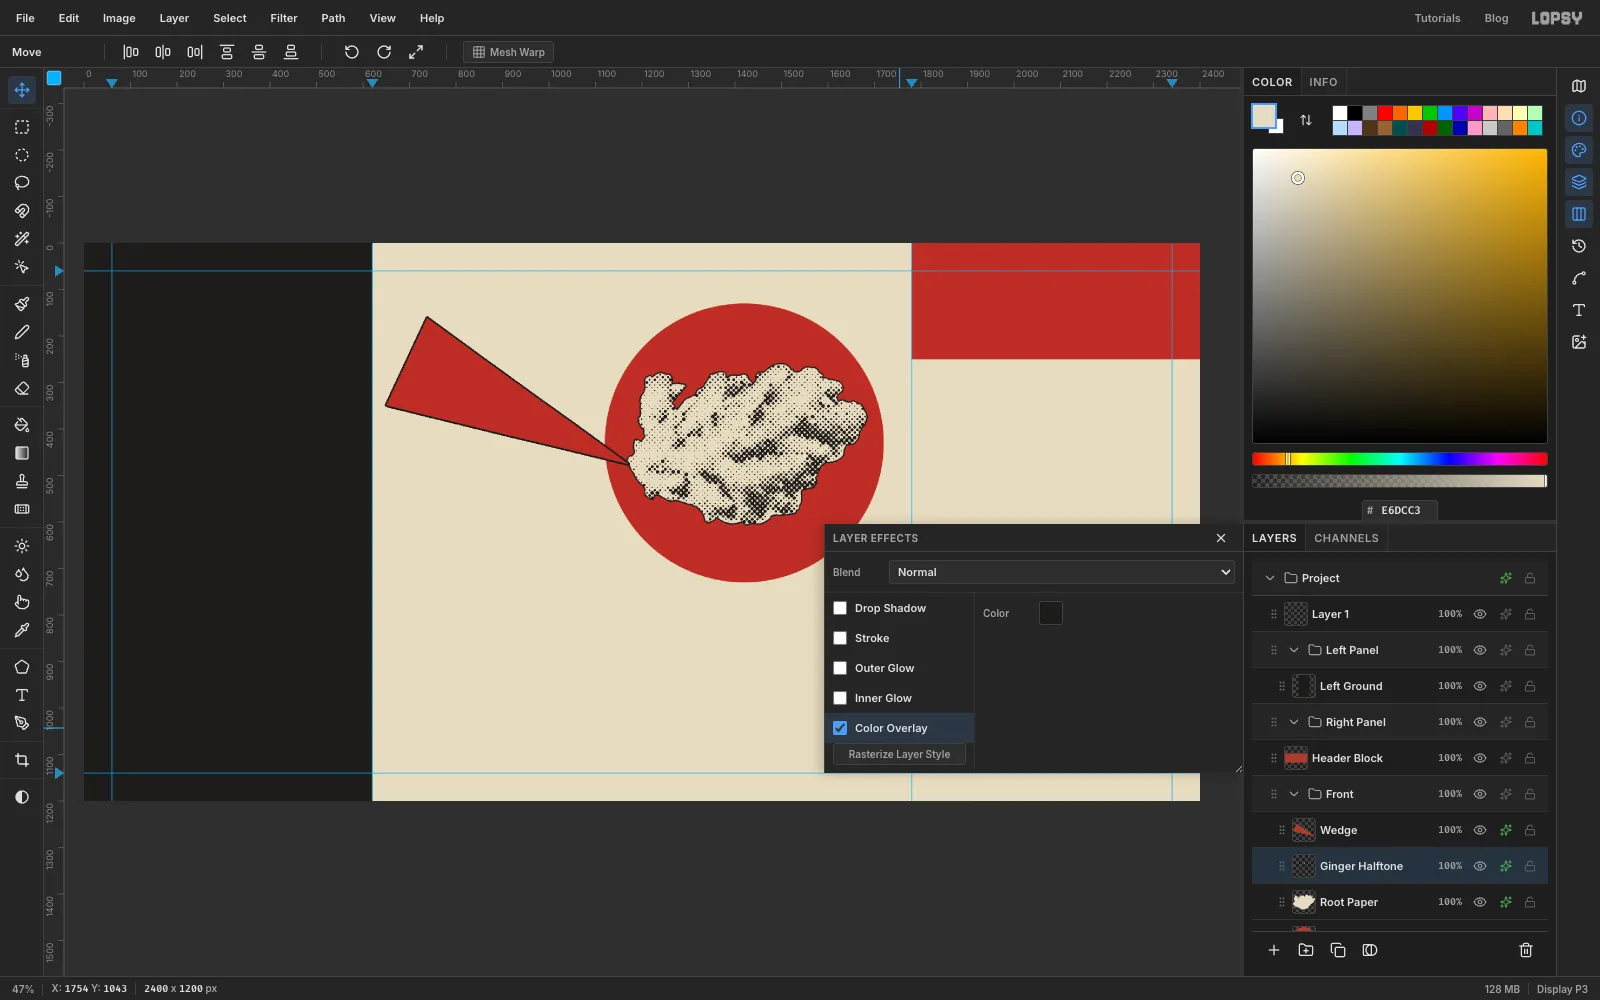
Each halftone dot keeps the grey of the photo under it. A printer only has one black ink, so:
- Open Layer effects on
Ginger Halftone. - Turn on Color Overlay and set its colour to . Close the drawer.
Every dot is now solid ink.
- Open Layer effects on
-
Trim the stray dots
A few dots on the edge cells can poke out past the silhouette.
- With
Ginger Halftoneactive, Cmd-click theRoot Paperthumbnail. - Choose Select → Inverse, press Delete, then Cmd+D.
- With
-
Check the printed root
Zoom in for a look. You should see crisp black dots on a cream silhouette with a thin outline, sitting on red, and the wedge's tip touching the outline.
-
Make the band
The band carries the brand name across the front.
- Click the
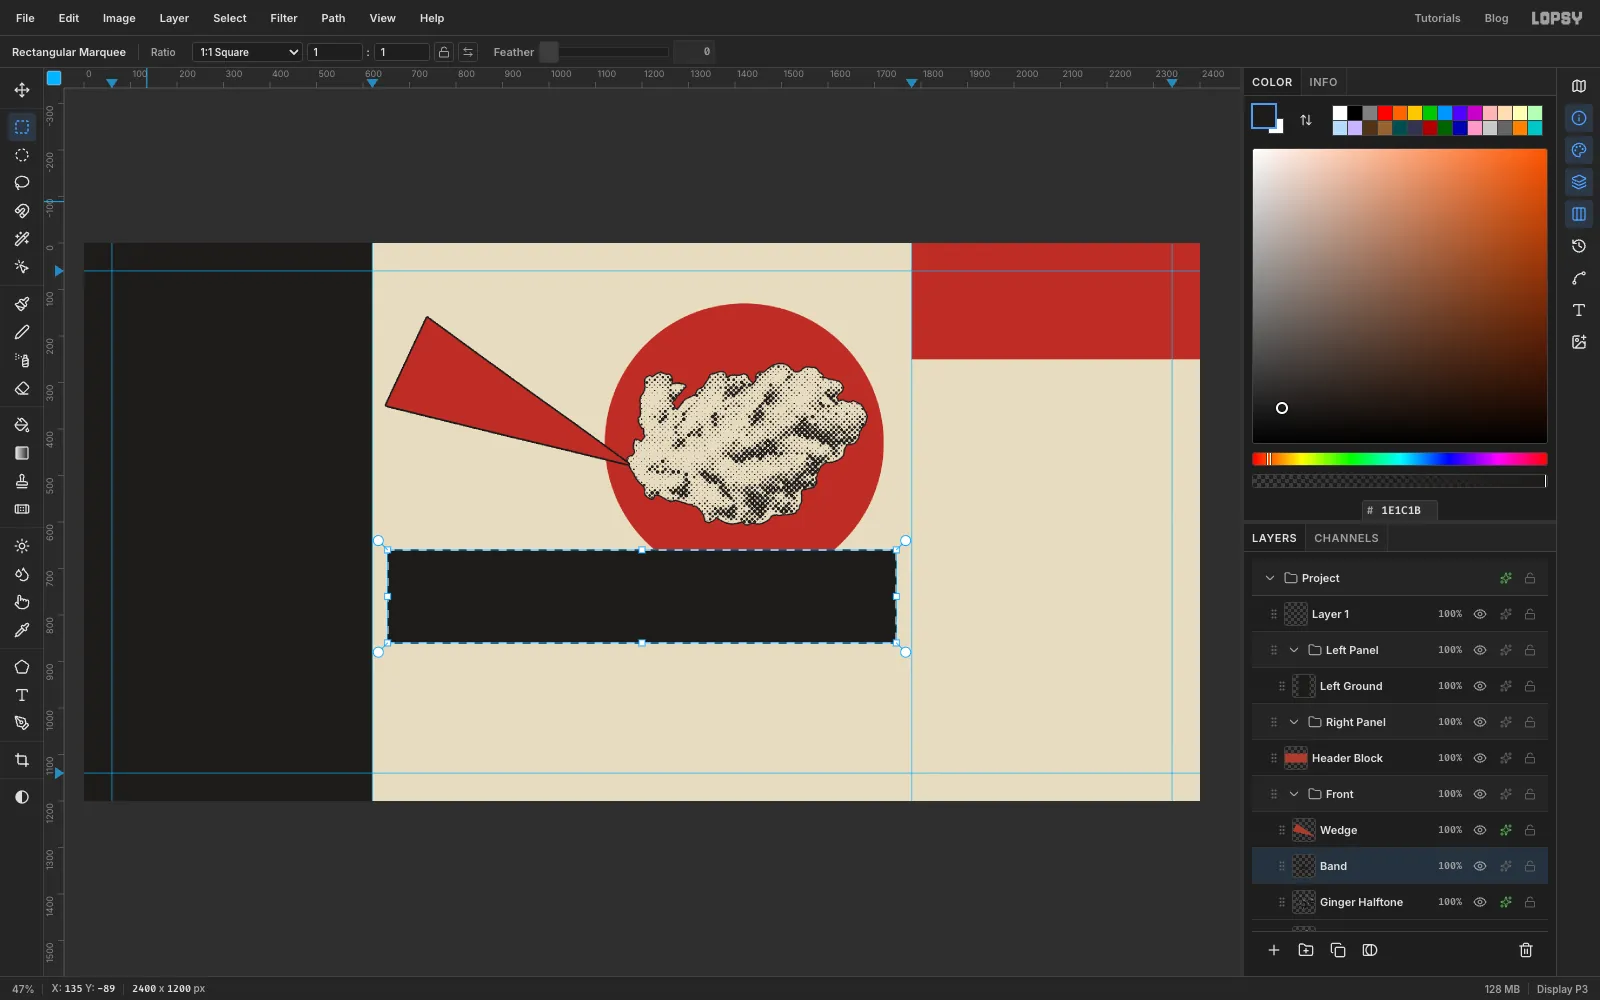
Ginger Halftonerow, click Add Layer and rename itBand. - With the Rectangular Marquee, drag from
653, 660to1747, 860. That's a 1094 × 200 bar centred on1200, 760. - Fill it with . Keep the selection.
The length is chosen so that, once the bar is tilted, both ends finish 25 px inside the folds.
- Click the
-
Tilt the band 15°
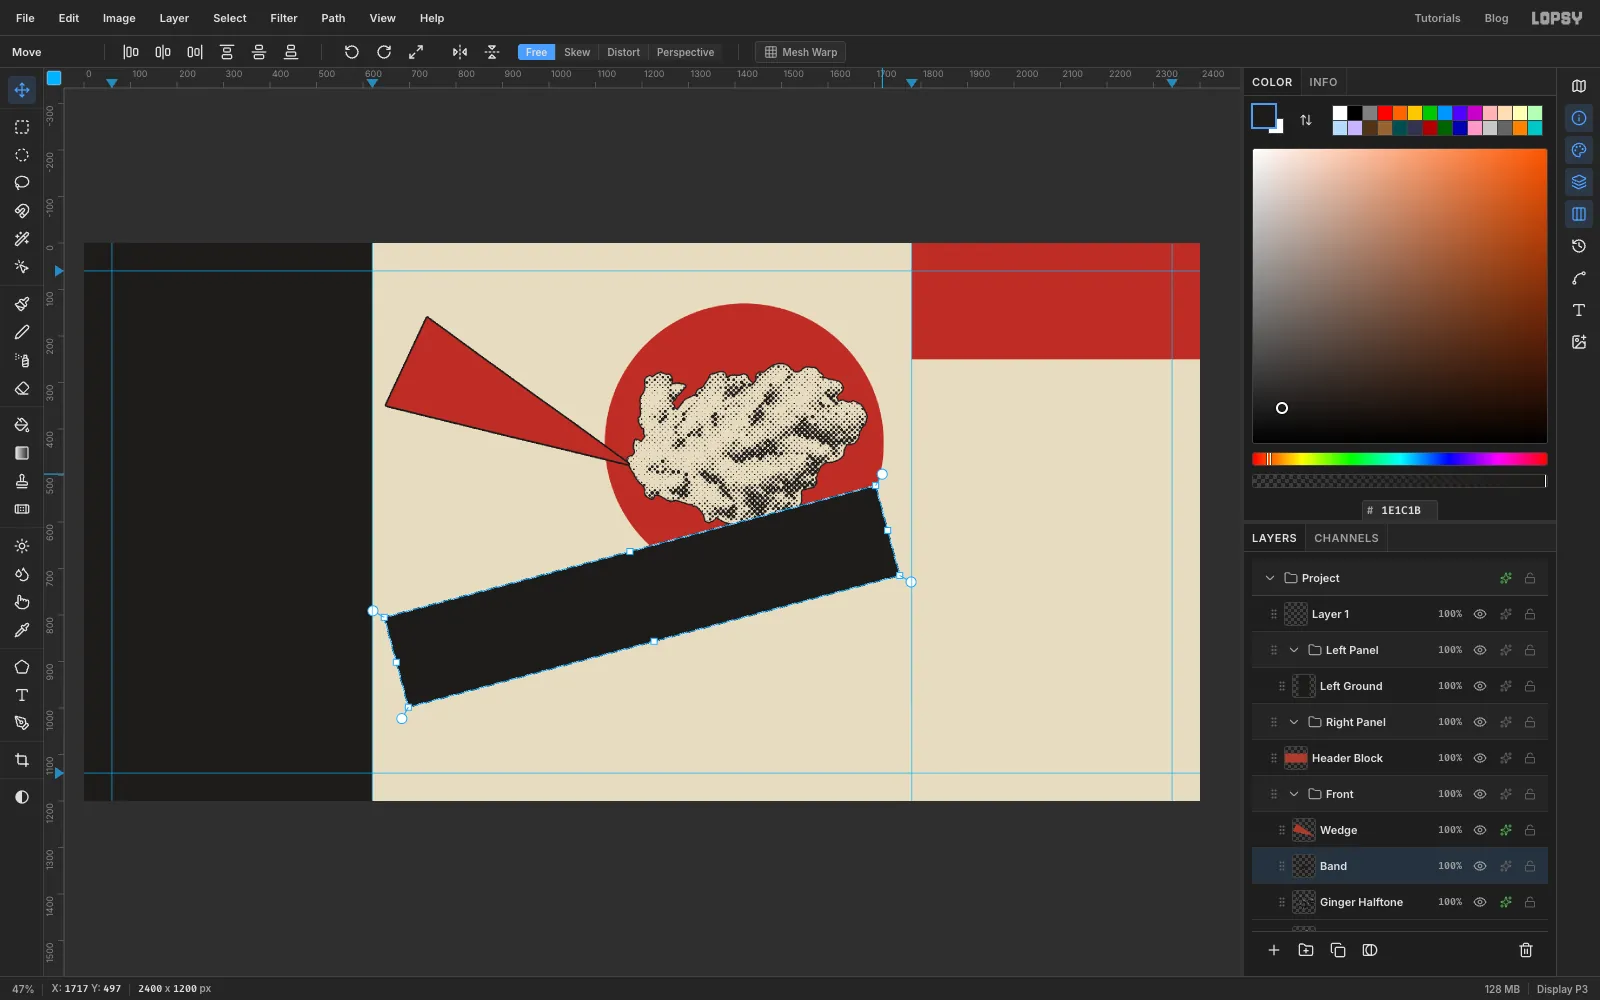
- Pick the Move tool. Hold Cmd and drag the round rotation handle at the top-right corner upwards by one 15° step.
- Press Enter, then Cmd+D.
The band now rises to the right and crosses the bottom of the sun. Its ends stay square to the band rather than cut straight up and down by the folds.
-
Type the brand name
- Click the
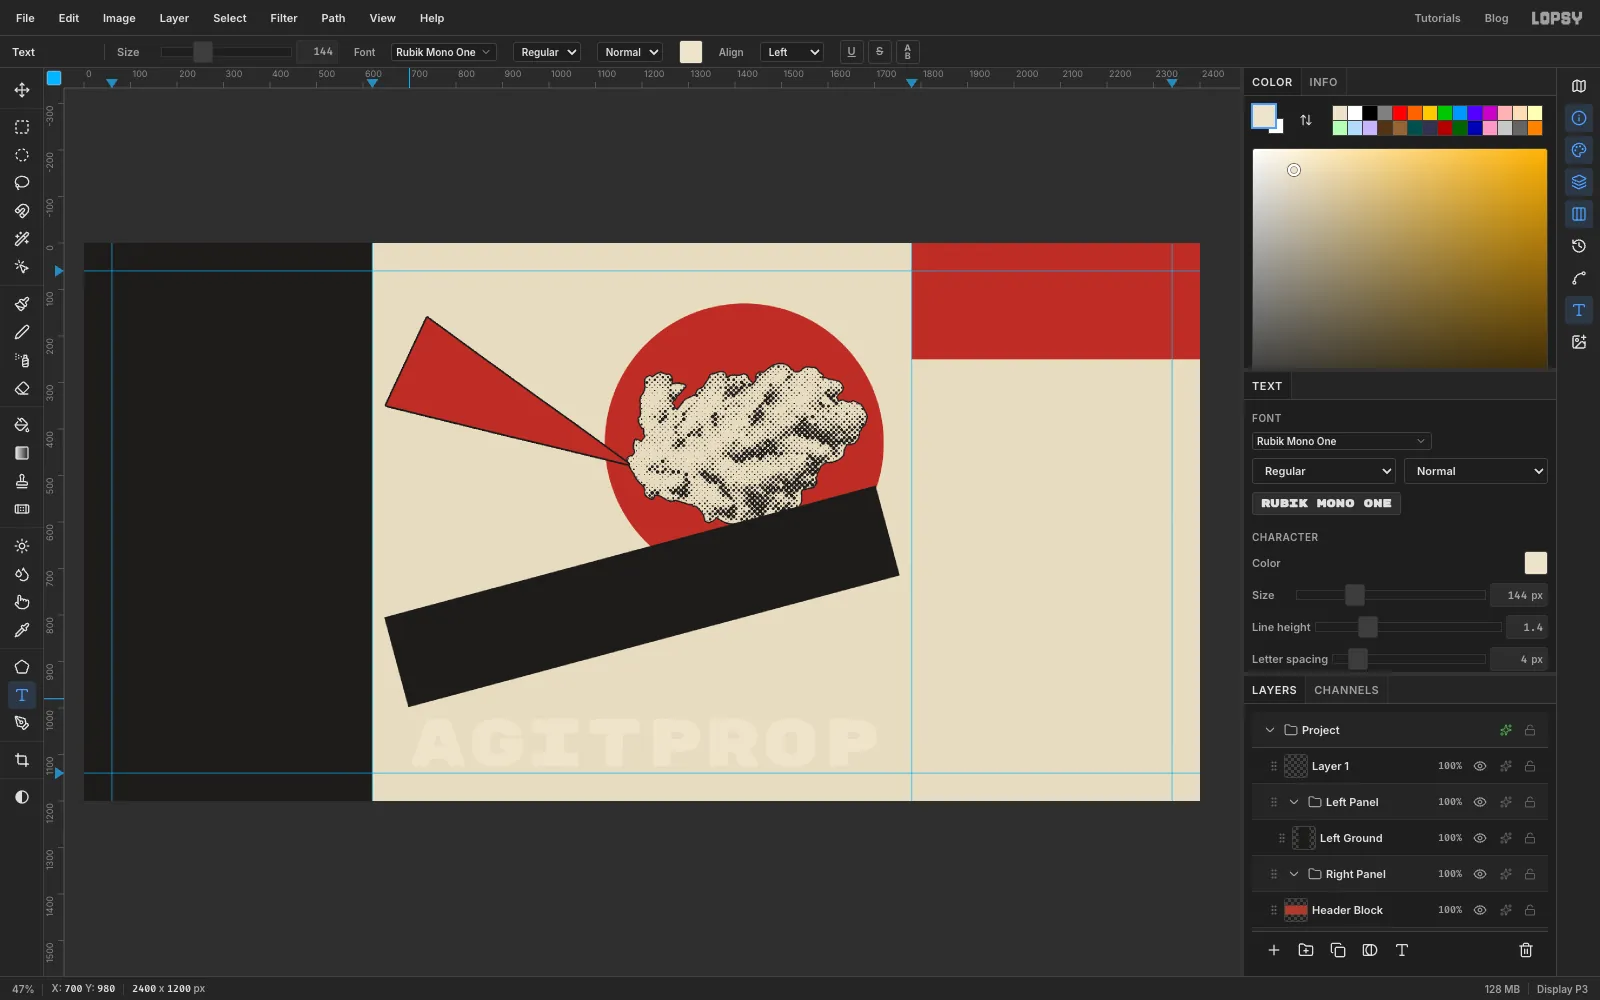
Bandrow. - Make a text layer: Rubik Mono One,
144px, , letter spacing4. Click in the empty paper below the band and typeAGITPROP. Rename the layerAgitprop.
It lands where you clicked. Don't worry that it's hard to see against the paper: it's going on the black band.
- Click the
-
Turn and seat the name
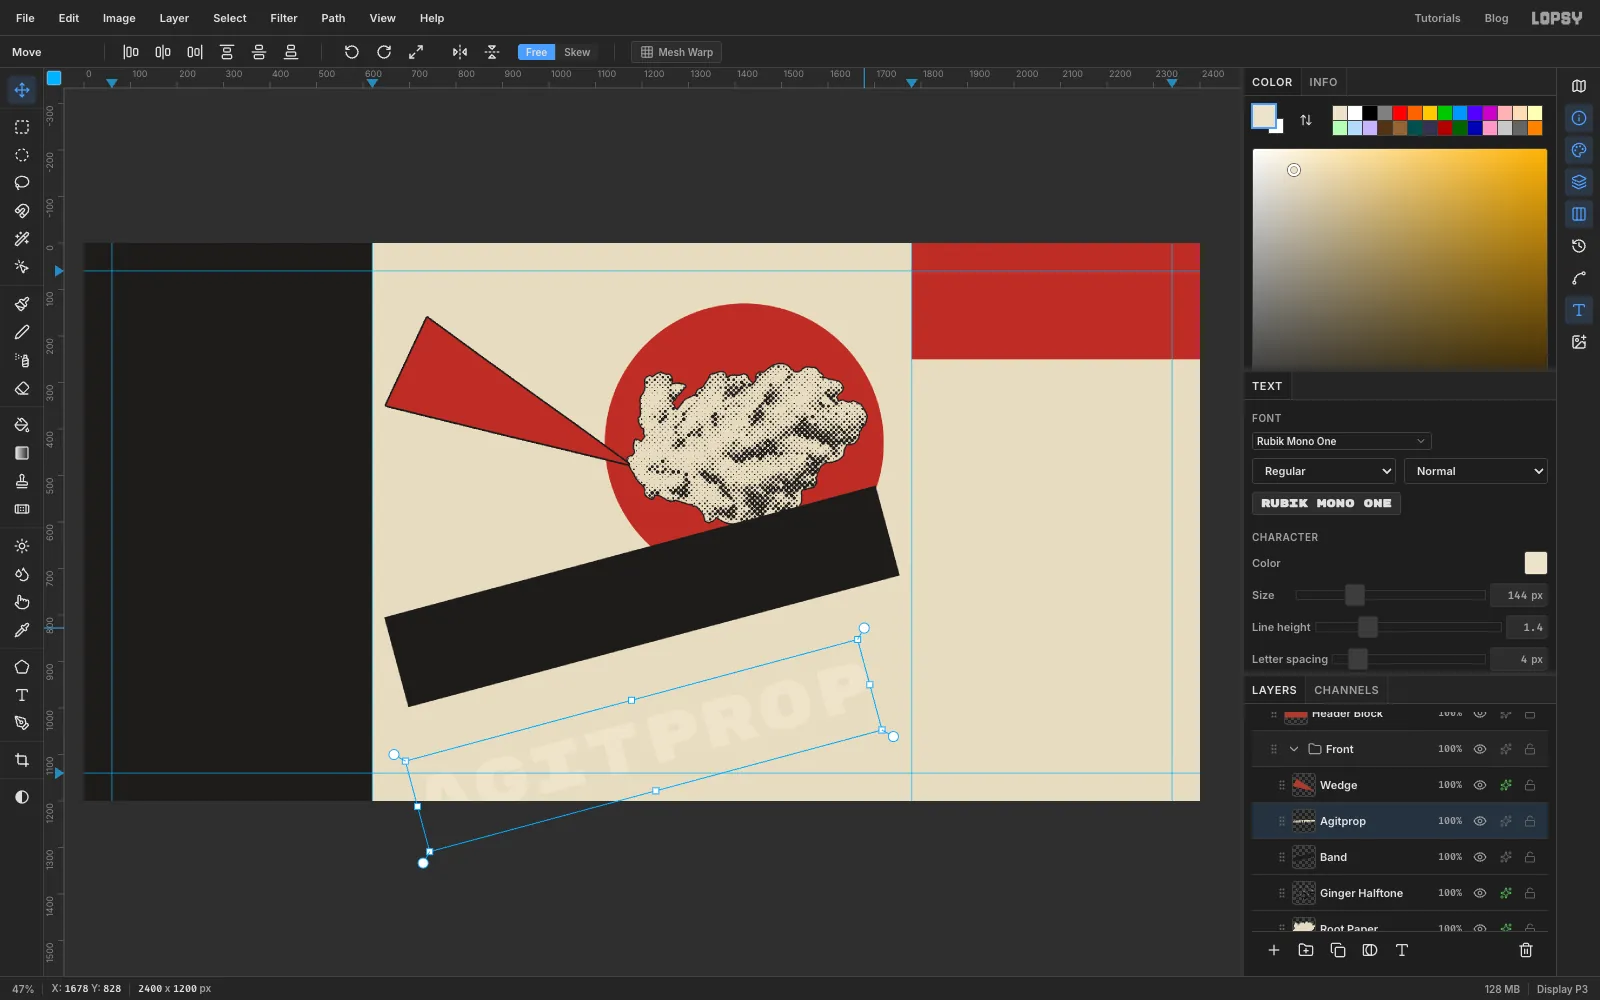
- With the Move tool, hold Cmd and drag the text's top-right rotation handle up one 15° step. Press Enter.
- Drag the text onto the band. Line it up so there's the same gap of black at both ends (about 45 px) and the same above and below the letters.
Live text rotates without being turned into pixels, so you can still fix a typo later.
-
Add GINGER BEER
- Click the
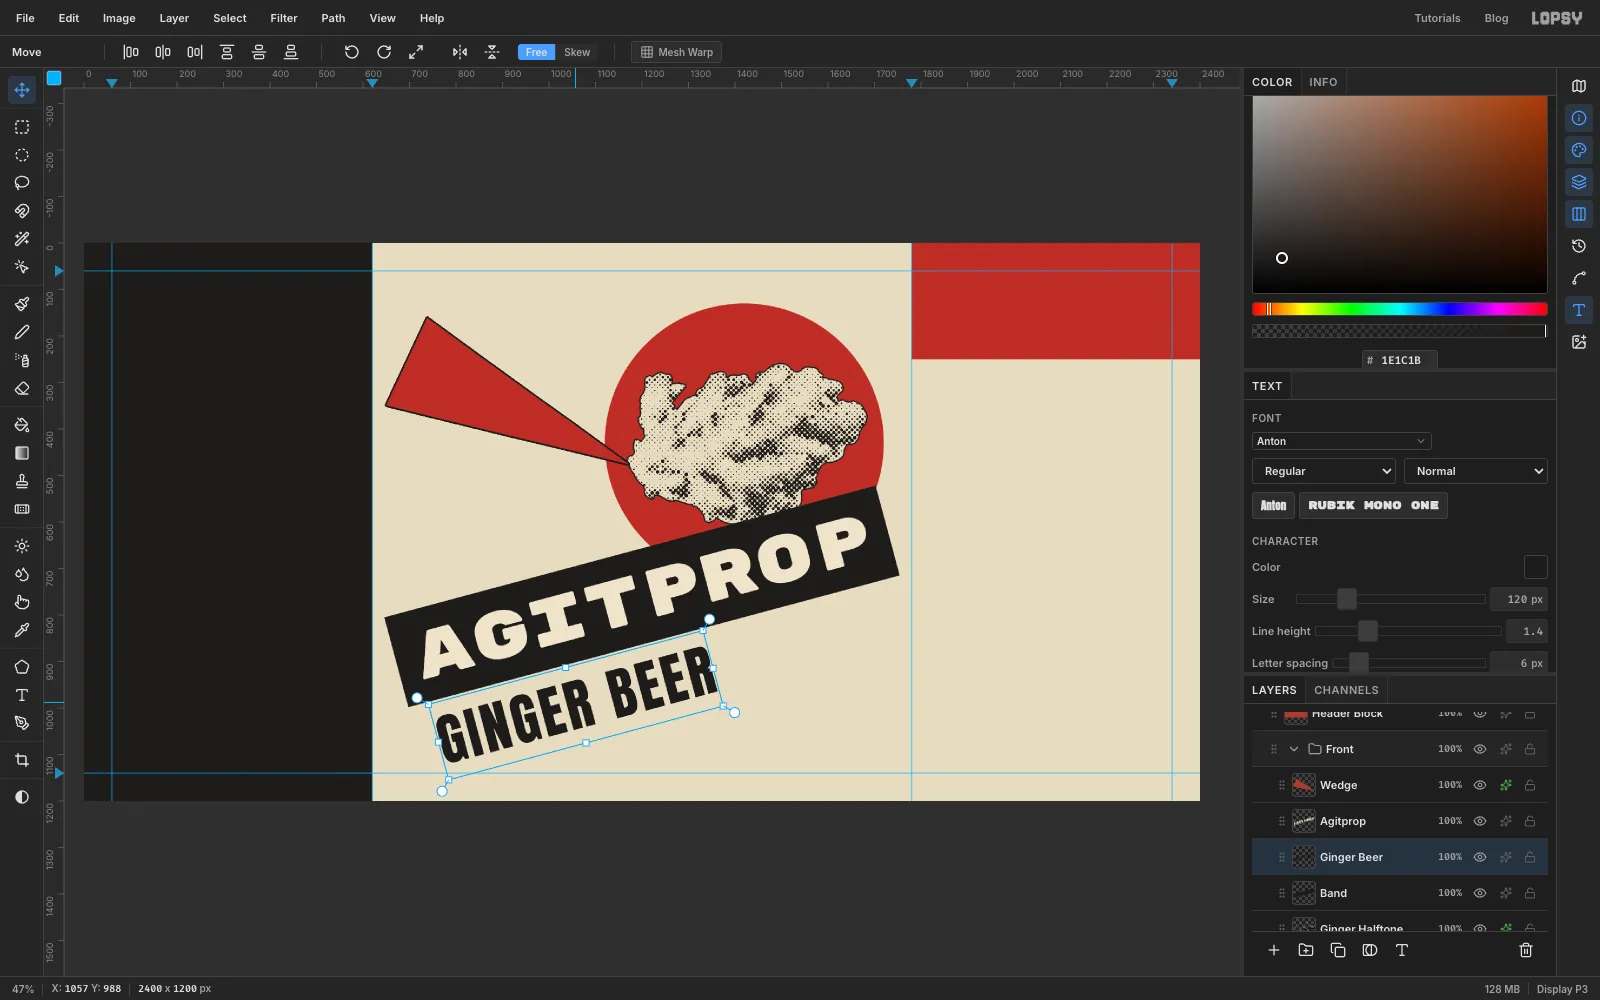
Bandrow again. - Make a text layer: Anton,
120px, , letter spacing6. TypeGINGER BEERand rename the layerGinger Beer. - Rotate it 15° the same way, then drag it below the band. Leave about 35 px between the band and the tops of the letters, and line the G up under the A of AGITPROP, measured along the slope.
The brand is the loudest thing on the label. The product name is a step down in size and printed in plain ink.
- Click the
-
Add the tagline and its rule
- Click the
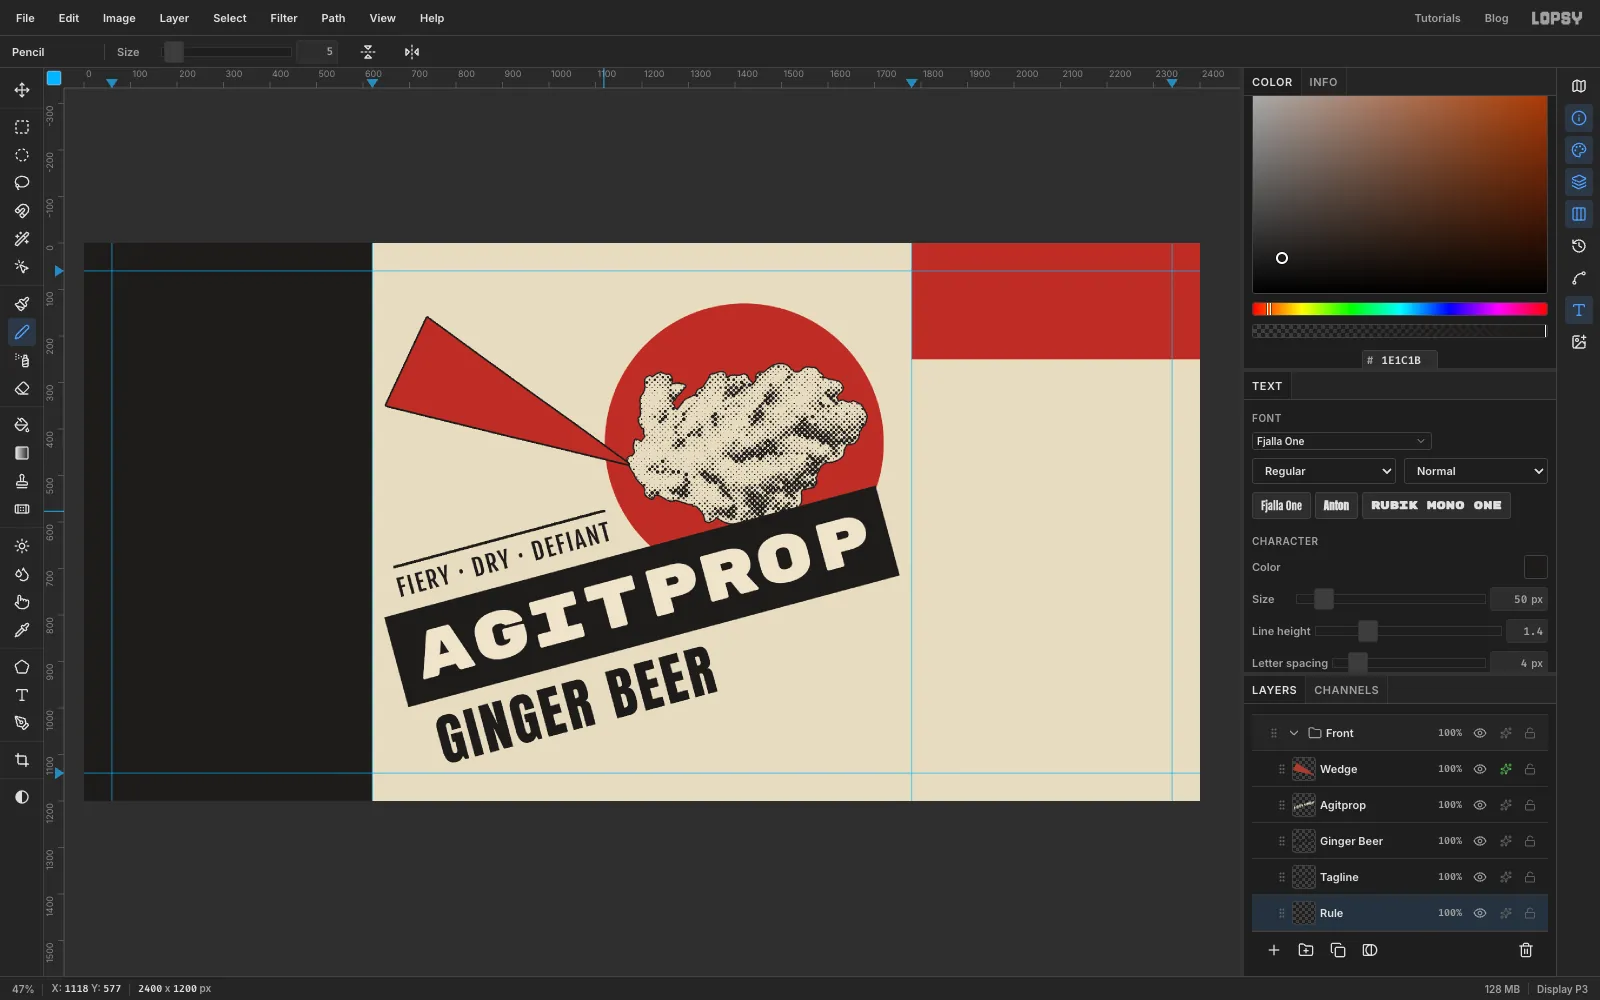
Bandrow. Make a text layer: Fjalla One,50px, , letter spacing4. TypeFIERY · DRY · DEFIANTand rename itTagline. - Rotate it 15°, then move it about 30 px above the band with its F on the same slanted line as the A and G below.
- Click Add Layer and rename it
Rule. Pick the Pencil (N), set Size to5and the colour to . - Click just above the left end of the tagline, then hold Shift and click just above its last letter. The Pencil draws a straight line between the two clicks, parallel to the band.
- Click the
-
Draw the red ladder
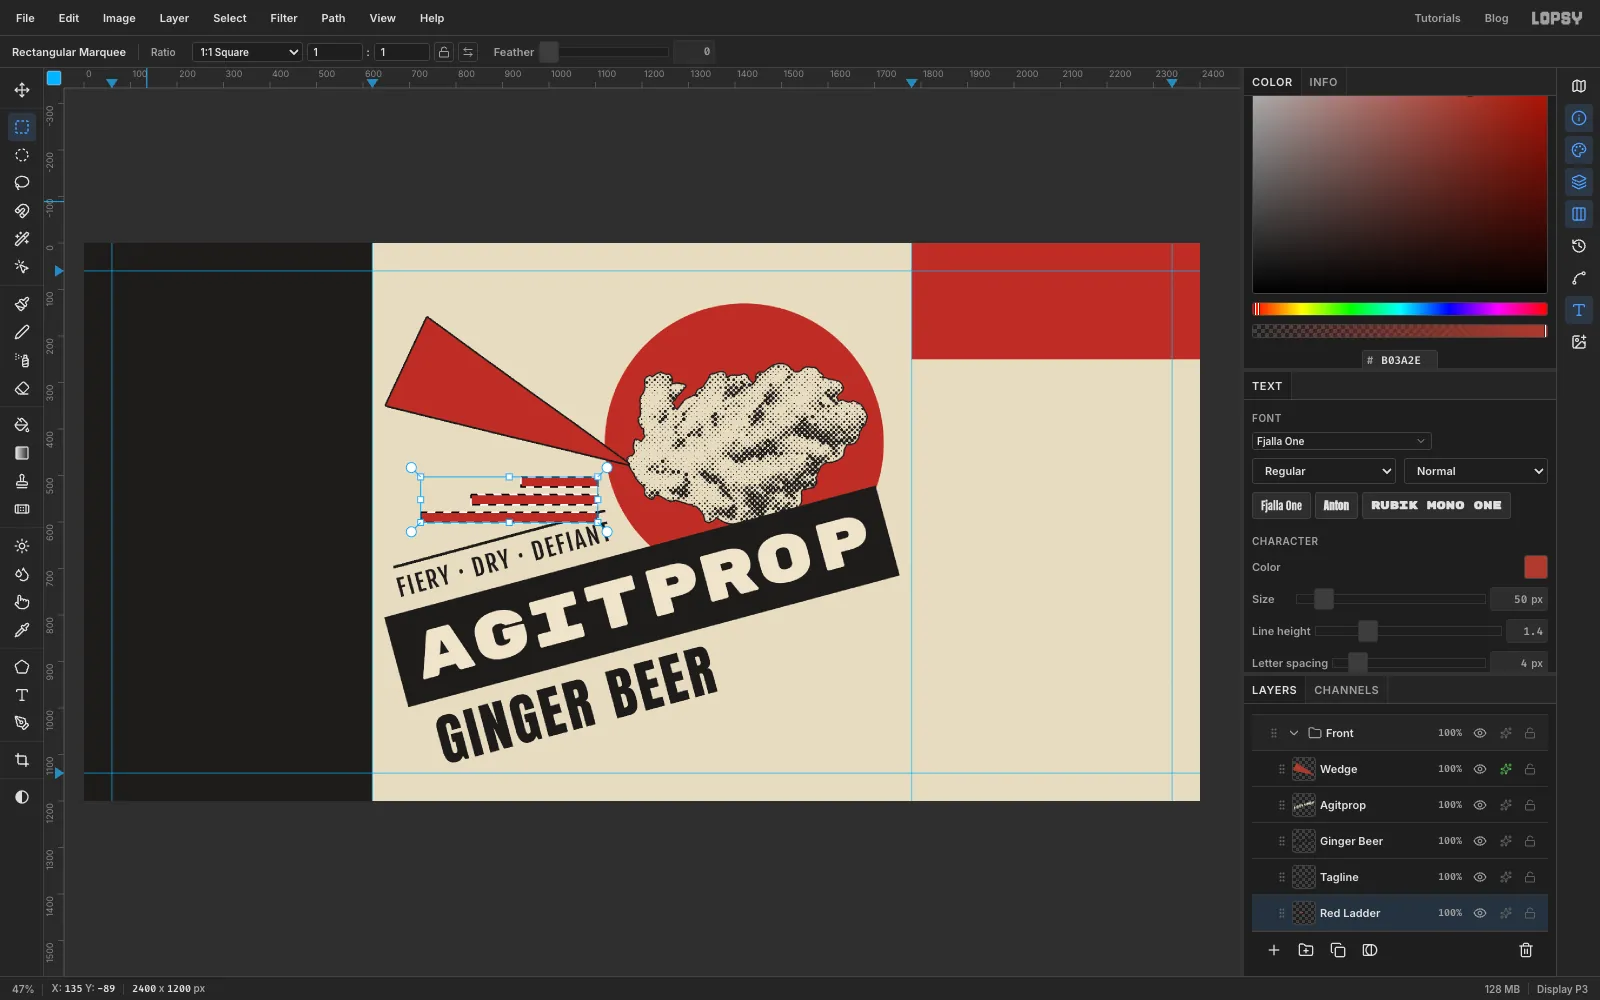
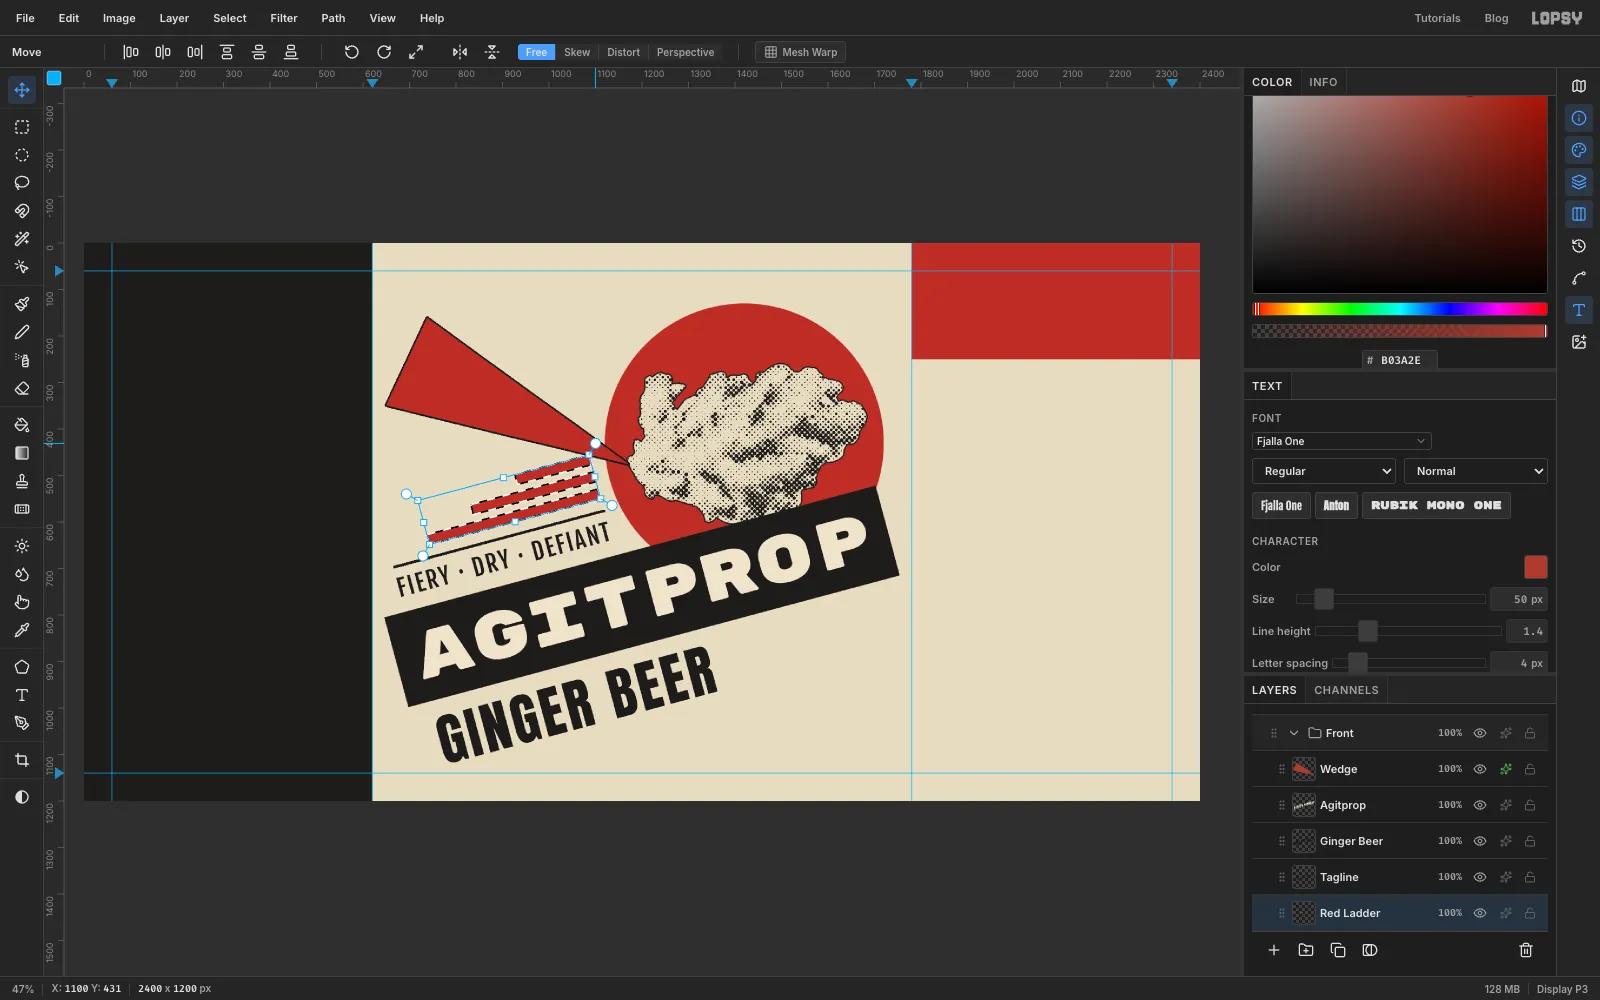
Three short red bars fill the empty corner between the wedge and the tagline and step up towards the sun. Draw them level first, then turn them all at once.
- Click Add Layer and rename it
Red Ladder. - Zoom in to 100% around the gap between the wedge and the tagline, so thin bars are easy to draw.
- With the Rectangular Marquee, drag the bottom bar from
724, 579to1105, 601. Hold Shift and drag two more above it, from832, 541to1105, 563and from940, 503to1105, 525. Each bar is 22 px tall and about 110 px shorter than the one below, with 16 px between them and the right ends lined up. - Fill with and keep the selection. Zoom back out (Cmd+0 fits the label to the window).
- Click Add Layer and rename it
-
Turn the ladder
With the Move tool, Cmd-drag the rotation handle up one 15° step and press Enter, then Cmd+D. The whole selection turns around its own centre, so the bars stay together and finish parallel to the band. Their right ends line up above the tagline's last letter. If they don't quite, nudge the layer with the arrow keys.
-
Add the top line and the badge
- Click the
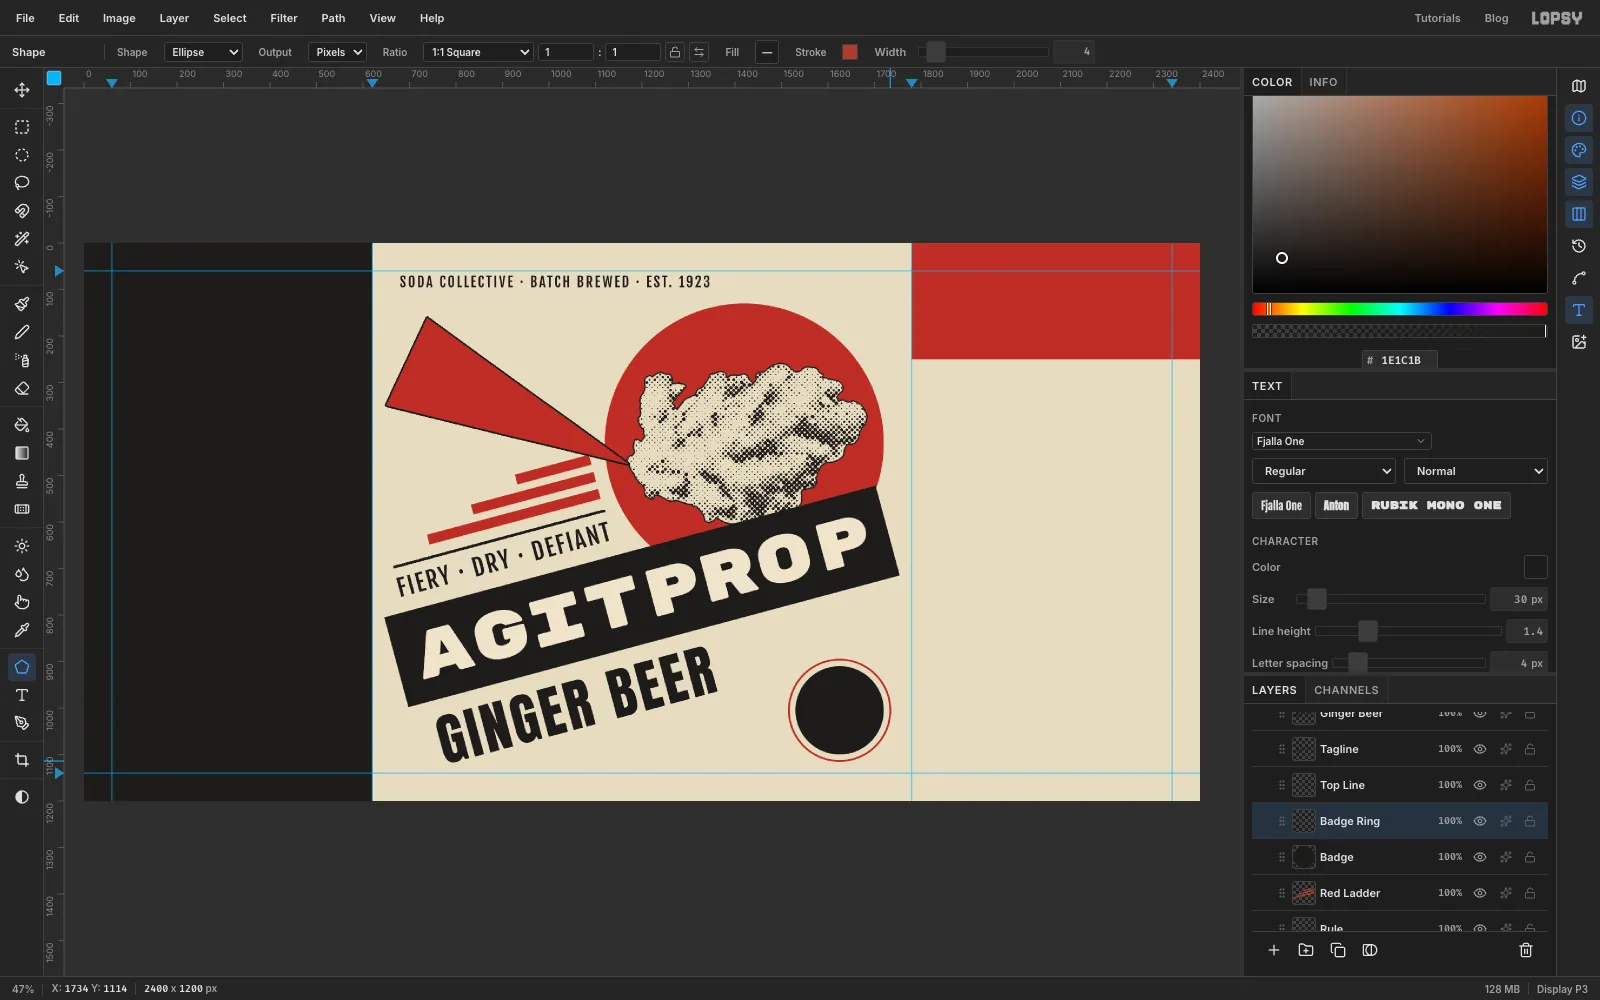
Red Ladderrow and make a text layer in Fjalla One,30px, , letter spacing4, readingSODA COLLECTIVE · BATCH BREWED · EST. 1923. Rename itTop Line. Move it so it starts 60 px in from the fold (x680) and its top sits on the 60 px margin guide. It's the only level line on the front, which stops the tilted layout from looking like it's sliding off the label. - Click the
Red Ladderrow, click Add Layer and rename itBadge. With the Elliptical Marquee and Cmd held, drag a 190 px circle from1530, 910to1720, 1100. Fill it with and press Cmd+D. - Click Add Layer and rename it
Badge Ring. - Pick the Shape tool (U). In the options bar choose Ellipse and Pixels. Click the fill swatch and choose Remove fill. Click the stroke swatch, set it to , and set Width to
4. - Shapes draw out from their centre. Hold Cmd to keep it a circle, press on the disc's centre (
1625, 1005), and drag diagonally down and to the right until the ring is about 14 px clear of the disc, roughly 218 px across.
- Click the
-
Number the batch
- Click the
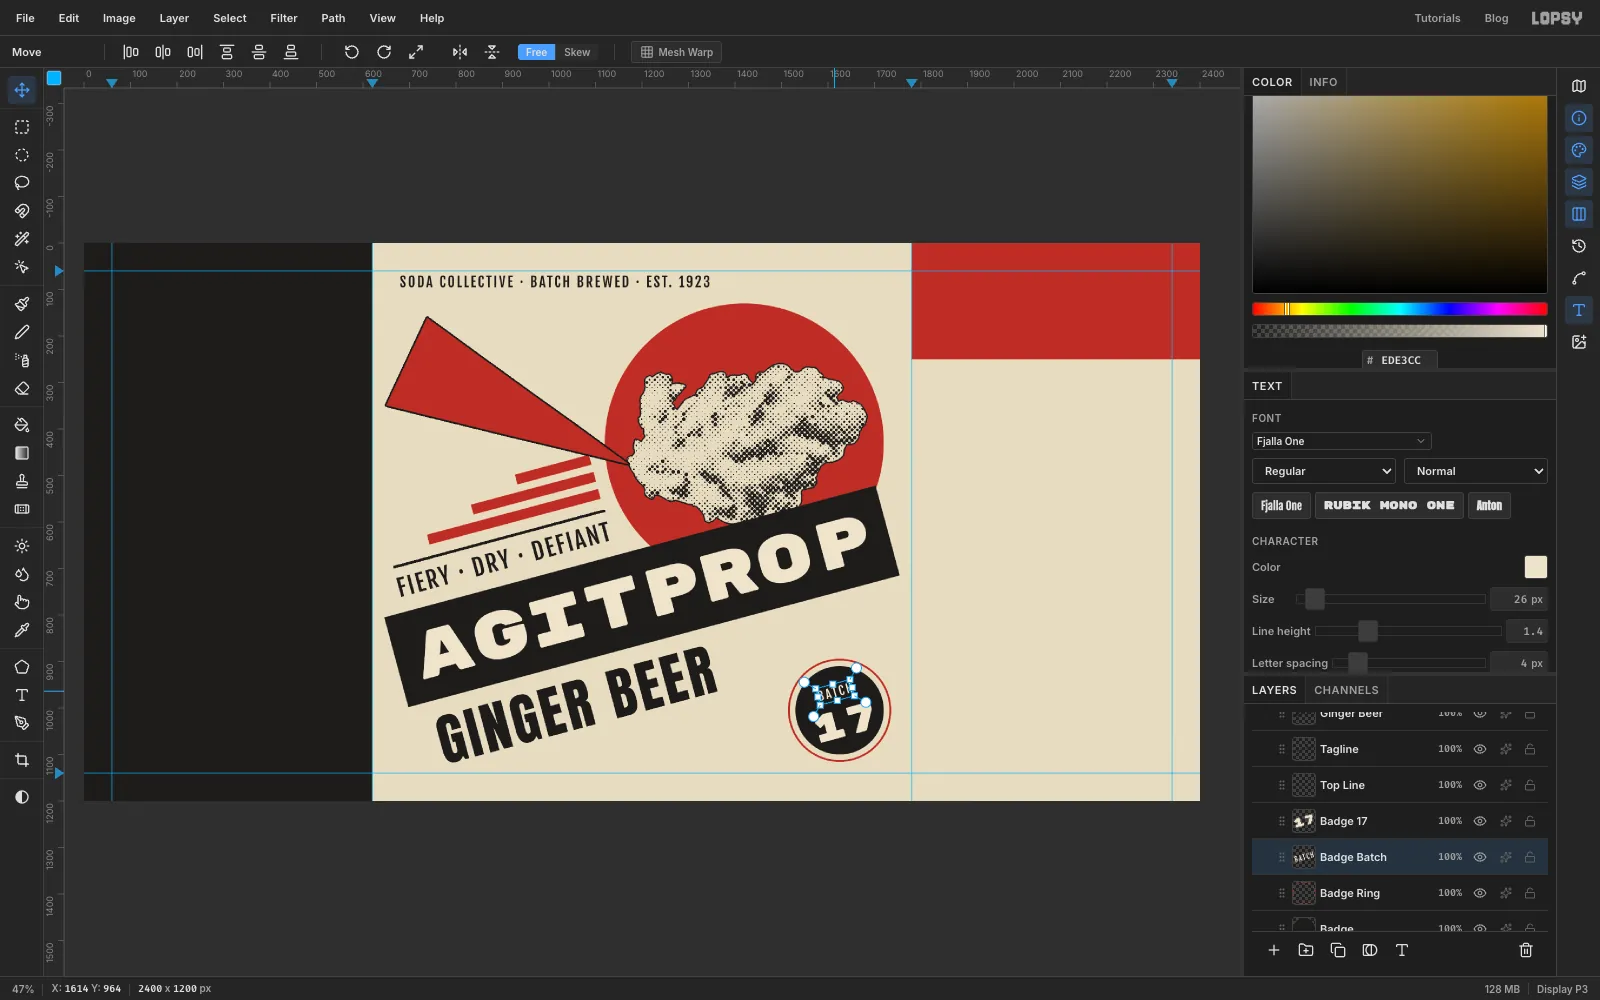
Badge Ringrow (a picture layer) and make a text layer in Rubik Mono One,84px, , reading17. Rename itBadge 17. - Click
Badge Ringagain and make another: Fjalla One,26px, , letter spacing4, readingBATCH. Rename itBadge Batch. - Rotate both 15° and move them into the disc, with BATCH above 17. Centre the pair as a block, a touch below the disc's middle, since the bigger number looks heavier.
- Click the
-
Set the ingredients and the nutrition table
Before each new text layer on this panel, click a picture layer inside the
Left Panelgroup:Left Groundto begin with, thenTable Rulesonce you've made it. That keeps all the type in the group. Line everything up on the 60 px margin guide, and rename each text layer as you go.INGREDIENTS: Anton,72px, , letter spacing2. Its top goes at y70. Name itIngredients.- The ingredient list: Fjalla One,
34px, , letter spacing1. Press Enter between lines to typeCarbonated water, cane sugar,/fresh-pressed ginger root (6%),/lemon juice, a pinch of cayenne,/live brewer's yeast.Its top goes at y182. Name itIngredient List. - Click Add Layer and rename it
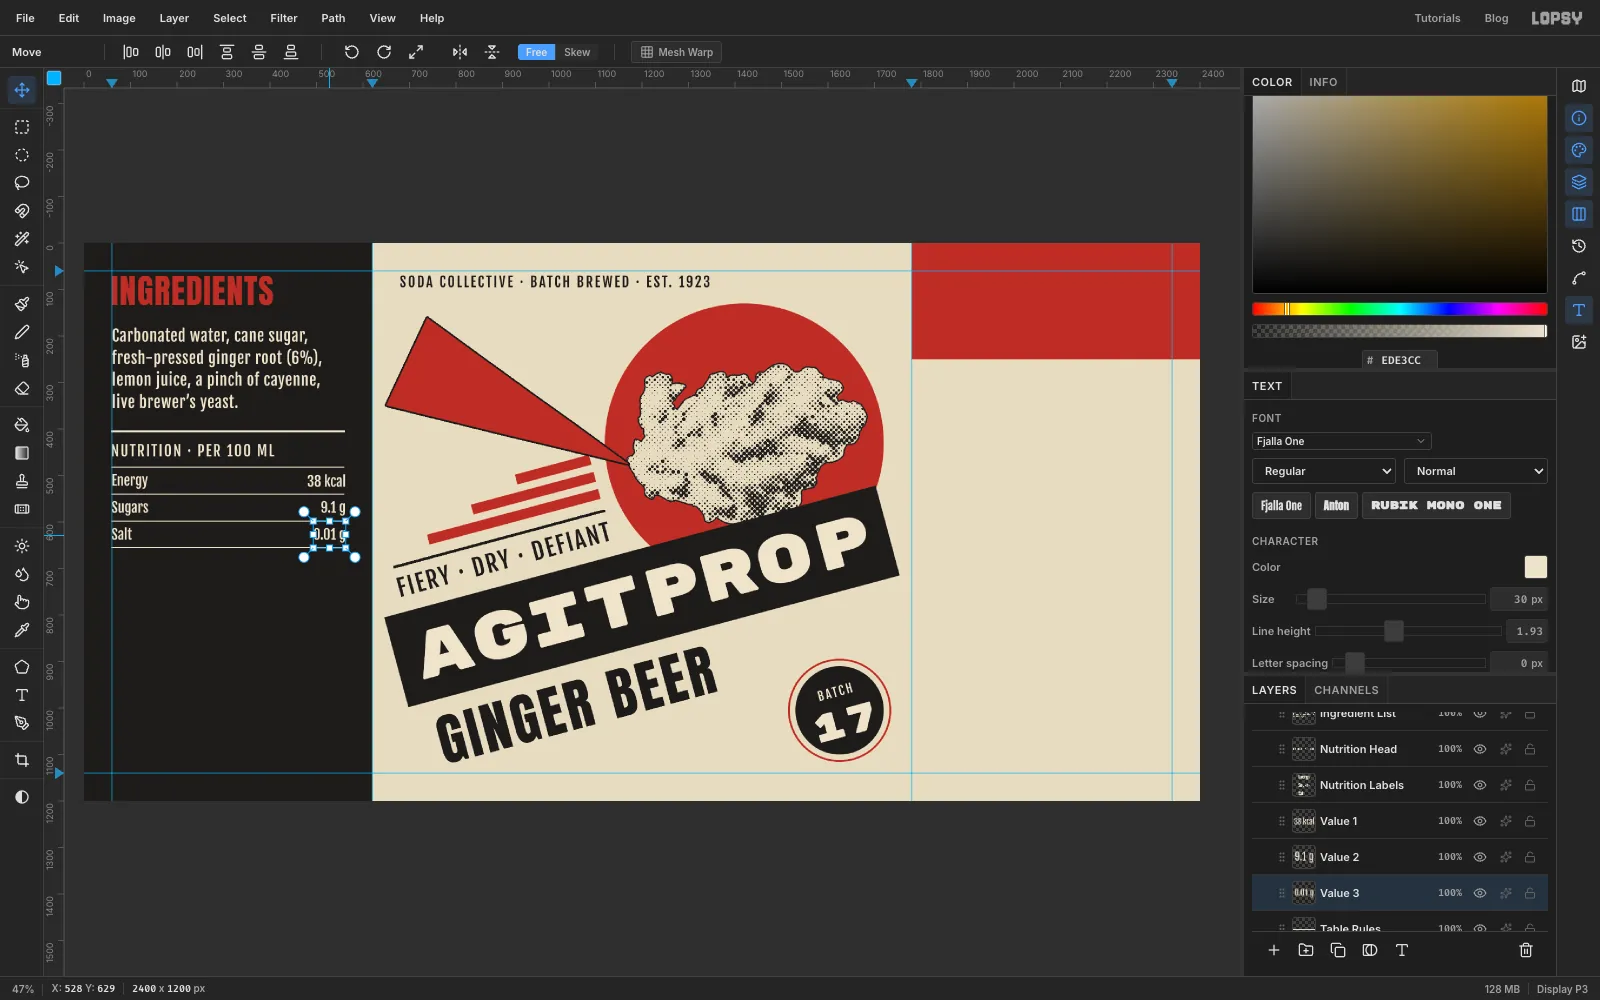
Table Rules. Pick the Pencil in . At Size4, draw a rule at y405from the margin guide to x560(click, then Shift-click). At Size2, draw four more at y482,540,598and656. NUTRITION · PER 100 ML: Fjalla One,32px, cream, letter spacing3, between the thick rule and the first thin one. Name itNutrition Head.Energy/Sugars/Salton three lines: Fjalla One,30px, cream, letter spacing0, with Line height1.93so the rows land 58 px apart, the same as the rules. Put its top at y497and name itNutrition Labels.- The values go in a right-aligned column. Set Align to Right in the options bar: the point you click becomes the text's right edge. Make
38 kcal,9.1 gand0.01 gas three text layers in the same style (Value 1toValue 3), one per row, each with its right edge on x560. Set Align back to Left afterwards.
-
Finish the left panel
Click
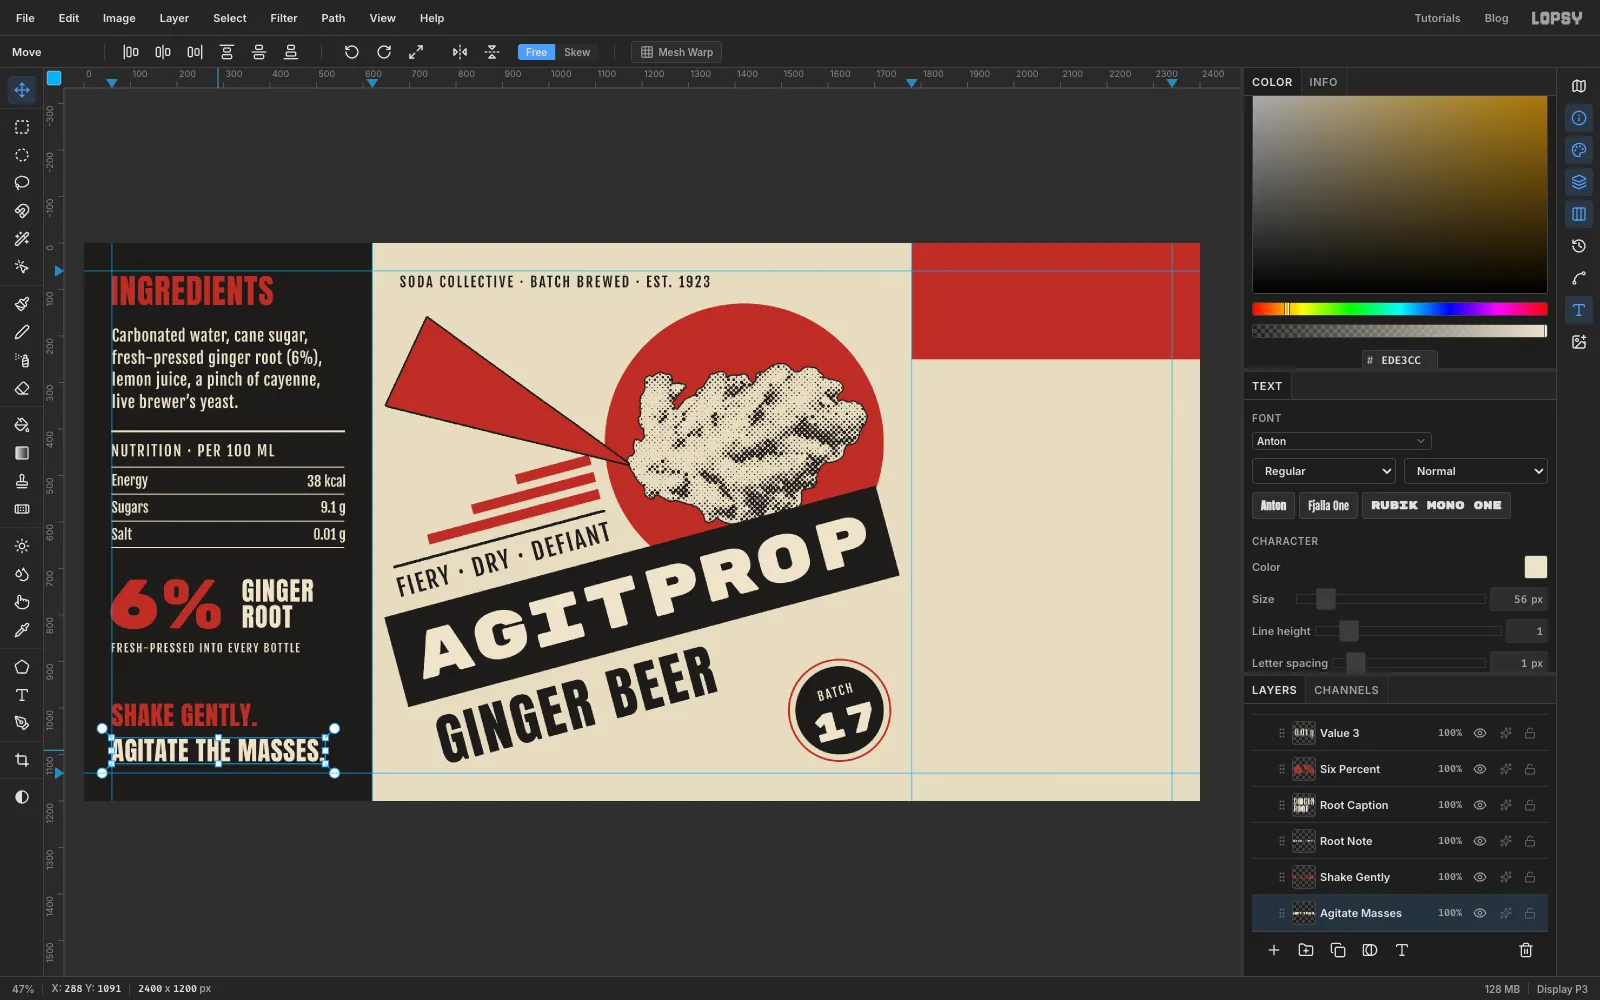
Table Rulesbefore each one:6%: Rubik Mono One,150px, , top-left at56, 722.GINGER/ROOTon two lines: Anton,56px, cream, letter spacing2, Line height1.0. Put it about 48 px to the right of the % sign, tops lined up. With "ginger root" spelled out beside it, nobody will read the 6% as alcohol.FRESH-PRESSED INTO EVERY BOTTLE: Fjalla One,24px, cream, letter spacing3, 30 px under the 6%.SHAKE GENTLY.in Anton56px red at y990, andAGITATE THE MASSES.in Anton56px cream at y1066. Both have letter spacing1.
-
Draw the barcode
- Click the
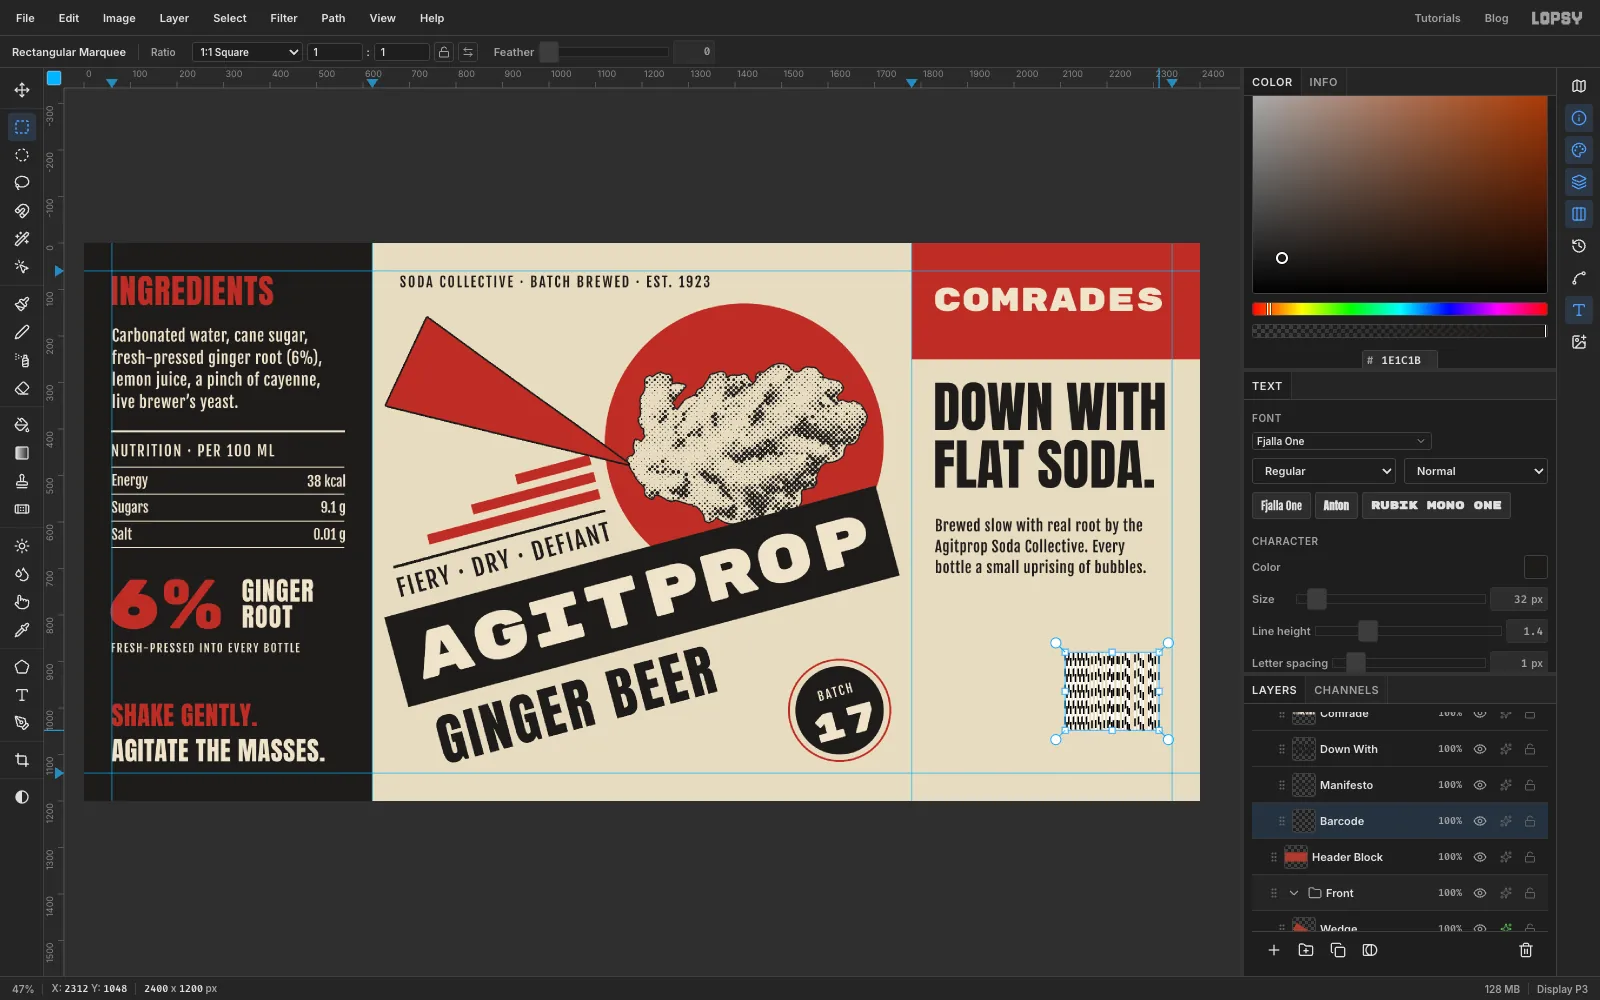
Right Panelgroup and click Add Layer. The new layer goes inside the group. Rename itBarcode. - Zoom in to 200% on that corner, so the thinnest bars are easy to see. With the Rectangular Marquee, draw thin upright rectangles from y
880to y1048, starting at x2110. Hold Shift for every one after the first. Start with two 4 px bars 4 px apart, then mix widths of 4, 8 and 12 px with gaps of 4 to 8 px until you reach about x2306. - Fill with , press Cmd+D and zoom back out.
- Click the
-
Set the manifesto side
Click
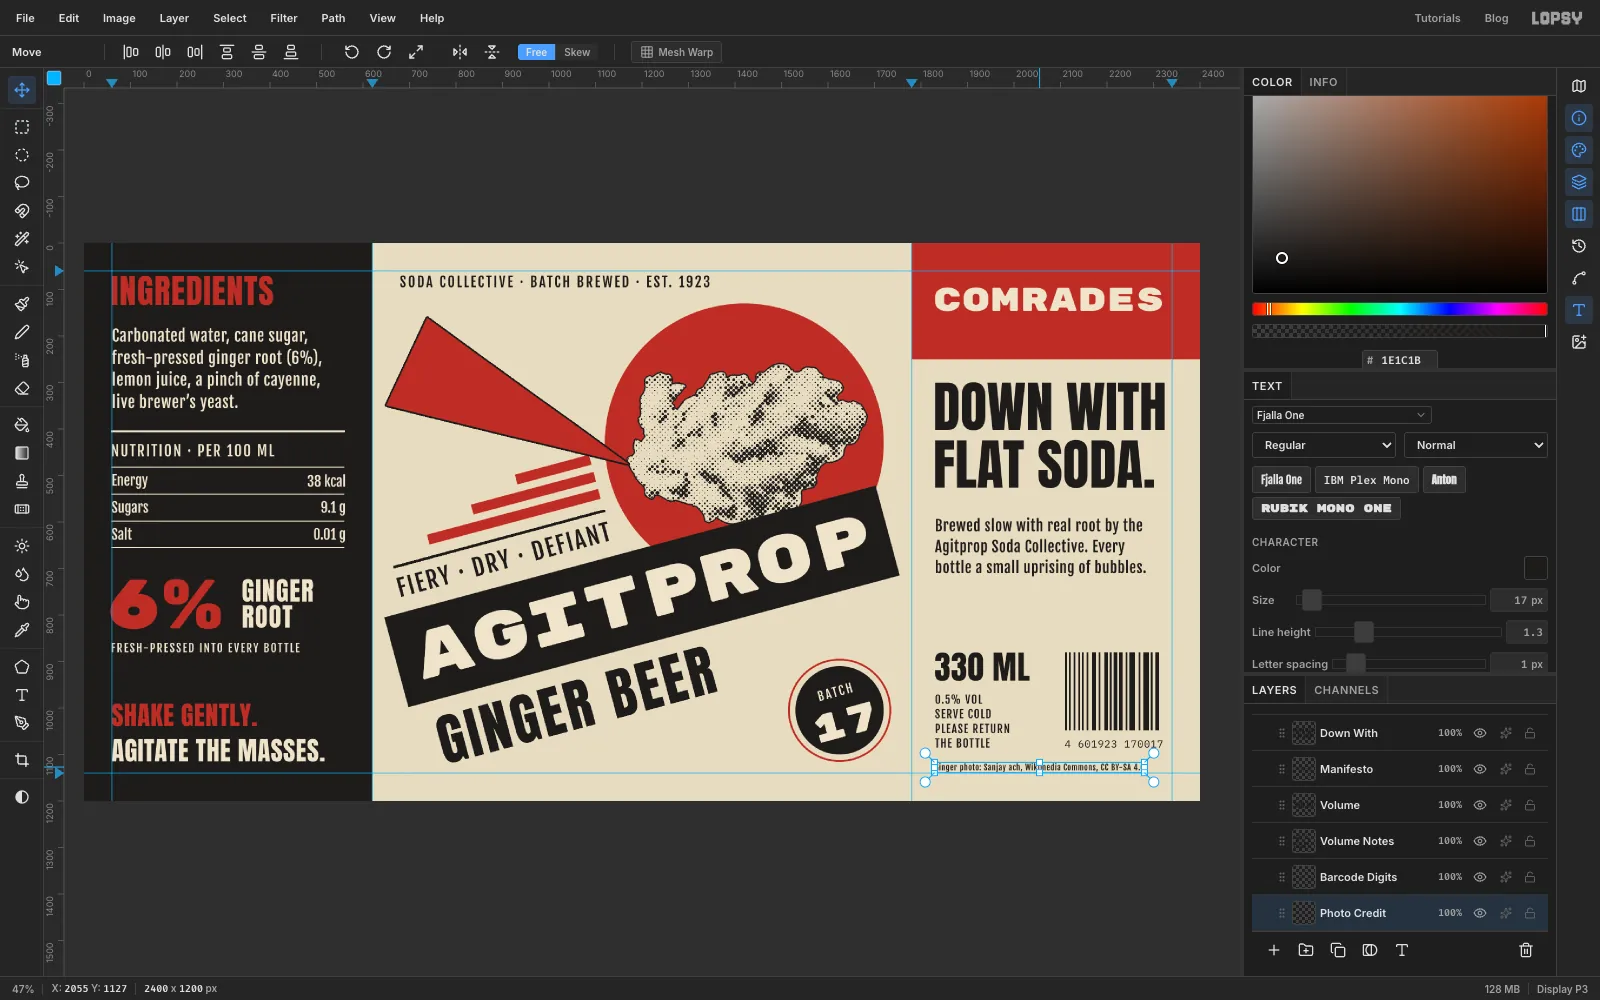
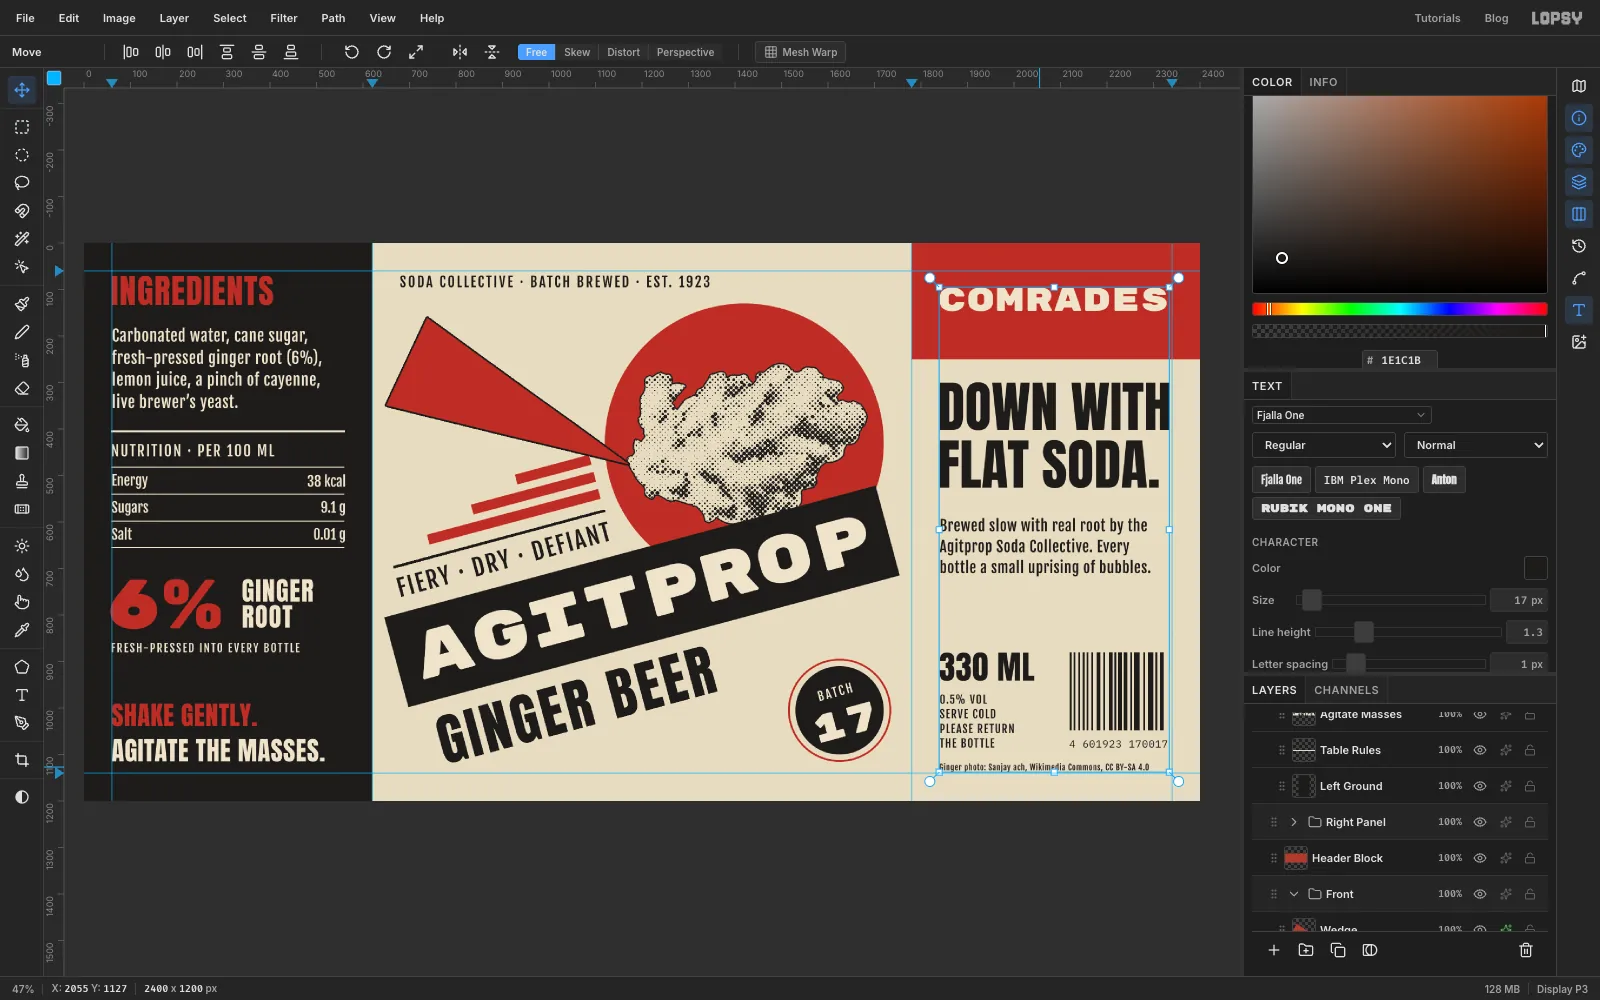
Barcodebefore each text layer so they all go in the group. Line the left edges up with each other at about x1830. Don't worry about hitting the margin guide exactly: once everything's set, you'll move the whole block onto it in one go.COMRADES: Rubik Mono One,71px, cream, letter spacing2, top at y95inside the red header.DOWN WITH/FLAT SODA.: Anton,118px, ink, Line height1.05, top at y300.Brewed slow with real root by the/Agitprop Soda Collective. Every/bottle a small uprising of bubbles.: Fjalla One,32px, ink, letter spacing1, line height1.4, top at y590.330 ML: Anton,70px, ink, letter spacing1, top at y880.0.5% VOL/SERVE COLD/PLEASE RETURN/THE BOTTLE: Fjalla One,24px, ink, letter spacing2, line height1.3, top at y970.4 601923 170017: IBM Plex Mono,22px, ink, letter spacing1, under the bars at x2110. Sit its bottom on the same line as the bottom ofTHE BOTTLE.- The credit,
Ginger photo: Sanjay ach, Wikimedia Commons, CC BY-SA 4.0: Fjalla One,17px, ink, letter spacing1, top at y1118.
-
Move the whole right panel onto the guide
Check the left edges of the right panel's type against the margin guide at x
1840. Here they sit 10 px short, so:- Click the arrow on the
Right Panelrow to collapse the group, then click the group's name to select it. - Pick the Move tool and press Shift+→ once. Everything in the group moves 10 px right onto the margin guide in one step.
The red header doesn't move, because it's outside the group.
- Click the arrow on the
-
Add paper grain
- Click
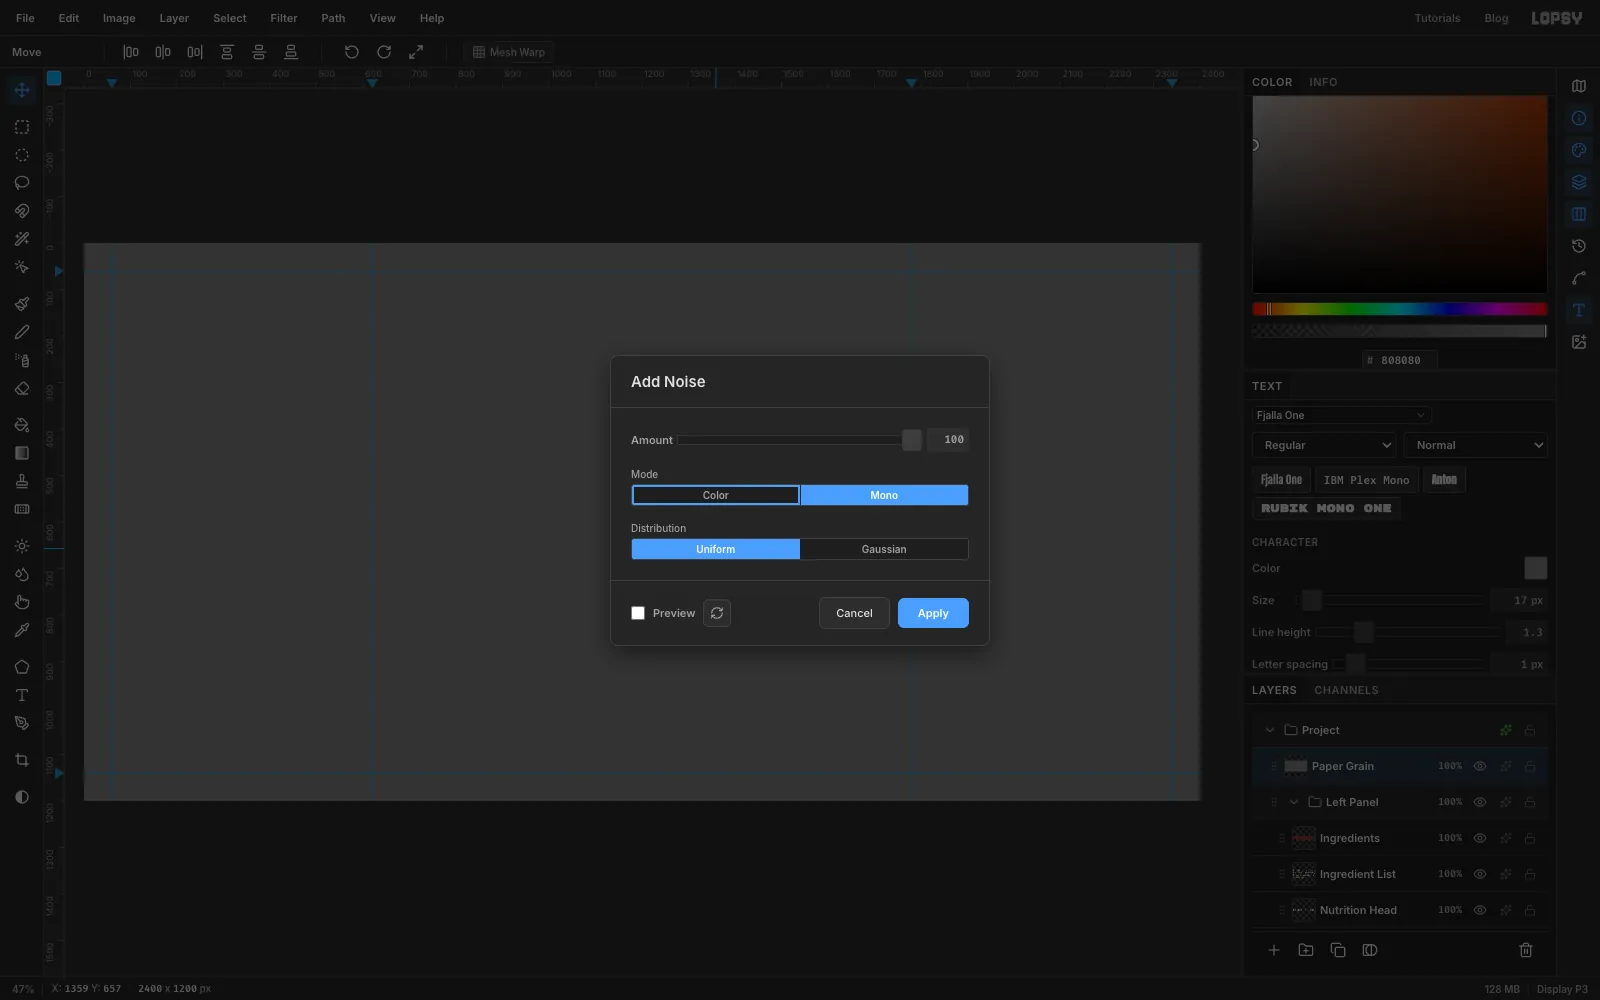
Layer 1at the top of the stack and rename itPaper Grain. Fill it with . The whole label turns grey for a moment. - Choose Filter → Add Noise…, set Amount to
100, and pick Mono and Uniform. Click Apply. - Choose Filter → Gaussian Blur…, set Radius to
1and click Apply to soften the grain.
- Click
-
Blend the grain in
Open Layer effects on
Paper Grain, set the blend mode to Overlay, and close the drawer. Then click the100%on thePaper Grainrow to open its opacity slider and set it to22. Overlay leaves 50% grey invisible and only lets the noise lighten and darken what's underneath.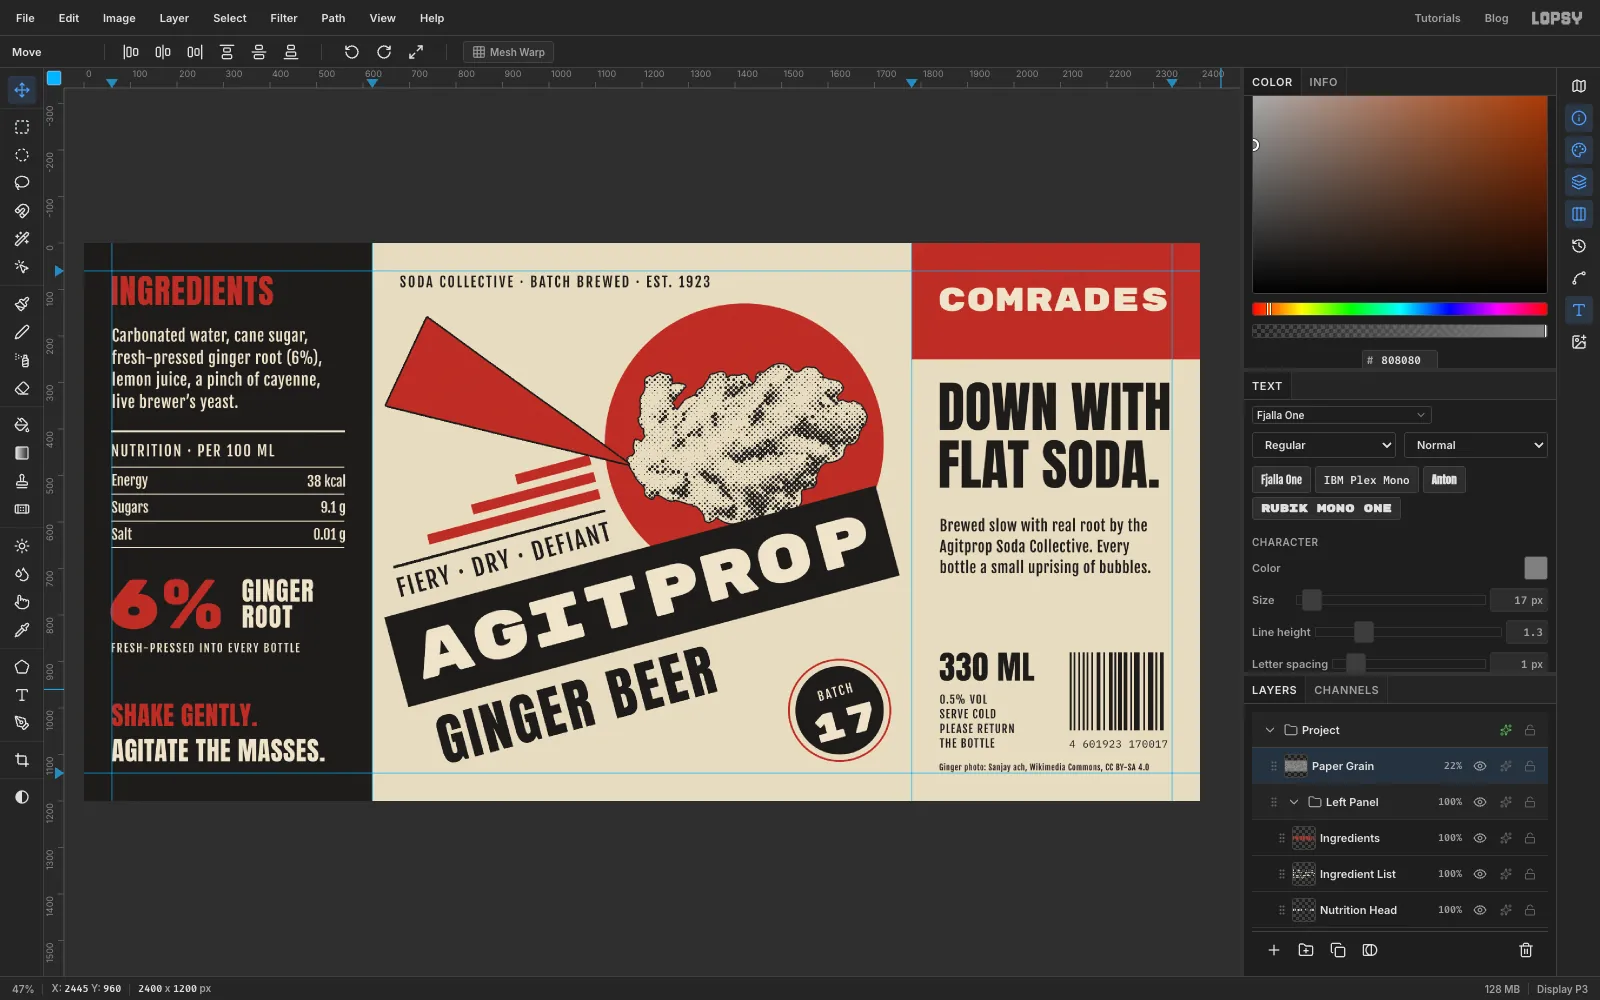
-
Make a map of worn spots
Letterpress solids never print perfectly. Little flecks of paper show through where the ink didn't take. You'll punch those flecks out of the biggest solids.
- With
Paper Grainactive, click Add Layer and rename itWear Map. Fill it with white. - Filter → Add Noise…: Amount
100, Mono, Uniform, then Apply. - Filter → Gaussian Blur…: Radius
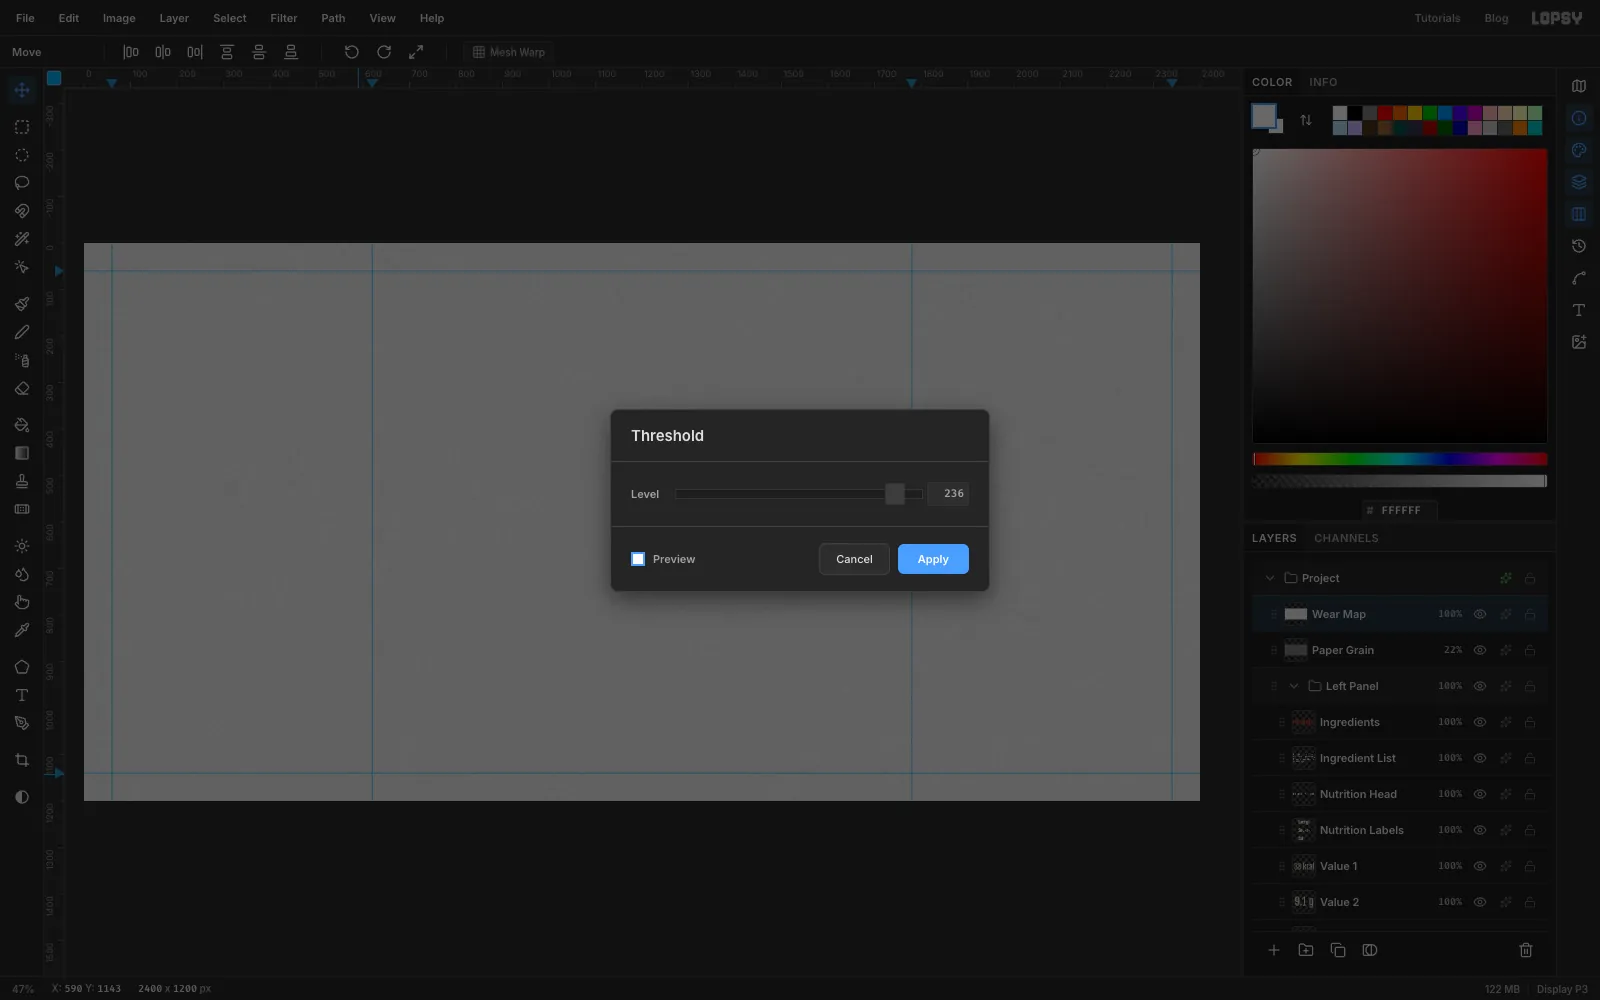
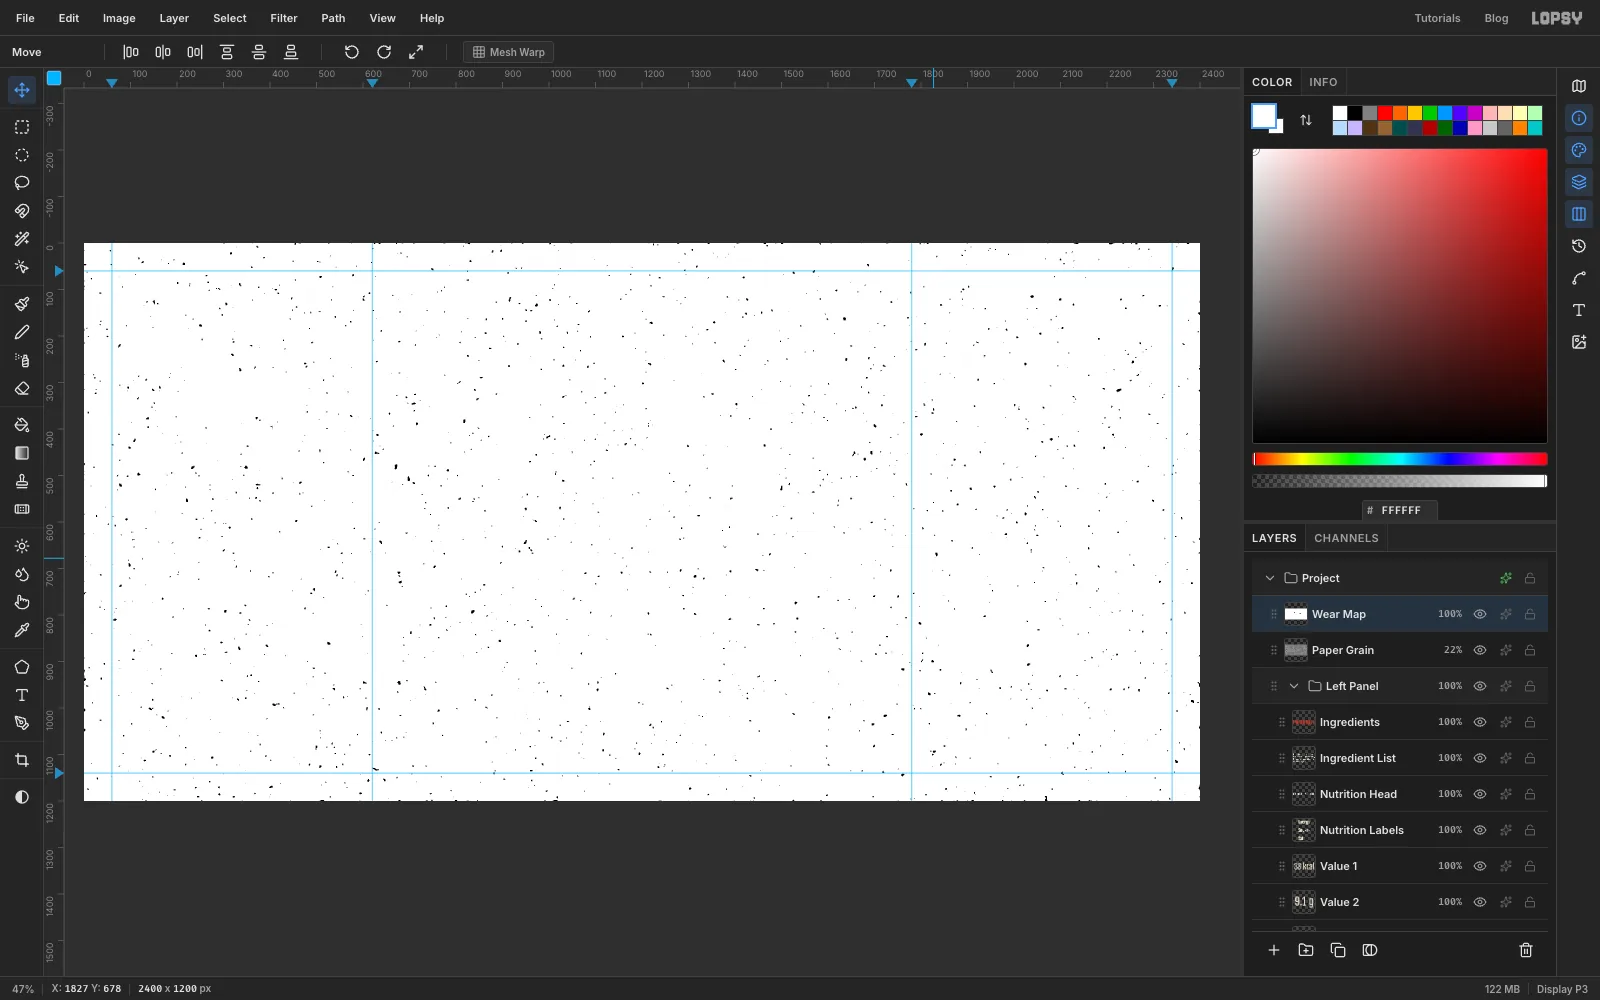
6, then Apply. The blur clumps the noise into soft blobs. - Filter → Threshold…: drag Level until only a few small black blobs are left scattered over white. That's
236here. Click Apply.
- With
-
Check the spots
Zoom in. You want sparse, irregular blobs a few pixels across. If the map looks like pepper, undo the Threshold and lower the level. If there are hardly any spots, raise it.
-
Select every spot at once
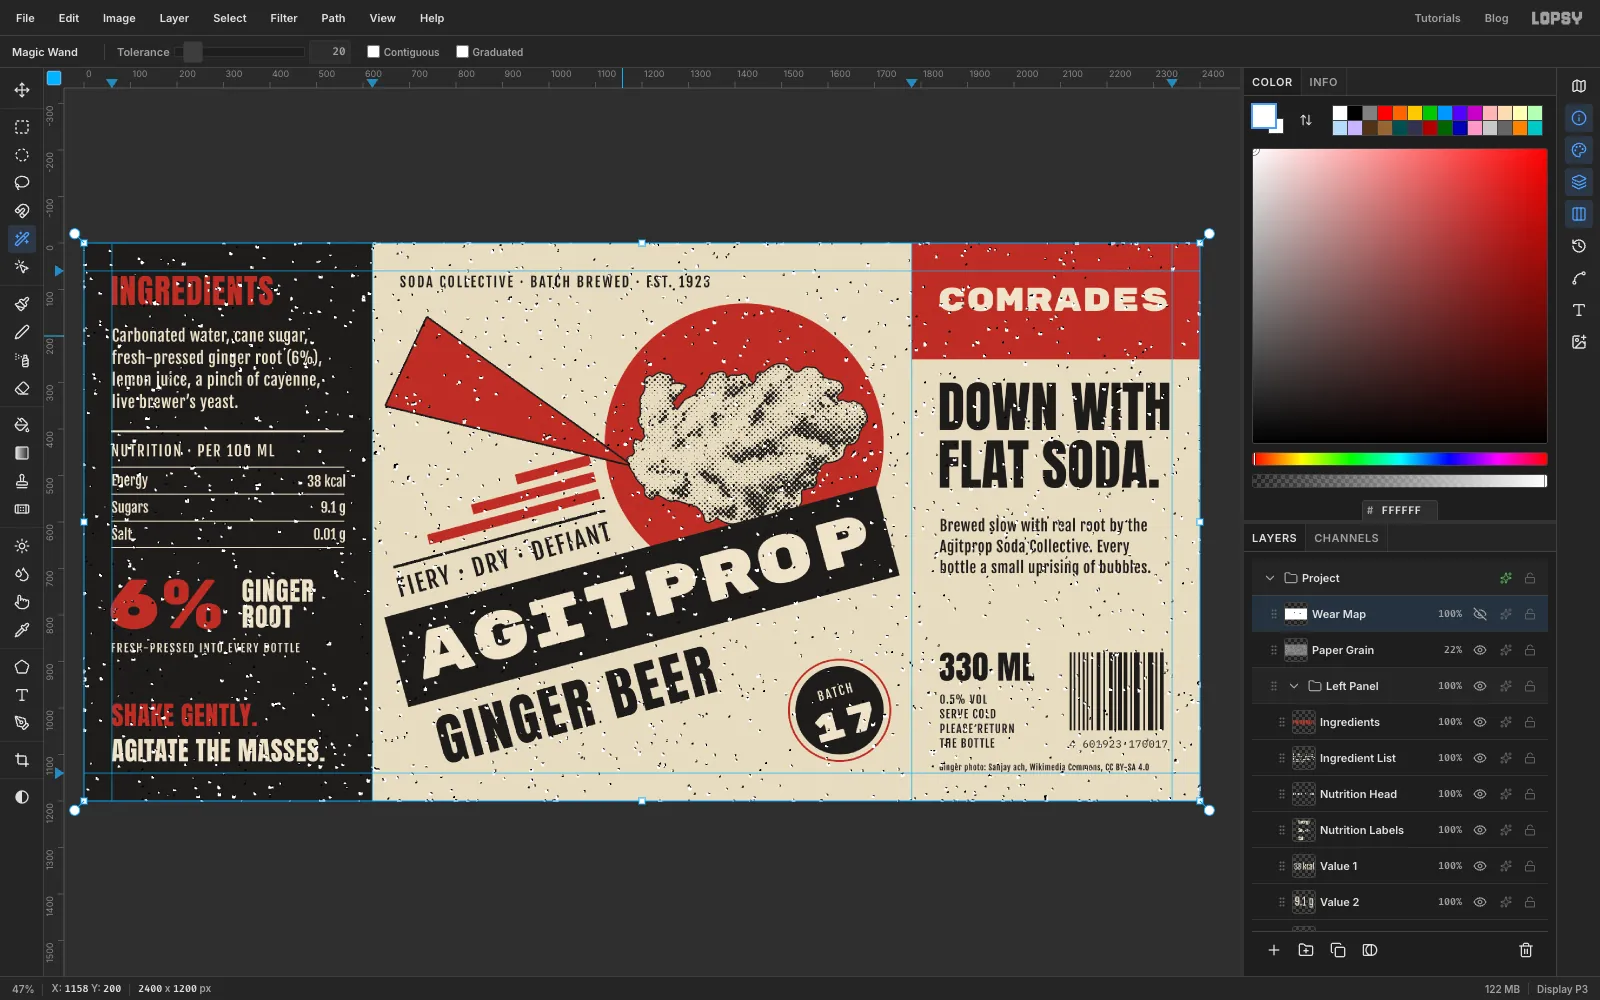
- Pick the Magic Wand. Set Tolerance to
20and untick Contiguous, so one click selects every black spot on the layer, not only the one you click. - Click any black blob.
- Click the eye on the
Wear Maprow to hide it. The selection stays. - Choose Select → Feather… and enter
1, so the specks have soft edges like worn ink rather than square pixels.
- Pick the Magic Wand. Set Tolerance to
-
Knock the specks out of the solids
With the selection still live, click each of these rows in turn and press Delete:
Band,Red SunandHeader Block. Then press Cmd+D.Leave the small type and the black left panel alone. Specks between words look like stray punctuation, and nutrition copy has to stay clean. Leave the wedge alone too: its Stroke effect would outline every hole.
Finally:
- Click the
Wear Maprow and delete it with the trash button. - Pick the Magic Wand and tick Contiguous again. It's a sticky setting and you'll want it back next time.
- Choose File → Save Project to keep a layered
.lopsycopy, and File → Quick Export PNG for the print file.
- Click the